How to Connect Google Lead Form with Amazon DynamoDB

The integration will allow you to get new leads from Google Lead Form and transfer them to Amazon DynamoDB for add rows. This way you can automate the process of processing data from the Google Lead Form using Amazon DynamoDB as efficiently as possible.
Let's go through the entire Google Lead Form with Amazon DynamoDB setup steps together!
Navigation:
1. What will integration Google Lead Form with Amazon DynamoDB do?
2. How to connect Google Lead Form account?
3. How to connect Amazon DynamoDB account?
4. How to setup data transfer from Google Lead Form to Amazon DynamoDB?
5. An example of the data that will be sent to your Amazon DynamoDB.
6. Auto-update.
Answers to frequently asked questions:
1. How do I create a database on an Amazon DynamoDB system?
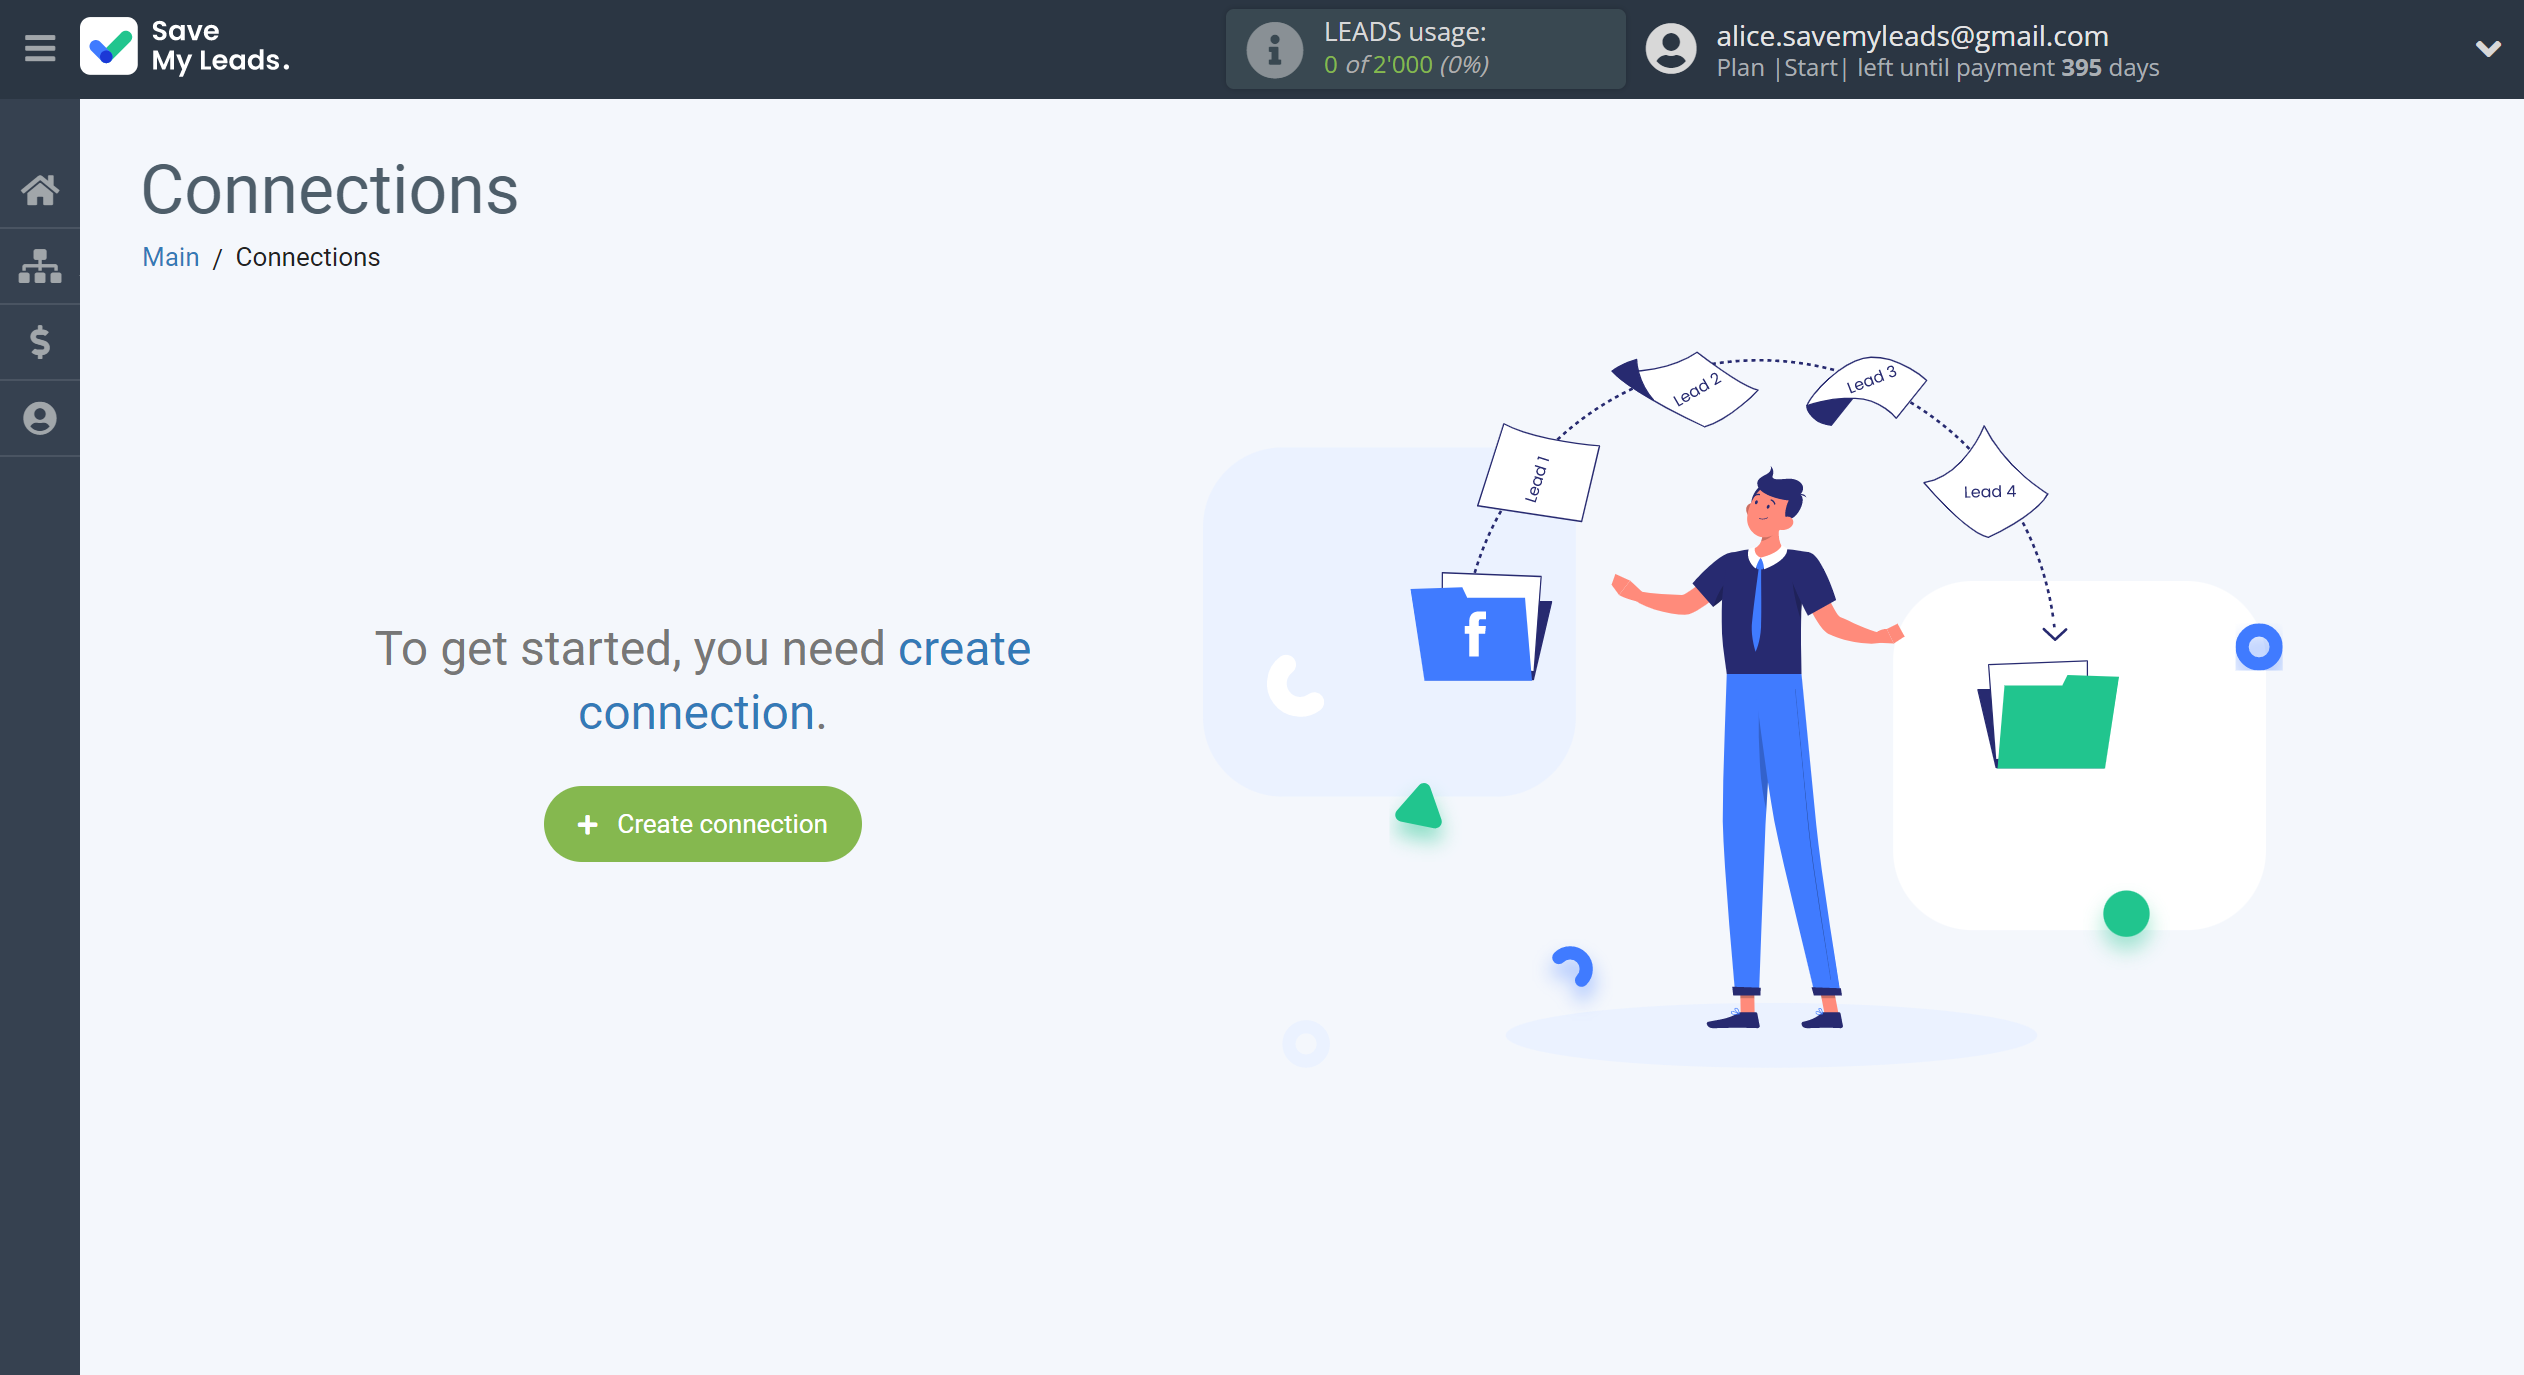
To start setup new connection, click "Create connection".
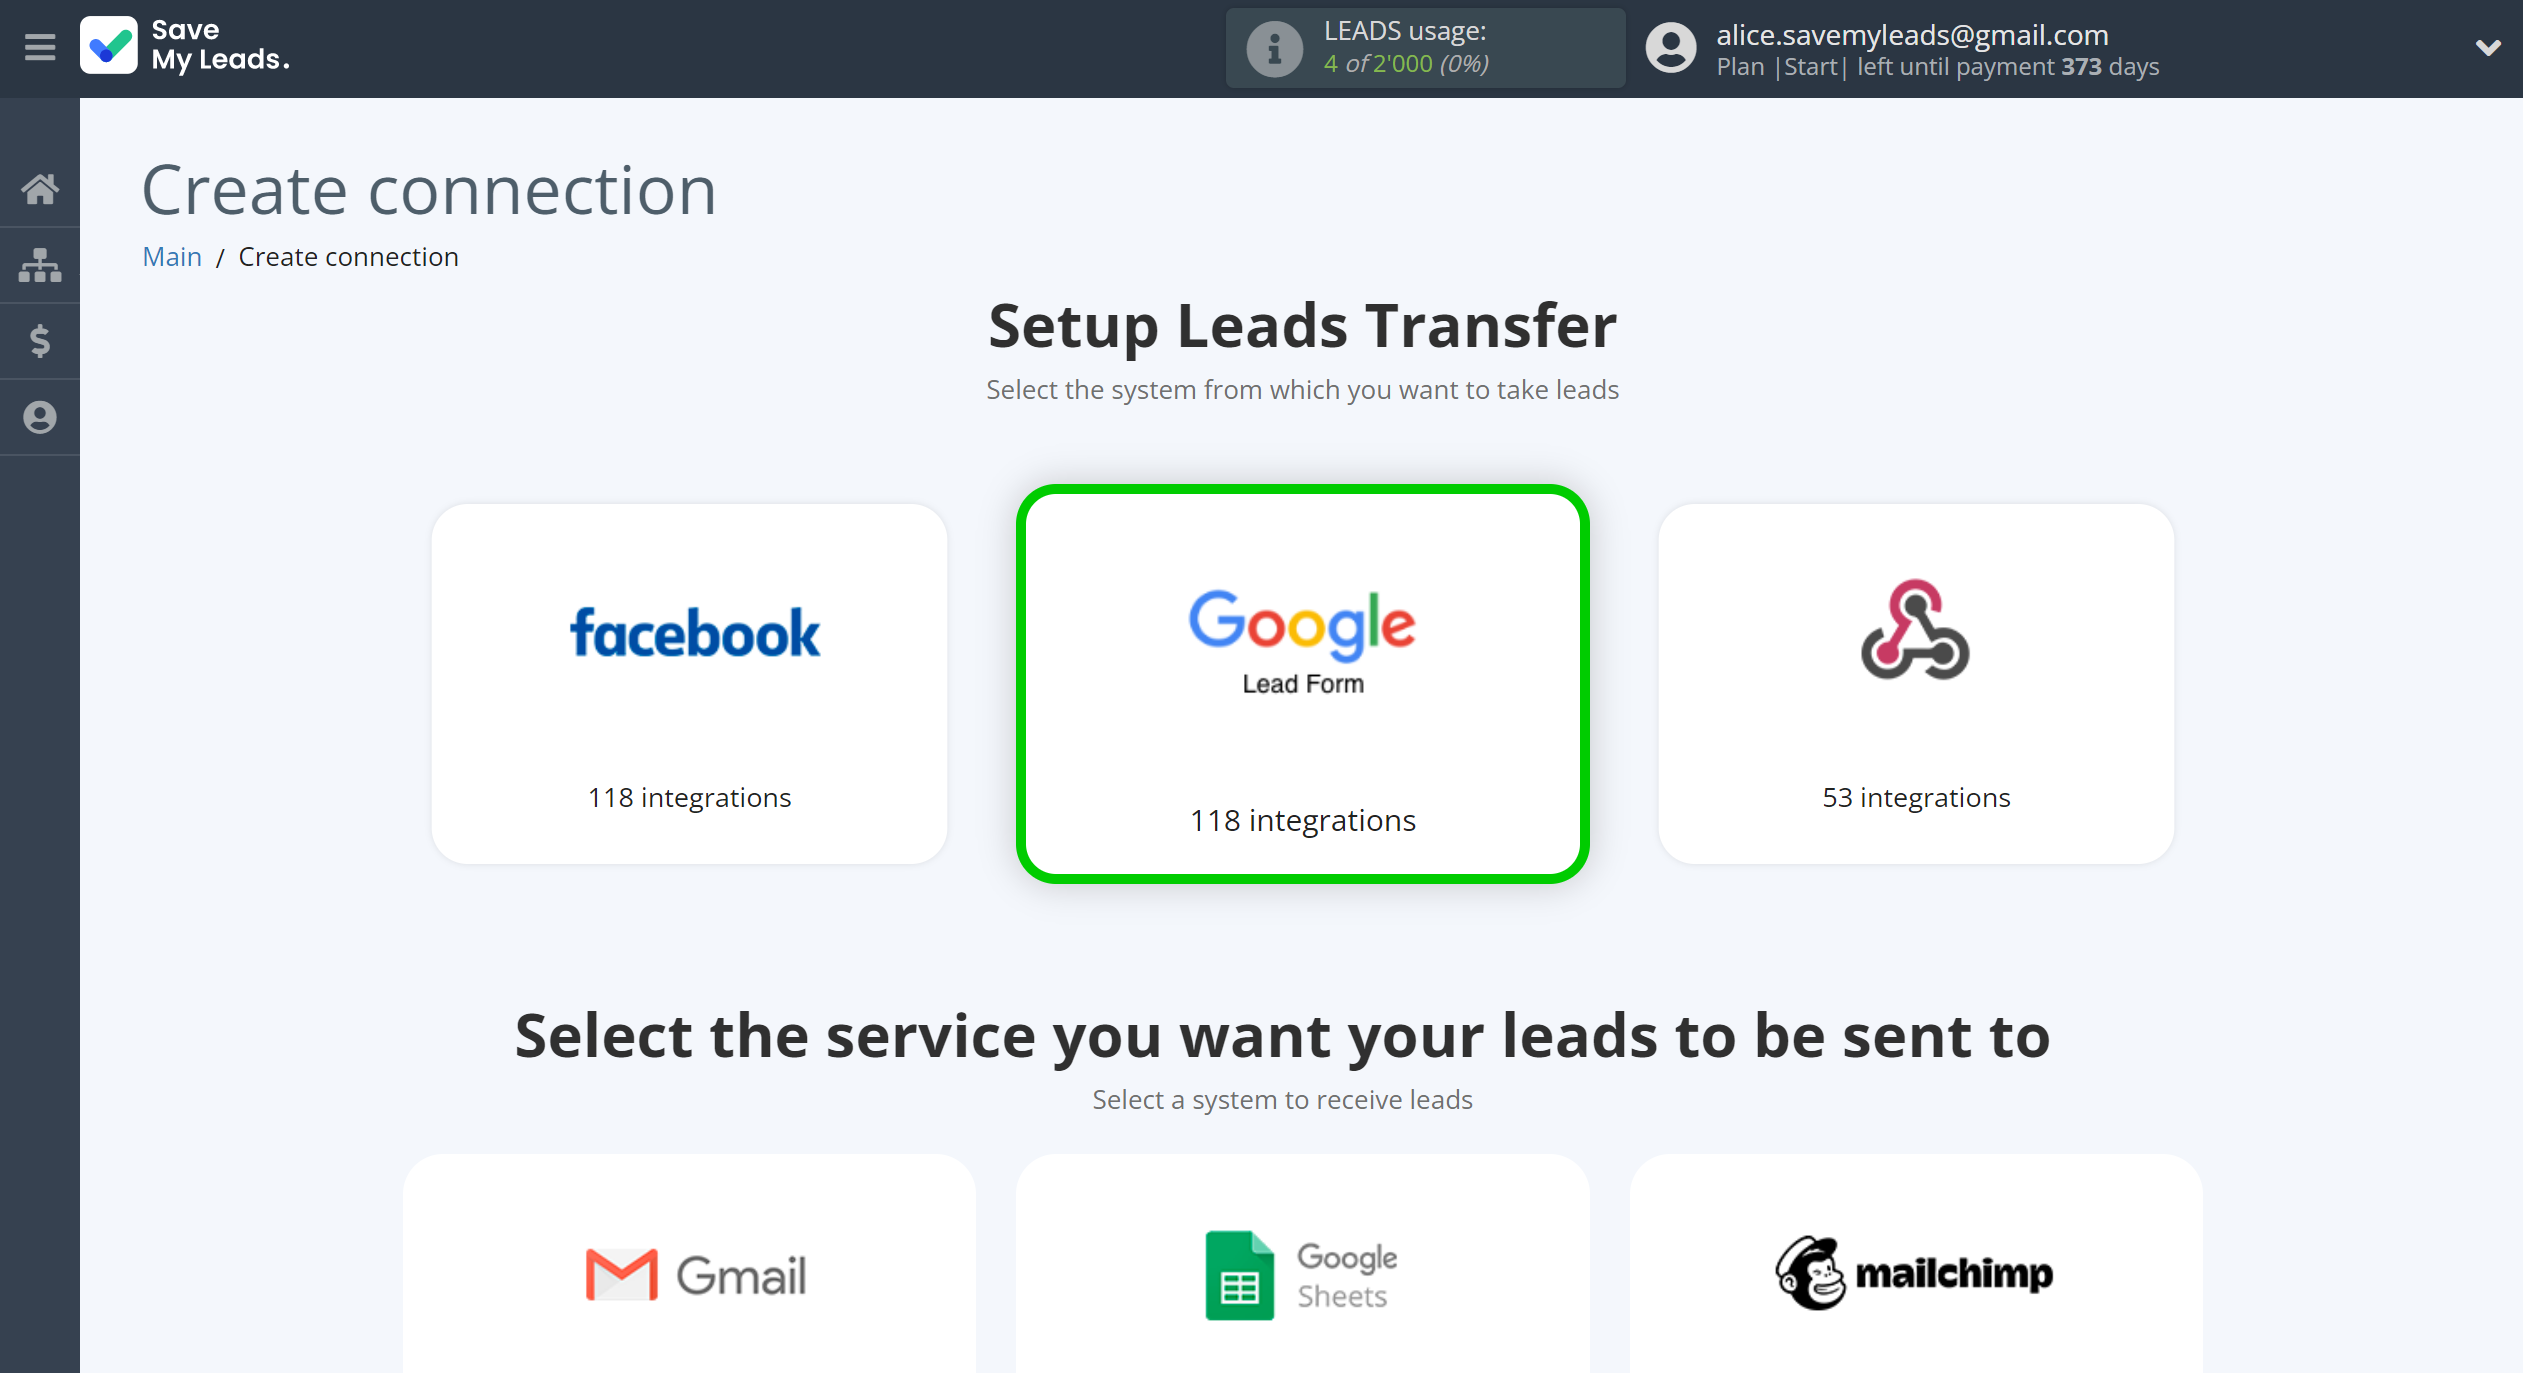
Select a system as the Data Source. In this case, you must specify the Google Lead Form.
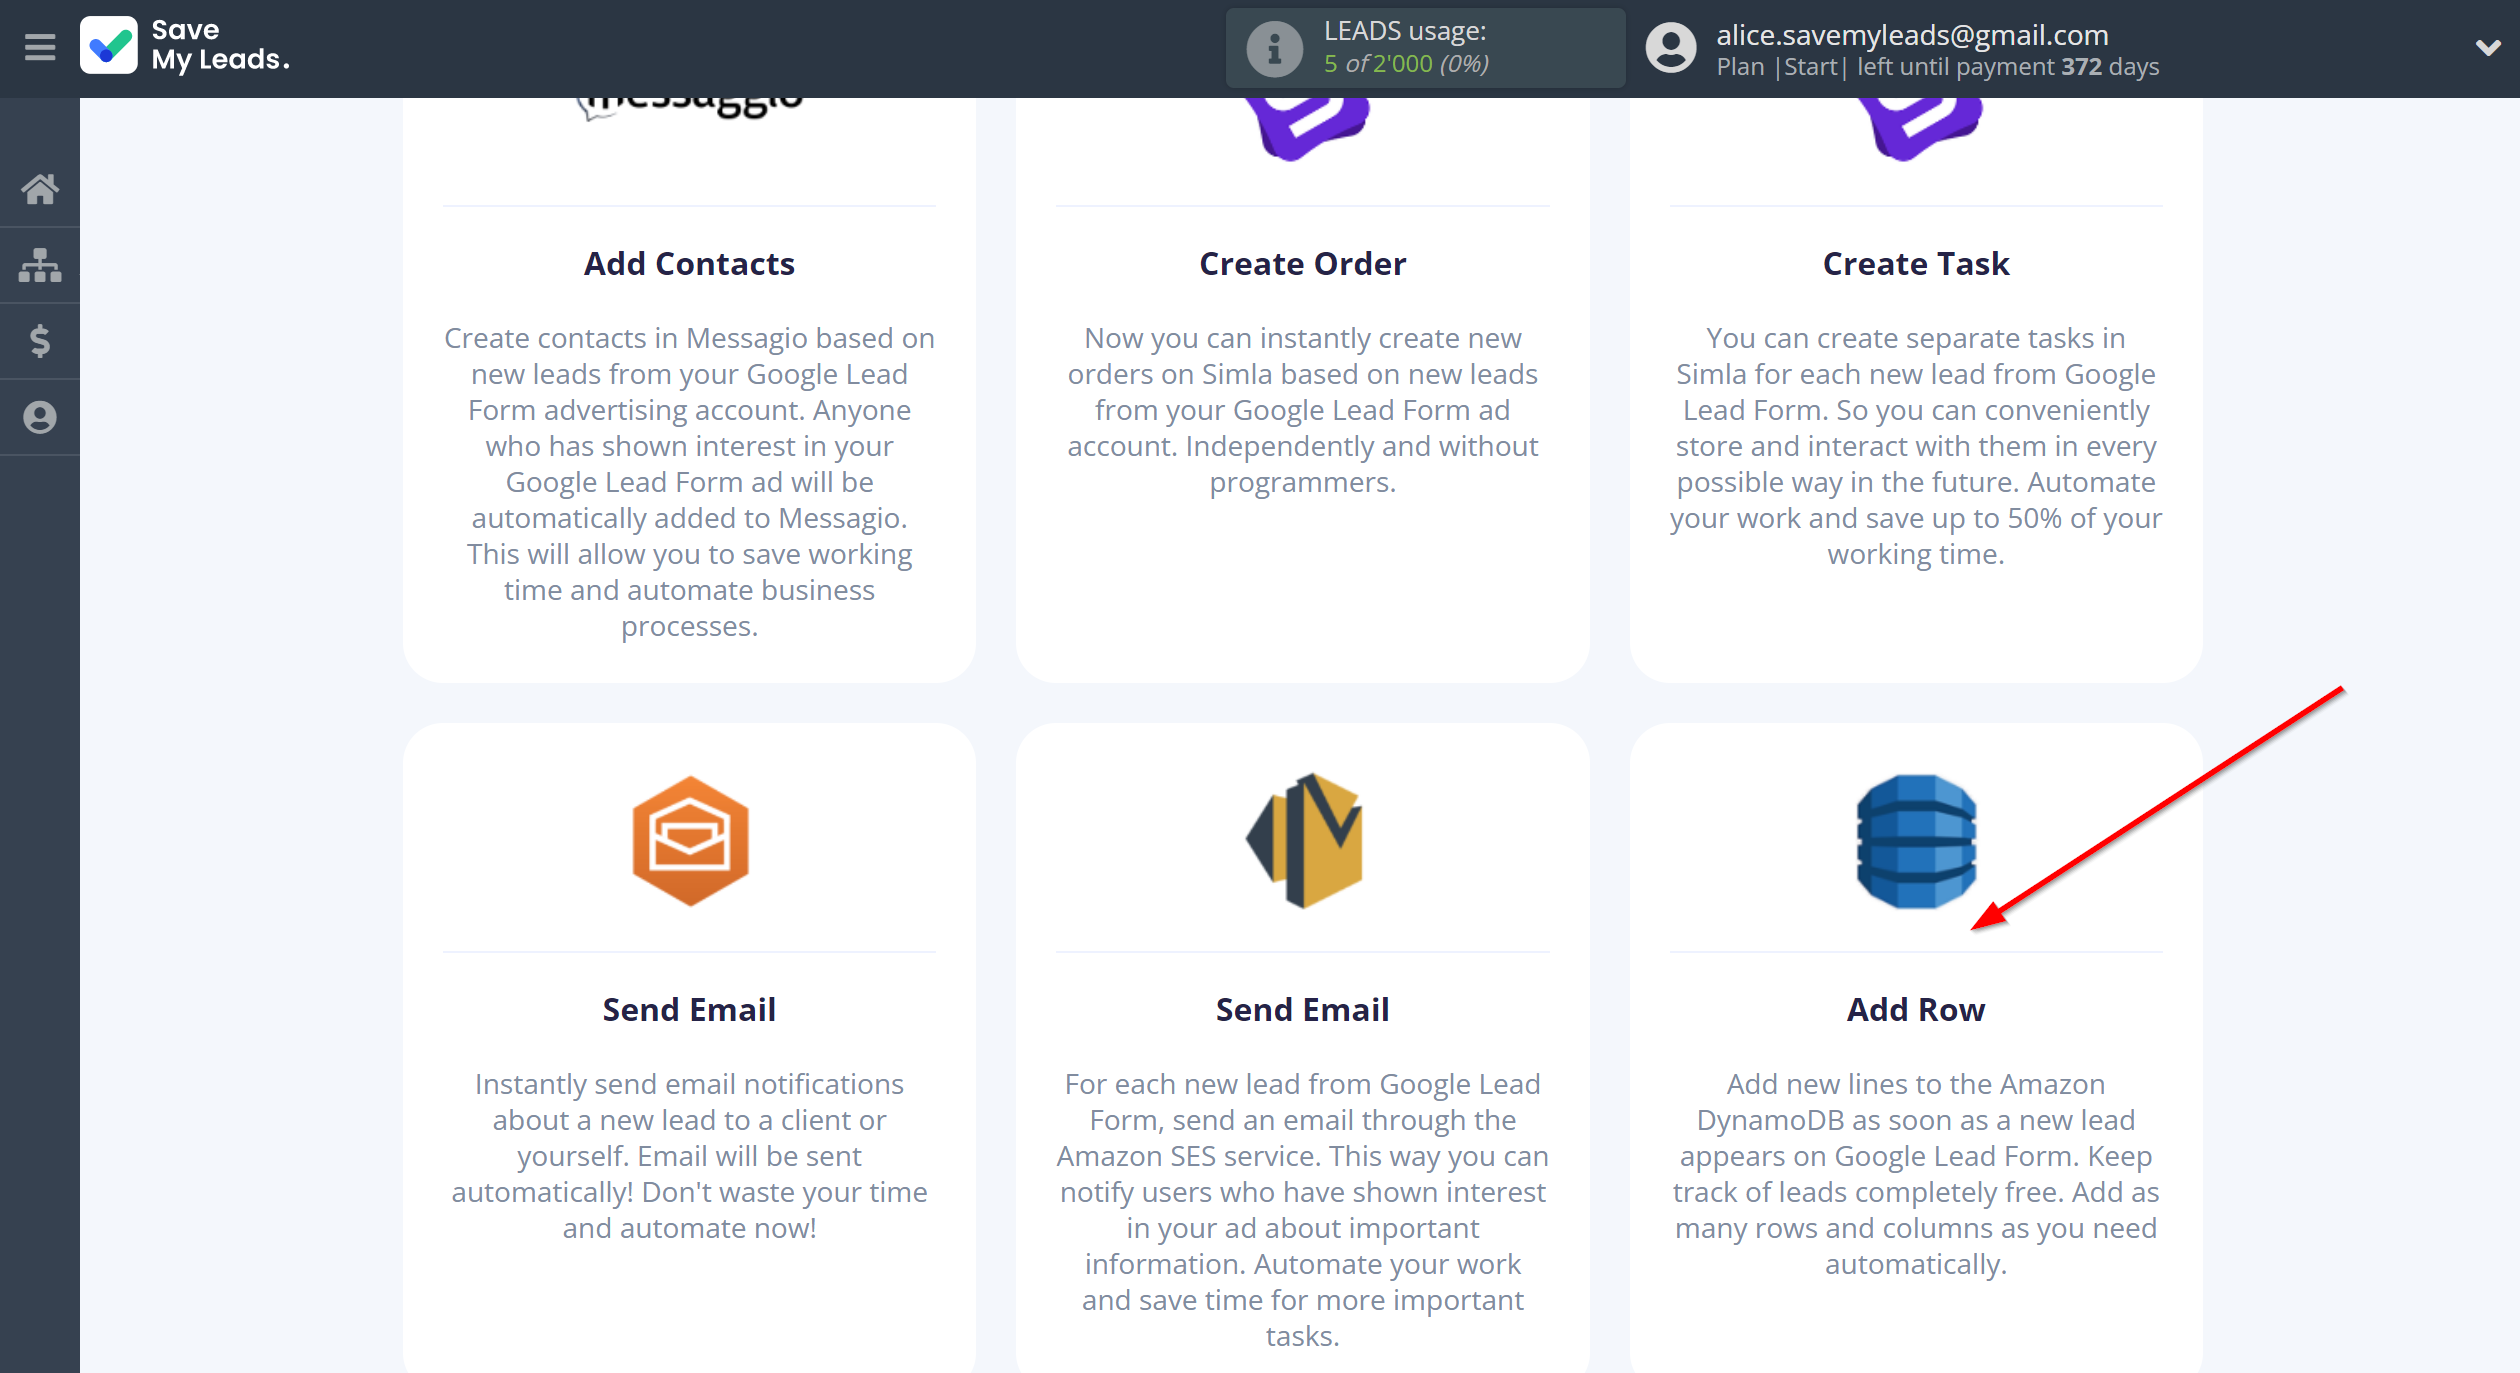
Next, you need to specify the system to which the data from the Google Lead Form will be transferred. In this case, you must specify Amazon DynamoDB.
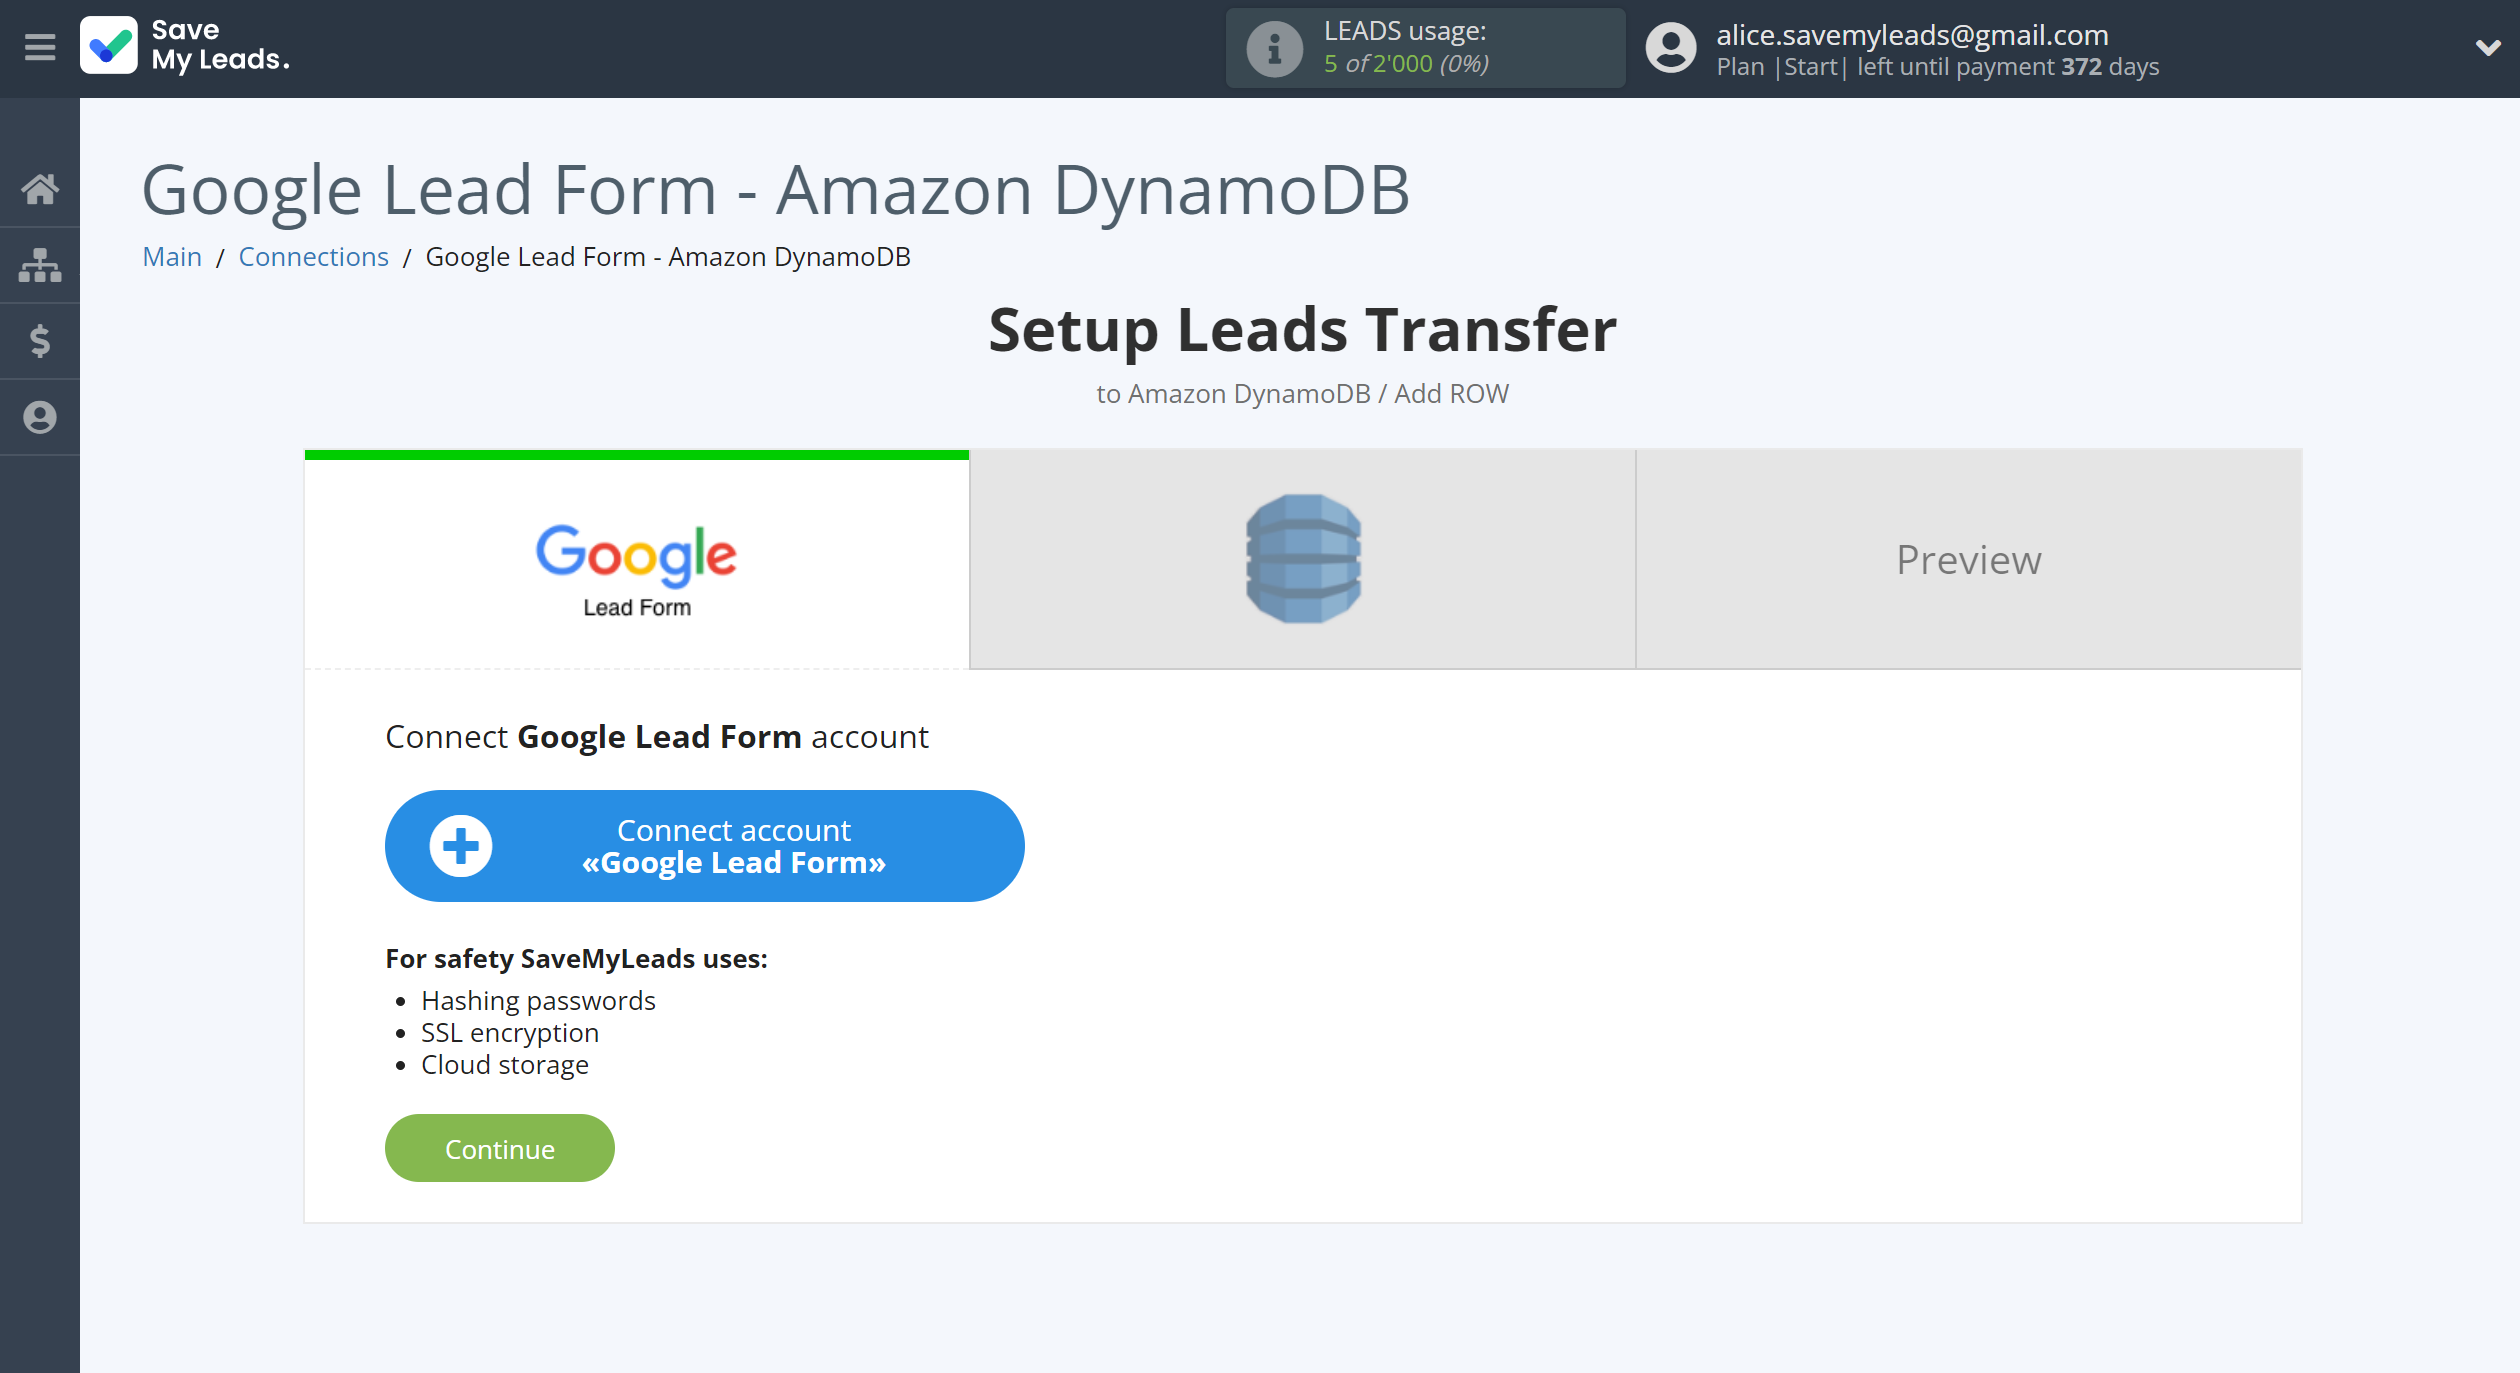
The next step is to select Google Lead Form account from which SaveMyLeads get leads.
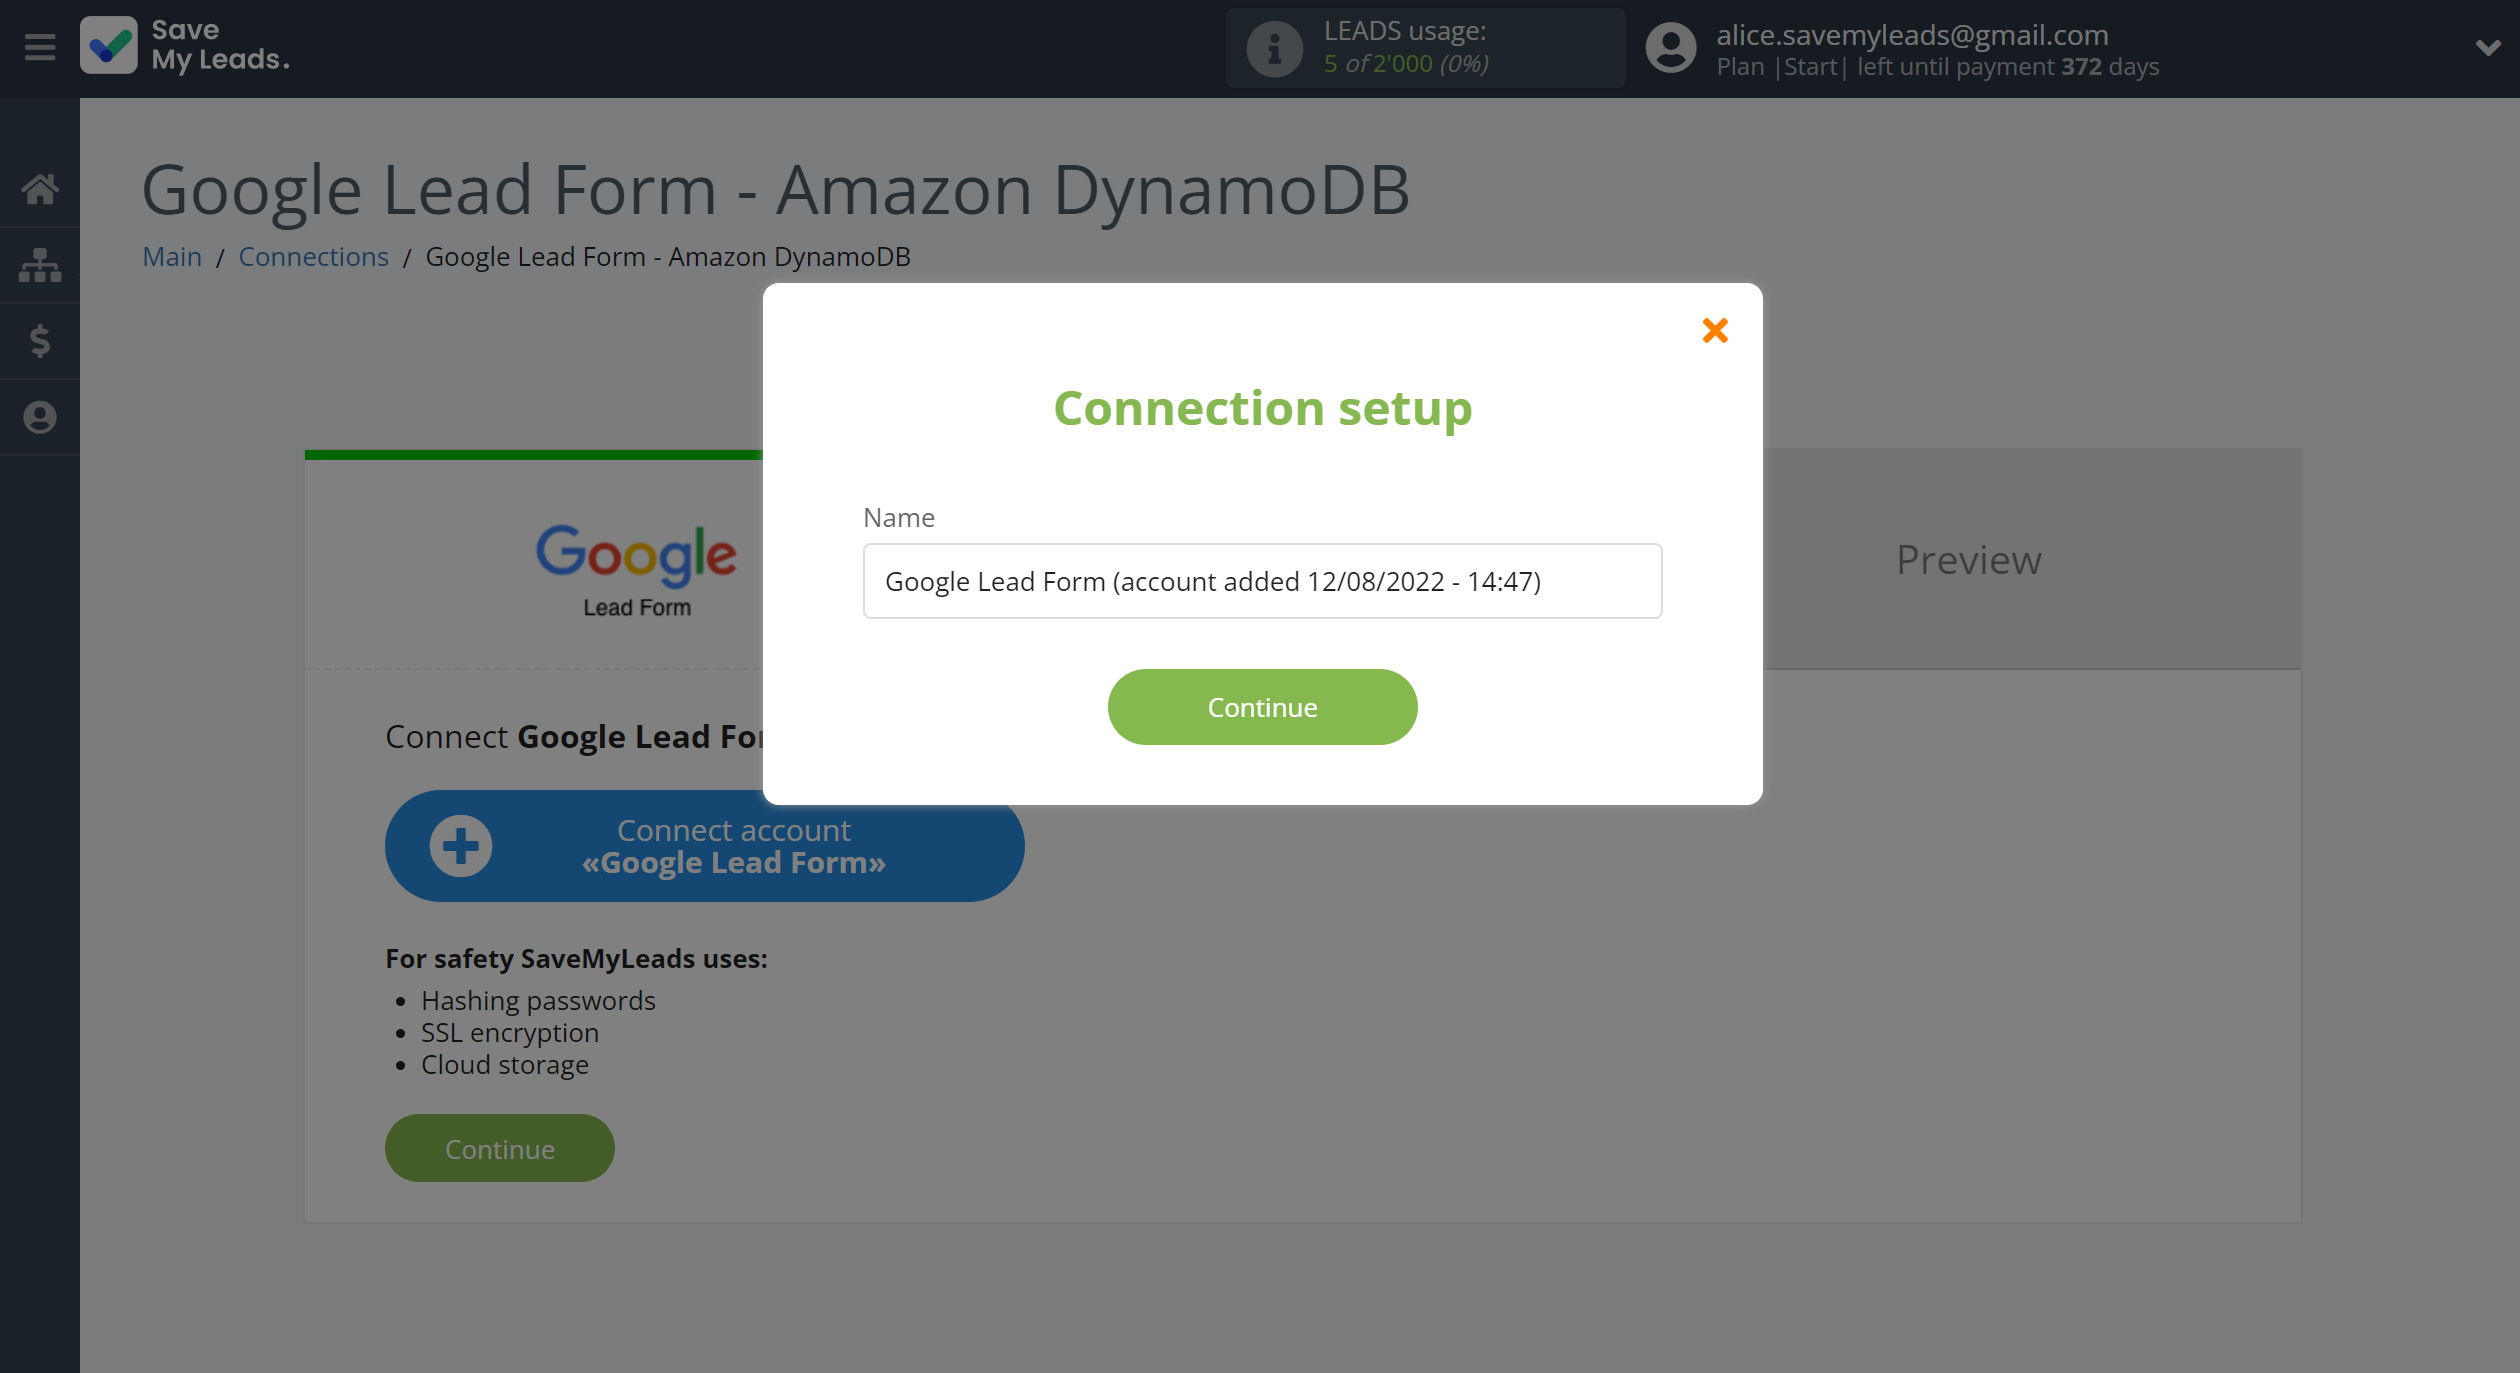
If there are no accounts connected to the system, click "Connect account".
If desired, you can change its name or simply click "Continue".
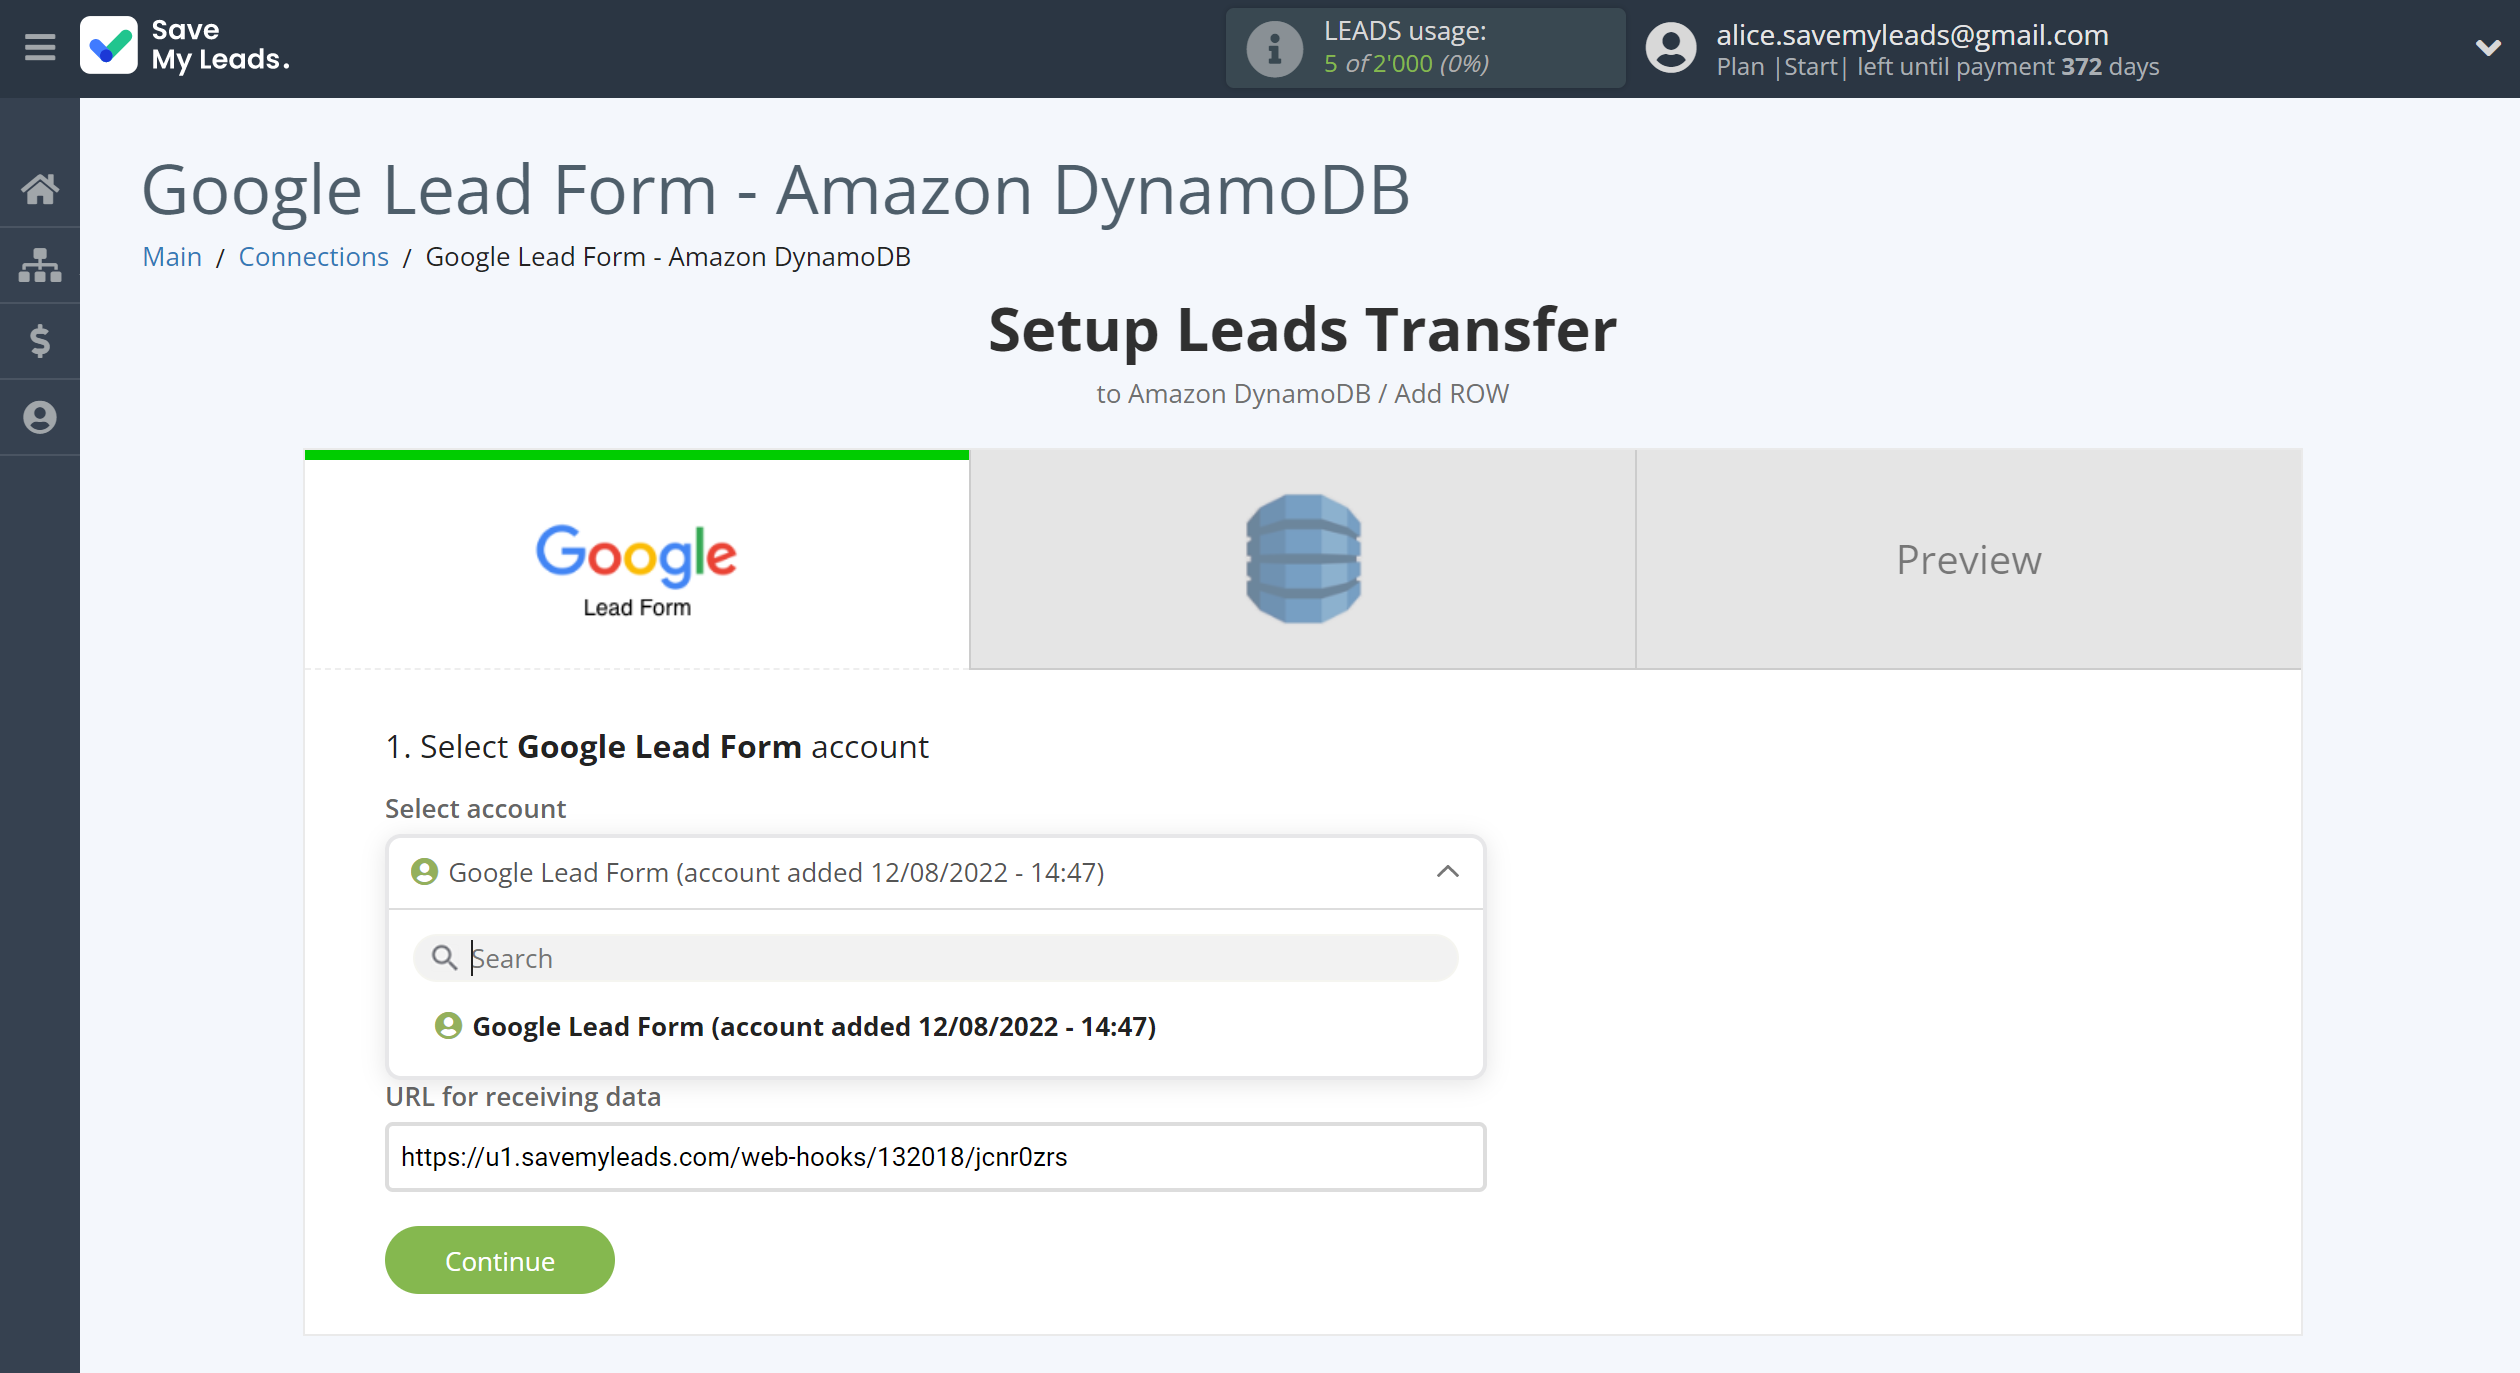
When the connected account is displayed in the "active accounts" list, select it for further work.
Attention! If your account is in the "inactive accounts" list, check your access to this account!
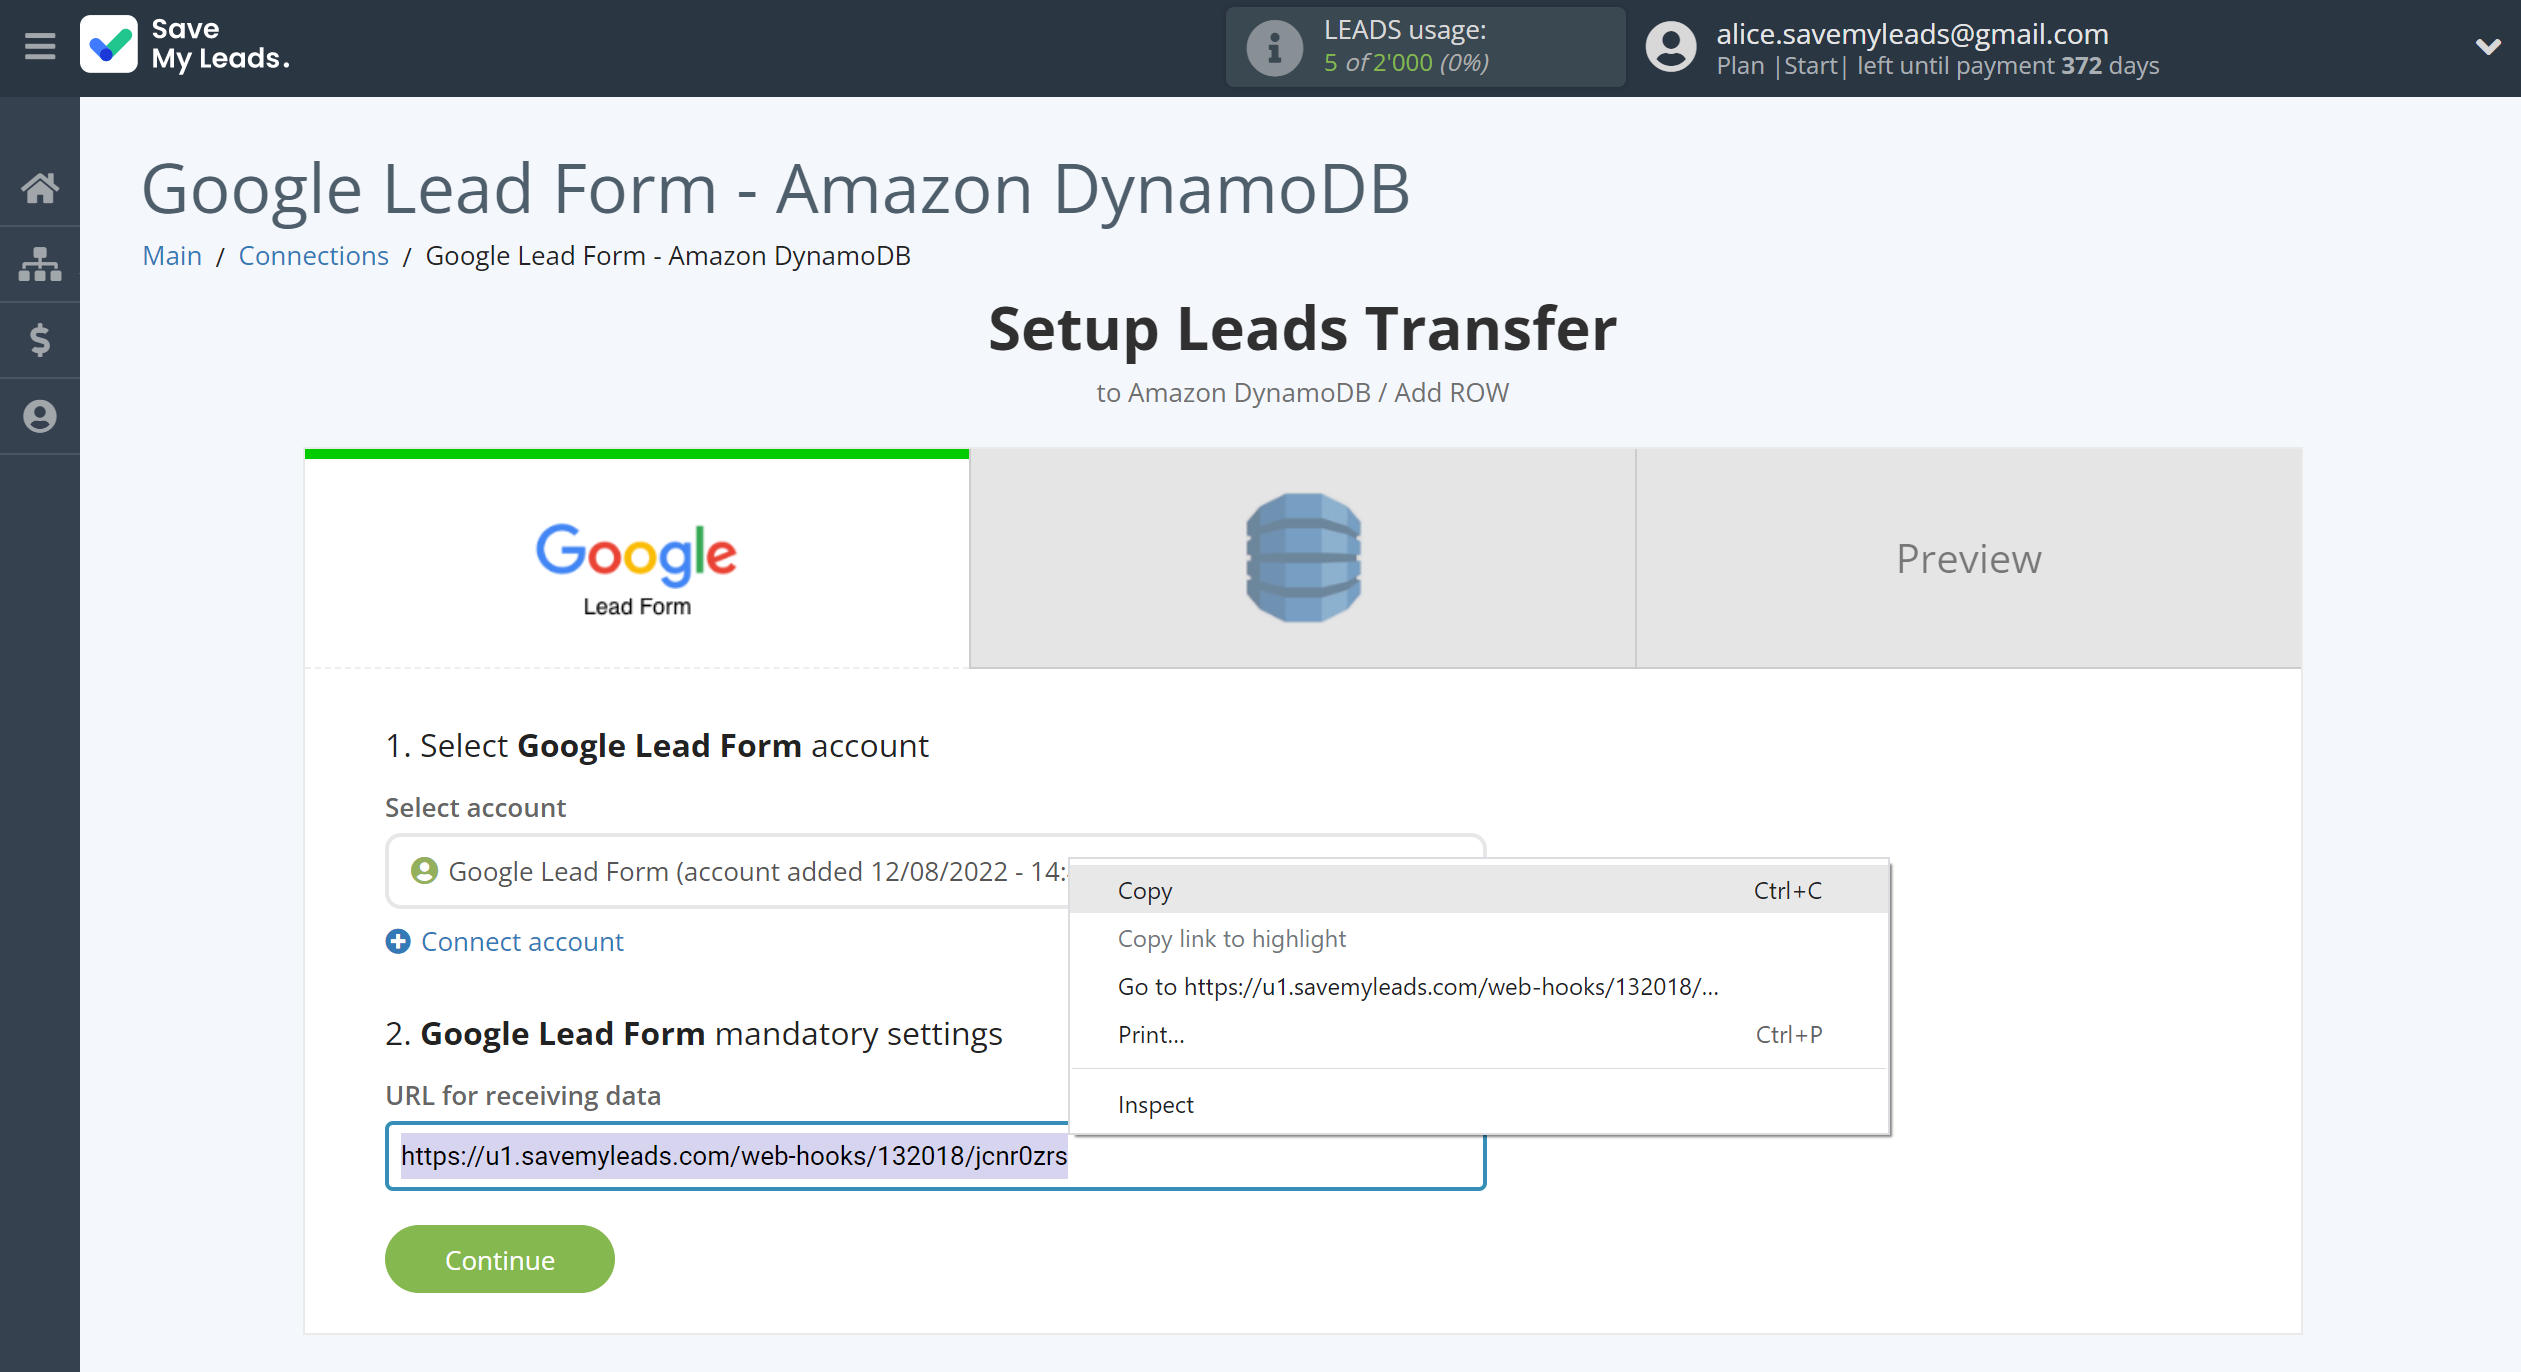
Next, you need to copy the "URL for receiving data", click "Continue" and go to your Google Lead Form account.
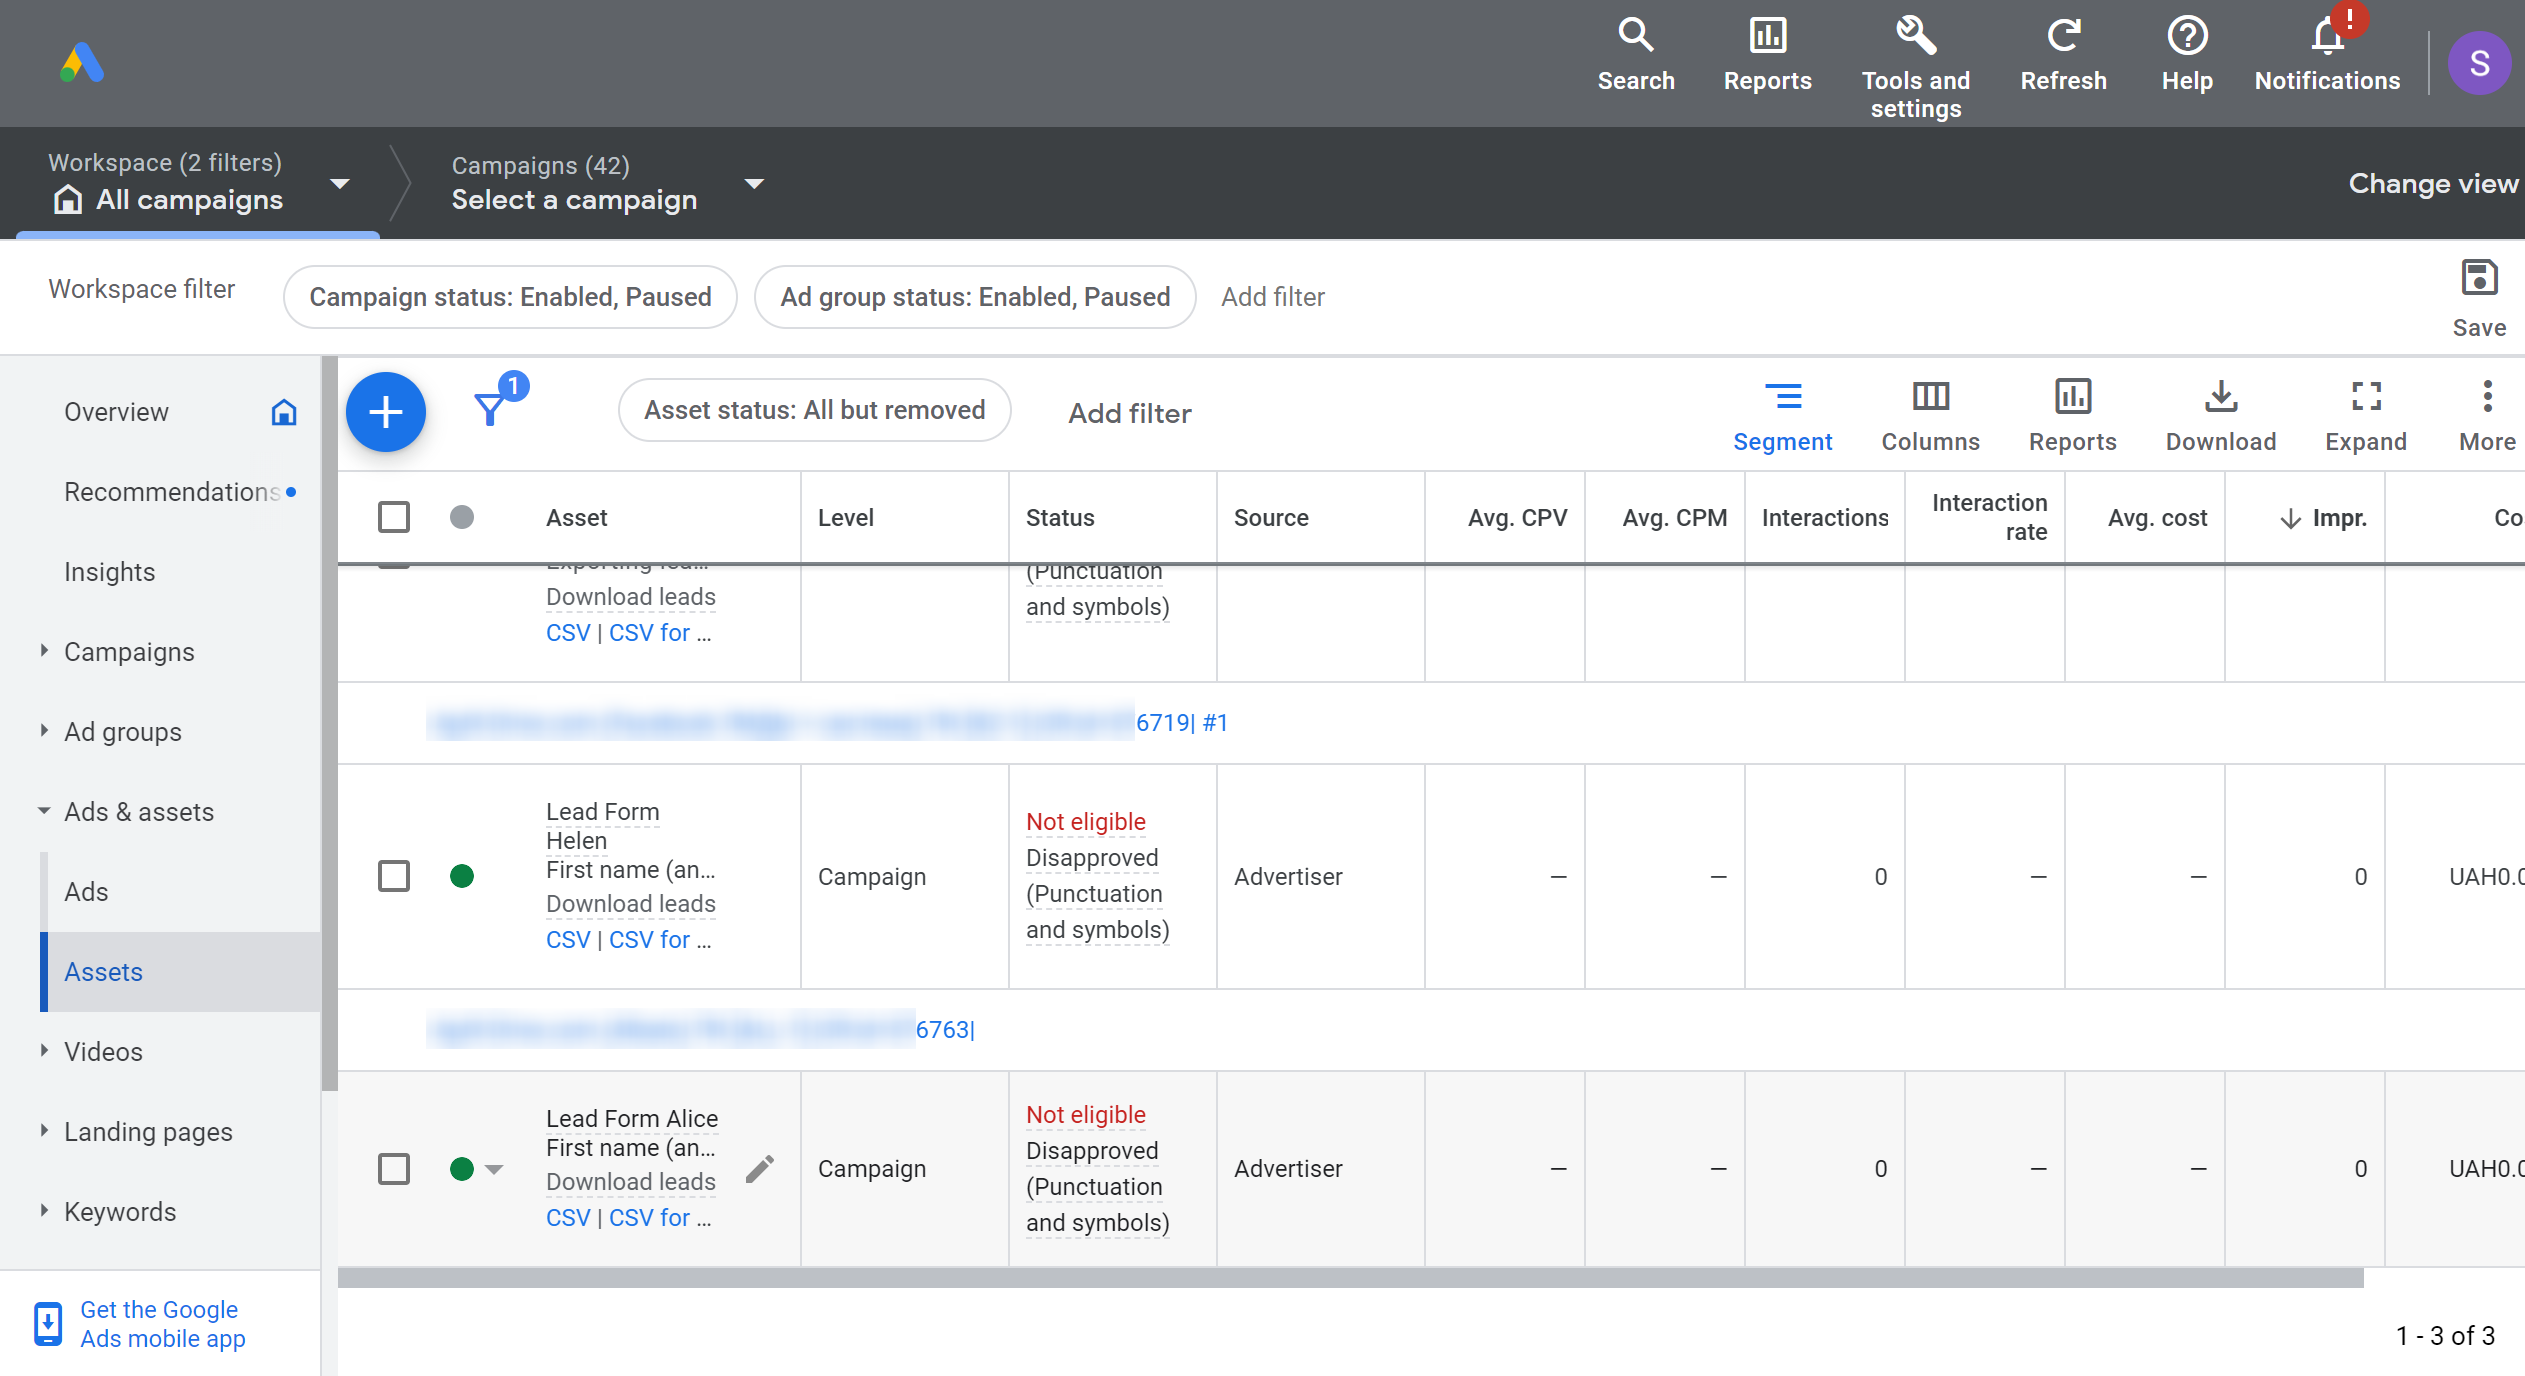
In the account, you need to select the lead form you need.
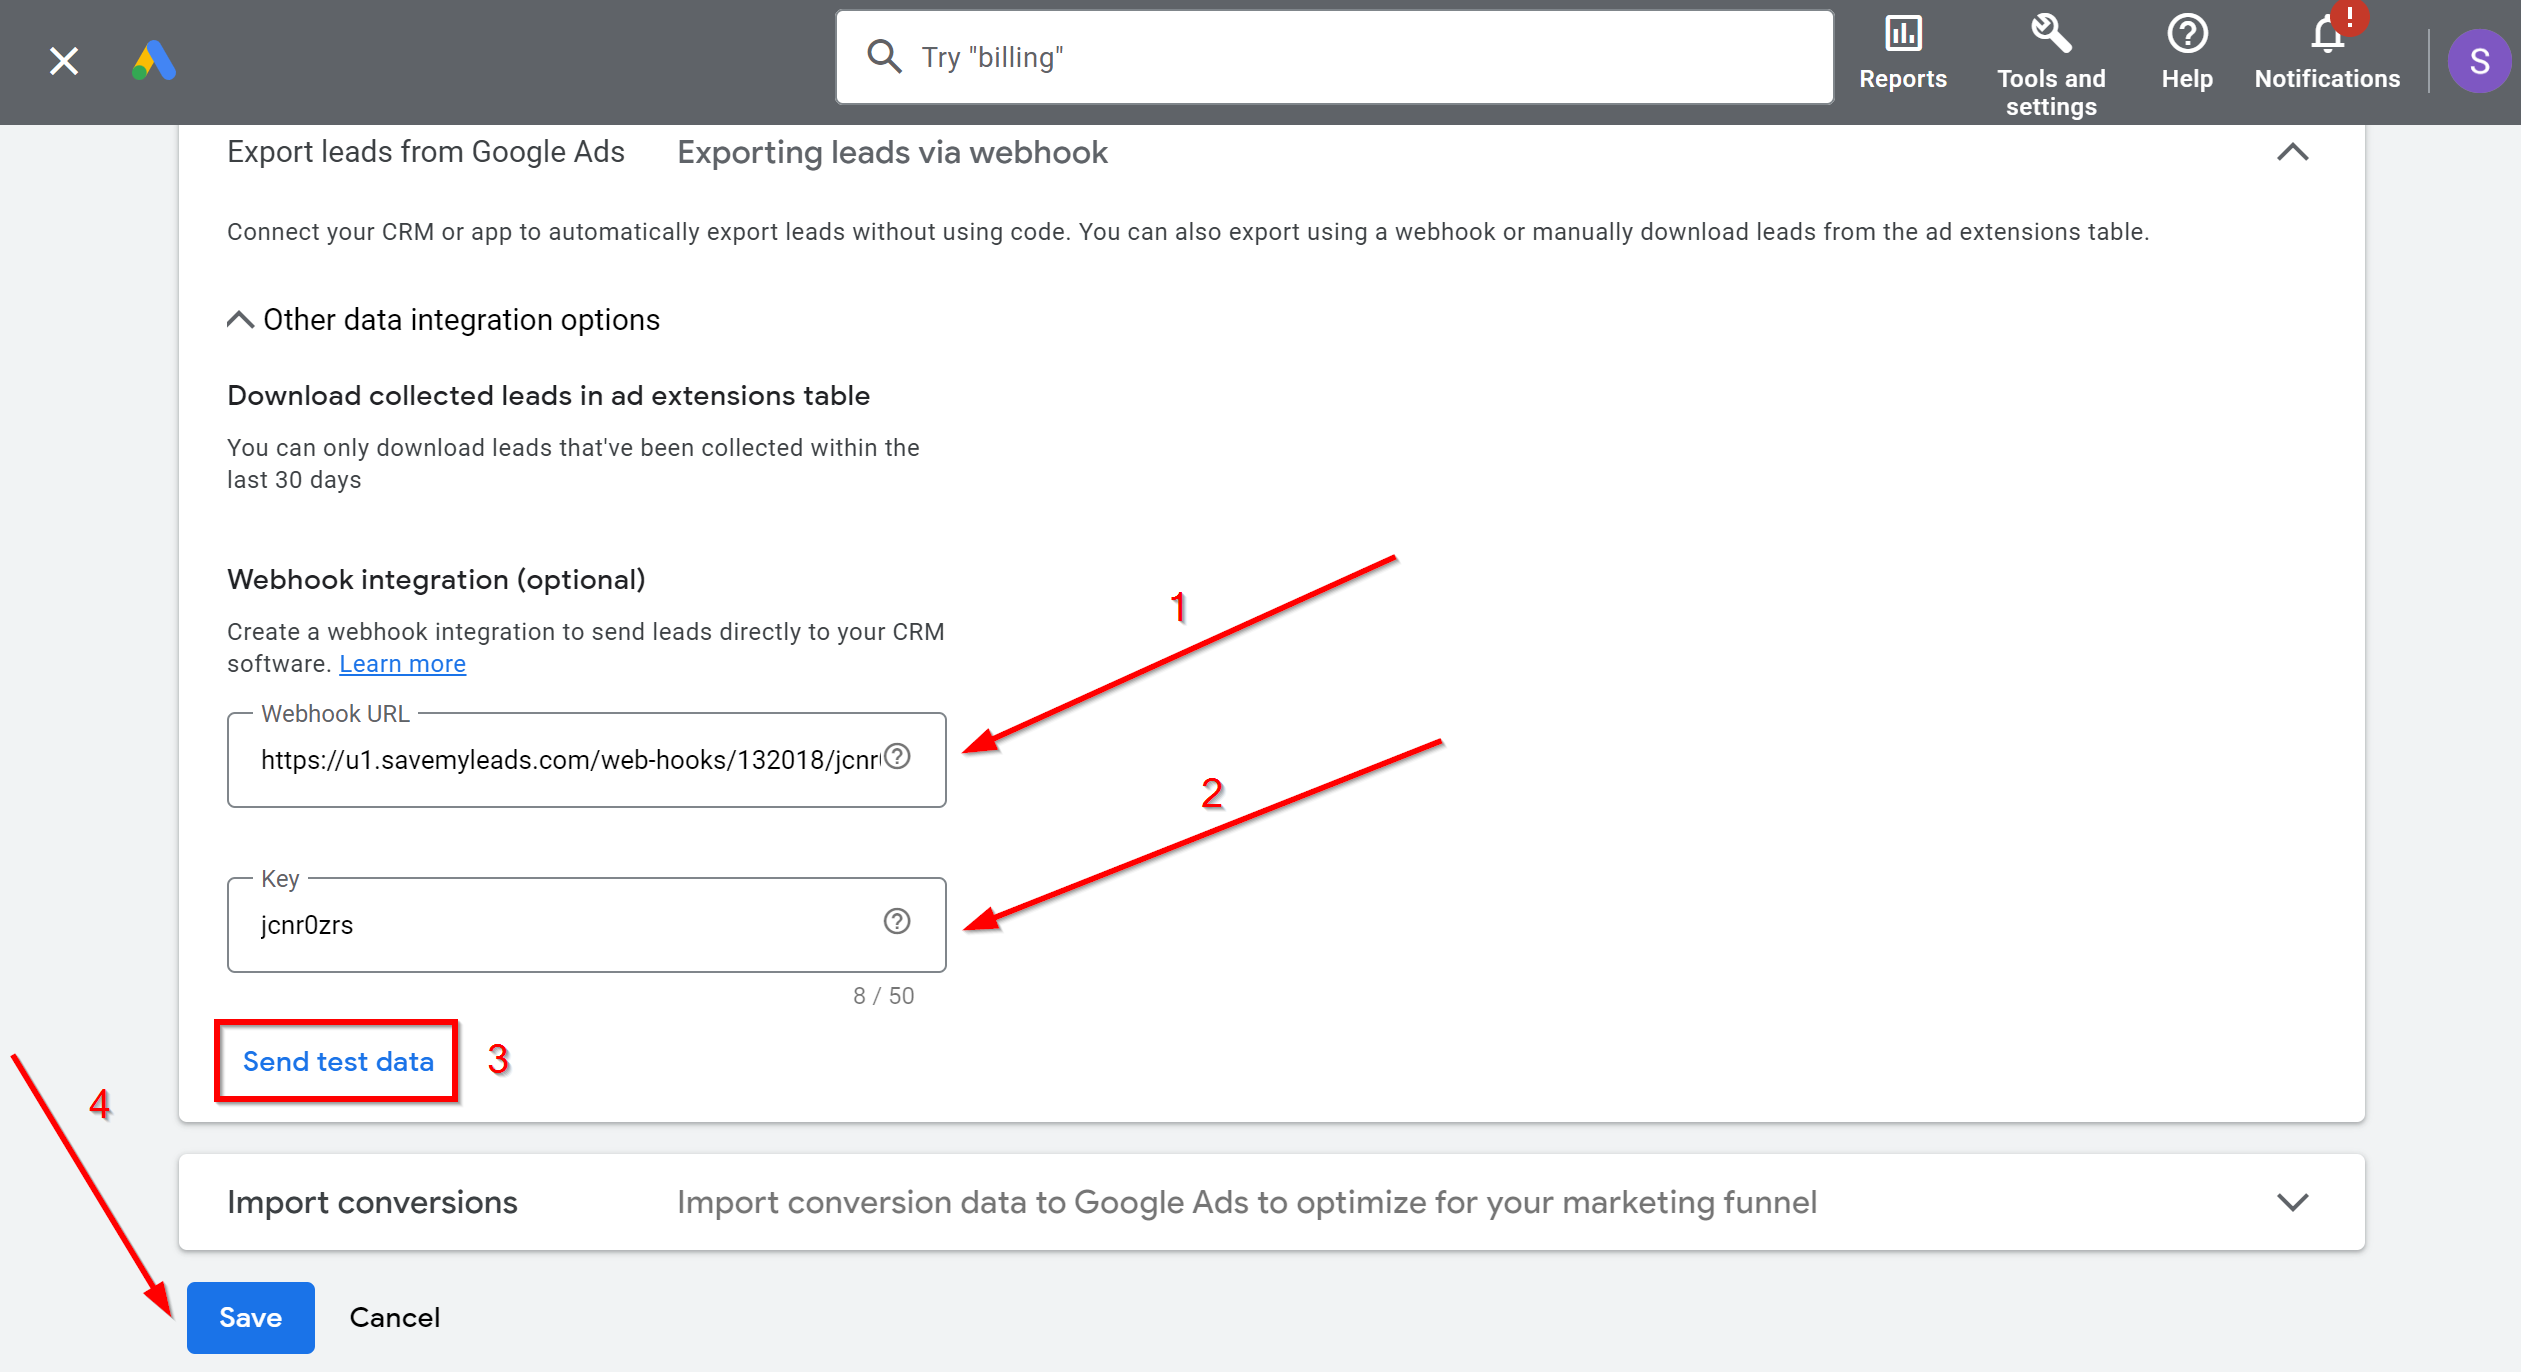
Now you need to do the following:
1 - paste the copied URL into the Webhook URL;
2 - insert the end of the URL link into the Key;
3 - click on the "Send test data";
4 - save changes.
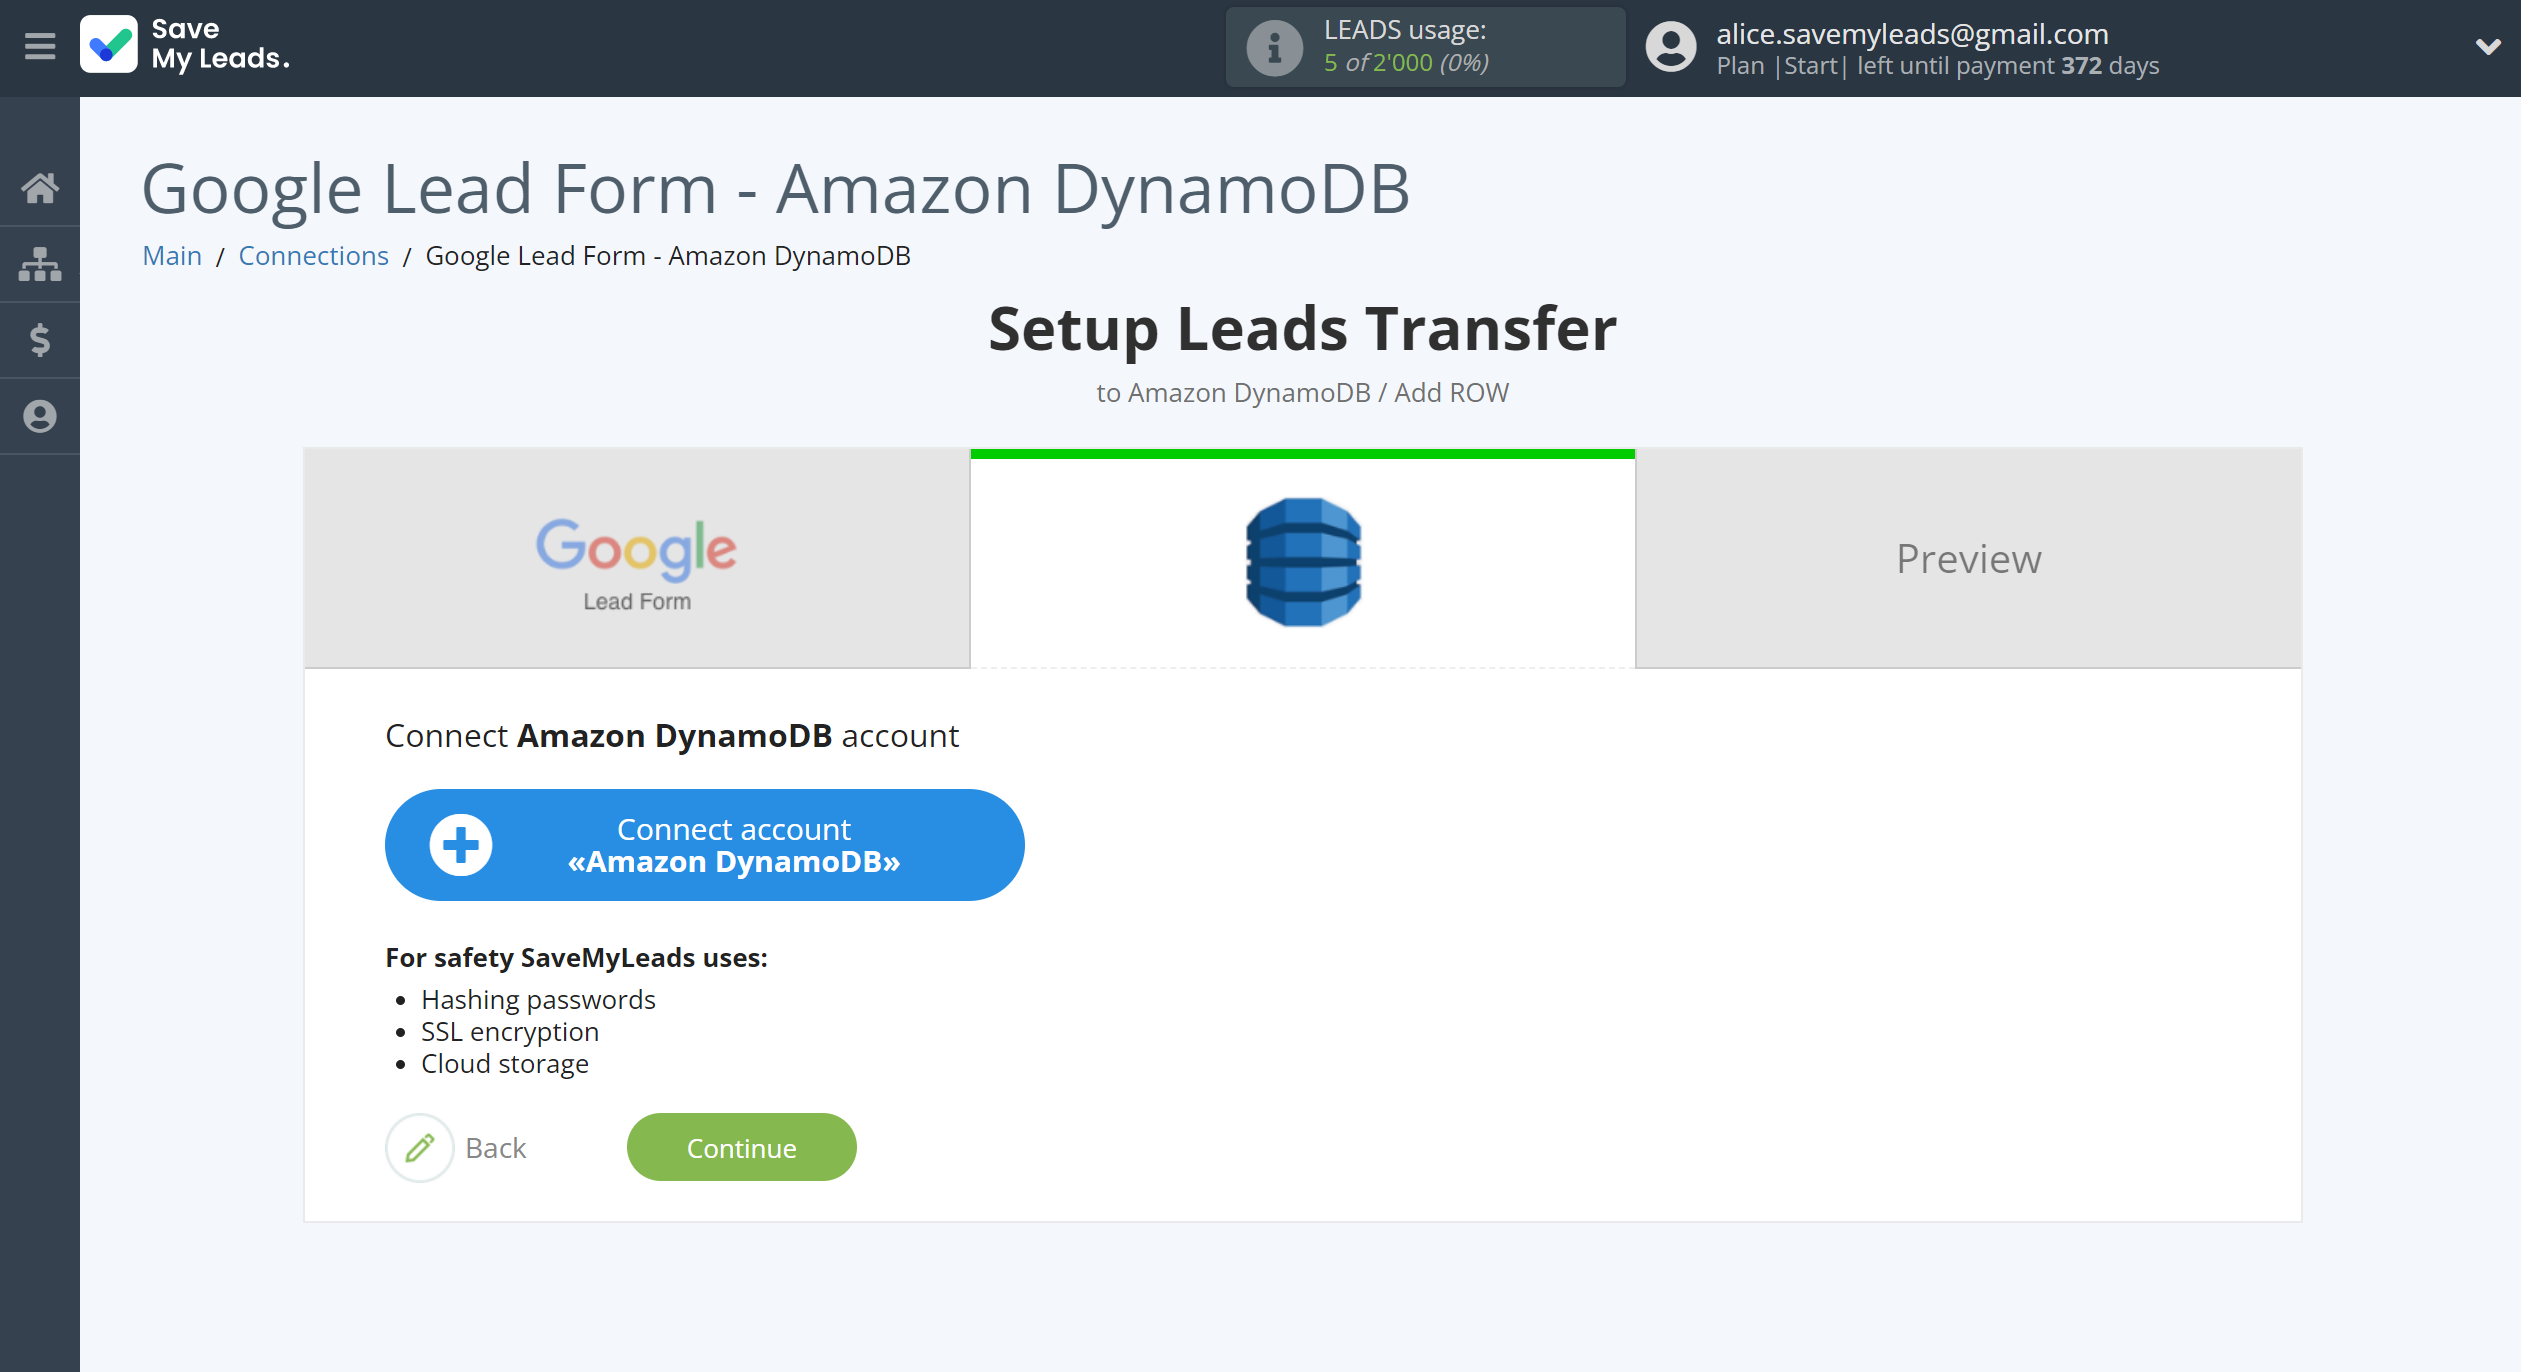
The next step is to select Amazon DynamoDB account to which leads will be sent.
If there are no accounts connected to the system, click "Connect account".
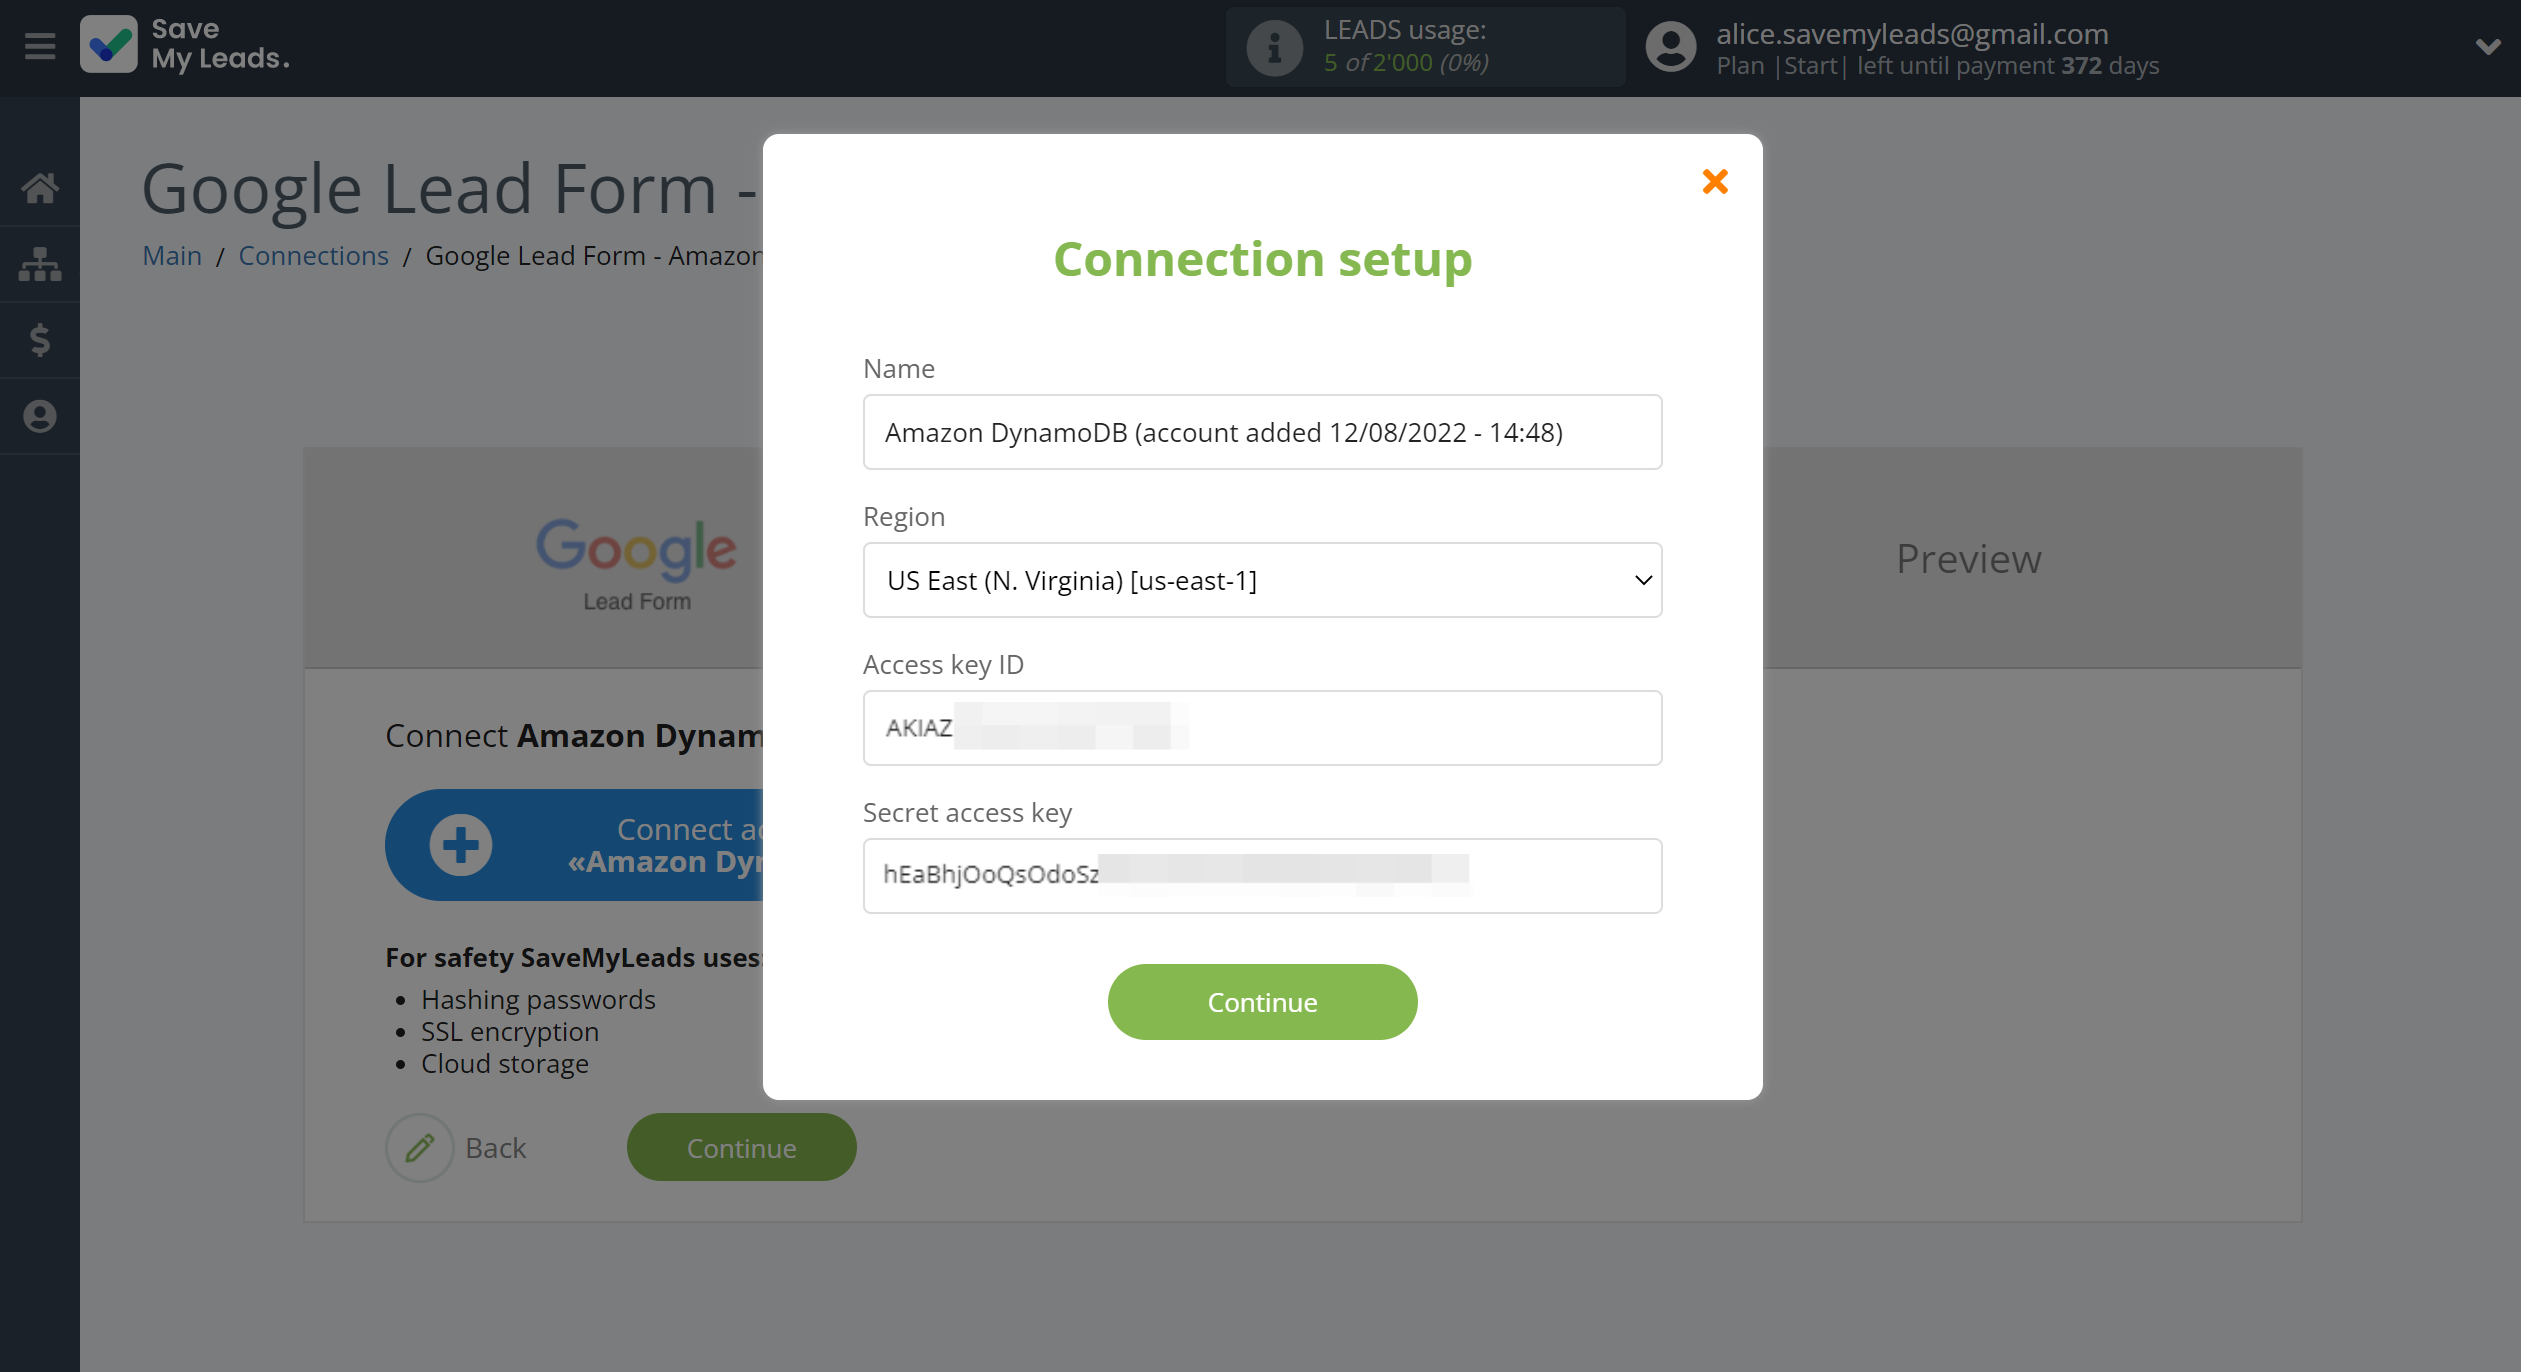
In the window that opens, specify the region in which you have Amazon DynamoDB configured, as well as "Access key ID" and "Secret access key".
To get this information go to your personal account Amazon DynamoDB.
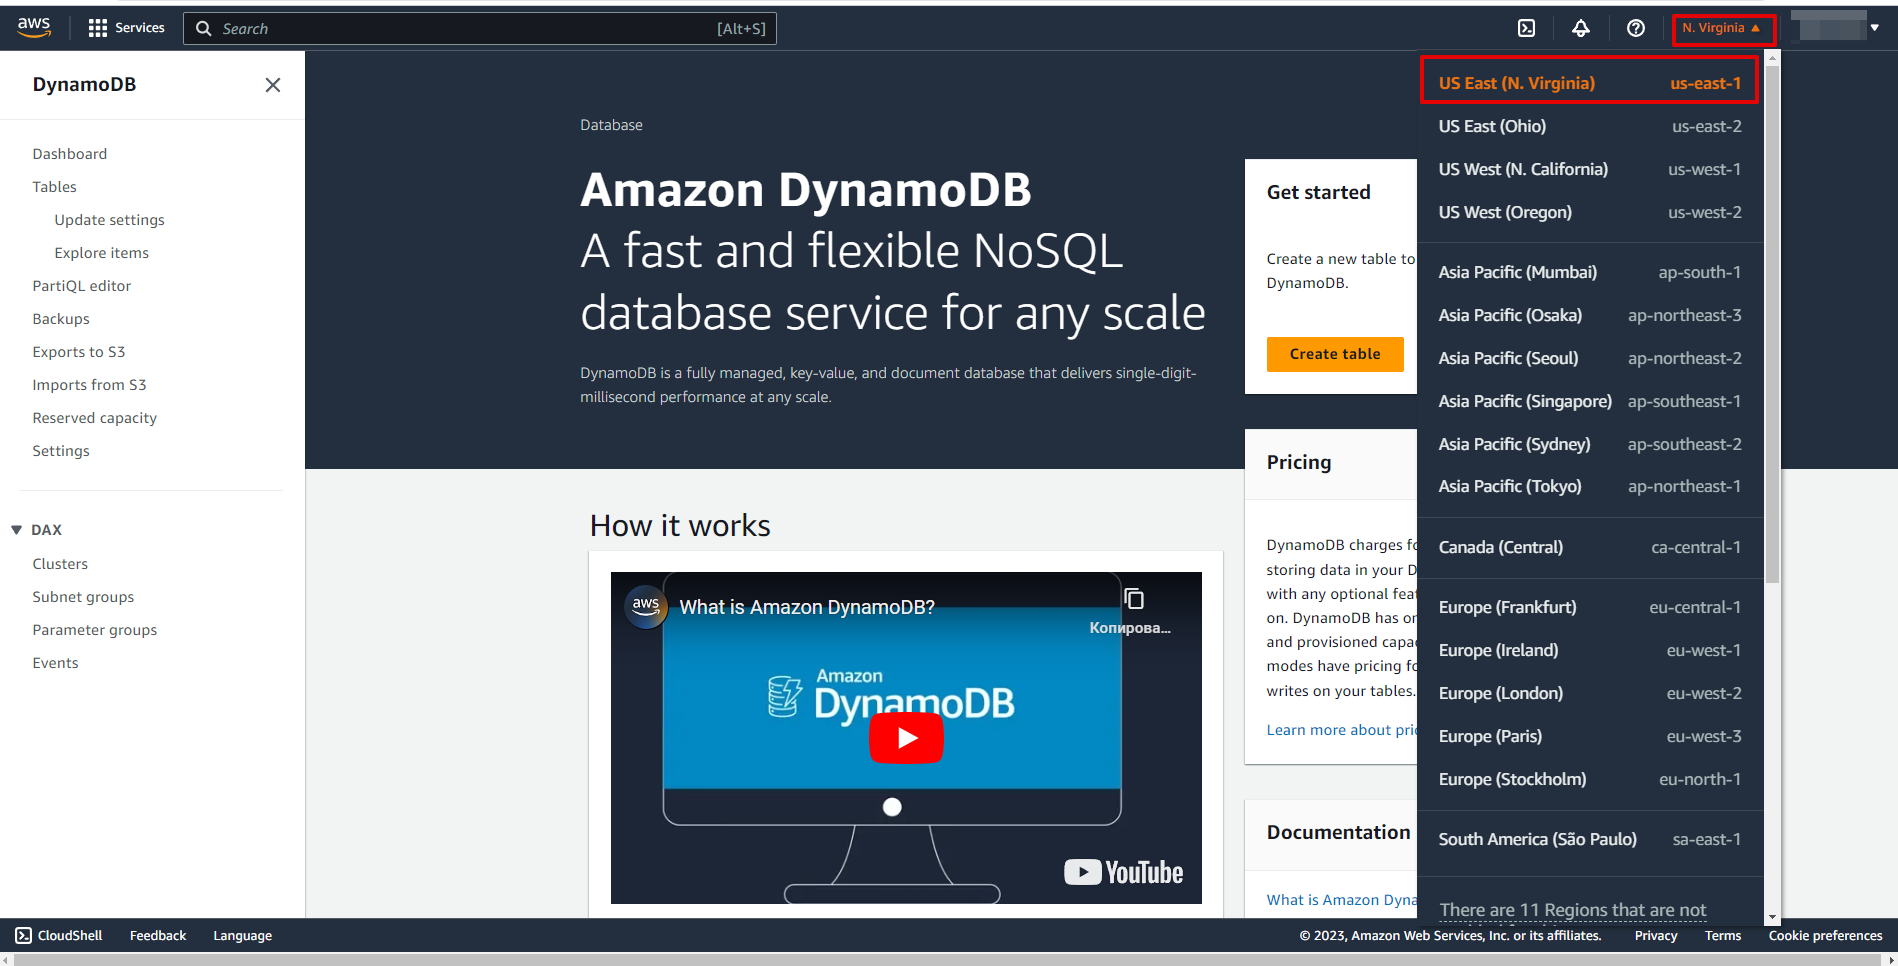
To specify your Region, go to your Amazon DynamoDB account. If you don't already have your Region selected, select it from the list.
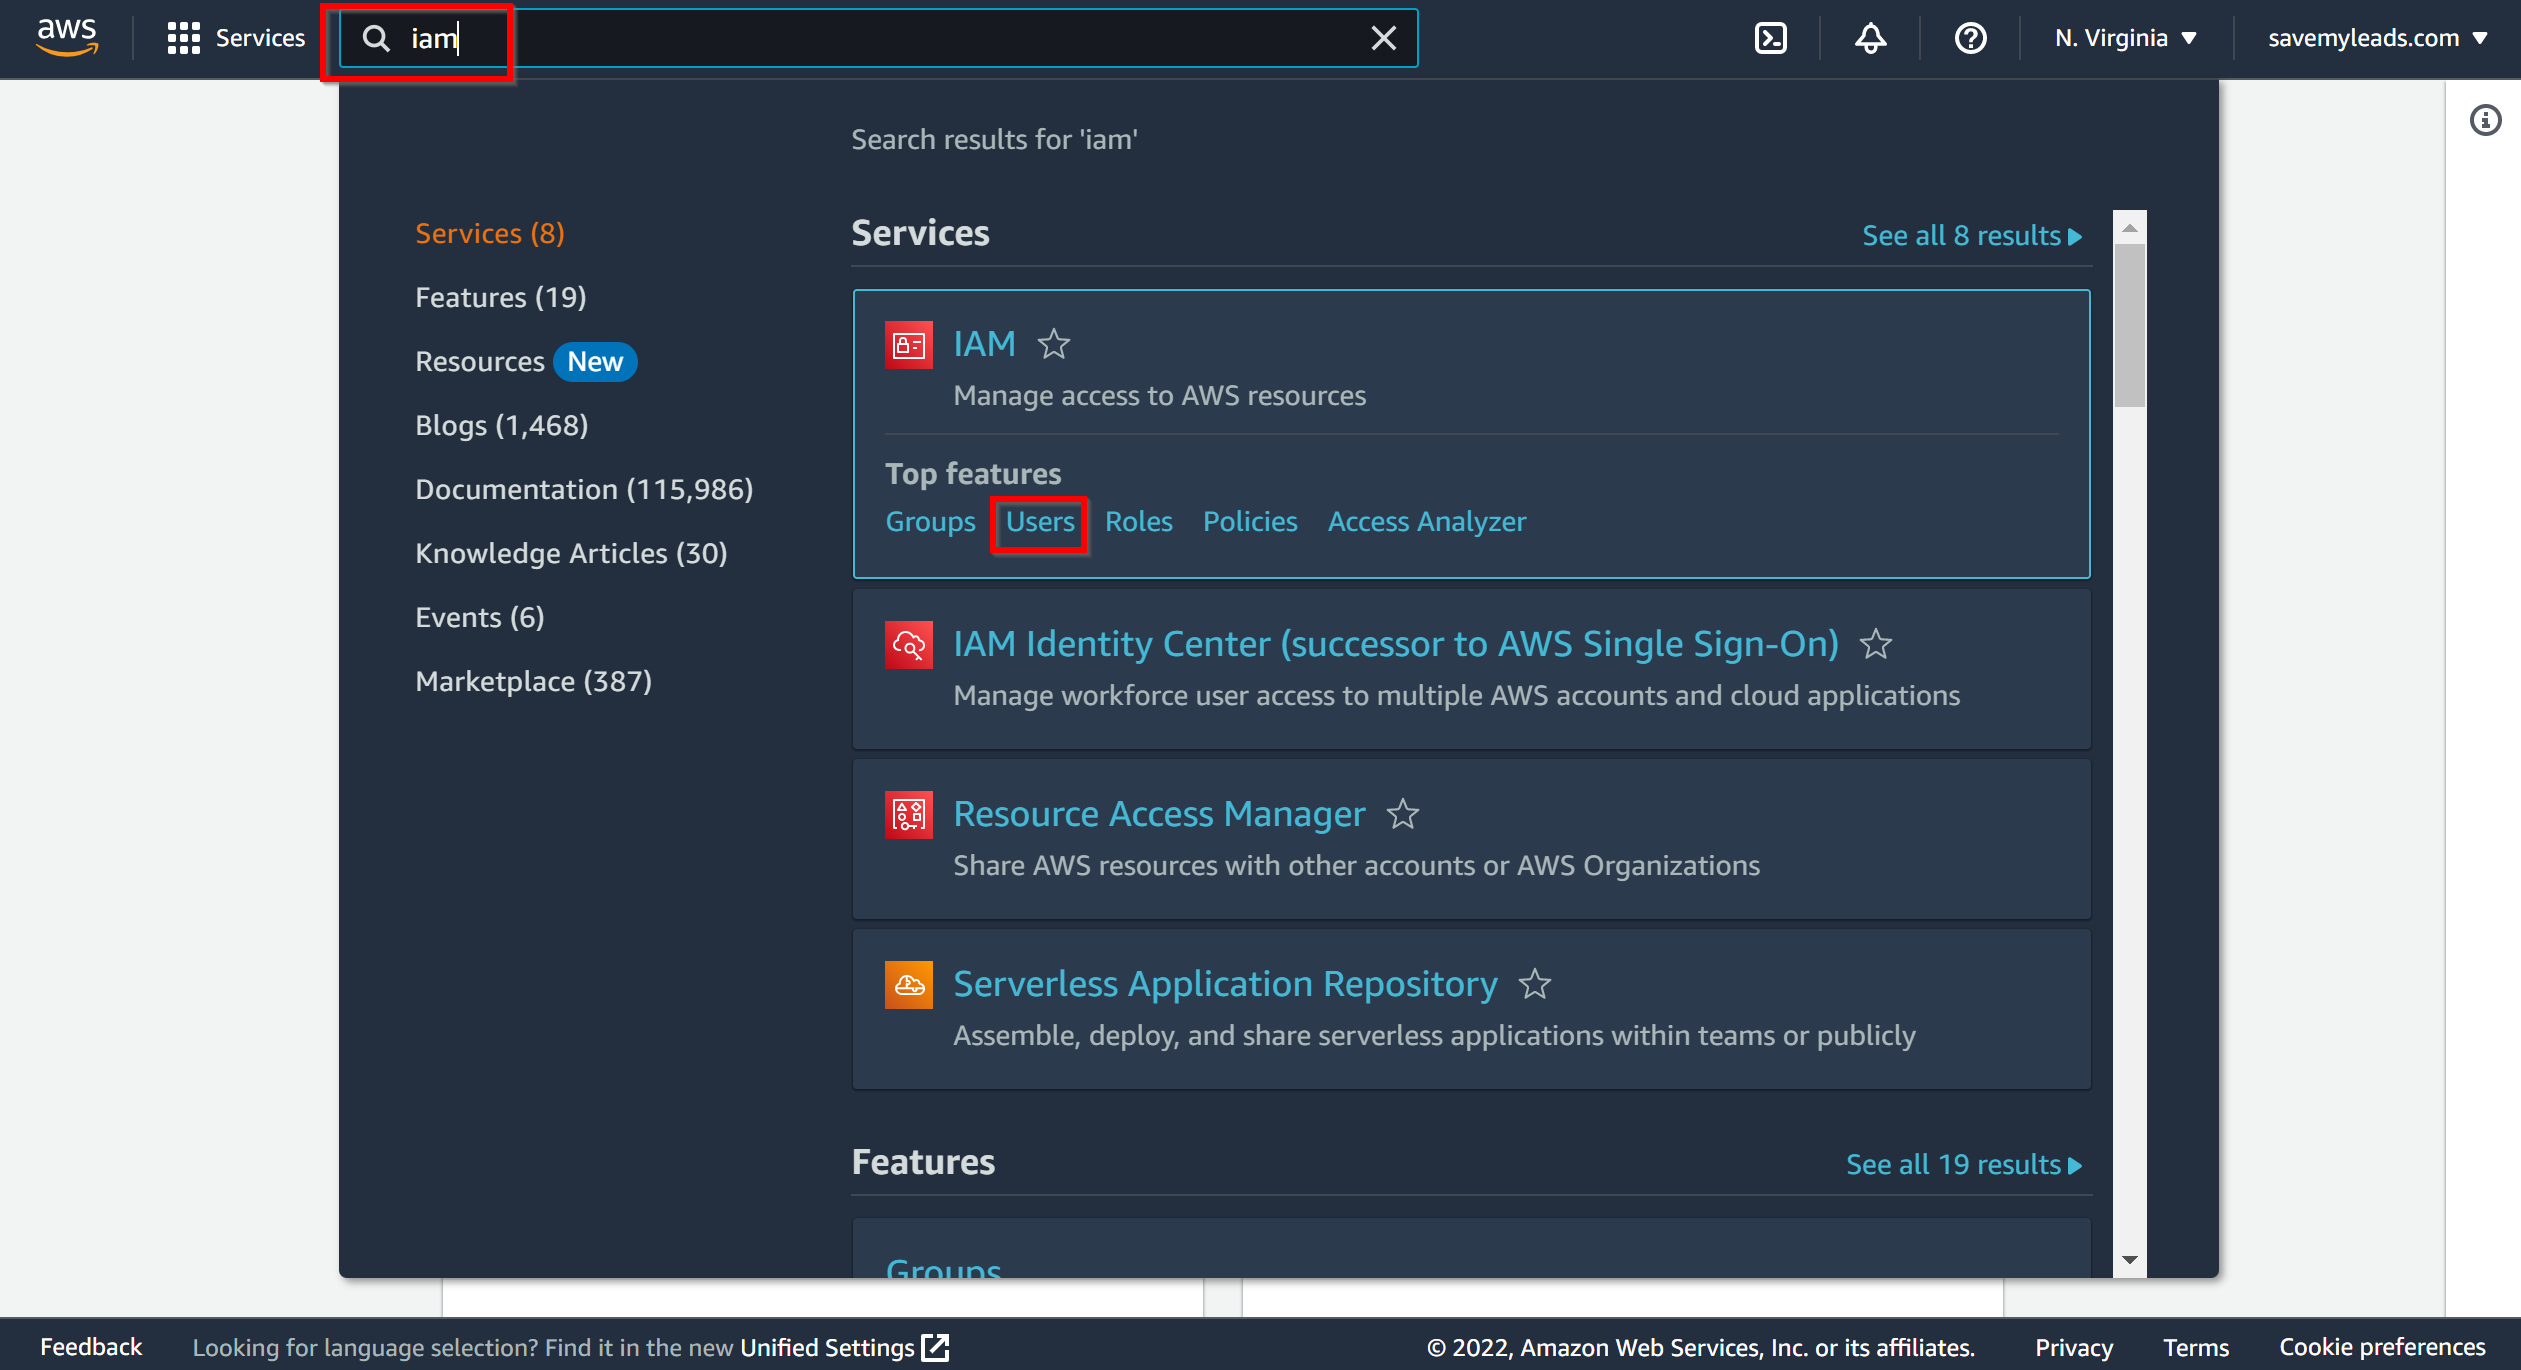
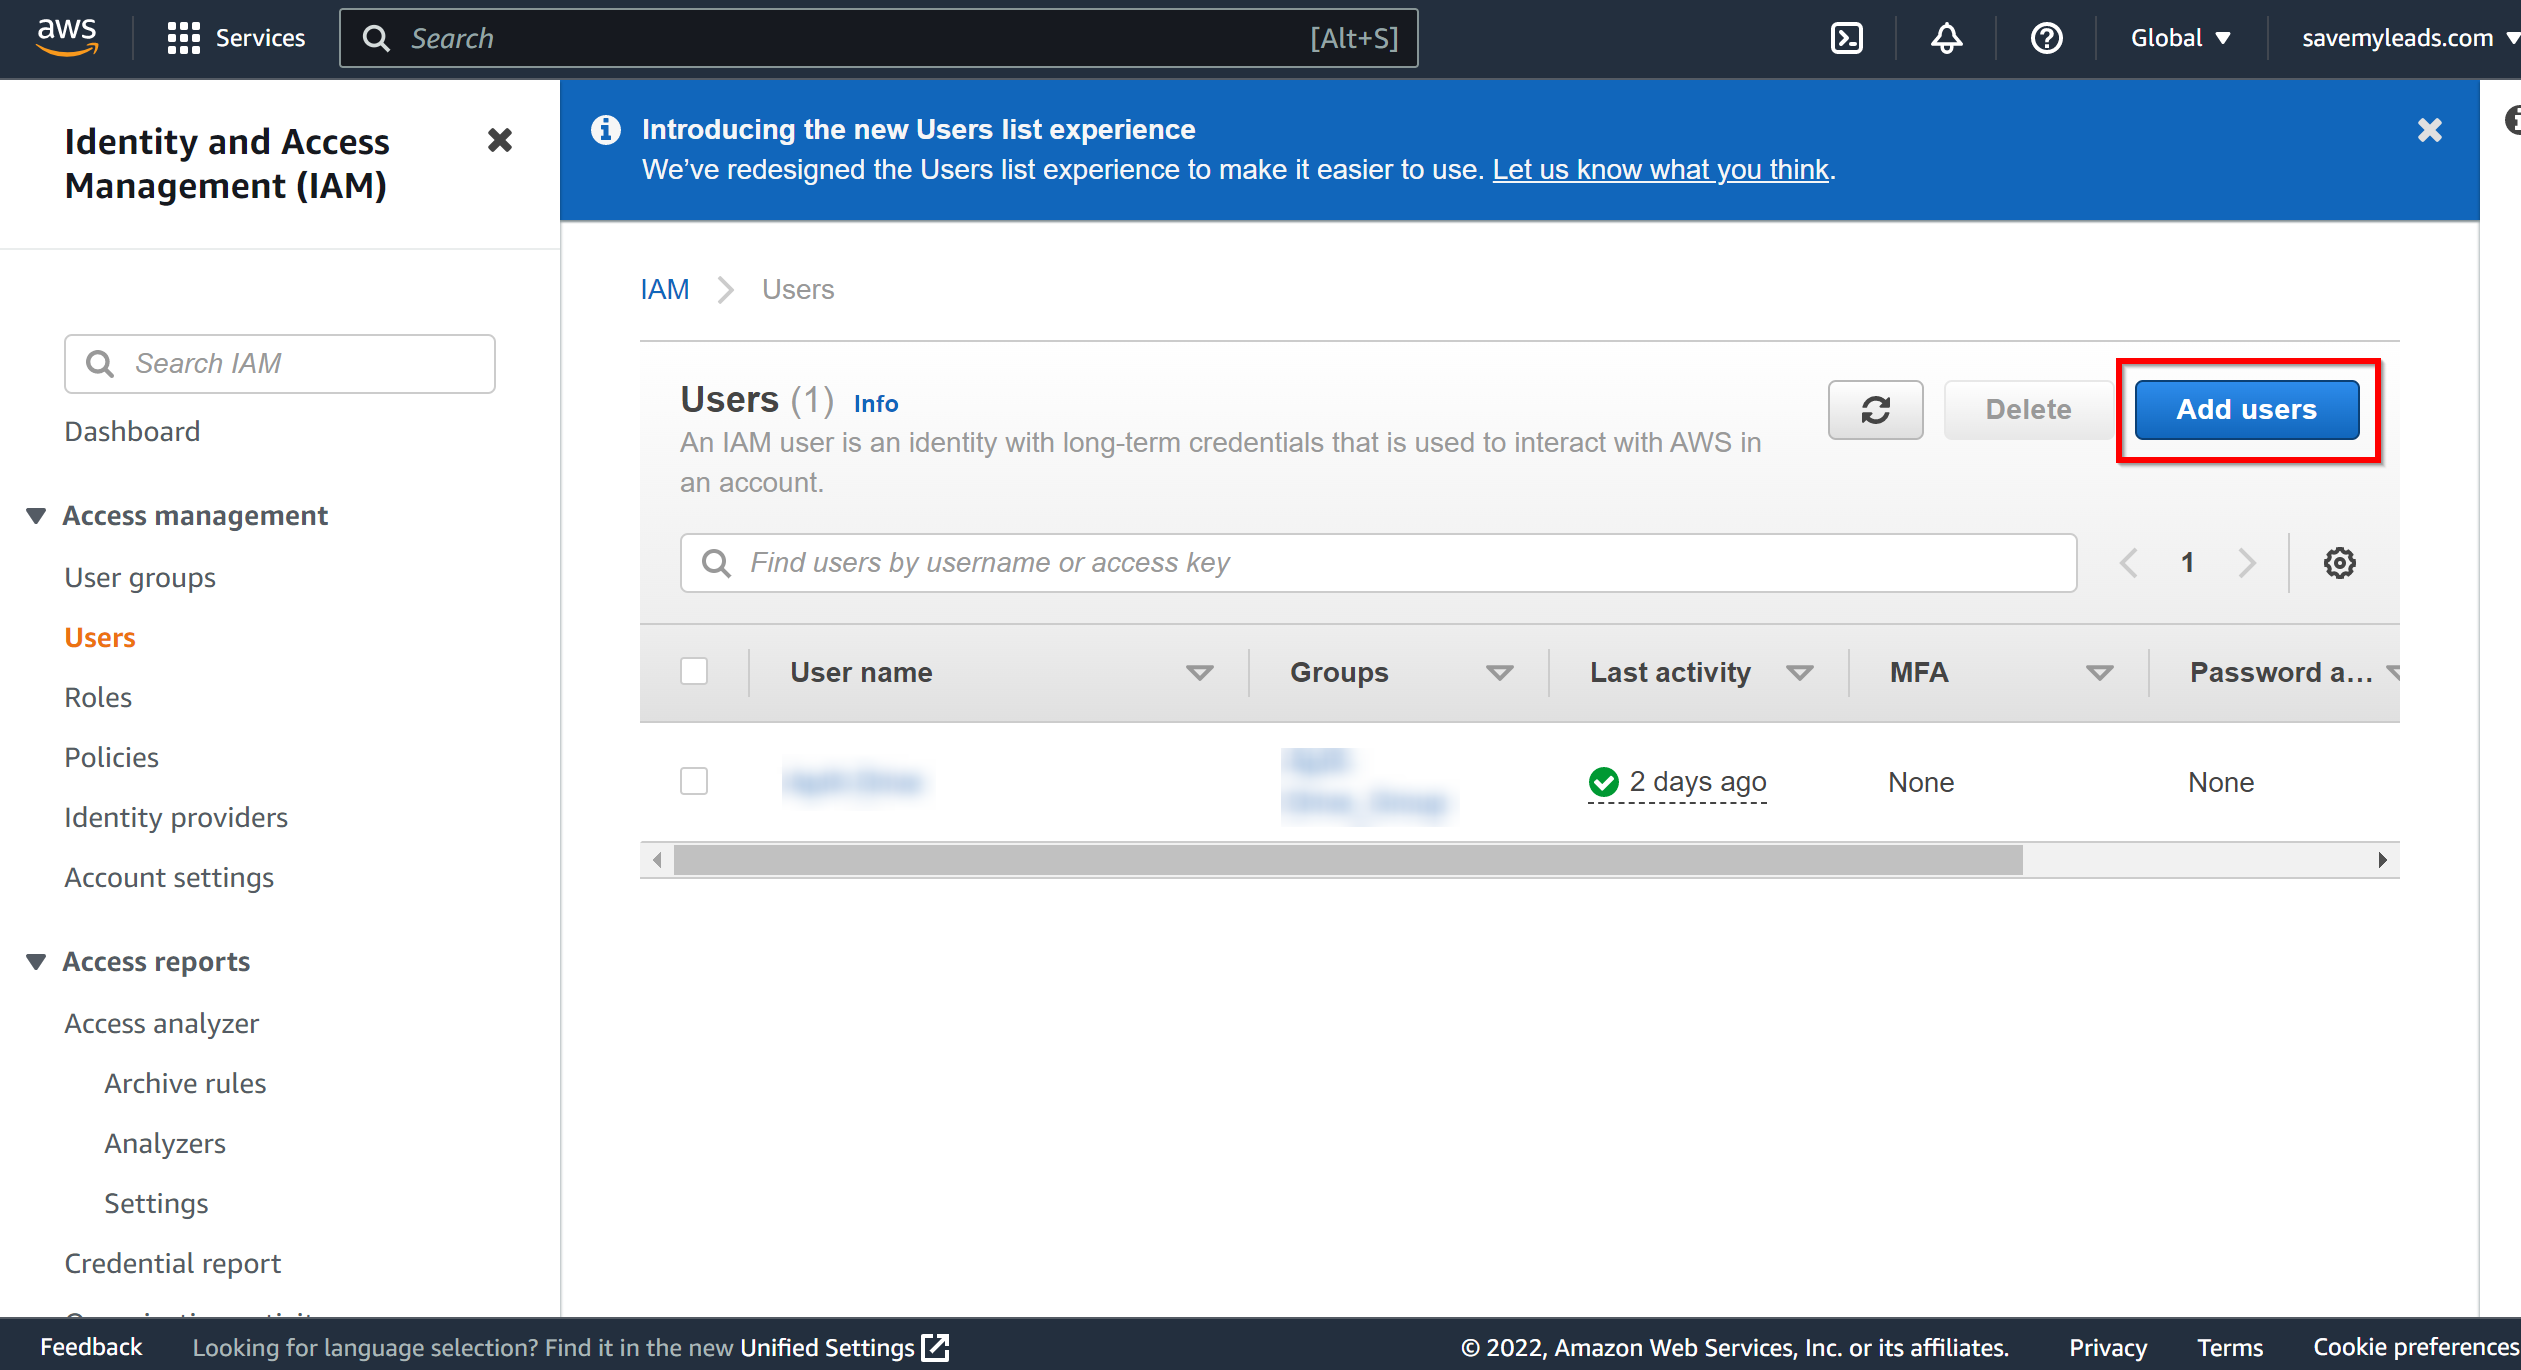
Find the IAM system in the search, then go to the "Users" tab and click "Add users".
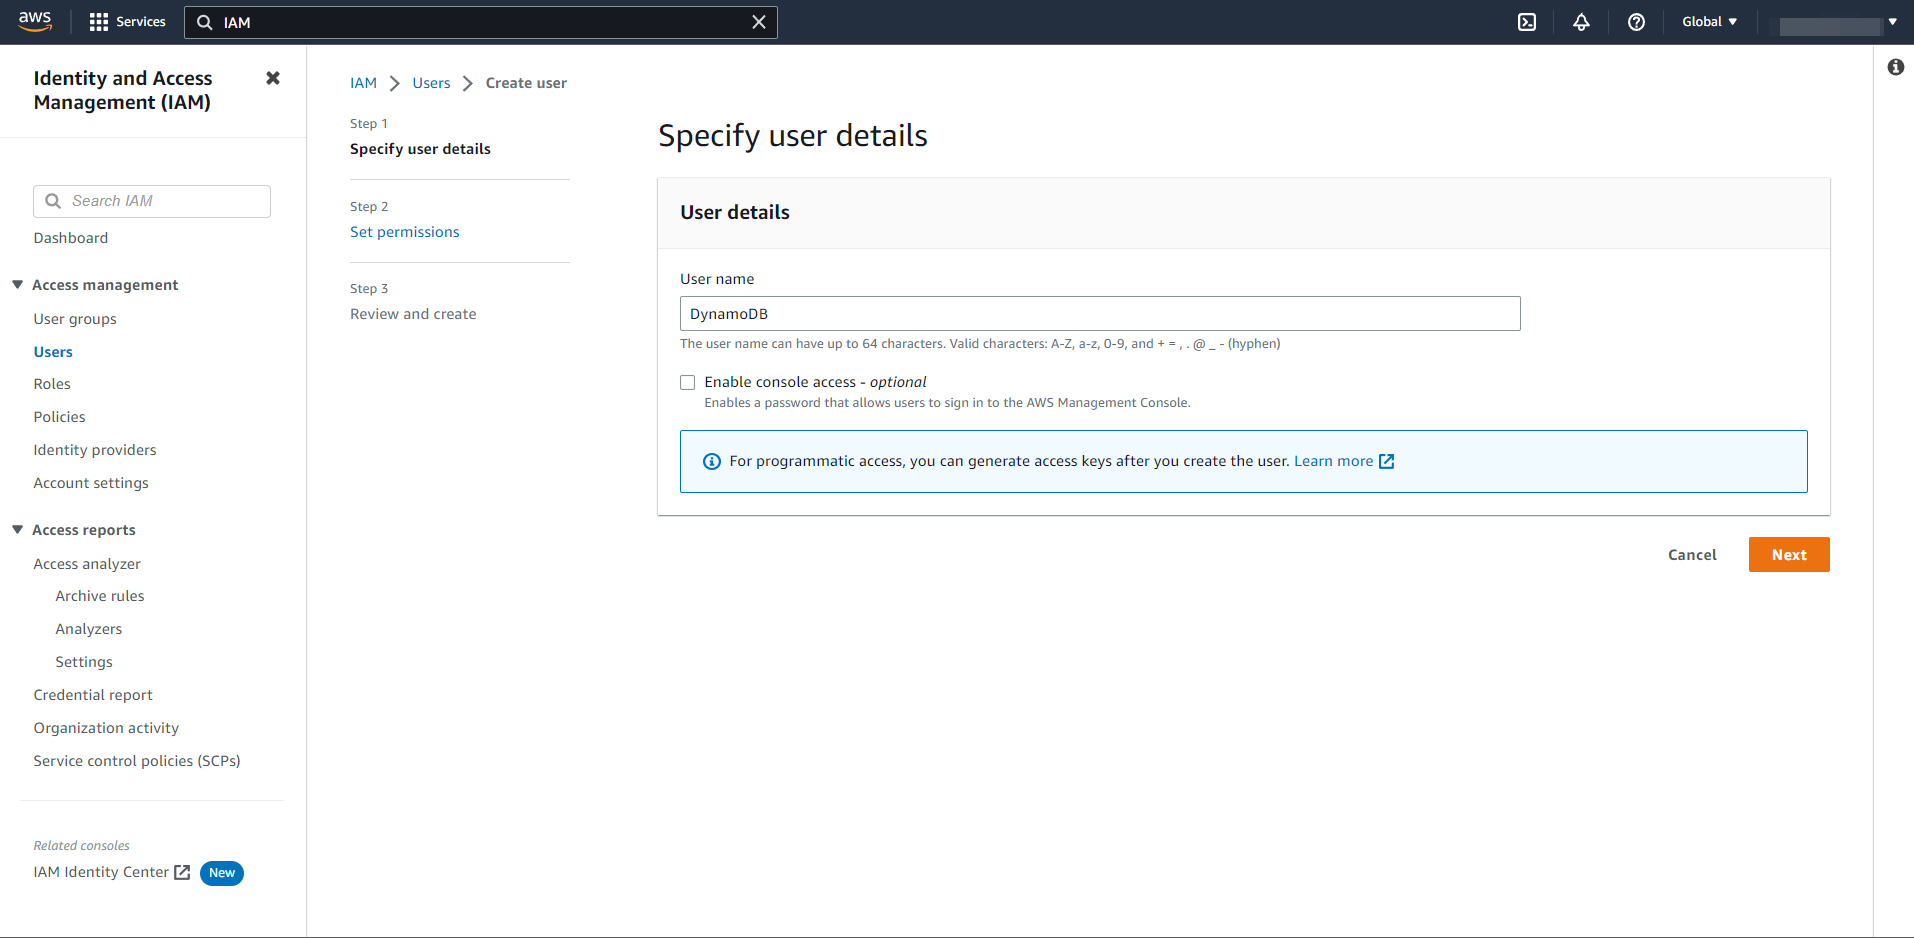
Specify the user name.
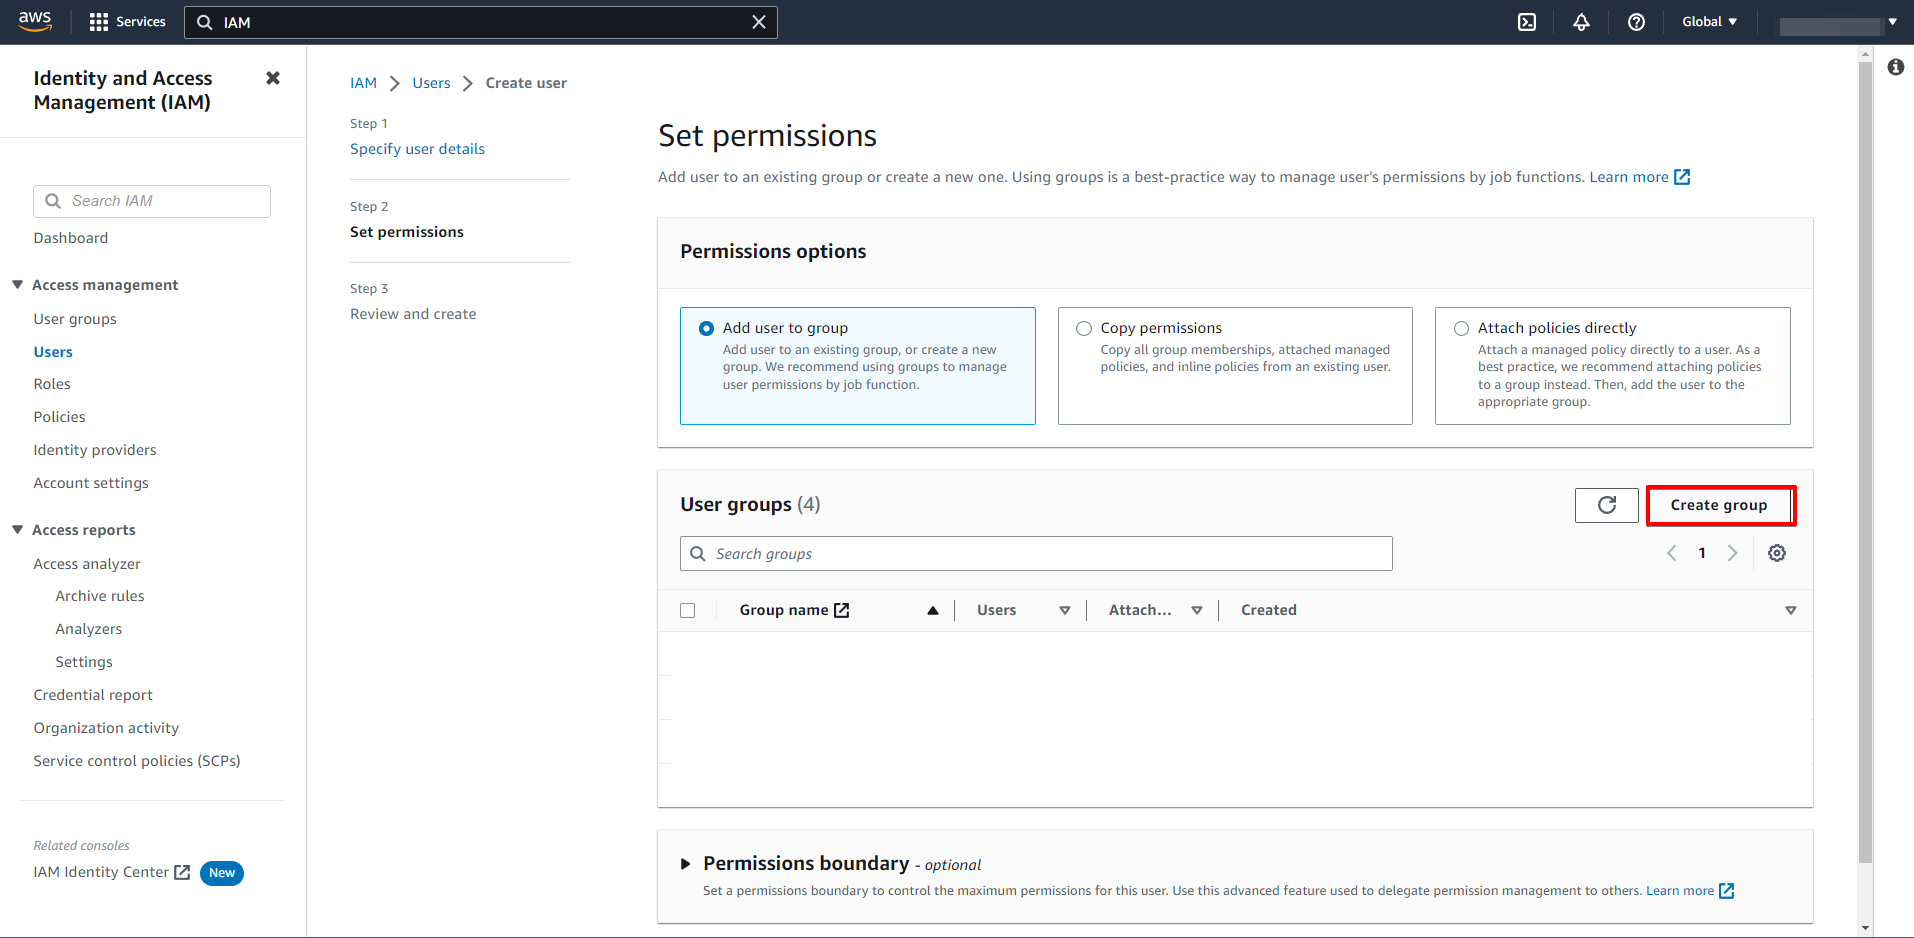
In the next step, click "Create group".
Specify the name of the group and in the search find "AmazonDynamoDBFullAccess", then tick these rights and click "Create group".
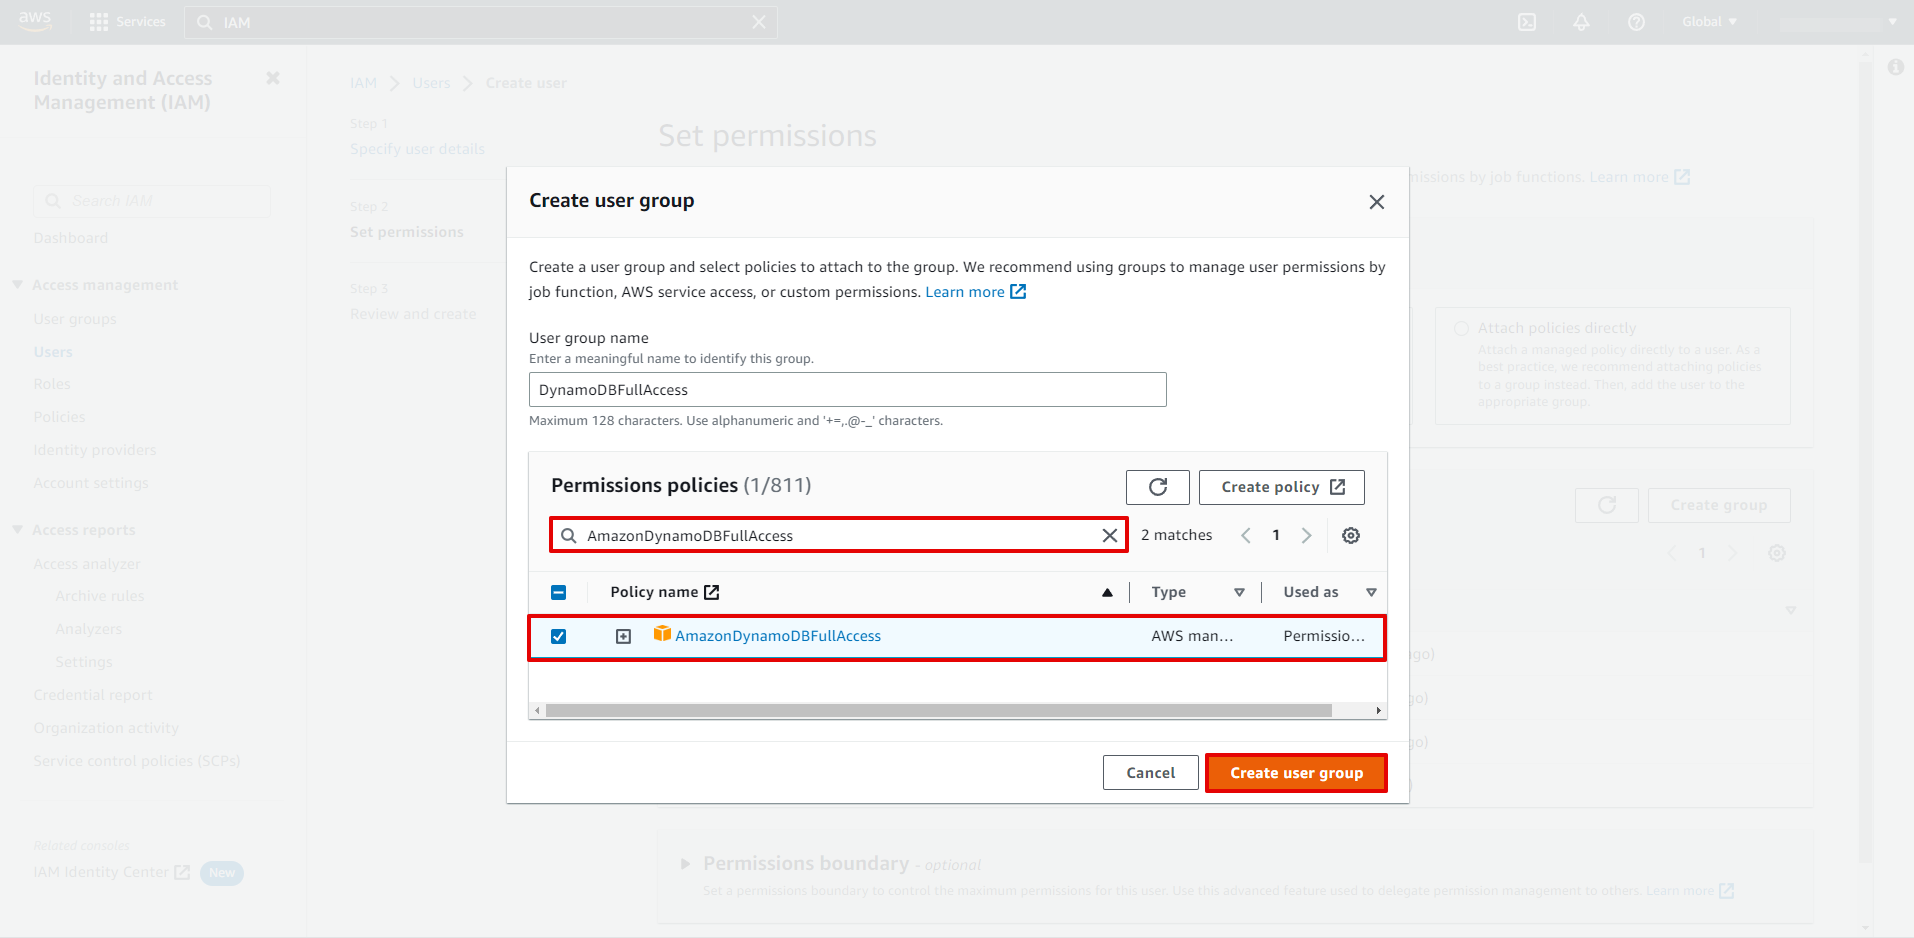
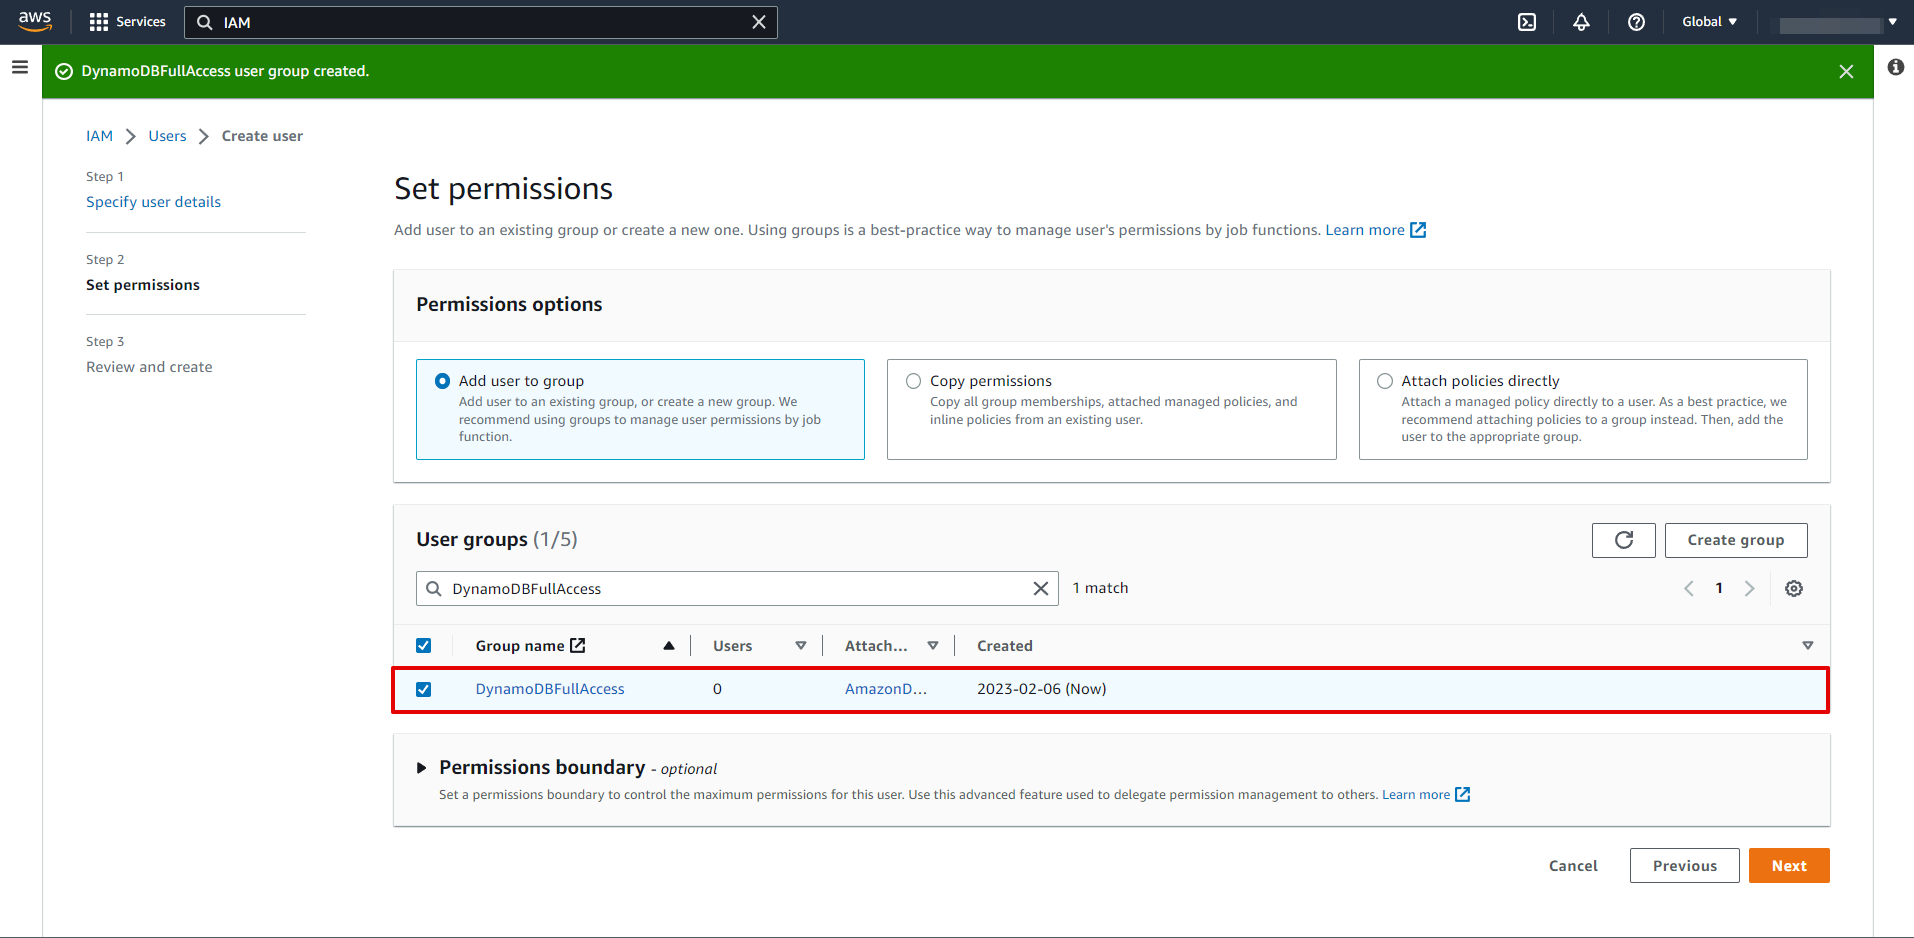
Click "Next" to move on to the next step.
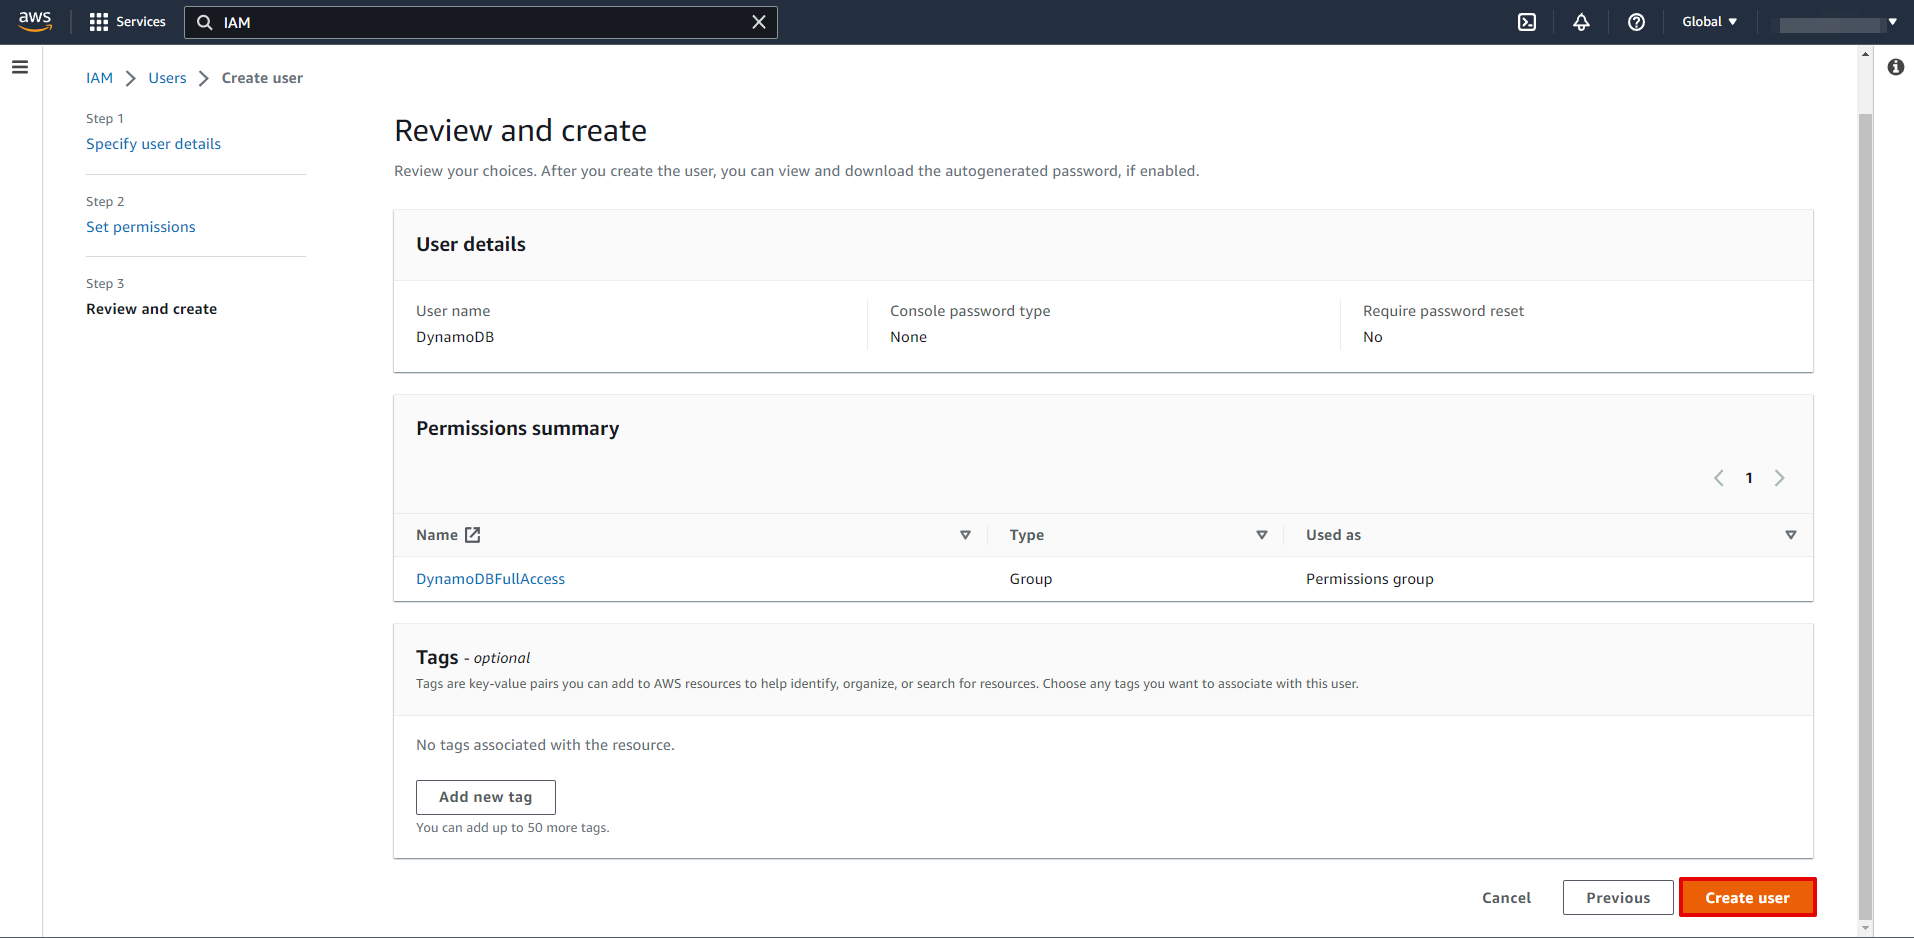
At this stage, it is not necessary to specify the settings and you can click "Create user".
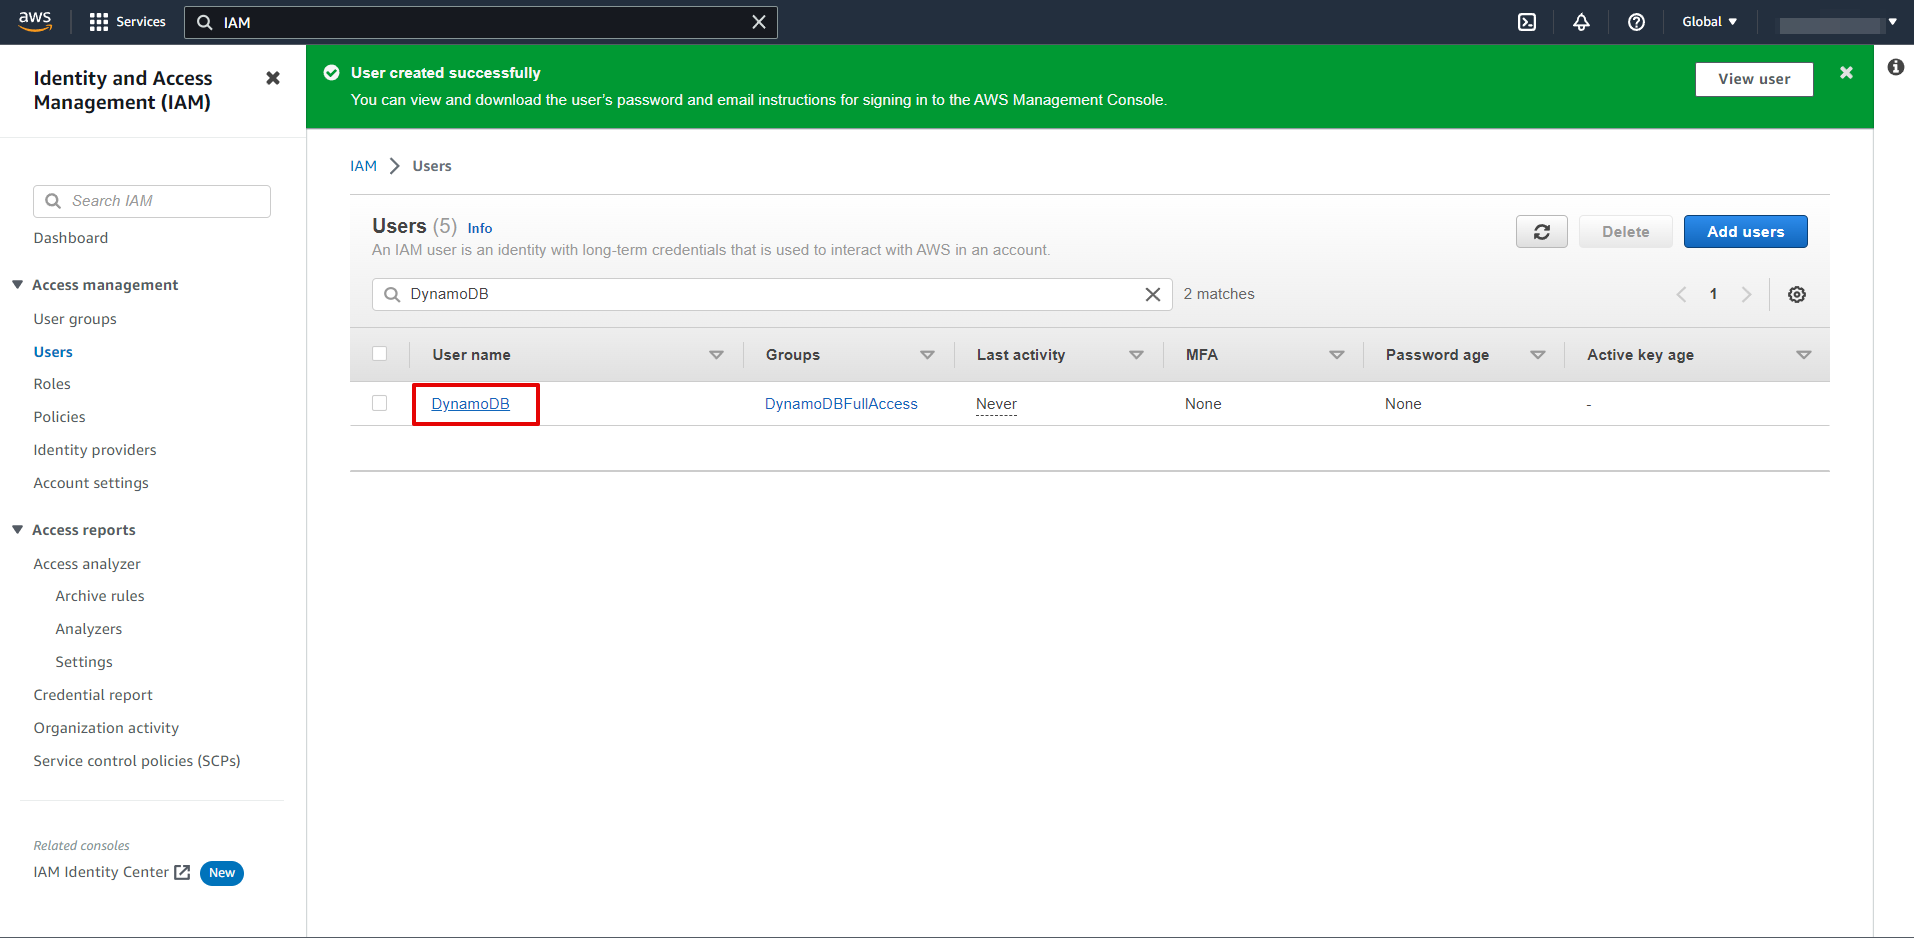
Select a created user.
Go to "Security credentials" tab and click "Create access key".
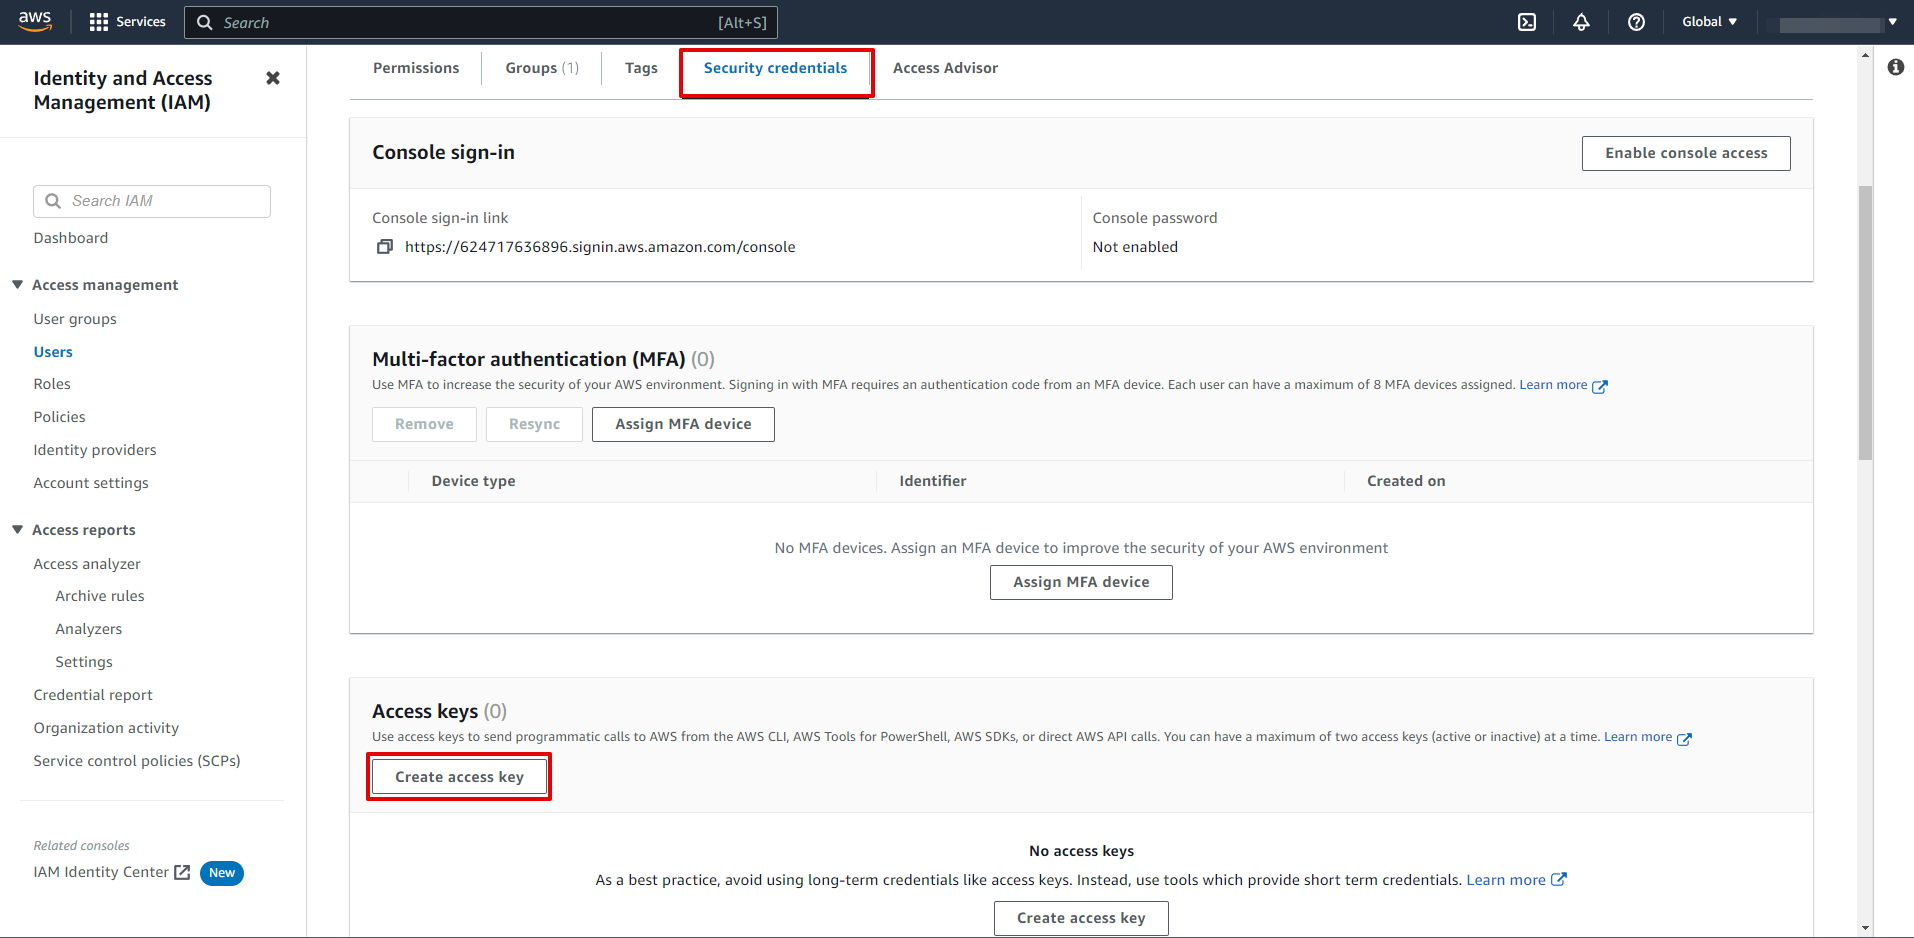
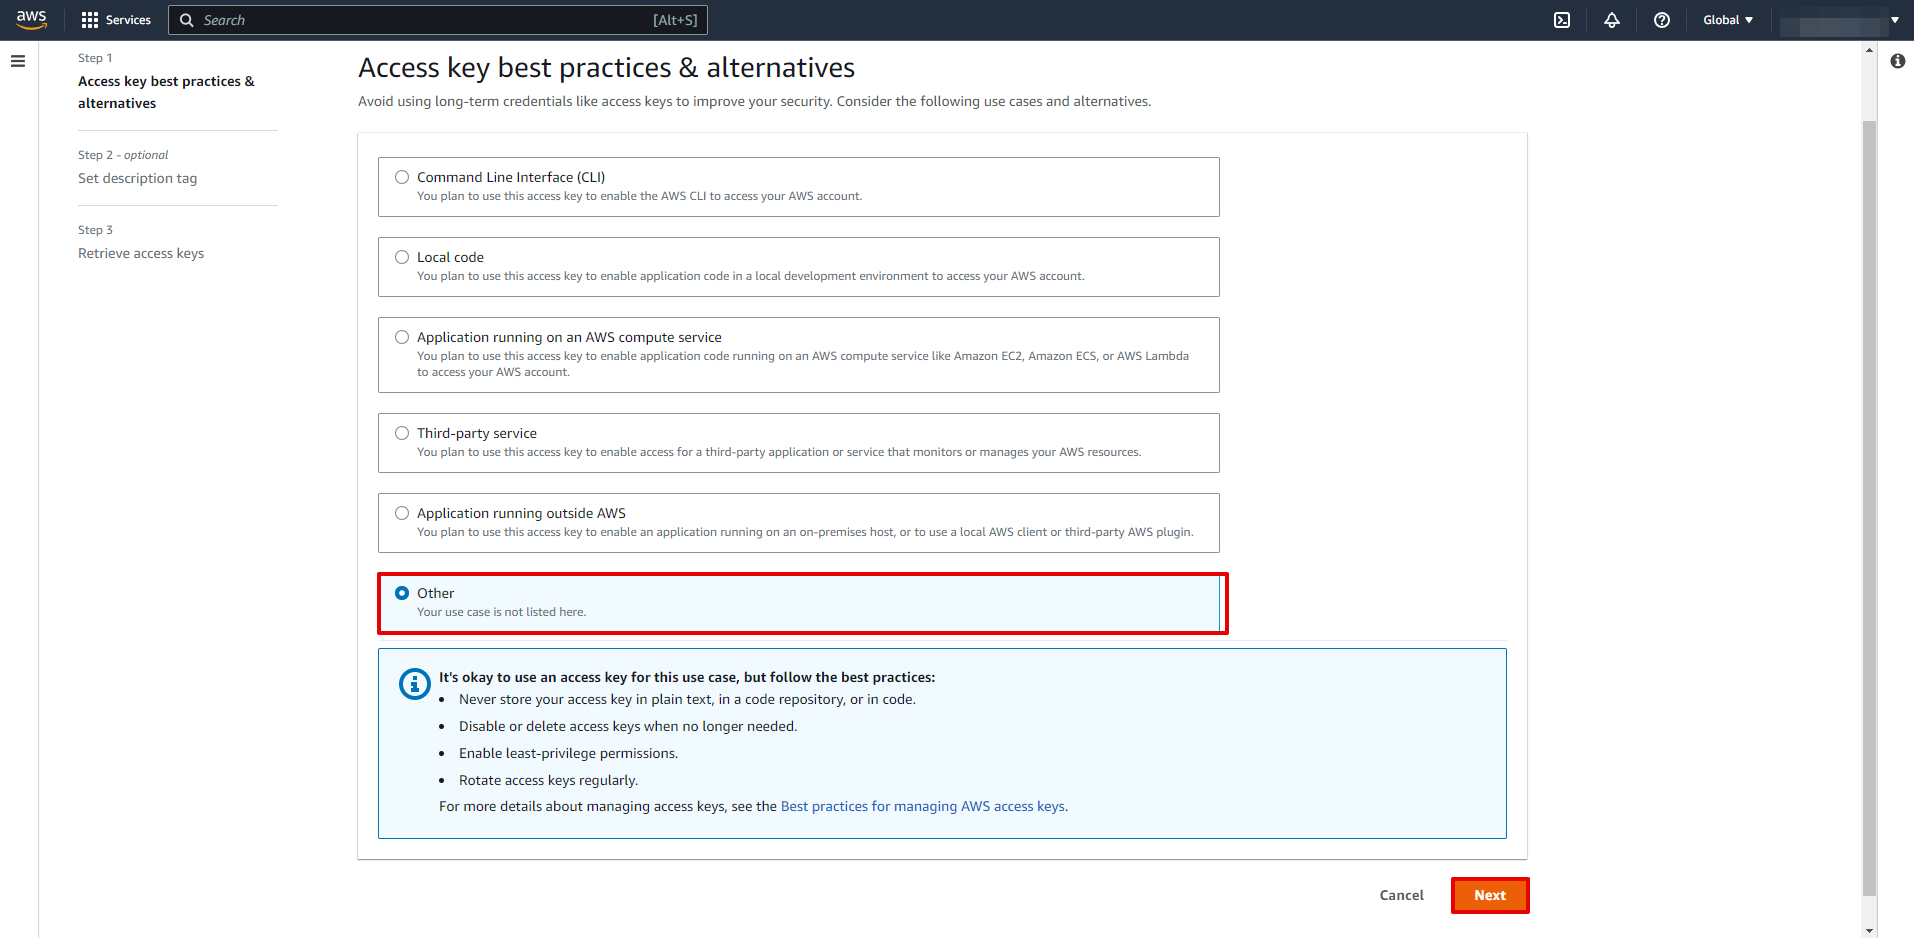
Select "Other".
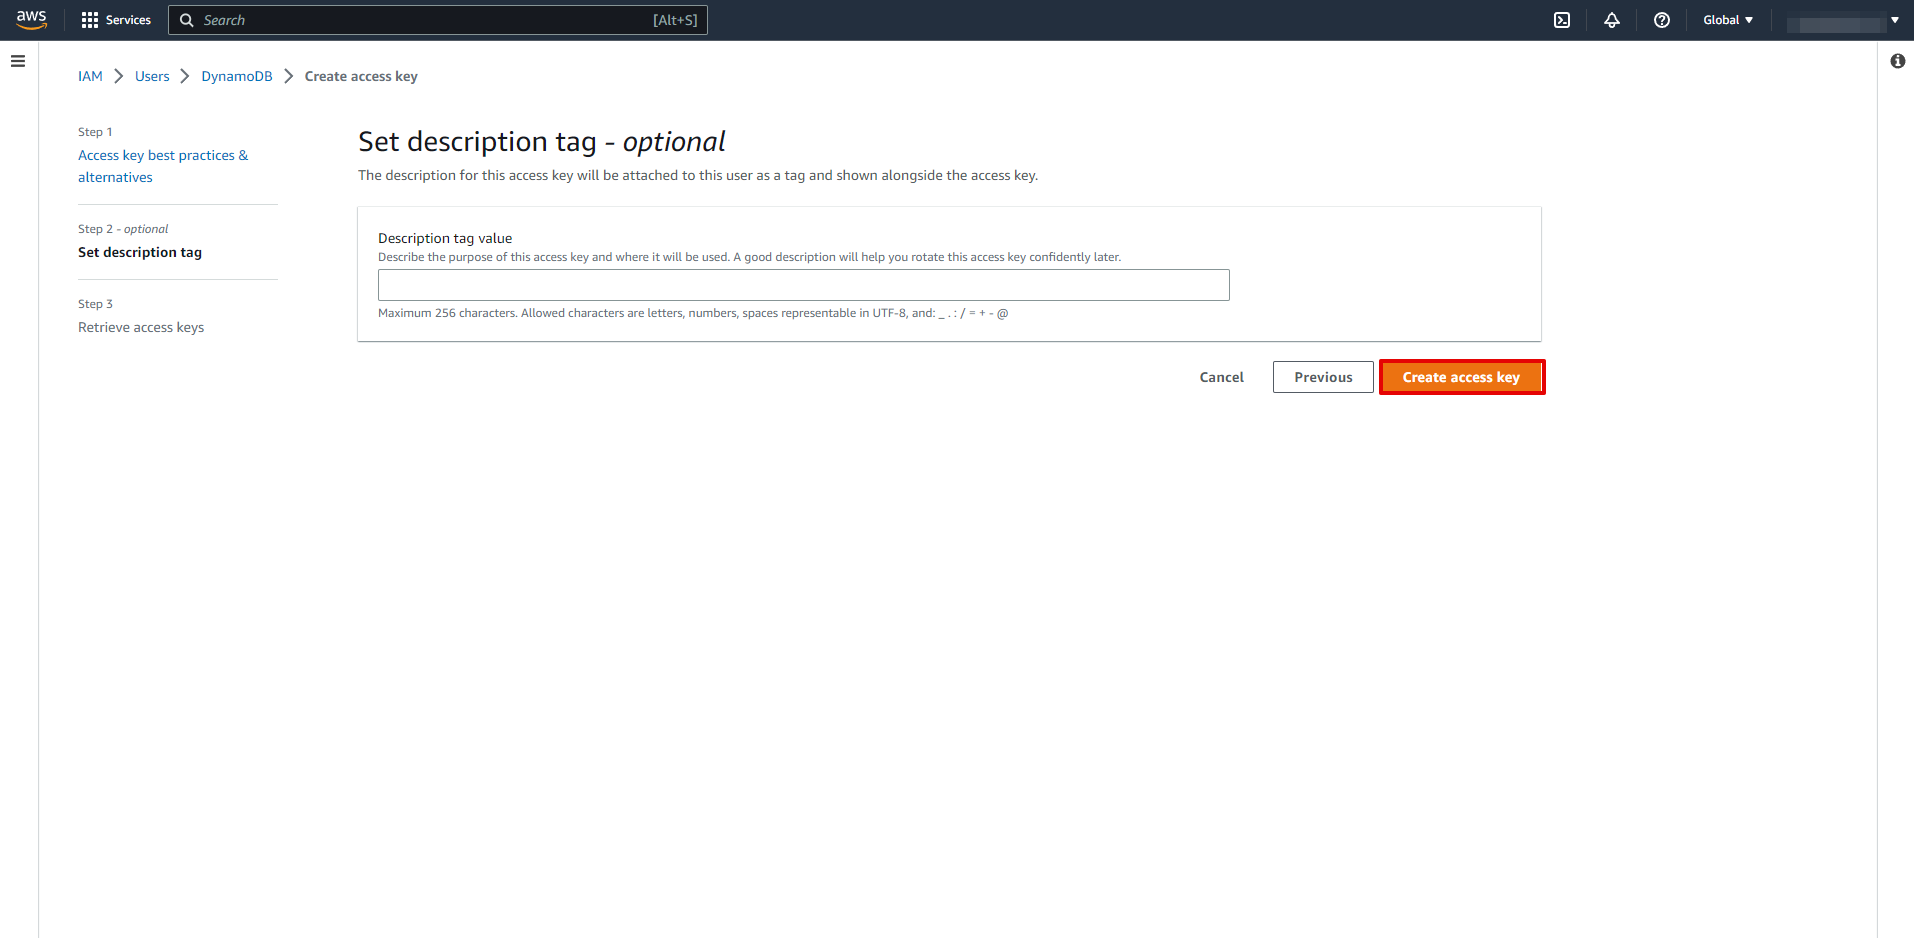
At this stage, it is not necessary to specify the settings and you can click "Create access key".
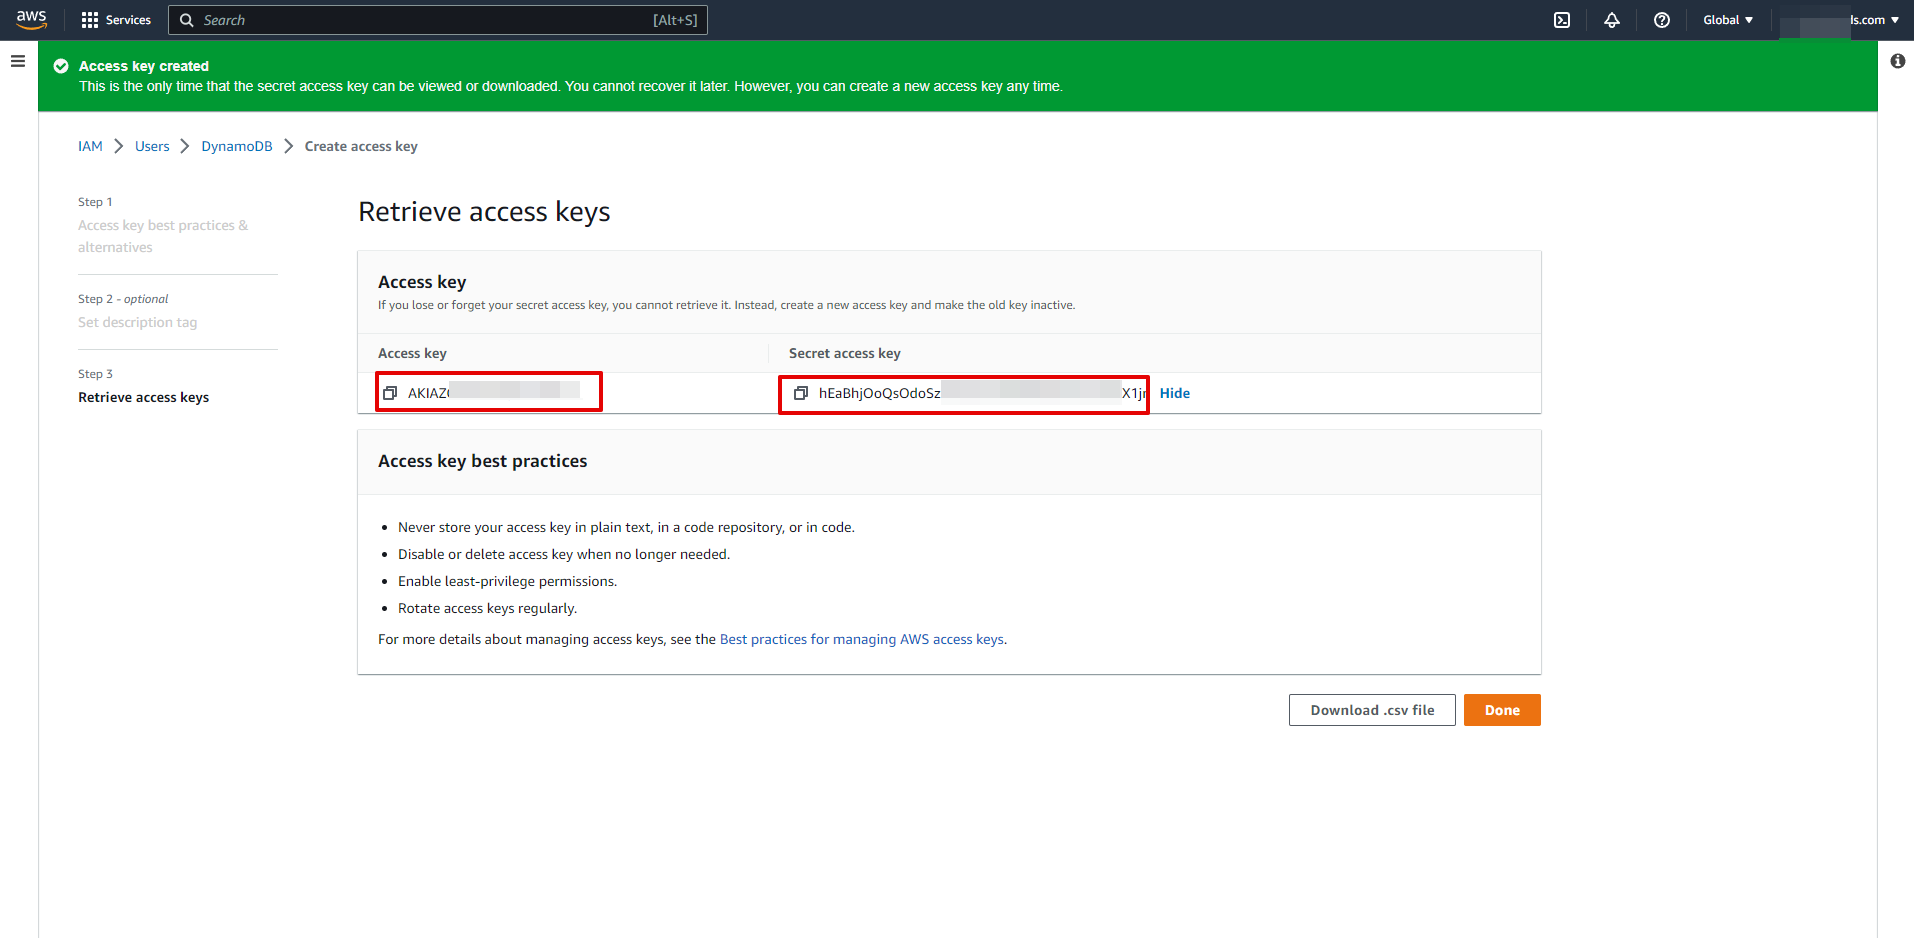
Copy "Access key ID" and "Secret access key" and paste them into the appropriate fields in SaveMyLeads.
When the connected account is displayed in the "active accounts" list, select it for further work.
Attention! If your account is in the "inactive accounts" list, check your access to this account!
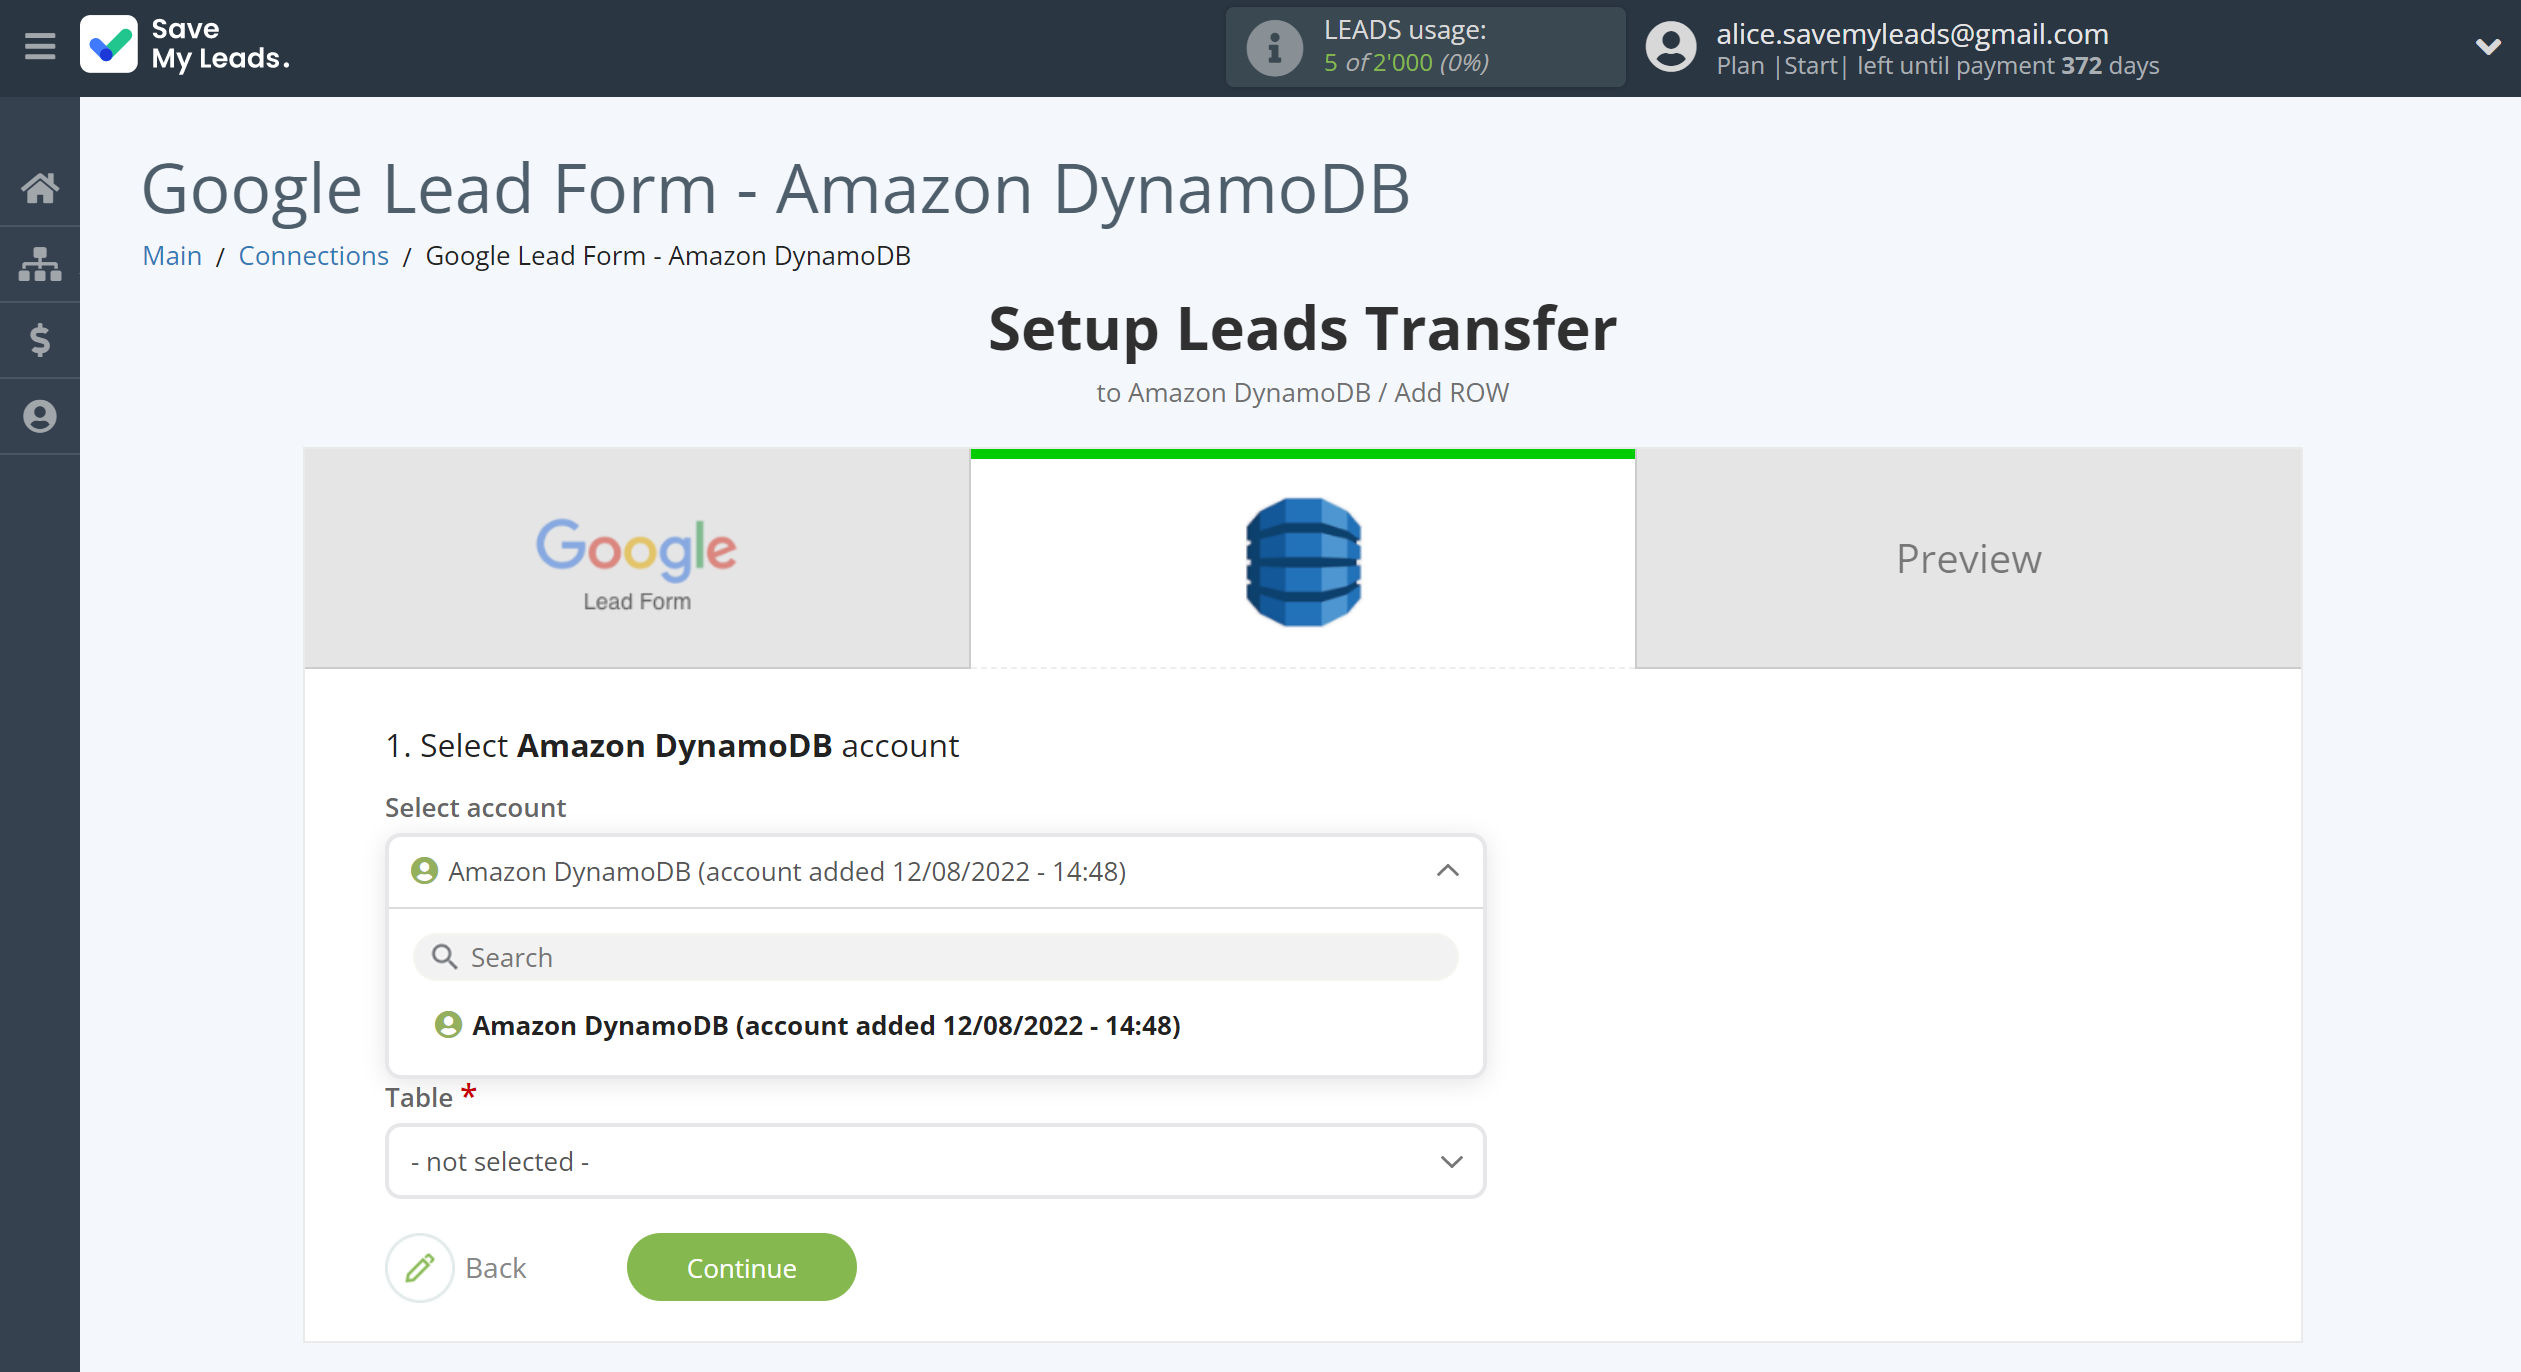
Now you need to create a database with certain settings. To do this, go to the Amazon DynamoDB service and click the "Create table".
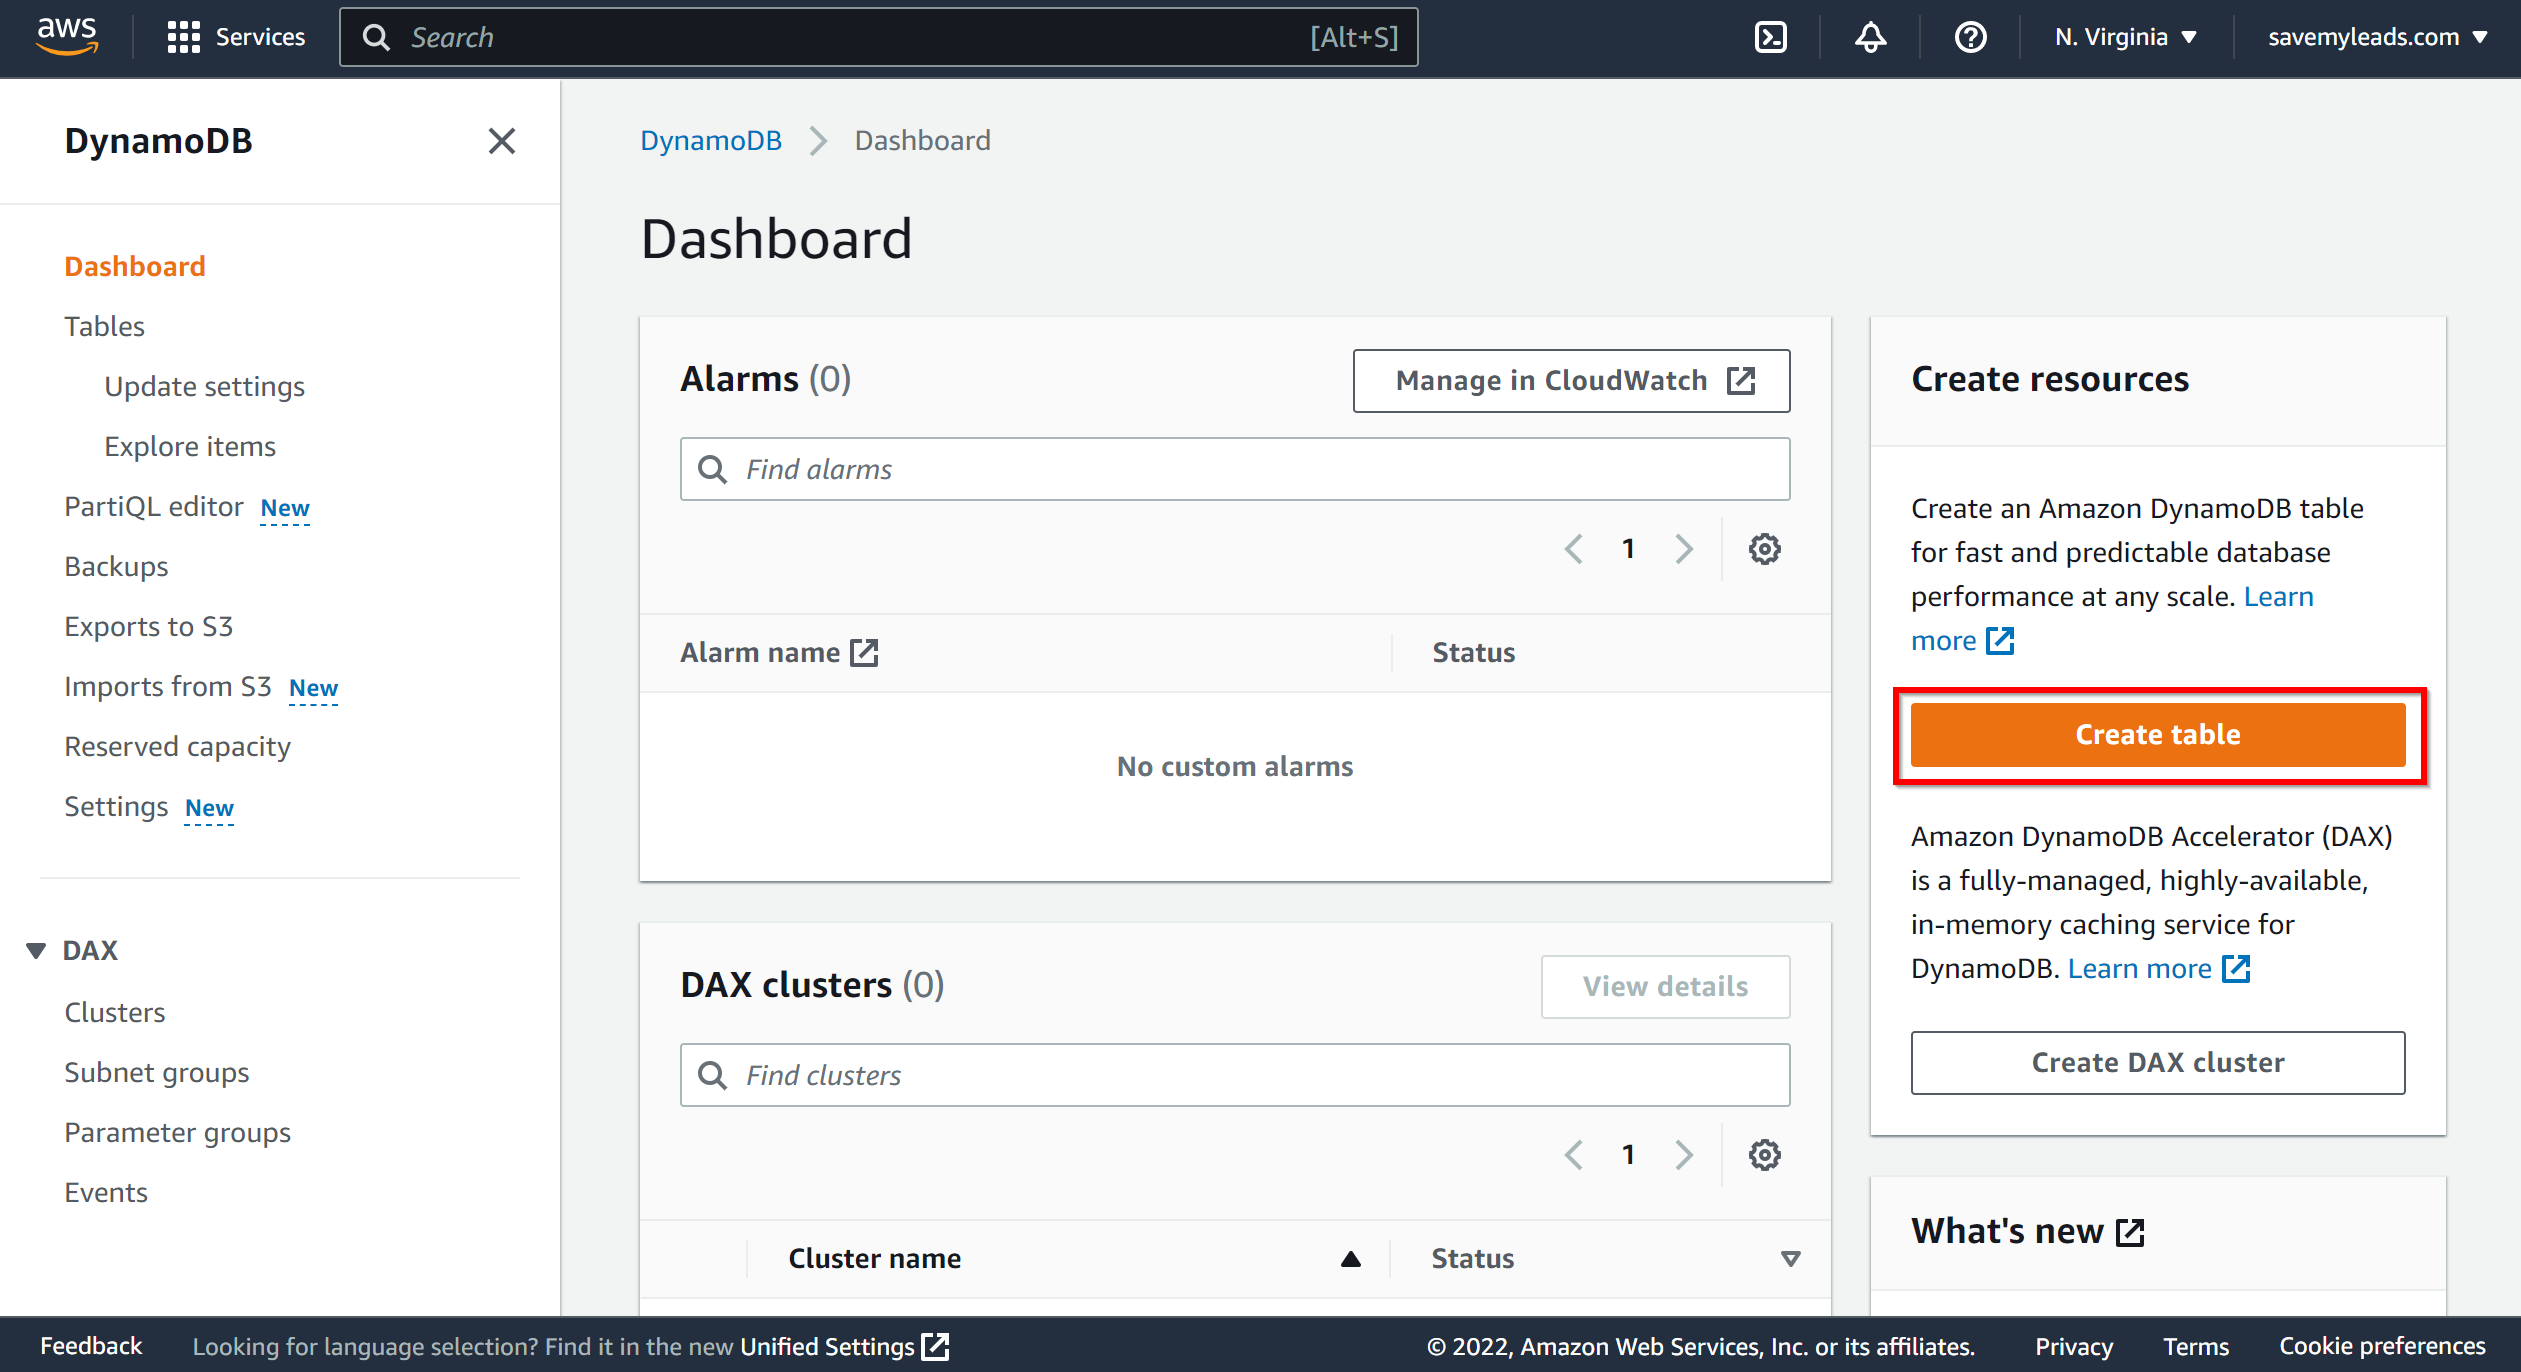
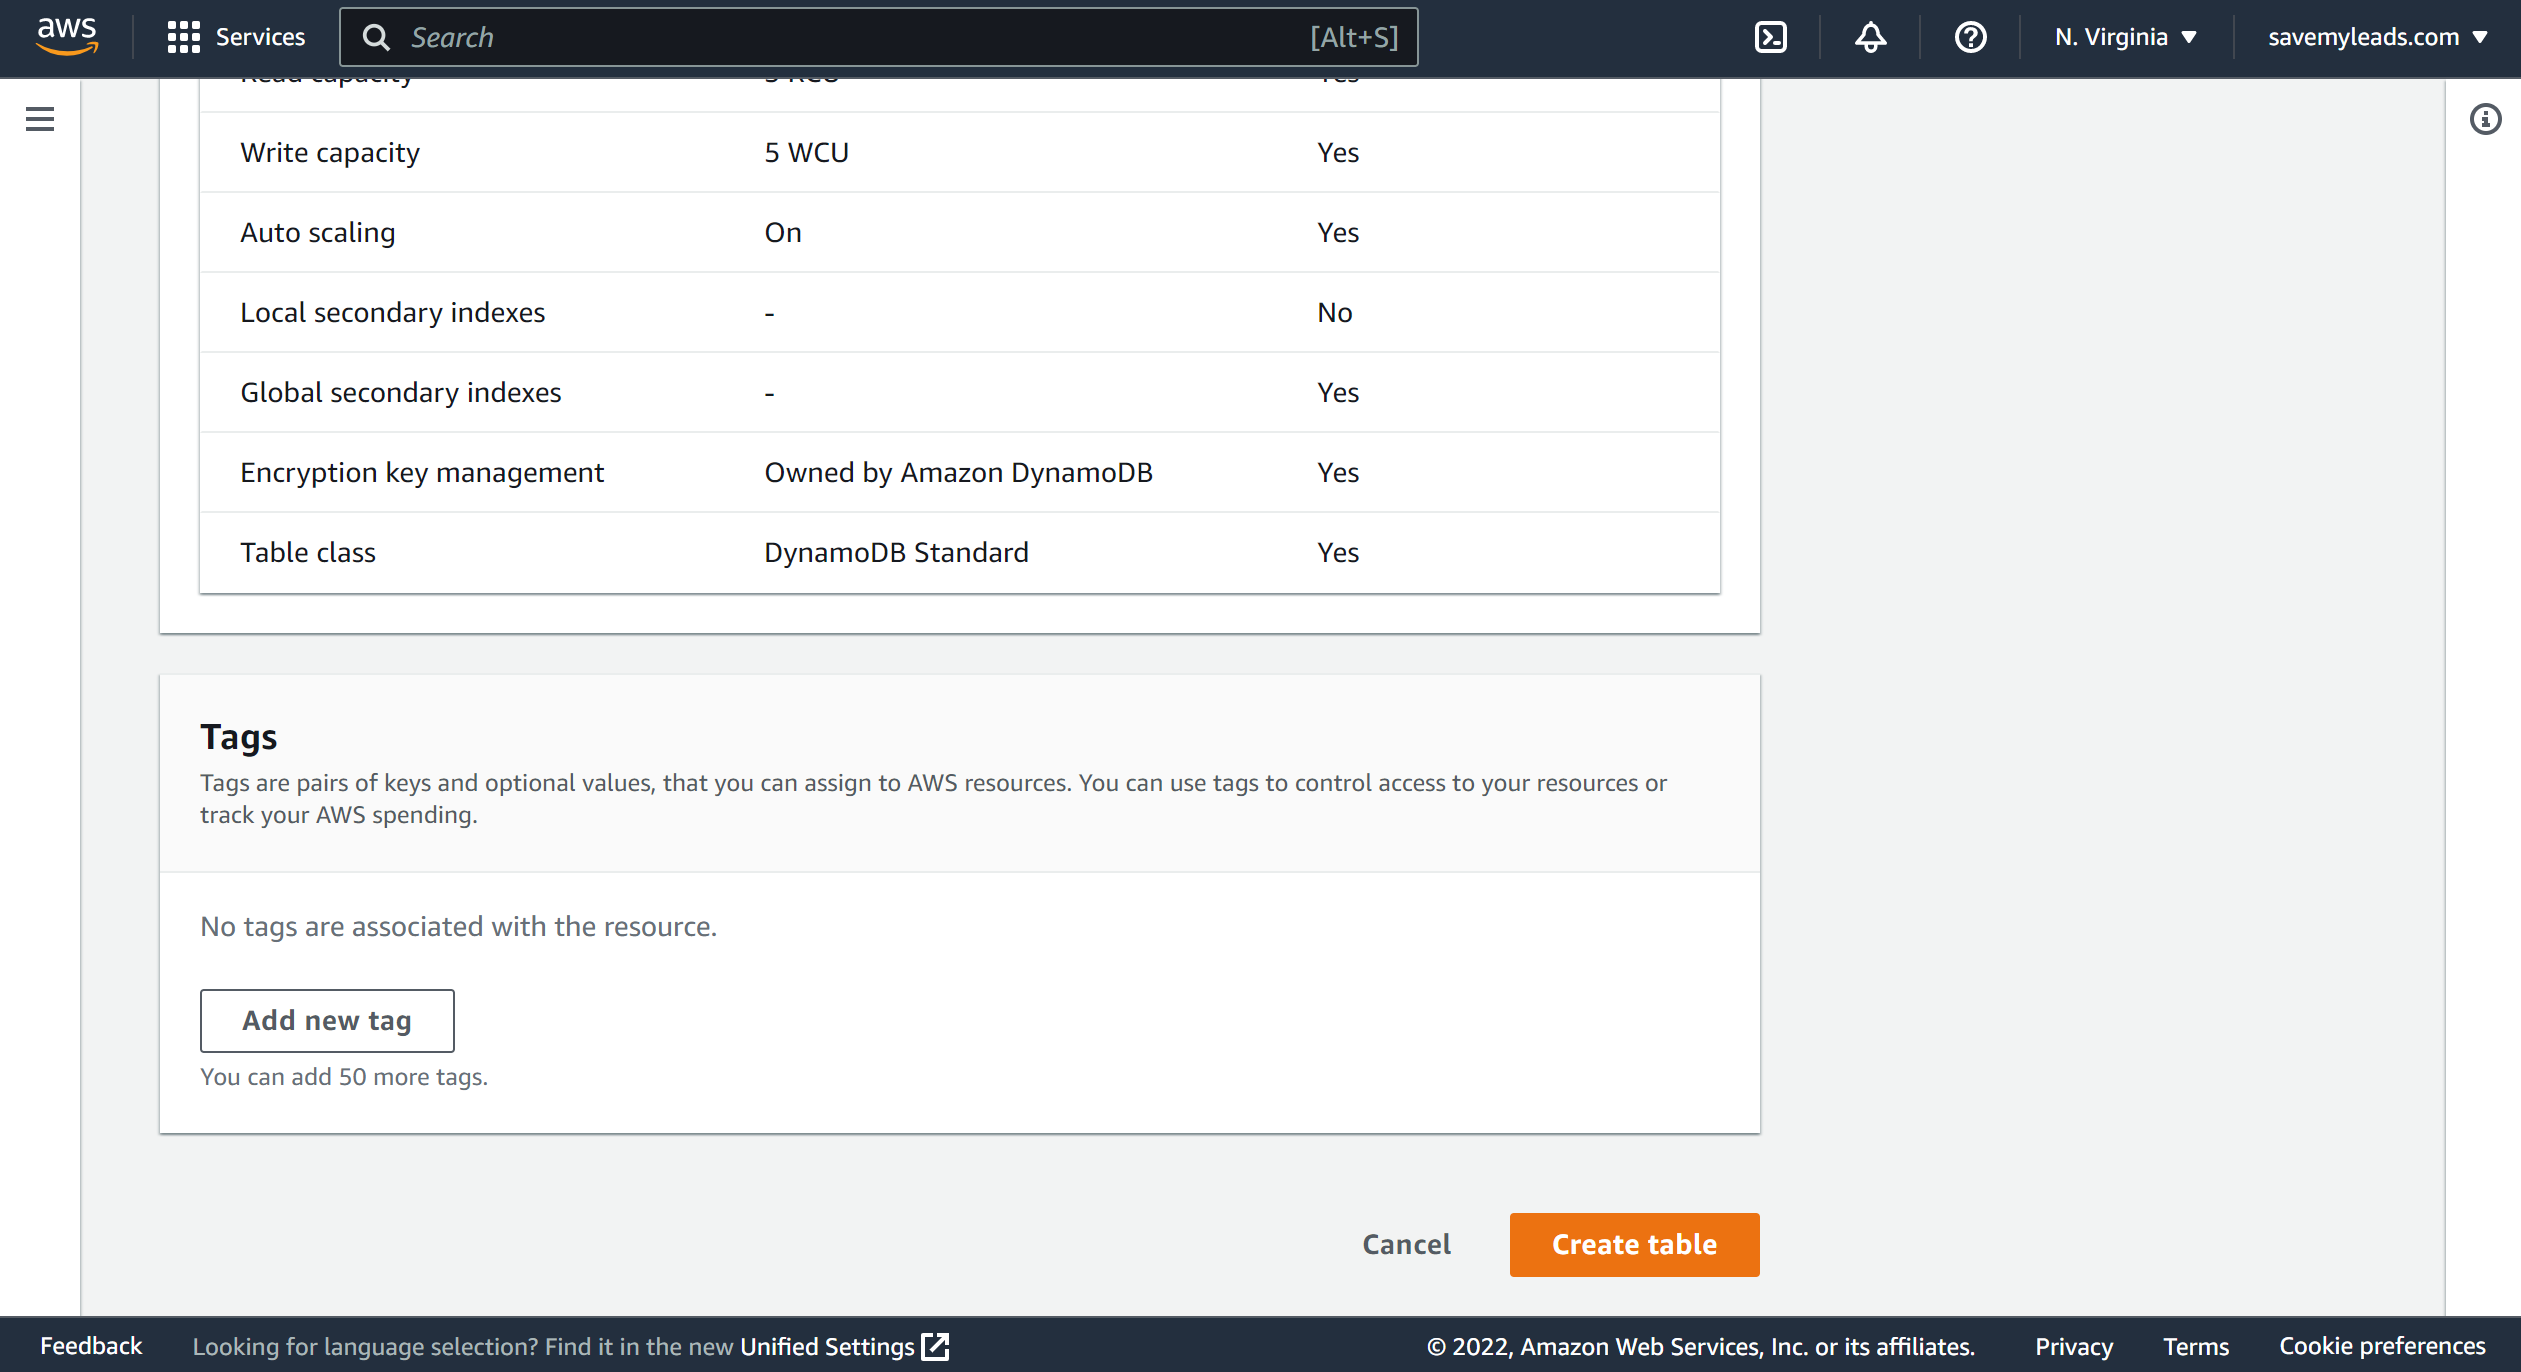
Next, specify "Table name" and "Partition key", then click "Create table".
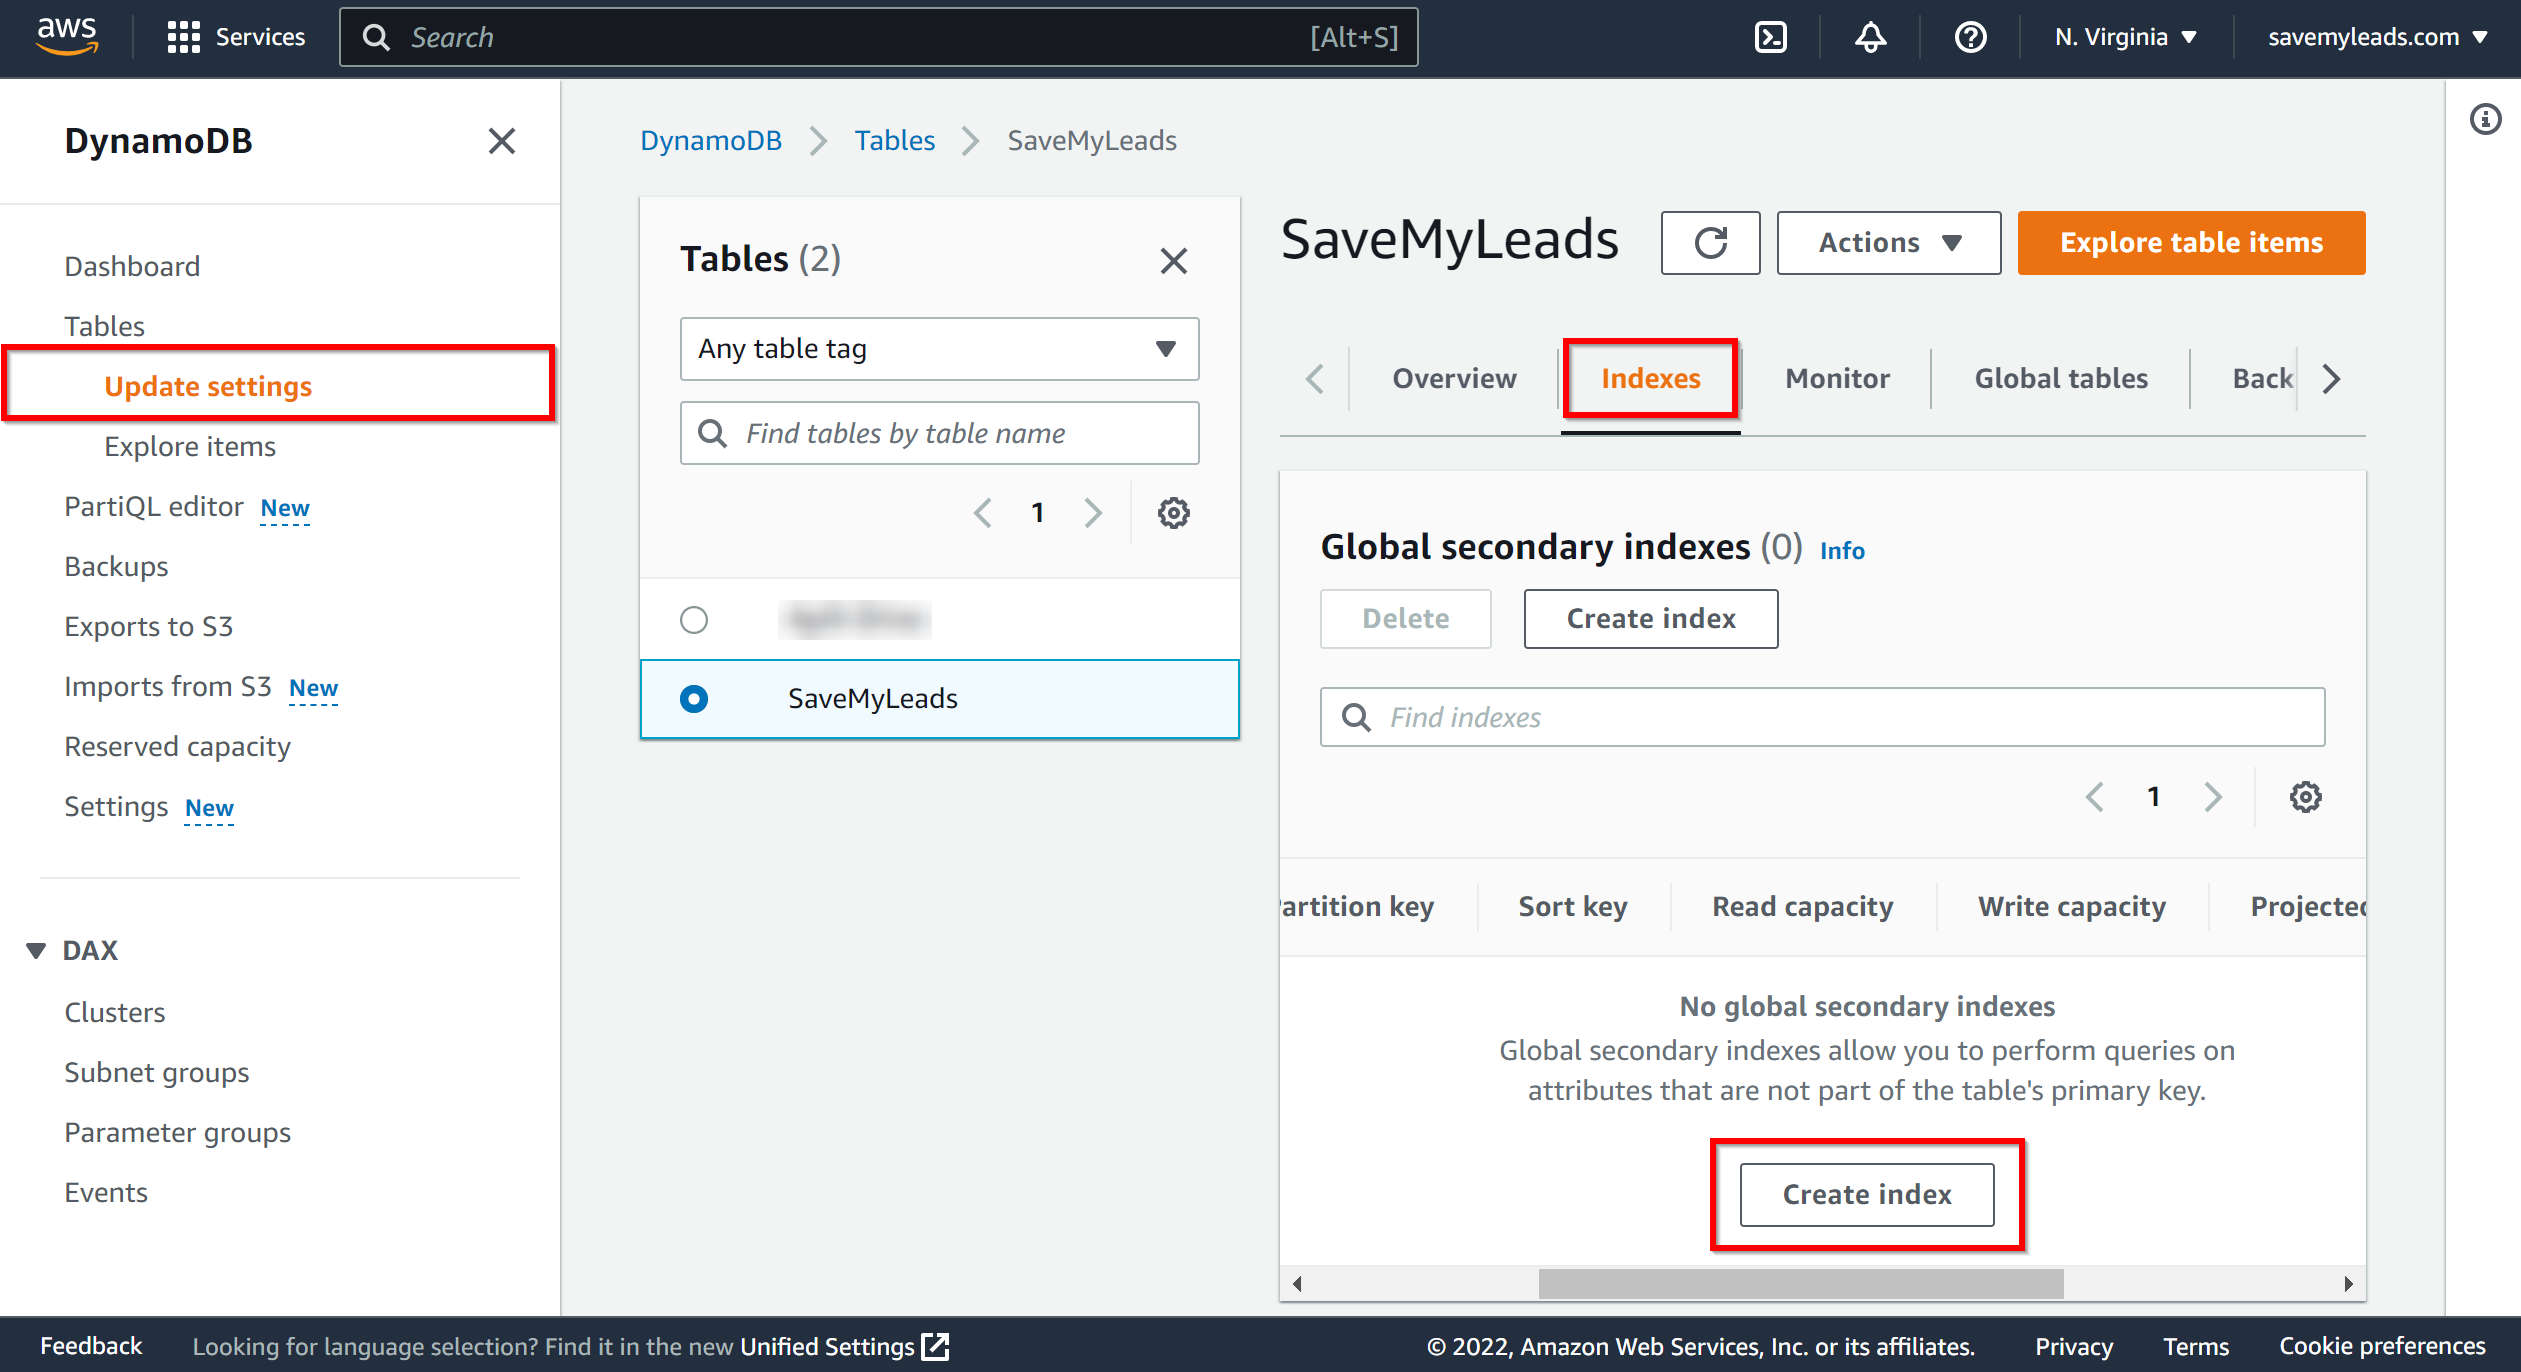
Next, go to the "Update setting" section, select your database, go to the "Indexes" section and click "Create index".
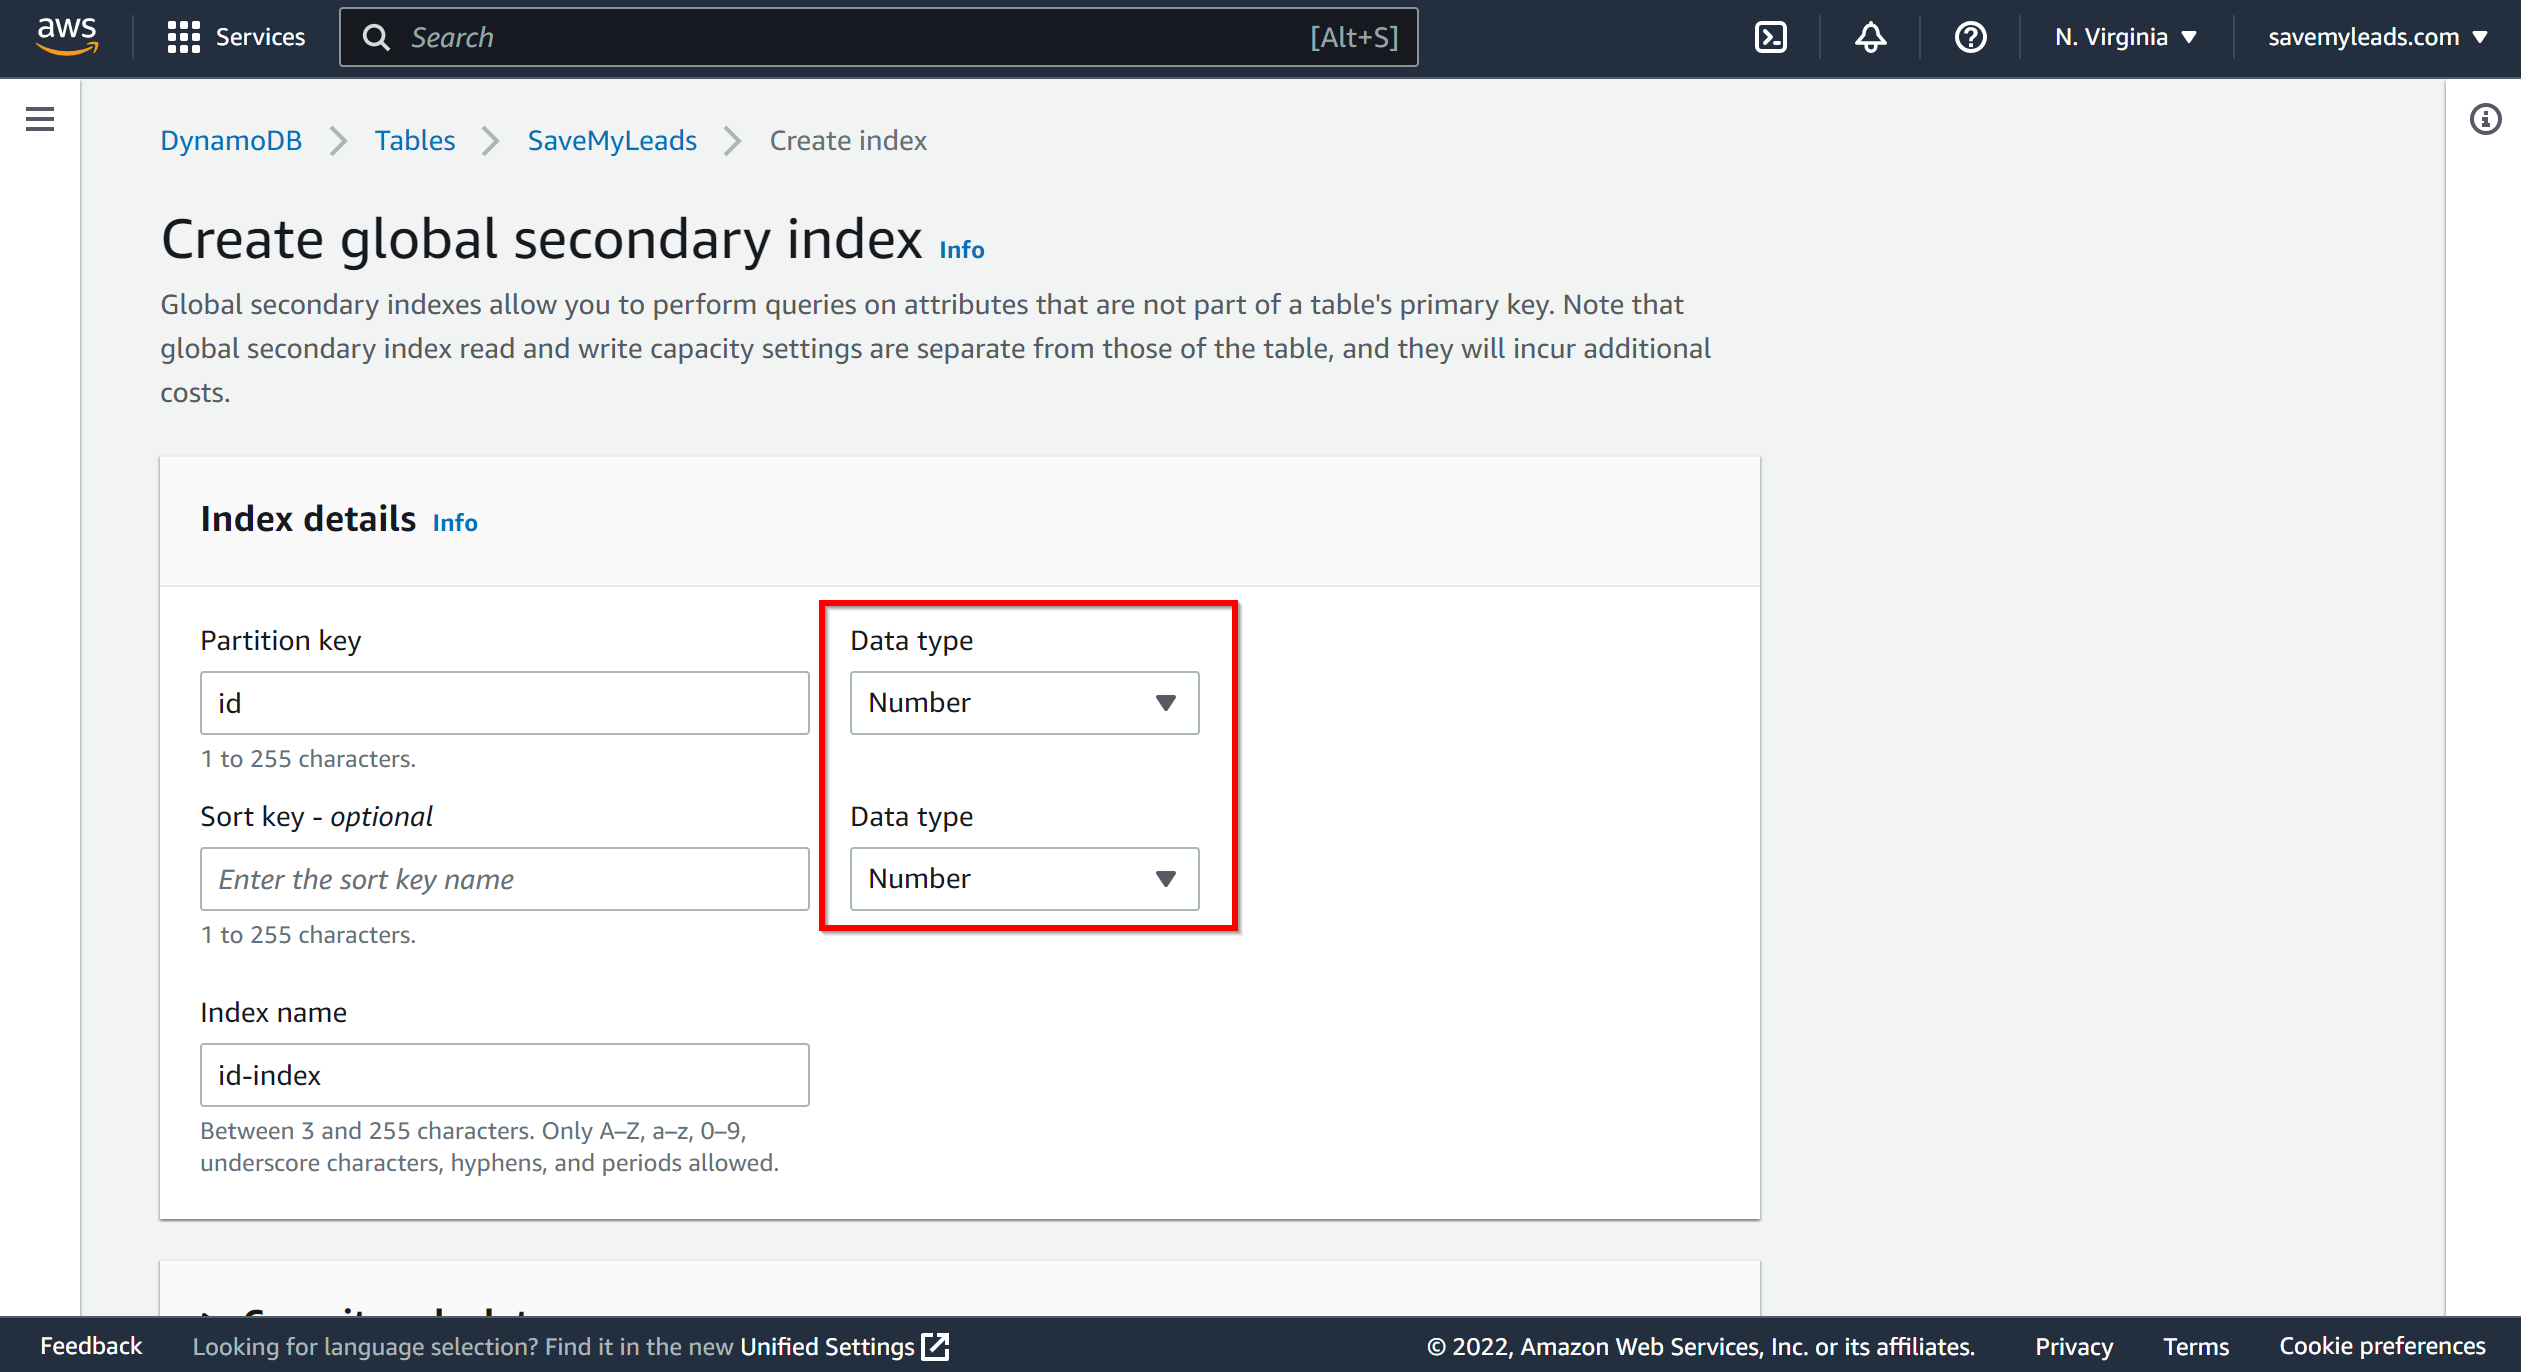
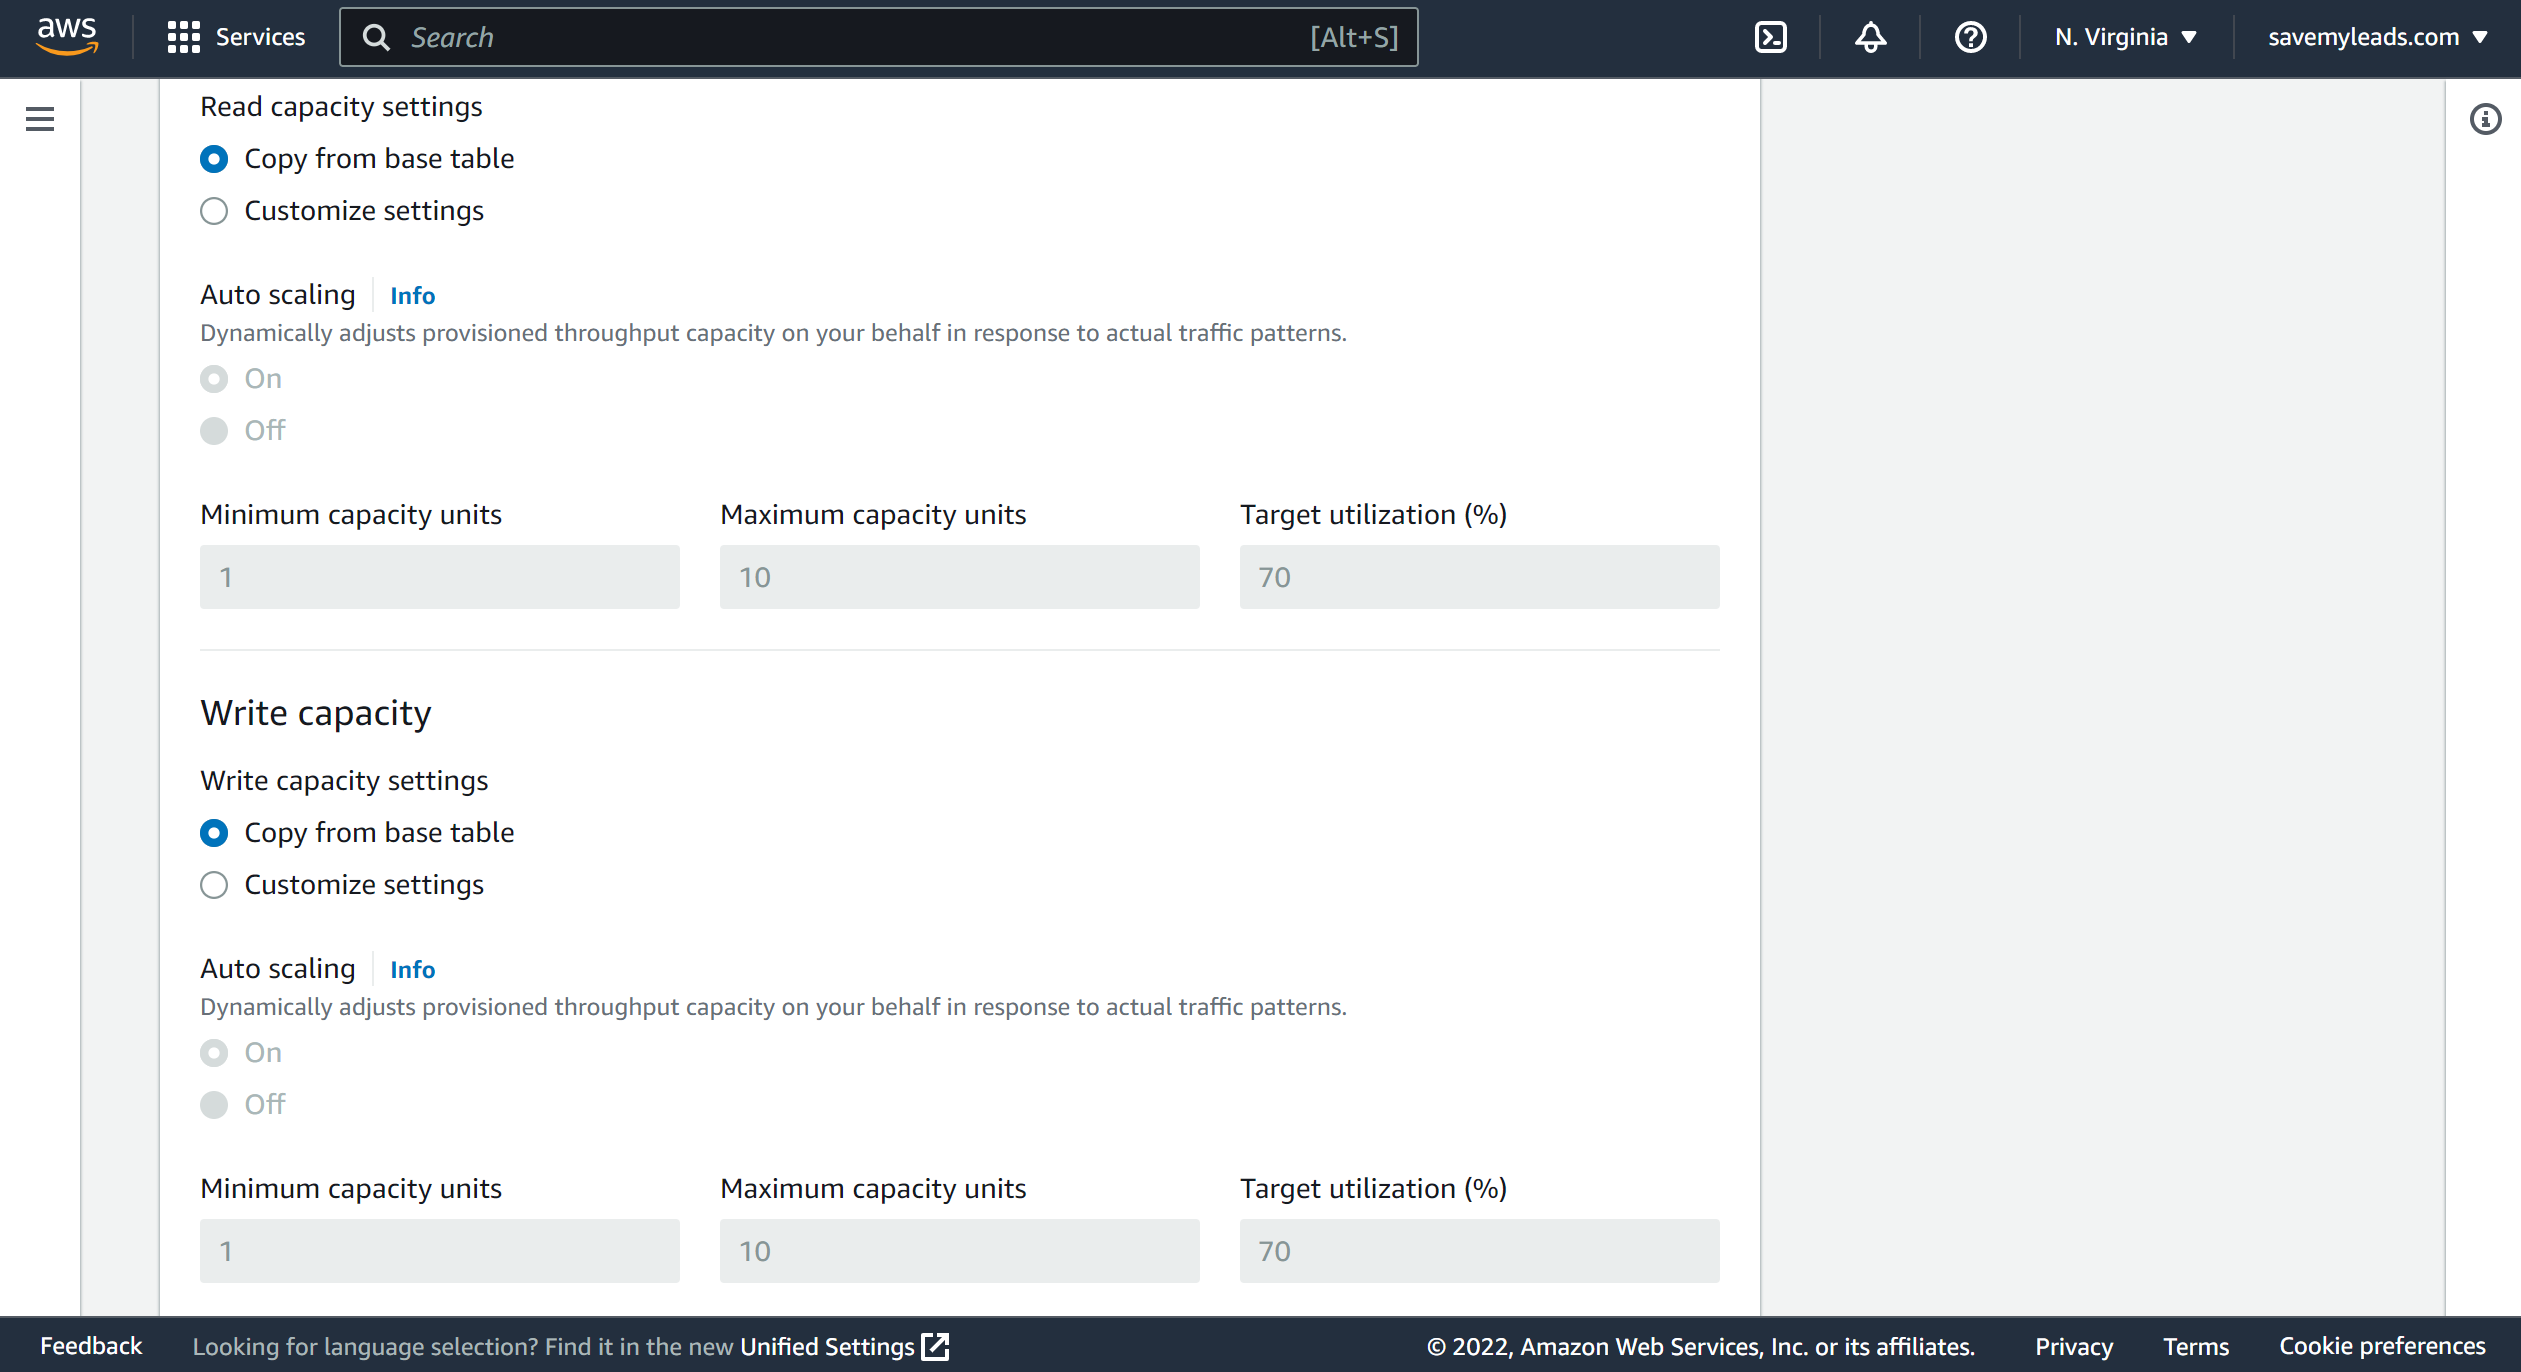
Specify the name of your index in the "Partition key" field and select "Number" in the "Data type" field. You can specify the rest of the settings as you wish. Once configured, click "Create index".
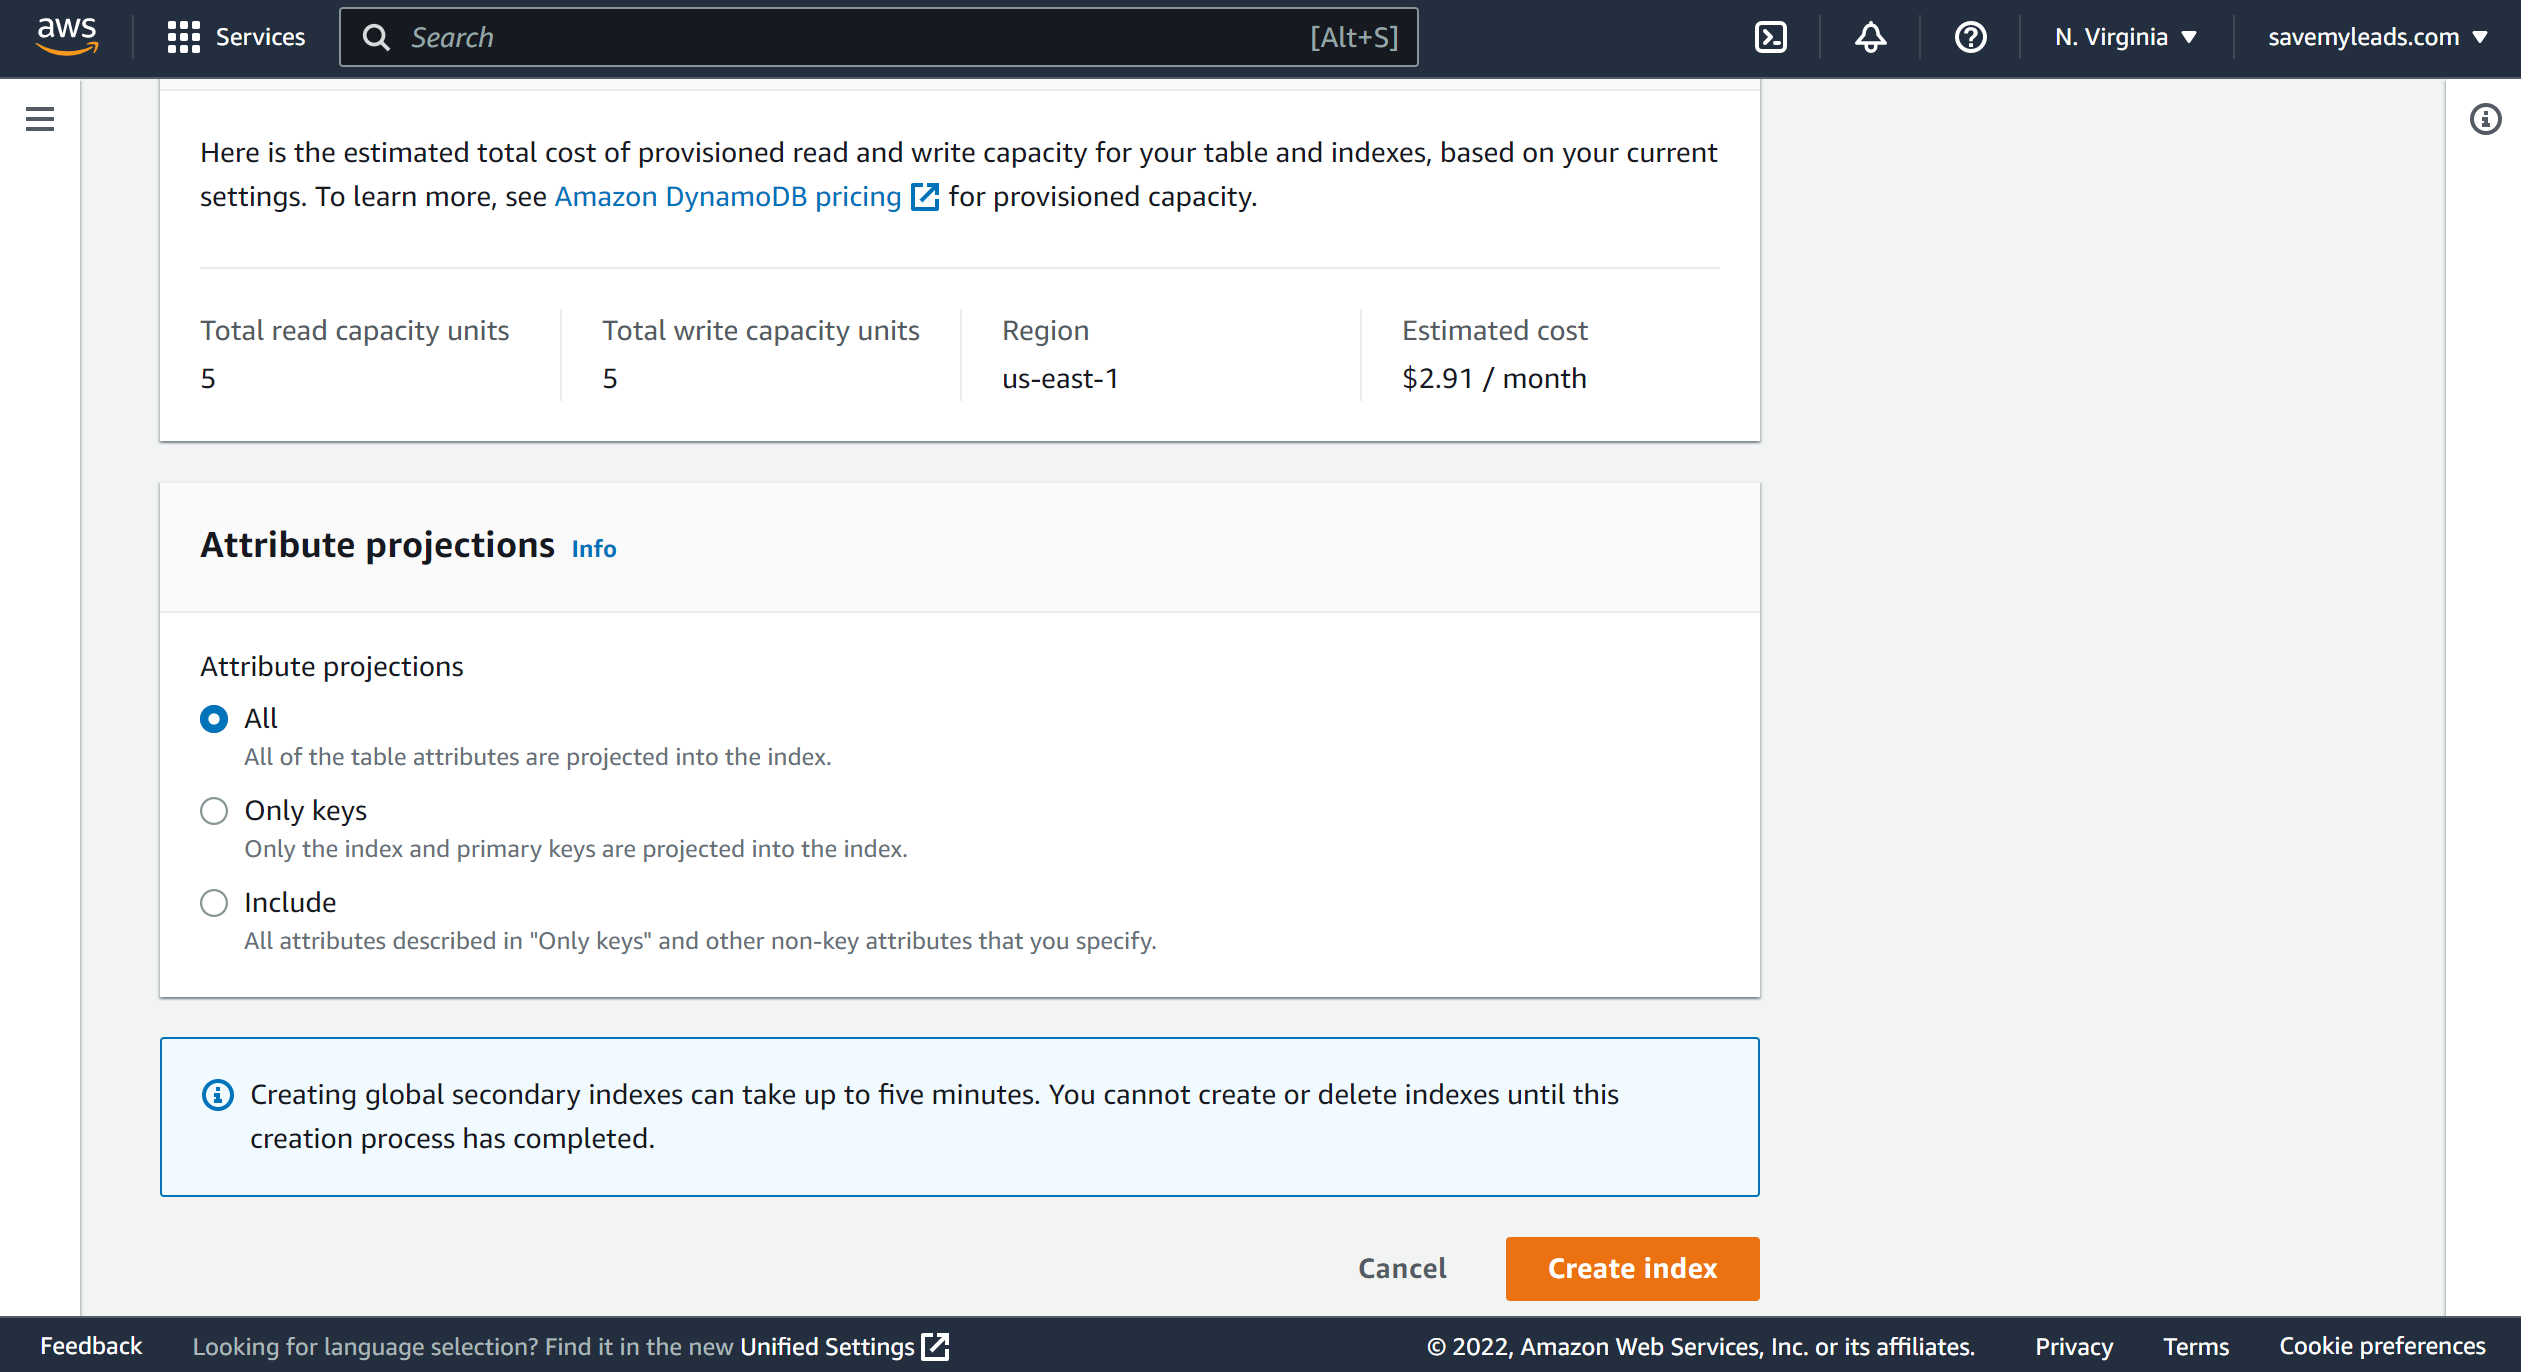
Wait until the index status is "Active".
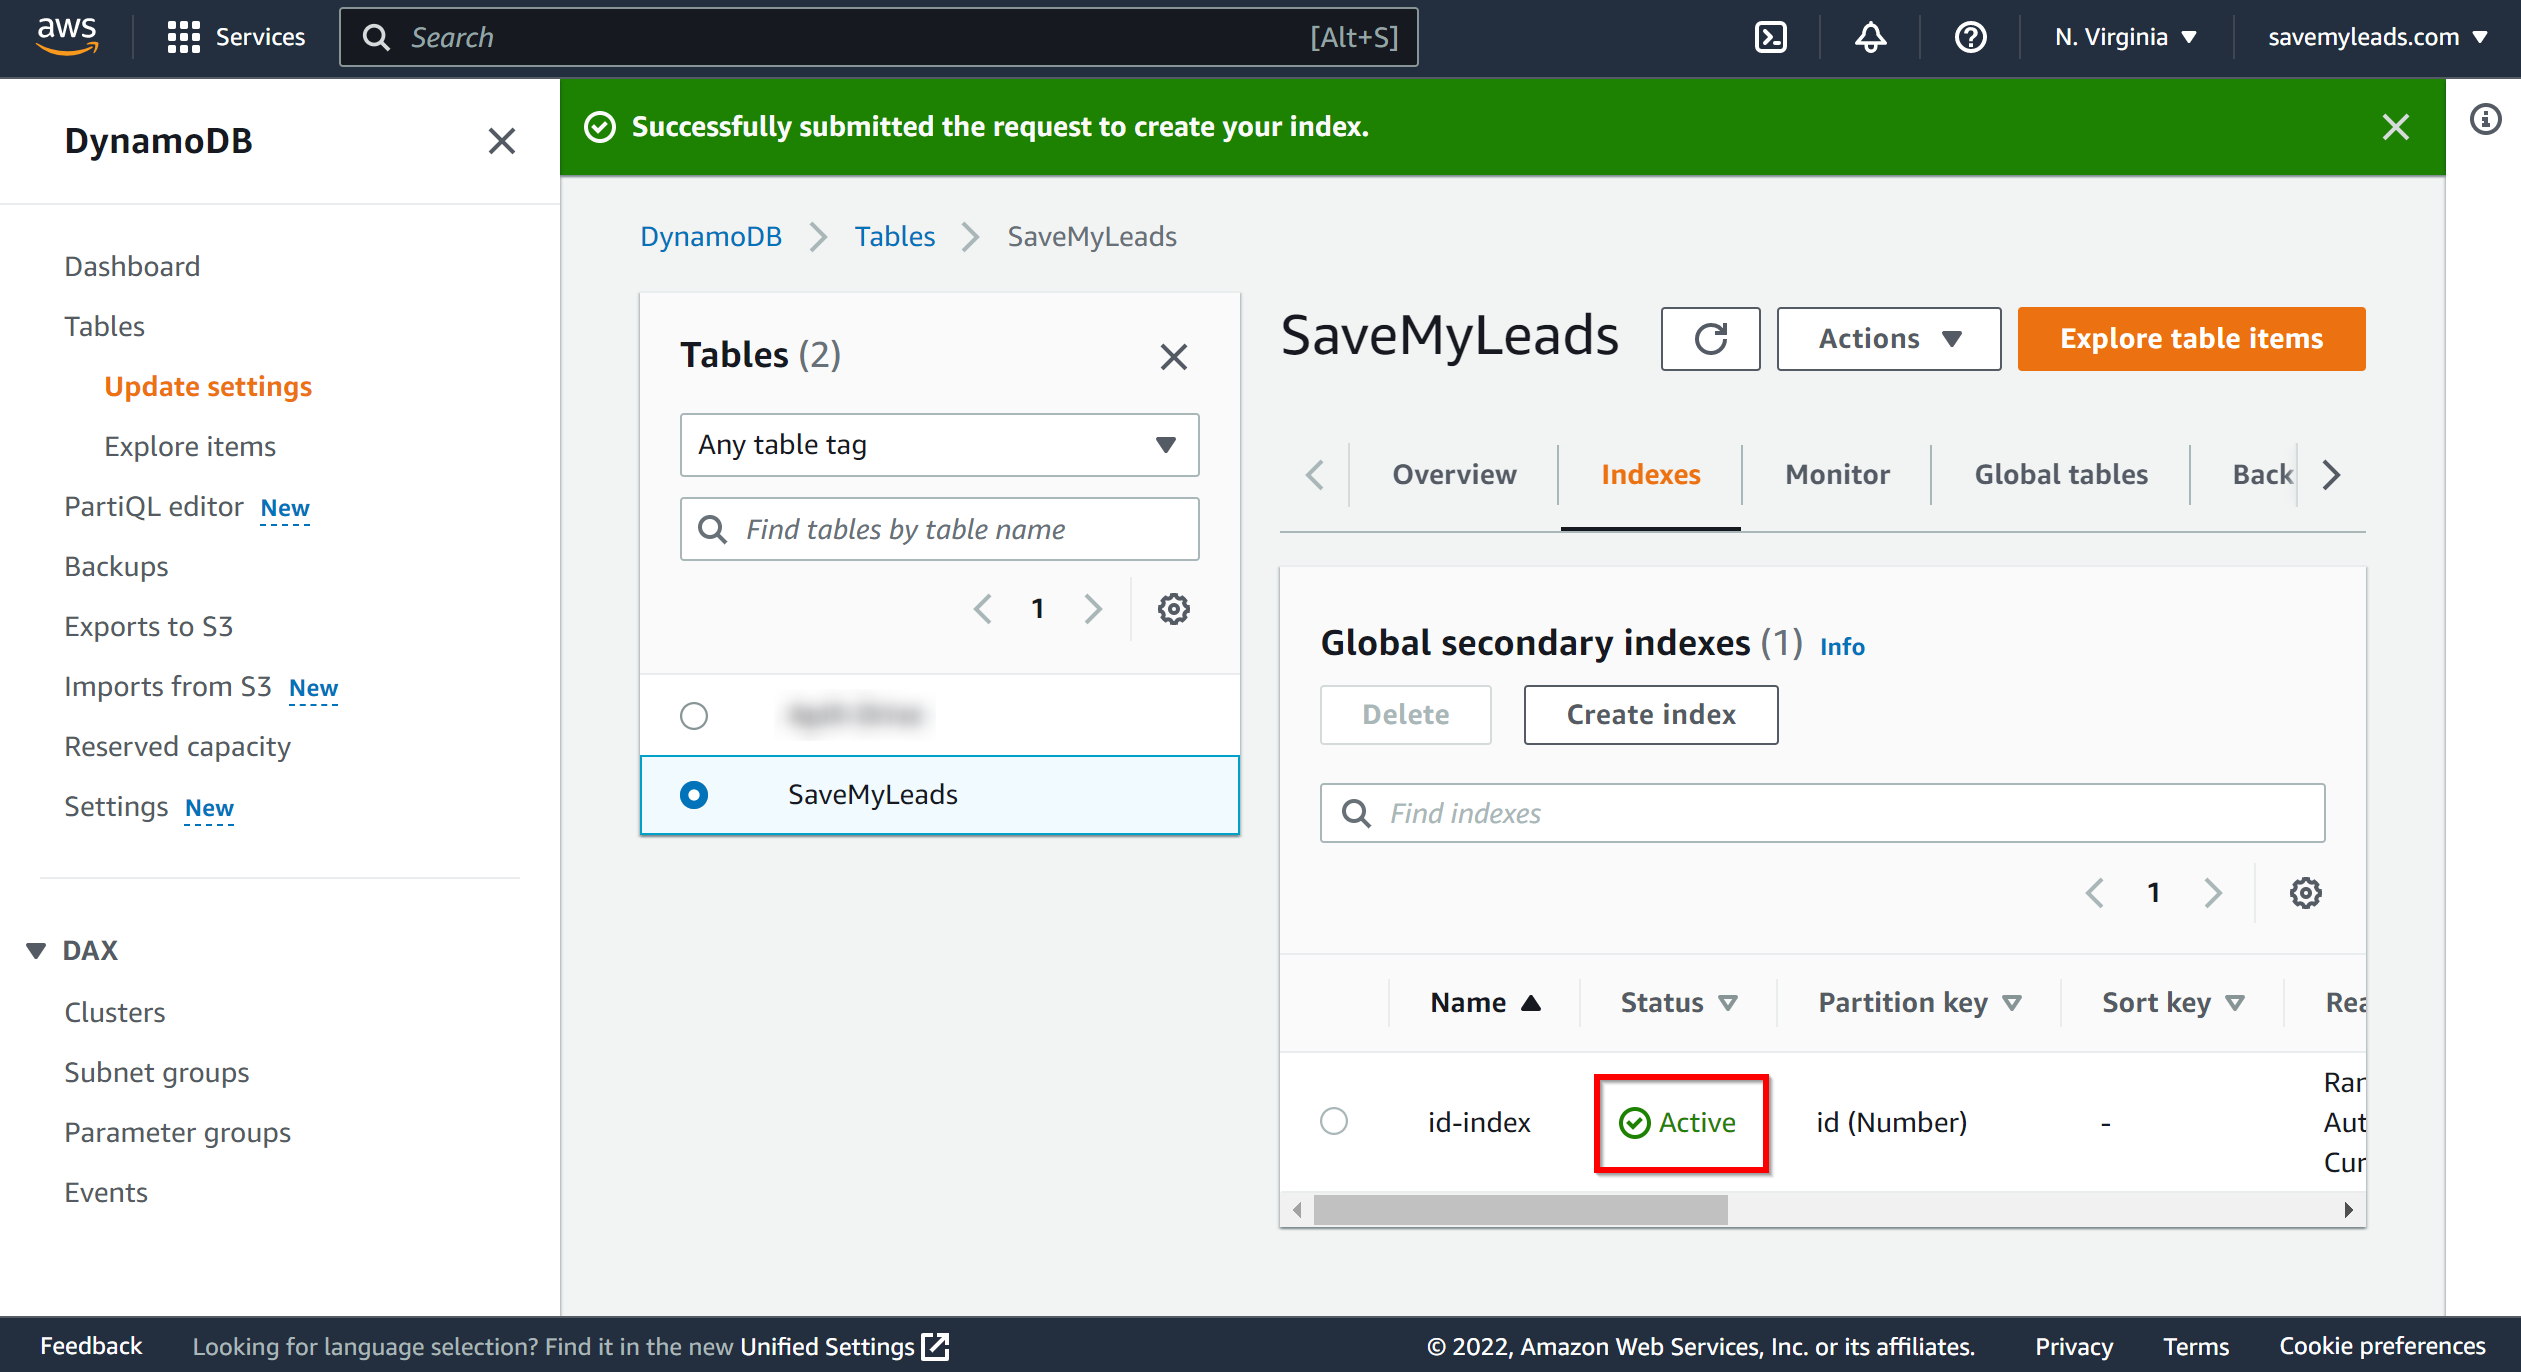
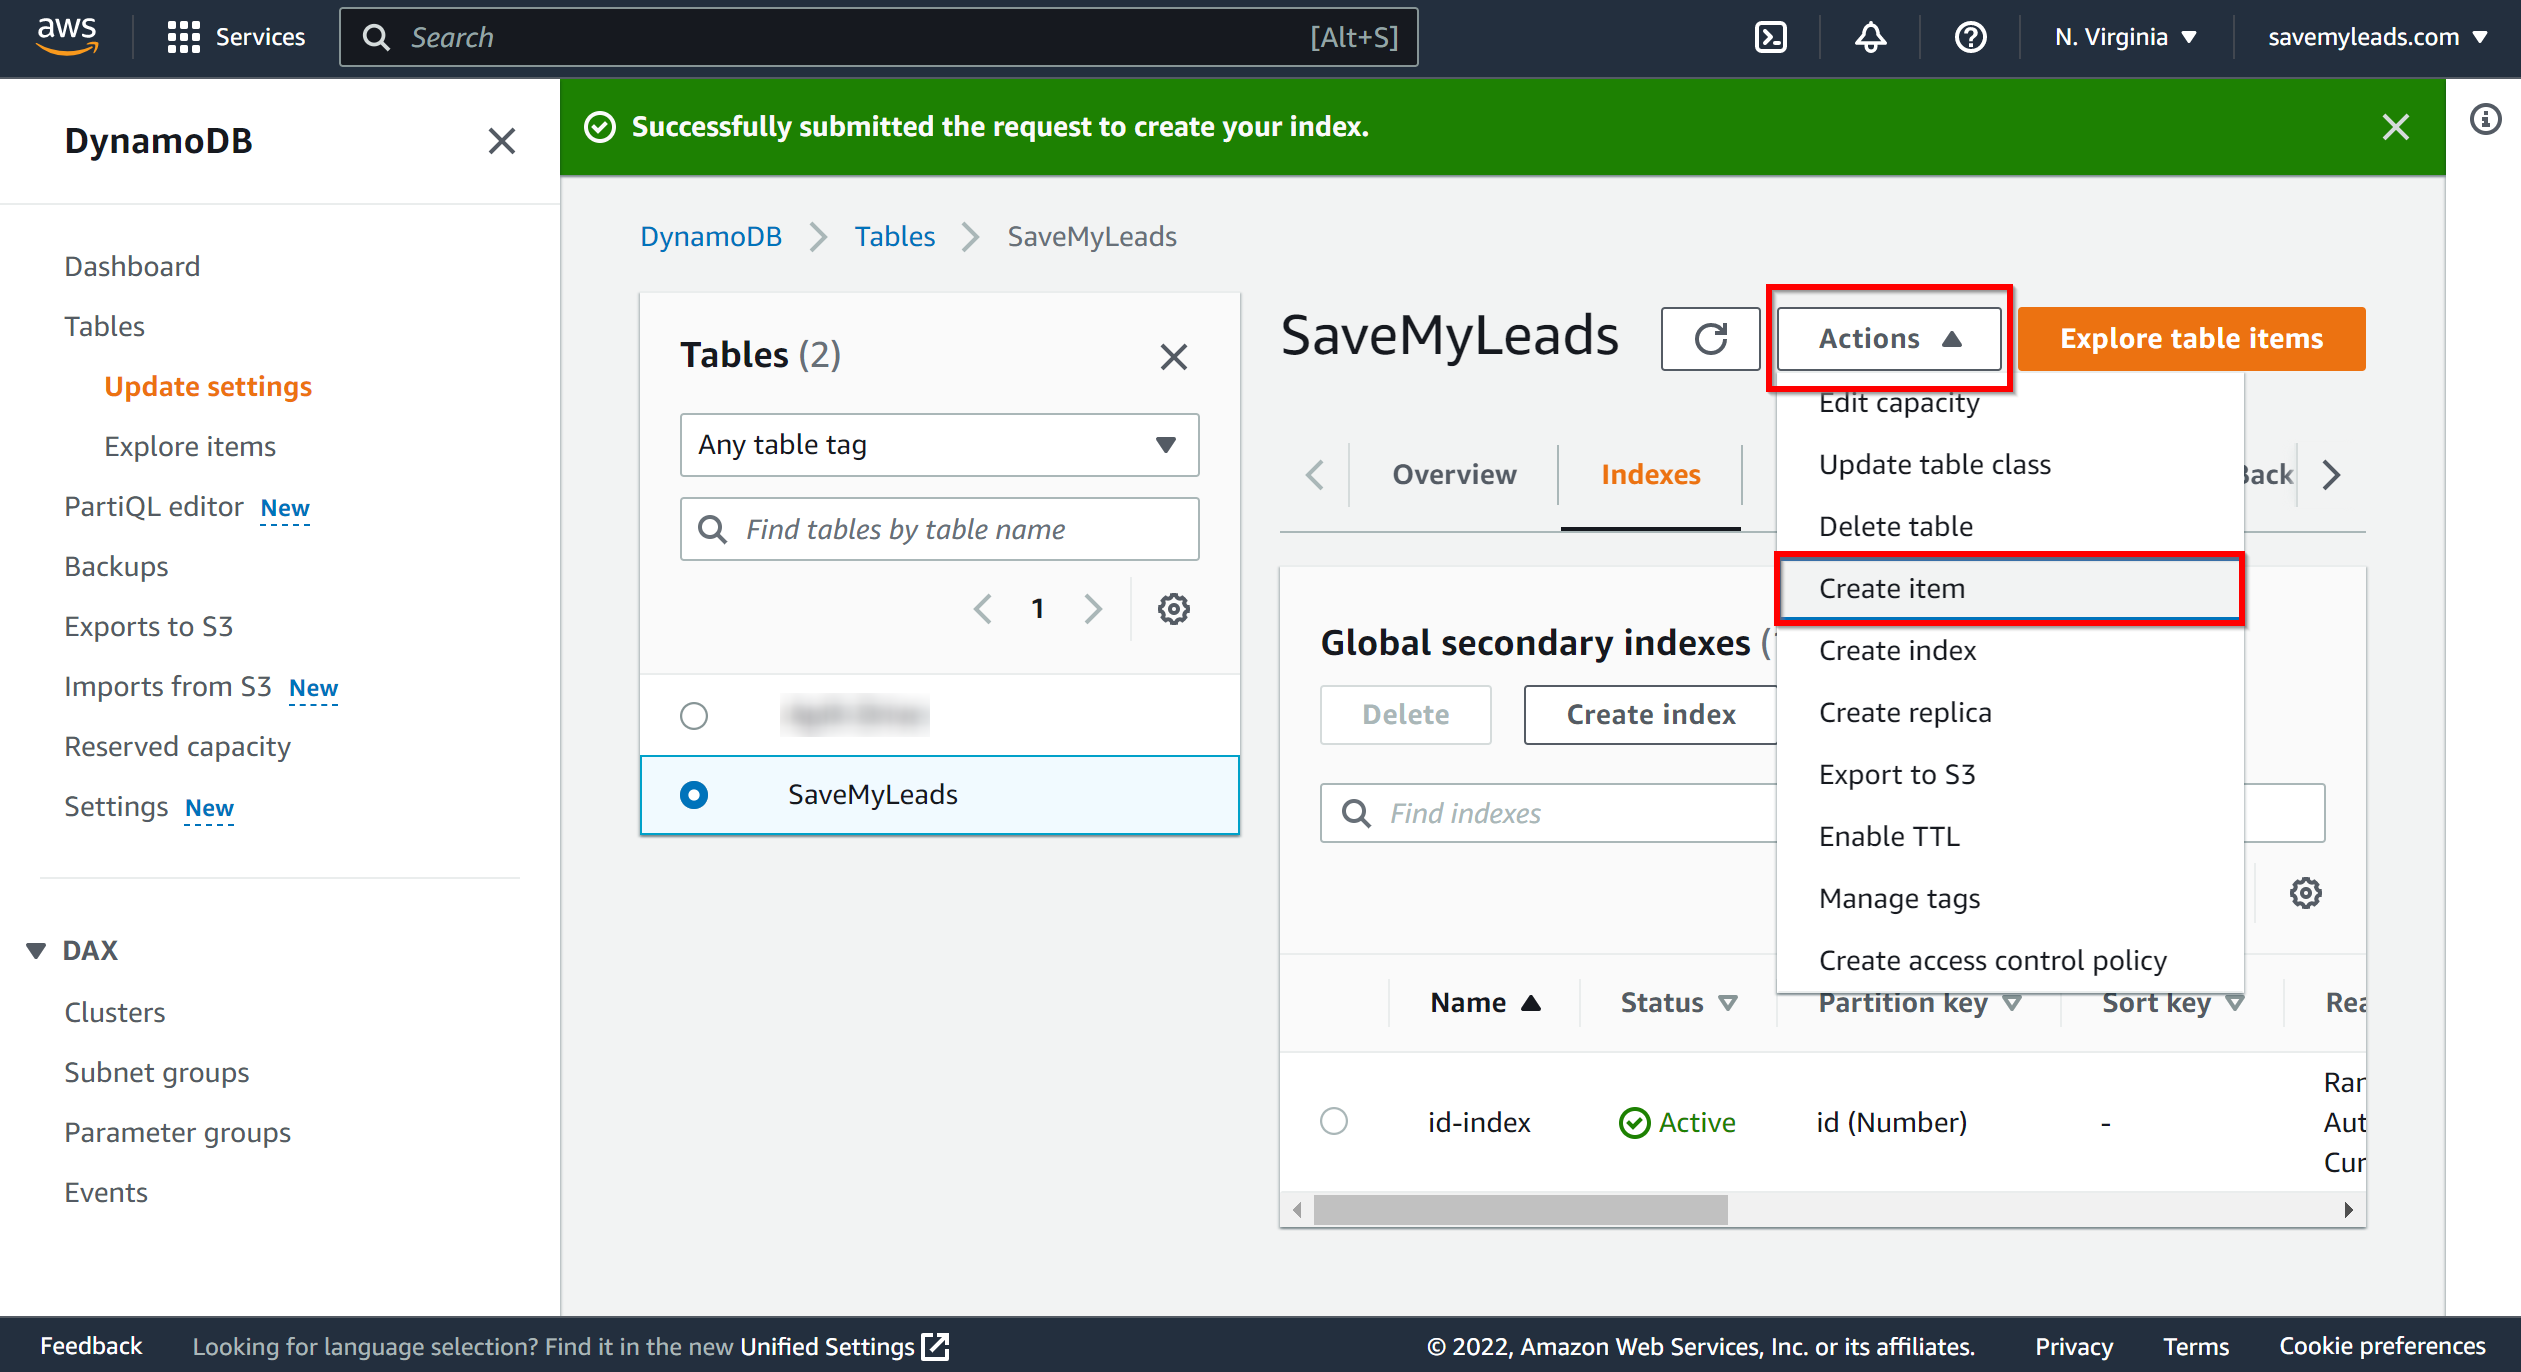
To add data to your database, click on "Action" and select "Create item".
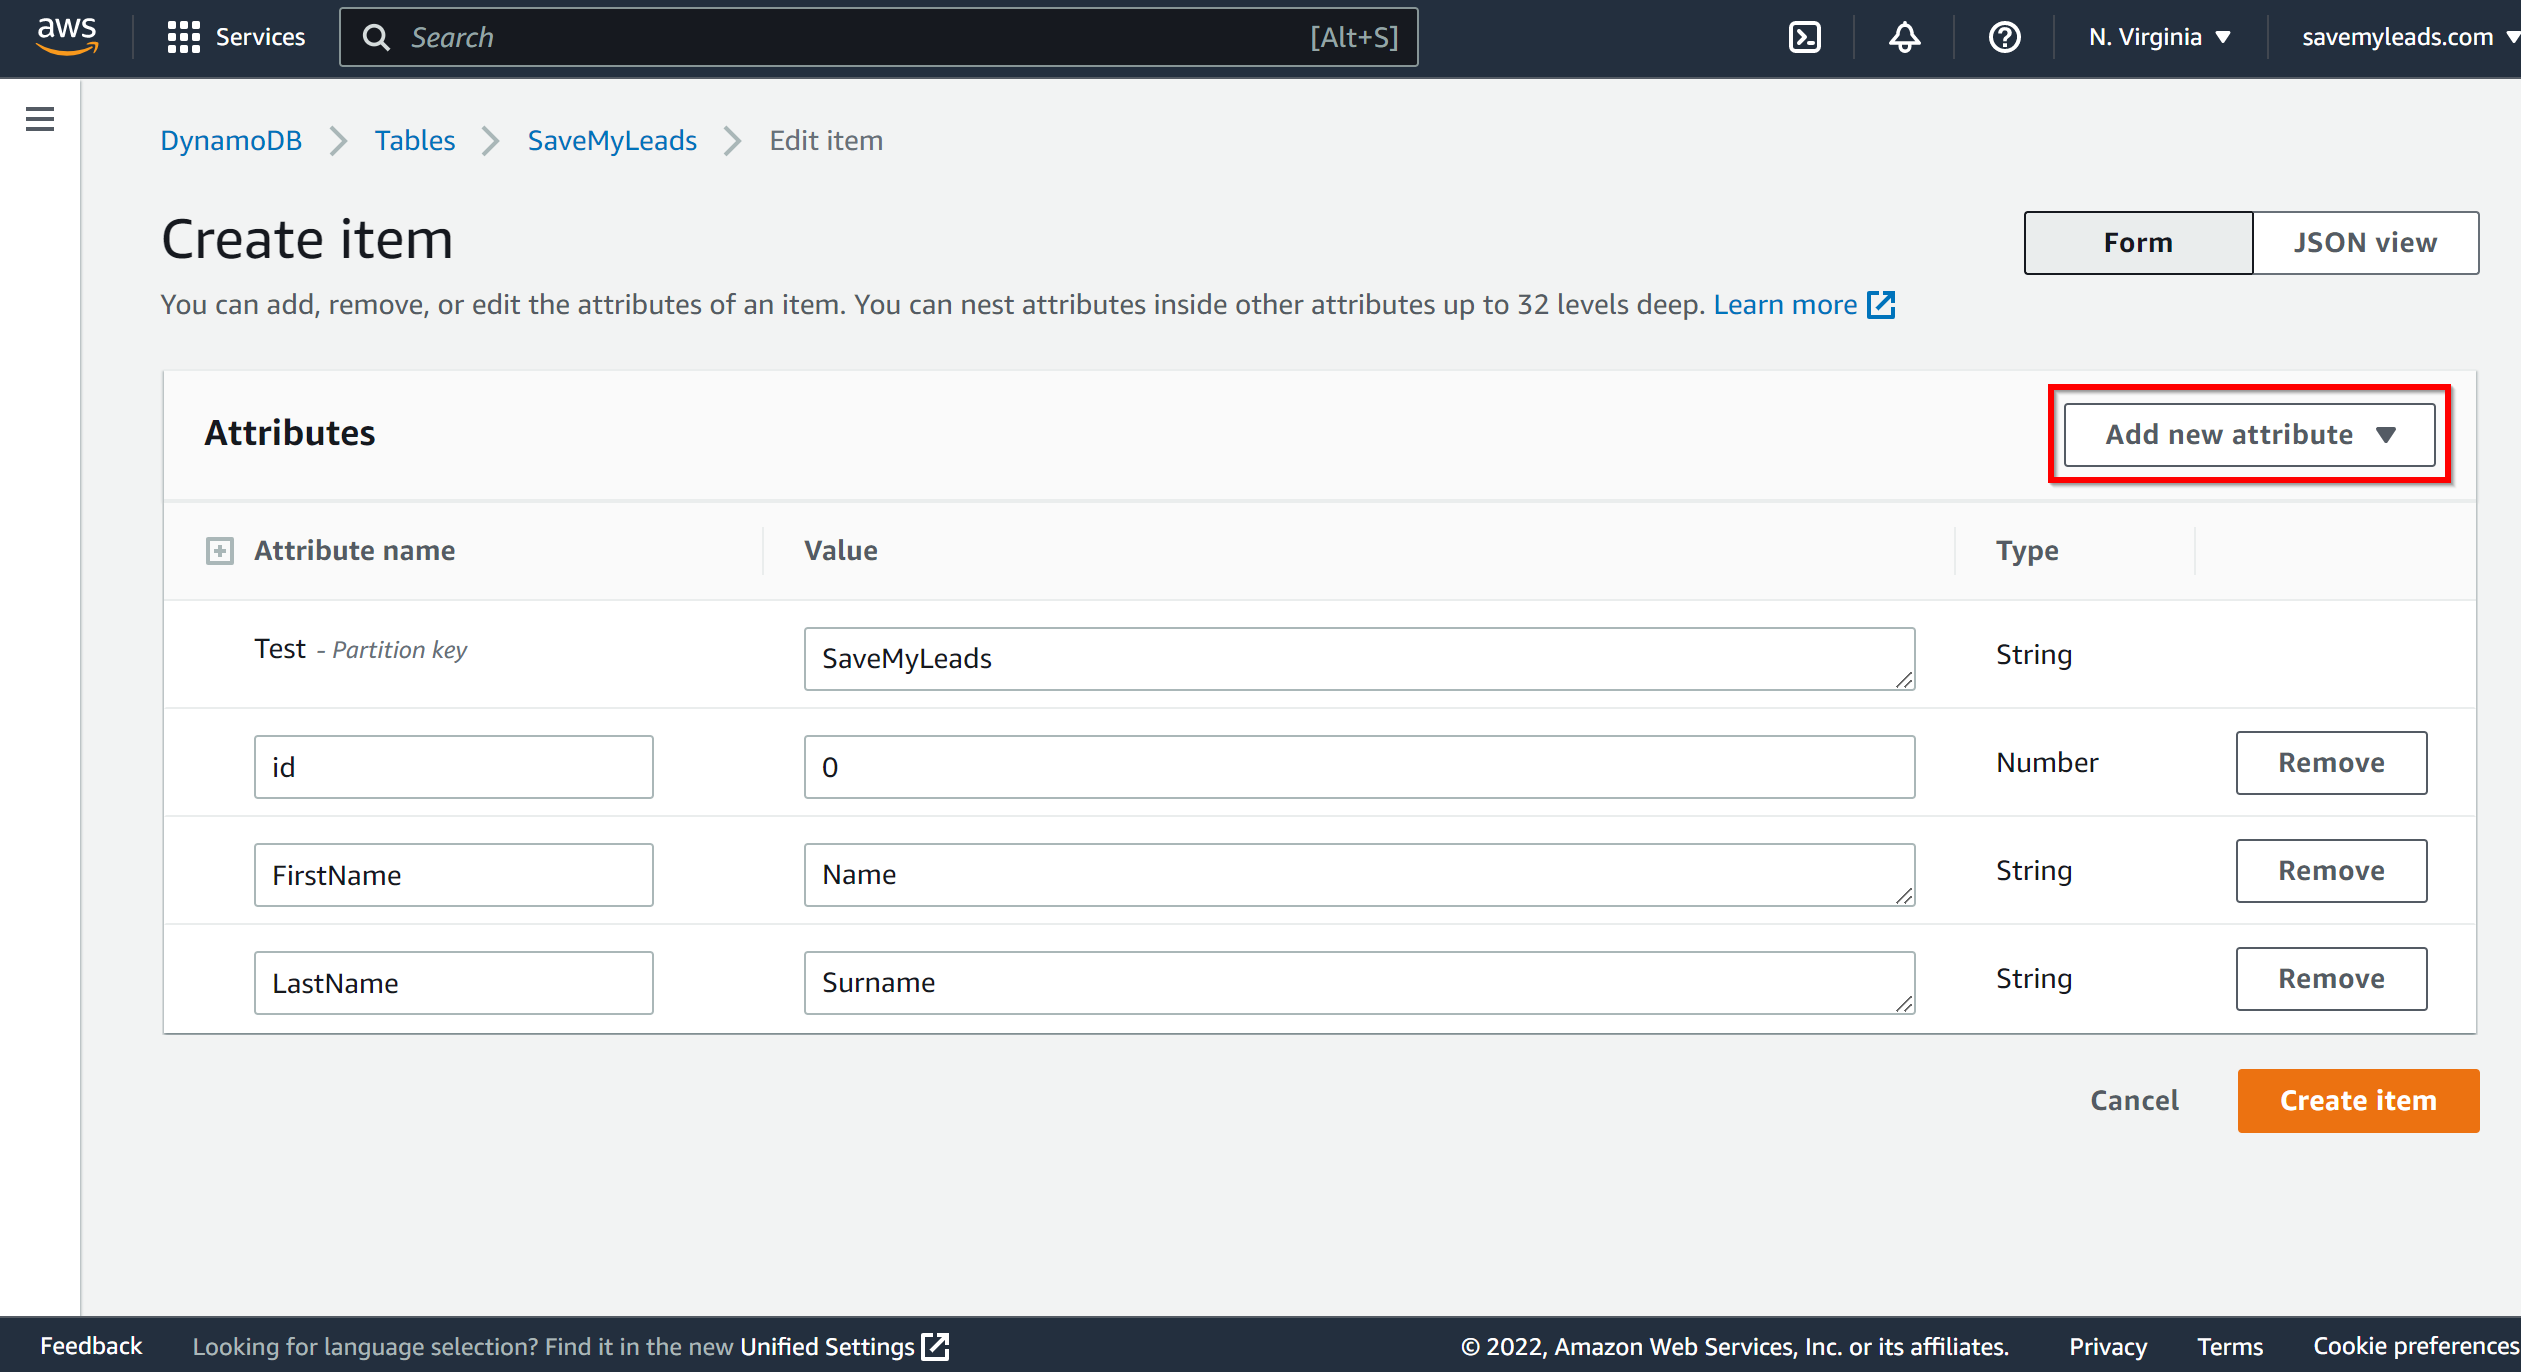
To add a new attribute, click on "Add new attribute". When all the data is entered, click "Create item".
Now you need to assign variables to the required fields to send data to Amazon DynamoDB.
Select the required Google Lead Form data, click on the parameter and it will be assigned to the selected Amazon DynamoDB field.
First select Table from the drop down list.
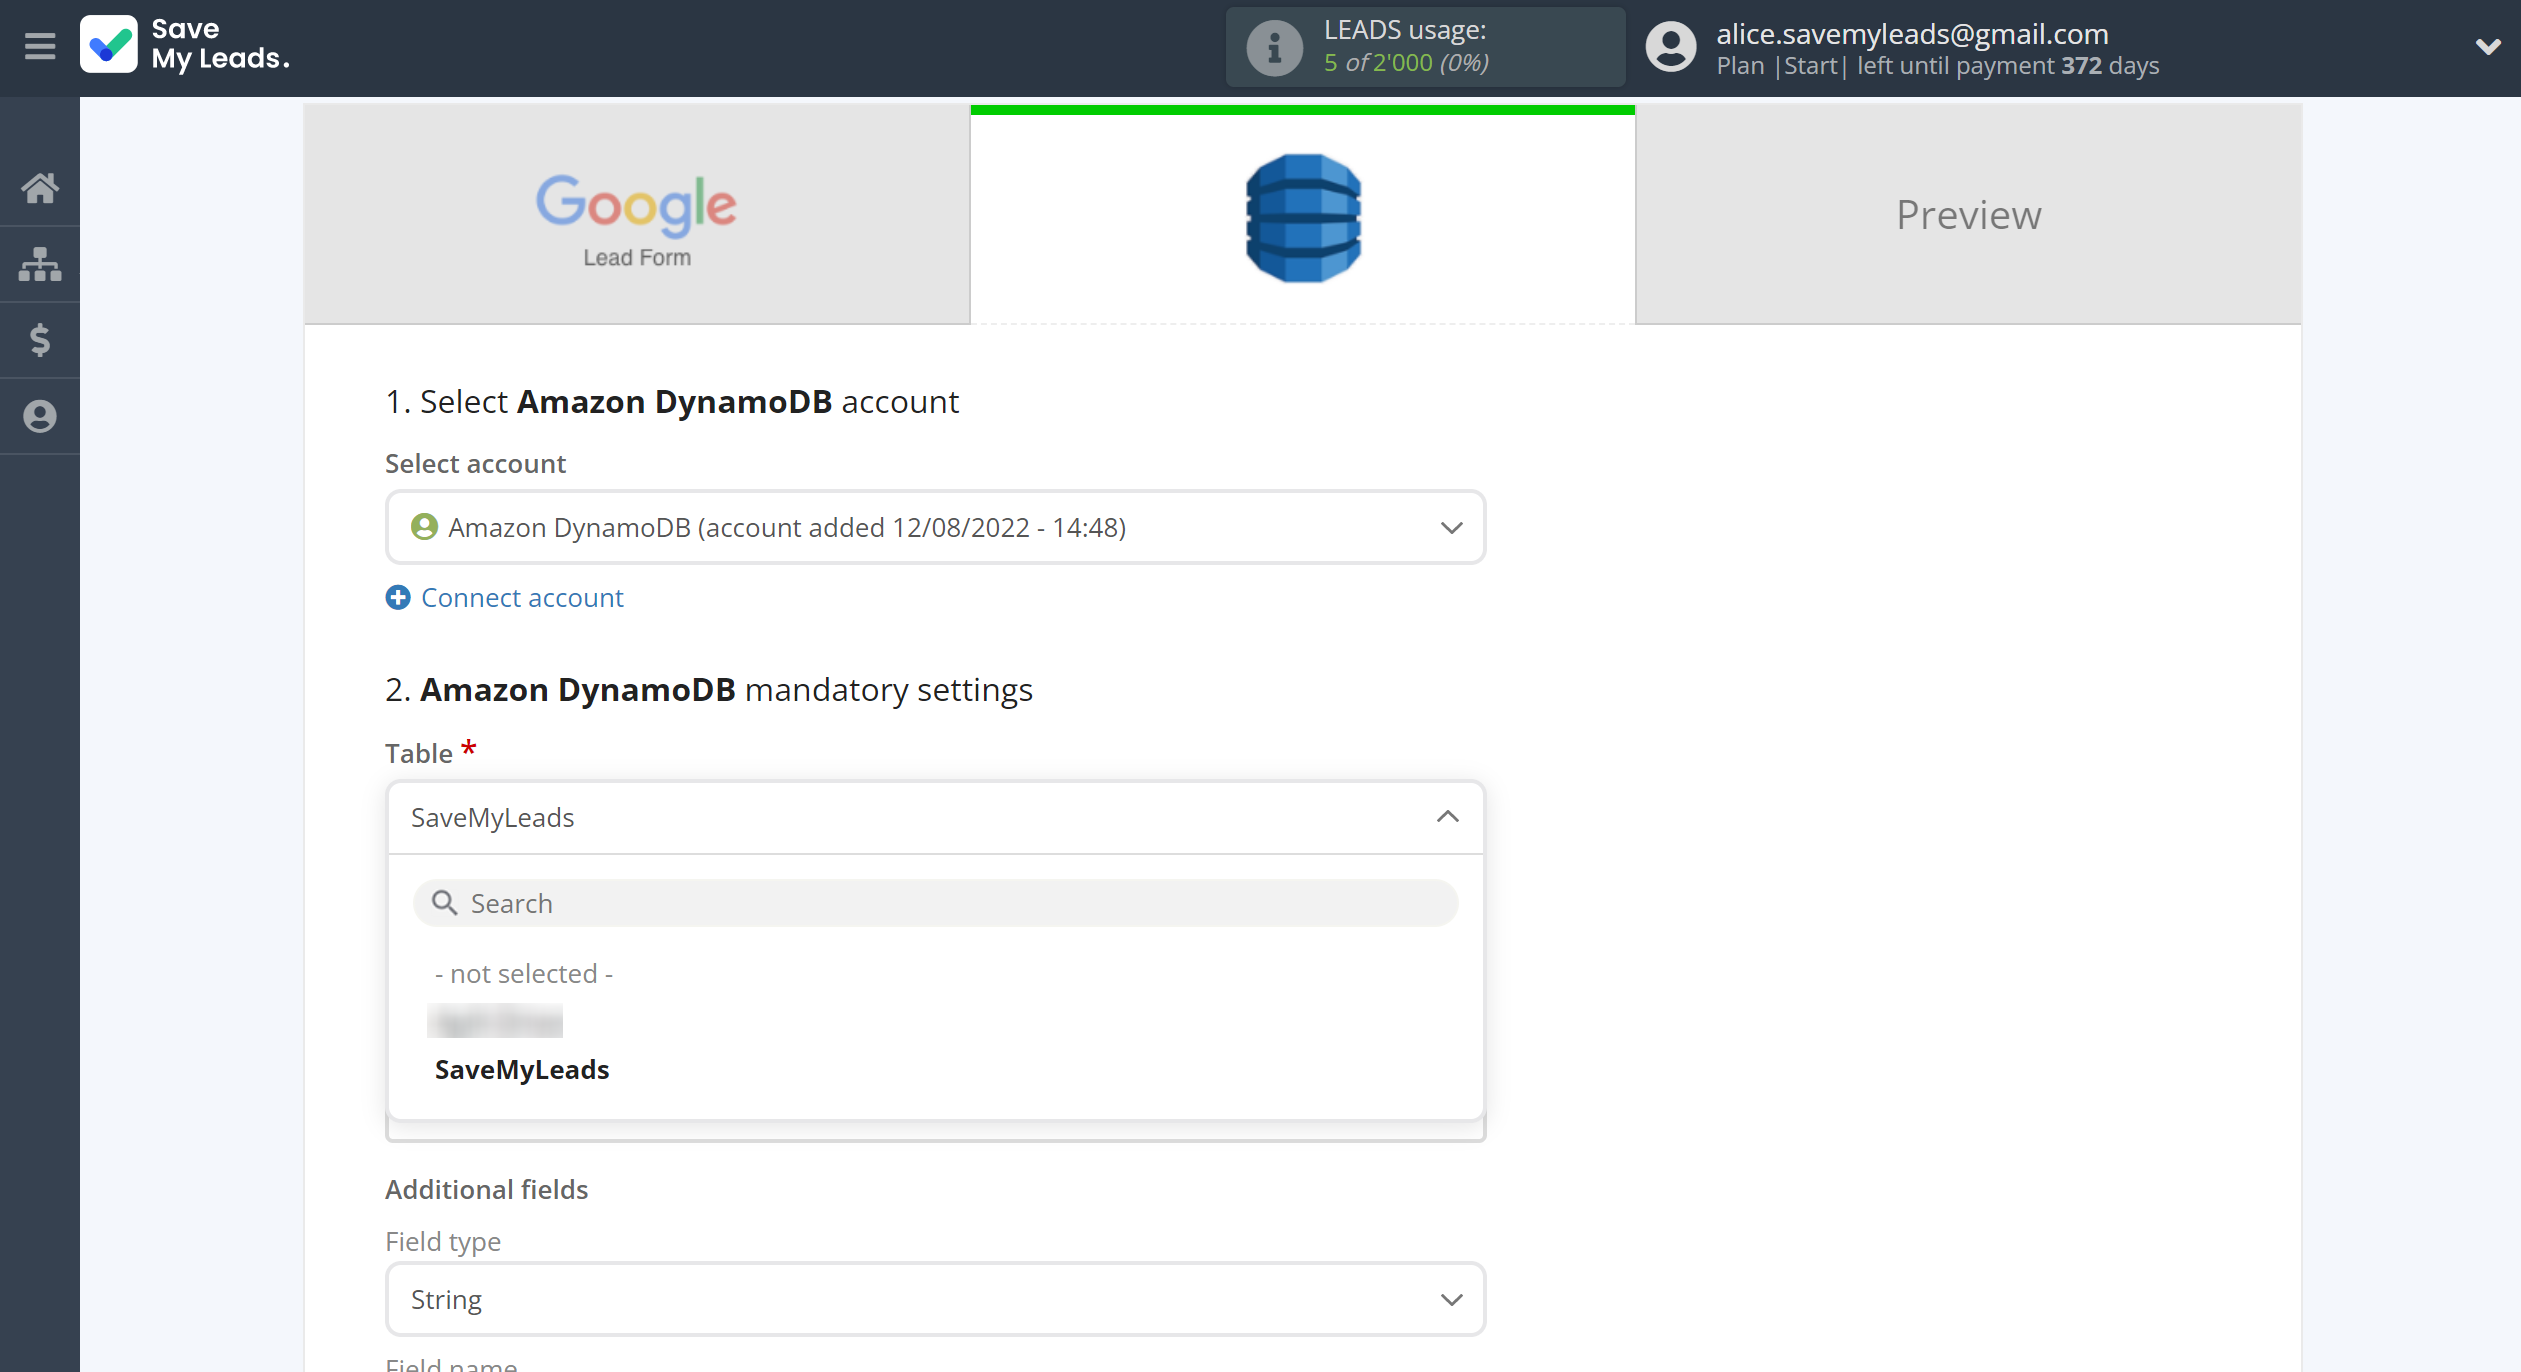
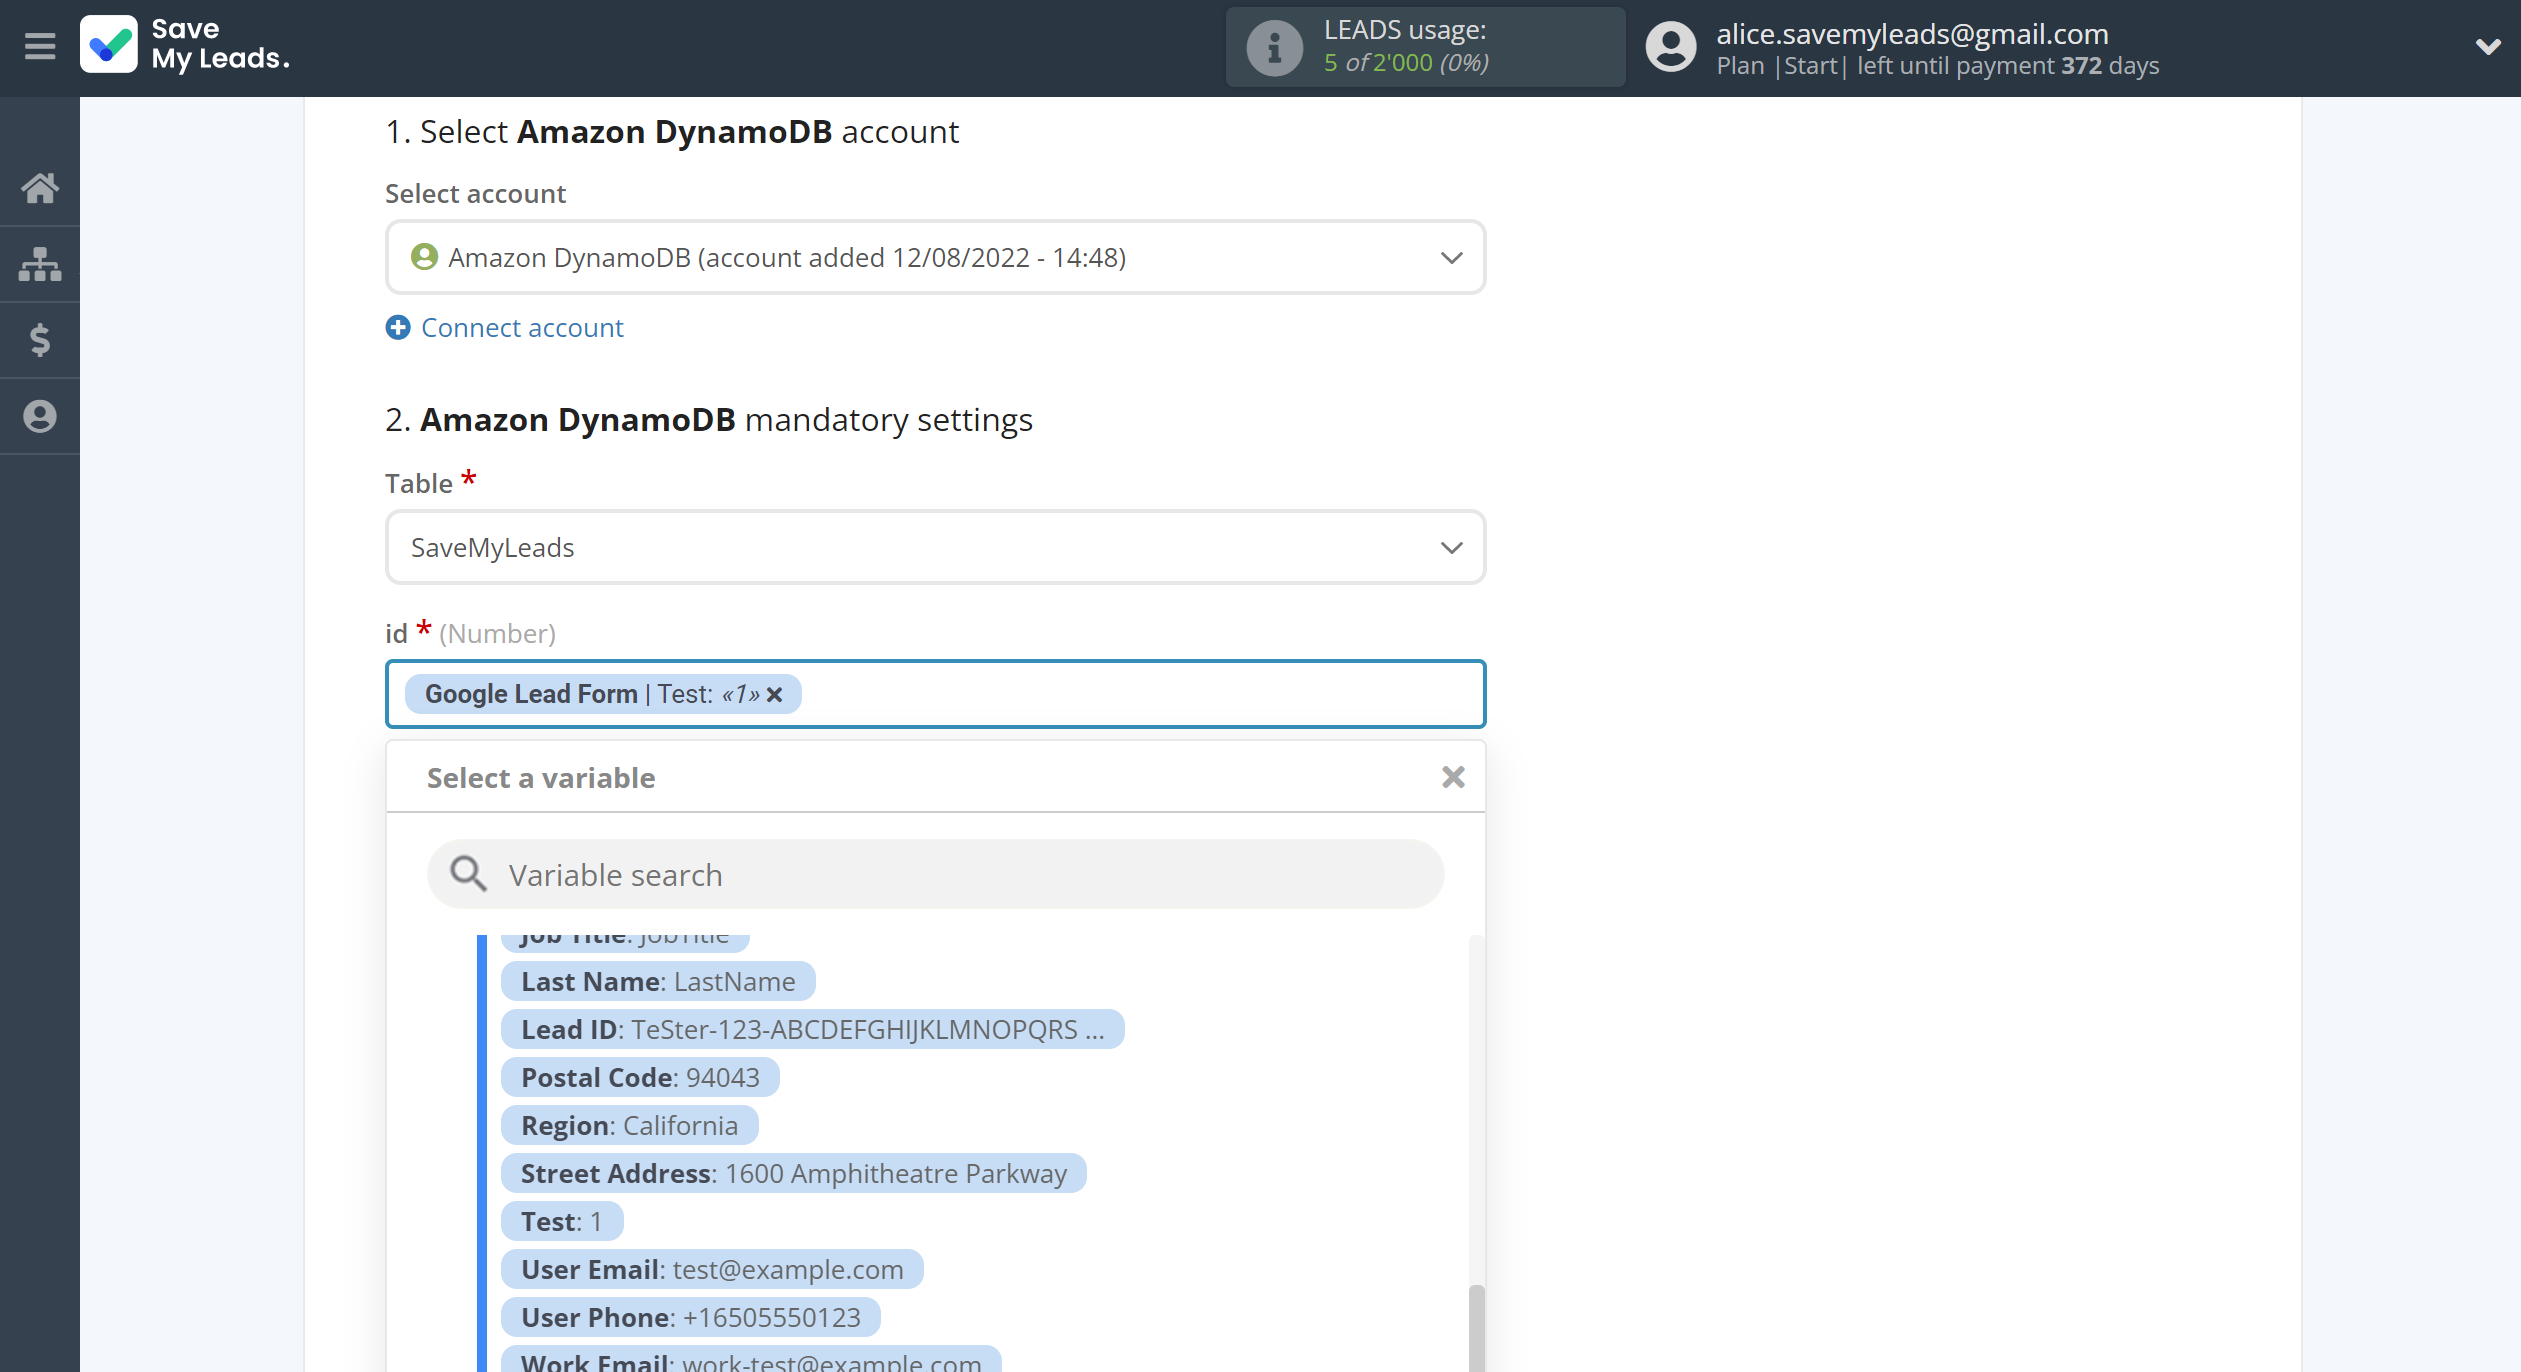
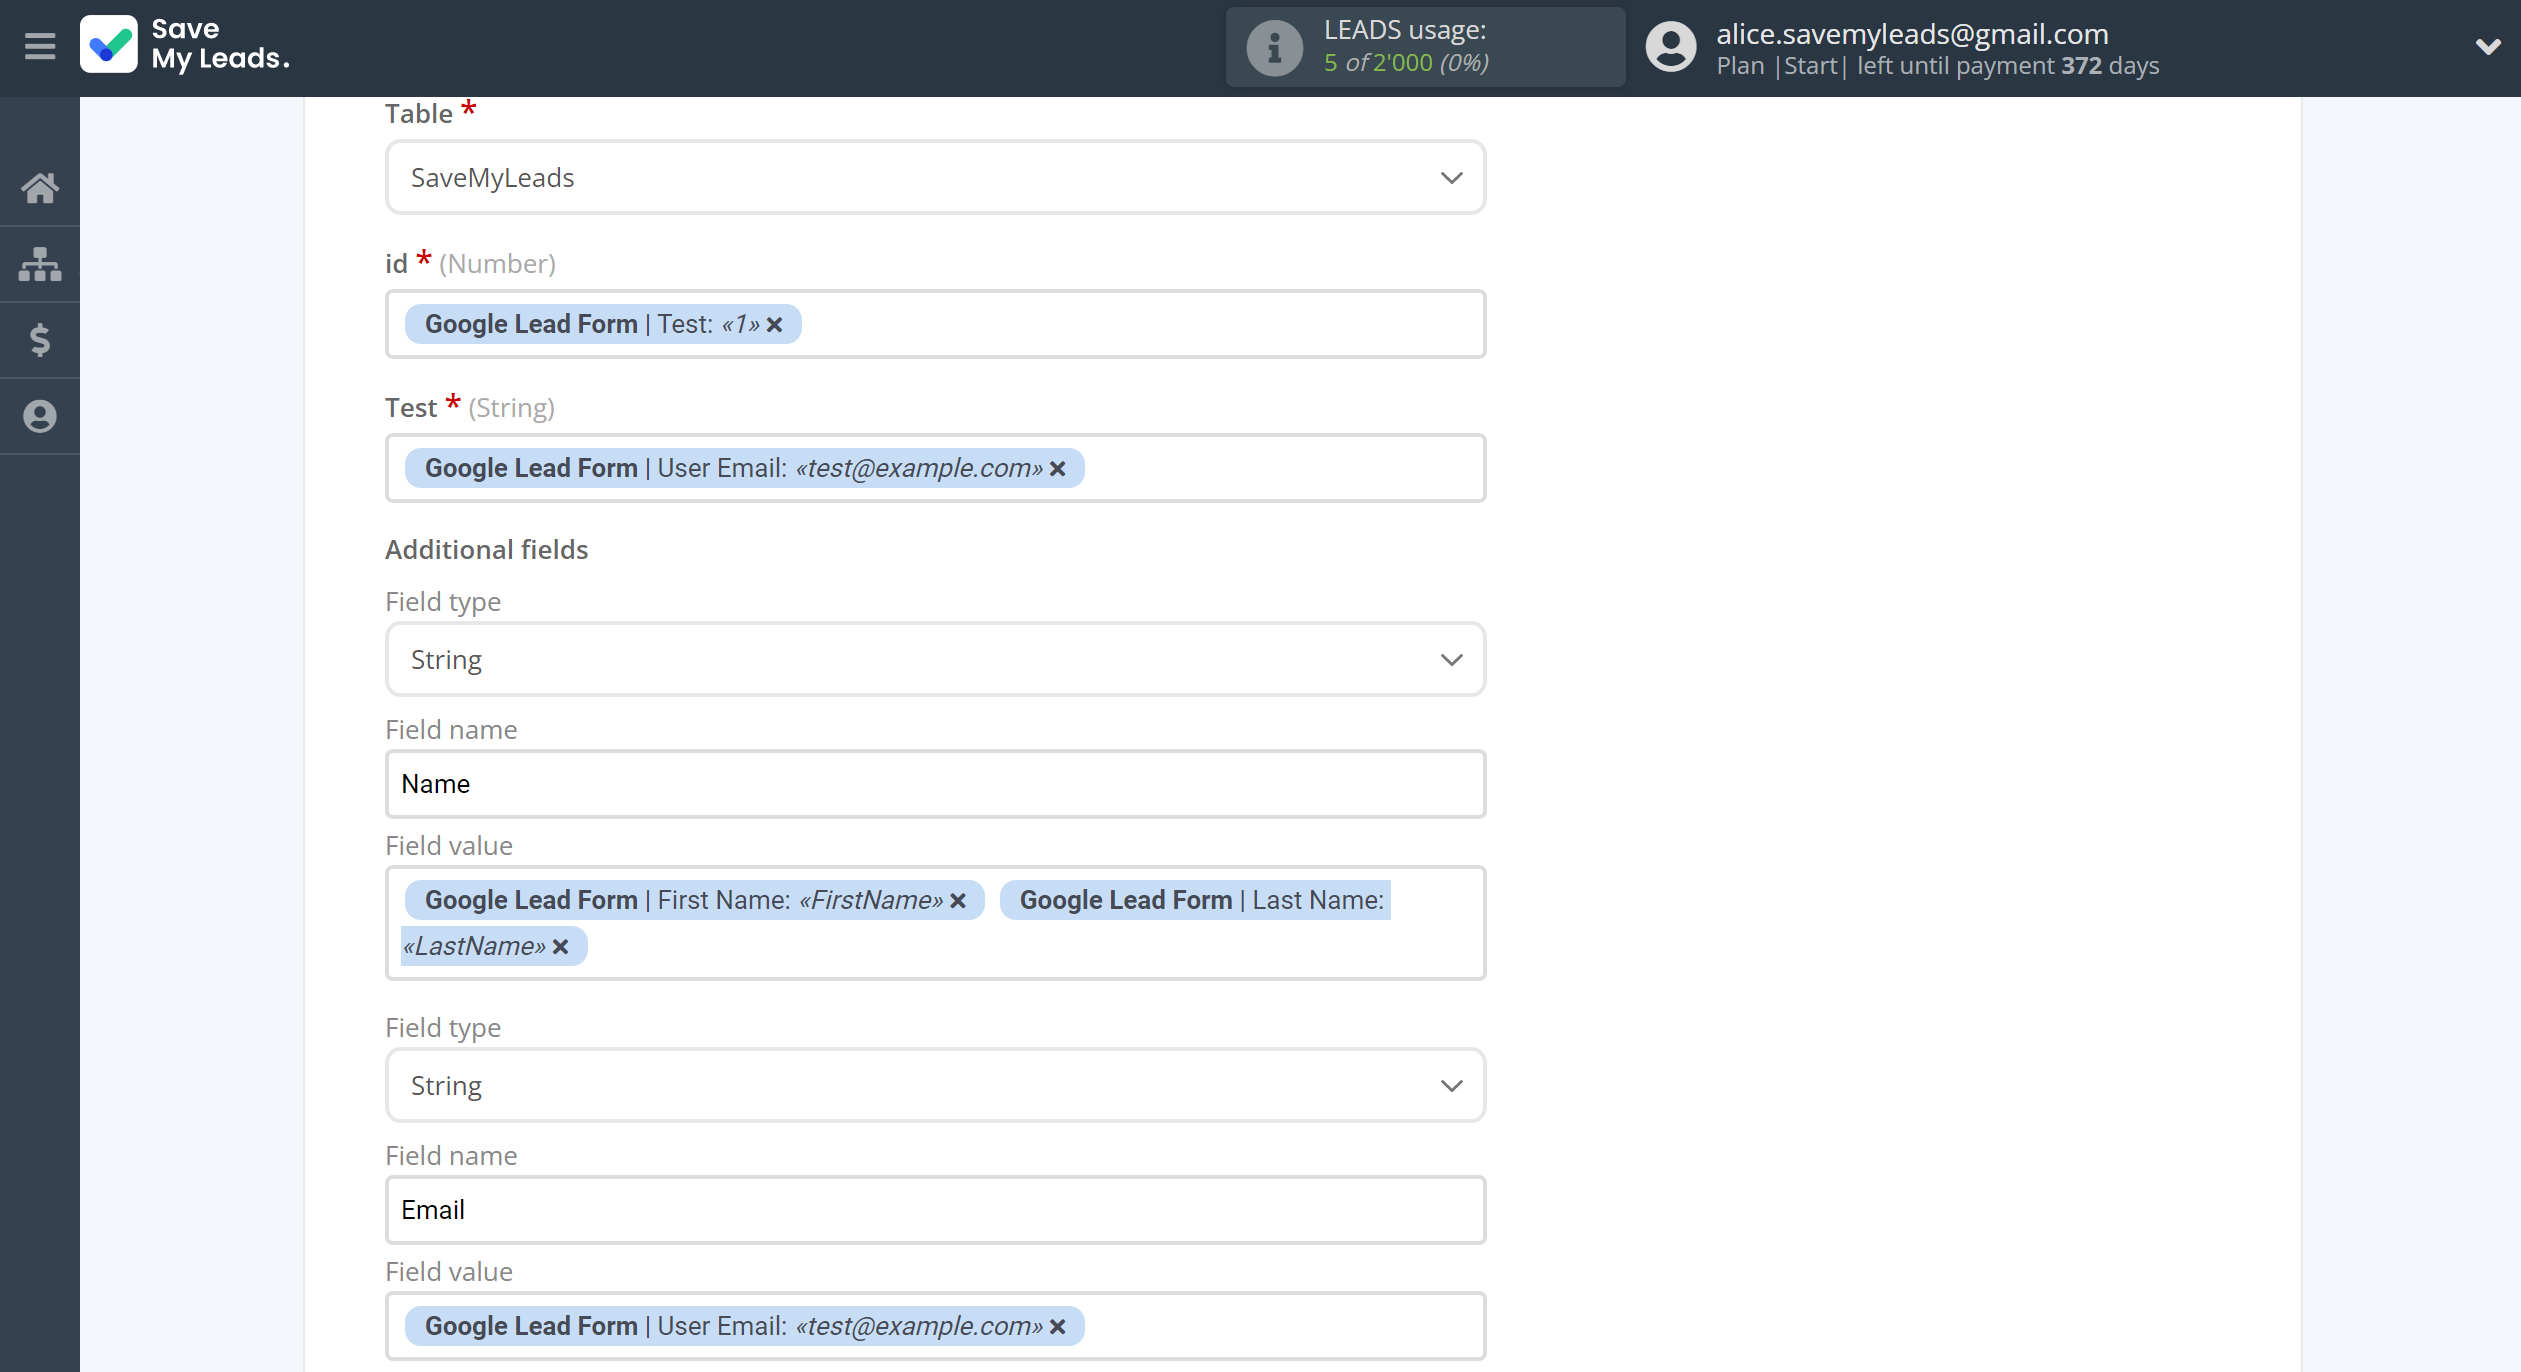
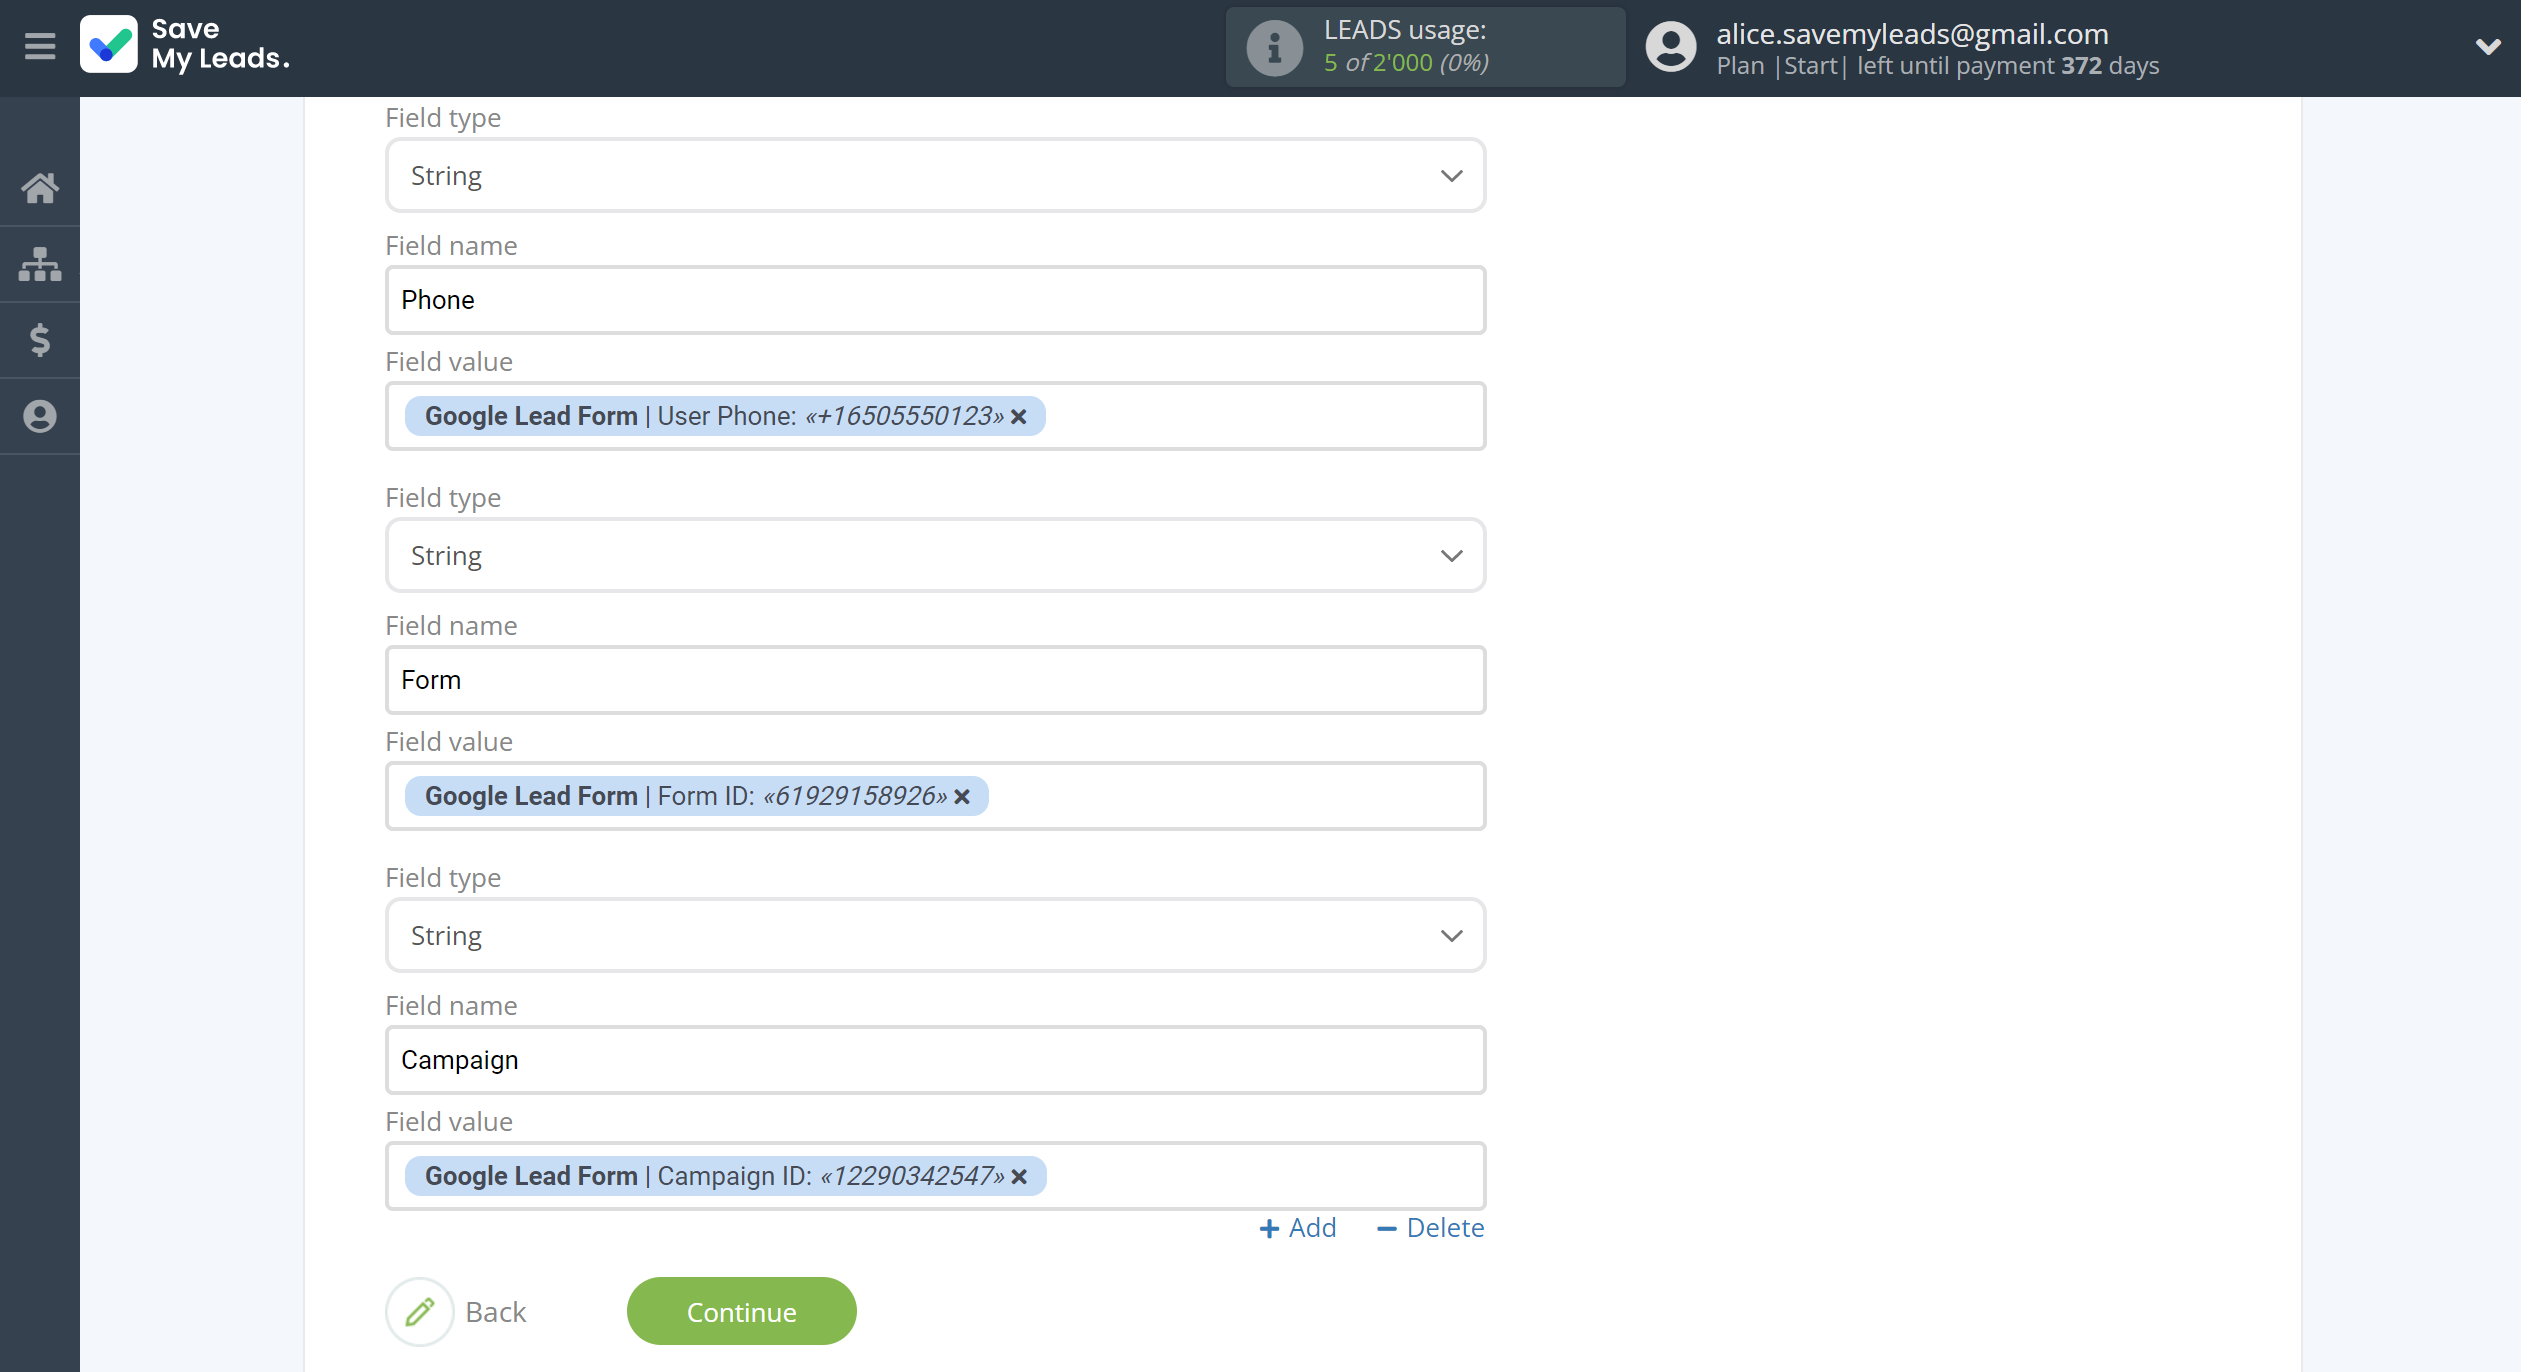
In this section, the fields will be assigned according to the template. You can completely change it or leave it as is.
Click "Continue" when you're done with assigning fields.
Please note that you can use not only Google Lead Form variables, but also manually entered data. Also, all these data can be combined with each other.
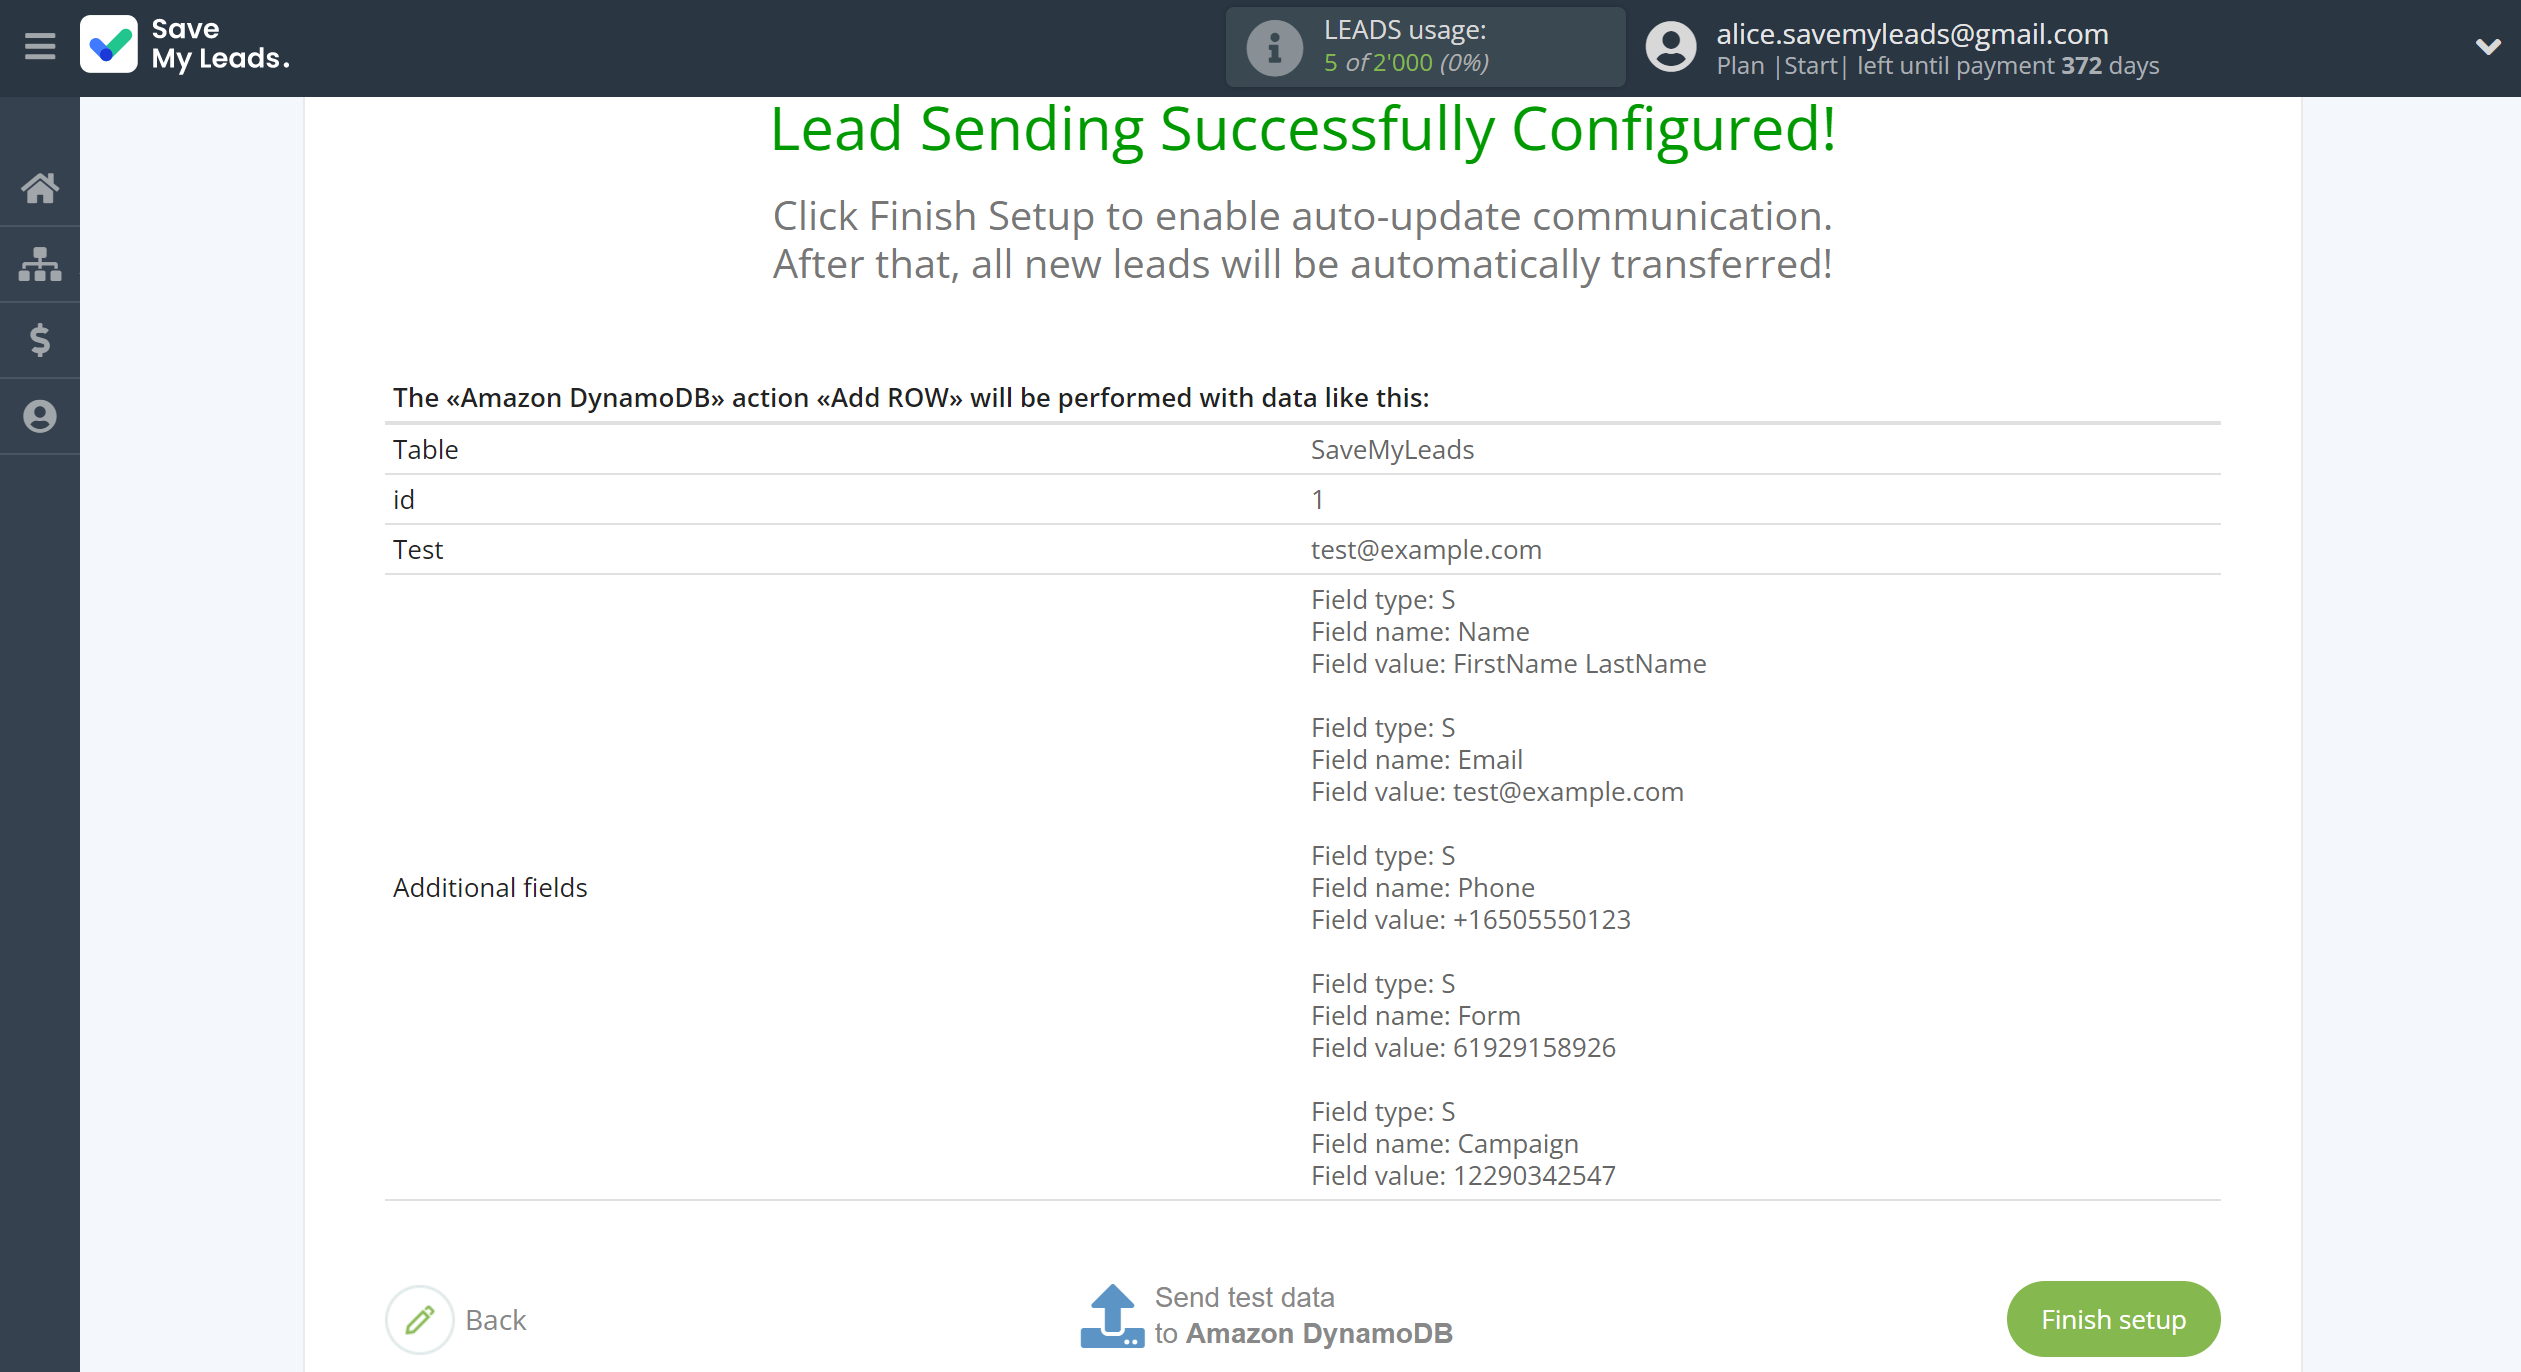
Now you can see Test data.
Click "Send test data to Amazon DynamoDB" and check your Amazon DynamoDB.
If something does not suit you, click "Back" and go back one step.
In order for data from Google Lead Form to be transferred multi-venously to Amazon DynamoDB, click "Finish setup".
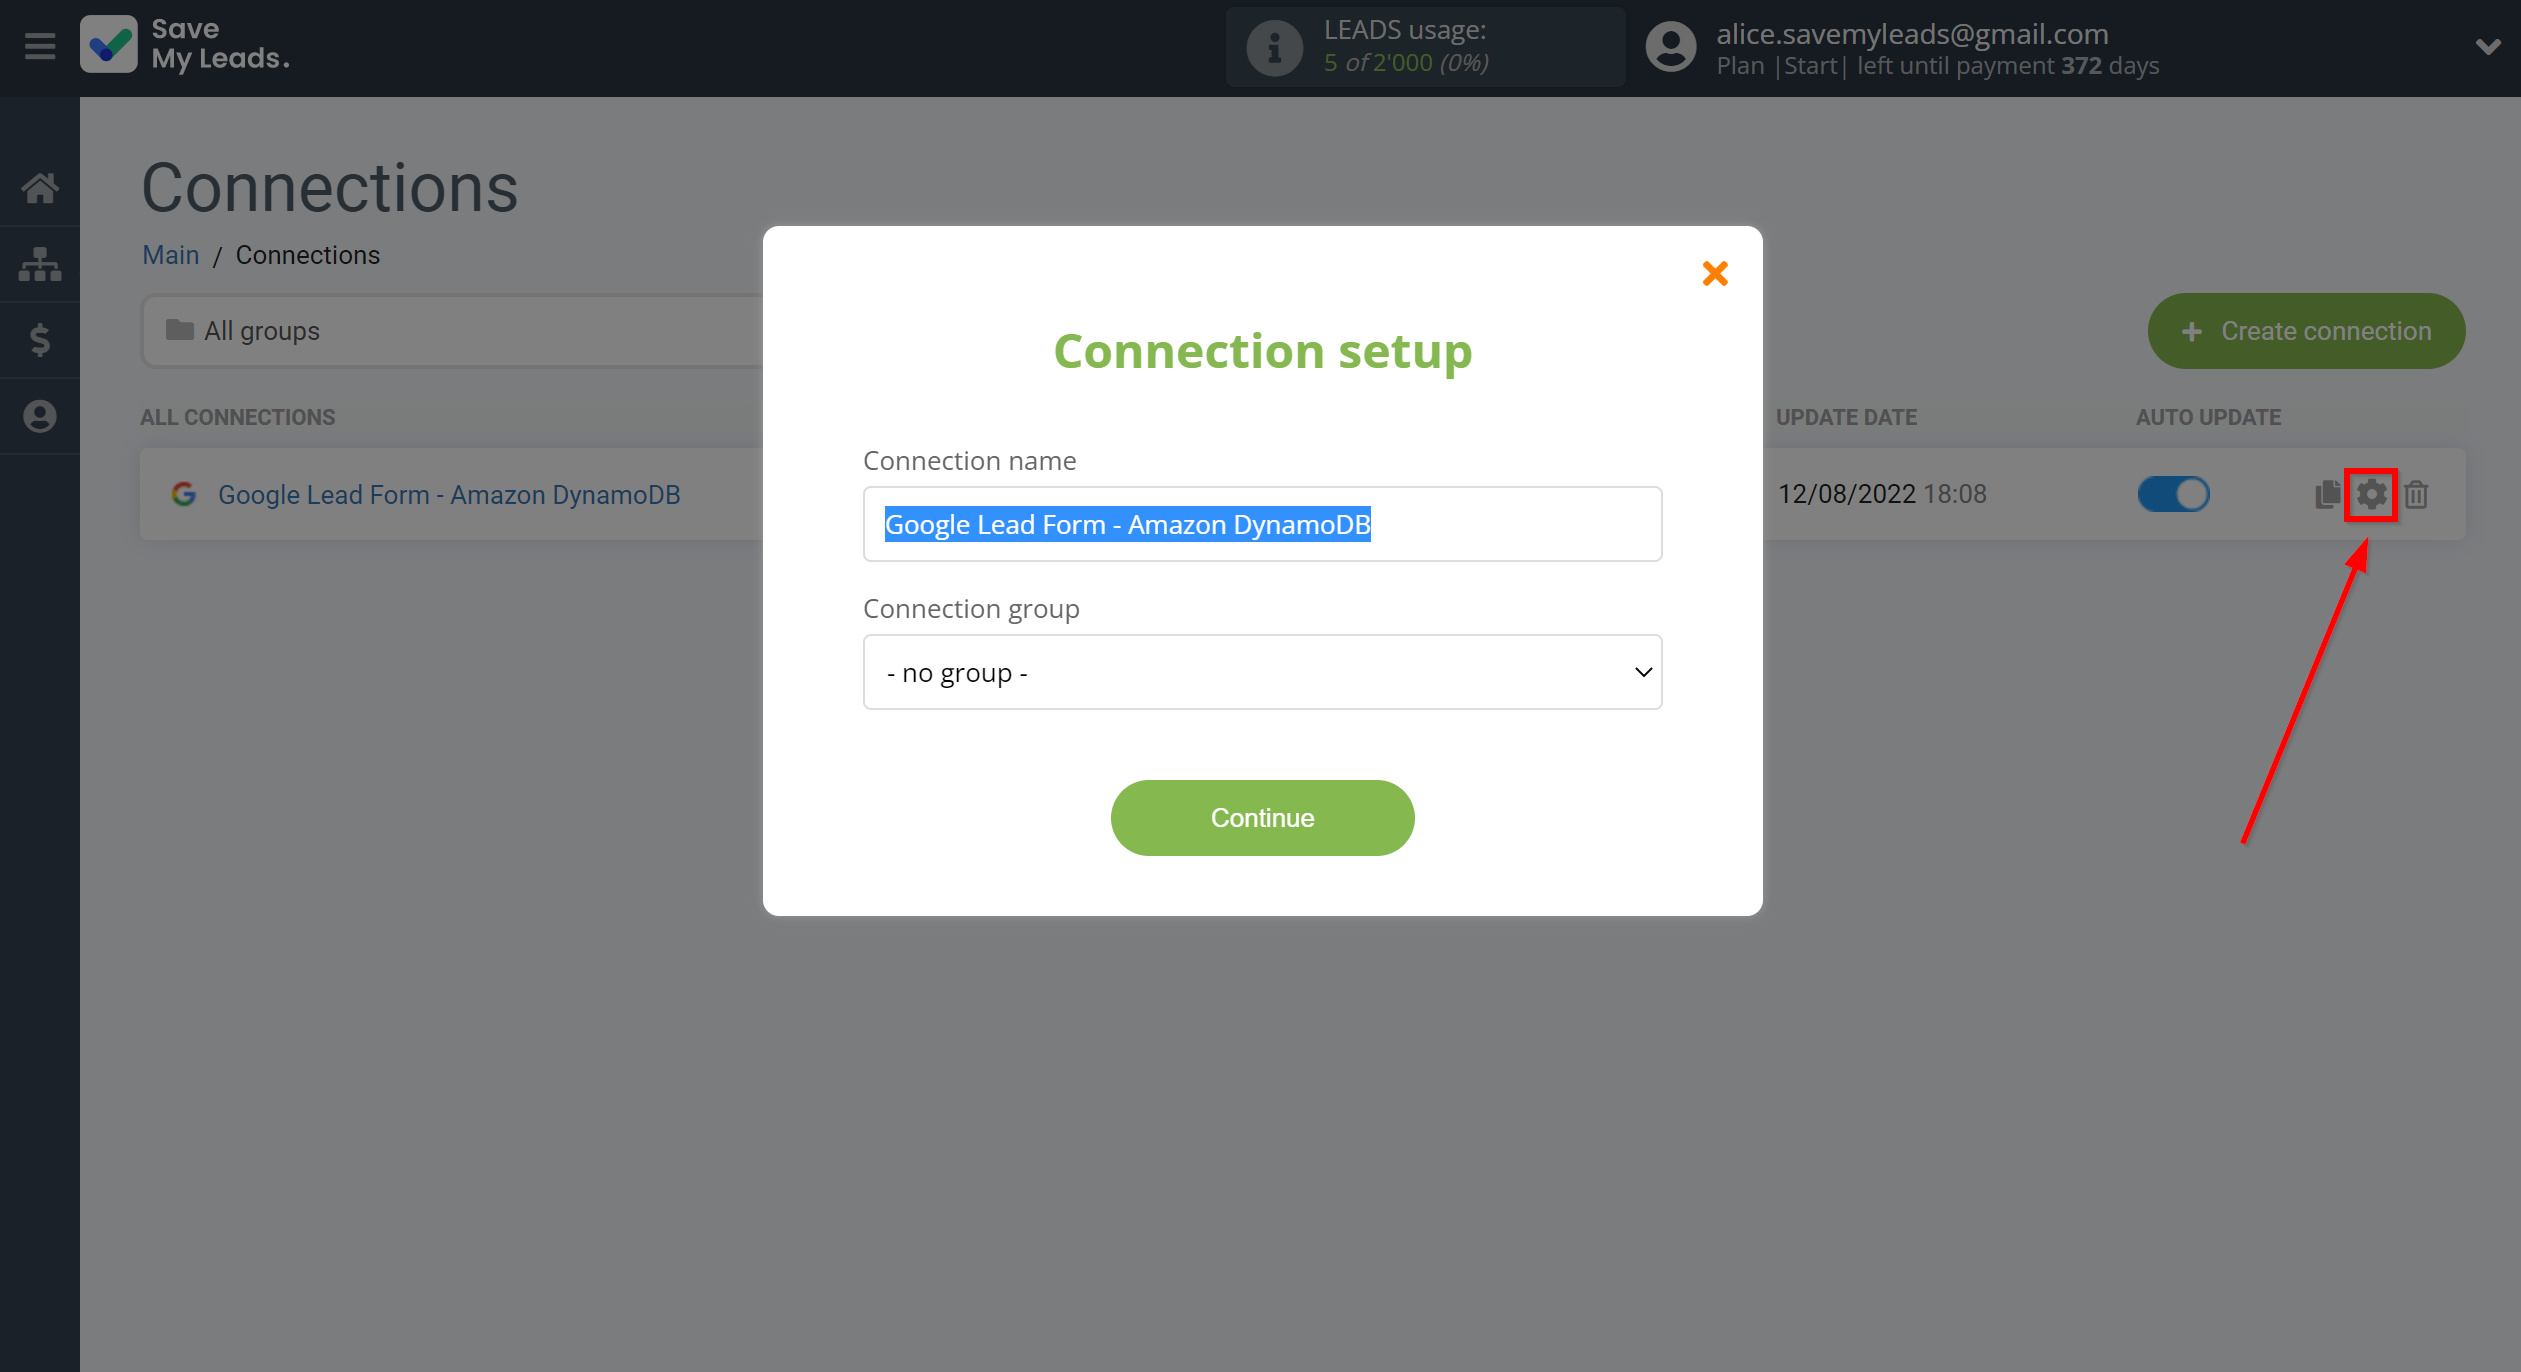
On the main screen, click on the gear icon to select name of the connection and select a group for it, if necessary.
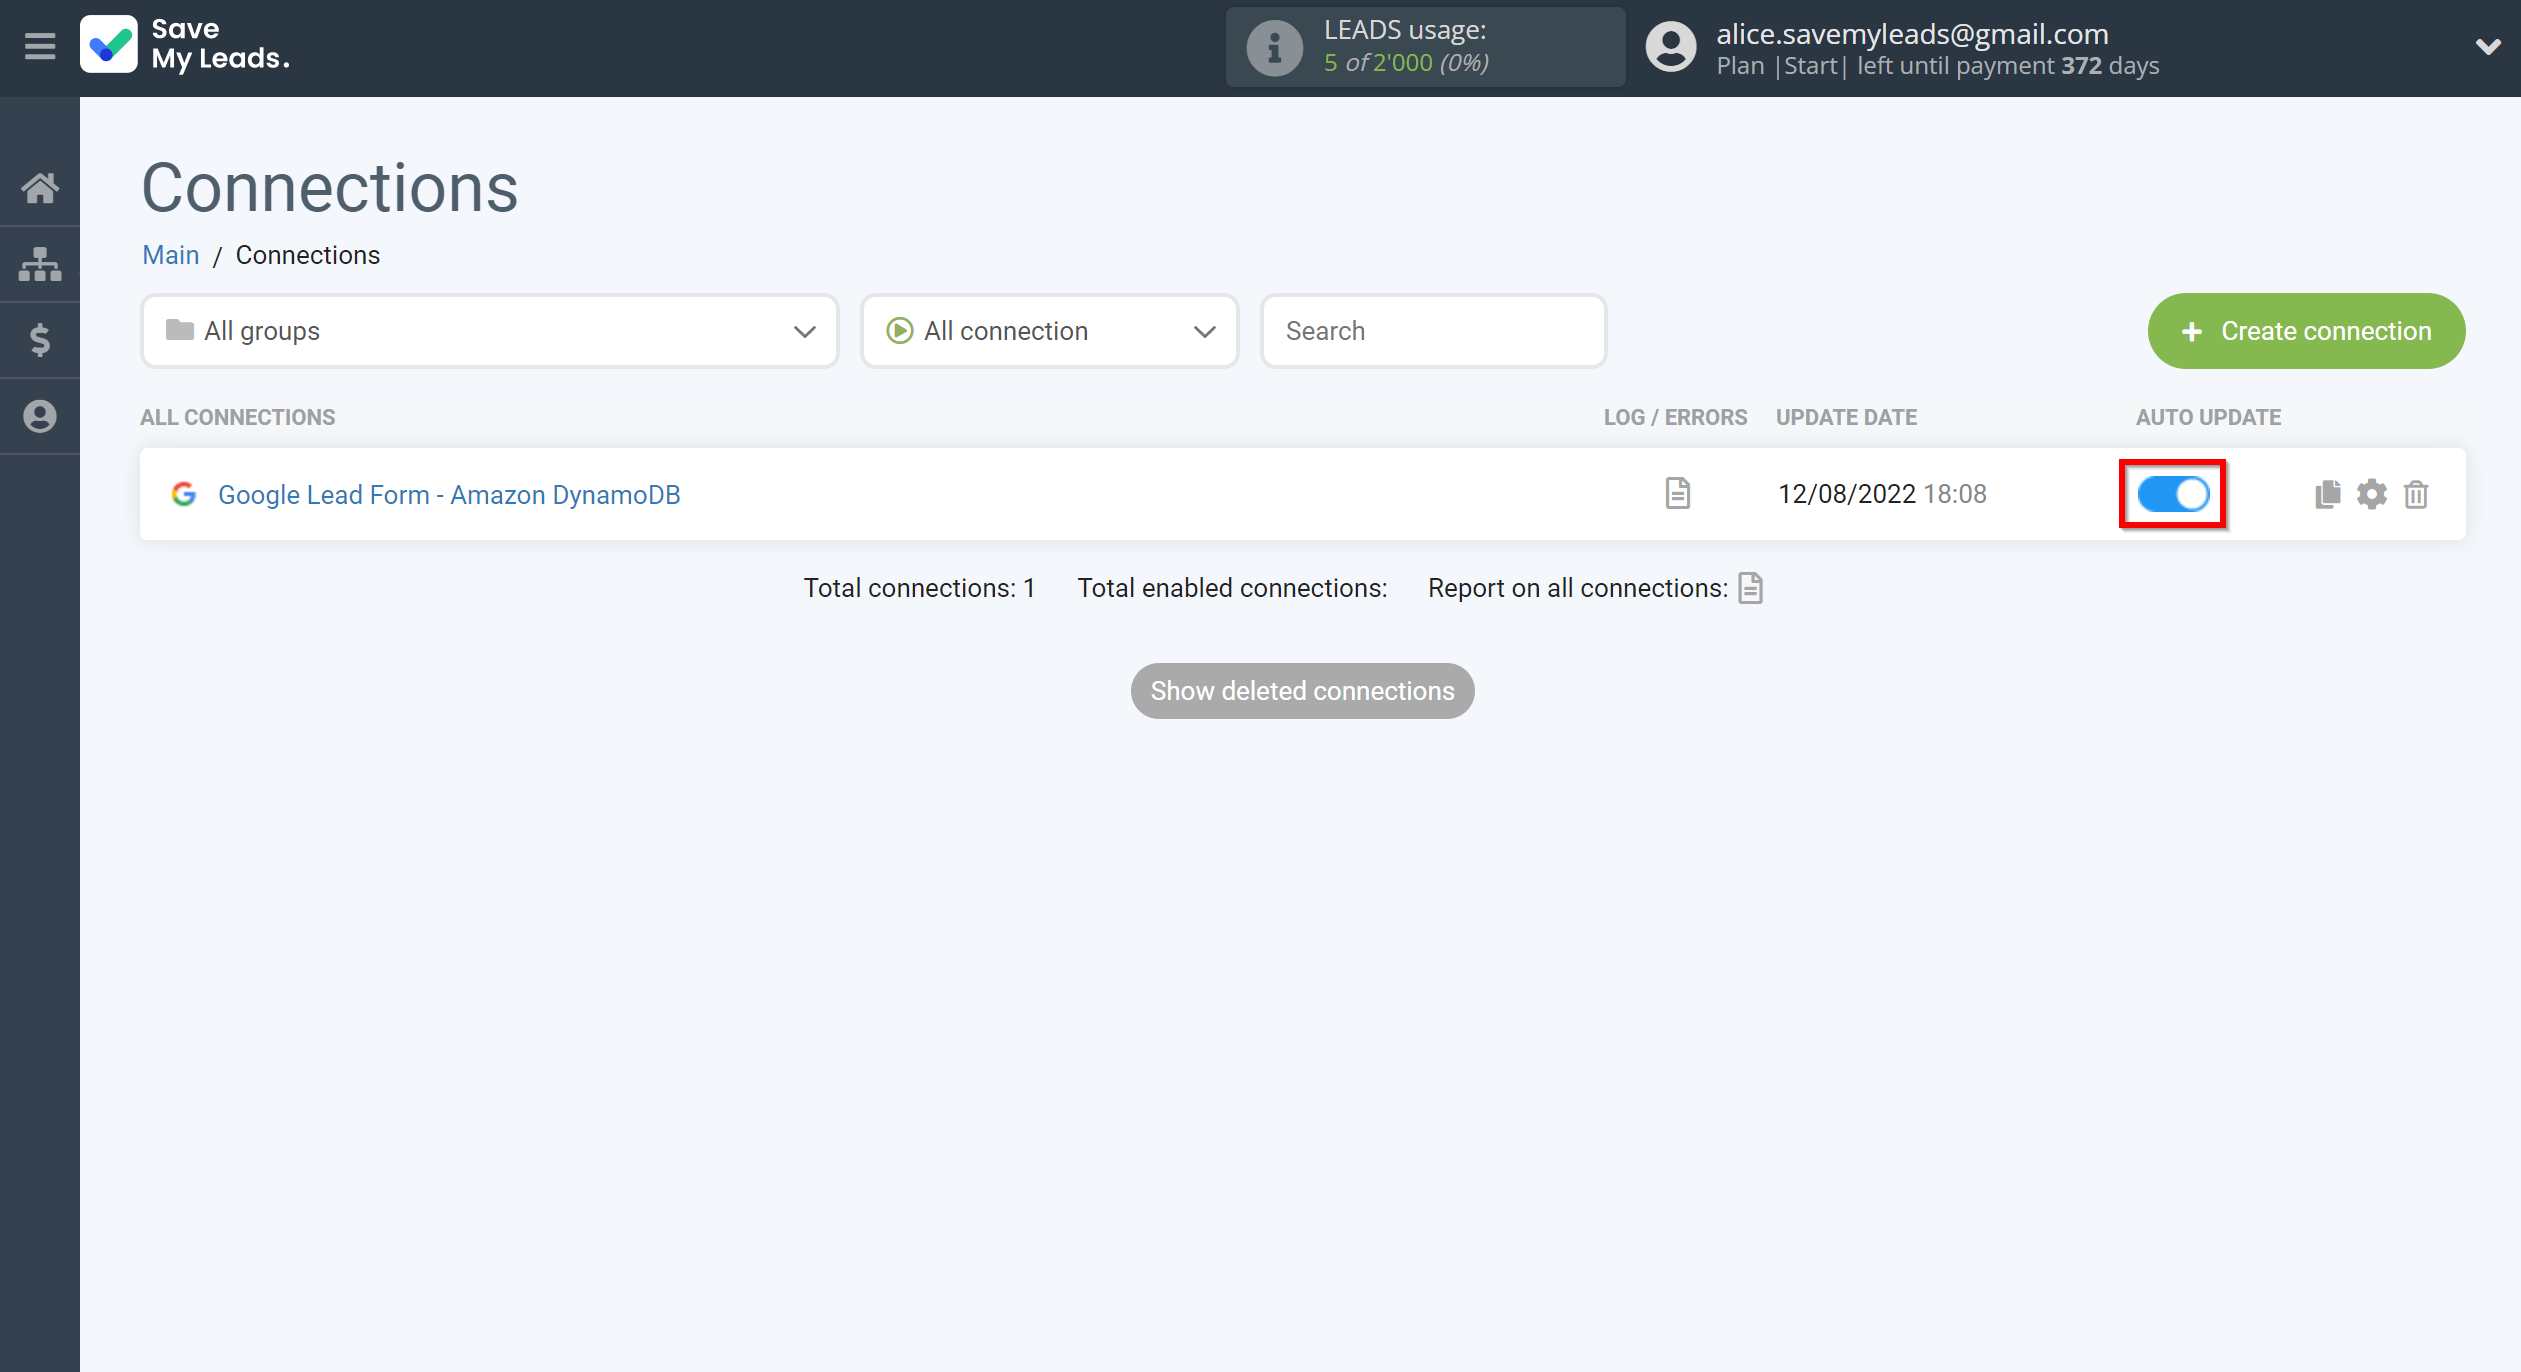
When the slider is in the position as shown in the picture - auto-update works. If you want to disable communication, click this slider.
This completes the integration setup between Google Lead Form and Amazon DynamoDB! See how easy it is!?
Now you don't have to worry, SaveMyLeads will do everything on its own!