The high speed of interaction with potential clients gives businesses the opportunity to successfully compete with rival companies in their sector. The Lead Form extension from Google Ads was created specifically to implement this opportunity. A convenient form for collecting applications allows leads to quickly express their interest in buying or ordering. To achieve this, they only need to make a few clicks. Airtable is a smart cloud service that combines the functions of databases, spreadsheets, and project management. It has proven itself as a CRM, task manager, program for inventory control, marketing planning, and solving numerous other tasks. From our article, you will learn how to perform Google Lead Form and Airtable integration to automate the transfer of lead data from forms directly to your database.
Automating the transfer of lead data from Google Lead Form to Airtable brings significant benefits to businesses:
- Accelerate communication with leads. Buyers of your products or services receive feedback much faster. This minimizes the likelihood of them abandoning their initial decision to purchase the product. Simply put, they do not have time to change their minds.
- Staff efficiency. Employees who were engaged in manual data transfer shift their focus to strengthening the qualitative aspects of communication with clients.
- Save time. Reduces the number of tasks that require your or your colleagues' immediate attention daily.
You will be able to see the results of Google Lead Form integration with Airtable immediately after completing its setup via the SaveMyLeads connector. Leads who have sent their contacts via Lead Form will be automatically redirected to your database. New rows with their contact information will be created in it. The most important thing is that all this will happen without your direct participation. If you previously manually transferred names, phone numbers, and email addresses from one service to another, now you can forget about this outdated method. In addition, automating the data transfer will not only make your work easier but will also have a positive effect on the impressions of leads from interacting with your company. Surprised by the speed of feedback, they are more likely to want to become your regular customers, which in the long term will be the key to the growth, development, and success of your business as a whole.
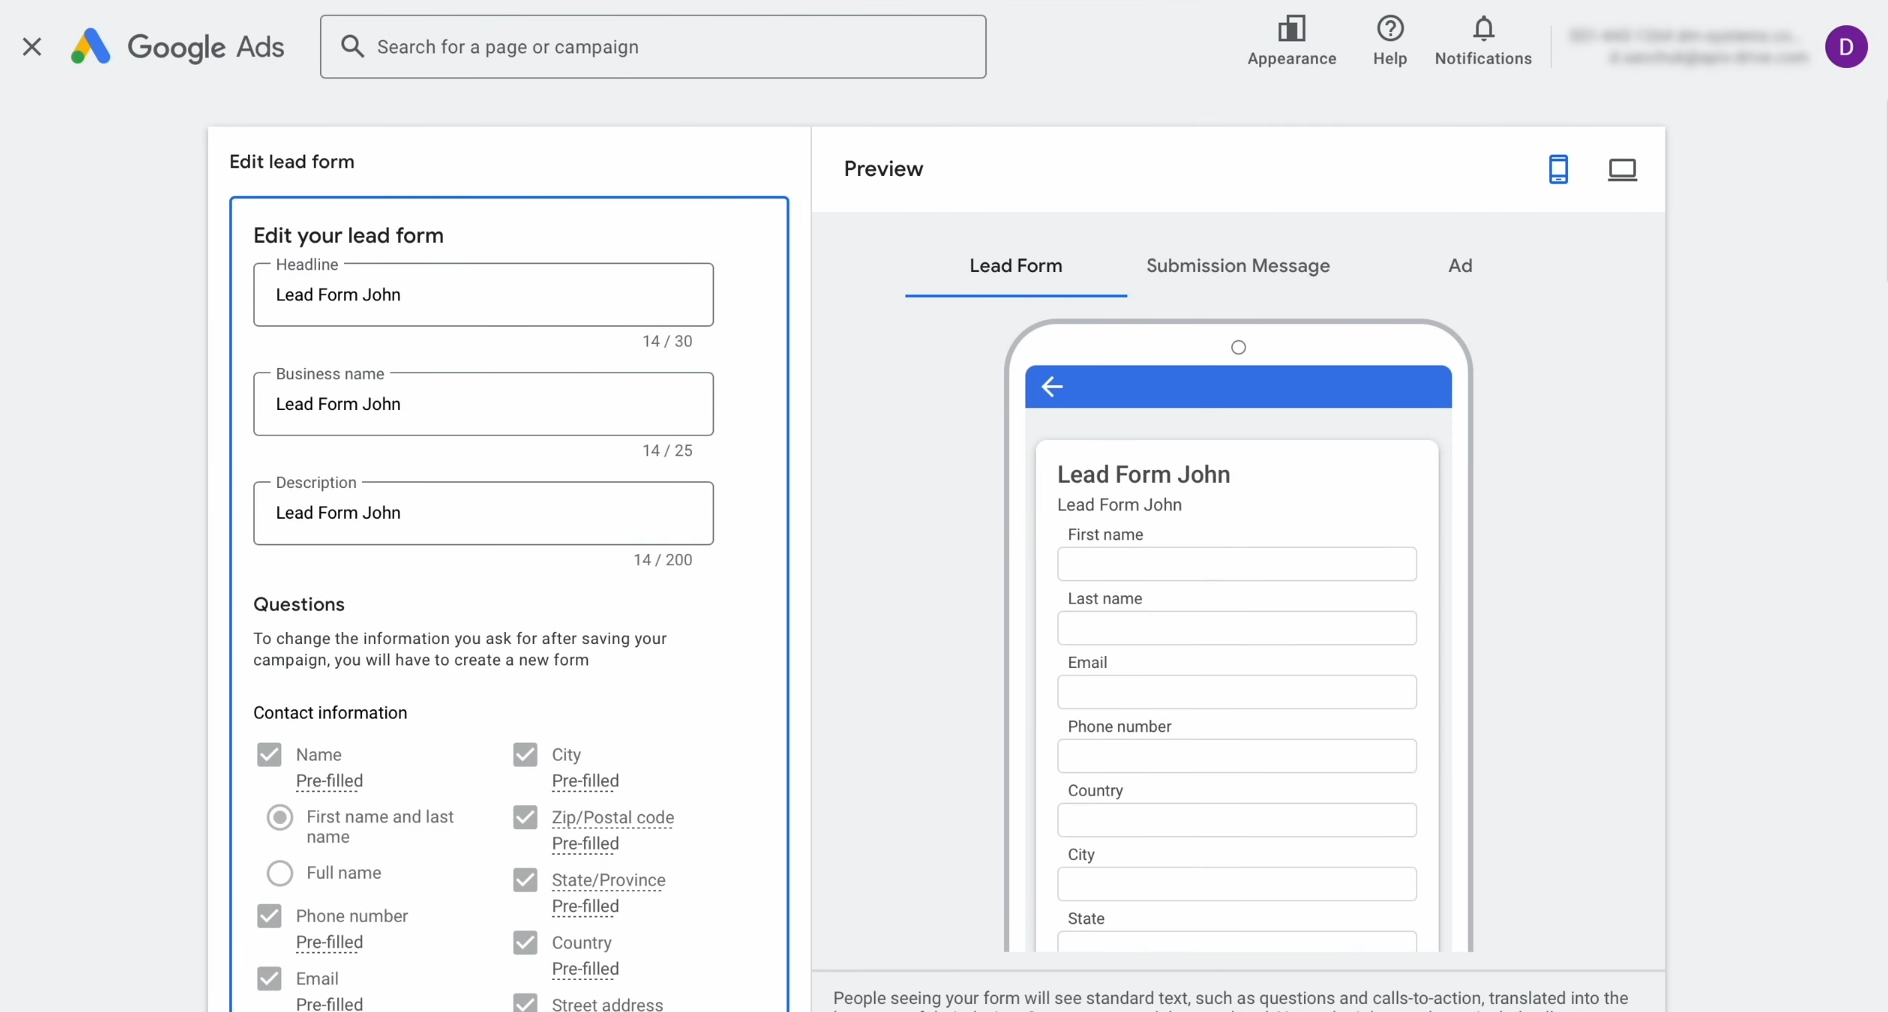
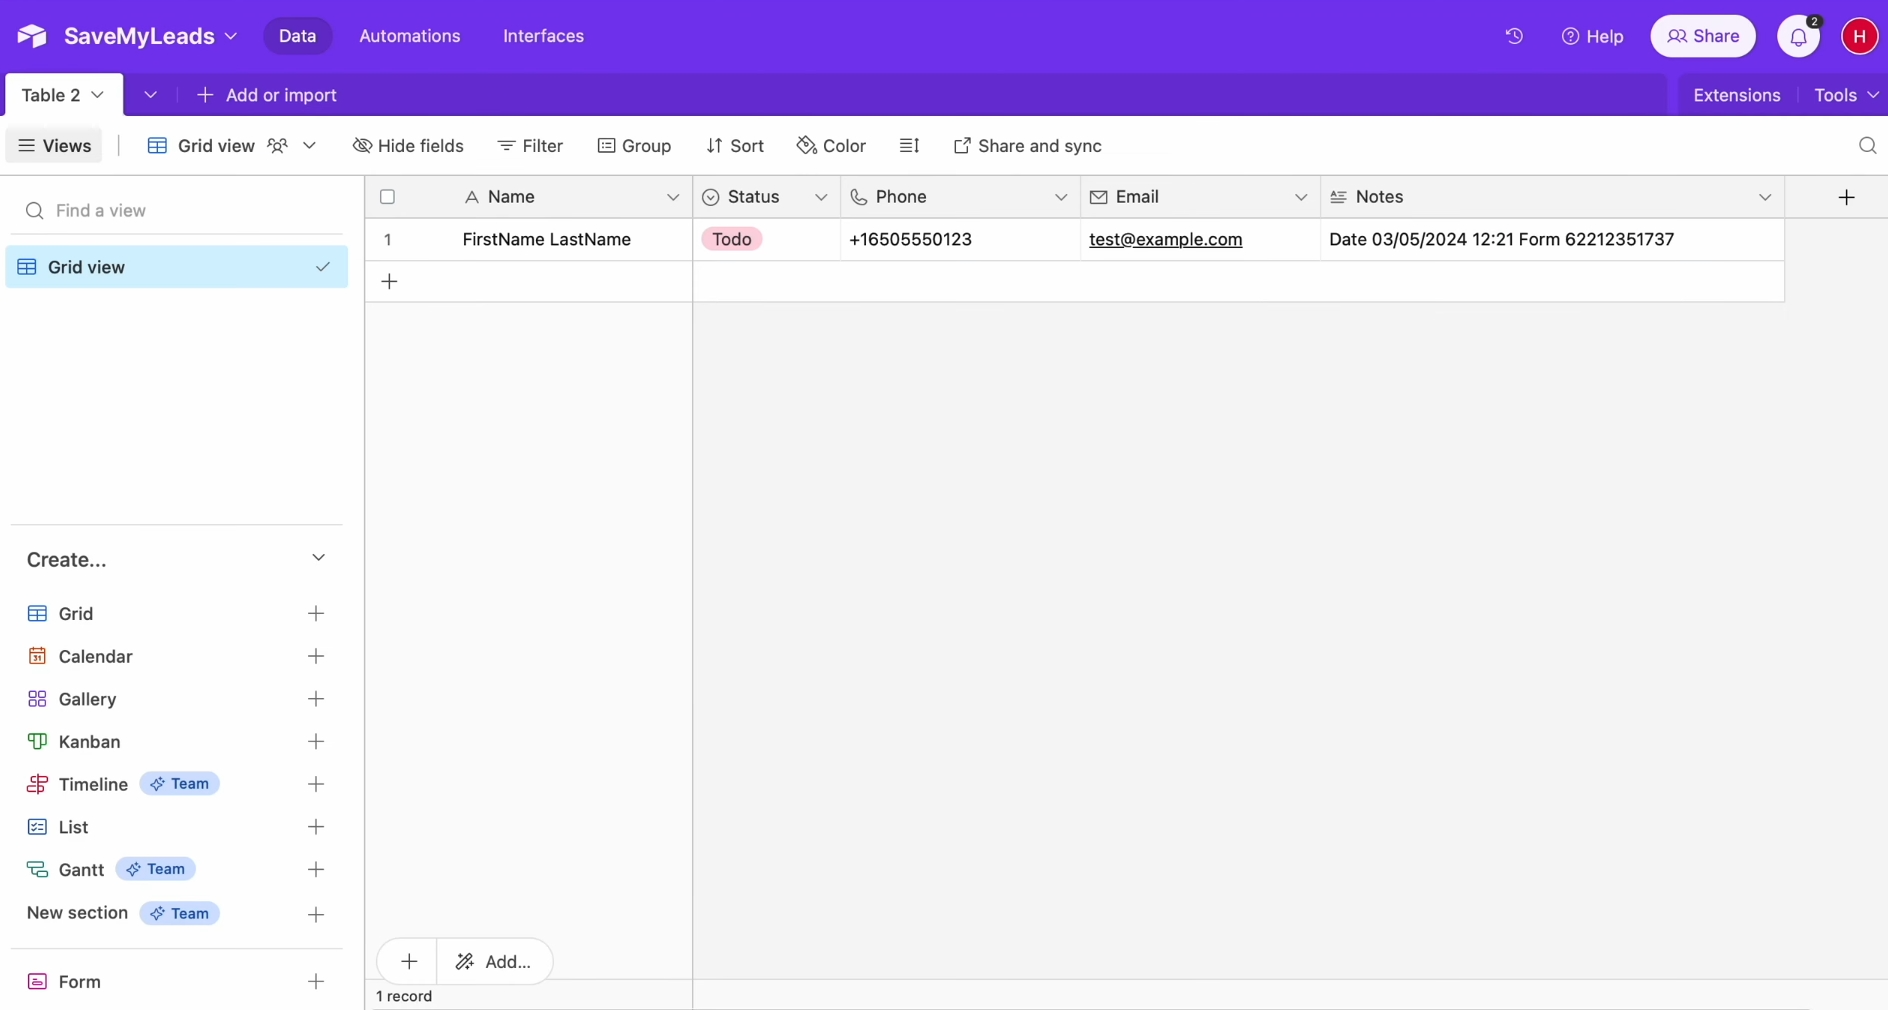
How to Set Up Google Ads Lead Form and Airtable Integration
Setting up Airtable and Google Ads Lead Form integration via SaveMyLeads is accessible even to those with minimal experience. To use this online connector, you don’t have to urgently understand API connections or find a specialist to perform this task. The developers strived to make the process intuitive and as simple as possible for users, thanks to which the setup takes no more than 10 minutes. If you already have experience with integrations, it will take even less time. Our detailed instructions in text and video format will help you avoid mistakes.
Firstly, you need to register on the website savemyleads.com. To create an account, enter your name, email address, and password. There is also an alternative way to register – through your Google or Facebook account. Ready? Now let's start setting up Airtable and Google Lead Form integration.
Setting Up the Data Source – Google Ads Lead Form
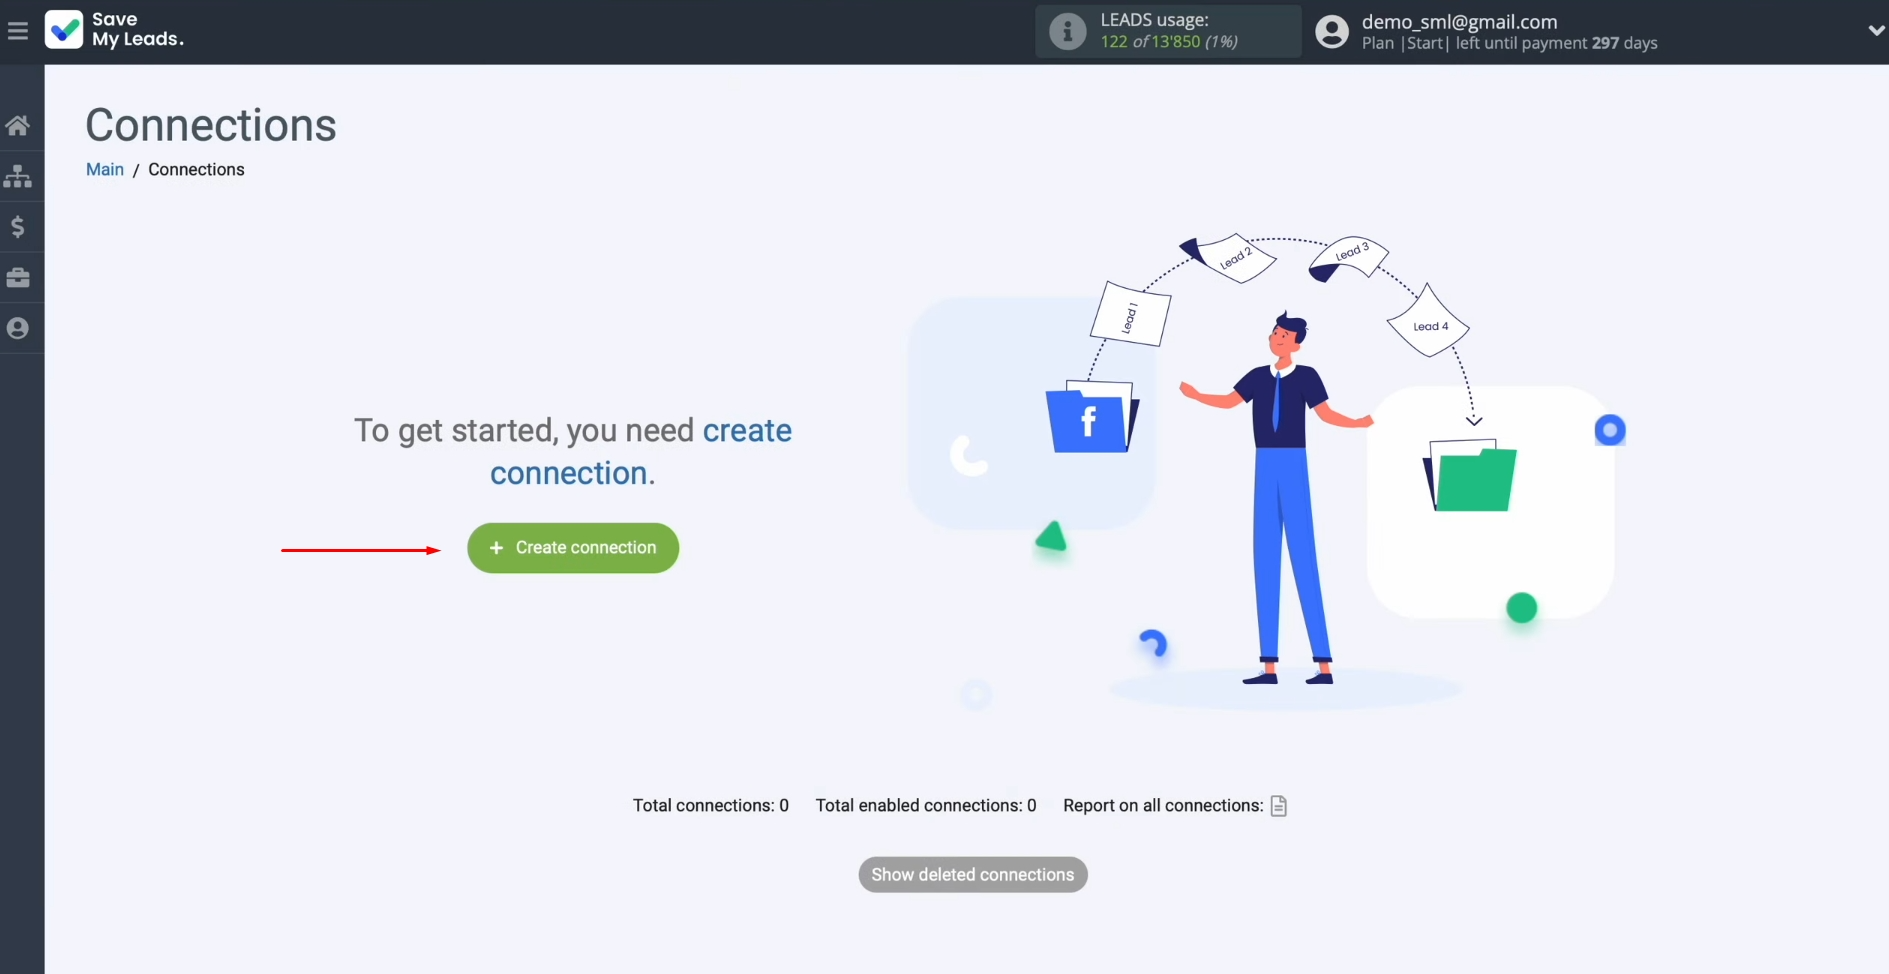
To set up the Google Ads Lead Form integration with Airtable, first create a new connection. For this, click on the green button.
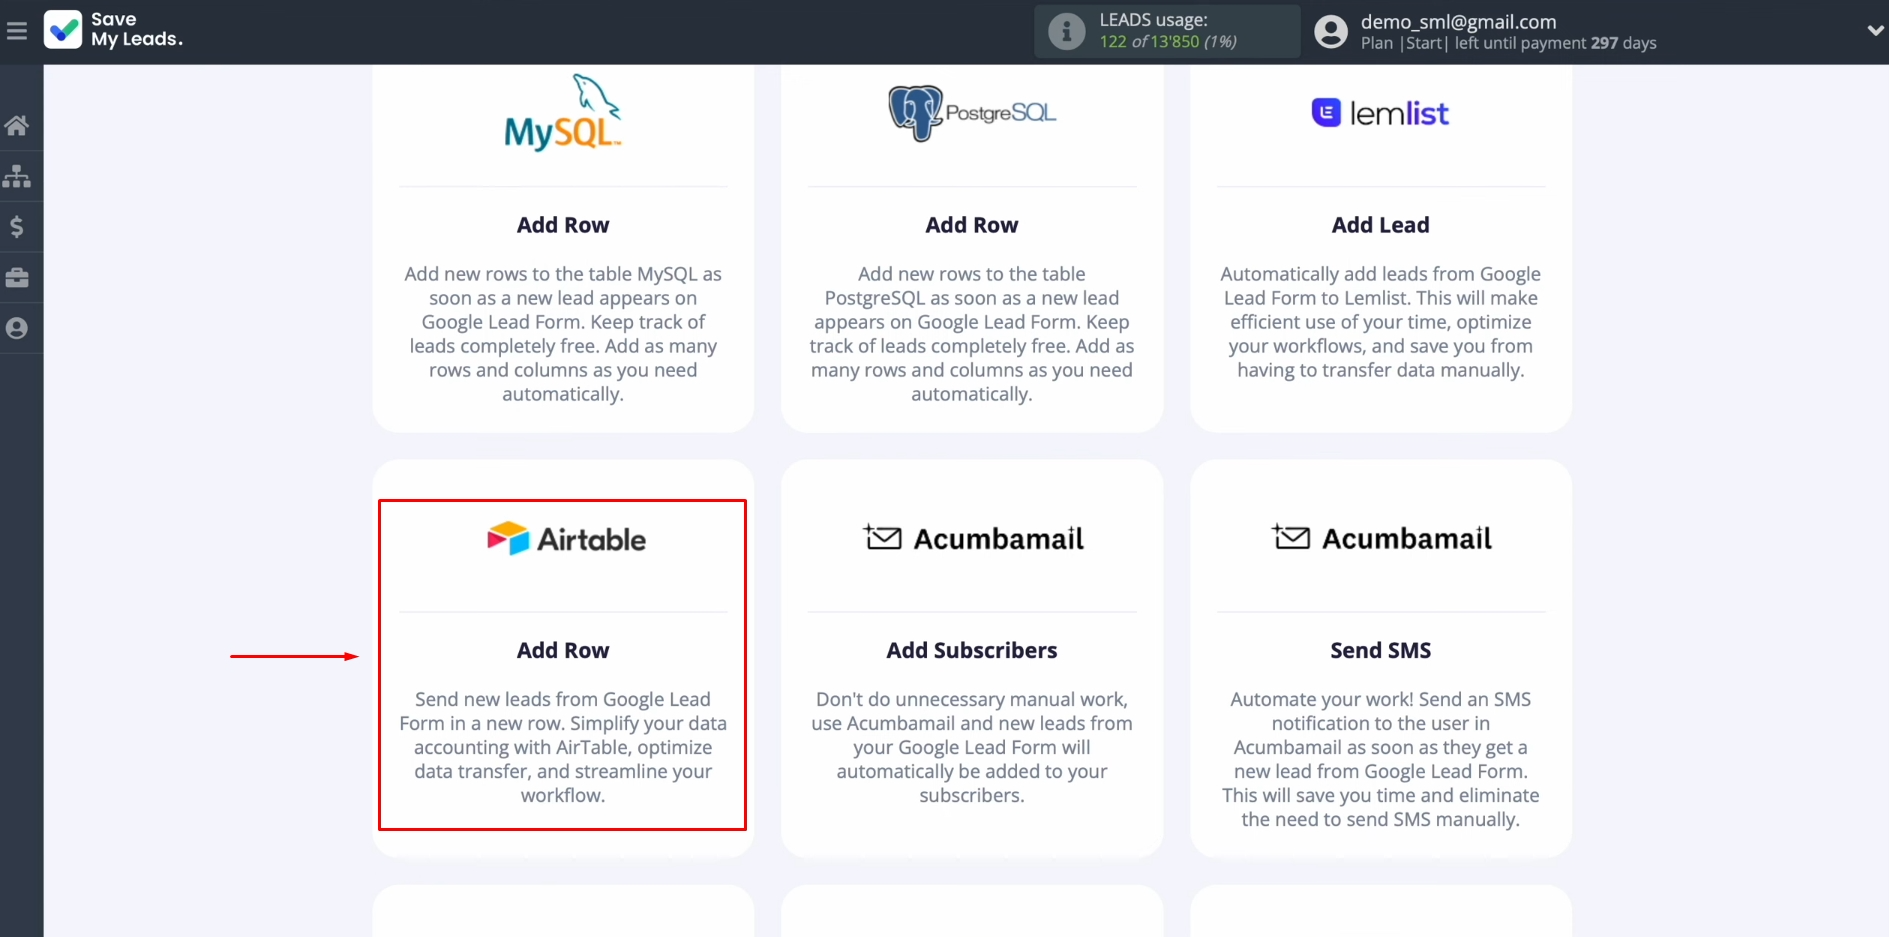
Select the data source system. This is Google Lead Form.
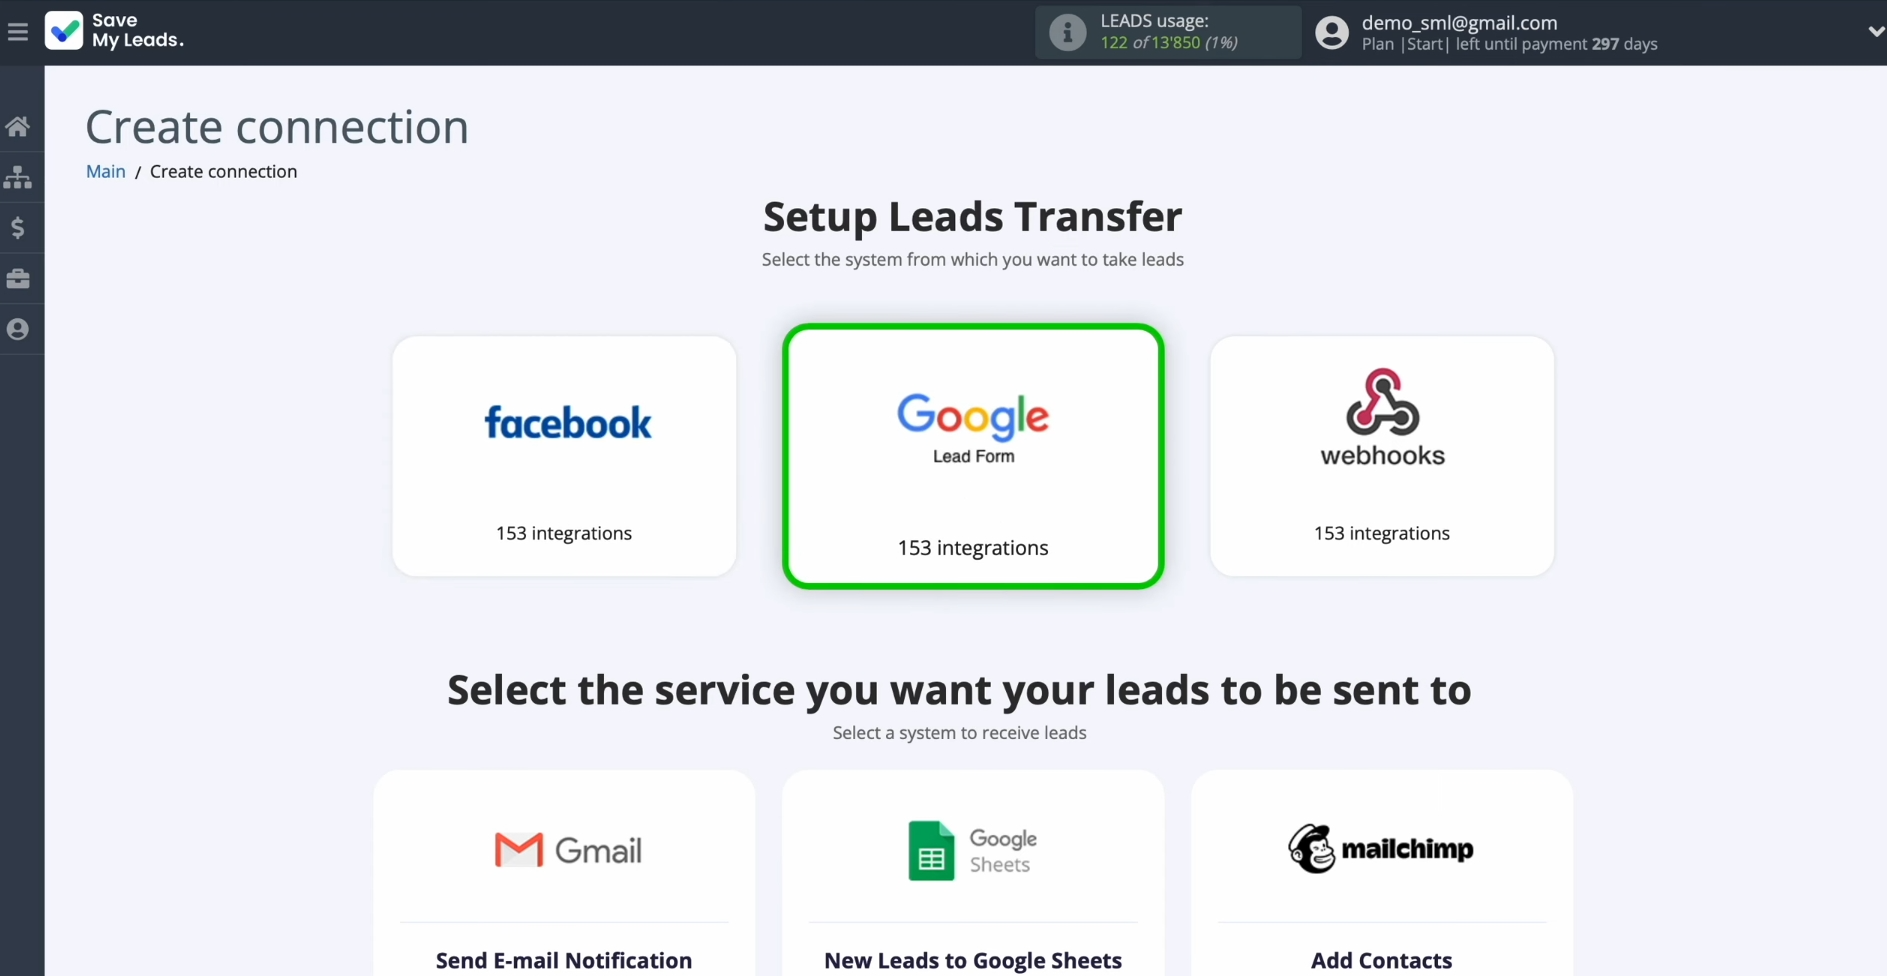
Choose the system where you want to transfer new leads from
Google Lead Form. You need Airtable (Add Row).
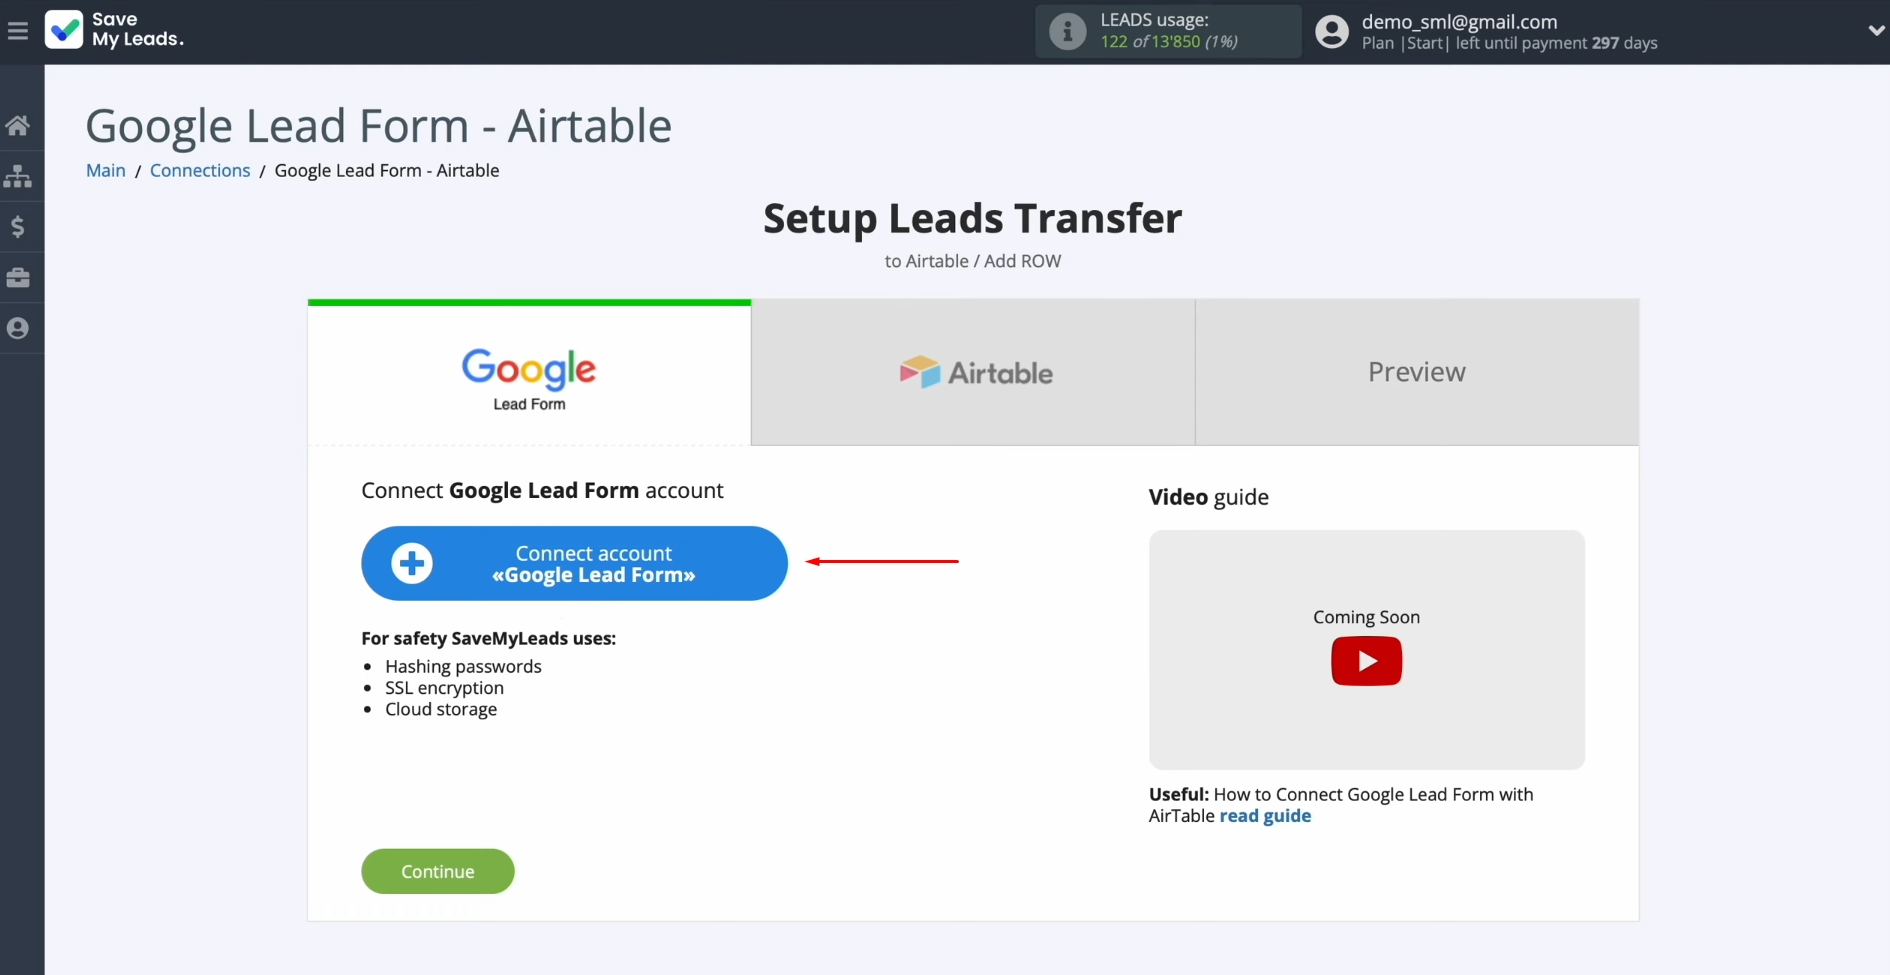
Connect your Google Lead
Form account to SaveMyLeads. For this,
click on the blue button.
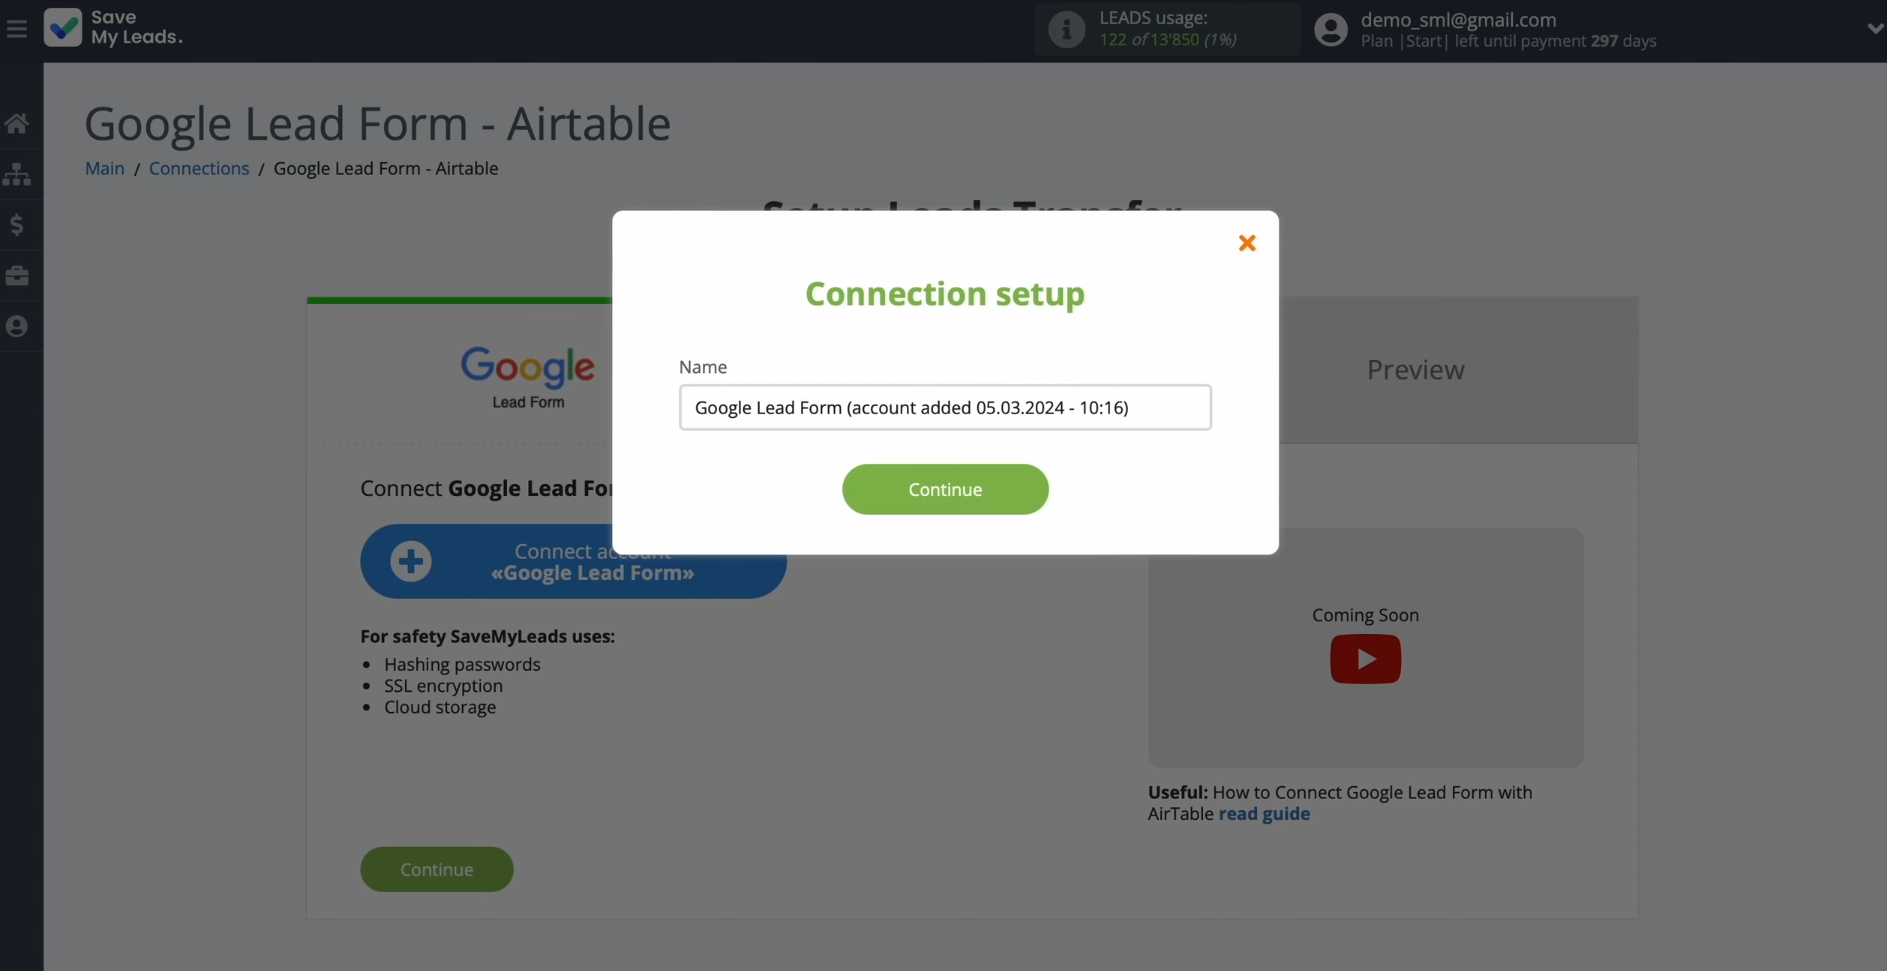
Here, you can give the virtual account a name or just
click “Continue”.
When the
connected account appears in the list, select it.
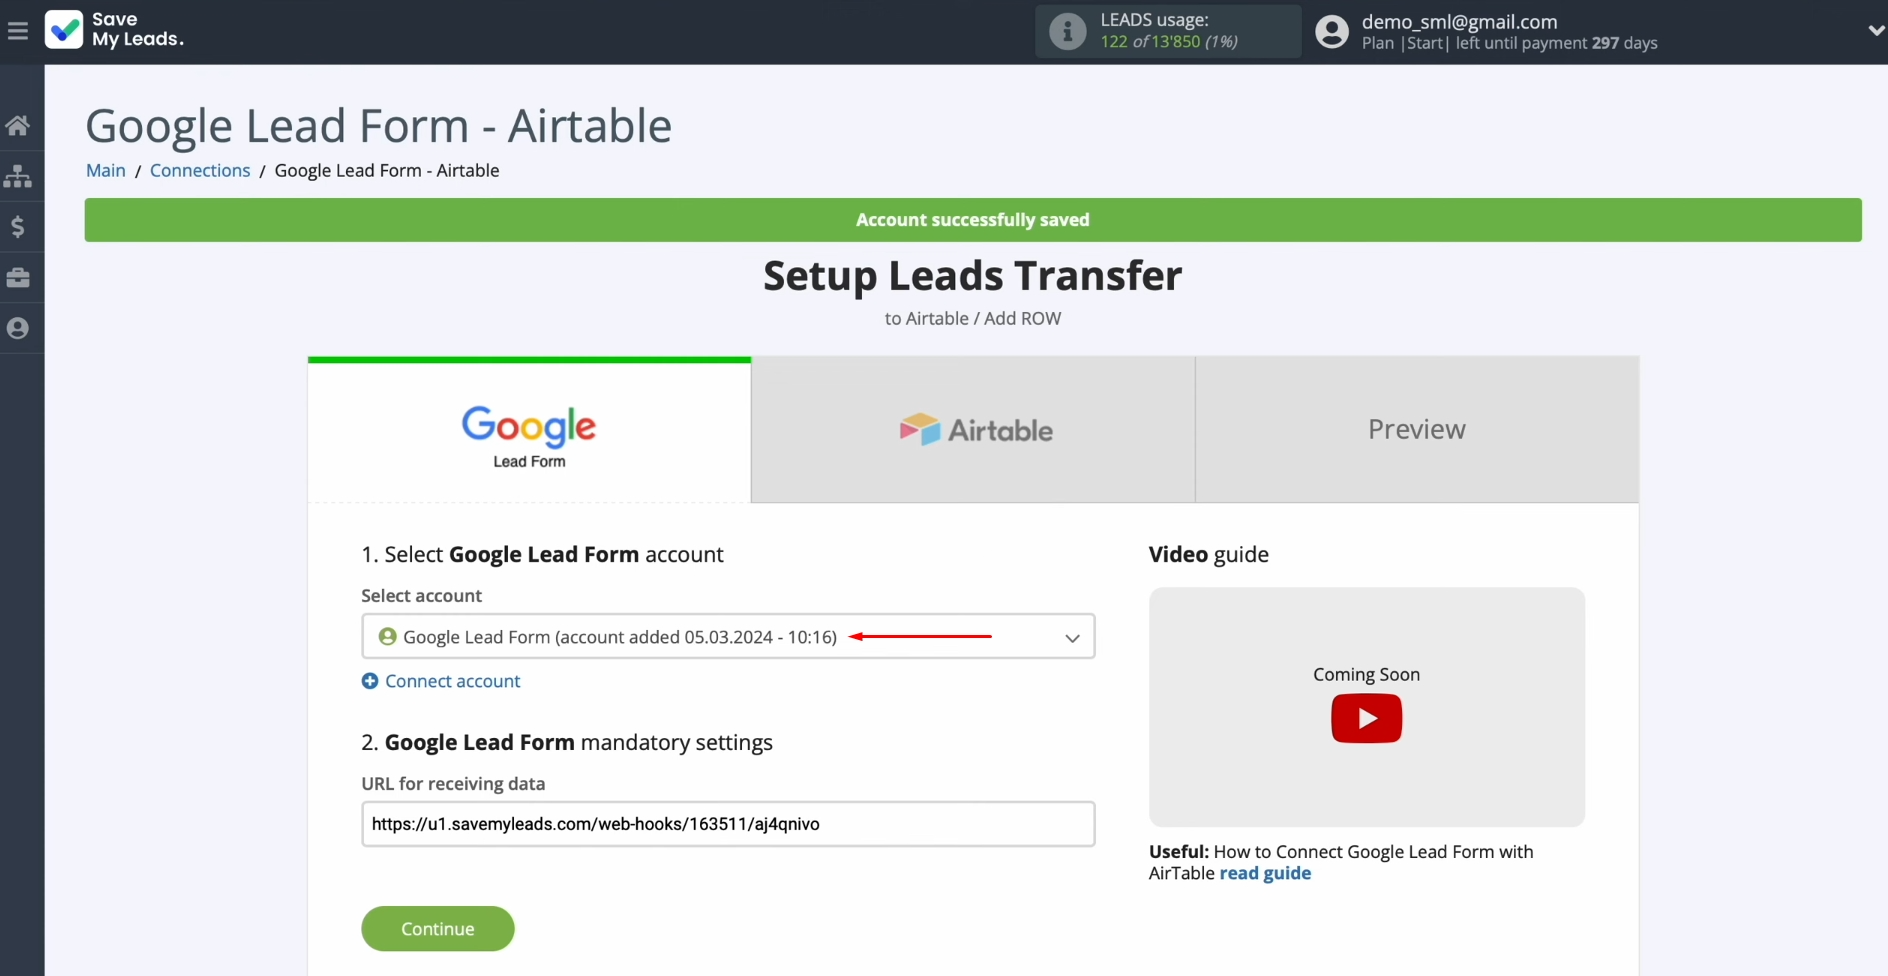
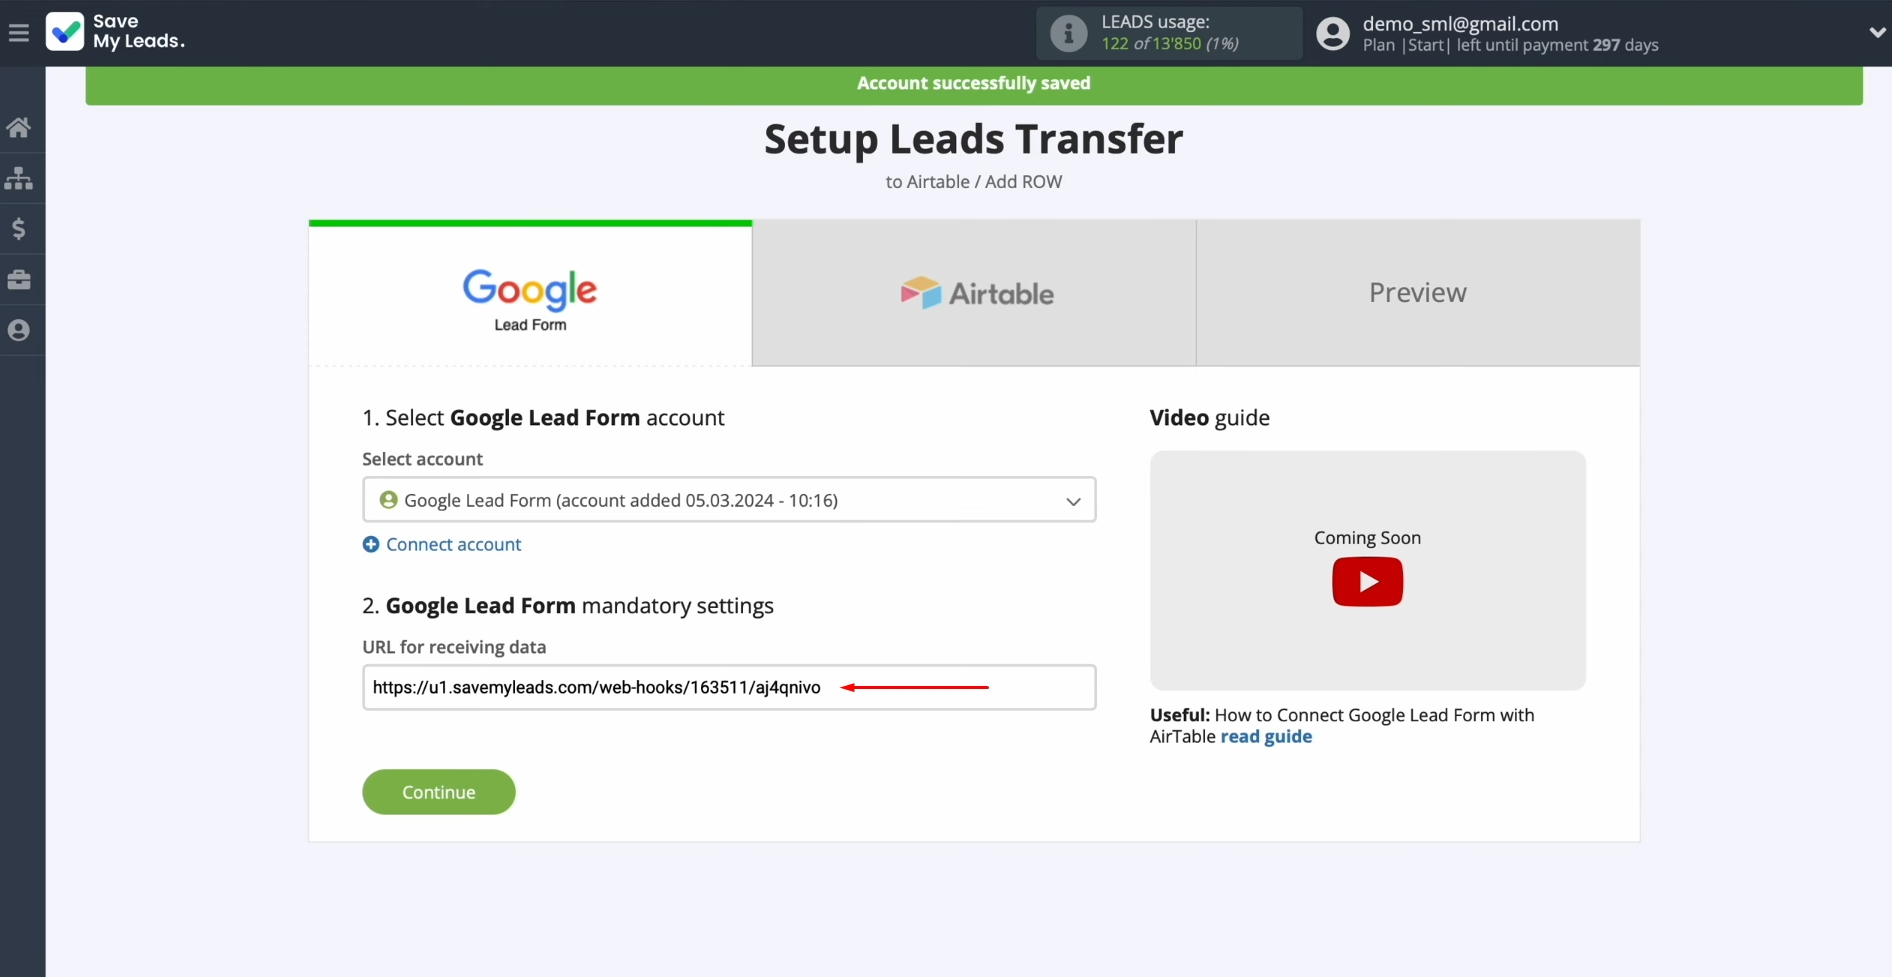
Now, you see
the URL for receiving data. It is to this URL that new data from the Google Lead
Form will be sent. To continue setting up, copy the URL.
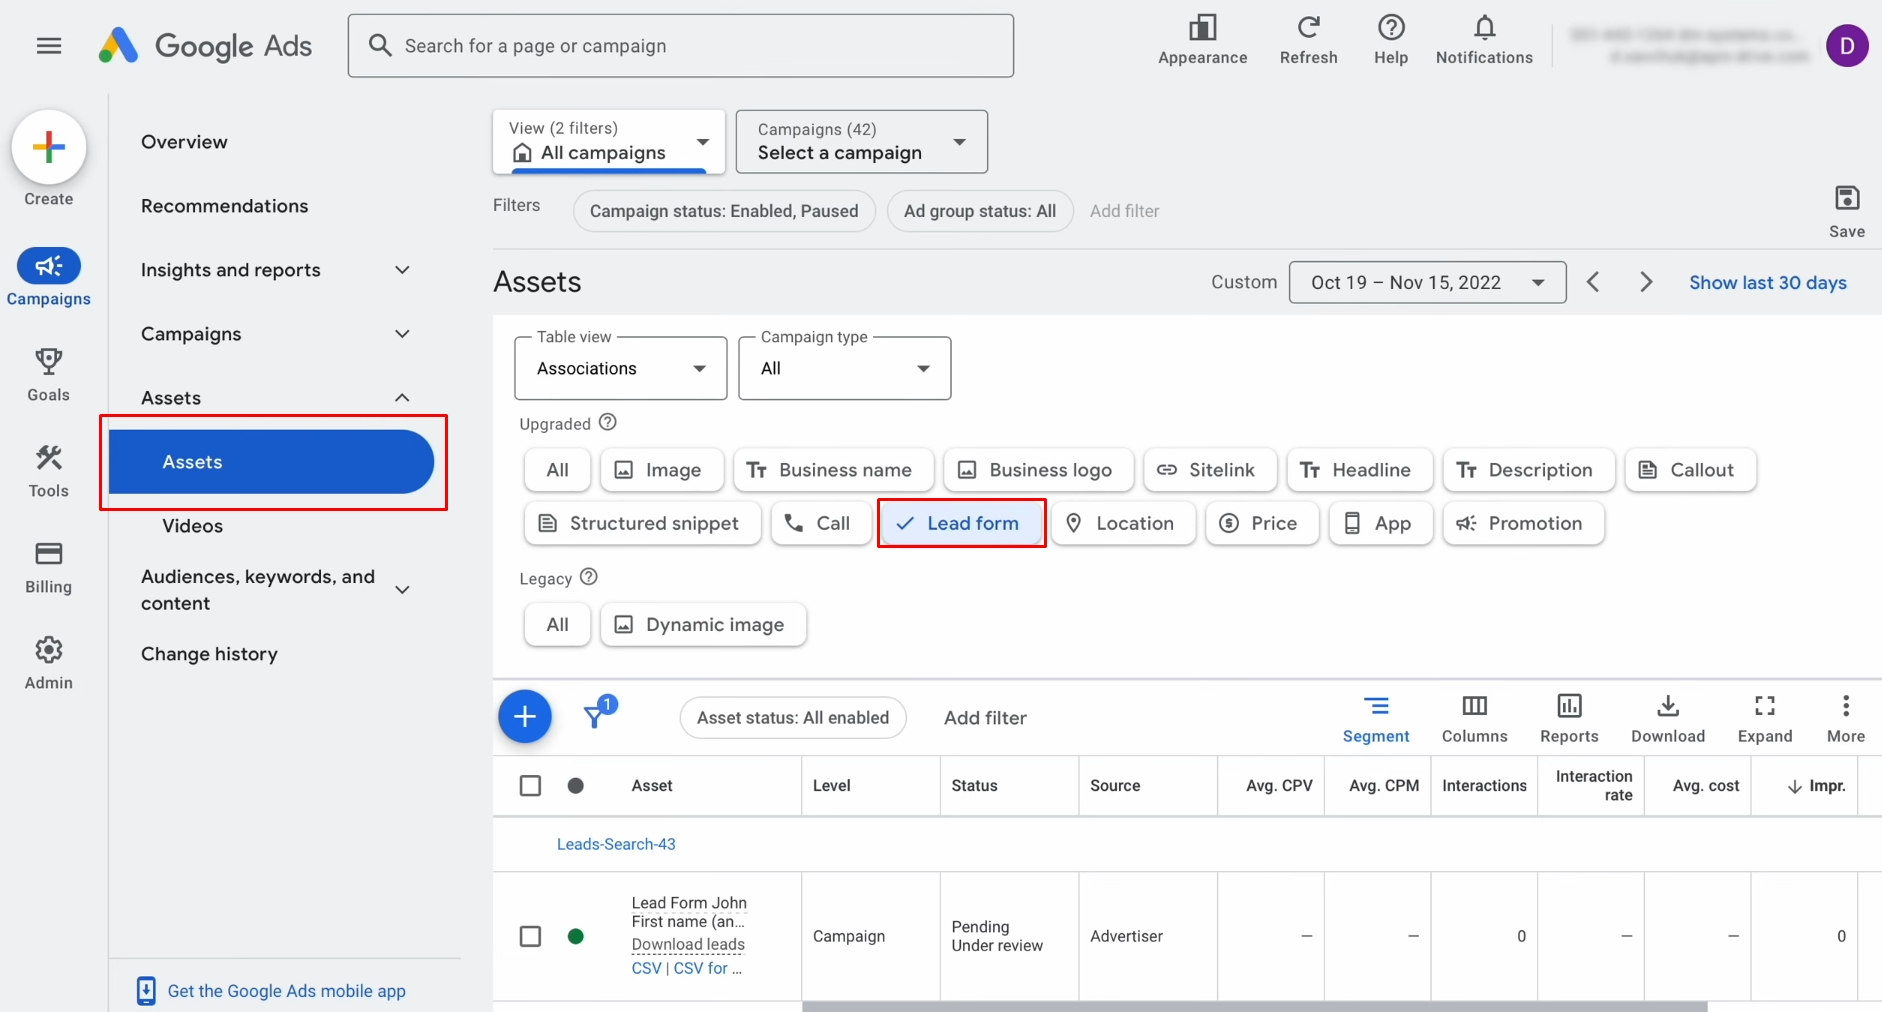
Go to the Ads
Assets section on your Google Ads personal account and select Lead Form.
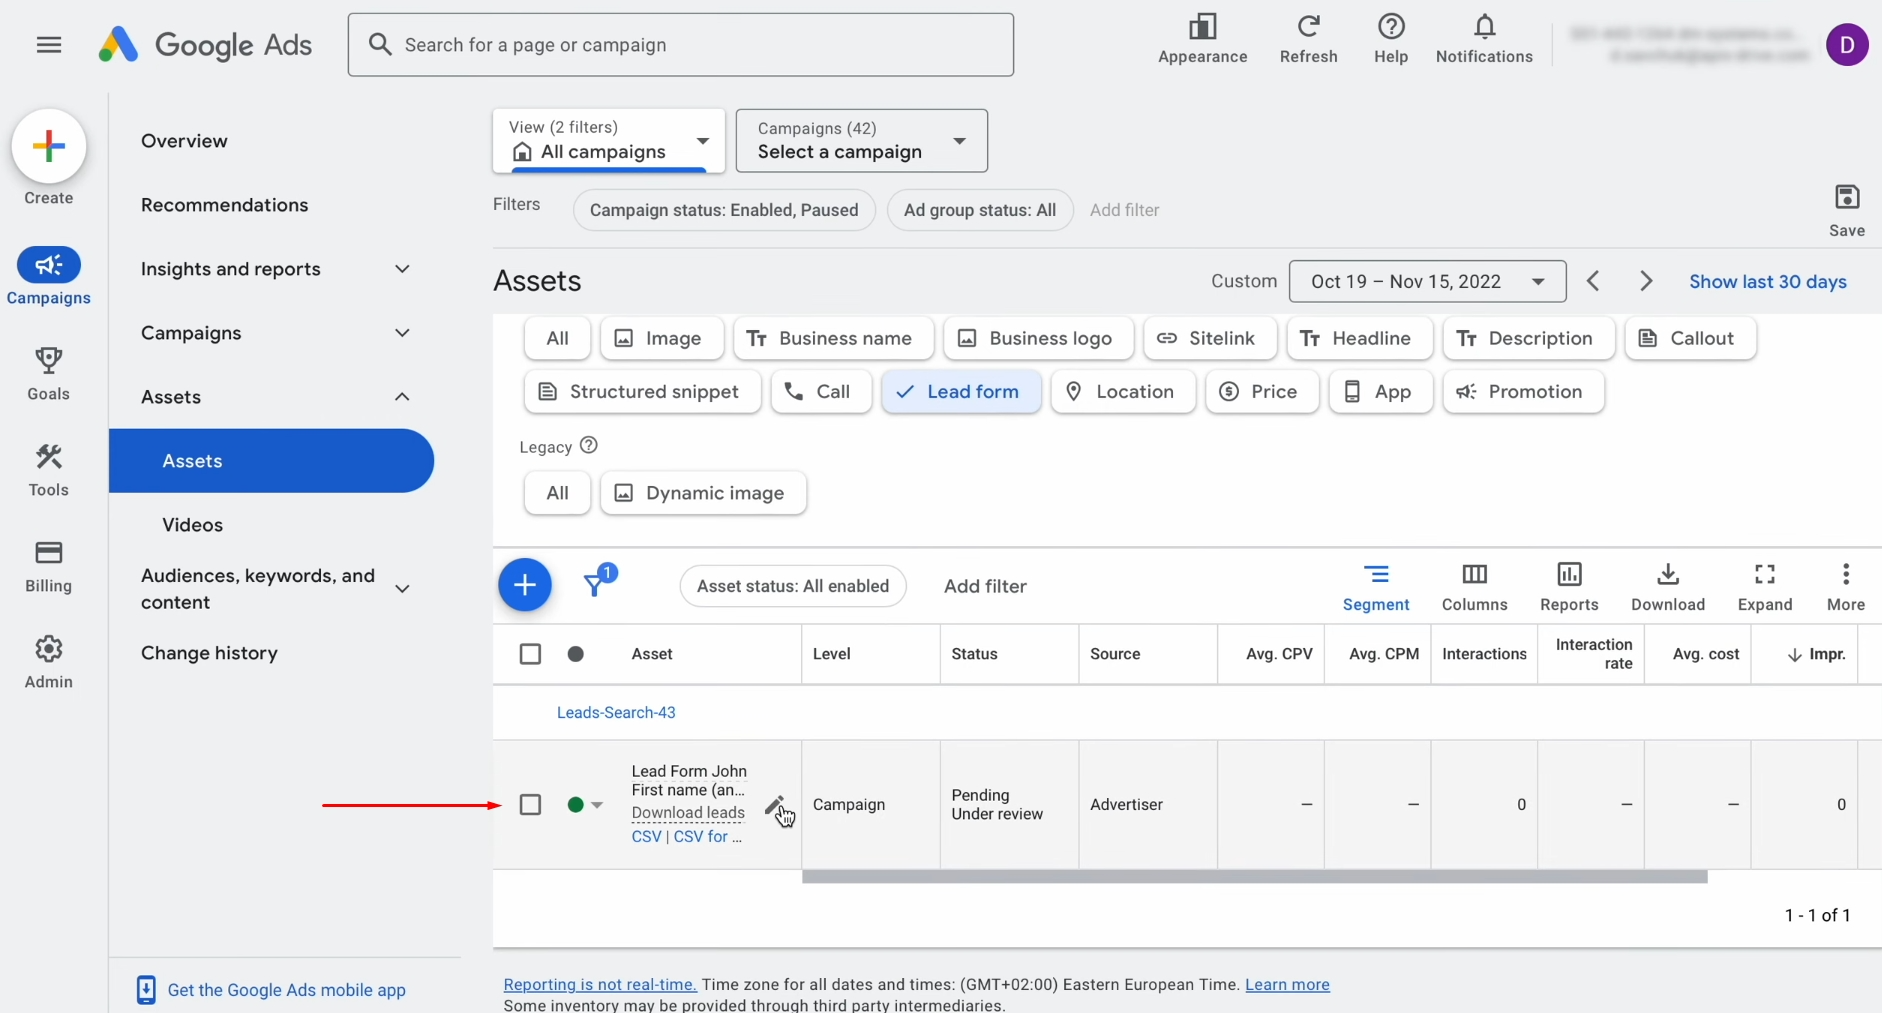
Select the
lead form from which you want to receive new leads and go to the settings of this
form.
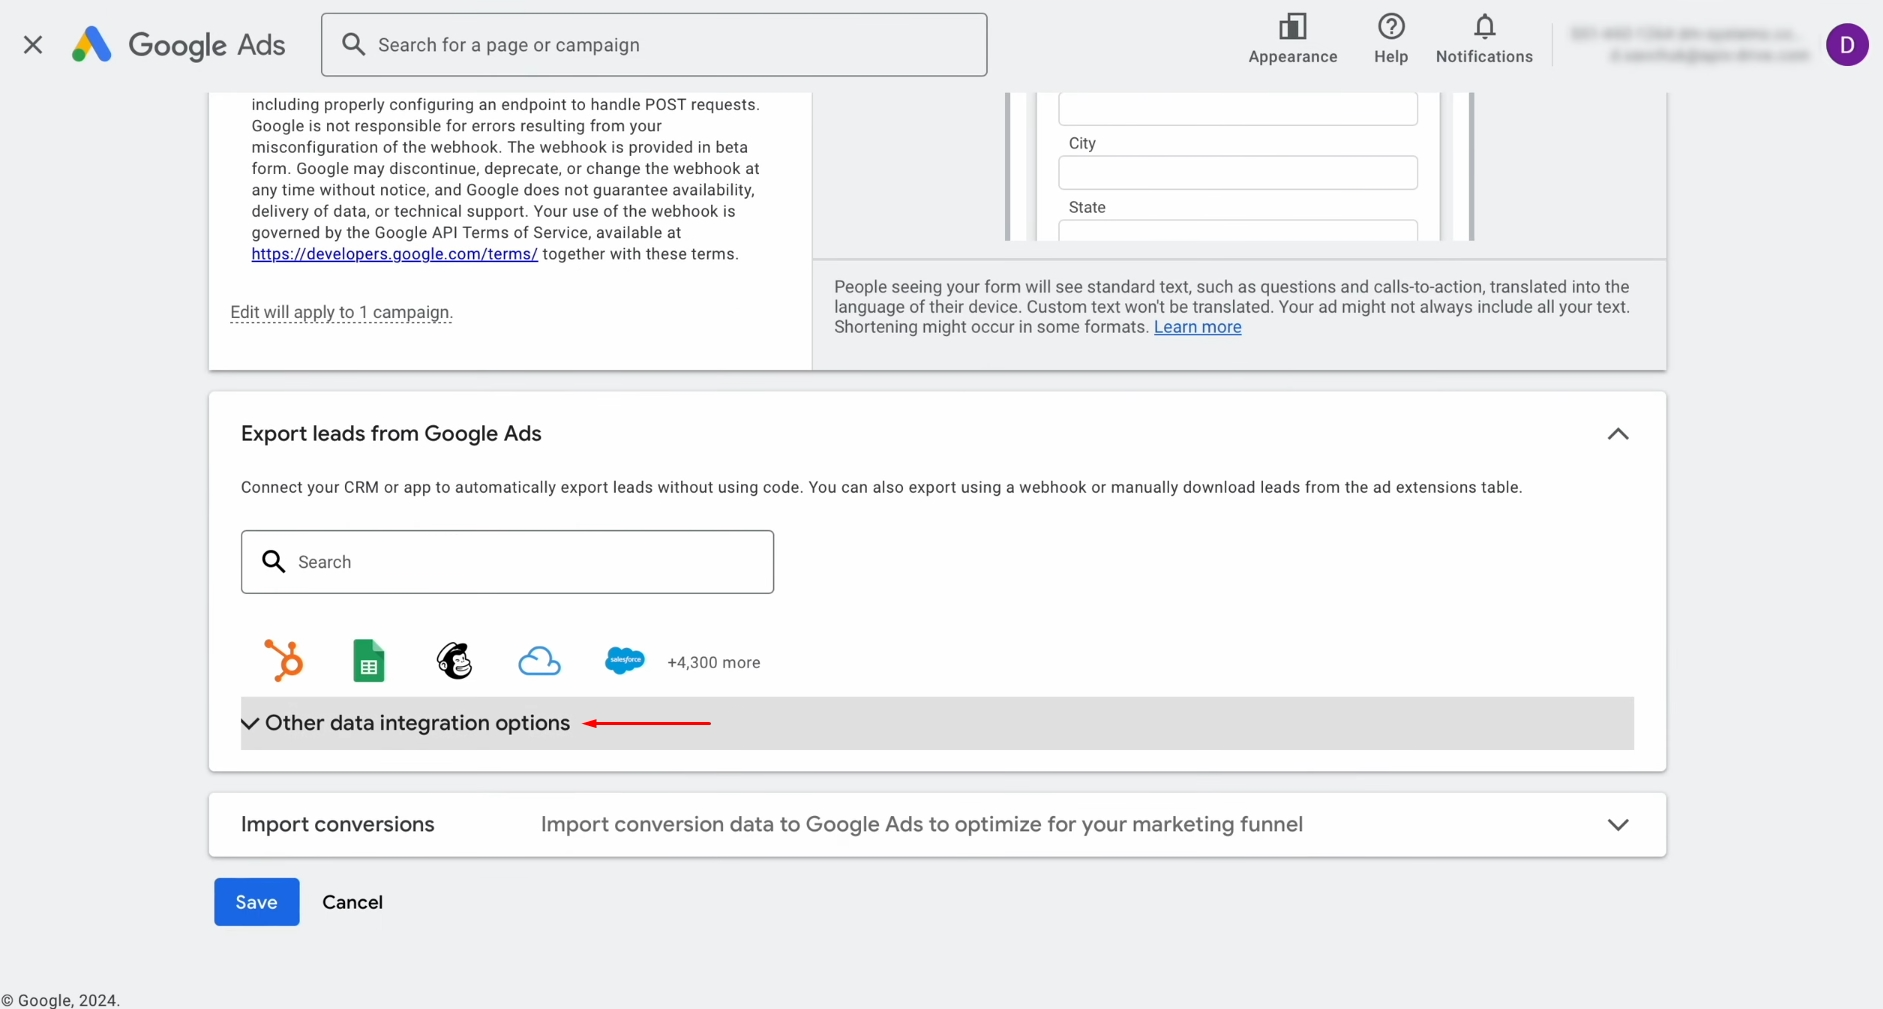
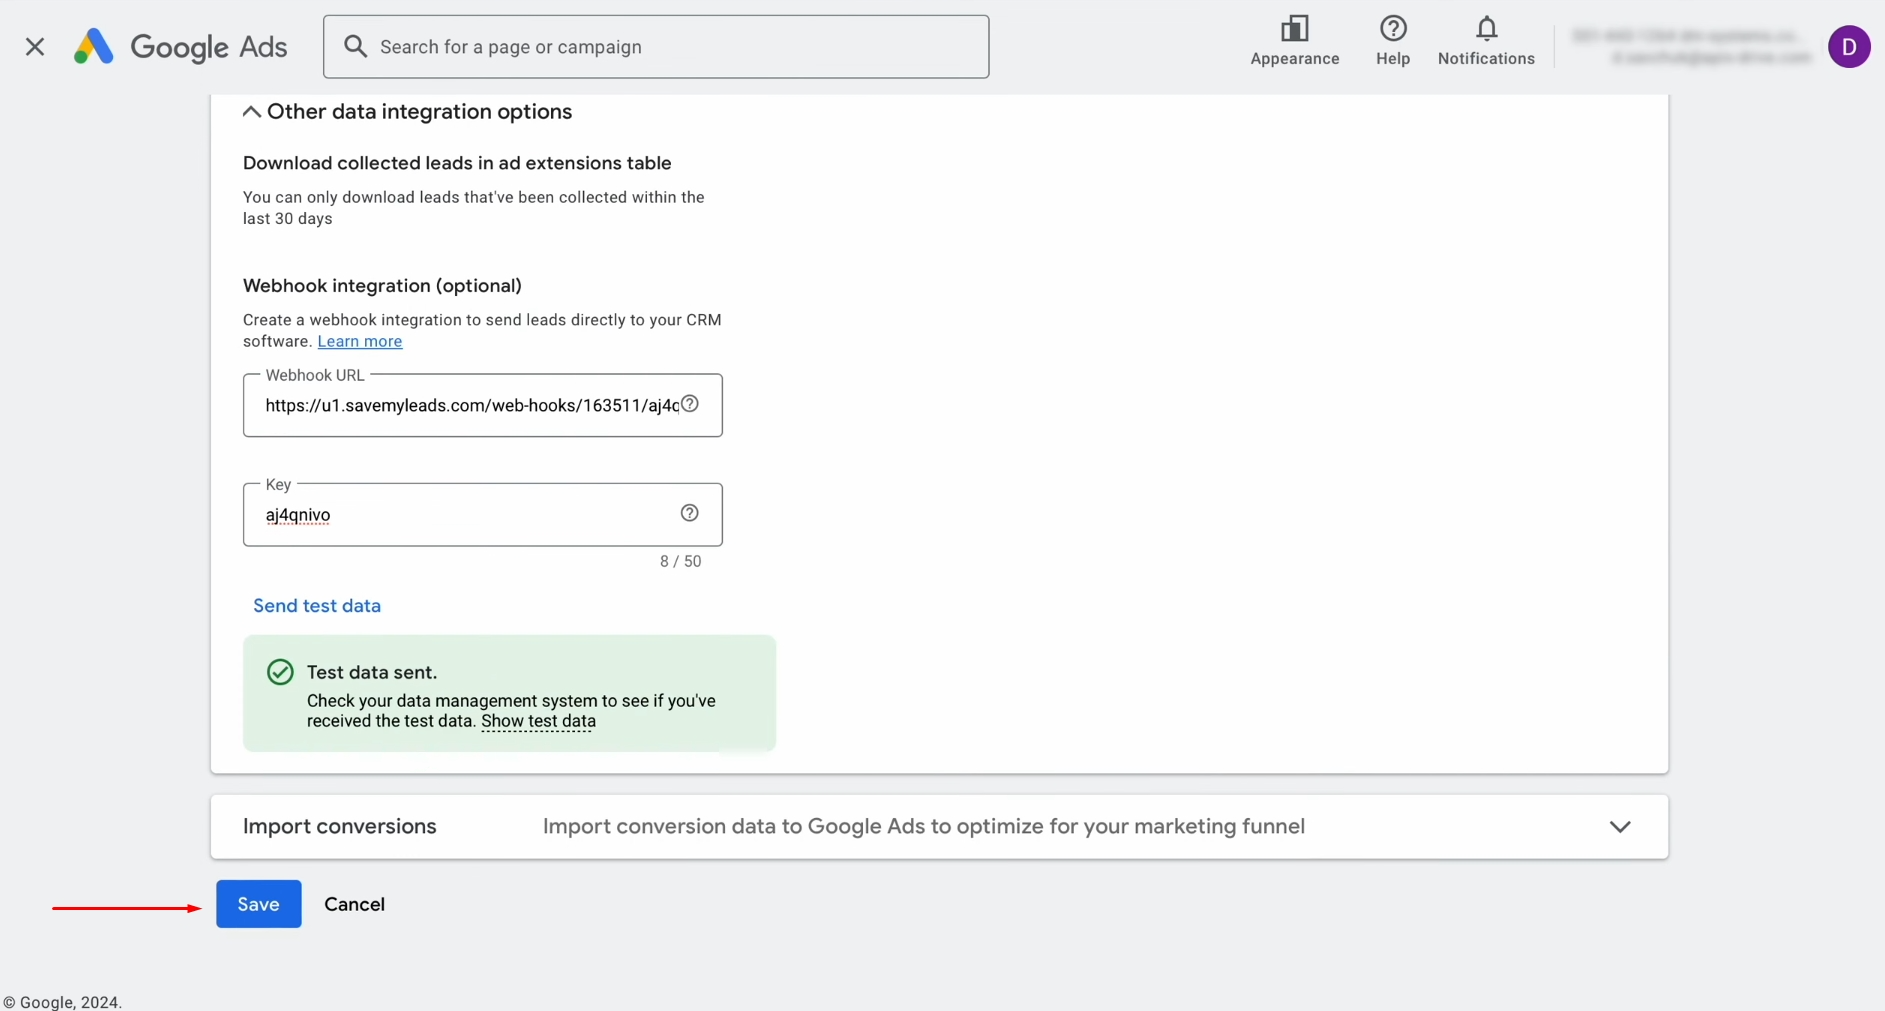
Go to Other data integration options.
Paste the
copied URL from SaveMyLeads into the Webhook URL field.
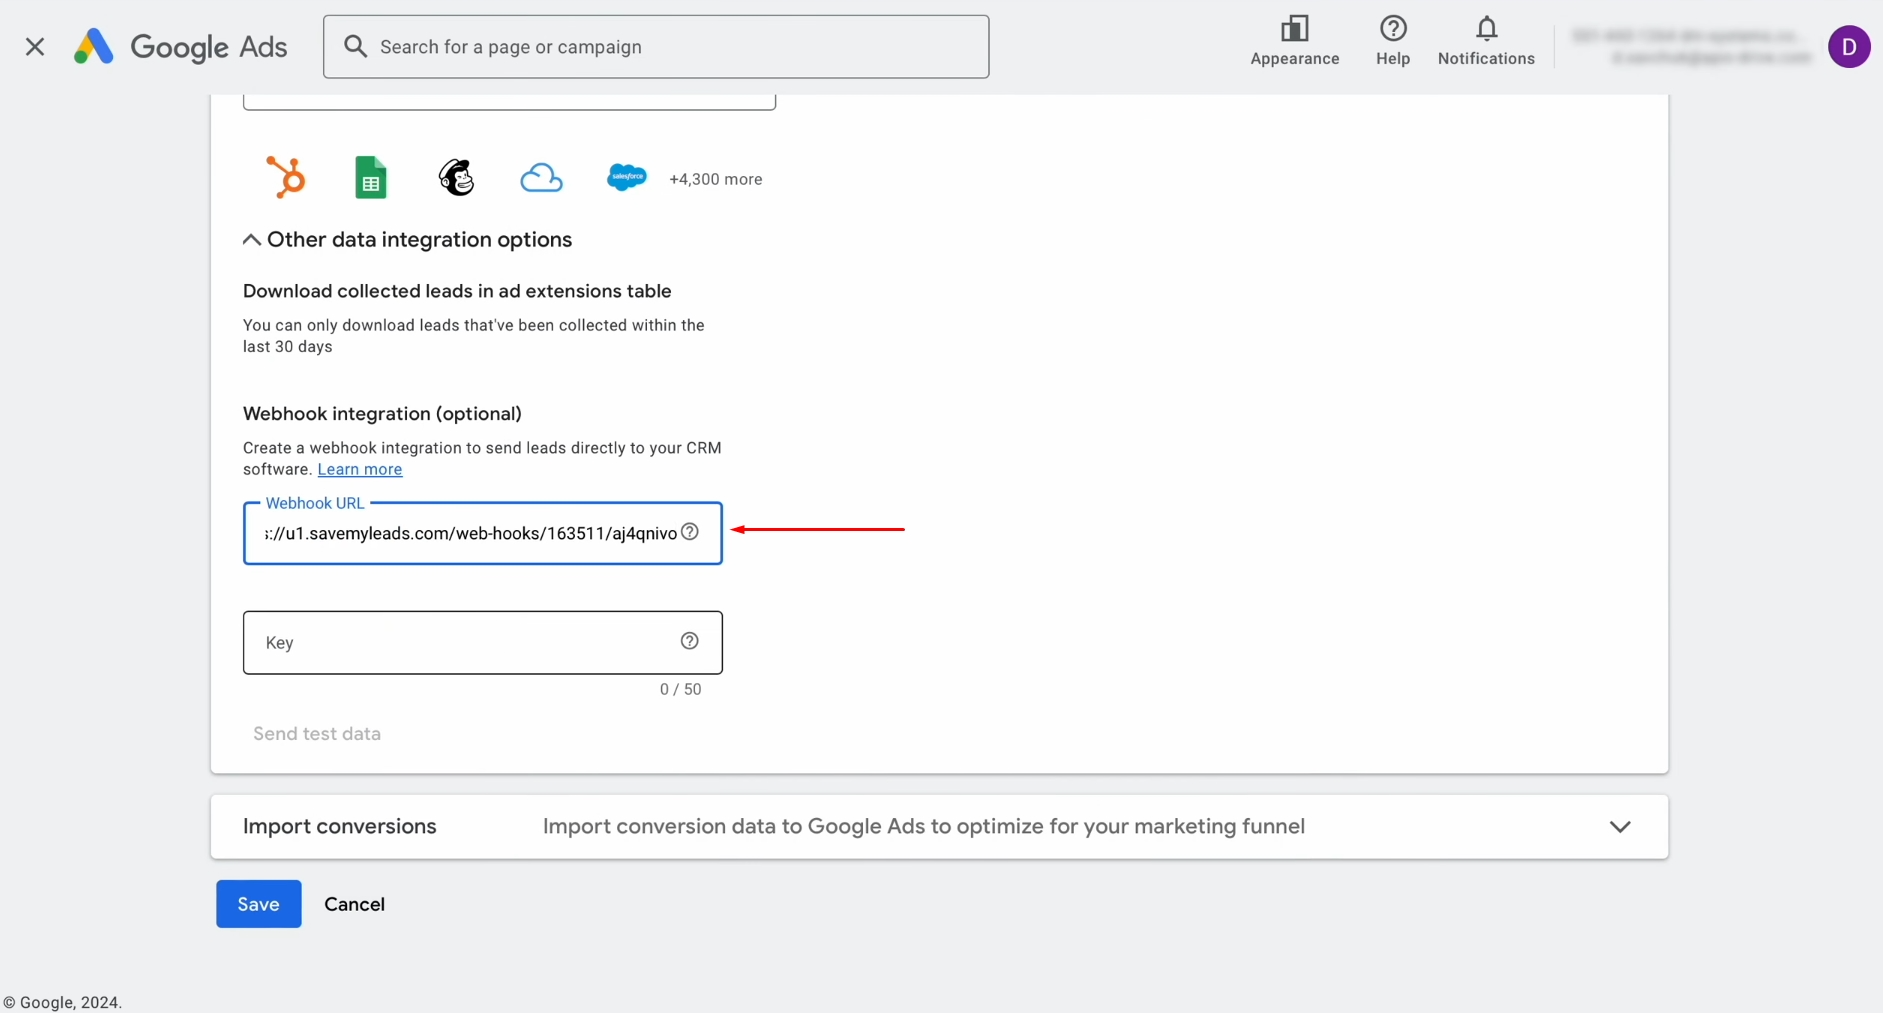
Copy part of
the URL.
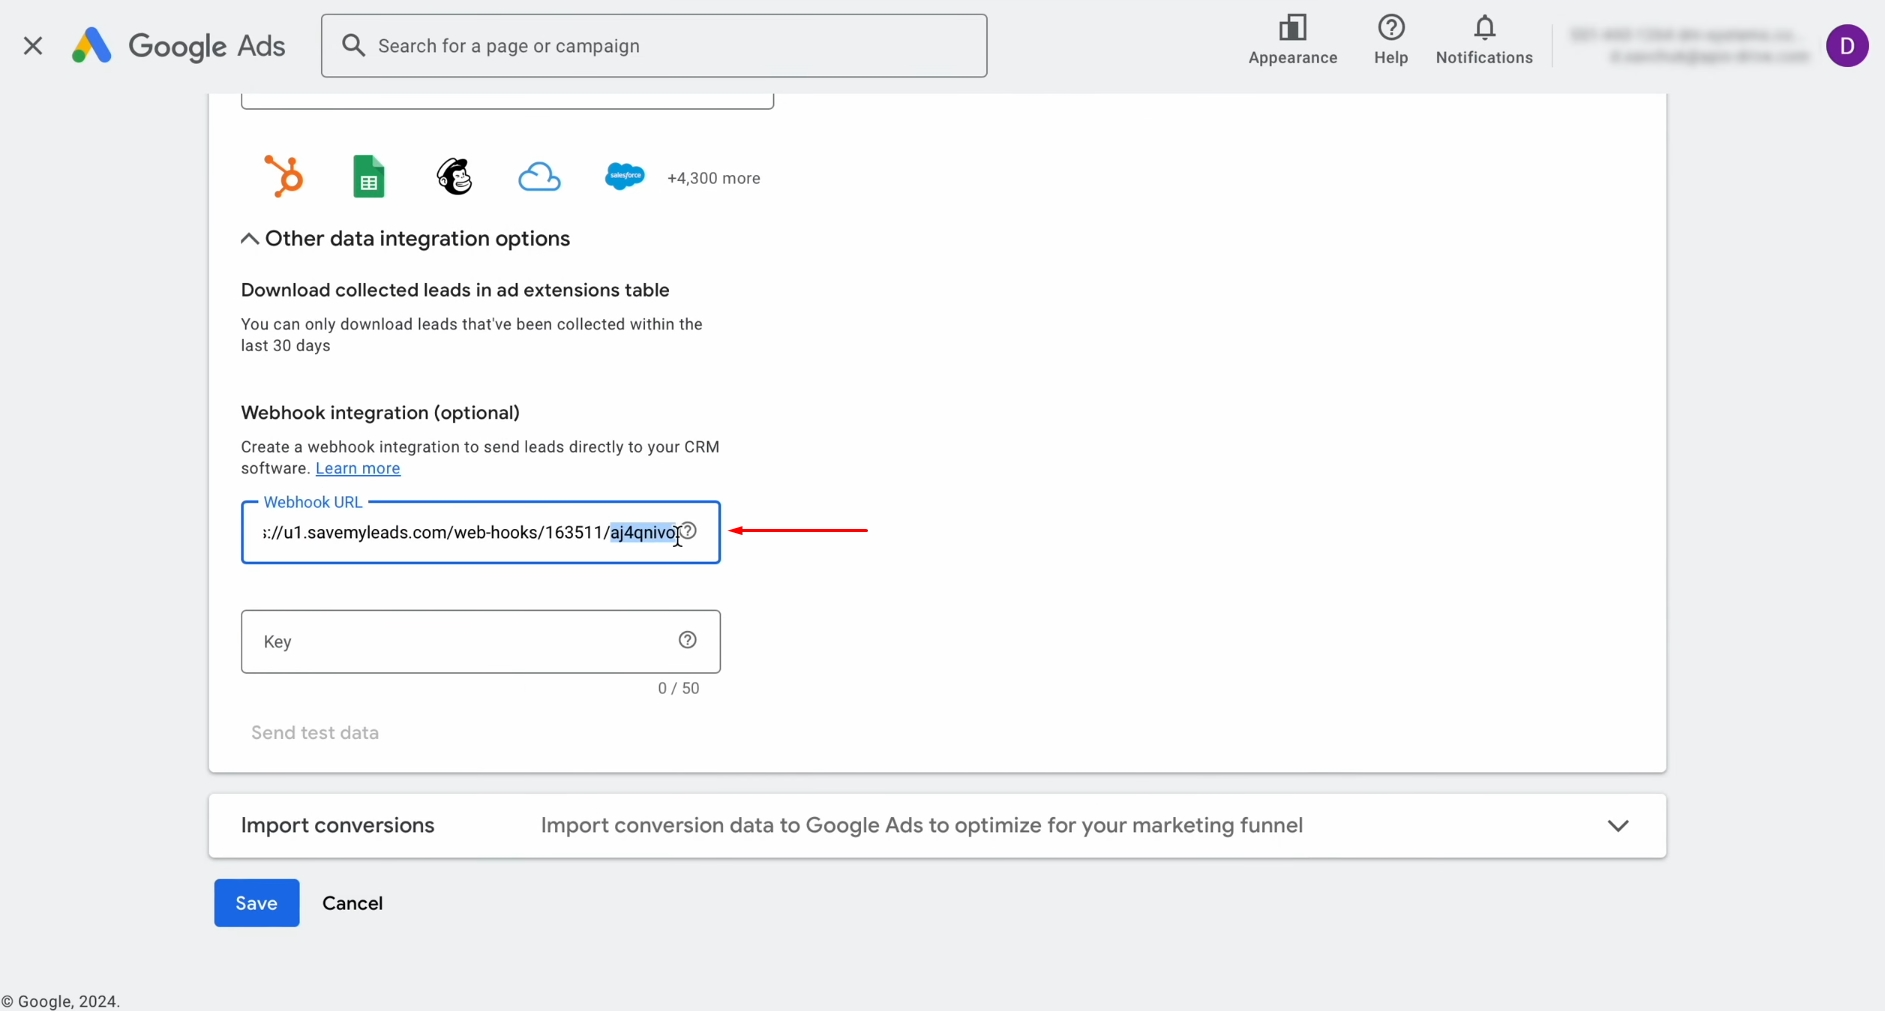
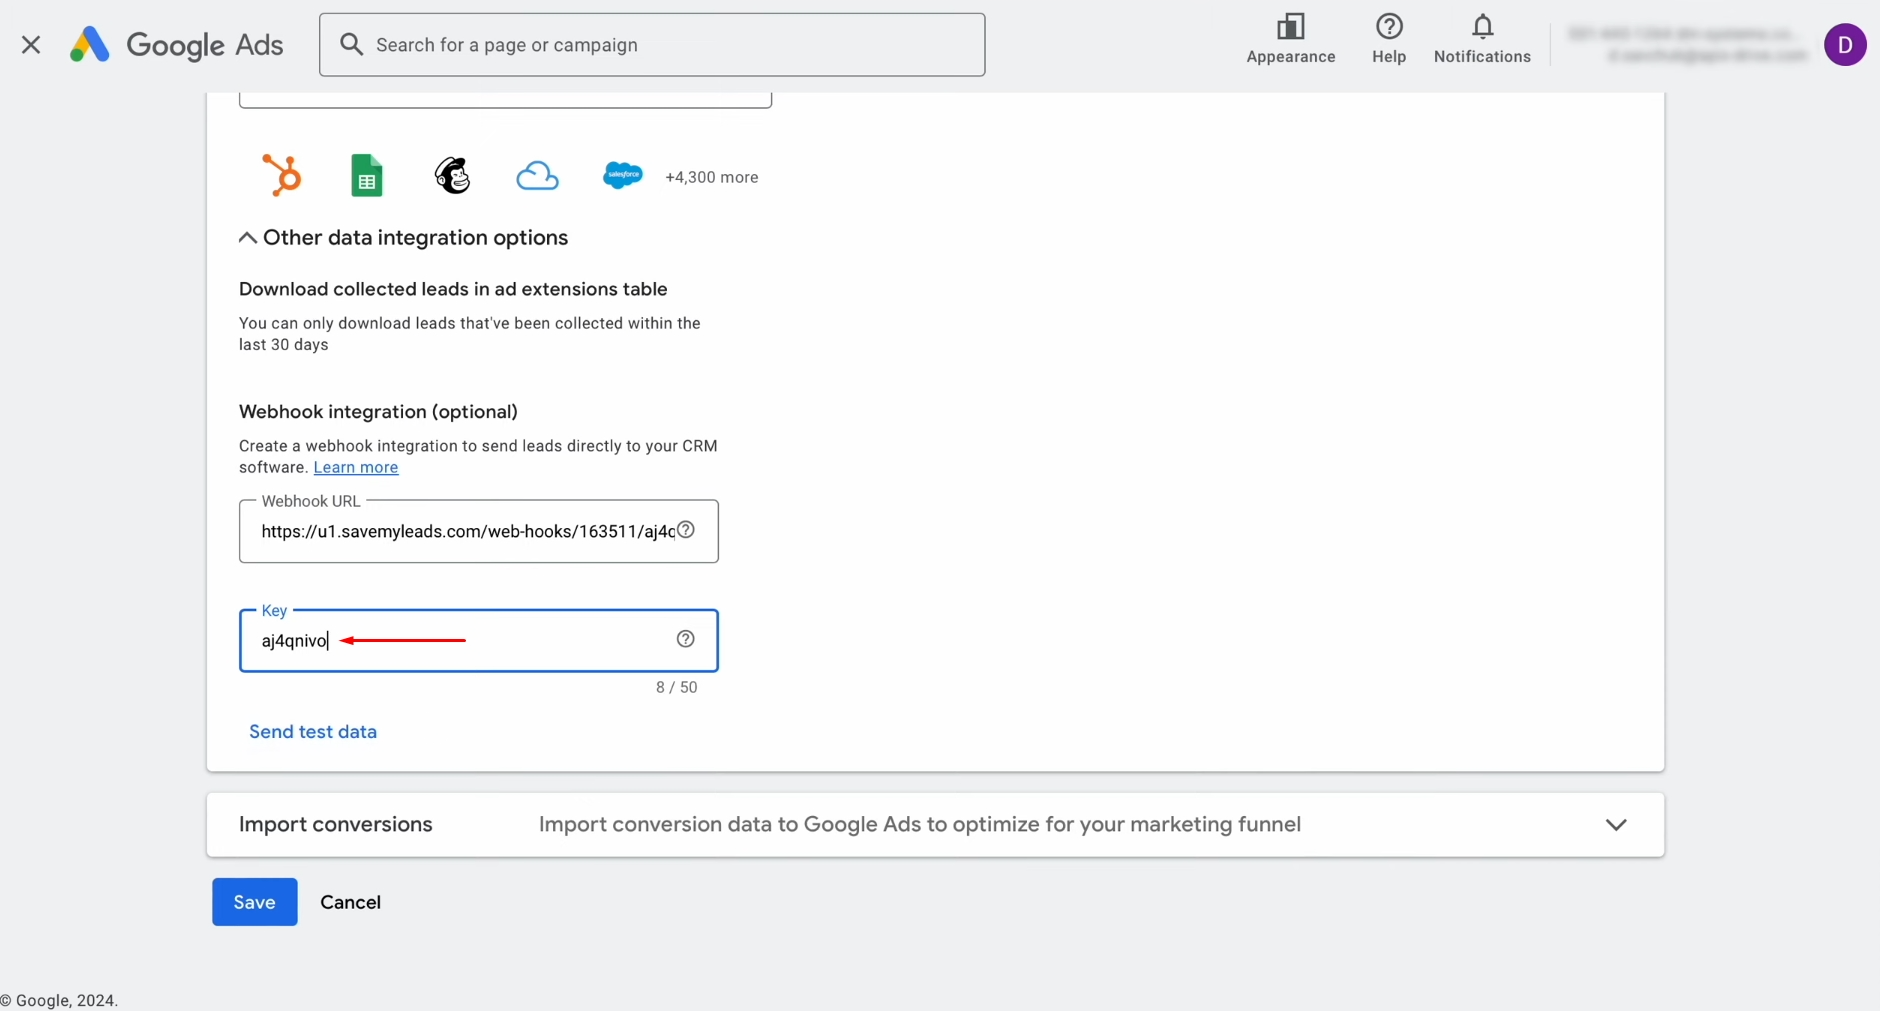
Paste the part of the URL into the Key field.
Send test
data to the specified URL.
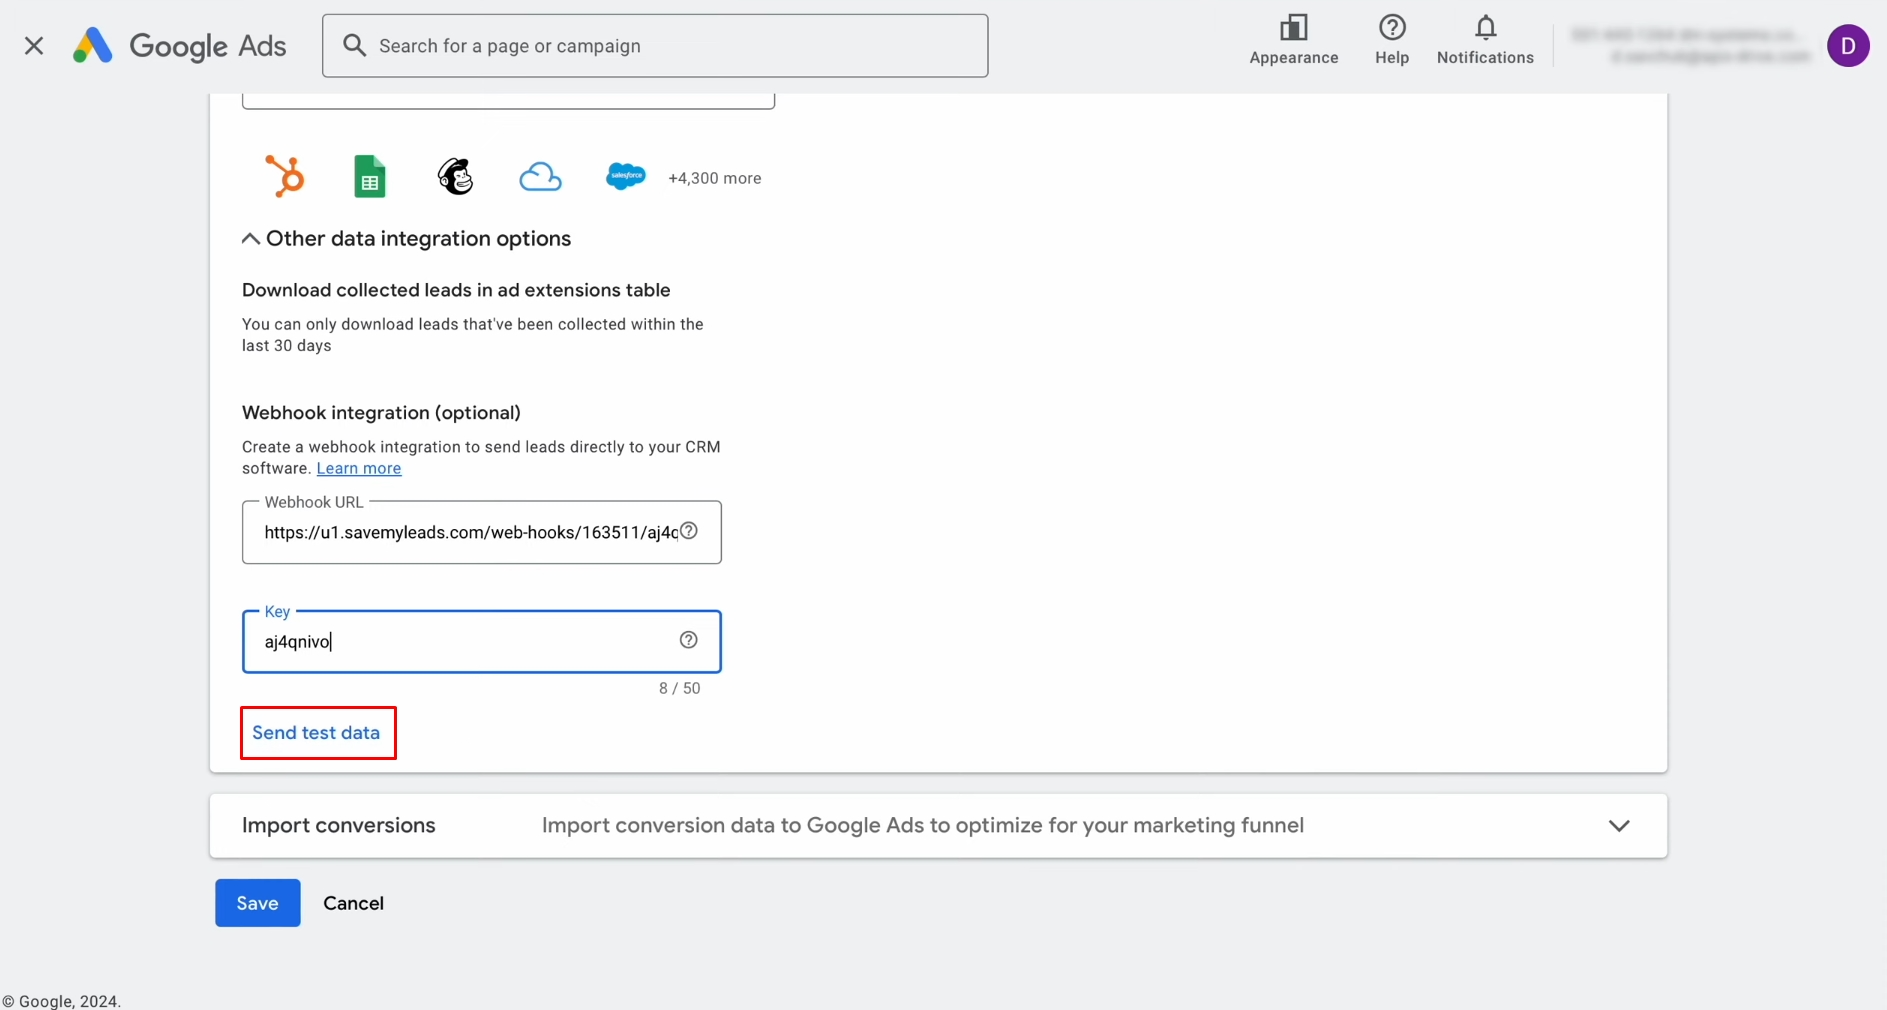
Then, click “Save” and return to SaveMyLeads.
Setting Up the Data Receiver – Airtable
To set up the Airtable integration with Google Lead Form, connect your Airtable account to SaveMyLeads. For this, click on the blue button.
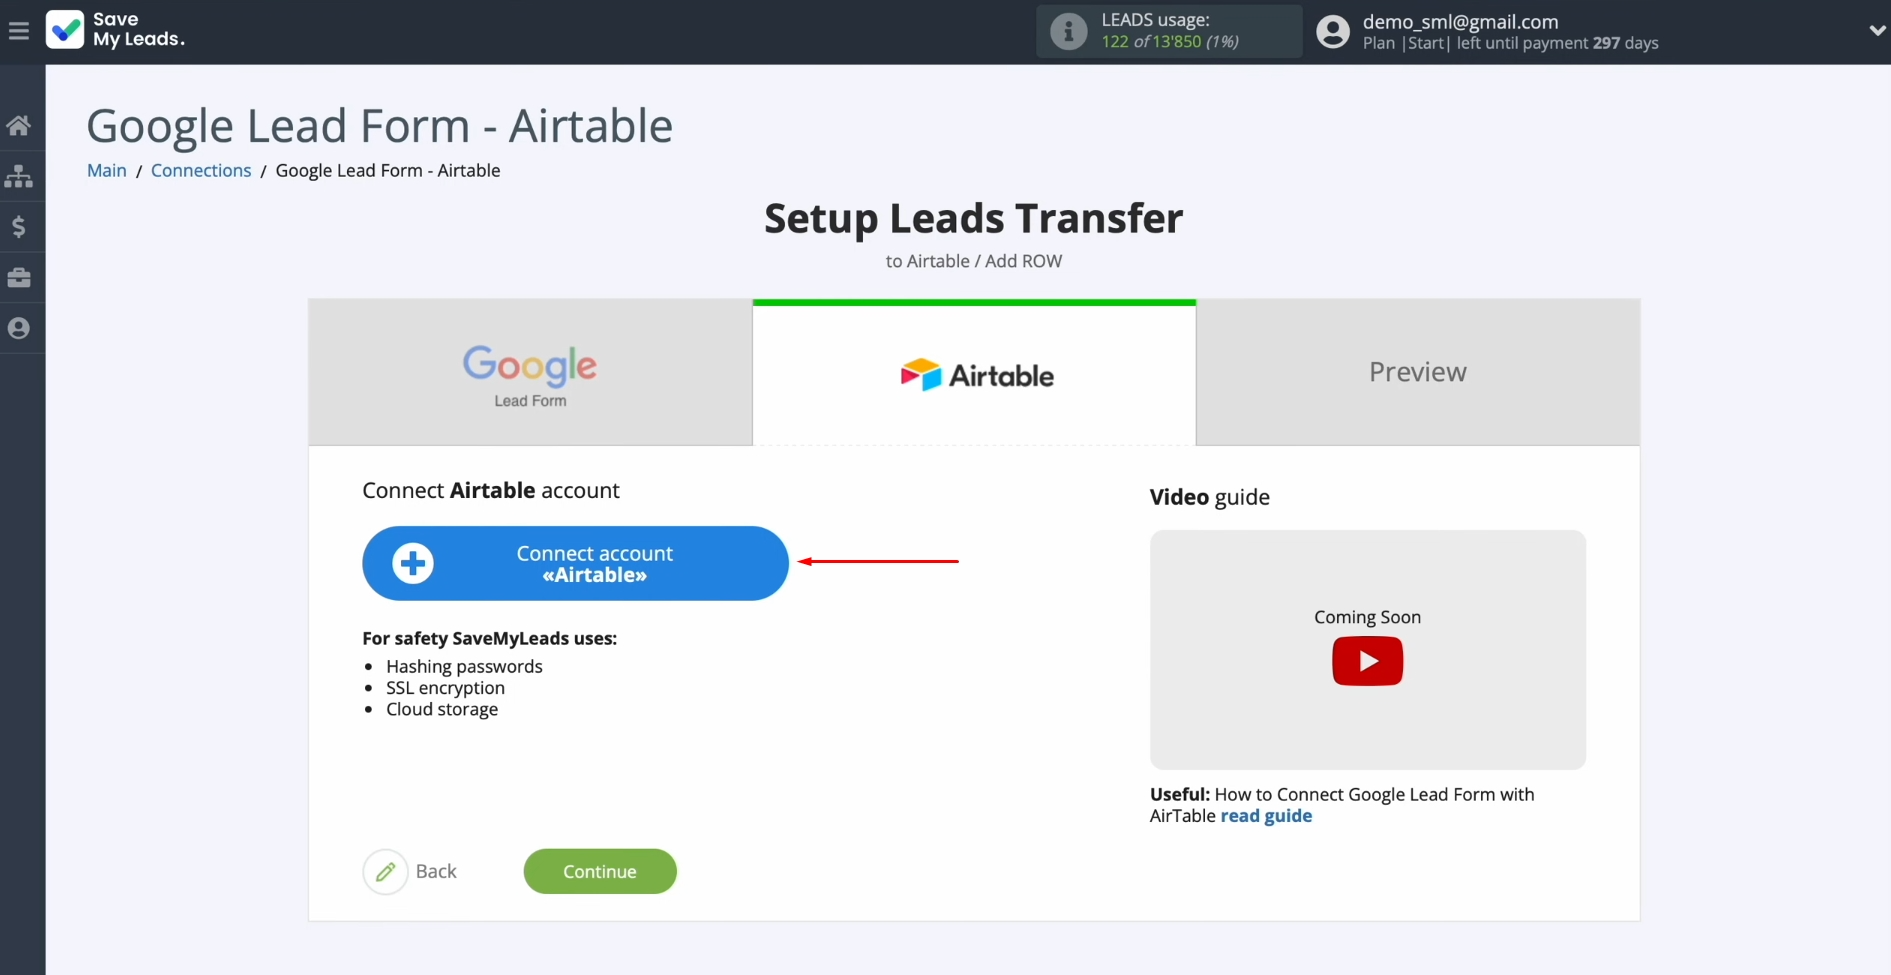
Specify the
login of your Airtable personal account.
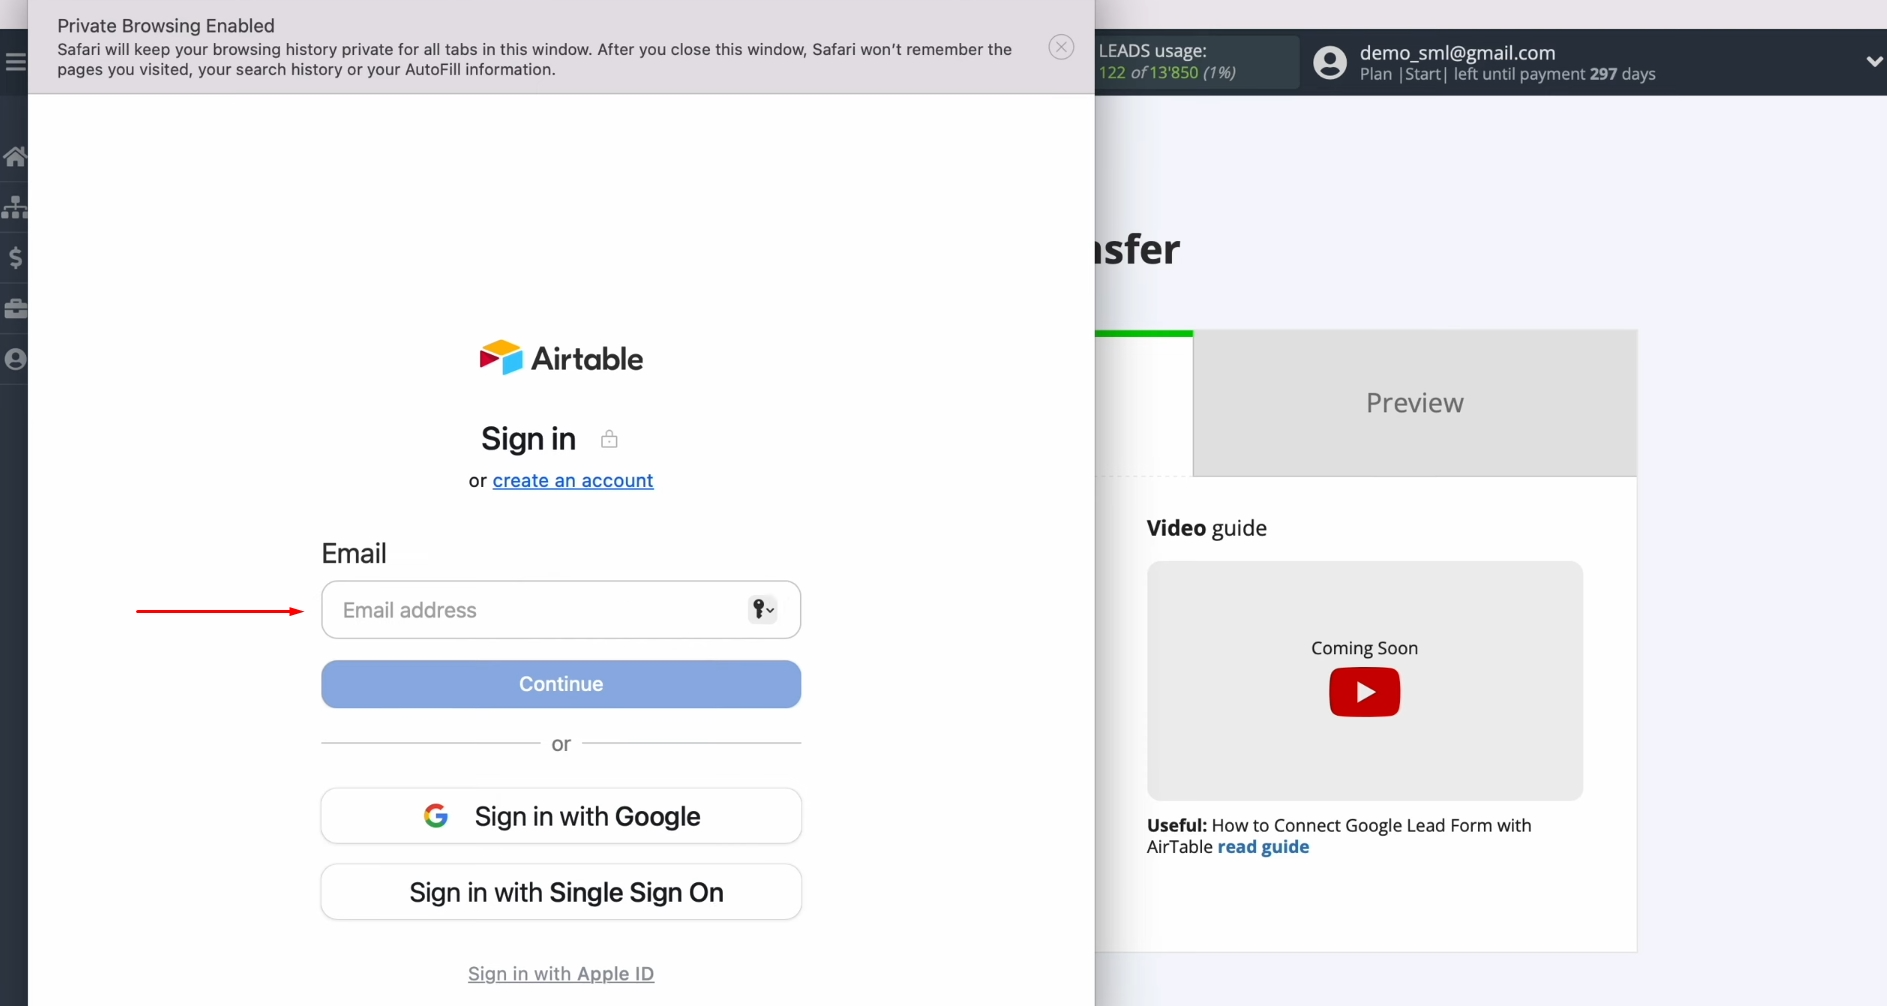
Specify the
password of your Airtable personal account and click
“Sign in”.
Provide
access to your databases. For this, click on “Add a
base”.
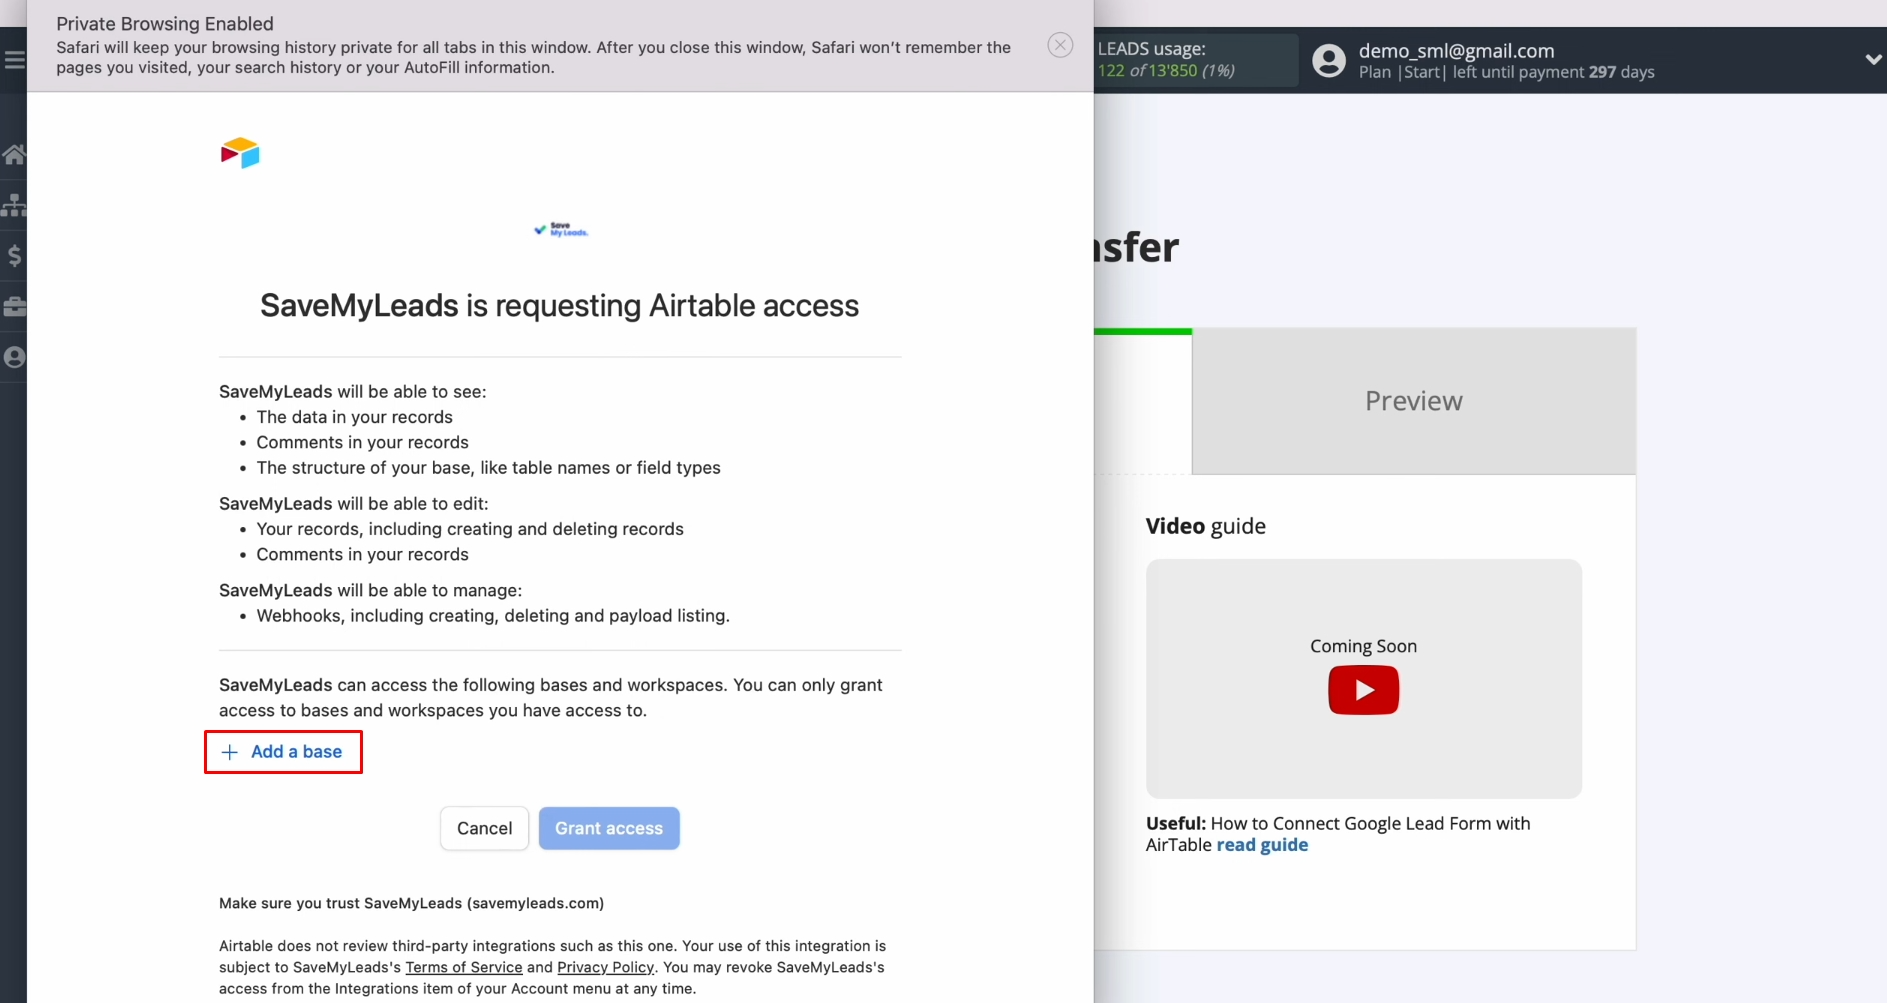
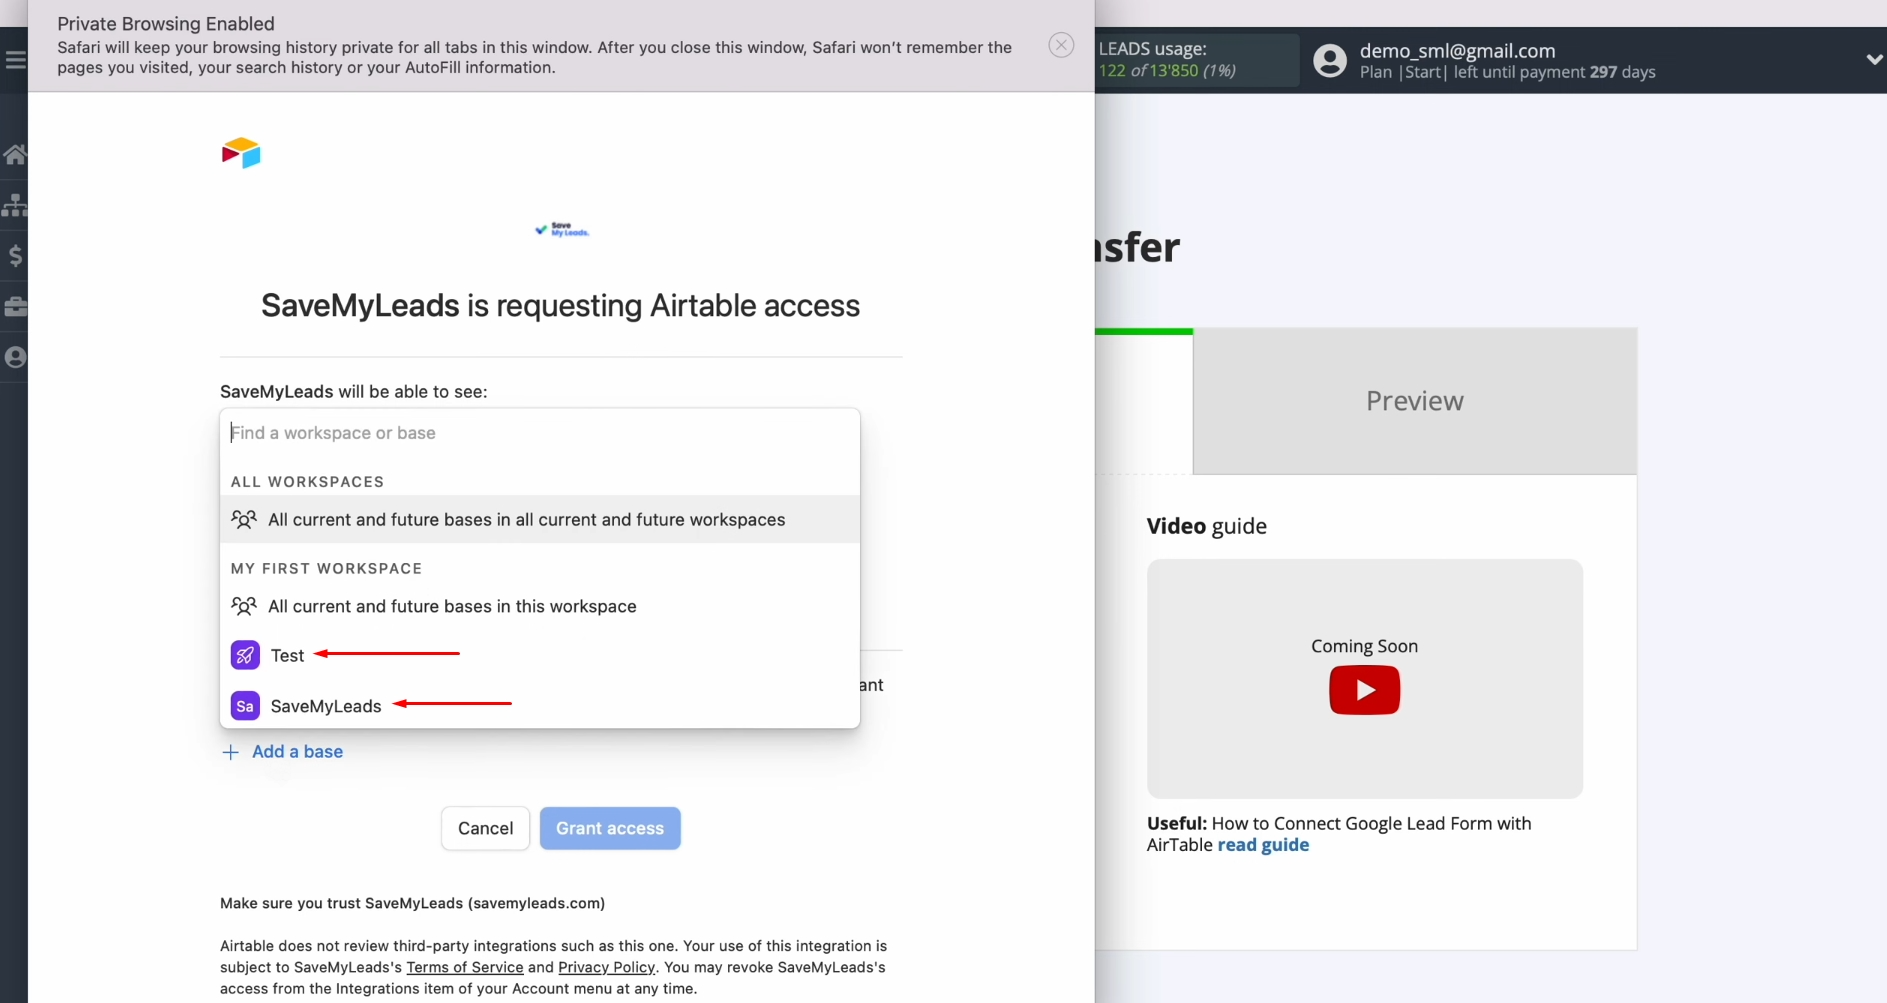
Choose databases. We recommend providing access to all databases at once in order to be
able to work with them in the future.
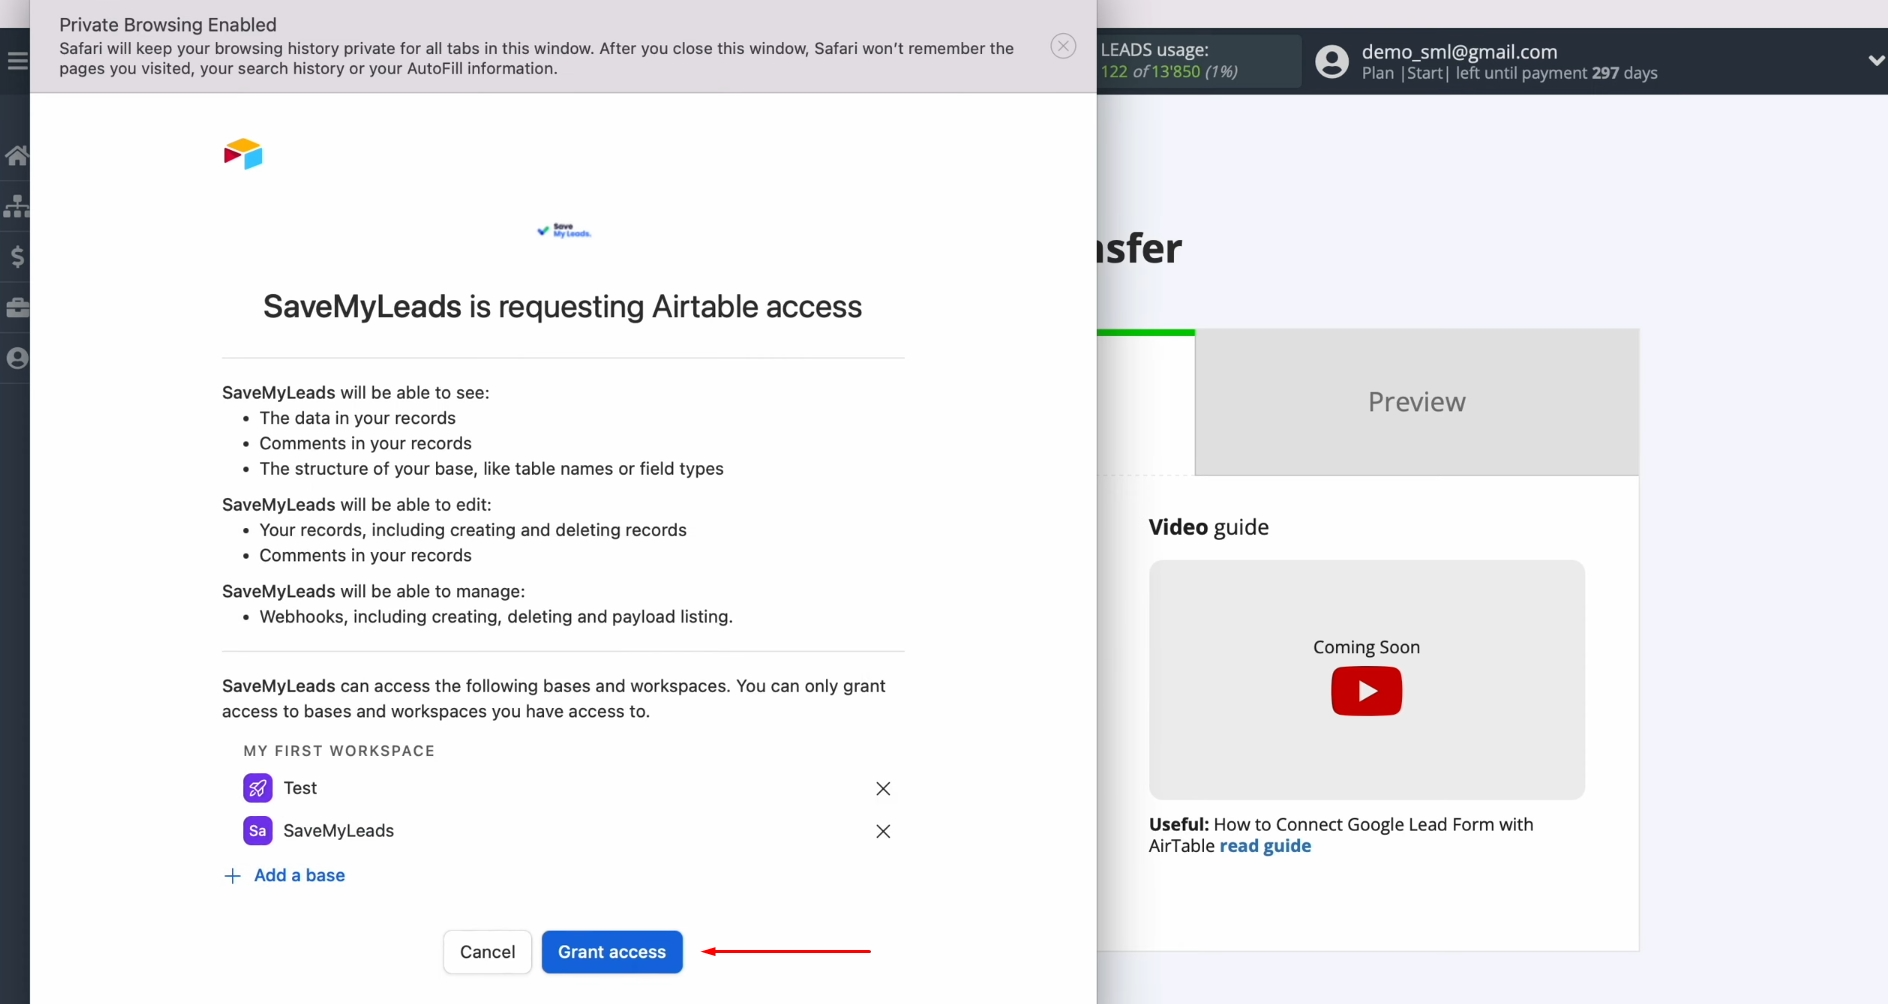
When all databases are added, click on “Grant access”.
When the
connected account appears in the list, select it.
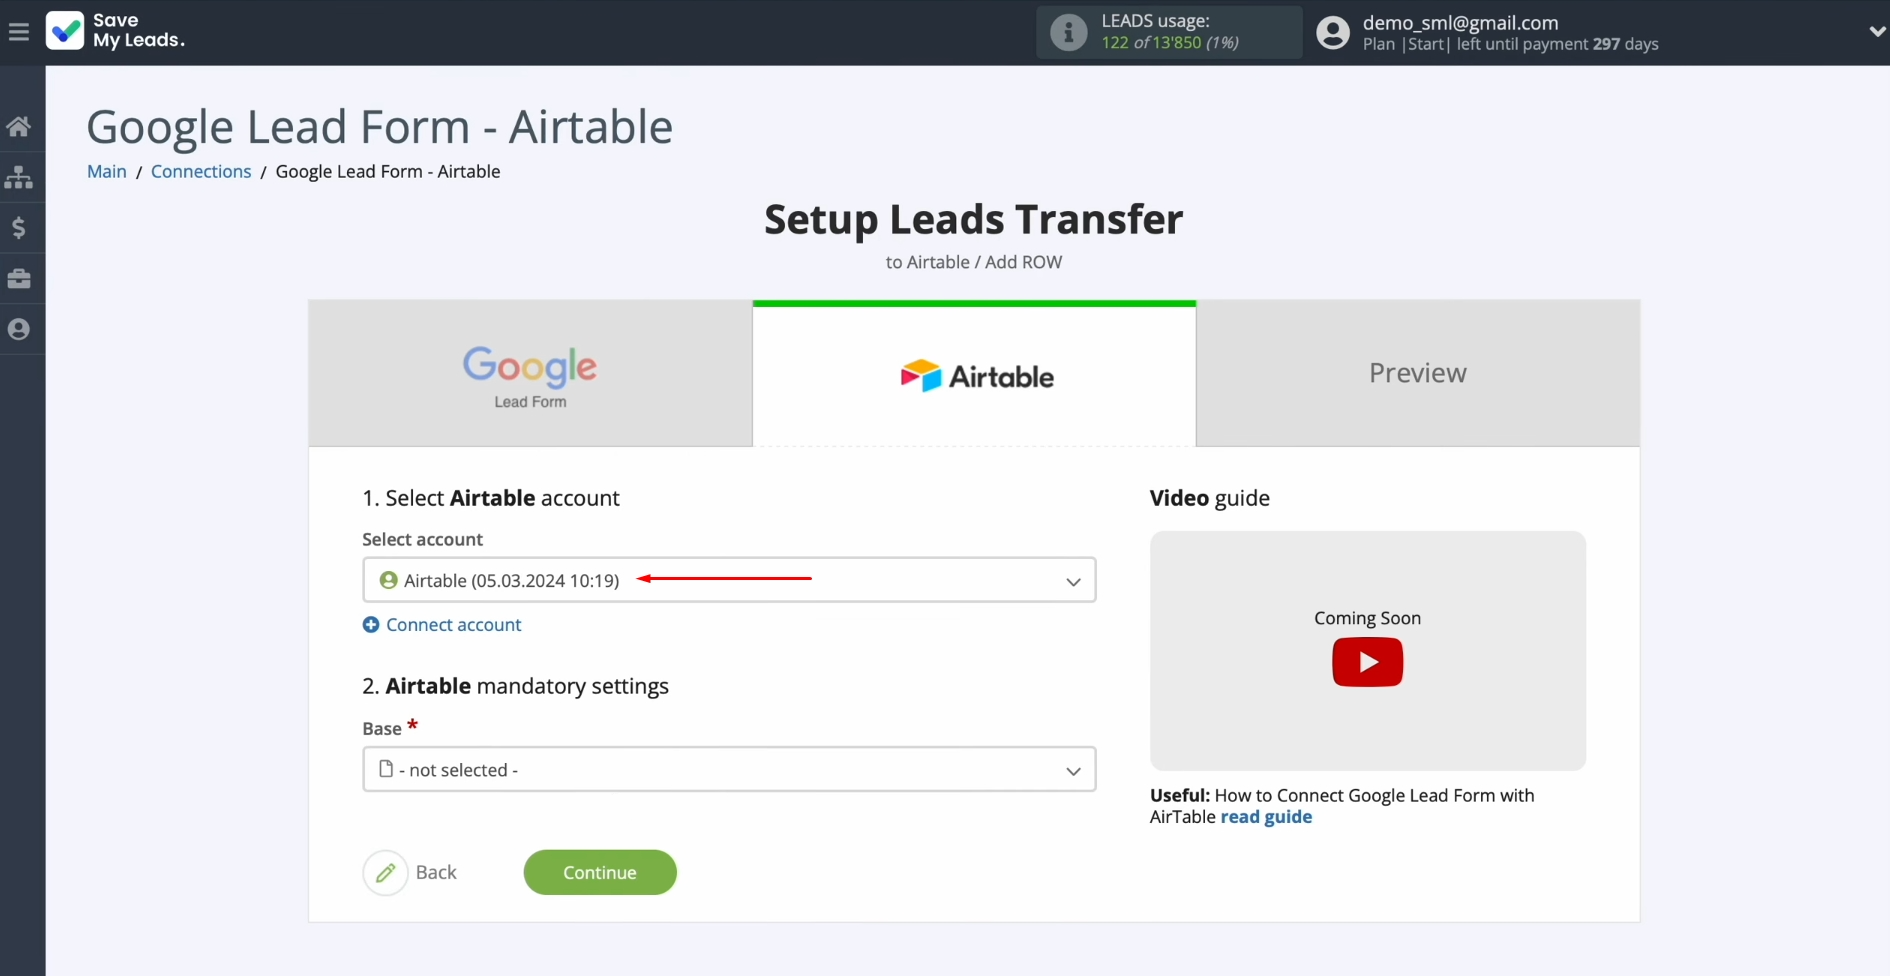
Choose the
database in which we will create new rows. Also, select the table.
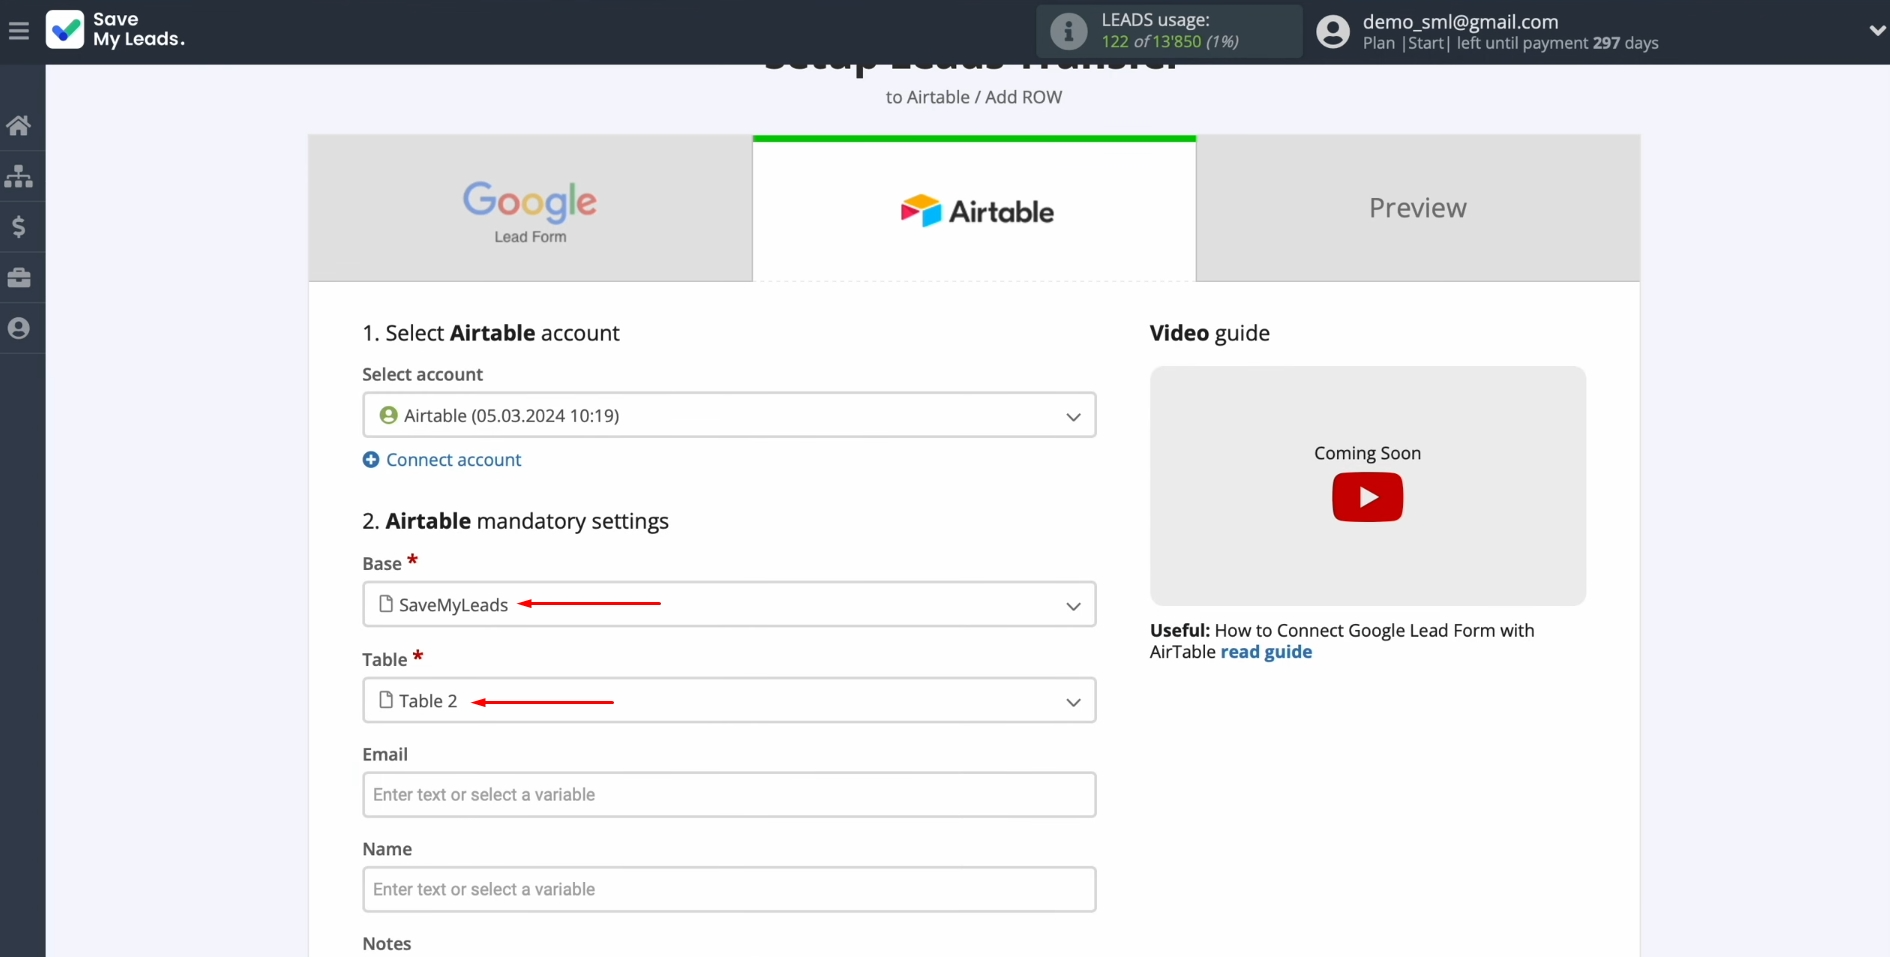
Now, you see
Airtable fields to which you can assign variables from Google Lead Form. To do this, place the cursor in the desired field and select the appropriate data from the drop-down list.
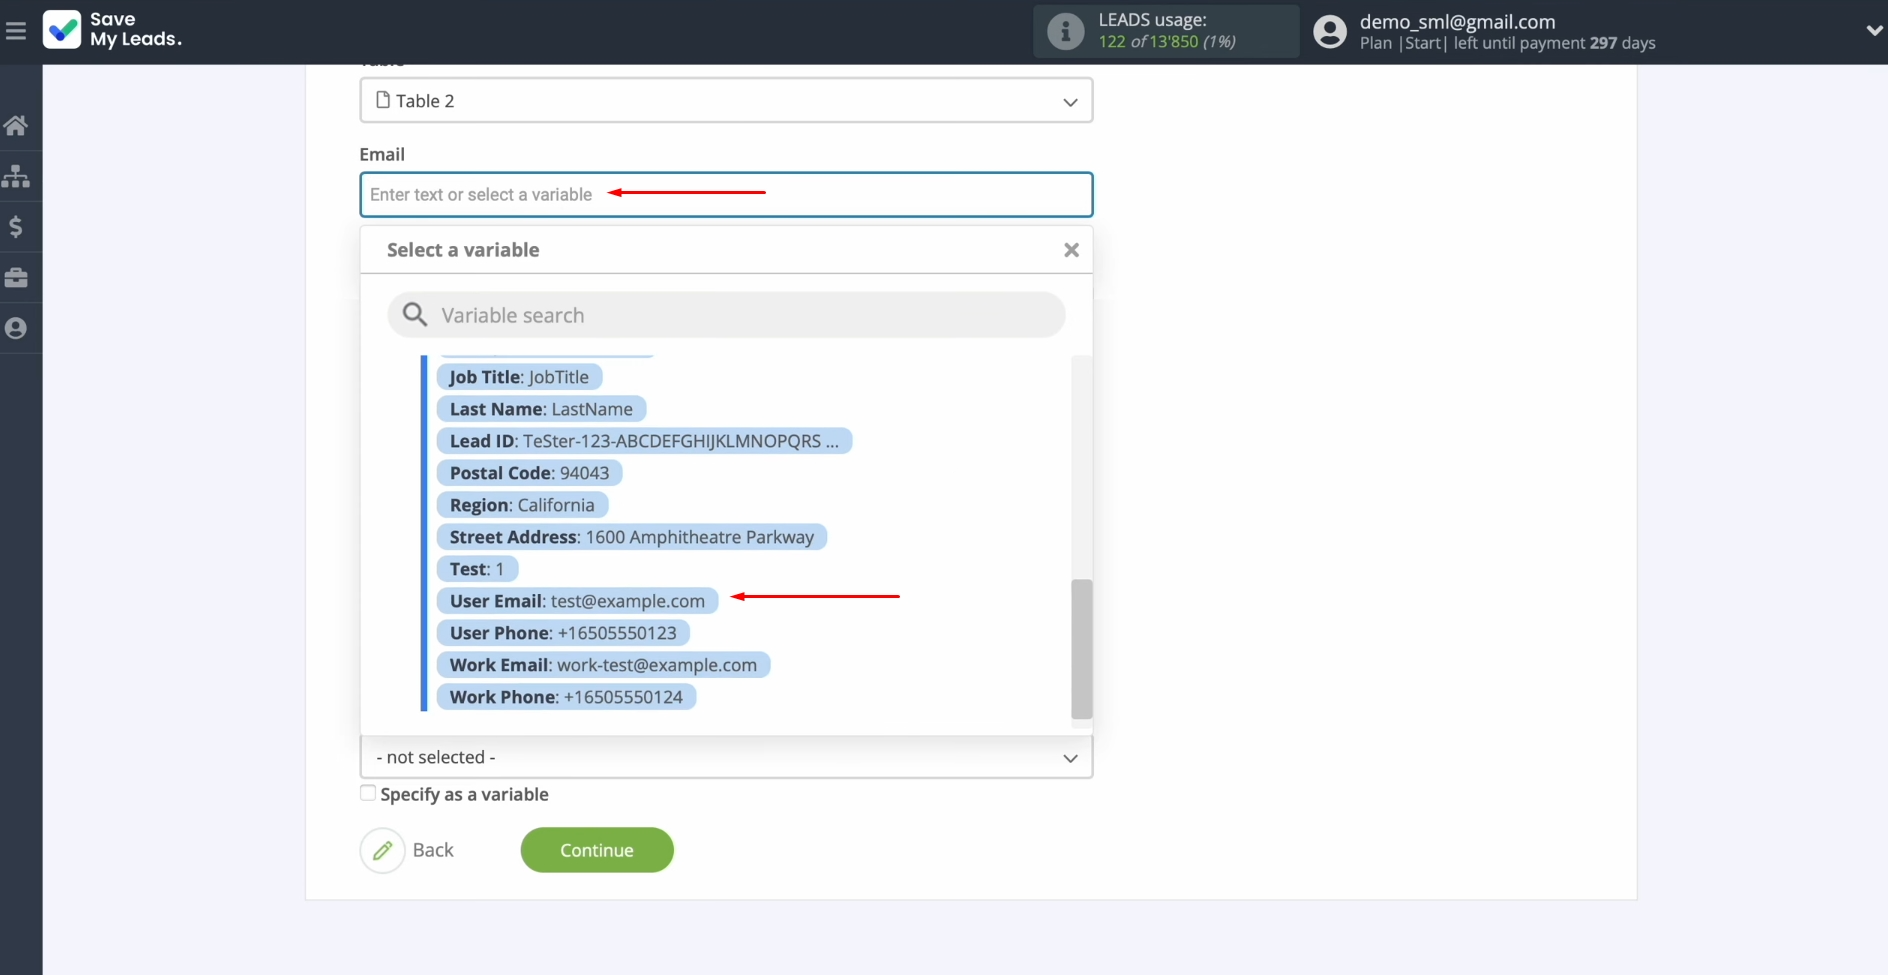
Please note
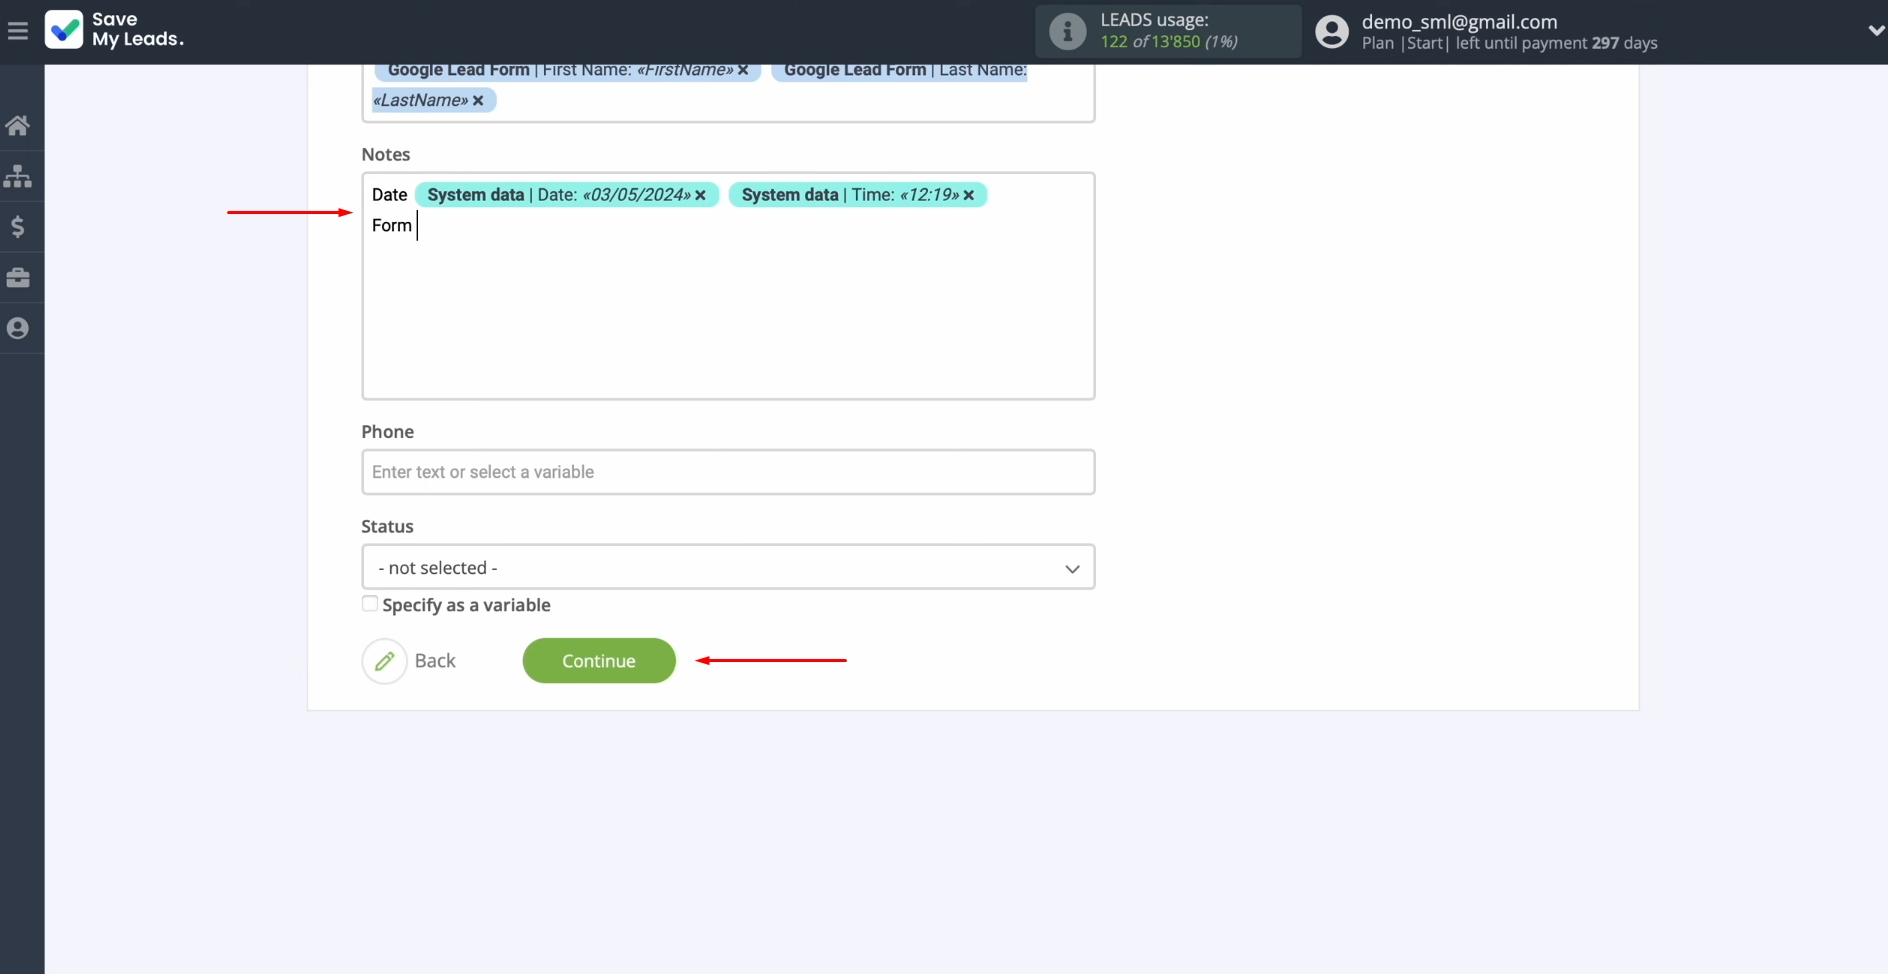
that you can use not only variables from the drop-down list but also
enter data manually. When all required fields are completed, click "Continue".
Here, you see an
example of the data that will be sent to Airtable as new rows for each new
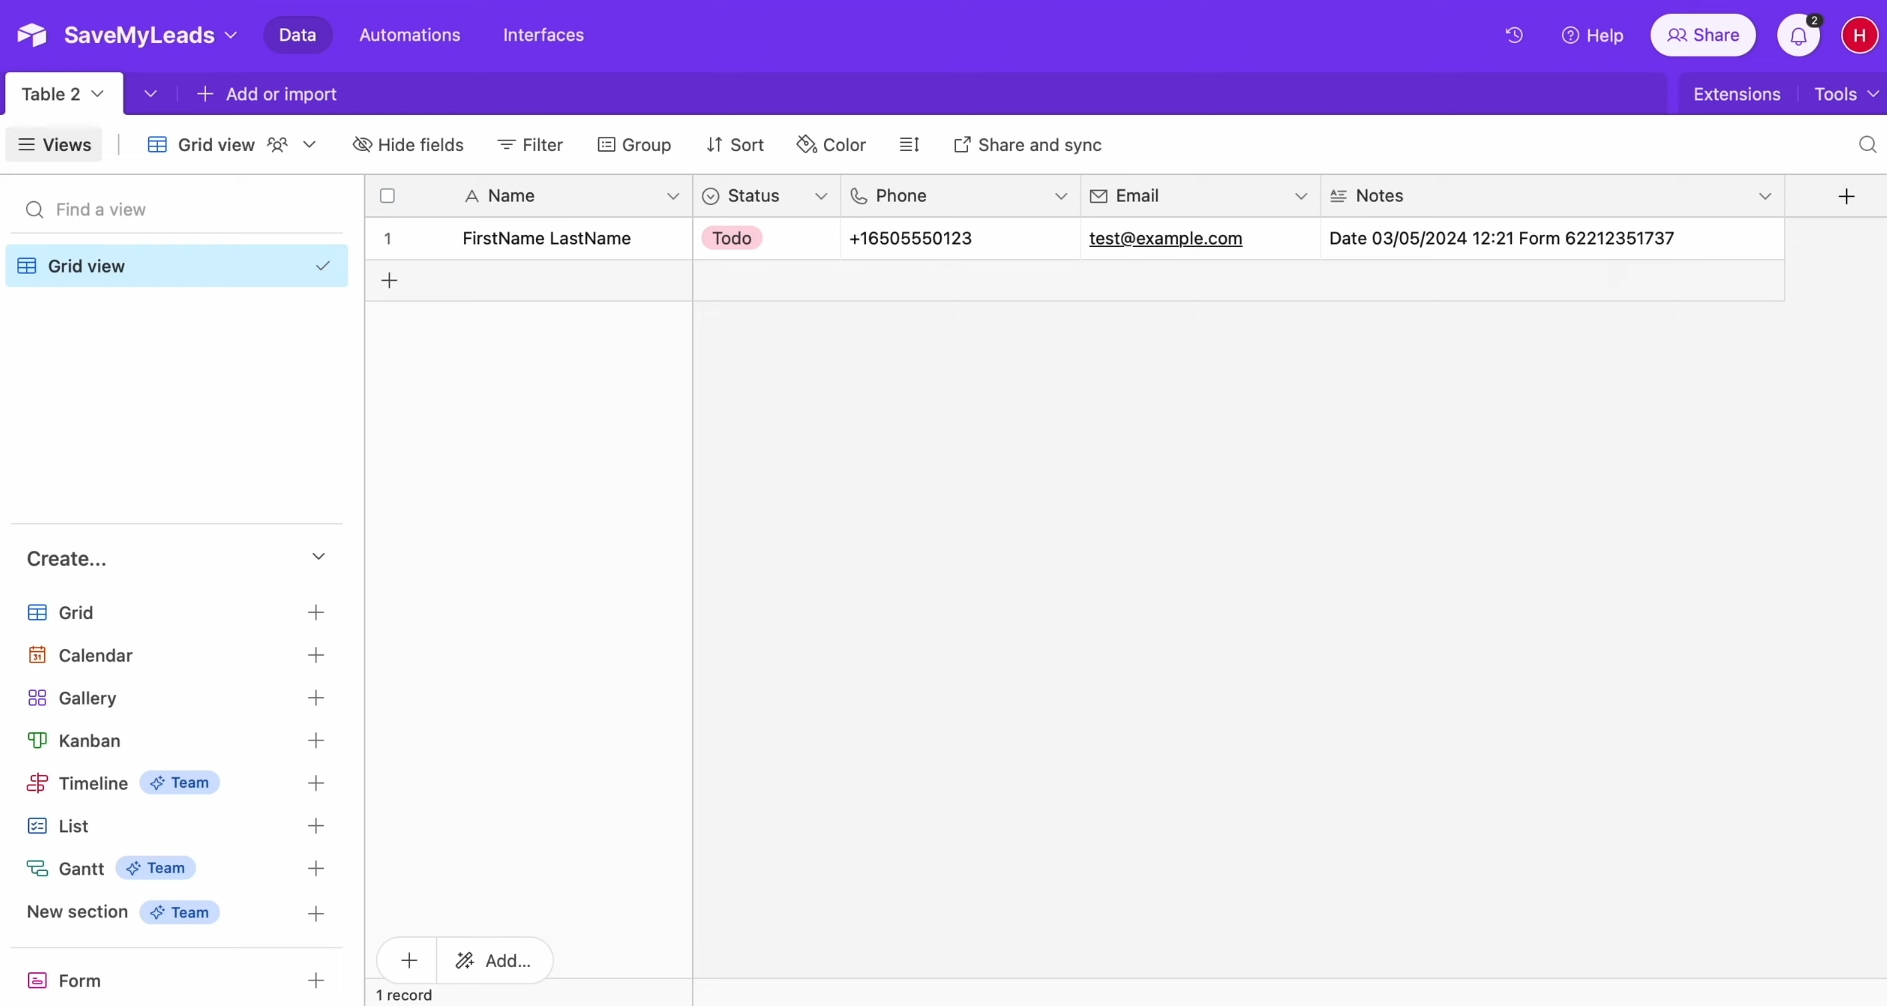
lead from Google Lead Form. If you need to make any adjustments, click "Back". To check if all the settings are correct, click "Send test data to Airtable".
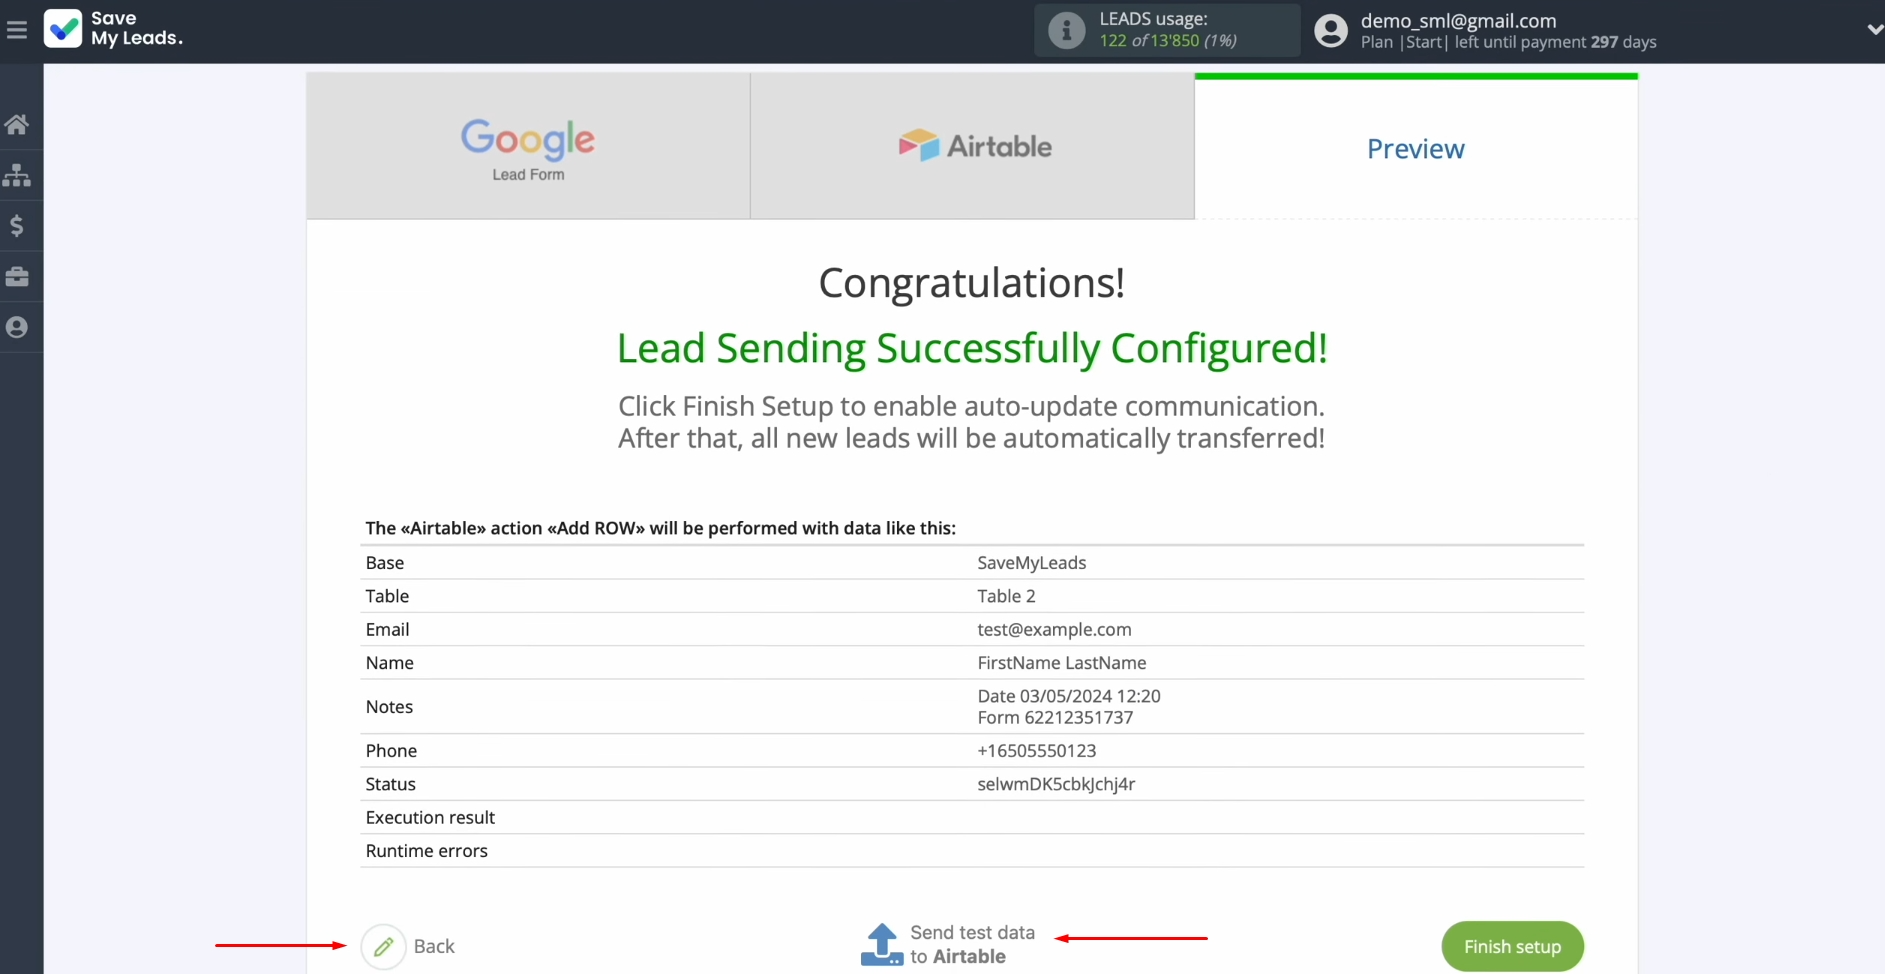
After
successful sending, go to Airtable and check the result.
If you are
satisfied with everything, return to SaveMyLeads and continue setting up the Airtable + Google Lead Form integration.
- Automate the work with leads from the Facebook advertising account
- Empower with integrations and instant transfer of leads
- Don't spend money on developers or integrators
- Save time by automating routine tasks
Setting Up Auto-update
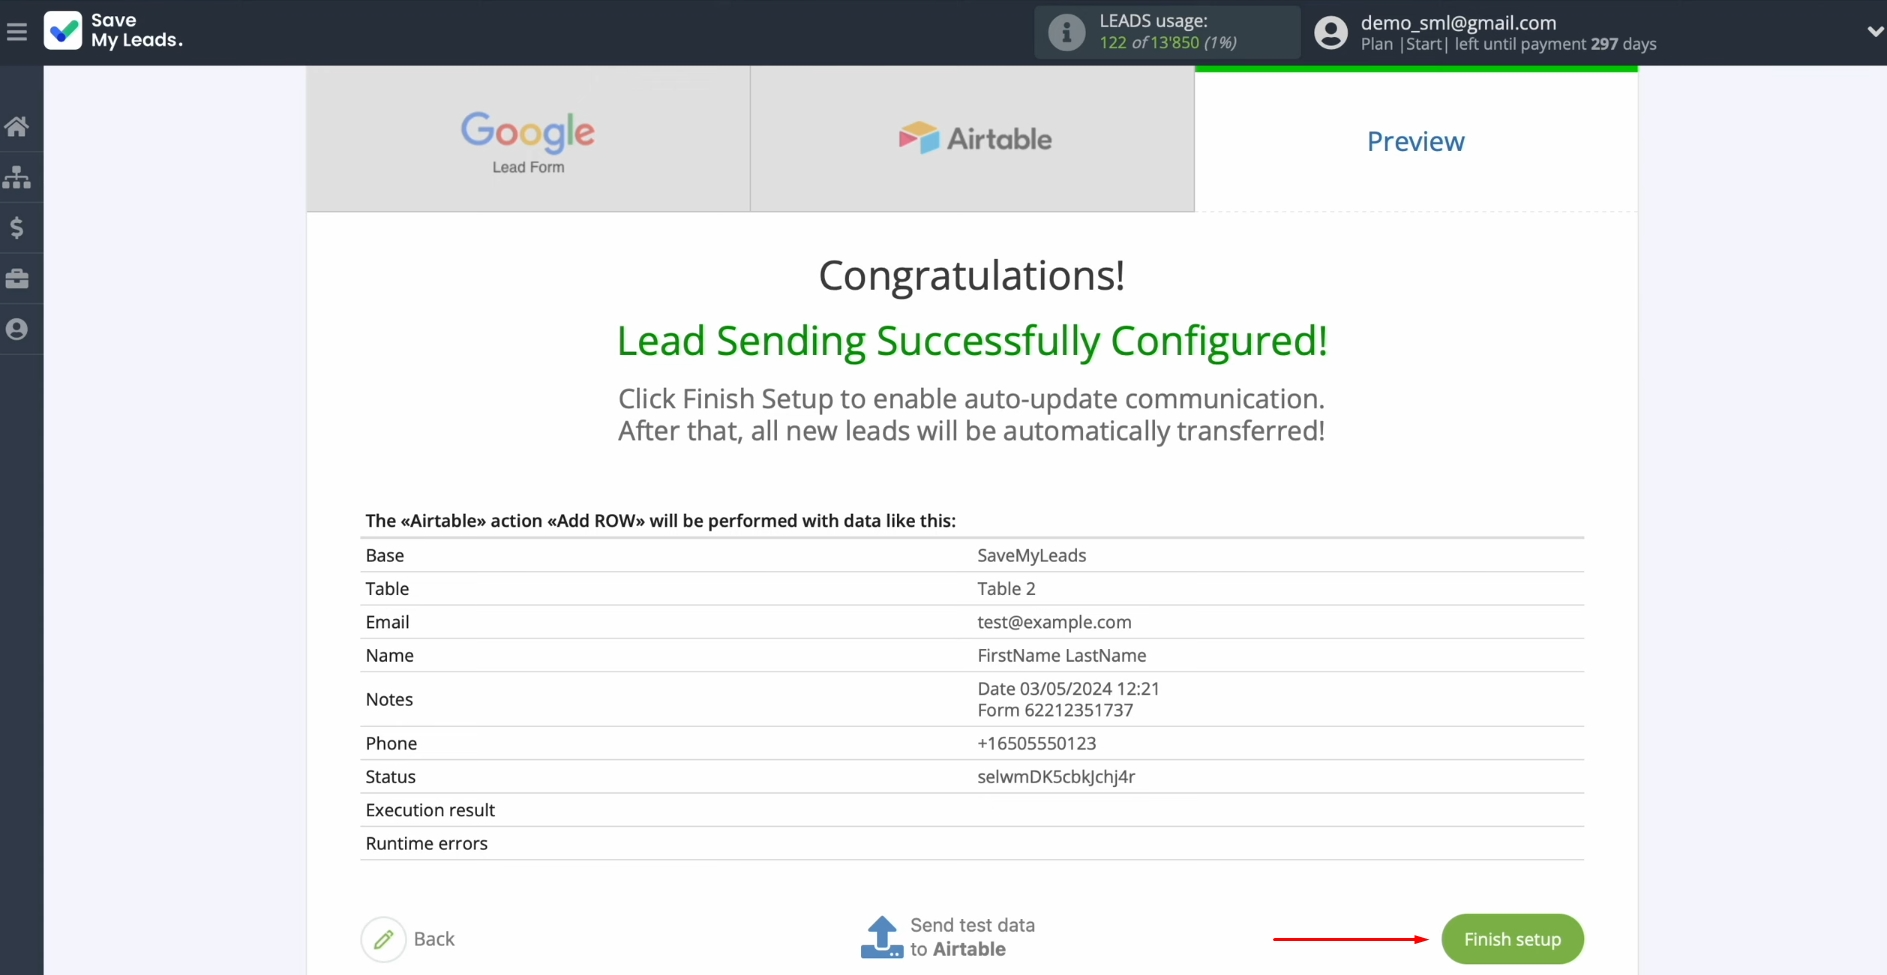
Click “Finish setup” to enable auto-update of the connection. In this case, all new leads from Google Lead Form will be instantly transferred to Airtable in the form of new rows.
If you want to
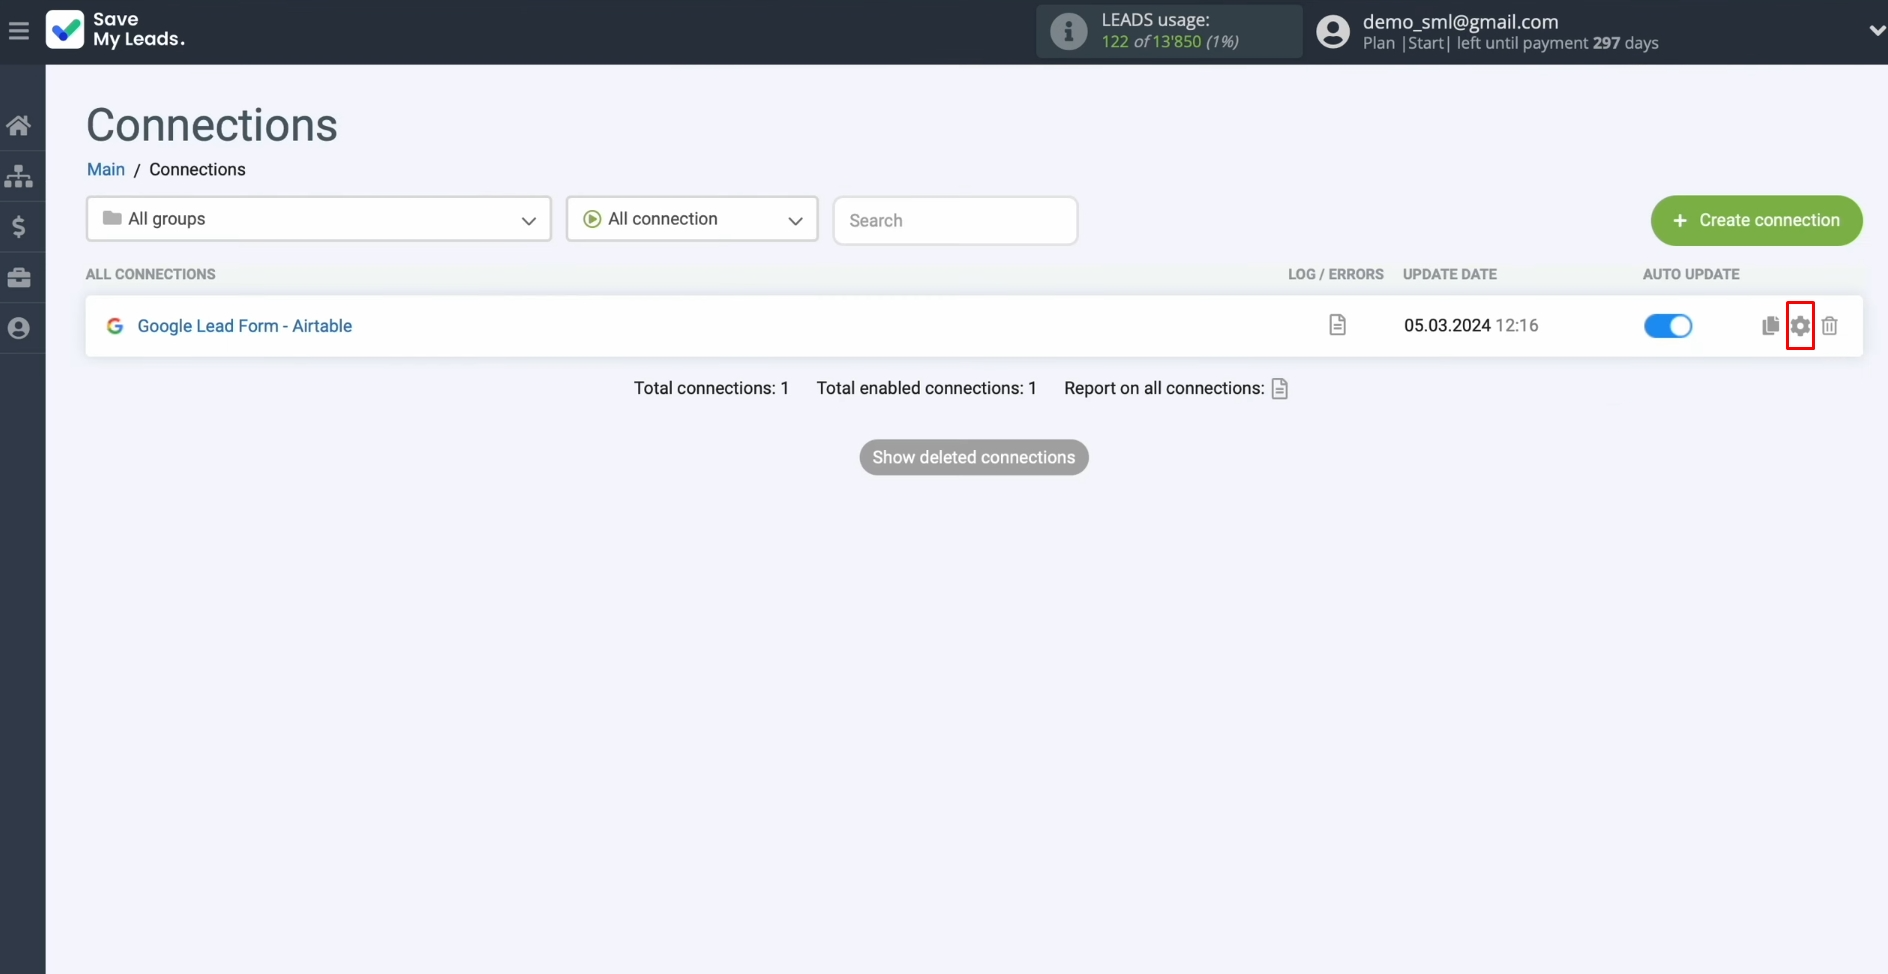
change the connection name, you can do this in its settings. To do this, click on the gear icon.
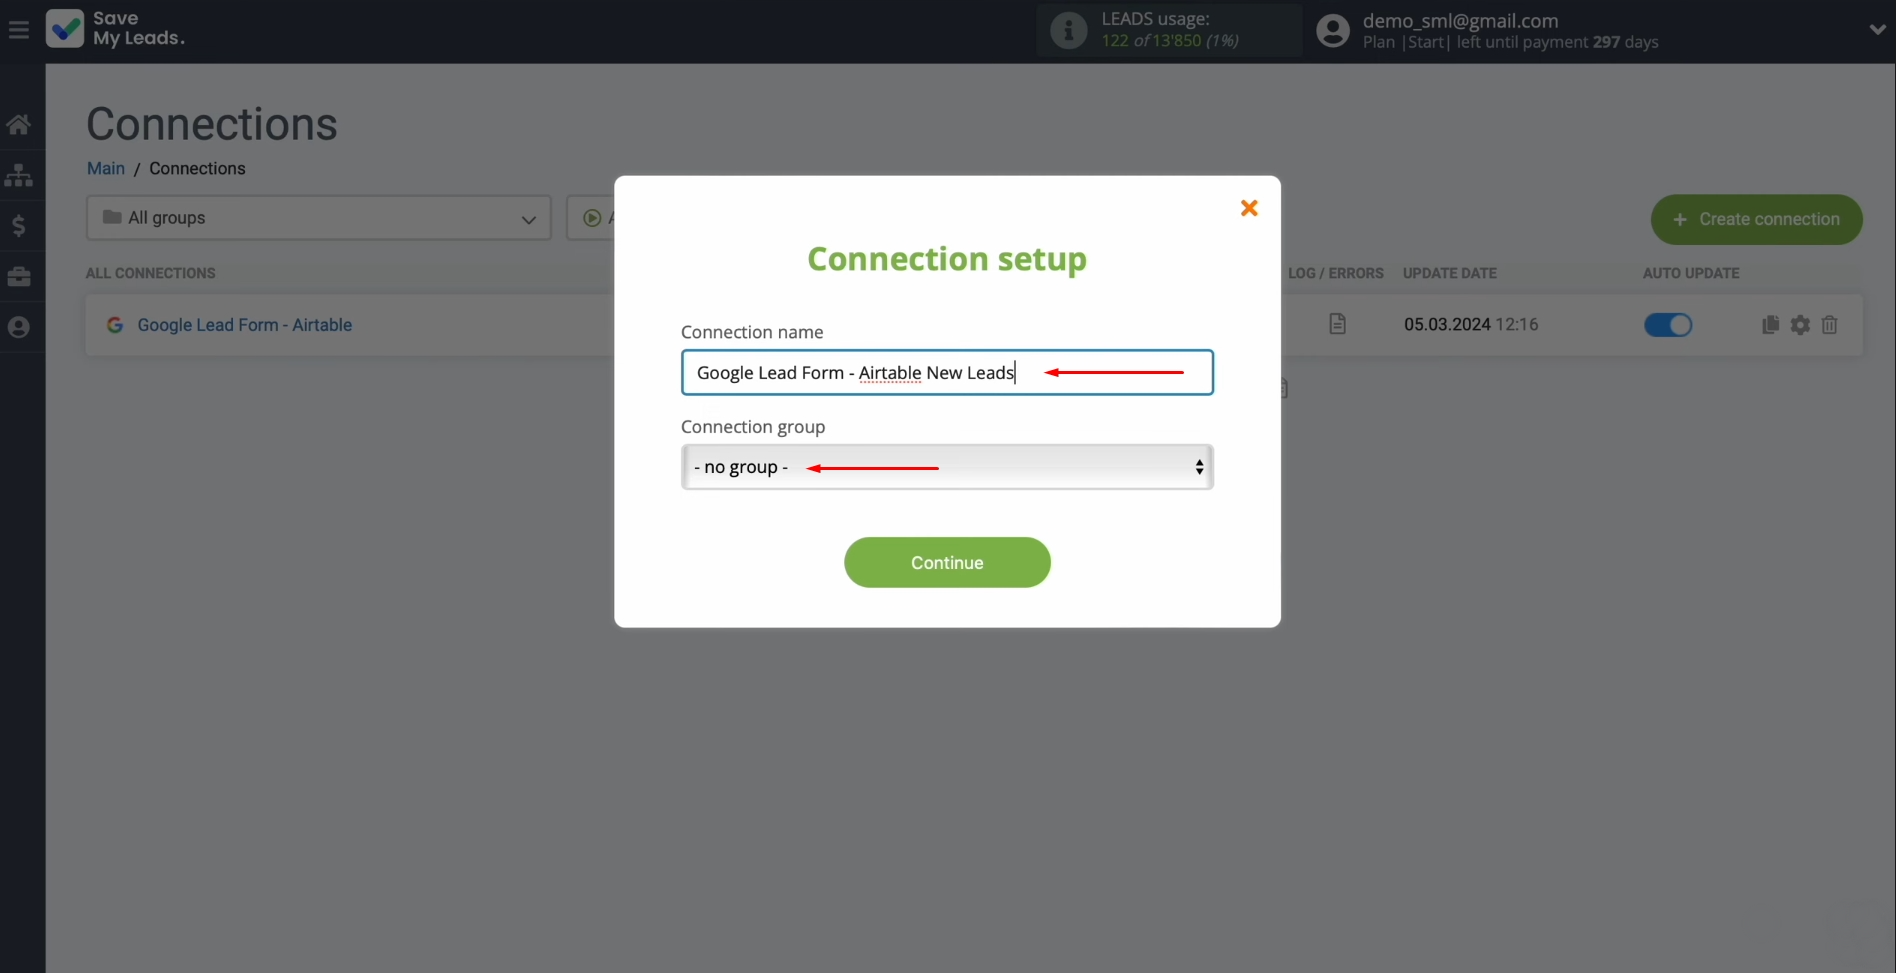
Here, you can change the connection name and add your connection to a group. After that, click “Continue”.
That's all. The Google Lead Form + Airtable integration has been completed.
Conclusion
By following our detailed guide, you have probably already successfully set up the Google Ads Lead Form + Airtable integration and received the results – automated transfer of lead data. By observing the process, you will be convinced that the connection between the platforms is really reliable and functions without failures.
The Airtable + Google Ads Lead Form integration will free you from the need to perform one of the most monotonous, boring manual operations, completely automating it. While SaveMyLeads takes care of this routine, you will be able to focus on other aspects of your business. Now you will be able to devote more time to improving communication with potential and regular customers, developing new marketing strategies, or other key areas. Automation of processes will simplify the management of your business and contribute to its further development. By choosing the SaveMyLeads connector for its implementation and enlisting its support, you will be able to improve the quality of your work and achieve your goals faster.
Step-by-Step Guides for Setting Up Integrations:
- Google Lead Form and Slack Integration: Automatically Sending Channel Notifications
- How-to Send Outlook Emails About New Facebook Leads
- How to Send Slack Channel Notifications from New Facebook Leads
- How to Connect Facebook Leads Ads to Kajabi
- Facebook and Snov.io Integration: Automatic Addition of Contacts
