Forward-thinking entrepreneurs and businesses continuously seek ways to streamline their workflows to save both time and money. This goal is achieved through the use of automation tools, system connectors, and AI. If you rely on Google Lead Form to gather customer data and Copper for lead management, there’s an easy way to make your processes faster and more efficient. All you need is to integrate these platforms via the SaveMyLeads. This tool will help you automate the transfer of lead data from forms directly into your CRM, enabling you to centralize leads in Copper. As a result, you’ll no longer need to waste time on manual data entry. Follow our step-by-step guide to set up and activate the Google Ads Lead Form and Copper integration seamlessly.
Why Choose SaveMyLeads?
When you properly sync Google Ads Leads with Copper using SaveMyLeads online connector, lead data from your forms will be automatically and reliably transferred to your CRM system. Once there, the data is instantly organized as new contacts, ready to be categorized by status and distributed among your managers for effective follow-up.
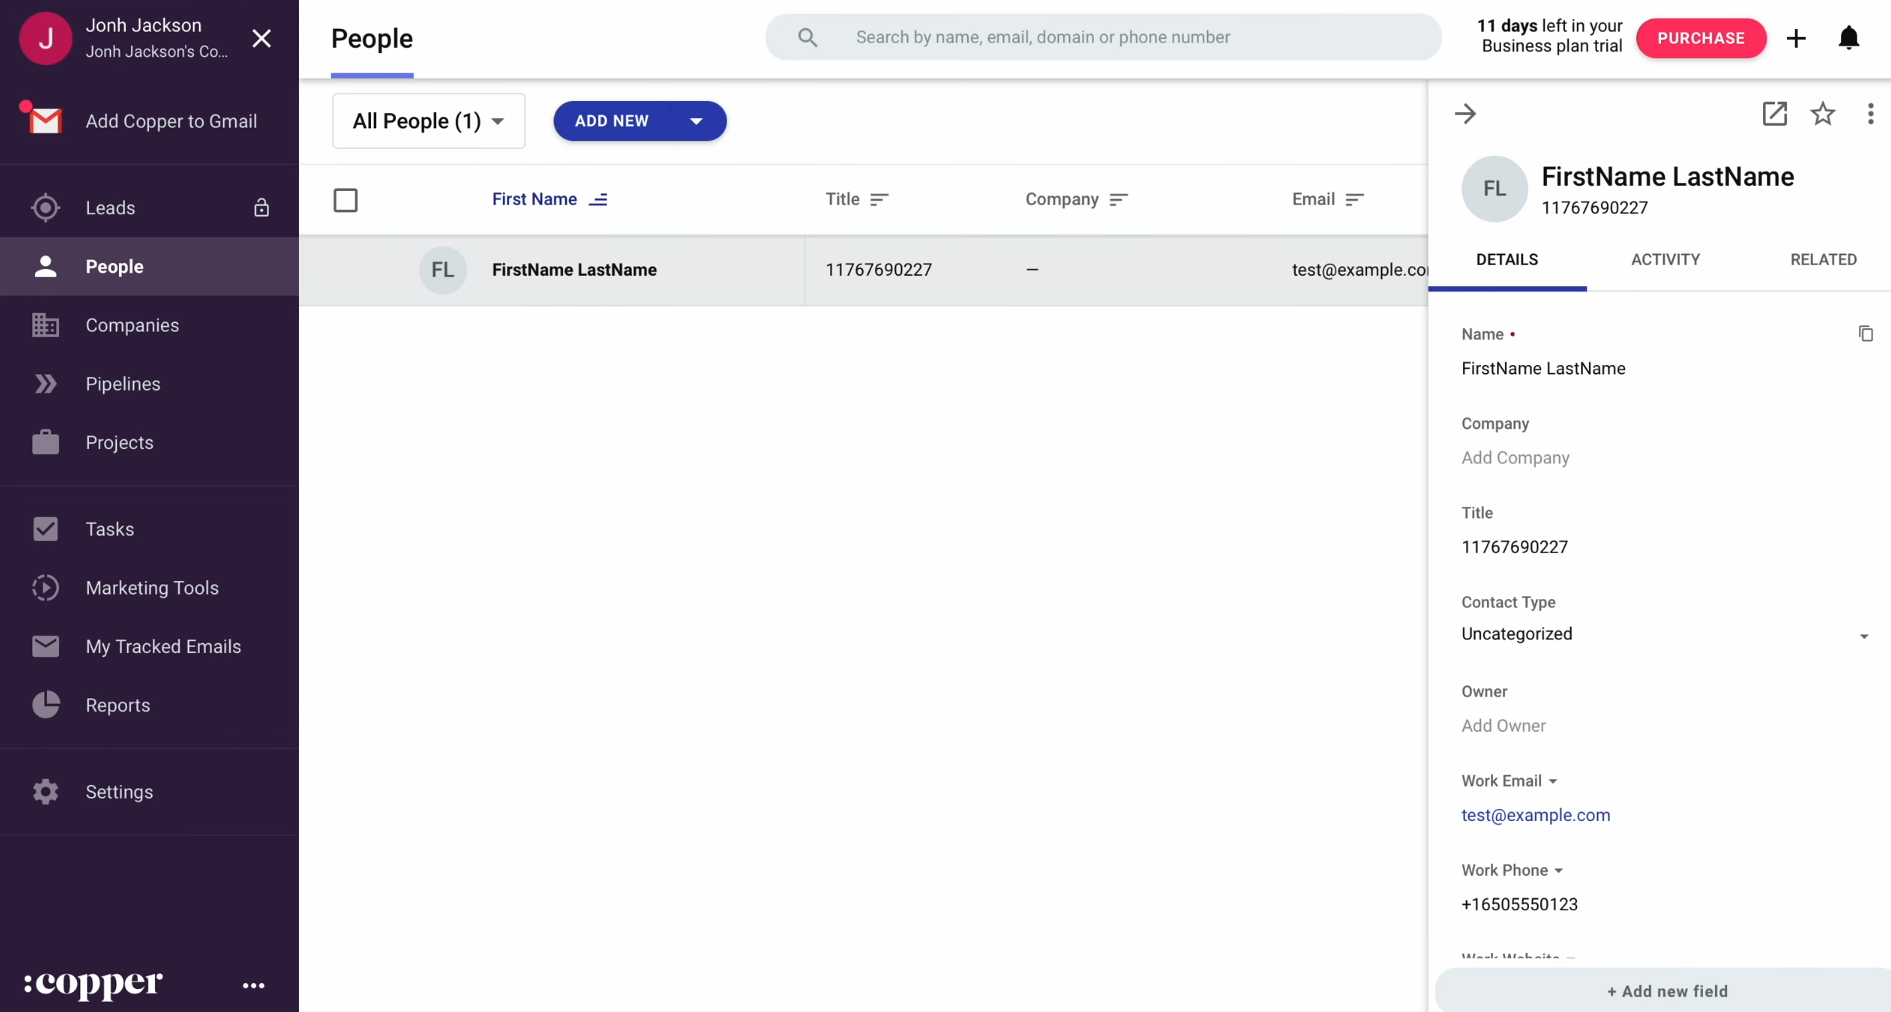
Here’s why SaveMyLeads is the perfect choice for Copper and Google Ads Lead
Form integration. First and foremost, this no-code tool makes setup
incredibly simple, quick, and hassle-free. Its user-friendly interface ensures
that even individuals with minimal technical skills can complete the process in
under 10 minutes. Additionally, SML provides a wide array of pre-built solutions for CRM systems, email and SMS platforms, messengers,
task management tools, Google services, and more. These features can be
invaluable if you’re looking to fully automate and integrate other systems you
rely on. Moreover, the pricing is designed to be accessible and
budget-friendly. Finally, we must mention the exceptional technical support
team — professional, responsive, and always ready to assist, making SaveMyLeads a
standout option.
How to Set Up Google Lead Form and Copper Integration
Here’s a simple step-by-step guide:
- Design a form that suits your specific requirements.
- Sign up for an account on SaveMyLeads.
- Link Google Lead Form to the connector, setting it as the data source.
- Configure Copper in the connector as the data recipient.
- Enable the auto-update mode to keep your data synchronized.
We’ll skip the explanation of how to create a Google Ads form, as you likely already know how to handle this task. Instead, let’s focus on a detailed walkthrough of how to connect Google Ads Lead Form to Copper.
Setting Up the Data Source – Google Lead Form
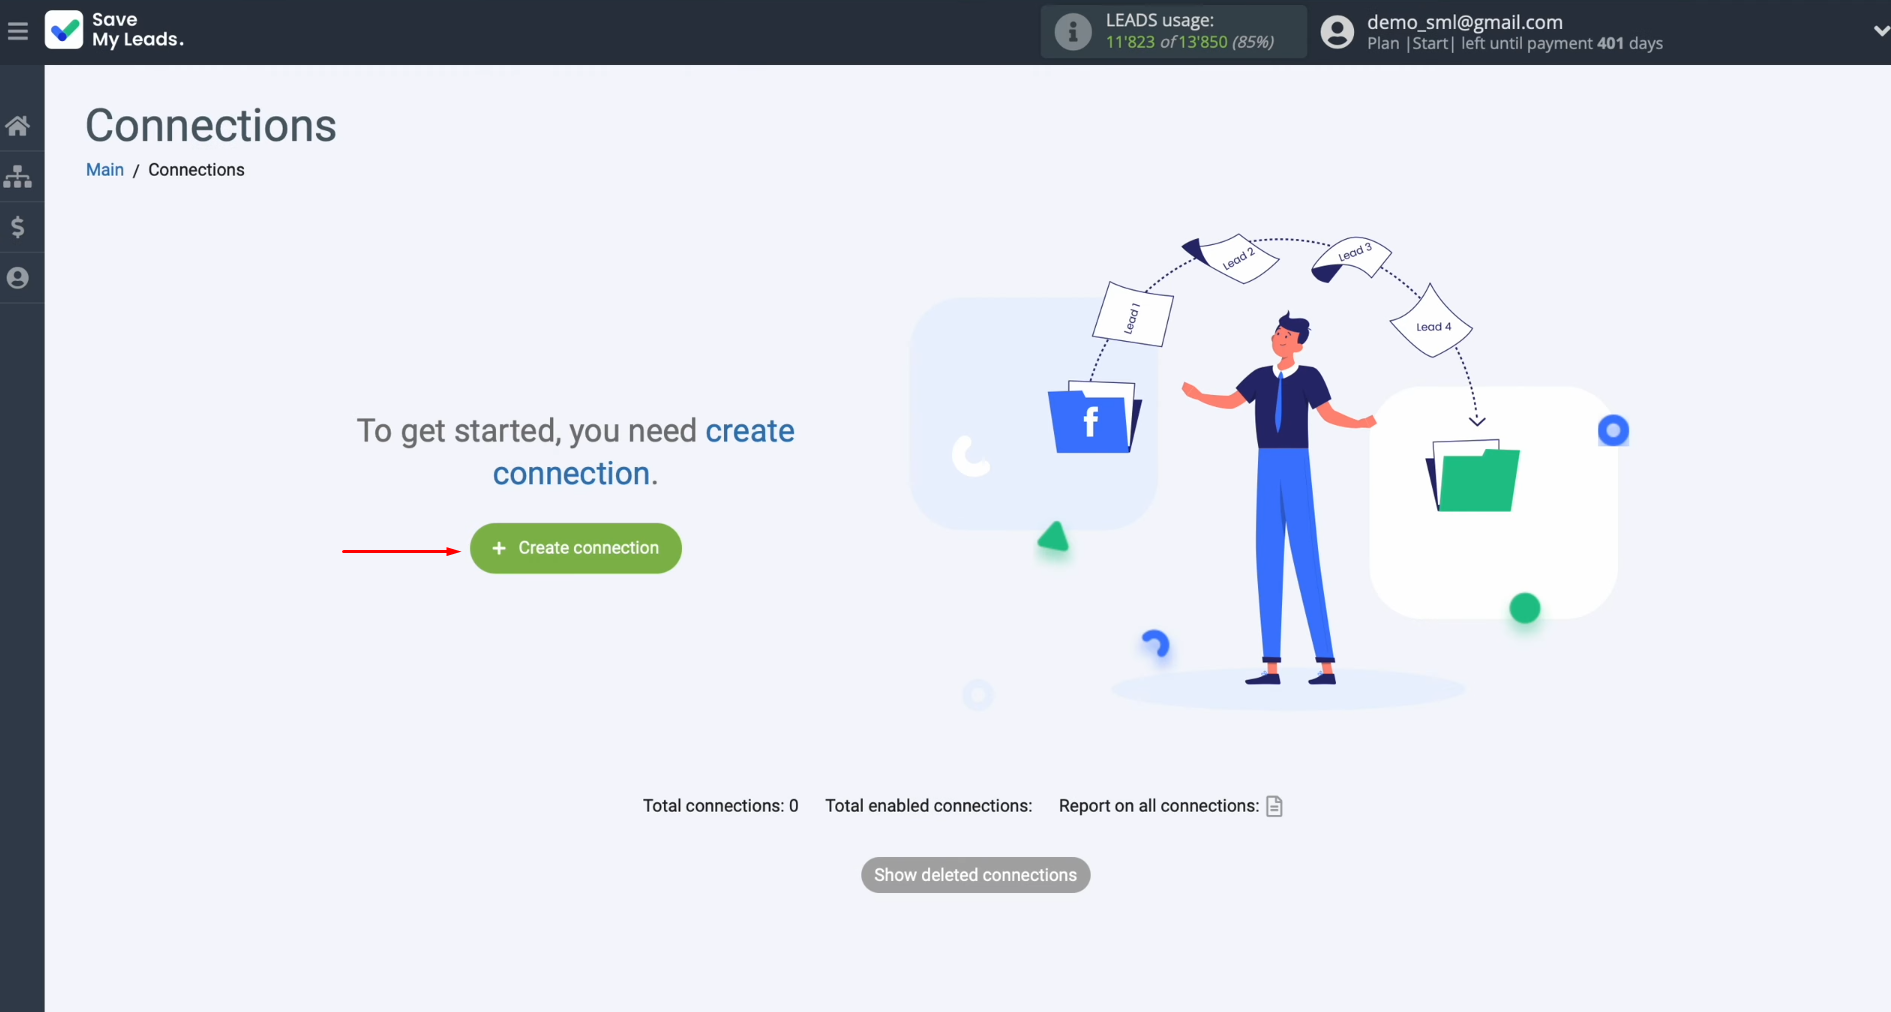
To start Google Leads and Copper integration, begin by creating a new connection.
Select the data source for importing leads; in this case,
opt for Google Lead Form.
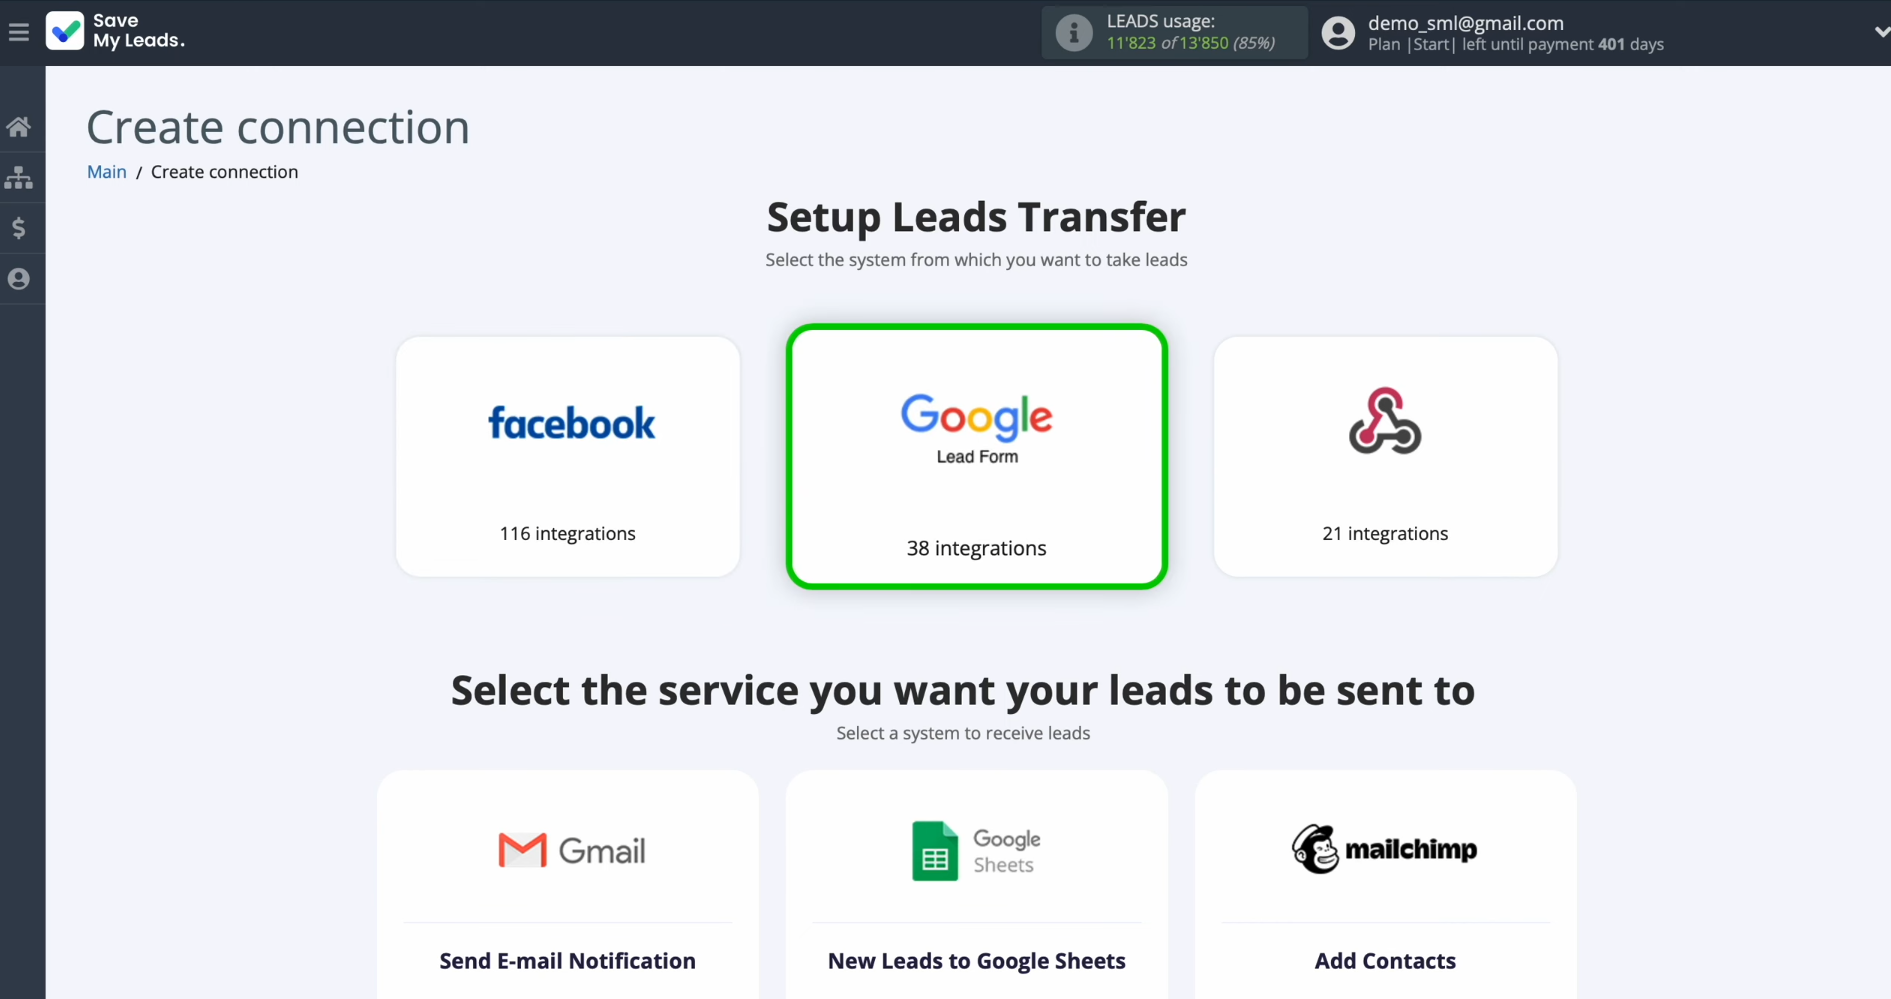
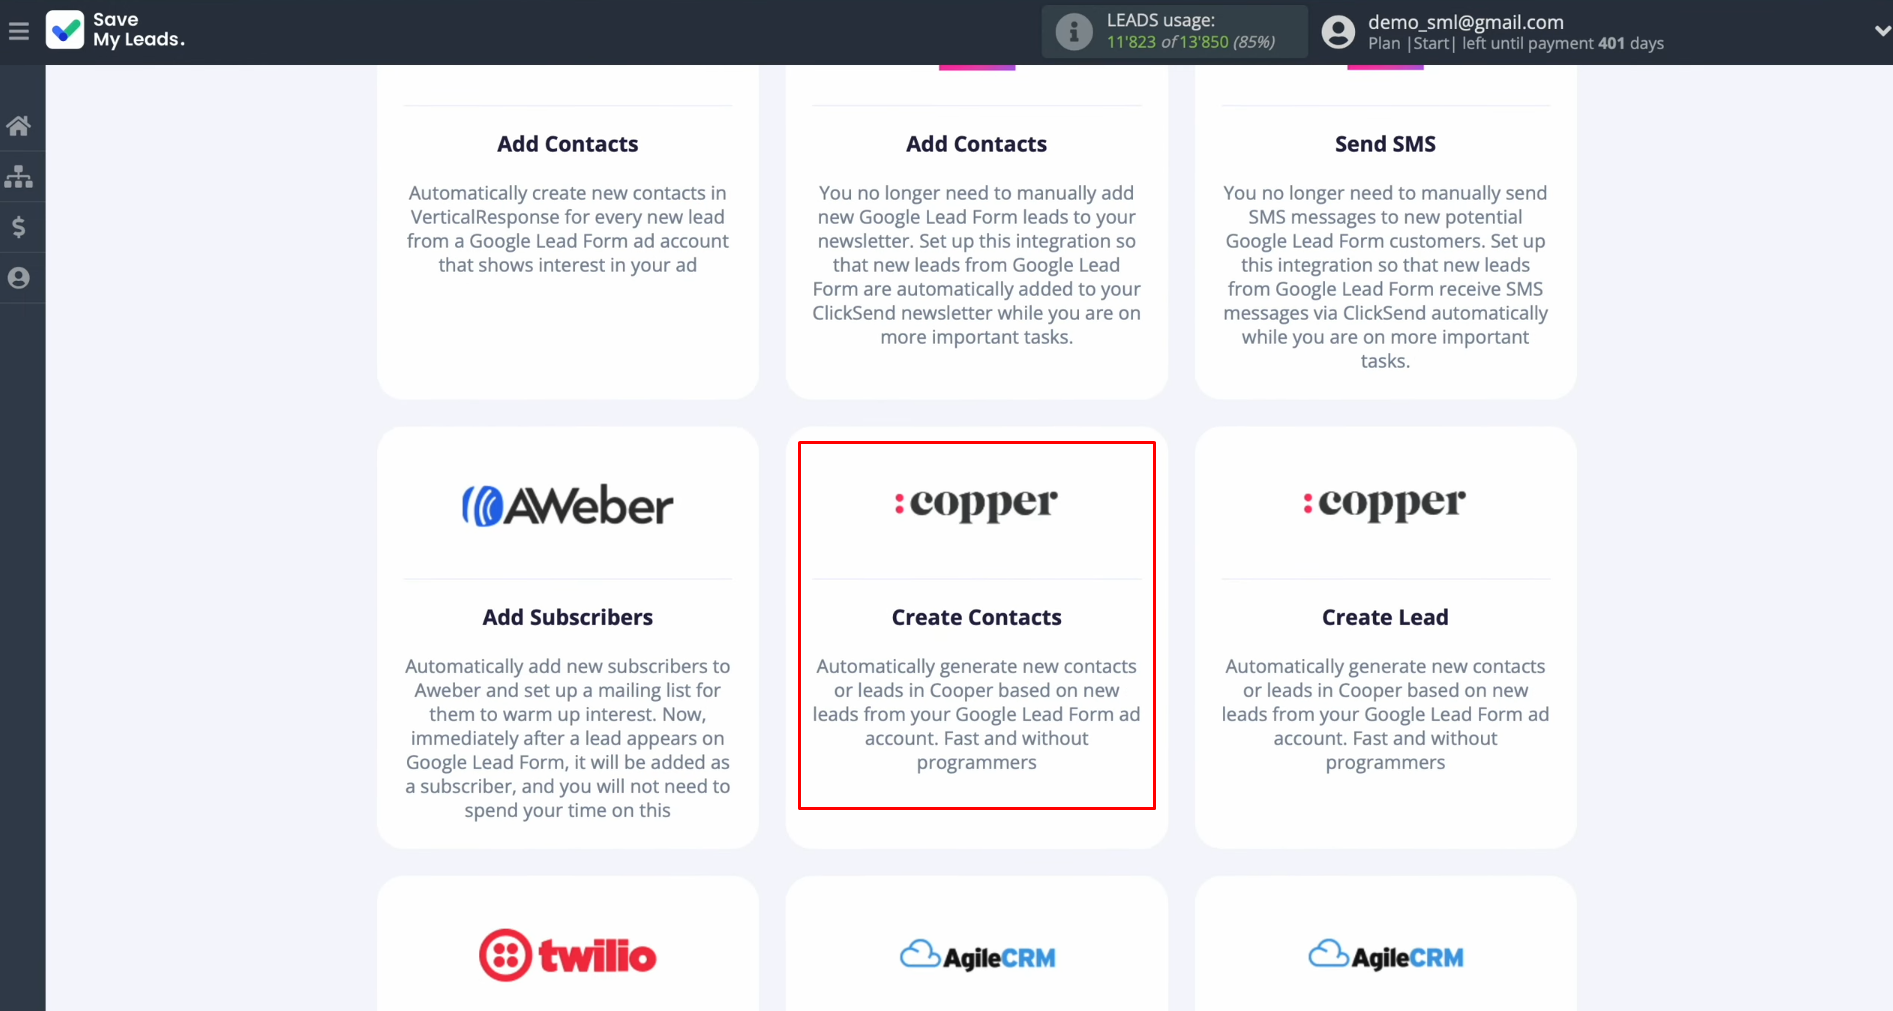
Next, specify the destination system for transferring
leads. For this integration, select Copper (Create Contacts).
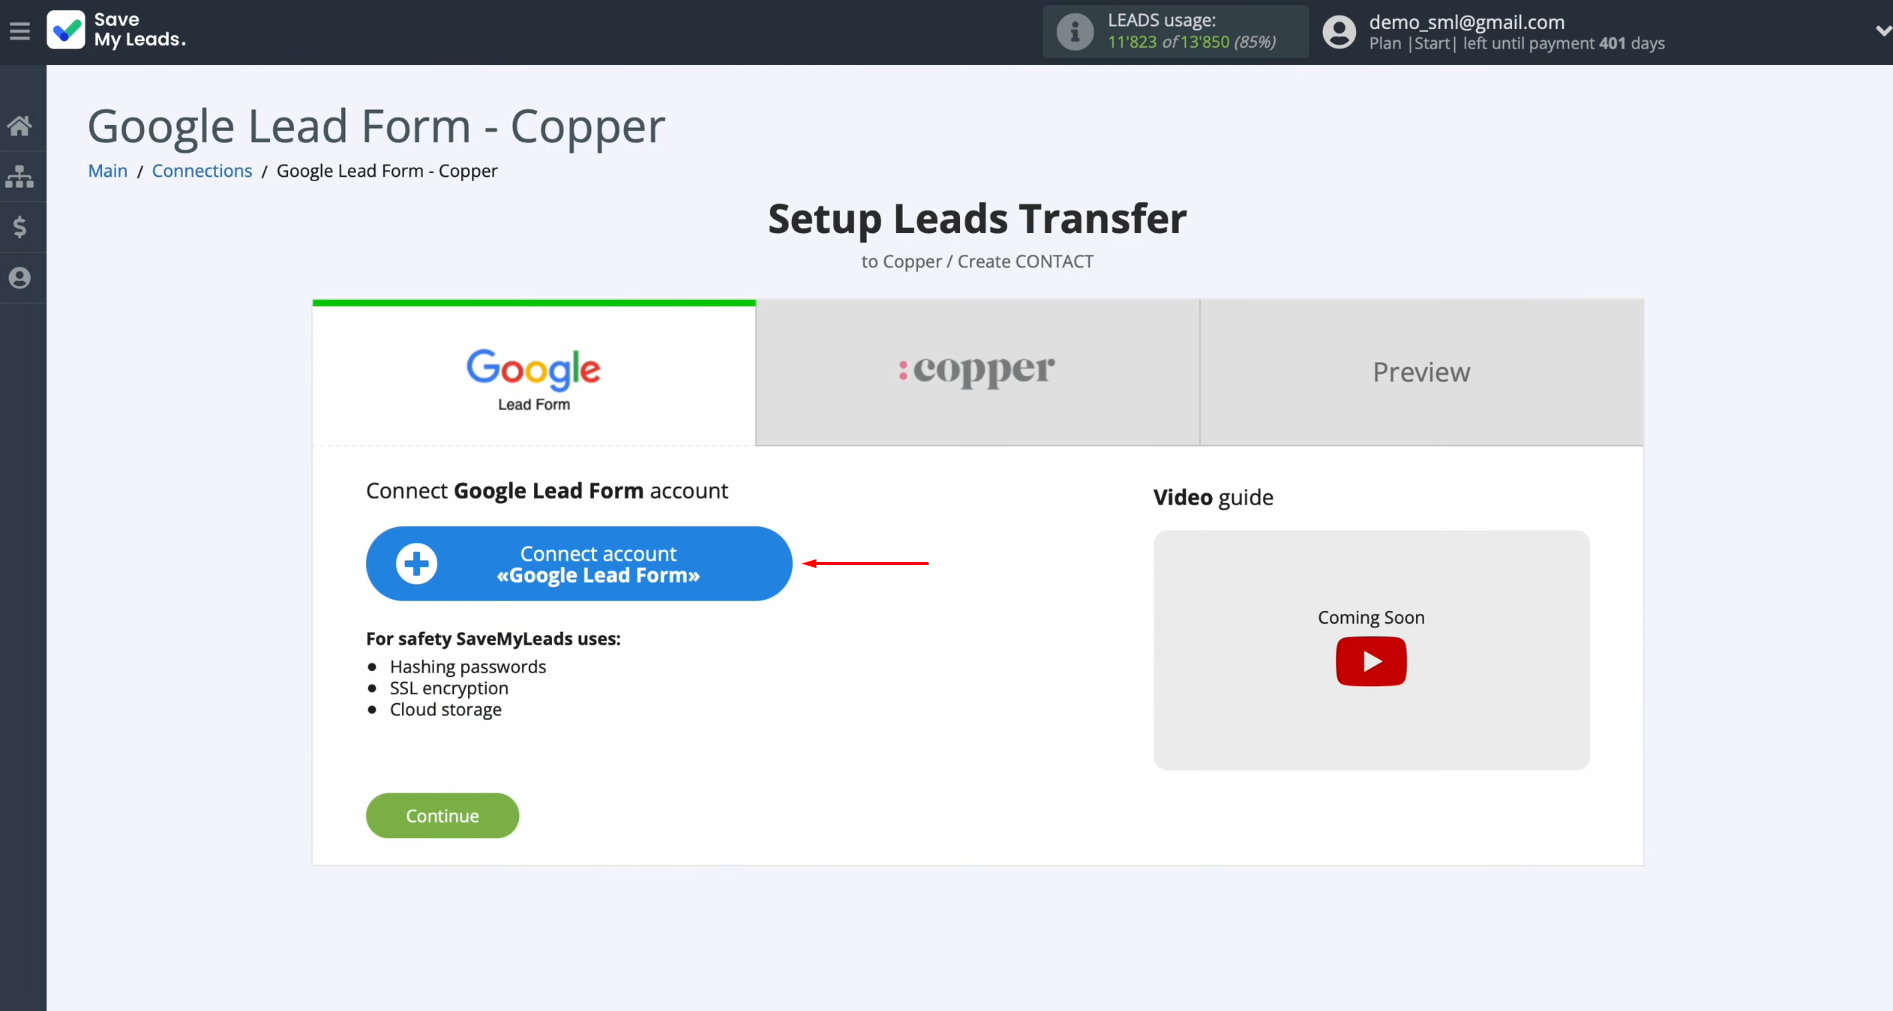
Connect your Google Lead Form account to SaveMyLeads.
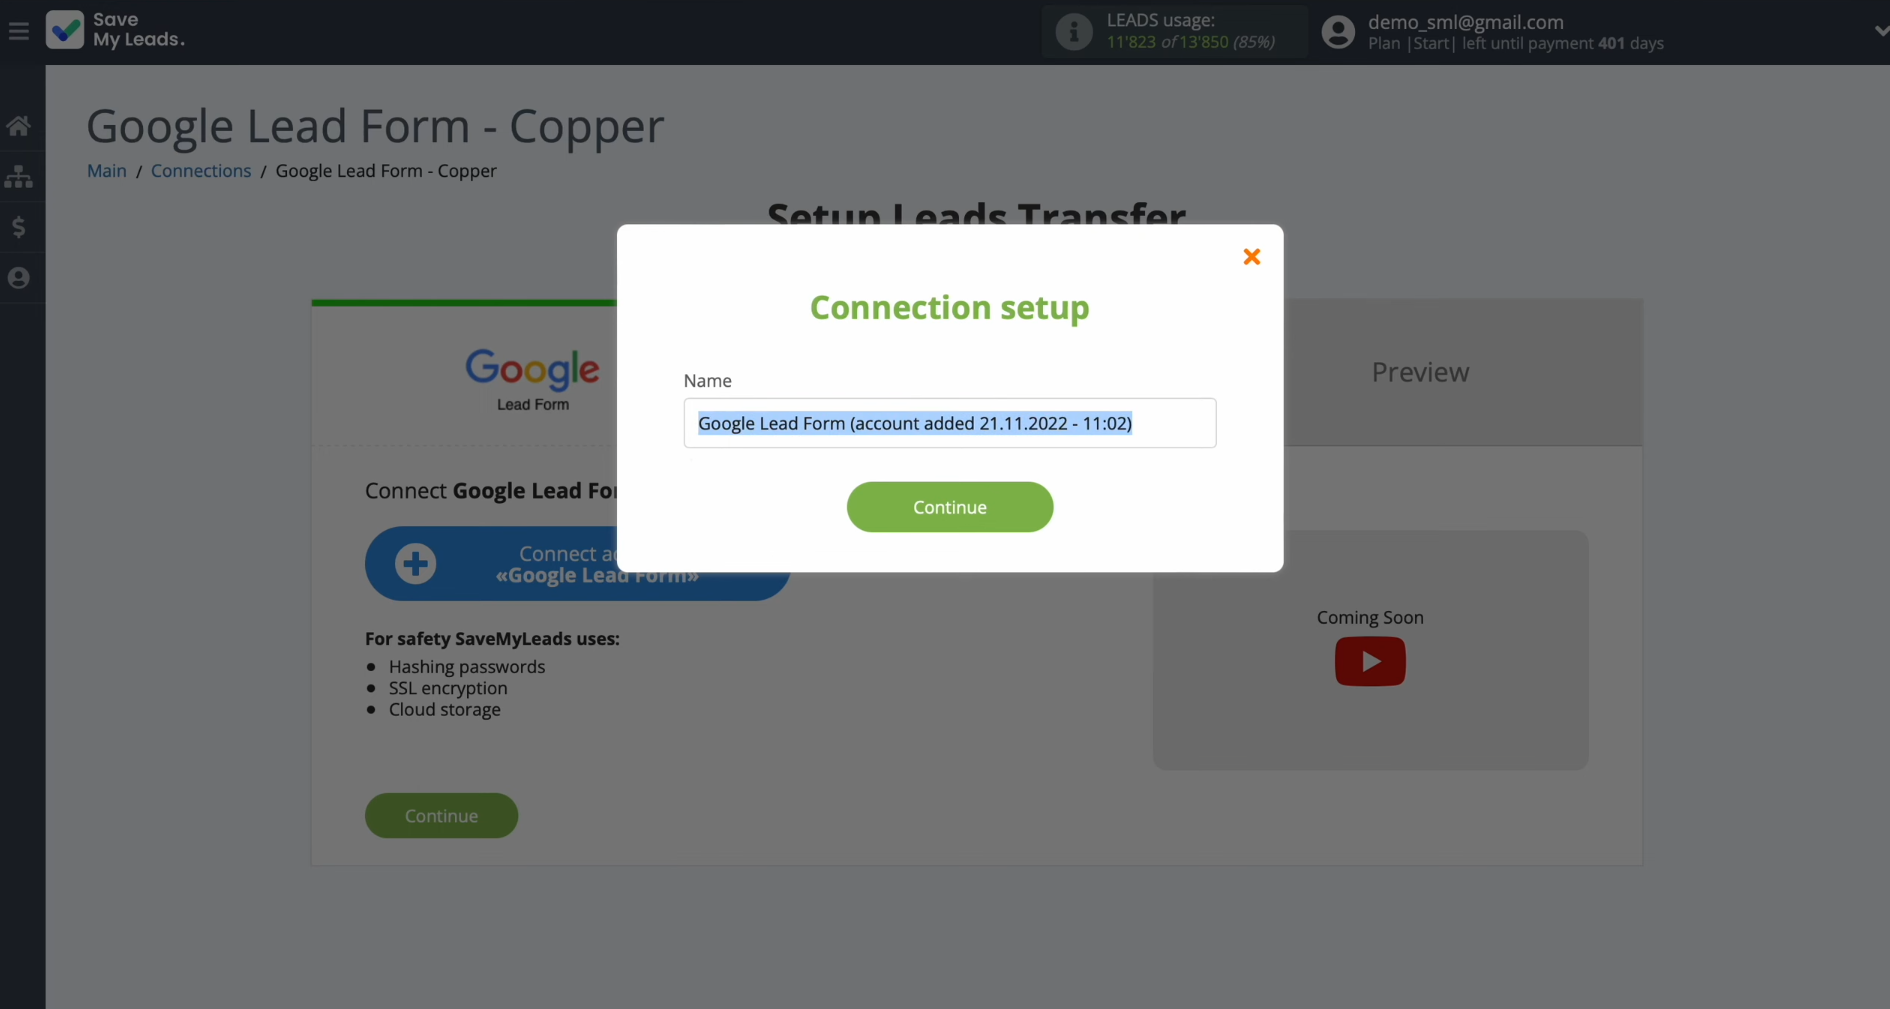
You can assign a custom name to your connection in this
step or proceed directly by clicking “Continue.”
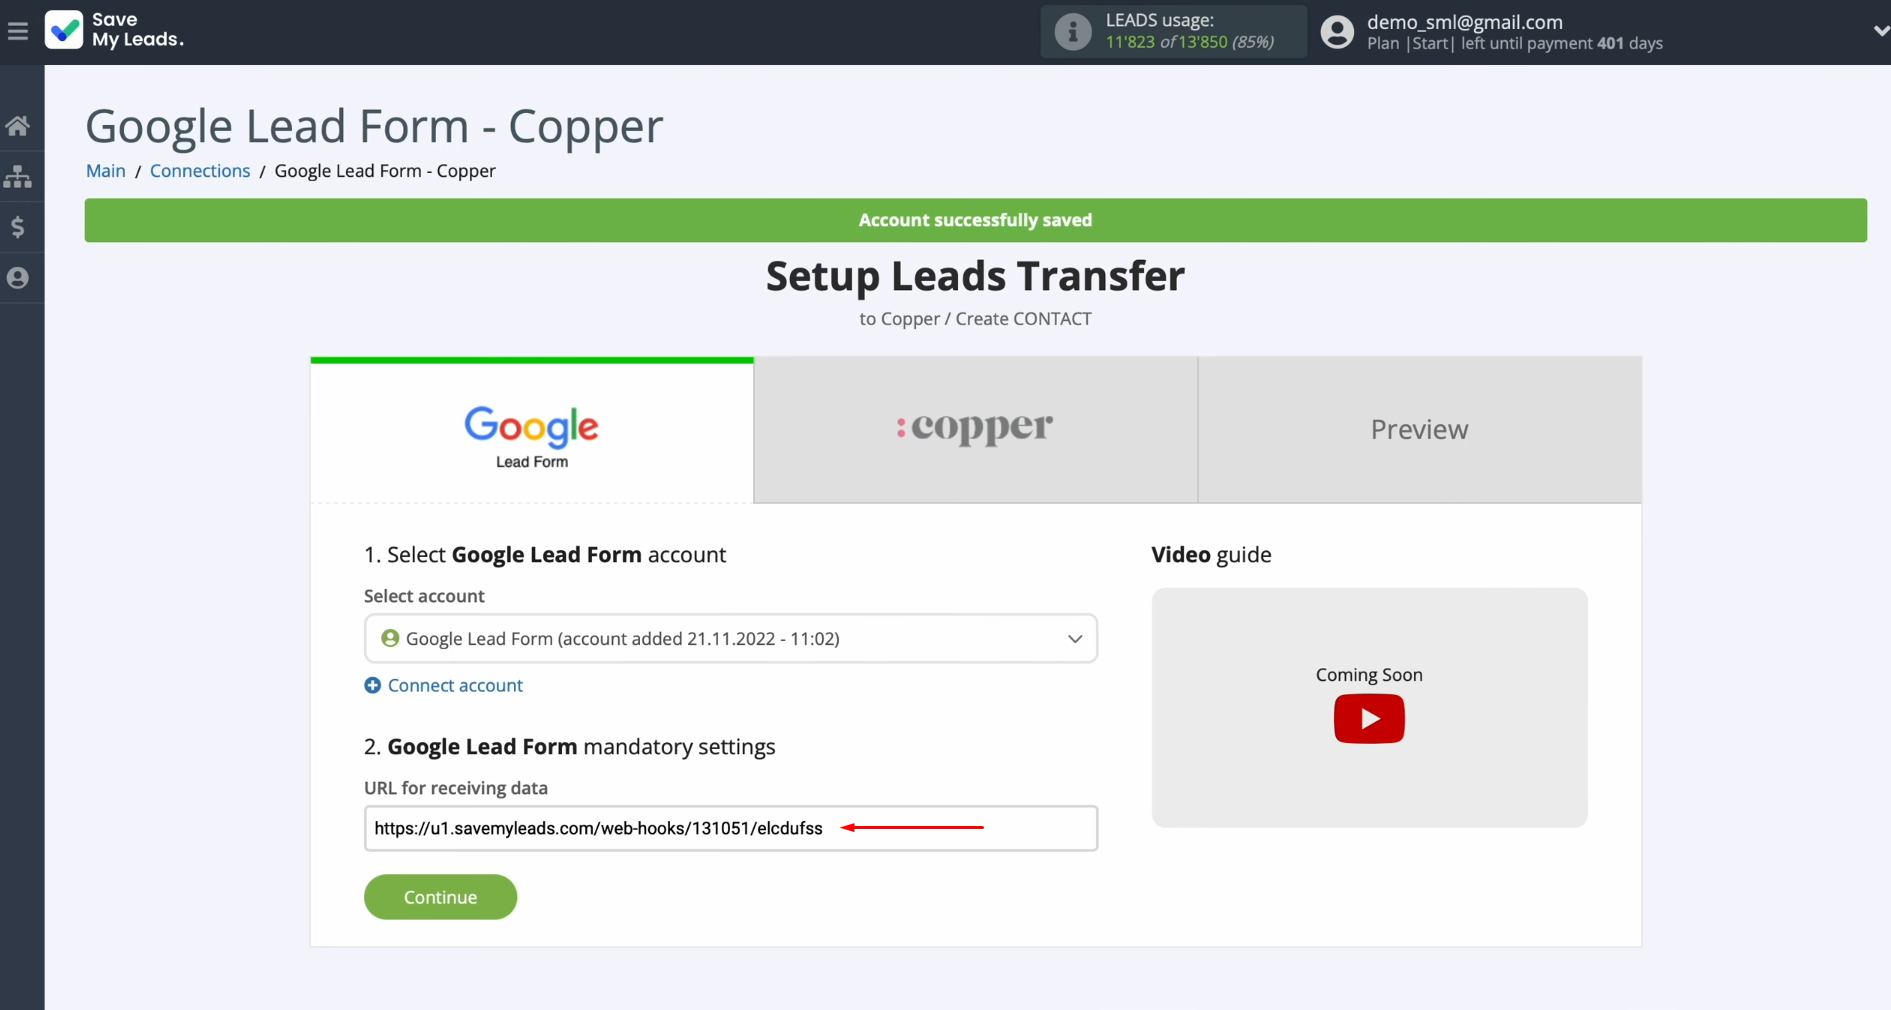
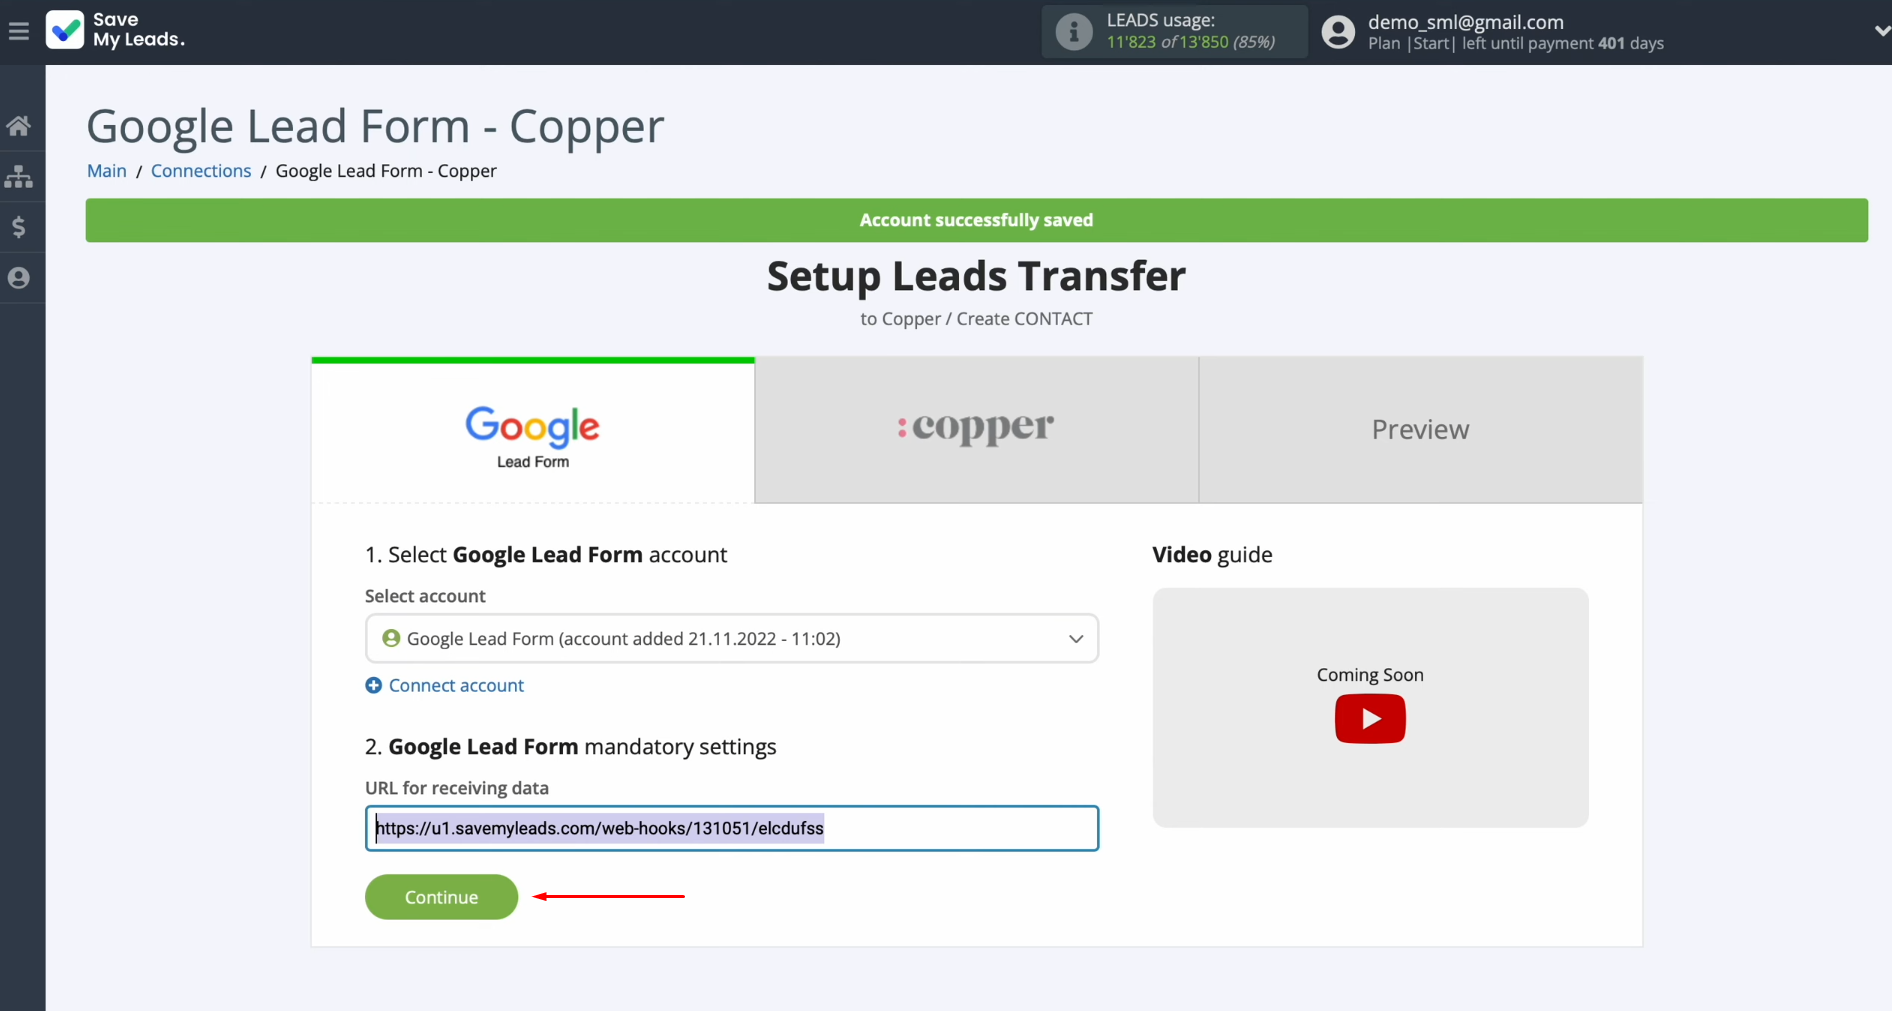
Once the account is successfully linked and visible in the
list, select it.
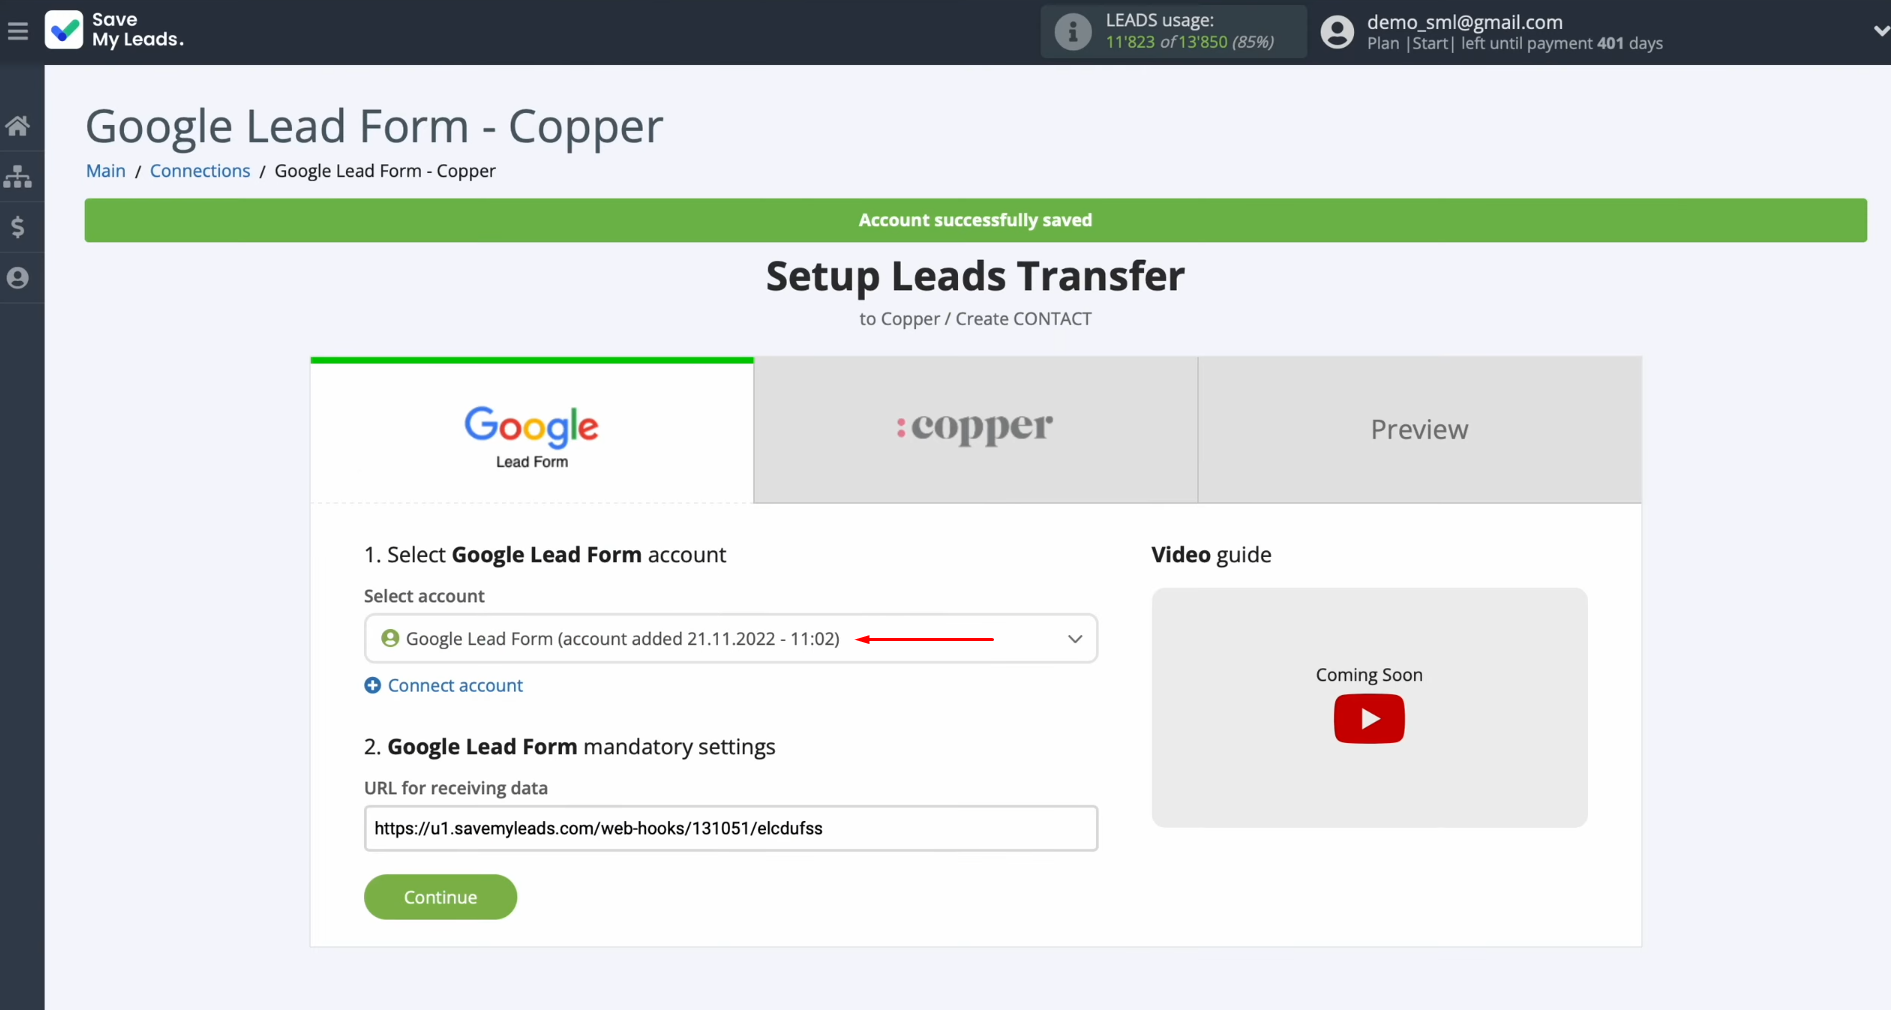
Copy the provided URL designed to receive data.
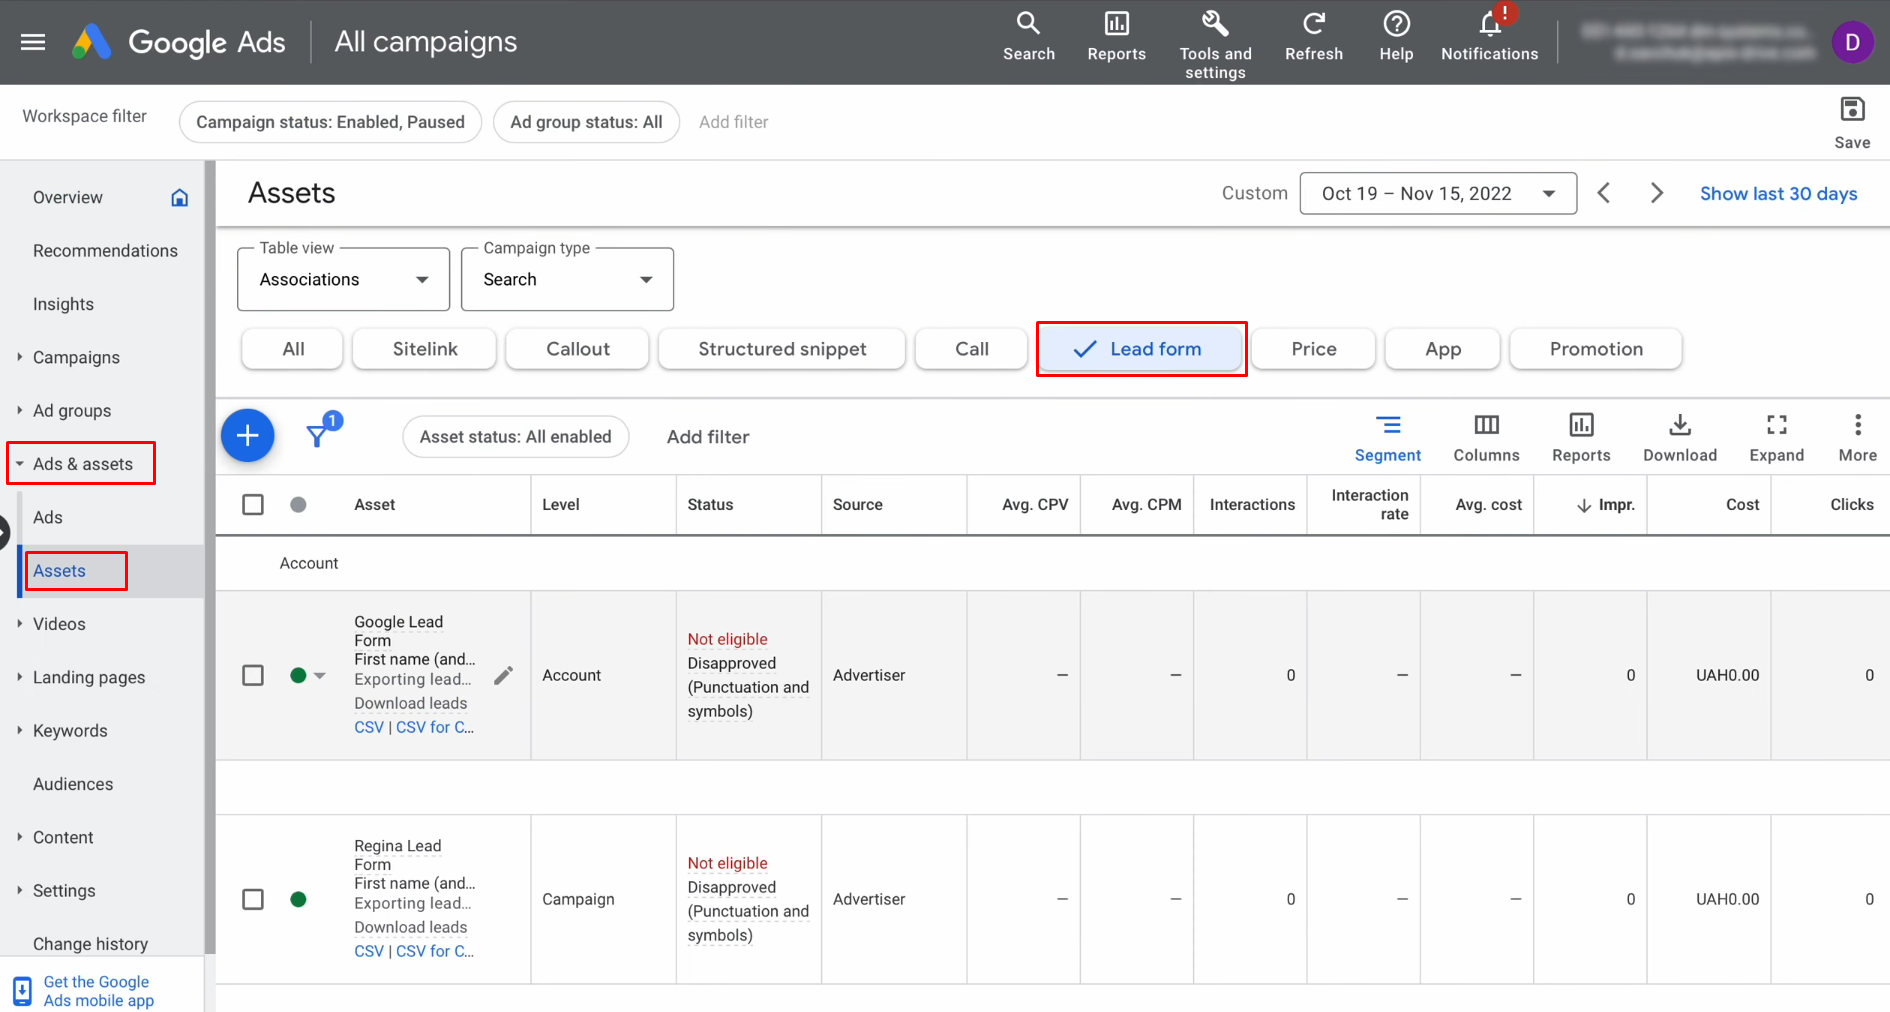
Log into your Google Ads account and navigate to the “Assets”
section.
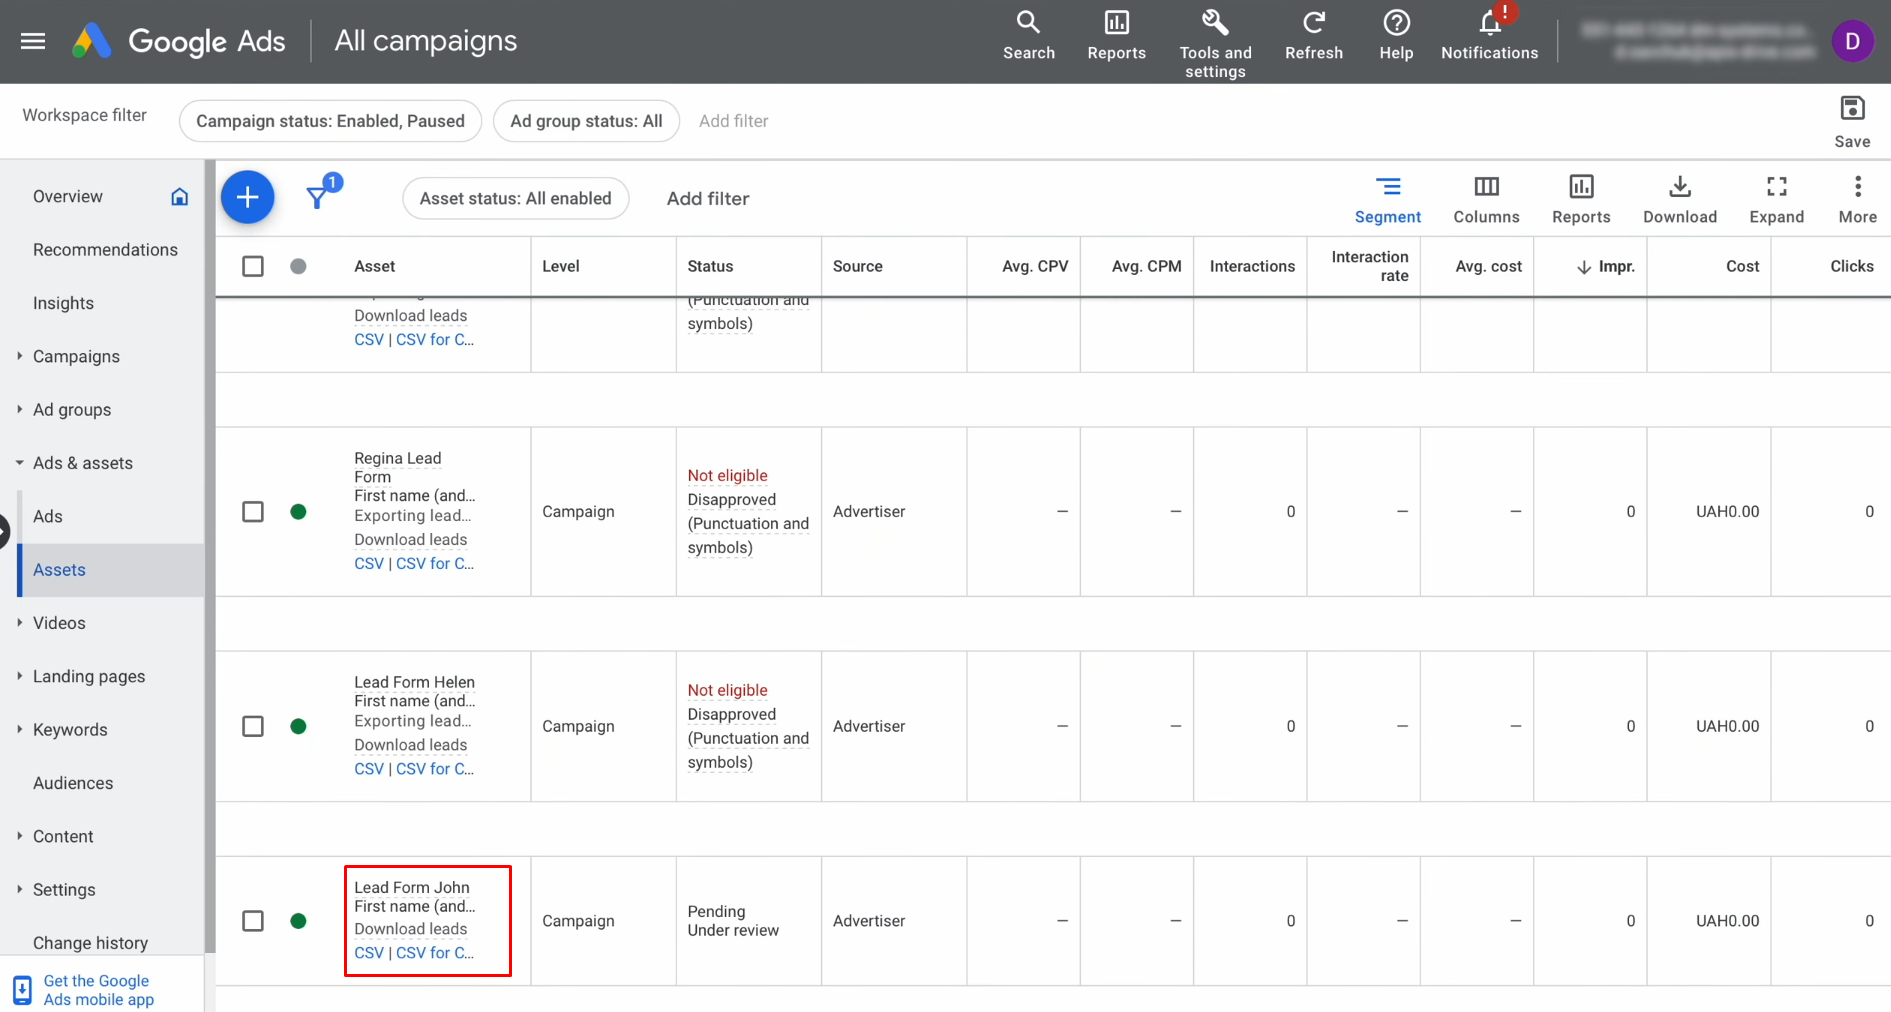
Locate and select the lead form you want to use for
capturing new leads.
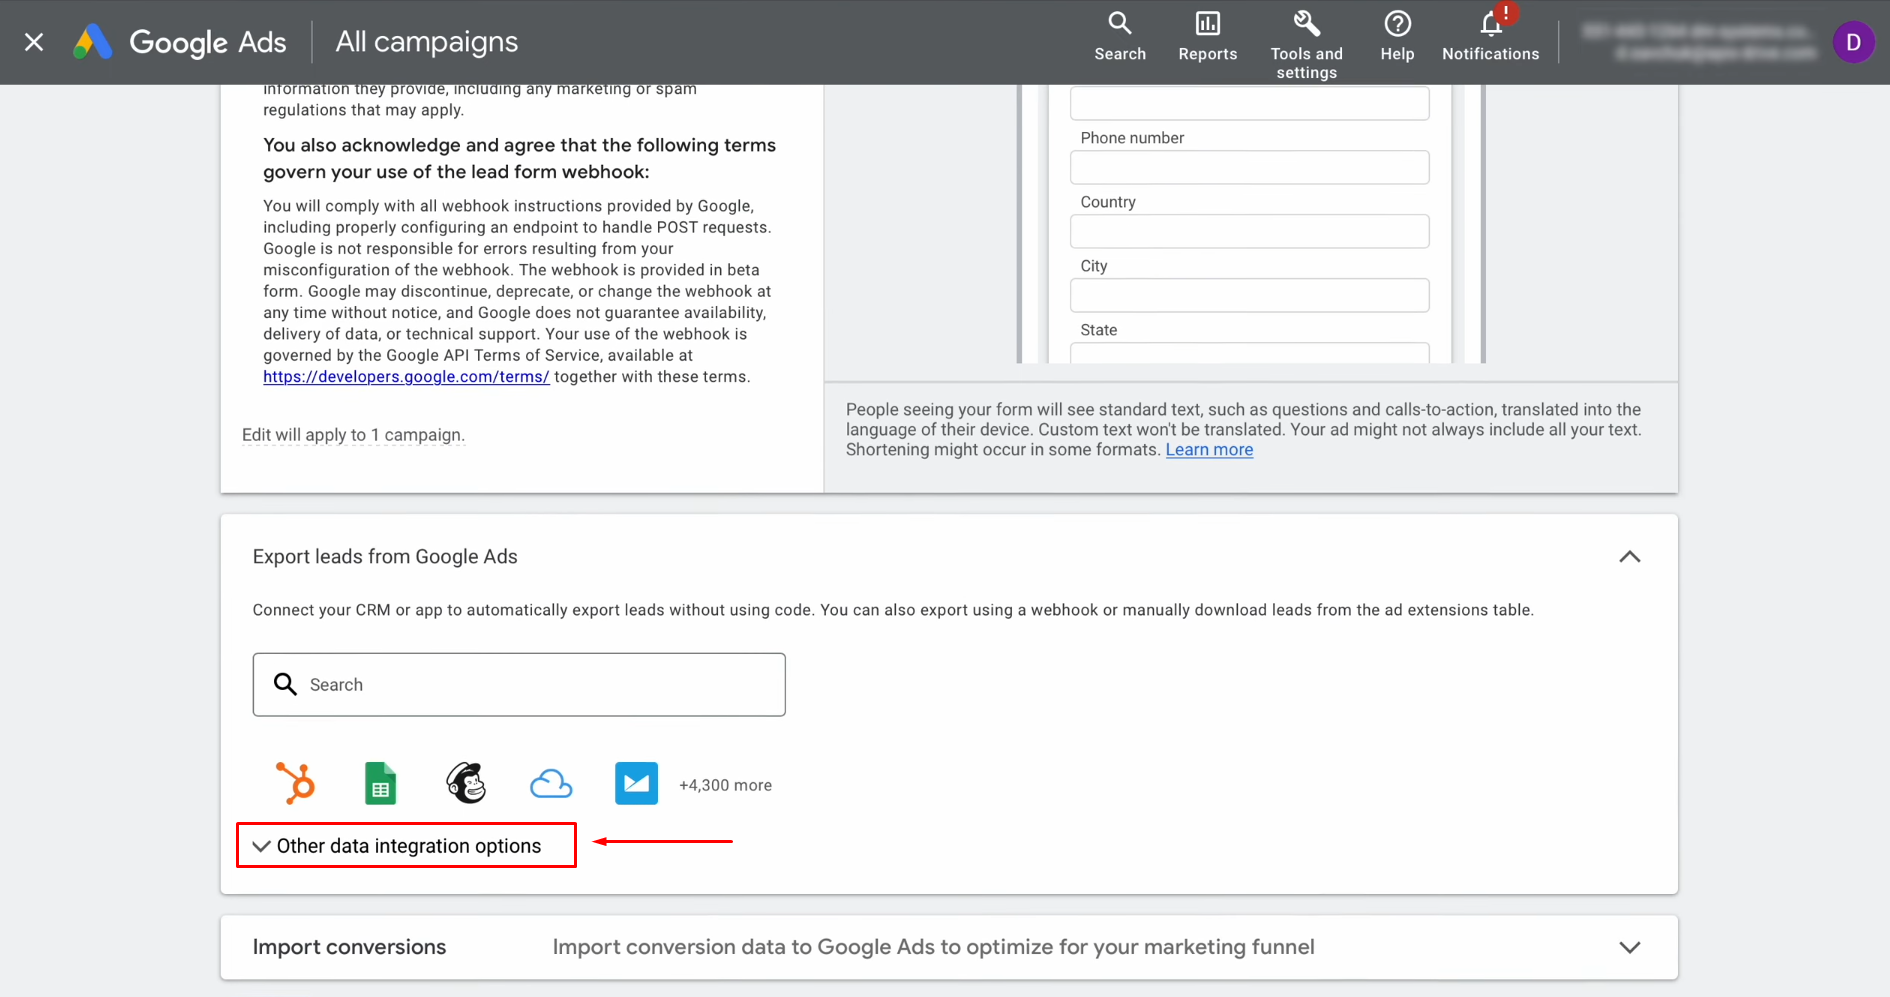
Access the lead form settings and go to the “Other data
integration options” section.
Paste the previously copied URL into the “Webhook URL”
field.
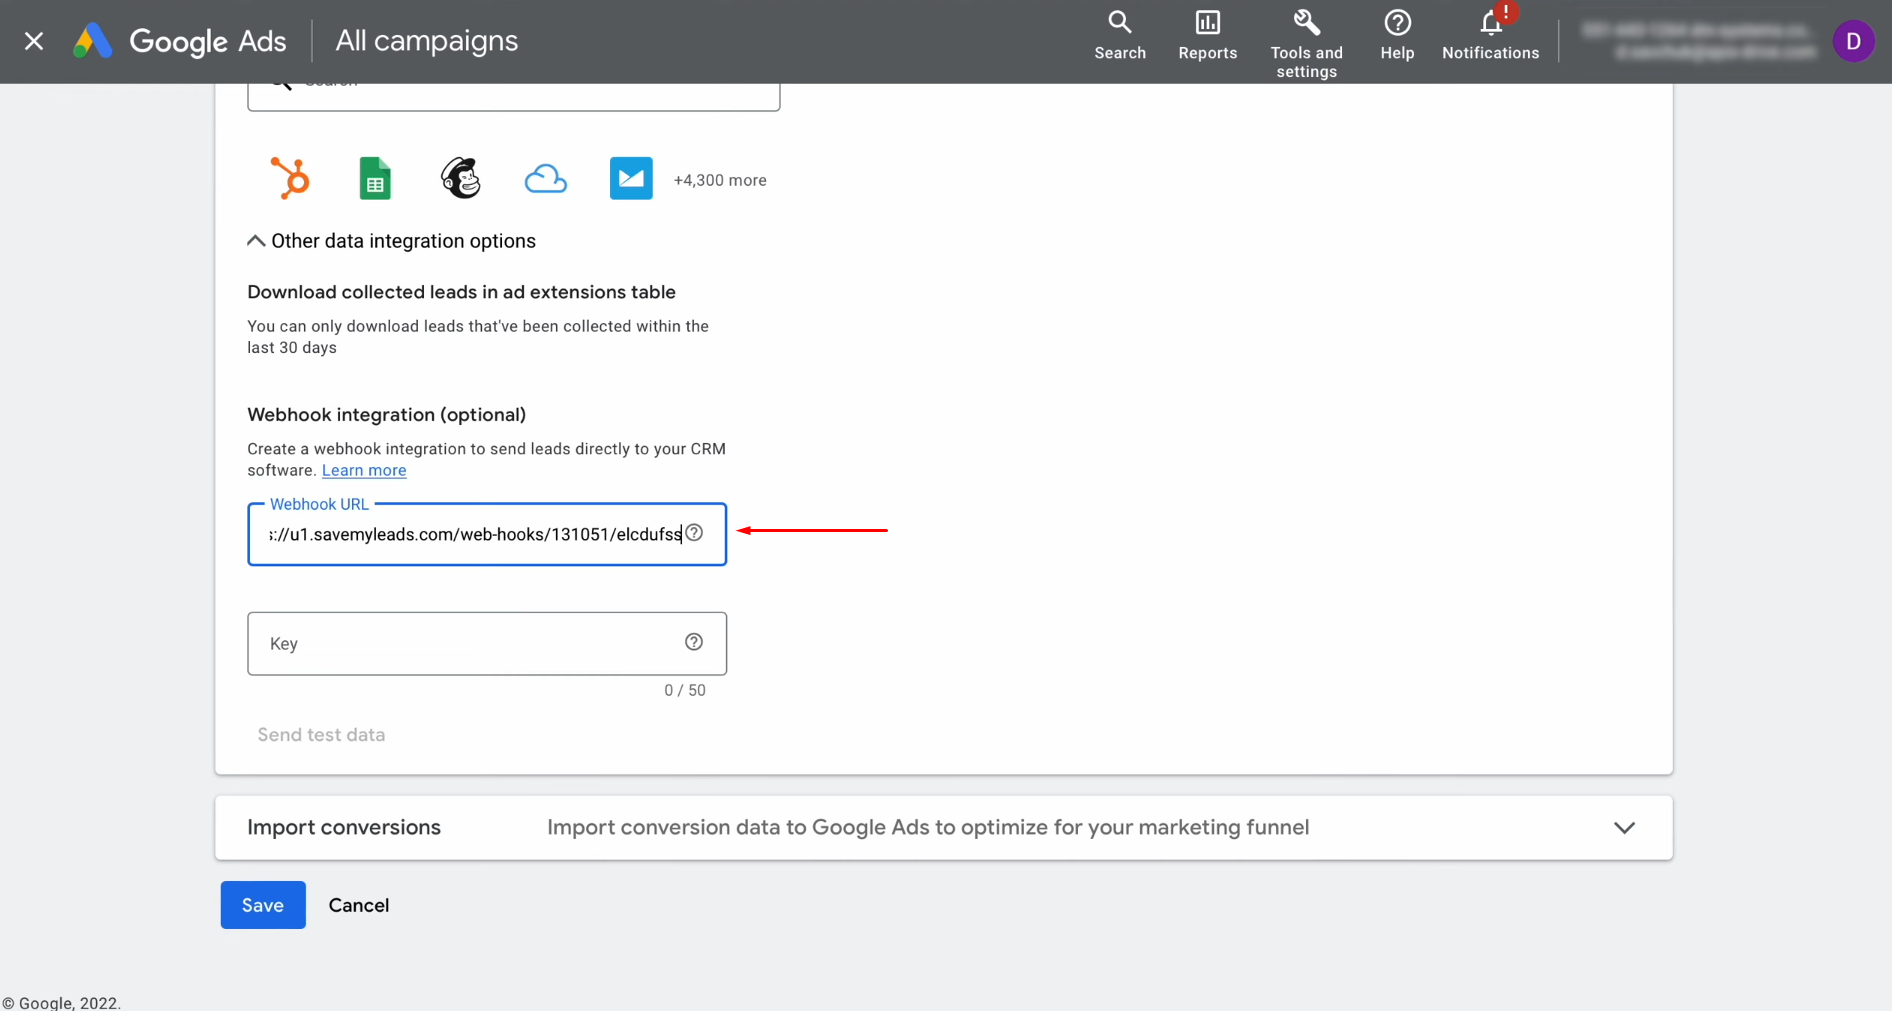
Extract the last portion of the URL and copy it.
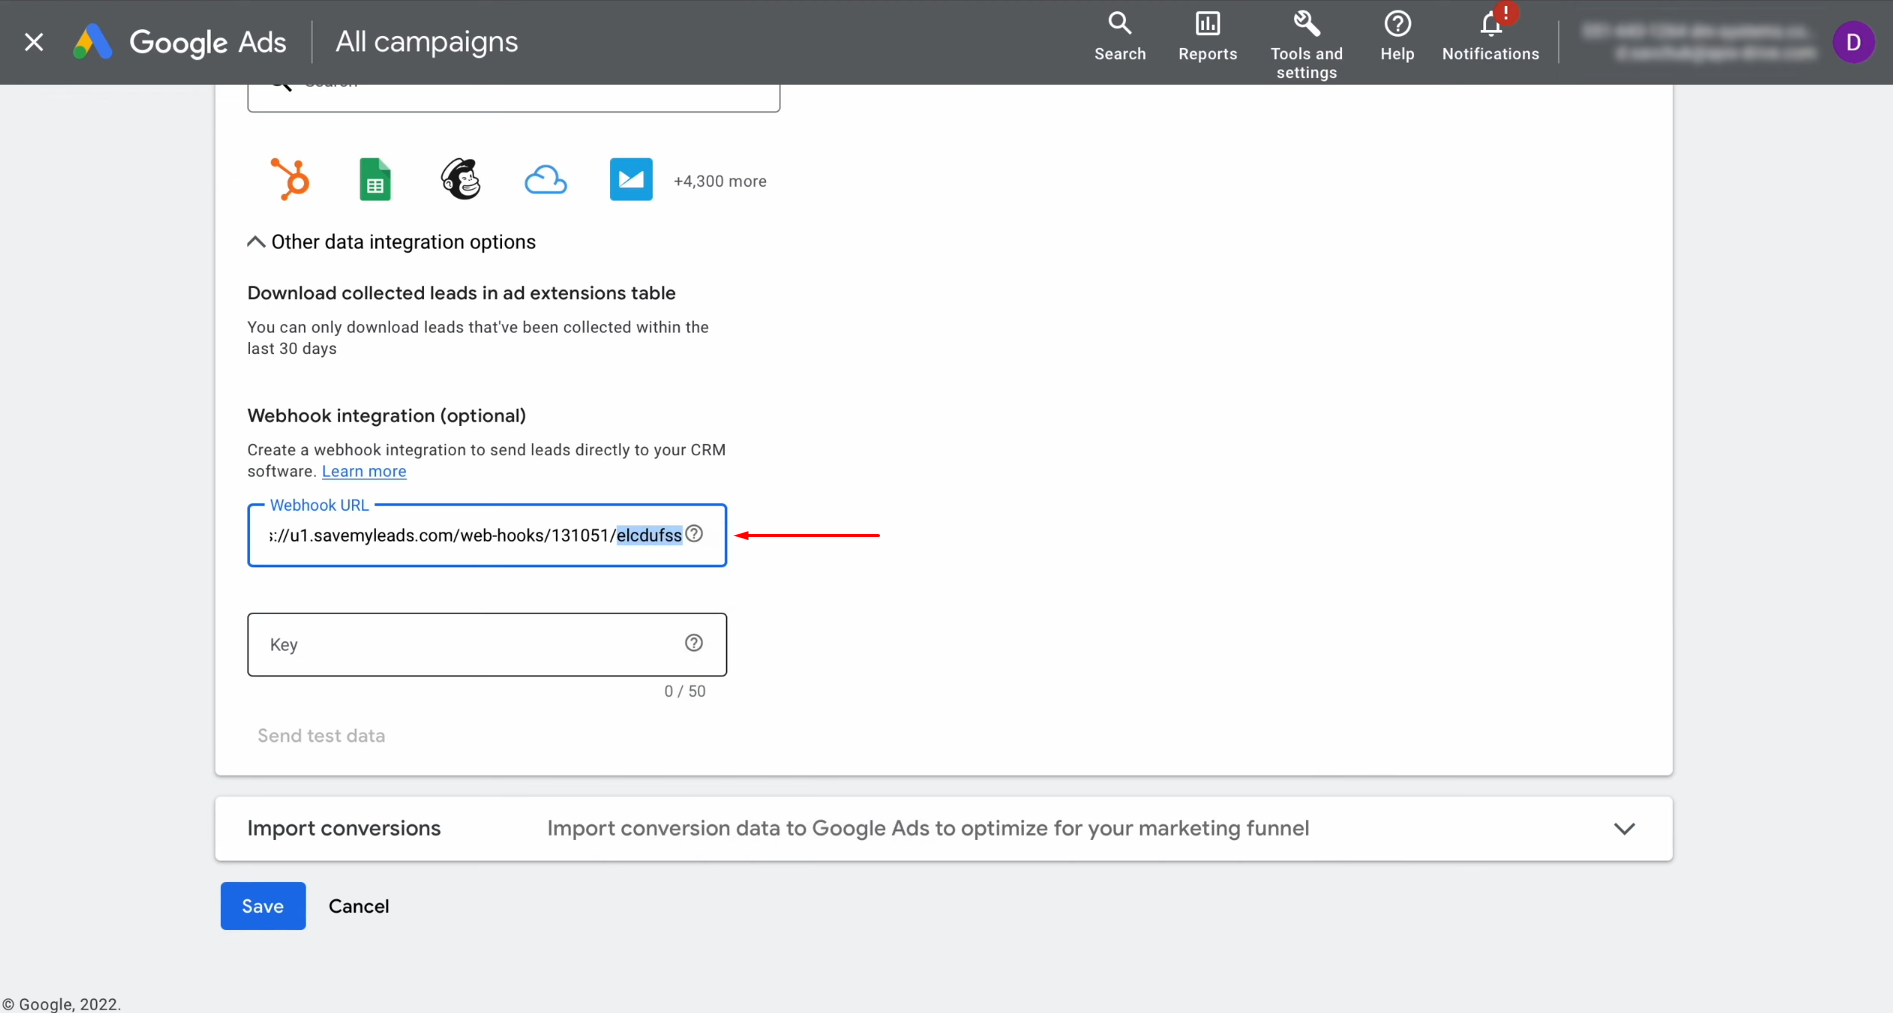
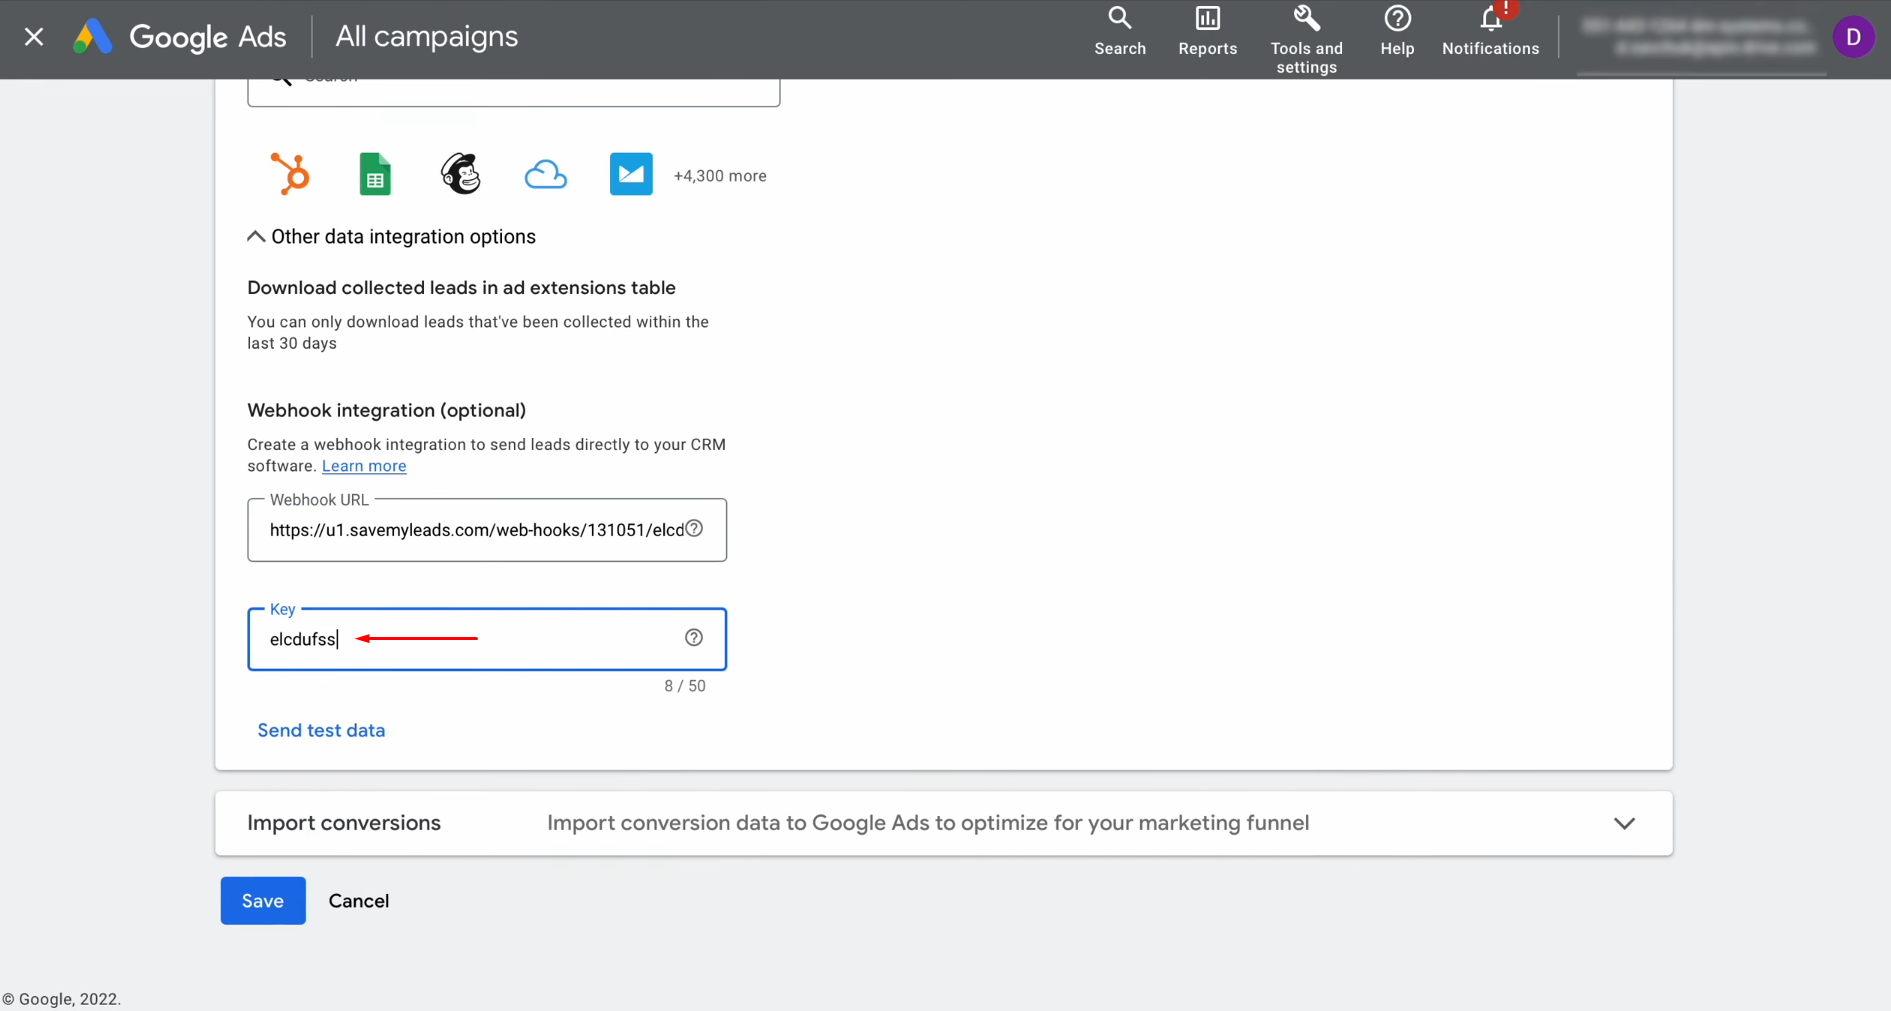
Paste this copied segment into the “Key” field to complete
the configuration.
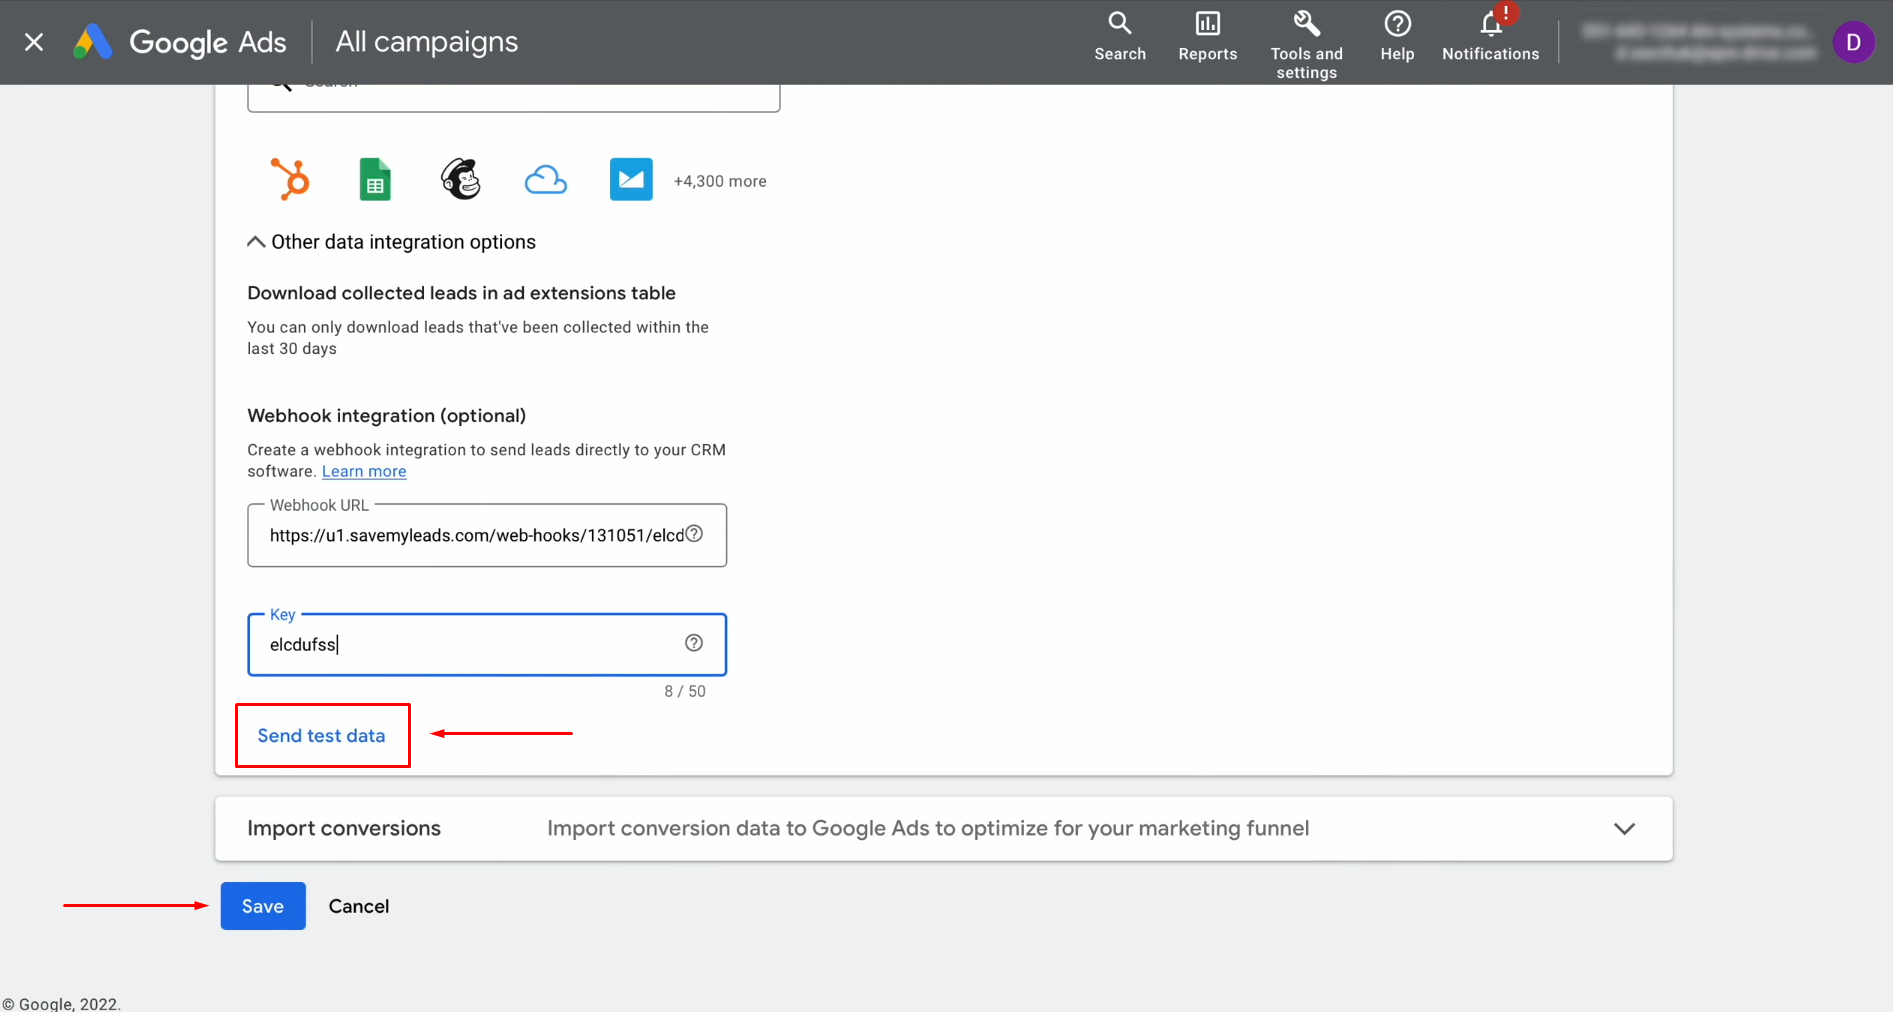
Click “Send test data” and then finalize
the process by clicking “Save.”
Return to your SaveMyLeads dashboard and click “Continue”.
Setting Up the Data Receiver – Copper
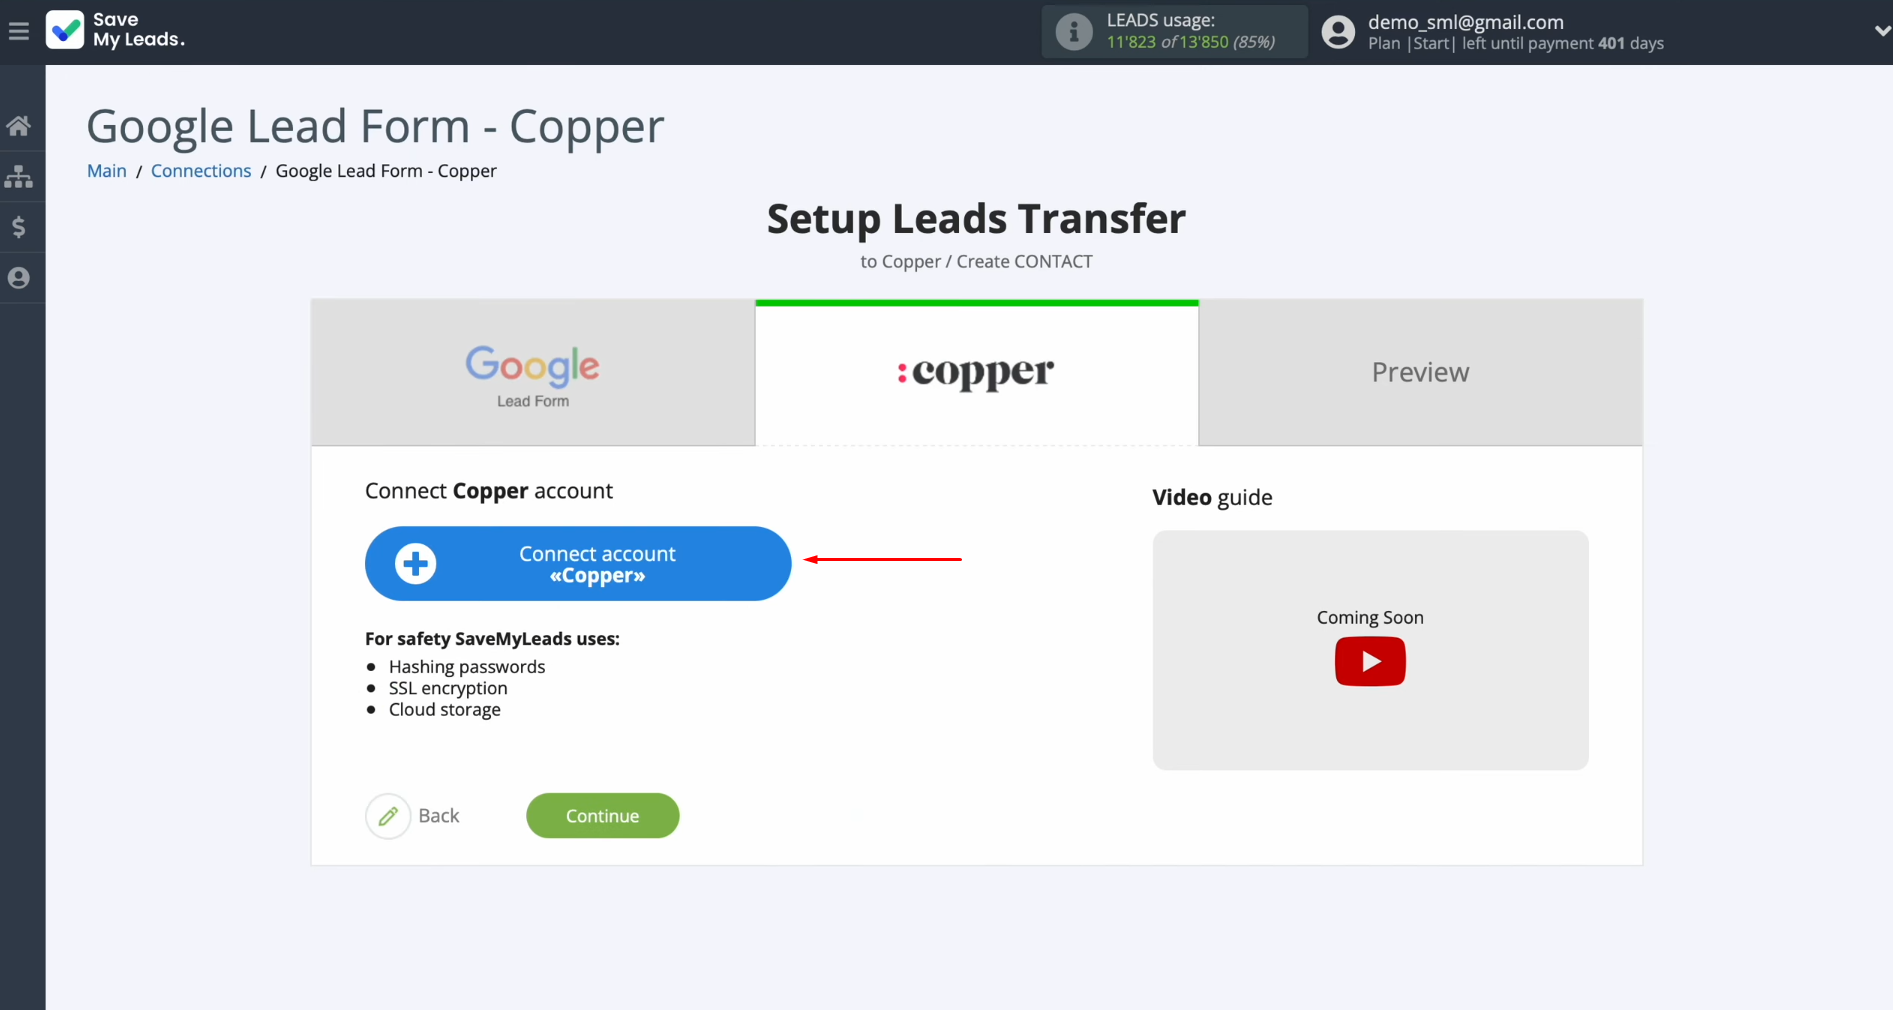
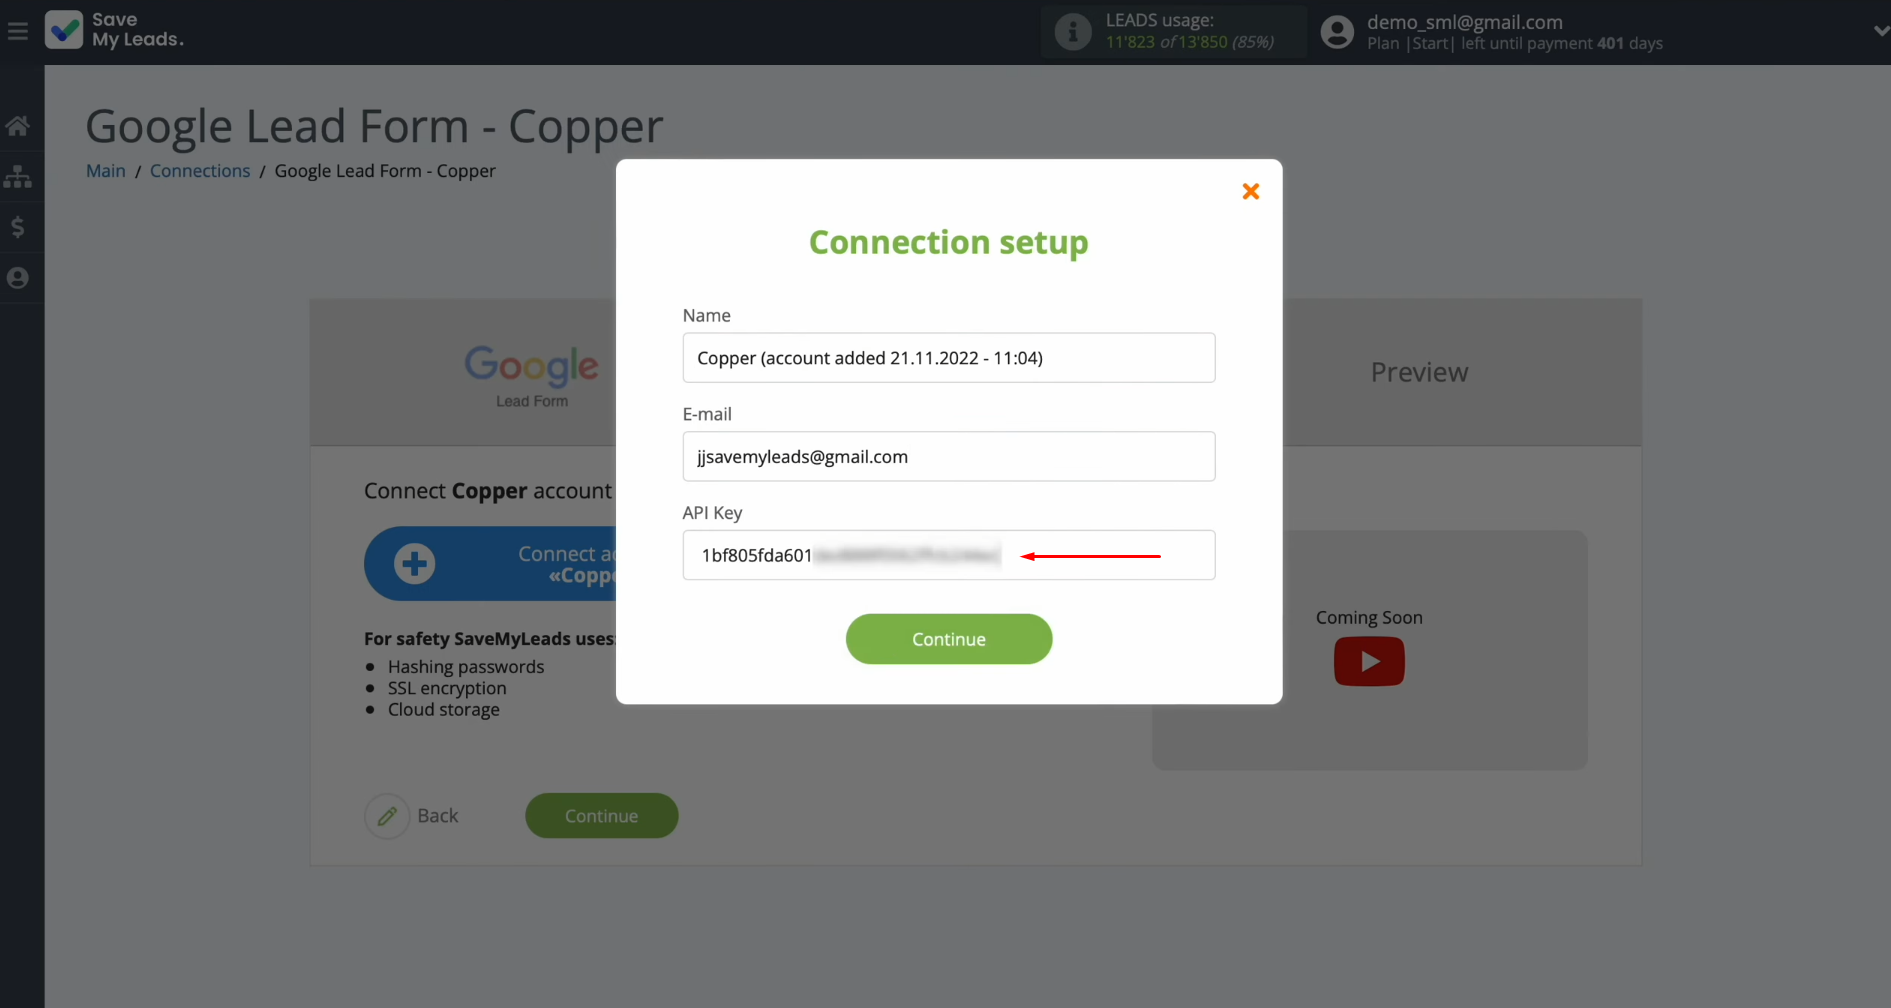
Connect your Copper account to SaveMyLeads.
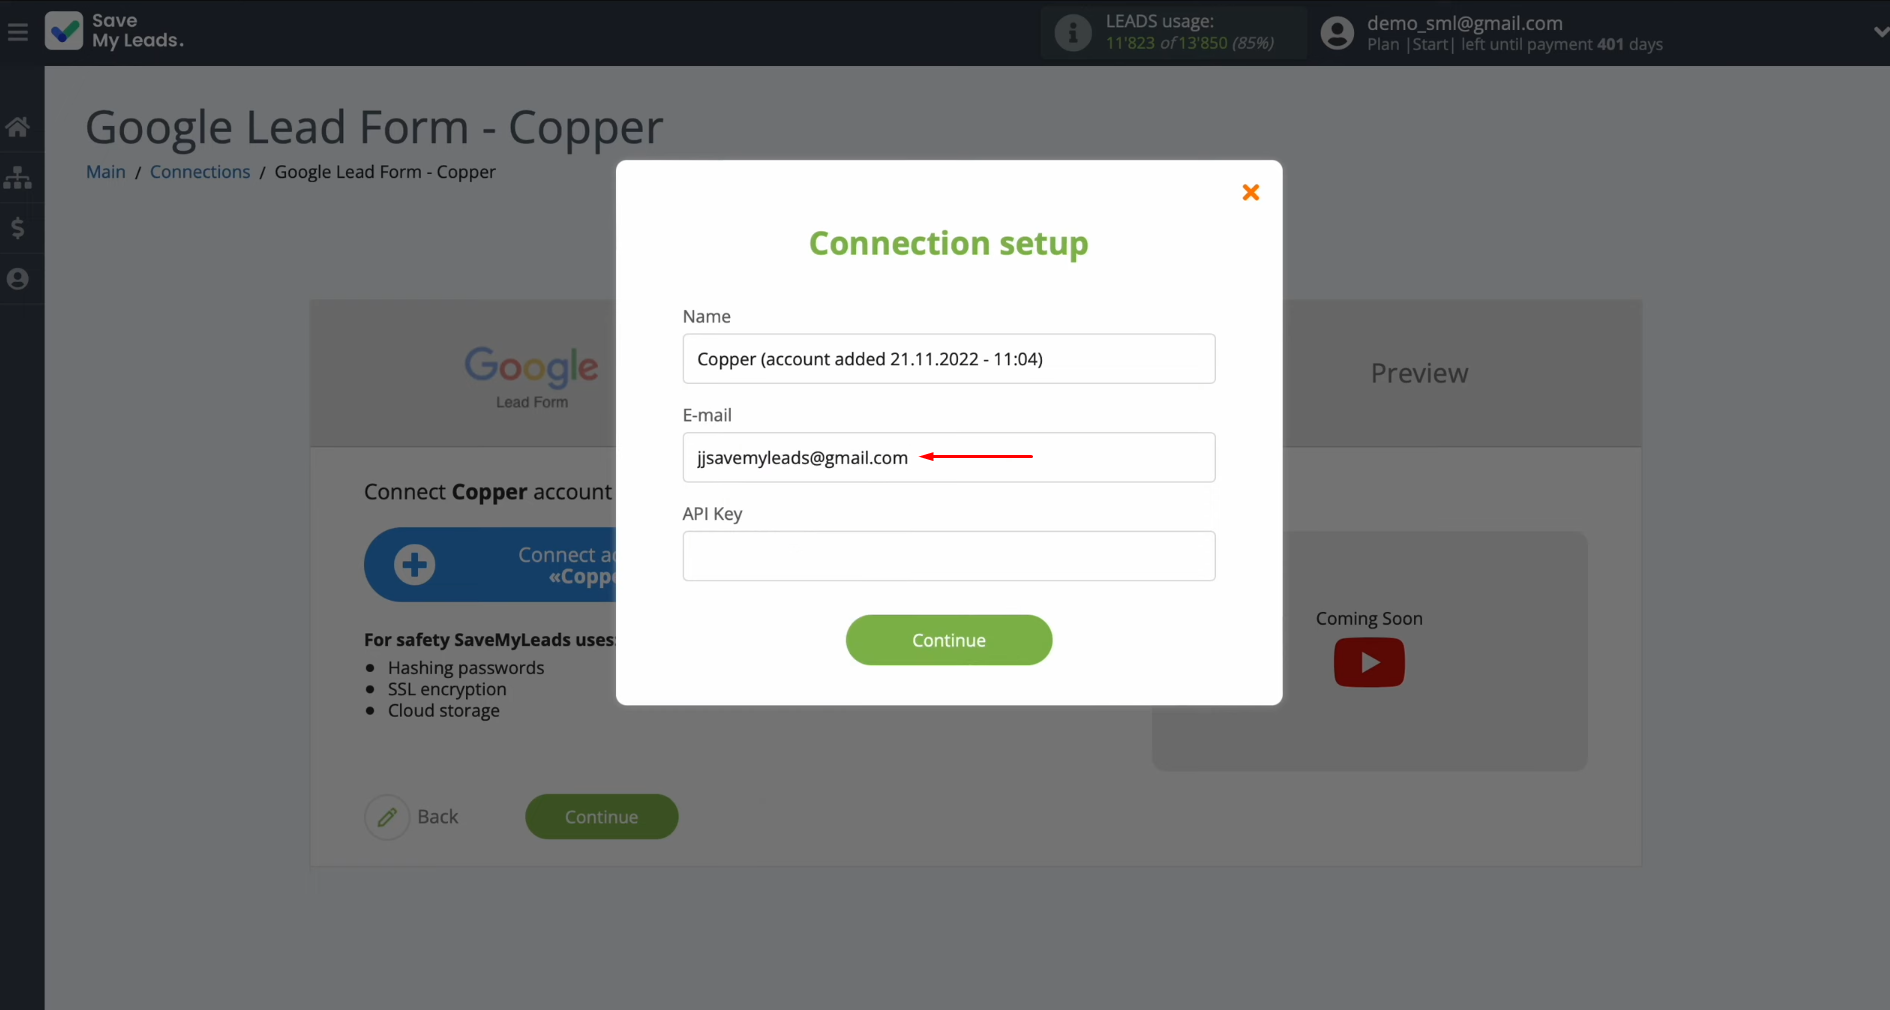
In the next window, enter the email address and the API key
associated with your Copper account.
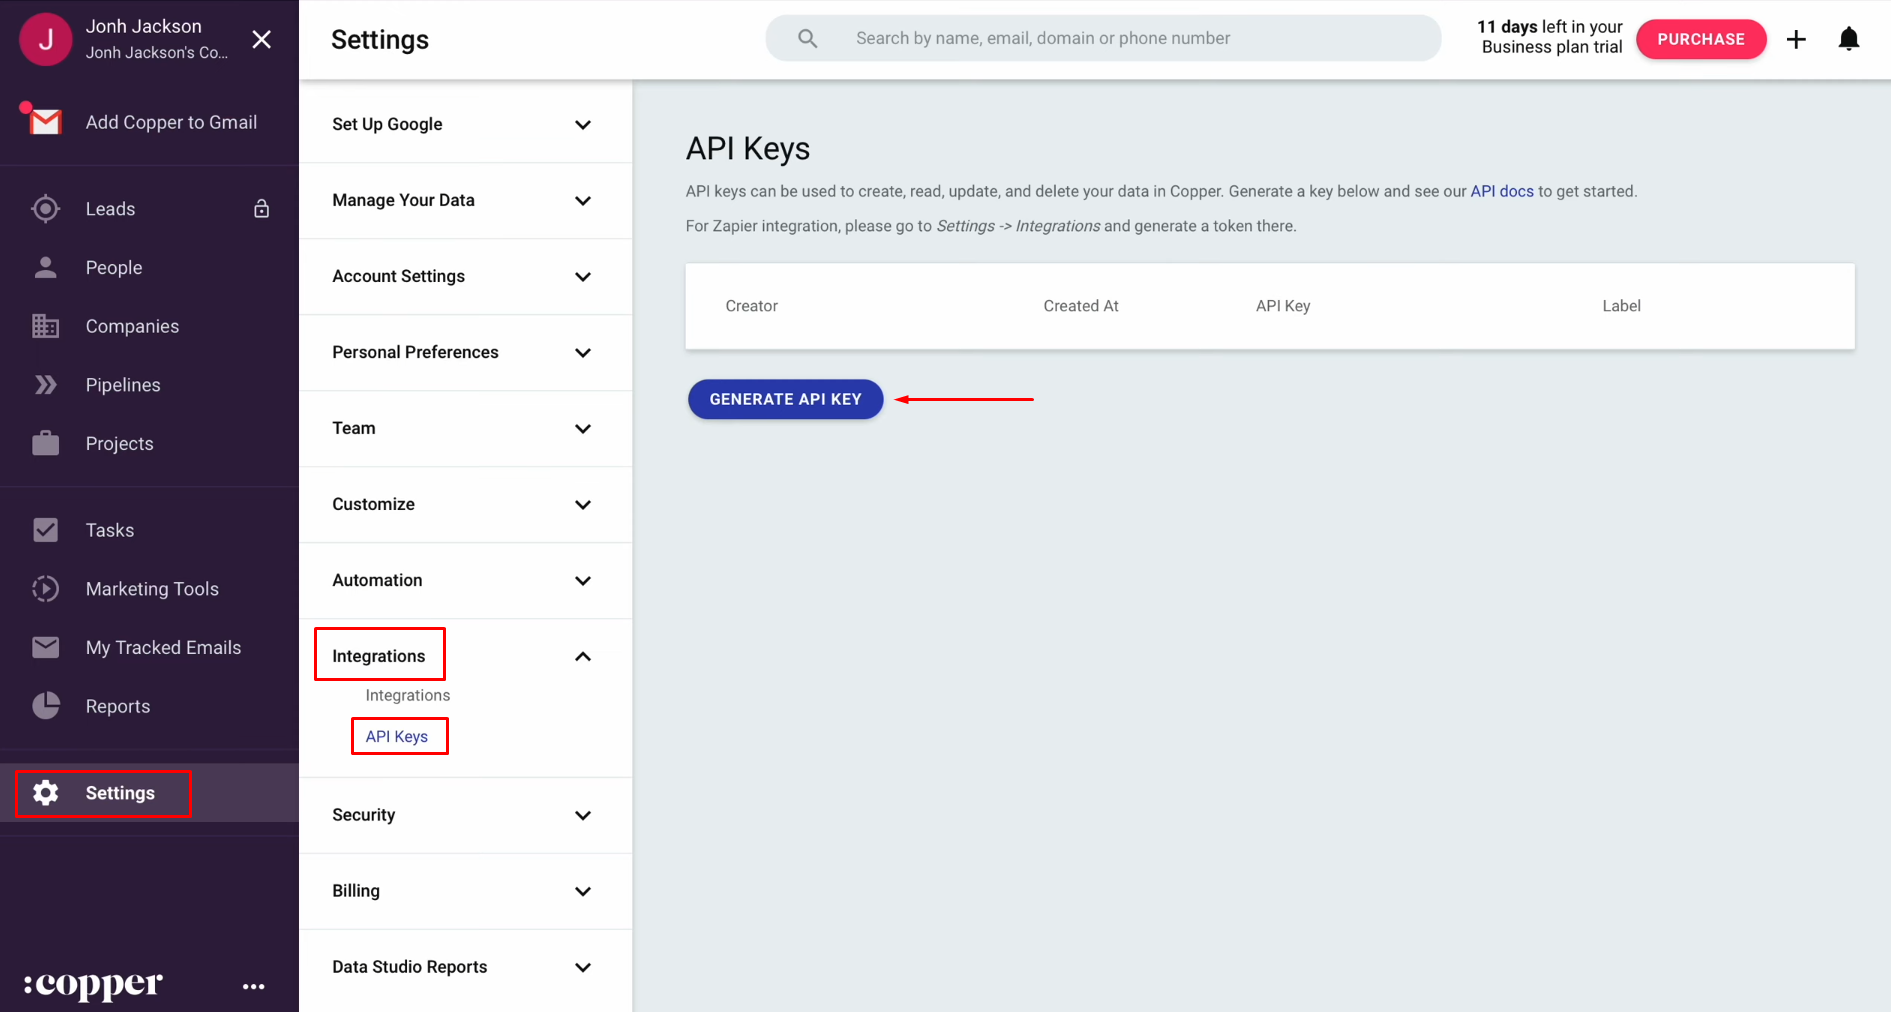
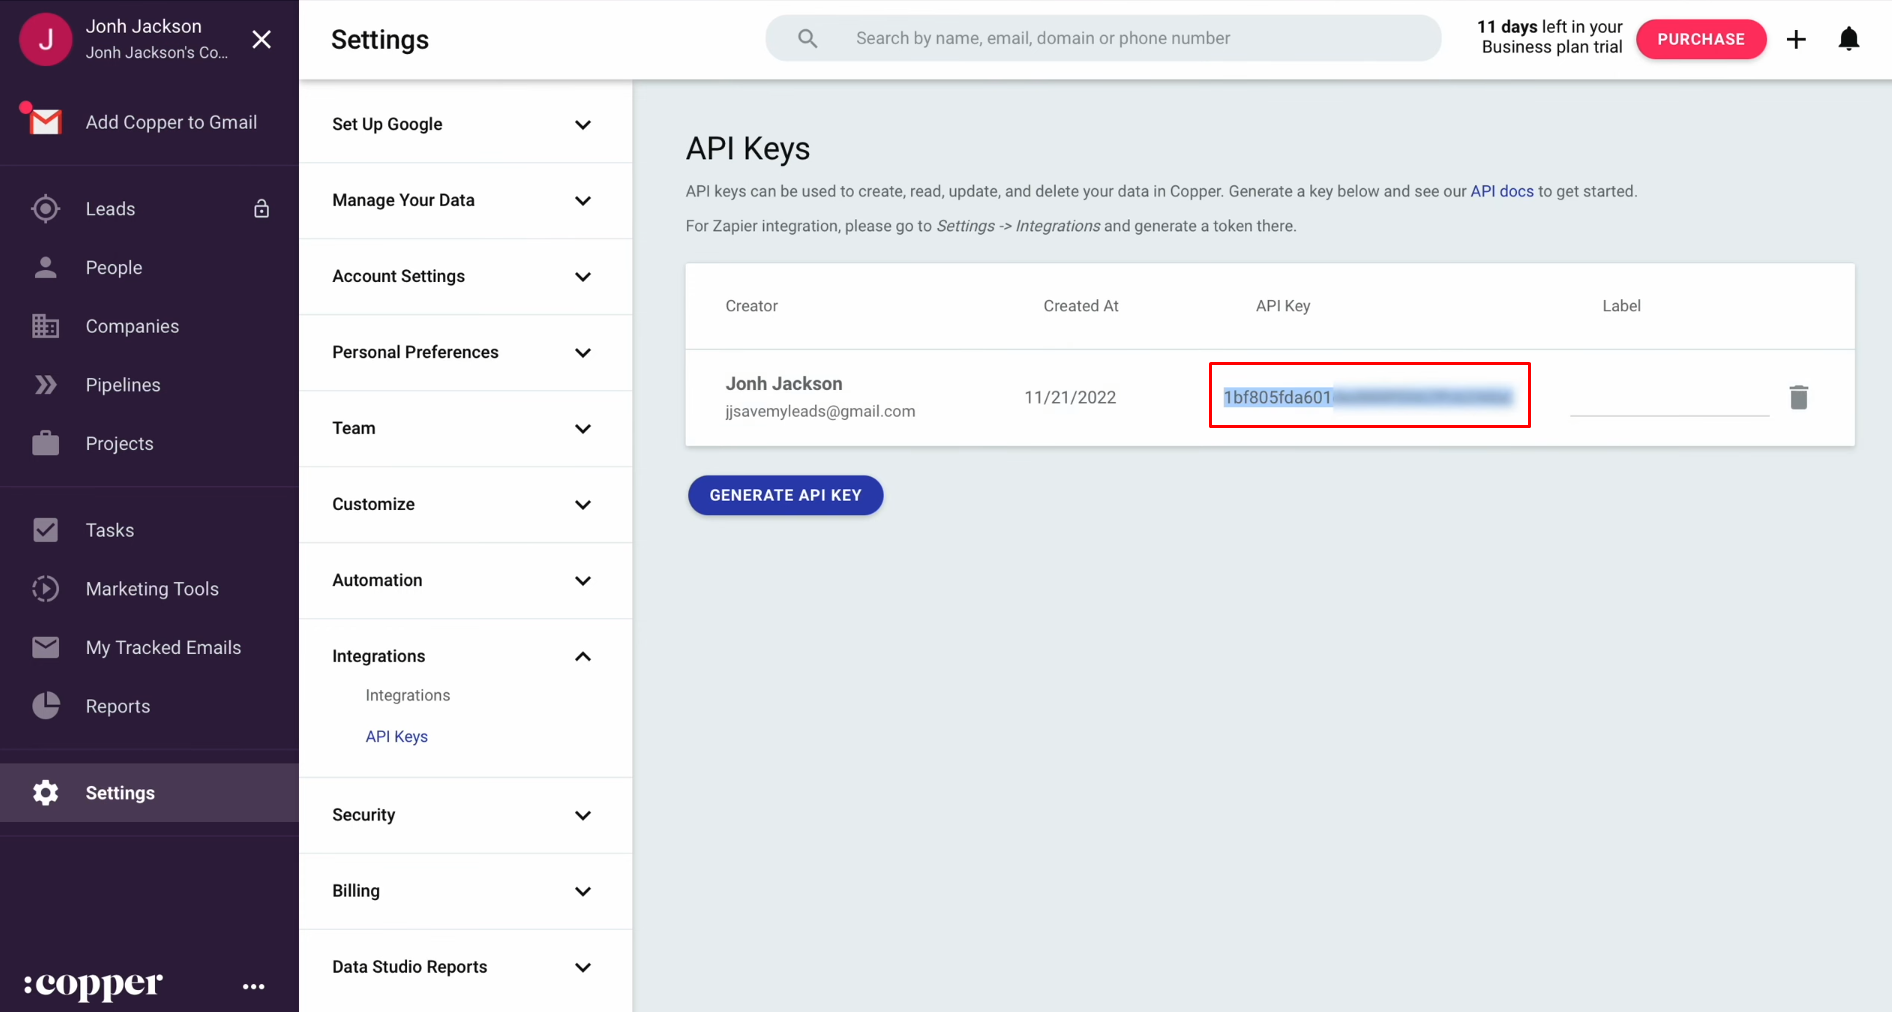
To retrieve the API key, navigate to the “Integration”
section in your Copper account settings. From there, click on “API Keys.” If
you don’t have an API key yet, click “Generate API Key” to create one.
Copy the newly generated API key.
Insert the copied API key into the designated field in
SaveMyLeads. Once all necessary fields are completed, click “Continue.”
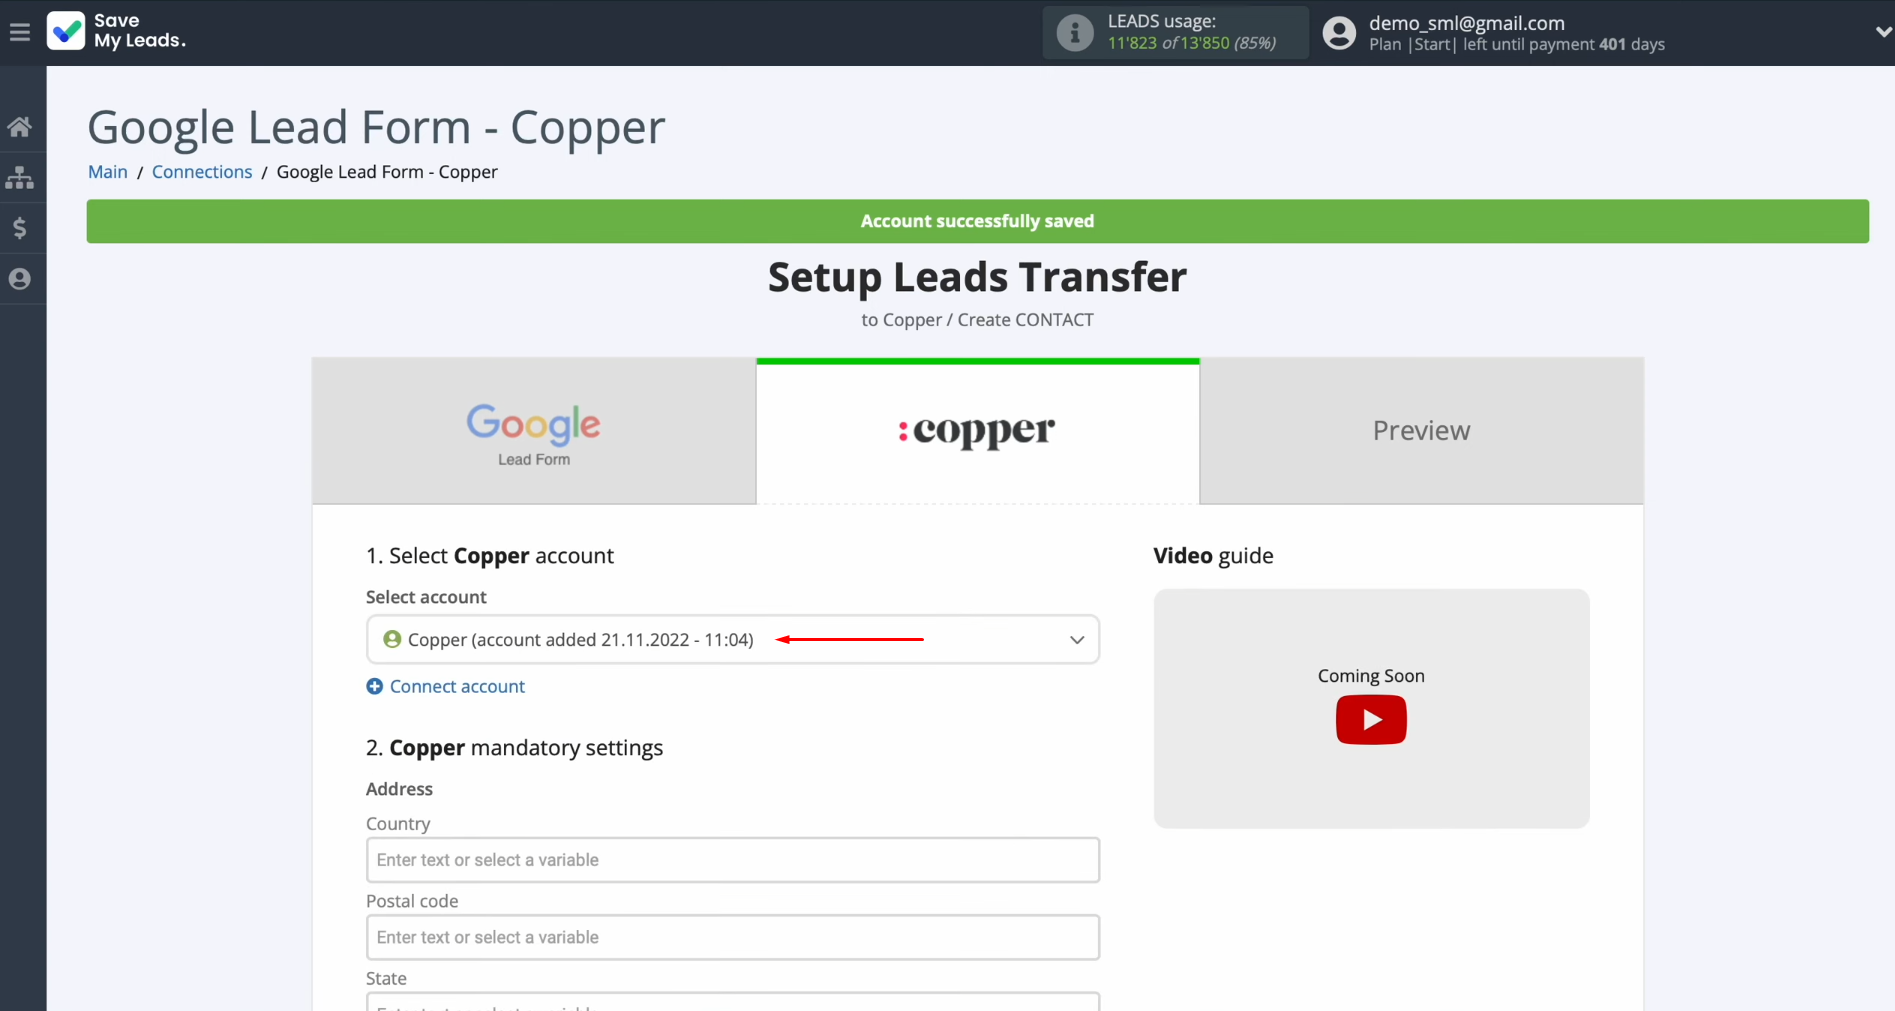
When your connected account appears in the list, select it
to proceed.
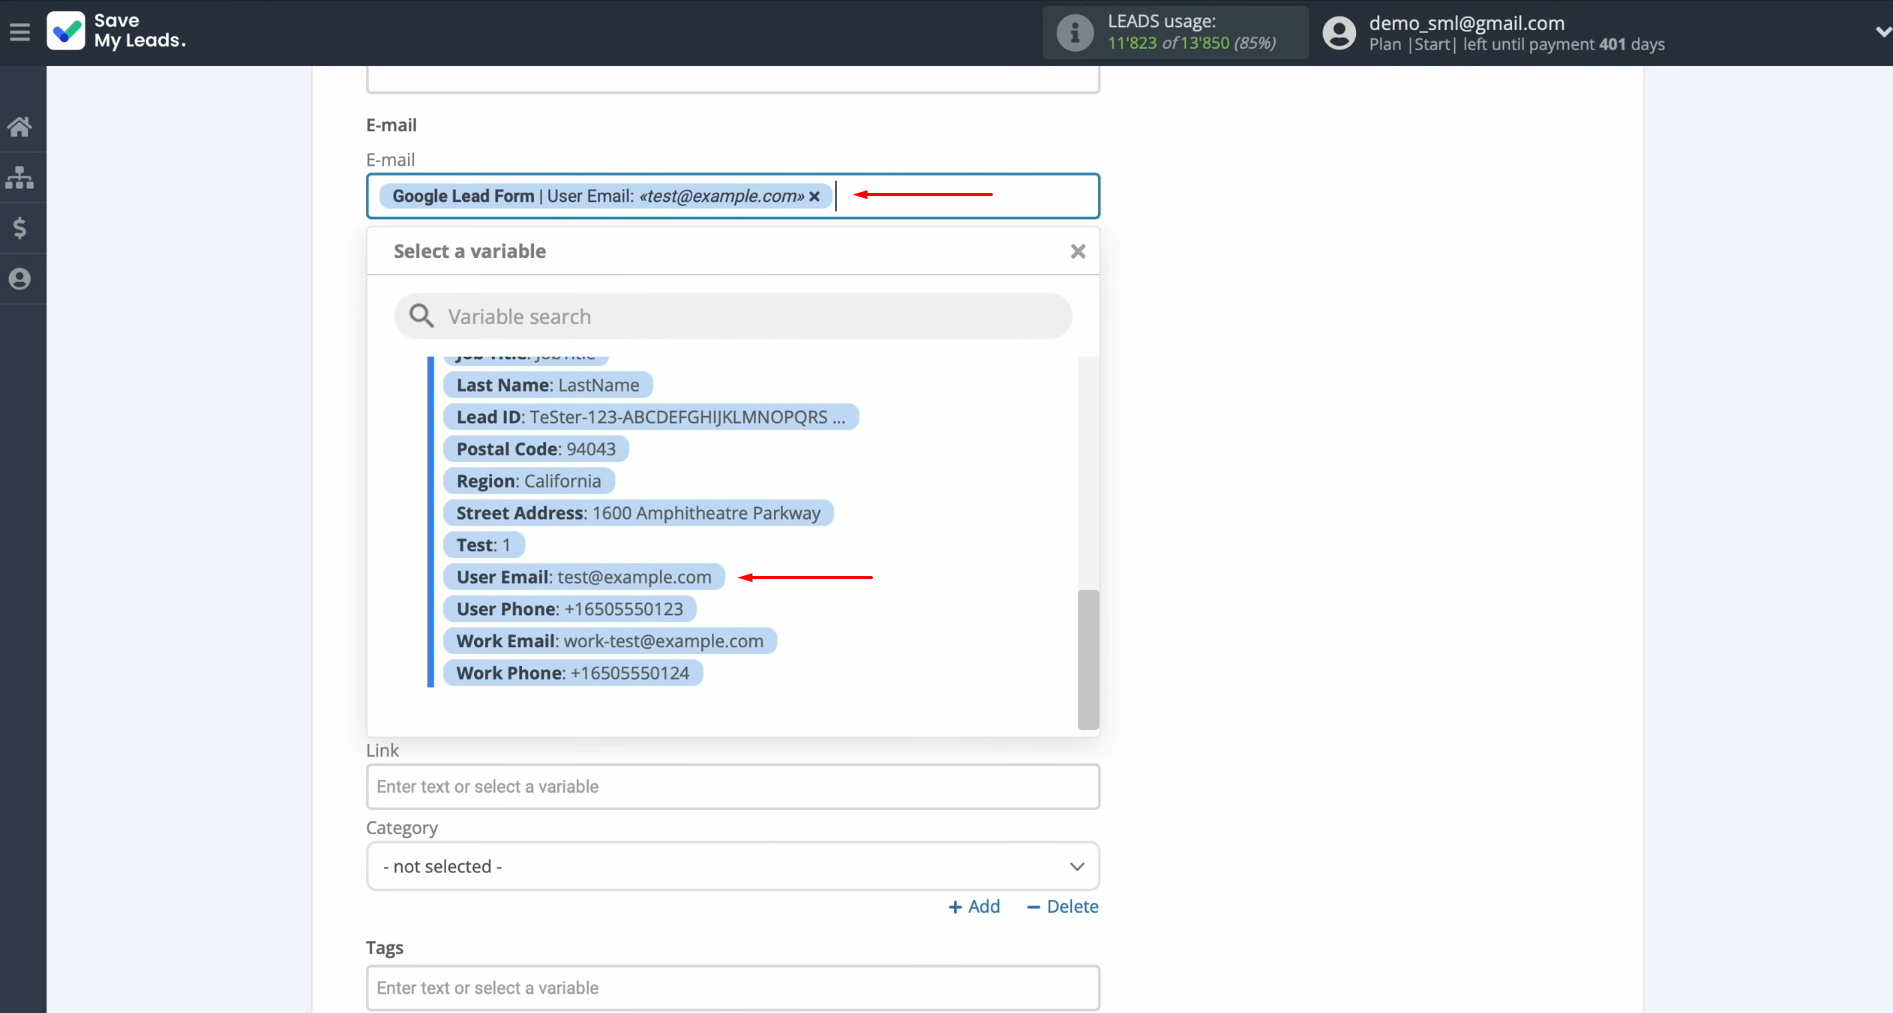
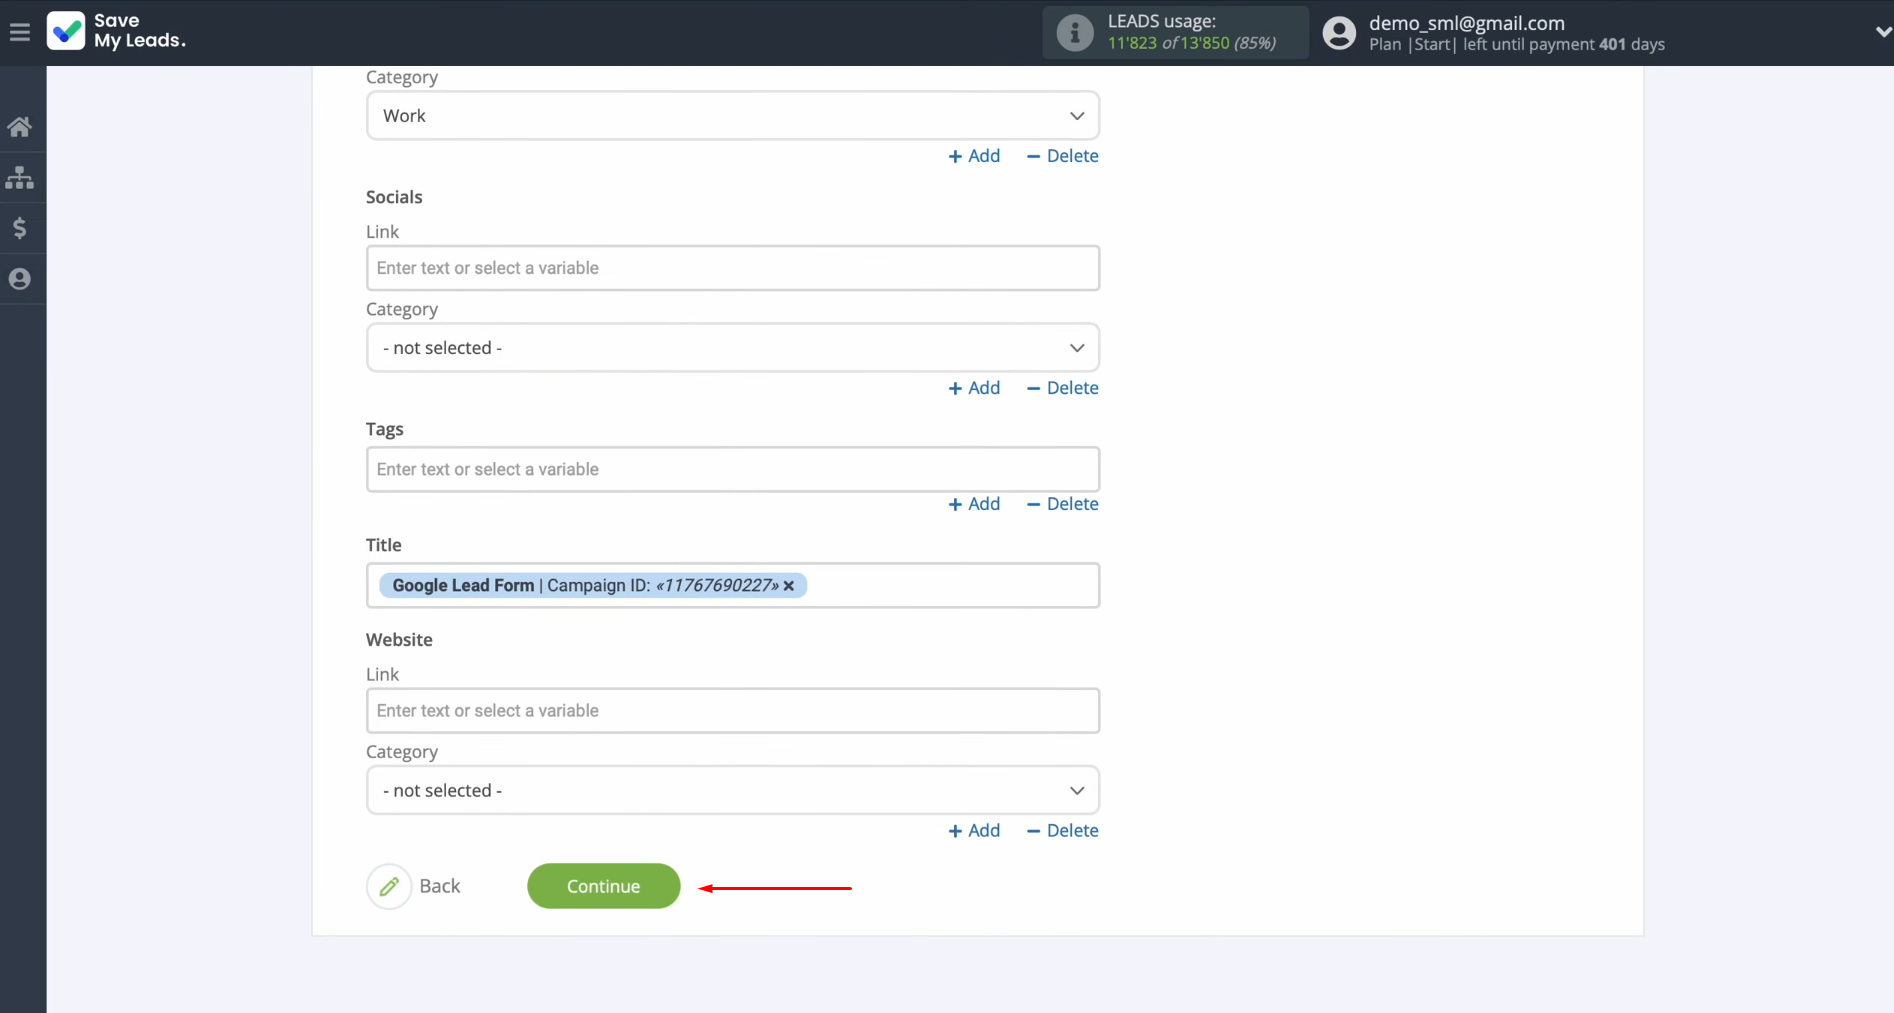
At this stage, the Copper fields for creating new contacts
will be displayed. Map variables from Google Lead Form to these fields by
clicking on the respective fields and selecting variables from the drop-down
menu. If the pre-configured fields suit your needs, feel free to leave them
unchanged.
After finishing all configurations, click “Continue.”
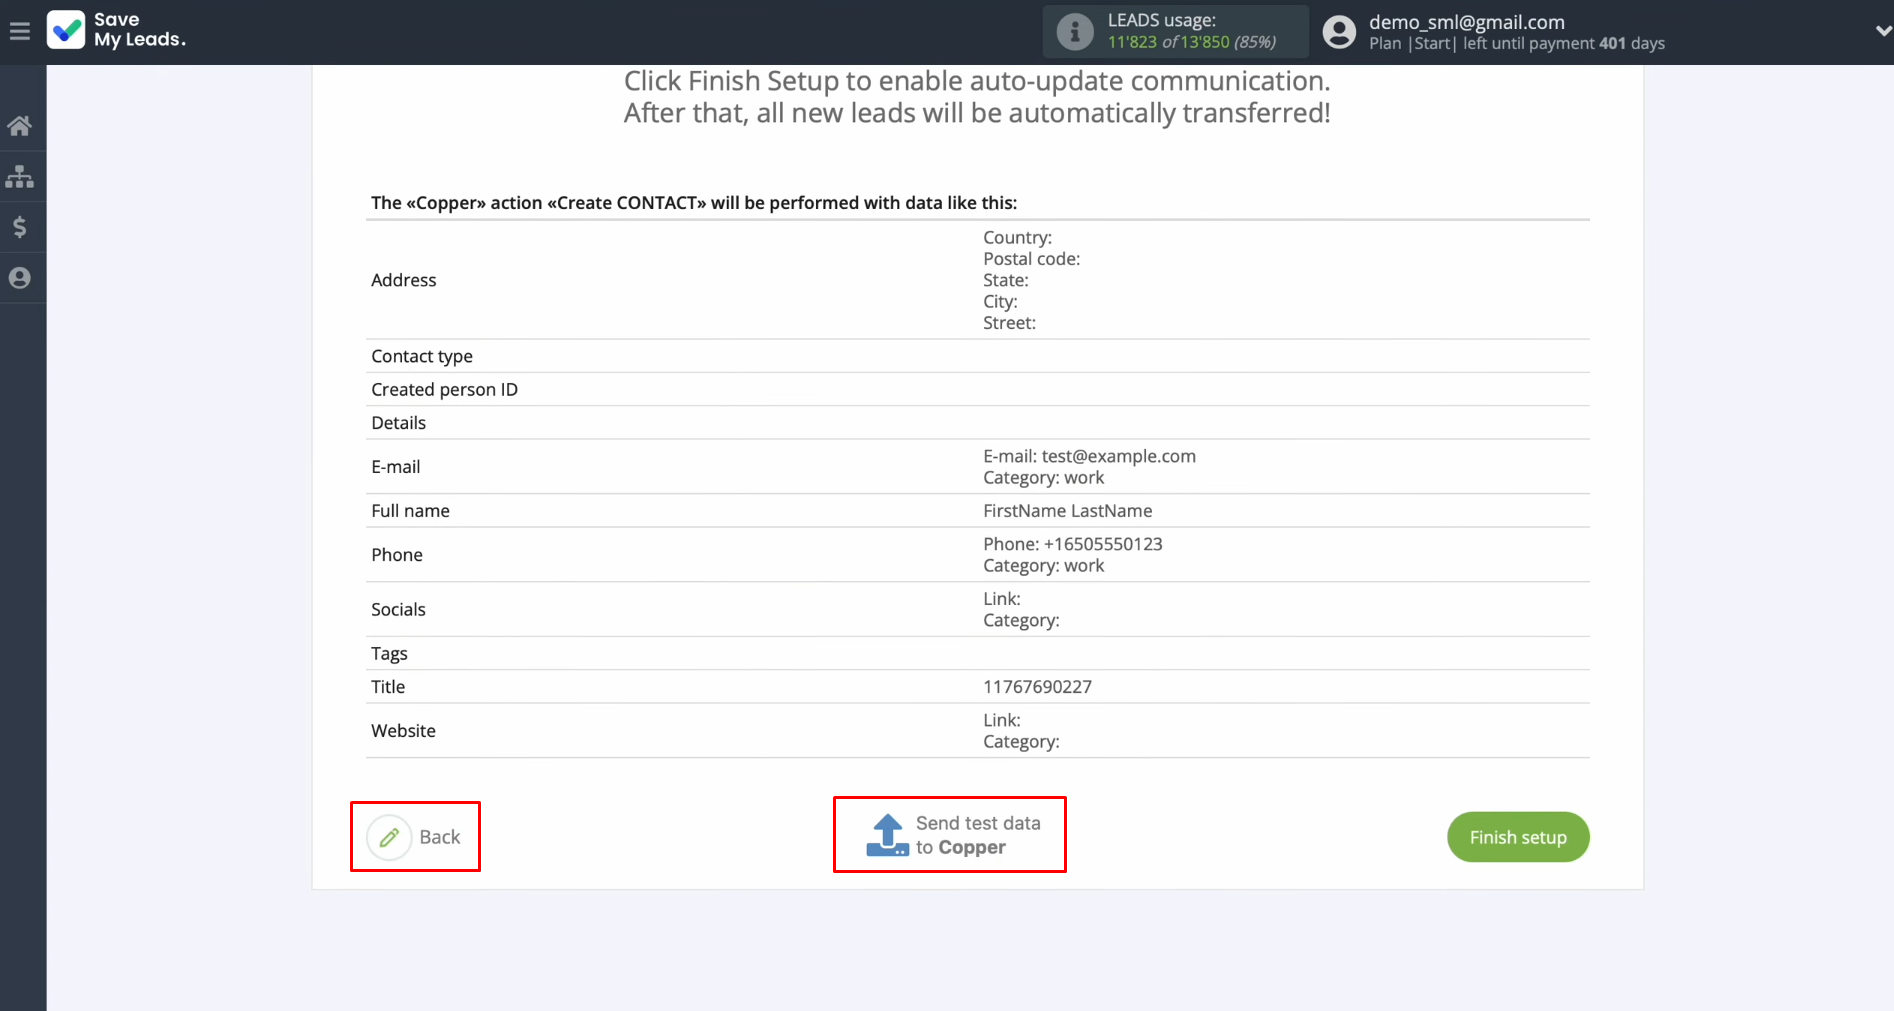
You will now see a preview of the data that will be
transferred to Copper as new contacts for each lead captured by the Google Lead
Form. If any adjustments are necessary, click “Back” to revise the setup. To
test the configuration, click “Send test data to Copper.”
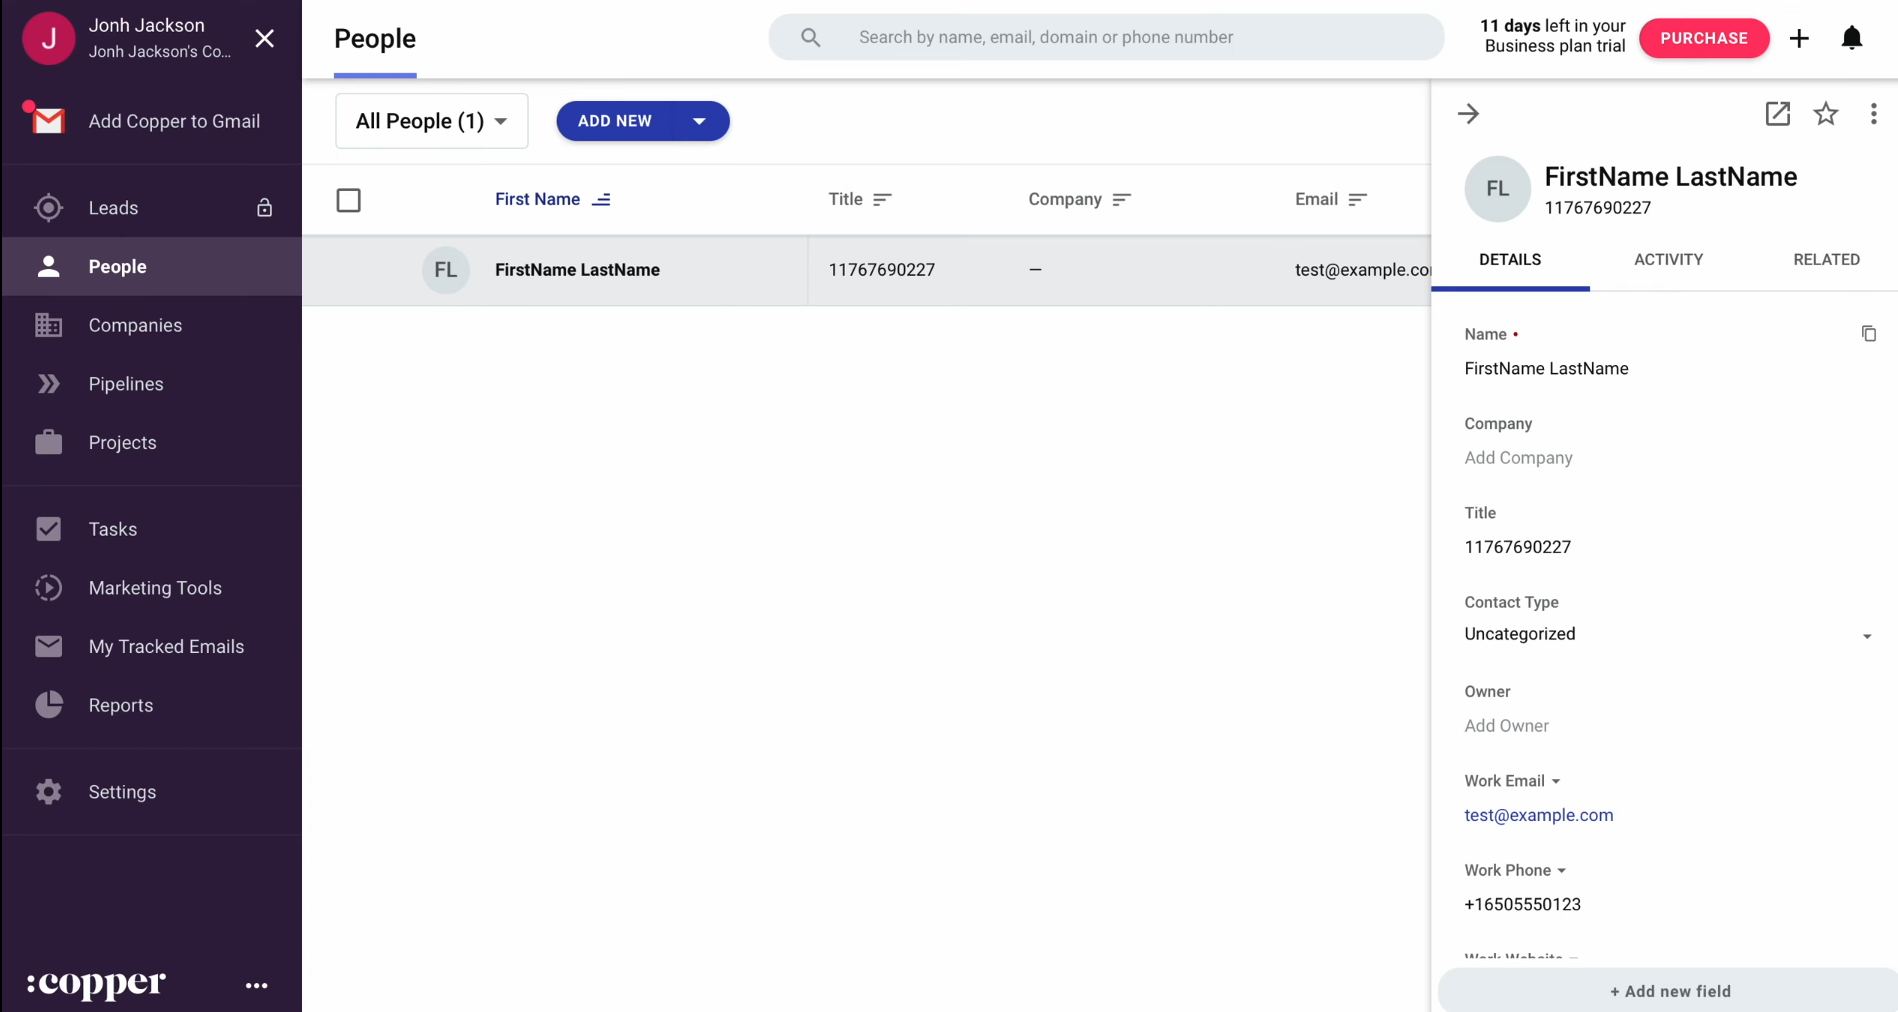
Upon successful completion of the test, access your Copper
account to check the results.
Return to SaveMyLeads and proceed with the remaining setup
steps.


Setting Up Auto-Update
To enable the auto-update functionality for your connection, click “Finish setup.” With this feature active, every new lead from Google Ads Lead Form will automatically sync with Copper.
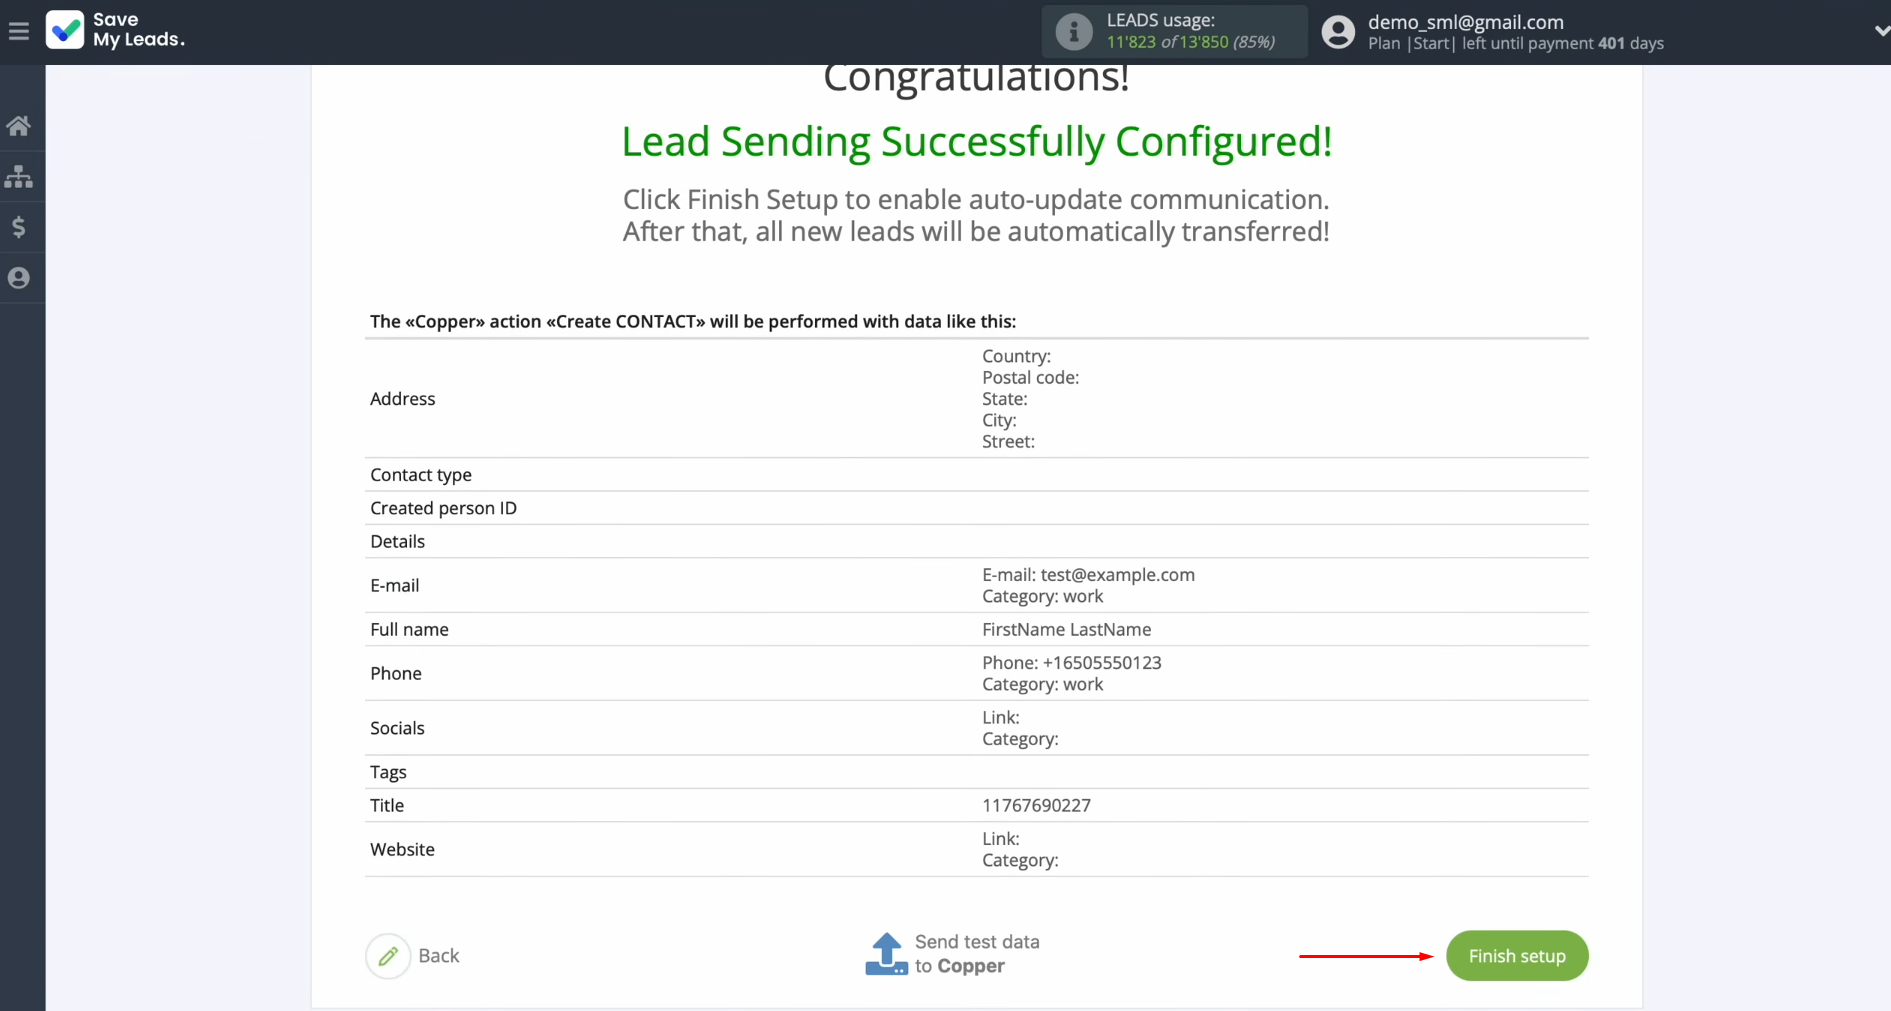
Should you wish to modify the connection name, access the
settings by clicking the gear icon.
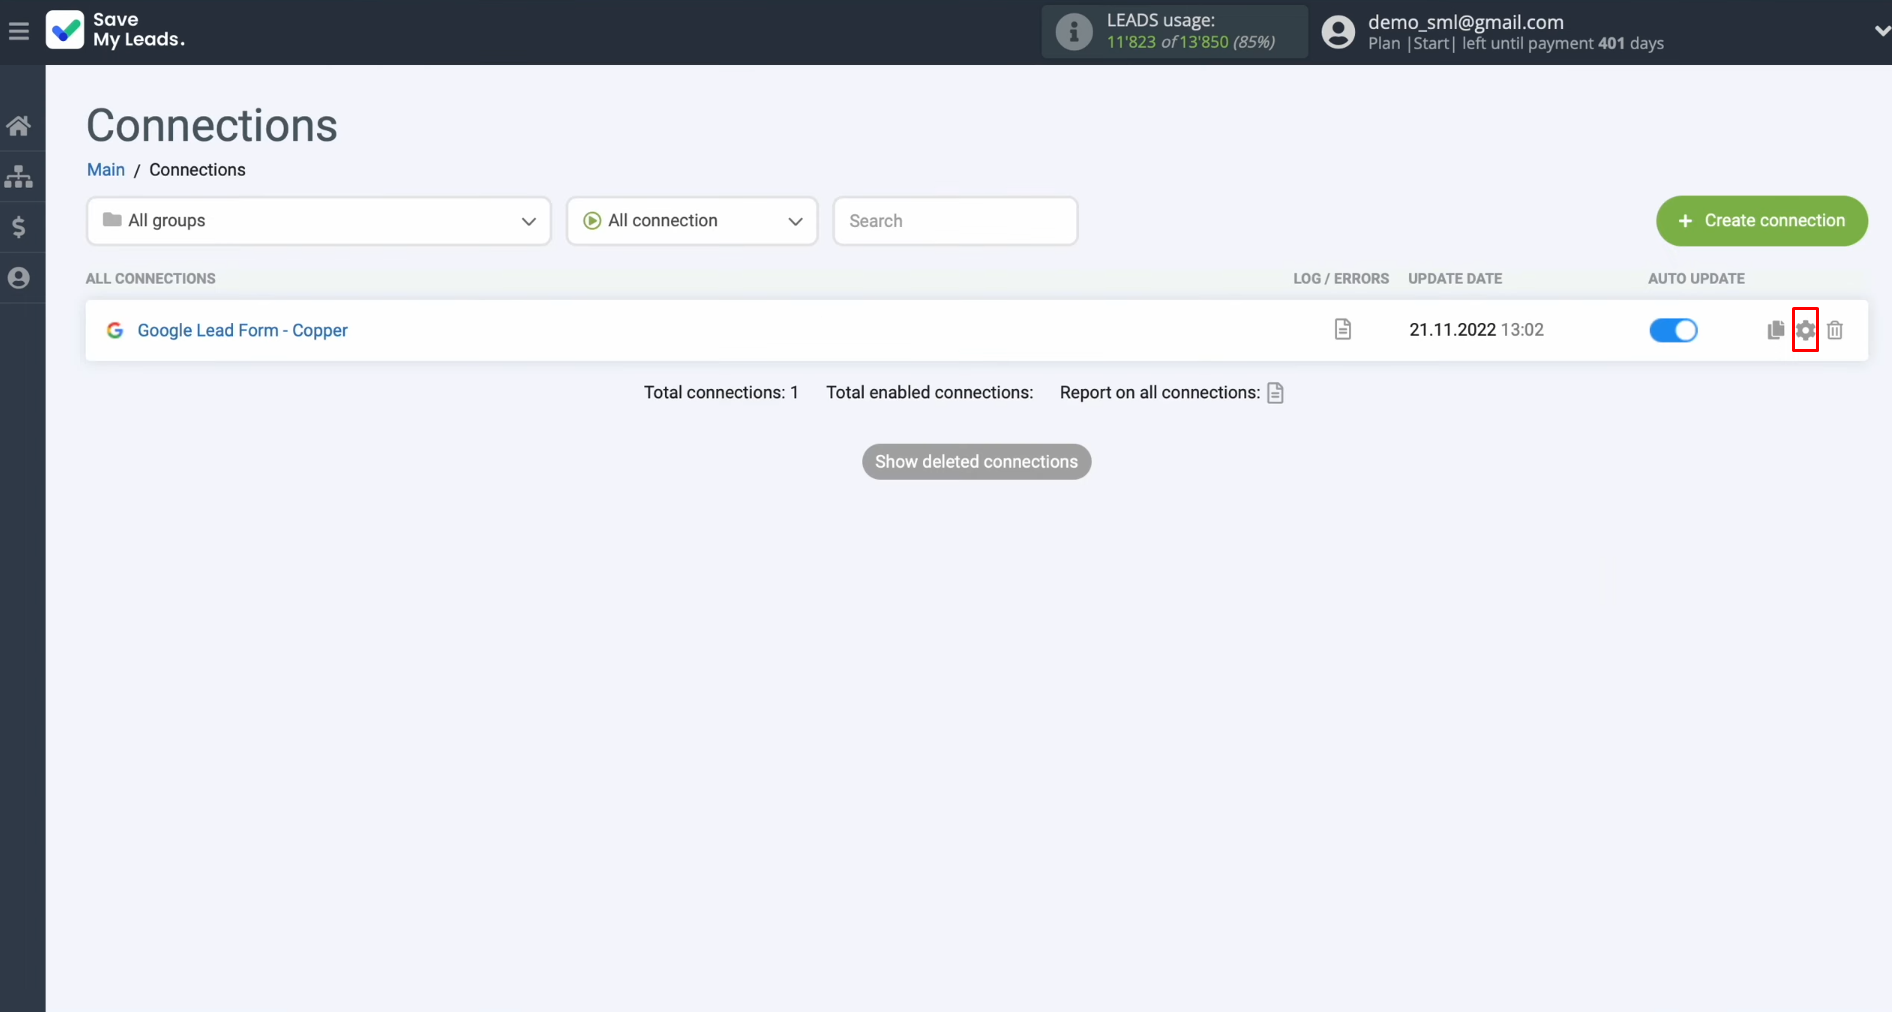
Within the settings menu, you’ll have the option to rename
the connection and organize it into a group for better management. Once you’ve
made the desired changes, click “Continue.”
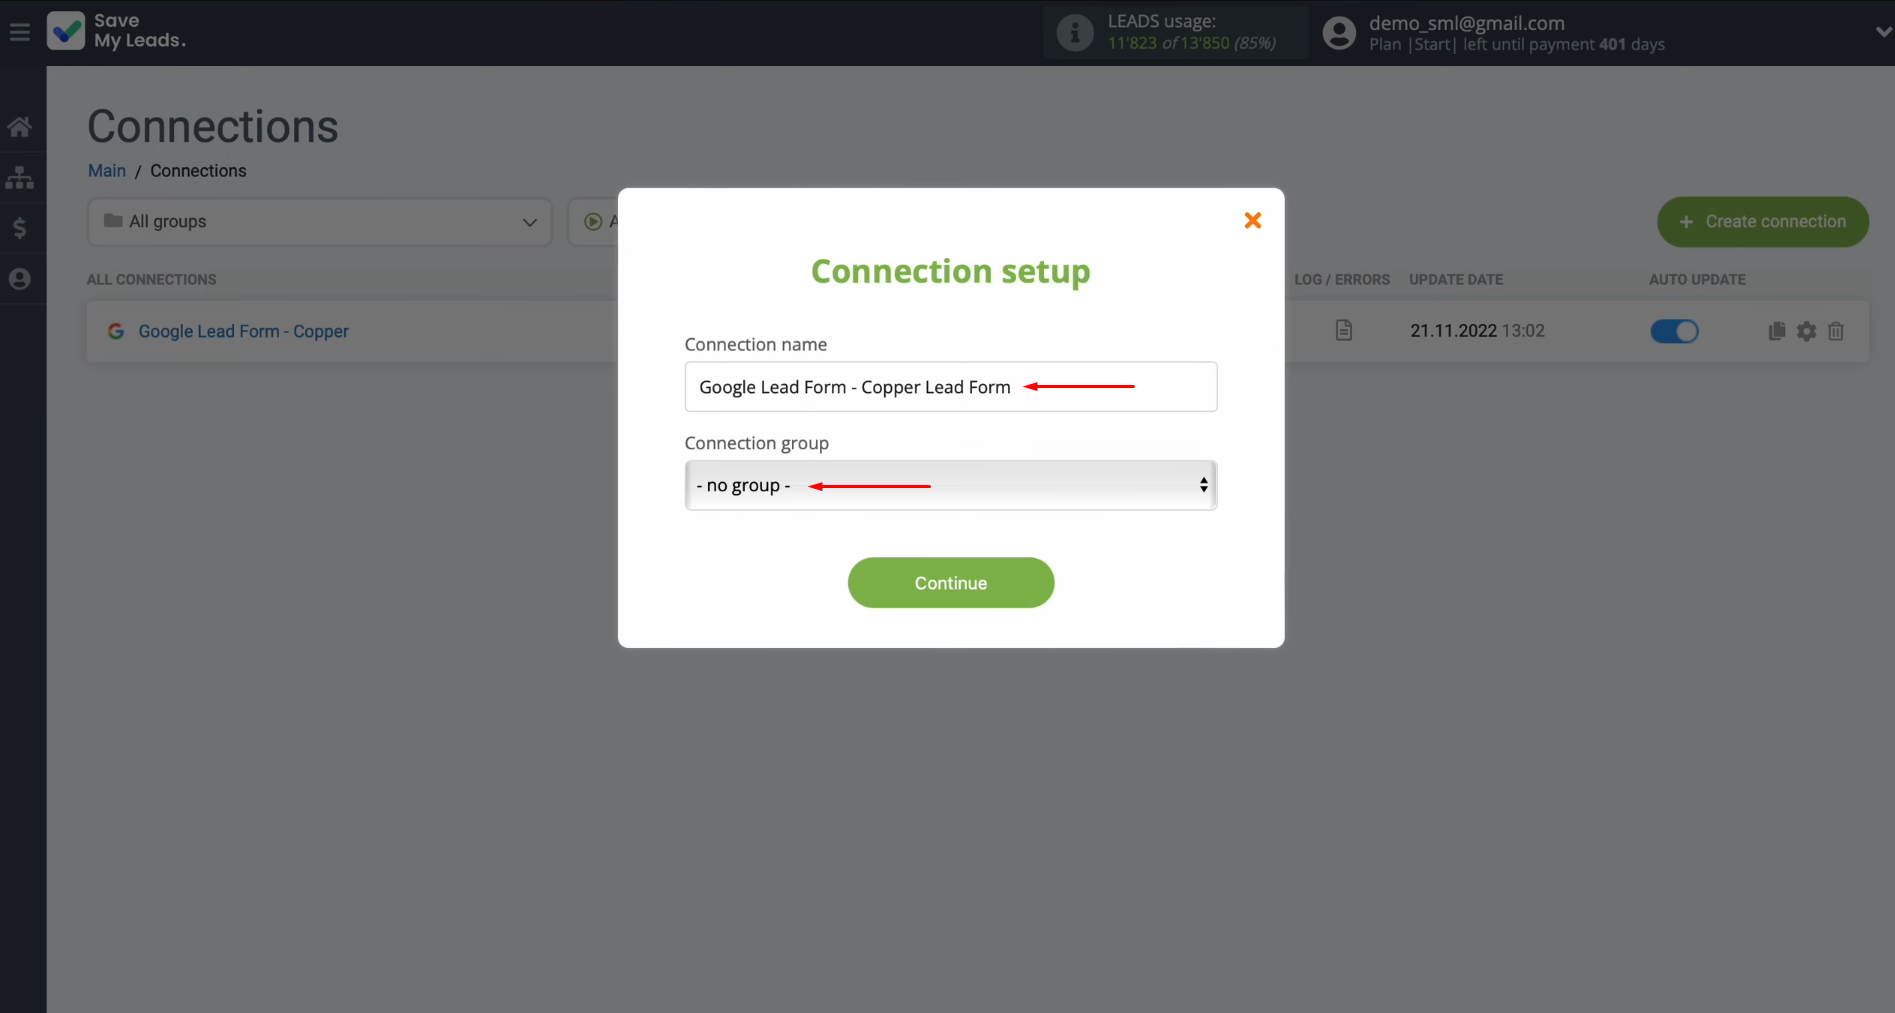
That’s all! Your Copper
and Google Leads integration is successfully configured and
ready to use.
Results
After completing the integration setup using our step-by-step guide, you’ve likely already experienced its benefits. Each time a customer fills out and submits a form on Google, their information is transferred to your CRM system and registered as a new contact. Automatic lead transfer from Google Ads to Copper accelerates the processing of customer data and streamlines your employees’ workflows by removing the need for manual data handling.
As you’ve seen, creating this integration doesn’t require advanced technical skills. The process is straightforward and can be completed within minutes using the user-friendly web interface of the connector. Once active, SaveMyLeads automatically manages the routine transfer of data from Lead Ads forms to your CRM system. Copper and Google Leads automation will help you save time on transferring lead data and thus optimize your business processes. This allows you to focus on more strategic tasks, enhancing productivity and elevating the quality of your customer interactions.
Step-by-Step Guides for Setting Up Integrations:
- TikTok and Slack Integration: Automatically Sending Channel Notifications
- How To Connect Google Lead Form Ads to Mailchimp
- Google Lead Form and Slack Integration: Automatically Sending Channel Notifications
- How To Connect Google Lead Form Ads to Notion
- Google Lead Form and ClickUp Integration: Automatic Data Transfer
