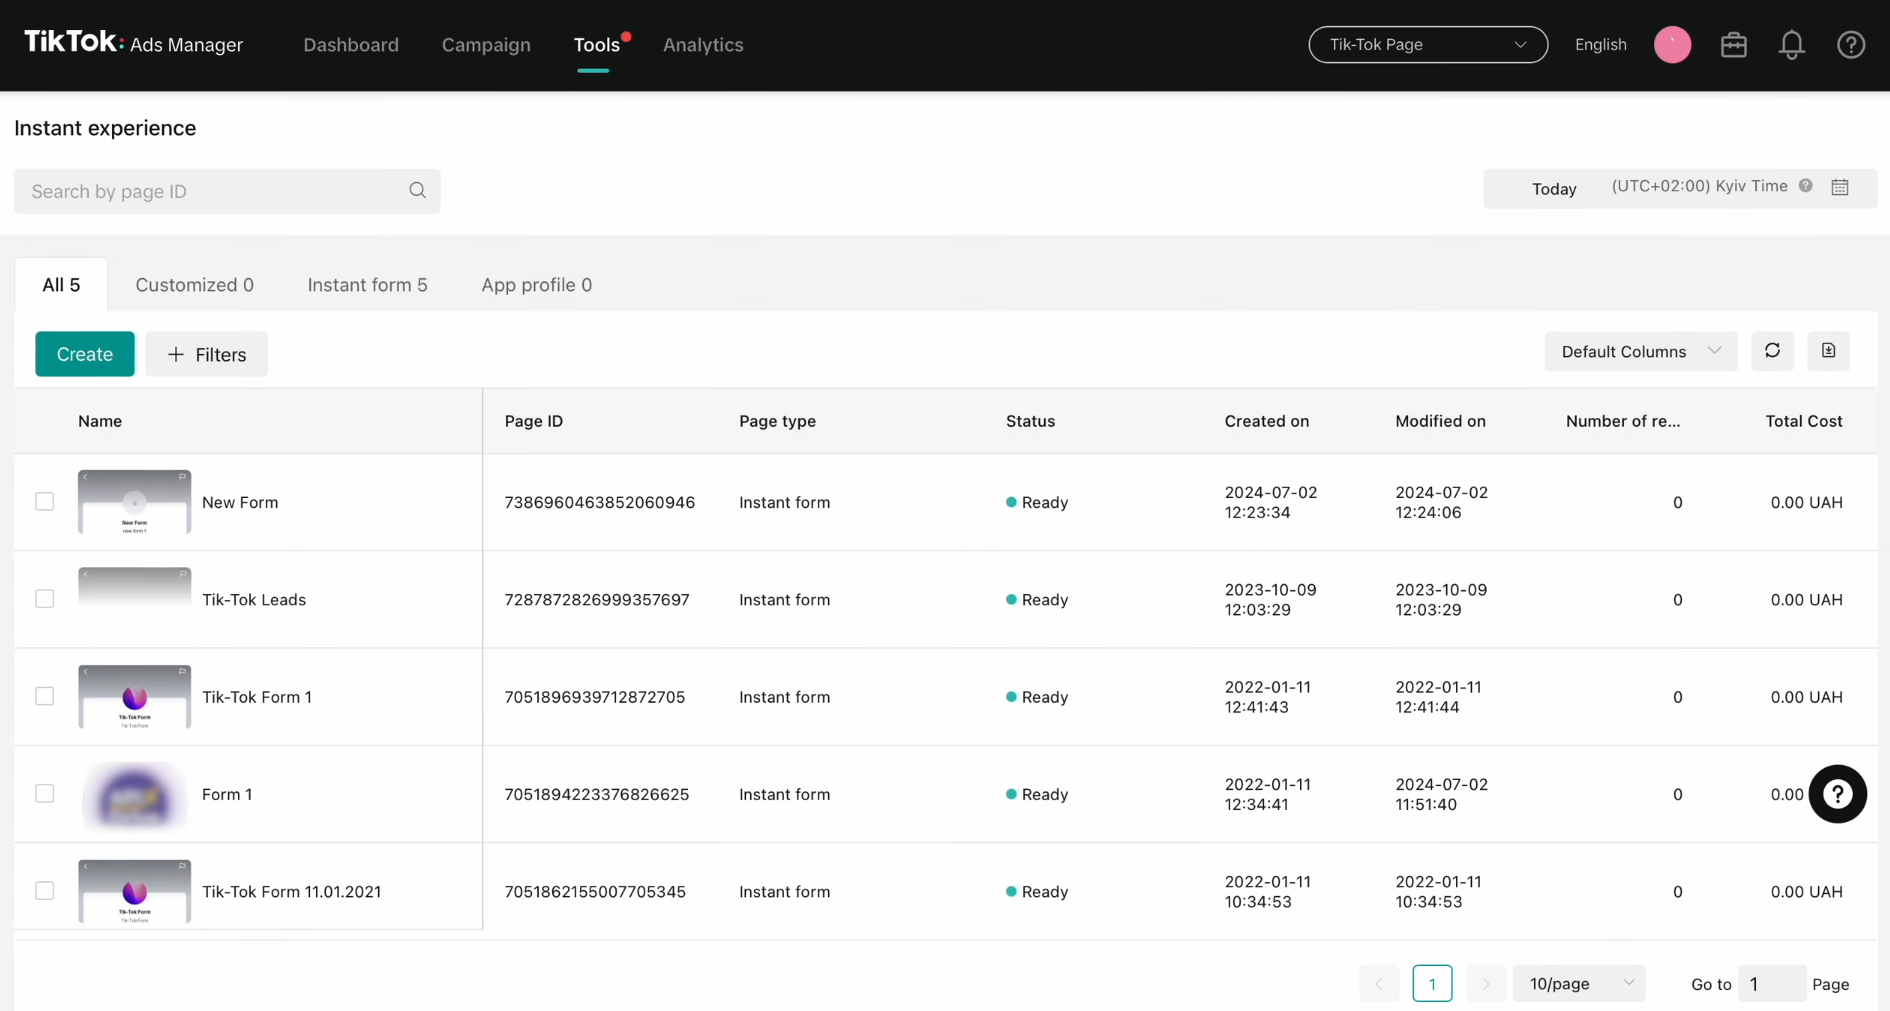
One of the key factors for business success is high-speed interaction with potential clients. This can be achieved, in particular, by using a lead capture form on TikTok. It allows leads to instantly signal their readiness to make a purchase or order with just a few clicks. Slack is a corporate messenger used by many companies to optimize team operations and improve productivity. By linking both services together via our online connector SaveMyLeads, you'll enter true turbo mode, automating the transfer of lead data from TikTok forms directly into the messenger. This article will show you how to set up the TikTok and Slack integration.
Automated transfer of TikTok leads to Slack brings a triple benefit to your business:
- Faster lead communication. Potential customers will receive quicker responses, reducing the chance they’ll reconsider their choices.
- Streamlined staff operations. Employees who once handled manual data transfers can now devote their time to improving customer engagement.
- Time efficiency. You'll minimize the number of daily tasks that need your or your team's direct attention.
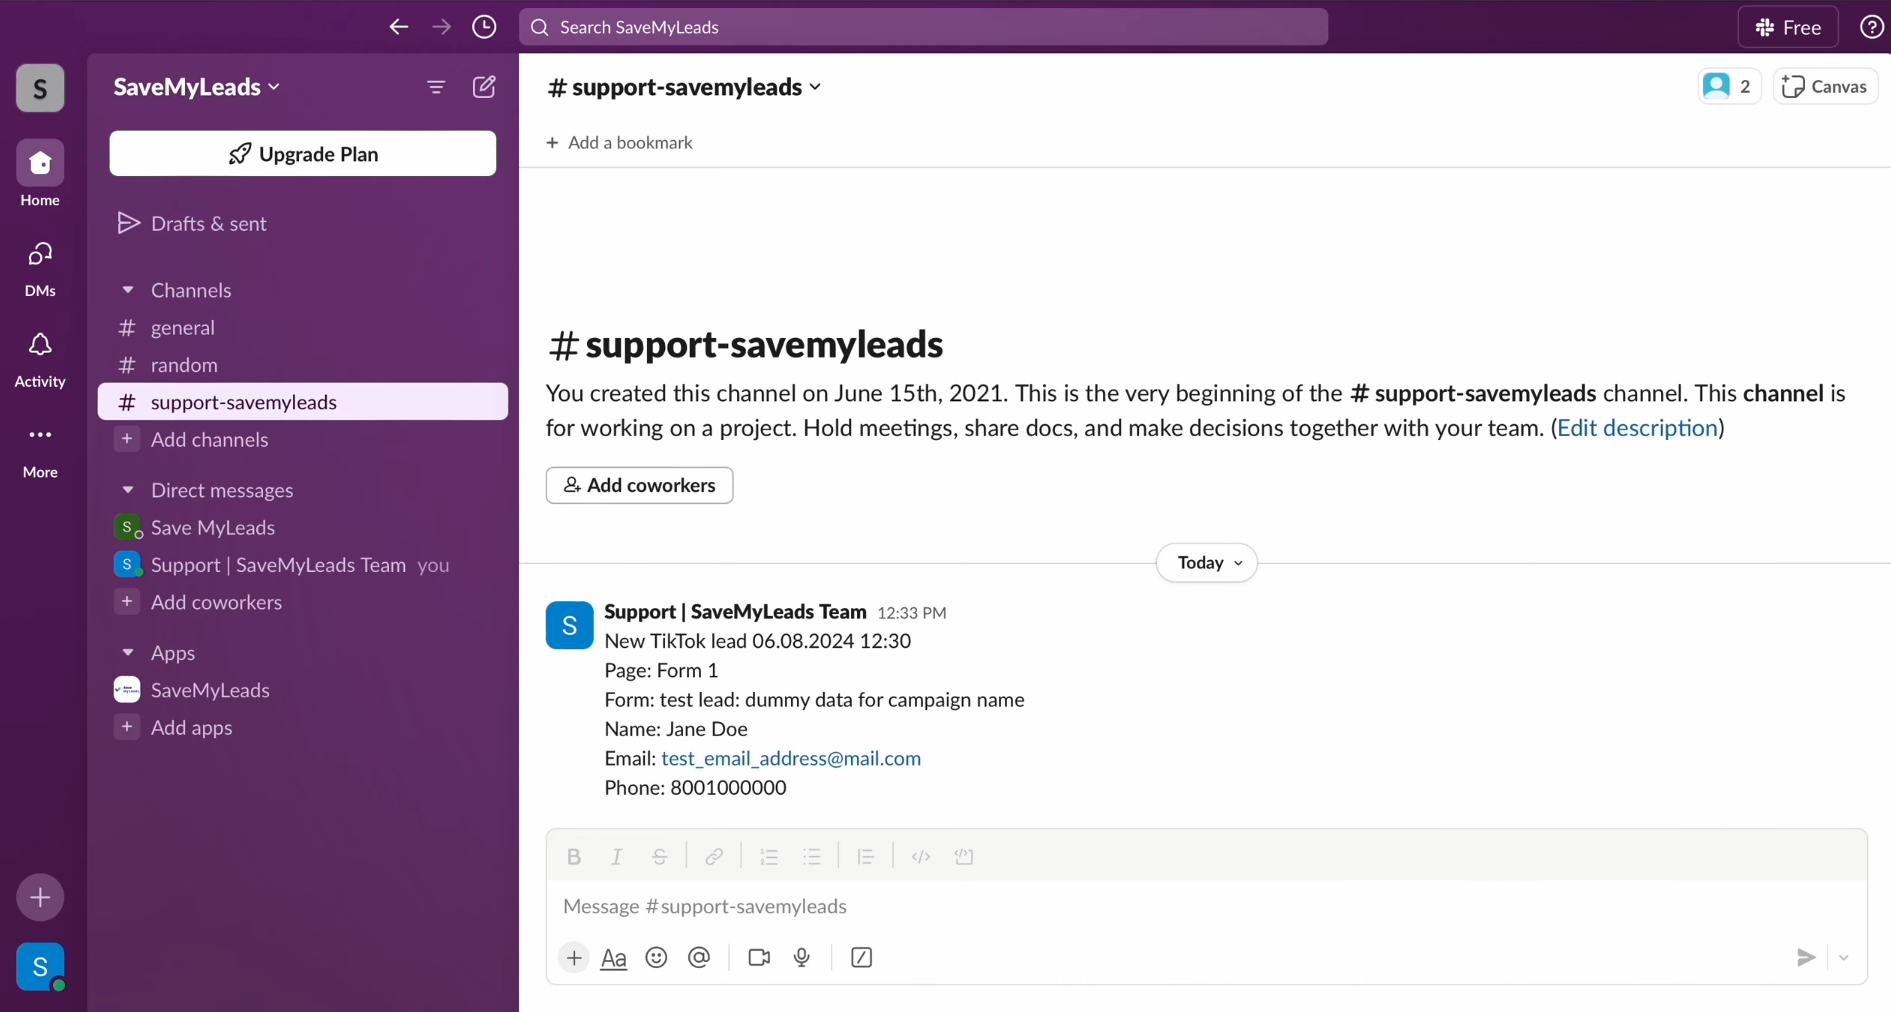
The advantages of the Slack and TikTok integration will become evident right after you set it up with the SaveMyLeads connector. Leads who fill out a form will be instantly directed to your corporate messenger. What once required manual entry of names, phone numbers, and email addresses is now automated, freeing you from outdated practices.
This
automation not only simplifies your tasks but also delights your leads.
Satisfied with the swift response and seamless experience, TikTok leads are
more likely to turn into loyal customers, driving significant benefits for your
business’s growth and success.
How to Connect TikTok to Slack
With SaveMyLeads, setting up the TikTok and Slack integration is a breeze. Even those with little to no technical background can easily manage it. By selecting our online connector, you avoid the need to dive into complicated API setups or find an expert to handle the integration. The developers have designed the process to be user-friendly, ensuring a seamless experience. The entire setup takes around 10 minutes, and if you have prior experience with integrations, it might take even less time. Our comprehensive step-by-step guides, available in both text and video formats, will ensure you configure the Slack and TikTok integration correctly on the first attempt.
Start by signing up on savemyleads.com. You’ll need to provide your name, email address, and password. You can also sign up using your Google or Facebook accounts for a faster registration process. Once done, you’re ready to configure the TikTok integration with Slack.
Setting Up TikTok as the Data Source
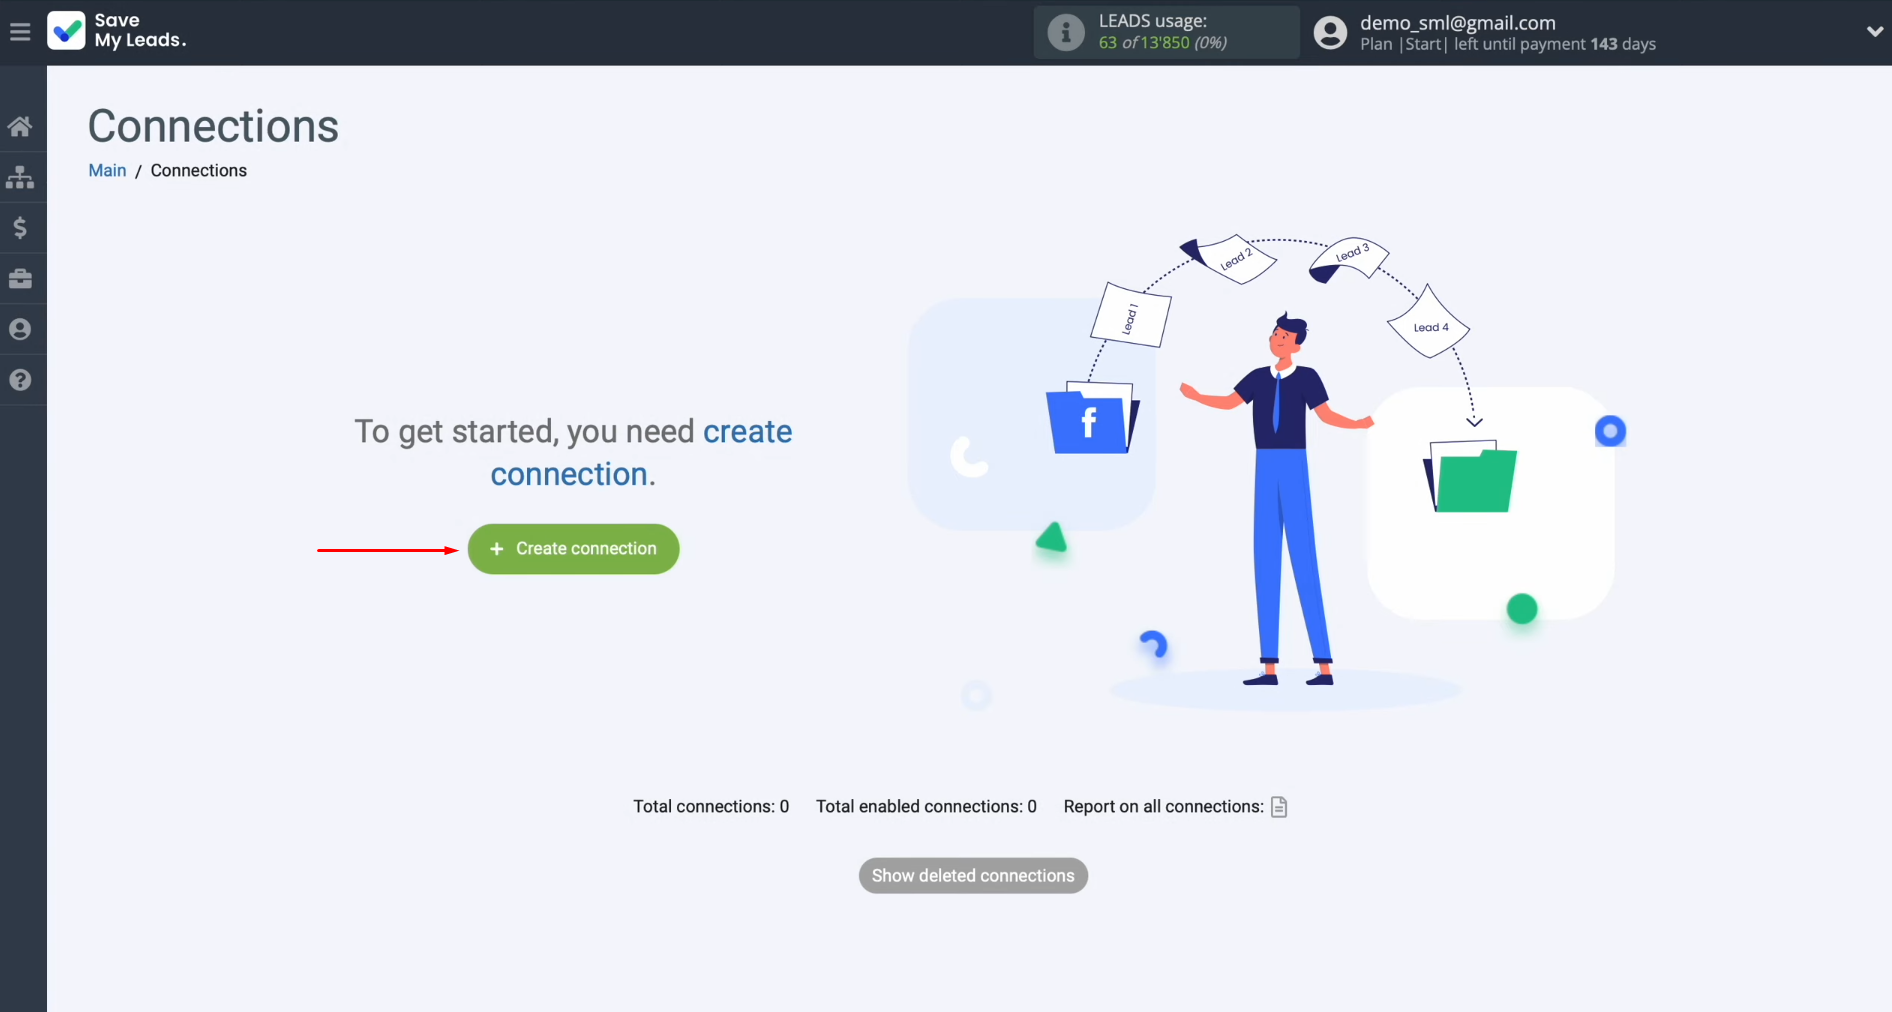
To kick off the process of TikTok integration with Slack, begin by creating a new connection within SaveMyLeads.
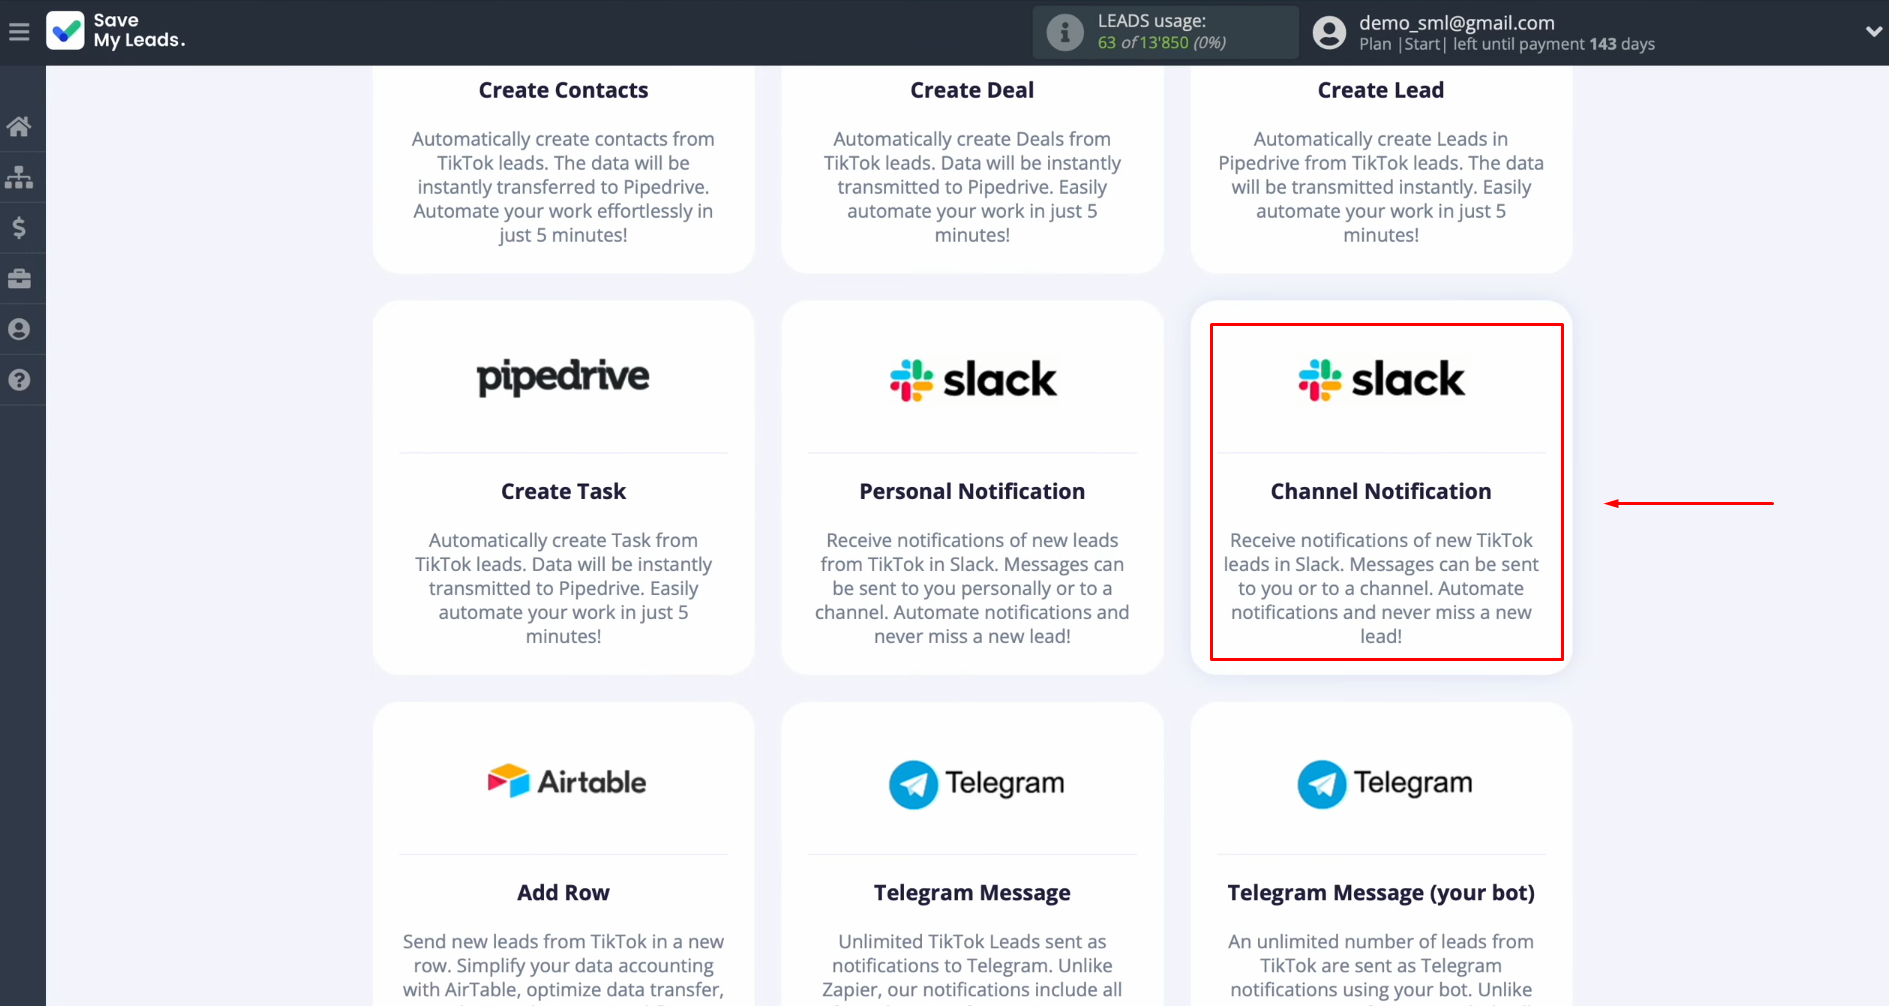
Select
TikTok as your data source system.
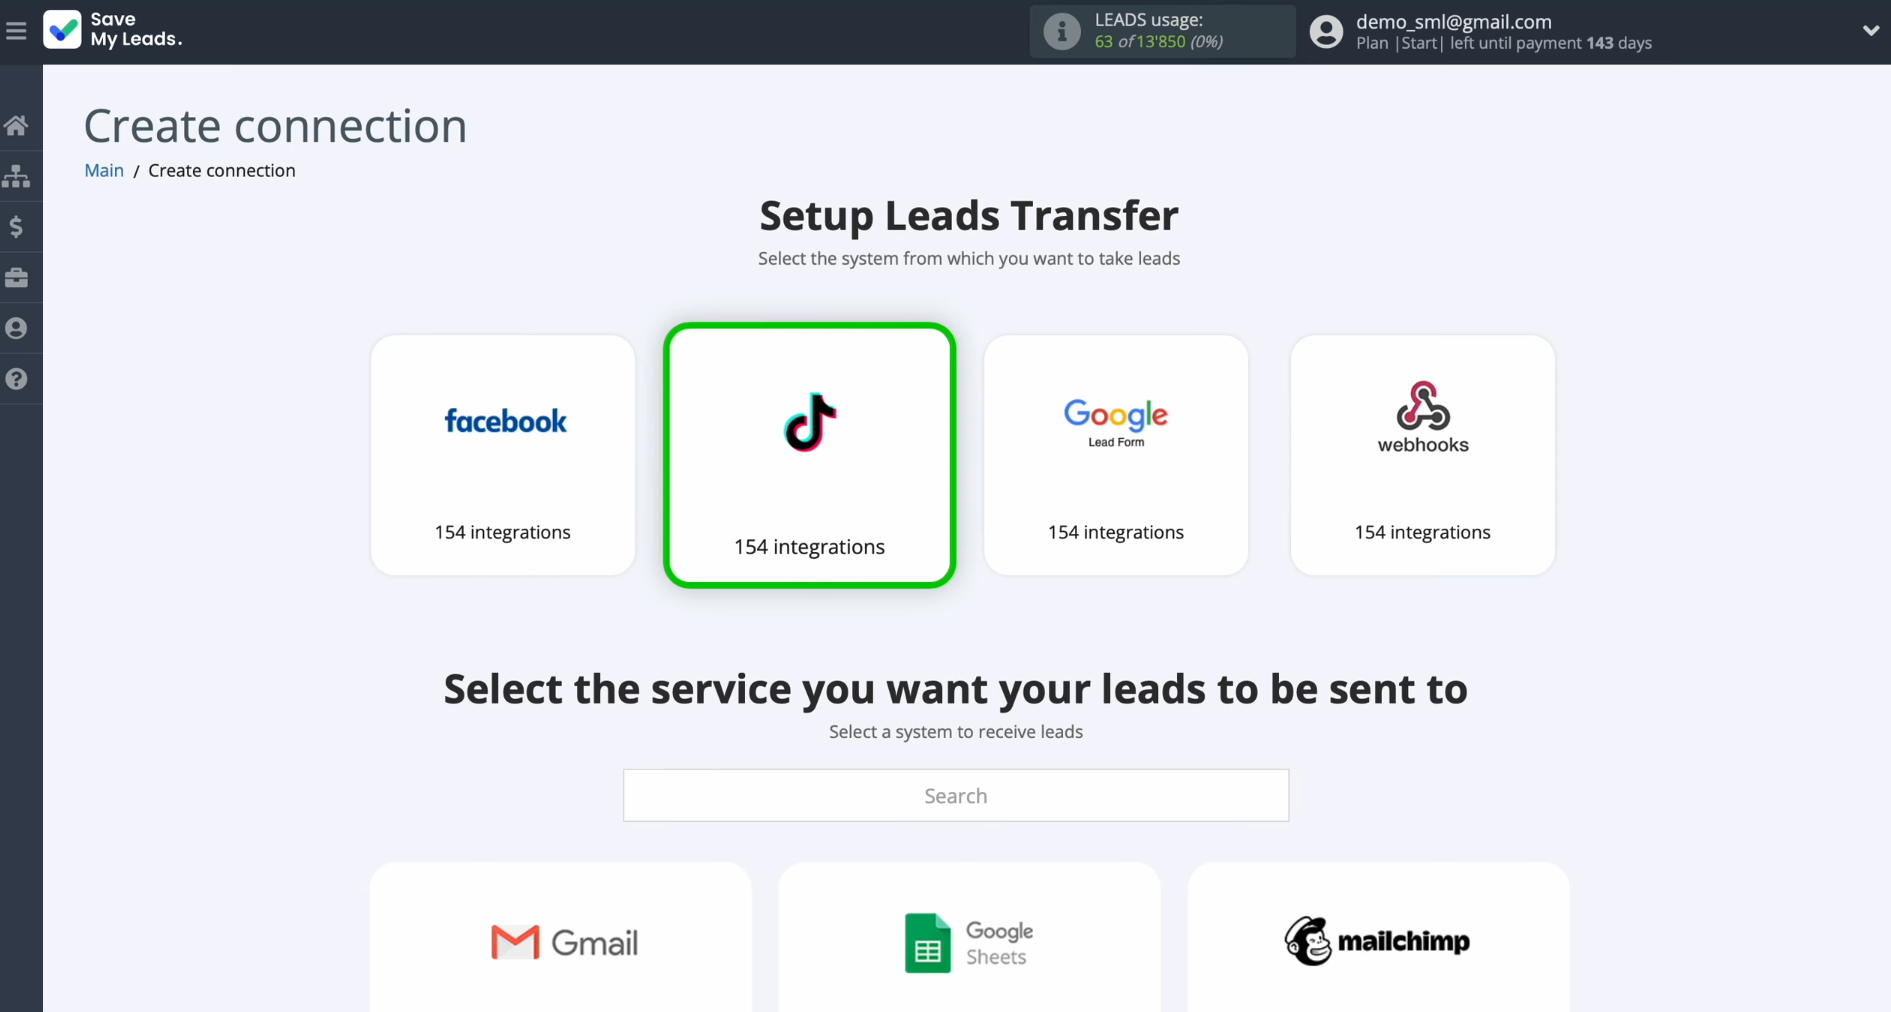
Next,
choose the destination for your TikTok leads. In this case, select Slack
(Channel Notification).
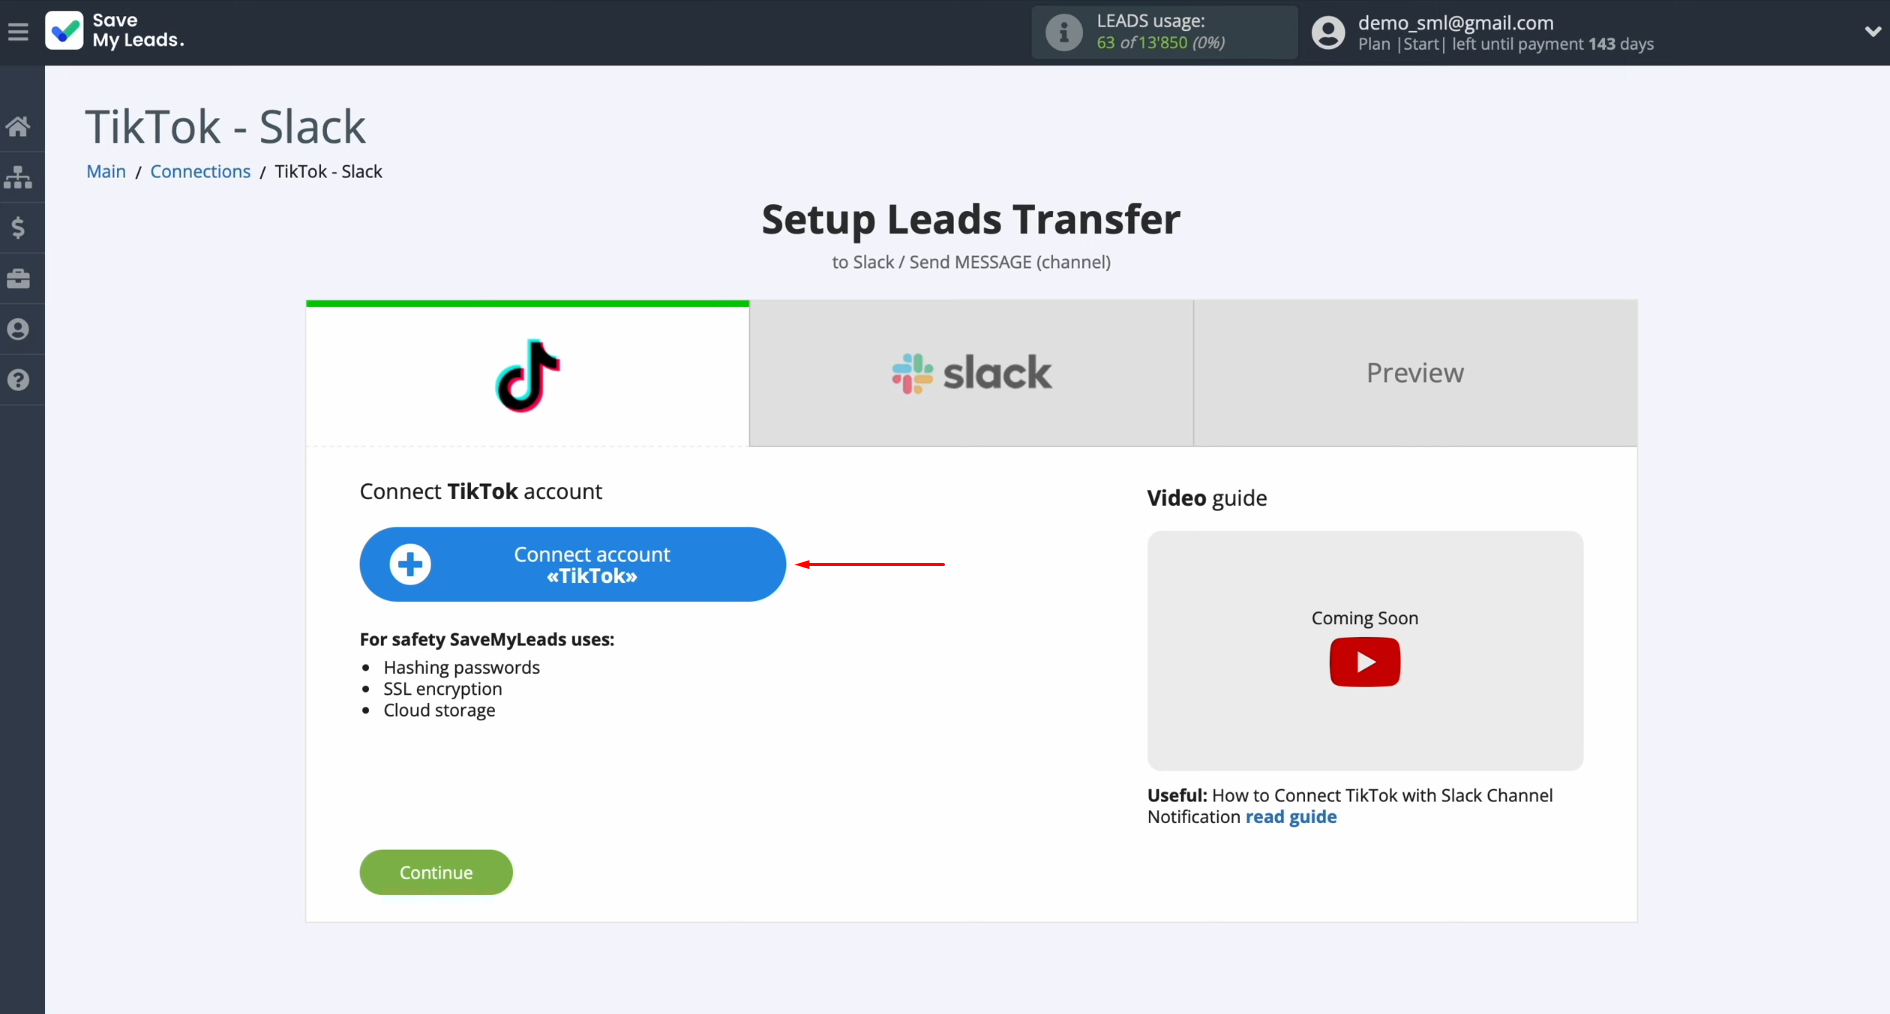
Proceed
by linking your TikTok account to SaveMyLeads.
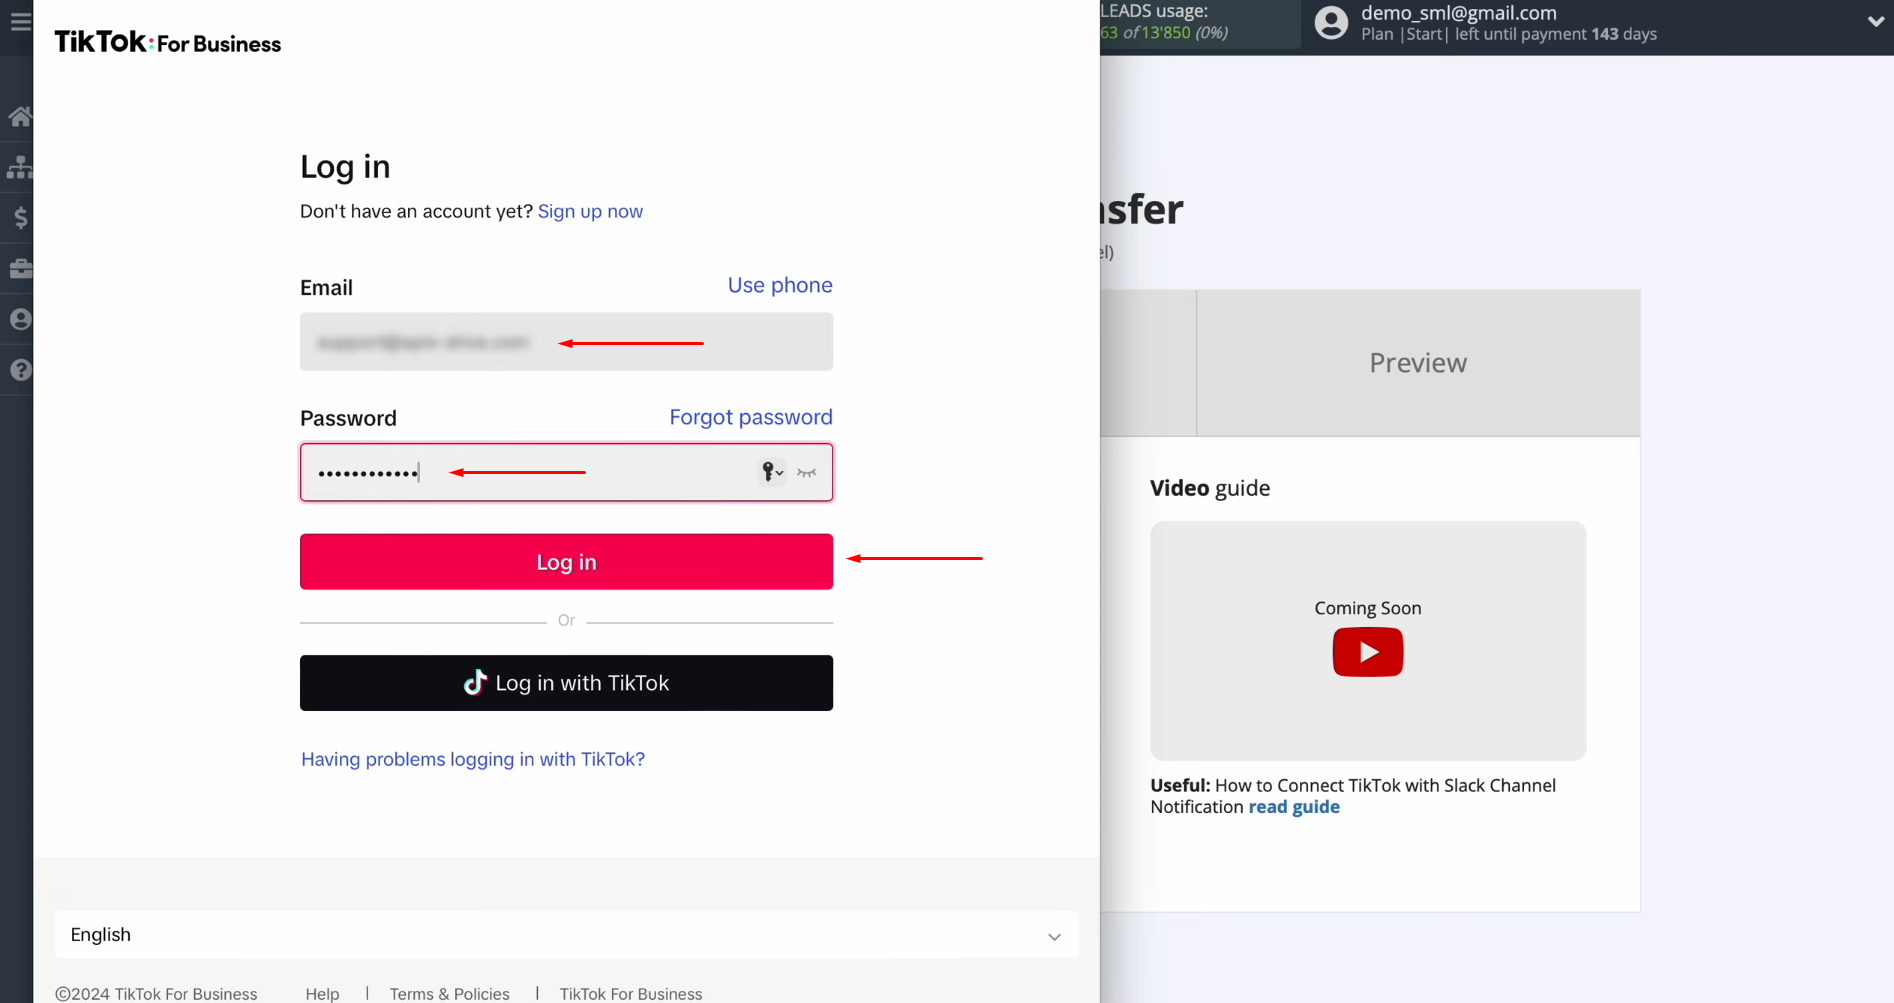
Input
your TikTok login credentials and click “Log in.”
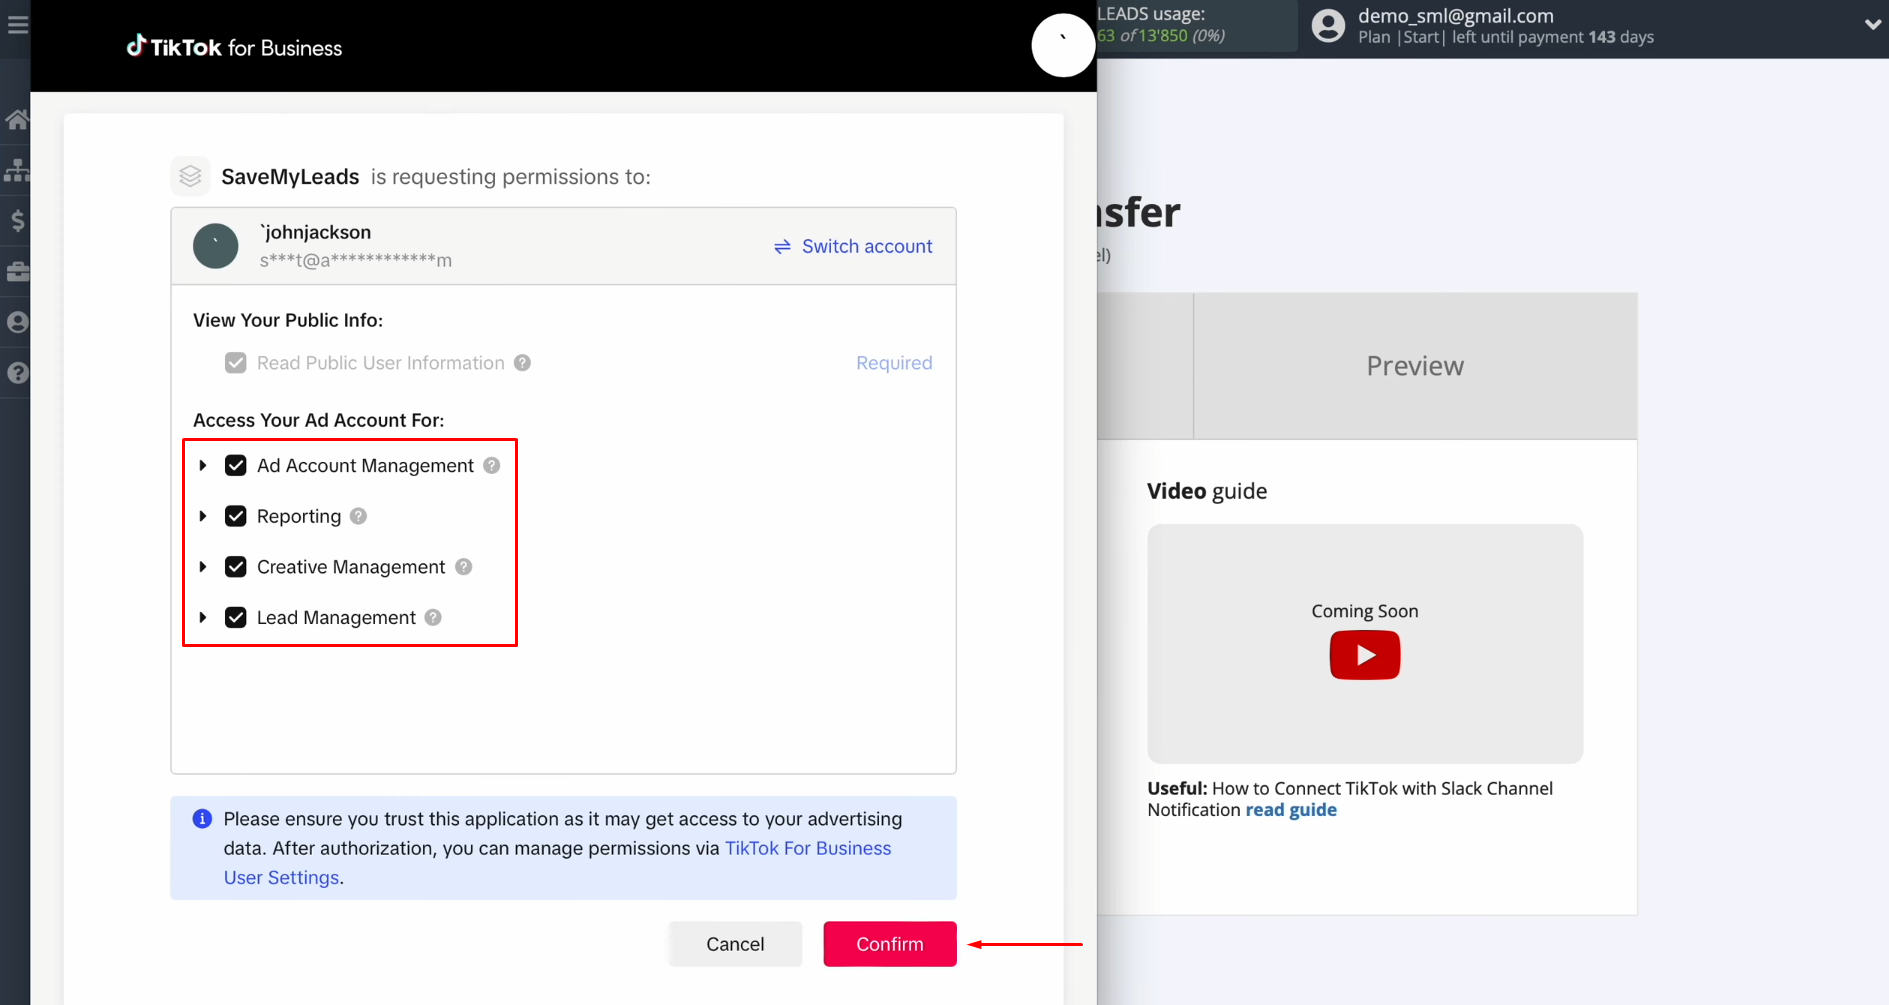
Give SaveMyLeads access to your TikTok account. Ensure all permission checkboxes are
checked, then click “Confirm.”
Once
your account is successfully connected, it will appear in the list of linked
accounts. Select it.
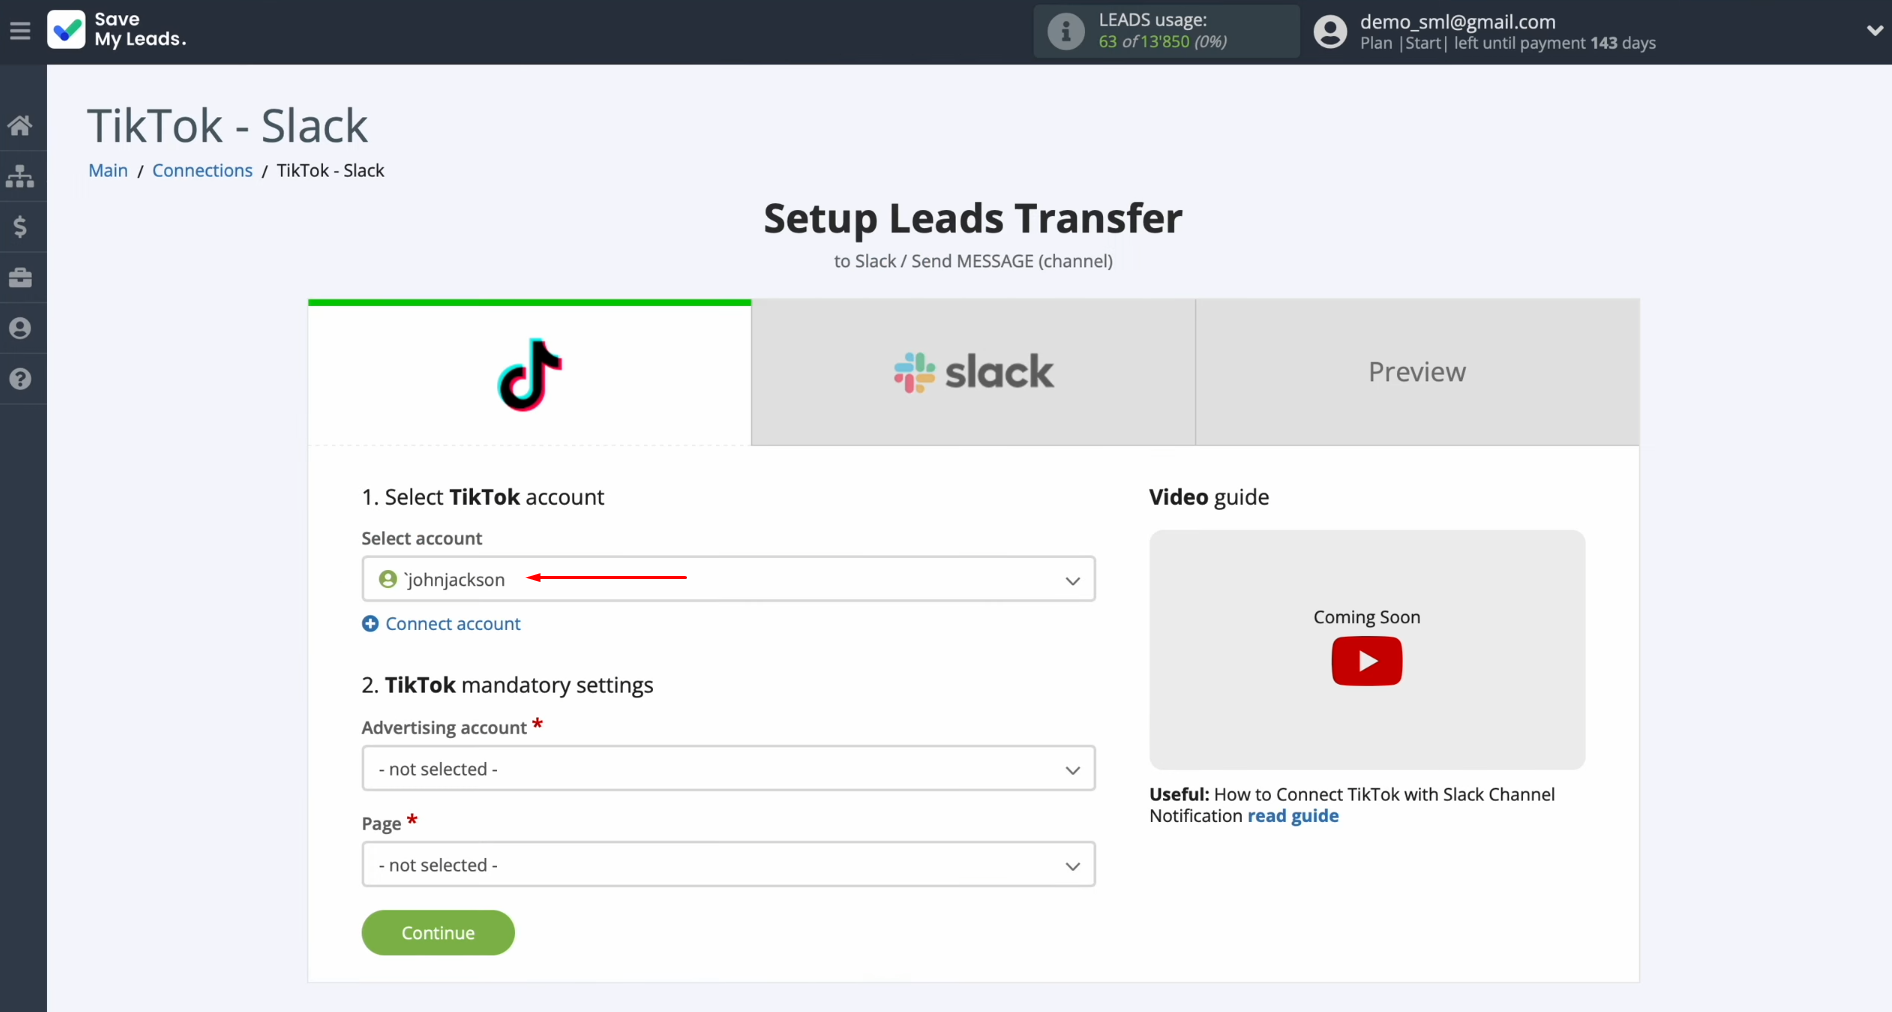
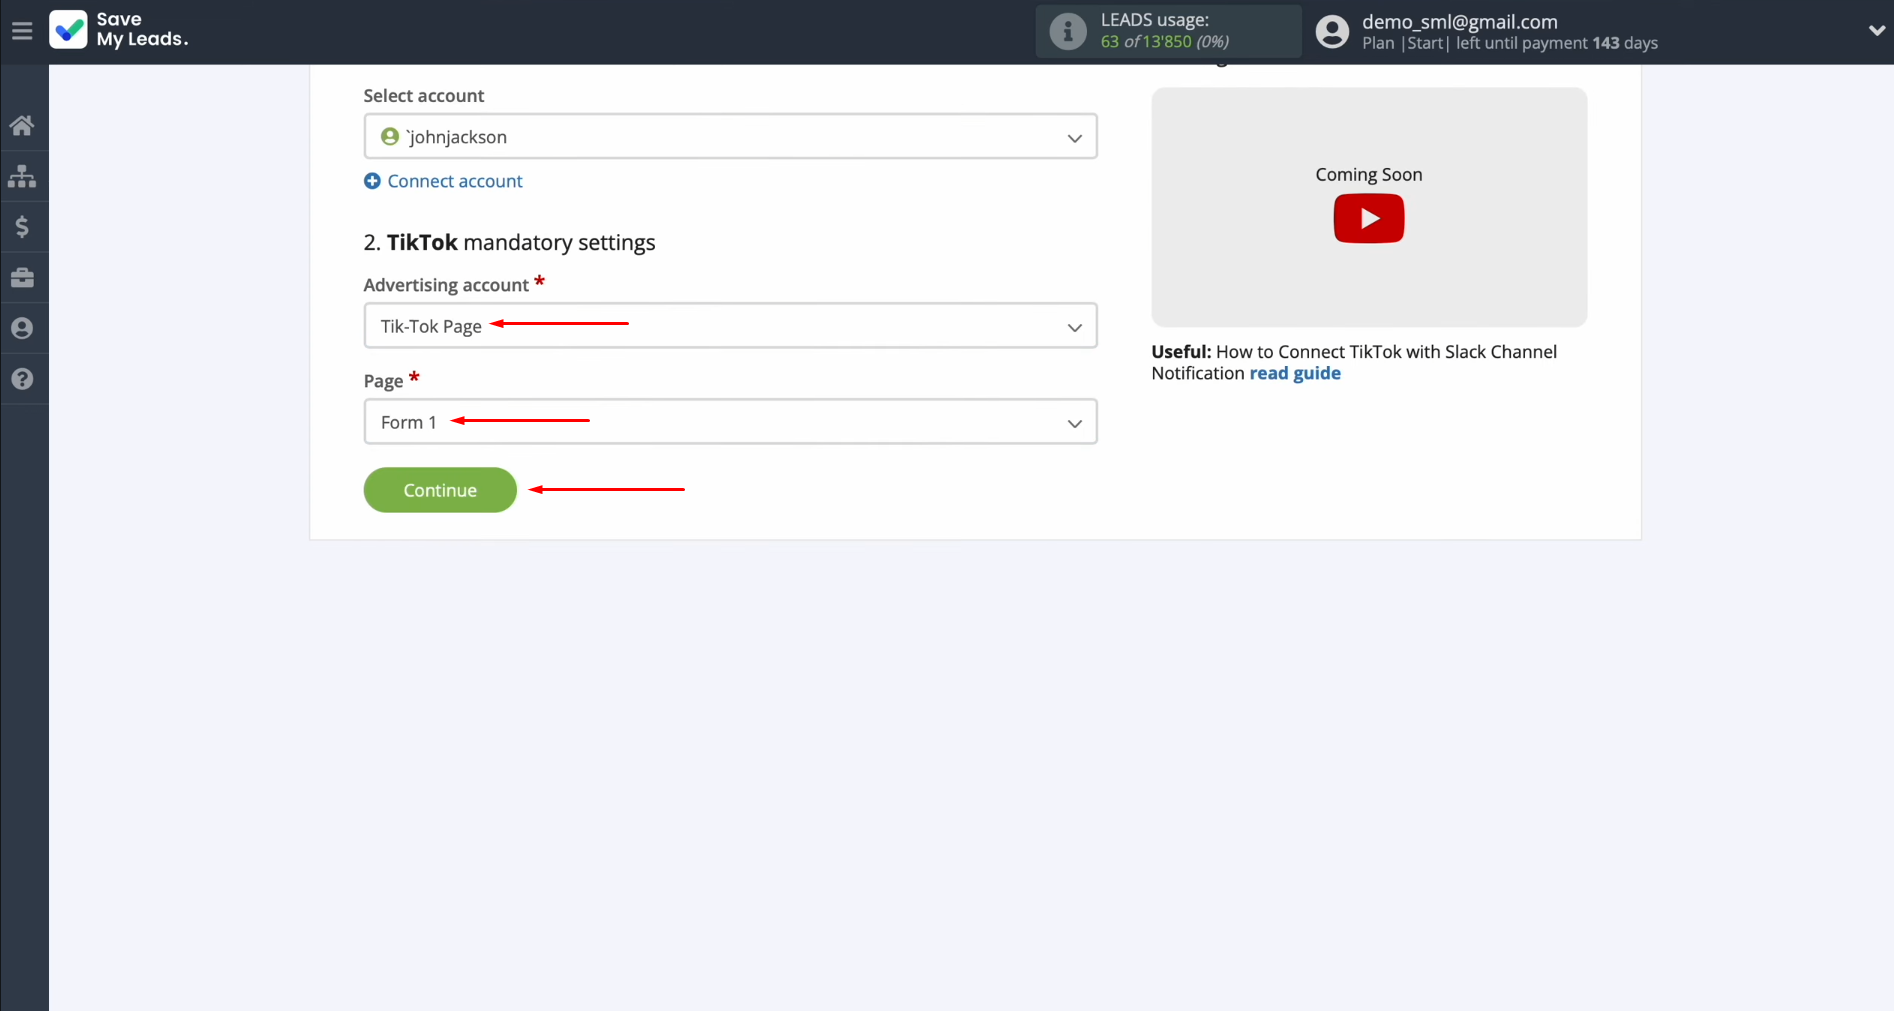
Choose
the specific advertising page and form you want to use, then click “Continue.”
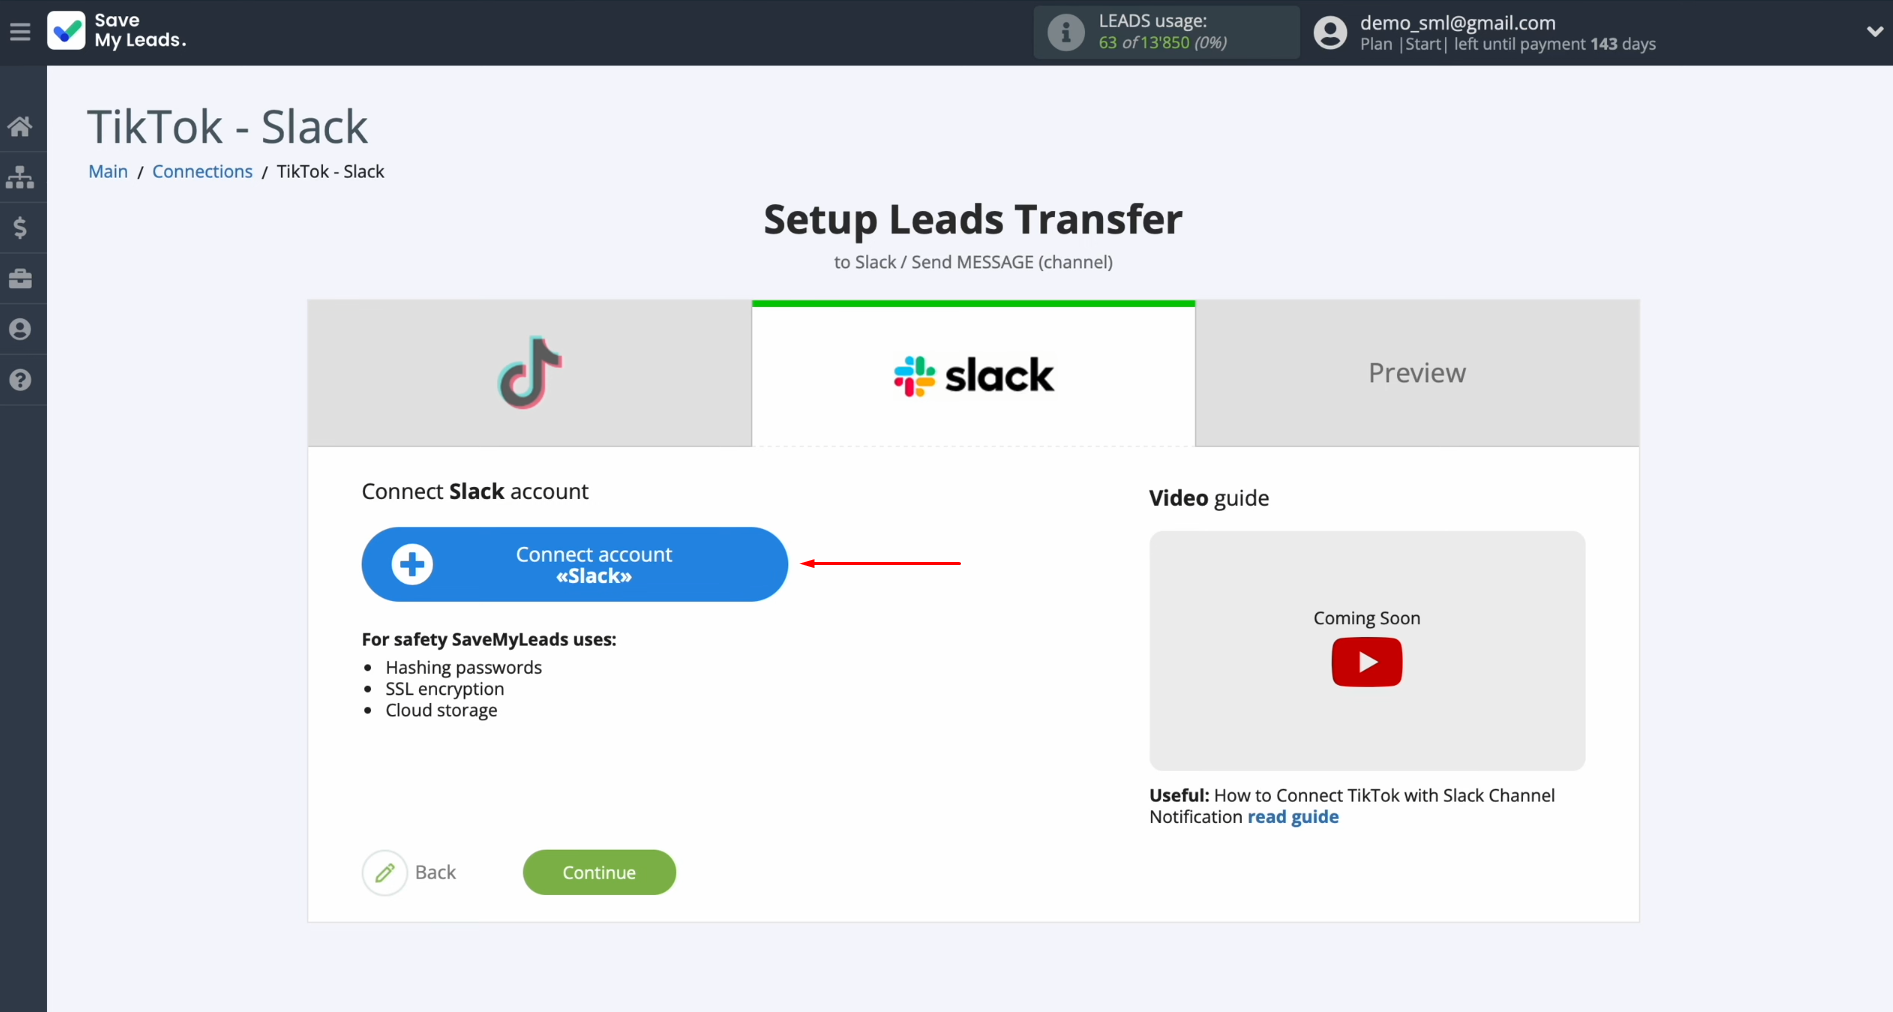
Configuring the Data Receiver – Slack
Connect your Slack account to SaveMyLeads.
In
the next step, you'll need to specify your Slack workspace. For this, log into
your Slack personal account.
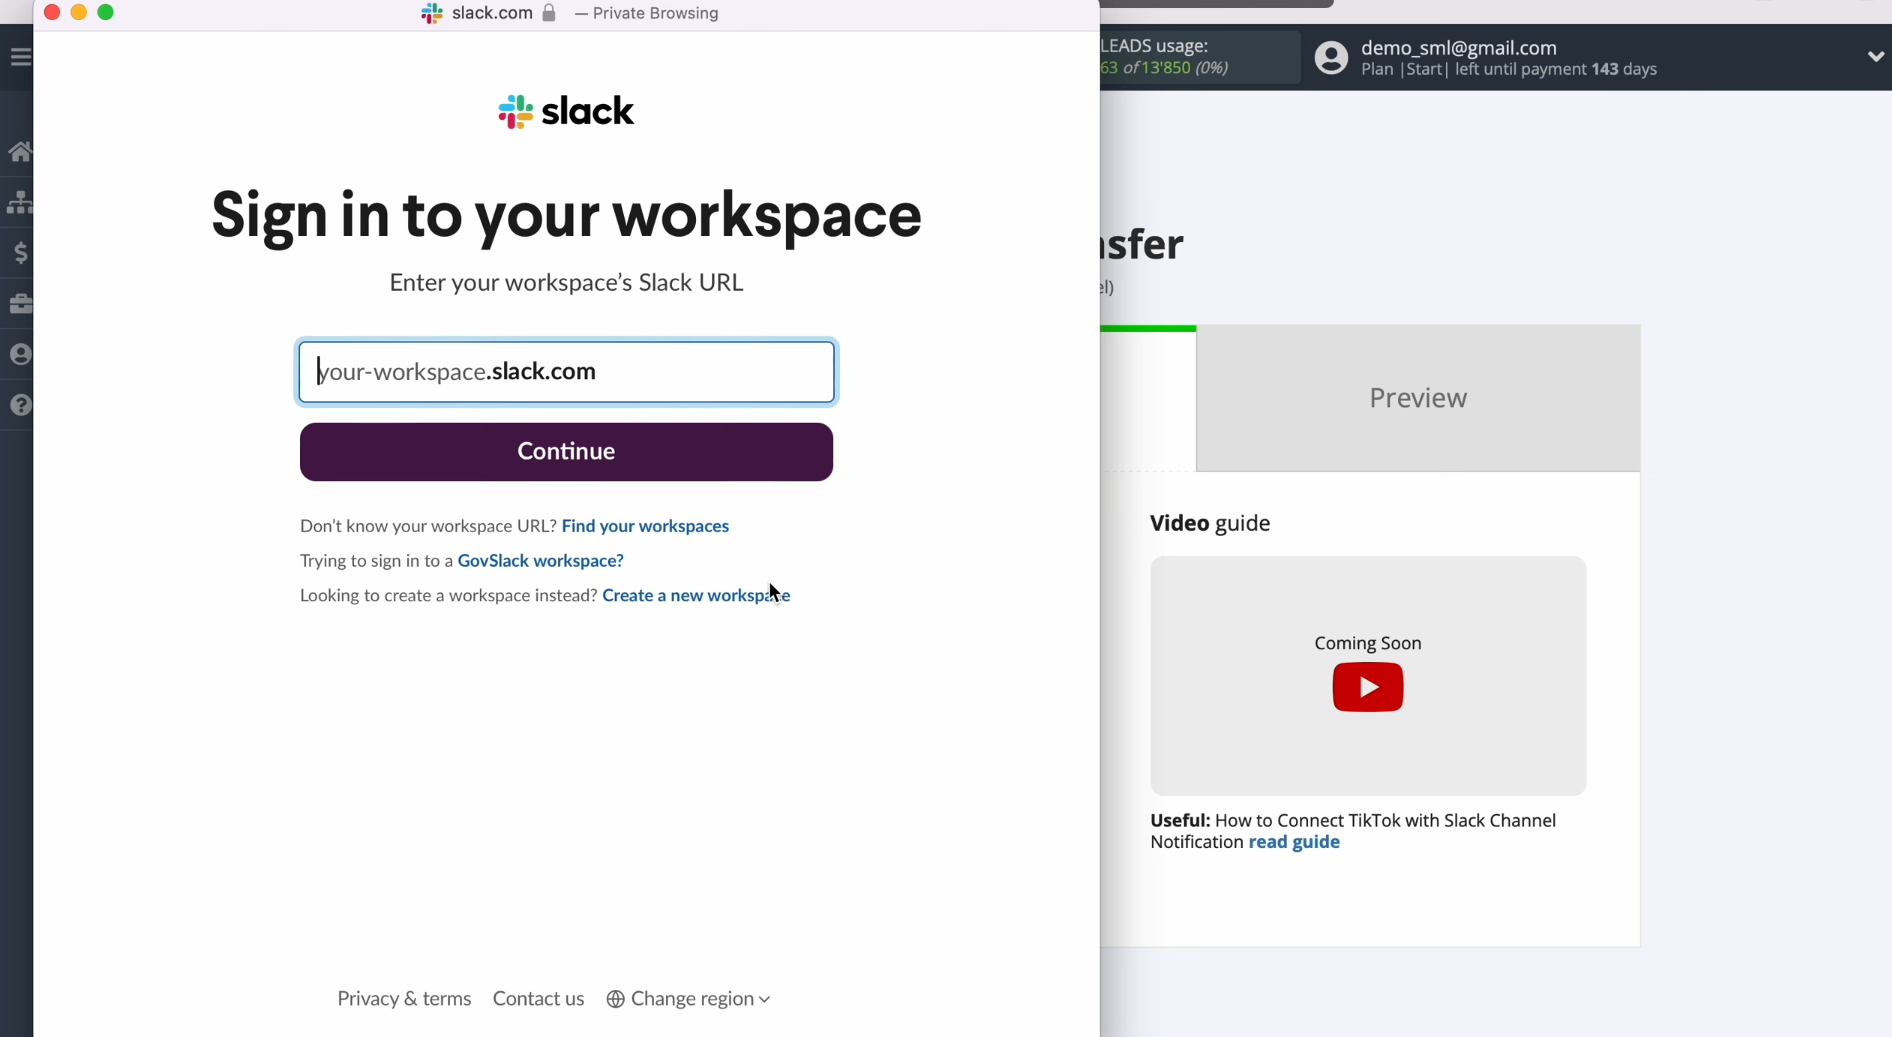
Copy your workspace name, ensuring no extra characters are included.
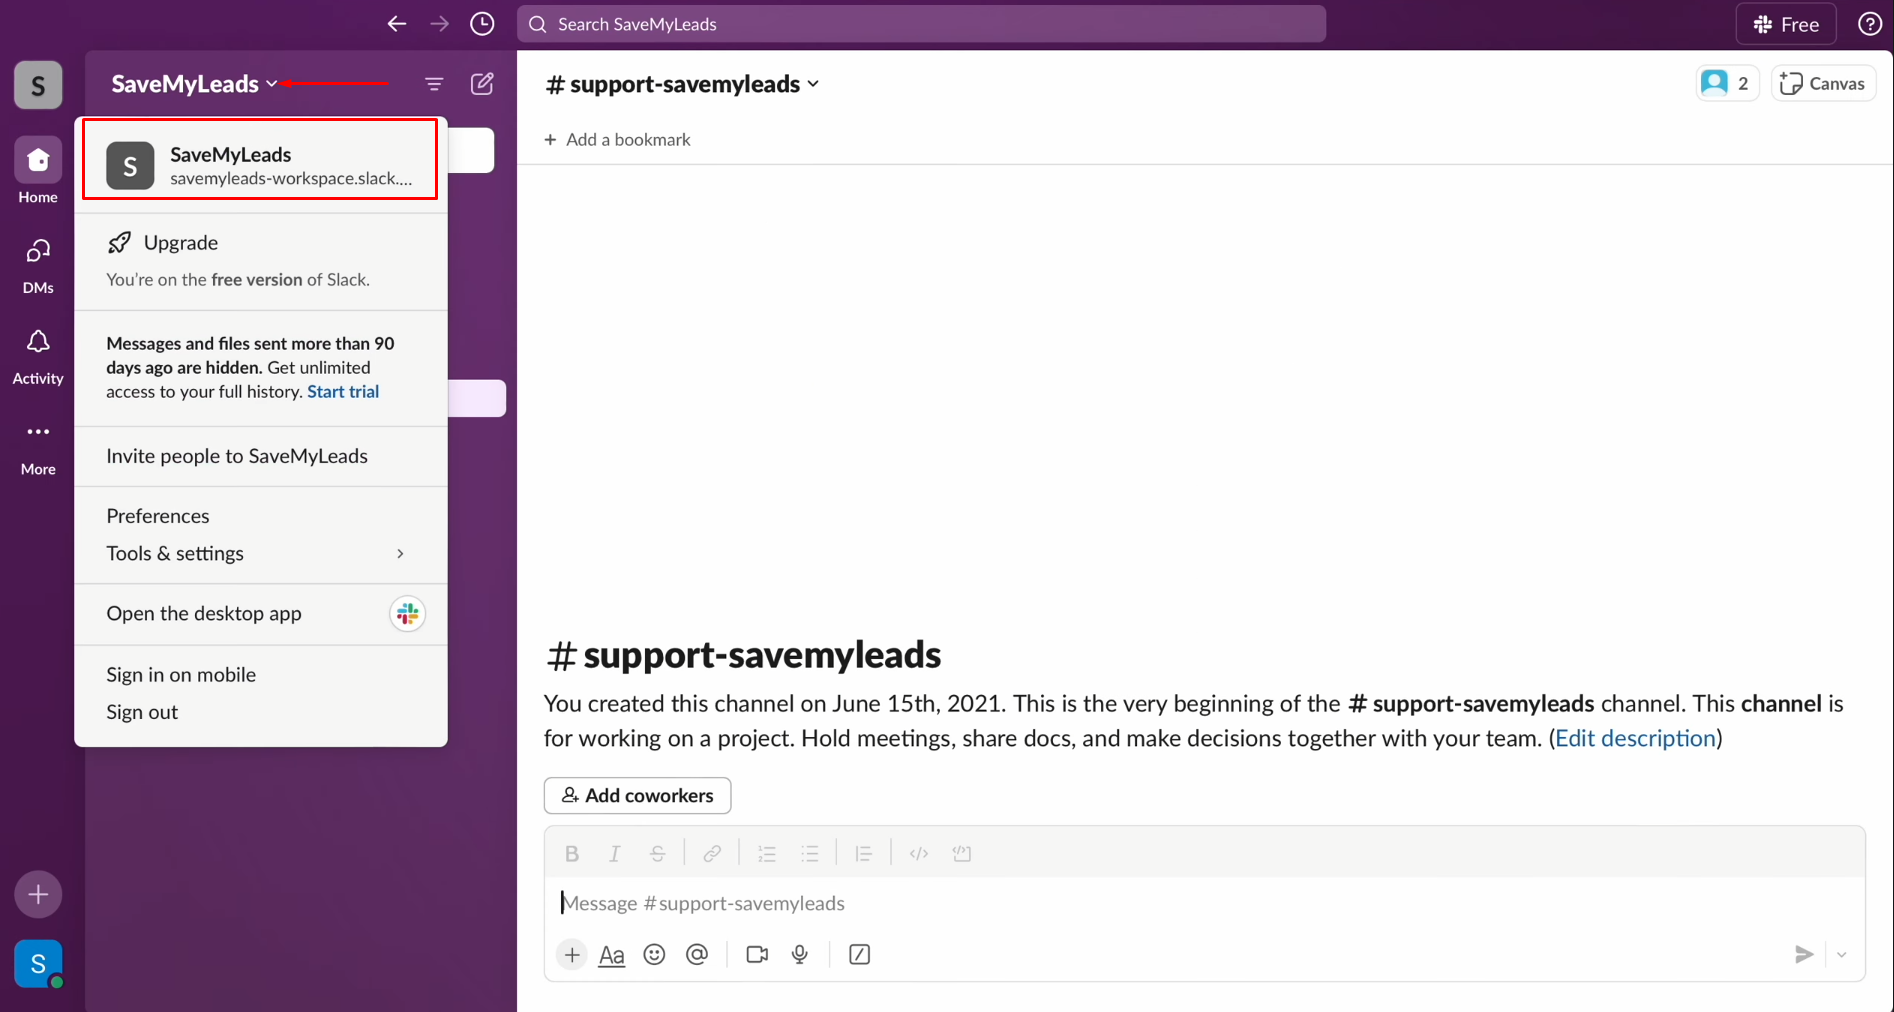
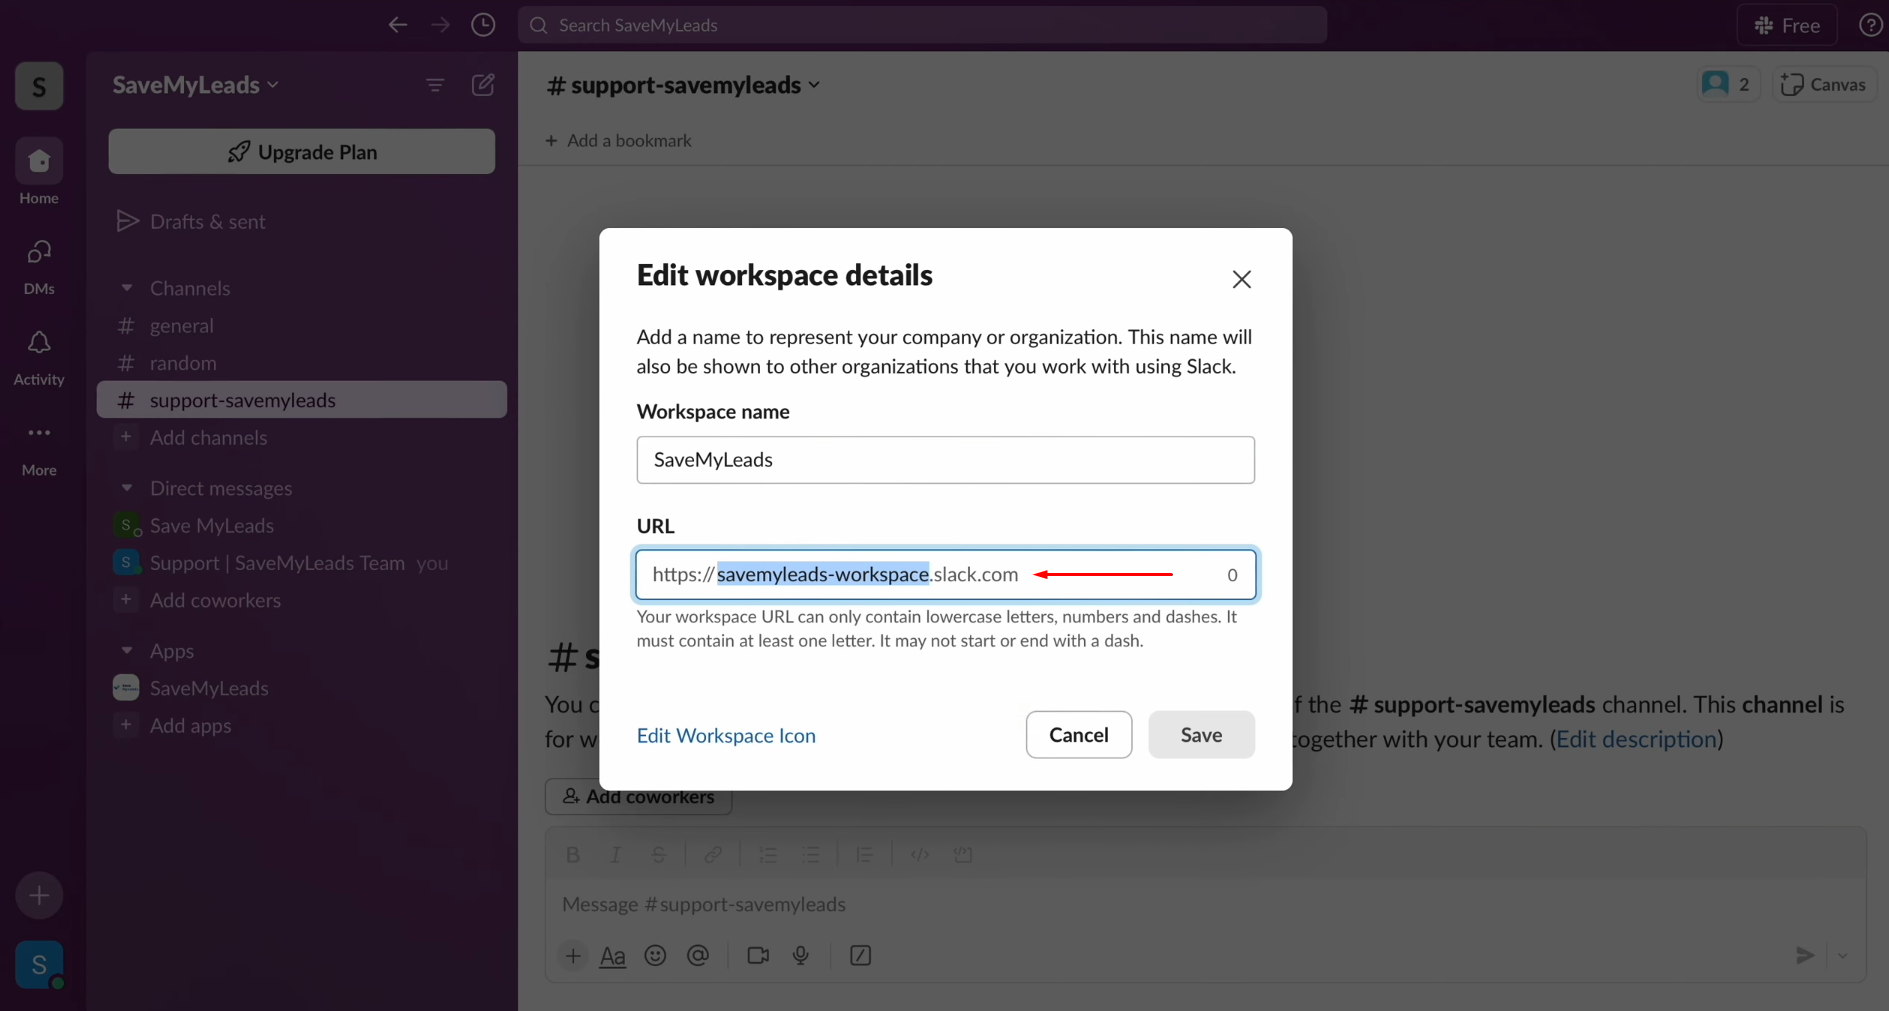
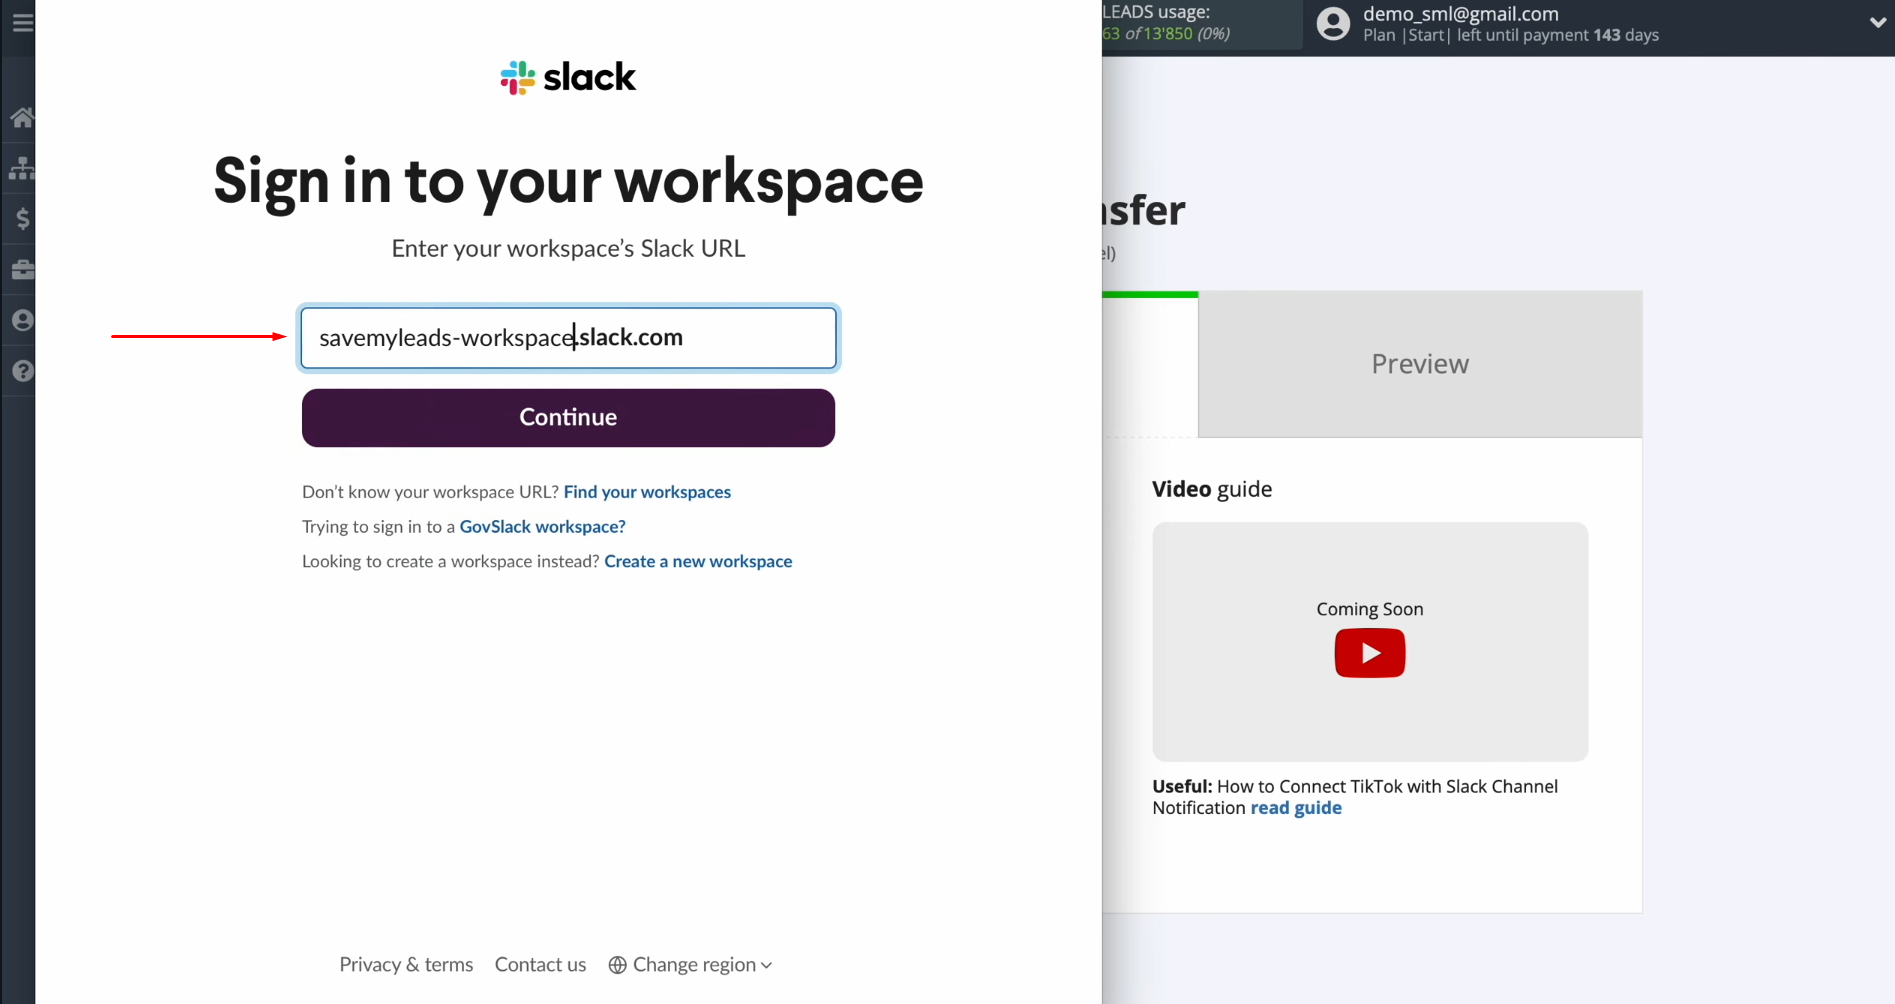
Paste
the copied workspace into the provided field and click “Continue.”
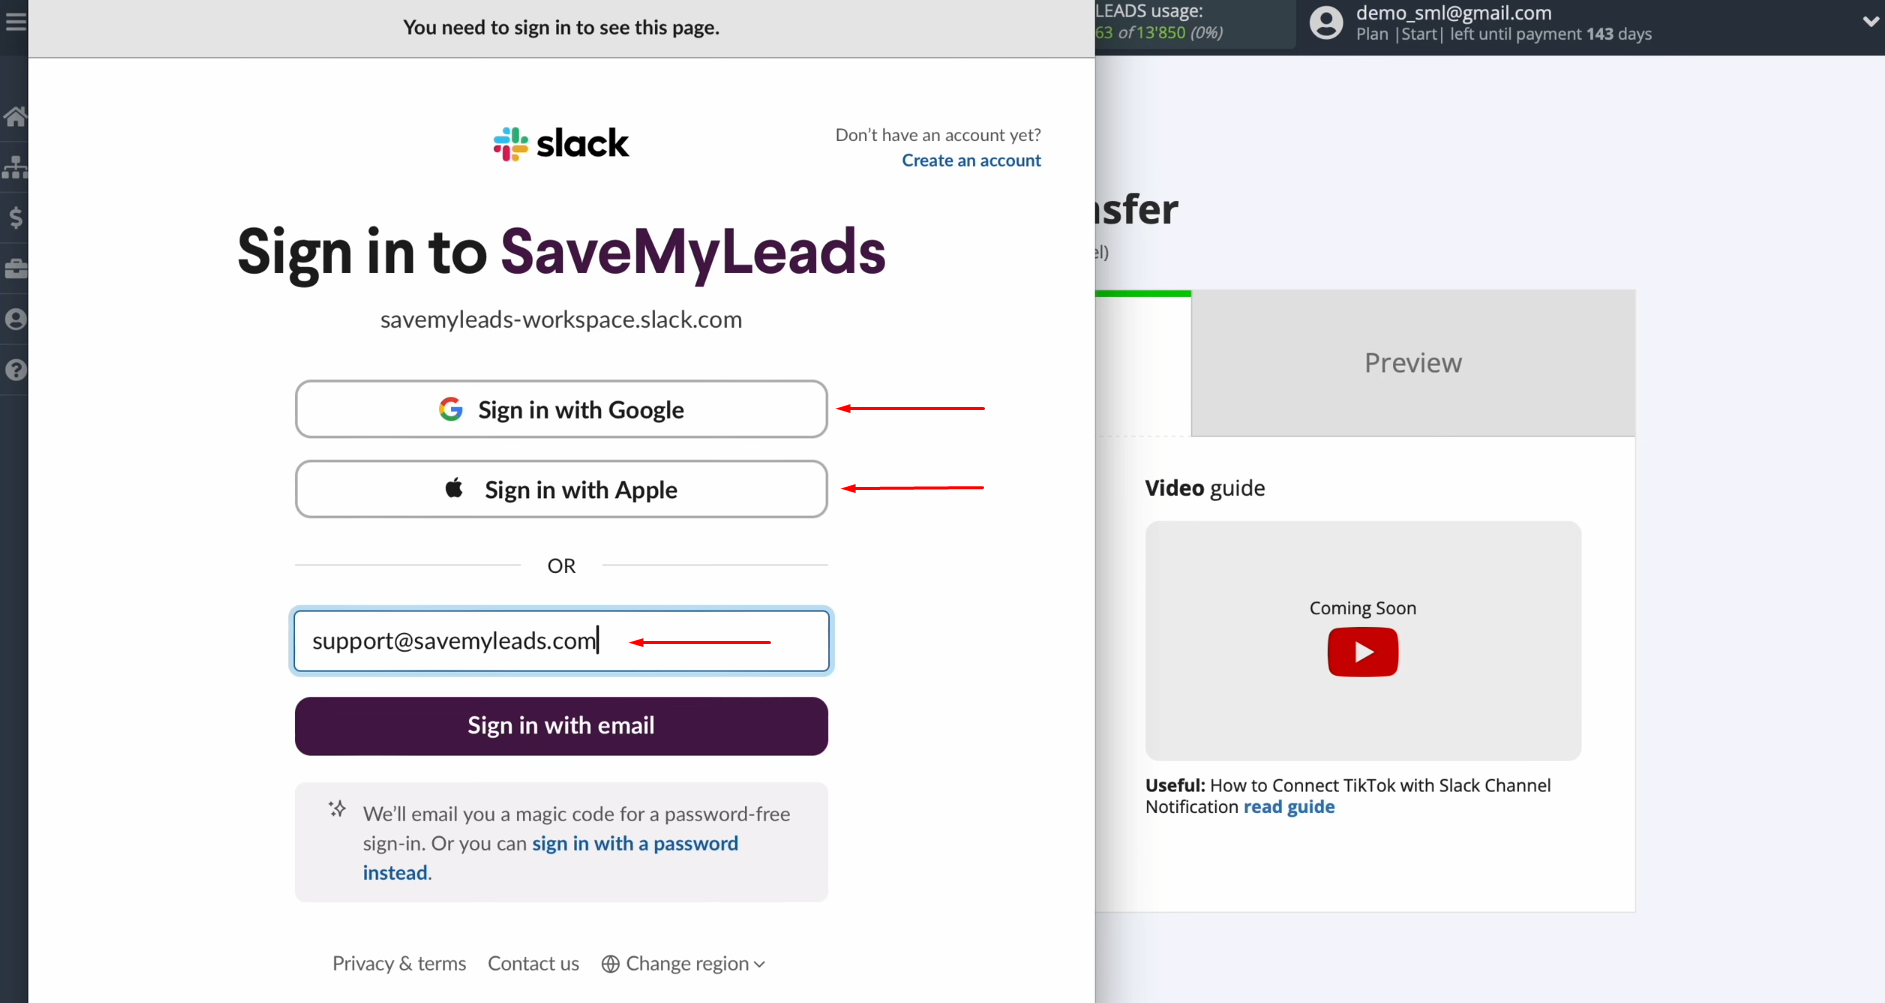
Enter
your Slack login credentials or log in through your Google or Apple account.
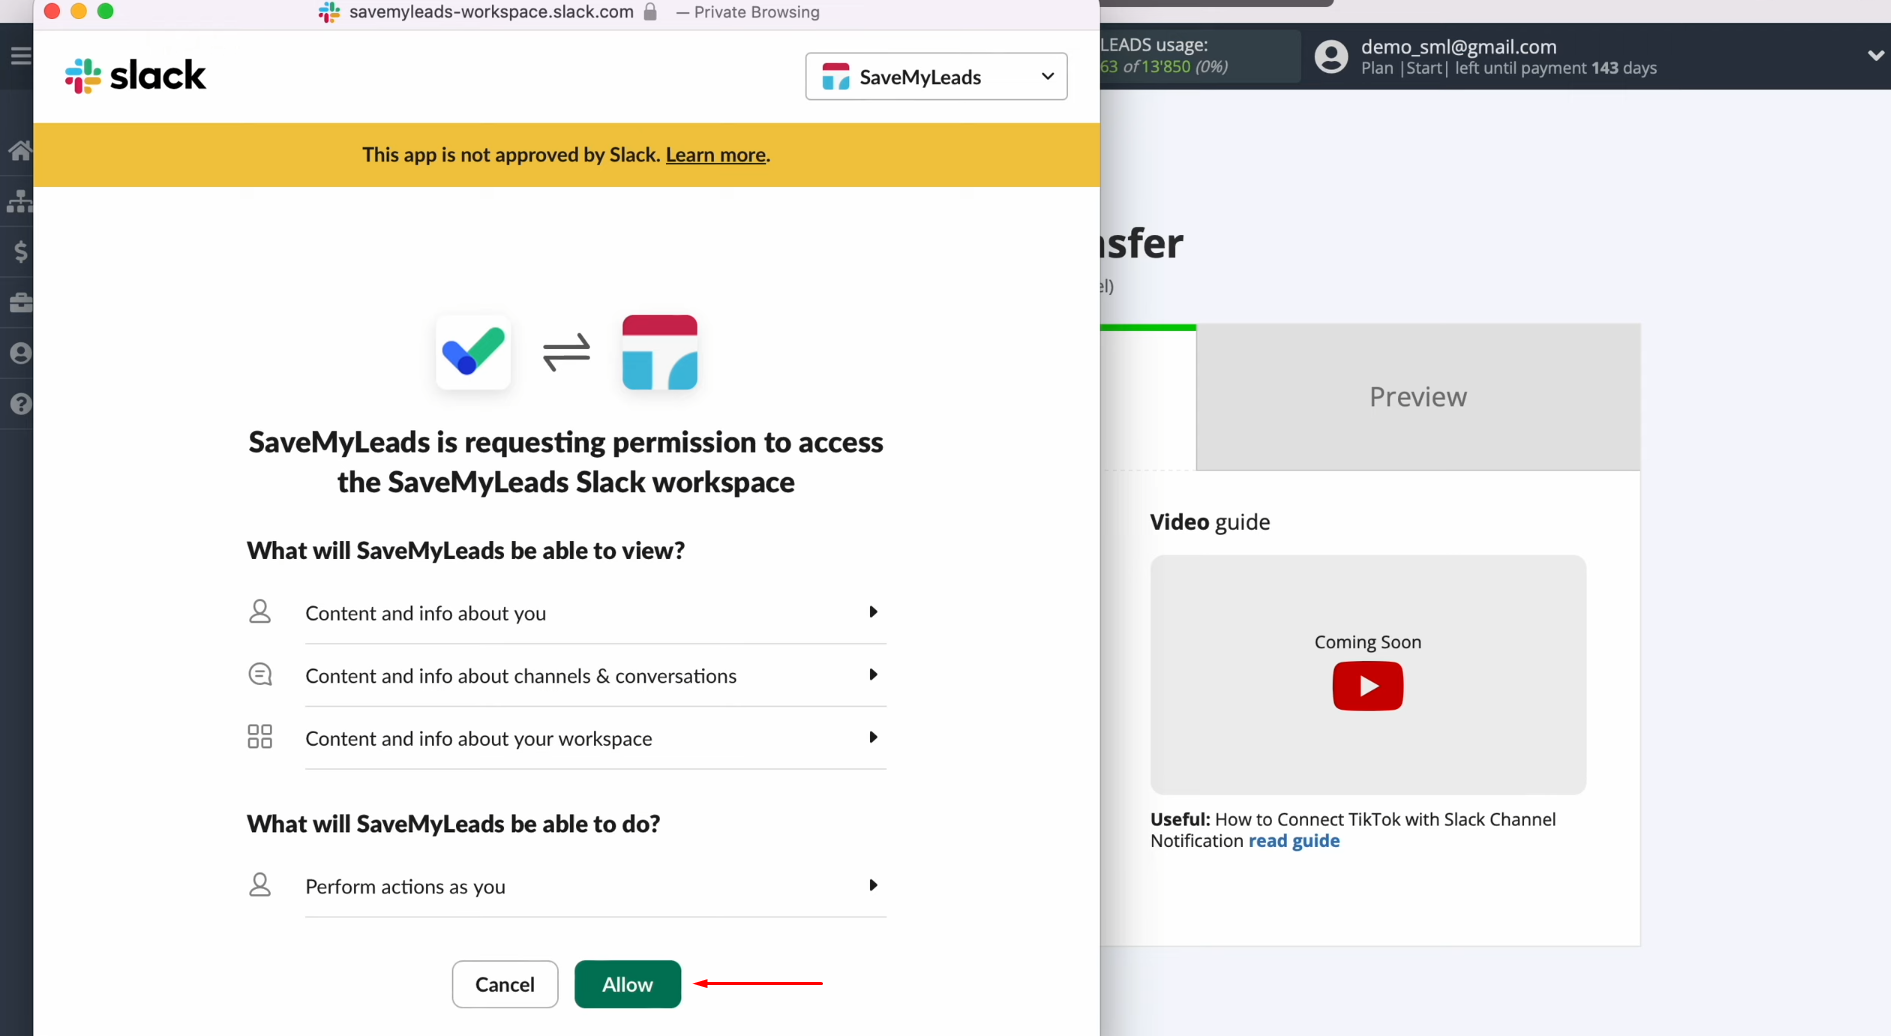
Grant
SaveMyLeads the necessary permissions to access your Slack account by clicking
“Allow.”
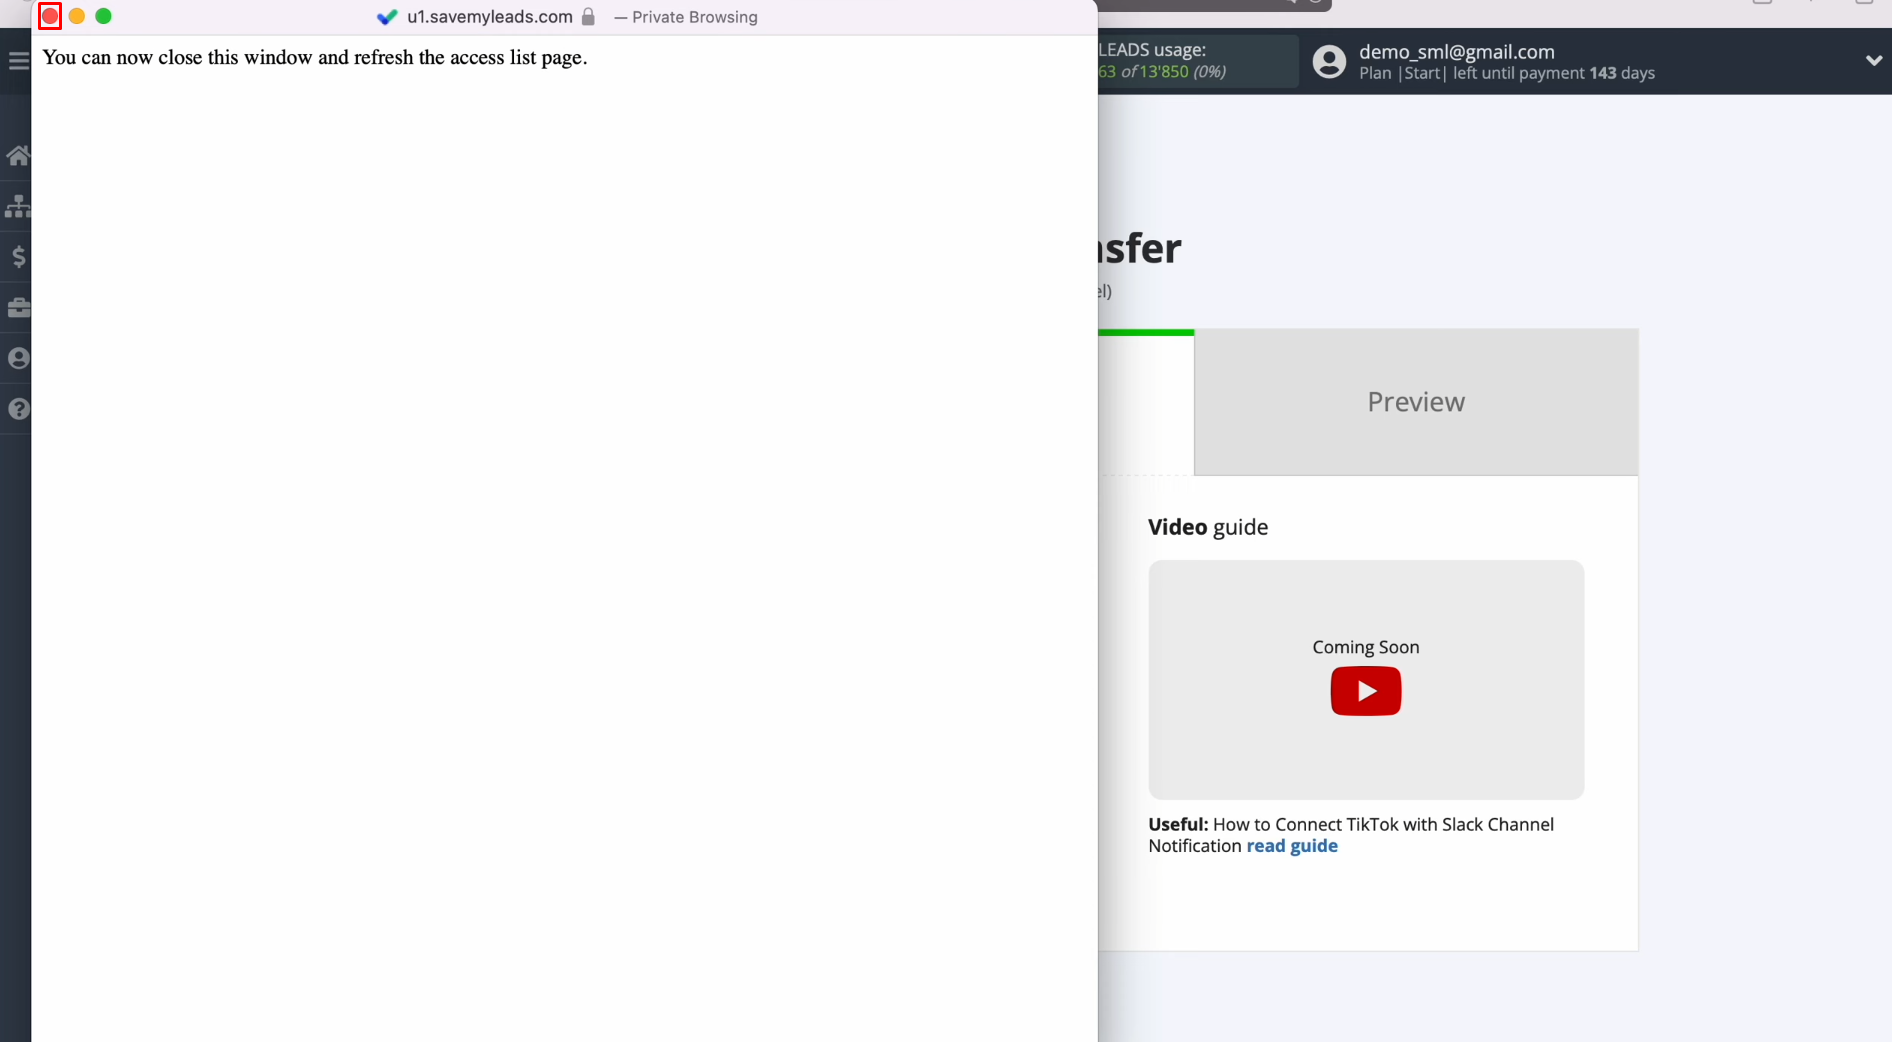
Close
the connection window.
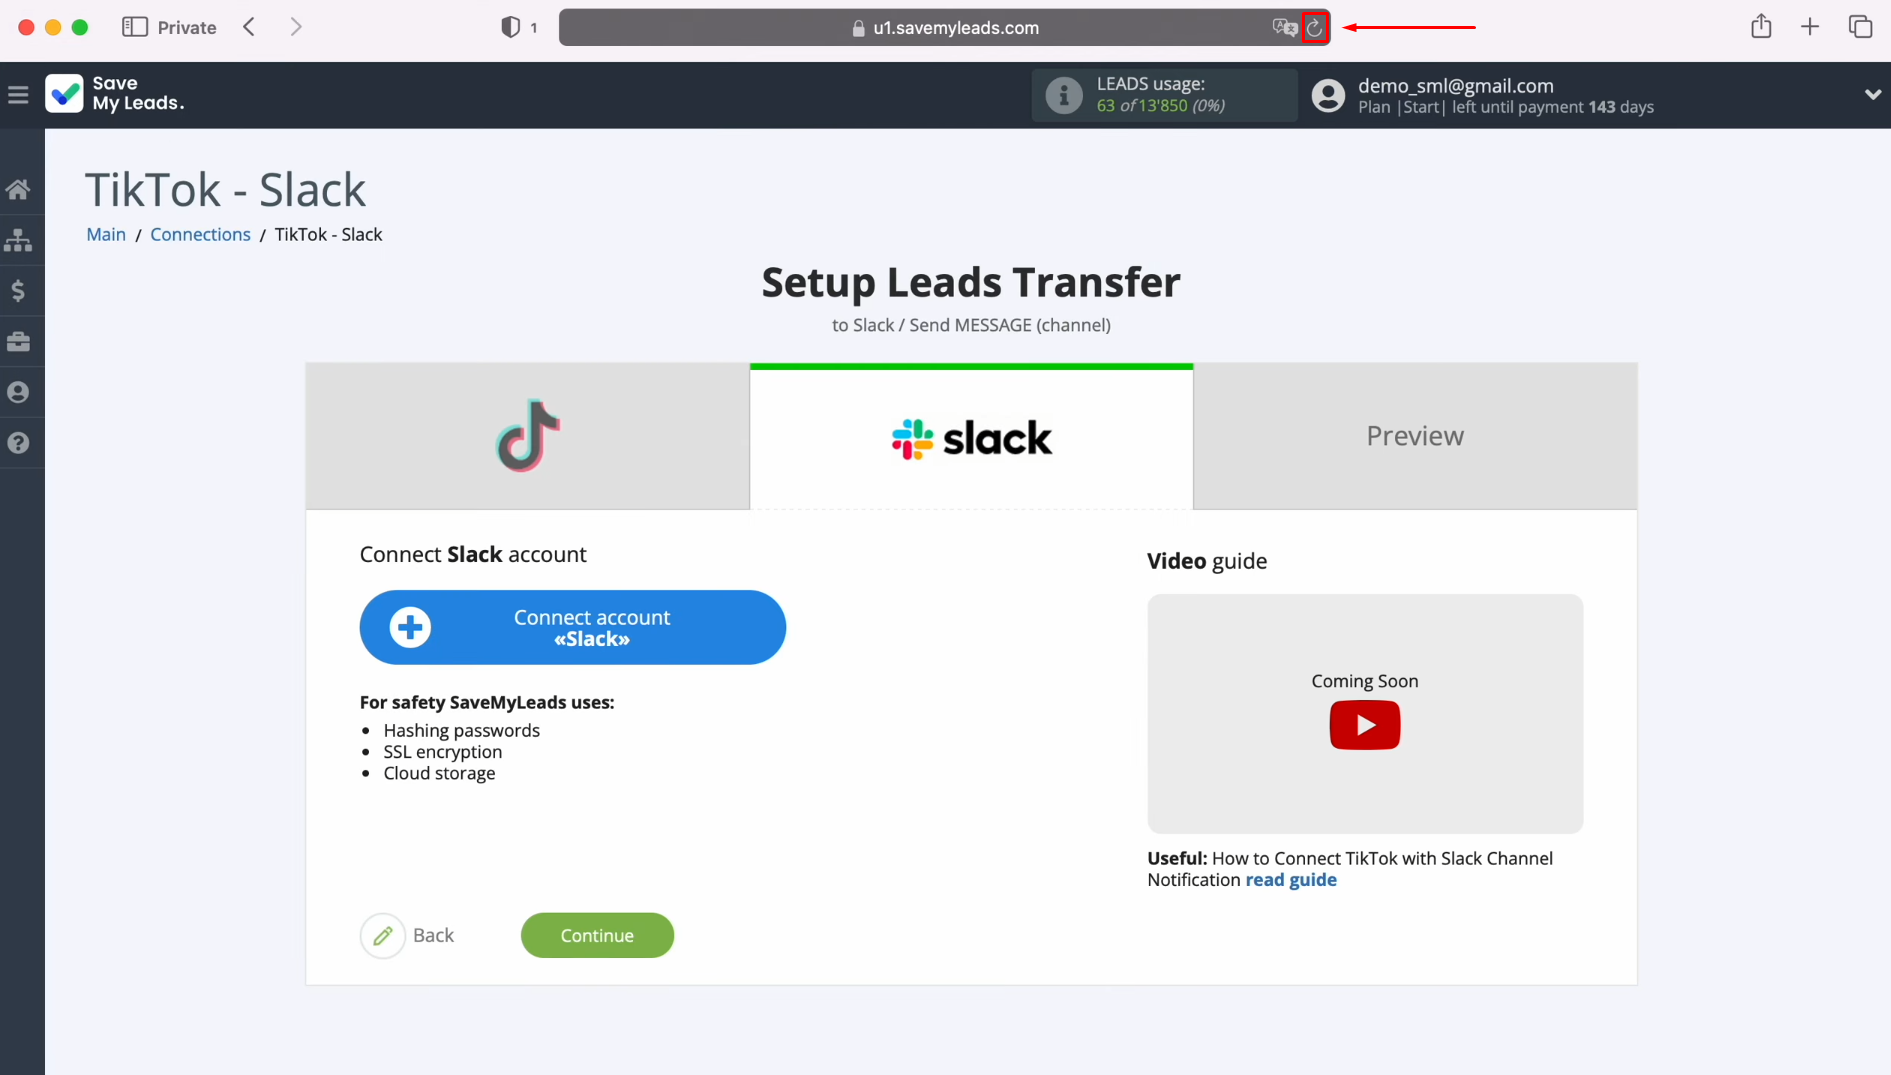
Refresh
the page.
Once your
connected login appears in the list, select it.
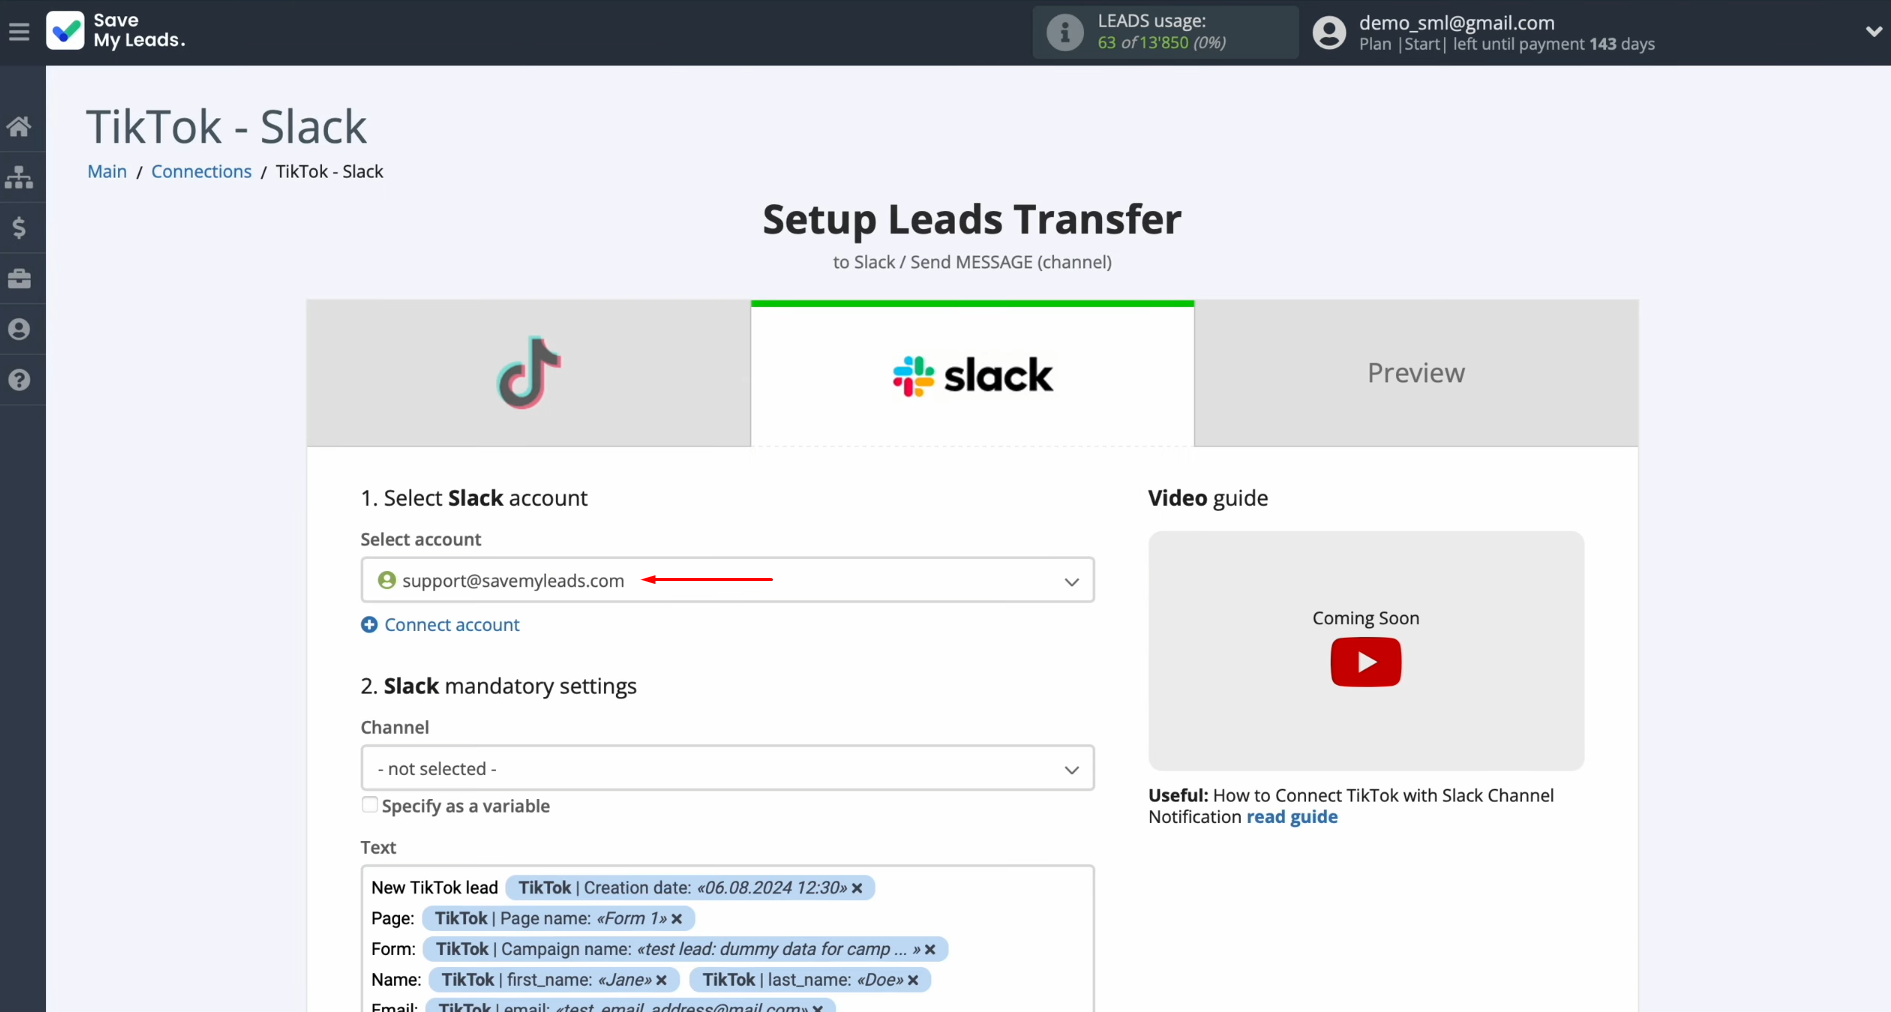
You will
now see the Slack fields for message sending. Start by selecting the channel.
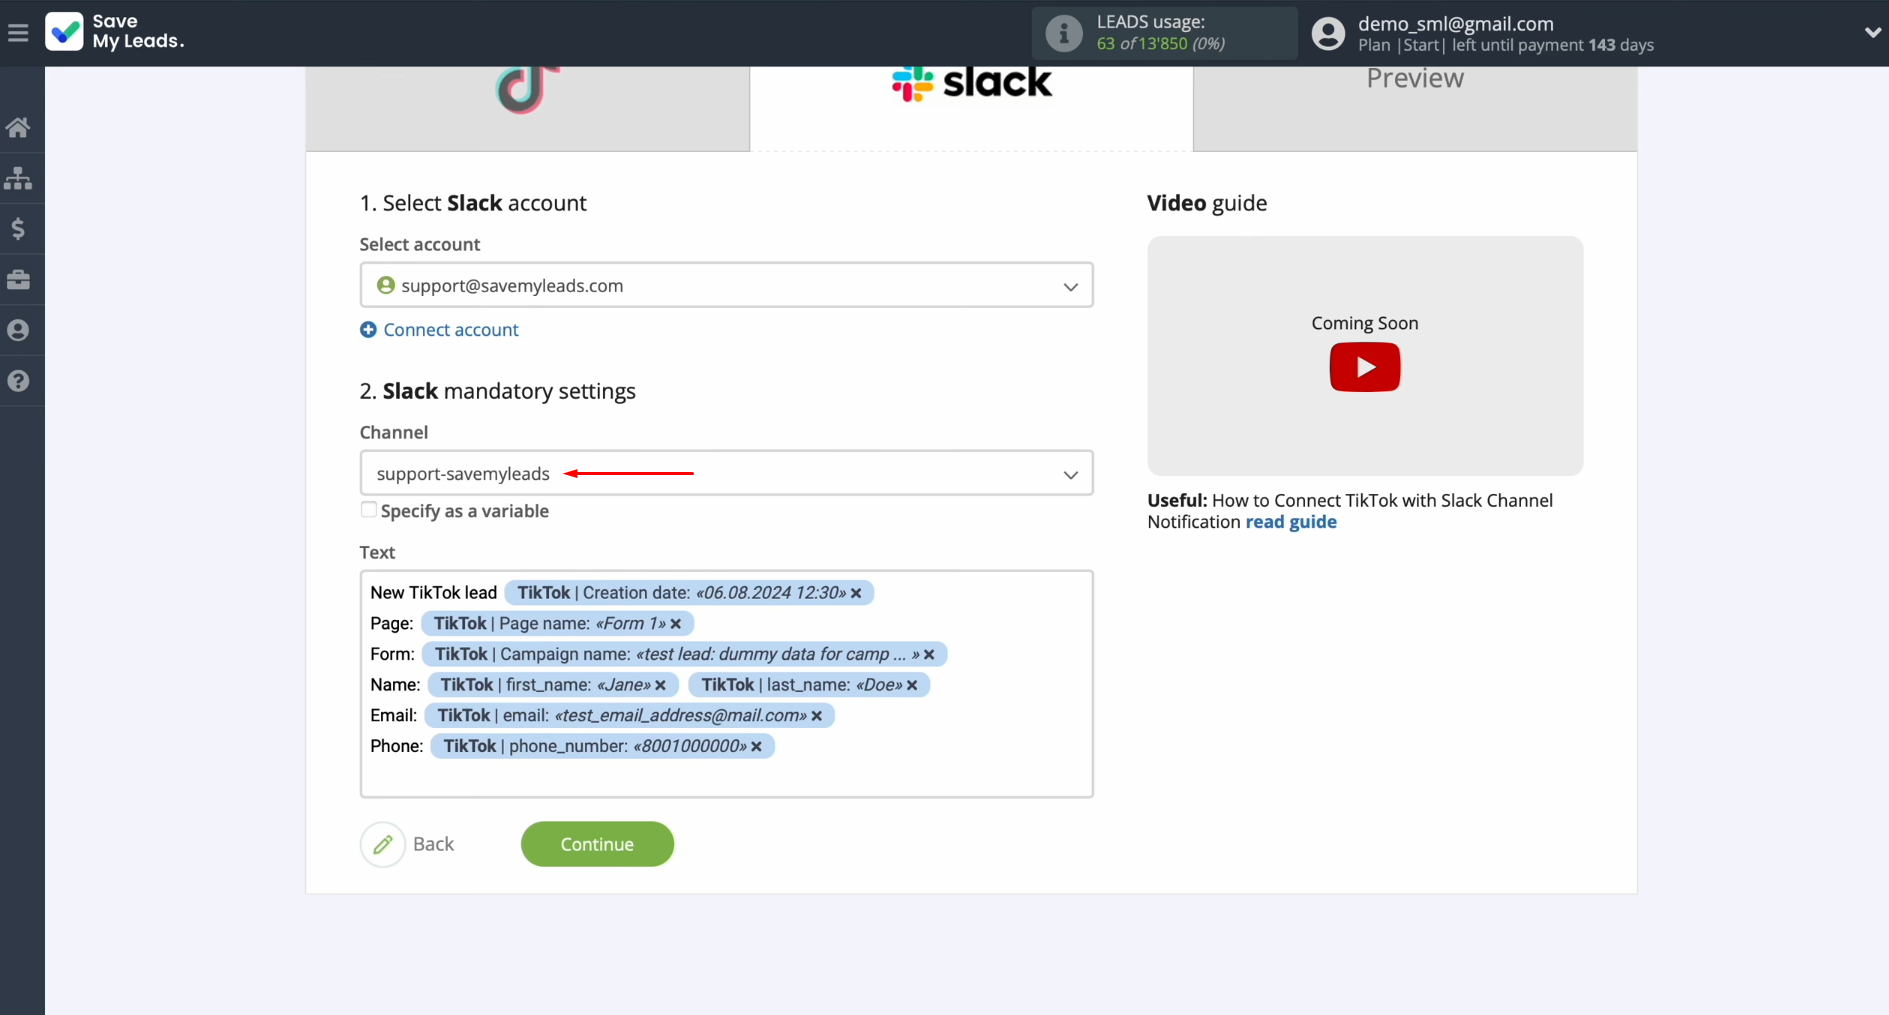
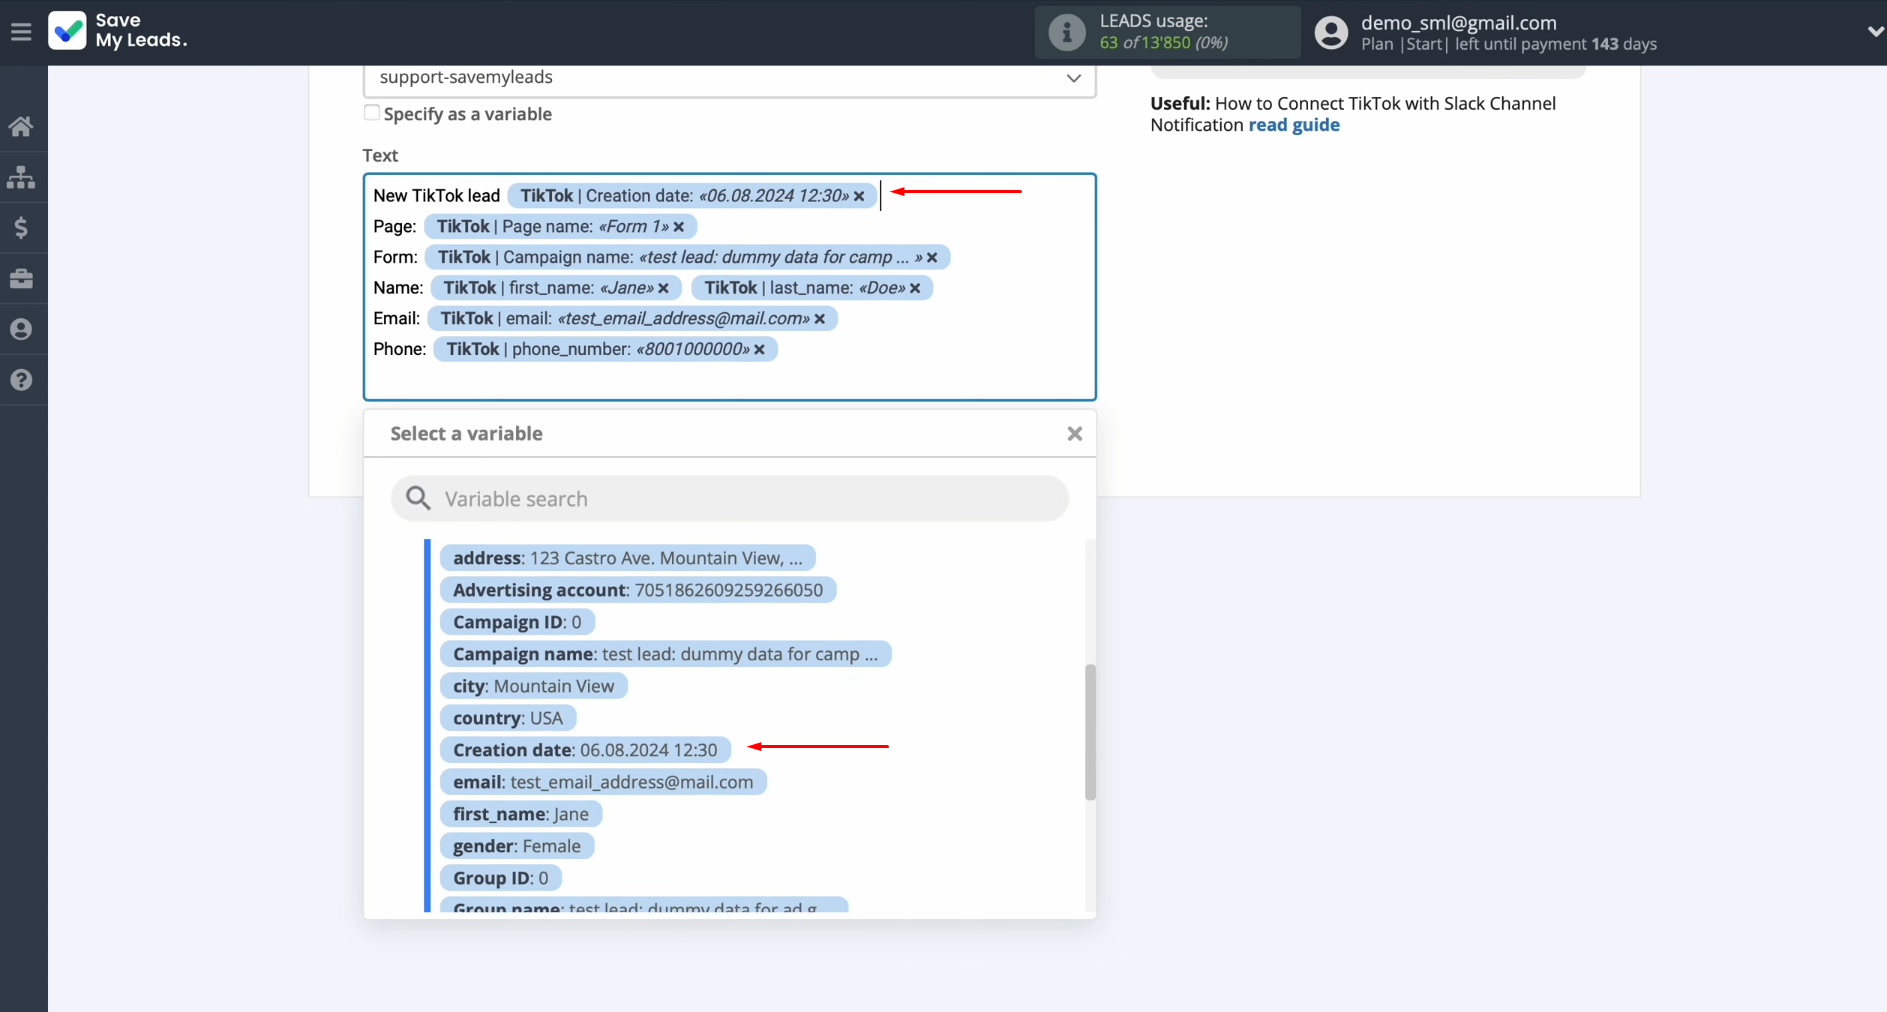
In the text
field, you can assign variables from TikTok. Click in the field and choose the
desired variable from the drop-down menu. If the preset fields meet your needs,
you can leave them as they are.
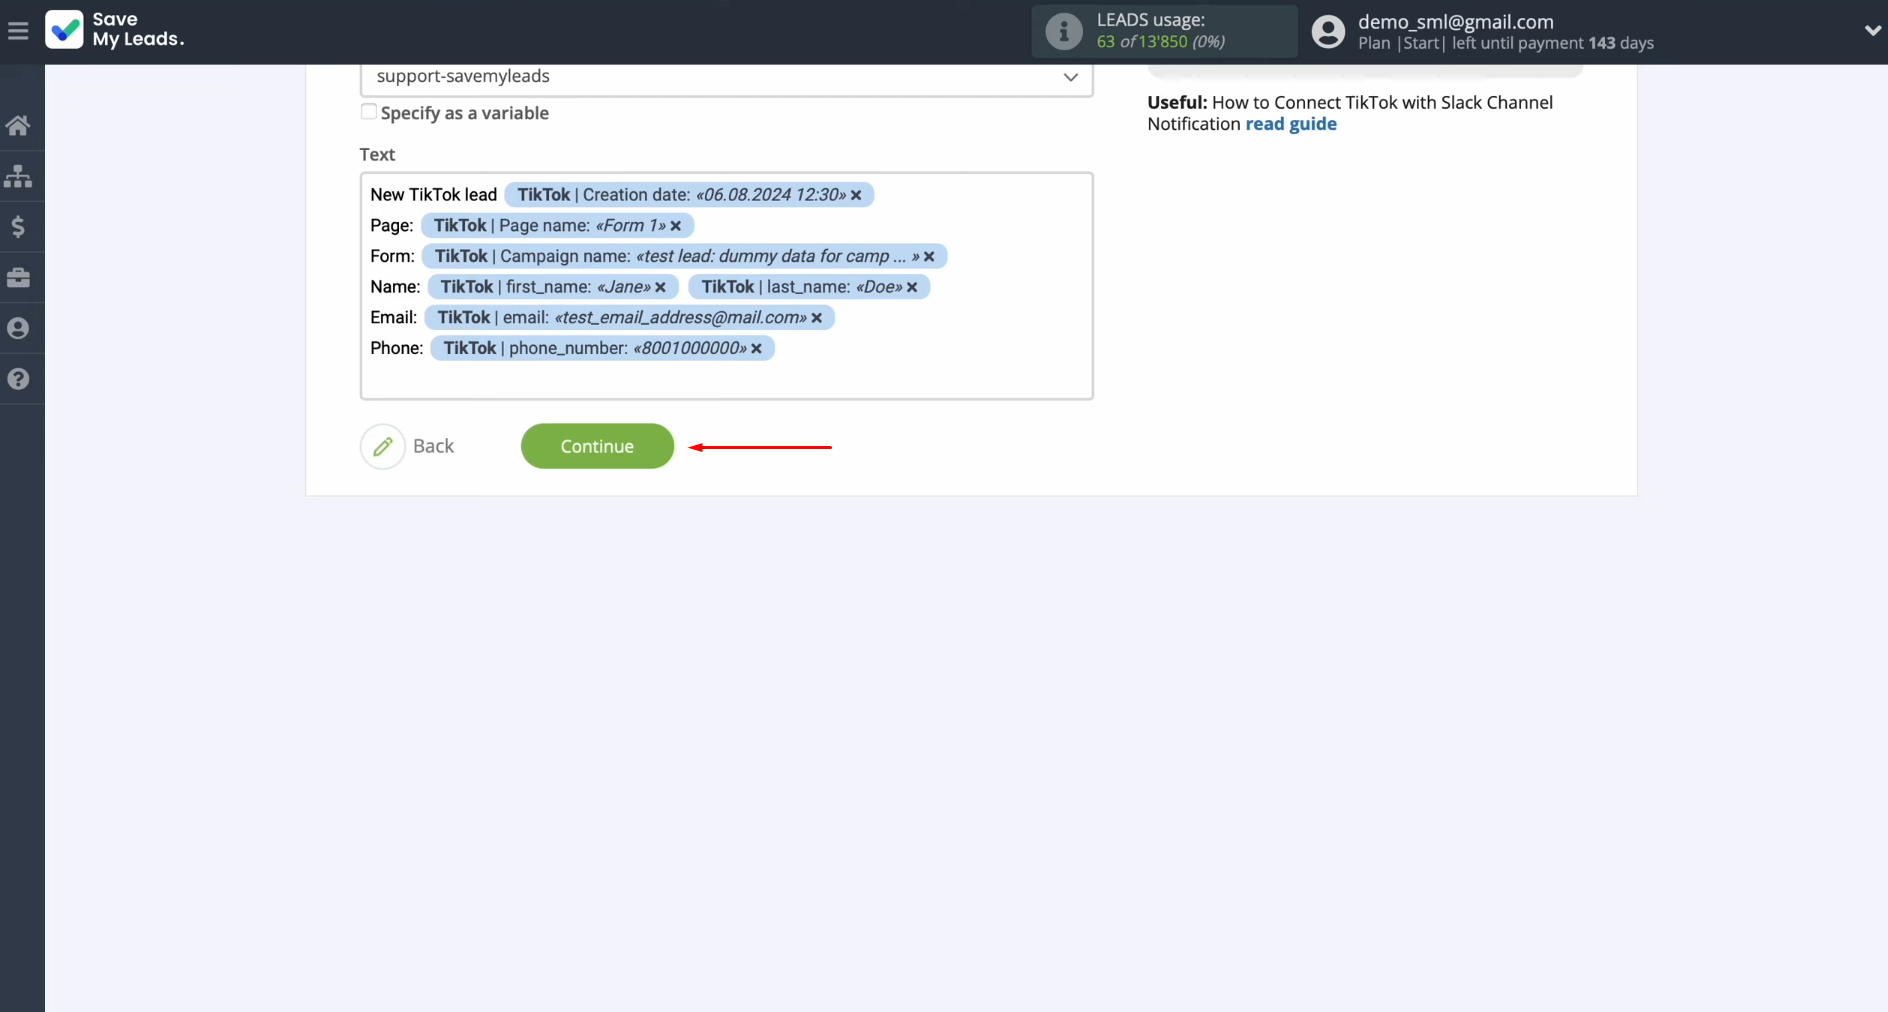
Click
“Continue.”
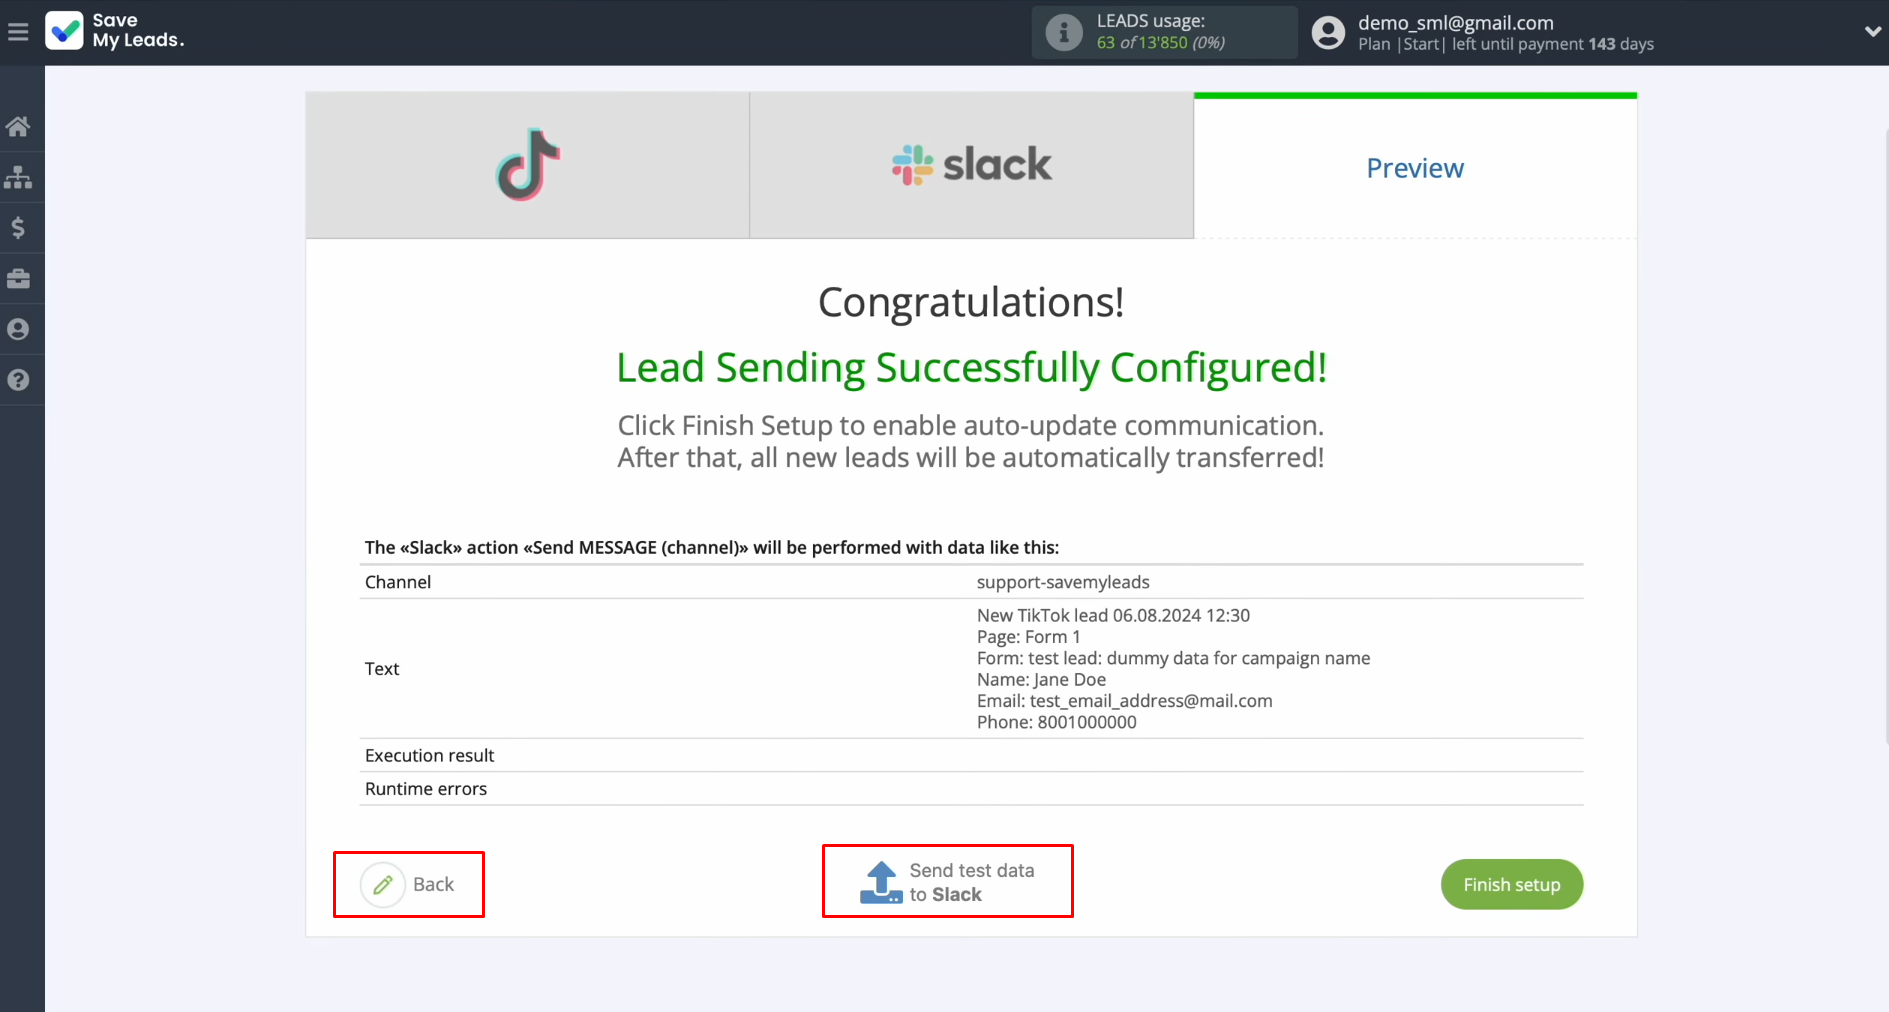
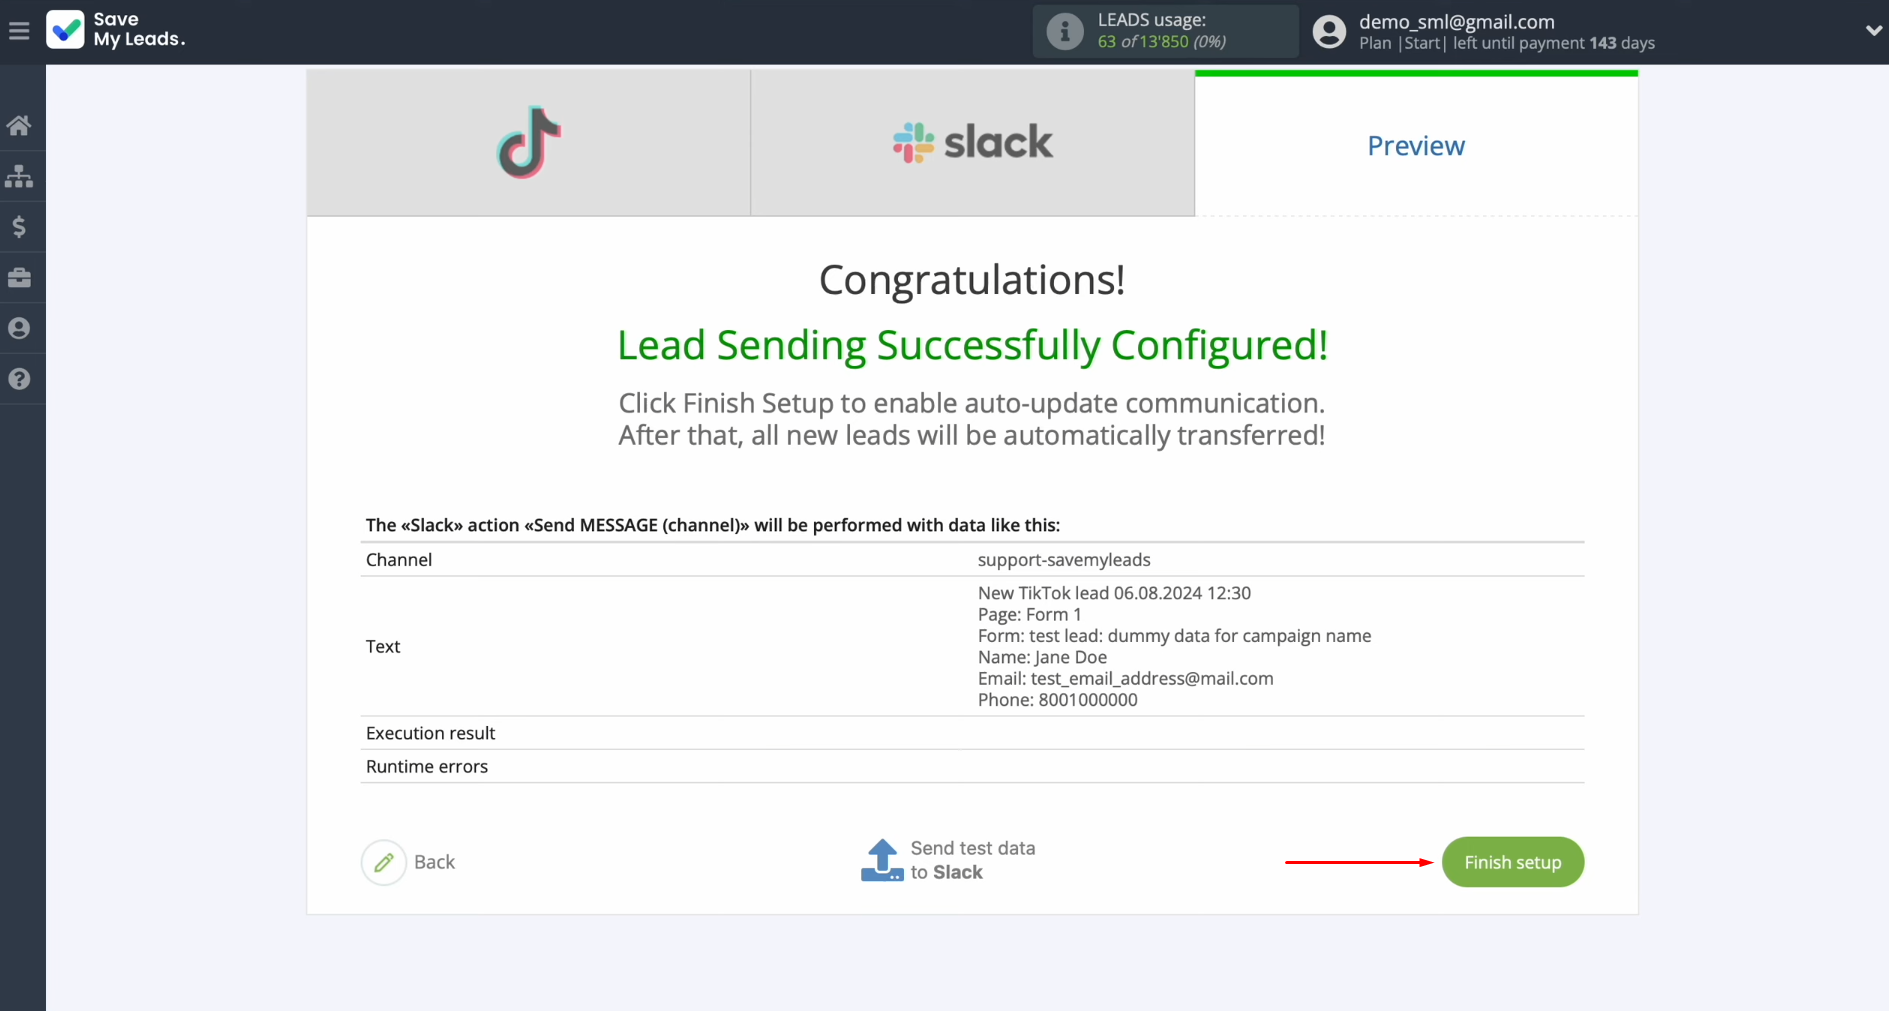
At this
point, you'll see a sample of the data that will be sent to Slack for each new
TikTok lead. If something doesn't look right, click “Back” to make adjustments.
To verify the settings, click “Send test data to Slack.”
After the
test data is successfully sent, check the result in Slack.
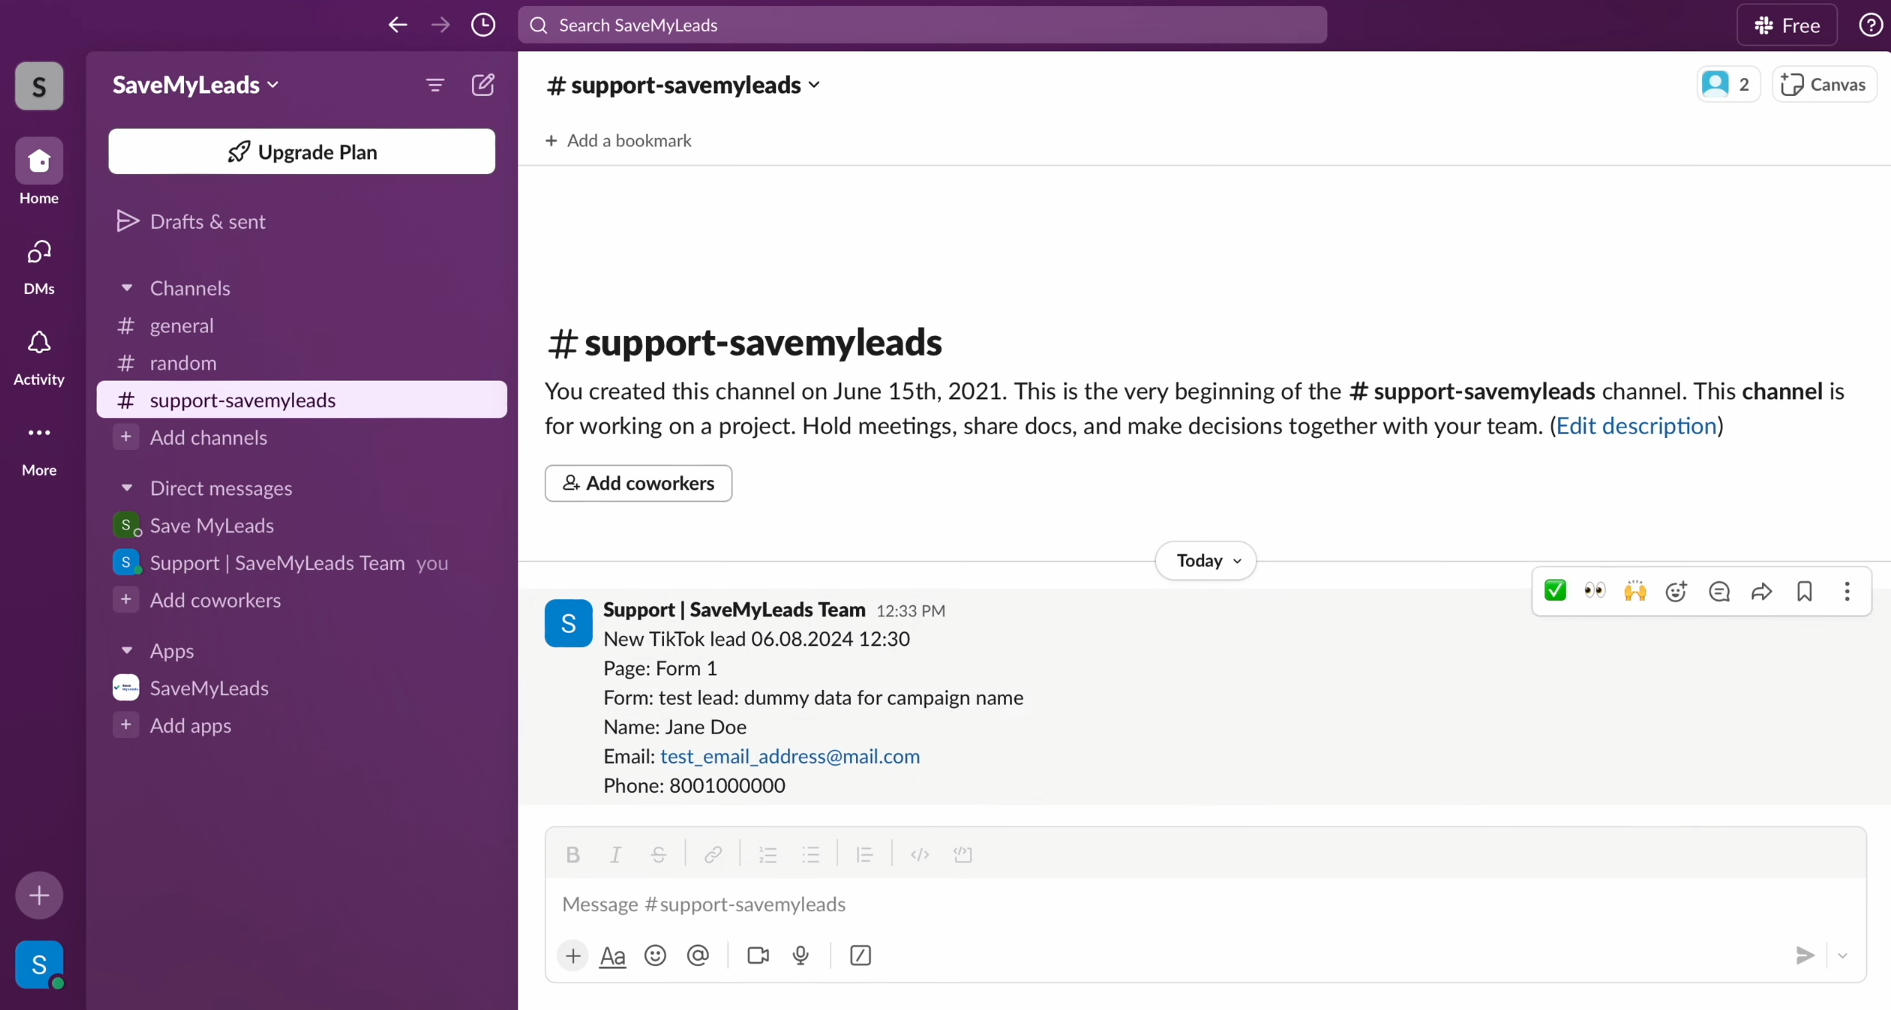
Return to SaveMyLeads and proceed with the setup.
Setting Up Auto-Update
Click “Finish setup” to activate the auto-update feature for the connection. This ensures that all new leads from TikTok are transferred to Slack.
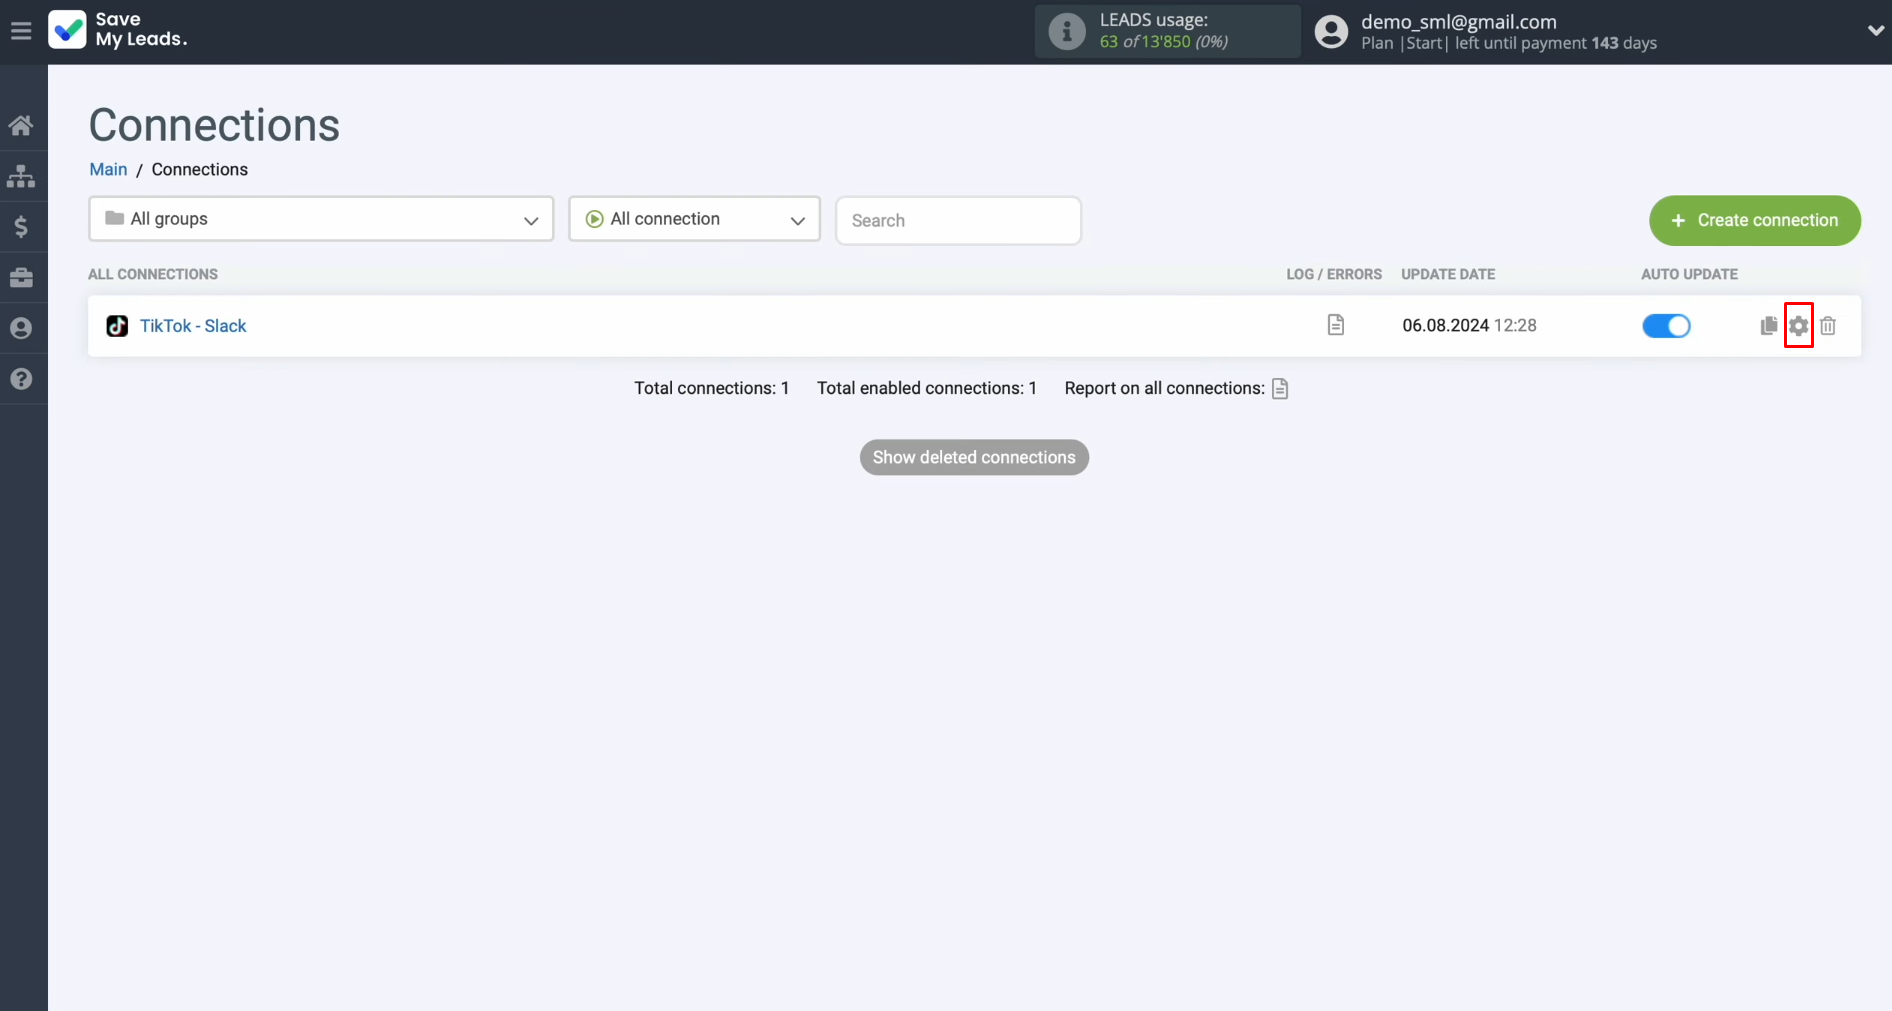
If you'd
like to rename the connection, you can do so in the settings. Simply click the
gear icon.
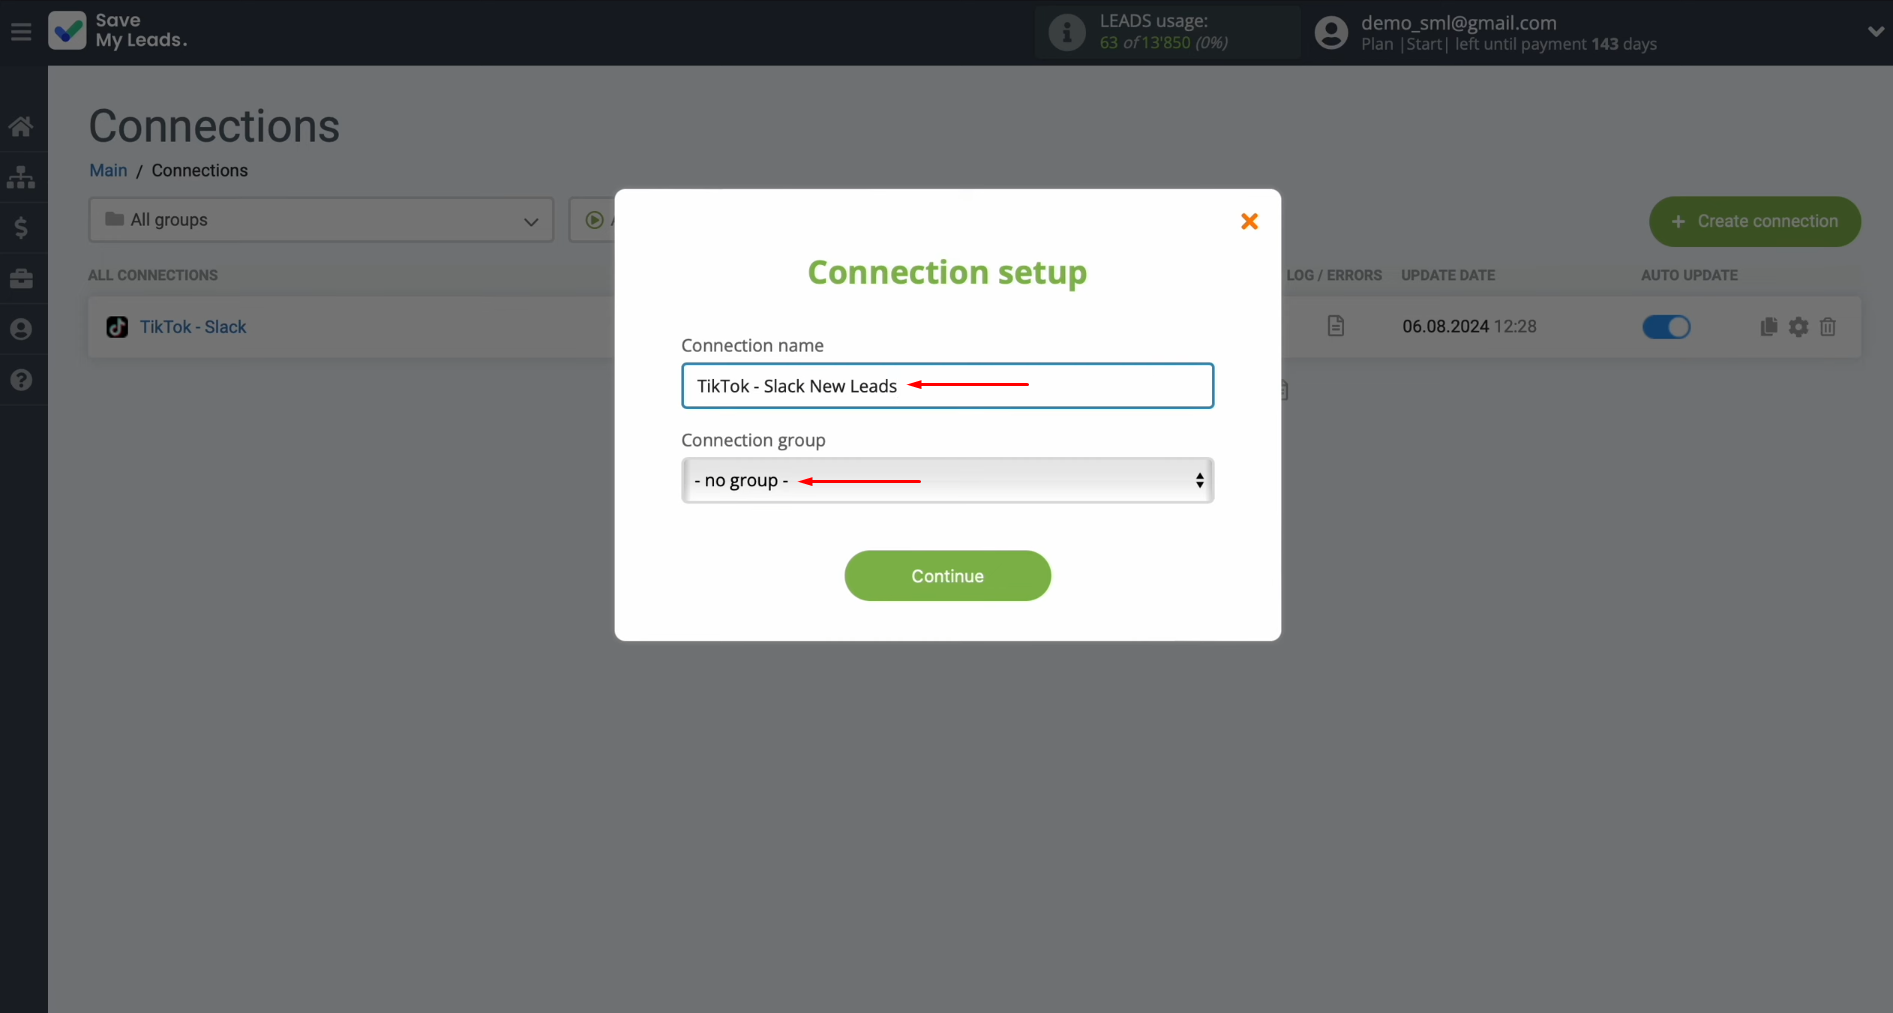
In this
section, you can modify the connection name and assign it to a group. Once
done, click “Continue.”
That's it! The Slack integration with TikTok is now fully
configured.
Wrapping Up
By following our step-by-step guide, you’ve likely already set up the TikTok and Slack integration correctly and may have even started to reap the benefits – Slack notifications from TikTok. If you observe the integration for a little longer, you’ll see that the connection between both platforms is solid and runs smoothly without interruptions.
The integration between the social network and the corporate messenger eliminates one of the most monotonous manual tasks, switching it to an automated process. Thanks to the TikTok to Slack automation, the SaveMyLeads connector will automatically transfer data about new leads as notifications to your Slack channel, freeing you from tedious work. This allows you to focus more on the quality of communication with clients, the development of new marketing strategies, or other essential tasks. Workflow automation not only modernizes your business but also takes it to the next level of growth. And SaveMyLeads will undoubtedly assist you in achieving this.
Step-by-Step Guides for Setting Up Integrations:
