A high level of work organization and speed of interaction with potential clients allows companies to withstand growing competition. Google Lead Form and Notion services have proven themselves in terms of improving efficiency. Want to get even more from them? By connecting both platforms via the SaveMyLeads online connector, you will start transferring data between them in automated turbo mode. You will no longer have to transfer them manually – a well-established system will work for you. This article will show you how to set up a Google Ads Lead Form and Notion integration. Using our instructions, you can fully automate the transfer of leads from the data collection tool directly to the organizer platform.
Automatically transferring lead data from Google Lead Form to Notion provides businesses with three significant benefits:
- Speed up interactions with leads. Buyers of your products or services will be able to receive answers to their queries faster. This significantly reduces the likelihood that they will change their minds.
- Optimization of employee tasks. Managers who previously dealt with manual data transfer can be oriented towards improving the quality of communication with clients.
- Saving time. The number of daily tasks that require your personal involvement or the attention of your colleagues will be significantly reduced.
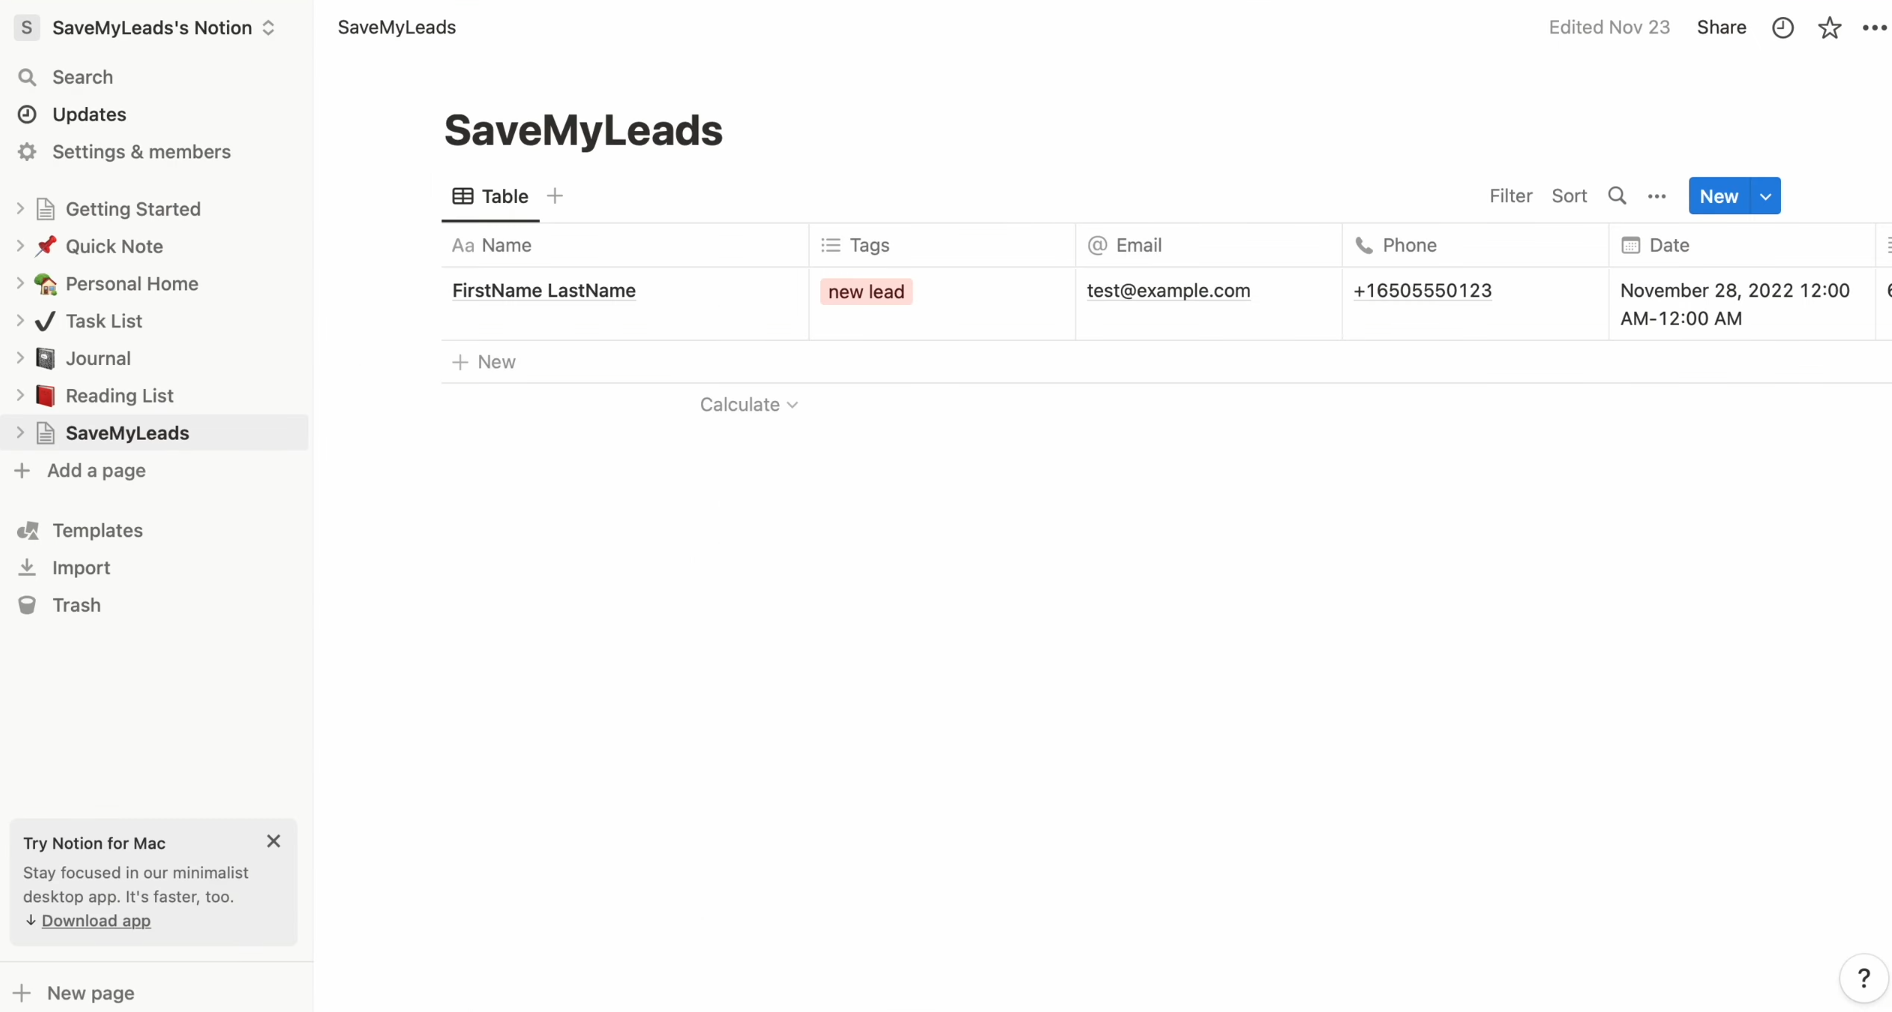
The results of Notion and Google Ads Lead Form integration will be visible immediately after the setup is complete. Applications submitted by leads through the form will be automatically and instantly sent to the productivity platform where you store and manage customer data. If you previously manually transferred names, phone numbers, and email addresses from one service to another, now this process will become a thing of the past for you.
Automating data transfer will benefit you by simplifying your daily business tasks, among other advantages. Satisfied with the speed of feedback and quality interaction, leads are more likely to become your regular customers. And this is a more significant result – the growth of your business, its development, and the strengthening of its success.
How to Set Up Google Lead Form and Notion Integration
Setting up Notion and Google Lead Form integration with SaveMyLeads is a simple and accessible process that even a beginner can handle. You won’t need to master complex API integration methods. You won’t need to hire a specialist to do this task. The SaveMyLeads developers have done everything possible to make the setup process as clear as possible and to ensure that users do not encounter any difficulties. It will take no more than 10 minutes. If you have previously dealt with integrations, you will cope even faster.
We offer detailed step-by-step instructions in text format and video tutorials. They will help you set everything up correctly the first time and avoid accidental errors.
Set Up the Data Source – Google Lead Form
Register at savemyleads.com. Provide your name, email address, and set a strong password. If you already have a Google or Facebook account, you can use it to quickly create a personal profile. After registering, you can proceed directly to the process of setting up Google Lead Form Ads and Notion integration. Let's start with the data source.
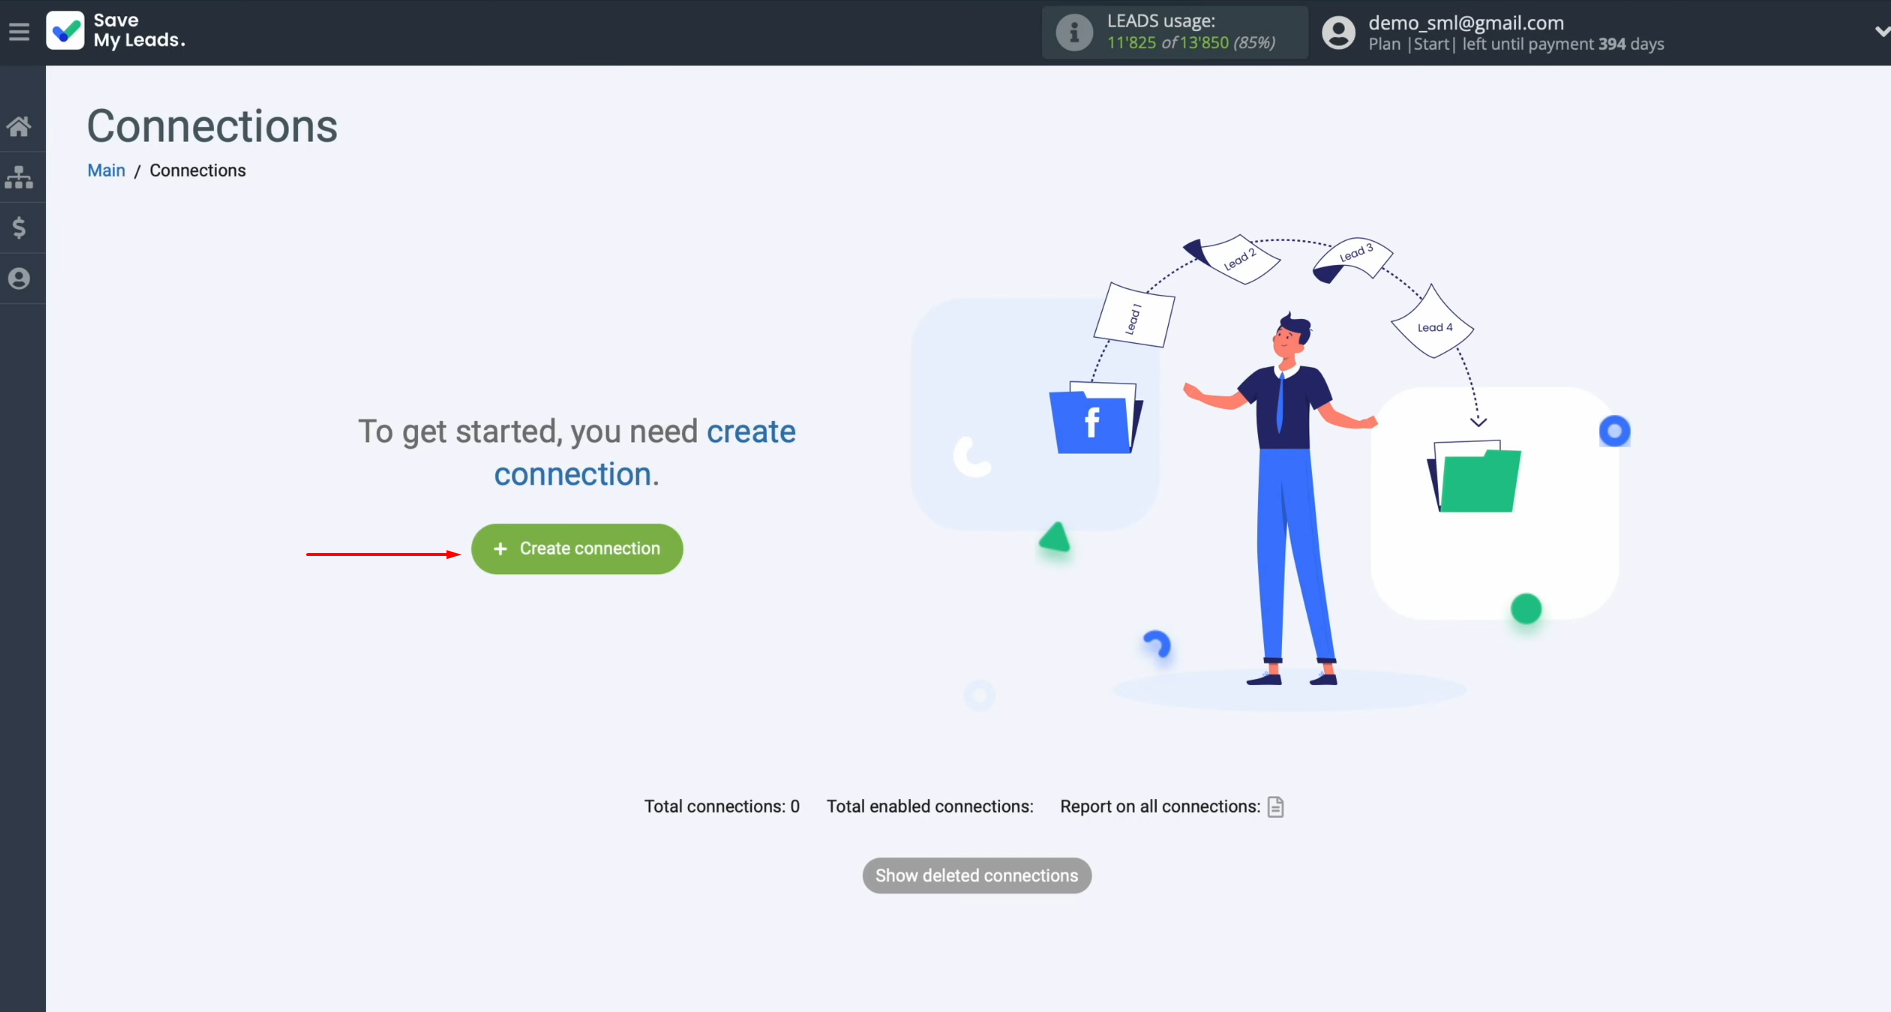
First, you need to create a new connection.
Choose a source from which you want to receive new data. You need Google Lead Form.
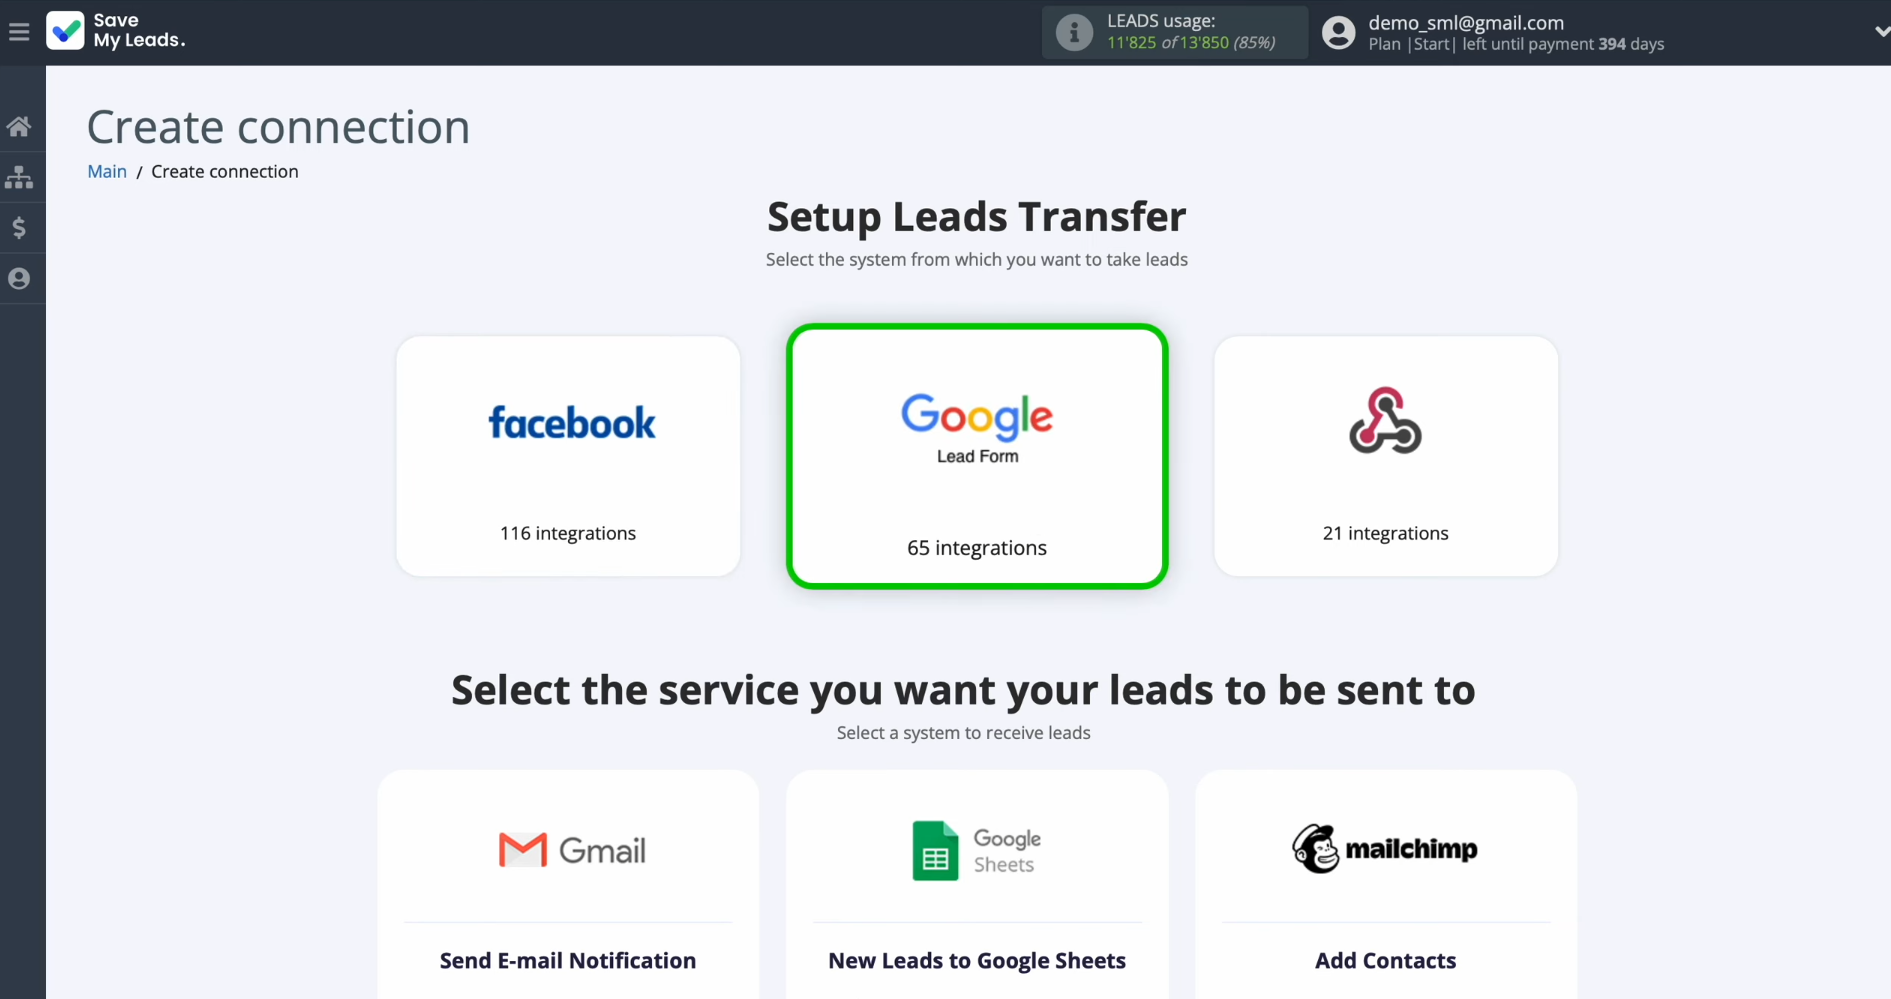
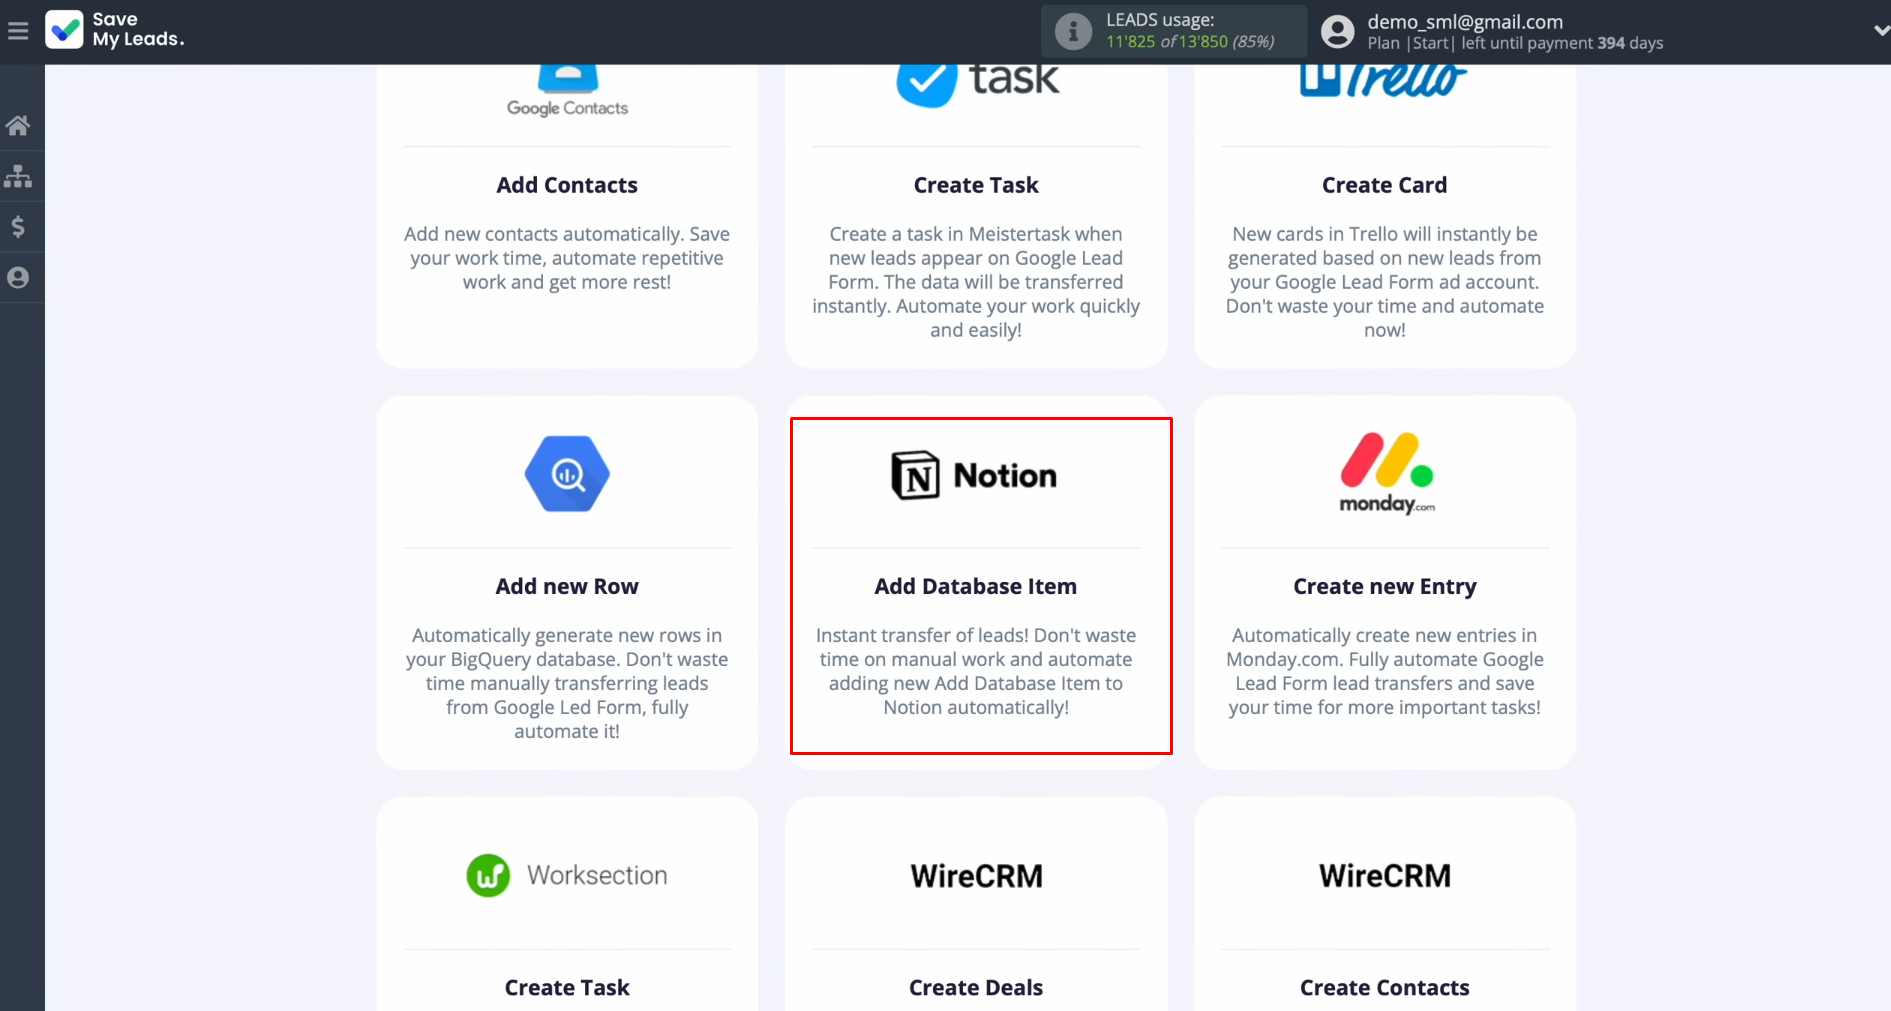
Choose the system where you want to
transfer new leads from the Google Lead Form. This is Notion.
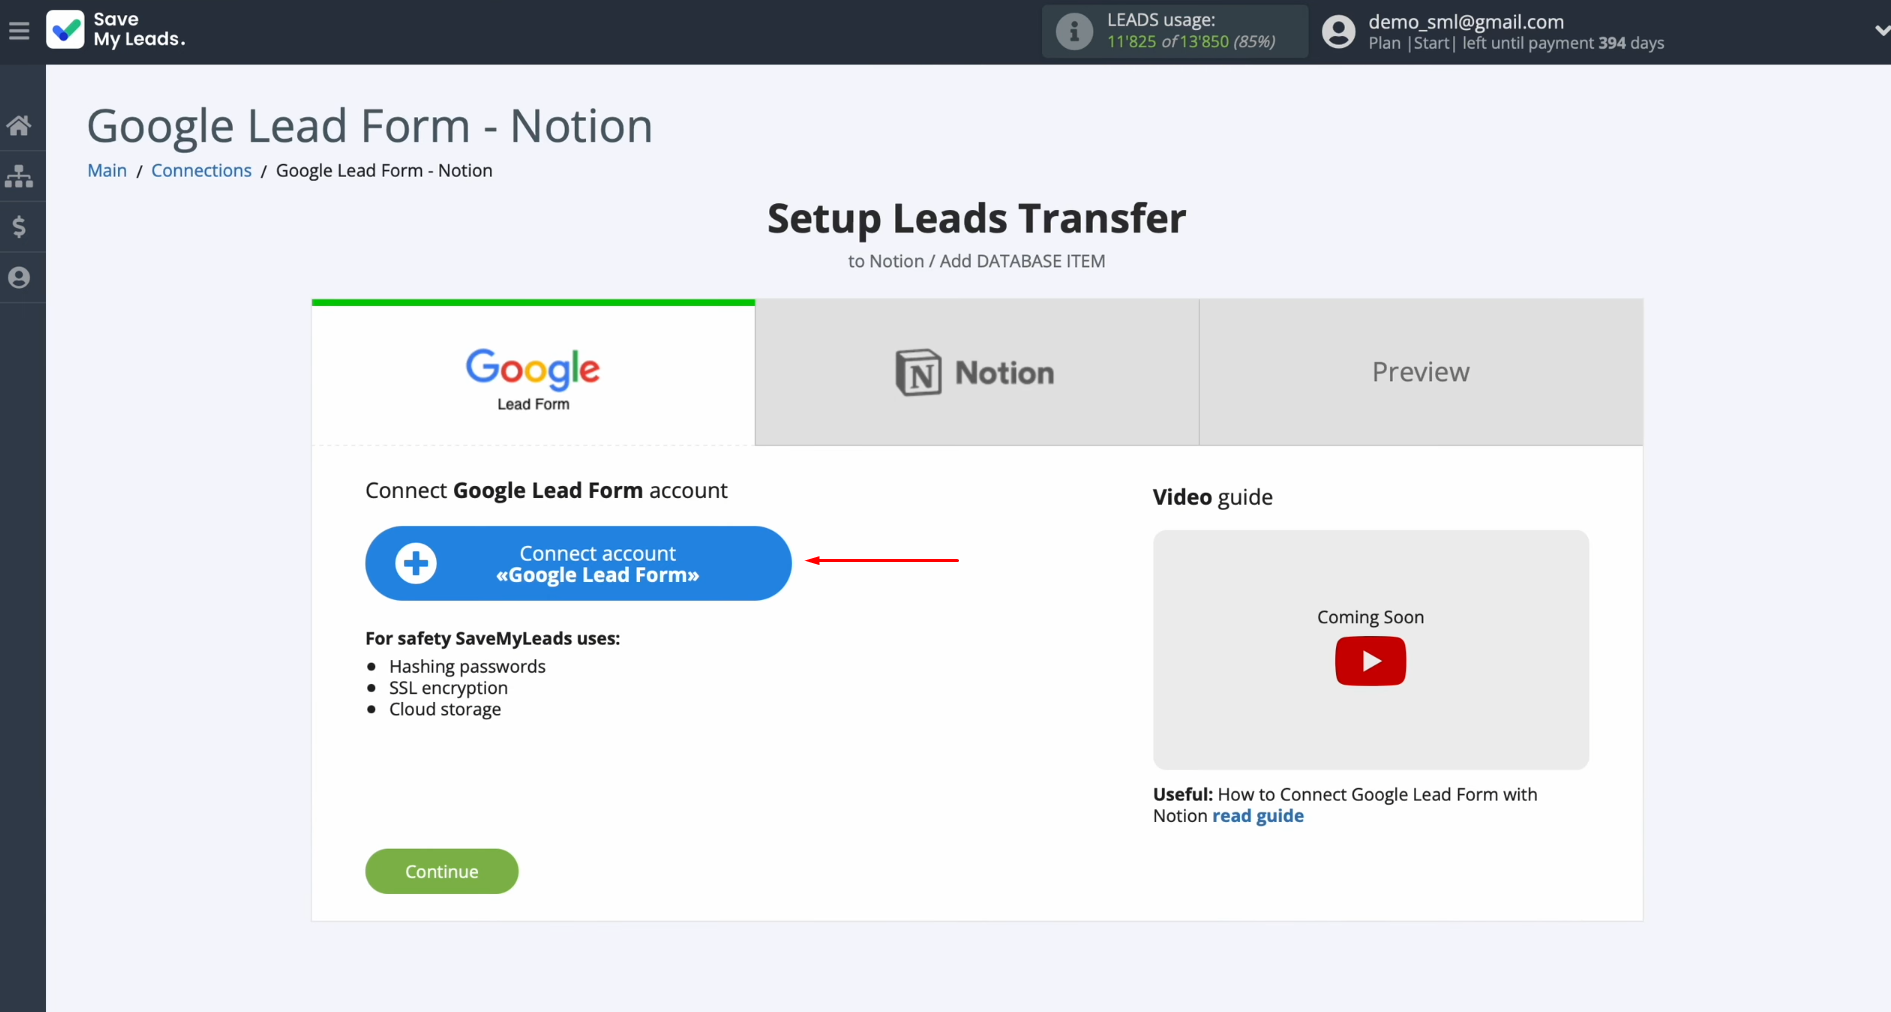
Connect the Google Lead Form account
to SaveMyLeads.
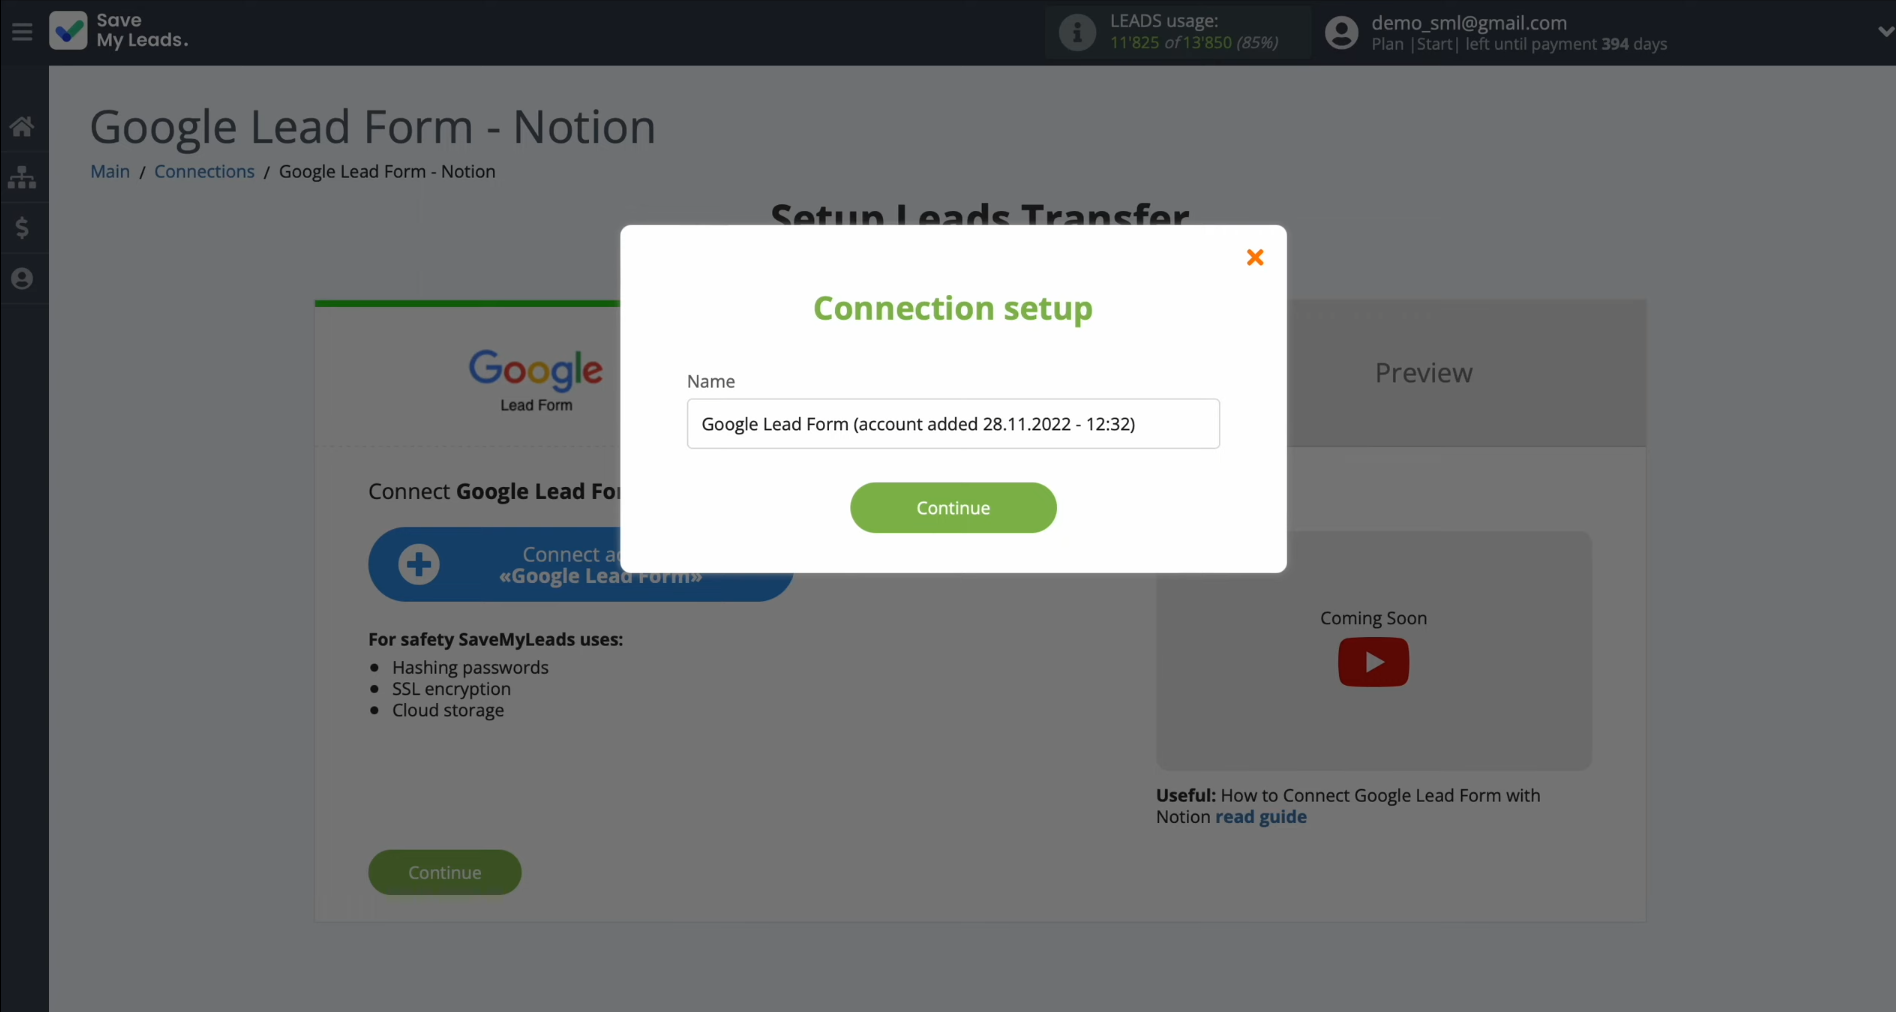
Here, you can give a name to the connection or just click “Continue.”
When the
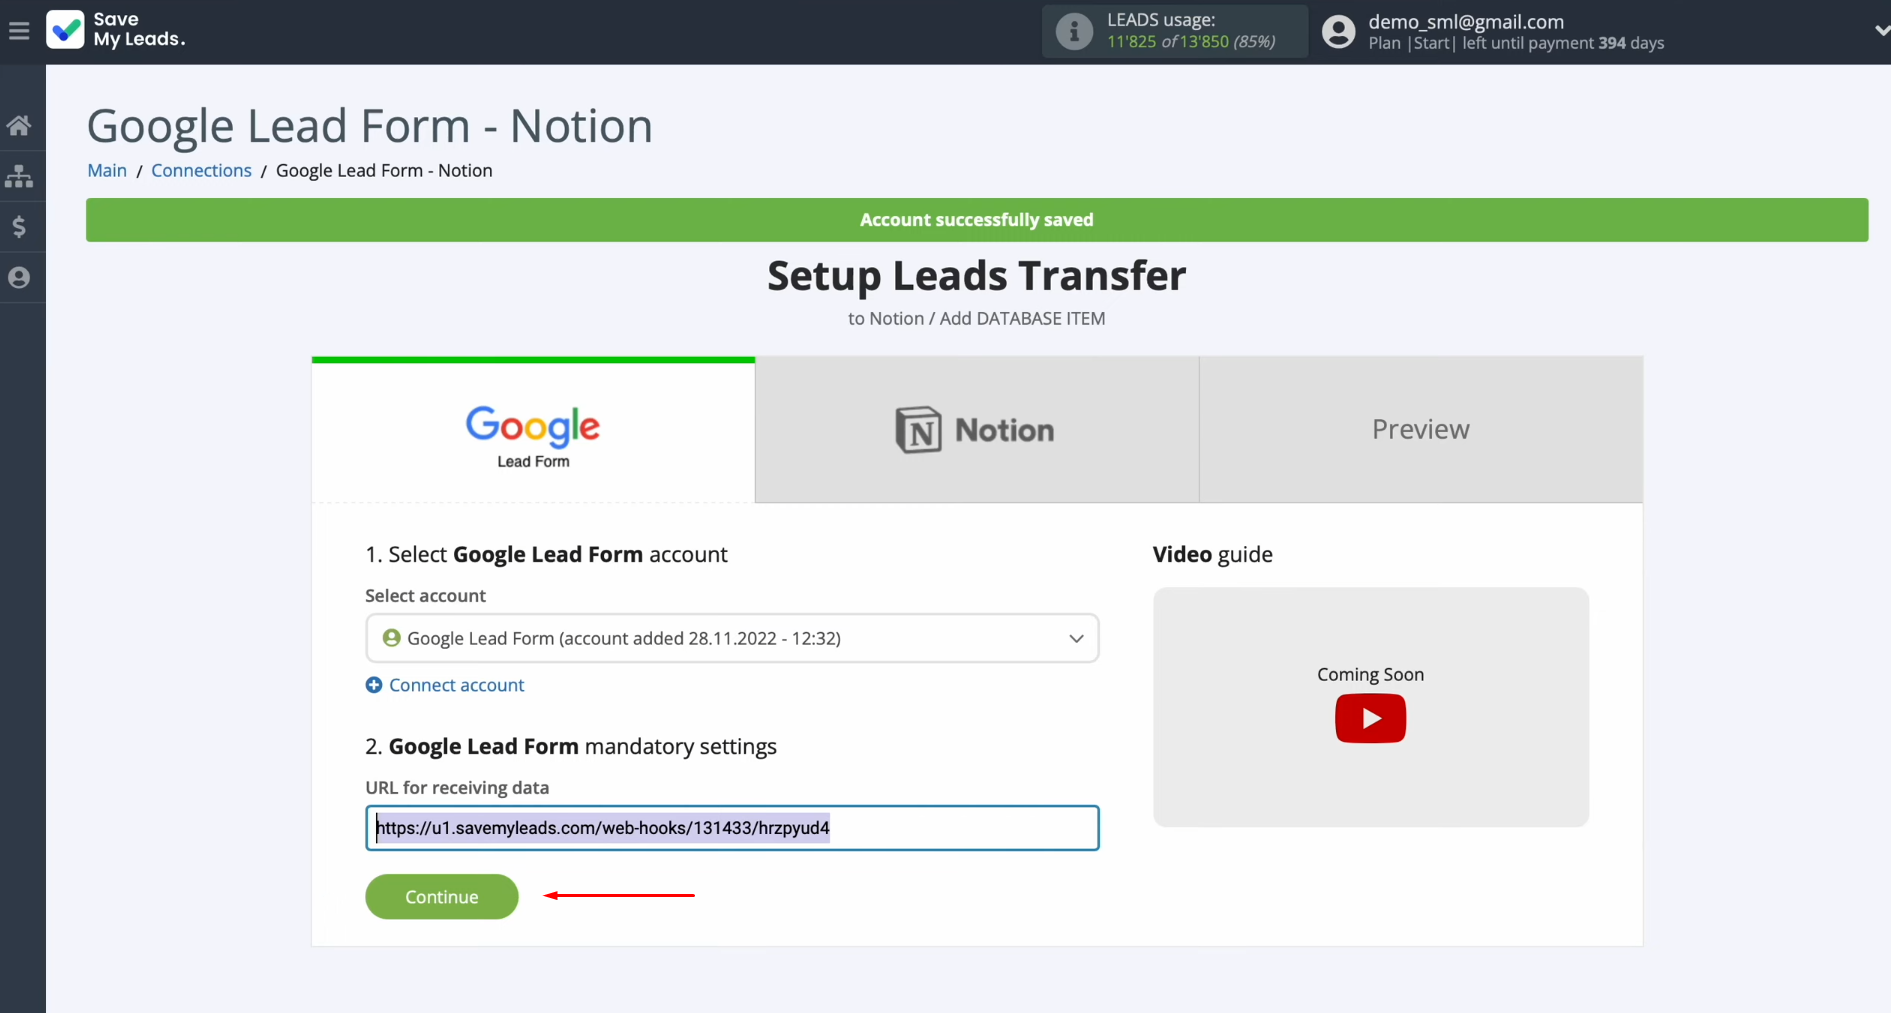
connected account is displayed in the list, select it.
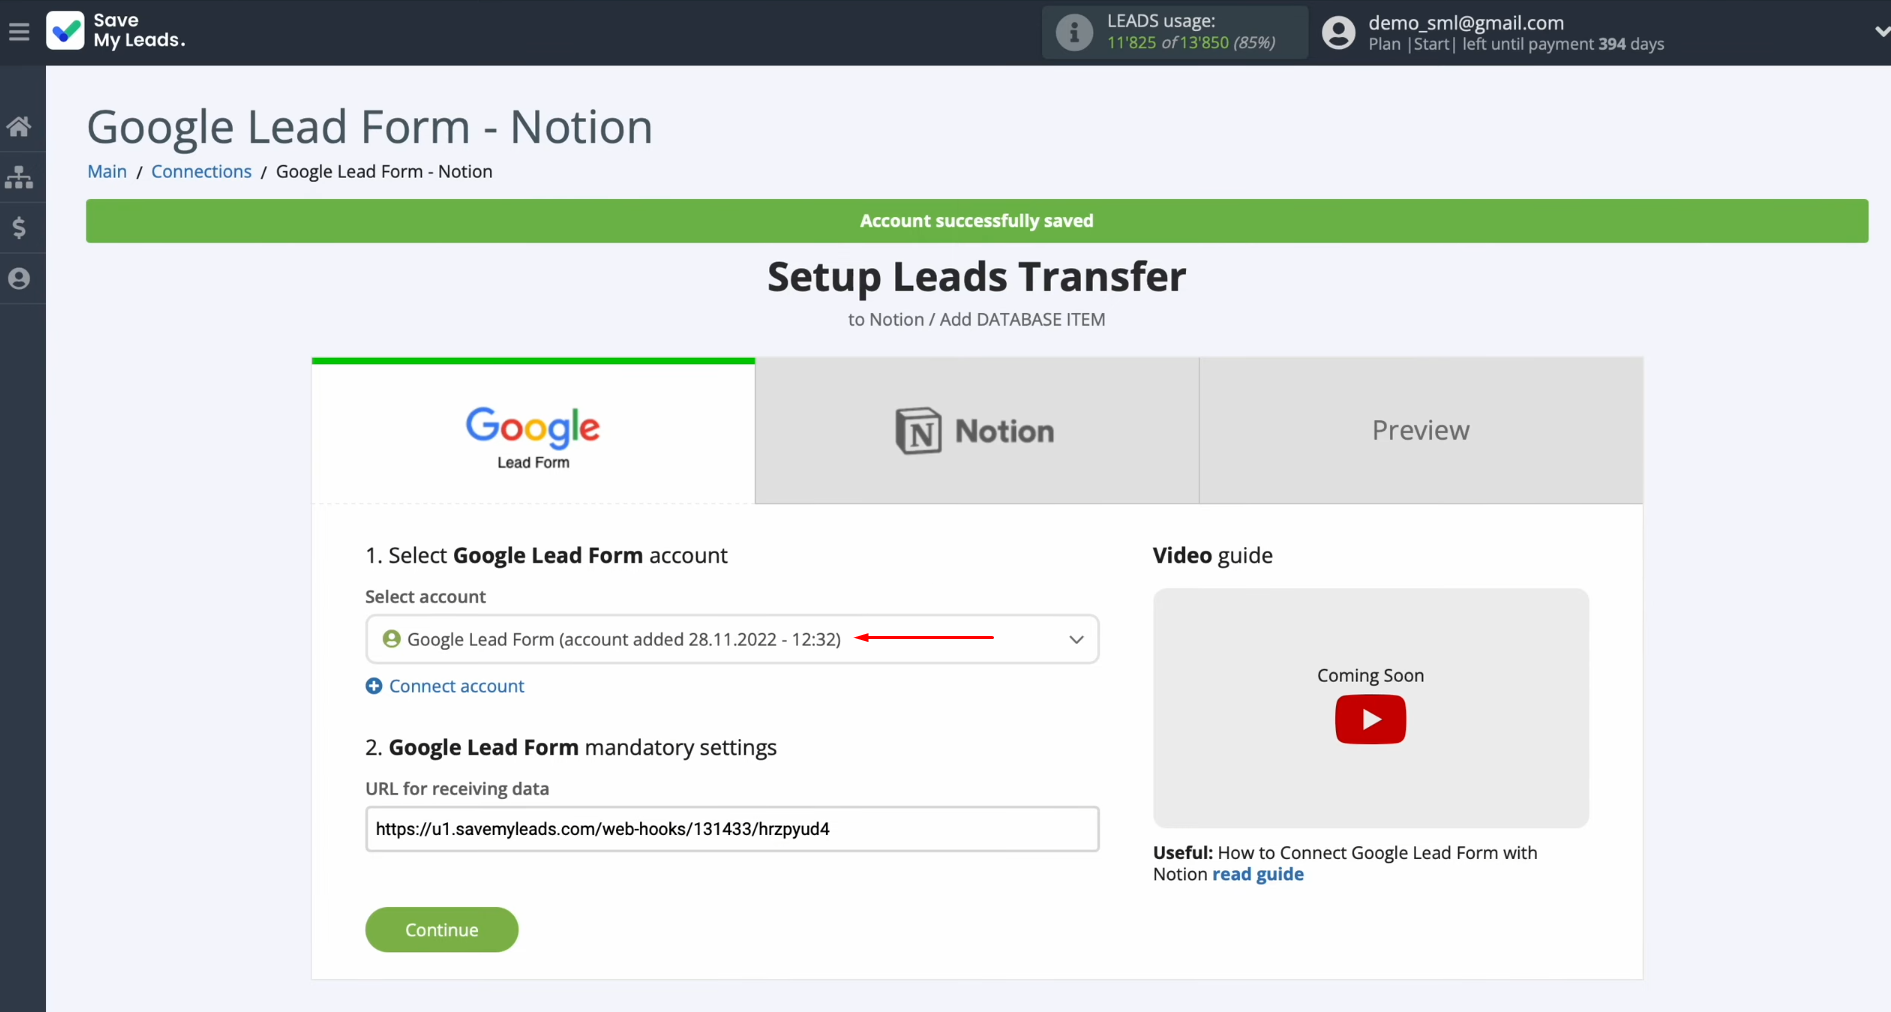
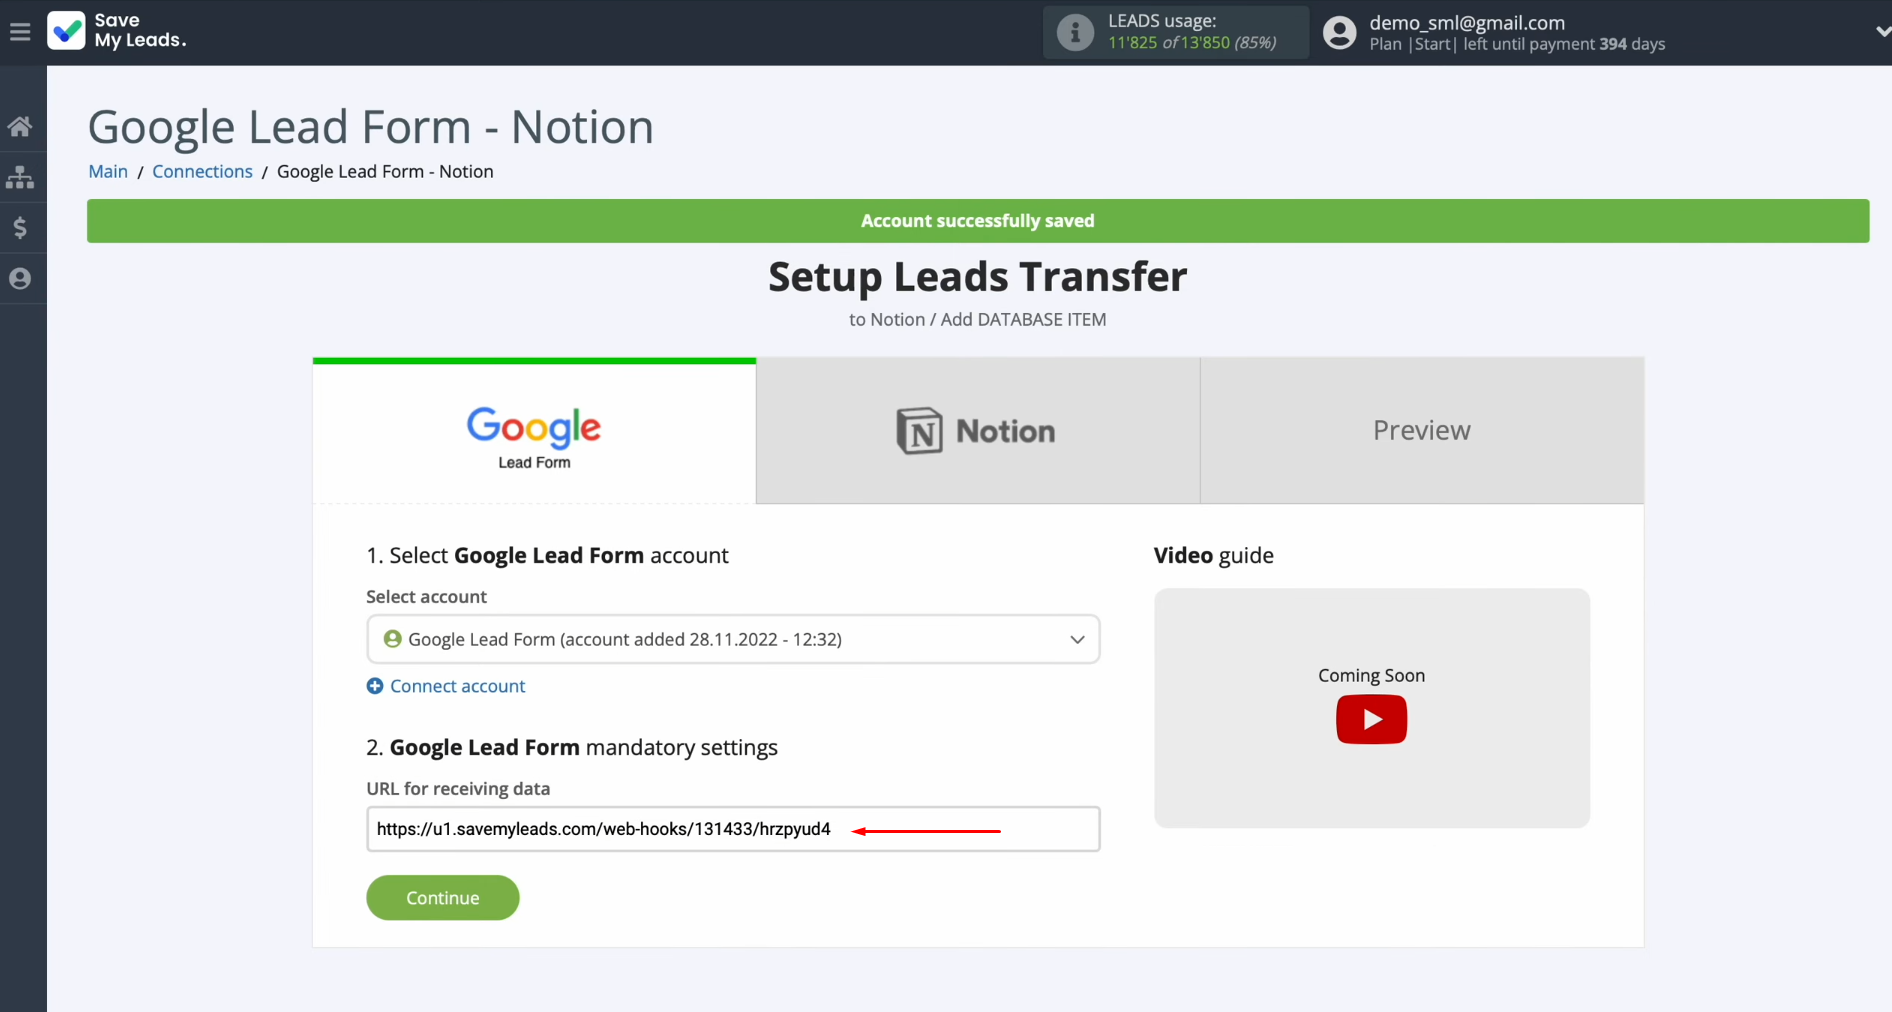
Copy the URL for receiving
data and go to the Google Ads personal account.
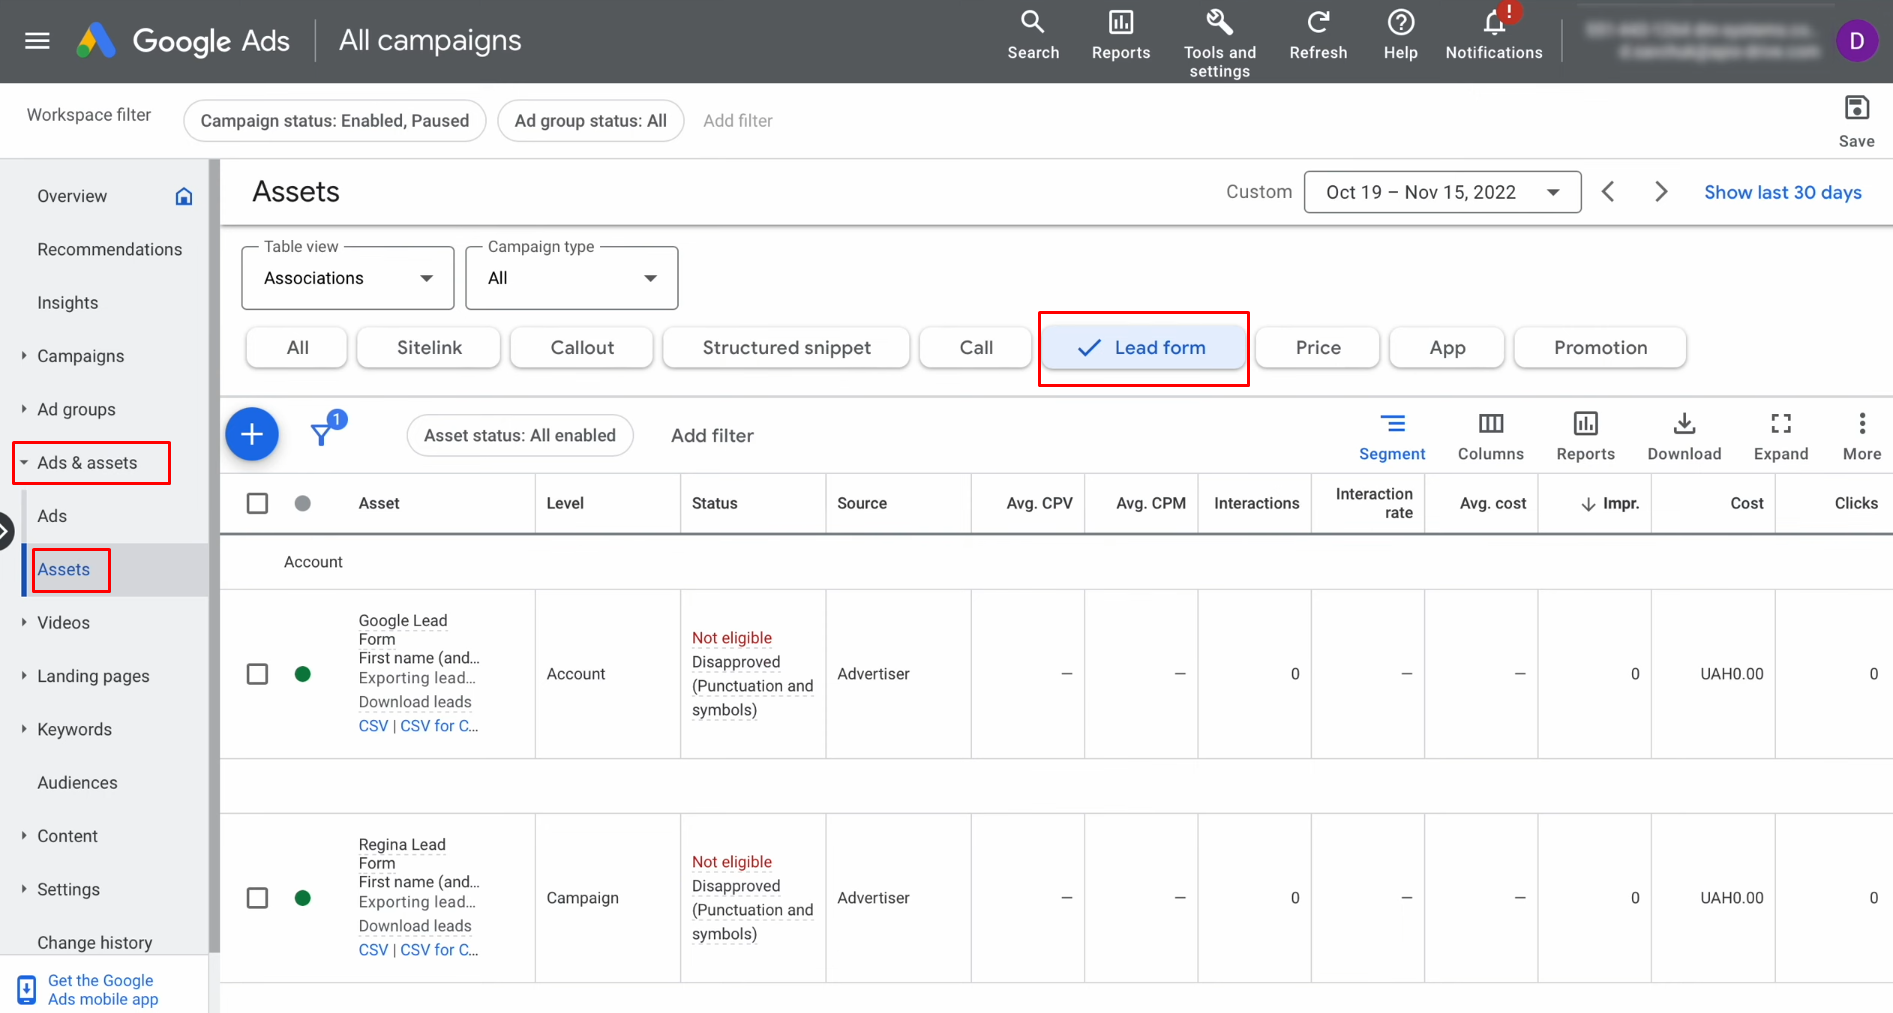
Navigate to the "Ads and Assets" section in your Google Ads account. You need the "Assets" tab. Ensure that the Lead Forms tab is selected.
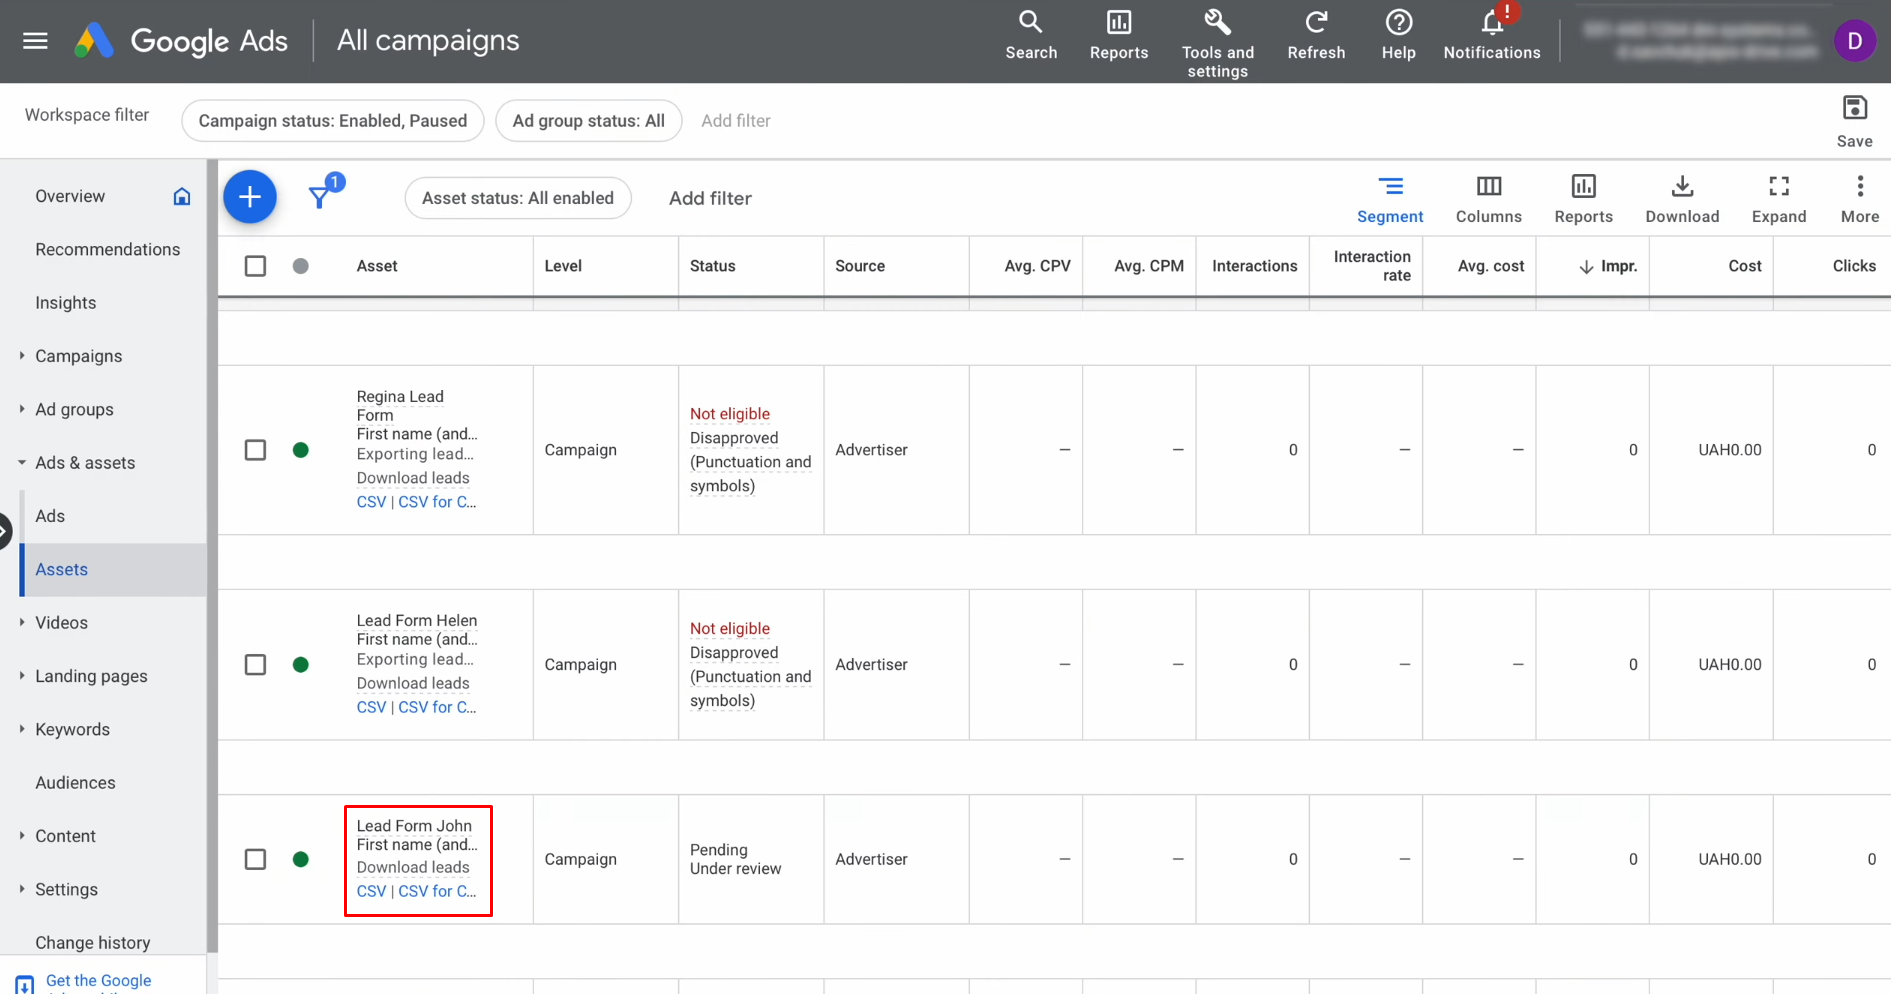
Go to the form from which you want to
receive data.
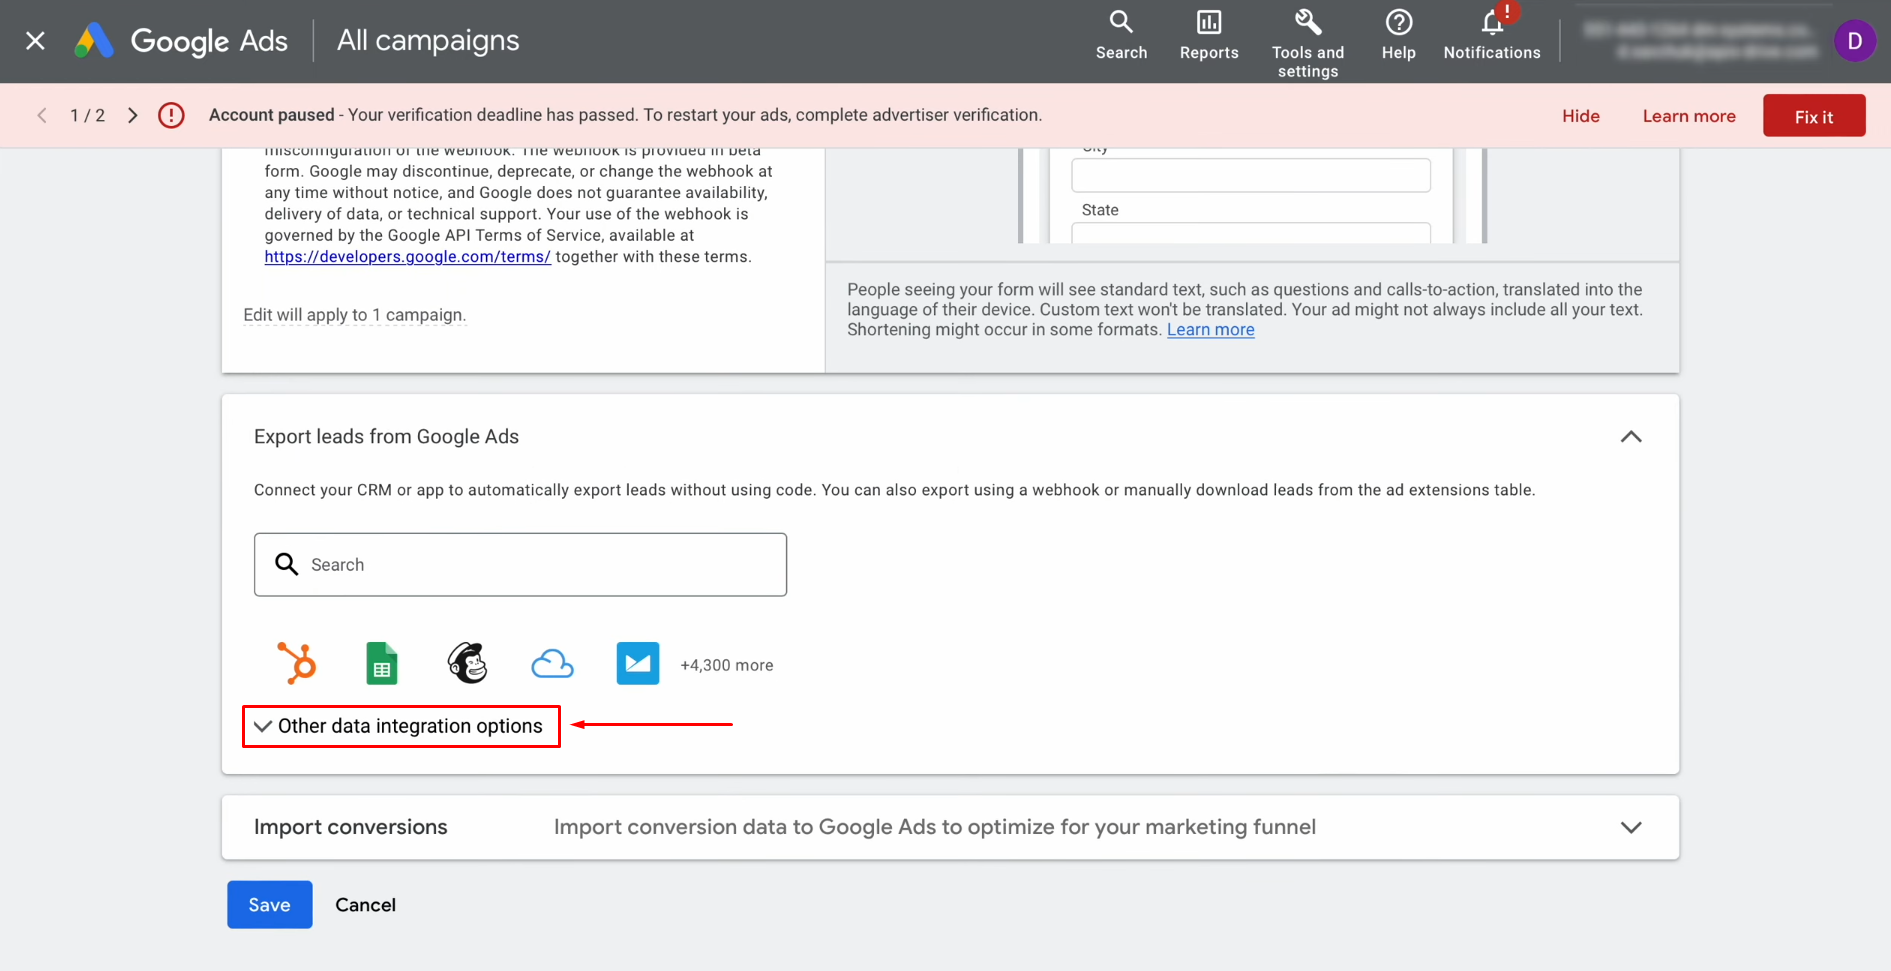
Find the section
"Other Data Integration Options."
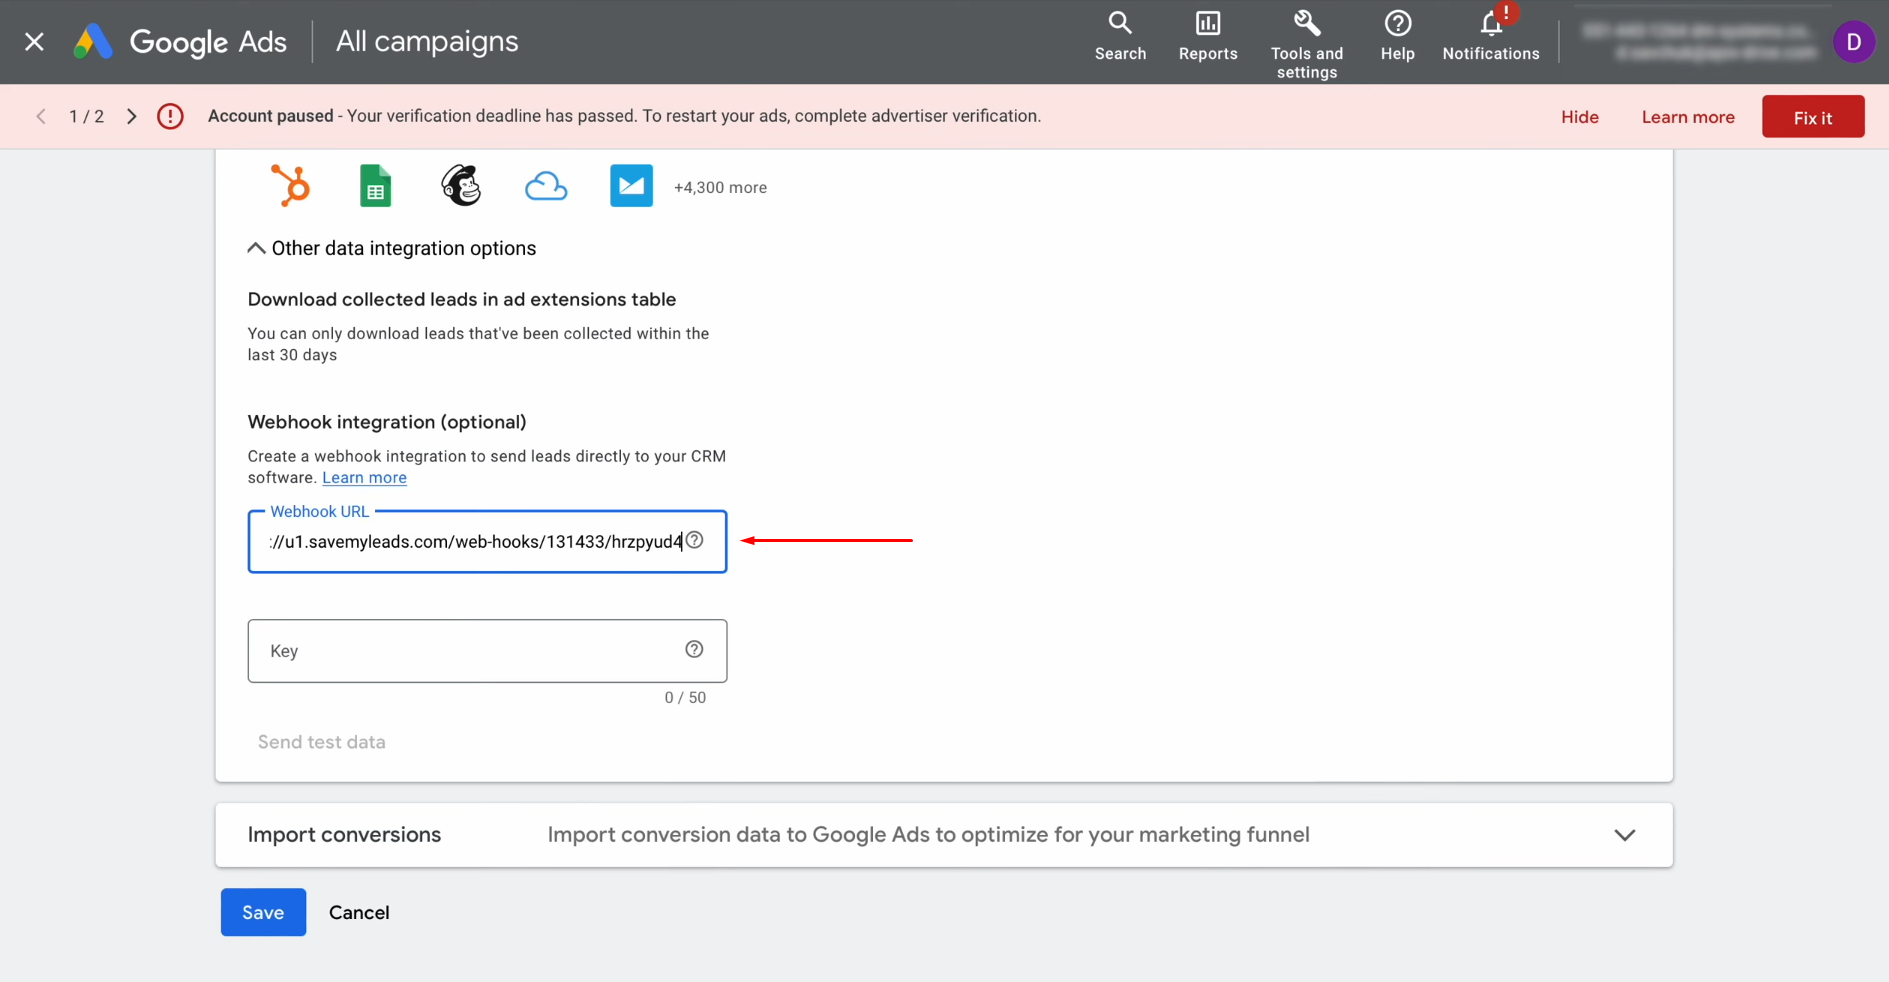
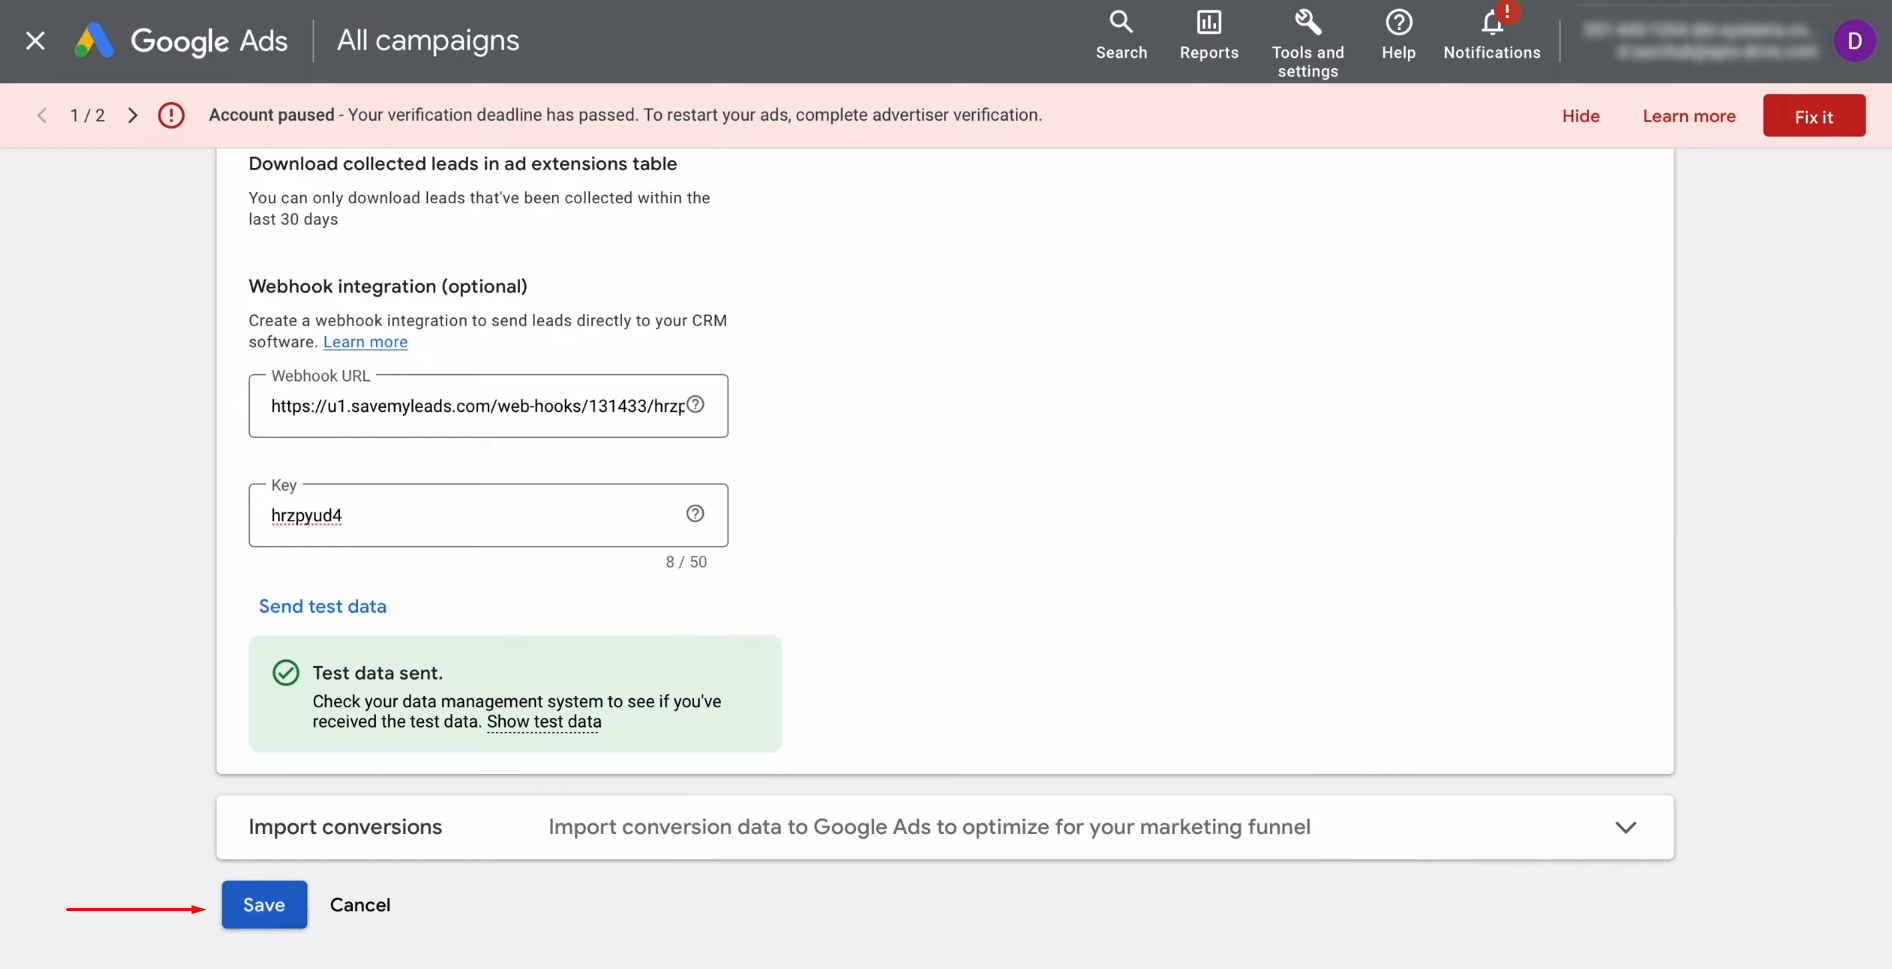
Paste the copied URL into the field "Webhook URL."
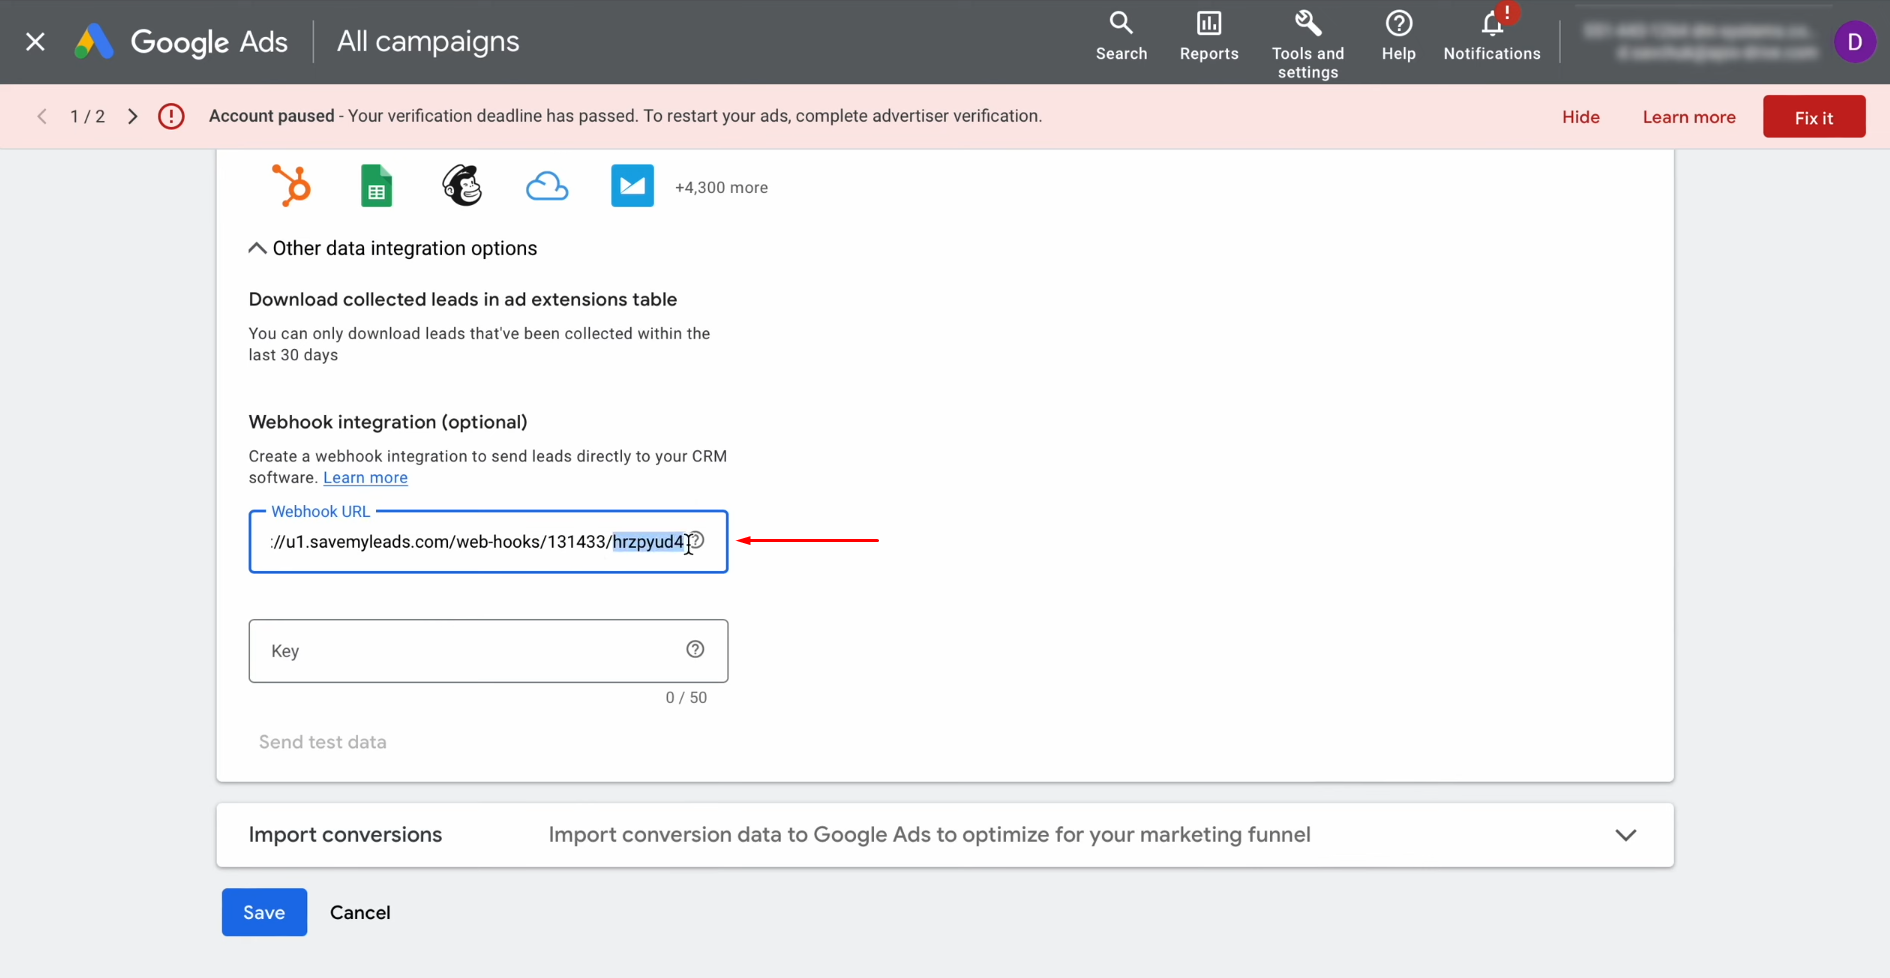
Next, use the last part of the URL as the key.
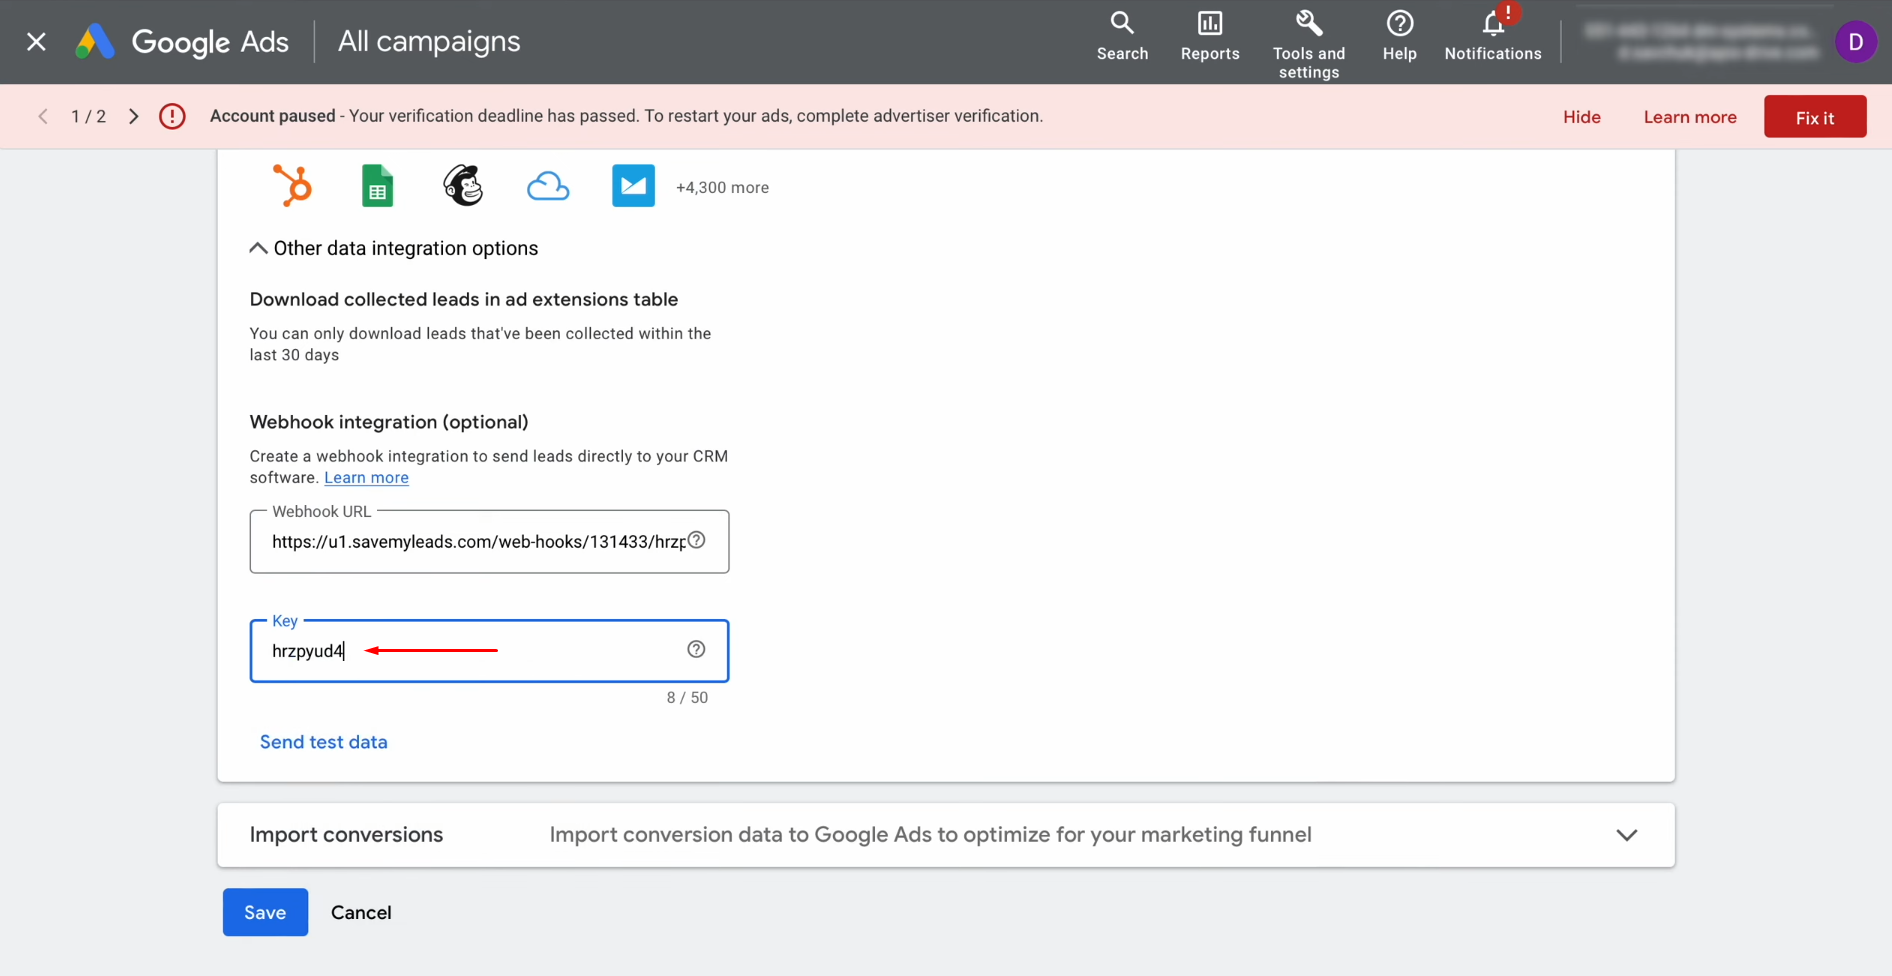
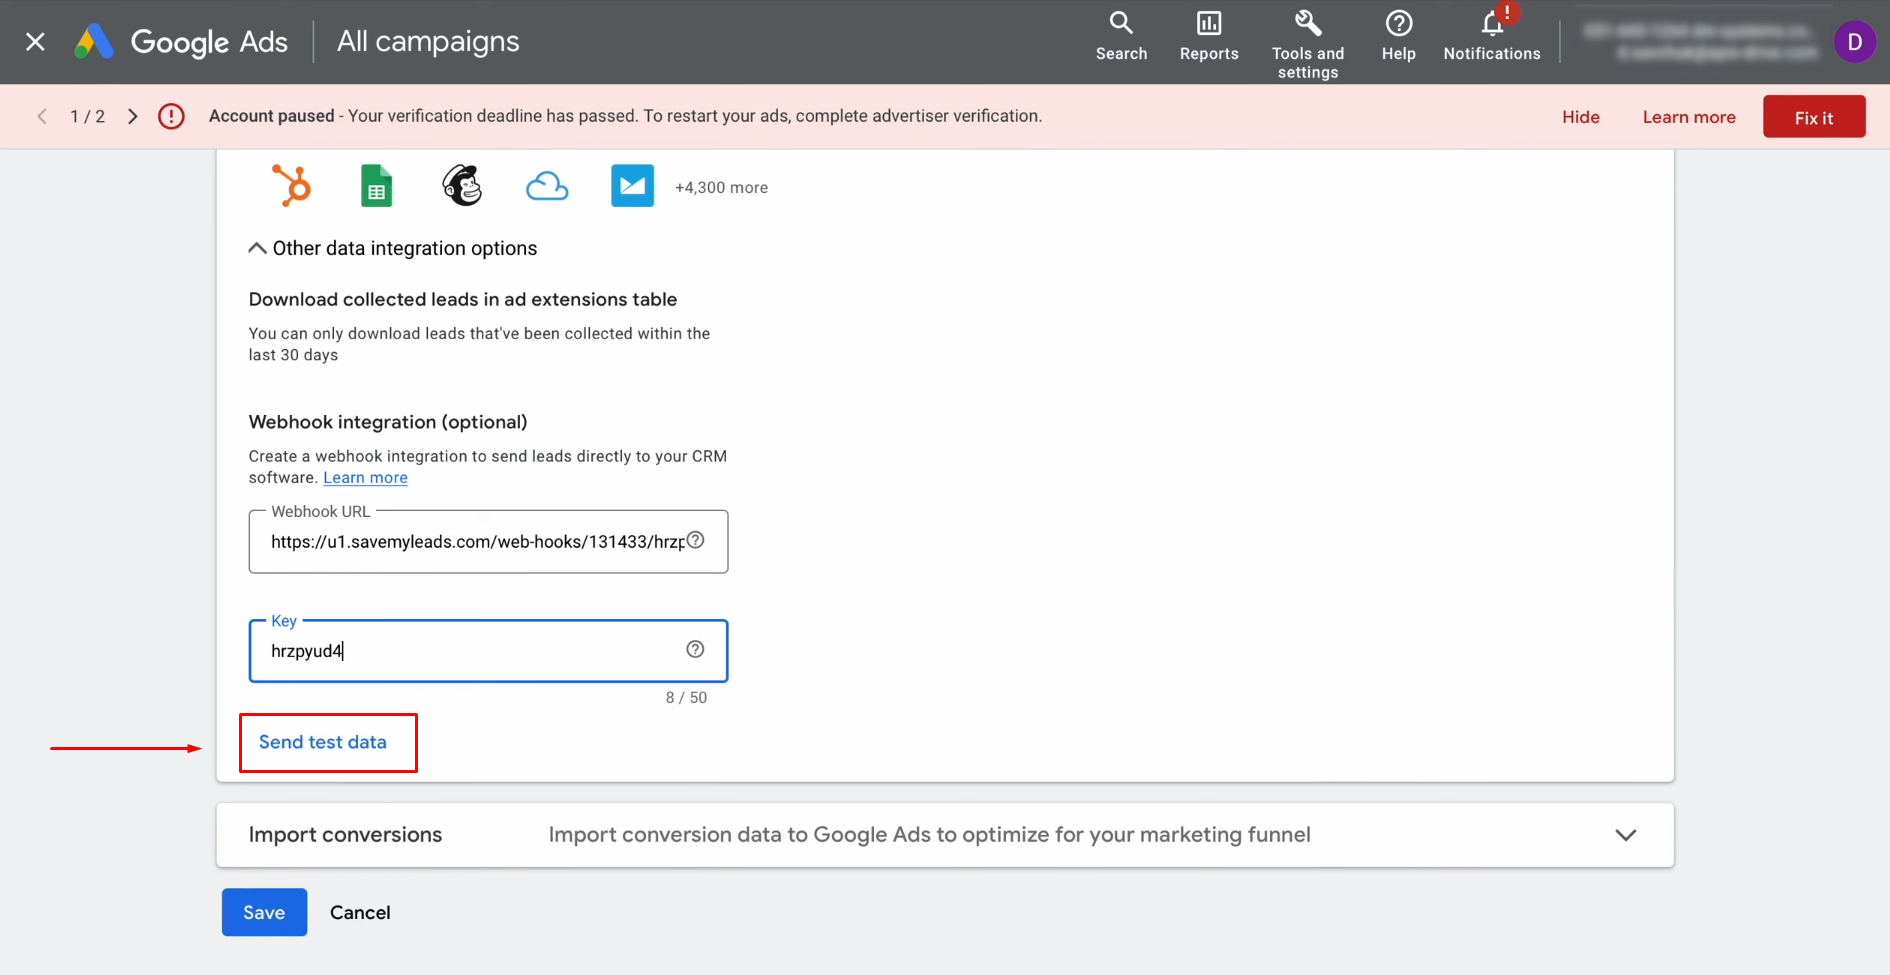
To continue
the setup, you need to
generate test data. Therefore, click "Send test data."
Don’t forget to save the
changes.
Now, you can return to
SaveMyLeads and continue setting up.
Set Up the Data Receiver – Notion
To set up Notion and Google Lead Form Ads integration, connect your Notion account to SaveMyLeads.
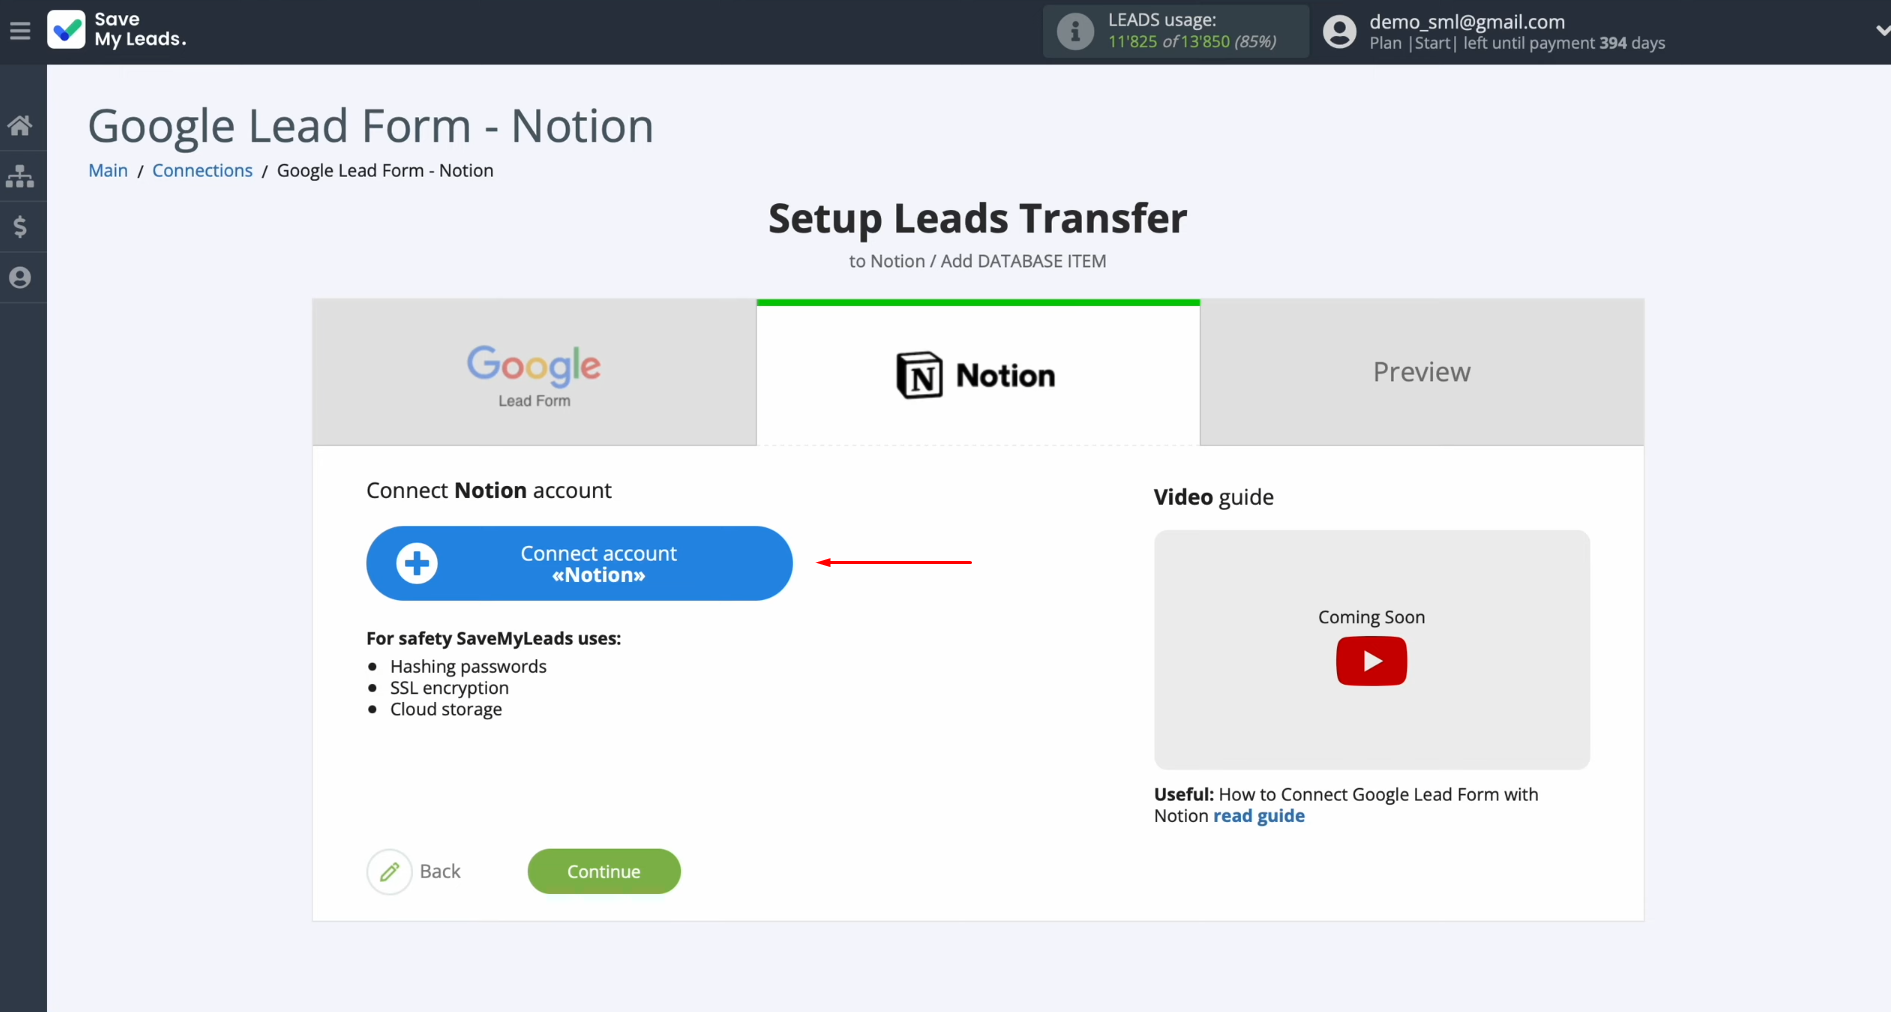
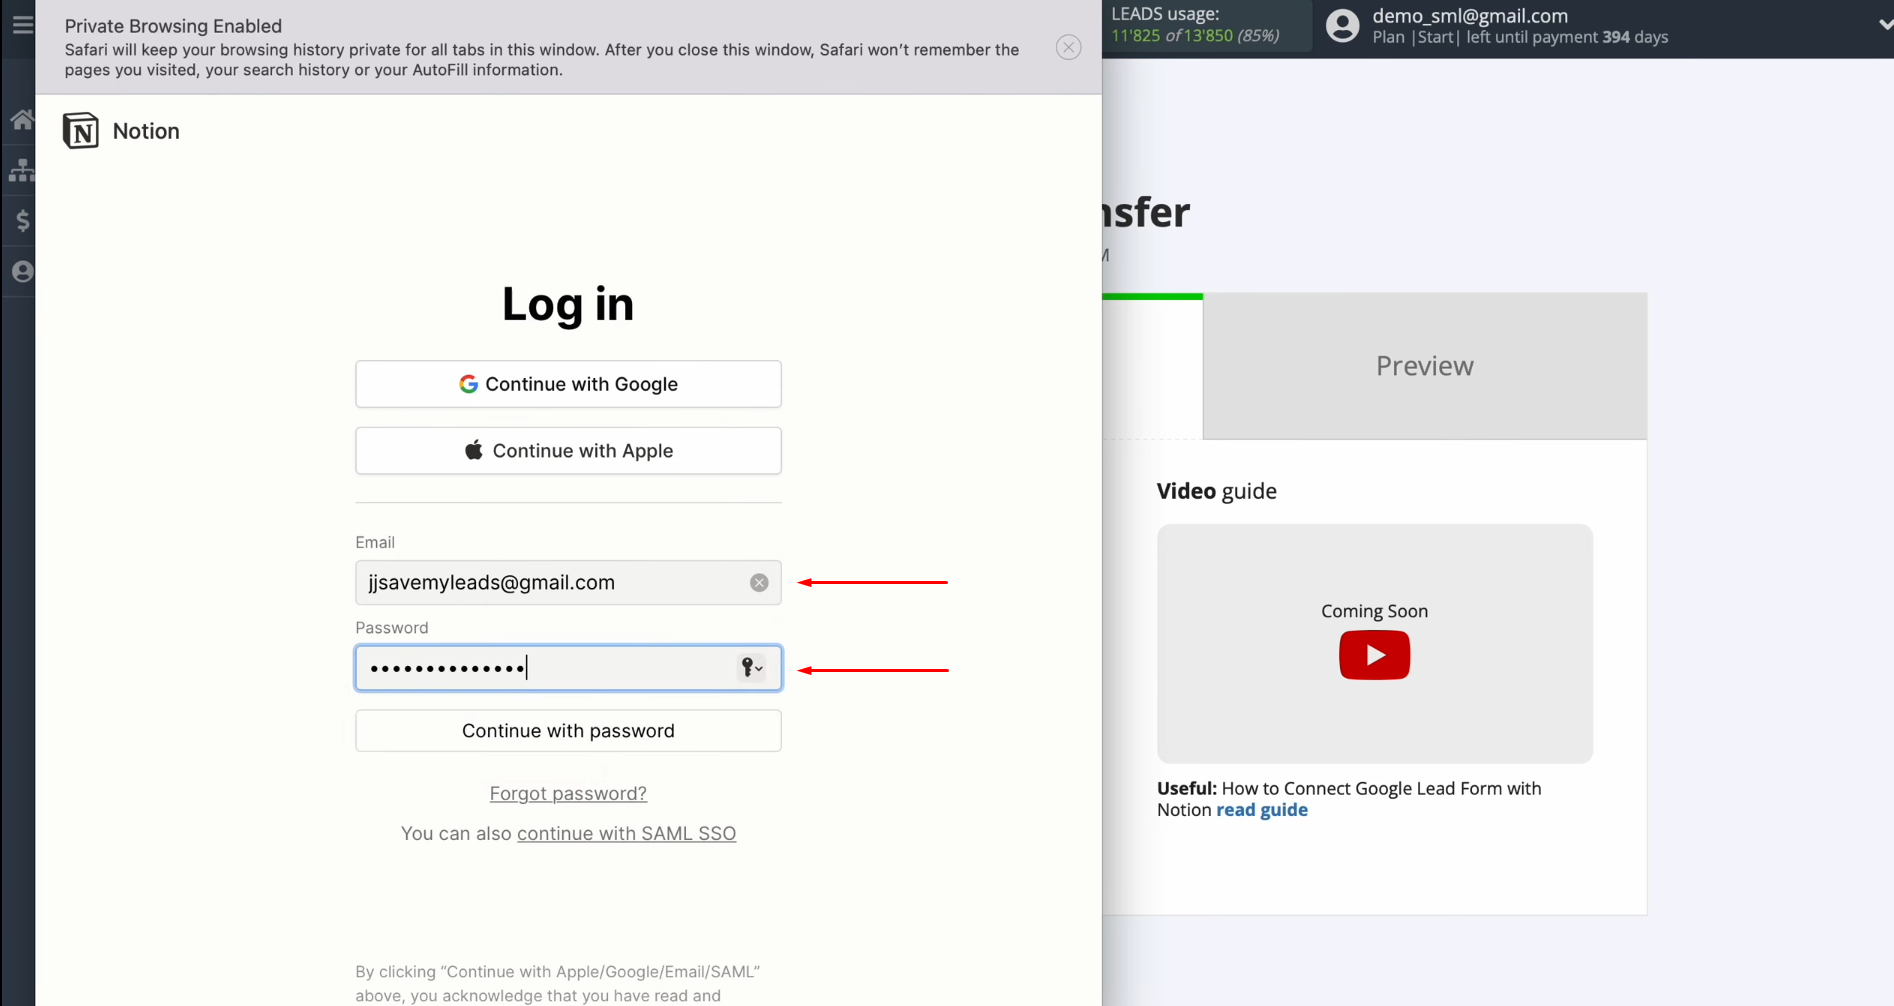
Specify the
login of your Notion personal account and click
“Continue with email.” Then, enter the password and click
“Continue with password.”
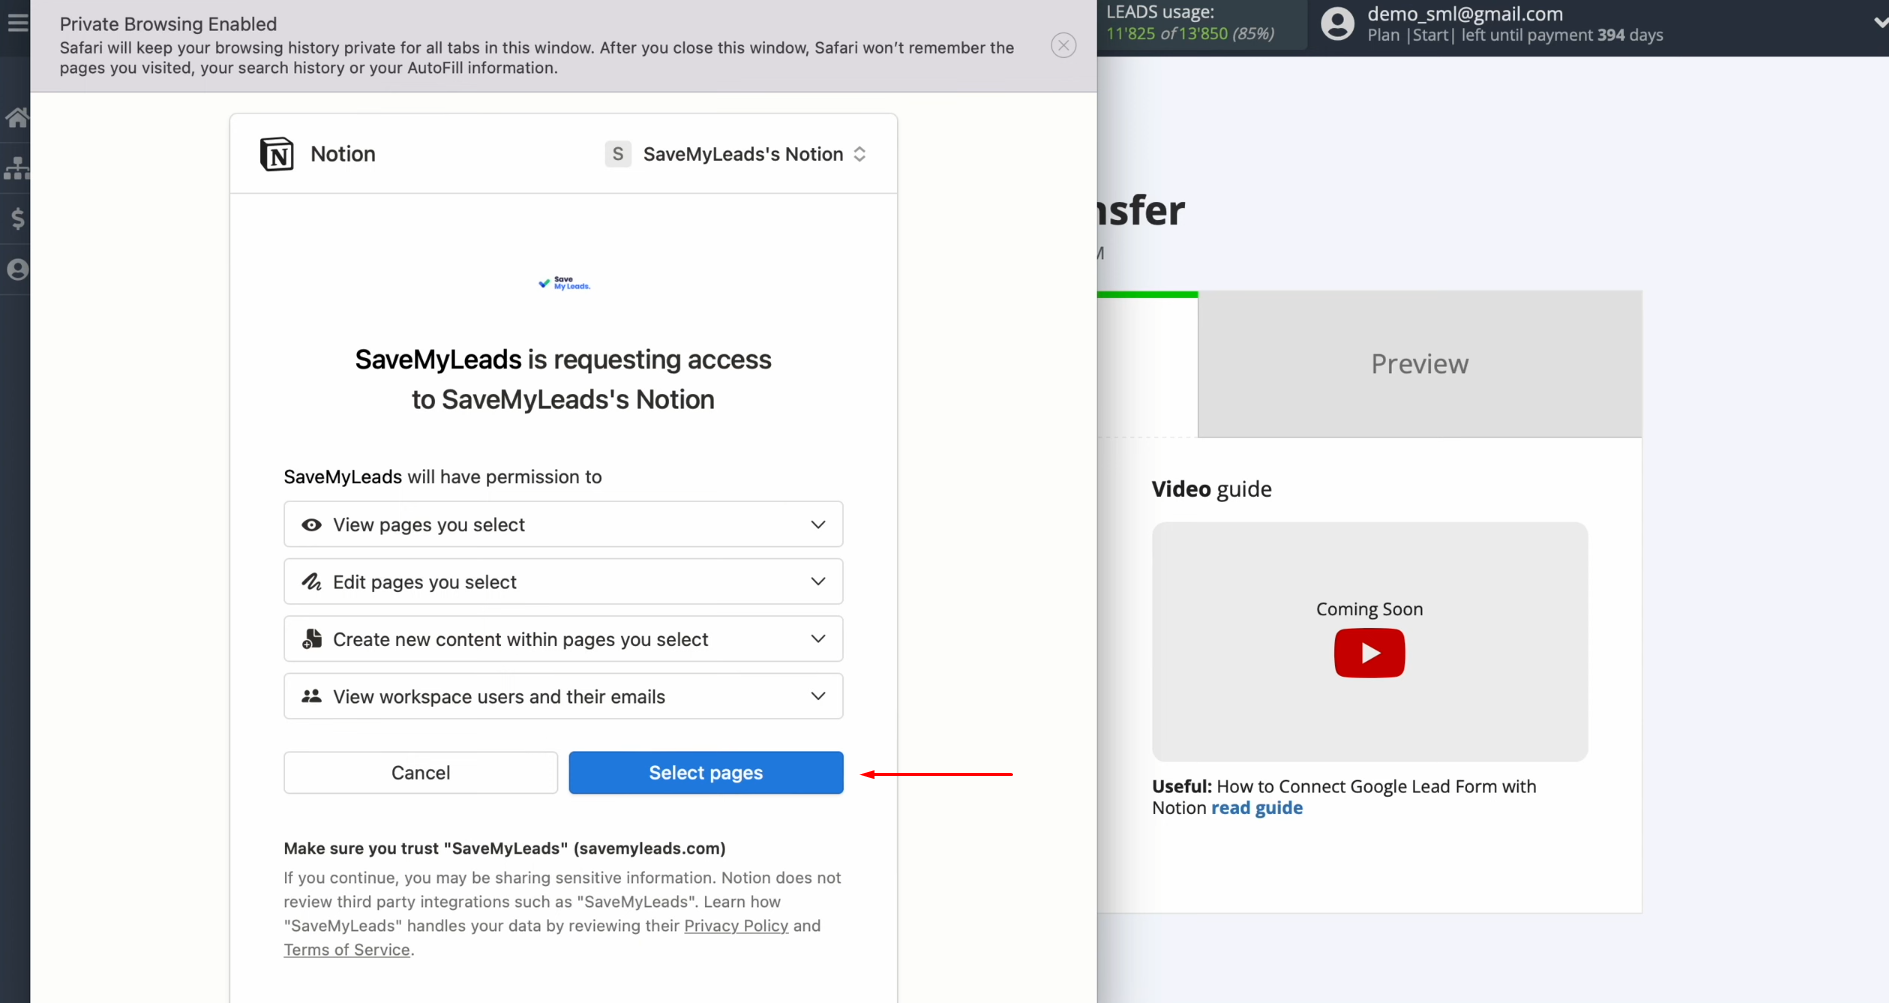
Grant
SaveMyLeads permission to work with your Notion account. For this,
click “Select pages.”
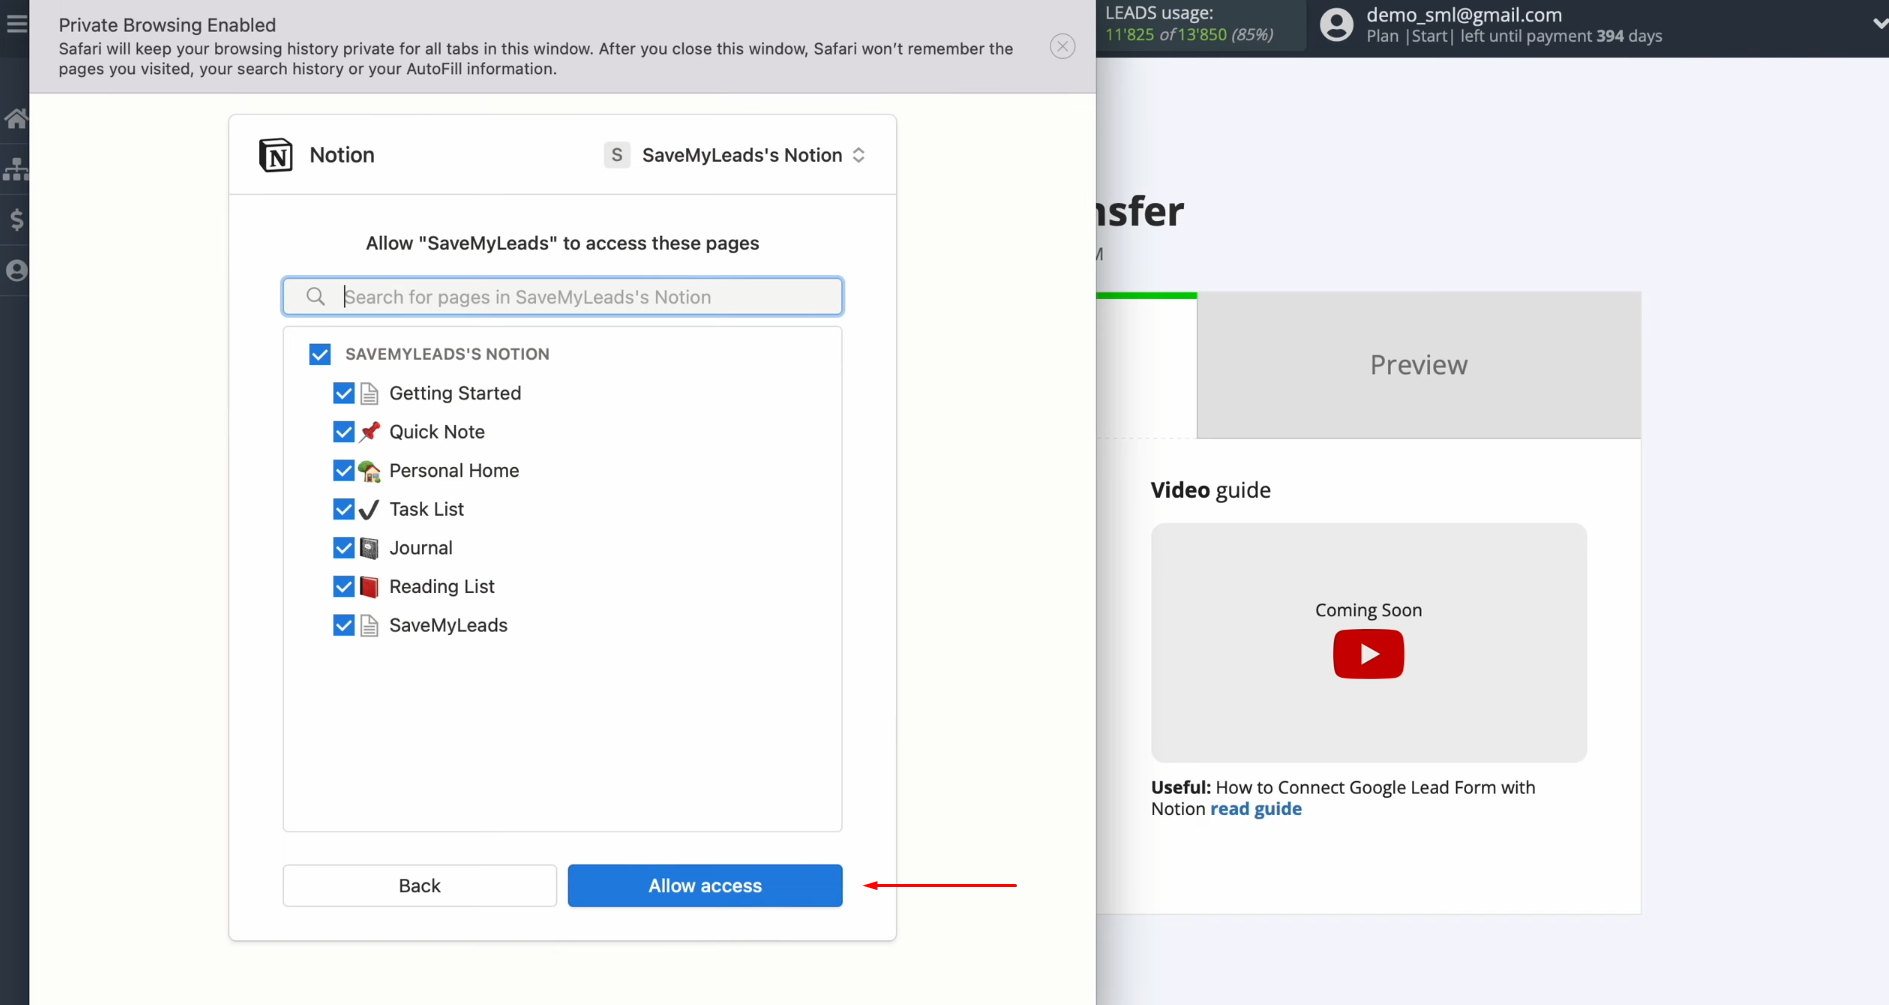
Choose the databases you want to grant SaveMyLeads access to. Click “Allow access.”
When the
connected login is displayed in the list, select it.
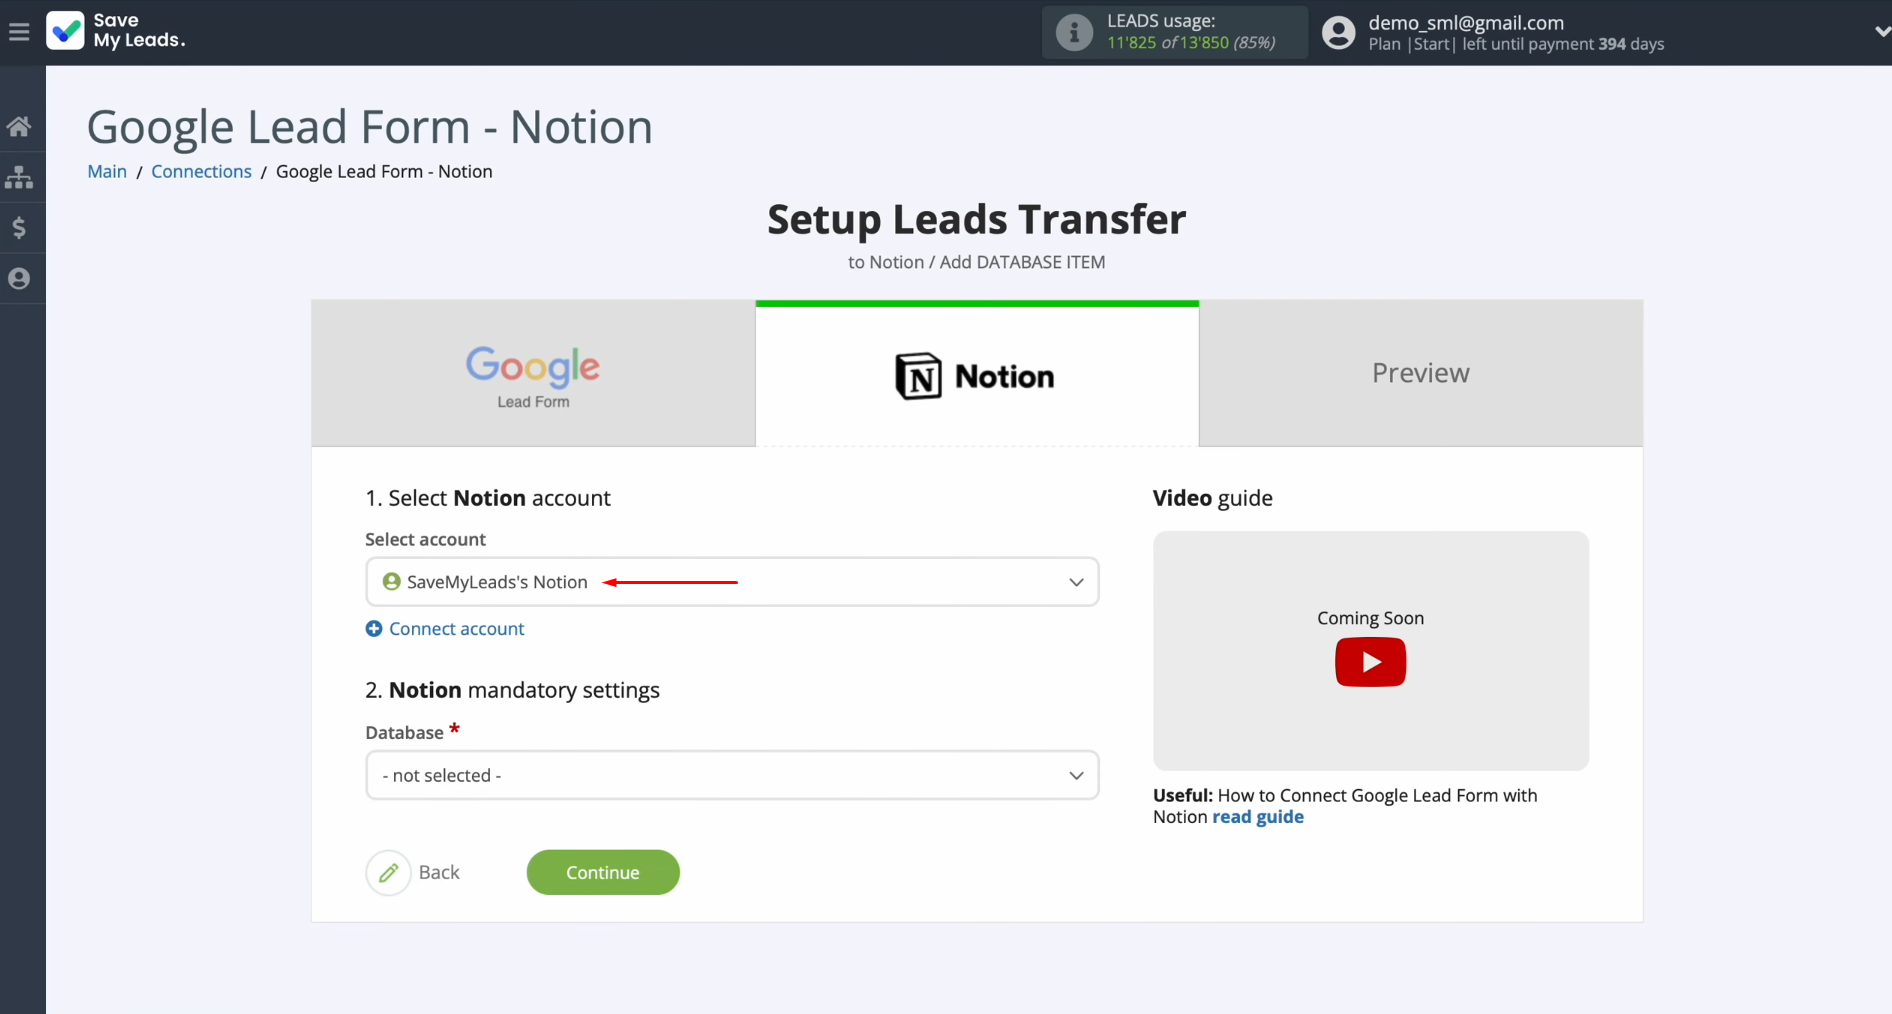
Choose the
database to which you want to transfer leads from the Google Lead Form.
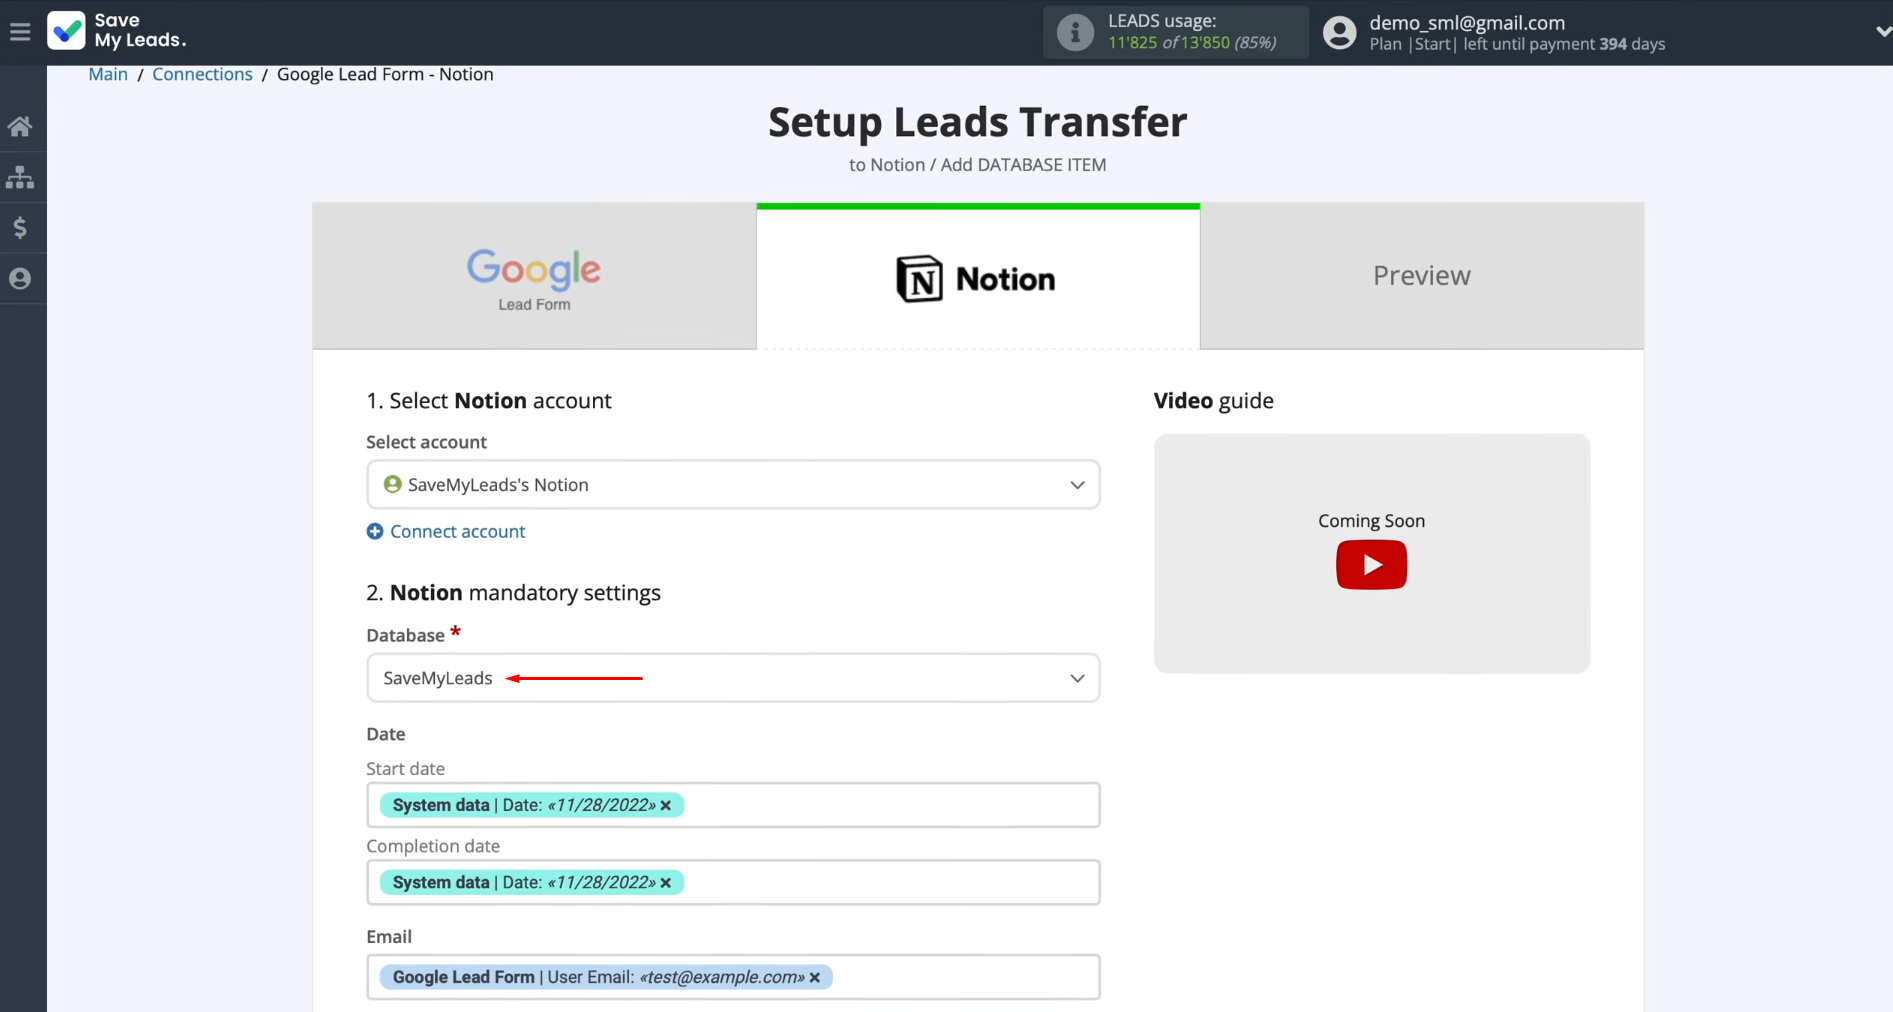
Now, you see the database fields to
which you can assign variables from the Google Lead Form. To do this, click in the field and
select a variable from the drop-down list.
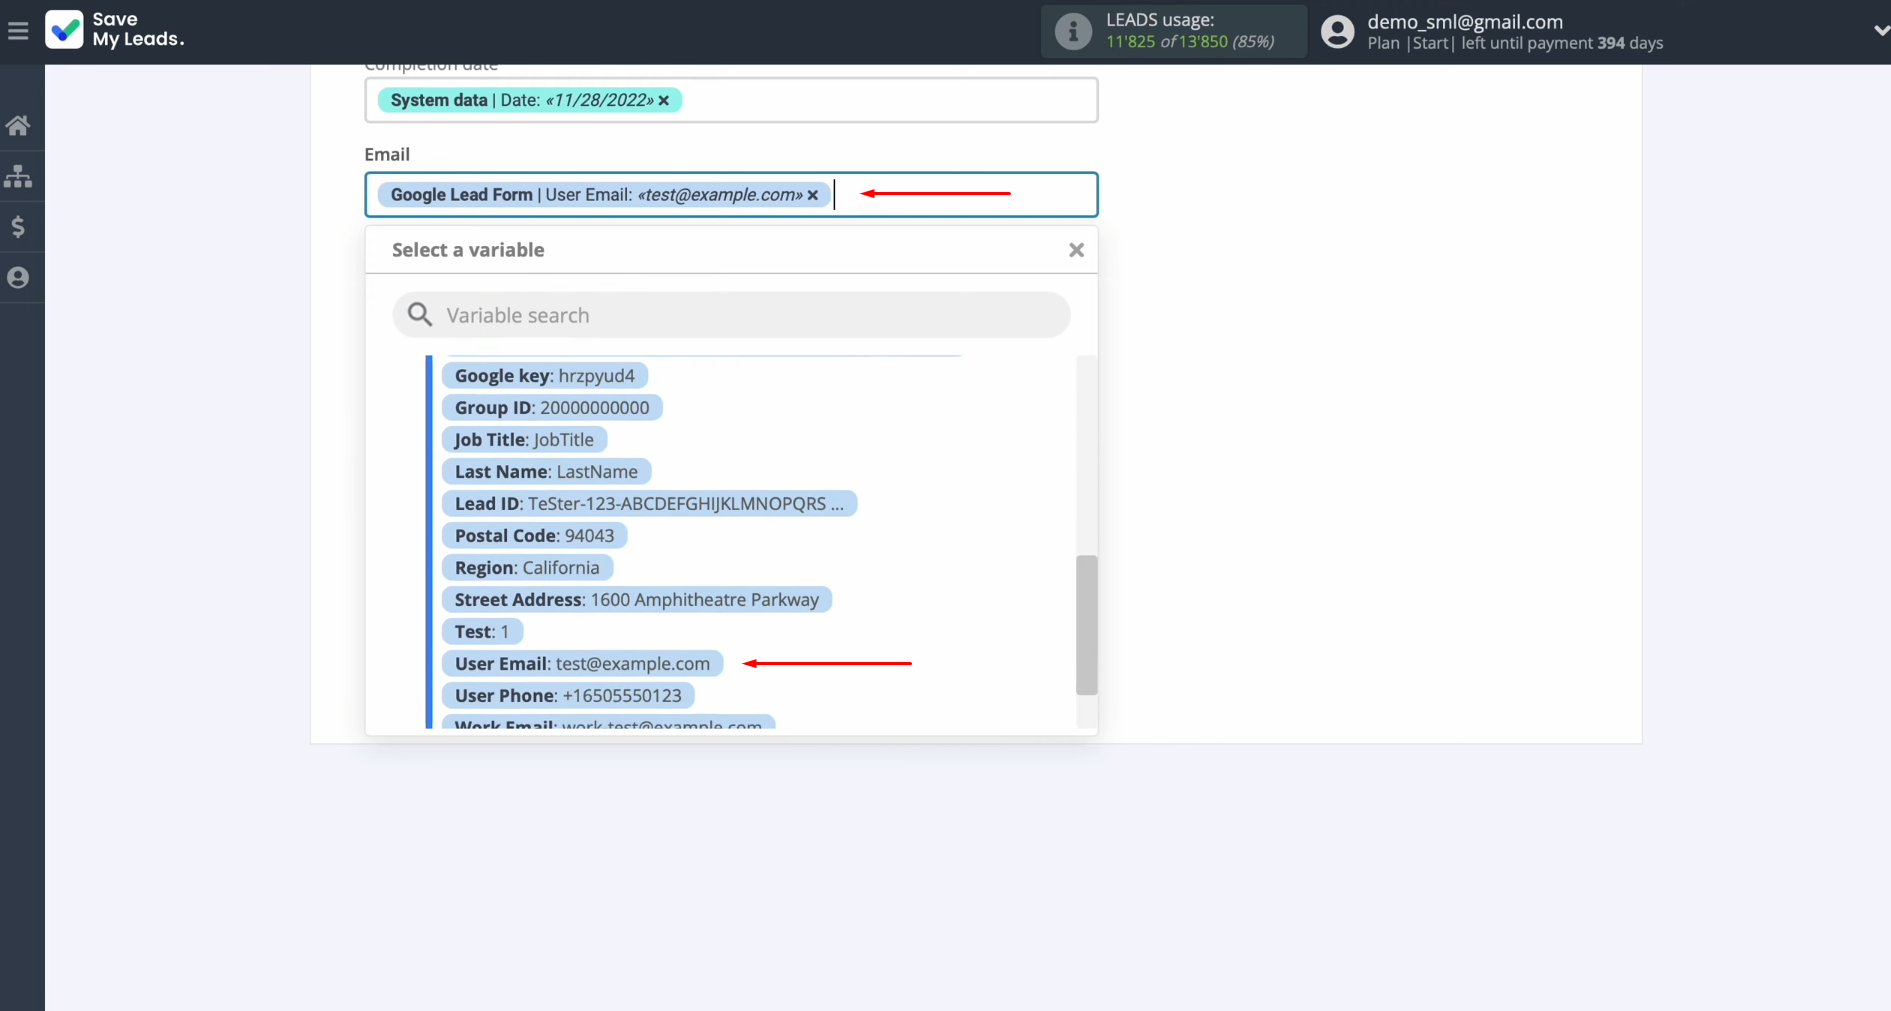
Please note
that you can use not only variables but also manually enter values.
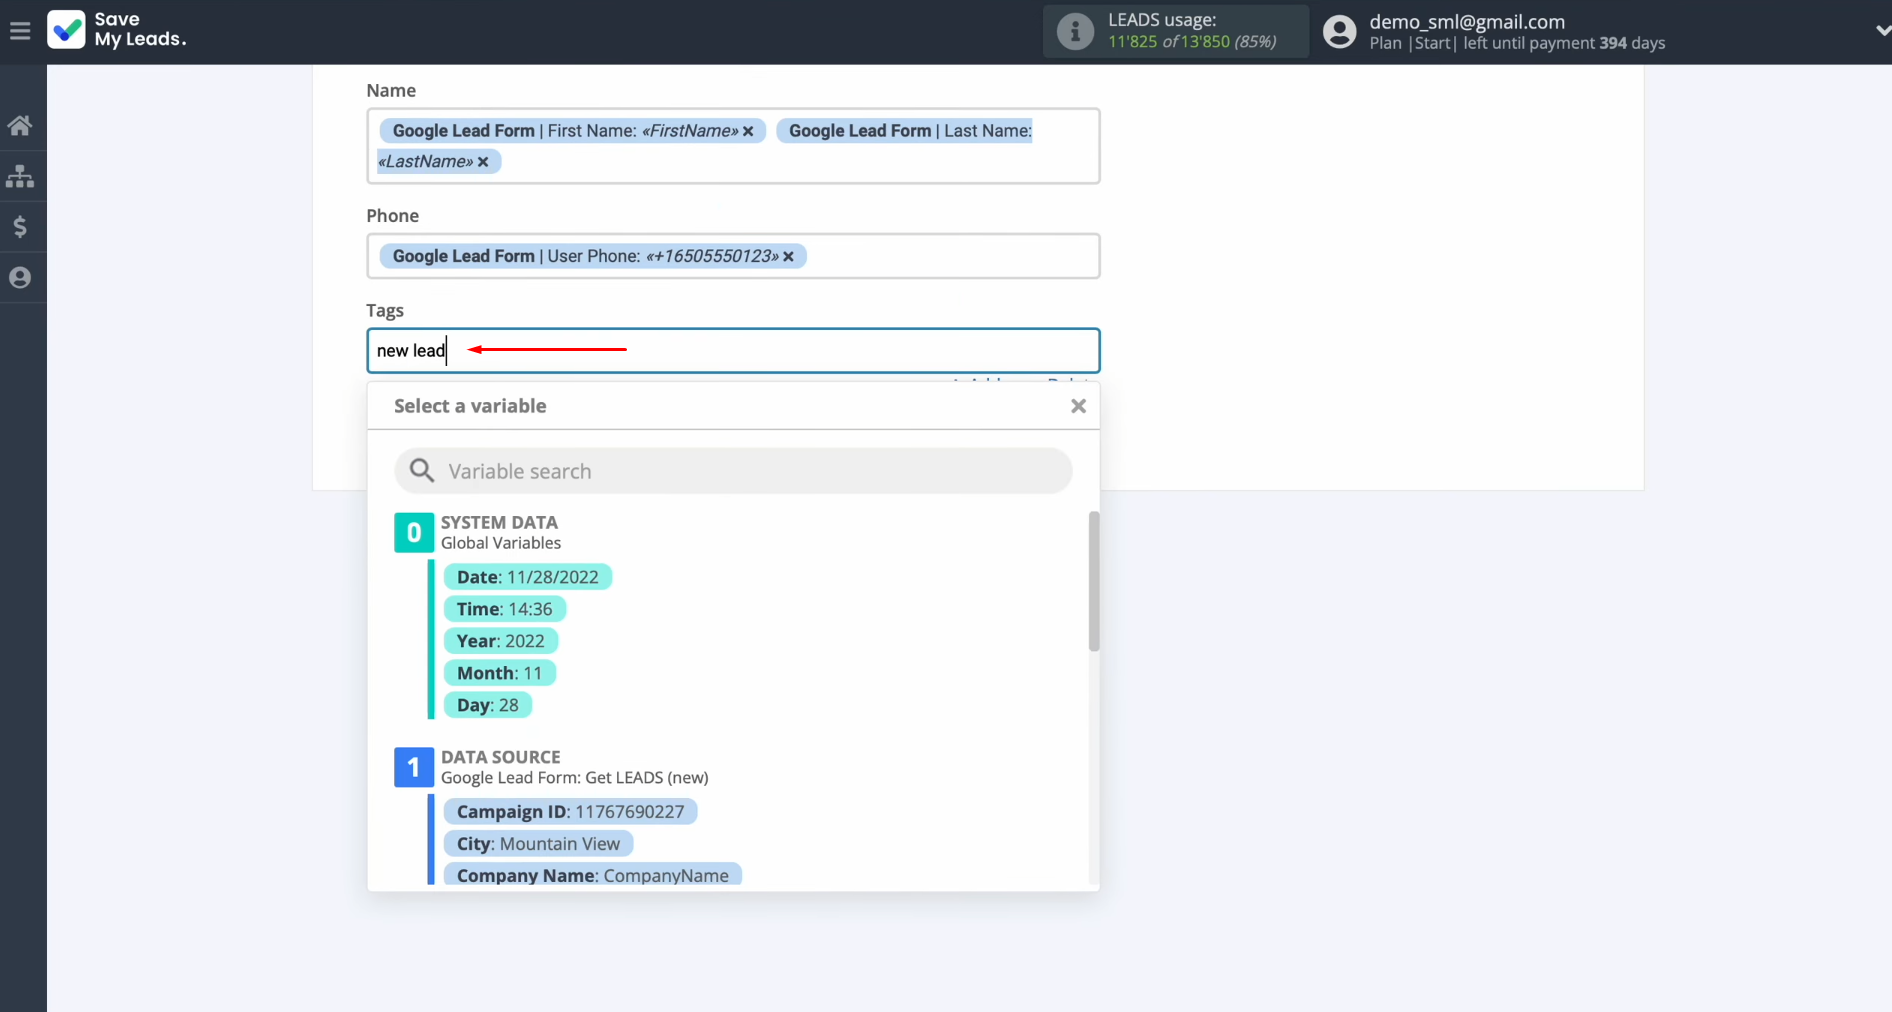
When all
fields are filled in, click “Continue.”
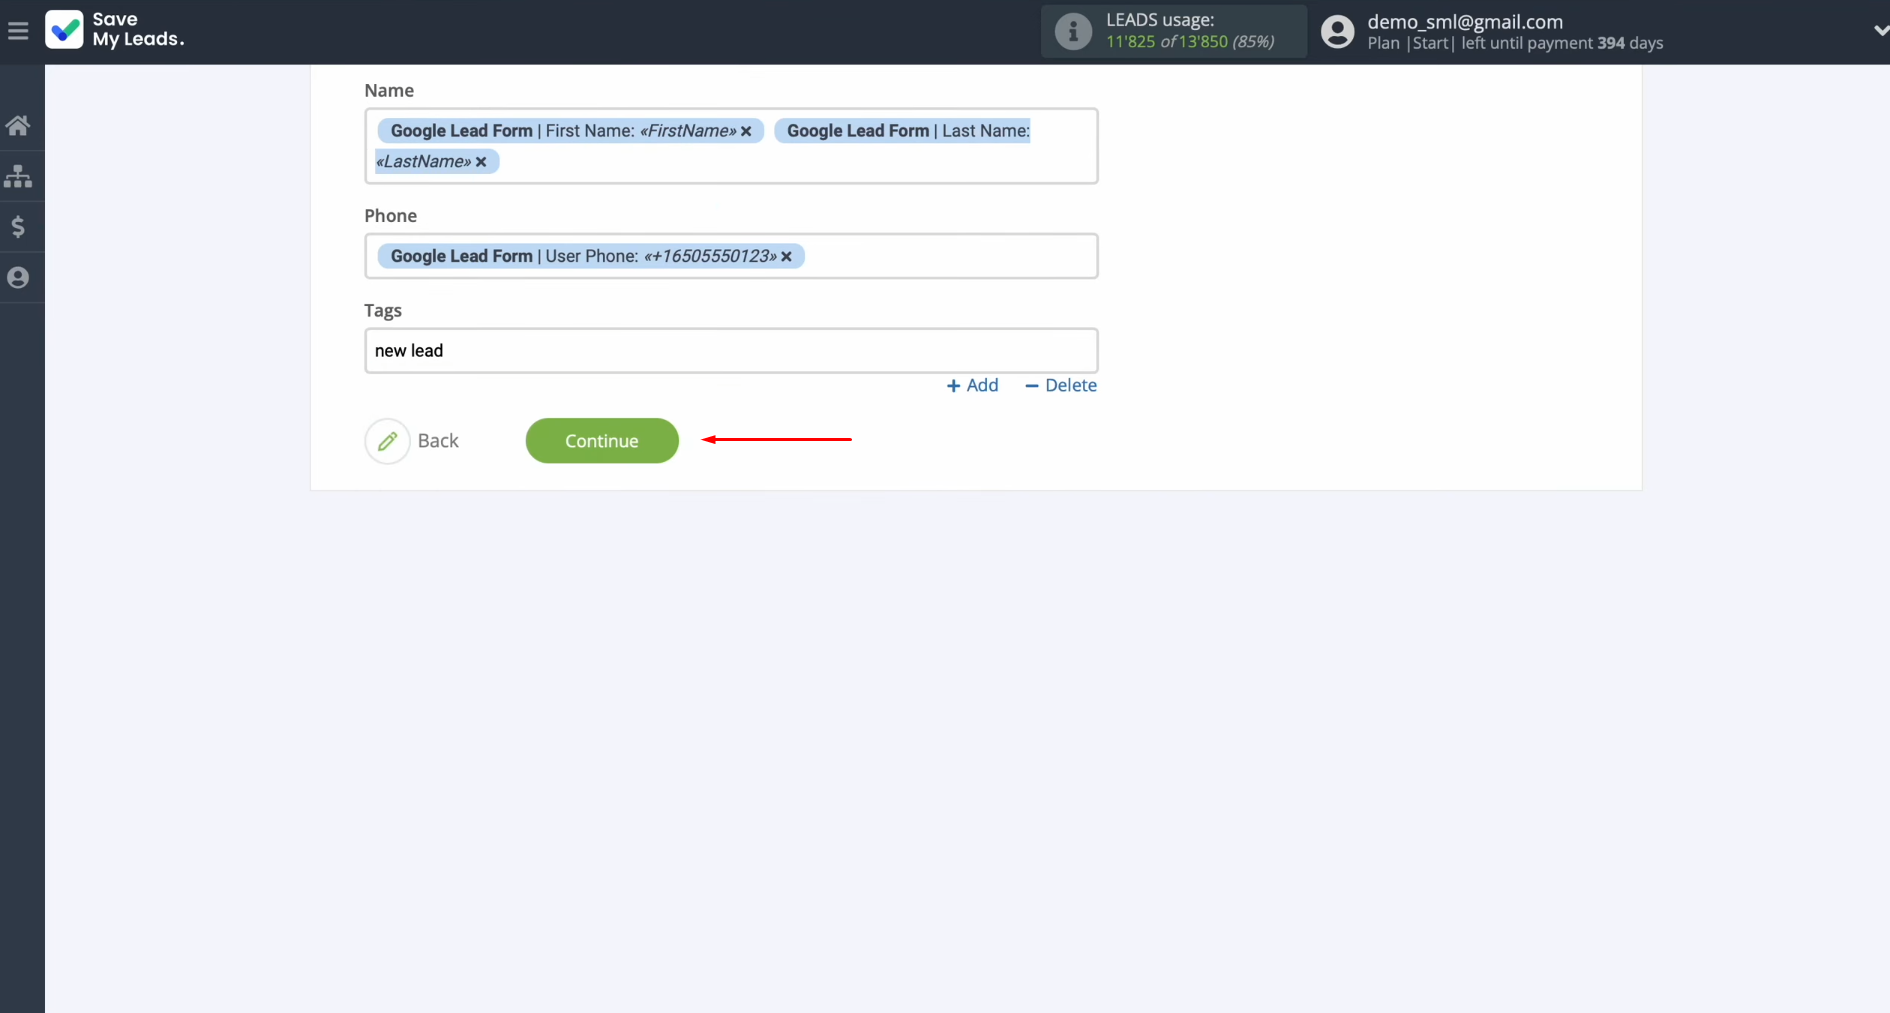
Here, you see an
example of the data that will be sent to Notion as a new database item for
each new lead from the Google Lead Form. If something does not suit you,
click “Back,” and you will go back one step. To check the correctness of
the settings, click "Send Test Data to Notion.”
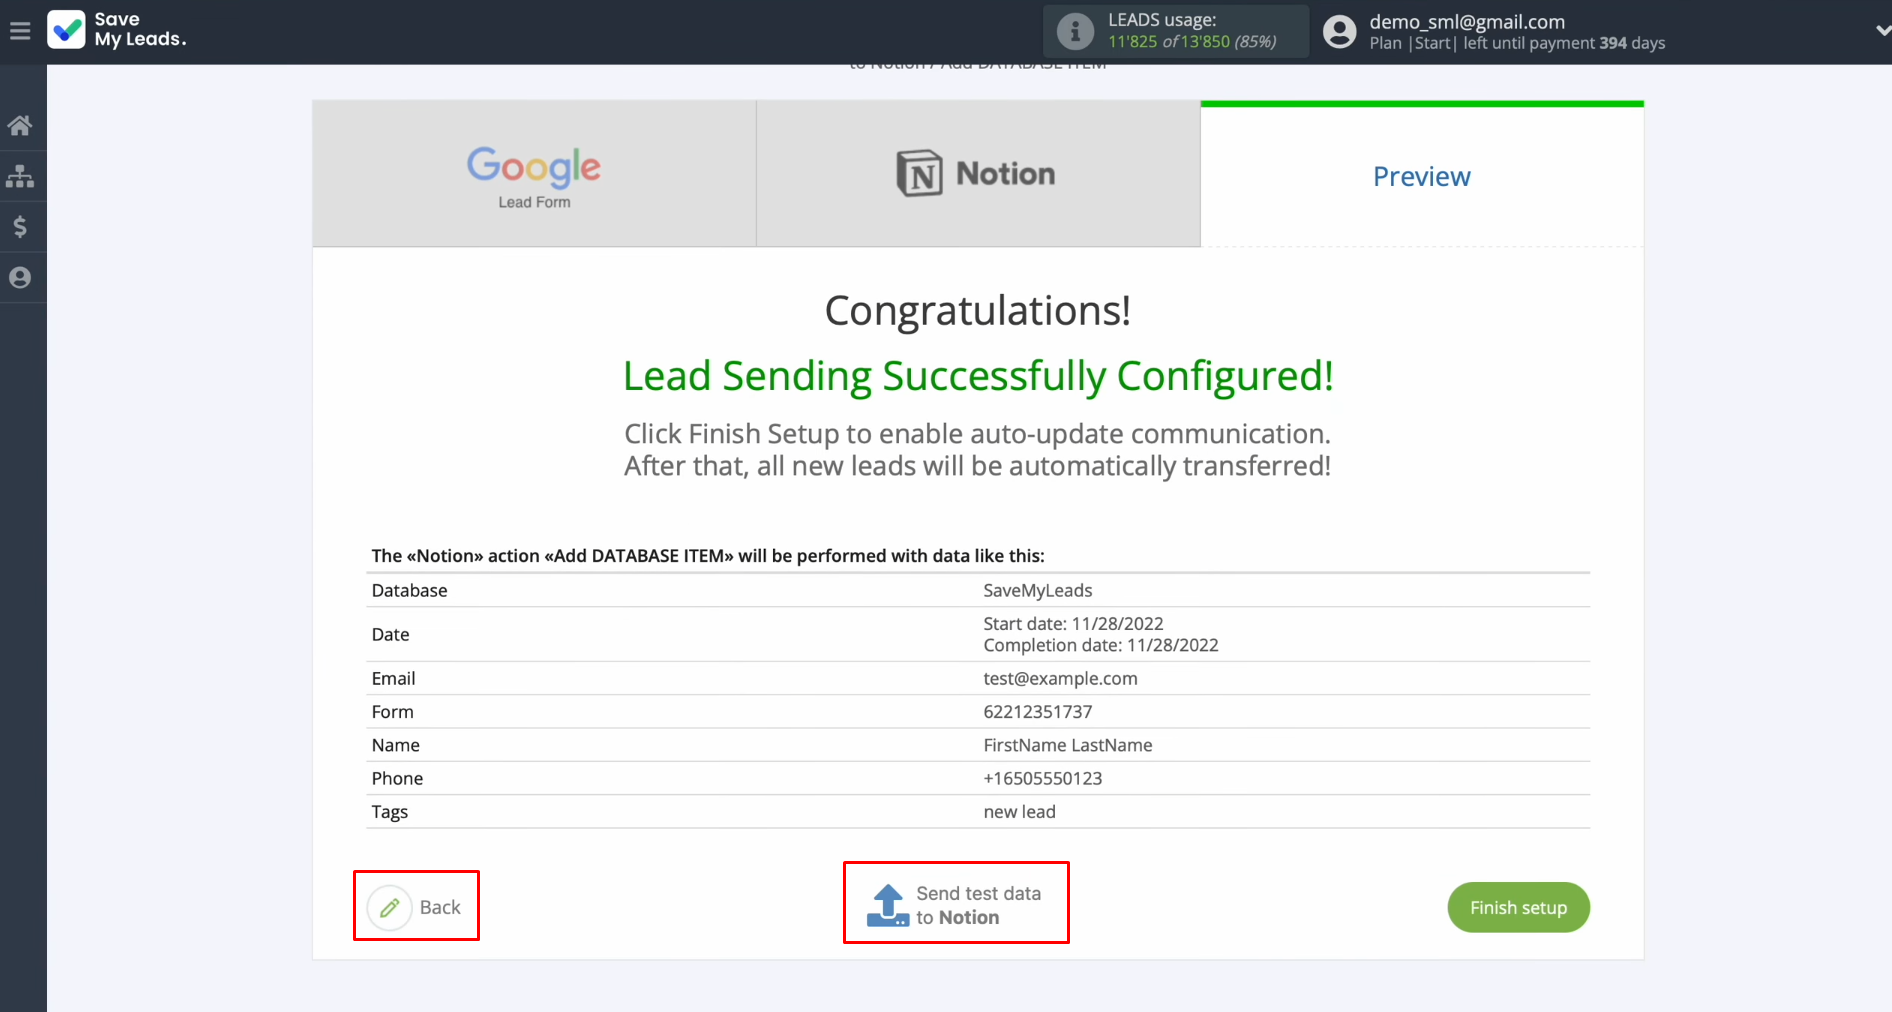
After
successful sending, go to Notion and check the result.
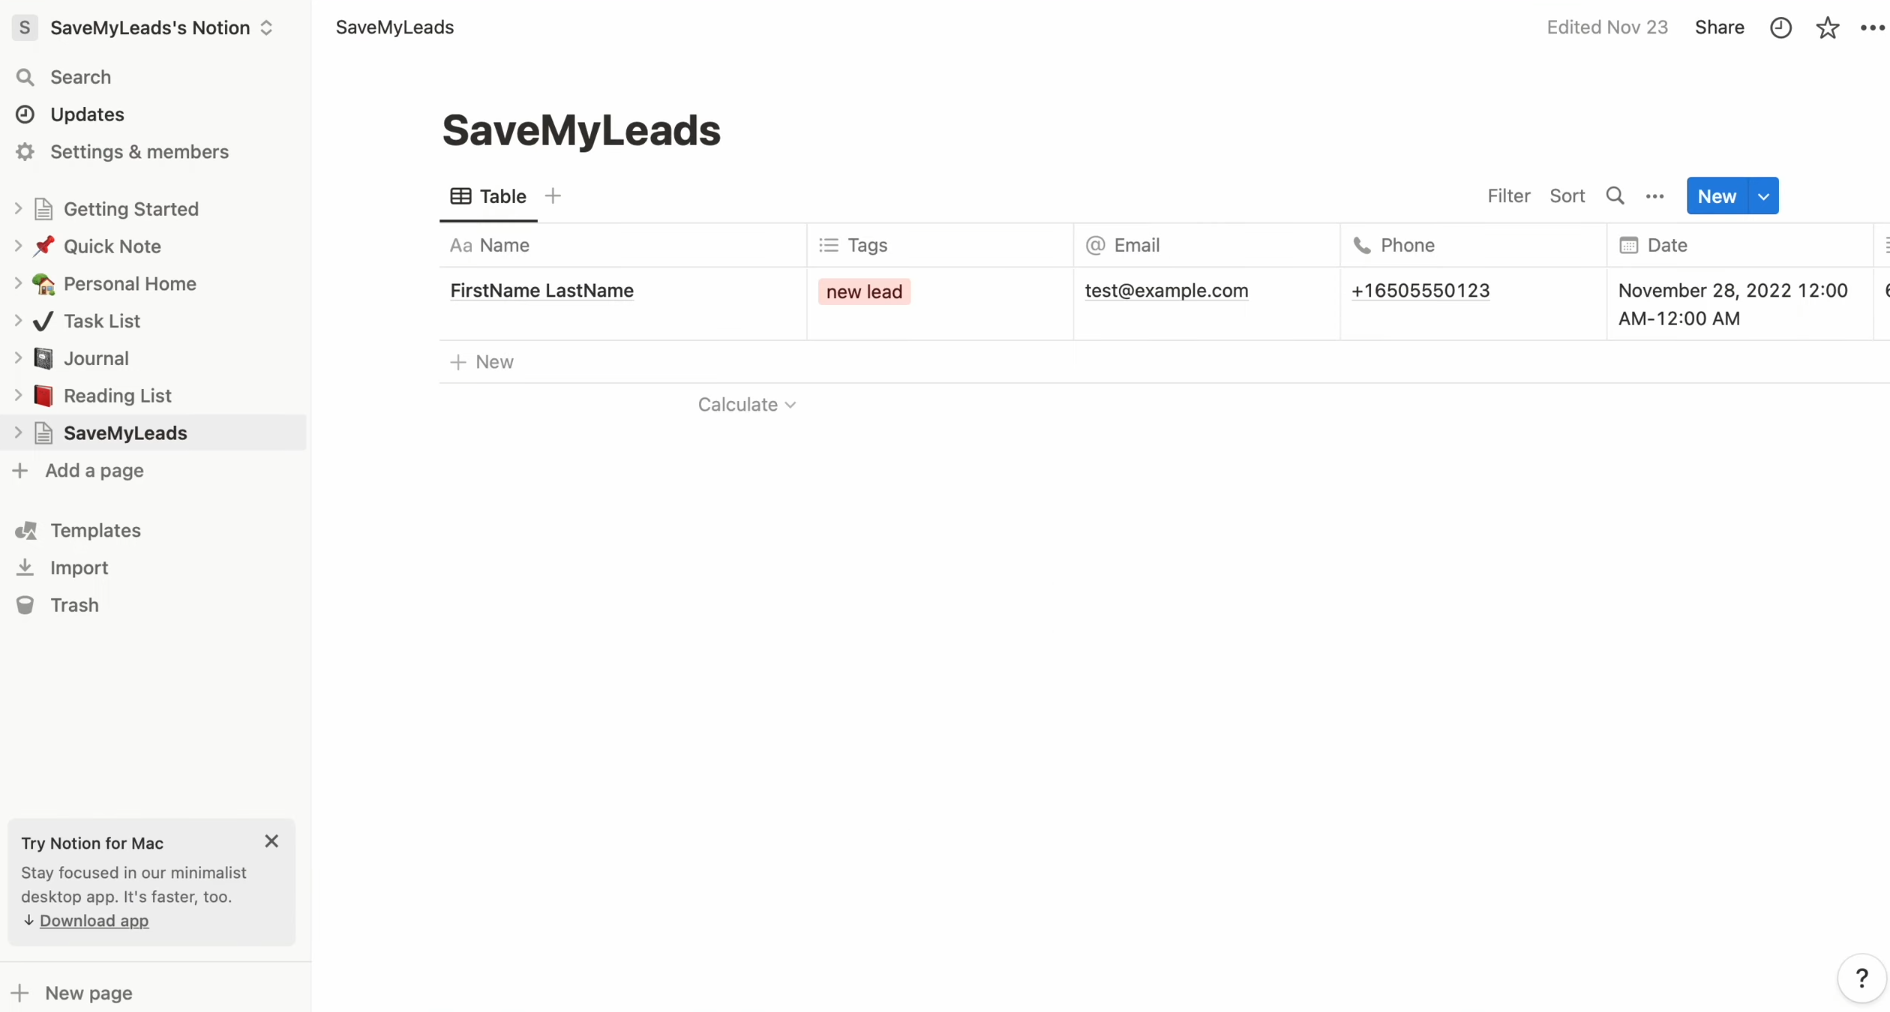
Then, return to
SaveMyLeads and continue setting up.
- Automate the work with leads from the Facebook advertising account
- Empower with integrations and instant transfer of leads
- Don't spend money on developers or integrators
- Save time by automating routine tasks
Setting Up Auto-Update
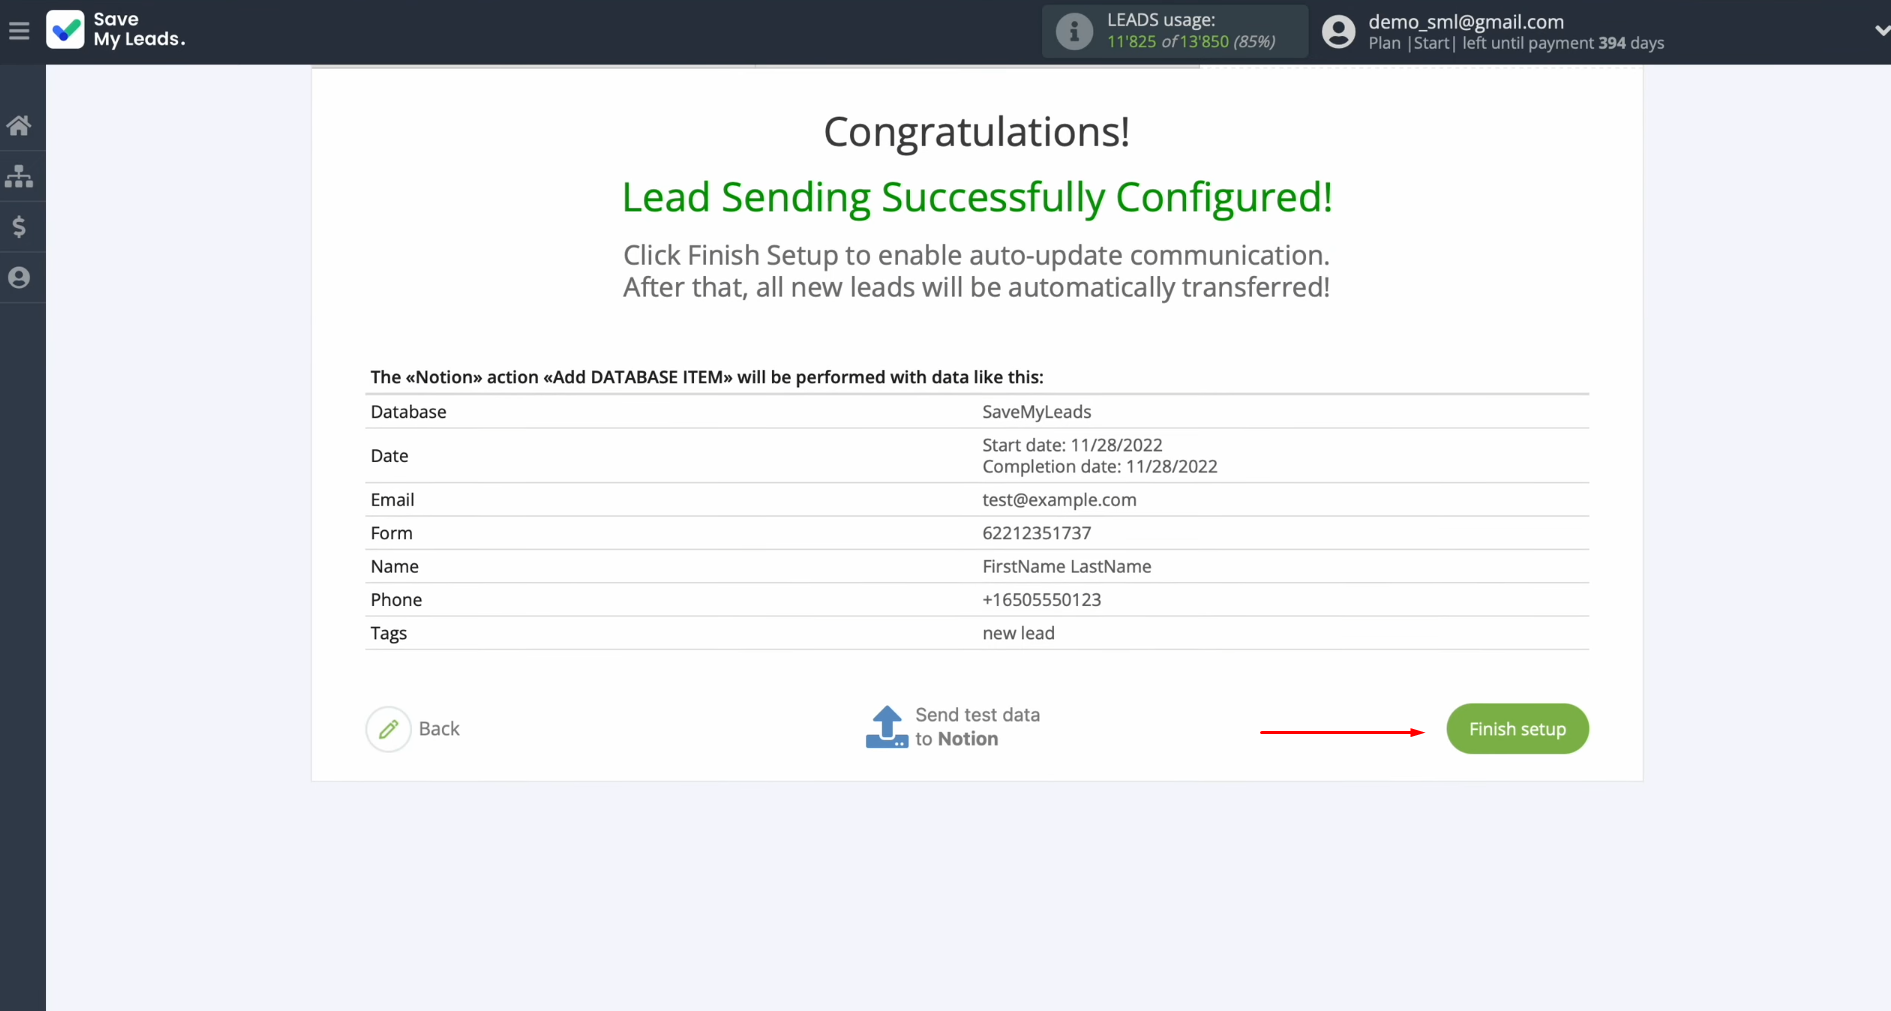
Click “Finish setup” to enable auto-update of the connection. In this case, all new leads from Google Lead Form will be instantly transferred to Notion to create new database items.
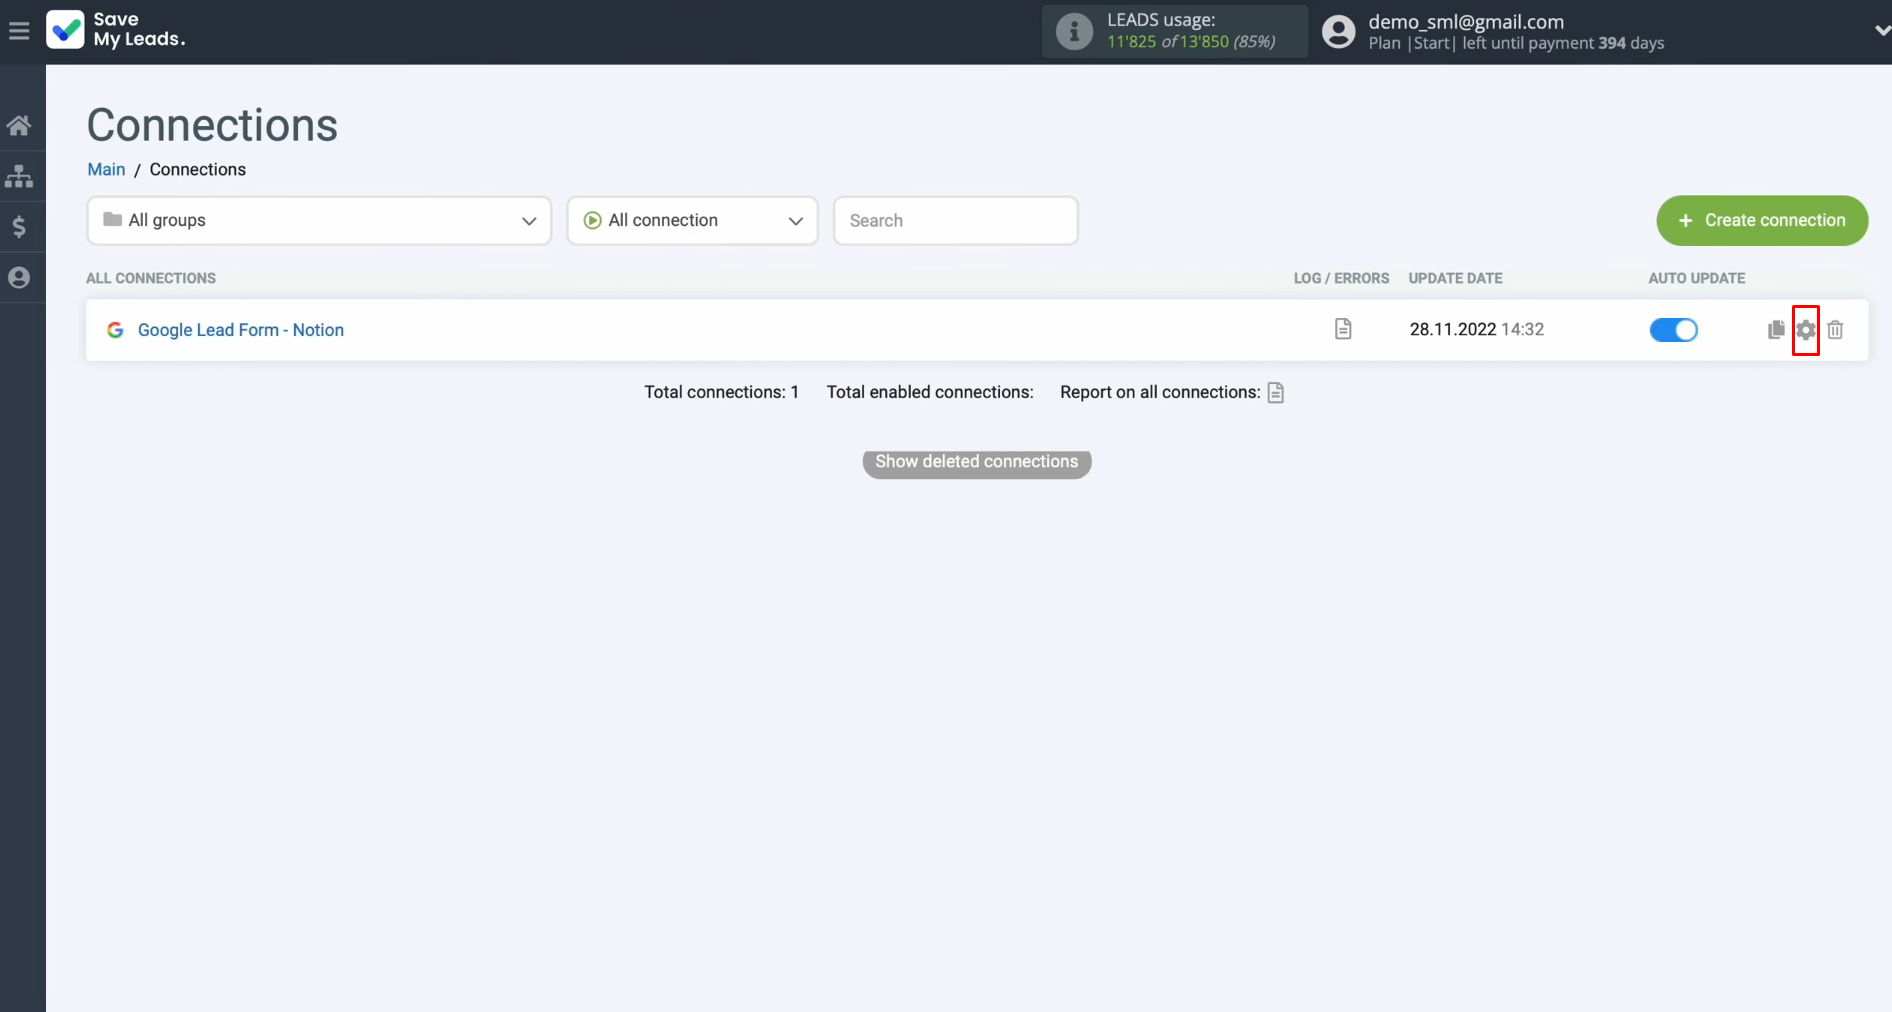
If you want to change the connection name you can do this in its
settings. For this, click on the gear icon.
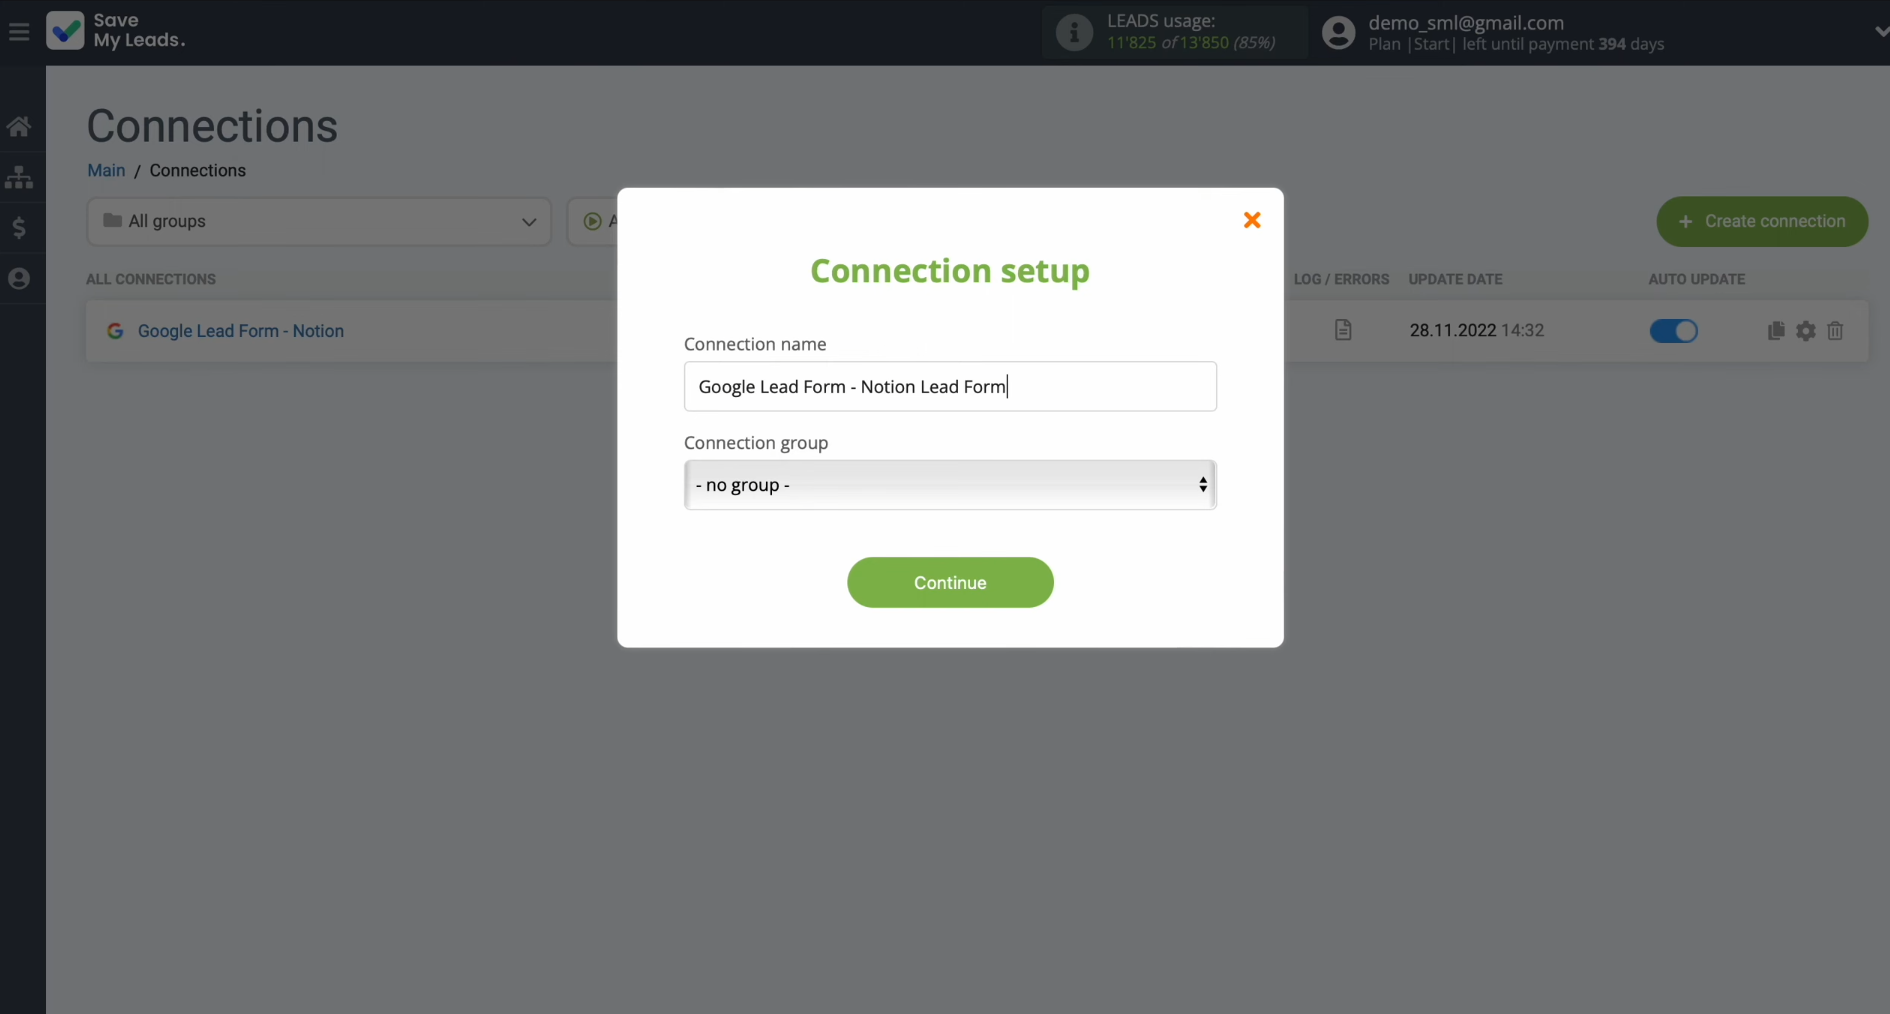
Here, you can change the connection name and add it to a
group. After that, click “Continue.”
That's
all. Google Lead Form and Notion integration has been
completed.
Let's Sum It Up
By following our step-by-step instructions, you have most likely already successfully set up Google Leads and Notion integration and probably have already managed to evaluate its result – the automatic transfer of lead data. Thanks to Notion and Google Leads integration, you can forget about the routine associated with manual data transfer. The process is now fully automated. This work will be taken over by the SaveMyLeads connector. While it is engaged in boring "copy-paste," you will be able to focus on more important aspects – improving the quality of communication with clients, developing marketing strategies, and other key areas.
Automation of work processes will not only simplify your work but will also contribute to the modernization of the business, helping it to grow and develop. And in this, SaveMyLeads will become your reliable assistant.
Step-by-Step Guides for Setting Up Integrations:
