It is not necessary to send messages to clients manually. Set up automatic SMS sending via ClickSend and don`t to waste your time and effort. With the SaveMyLeads service, this can be done in five minutes and without programmers.
Contents:
1. How to setup ClickSend and SaveMyLeads integration
2. Start setting up SaveMyLeads
3. Connect Facebook Lead Ads
4. Connect ClickSend
5. Test data transfer
6. Finish the setup
So, you want every new customer who leaves a contact on the Facebook lead form to receive an SMS: a message about the manager's quick response, order confirmation, or any other short text. Let's see how SaveMyLeads can help you with this task.
Automation of routine actions. Our service captures the appearance of new leads in the Facebook form, copies their contacts to ClickSend, and initiates the sending of an SMS. Everything happens automatically. Thus, you do not have to do this routine monotonous work manually.
Instant replies to leads. Clients will receive your message without delay. This is because ClickSend monitors Facebook every second and sends SMS immediately after the contact appears in the lead form. In addition, SaveMyLeads works without breaks and weekends.
Personalization. If the lead form asks for a customer name, SaveMyLeads can copy and paste it into the body of the message. As a result, each SMS will have a personalized appeal to the recipient.
How to setup ClickSend and SaveMyLeads integration
You don't need to have technical knowledge to work with SaveMyLeads. It is enough to register on the site of our service, select the connection to ClickSend and follow the prompts of the interface. They will help you link your Facebook and ClickSend accounts, as well as set up messaging.
Our guide will help you figure it all out. Before you start using SaveMyLeads, make sure you've set up a Facebook lead form and have at least one contact on it. If the form is still empty, send any contact yourself - this will come in handy for the test.
Start setting up SaveMyLeads
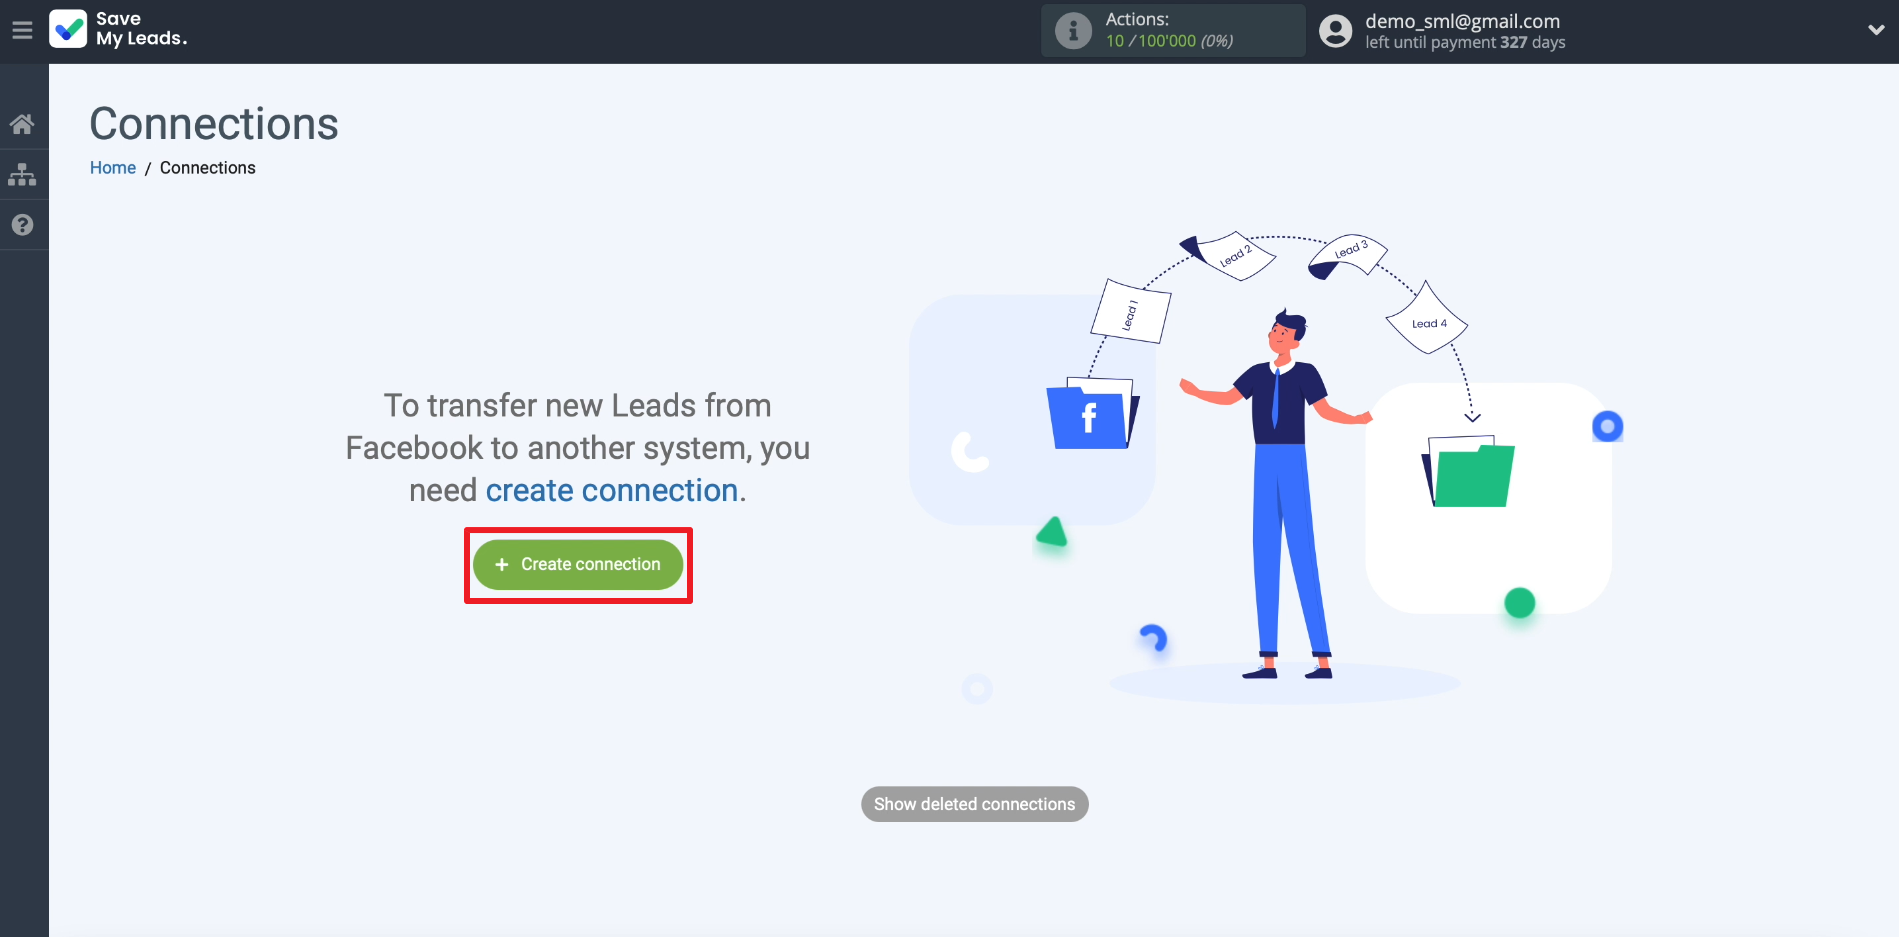
Register on the SaveMyLeads website and click Create connection.
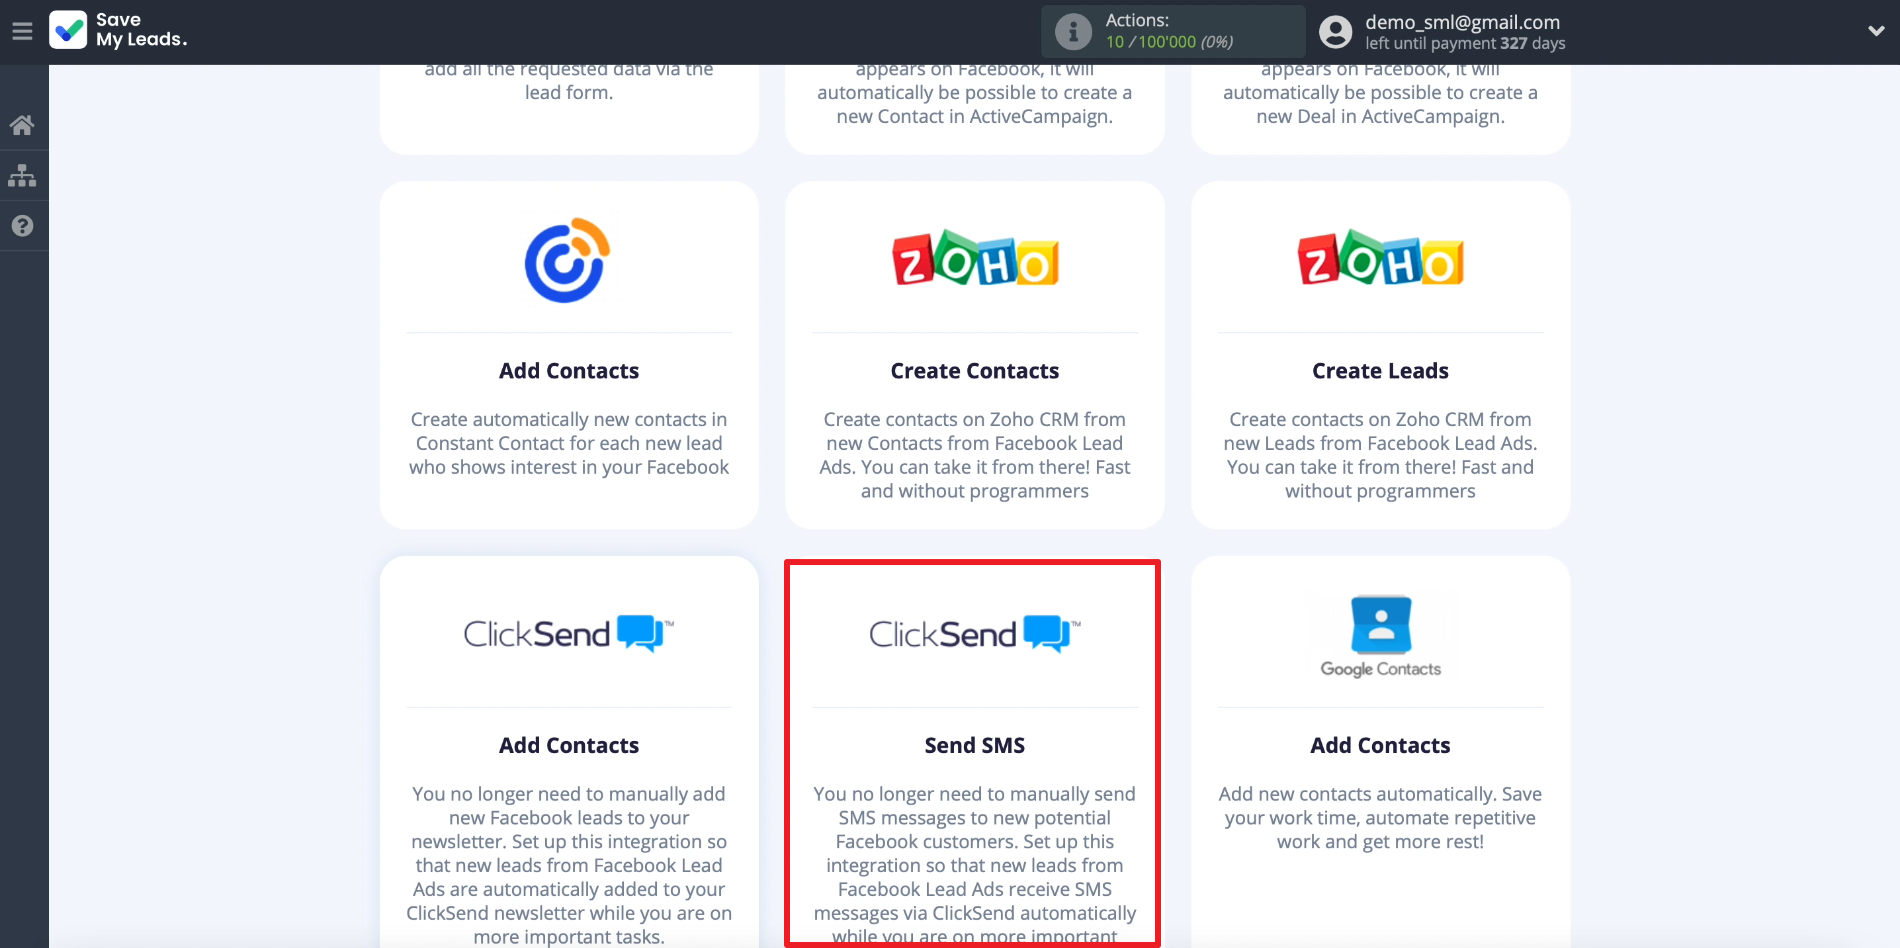
A list of connections that can be created in SaveMyLeads will appear on the screen. Each of them is designed to integrate Facebook with a specific service. Select the connection to ClickSend Send SMS.
Connect Facebook Lead Ads
Let's connect a Facebook account so that SaveMyLeads can track new leads and upload contacts from them.
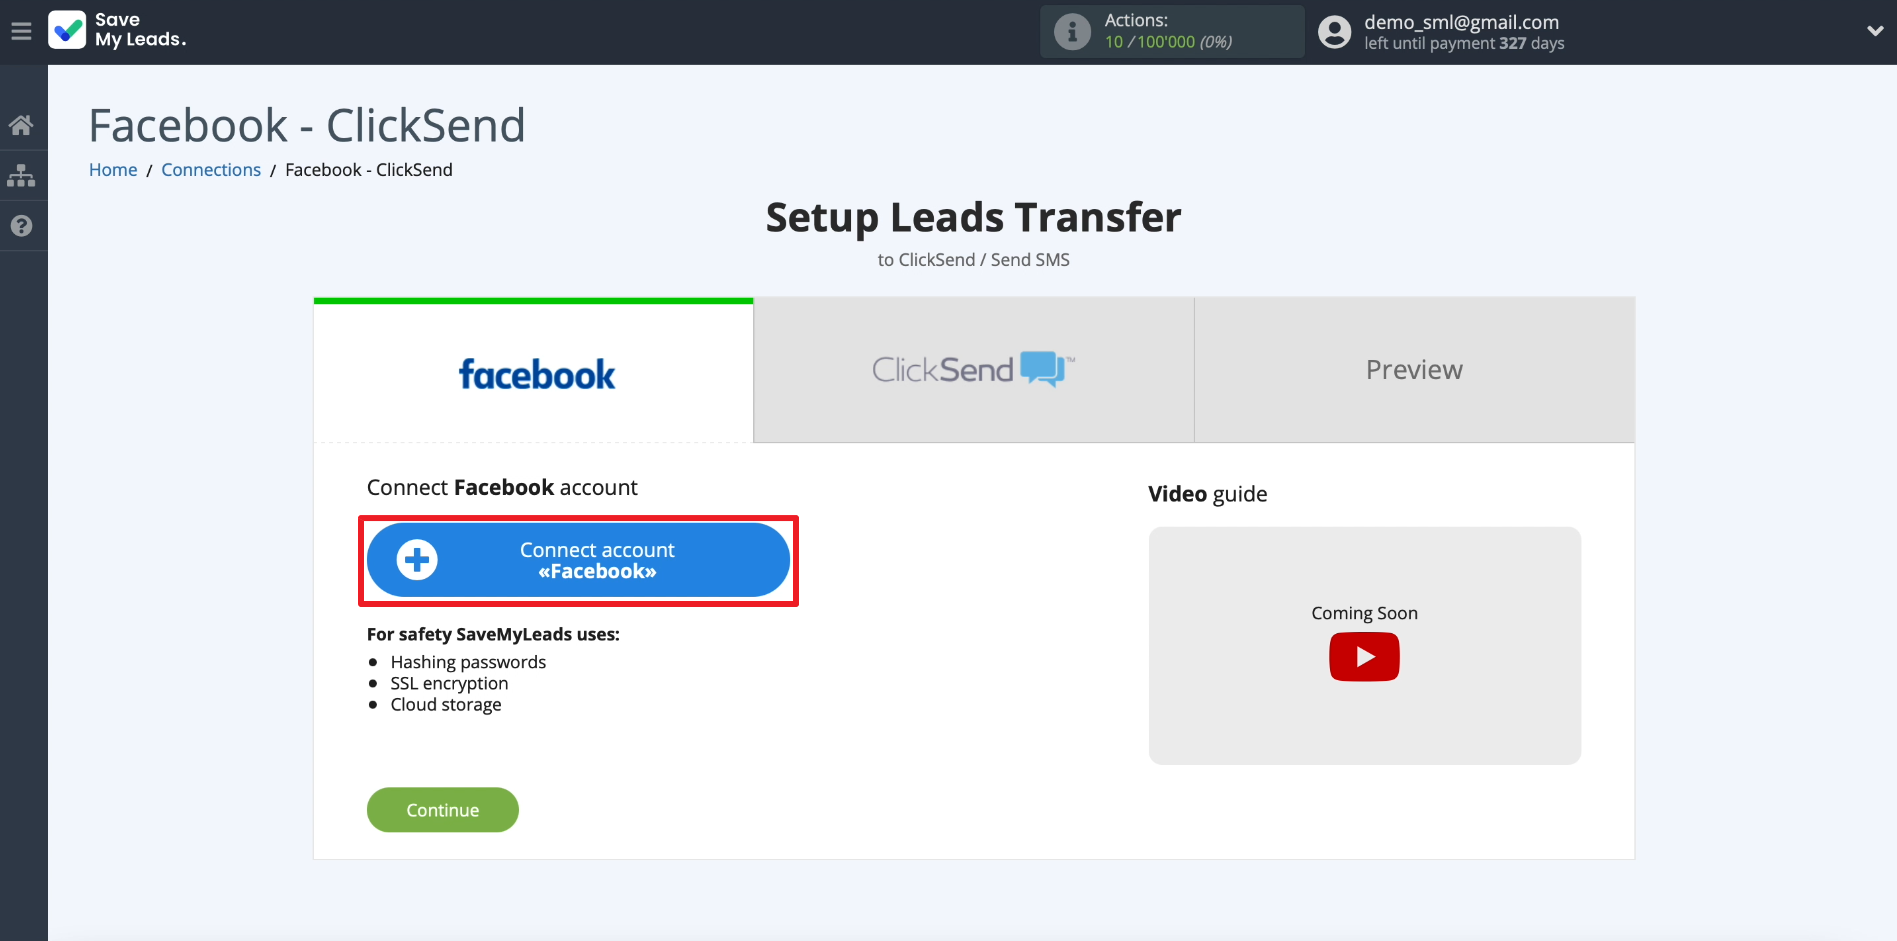
Click "Connect account "Facebook" and enter the login and password for the account that we use to manage advertising. We grant all requested permissions. This is required for SaveMyLeads to access the leads.
Now we specify where SaveMyLeads can upload contacts from. To do this, select the newly connected account. Then the business page for which advertising is configured. Finally, we select the form that we use to collect leads.
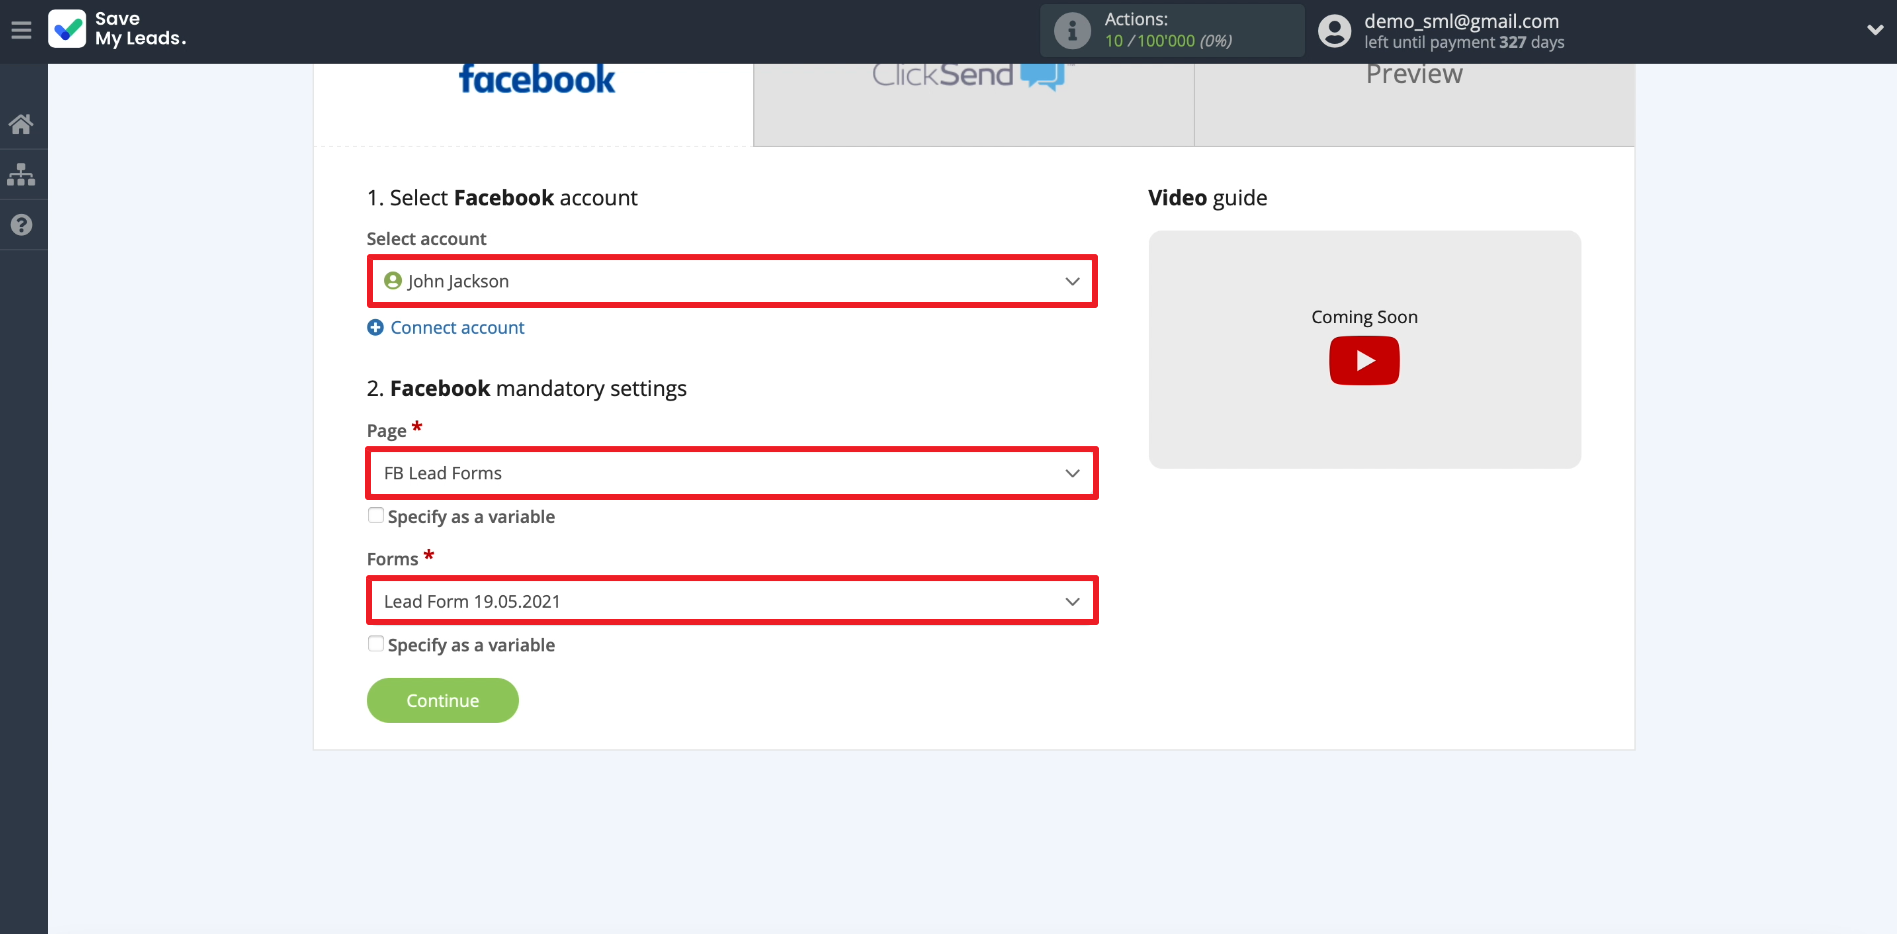
Within one connection, you can select only one lead form. If you want to set up sending SMS to leads from several forms, create a separate connection for each of them.
Connect ClickSend
Let's connect ClickSend account so that SaveMyLeads can copy contacts from Facebook to it and initiate auto-sending of messages.
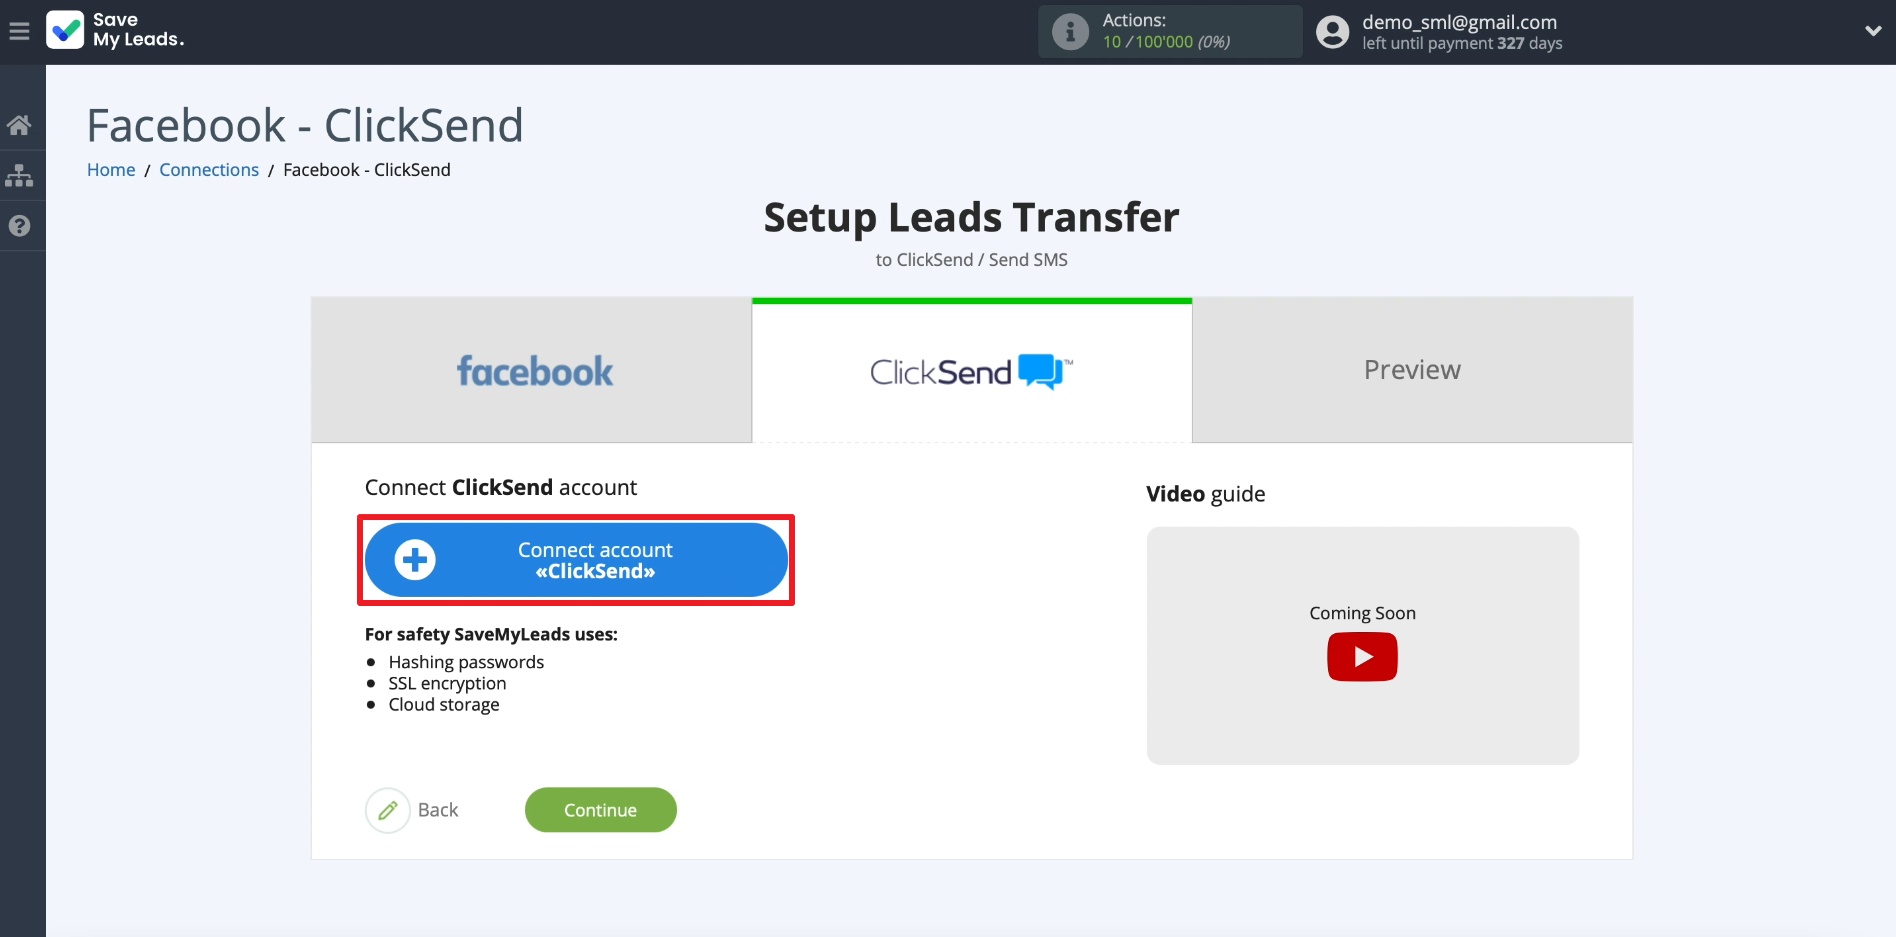
Click "Connect account "ClickSend".
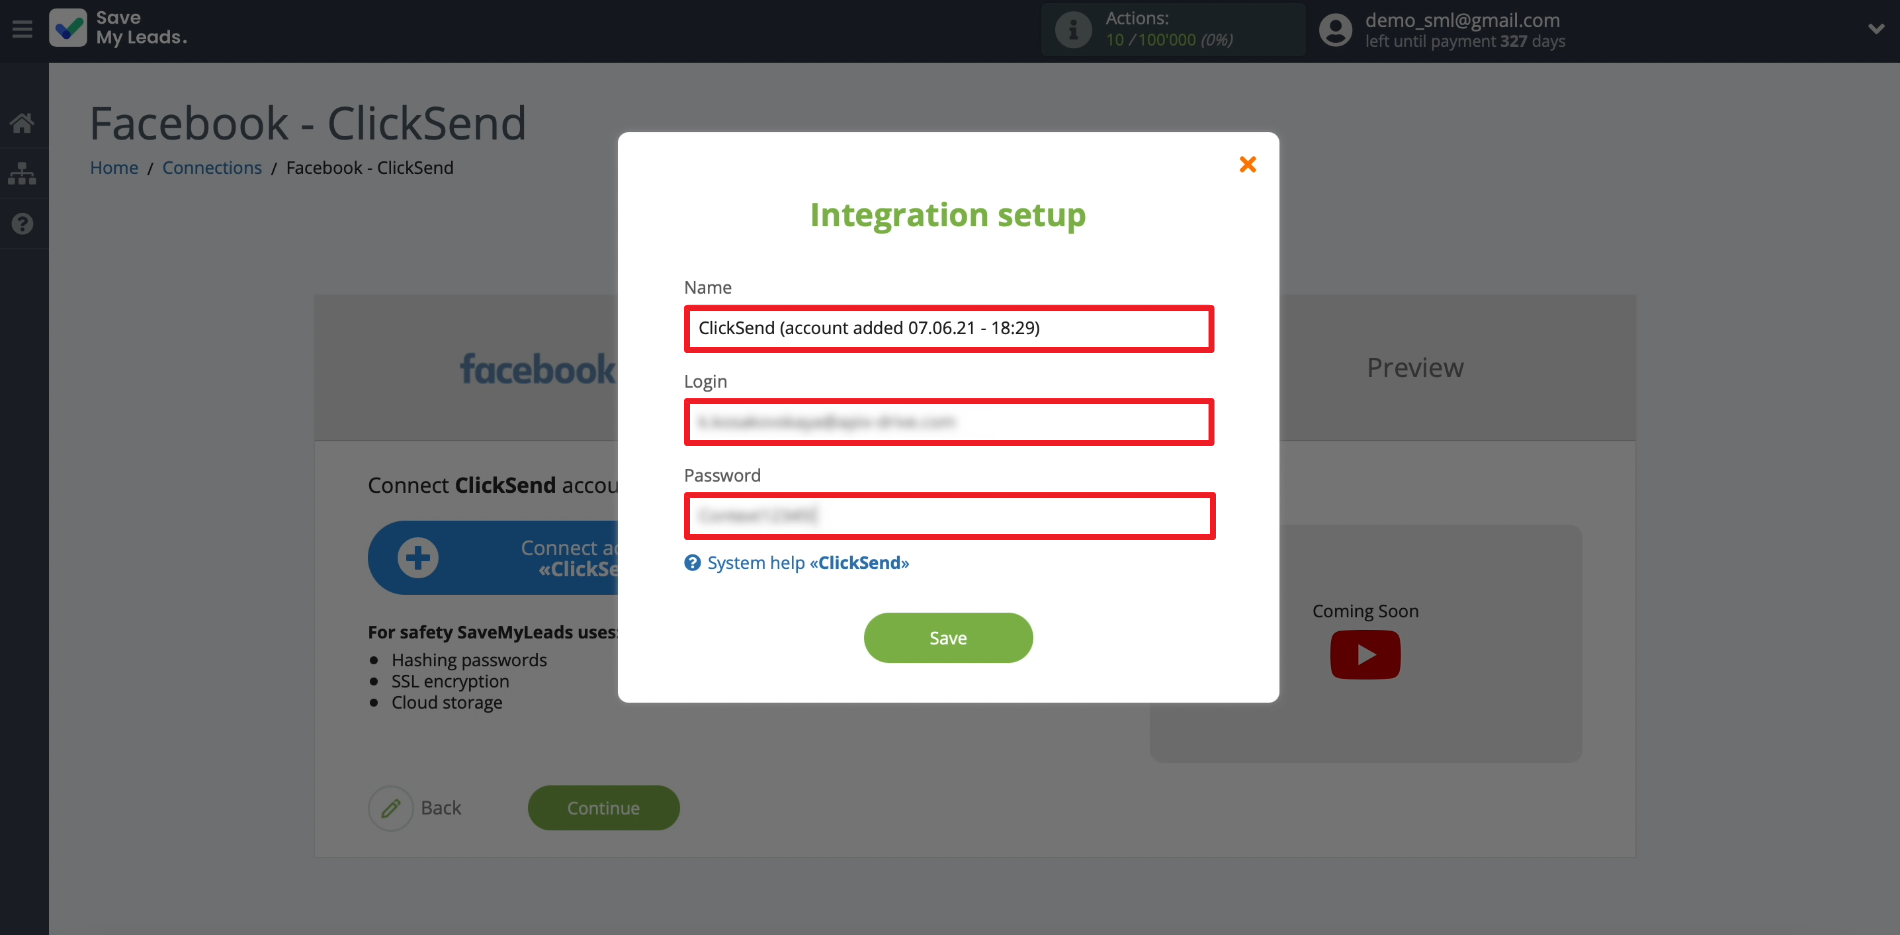
We enter any suitable account name, as well as the login and password from our ClickSend account.
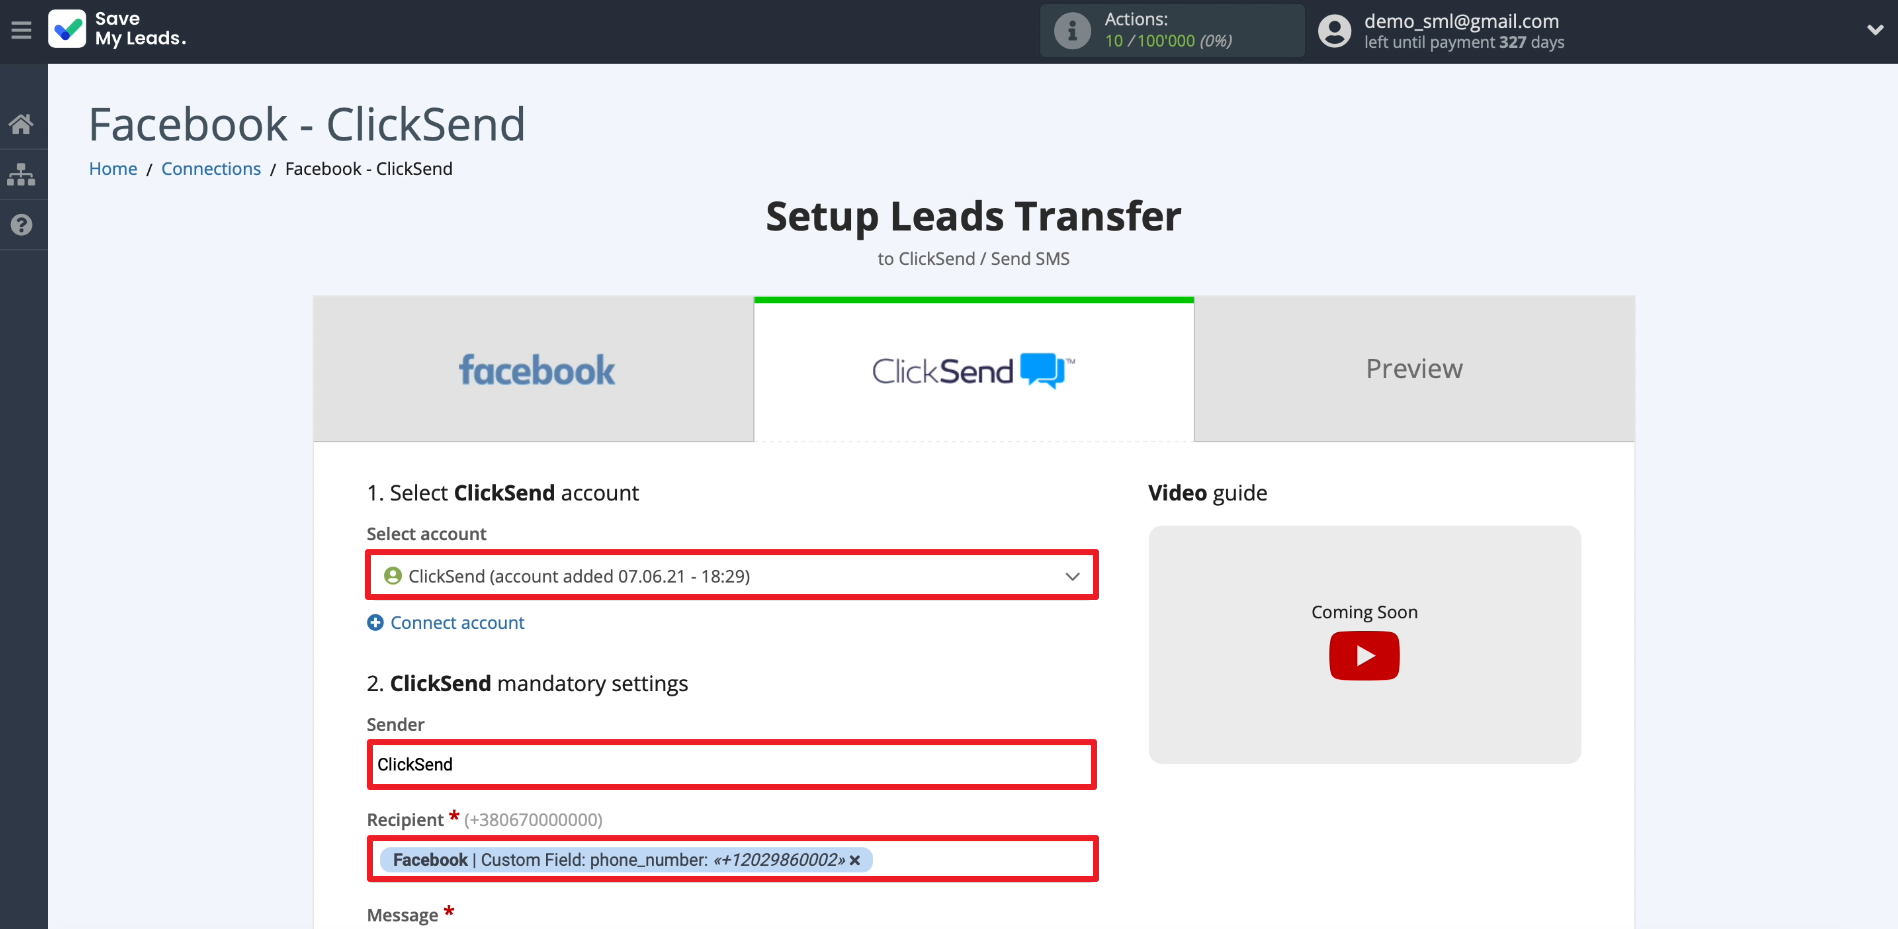
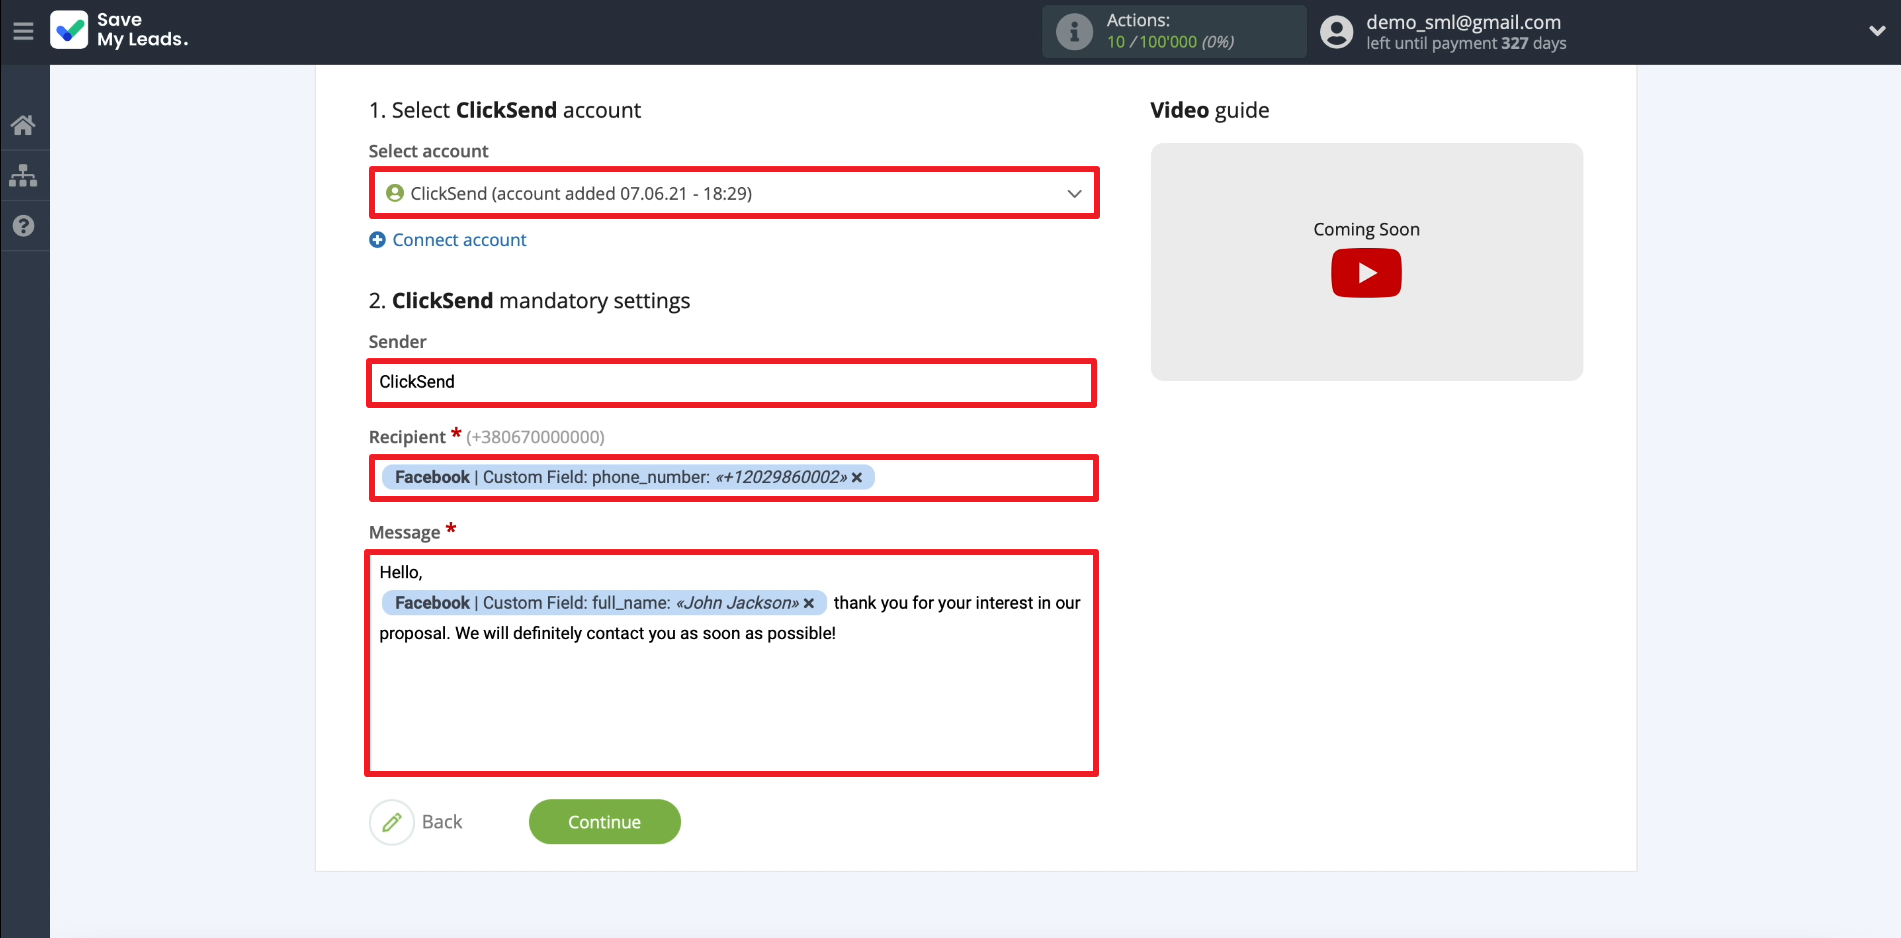
Now we set up sending SMS. First, select the newly connected ClickSend account through which messages will be sent. Next, enter the name of the sender that customers will see. Then click on the Recipient item and choose from which lead form field SaveMyLeads will copy the number for each message.
Enter the text of the message below. If you want SaveMyLeads to substitute the name of the current client in the SMS, click in a suitable place in the text and select the lead form field with the name from the drop-down list.
Test data transfer
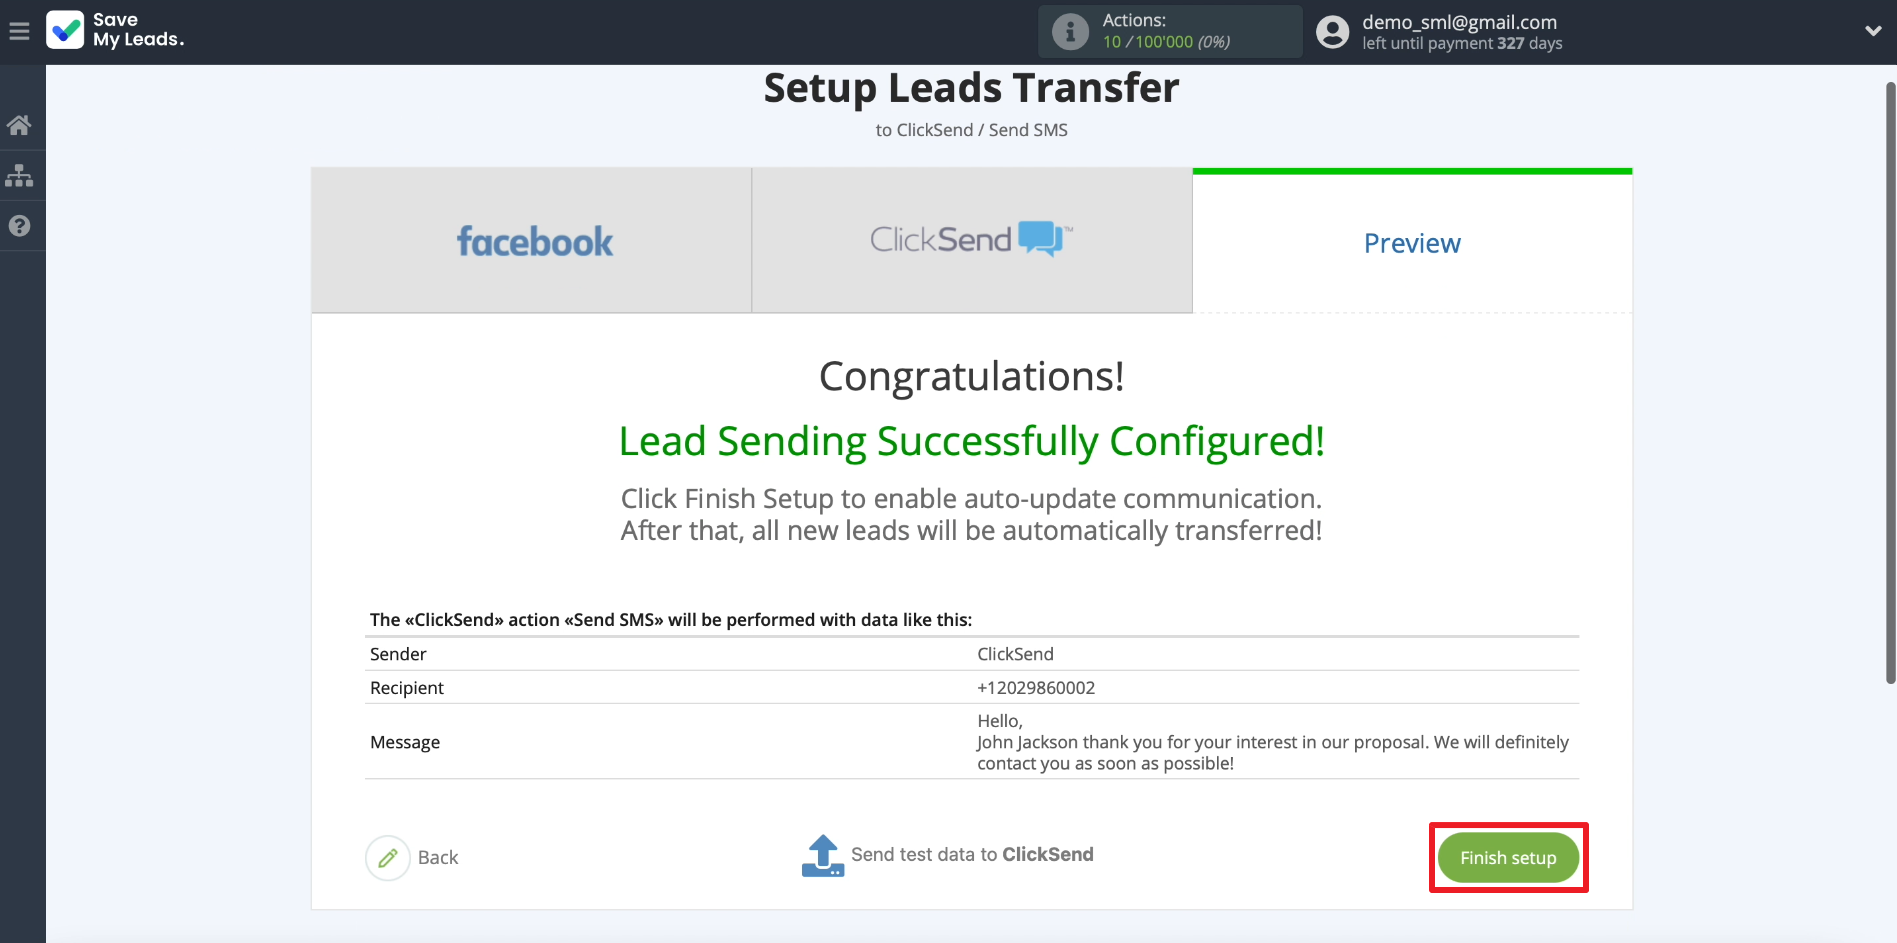
At this point, SaveMyLeads should upload the contact of the last lead from the form and display the text of the message.
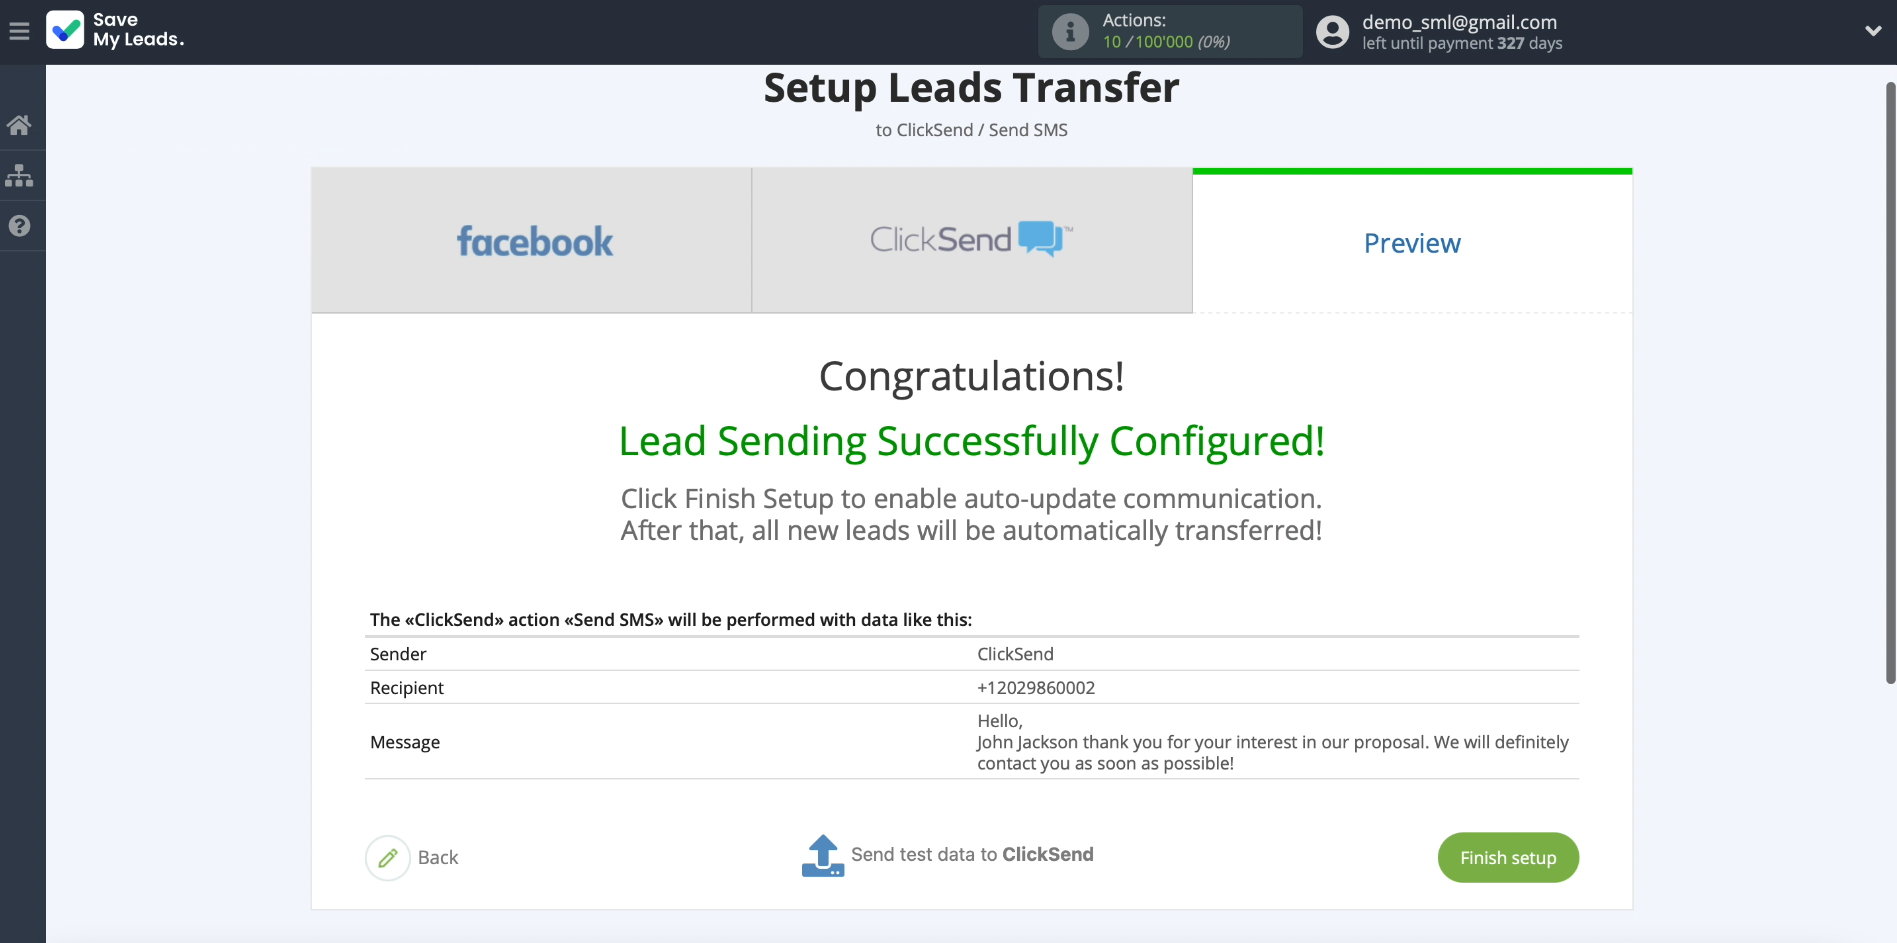
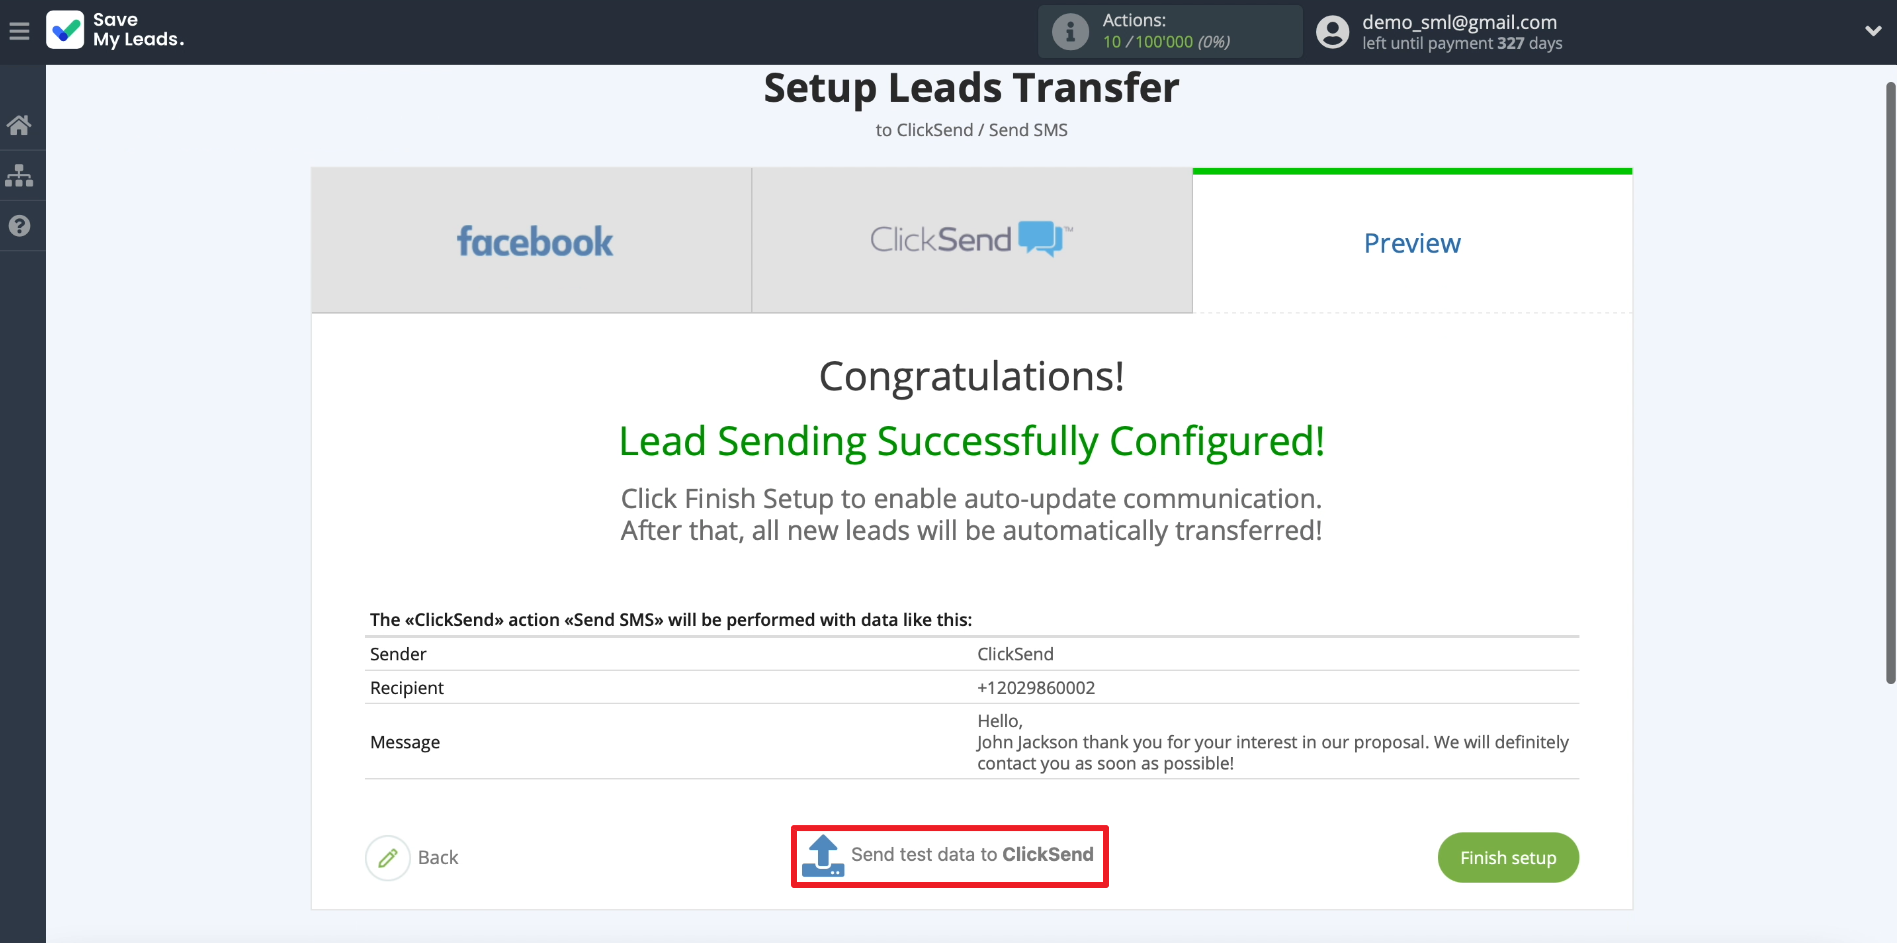
Click "Send test data to ClickSend" to test the send.
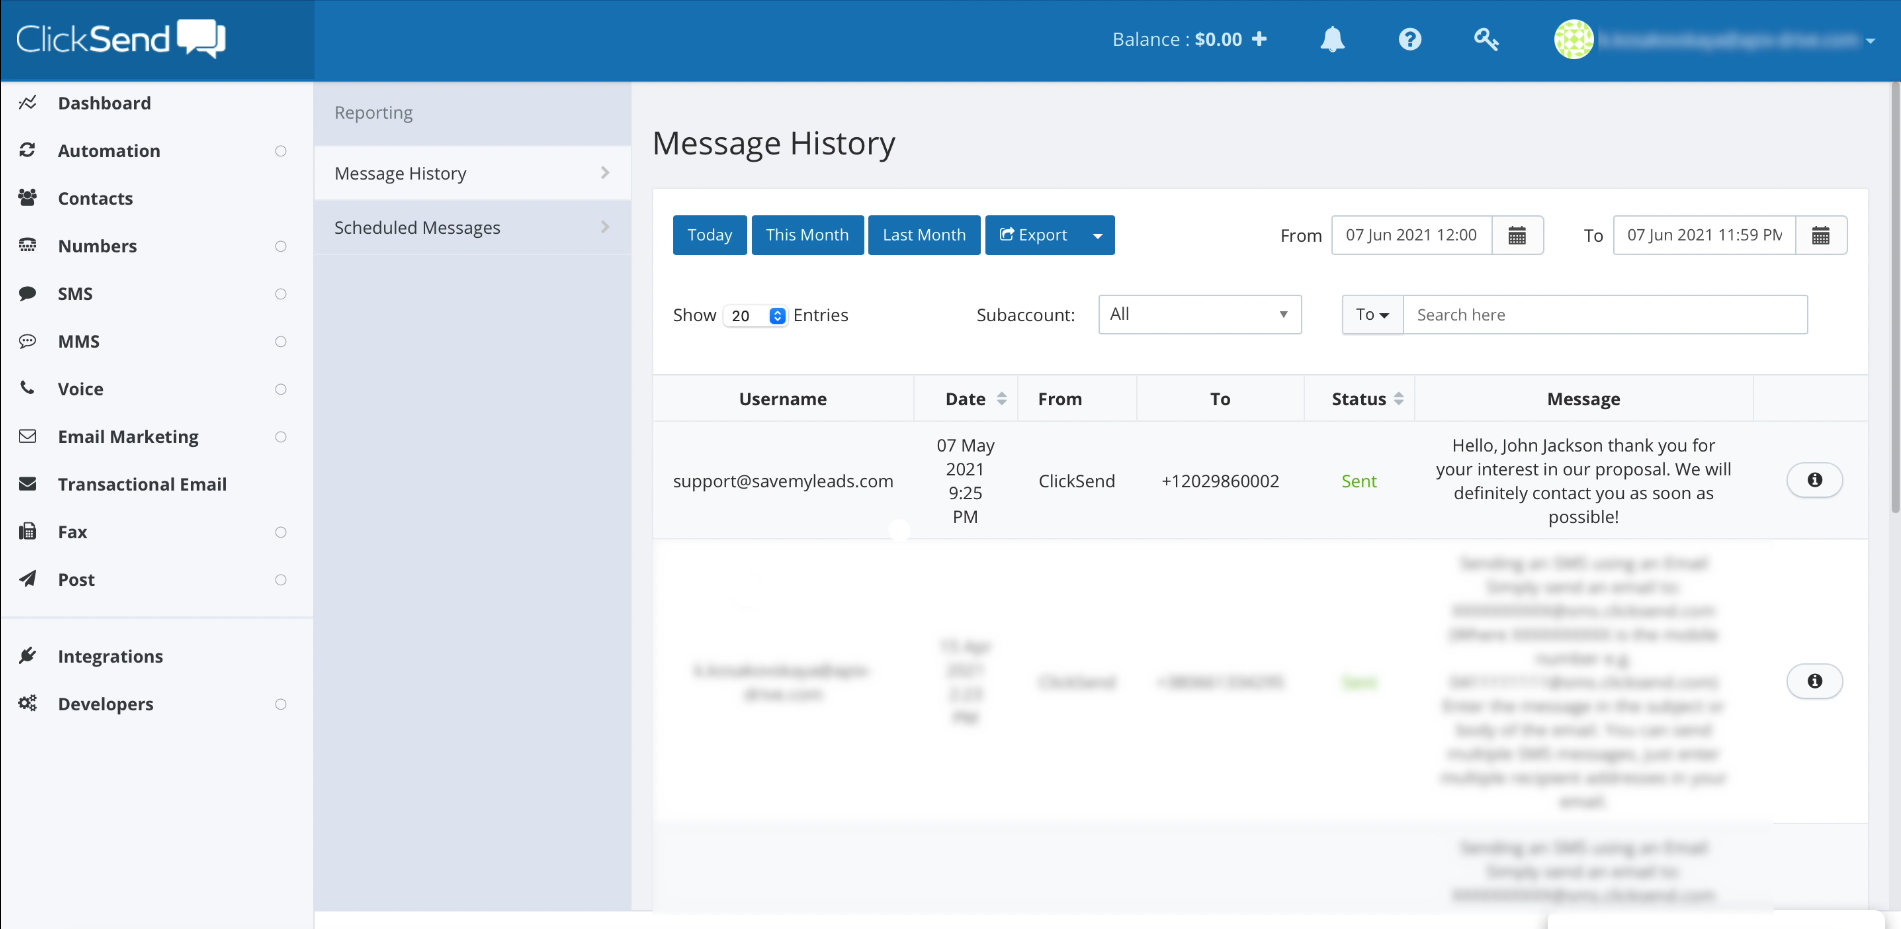
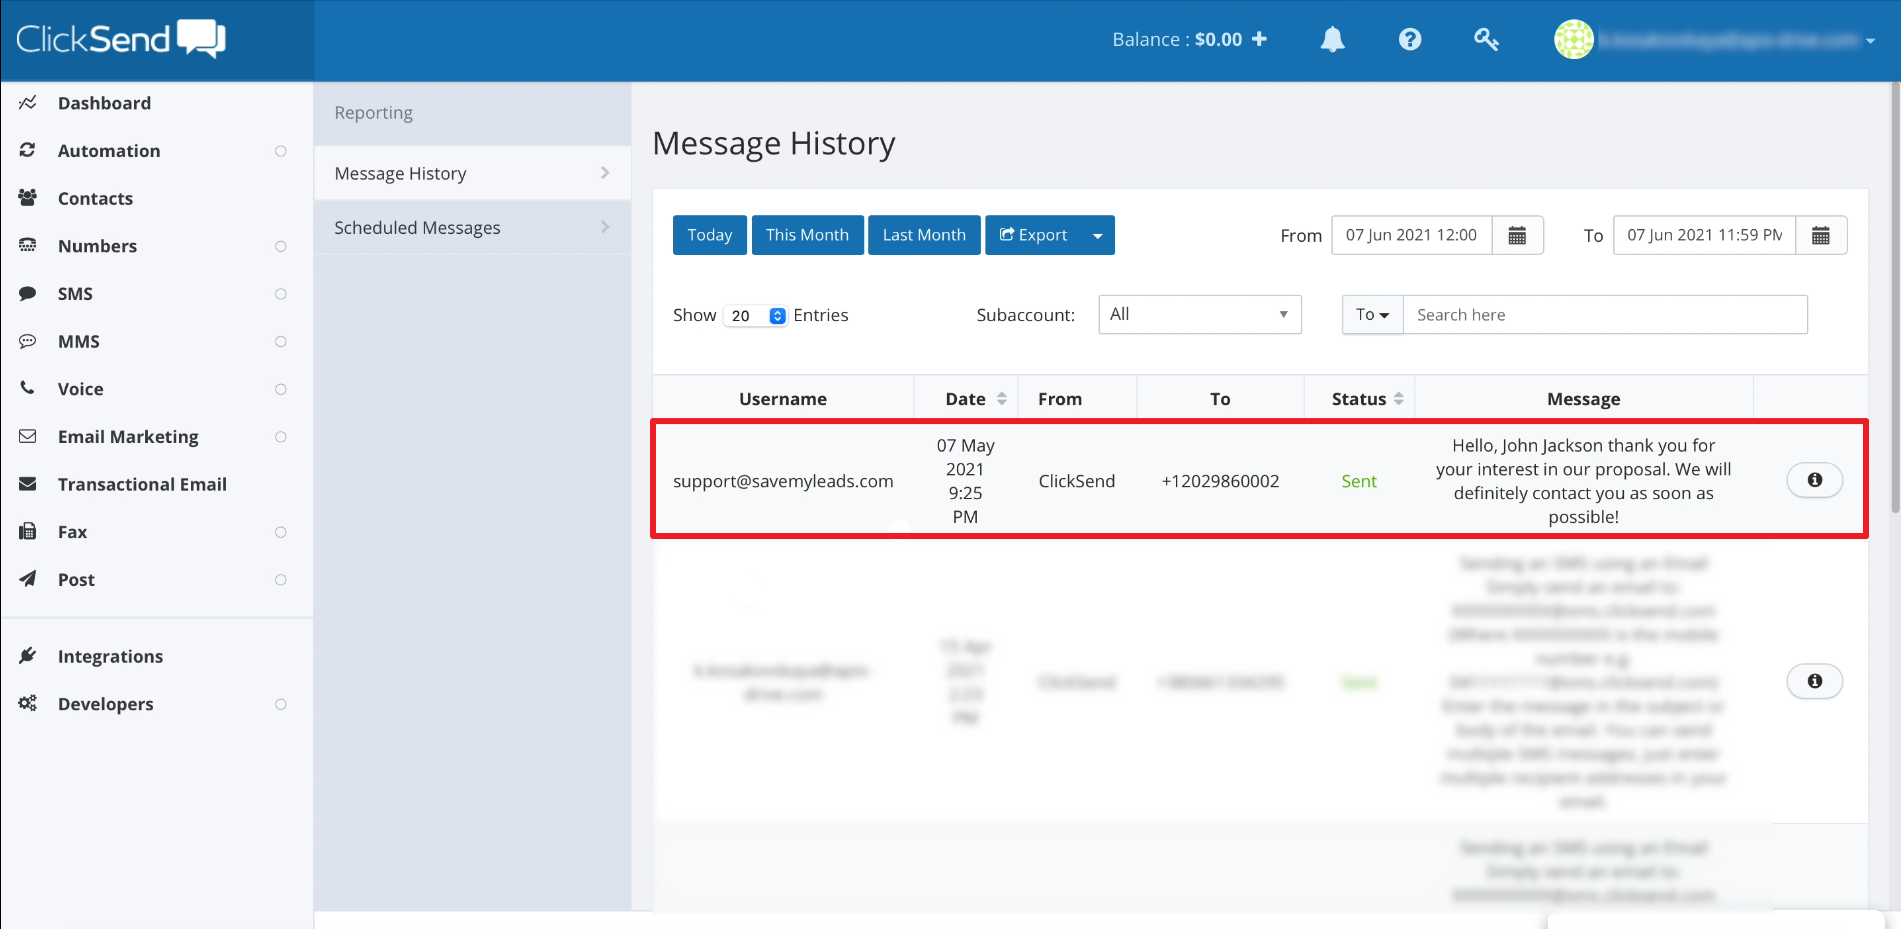
We go to the ClickSend website and check the message history. If our SMS is not displayed here, we check the correctness of the previous configuration steps. If the message appears, then we proceed to the final stage.
Finish the setup
Click "Finish setup" to complete the setup and start auto-sending messages.
Edit the name of the connection if necessary. To do this, just click on the gear and enter the desired text in the appropriate field.
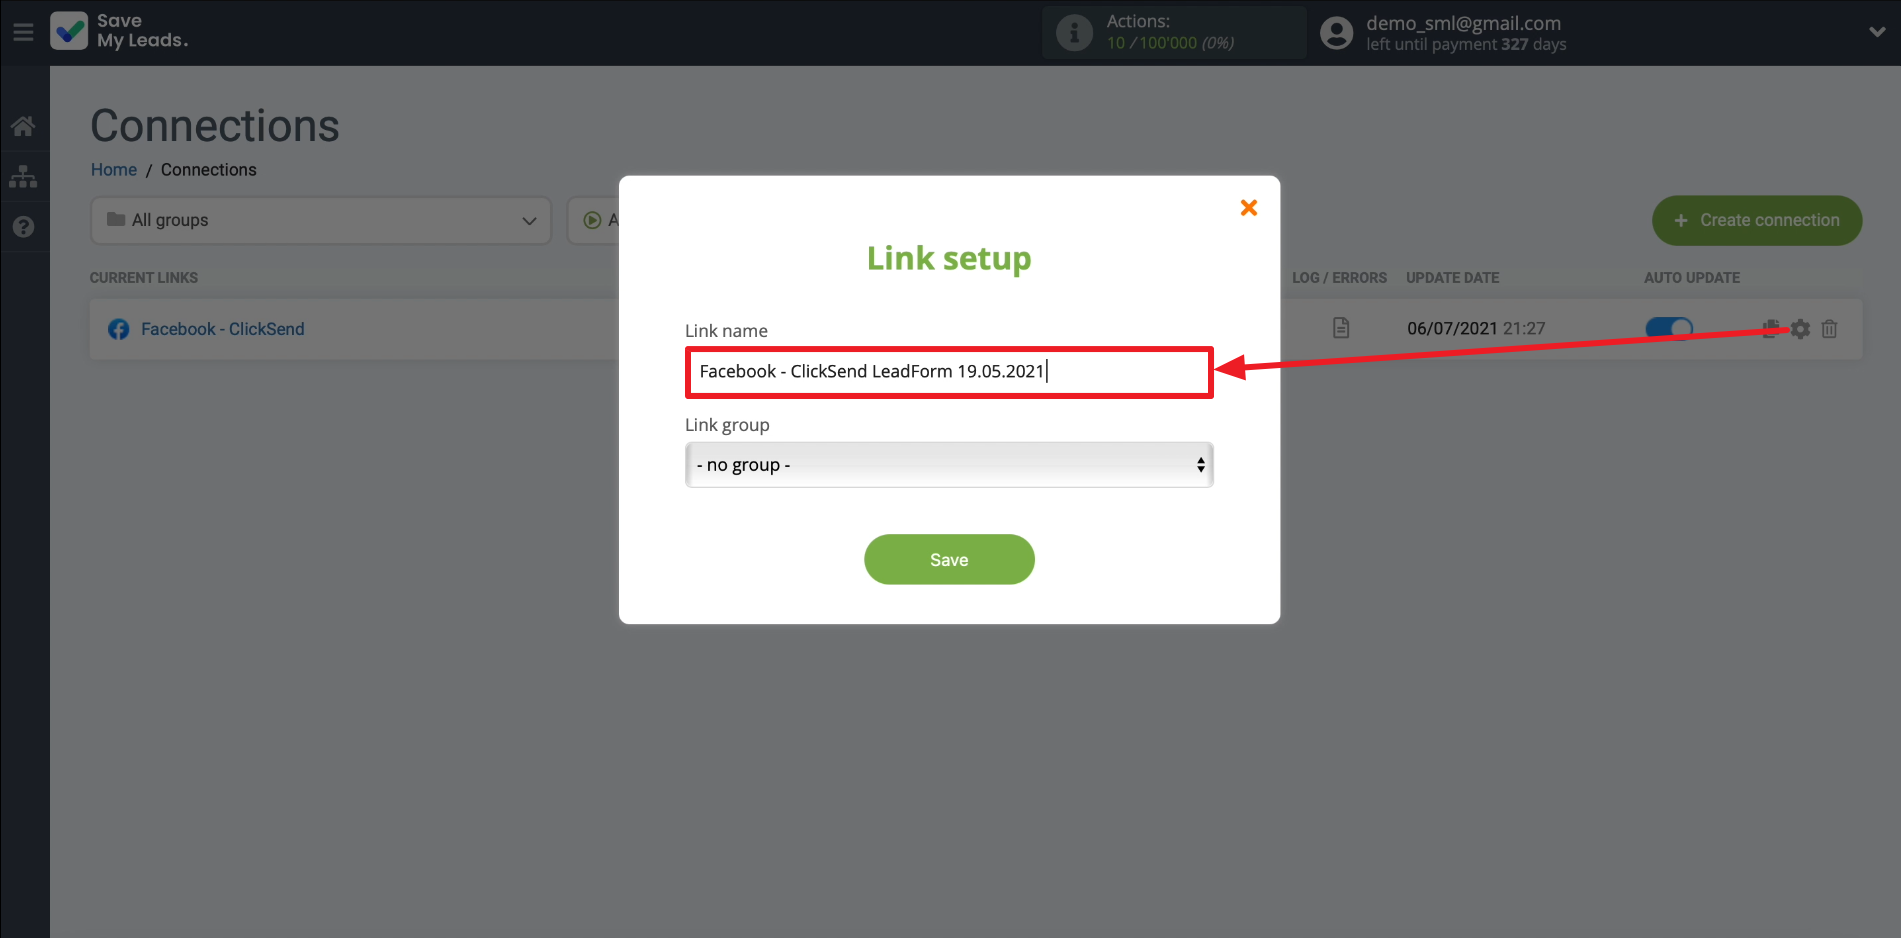
That's all. The connection is ready. Now SaveMyLeads will automatically send SMS to new leads from Facebook in accordance with the specified settings. Good luck with your work!
