Microsoft Outlook is an email and calendar management application. This tool is actively used for communication, planning the working day, organizing events and meetings. After reading this article, you will be able to expand the already impressive capabilities of the Outlook email client. We will show you how to set up Facebook and Microsoft Outlook integration so that a welcome email is automatically sent to each new lead from the social network.
Contents:
1. How to setup Facebook and Microsoft Outlook integration
2. Data source connection — Facebook Lead Ads
3. Receiver system connection — Microsoft Outlook
4. Enable automatic data updates
5. Conclusions
Facebook Lead Ads allow you to receive orders and customer data through a social network. Users do not need to go from Facebook and Instagram to third-party resources to submit a request. It is important to understand that receiving an order or contact is only part of the process. It is necessary to establish communication with the customer, as well as to ensure the prompt execution of the request. One of the options for communicating with the lead can be an email with order confirmation or other useful information. Thus, the user will be notified about the acceptance of the order for work. You can also use a welcome email to move your lead to the next stage of the sales funnel.
Another important task is to ensure fast processing of the lead. All participants in the order fulfillment chain must promptly receive the data on the order. Using the Microsoft Outlook application, you can implement both the process of sending letters to new customers from Facebook, and the process of delivering information to company employees. But you don't have to do it manually. If you set up Facebook and Microsoft Outlook integration using the SaveMyLeads service, then emails to new leads and employees will be sent automatically.
How to setup Facebook and Microsoft Outlook integration
SaveMyLeads is an online connector designed specifically for integrations involving Facebook. An FB advertising account can be linked to various systems and applications in just a few minutes. The SaveMyLeads service monitors the emergence of new leads on Facebook in real time and automatically uploads the data. The received information is transmitted to the receiving system, where certain actions are initiated.
In our case, the Microsoft Outlook email client is the receiver, and the target action is sending an email. Let's take a closer look at the setup process. Register on savemyleads.com, follow the steps below and automate business processes in your company.
Data source connection — Facebook Lead Ads
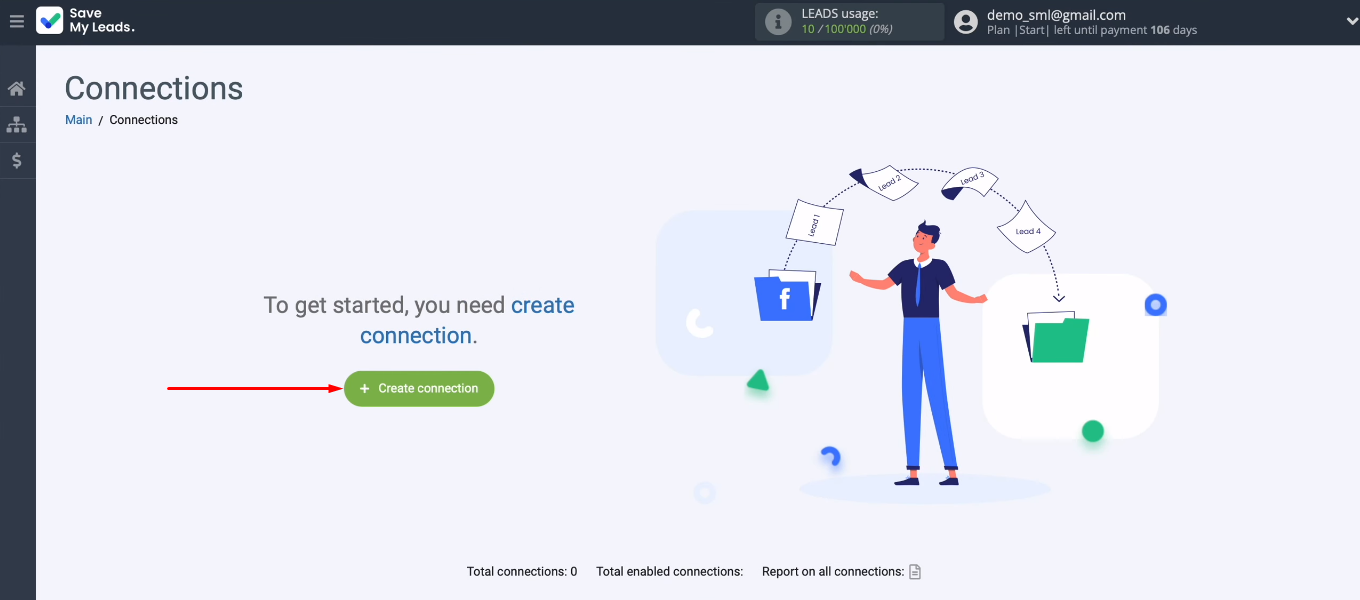
Log in to your personal SaveMyLeads account. Click the "Create connection" button.
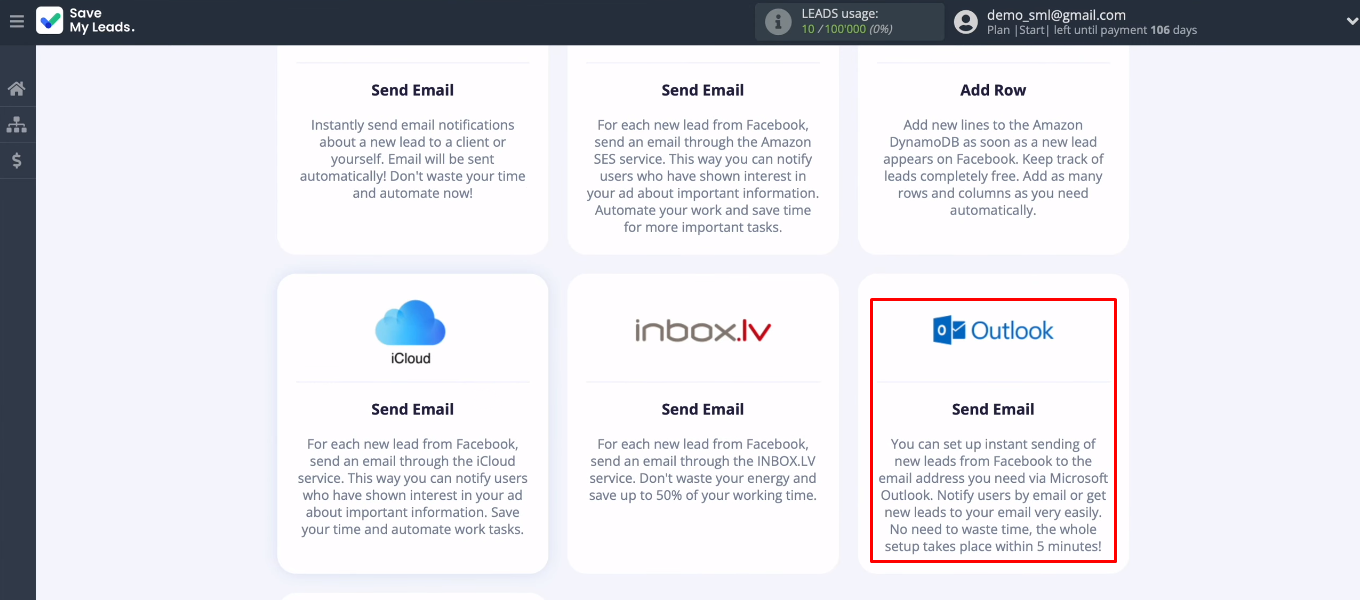
Select the setup template — “Outlook (Send Email)”.
Integration setup is broken down into a few simple steps. First, let's set up the data source. Click "Connect account Facebook".
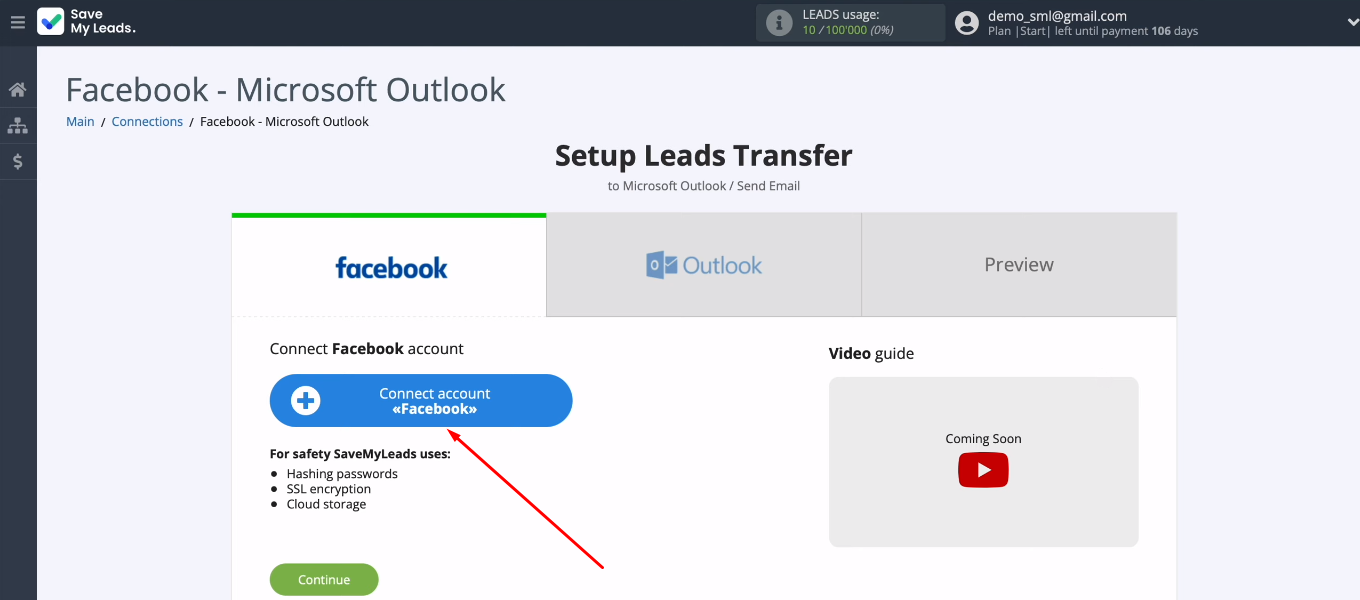
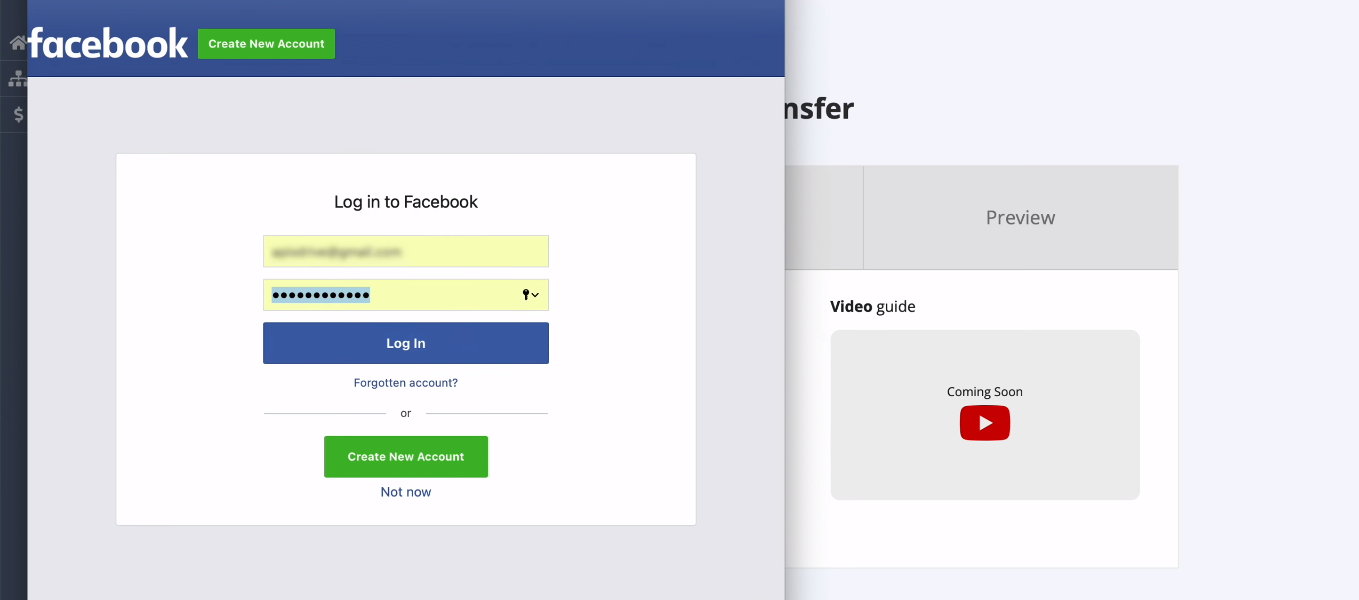
Enter your username and password for your FB account.
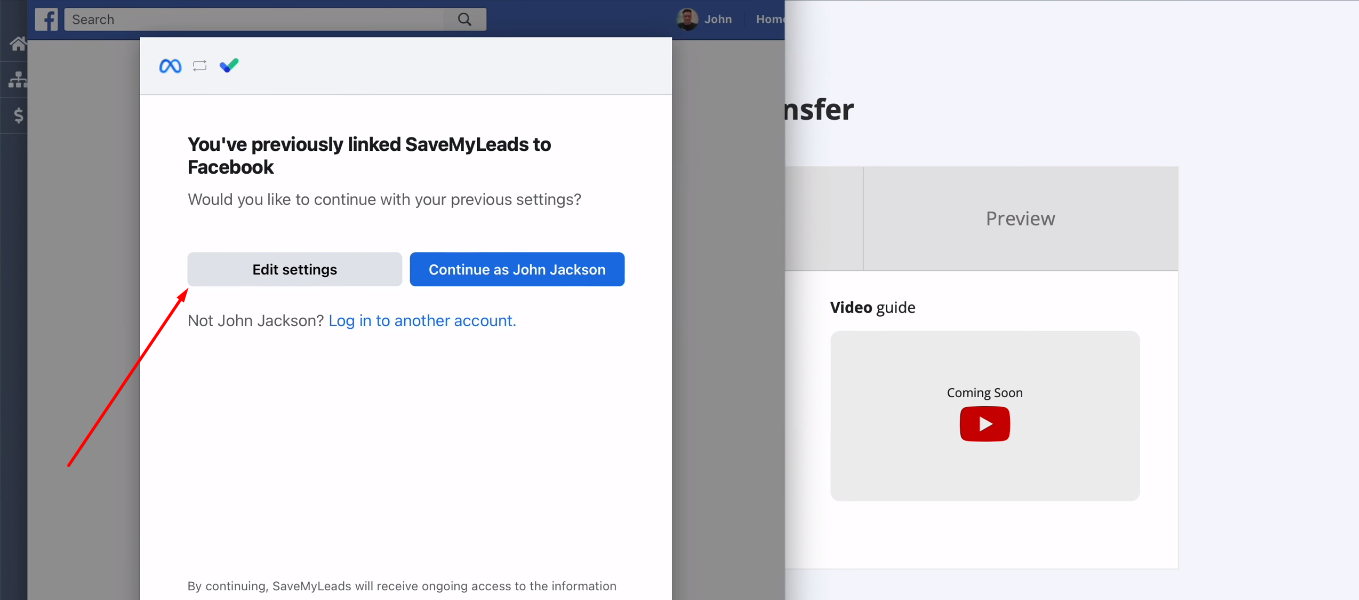
Go to settings.
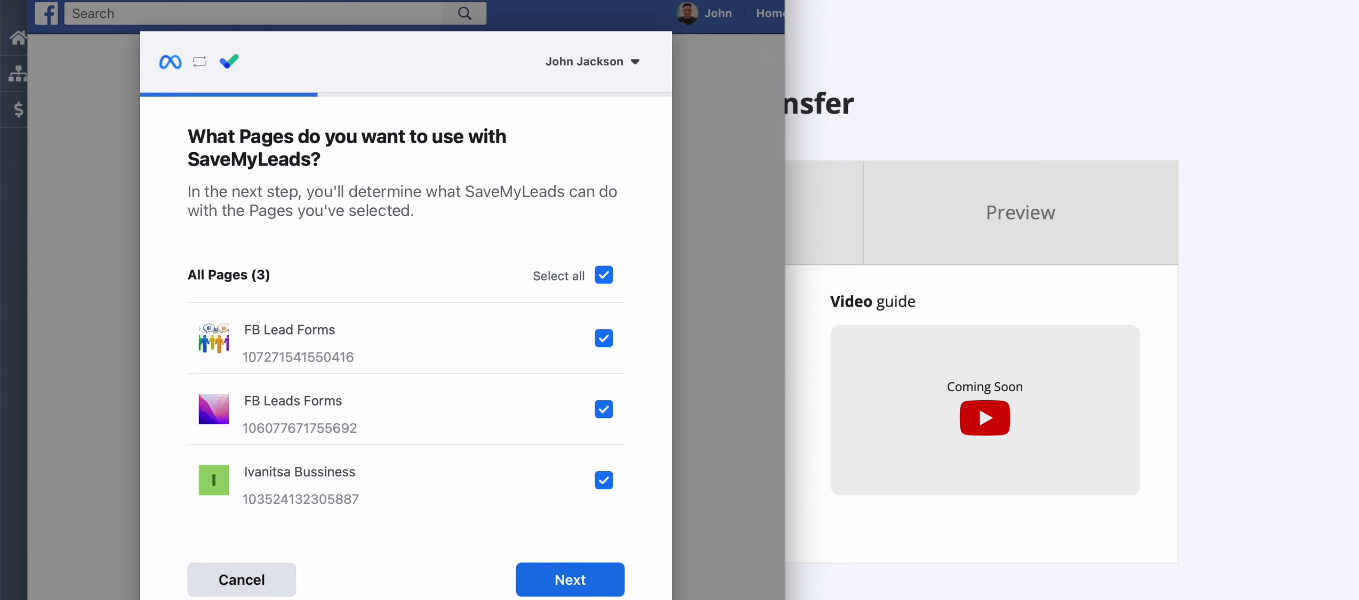
Select the advertising pages you plan to work with in the SaveMyLeads system. We recommend checking the “Select all” checkbox to be able to work with all available advertising pages.
Make sure all access checkboxes are enabled.
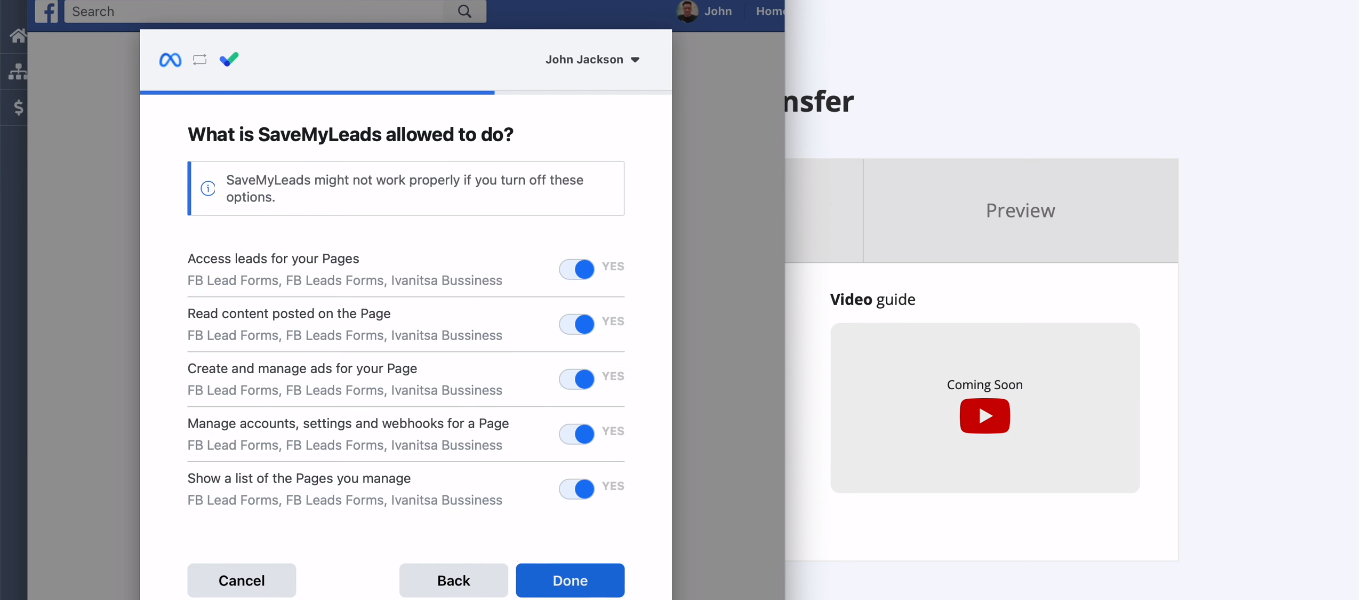
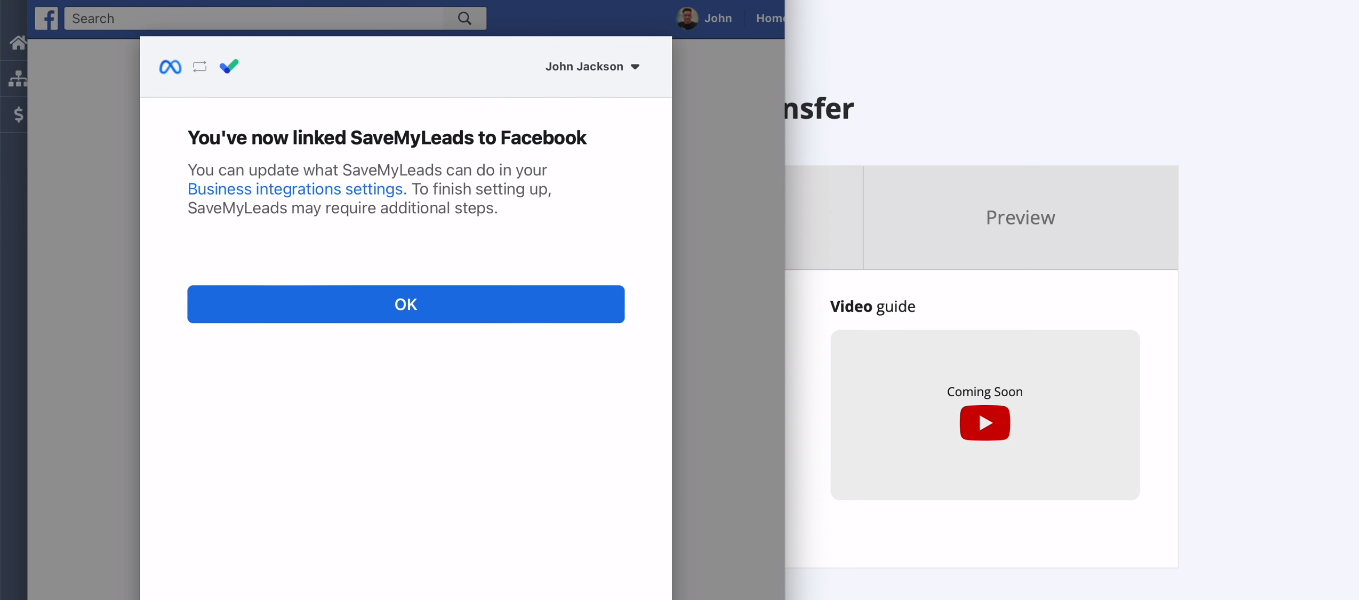
FB account added to SaveMyLeads system. Click "OK".
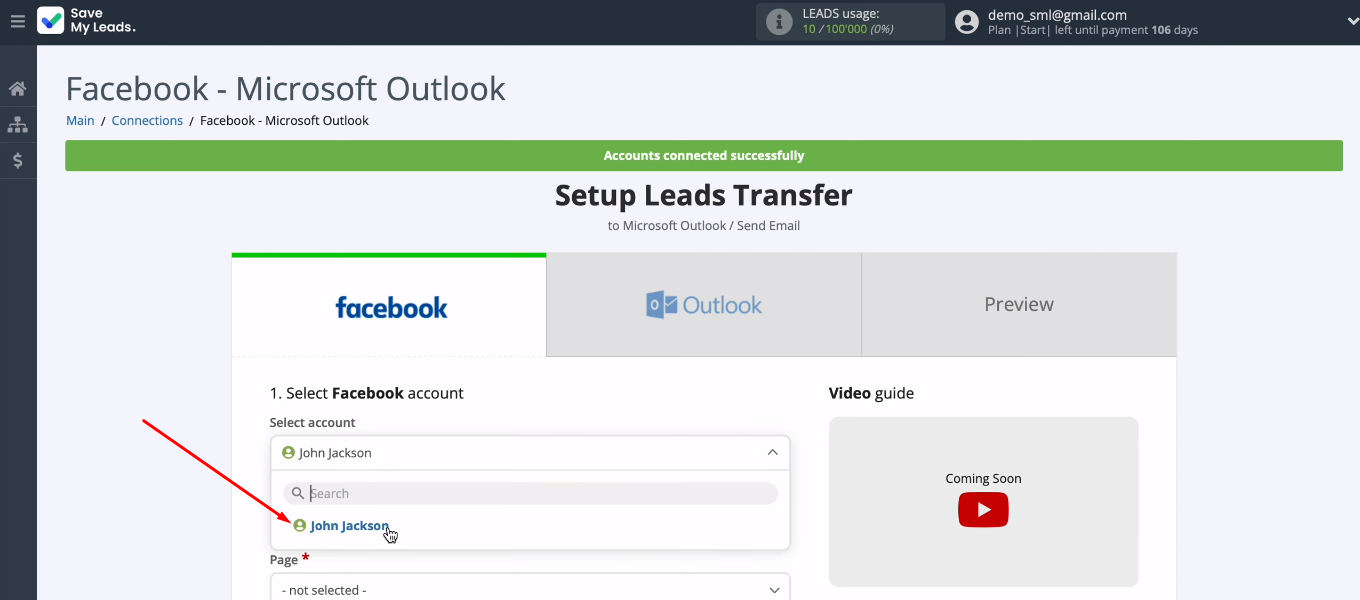
You can add multiple Facebook accounts. They will be displayed in the list of available logins. Select the required account.
Select an advertising page and a lead form for uploading results. Click "Continue". This completes the data source setup.
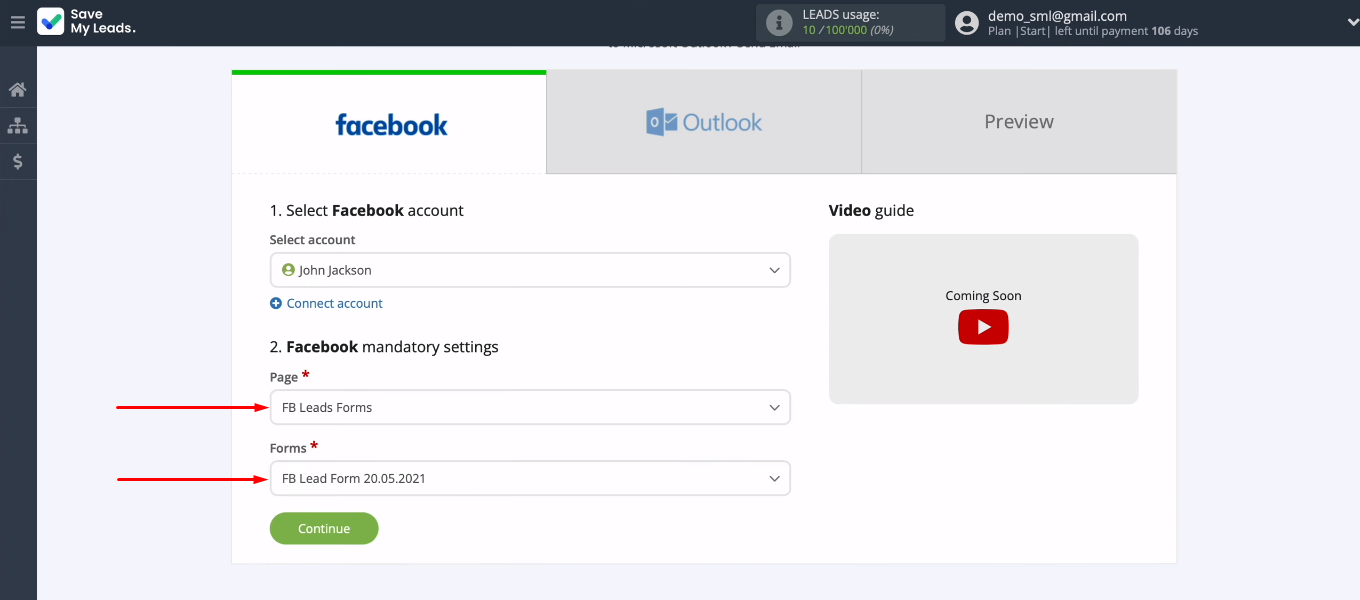
If you have a task to receive data on different lead forms, then create a separate connection for each of them.
Receiver system connection — Microsoft Outlook
Click “Connect account Microsoft Outlook”.
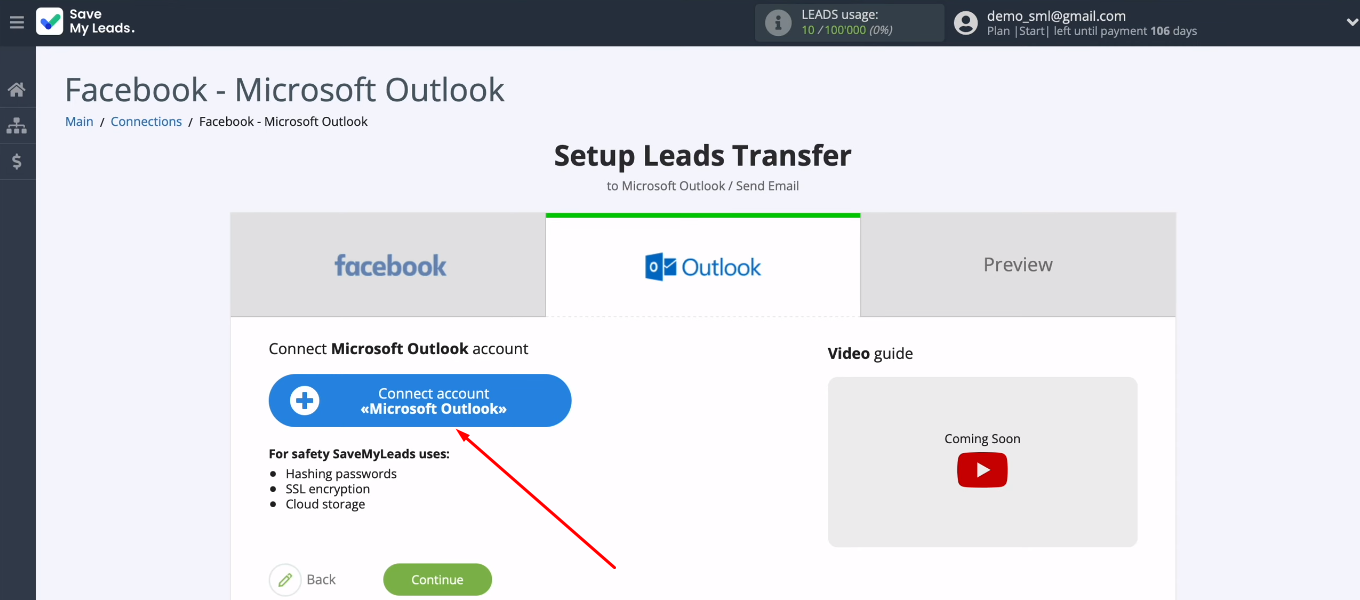
Specify the mailbox of your Microsoft Outlook account.
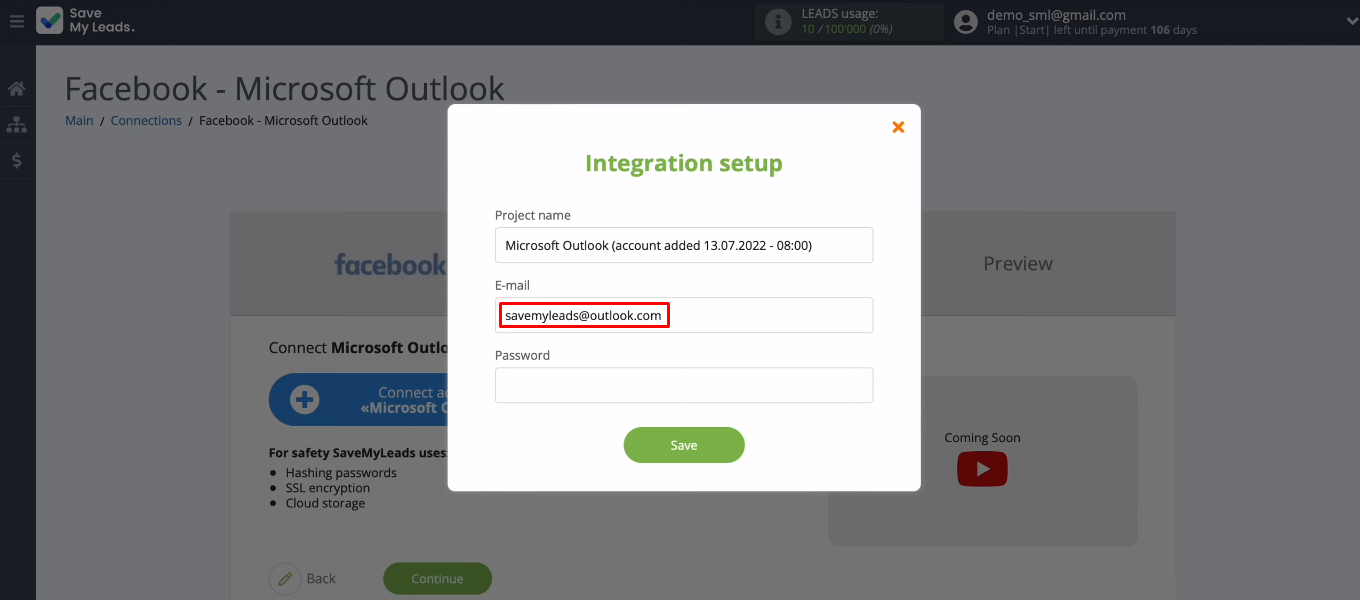
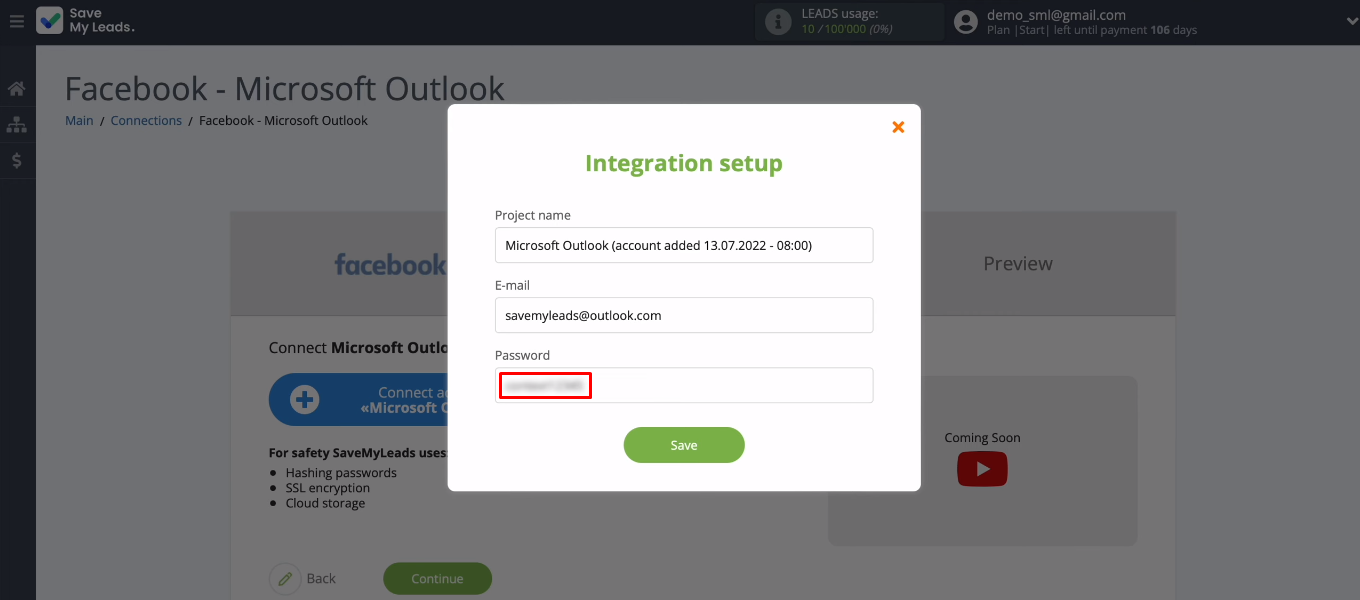
Enter password and click "Save".
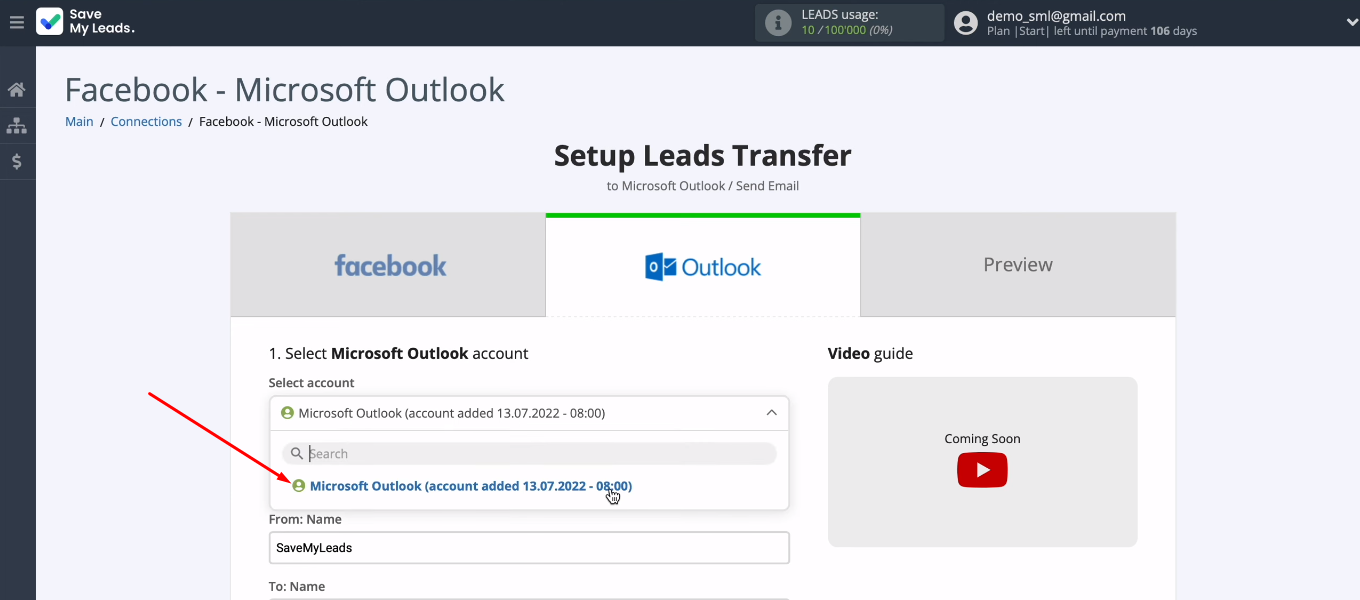
Select the added Microsoft Outlook account and proceed with the setup.
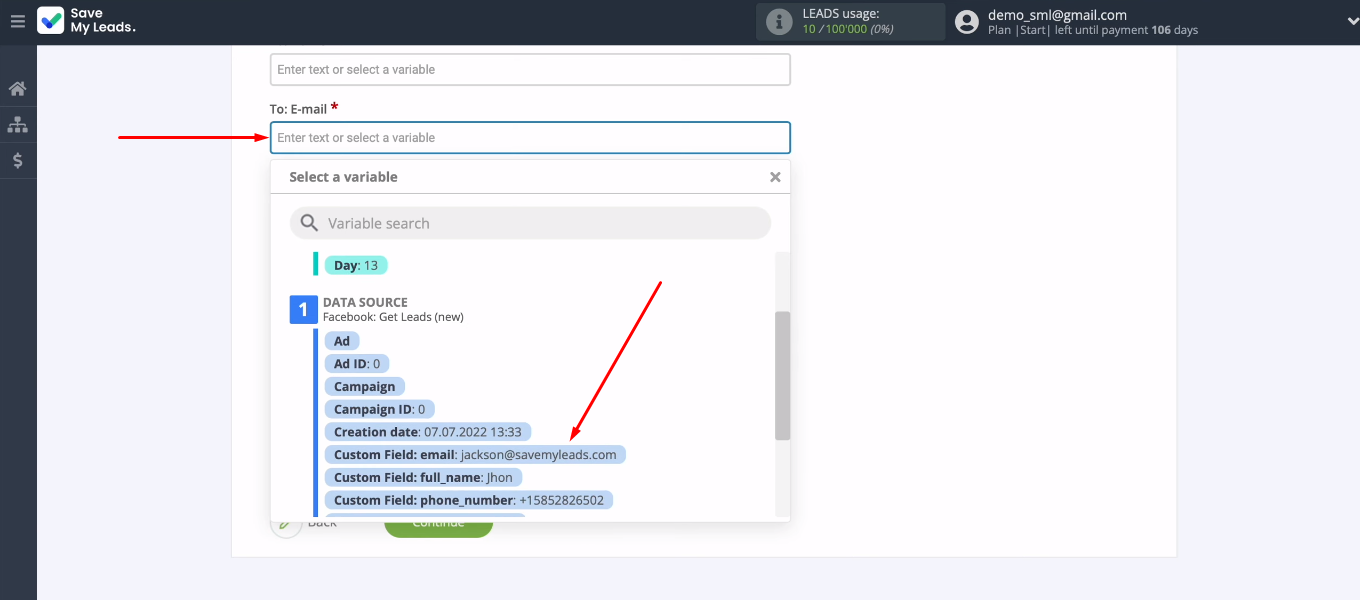
Now we need to configure the email settings. We remember that our integration can solve various problems. If you need to automatically send emails to each new lead from Facebook, then in the “To: E-mail” field, insert a variable with the customer's mailbox. To do this, click in the field and select the desired value from the drop-down list.
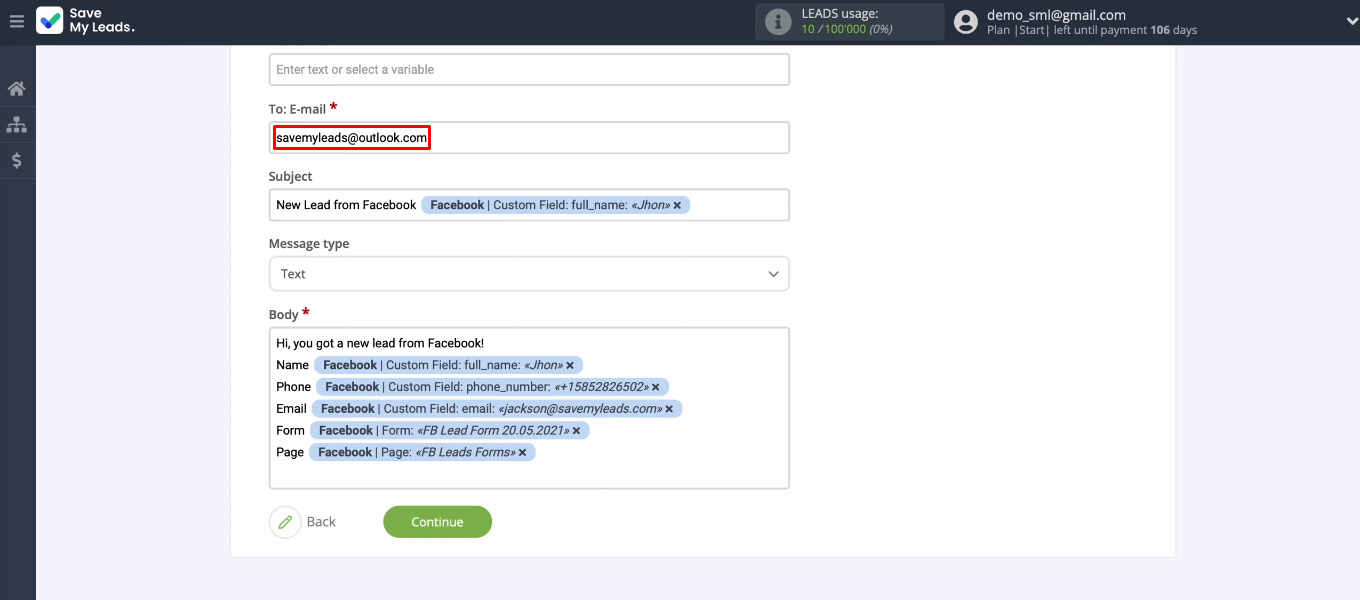
If you need to send data of new leads to yourself or a specific employee, then manually enter the mailbox in the “To: E-mail” field. Set the subject and body of the email as well. Use system variables, Facebook variables, and also enter your own text.
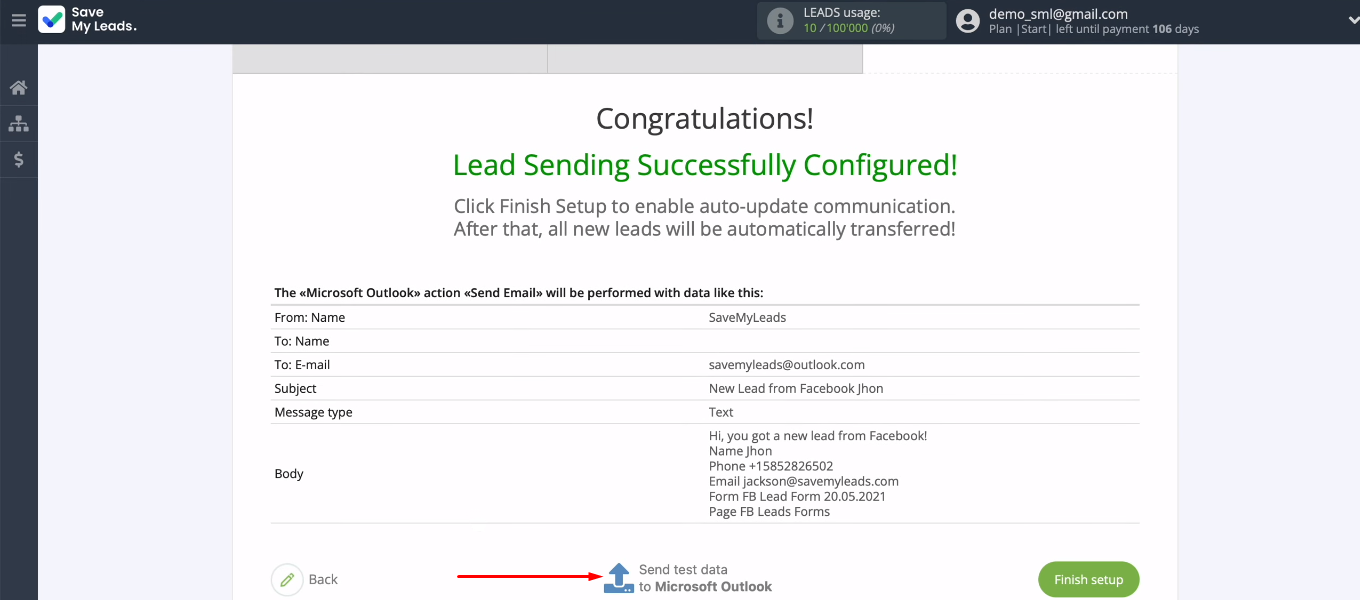
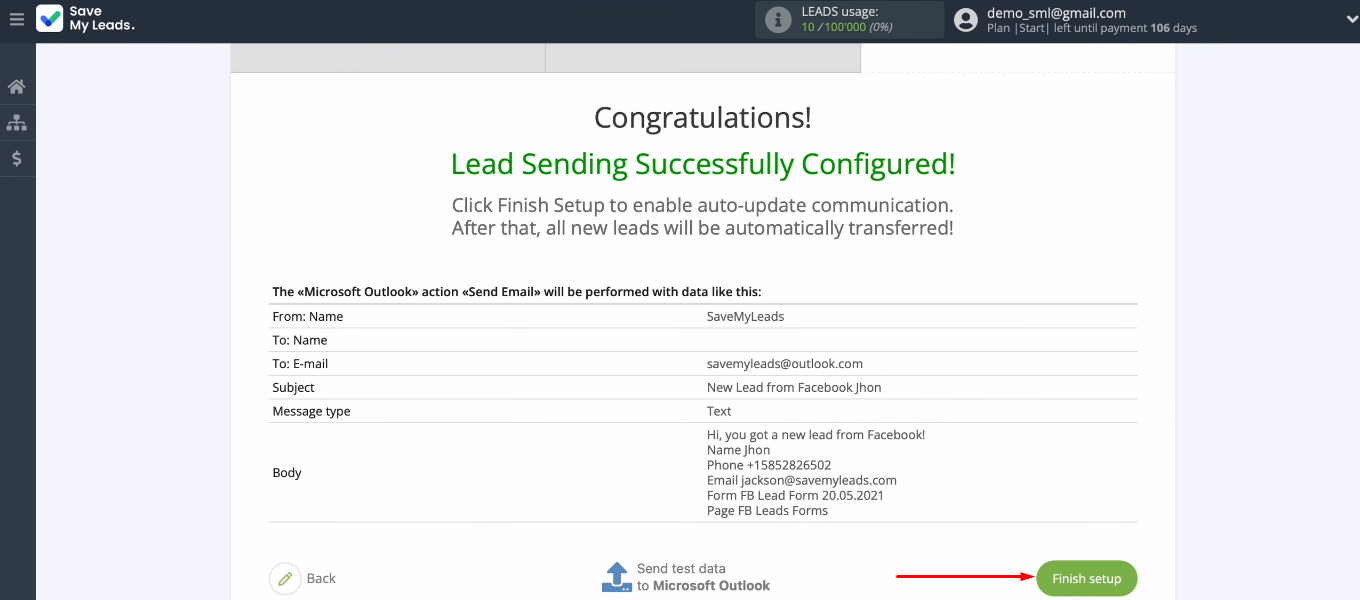
At the next stage, check the test data and email settings. To make adjustments, press the “Back” button and return to the previous step. If everything suits you, click “Send test data to Microsoft Outlook”.
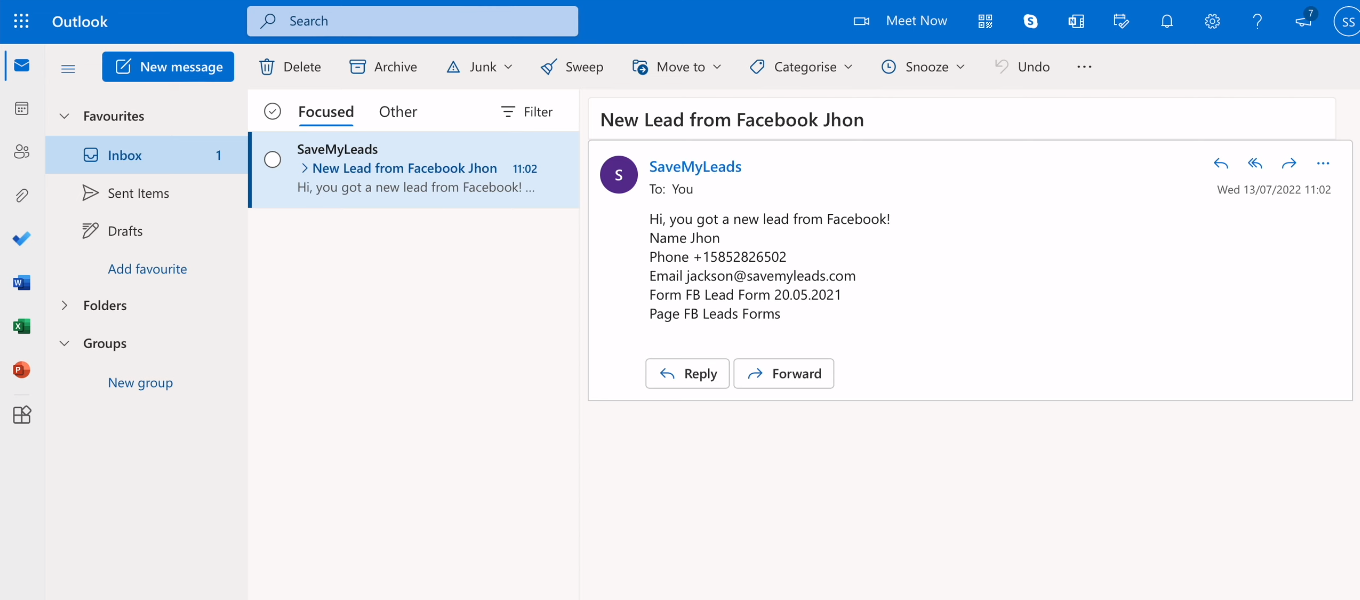
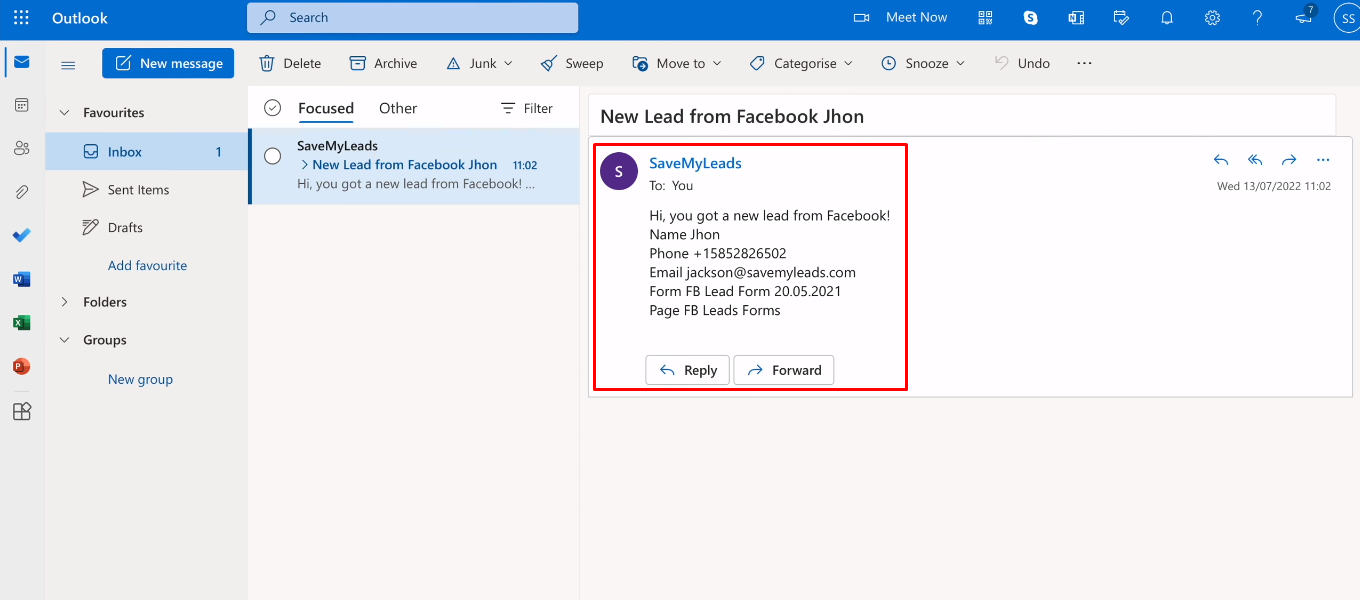
We set up the integration in such a way that letters come to a specific address. If you did the same, go to the mailbox specified as the recipient and check for a new letter.
Enable automatic data updates
The configured connection works correctly. Now you need to run the integration so that the SaveMyLeads system starts tracking new leads in your Facebook ad account. To enable auto-update of data, click “Finish setup”.
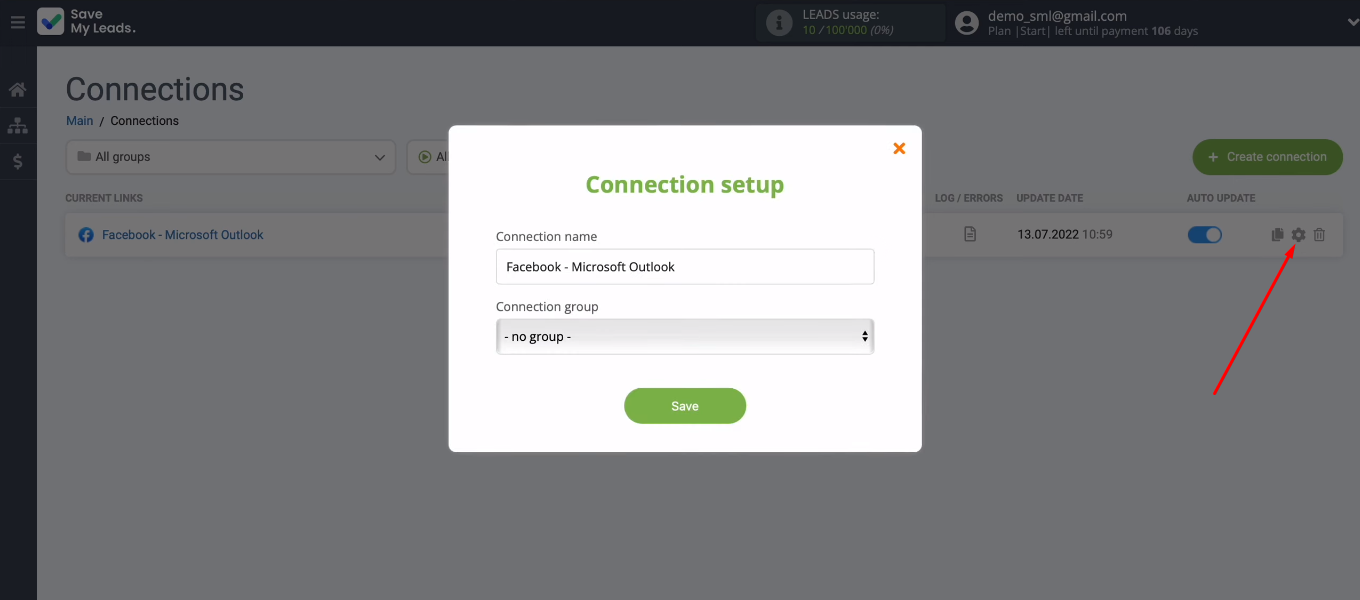
If necessary, you can change the name of the integration and add it to the group. Click the "gear", make the necessary settings and save the changes.
Conclusions
We set up Facebook and Microsoft Outlook integration using the SaveMyLeads online connector. To work with this system, we did not need any special skills or programming knowledge. Facebook and Microsoft Outlook integration can solve various problems. Set up a complex of connections to automate the maximum number of business processes and get rid of routine operations.


Automated data transfer allows not only to relieve employees, but also helps to increase the speed and quality of lead processing. Your customers will quickly receive a welcome email, and data of new leads will be promptly delivered to employees. Set up integrations with SaveMyLeads and focus on key tasks.
