Kajabi is a platform for creating complex information products. It makes it possible to engage in educational activities (create online courses and trainings), develop and distribute modern marketing information products, and solve administrative problems. If you are promoting your information business through Facebook, you will probably be interested in how to organize the transfer of leads from Leads Ads to Kajabi. In this article, we'll show you how to set up a Kajabi and Facebook integration to completely automate the process.
Facebook Lead Ads is a tool for effectively attracting leads from the social network. It is a special advertising format (lead form), which allows each user of this social network, in just a few clicks, to submit a request to purchase a product or service or to participate in an event, as well as transfer their contact information. This form attracts people with creativity and “tasty” offers to encourage them to fill it out and leave their contact information with the business. After sending it, the managers contact the interested users. They write or call the leads and agree with them on the sale of a product, service, or information product, or immediately confirm the deal.
Kajabi is a platform for developing and promoting information products used in online education, marketing, and other purposes. It provides all the necessary tools to create different online courses, manage them, and advertise them to the target audience. In addition, this service has analytical functionality that allows you to track important indicators of a launched marketing campaign (open rate, number of clicks, transitions, etc.). Other equally popular tools include built-in sales funnels and affiliate marketing functions, which make it possible to effectively attract new leads.
As your information business begins to grow, you will need to streamline your workflow so that you can concentrate on developing and presenting the highest-quality information product to your clients. Automation of routine, repetitive actions is the best way to save time without compromising current business processes. Once enabled, it will be much easier for you to attract, connect with, and retain your customers on Kajabi. By putting the flow of incoming user data “on automatic”, you can completely devote yourself to transferring your knowledge and skills to those who want to receive them. Setting up communication between systems using the no-code SaveMyLeads platform will allow you to automate data transfer. Facebook and Kajabi integration will provide an “independent” transfer of leads from the social network to the platform where you offer a training course or information product.
How to Make Facebook and Kajabi Integration
To integrate Facebook Lead Ads with the Kajabi platform via API, you usually hire a full-time programmer or outsource this task. But why wait until your programmer allocates time for this or pay a separately hired specialist who asks for a considerable amount? The SaveMyLeads online connector is a solution that will give you the opportunity to save not only time but also your budget. Our service will help you set up and test the desired connection in just a few minutes. An intuitive interface and operating algorithm, as well as our step-by-step instructions, allow you to quickly figure out what’s what, even for an inexperienced user.
The principle of operation of the Facebook Lead Ads and Kajabi integration is expressed in the “source-connector-sink” scheme. The SaveMyLeads system vigilantly monitors the emergence of new leads in Facebook Leads Ads and immediately forwards them to Kajabi. To start this process, you only need to take a few steps. We suggest you start.
Setting up the Data Source – Facebook Lead Ads
To set up Facebook integration, first you need to create a new connection.
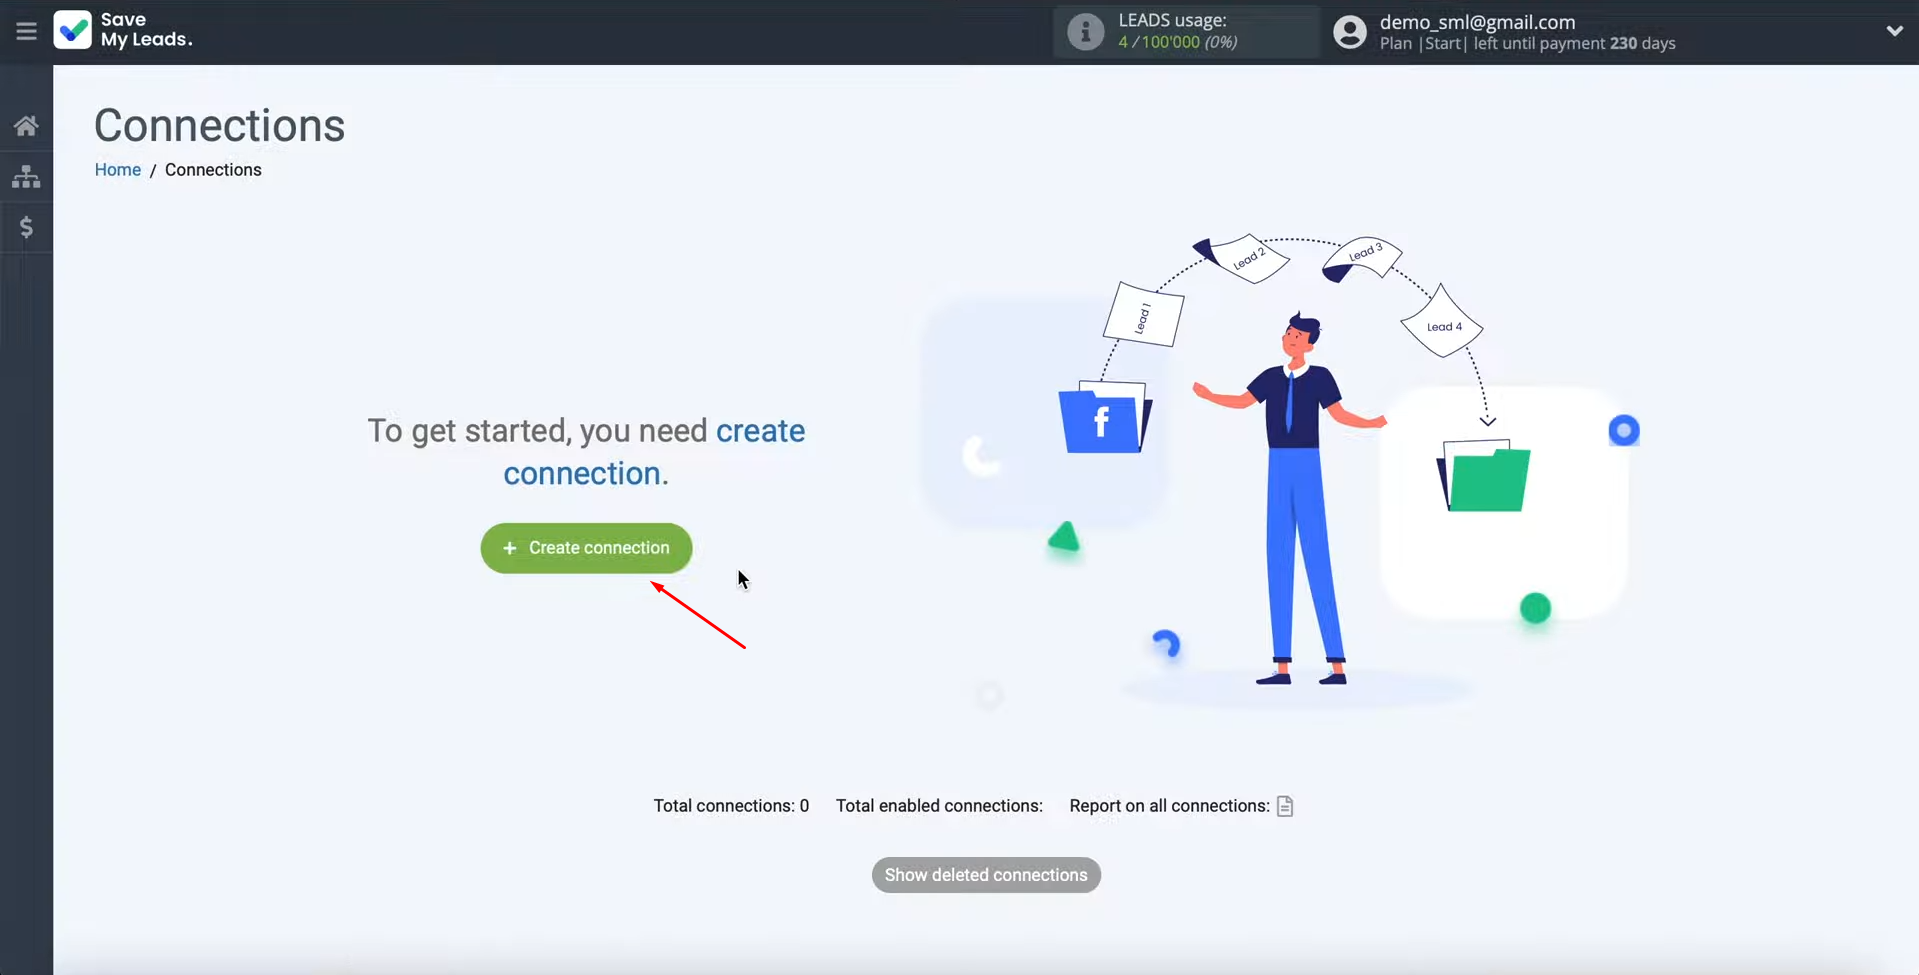
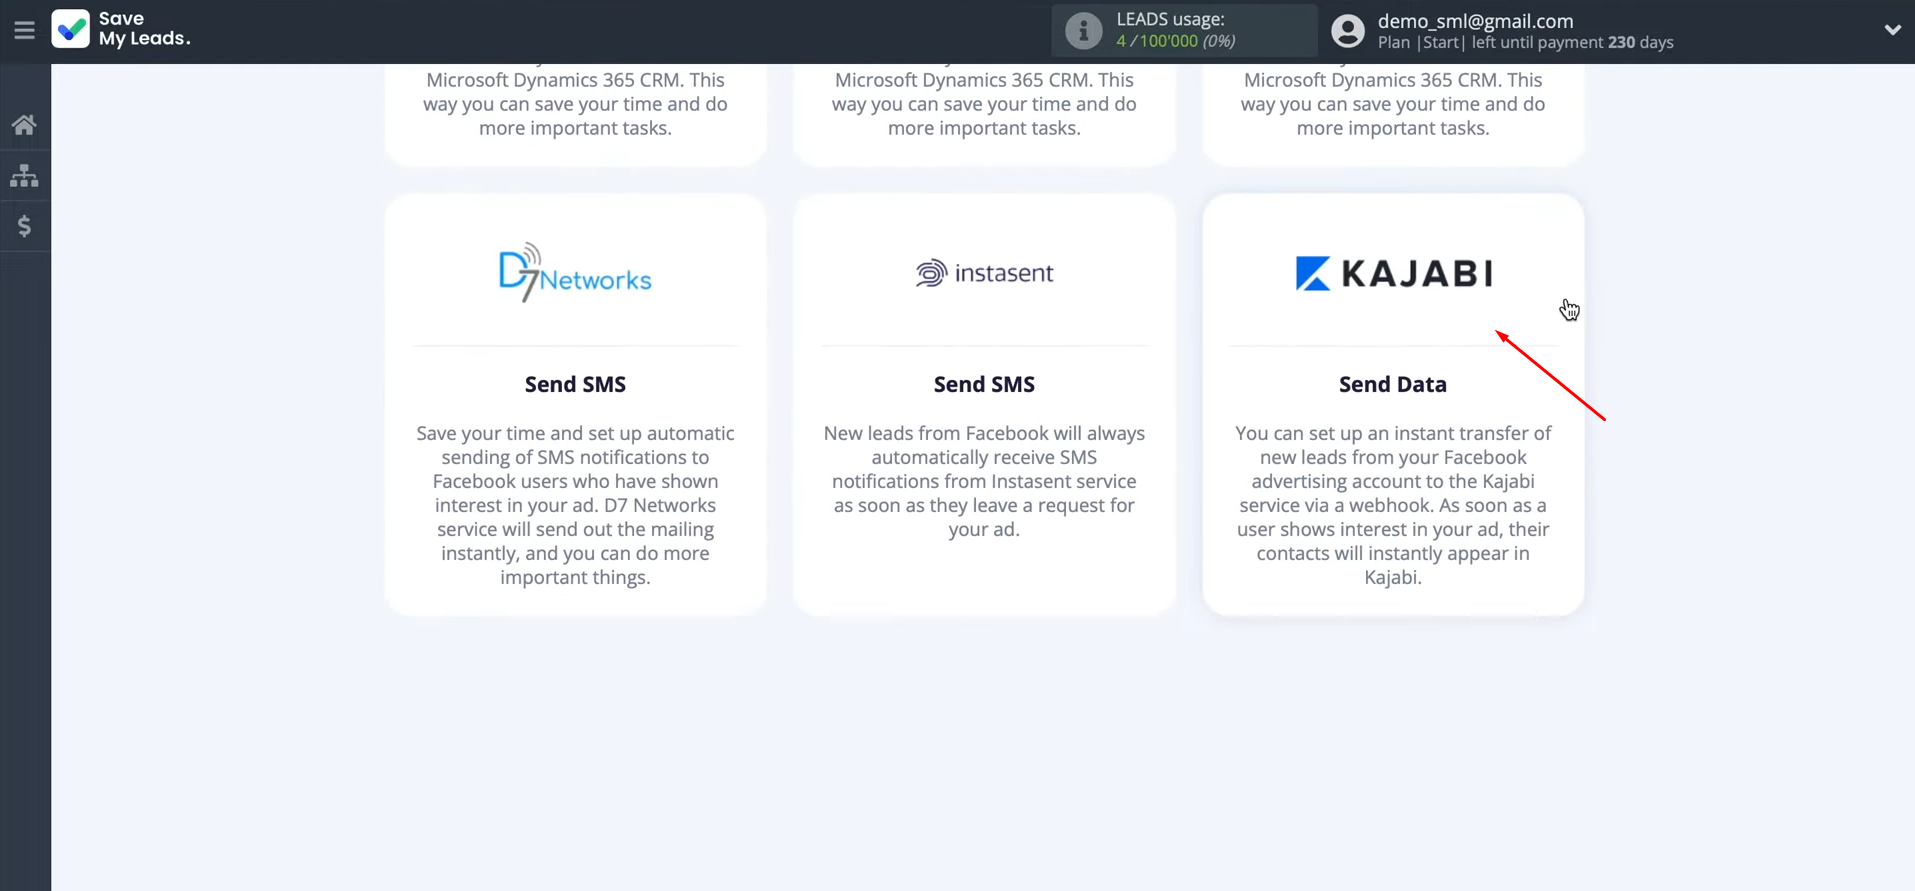
At this stage, you can use one of the ready-made templates for systems to which data
can be transferred. In this case, we have to select the Kajabi system template.
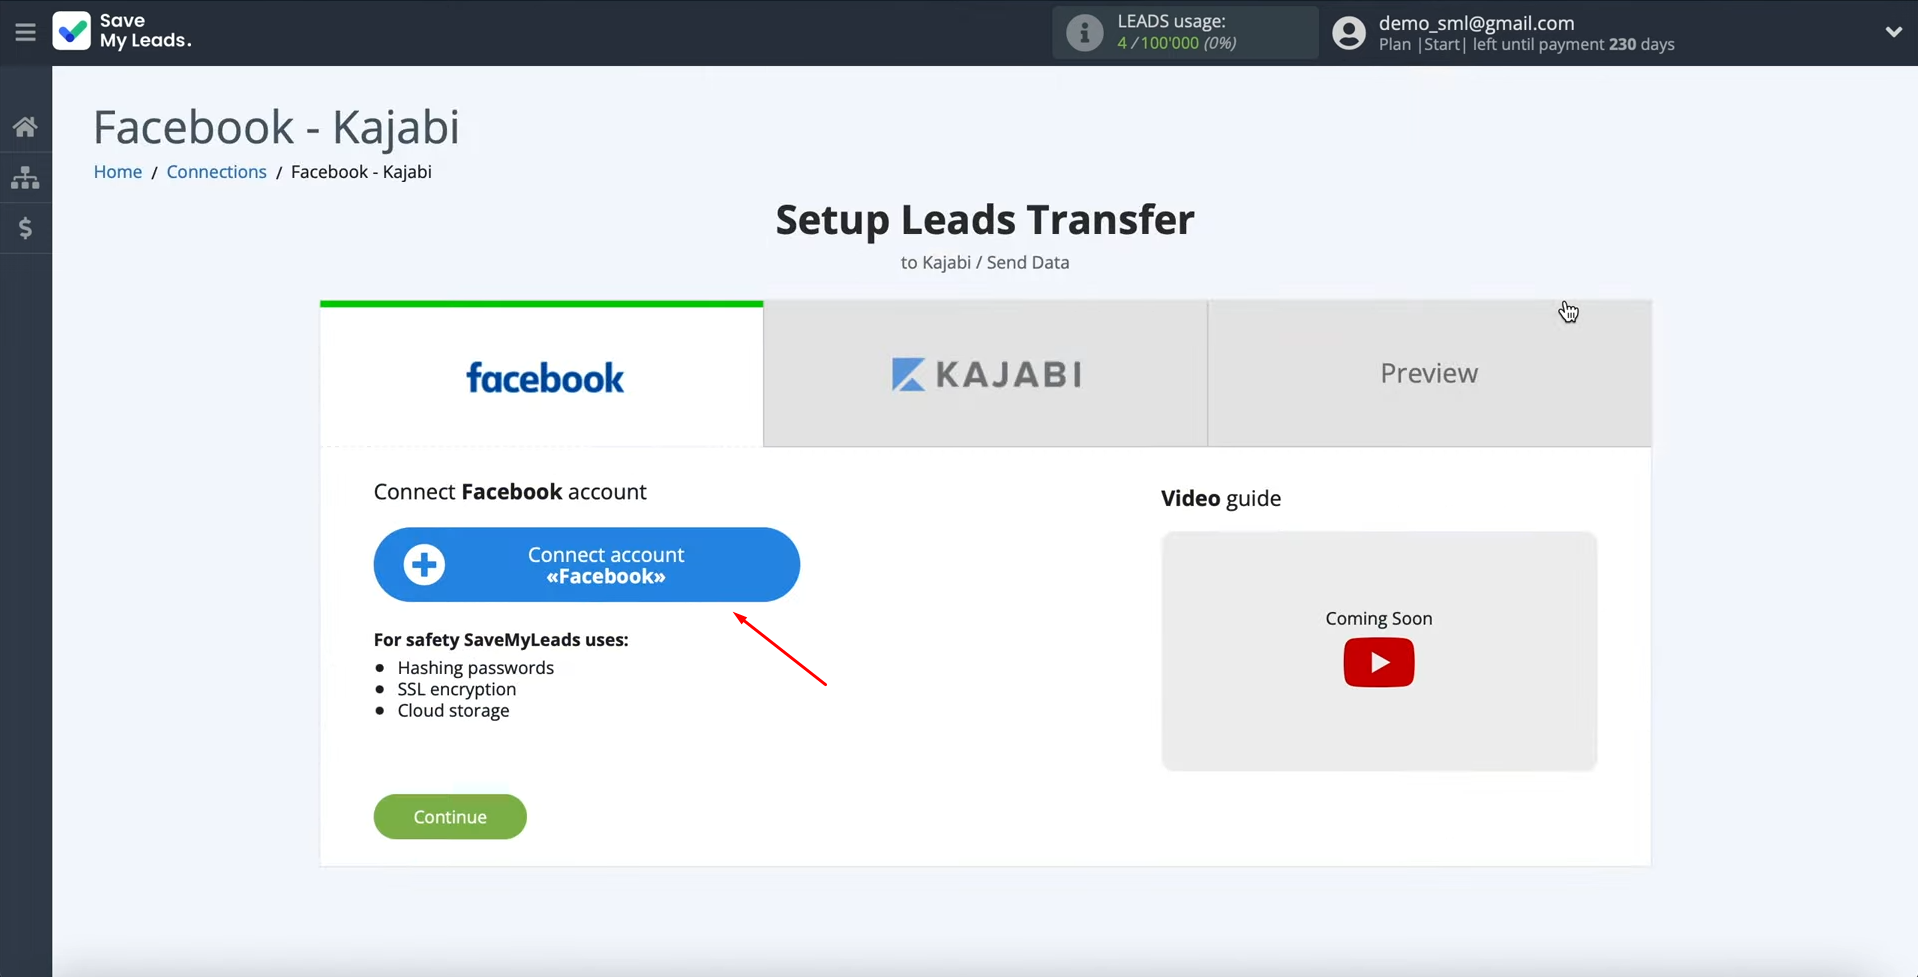
At this stage, you have to connect your Facebook
account to the SaveMyLeads service.
Click on the blue button.
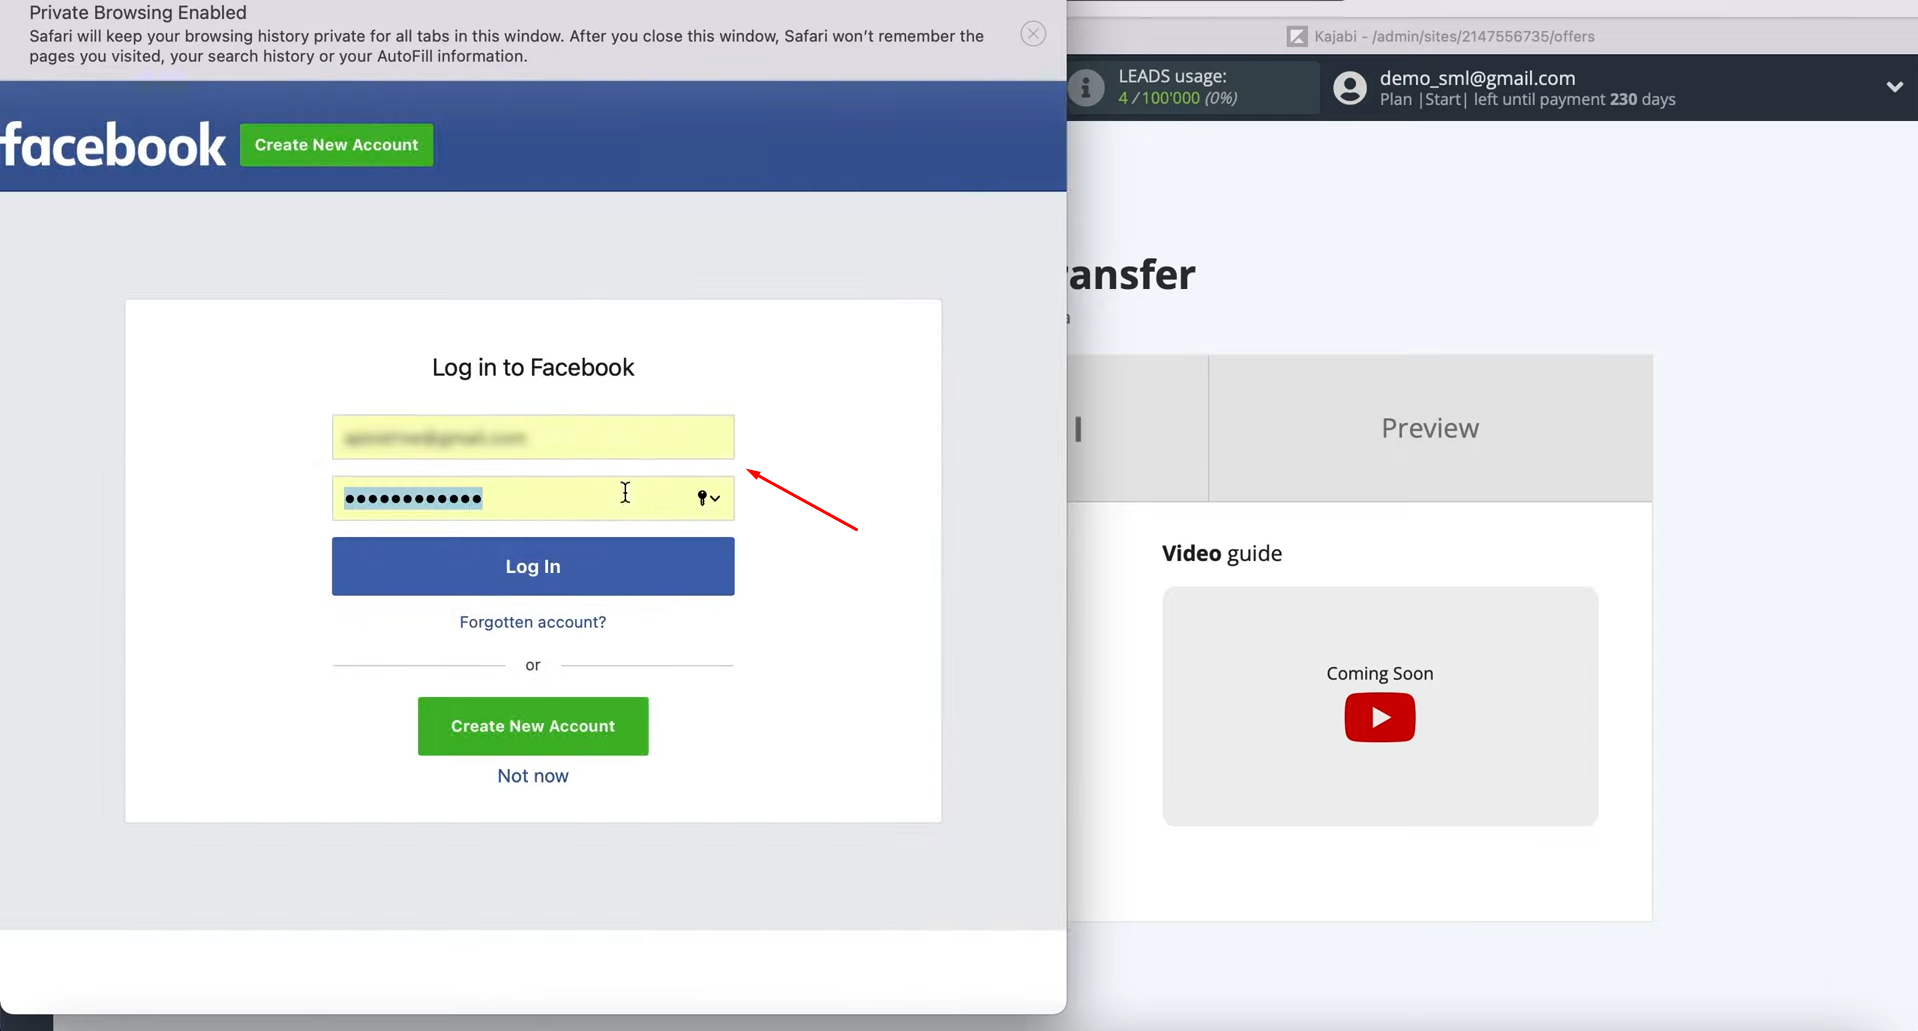
First, you have to specify the username and password for your Facebook
account. Then click “Log
In”.
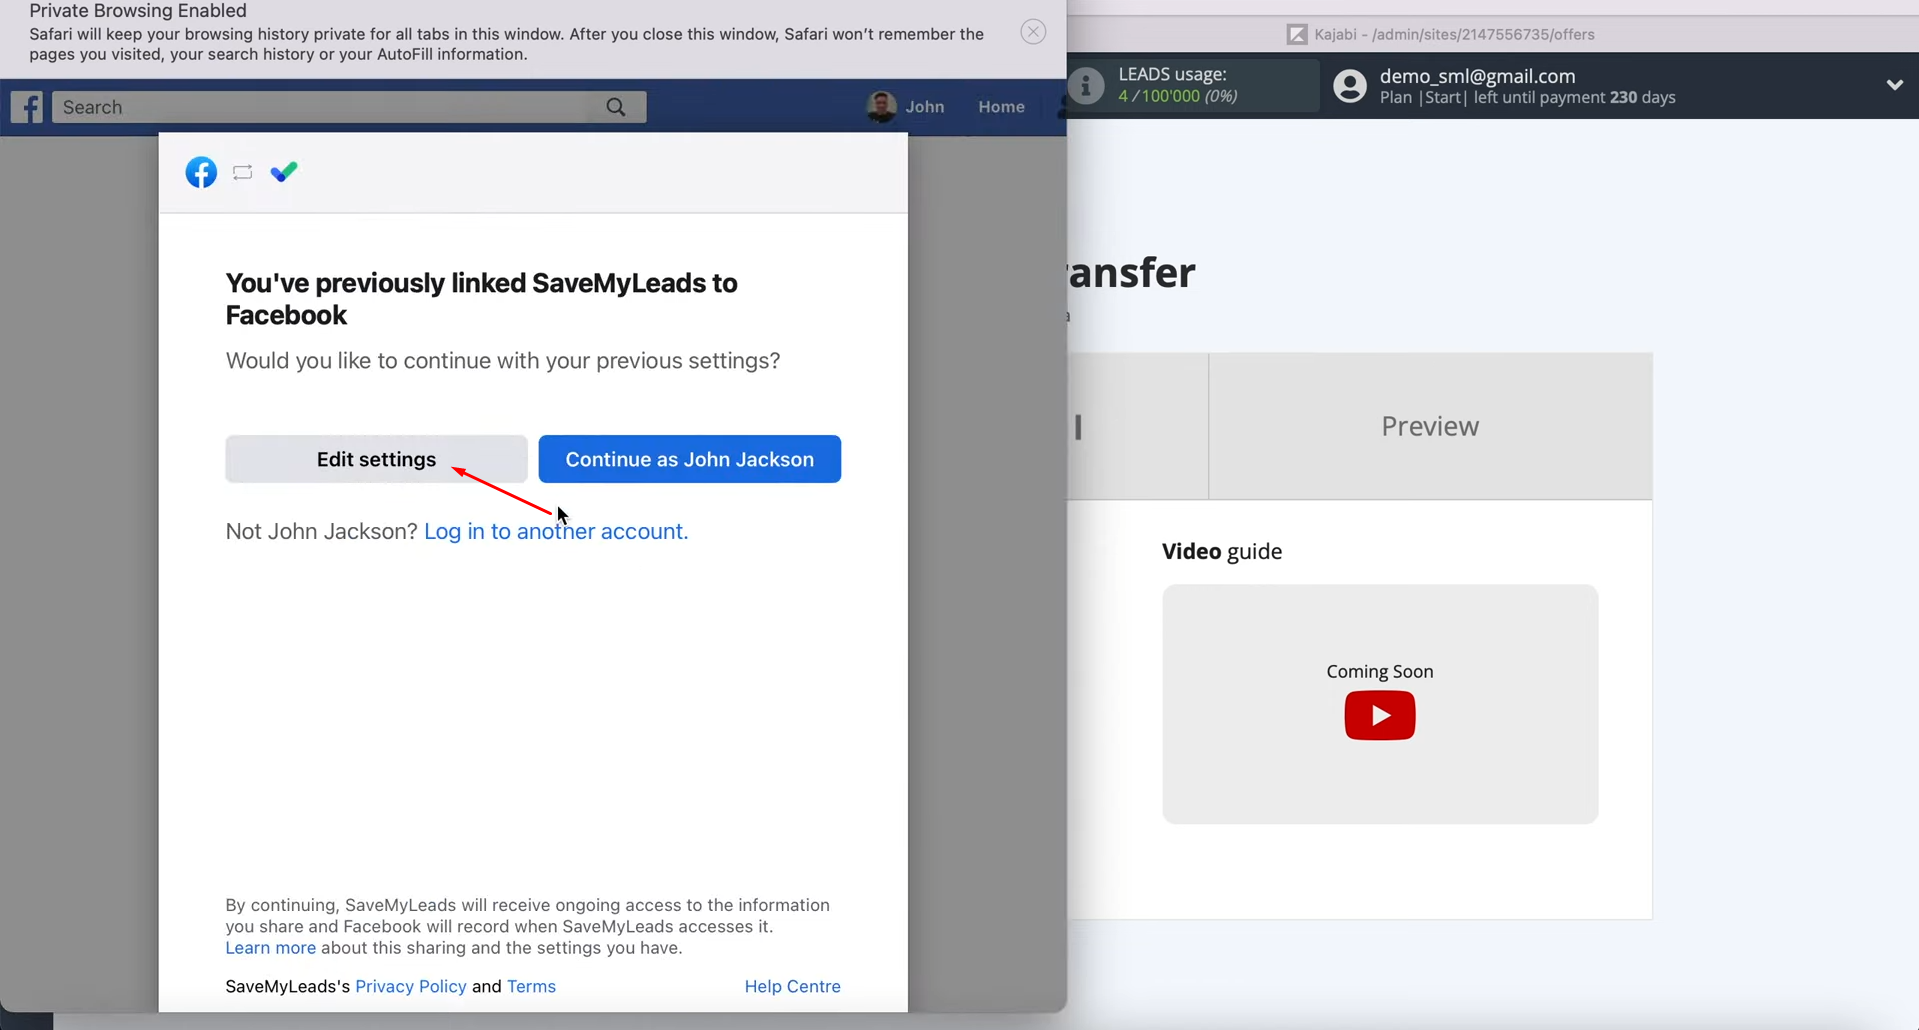
Then
click “Edit
settings”.
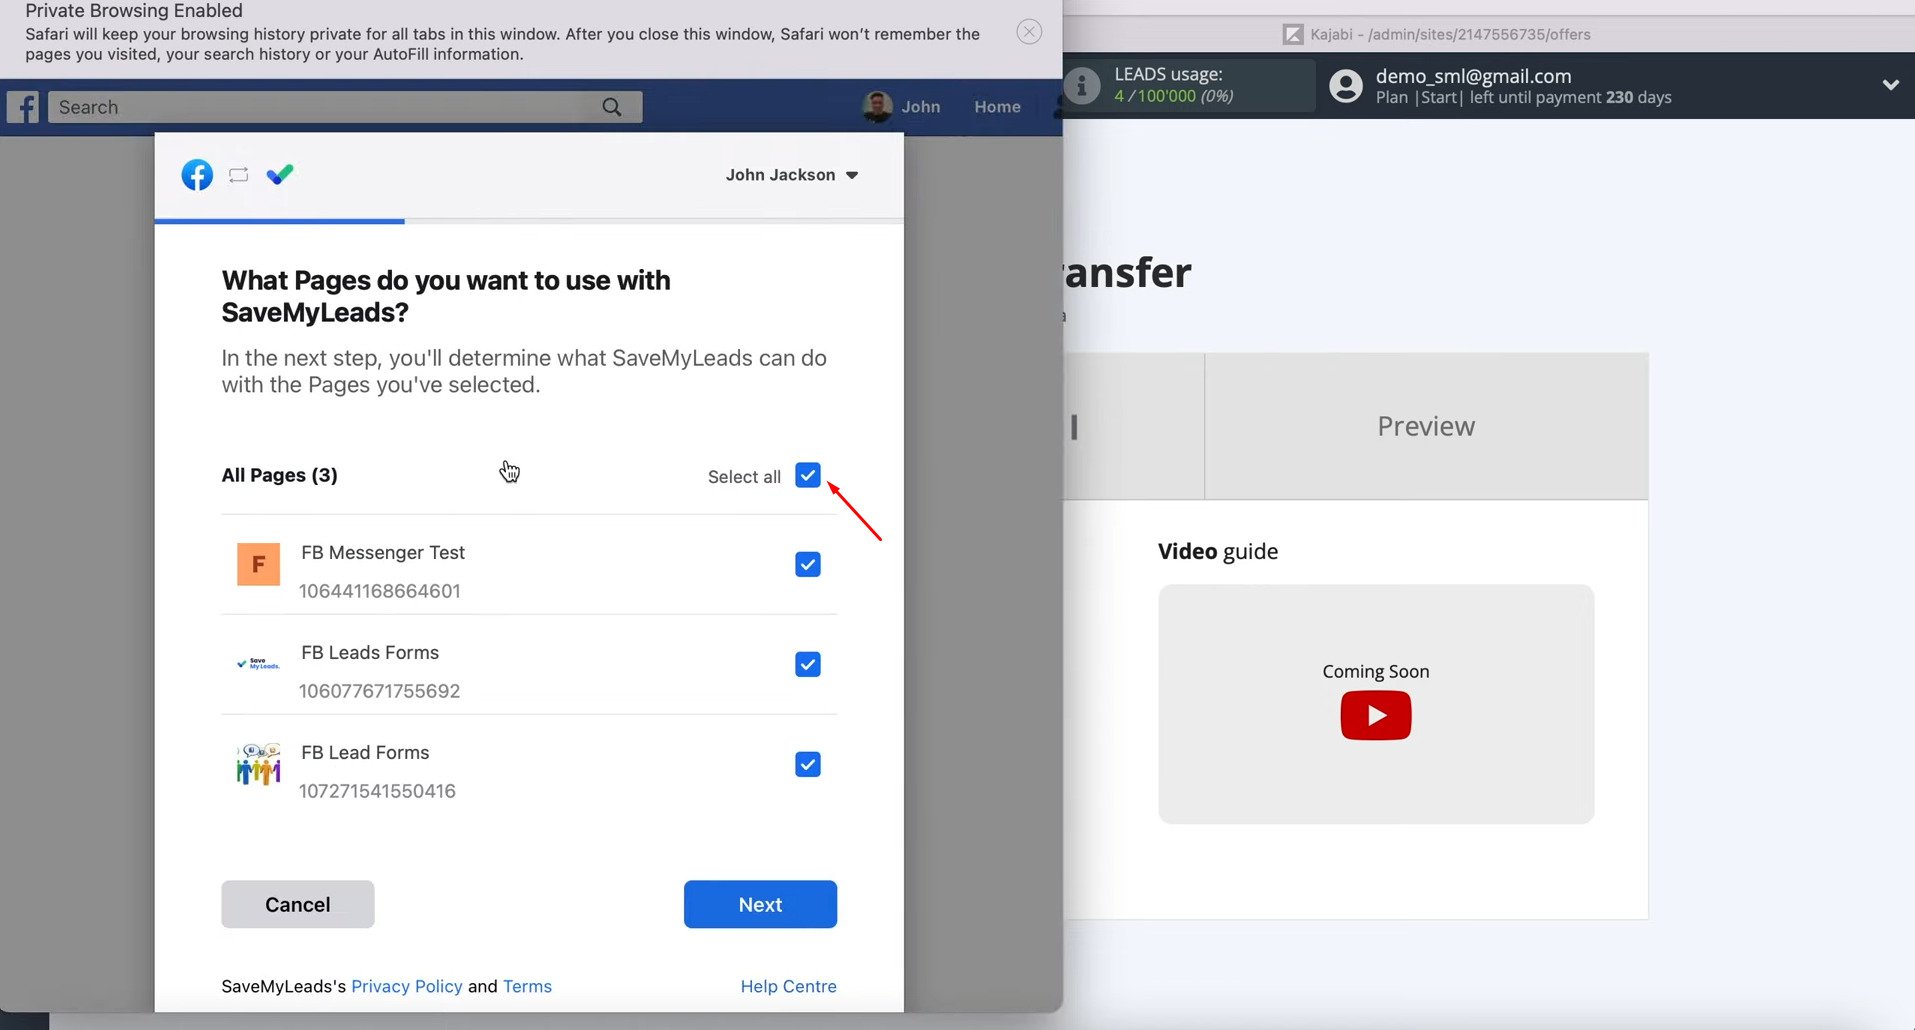
At this stage, you see all the advertising pages to which you have access. We recommend checking all the checkboxes at once to be able to work with them in the
future. Click
“Next”.
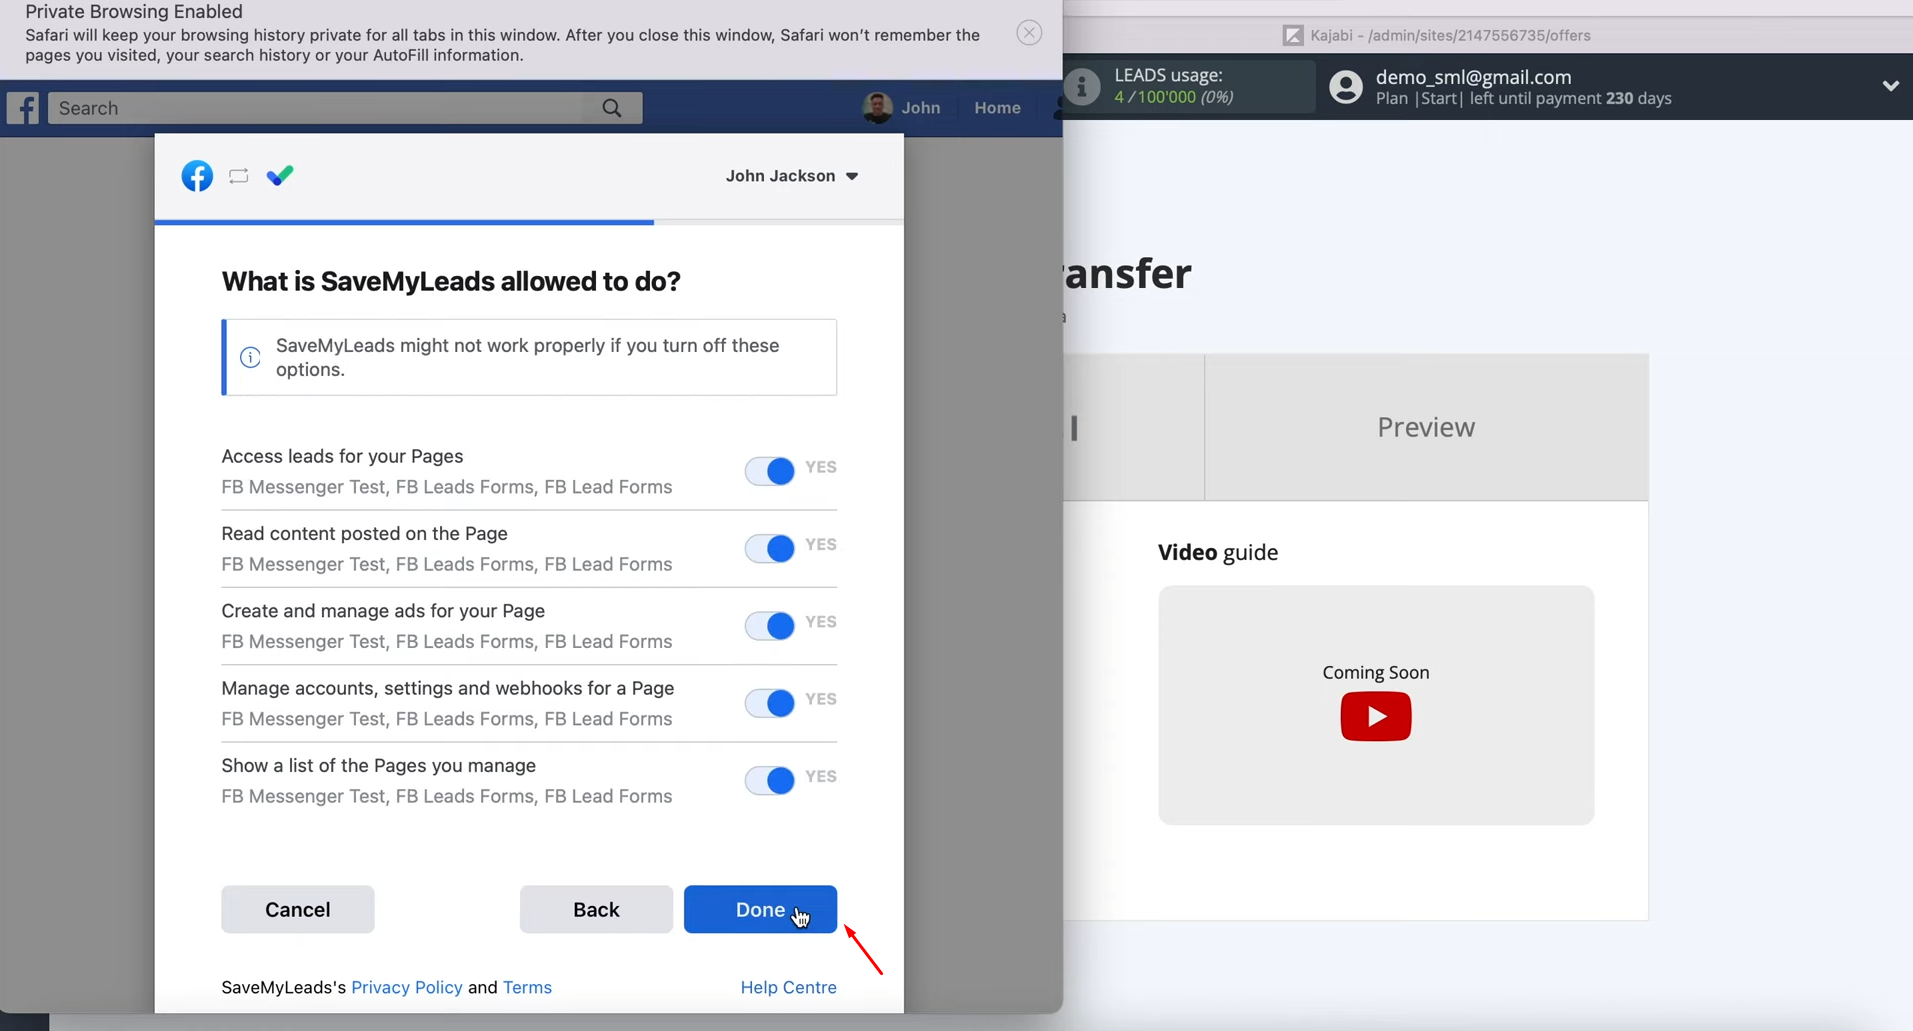
Now you need to leave all access checkboxes enabled. Click “Done”.
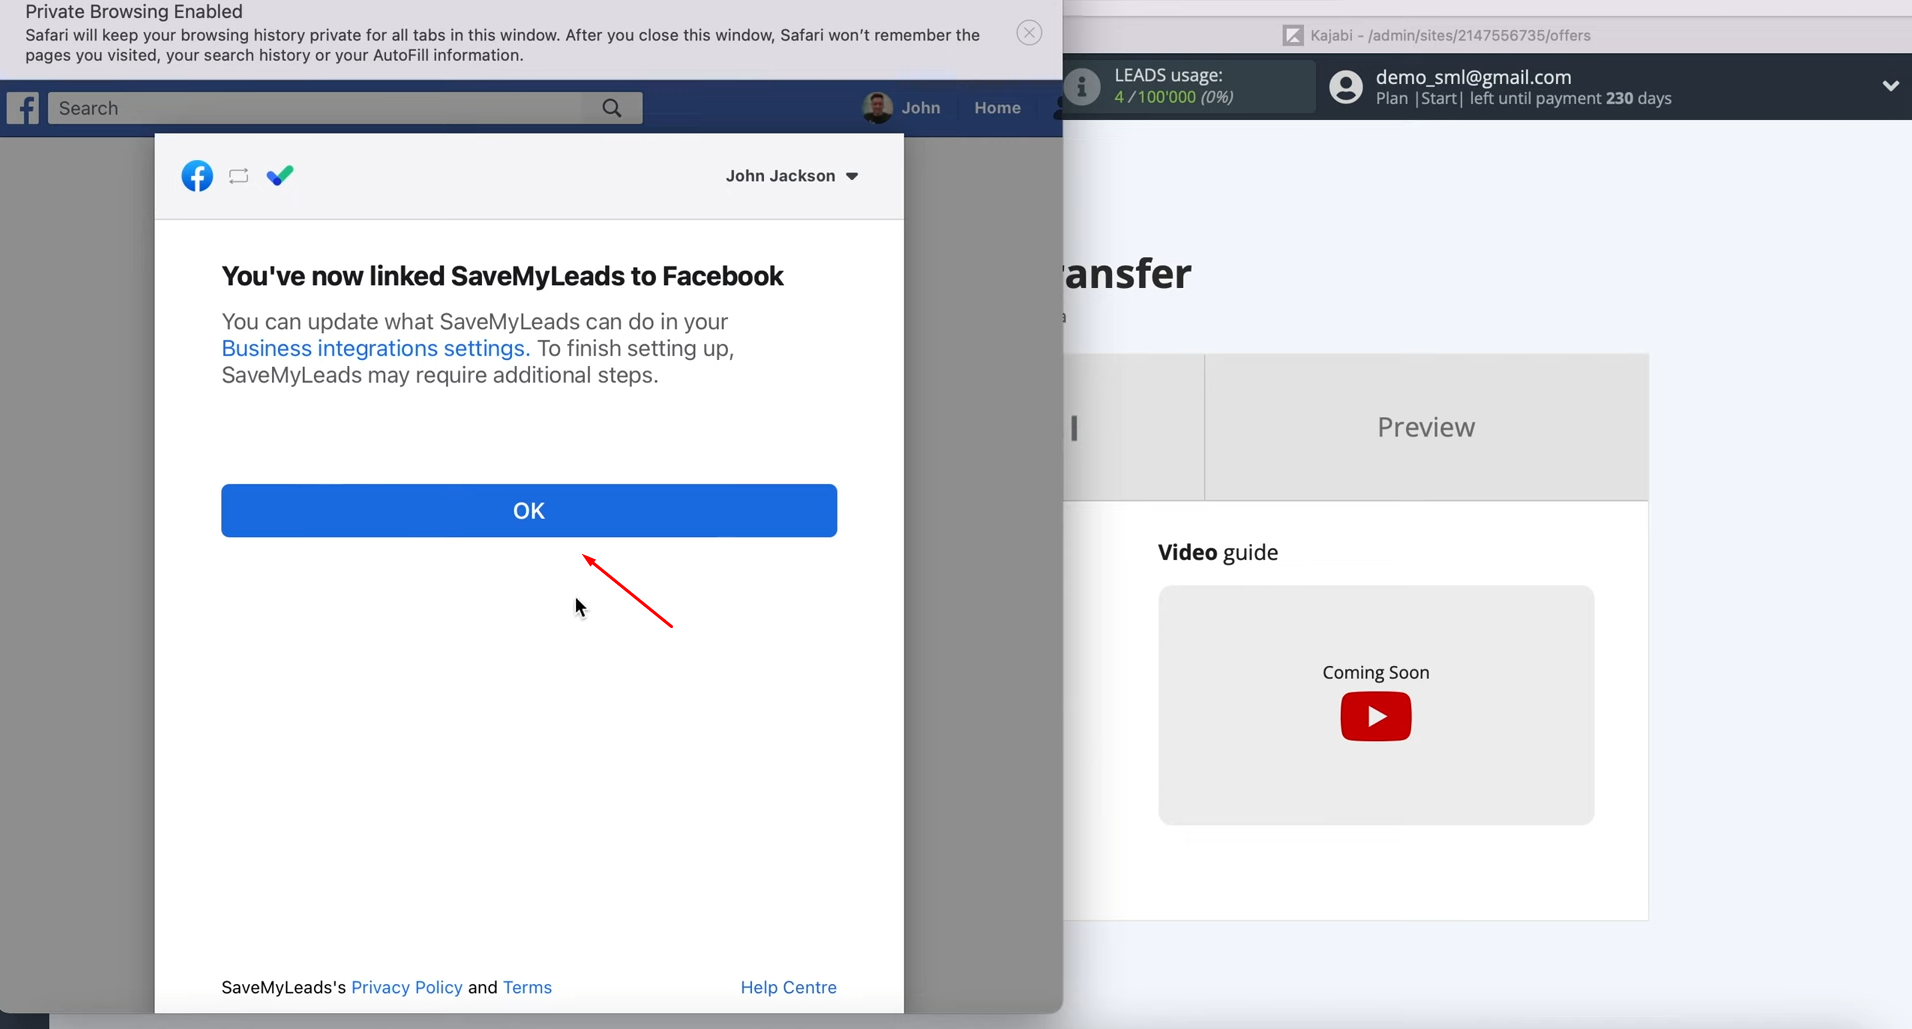
In
this window, simply click "OK”.
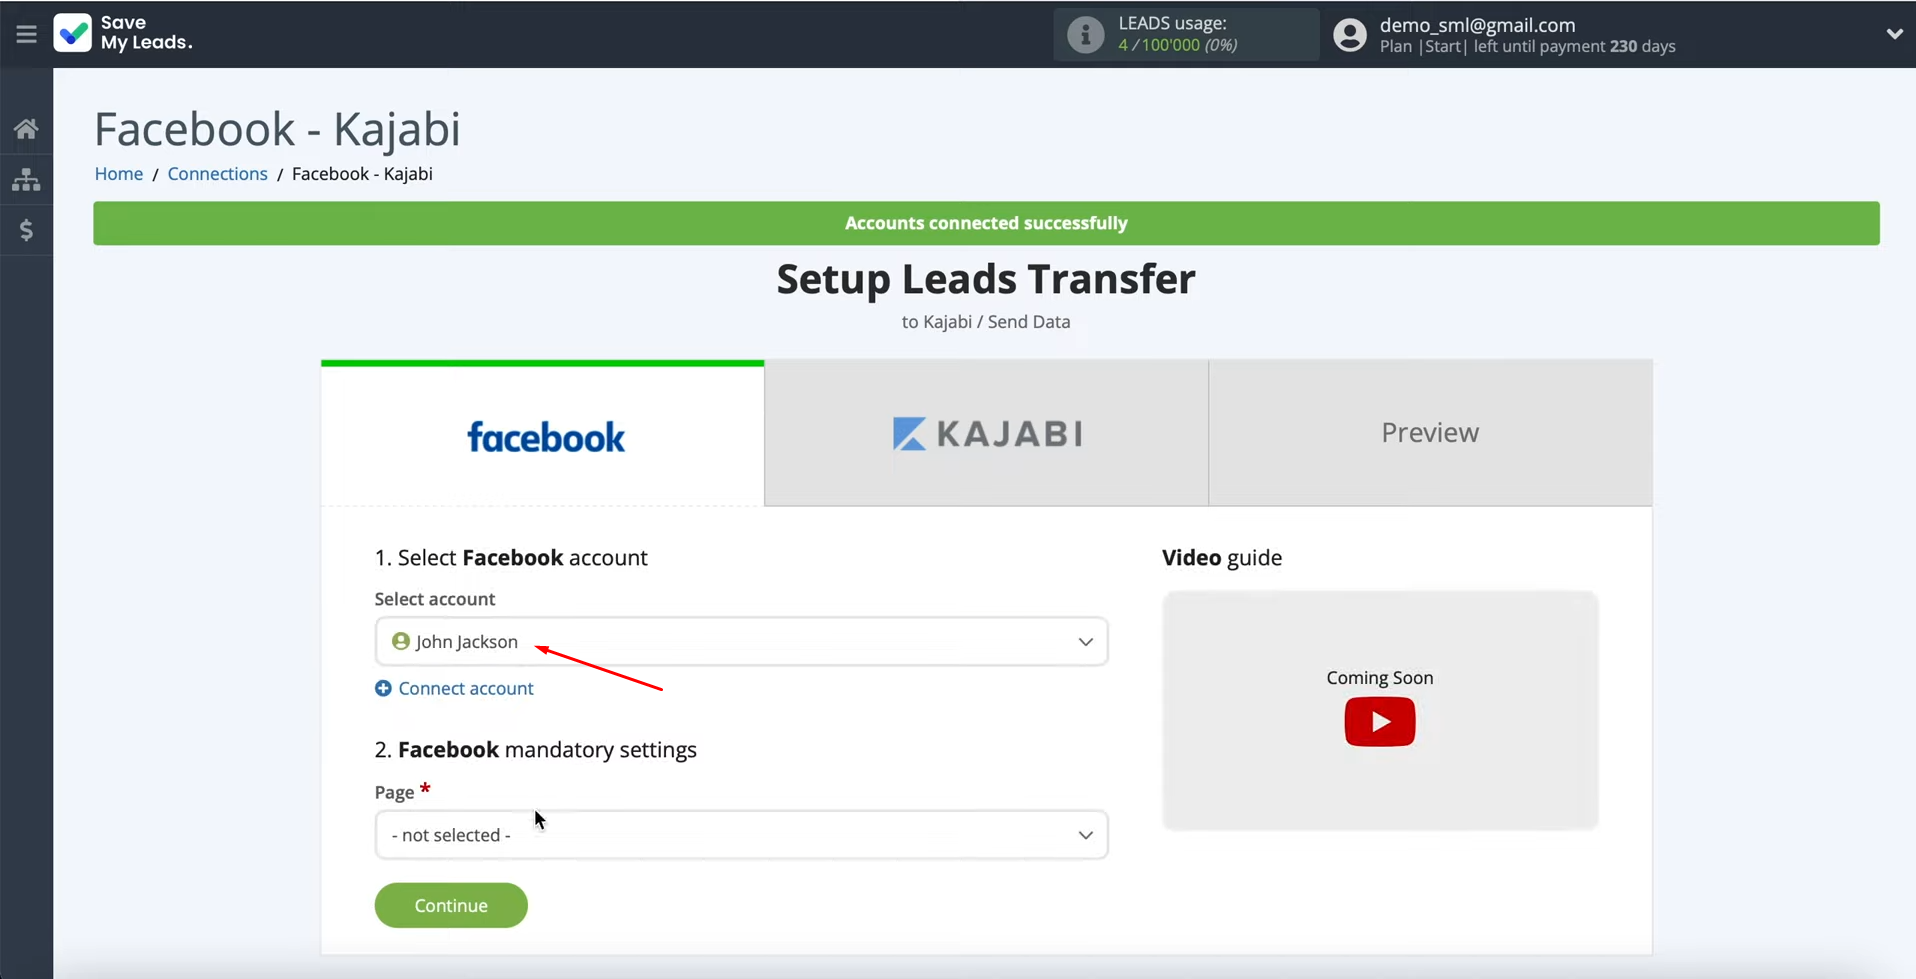
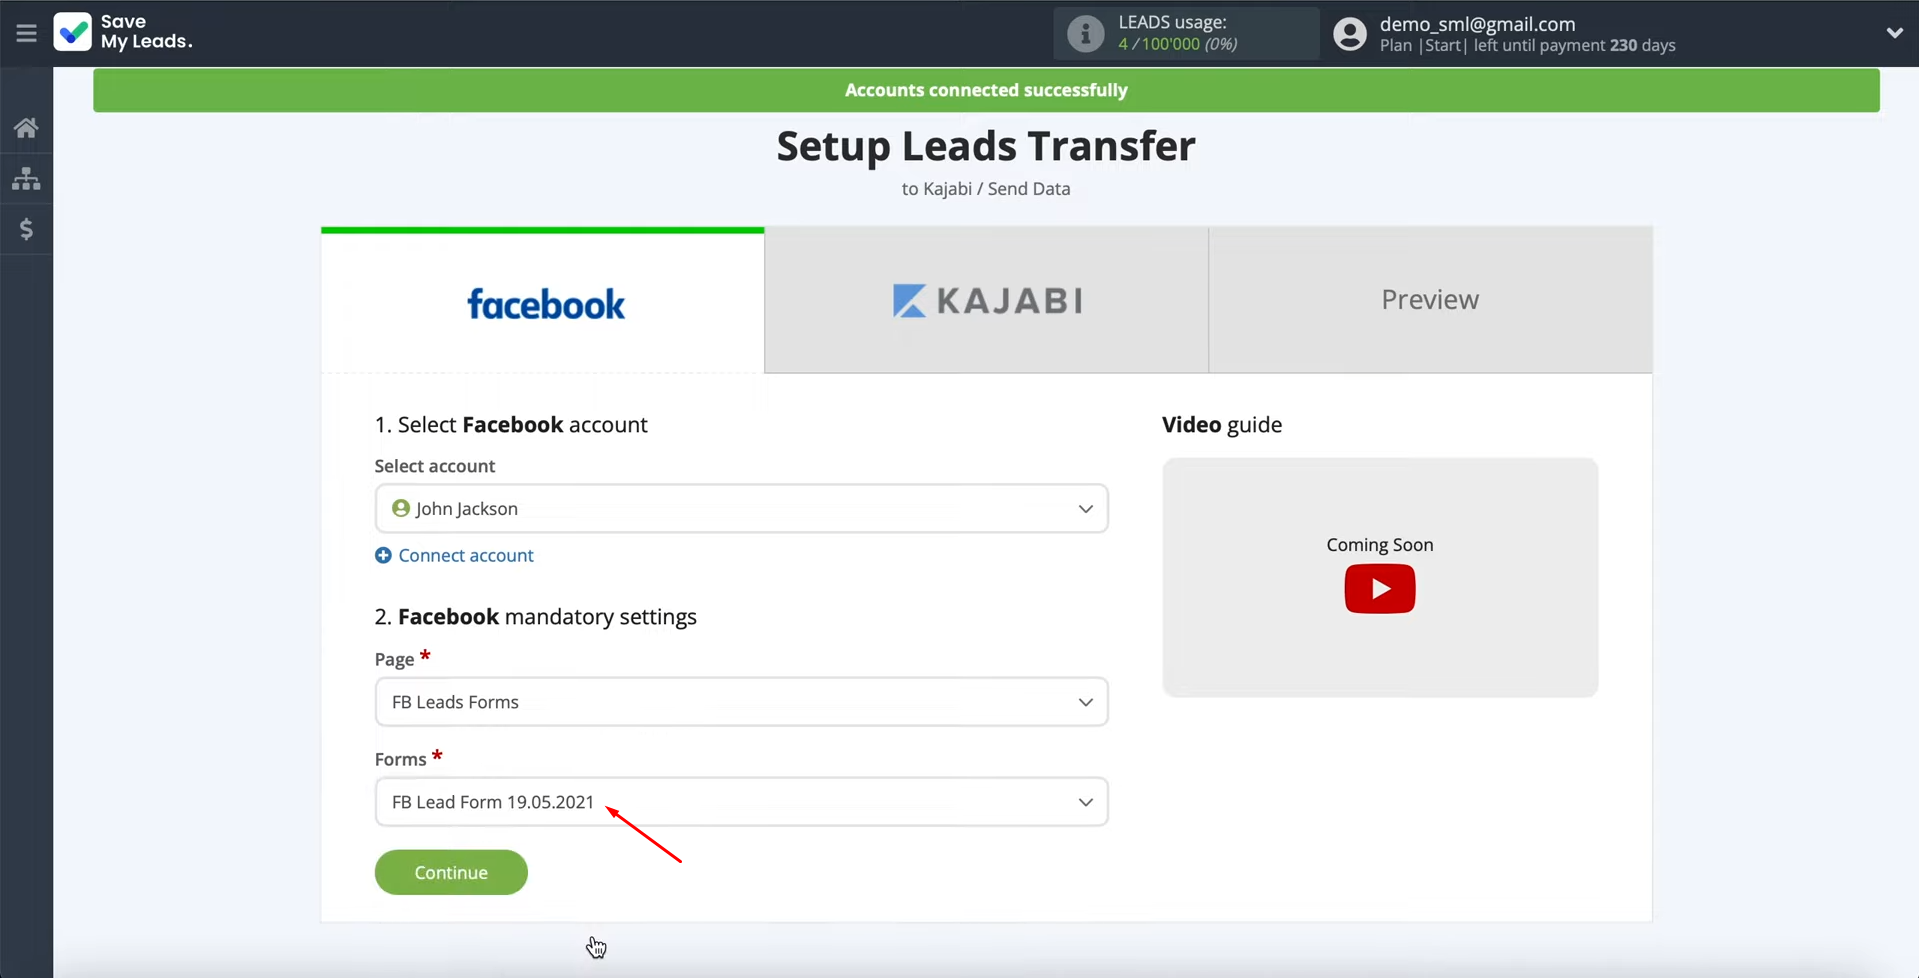
When the connected account is displayed in the list, it must be selected.
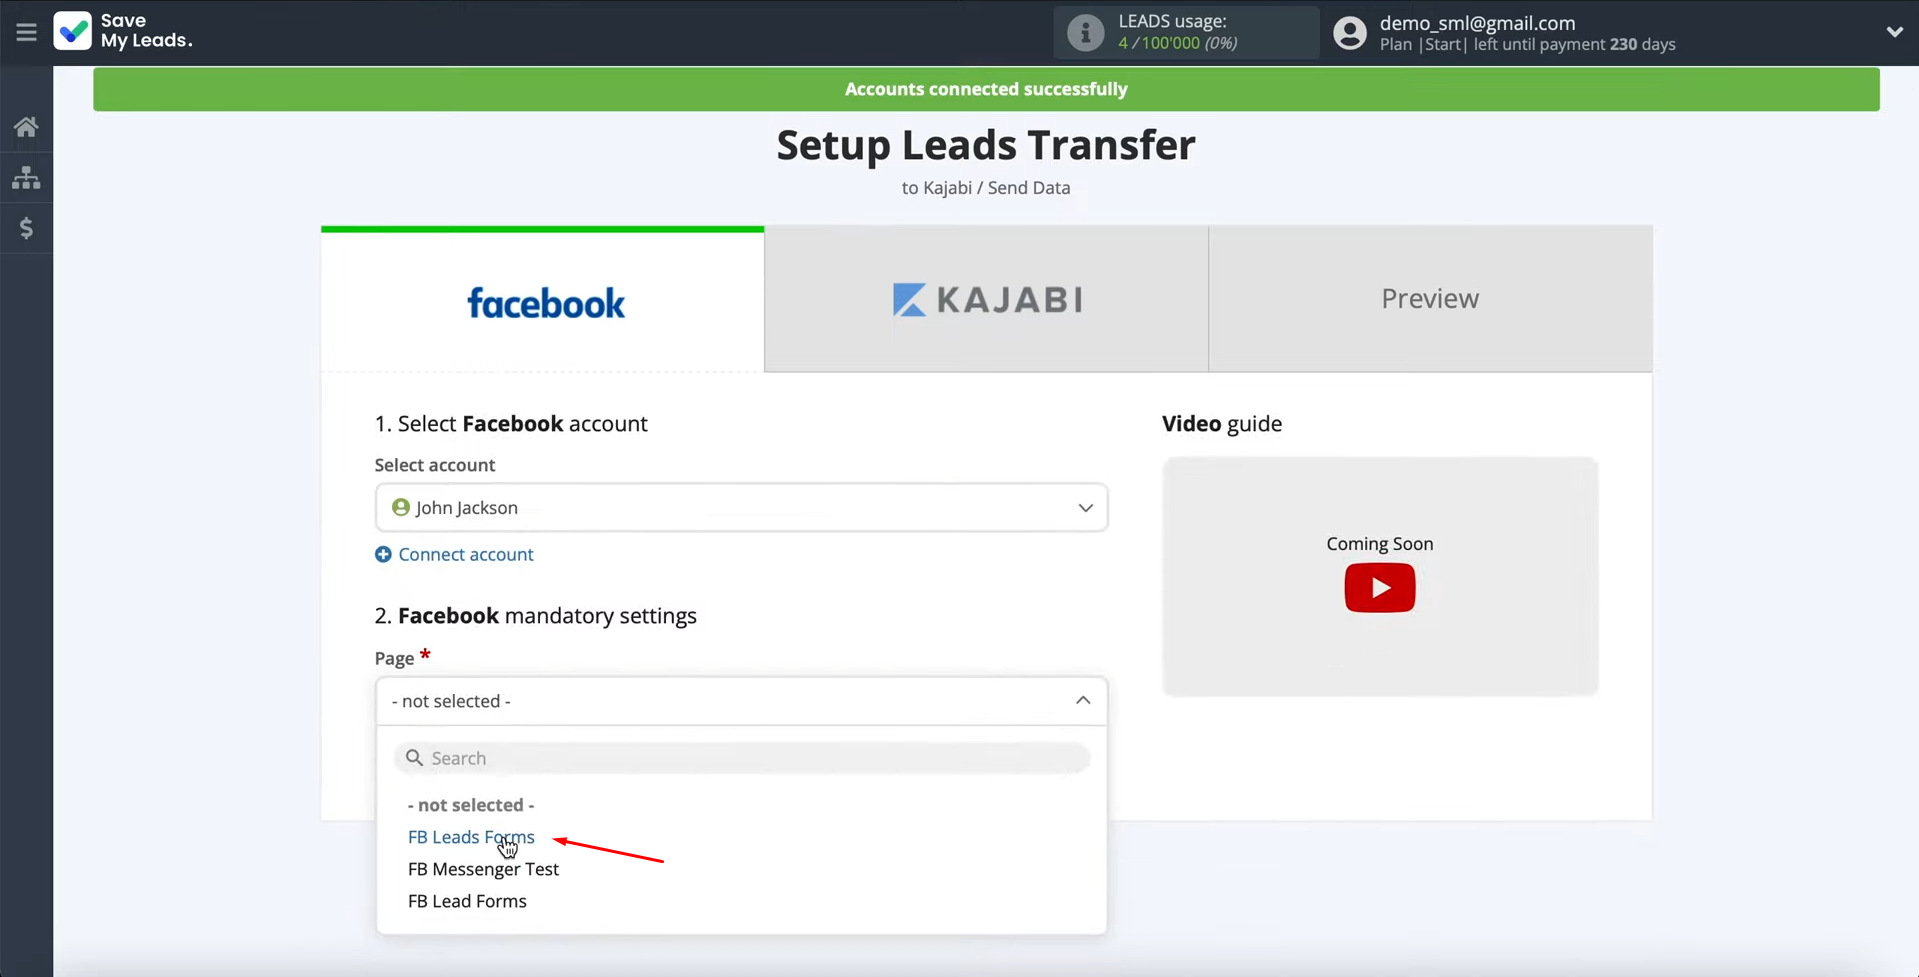
After that, we select the advertising page from which we want to upload leads.
Then we need to specify the forms from which the data will be downloaded. If you have multiple forms specified, you will have to create multiple connections for each of
them. Click
“Continue”.
Setting up the Receiver – Kajabi
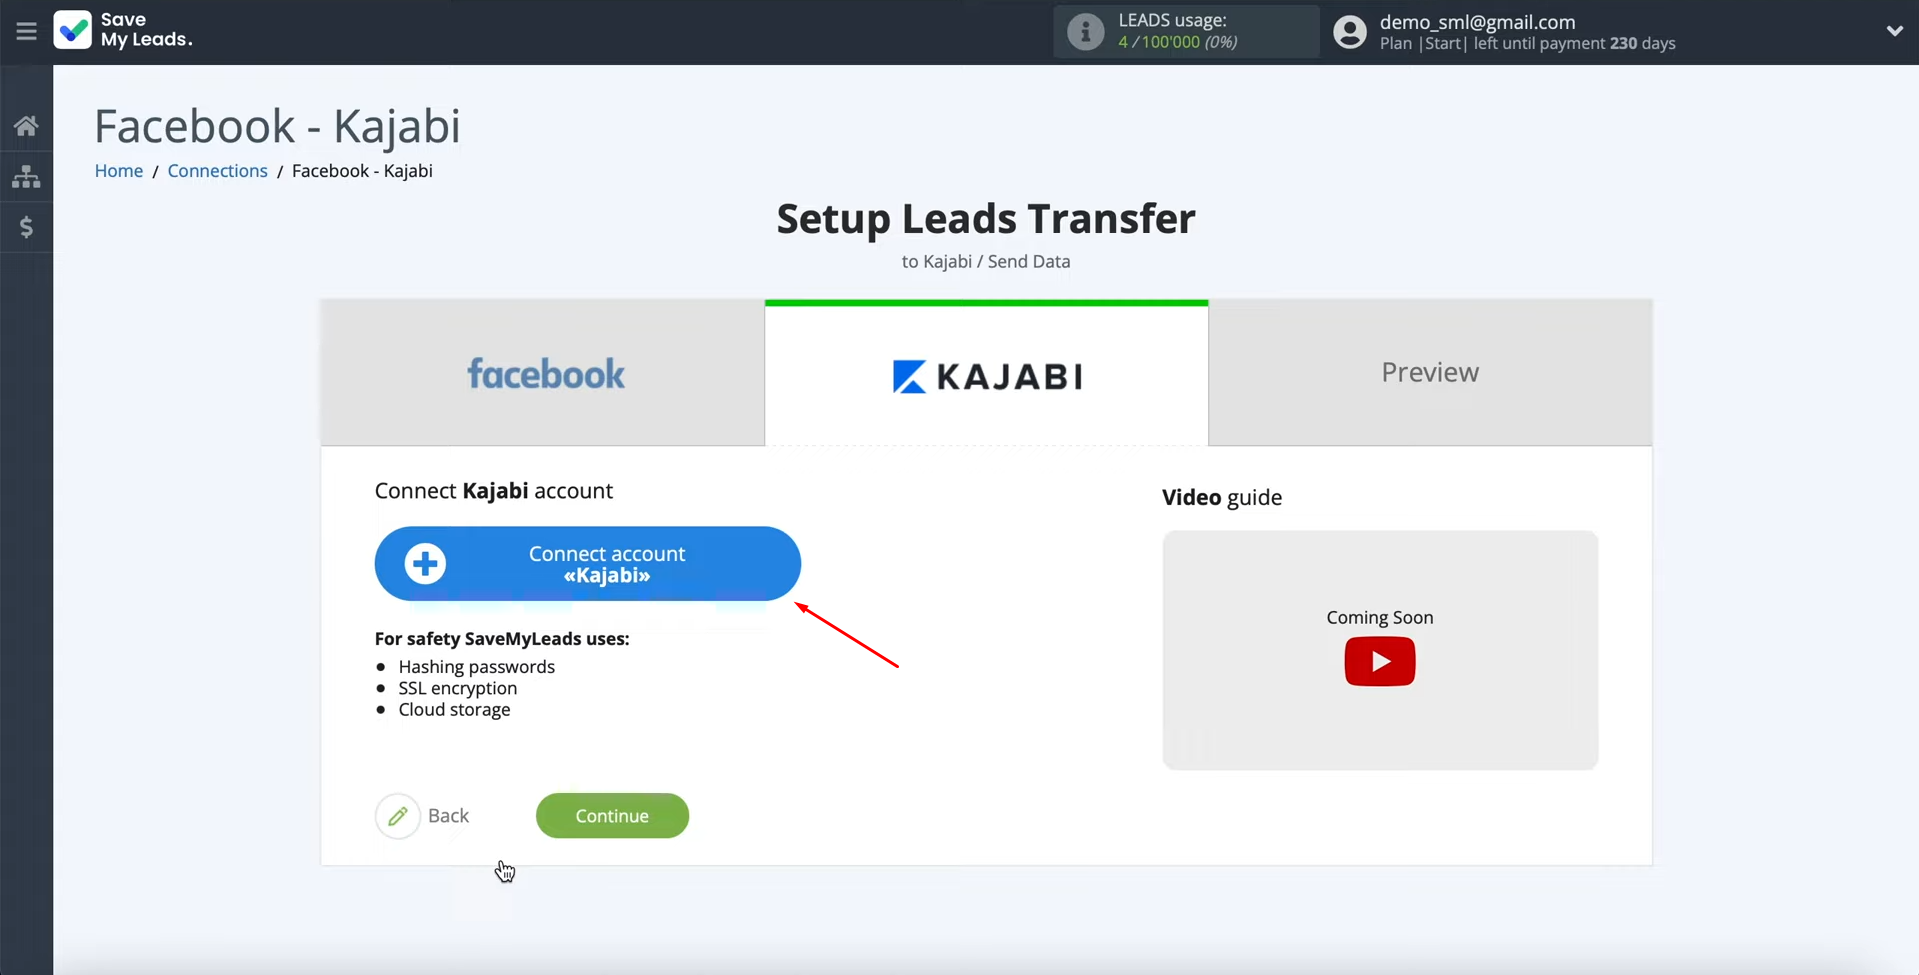
At this stage, you have to connect your Kajabi account to the SaveMyLeads service. Click on the blue button.
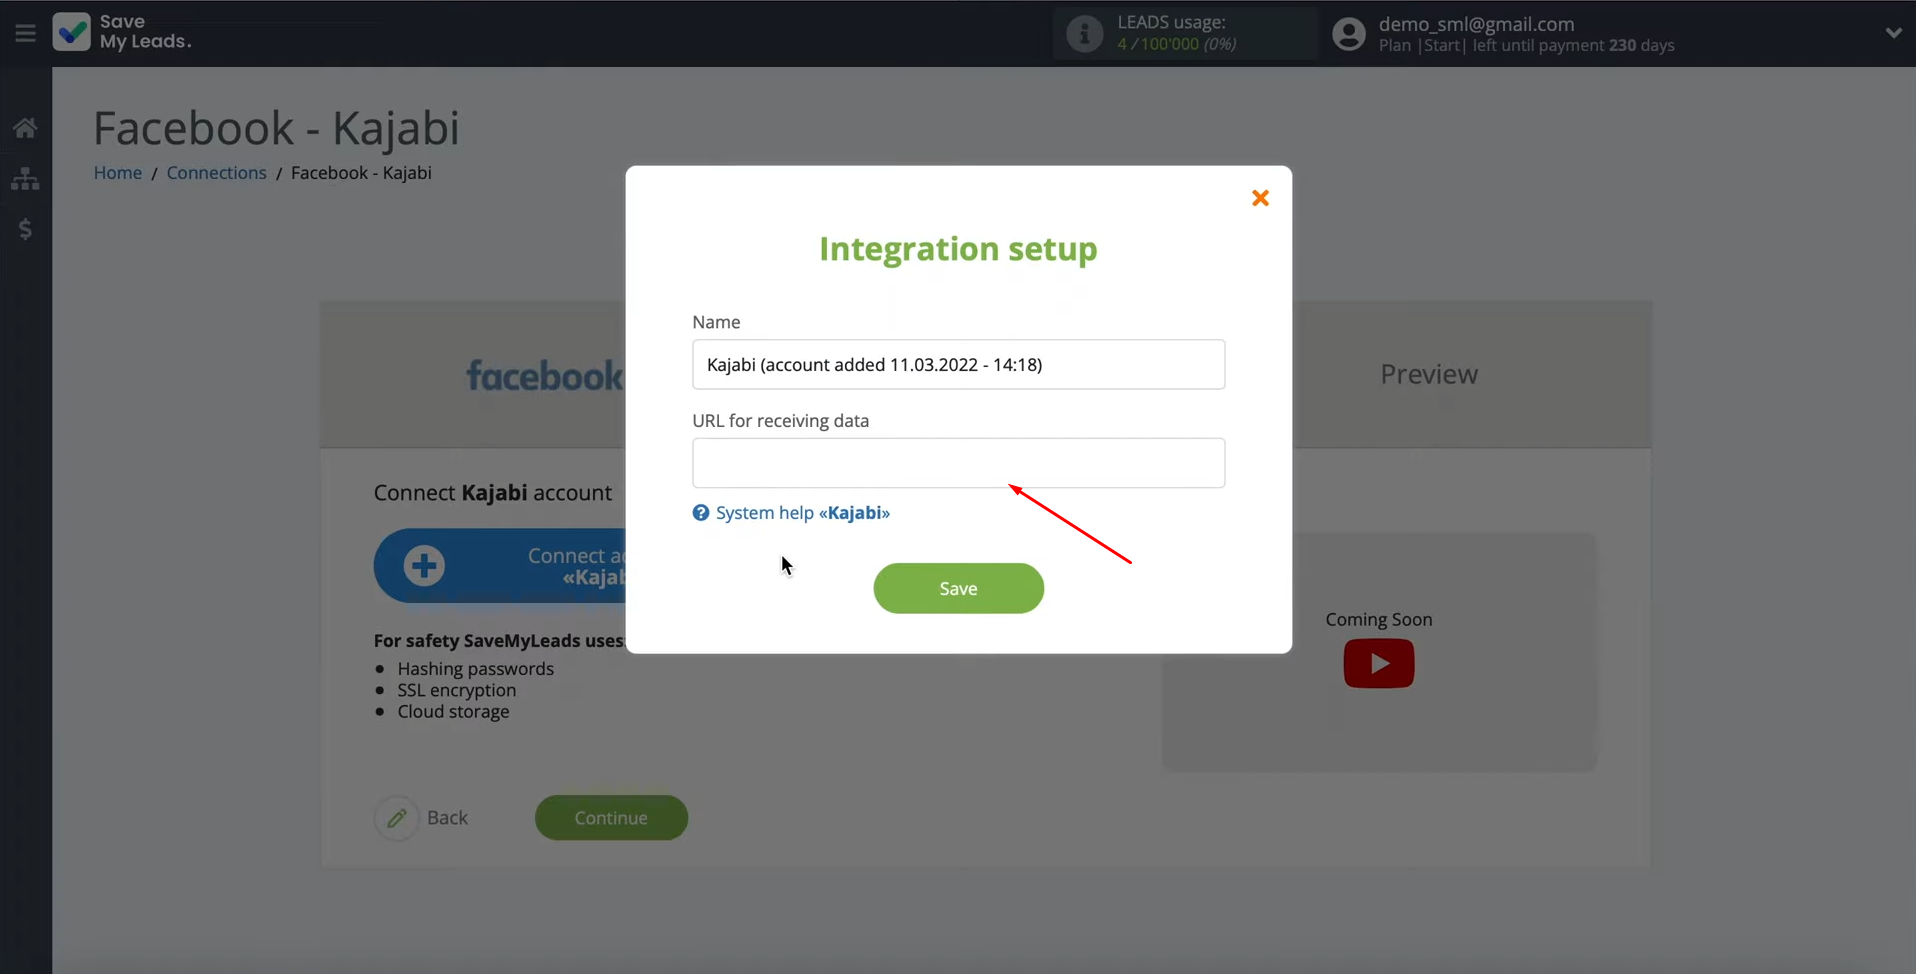
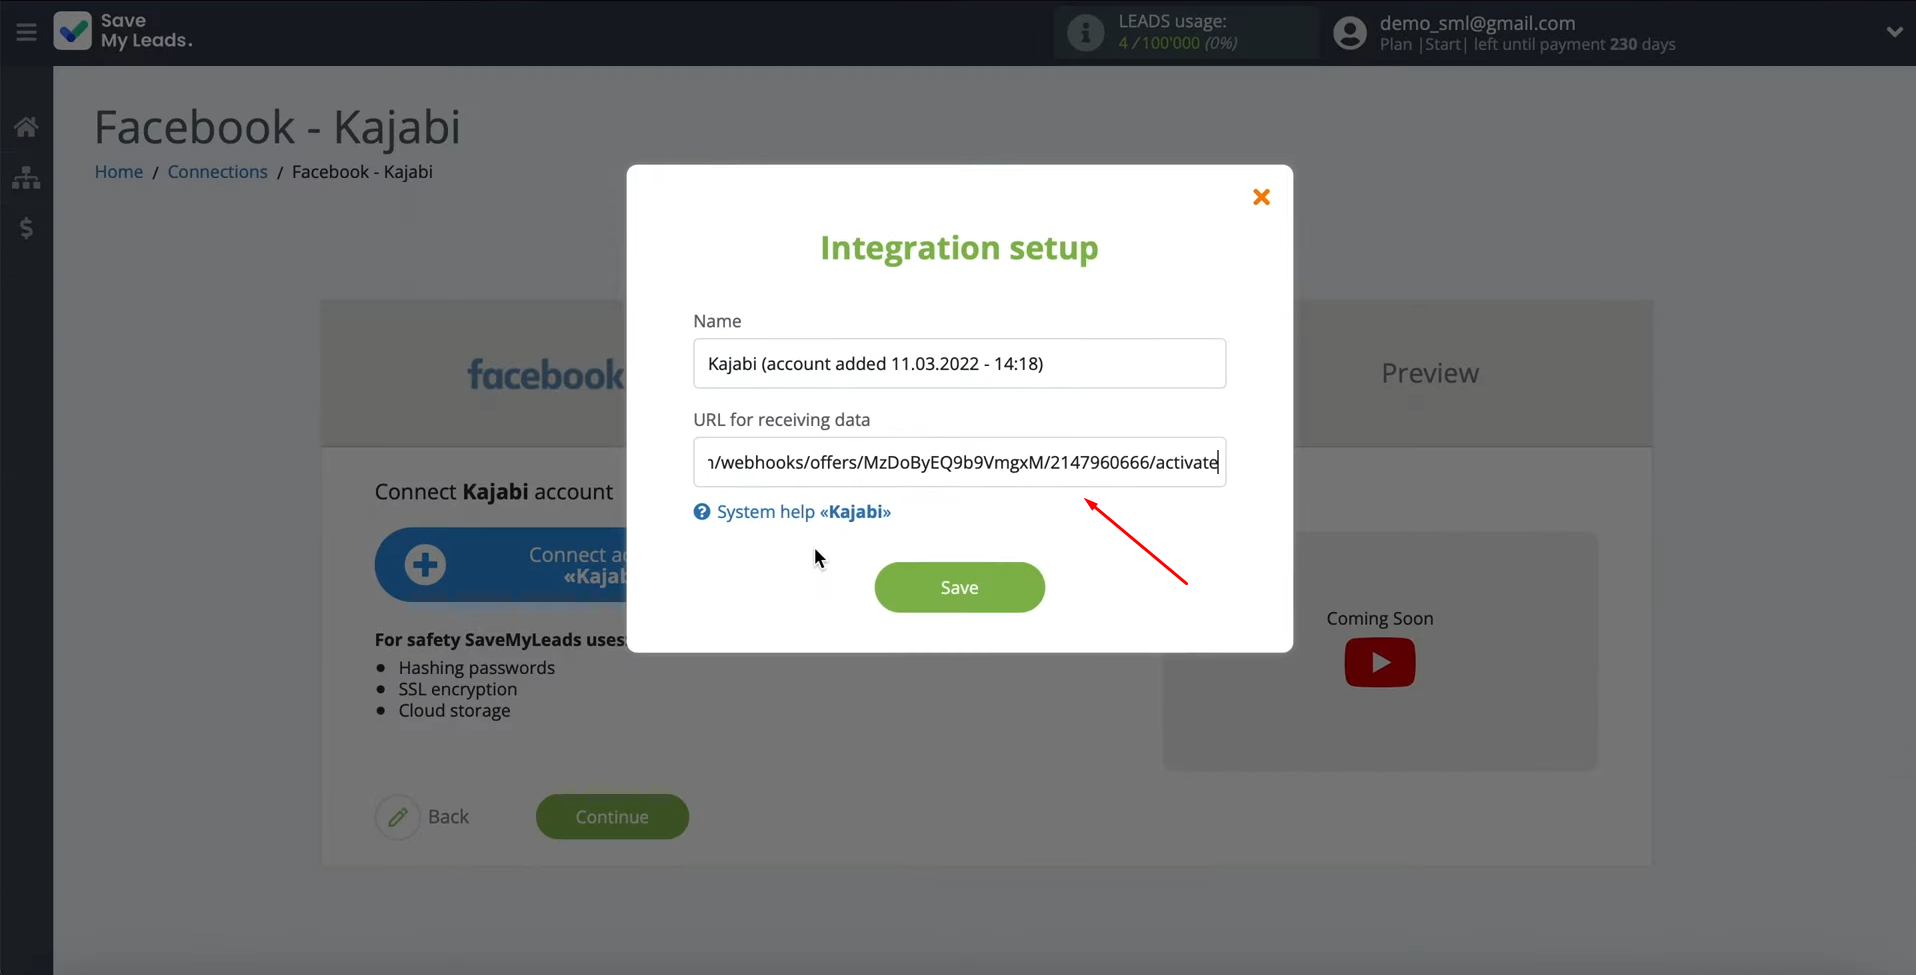
In this window, you must specify the URL to which data from SaveMyLeads will be sent.
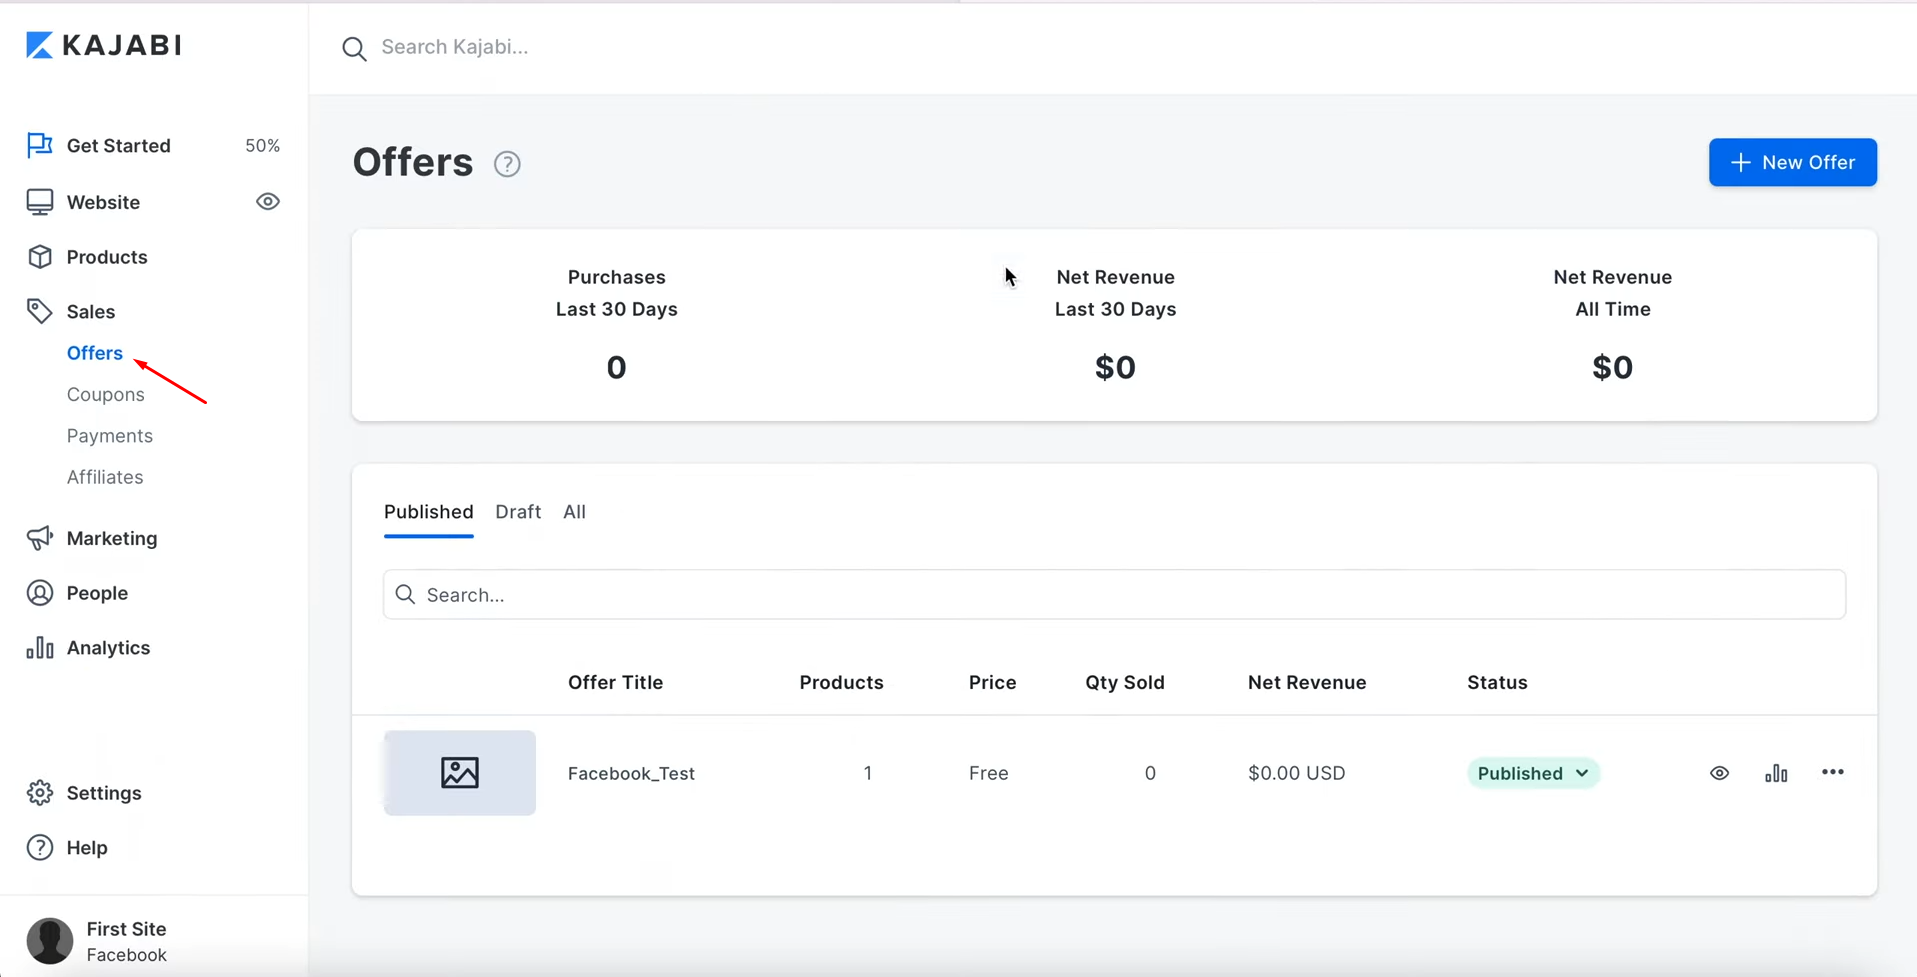
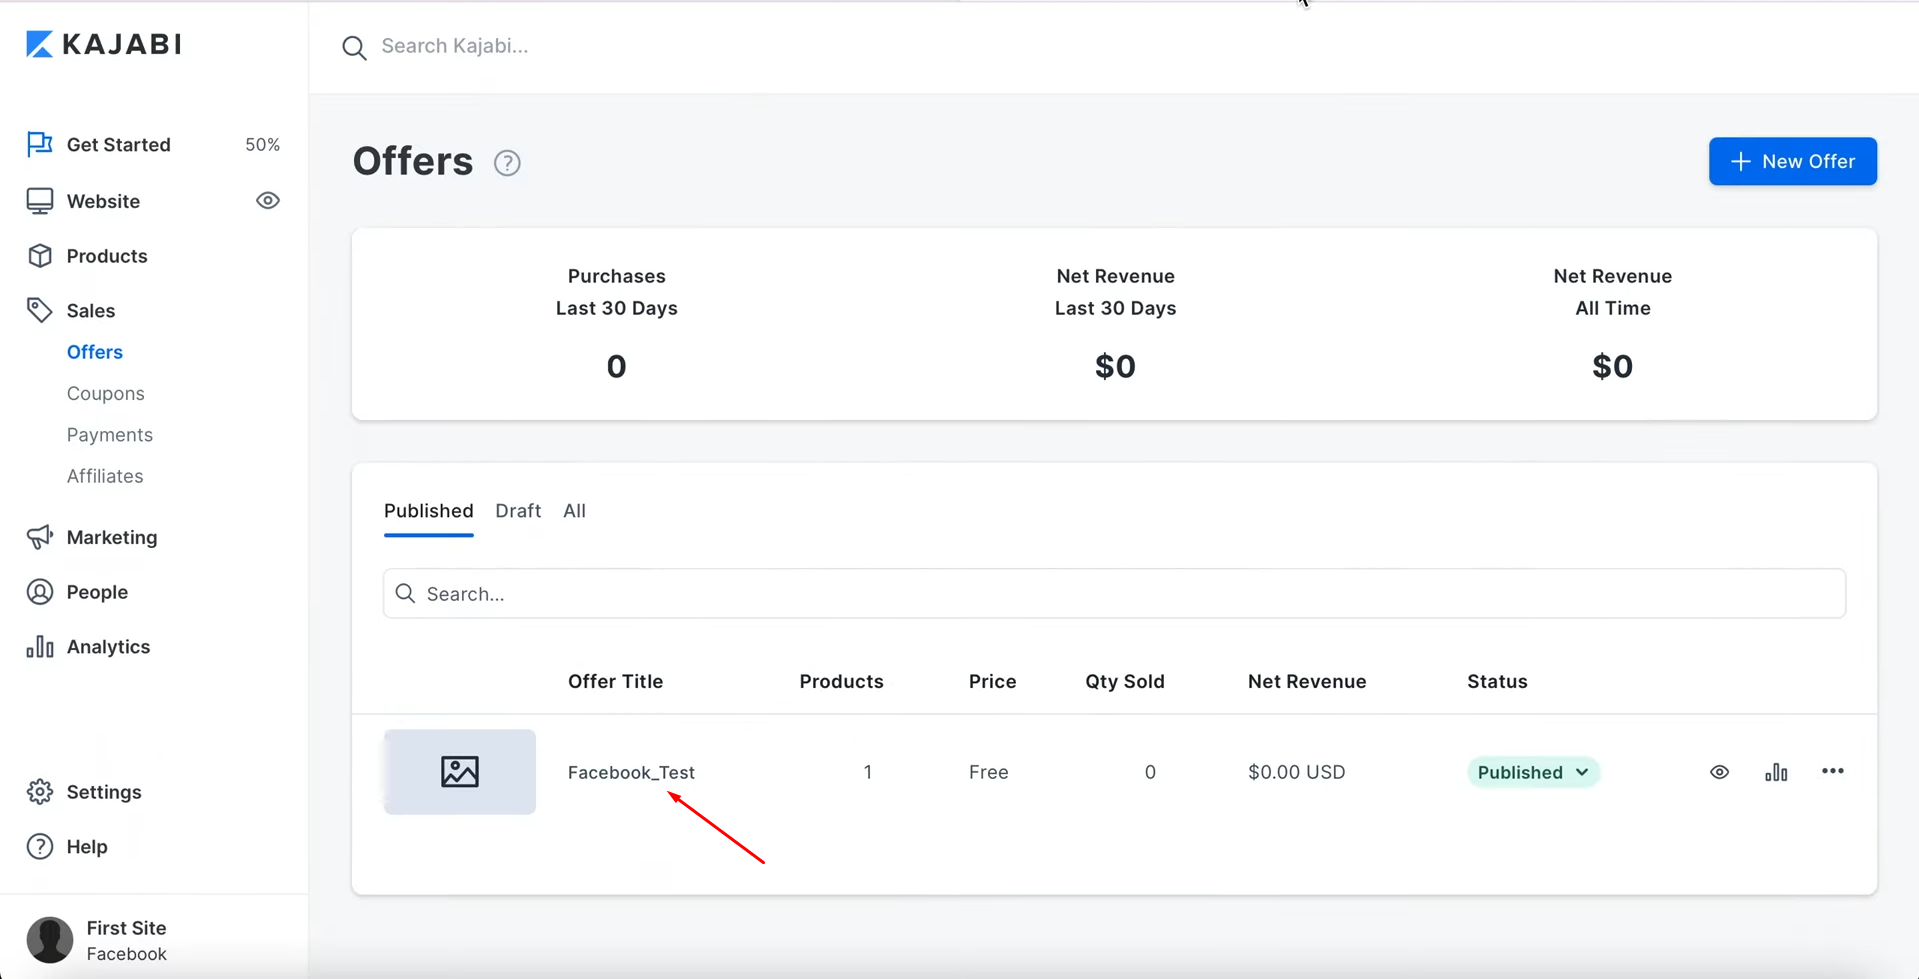
To get this URL, go to your Kajabi account. Then you need to go through your offers.
Click
on your offer.
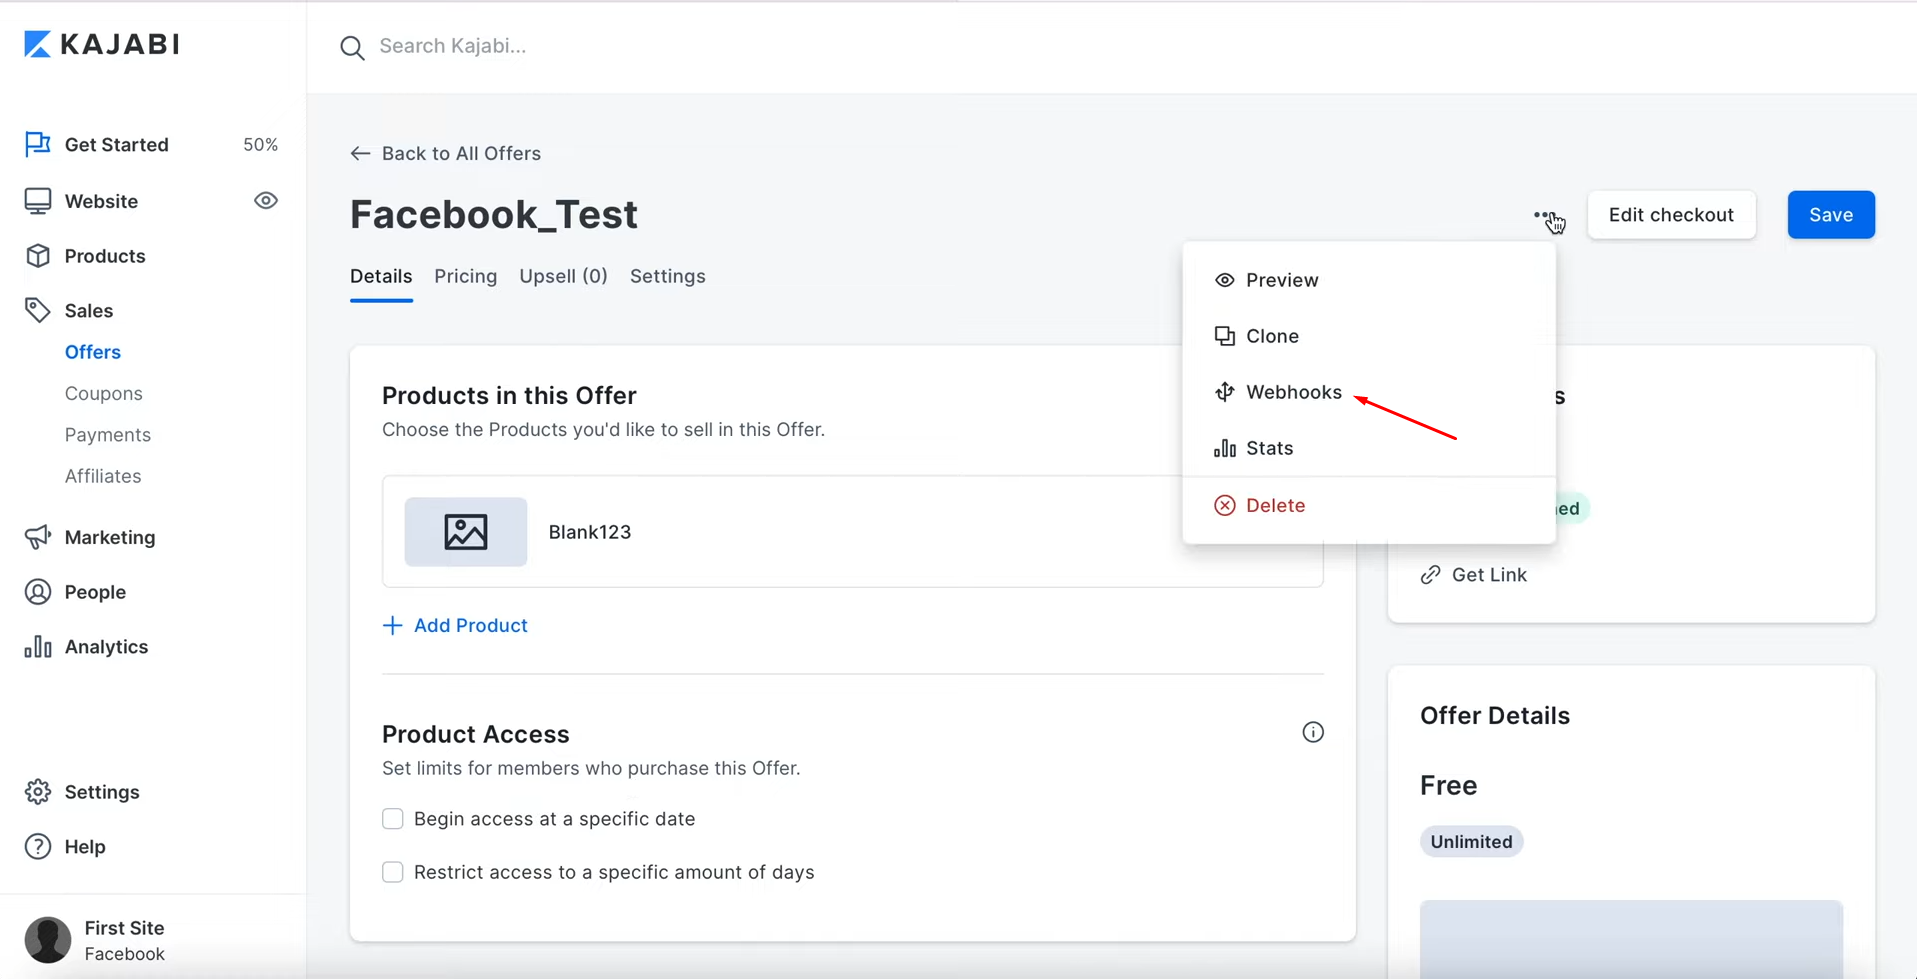
Click the three-dot icon and select "Webhooks".
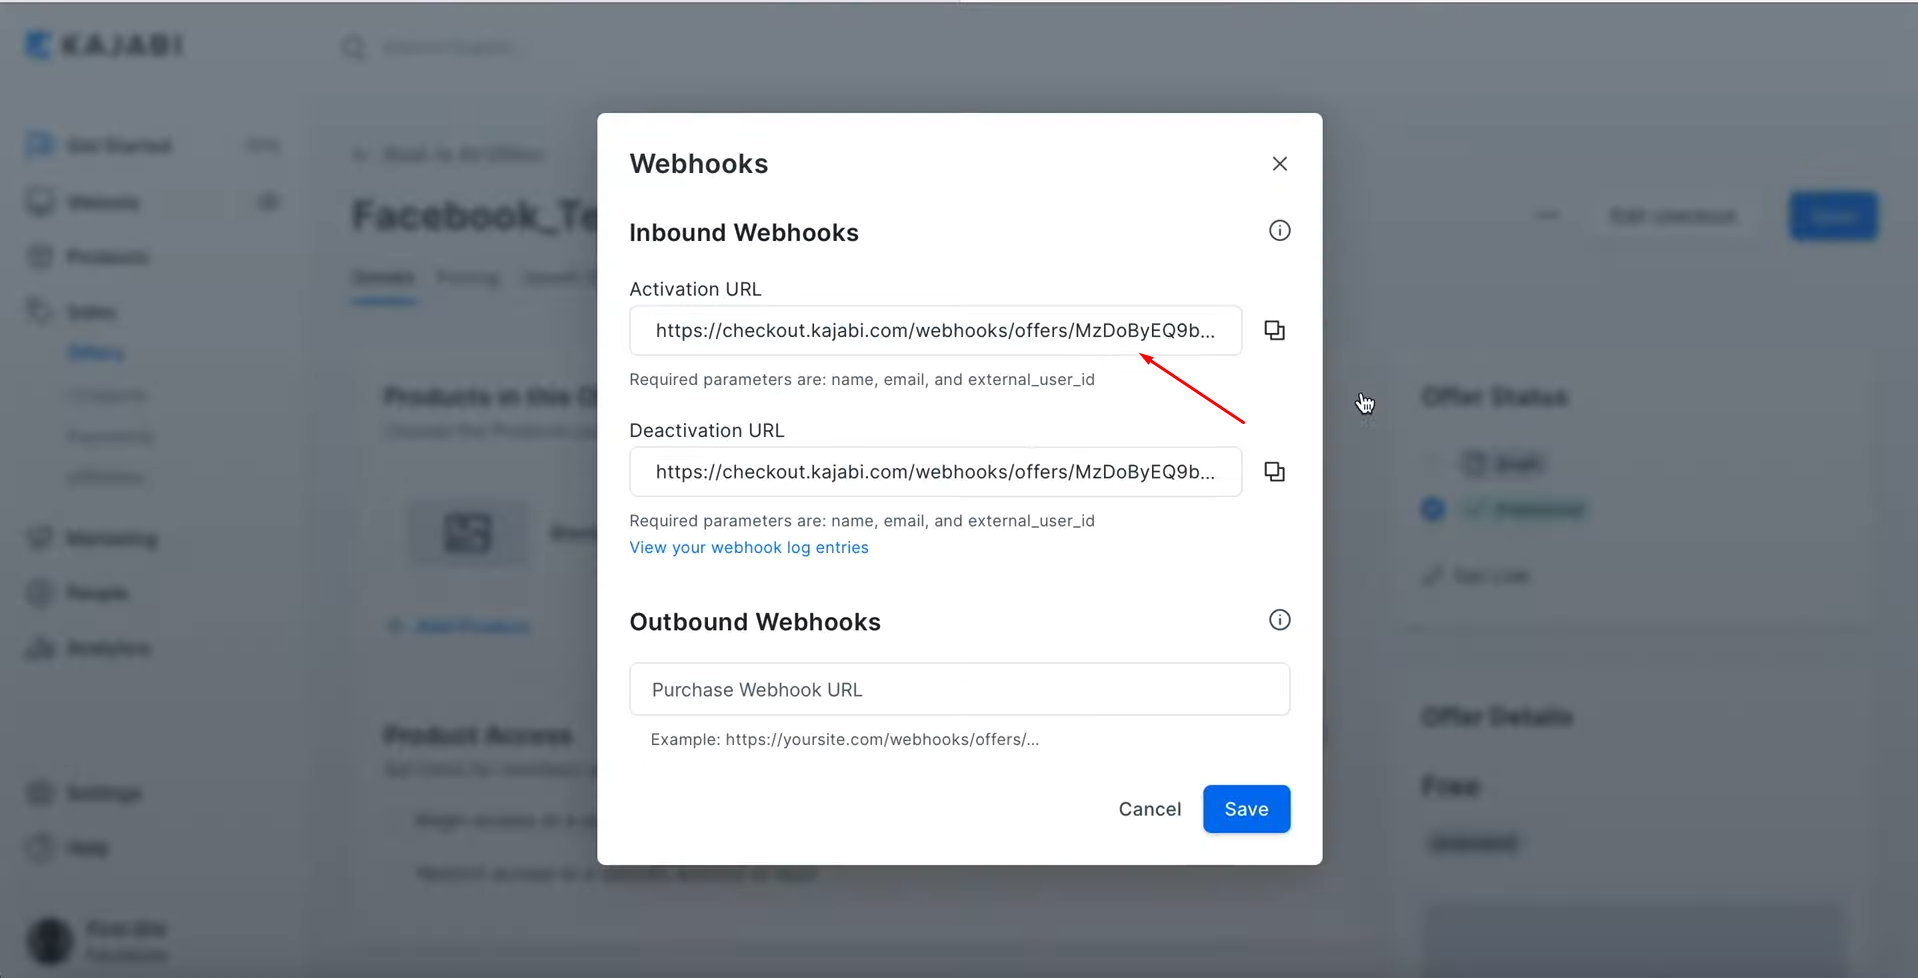
Copy the activation URL.
Paste the copied value into the appropriate field by returning to the SaveMyLeads system. When the required field is filled, click “Save”.
When the connected account is displayed in the list, select it.
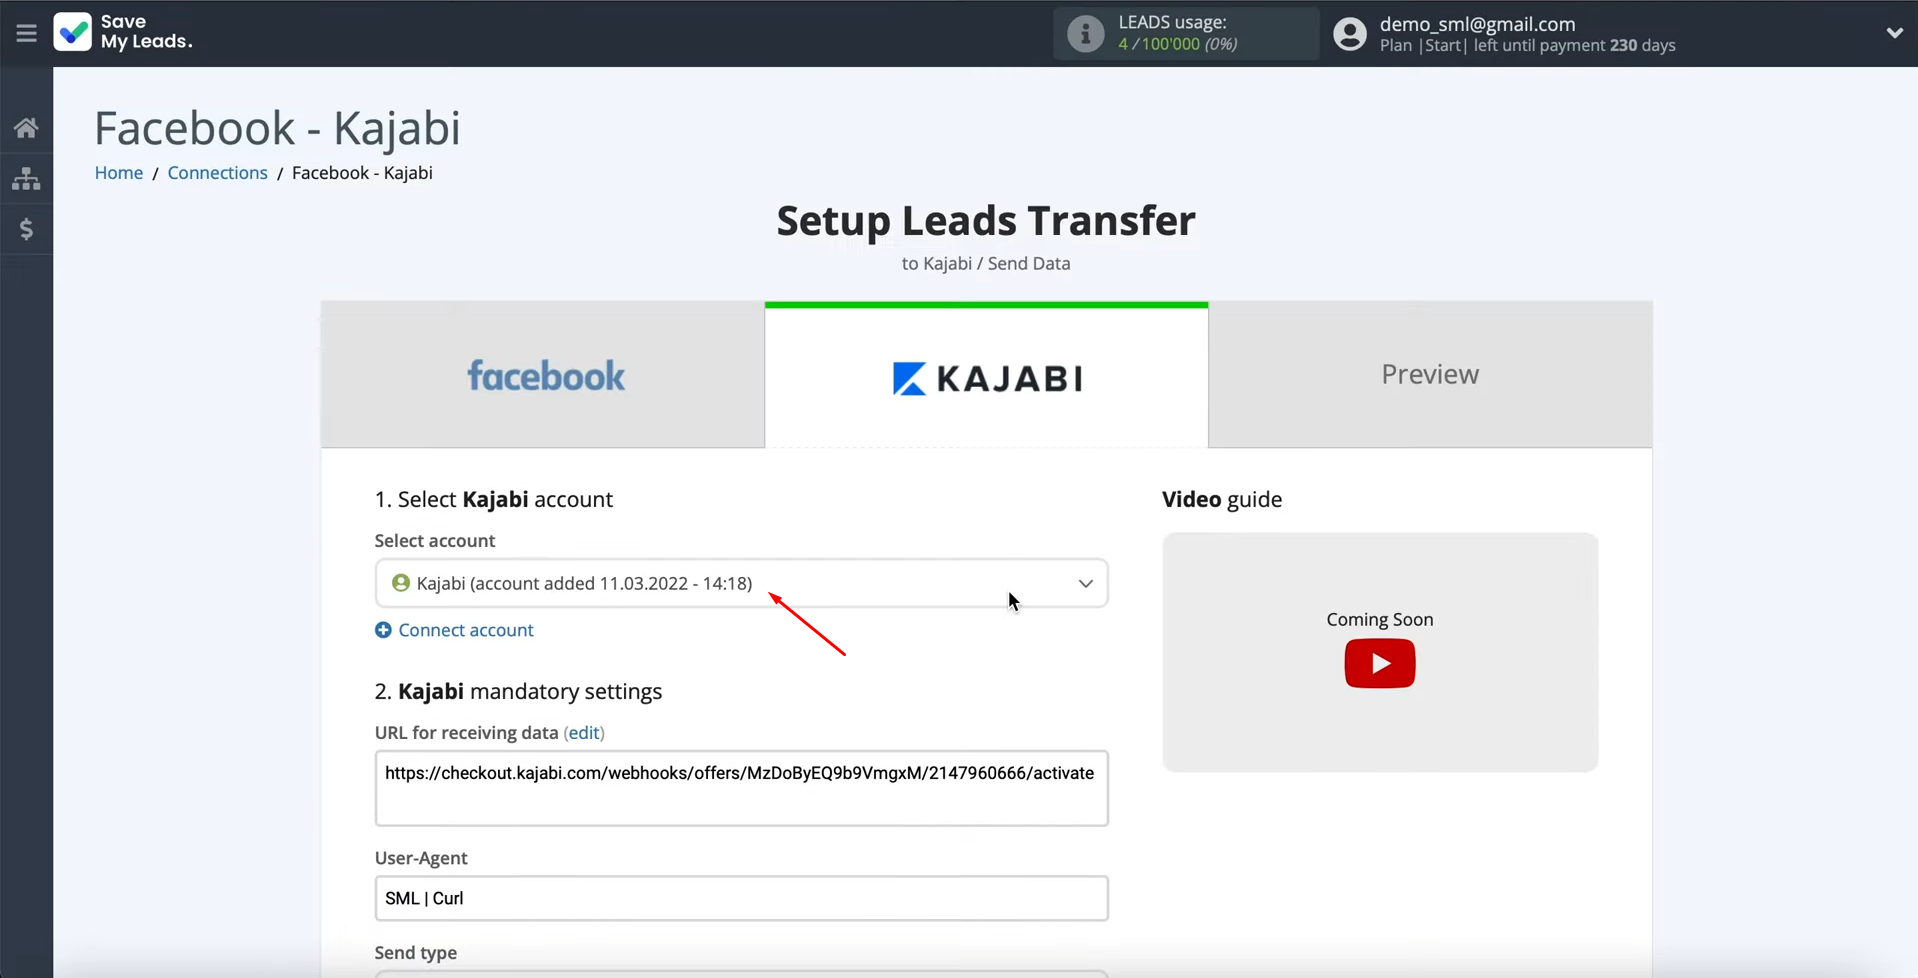
Then you need to select the type of data sending: “Post”.
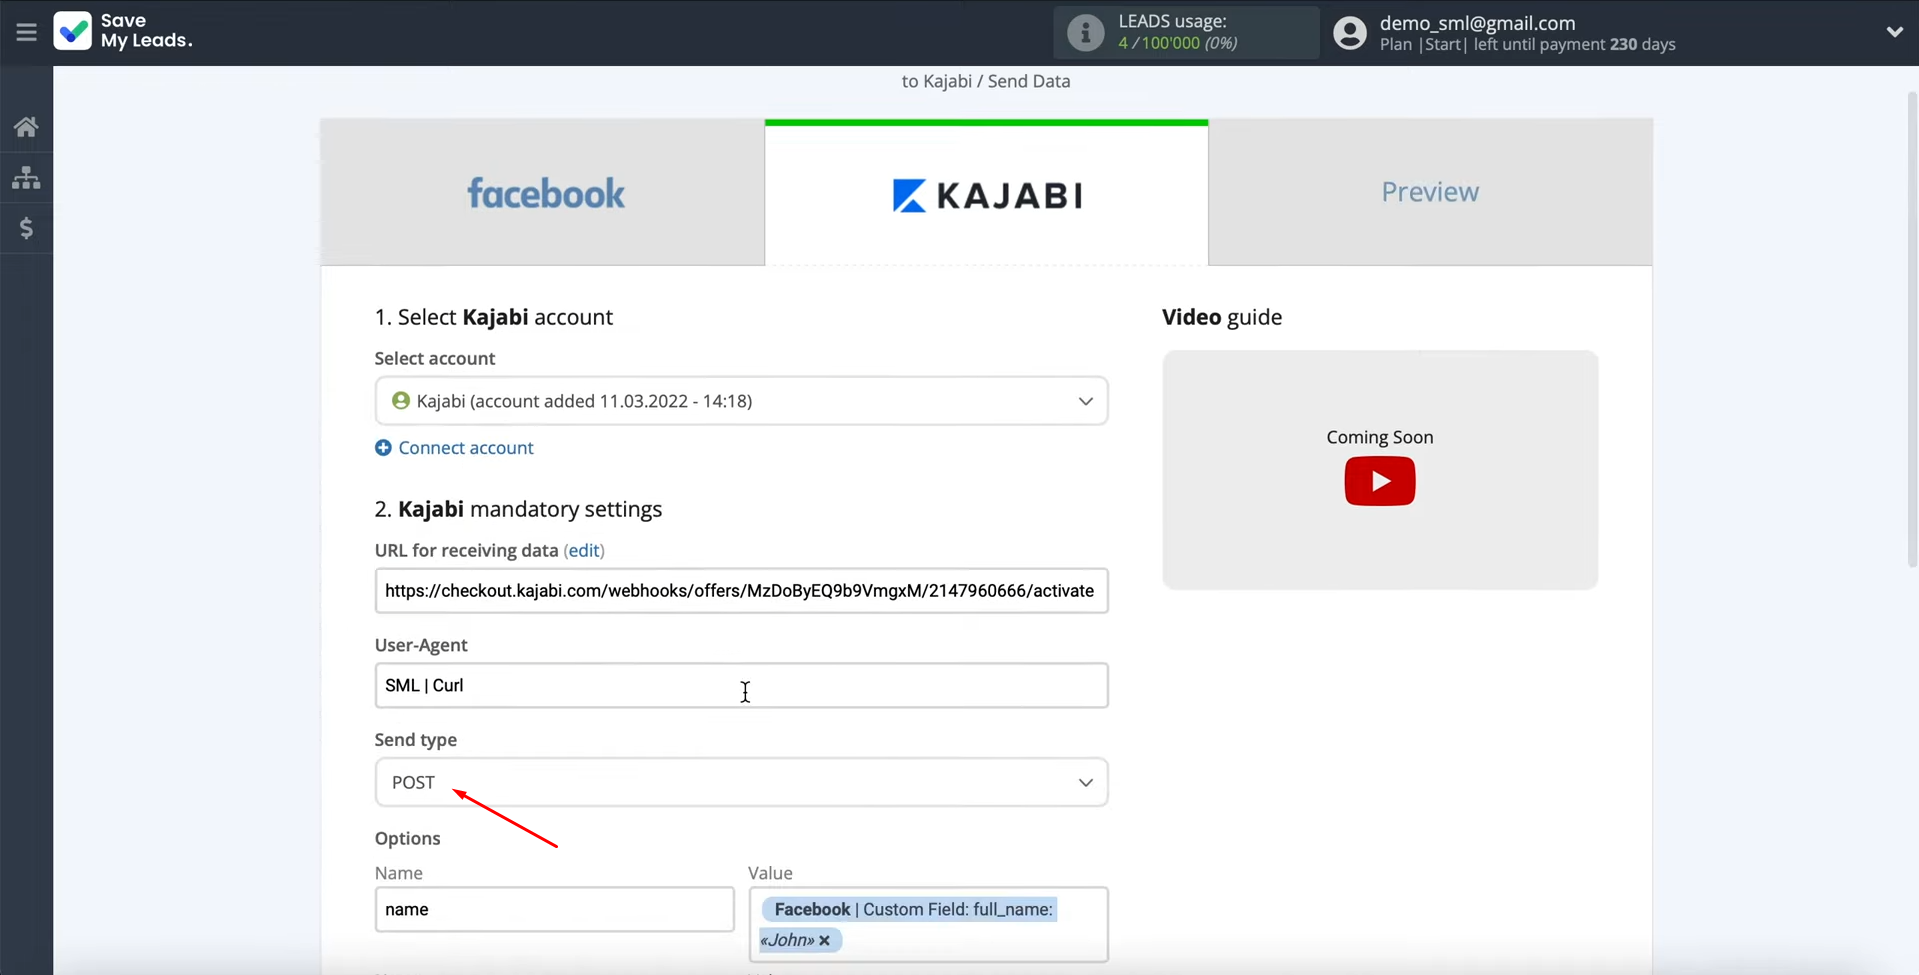
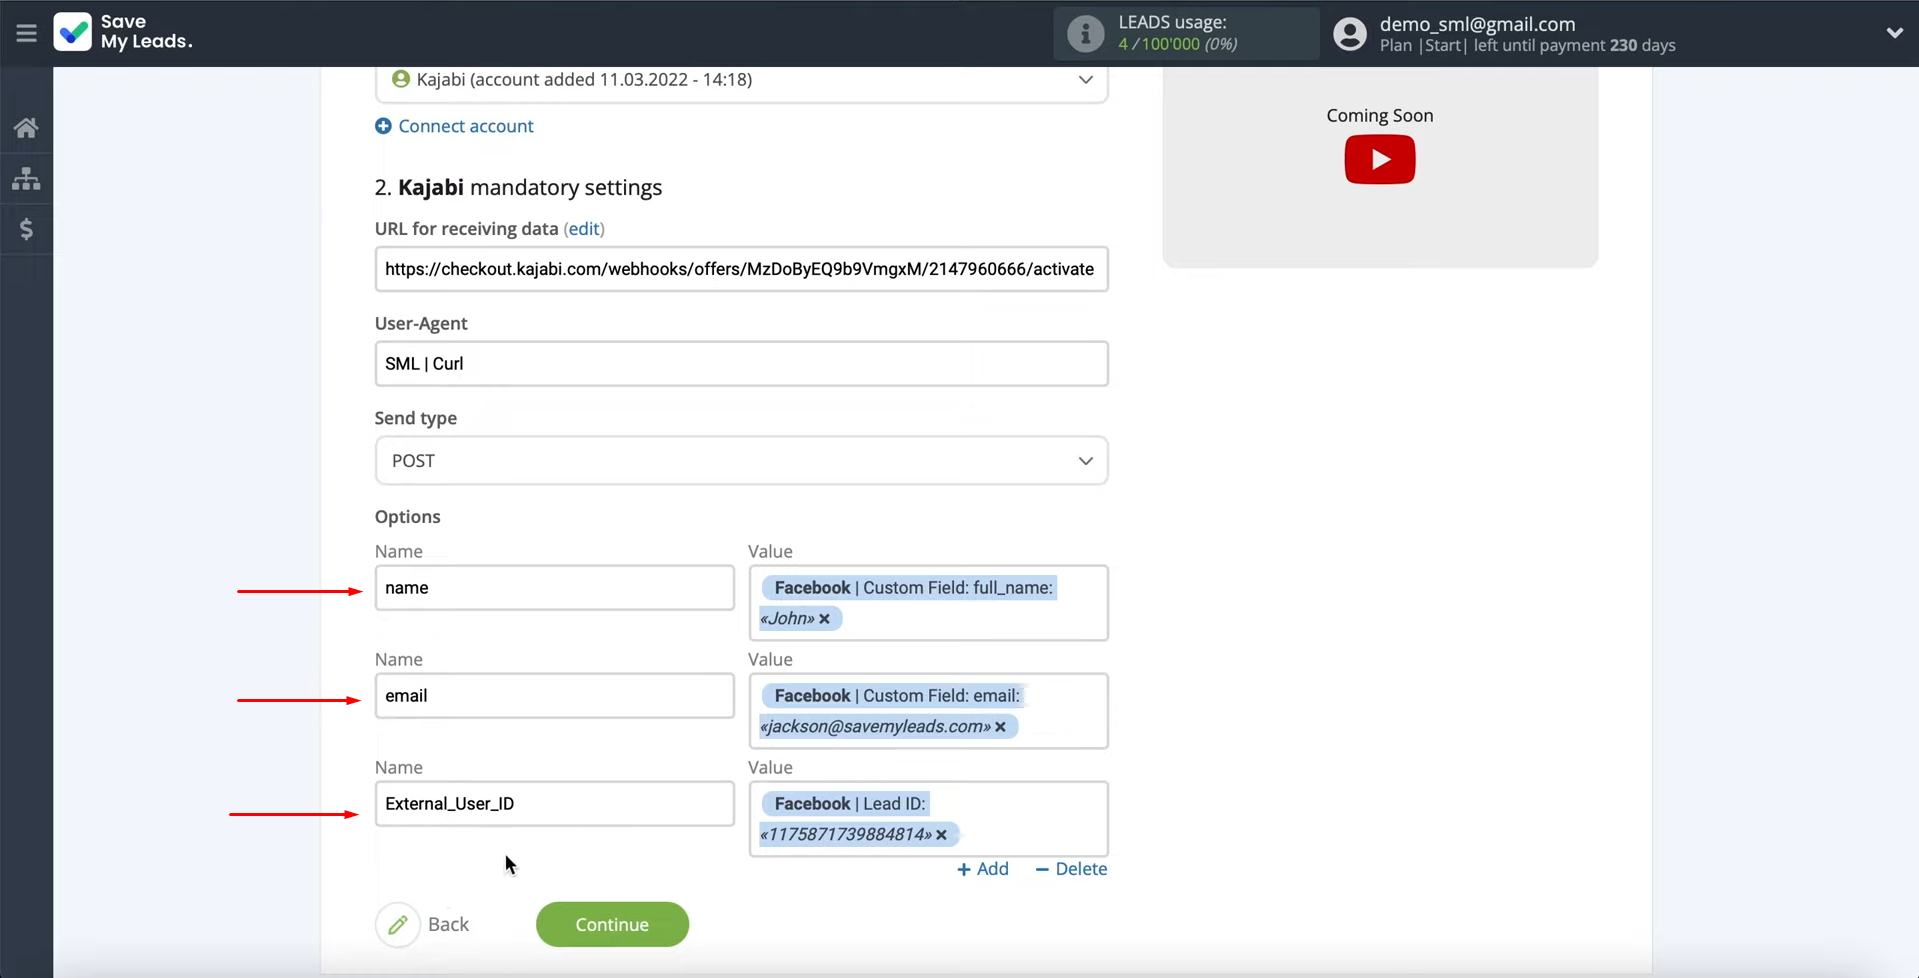
Now
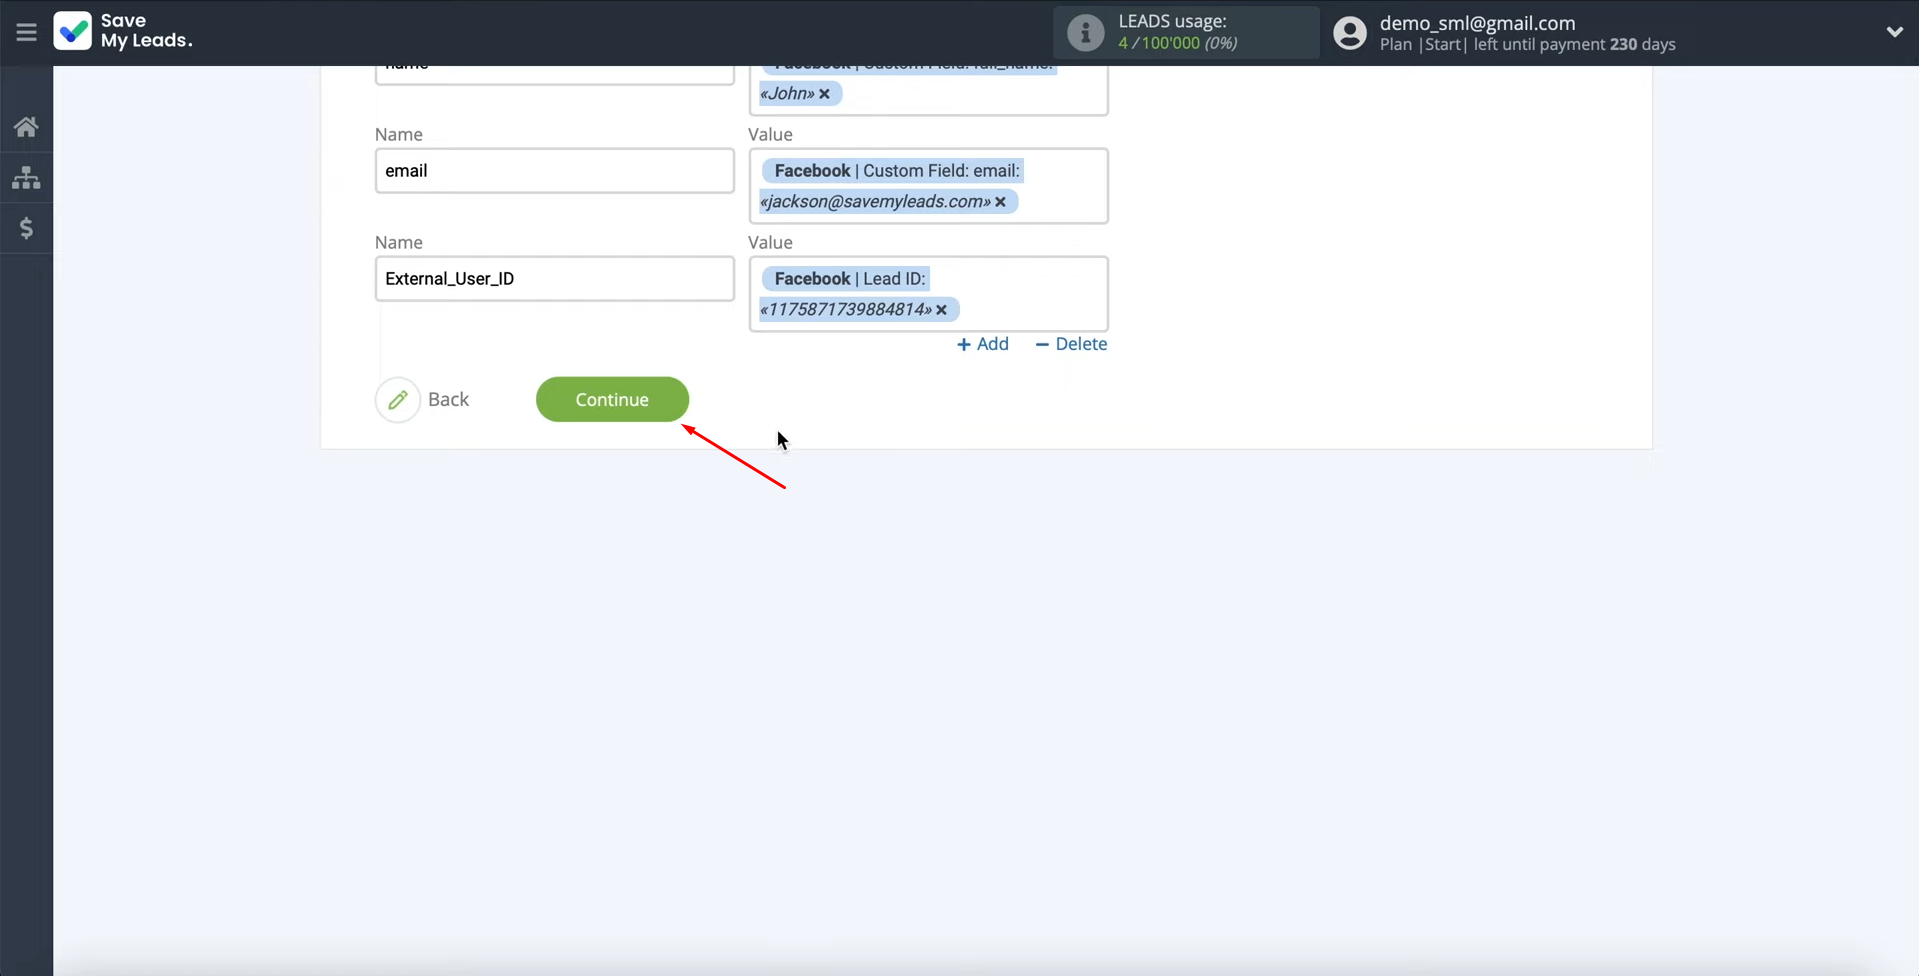
you have to compose the names of the variables
and their values, which will be sent to Kajabi
as new contacts. Variable
names are standard.
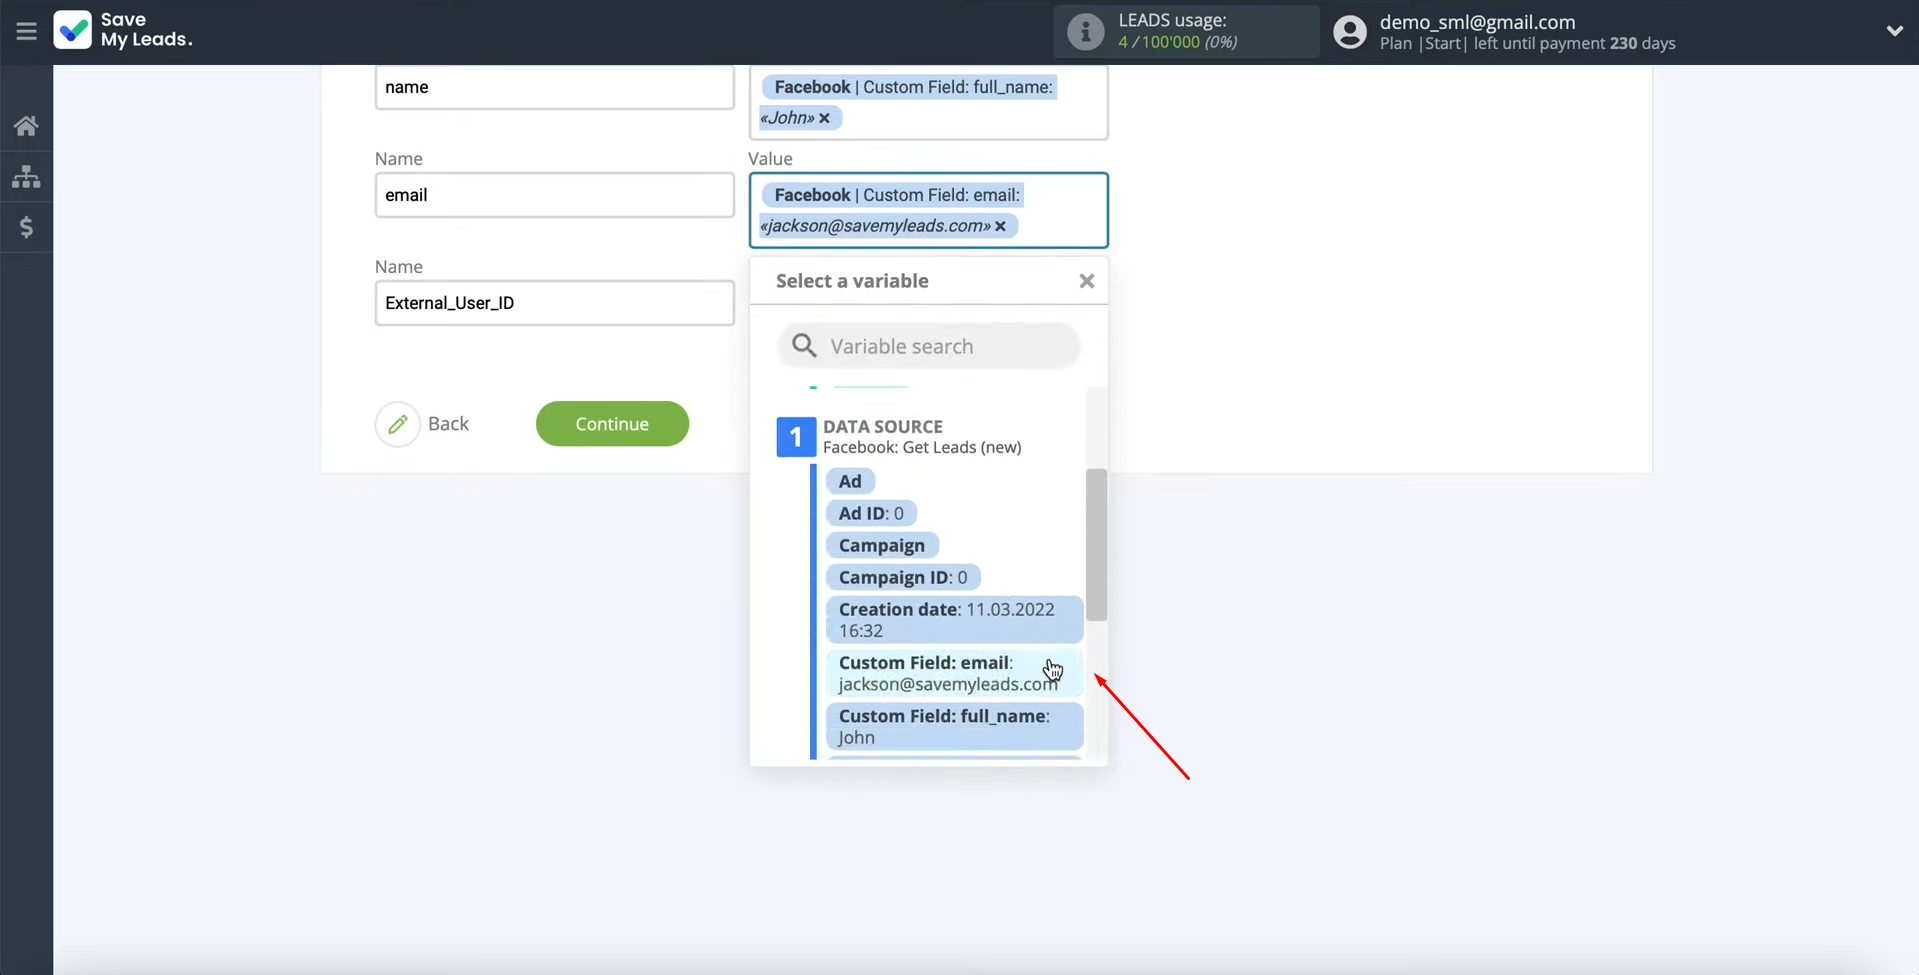
To assign a variable to the value, you have to click in the field and
select a variable from the drop-down list.
If you are satisfied with the preset fields, you can leave them unchanged. When all required fields are filled in, click “Continue”.
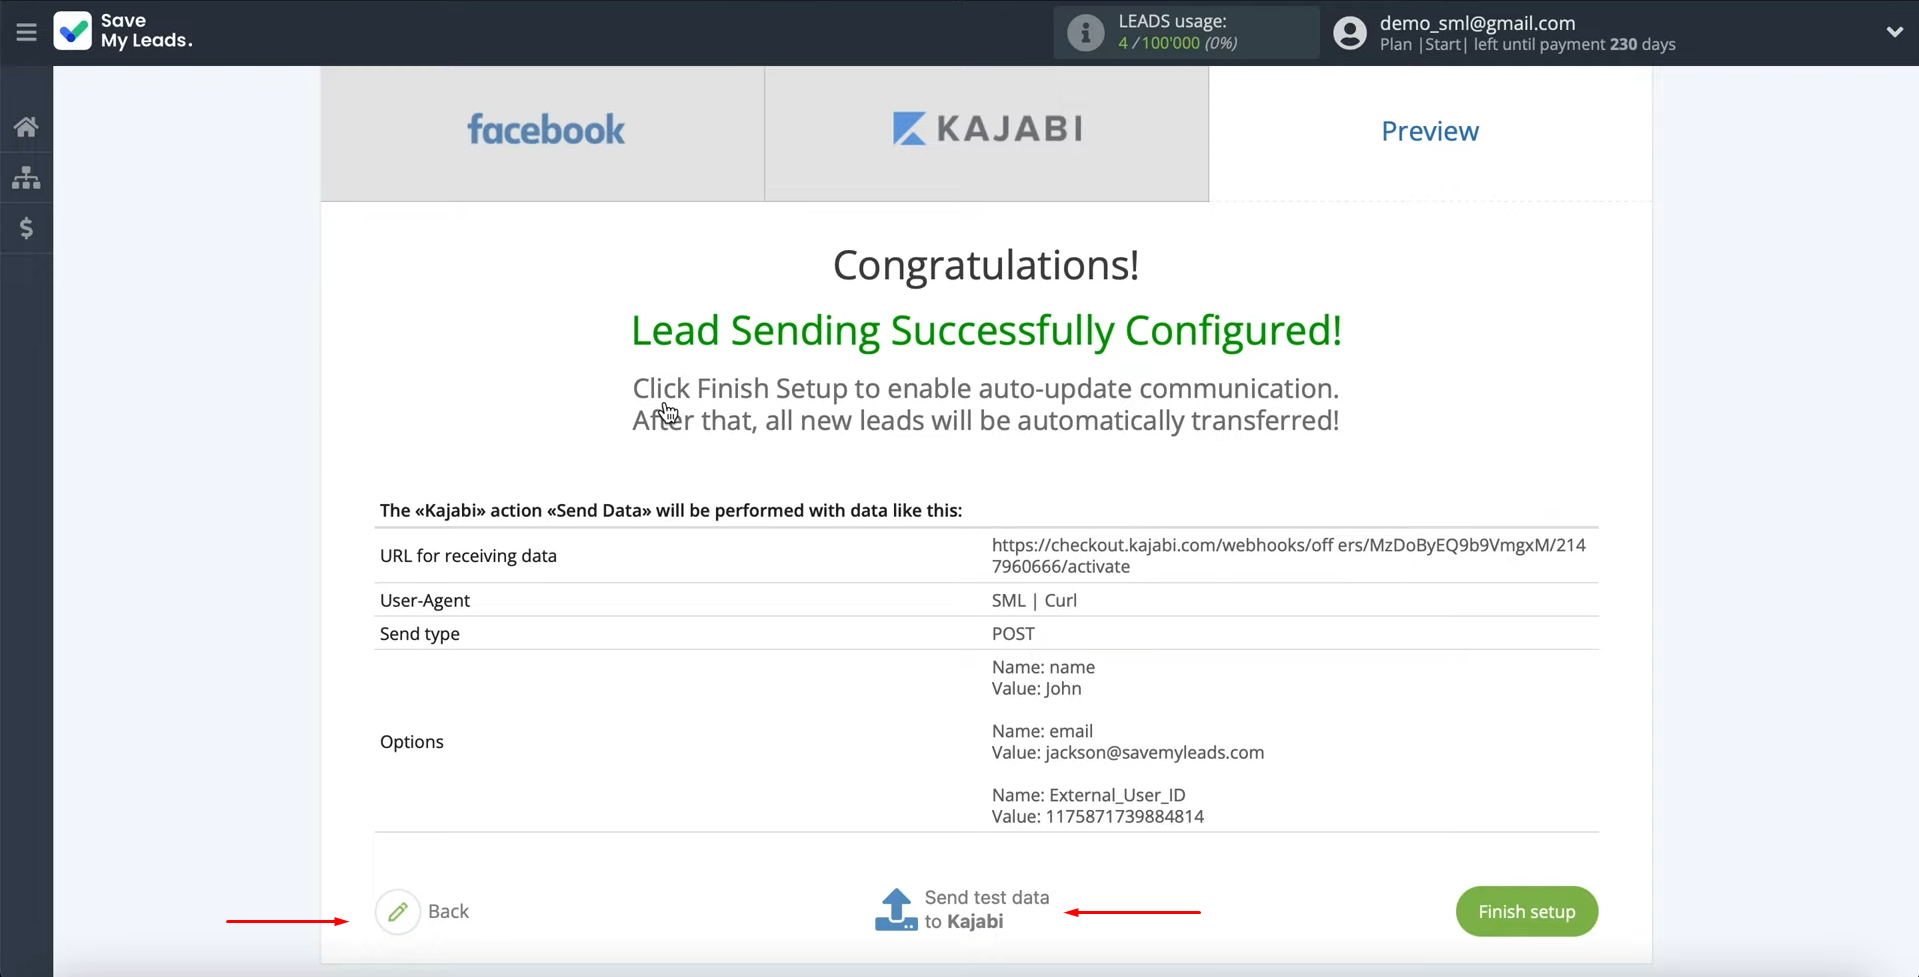
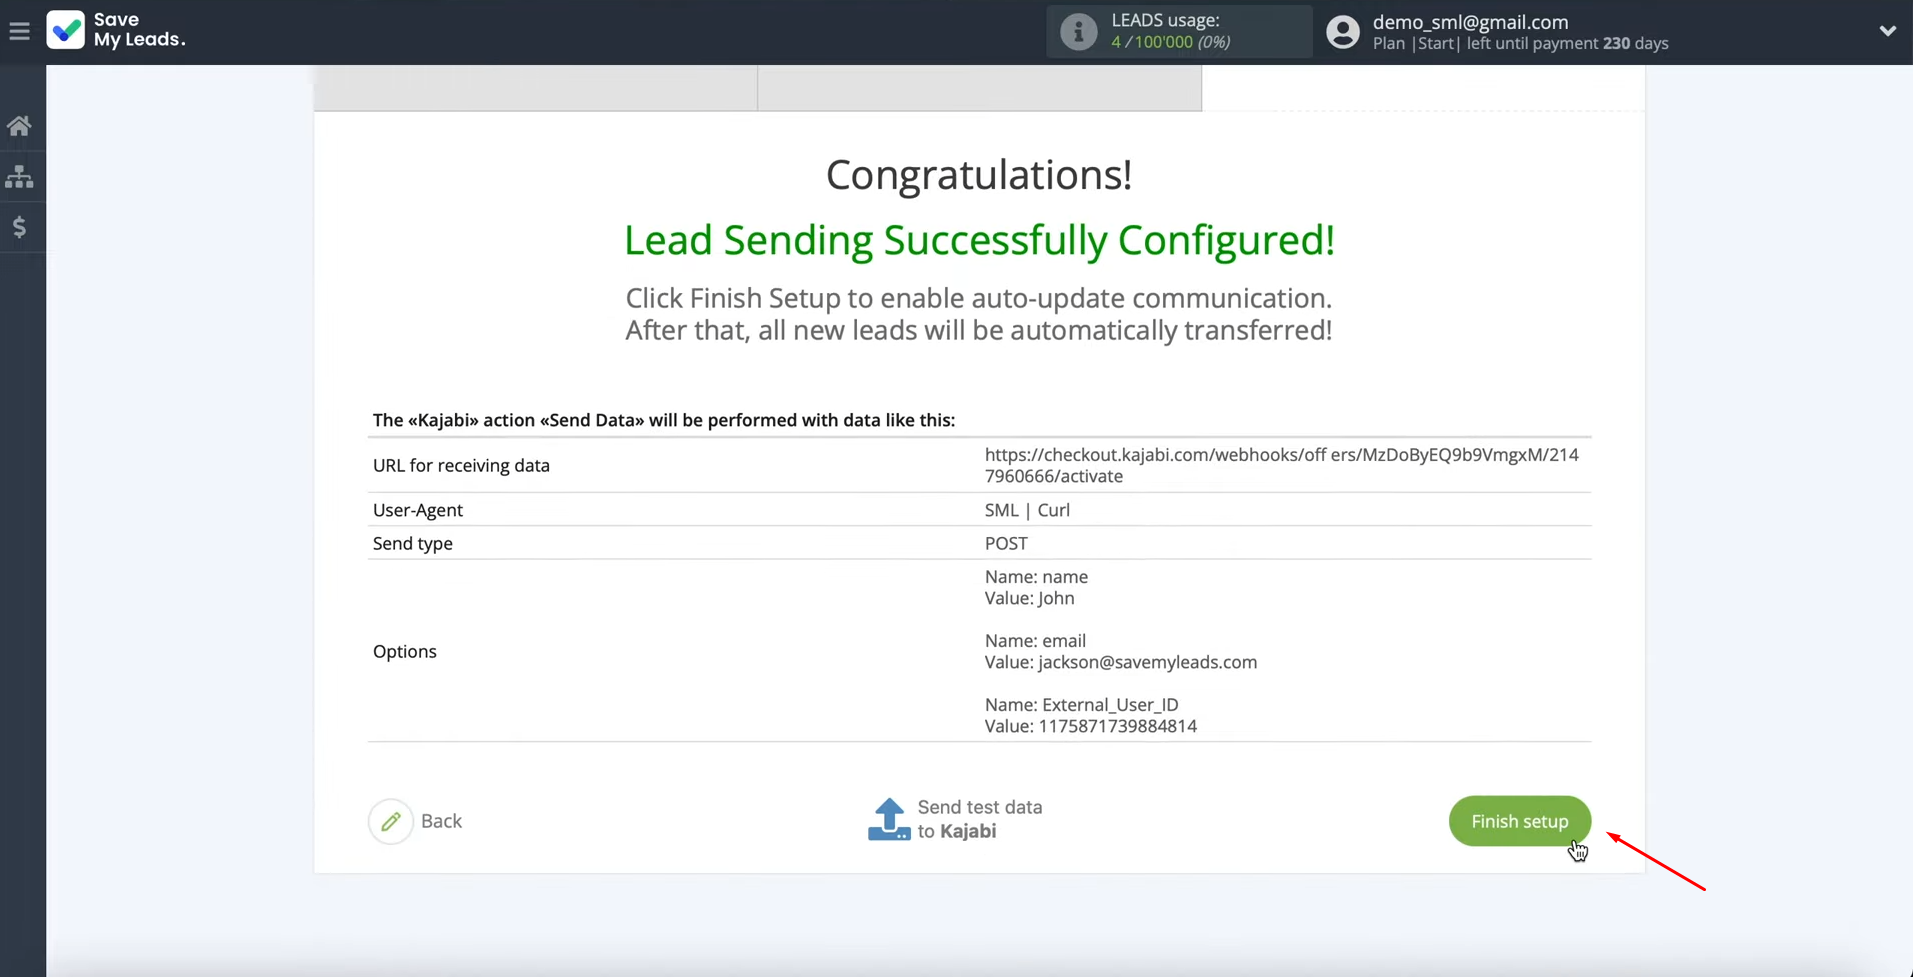
At this point, you see an example of the data that will be sent to Kajabi: new contacts for each new lead from Facebook. If something does not suit you, click "Back" and go back one step. To
check the correctness of the settings, click “Send test data to Kajabi”.
After successful submission, go to Kajabi and check
the result.
Click on “People”. Then go to your new contact.
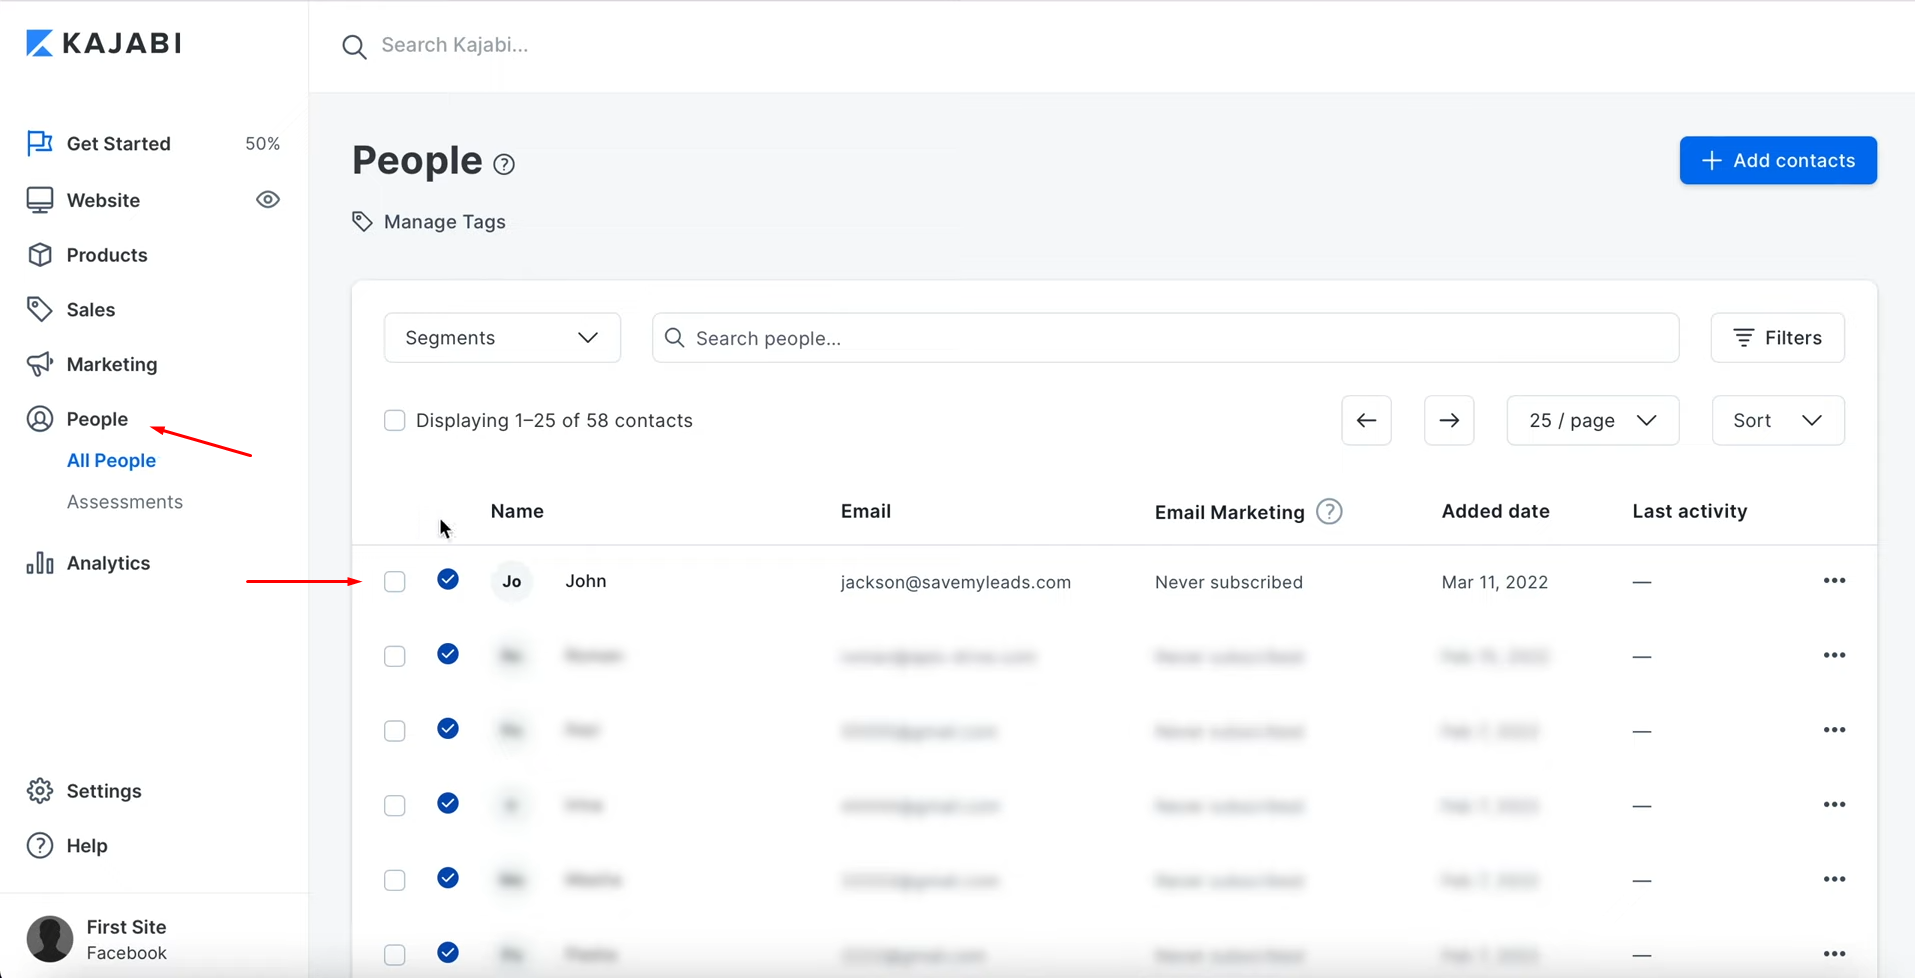
This is what it will look like.
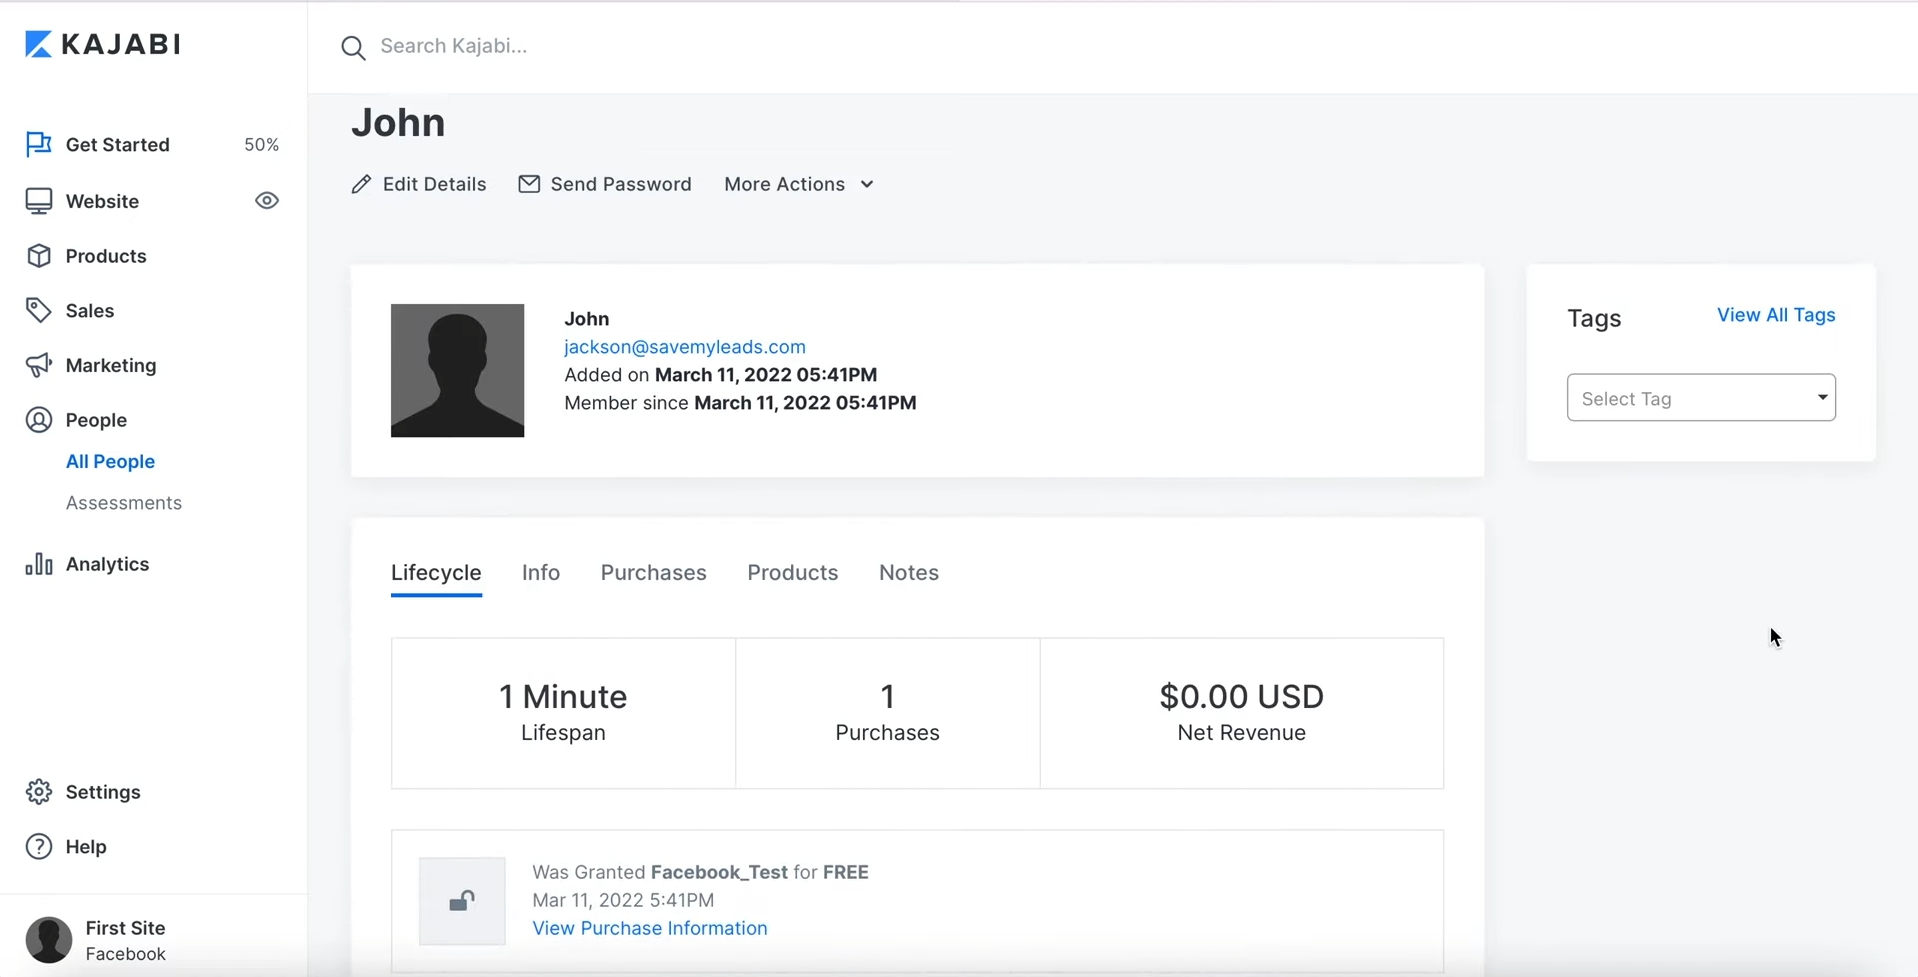
If everything suits you, return to the SaveMyLeads service and continue setting up.
Setting up Auto-update
In order for new Facebook leads to be instantly transferred to Kajabi you need to enable auto-update. Click “Finish setup”.
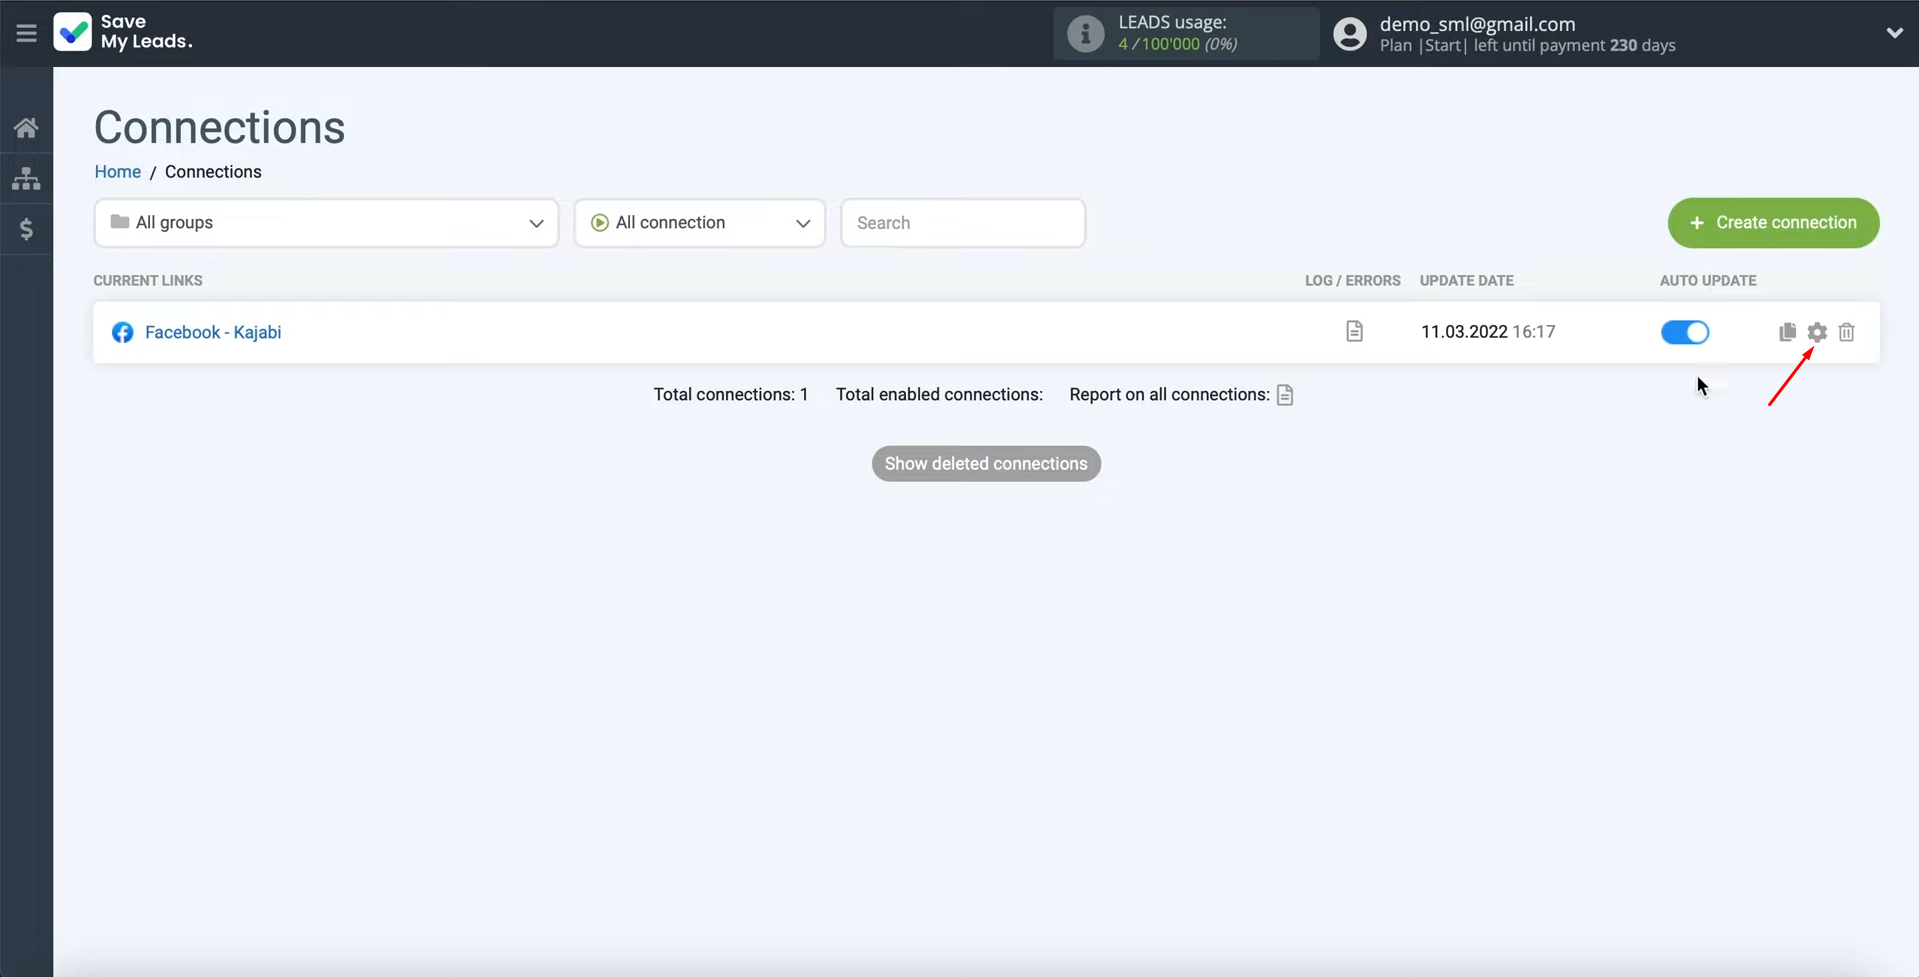
Then click on the
gear icon.
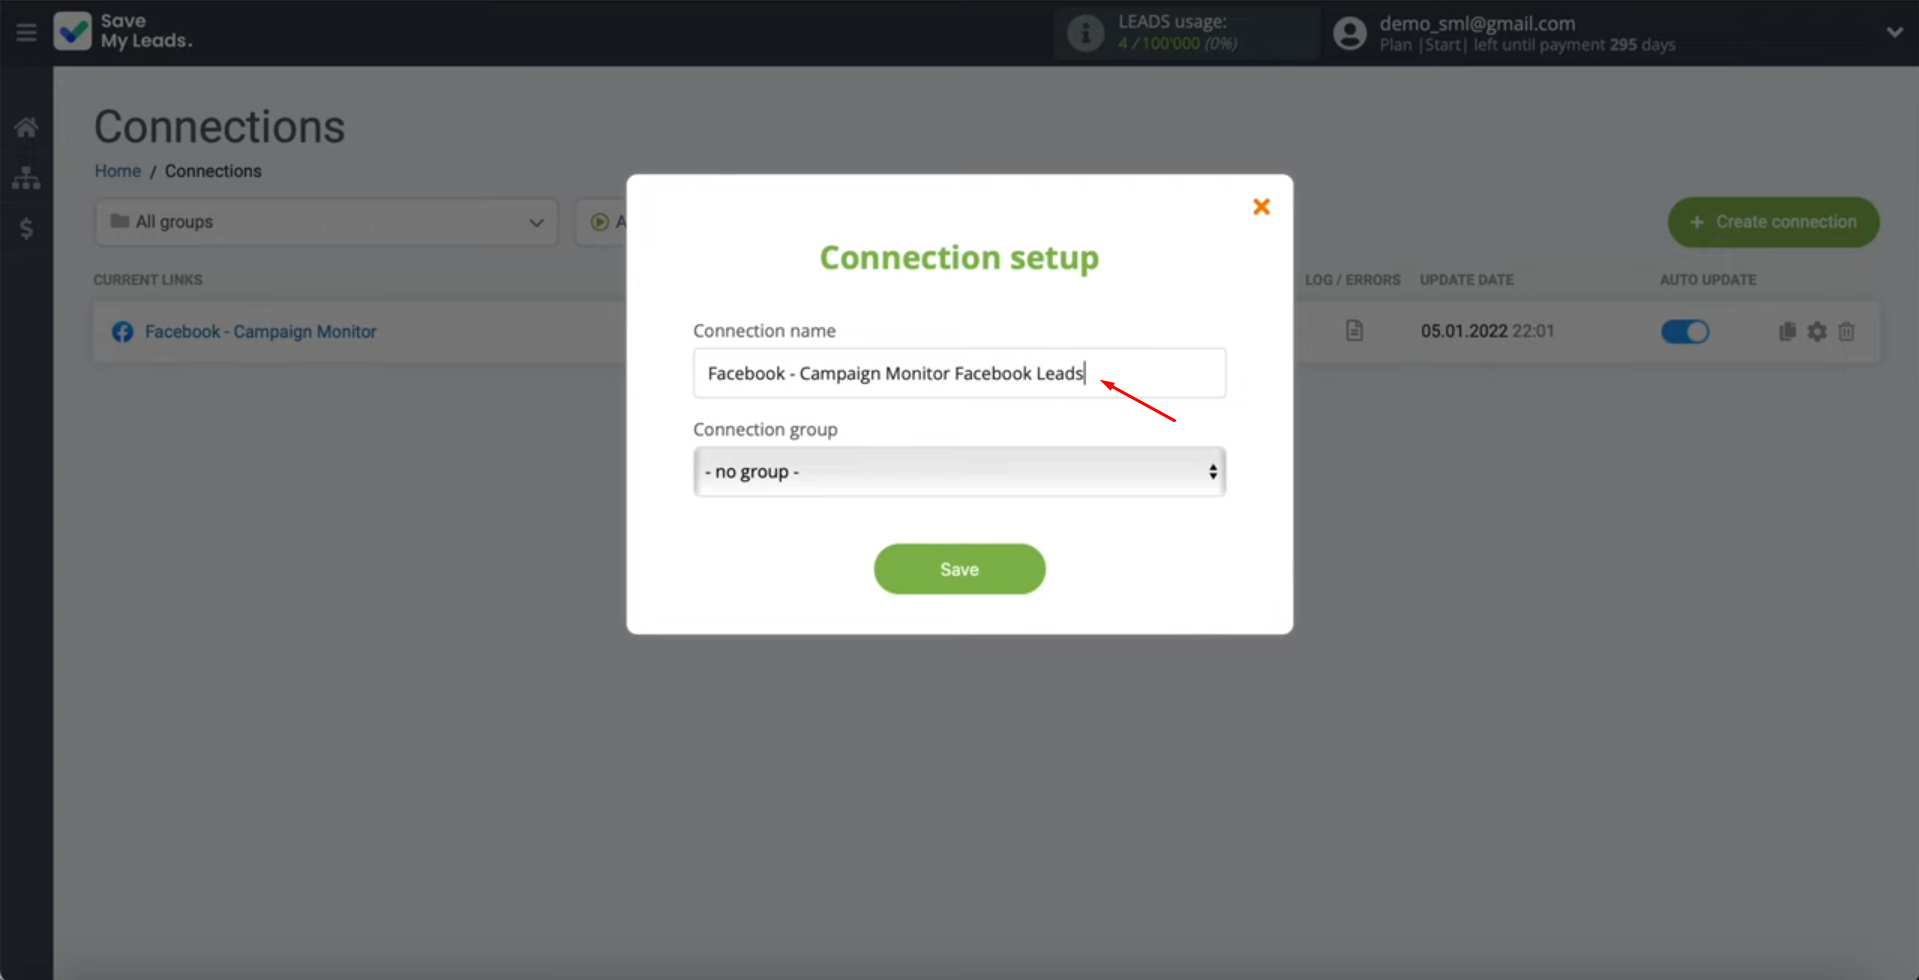
Edit
the connection name. Click “Save”.
That's all. The task “Facebook Lead Ads + Kajabi integration” is completed.
Result of Facebook-Leads and Kajabi Integration
If you followed our instructions, the connection to automatically transfer new contacts from Facebook Lead Ads to Kajabi is set up and already working. Kajabi - Facebook integration will allow you to forget about the need to copy data from one system and enter it into another. This way, you will be able to free up time and spend it on solving more important tasks that cannot be automated.
- Automate the work with leads from the Facebook advertising account
- Empower with integrations and instant transfer of leads
- Don't spend money on developers or integrators
- Save time by automating routine tasks
It will take you about 10 minutes to set up the integration using the SaveMyLeads online connector. If you've never done anything like this, don't worry. No special knowledge or skills are needed. Just follow our instructions, and you will succeed.
If you use Facebook Lead Ads, then you should know what it means to regularly download CSV files and transfer data to various support services. How many times a day do you check for new leads in your ad account? How often do you transfer data to a CRM system, task manager, email service or Google Sheets? Try using the SaveMyLeads online connector. This is a no-code tool with which anyone can set up integrations for Facebook. Spend just a few minutes and you will receive real-time notifications in the messenger about new leads. Another 5-10 minutes of work in SML, and the data from the FB advertising account will be automatically transferred to the CRM system or Email service. The SaveMyLeads system will do the routine work for you, and you will surely like it.
