For businesses collecting orders via Google Lead Form and managing customers through Pipedrive, we offer a workflow acceleration solution. Simply connect both platforms through the no-code online connector SaveMyLeads. With its help, you'll automate lead transfer from forms to the CRM system. Read the step-by-step guide for setting up Google Ads Lead Form and Pipedrive integration.
Why SaveMyLeads is an Optimal Solution
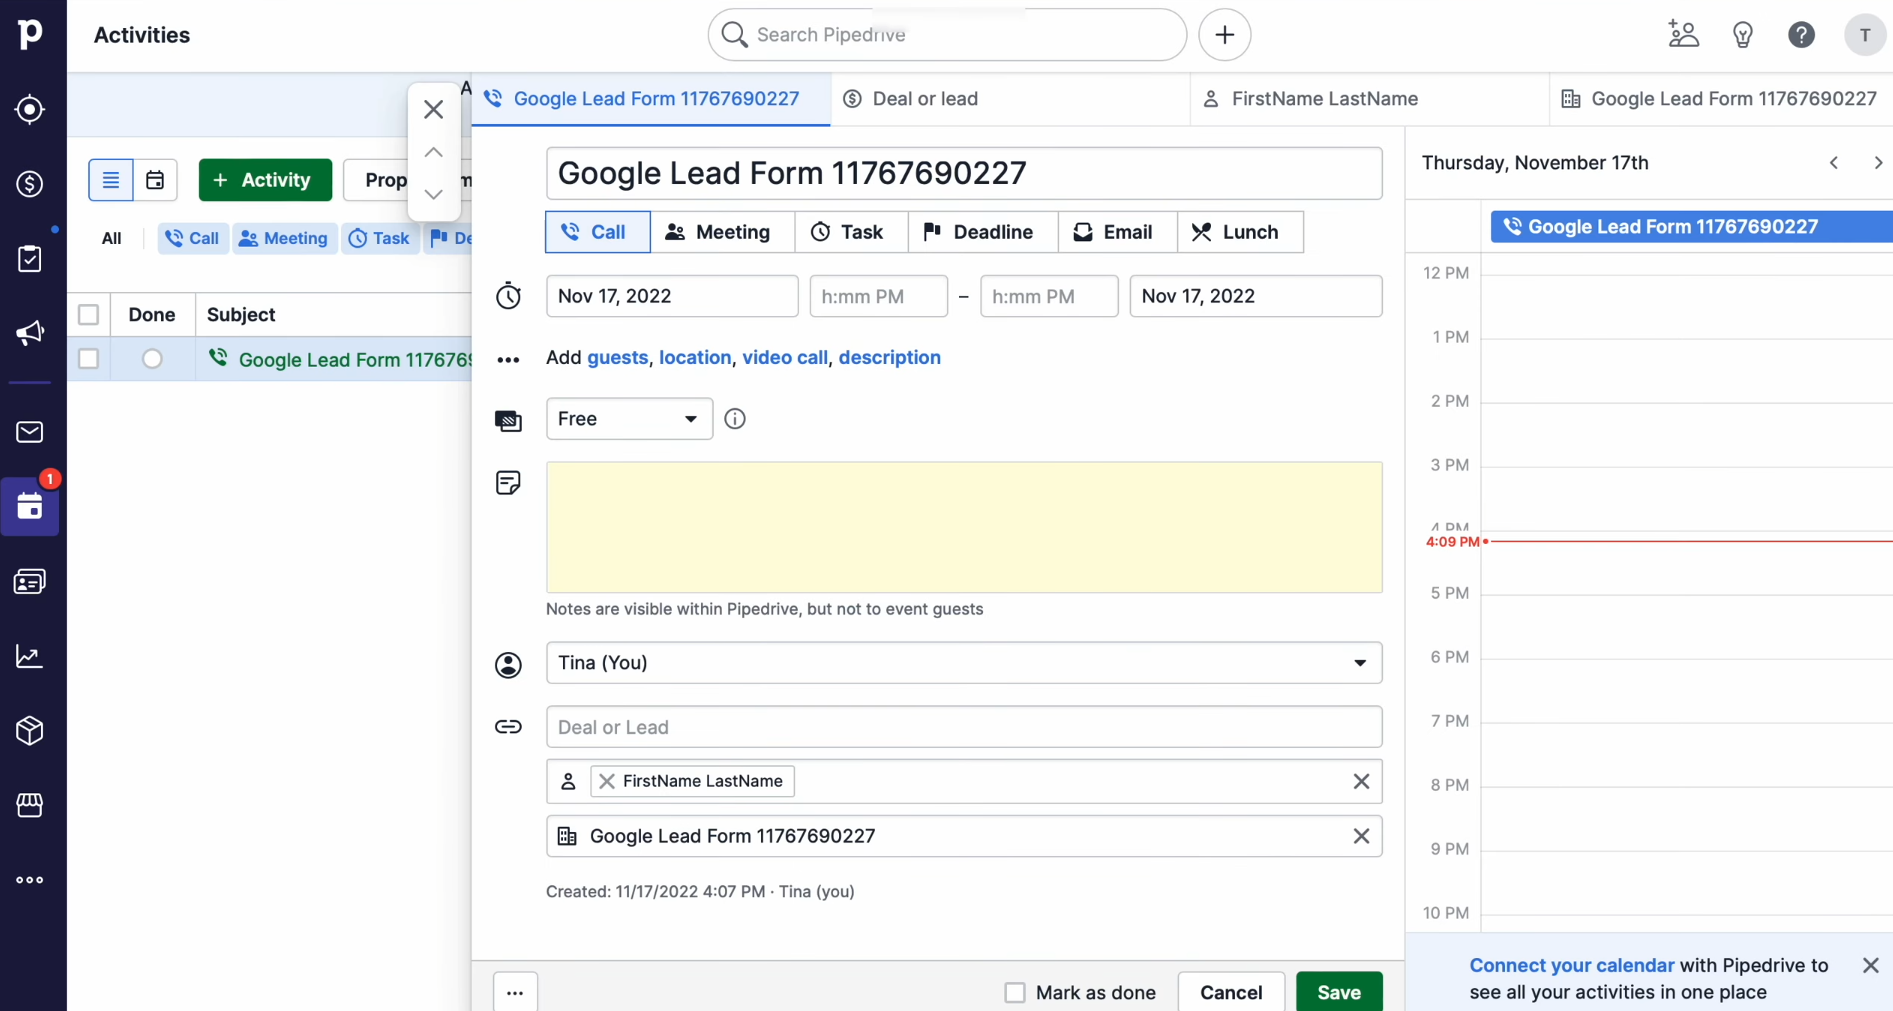
After successfully configuring data transfer from Google Lead Form to Pipedrive, leads will seamlessly enter the CRM system automatically. They will be processed as new tasks. Incoming orders, inquiries, or communications can be immediately categorized, distributed among managers, and assigned statuses.
For Pipedrive
and Google Ads Lead Form integration, we recommend SaveMyLeads. Using it, you'll set up connection quickly and effortlessly. An intuitive
interface allows even someone with minimal experience to complete the process
in just 10 minutes. SML offers a library of ready-made
solutions for various CRM systems, Google services, messengers, email and SMS
services, task managers, and more. Some of these will undoubtedly interest you
if you plan to integrate other work systems.


General Stages for Google Lead Form and Pipedrive Integration
Procedure:
- Create a form for your specific task.
- Register a personal account in SaveMyLeads.
- Connect the data source (Google Lead Form).
- Connect the data receiver (Pipedrive).
- Launch auto-update.
We'll focus on the integration process, assuming you're familiar with form creation. All further actions, how to connect Google Ads Lead Form to Pipedrive, will be examined step by step.
Setting Up the Data Source – Google Lead Form
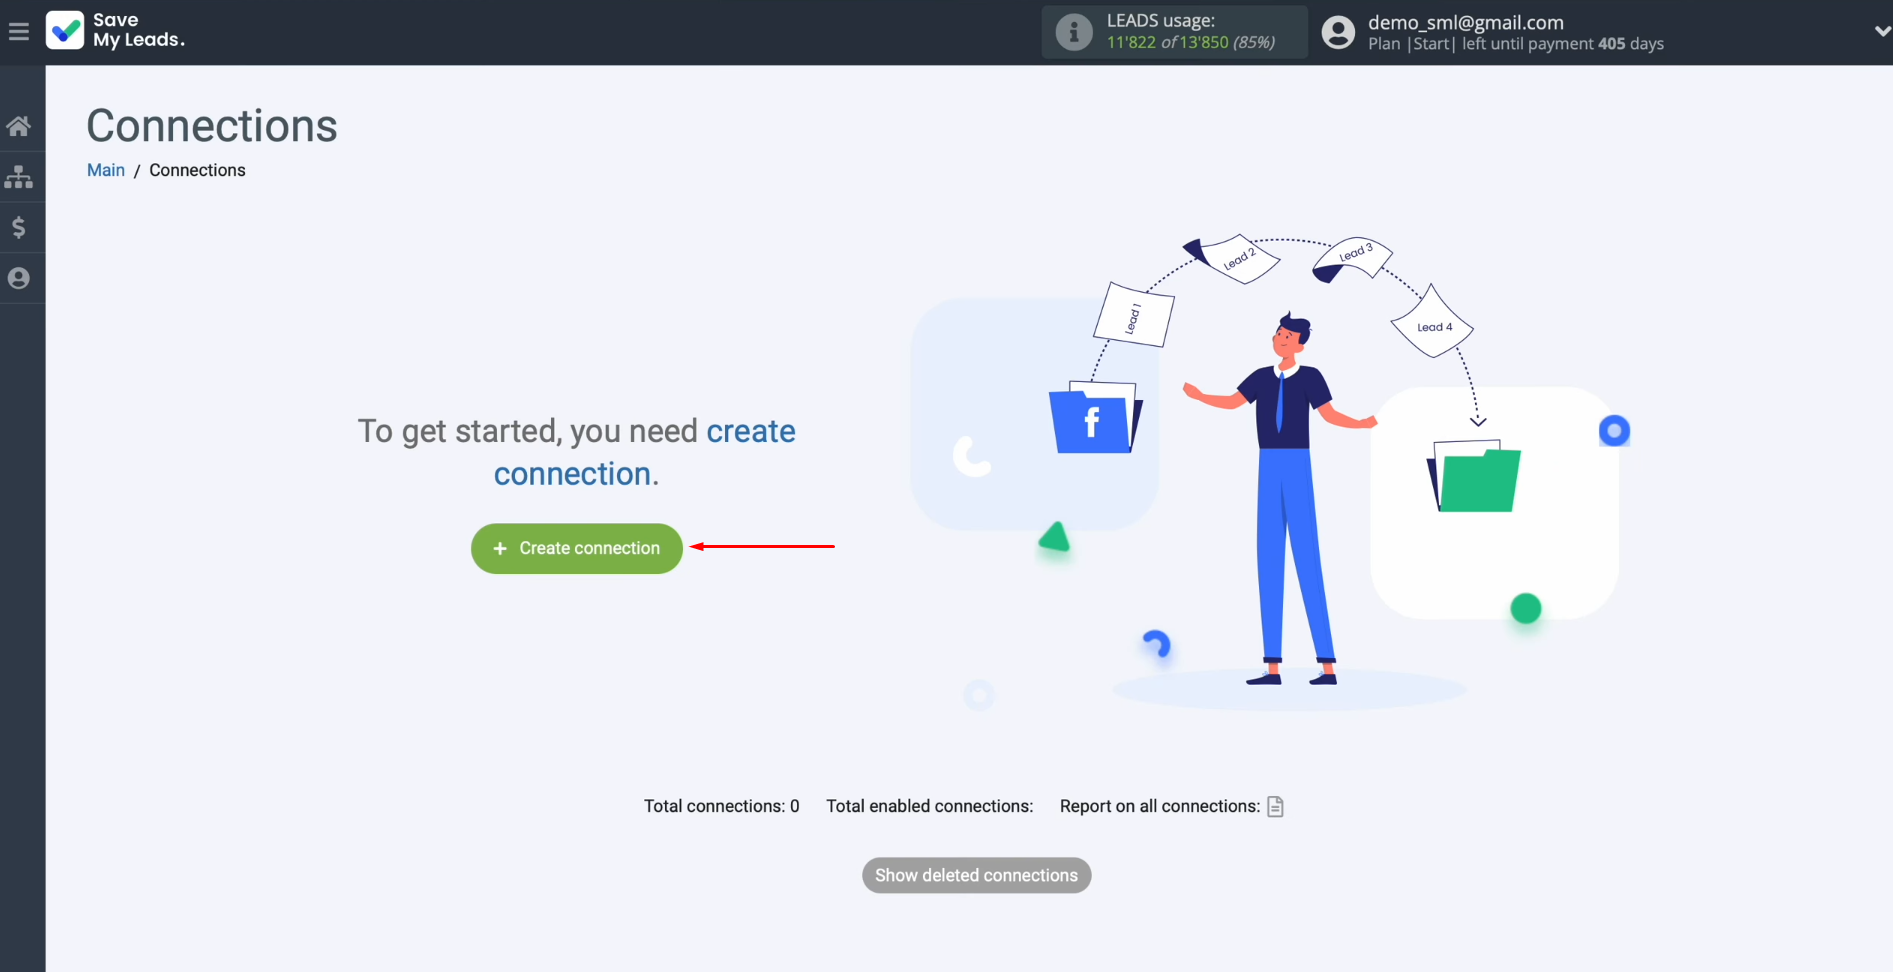
To establish Google Leads and Pipedrive integration, you'll first need to initiate a new connection.
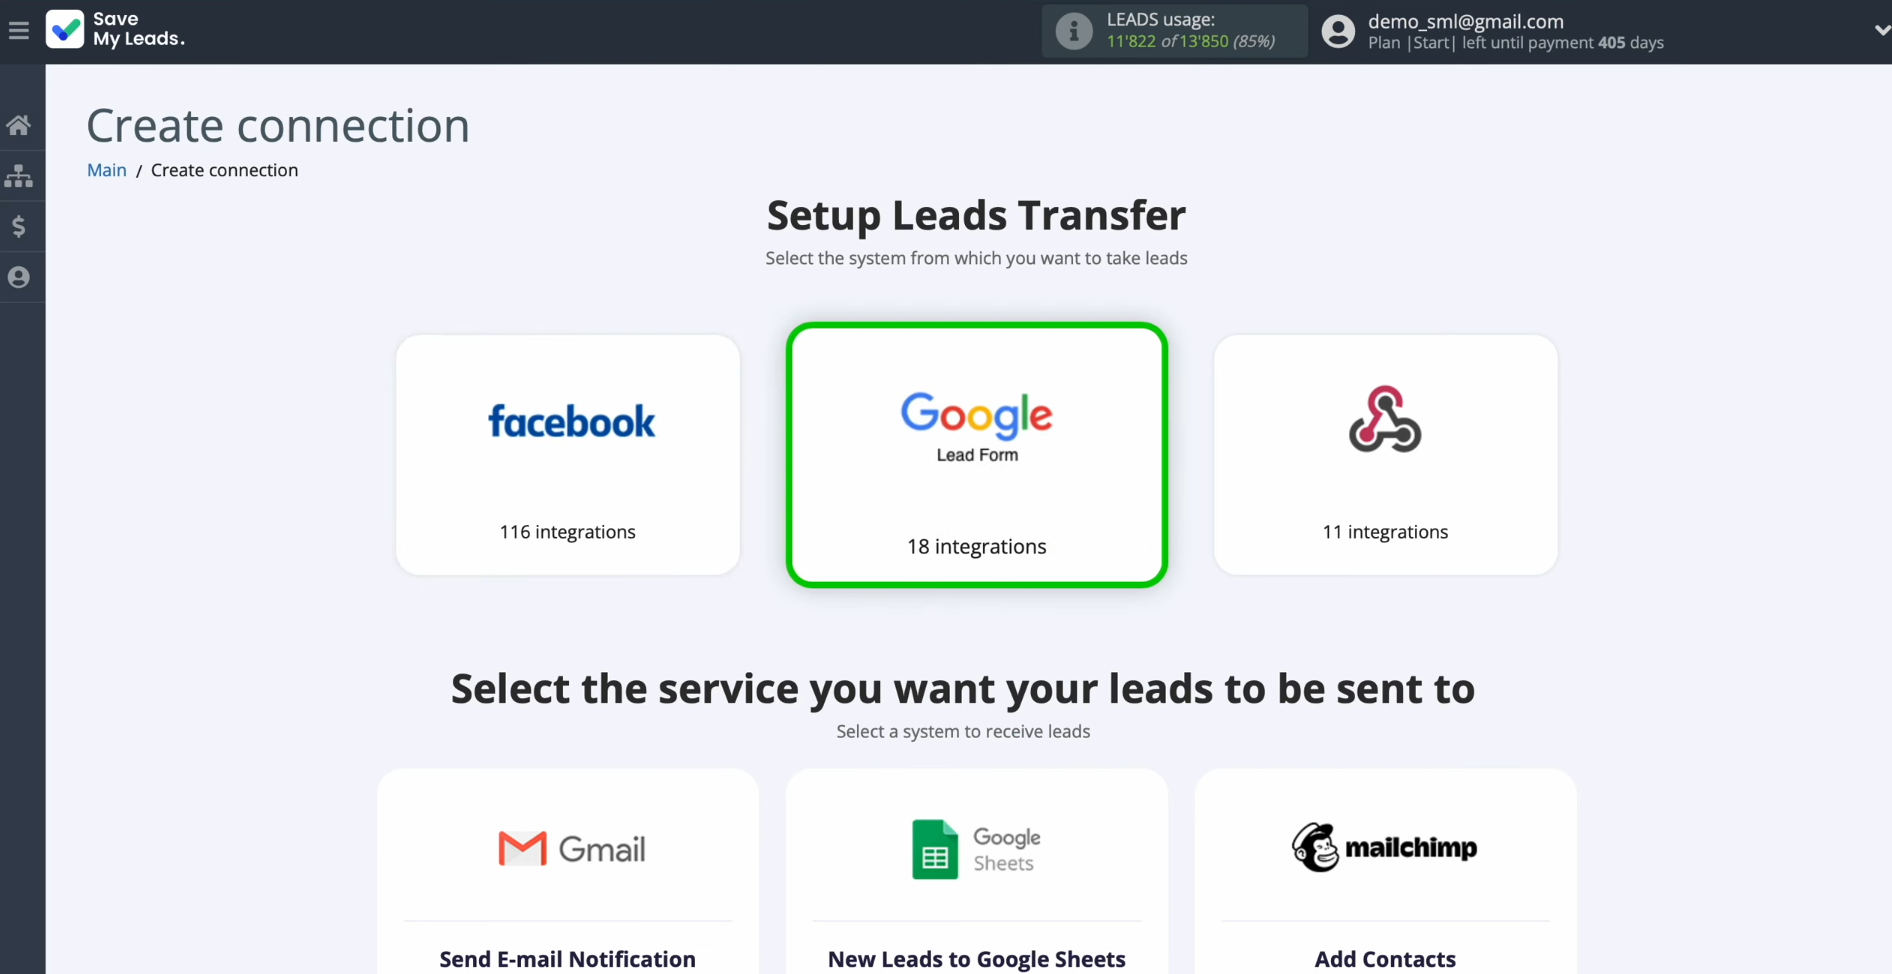
Select the data source from which you want to
receive new leads. In this scenario, choose Google Lead Form.
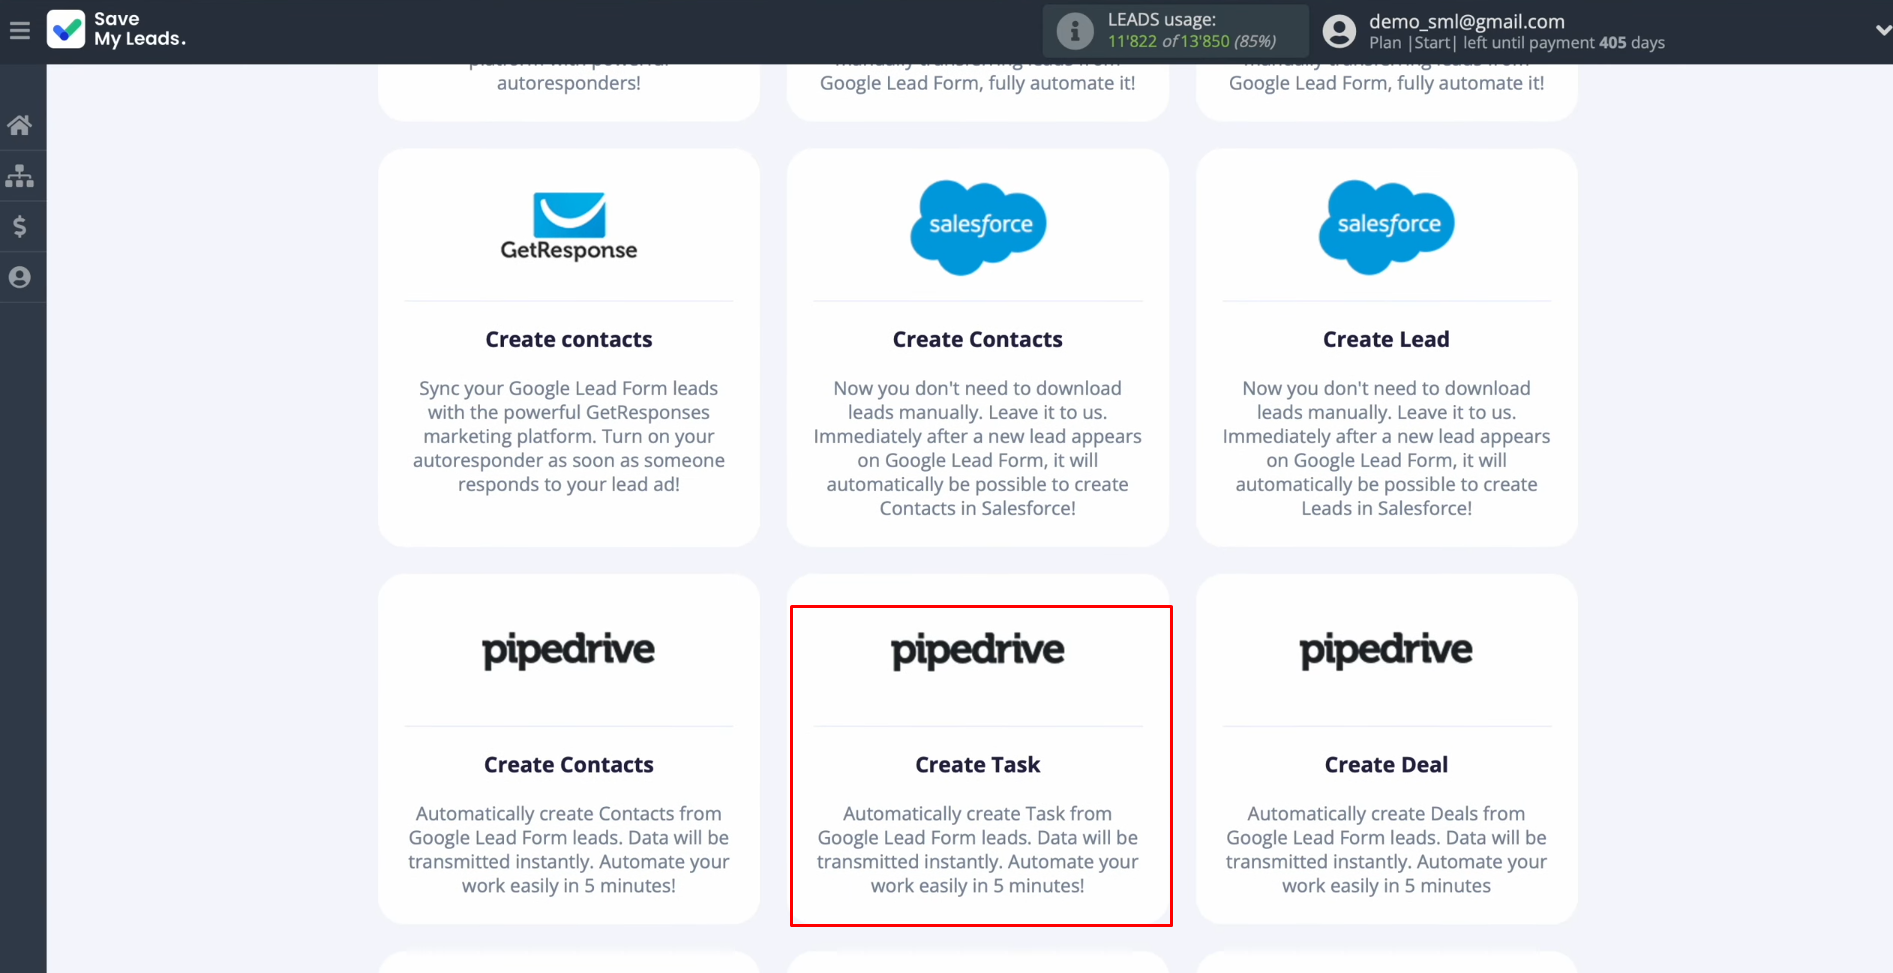
Determine the destination system for
transferring new leads from the Google Lead Form. Here, select Pipedrive
(Create Task).
Now, link your Google Lead Form account to
SaveMyLeads.
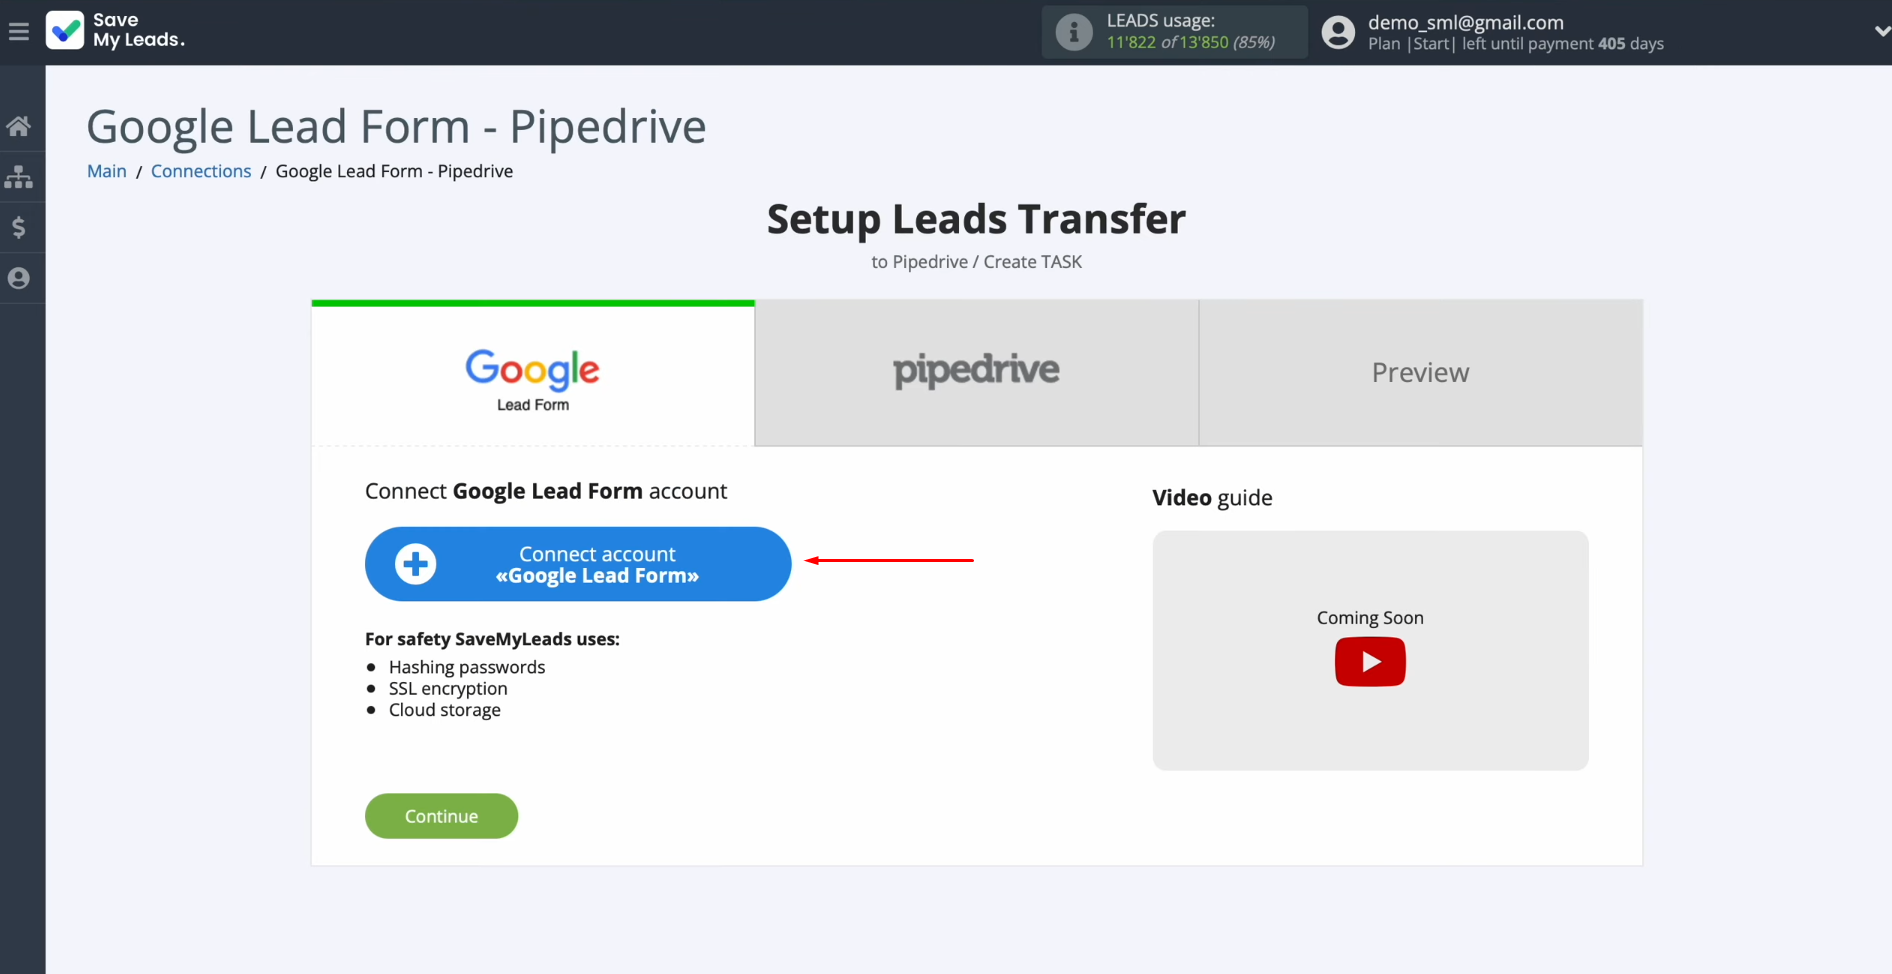
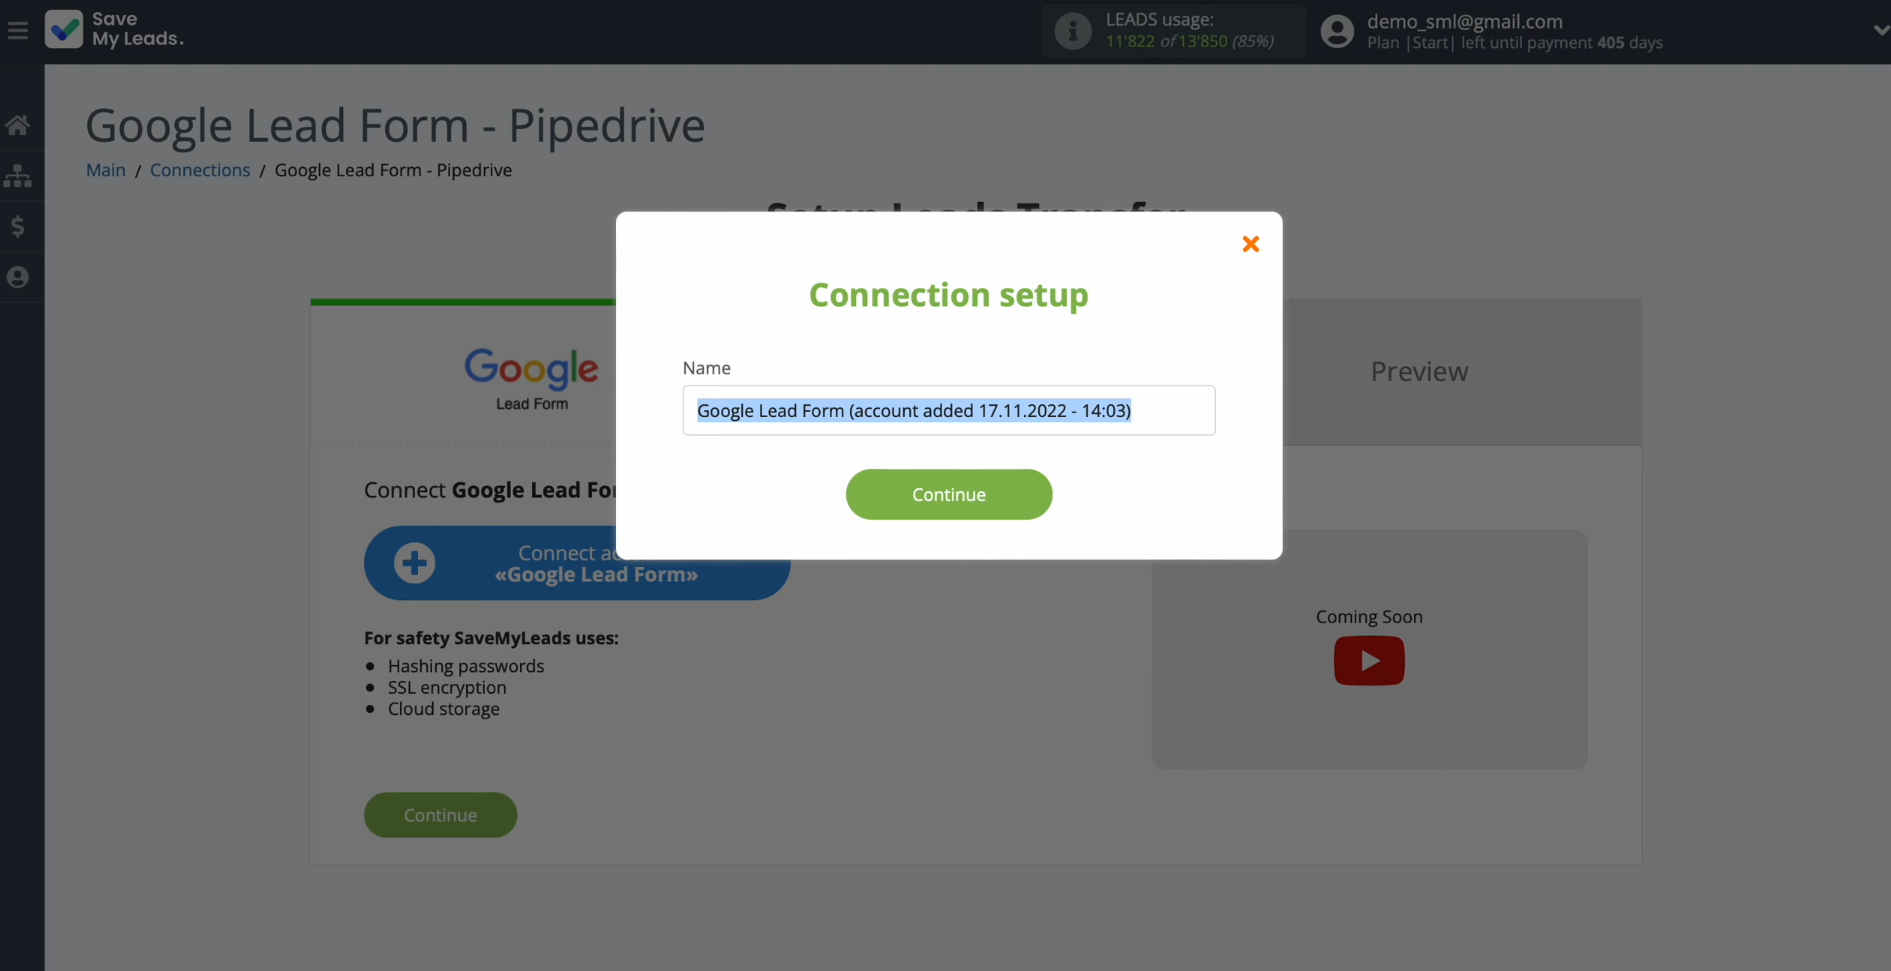
In the displayed window, you can optionally name
this account or simply click "Continue."
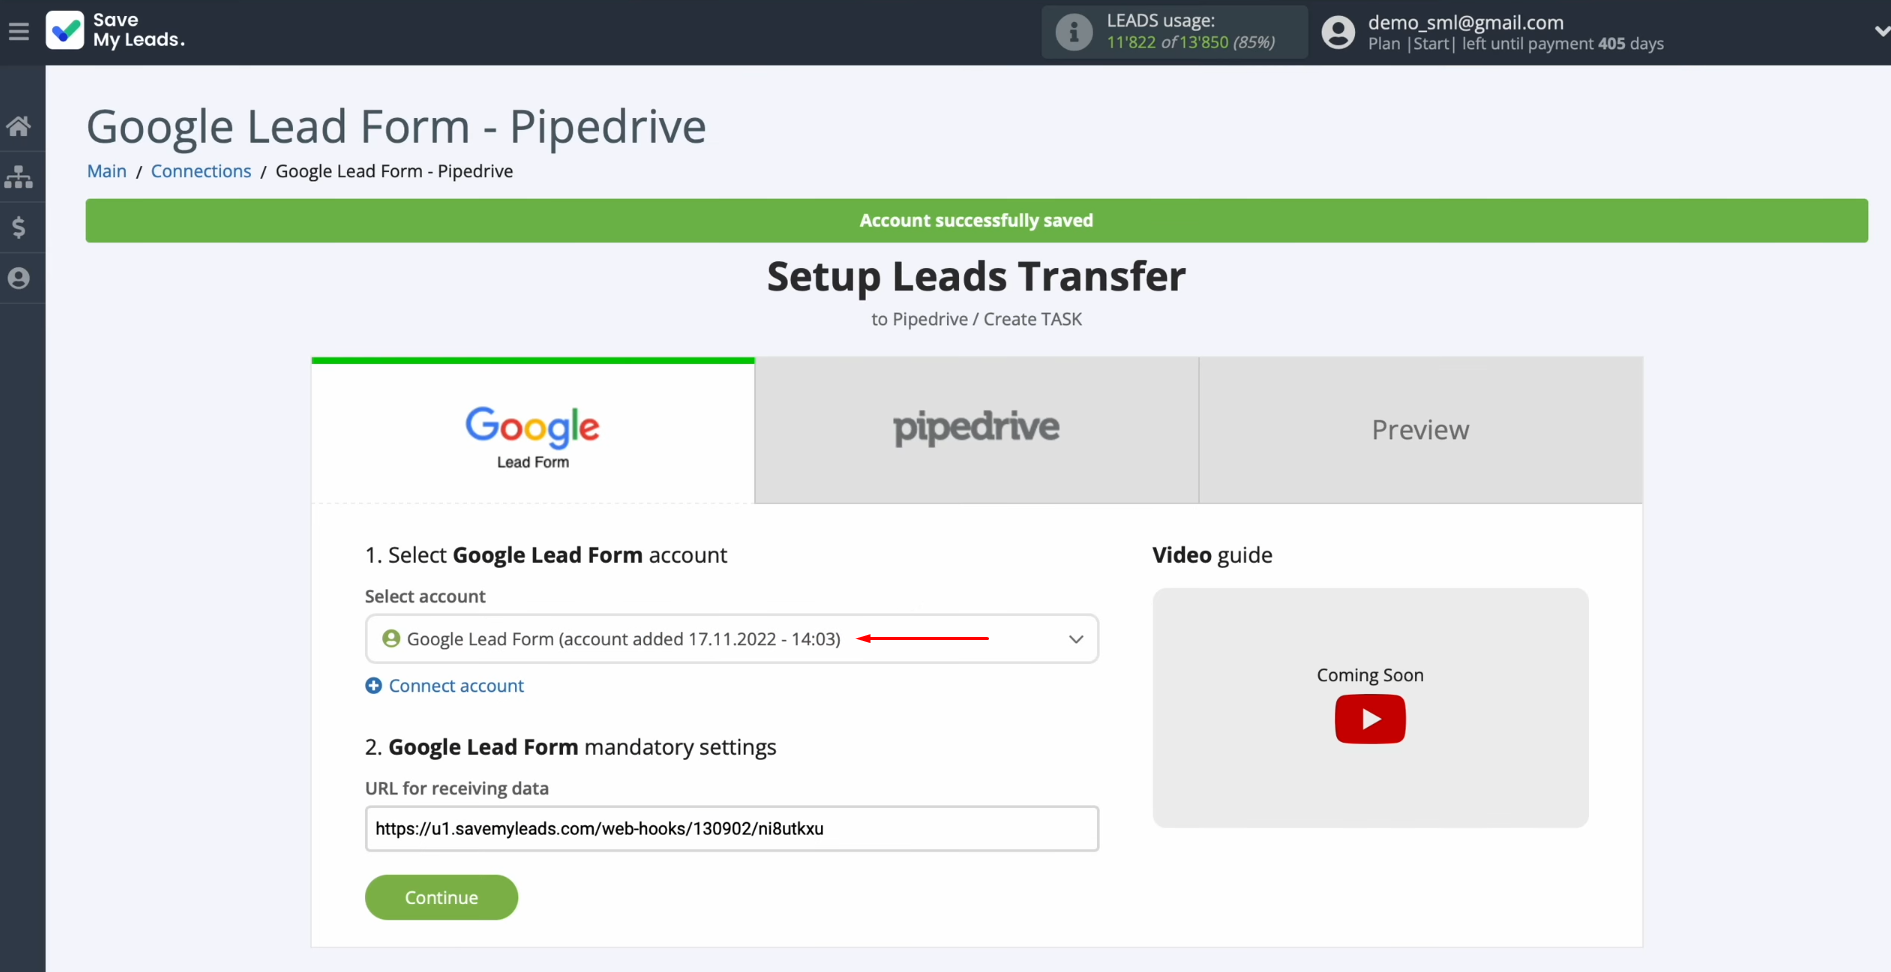
When your connected account appears in the list,
select it.
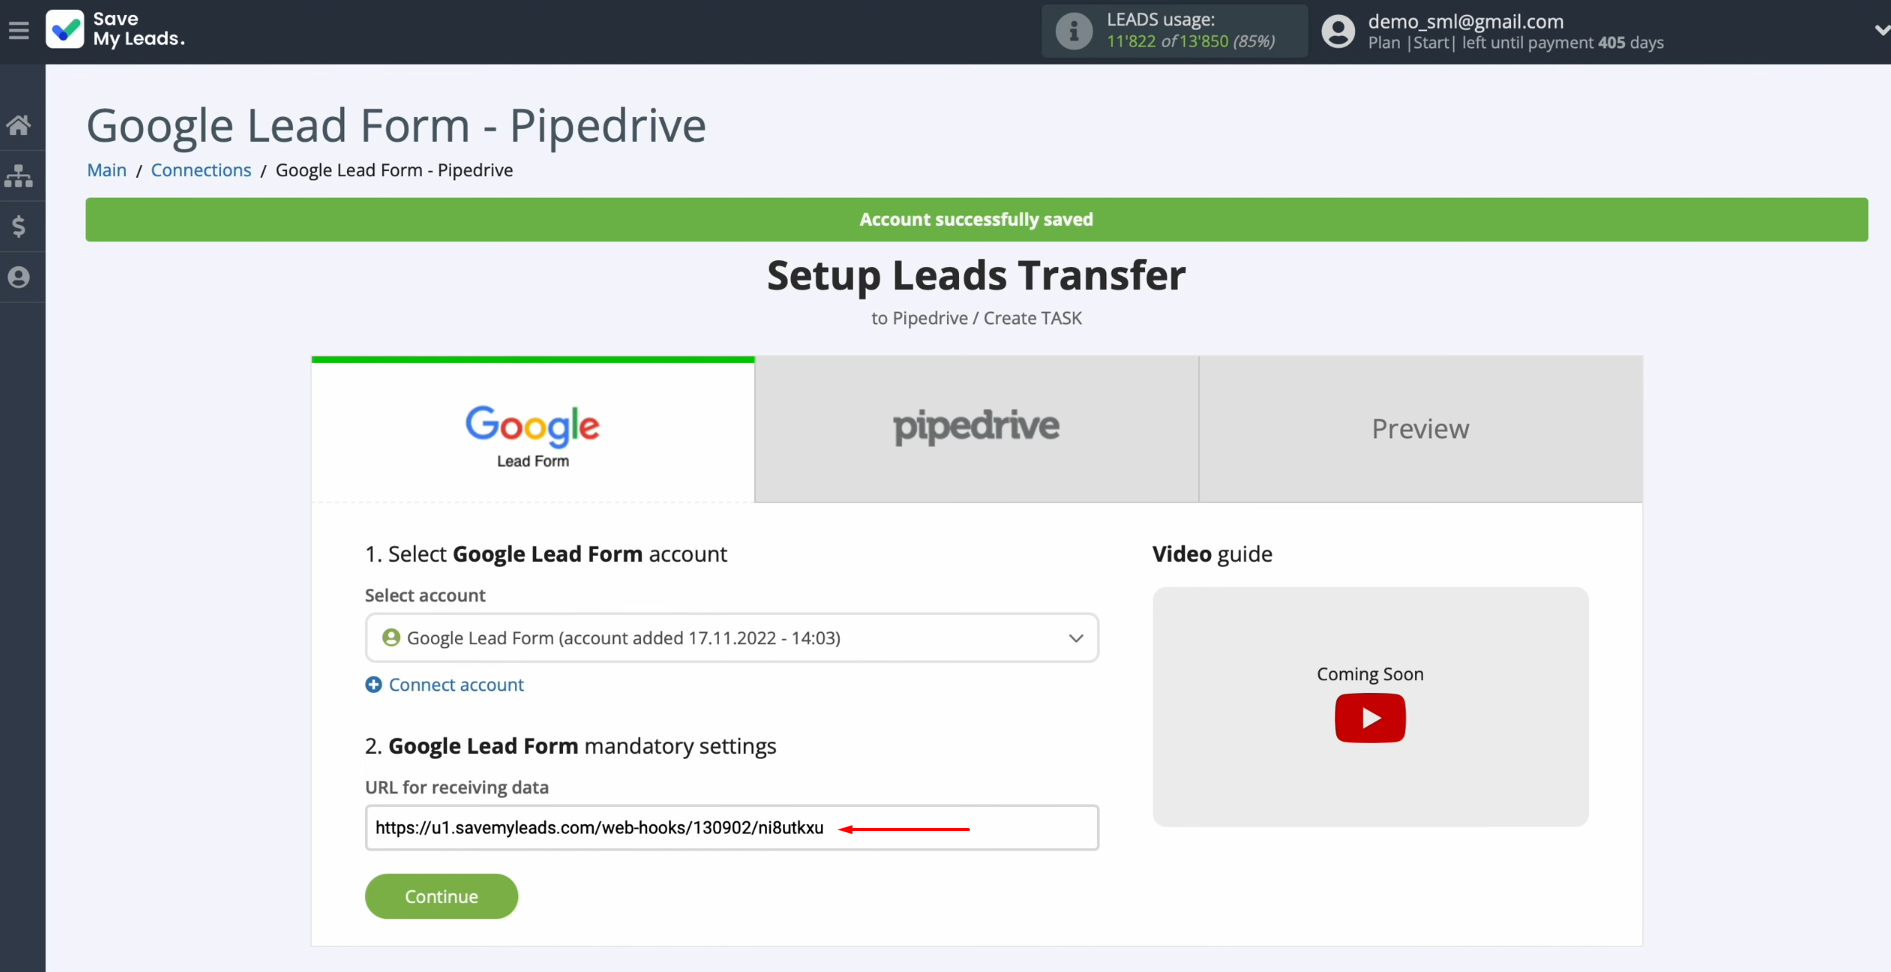
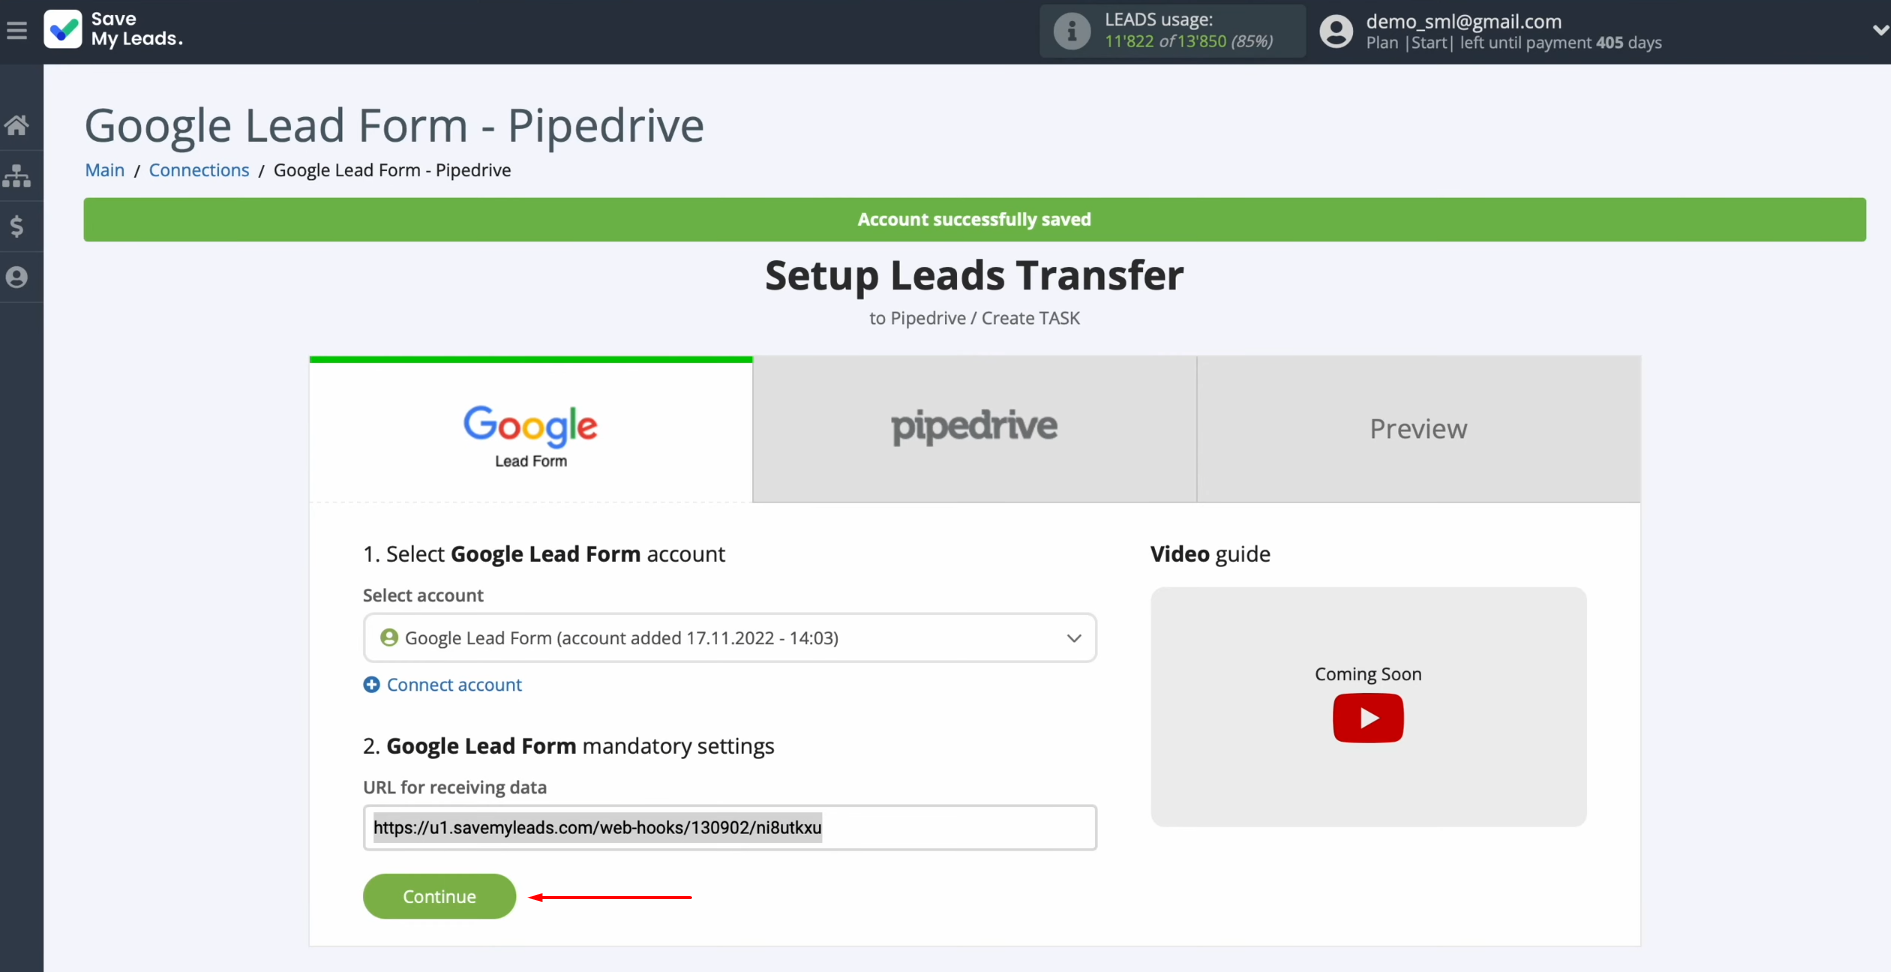
Copy the URL for receiving data and navigate to your
Google Ads personal account.
Access the "Ads & Assets" section, then
proceed to the "Assets" area.
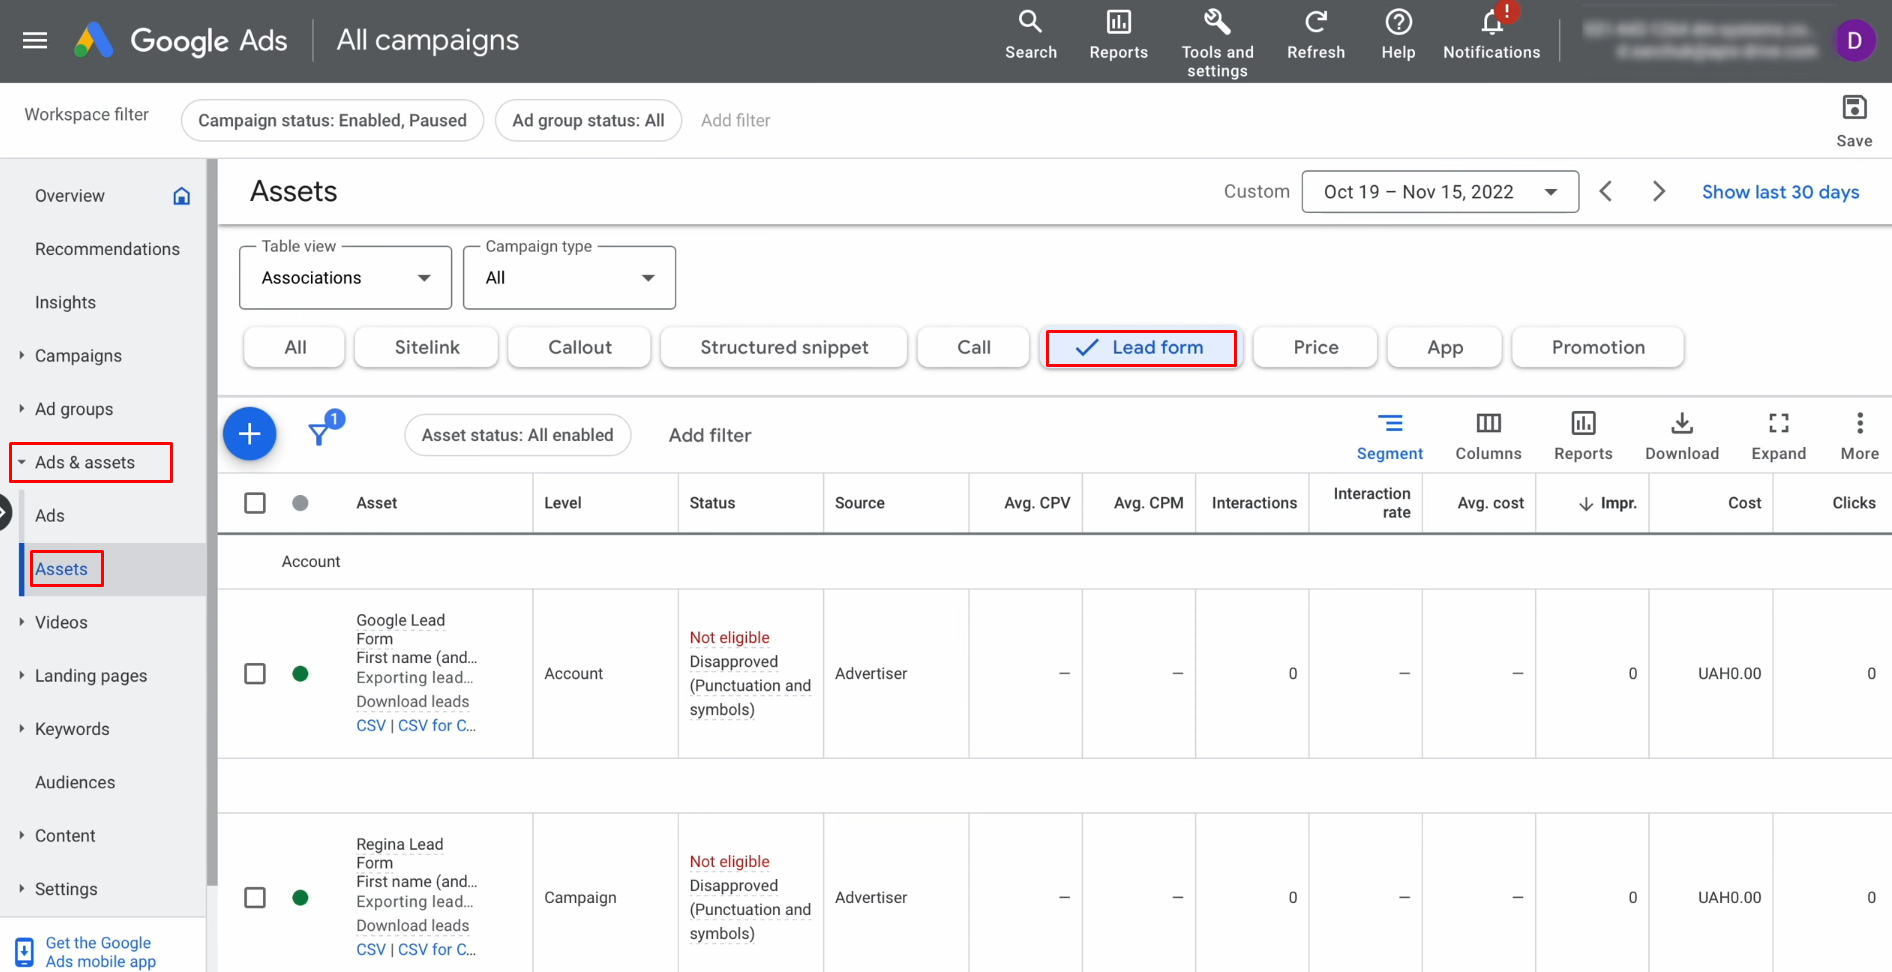
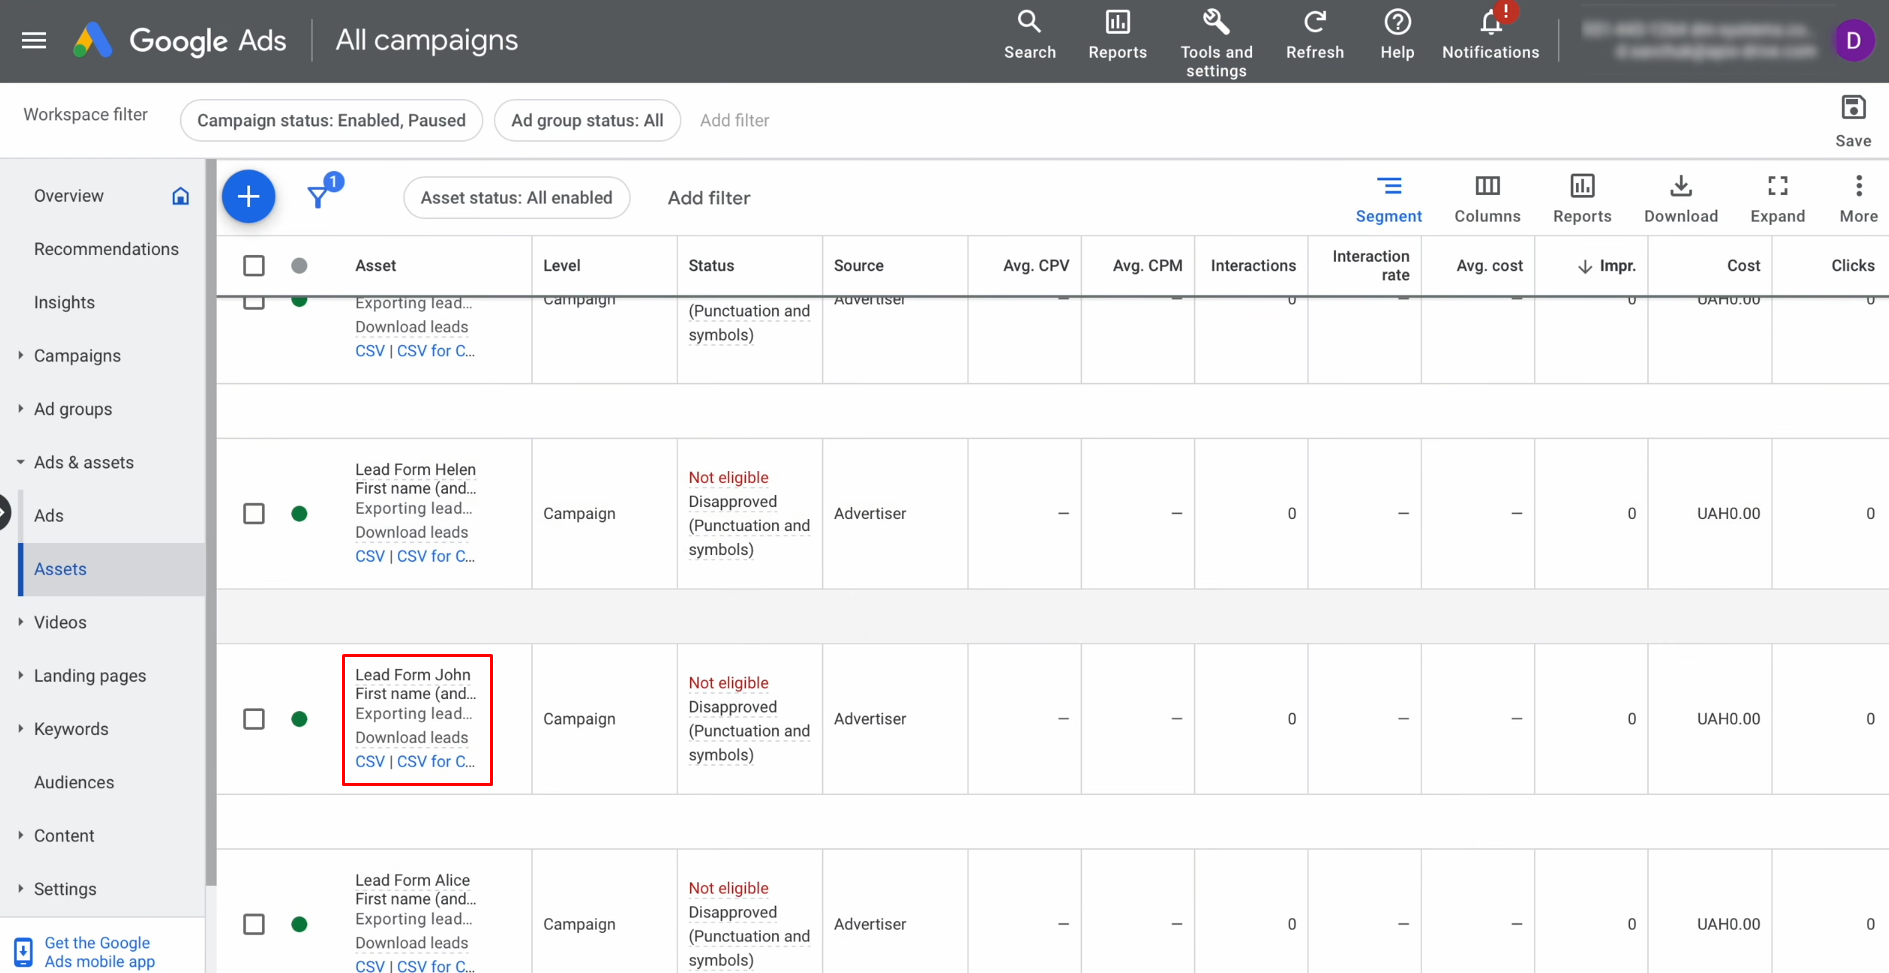
Identify the specific lead form from which you
want to capture new leads.
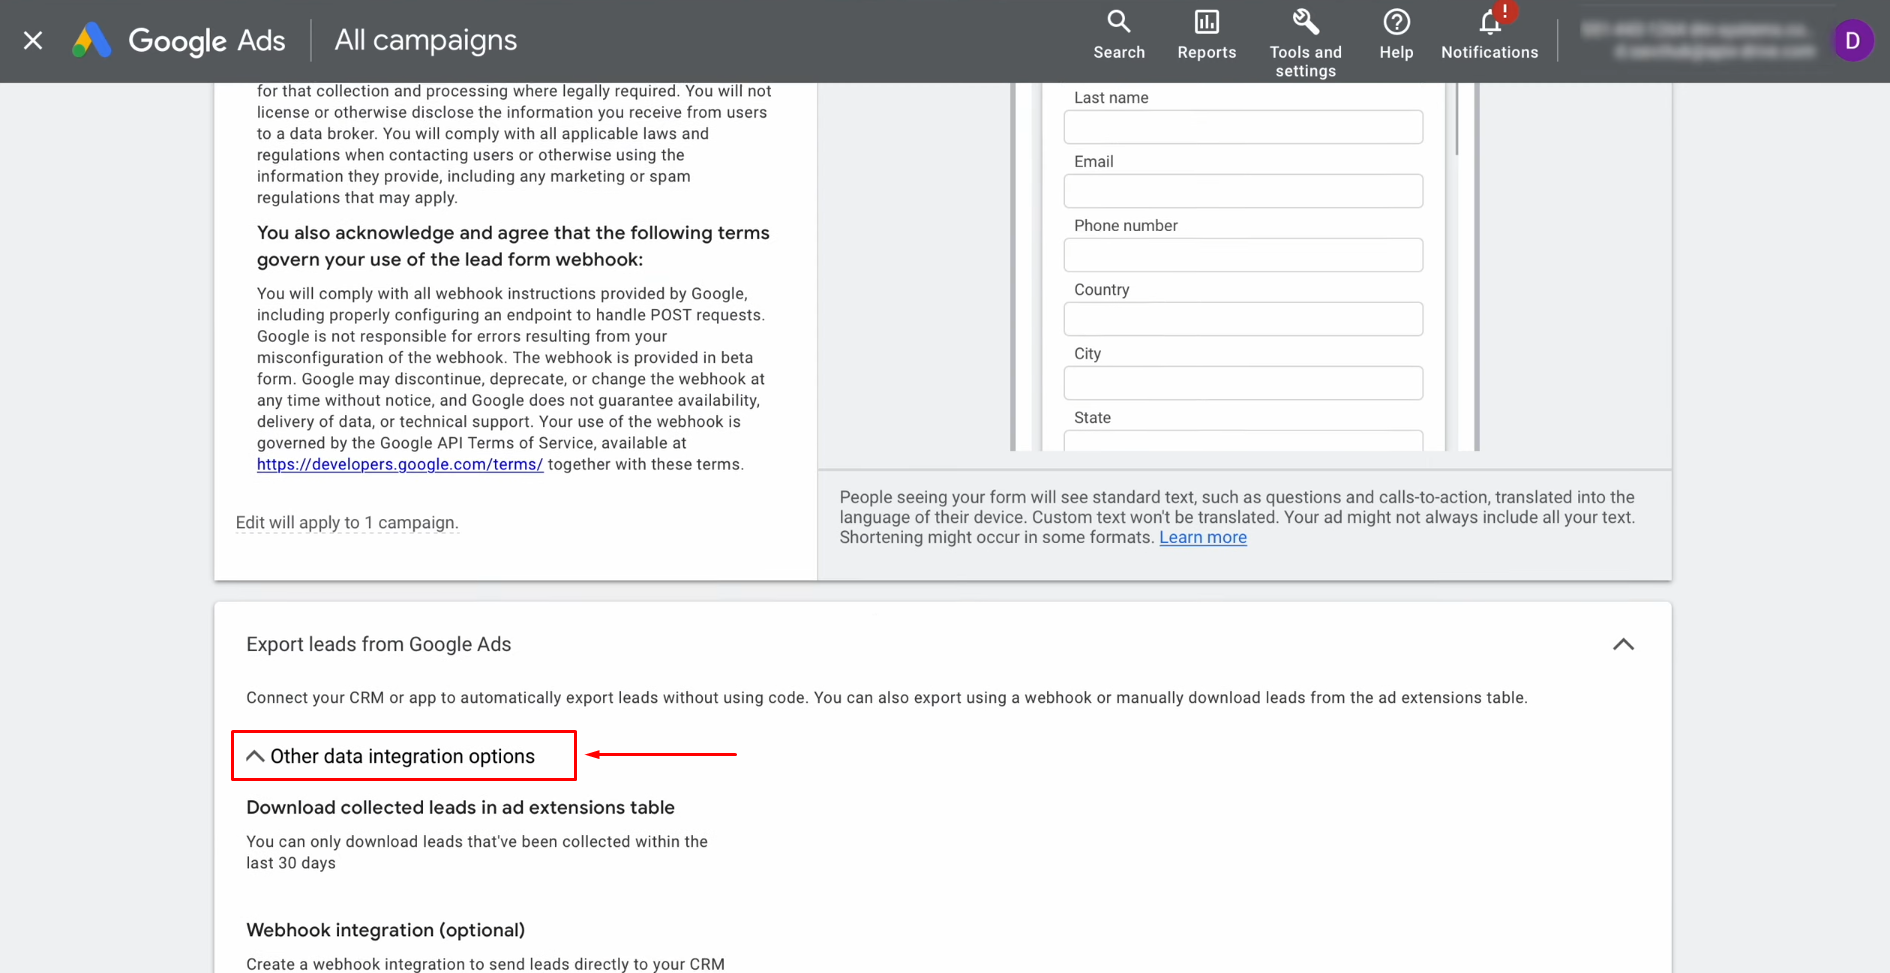
Within the lead form settings, navigate to the "Other data integration options" section.
Paste the previously copied URL.
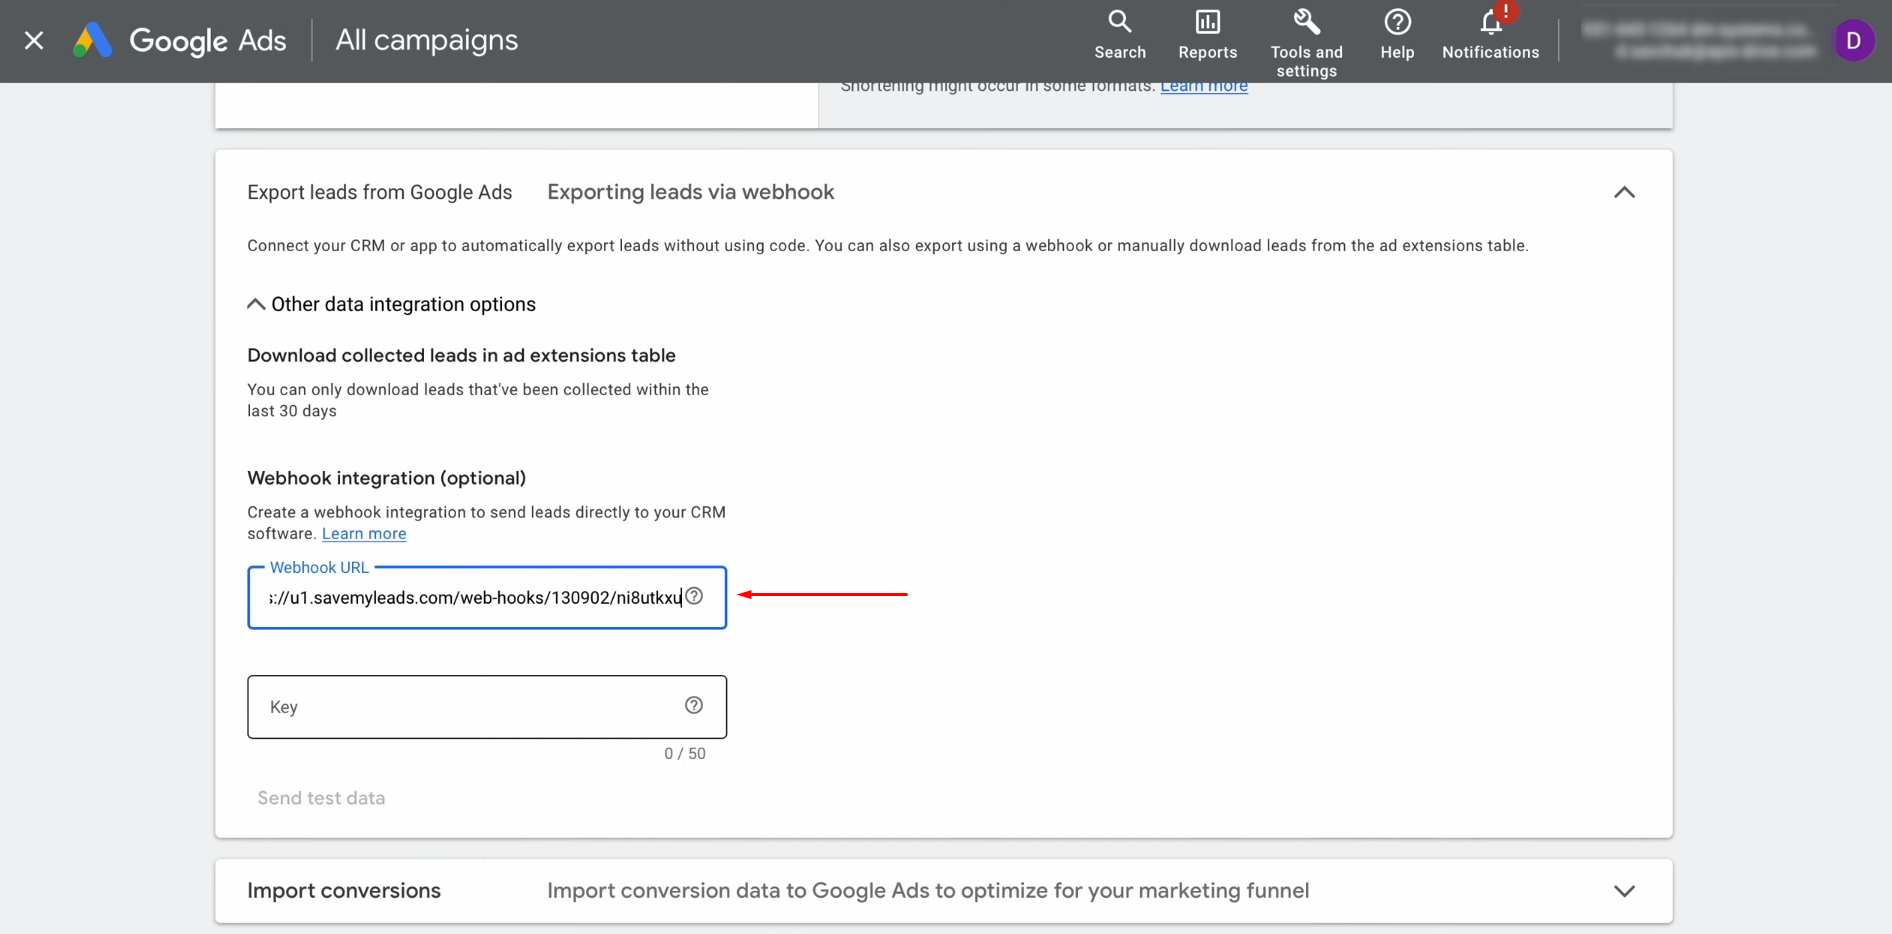
Copy the unique integration identifier from the URL (a sequence of characters after the last "/" symbol).
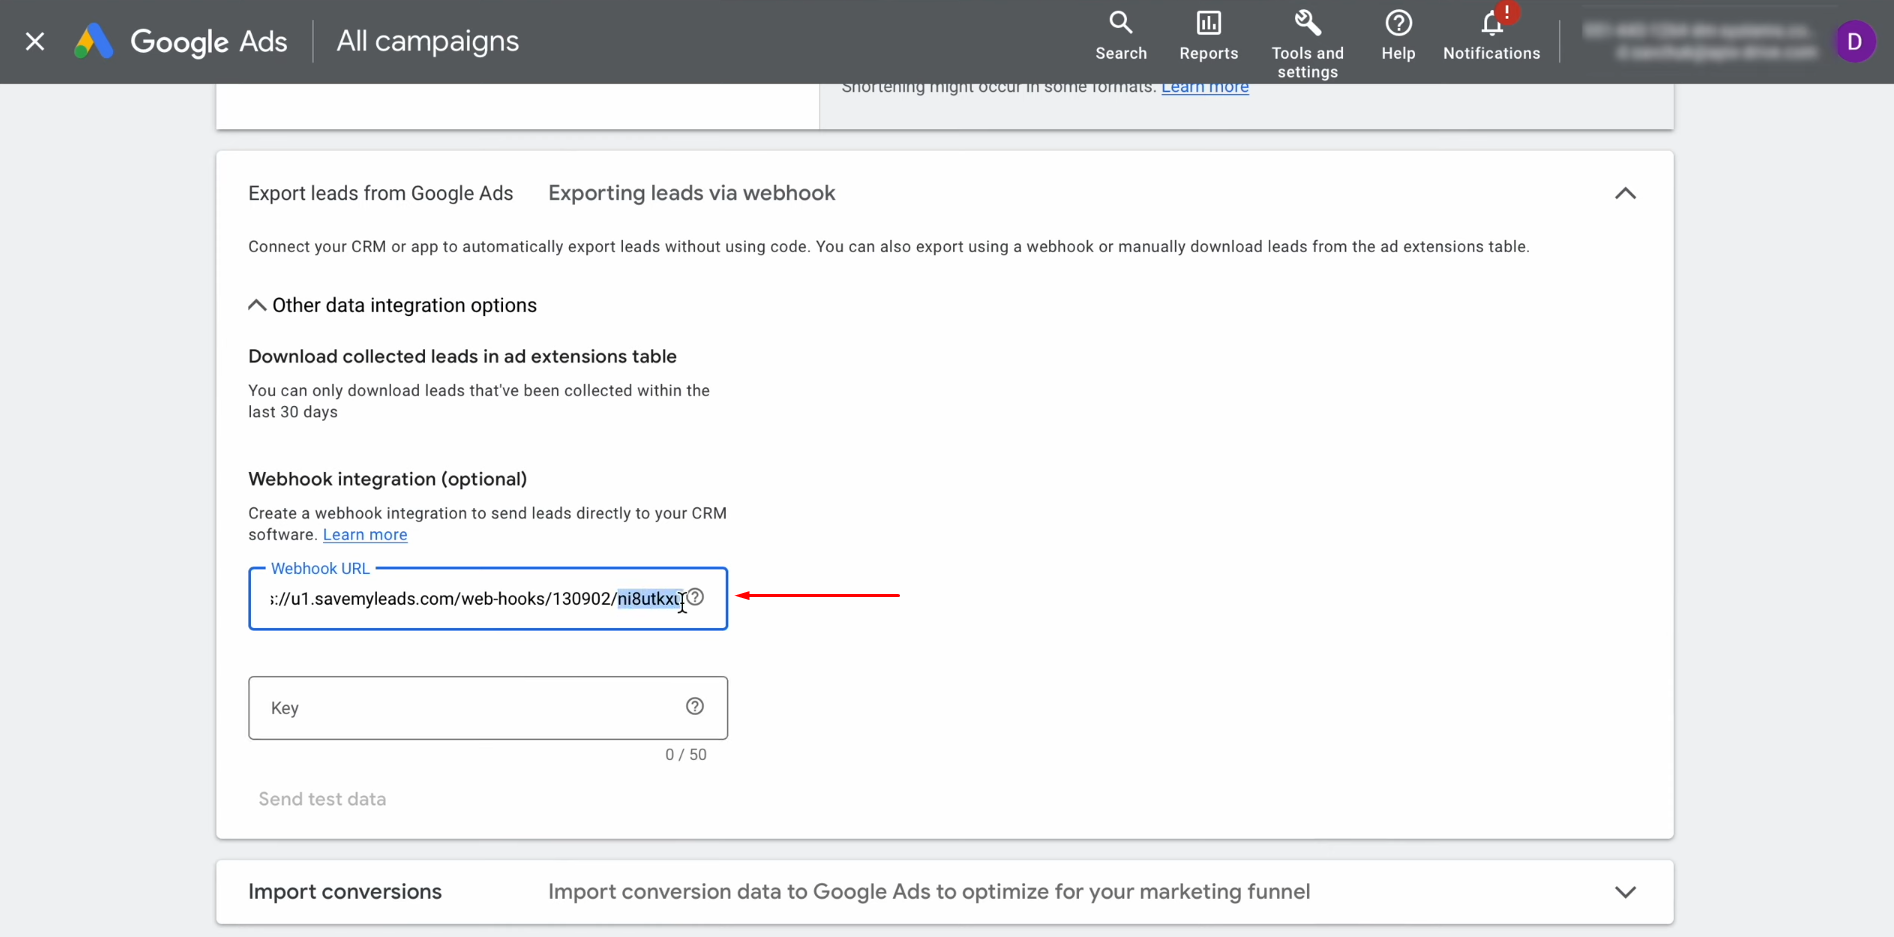
Insert this identifier into the Key field.
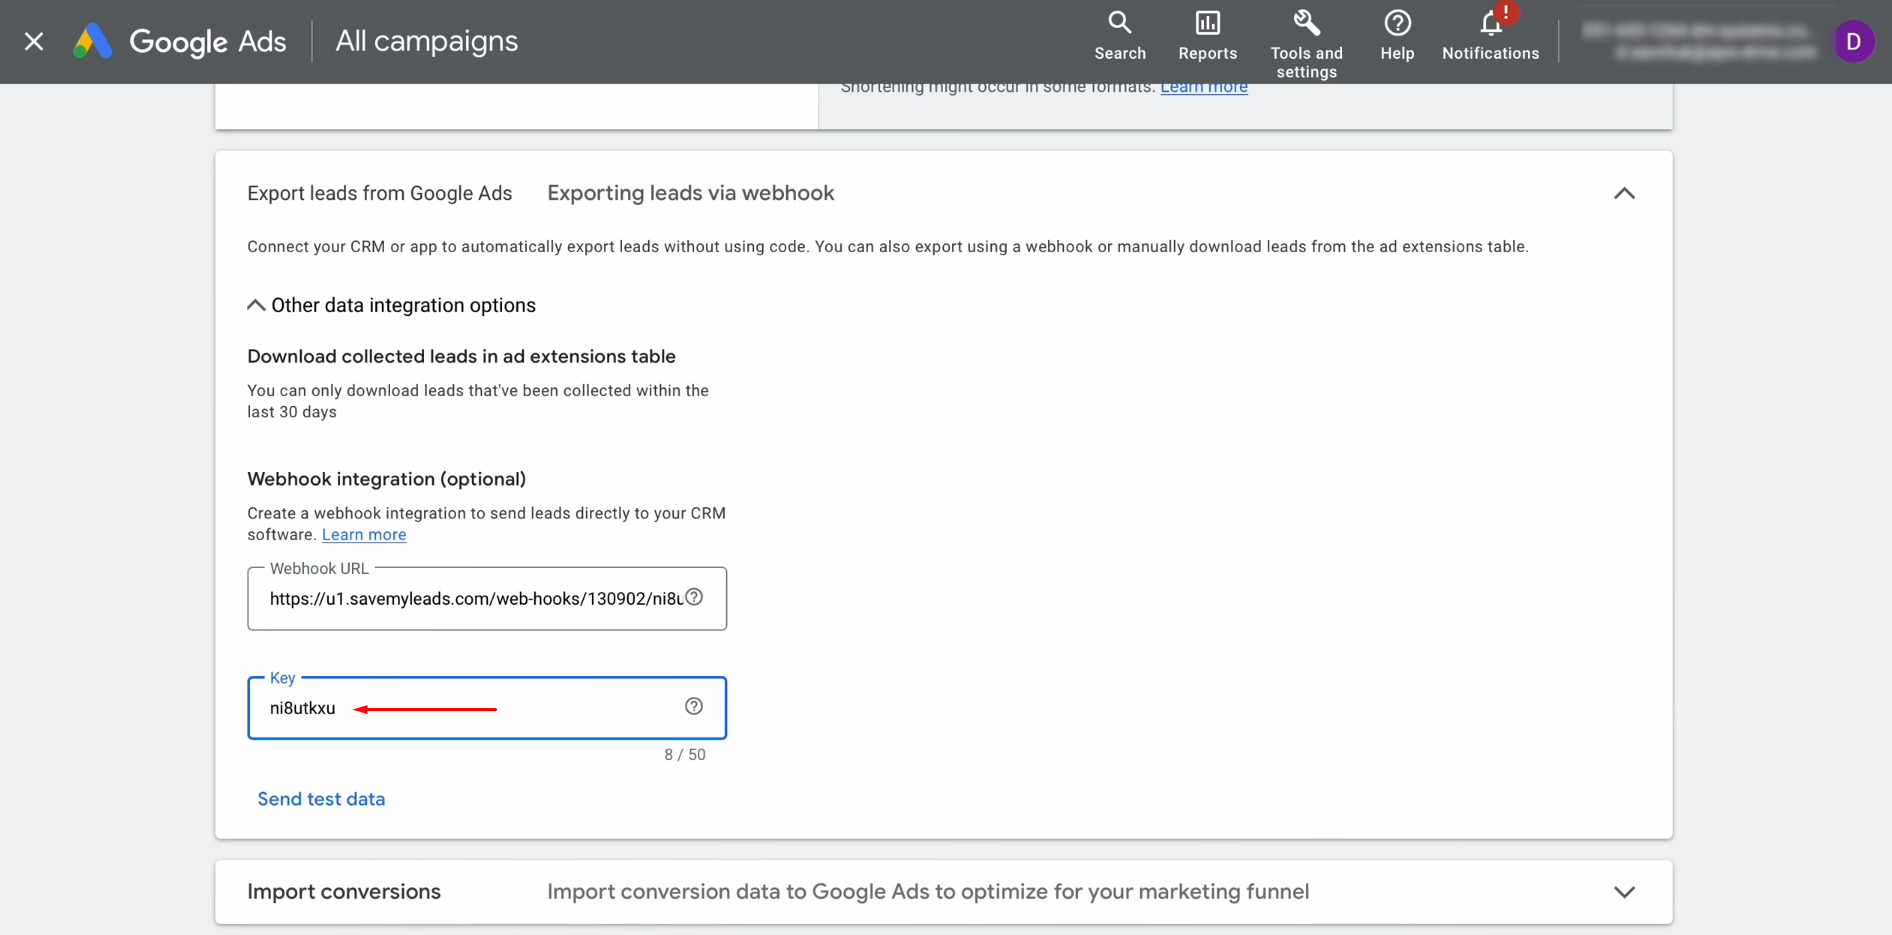
Click "Send test data."
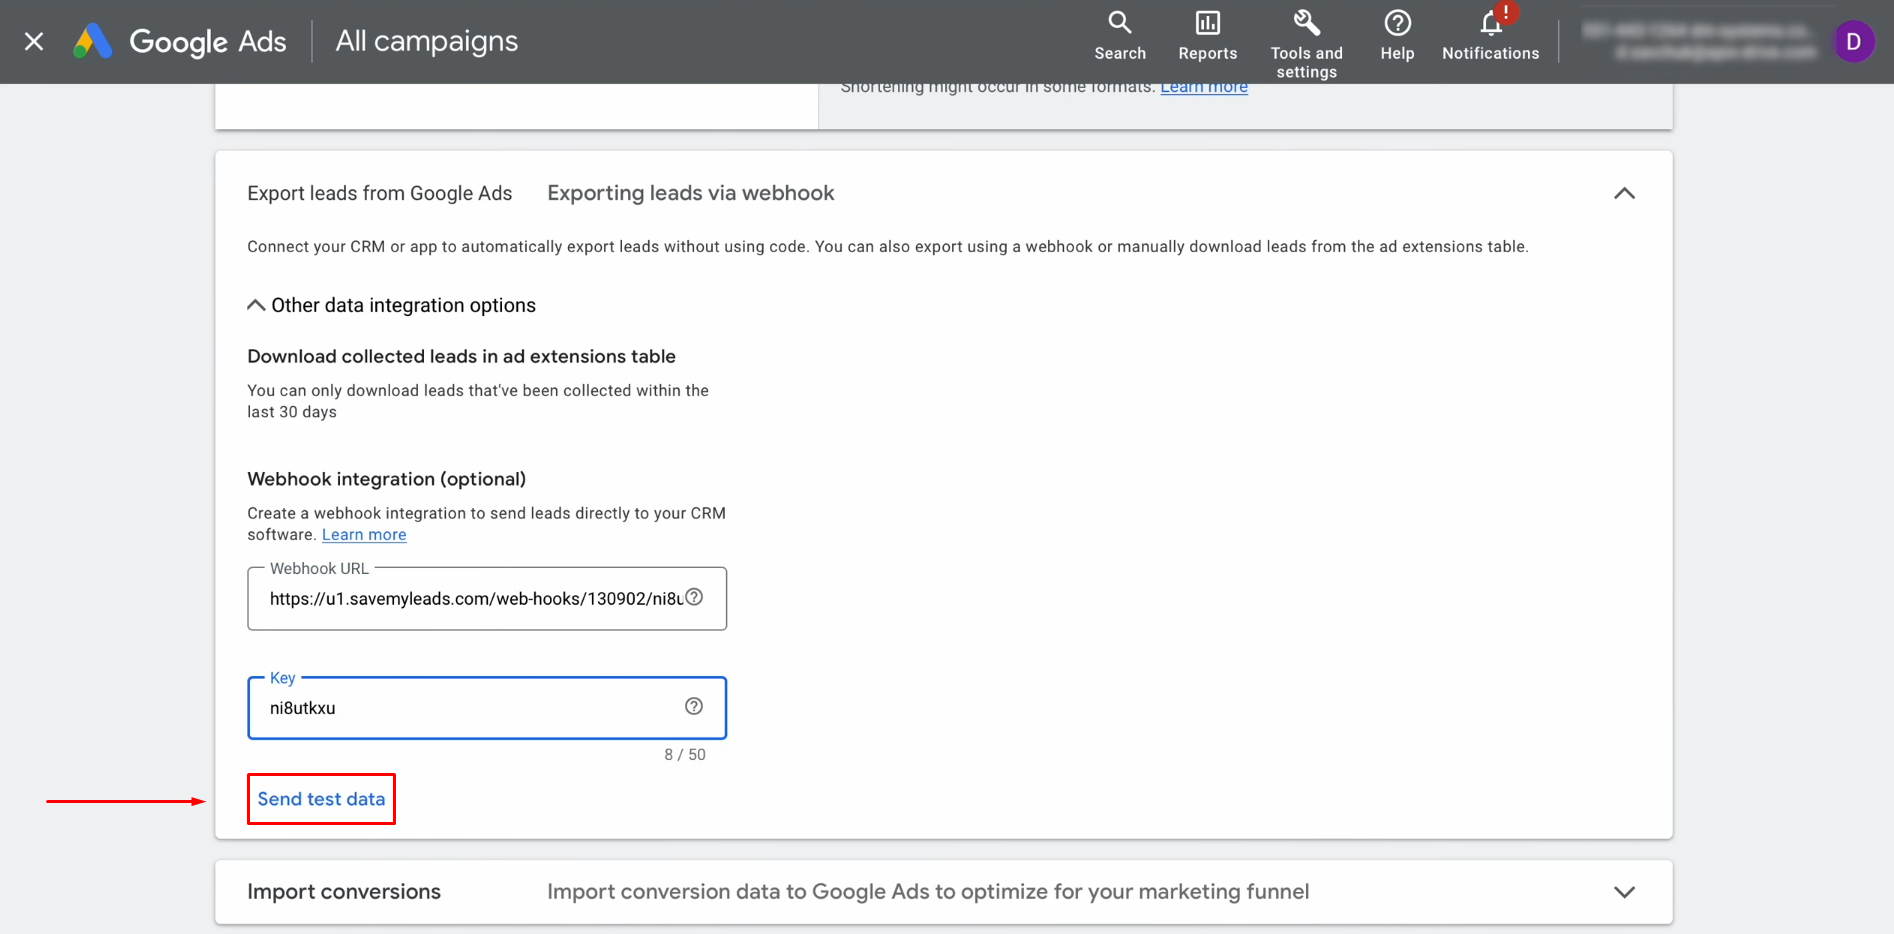
Next, click "Save" and return to your SaveMyLeads account.
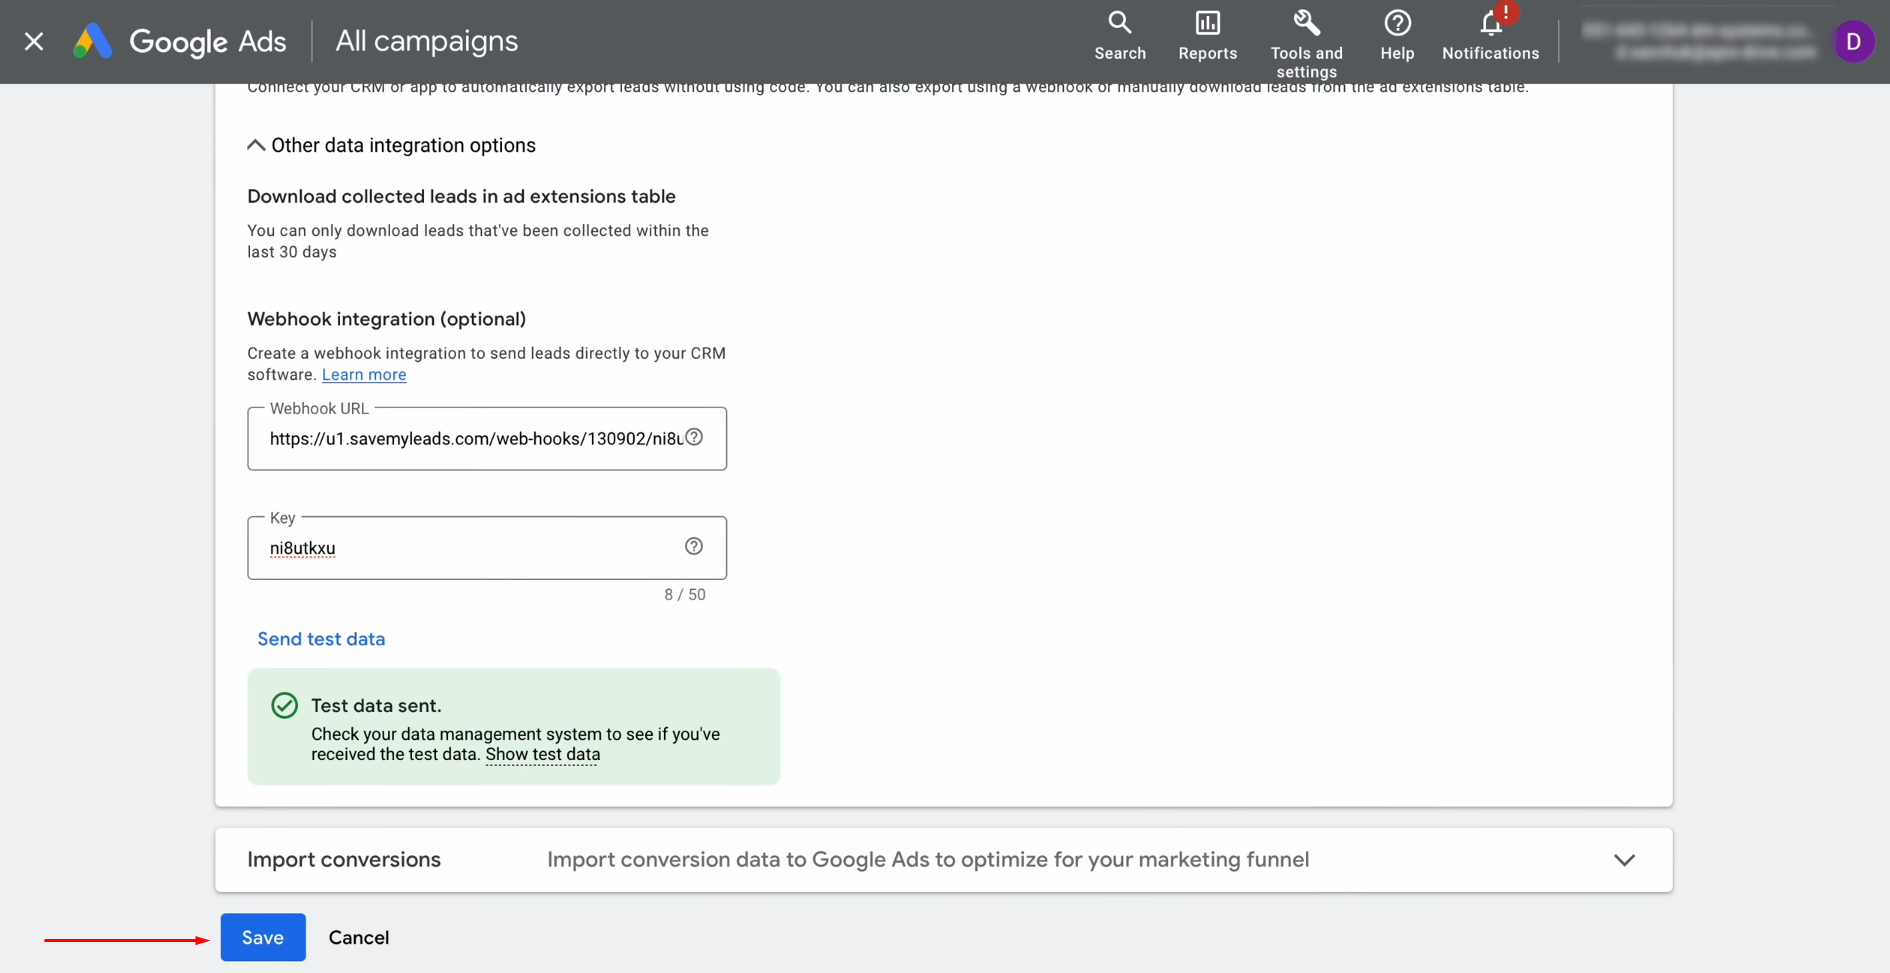
Then,
click "Continue."
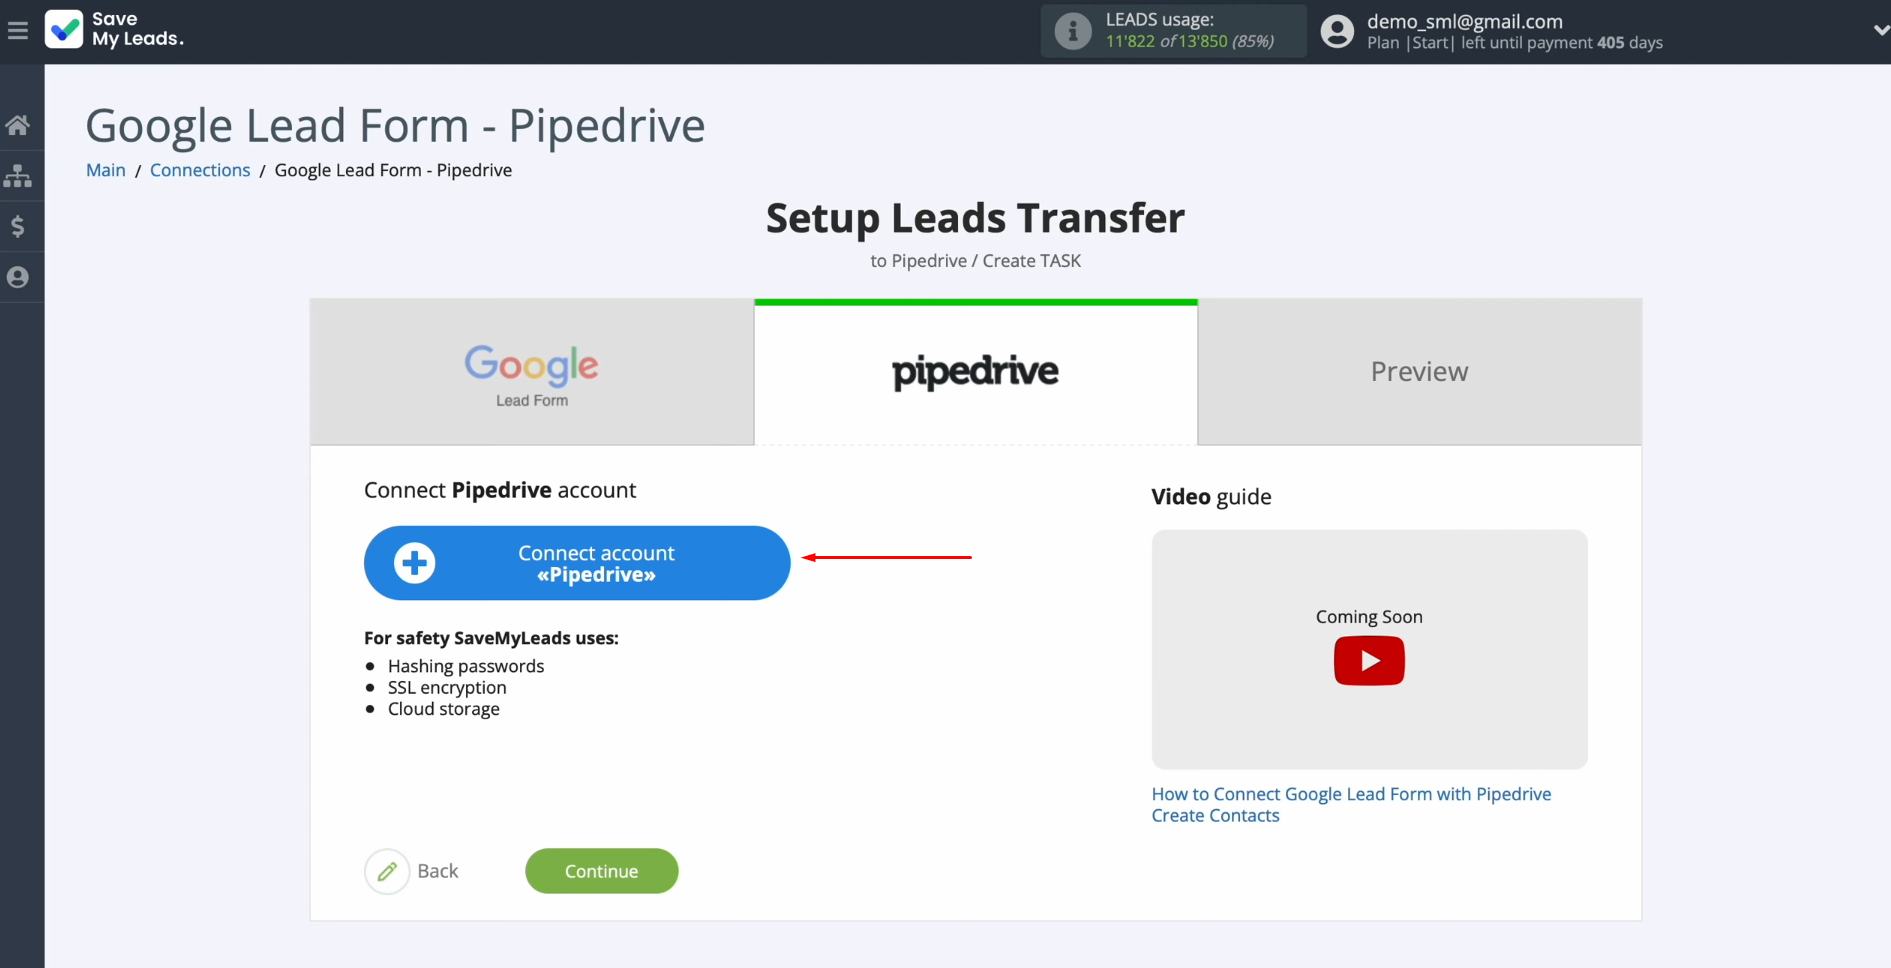
Setting Up the Data Receiver – Pipedrive
To continue configuring Pipedrive and Google Lead Form integration, you'll need to connect your Pipedrive account to SaveMyLeads.
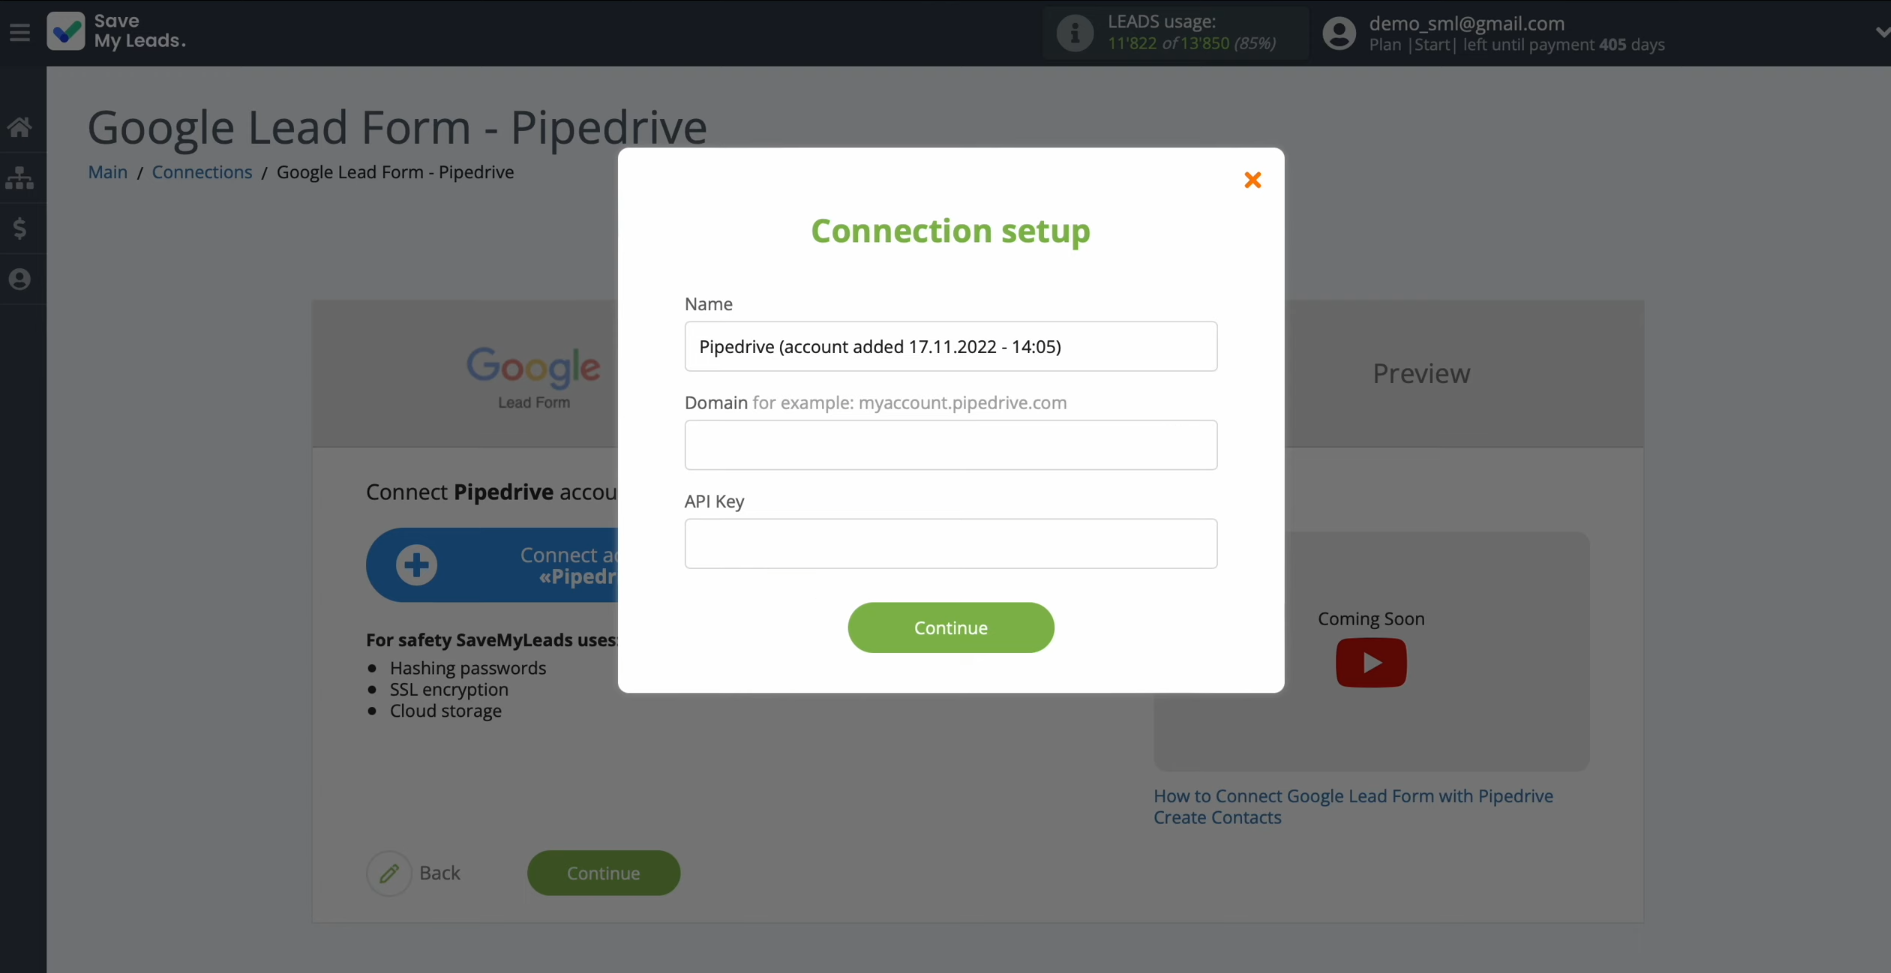
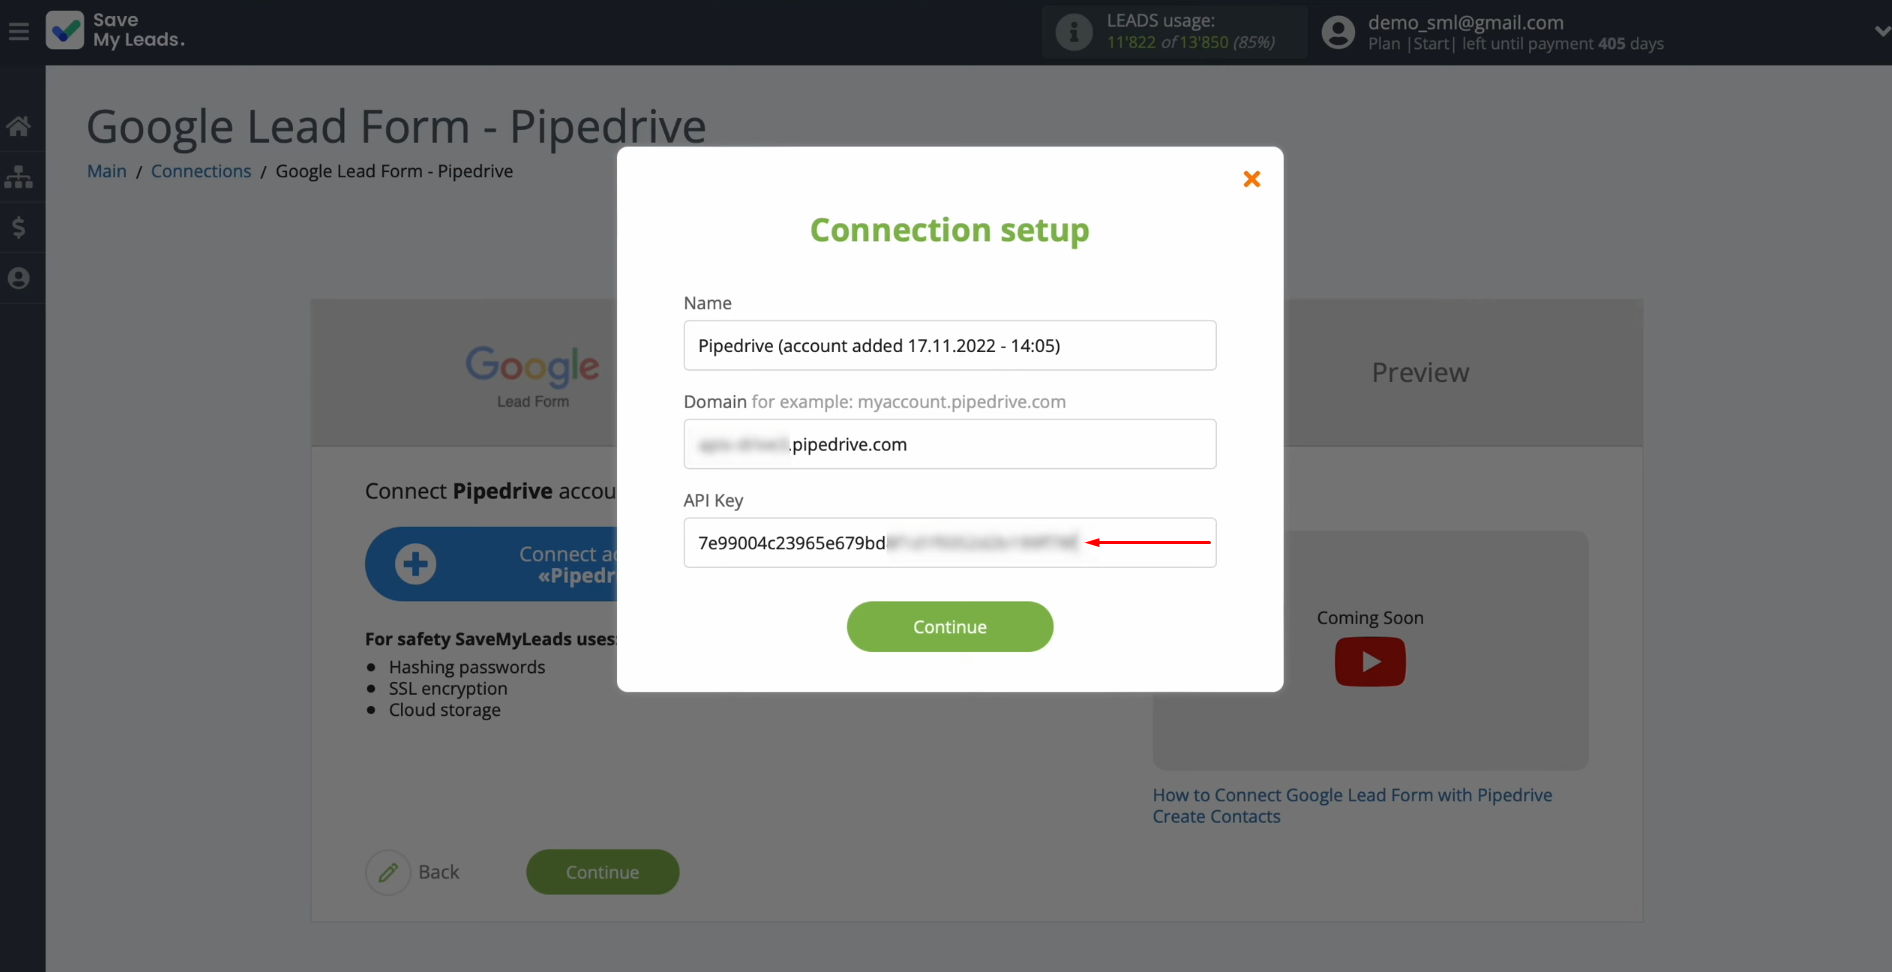
In the upcoming window, you must provide your domain and API key. To
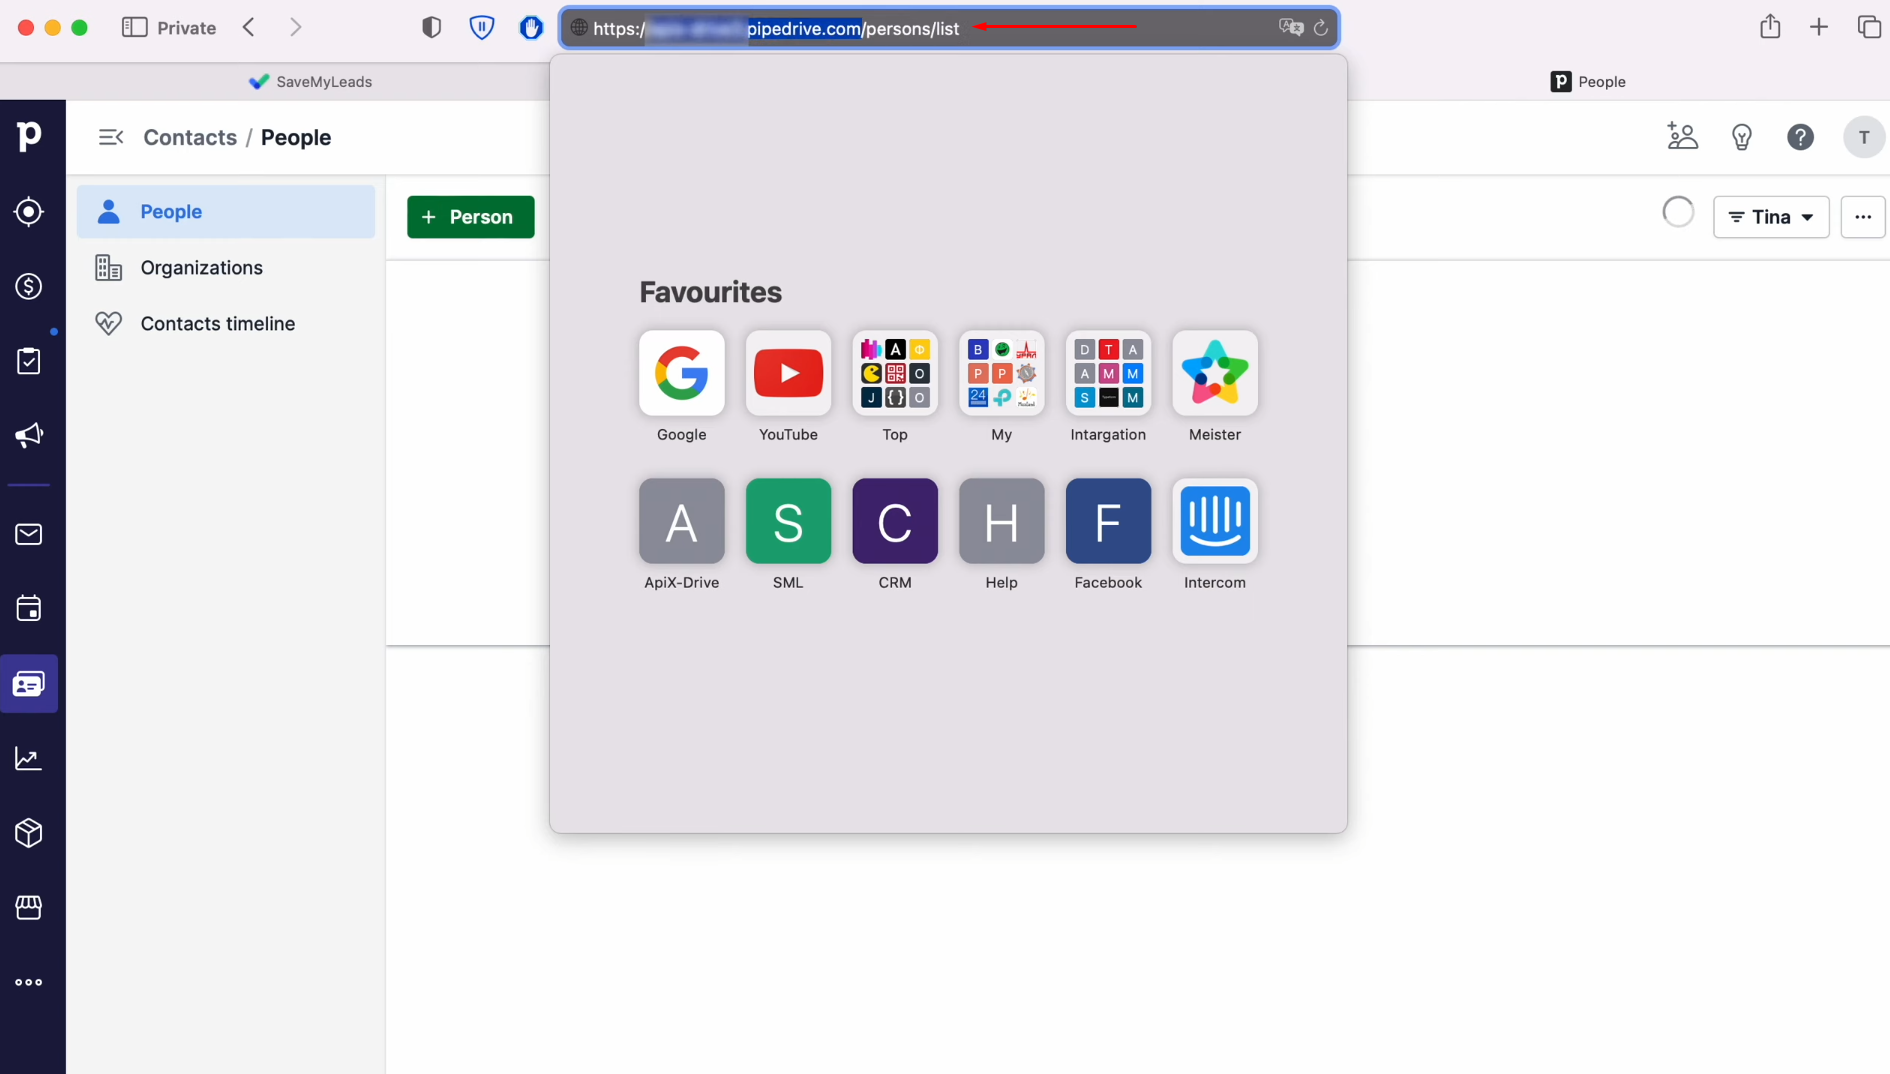
retrieve this information, access your Pipedrive account.
Extract the domain from the address bar, omitting any additional
characters.
Paste the domain into the required field.
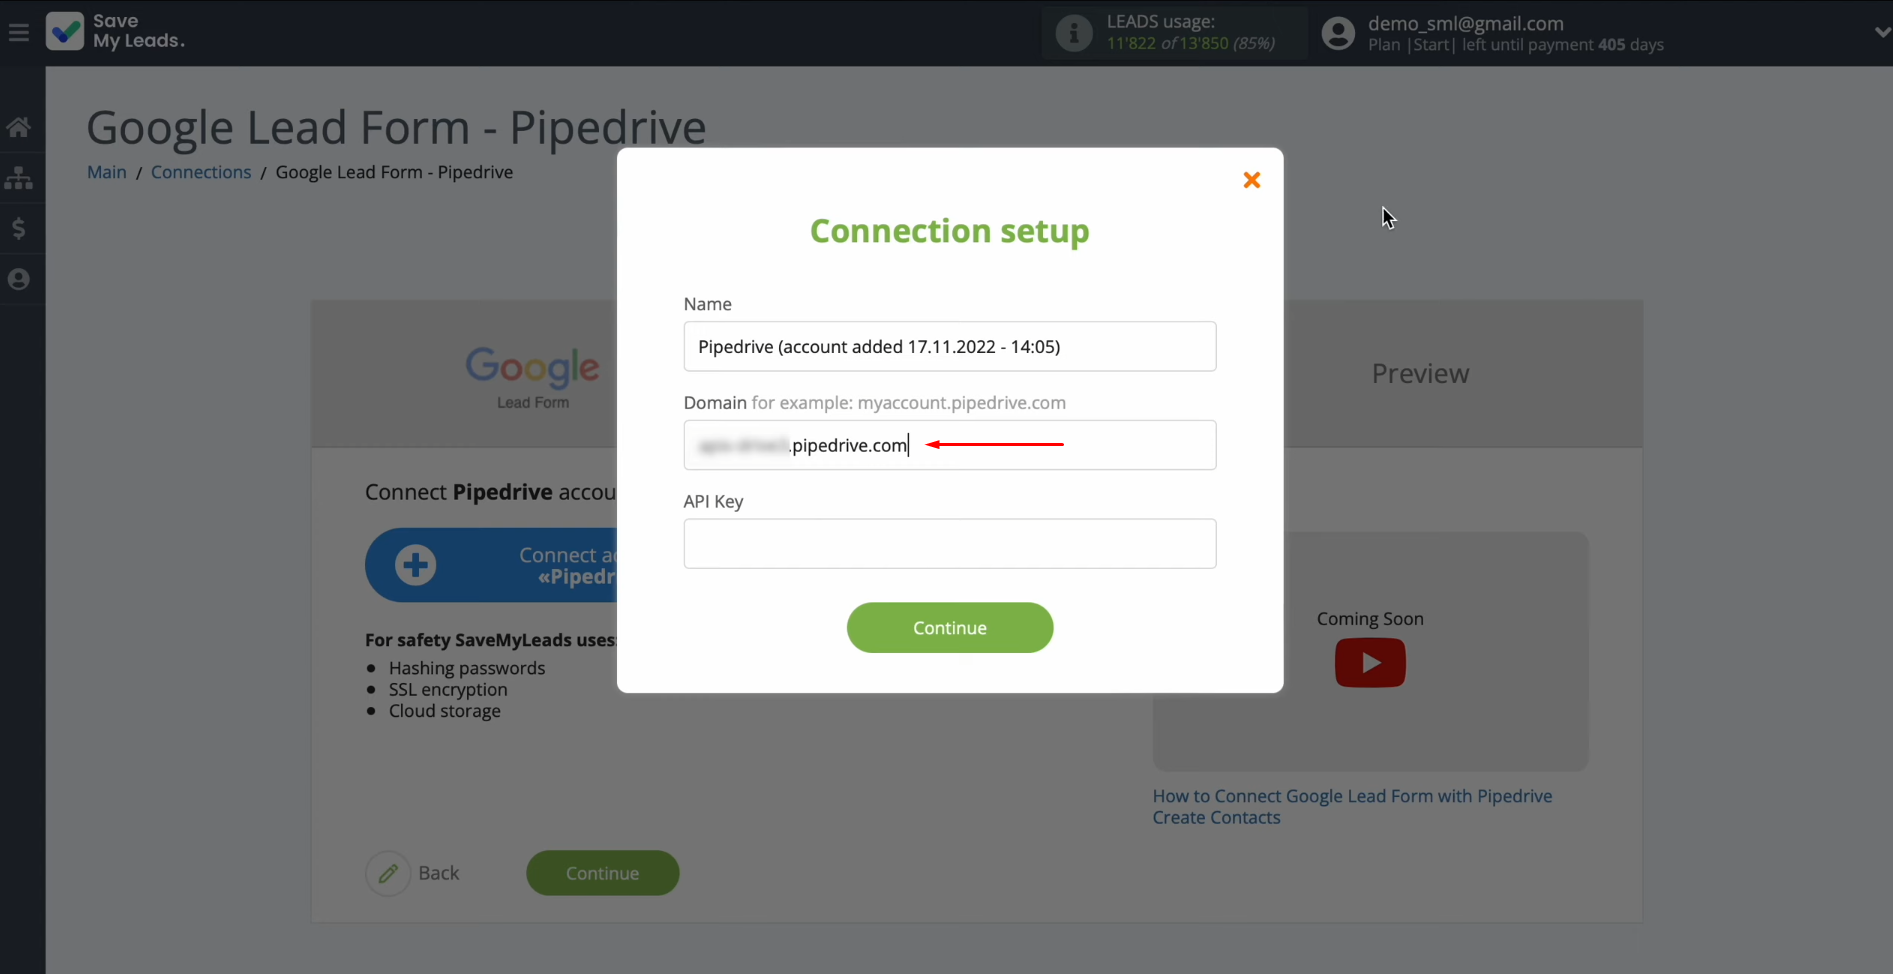
To obtain the API key, return to your Pipedrive personal account and proceed to profile
settings.
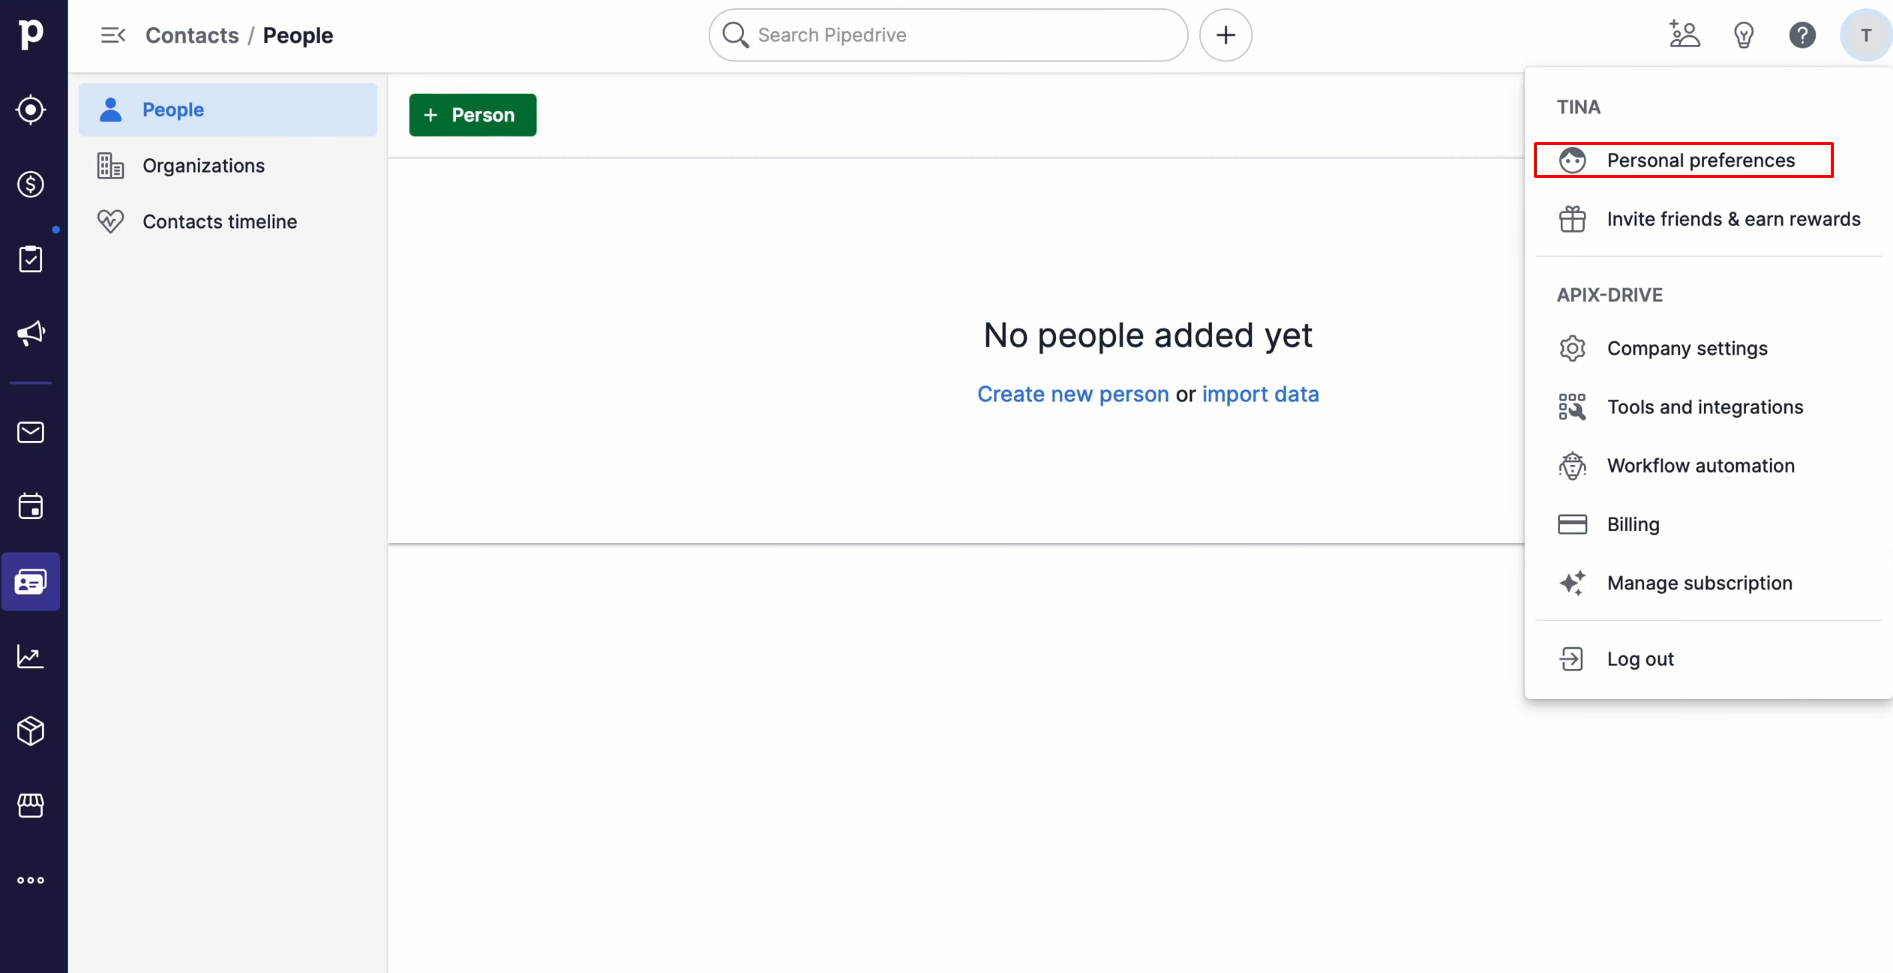
Navigate to the API tab.
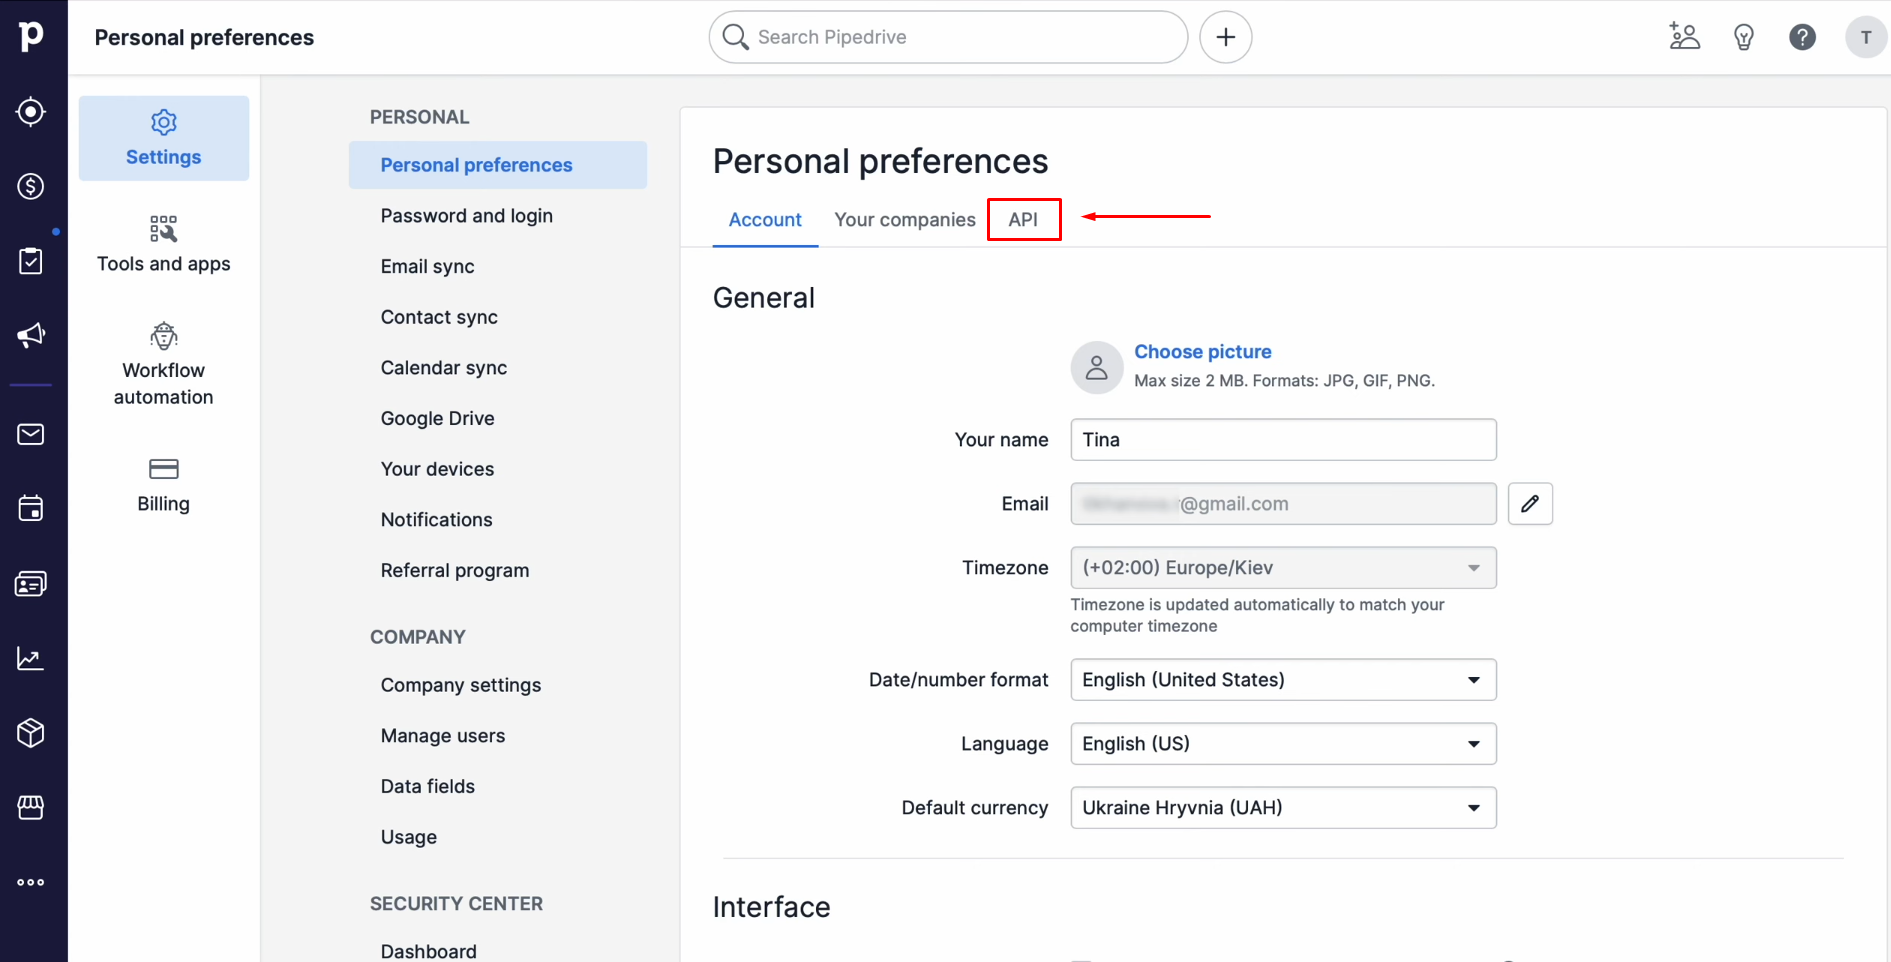
Copy the API key.
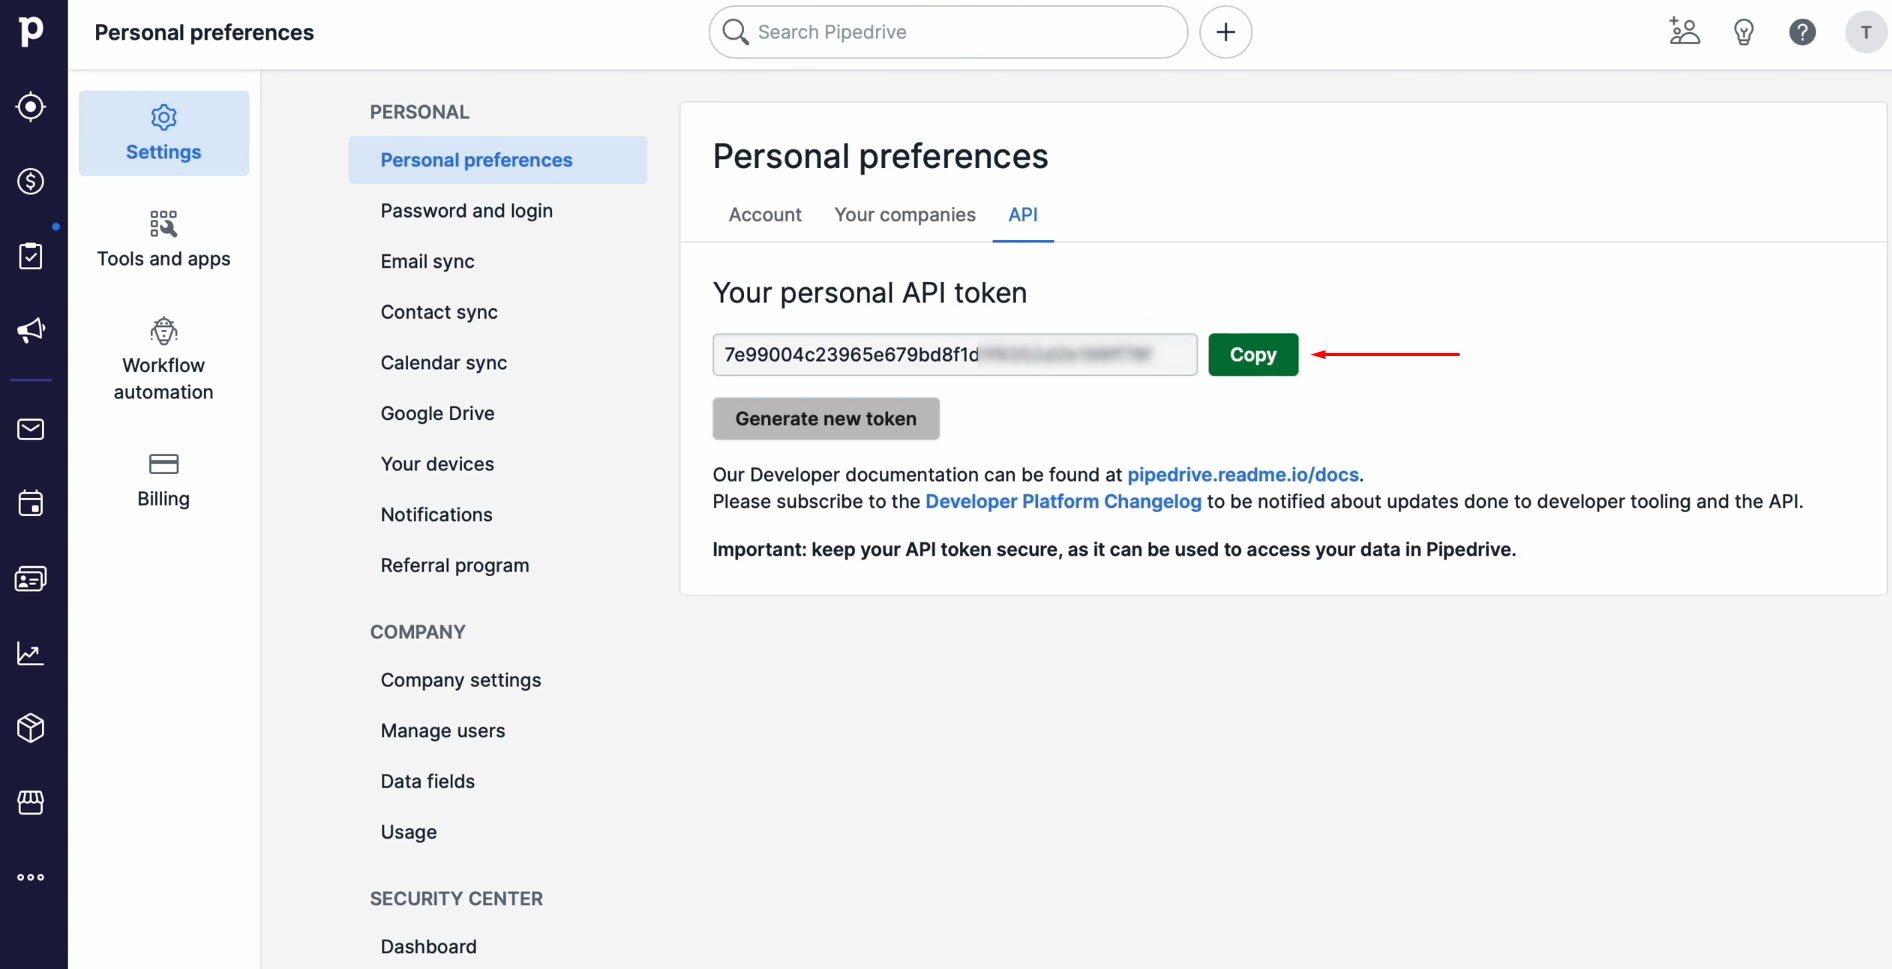
Paste the API key into the corresponding field in SaveMyLeads. Once the required fields are completed,
click "Continue."
When your connected account appears in the list, select it.
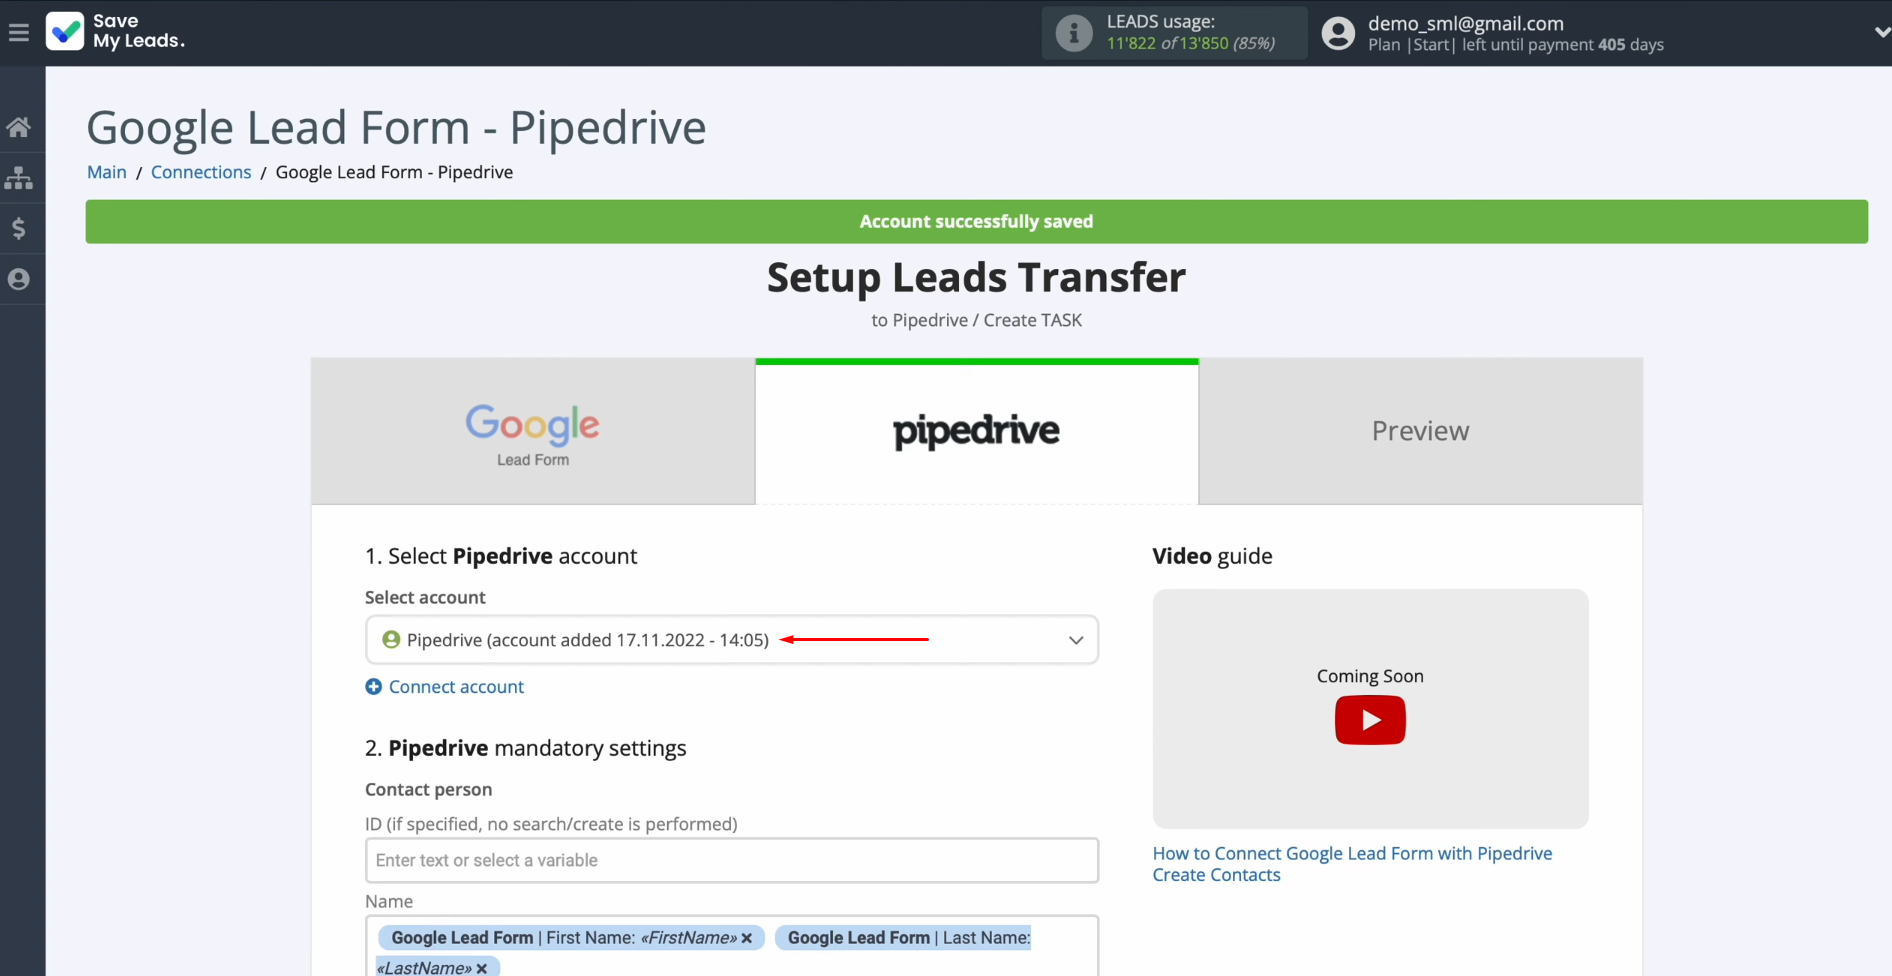
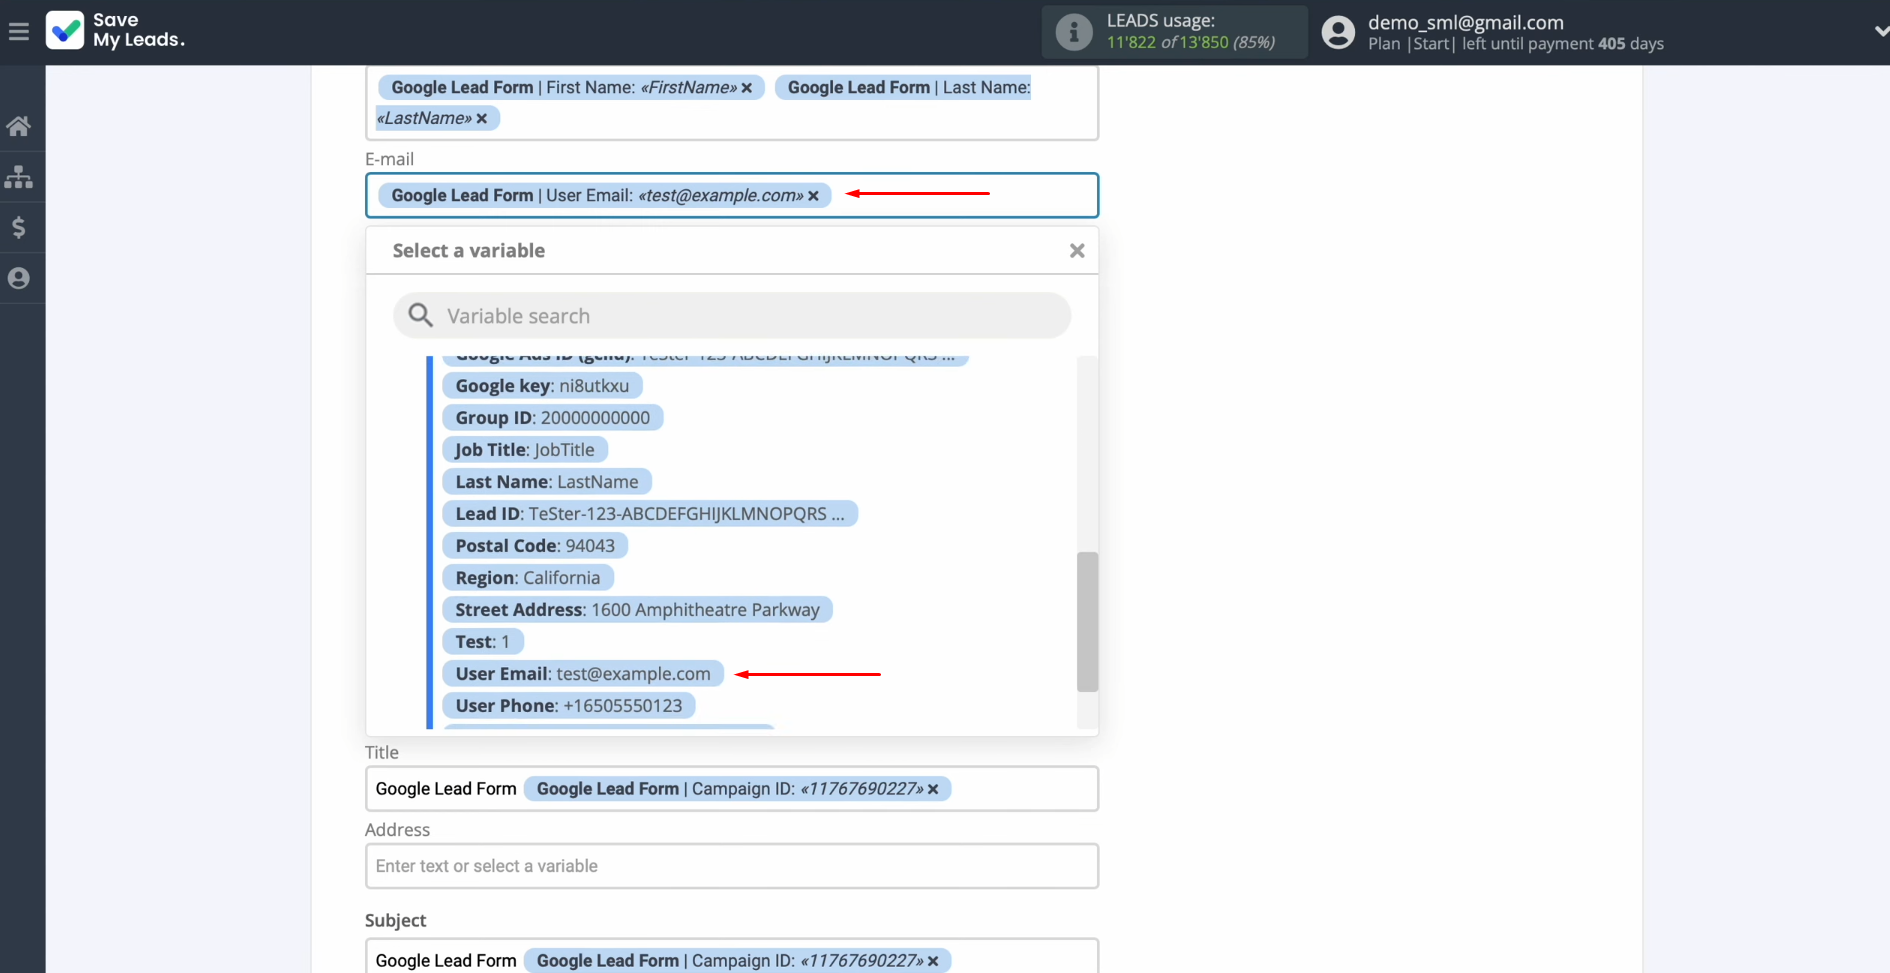
You'll see the Pipedrive fields for creating a new task. You can map
variables from Google Lead Form to these fields by clicking in the field and
selecting a variable from the dropdown list. If the preset fields meet your requirements, you can leave them
unchanged.
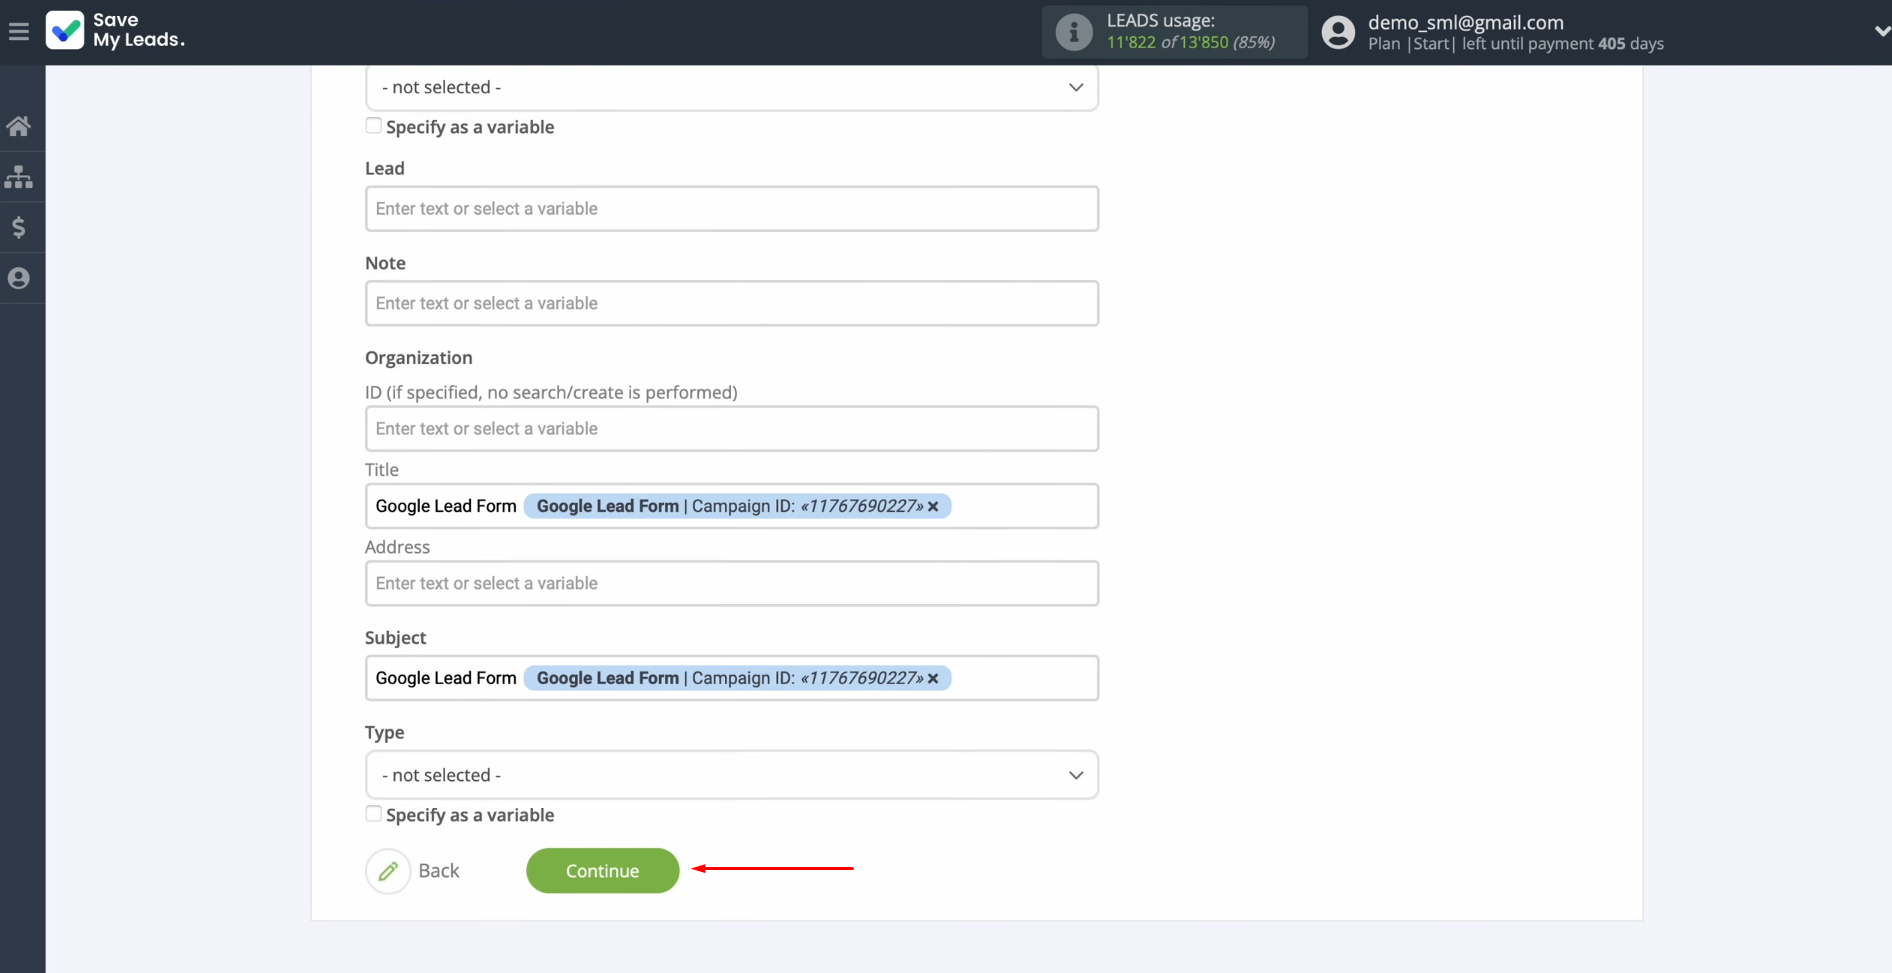
After finalizing the settings, click "Continue."
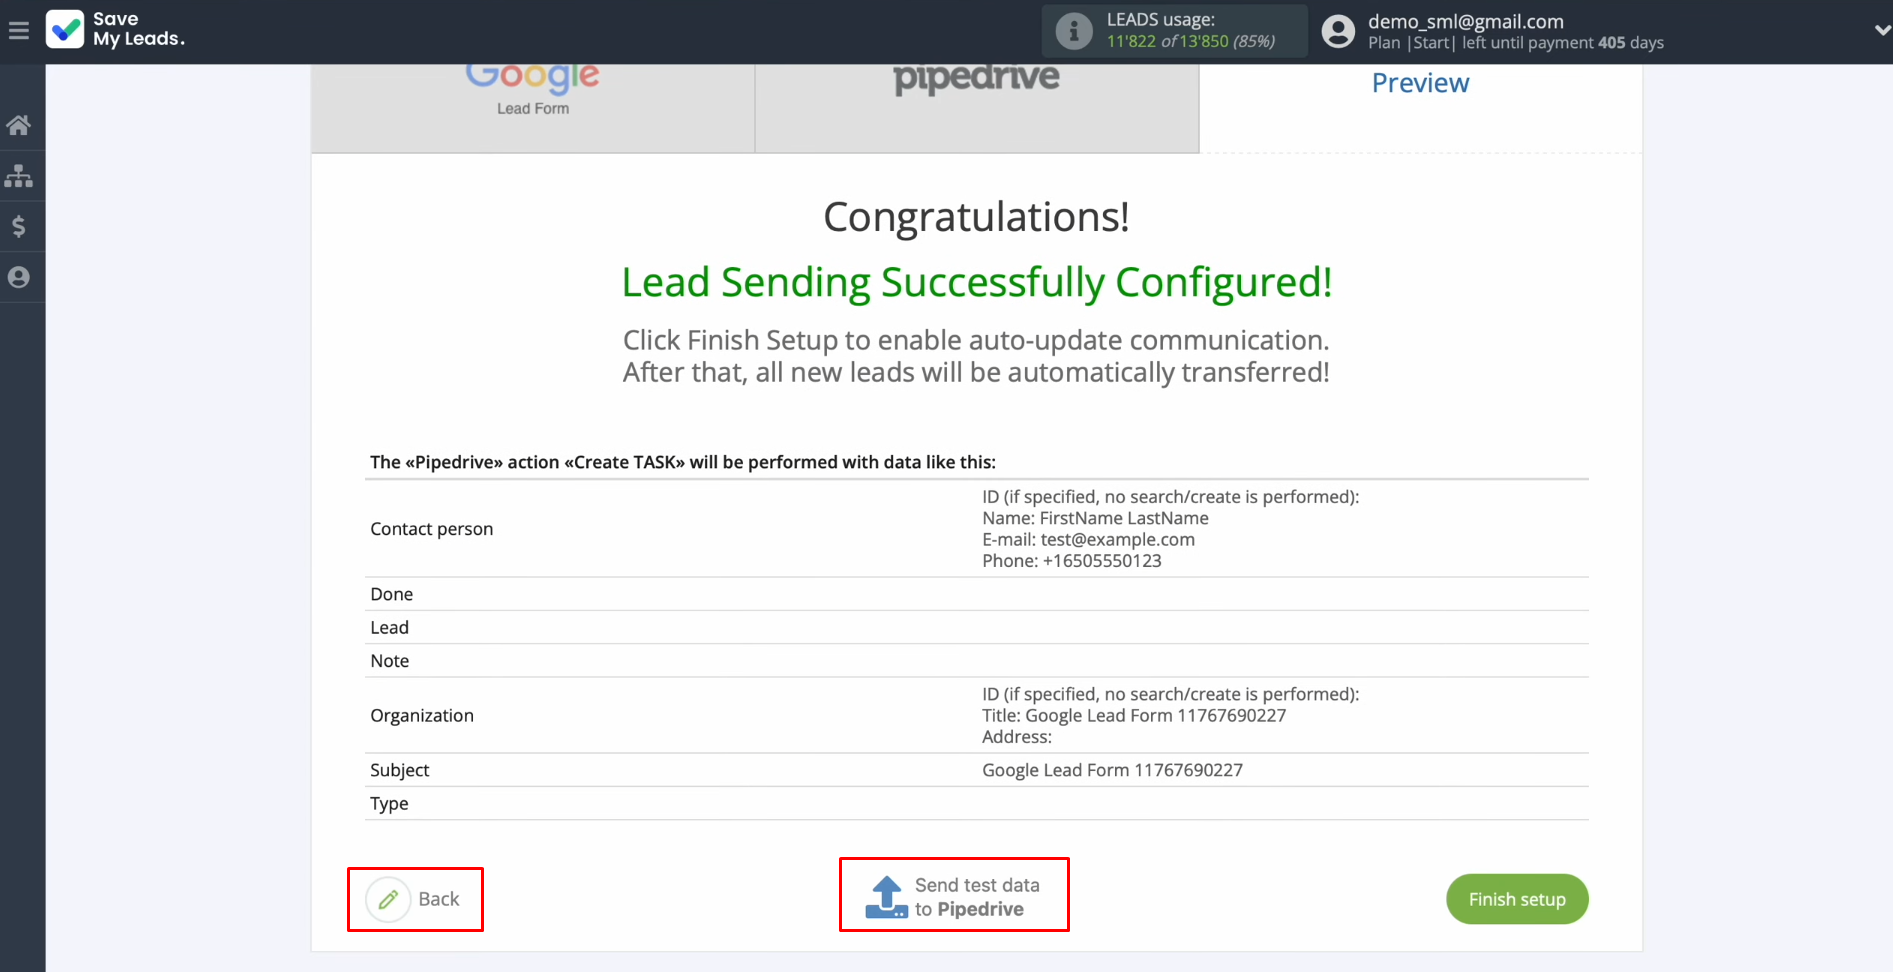
Data example for new Pipedrive tasks will now be displayed. If anything doesn't meet
your expectations, click "Back" to return to the previous step. To
verify the settings' accuracy, click "Send test data to Pipedrive."
Following a successful submission, check the result in Pipedrive.
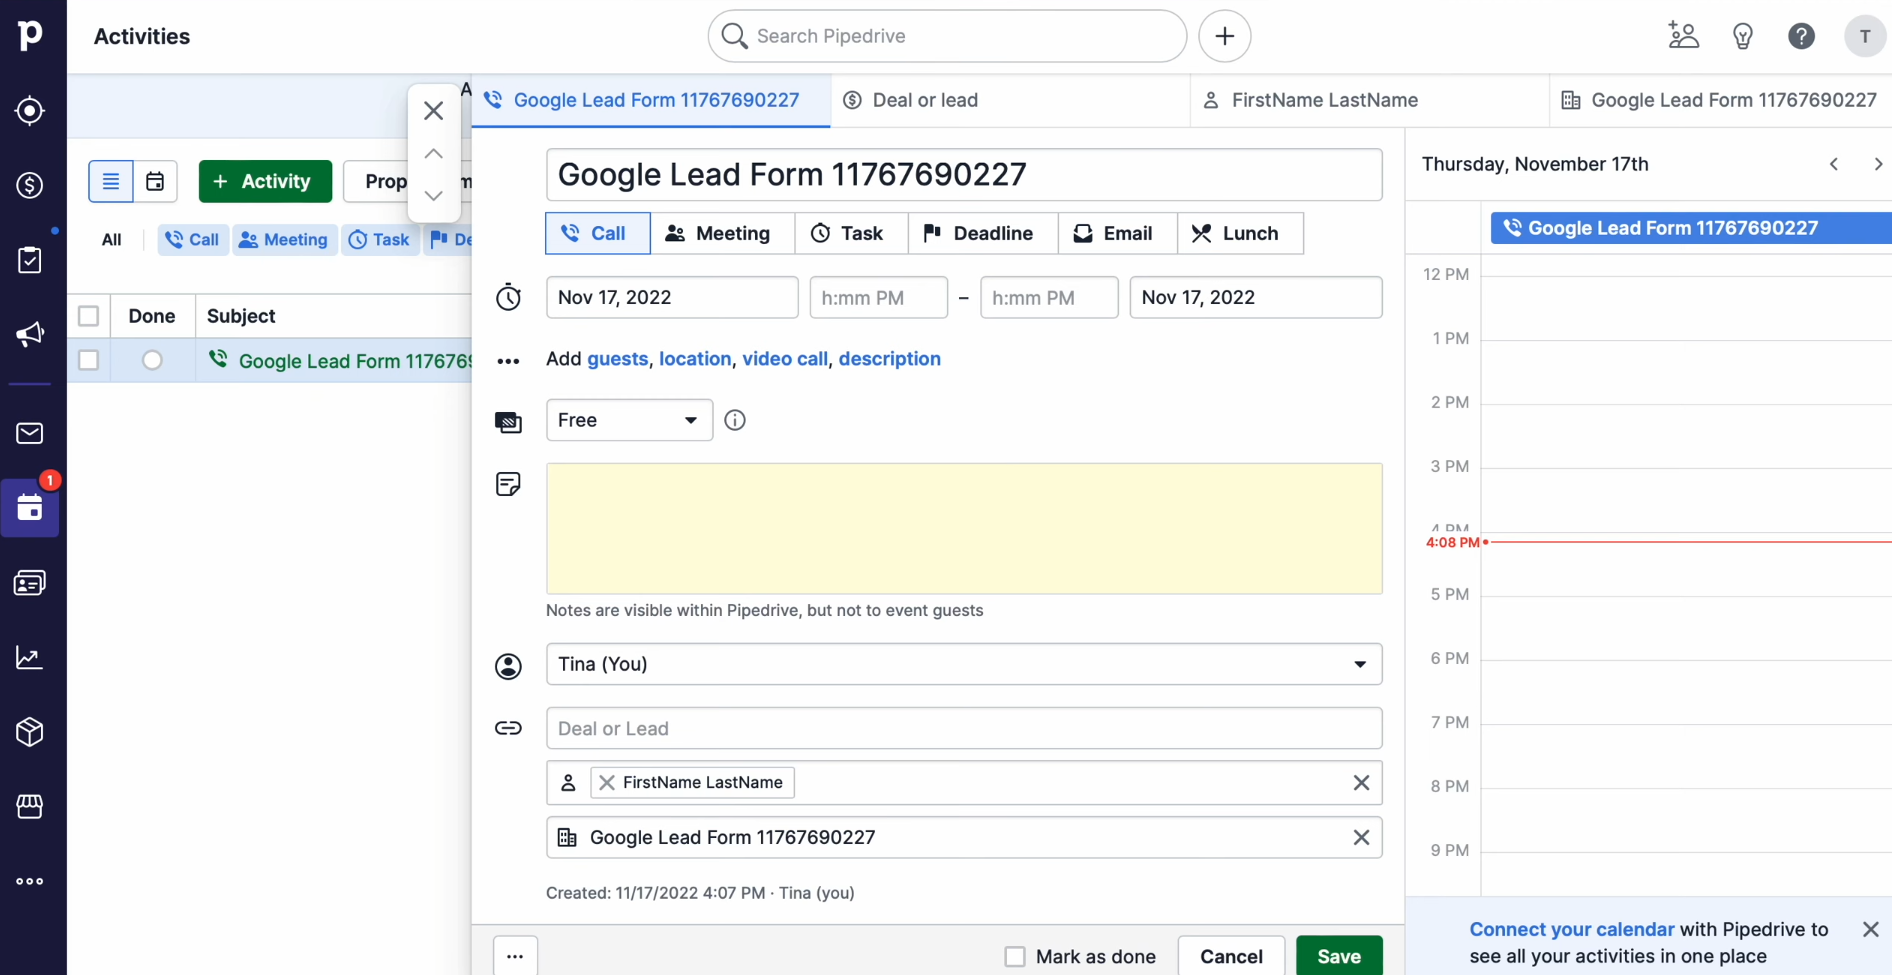
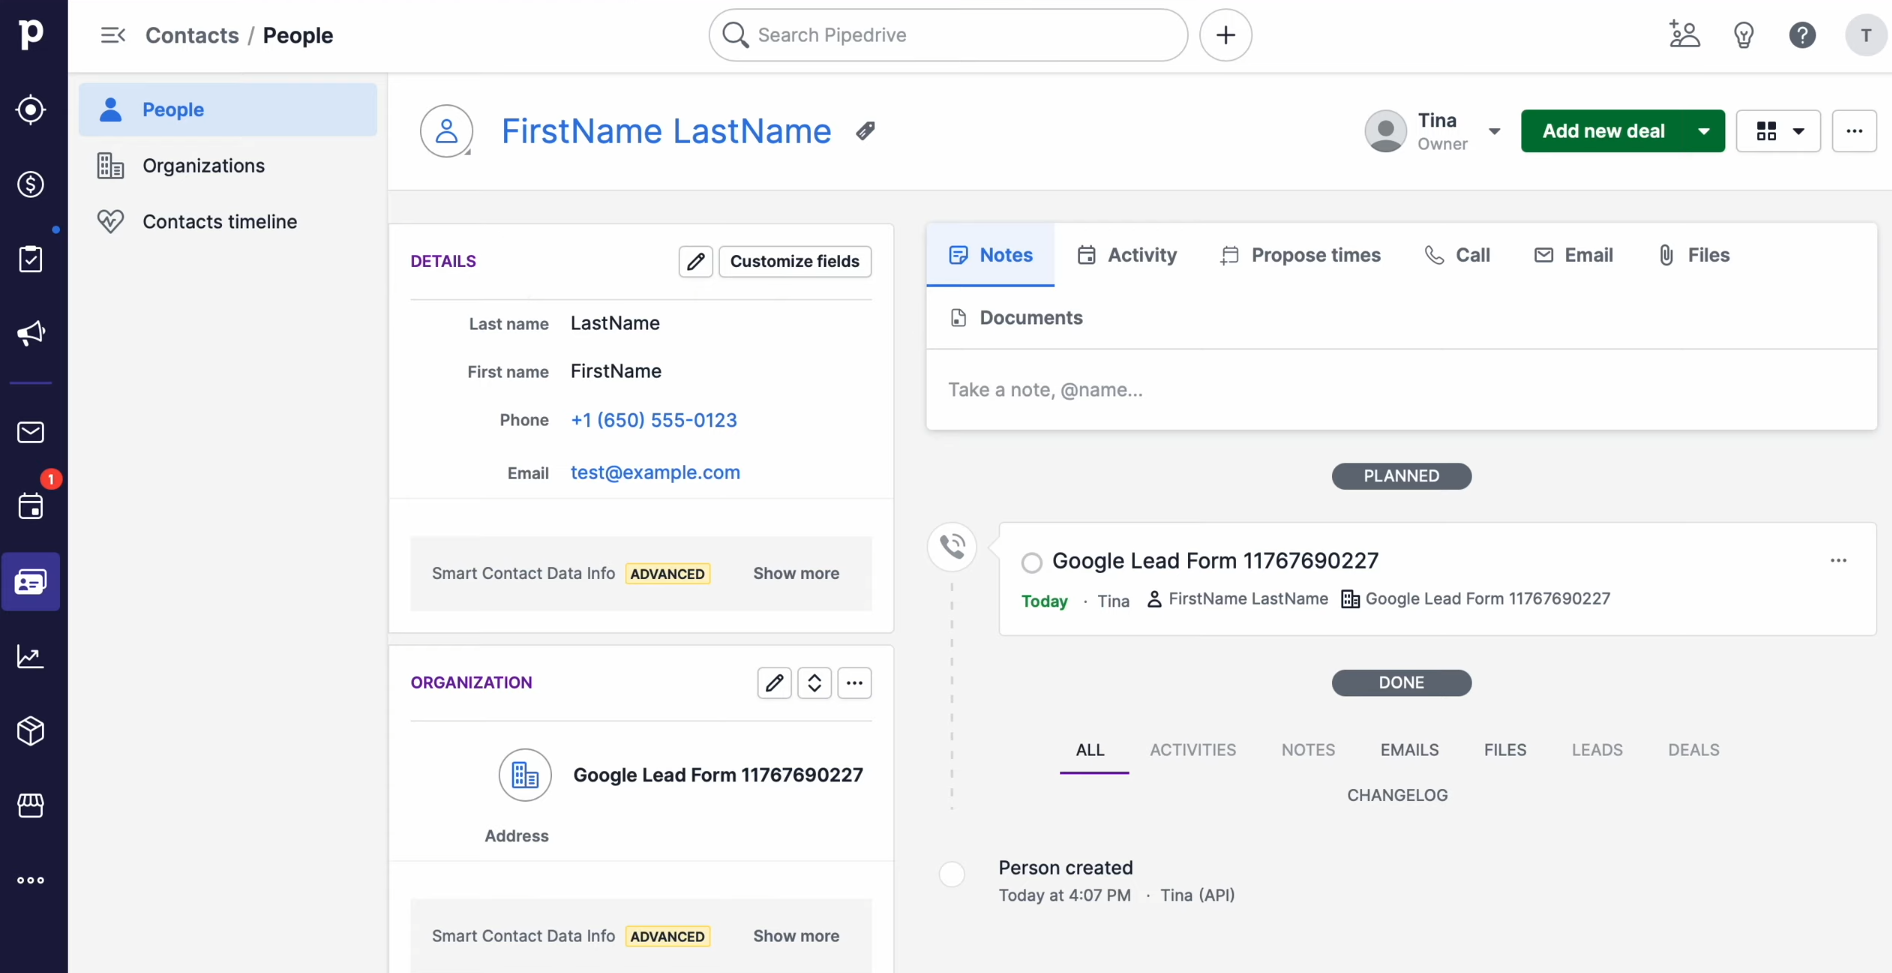
If everything looks satisfactory, return to
SaveMyLeads and proceed with the setup.
Setting Up Auto-Update
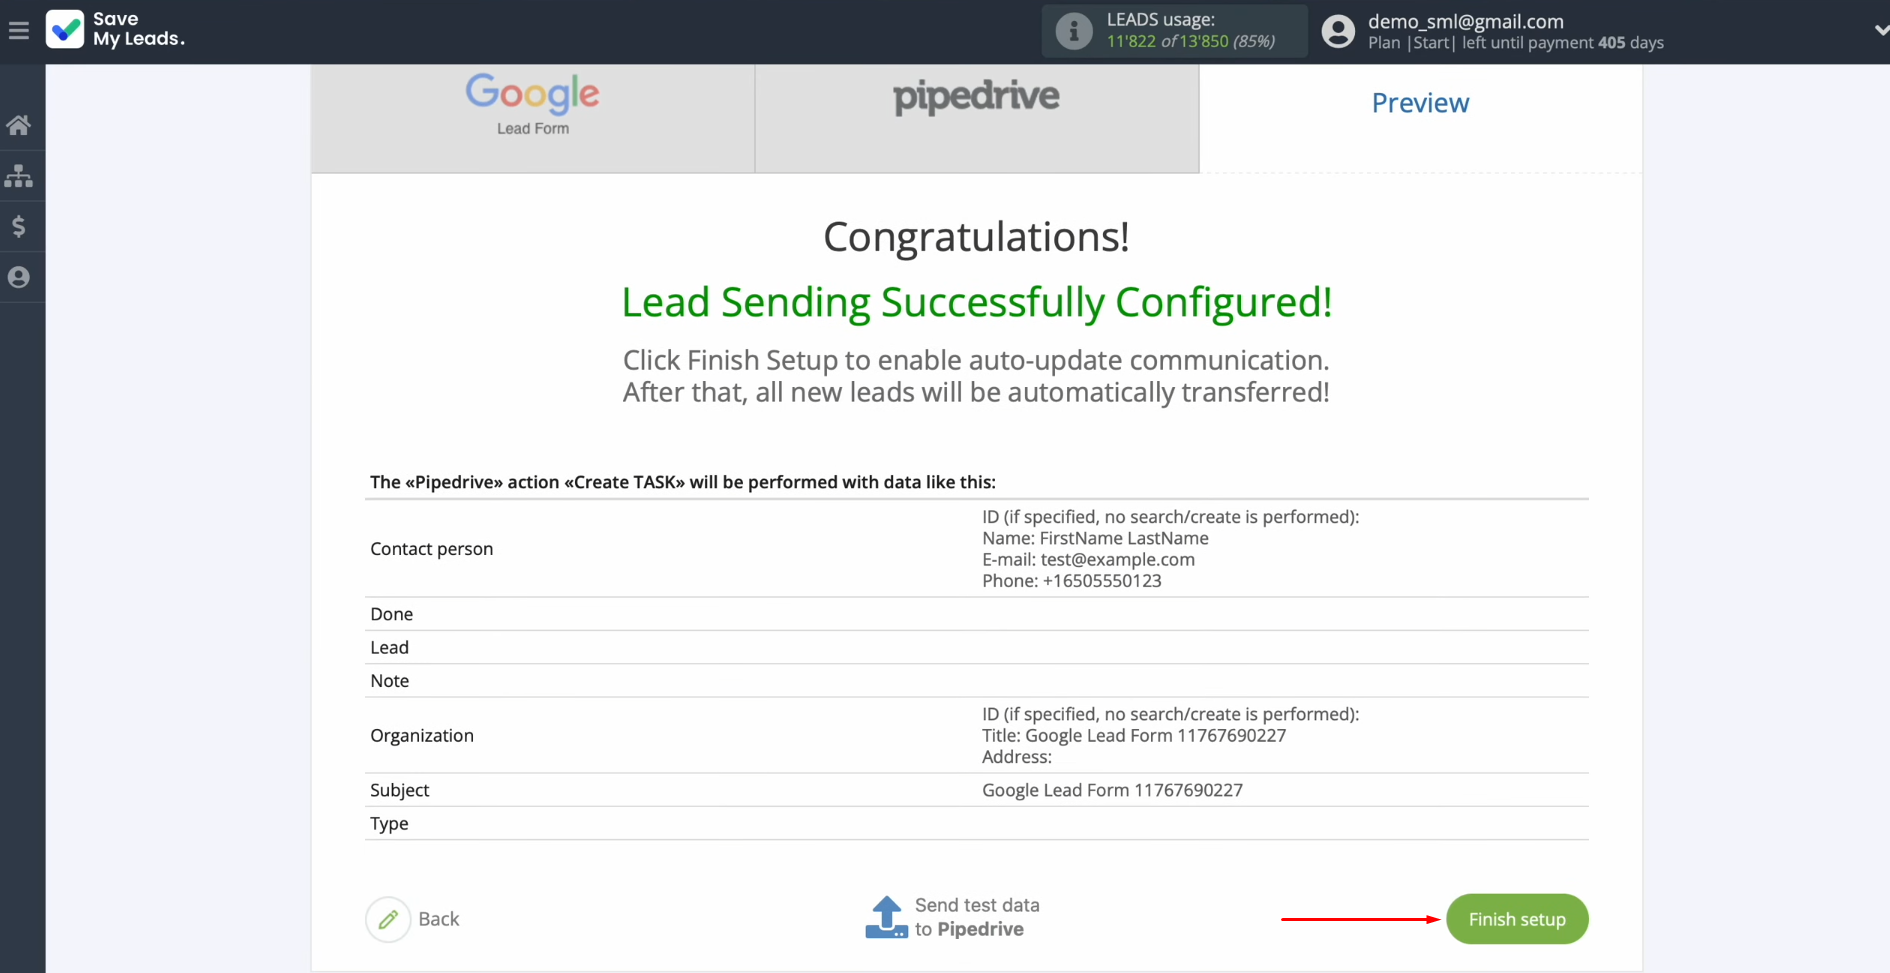
Click "Finish setup" to enable connection auto-update. This ensures all new leads from Google Lead Form will be transferred to the Pipedrive system to create new tasks.
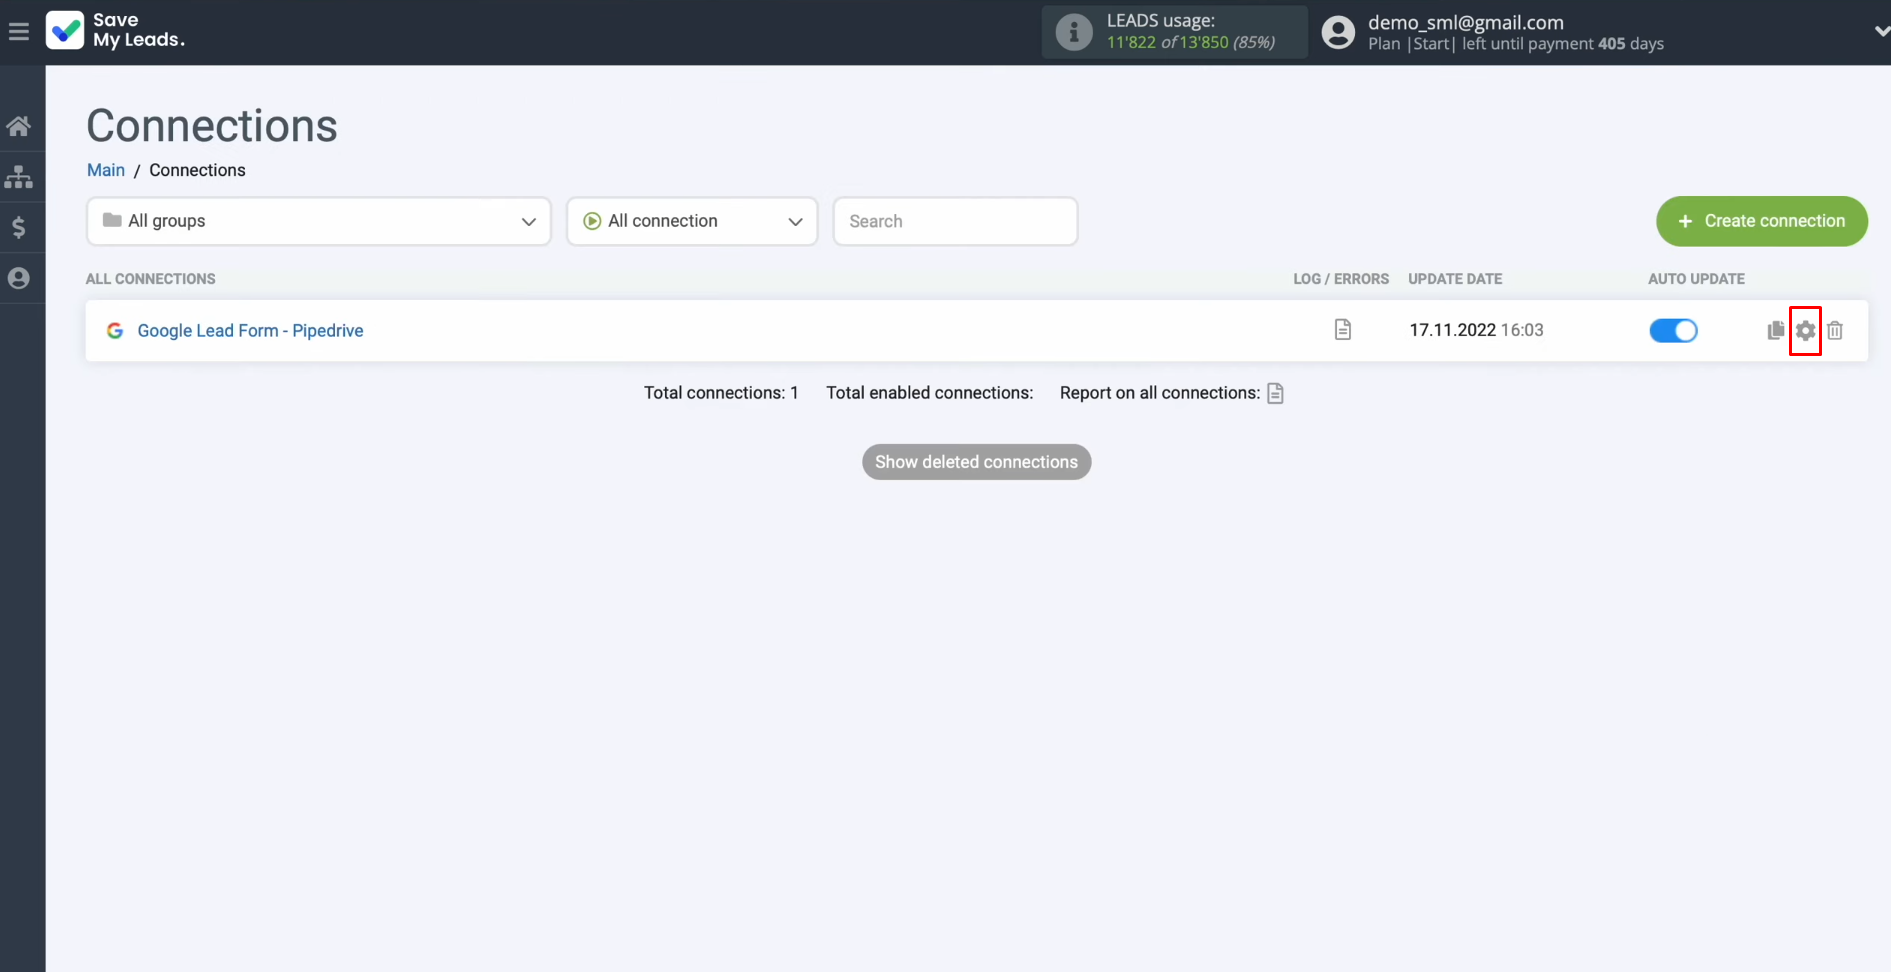
Should you wish to modify the connection name, you can do so in its
settings by clicking the gear icon.
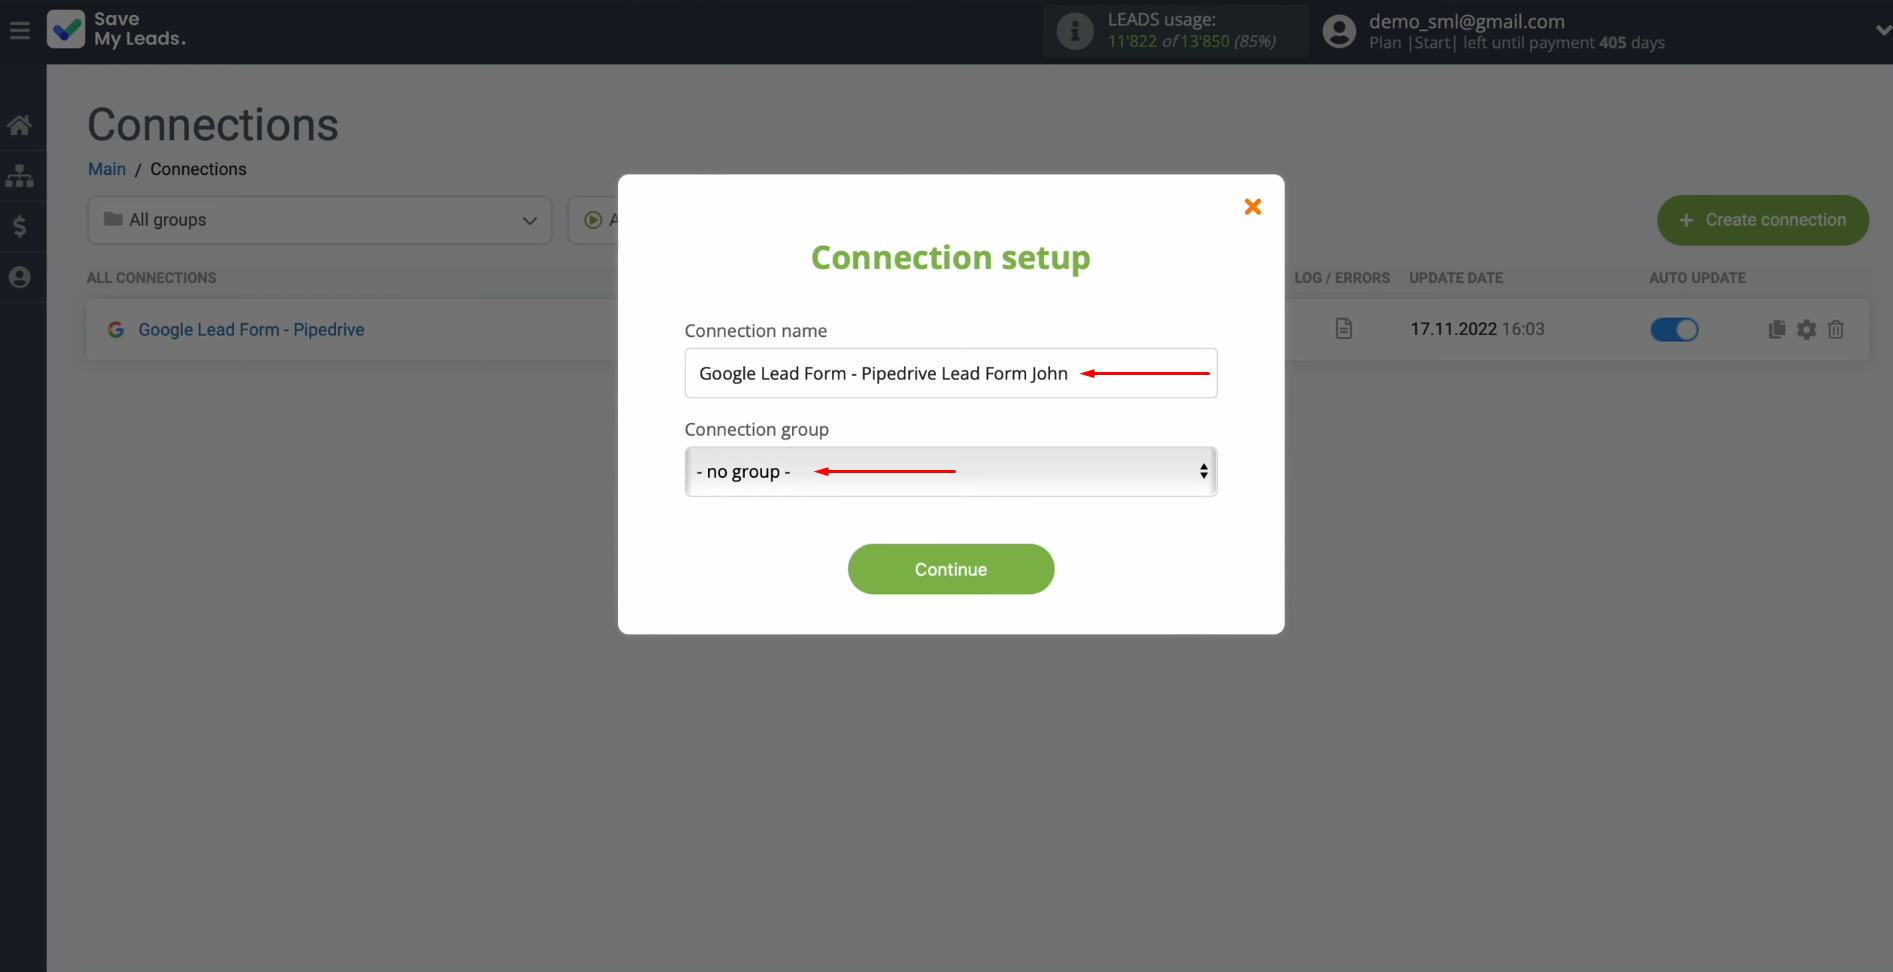
Here, you can rename the connection and add it to a group. Afterward,
click "Continue."
That's it. Google Lead Form and
Pipedrive integration is complete.
The Result: Automatic Lead Transfer from Google Ads to Pipedrive
Data from each new lead who completes and submits the form will be automatically transferred to the CRM system and processed as a new task. Sync Google Ads leads with Pipedrive and increase the speed of processing inquiries from potential clients! Moreover, this will simplify your employees' work, they will no longer need to manually transfer data.
As you can see, no special skills are required to create Pipedrive integration for Google Ads Leads. Thanks to the intuitive interface of the online connector, the connection is set up in just minutes. After launch, SaveMyLeads completely handles the routine data transfer from forms to the Pipedrive CRM system. Meanwhile, you gain an excellent opportunity to focus on other important tasks that, for various reasons, are not yet subject to automation.
Step-by-Step Guides for Setting Up Integrations:
- TikTok and Slack Integration: Automatically Sending Channel Notifications
- How to Integrate TikTok and Notion: Step-by-Step Guide
- Facebook and Copper Integration: Automatic Creation of Contacts
- How to Connect Google Lead Form Ads to Notion
- Google Lead Form and ClickUp Integration: Automatic Data Transfer
