Responsiveness to potential customer requests provides a business with a significant competitive advantage. Facebook Lead Ads tool was created specifically to speed up this process. This format gives customers the opportunity to quickly express interest in a purchase or order with just a few clicks. The Copper CRM system allows entrepreneurs to effectively manage their client base, entire projects, and individual tasks, quickly track leads and deals, and also provides deep analytics. All this helps to optimize workflows and improve productivity. In this article, we will tell you how to set up Facebook and Copper integration, thereby automating the transfer of data from Lead Ads forms directly to the CRM platform.
Automatically transferring customer contact information from Facebook to Copper brings three main benefits to businesses:
- Accelerate feedback. Your customers will receive quick responses, which significantly reduces the risk of them abandoning the deal.
- Optimizing employee performance. Managers who were busy manually transferring data can focus on improving the quality of communication with clients.
- Reducing time spent. You will free up more time for yourself and your colleagues by delegating some routine daily processes to the connector.
You will be able to see the results of Copper and Facebook integration immediately after completing its configuration using the SaveMyLeads connector. Leads that fill out the Lead Ads form will be automatically transferred to the CRM system. If you previously manually transferred data such as names, phone numbers, email addresses, now you can forget about this outdated method. Automating the transfer of contacts will not only simplify your work but also improve the customer experience when interacting with your company. This, in turn, will increase the likelihood of them becoming repeat customers, which will contribute to the growth and development of your business.
How to Set up Facebook and Copper Integration
Setting up Facebook-Leads and Copper integration using SaveMyLeads is very simple. Even a person with minimal experience working with programs can easily cope with this task. By using this tool to connect your social network and CRM platform, you don't have to learn the technical aspects of the API or invite a specialist to complete the task. The intuitive interface allows setup in just 10 minutes. If you already have experience with integrations, the process will take even less time. Our detailed text and video instructions will help you avoid mistakes and complete the setup correctly the first time.
The first step is to register at savemyleads.com. Create an account by entering your name, email address, and password. If you have Google or Facebook accounts, you can register through them. Already done this? Great! Now let's get started setting up Facebook Lead Ads and Copper integration.
Setting up the Data Source – Facebook
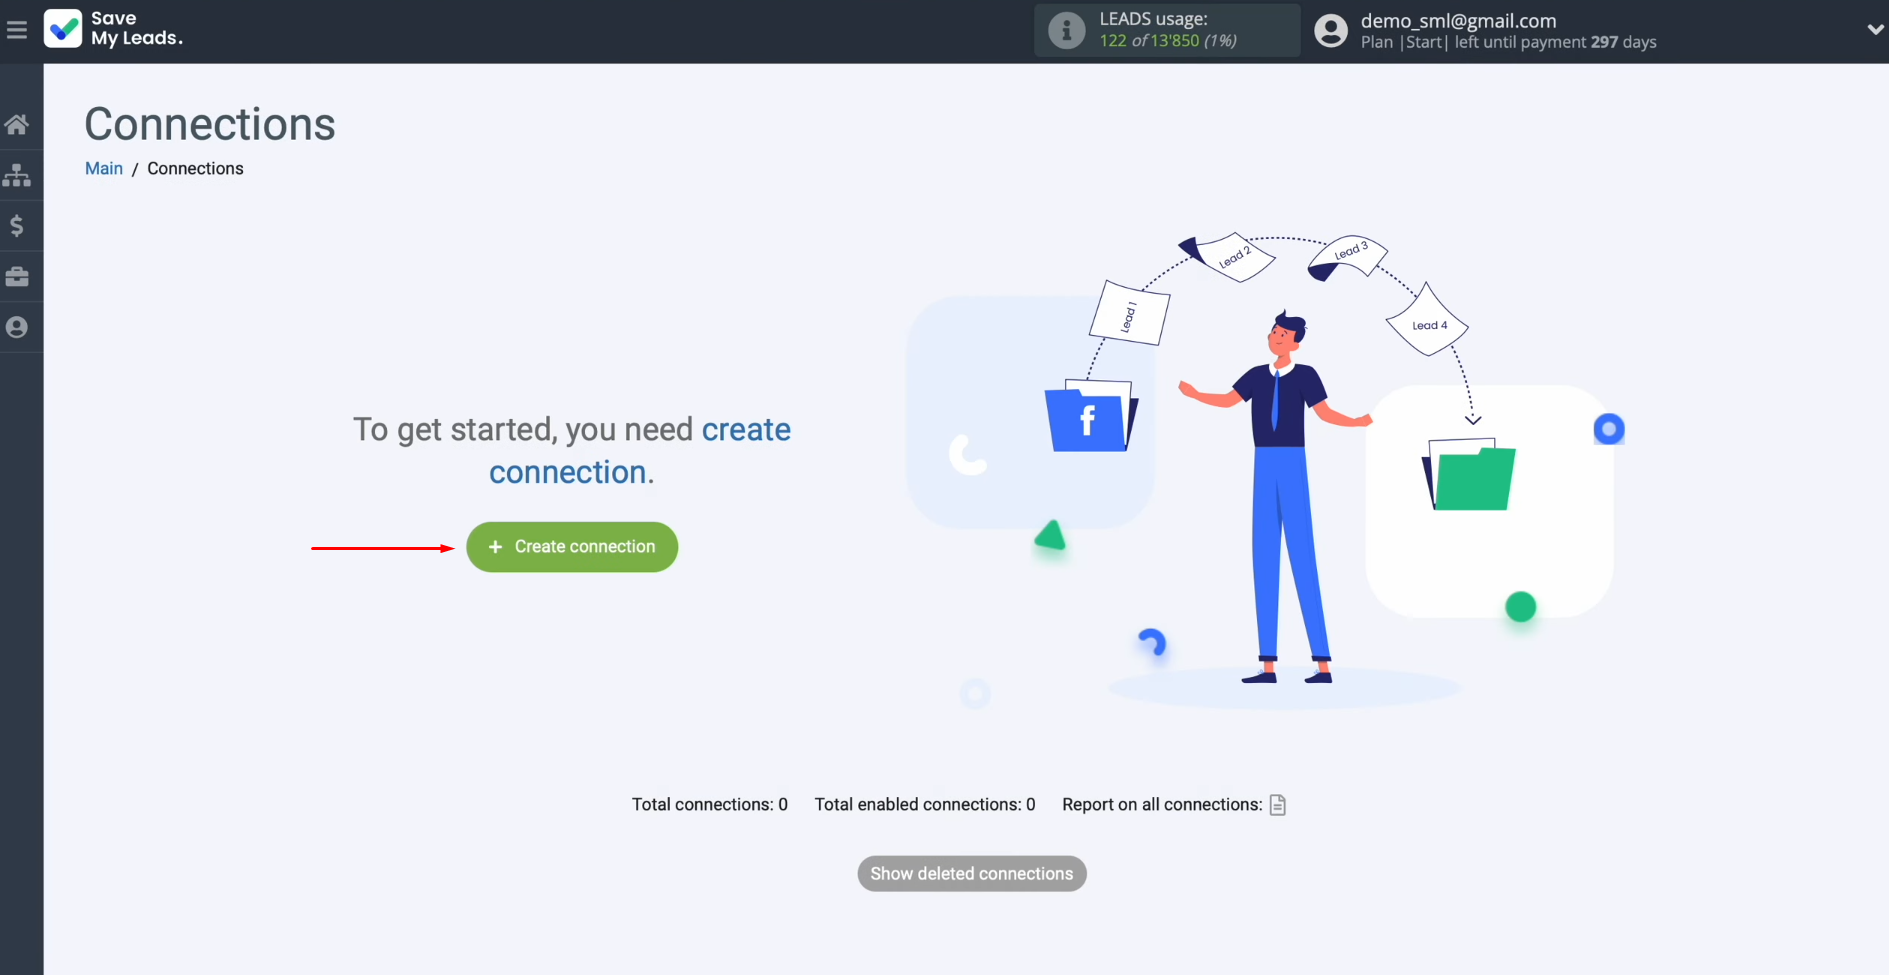
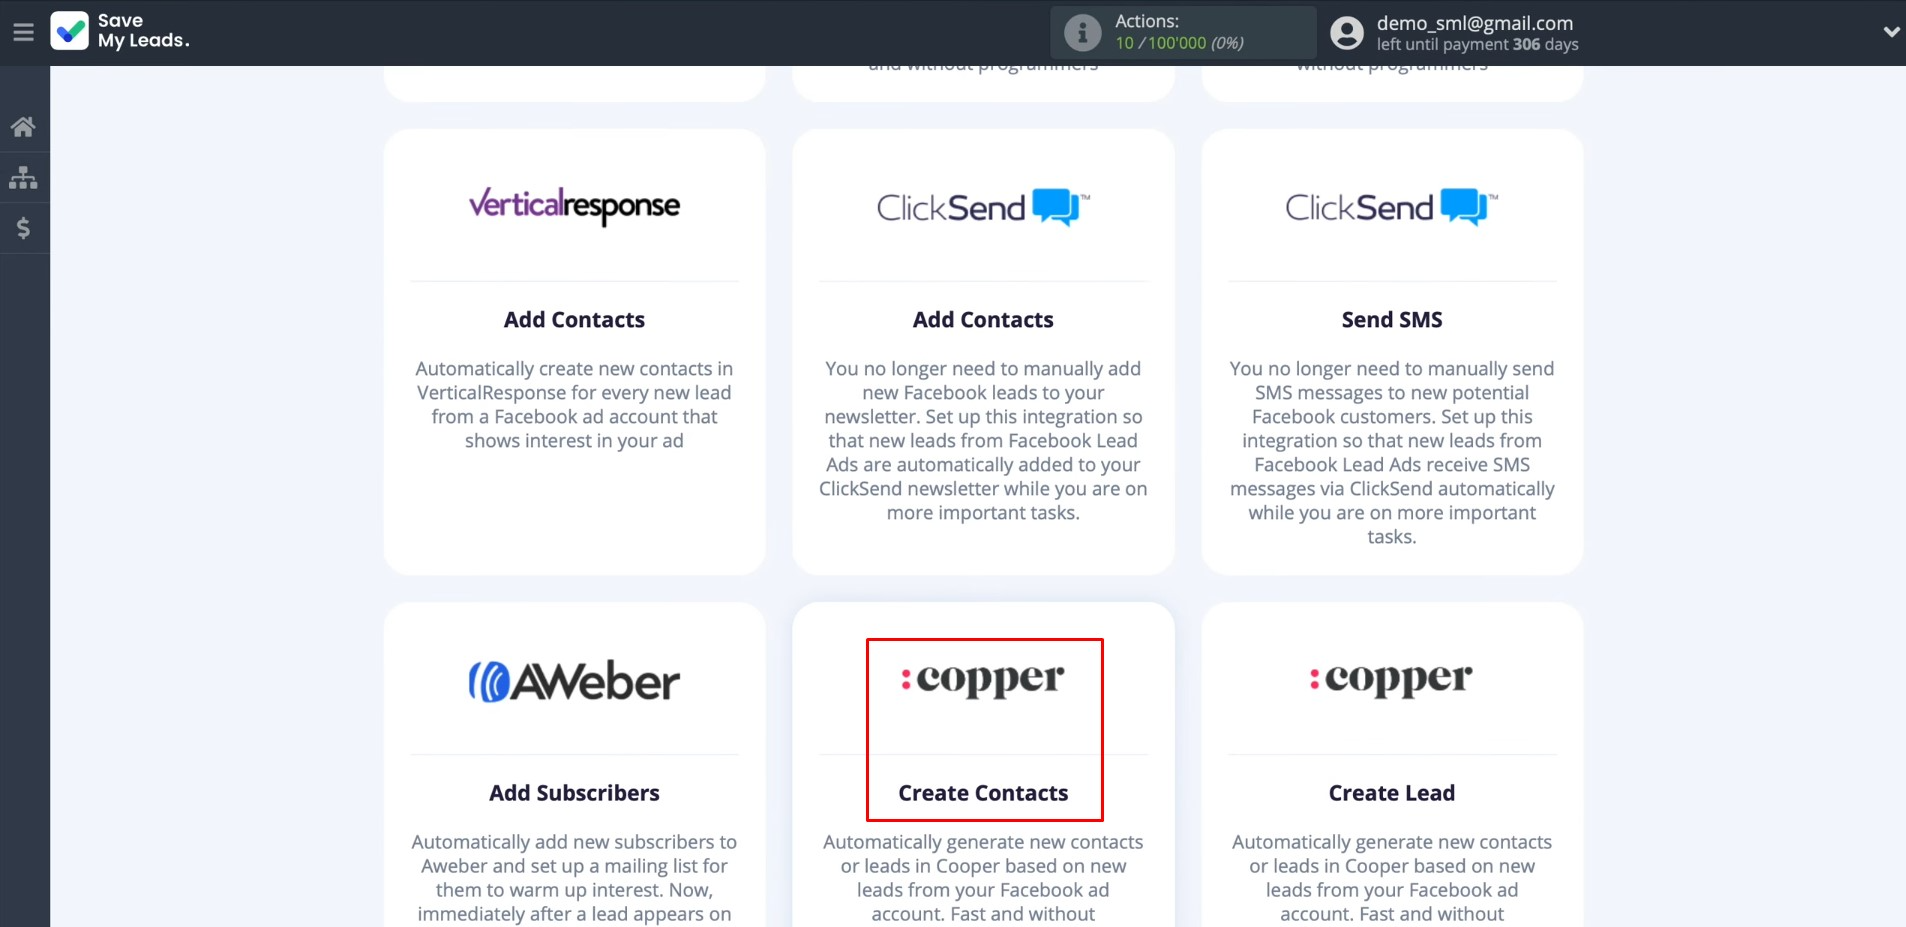
To set up Facebook integration with Copper, first, create a new connection. For this, click on the green button.
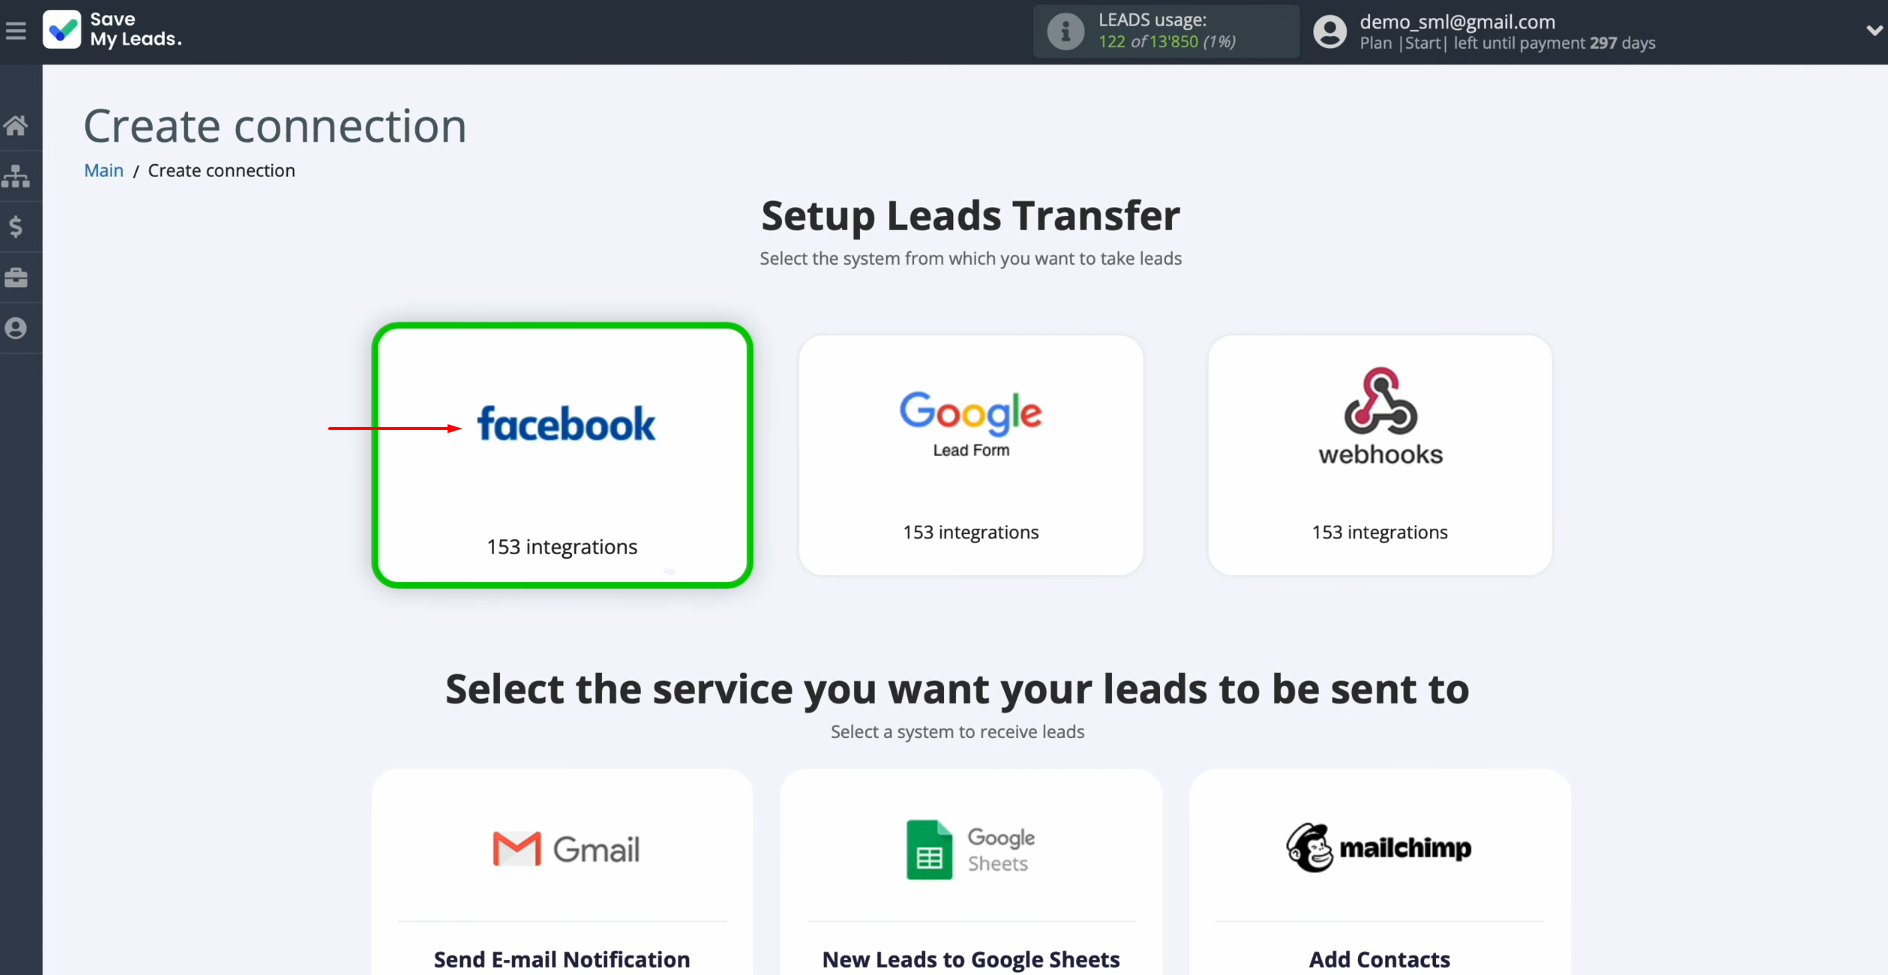
Select the
system from which you
want to receive new data. In our case, it is Facebook.
Choose the
system where you
want to transfer new leads from
Facebook. In our case, it is Copper (Create Contacts).
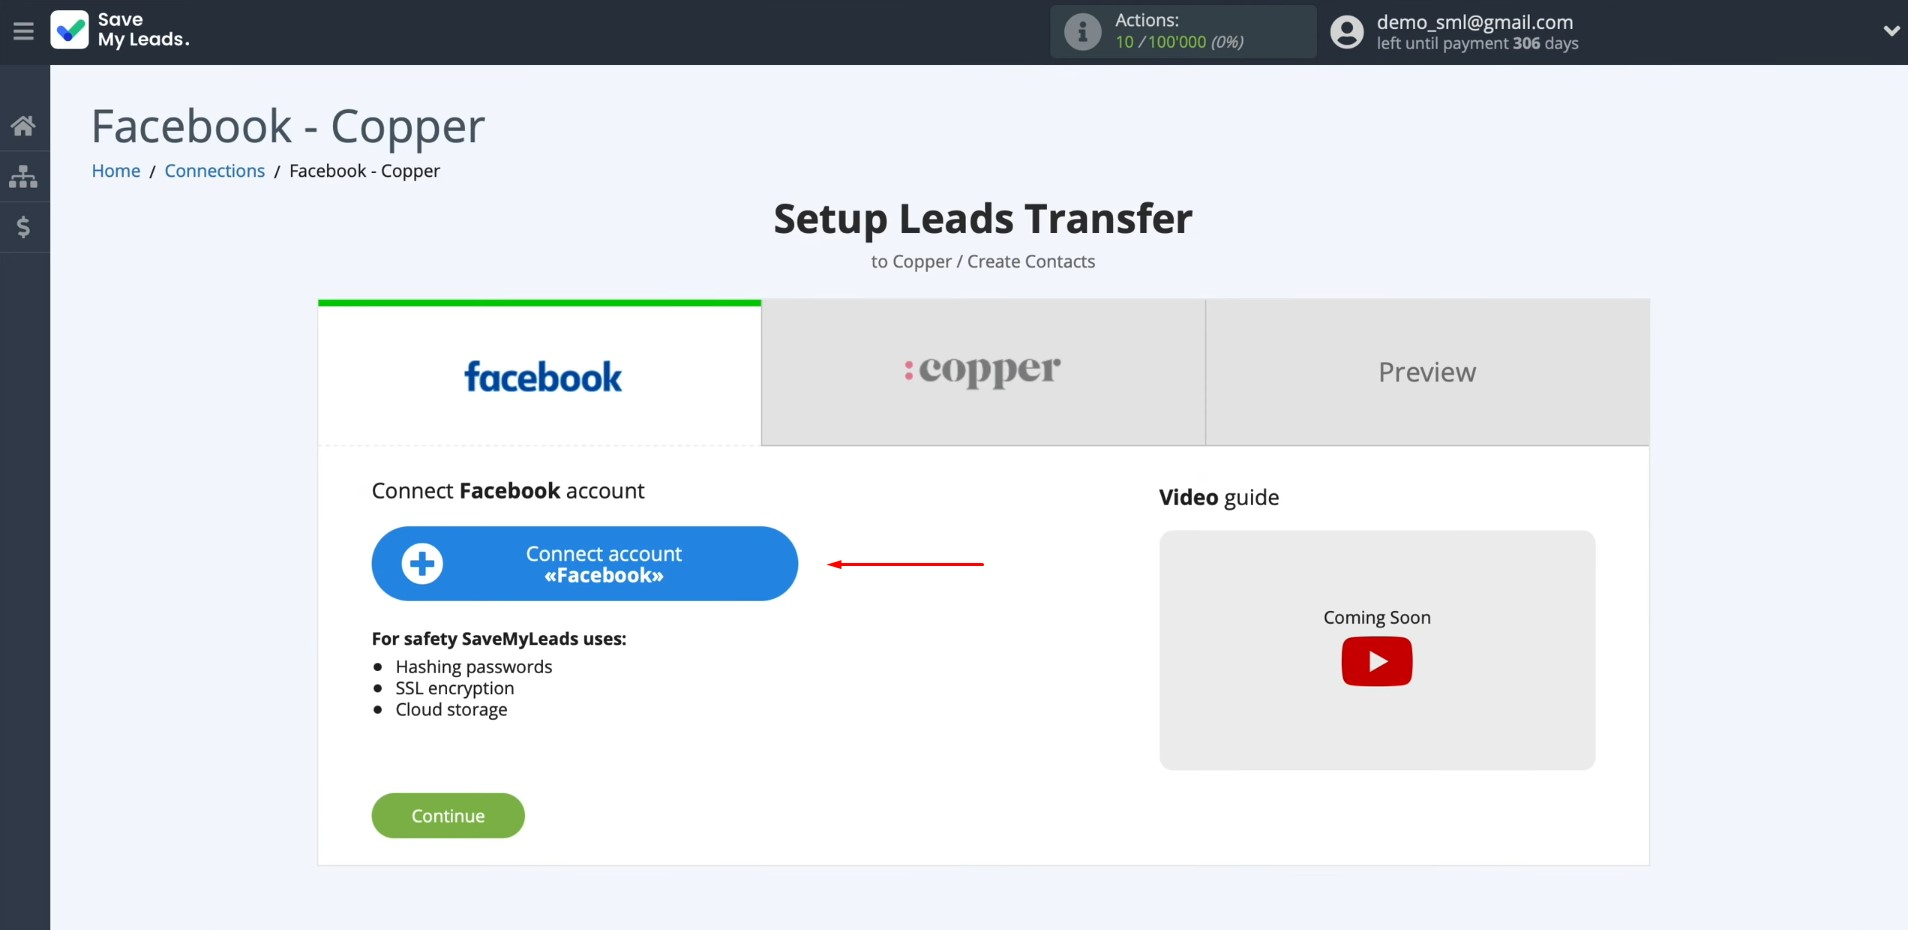
Connect your Facebook account to SaveMyLeads. For this, press the blue
button.
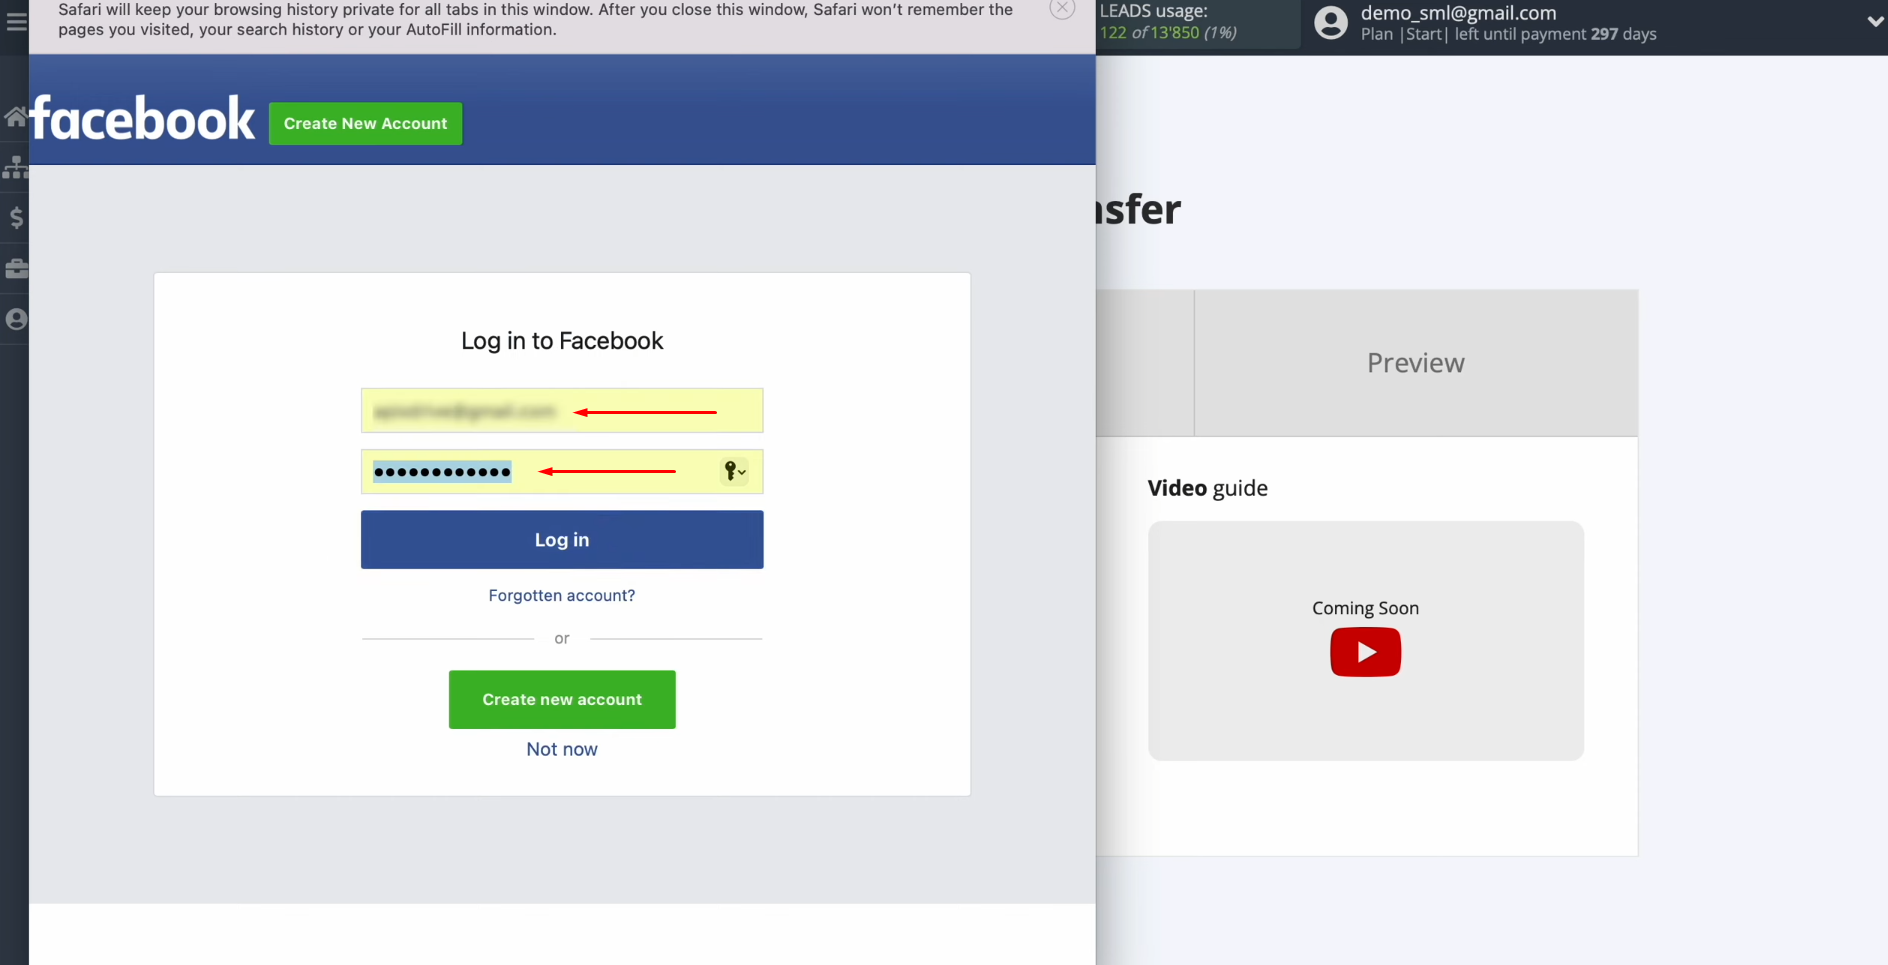
Enter the username and password of the
Facebook personal
account. Click “Log in”.
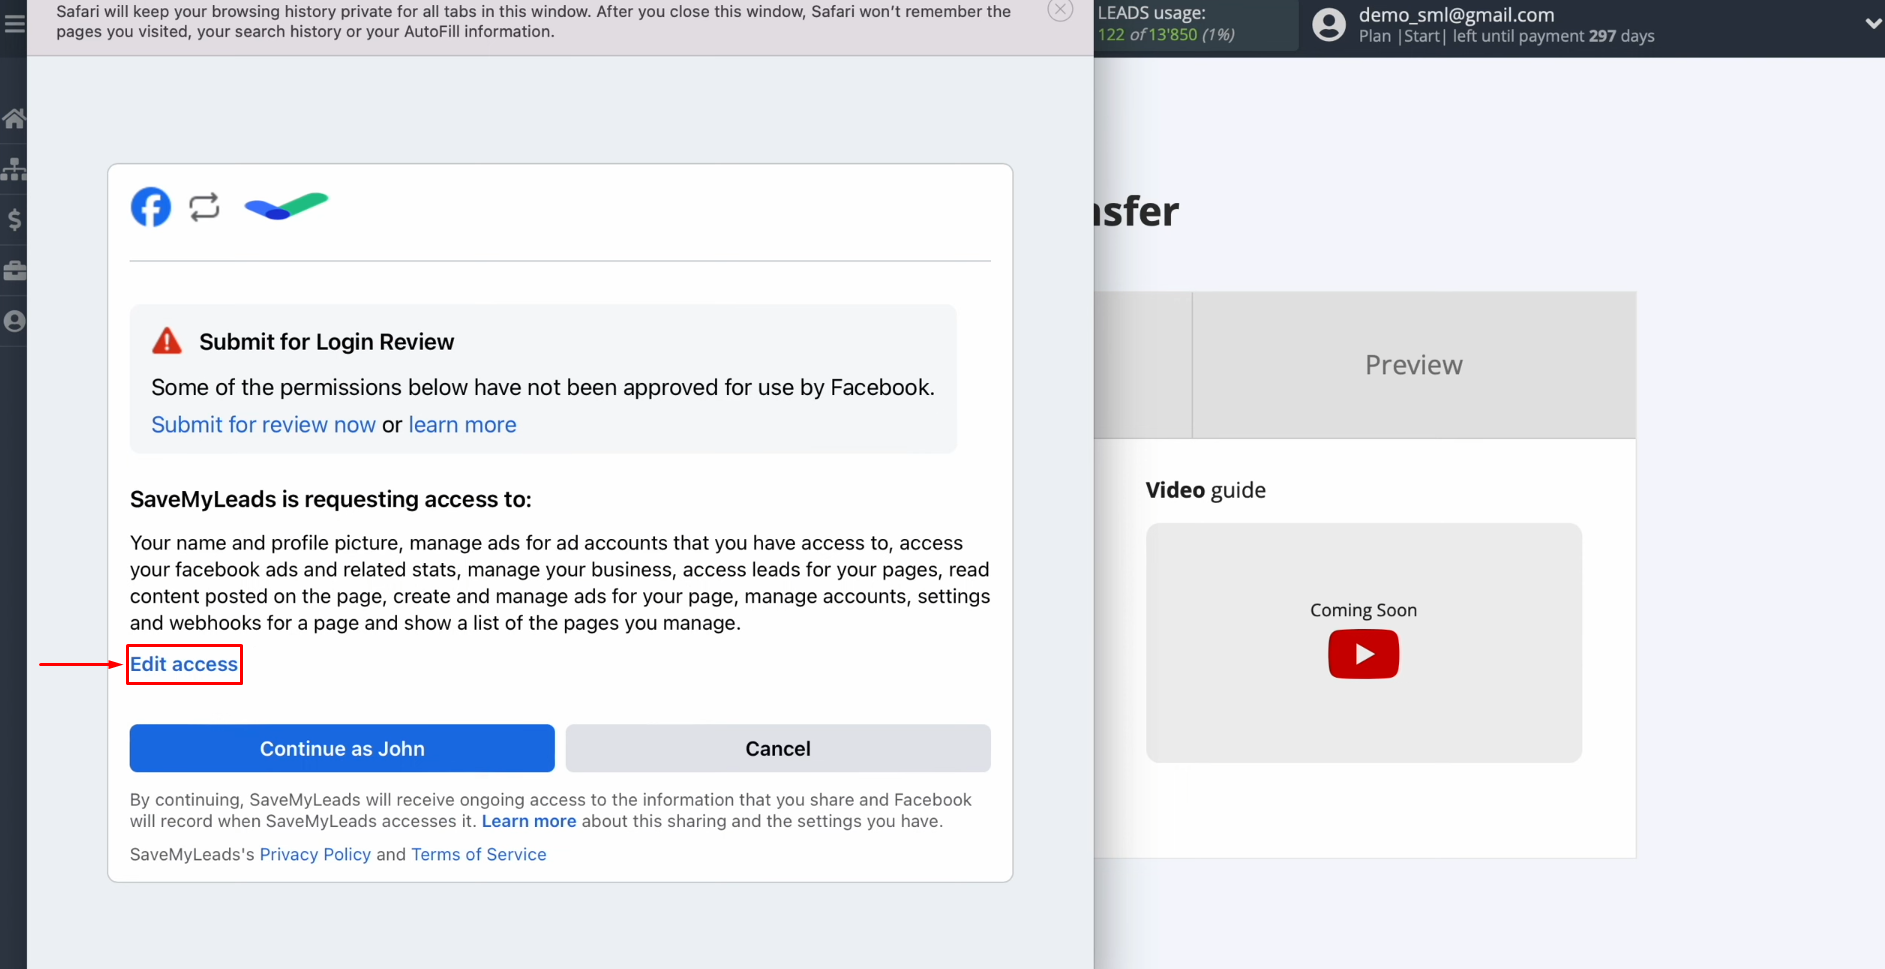
Provide SaveMyLeads
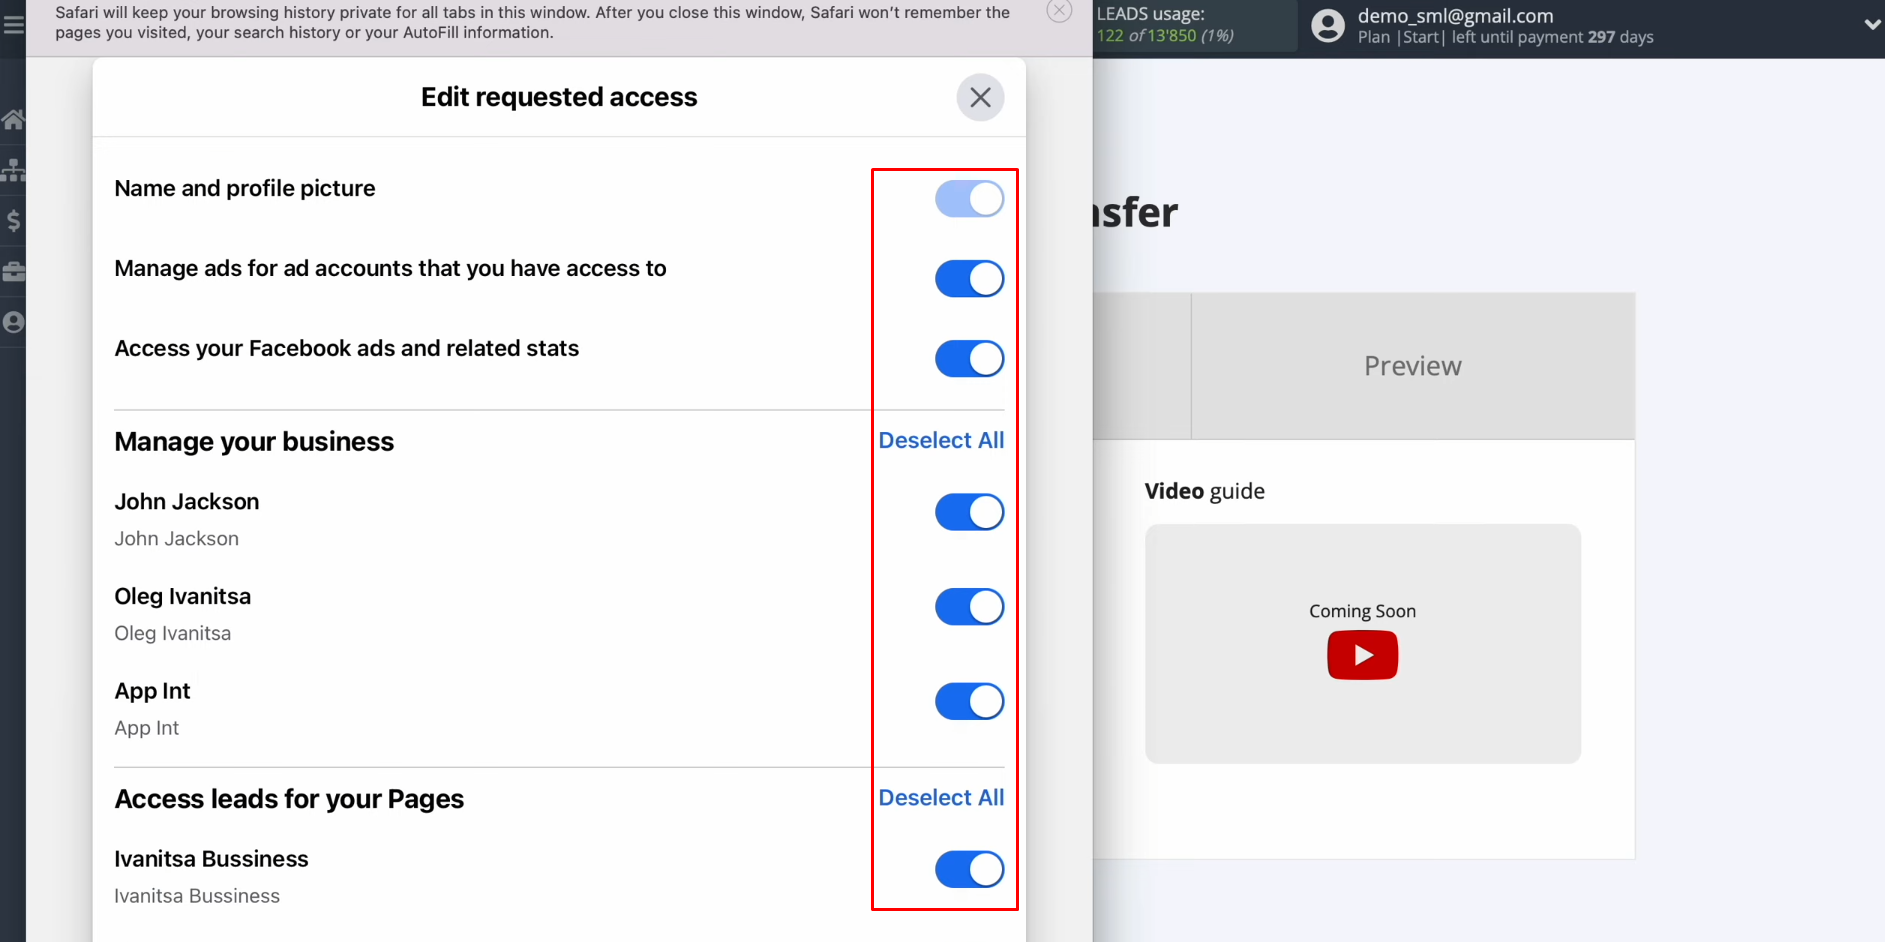
access to work with your Facebook account. To do this, click “Edit
access”.
Leave all access checkboxes
enabled.
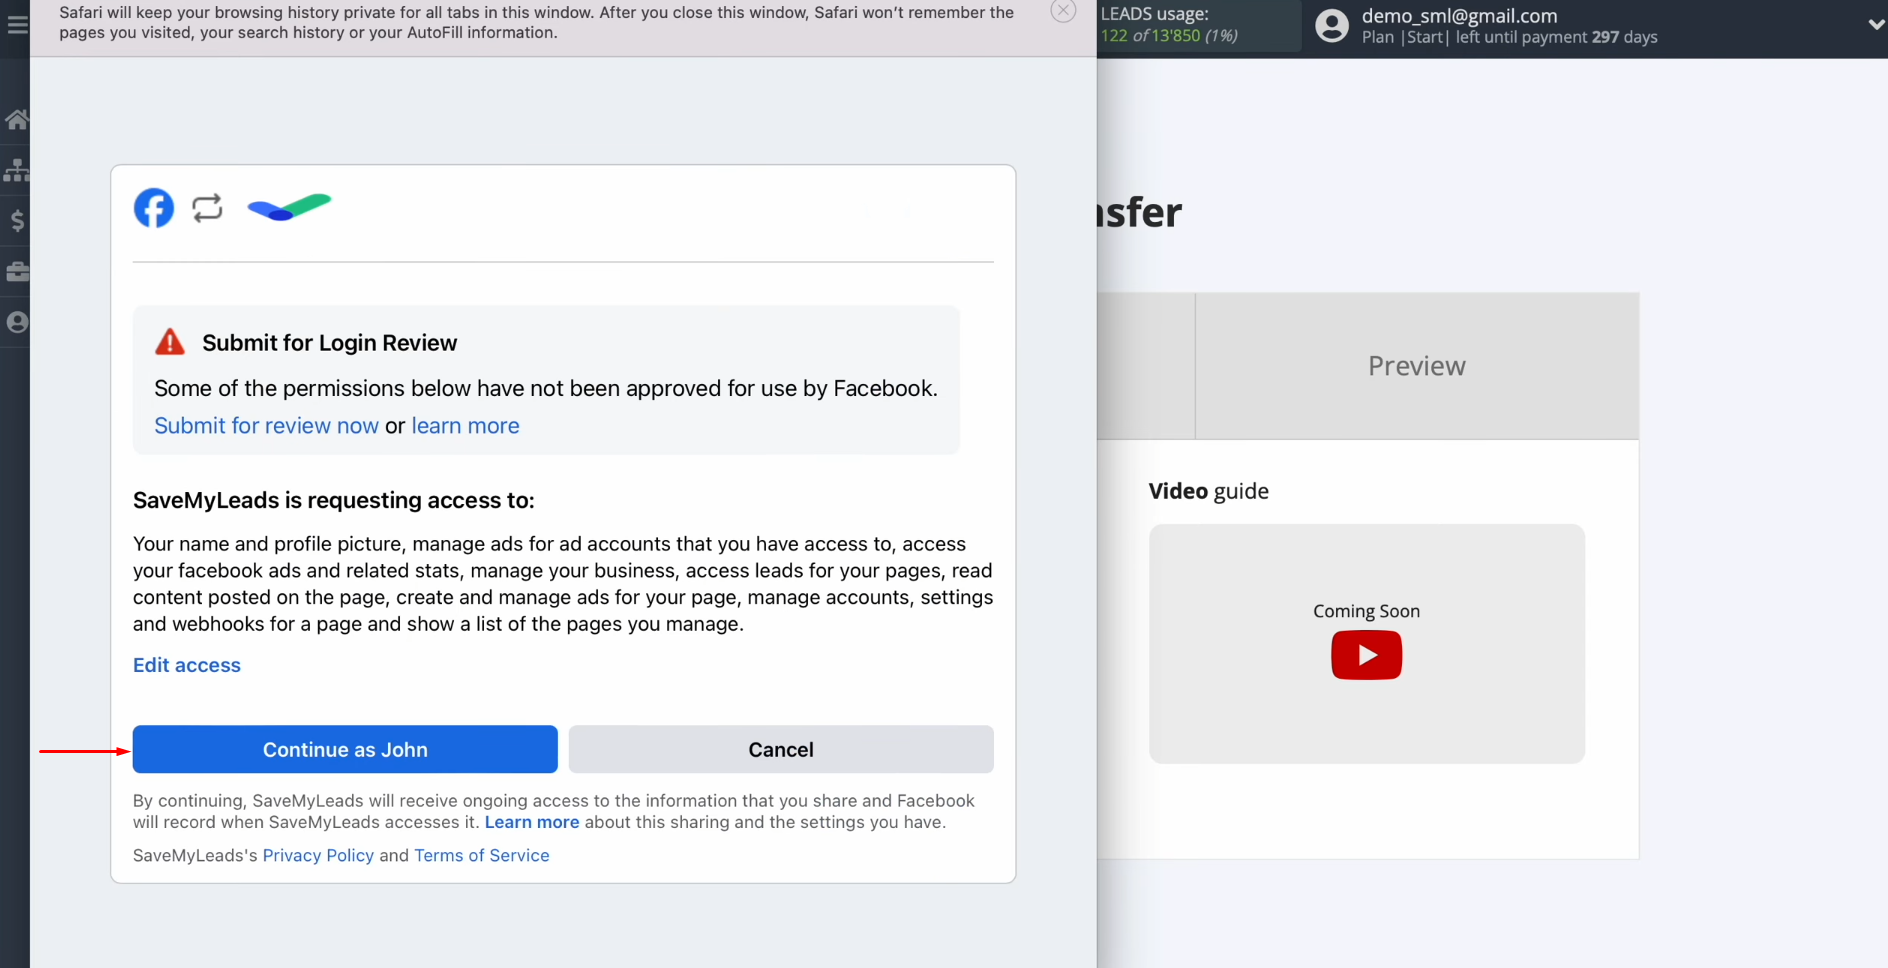
Press “Continue as…”.
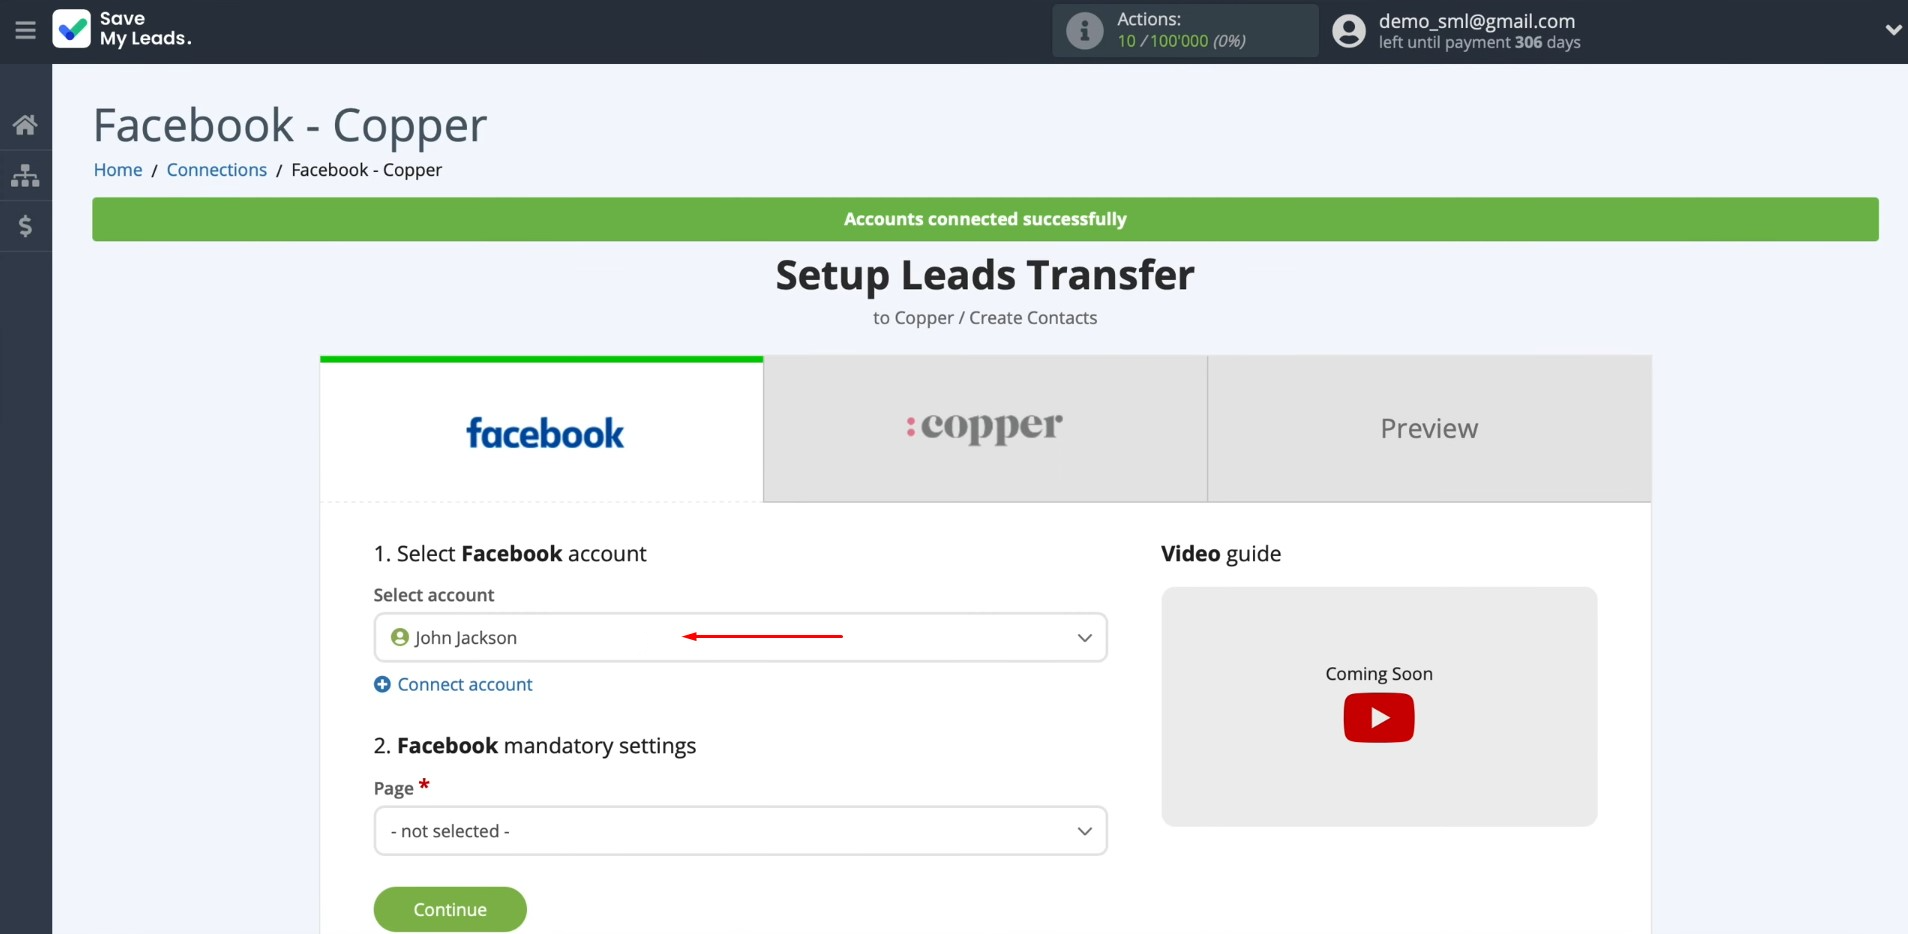
When the
connected account is displayed in the
list, select it.
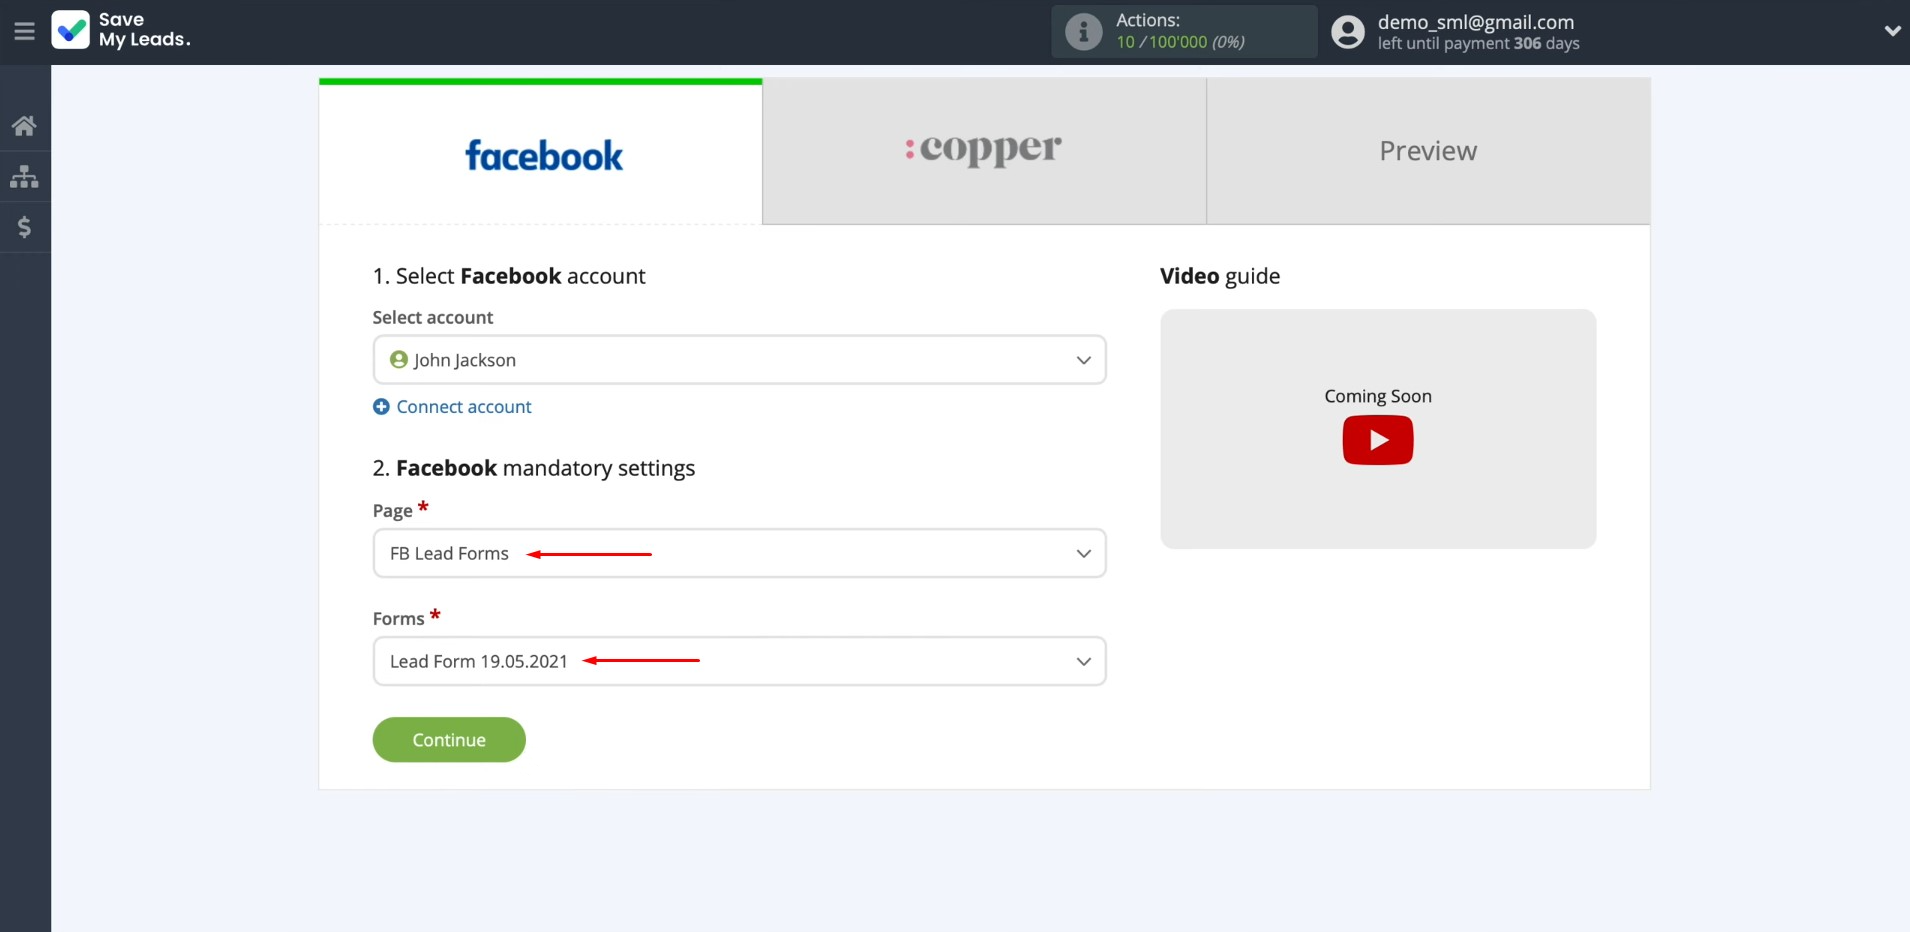
Select the
advertising page and specify
the form for which the data will be downloaded. Click “Continue”.
If you have multiple forms specified, you will need to create multiple
connections for each of them.
Setting up the Data Receiver – Copper
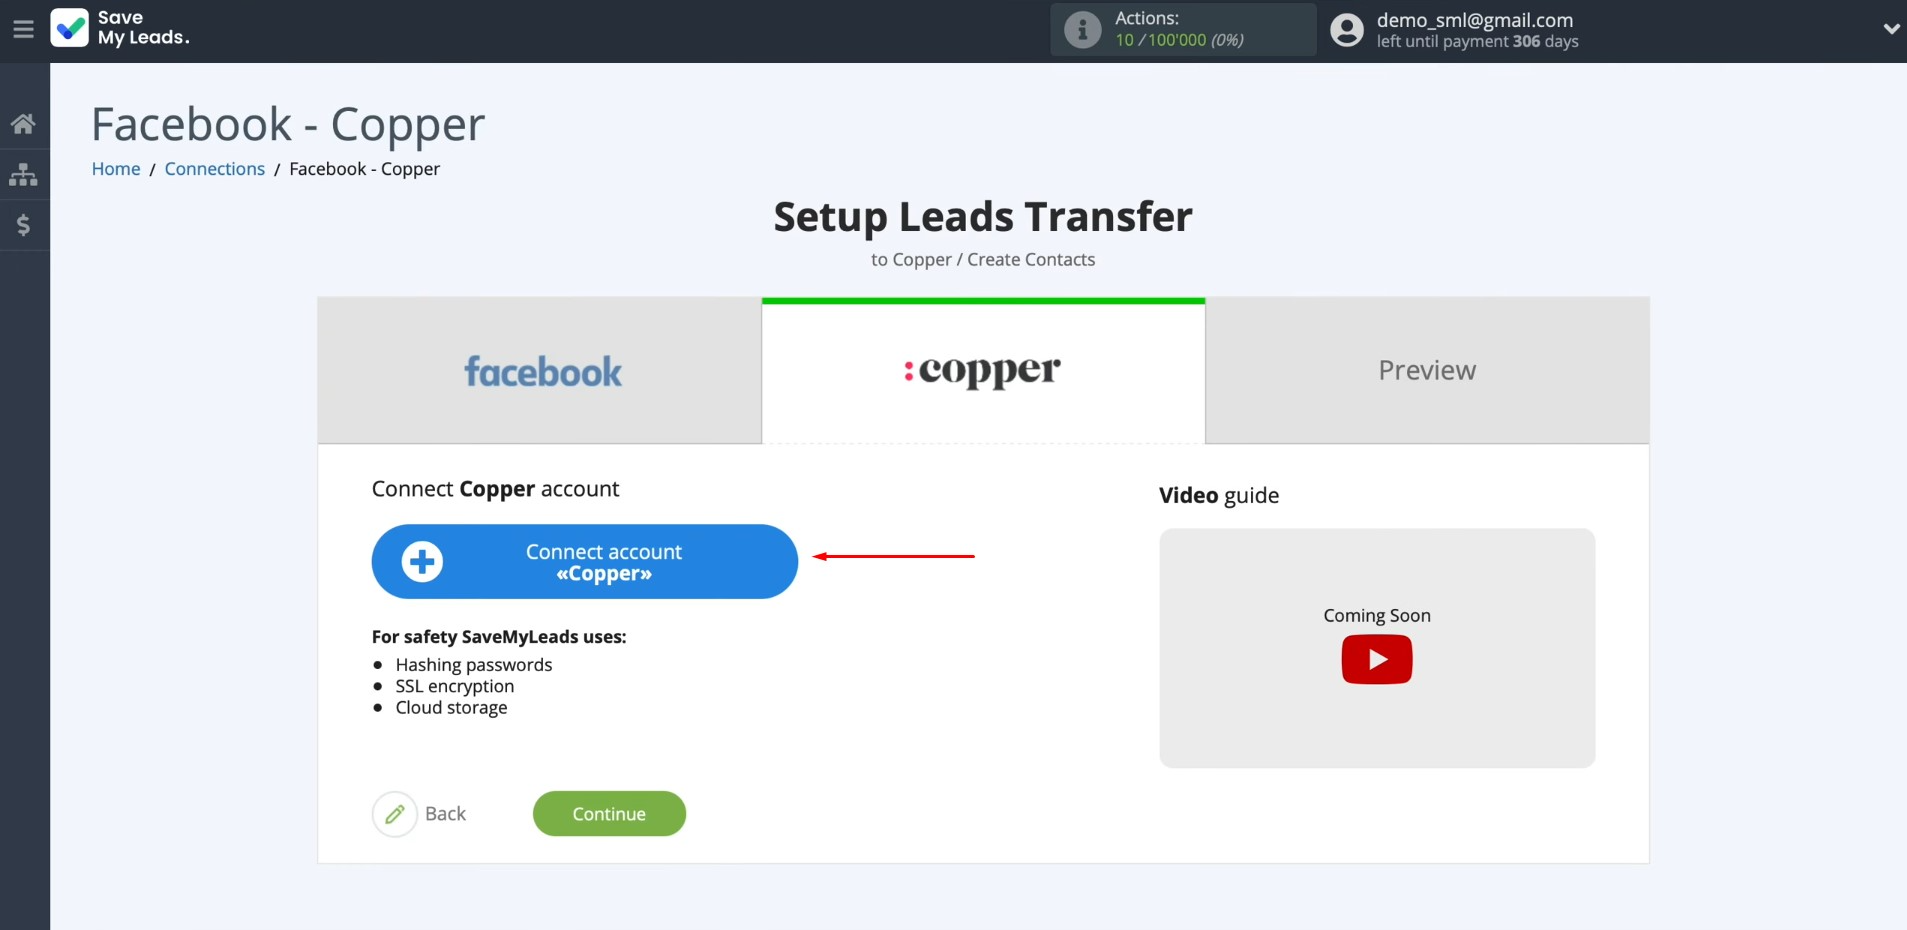
To set up Copper integration with Facebook, connect your Copper account to SaveMyLeads. For this, click on the blue button.
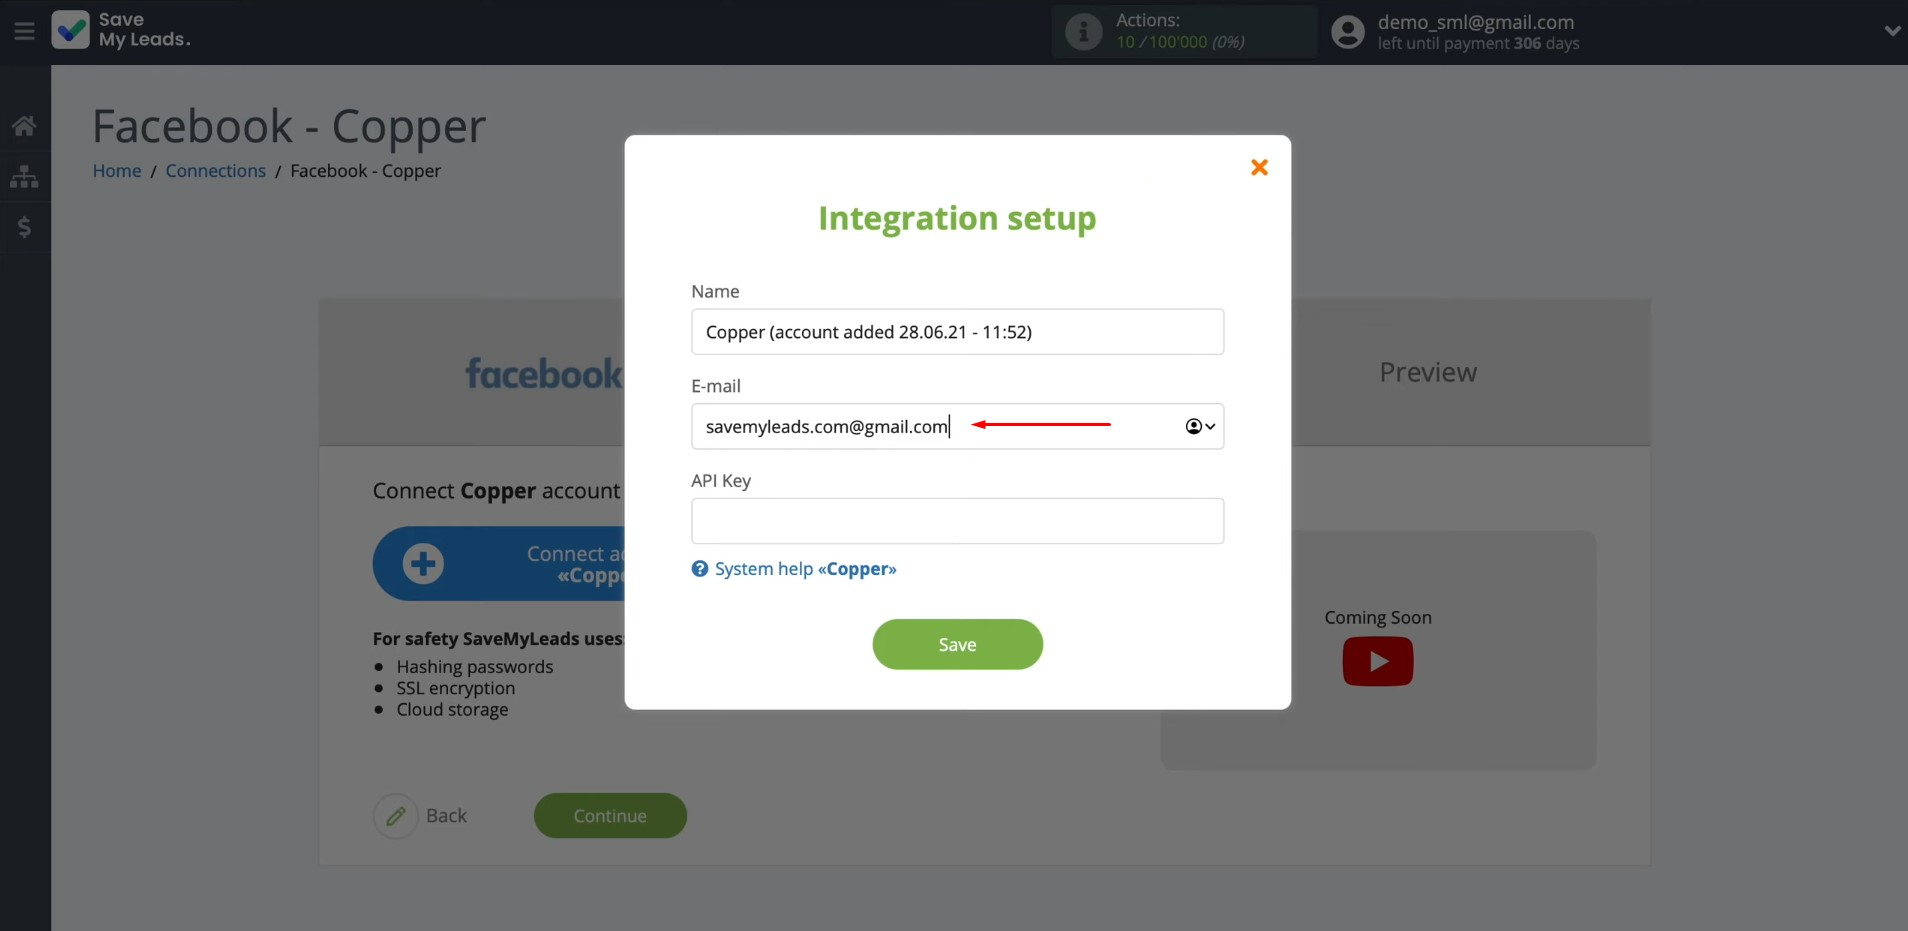
Specify the
email to which the Copper account is registered.
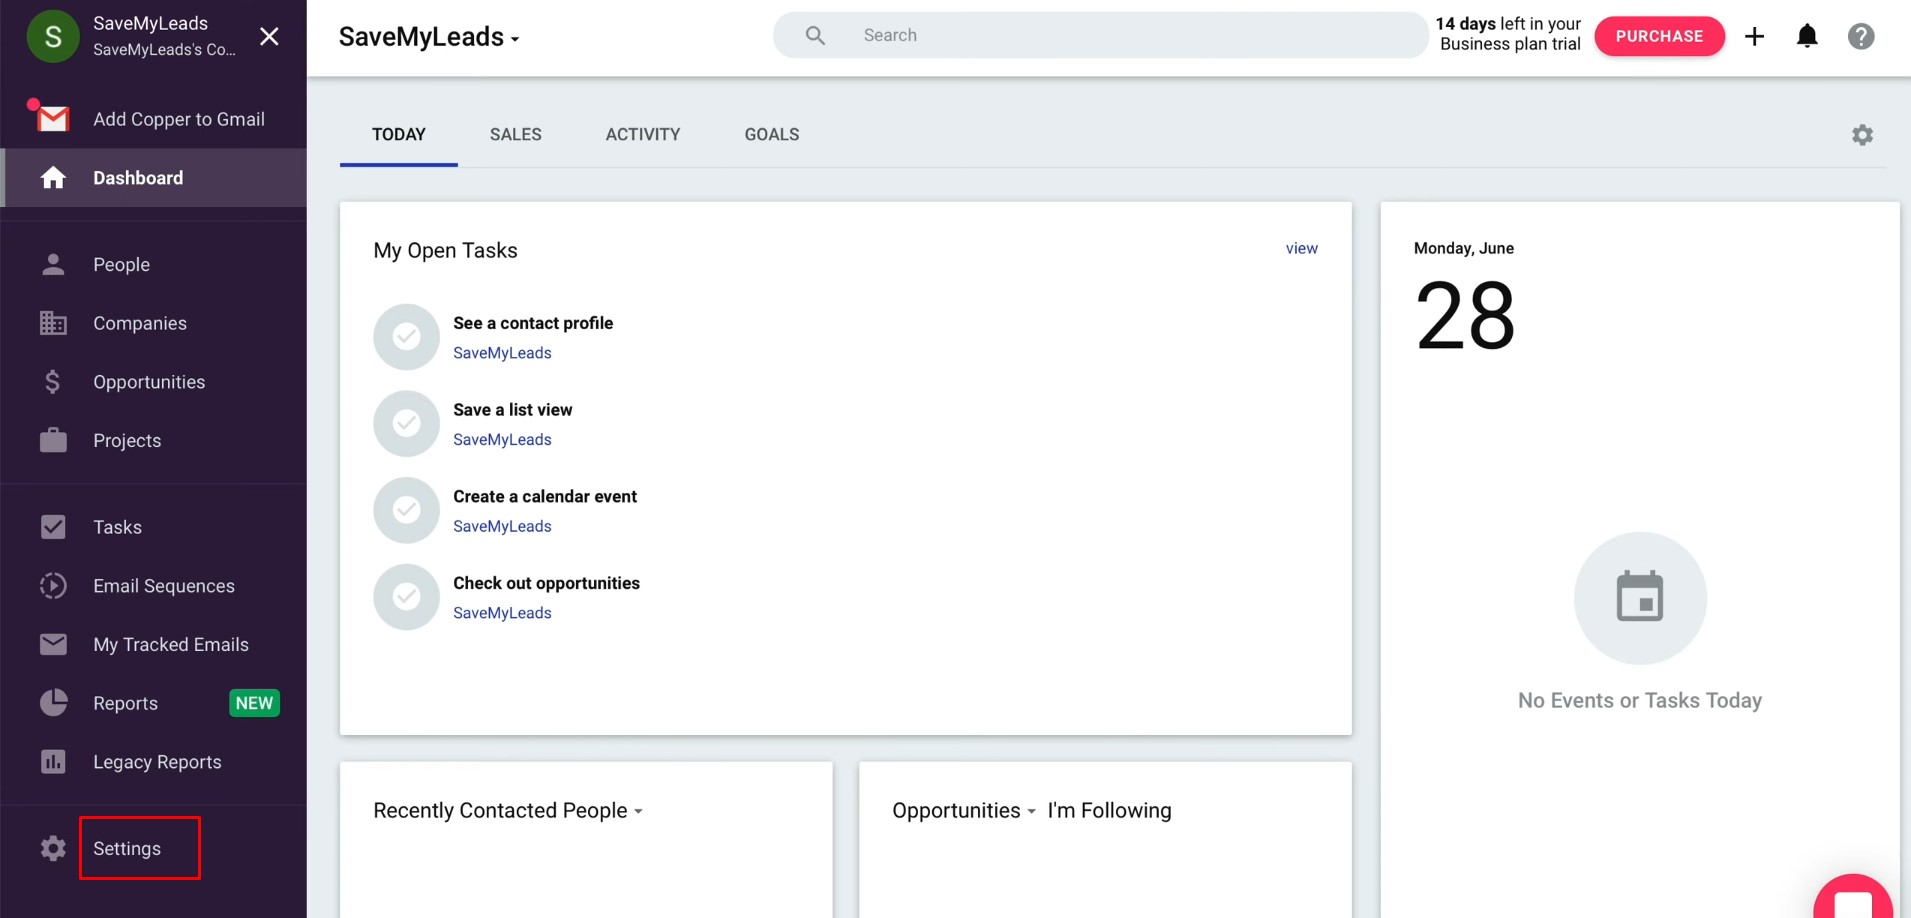
To get the API key, go to the settings in your Copper account.
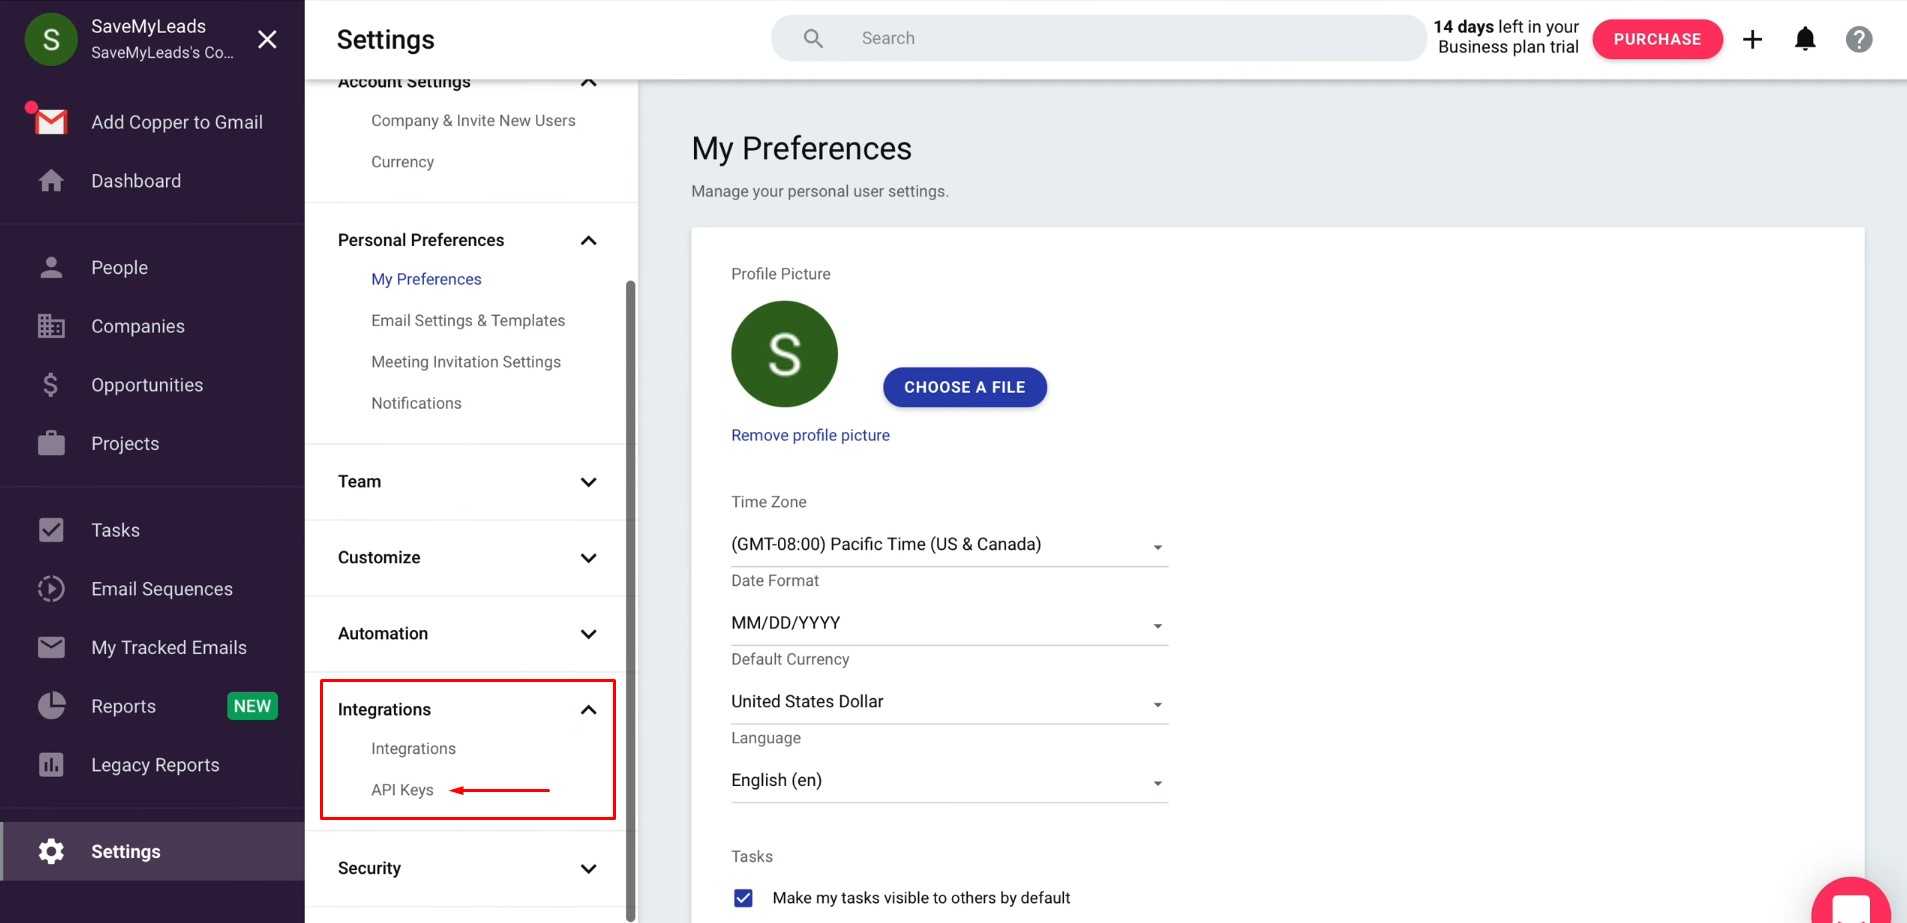
Choose the section “Integrations”, and
click on “API Keys”.
Generate a new API key.
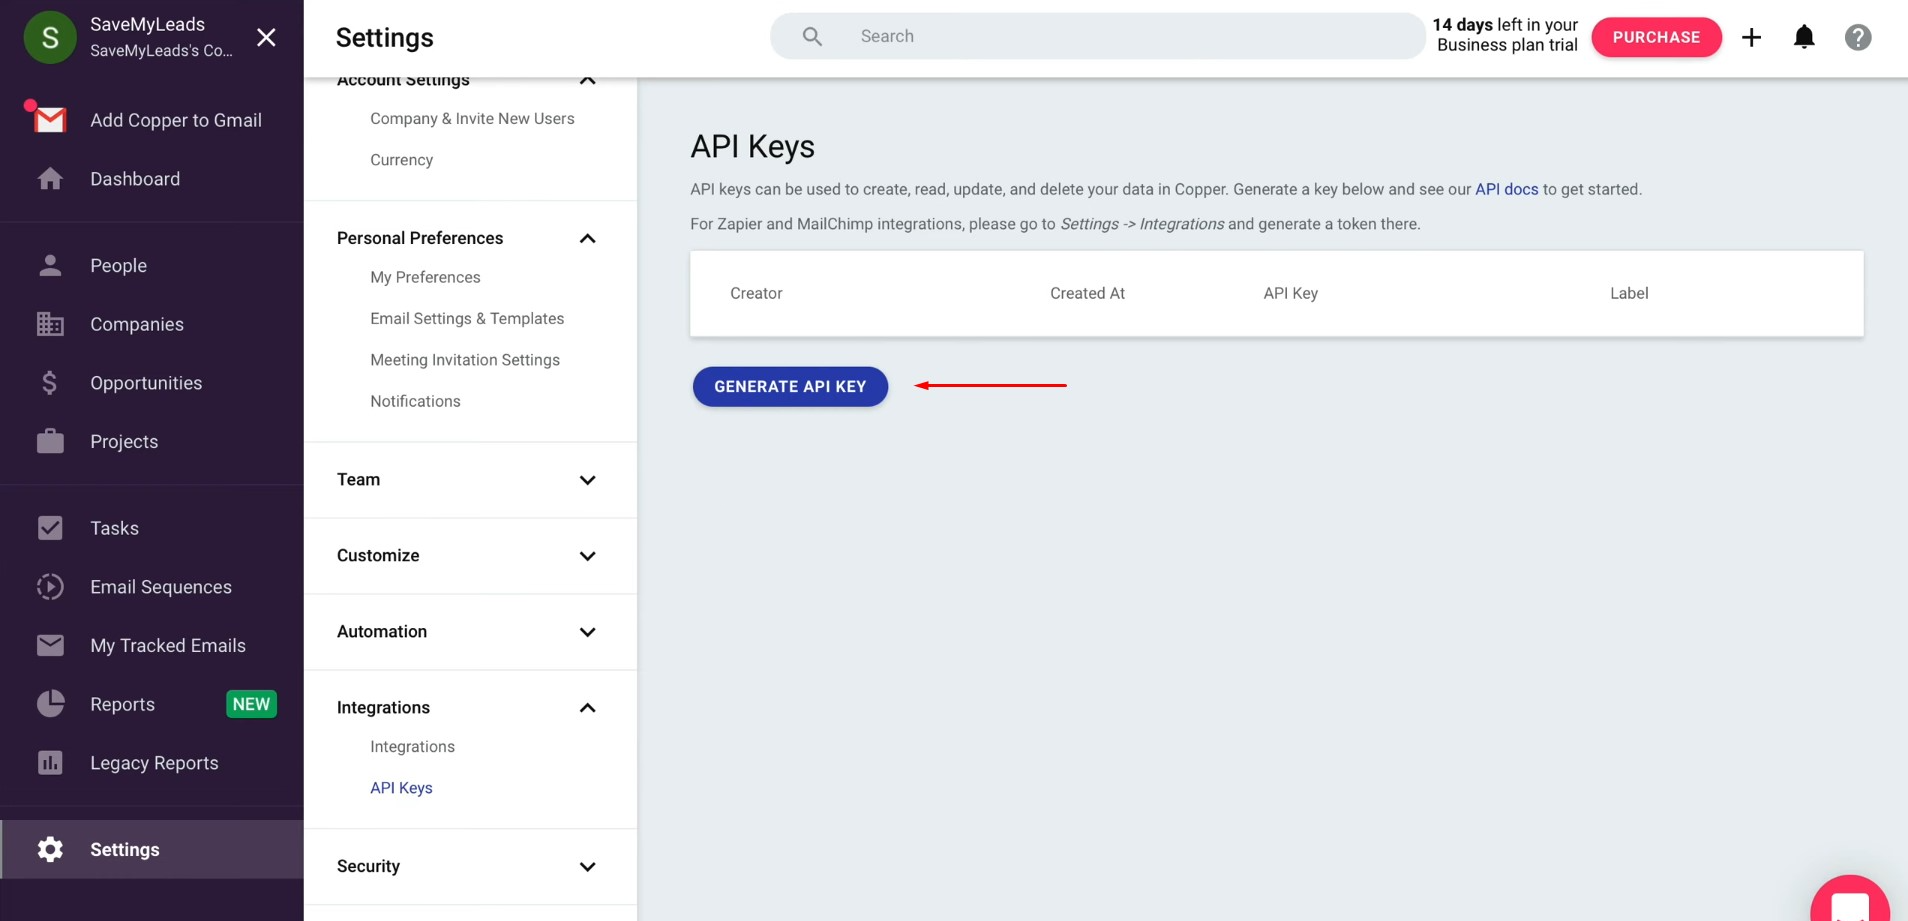
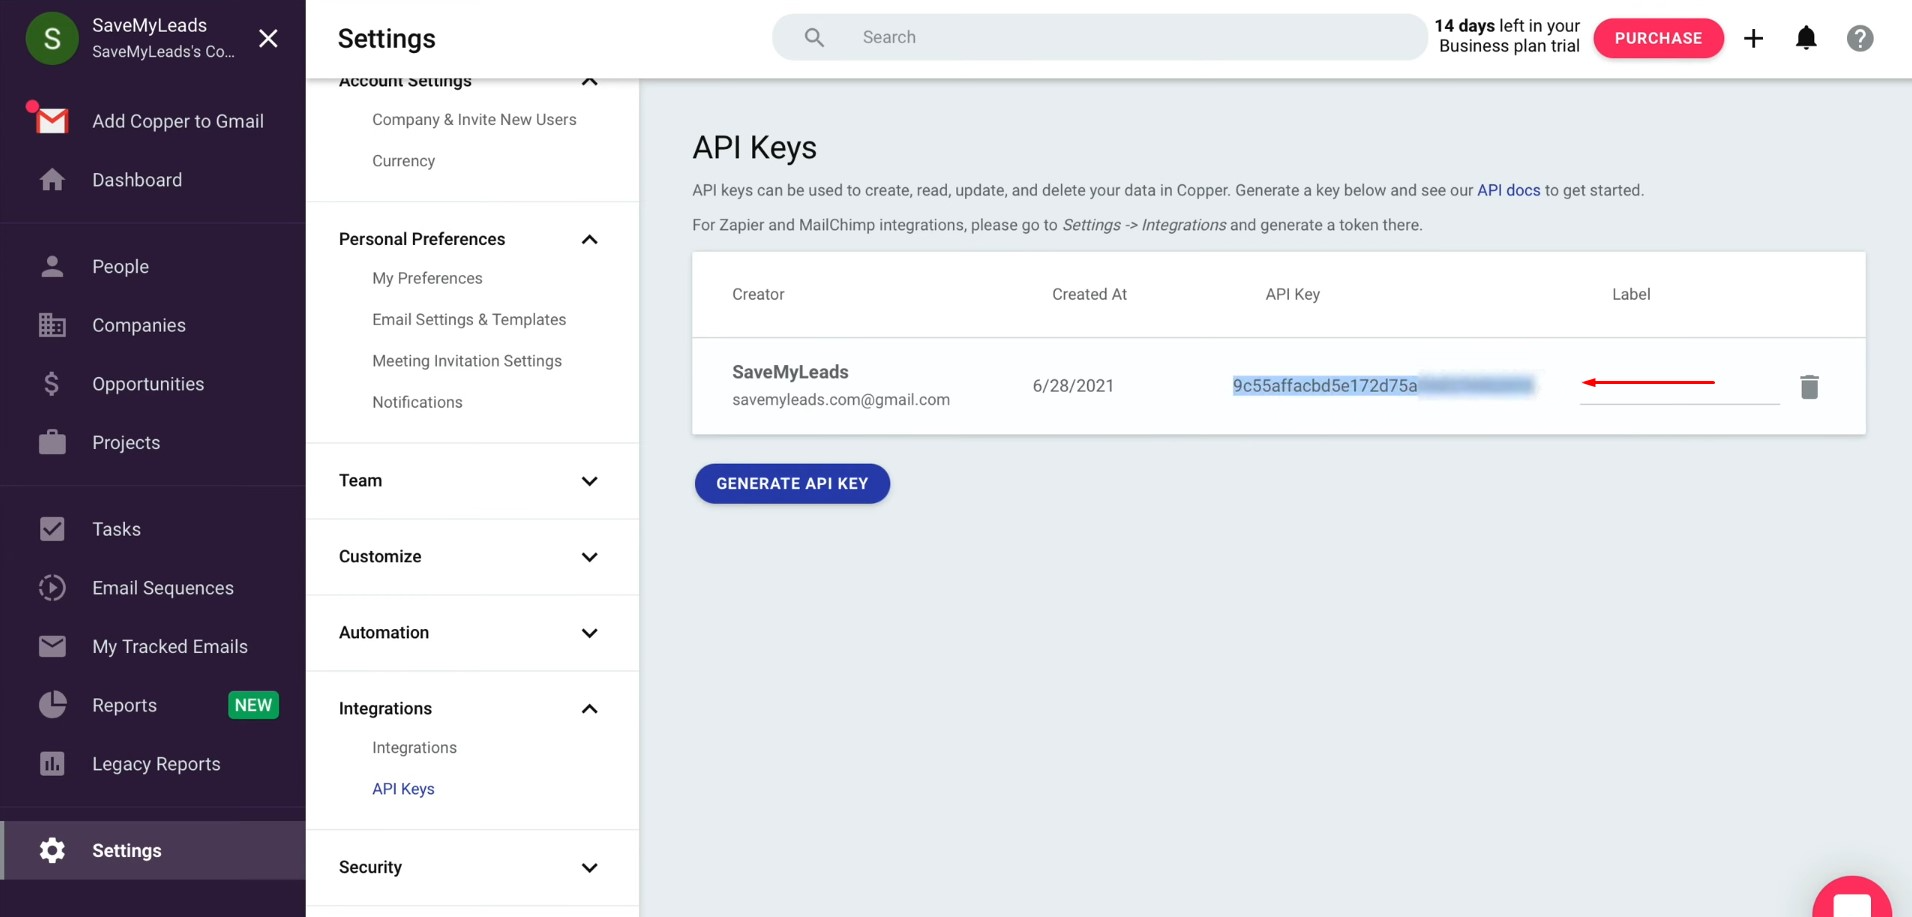
Copy the API key.
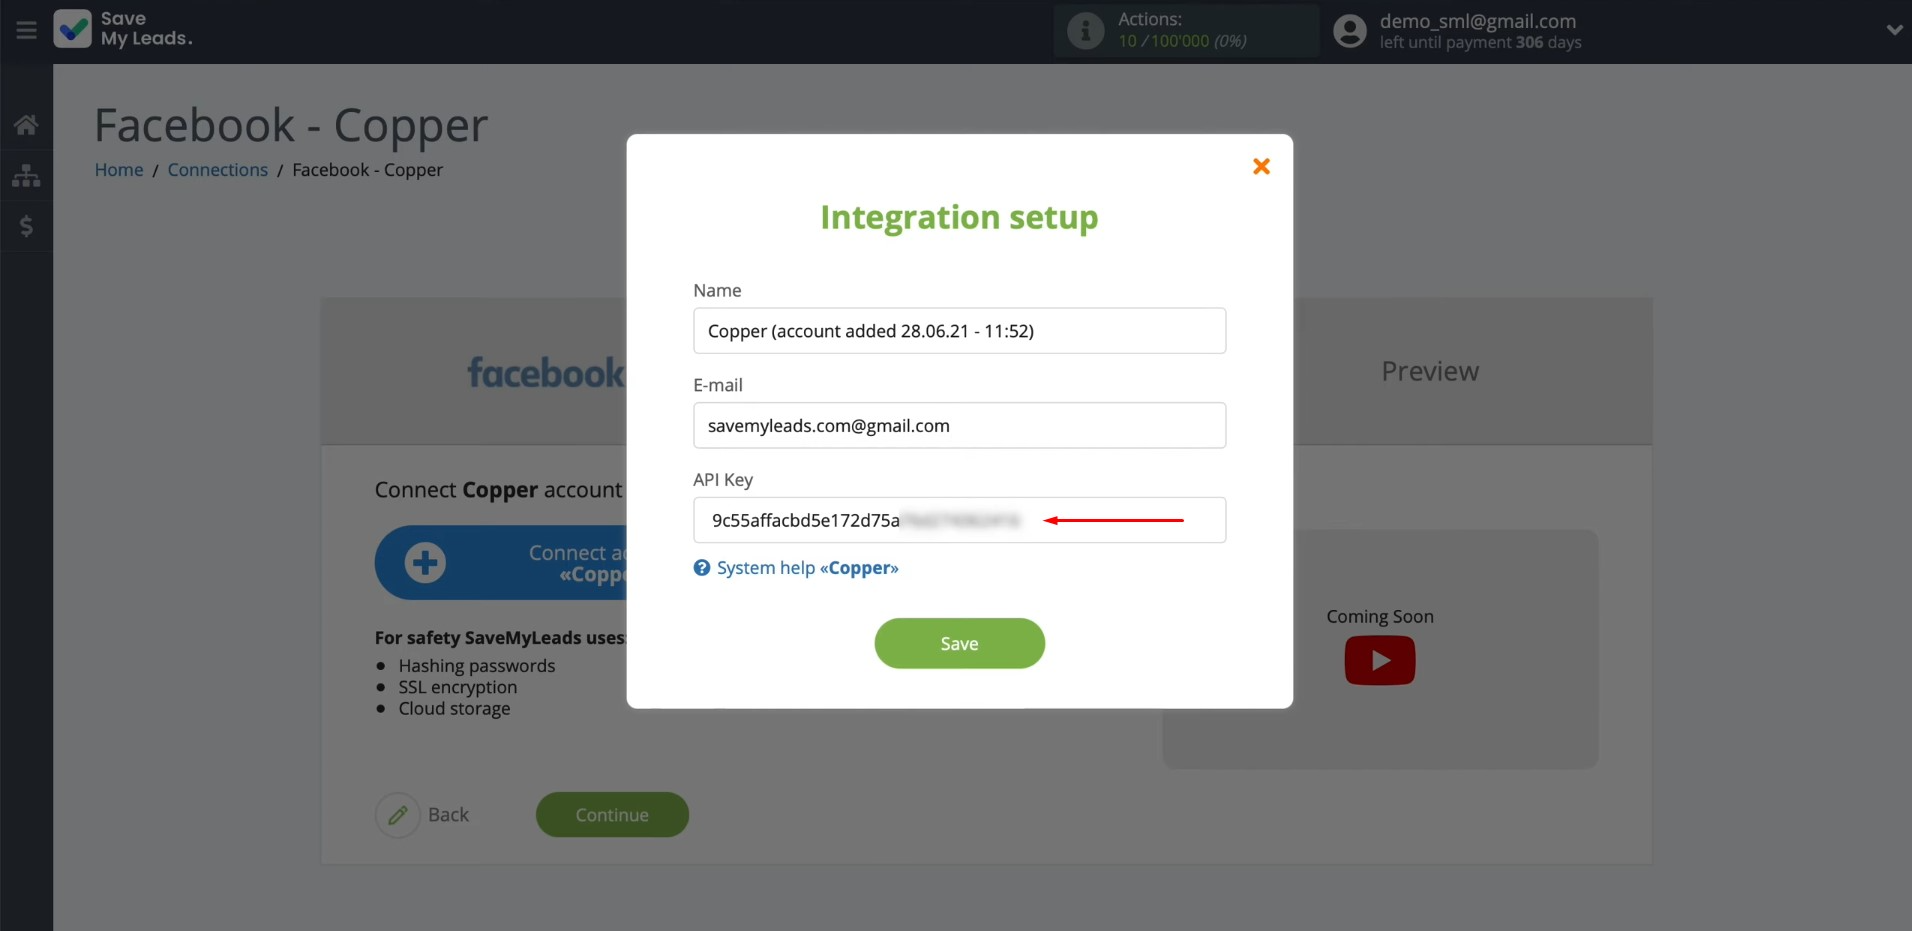
Paste the API key into the appropriate field in SaveMyLeads.
When the required
fields are filled in, click “Save”.
When the
connected account is displayed in the list, select it.
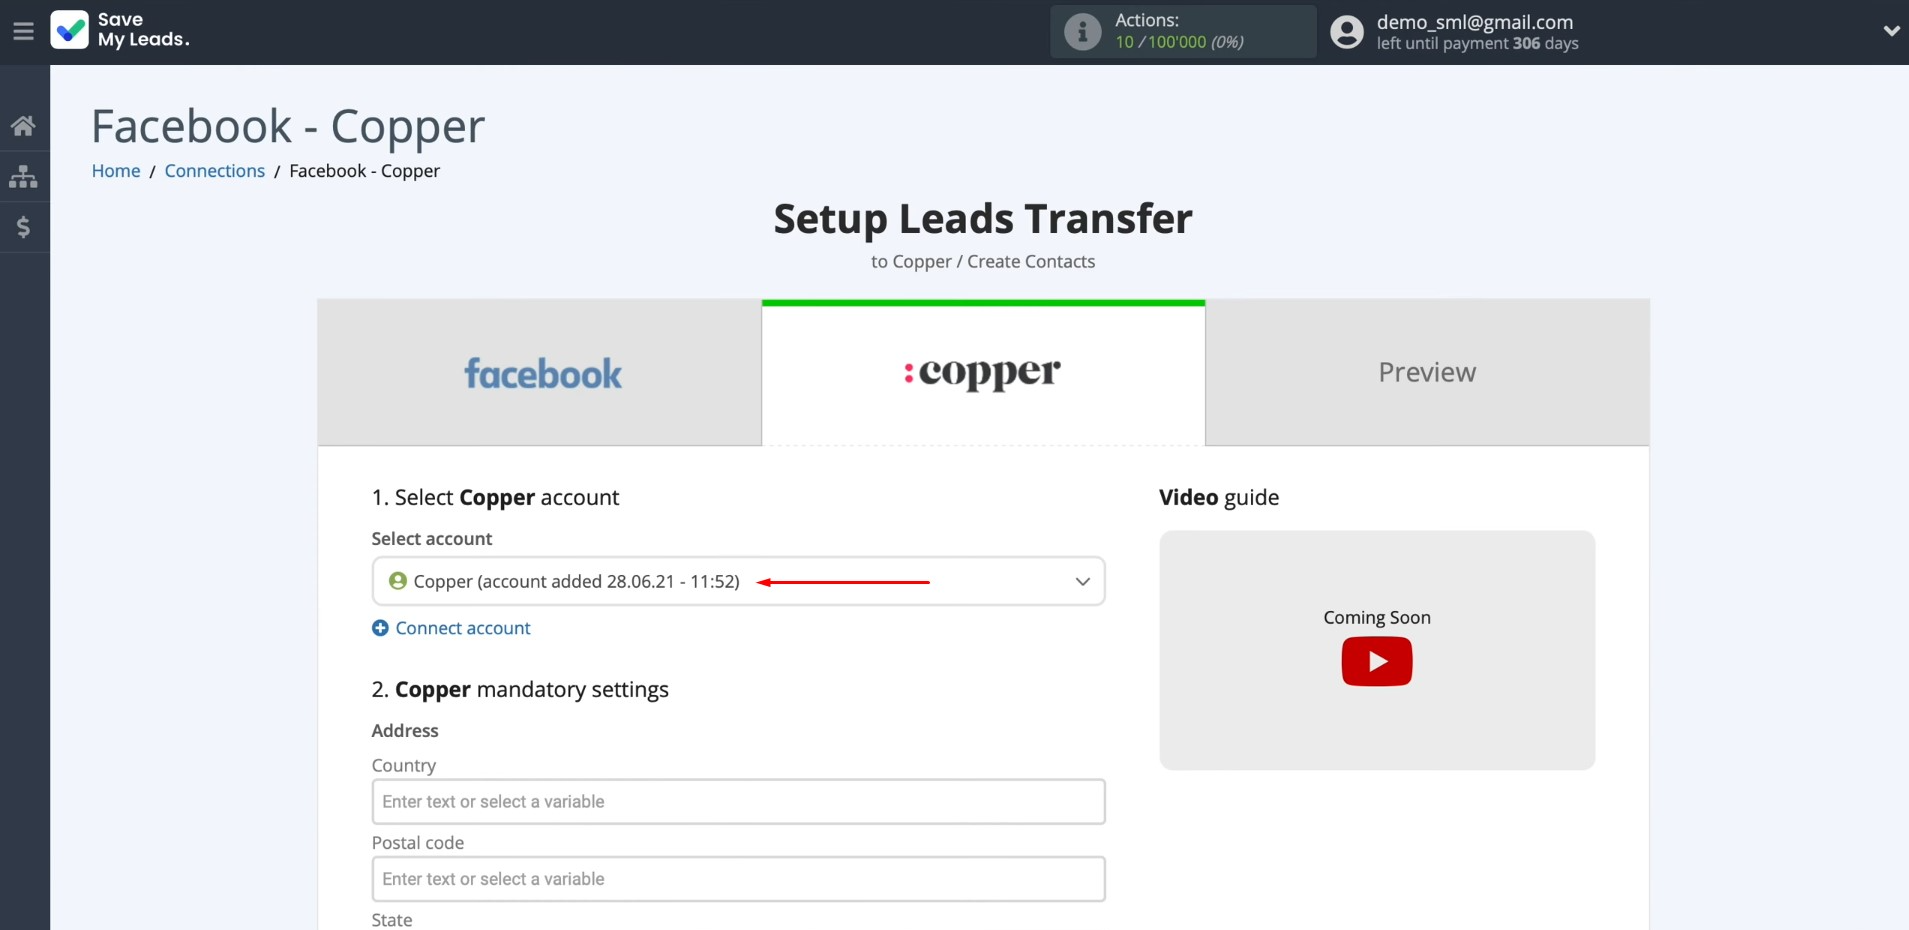
You see the Copper fields. In these fields, you can assign variables from Facebook, which are in the drop-down list.
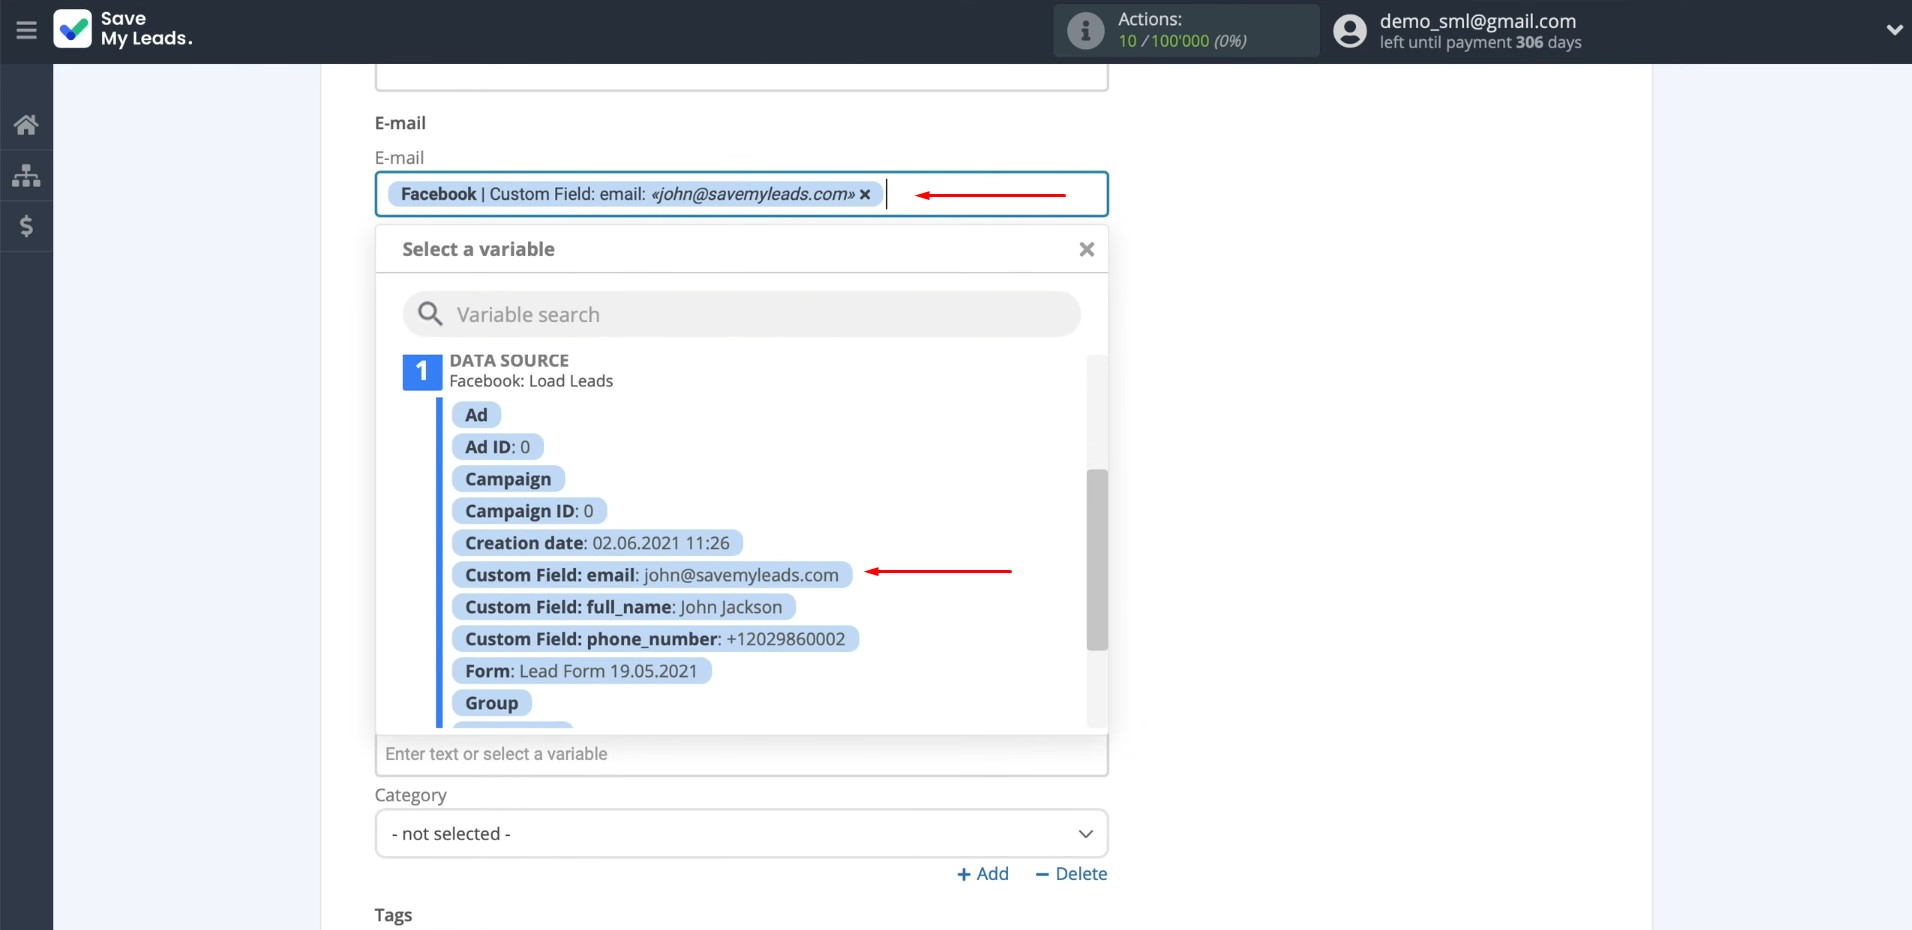
If you are satisfied
with the presetting of the
fields, leave them
unchanged. After setting, click “Continue”.
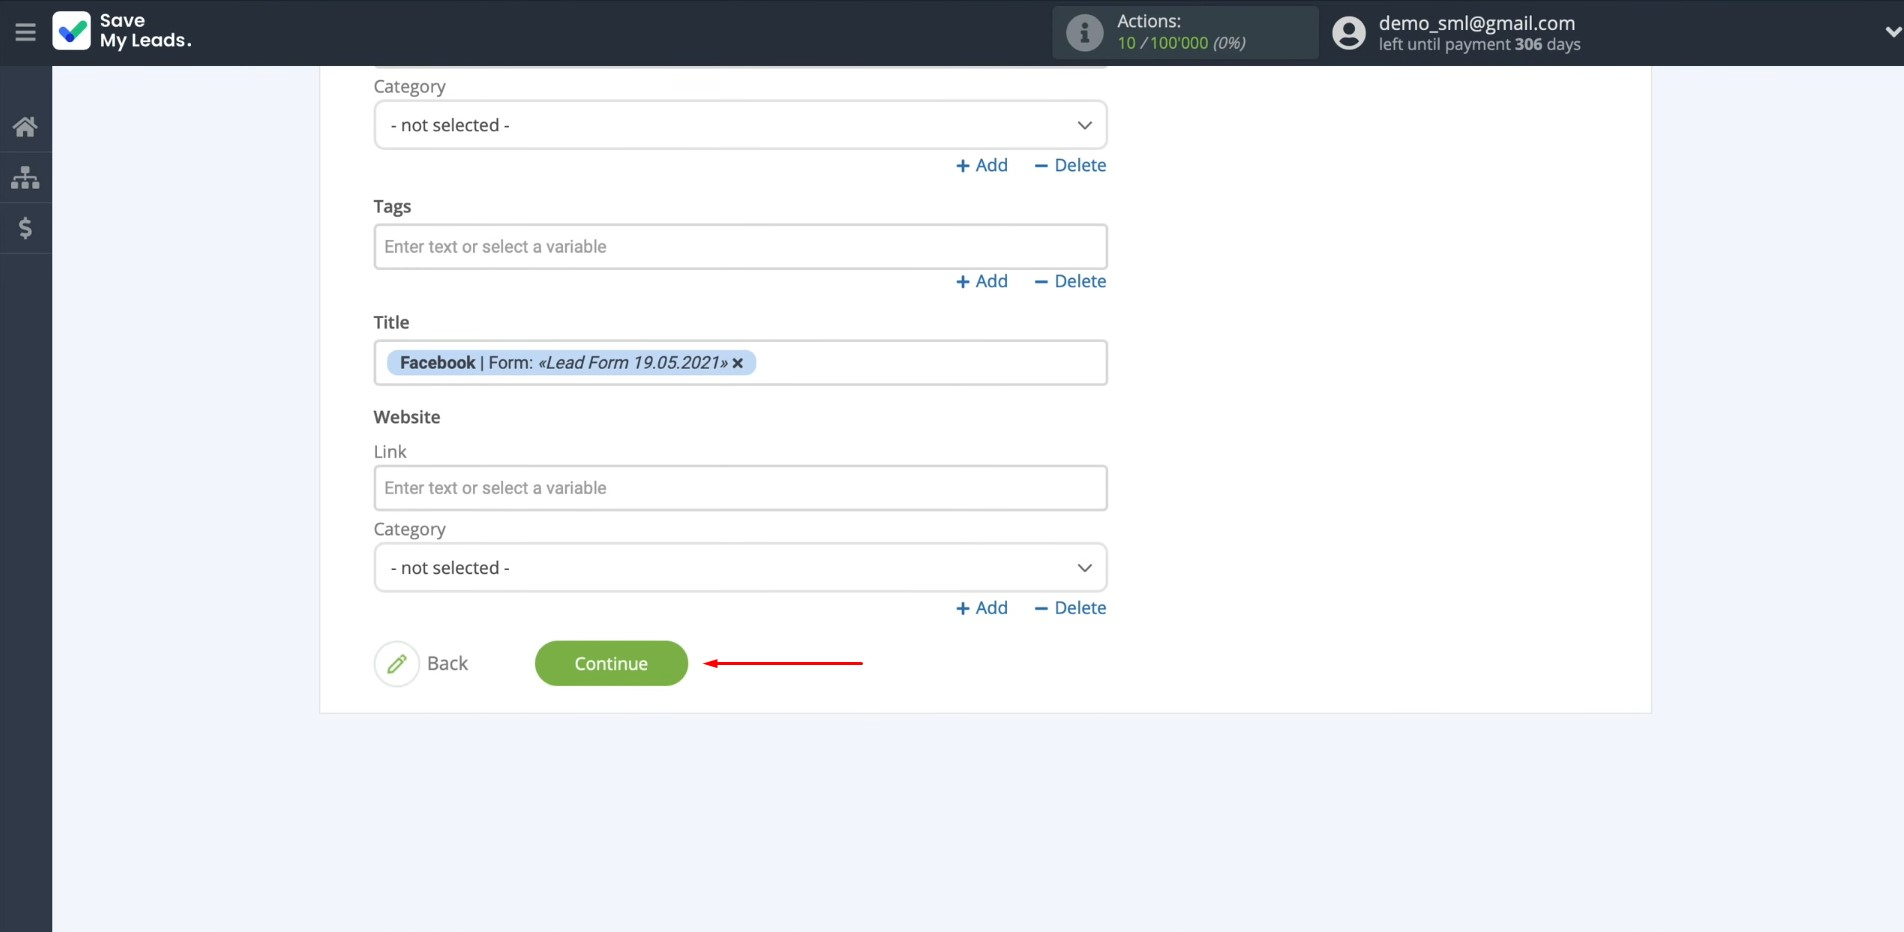
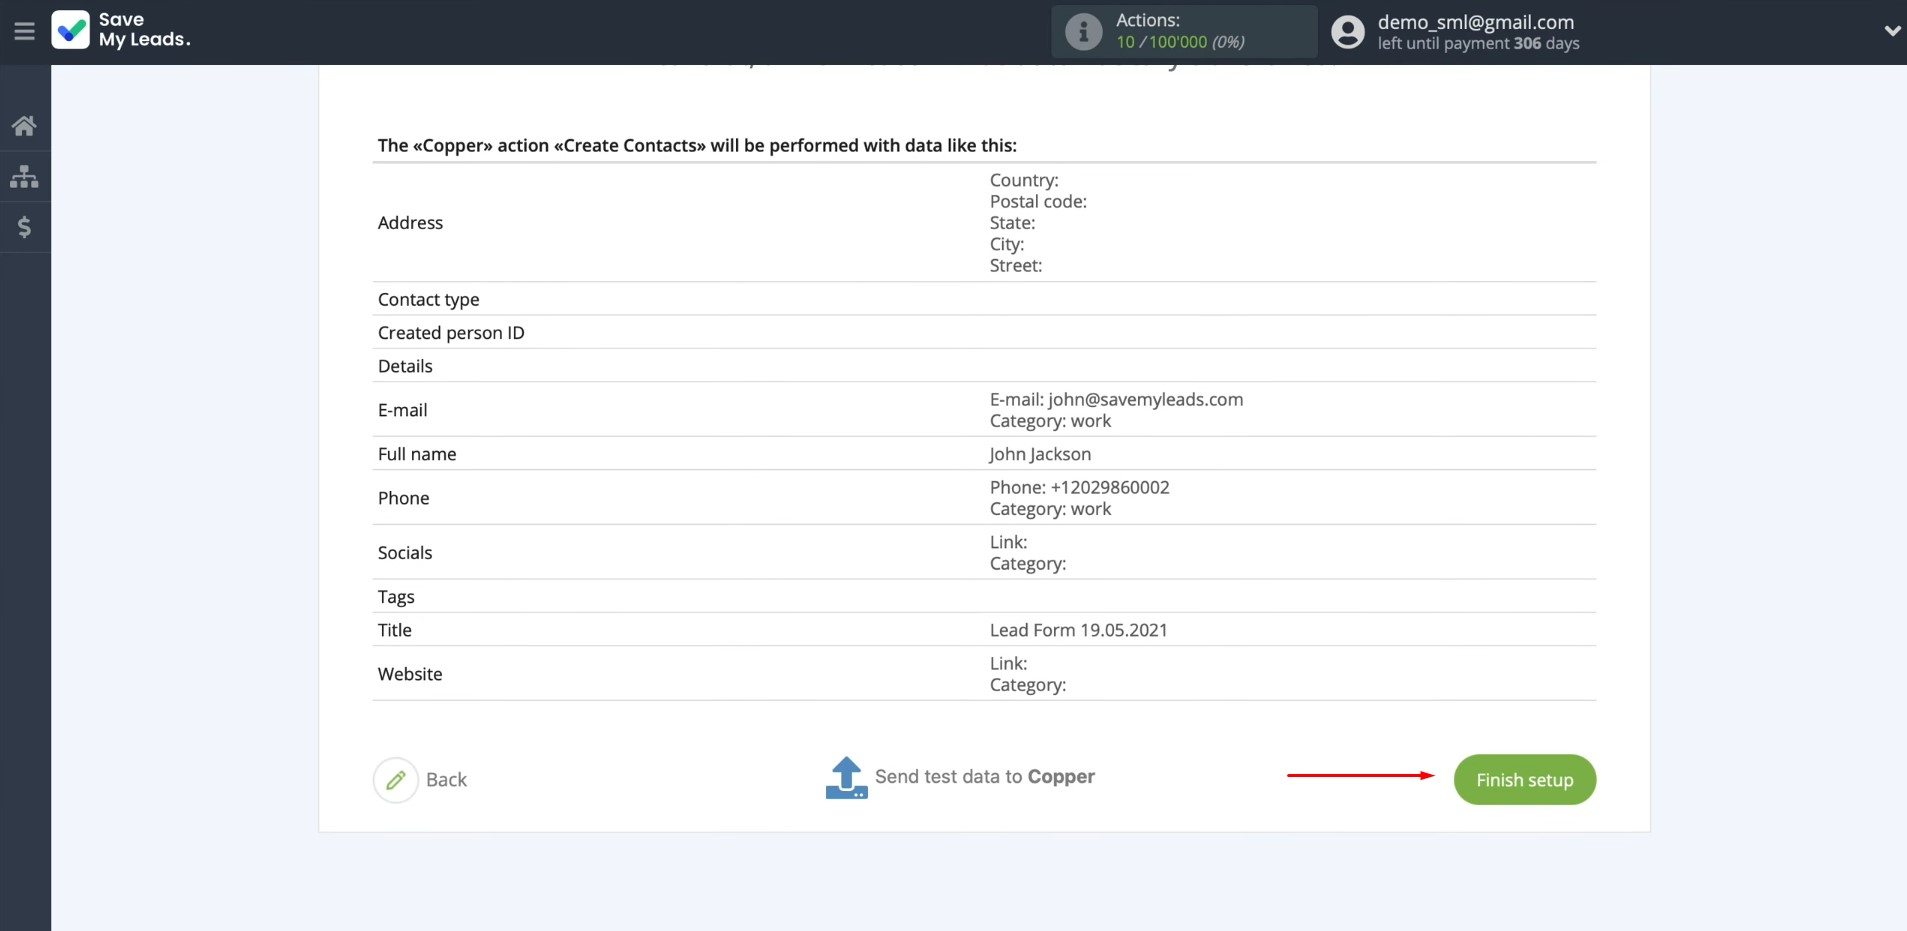
You see an
example of filling in
the fields when creating a contact in Copper. To check the correctness of the settings, click “Send test data to Copper”.
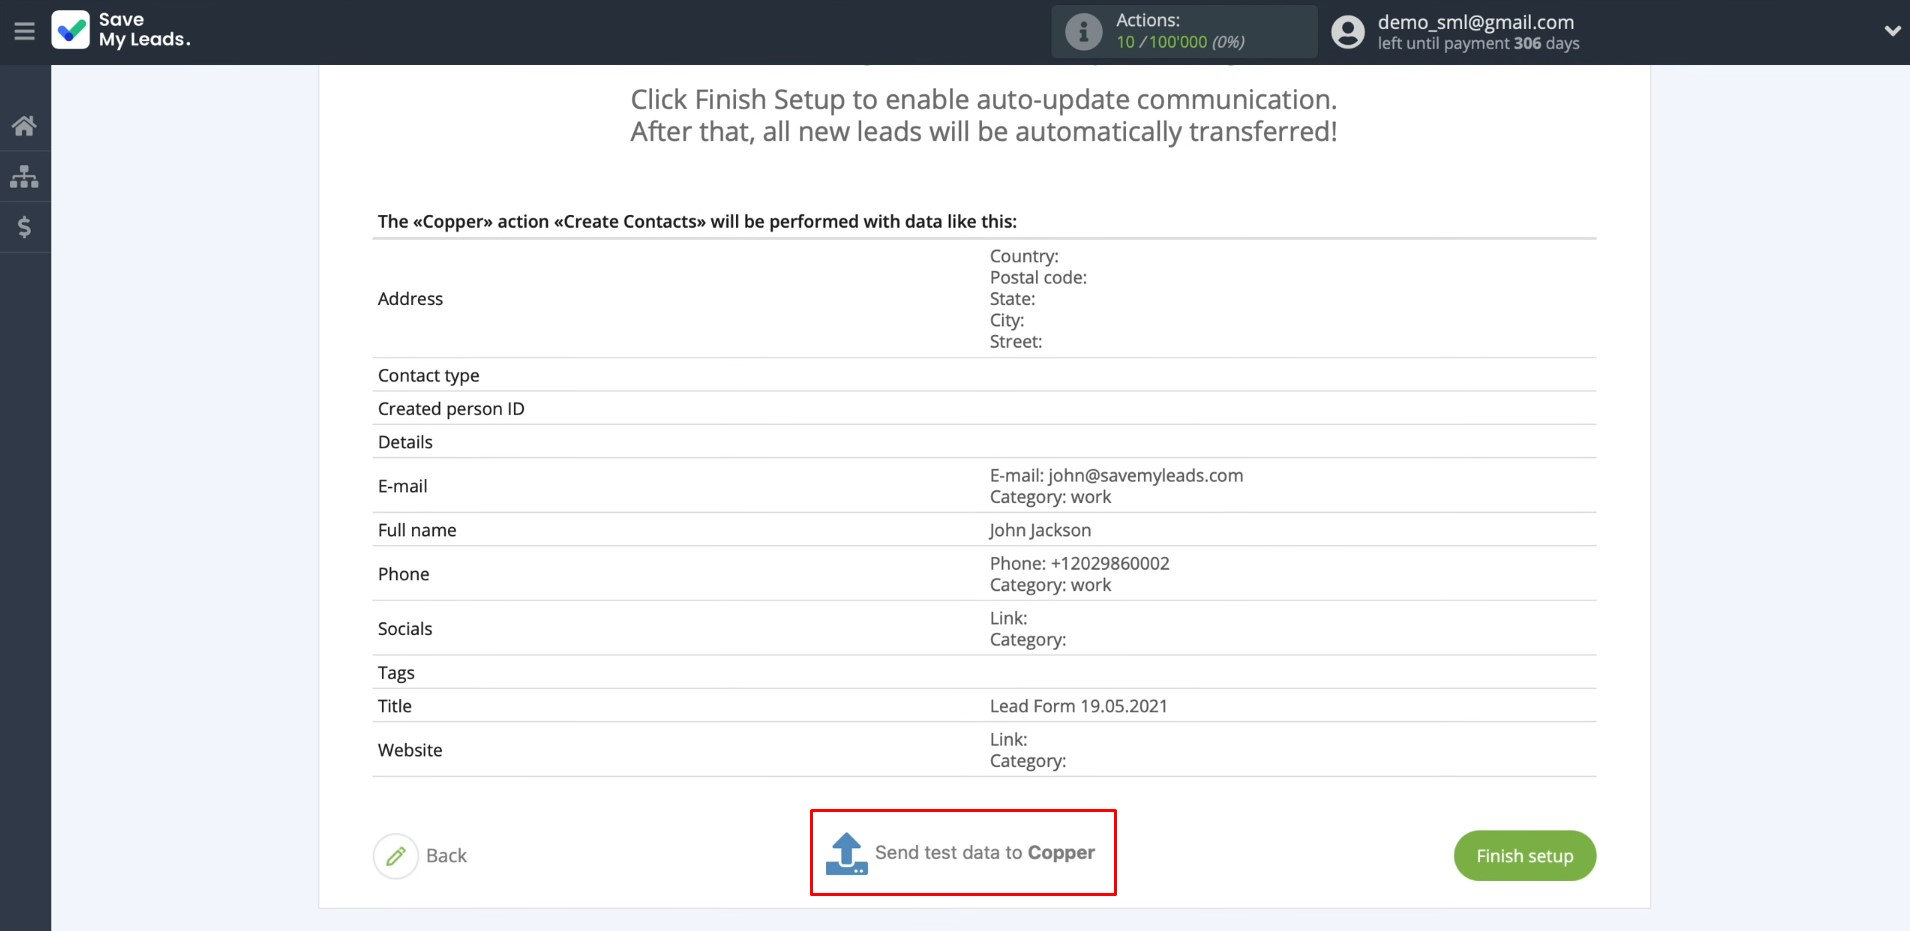
After
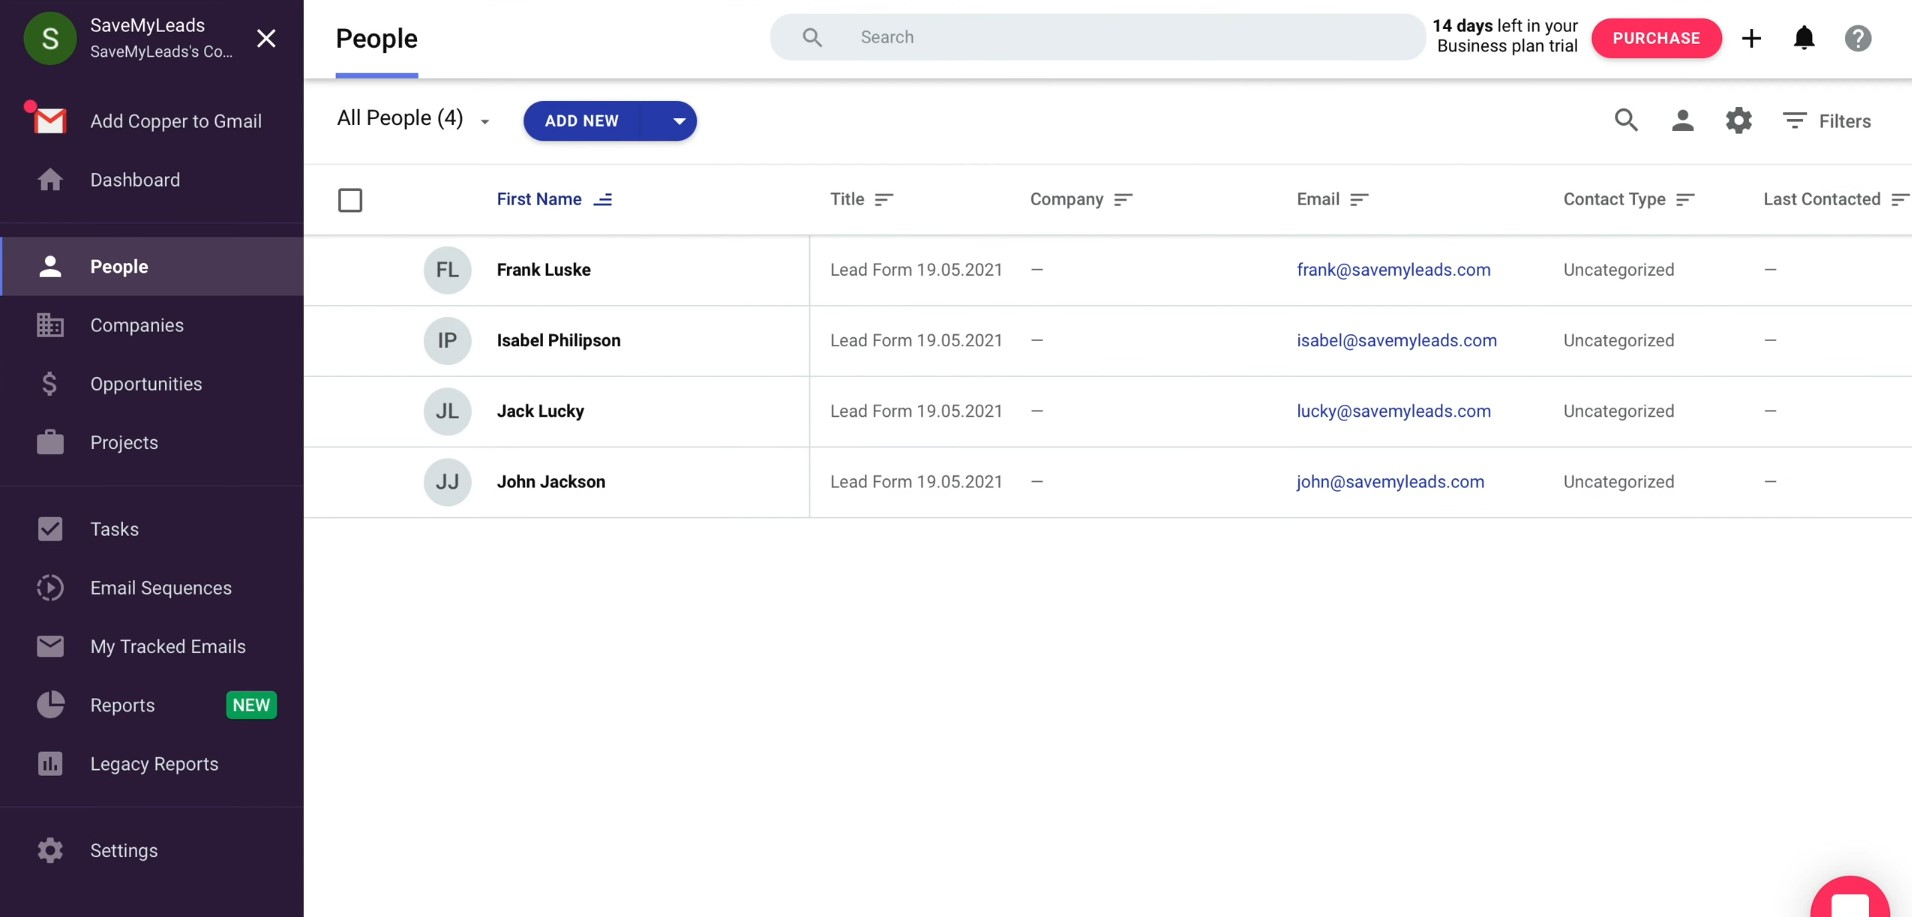
successful sending, go to Copper and check the result.
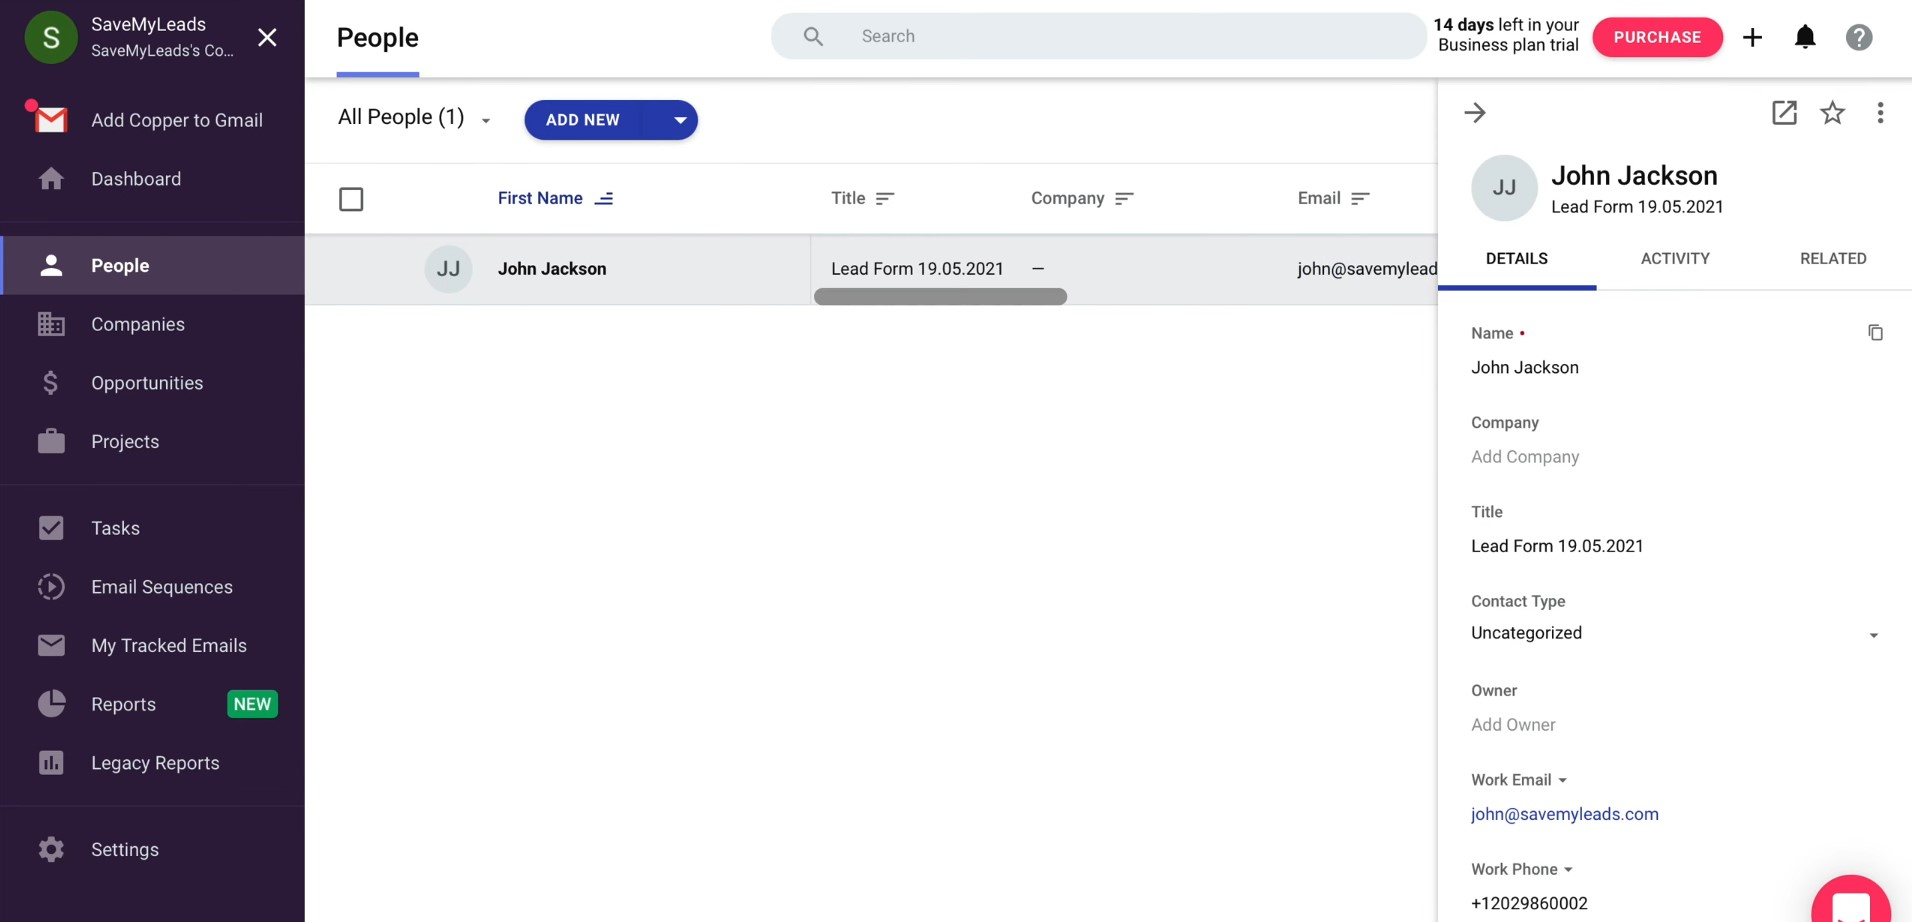
If everything
suits you, return to SaveMyLeads and complete the setup.
Setting up Auto-update
To instantly create new contacts in Copper based on new leads on Facebook, enable auto-update. For this, click “Finish setup”.
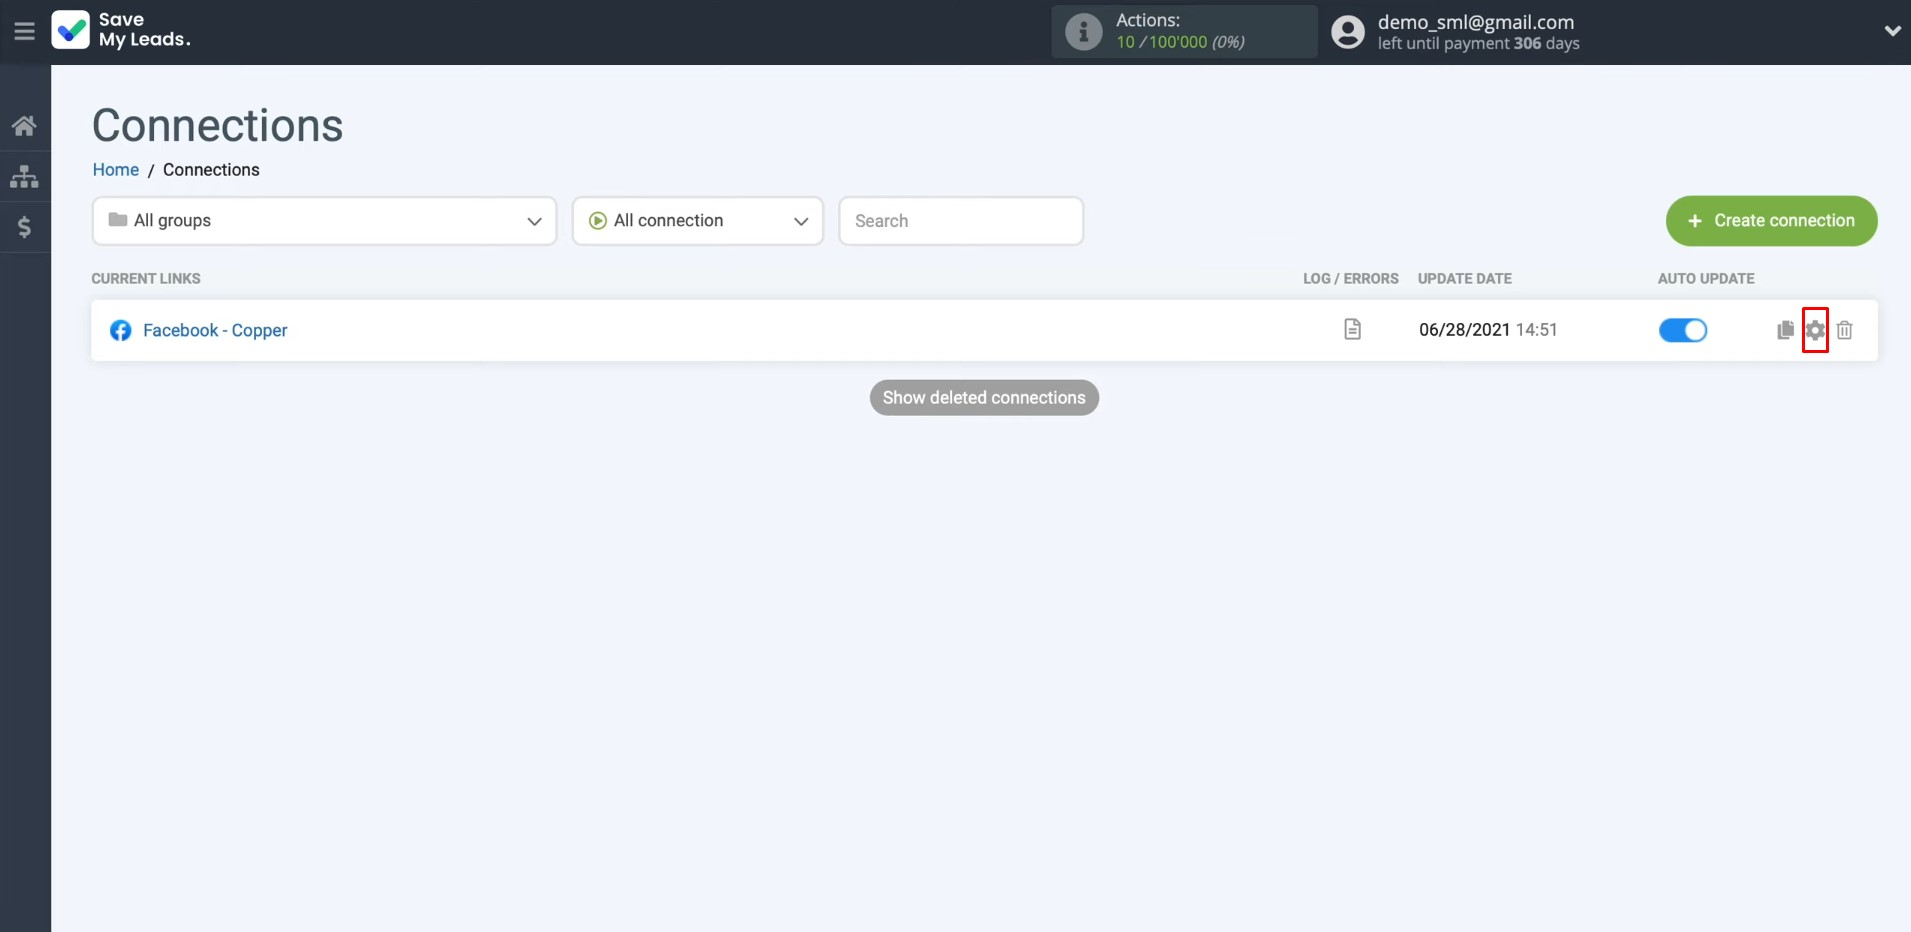
If you want to change the connection name, you can do this in its
settings. For this, click on the gear icon.
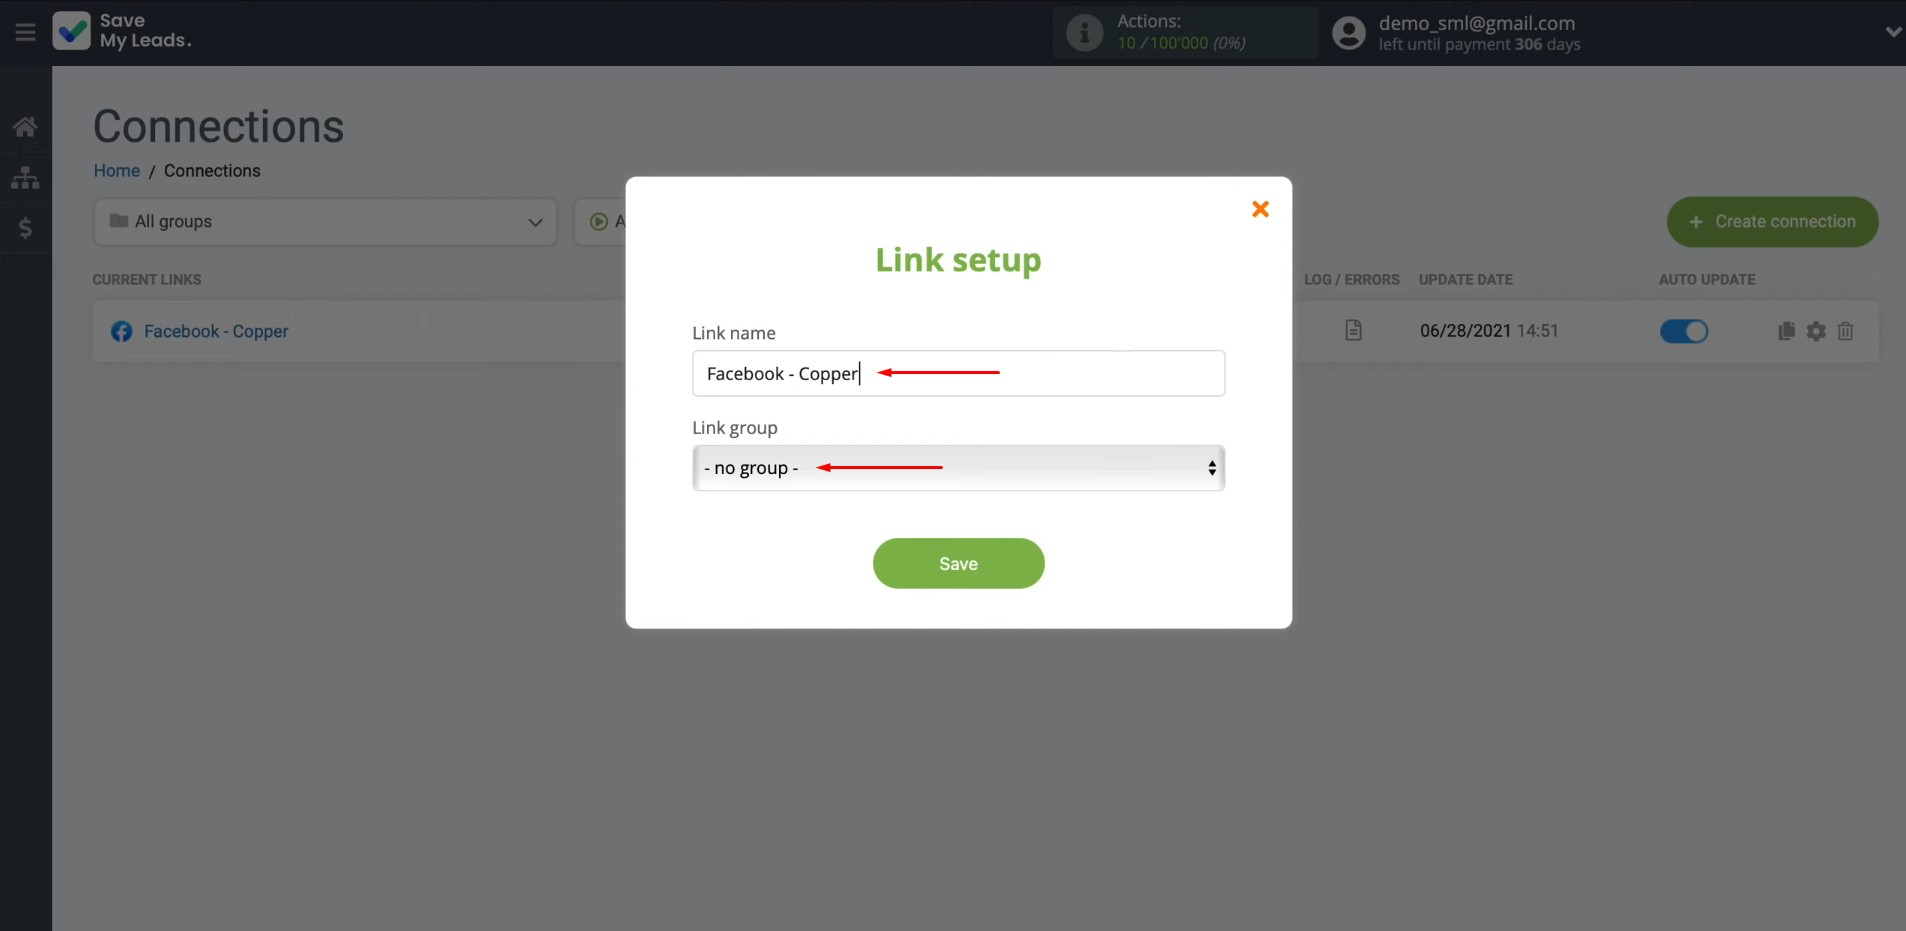
Change the connection name and add your
connection to a group. After that, click “Continue”.
That's all. The Facebook and Copper integration has been completed.
Conclusion
By following our step-by-step instructions, you can easily set up Copper & Facebook integration, and you will be able to evaluate its results – automatic transfer of lead contact information. After observing its operation for some time, you will be convinced that the connection between the platforms is truly reliable and works smoothly.


Facebook & Copper integration will save you from one of the most monotonous tasks by completely switching it to auto mode. Now, while the SaveMyLeads connector takes care of the routine, you can focus on improving the quality of communication with customers, developing new marketing strategies, and other important tasks. Automation of work processes will not only improve your business but will also contribute to its further development. And SaveMyLeads will become your reliable assistant in this.
Step-by-Step Guides for Setting Up Integrations:
