Pipedrive is a CRM system that provides a wide range of functionality for working with clients and managing sales. A deal is one of the main objects in such programs. In this article, we'll show you how to automatically create deals in Pipedrive based on new leads from Facebook.
Content:
1. How to setup Facebook and Pipedrive integration
2. Connect Facebook Leads Ads
3. Connect Pipedrive
4. Check the connection and enable auto-update
5. Result of integration
The Pipedrive platform is a popular CRM system that helps you create and implement sales funnels. The service provides integration with email, allows you to work with deals in Kanban mode, provides the ability to track key indicators using a dashboard, etc.
The deals section is one of Pipedrive's key workspaces. The main part of the work related to the promotion of the client through the sales funnel takes place in it. A deal is a full-fledged information object that describes an order or a customer request. Contacts, product, customer name / company name, price, etc. can be indicated here. The fields for deals are flexibly configured to the needs of the business.
Creating a deal is an important part of the workflow in Pipedrive. This can be done manually or using automation solutions. One of the source channels for deals can be Facebook lead forms. The most popular social network is an effective platform for lead generation. With the help of lead forms, you can take orders, collect applications and grow your customer base. If you link your Facebook ad account and Pipedrive, you can set up automatic conversion of FB leads into Pipedrive deals.
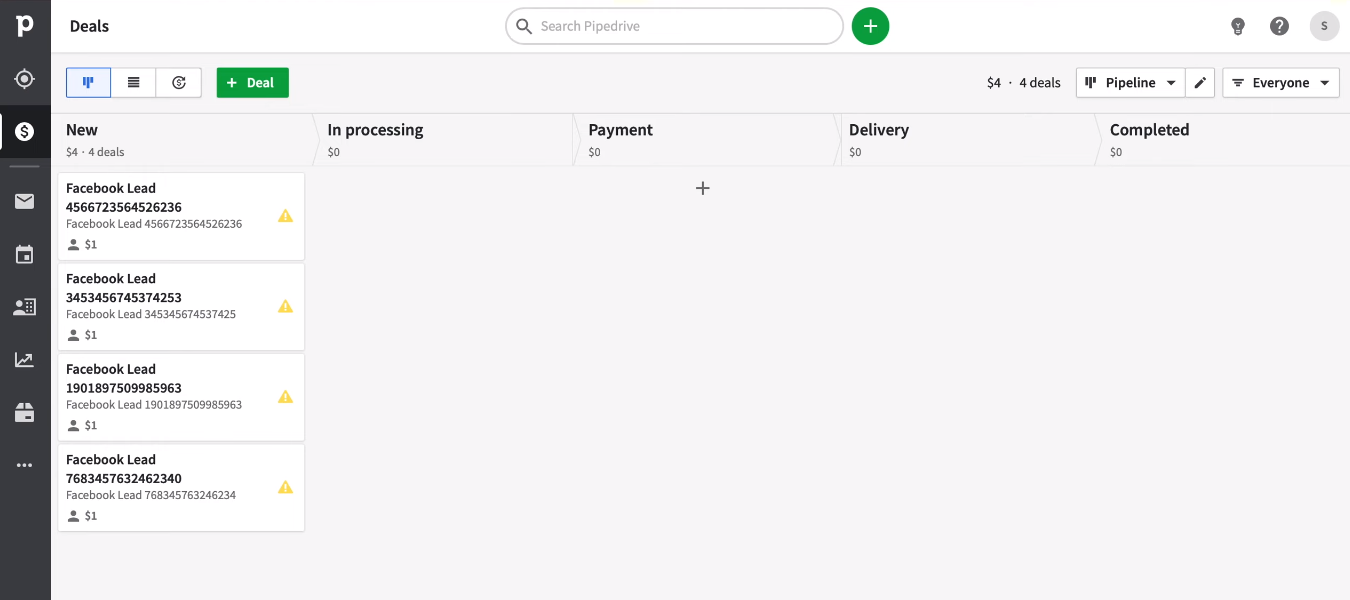
How to setup Facebook and Pipedrive integration
Integrations are created to improve work efficiency. For example, to automate work processes and minimize routine operations. If a company uses Facebook for lead generation and Pipedrive for sales management, then there is a regular task of transferring data from one system to another. Using the SaveMyLeads service, you can link your Facebook advertising account and the Pipedrive CRM system. The result of this integration is the automatic upload of new leads from Facebook in the form of Pipedrive deals.
The SaveMyLeads service allows you to create an integration between Facebook and Pipedrive without the involvement of programmers. This is a no-code solution with a simple interface, which allows you to set up the transfer of new leads from Facebook to various systems in just a few minutes. SaveMyLeads users are offered a wide range of ready-made customization templates for different systems. Including solutions for linking Facebook and Pipedrive.
Connect Facebook Leads Ads
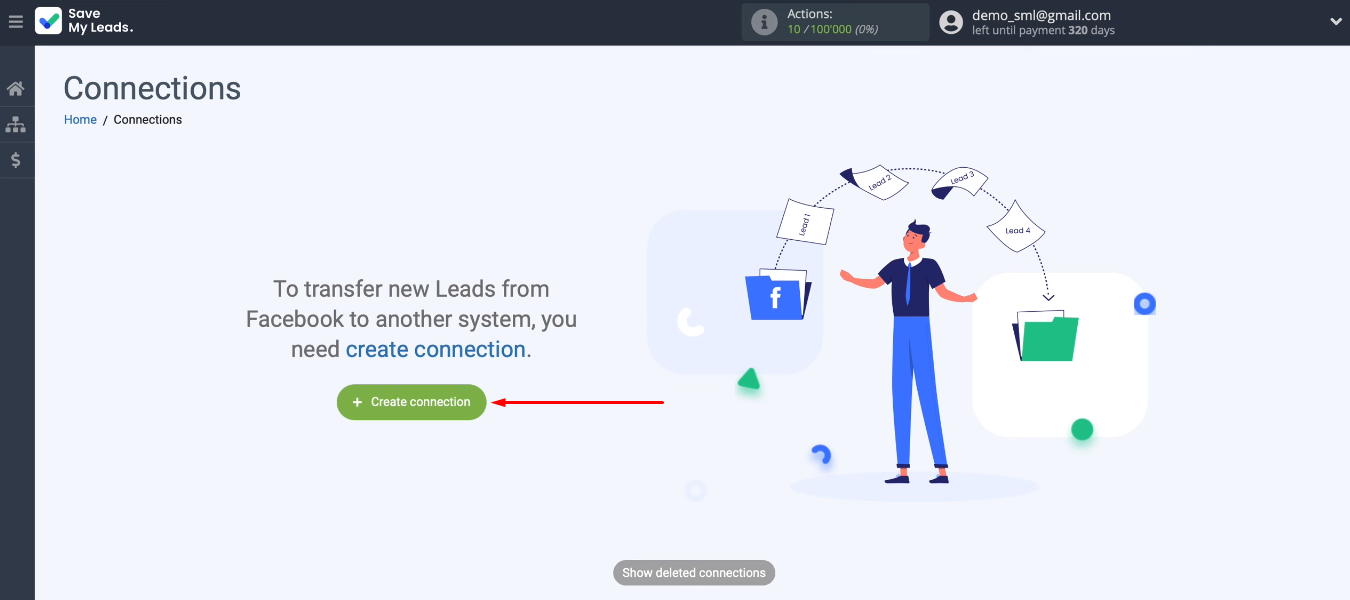
To use the functionality of the SaveMyLeads online connector, you need to register and enter your personal account. Now you can create a new connection.
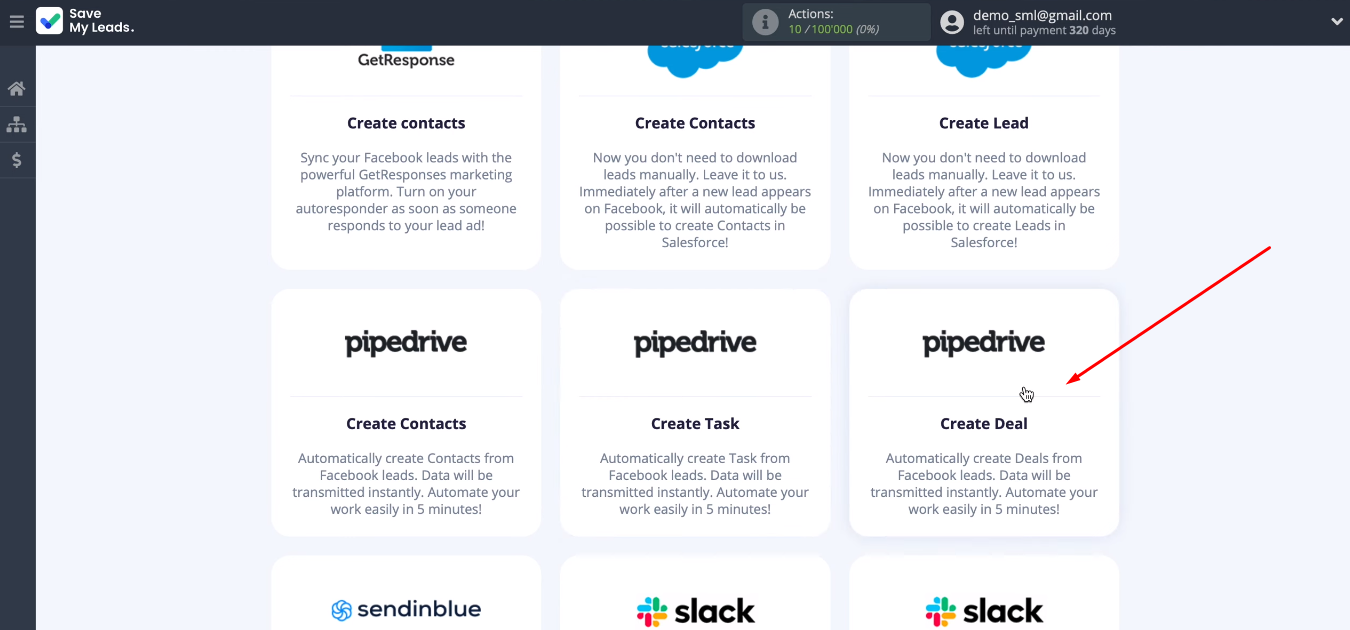
From the proposed templates, choose the appropriate option. For our task, this is “Pipedrive (Create Deal)”.
We begin work on setting up a data source. Connecting a Facebook account.
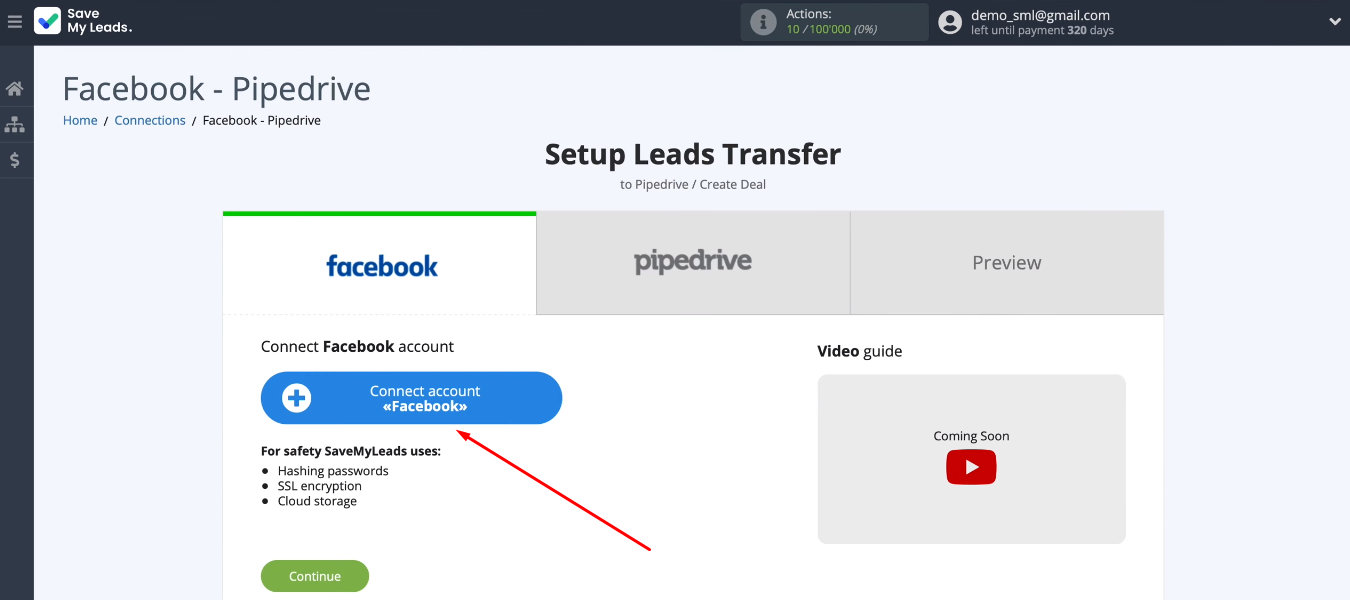
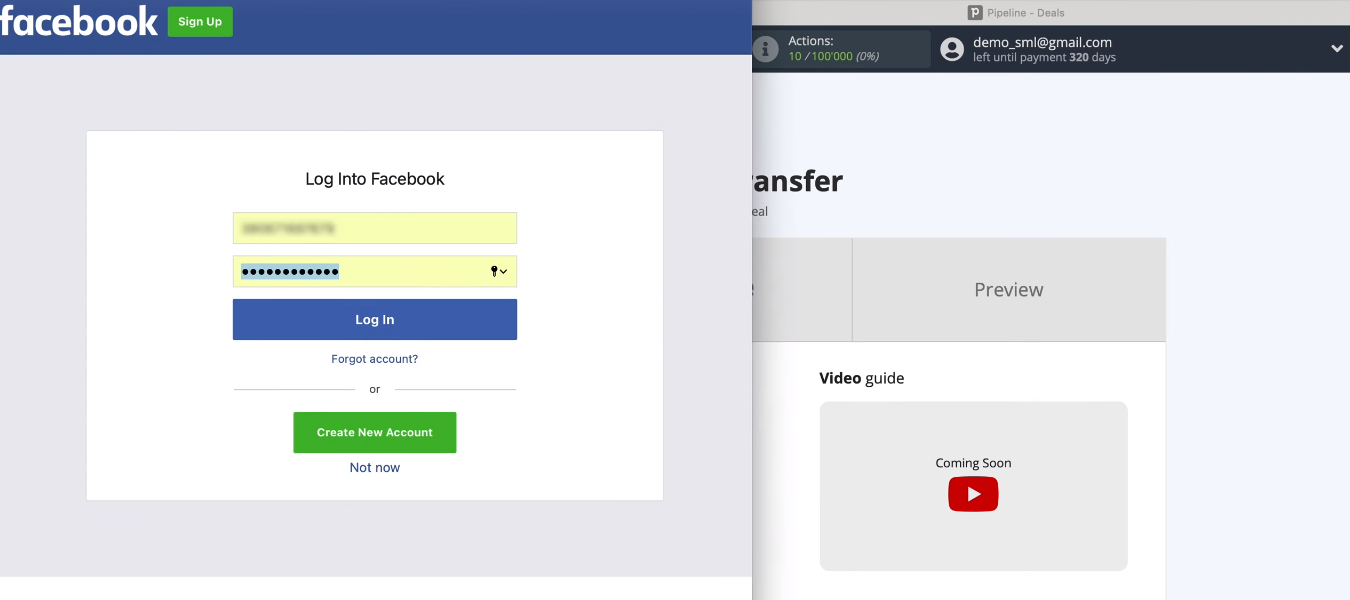
Specify login and password.
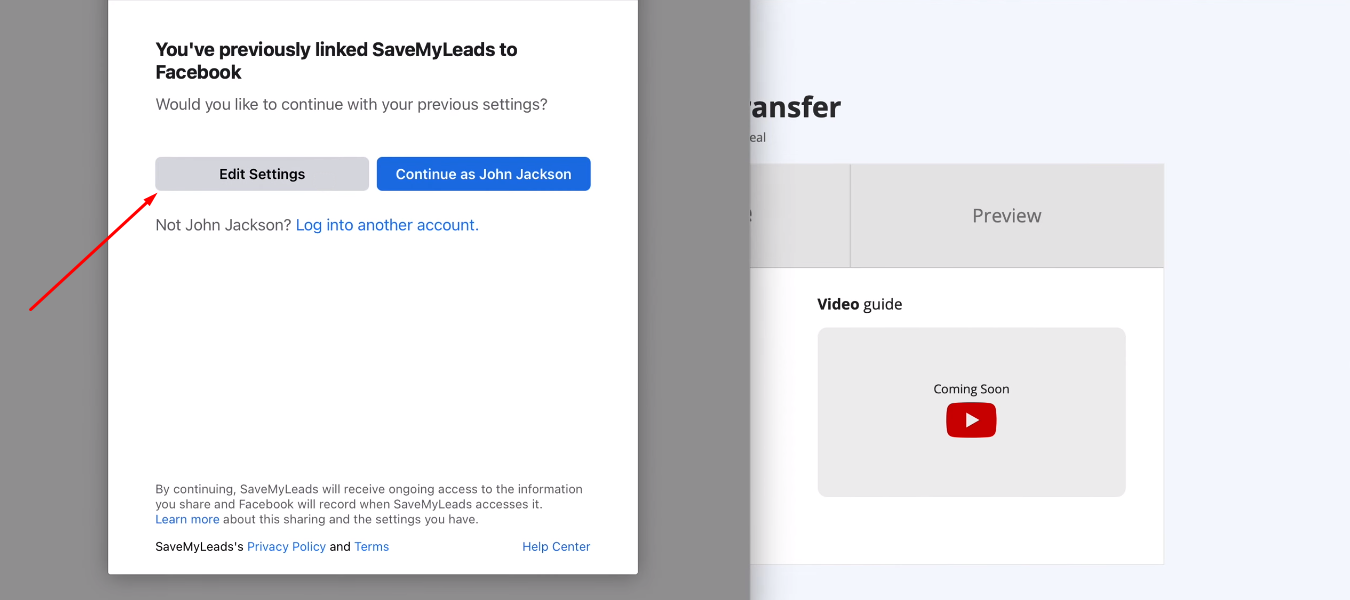
Go to account settings.
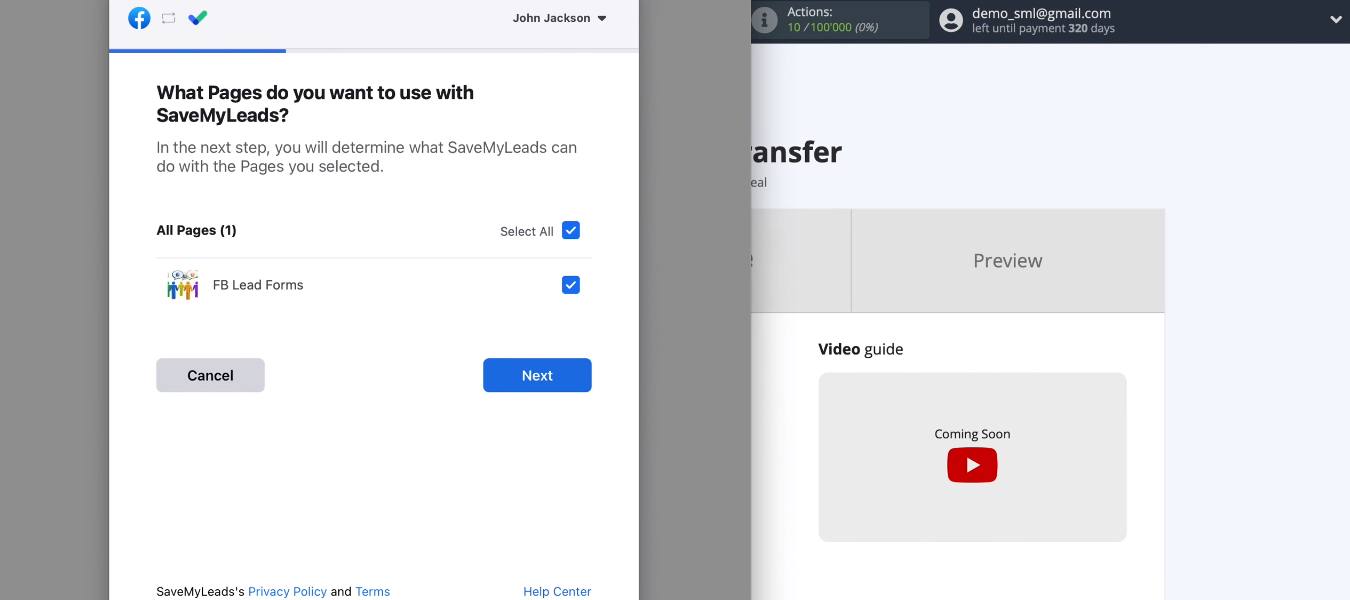
We can select all advertising pages at once or mark individual pages that we can work with in the future.
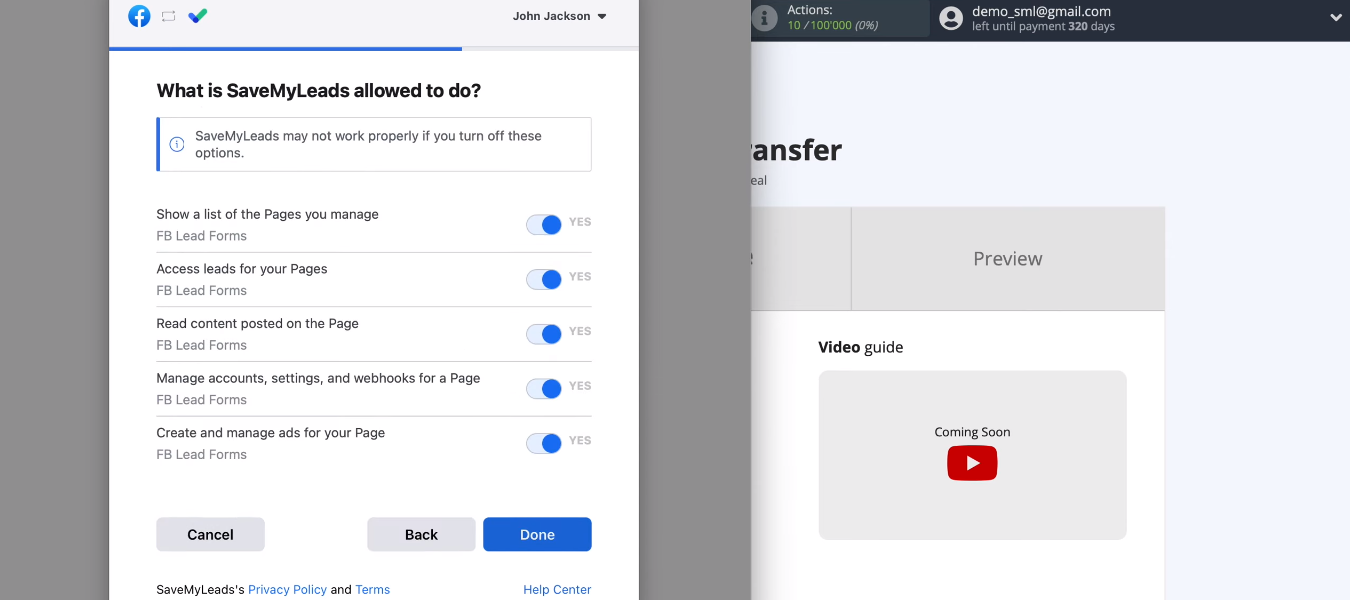
In the next window, you need to leave all the access checkboxes enabled.
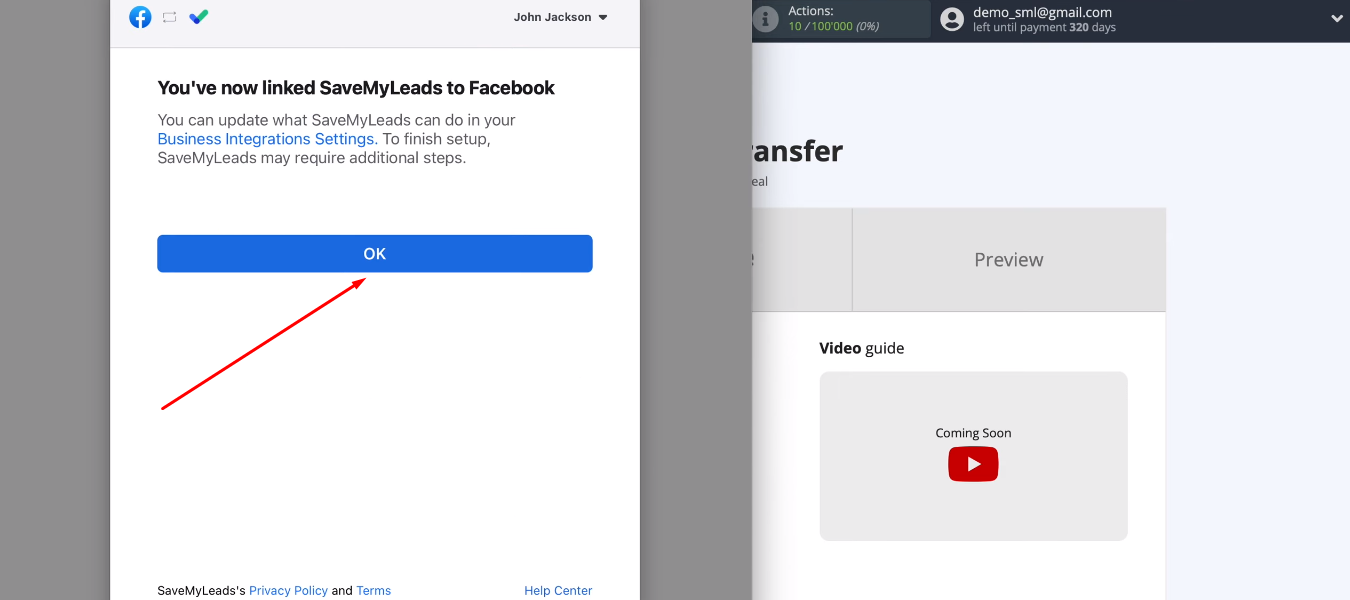
We have created a connection between Facebook and the SaveMyLeads service. Click the “OK” button and continue working with the data source.
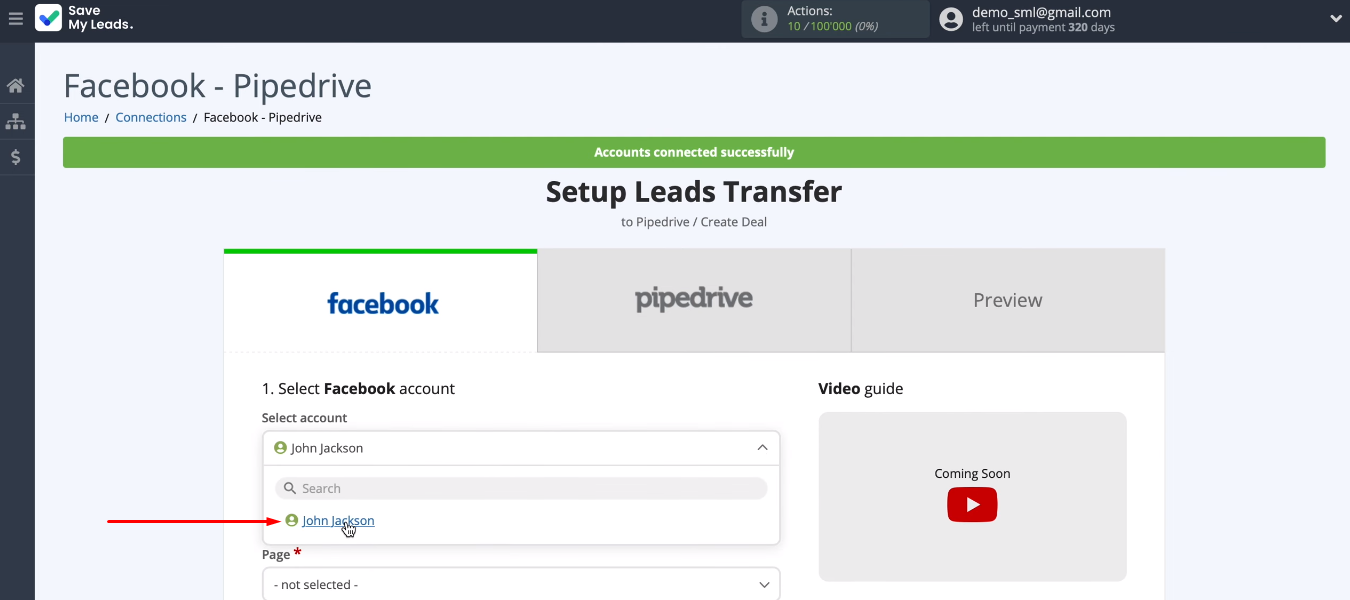
The connected account is now available for selection.
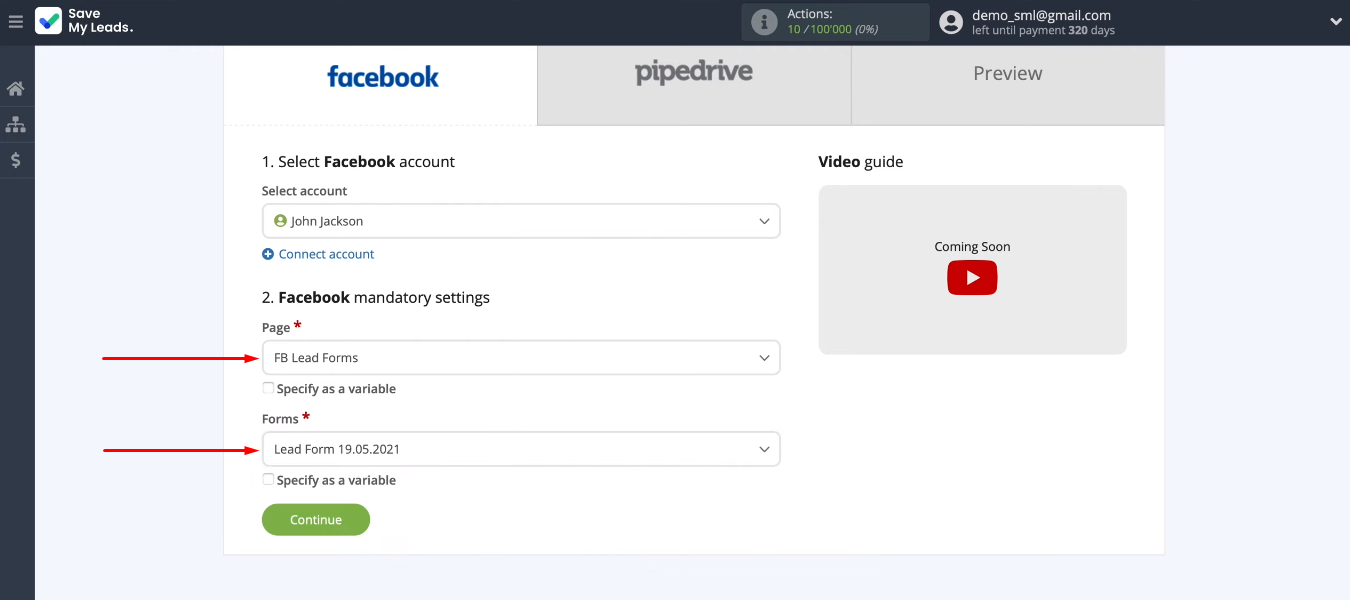
Select the advertising page with which we will work. Define the form for uploading leads. If you have several forms specified and you want to receive leads for each of them, then you need to create separate connections. When we have decided on all the points, click “Continue”.
Connect Pipedrive
Connecting a Pipedrive account.
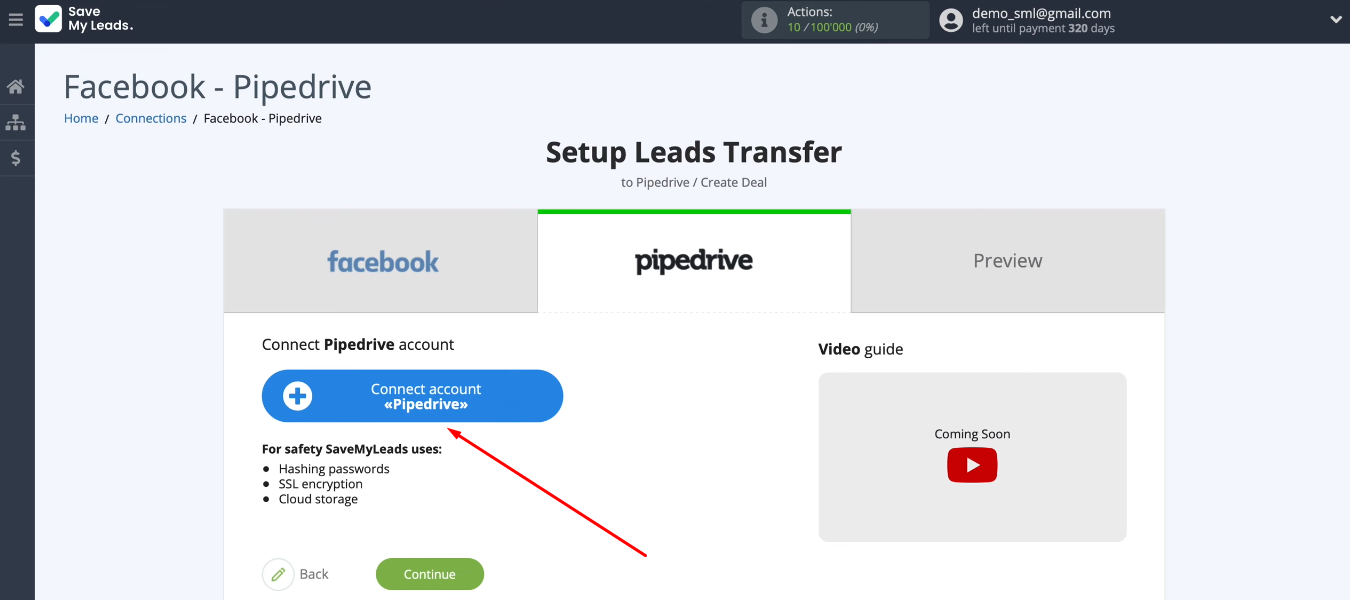
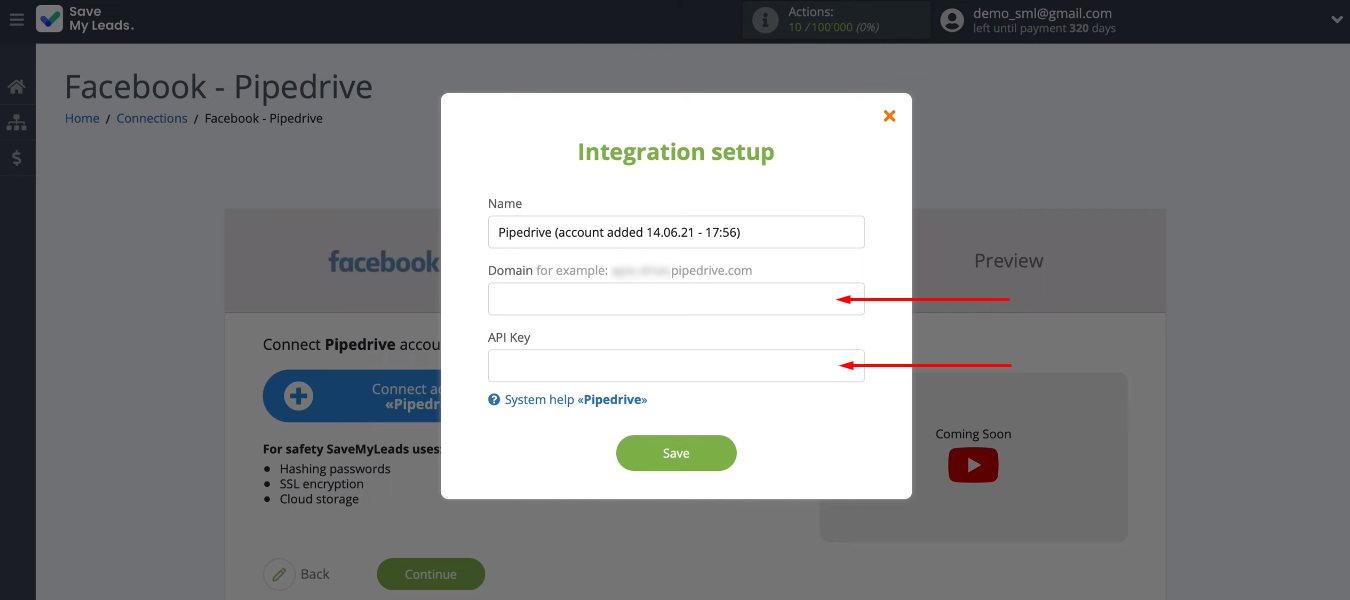
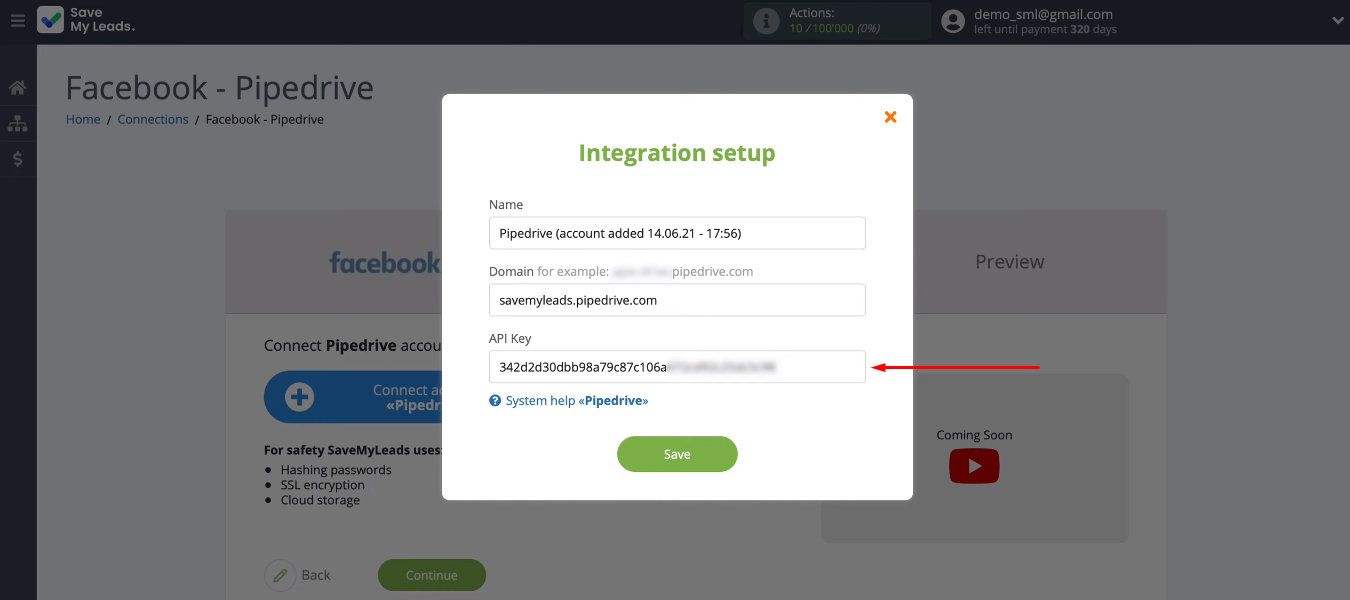
To connect the CRM system to the integration, we need to fill in a few fields.
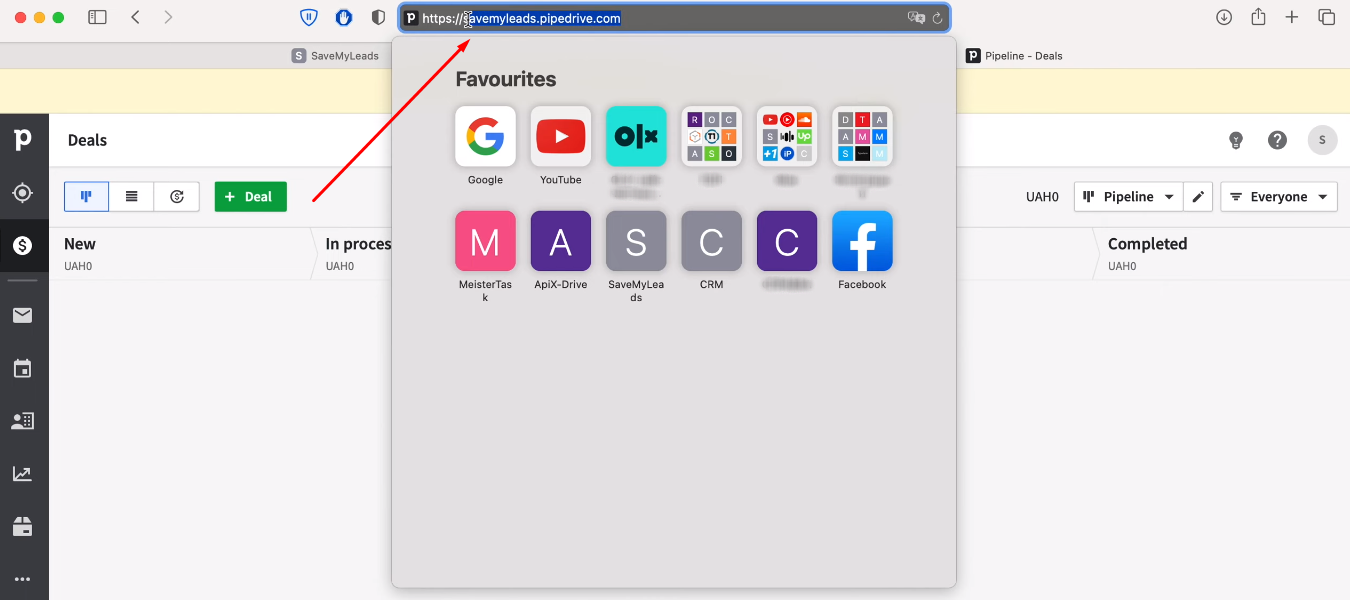
Go to the Pipedrive personal account and copy the domain in the address bar without additional characters.
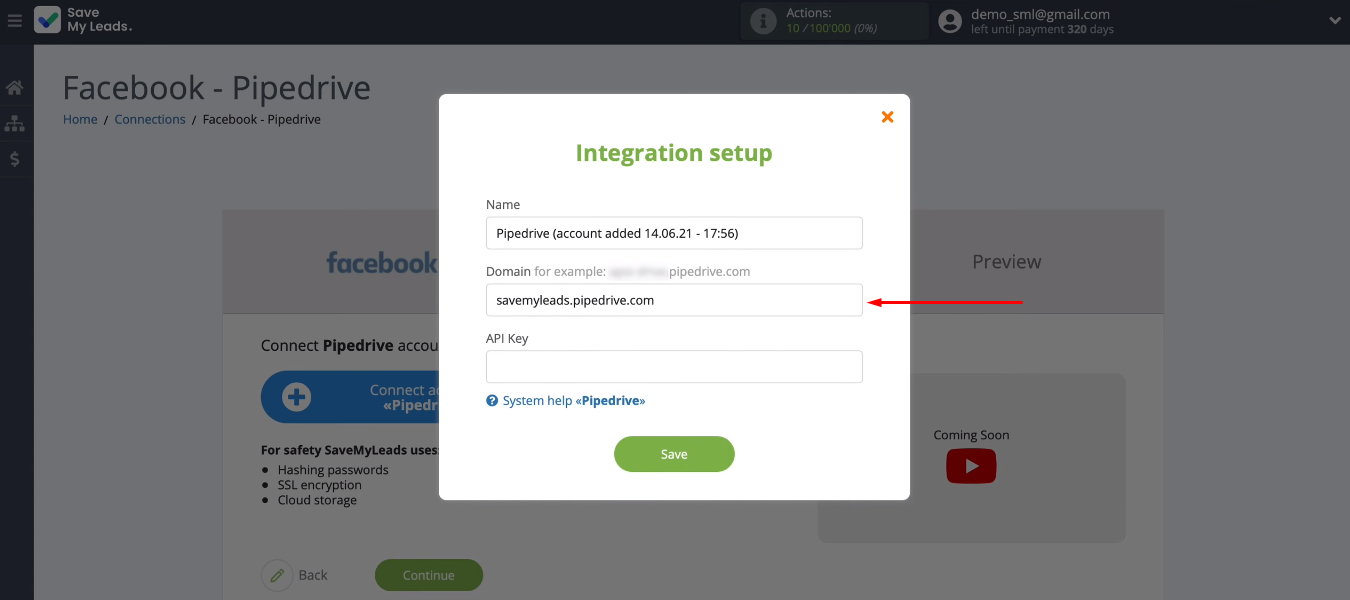
Return to the integration settings and paste the copied value into the “Domain” field. In the tip above the field, you can see in what format the domain should be specified.
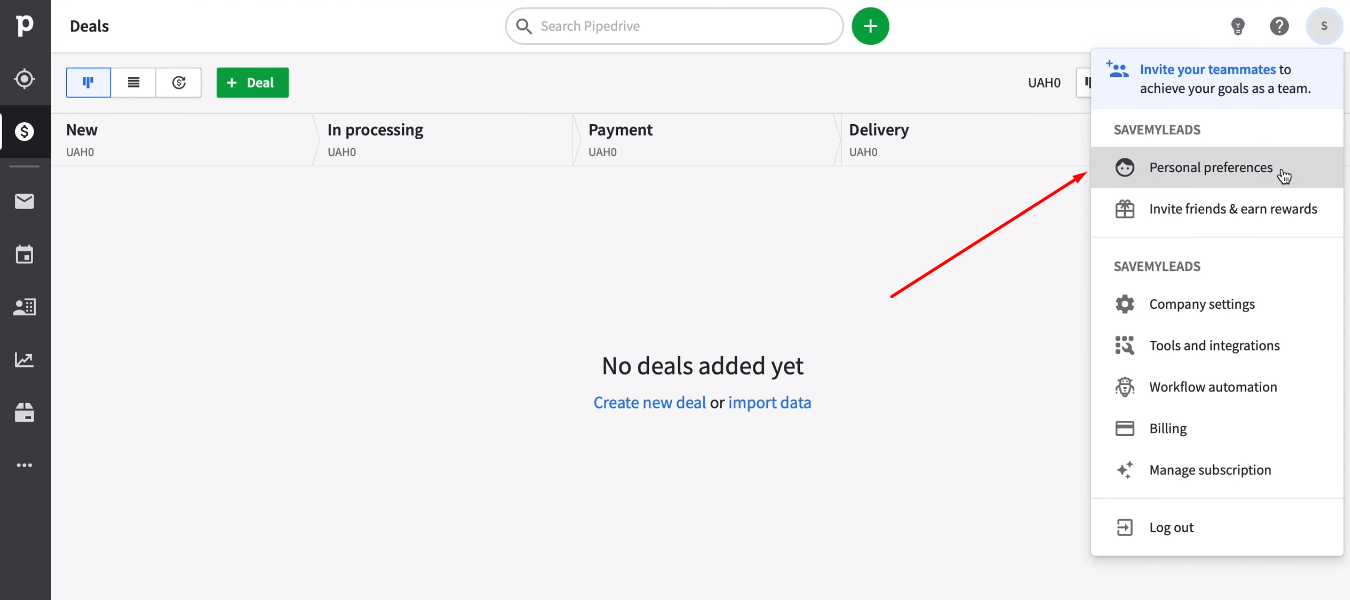
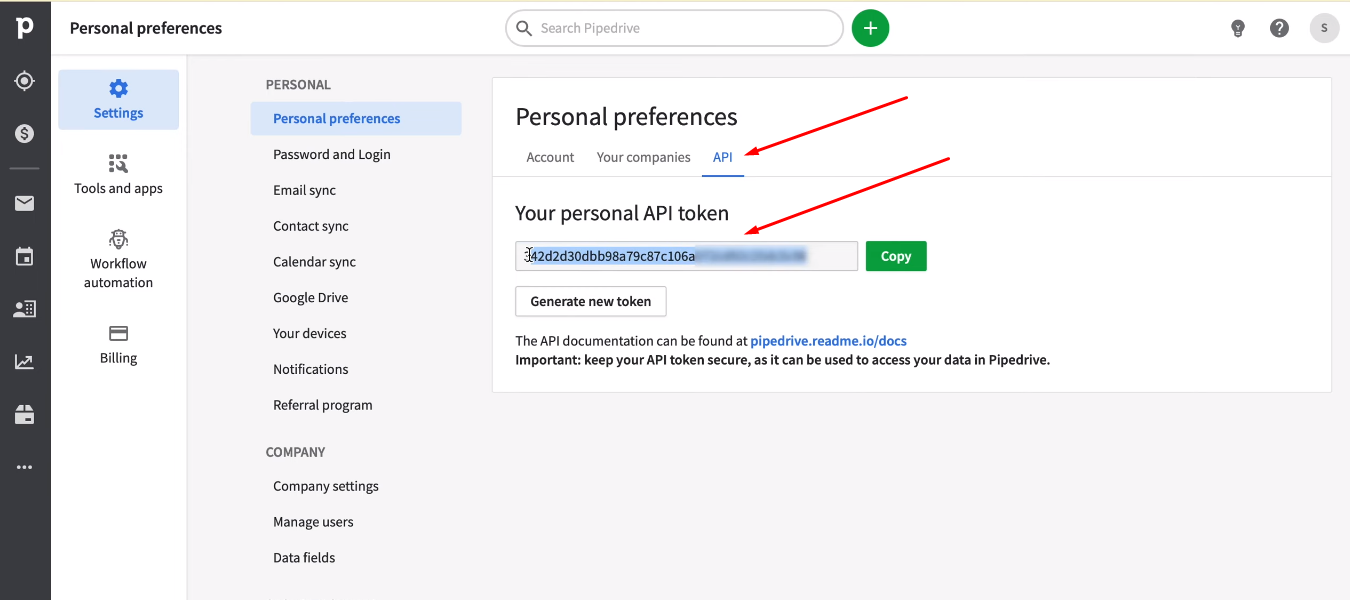
In the Pipedrive system go to profile settings.
Go to the "API" tab. Copy the personal API token.
Return to the SaveMyLeads service. Paste the previously copied value into the “API Key” field. Click "Save".
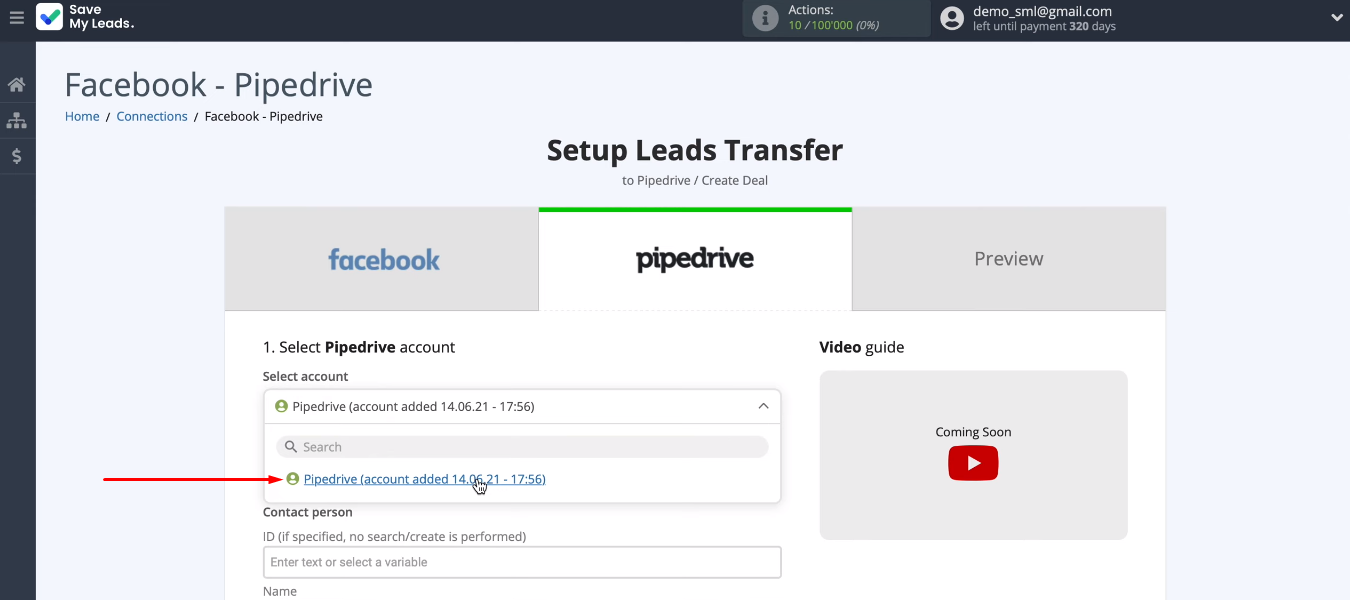
The connected account appears in the list. Select it.
We need to assign the variables we got from Facebook to the Pipedrive fields. Click in the field and select the desired value from the drop-down list. We can also add our own text.
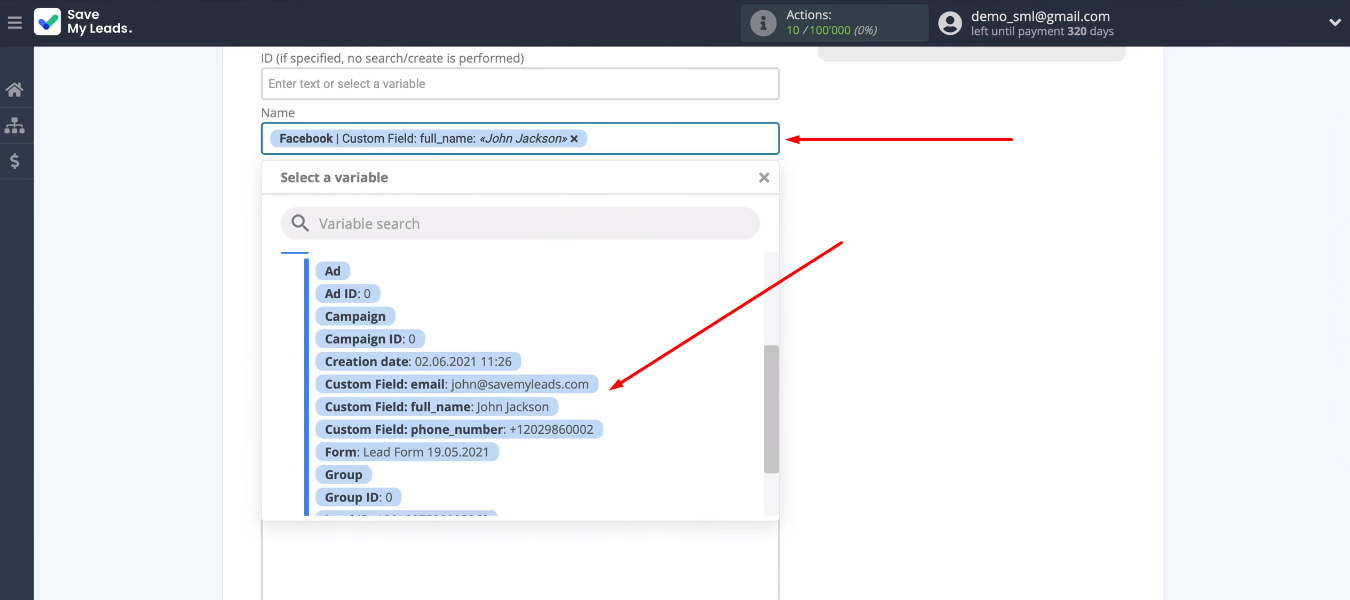
The system offers a preset content of the fields. If the default option suits you or you have customized the contents of the Pipedrive fields yourself, click the “Continue” button.
Check the connection and enable auto-update
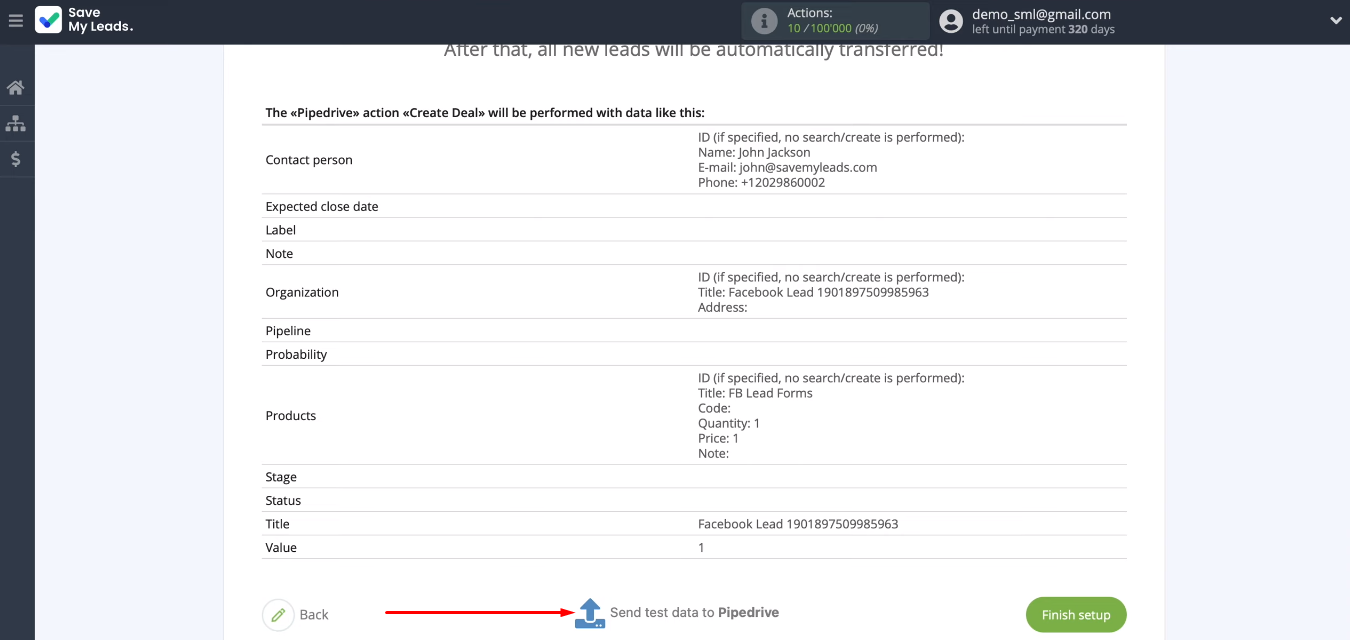
At this stage, we see an example of the data that will be transferred to the CRM system to create a deal. Click “Send test data to Pipedrive”.
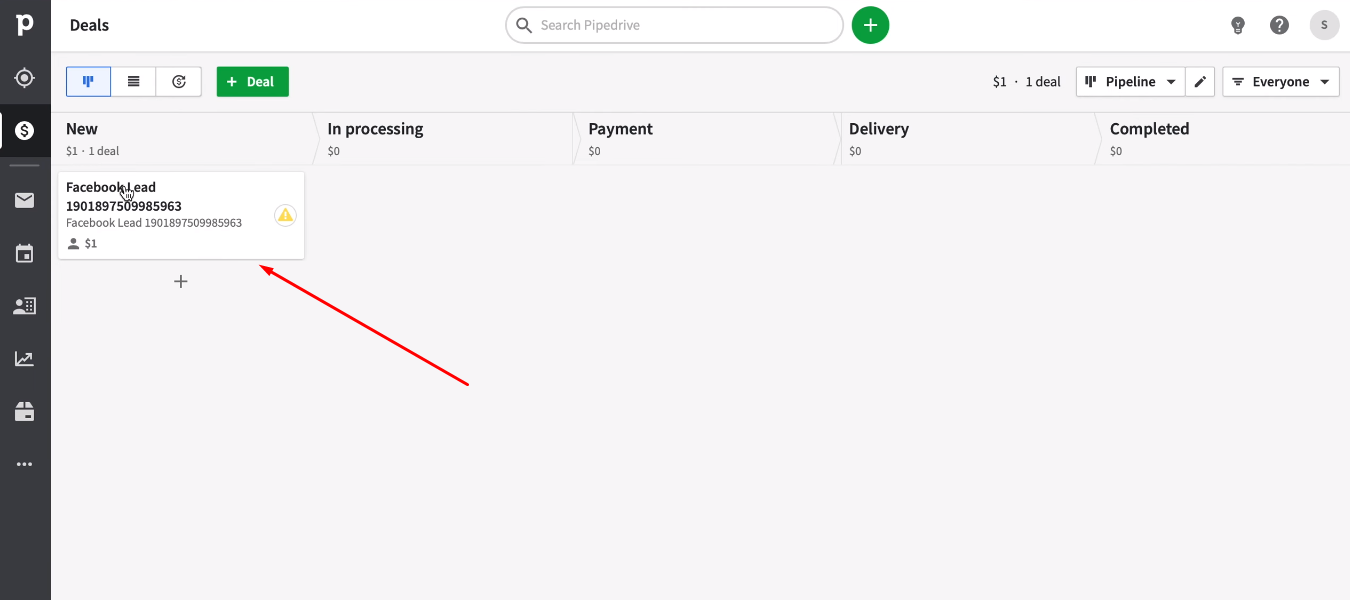
Go to your personal Pipedrive account. Check the presence of a new deal and the correctness of the data transfer.
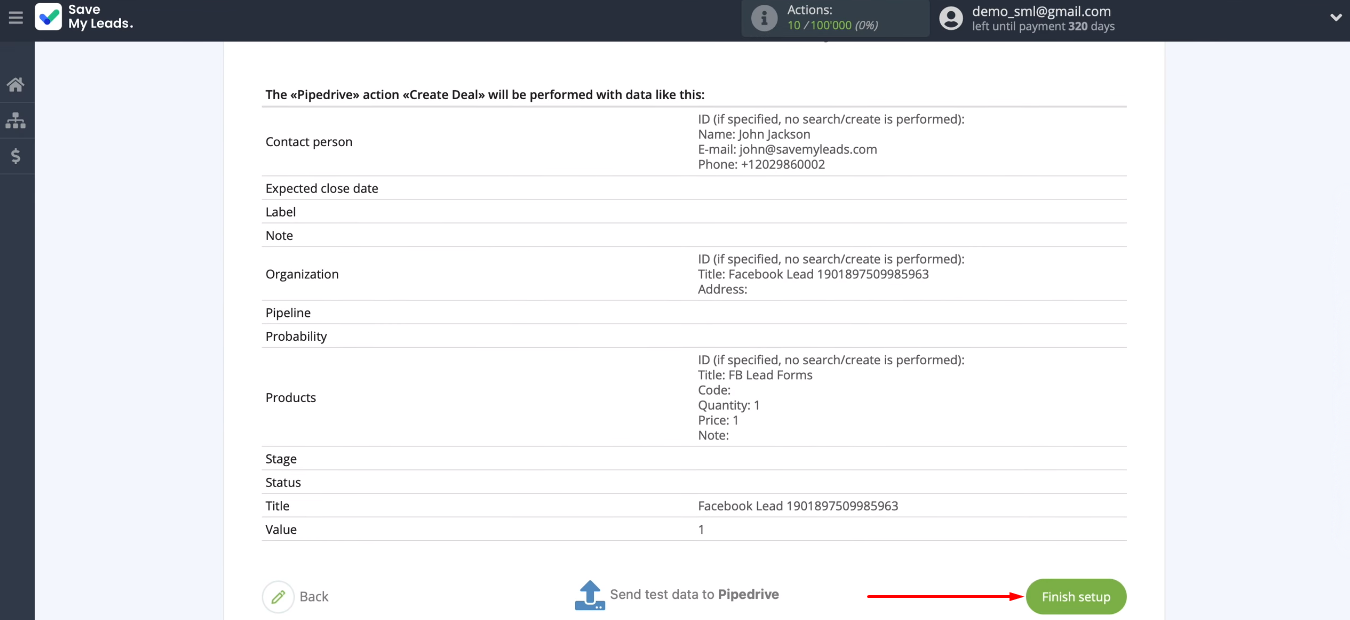
Return to the SaveMyLeads workspace and click “Finish setup”. Thus, we turned on automatic updates and activated the integration.
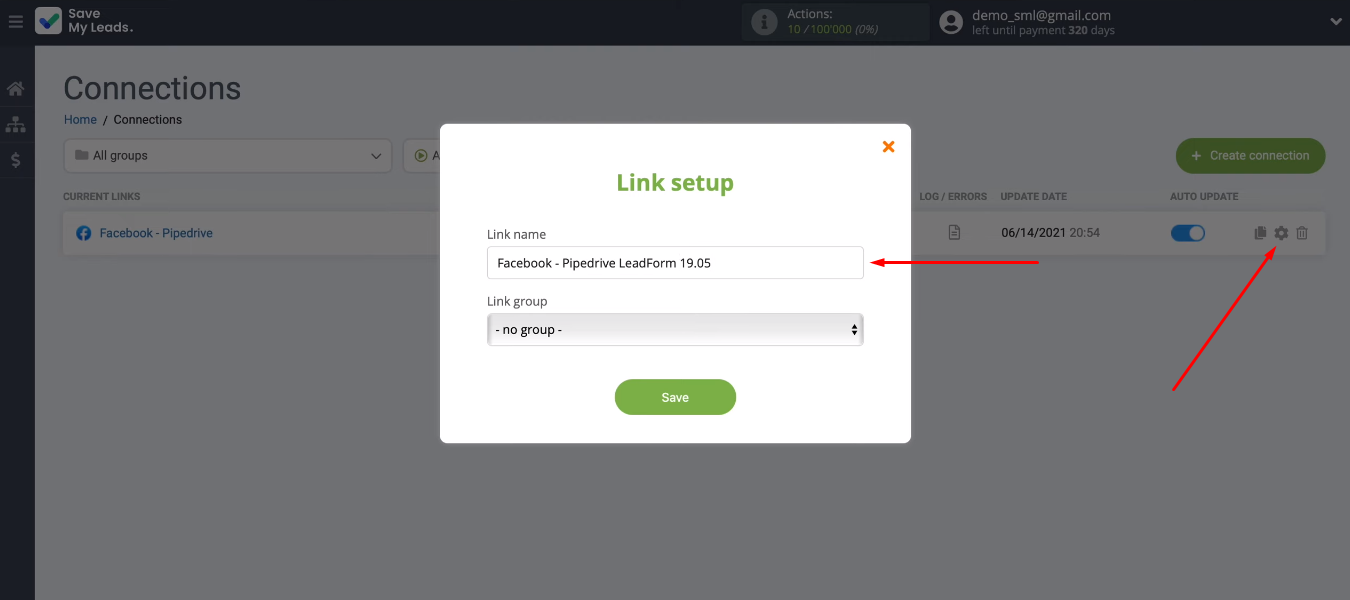
Optionally, you can change the name of the connection. Go to the connection settings and adjust the value in the “Link name” field.
Result of integration
With the help of the SaveMyLeads service, we set up the integration of Facebook Ads and Pipedrive. As a result, all new leads generated through the social network are automatically entered into the CRM system as a deal. The manager receives information about the new lead as quickly as possible in the Pipedrive window. An employee does not need to constantly monitor the Facebook advertising account, transfer data to CRM and manually create deals. All of these workflows are now automated.
- Automate the work with leads from the Facebook advertising account
- Empower with integrations and instant transfer of leads
- Don't spend money on developers or integrators
- Save time by automating routine tasks
The integration of Facebook and Pipedrive greatly simplifies the work and increases the speed of processing applications. The connection was set up in just a few minutes, and in the long run it will save a lot of time and increase sales conversion. SaveMyLeads is extremely easy to use. No special knowledge or special skills are required. Everyone can quickly automate work processes and increase their efficiency.
