HelpCrunch is a universal platform for effective communication with clients. It gives a business the opportunity to quickly interact with its audience through different communication channels (chatbot, online chat, instant messenger, mailing module), as well as collect contacts. In this article, we will tell you how to set up the HelpCrunch and Facebook integration to start the process of automatically transferring leads from the social network to this service and creating new contacts from them.
Facebook Lead Ads is a marketing tool for increasing lead generation efficiency. It looks like a lead form through which users of the social network Facebook can instantly signal that they are ready to purchase a product/service or attend an announced event. To achieve this, users just need to enter their personal contact information (as a rule, last name, first name, phone number, and email address) and press the send button. After this, the manager gets in touch with the customer to confirm the conclusion of the transaction and at the same time discuss the nuances of payment, delivery of goods/services, or registration for an event.
HelpCrunch is a comprehensive multichannel service for managing leads' life cycles at all stages of their interaction with the company. Marketers use it to convert leads into customers, increase sales, and increase customer loyalty and retention. The platform has a chat for applications, tools for automating email marketing, and a helpdesk system for technical support. HelpCrunch makes it possible to understand who your ideal client is, what the individual needs of your customers are, and to contact them in a timely and high-quality manner, receiving valuable feedback.
If you promote your business on Facebook and communicate with clients through HelpCrunch, you have to spend time manually creating contacts on this platform every time new leads appear from the social network. Surely, you would really like the leads to somehow get there themselves, even in the form of already-registered contacts. This desire becomes especially acute when you receive a lot of lead forms. We have good news for you: you can automate this process, completely freeing yourself from manual labor. To achieve this, you just need to set up a connection between the two platforms using our no-code SaveMyLeads connector. Facebook Lead Ads and HelpCrunch integration, with its help, will ensure regular and uninterrupted transfer of lead data from Lead Ads to the service for communicating with clients. By outsourcing your routine to SaveMyLeads, you can spend more time interacting with your customers, thereby increasing your own productivity, the level of customer engagement and satisfaction, and, as a result, the number of sales.
How to Set up Facebook and HelpCrunch Integration
Integrating Facebook and HelpCrunch via API is a feasible task for IT specialists. You, of course, can entrust it to your in-house programmer or hire someone from outside, but these options are not without their drawbacks. In the first case, you will probably have to wait until your colleague finds time to complete your assignment. The second is associated with financial costs, which can be quite significant. Do you want to get a ready-made solution quickly and economically, but you doubt that this will happen? With the SaveMyLeads online connector, this is truly possible. Our service will help you set up the necessary connection yourself in just a few minutes. The intuitive interface and operating algorithm will make it easy for even a completely inexperienced user to cope with this.
The integration of Facebook and HelpCrunch works like this: “source-connector-receiver”. The SaveMyLeads system monitors the emergence of new leads in Facebook ad accounts and transfers them to the HelpCrunch platform. To create and launch automation of this process, you need to do just a few simple steps.
Setting up the Data Source – Facebook
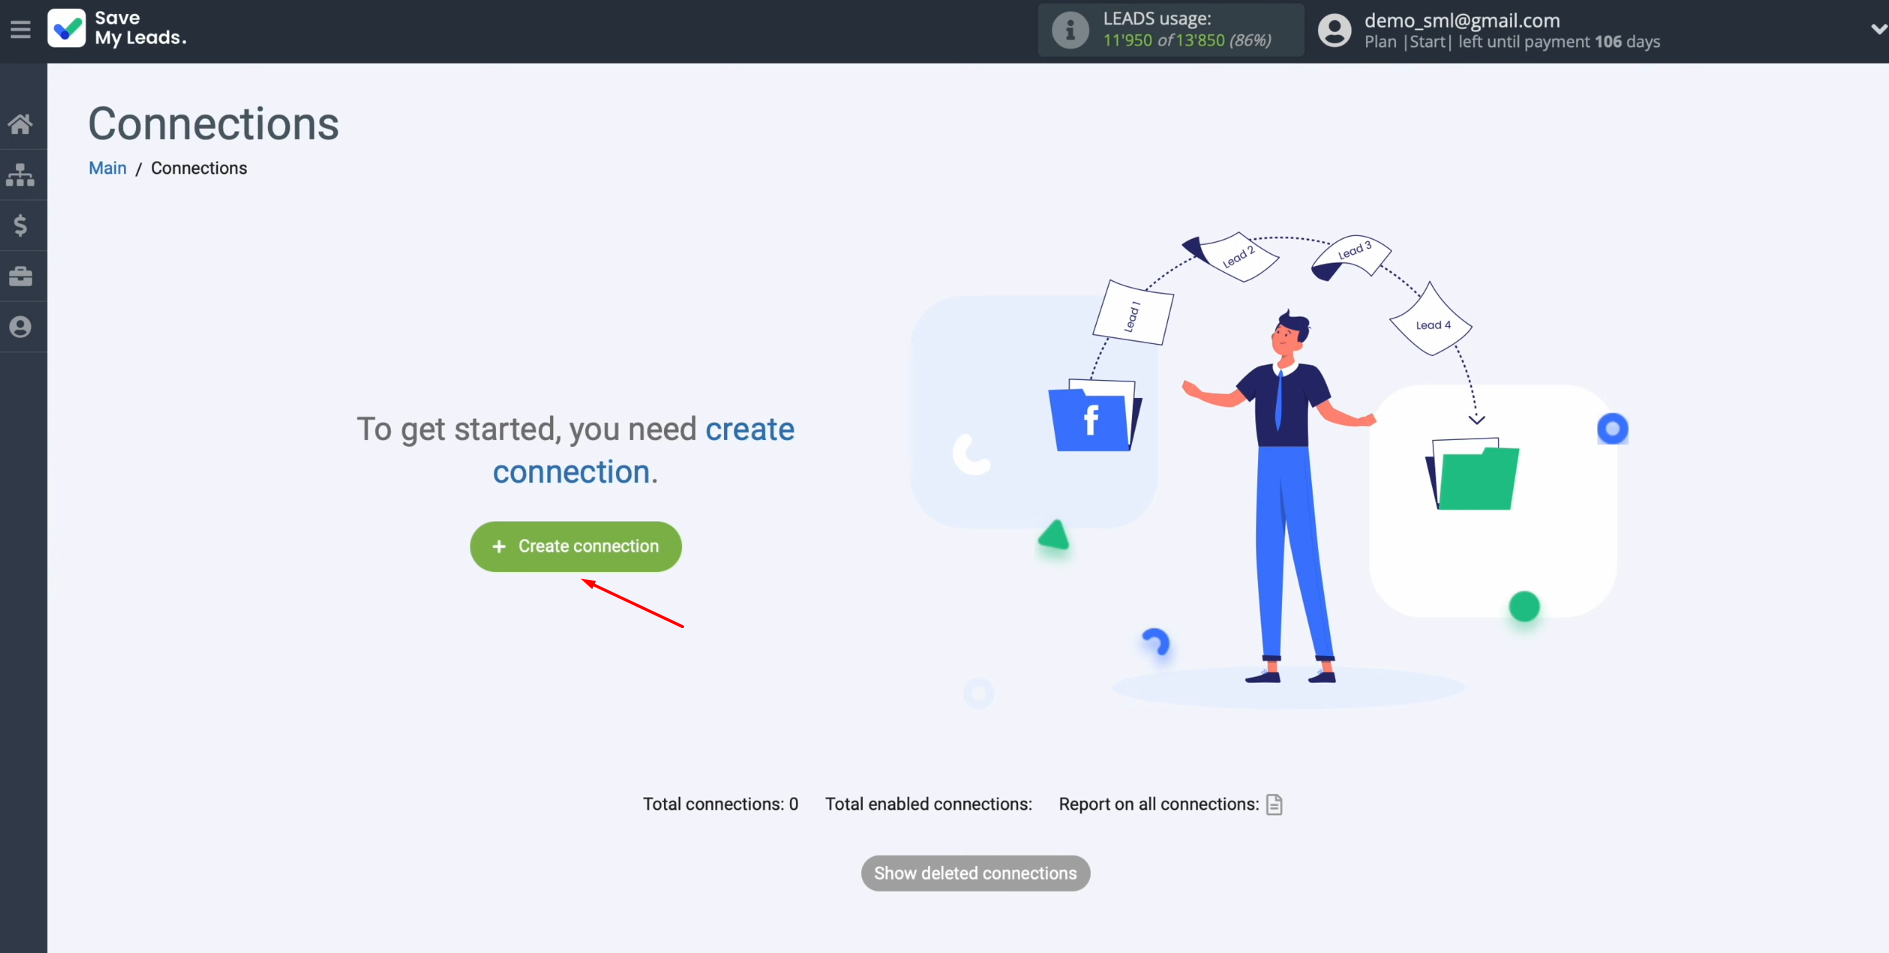
To set up the Facebook integration with HelpCrunch, first you have to create a new connection. Click on the green button.
Next, you must select a data source system. In this case, choose Facebook.
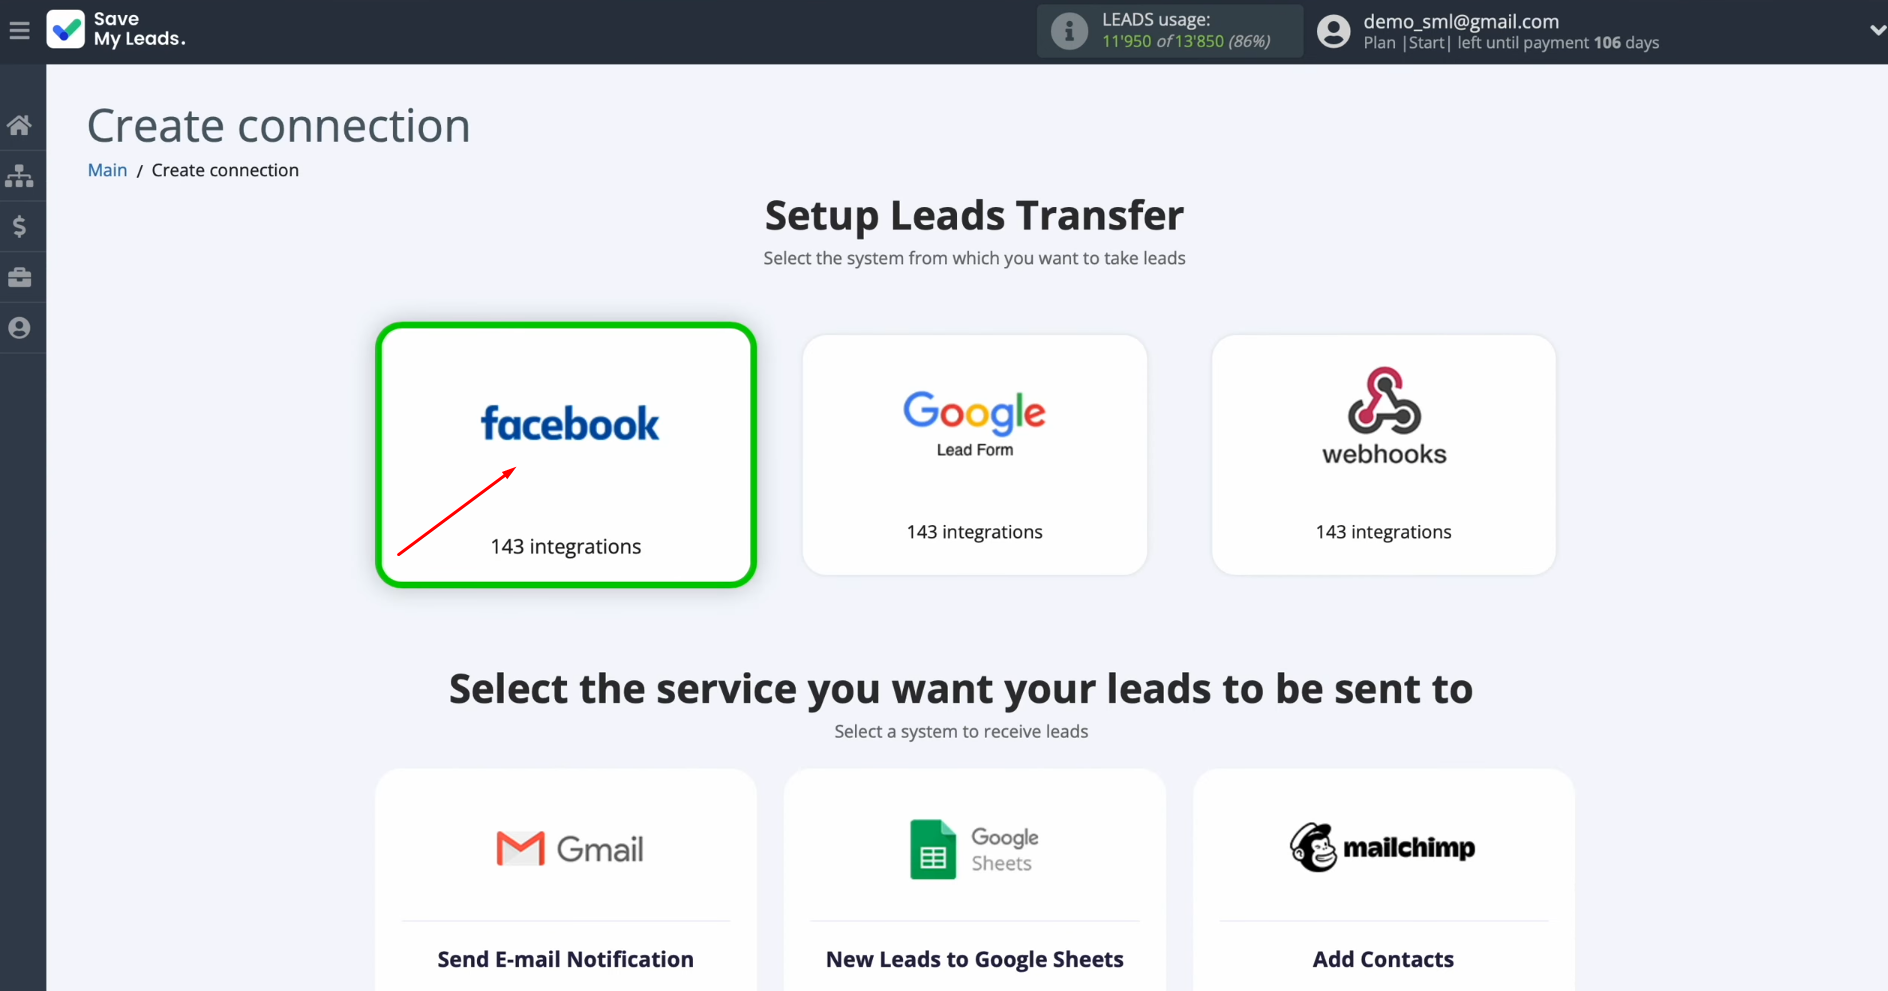
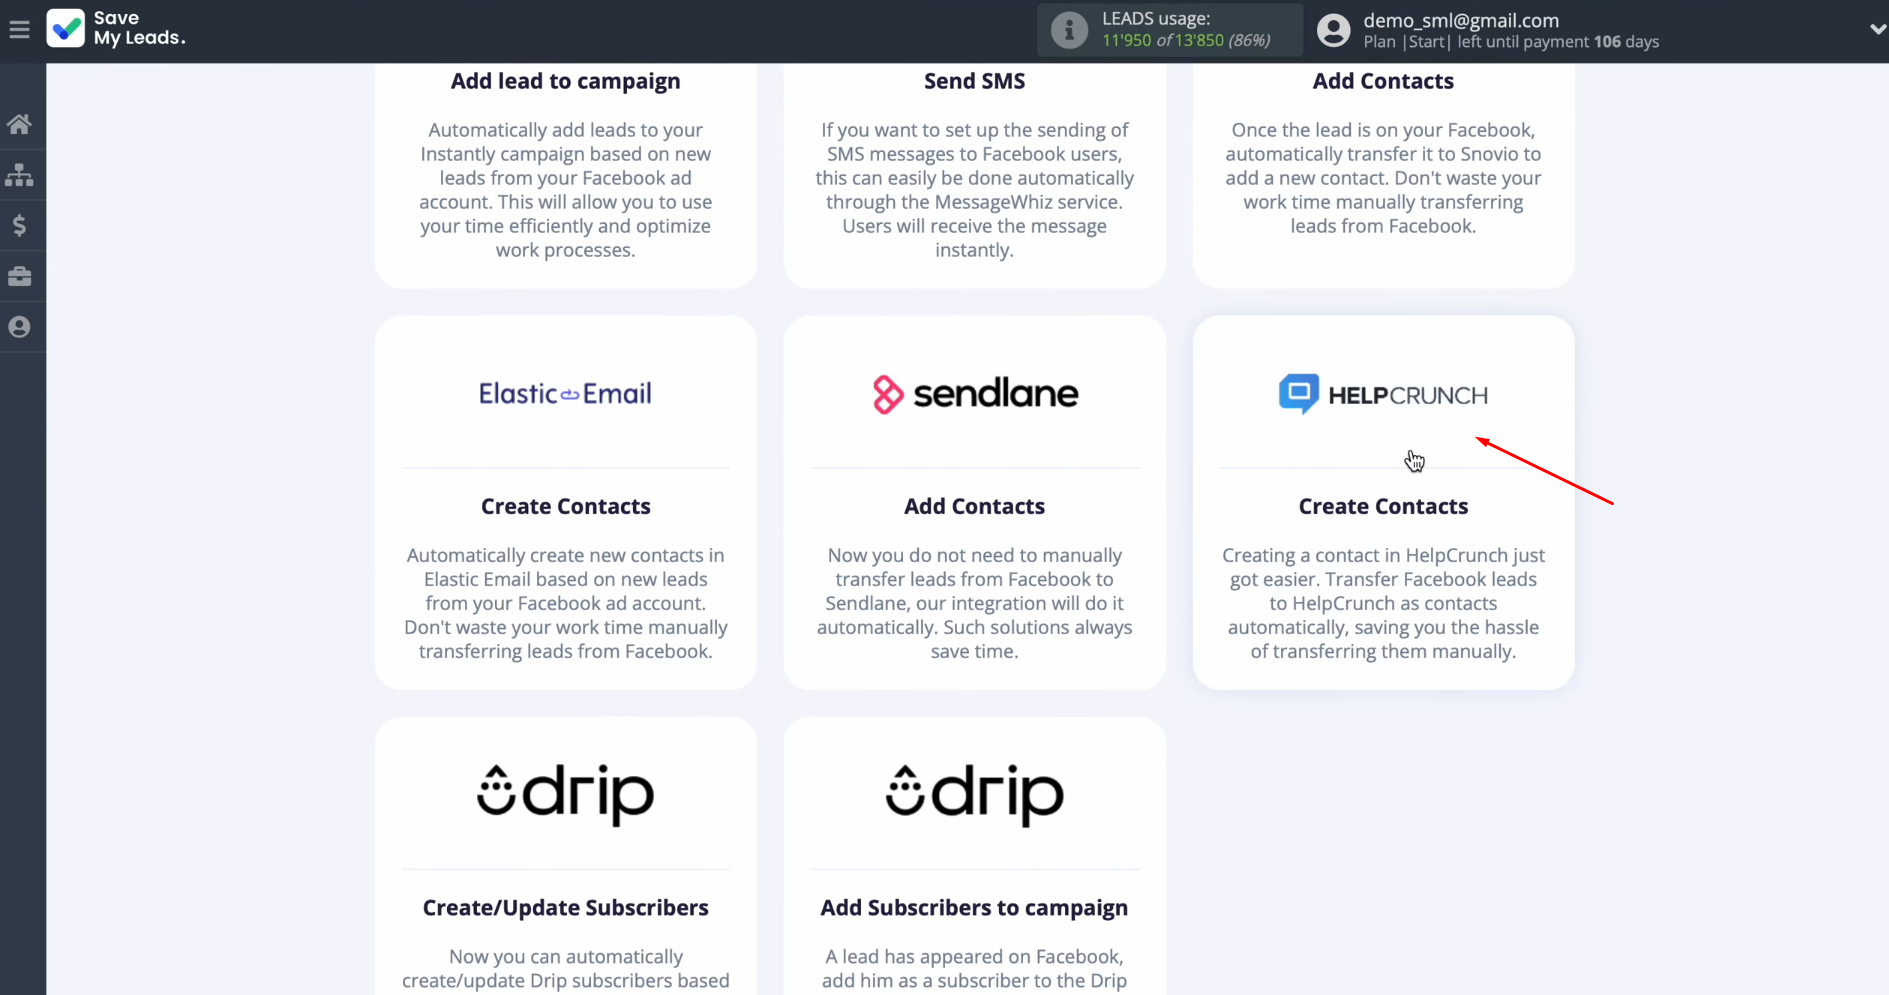
Now you have to select the system where you want to transfer new leads from
Facebook. In this case, select “HelpCrunch Create Contacts”.
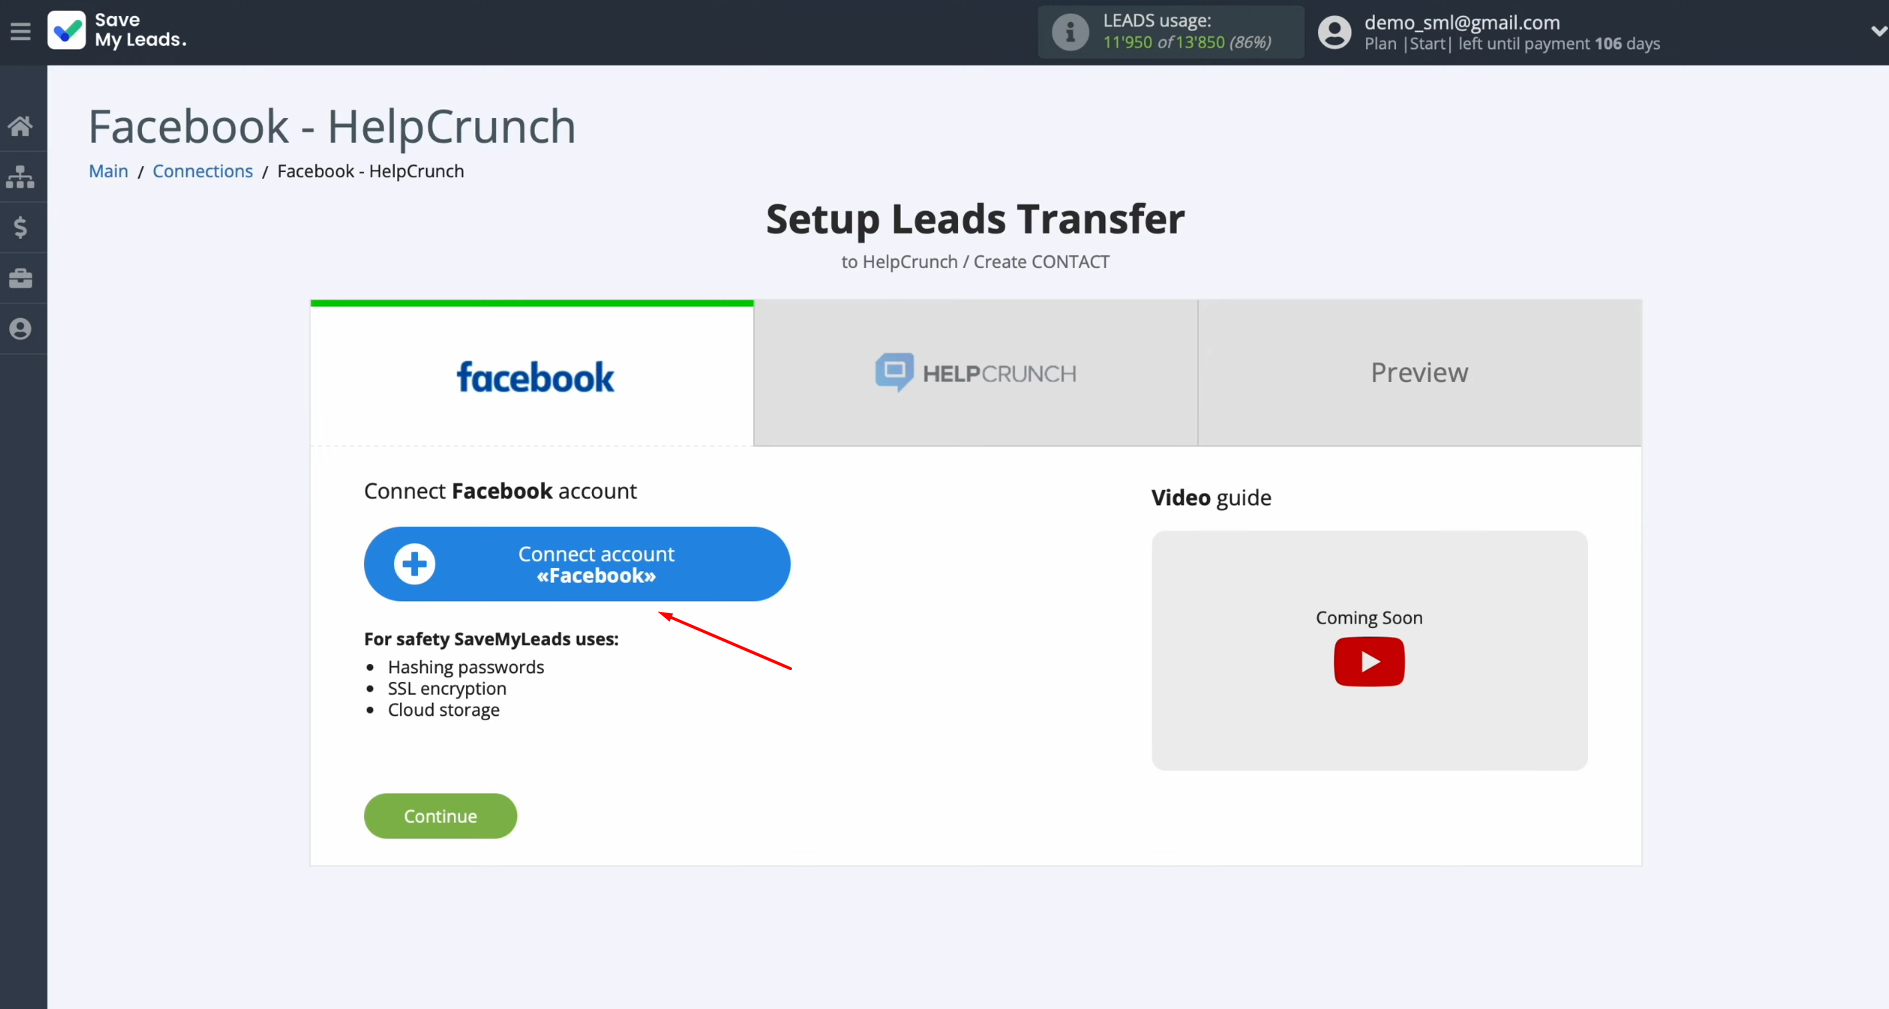
At this stage, you have to connect
your Facebook
account to the SaveMyLeads system. Click on
the blue button.
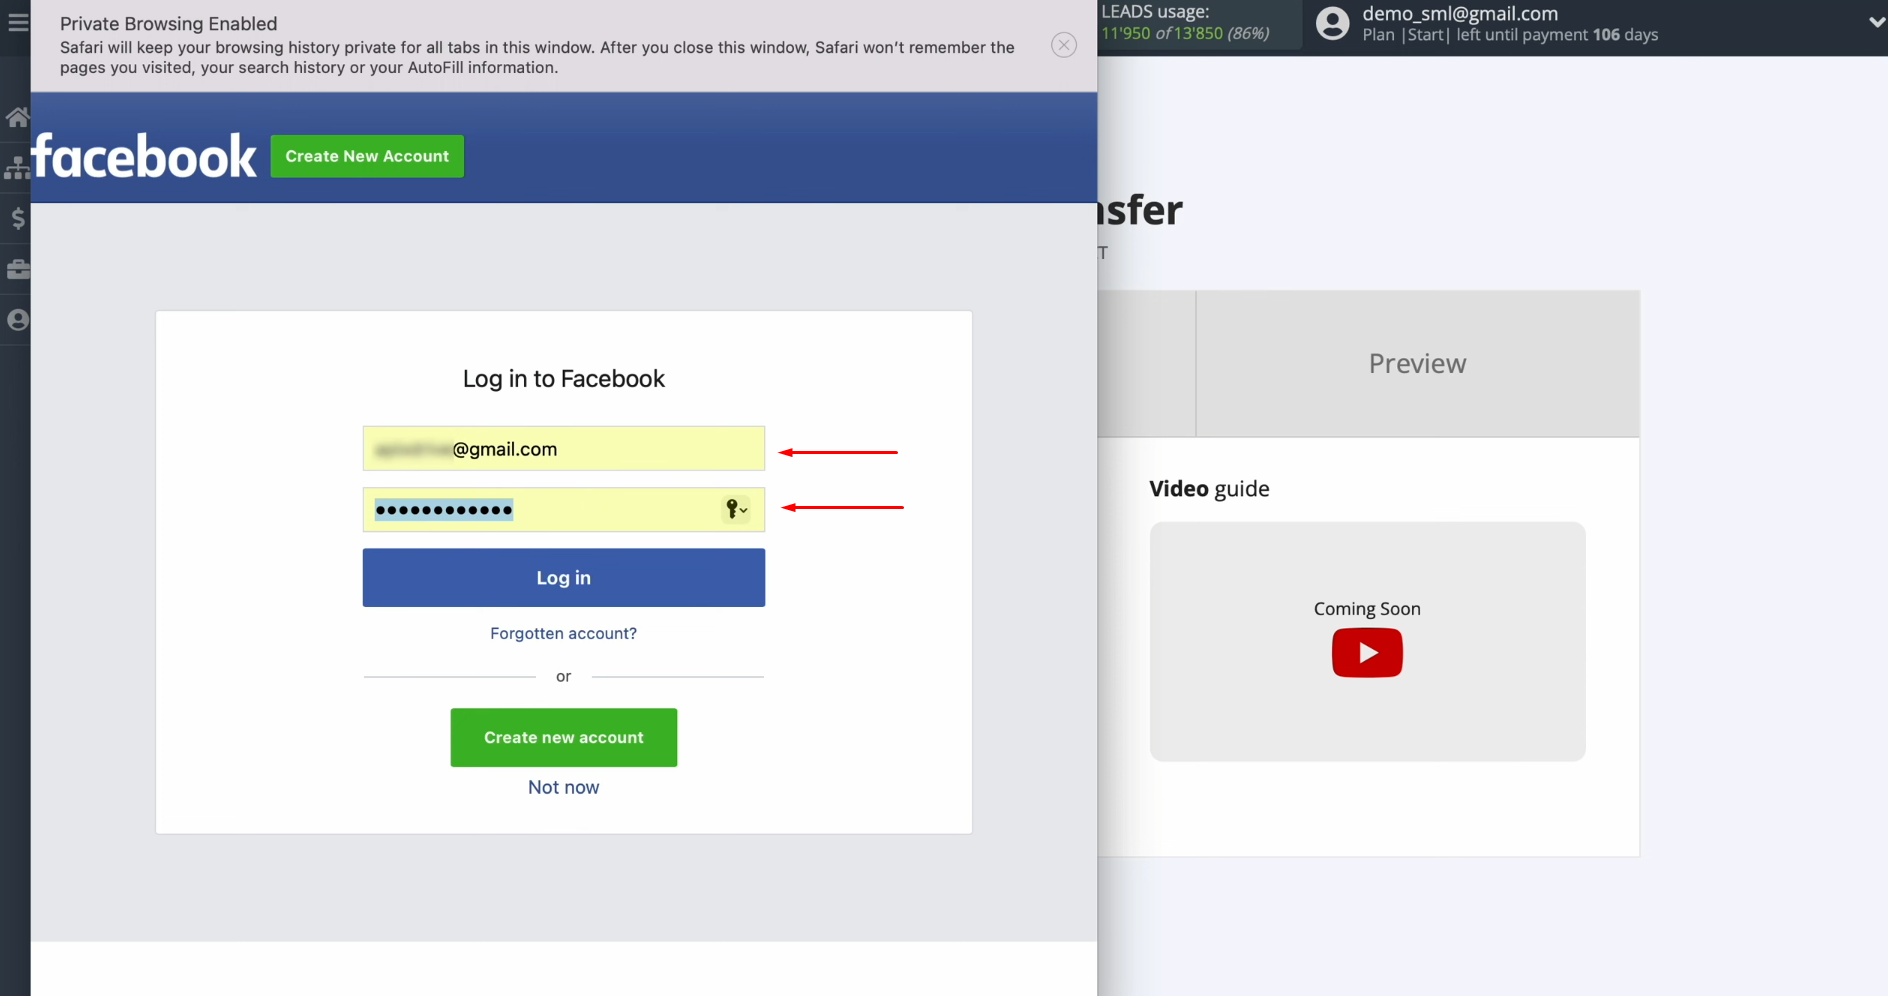
In this
window, you must specify the login and password of your personal Facebook account. Click “Log
in”.
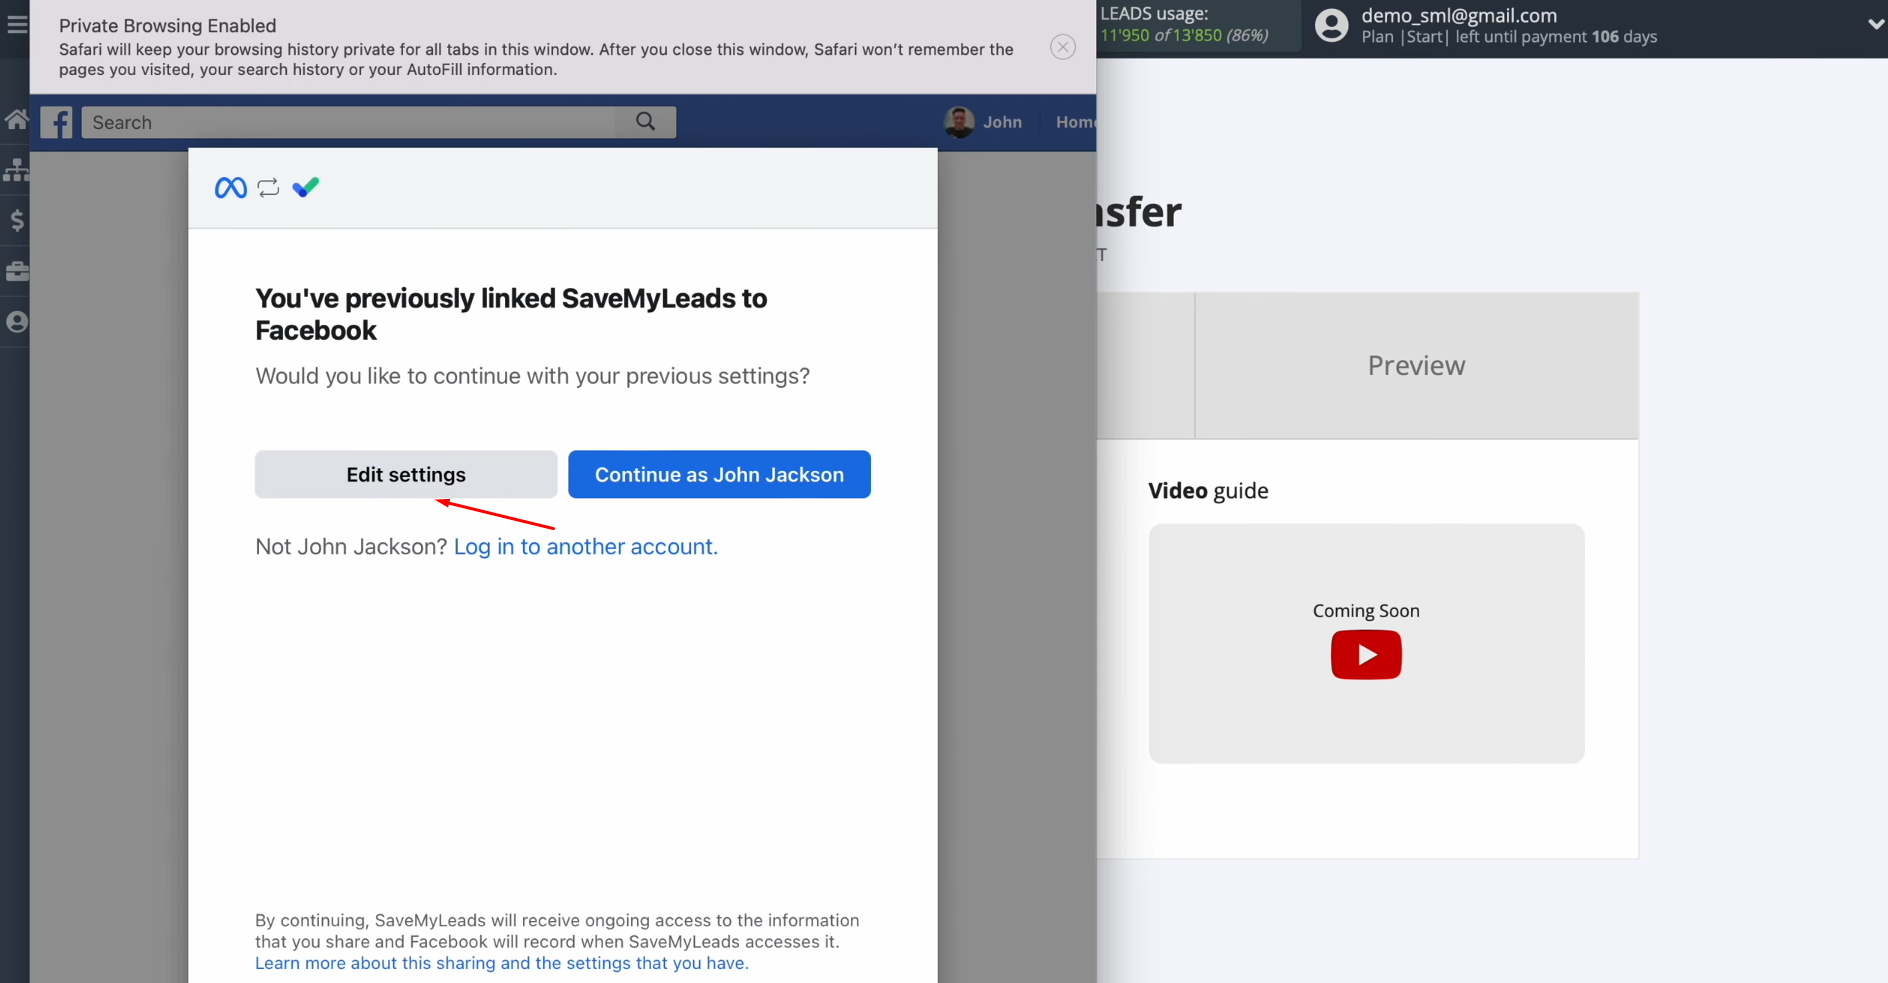
Then click
“Edit settings”.
At this stage, it is necessary to select the
advertising pages from which you want to receive new leads. We recommend marking all advertising pages at once to be able to work with
them in the future. Click “Next”.
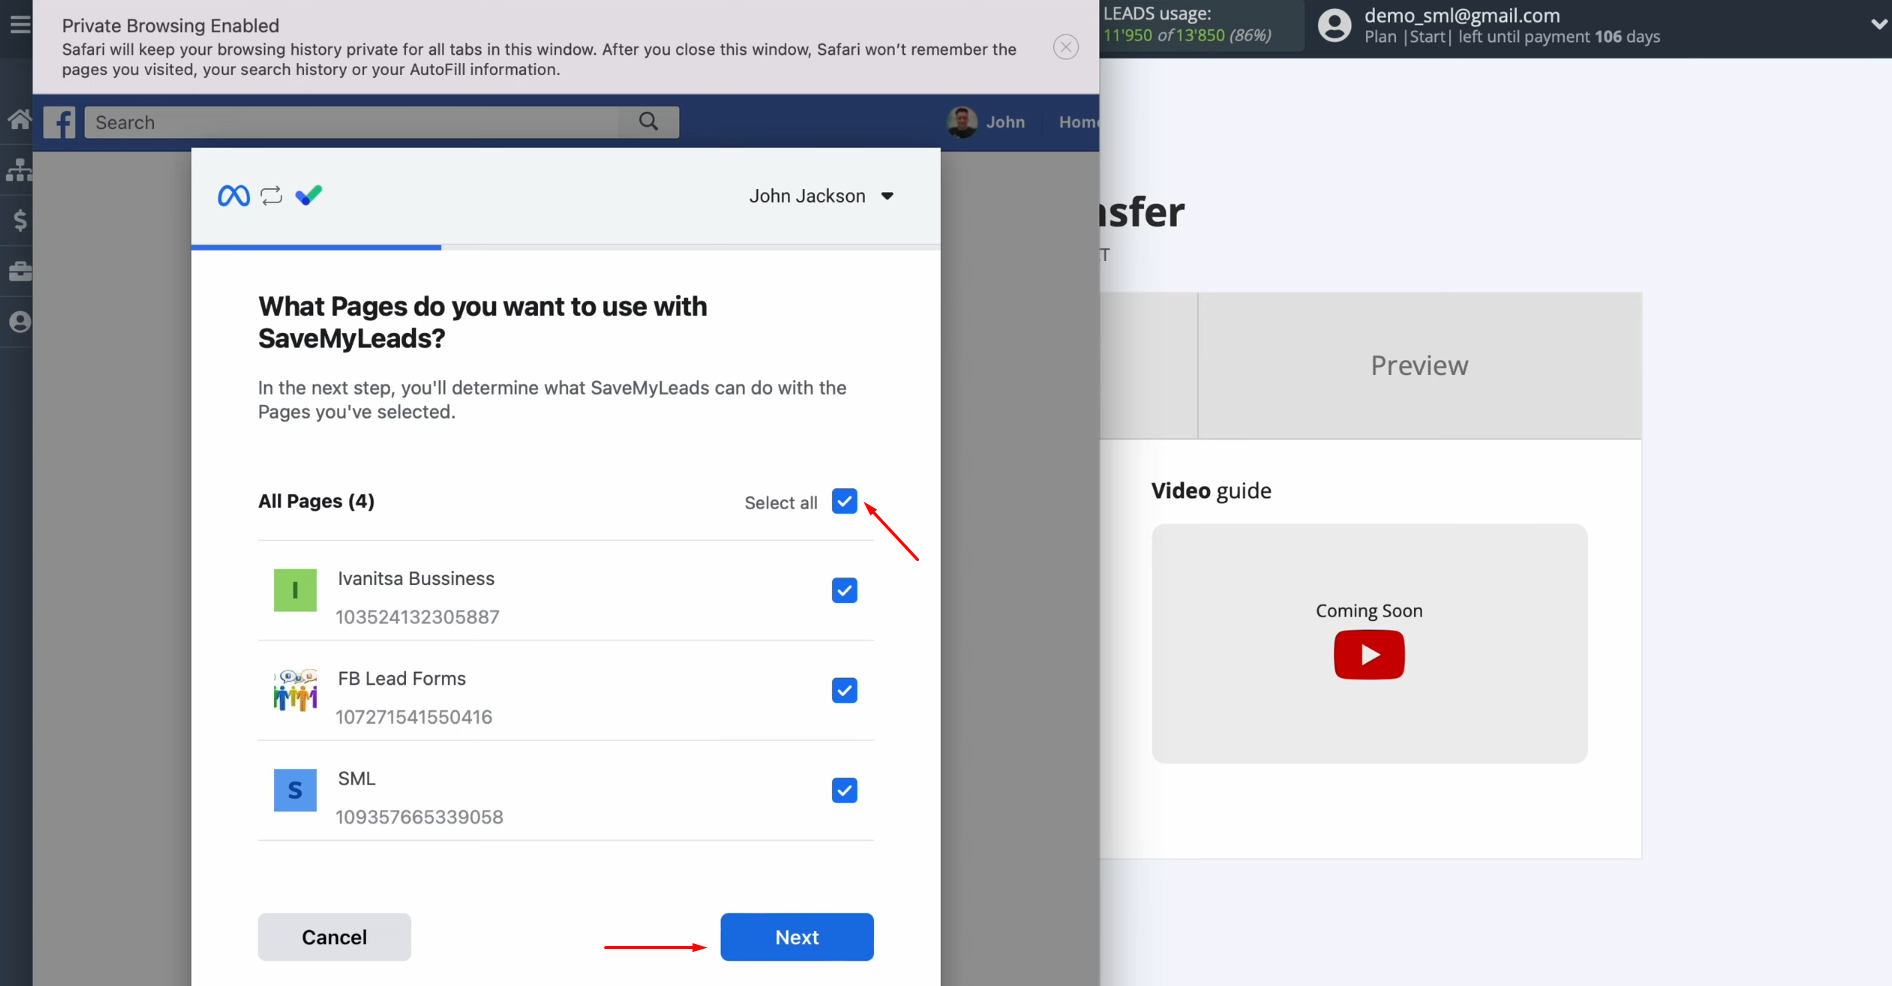
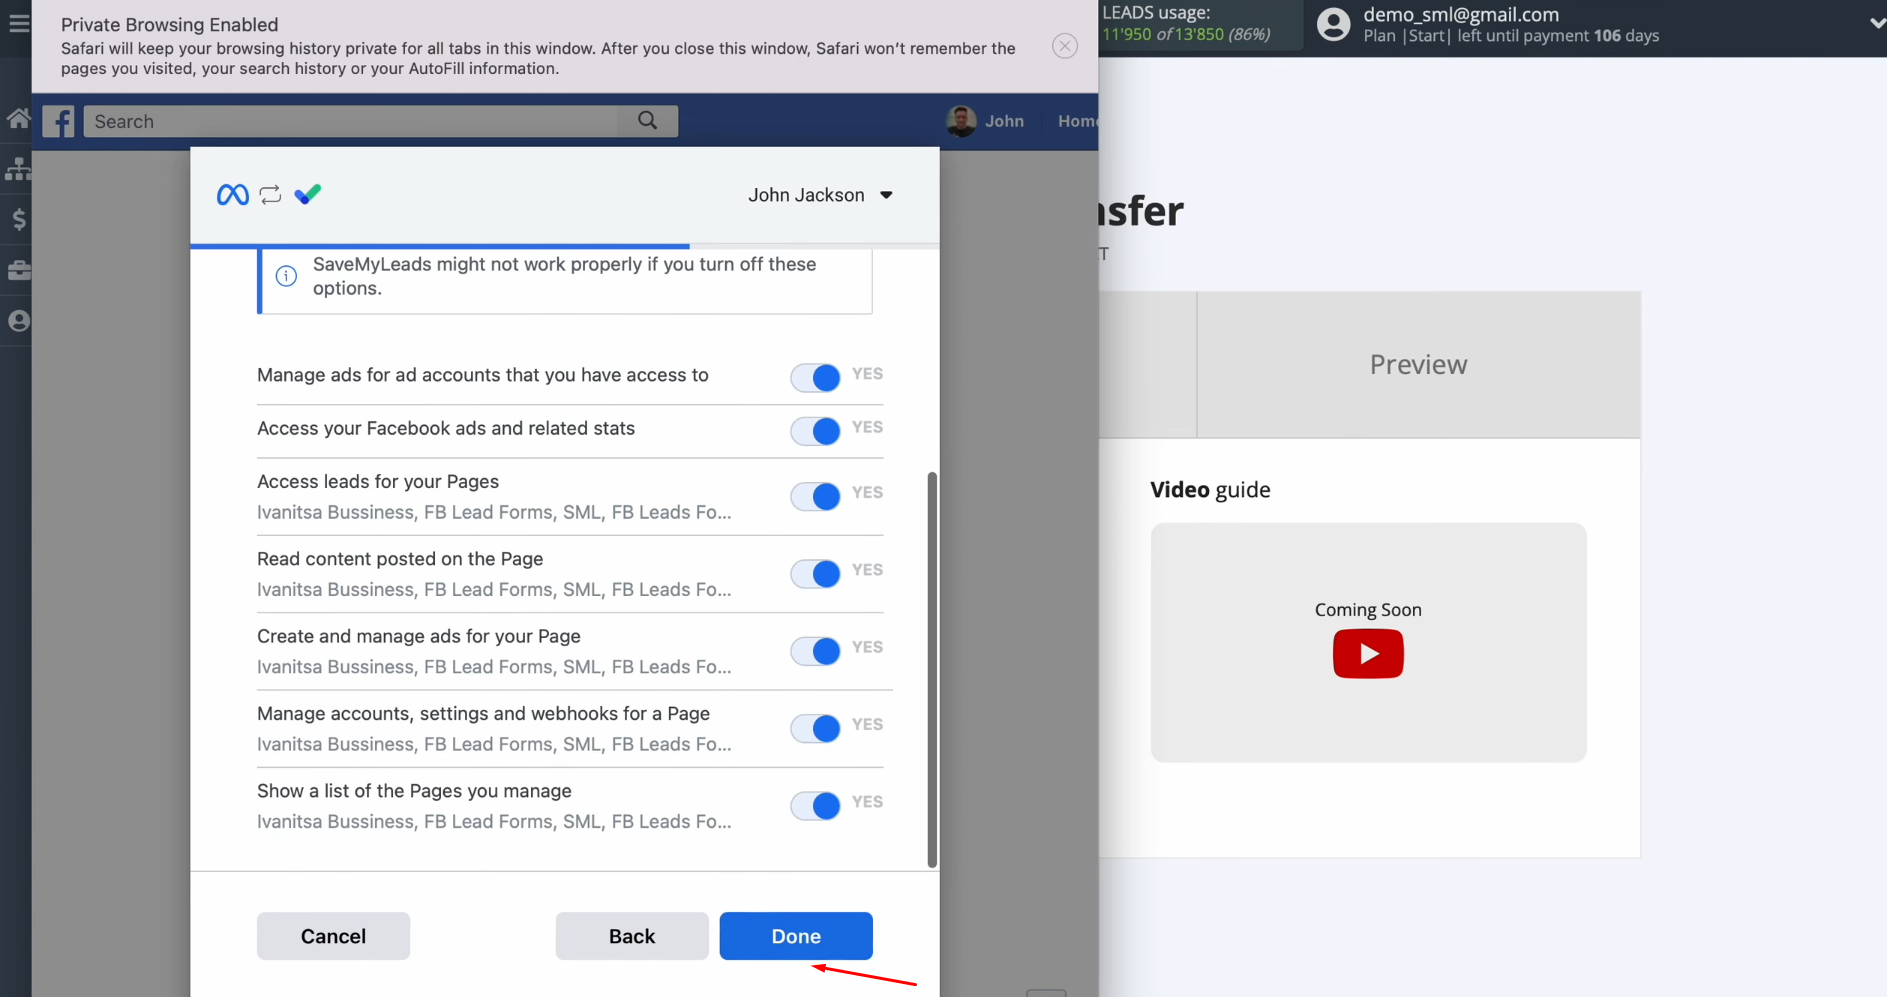
In this
window, leave all check boxes enabled. Click “Done”.
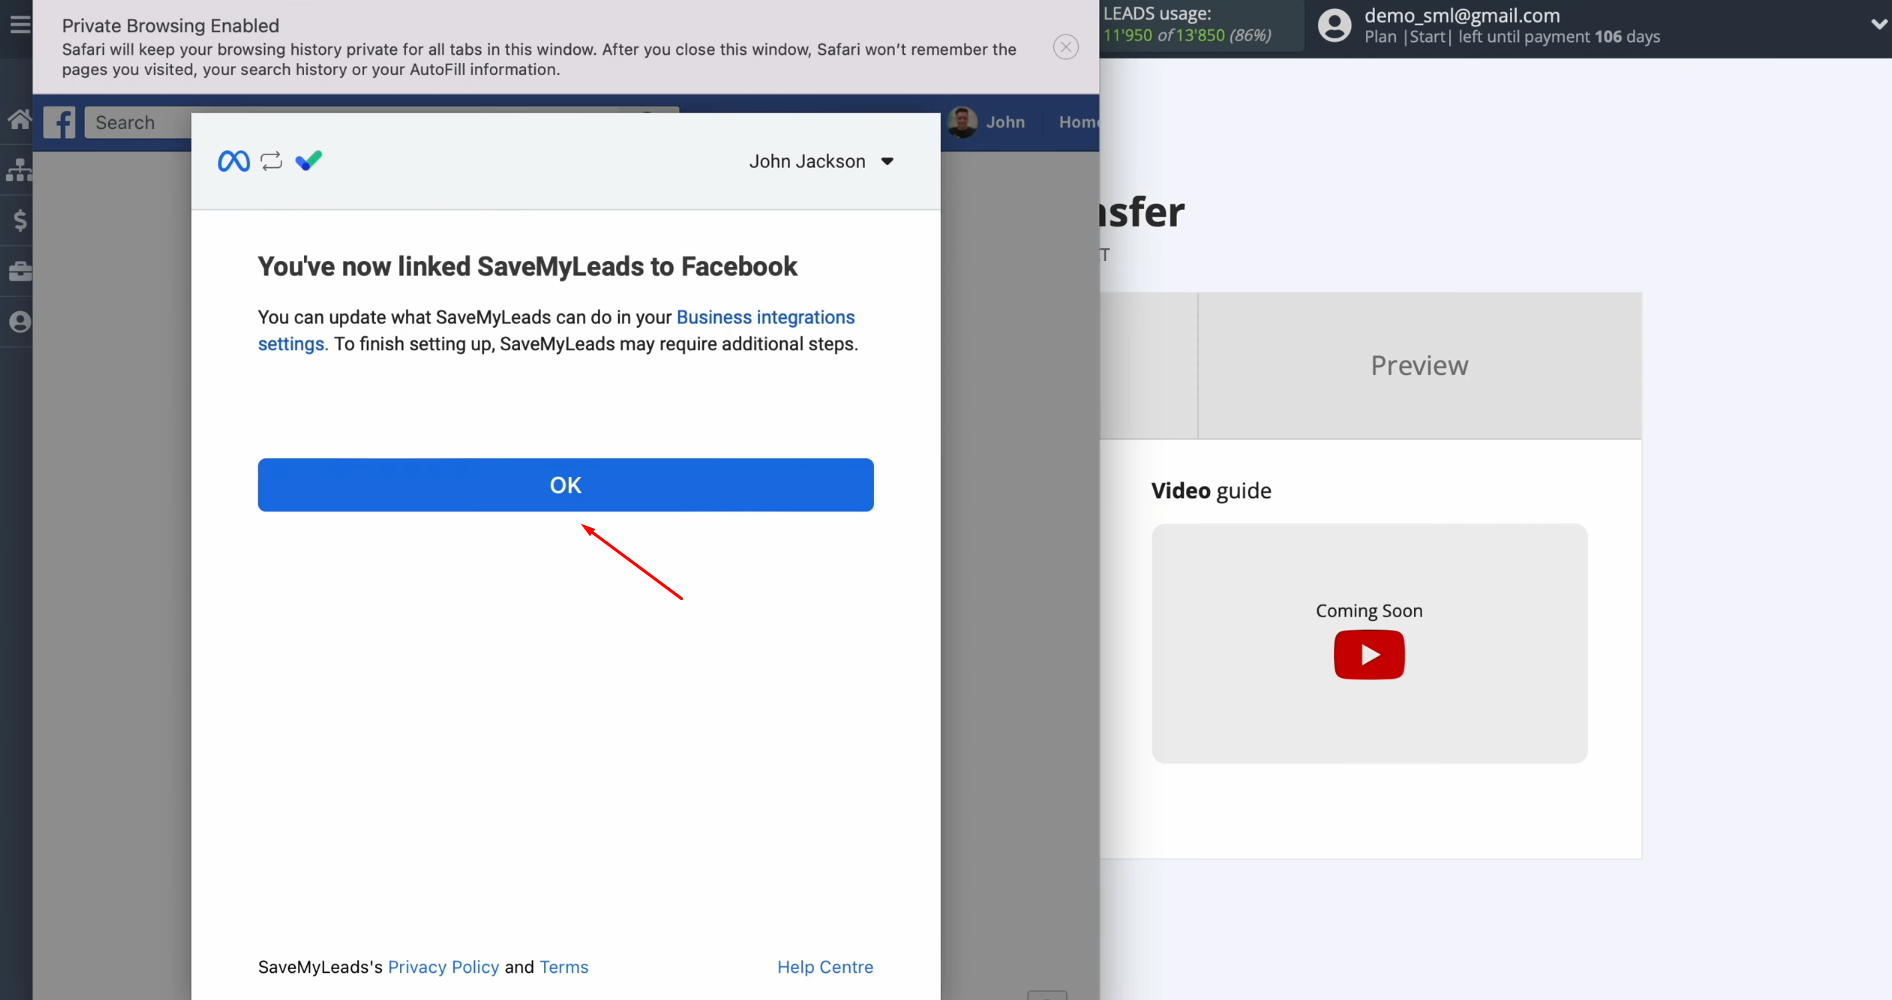
Then click “OK”.
When the
connected login is displayed in the list, select it.
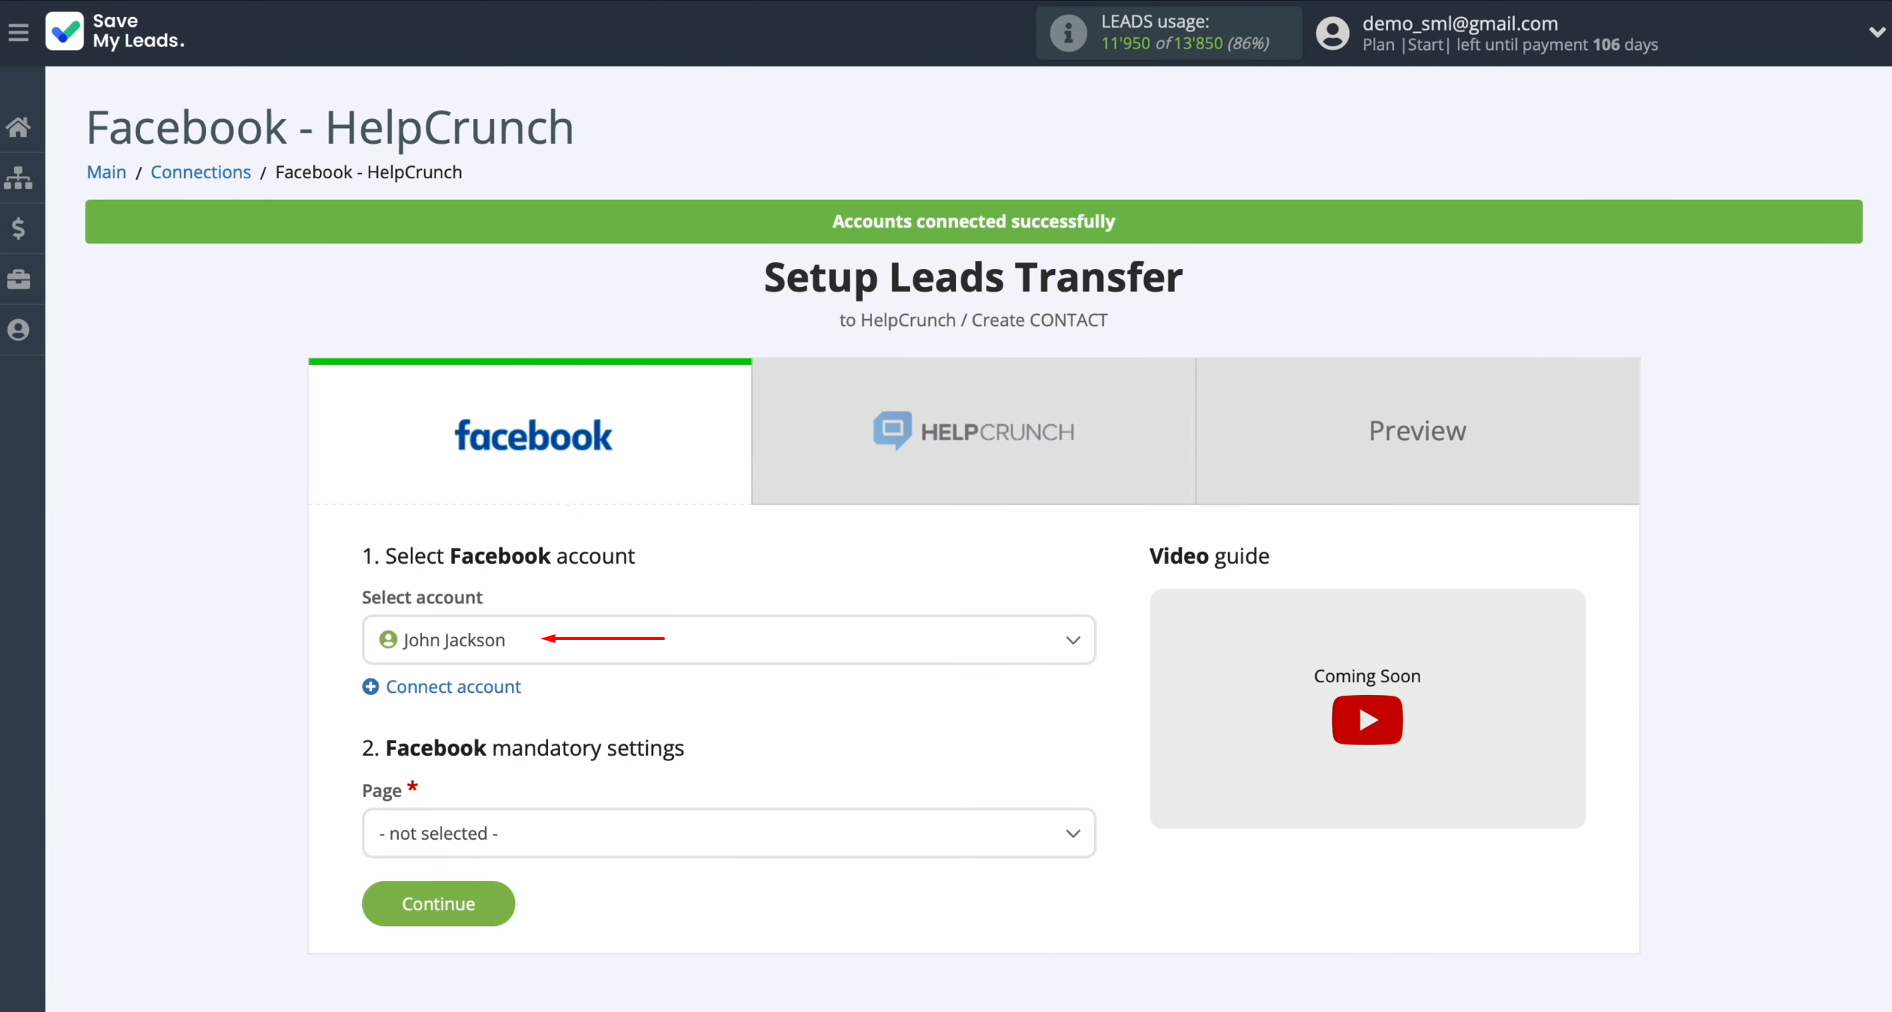
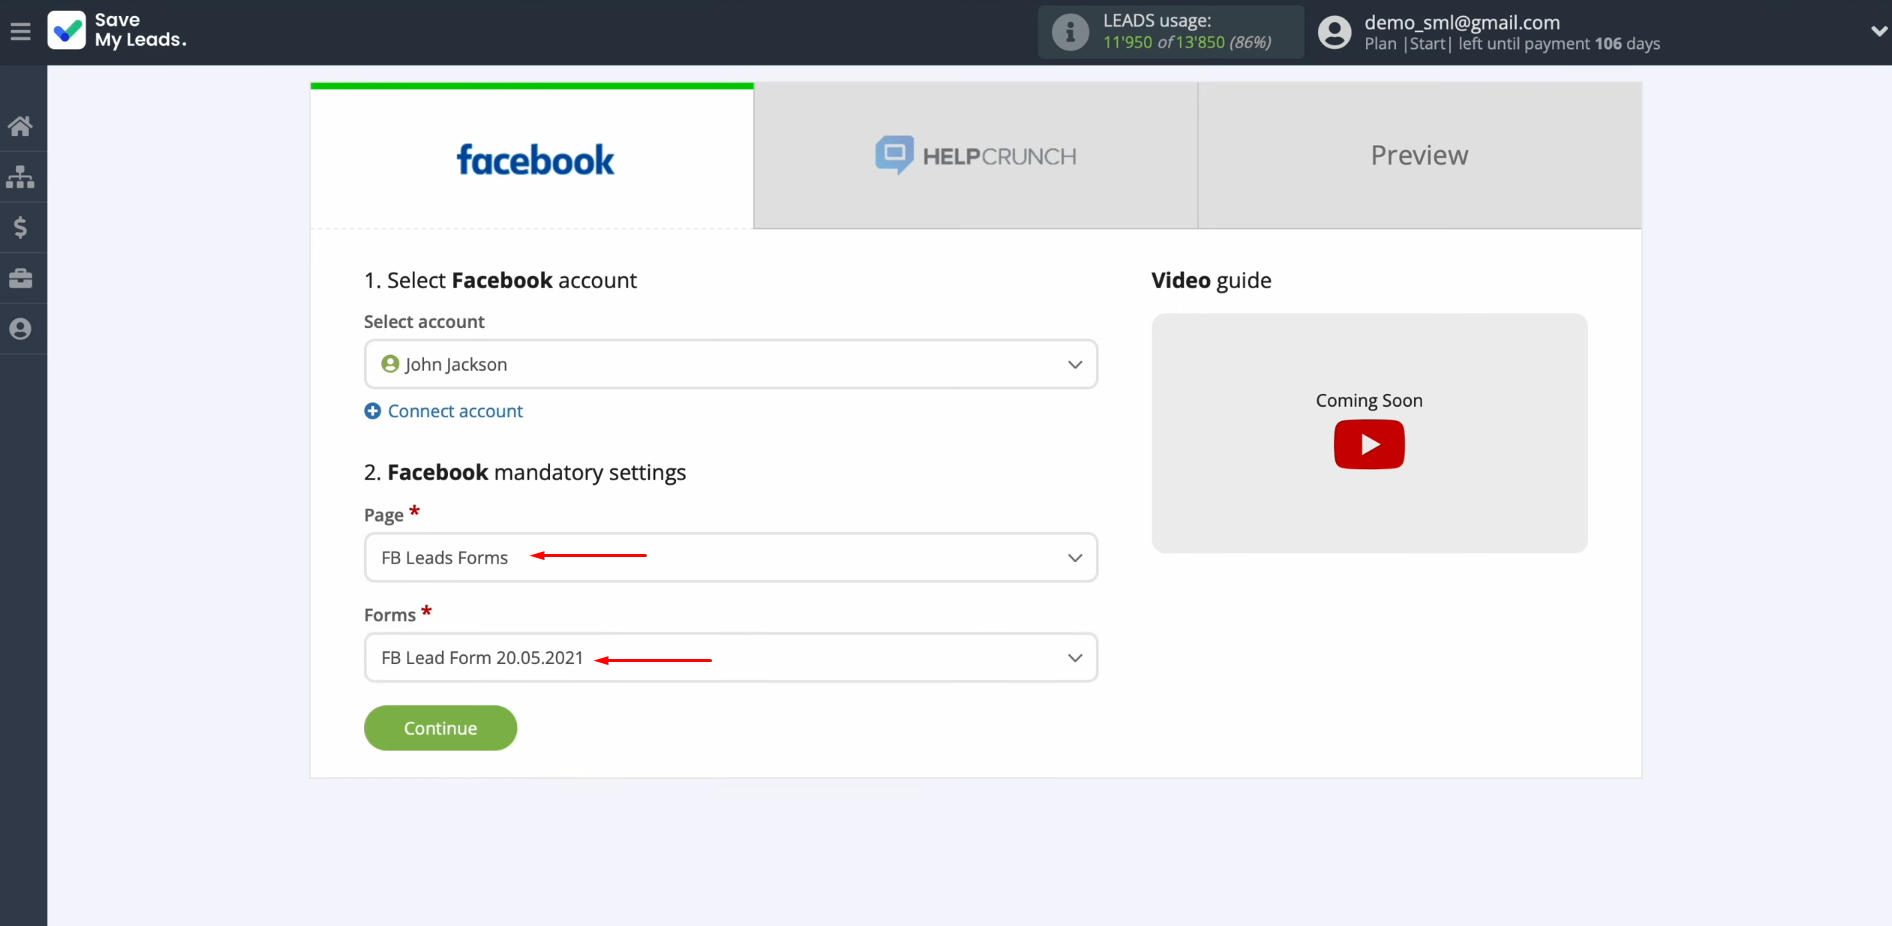
Now you have to
select the advertising page and the form from which
you want to receive new leads. Click “Continue”.
Setting up the Data Receiver – HelpCrunch
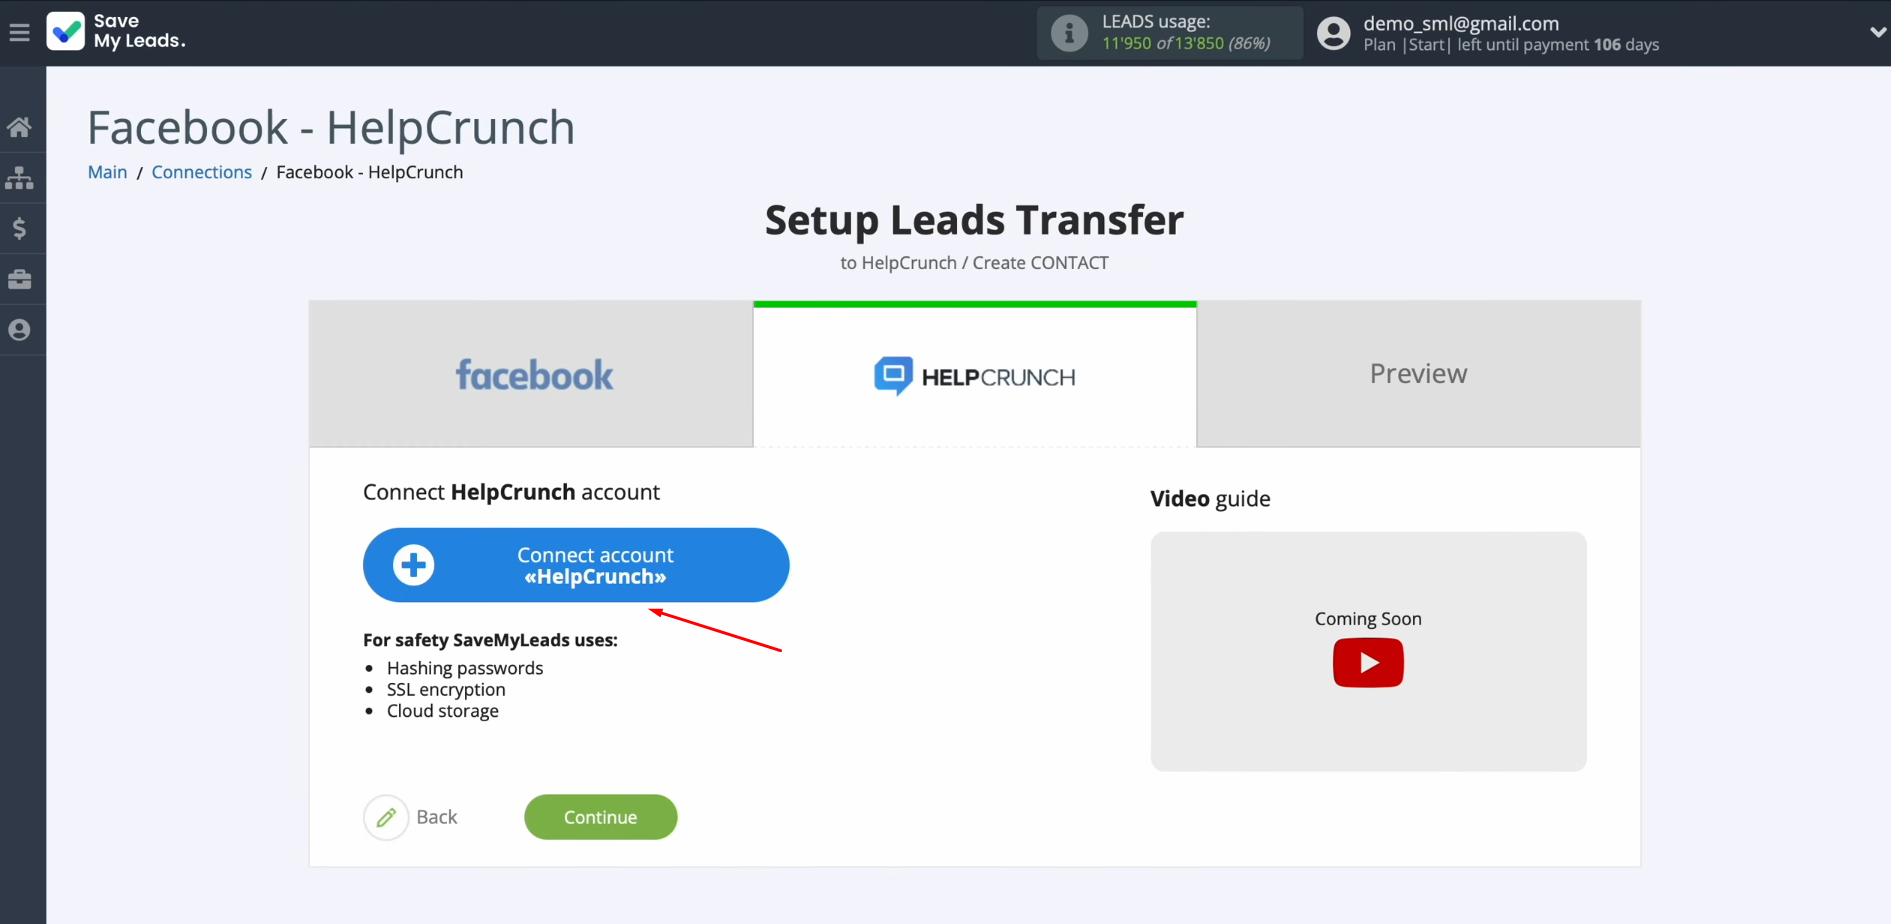
At this stage, you have to connect
your HelpCrunch
account to the SaveMyLeads system.
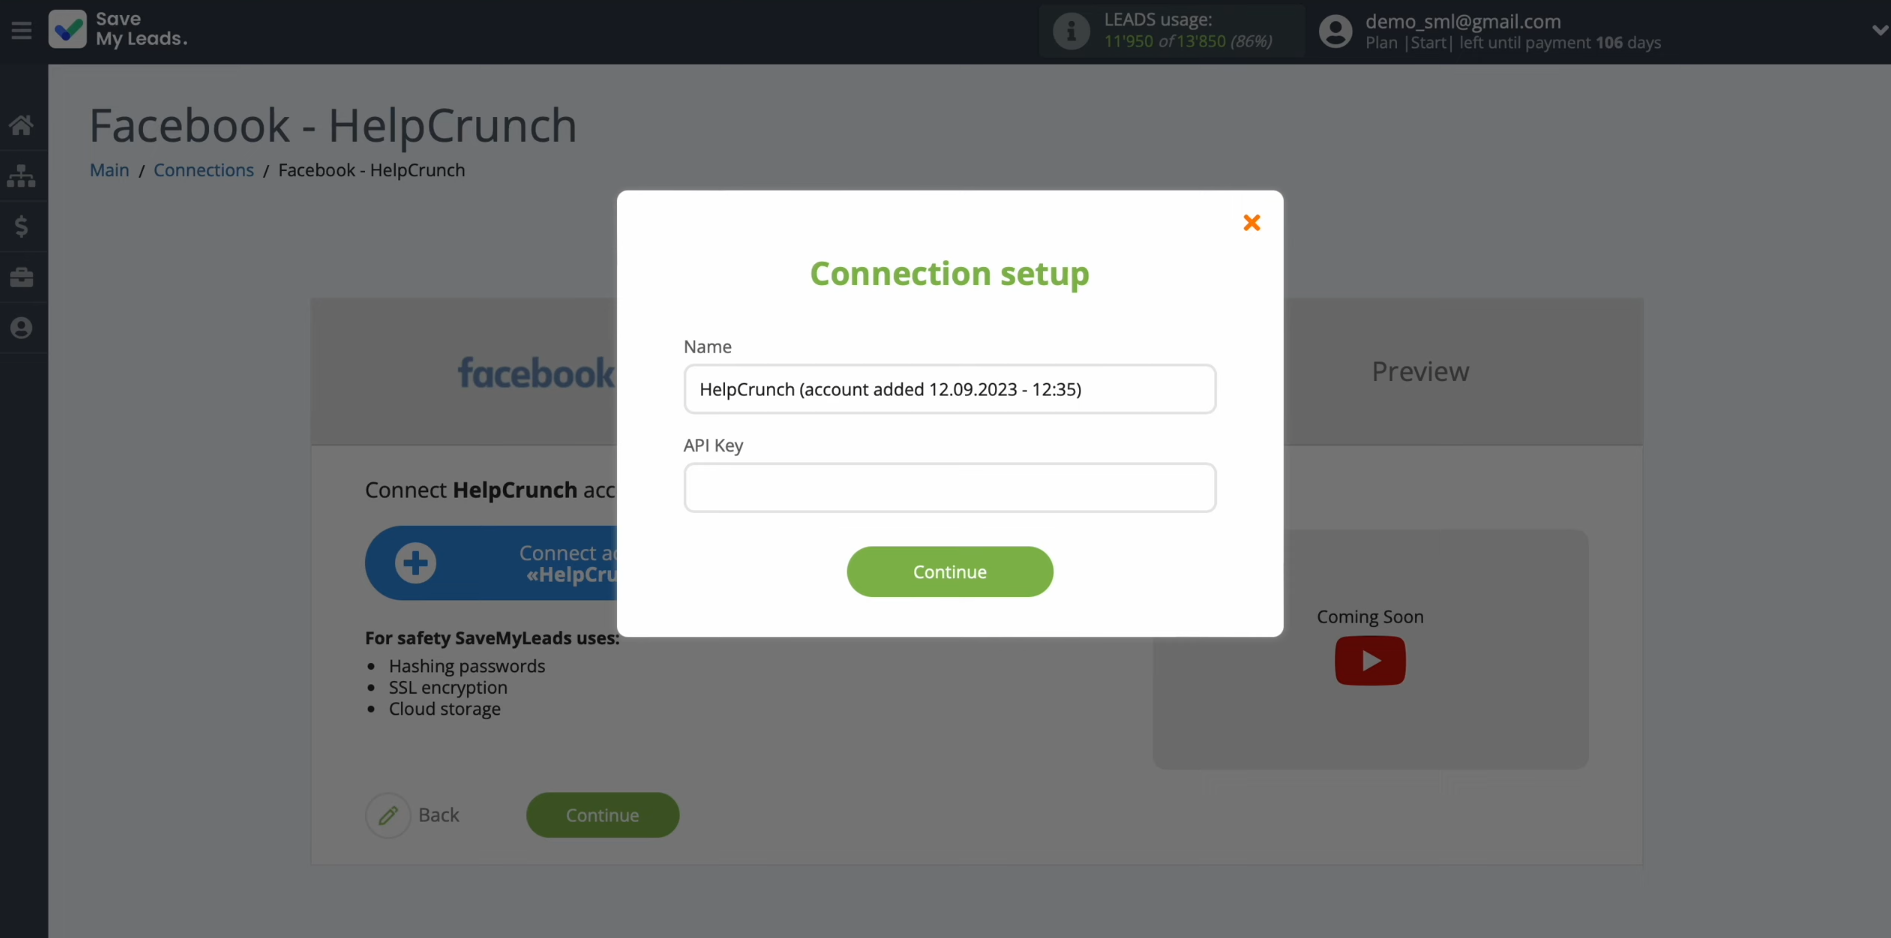
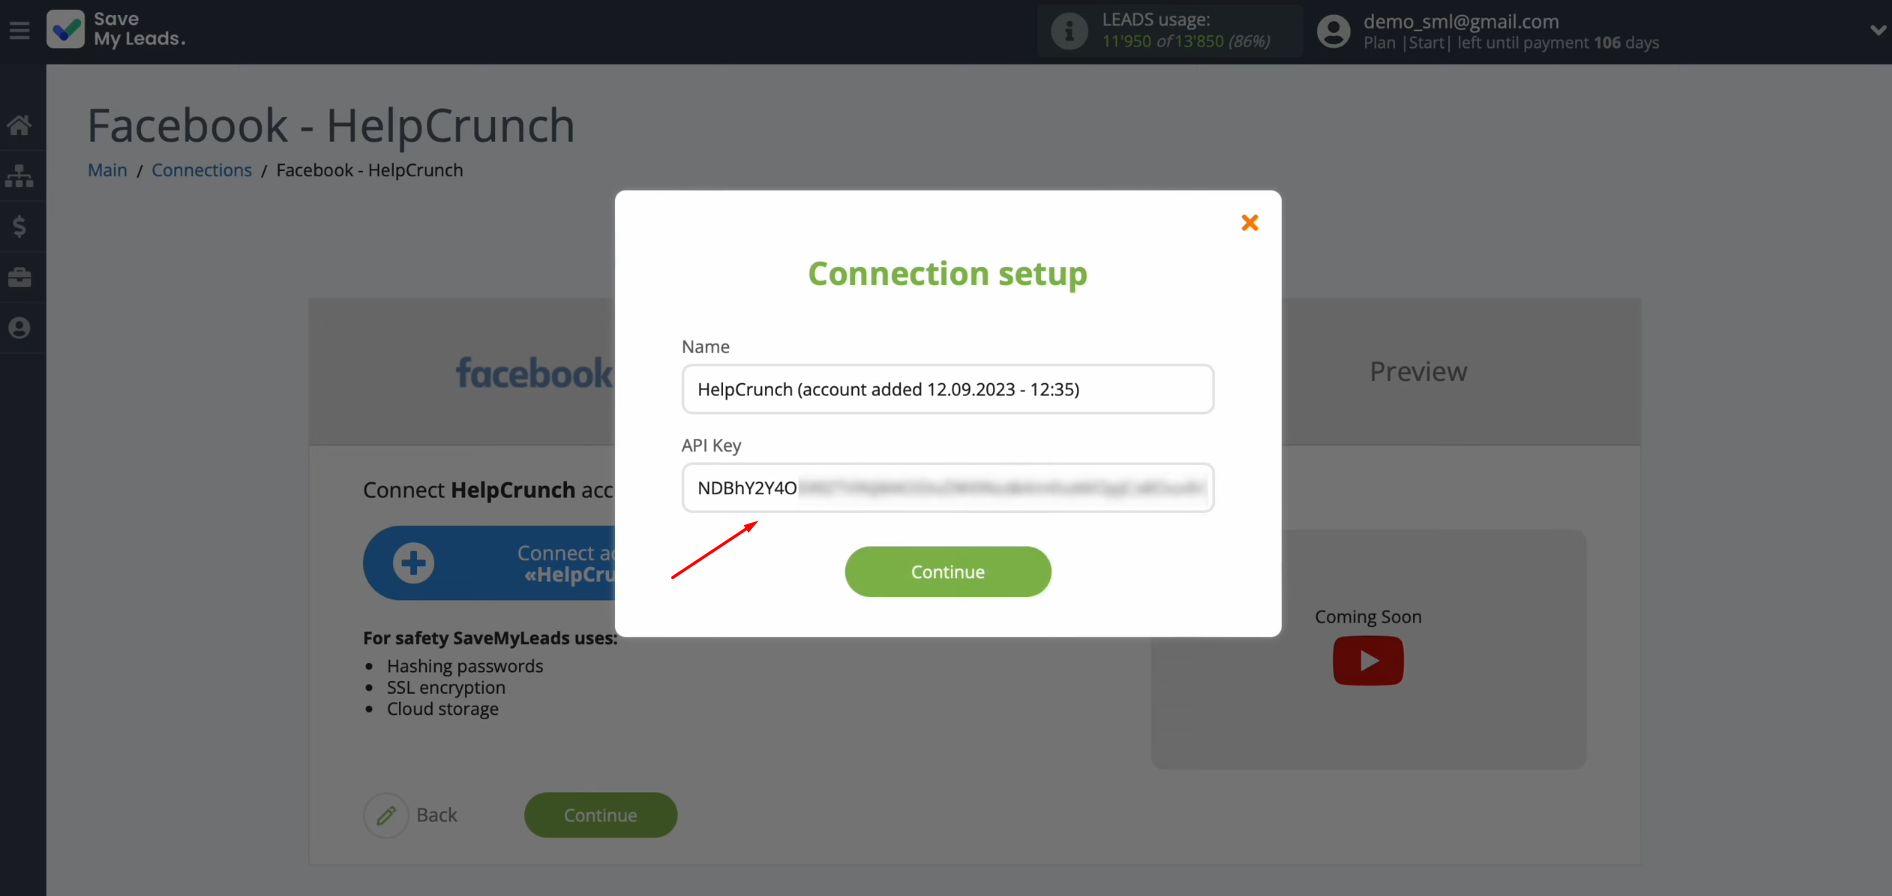
In this
window, you must specify the API key.
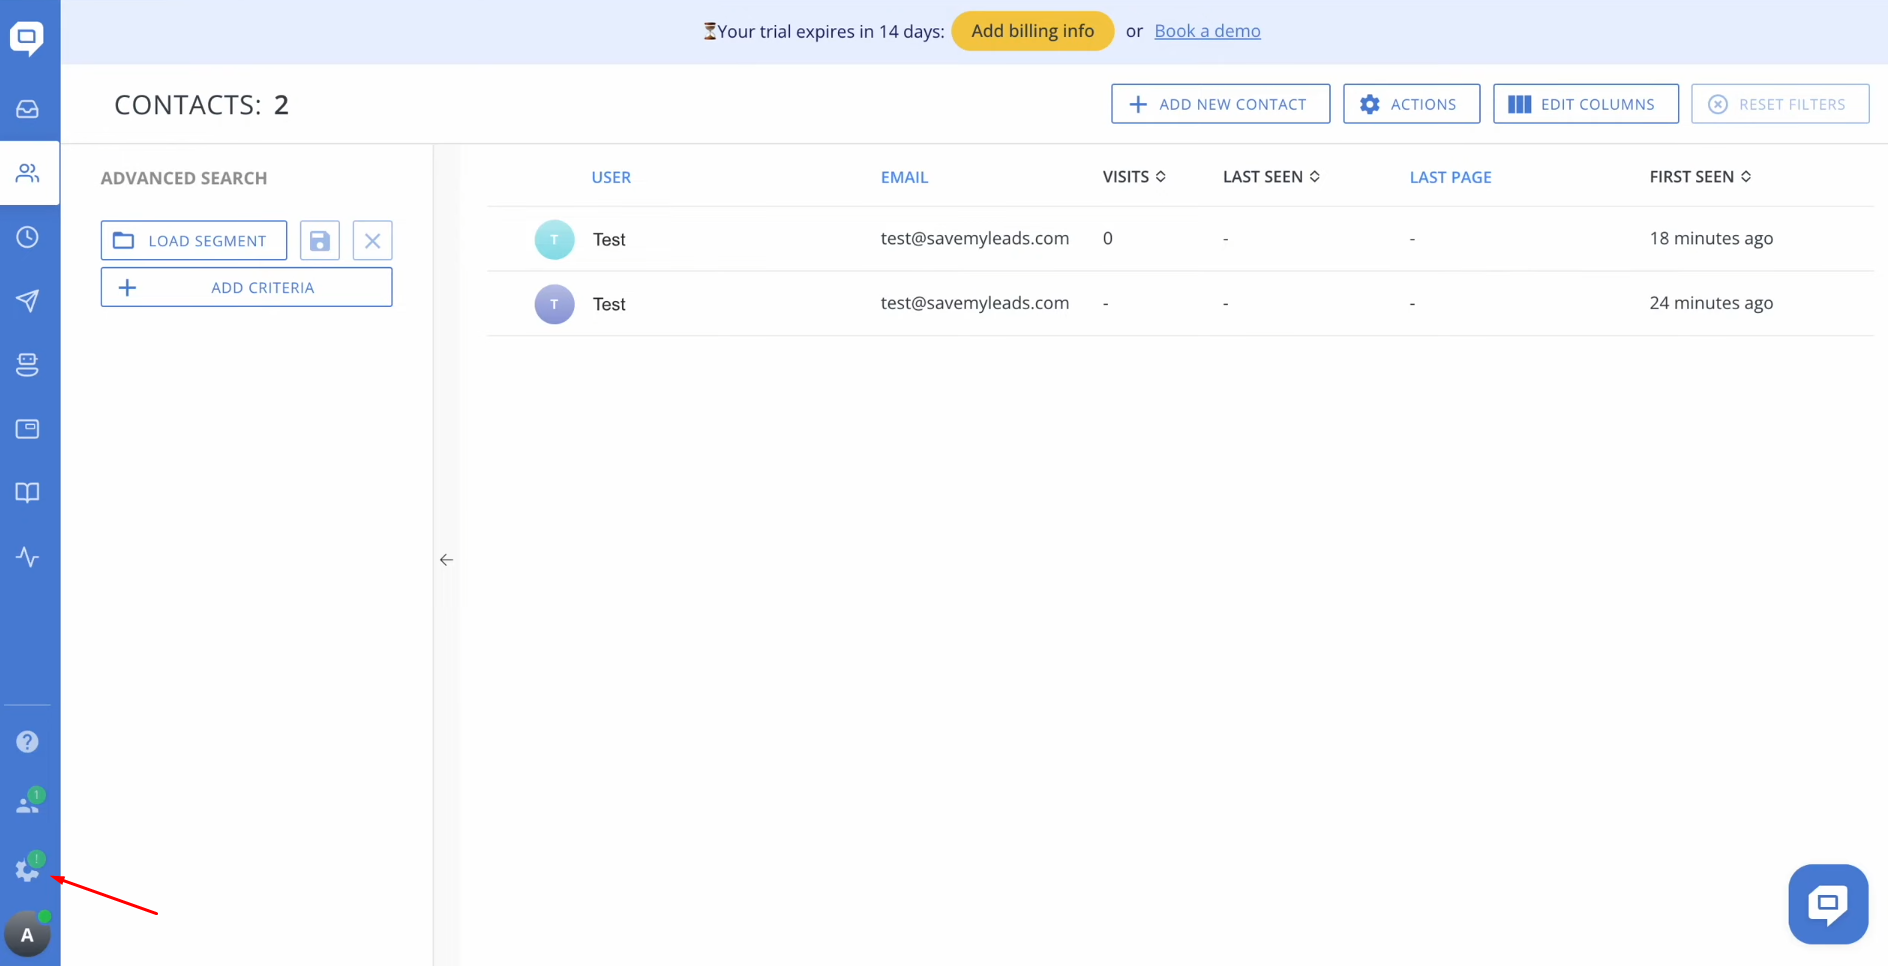
To get it, go
to the settings of your HelpCrunch personal account (the gear icon
at the bottom of the window).
Go to
“Developers”.
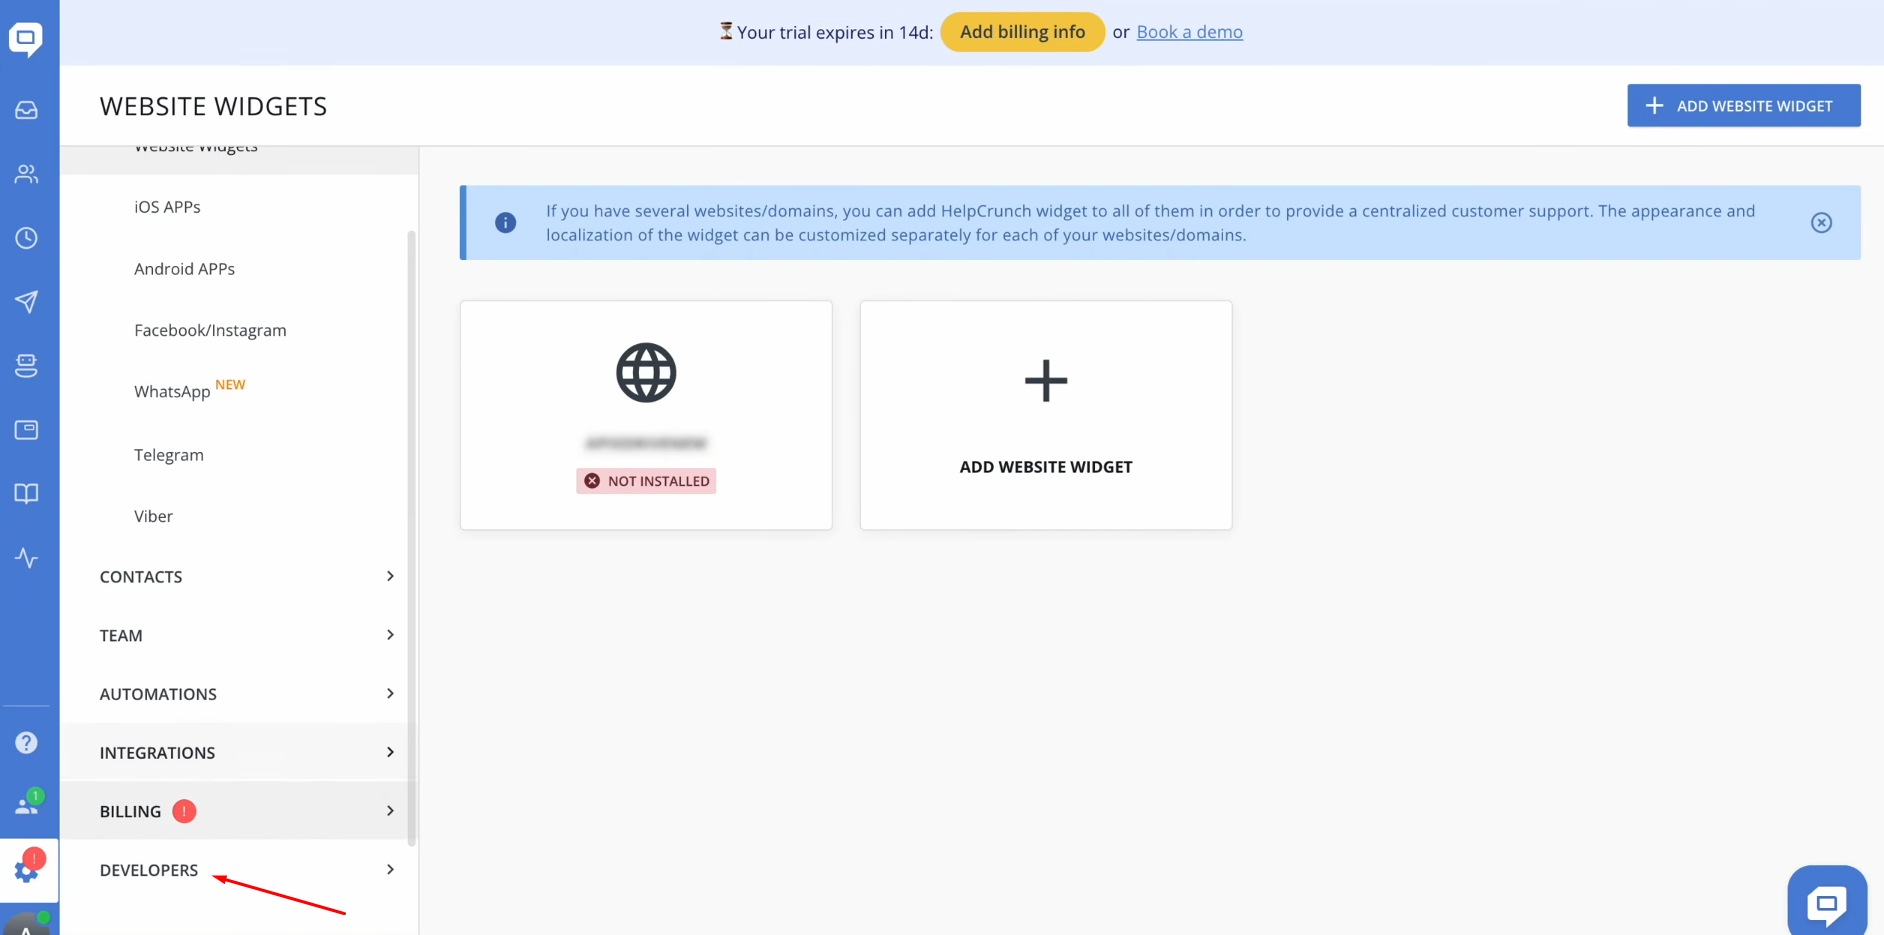
Click
on “Public API”.
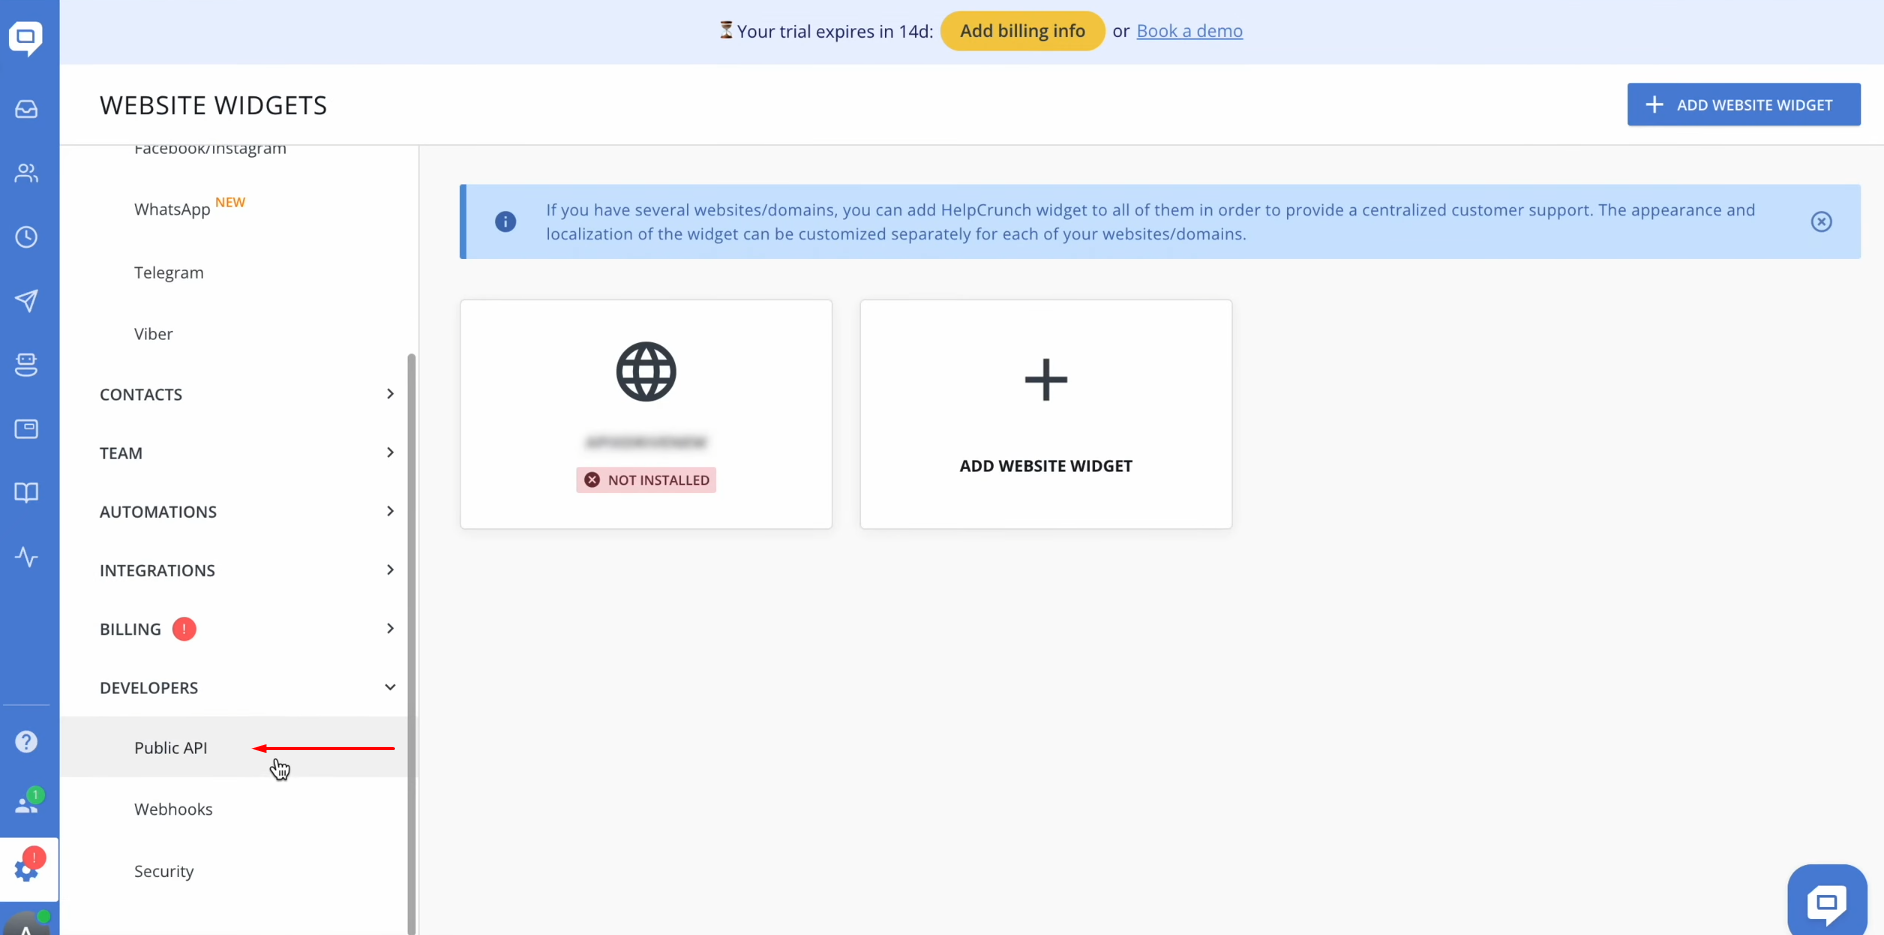
Copy the API
key.
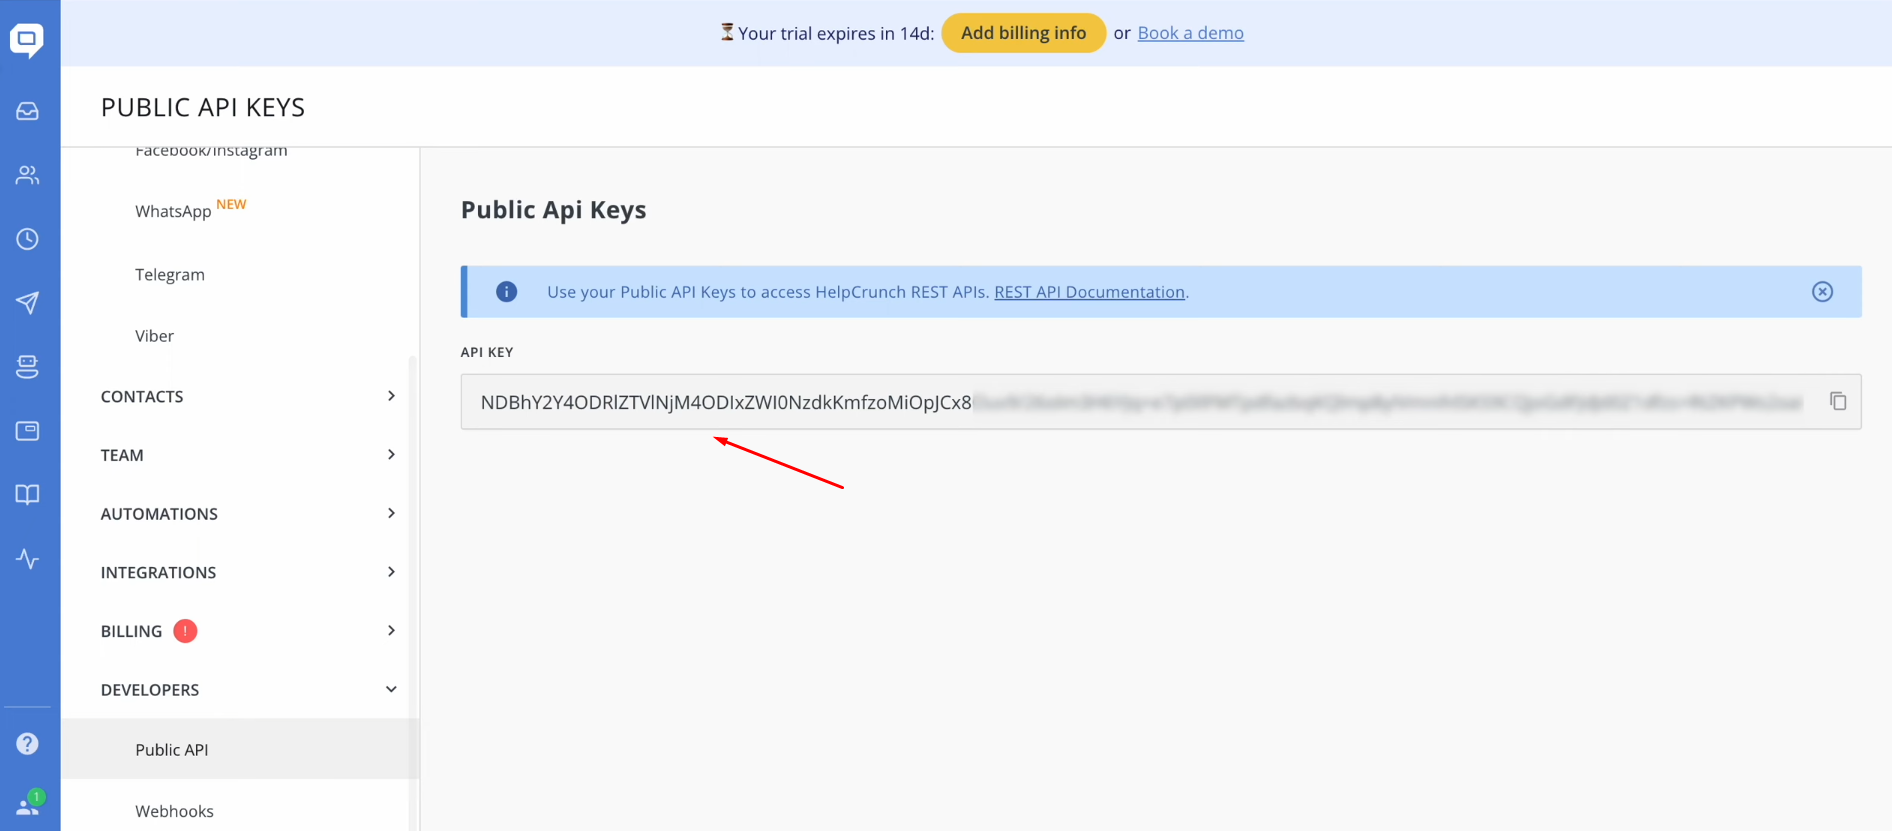
Paste the API
key into the
appropriate field in the SaveMyLeads system. When the required field is filled in, click “Continue”.
When the connected
account appears in the list, select it.
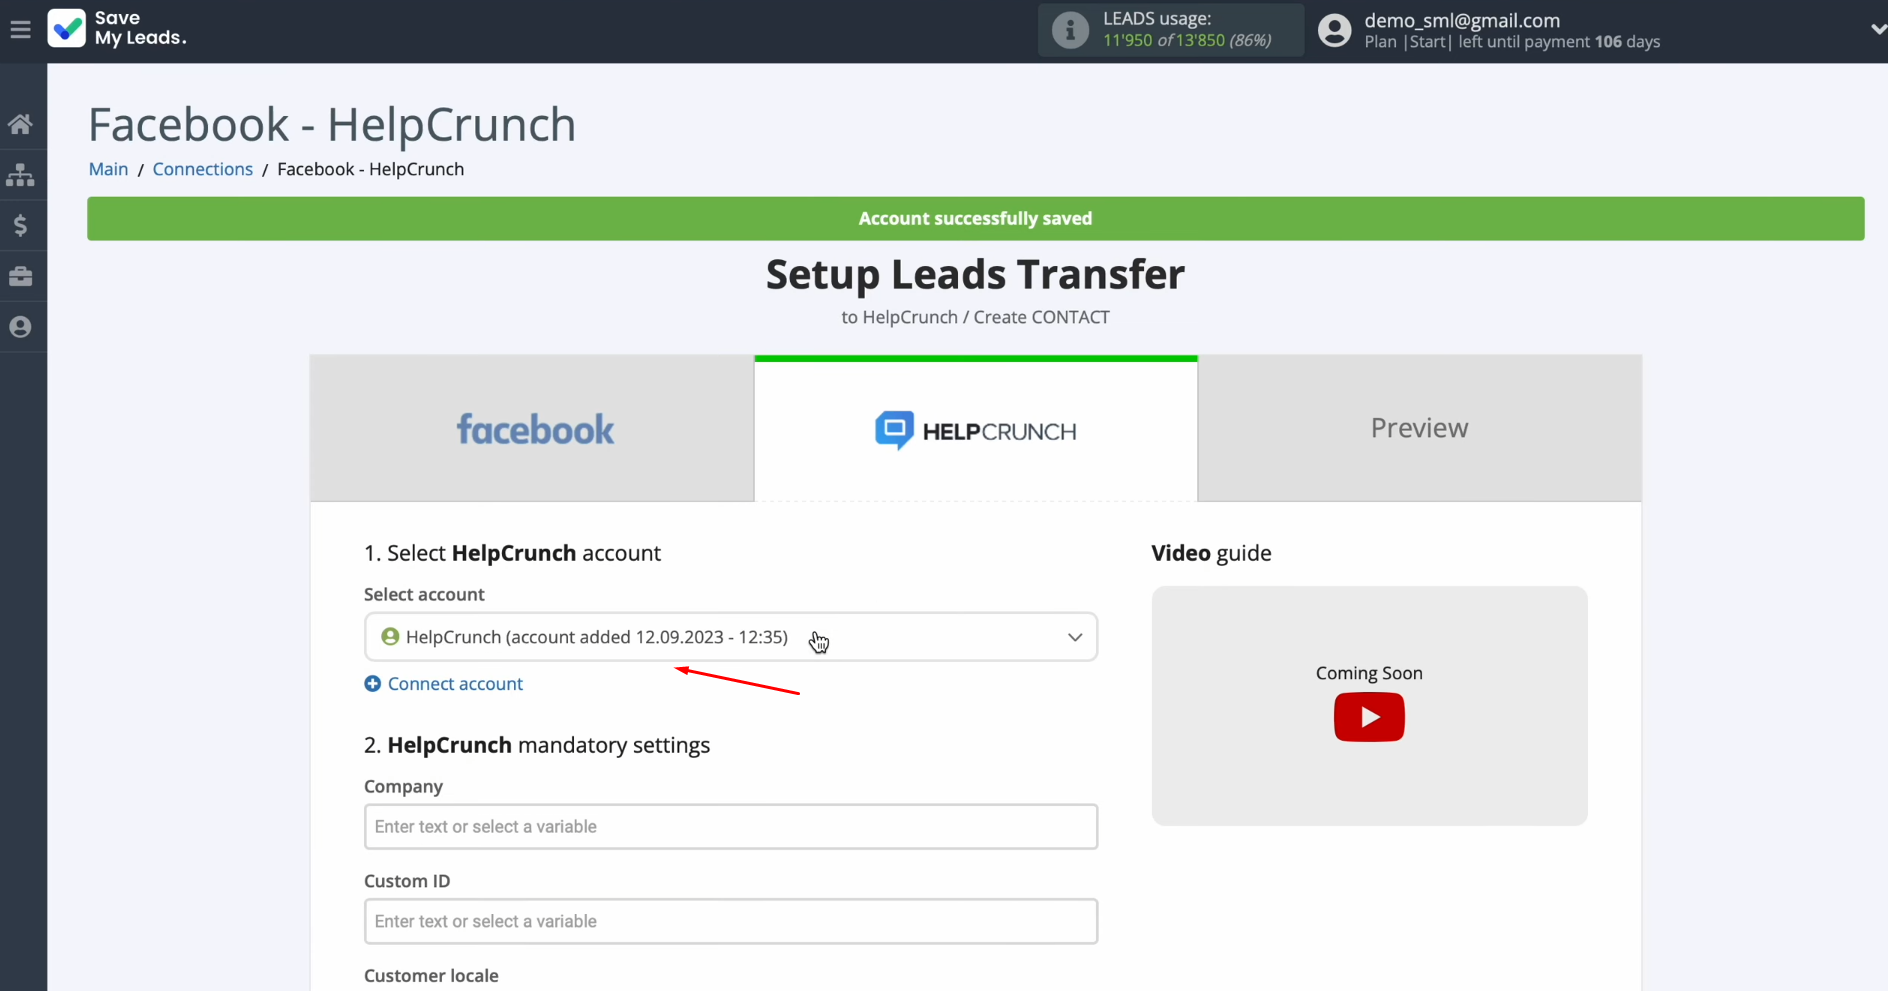
Next you see HelpCrunch fields for creating new
contacts.
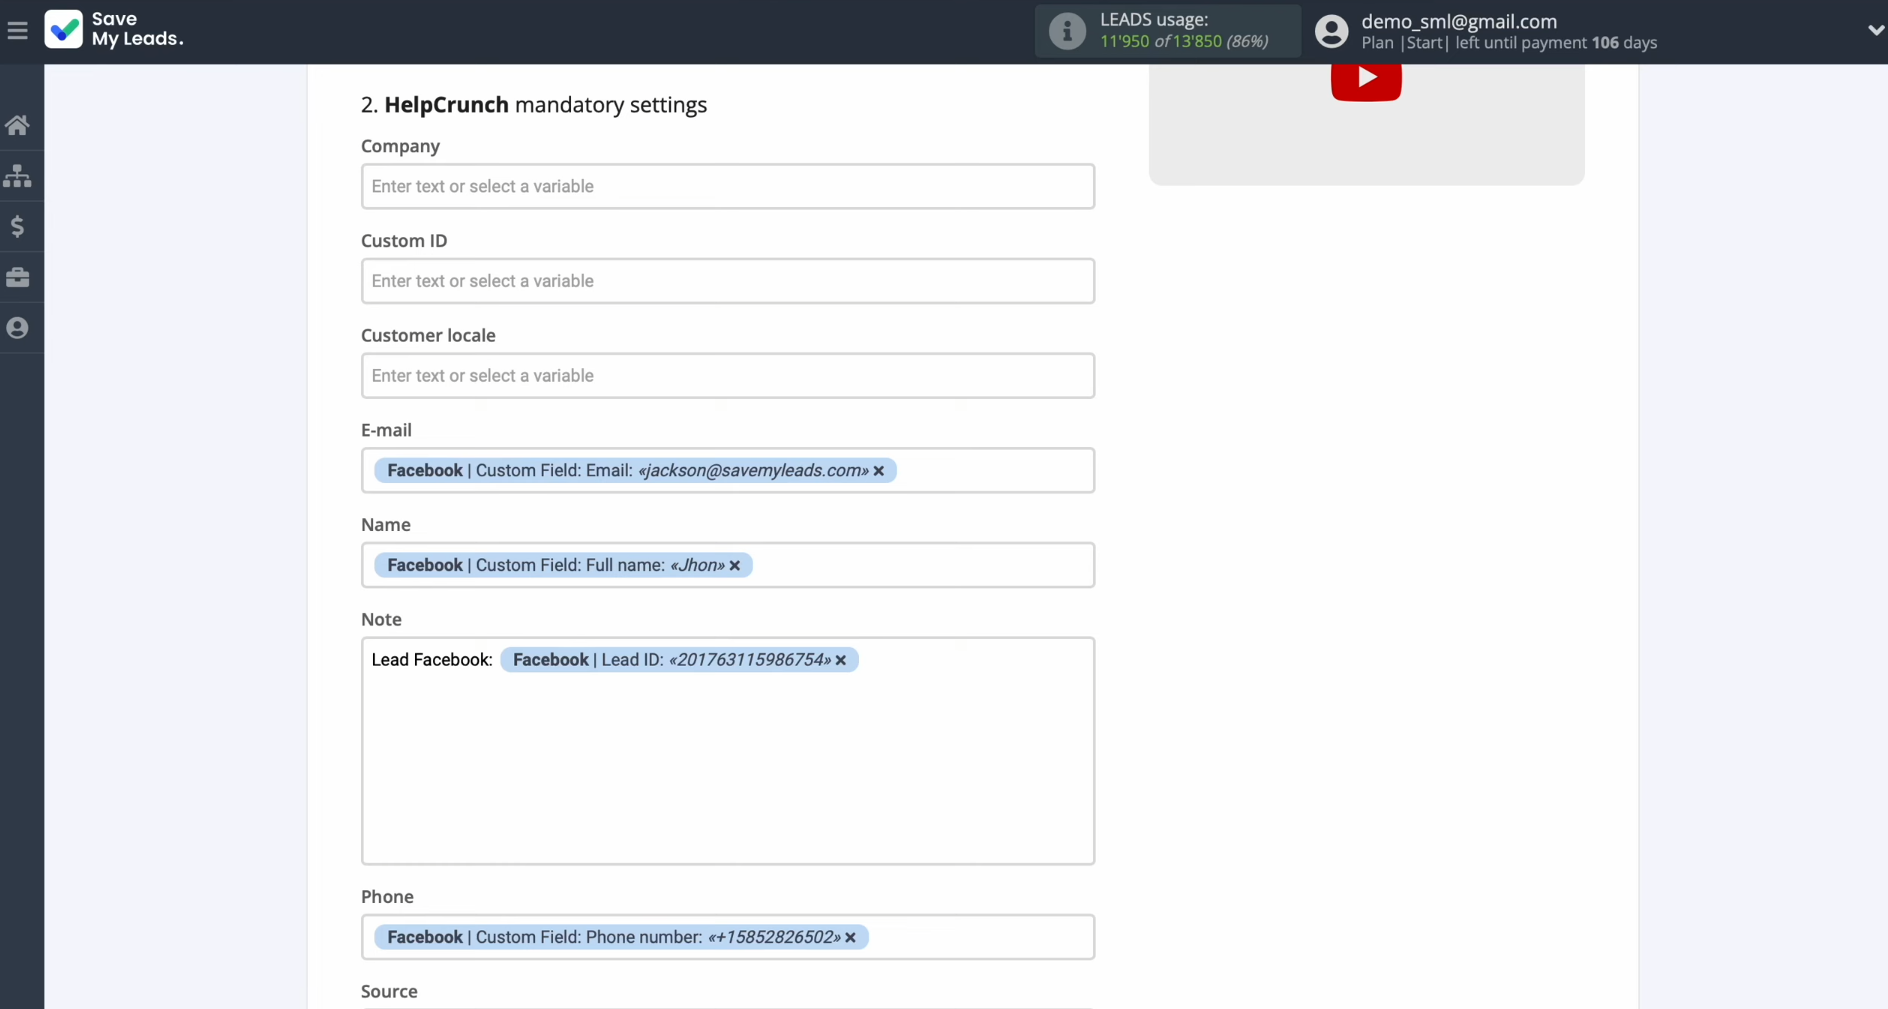
You can
assign variables from Facebook to these fields. To achieve this, click on the field and select a variable from the drop-down list.
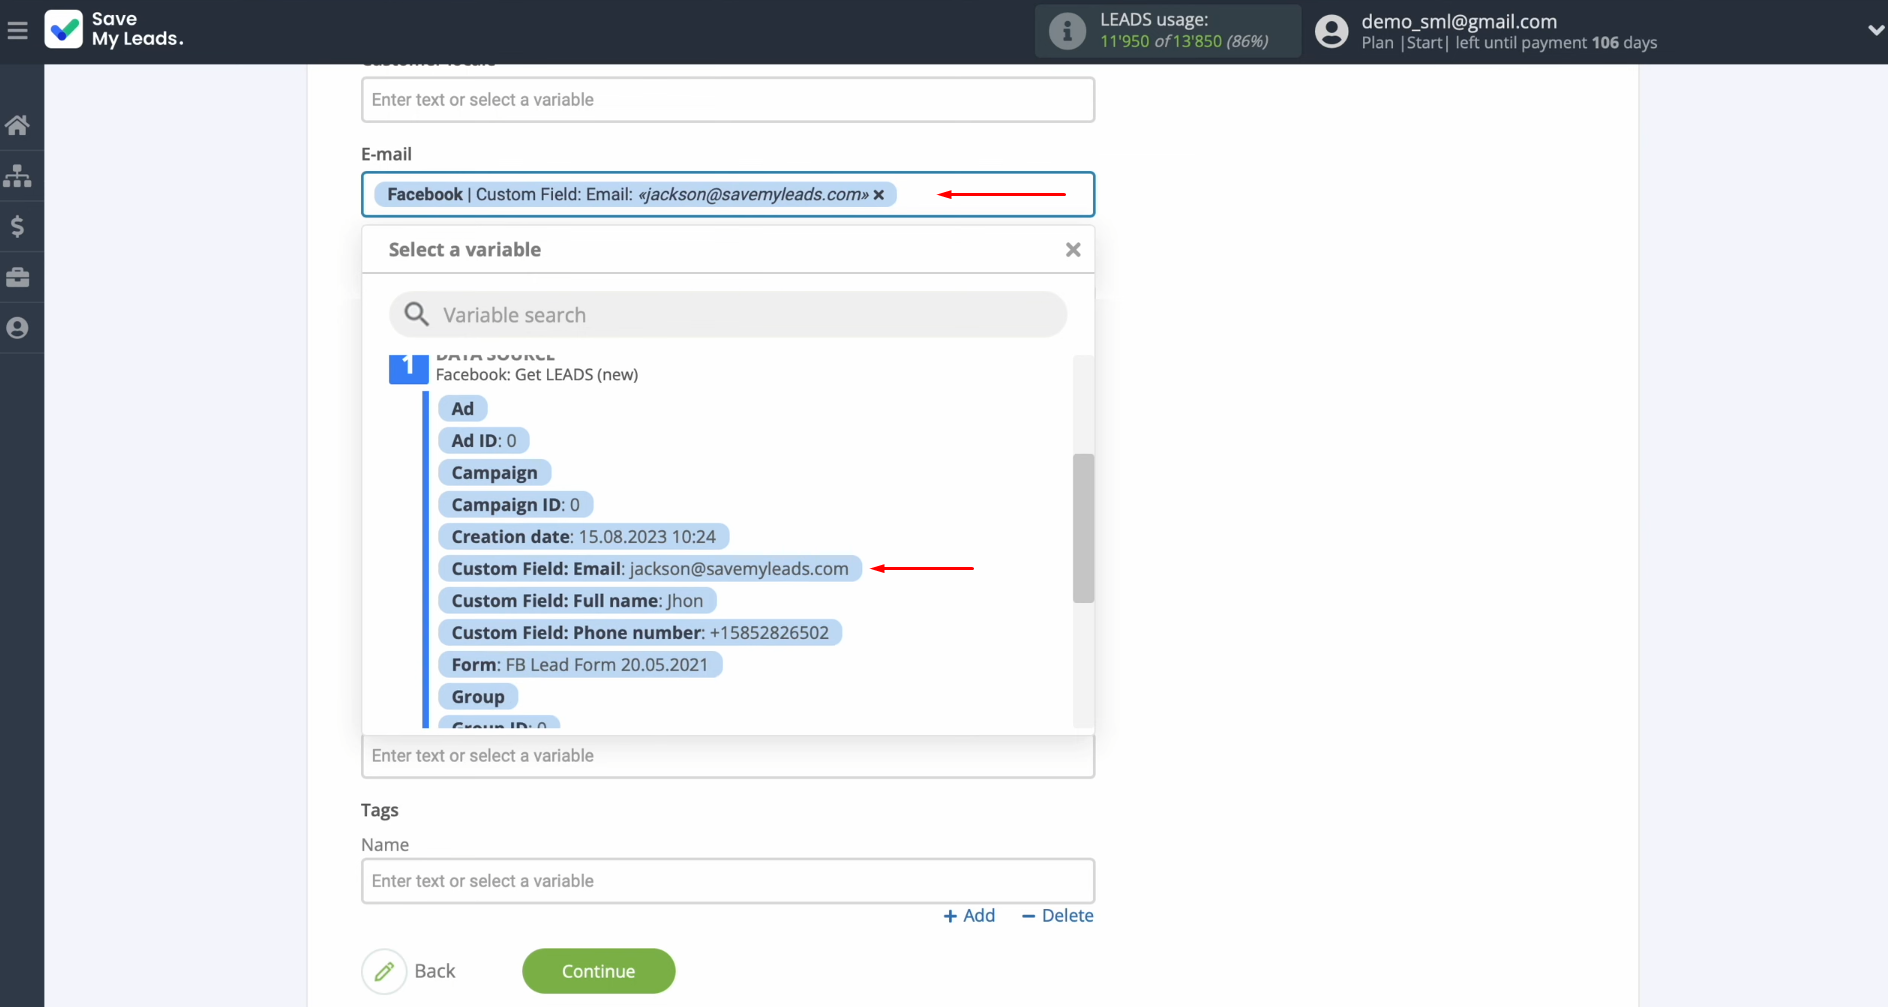
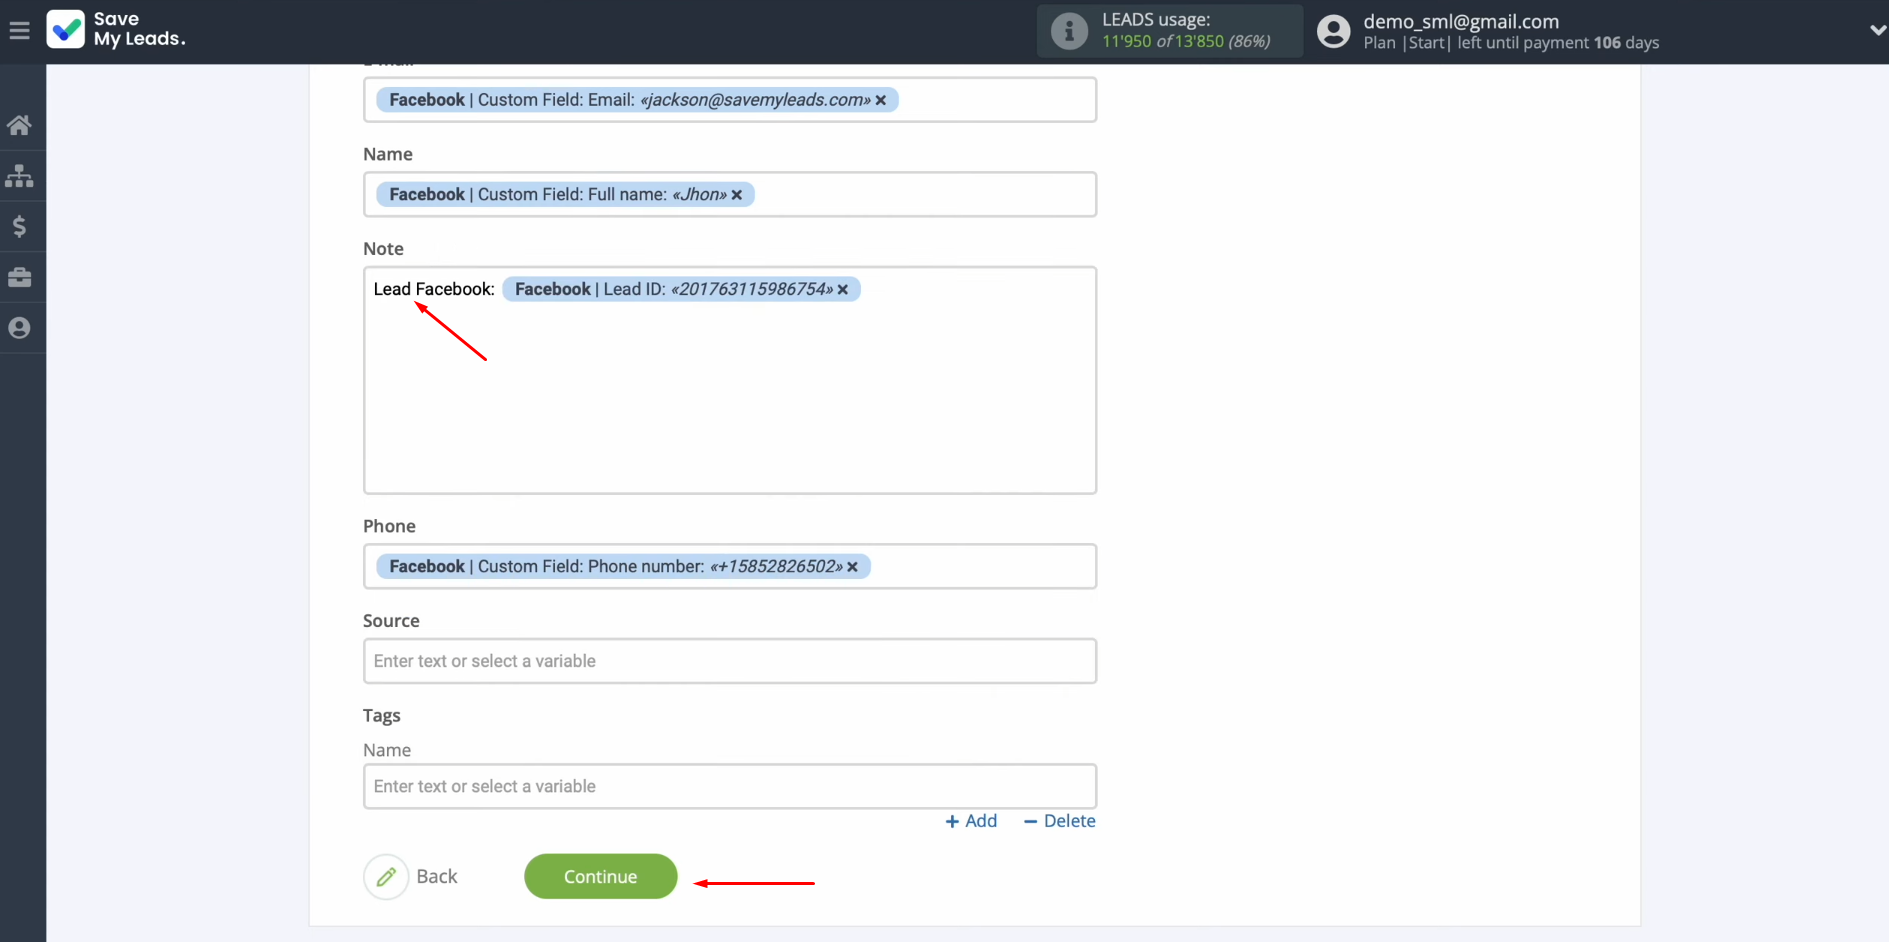
Please note
that you can use not only variables but also enter values manually. When all required fields are filled
in, click “Continue”.
At this point, you see an example of
the data that will be sent to HelpCrunch in the form of new contacts for each new lead from Facebook. If you are not satisfied with something, click “Back”, and you will go back a step to
check the correctness of the settings.
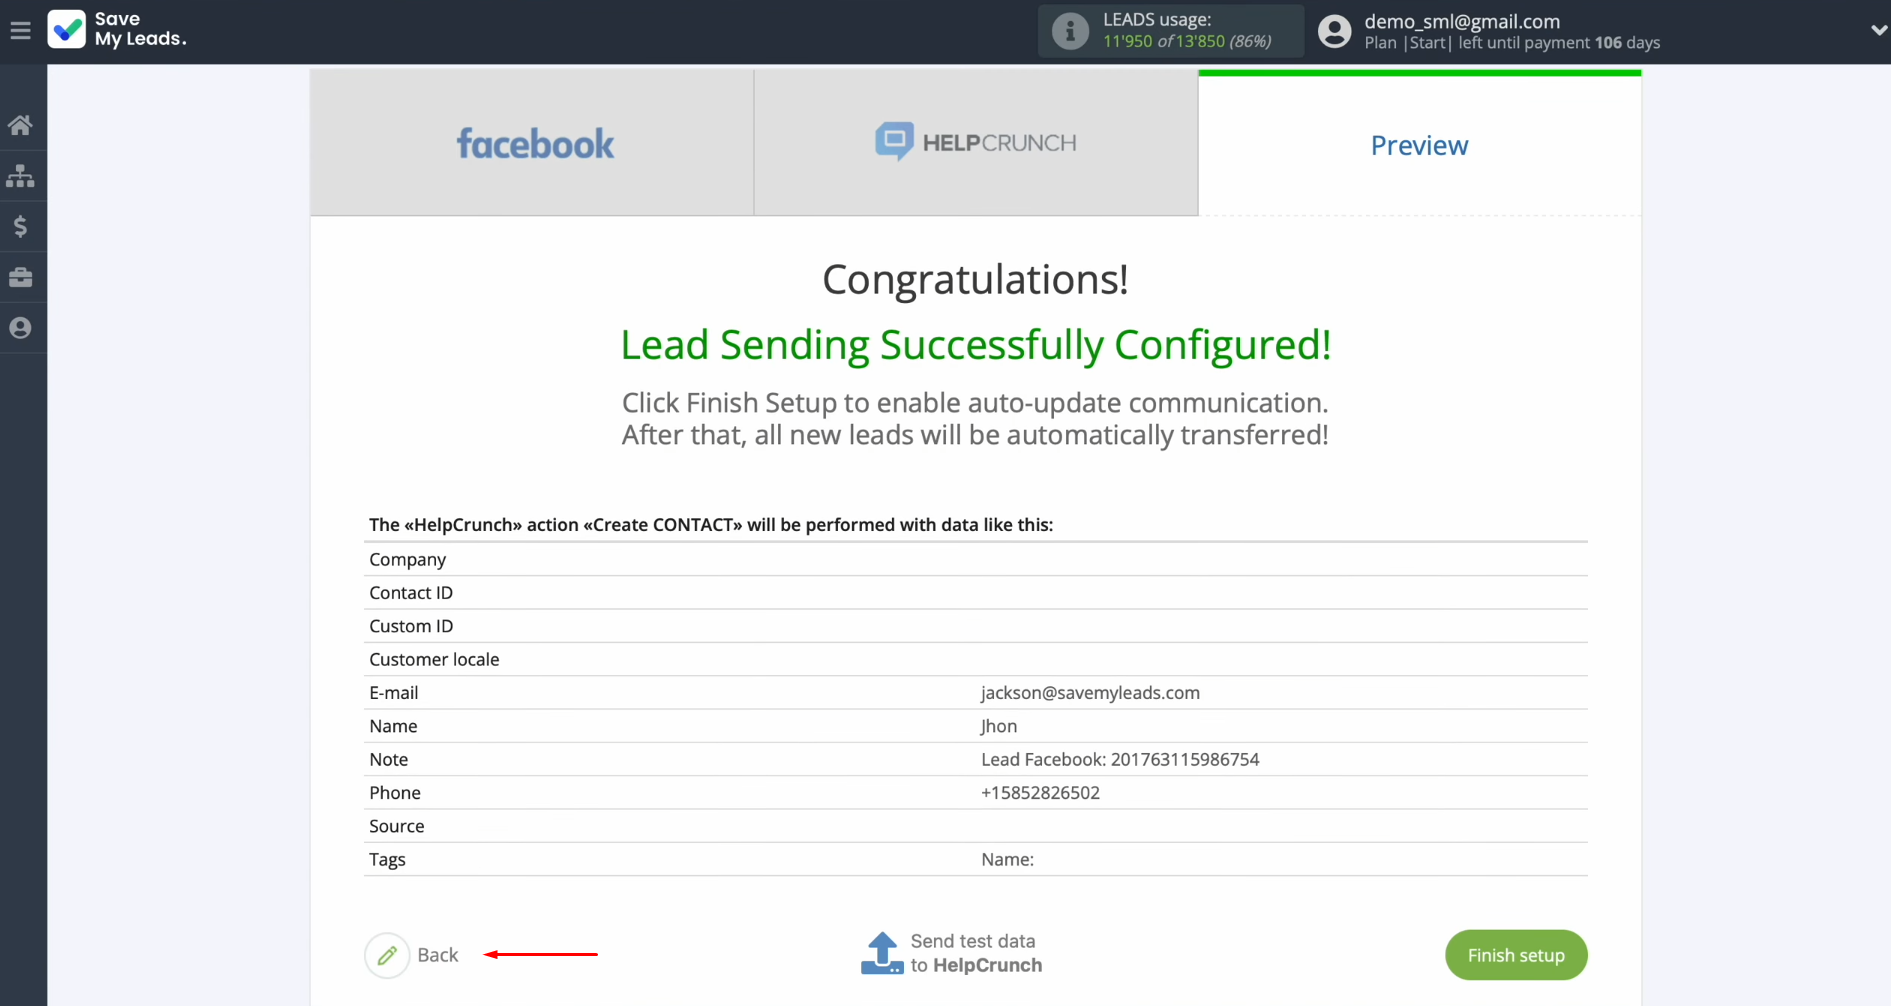
Click “Send test data to HelpCrunch”.
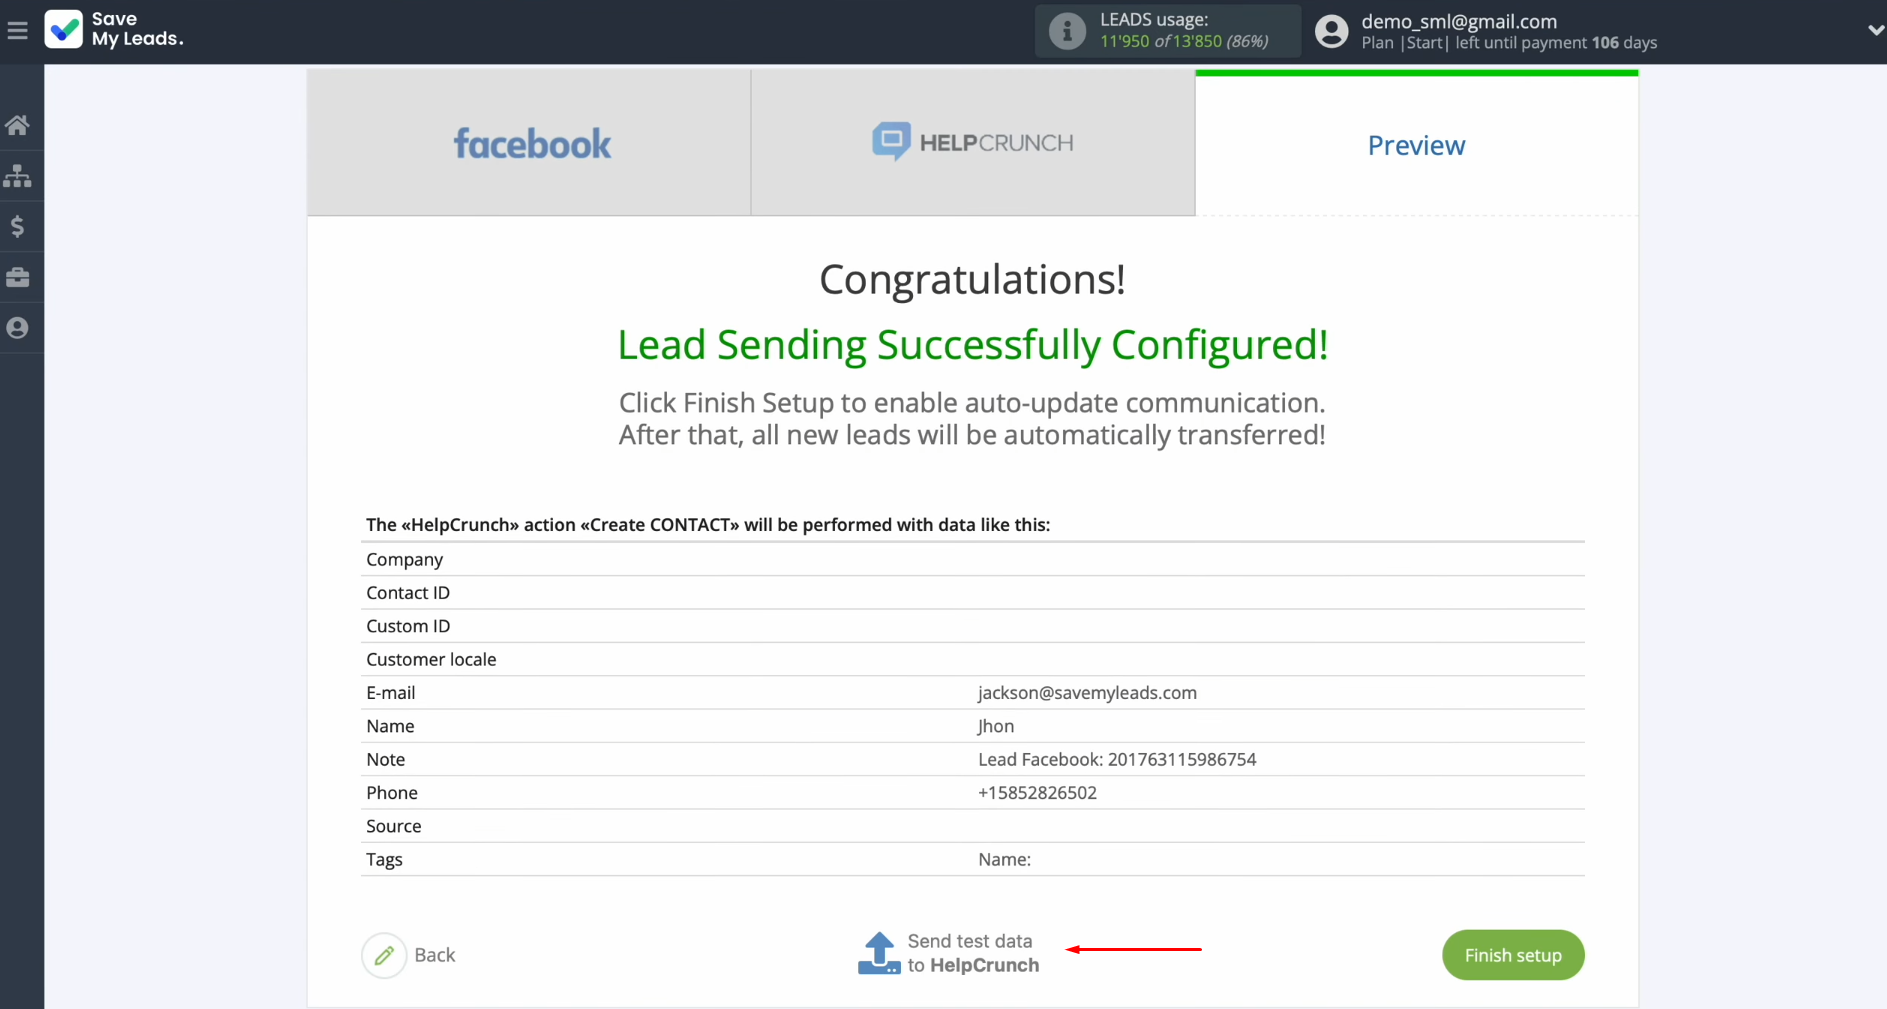
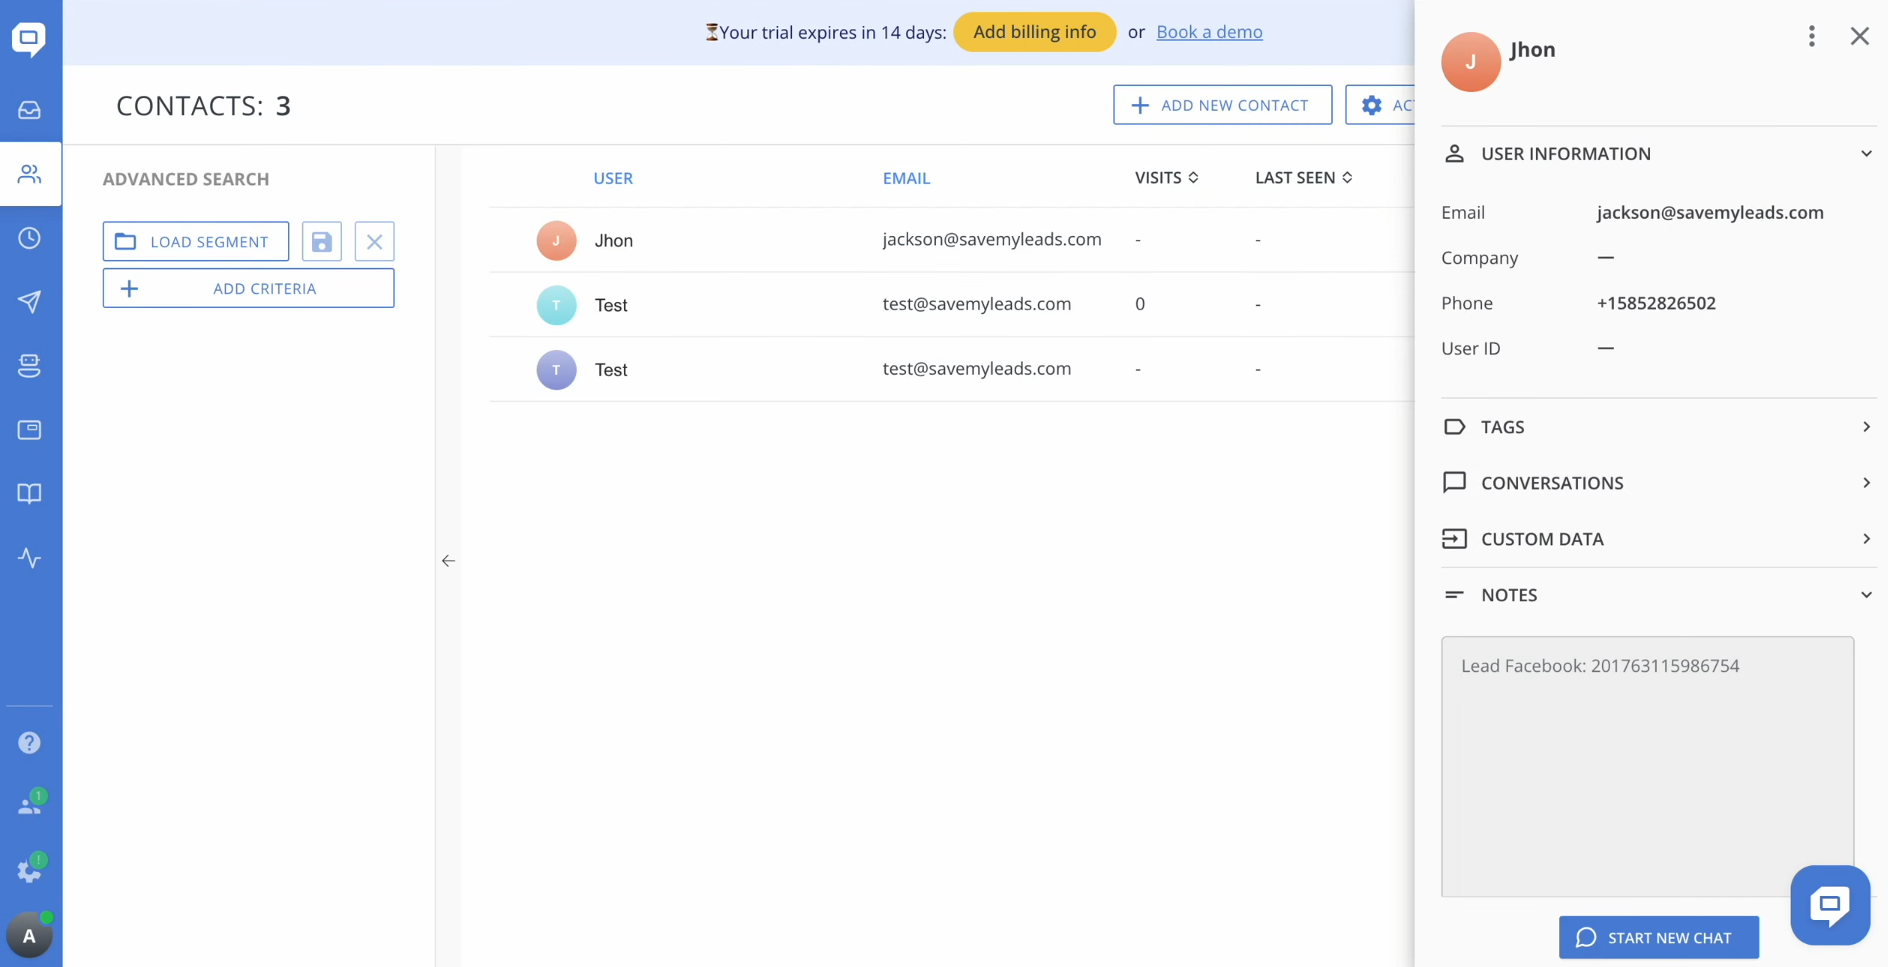
After successful submission, go to HelpCrunch and check the result of the Facebook-Leads and HelpCrunch integration.
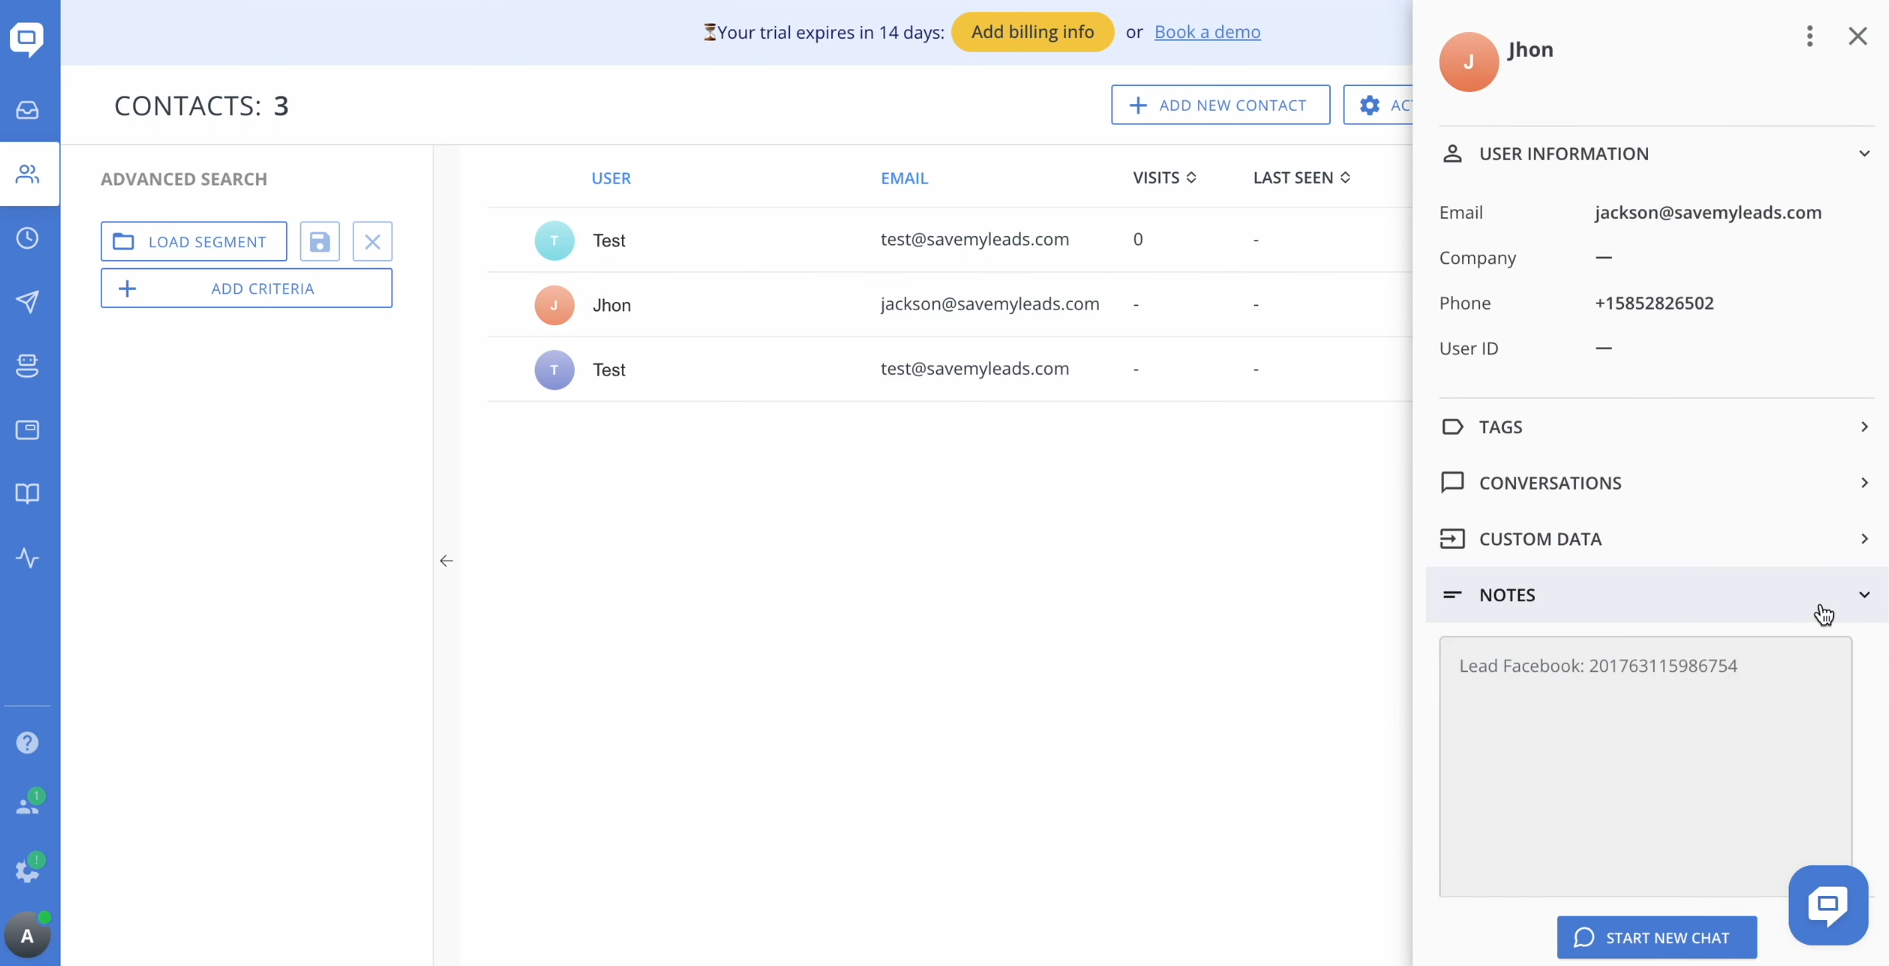
If you are
satisfied with everything, return to the SaveMyLeads system and continue setting up.
Setting up Auto-update
In order for new leads from Facebook to be instantly transferred to HelpCrunch as new contacts, you have to enable auto-update. To achieve this, click “Finish setup”.
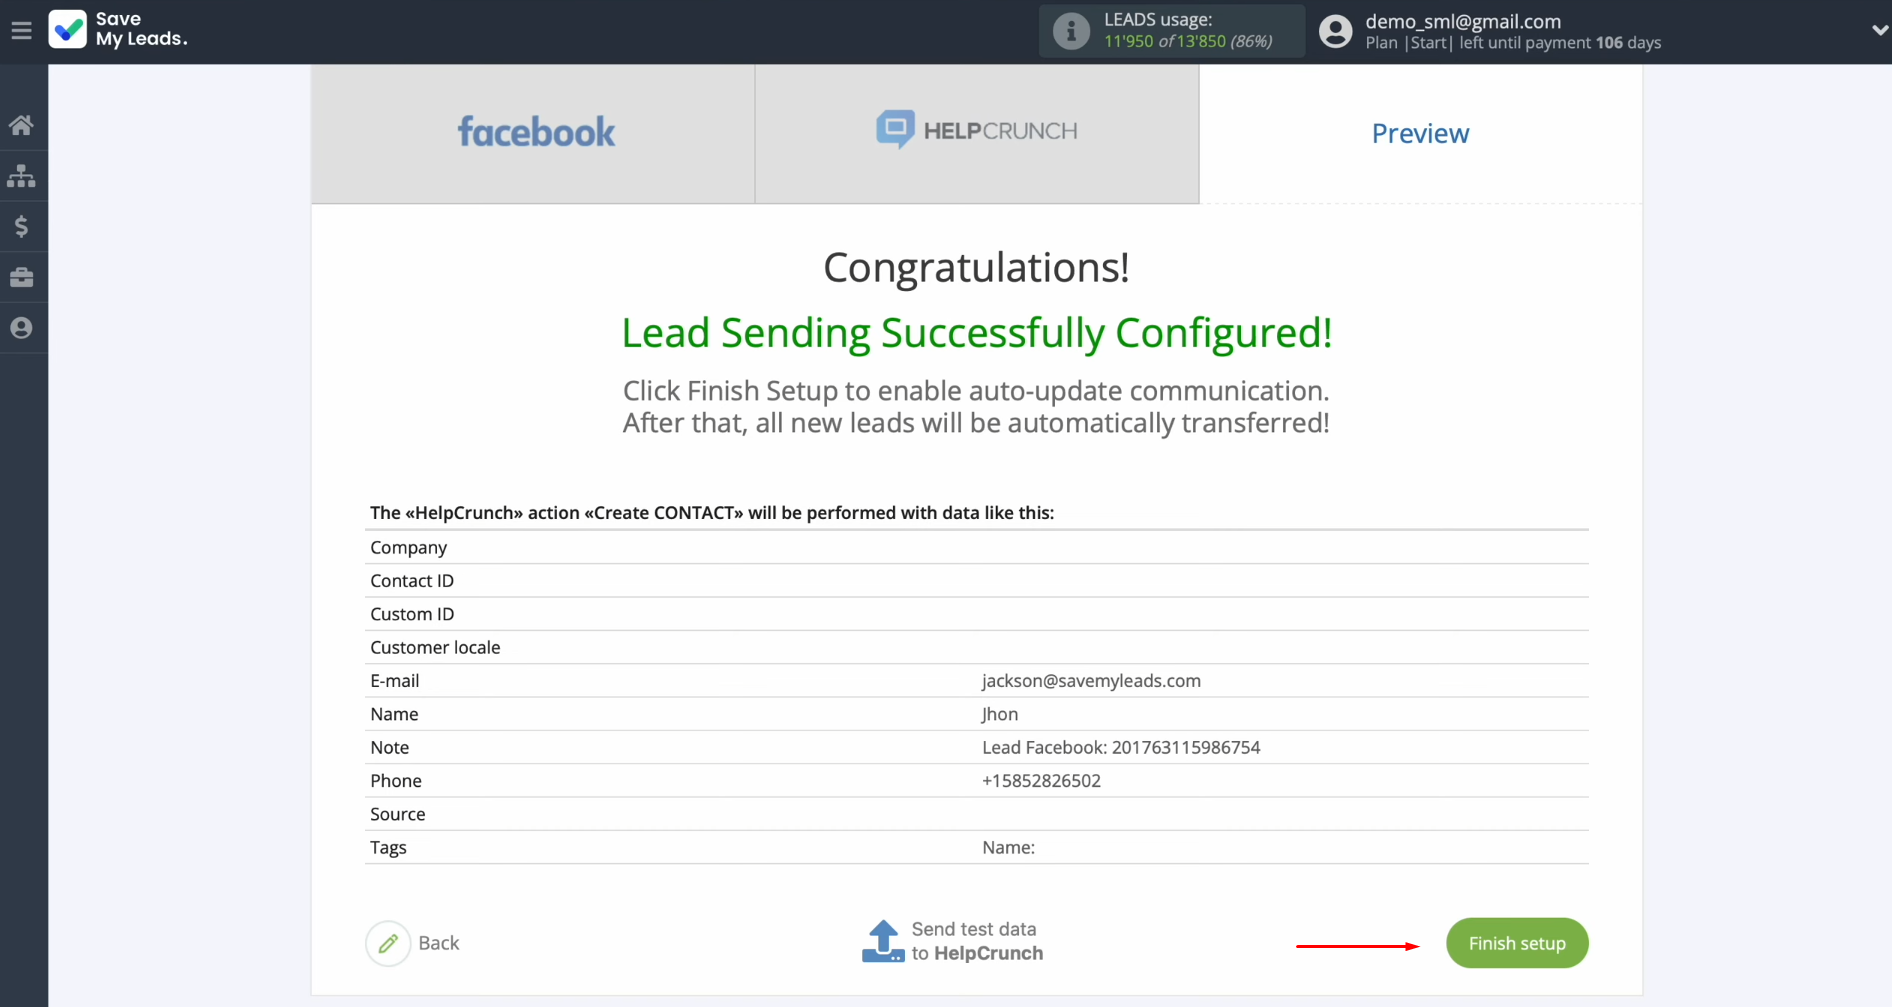
If you want
to change the connection name or add it to a group, you can do
this in its settings. Click on the gear icon.
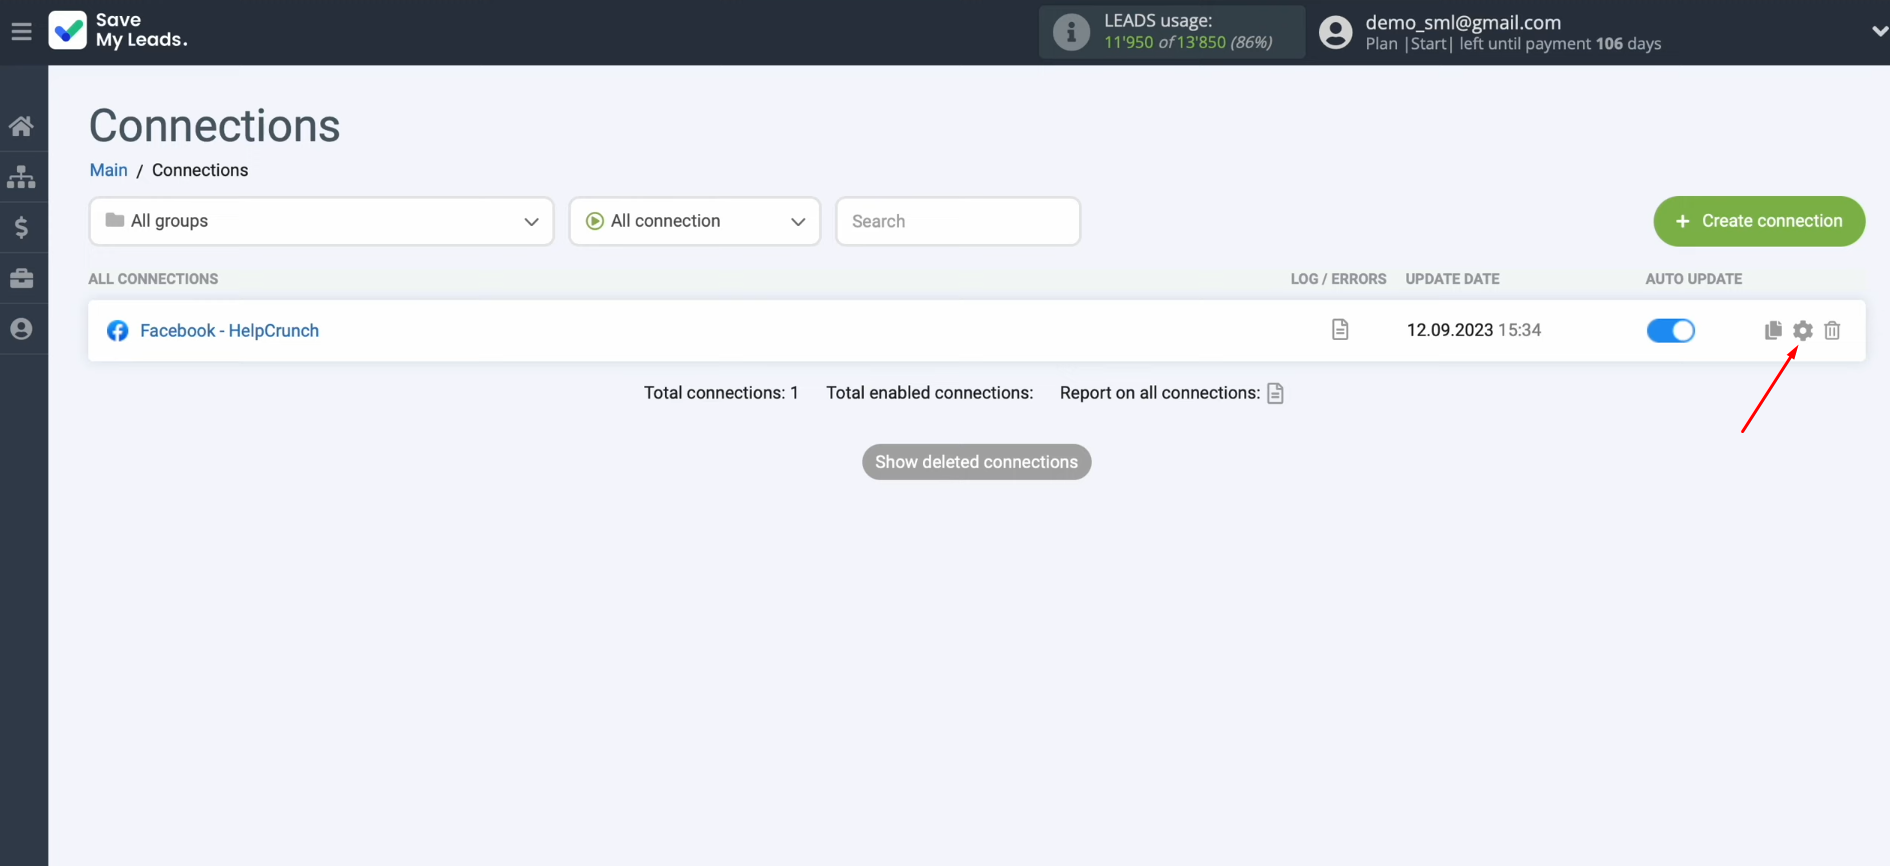
Make the necessary changes and click “Continue”.
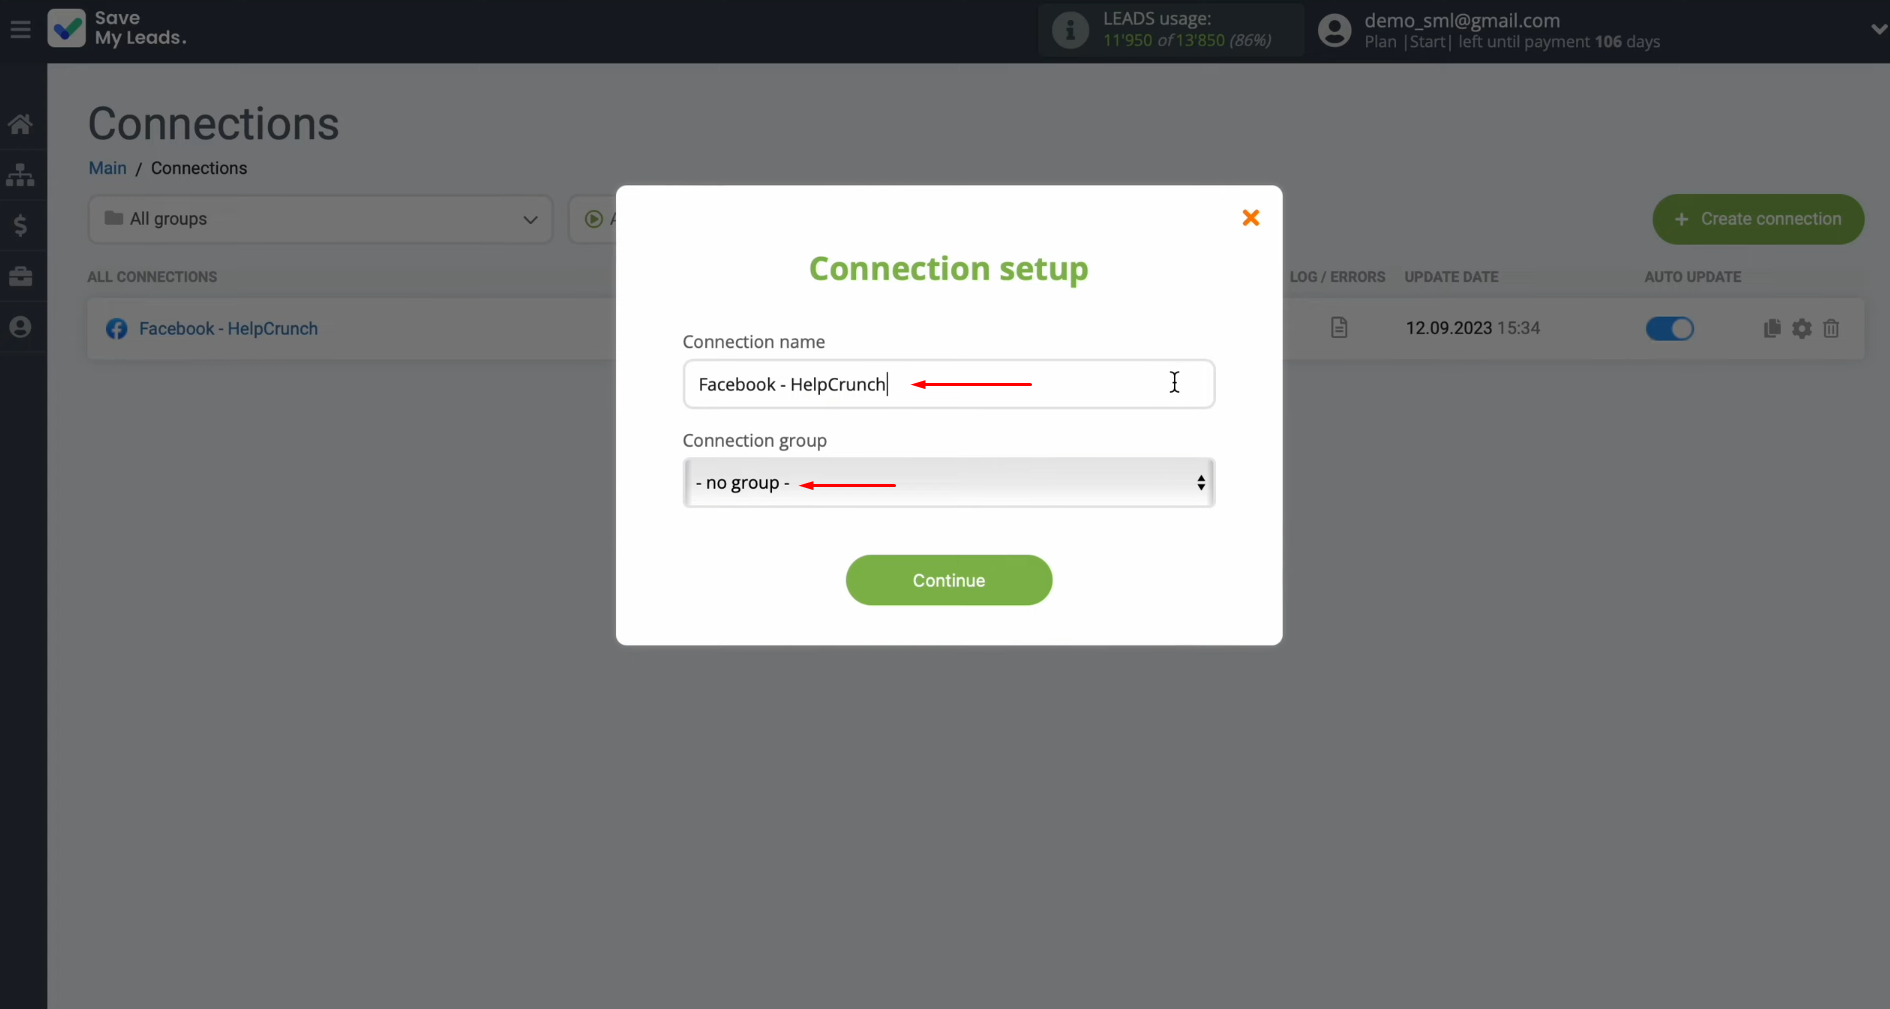
That's all. HelpCrunch
integration with Facebook is complete.
The Result of the HelpCrunch + Facebook Integration
By strictly following our instructions, you will successfully connect Facebook Lead Ads with the HelpCrunch platform and start the process of automatically transferring data from new leads from the social network to the multichannel communication system. Facebook + HelpCrunch integration using SaveMyLeads will save you from the time-consuming routine manual transfer of lead contact information and at the same time reduce the risk of errors to zero. You can use the freed-up time to interact with clients as well as solve tasks that cannot be automated: for example, develop marketing strategies, search for fresh creative ideas, or pay attention to team building. The choice is yours. Good luck!
What do you do with the data you get from Facebook lead forms? Do you send them to the manager, add them to mailing services, transfer them to the CRM system, use them to implement feedback? Automate all of these processes with the SaveMyLeads online connector. Create integrations so that new Facebook leads are automatically transferred to instant messengers, mailing services, task managers and other tools. Save yourself and your company's employees from routine work.
