In modern business, the speed of response to potential customers' requests plays a key role. If contact data is received late or gets lost, the business loses the chance to turn a lead into a buyer. Google Ads Lead Form and Google Contacts integration allows you to quickly transfer all the received data into a single contact list. This way, you can immediately start working with customers and minimize the risk of missed opportunities. In this article, we will tell you how to automate the transfer of lead data by integrating the services with the SaveMyLeads connector.
Google Leads and Google Contacts Integration—Effective Automation
The main goal of Google Contacts and Google Ads Lead Form integration is to automate processing data generated by advertising campaigns. When users leaves their contact details in the form, the system creates a record in Google Contacts. This eliminates manual copying, reduces errors, and ensures continuity of work with leads. Thus, the integration is not just a convenient tool but forms the basis for building a systematic approach to working with potential customers.
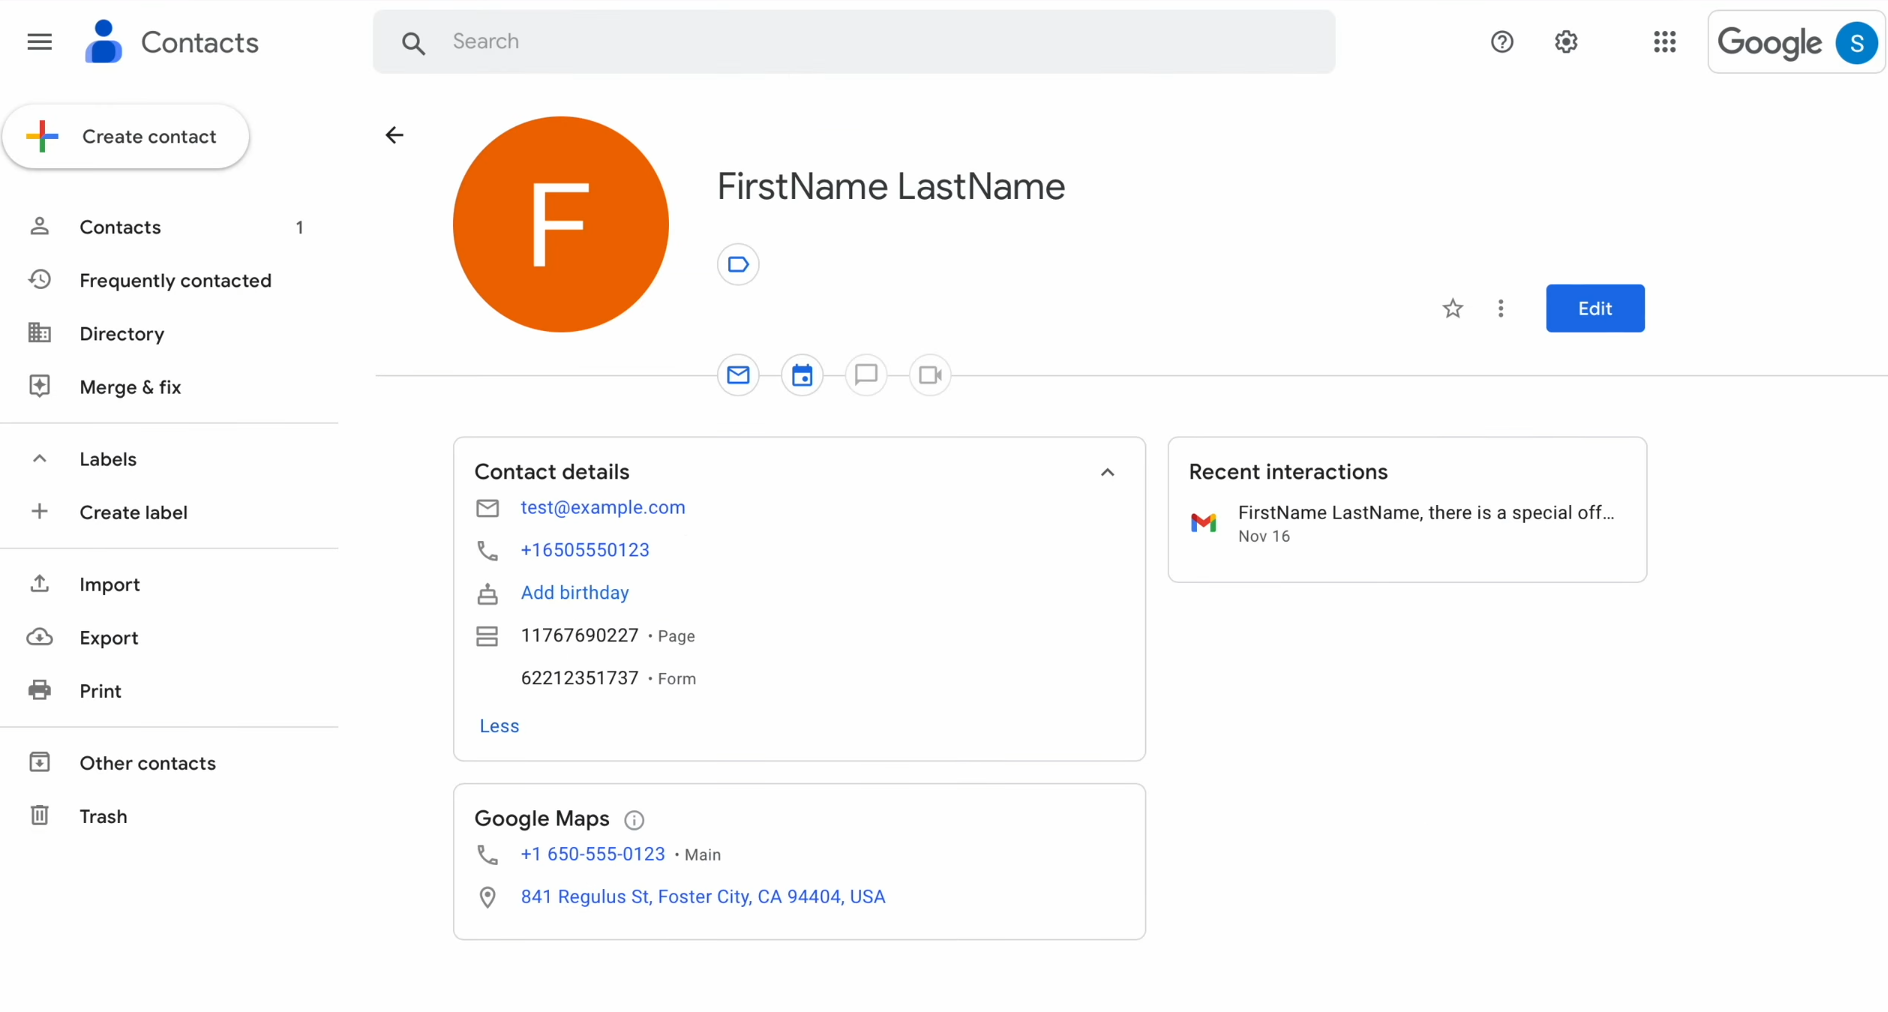
Example: A company runs multiple Google Ads campaigns for different regions. When potential customers fill out forms, their contacts are automatically added to Google Contacts with the source. This allows managers to quickly identify which campaign generated the lead and start working on it right away. This approach reduces lead processing time and helps to allocate team resources more efficiently.
With Google Lead Form Assets and Google Contacts integration, businesses gain a streamlined process where data collection, transmission, and storage are automated. This increases responsiveness, reduces time spent on routine tasks, and provides a transparent tracking of all contacts.
How to Connect Google Ads Lead Form to Google Contacts
Many people think that connecting different services is a complex technical process that requires programmers. This was the case before the advent of online connectors. Today, you can set up Google Contacts and Google Lead Form Assets integration in just a few minutes using the SaveMyLeads connector.
Main advantages:
- Simplicity: The interface is intuitive; no technical knowledge is required.
- Speed: Integration can be started in just a few clicks; connect accounts and choose which fields to transfer.
- Flexibility: You can transfer leads only from specific campaigns.
- Reliability: Data is transferred automatically and accurately.
As a result, managers quickly receive new contacts in Google Contacts, ready to work with. This allows the company to be one step ahead of competitors, because the speed of processing leads often decides who gets the client.
Setting Up the Data Source—Google Lead Form
Create a new connection.
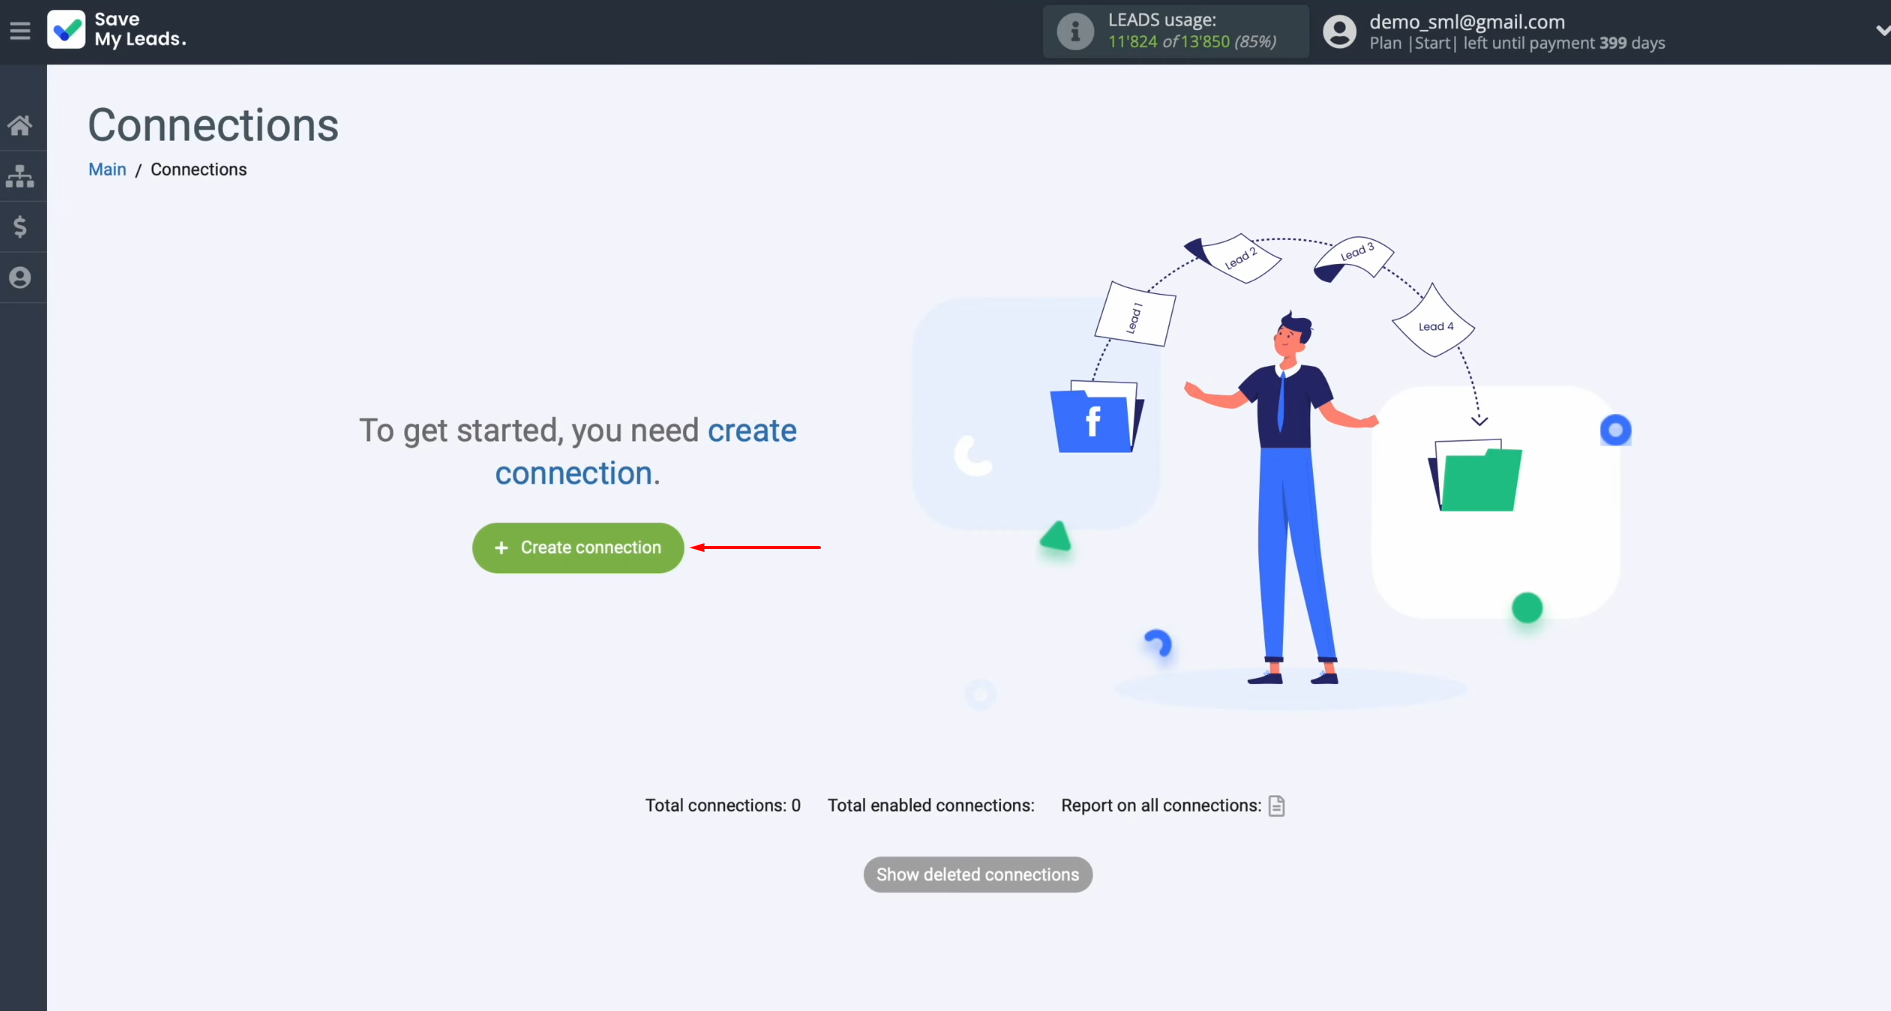
Choose a source from which you wish to obtain new data. You need Google Lead Form.
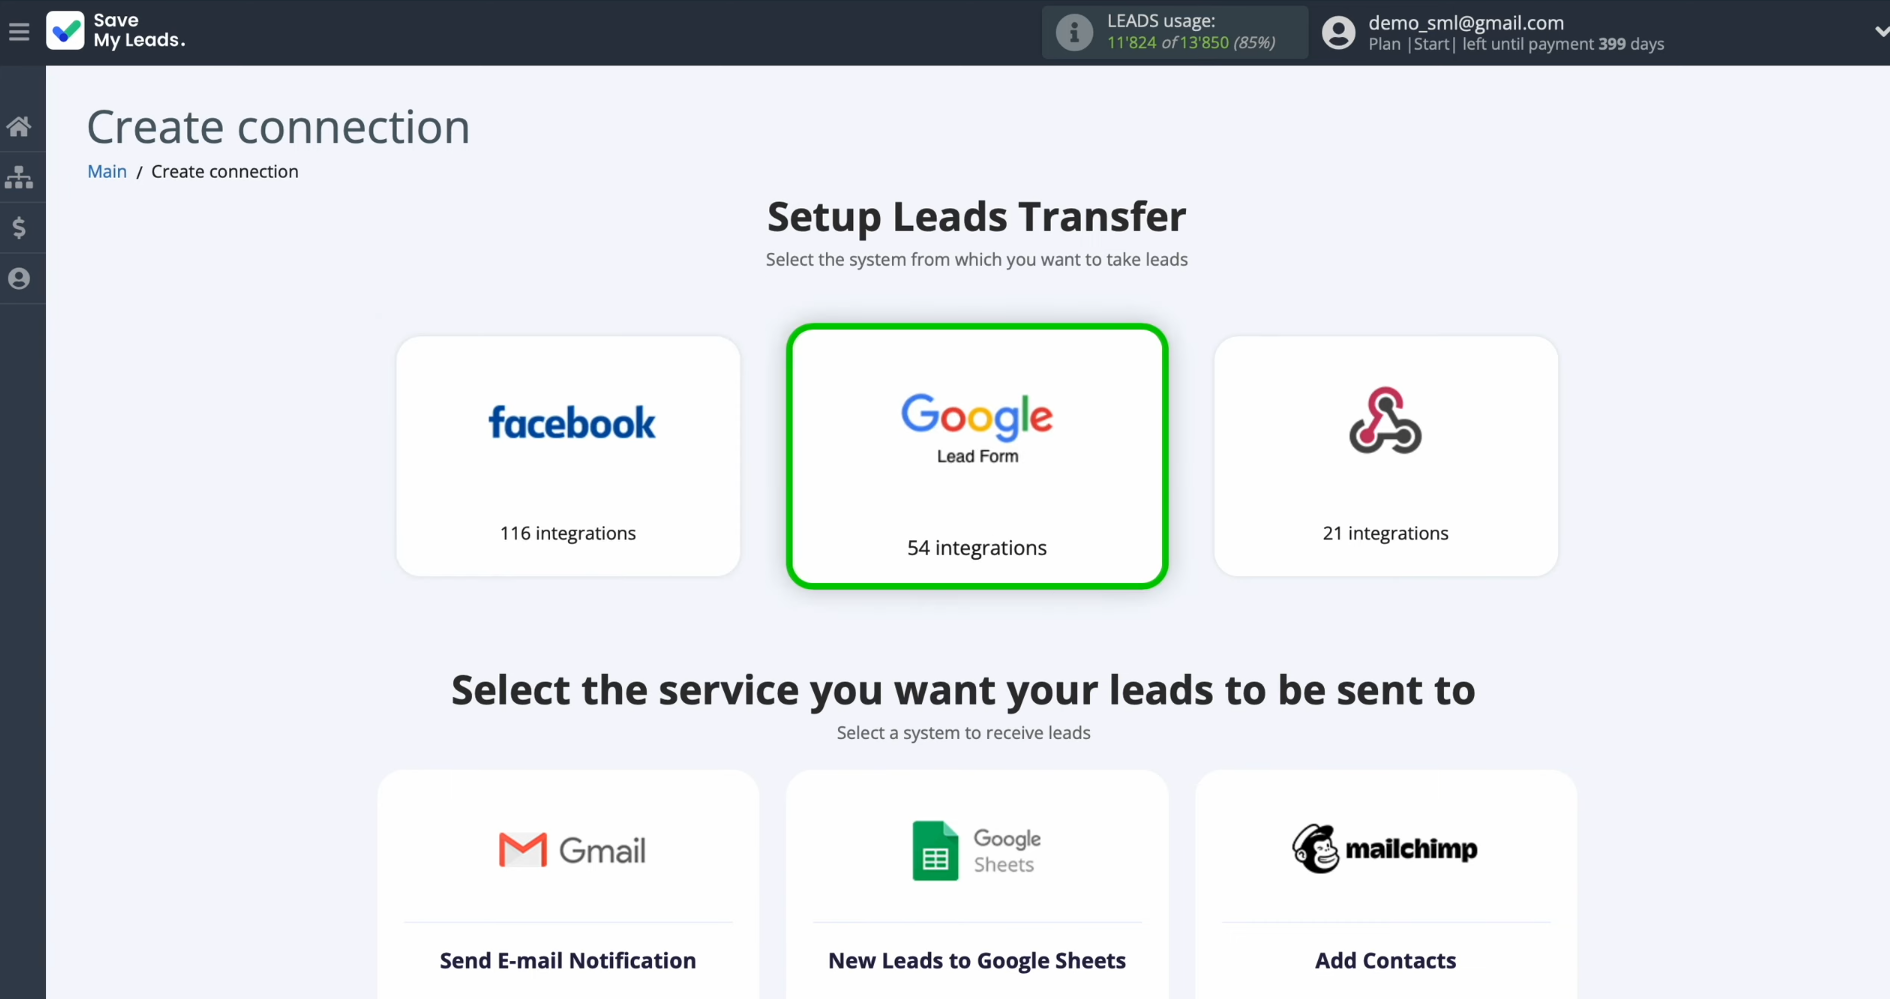
Pick the system to which you want to send new leads collected from the Google Lead Form. Select Google
Contacts.
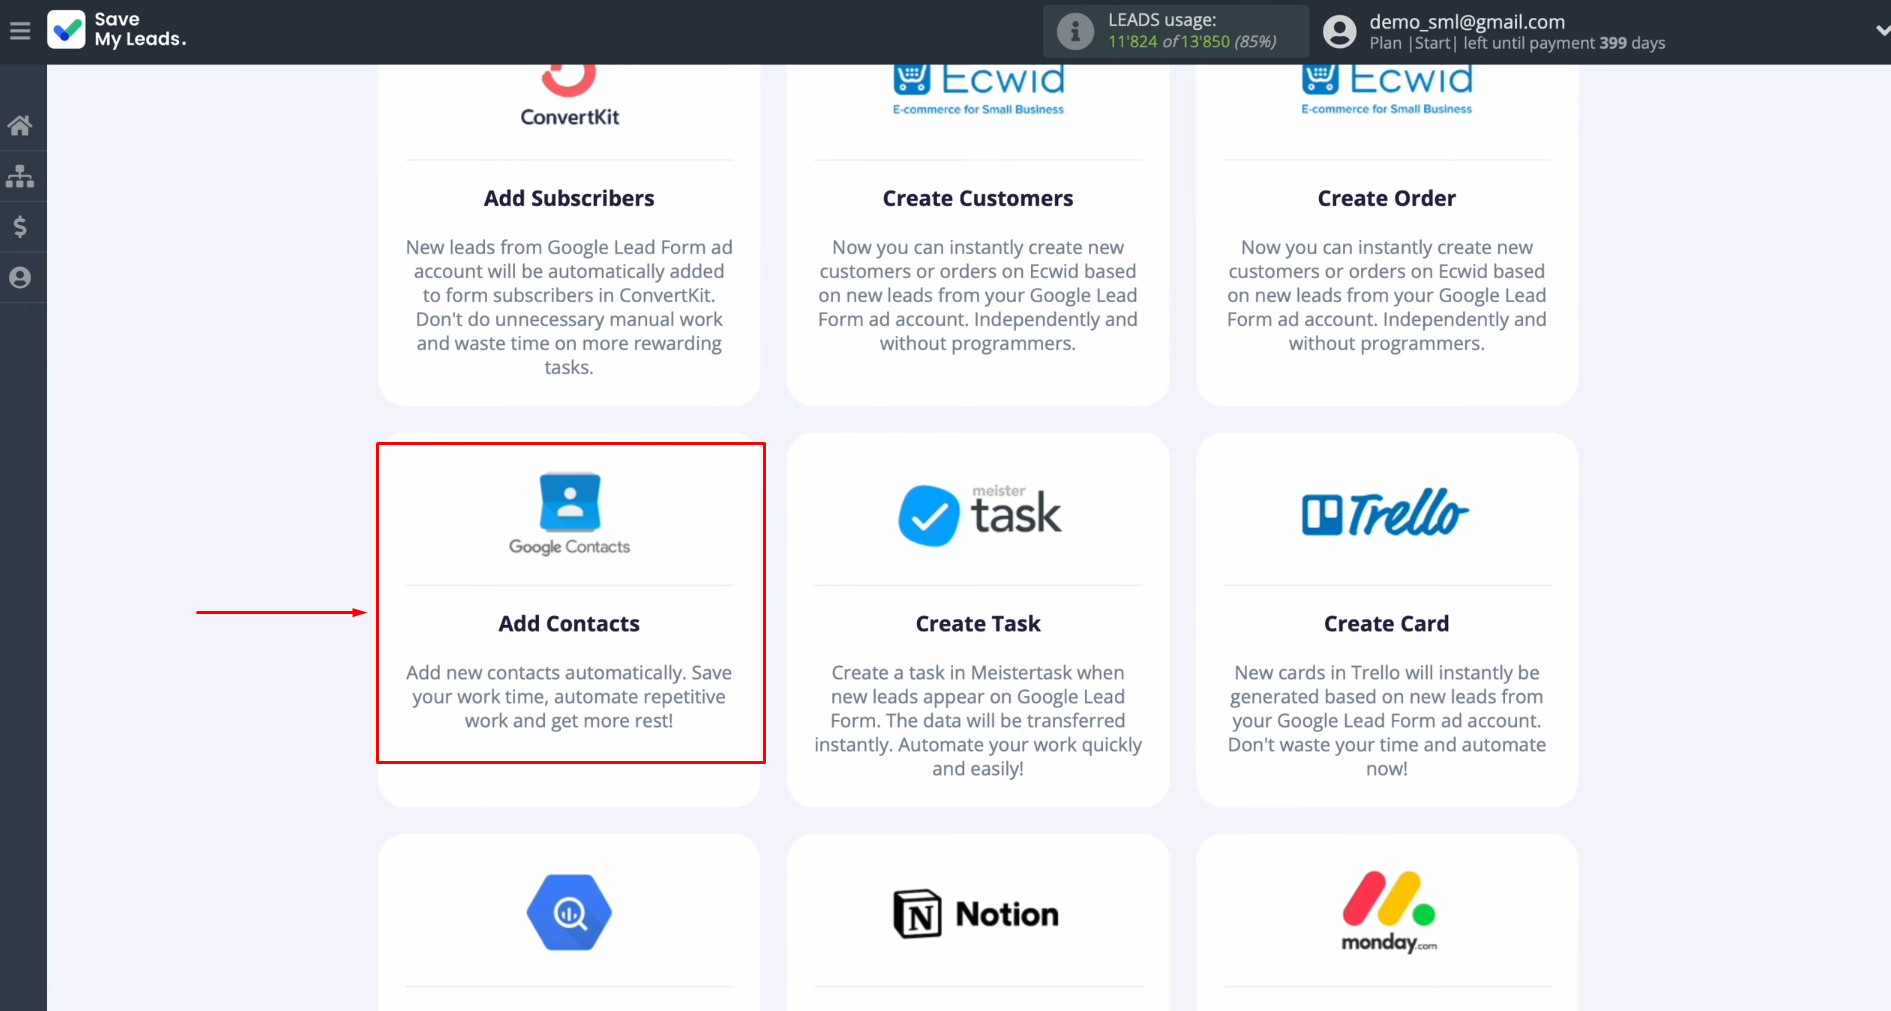
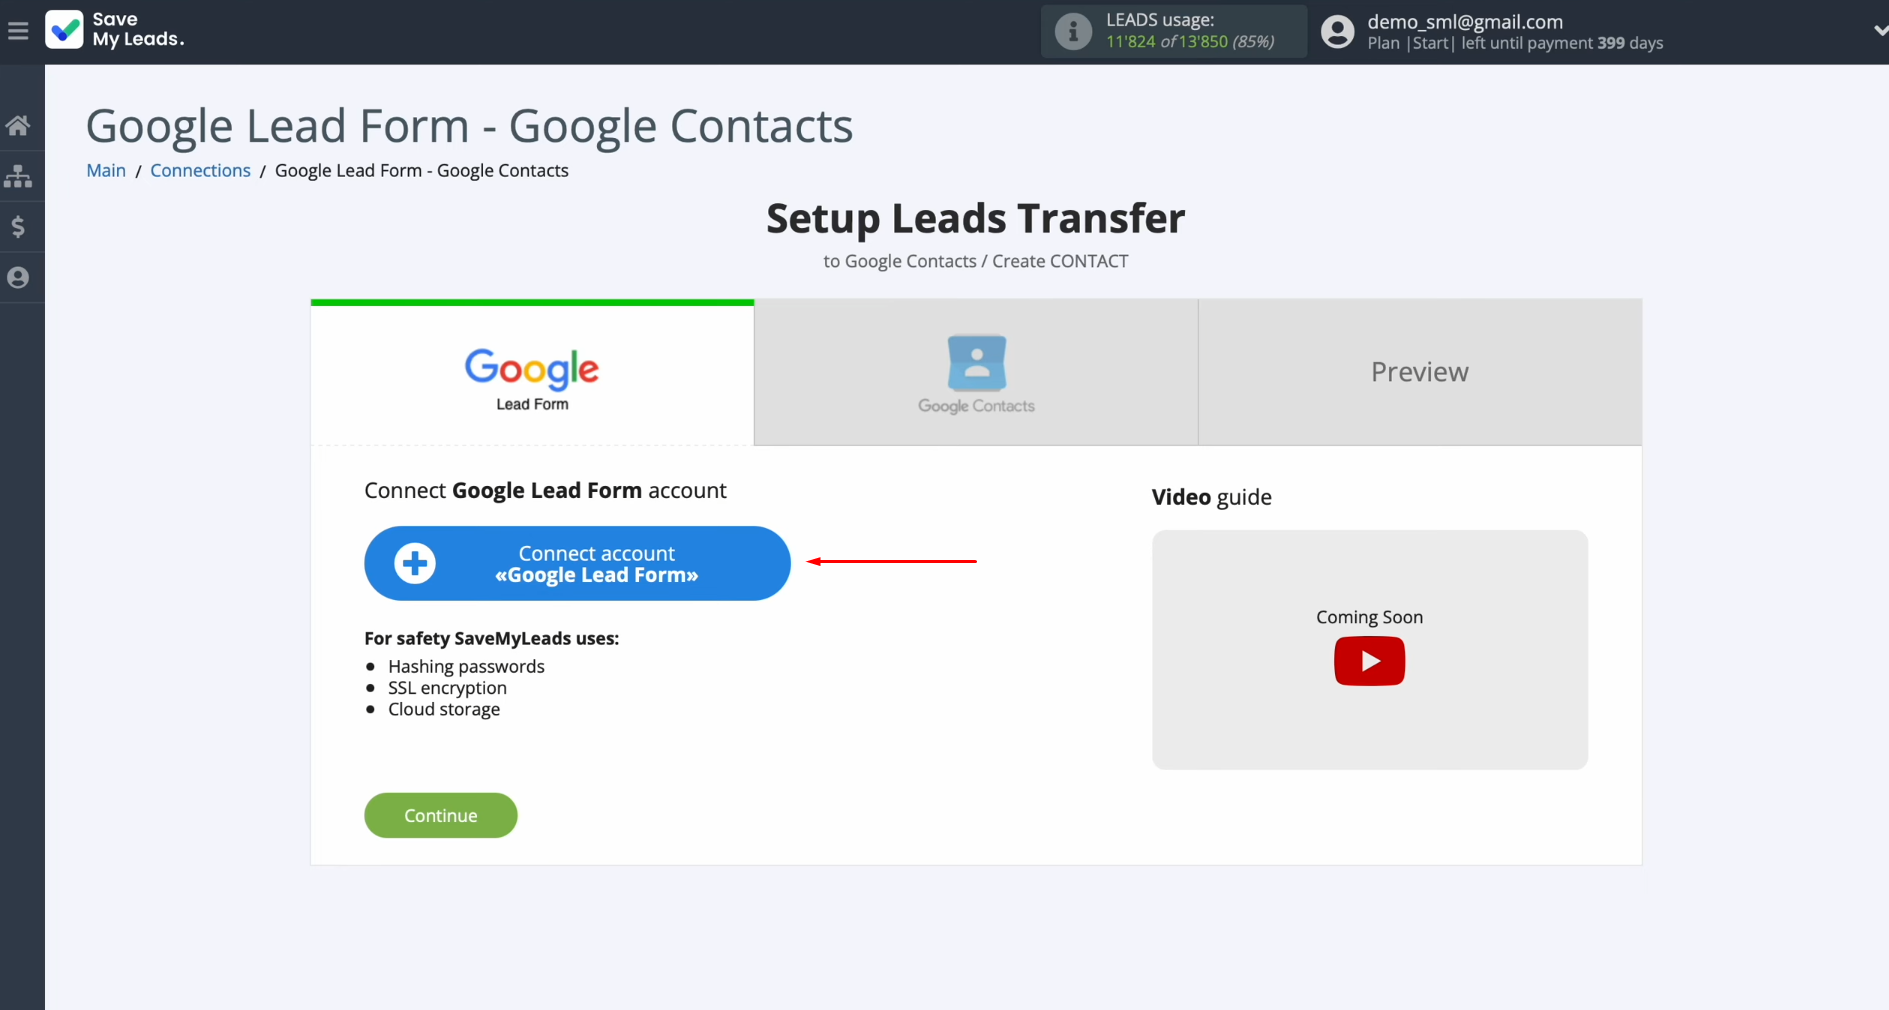
Connect the
Google Lead Form account to SaveMyLeads.
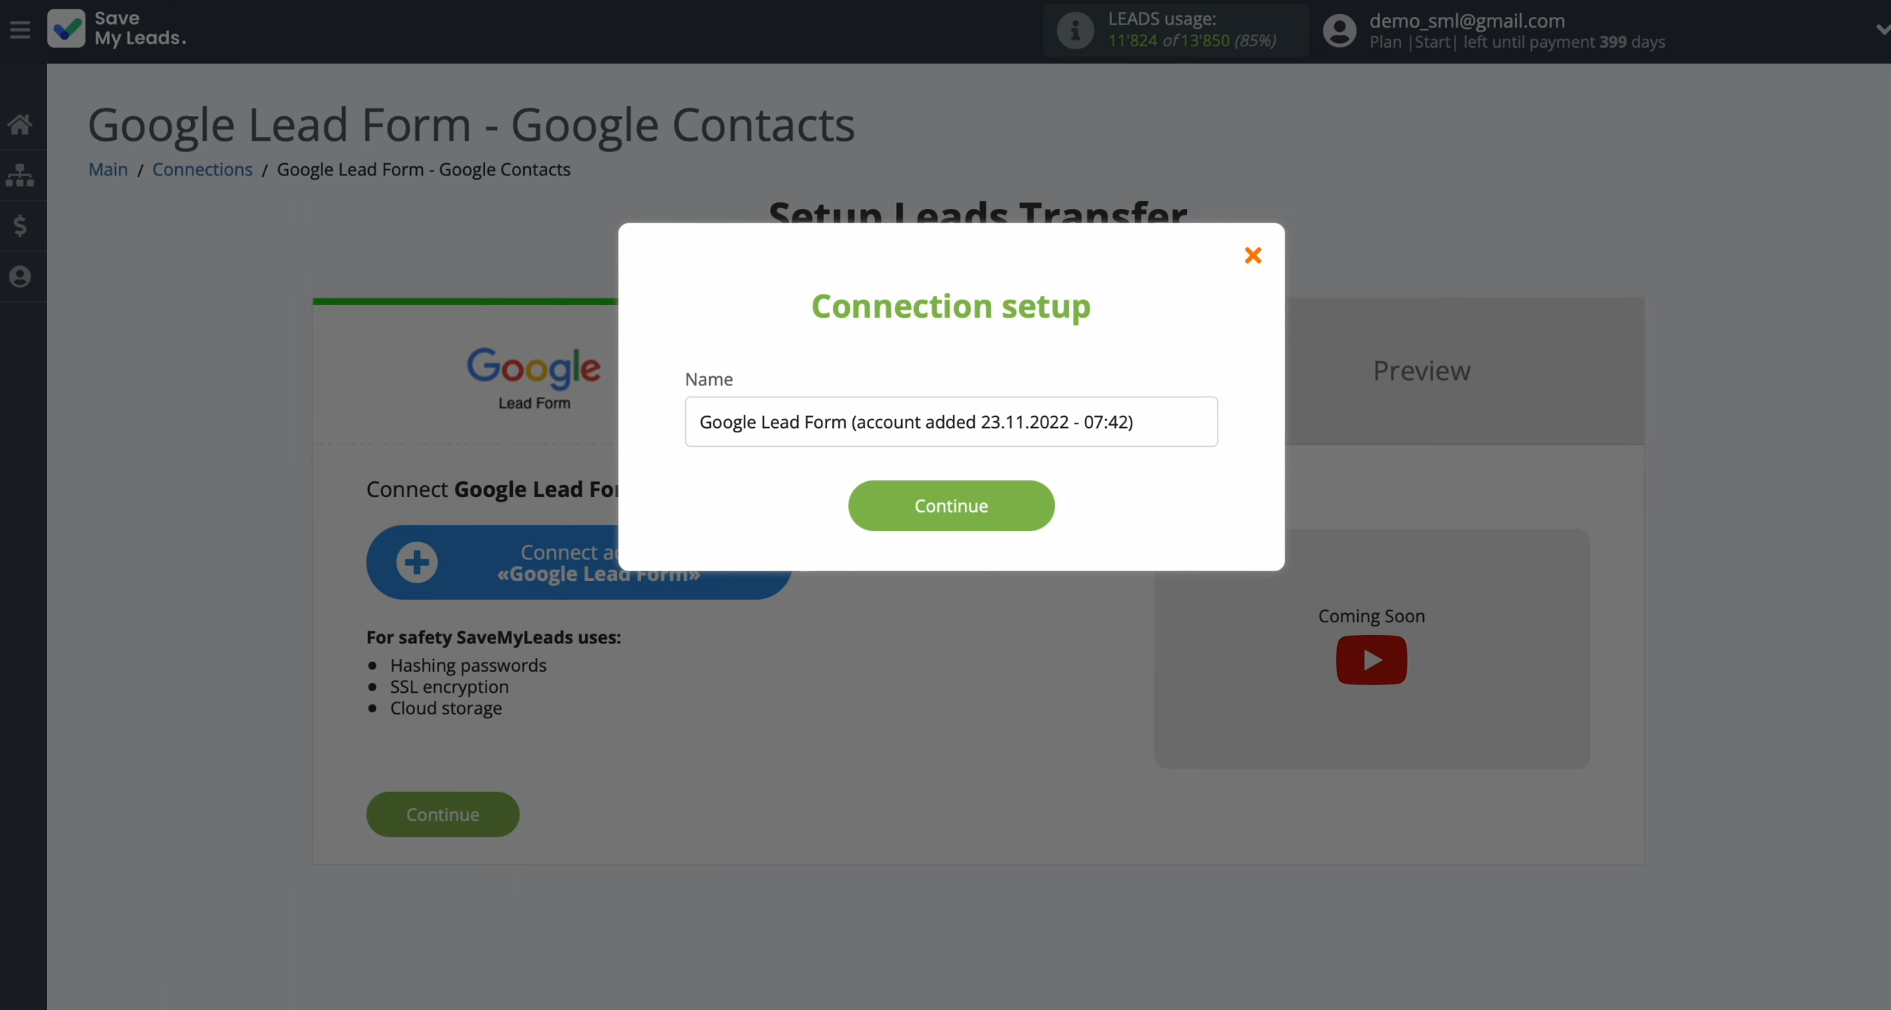
Naming the account is optional. You can simply click “Continue.”
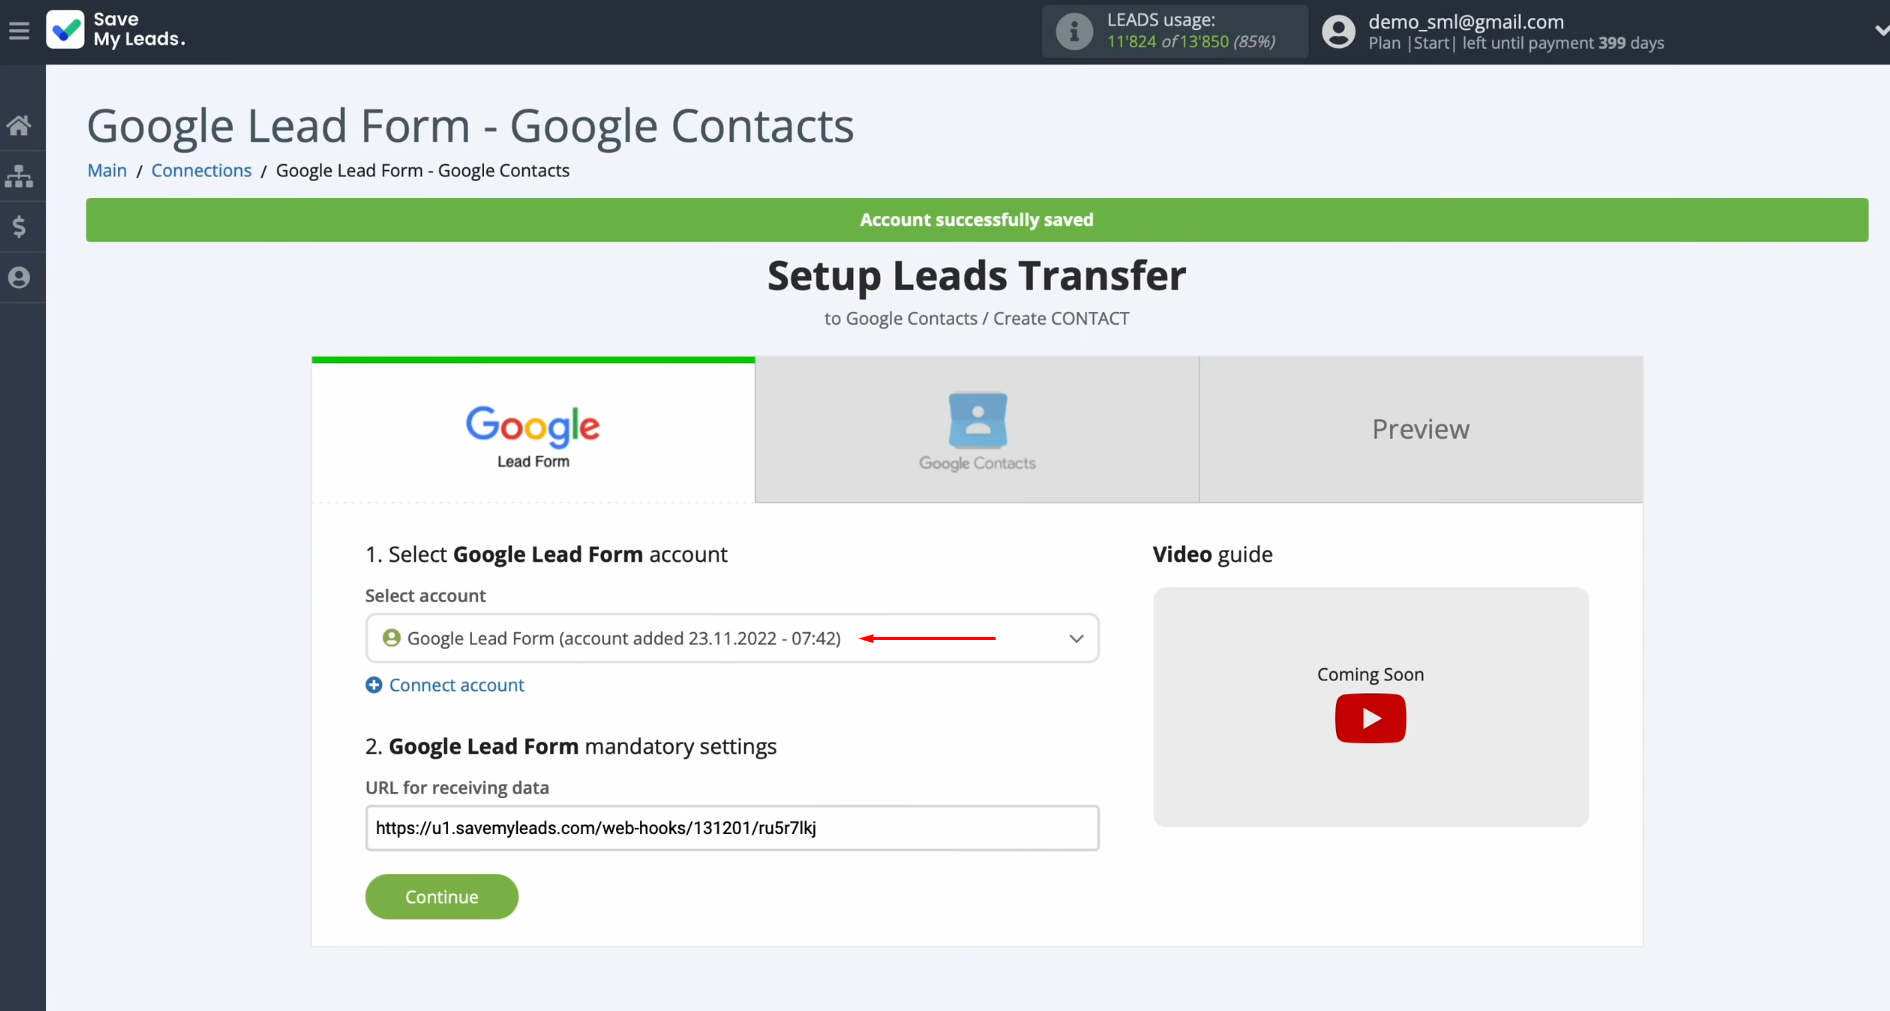
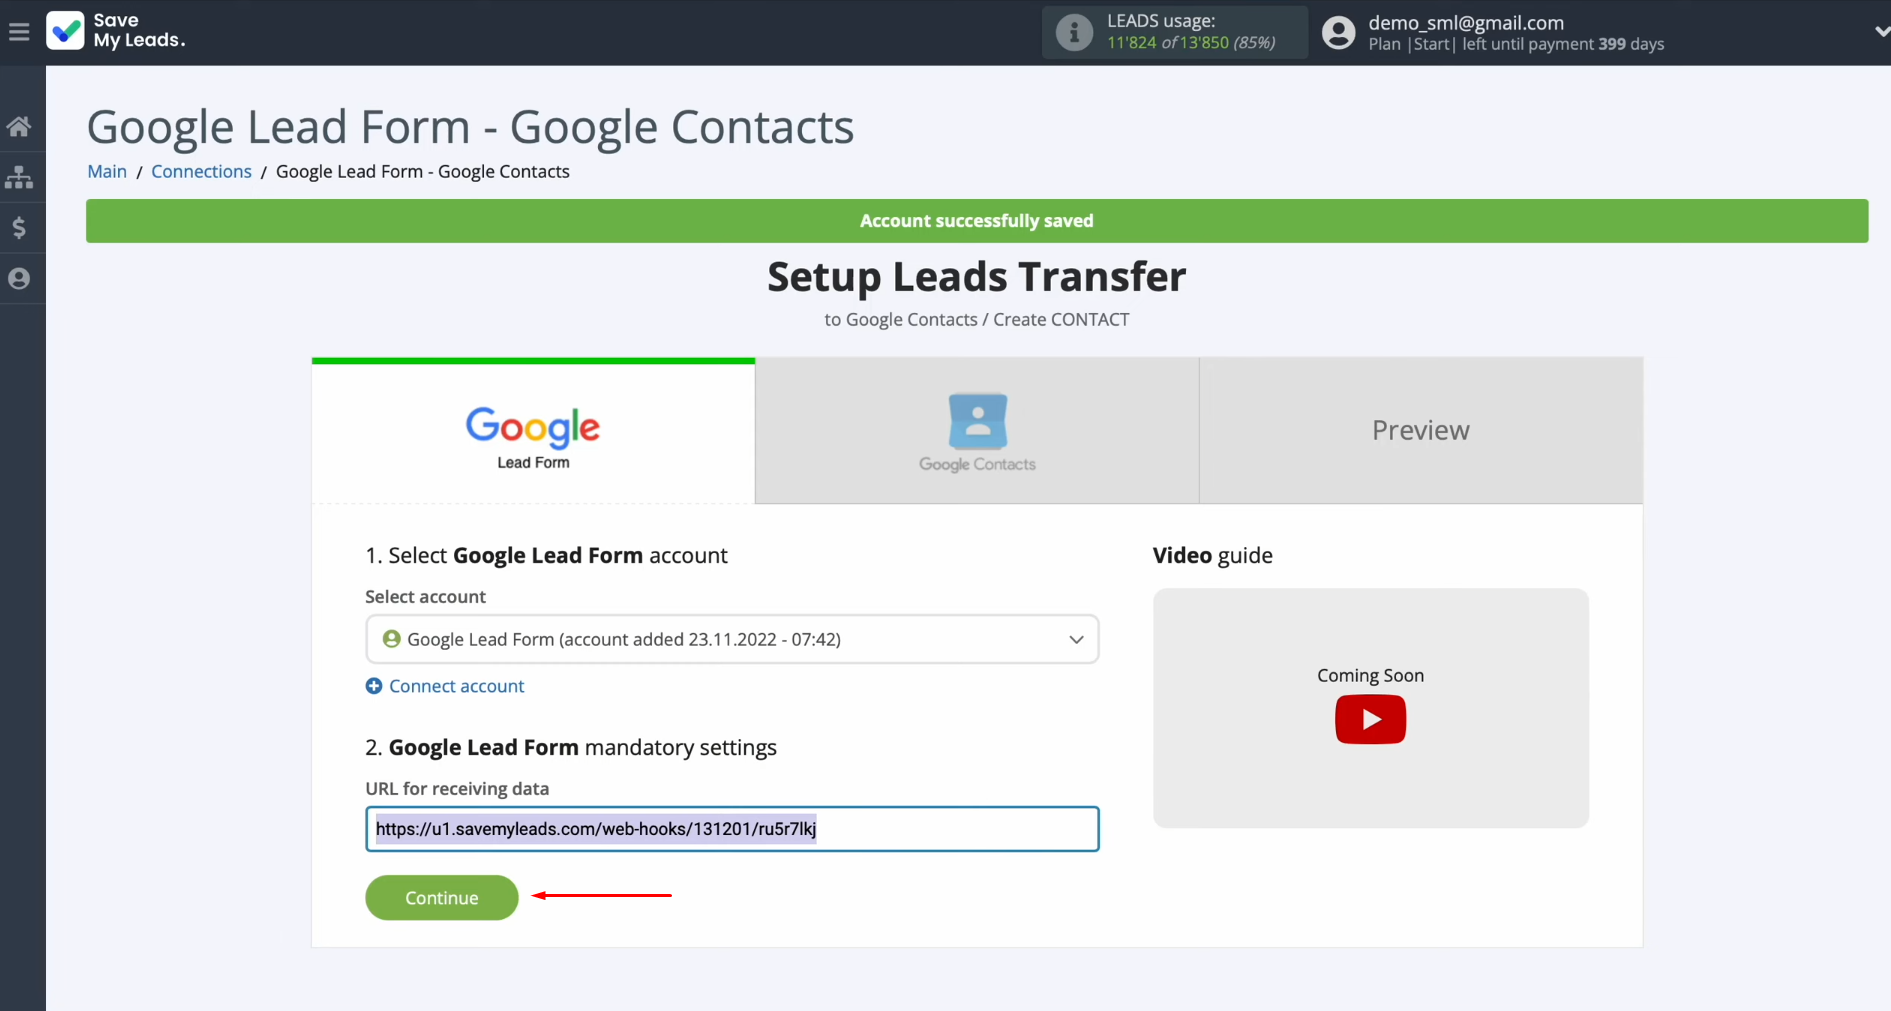
Once the linked account appears in the list, choose it.
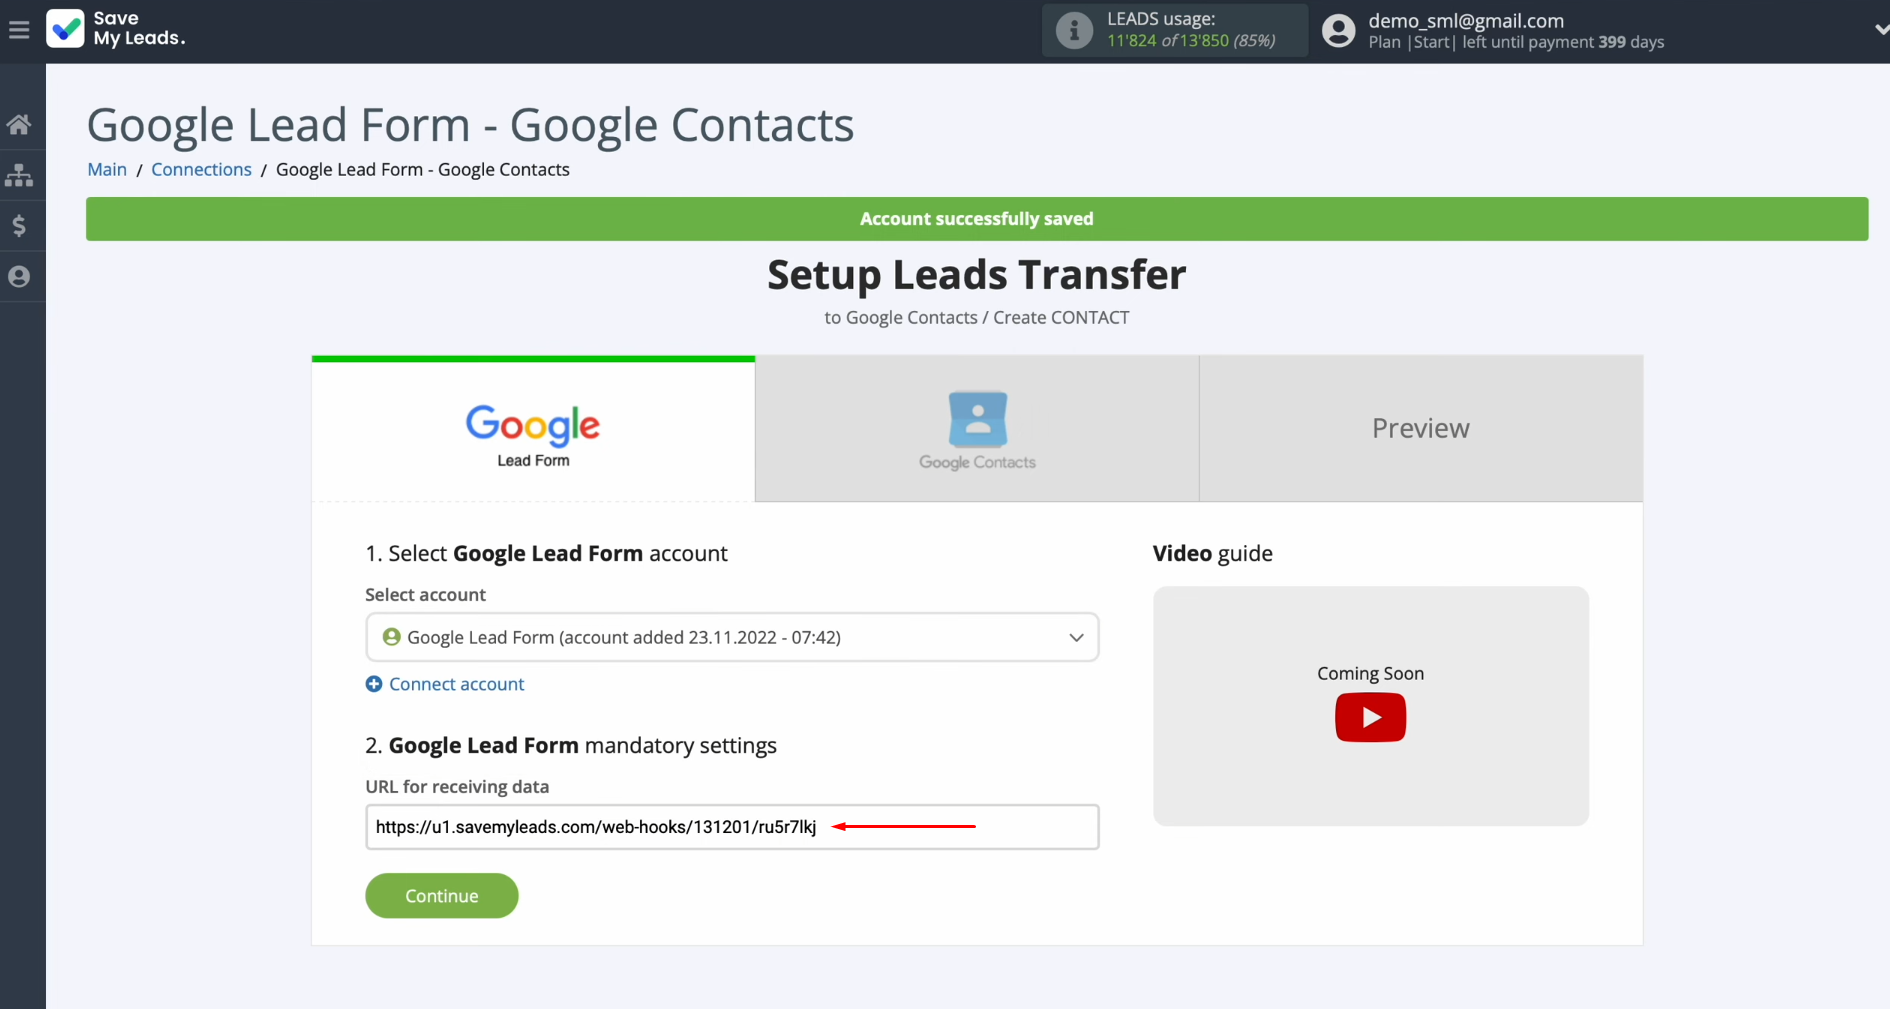
Copy the URL
for receiving data.
Go to the
Google Ads personal account. Here, you need the “Assets” section.
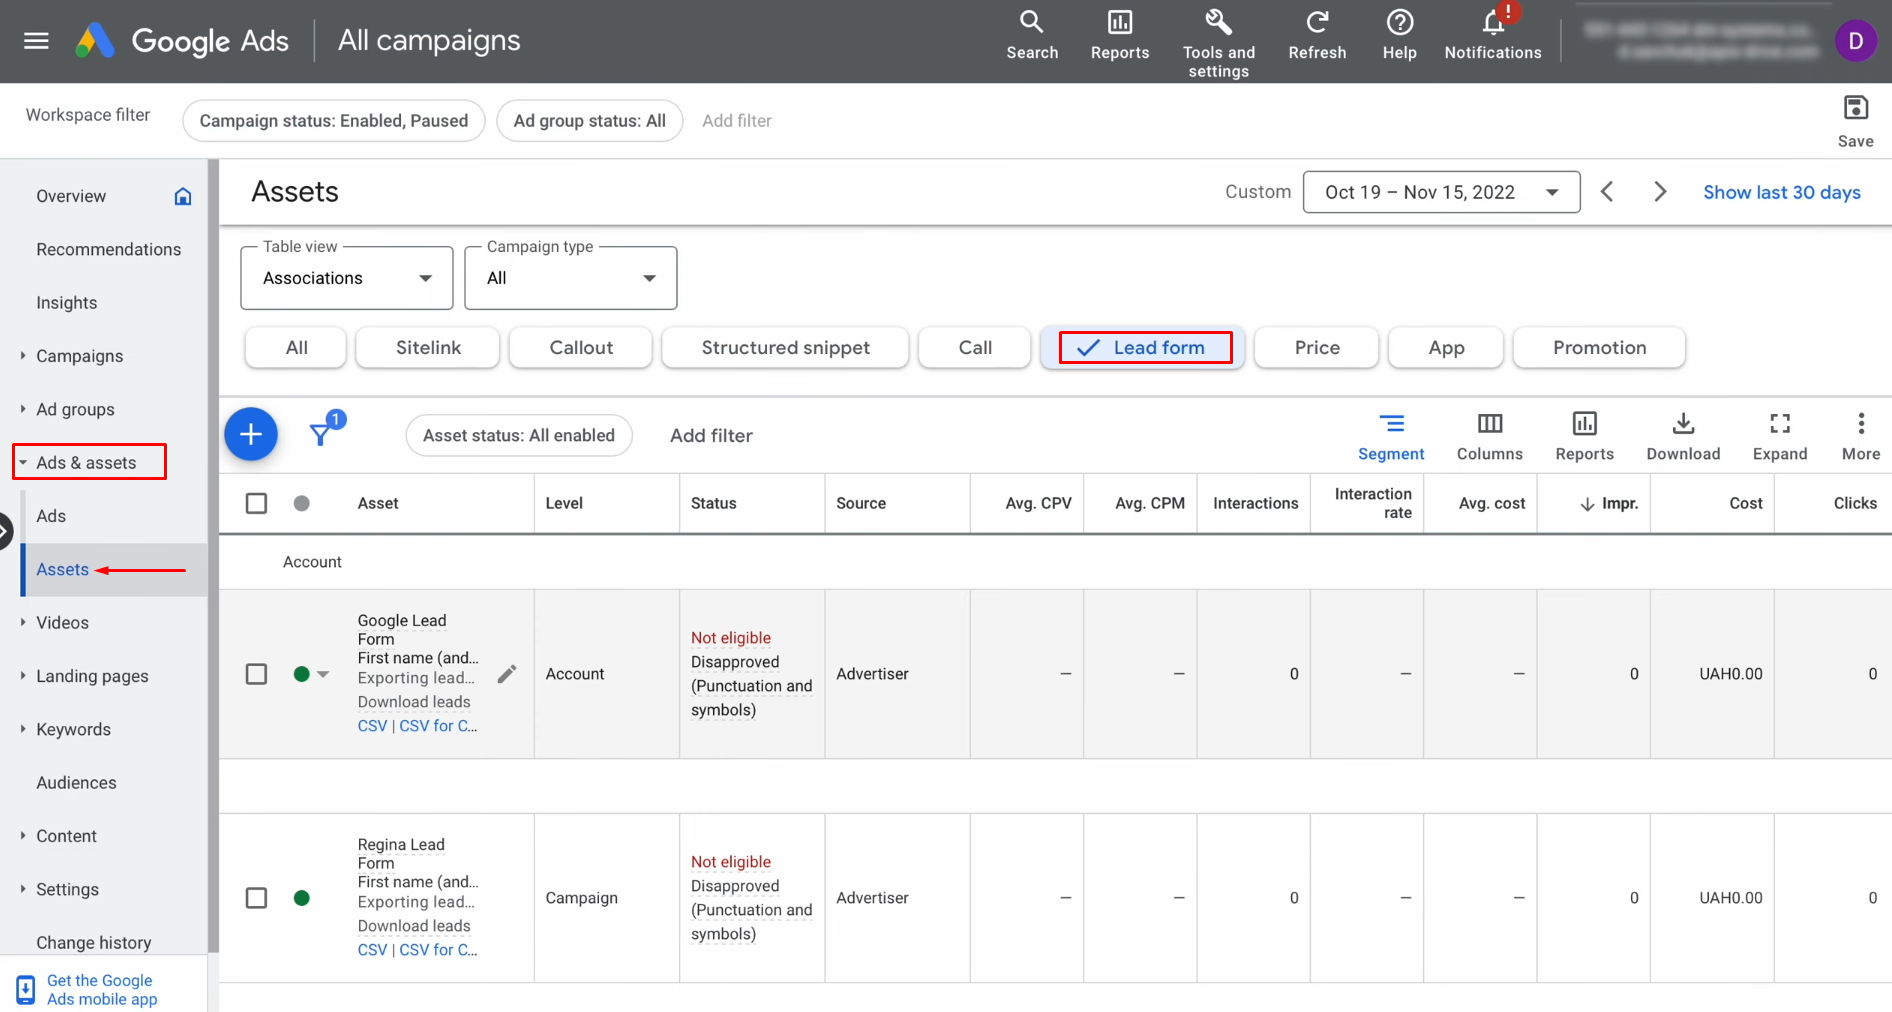
Choose the specific lead form from which you wish to receive new leads.
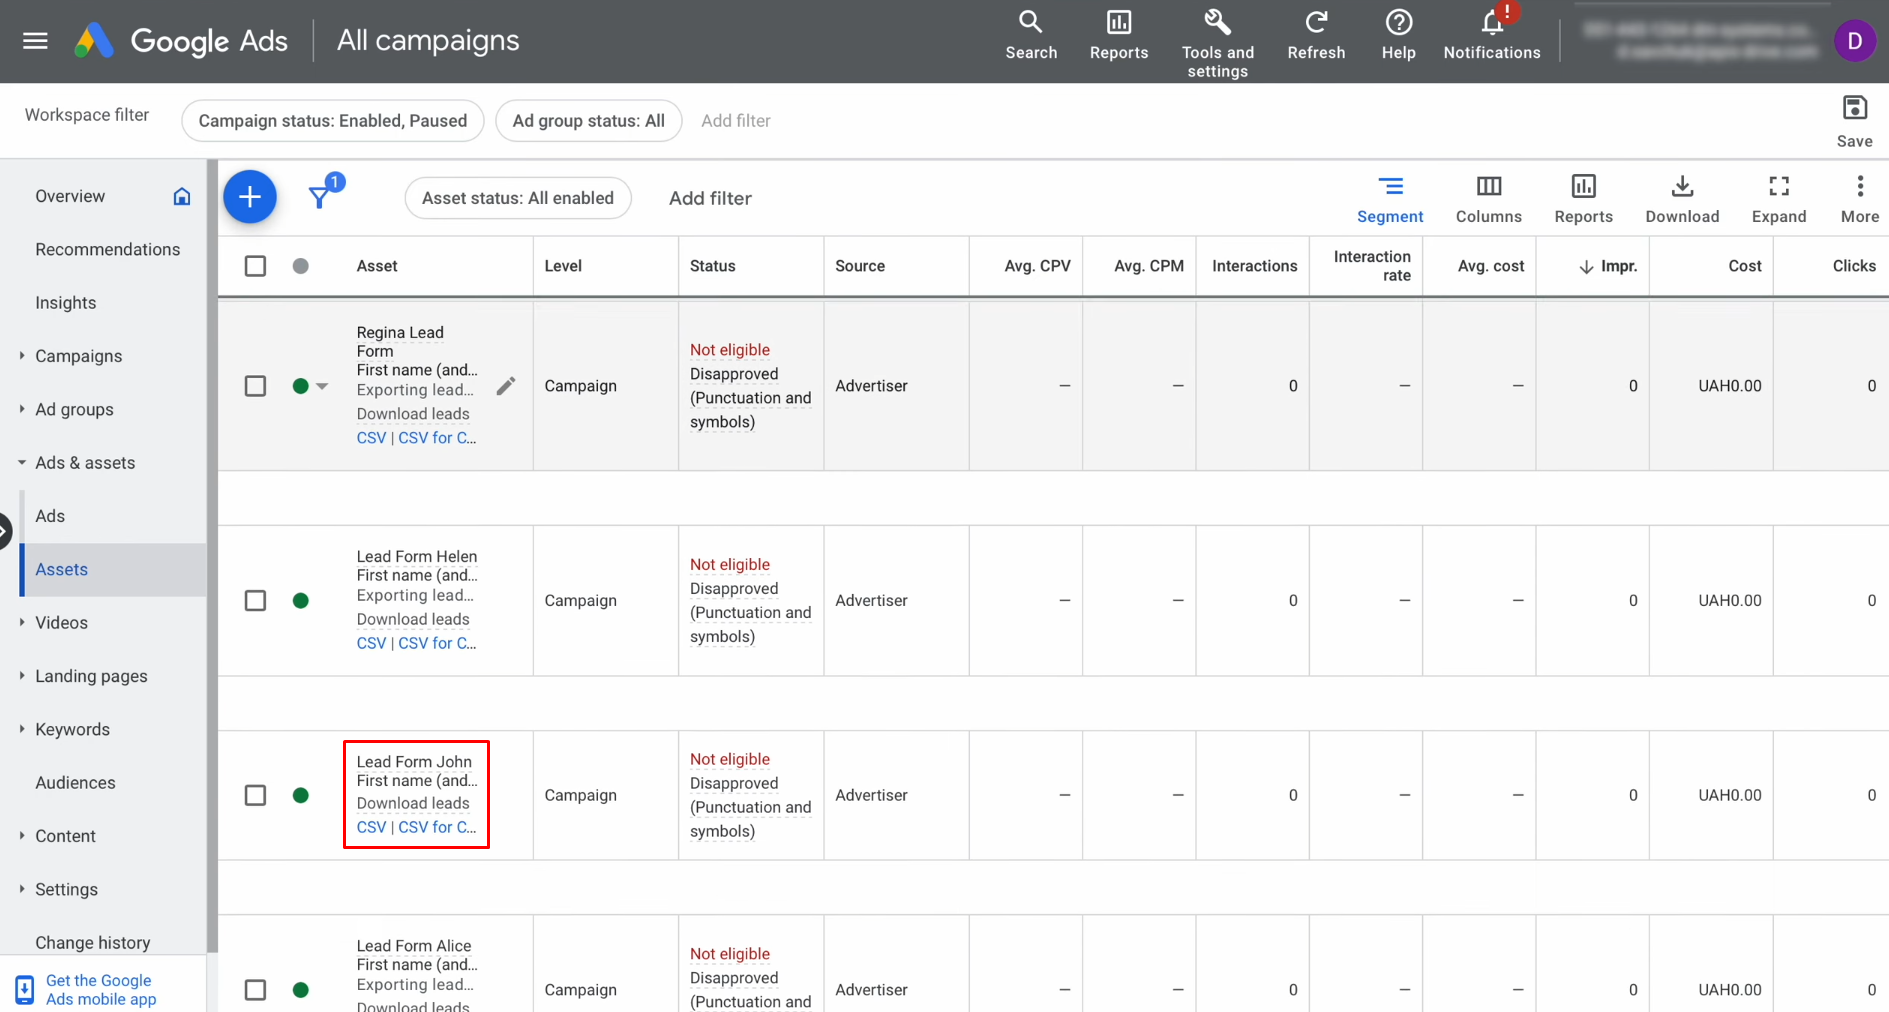
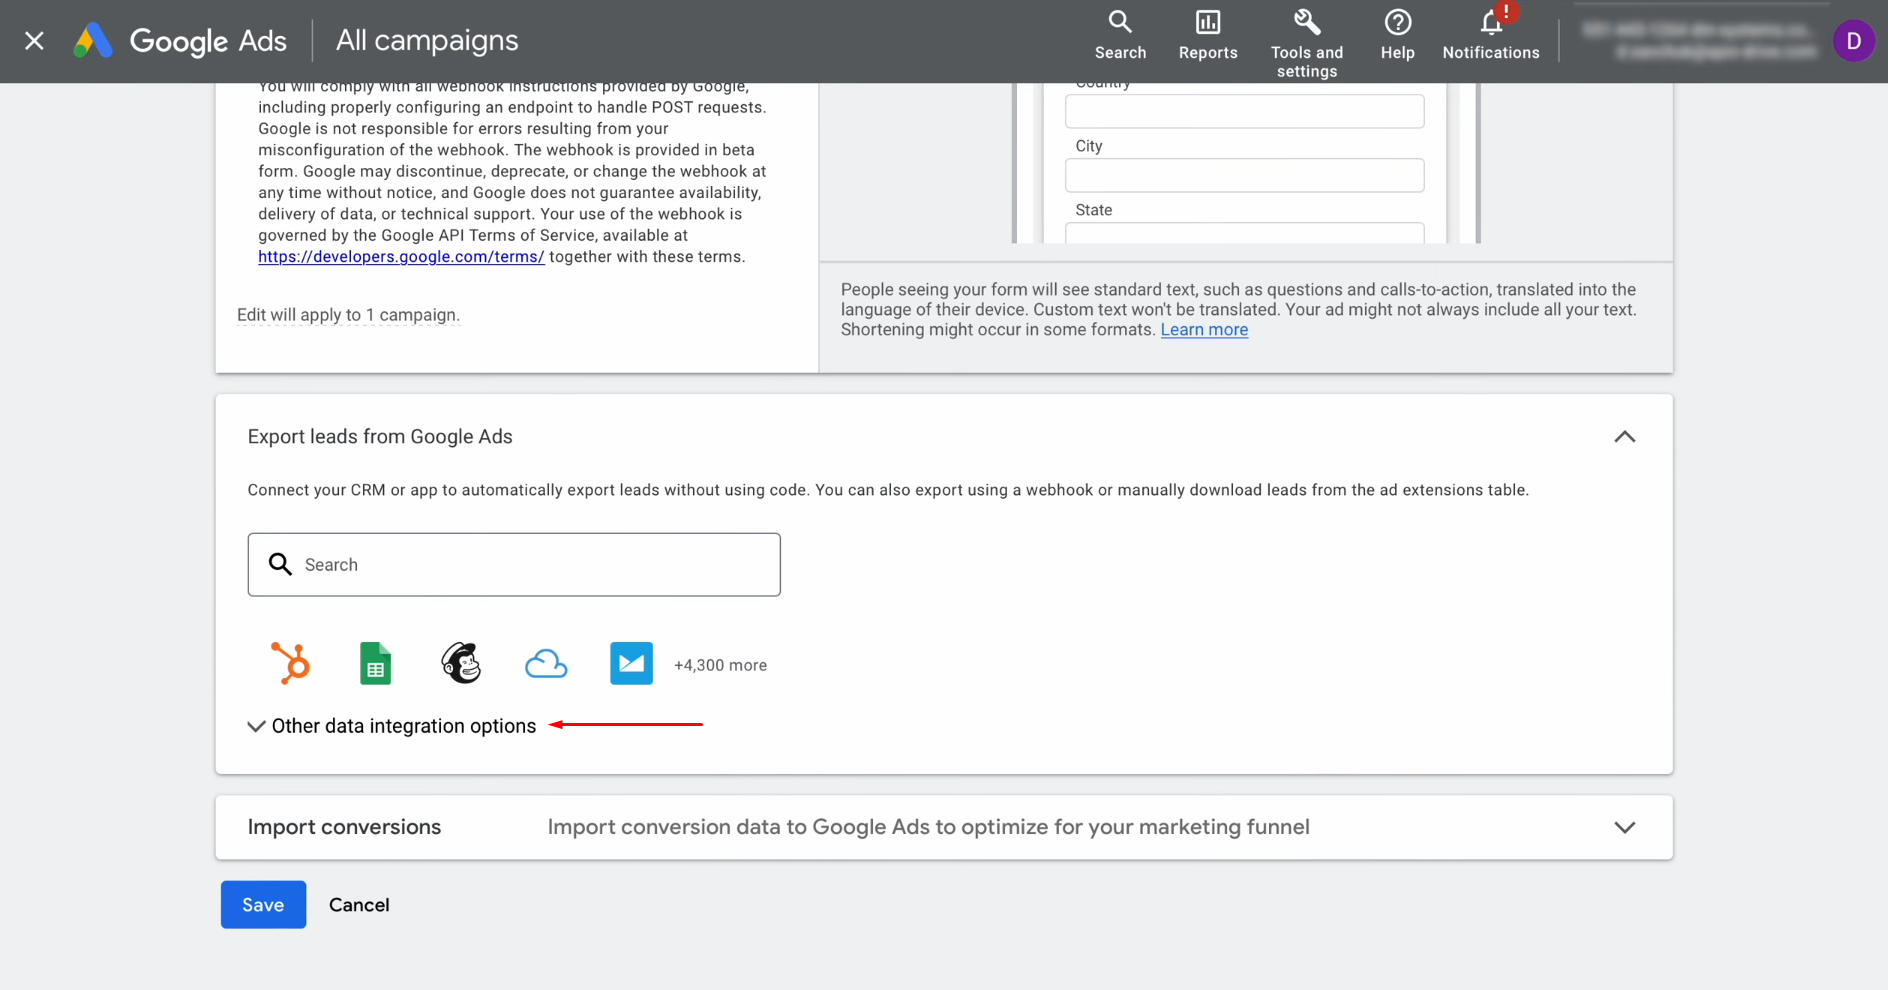
Go to the lead
form settings. Find the “Other data integration options” section.
Paste the copied URL into the "Webhook" field.
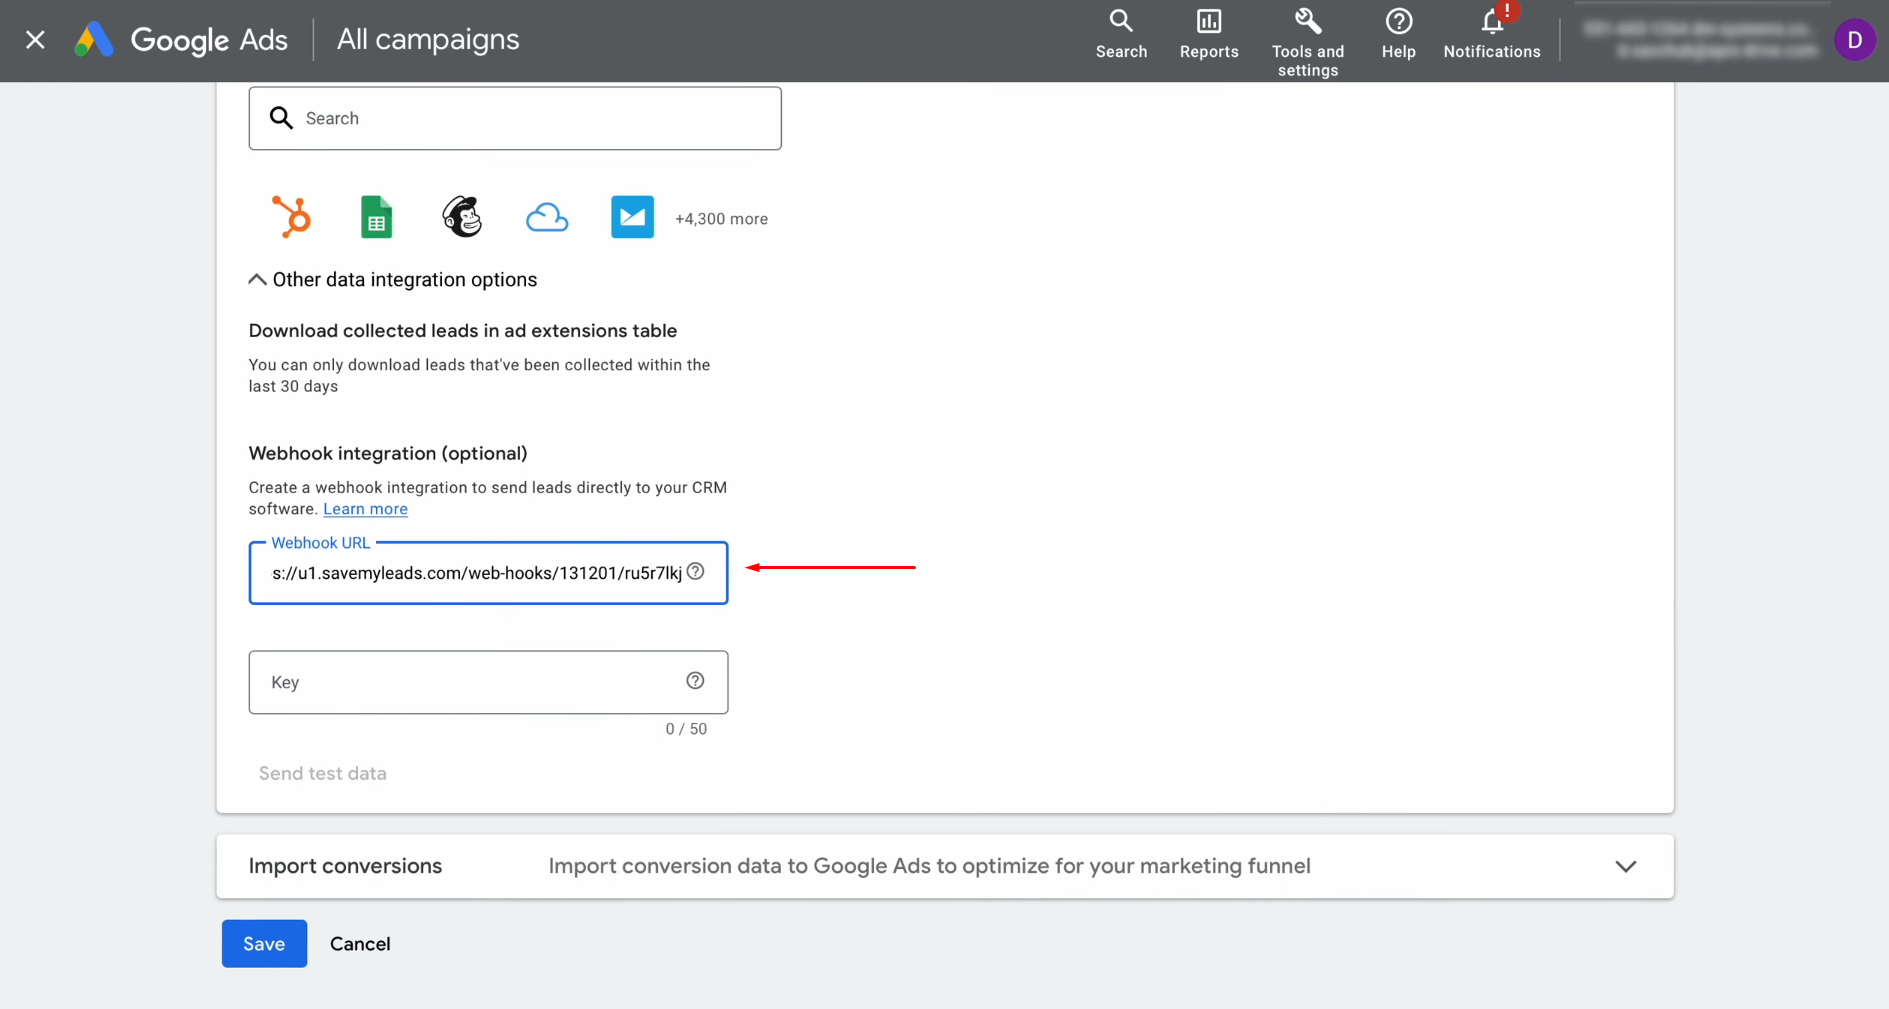
Copy the last segment of the URL.
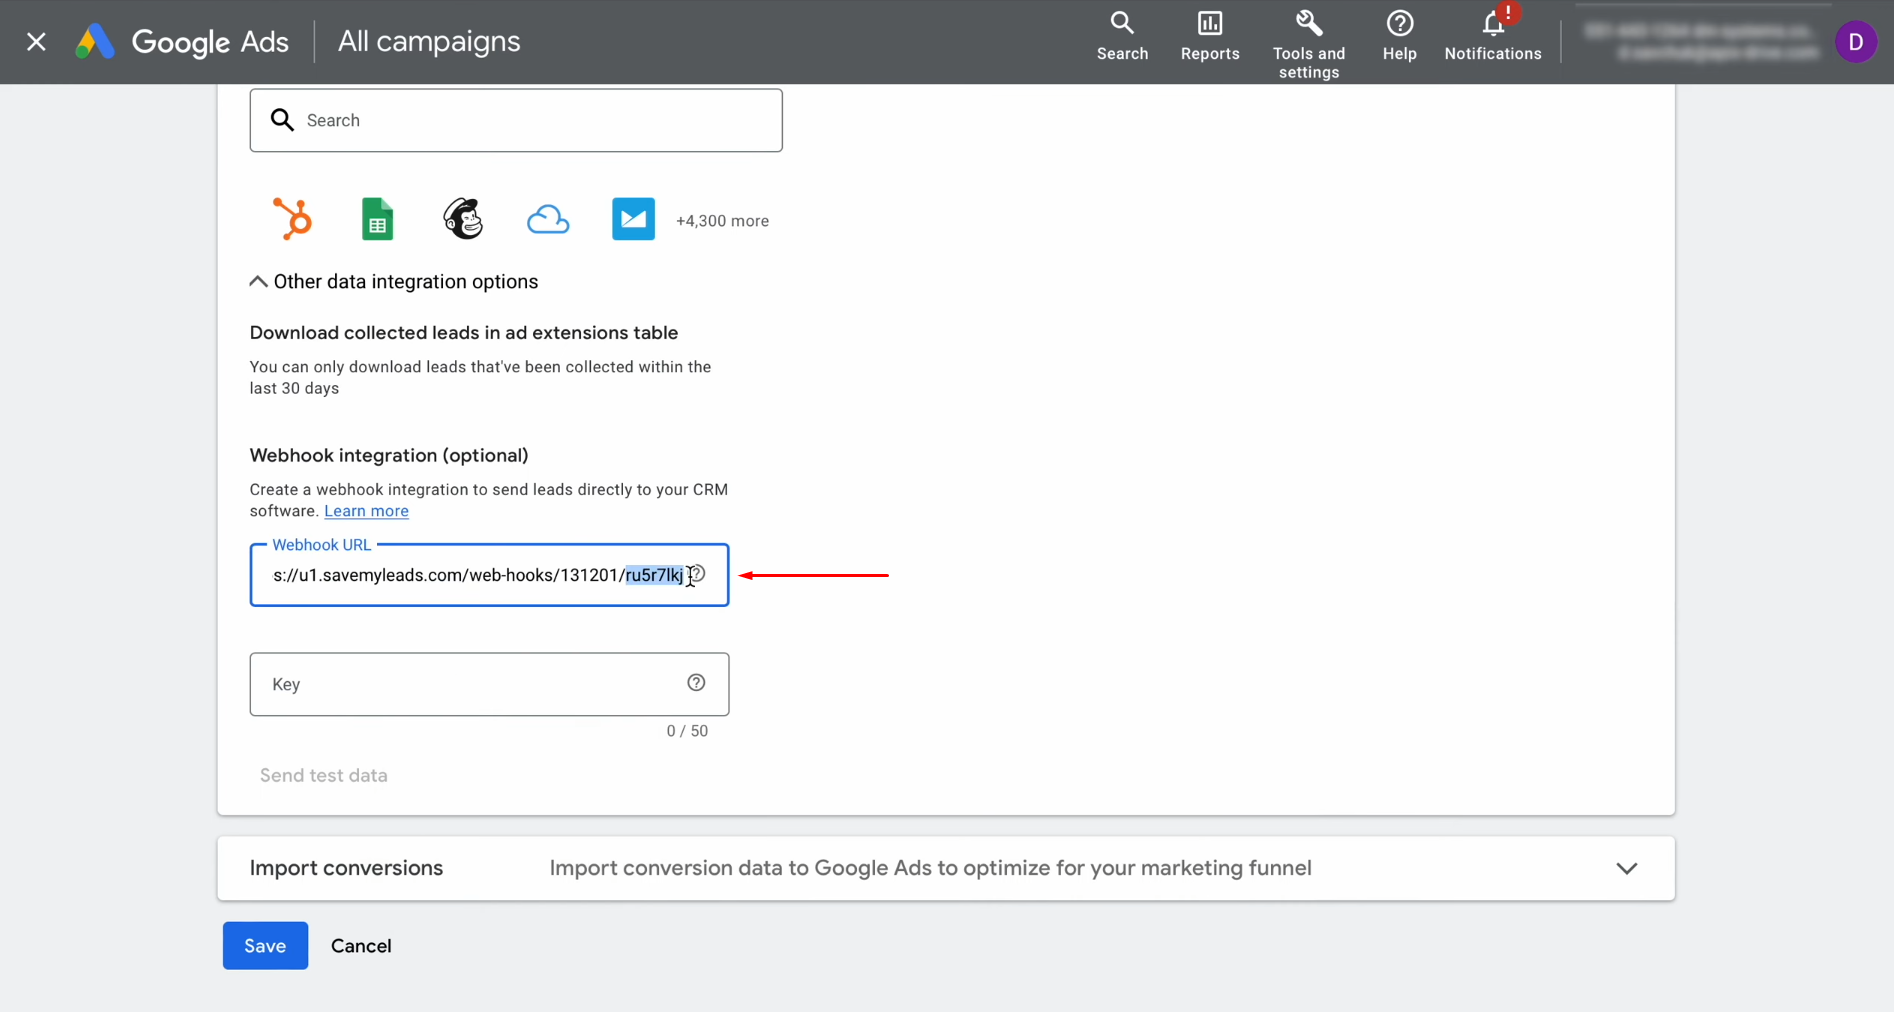
Paste the last segment of the URL into the "Key" field.
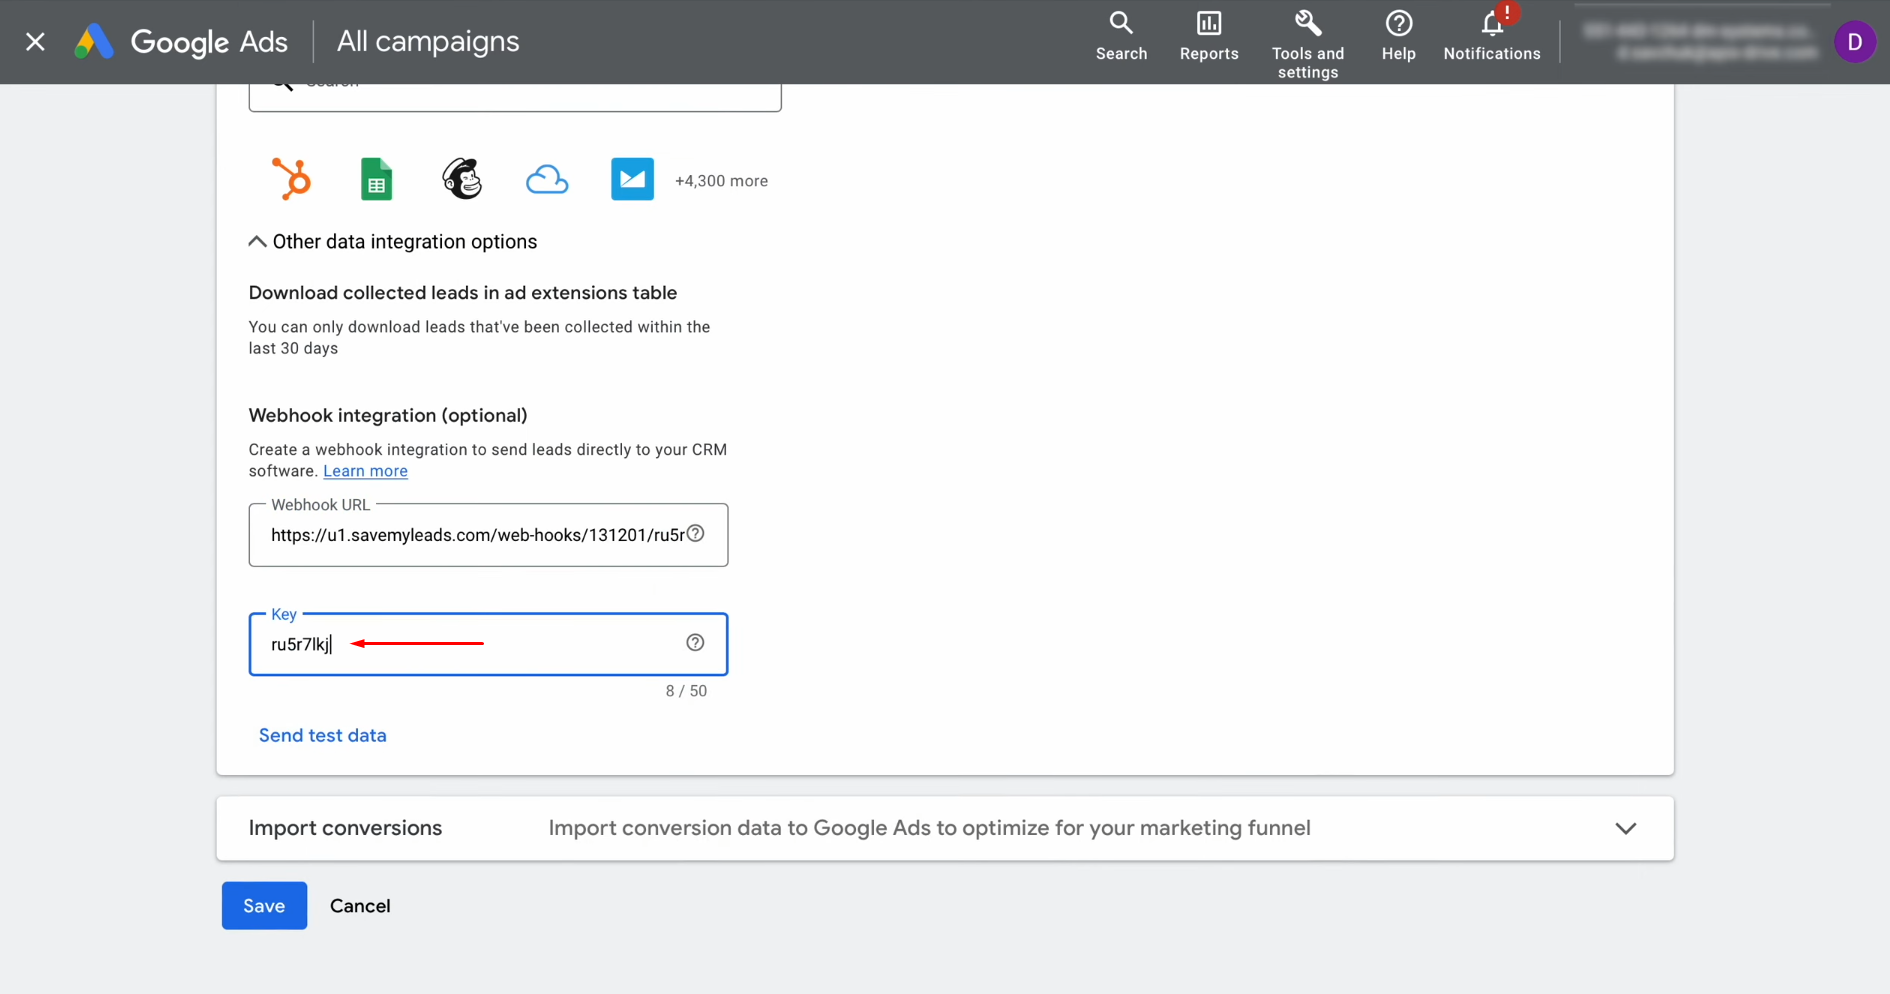
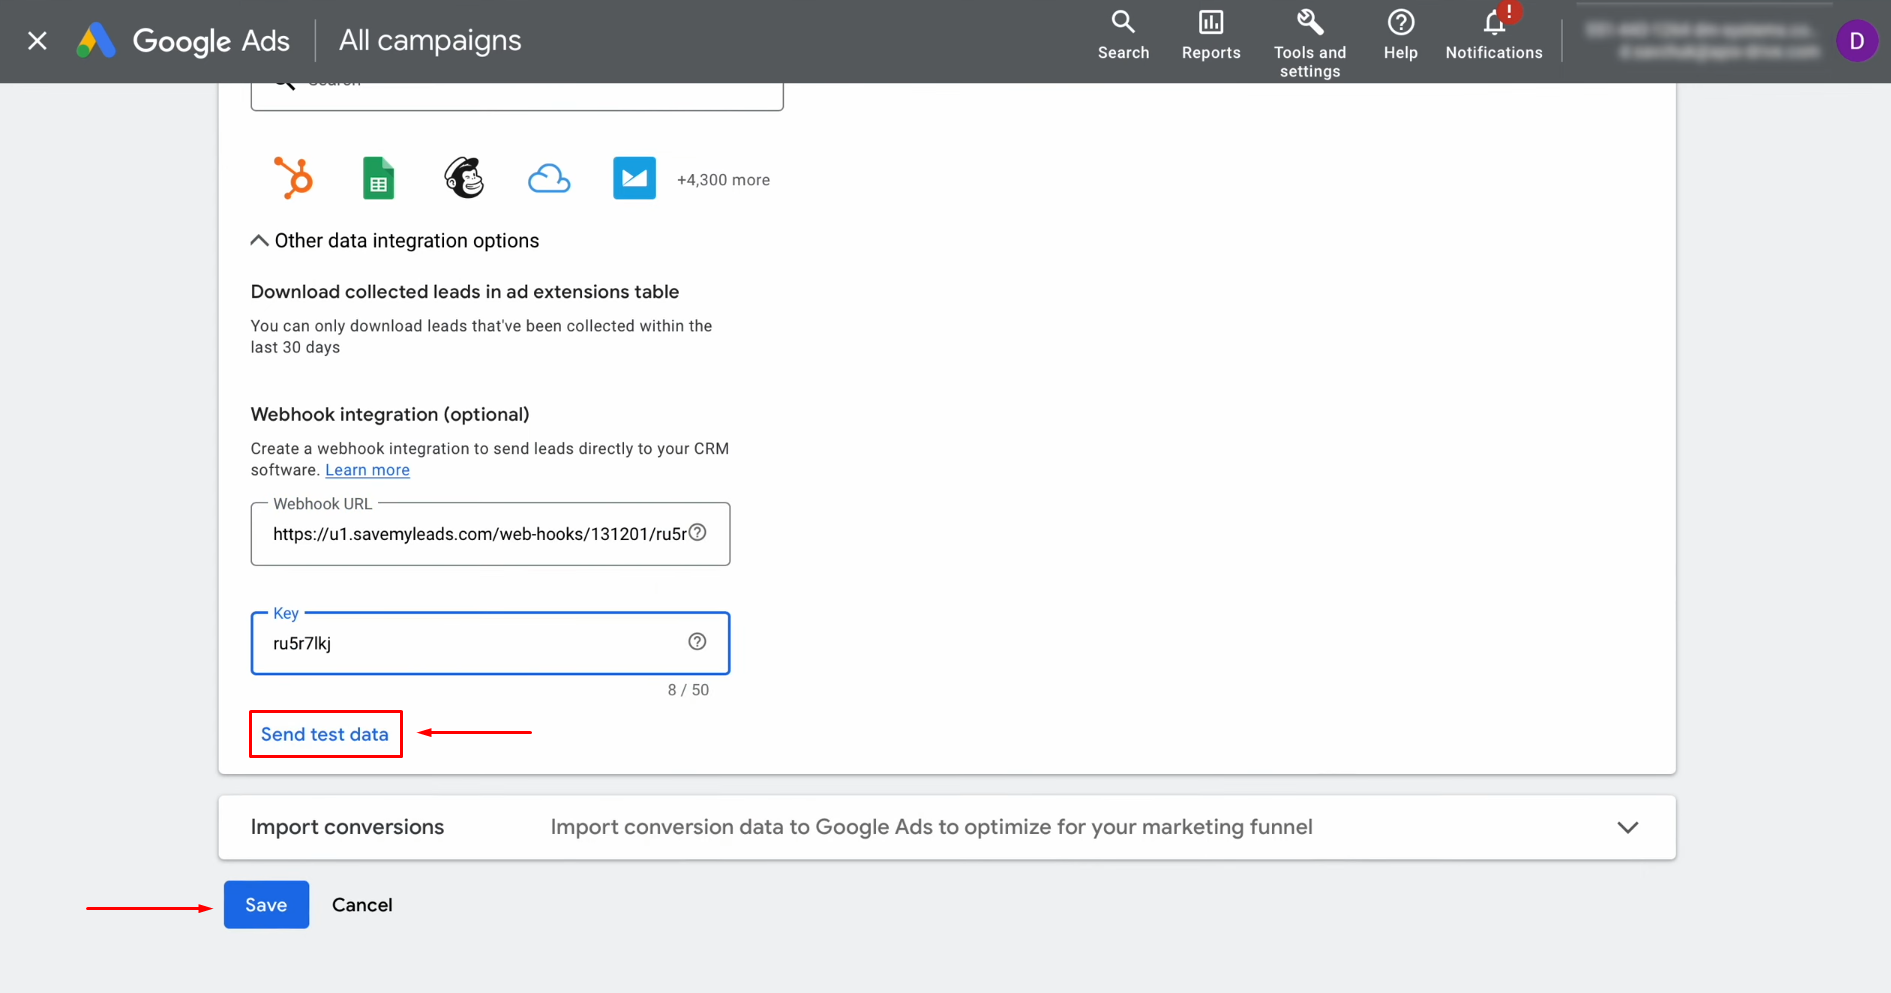
Send test data. Next, click "Save" and return to your account in SML.
Click “Continue.”
Setting Up the Data Destination—Google Contacts
Connect your Google Contacts account to SaveMyLeads.
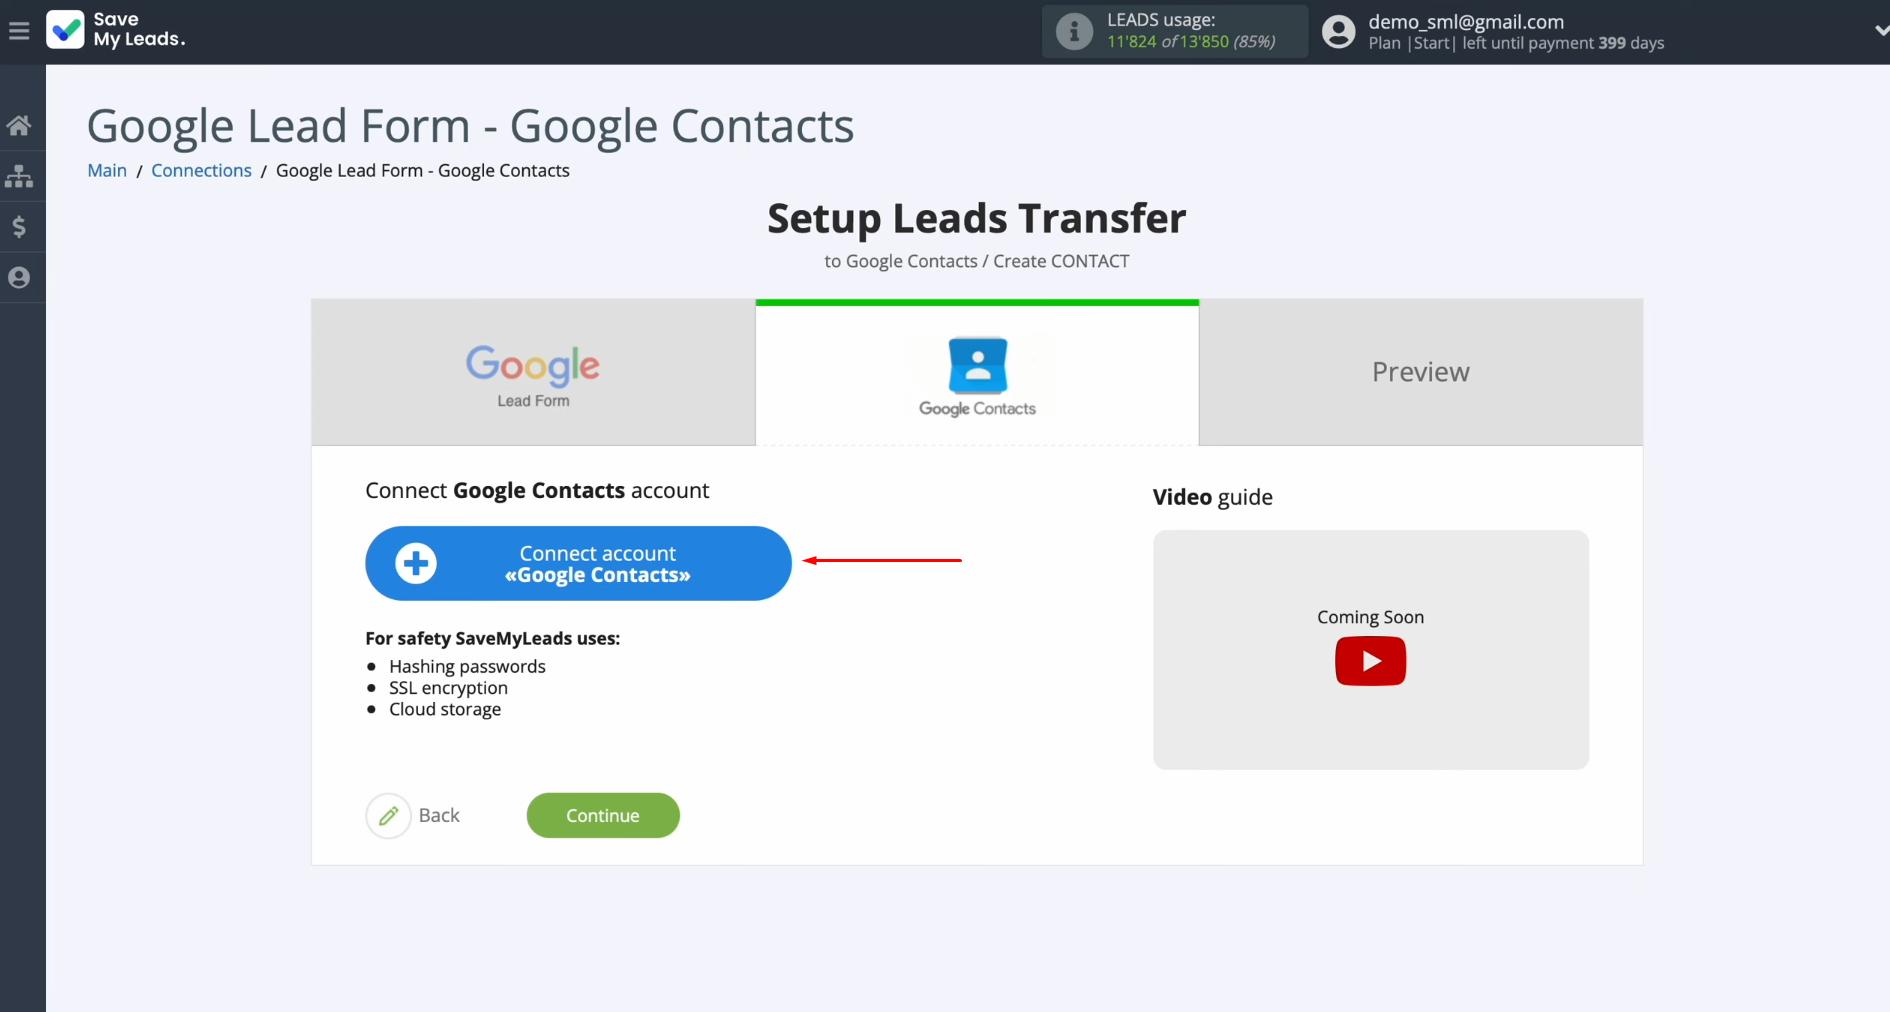
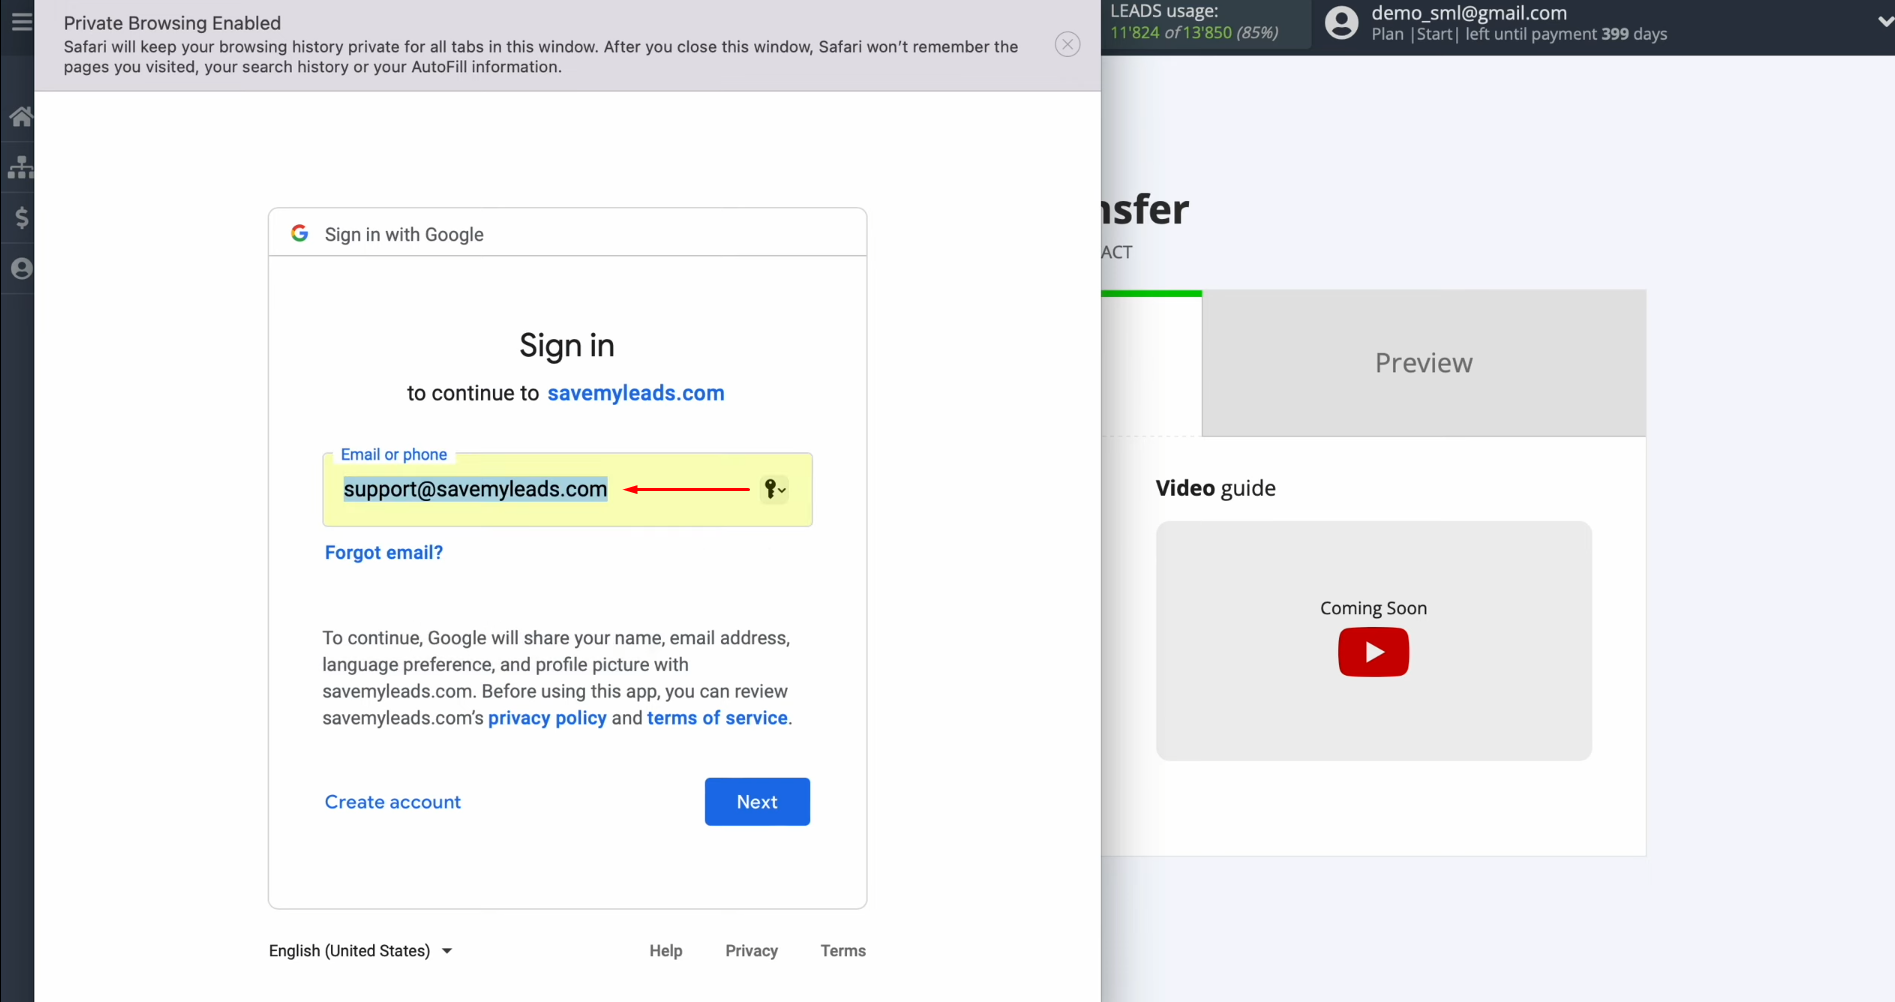
In this window, enter the username and password associated with your Google account.
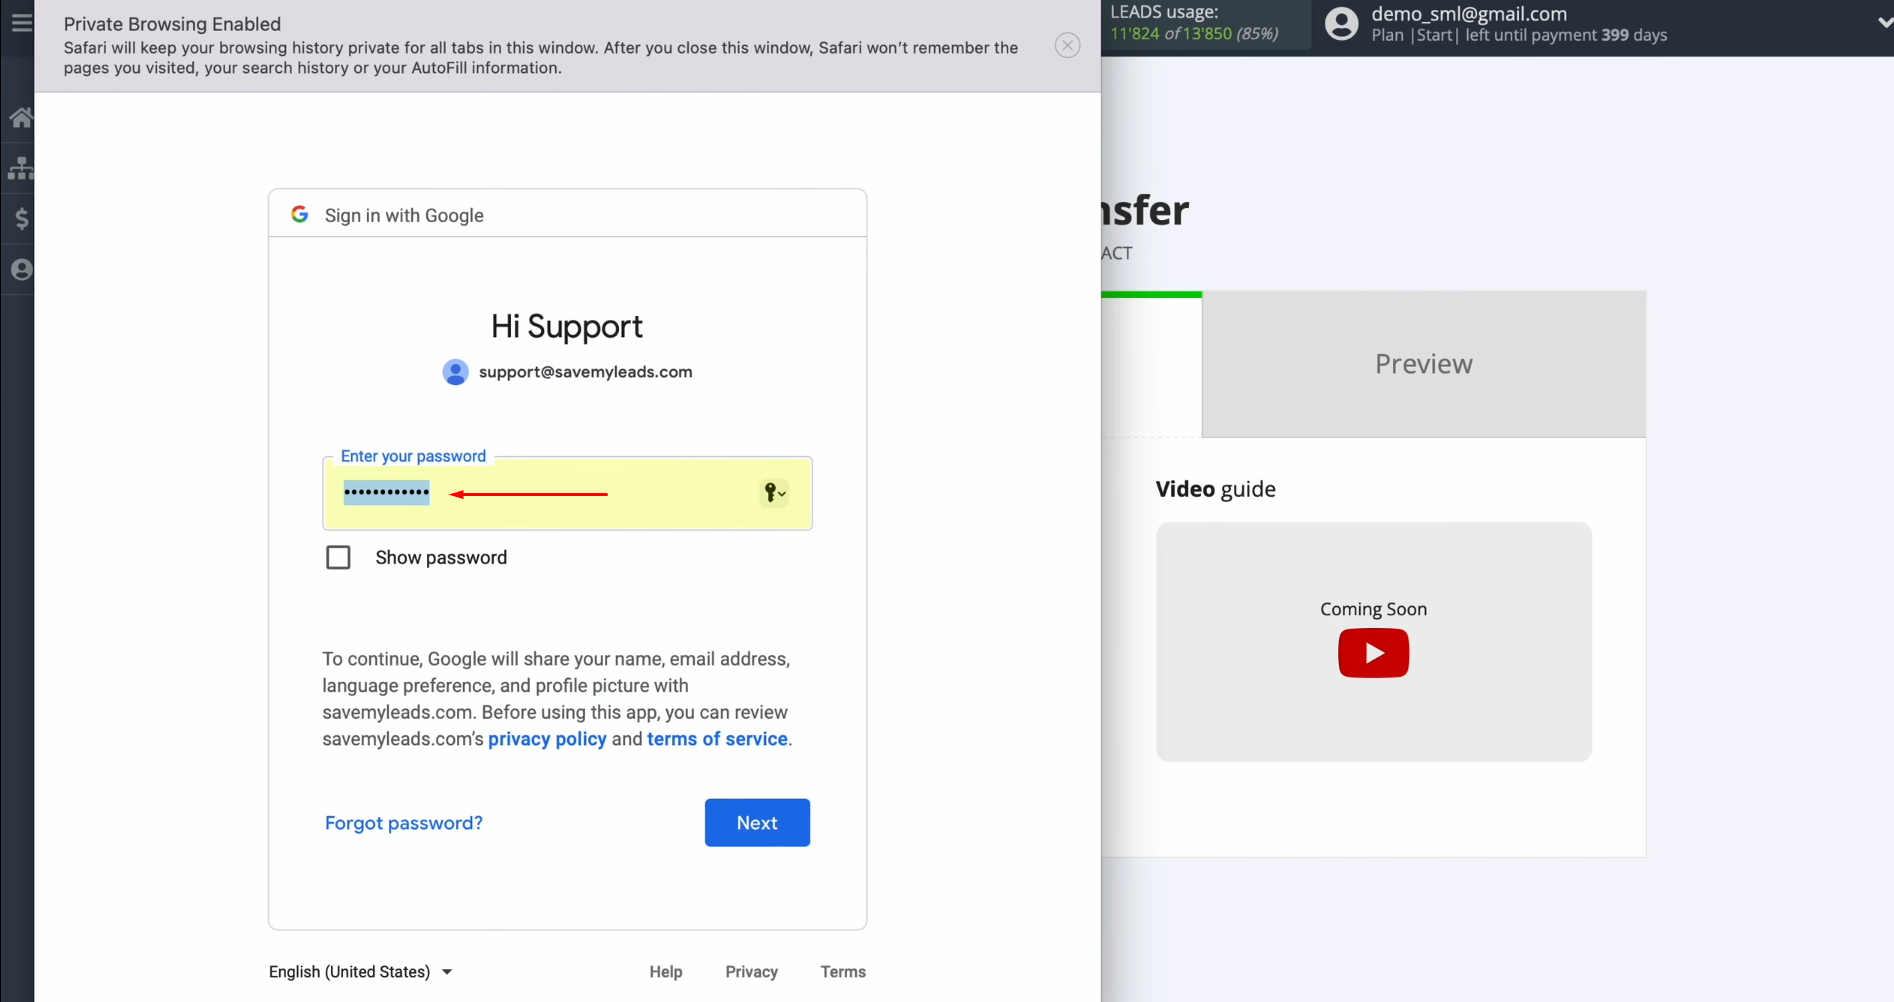
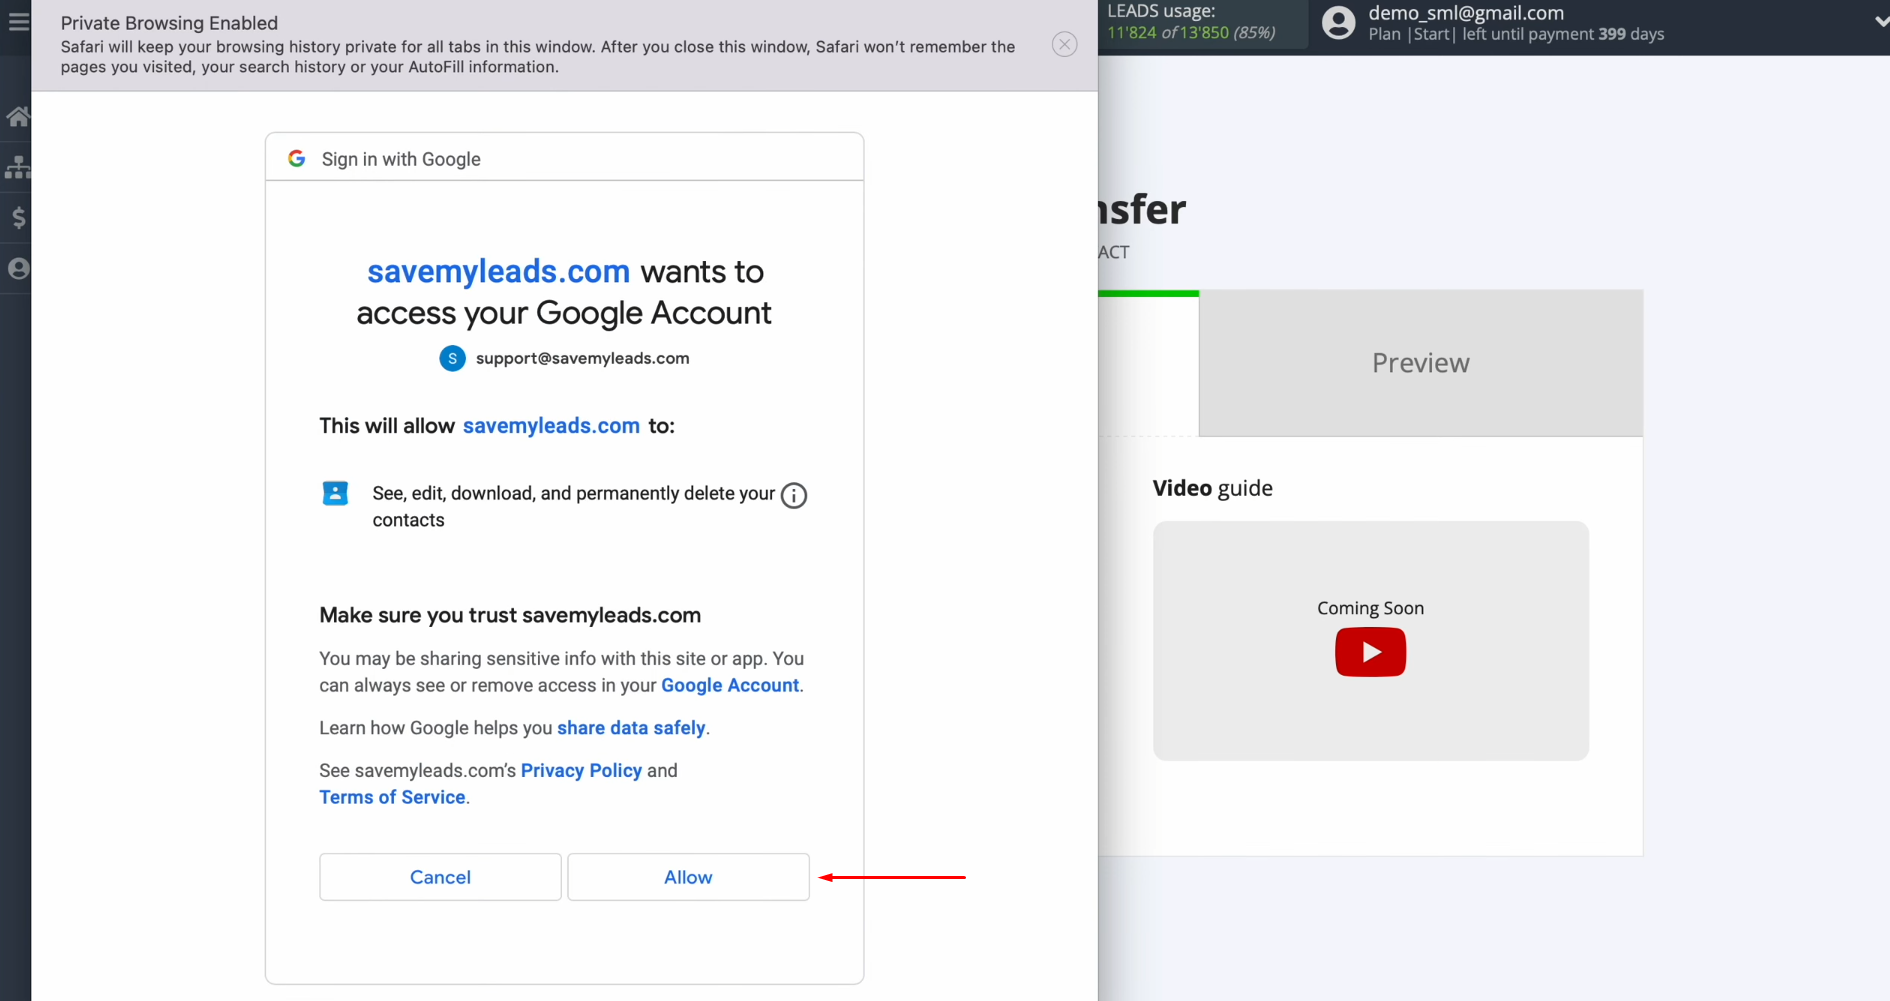
Grant SaveMyLeads
permission to work with your Google account.
When the
connected account is displayed in the list, select it.
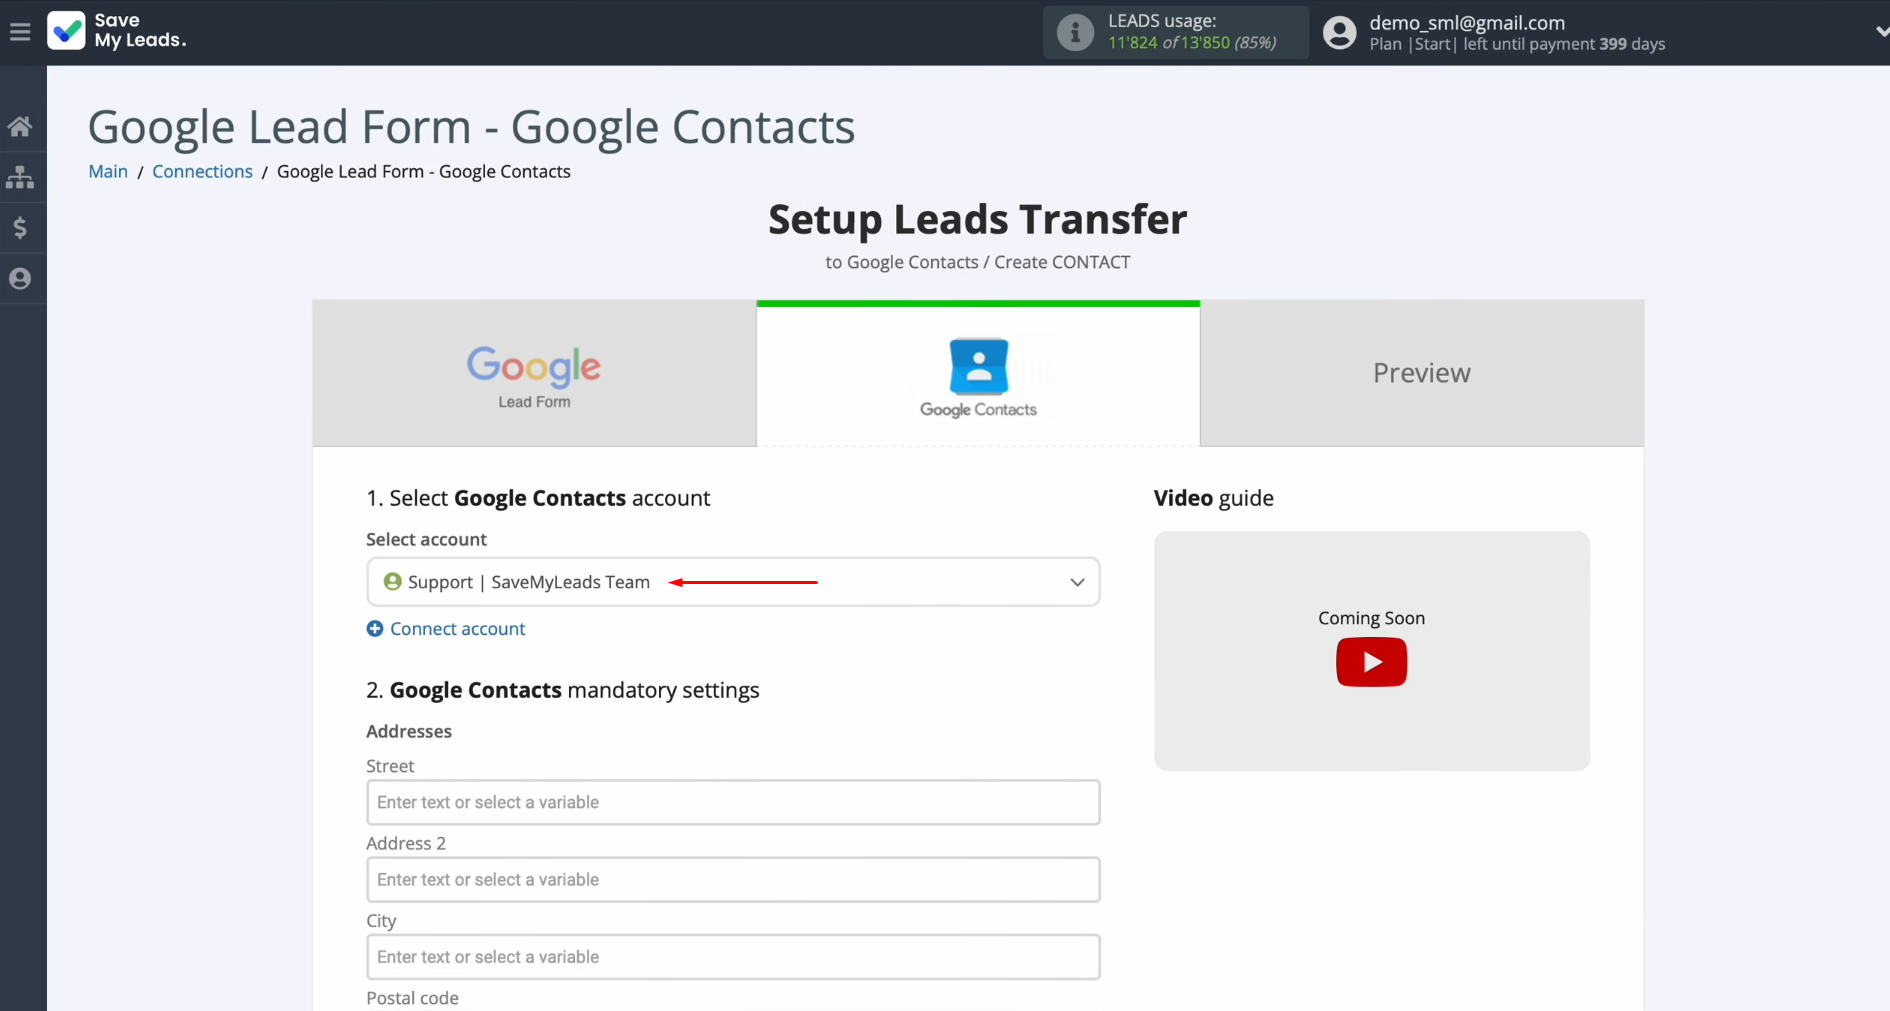
You see the Google
Contacts fields to which you can assign variables from the Google Lead
Form. To perform this action, click inside the field and choose a variable from the dropdown menu. If the default fields meet your needs, you may leave them as they are.
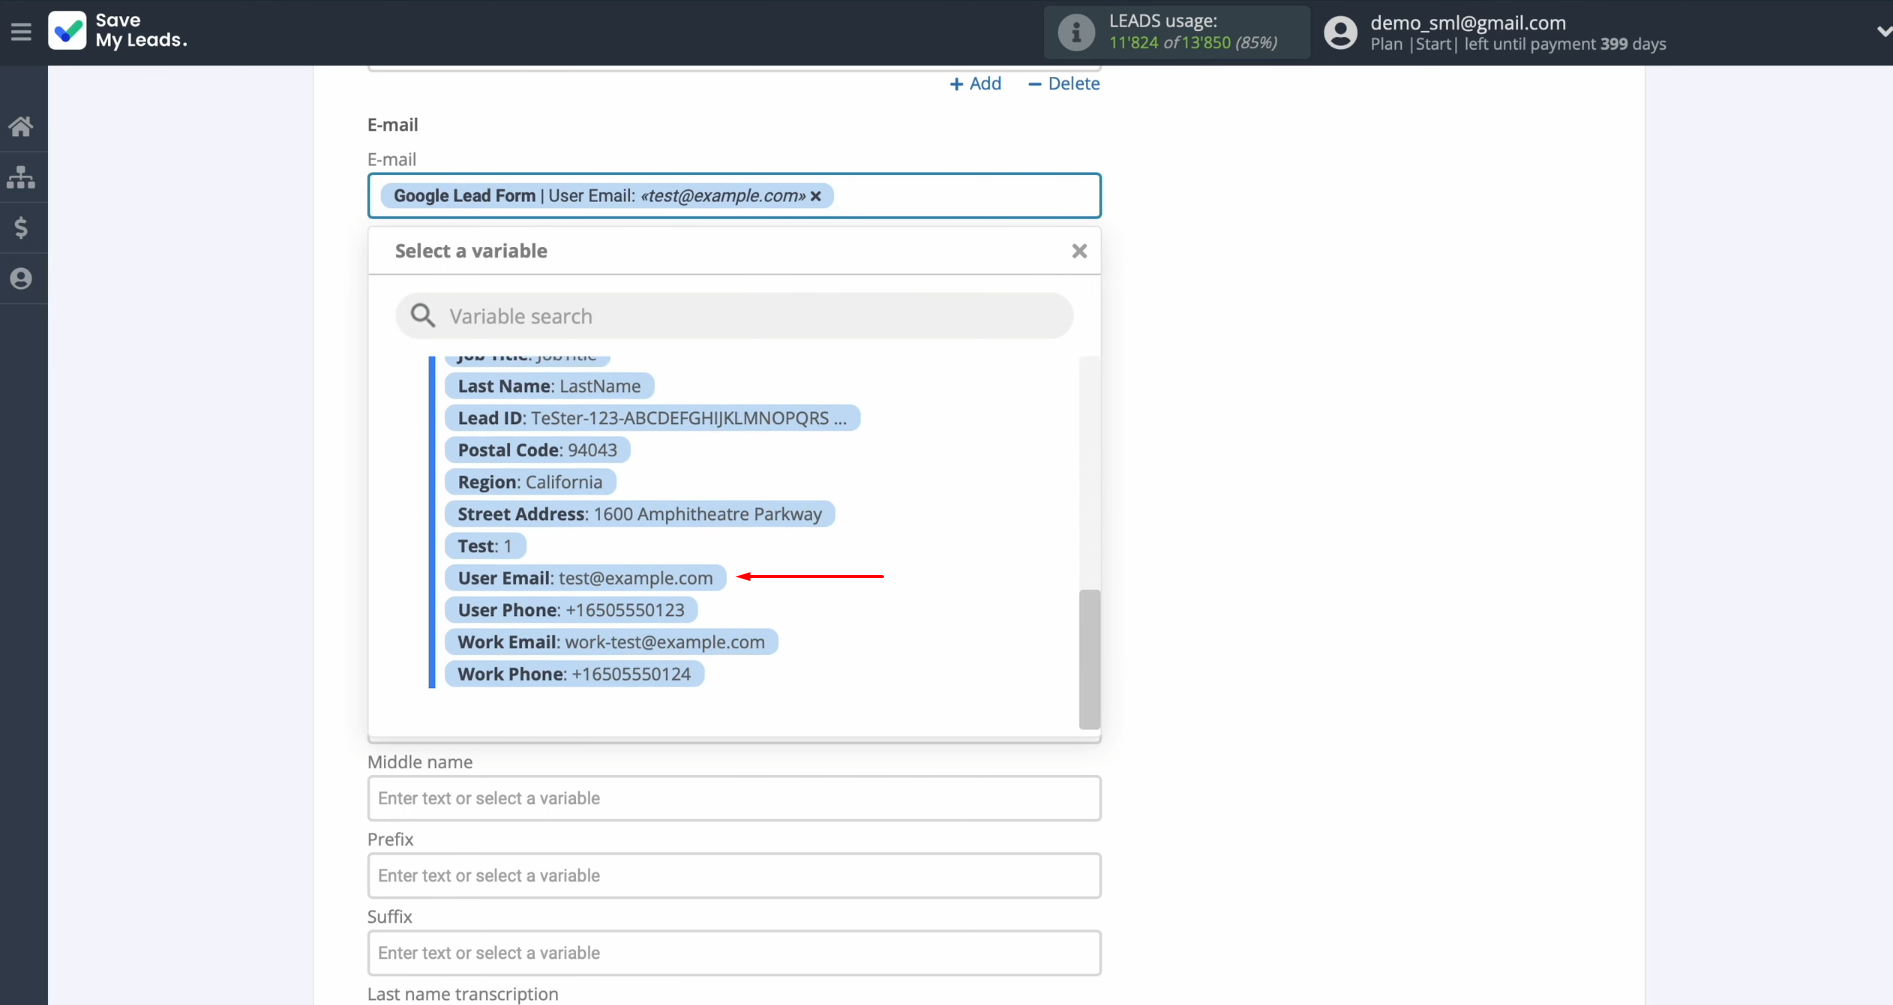
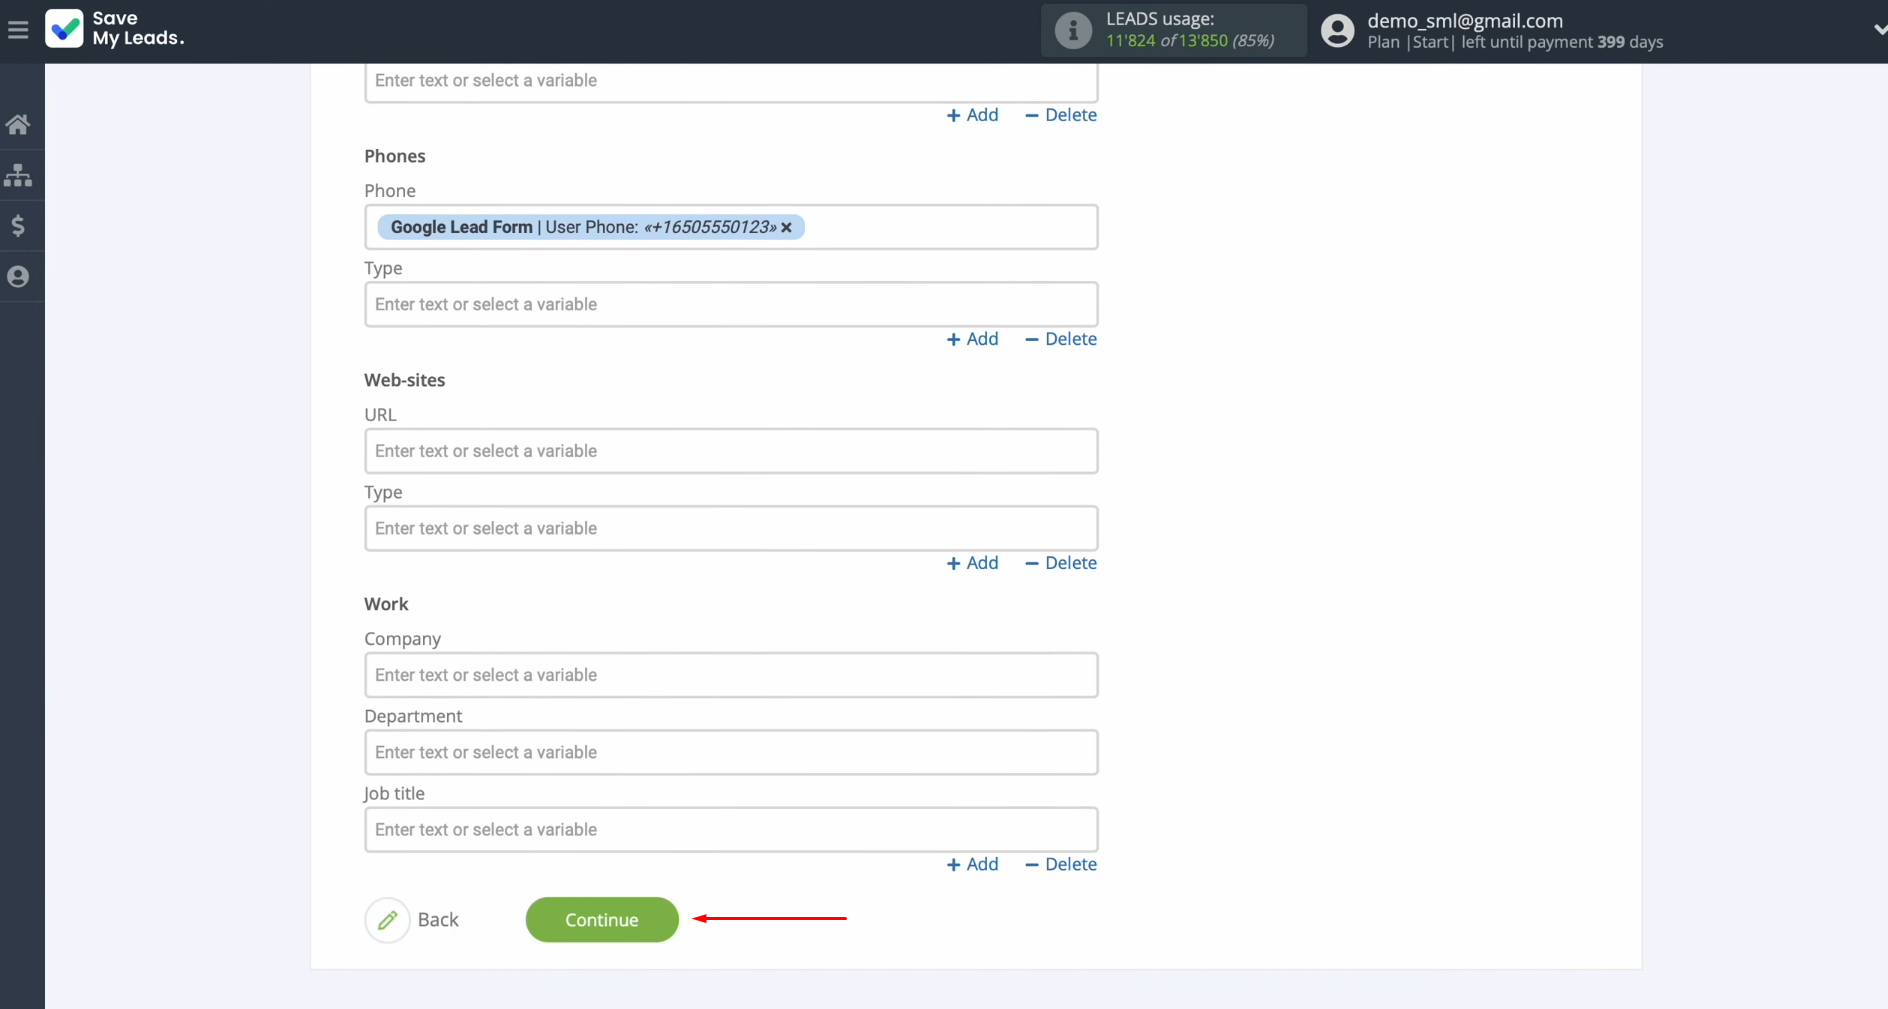
When
all required fields are filled in, click “Continue.”
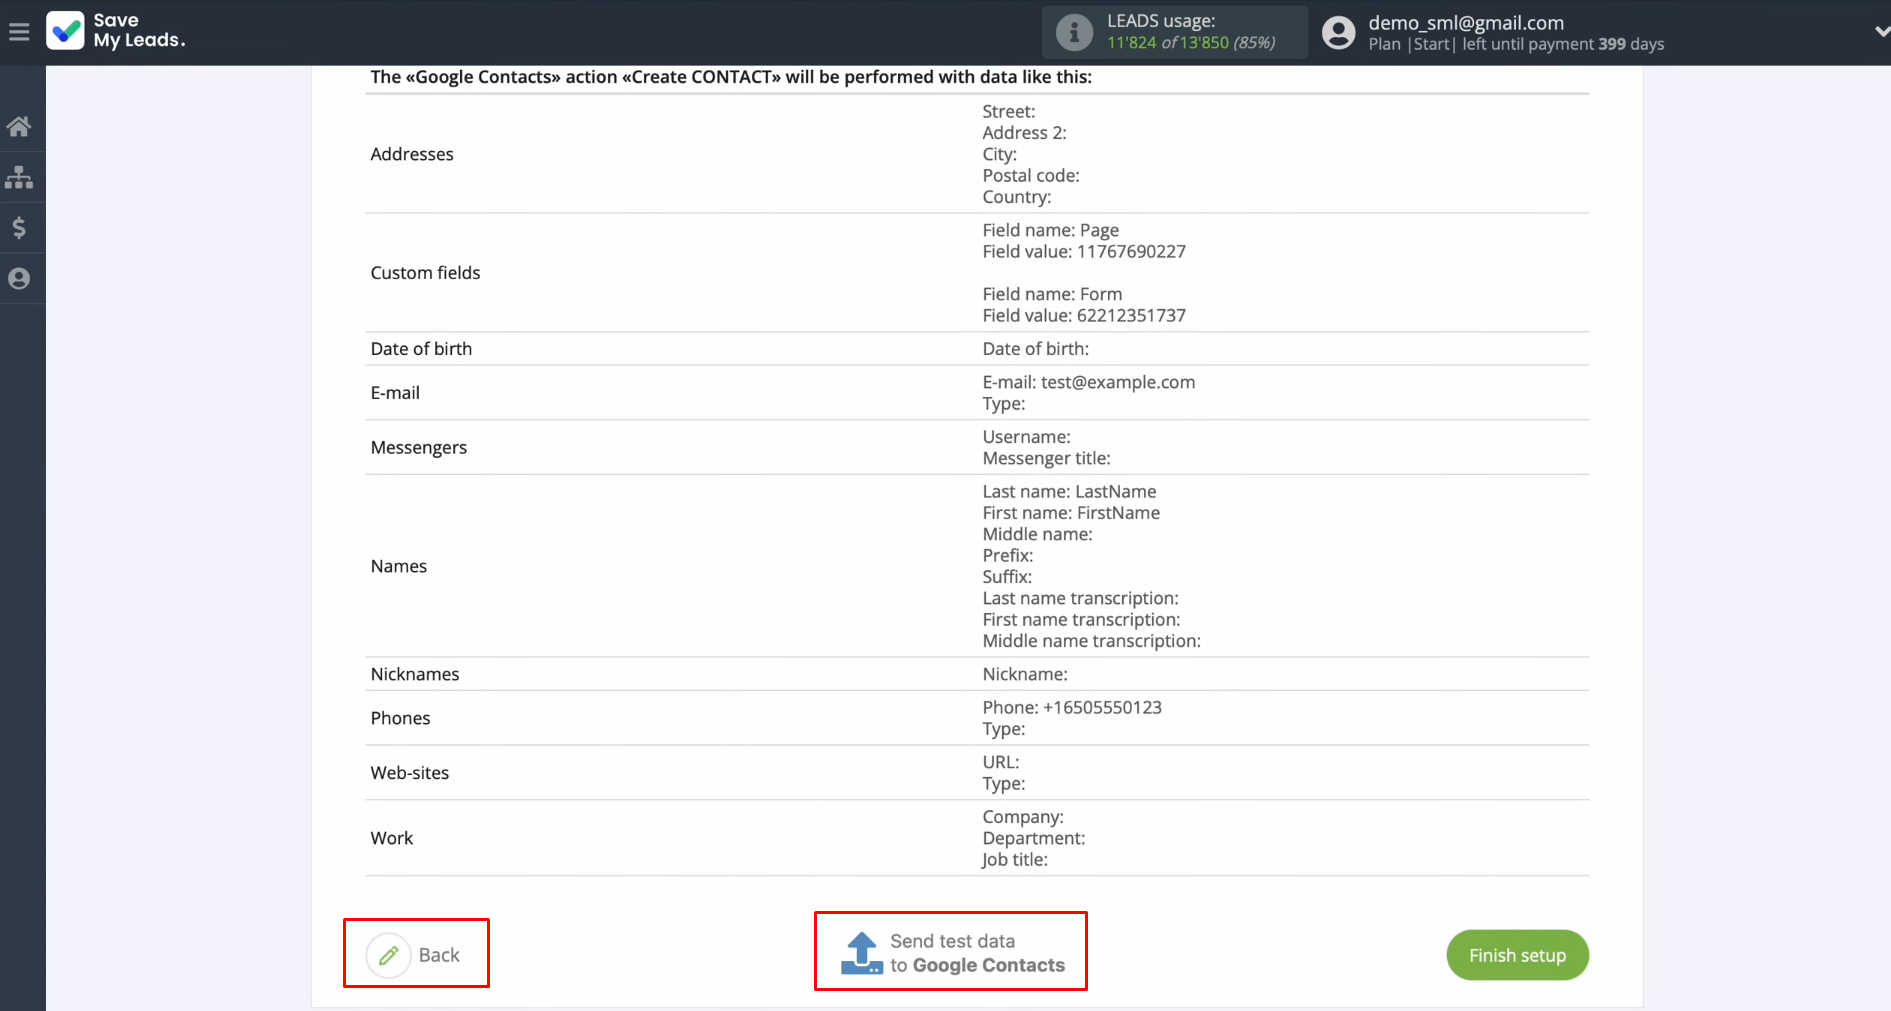
Now, you see an
example of the data that will be sent to Google Contacts as new contacts
for each new lead from the Google Lead Form.
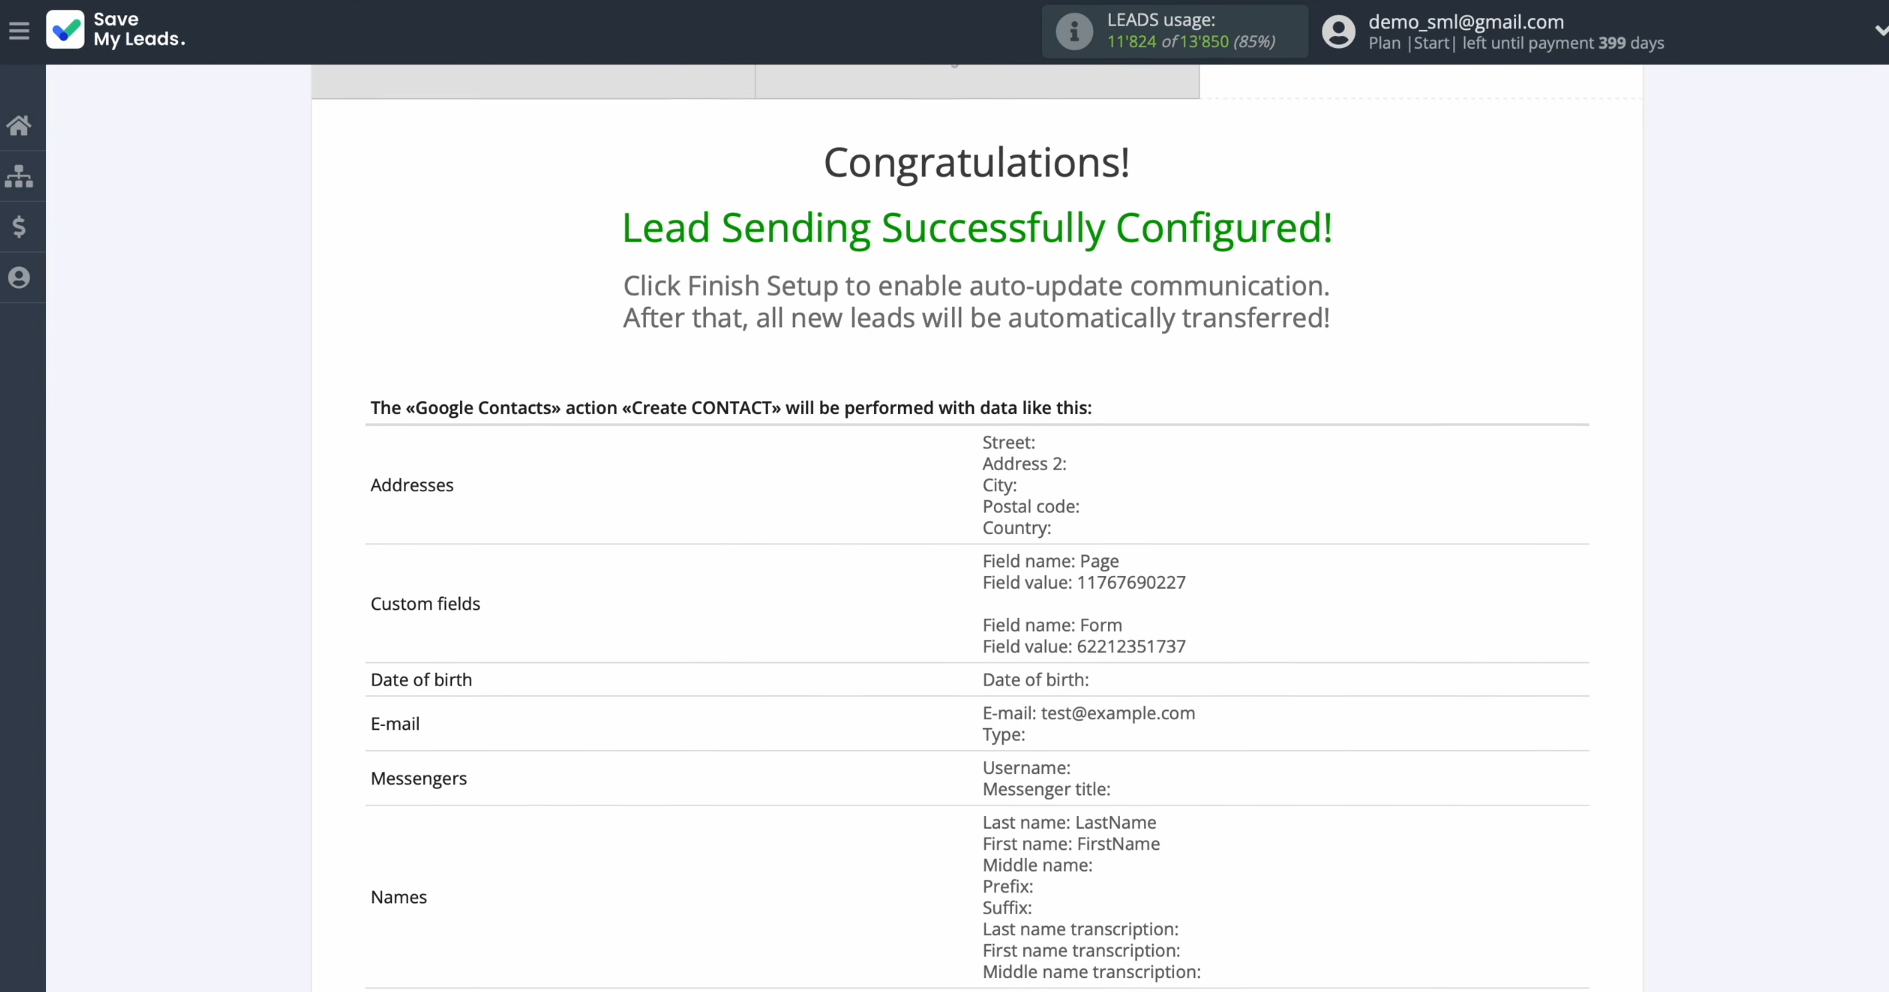
If something does not suit you, click “Back,” and you will go back one step. To check the correctness of the connection, send test data to Google Contacts.
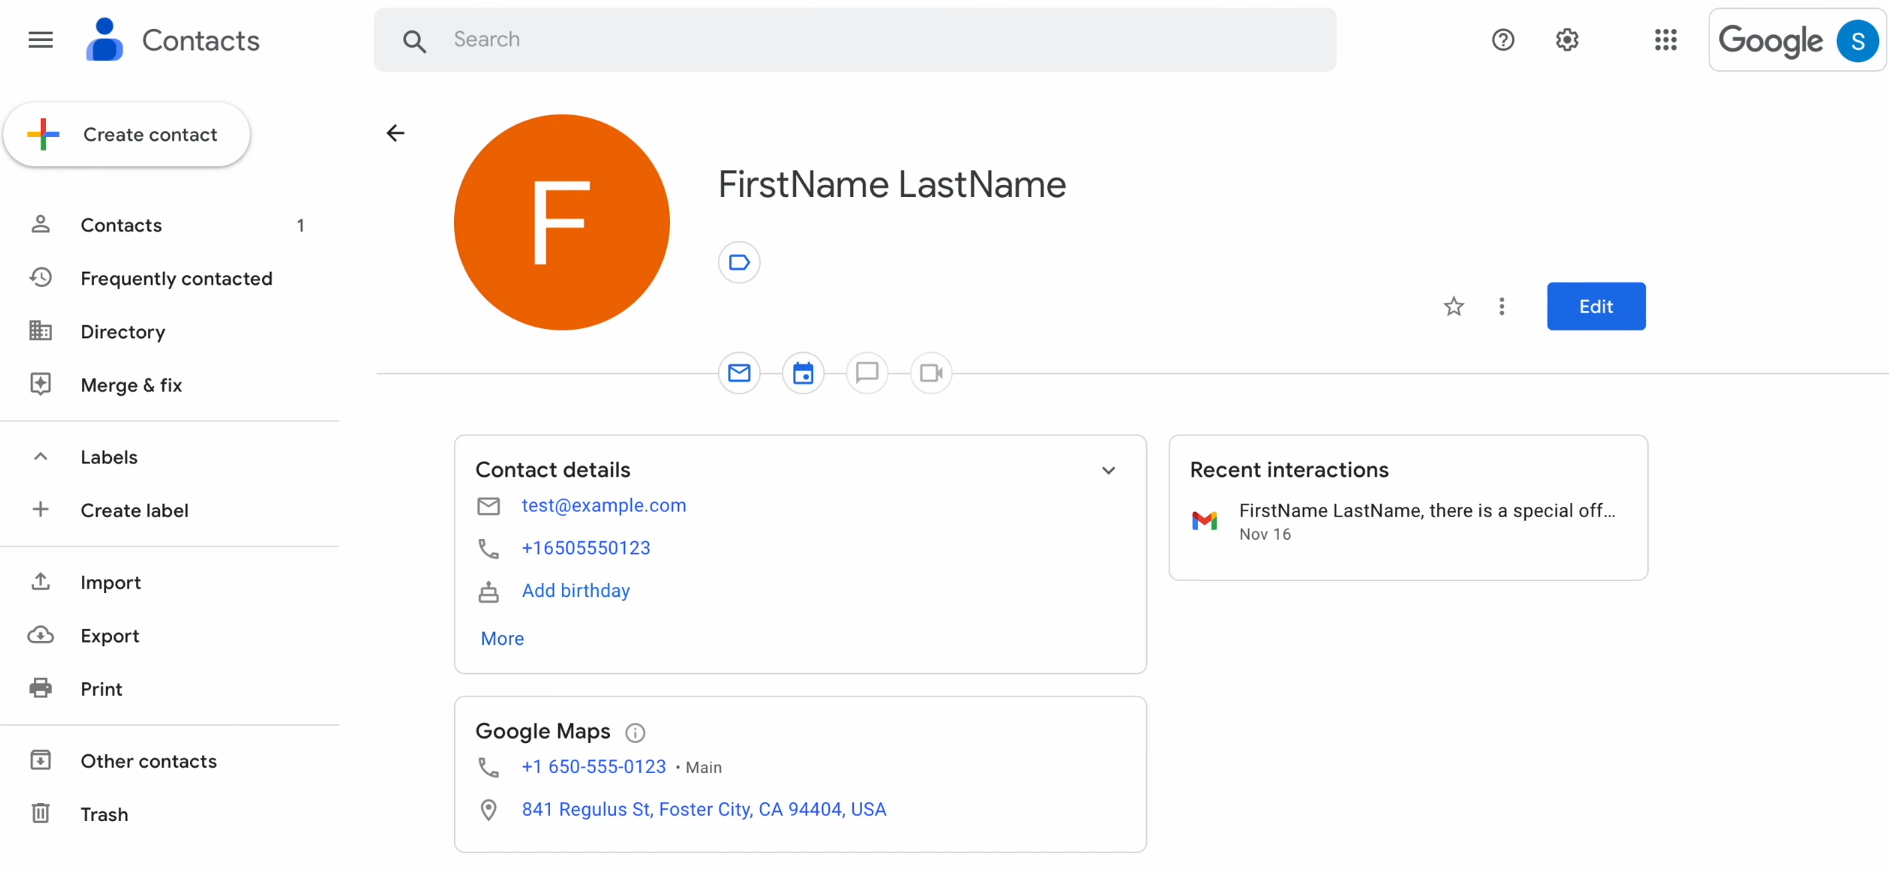
Go to Google
Contacts and check the result.
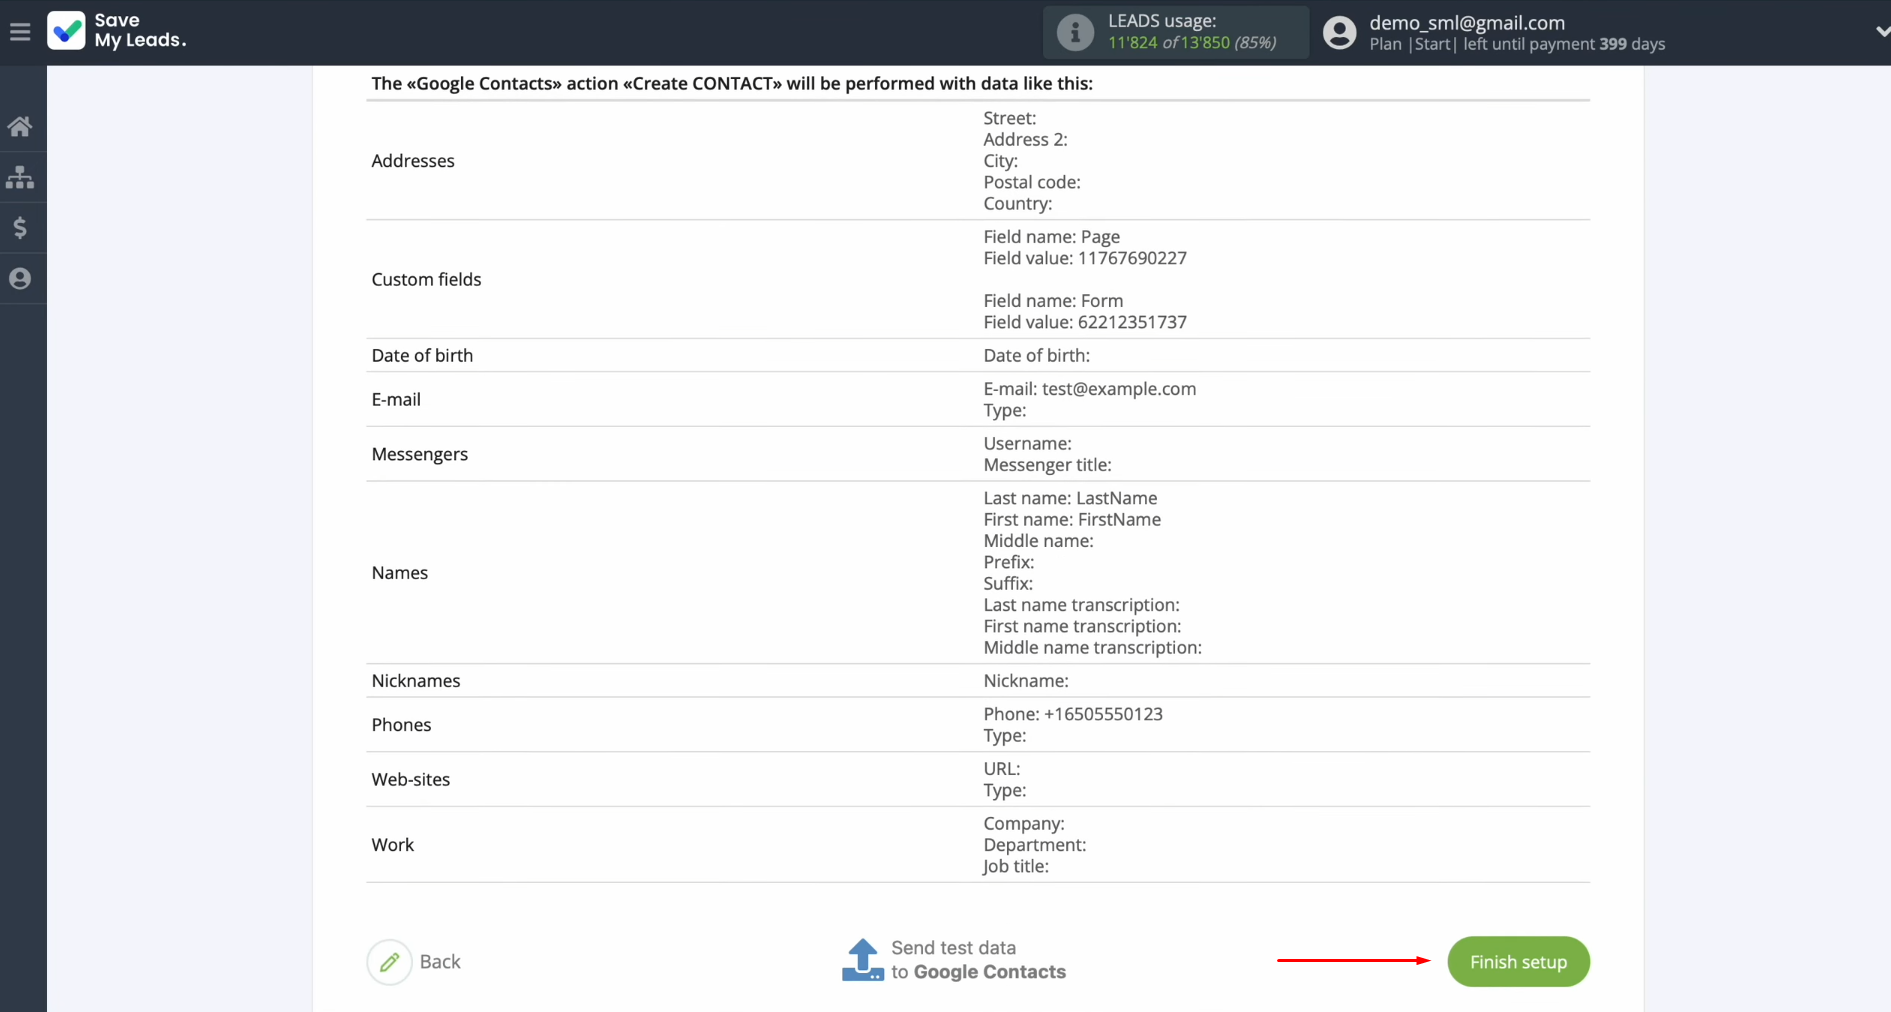
Automatic Data Update
Return to SaveMyLeads and continue setting up. Click "Finish setup" to enable auto-update of the connection. In this scenario, every new lead submitted through the Google Lead Form will be automatically added to Google Contacts.
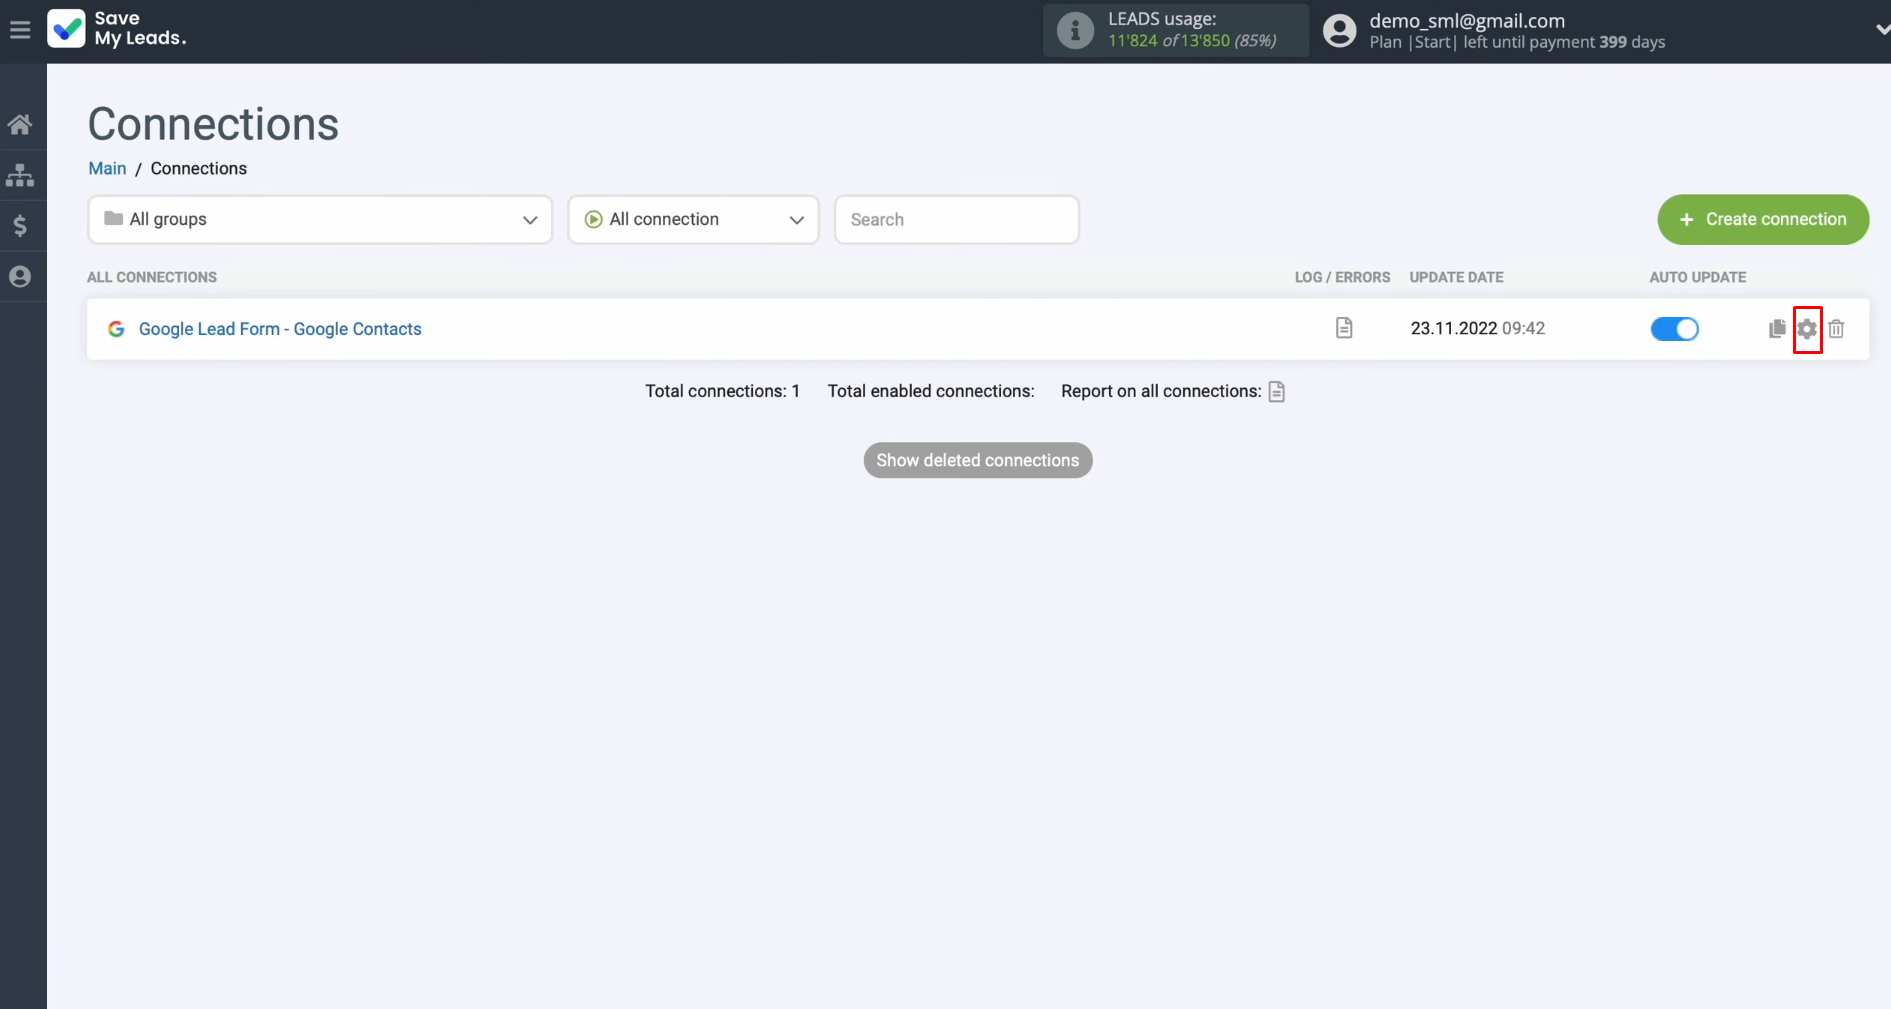
If you want to
change the name of the connection, you can do so in the settings. For this, click on the gear icon.
At this stage, you have the option to rename the connection and assign it to a group. After that, click “Continue.”
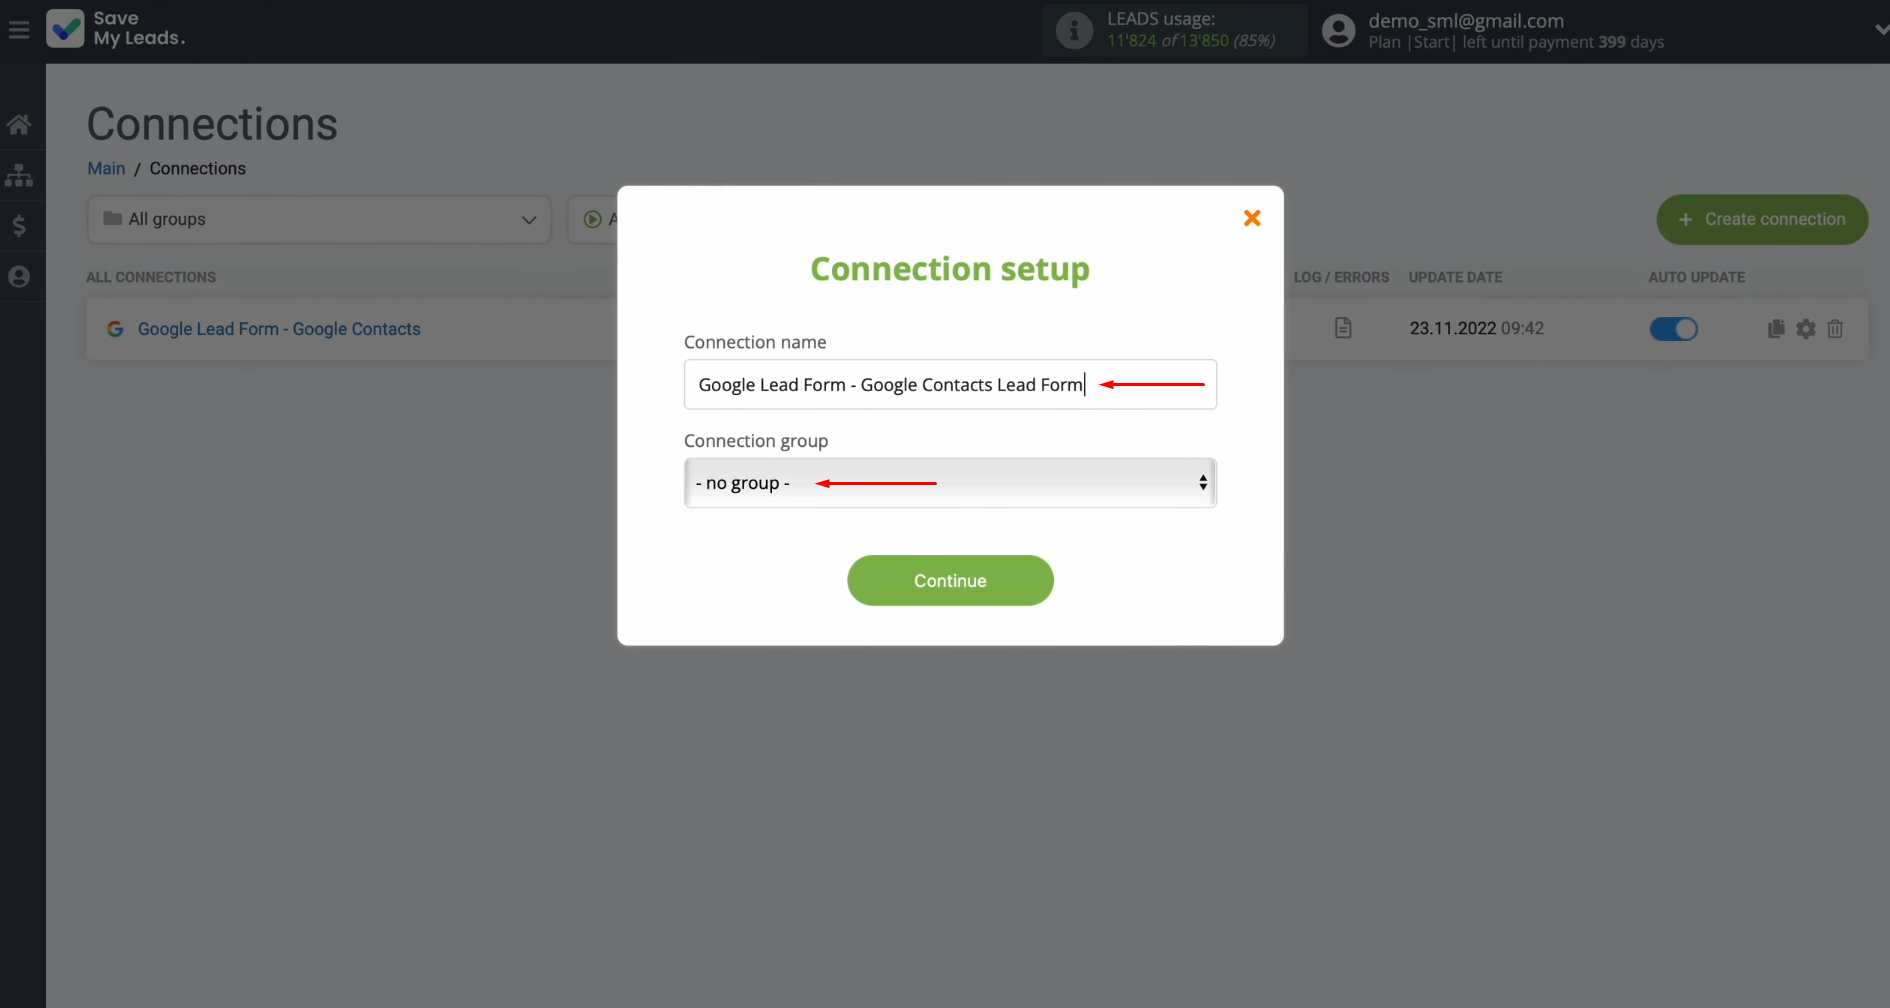
That's all. Google Lead
Form integration with Google Contacts has been completed.
Results
Google Contacts and Google Leads integration is a simple but extremely effective solution for automating business processes. It eliminates routine, increases the speed of response to customer requests, and creates a convenient contact database for further work. Thanks to SML, you can set up this integration in a matter of minutes, getting a fully automatic lead transfer from Google Ads to Google Contacts. This means that each lead will be processed on time, and the business will be able to work as efficiently as possible.
Step-by-Step Guides for Setting Up Integrations:
- TikTok and Slack Integration: Automatically Sending Channel Notifications
- Google Lead Form and Discord Integration: Automatically Send Messages About New Leads
- Facebook and Copper Integration: Automatic Creation of Contacts
- Google Lead Form and Pipedrive Integration: Automatic Task Creation
- TikTok and Copper Integration: Automatic Lead Transfer
