There are two important points in working with leads: collecting their data without errors and responding quickly to each request. If you collect applications using Google Lead Form and use Discord for corporate communication, it is worth connecting these services. Integration allows you to automatically send notifications about new leads to the corresponding messenger channel, saving time and human resources. In this article, we will tell you how to quickly set it up using the SaveMyLeads connector.
Google Ads Lead Form and Discord Integration: Who Benefits
Discord and Google Ads Lead Form integration is primarily needed by marketing specialists and sales managers. The advantages of this solution will also be appreciated by business owners and teams who actively use Discord. Its main task is to automate the transfer of leads and thus make their processing as efficient and convenient as possible.
Implementation examples:
- A marketer launches a Google Ads campaign with lead generation forms, and each new lead is automatically sent to the #sales-leads channel in Discord.
- The matchmaking agency manager sees new requests/orders in the group chat at once and quickly identifies the responsible person.
- The IT company receives requests for technical consultation and immediately distributes them among specialists.
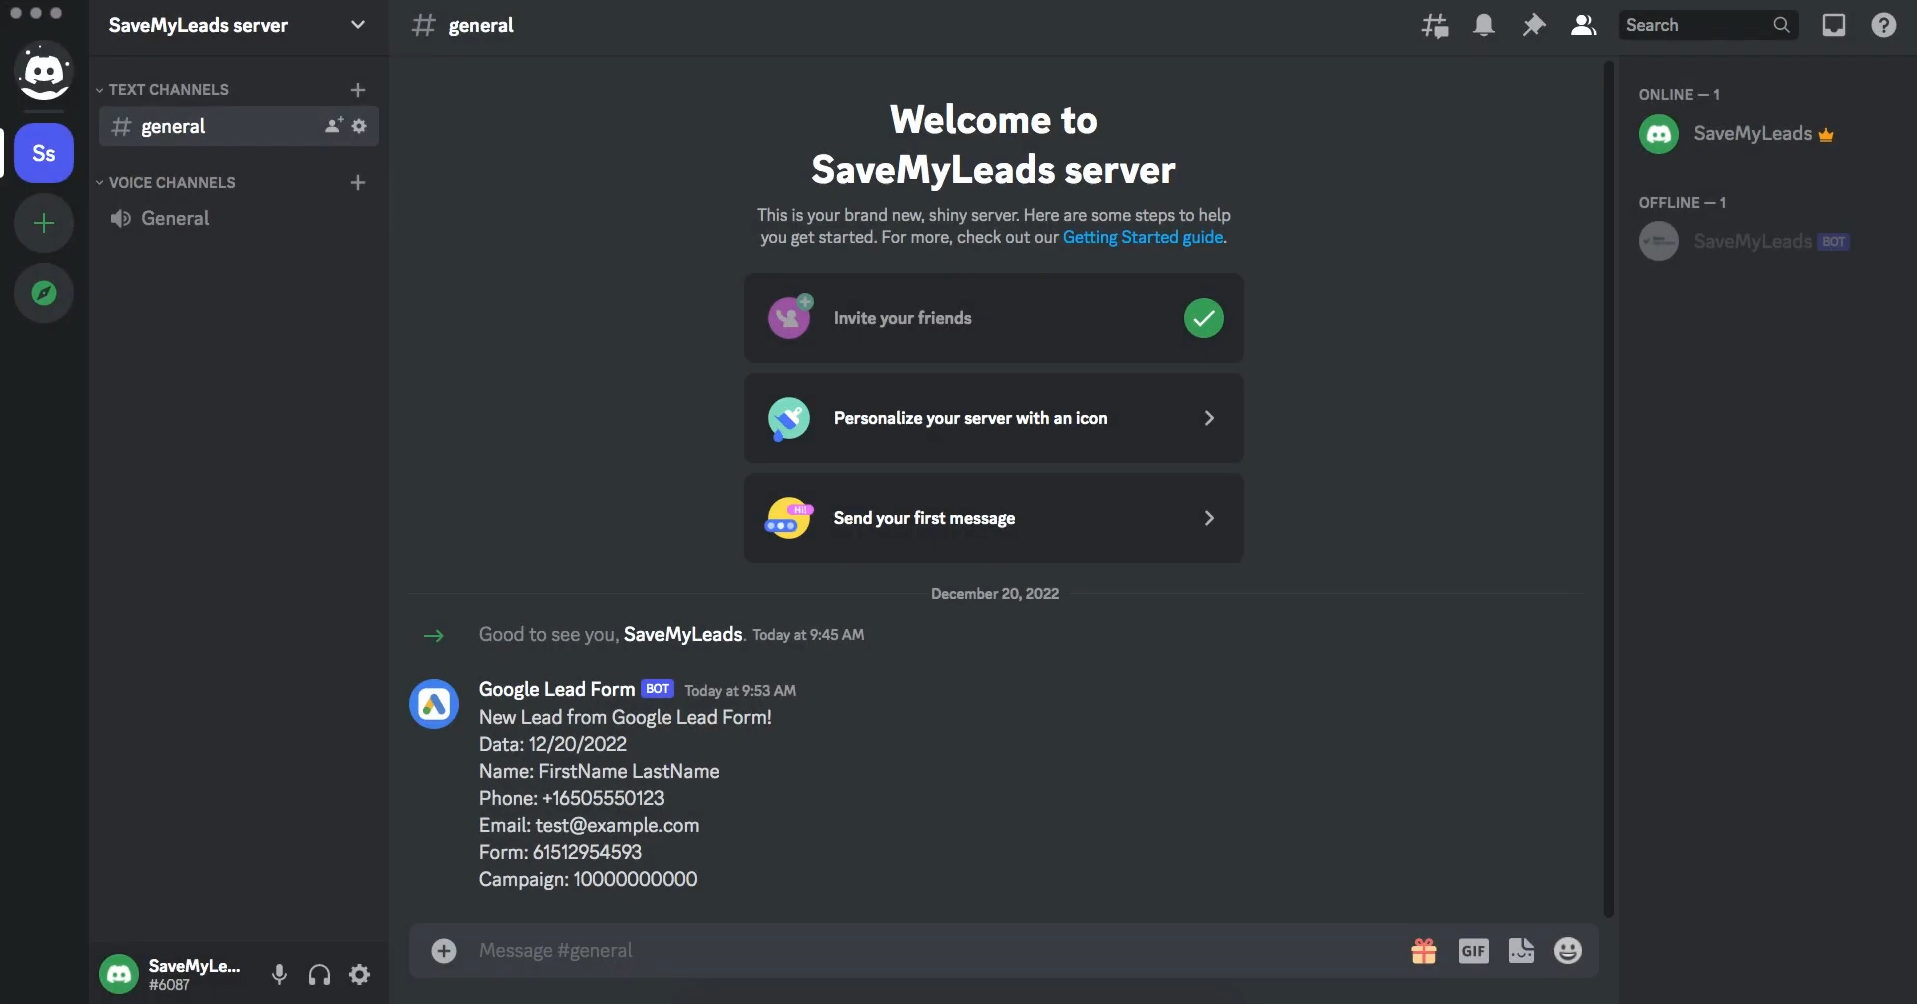
This integration allows the team to centralize leads in Discord. It saves time on manual lead screening, avoids missing important applications, and enables much faster engagement with potential customers. This is especially critical for businesses where the speed of the first response impacts conversion (so, for almost all businesses).
How to Connect Google Ads Lead Form to Discord
Our online connector, SaveMyLeads, will assist you in quickly and easily setting up Discord and Google Ads Lead Form integration. No specific technical skills or programming knowledge are required to use this service. Basic computer experience is enough.
Since the connector takes care of all the hard work, the setup process is as simple as possible for the user. It consists of the following steps:
- Creating a personal account on SaveMyLeads.
- Selecting the system to serve as the data source—Google Lead Form.
- Selecting the system that will become the data receiver—Discord.
- Connecting Google and Discord accounts to SaveMyLeads.
- Setting up the message to be delivered to the chosen Discord channel. Example: "New lead: name—phone—email."
- Launching the integration.
Advantages of the SaveMyLeads connector:
- Intuitive interface.
- No need for specific knowledge and skills in the IT field.
- Setup takes no more than 10–15 minutes, even for users with minimal experience.
- Stability and reliability of data transmission.
Data Source Settings—Google Lead Form
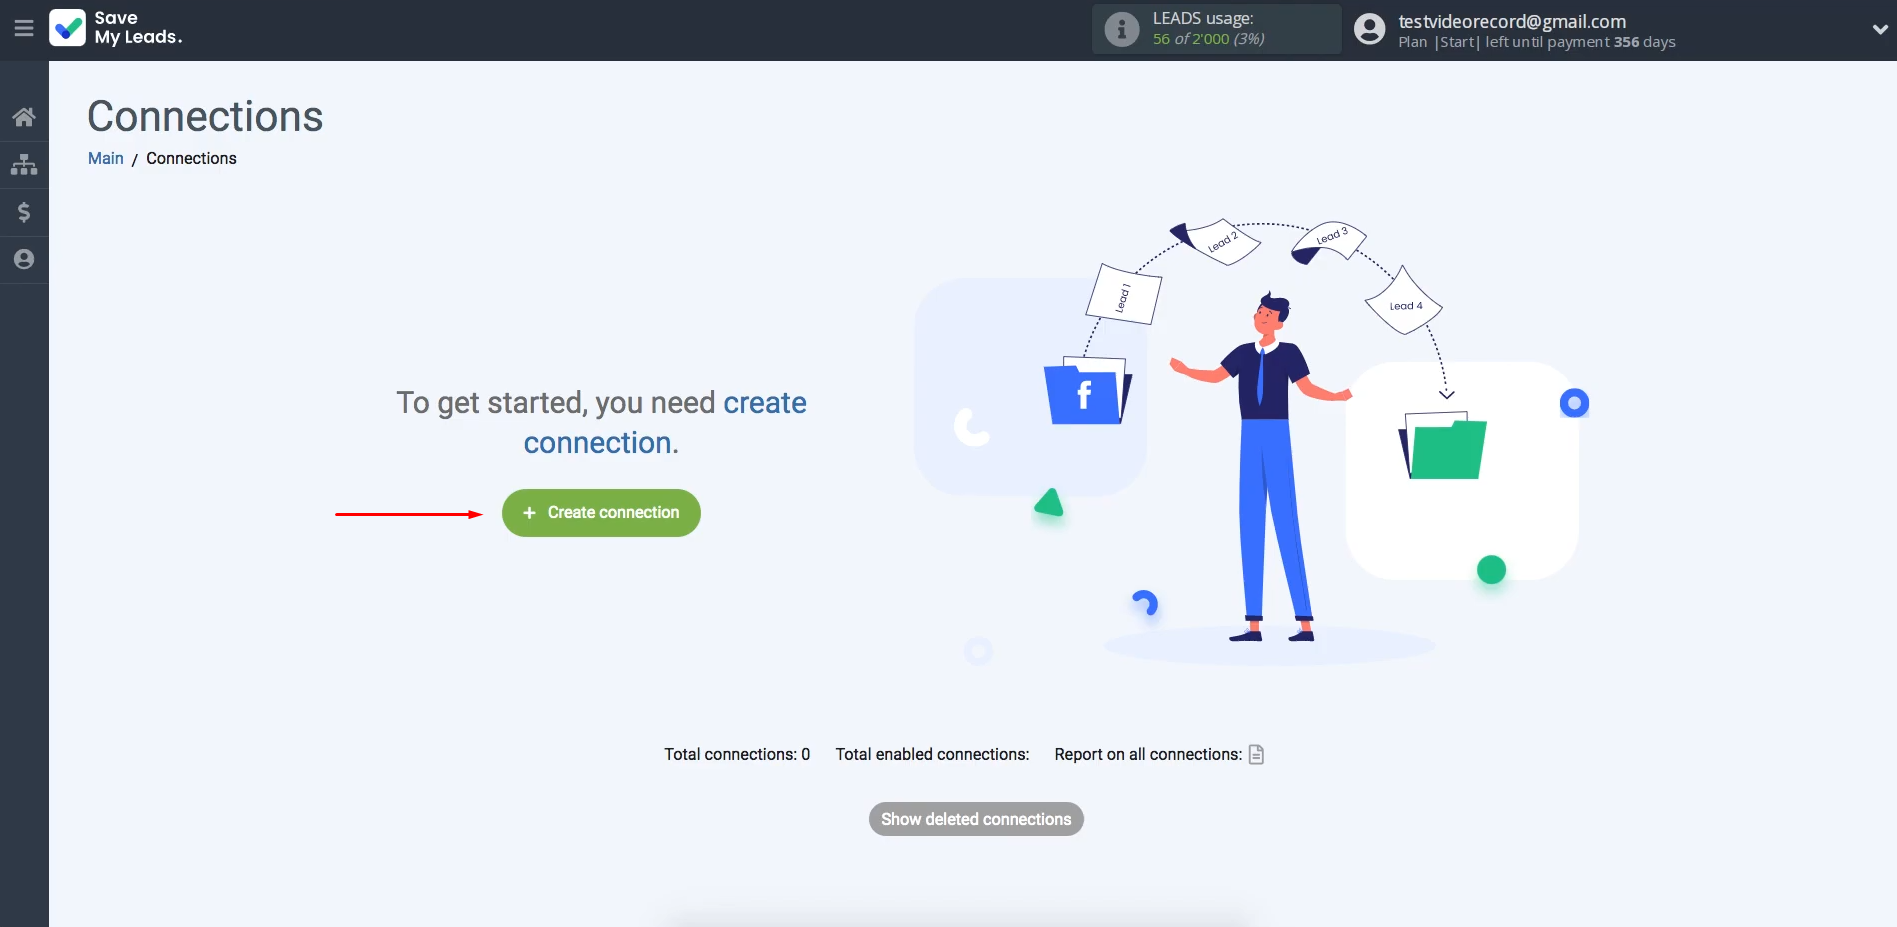
Create a new connection.
Next, select the source system from which you want to transfer lead data—for this purpose, choose Google Lead Form.
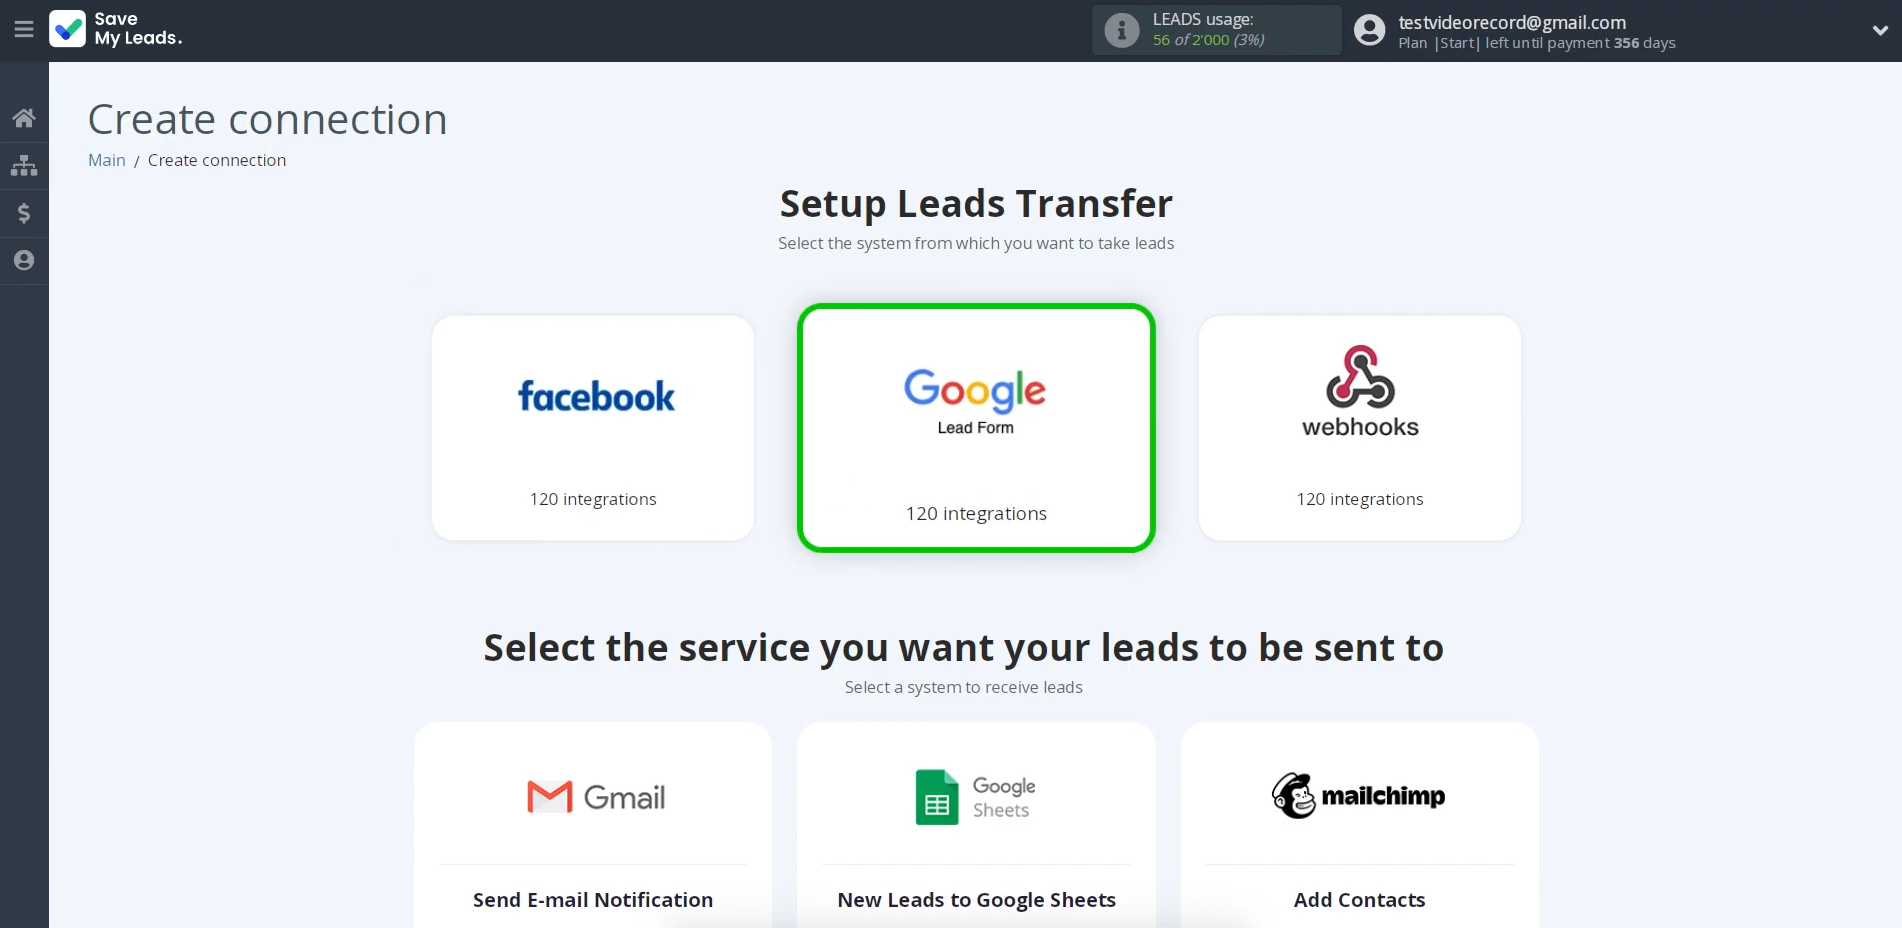
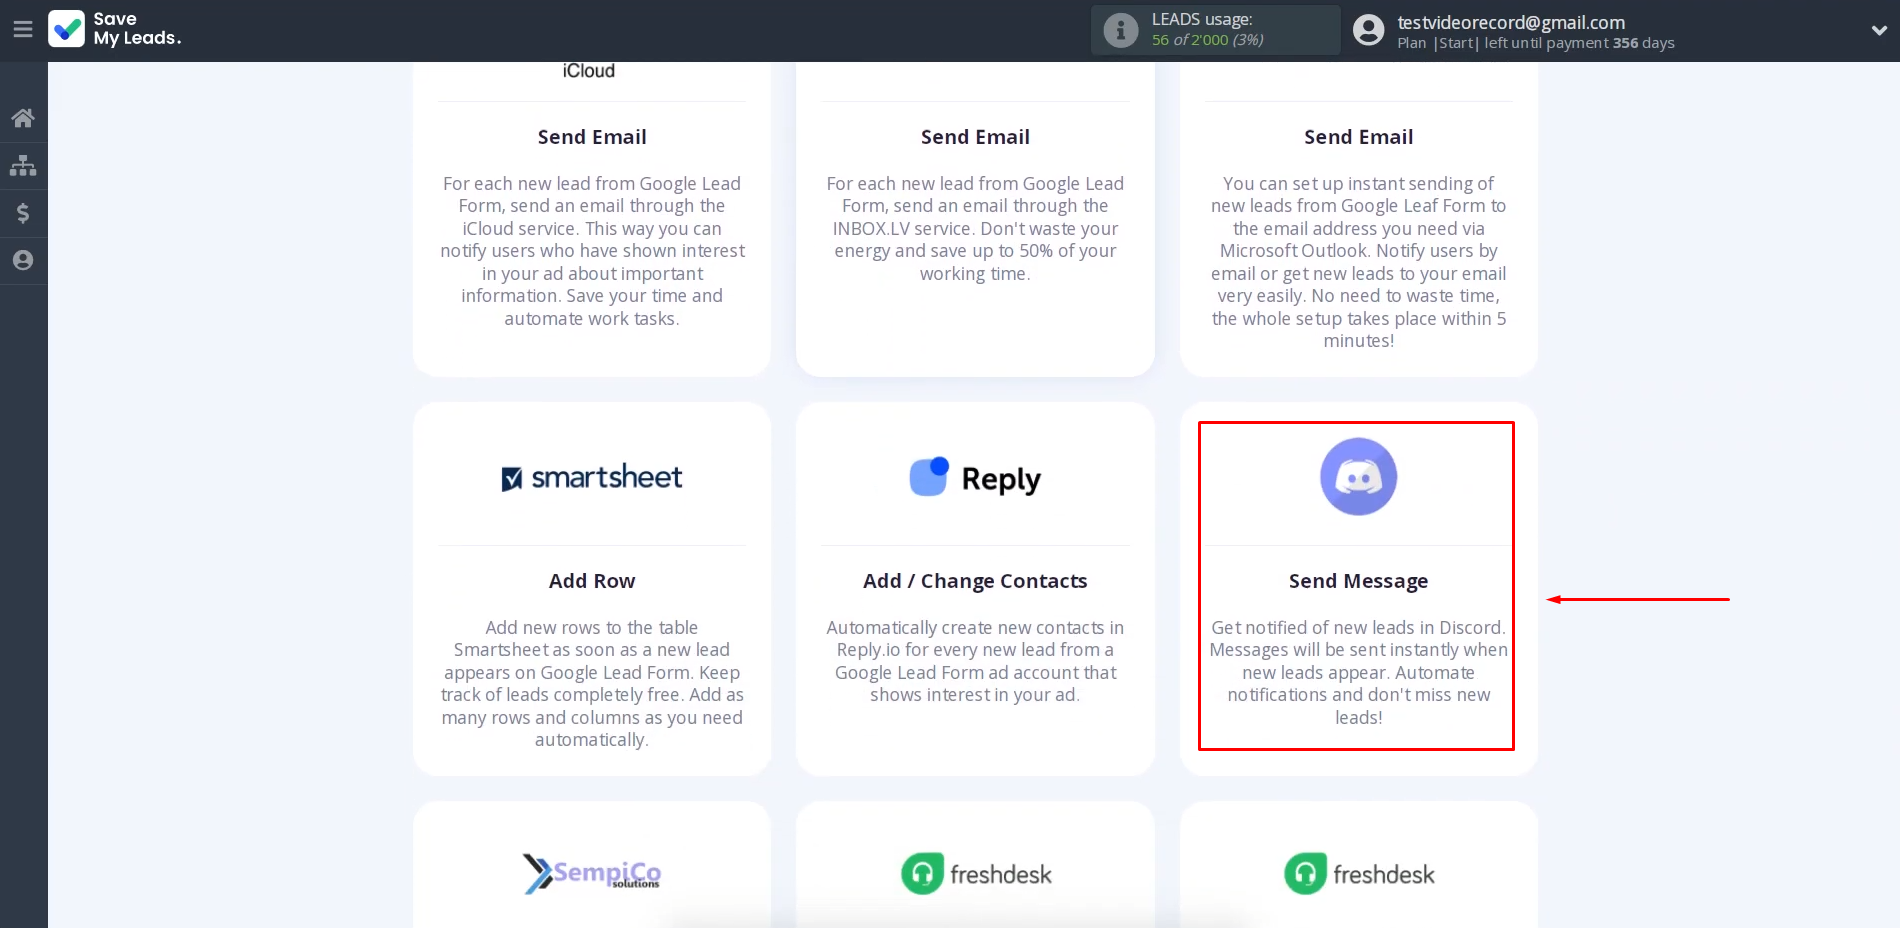
Select the
destination template for your integration. Select “Discord (Send Message).”
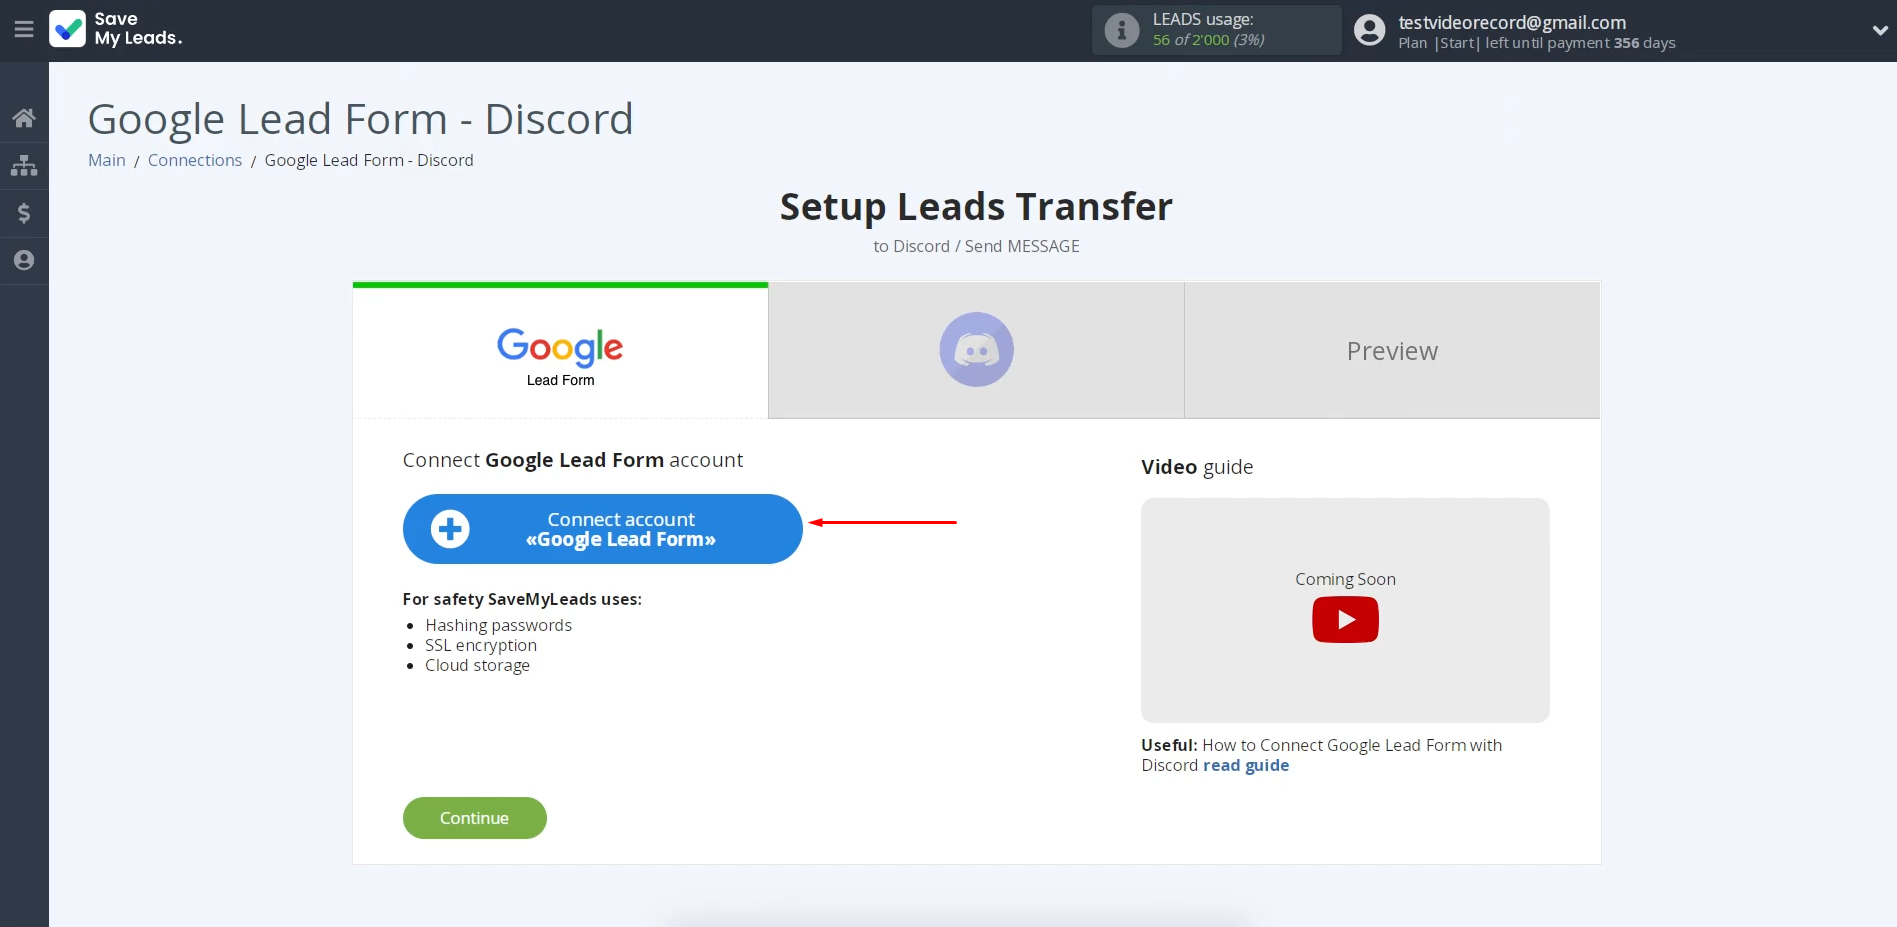
Connect your
Google Lead Form account to SaveMyLeads.
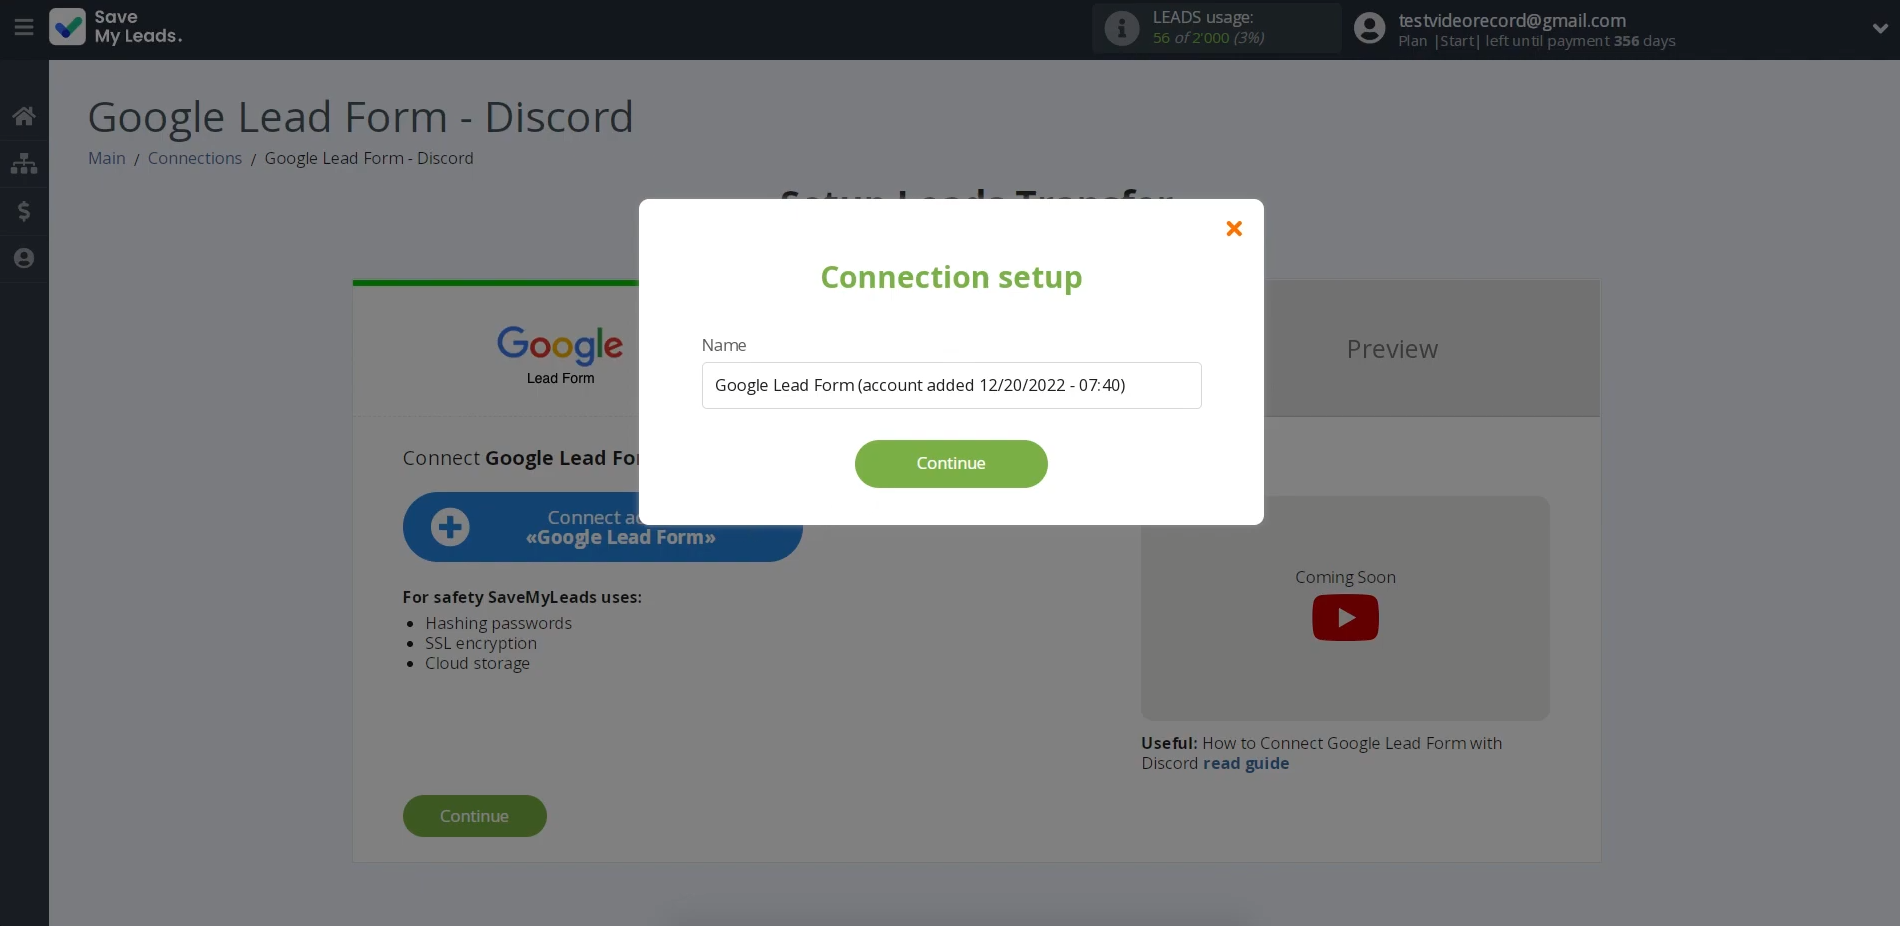
In the setup
window, you can assign a name to the new connection.
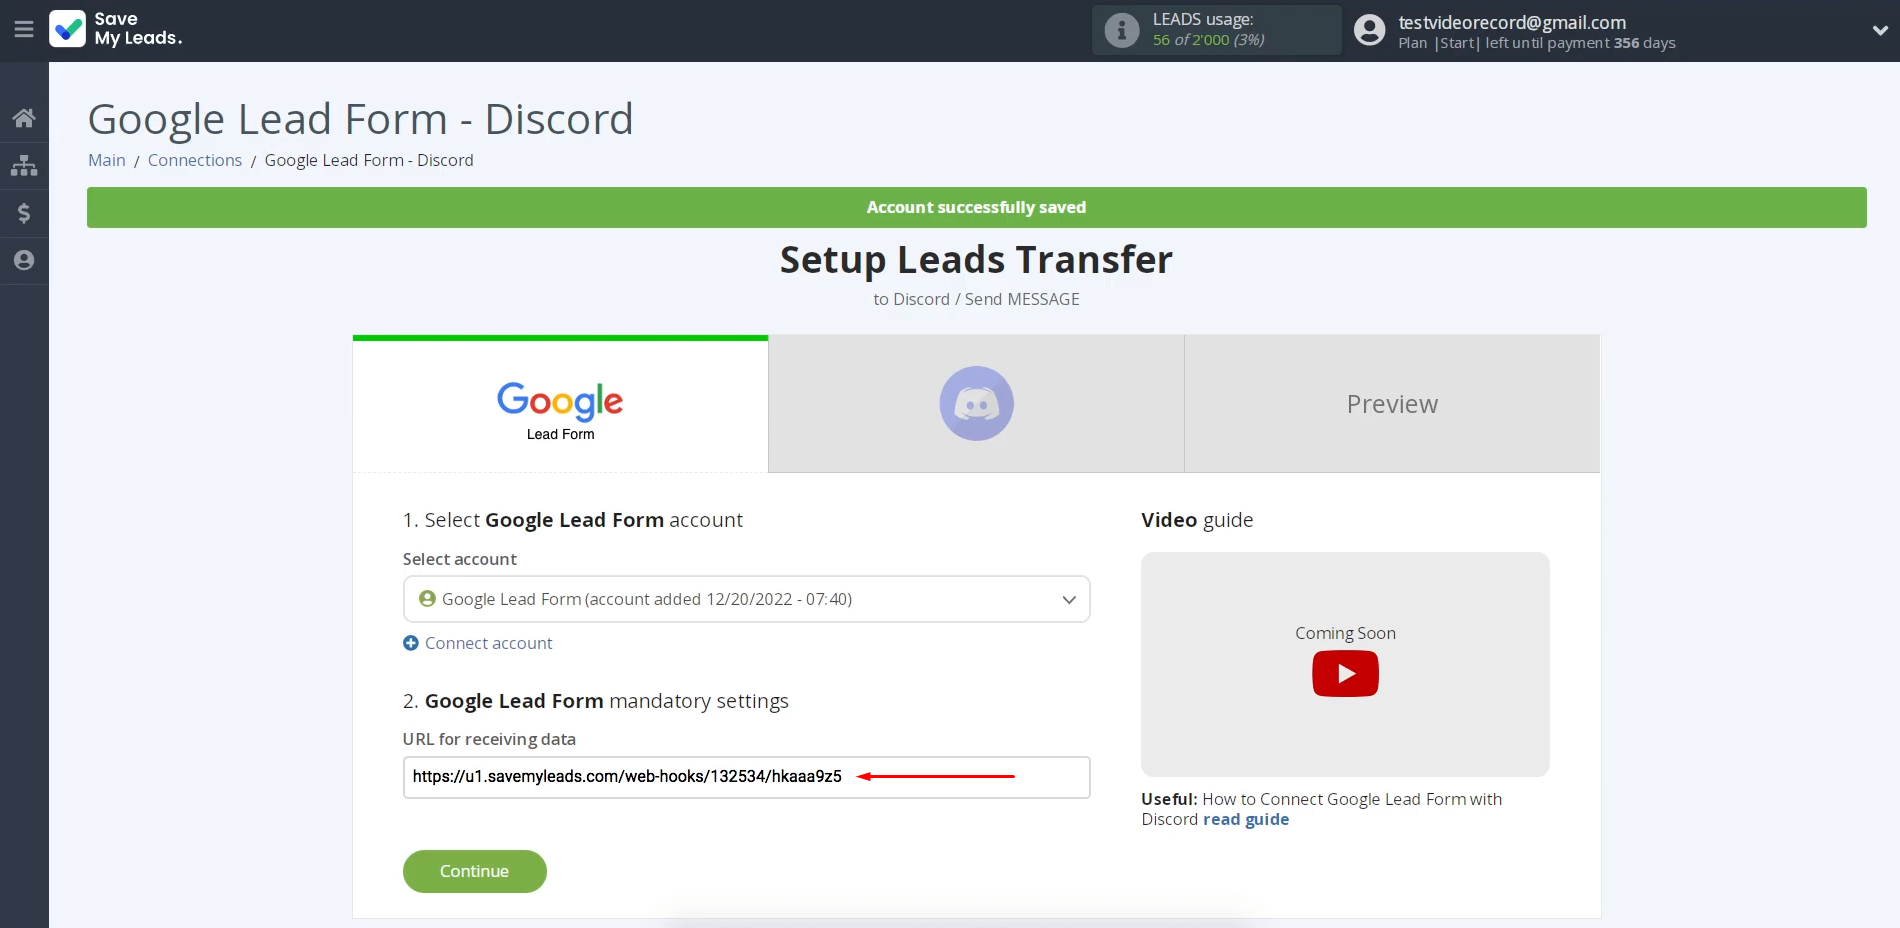
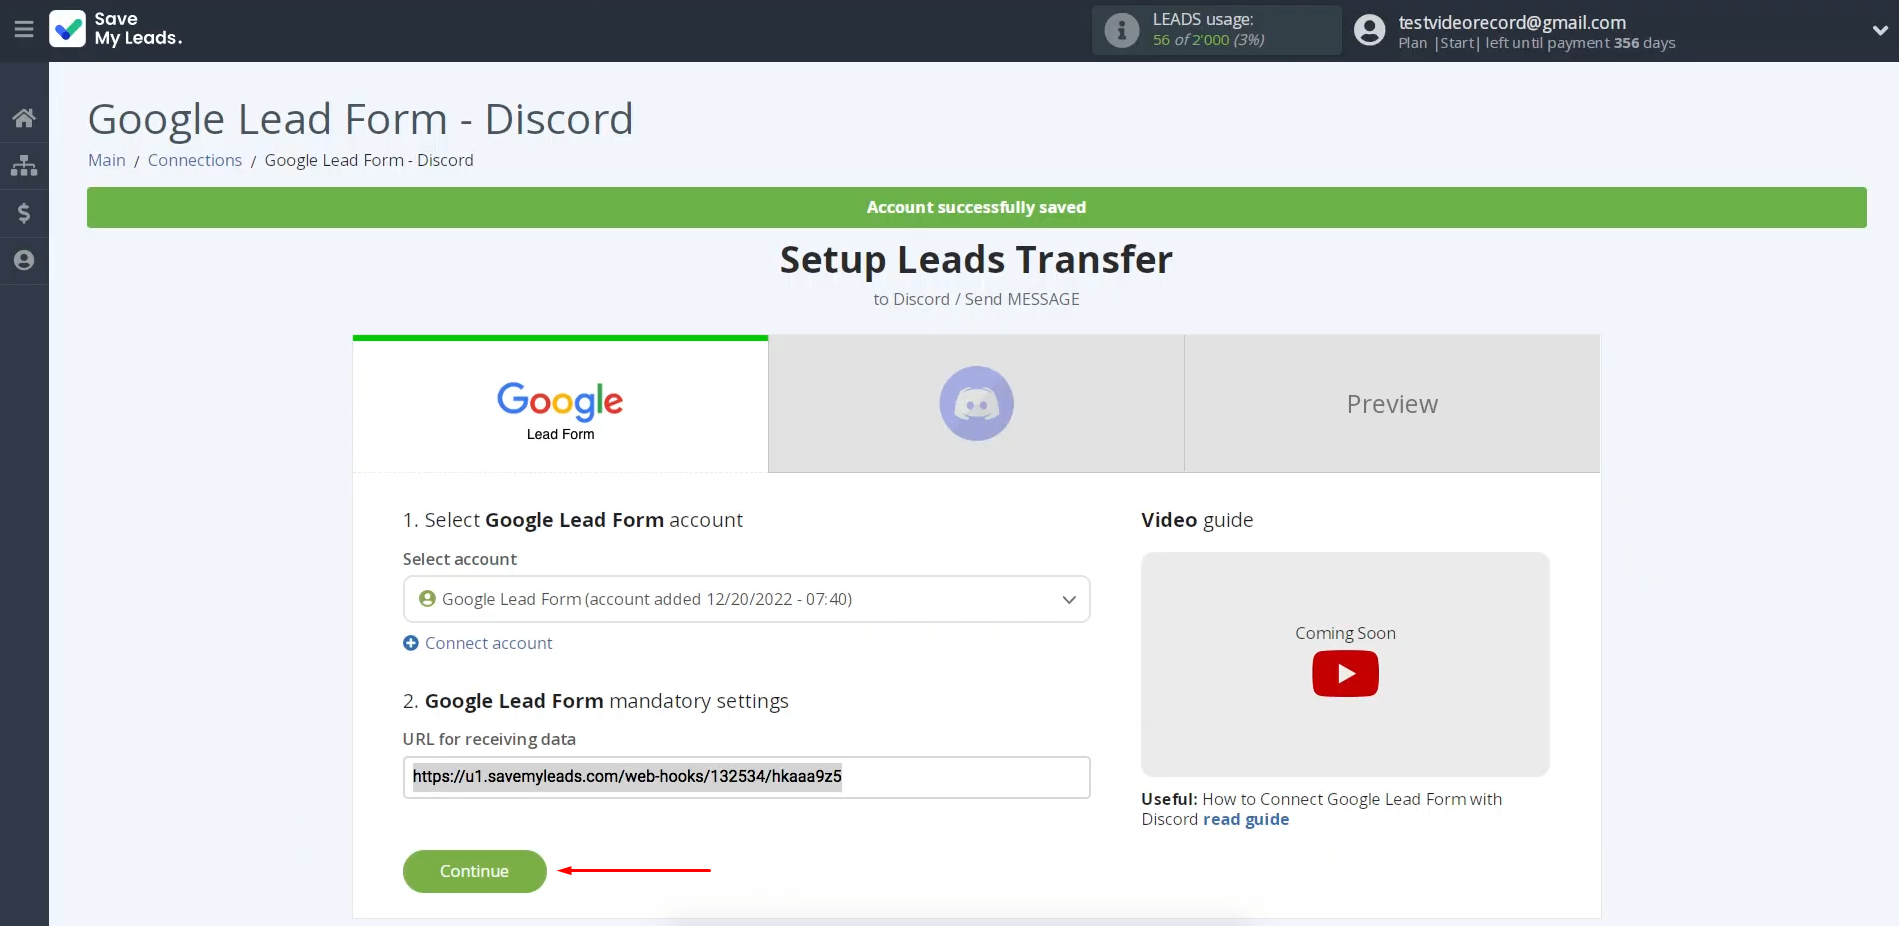
Select your newly added Google account from the list.
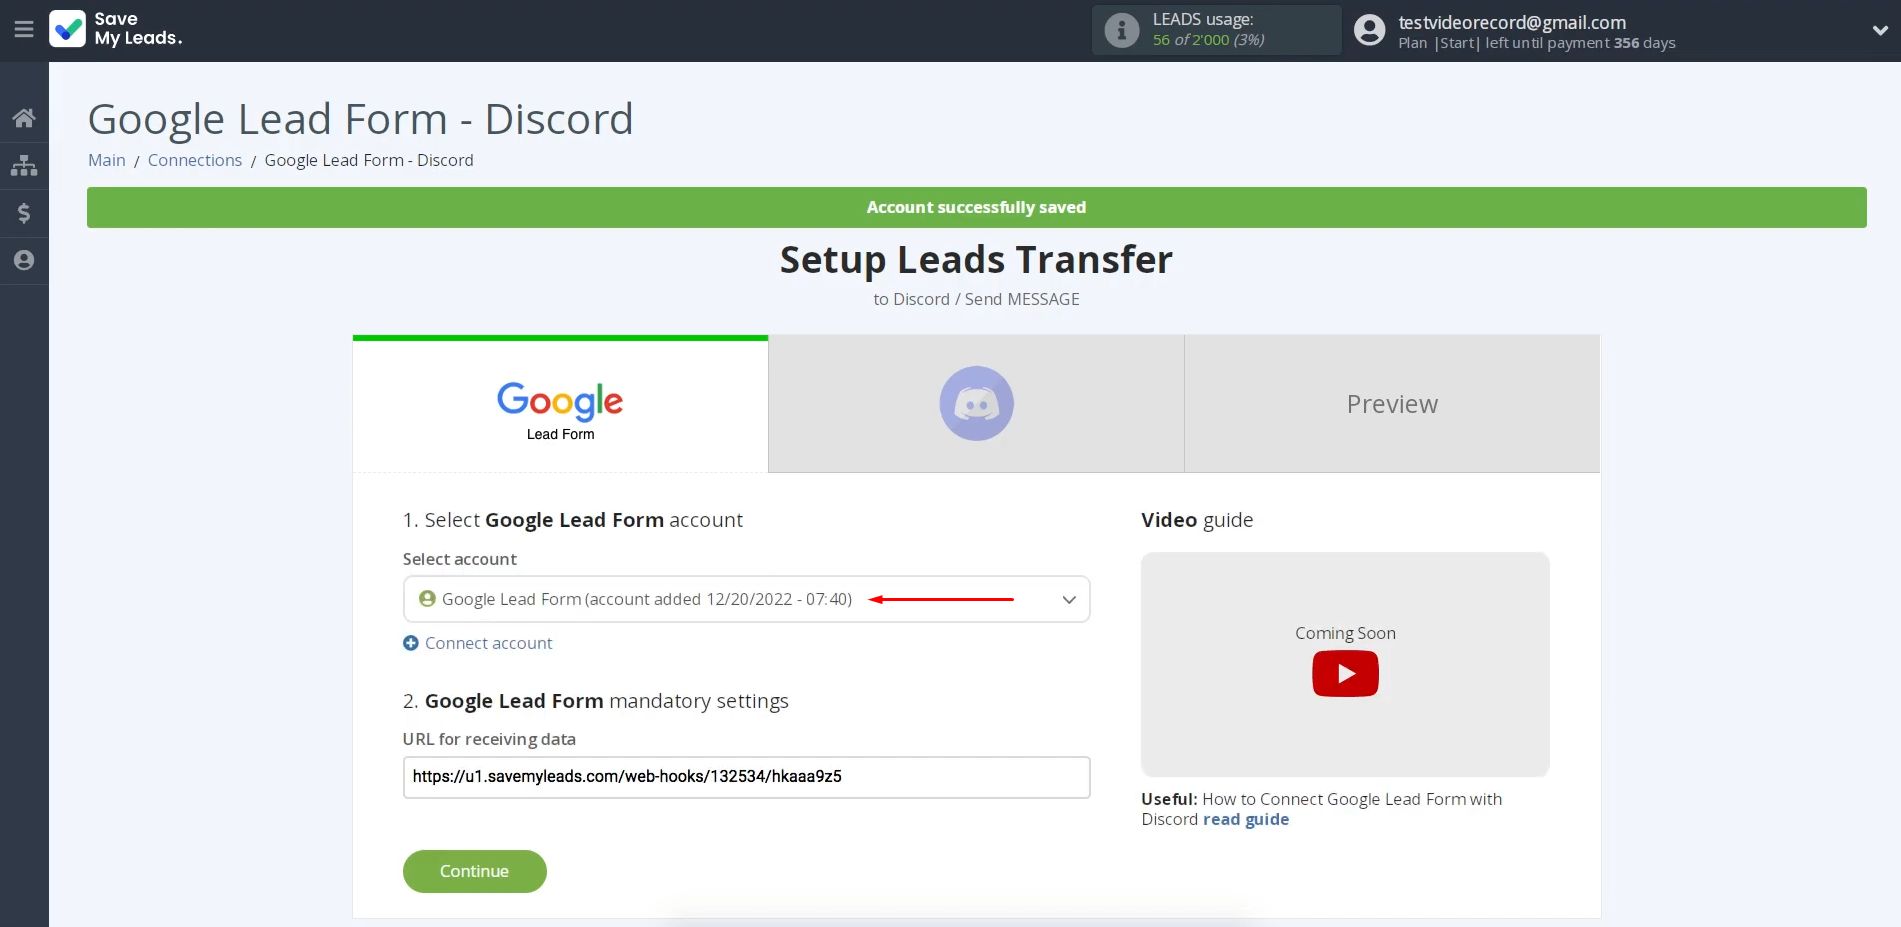
A webhook URL will
be generated for you. This URL is where the data from your Google lead form will be delivered. Copy the URL. You will need it in a few steps.
In your Google Ads
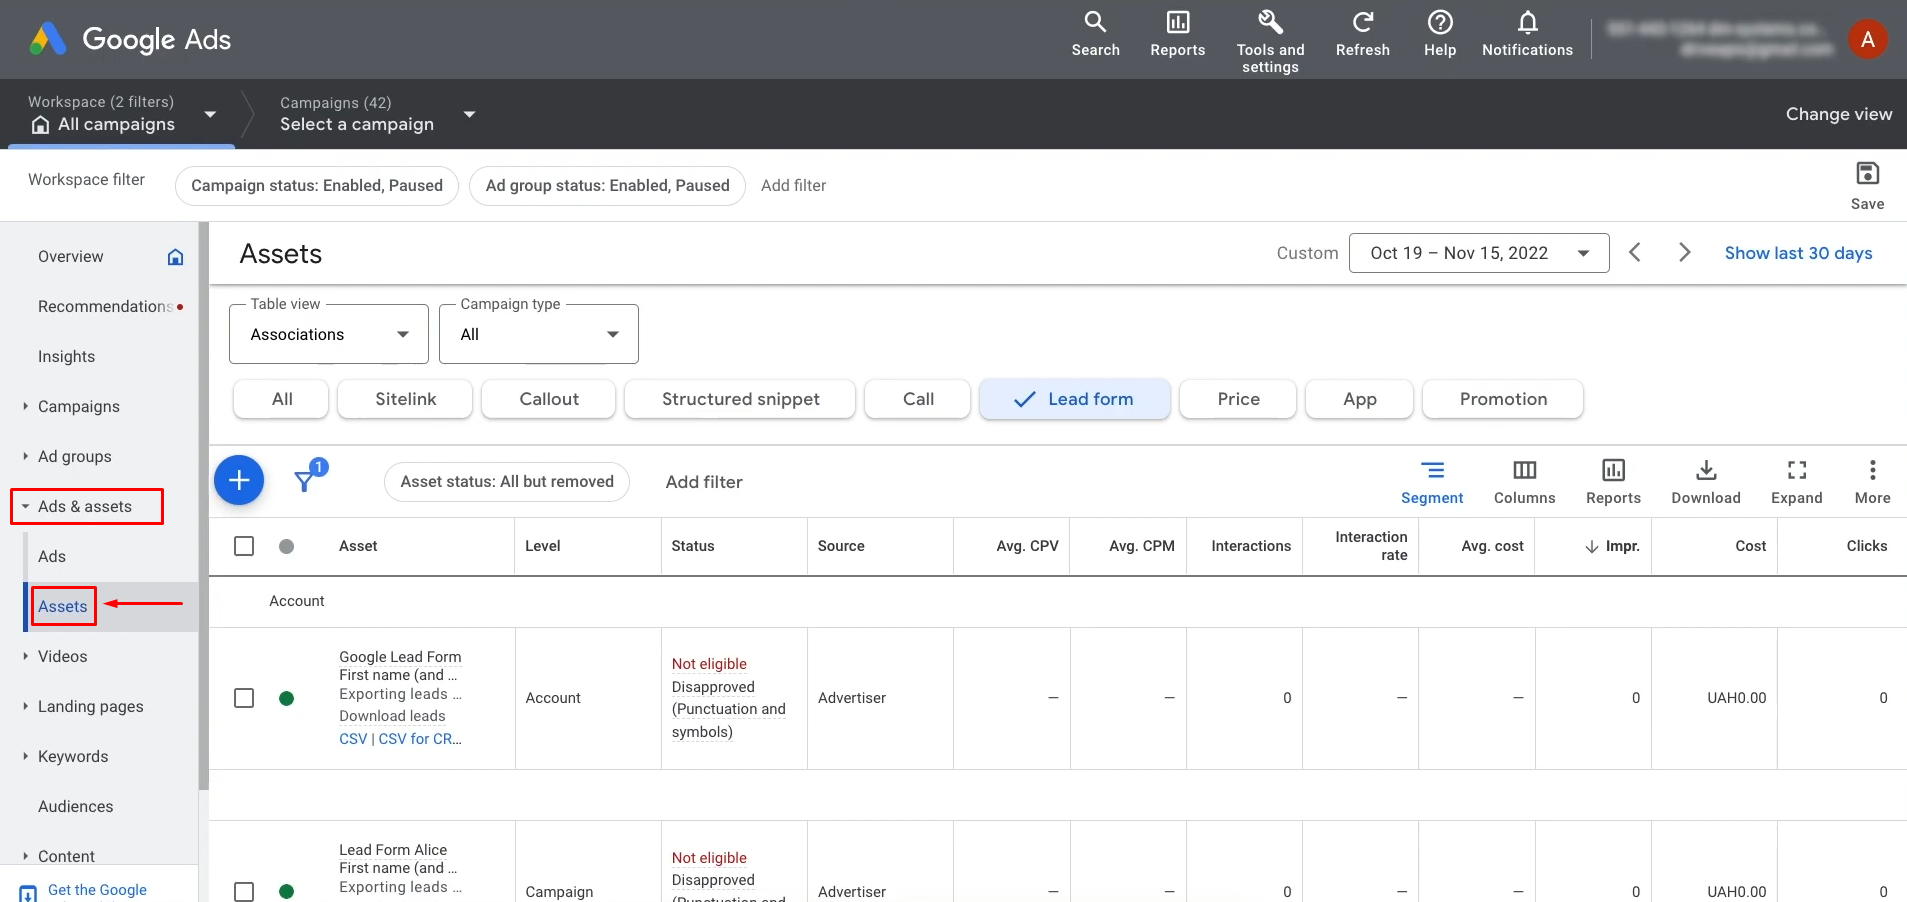
account, go to “Ads & Assets” and open “Assets.”
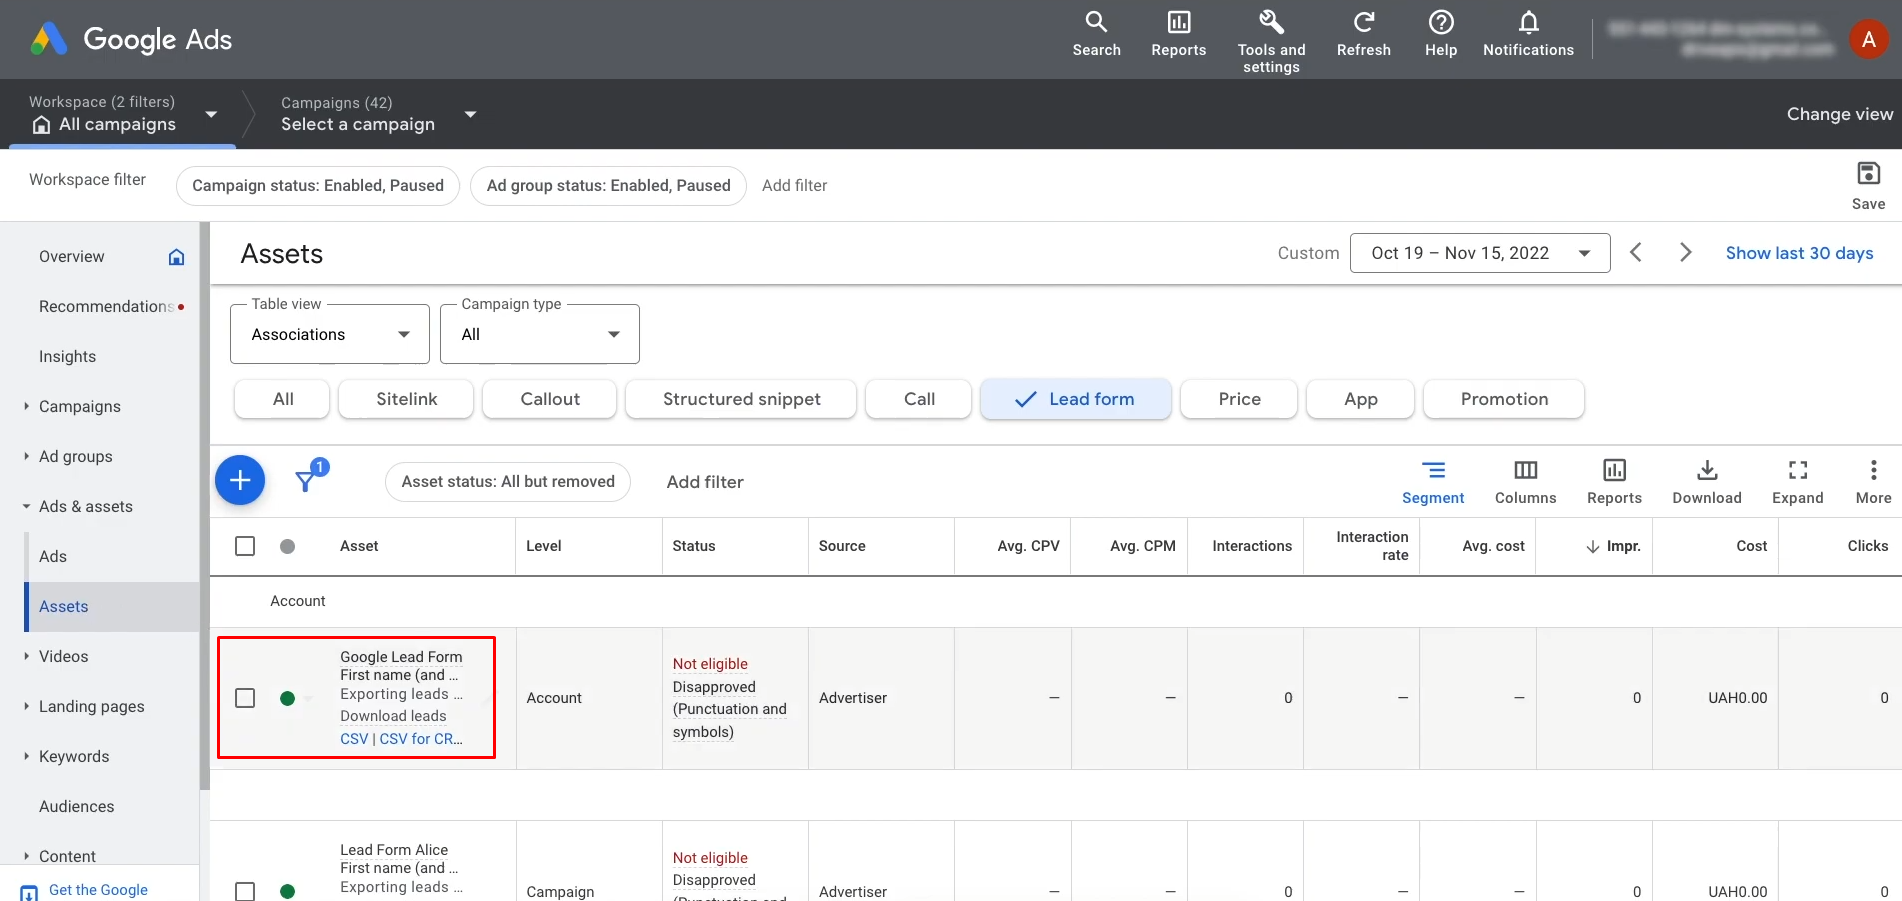
Open the desired
lead form that will be the data source.
Scroll to the "Other Data Integration Options" section within the form settings.
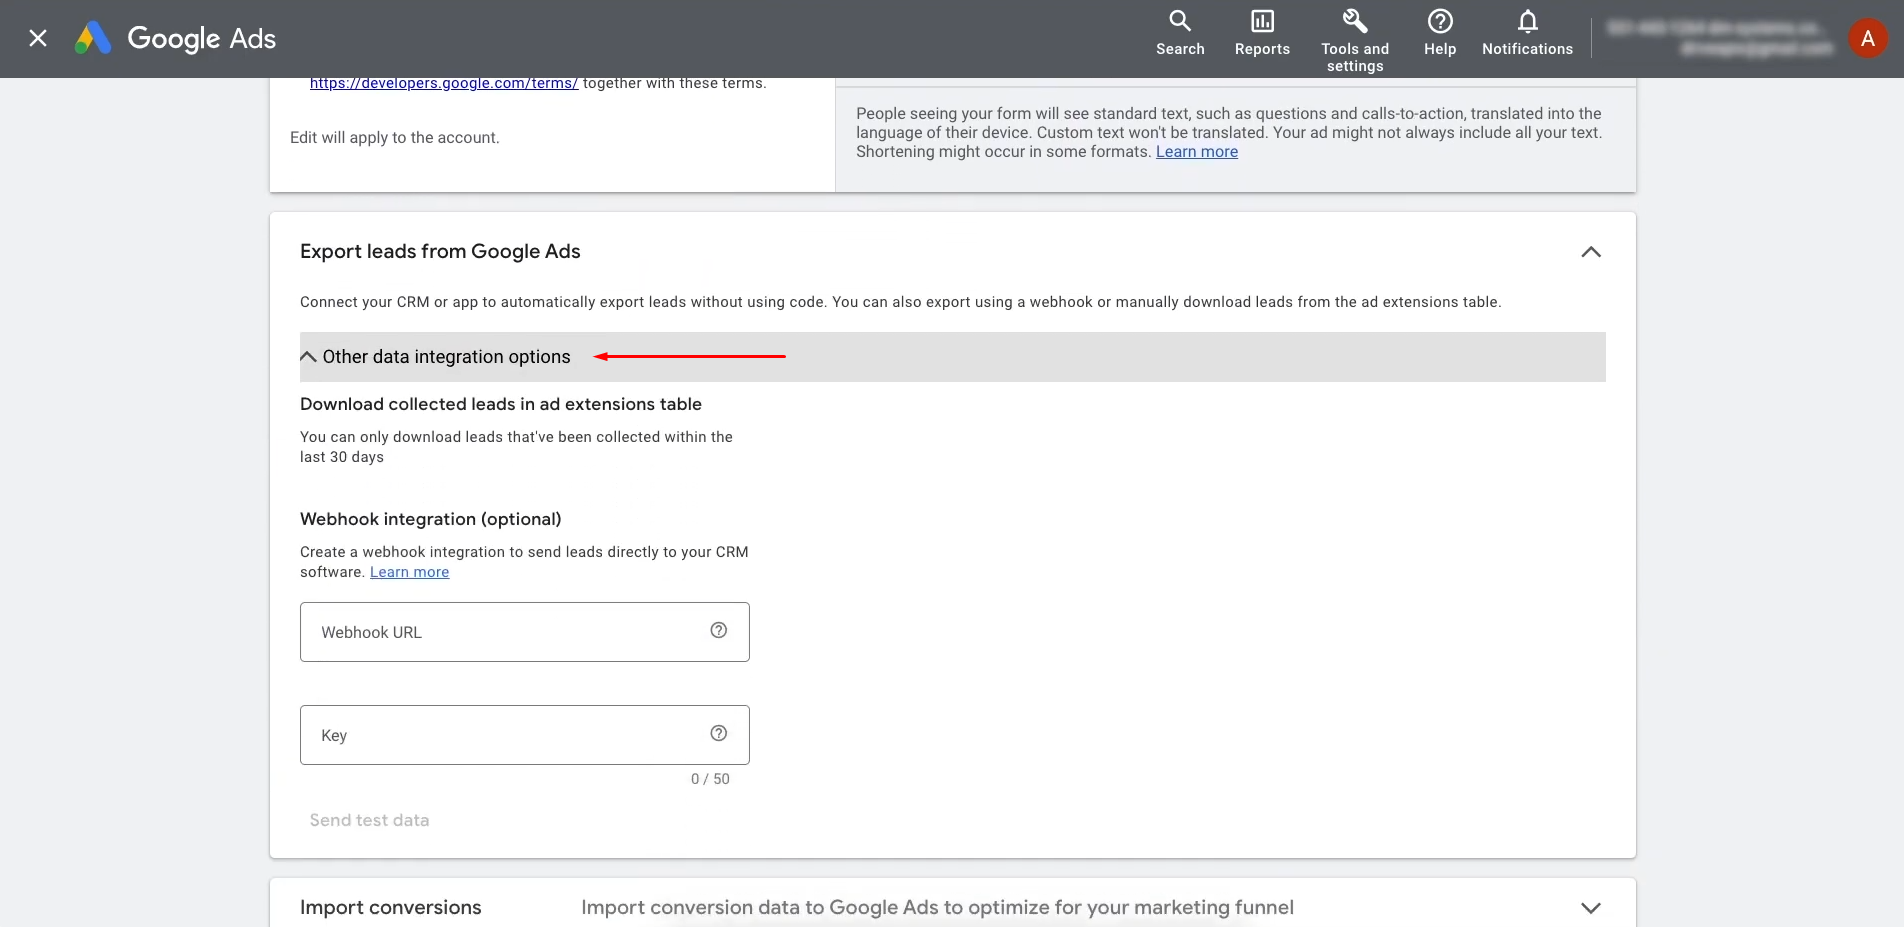
Paste the copied
Webhook URL into the designated field for external integrations.
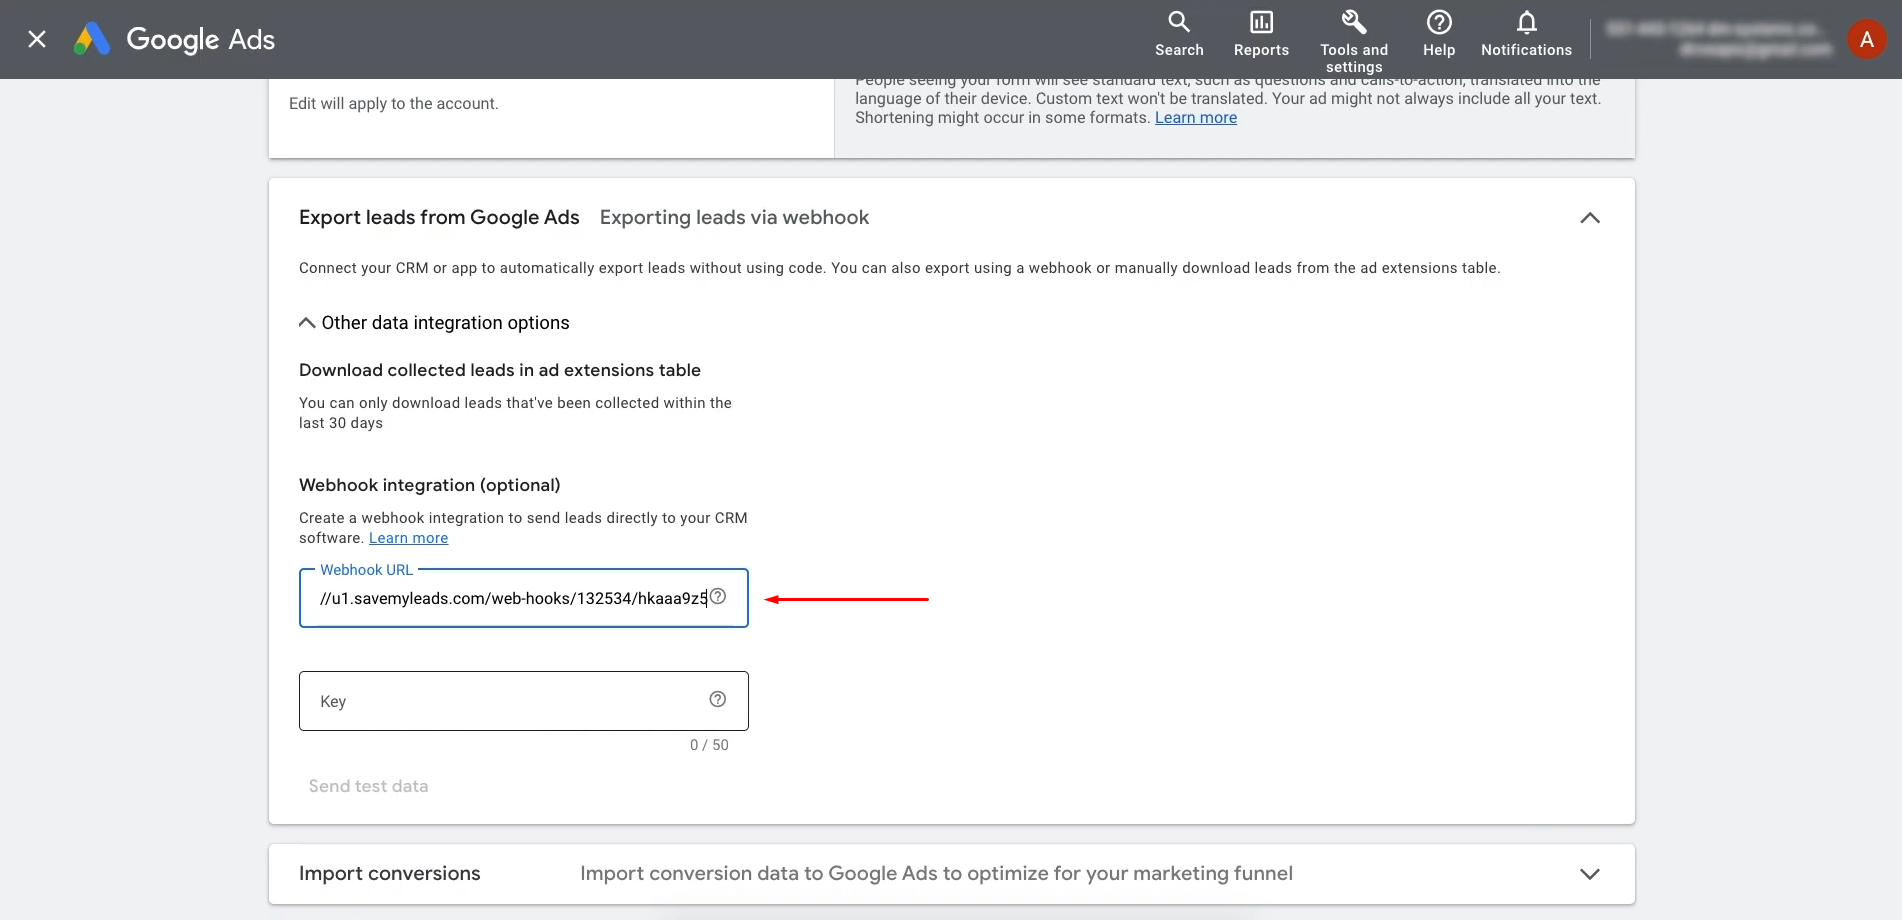
Copy the final
segment (after the last slash) of the webhook URL.
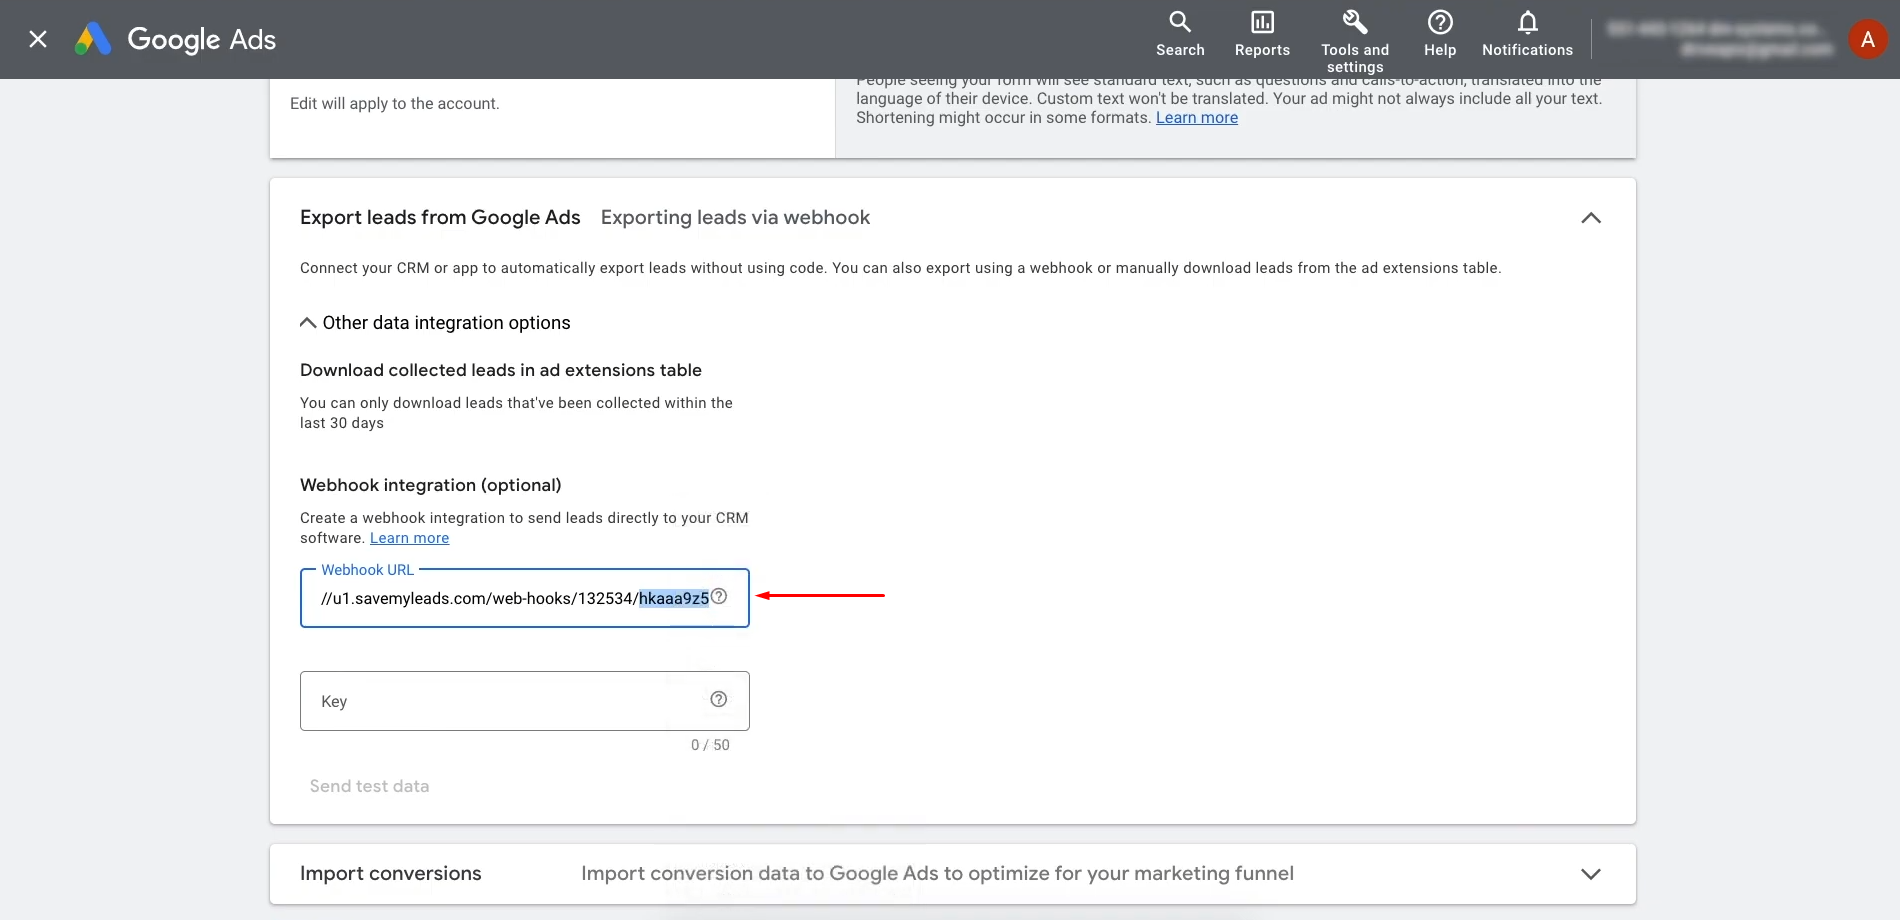
In the "Key" field,
enter the final segment of the URL.
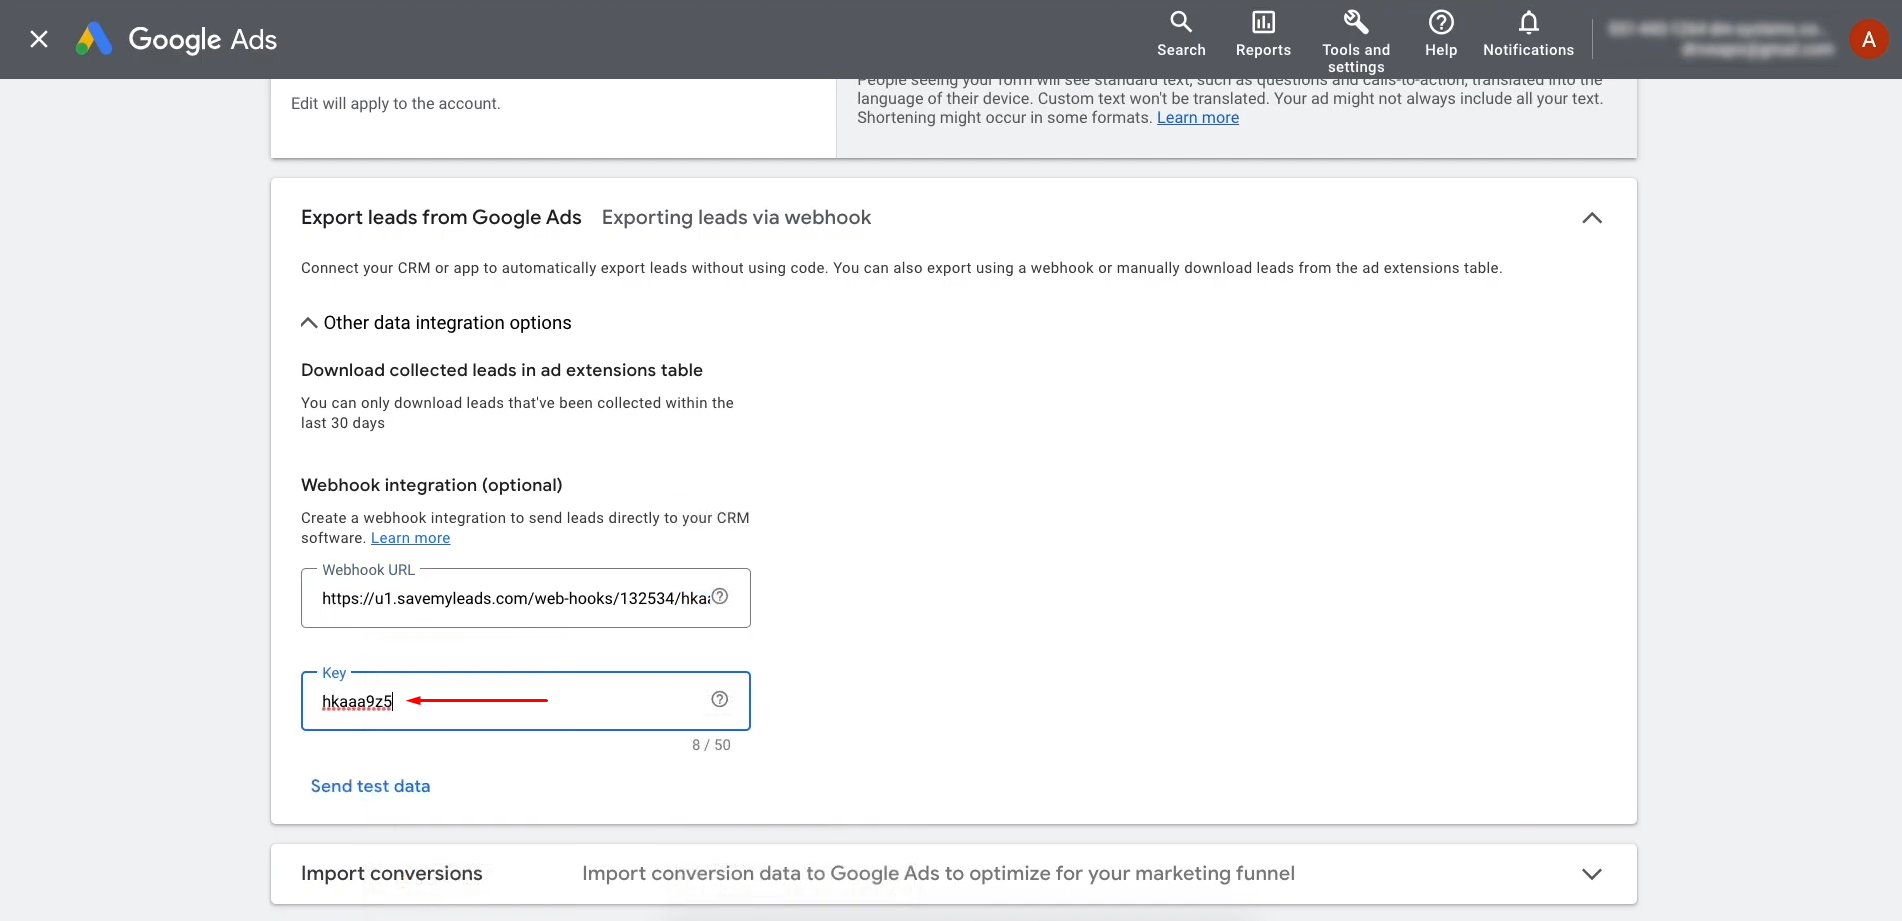
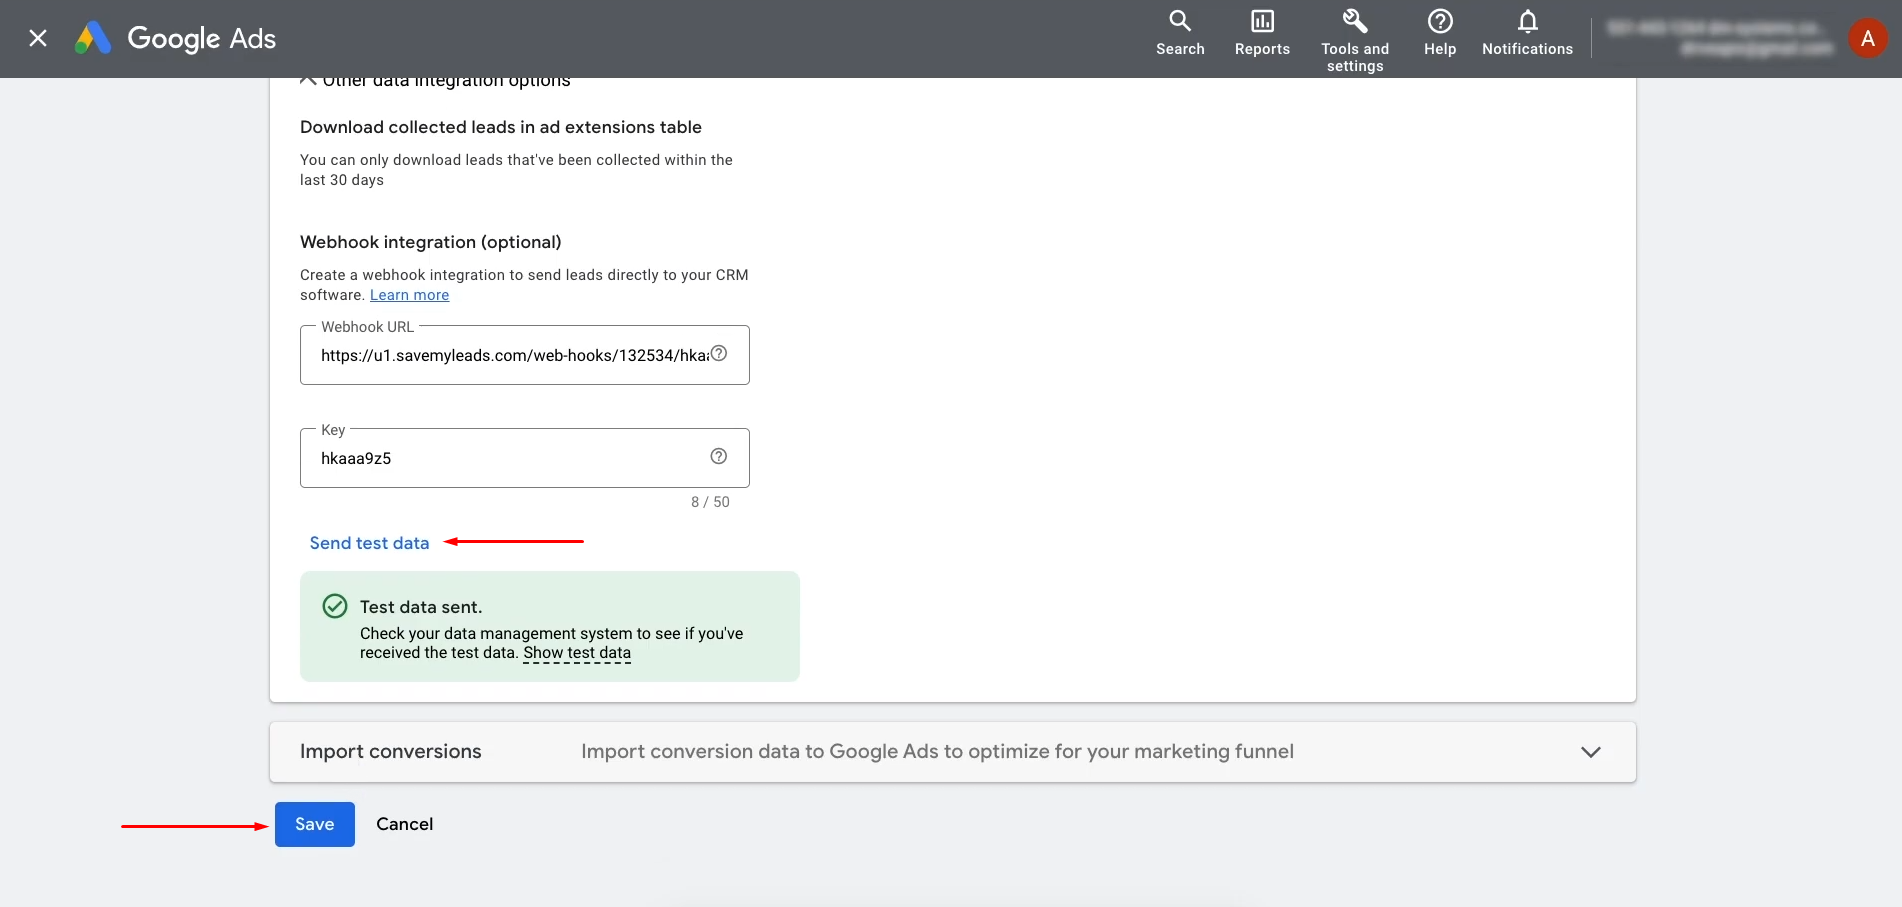
Submit test data and click "Save" to apply the changes.
Return
to SaveMyLeads to proceed to the next step of setting up the Google Leads
and Discord integration.
Data Destination Settings—Discord
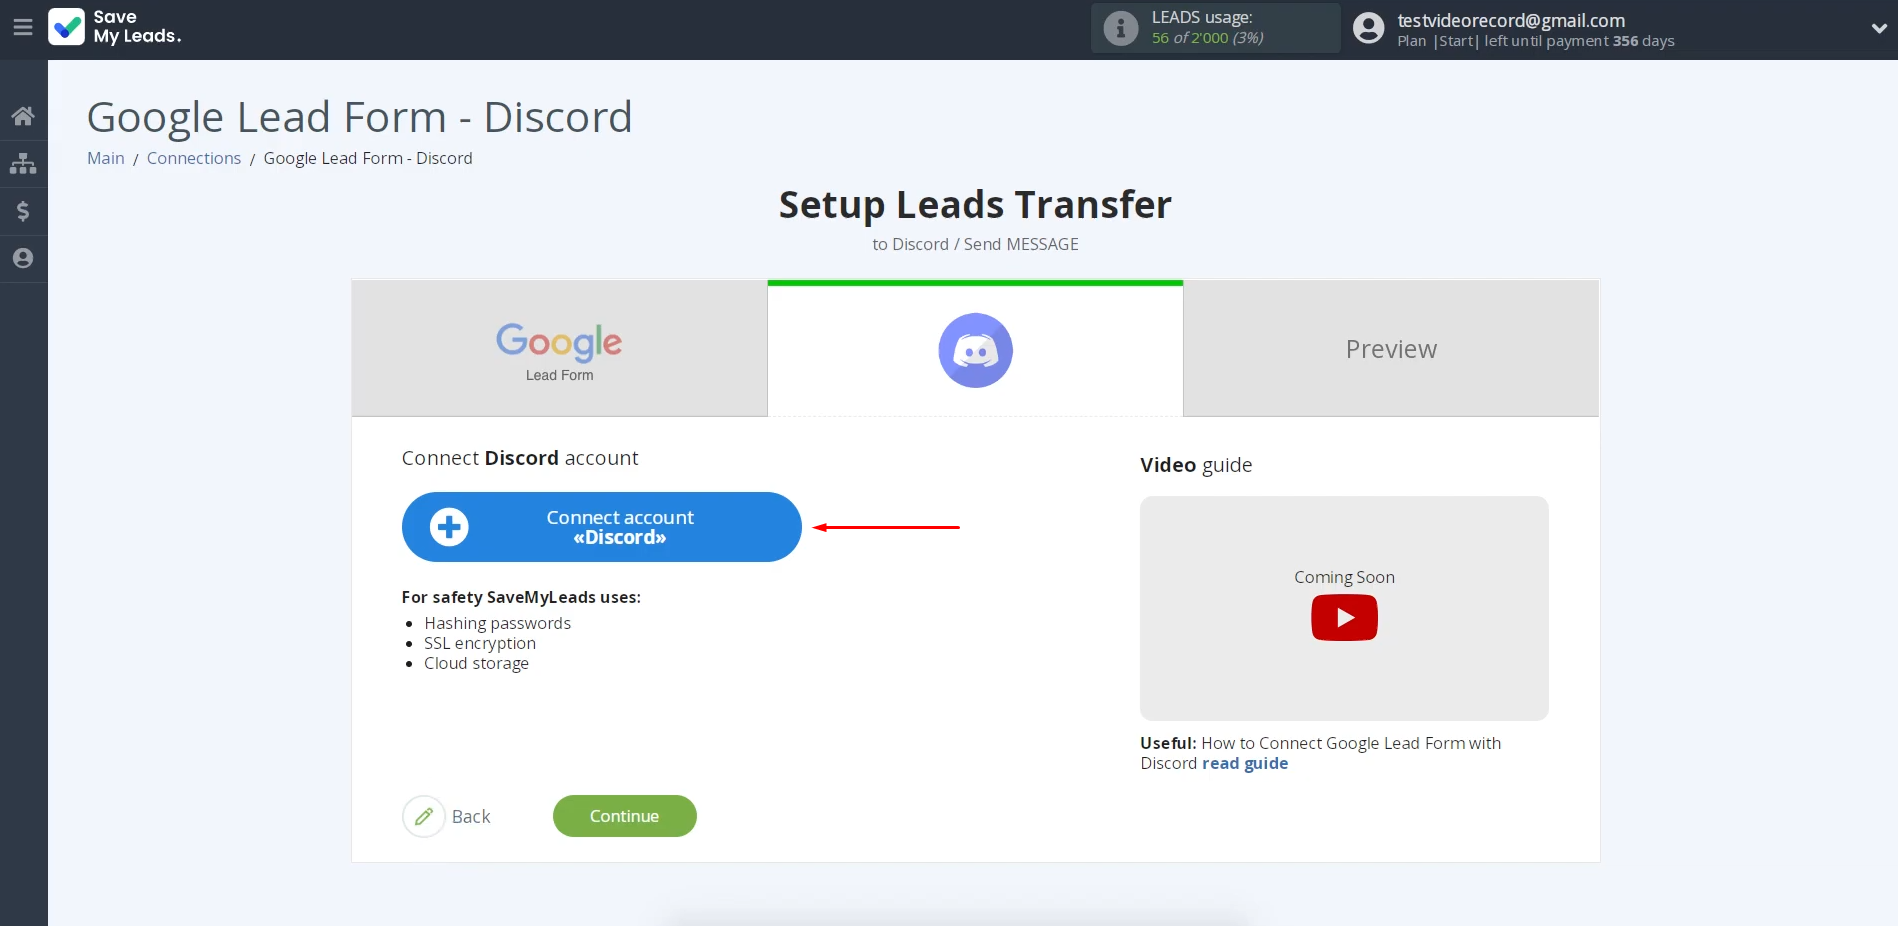
Connect your Discord account to SML to continue integration setup.
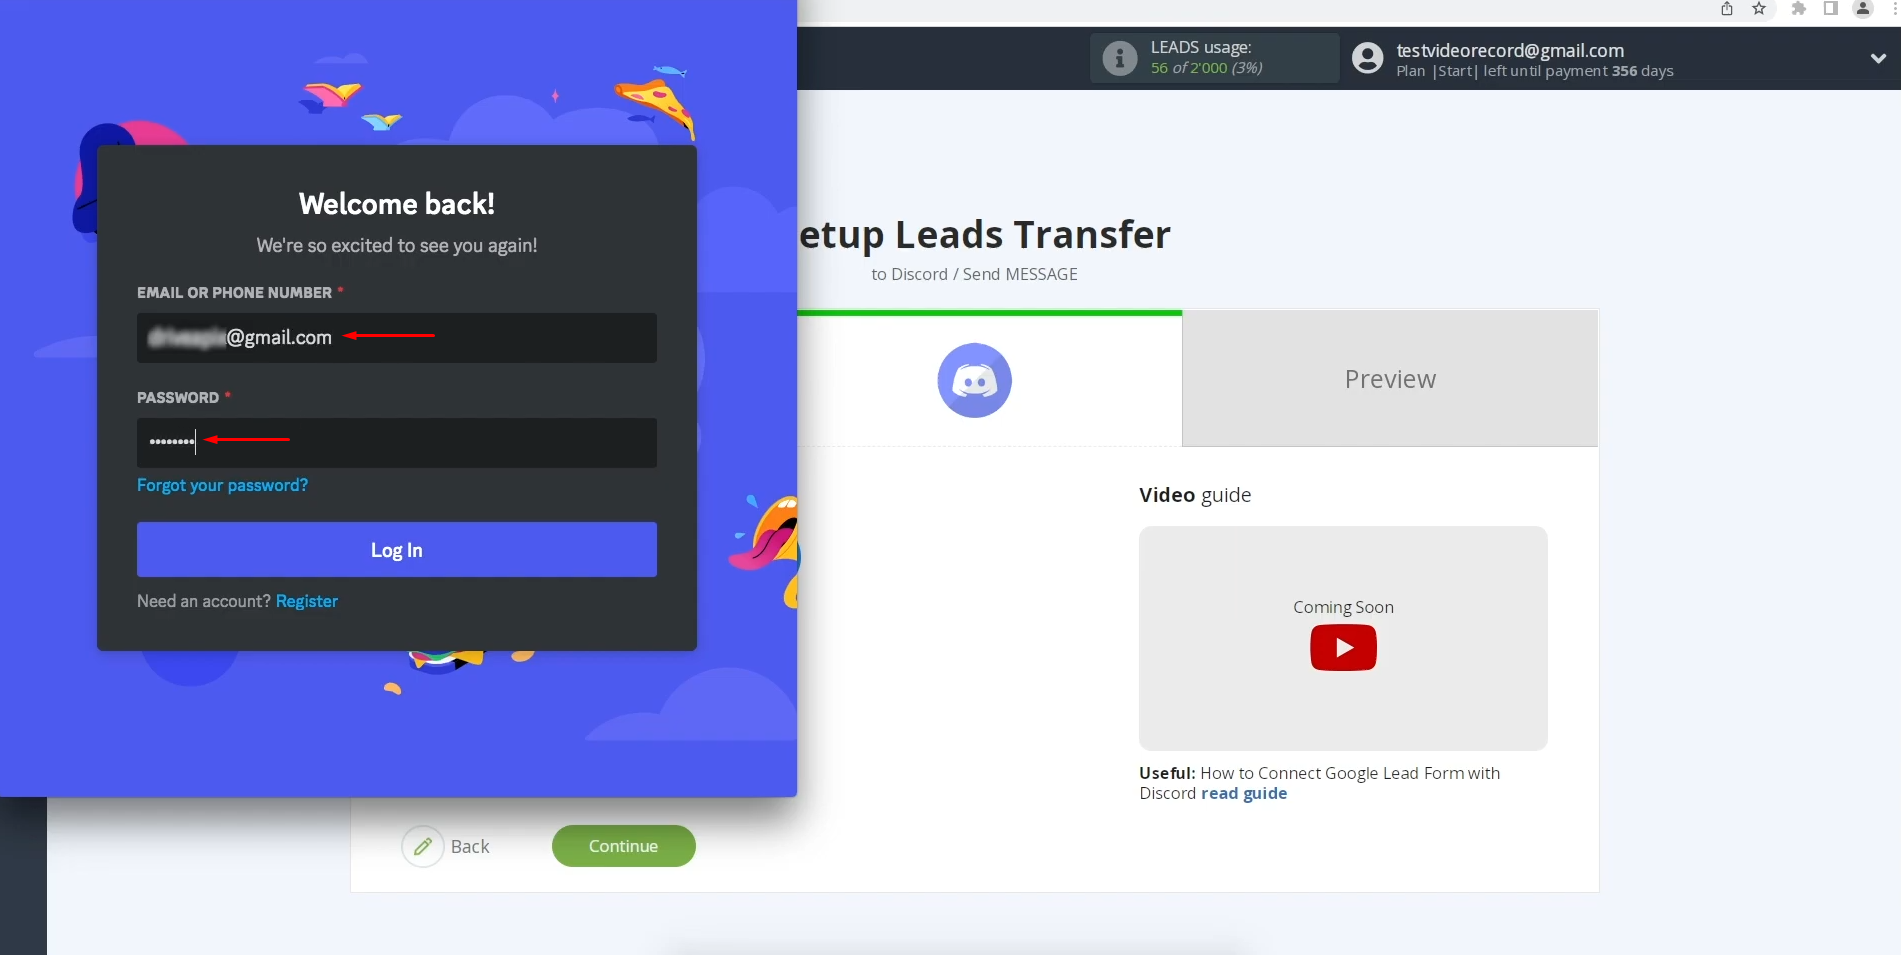
Enter your Discord
login details.
Select the Discord server where the lead data should be delivered.
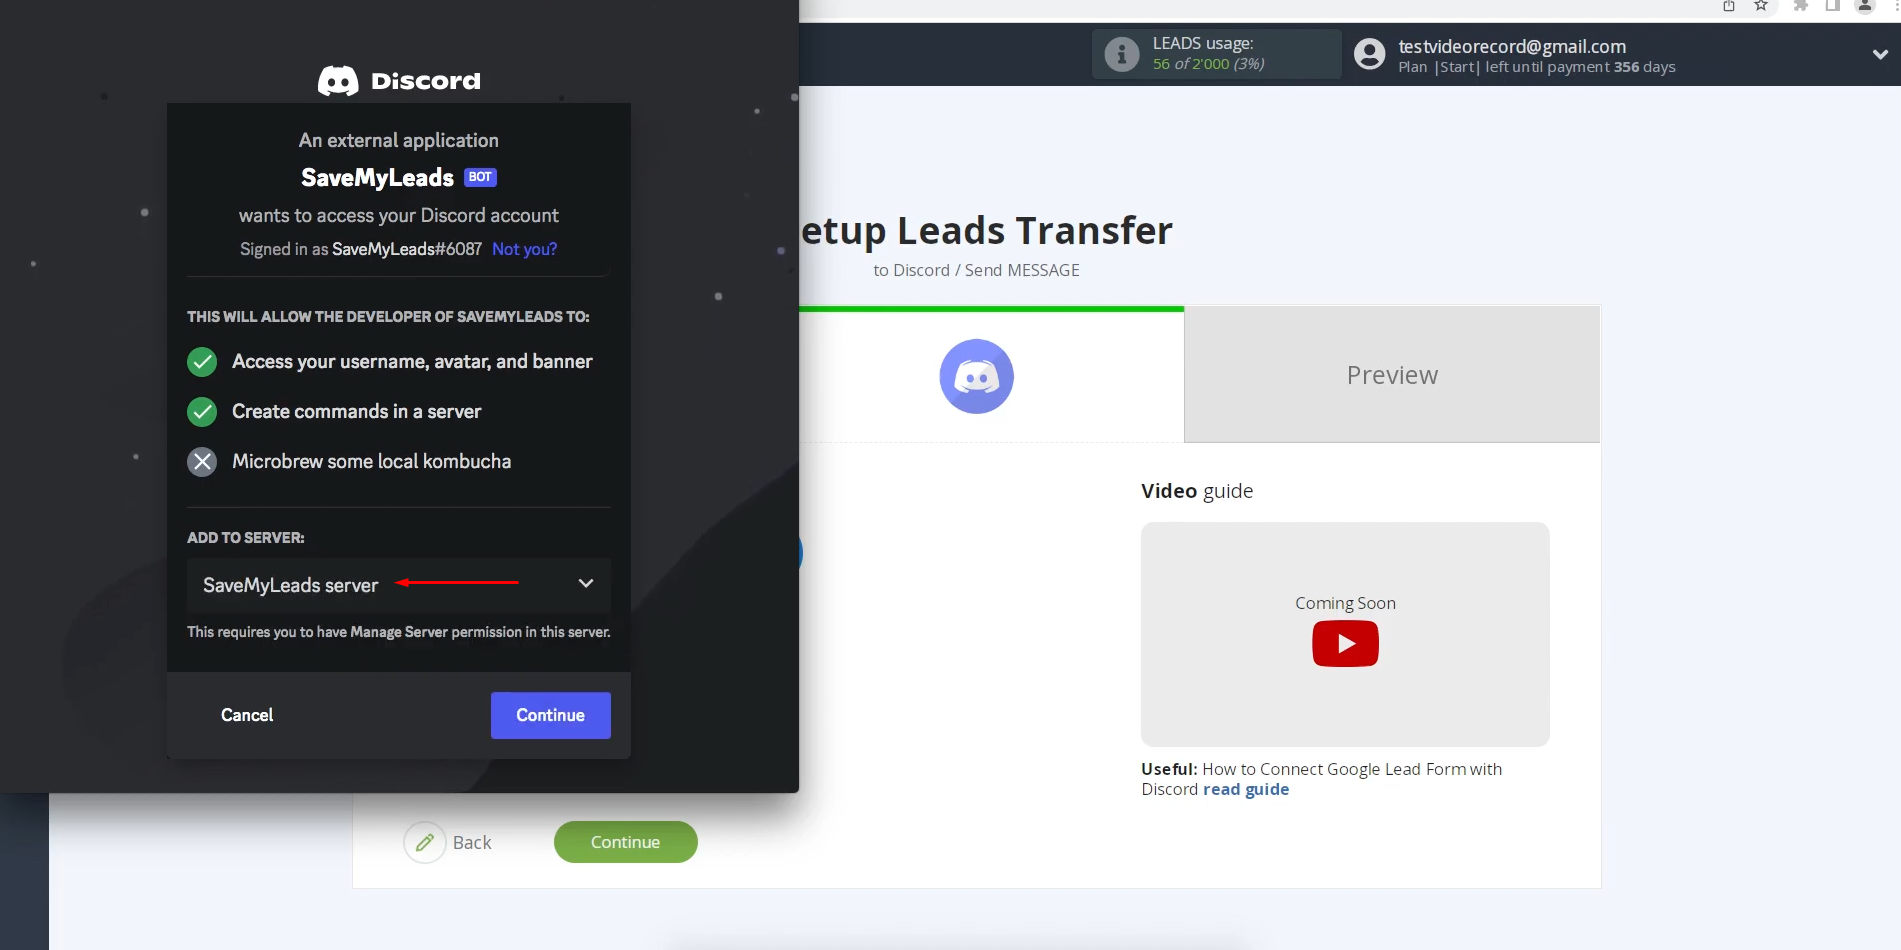
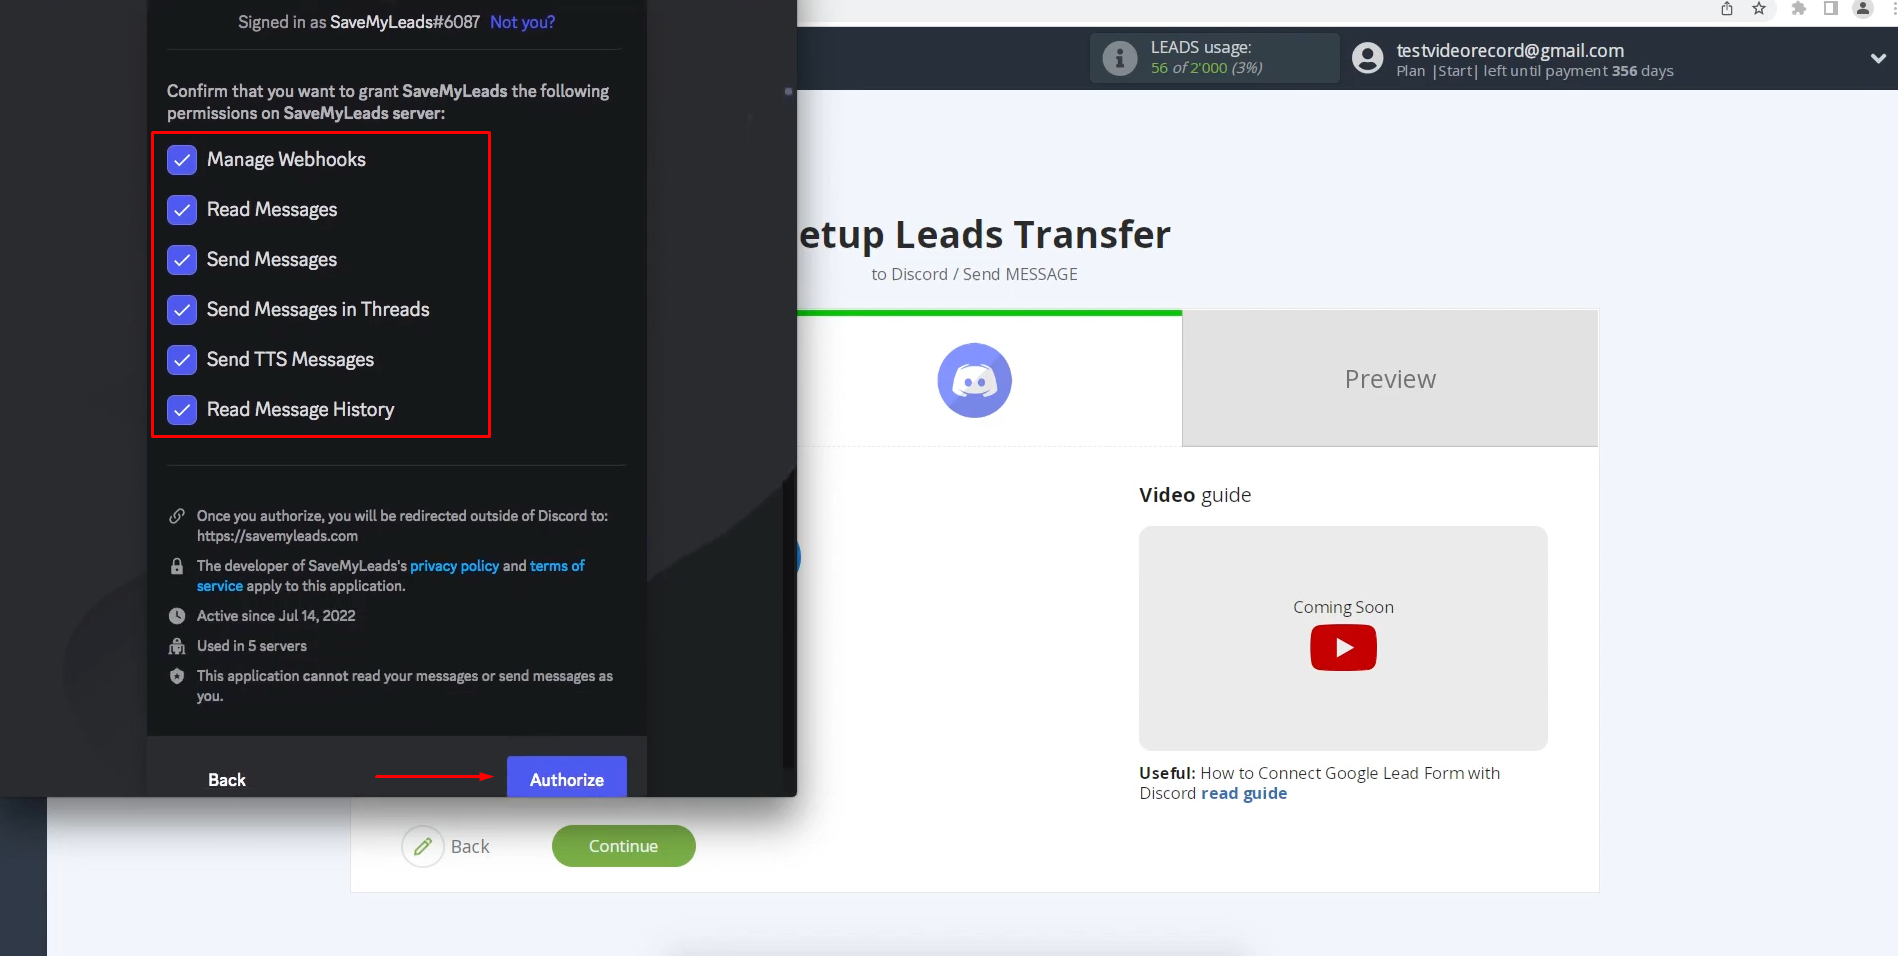
Leave all
permission checkboxes selected and click "Authorize" to grant
SaveMyLeads access to your server and channels.
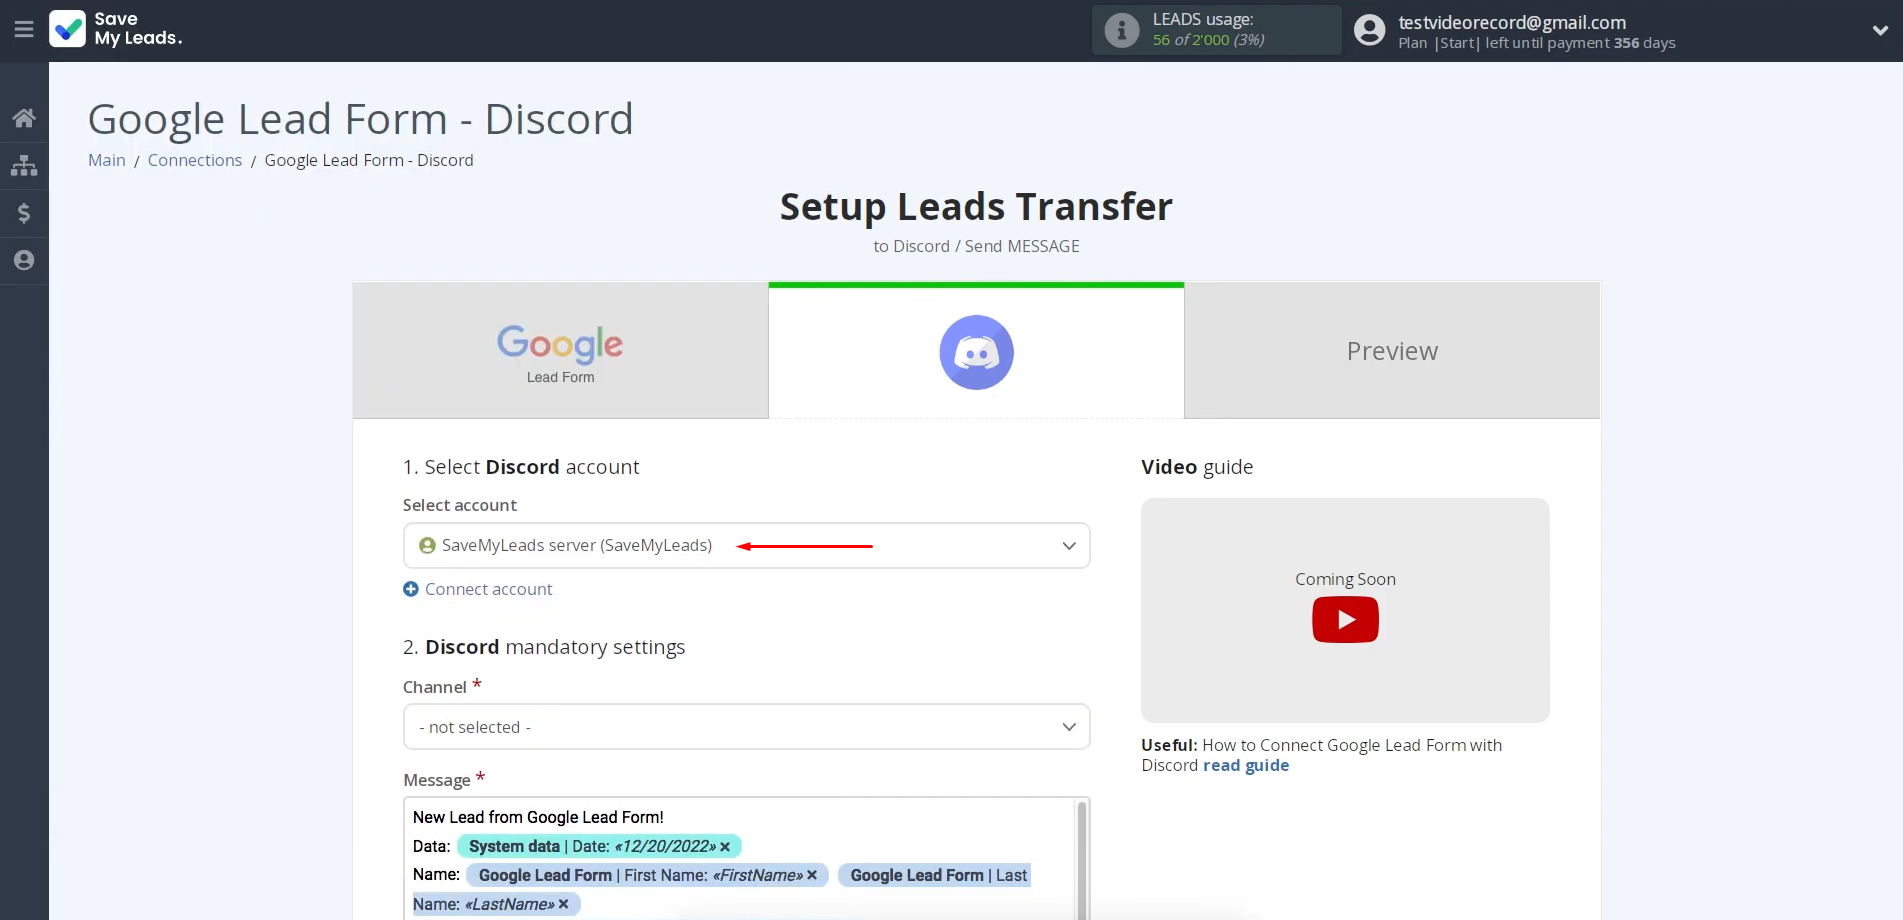
When your Discord
account appears in the list, select it to proceed.
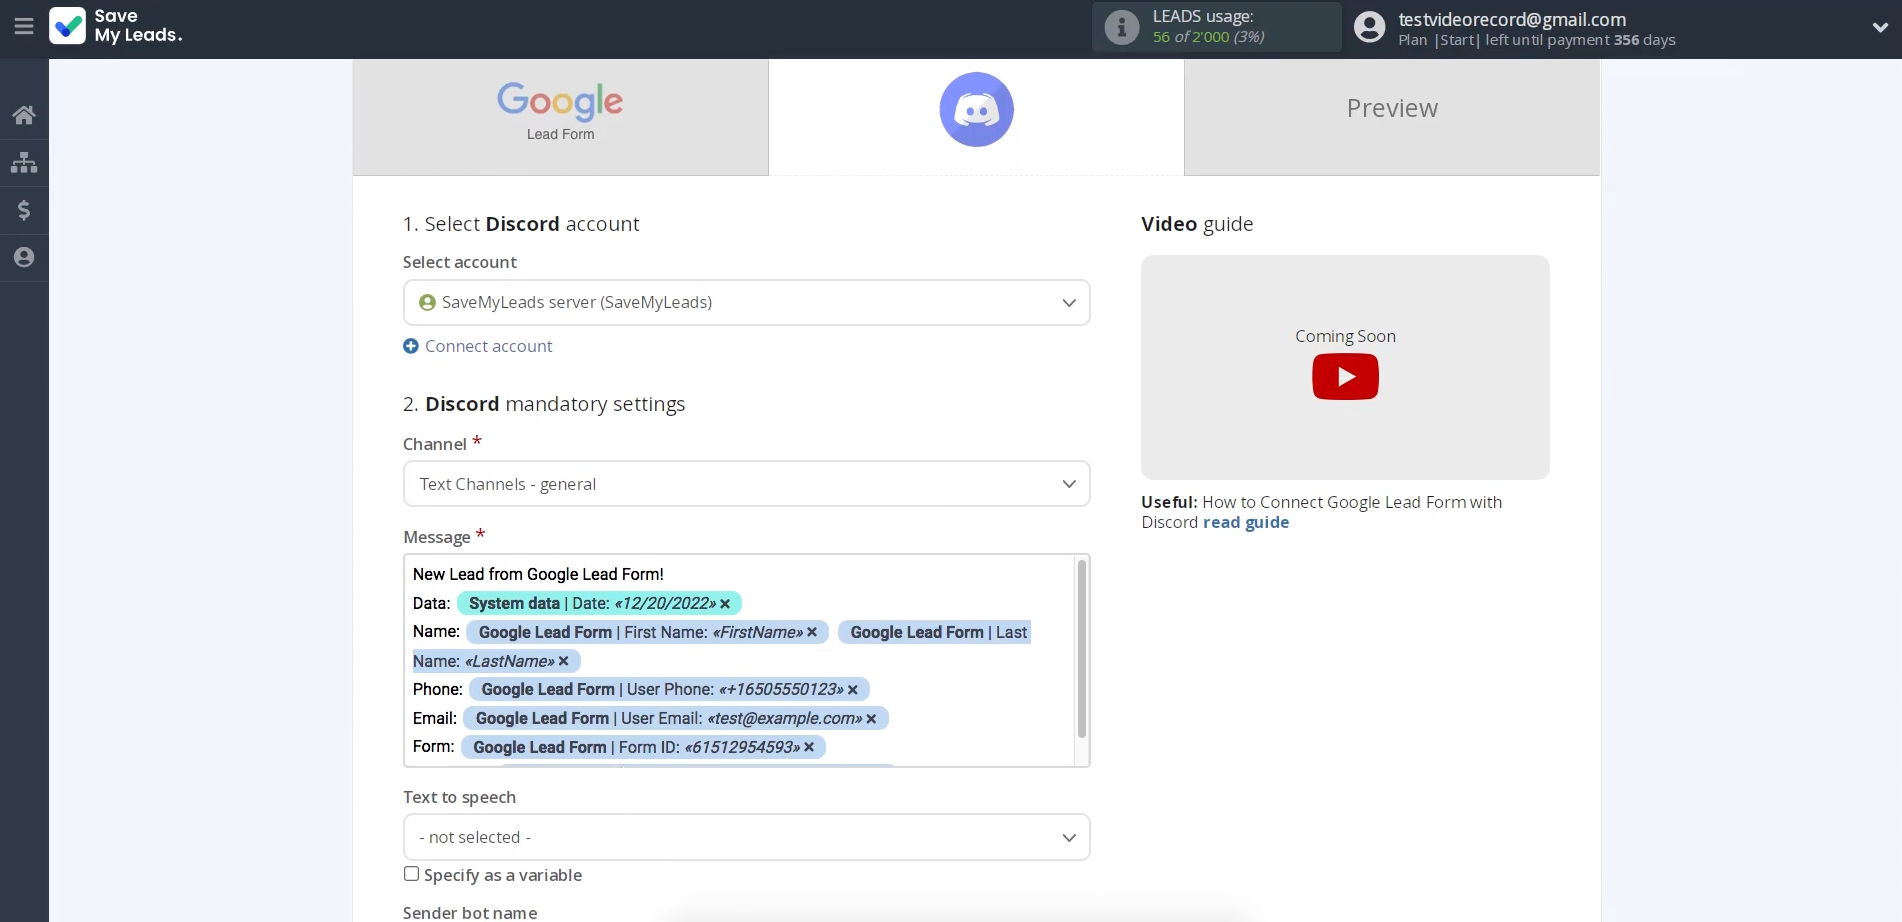
Specify the channel that will receive messages with lead information.
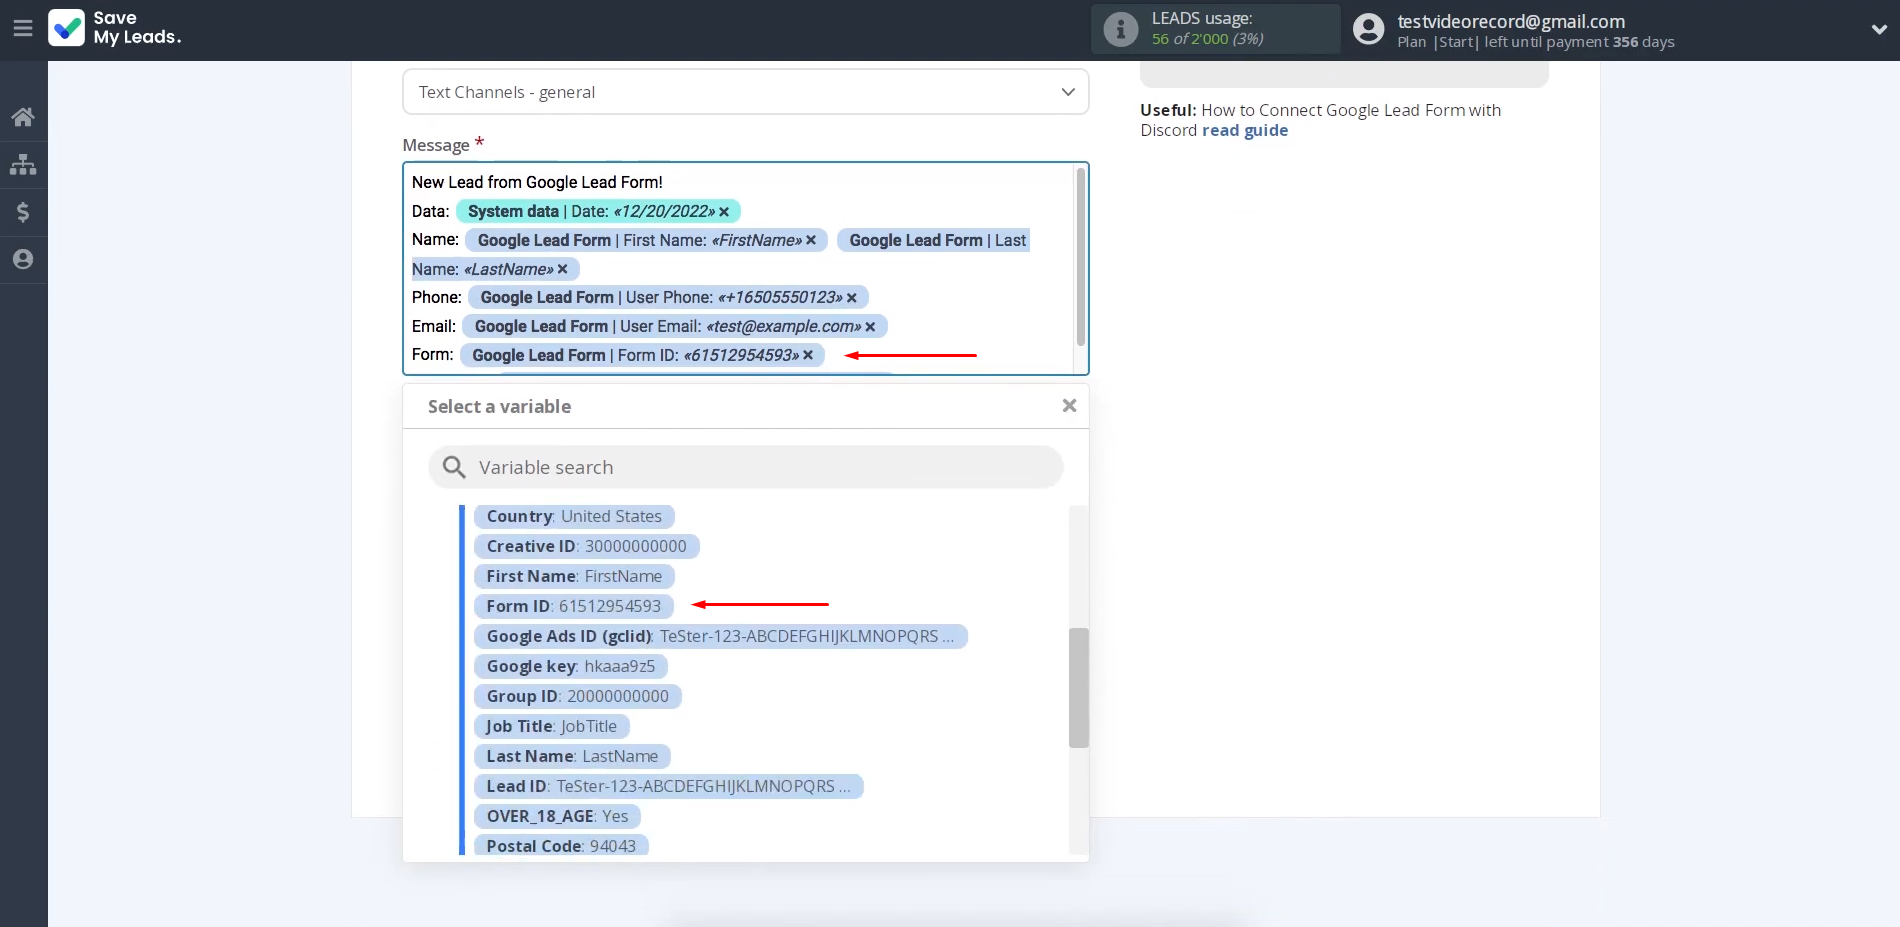
On the following screen, the available Discord message fields will be displayed. Assign variables
from the Google Lead Form to the fields using the dropdown lists.
You can give the sender bot a name and add the URL of the image you plan to set as its avatar.
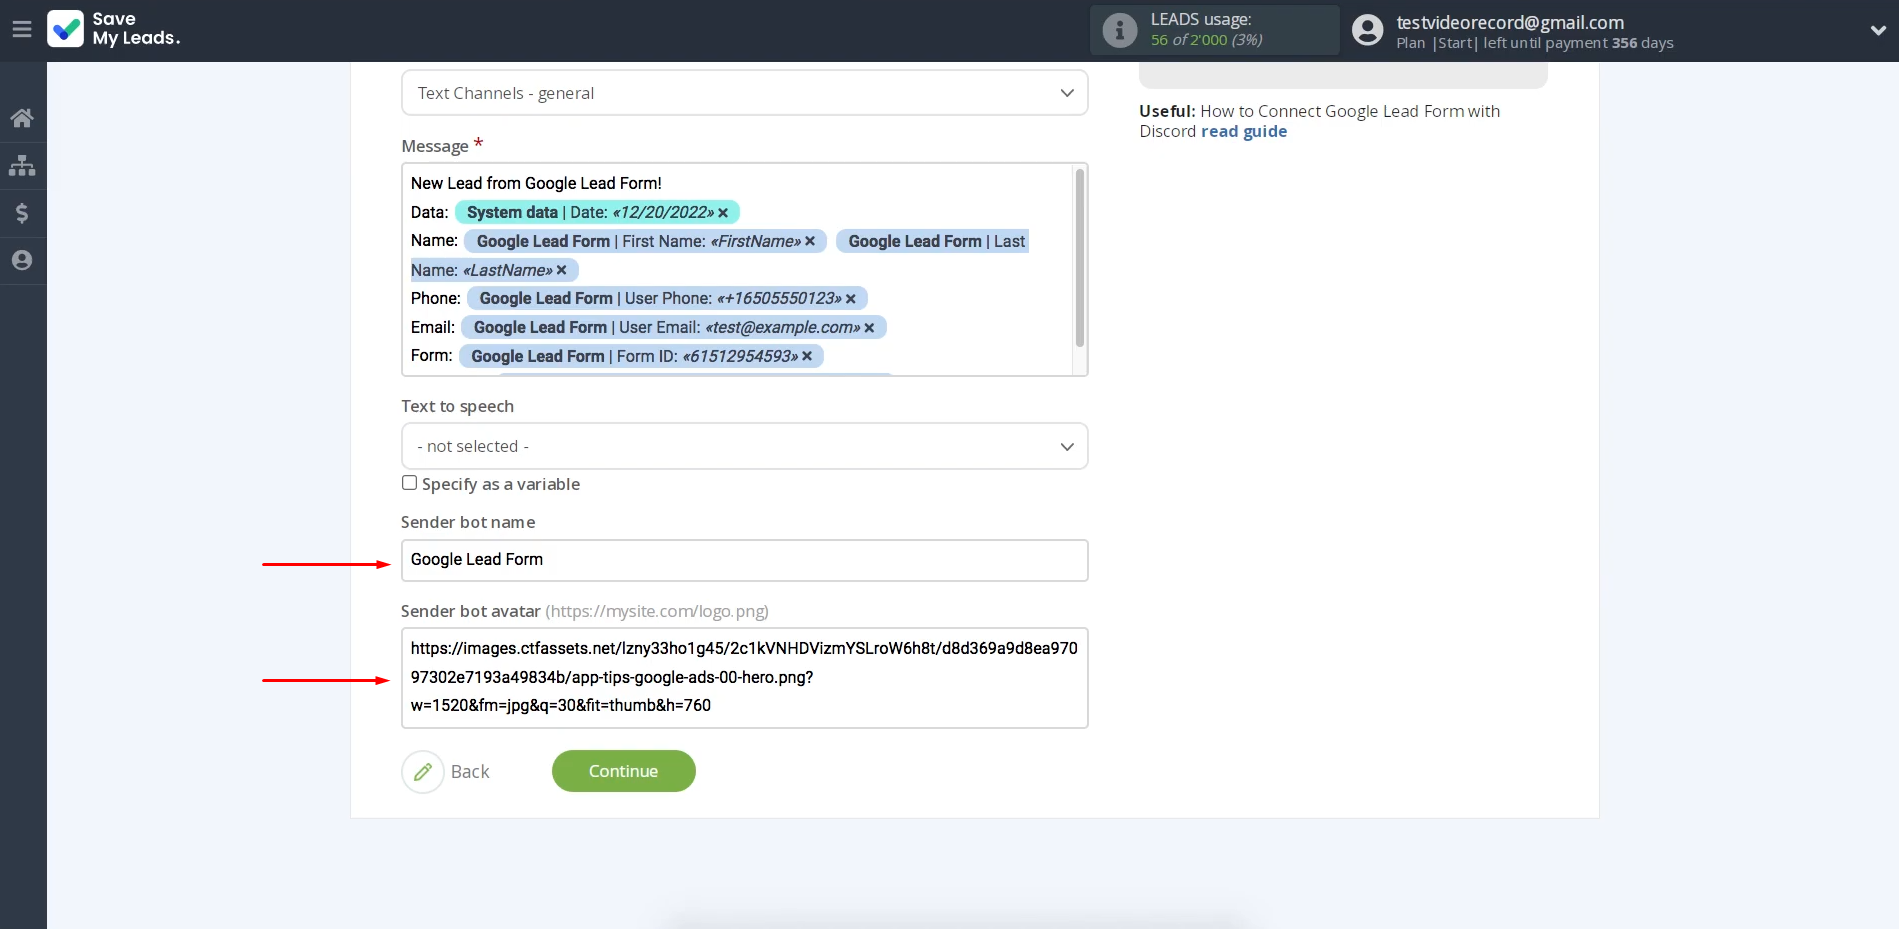
When you are finished with the fields, click "Continue."


You should now see a sample message that will be sent to Discord for each new lead. Send test data to confirm that the integration is functioning properly.
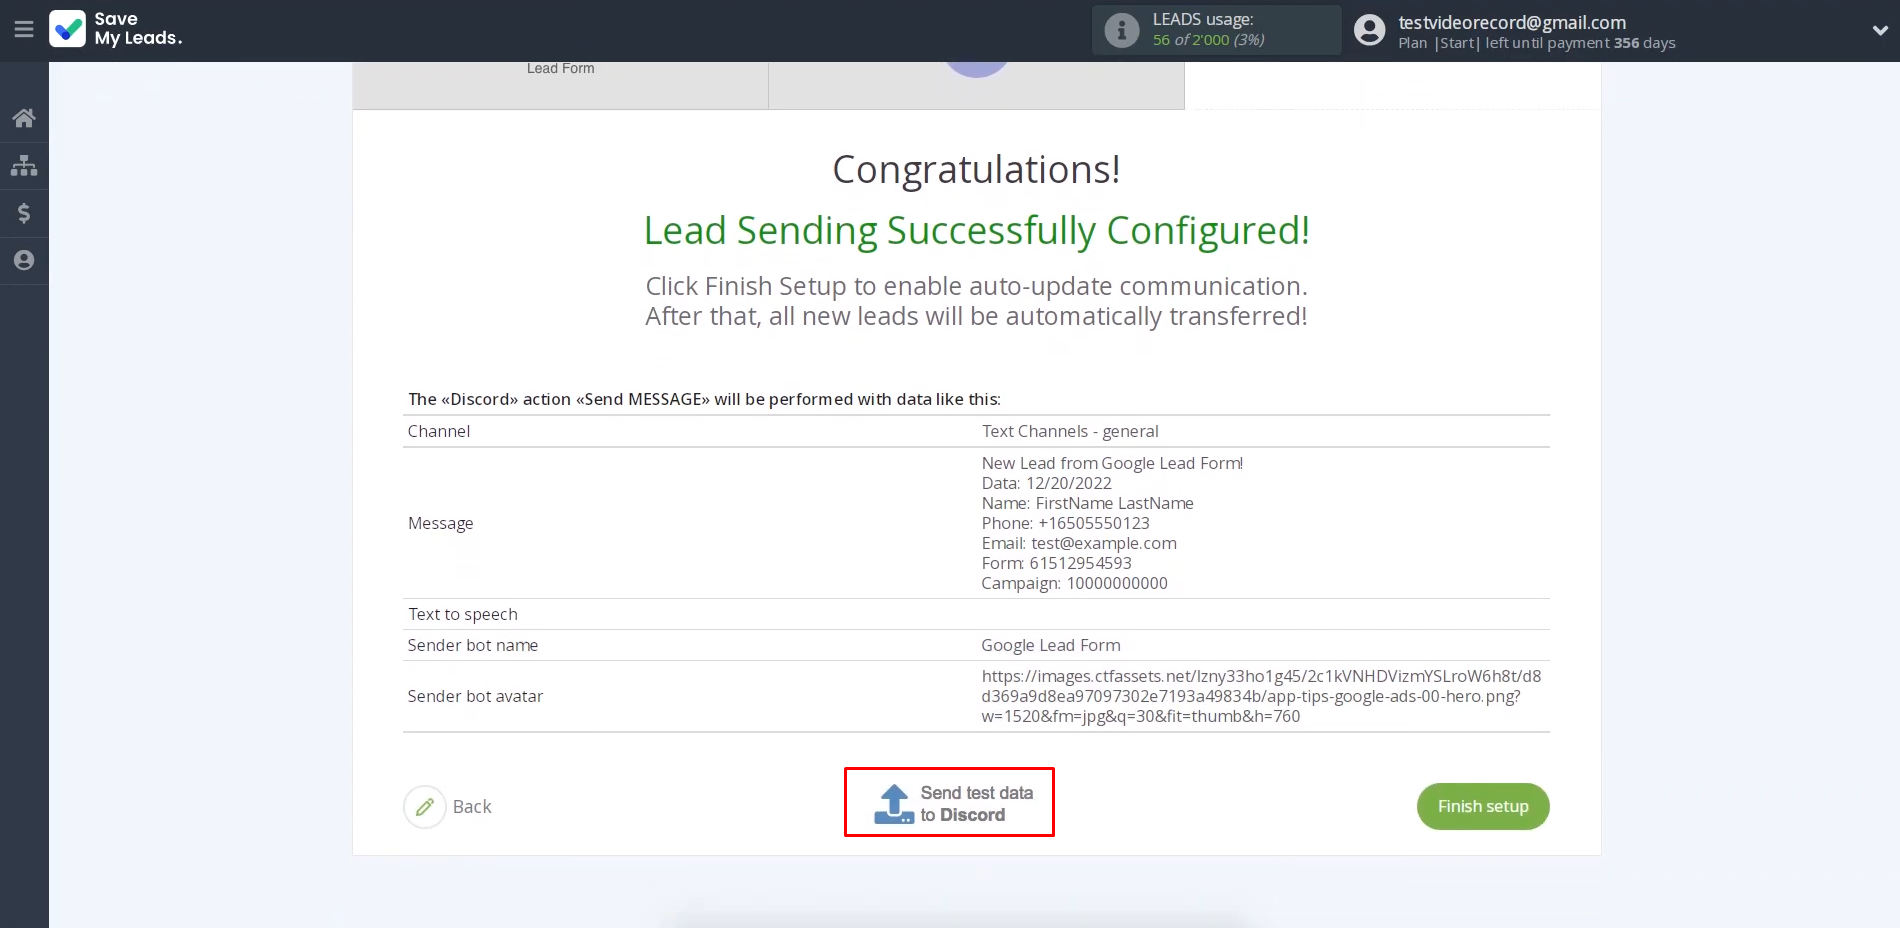
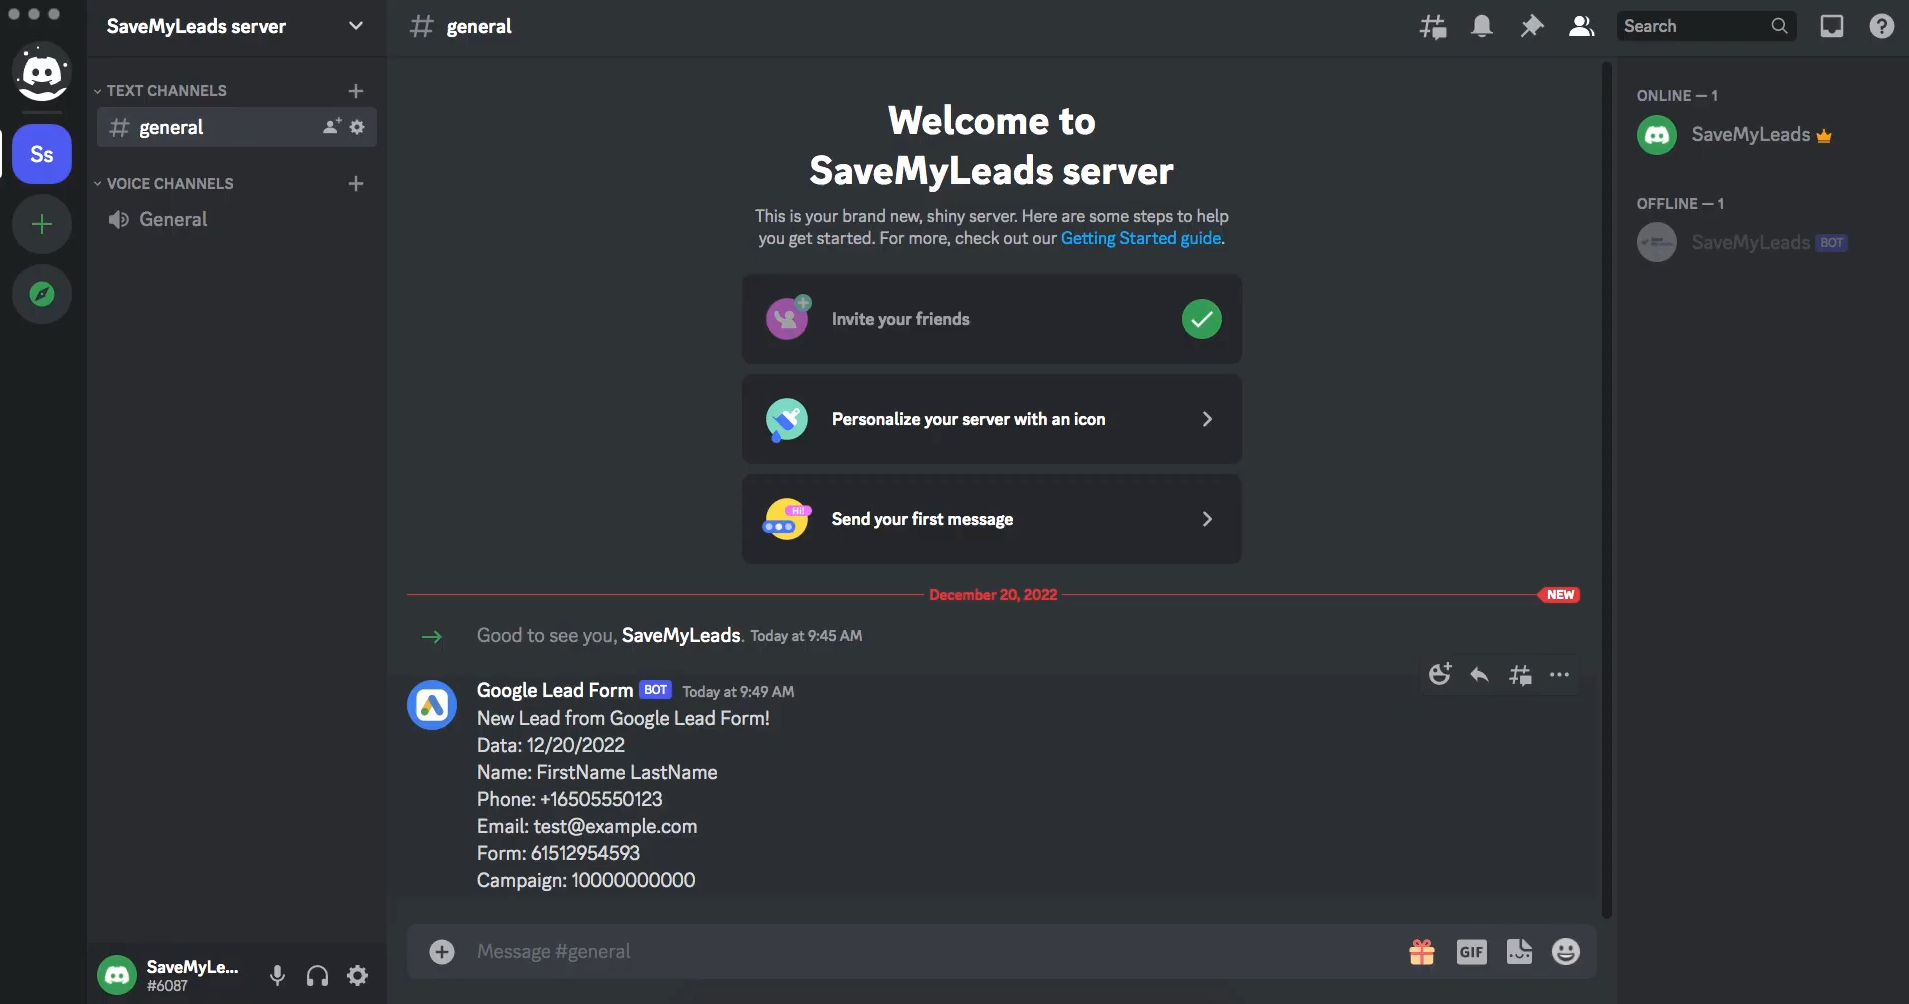
Open the selected
Discord channel to verify that the test message was received.
Return to SaveMyLeads and finish the Discord and
Google Leads integration setup.
Auto-Update Settings
Click “Finish setup” and the automatic lead updates will now be enabled. From now on, every new lead that submits their data via Google Lead Form will arrive in Discord as a separate message.
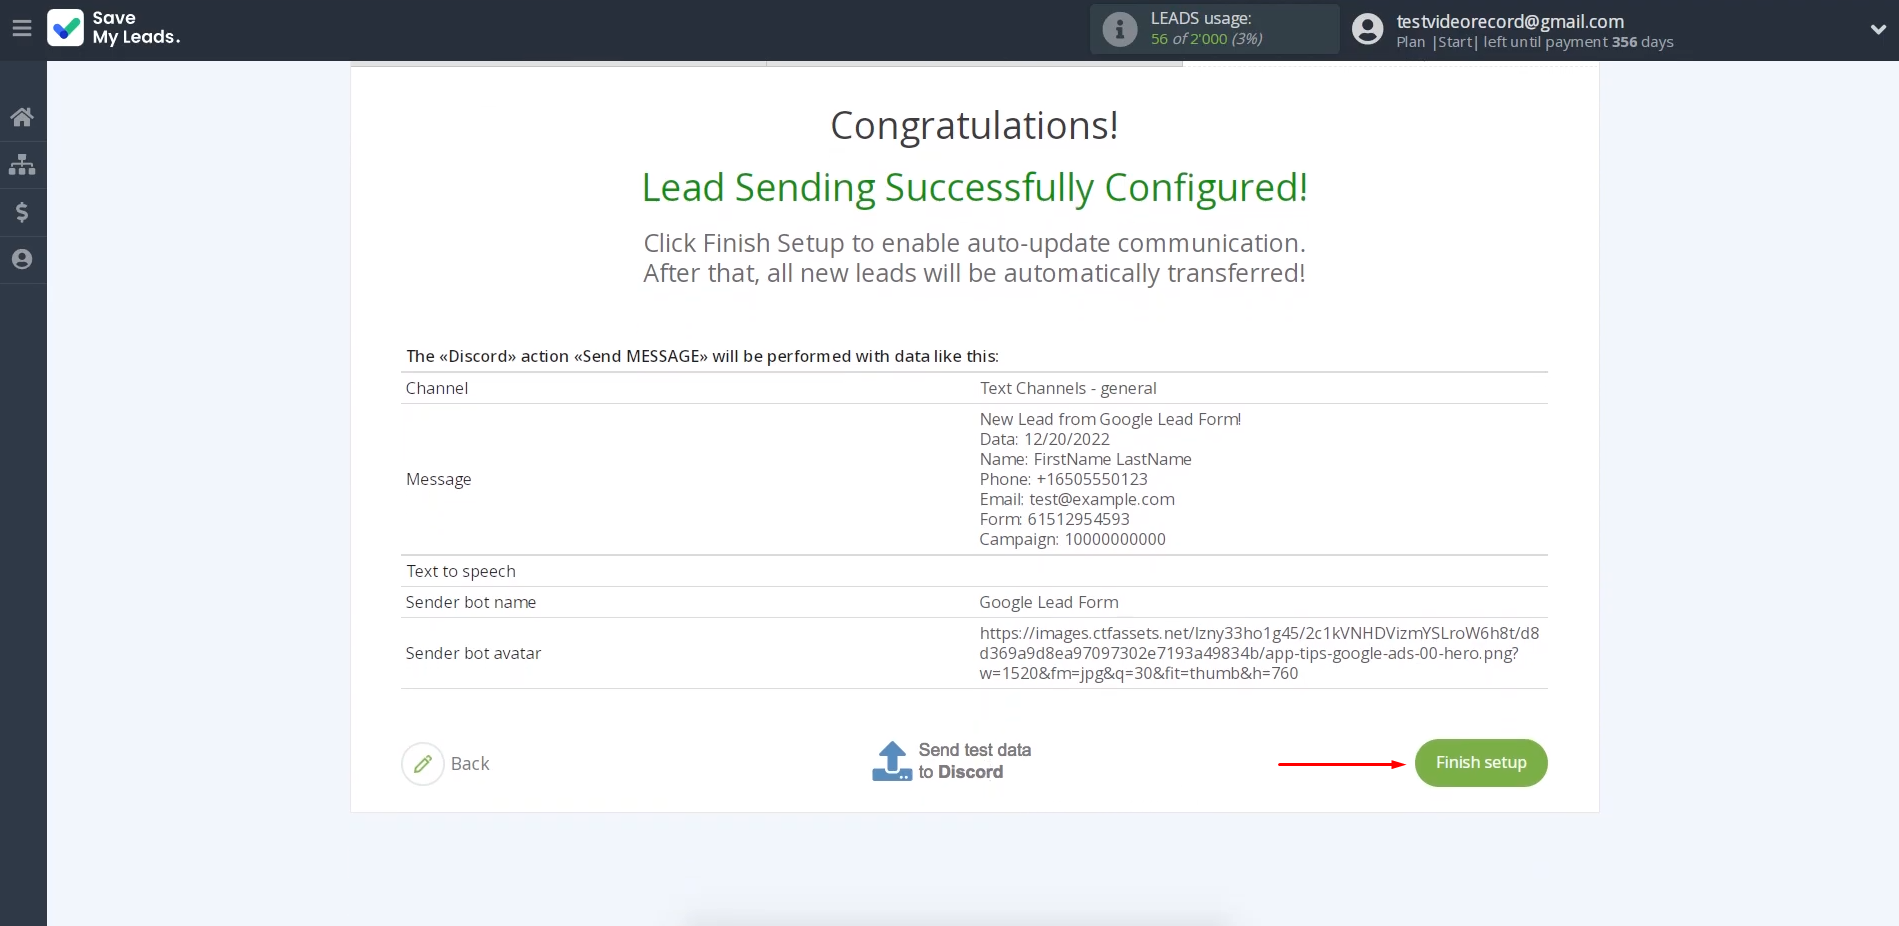
You can rename a
new integration in the settings. To access them, click the gear icon.
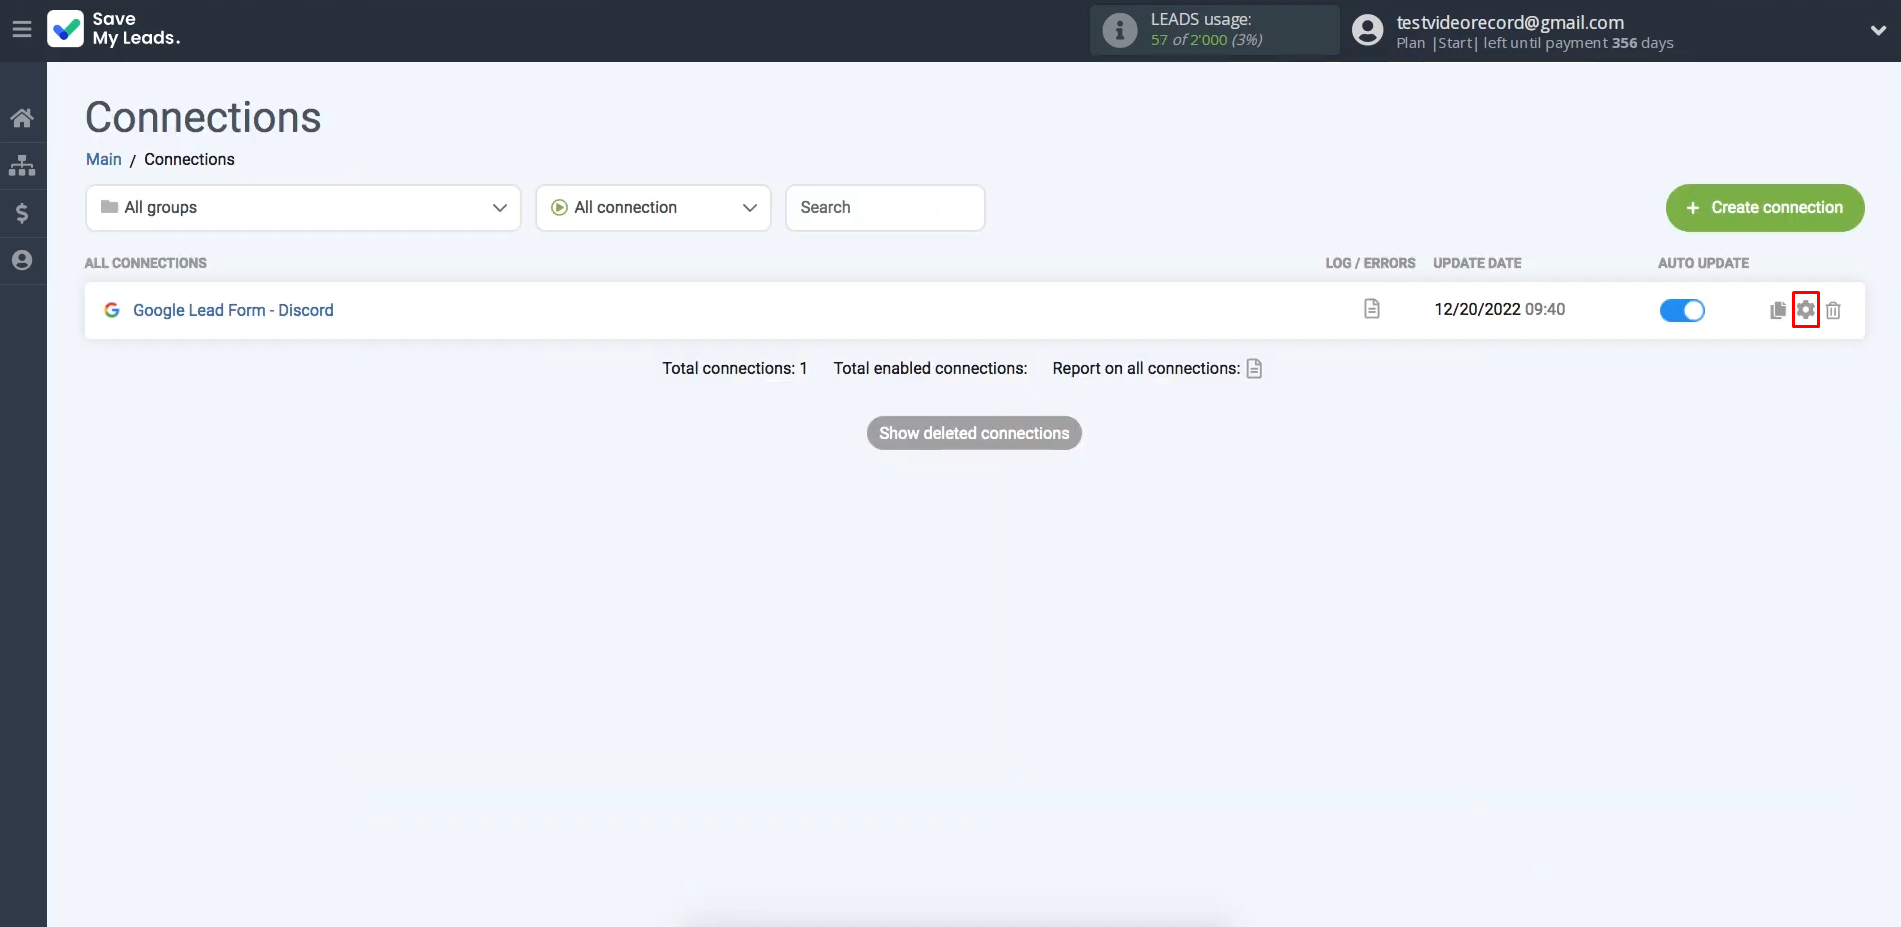
Here you can
update the integration name and add it to a specific group, but this is not
required. To complete the setup, click “Continue.”
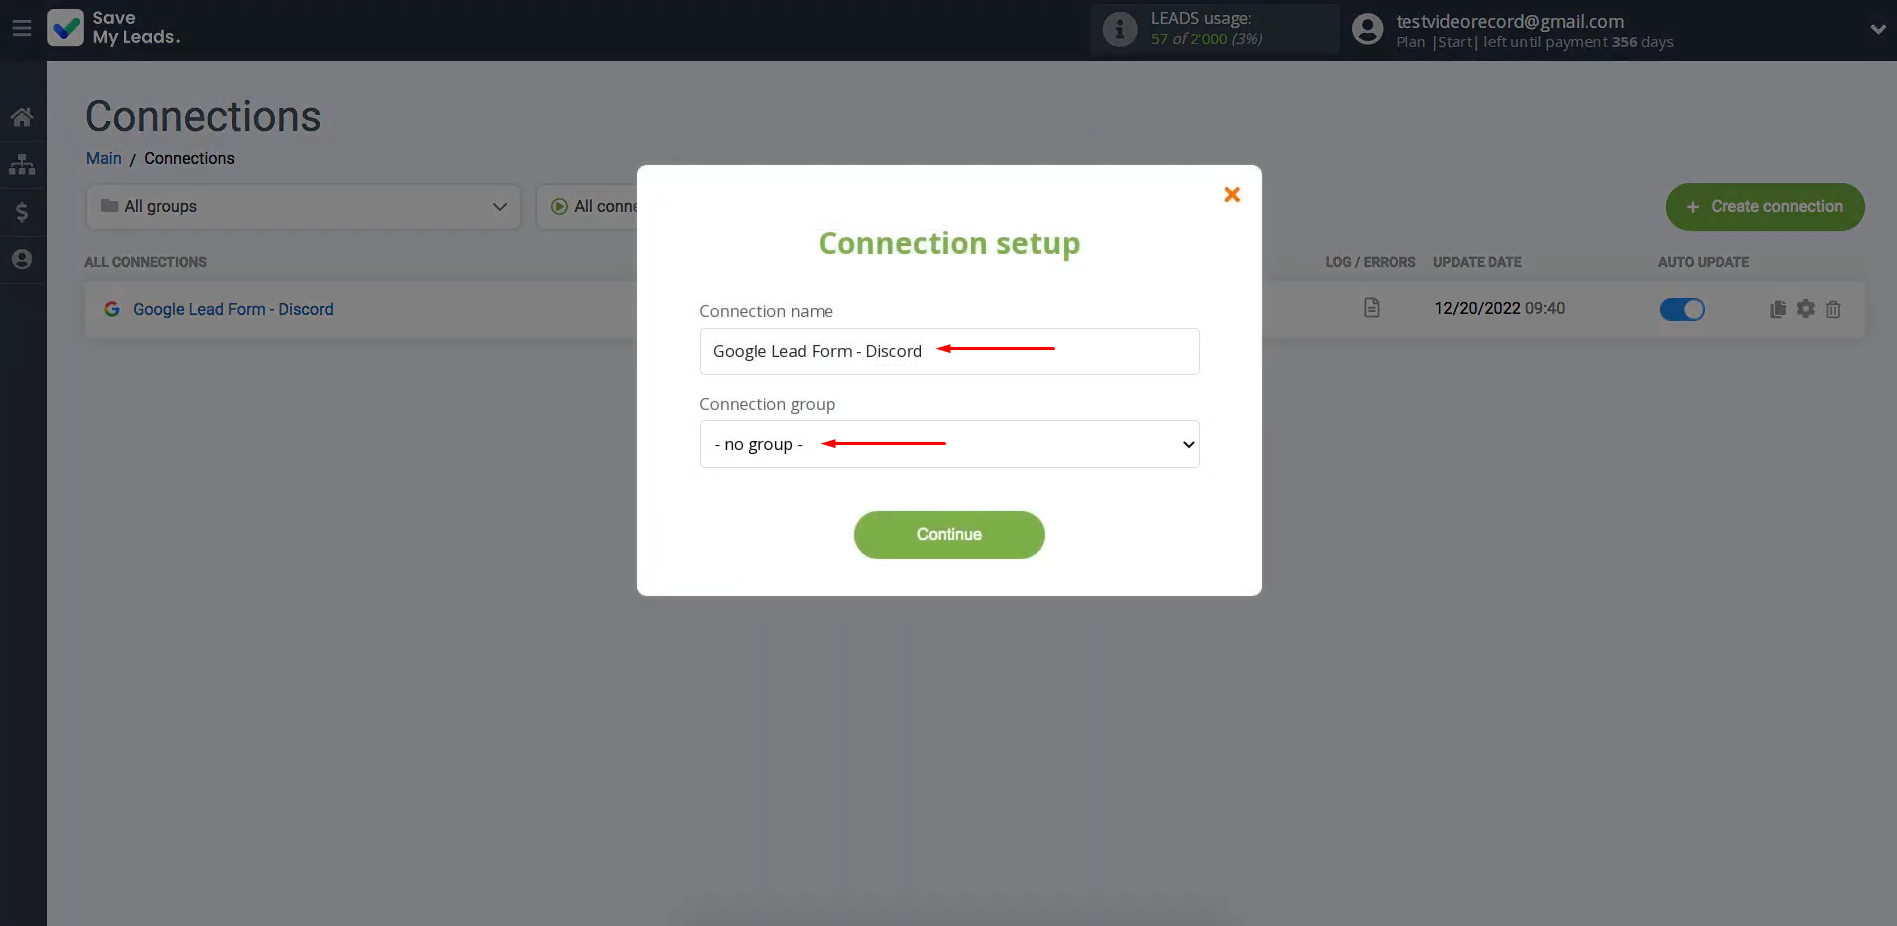
The automatic lead transfer from Google Ads to Discord has been successfully activated.
Conclusion
Google Lead Form and Discord integration is a modern, simple solution that increases the efficiency of any business. It allows you to quickly respond to new leads and their requests, reduce the risk of lost applications, and also improve the coordination of teamwork. Connecting these tools via SaveMyLeads allows you to automate the transfer of new submissions from Google Lead Forms directly to the Discord work channel. As a result, the team can see, distribute, and process them much faster.
Step-by-Step Guides for Setting Up Integrations:
- TikTok and Slack Integration: Automatically Sending Channel Notifications
- TikTok and Salesforce CRM Integration: Automatic Contact Creation
- Facebook and Copper Integration: Automatic Creation of Contacts
- Google Lead Form and Pipedrive Integration: Automatic Task Creation
- Google Lead Form and ClickUp Integration: Automatic Data Transfer
