Many leads are lost because their data is slow in reaching the team. The longer a business delays responding to a new inquiry, the more likely it is that the customer will go to a competitor. Google Ads Lead Form and Asana integration helps solve this problem. It automatically converts lead data into tasks for managers, reducing the time from request to first contact. In this article, we’ll show you how to quickly and easily set up the integration using our SaveMyLeads connector.
Benefits of Google Leads and Asana Integration
Automatic data transfer from Google Lead Forms to Asana solves several critical problems at once. First, the need for manually copying contacts disappears, which significantly saves employees' time. Second, the risk of errors is minimized. Information is transferred without errors or inaccuracies, which is especially important when working with large volumes of applications.
In addition, Asana and Google Ads Lead Form integration helps structure the team's work. All new leads are automatically displayed as tasks in the corresponding projects of the task management service.
For example, if a client leaves a request to participate in a webinar, a task appears in Asana for the responsible manager with contact details. This approach allows the team to react promptly and distribute the workload effectively.
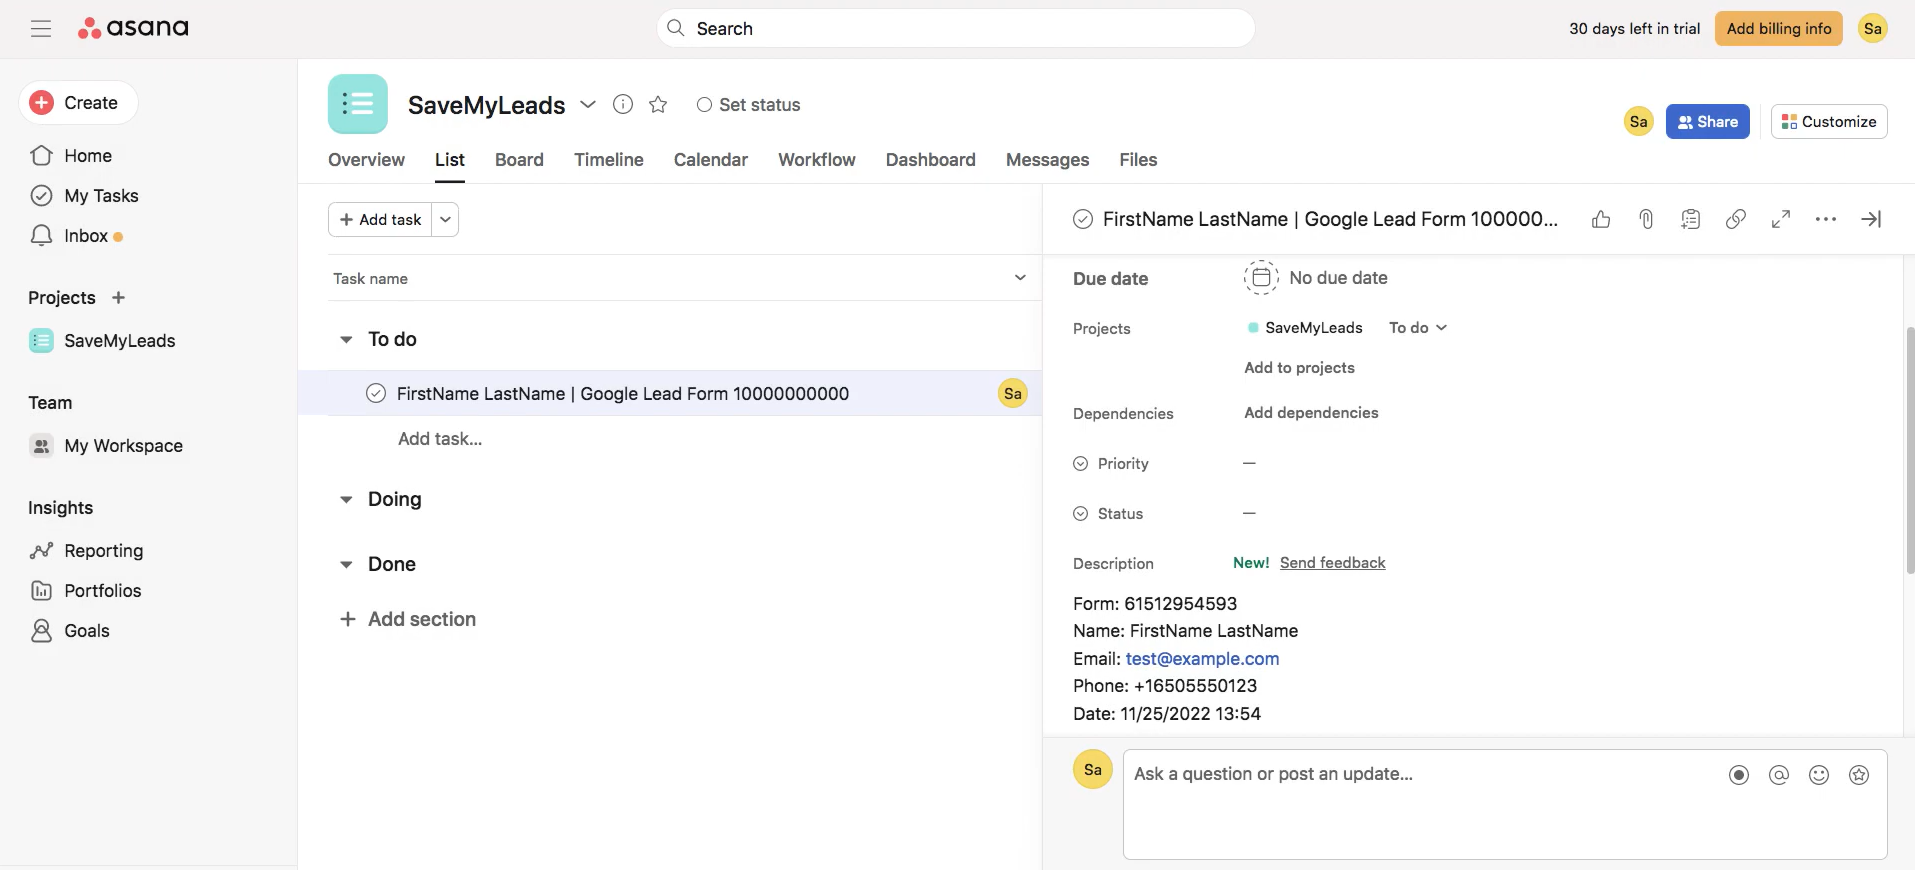
Another important benefit of the integration is the elimination of data transfer delays. When leads from Google Lead Form are automatically converted into tasks in Asana, the team can start working quickly. Businesses can process inquiries faster. This directly impacts customer satisfaction and increases the company’s competitiveness.


How to Connect Google Ads Lead Form to Asana
You can set up the Google Lead Form assets and Asana integration with SaveMyLeads in just a few minutes. You don't need any technical knowledge or coding skills. Just follow a few simple steps:
- Create an account on SaveMyLeads and log in.
- Connect your Google account and select the form from which you want to collect data.
- Connect your Asana account and specify which project and section new tasks should go into.
- Configure data transfer: determine which fields from the form (name, email, phone, etc.) should be transferred to Asana.
- Activate the auto-update mode. After that, data transfer will occur 24/7.
We have prepared a step-by-step guide for you to set up Asana and Google Lead Form assets integration. This will allow you to link both services quickly and without mistakes.
Setting Up the Data Source—Google Lead Form
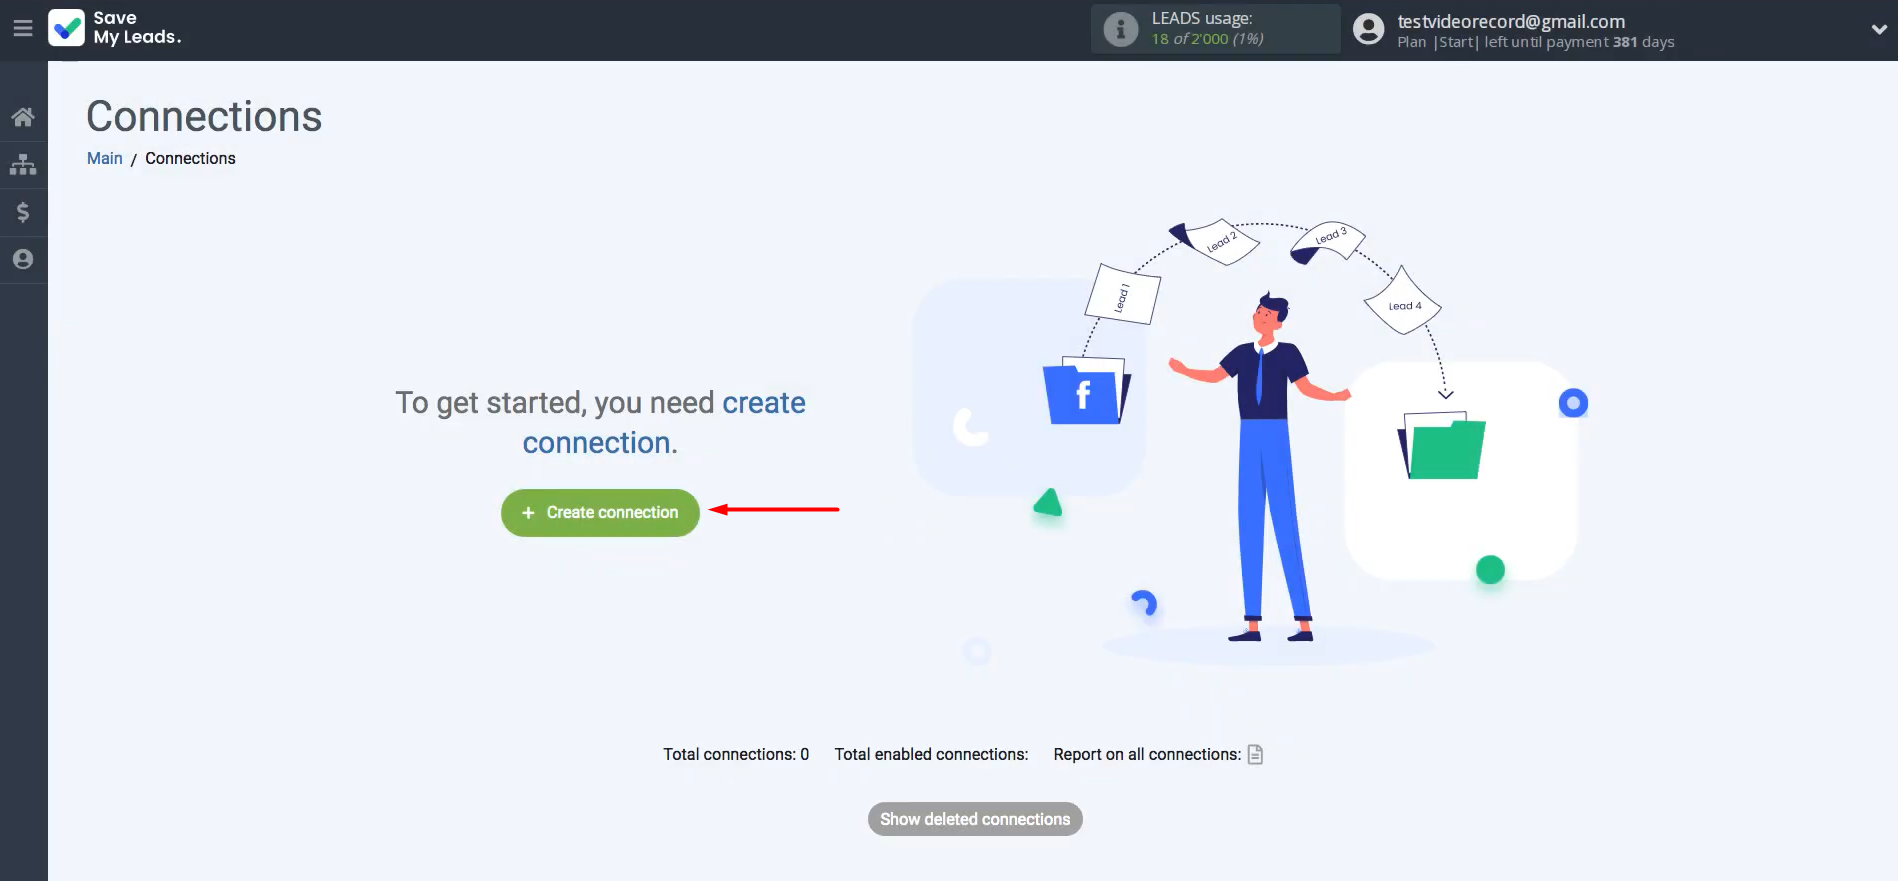
Start by creating a new connection.
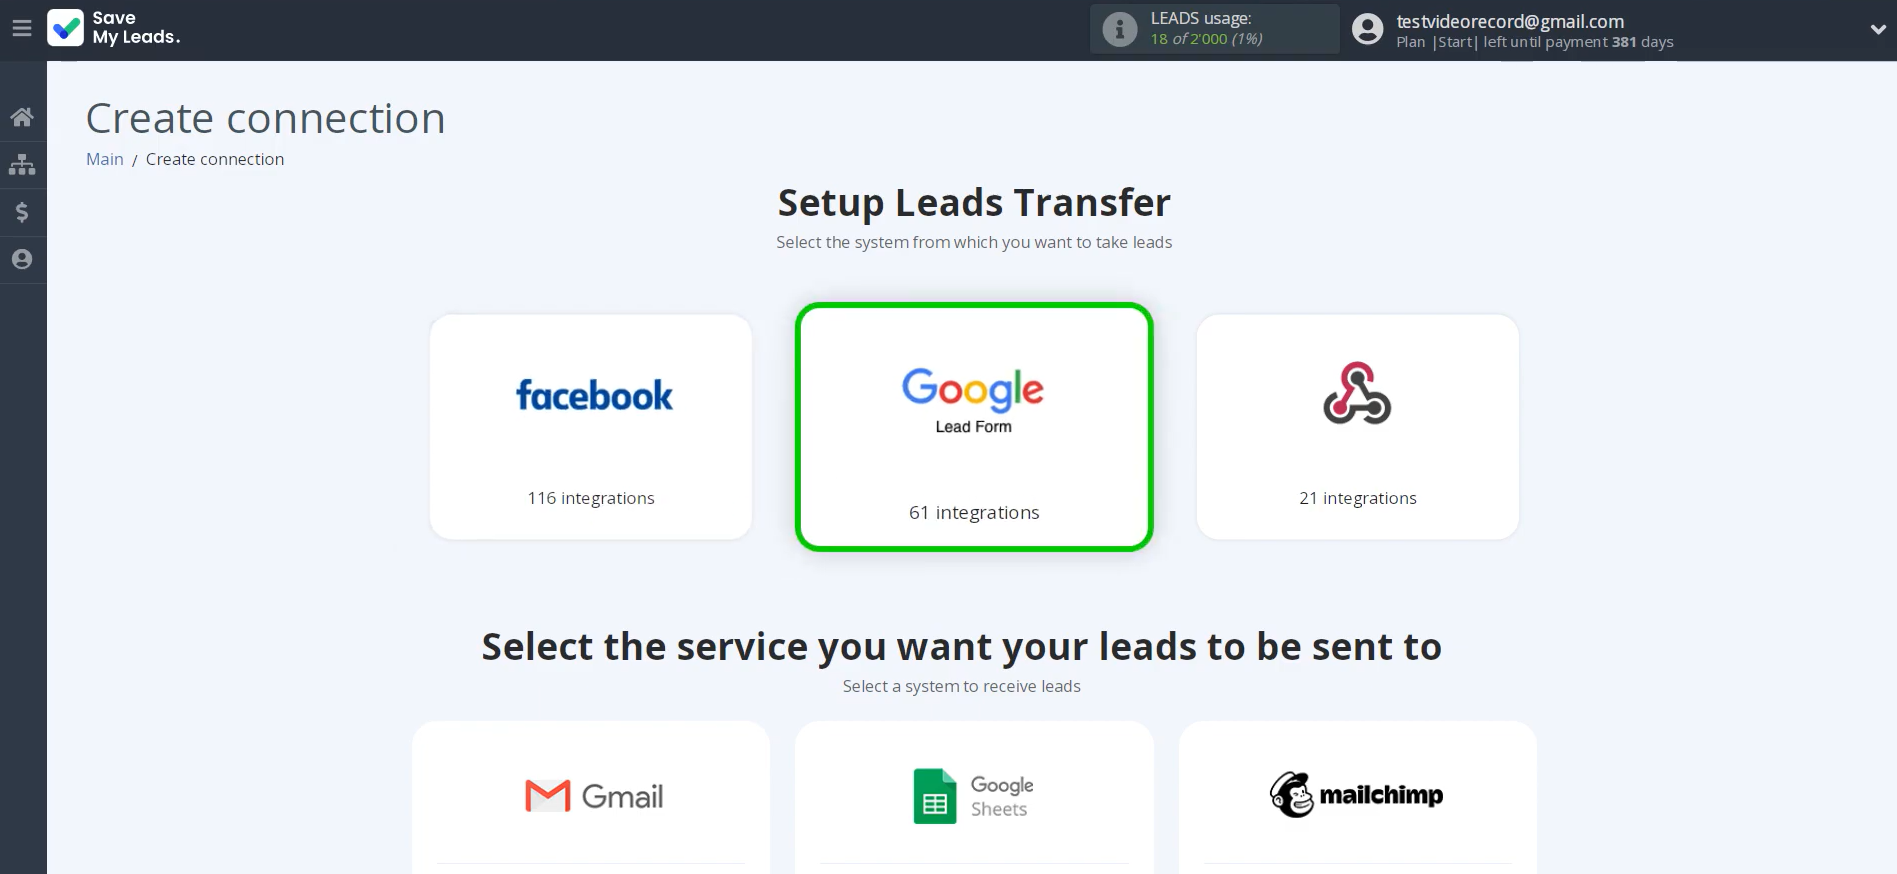
Choose the system from which leads will be transferred—in this case,
Google Lead Form.
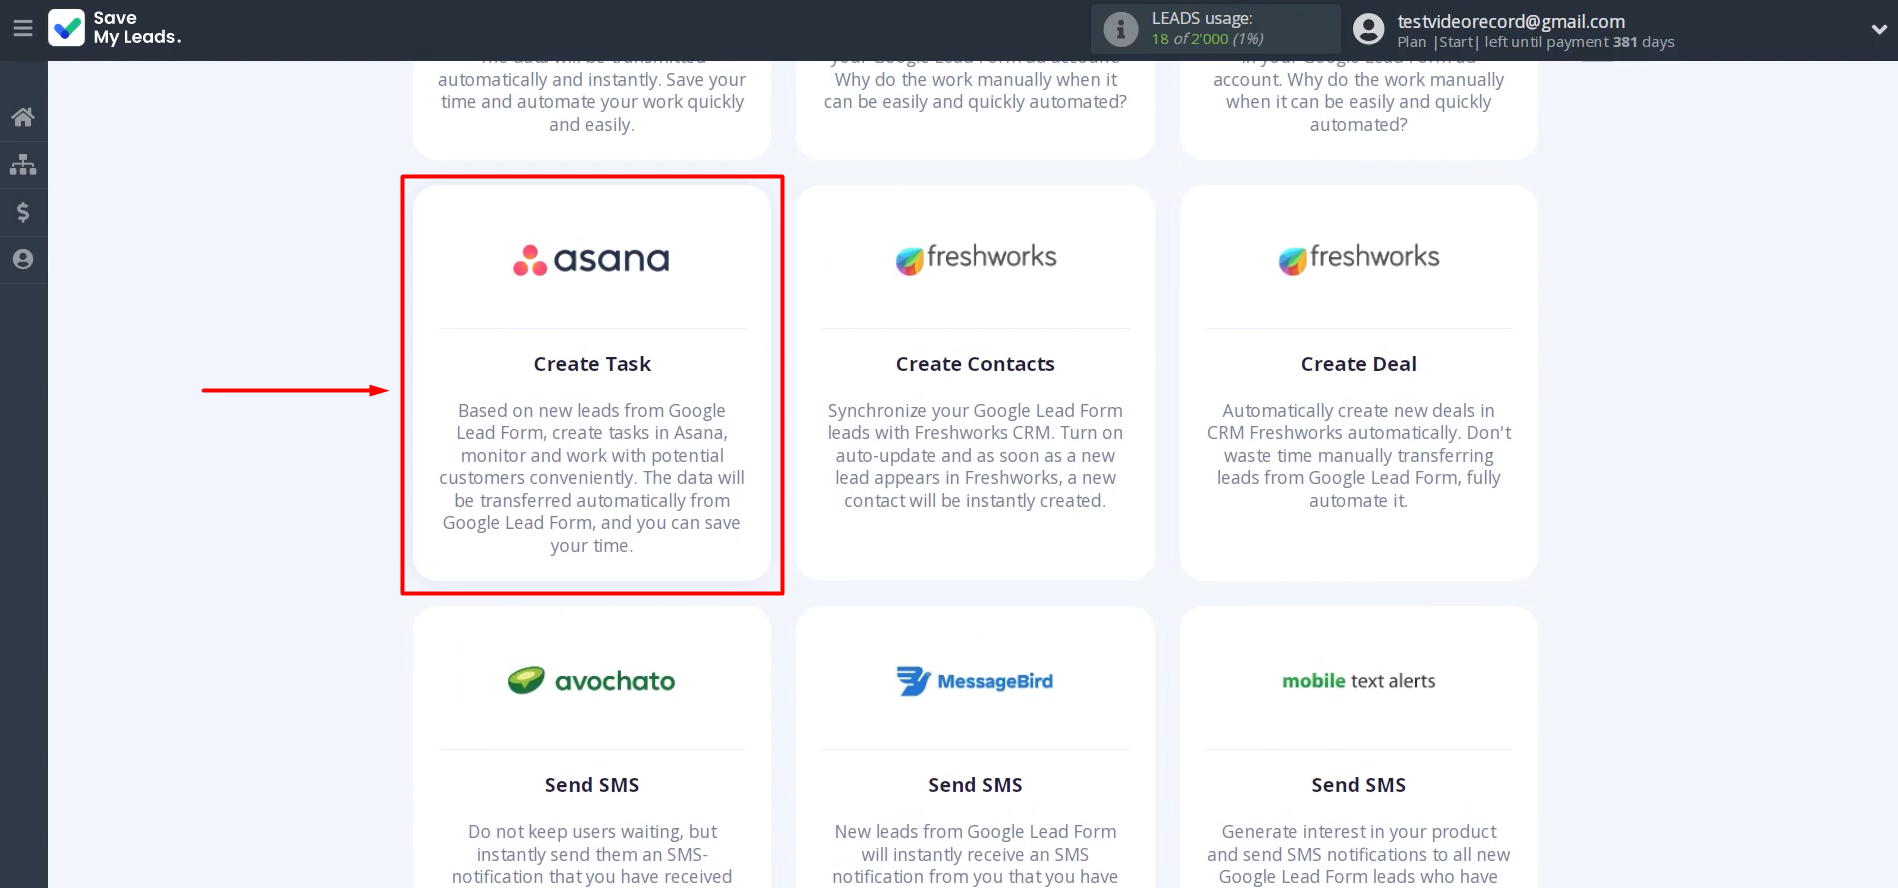
Next, you can choose one of the ready-made templates for sending leads from Google Lead Form. You need to select Asana (Create Task).
Connect
your Google Lead Form account to SaveMyLeads.
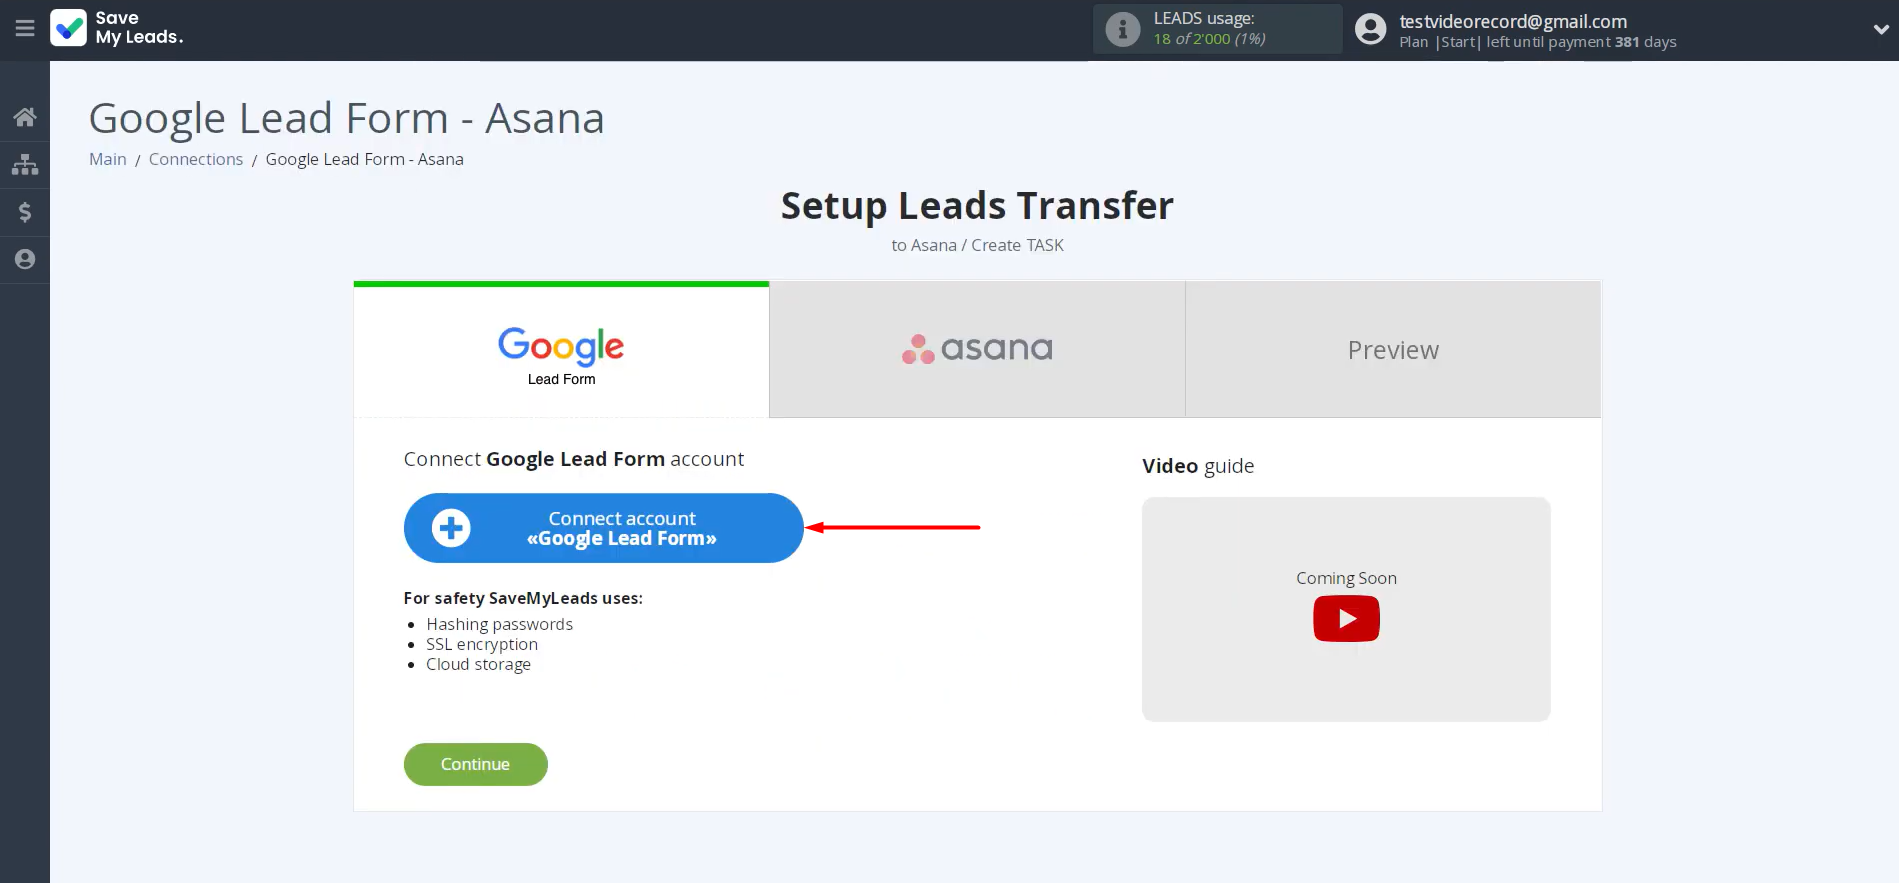
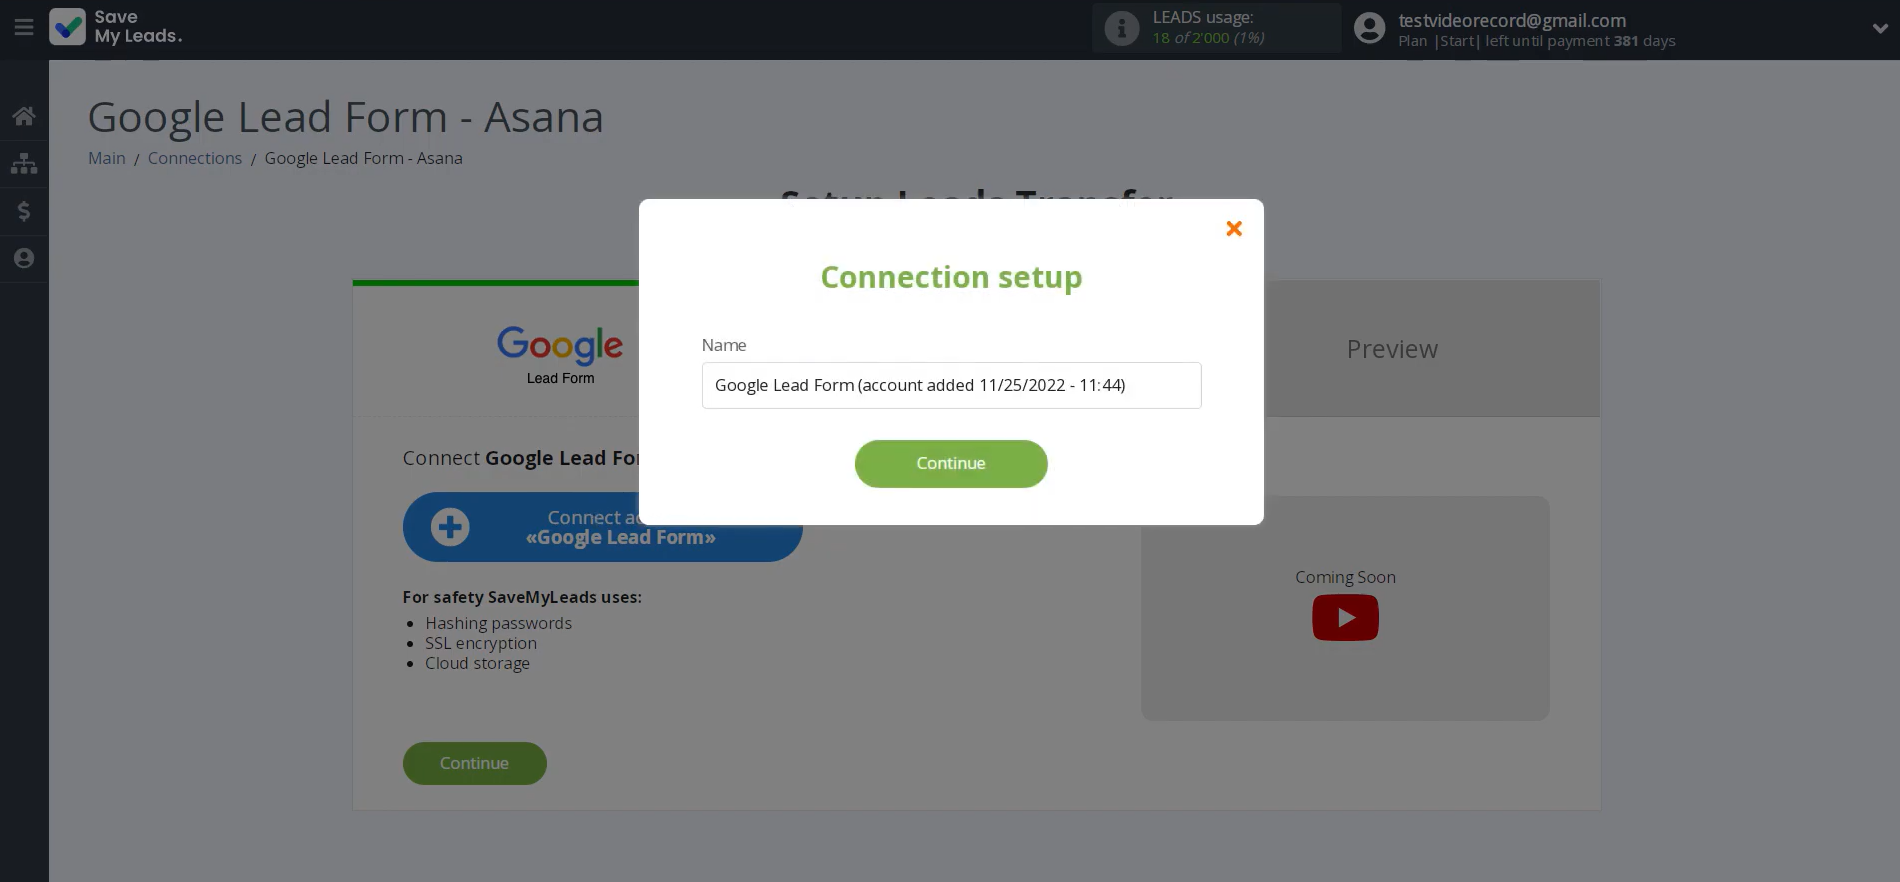
In this
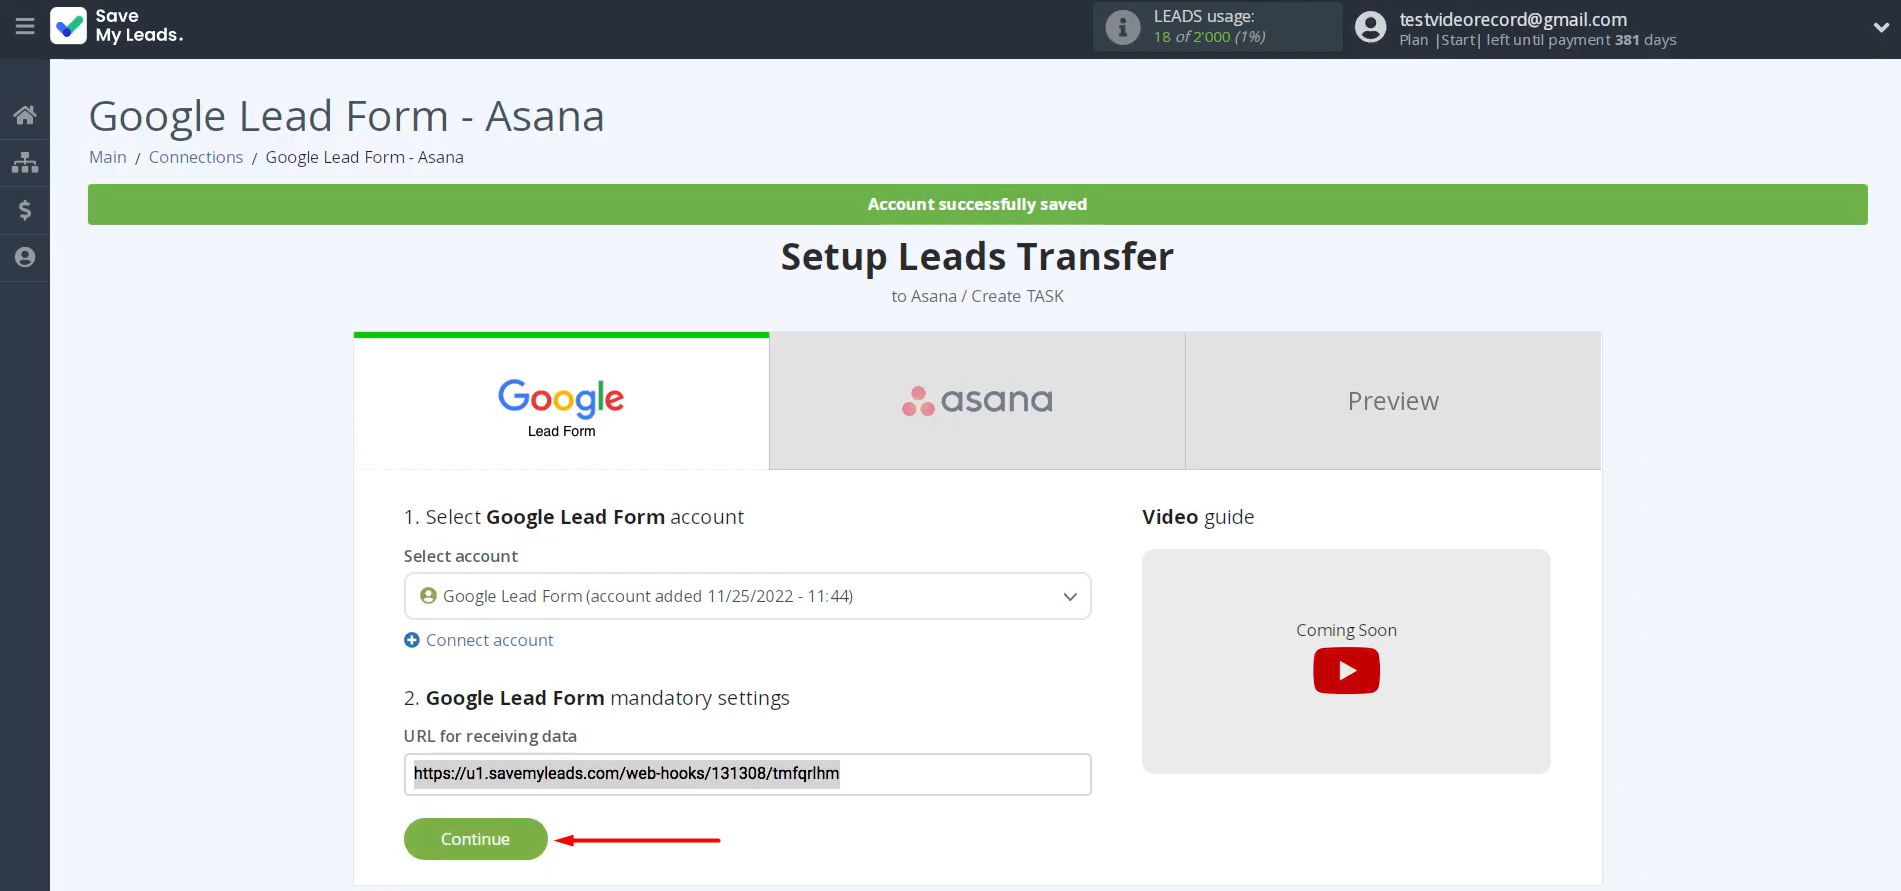
step, you can assign a name to the connection or simply click Continue.
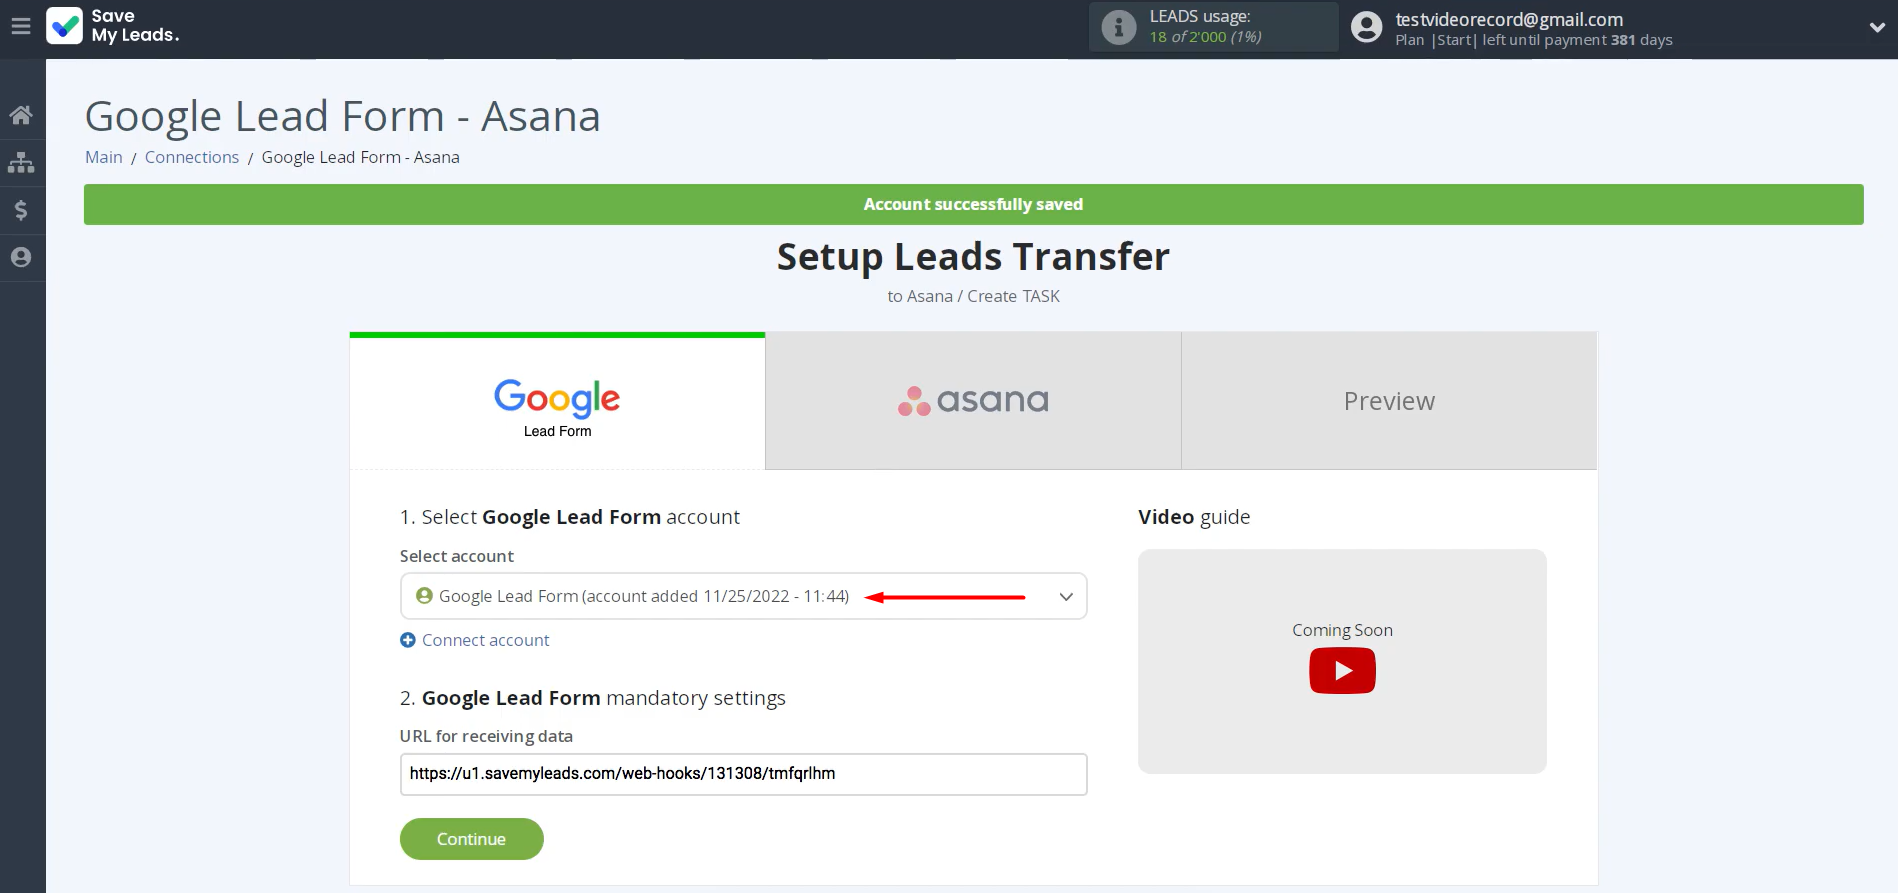
Once
the connected account appears in the list, select it.
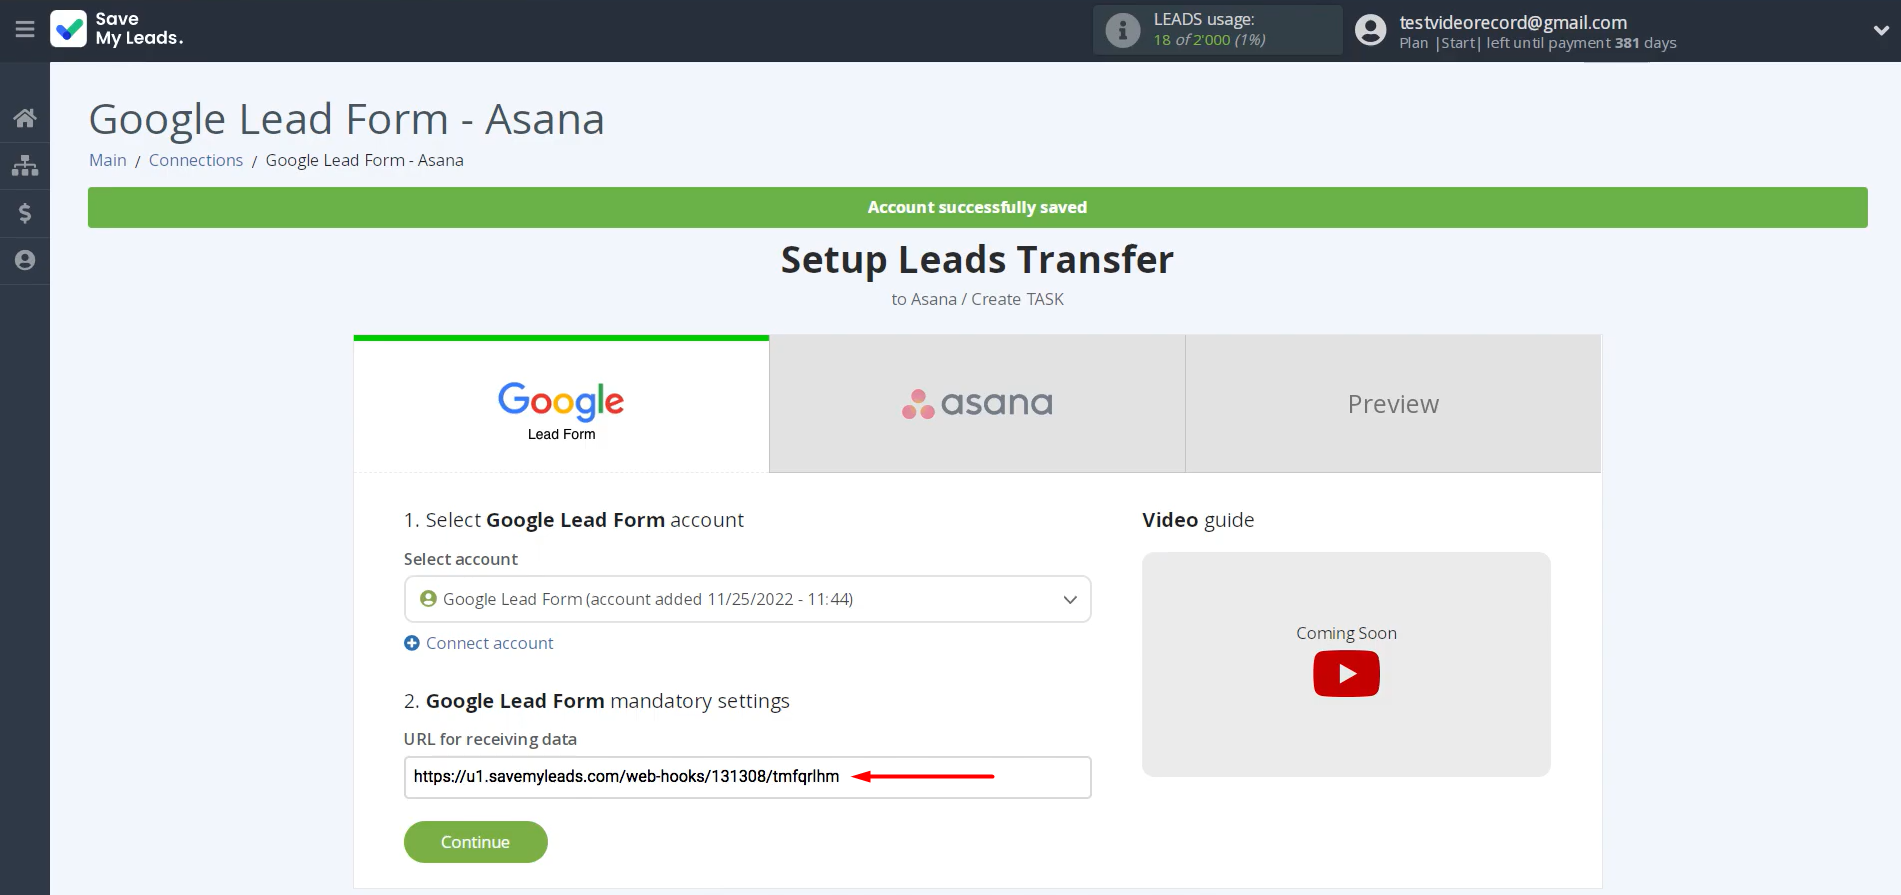
You
will now see the data reception URL. This link is where new data from
Google Lead Form will be sent. Copy this URL.
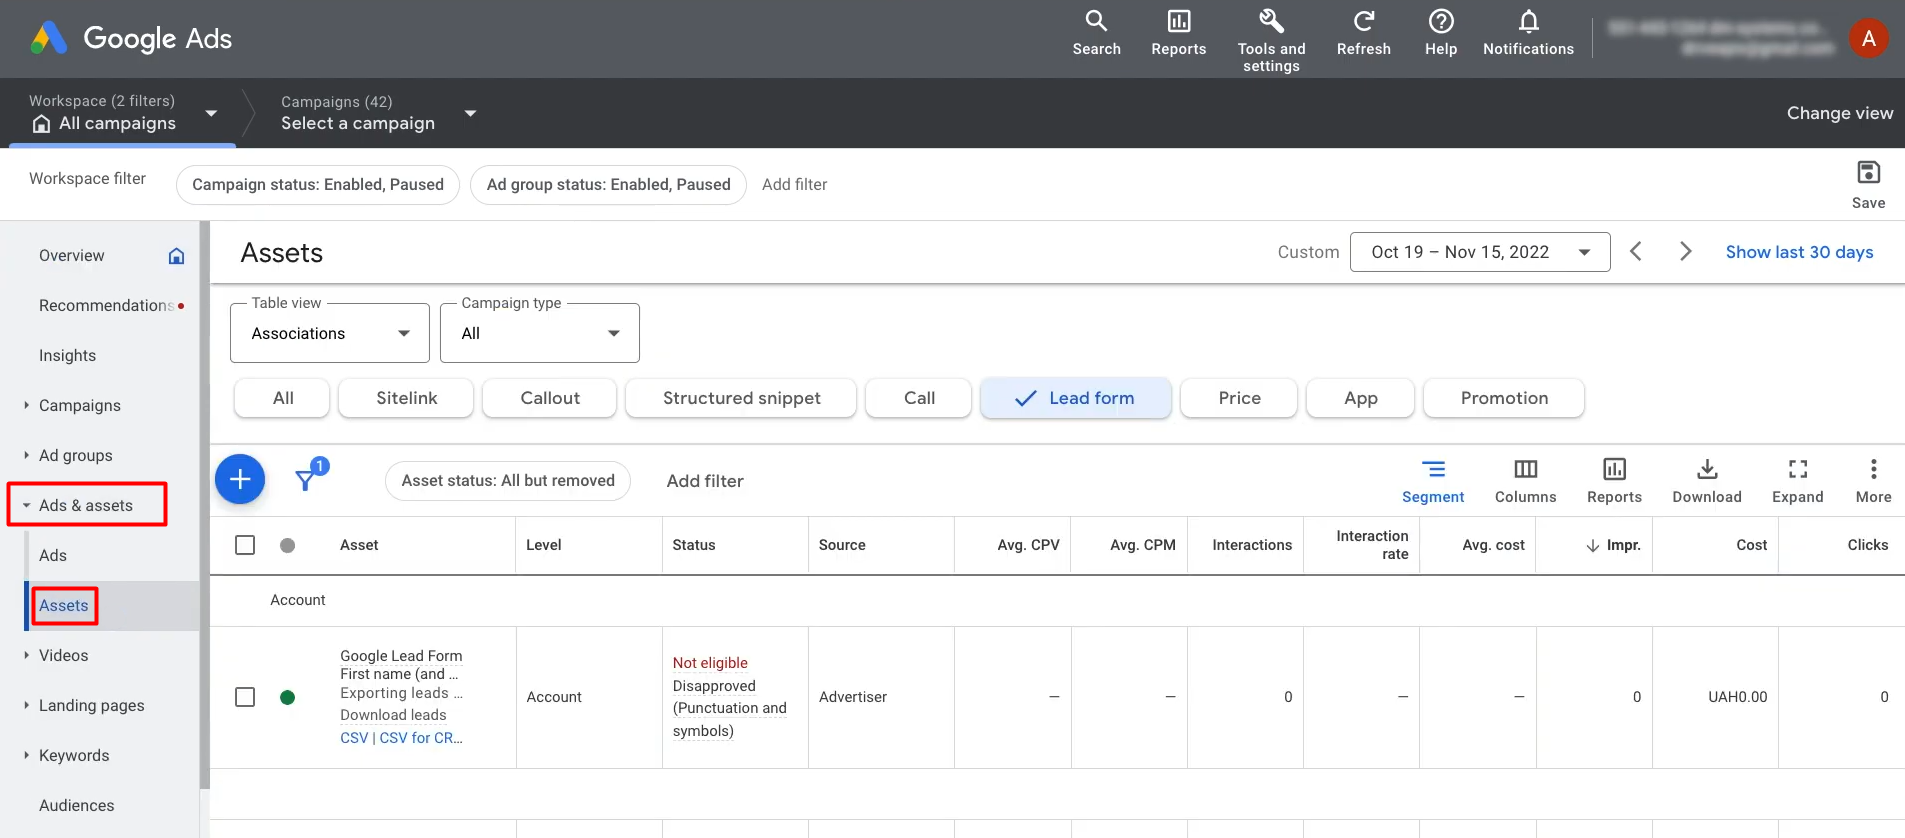
Go to the Ads and Assets section on your Google
Lead Form account and open the Assets tab.
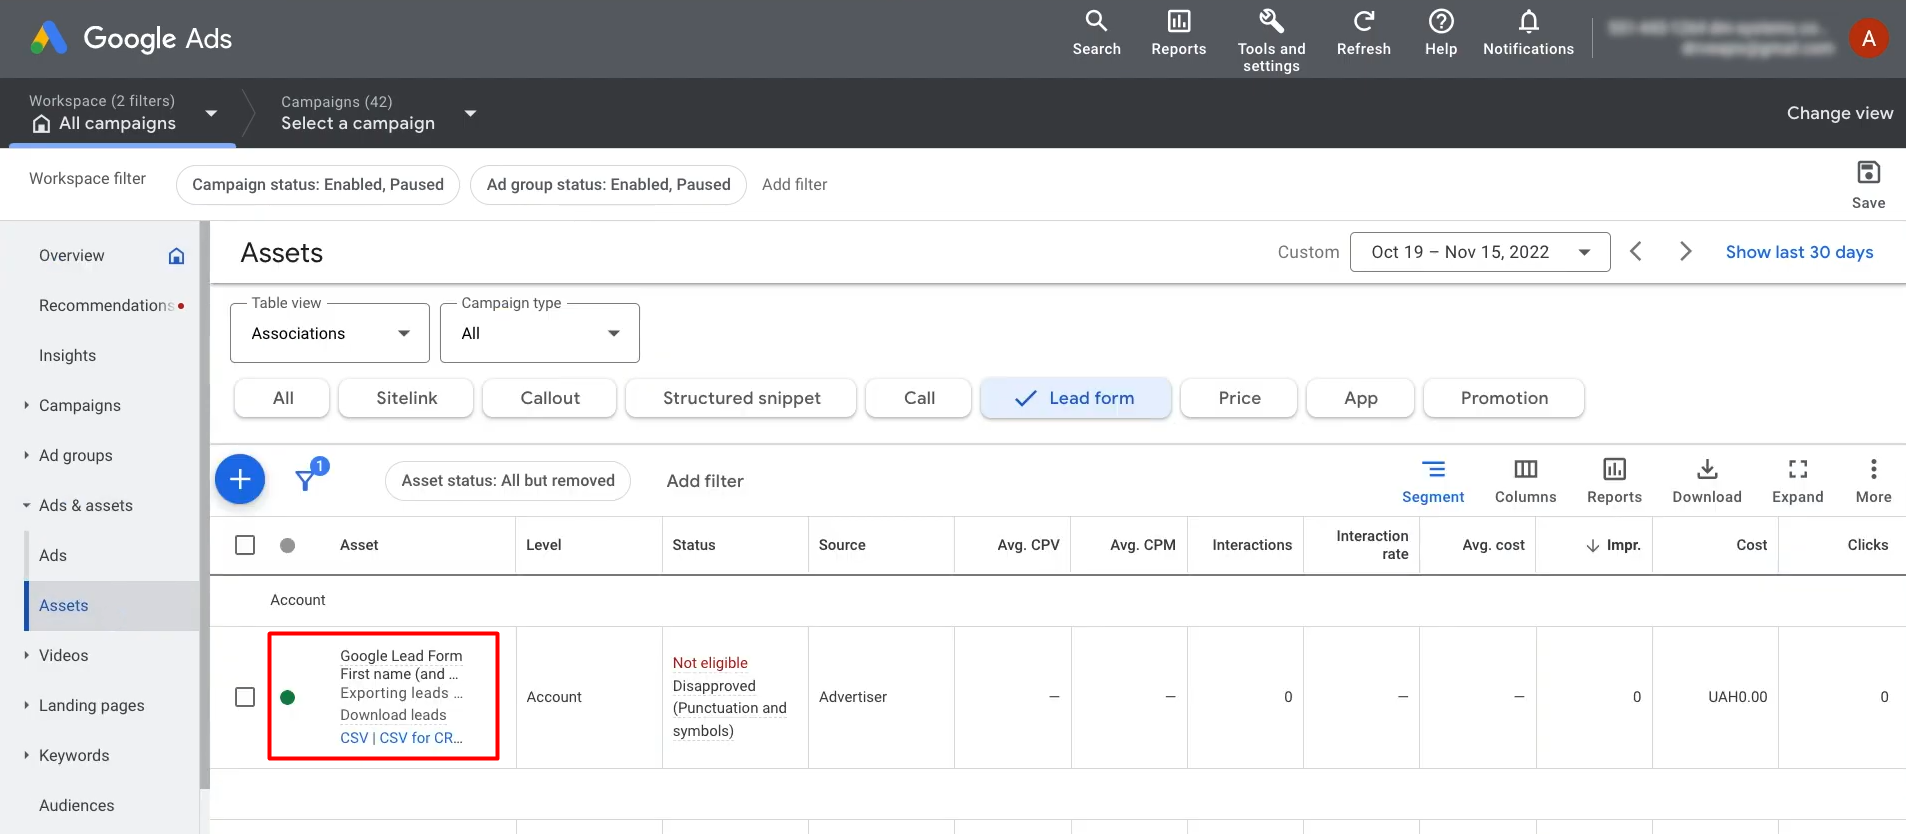
Next, go to the form from which you want to receive data.
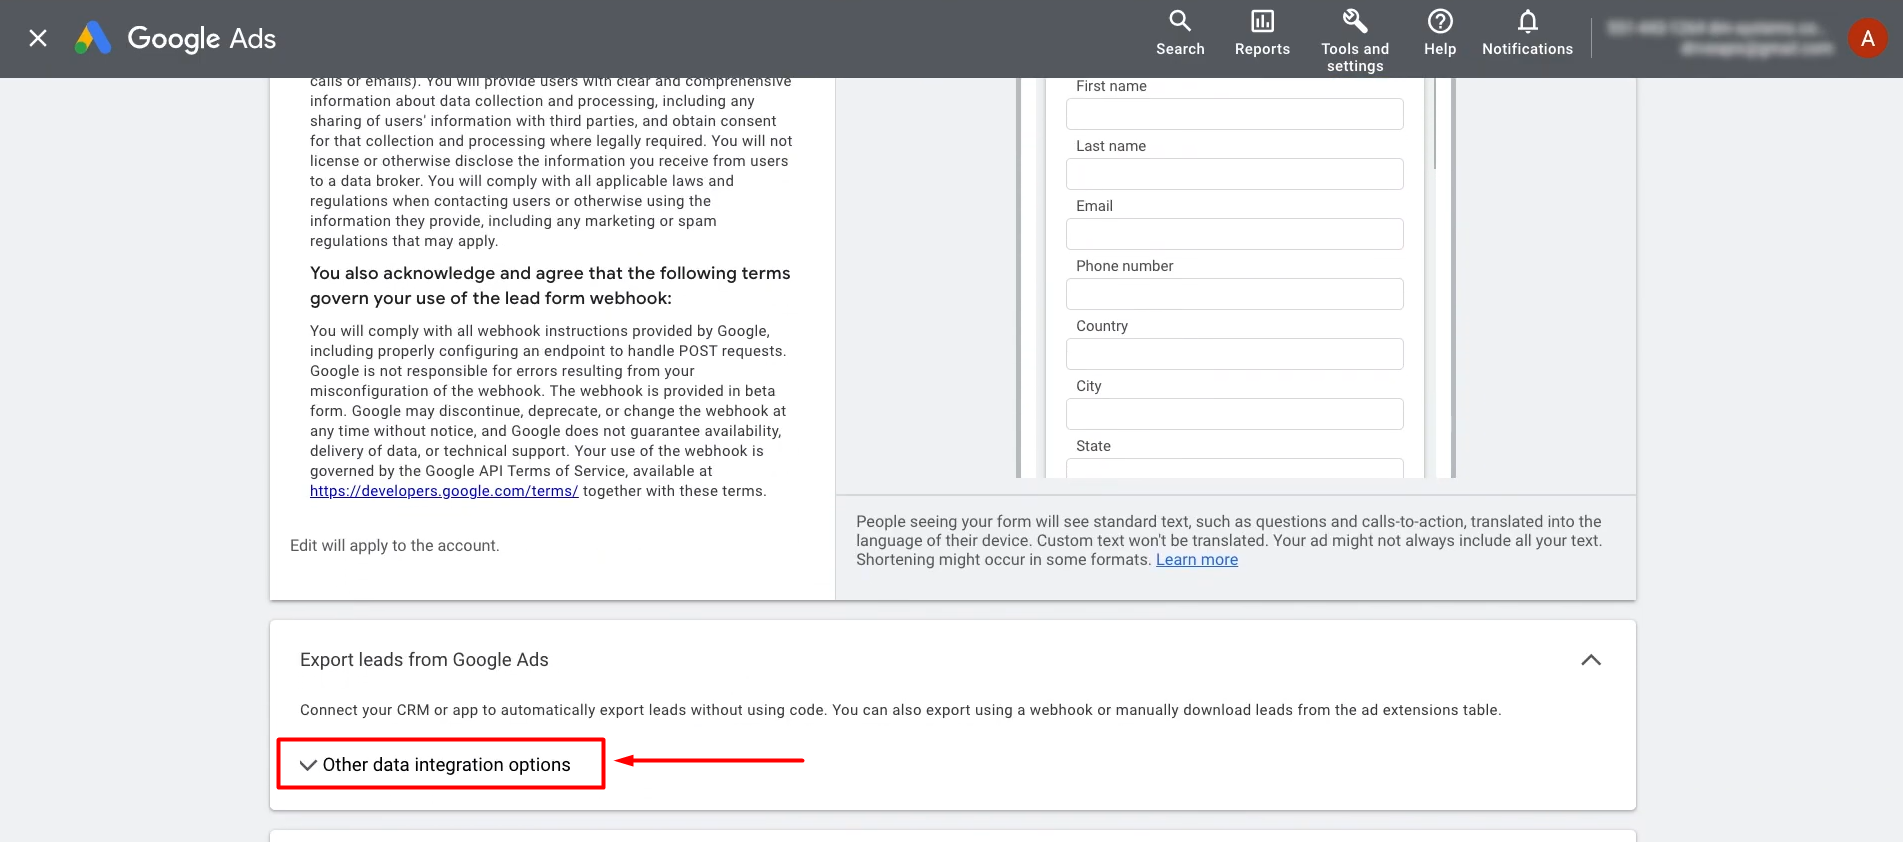
Find
the section Other Data Integration Options.
Insert the copied SaveMyLeads link into the corresponding
field.
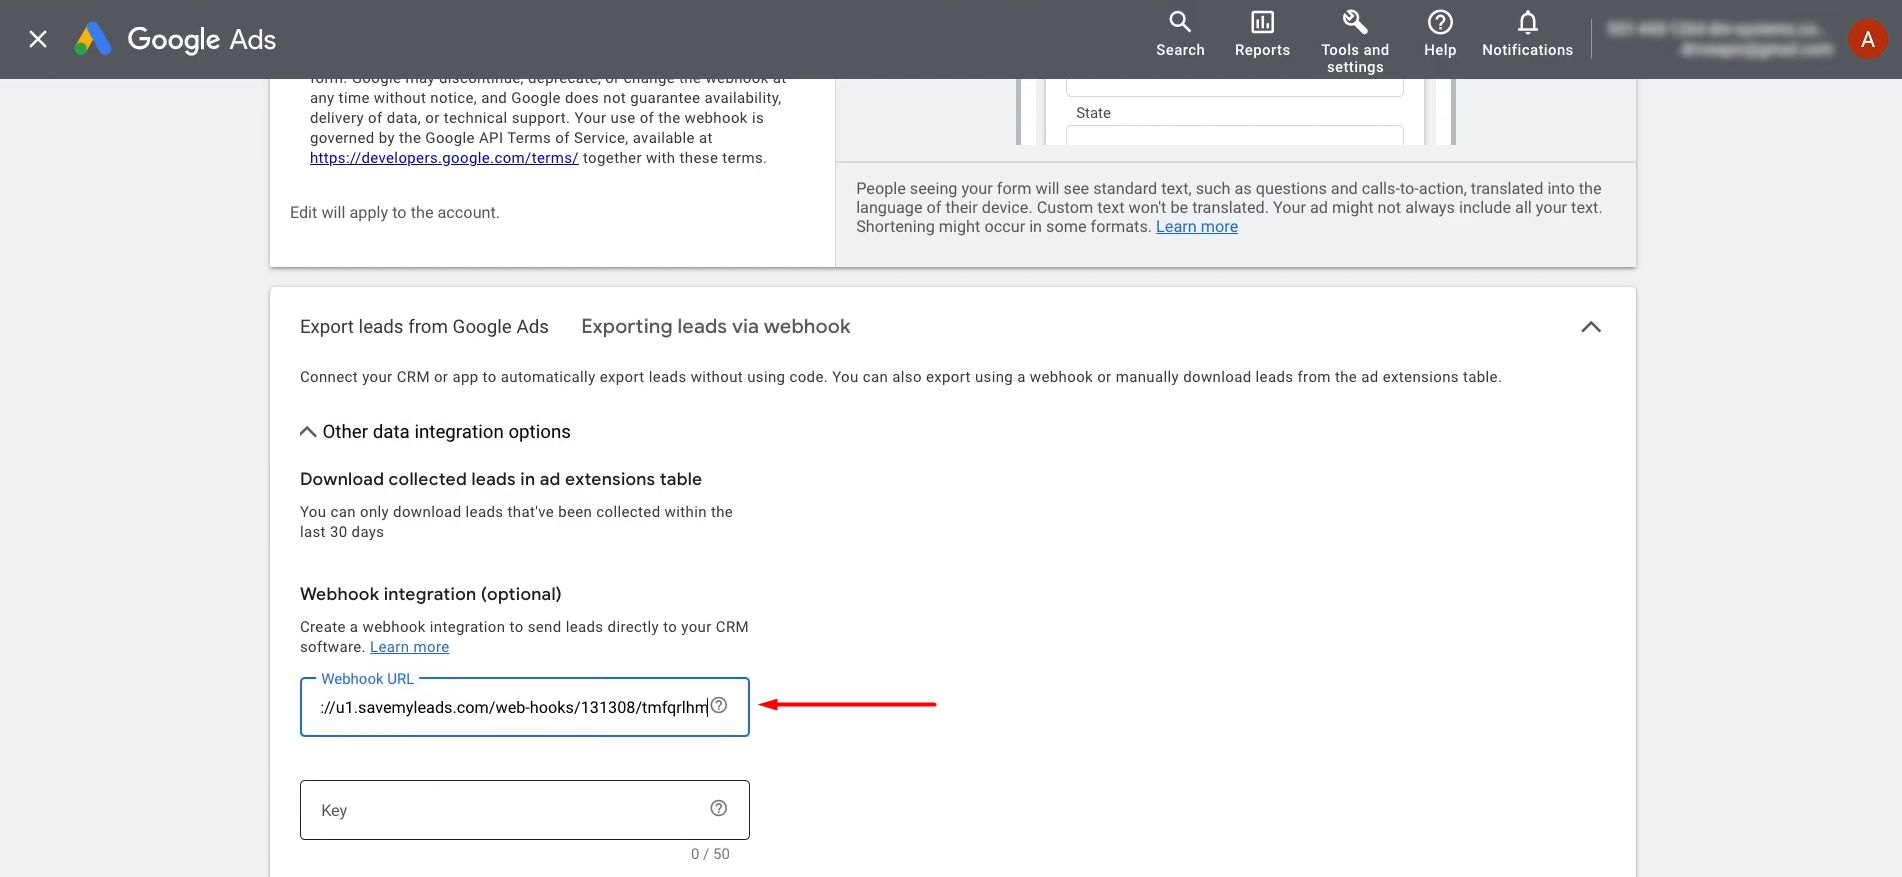
For the key, enter the last part of the URL you
copied earlier.
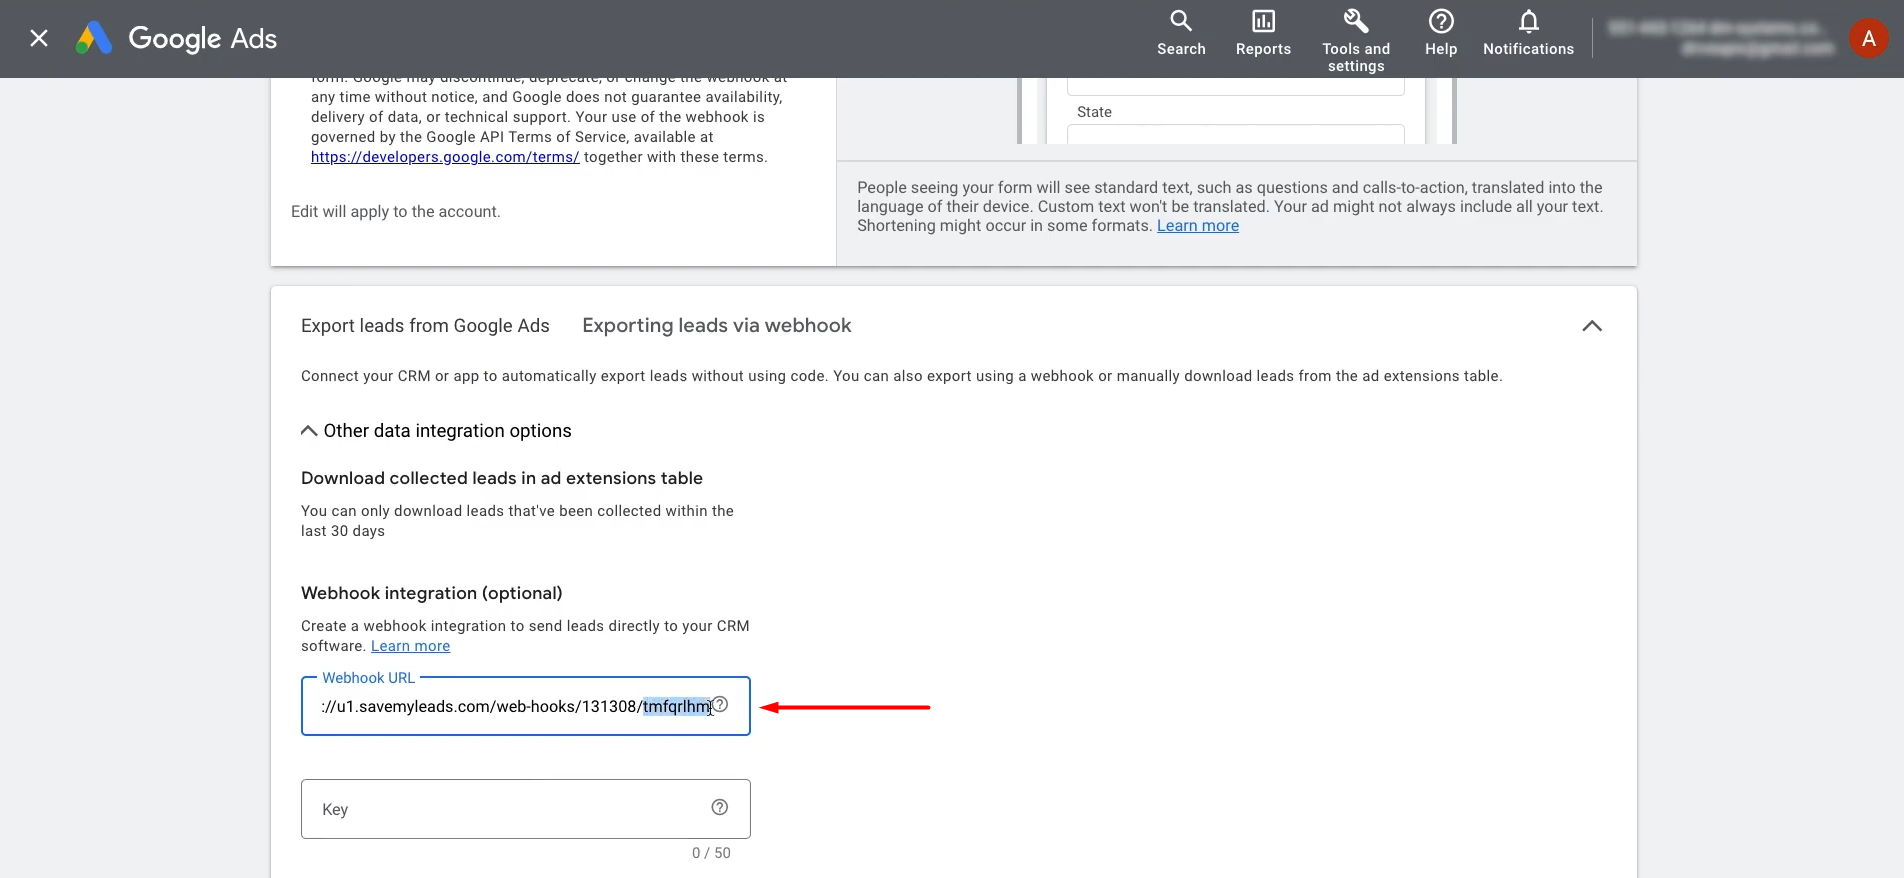
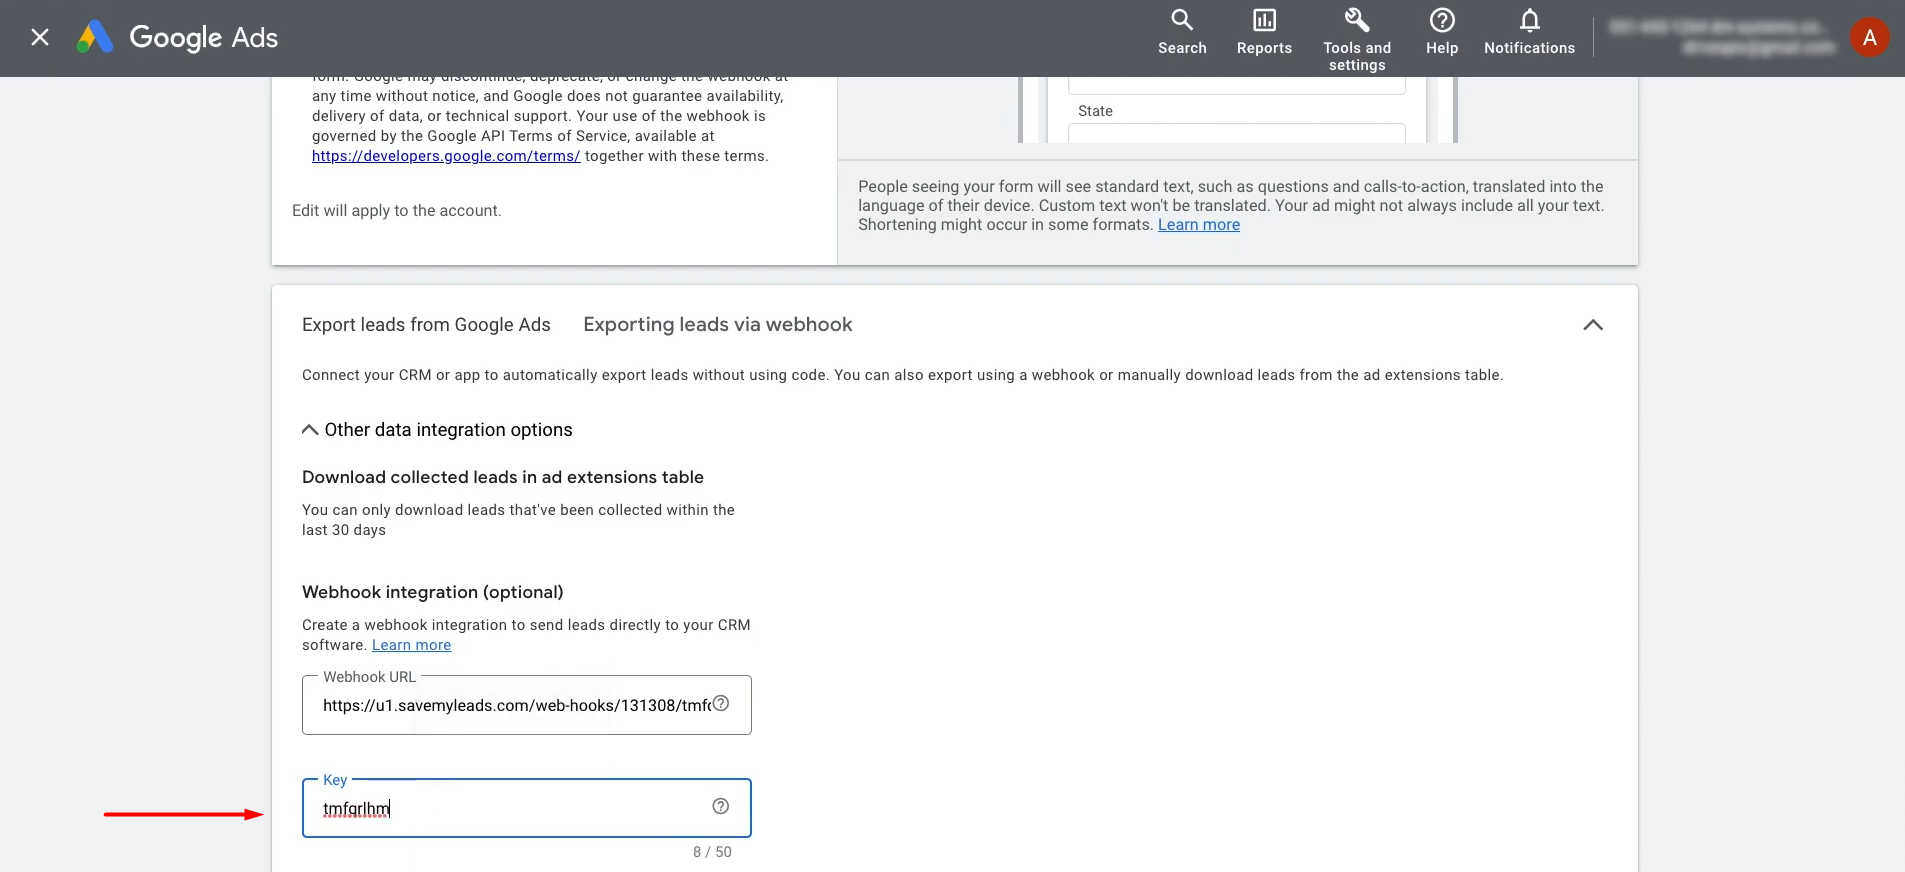
To move forward, you need to send test data.
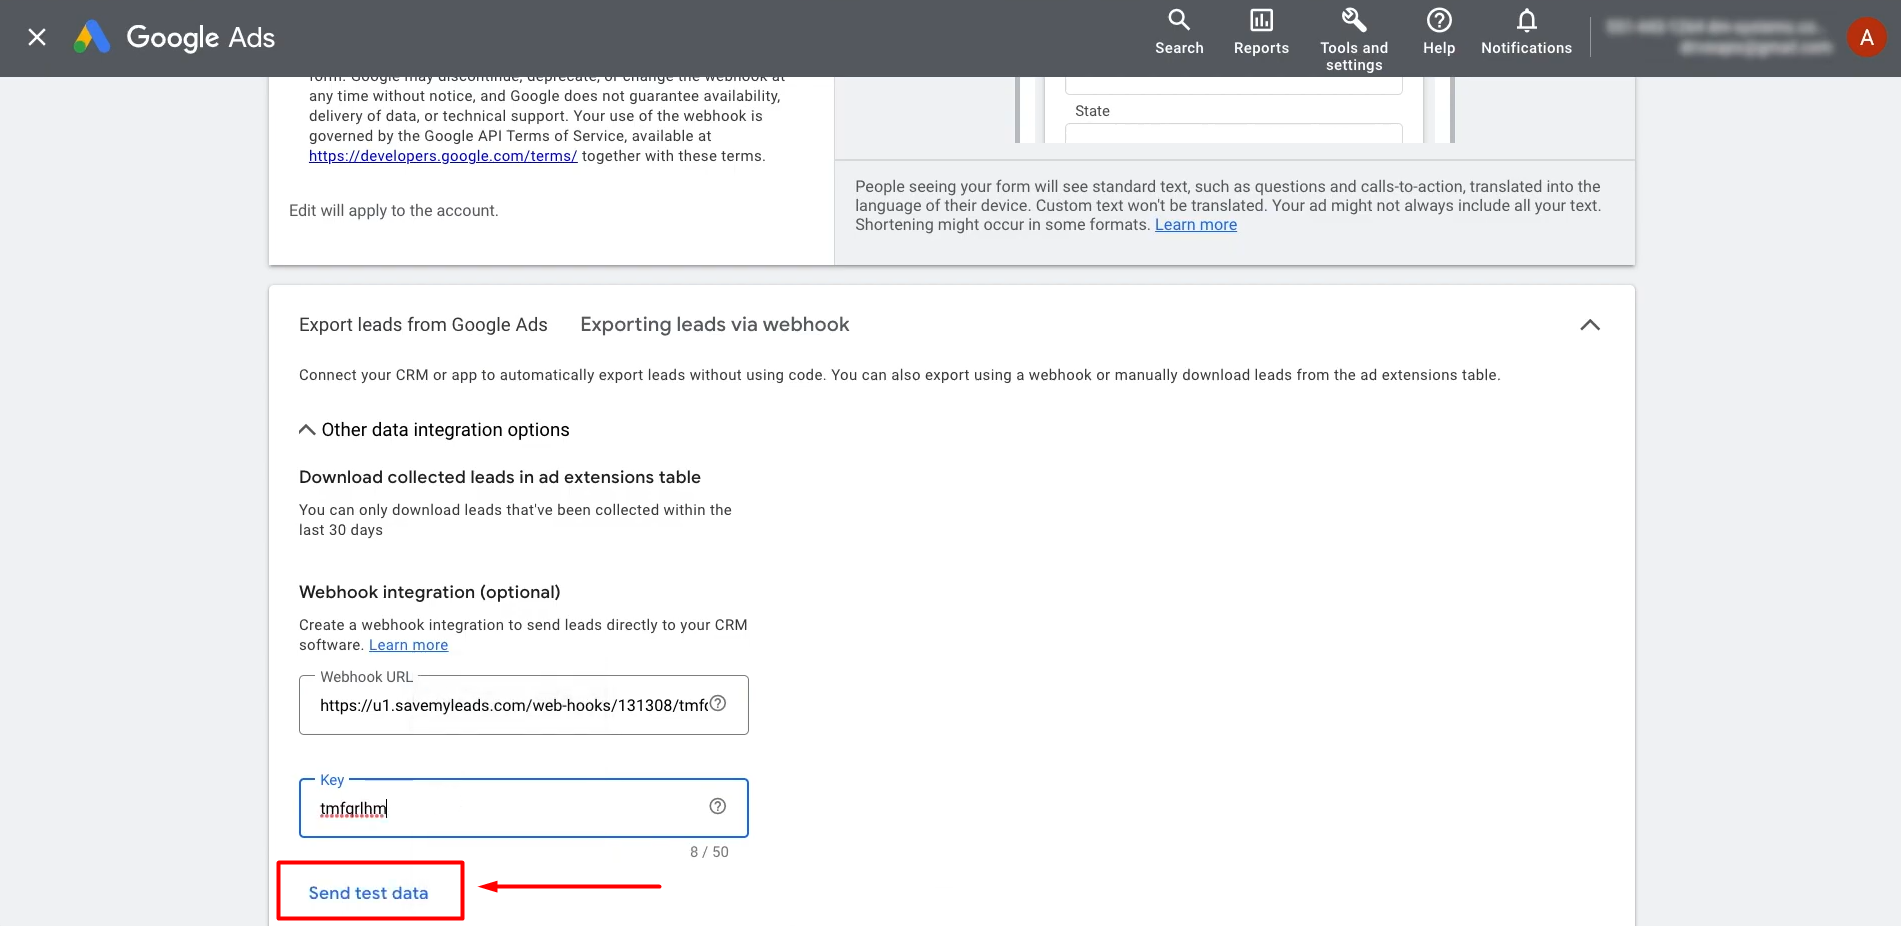
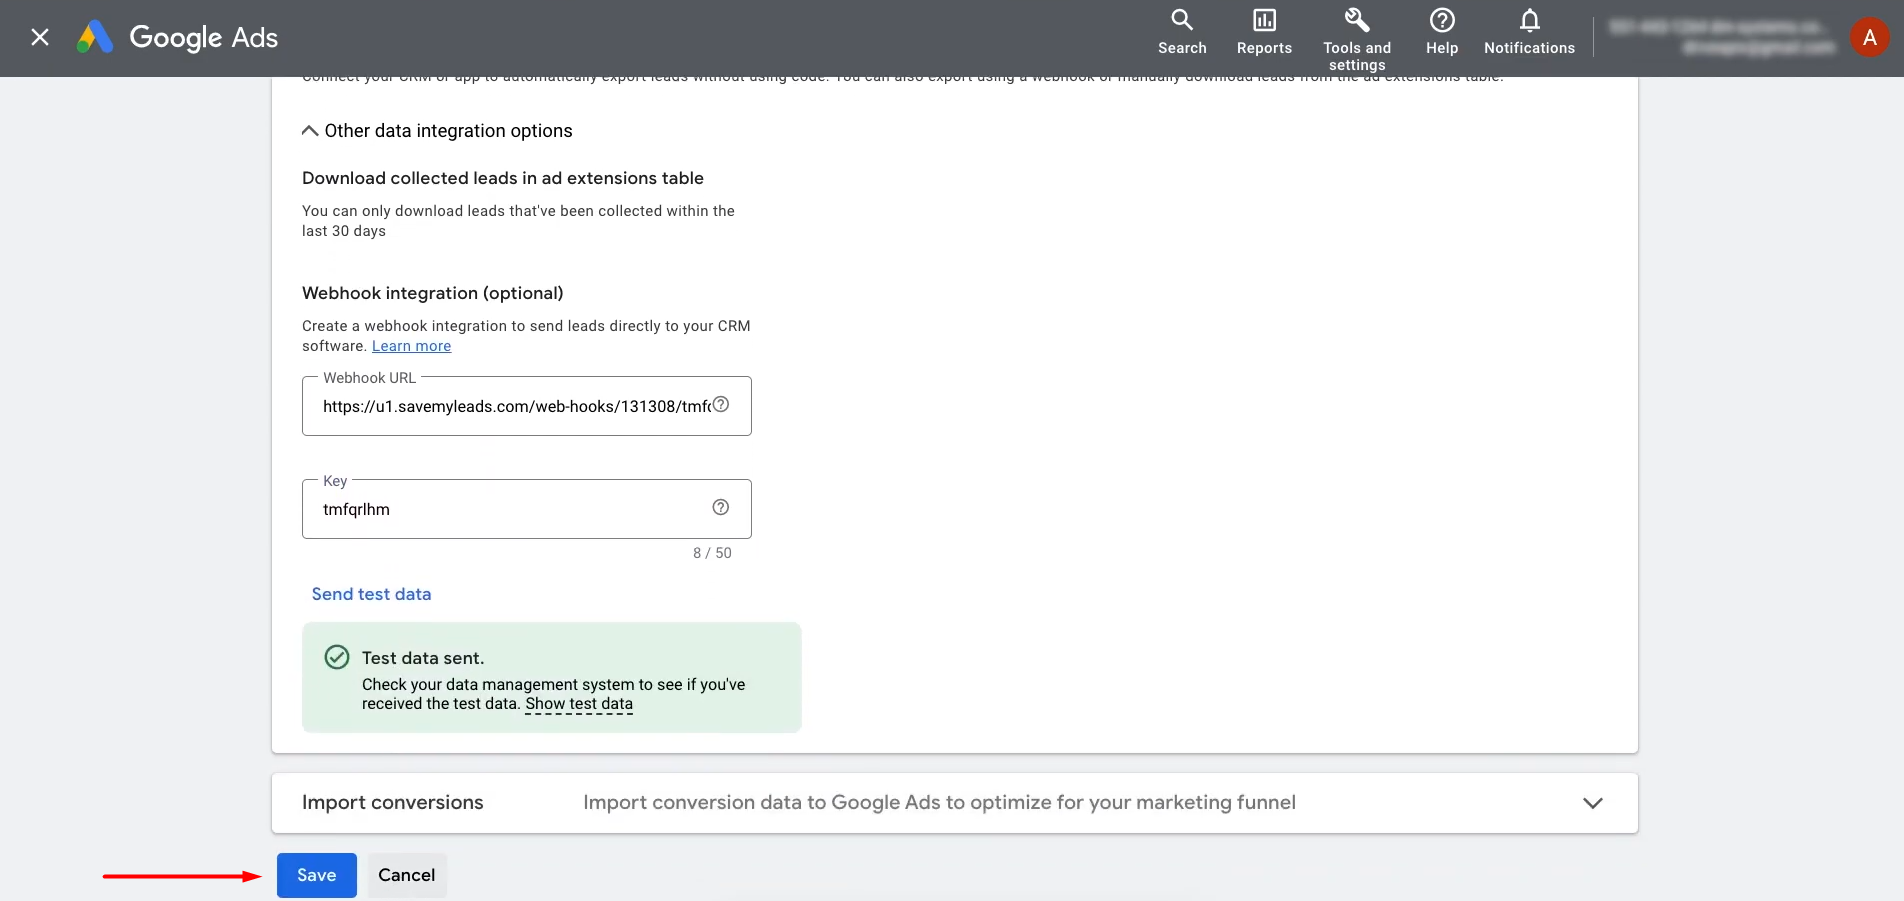
After that, save your changes, return to SaveMyLeads, and
continue the configuration process.
Setting Up the Data Receiver—Asana
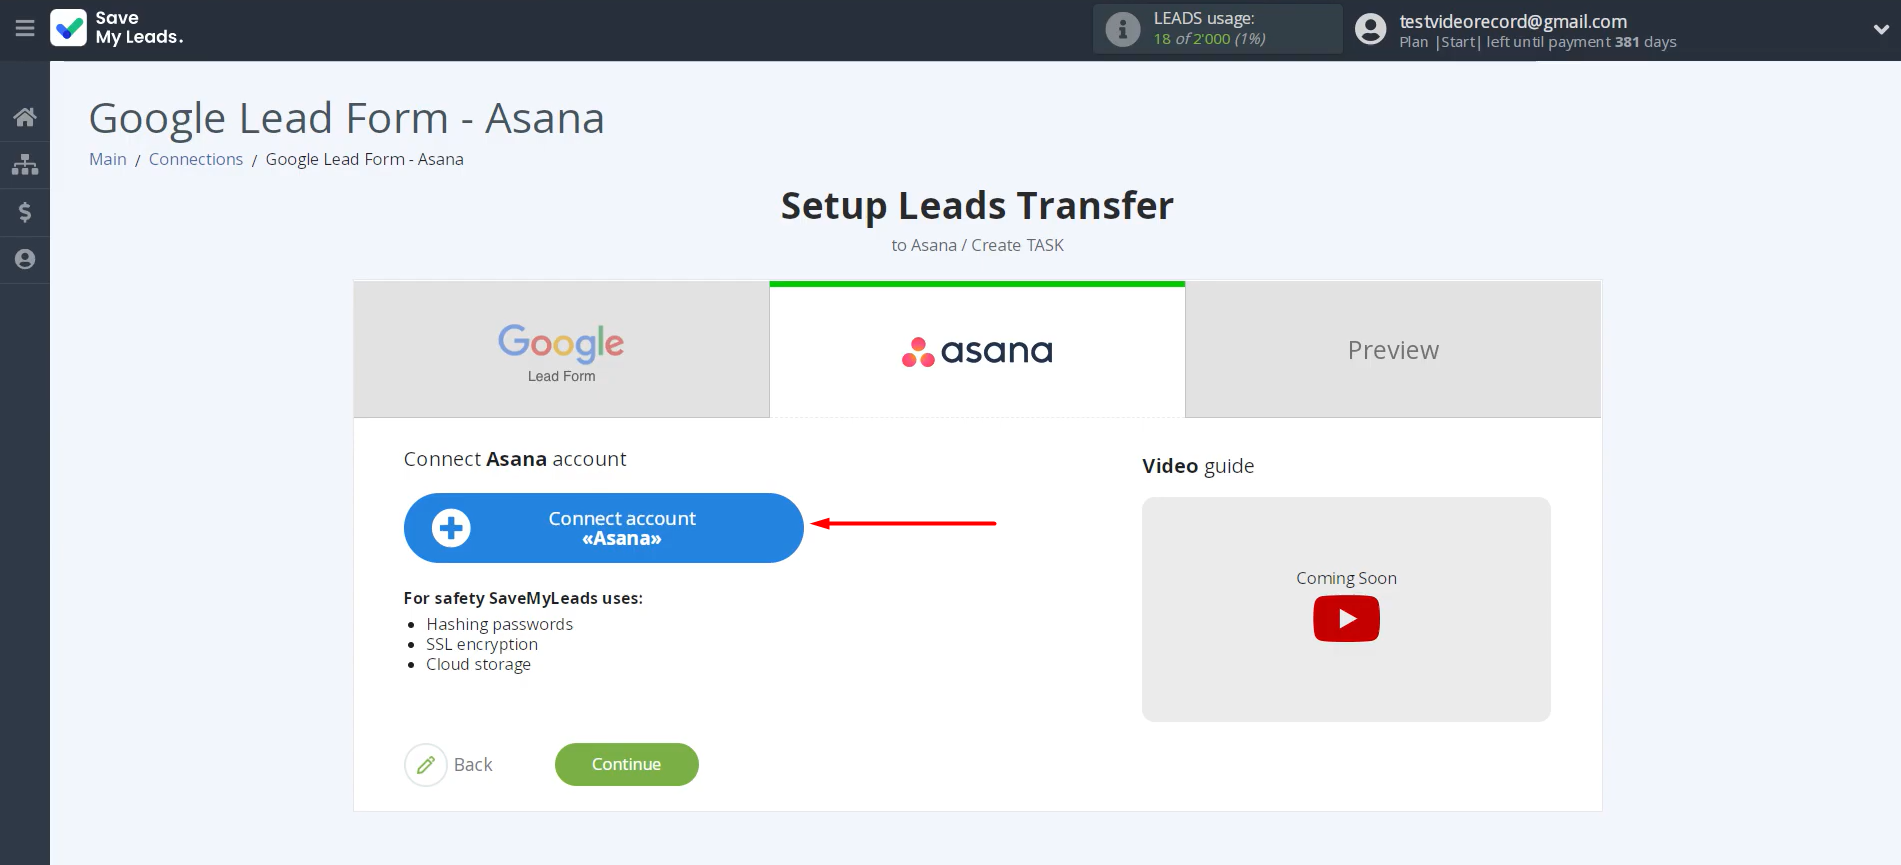
Connect your Asana account to SaveMyLeads.
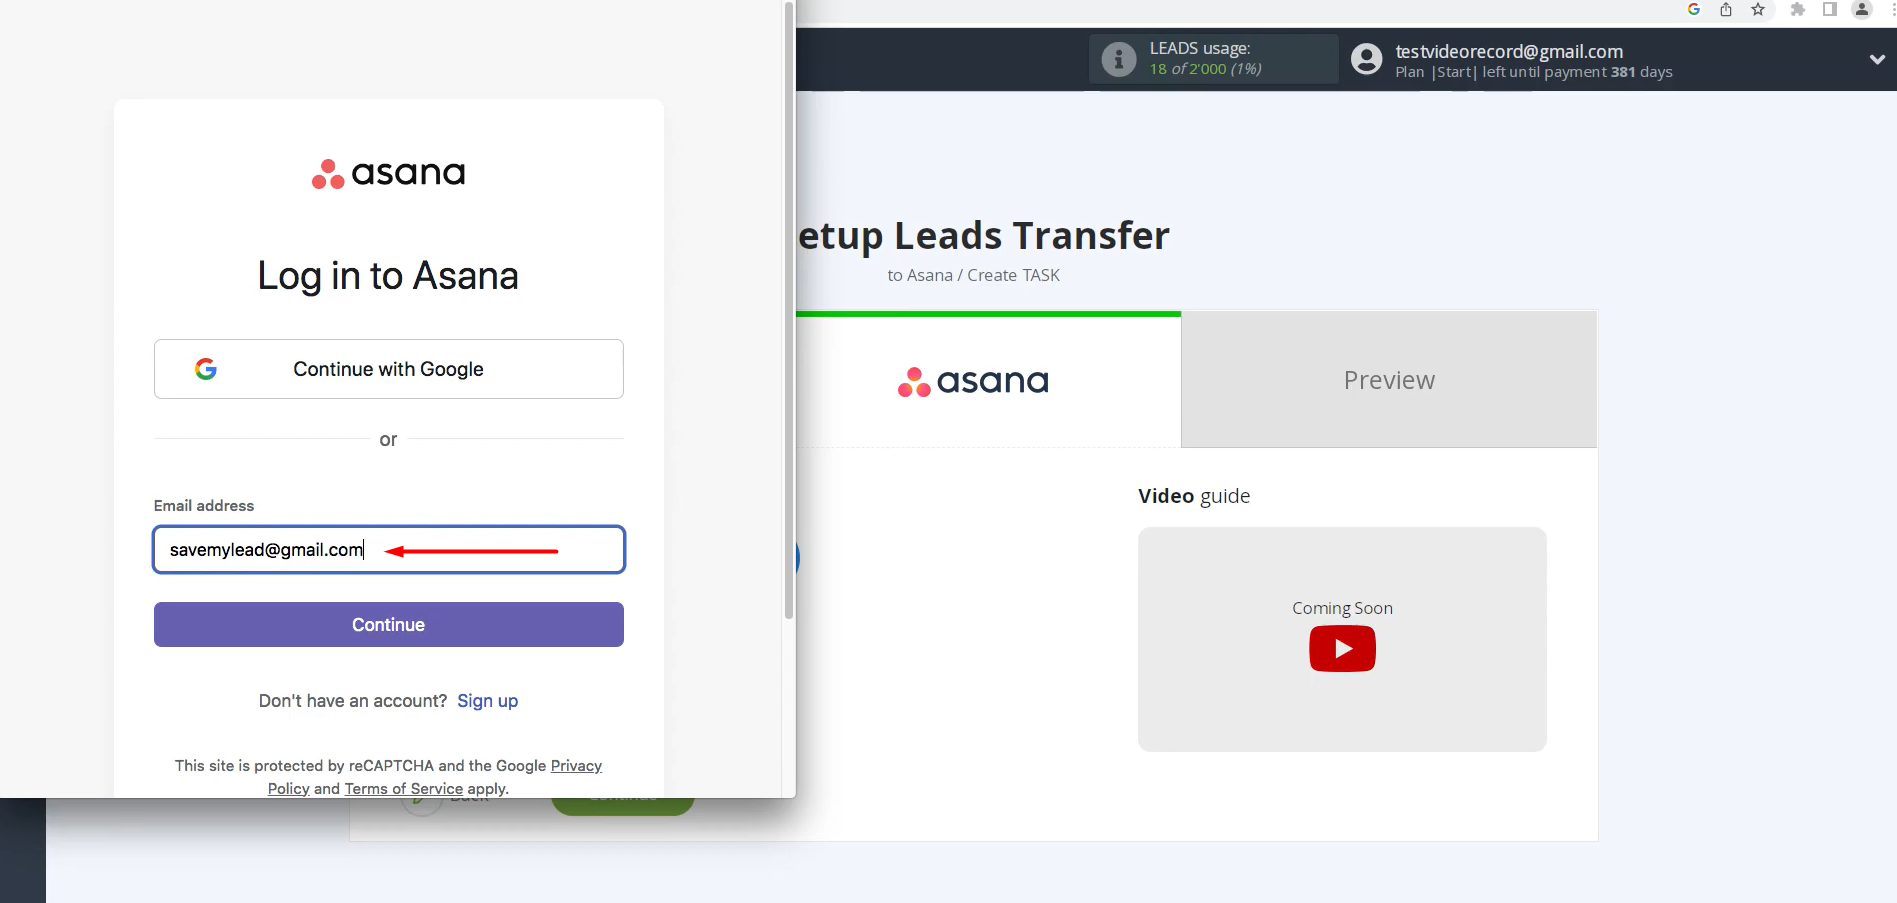
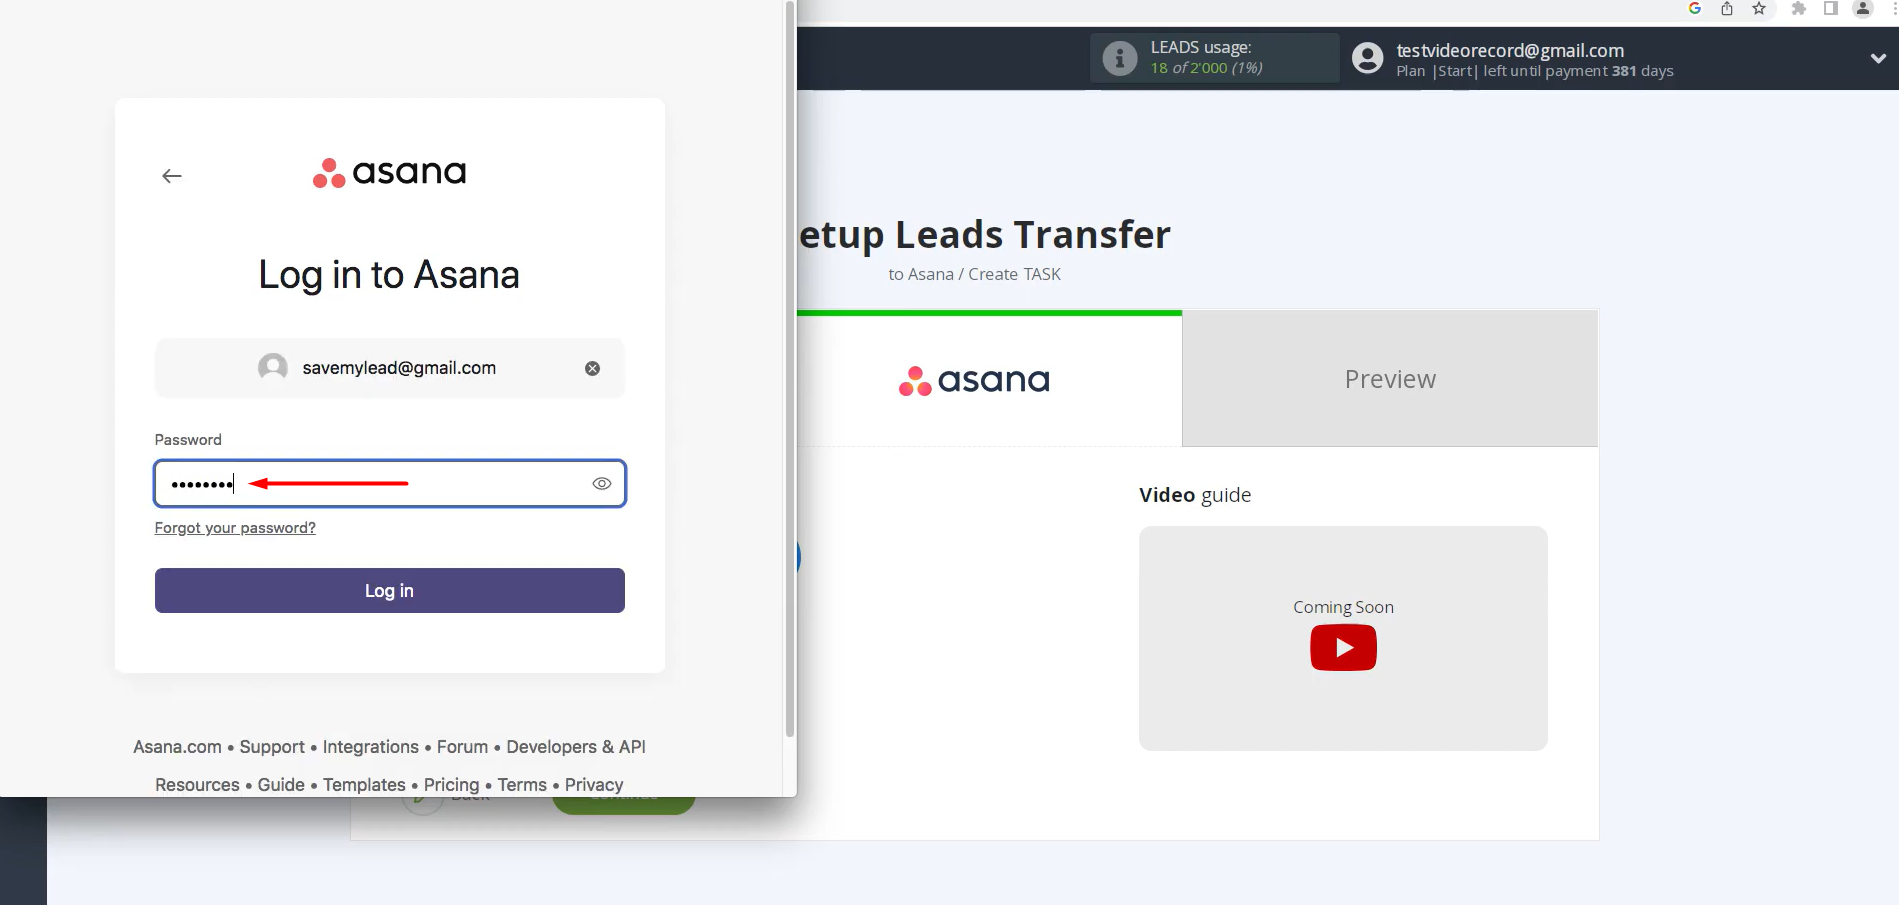
Enter your Asana login and password.
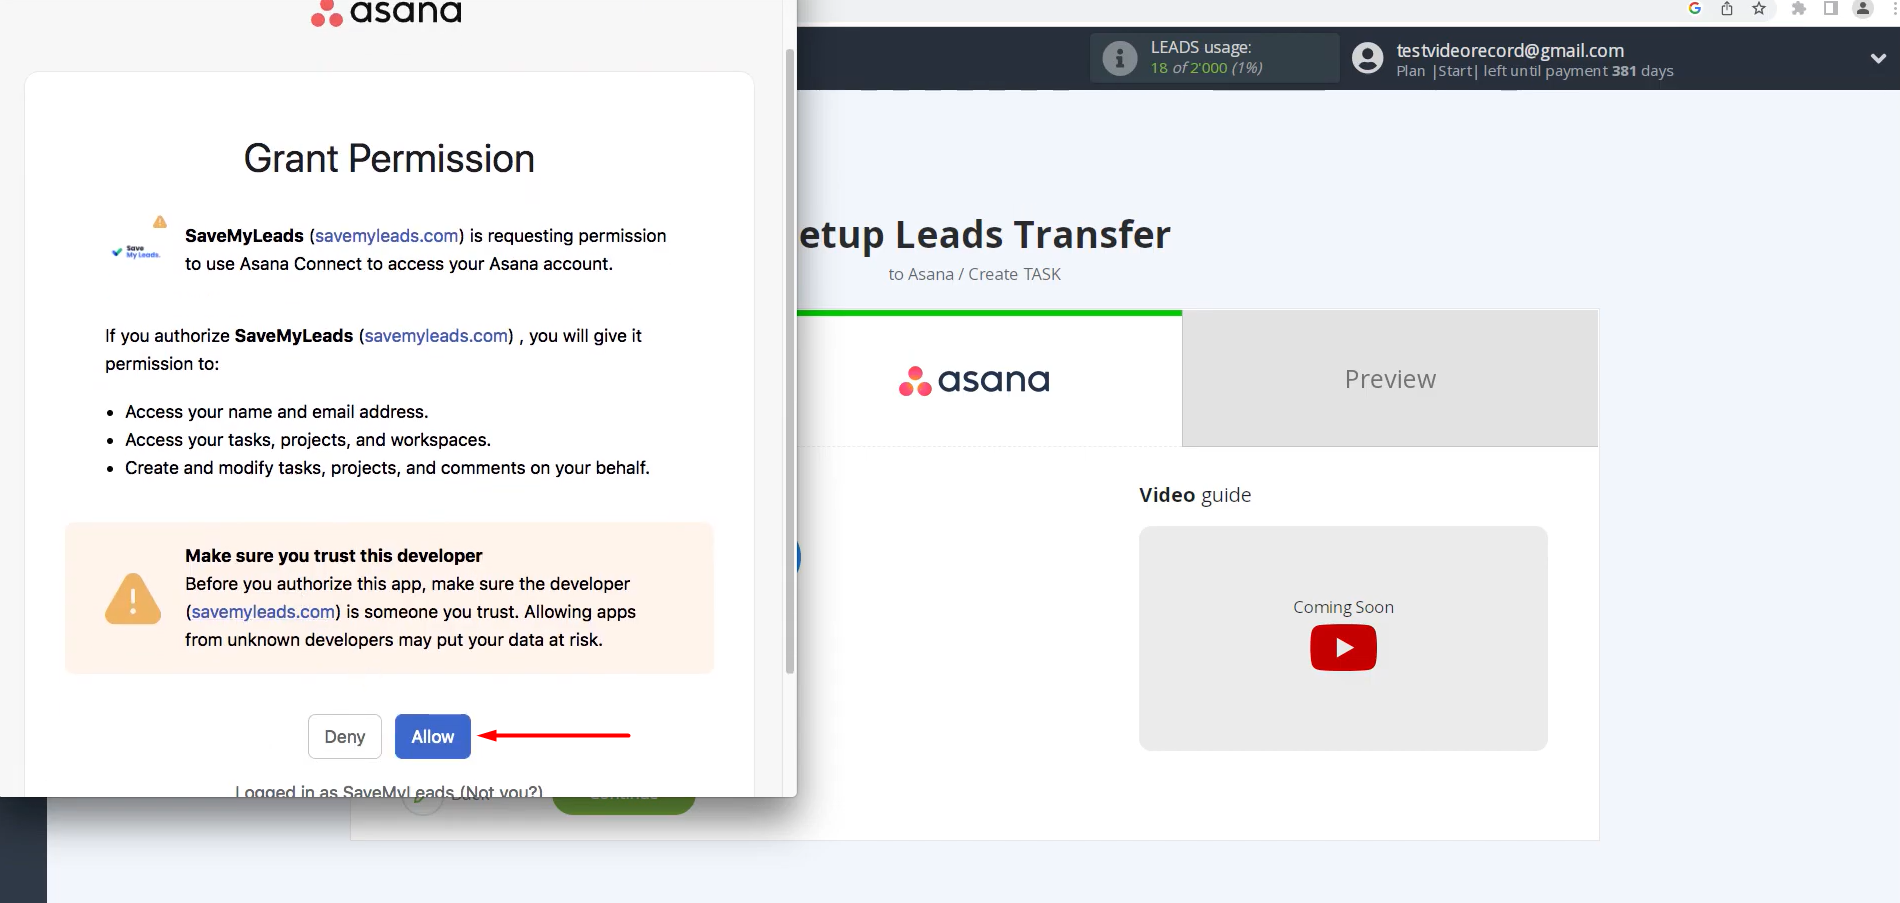
Give SaveMyLeads permission to work with your account.
When your Asana account is displayed in the list, select it.
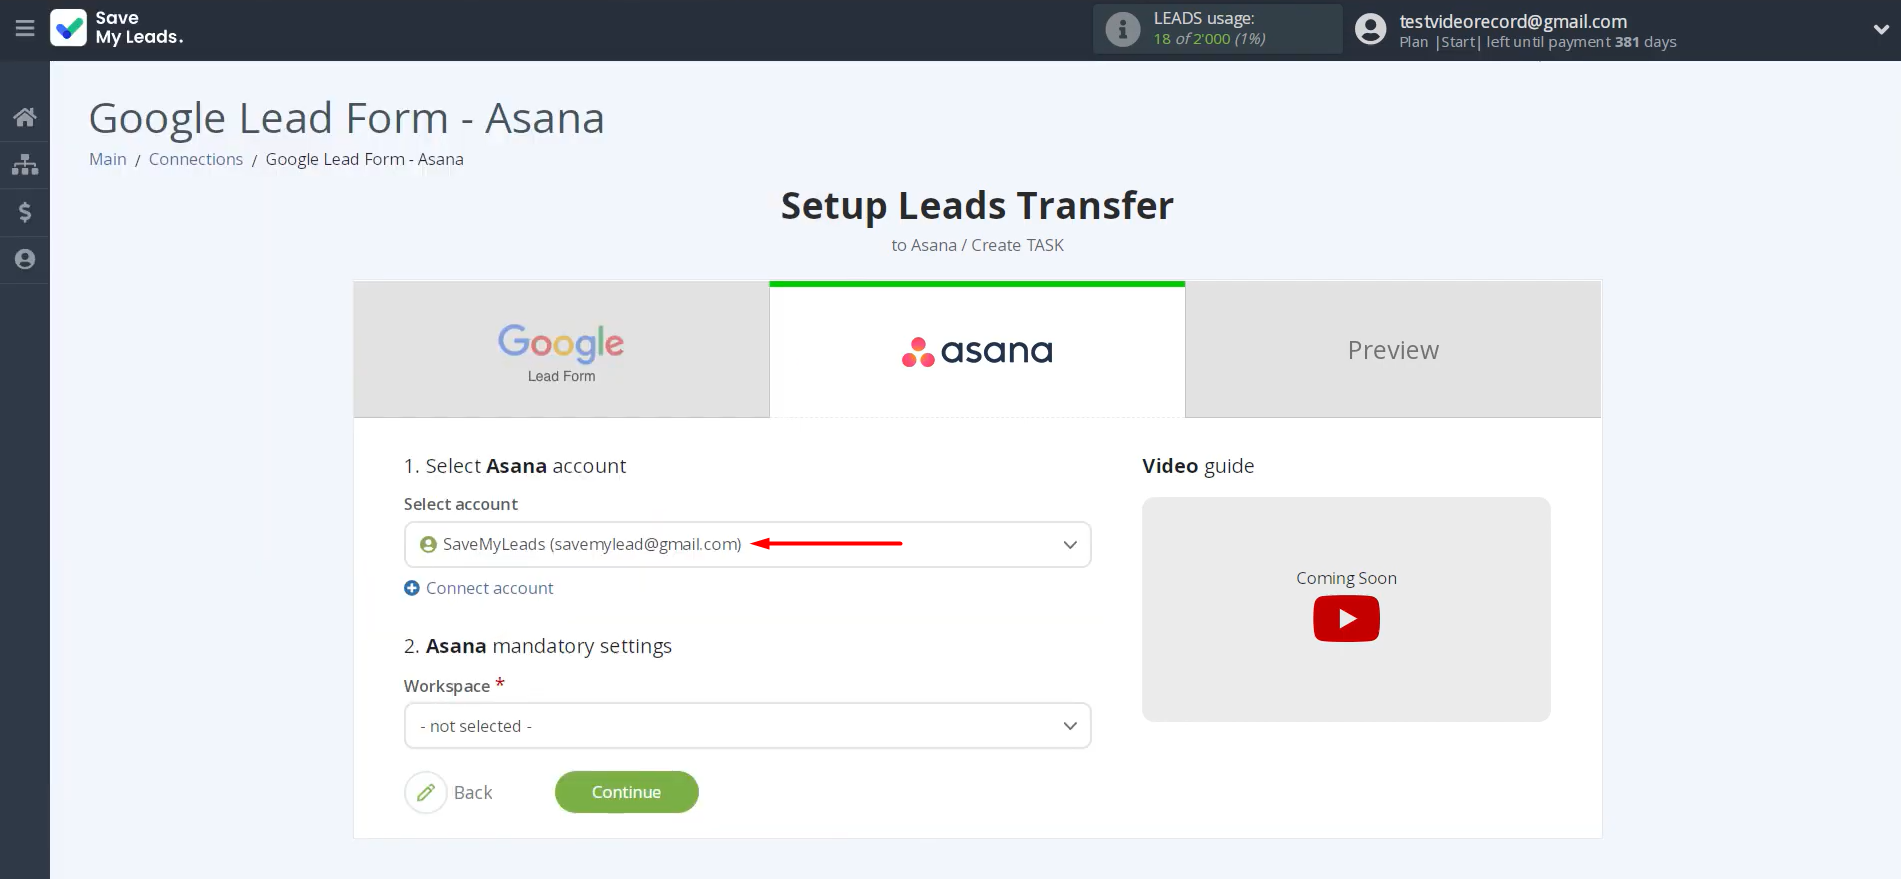
Specify
the workspace, project, and section.
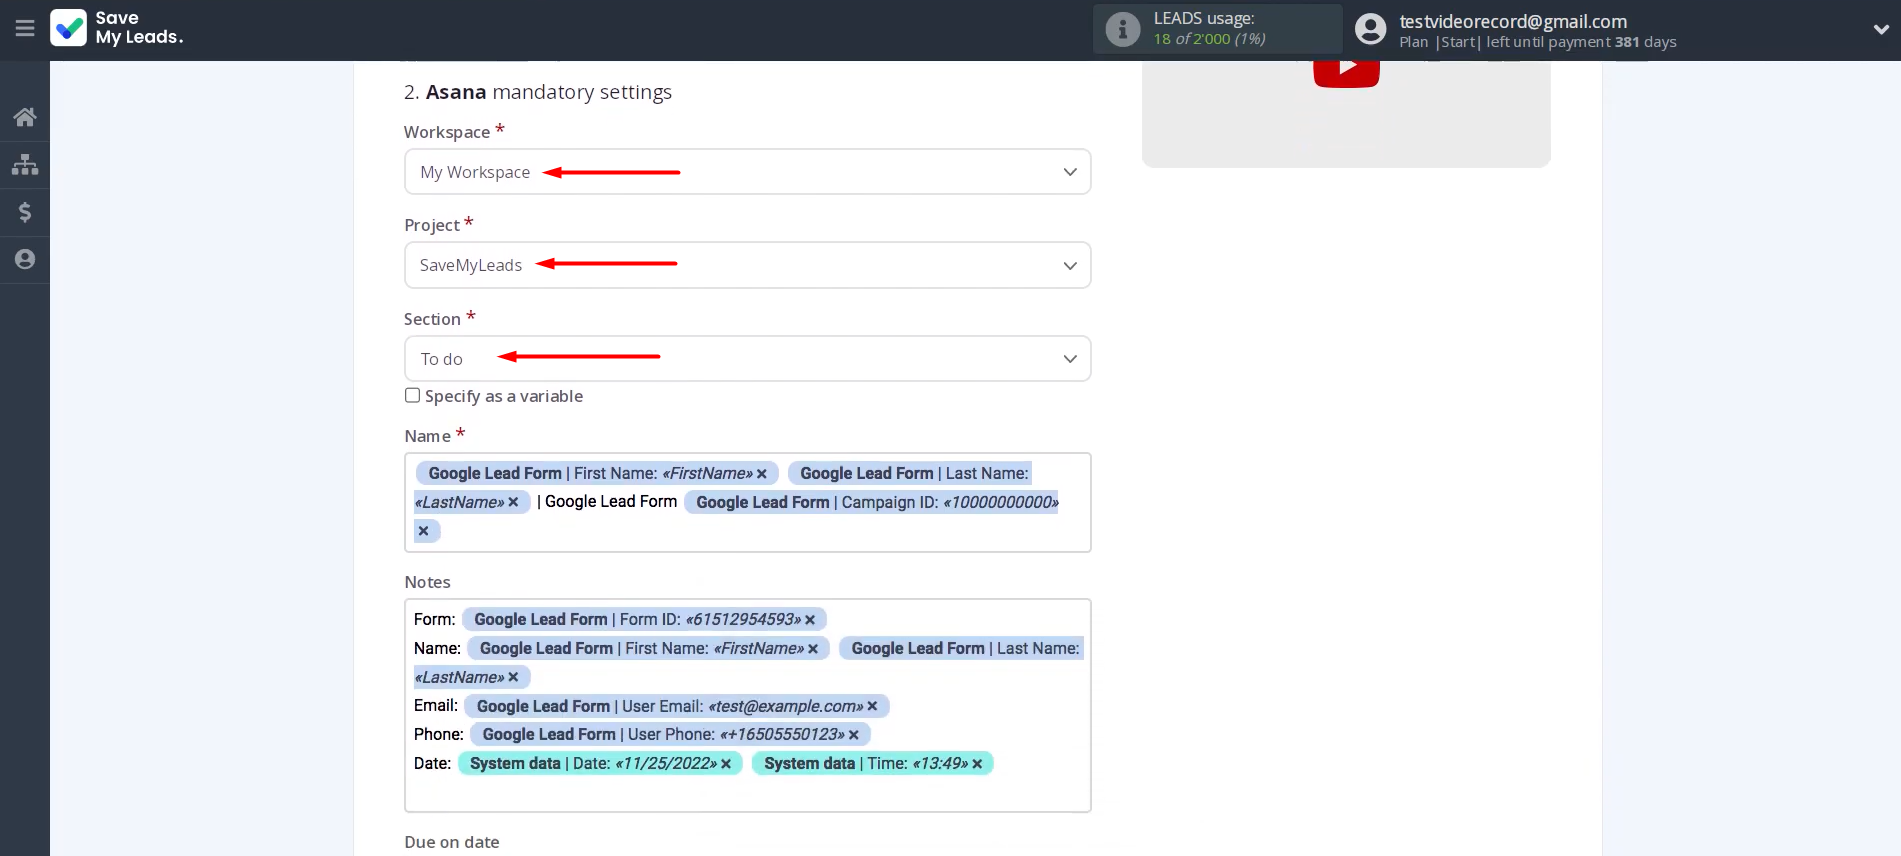
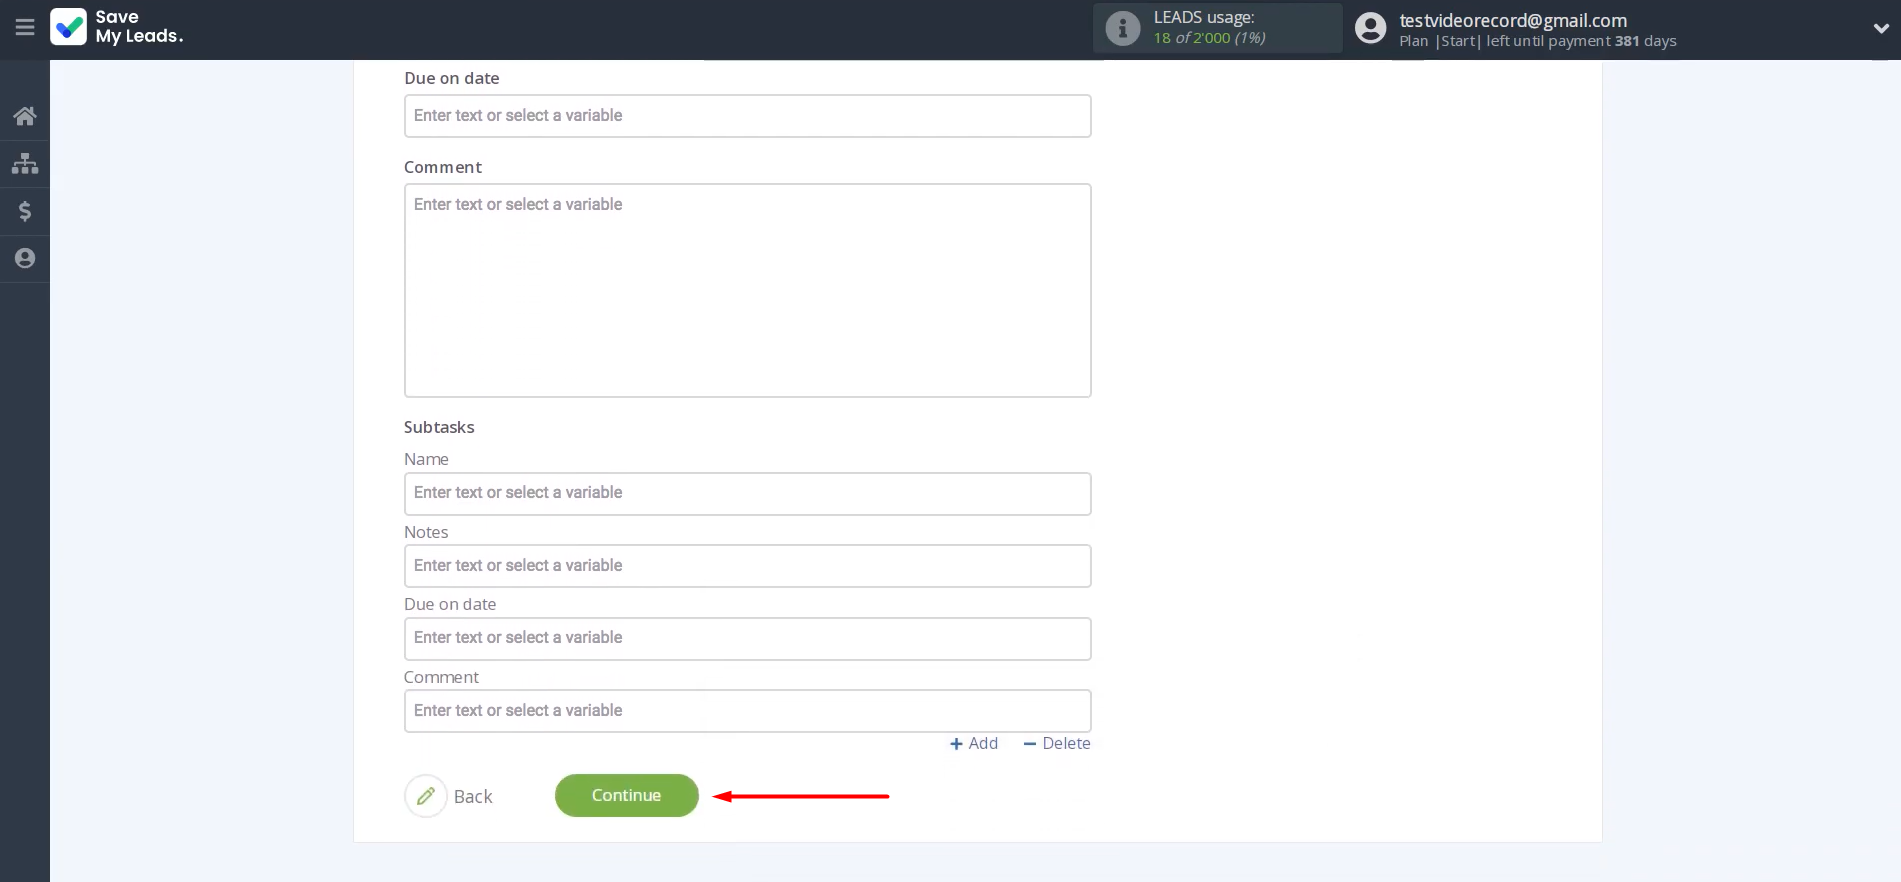
You will then see Asana fields where variables from Google
Lead Form can be mapped. SML has already done this. If something does
not suit you, add variables from the dropdown list.
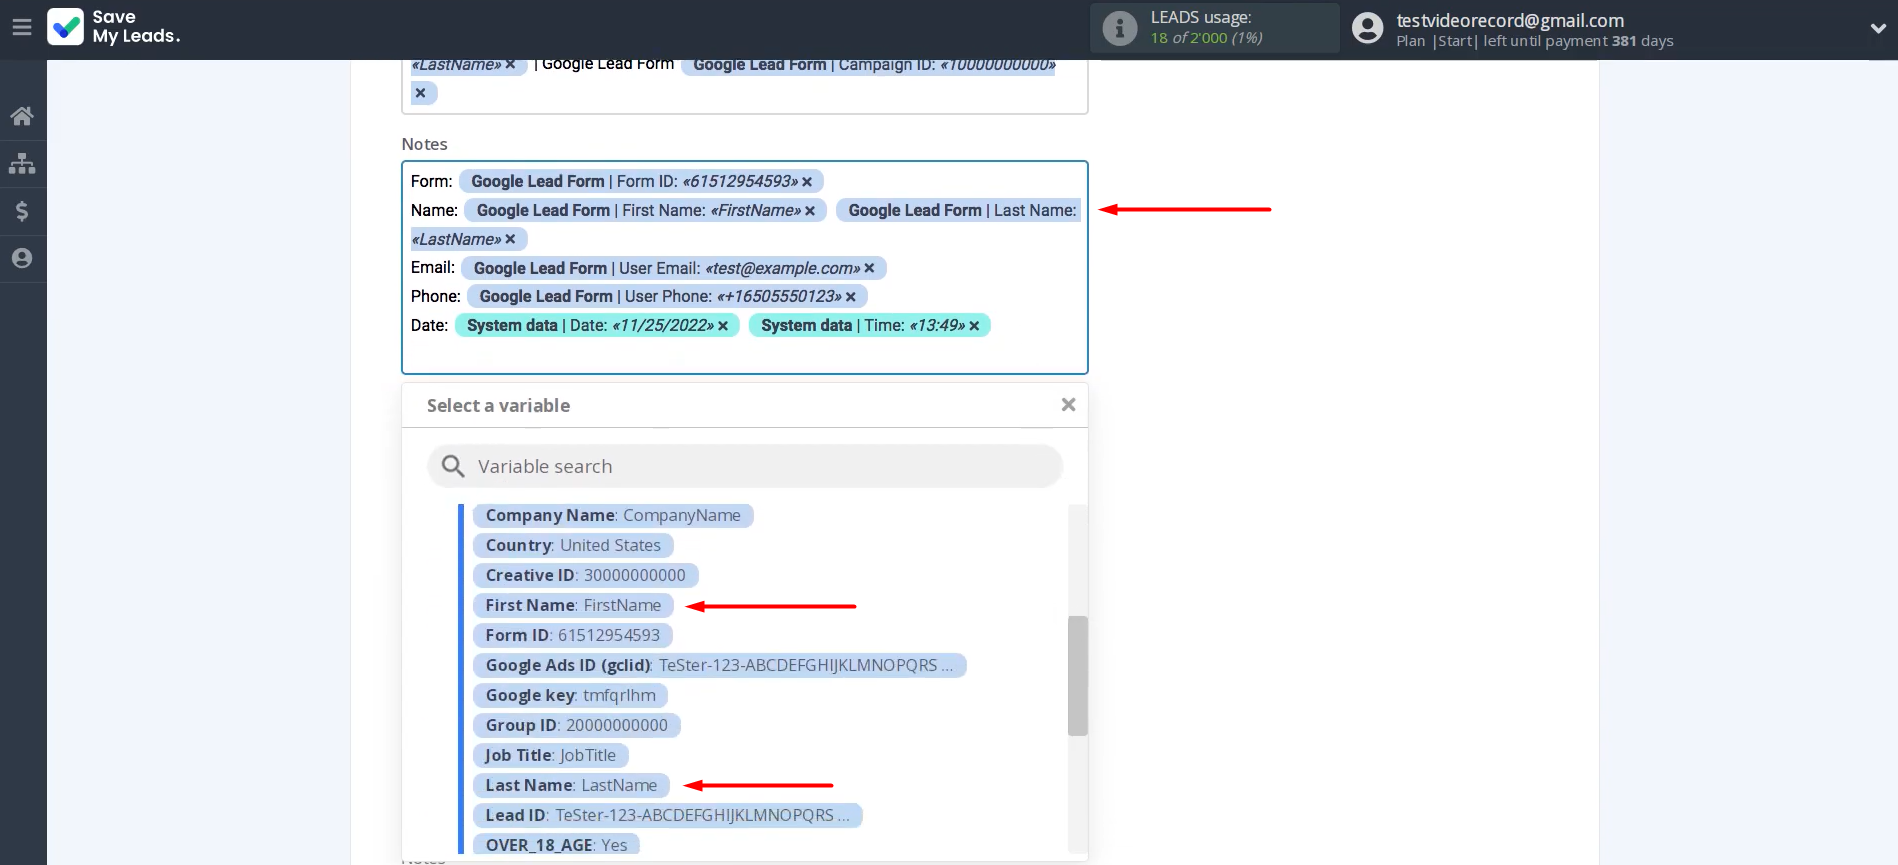
When the data is assigned, click Continue.
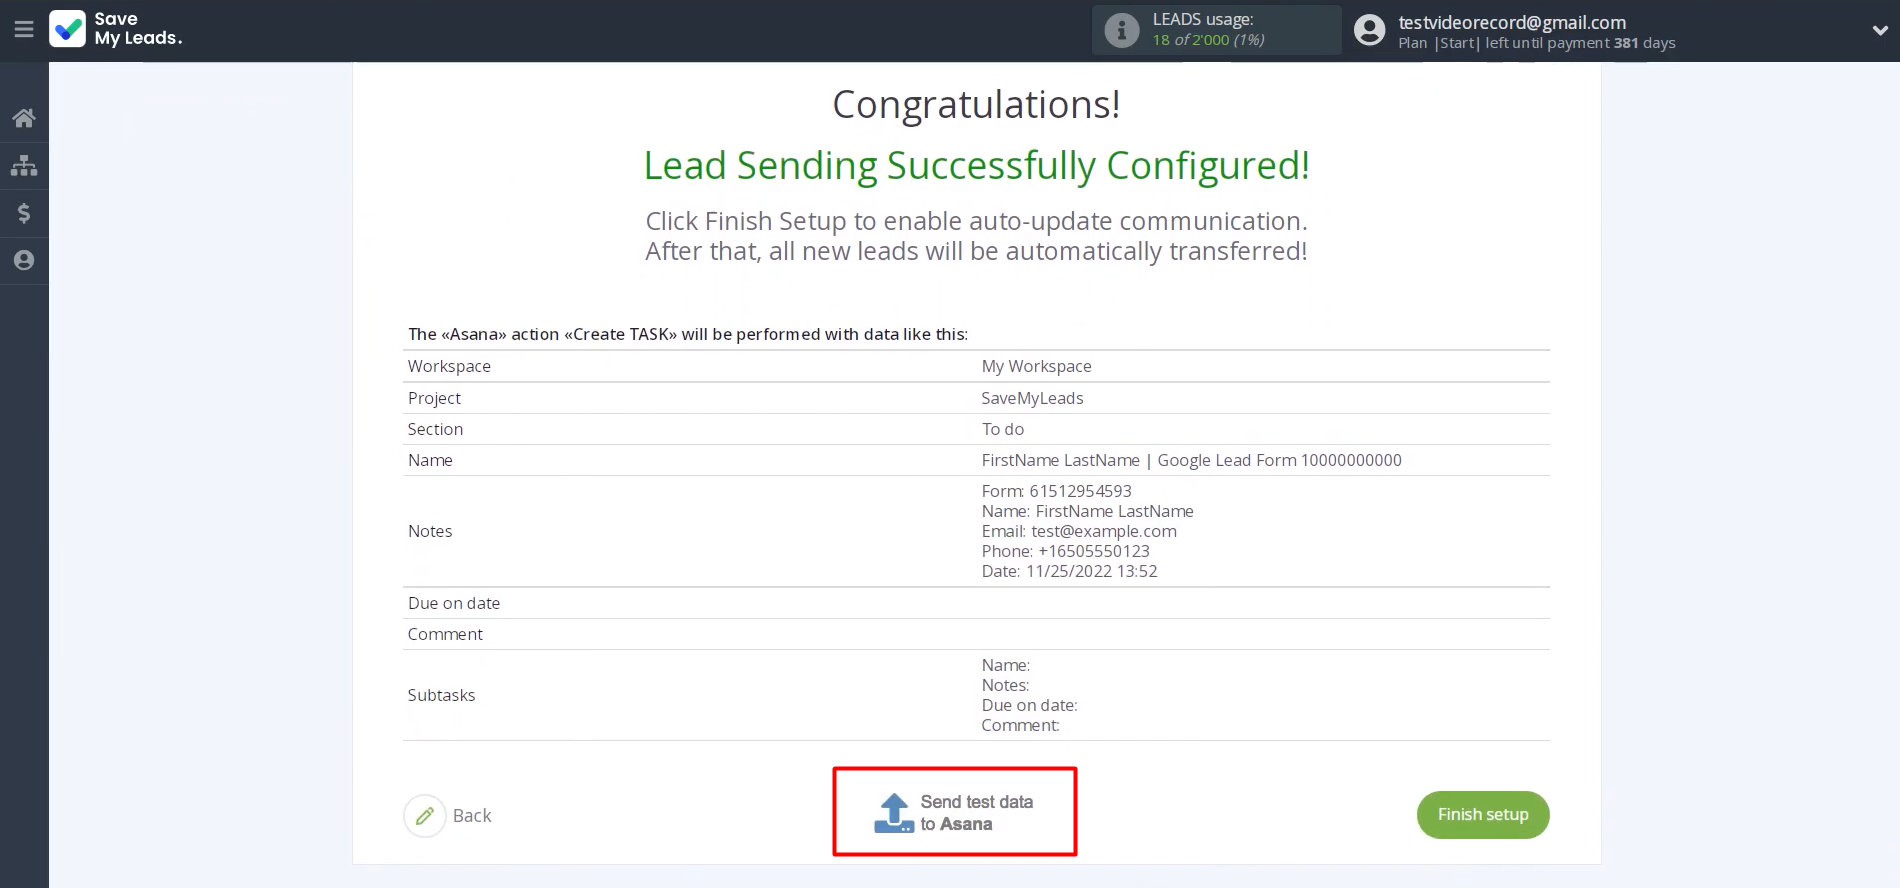
Here you can preview the sample data that will be
transferred to Asana each time a new lead comes in from Google Lead Form. Send test data to Asana to verify the settings.
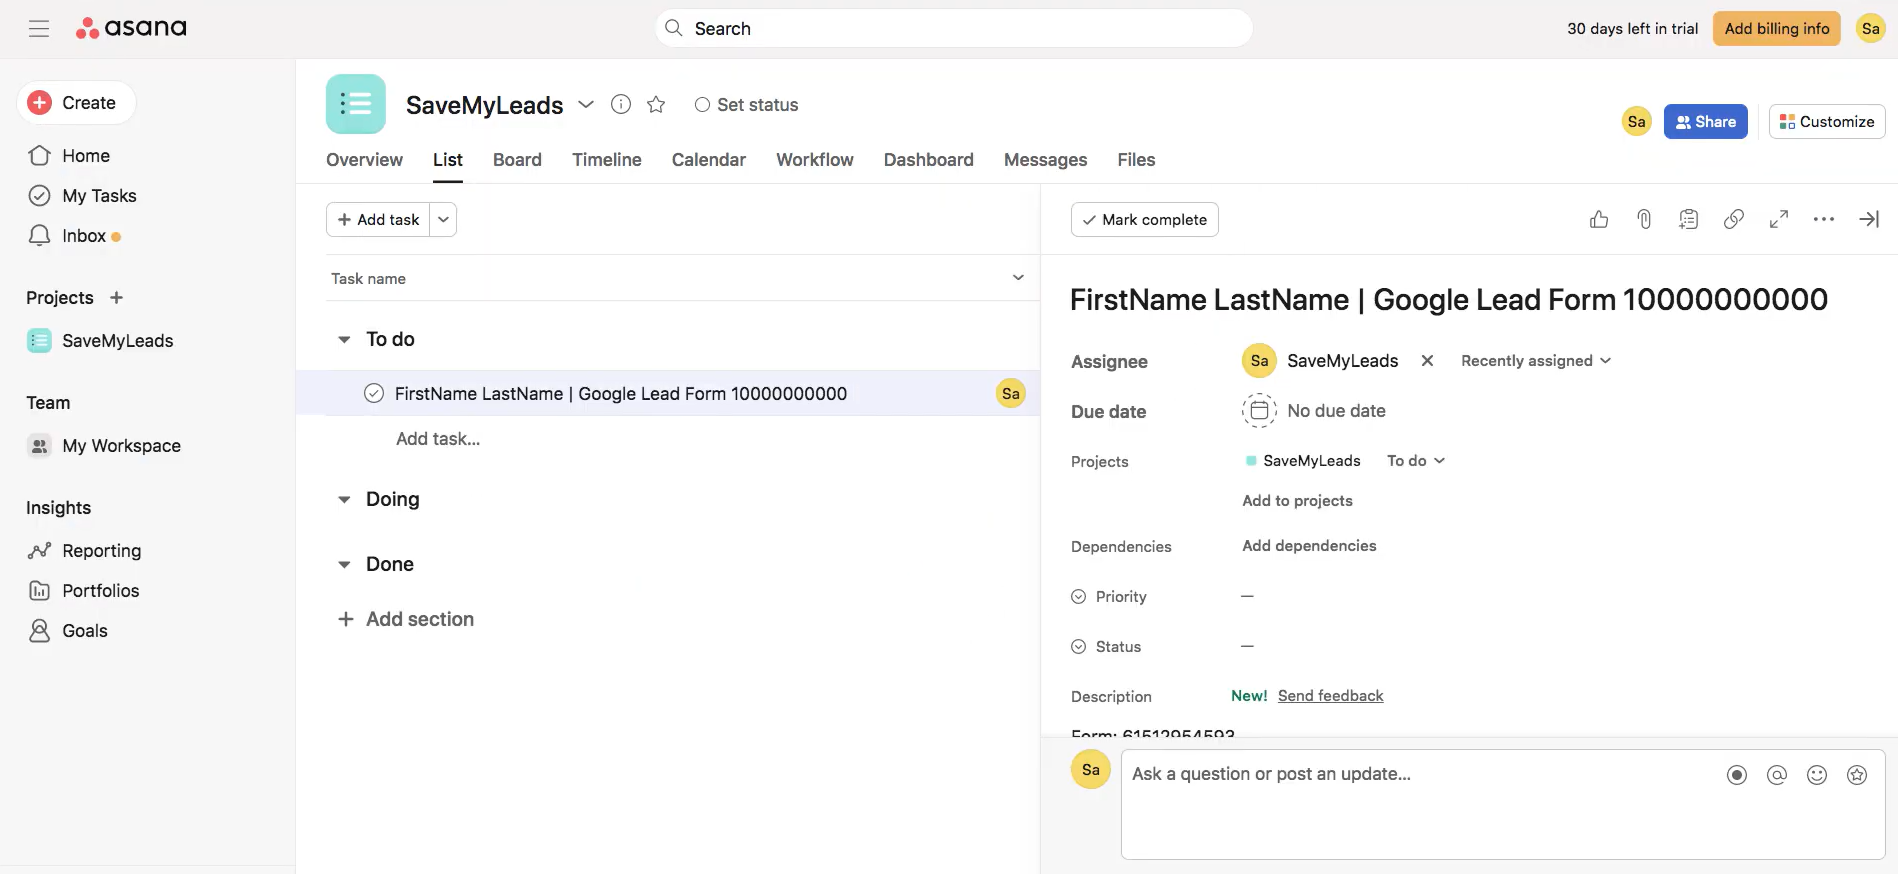
To check the result, go to Asana.
Now,
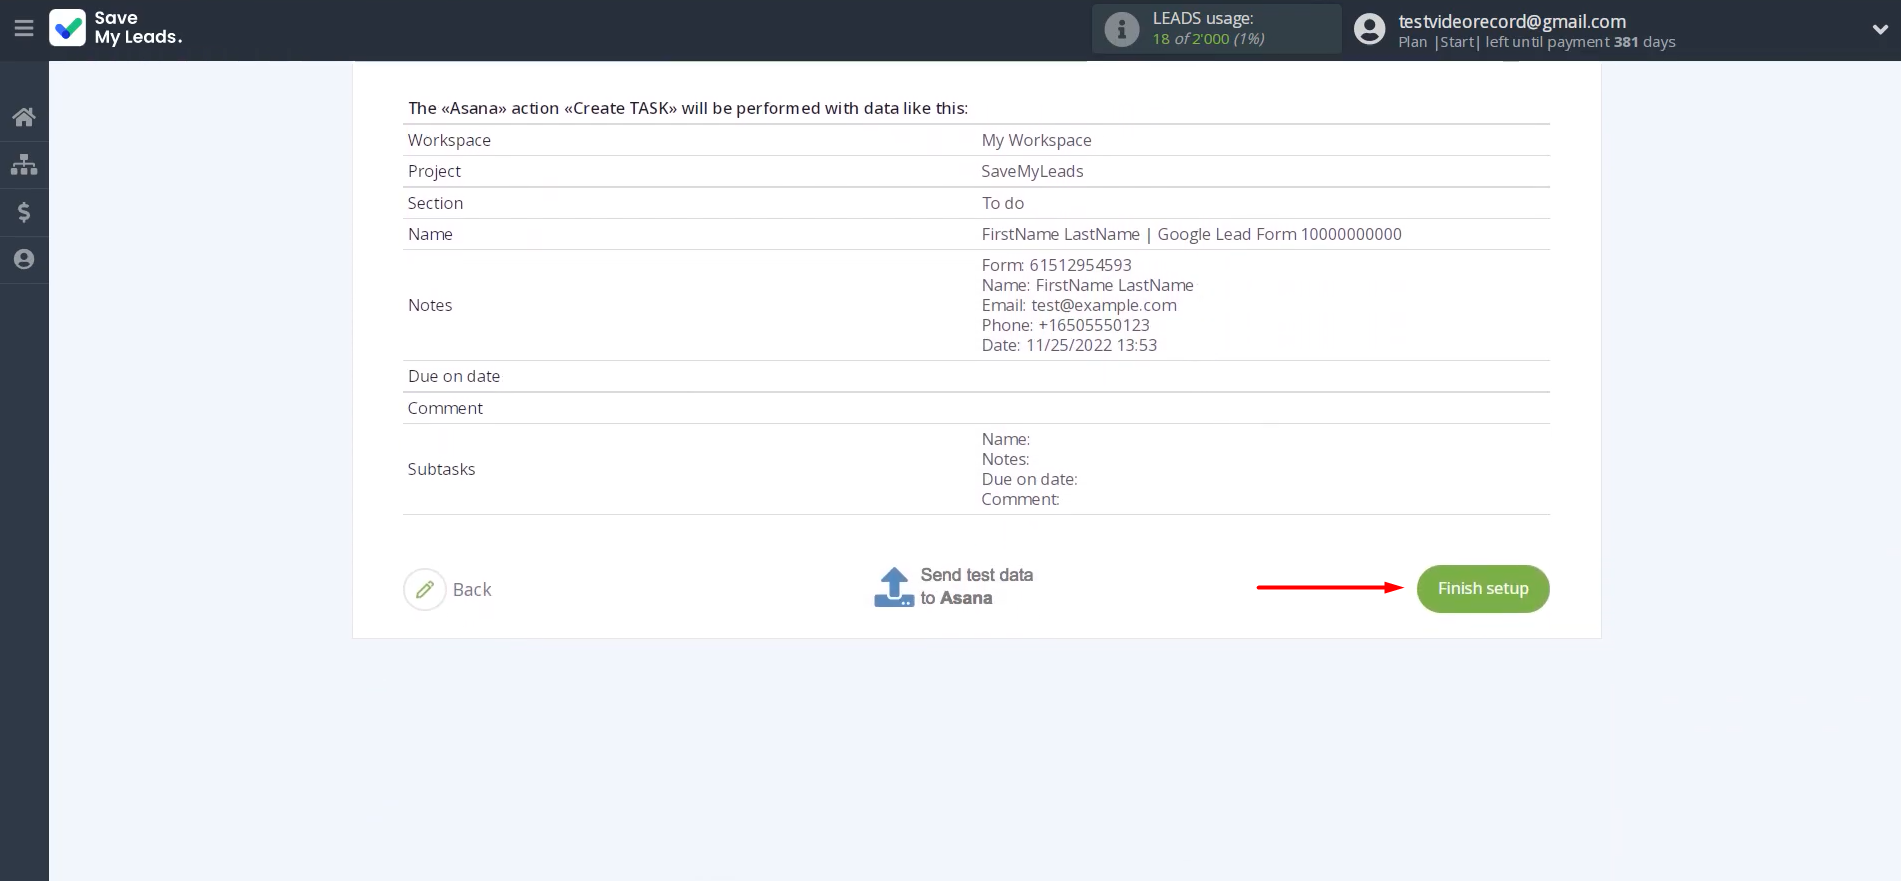
return to SaveMyLeads and complete the setup.
Auto-Update
Finally, click Finish setup to activate the automatic data transfer. From now on, all new leads from Google Lead Form will be added to Asana as tasks.
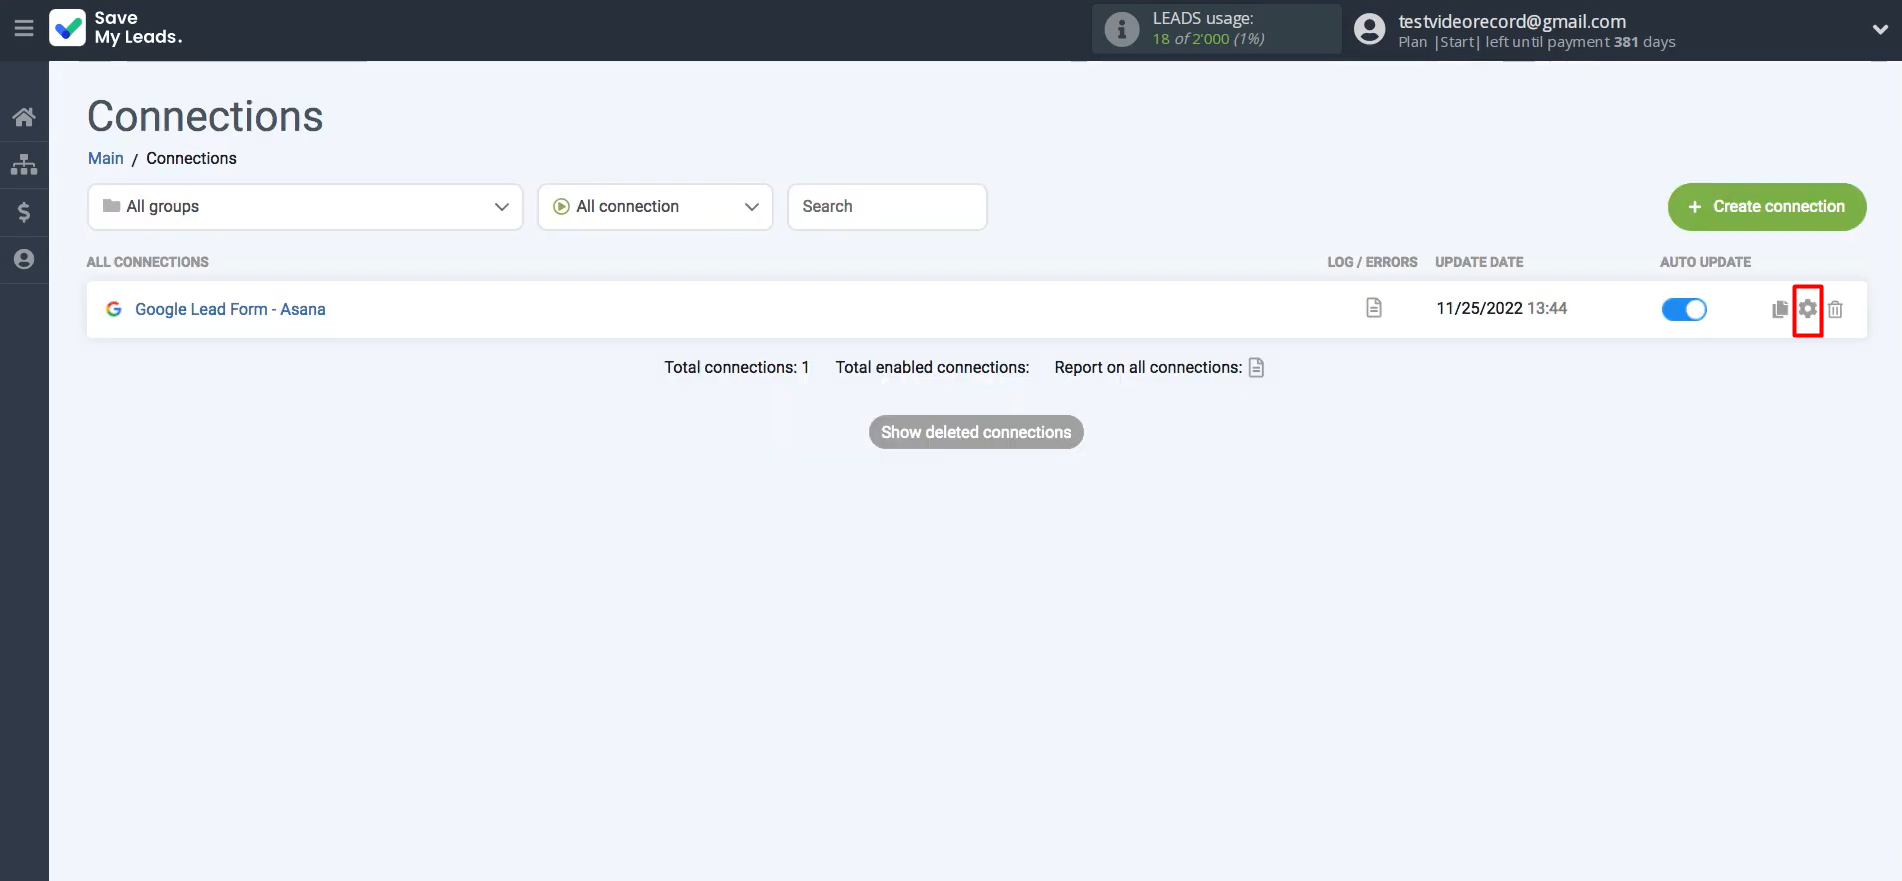
If needed, you can change the connection name in the
settings. For this, click on the gear icon.
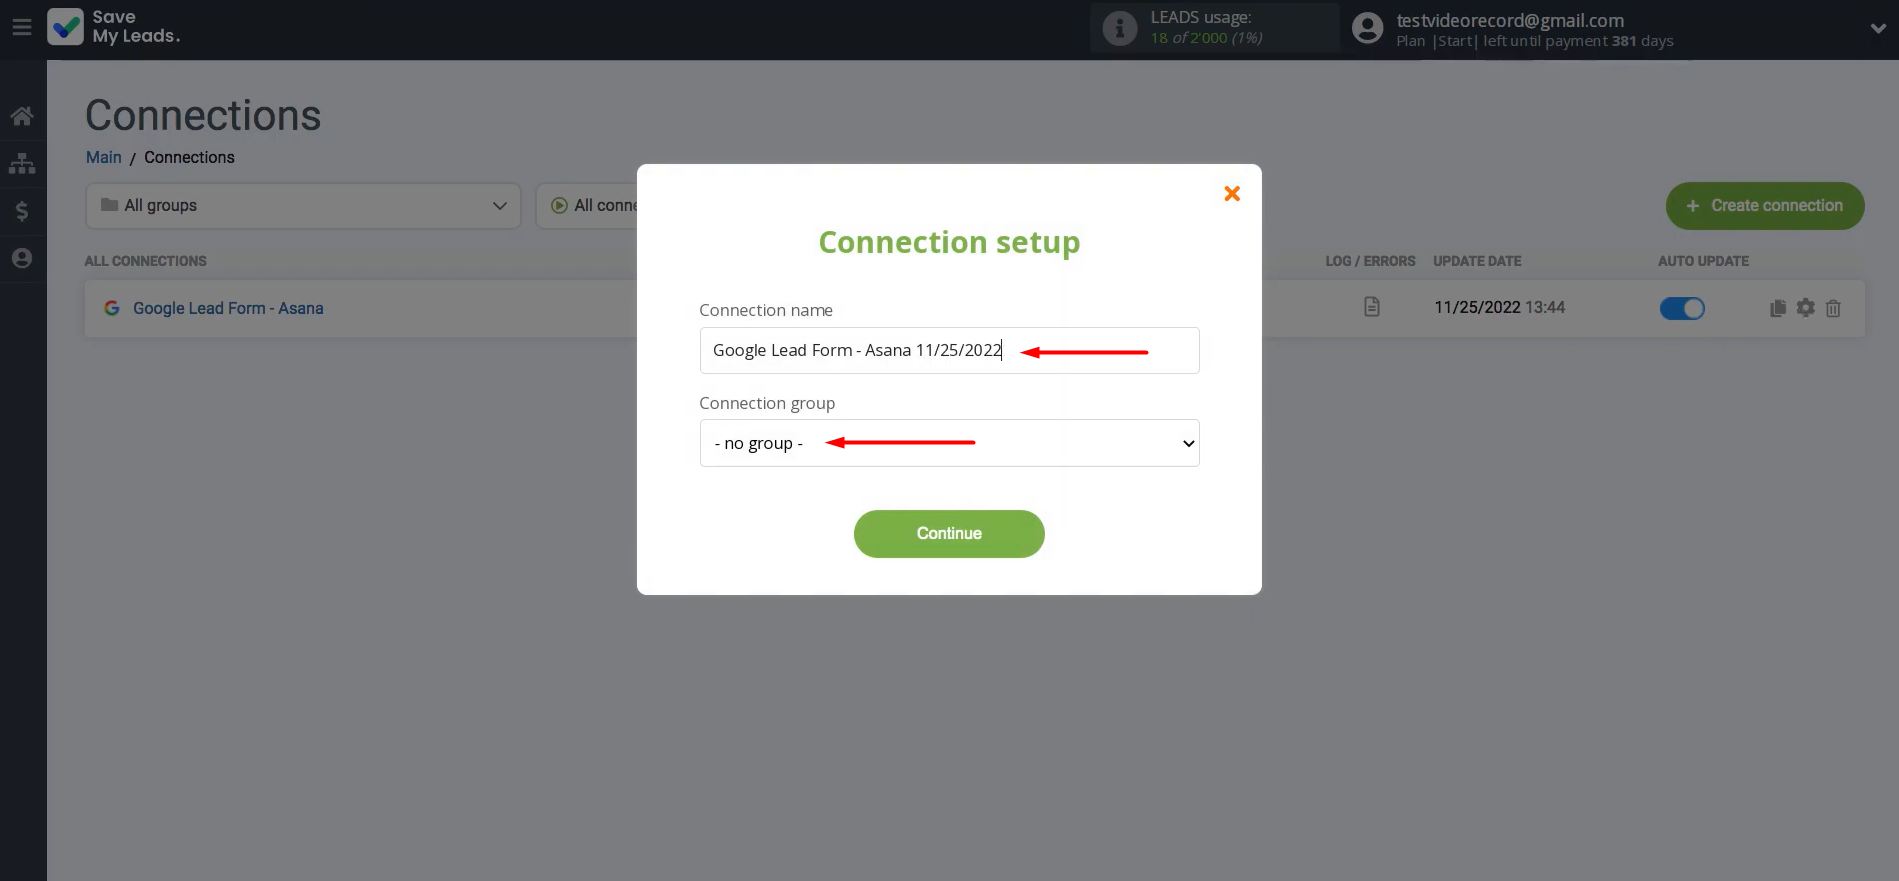
Here, you can change the connection name and add it to a group. After that, click Continue.
That's all. The
Asana and Google Leads integration has been completed.
Results
Automatic lead transfer from Google Ads to Asana is not just a technical solution but a strategic step towards improving business efficiency. It allows you to reduce response time to customer inquiries and avoid losing valuable leads. Using SaveMyLeads, you can set up integration yourself, without the help of IT specialists.
The advantage of using the online connector is that all submissions from Google Lead Form are automatically delivered to Asana. Even if clients submit forms in bulk at the same time, the system correctly processes all data and promptly creates tasks for the team. This way, the business is freed from routine work, and employees can immediately start fulfilling their responsibilities.
Step-by-Step Guides for Setting Up Integrations:
- TikTok and Slack Integration: Automatically Sending Channel Notifications
- Google Lead Form and Discord Integration: Automatically Send Messages About New Leads
- How to Connect TikTok to Airtable: A Step-by-Step Guide
- Google Lead Form and Pipedrive Integration: Automatic Task Creation
- TikTok and Copper Integration: Automatic Lead Transfer
