The speed of response to the interest of potential customers is a key factor for successful competition in the market. Facebook's Lead Ads was created to improve this metric. This tool allows users to express their interest in purchasing or ordering services in just a couple of clicks by filling out a special form. Worksection is a powerful task management platform that automates work with projects, tasks, and team interaction. It optimizes business processes and customer relationships by simplifying planning, organizing activities, and monitoring task completion. All this significantly improves collective productivity. If you already use both services or plan to implement them in the near future, it is important to strive to not only maintain but also increase the speed of lead processing. Our online connector SaveMyLeads will help you achieve this goal. It integrates Facebook and Worksection, providing automatic transfer of data from Lead Ads directly to the task manager. In this article, we will tell you how to set up Facebook and Worksection integration using SaveMyLeads to automate daily, routine business processes and increase the efficiency of your work.
Automating the transfer of lead data from Facebook to Worksection brings tangible benefits to companies:
- Accelerate response to lead requests. High-speed feedback allows customers to quickly get the information they need about products or services, reducing the likelihood that they will reconsider their decision or turn to other sellers.
- Increasing team efficiency. Employees who were previously involved in manual data entry can redirect their efforts to improve the customer experience and other important tasks.
- Freeing up resources. Reducing the time and effort spent on routine tasks allows you to focus on the key aspects of your business.
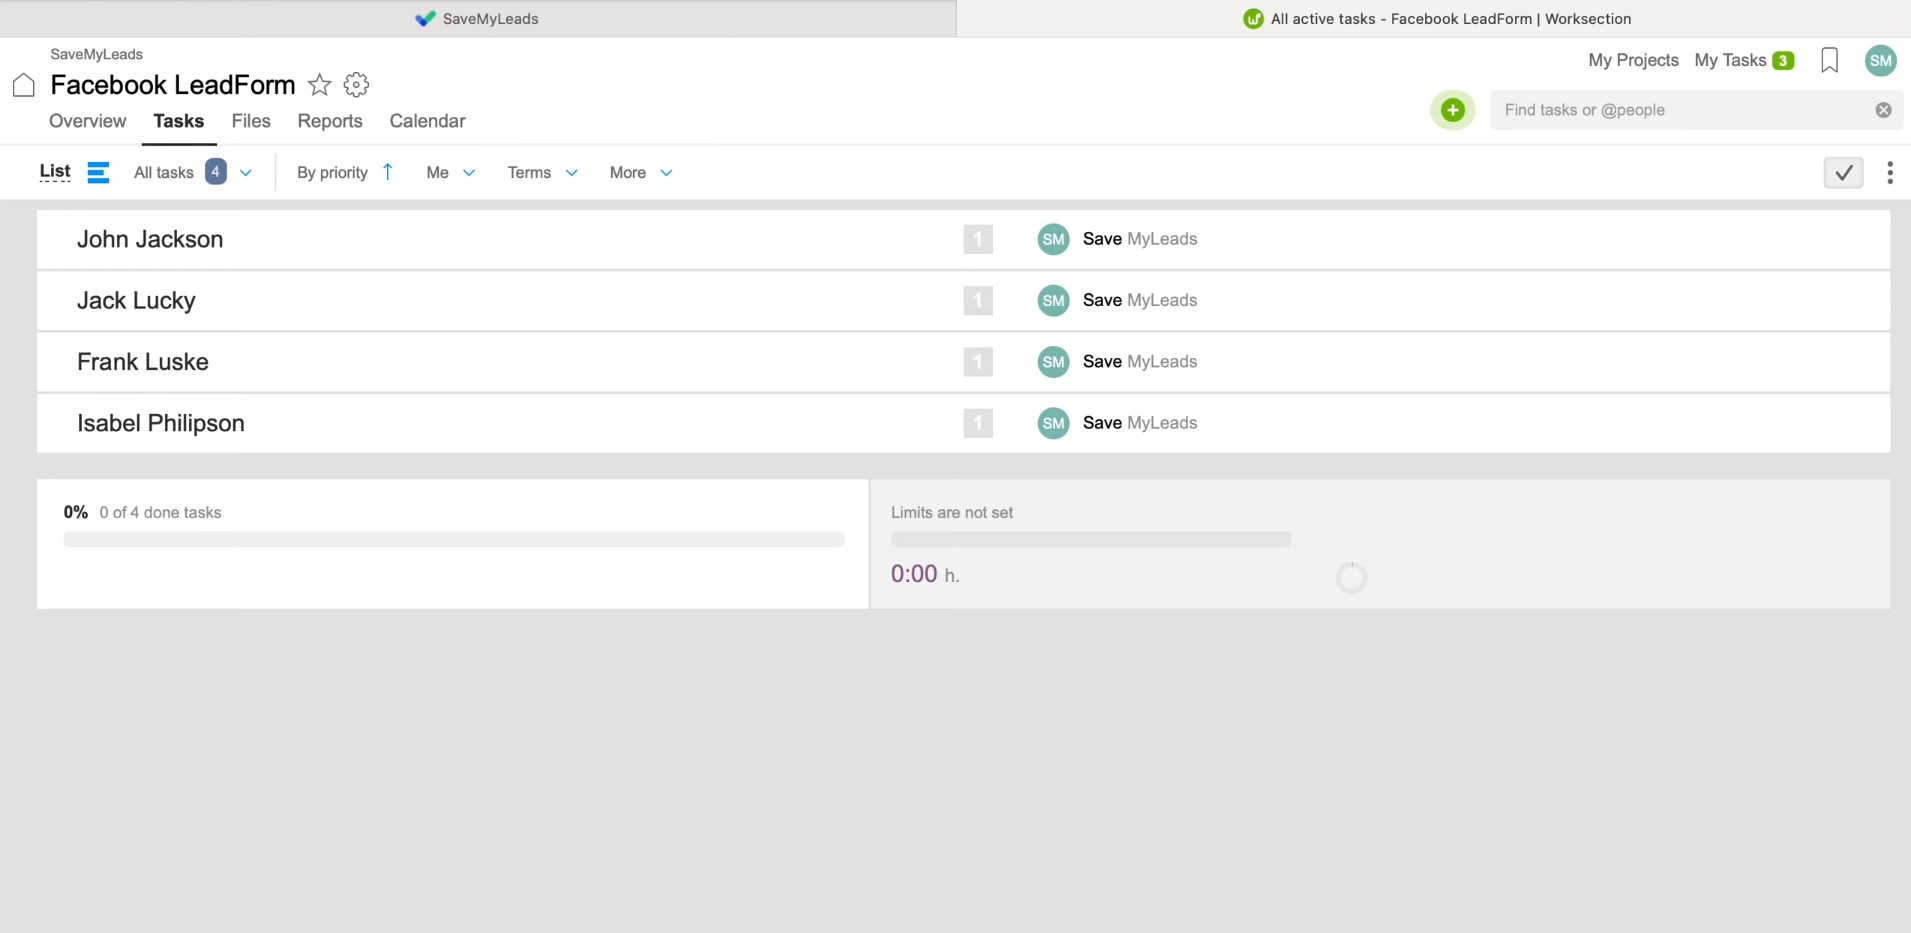
Immediately after completing the Worksection and Facebook integration setup, you will see the first results. Applications from leads collected through the Lead Ads form will be automatically transferred to the task manager and converted into new tasks. You can distribute them among the team, assign them priorities, and start tracking implementation. This will save your employees from having to manually transfer customer contact information. Thus, the old methods of work will finally become a thing of the past, giving way to more progressive ones.
Automating data transfer not only simplifies the internal work of the team, but also significantly improves the customer experience. Consistently high application processing speed increases the likelihood of turning leads into regular customers. As a result, this will lead to an increase in the success of your business.
How to Set up Facebook and Worksection Integration
Setting up Facebook Lead Ads and Worksection integration using SaveMyLeads is extremely easy and accessible, even for users who do not have deep technical knowledge. Using this online connector, you won't have to rush to learn the API or look for a programmer to help you. The SaveMyLeads developers have made the process intuitive, minimizing potential difficulties for users. Typically, setup takes no more than 10 minutes. If you already have experience working with integrations, you'll get through it even faster. The detailed instructions in text and video formats that we provide will help you avoid mistakes and do everything correctly on the first try.
So, let's begin. First of all, you need to register on savemyleads.com. Create an account using your name, email, and password. To simplify the process, you can register through a Google or Facebook account. Once registration is complete, you can begin setting up your Facebook Lead Ads and Worksection integration.
Setting up the Data Source – Facebook
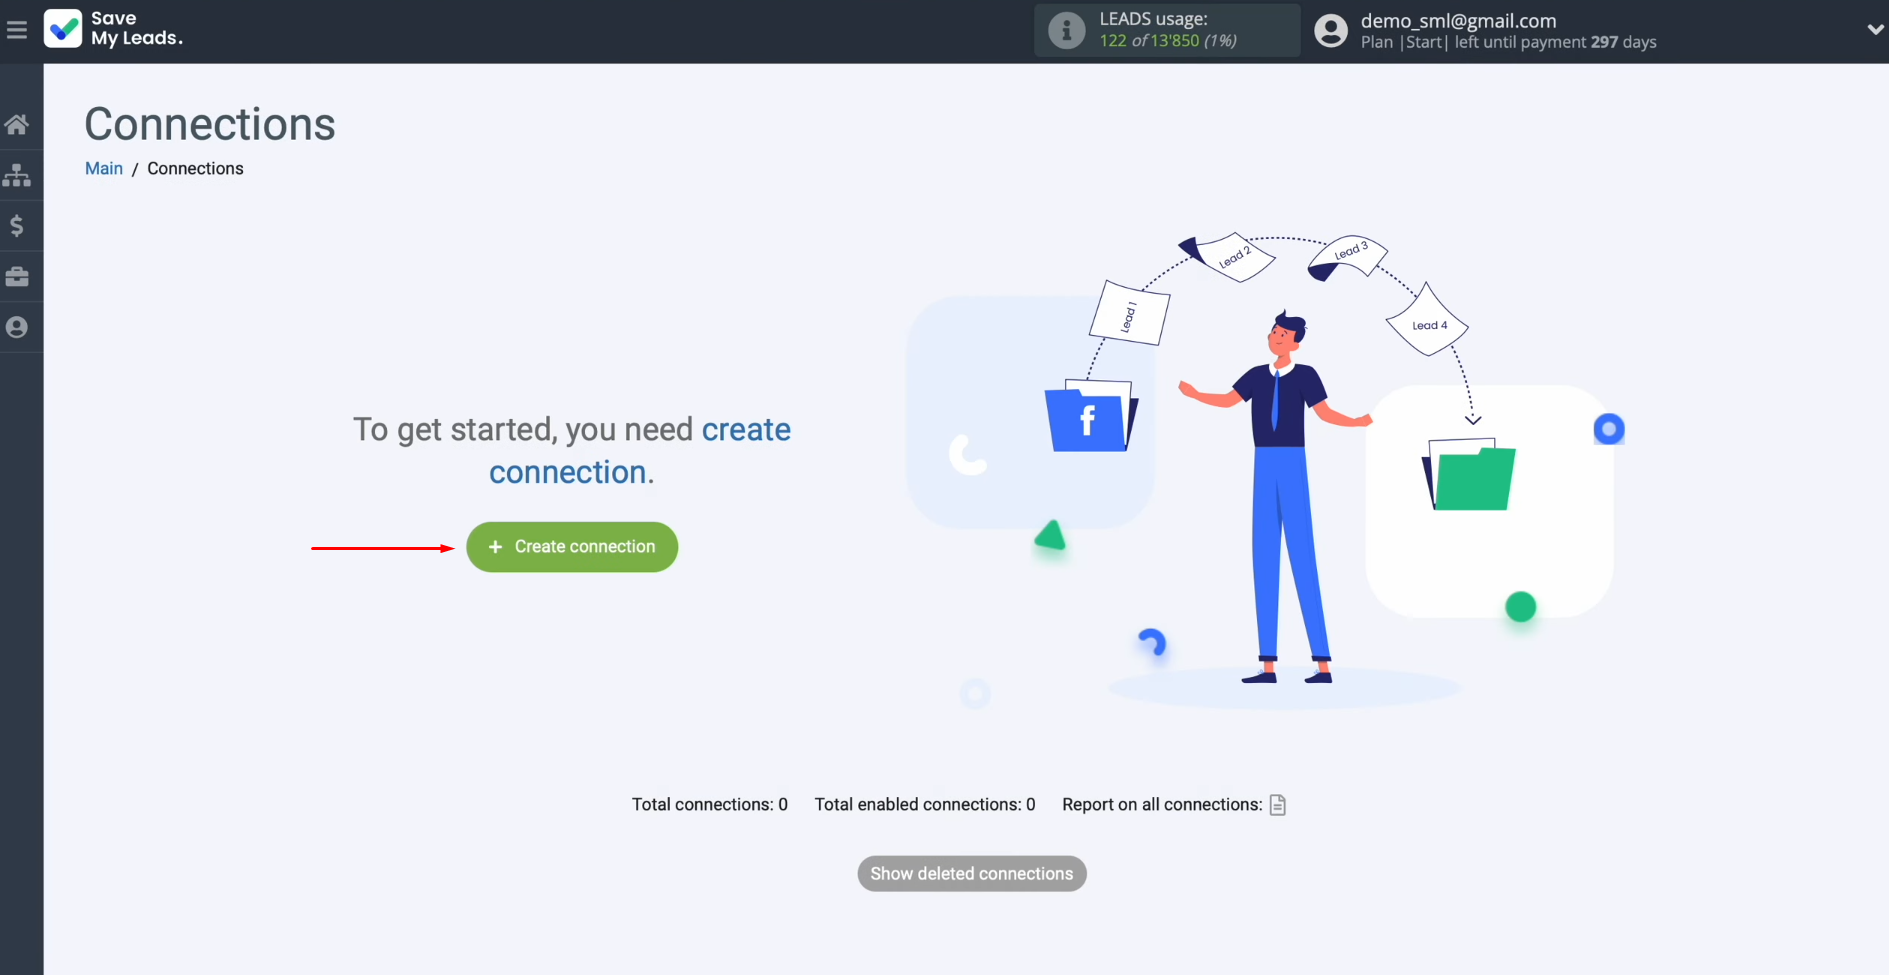
To set up Facebook integration with Worksection, first, you need to create a new connection. For this, click on the green button.
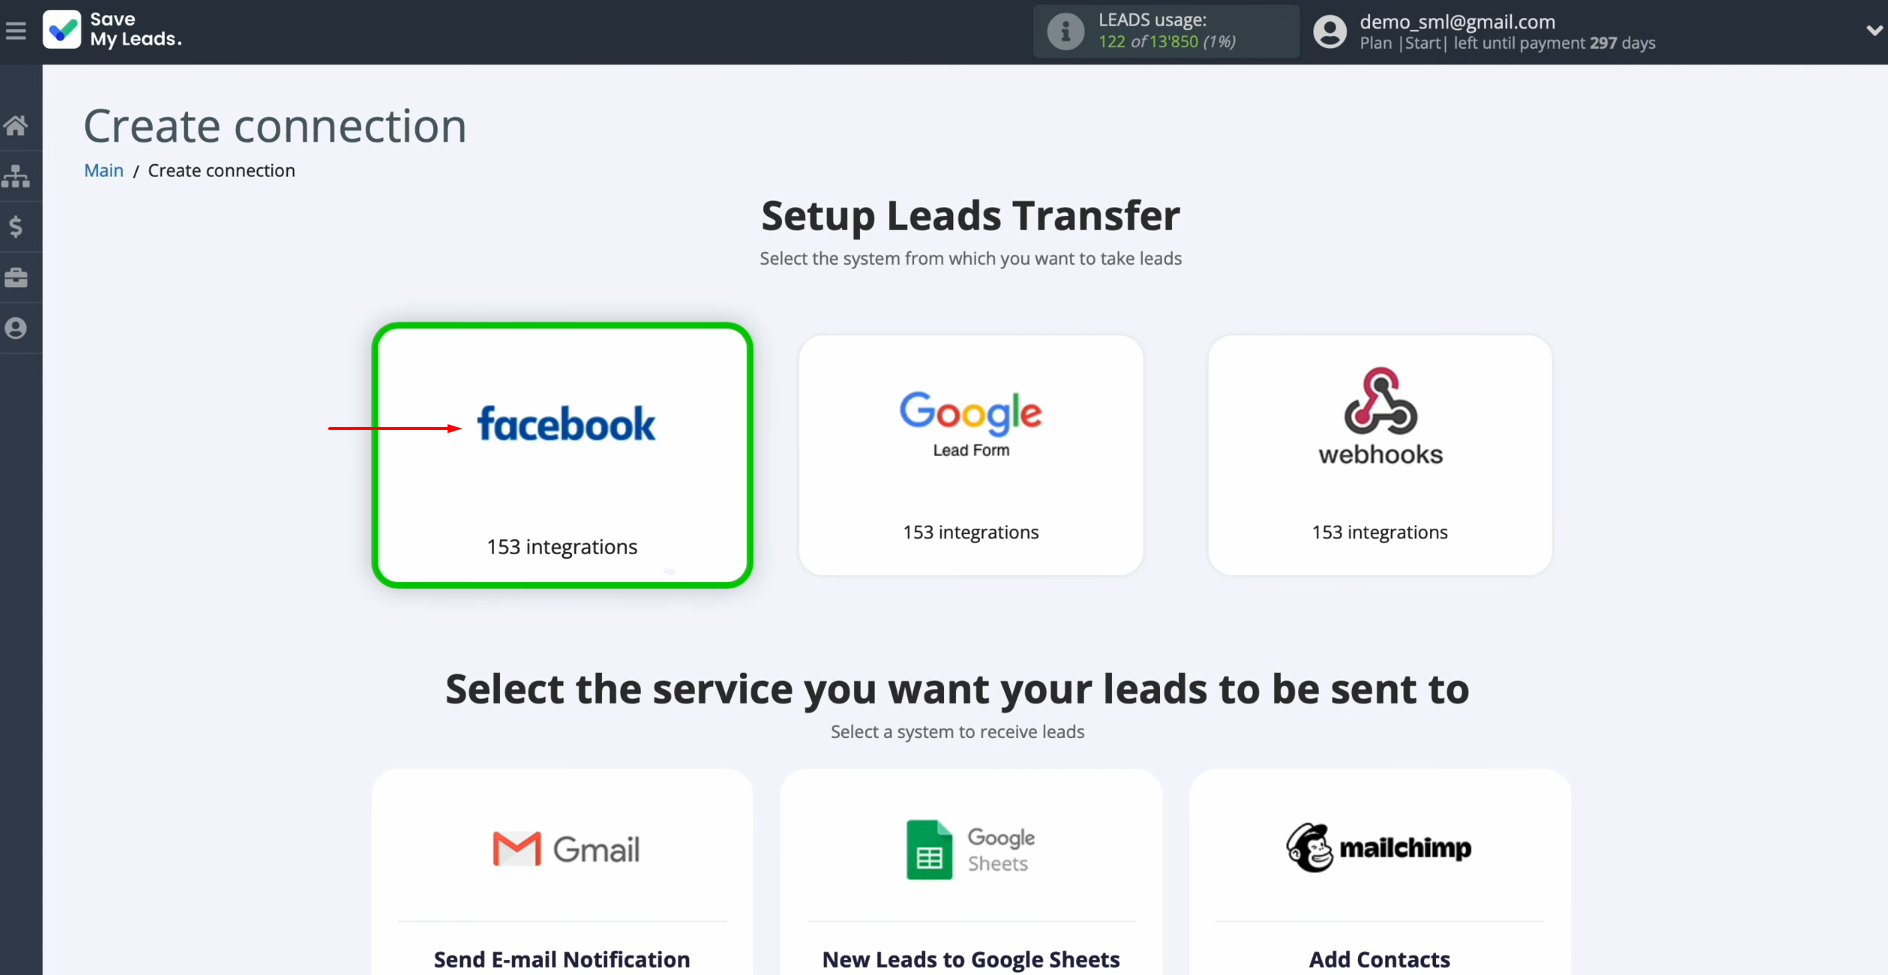
Next, you need to
select the system from which you
want to receive new data. In this case, you must select Facebook.
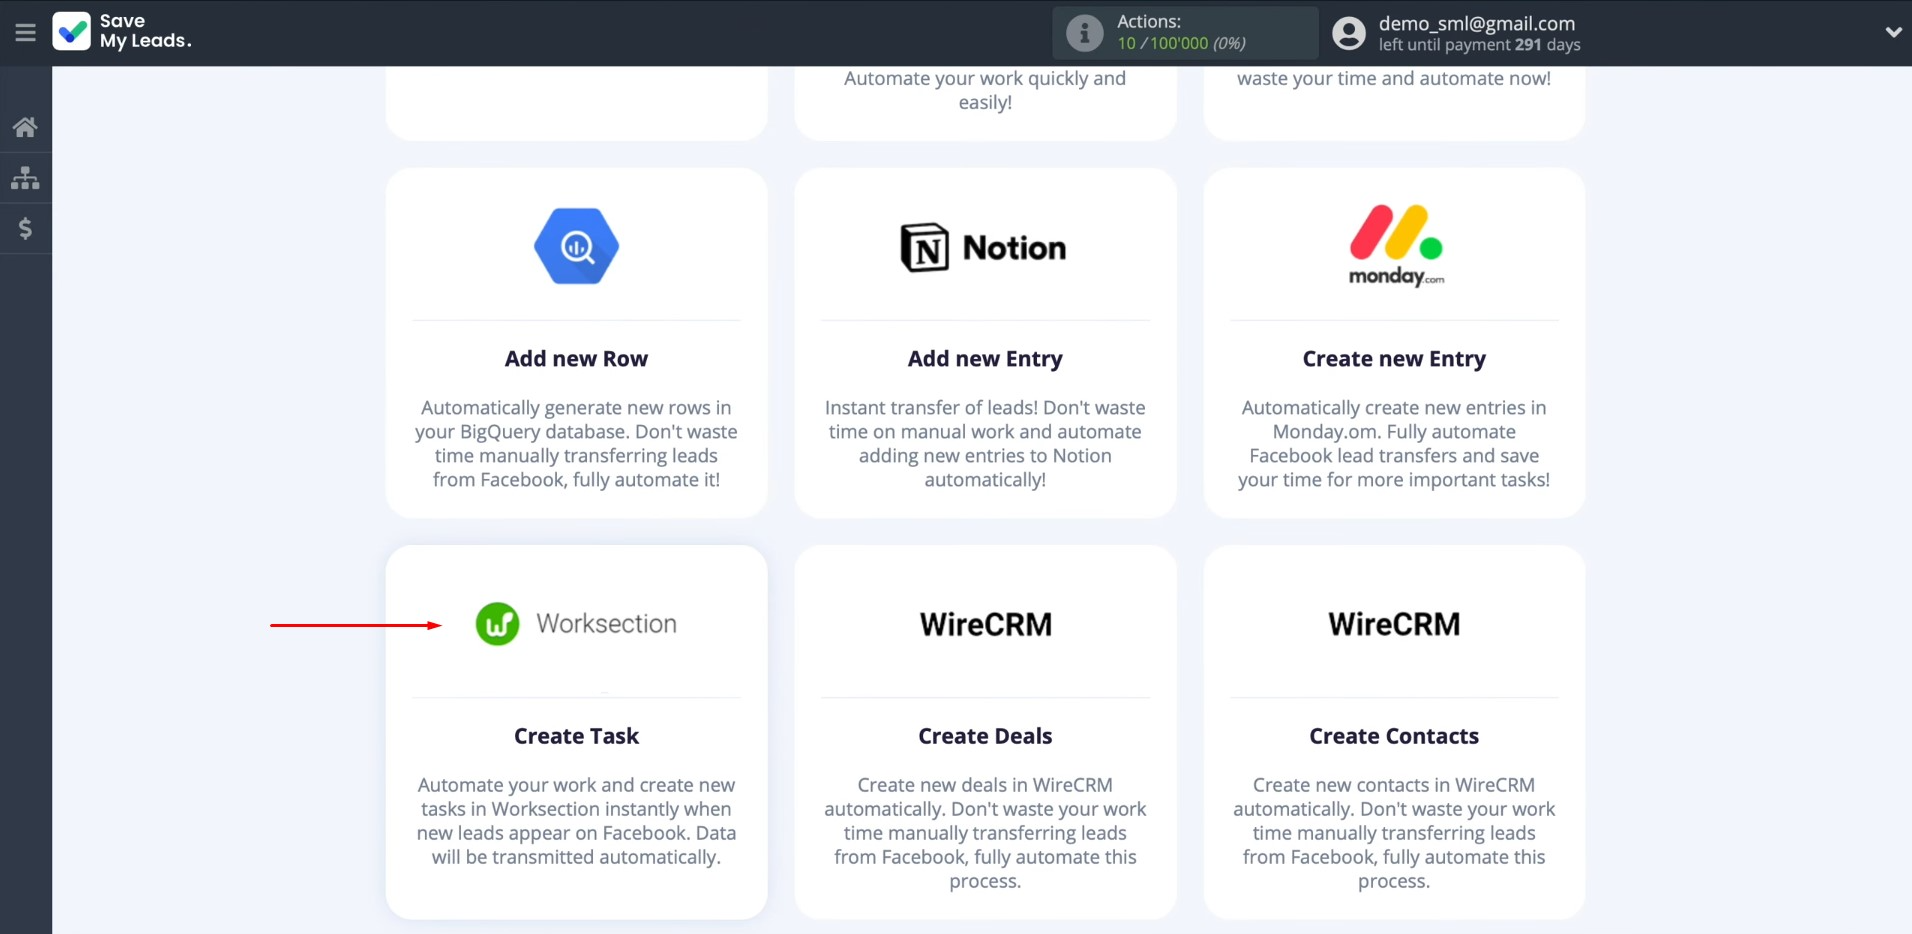
Now, choose one of the ready-made templates for systems to which you can transfer data. In this case, select the Worksection
(Create Task) template.
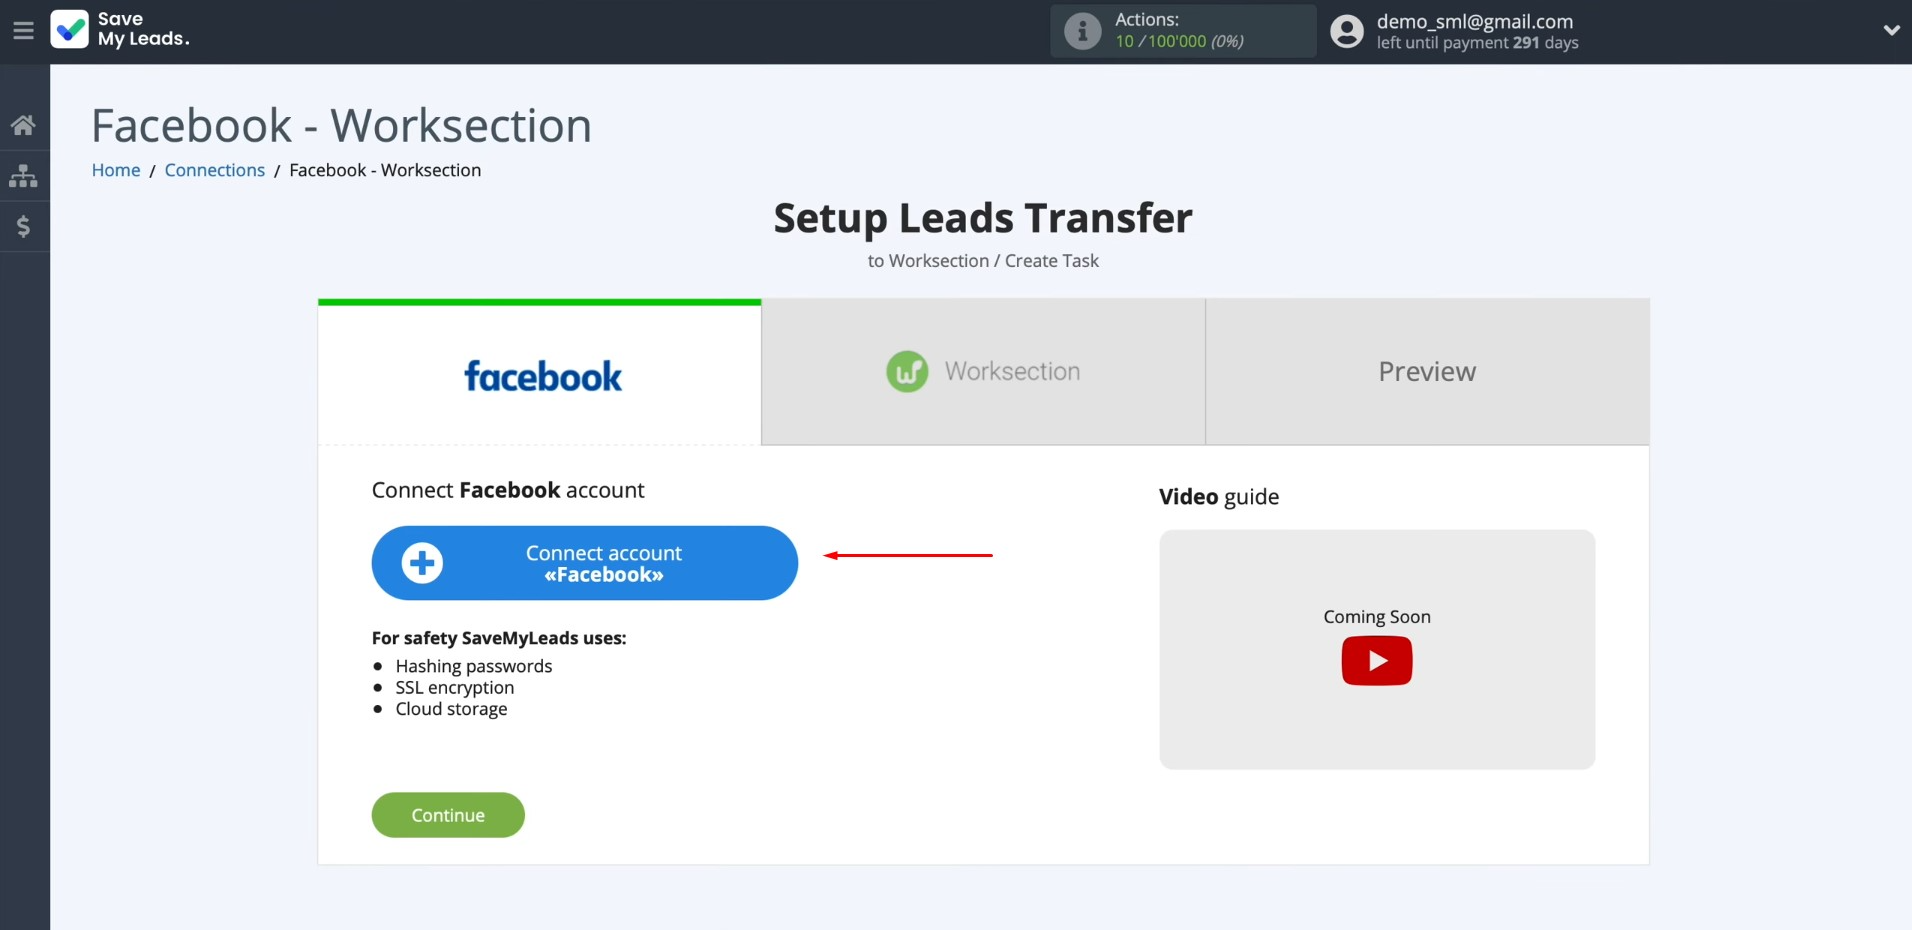
At
this stage, you need to connect your Facebook account to SaveMyLeads. To achieve this, press the
blue button.
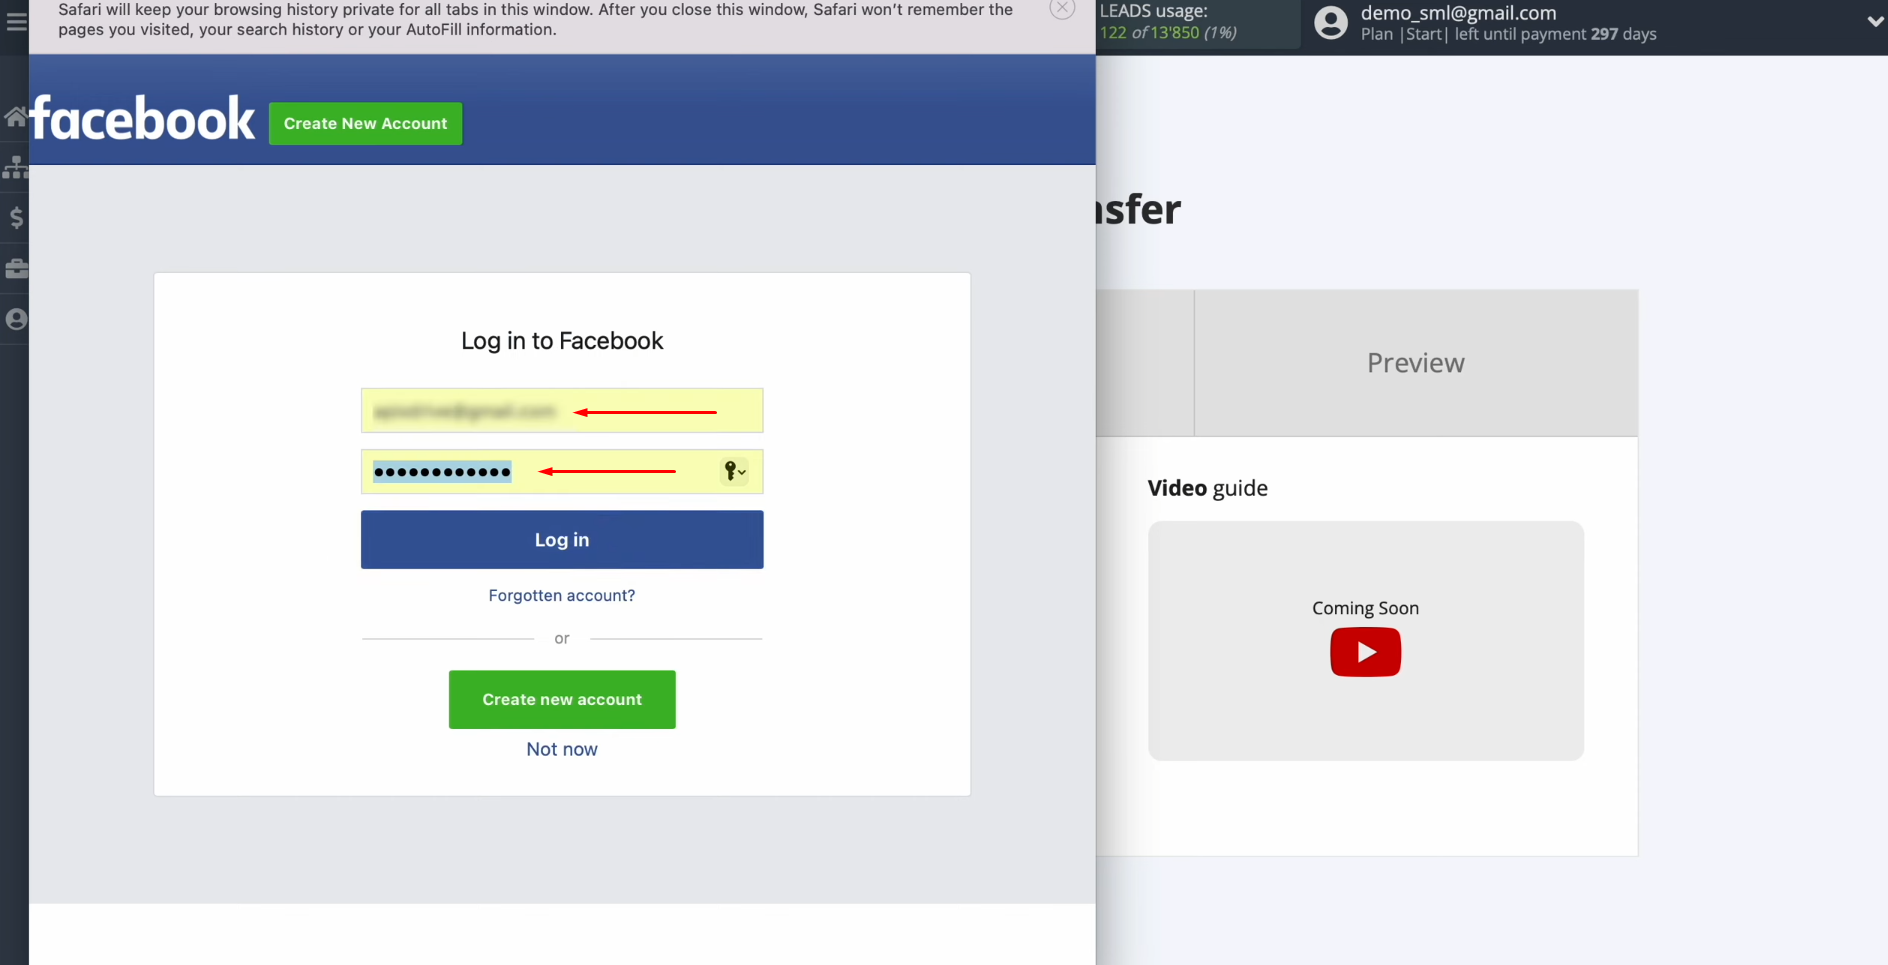
In this
window, you need to specify the username and password of the
Facebook personal
account. Click “Log in”.
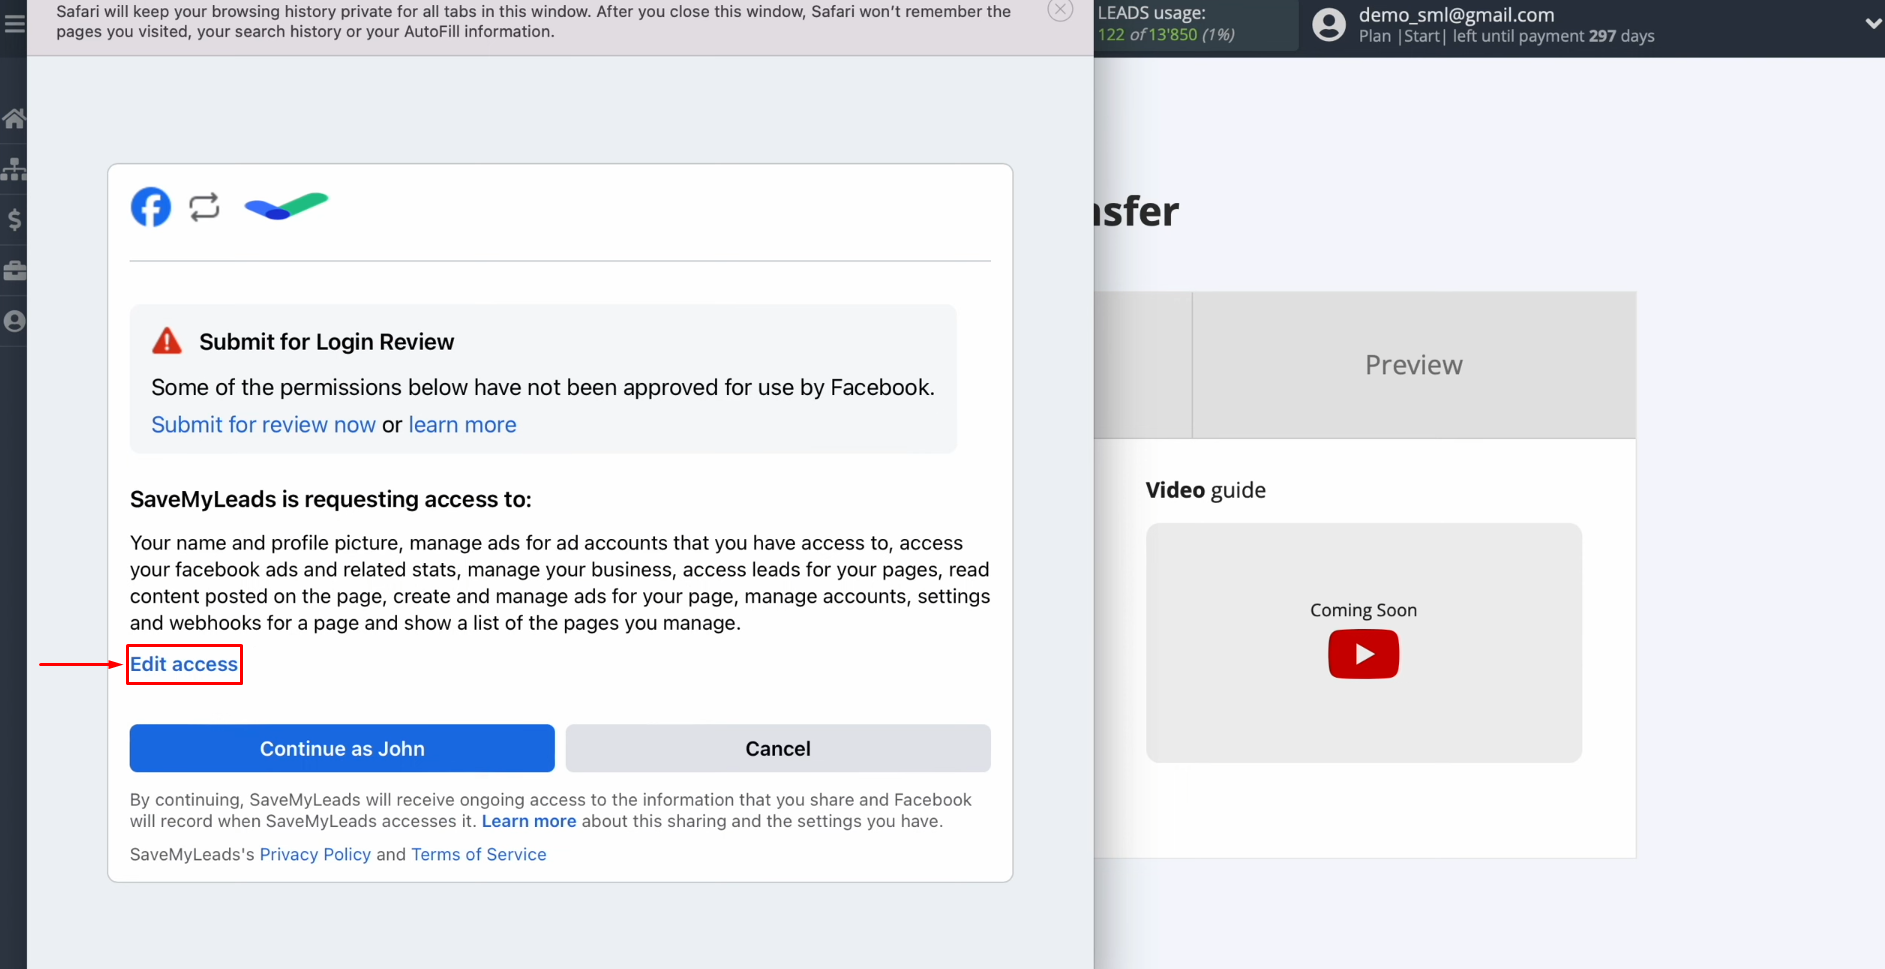
Provide SaveMyLeads
access to work with your Facebook account. To do this, go to settings – click
“Edit access”.
Leave all access checkboxes
enabled.
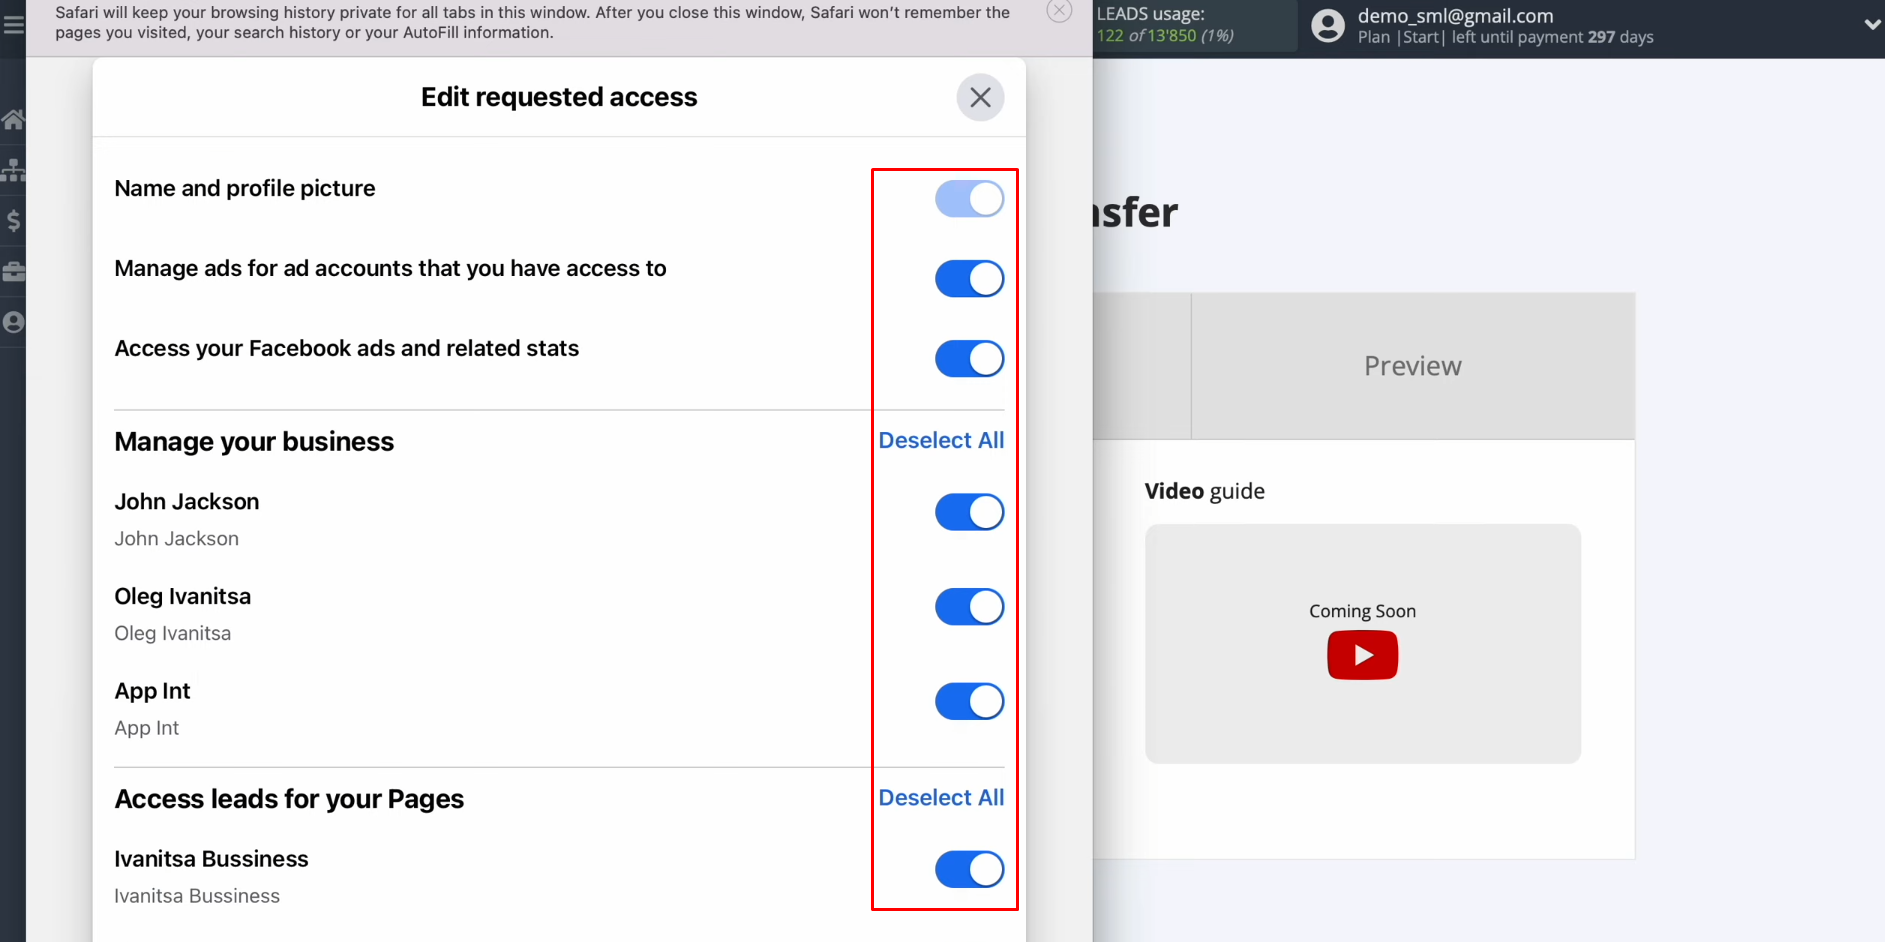
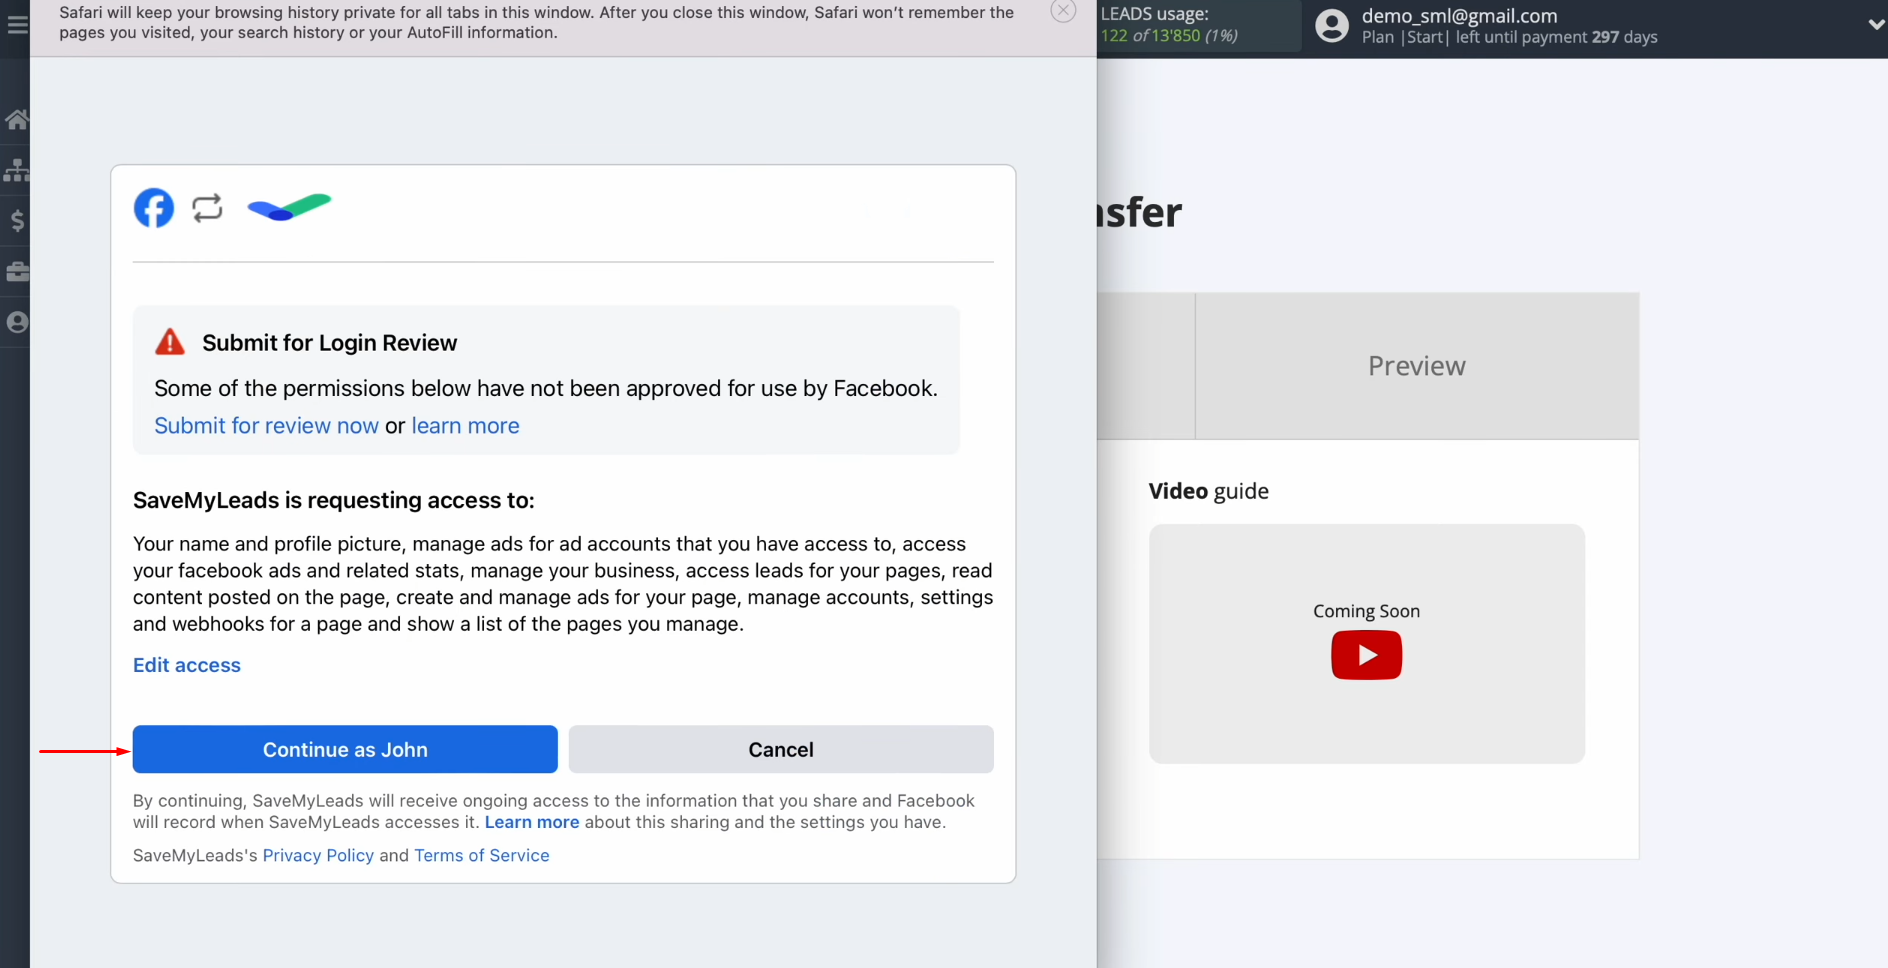
Click “Continue as…”.
When the connected account is displayed in the list, it must be selected.
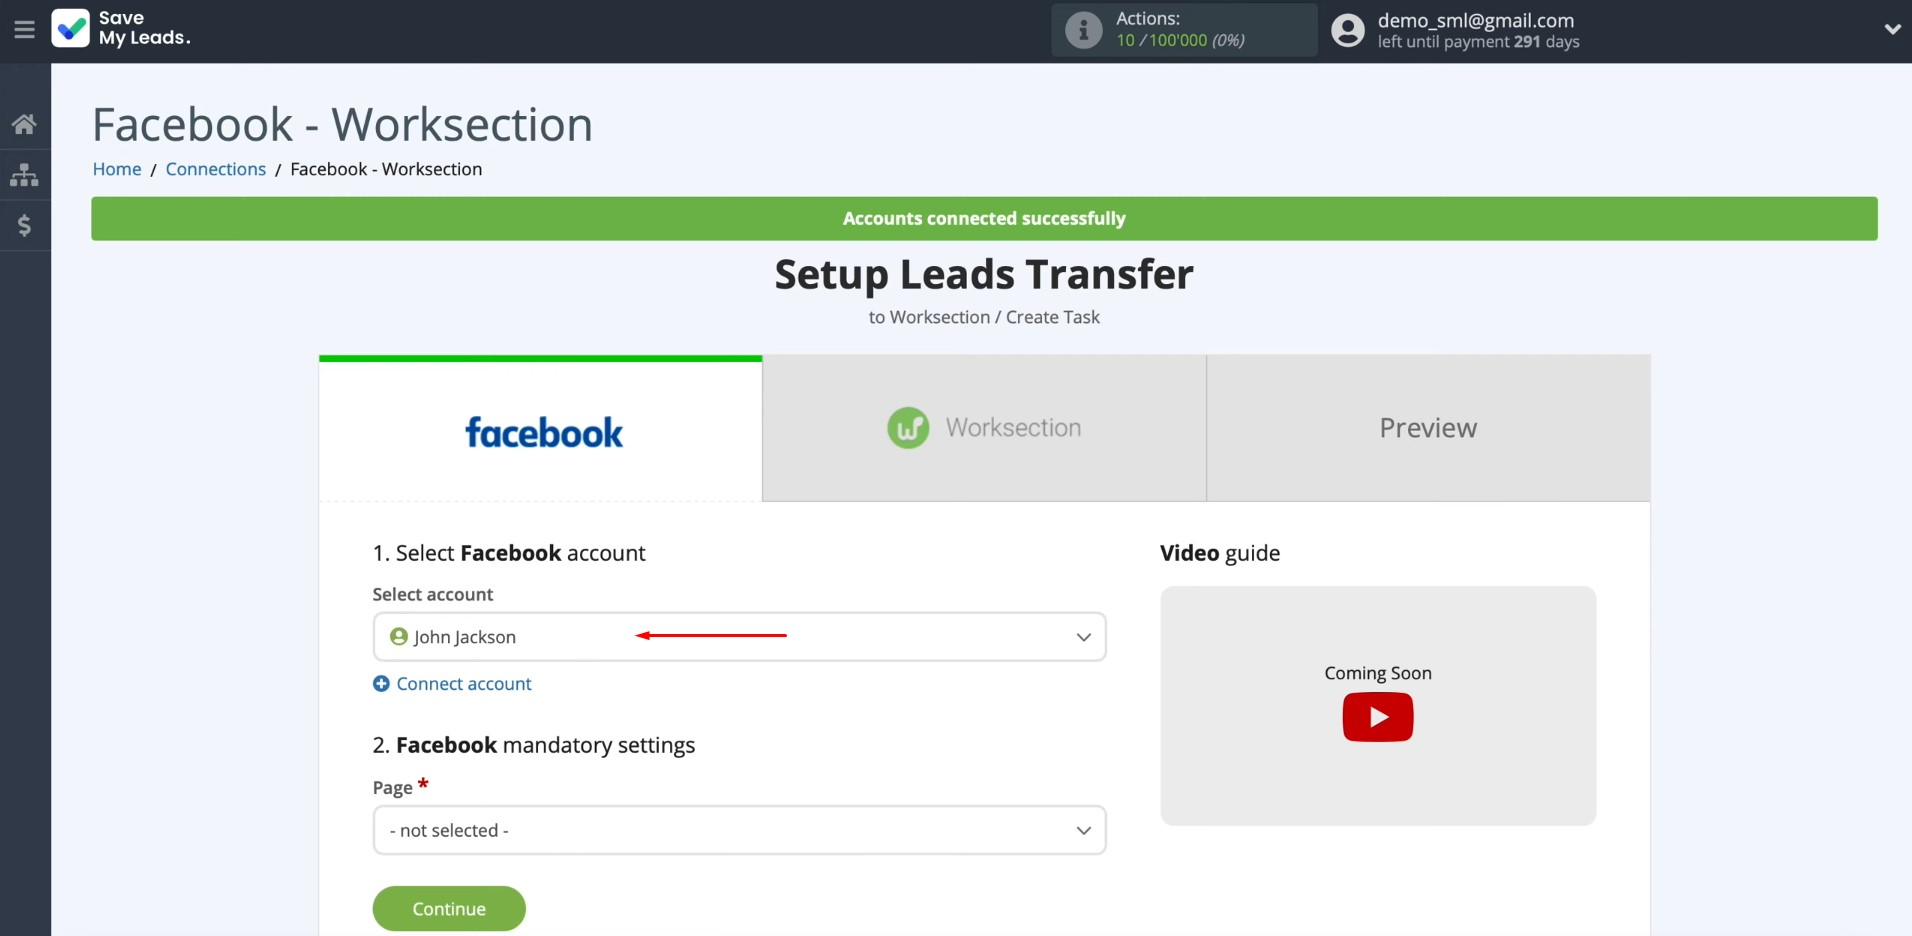
After that, select the
advertising page. Then you
need to specify the form by which the data will be downloaded.
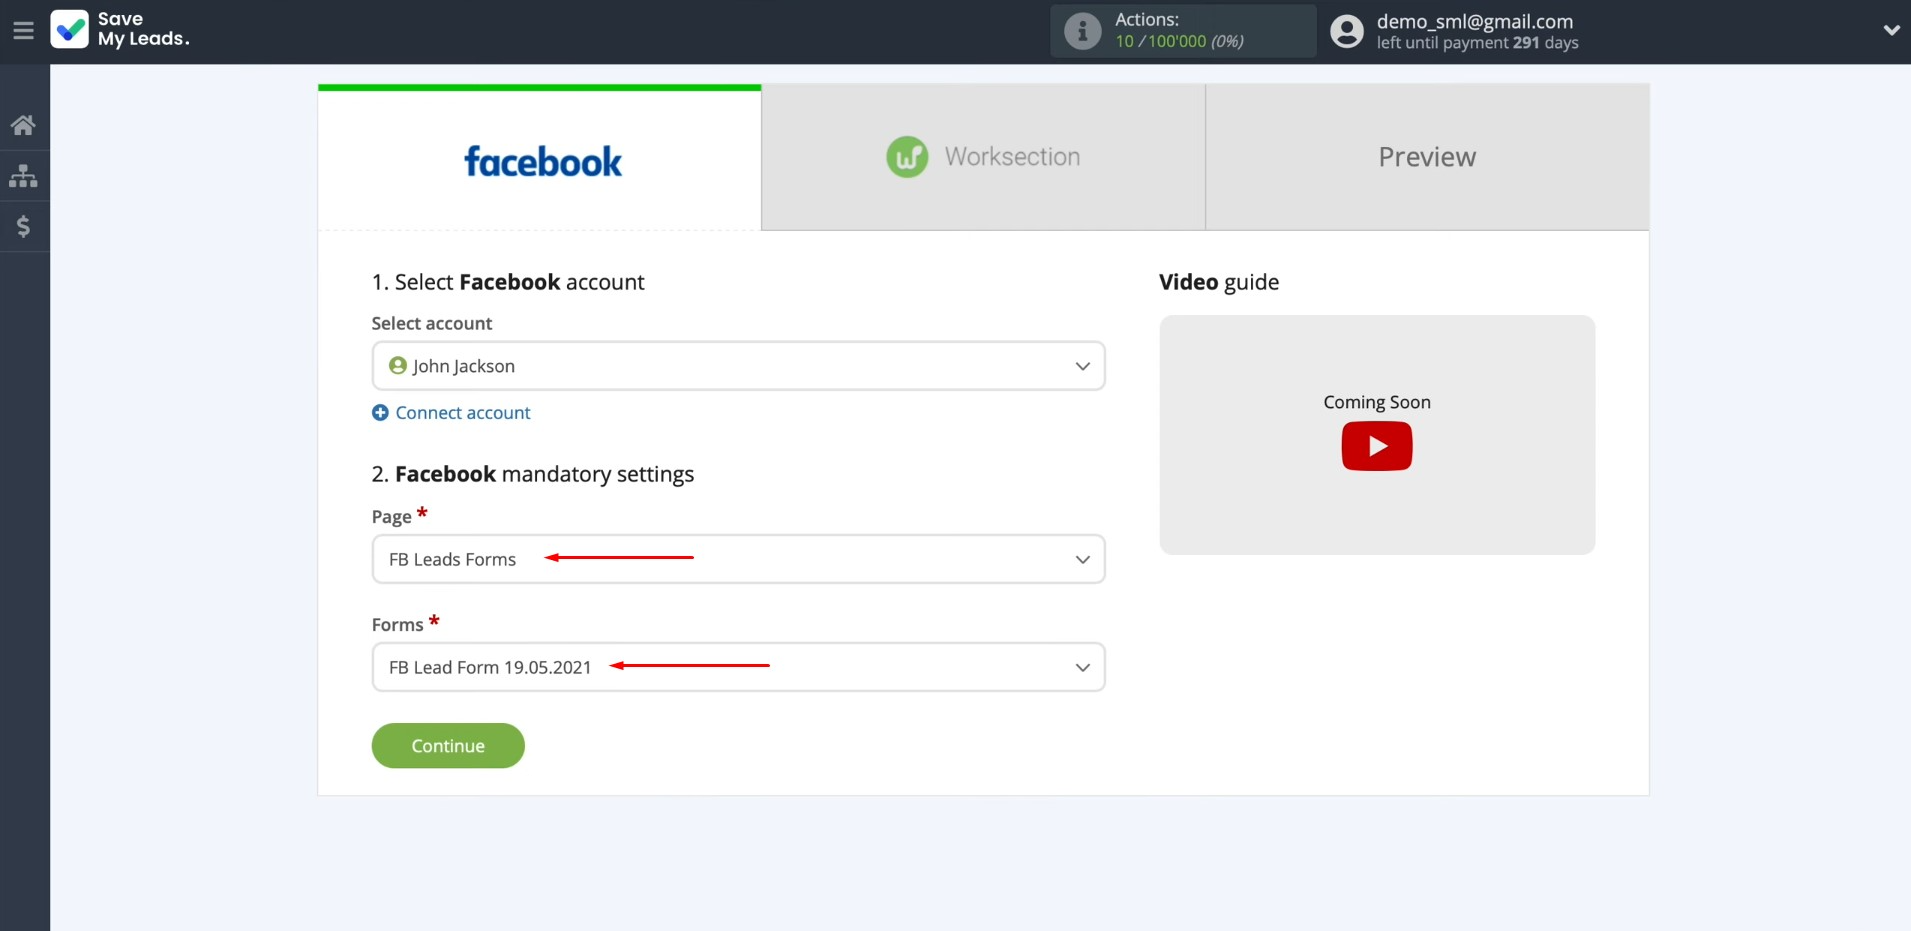
If you have multiple forms specified, you will need
to create multiple connections for each of them.
Setting up the Data Receiver – Worksection
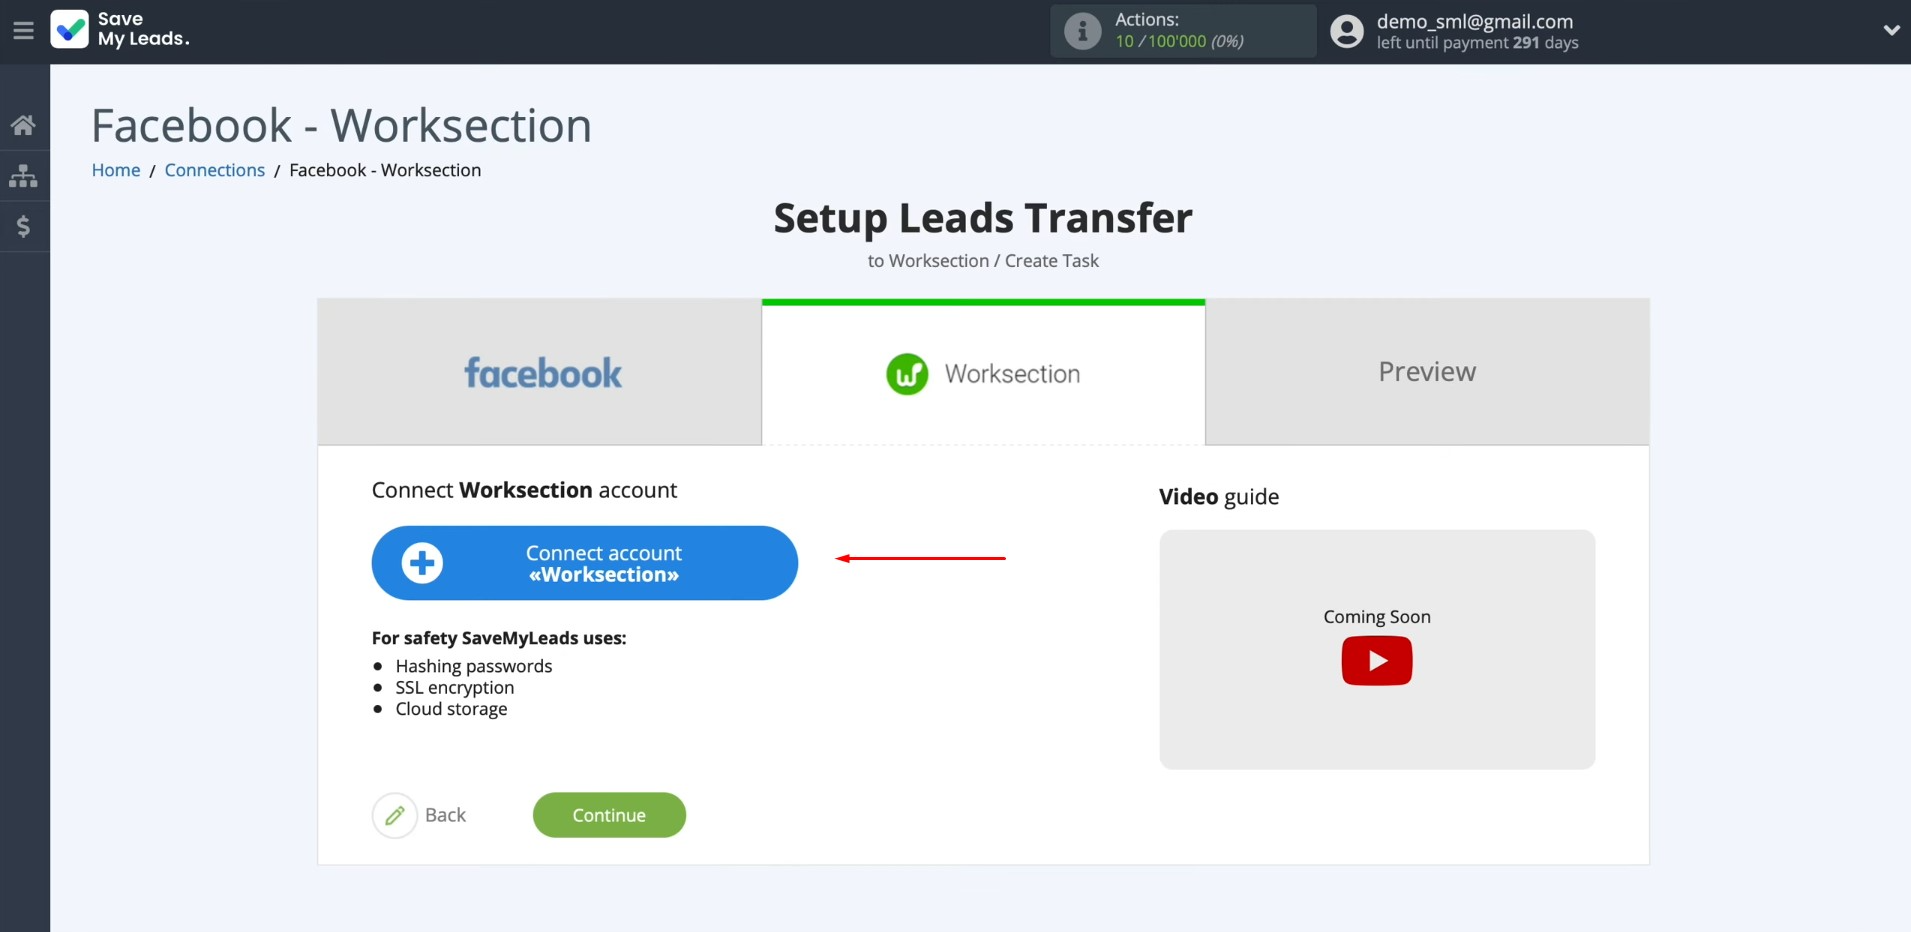
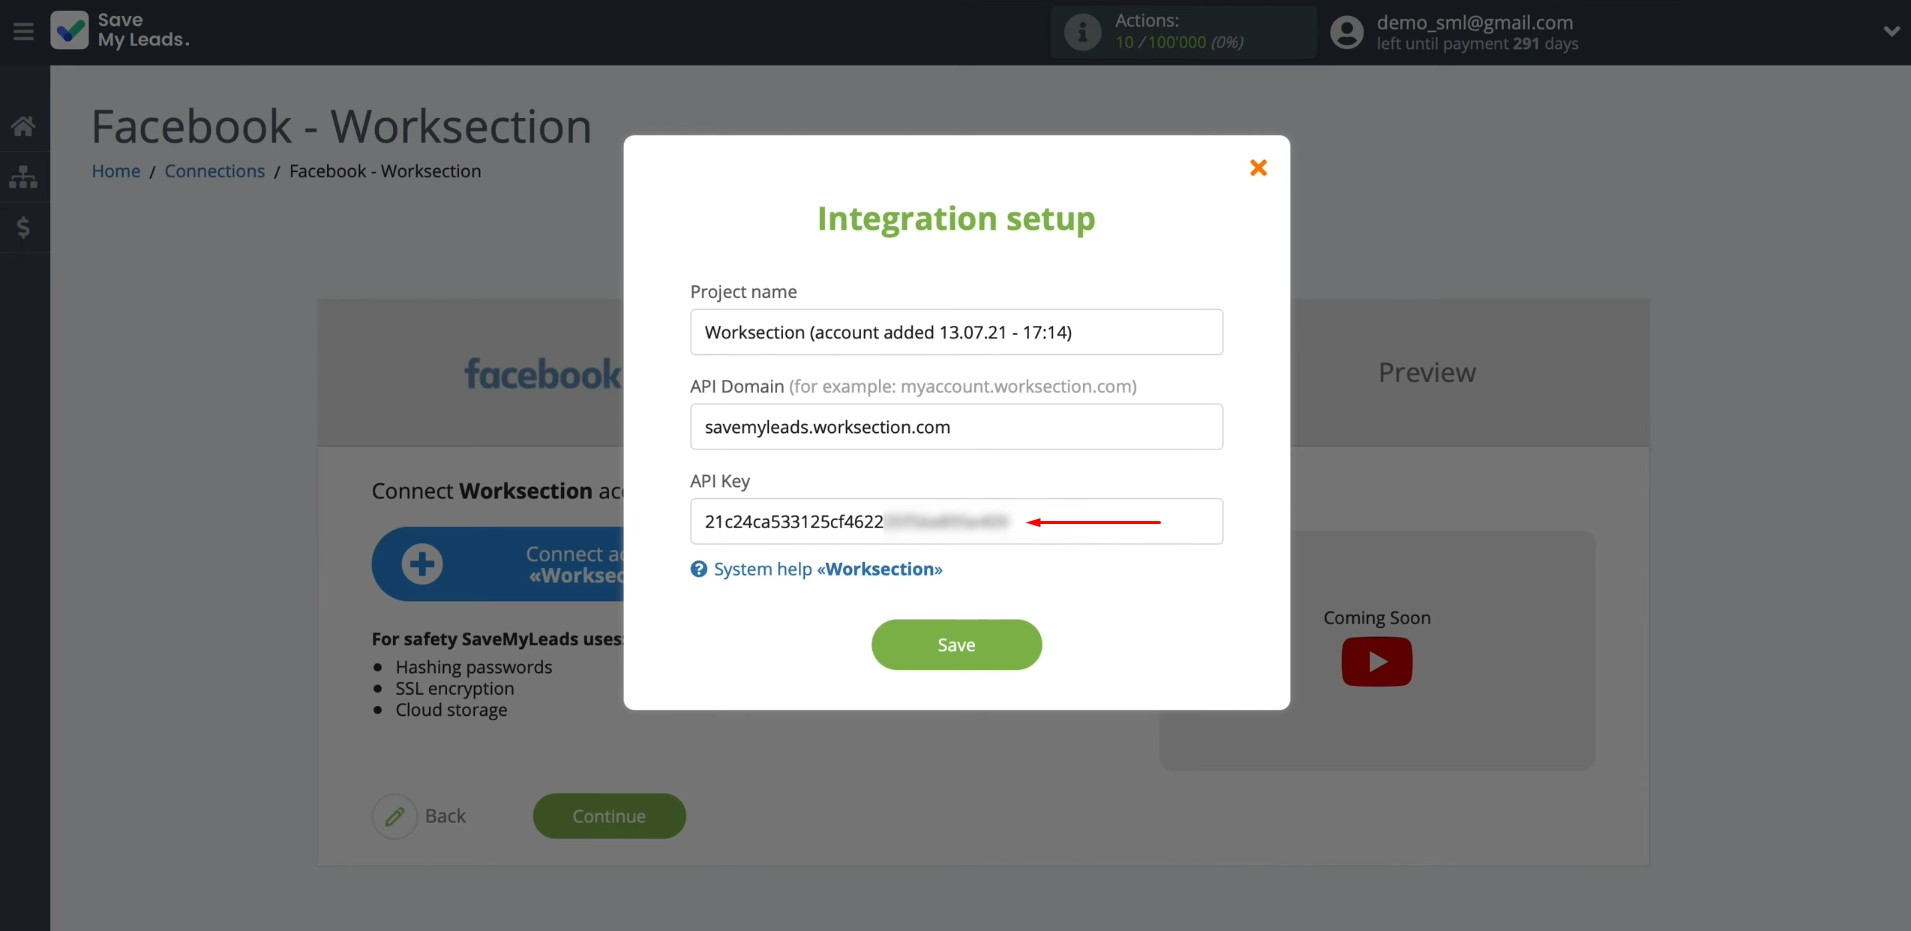
Connect your Worksection account to SaveMyLeads. For this, click on the blue button.
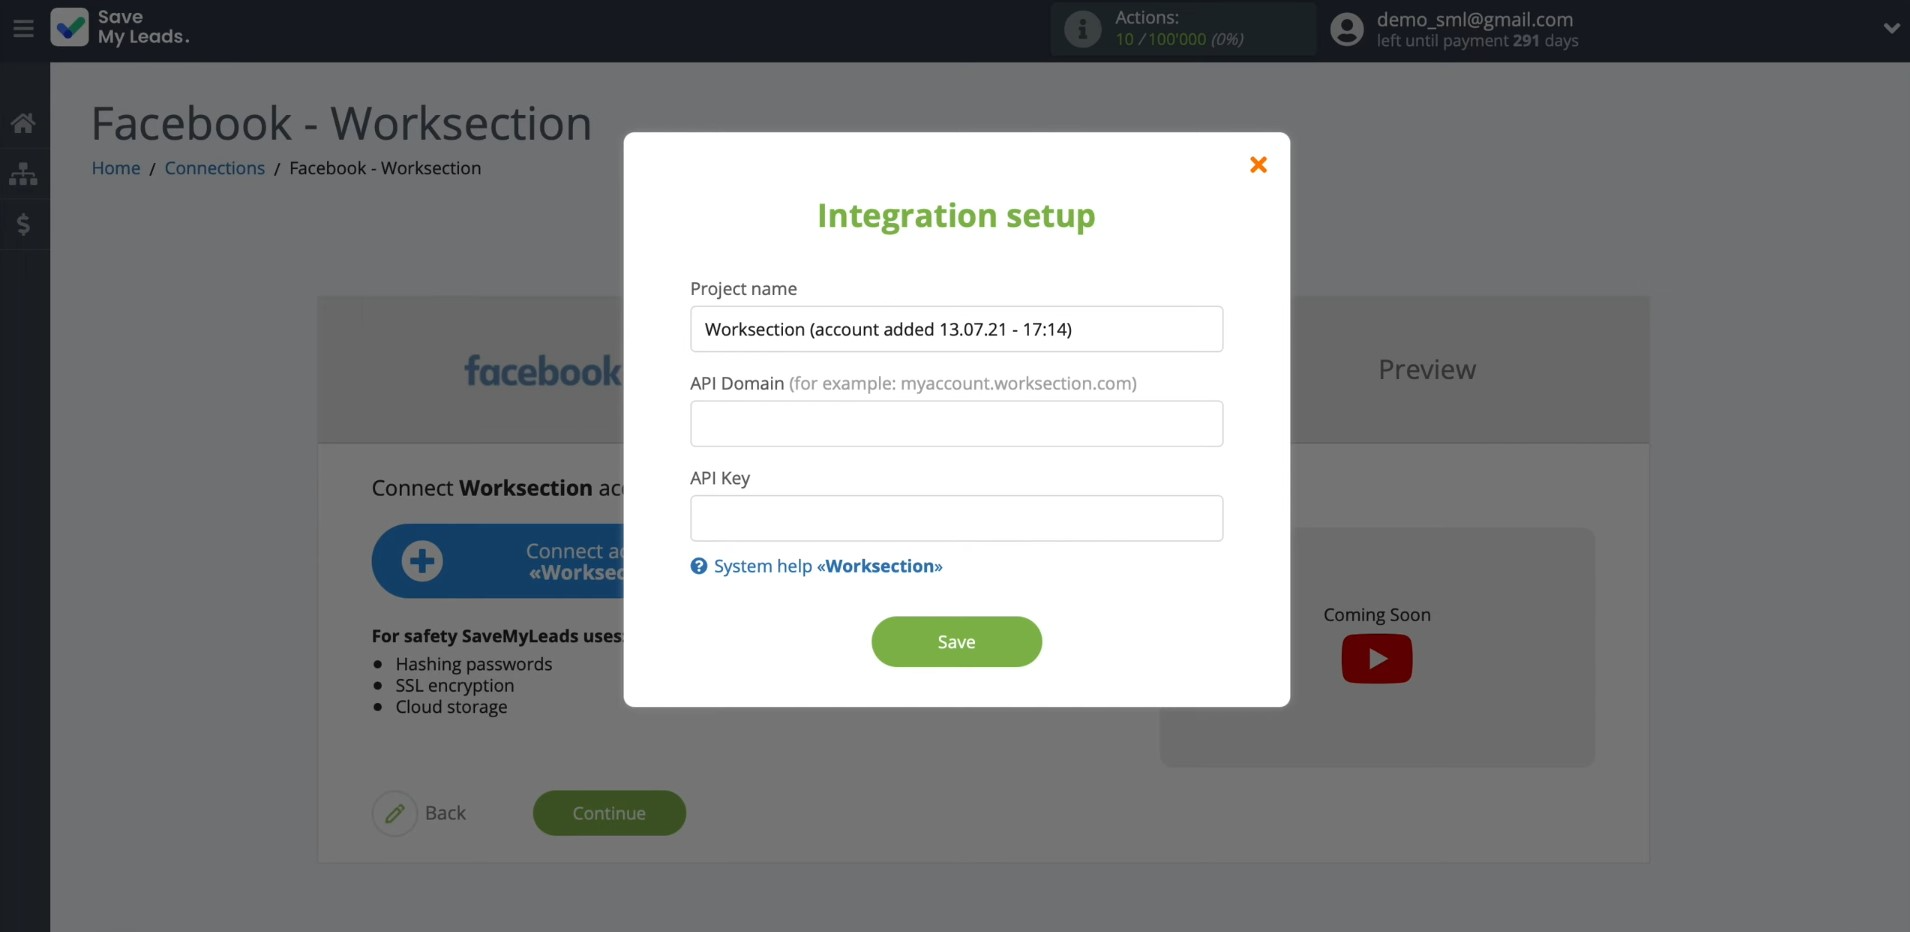
Specify the API domain and API key.
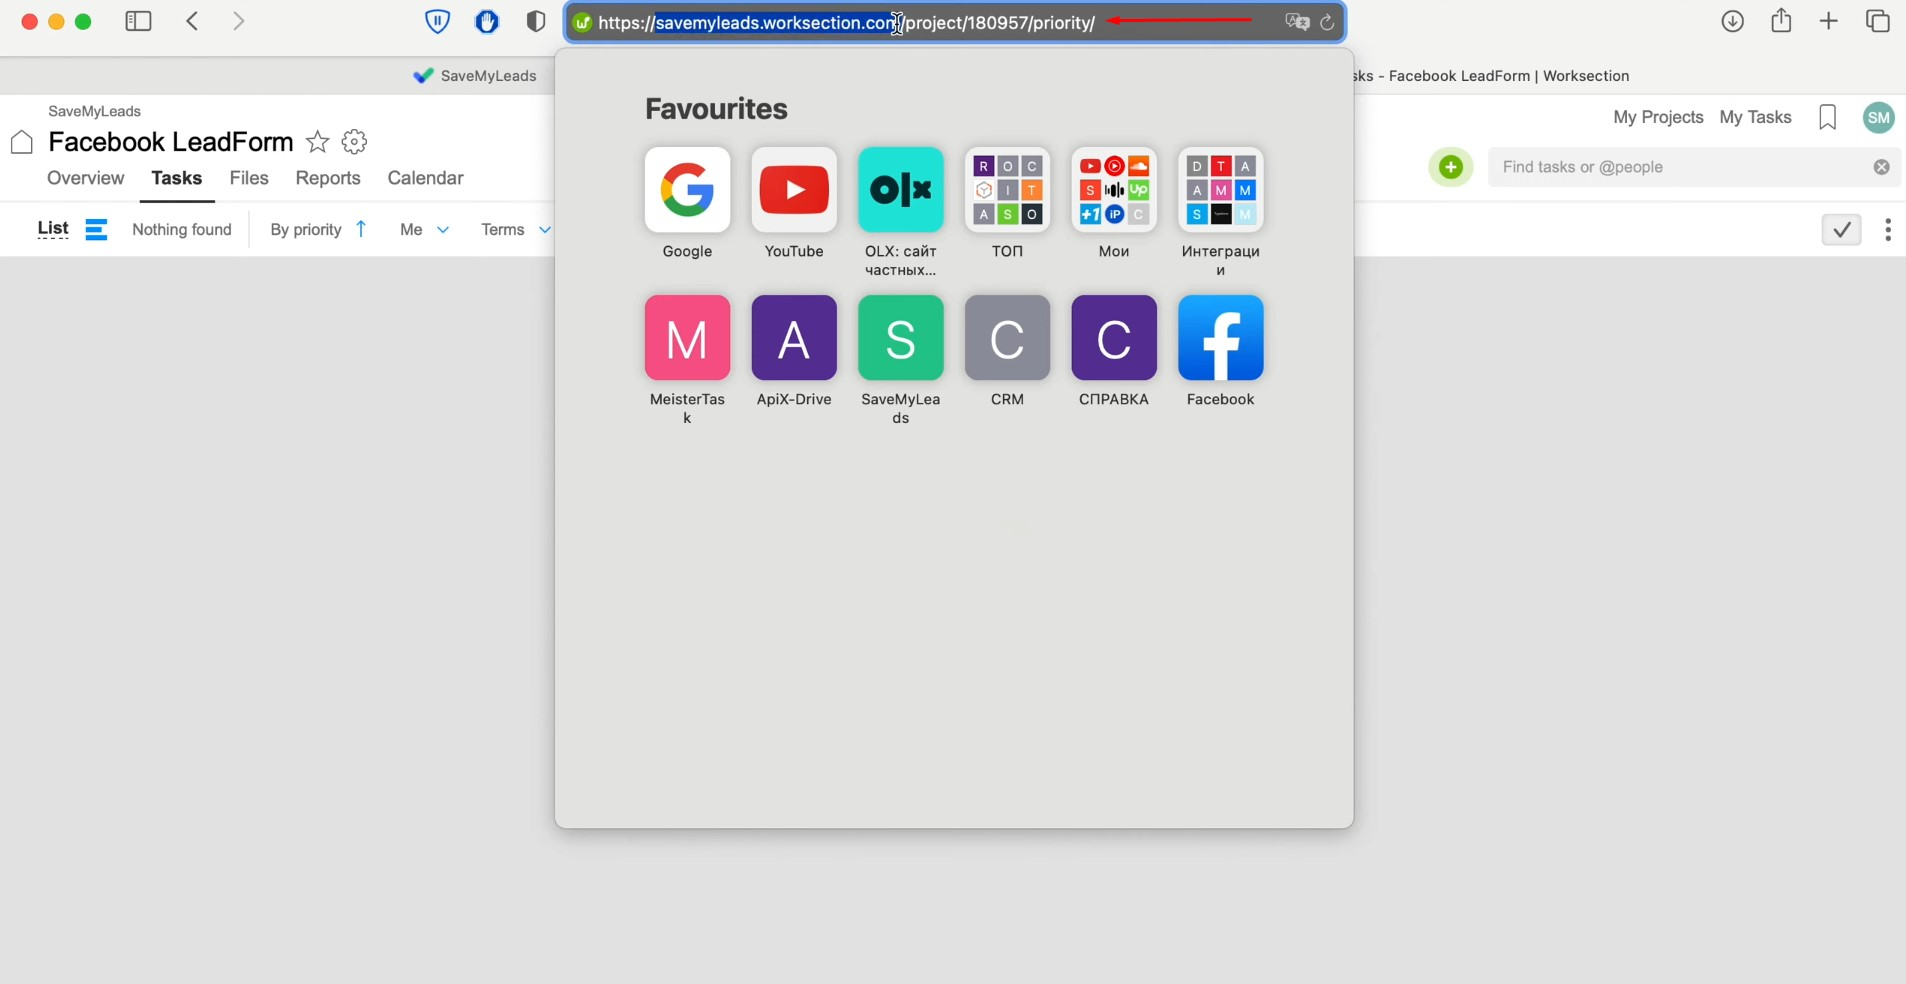
To obtain them, go to your Worksection personal account. Copy the API domain from the address bar without any additional characters.
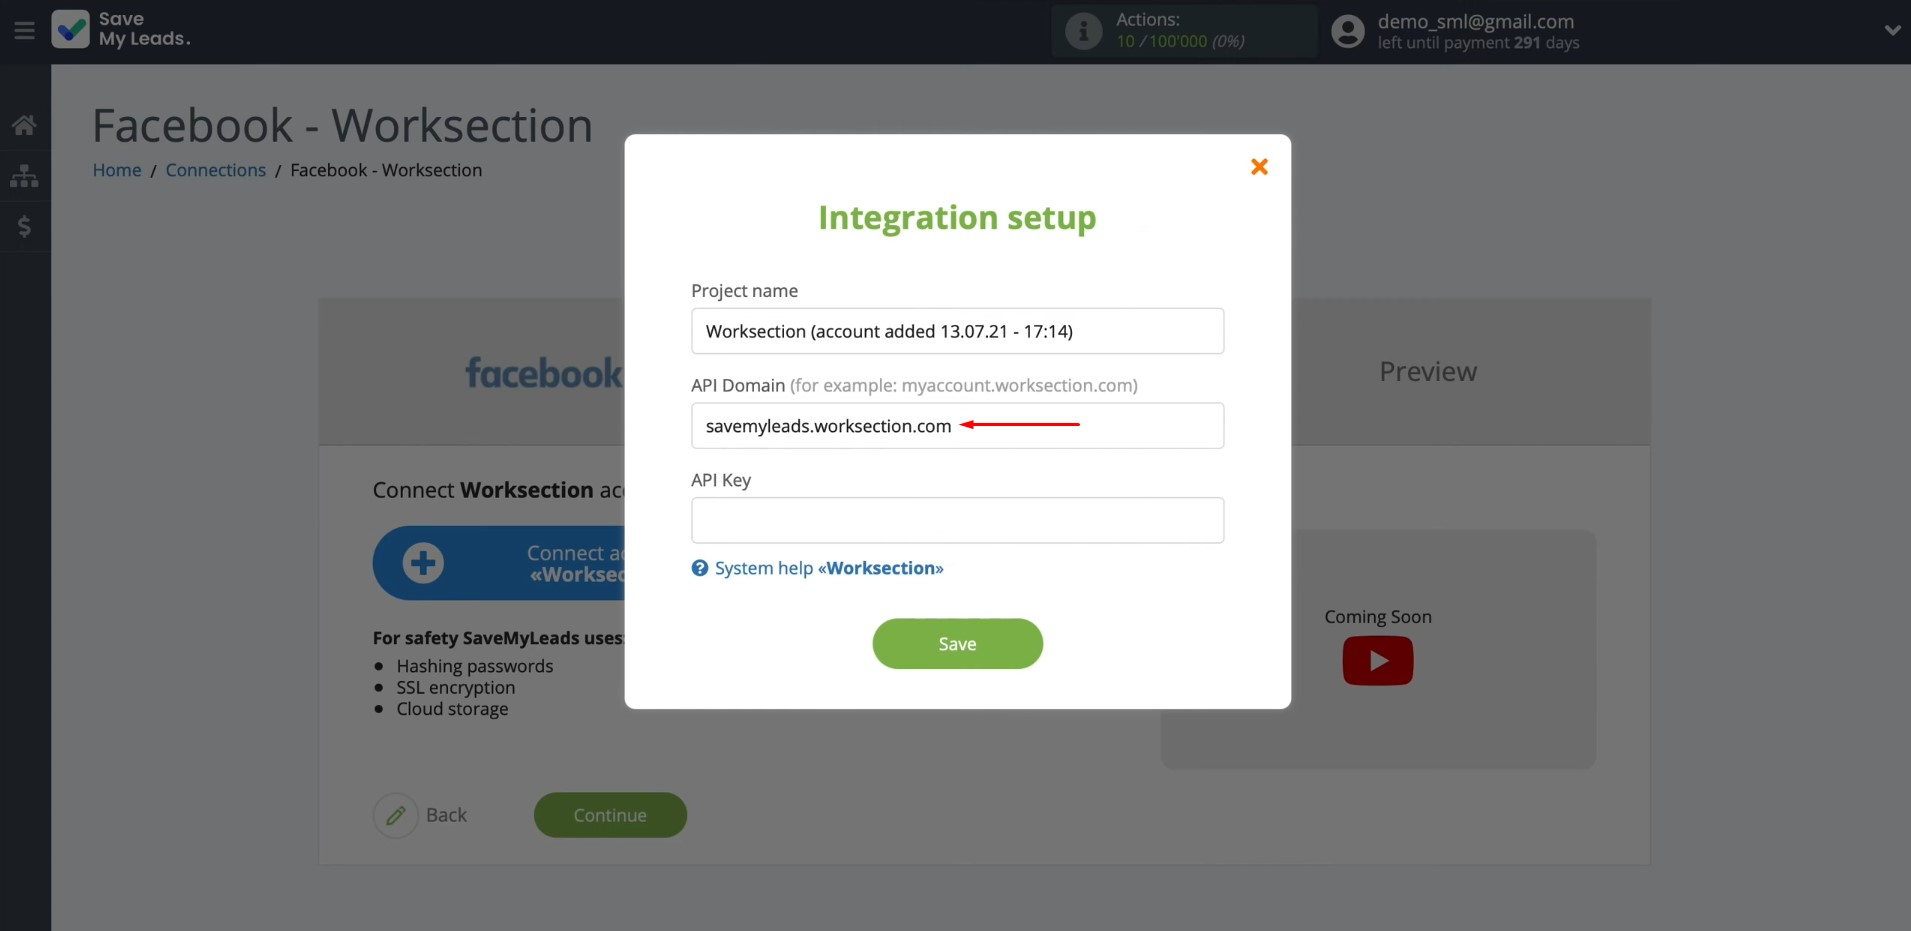
Paste the API domain into the corresponding field in SaveMyLeads.
To obtain the API key,
go to your Worksection personal profile.
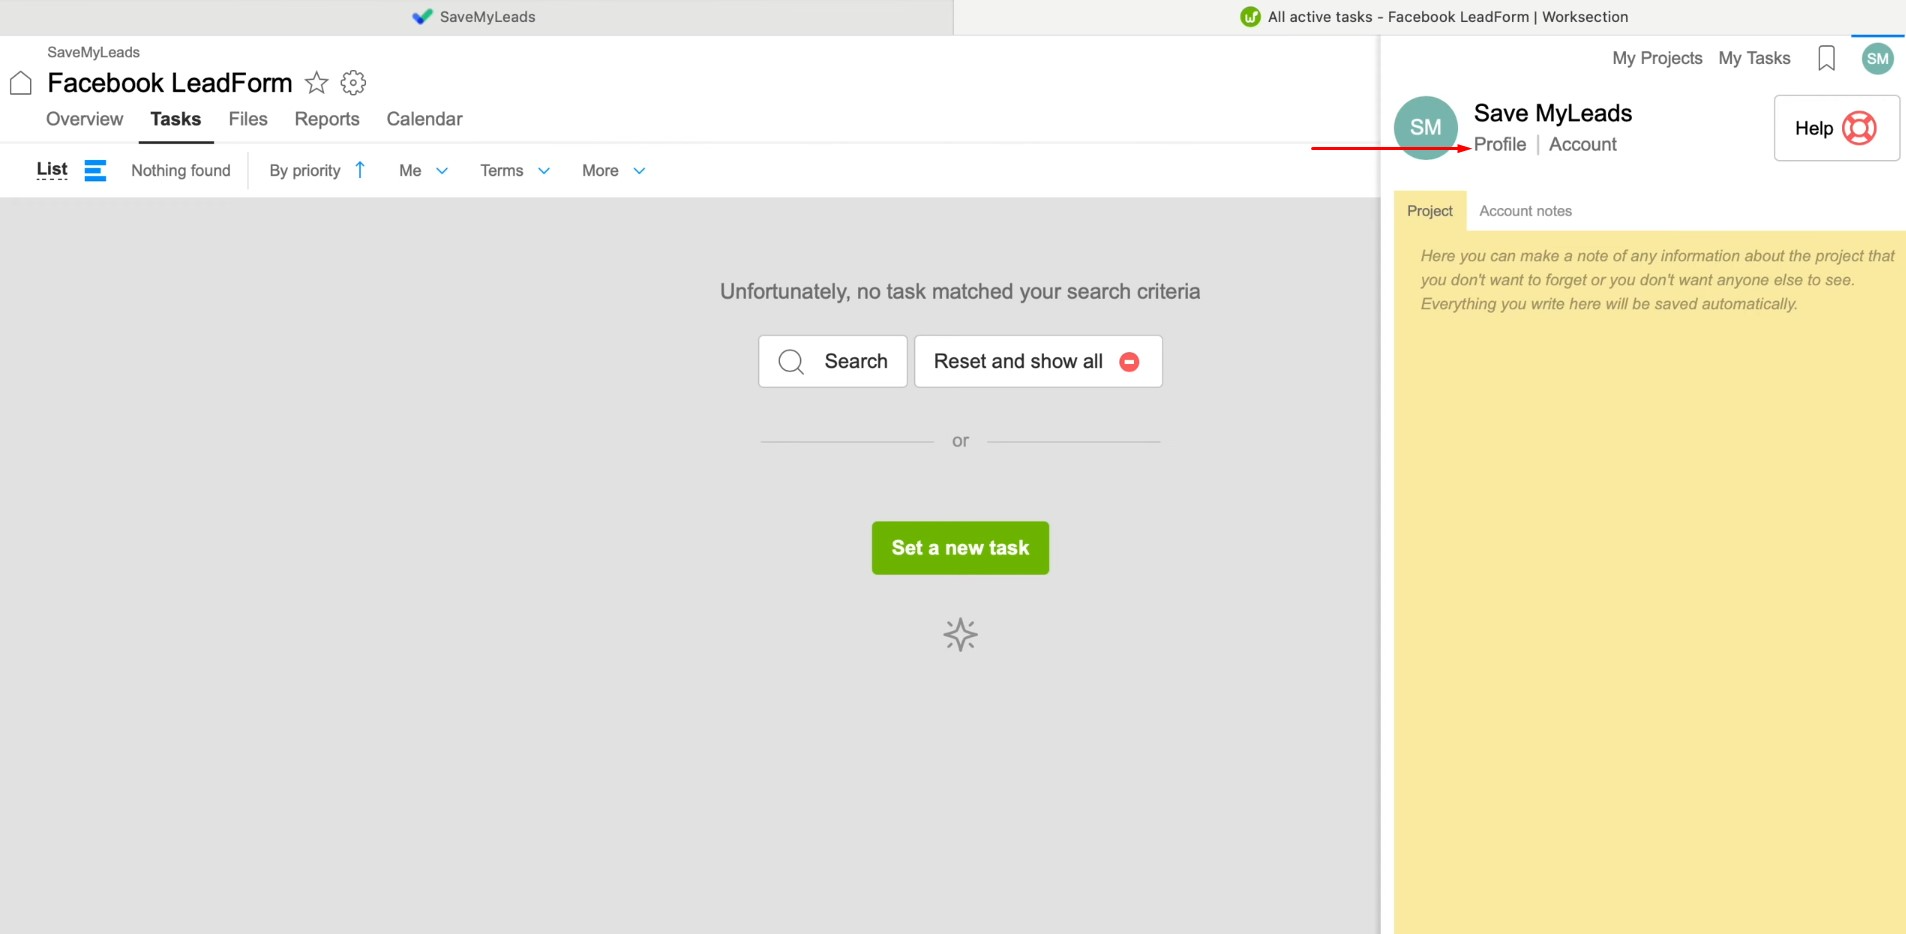
Go to the “Security” tab and click on “Show API key”.
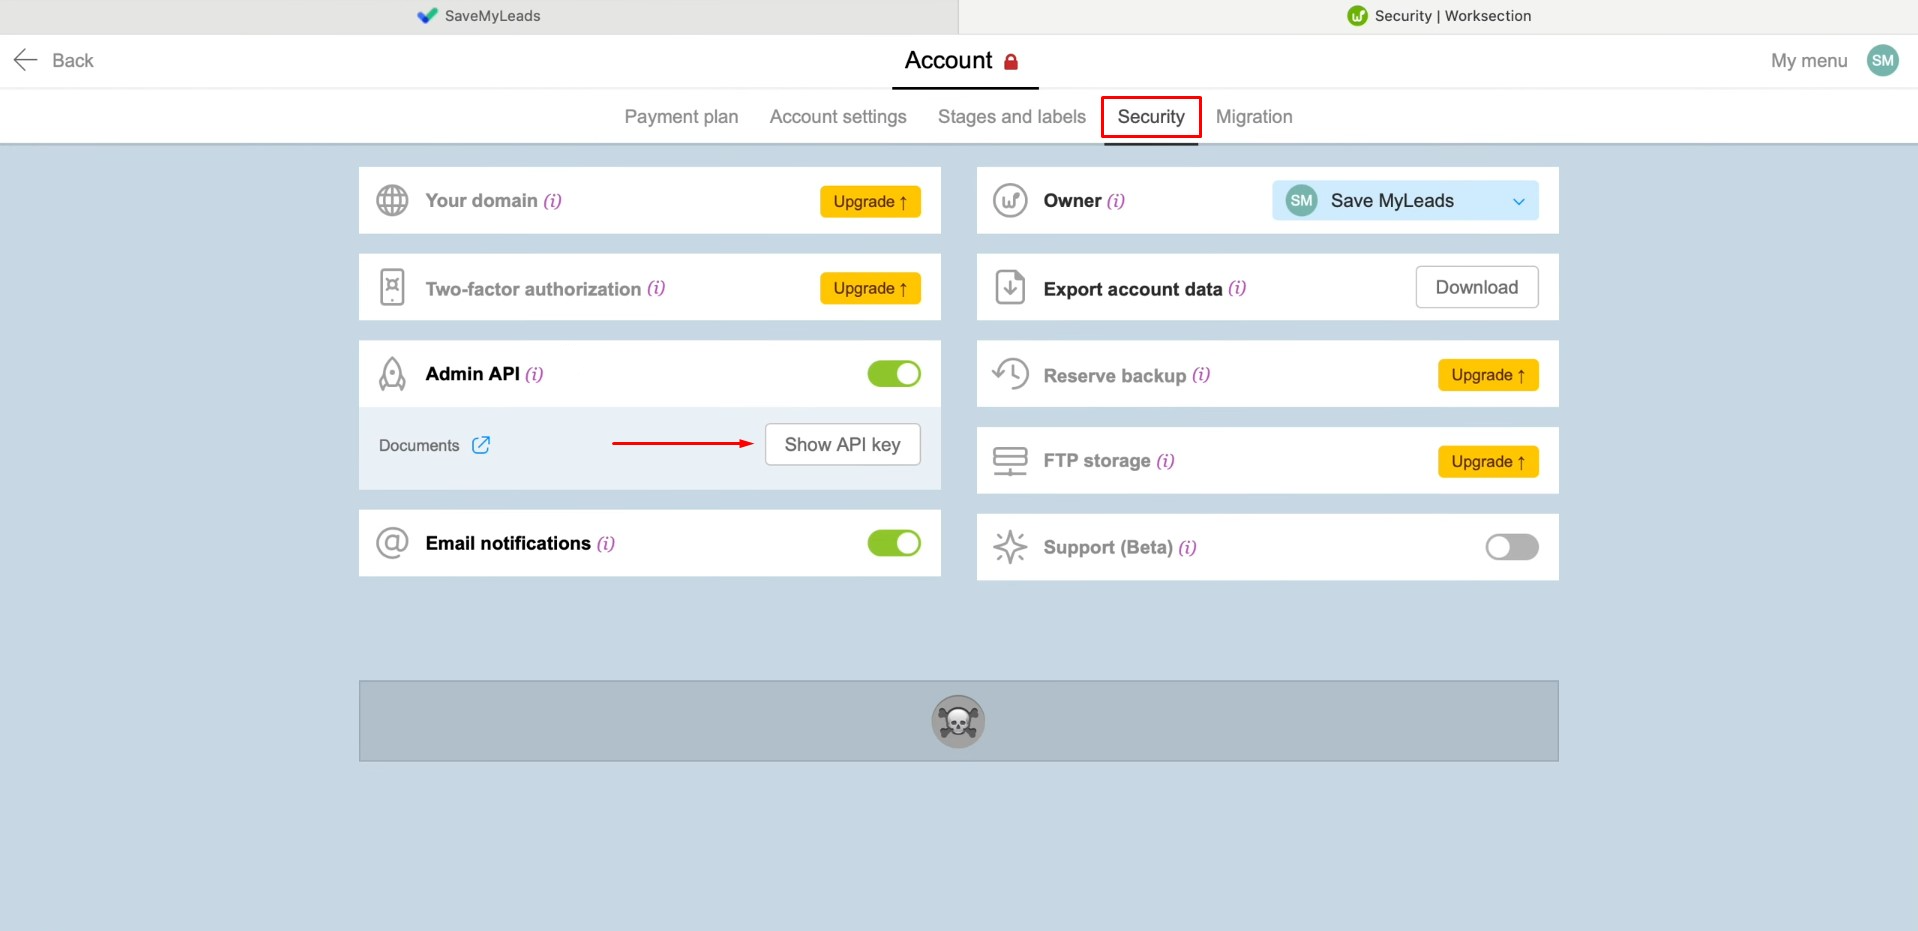
To view the API key, enter the password for your Worksection account. Click
“Continue”.
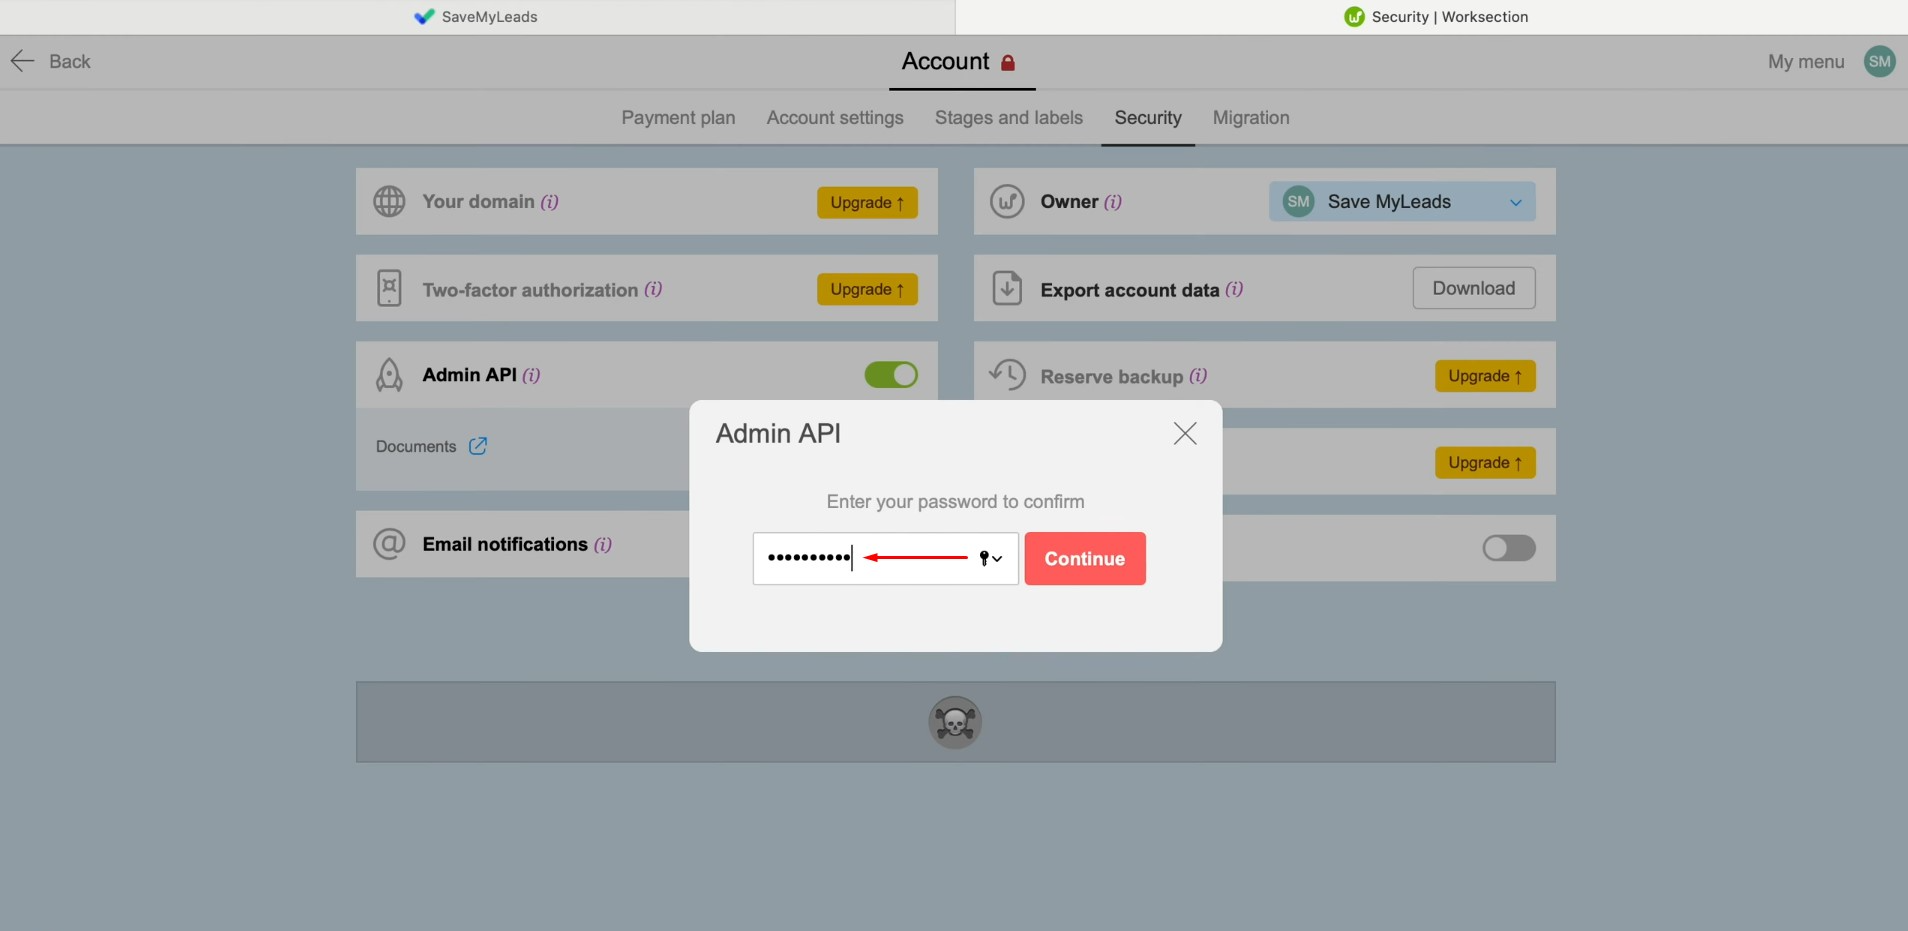
Copy the API key.
Paste the API key into the corresponding field in SaveMyLeads. Once the required fields are filled in, click “Save”.
Now, specify the project in which new
tasks will be created based on Facebook leads.
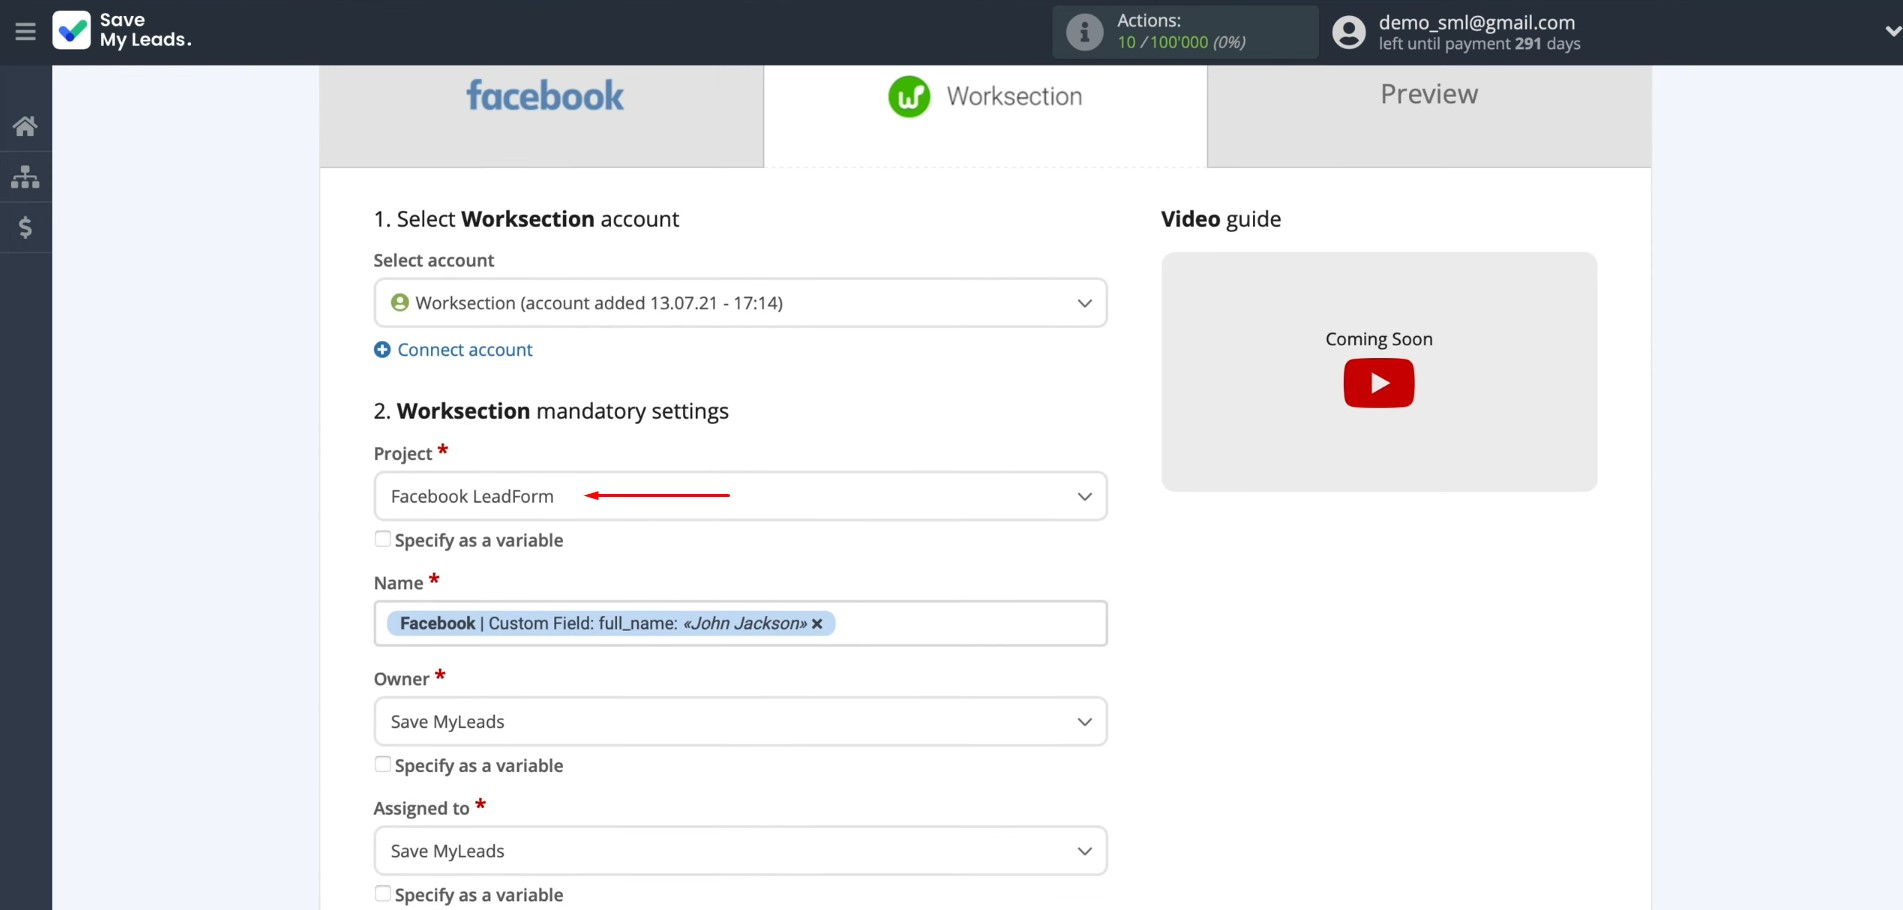
Then, you will see the fields for creating tasks.
In these
fields, you can assign variables from Facebook. To do this, click in the field and select a
variable from the drop-down list.
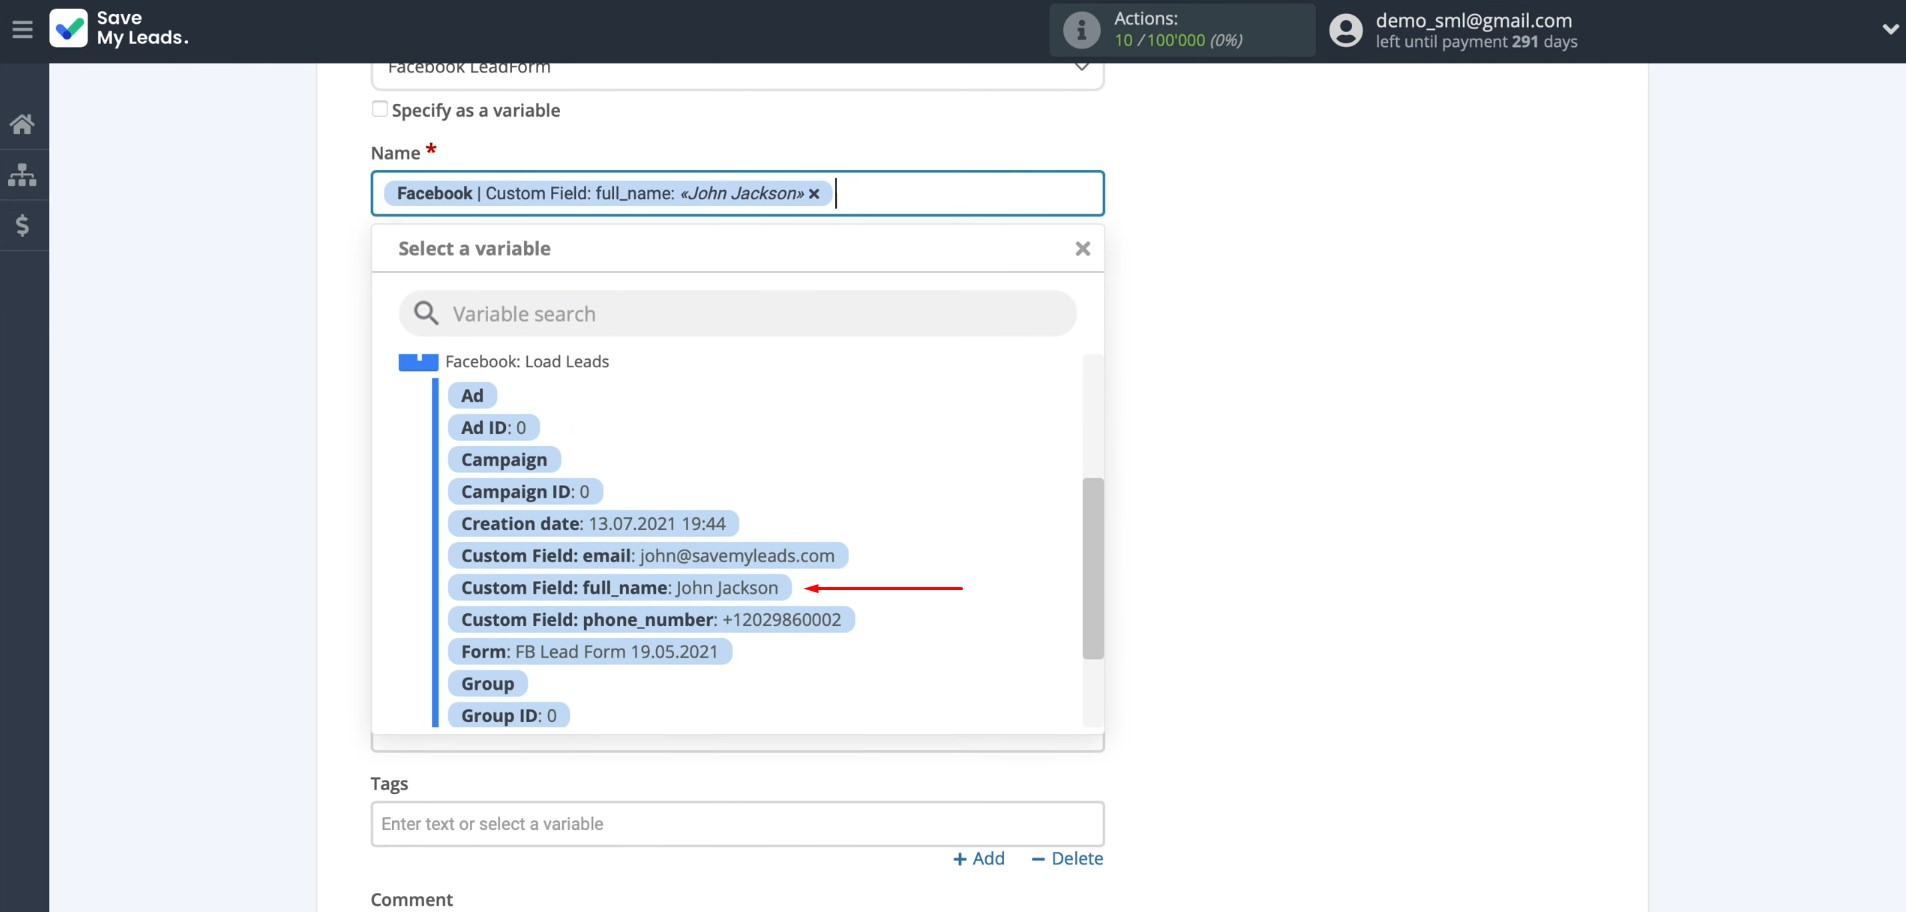
If you are
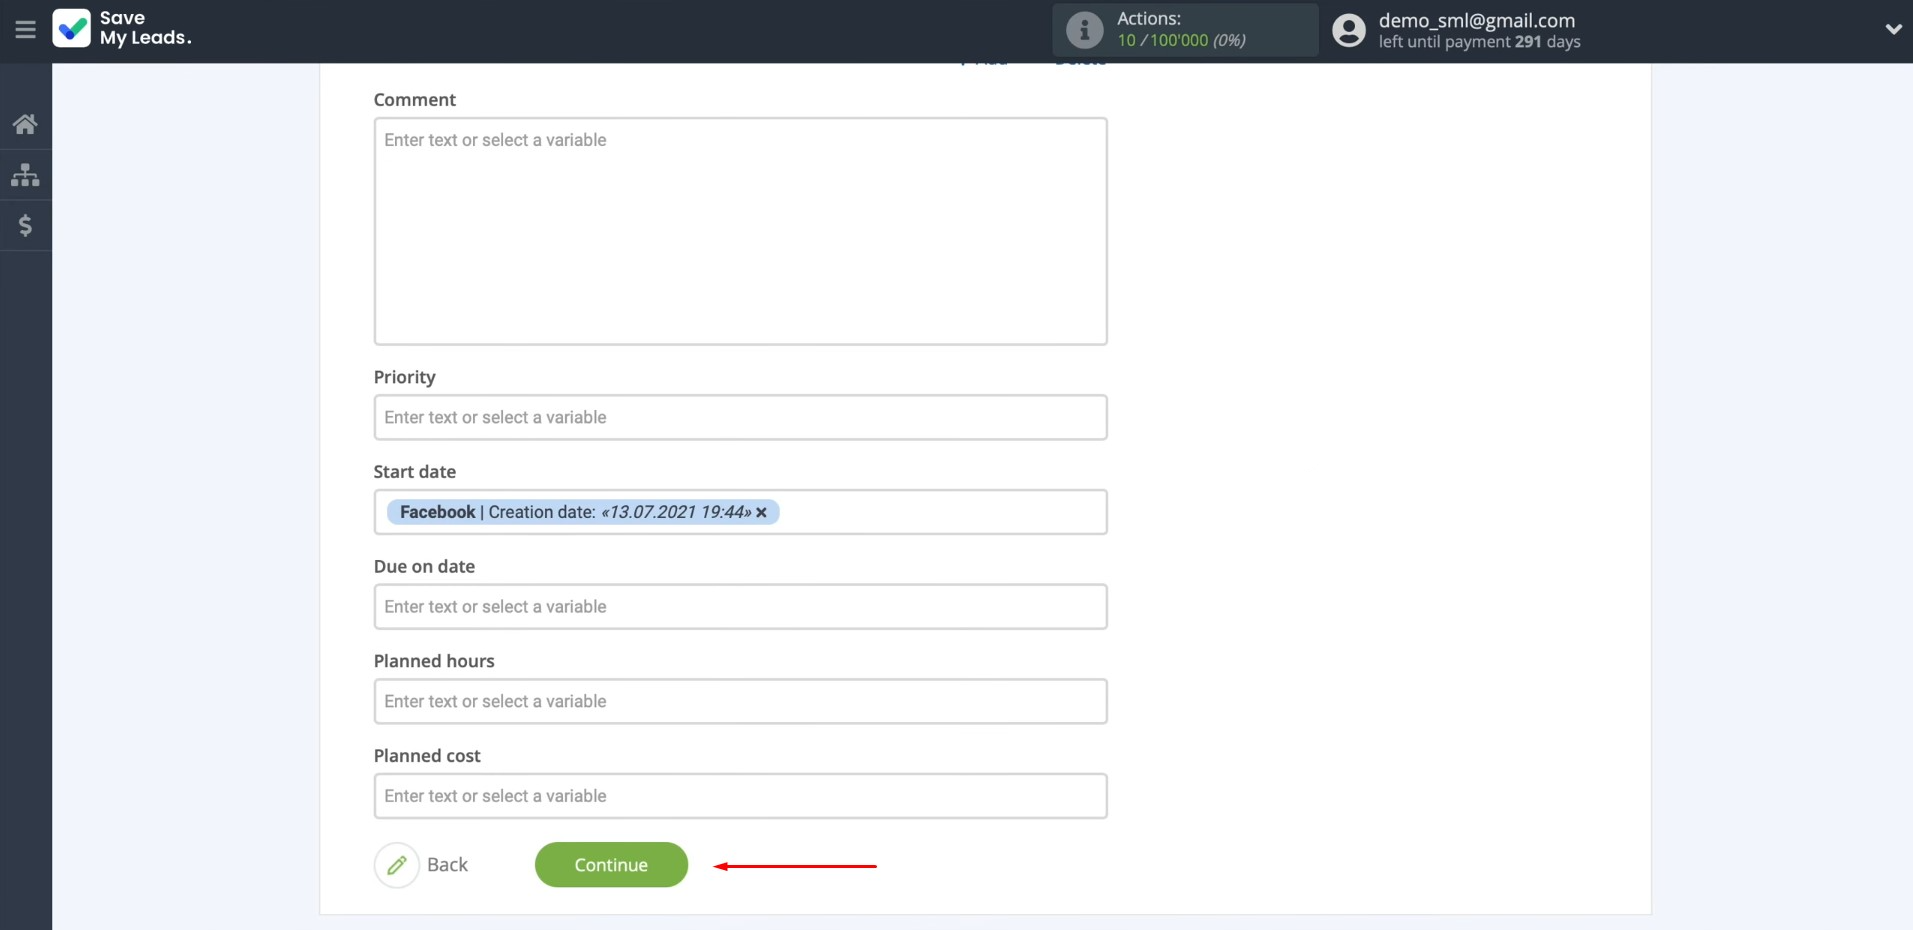
satisfied with the presetting of fields, you can leave it unchanged.


After configuring all the settings, click “Continue”.
At this stage, you will see an example of filling in
data to create a task. To check the correctness of
the settings, click “Send test data to Worksection”.
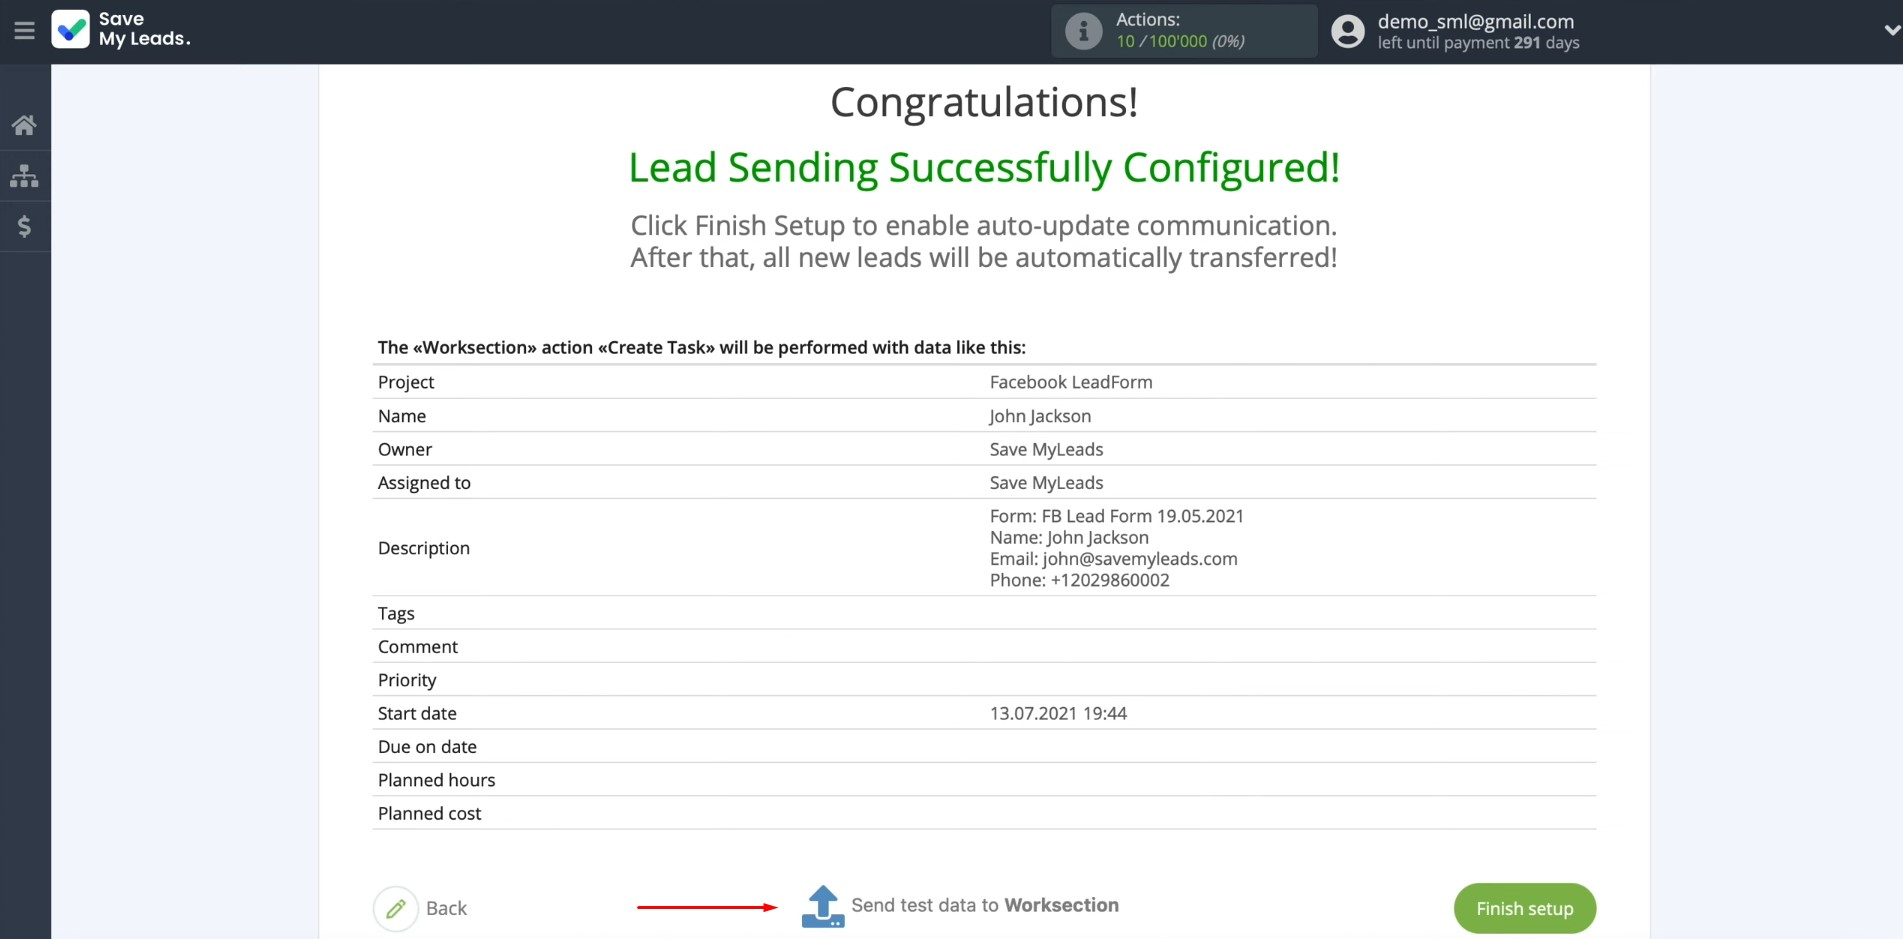
After
successfully sending, go to your Worksection account and check the result.
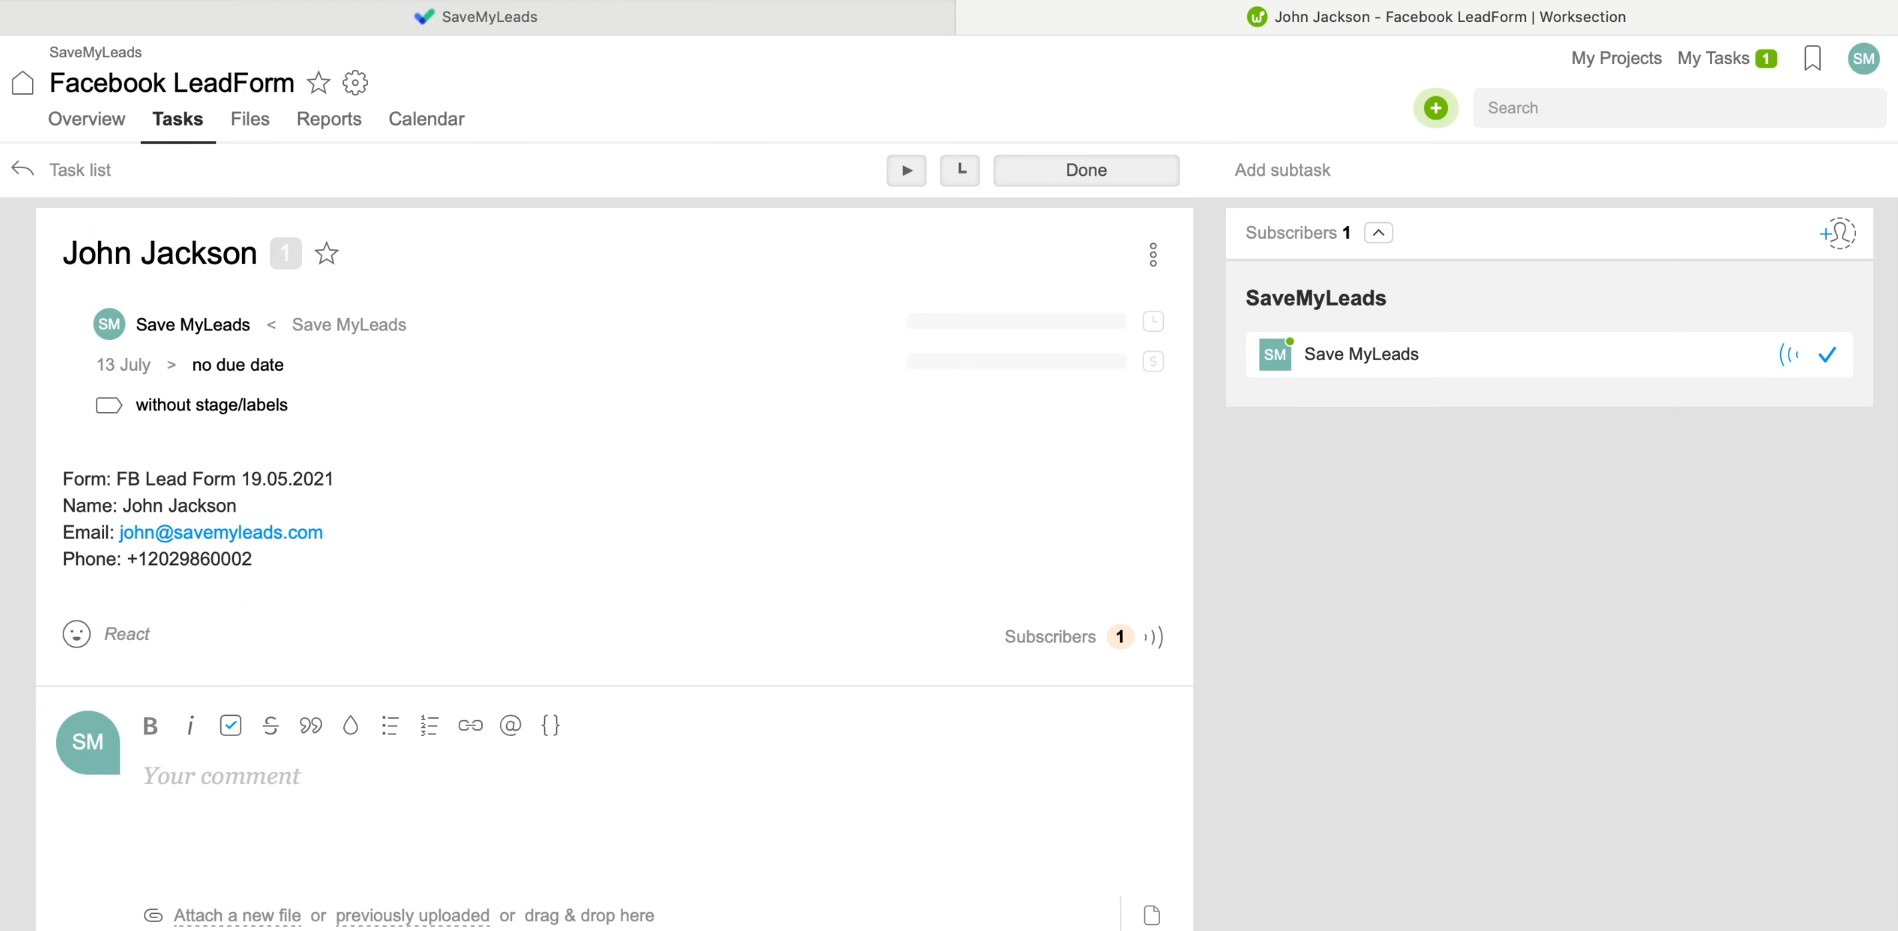
If
everything meets your requirements, return to
SaveMyLeads and complete the setup.
Setting up Auto-update
To instantly create new tasks based on new Facebook leads in Worksection, you need to enable auto-update. To do this, click “Finish setup”.
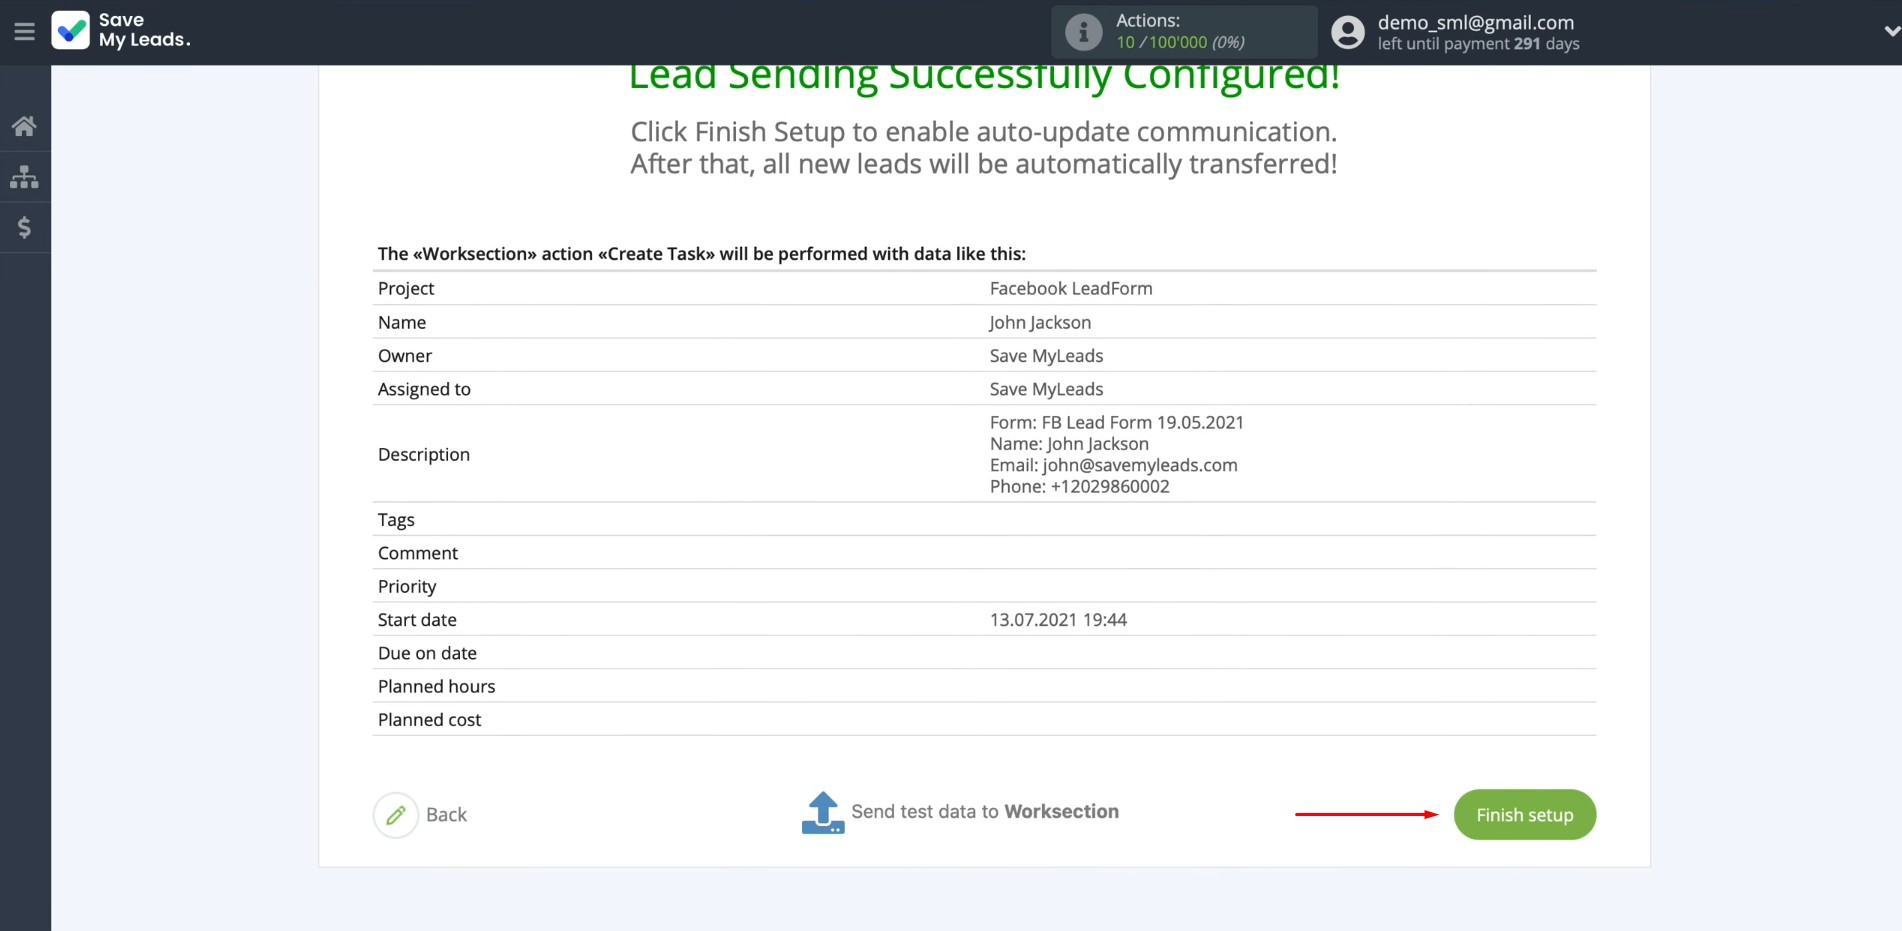
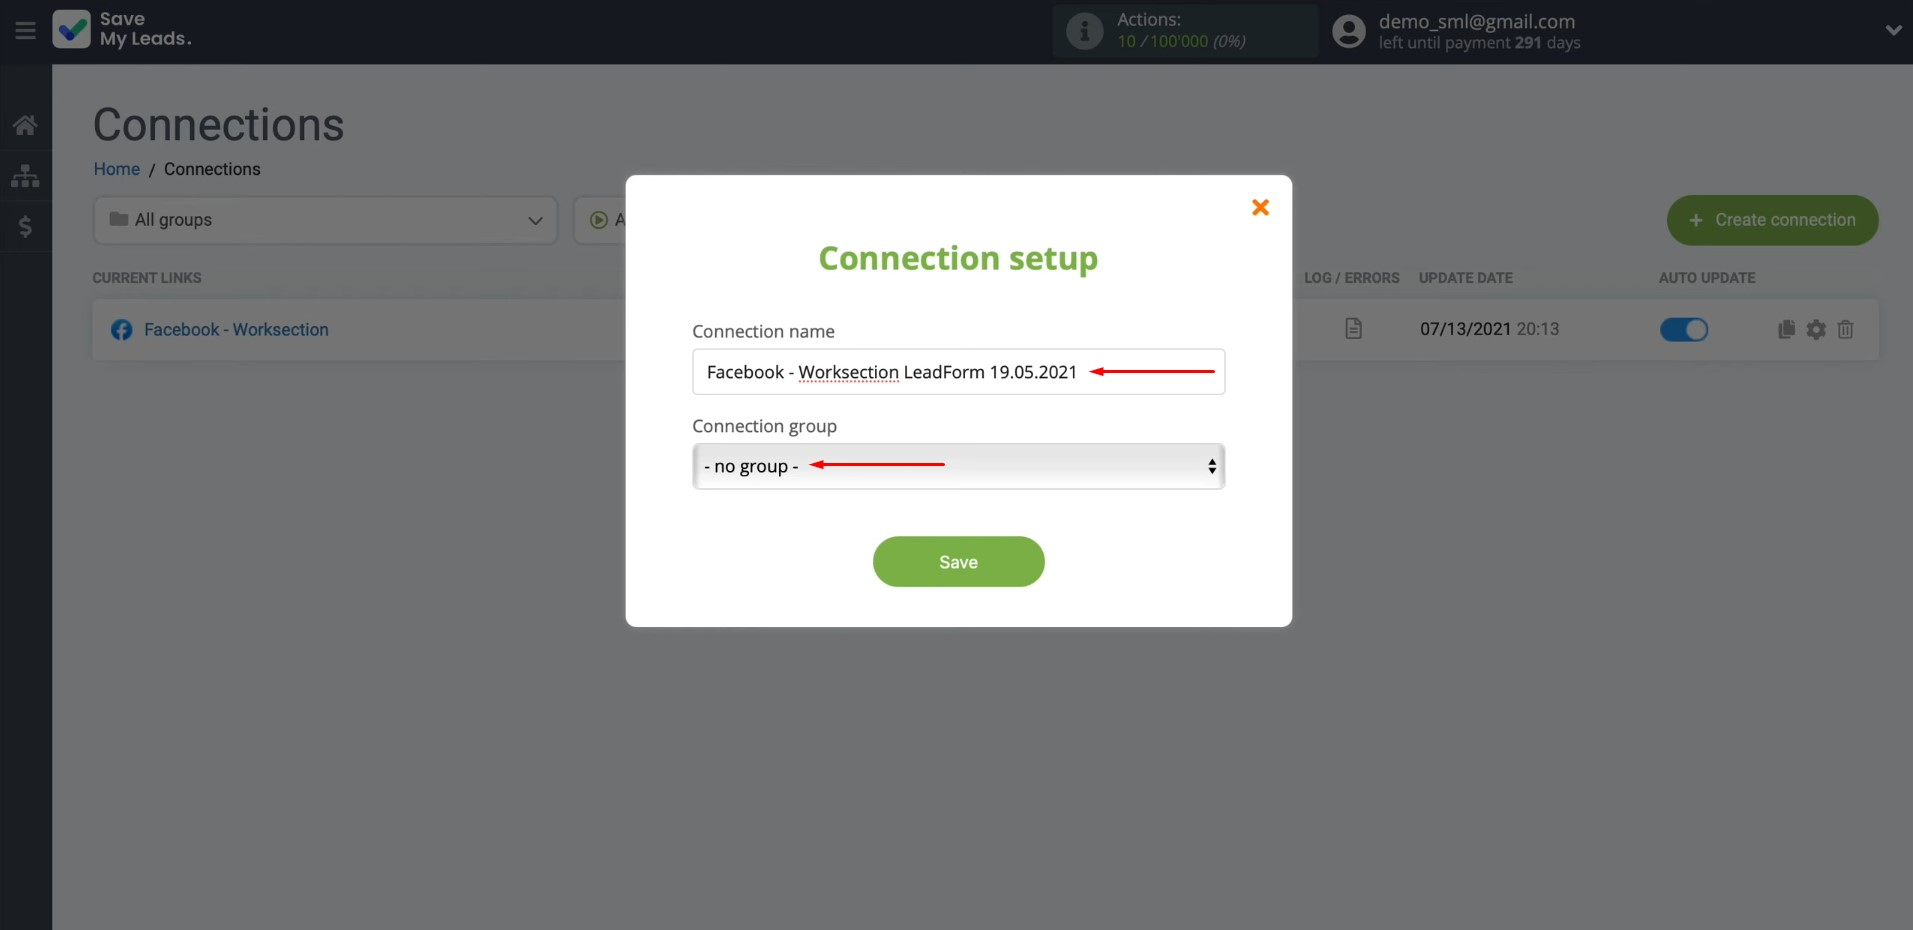
If you want to change the connection name, you can do this in its
settings. To do this, click on the gear icon.
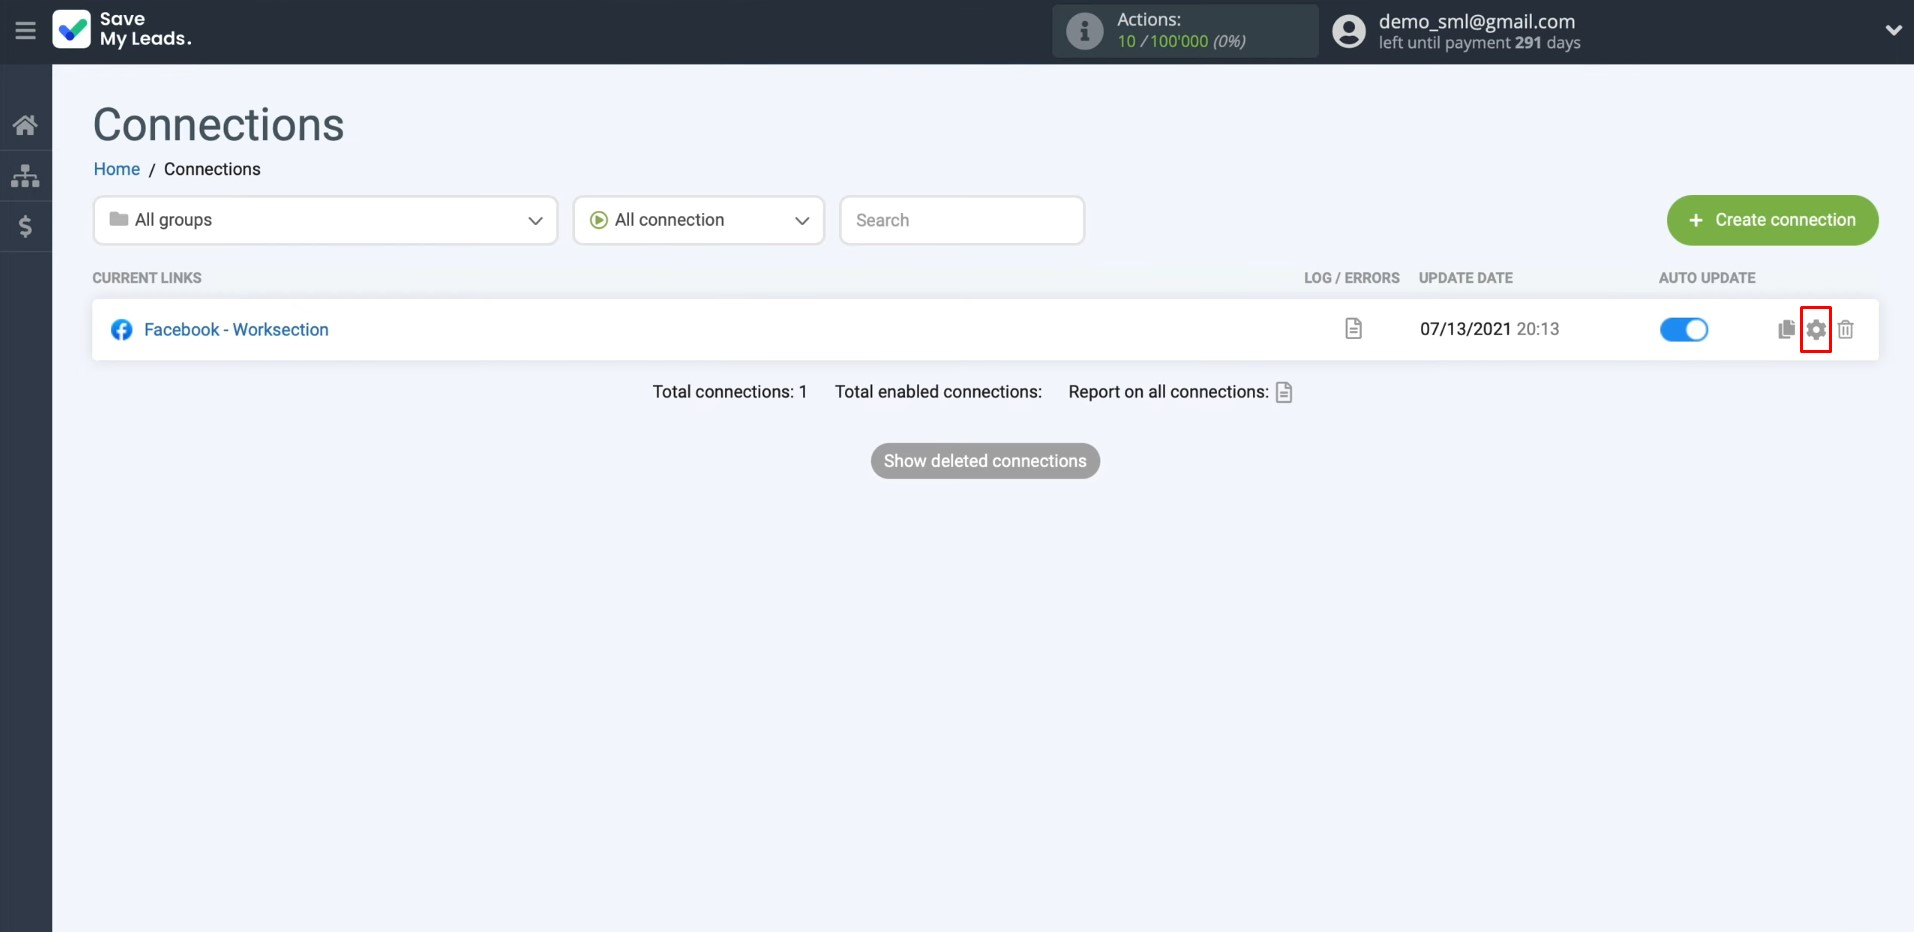
Here, you can change the connection name and add your
connection to a group. After that, click “Continue”.
That's all. The Facebook-Leads and Worksection integration has been completed.
Facebook + Worksection – Done!
By following our detailed guide, you have probably successfully set up the Worksection & Facebook integration and have already started enjoying its benefits. As you continue to monitor the automatic transfer of lead data, you will see that the communication between the platforms is established reliably and functions smoothly.
The Facebook & Worksection integration will free you from the need to perform monotonous manual operations, transferring them to a fully automated mode. While the SaveMyLeads connector takes on the routine of formatting each new lead in the task manager as a new task, your focus will shift to more important areas. You will be able to devote more time to improving customer communications, developing marketing strategies, and other key aspects of the business. Process automation will not only optimize your activities but also contribute to its further development and success. And SaveMyLeads will certainly help you with this.
Step-by-Step Guides for Setting Up Integrations:
