In today's business world, automation has become a key element of success. Progressive entrepreneurs and companies actively strive to optimize work processes as much as possible in order to save time and money, as well as to stand out from competitors. Their arsenal includes automation services, system connectors, and artificial intelligence technologies. Using tools like Facebook Lead Ads for marketing and KeyCRM for lead management and sales automation can significantly speed up and simplify workflows. By integrating these platforms through our SaveMyLeads online connector, you will automate the transfer of leads from the social network to the CRM system, create new customers in it, and also get rid of manual data entry. We offer you step-by-step instructions that will help you set up and launch Facebook and KeyCRM integration.
Why SaveMyLeads?
By using SaveMyLeads to transfer customer data from Facebook to KeyCRM, you will ensure that it is automatically and continuously registered in the CRM system. Here, they will immediately be recorded as new buyers. After this, their requests will be instantly sent for processing, and then communications will be initiated regarding the orders placed and their transfer to the delivery service. All these processes occur automatically.
There are several more arguments in favor of choosing SaveMyLeads for Facebook-Leads and KeyCRM integration. Firstly, it is a no-code tool that allows you to configure the system quickly, simply, and efficiently. Thanks to the intuitive interface, even a novice user can handle it in a matter of minutes. Secondly, the connector offers many ready-made solutions for various CRM systems, email, SMS services, instant messengers, task managers, Google services, and much more. Thirdly, its tariff policy is considered quite affordable. And finally, having professional technical support, always ready to help, is a definite advantage.
How to Set up Facebook Lead Ads and KeyCRM Integration
Step-by-step instruction:
- Create a targeted Facebook Lead Ads form.
- Sign up for SaveMyLeads.
- Connect Facebook as a data source to the connector.
- Specify Facebook pages and forms for forwarding contacts.
- Configure KeyCRM as a data sink in the connector.
- Activate automatic data updates.
We will skip the details of creating a form on Facebook, assuming you are familiar with this process. Instead, we suggest focusing on the next steps.
Setting up the Data Source – Facebook
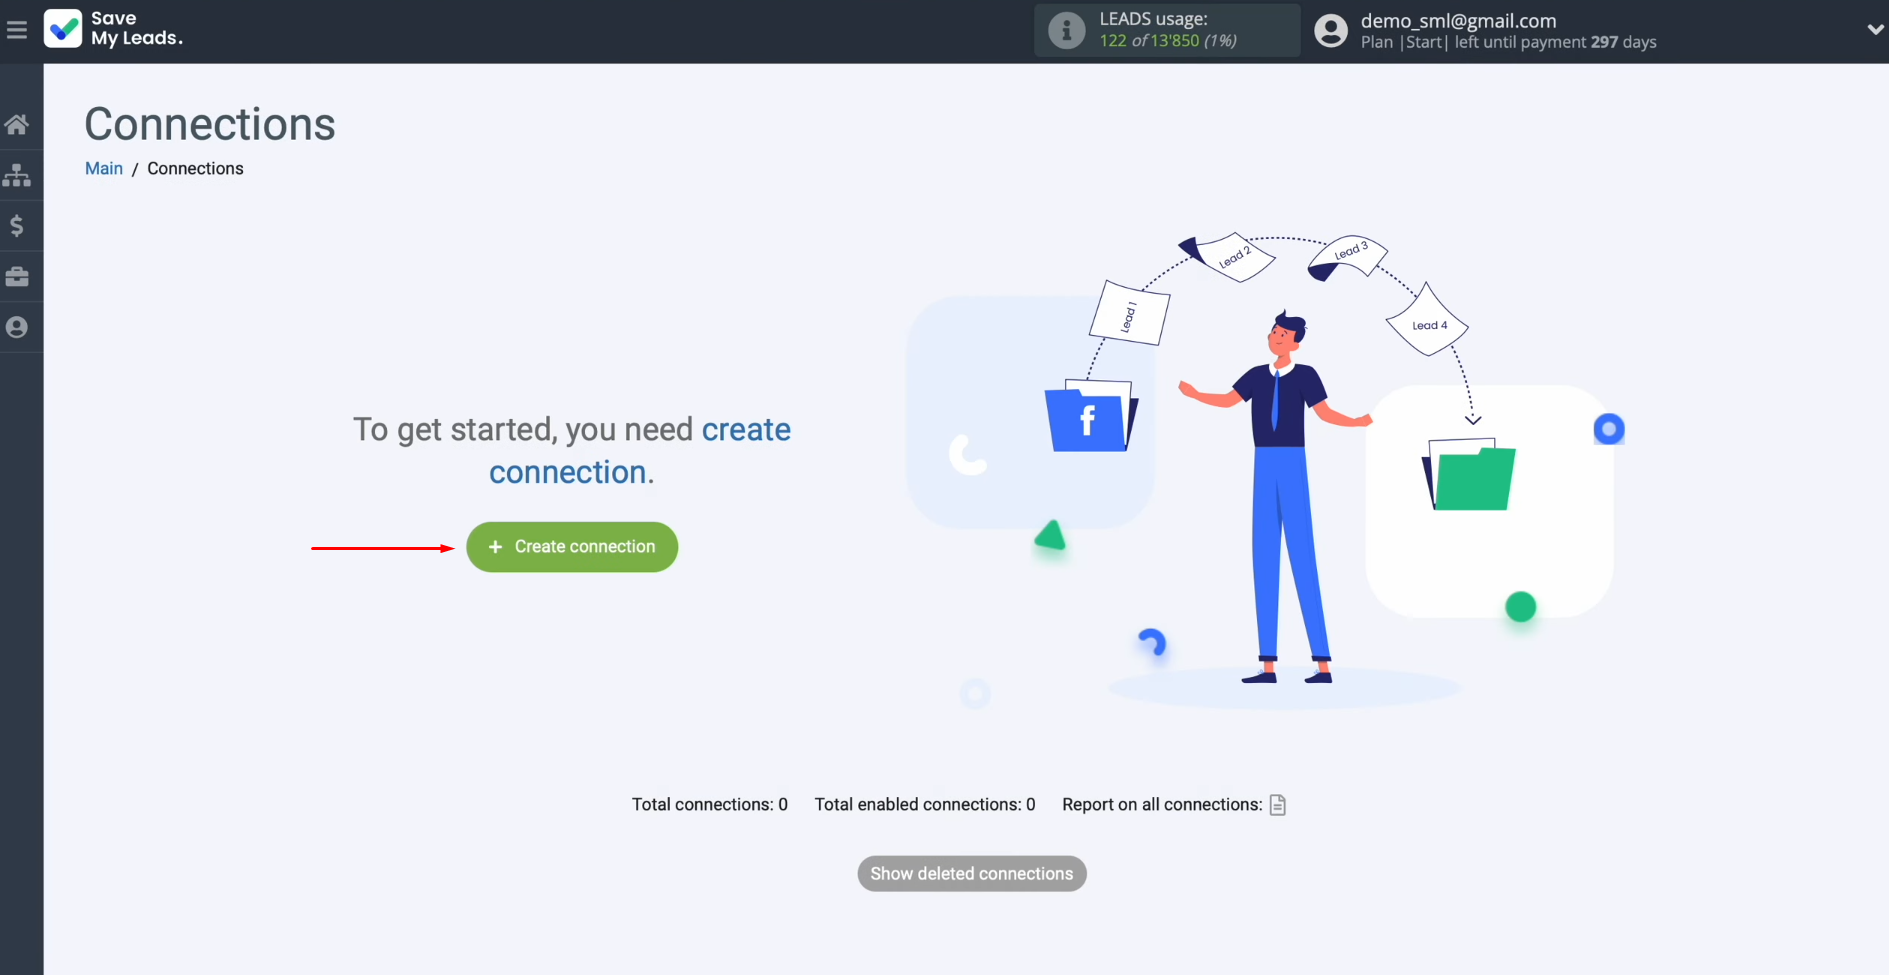
To set up Facebook integration with KeyCRM, first, you need to create a new connection. For this, press the green button.
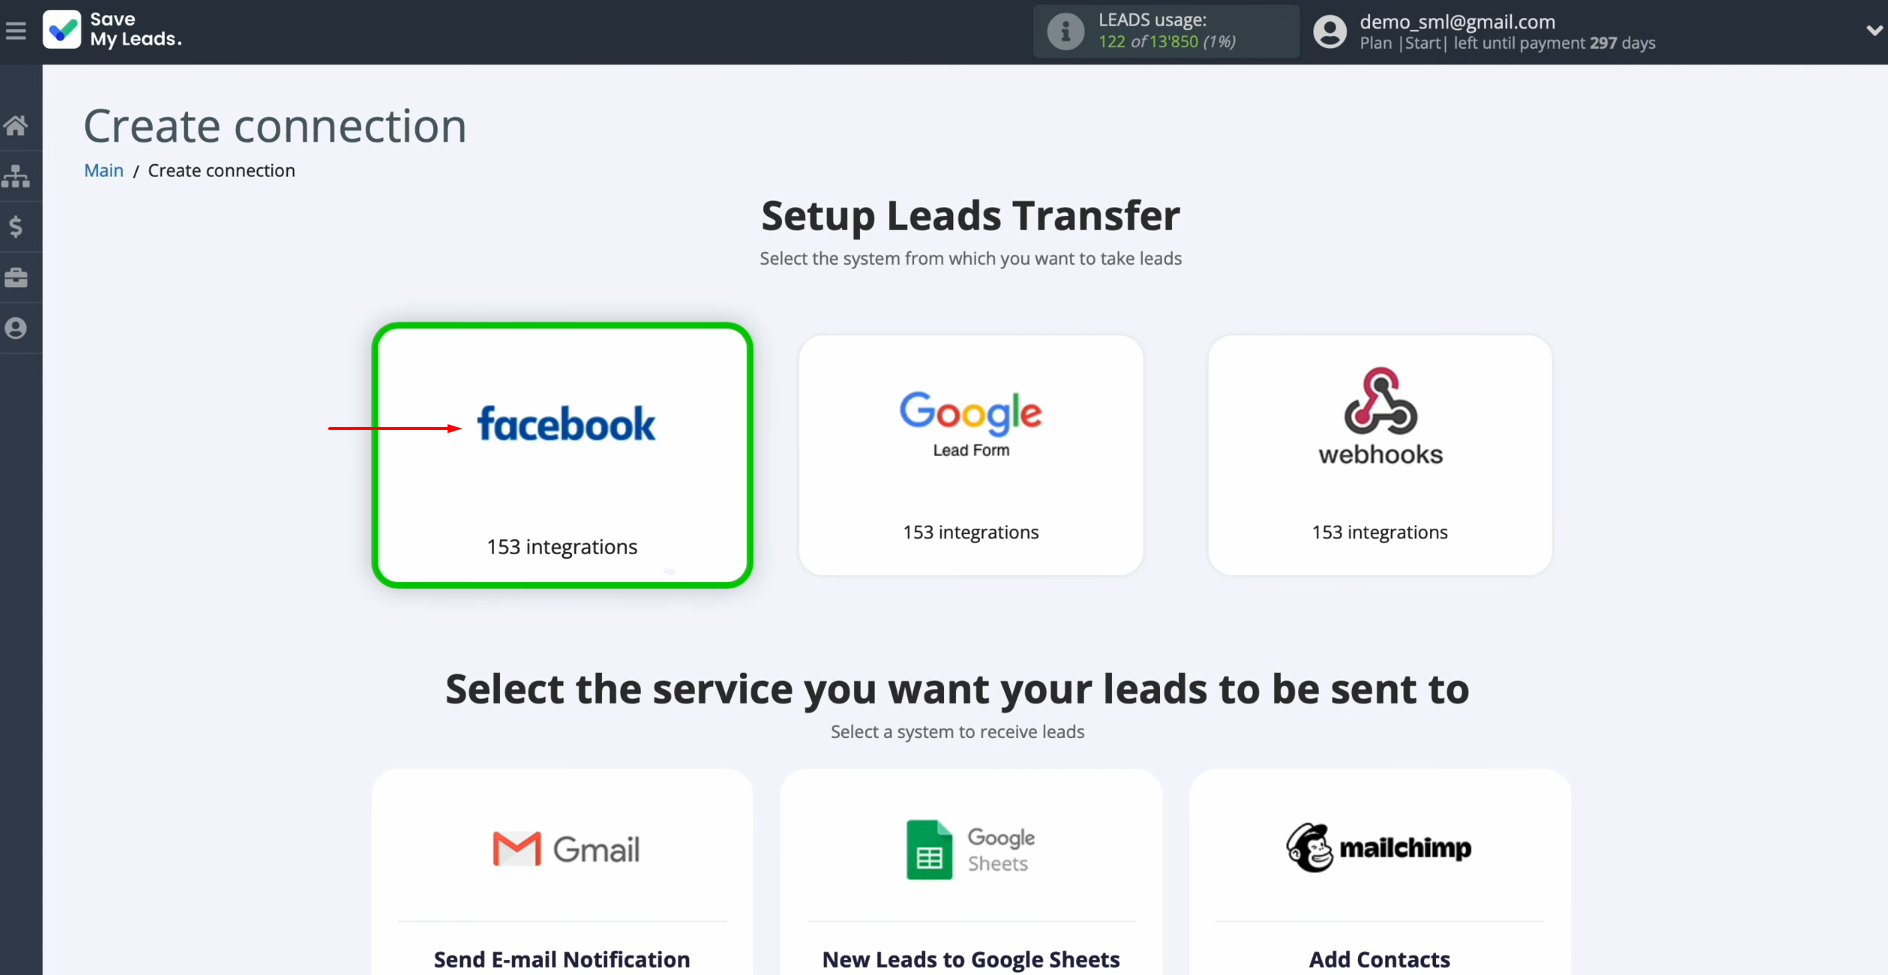
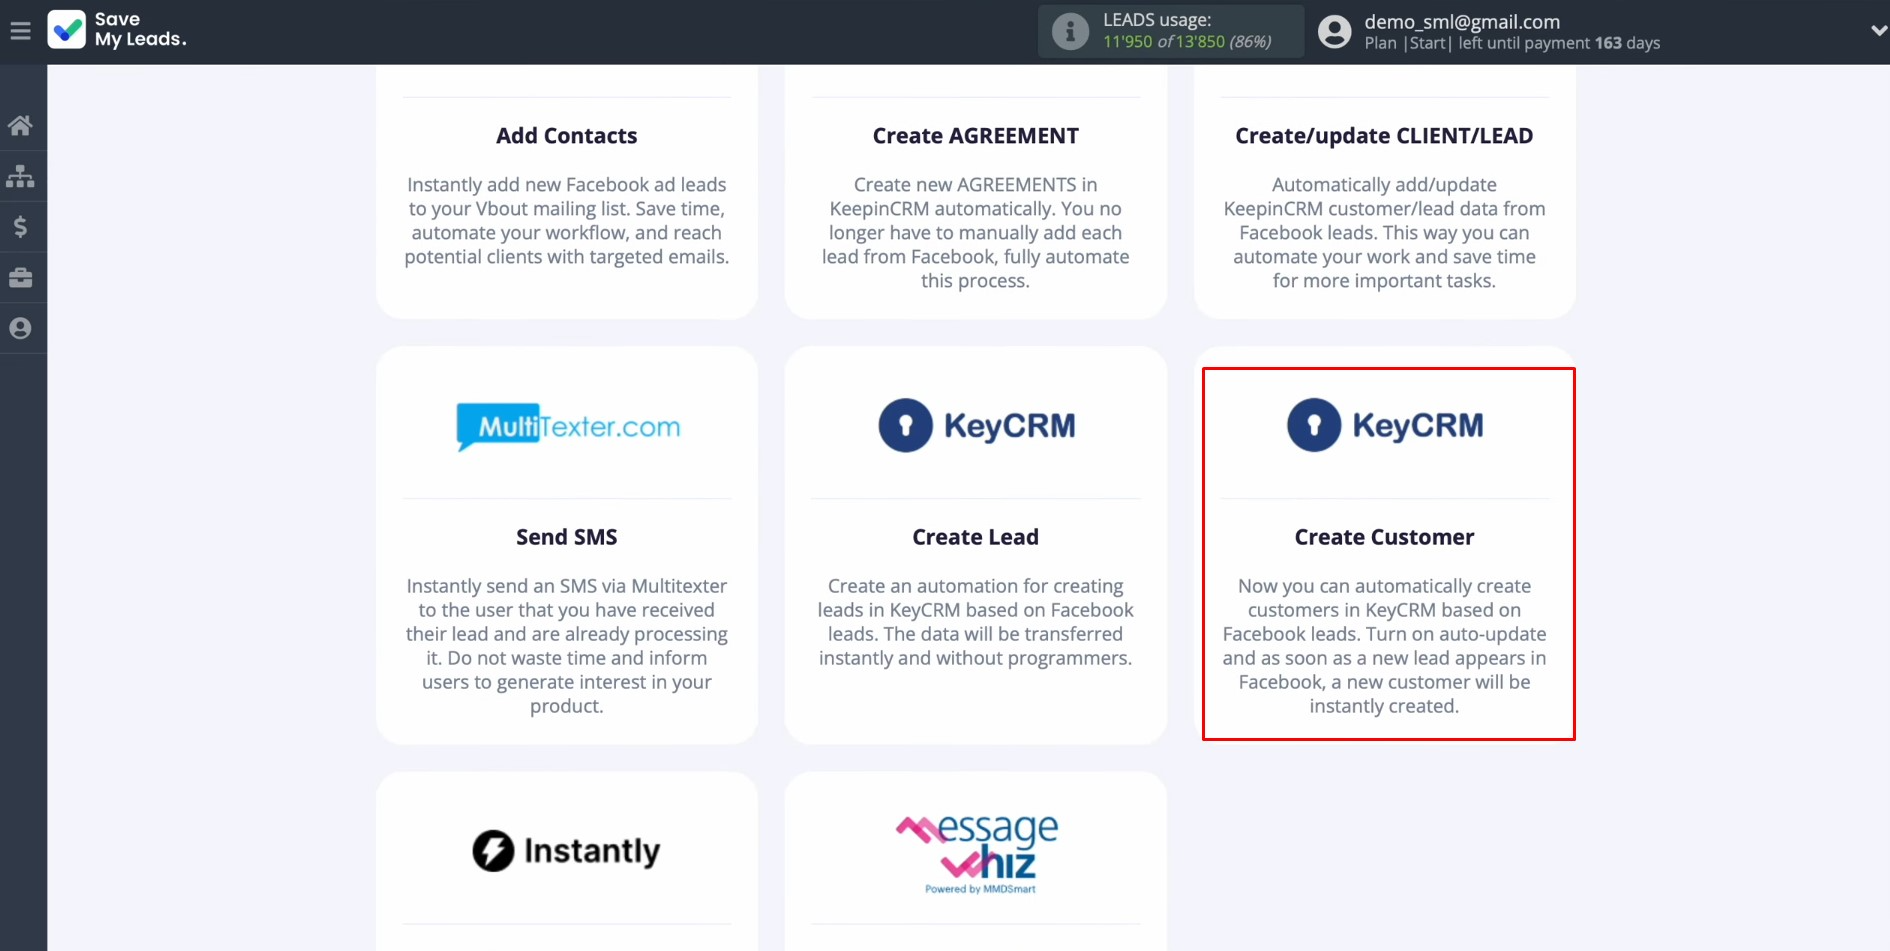
Select the system from which you want to receive new data. You need Facebook.
Choose one of
the ready-made
templates where you want to send leads
from Facebook. You need KeyCRM (Create Customer).
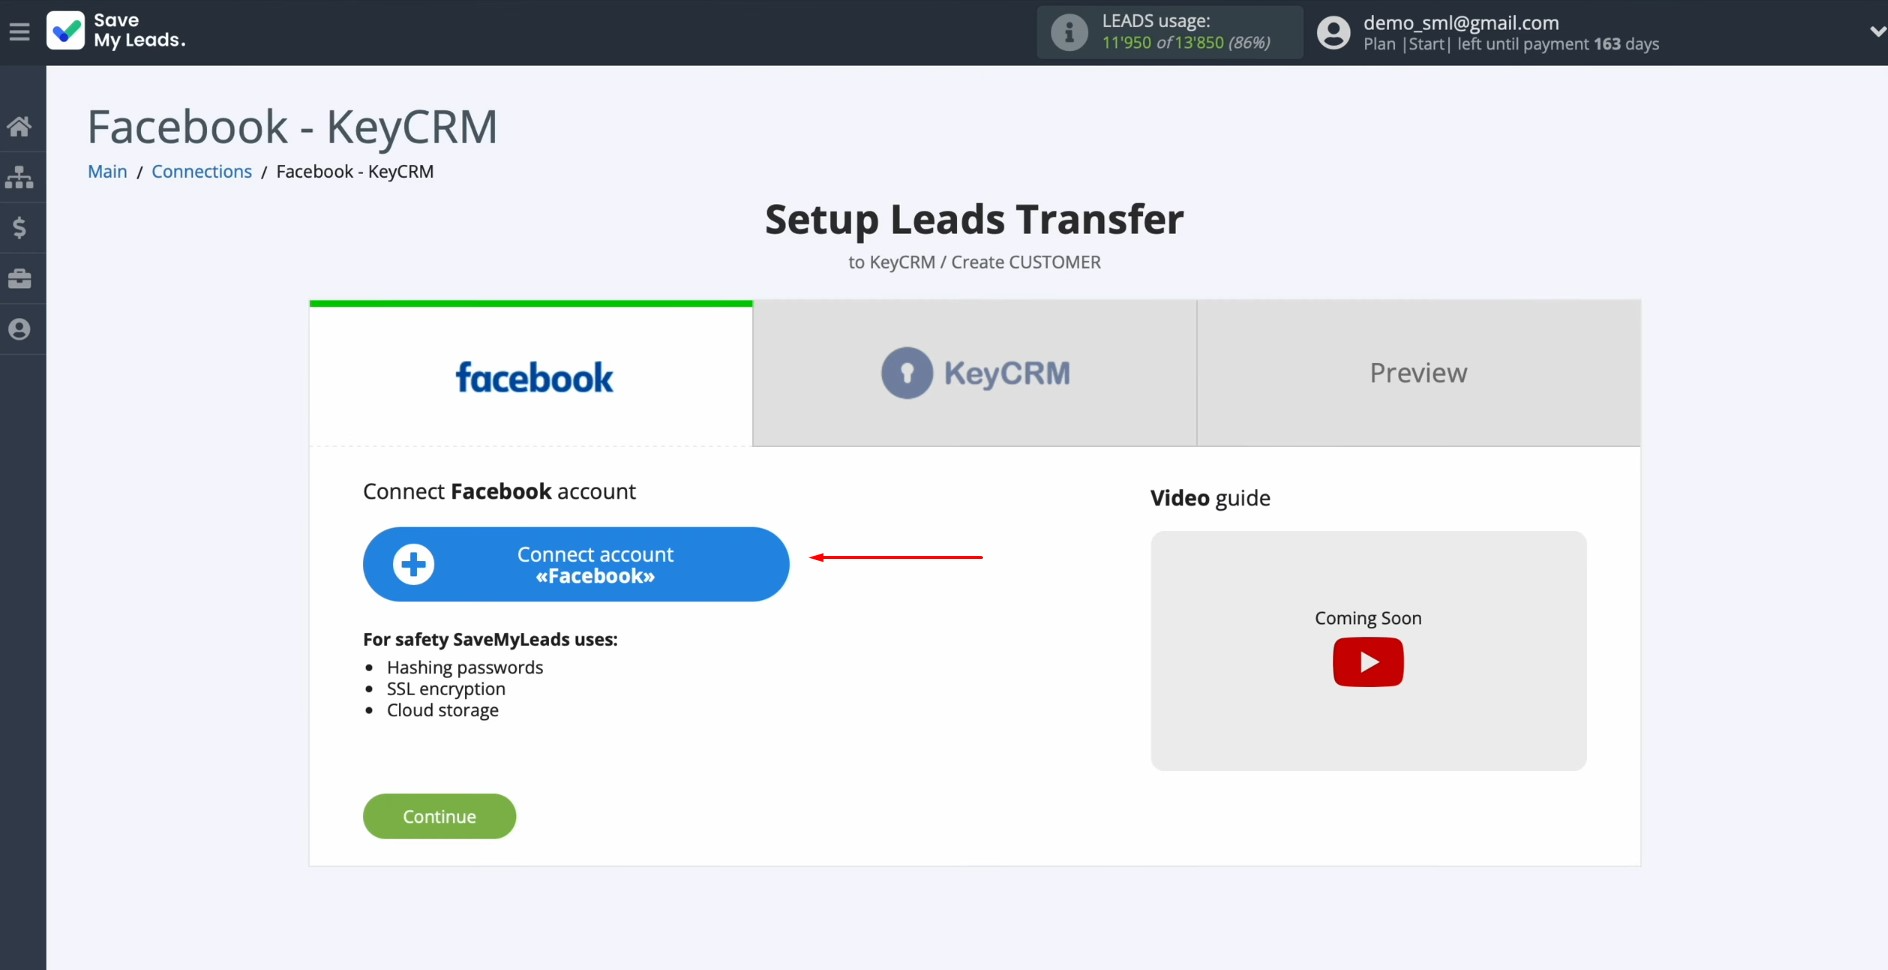
Connect your Facebook account to SaveMyLeads. To achieve this, press the
blue button.
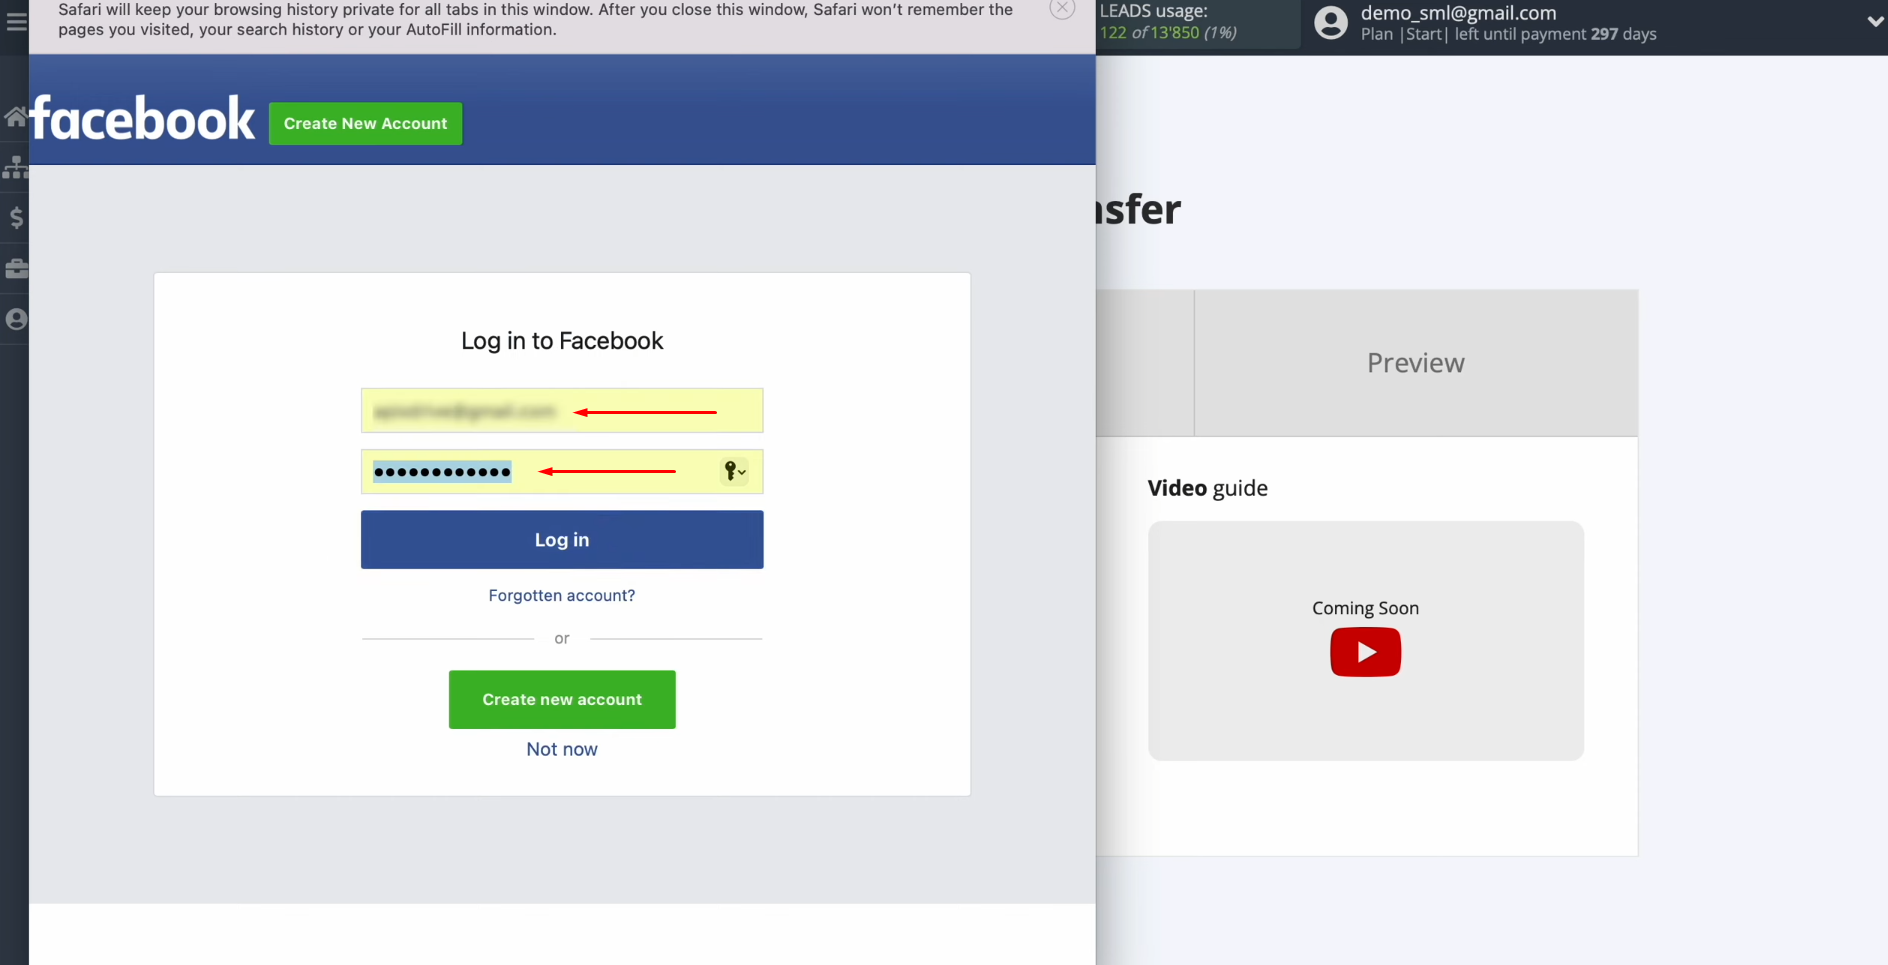
Specify the username and password of the
Facebook personal
account and click “Log in”.
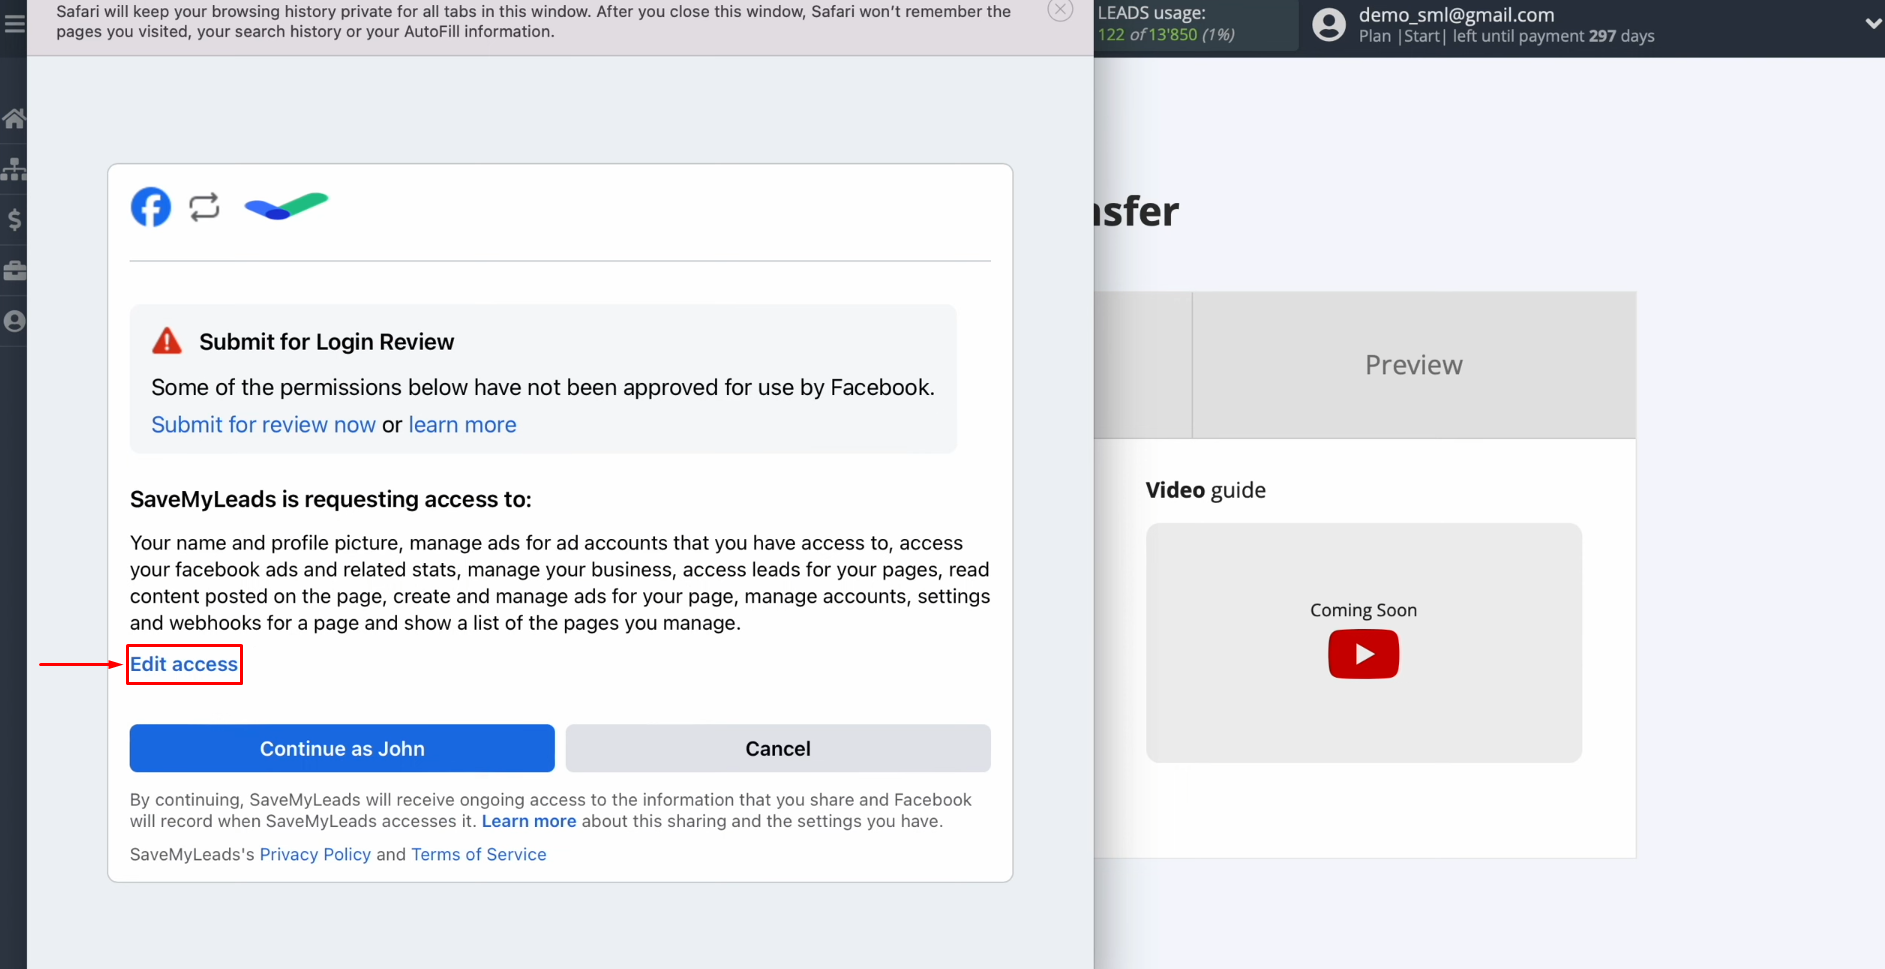
Provide SaveMyLeads access to
work with your Facebook account. To do this, click “Edit
access”.
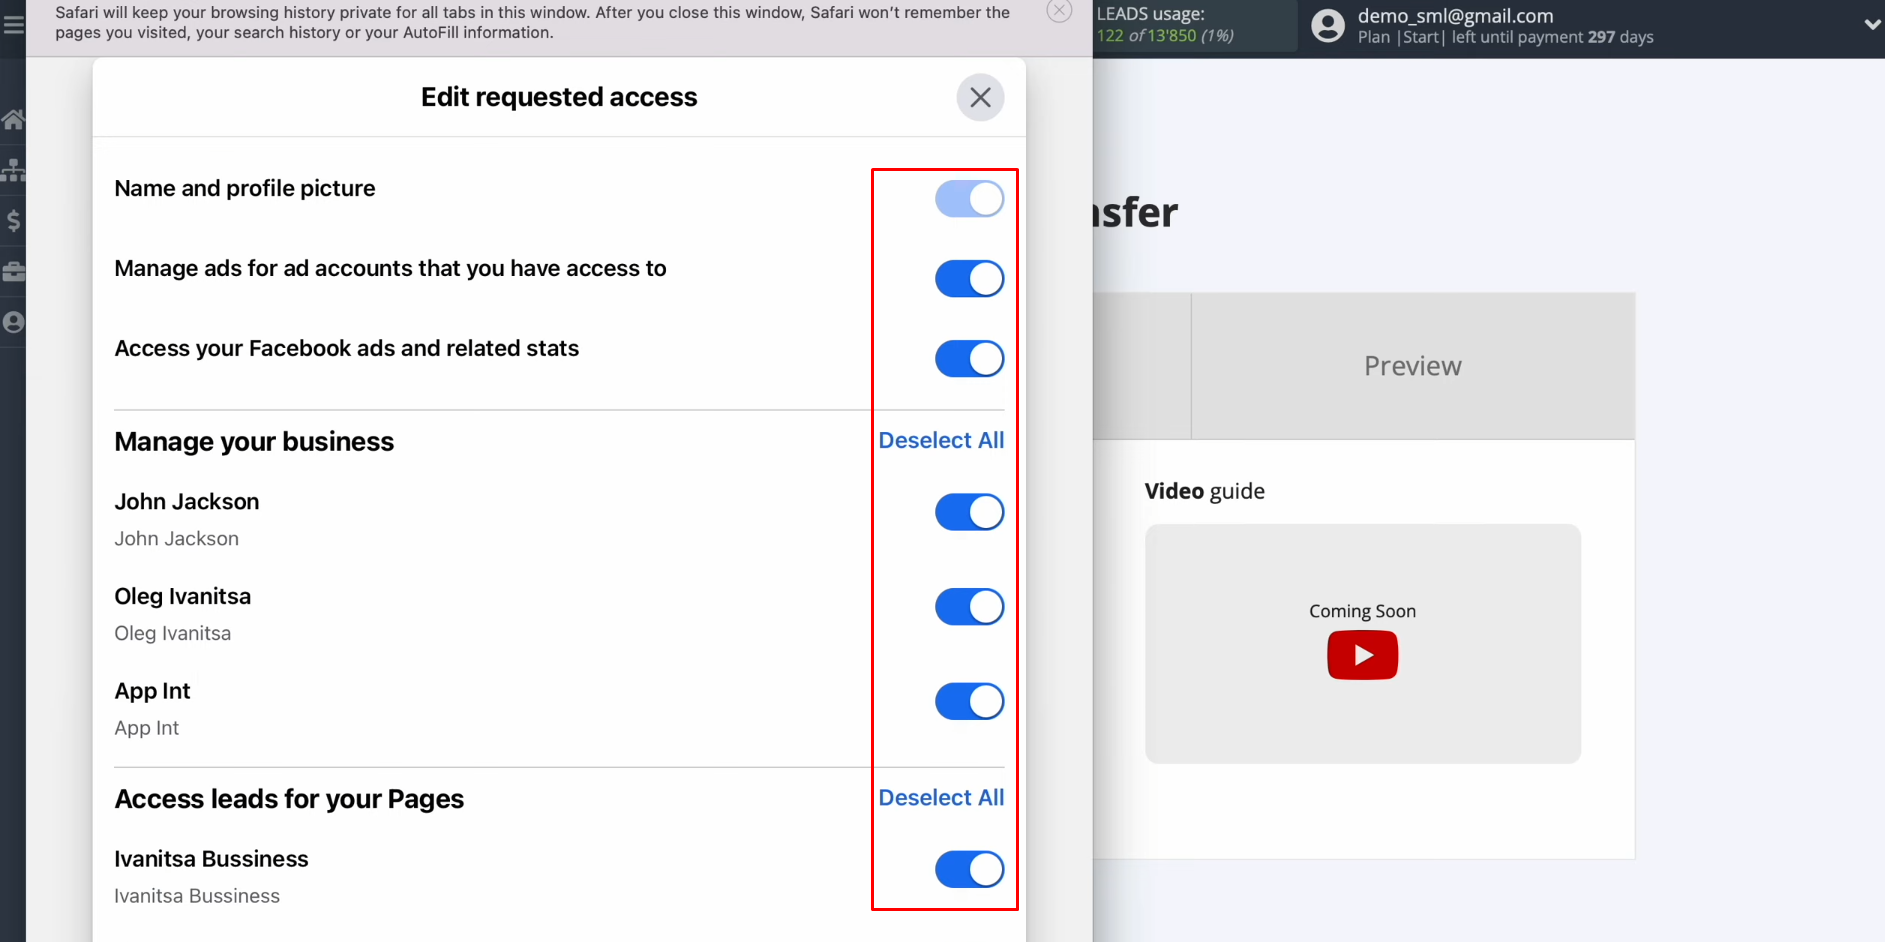
Leave
all access checkboxes enabled.
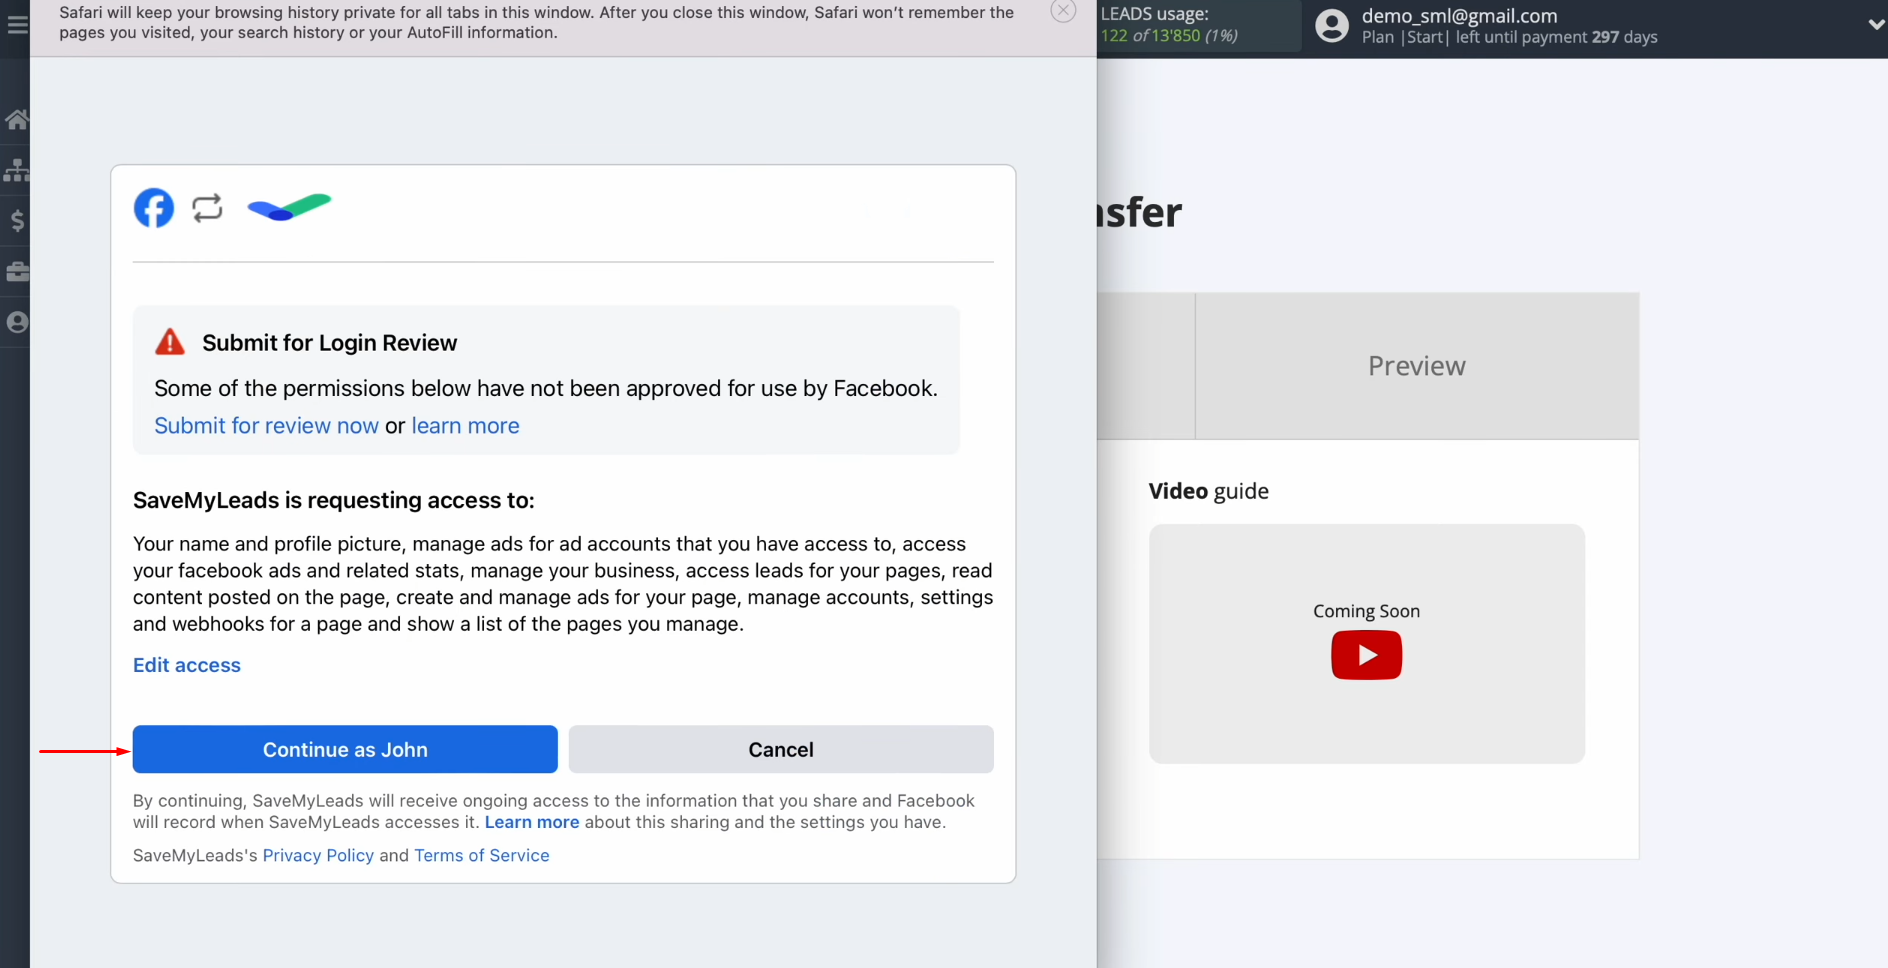
Click
“Continue as…”.
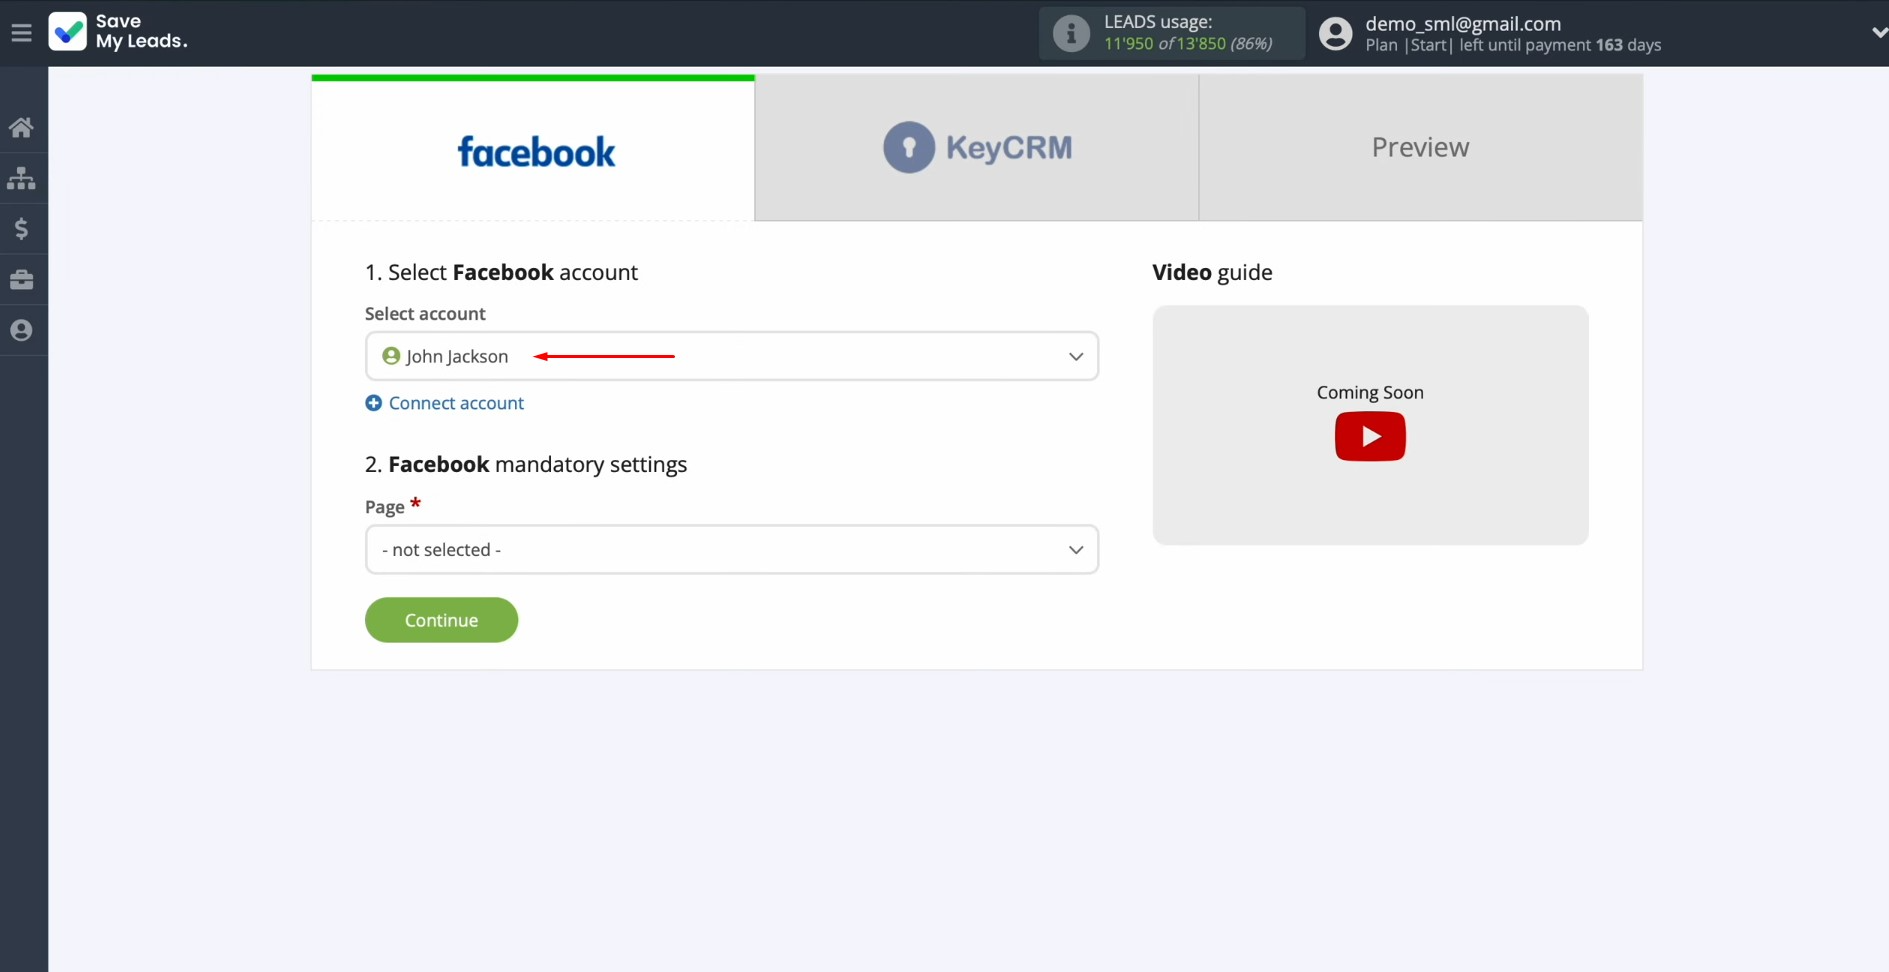
When the
connected account is displayed in the
list, it must be selected.
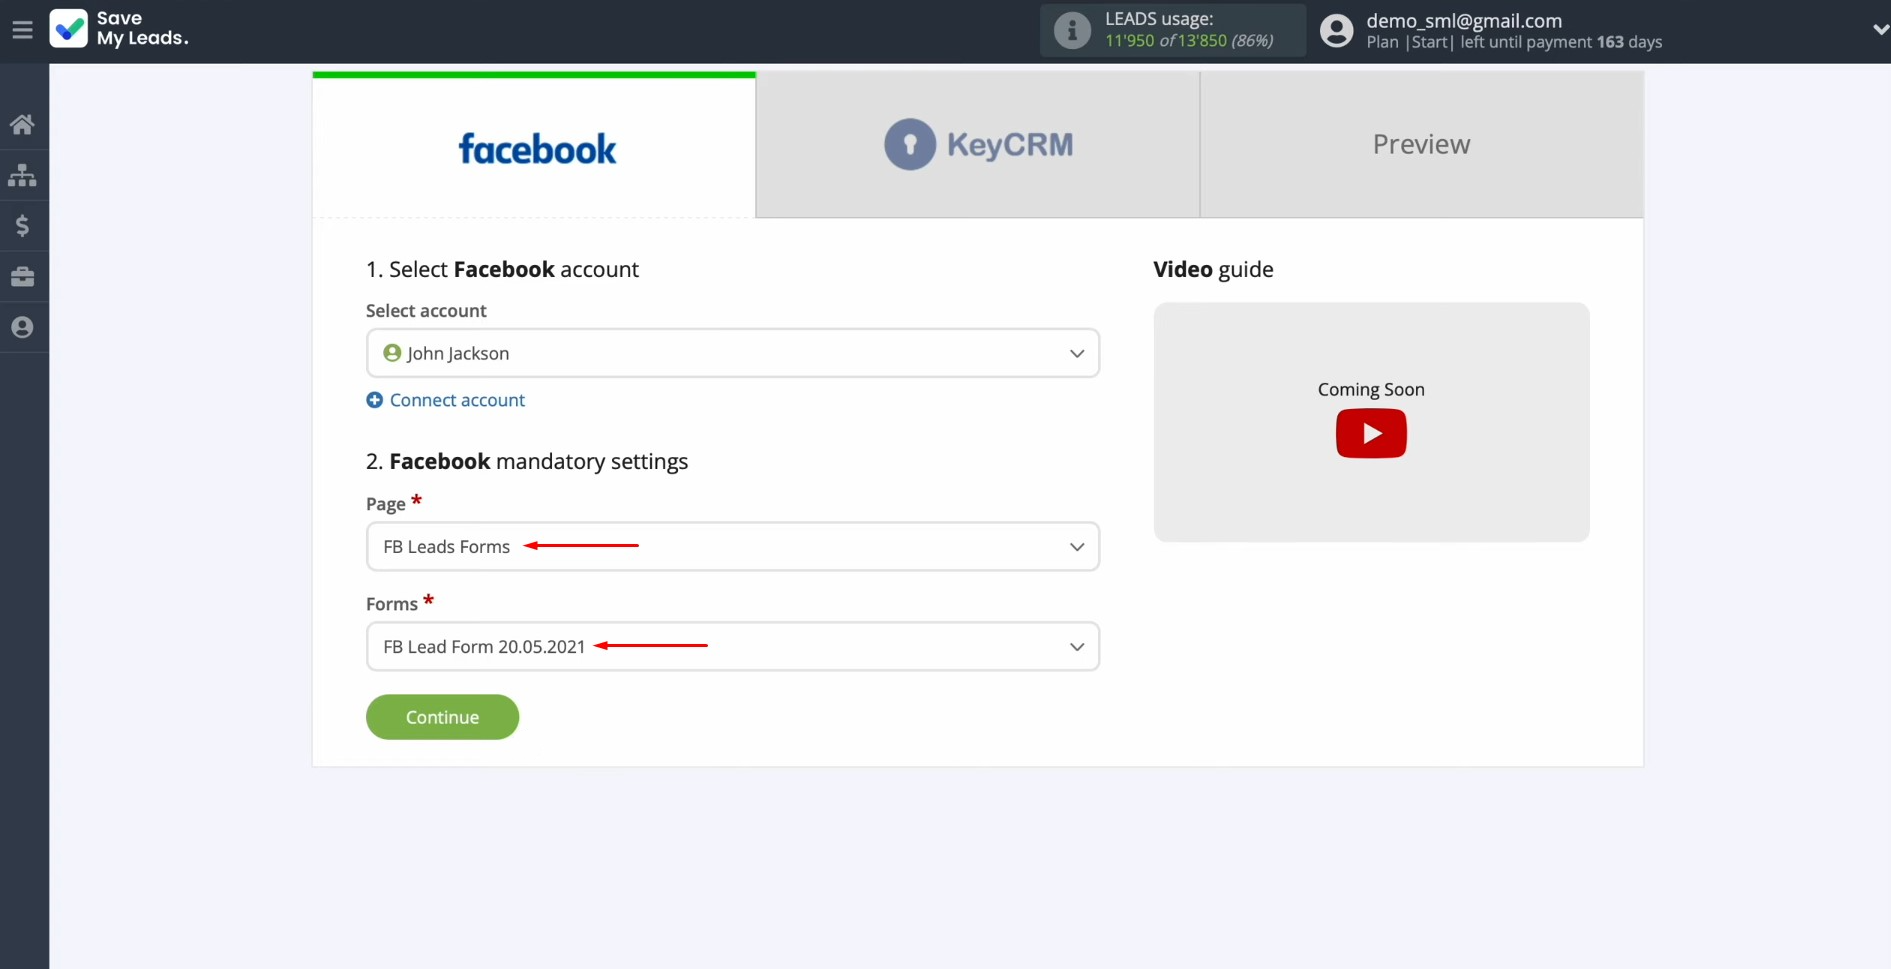
Select the advertising page from which you want to send leads. Then choose
the form by which the data will be downloaded.
If you have several forms specified, you will need
to create connections for each of them.
Setting up the Data Receiver – KeyCRM
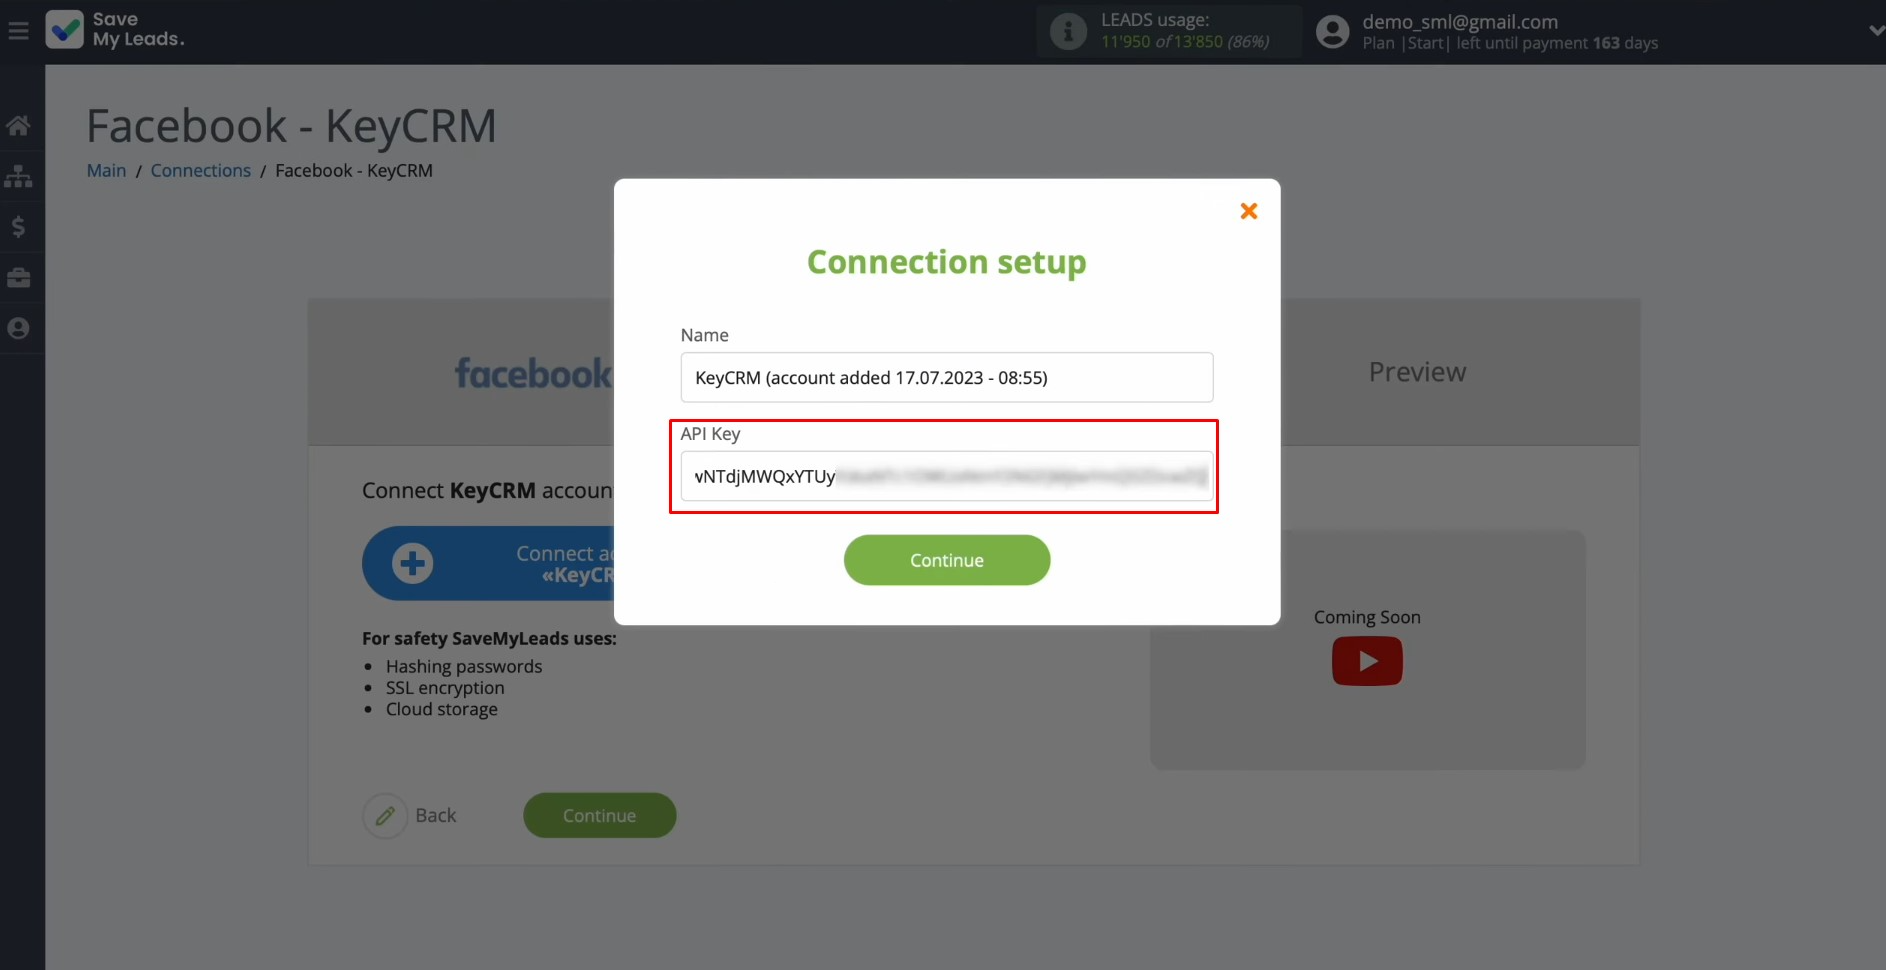
To set up KeyCRM integration with Facebook, you need to connect your KeyCRM account to SaveMyLeads. To achieve this, press the blue button.
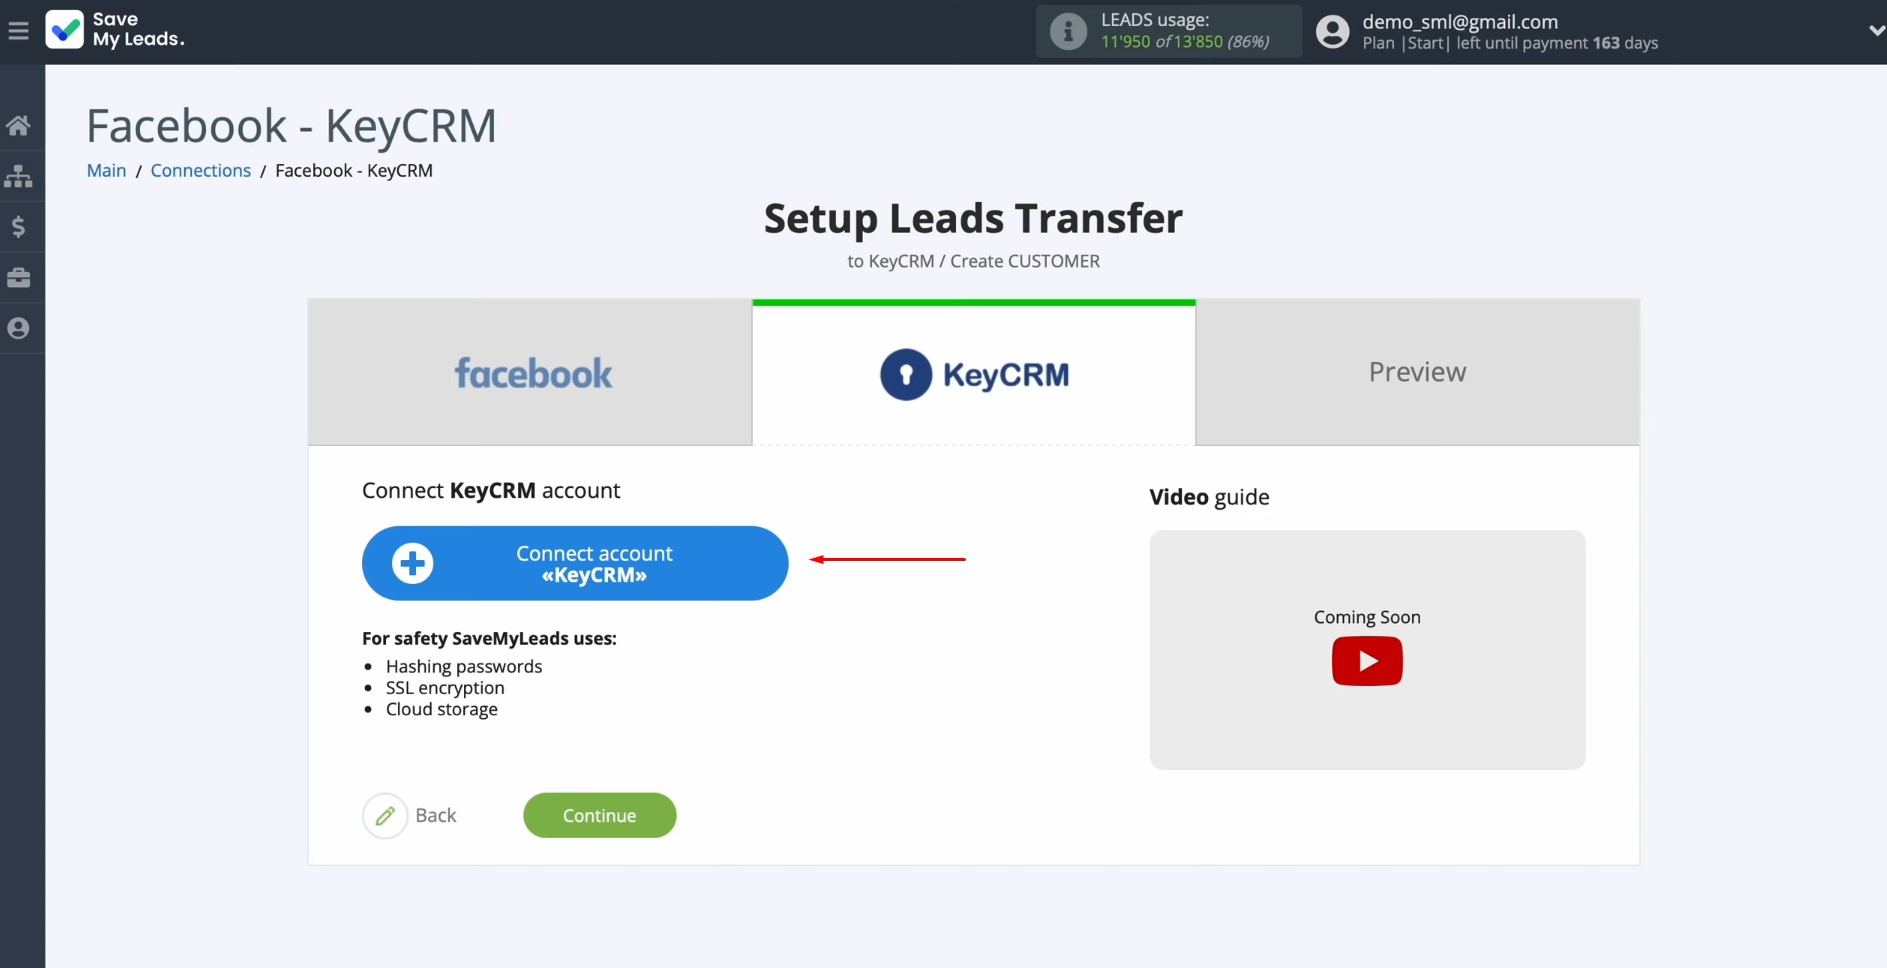
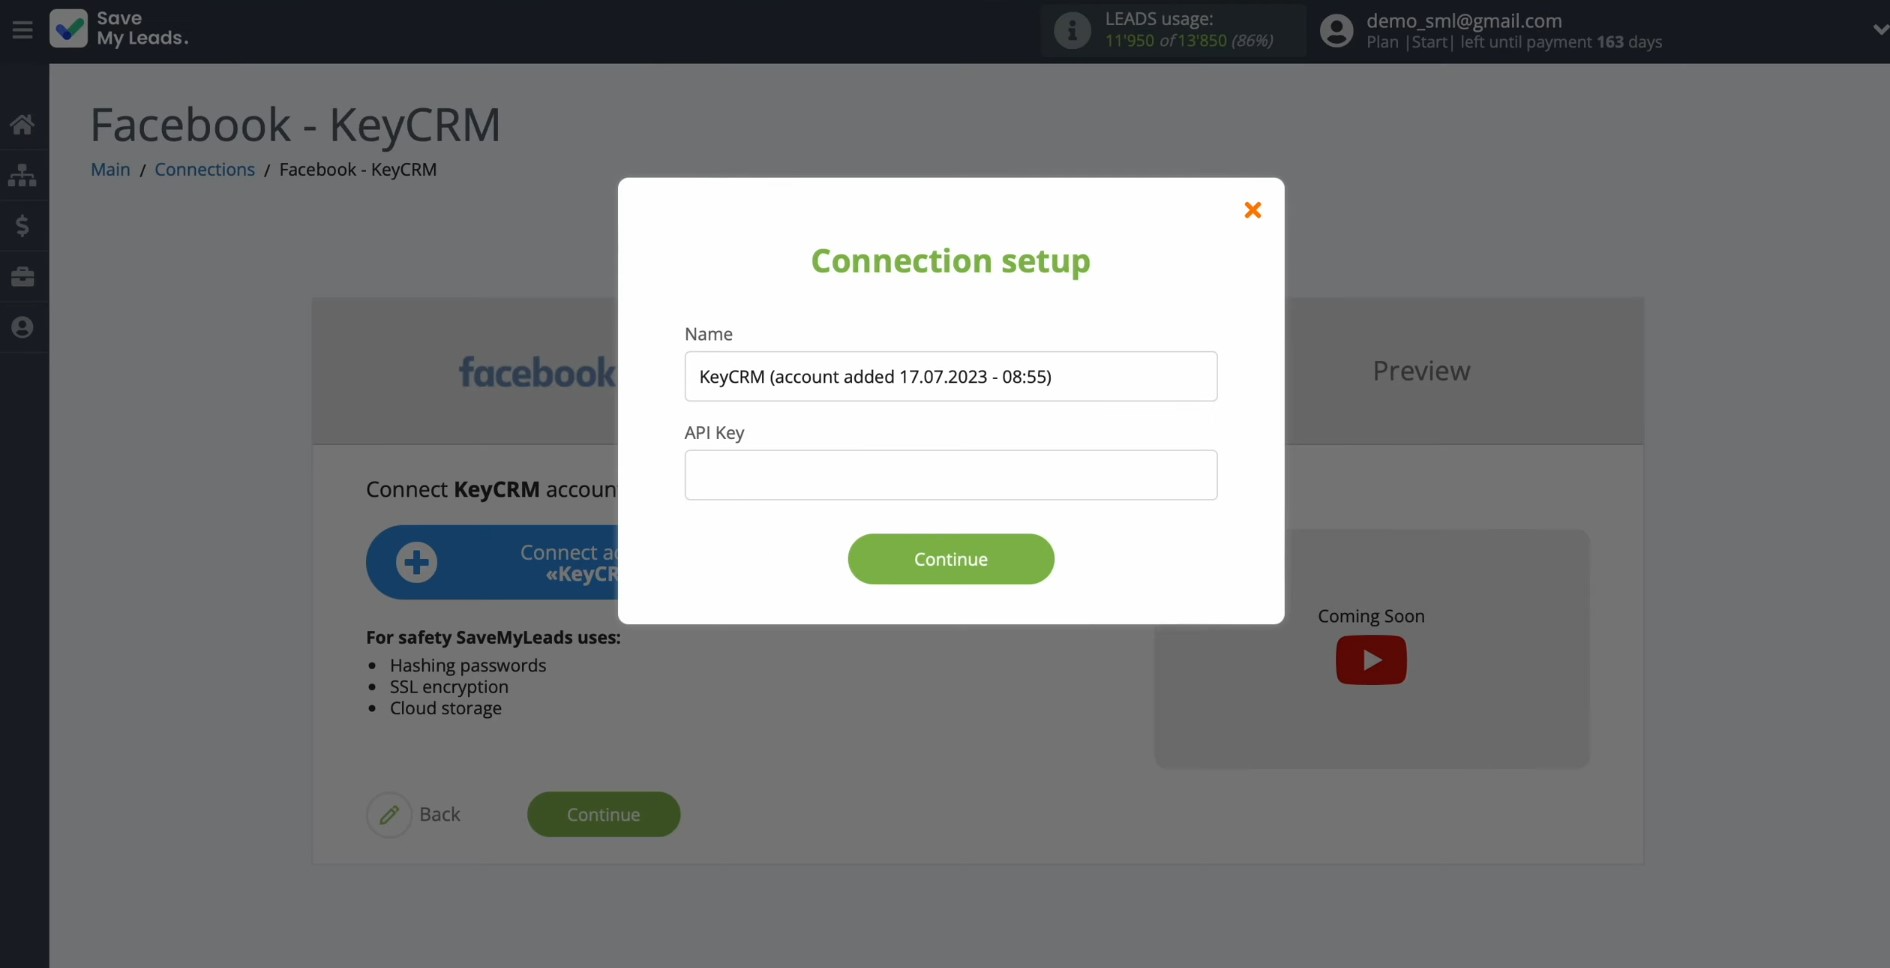
In this window, you must specify the API key.
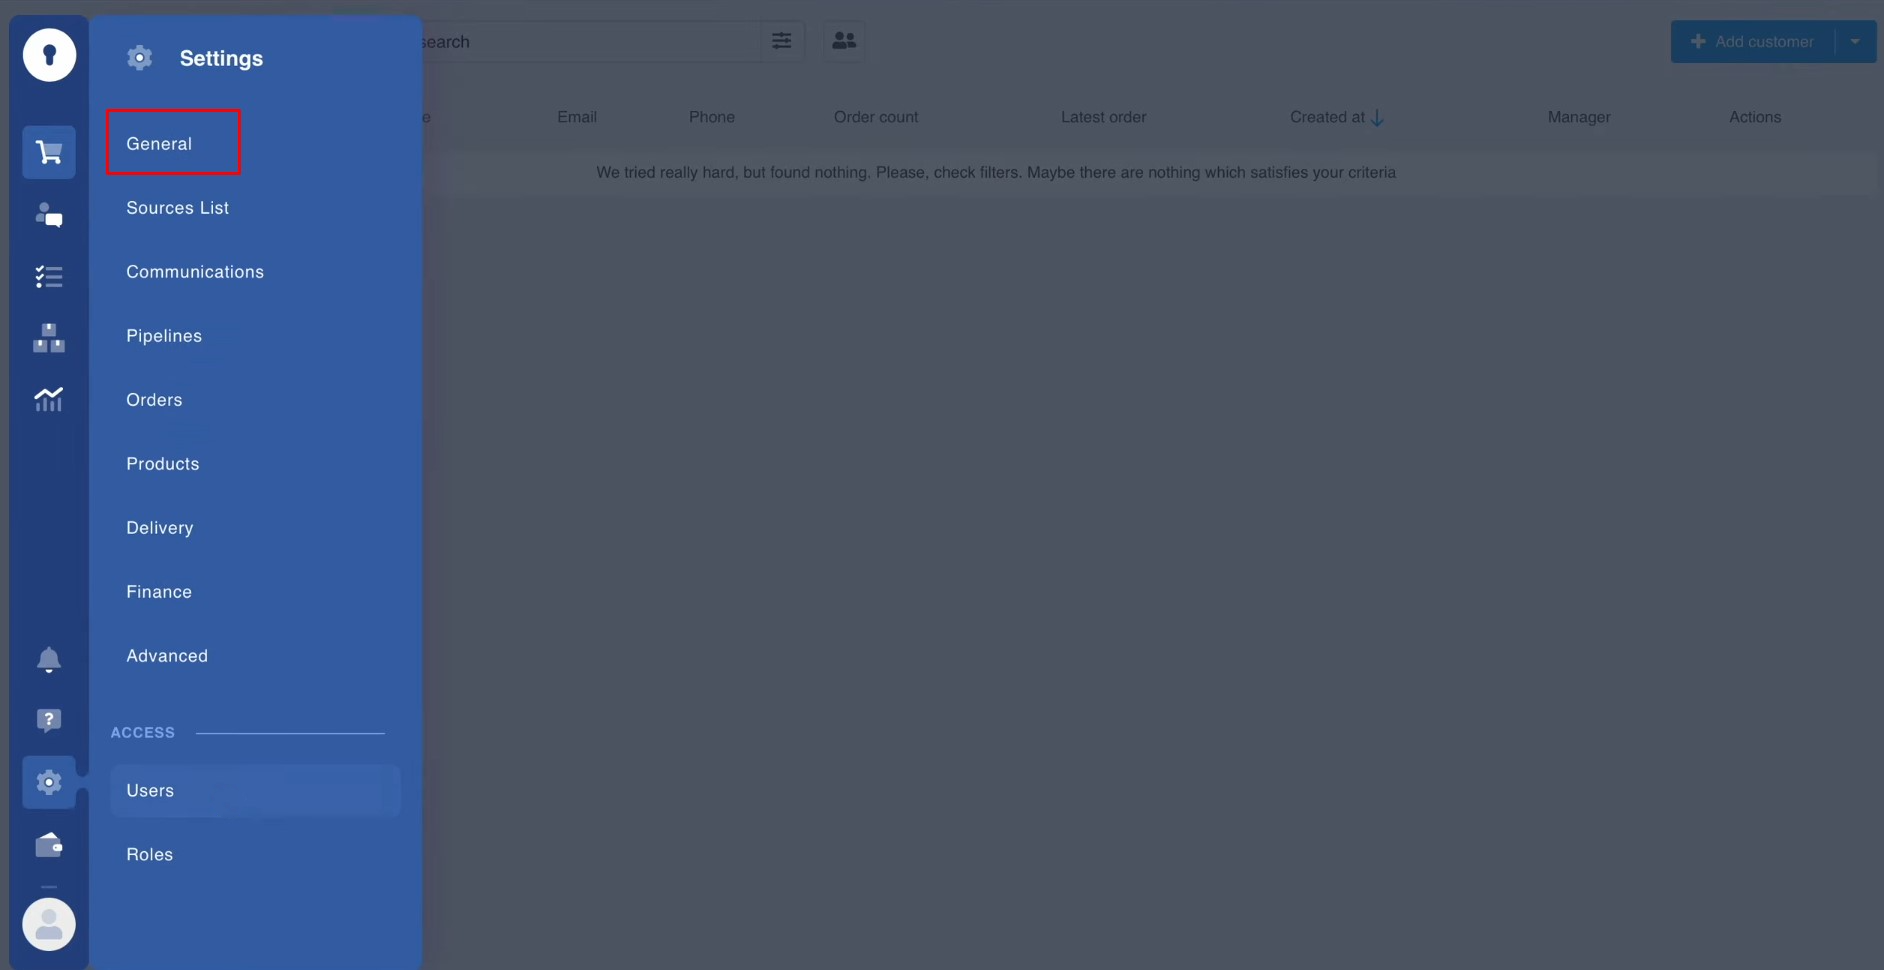
To get the
API key, go to “General” settings in your personal KeyCRM account.
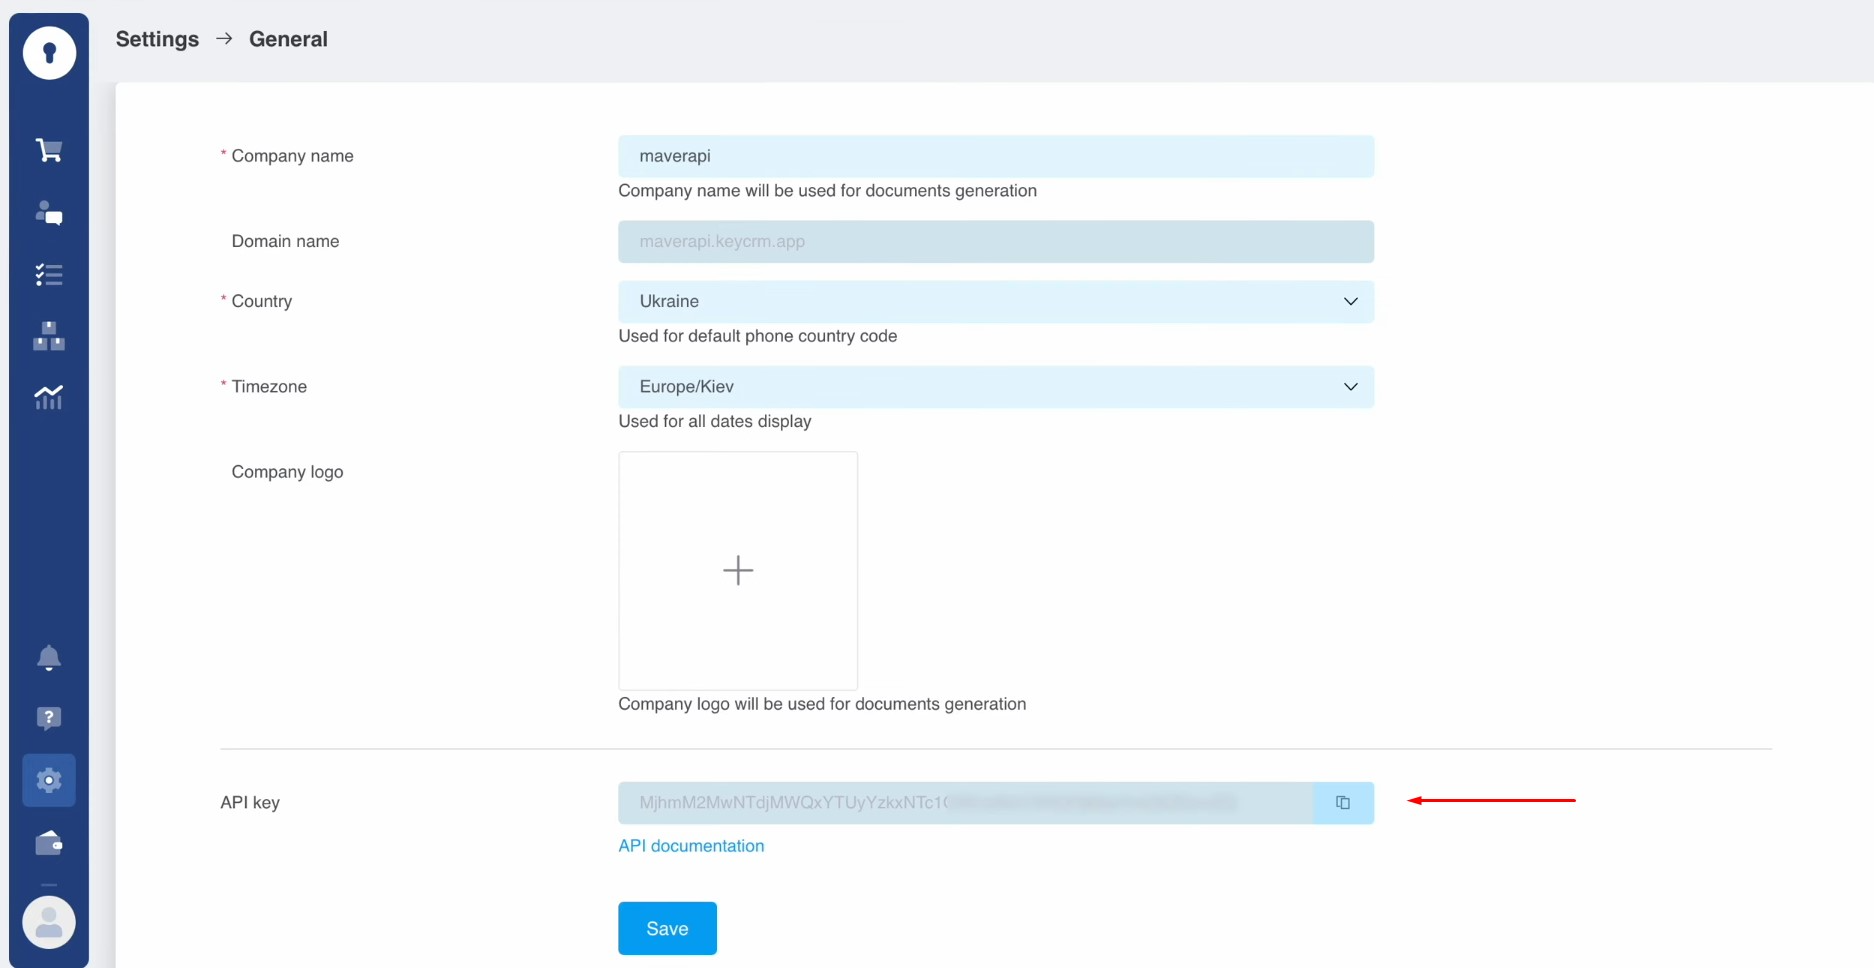
Copy the API
key.
Paste the API
key into the appropriate field in SaveMyLeads. When the required field is filled, click “Continue”.
When the
connected account is displayed in the list, select it.
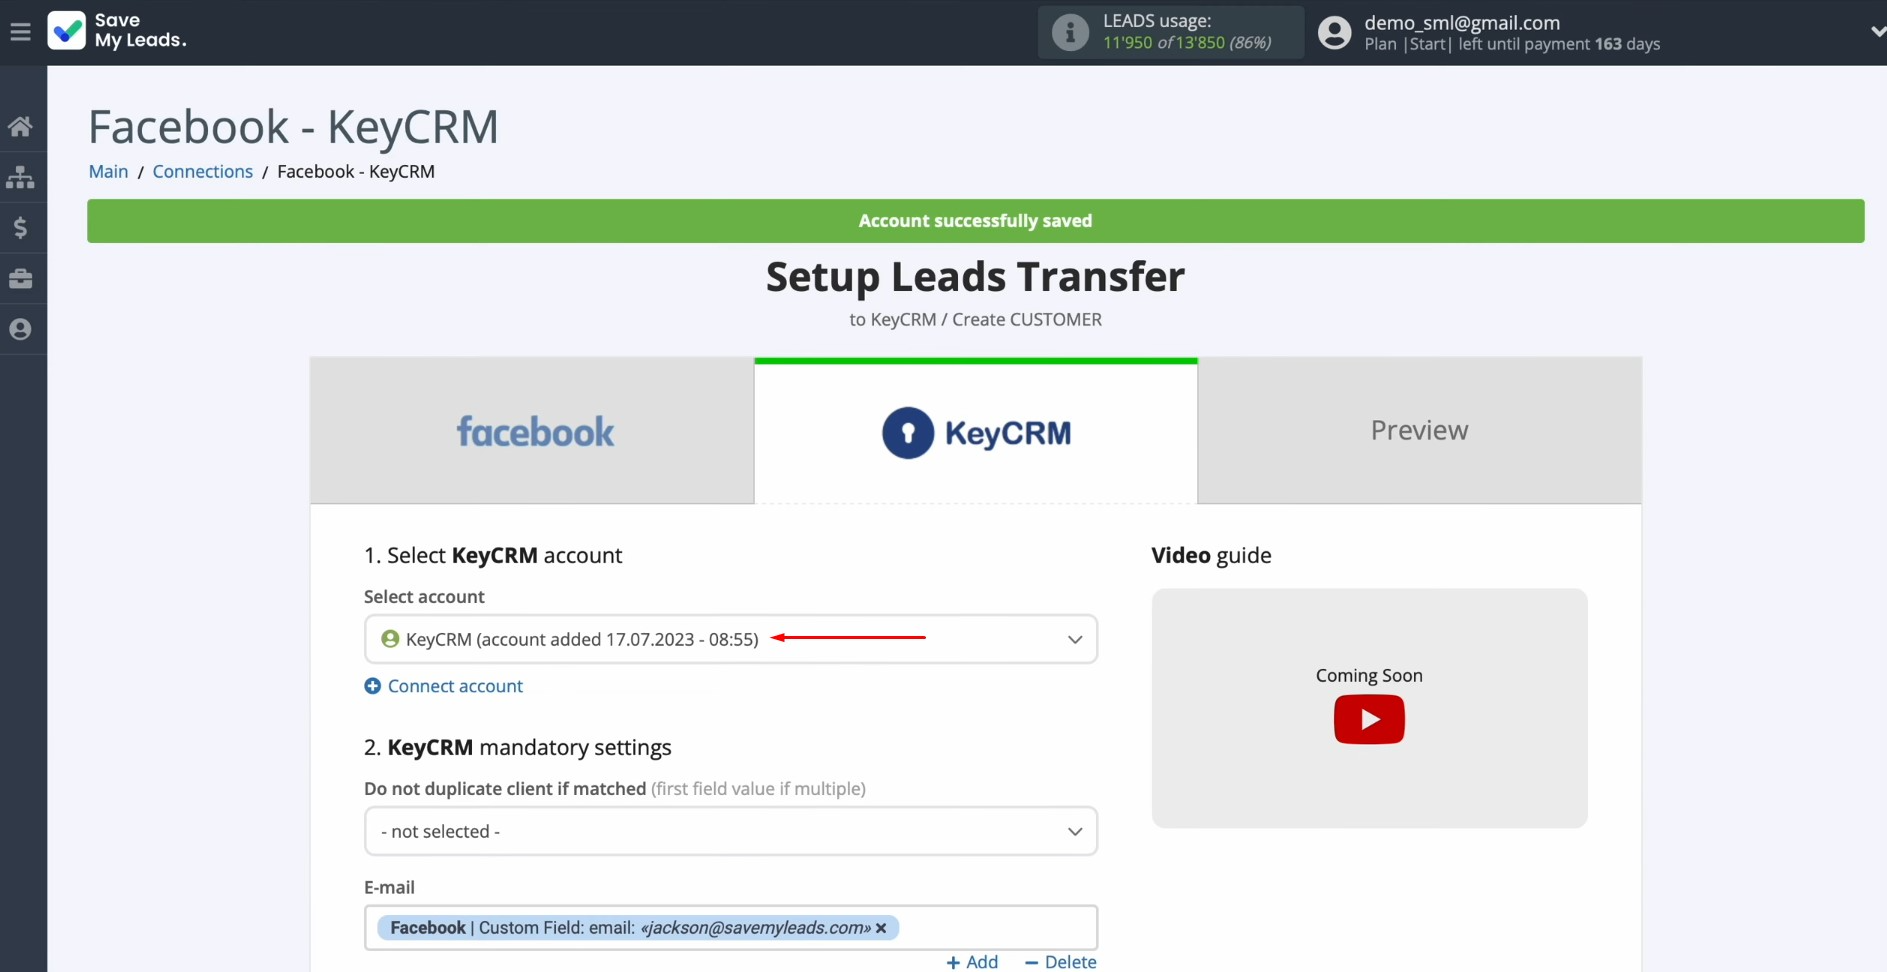
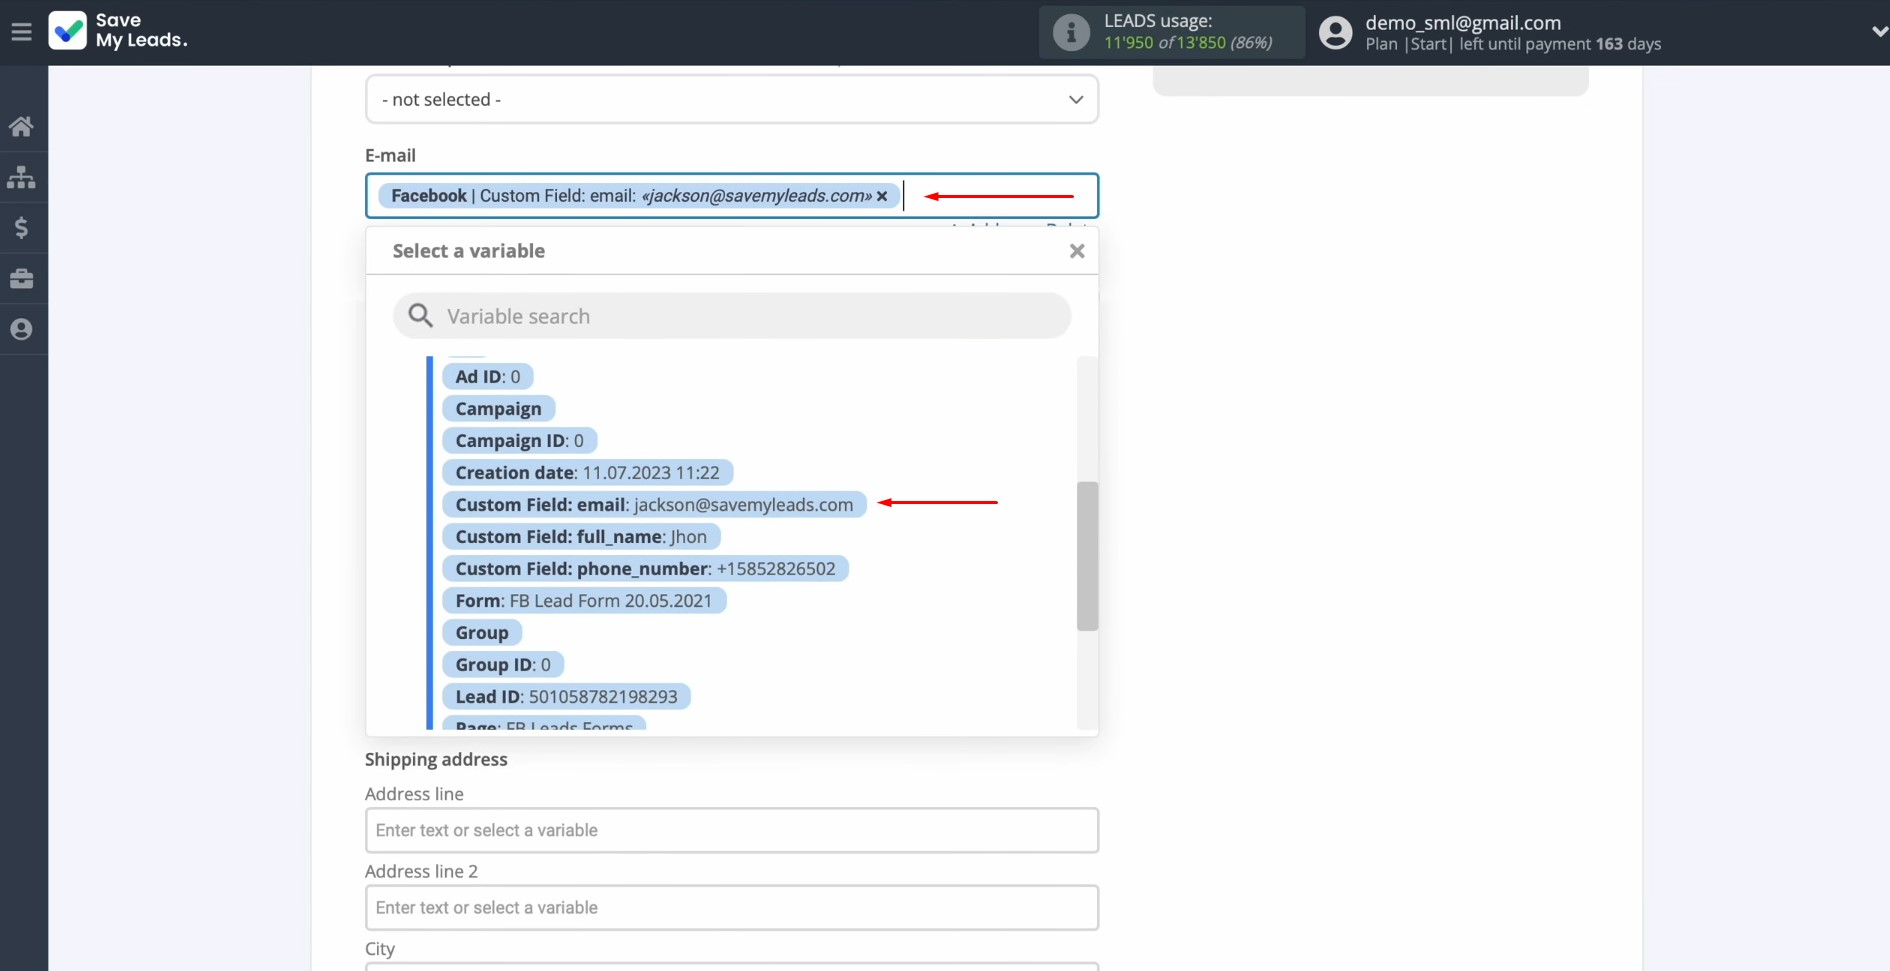
Here, you see the
KeyCRM fields for creating new
customers. You can assign variables from Facebook to these
fields. To do this, click in the field and select a variable from the
drop-down list.
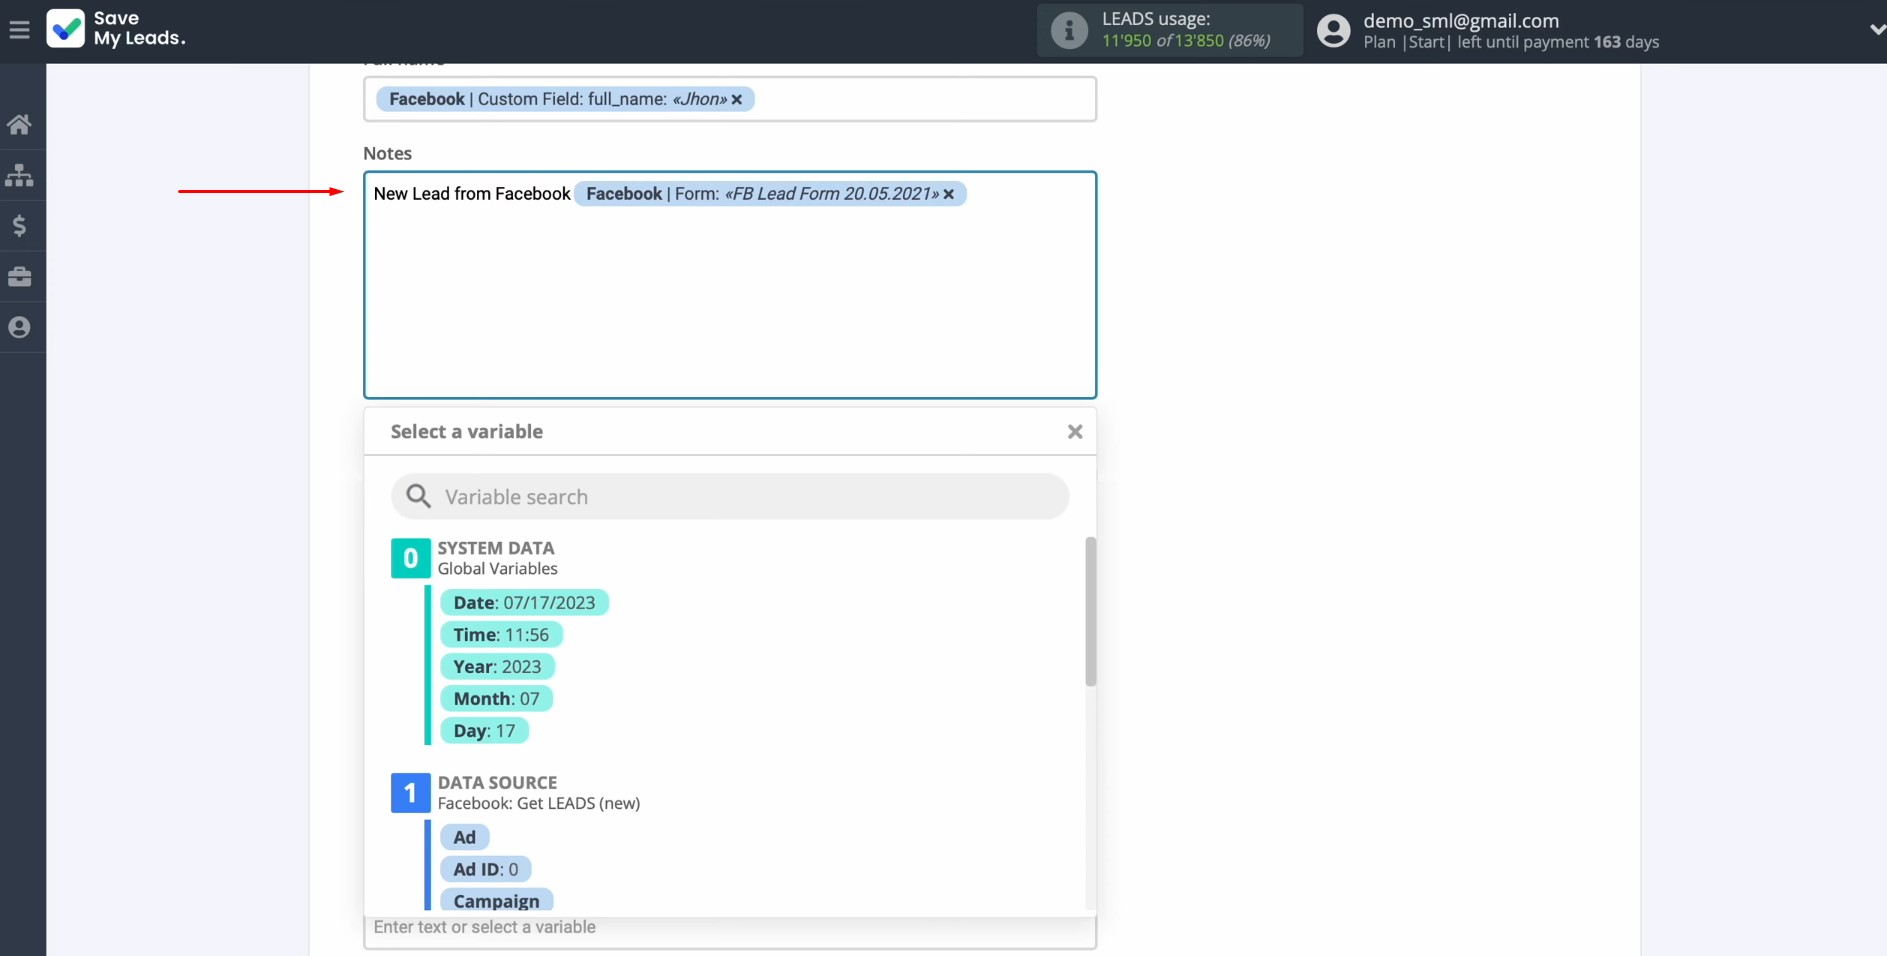
You can use
not only variables but also
manually write values.
When all the
required fields are filled, click “Continue”.
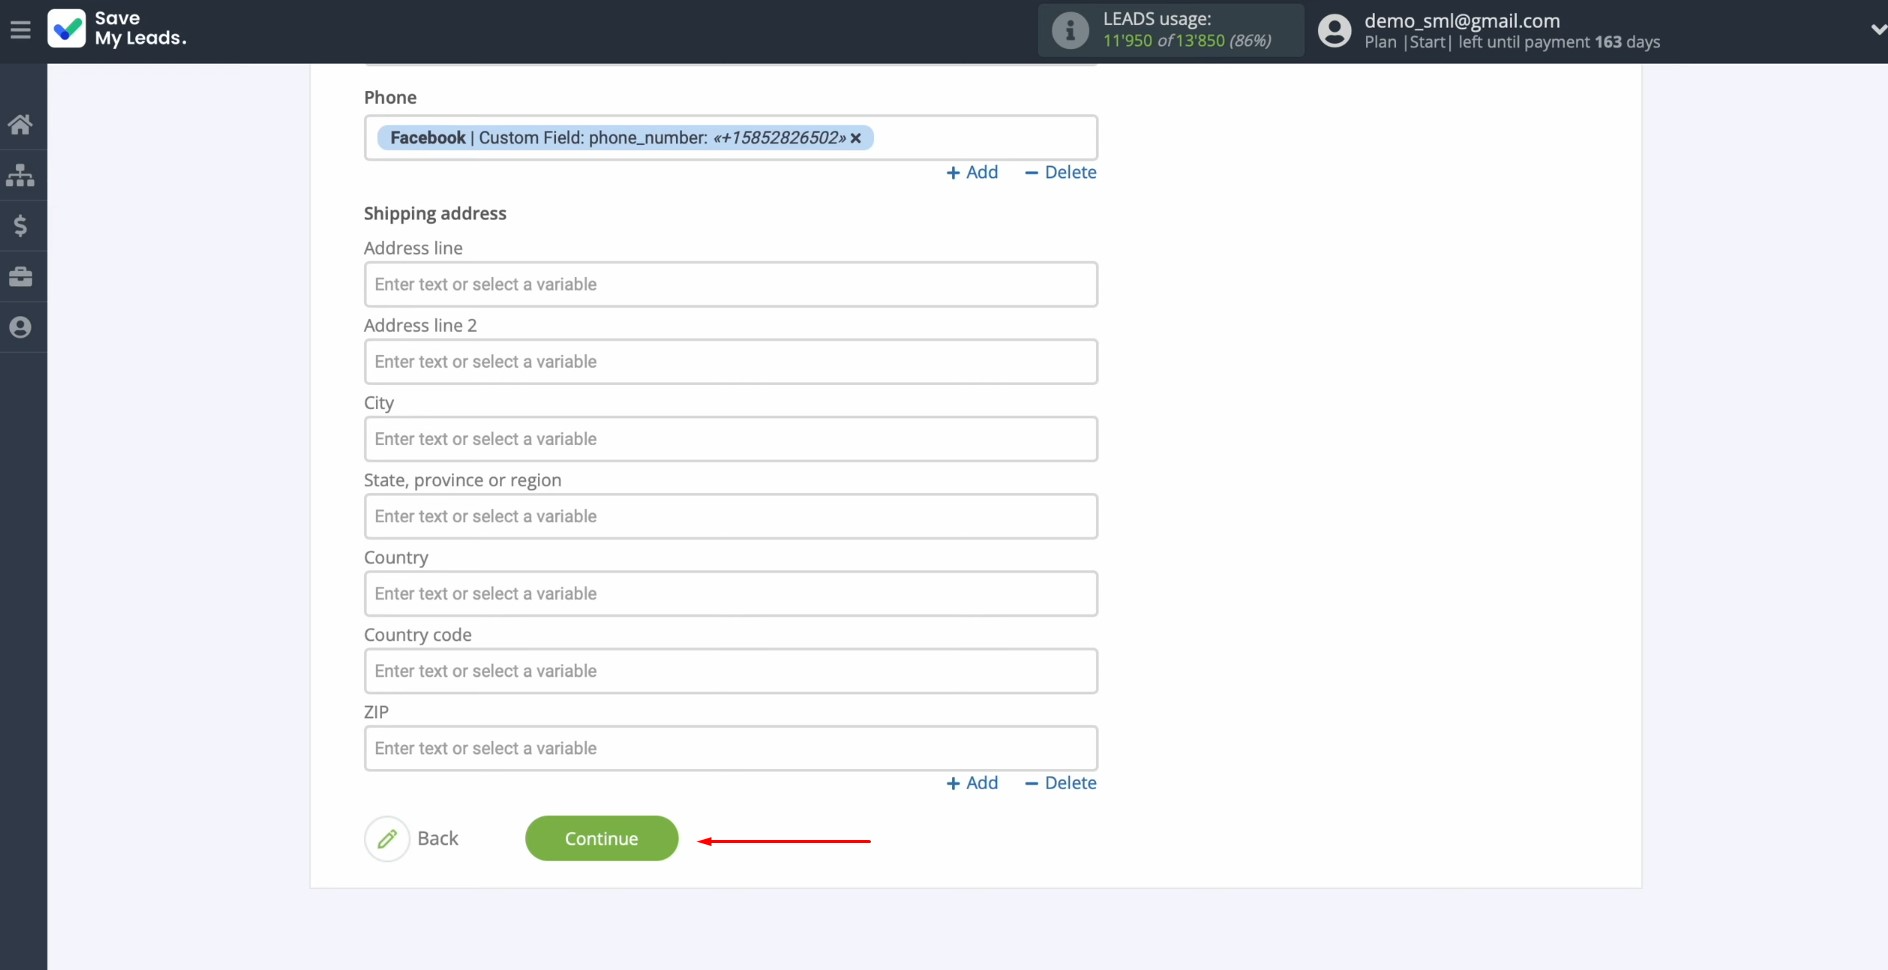
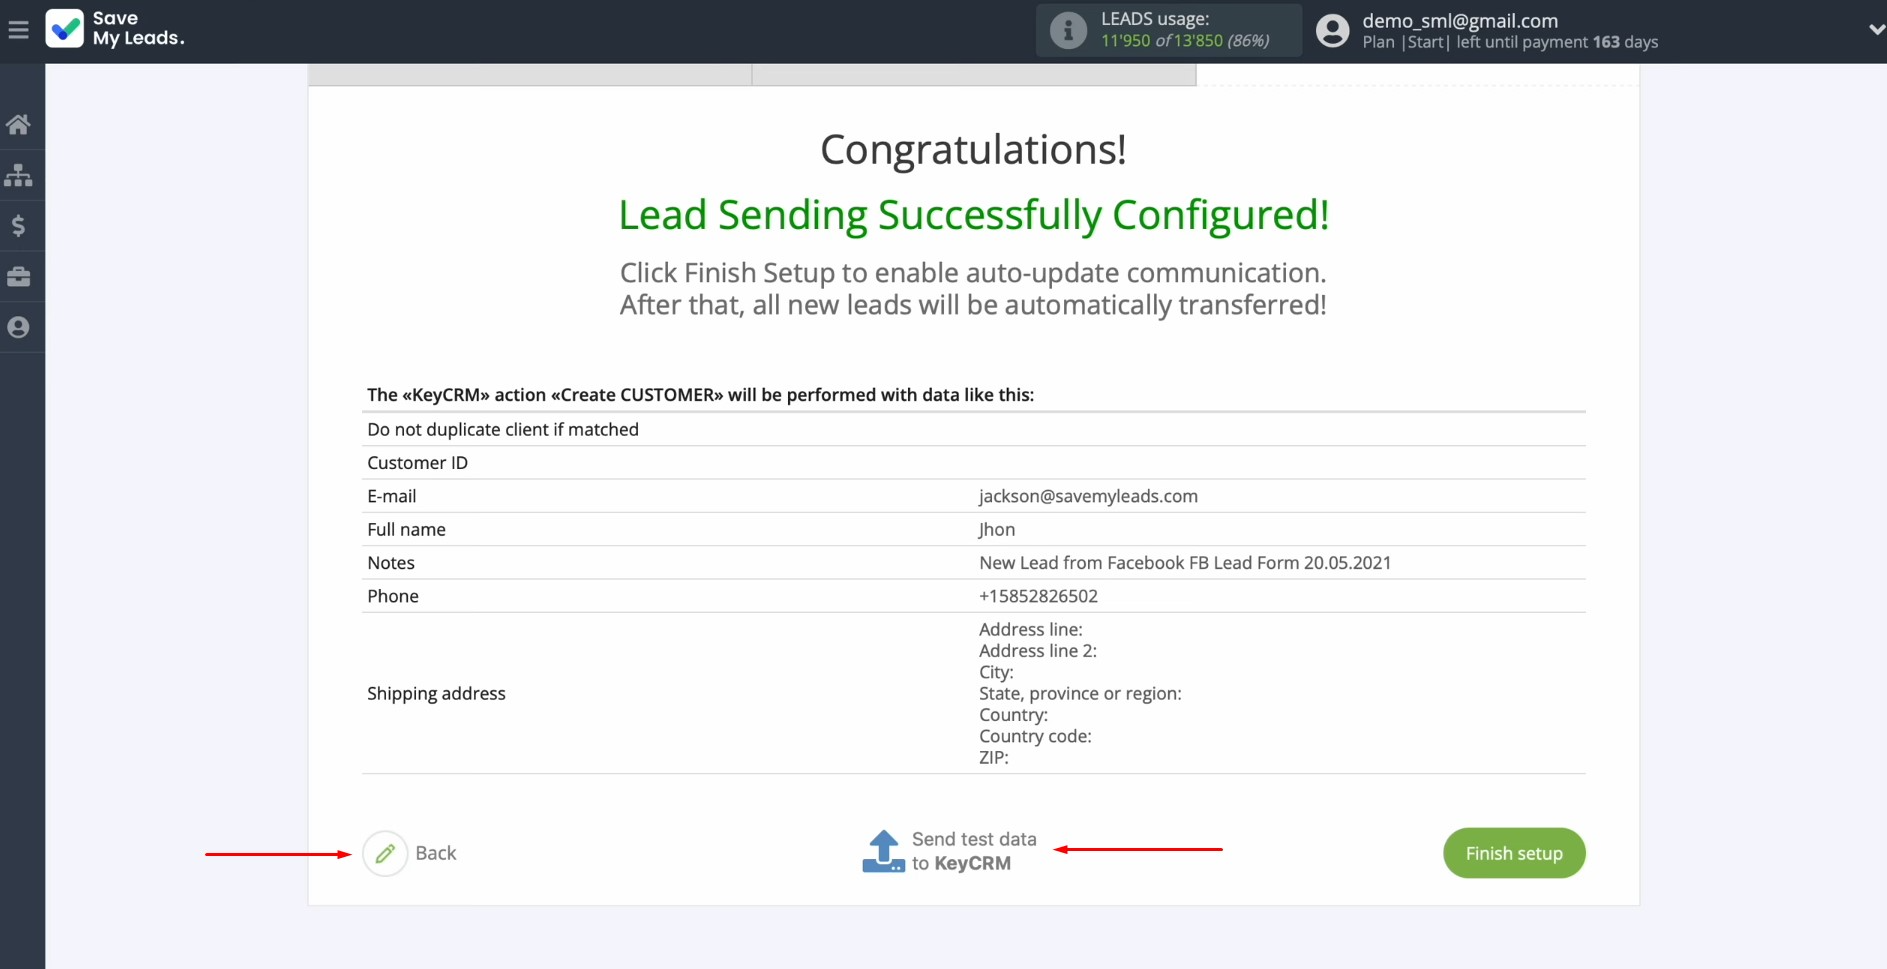
Now, you see an
example of data that will be
sent to KeyCRM in the form of new customers with each new lead
from Facebook. If something does not suit you, click “Back” and you will go back one step. To check the correctness of the settings, click “Send test data to KeyCRM”.
After
successful submission, go to KeyCRM and check the result.
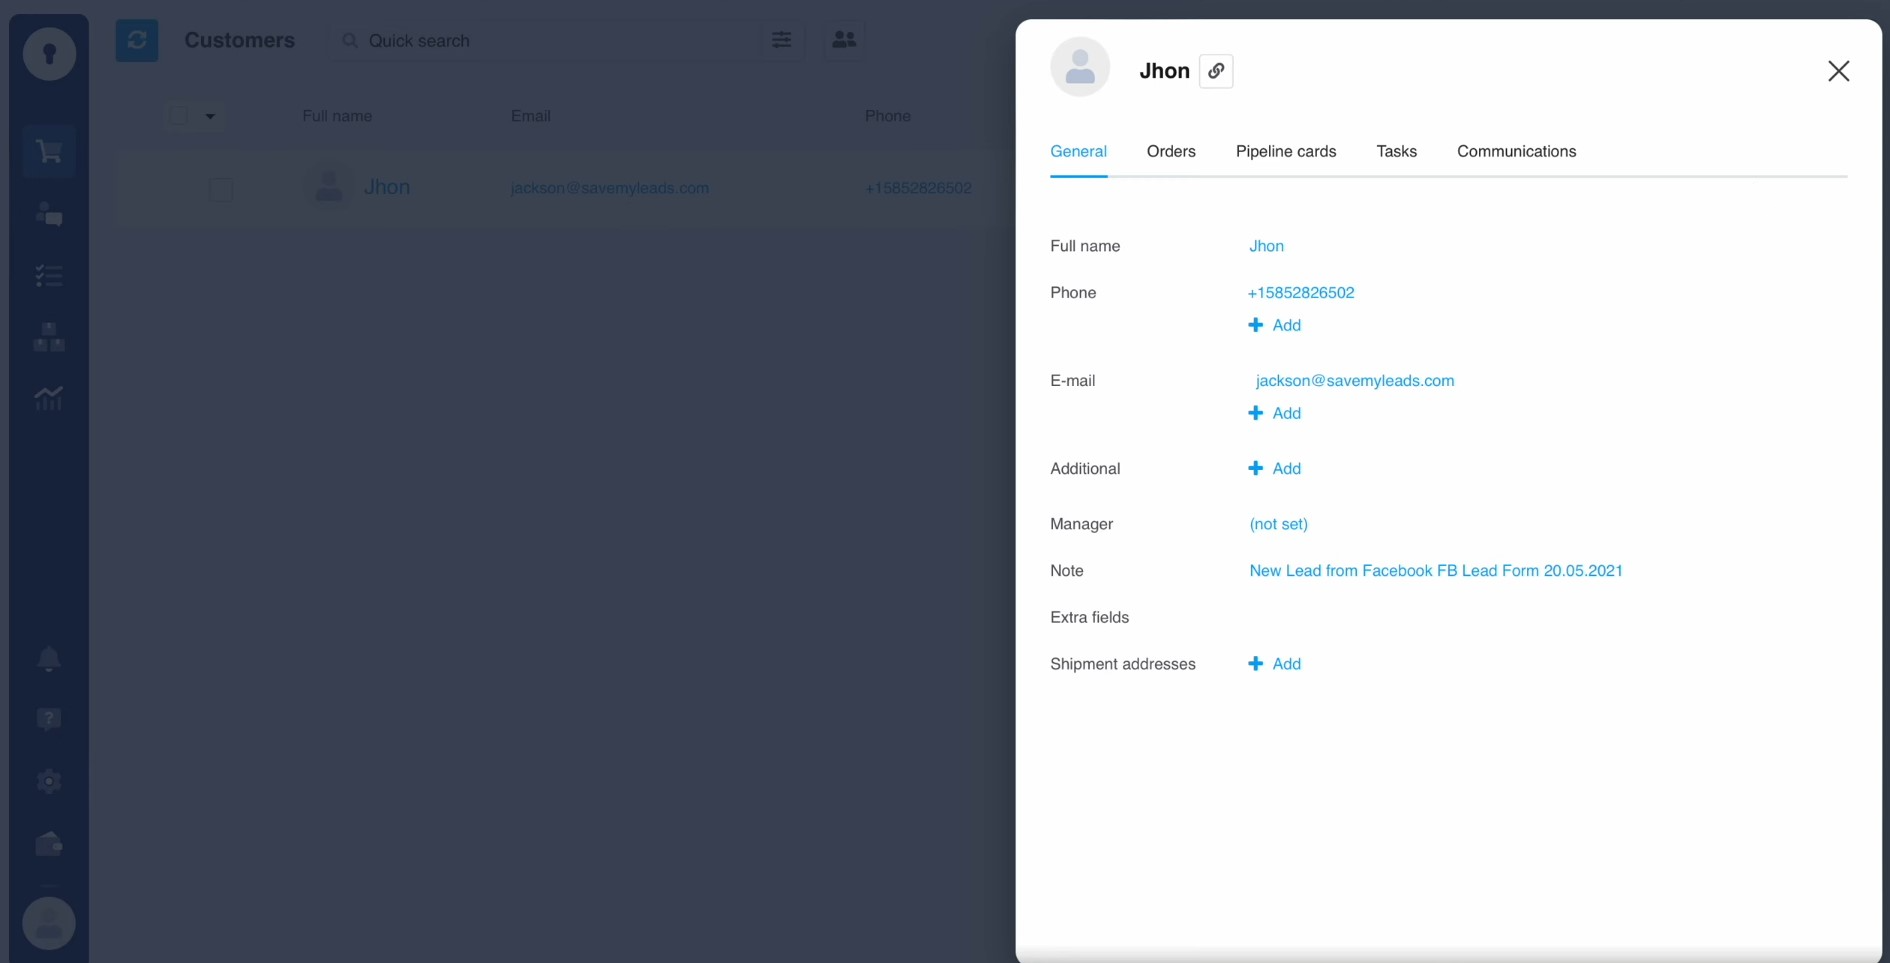
If everything
suits you, return to SaveMyLeads and continue setting up.
Setting up Auto-update
Click “Finish setup” to enable auto-update of the connection. In this case, all new leads from Facebook will be instantly transferred to the KeyCRM system in the form of new customers.
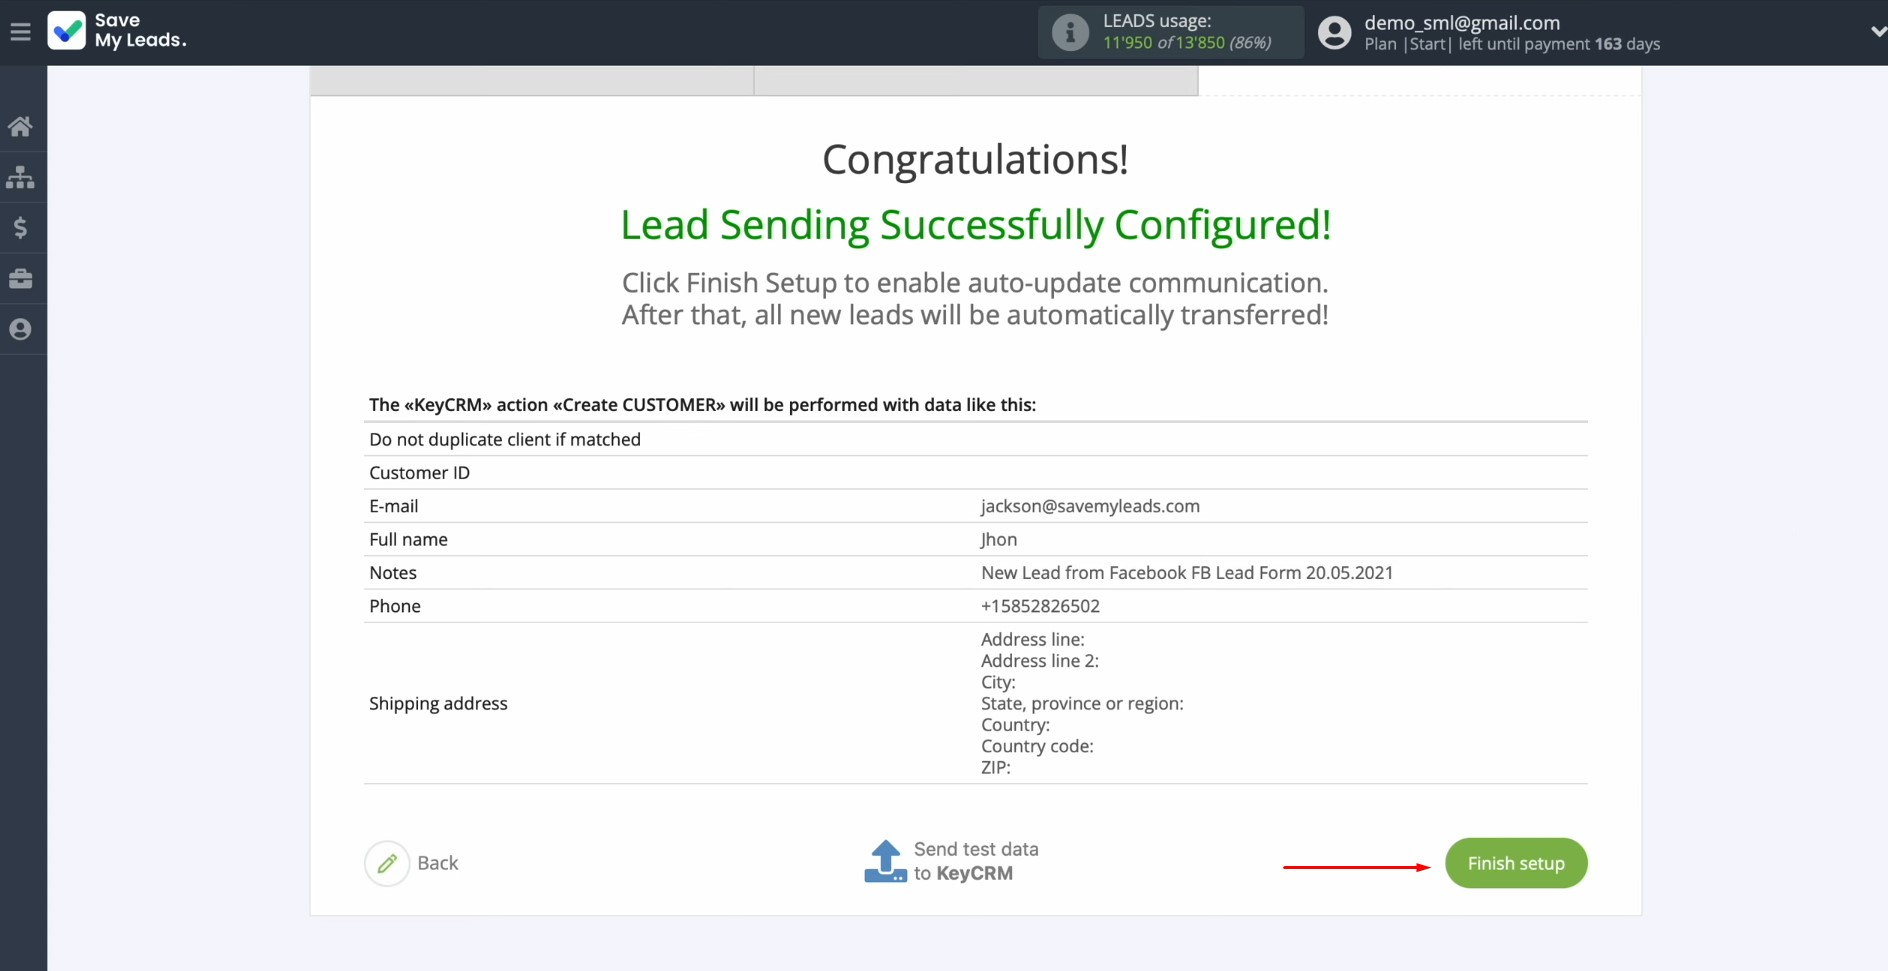
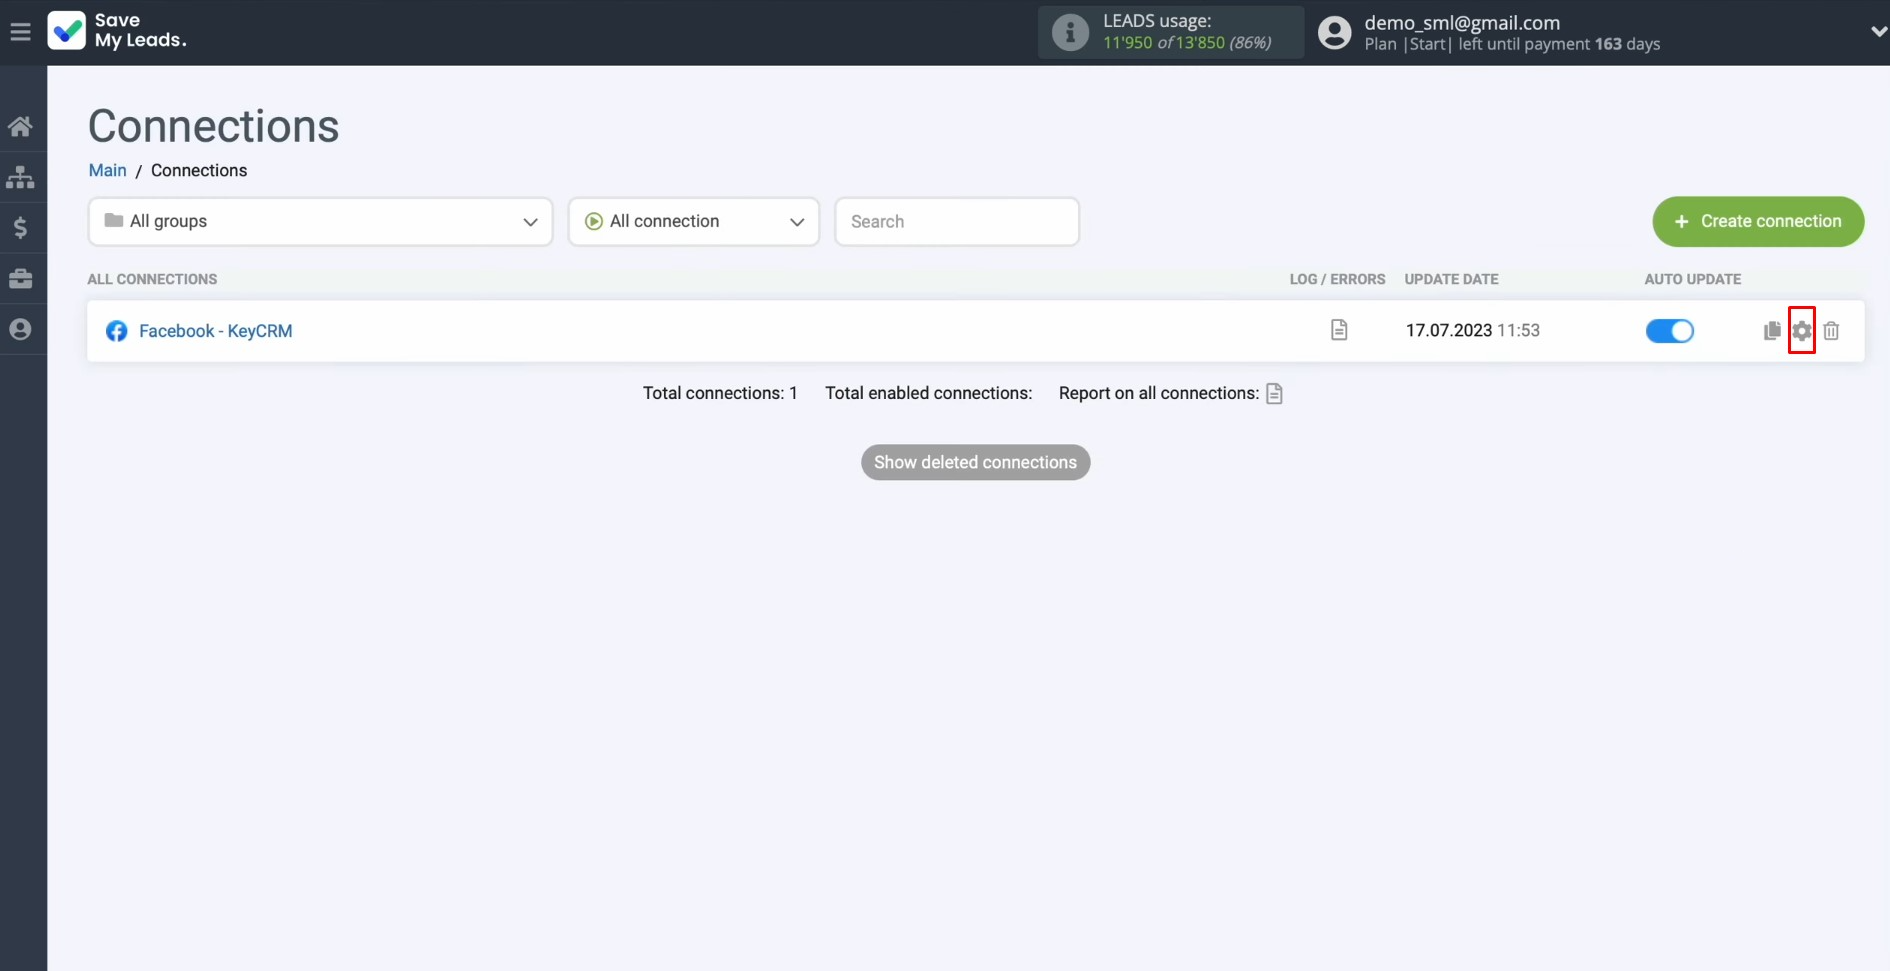
If you want to change the connection name, you can do this in its
settings. For this, click on the gear icon.
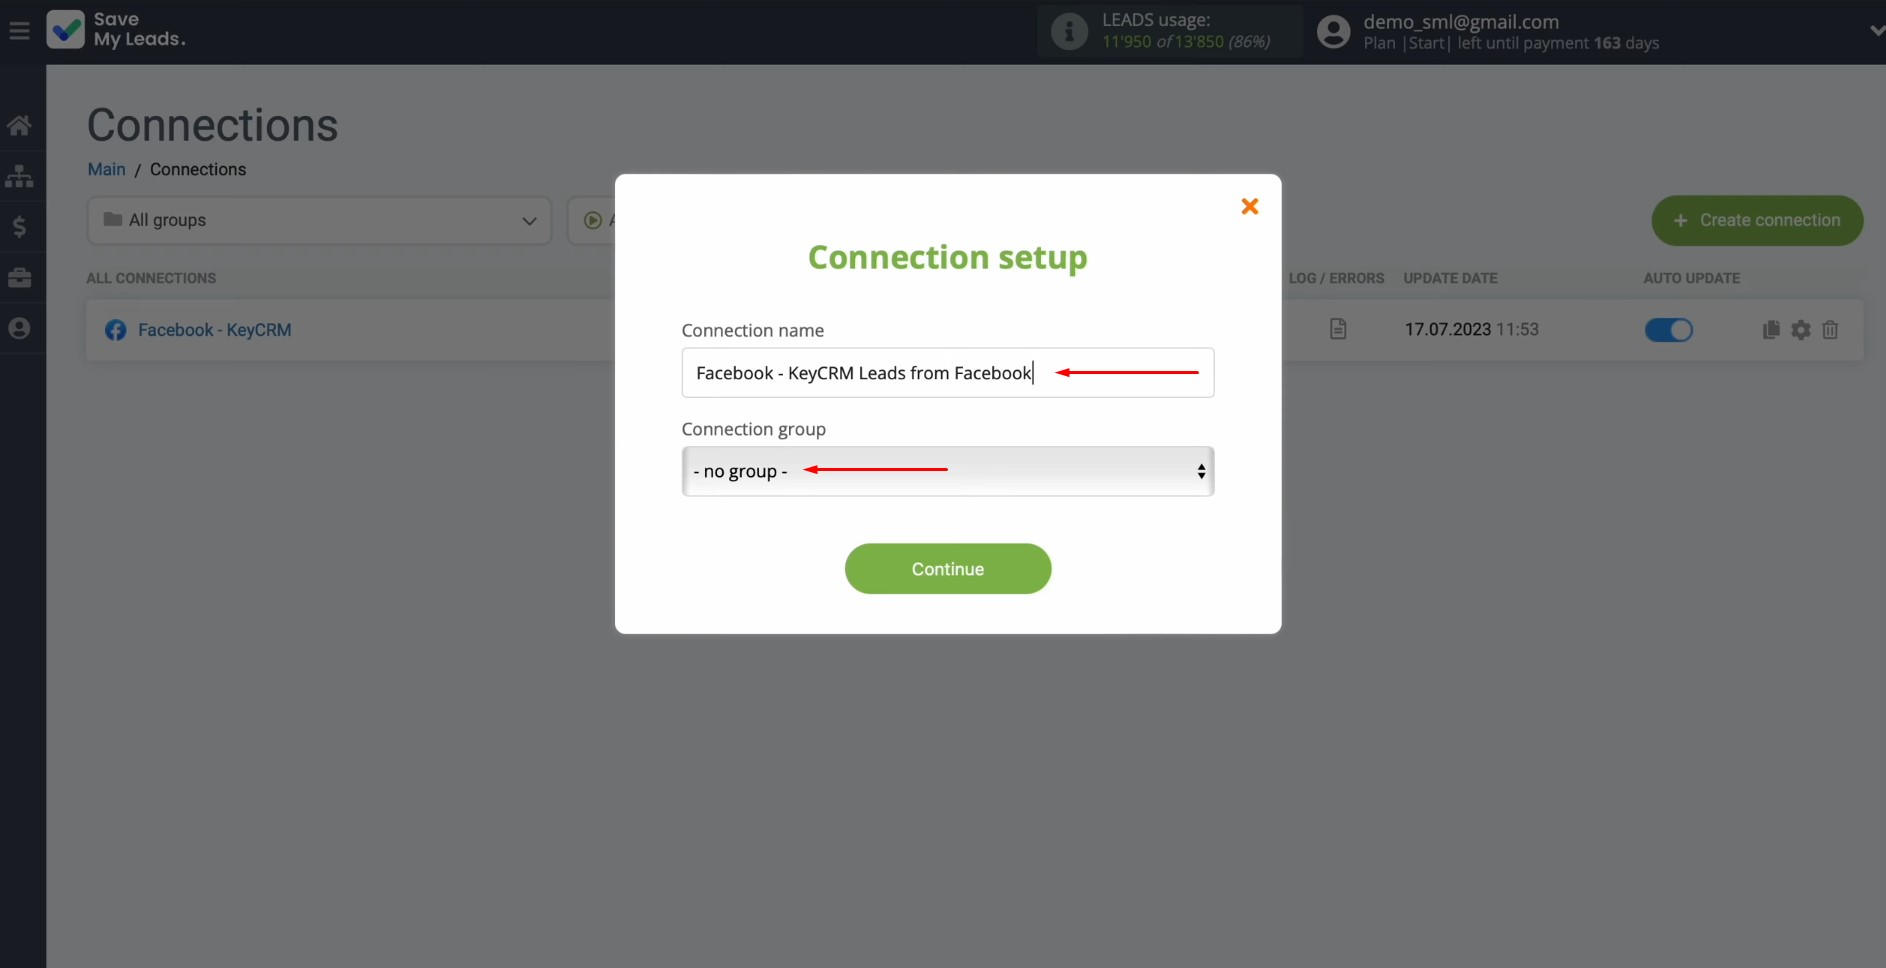
Here, you can change the connection name and add it to a
group. After that, click “Continue”.
That's all. KeyCRM and Facebook integration has been completed.
Result of Facebook and KeyCRM Integration
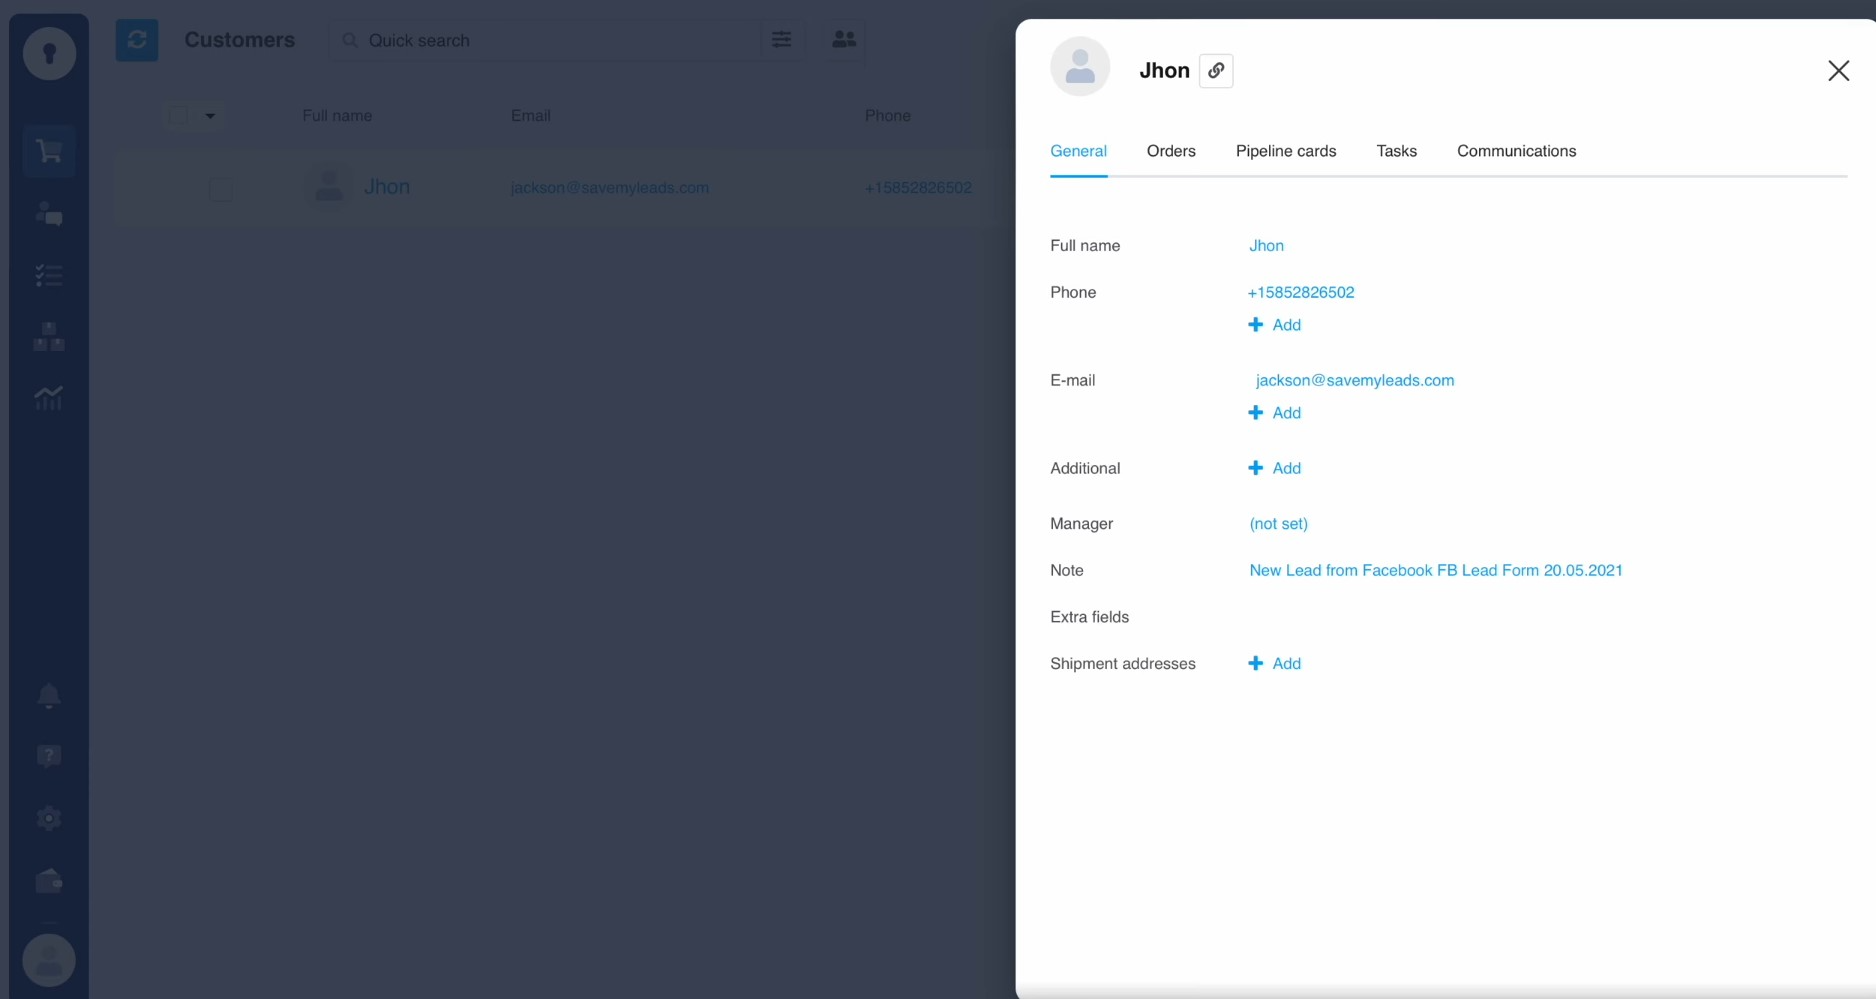
After setting up the Facebook & KeyCRM integration, you will quickly see the first results. Each new lead that fills out and submits the Lead Ads form is transferred to the CRM system and registered there as a new customer. Automating this process significantly speeds up the processing of customer requests and simplifies the work of your staff, freeing them from manual work.
- Automate the work with leads from the Facebook advertising account
- Empower with integrations and instant transfer of leads
- Don't spend money on developers or integrators
- Save time by automating routine tasks
As you can see, setting up KeyCRM & Facebook integration does not require any special skills. Integration occurs through an easily managed web interface of the connector in just a few minutes. Once launched, SaveMyLeads takes care of the routine transfer of data from Lead Ads forms to the KeyCRM system, allowing you to focus on other tasks, increasing productivity and customer service.
Step-by-Step Guides for Setting Up Integrations:
