Google Lead Form and Vbout are powerful tools that excel in their respective domains. By utilizing these services, you can optimize multiple aspects of your business workflows. But what if you could take efficiency a step further? Connecting these platforms enables seamless data exchange, enhancing automation and productivity. In this article, we’ll guide you through the process of integrating Google Ads Lead Form with Vbout.
Google Lead Form and Vbout Integration – the Pinnacle of Automation
Integrating Vbout with Google Ads Lead Form helps businesses improve workflow accuracy and efficiency, especially in e-commerce and marketing. This integration takes business automation to the next level. Once the platforms are synchronized, every lead form submission automatically feeds into Vbout, where it is converted into a new contact.
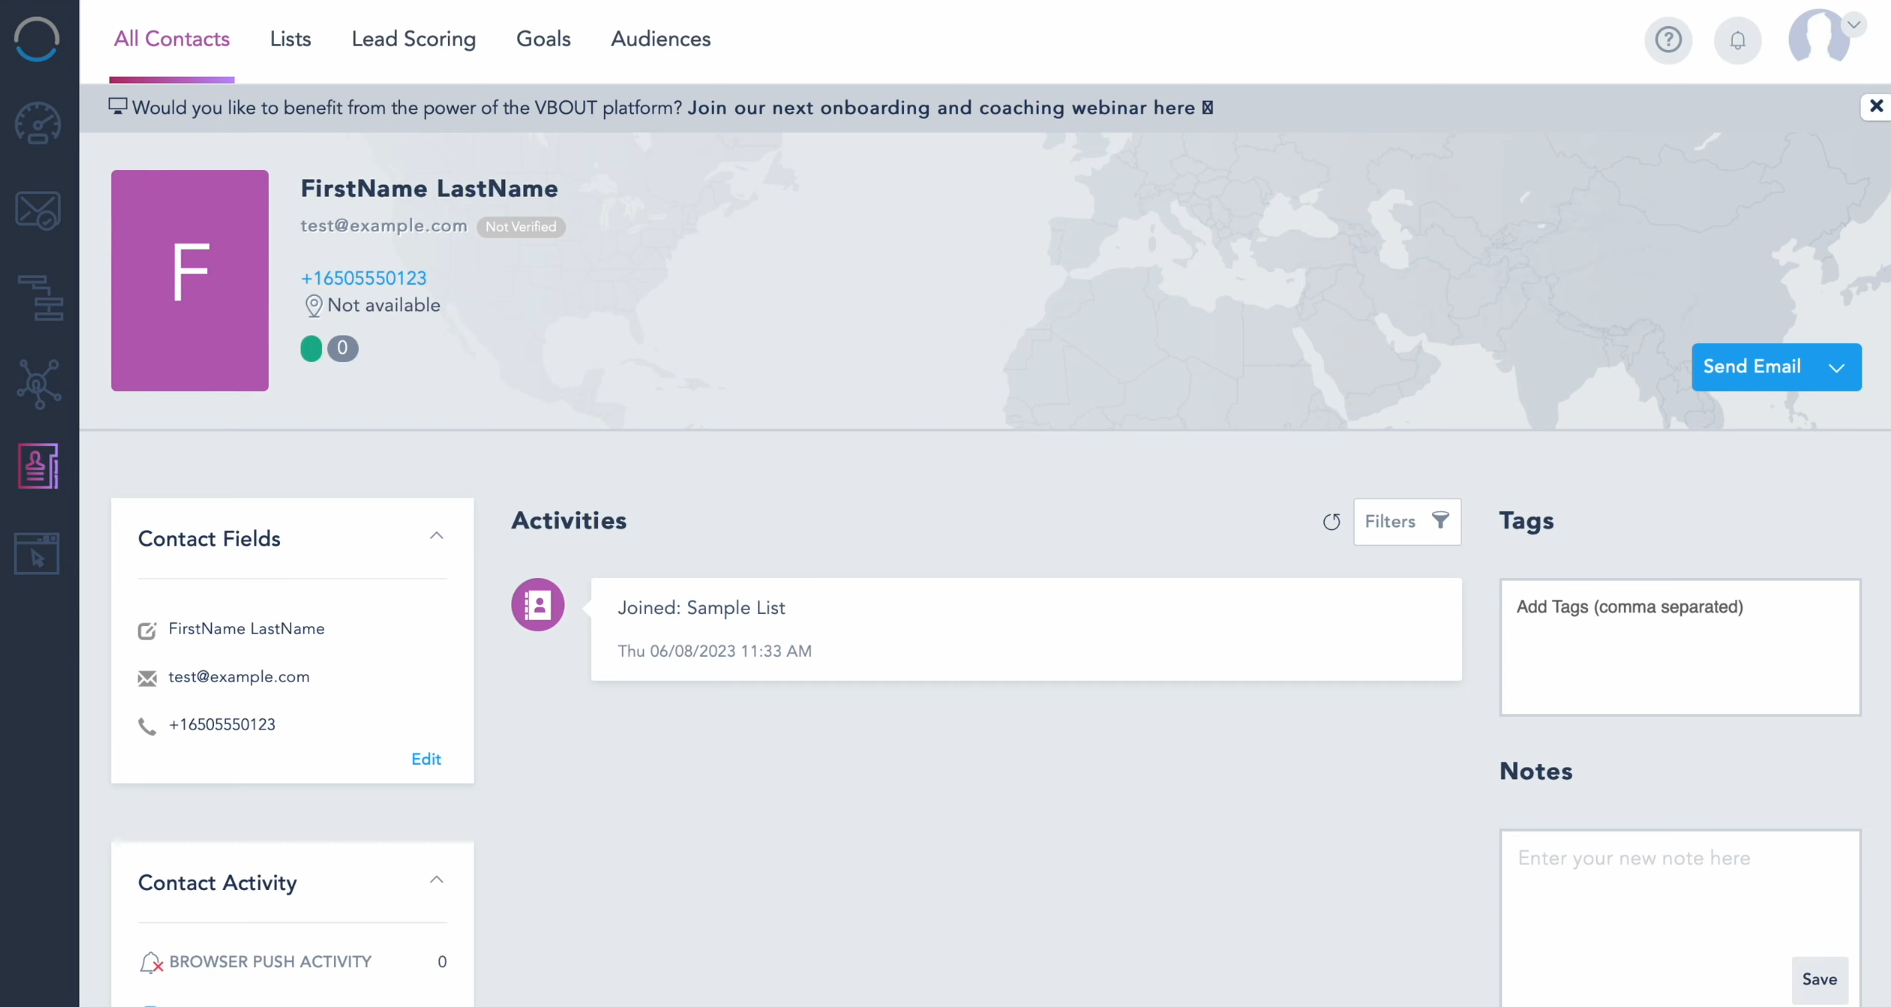
Let’s look at real-world examples of how this integration improves efficiency:
- A fitness center utilizes Google Lead Form to collect inquiries from potential clients interested in trial workouts. Once the form is filled out, the contact information is automatically transferred to Vbout, where an automated email sequence is triggered for each new client. This sequence includes a welcome email, a class schedule, and special subscription offers. This approach increases the likelihood that the client will take advantage of the fitness center's services.
- A real estate agency uses Google Lead Form in its advertising campaigns to attract potential buyers. When a client completes the form, their contact details are sent to Vbout, where the agency can segment clients based on their interests (e.g., apartments or houses) and send personalized offers about available properties. This streamlines communication and helps the agency close more deals.
How to Connect Google Ads Lead Form to Vbout
Connecting Google Lead Form to Vbout requires no programming skills or API knowledge, nor the need to hire IT professionals. The online connector SML streamlines the integration, enabling a quick and effortless setup. Thanks to its user-friendly interface, the entire process takes less than ten minutes.
Ready to get started? Create an account on the SaveMyLeads platform if you haven’t done so yet. From there, you’re just moments away from completing your Vbout and Google Lead Form integration.
Setting Up the Data Source: Google Lead Form
To configure Google Leads and Vbout integration, the first step is to establish a new connection. Simply click on the designated button to get started.
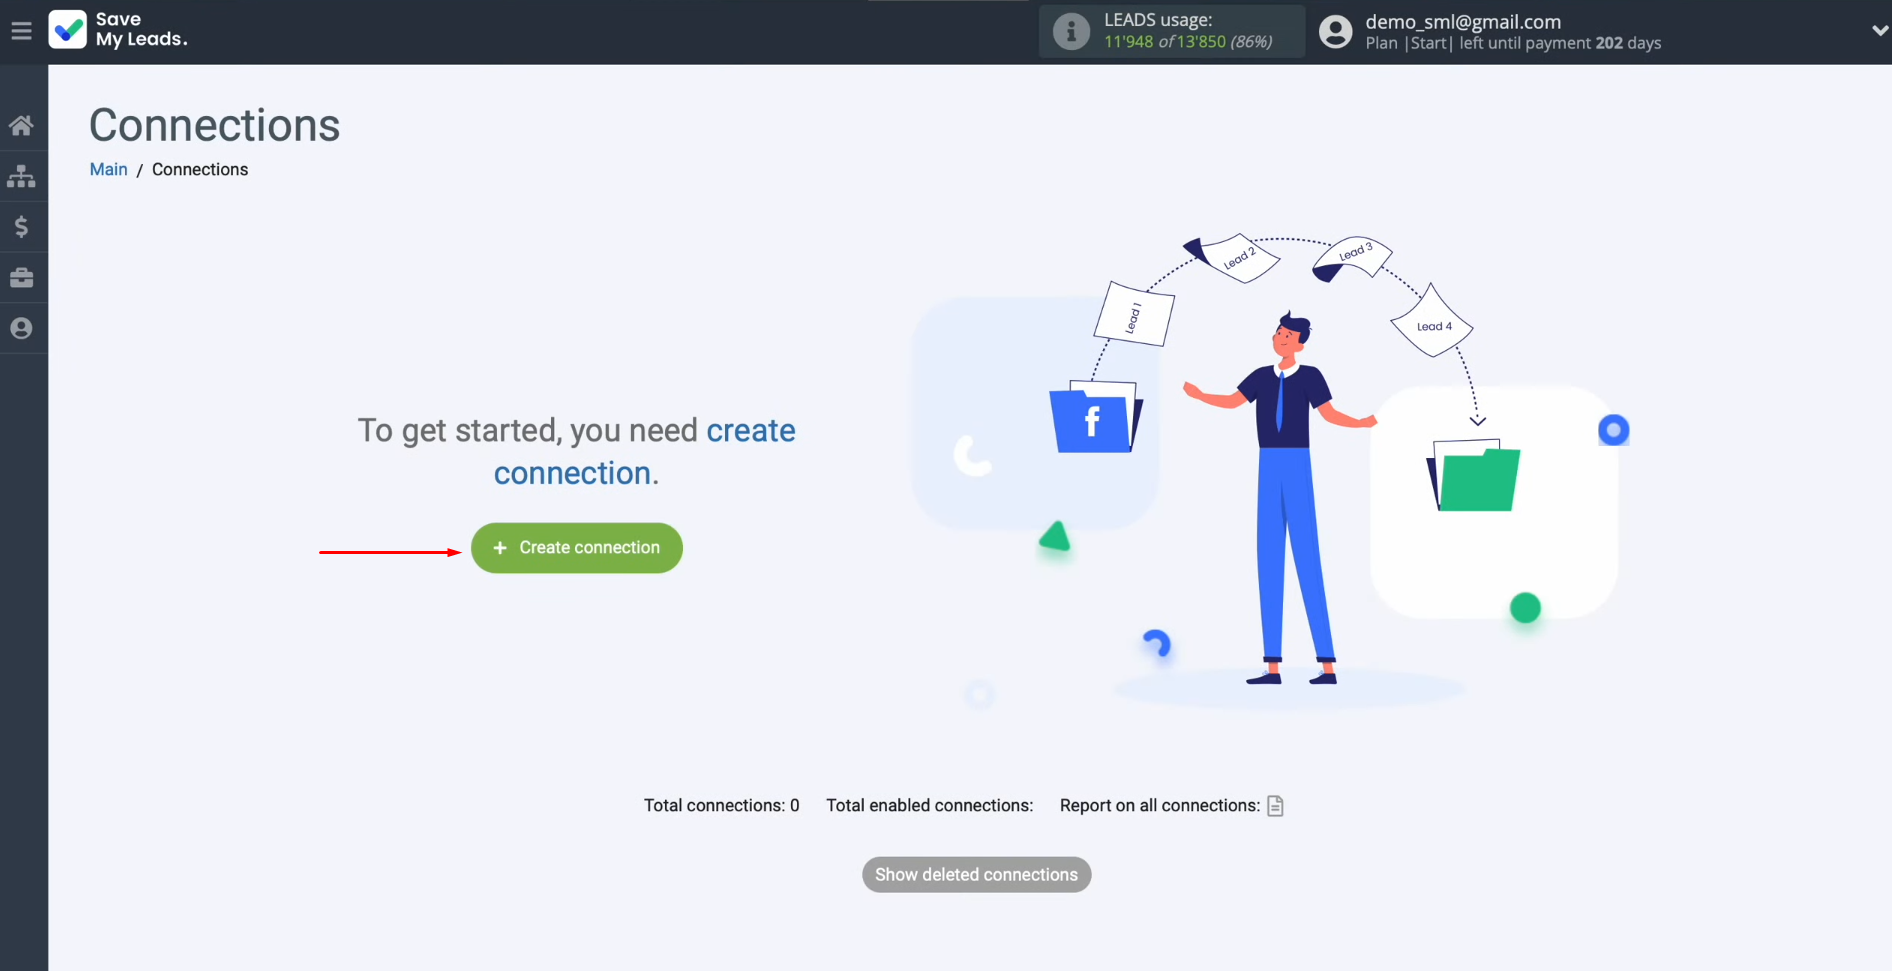
Next, choose
the platform from which you want to collect lead data. In this case, select
Google Lead Form.
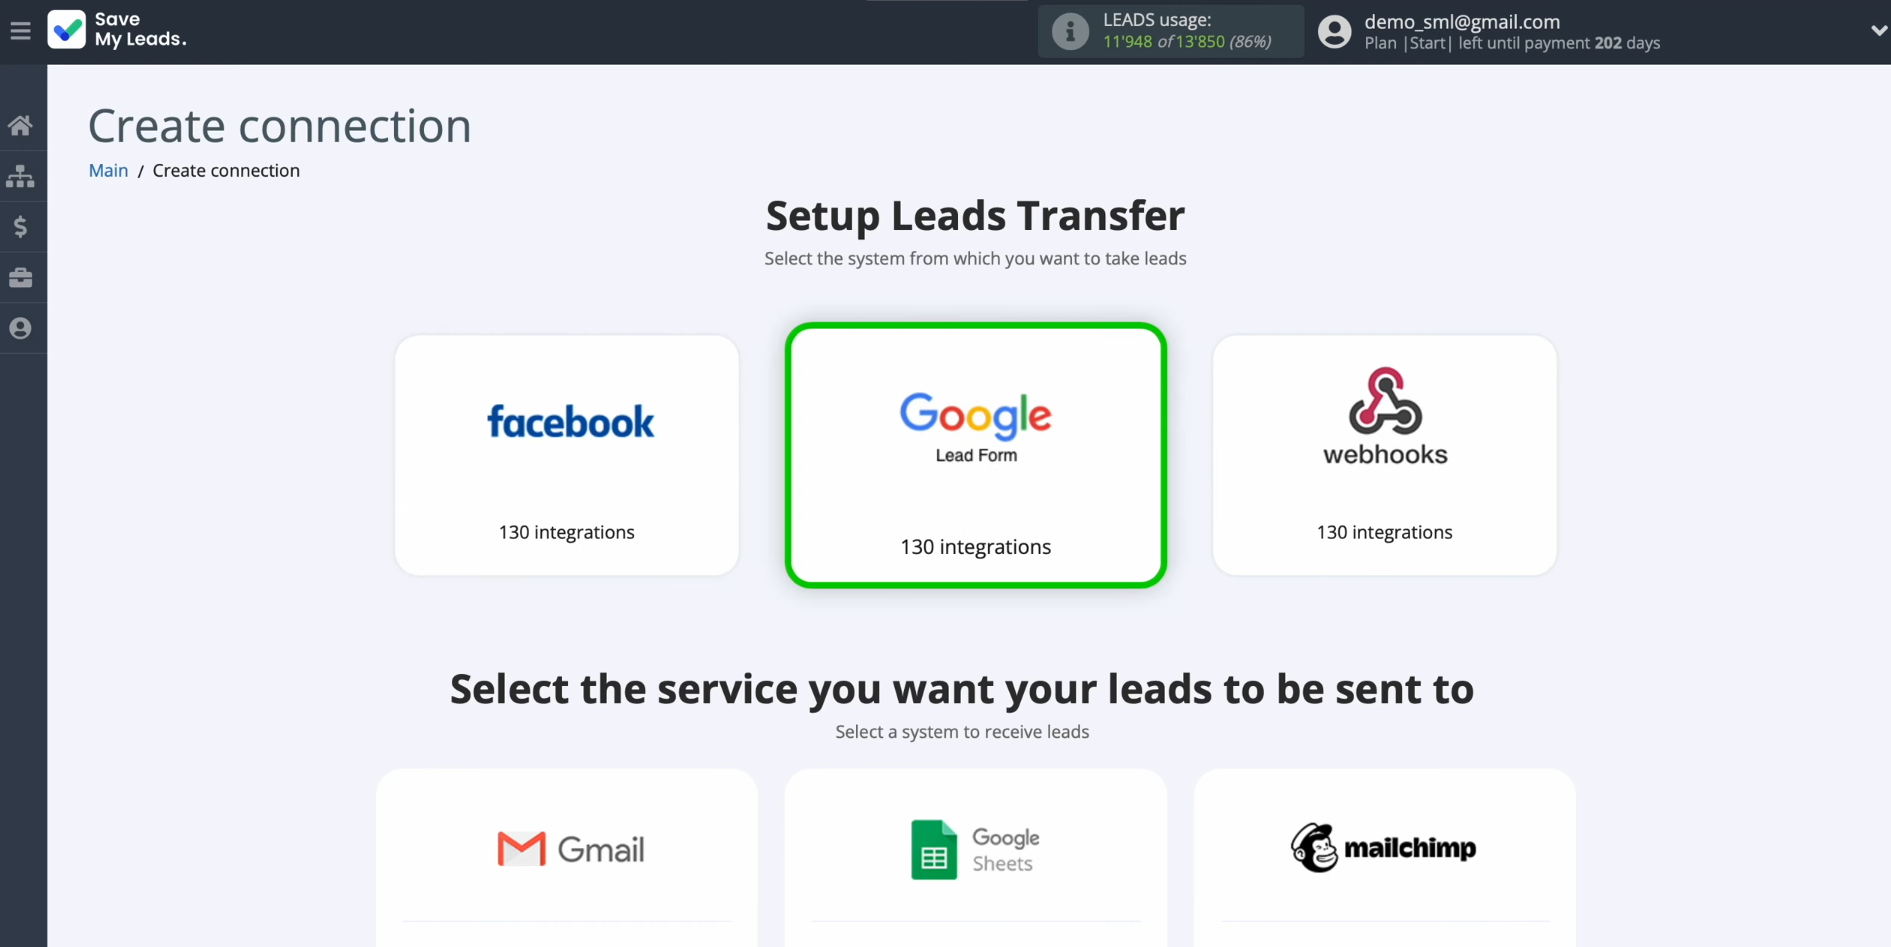
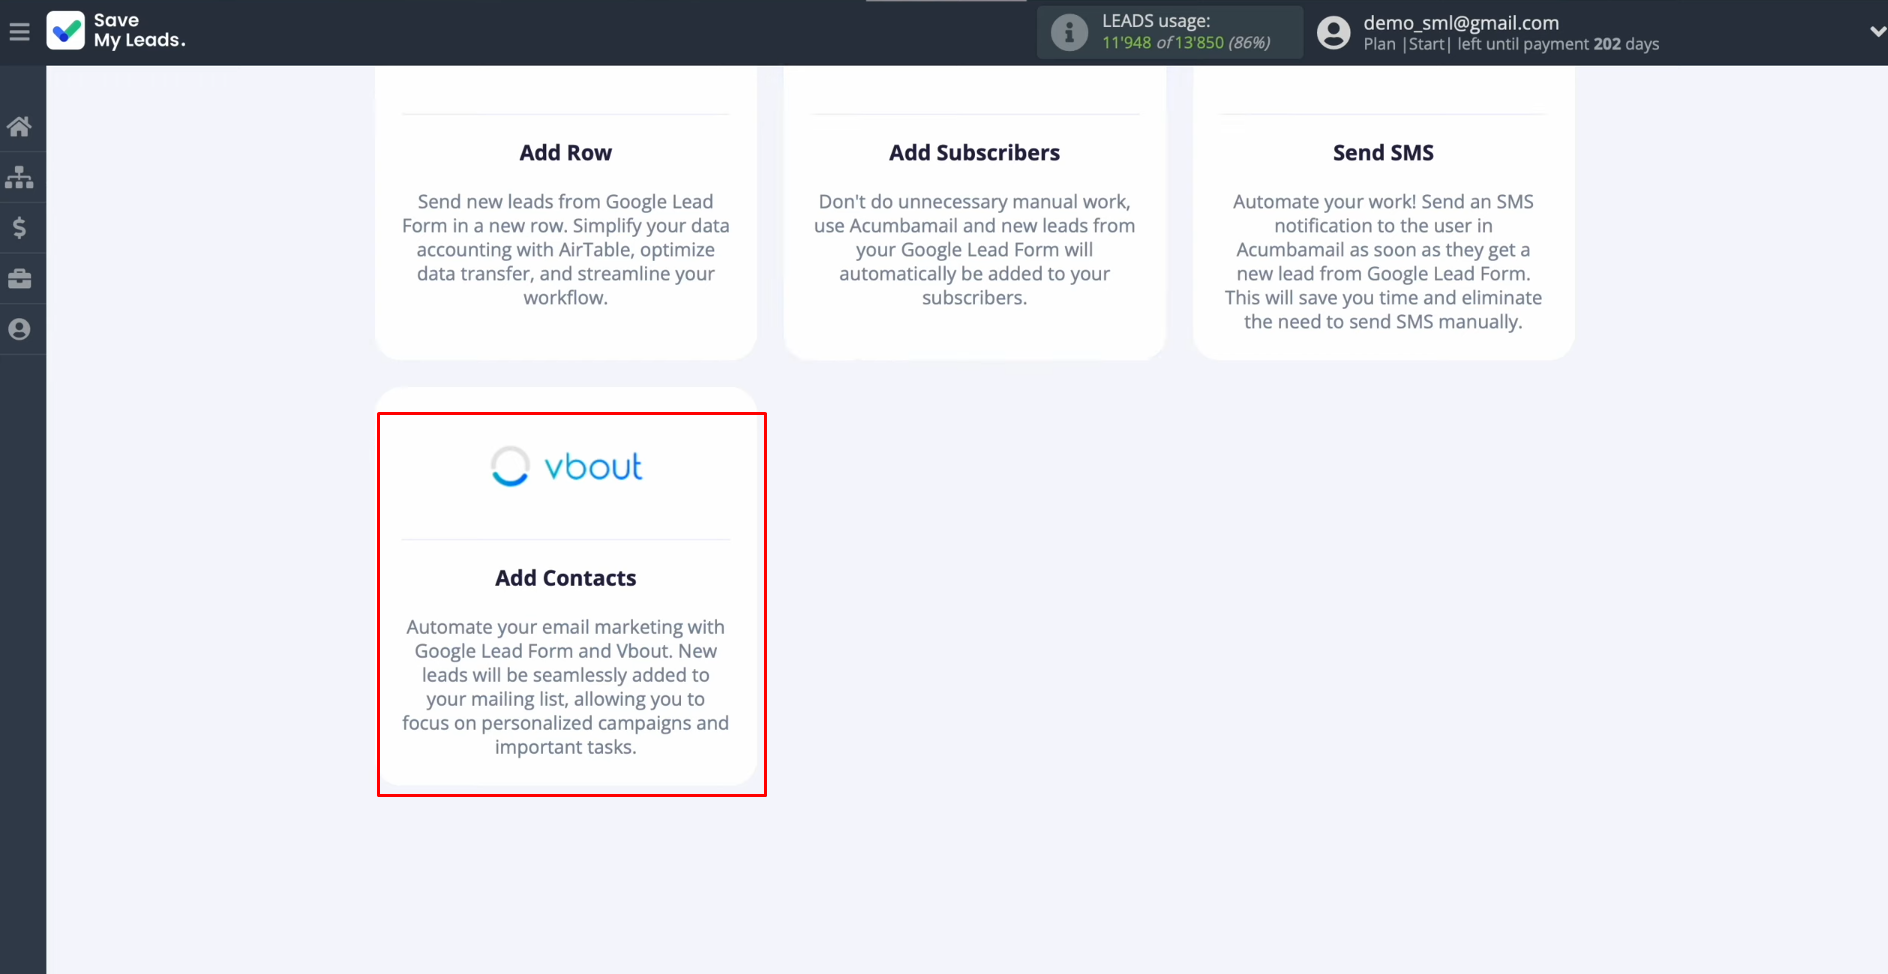
Now,
determine where you’d like to transfer the leads. Select Vbout with the
option "Add Contacts."
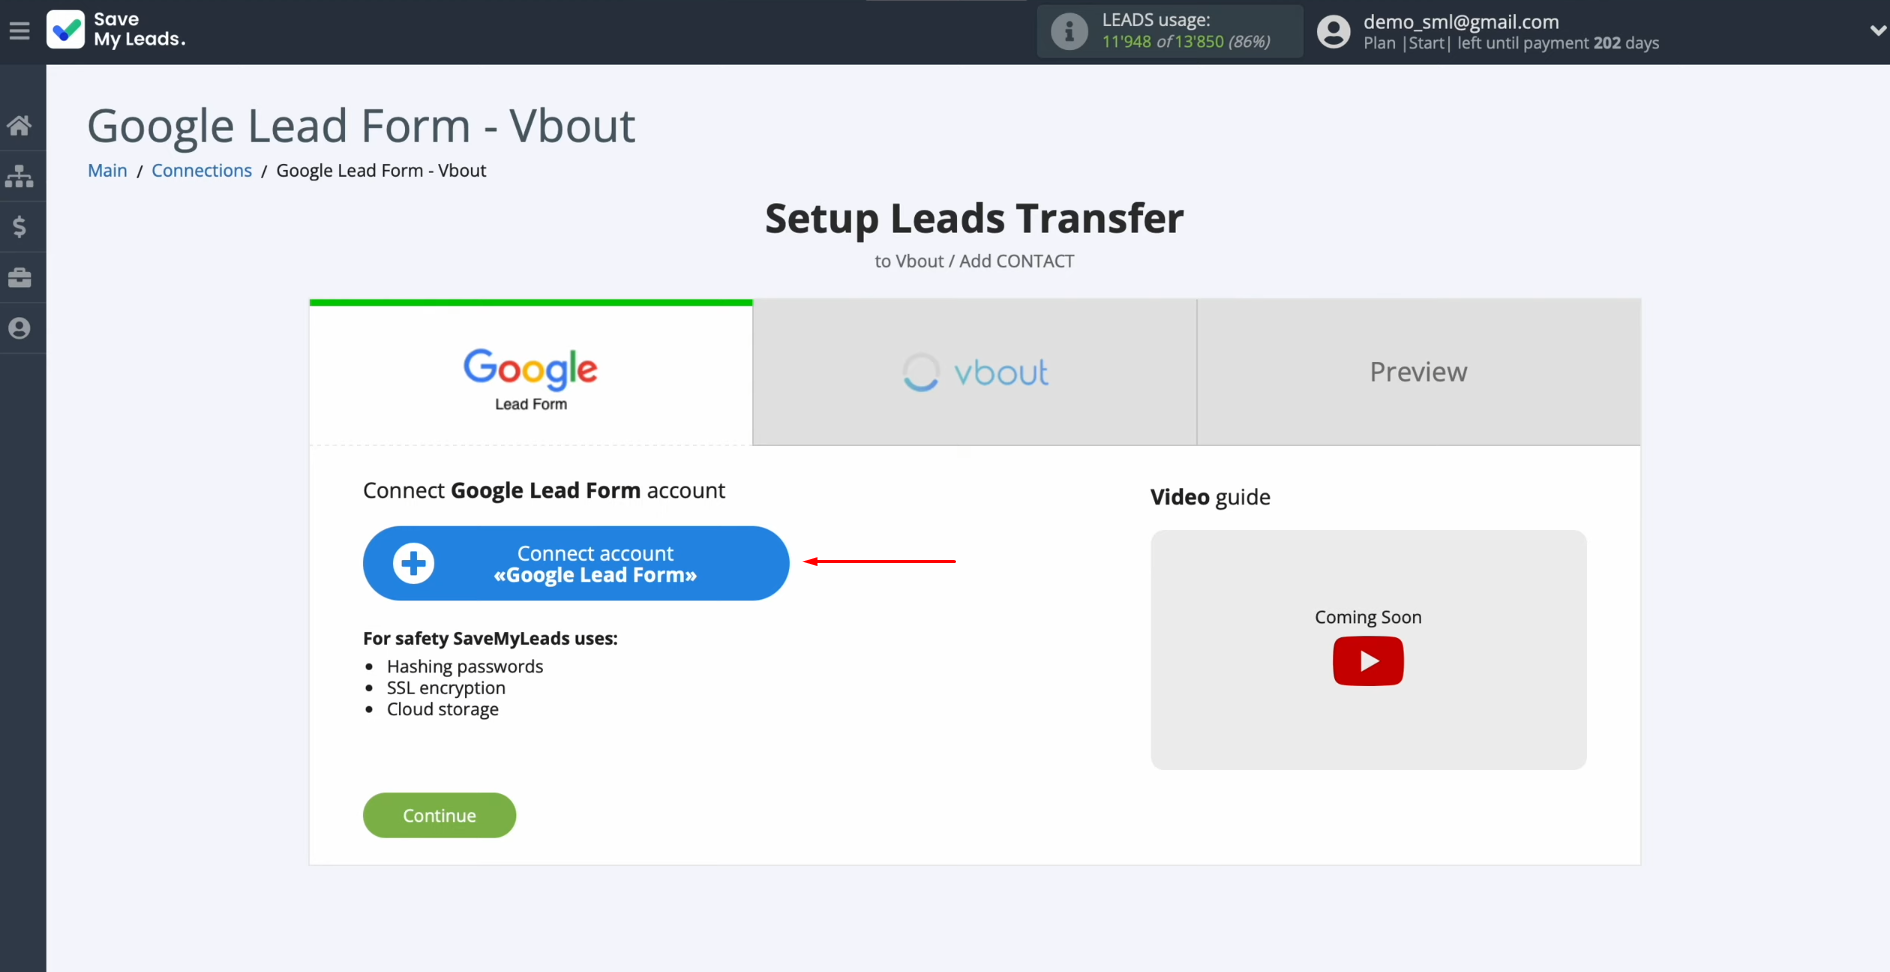
Proceed by
linking your Google Lead Form account to SaveMyLeads.
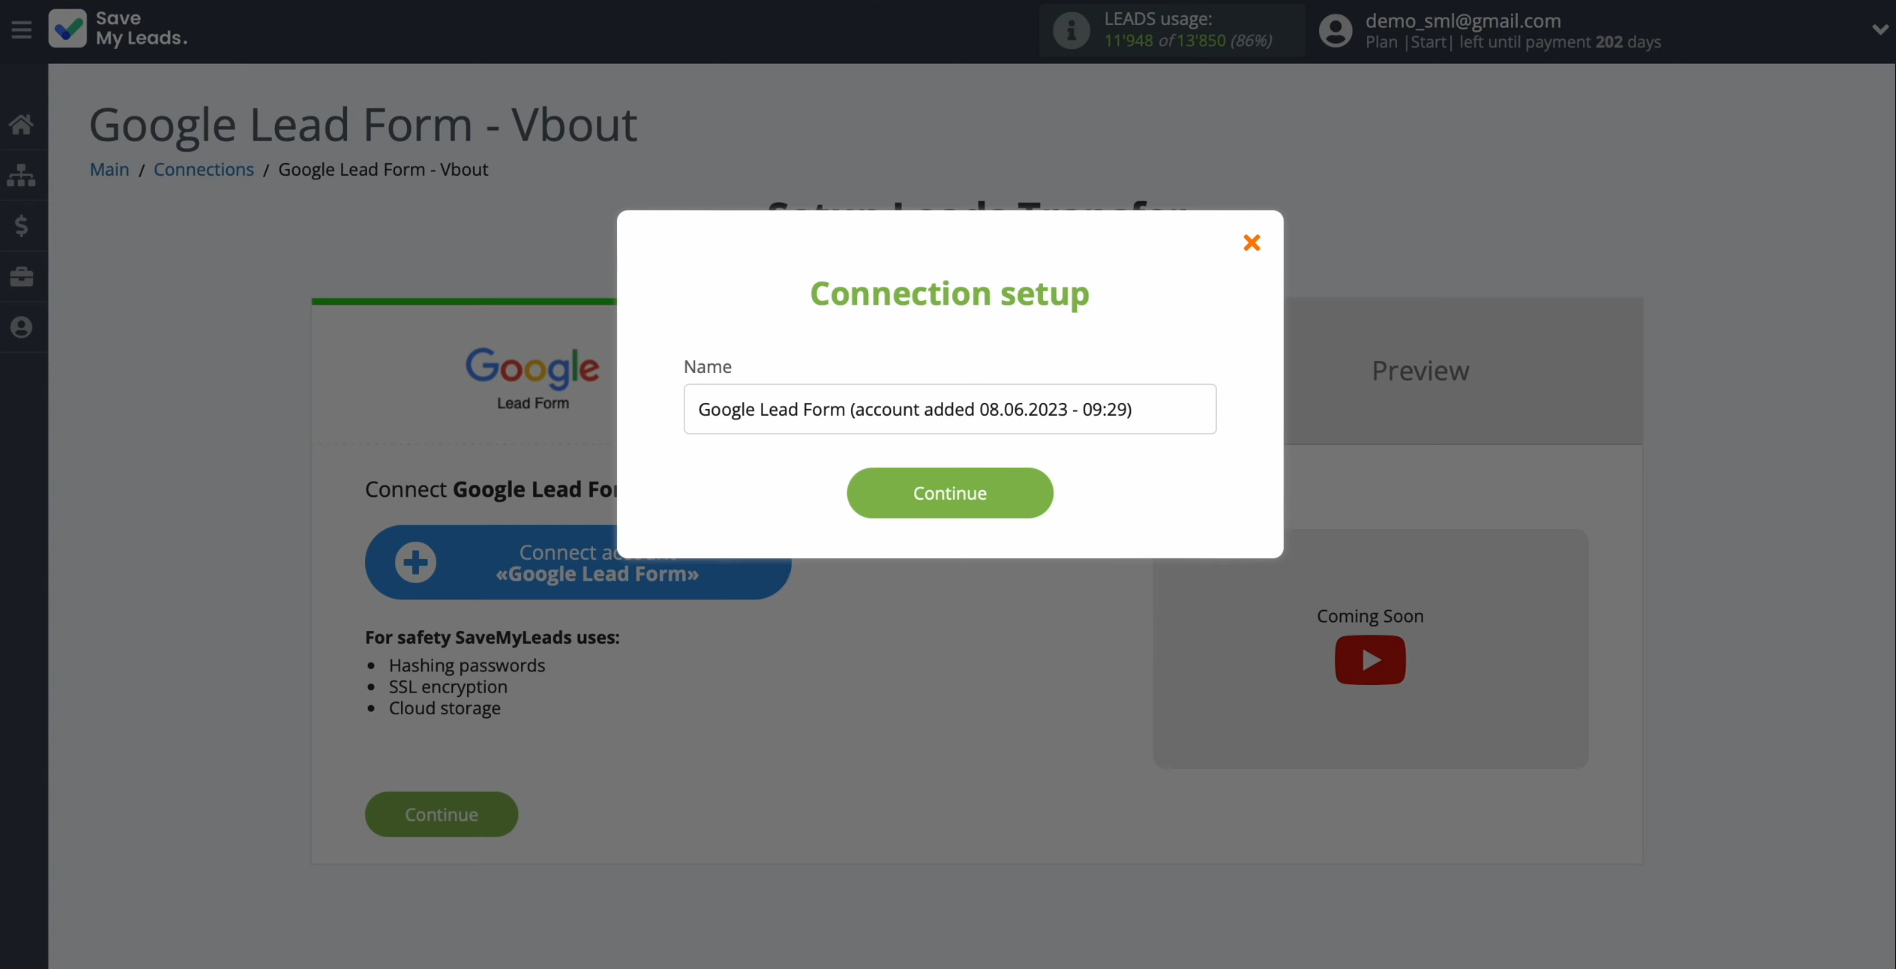
In the next
window, you have the option to name this connection for easy reference or
simply click "Continue."
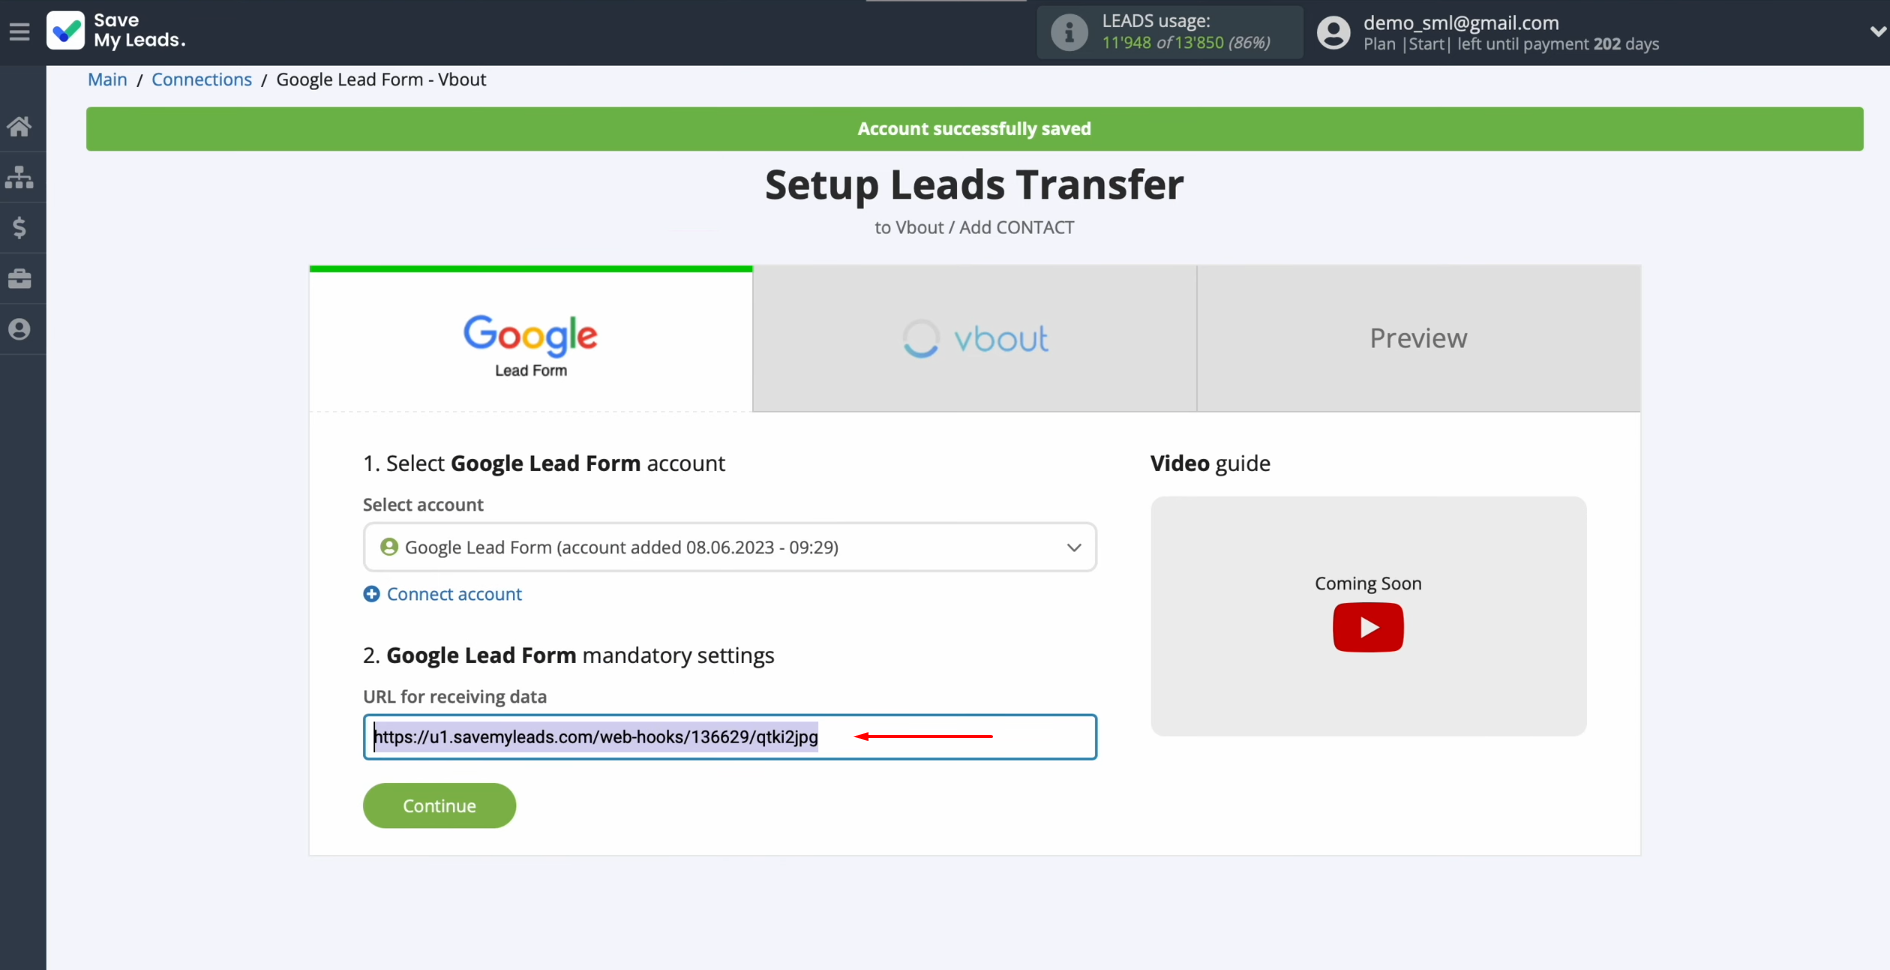
Once your
account appears in the list of connected accounts, select it to move forward.
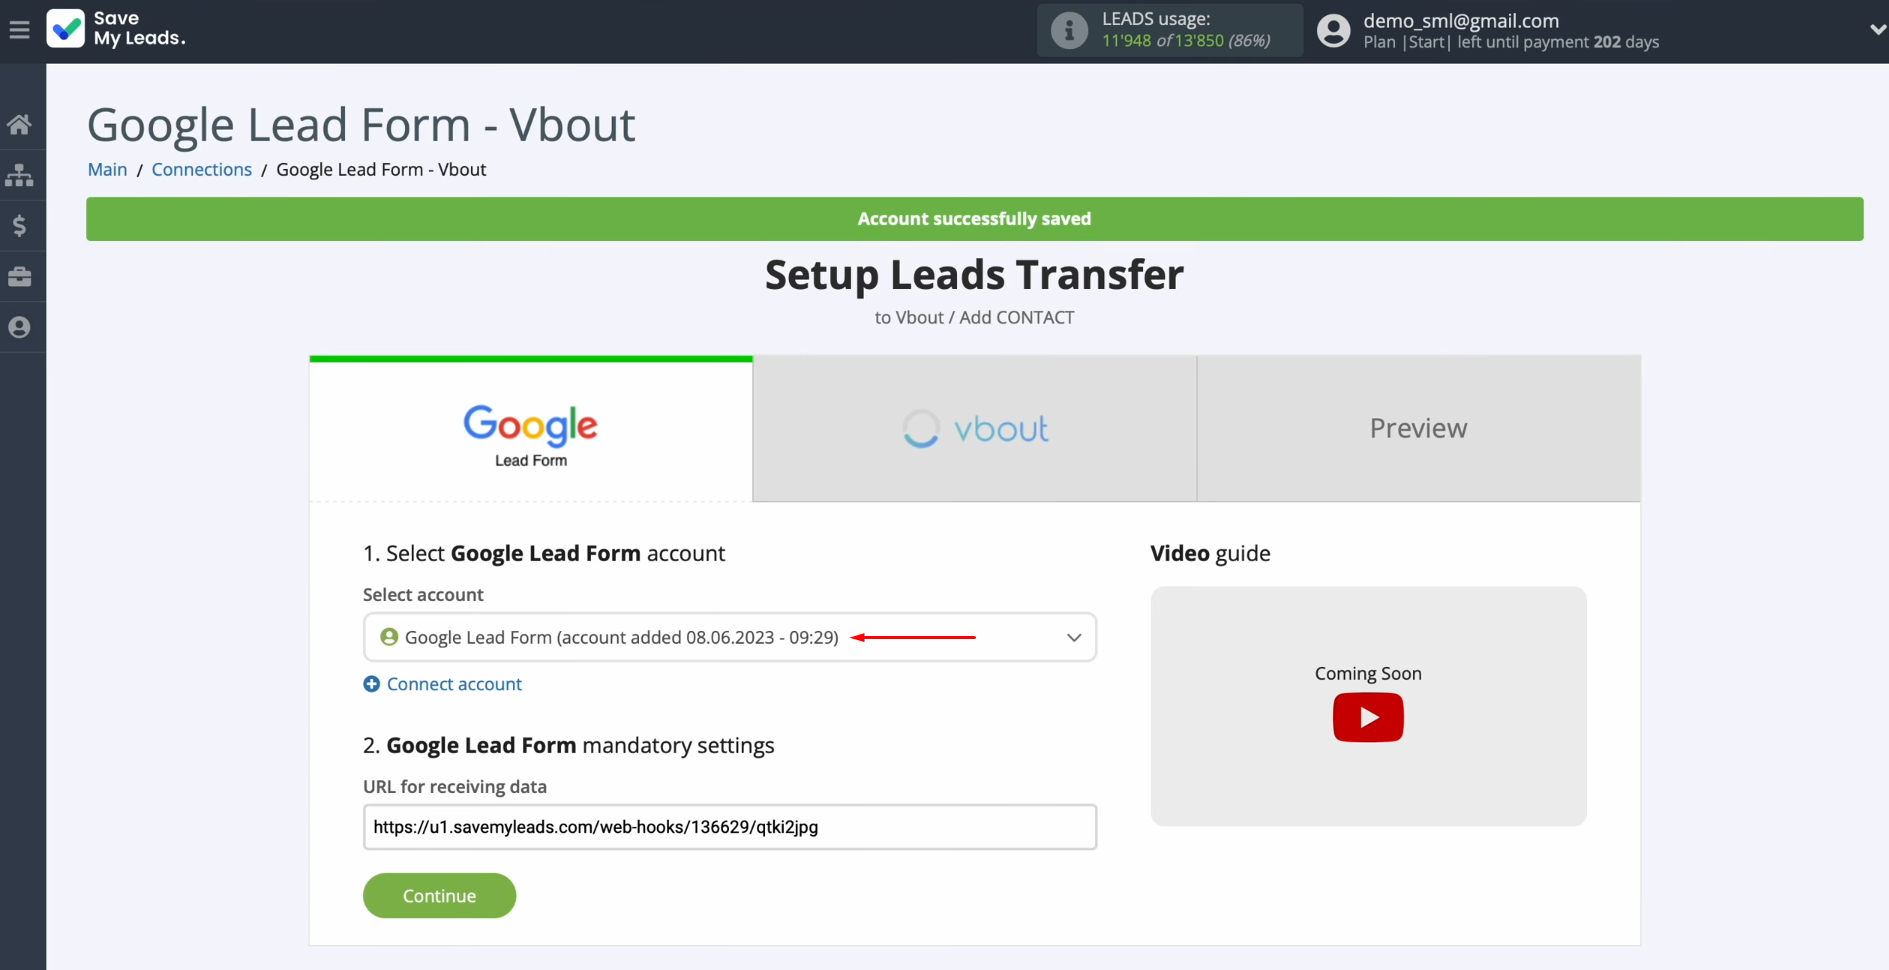
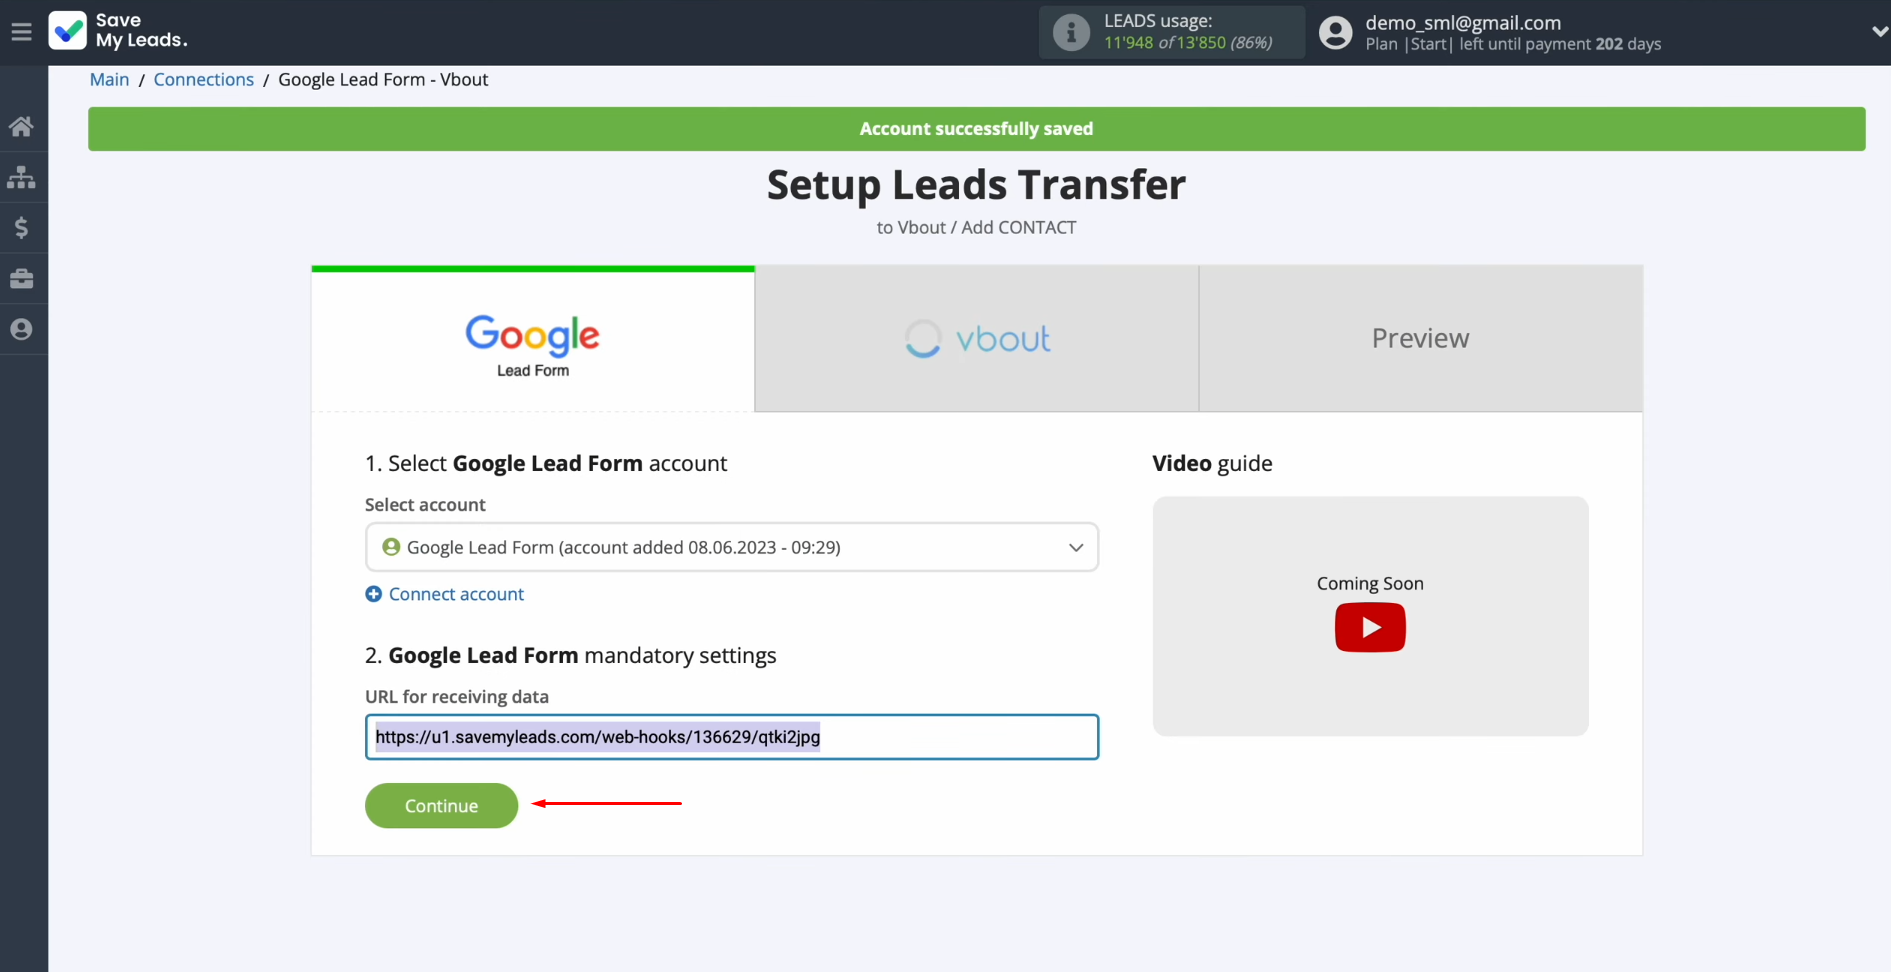
At this
point, copy the provided URL for receiving data.
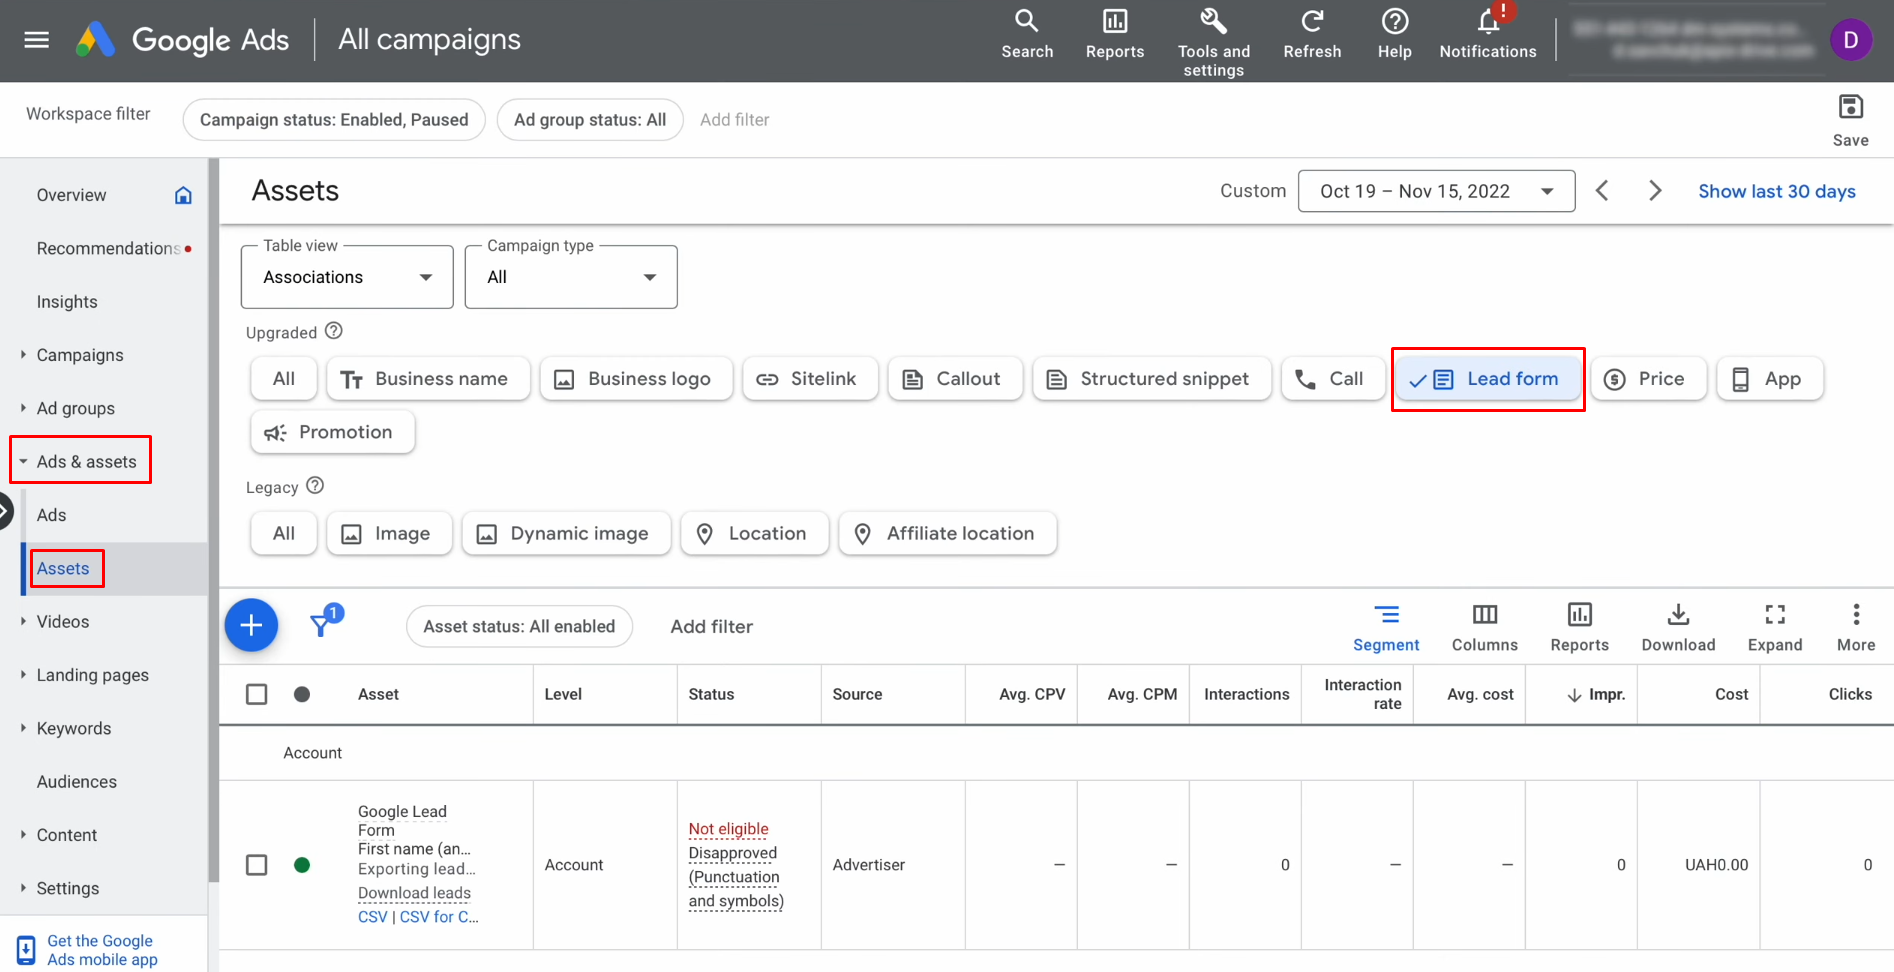
Head over to
the "Assets" section in your
Google Ads account settings.
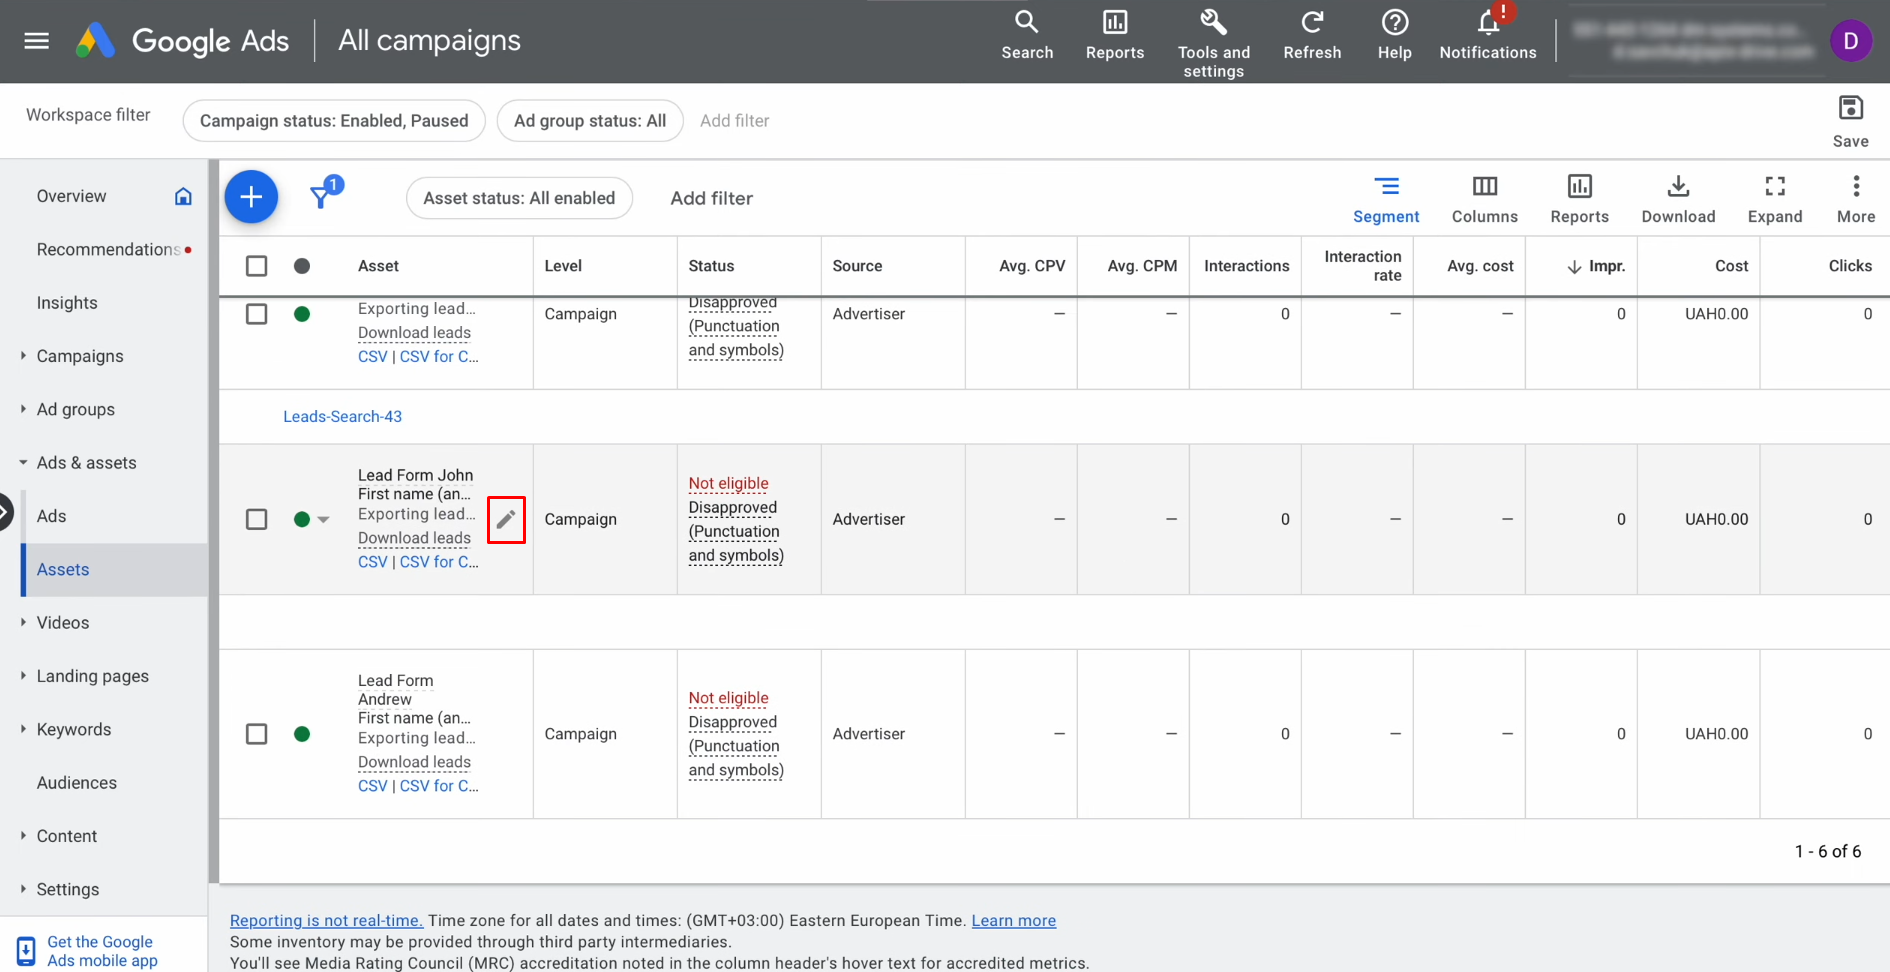
Locate the
lead form you use for collecting new leads and open it.
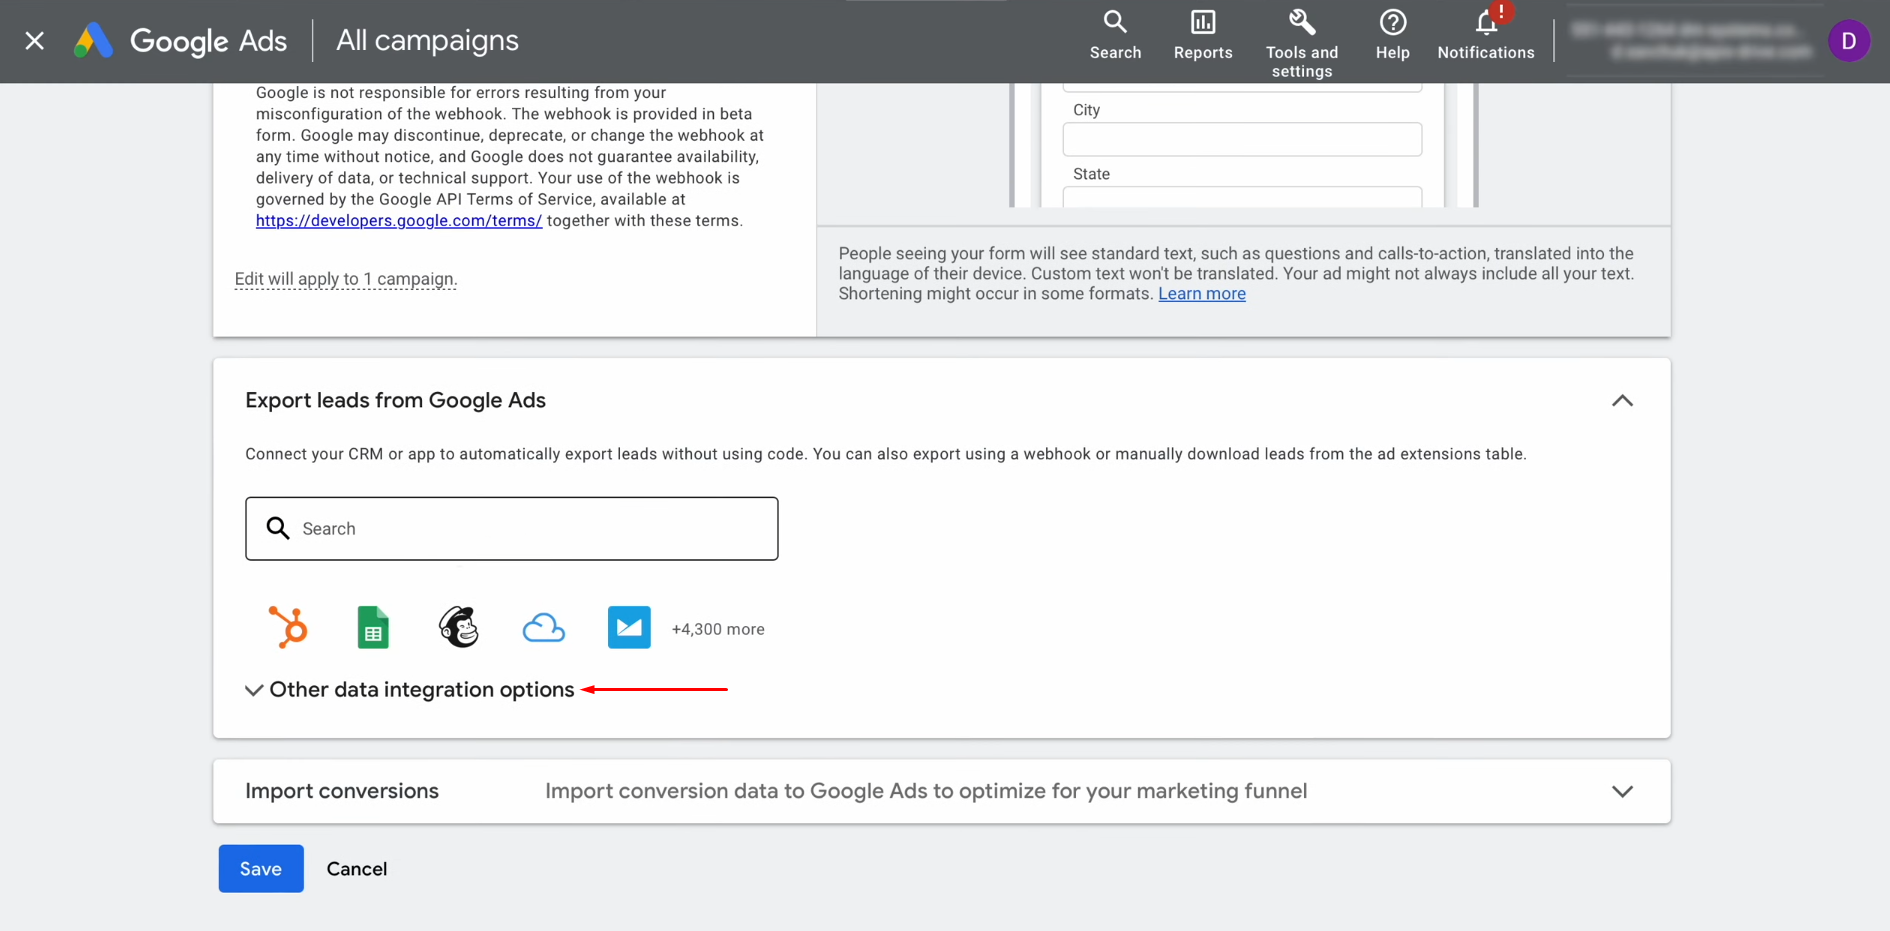
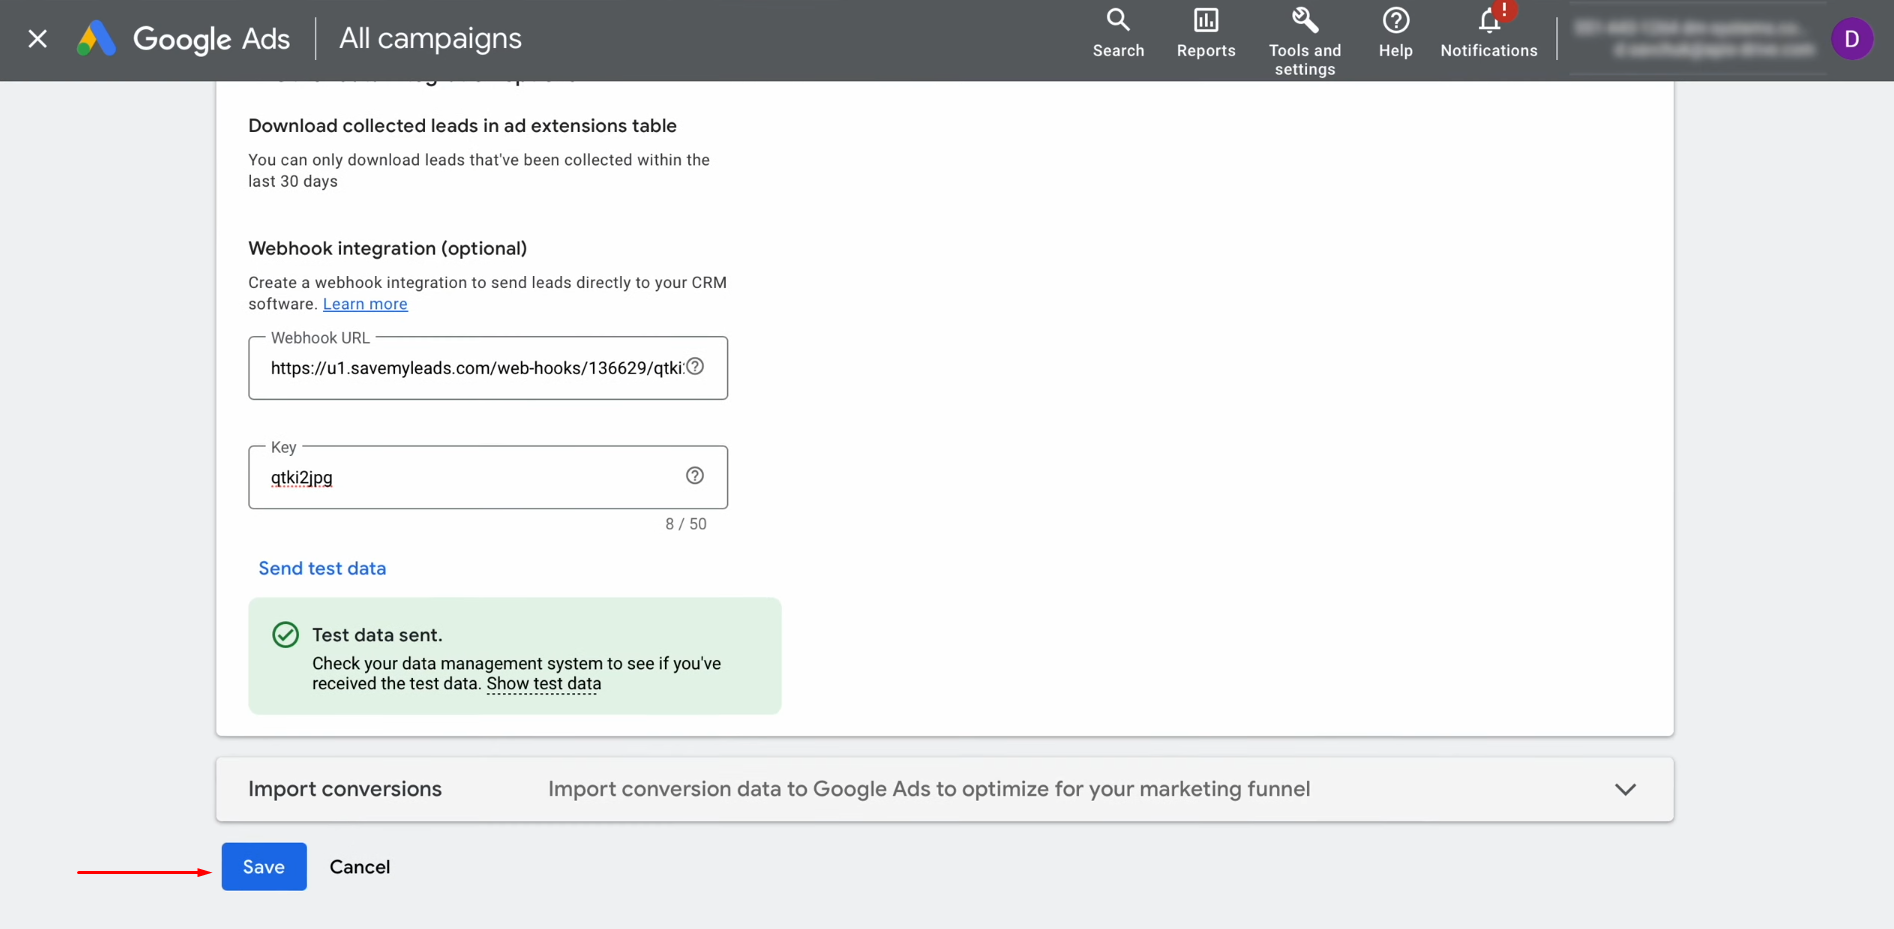
Within the
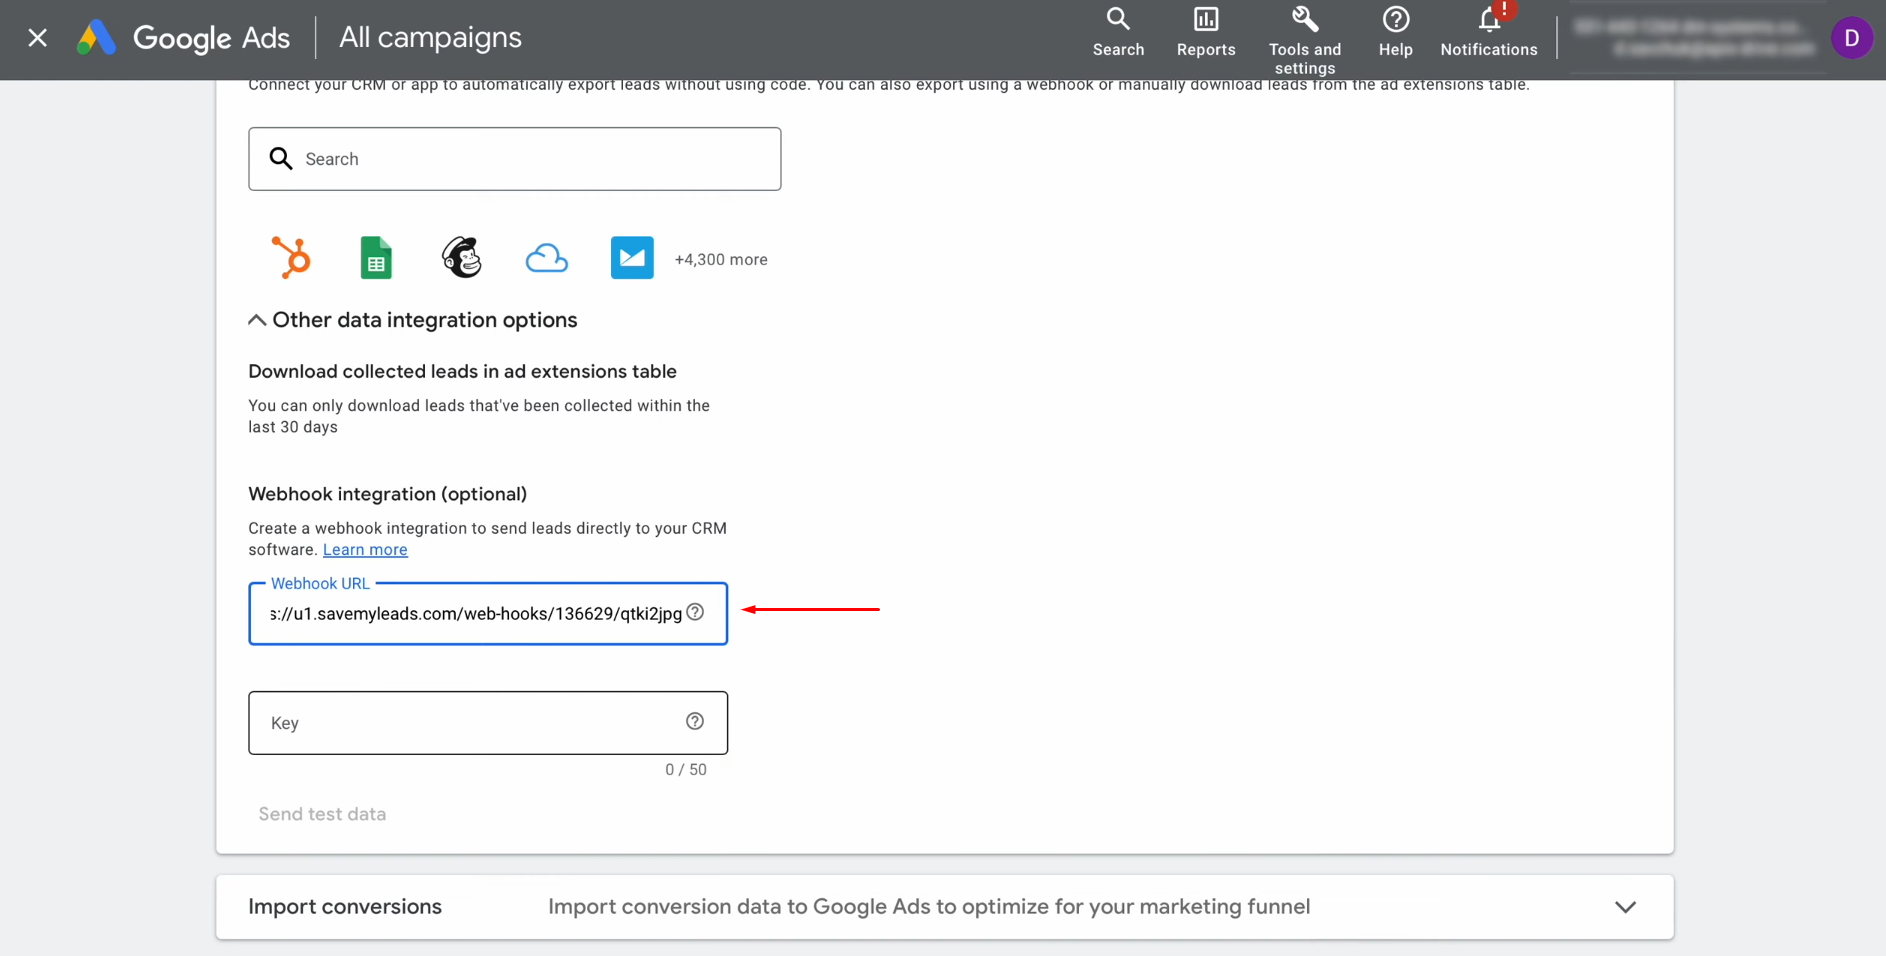
lead form settings, navigate to the "Other data integration options" tab.
Paste the
copied URL into the designated field.
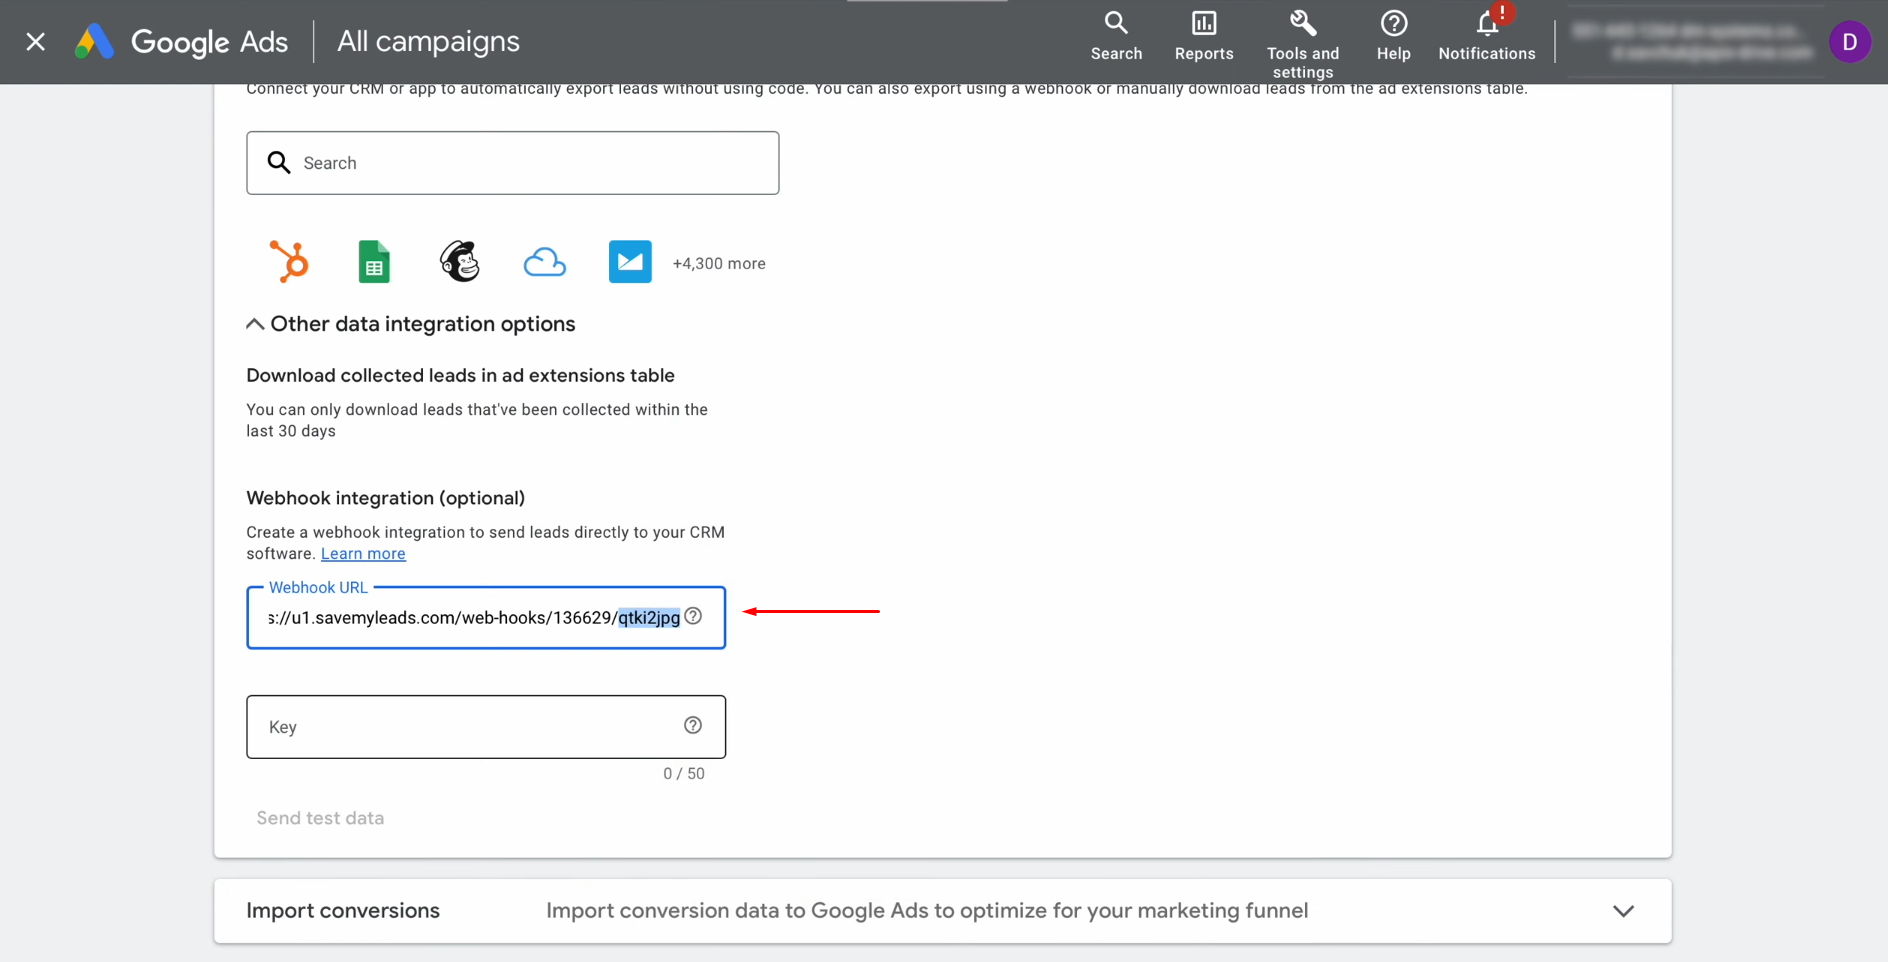
Then,
copy the last portion of
the URL.
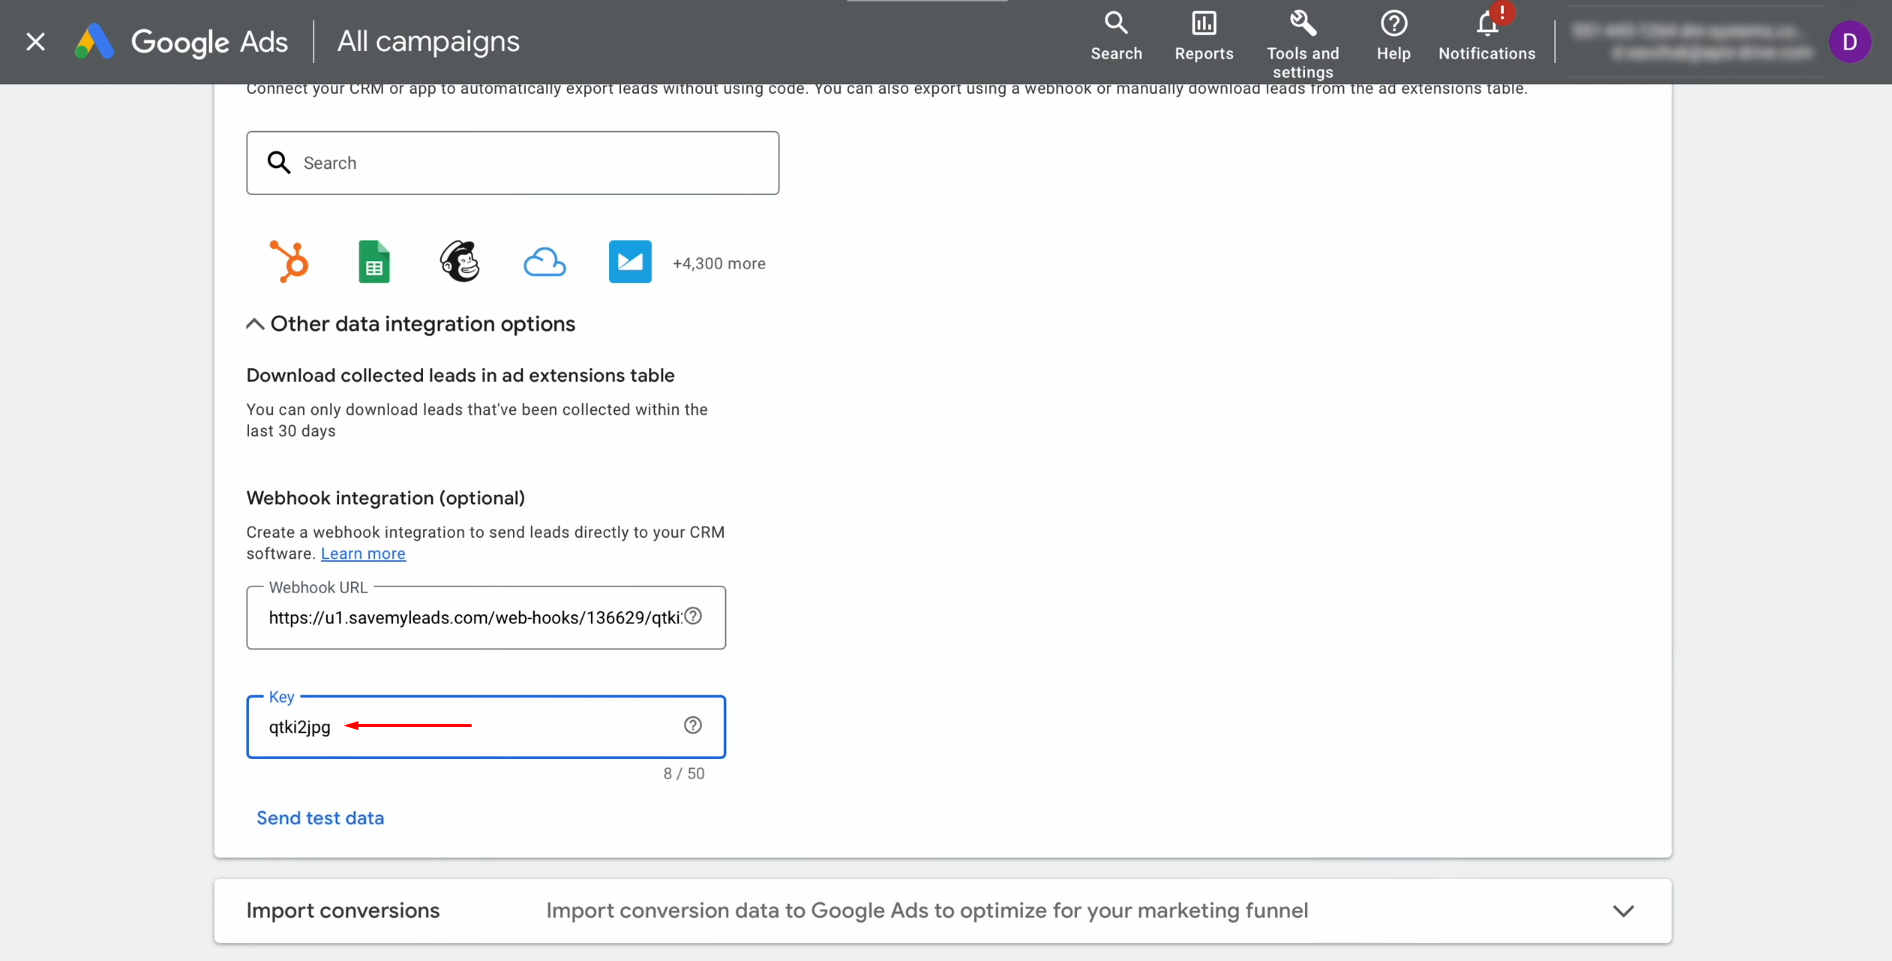
Insert this portion into
the "Key" field.
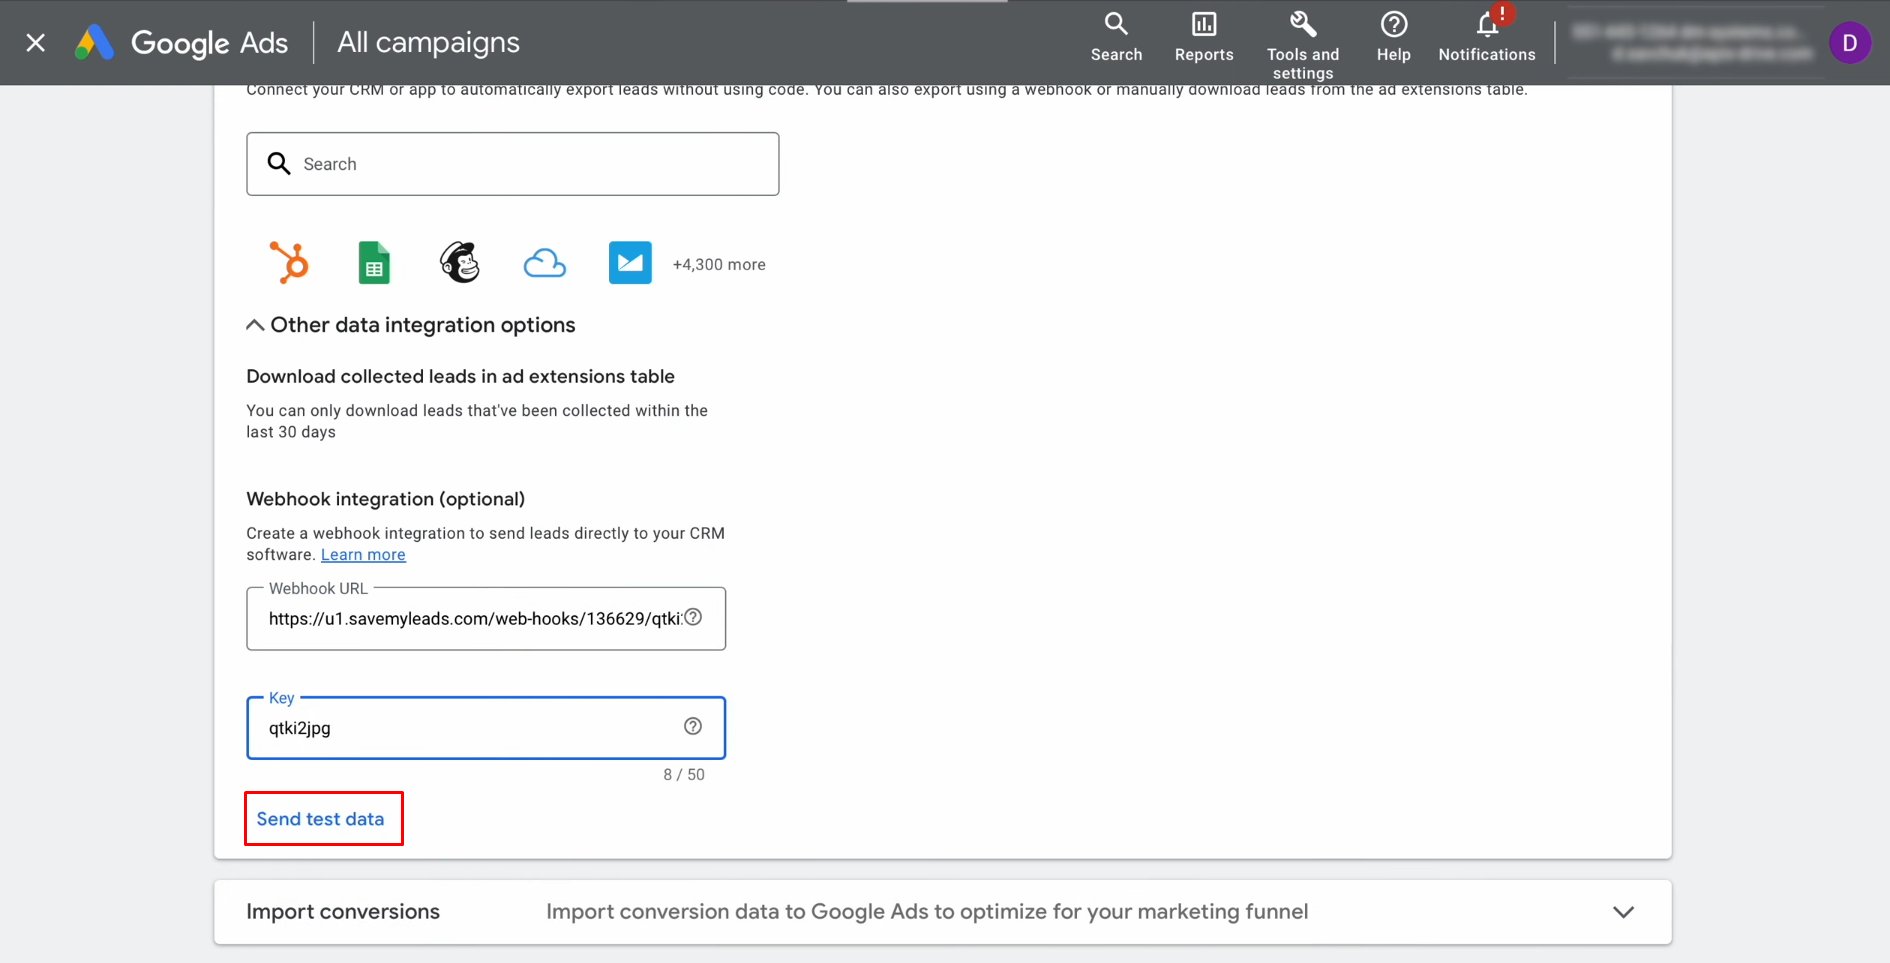
Finally,
send test data by clicking "Send test data."
Save your
changes by clicking "Save."
Return to
your SaveMyLeads account to complete the setup.
Setting Up the Data Receiver: Vbout
To continue setting up the integration, connect your Vbout account to SaveMyLeads. Begin by clicking on the appropriate button to initiate the process.
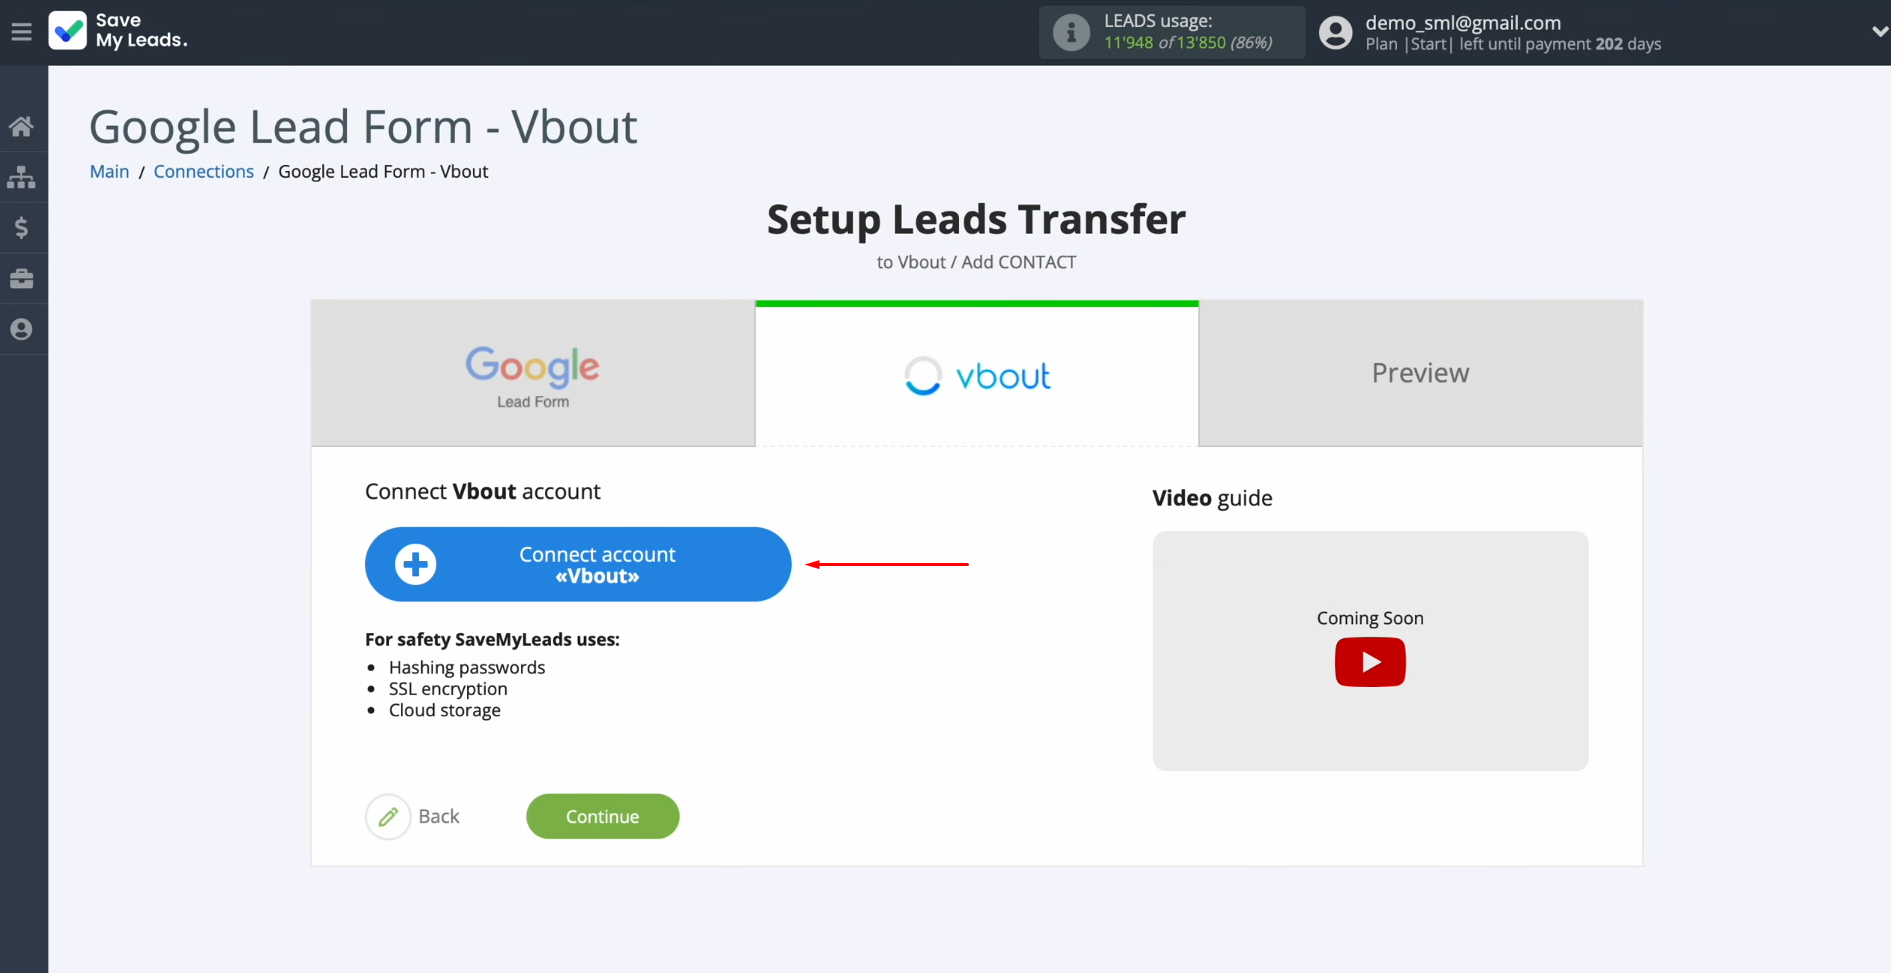
In the next
window, you’ll be prompted to enter your API key.
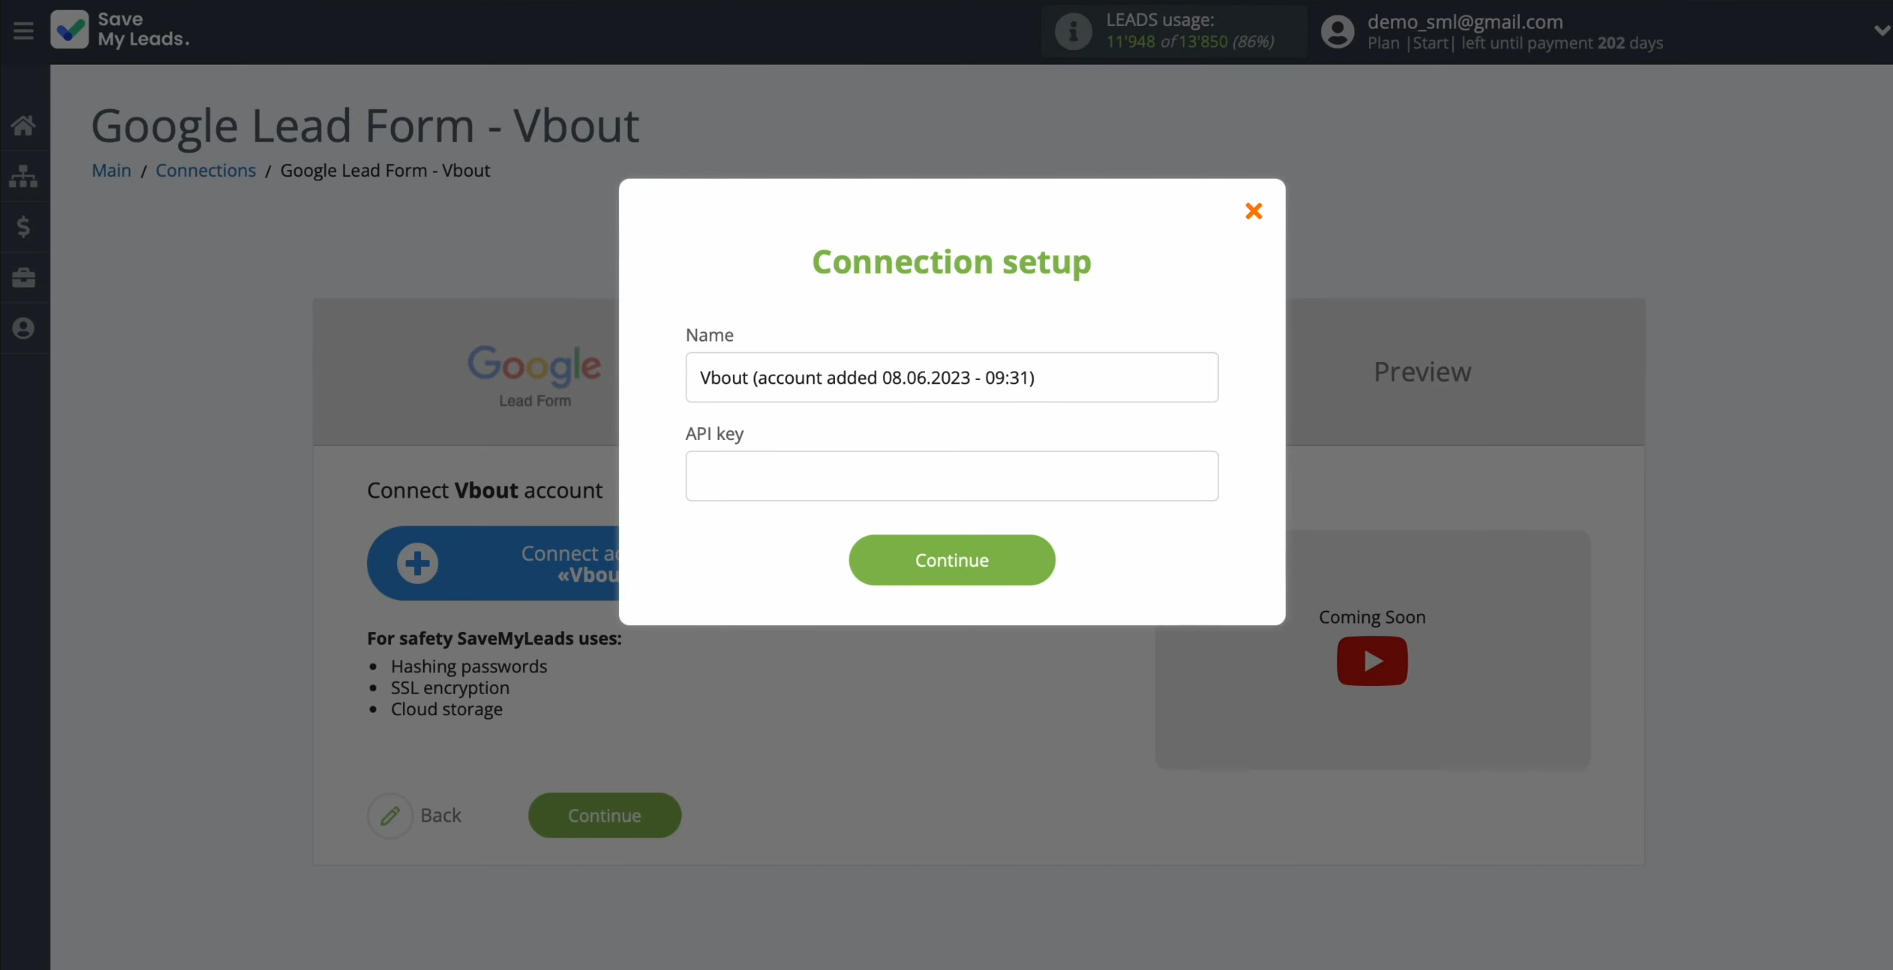
To retrieve
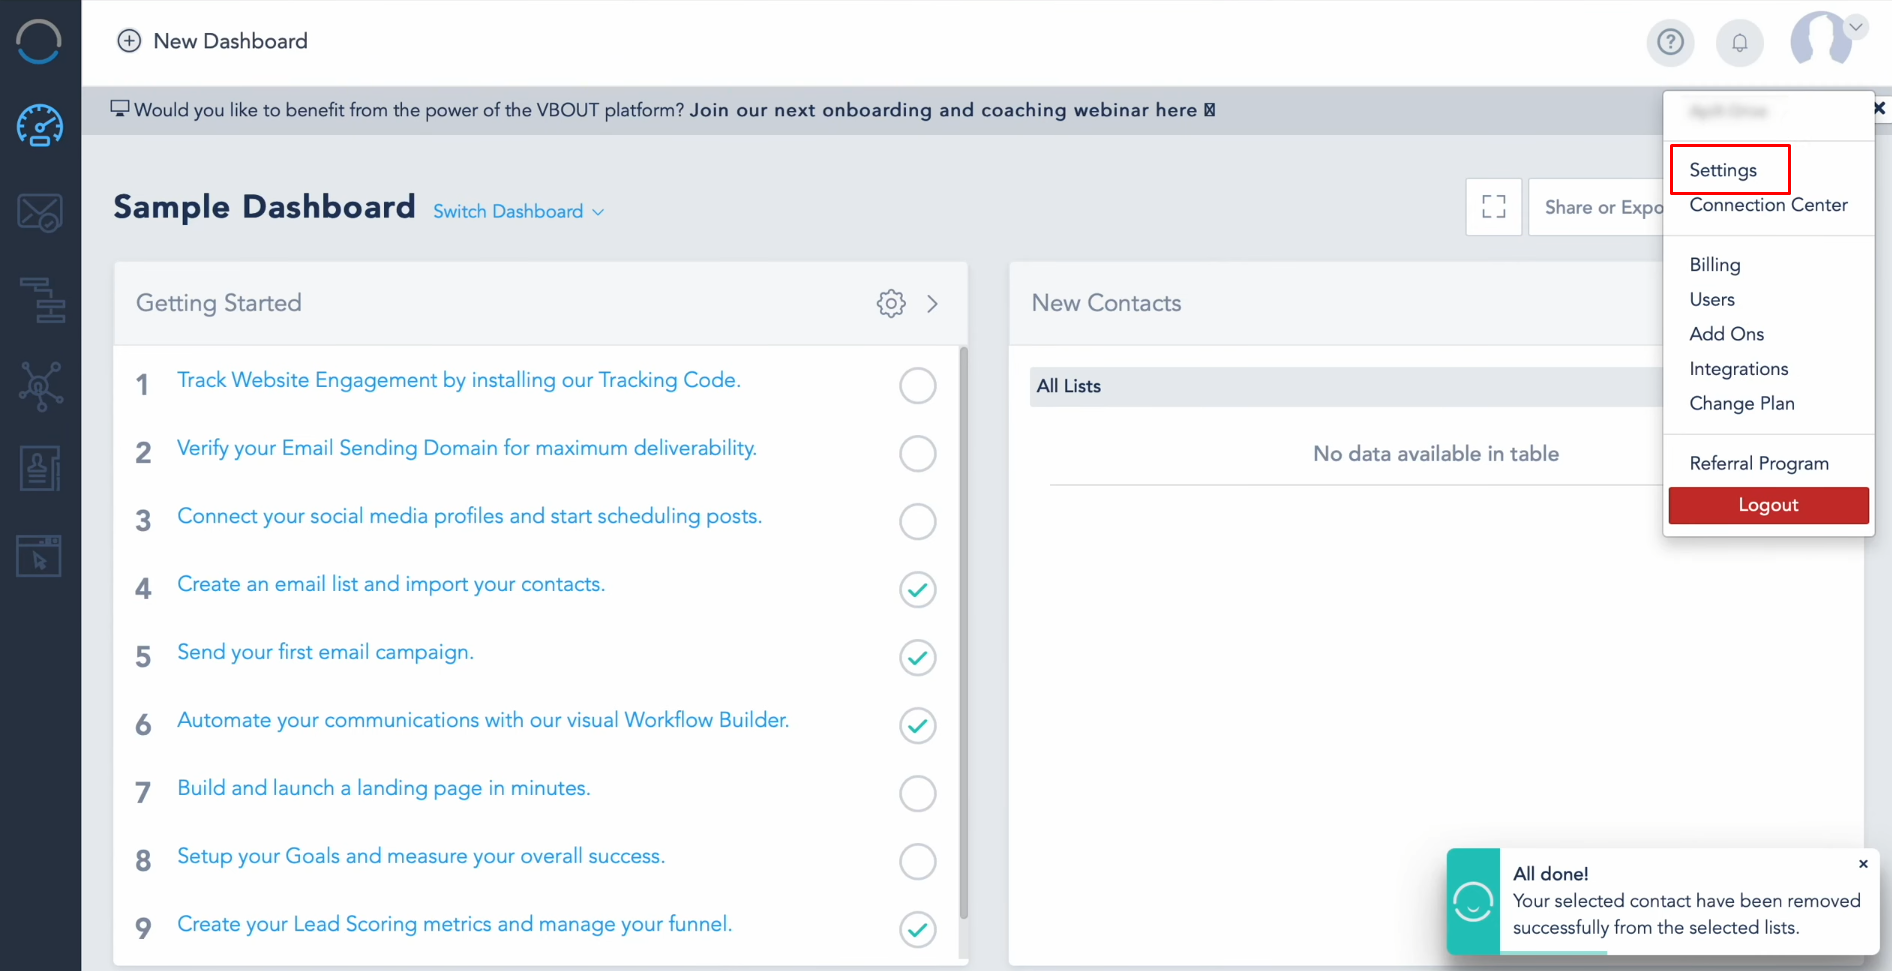
the API key, log in to your Vbout account and navigate to the "Settings" section.
From there,
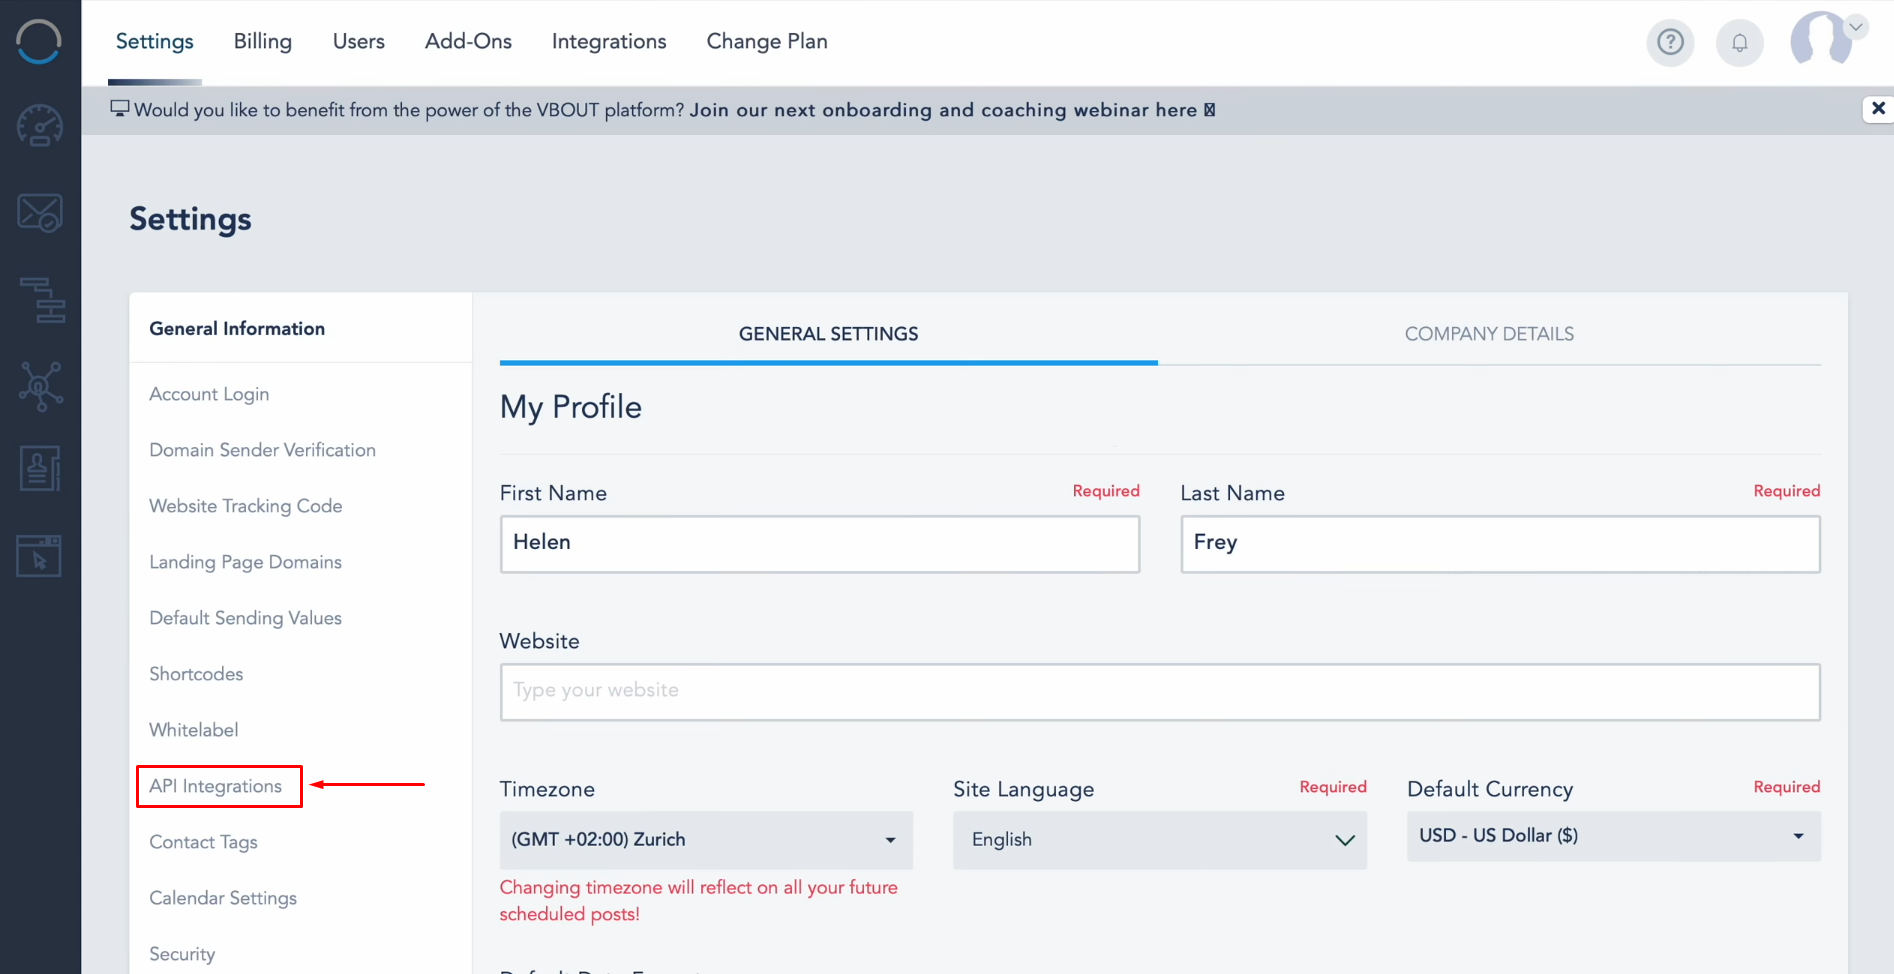
go to the "API Integrations" tab.
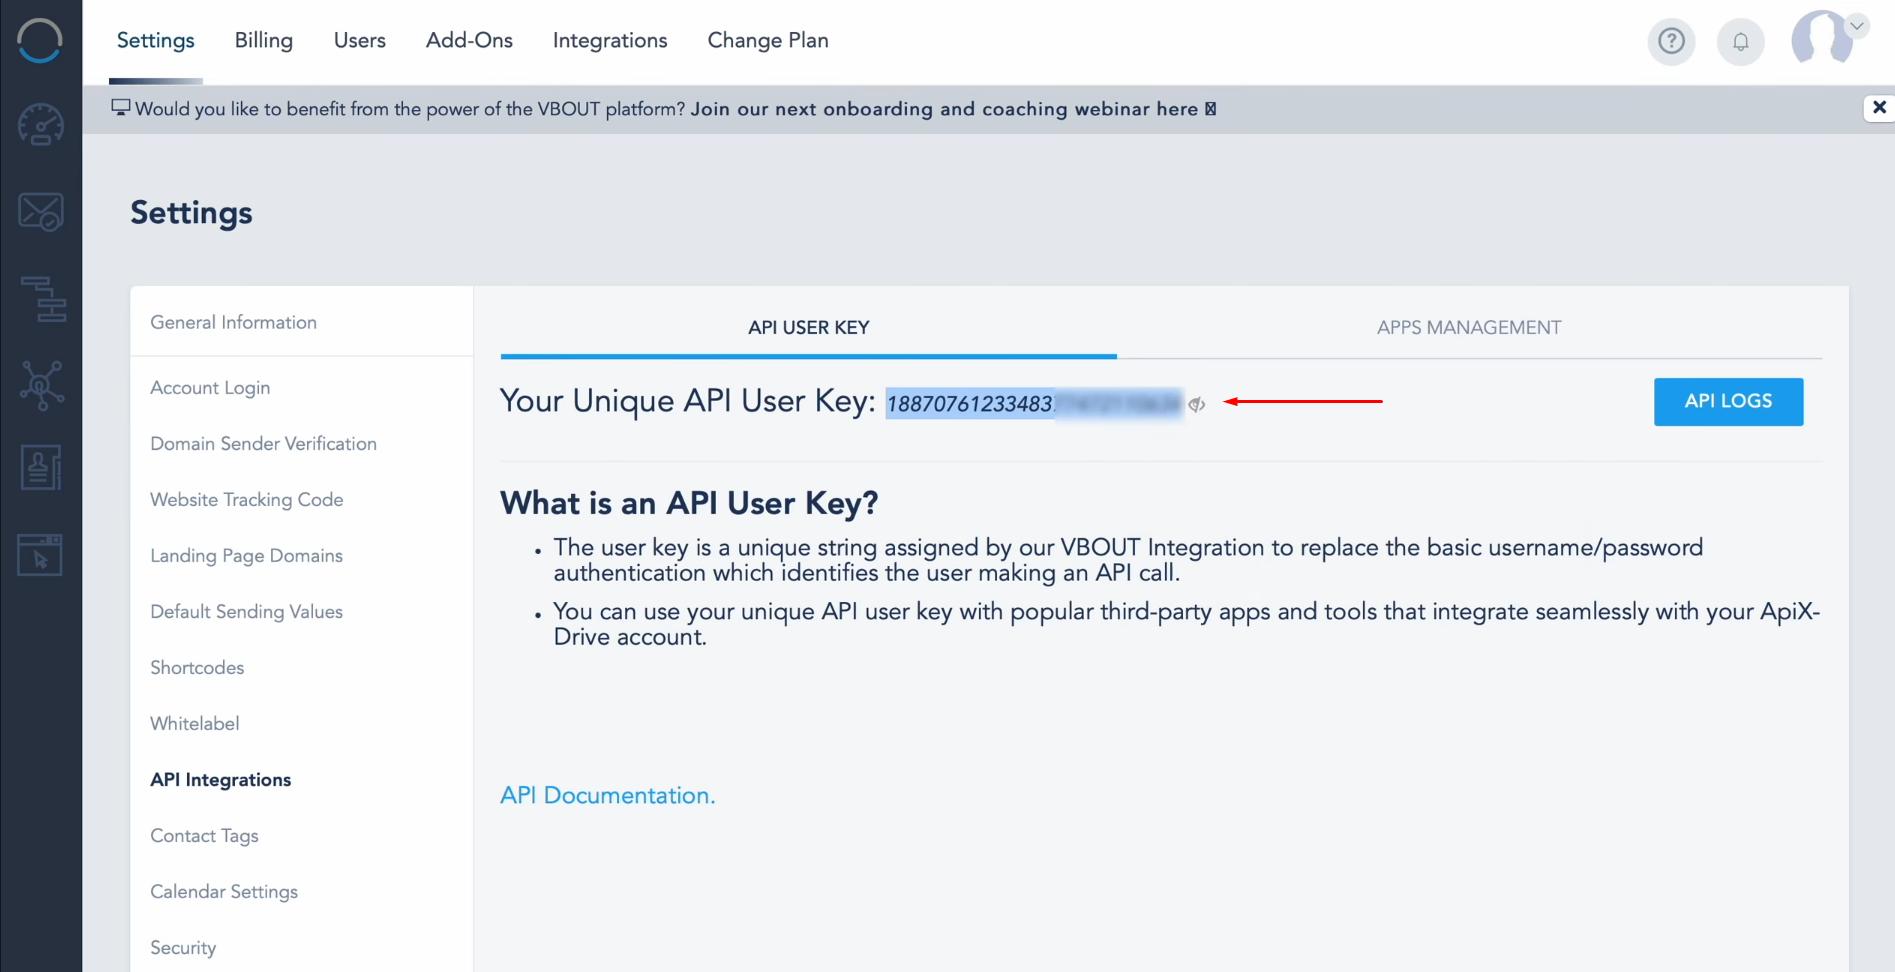
Click on the
icon to reveal your API key, then copy it.
Return to
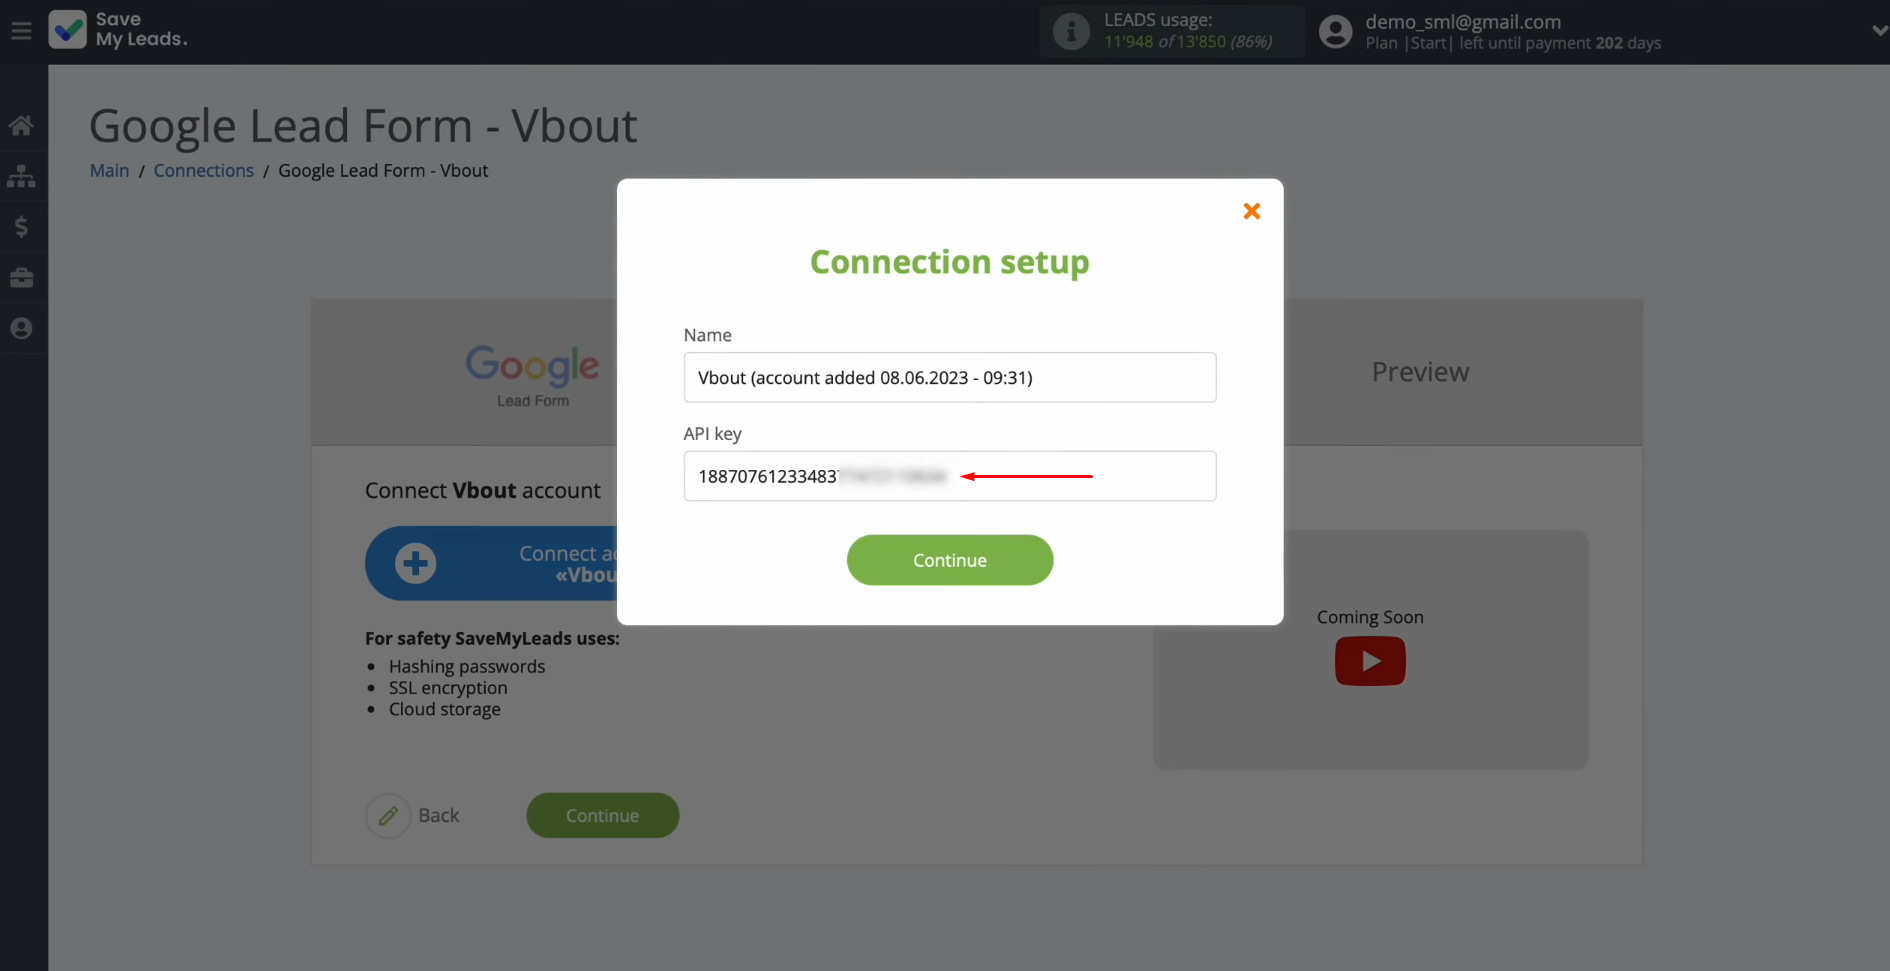
SaveMyLeads and paste the API key into the designated field. Once you’ve entered the key, click
“Continue.”
Your
connected account should now appear in the list. Select it to proceed.
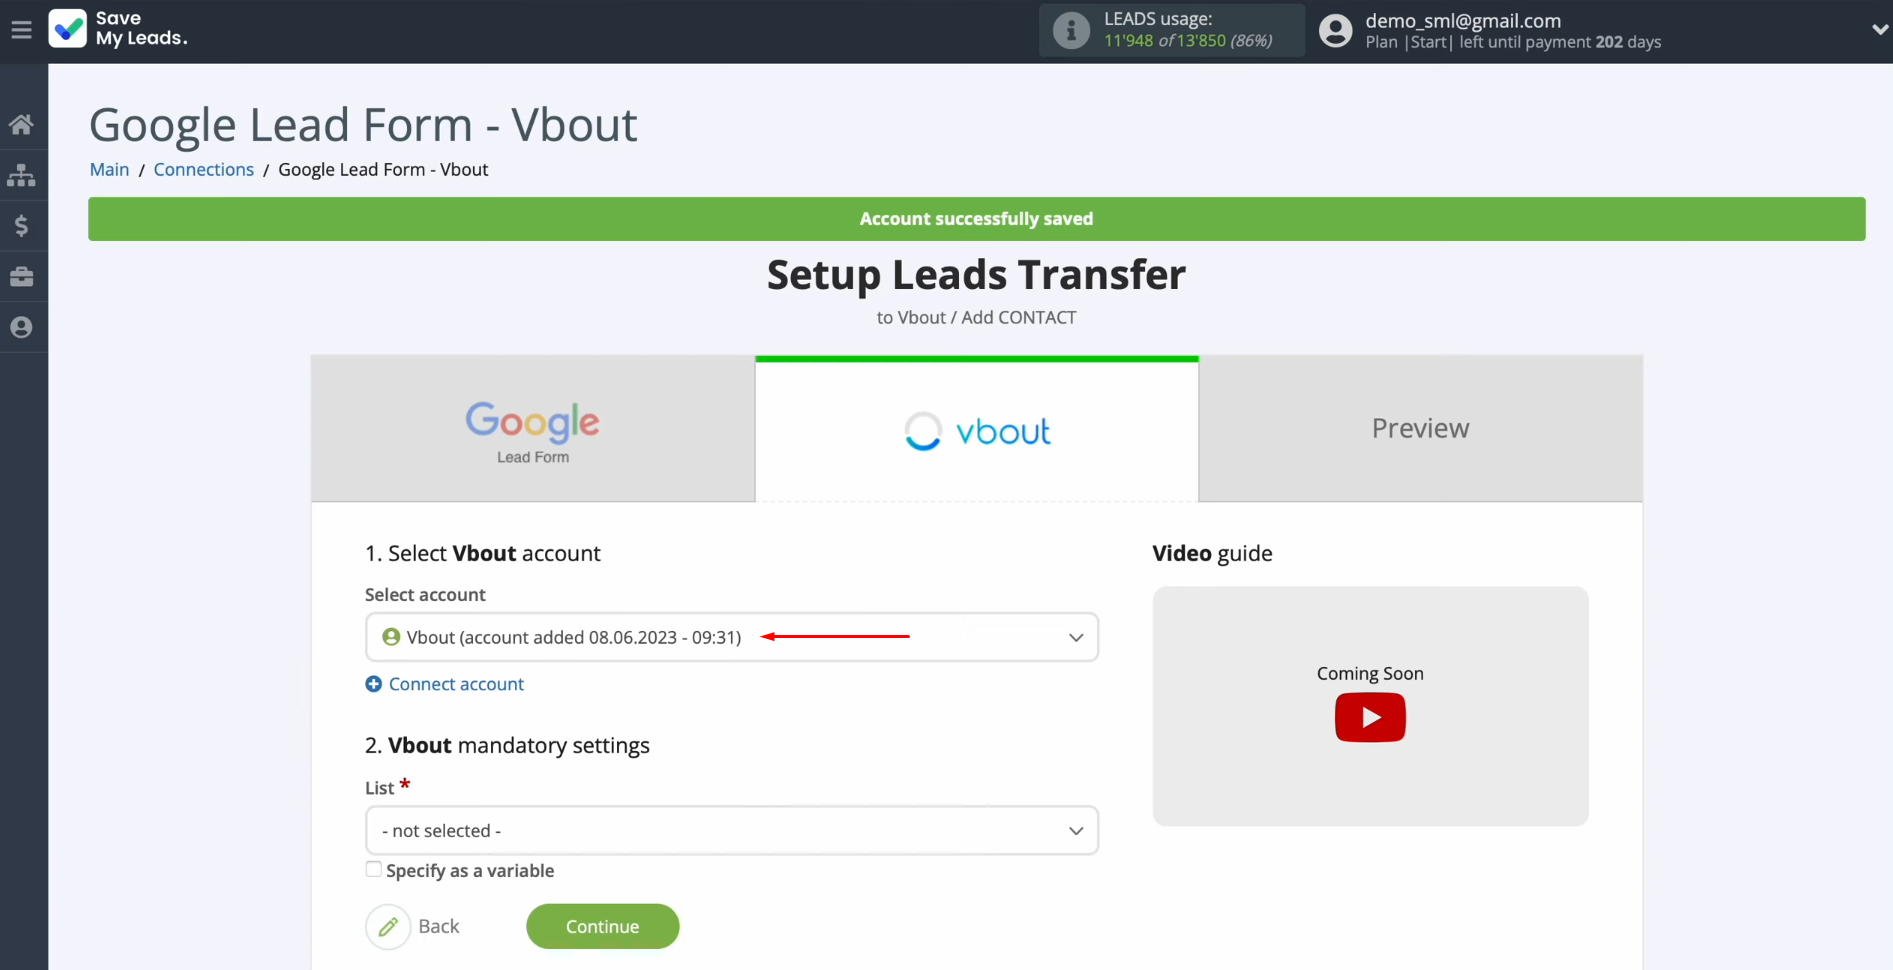
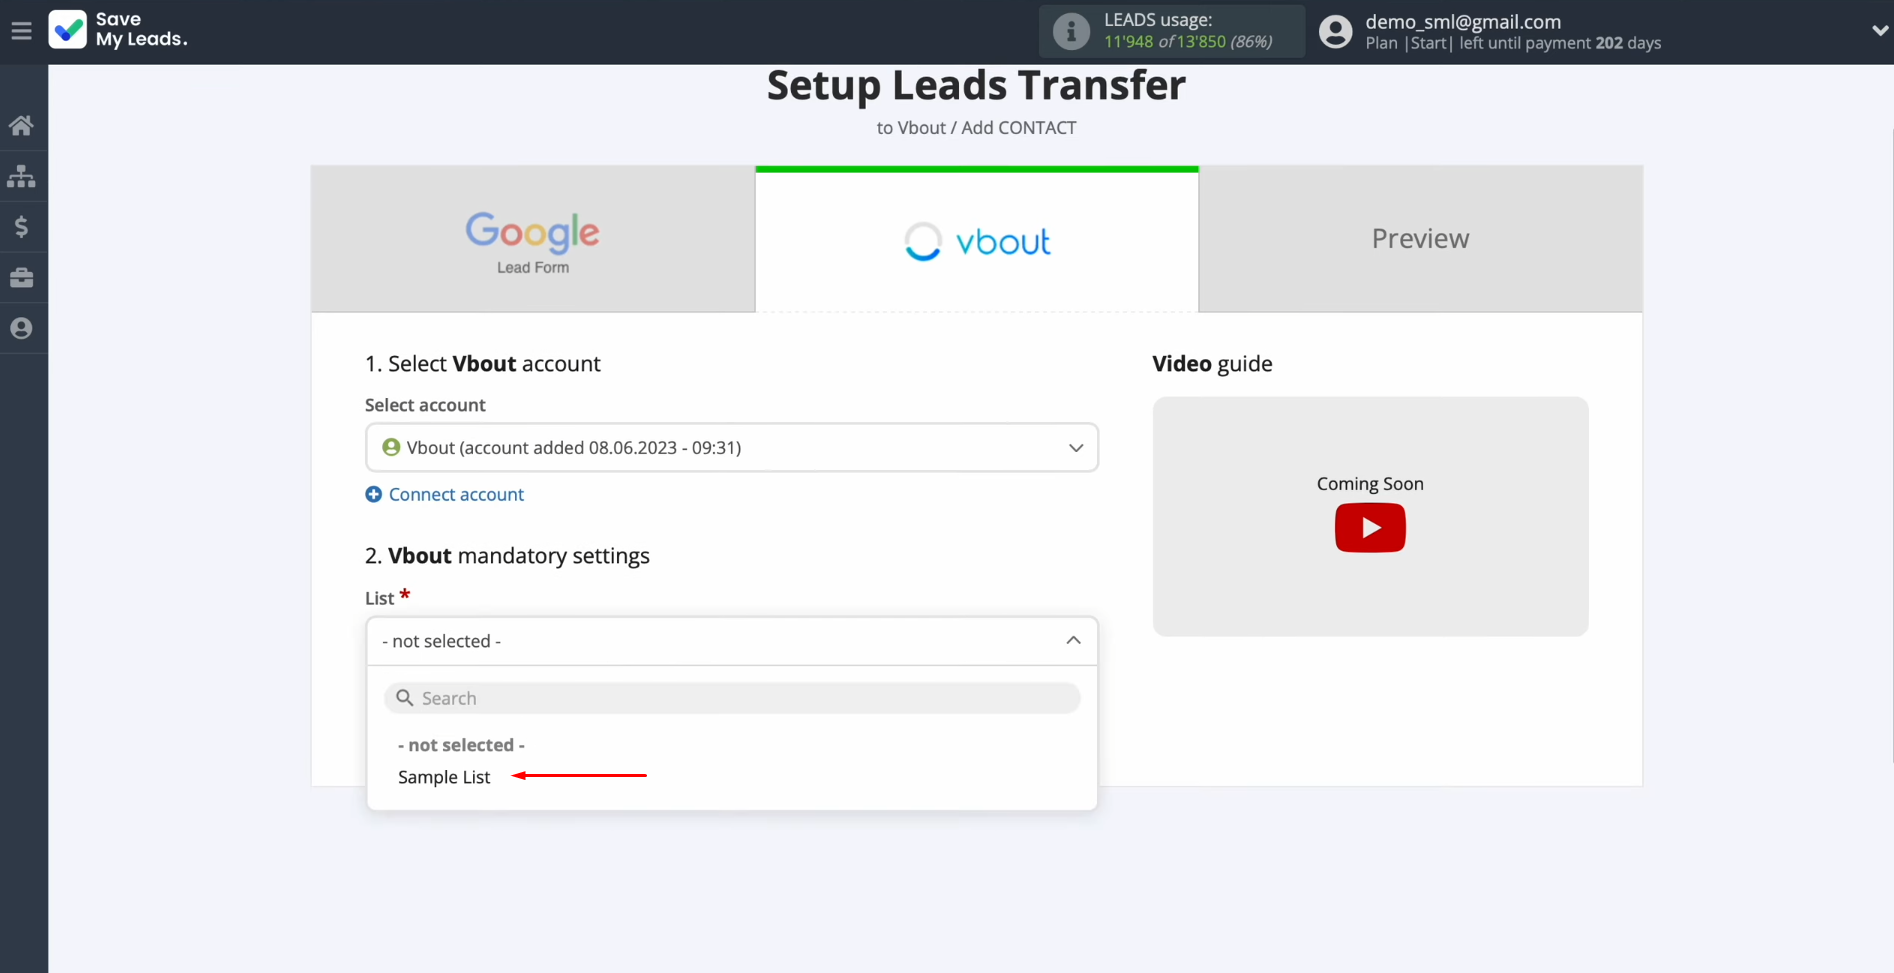
Next, choose
the specific list in Vbout where new contacts will be automatically created for
each lead generated through the Google Lead Form.
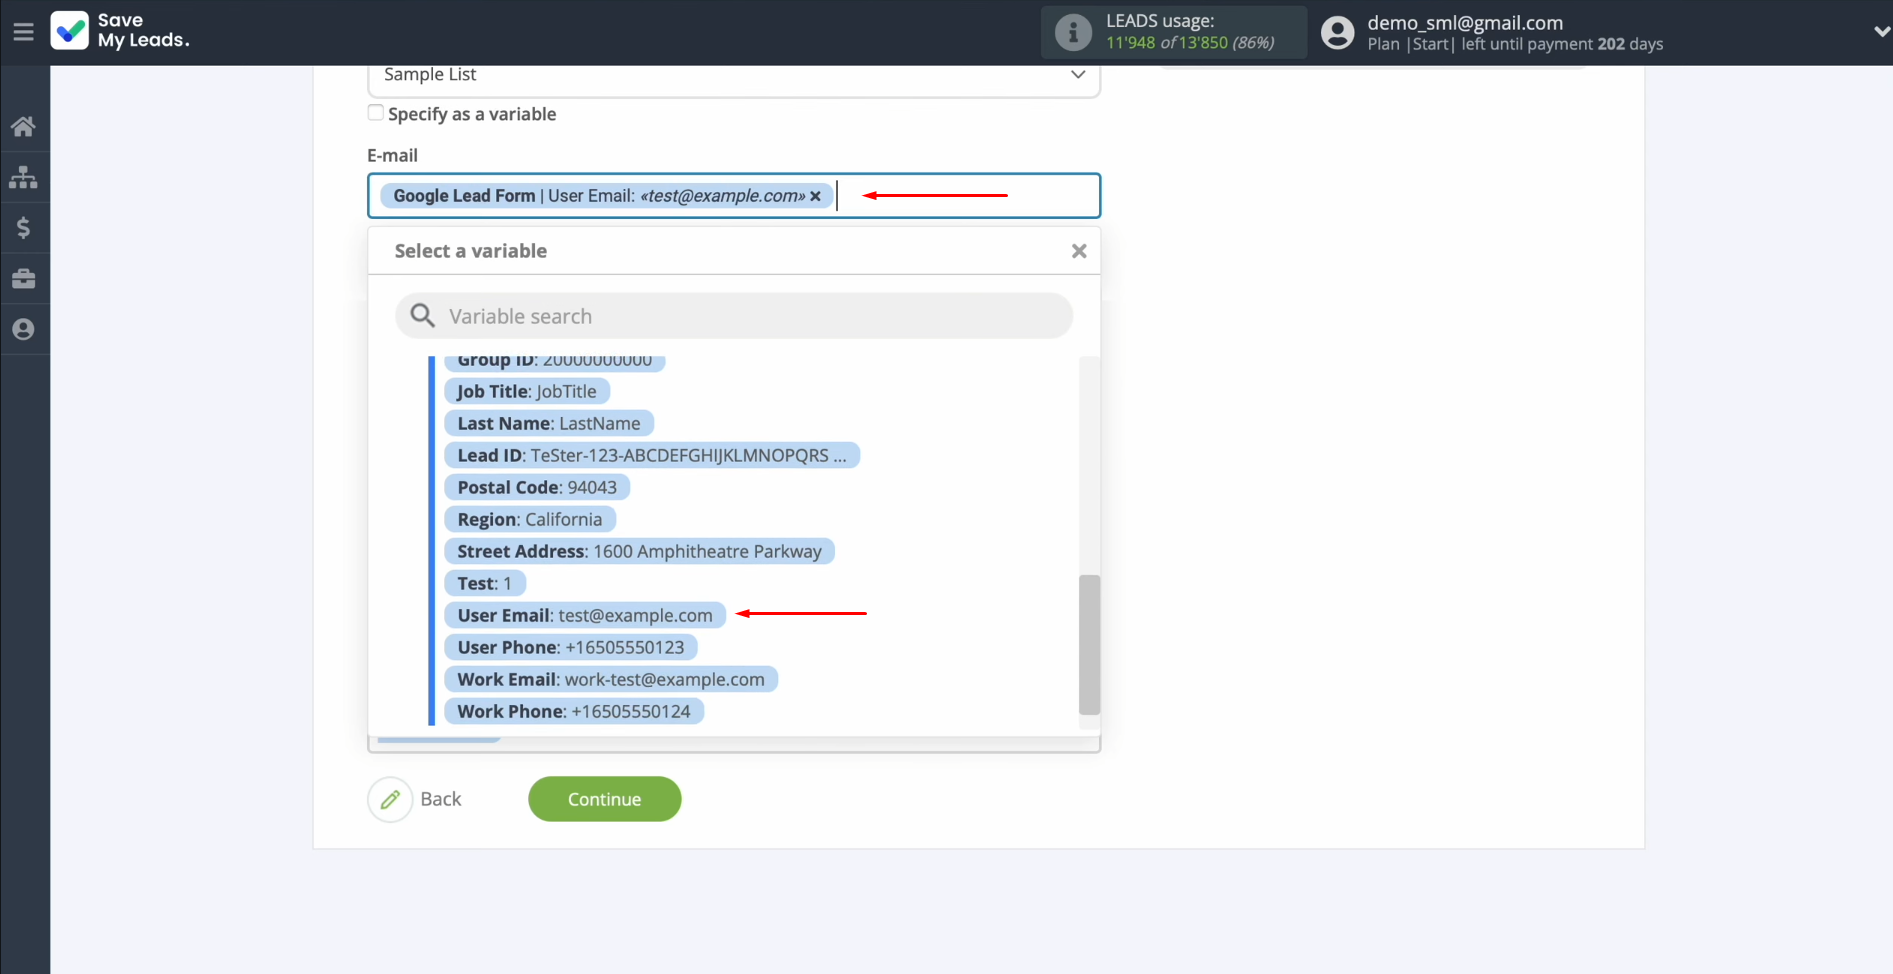
At this
stage, you’ll see the available Vbout fields. You can map these fields to
variables from the Google Lead Form. Simply click on a field, then select the
appropriate variable from the drop-down menu. If the default settings meet your
needs, you can leave them unchanged.
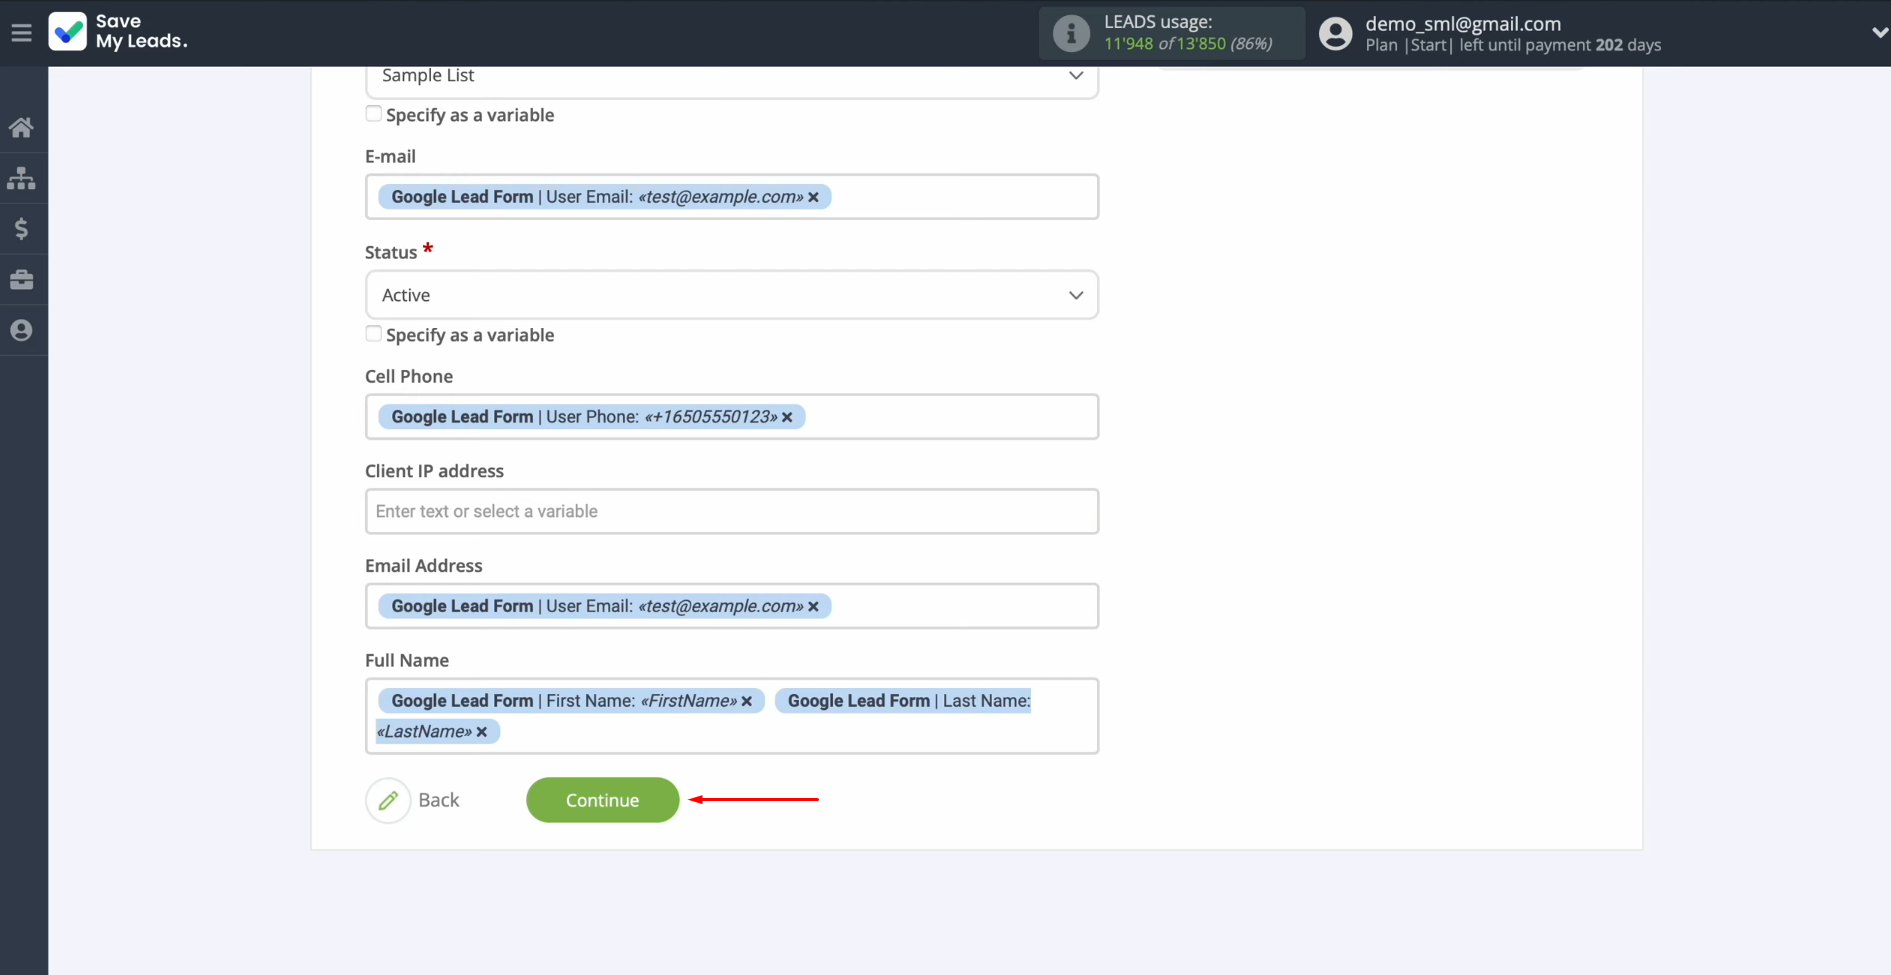
Once all
necessary fields are configured, click “Continue.”
You’ll now
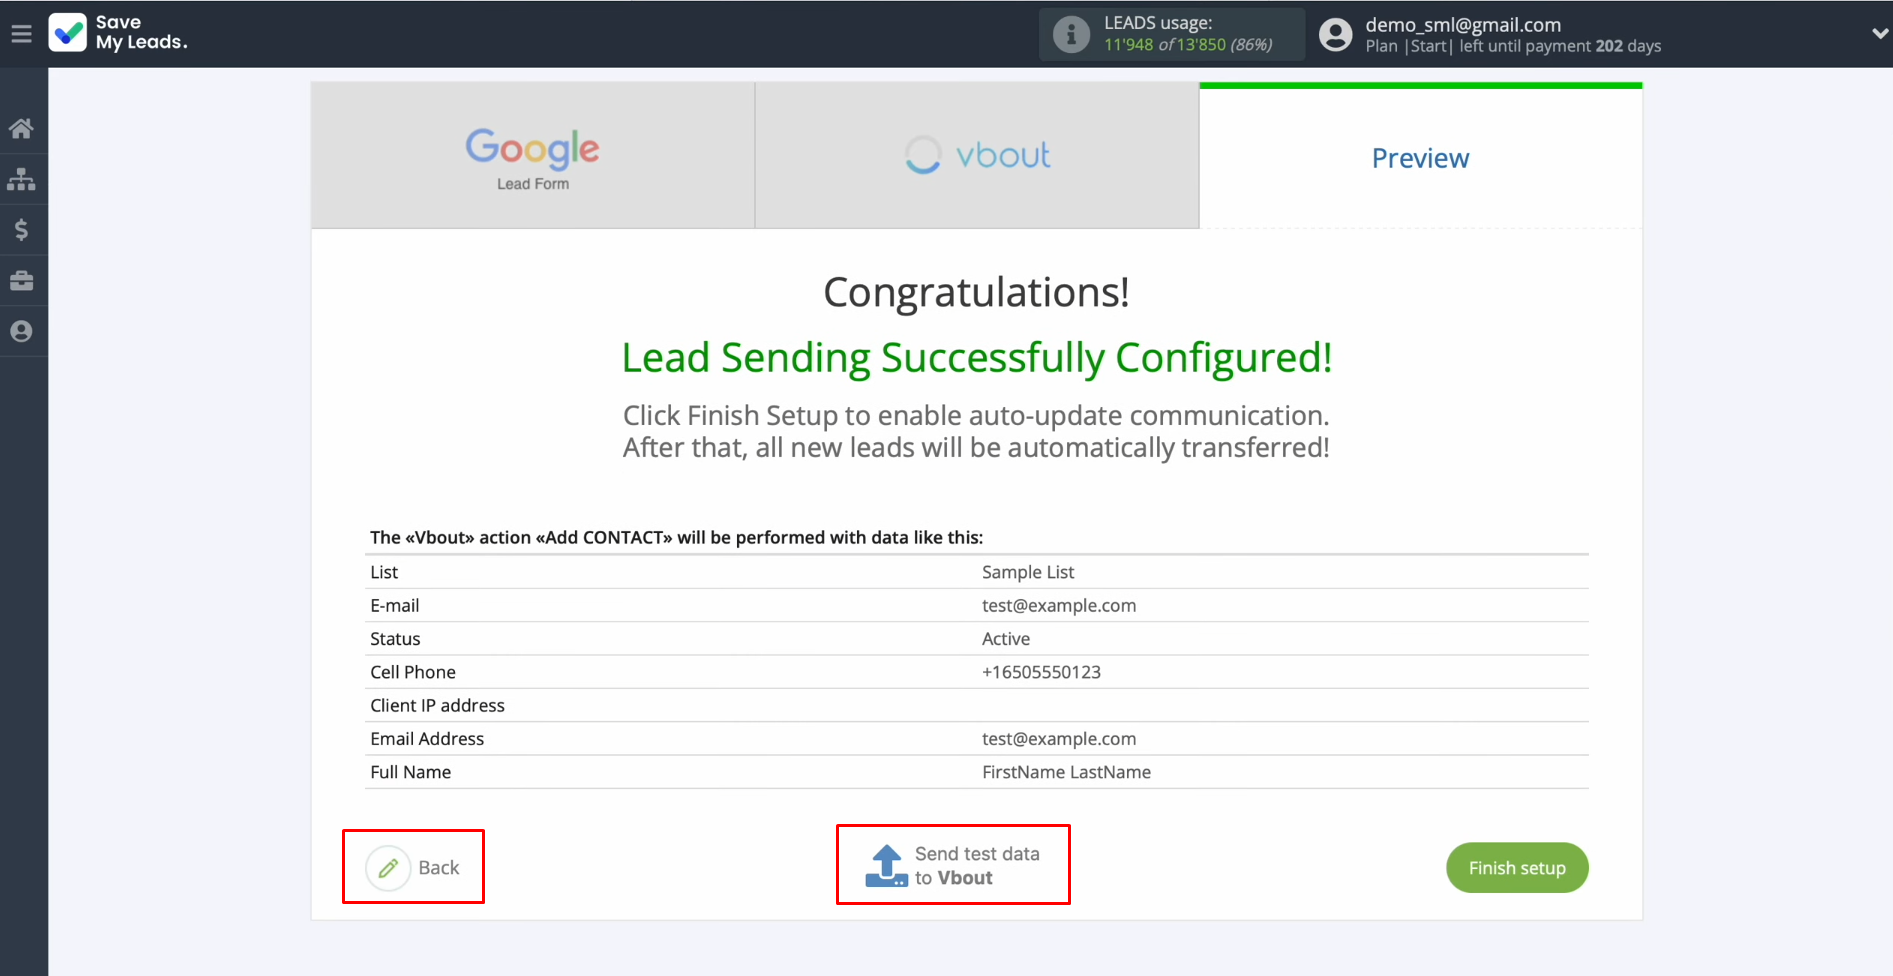
see a preview of the data that will be sent to Vbout for each new lead. If
something doesn’t look right, click “Back” to return to the previous step and
make adjustments. To ensure everything is set up correctly, click “Send test
data to Vbout.”
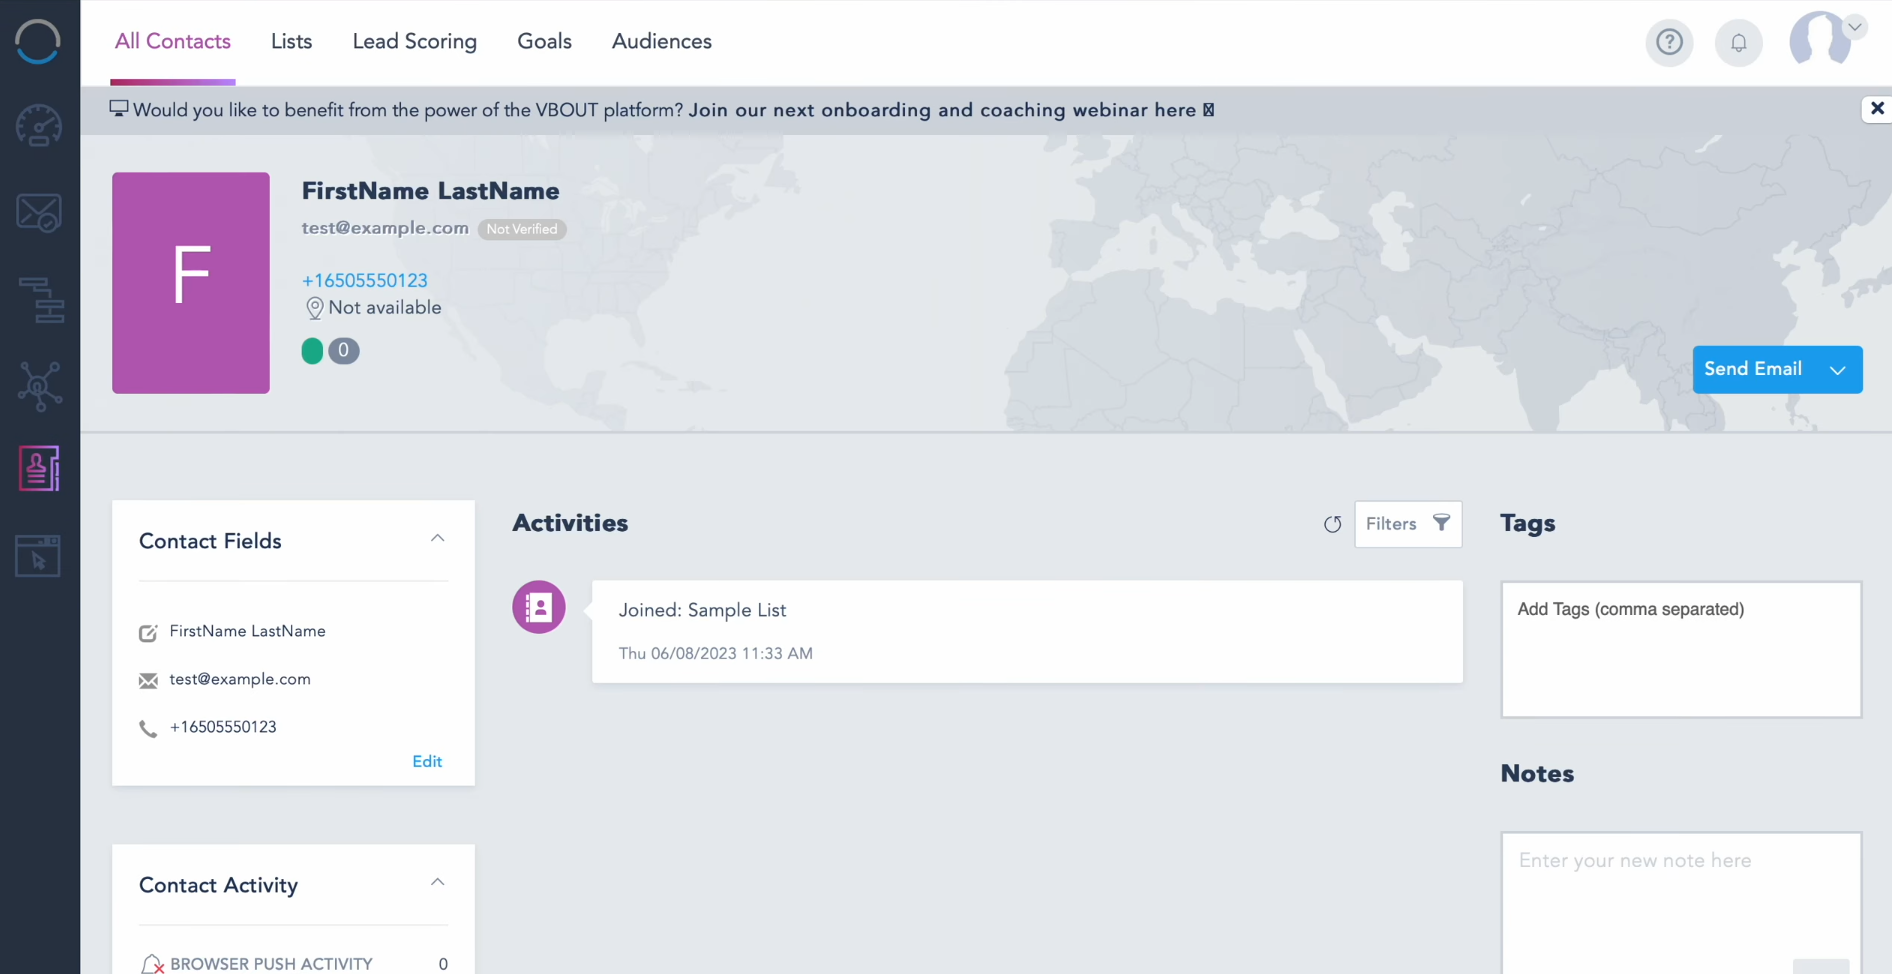
After the
test data is successfully sent, log in to Vbout and verify the results.
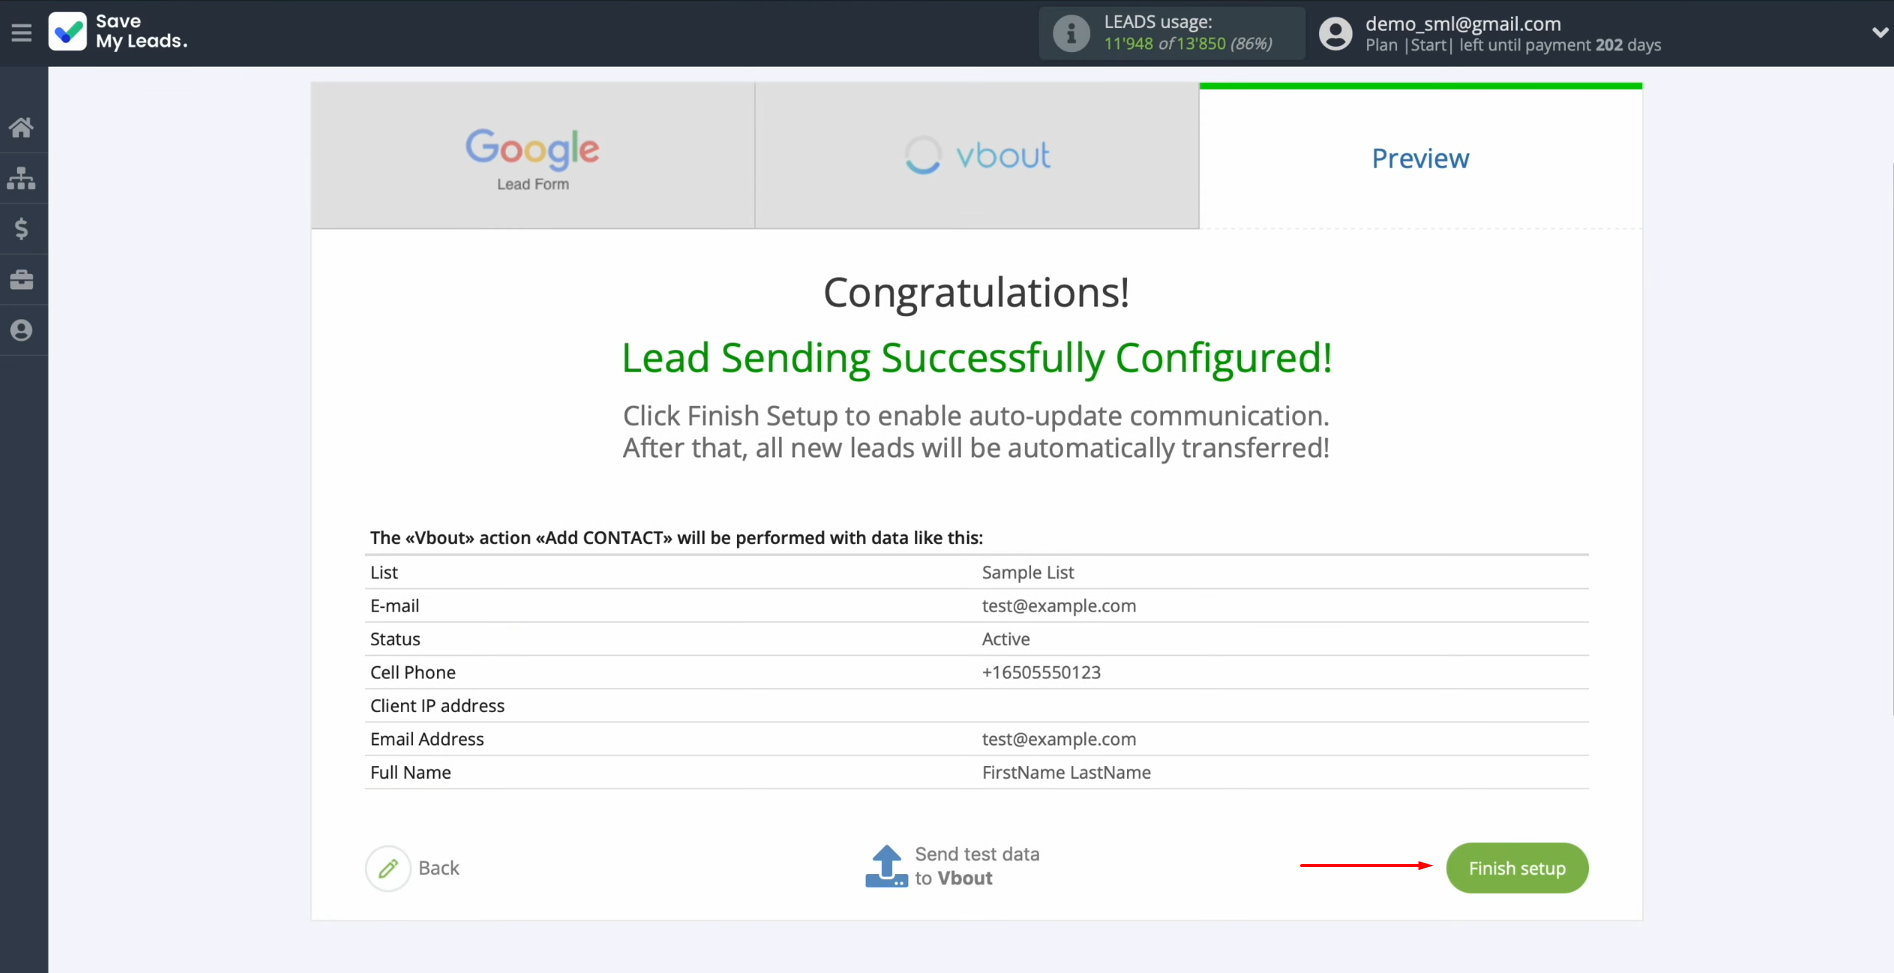
Finally,
return to SaveMyLeads to complete the remaining setup steps.
Enable Auto-Update
To activate the auto-update feature for your connection, click on “Finish setup.” This will ensure that all new leads from Google Lead Form are automatically transferred to Vbout, where new contacts will be created in real-time.
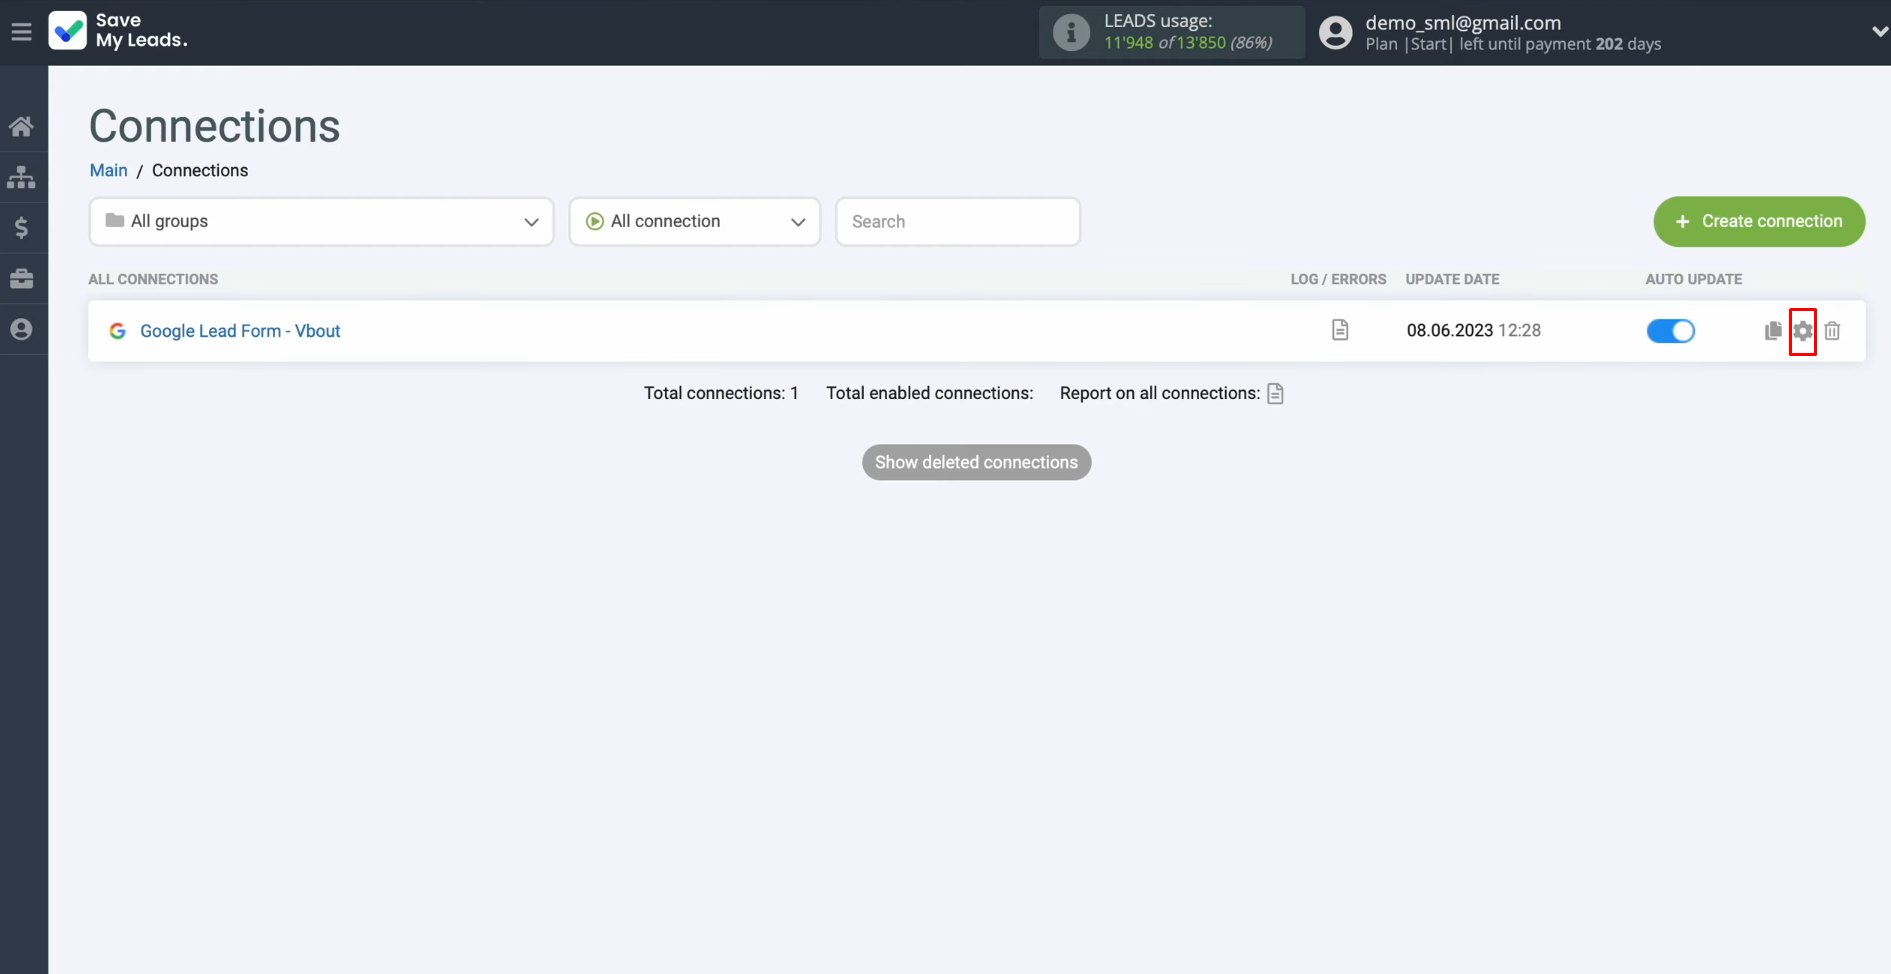
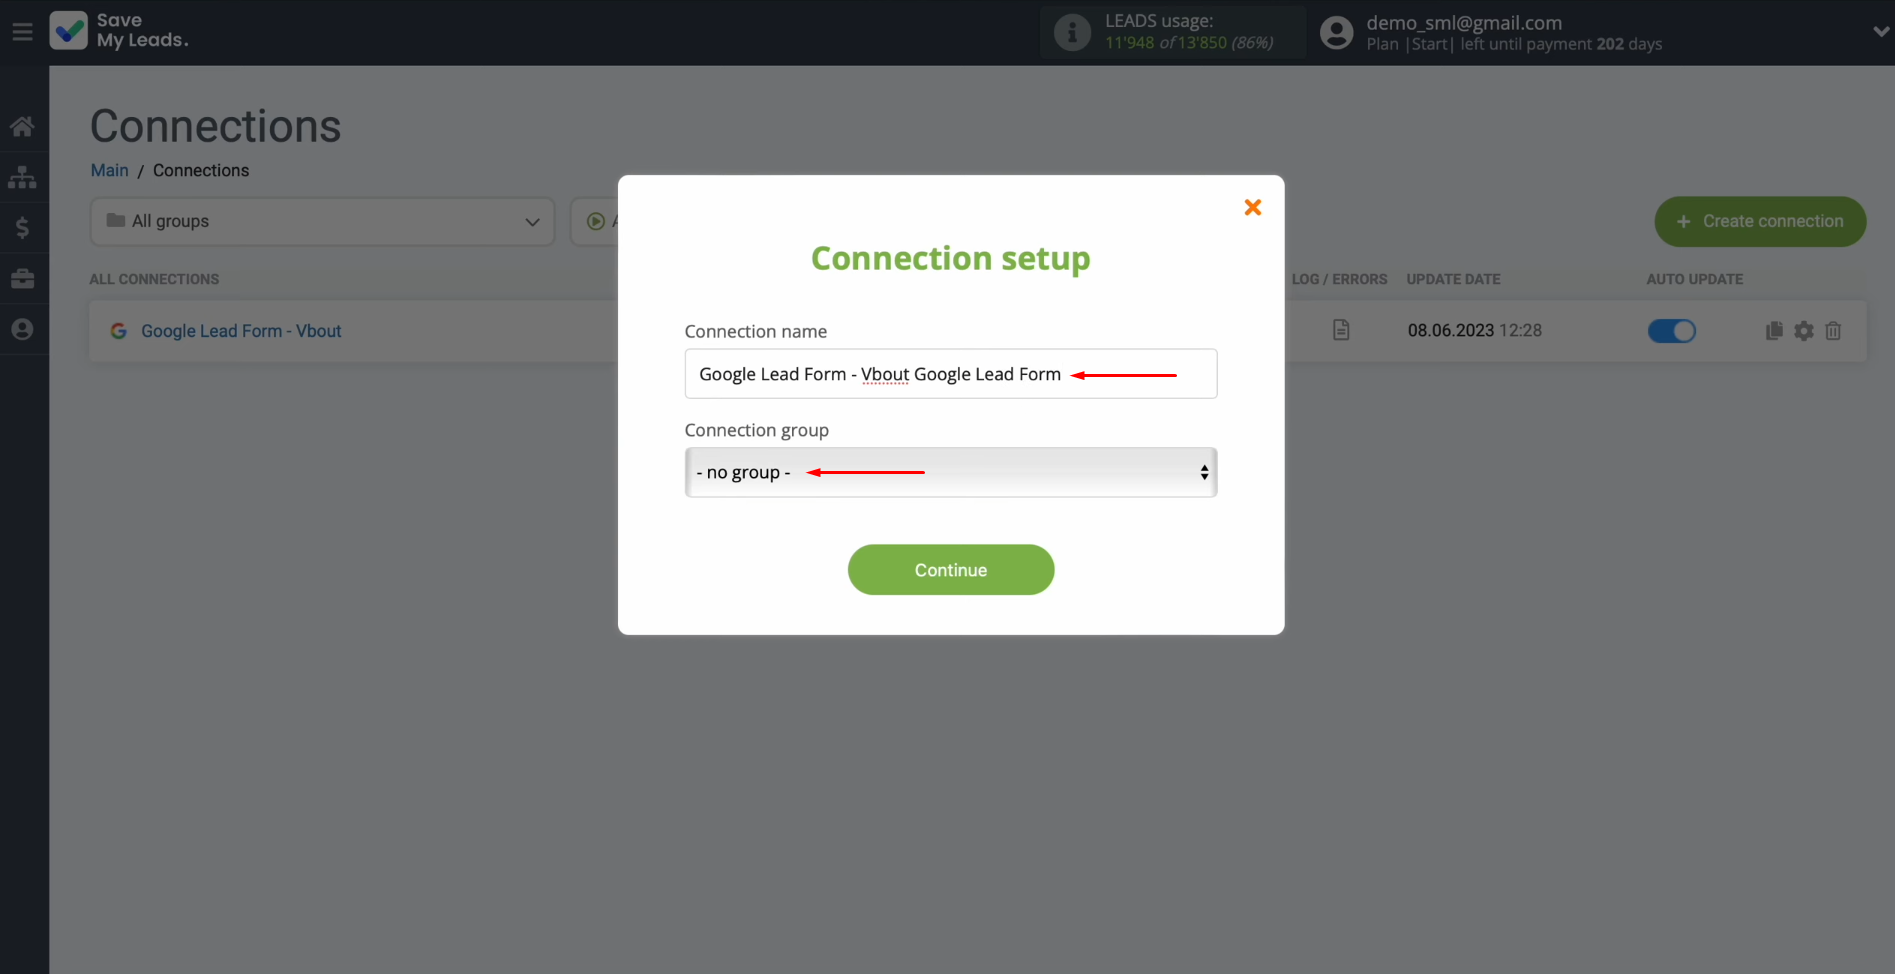
If you wish
to rename your connection, simply go to its settings by clicking on the gear
icon.
From there,
you can update the connection name and assign it to a specific group. Once
done, click “Continue.”
And that's
it – your integration is now complete!
In Conclusion
By following these steps and enabling auto-updates, you can efficiently sync Google Ads leads with Vbout for seamless data flow. This automation saves time, reduces manual tasks, and enhances business efficiency. With lead transfers handled by SaveMyLeads, you can prioritize customer engagement, strategic planning, and long-term growth.
Step-by-Step Guides for Setting Up Integrations:
- TikTok and Slack Integration: Automatically Sending Channel Notifications
- How to Connect Google Lead Form Ads to Mailchimp
- How to Integrate Google Lead Form and Copper: Automatic Lead Transfer
- How to Connect Google Lead Form Ads to Notion
- Google Lead Form and ClickUp Integration: Automatic Data Transfer
