In the modern world, a successful business is unthinkable without the use of automation. Market leaders and innovative companies are actively striving to optimize operations, which allows them to reduce time and budget costs and achieve leading positions in their niches. The tools available for this include automation services, integration connectors, and artificial intelligence. Using Facebook Lead Ads for marketing and collecting feedback, and Wrike for project management and team collaboration, you can make your work much easier and faster. With our SaveMyLeads service, which combines these platforms, you can automate the transfer of leads from Facebook to your project management system. Thus, you will be able to increase the speed of creating new tasks and simplify the process itself. In addition, it will free you from the need for manual data entry. Interesting? Then we offer you detailed instructions for setting up and launching Facebook and Wrike integration.
Why SaveMyLeads?
By using SaveMyLeads for Wrike and Facebook integration, you will ensure automatic and continuous transfer of information to the project management system. Here, data will instantly turn into new tasks that can be sorted, distributed among managers, and also set priorities and statuses. Why is SaveMyLeads preferred for this integration? First of all, with this no-code tool, setup will be easy and fast. Even people with minimal experience will master the process in just 10 minutes. Developers made sure that the interface and operating principle of the connector were intuitive. In addition, SaveMyLeads provides a wide range of ready-made solutions for integration with CRM systems, email, SMS services, instant messengers, task management systems, and Google services. These solutions can be useful for those who aim for maximum automation. Furthermore, it is worth noting the affordable cost of tariff plans and the availability of professional technical support, which is ready to assist at any time.
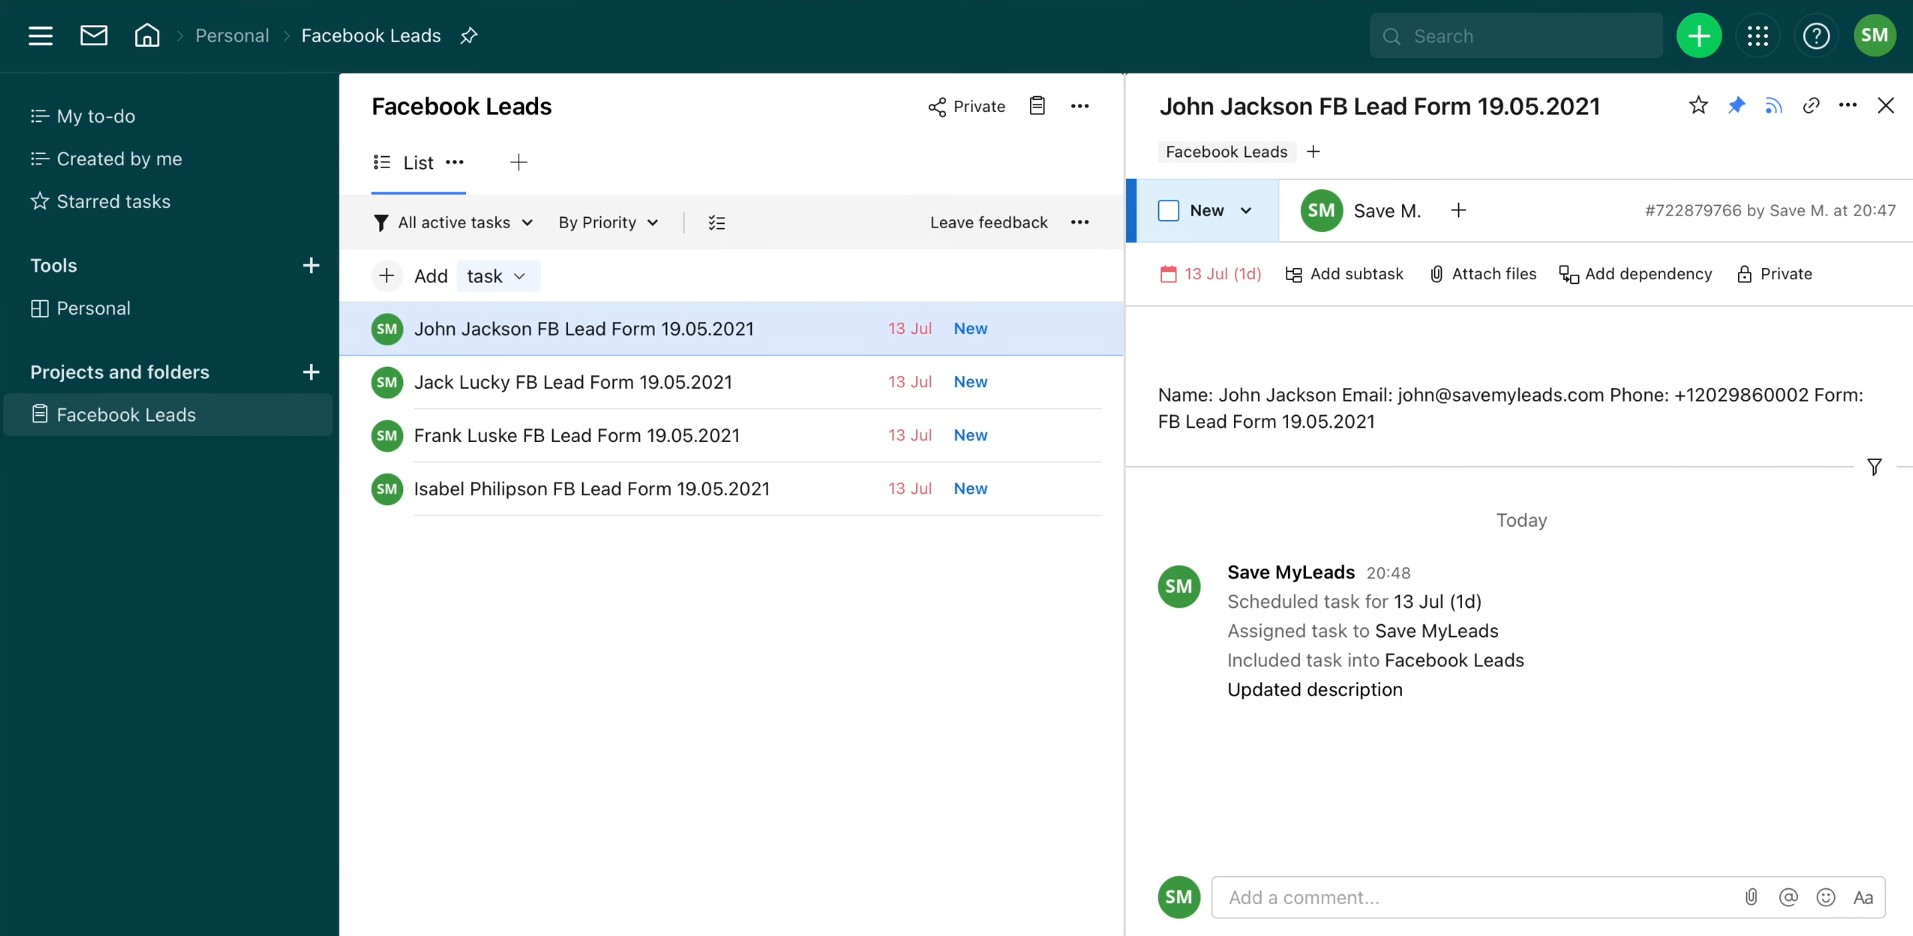
How to Set up Facebook and Wrike Integration
Procedure:
- Create a Facebook Lead Ads form.
- Register a personal profile in SaveMyLeads.
- Connect the data source to the connector – Facebook.
- Specify the Facebook page and form from which lead data should be sent.
- Connect and configure the data receiver – Wrike.
- Enable auto-update.
We won’t tell you how to create a form on Facebook, since you apparently know how to do it. We will consider further actions step by step.
Setting up the Data Source – Facebook
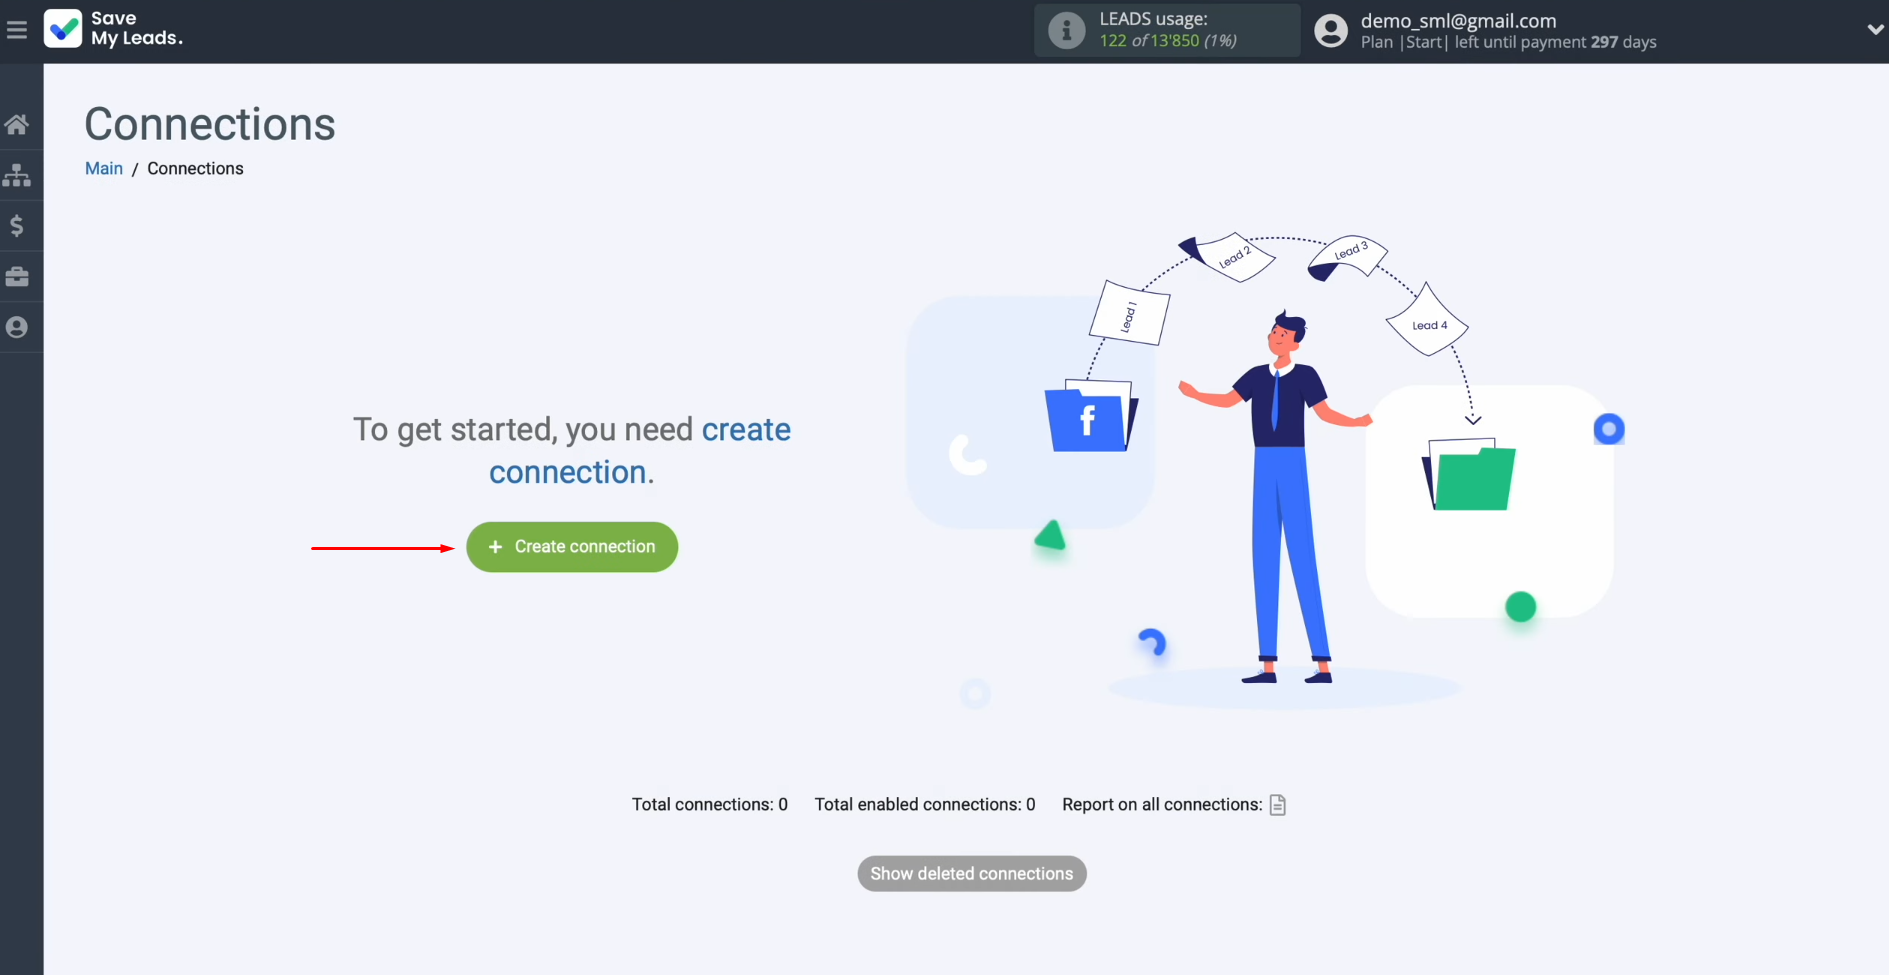
To set up Facebook integration with Wrike, first, you need to create a new connection. For this, click on the green button.
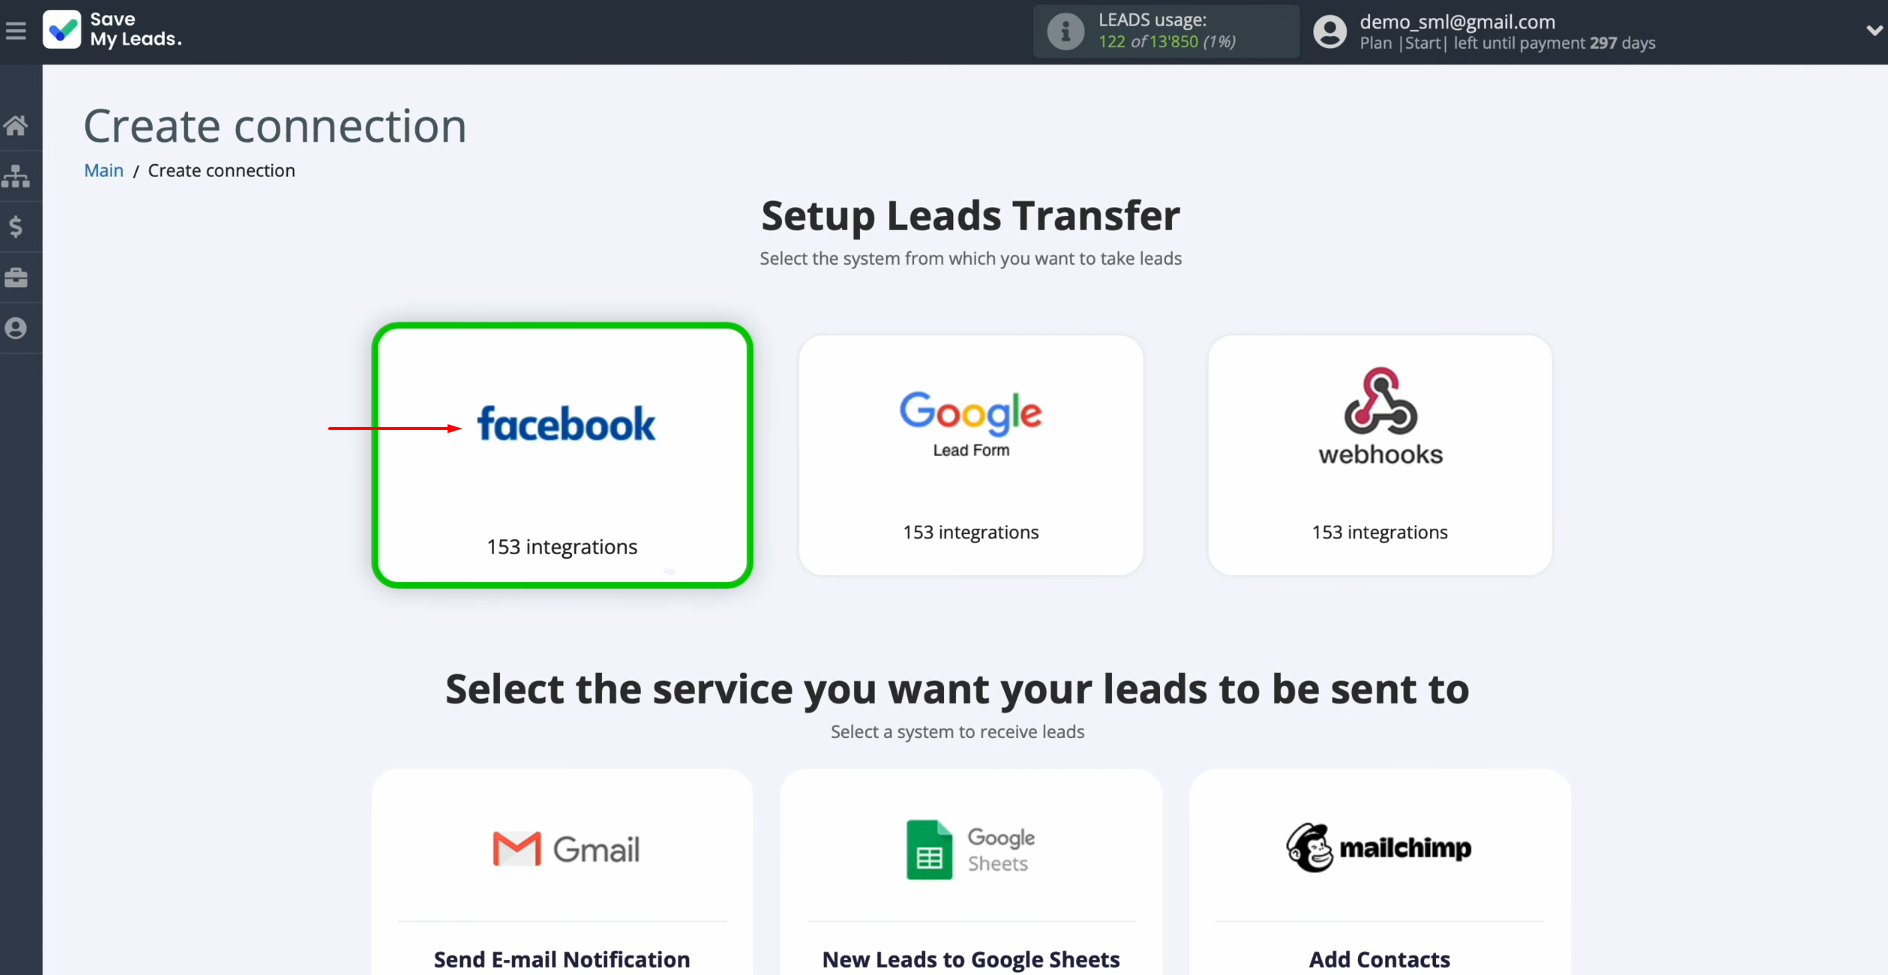
Select the system from which you want to receive new data. You need Facebook.
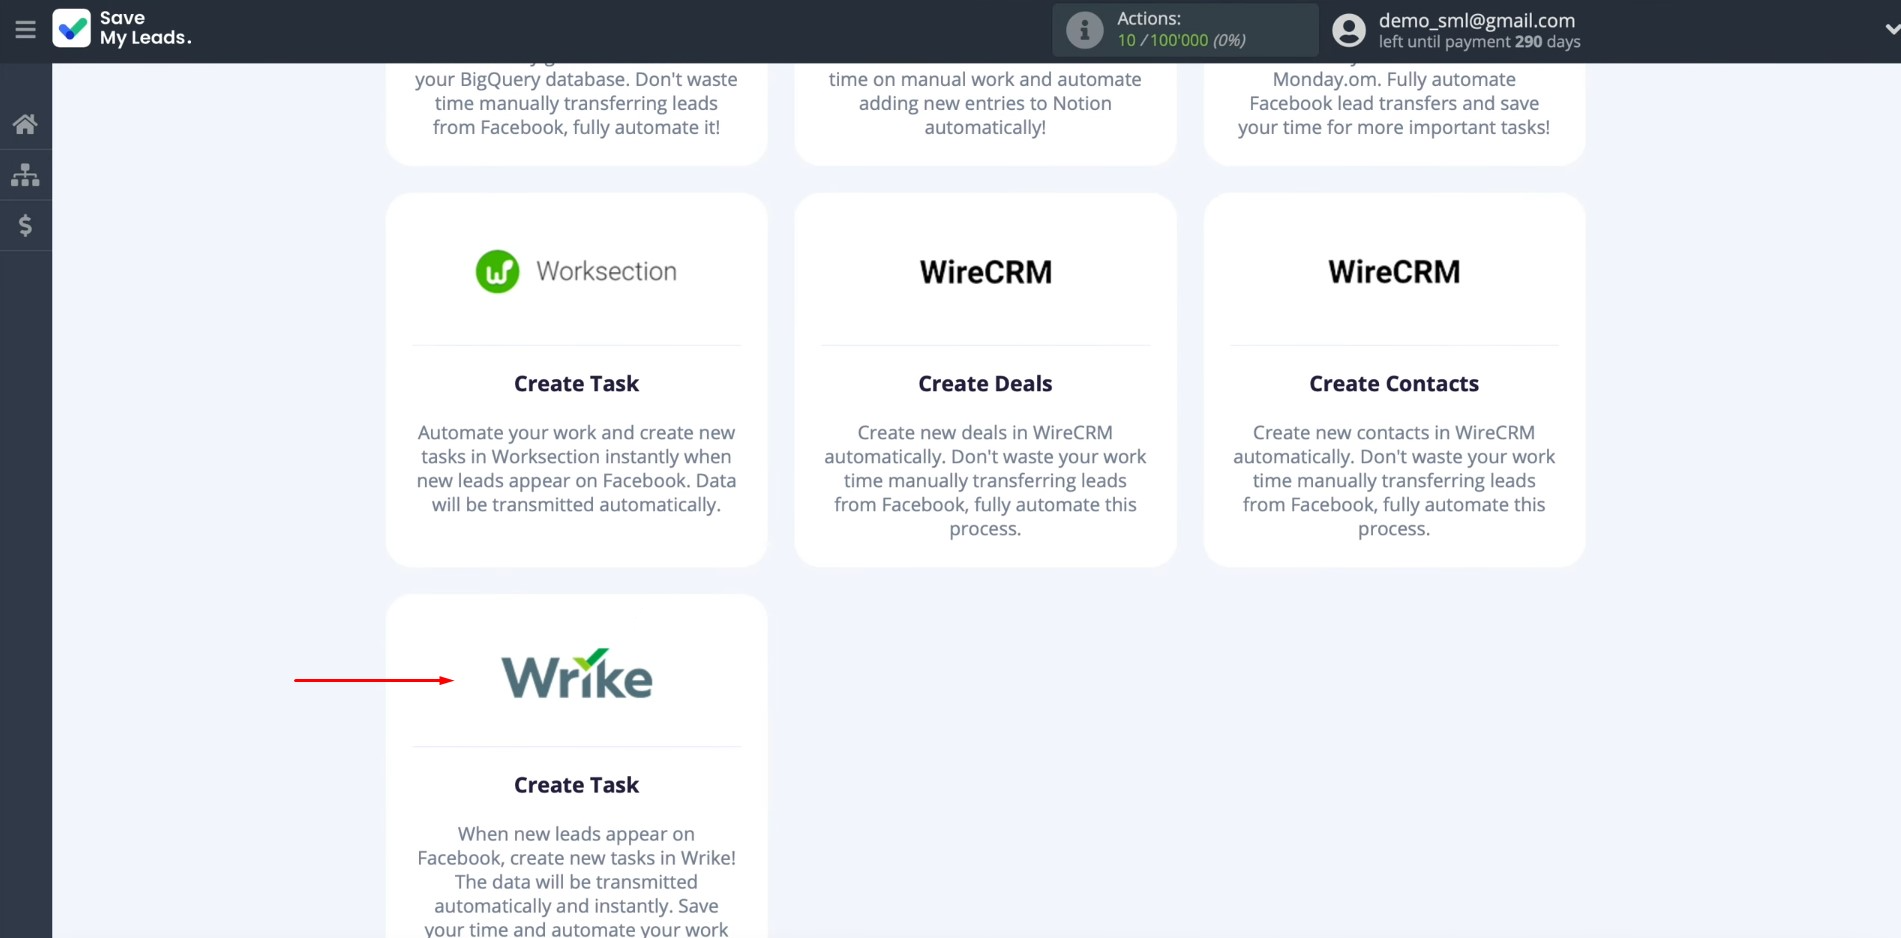
Choose one of
the ready-made
templates where you want to send leads
from Facebook. You need Wrike (Create Task).
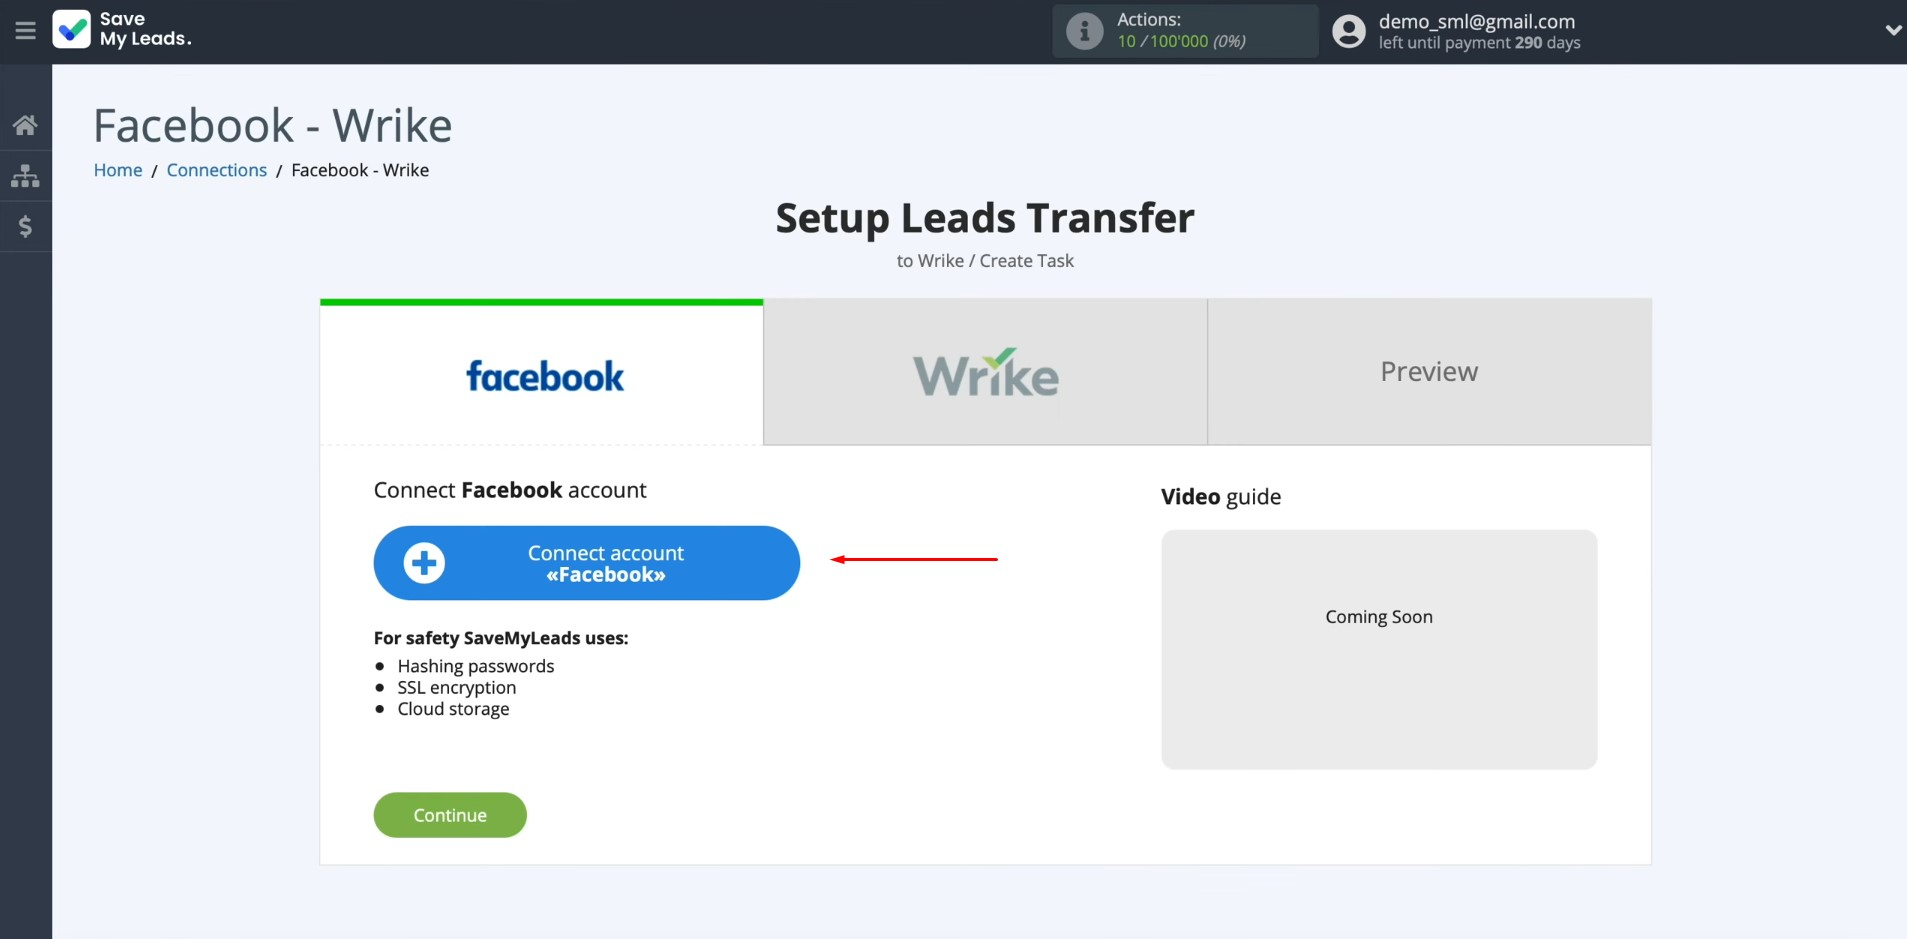
Connect your Facebook account to SaveMyLeads. To achieve this, press the
blue button.
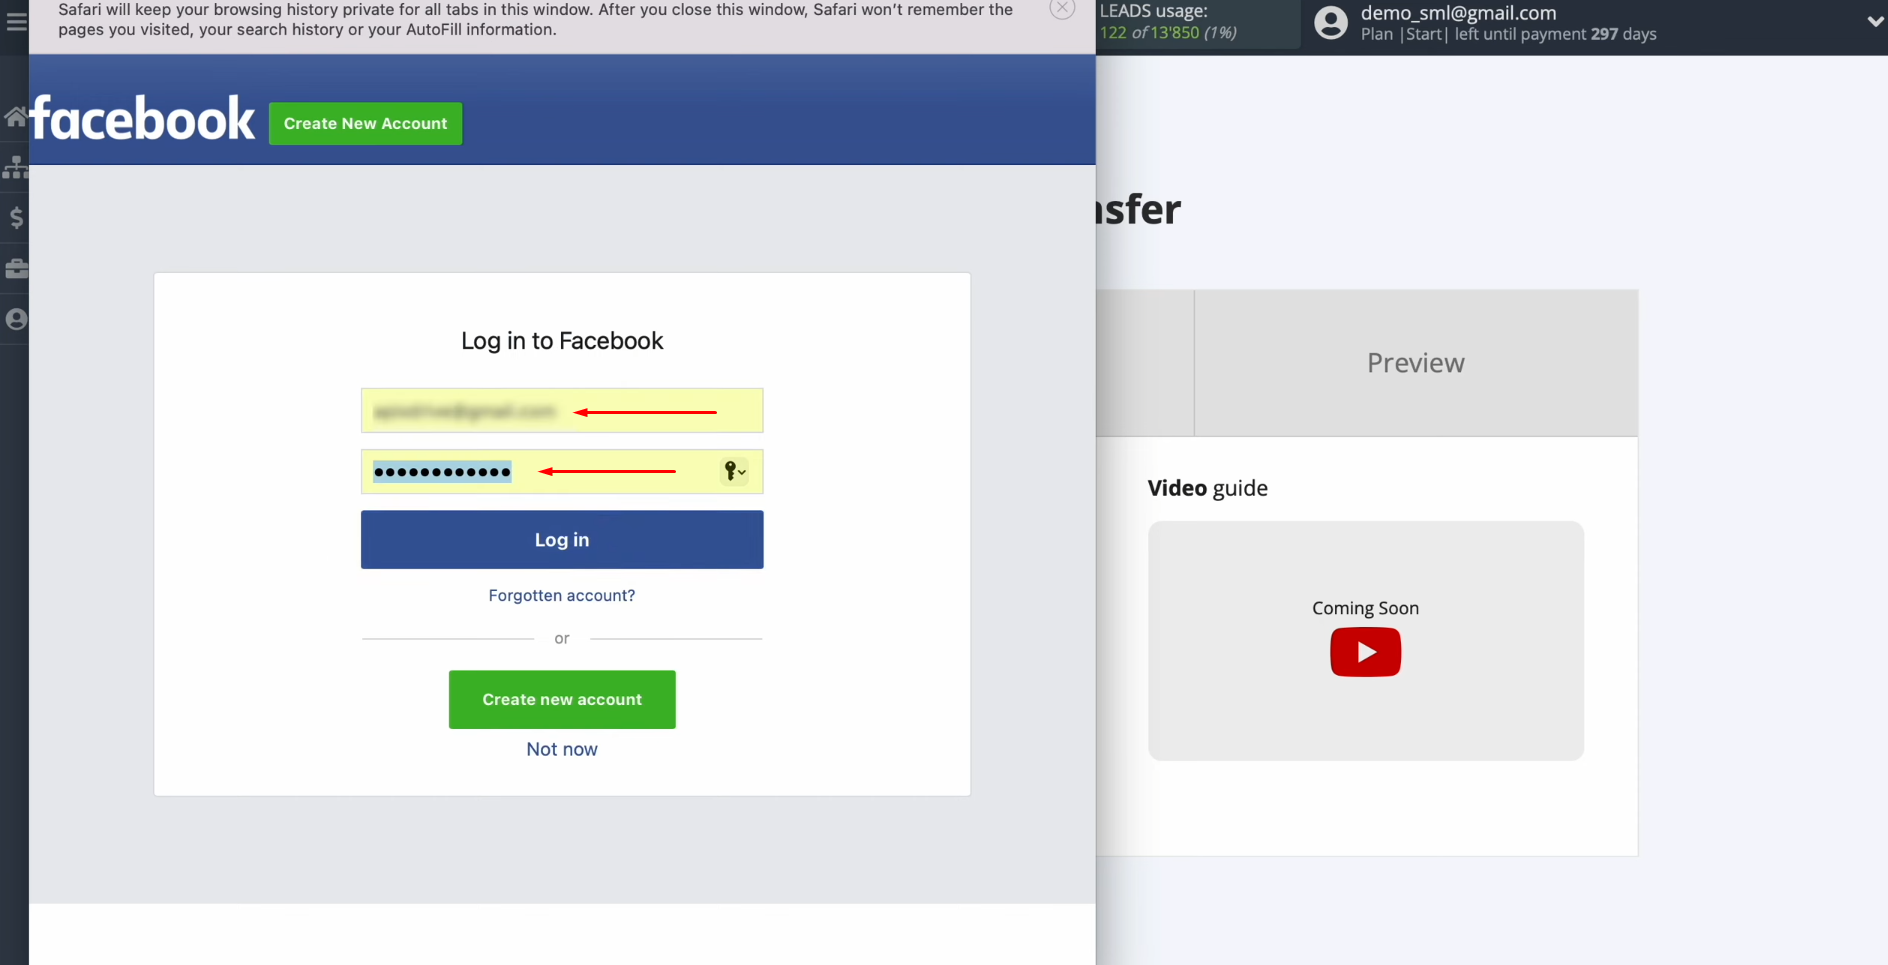
Enter the username and password of your Facebook personal
account and click “Log in”.
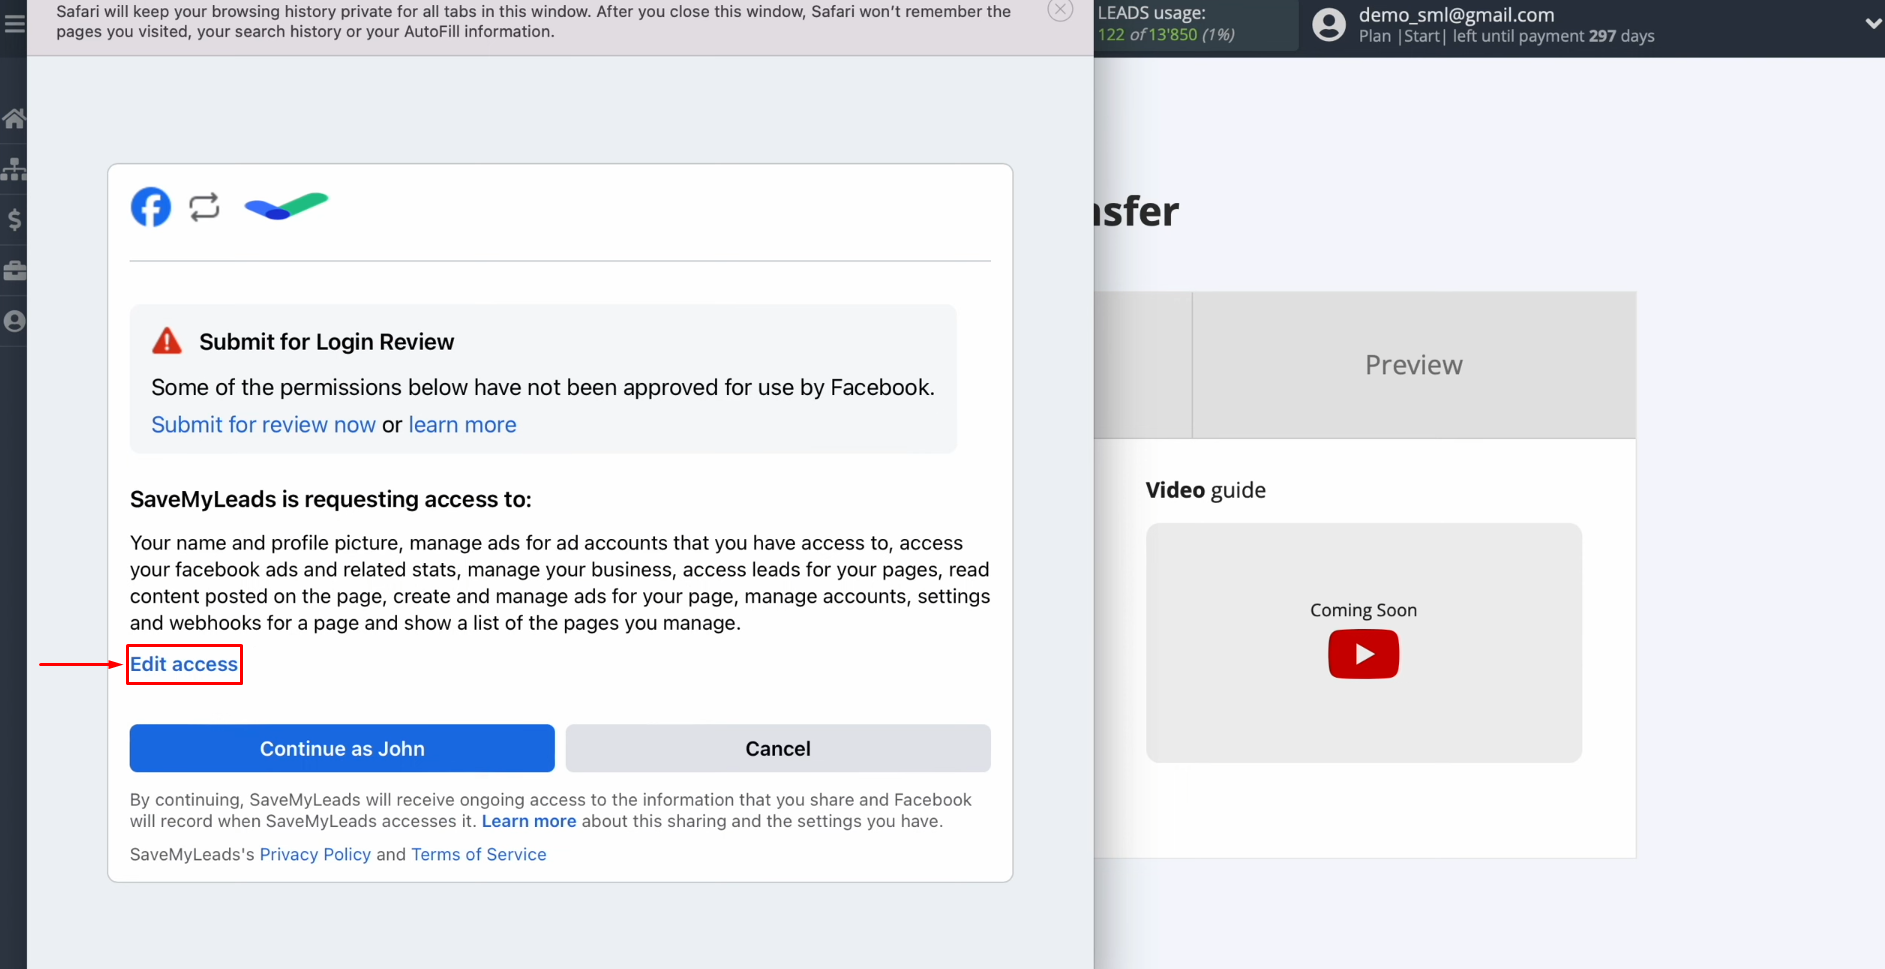
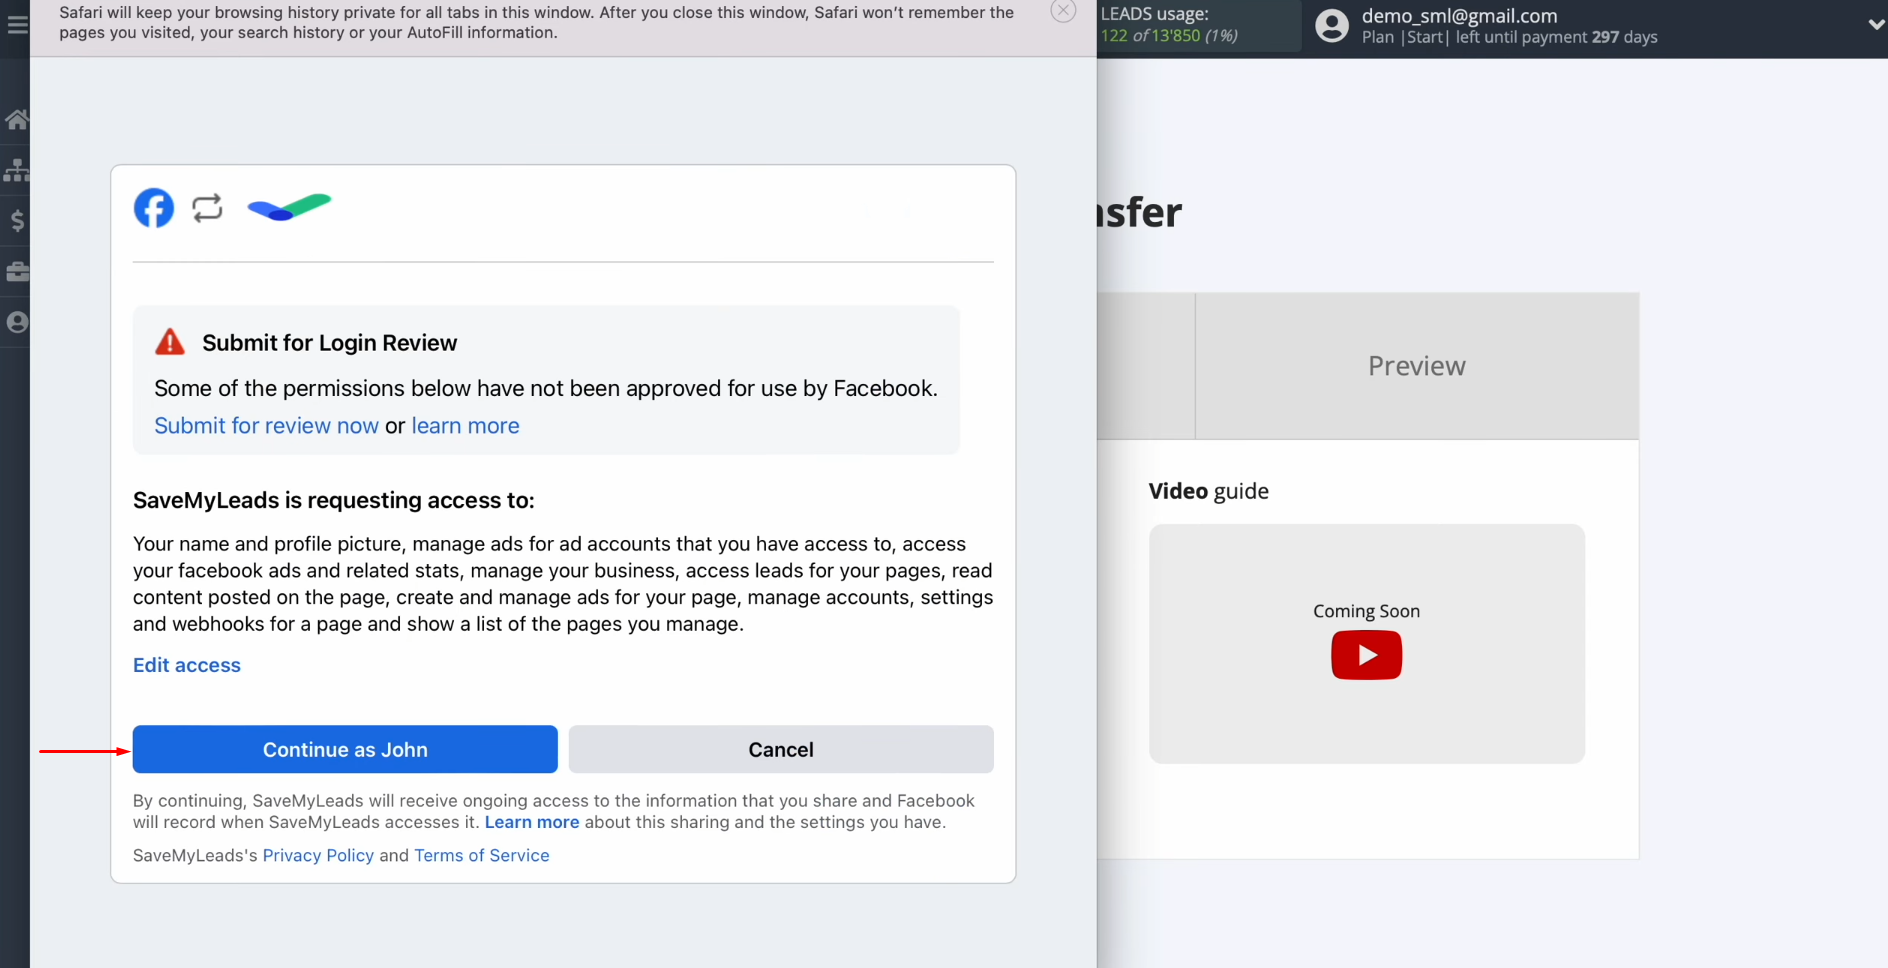
Provide SaveMyLeads access to
work with your Facebook account. To do this, go to settings – click
“Edit access”.
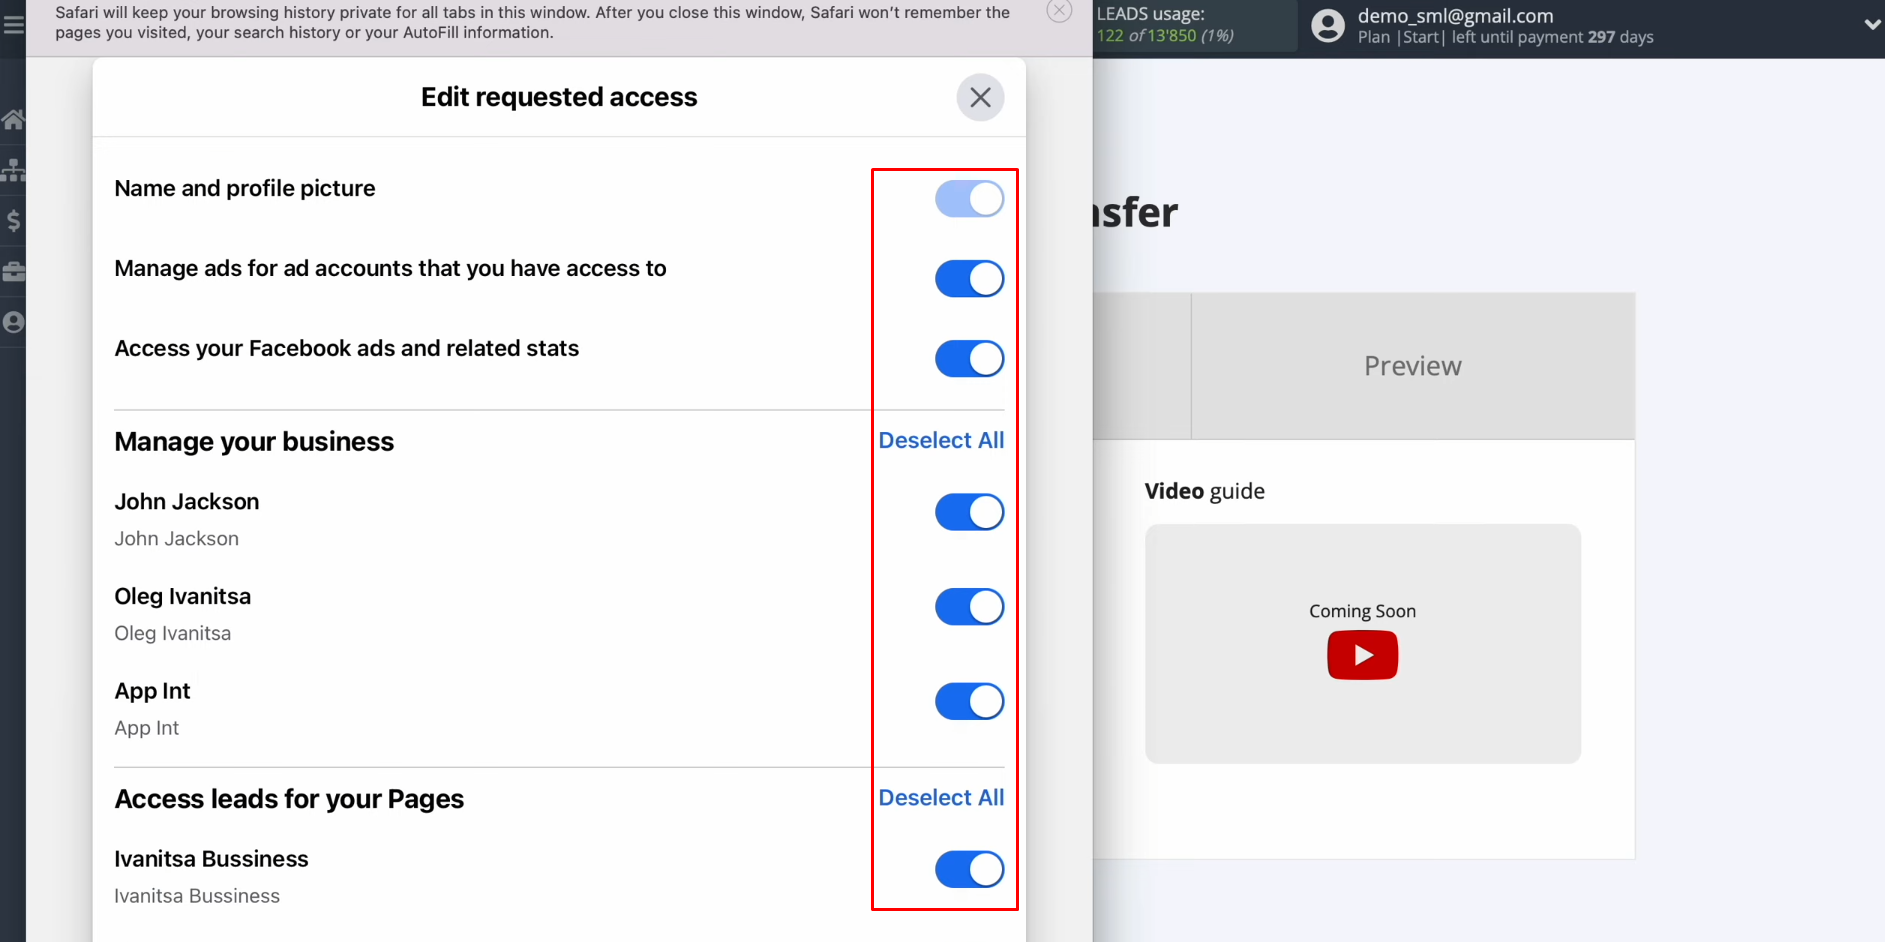
Leave
all access checkboxes enabled.
Click
“Continue as…”.
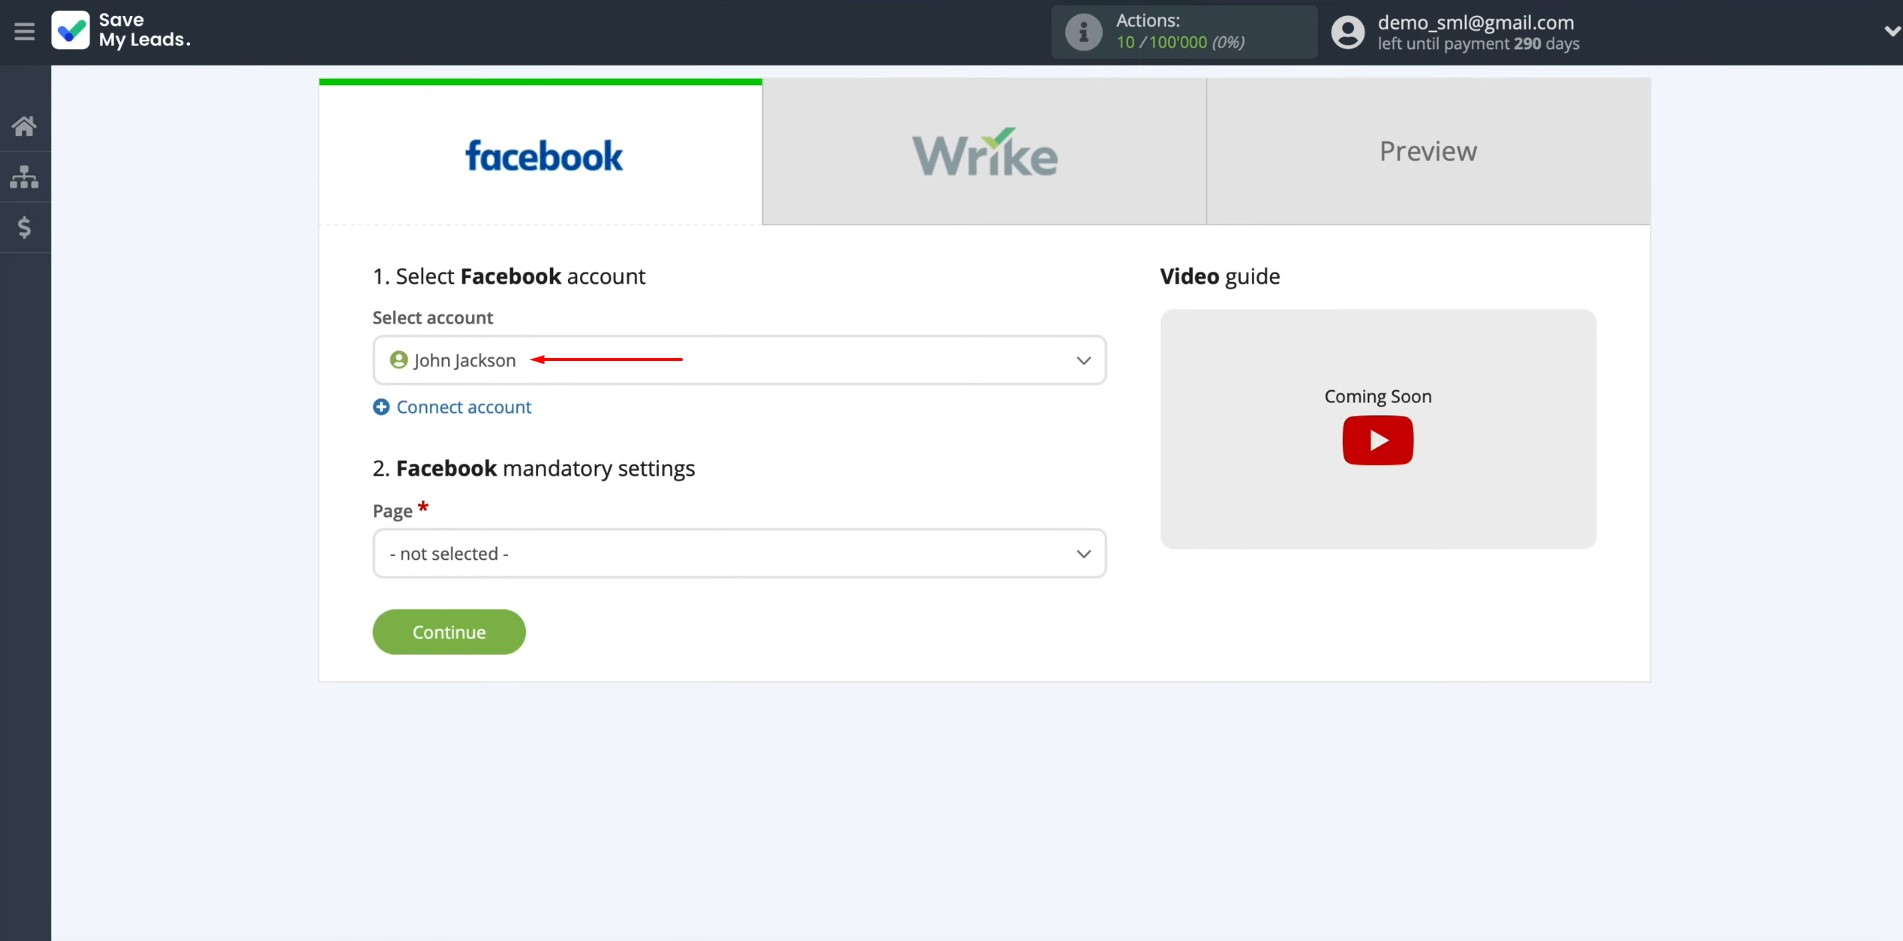
When the
connected account is displayed in the
list, it must be selected.
Select the advertising page for which you want to send leads. Then you
need to specify the form for which the data will be downloaded.
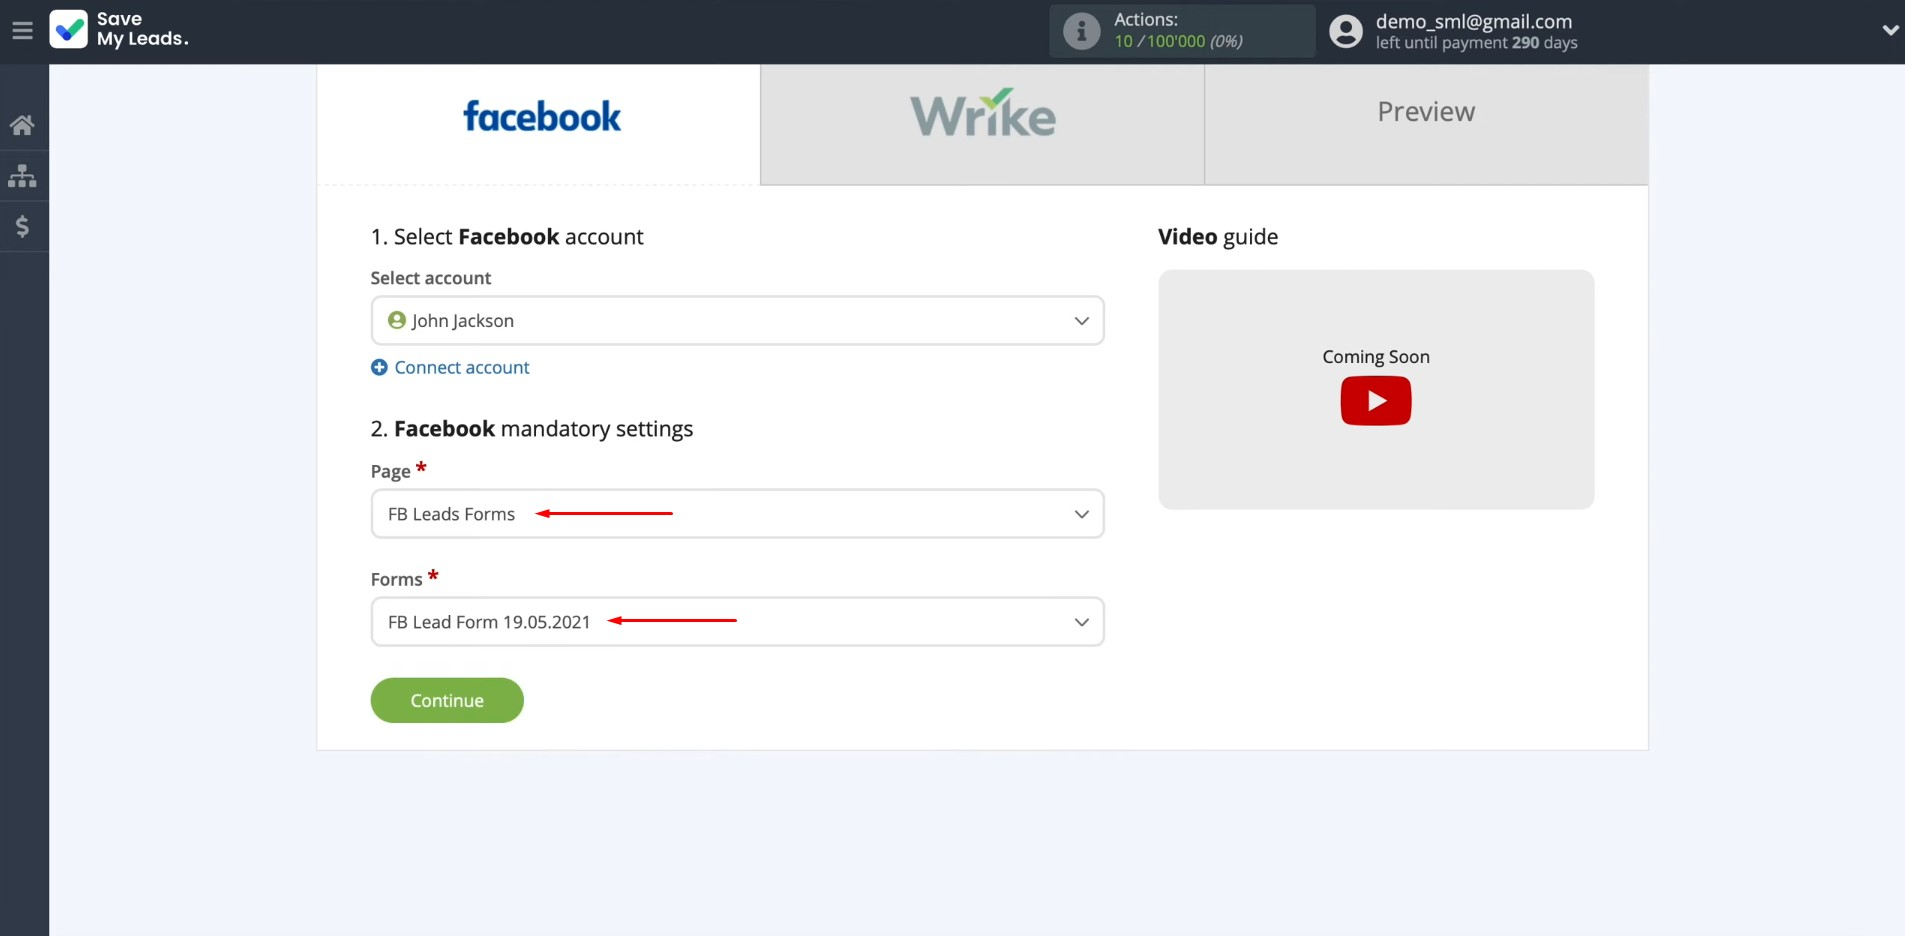
If you have several forms and need them all, you will need to create a separate connection for each one.
Setting up the Data Receiver – Wrike
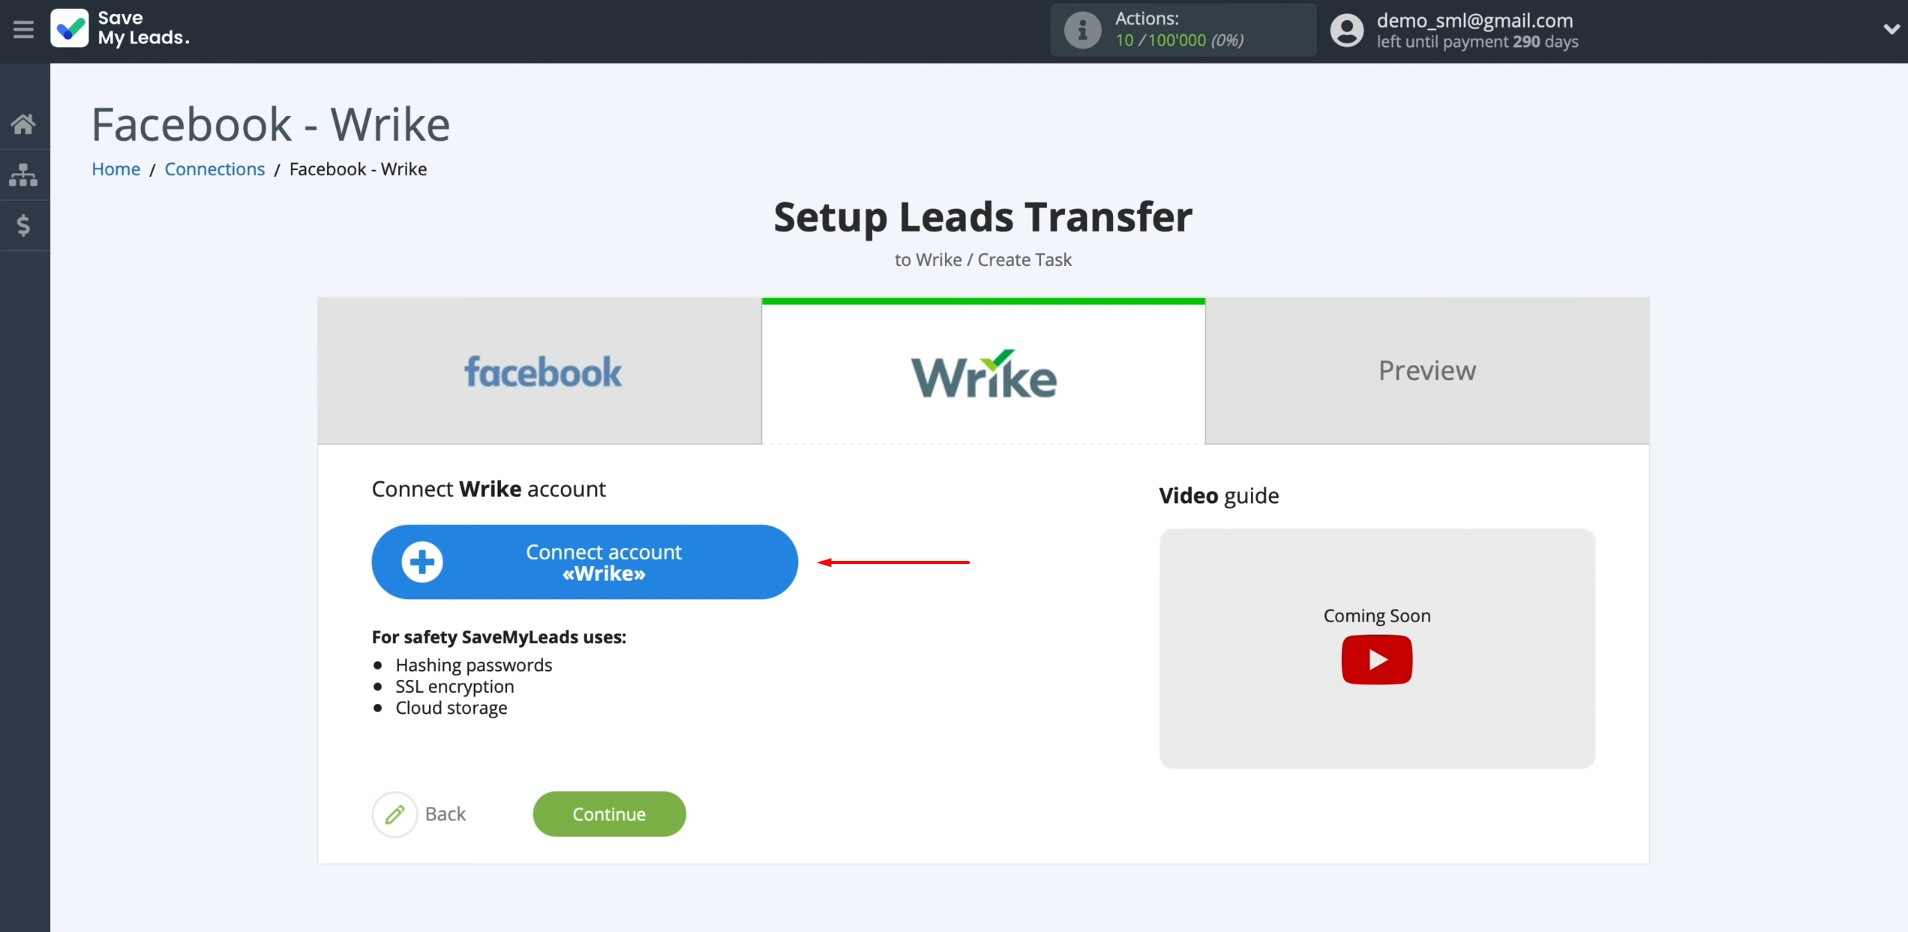
To set up Wrike integration with Facebook, you need to connect your Wrike account to SaveMyLeads. For this, click on the blue button.
Specify the email to which you
registered Wrike. Click “Next”.
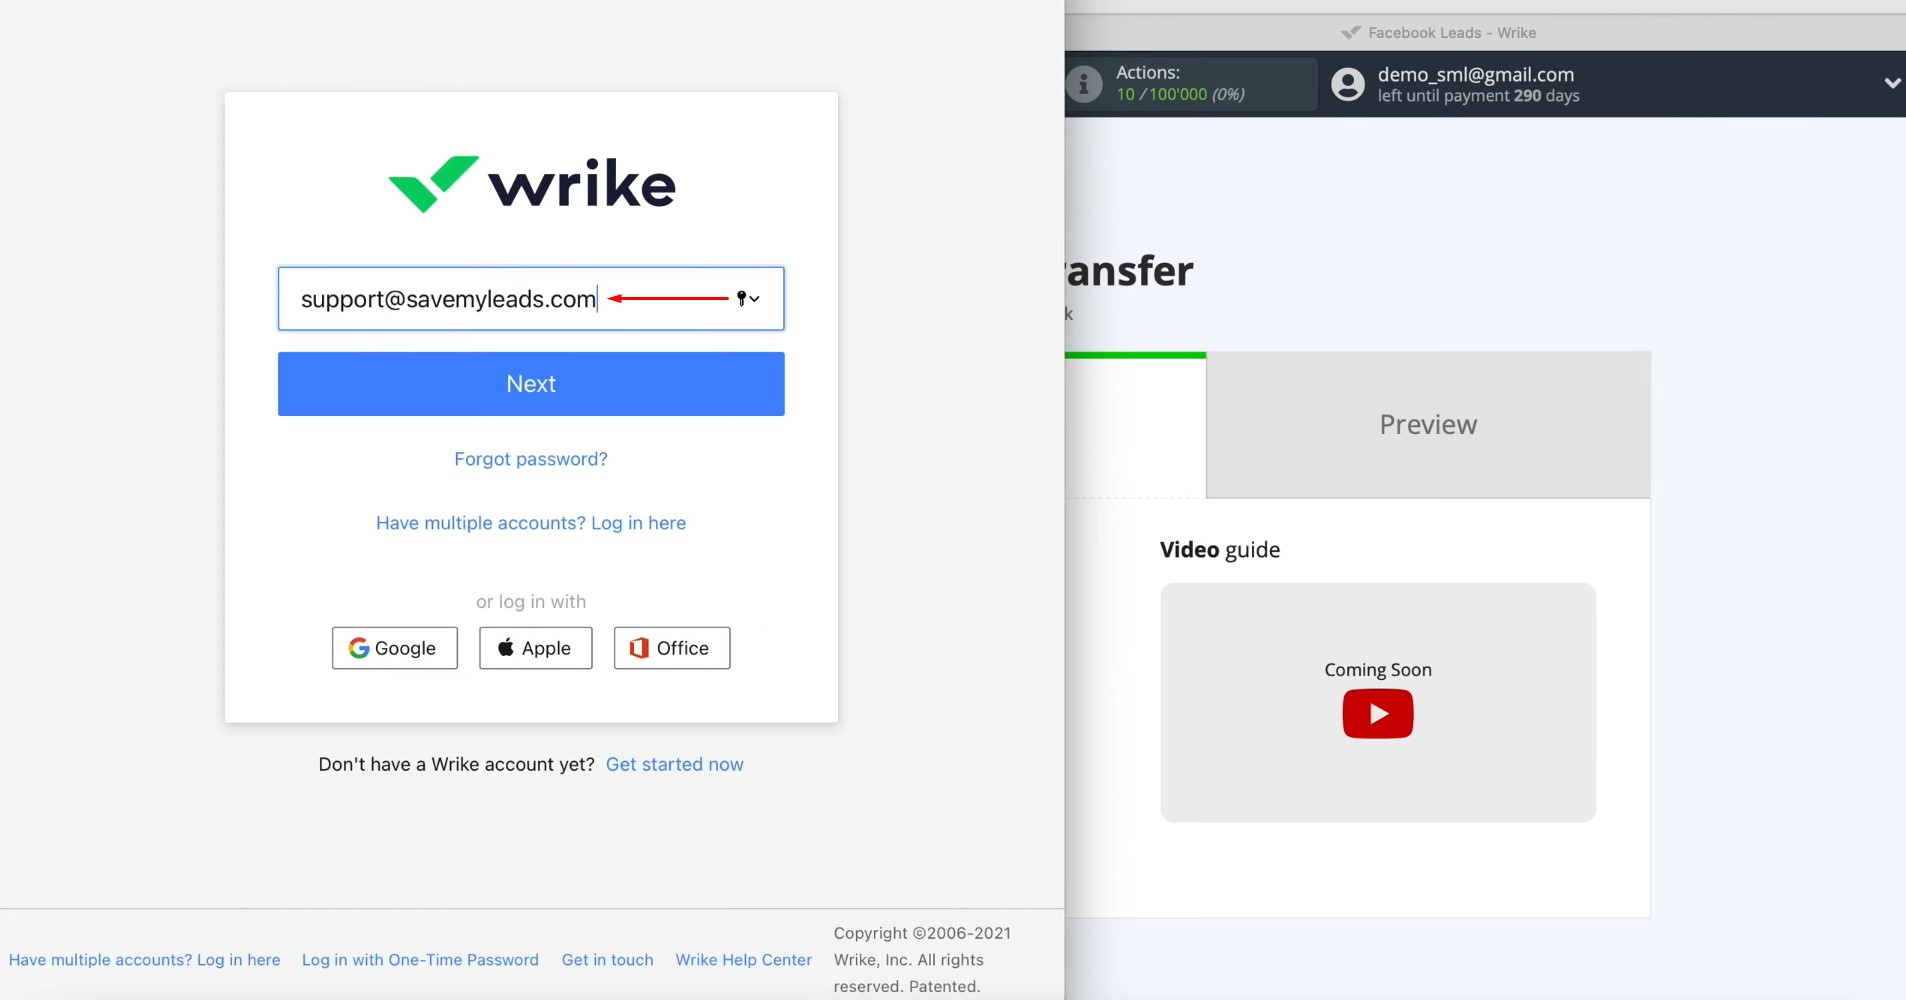
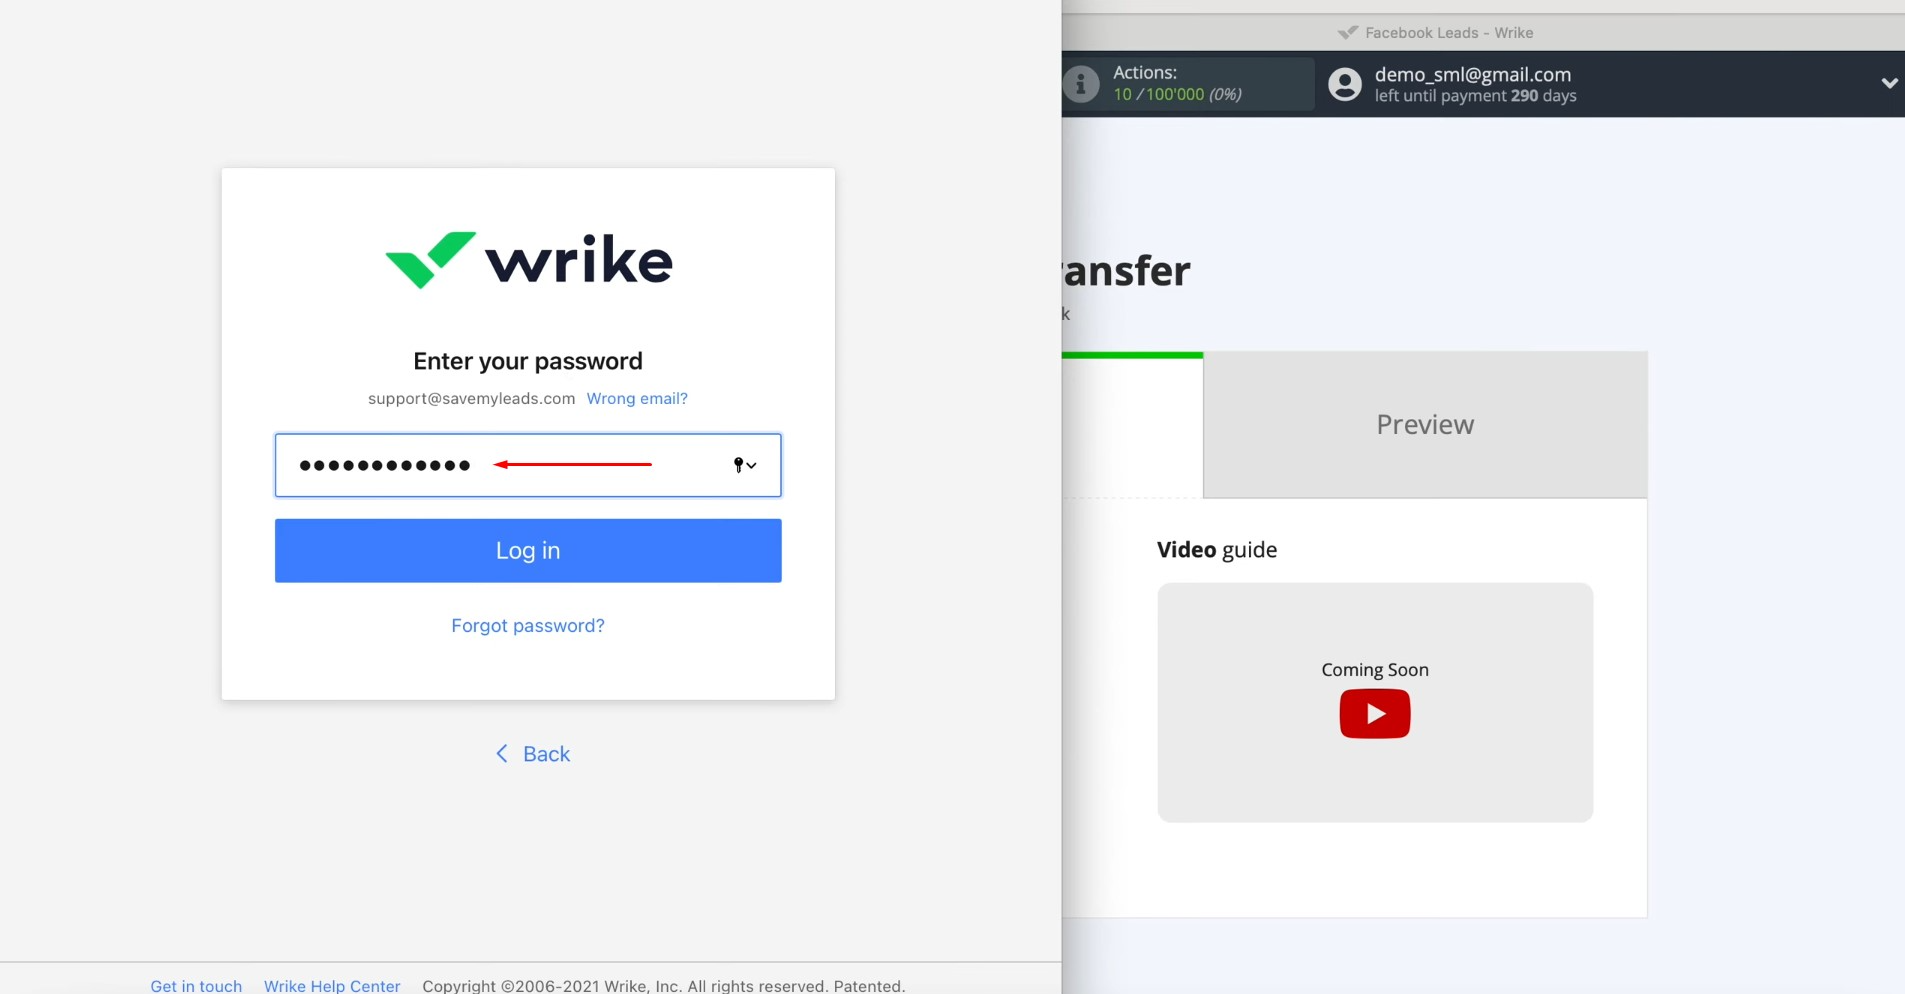
Specify a password and click “Log in”.
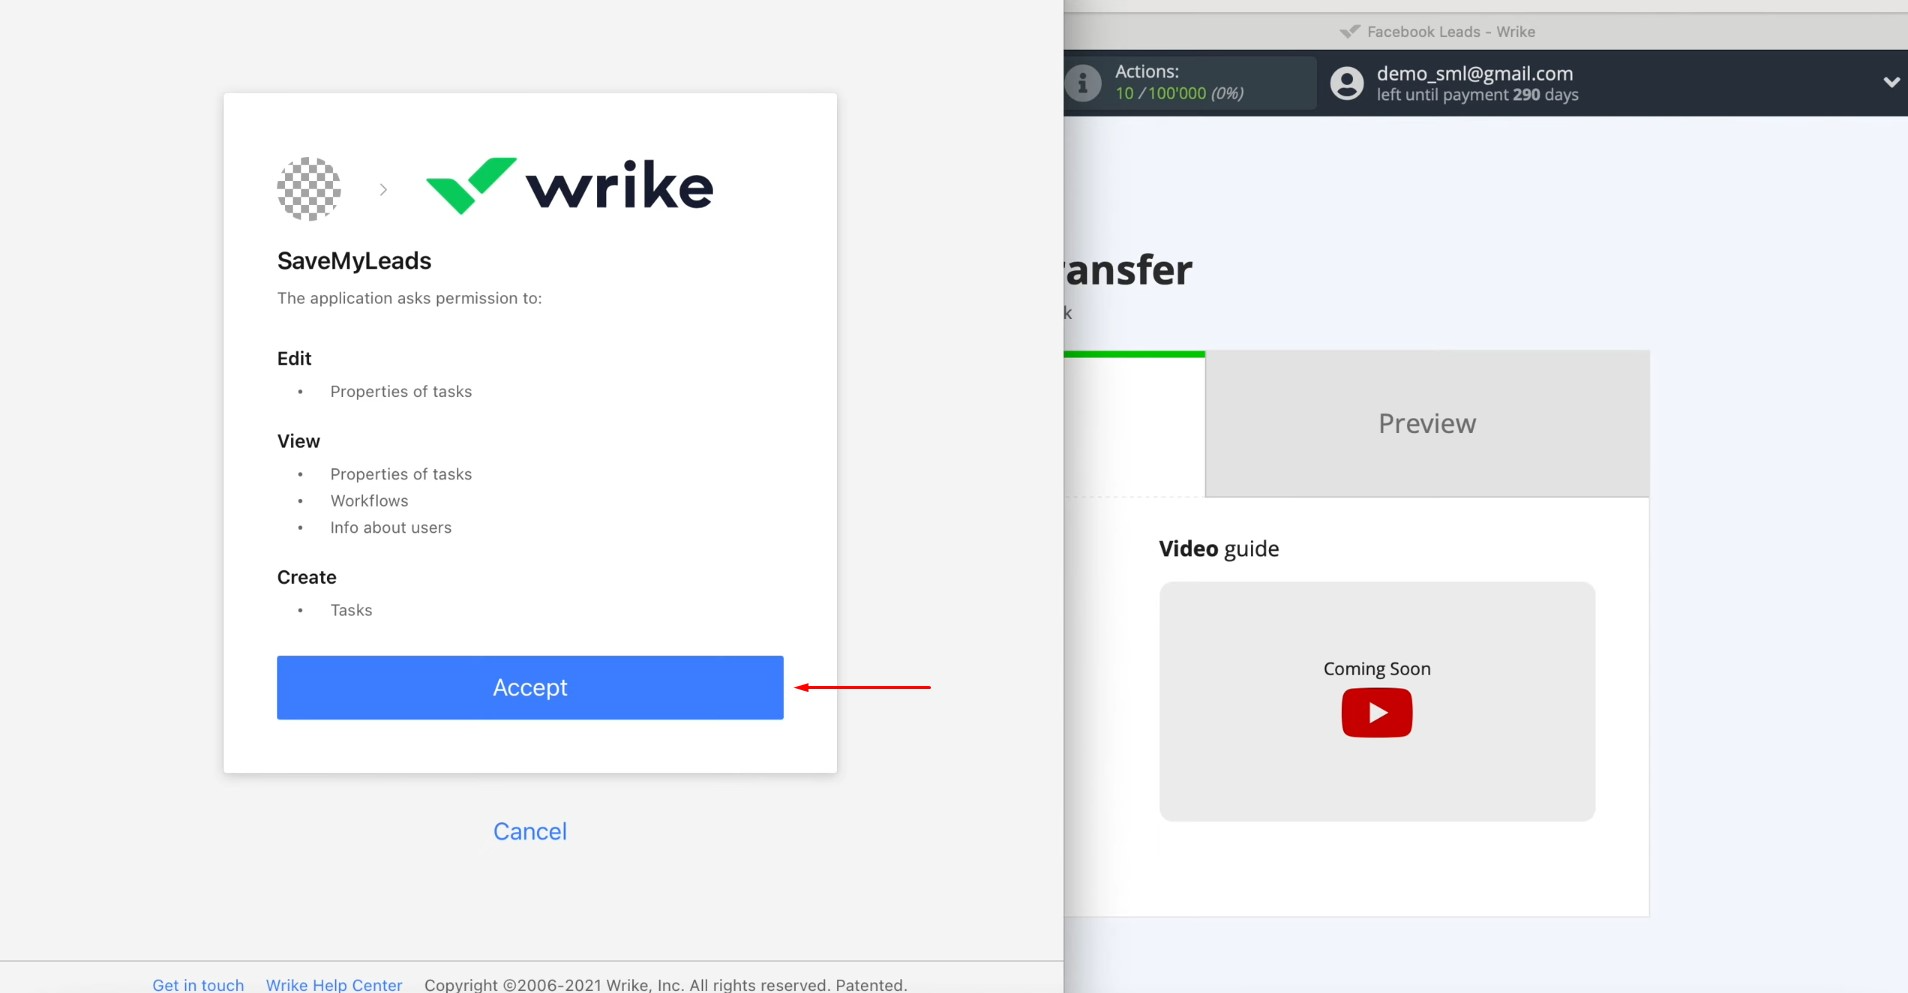
Grant SaveMyLeads
permission to work with your Wrike. For this, click “Accept”.
Select the
connected account.
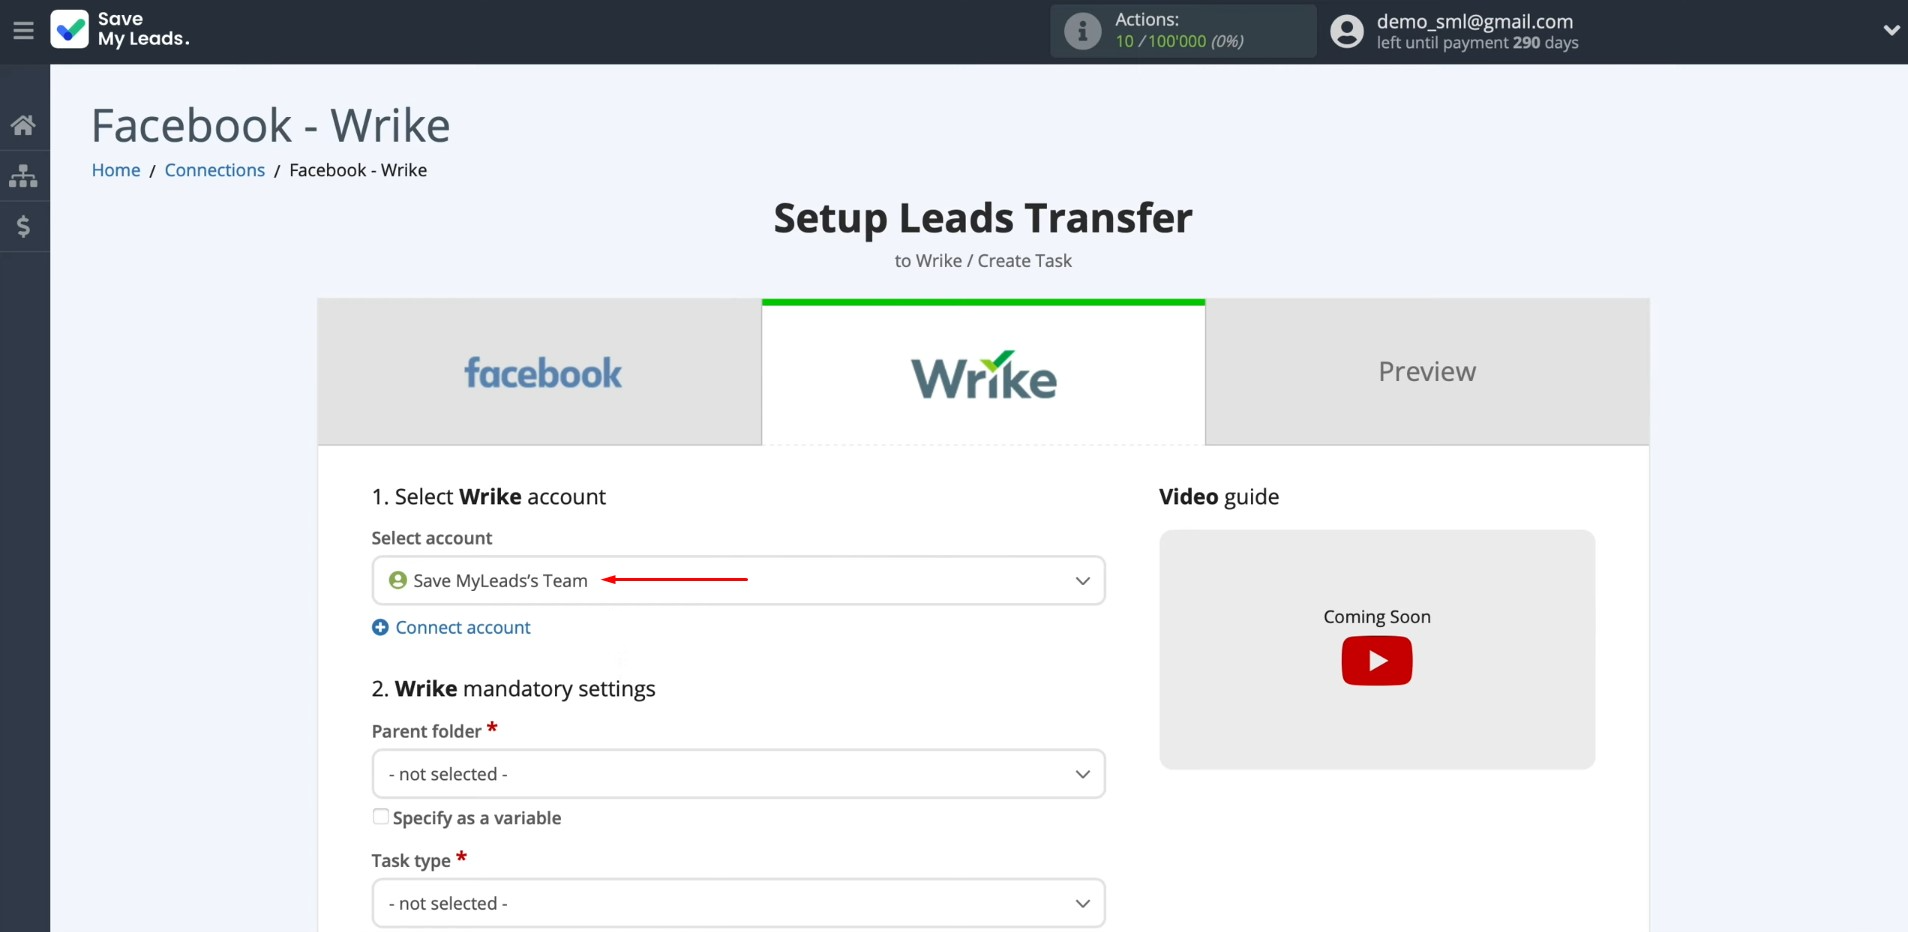
Choose the project
in which new tasks will be created, and the task type.
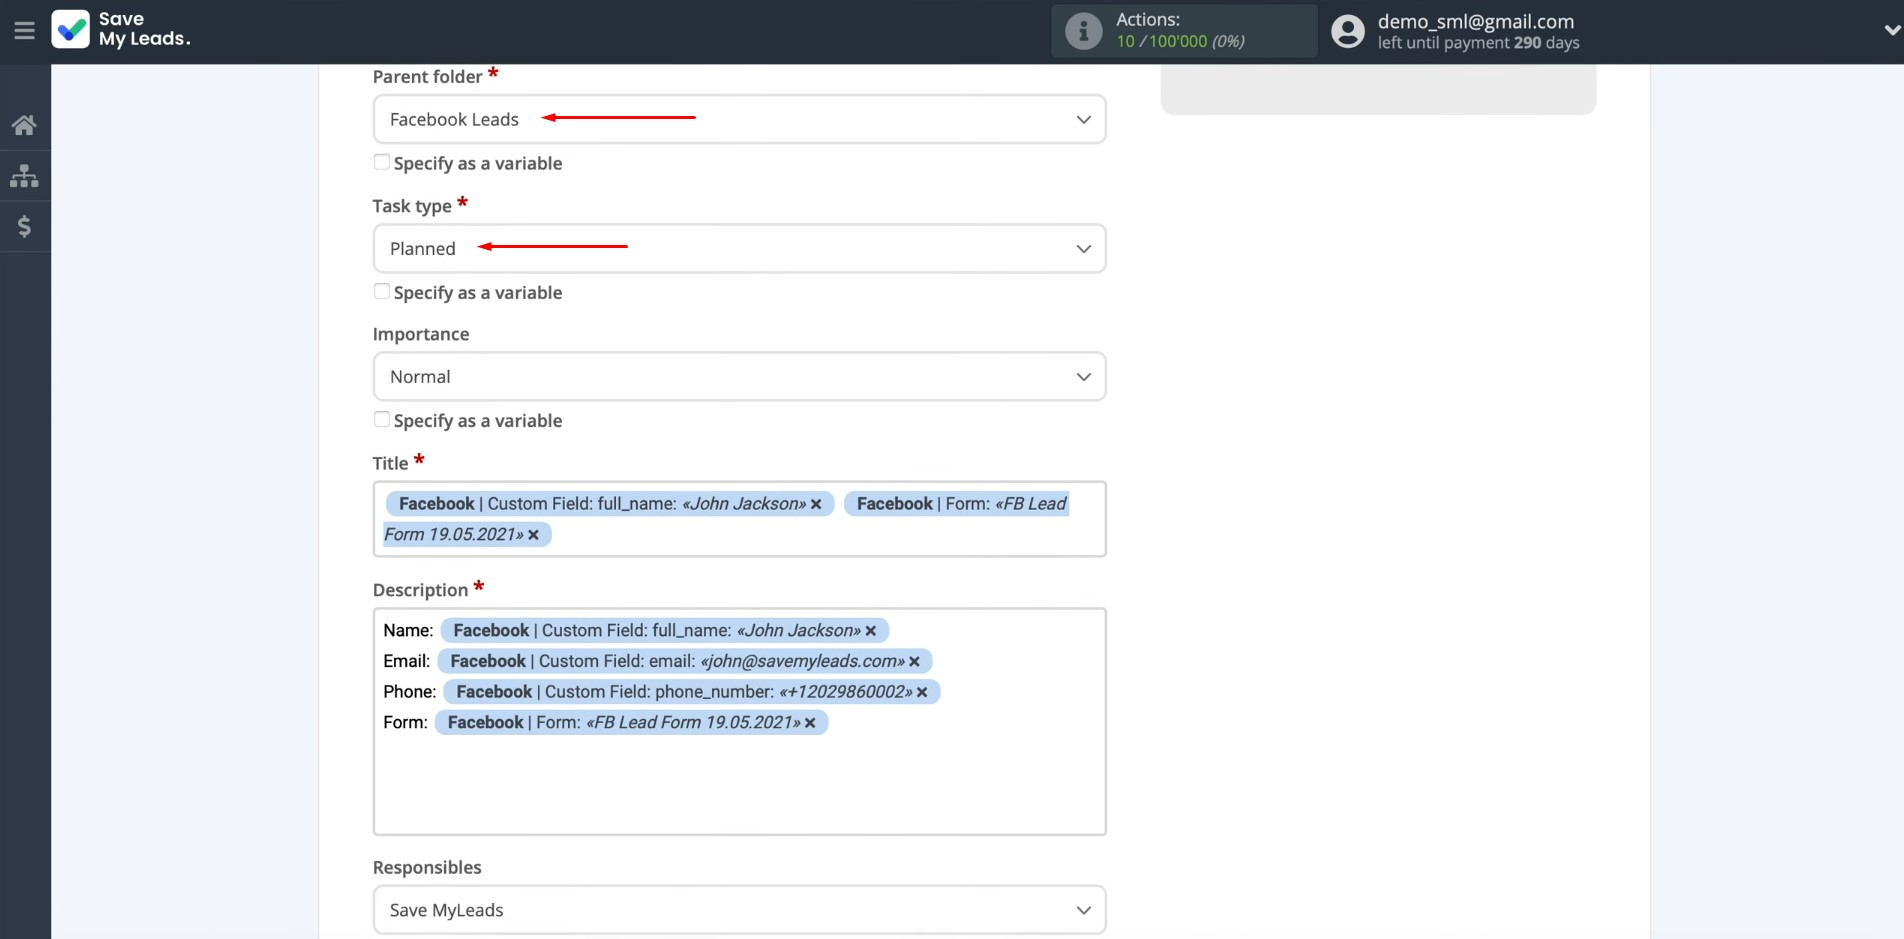
Fill in the
task fields with
variables from Facebook. To achieve this, click in the field and choose the desired variable from
the drop-down
list.
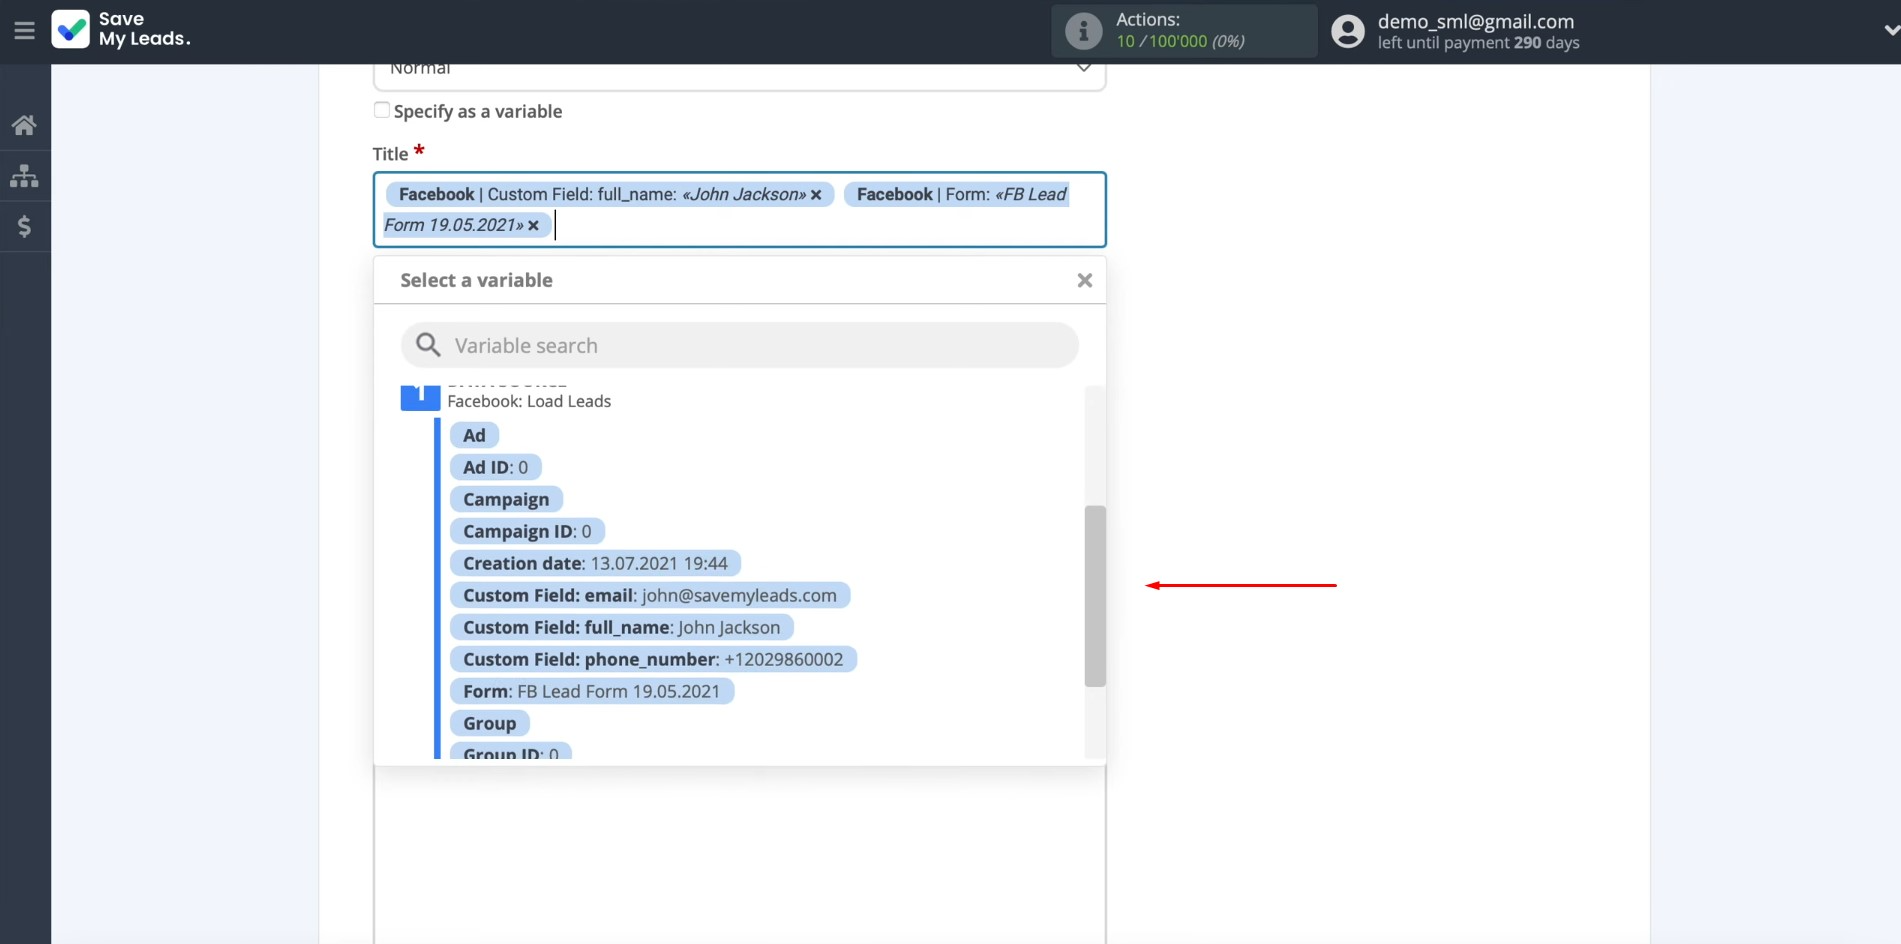
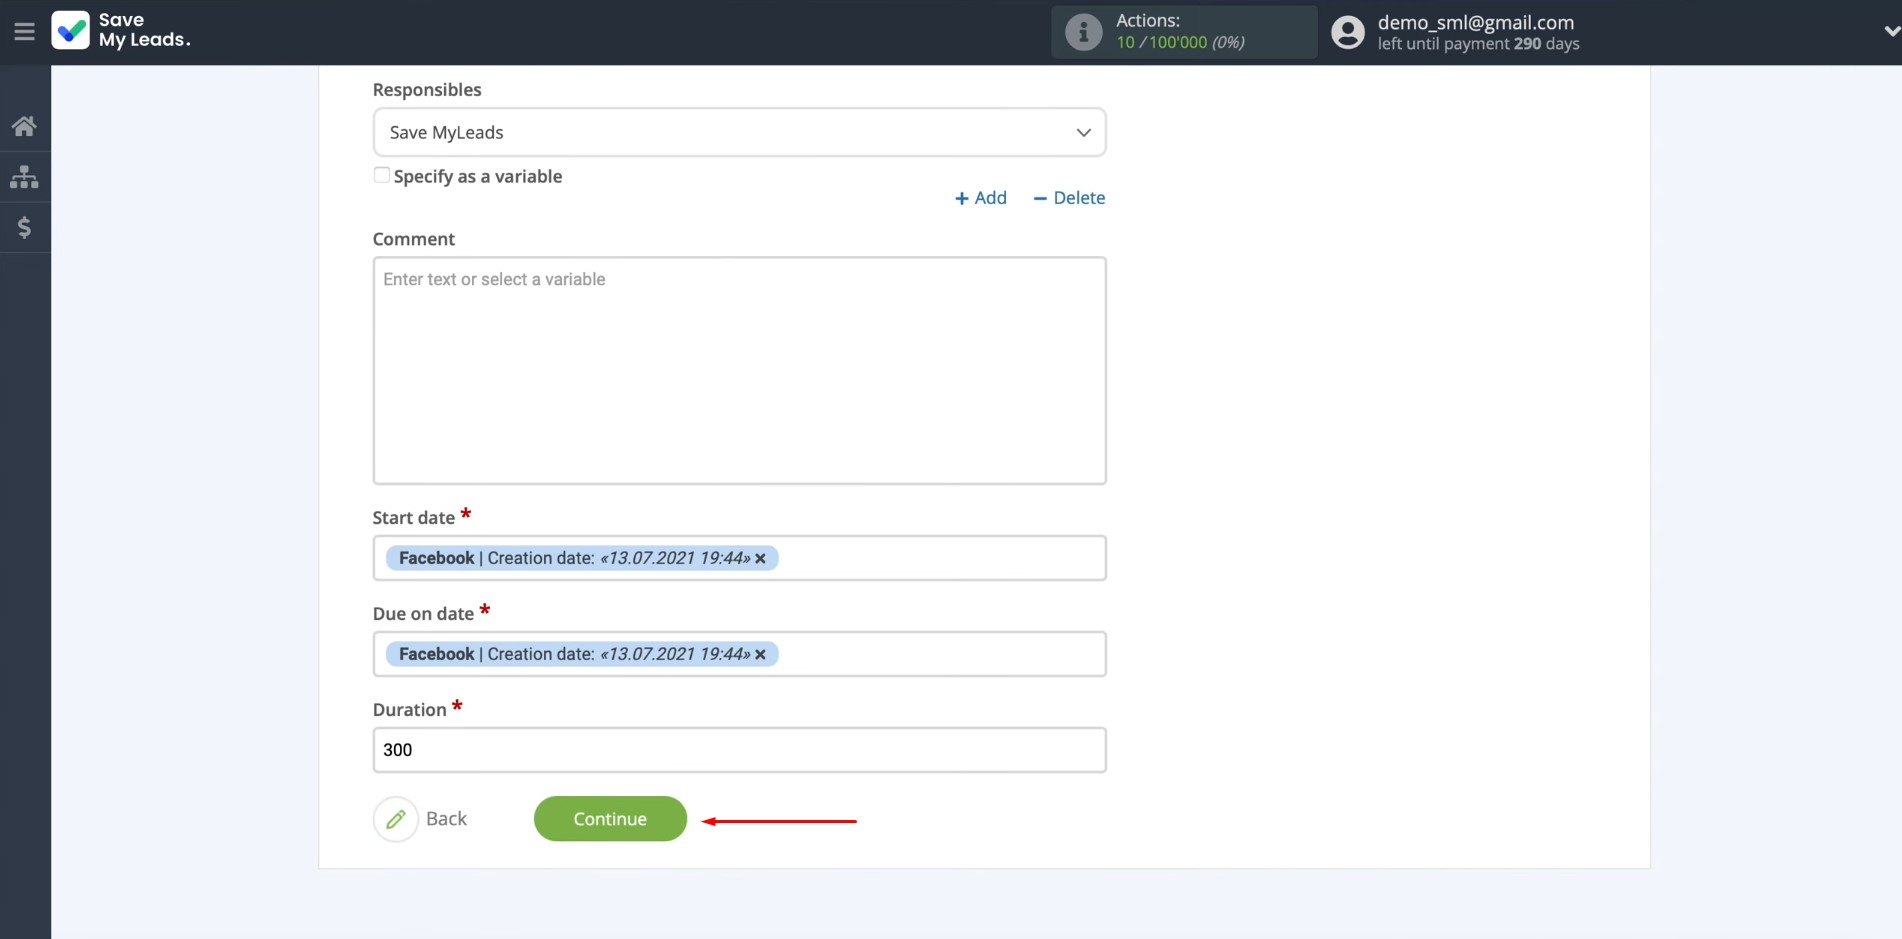
If you are
satisfied with the presets of the fields, leave them unchanged. After all the settings, click “Continue”.
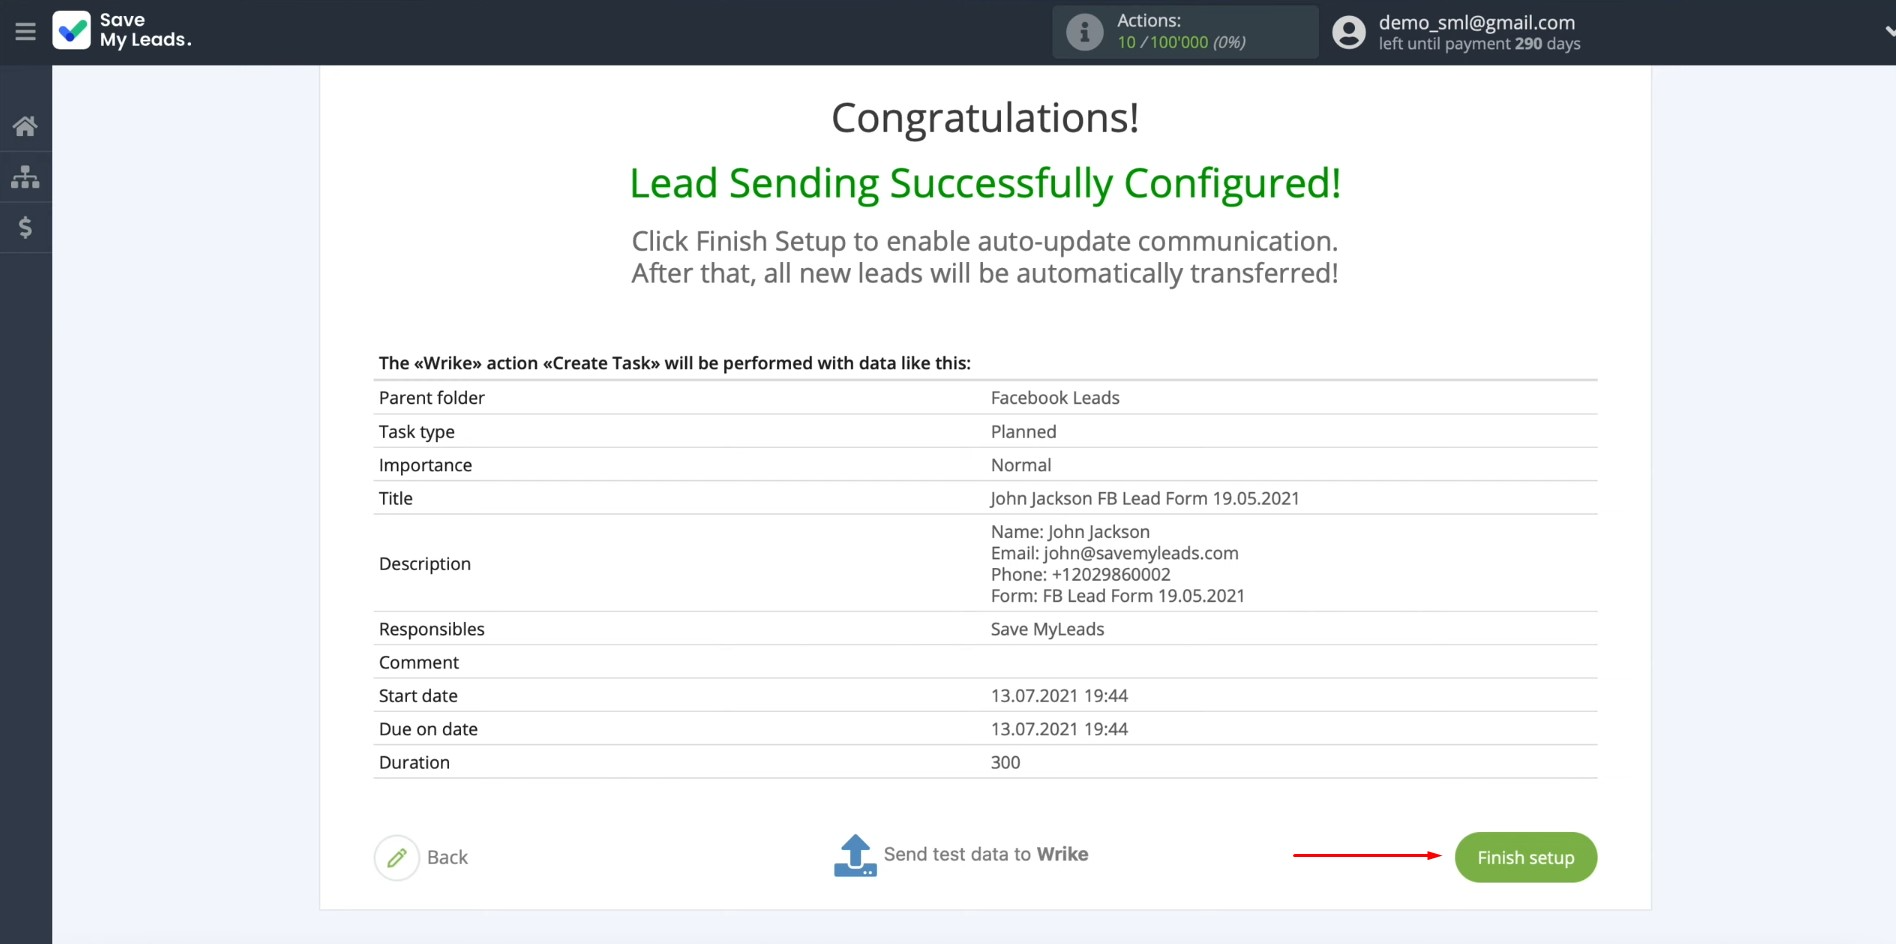
Now, you will see an example of filling in
the fields by task. To check the
correctness of the settings, click “Send test
data to Wrike”.
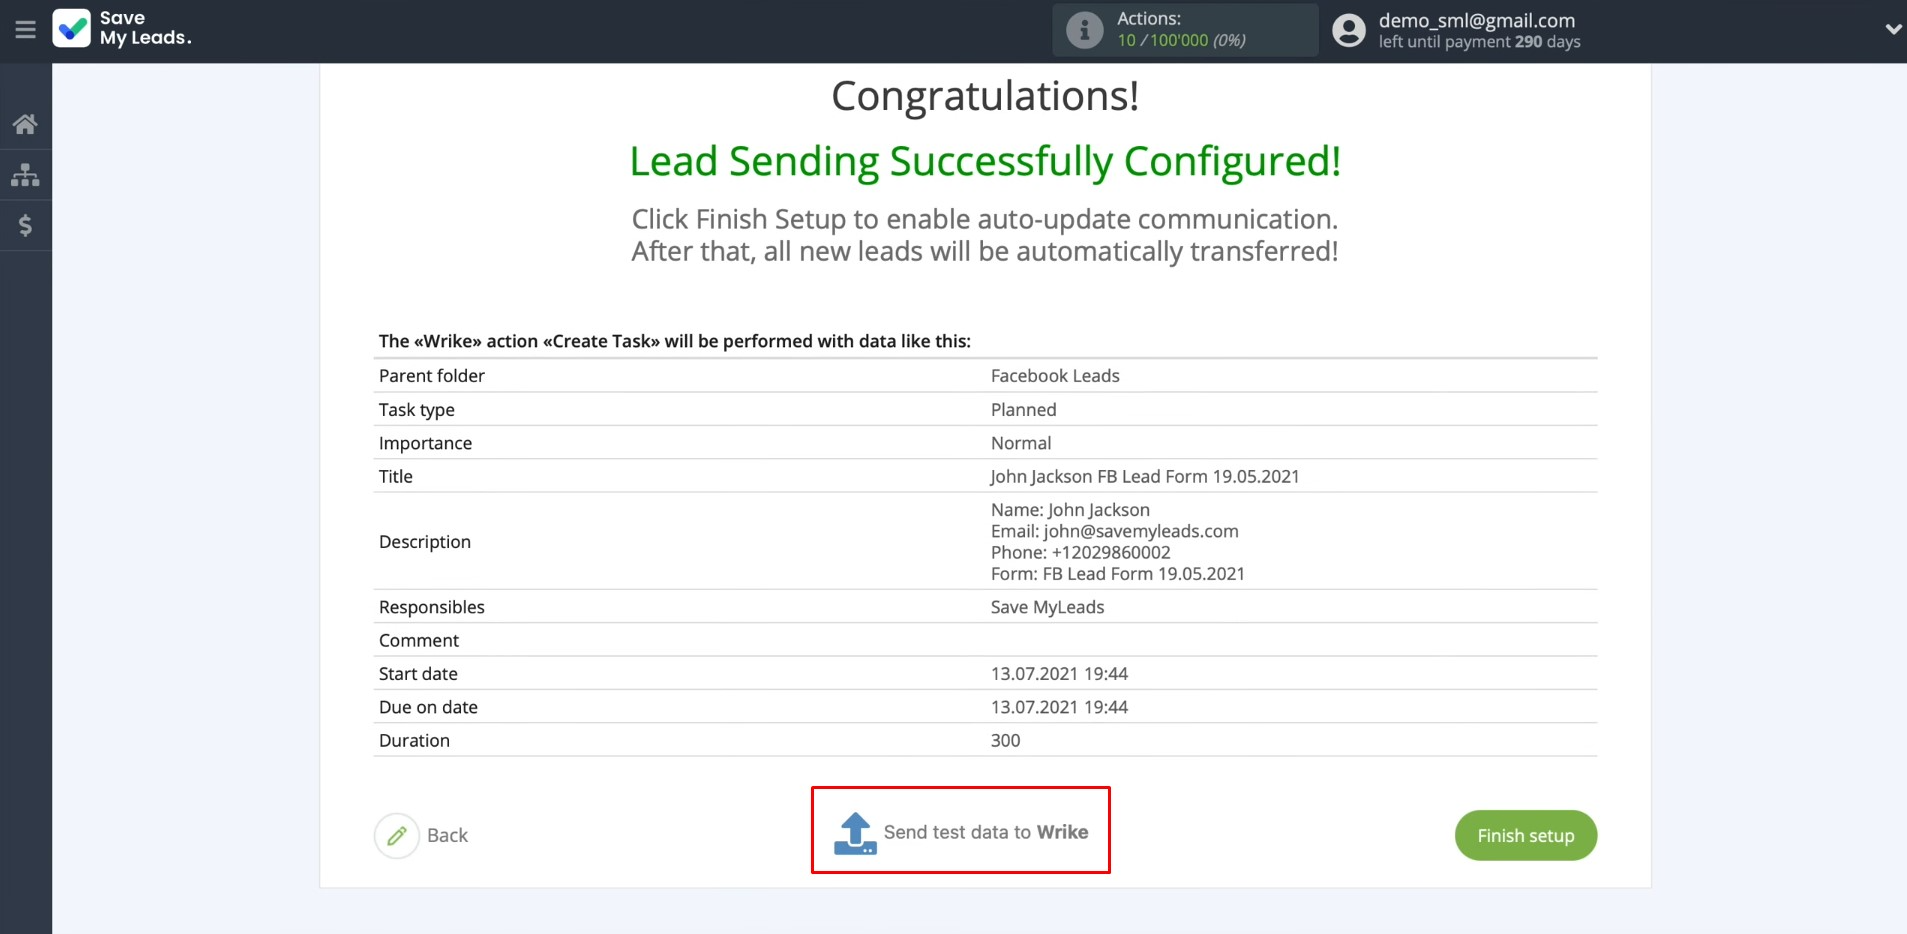
After
successful submission, go to your Wrike account and check the result.
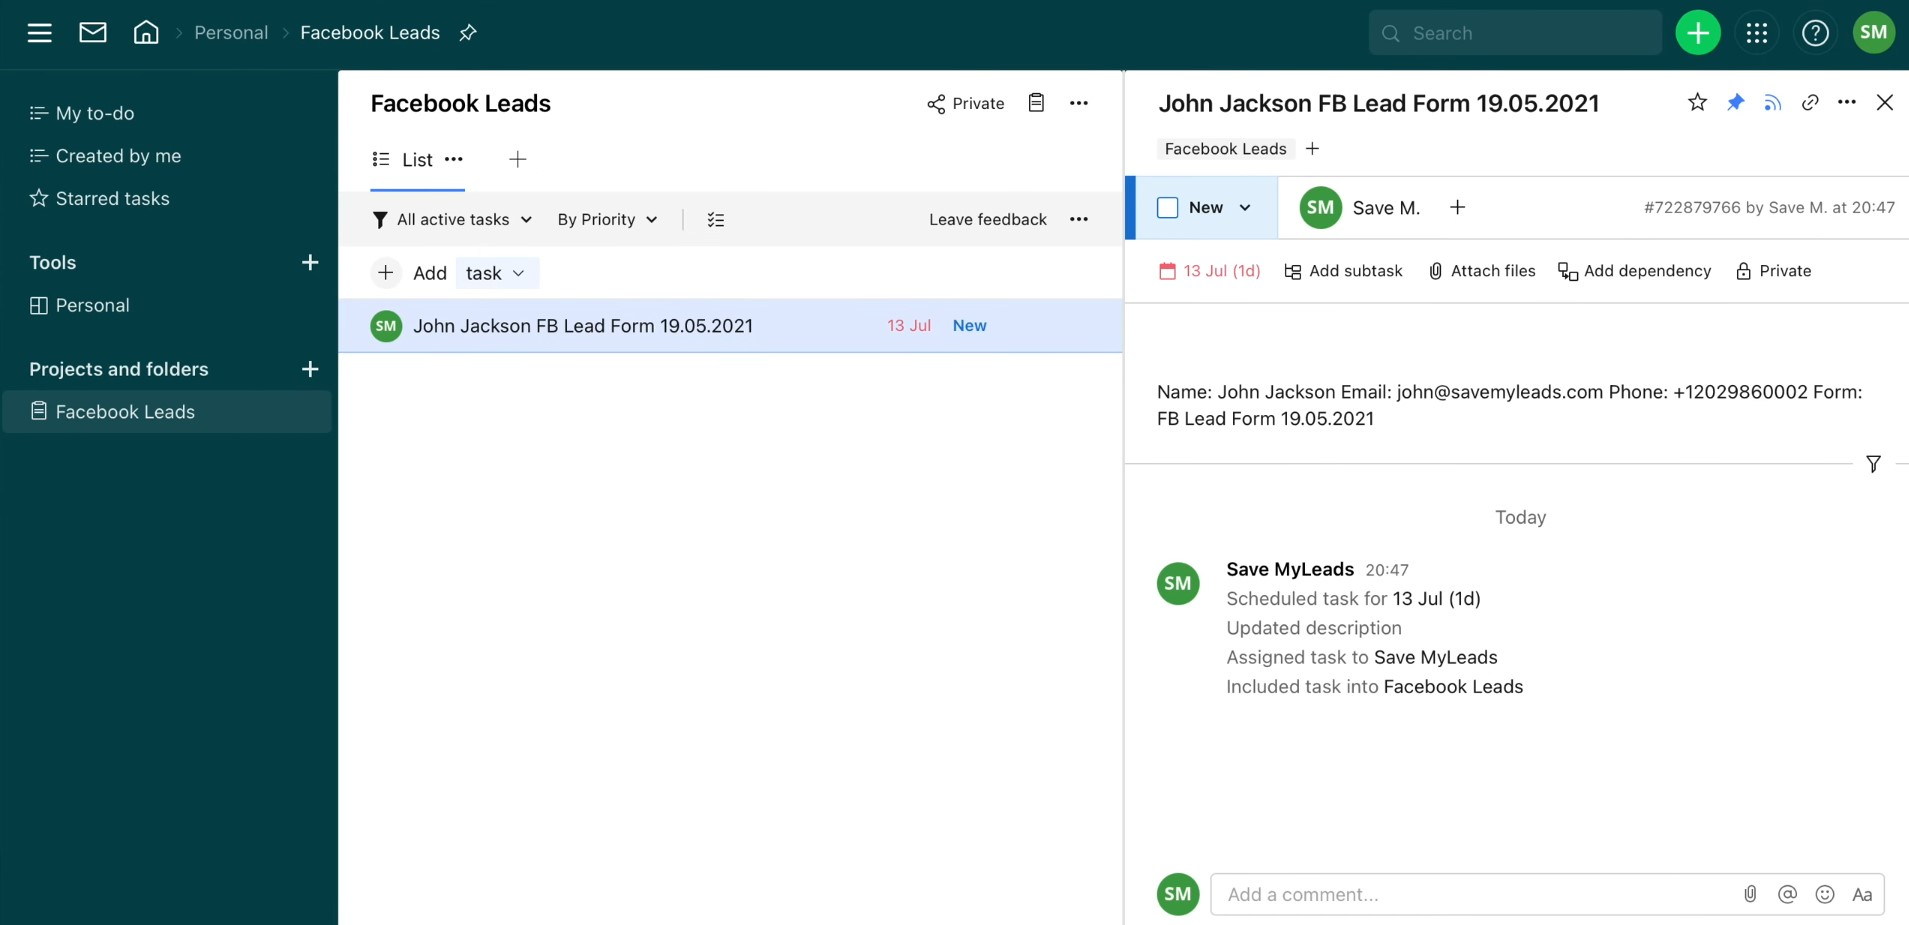
If everything
suits you, return to SaveMyLeads and complete
the setup.
Setting up Auto-update
In order for new tasks to be created instantly when new leads appear on Facebook, you need to enable auto-update. To do this, click “Finish setup”.
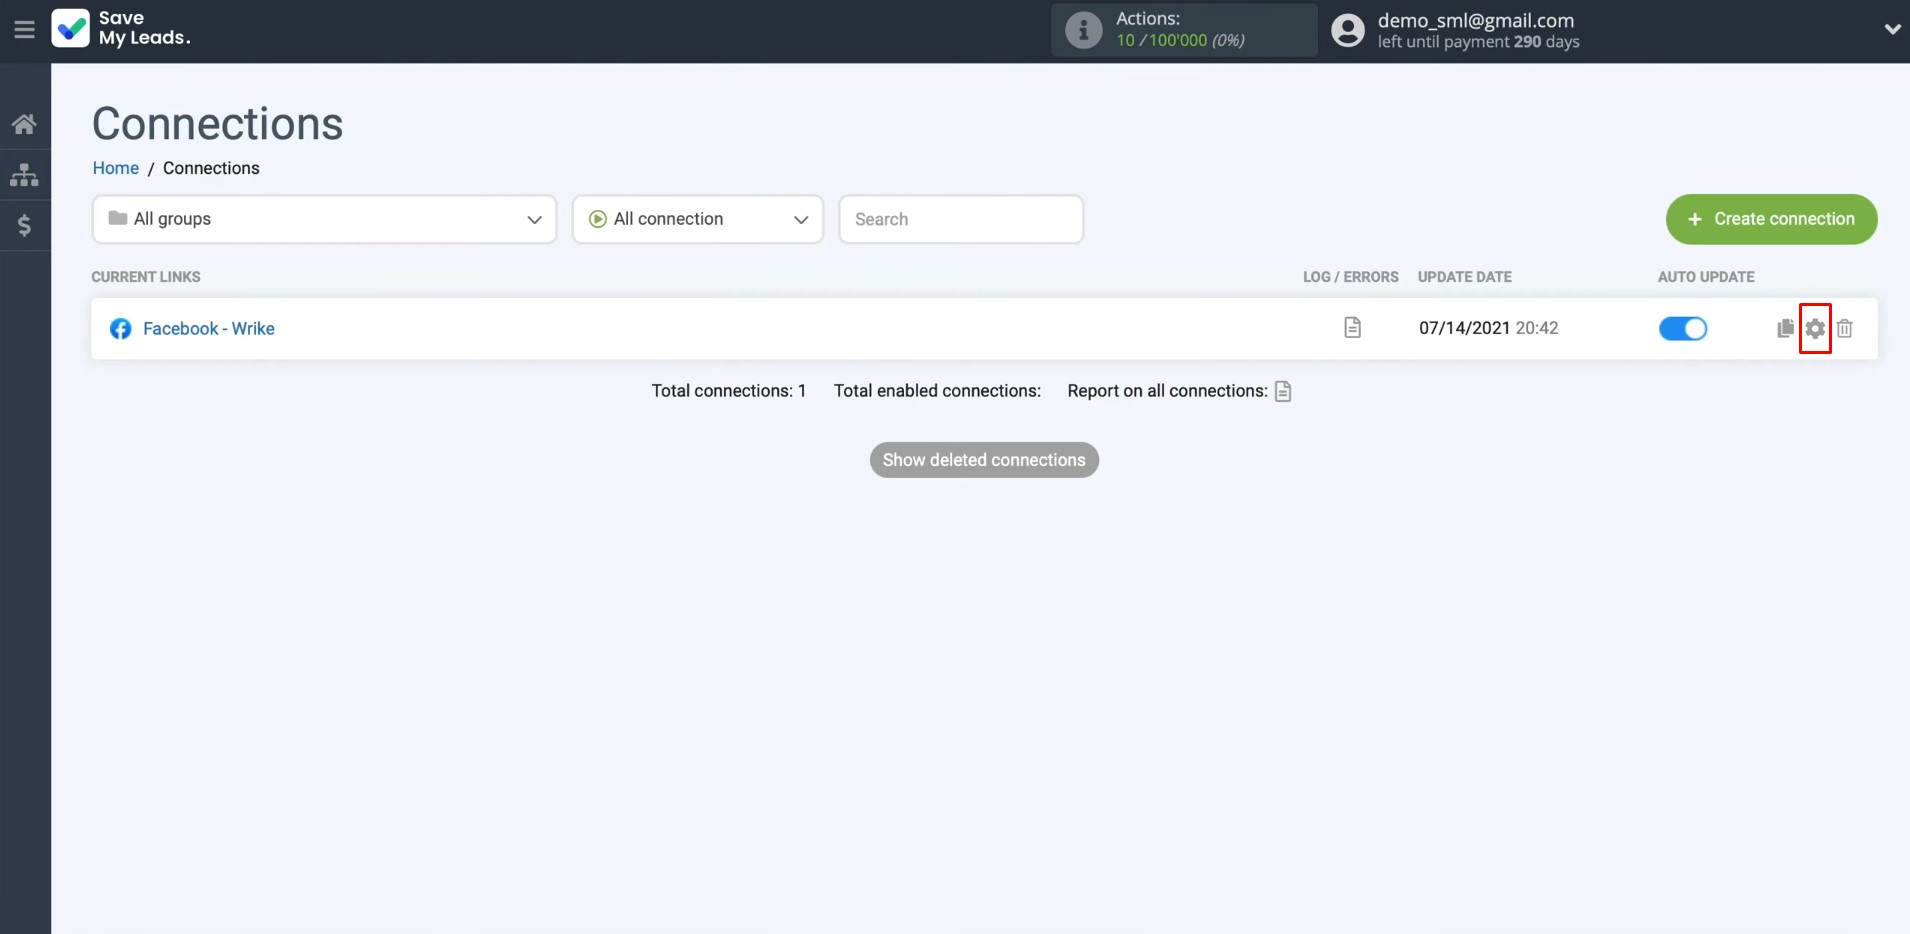
If you want to change the connection name you can do this in its
settings. To do this, click on the gear icon.
Change the connection name and add it to a group. After that, click “Continue”. That's
all. The Facebook Lead Ads and Wrike integration has been completed.
Result of Facebook-Leads and Wrike Integration
If you have already configured the Facebook & Wrike integration according to our instructions, you have probably noticed the first results. Every new lead that fills out a Lead Ads form on Facebook is automatically “moved” into your project management system, where their data is turned into a new task. This process automation significantly speeds up the processing of client requests and makes it easier for your team, freeing employees from manual data entry.
You've probably already seen that implementing Wrike & Facebook integration does not require any special technical skills. Setting up the connection occurs through a simple and intuitive web interface of the connector and takes up to 10 minutes. Once the integration is up and running, SaveMyLeads takes care of all the tedious work of migrating your data from Facebook to Wrike. This will allow you to focus on other aspects of your work and improve your efficiency and customer experience.
Step-by-Step Guides for Setting Up Integrations:
