
When users fill out a Google Lead Form, their interest in a product or service is at its highest, and they expect a fast response. Google Lead Form and Resend integration allows you to quickly send emails in response to each new request without human intervention. This allows businesses to respond to potential customers shortly after they submit a form, helping establish communication from the first interaction. You can set up this workflow in just a few minutes with zero coding experience.
Save Time With Google Lead Form and Resend Integration
Manually exporting CSV files from Google Ads, copying contacts, and pasting them into Resend wastes valuable hours every week. It also increases the risk of human error, such as lost contacts, typos in email addresses, or delayed responses that cost you hot leads.
Automating data transfer between Google Ads and your email platform changes how quickly you can convert prospective clients. Resend and Google Lead Form integration allows you to completely remove the manual stage of data processing. Lead data from the advertising form are automatically transferred directly to Resend for prompt sending of confirmations, special offers or useful materials to potential clients.
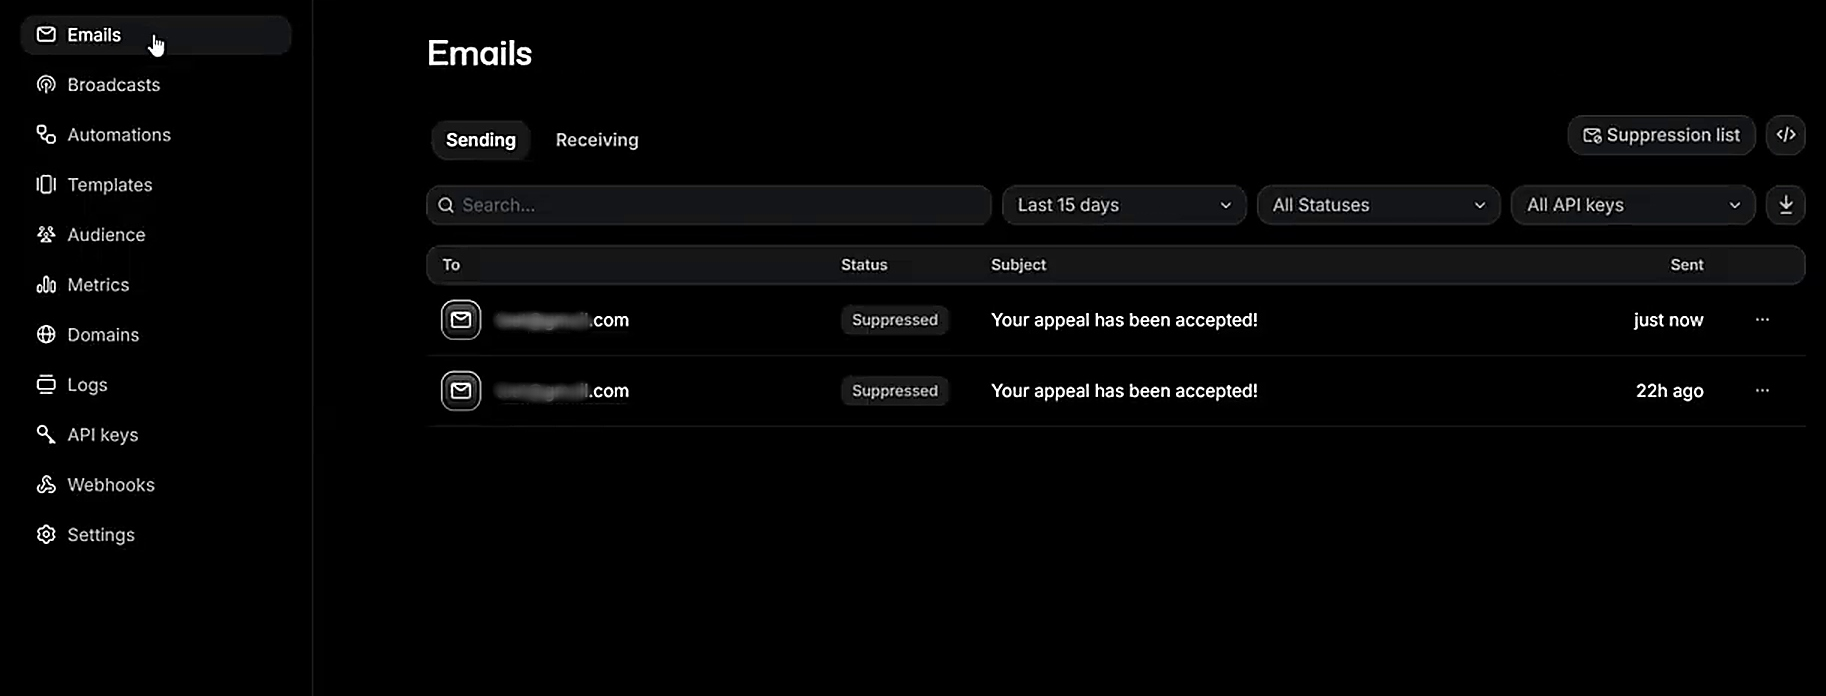
This integration is primarily useful for marketing departments, sales managers, small and medium business owners, as well as online services that actively generate leads through Google Lead Forms. It helps them achieve several important goals at once:
- Increase conversion rates. Personalized emails arrive in potential customers' inboxes shortly after they submit the form.
- Optimization of human resources. The management team is freed from routine manual work and can focus on communicating with clients and closing deals.
- Minimization of lost contacts. Each lead is automatically processed, reducing the risk of a request being overlooked or left without a timely response.
This approach can be particularly useful for service businesses and online education providers. For example, a potential customer submits a request for a repair estimate or download of training materials. While the manager processes the request manually, the customer may turn to competitors. Automatically emailing Google Lead Form leads via Resend shortly after they fill out the form ensures that the person quickly receives a price quote or promised materials, and increases the likelihood of a successful deal and brand loyalty.
How to Connect a Google Lead Form to Resend
You can set up the connection between Google Lead Form and Resend in a few ways, such as creating a custom integration via the API or using the online connector SaveMyLeads. Building the integration with the API requires writing and testing code, as well as constant technical monitoring.
SaveMyLeads service offers a ready-made no-code solution that allows you to connect both tools and automate the Google Lead Form and Resend workflow in a few minutes. No programming knowledge is required for this. The entire setup process takes place in a visual interface through a step-by-step wizard.
Try it now to start sending automated emails to Google leads today. Below is a step-by-step guide to help you quickly navigate the integration settings.
Data Source Settings: Google Lead Form
Your first step is to add a new connection.
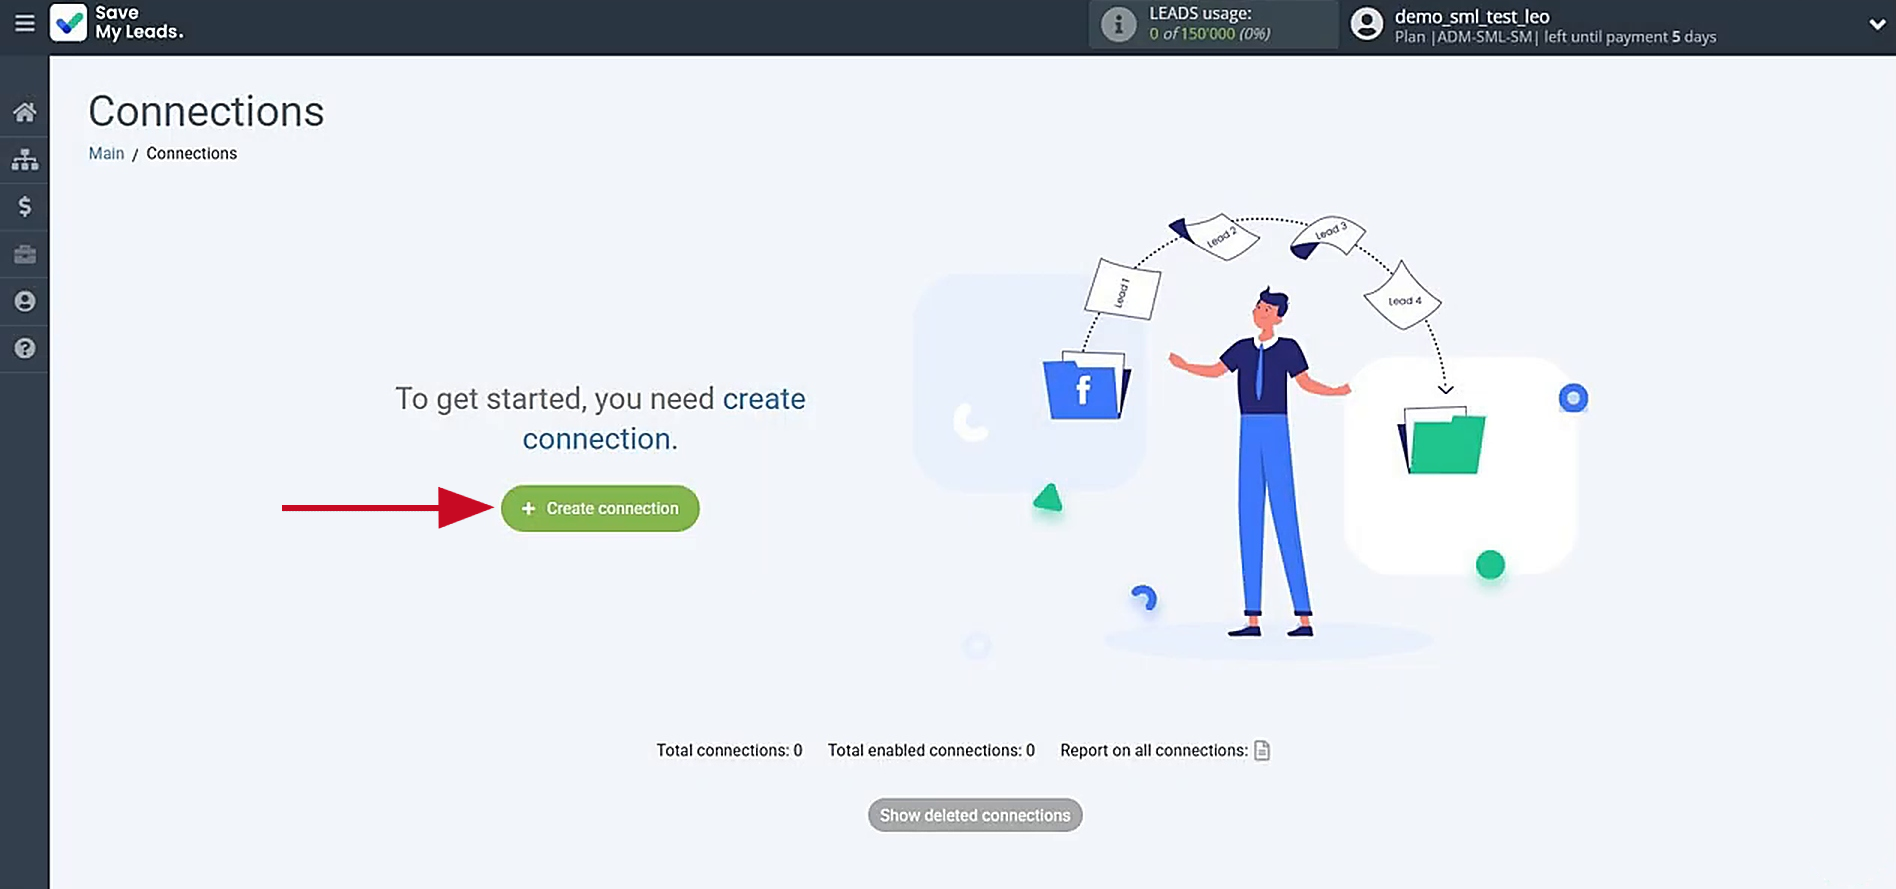
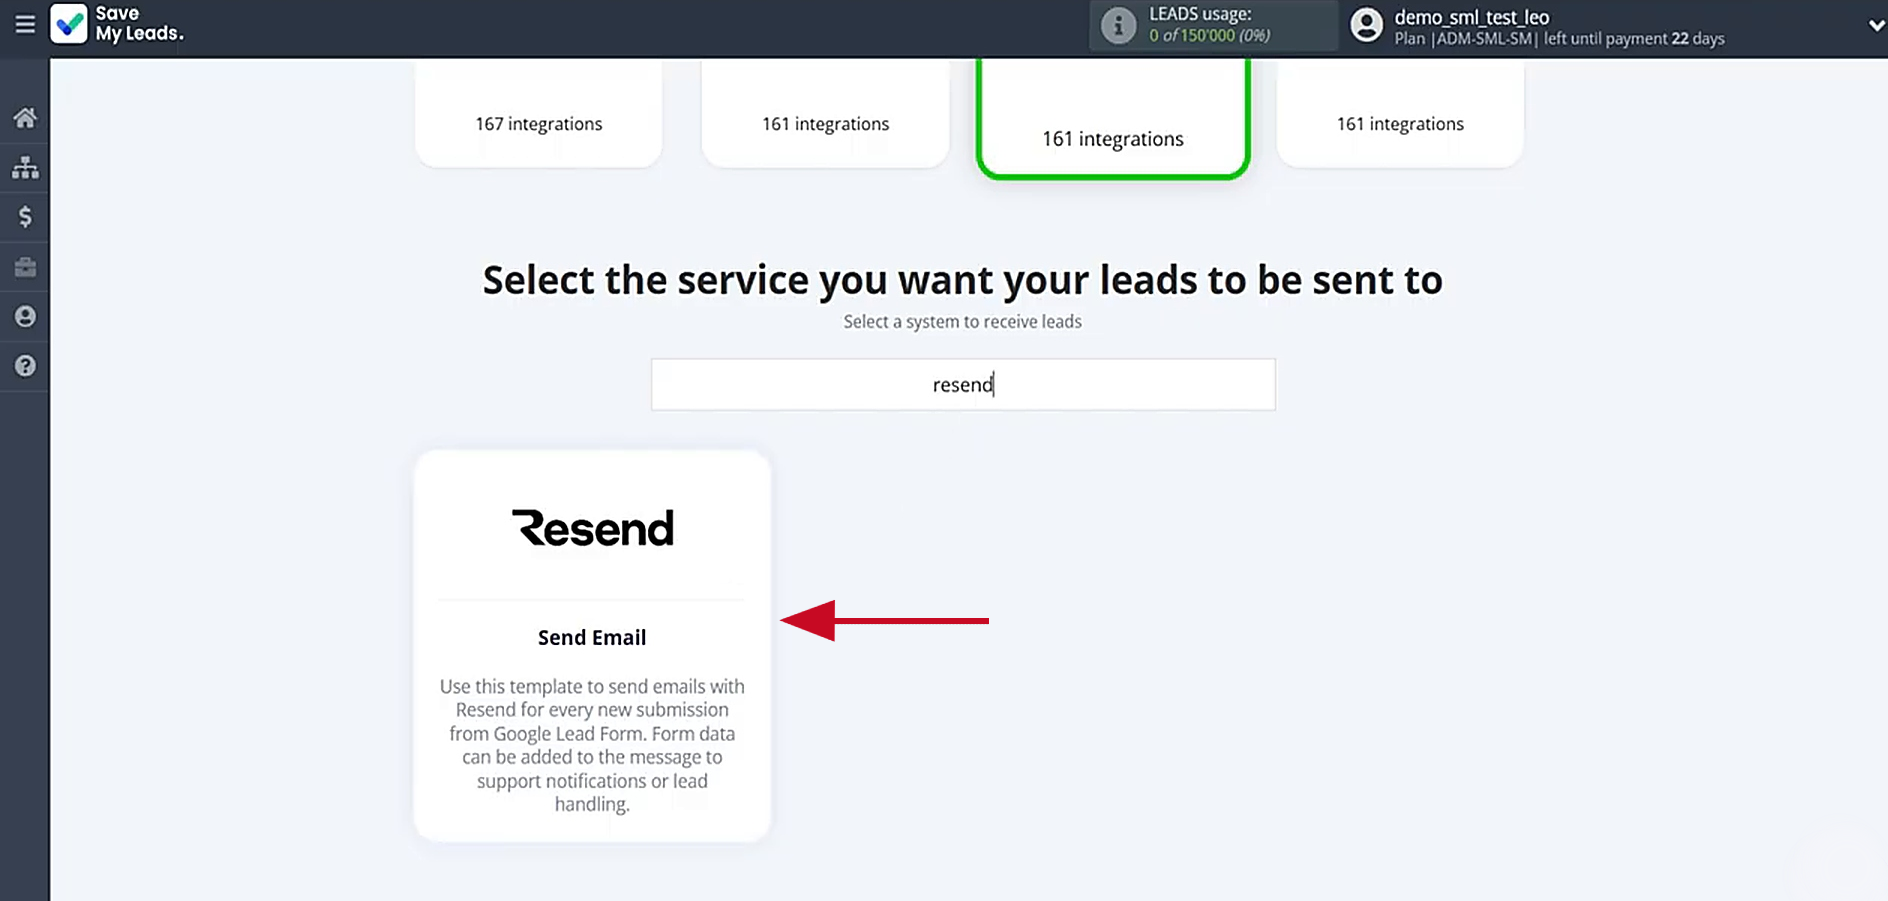
Select the source: Google Lead Form. Next, select a template of integration. You need Resend (Send Email).
Establish a connection between your Google Lead Form account and SaveMyLeads.
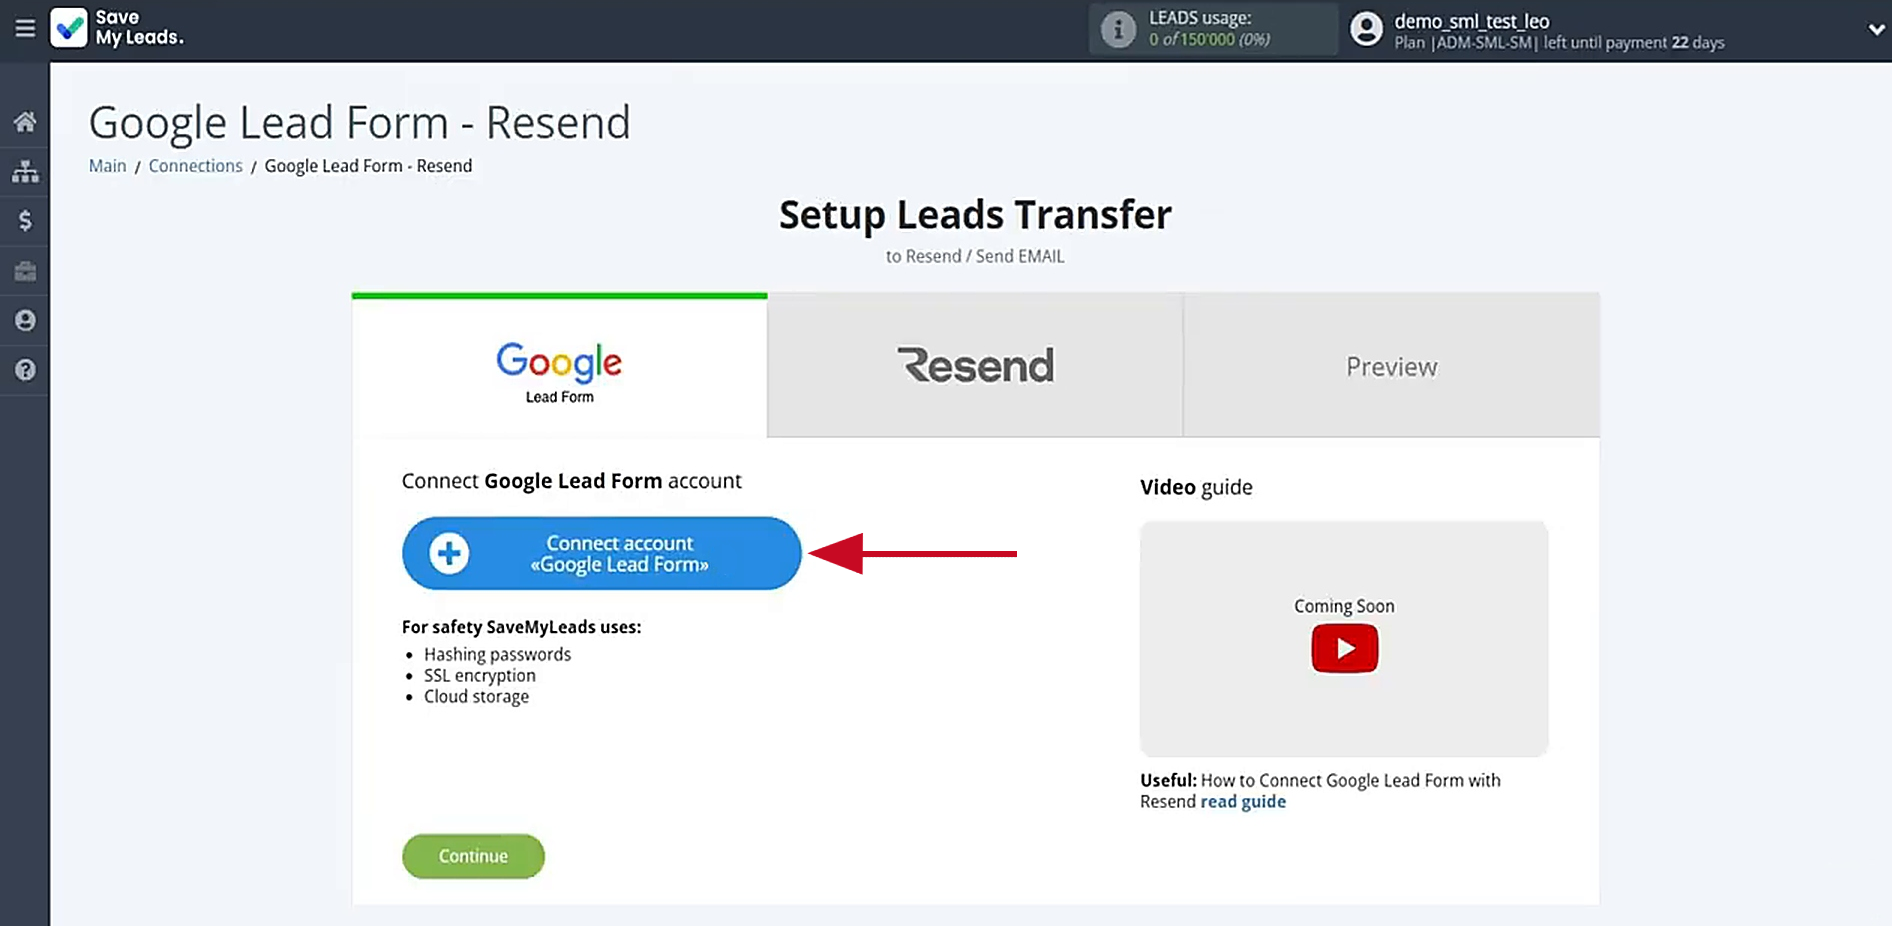
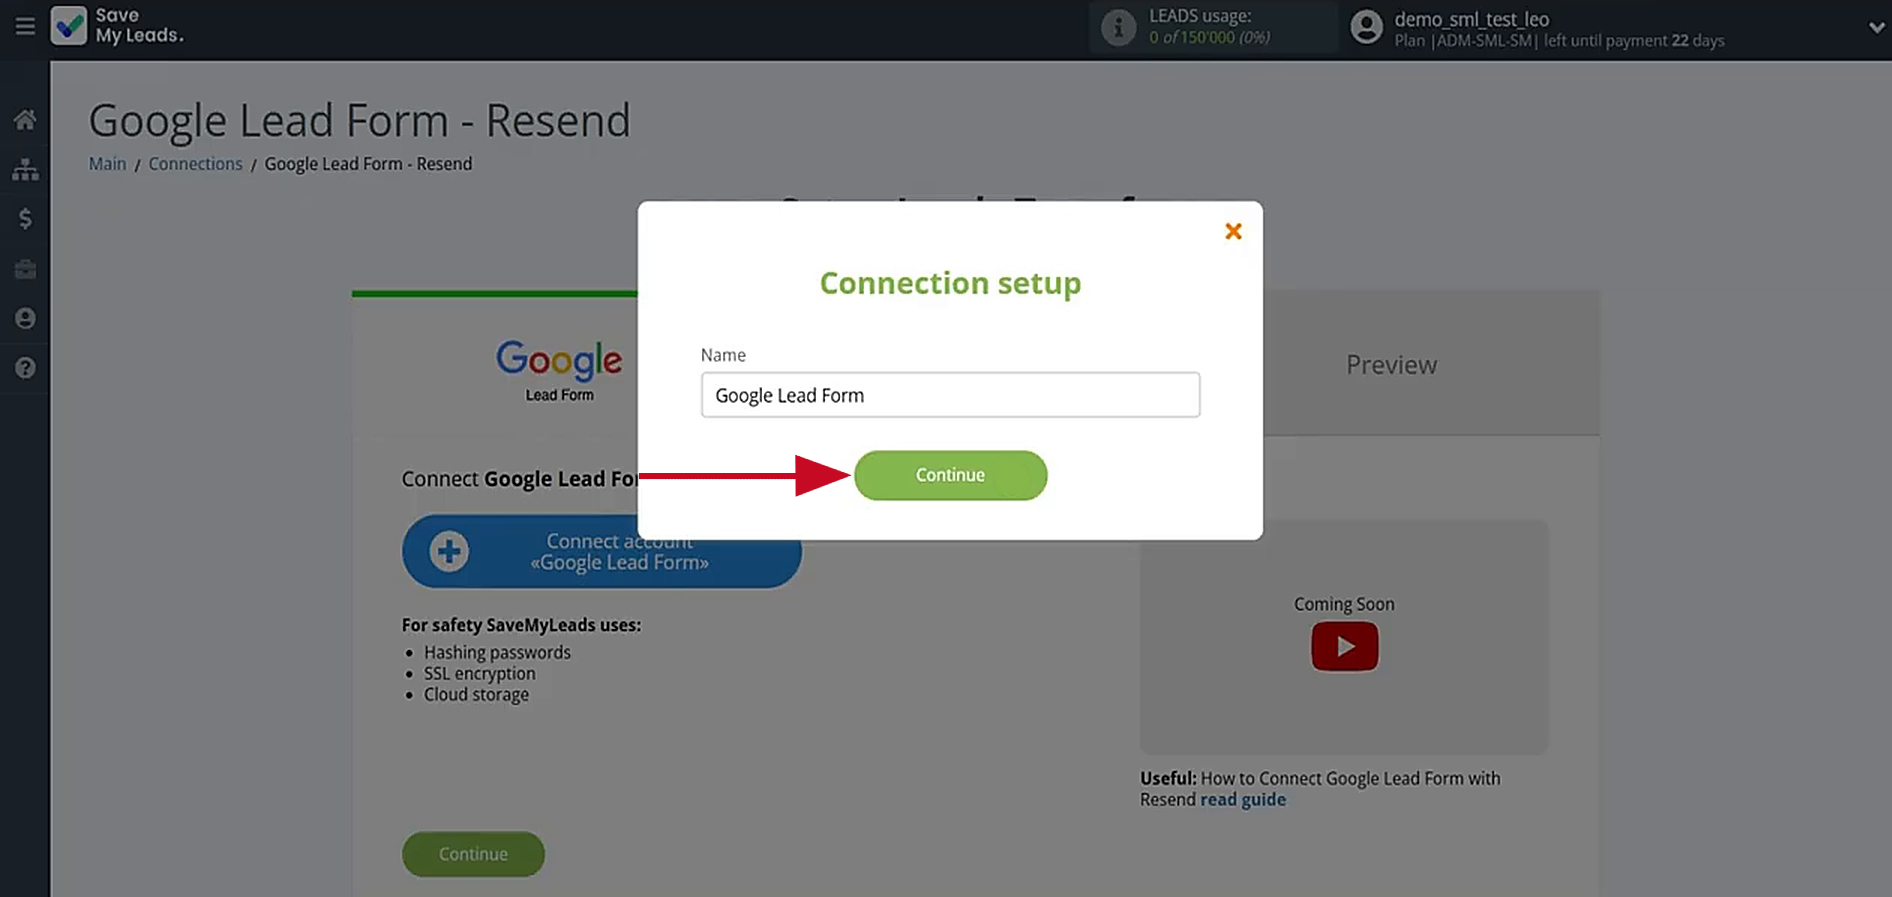
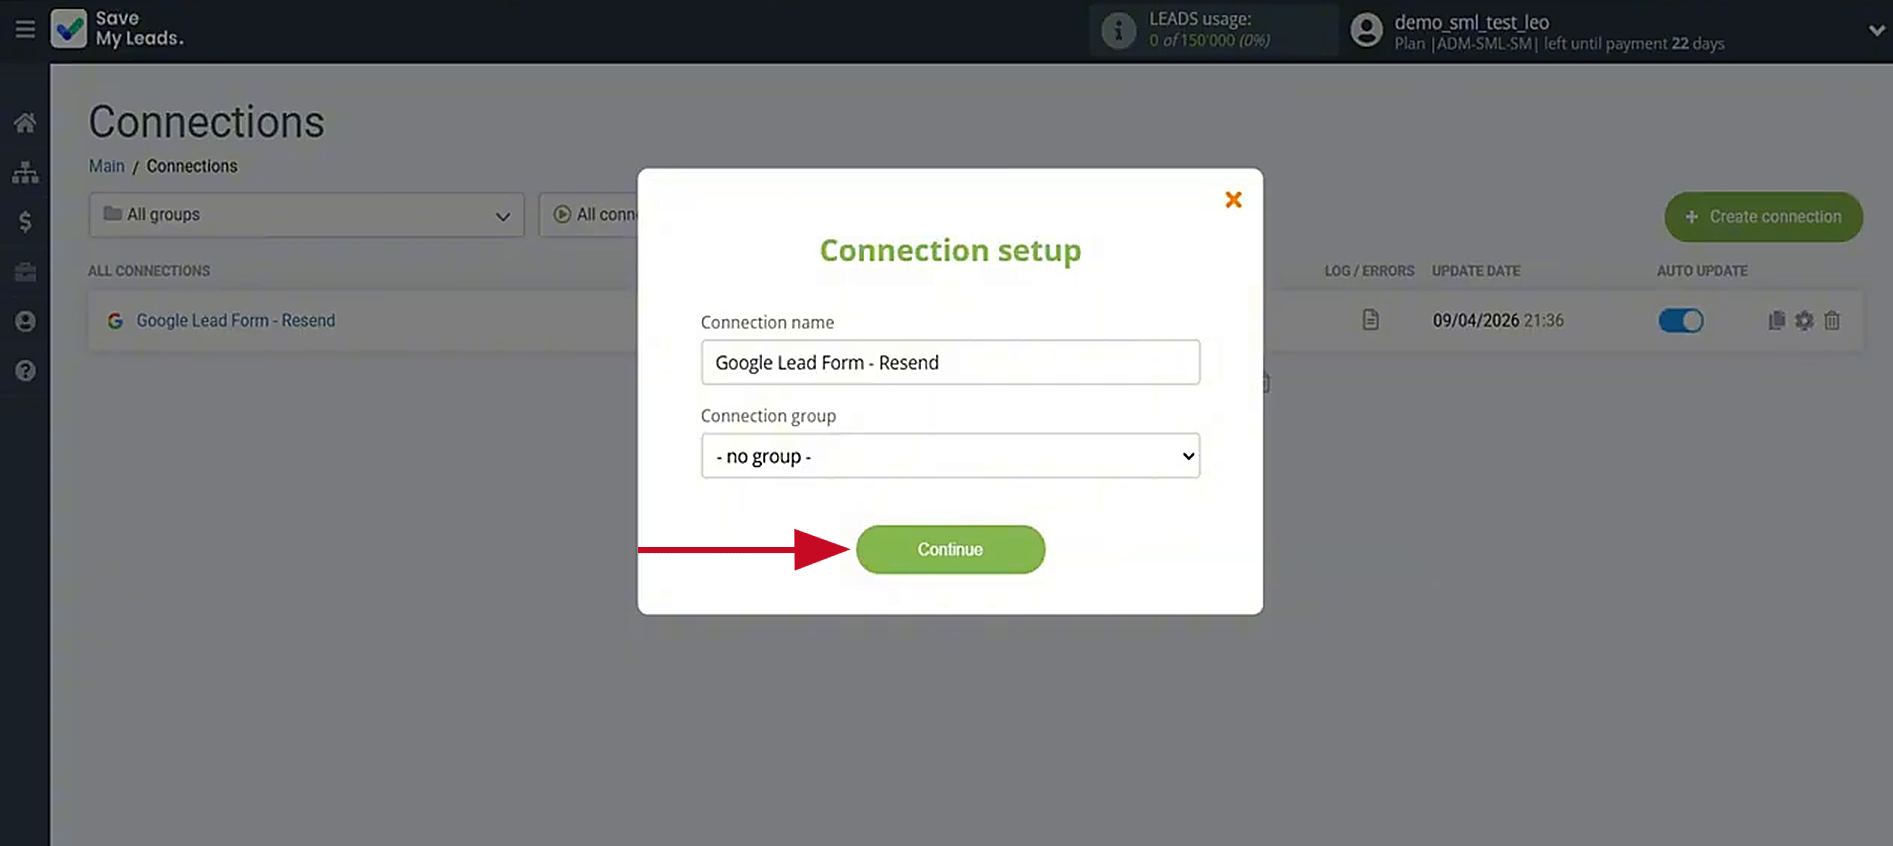
Here, enter a connection name if needed, or click Continue to proceed.
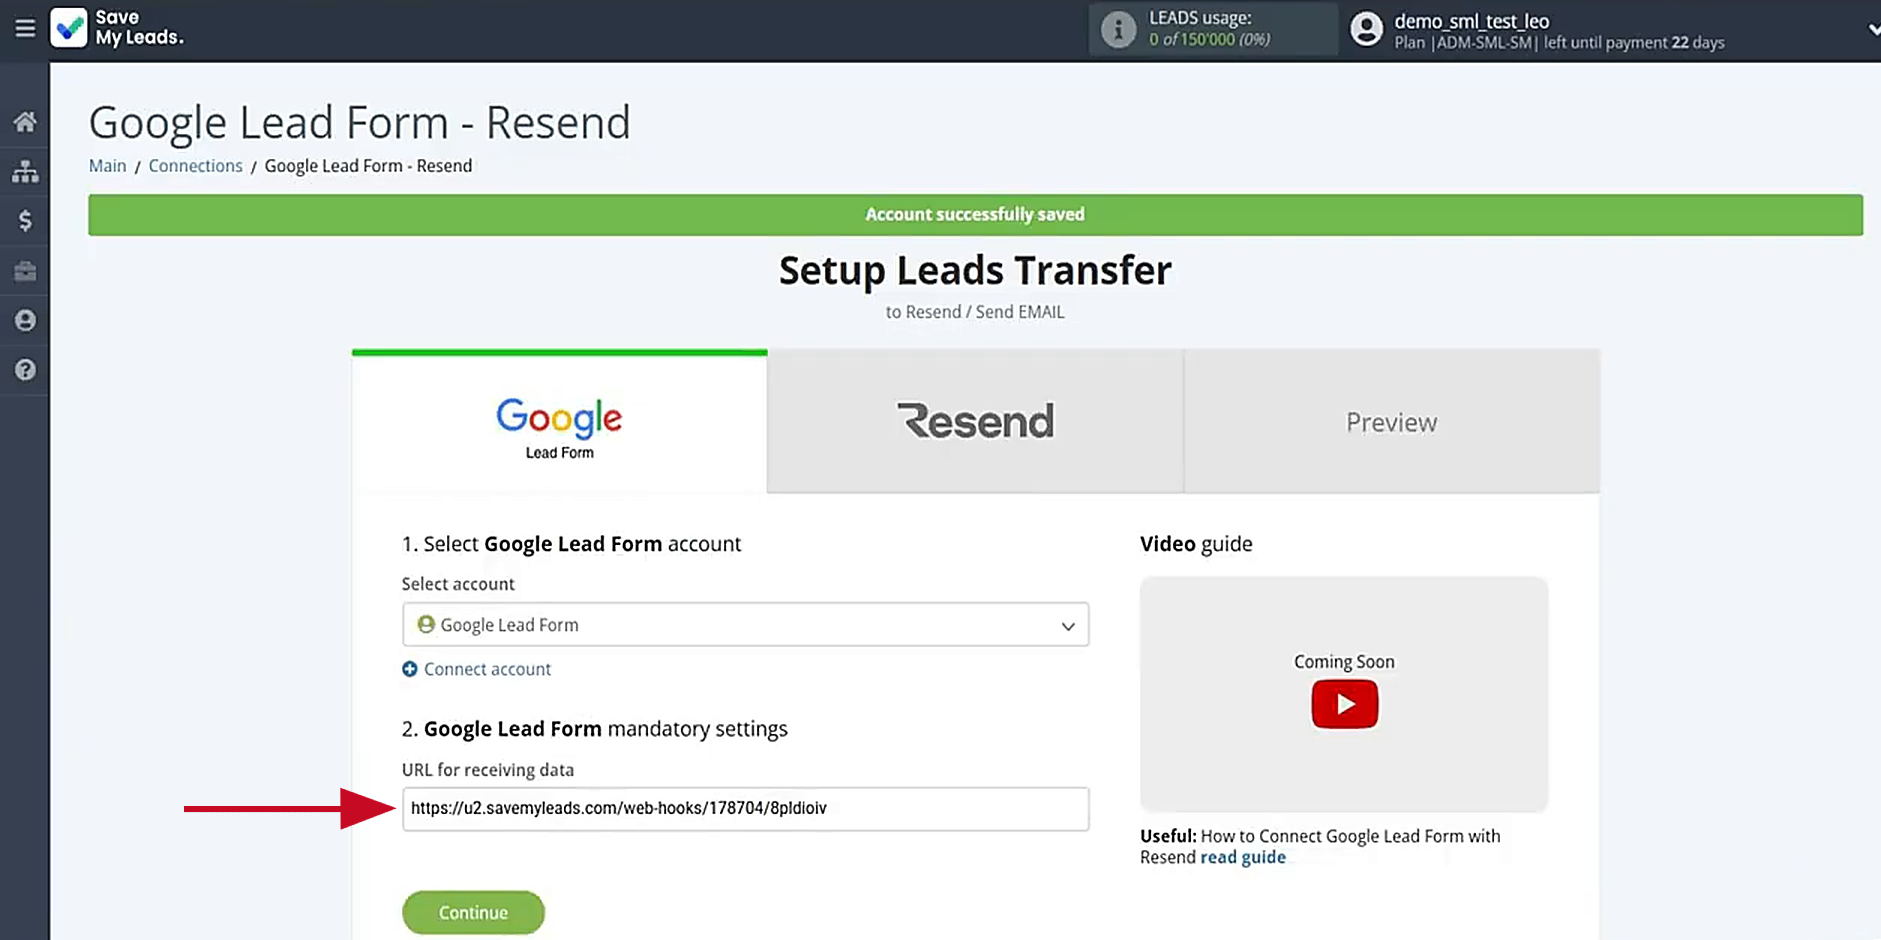
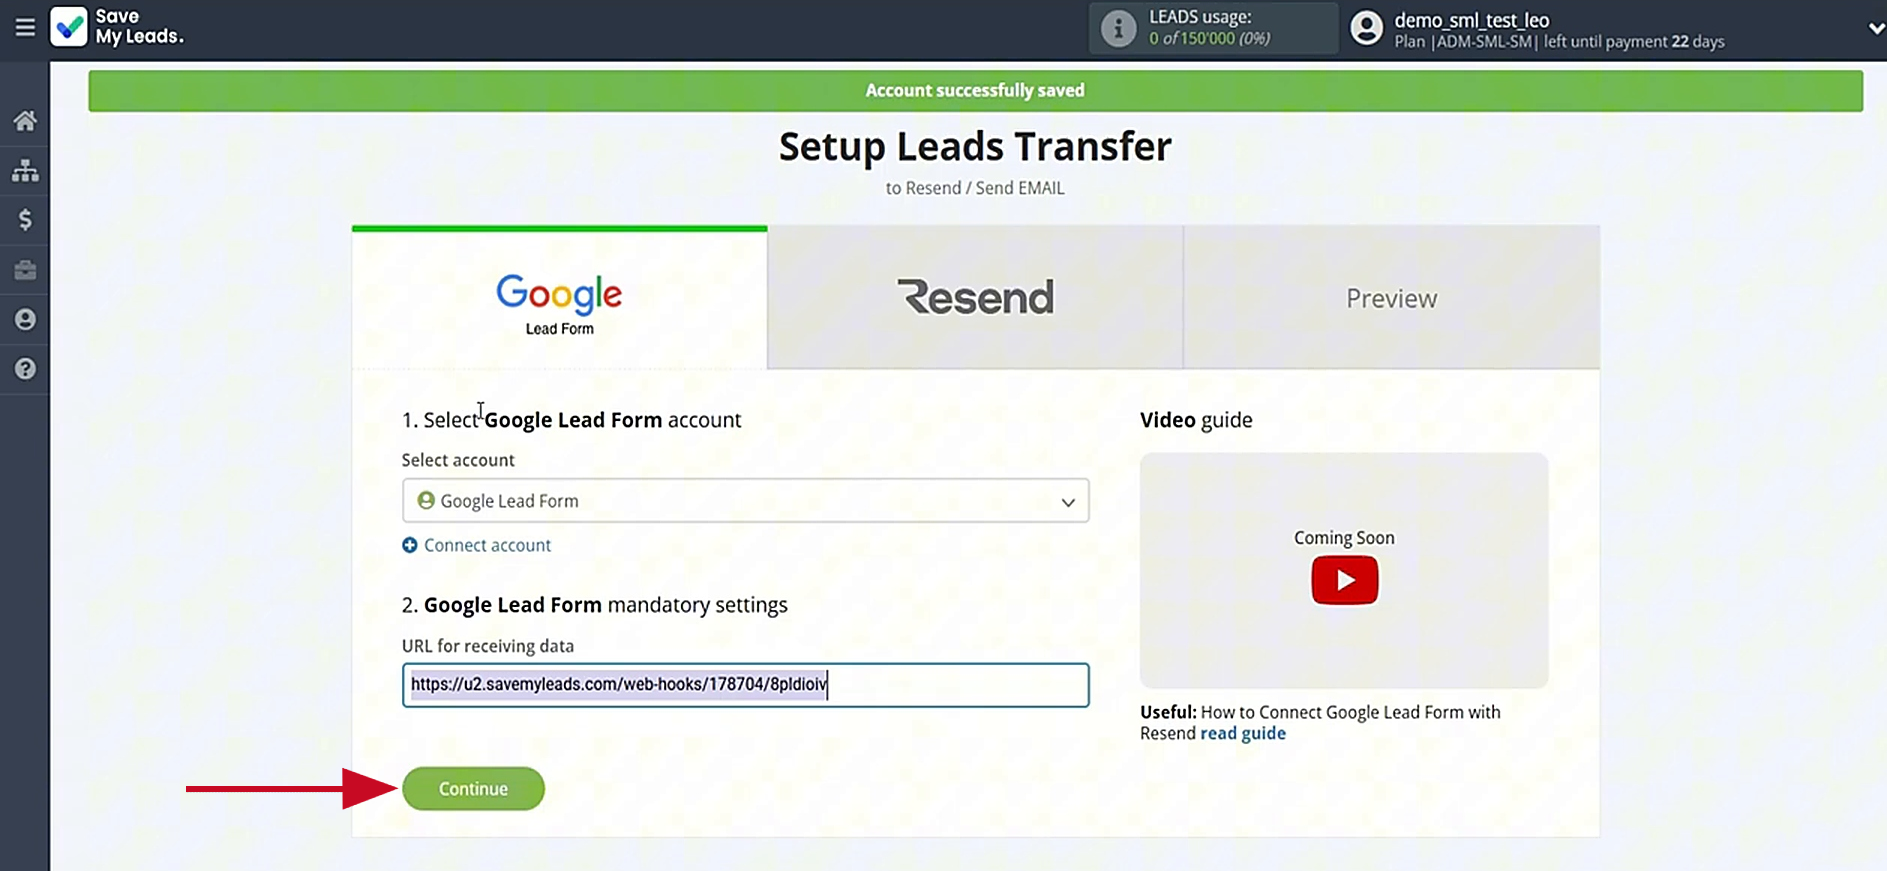
A URL for receiving data will be generated. Copy the link and go to your Google Ads account.
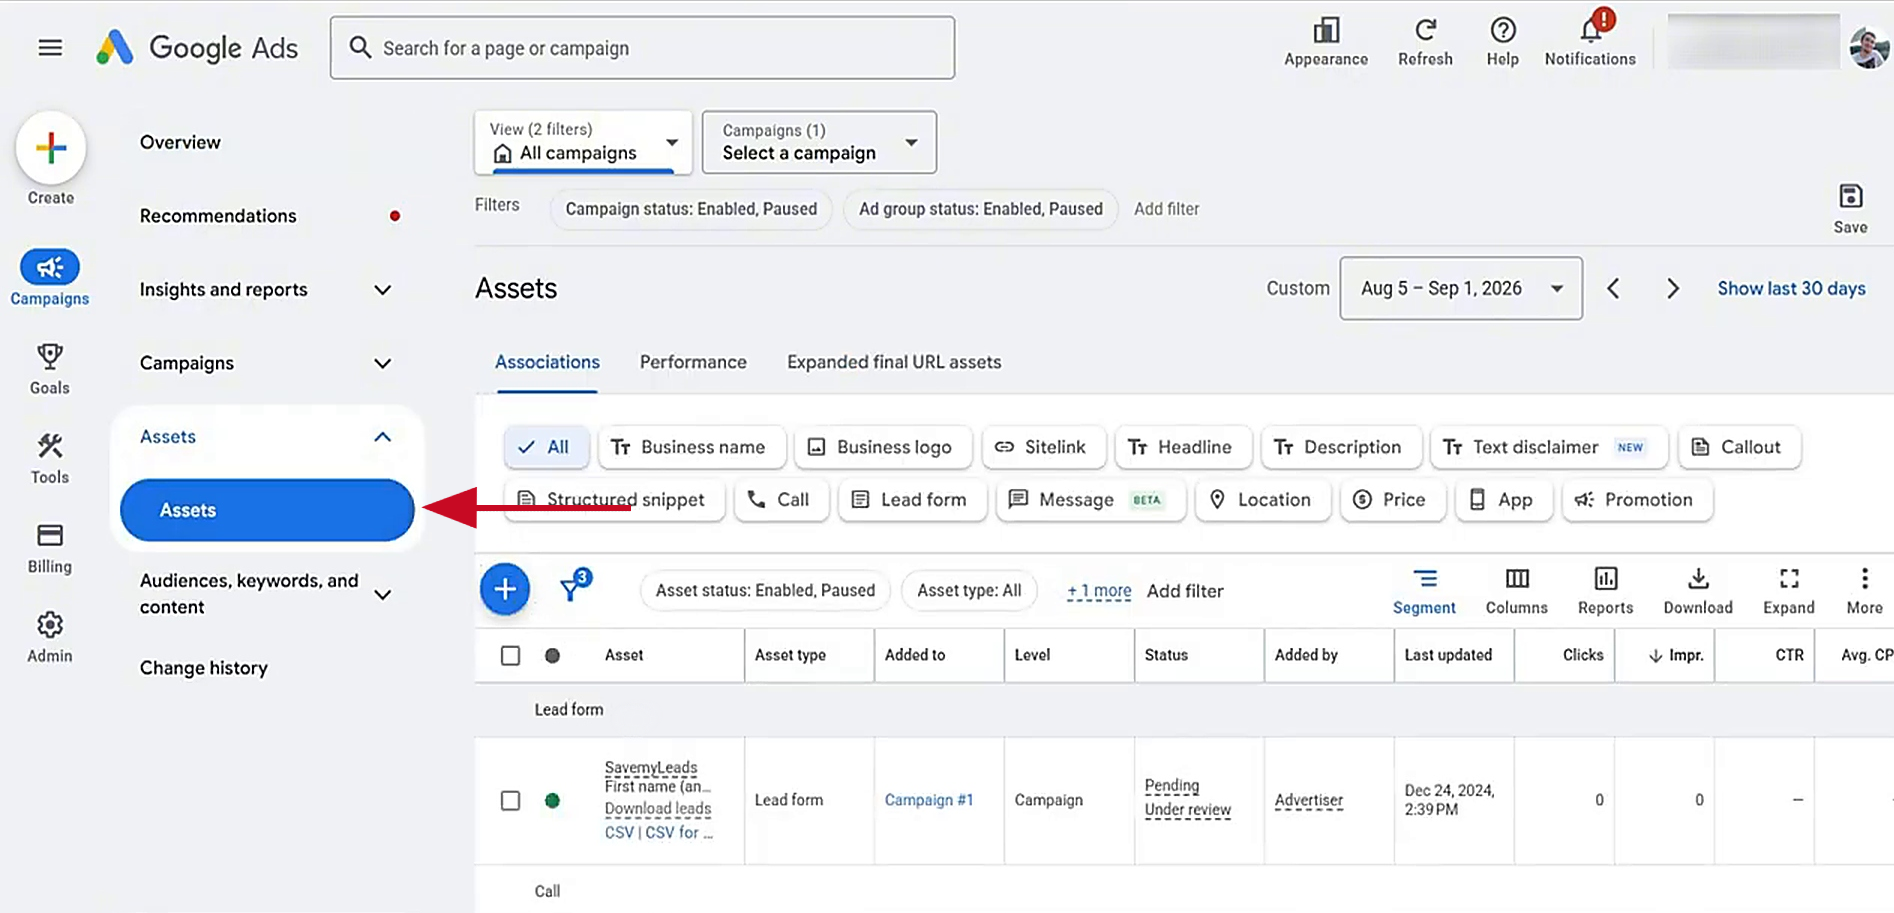
In your Google Ads account, click on the Assets tab.
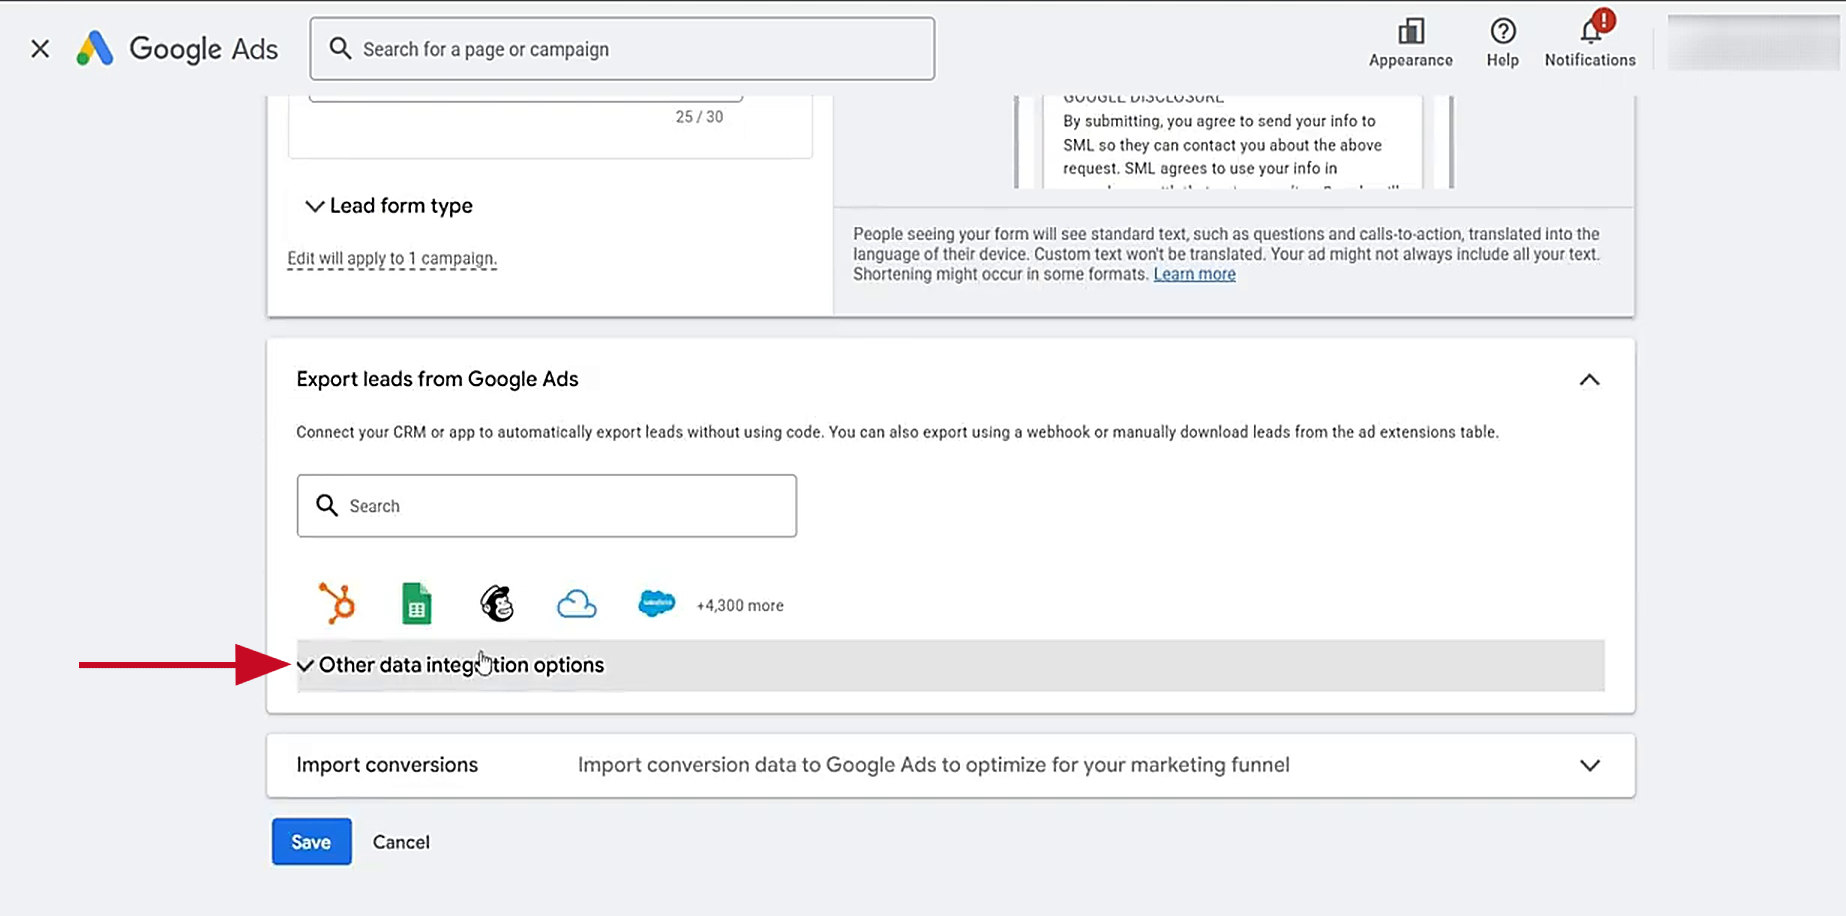
Open the form you want to configure and pick the section Other data integration options.
Paste the URL you copied into the designated field. For the key value, enter the last part of the link. Click Send test data.
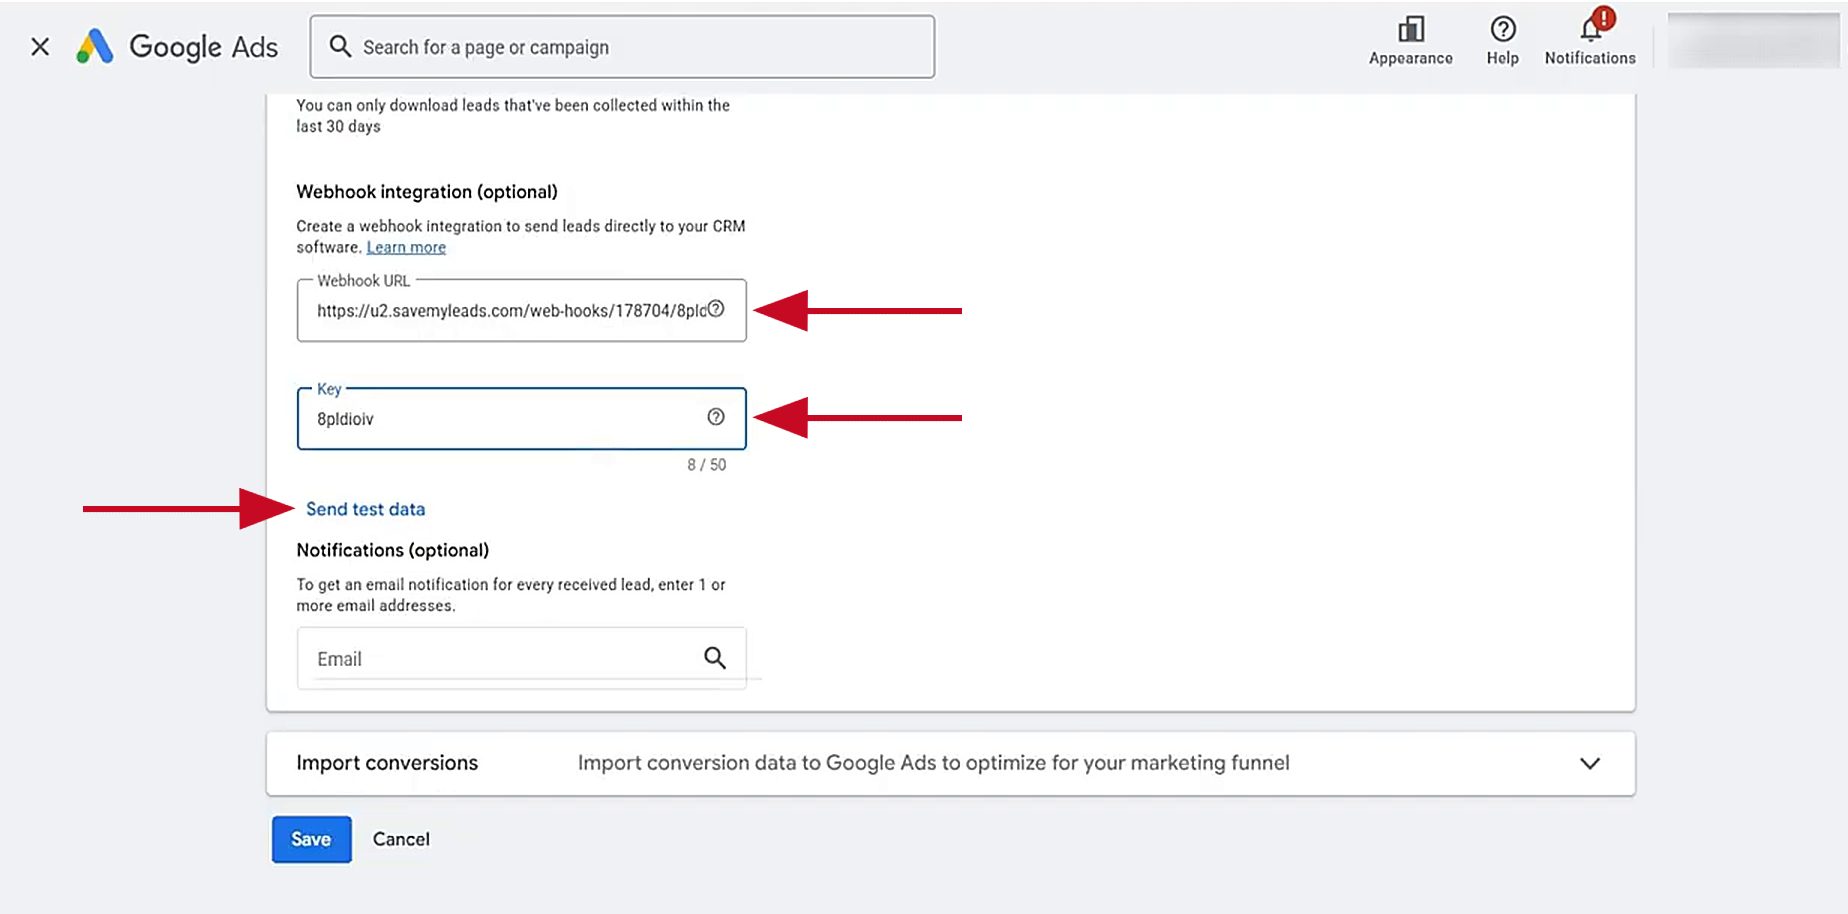
Save your settings.
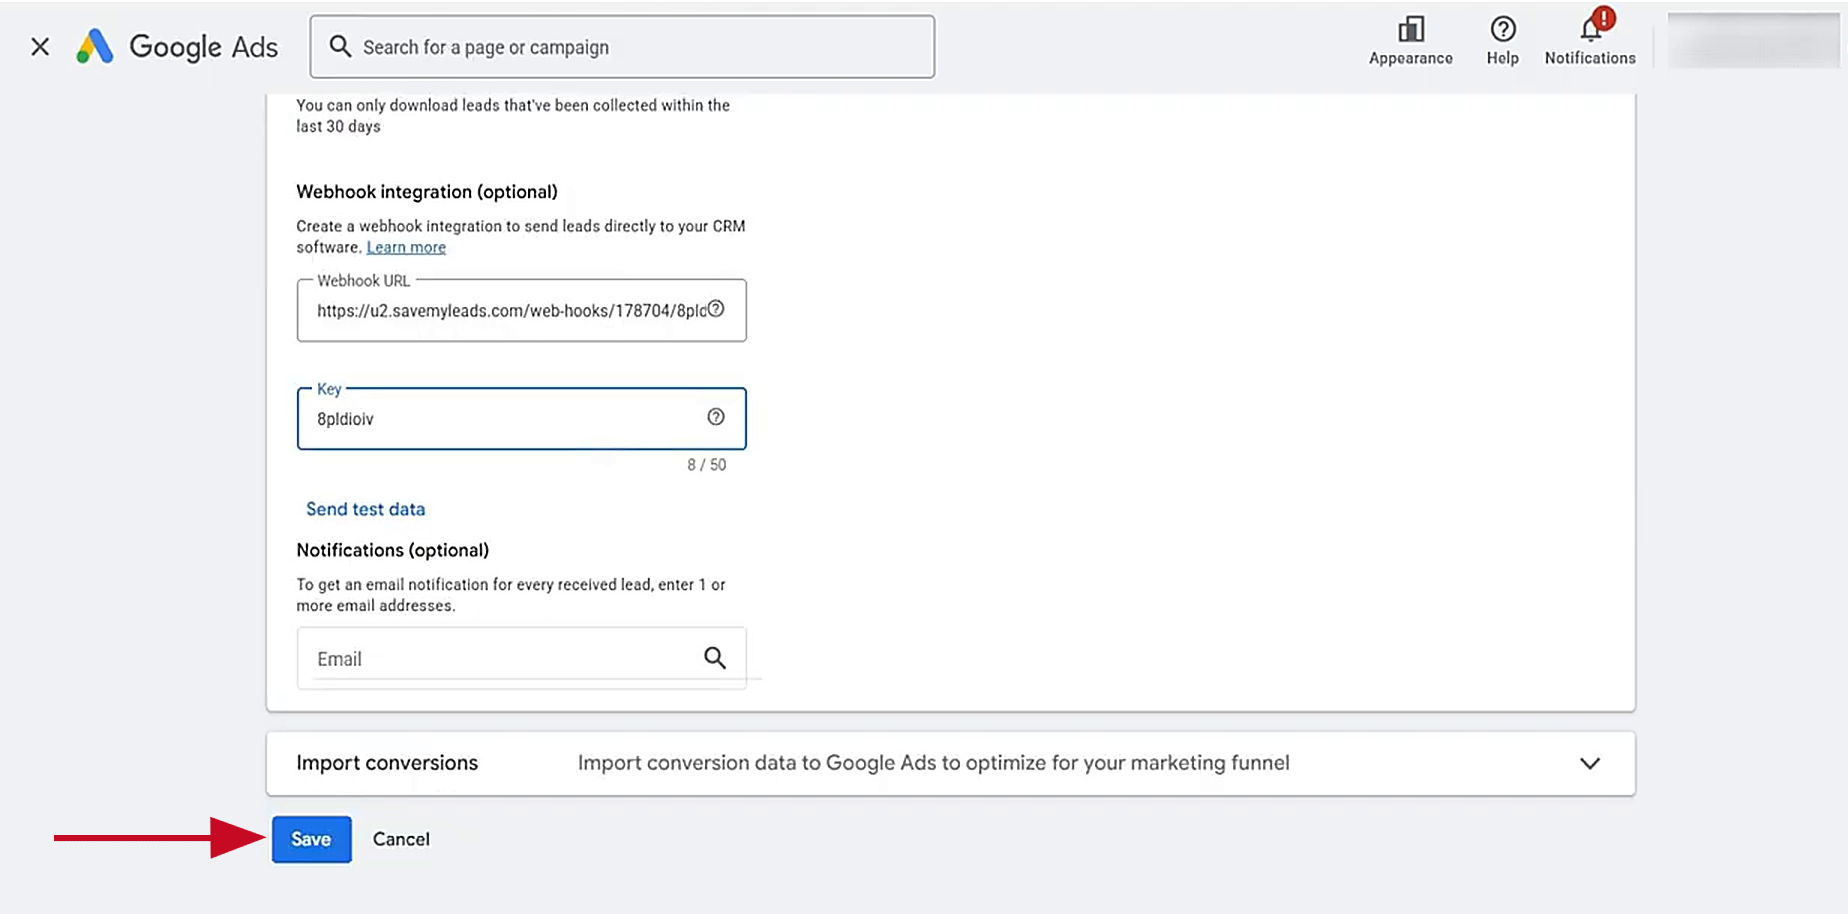
Switch back to SaveMyLeads to move on.
Data Destination Settings: Resend
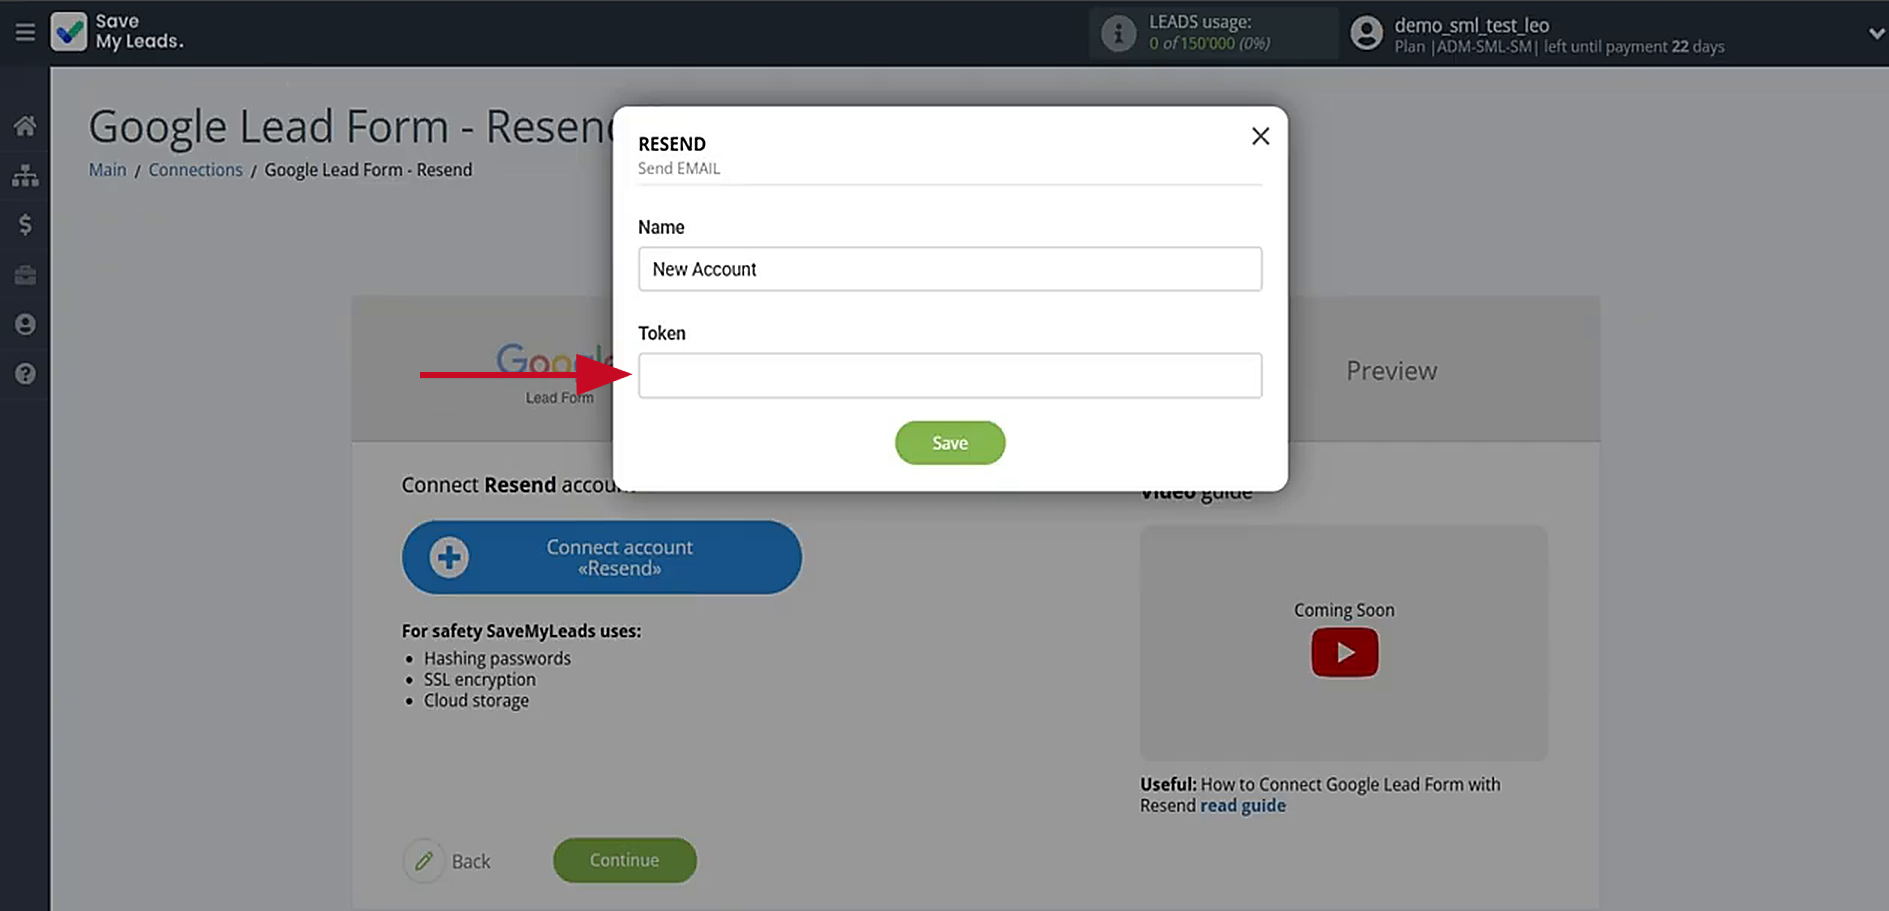
Connect your Resend account.
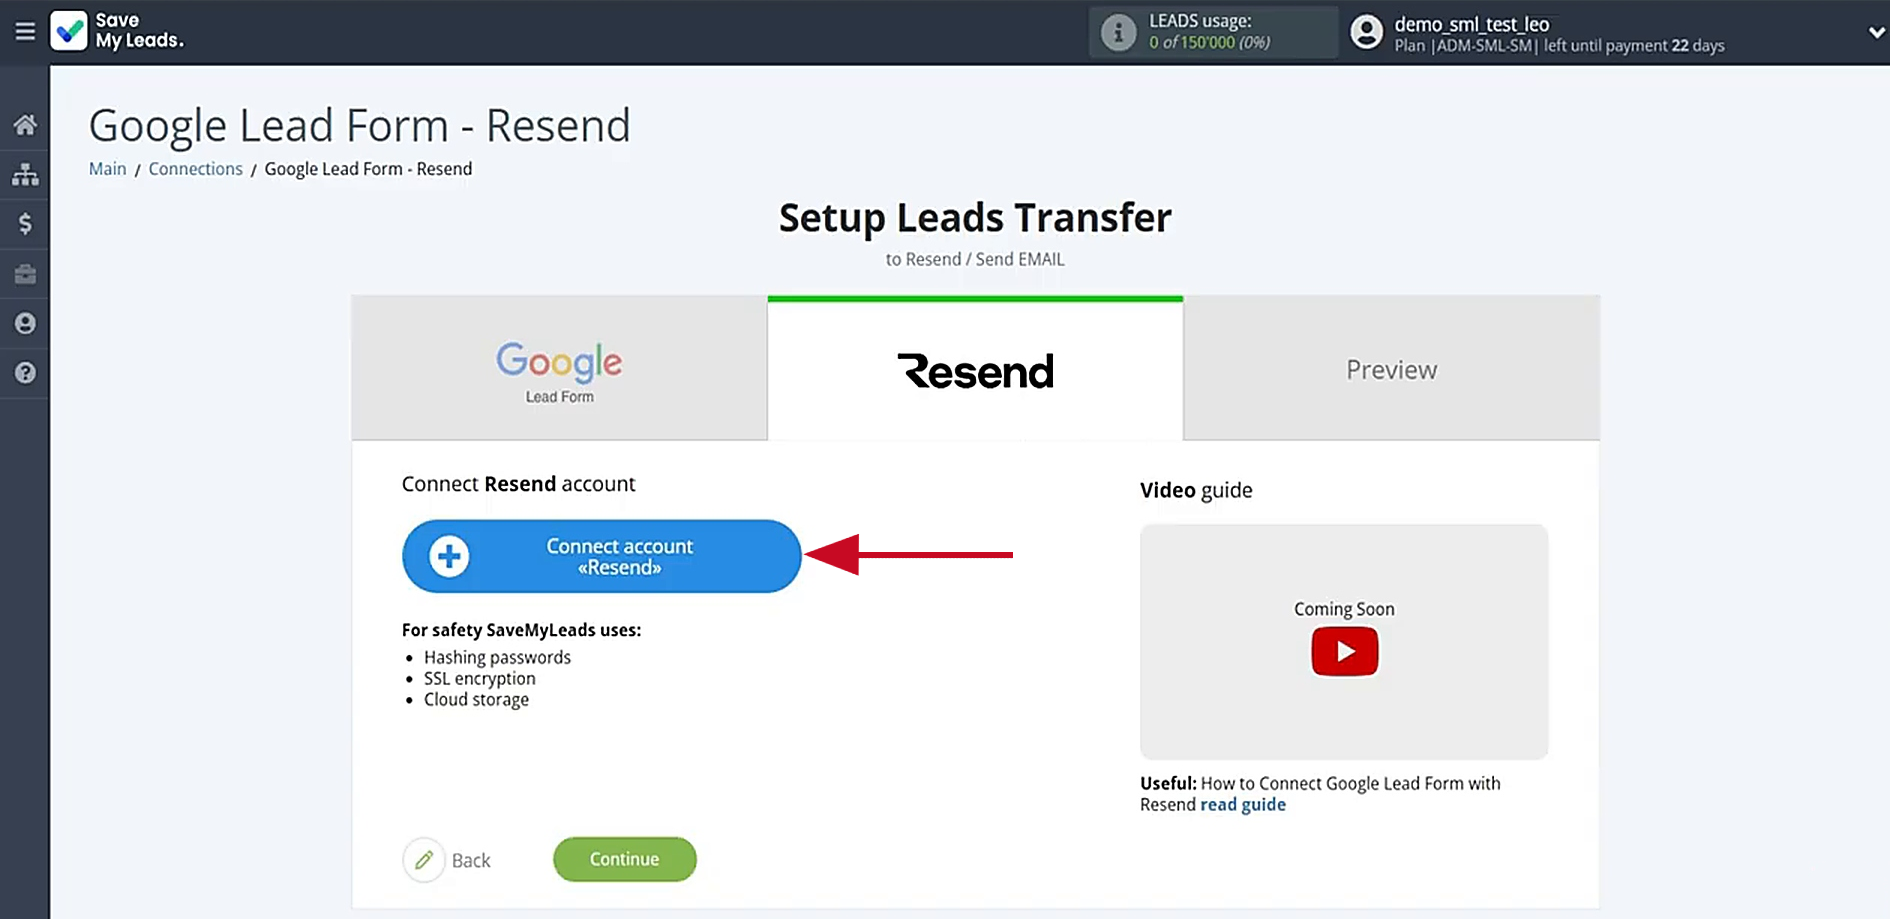
In the window that opens, enter your API token from Resend.
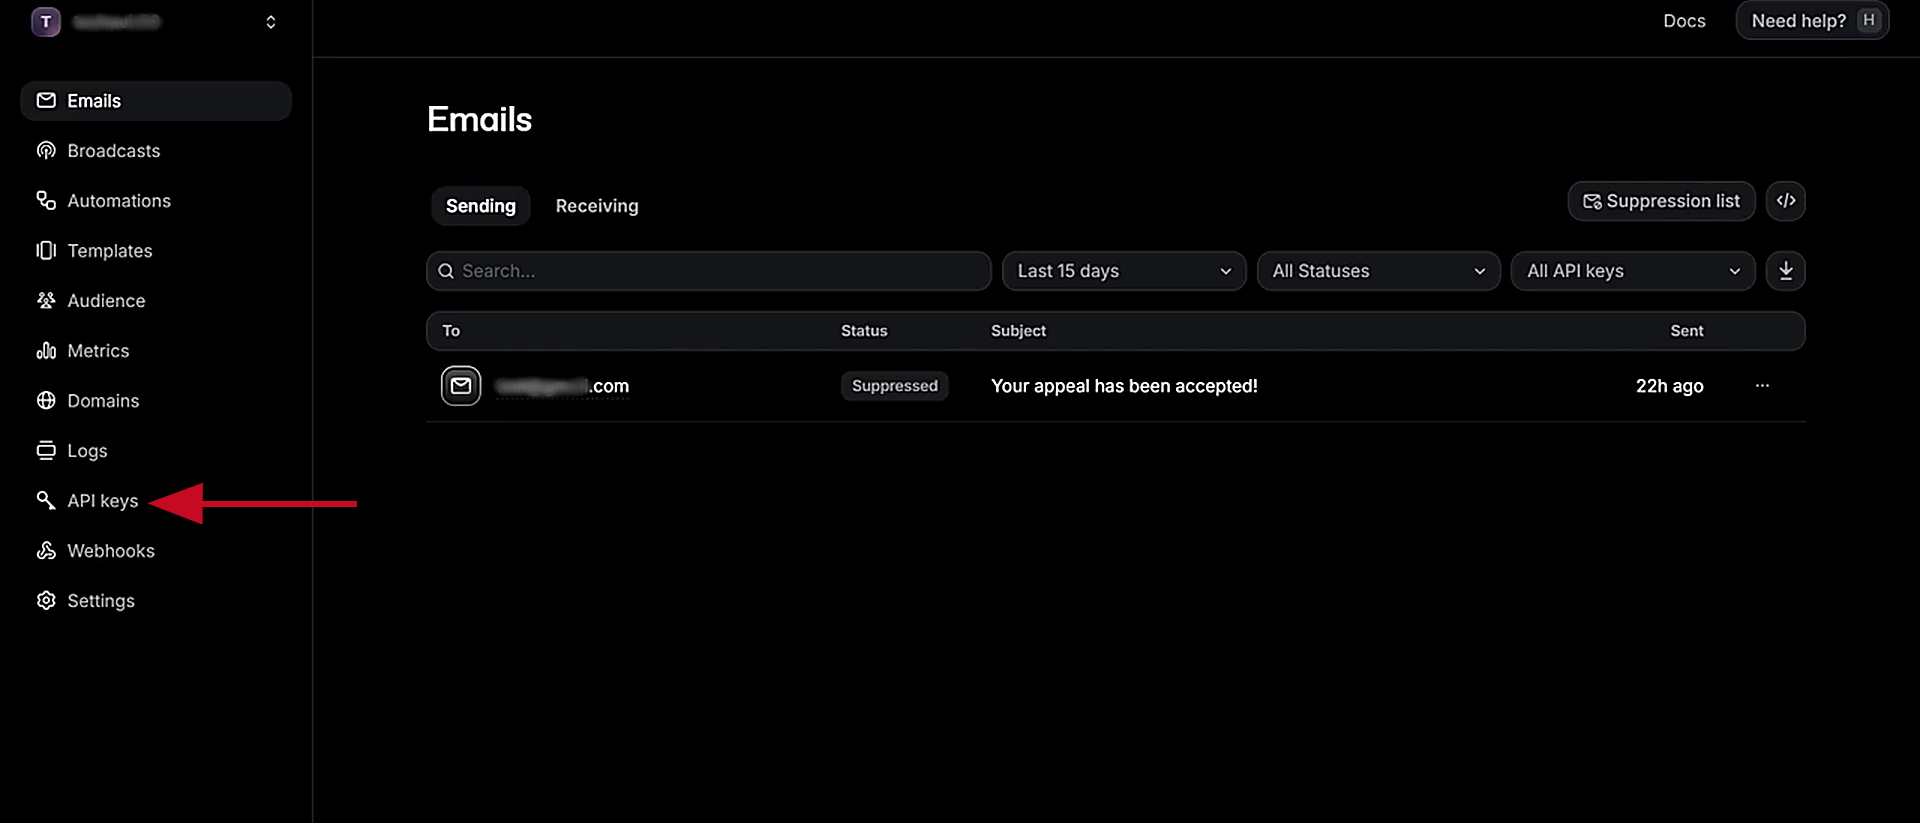
Go to your Resend account. Open the API keys section.
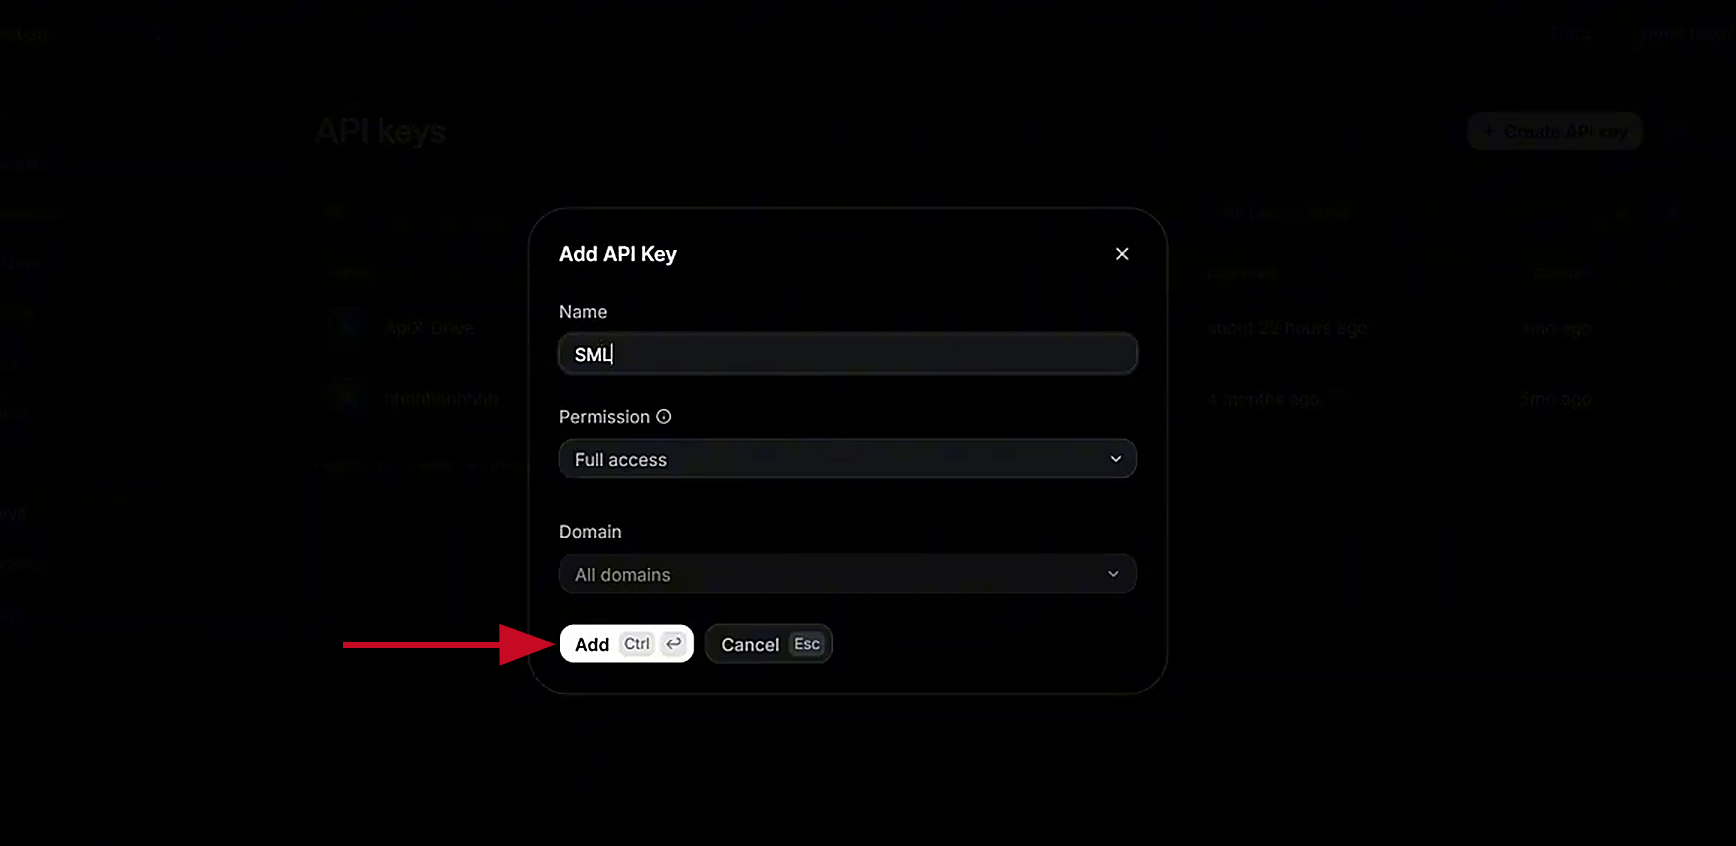
Click Create API key. Enter your token name and click Add.
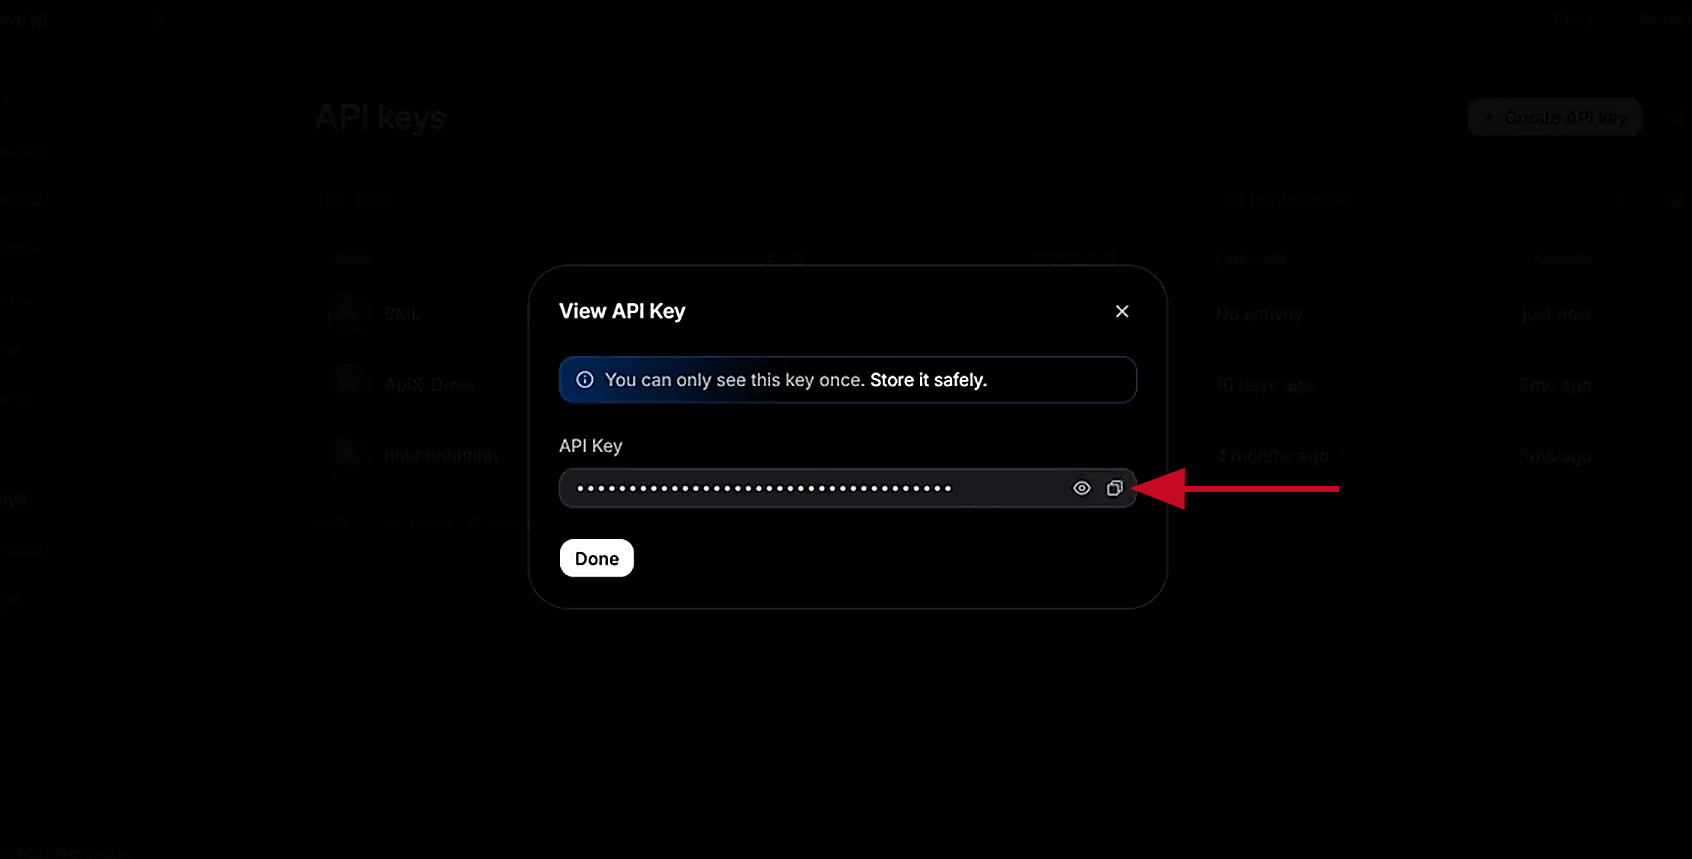
Copy the API key.
Paste the API key into the appropriate field in SaveMyLeads and click Save.
Select the connected account when it appears in the list.
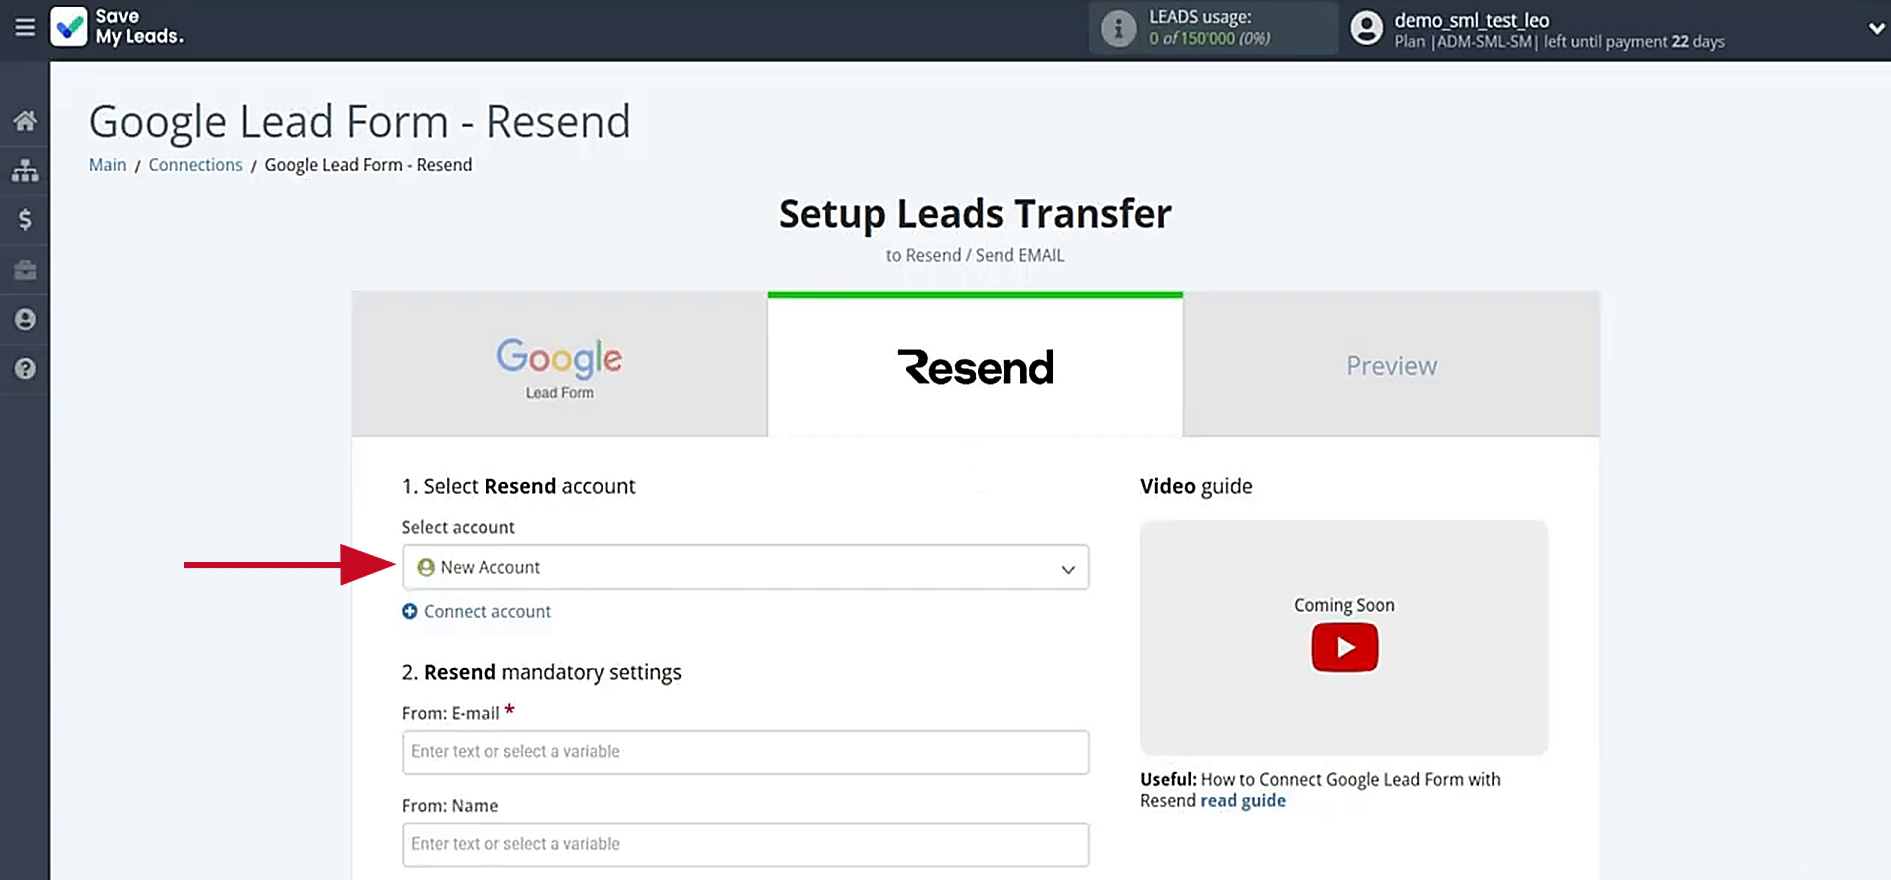
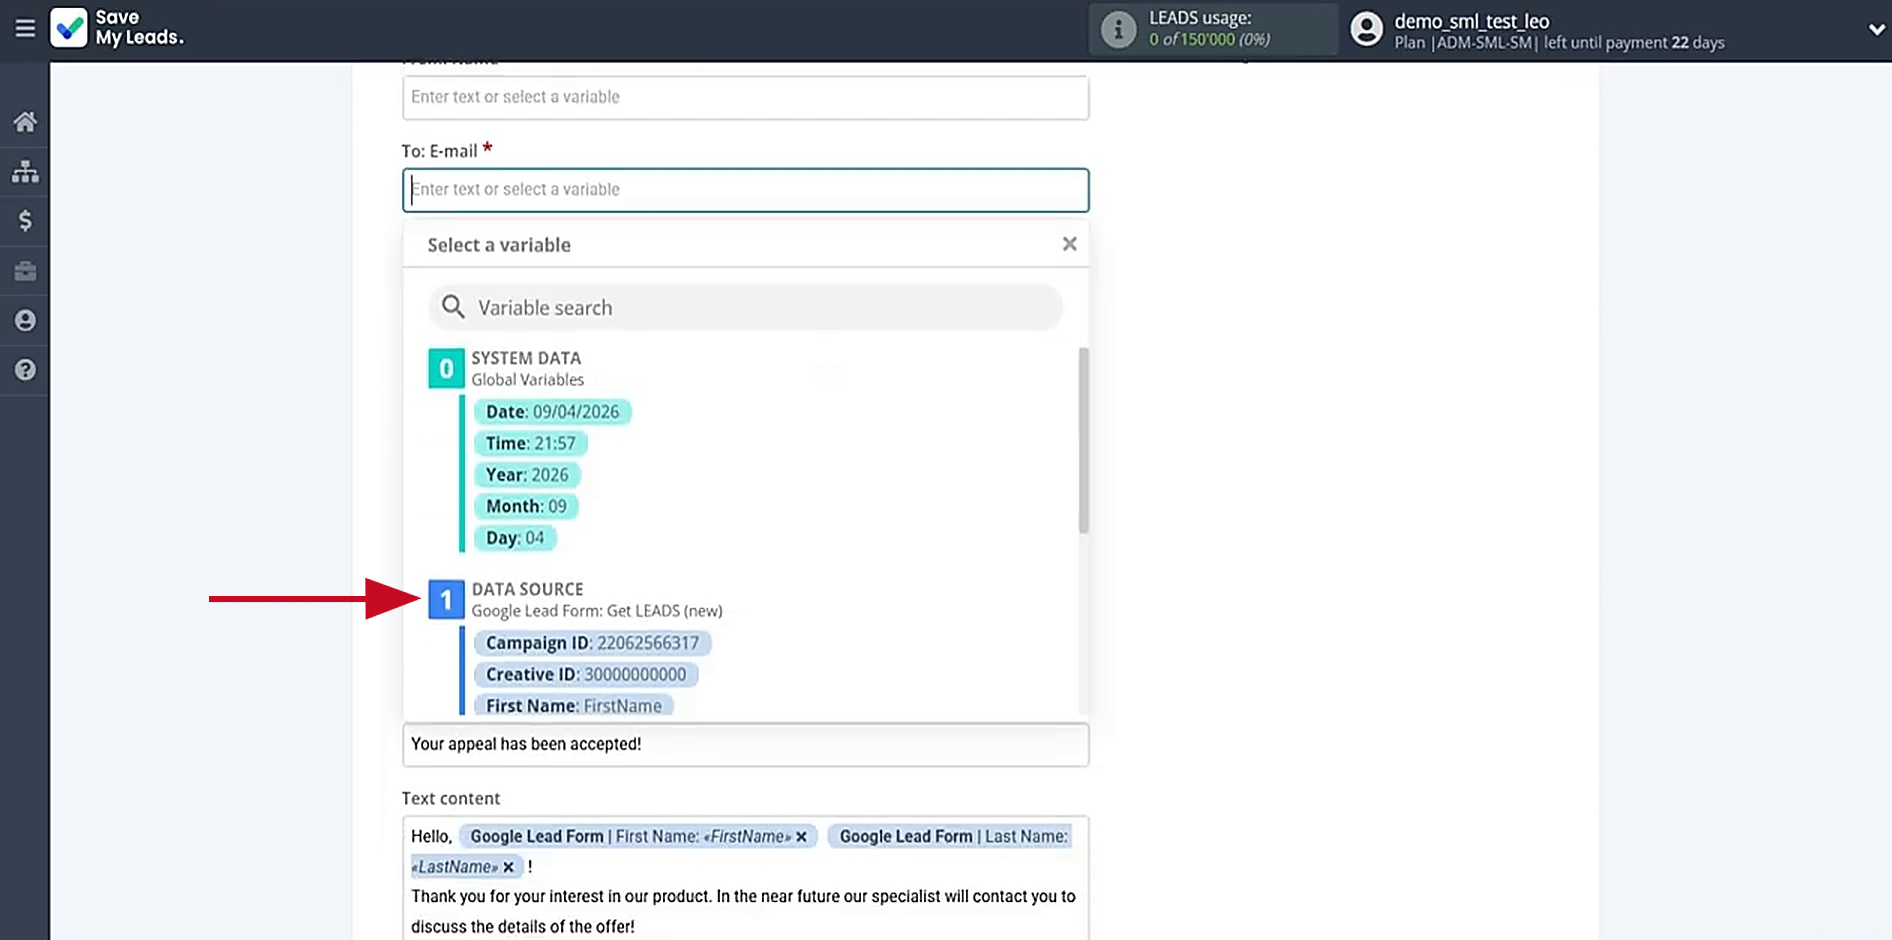
Now you need to assign variables to the required fields, and add your own text manually if needed. Fill in sections such as From email, To email, Subject, and Text content. When the fields are filled in, click Continue.
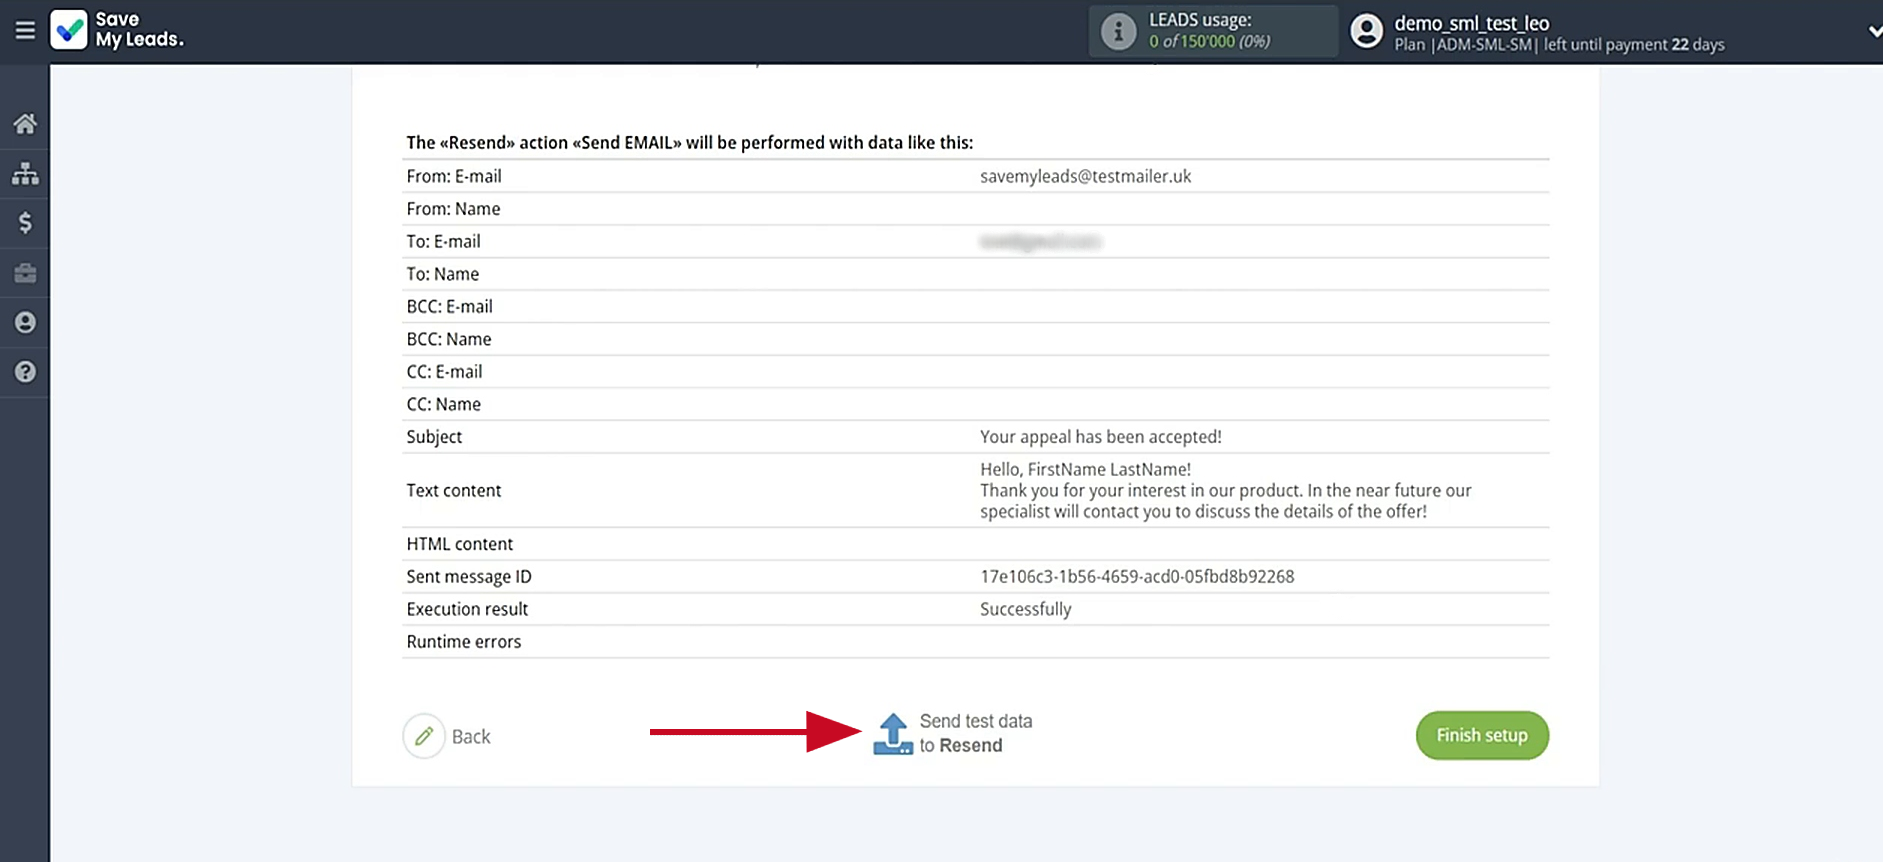
At this point, a preview of the data that will be sent to Resend is displayed. Click Send test data to Resend to ensure the settings are correct.
Check your Resend account to confirm the result. Return to SaveMyLeads to finalize the setup.
Auto-Update
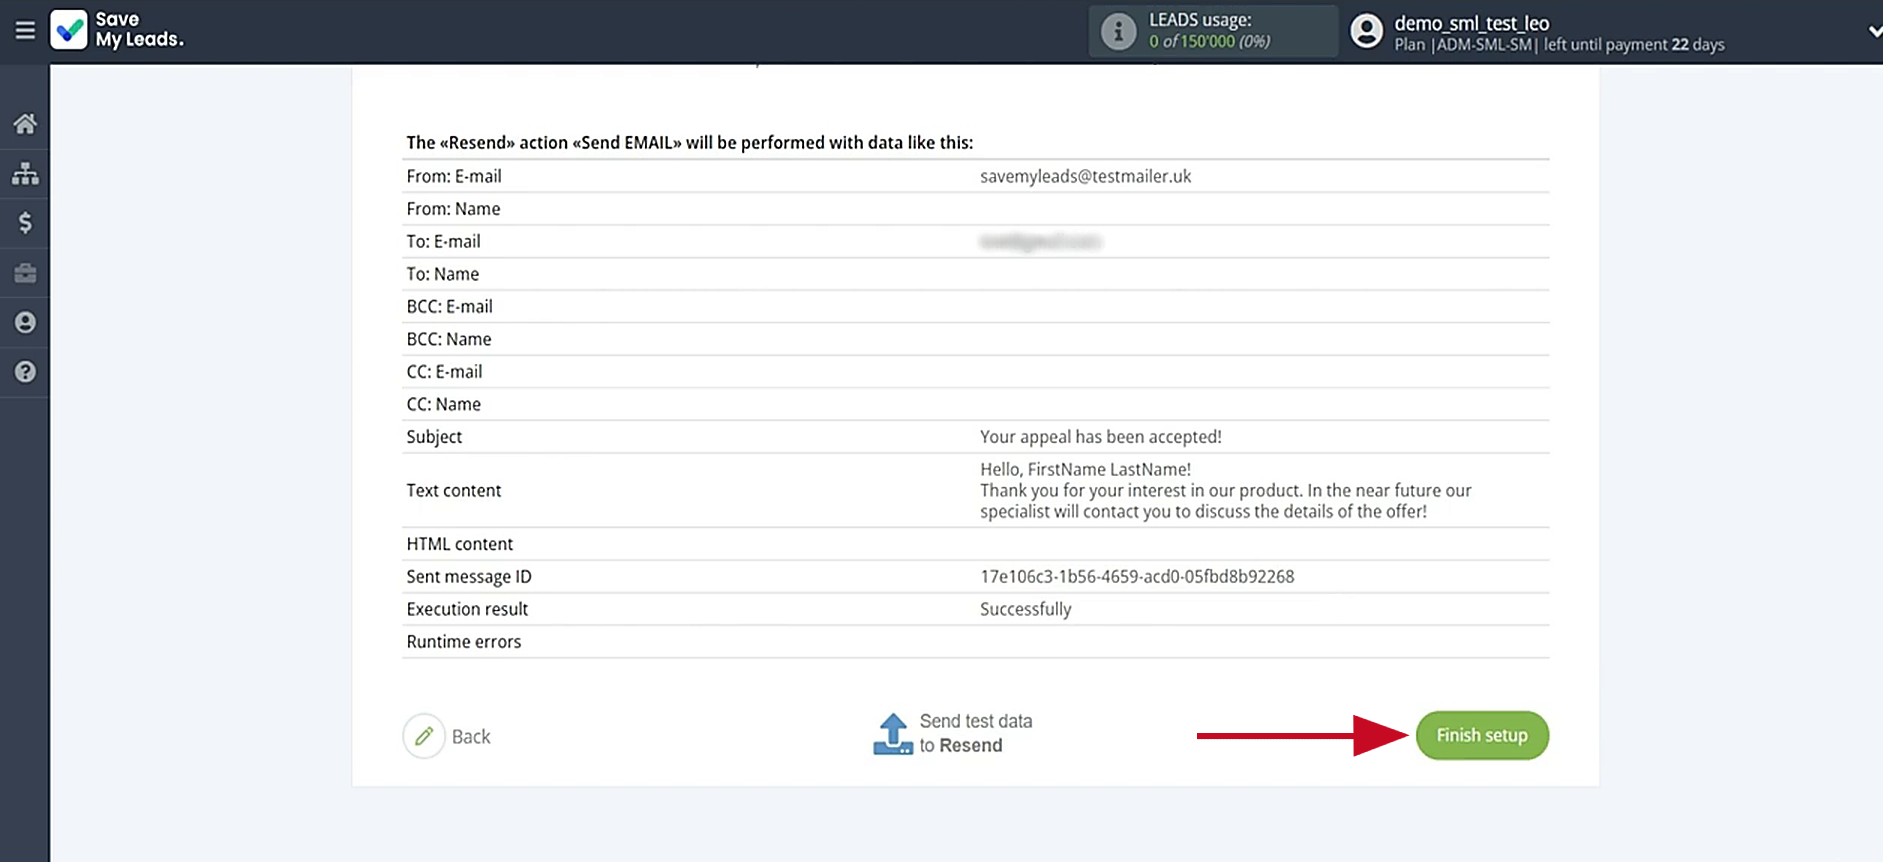
Click the Finish setup button to enable automatic updates for this connection. Once enabled, new leads from Google Lead Form will automatically trigger emails in Resend.
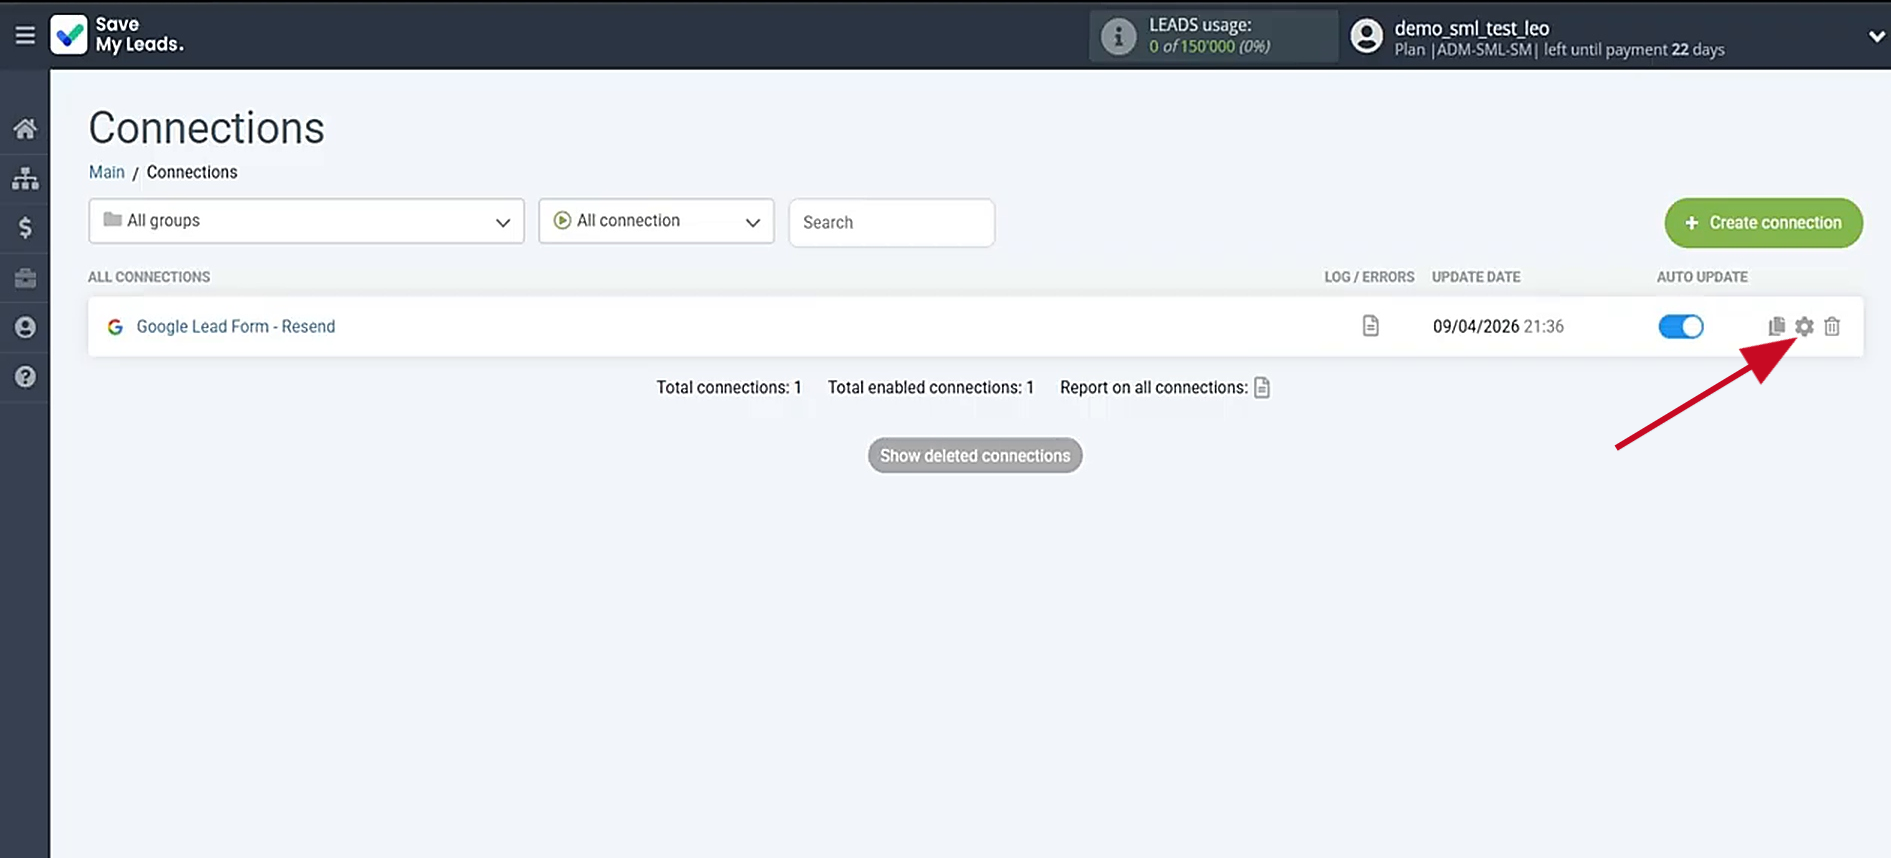
To change the connection name, click the gear icon to open the settings panel.
In this section, you can change the name or assign the connection to a group. Click Continue.
Conclusion
Google Lead Form and Resend no-code integration is a practical step for businesses looking to speed up lead processing, improve conversion rates, and reduce staff workload. Automatic data transfer eliminates communication delays, increases potential customer trust, and reduces the risk of losing leads. Using the SaveMyLeads connector makes this process simple and accessible to almost anyone, eliminating the need to spend effort, time, and other resources on custom development.
Step-by-Step Guides for Setting Up Integrations:
- Facebook and Resend Integration: How to Send Emails Automatically
- Google Lead Form and Asana Integration: Automatic Data Transfer
- How to Connect TikTok to Brevo: A Seamless Integration Guide
- Google Lead Form and Constant Contact Integration: Step-by-Step Setup Guide
- TikTok and MeisterTask Integration: Step-by-Step Guide