
If a sales manager manually transfers lead data from a Facebook Lead Ads form to an email platform, the company loses time and risks missing the window when the lead is most engaged. A Facebook and Resend integration automates lead data transfers, ensuring prospective clients receive an email after submitting their information. This guide shows how to set up the connection in a few minutes to eliminate follow-up delays.
Why Send Emails to Facebook Leads Automatically
A typical situation: a user stumbles upon a Facebook ad, decides they need the product or service, and submits their details via a lead form. Of course, they expect to receive a response in the near future.
If automation is not available, this data must be uploaded and entered into an email marketing system that will send a pre-prepared message to the user. Busy managers rarely catch every new lead as soon as it arrives, making delays inevitable. This delay may be enough for the potential client to reconsider their decision or abandon it altogether.
A Facebook and Resend integration eliminates manual lead handling. After setup, new lead data flows directly from the form into Resend, triggering the right email message without manual effort. This significantly speeds up the process of sending potential customers order confirmations, product presentations, instructions, and messages like "expect to be contacted by a manager soon."
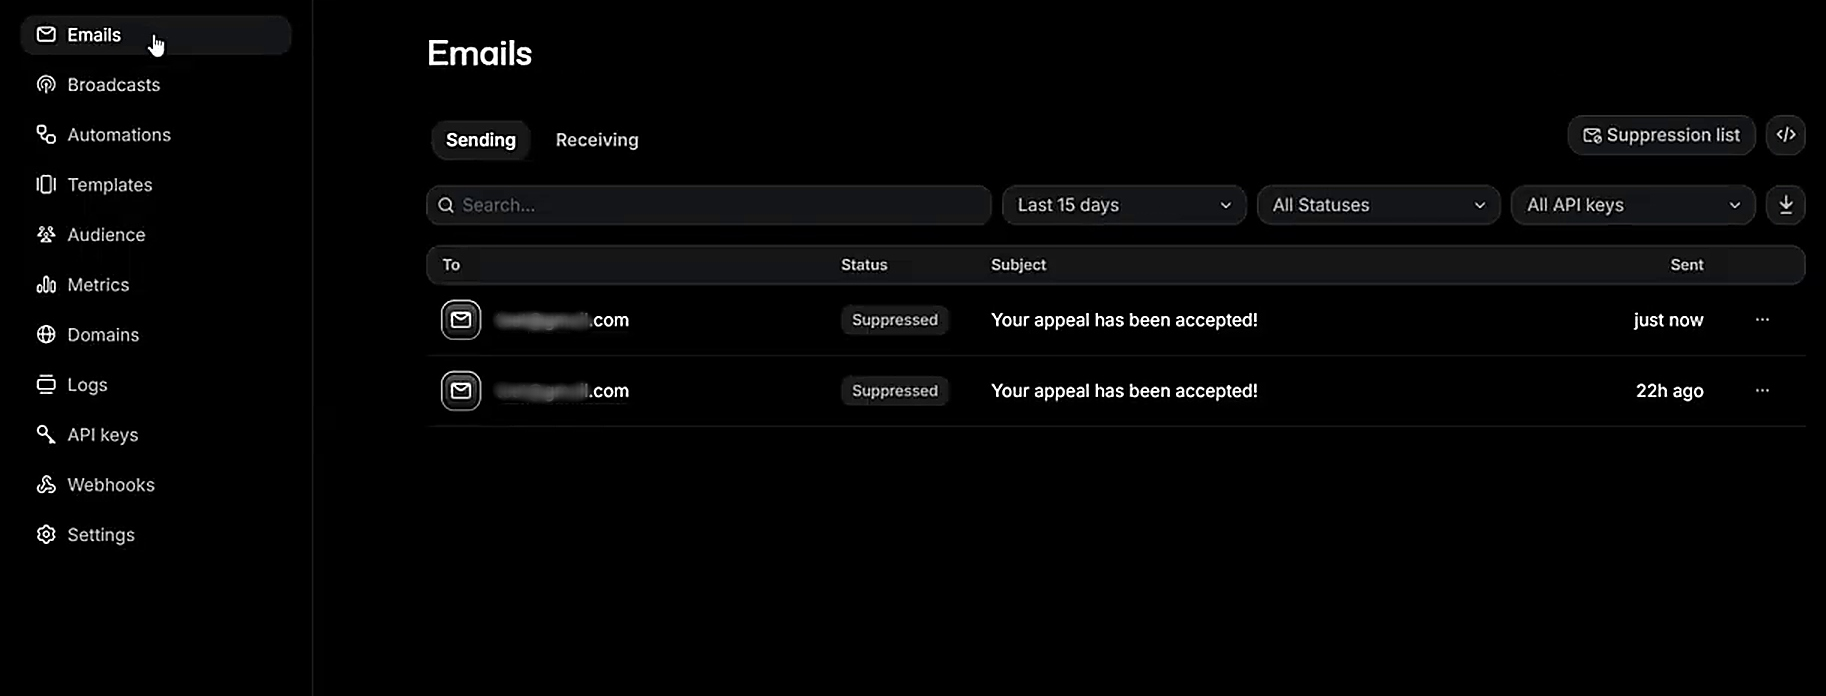
The biggest advantage of integrating Facebook with Resend goes beyond saving time. It creates a direct follow-up process that minimizes the gap between a prospect's inquiry and your response. This faster response time directly improves lead conversion rates and boosts overall sales.
How to Connect Facebook to Resend
Technically, Facebook and Resend can be connected via API. To do this yourself, you will have to work with the documentation of both platforms, understand the specifics of authorization and API requests, determine which parameters to pass, and learn how to detect and fix possible errors.
A much simpler option is using SaveMyLeads, a no-code connector. It provides a pre-built integration between Facebook Lead Ads and Resend that you can set up in minutes. For users without technical experience, this is a much easier alternative.

You can start sending automated emails to Facebook leads via Resend today. So let’s set up the integration. Below is a step-by-step guide that will help you do everything in a matter of minutes and avoid mistakes.
Data Source Settings: Facebook
Start by creating a new connection.
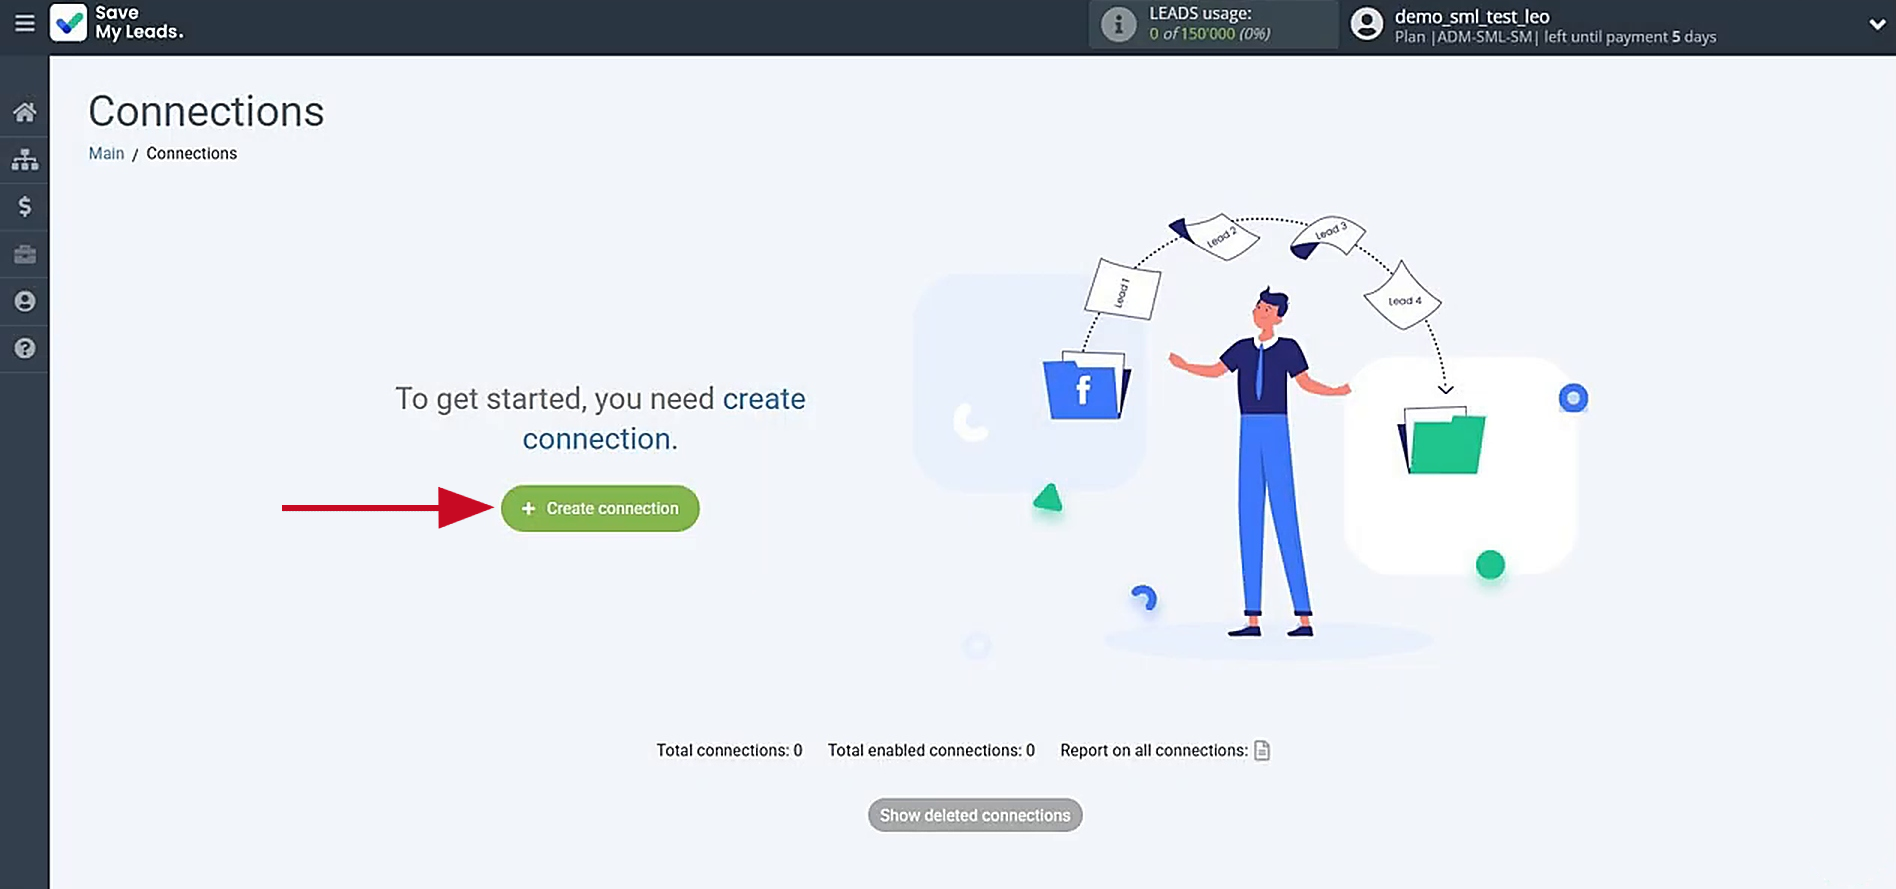
Select the platform you want to use as the source of new data. In this case, choose Facebook.
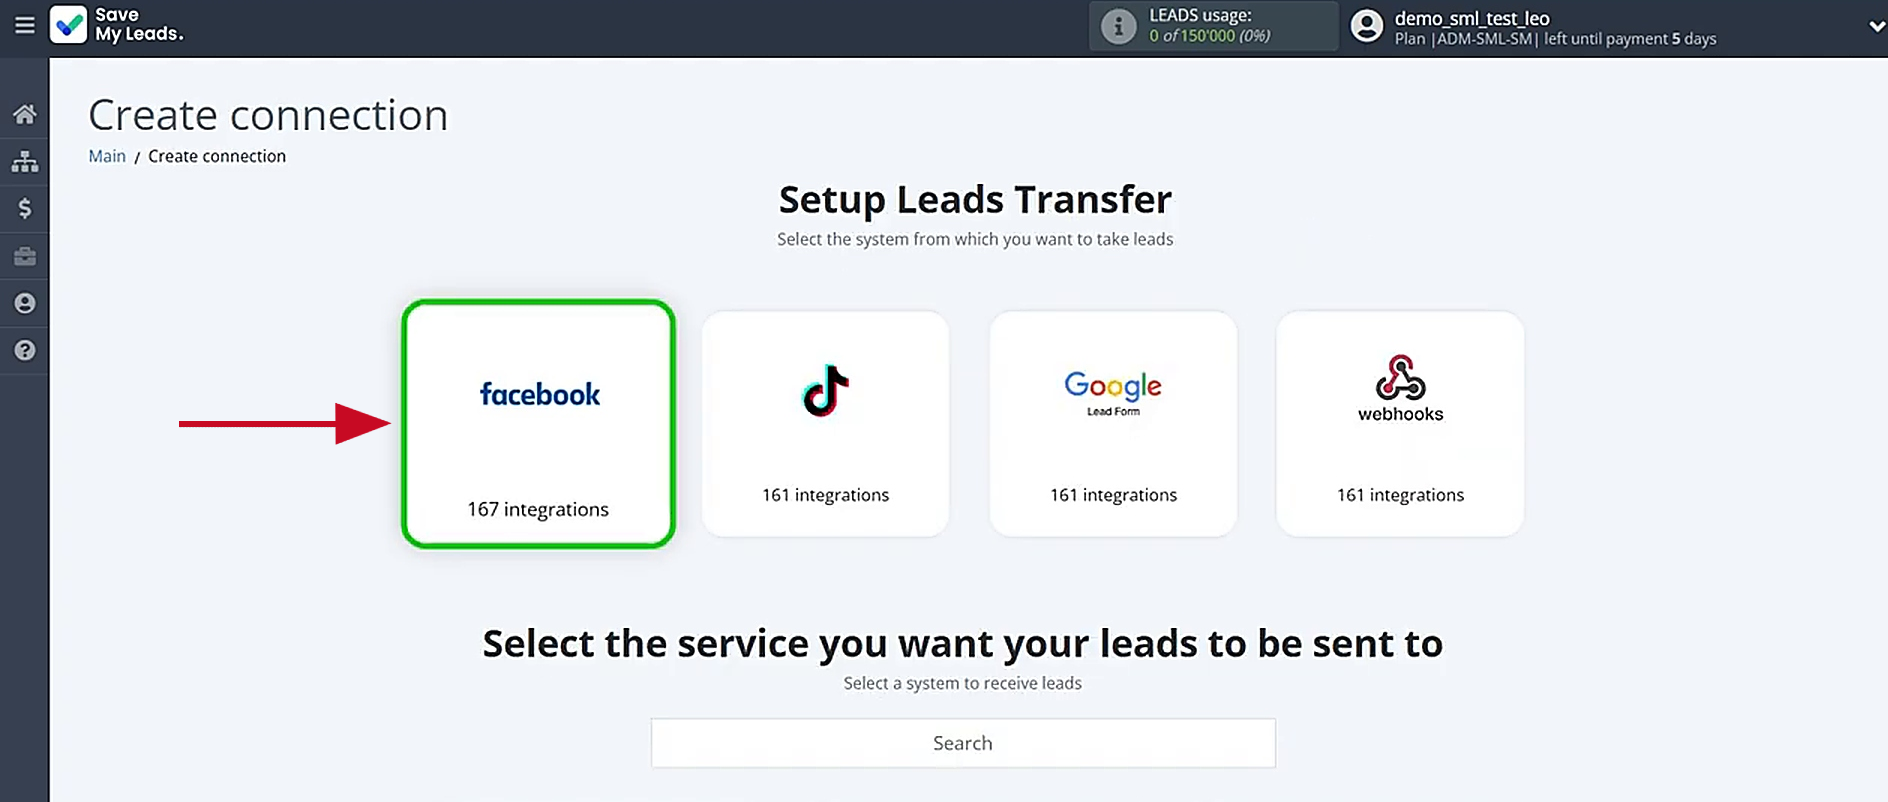
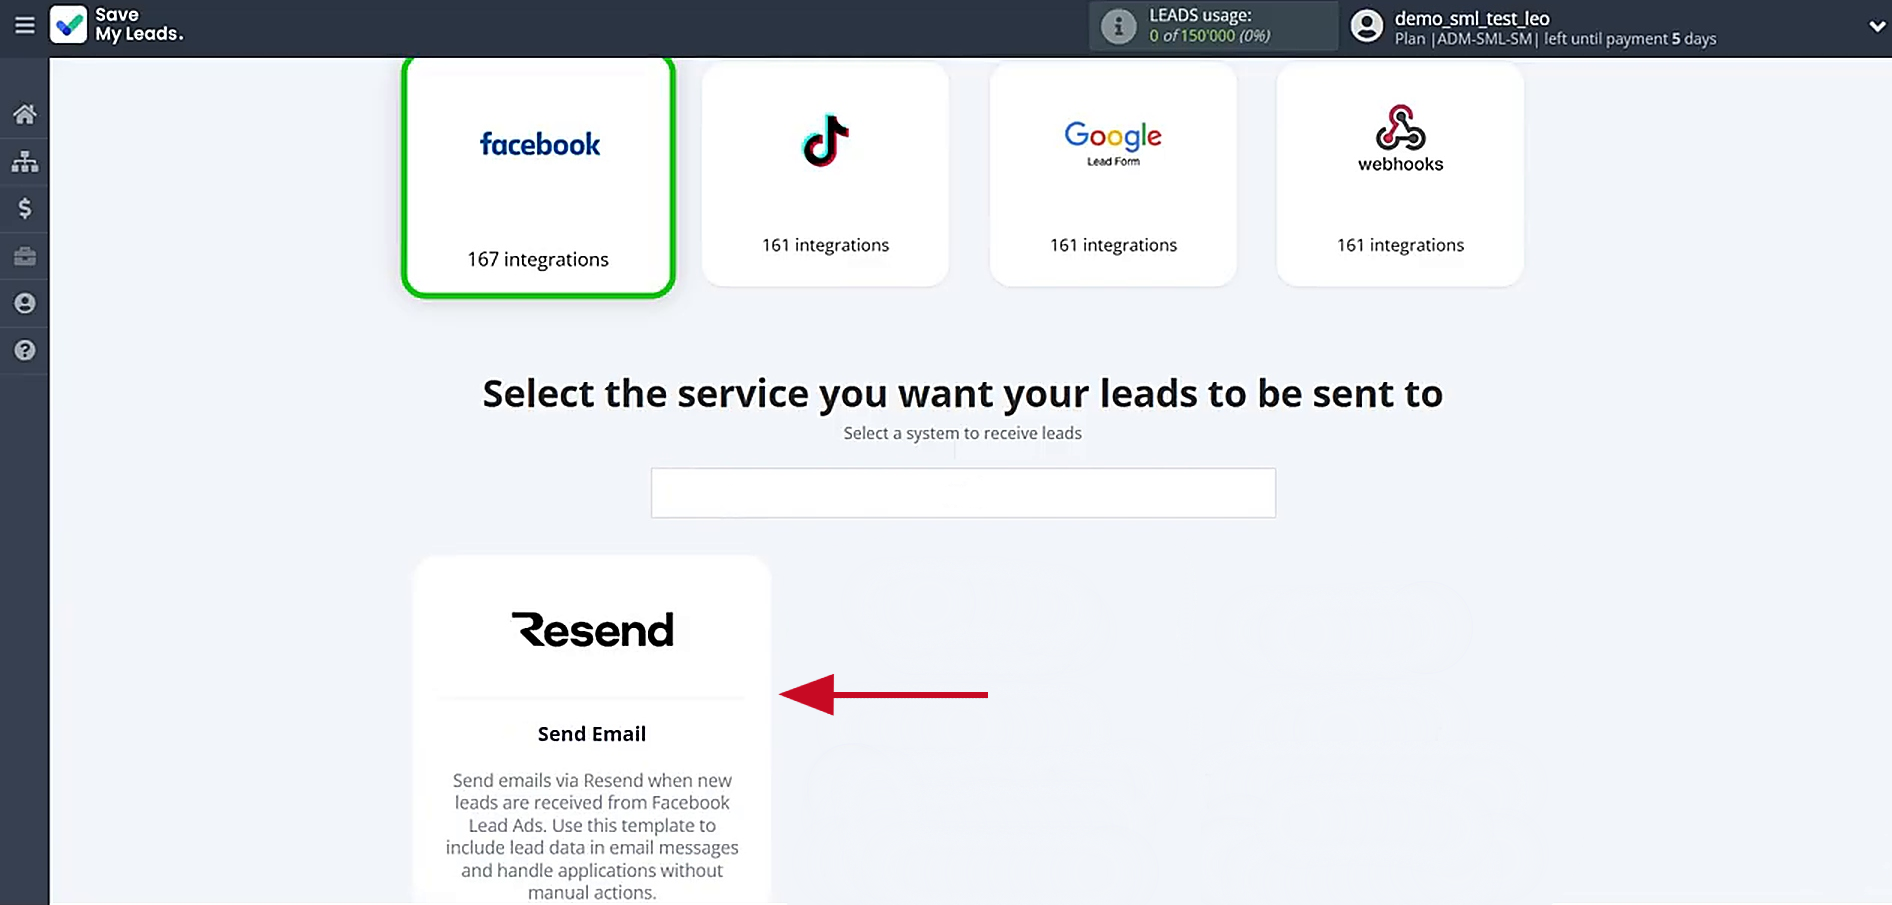
Next, select the platform where you want to send the new Facebook leads. You need Resend (Send Email).
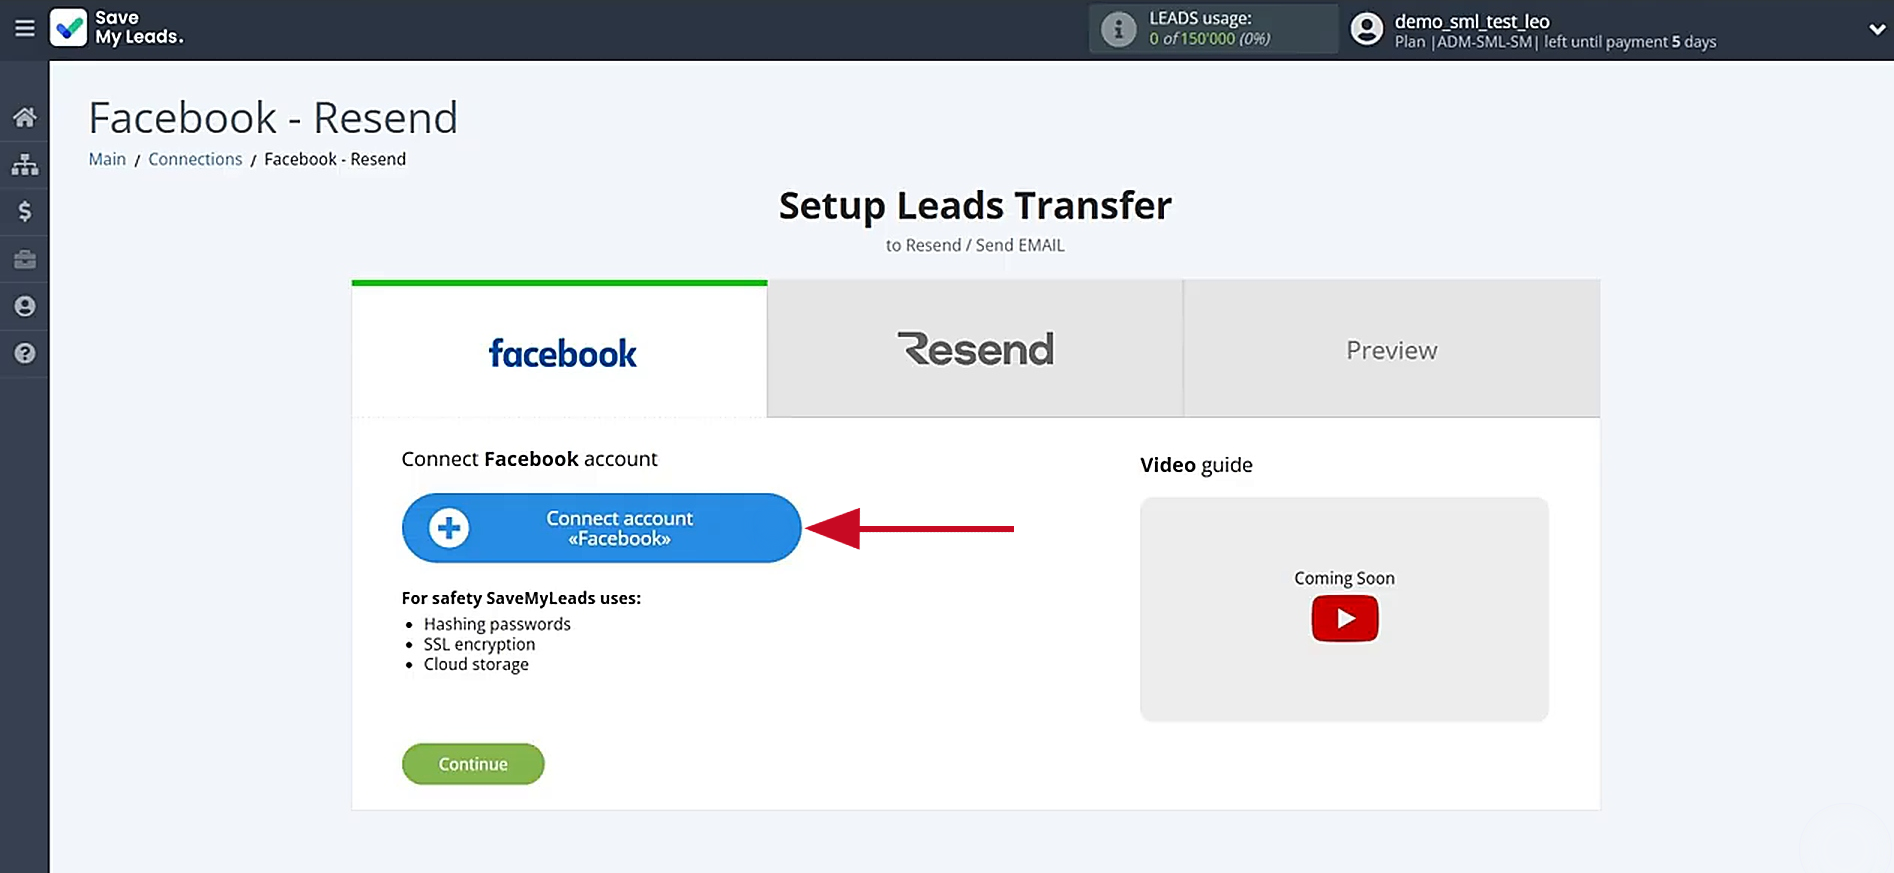
Connect your Facebook account to SaveMyLeads.
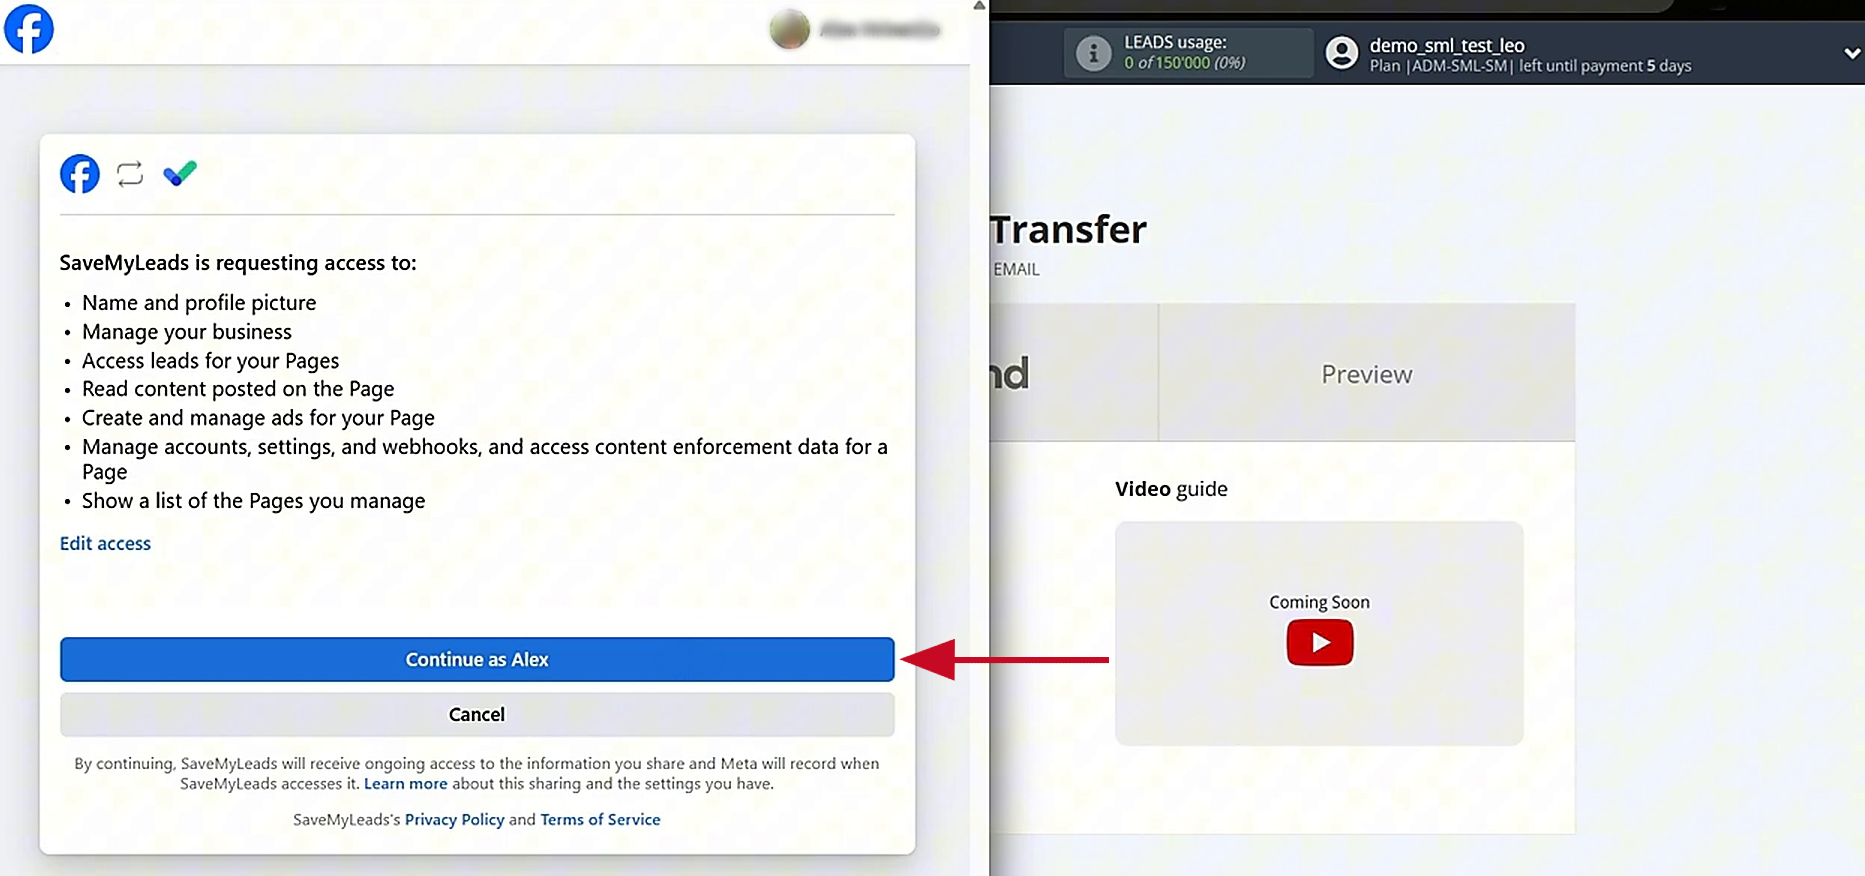
Enter the username and password for your Facebook account. Then, grant SaveMyLeads permission to access your Facebook account. Then click Continue as [Your Name].
Once your account appears in the list of connected accounts, select it. Then choose the Facebook Page and the form you want to track. After that, click Continue.
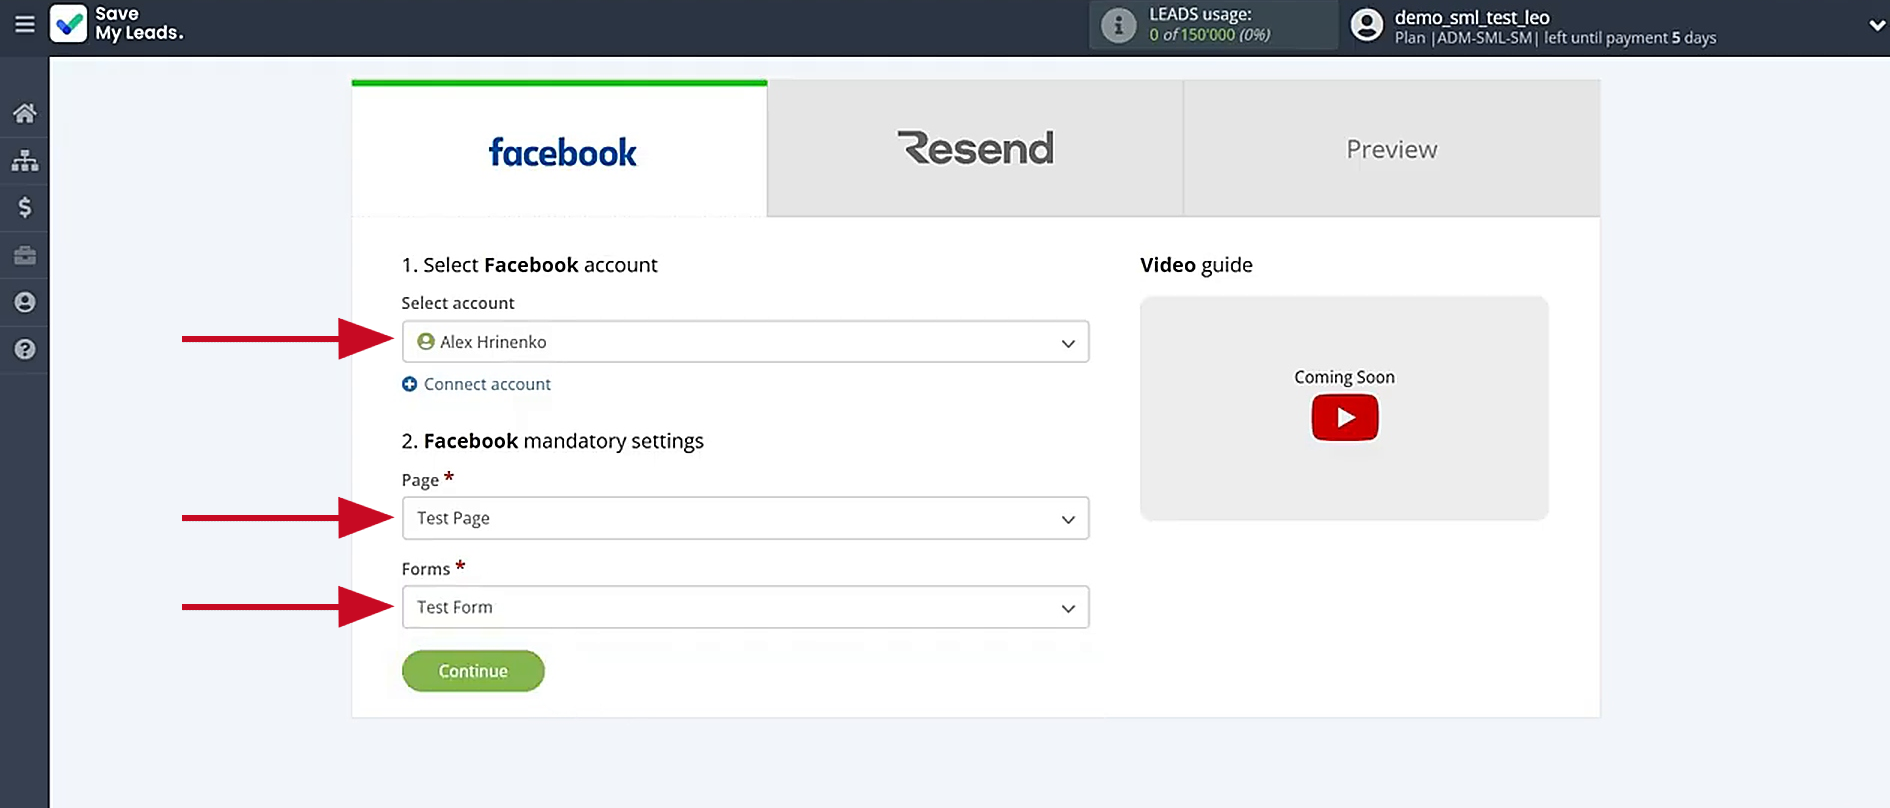
If you need to work with several forms, create a separate connection for each one.
Data Destination Settings: Resend
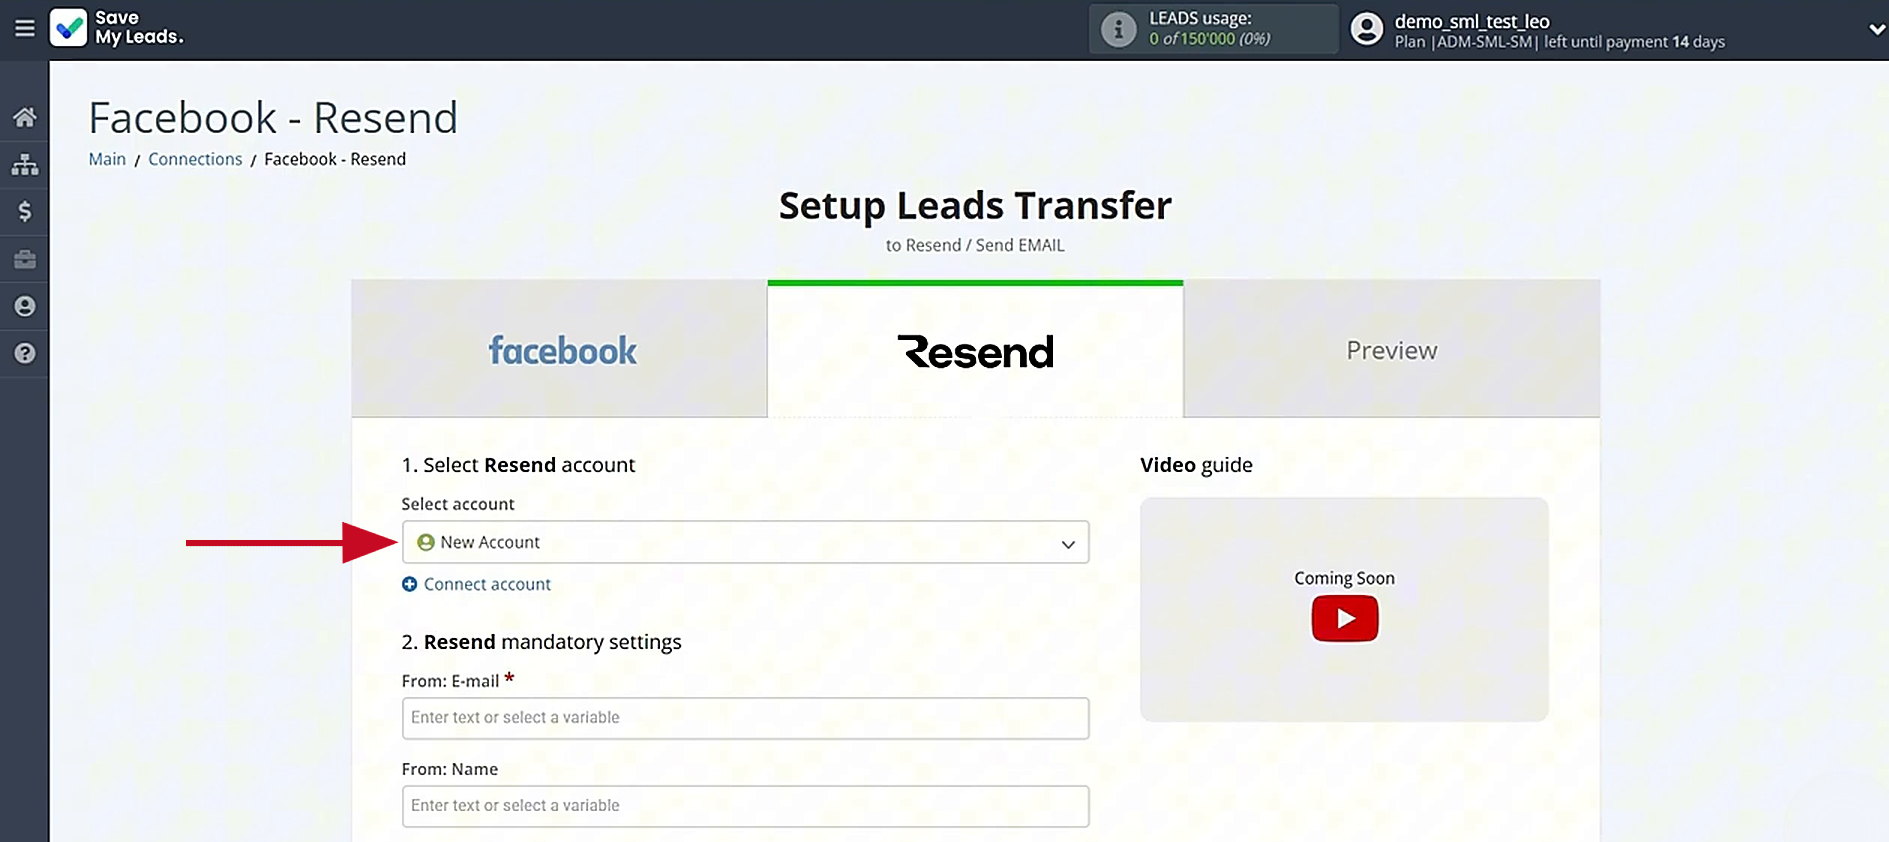
Connect your Resend account to SaveMyLeads.
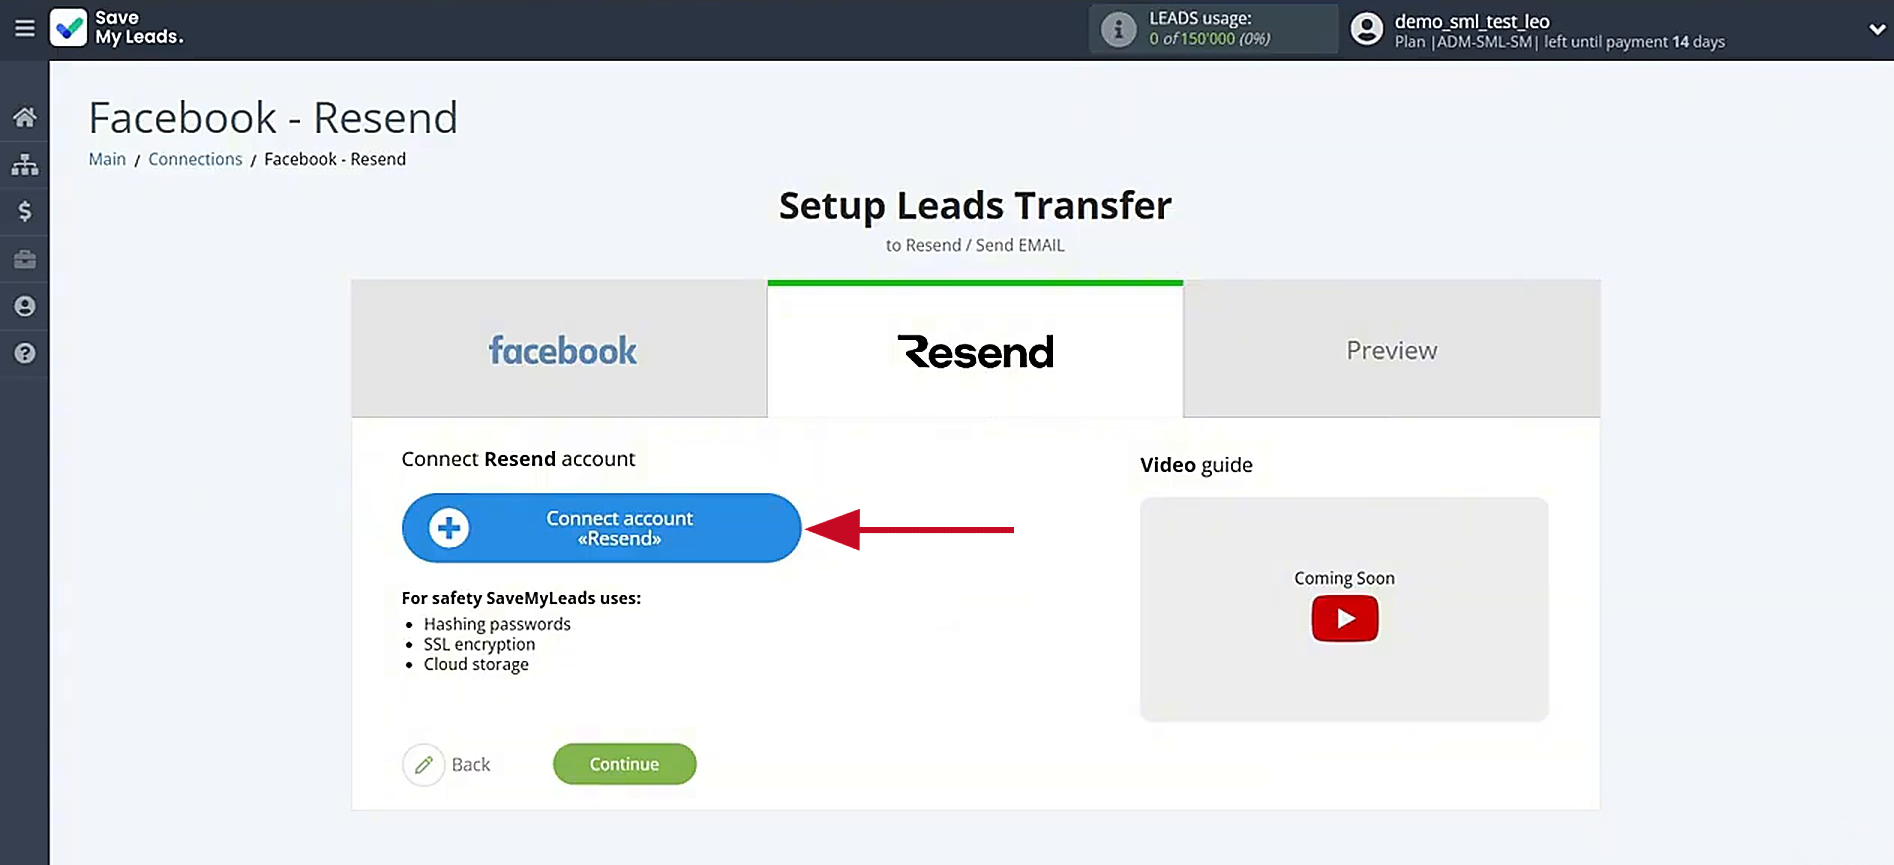
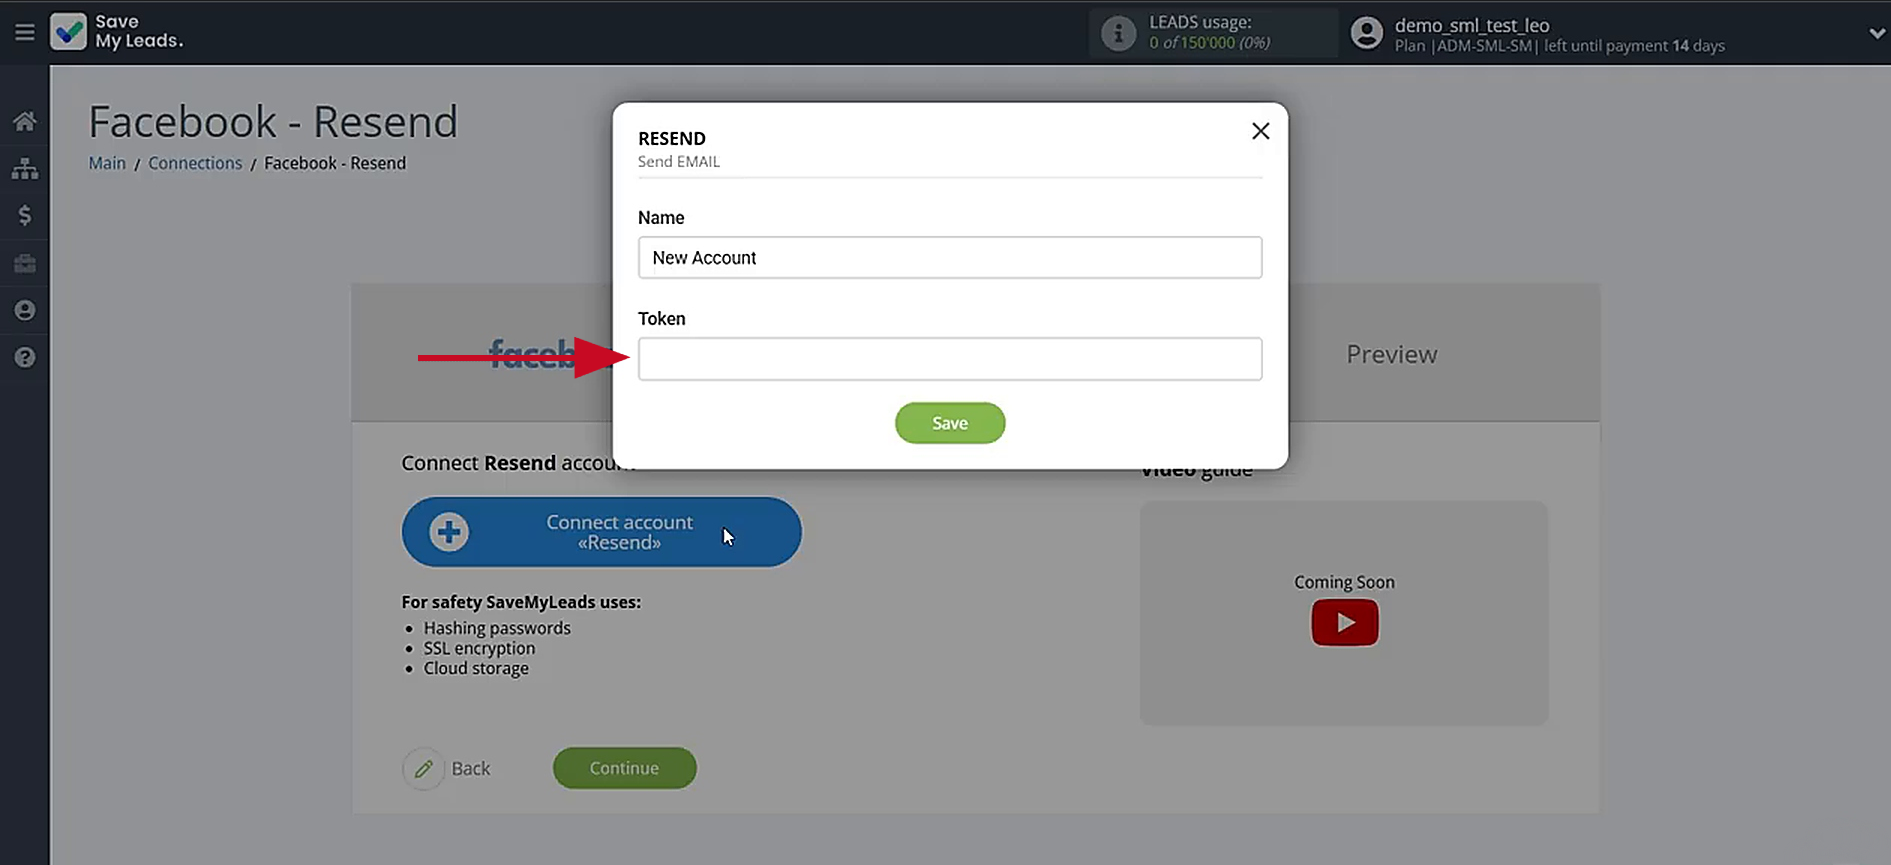
In the window that opens, enter the API token from Resend.
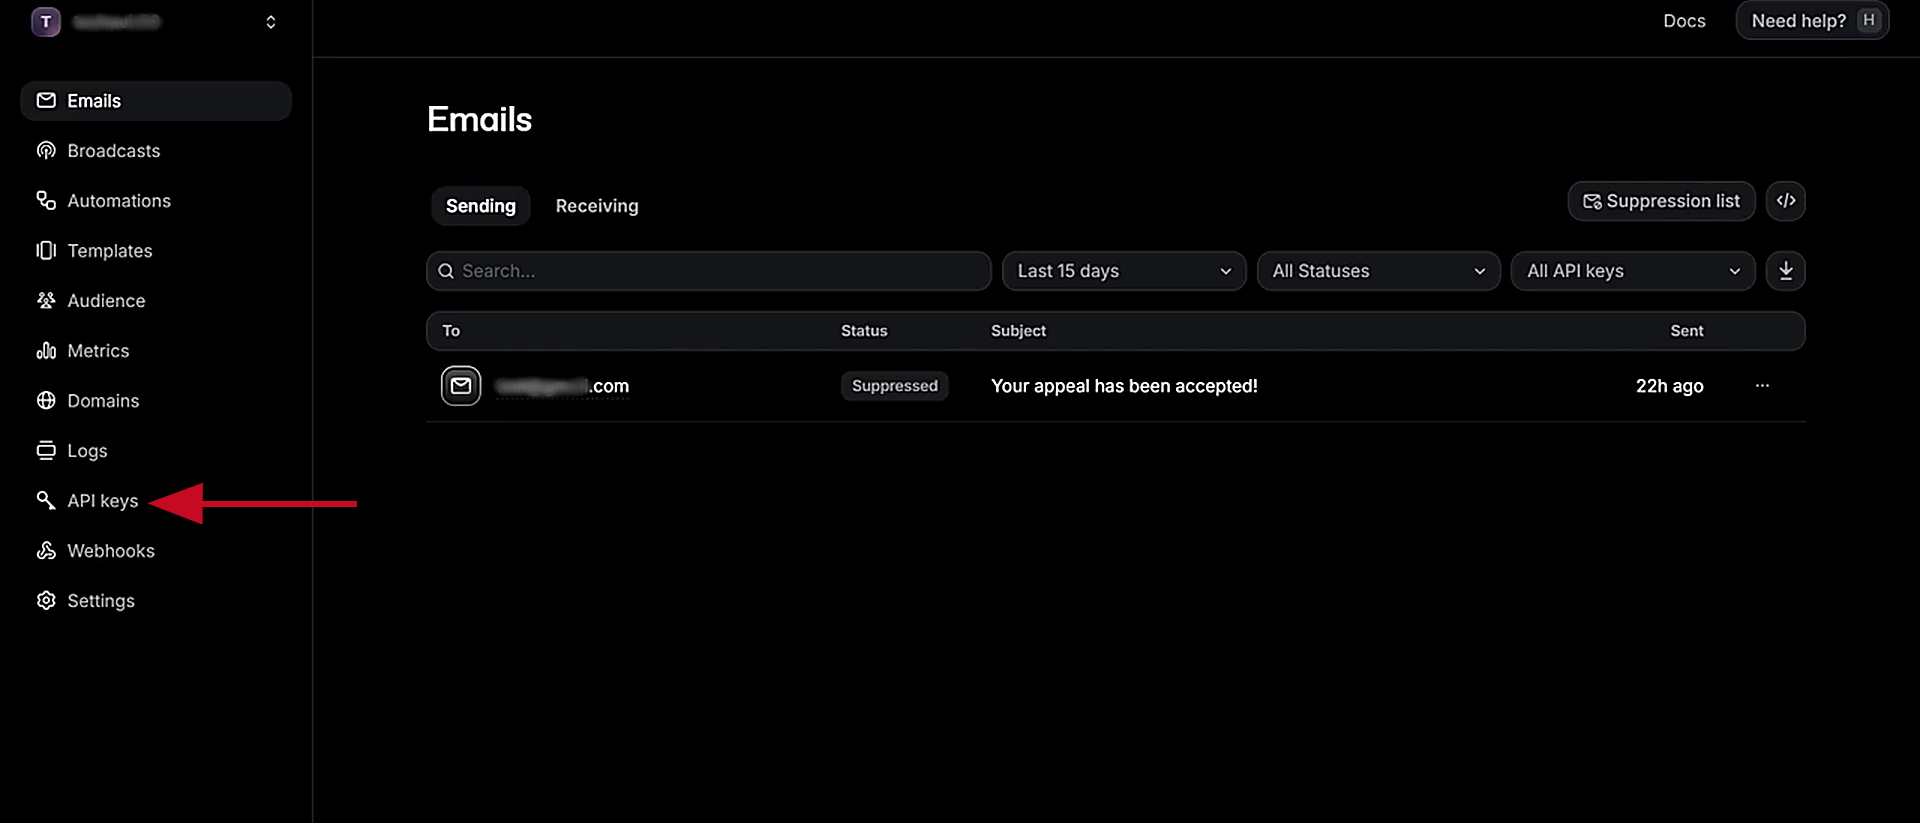
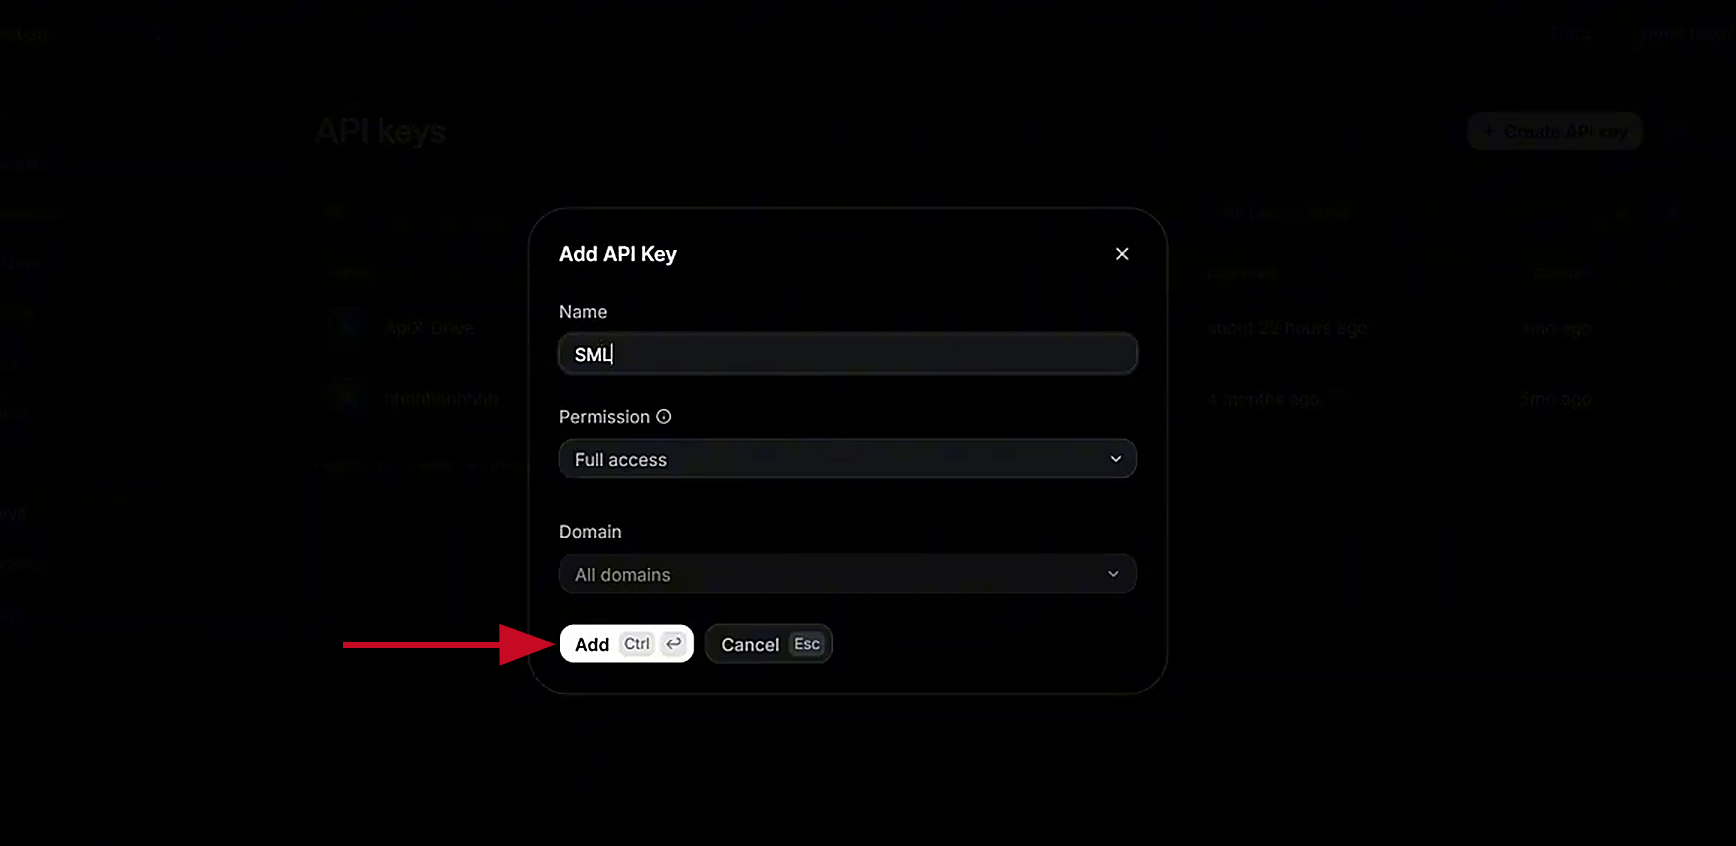
To find the API token, open your Resend account and select the API keys section.
Create a new API key. Enter your token name and click Add.
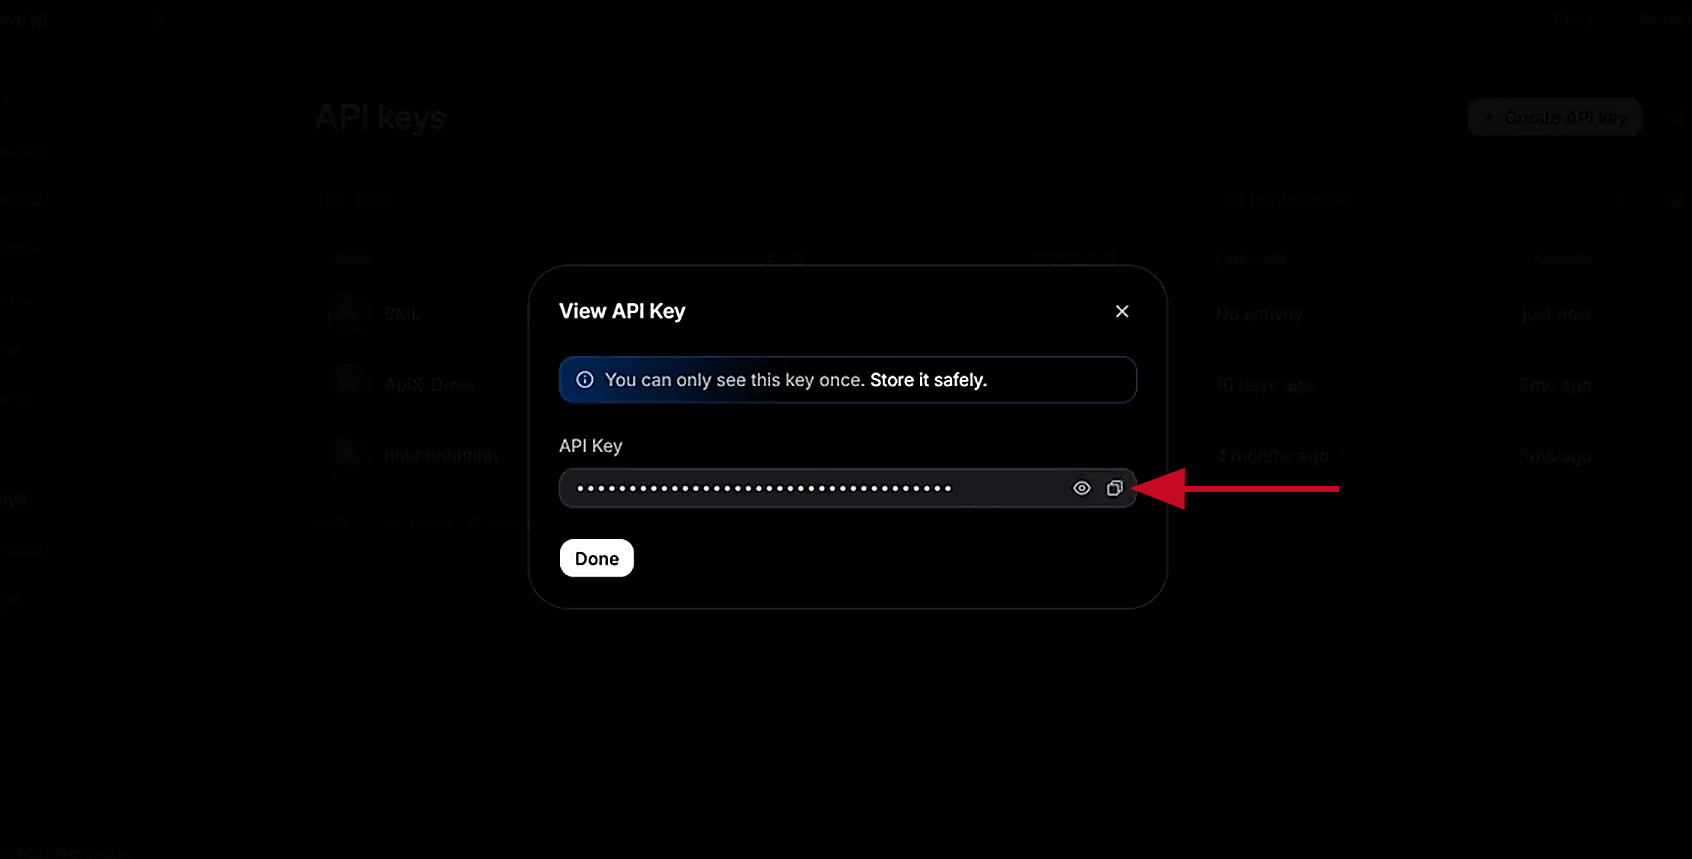
Copy the generated API key.
Paste the key into the corresponding field in SaveMyLeads, and click Save.
Select your Resend account when it appears in the list of connected accounts.
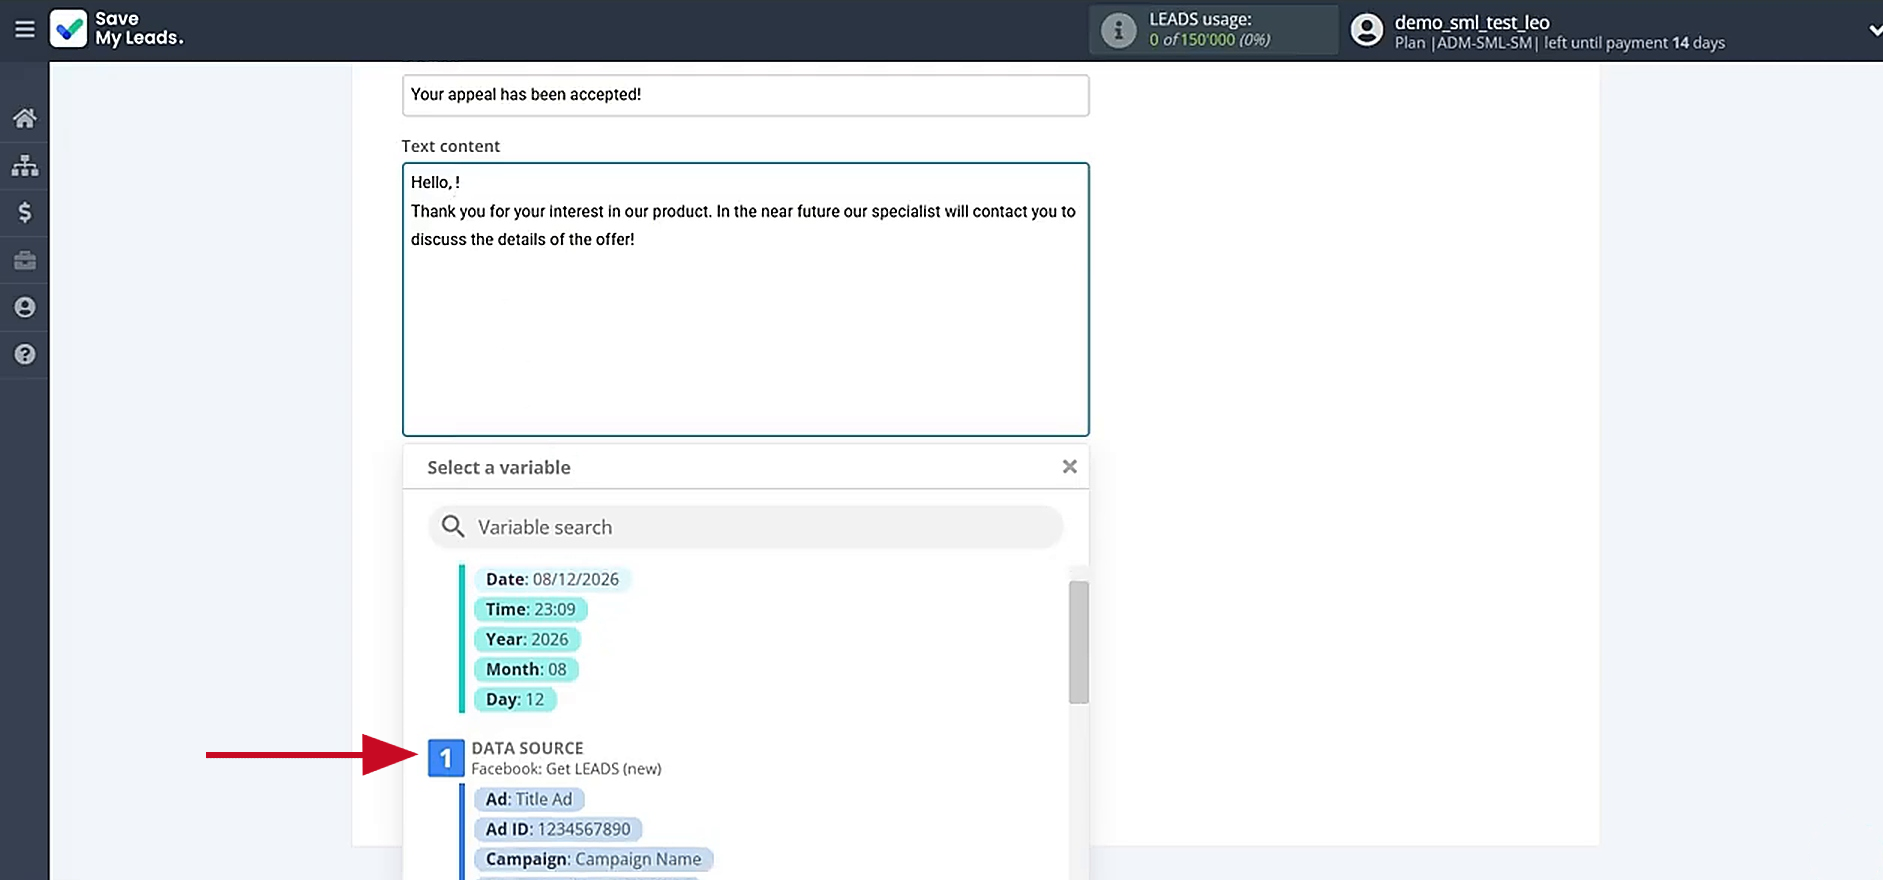
Map variables to the required fields to send data to Resend. Fill in fields such as From: email, To: email, Subject, and Text content. After that, click Continue.
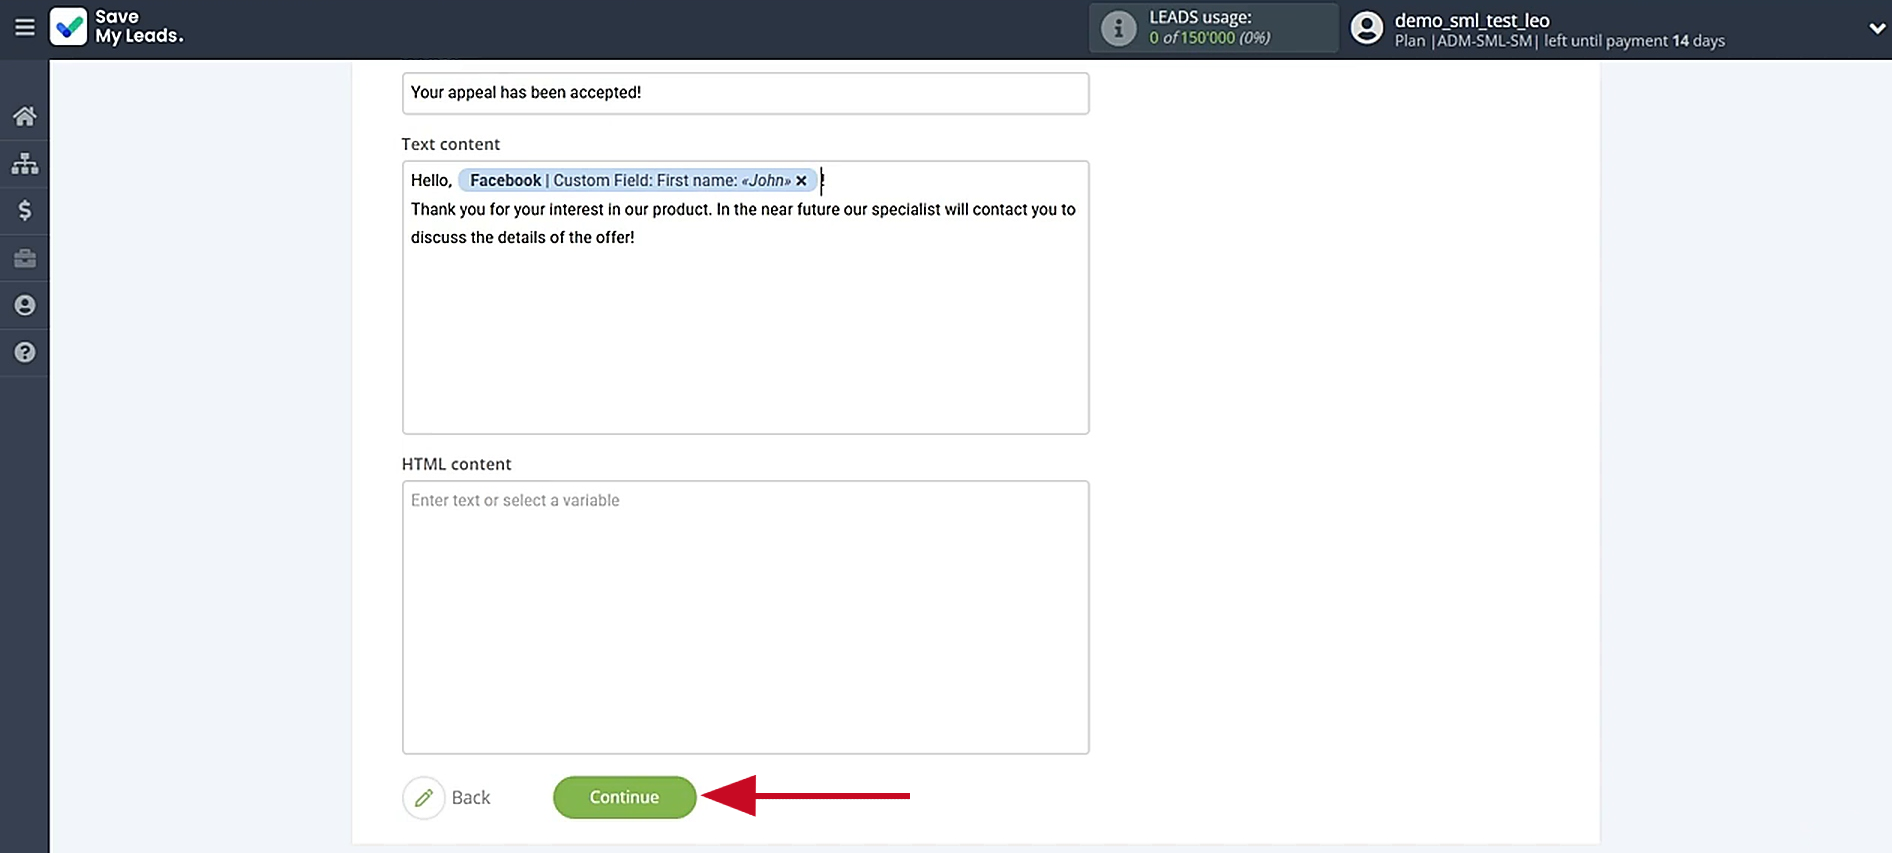
Now, you can check that the sender, recipient and the message text are correct. To verify the settings, click Send test data to Resend.
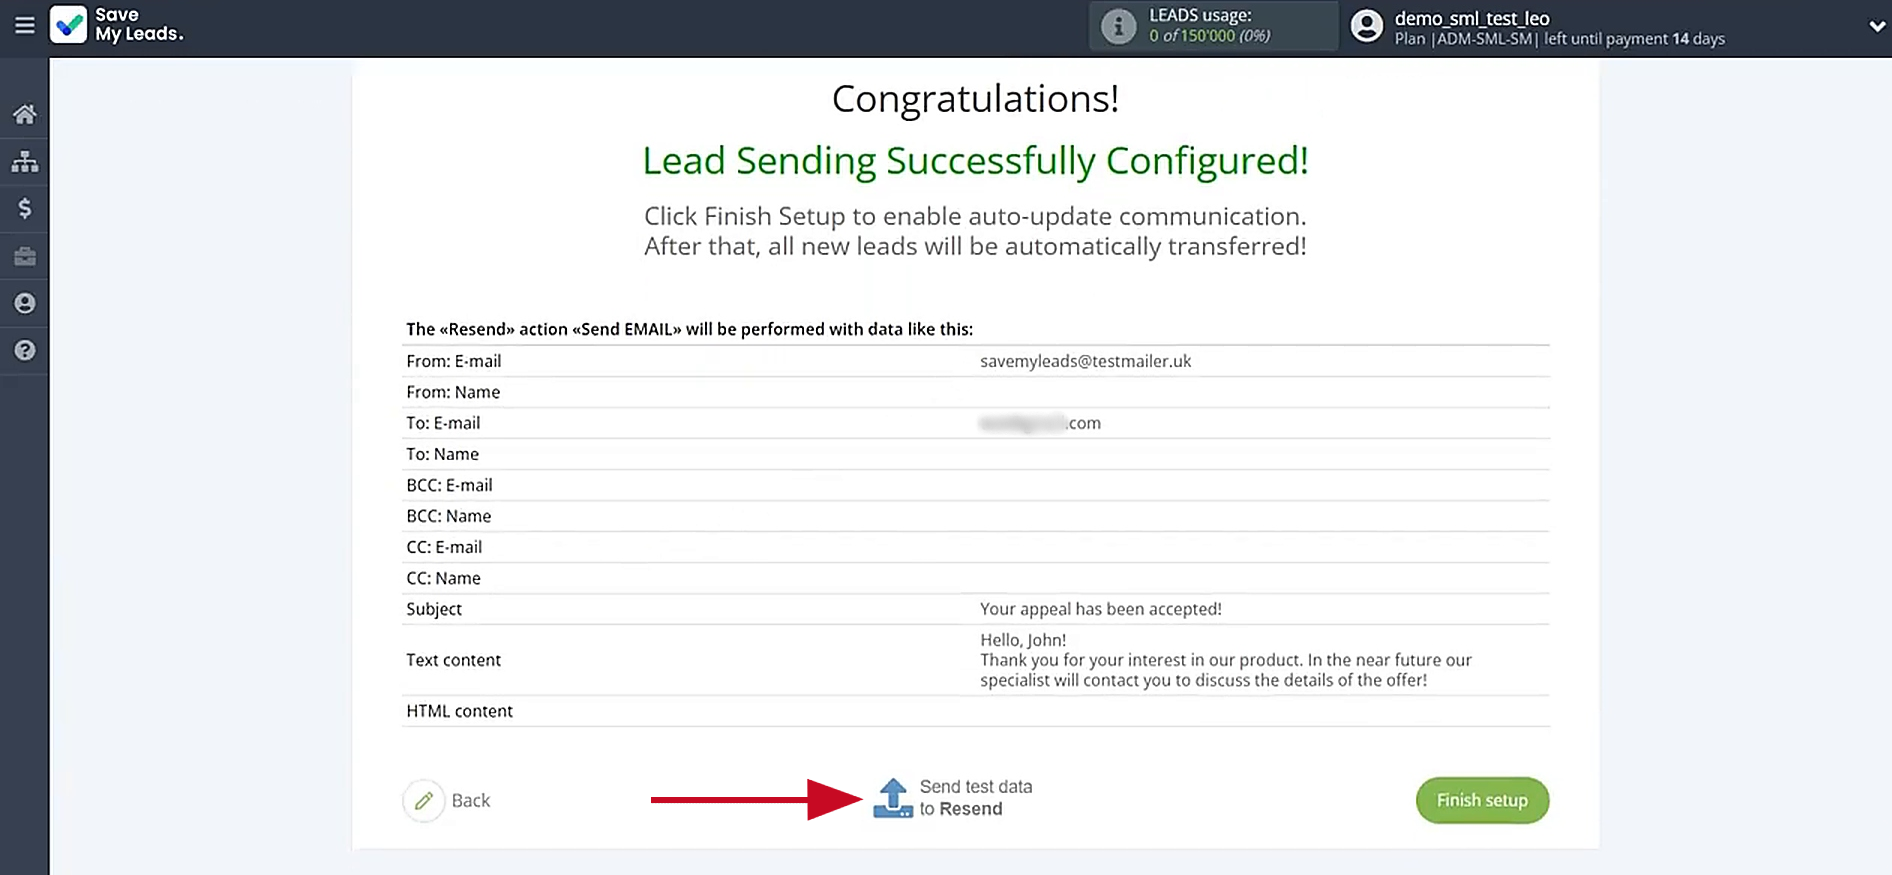
Once the test data has been sent successfully, open Resend and check the result.
Return to SaveMyLeads to finish configuring the connection.
Auto-Update
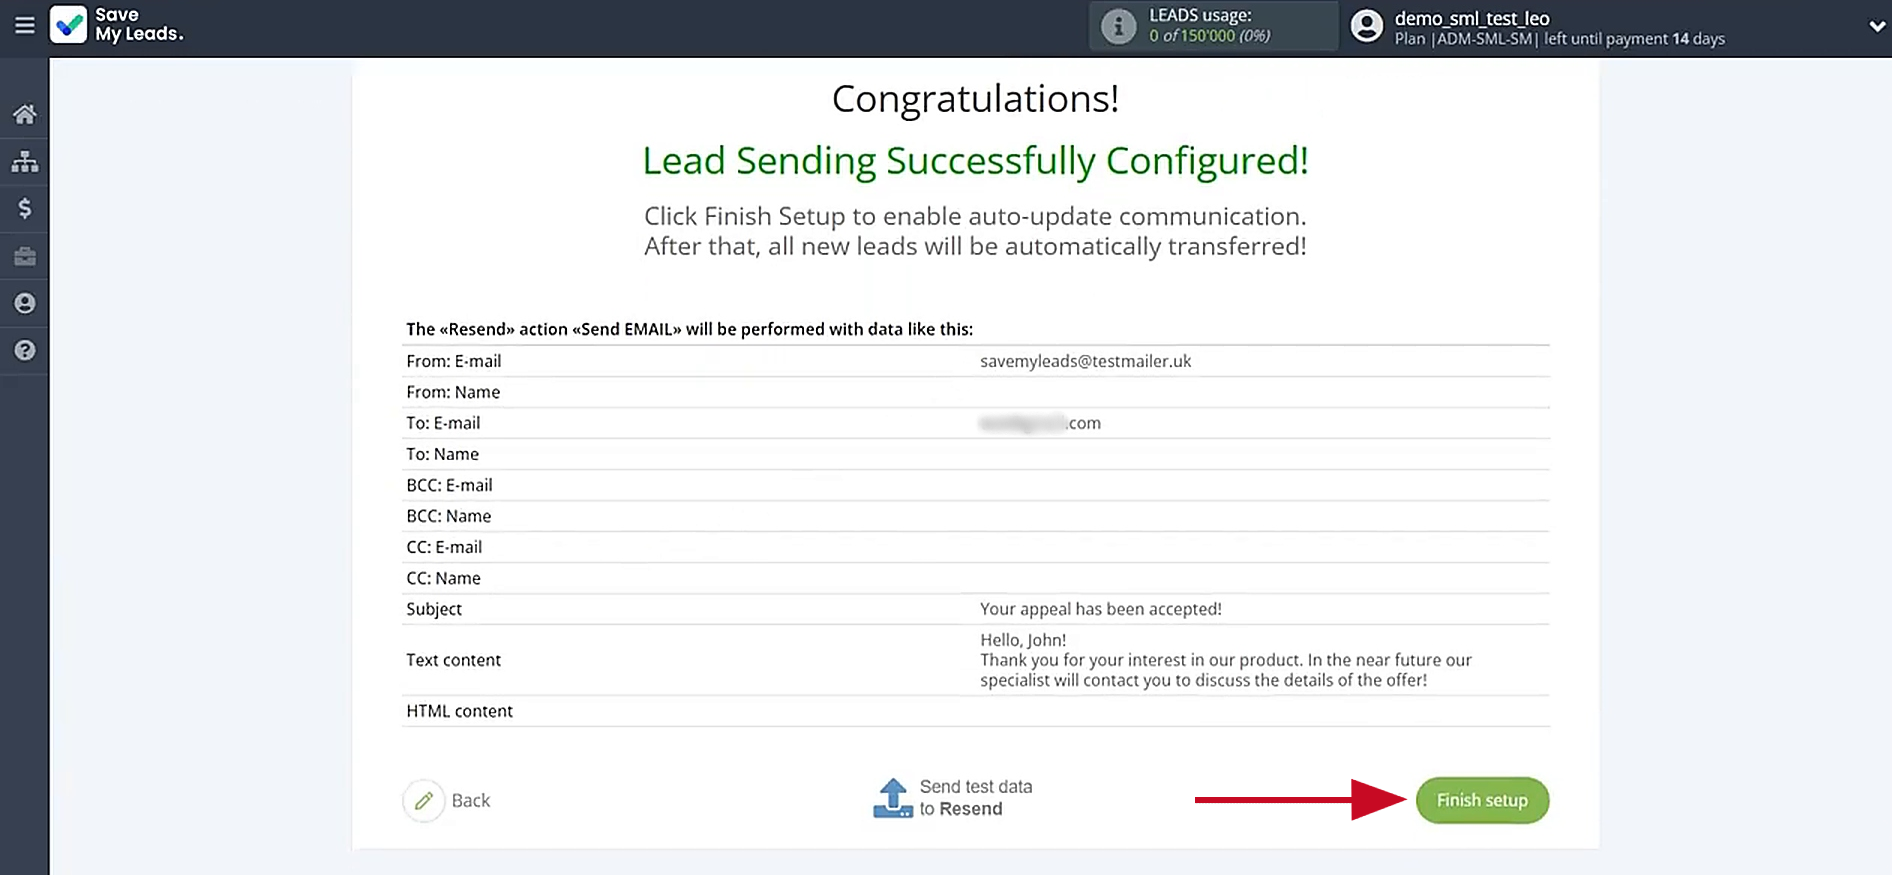
Enable auto-update to automate emails for Facebook leads. To do it, click Finish setup.
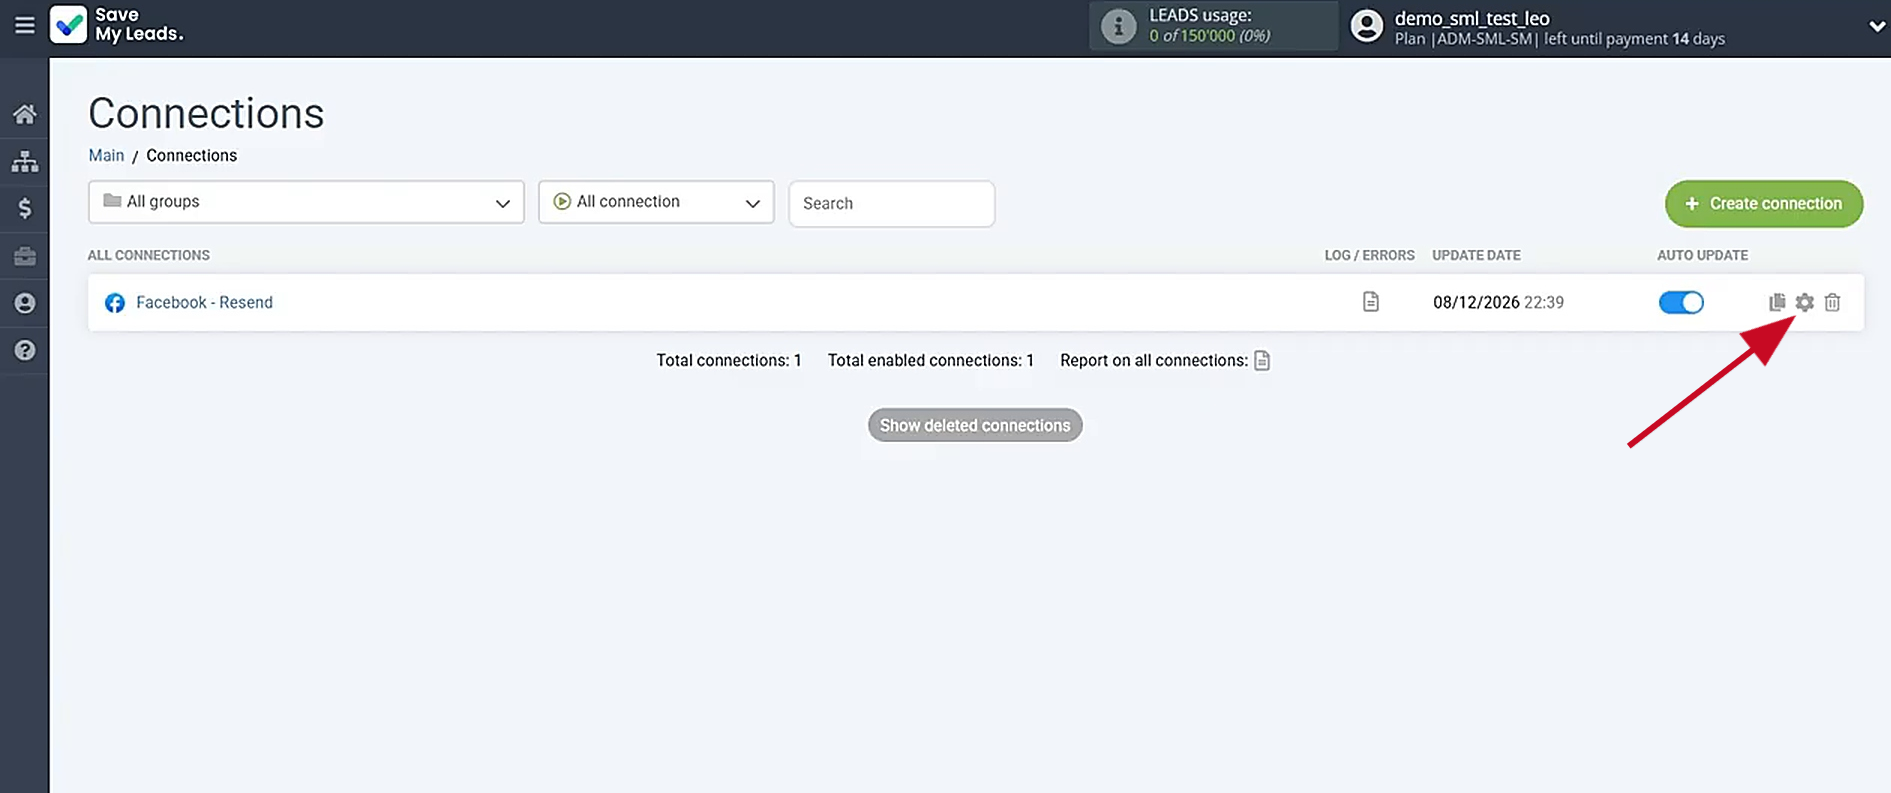
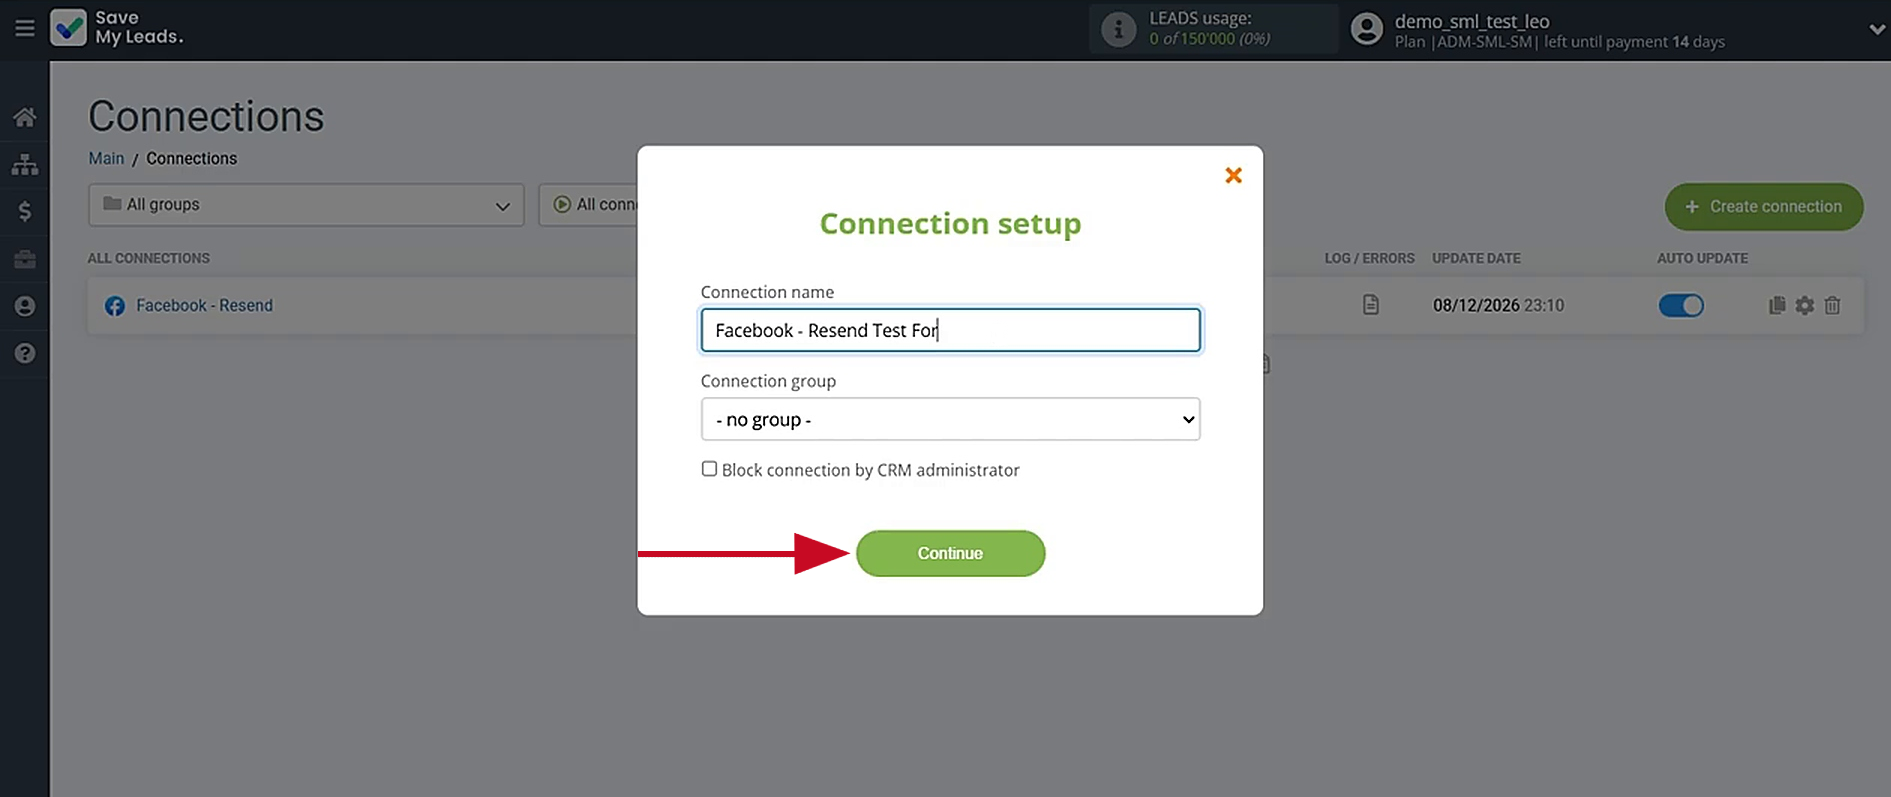
If you want to rename the connection, open its settings by clicking the gear icon.
Enter a new connection name and assign the connection to a group if needed, then click Continue.
That is all. The system will now automatically send new Facebook leads to Resend.
Conclusion
Connecting Facebook Lead Ads to Resend creates an automated follow-up process, from initial form submission to the first email contact. Lead details transfer after submission without manual handling, letting prospective clients receive order confirmations or requested details. With SaveMyLeads, you can set up this integration in just a few minutes and start reaching prospects faster.
Step-by-Step Guides for Setting Up Integrations:
- How to Connect Facebook Lead Ads to Instasent Without Coding
- Google Lead Form and Asana Integration: Automatic Data Transfer
- How to Connect TikTok to Brevo: A Seamless Integration Guide
- Google Lead Form and Constant Contact Integration: Step-by-Step Setup Guide
- TikTok and MeisterTask Integration: Step-by-Step Guide