Progressive companies and entrepreneurs are actively seeking to streamline workflows to save time and budget, and gain a competitive advantage. Automation services, system connectors, and artificial intelligence help them with this. If you use Facebook Lead Ads to promote products or services, and Telegram as a working messenger, you can significantly speed up and simplify your work with these platforms. To do this, just connect them through our SaveMyLeads online connector. It allows you to automate the transfer of leads from the social network to your Telegram bot, thus ensuring prompt communication with clients and eliminating the need for manual data transfer. We suggest you do this based on our step-by-step instructions, which will help you set up and launch Facebook and Telegram integration without errors.
Why Choose SaveMyLeads?
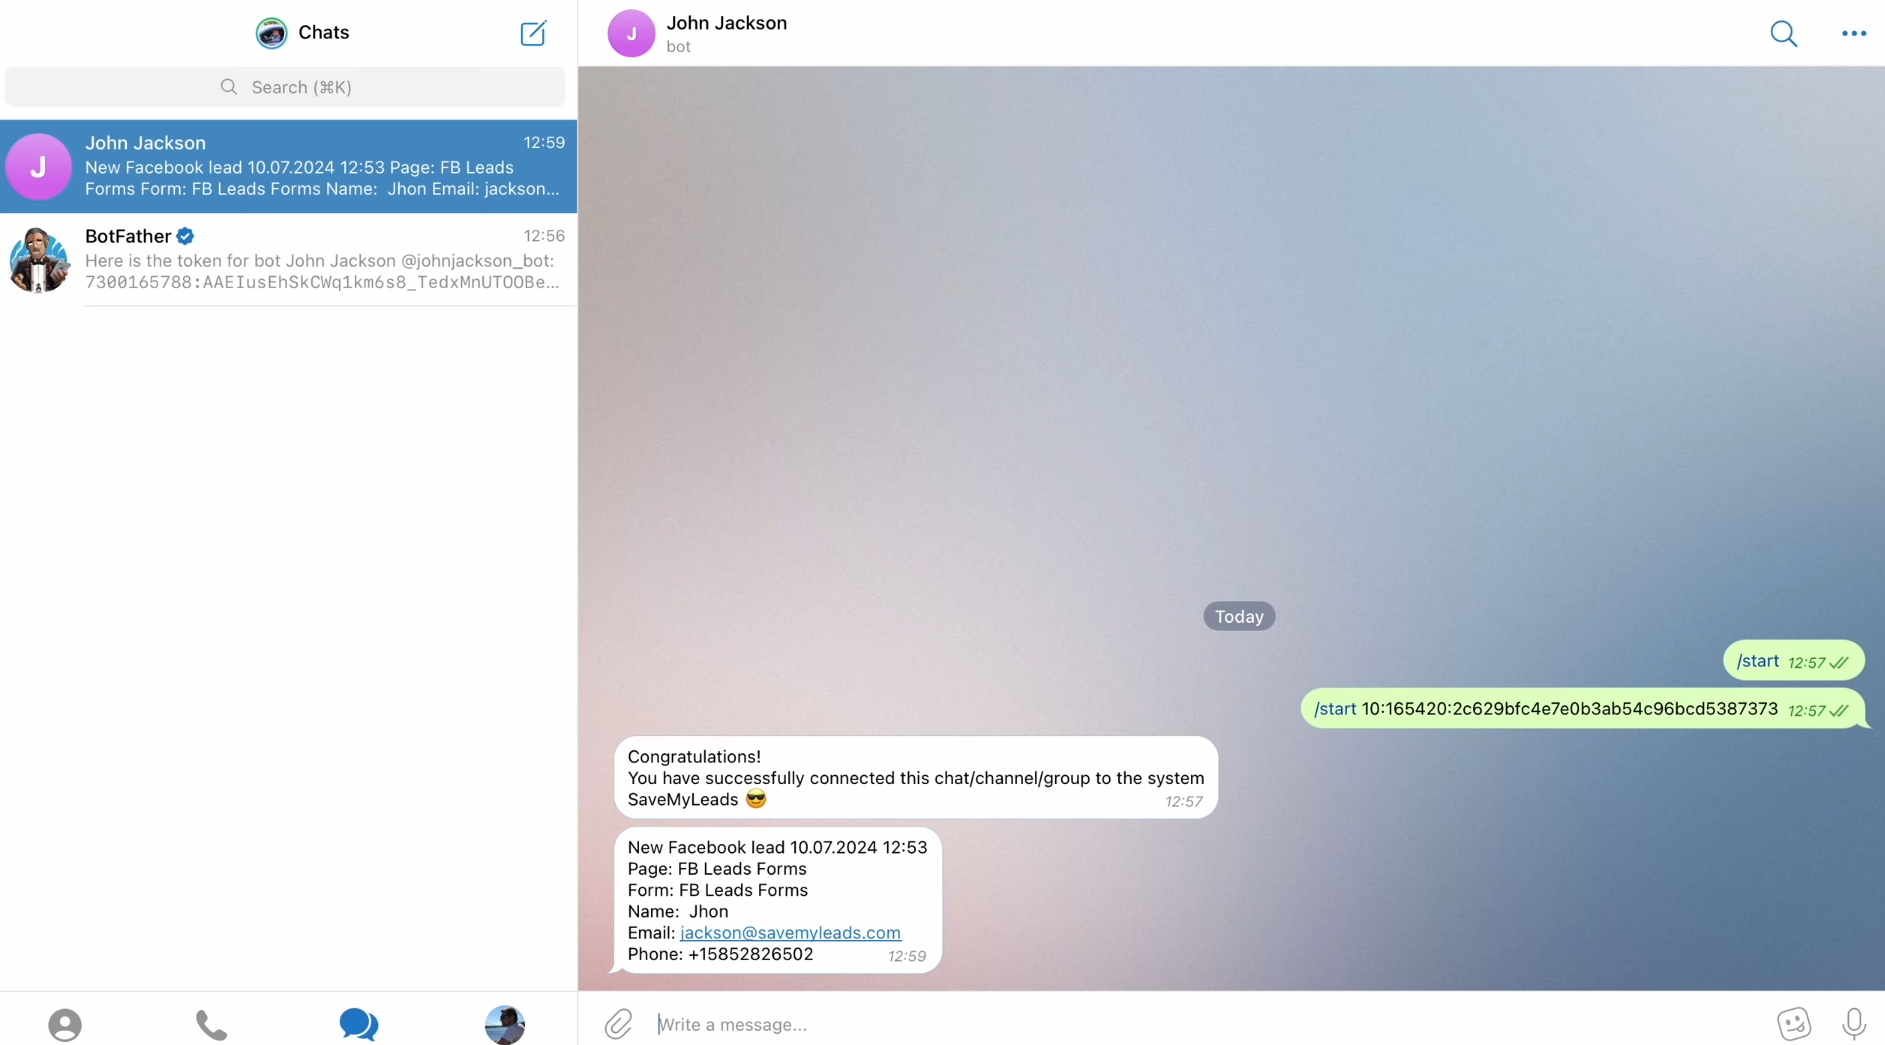
Once you set up the transfer of lead data from Facebook to Telegram using SaveMyLeads, the process will become automatic and seamless. You will be able to instantly receive all the necessary customer data in the bot: name, phone number, and email address. It's very convenient.
For Telegram and Facebook integration we recommend using SaveMyLeads. Let’s briefly go through the main reasons for choosing this particular online connector. Firstly, it is a no-code tool that allows you to set up integrations quickly and easily thanks to an intuitive interface. Even users with minimal experience can handle it in 10 minutes. Secondly, the connector offers many ready-made solutions for CRM systems, email and SMS services, messengers, task managers, and Google services. Thirdly, its tariffs can be considered quite affordable. Finally, SaveMyLeads provides professional and responsive technical support, which is a significant benefit.
How to Set Up Facebook and Telegram Integration
Step-by-step instruction:
- Create a Facebook Lead Ads form for your task.
- Register in the SaveMyLeads service.
- Connect Facebook to the connector as a data source.
- Specify the Facebook page and form from which contacts will be sent.
- Connect and configure the Telegram bot as a data receiver.
- Activate automatic updates.
We won't go into the details of creating a Facebook form, assuming you're familiar with the process. Let's focus on the next steps.
Setting Up the Data Source – Facebook
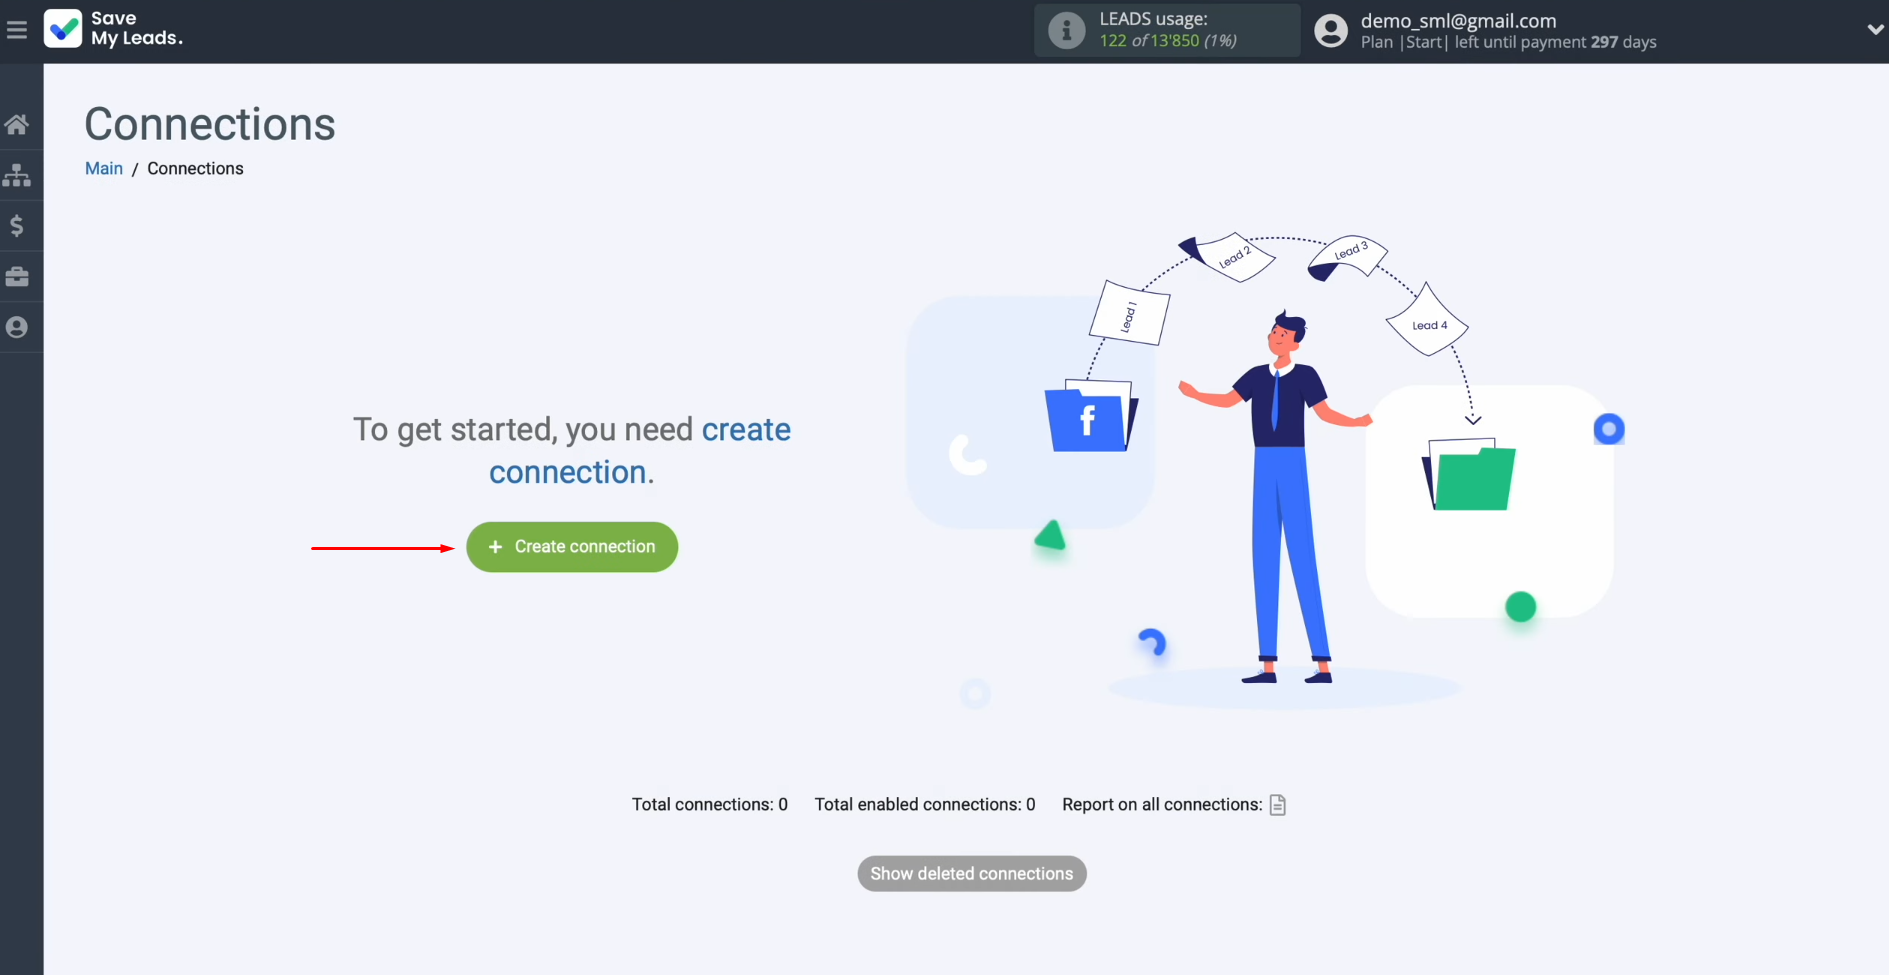
To set up Facebook integration with Telegram, first, you need to create a new connection. For this, click on the green button.
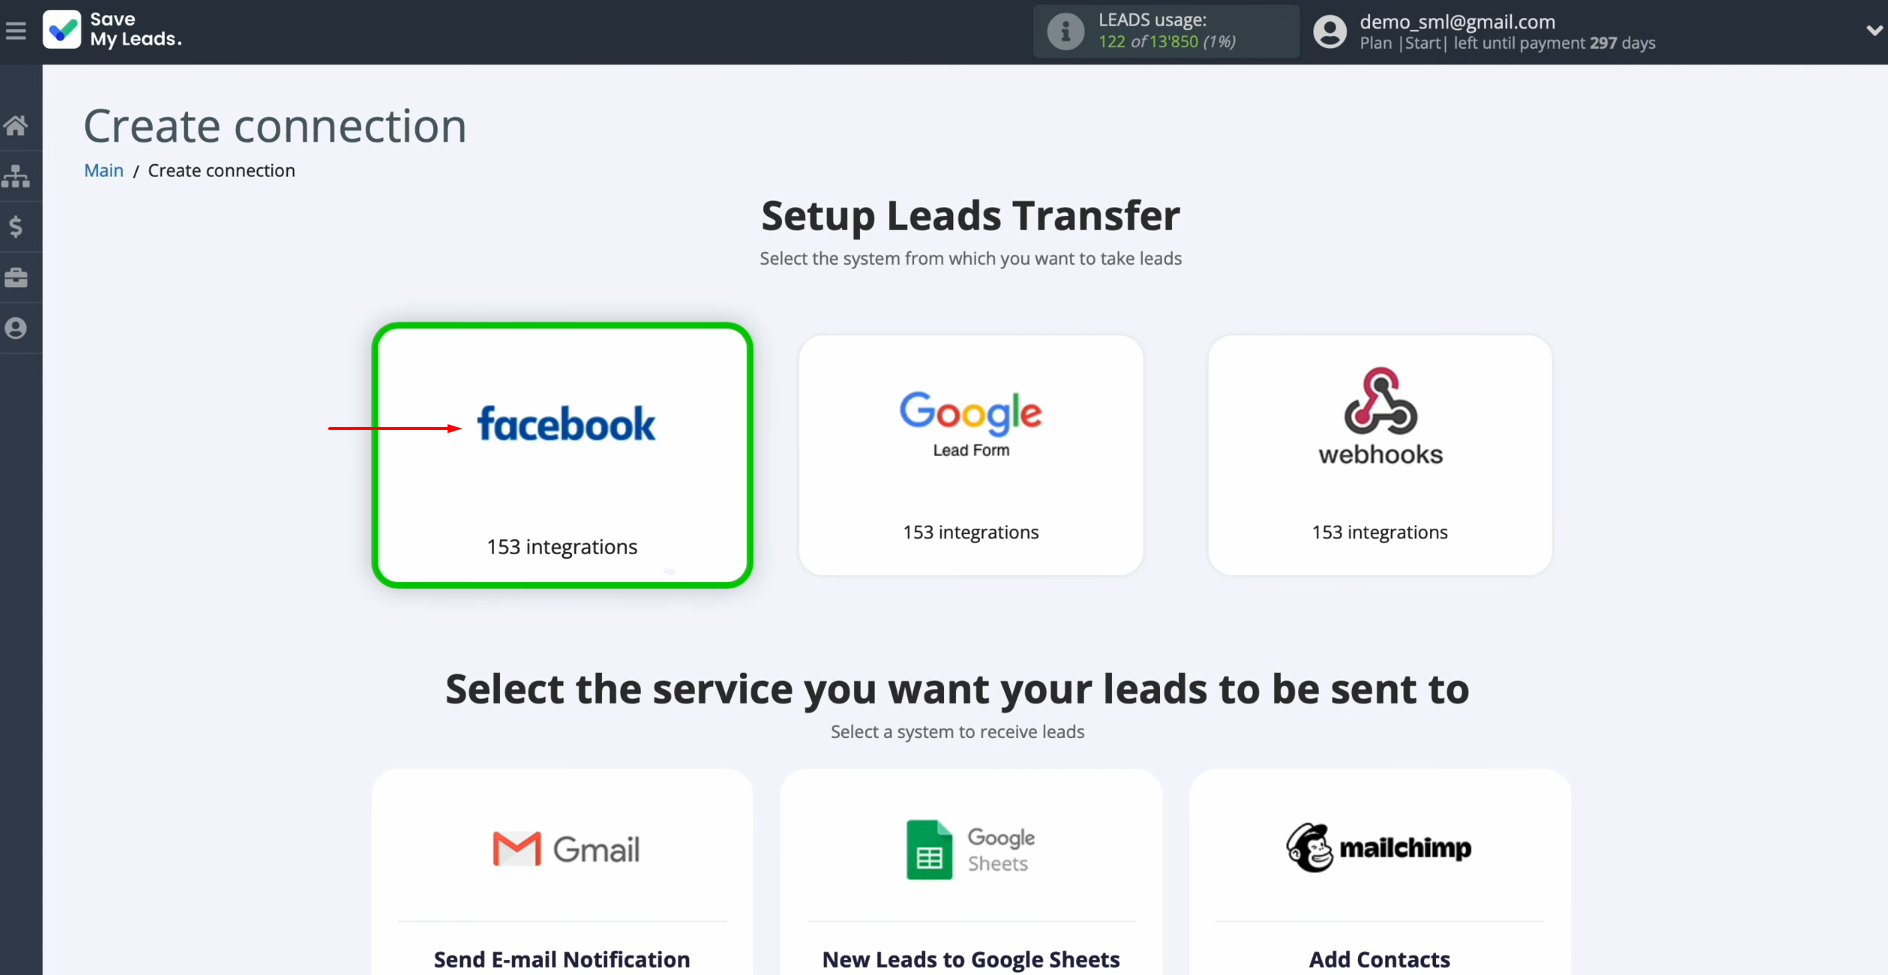
Select the system from which you want to receive new data. You need Facebook.
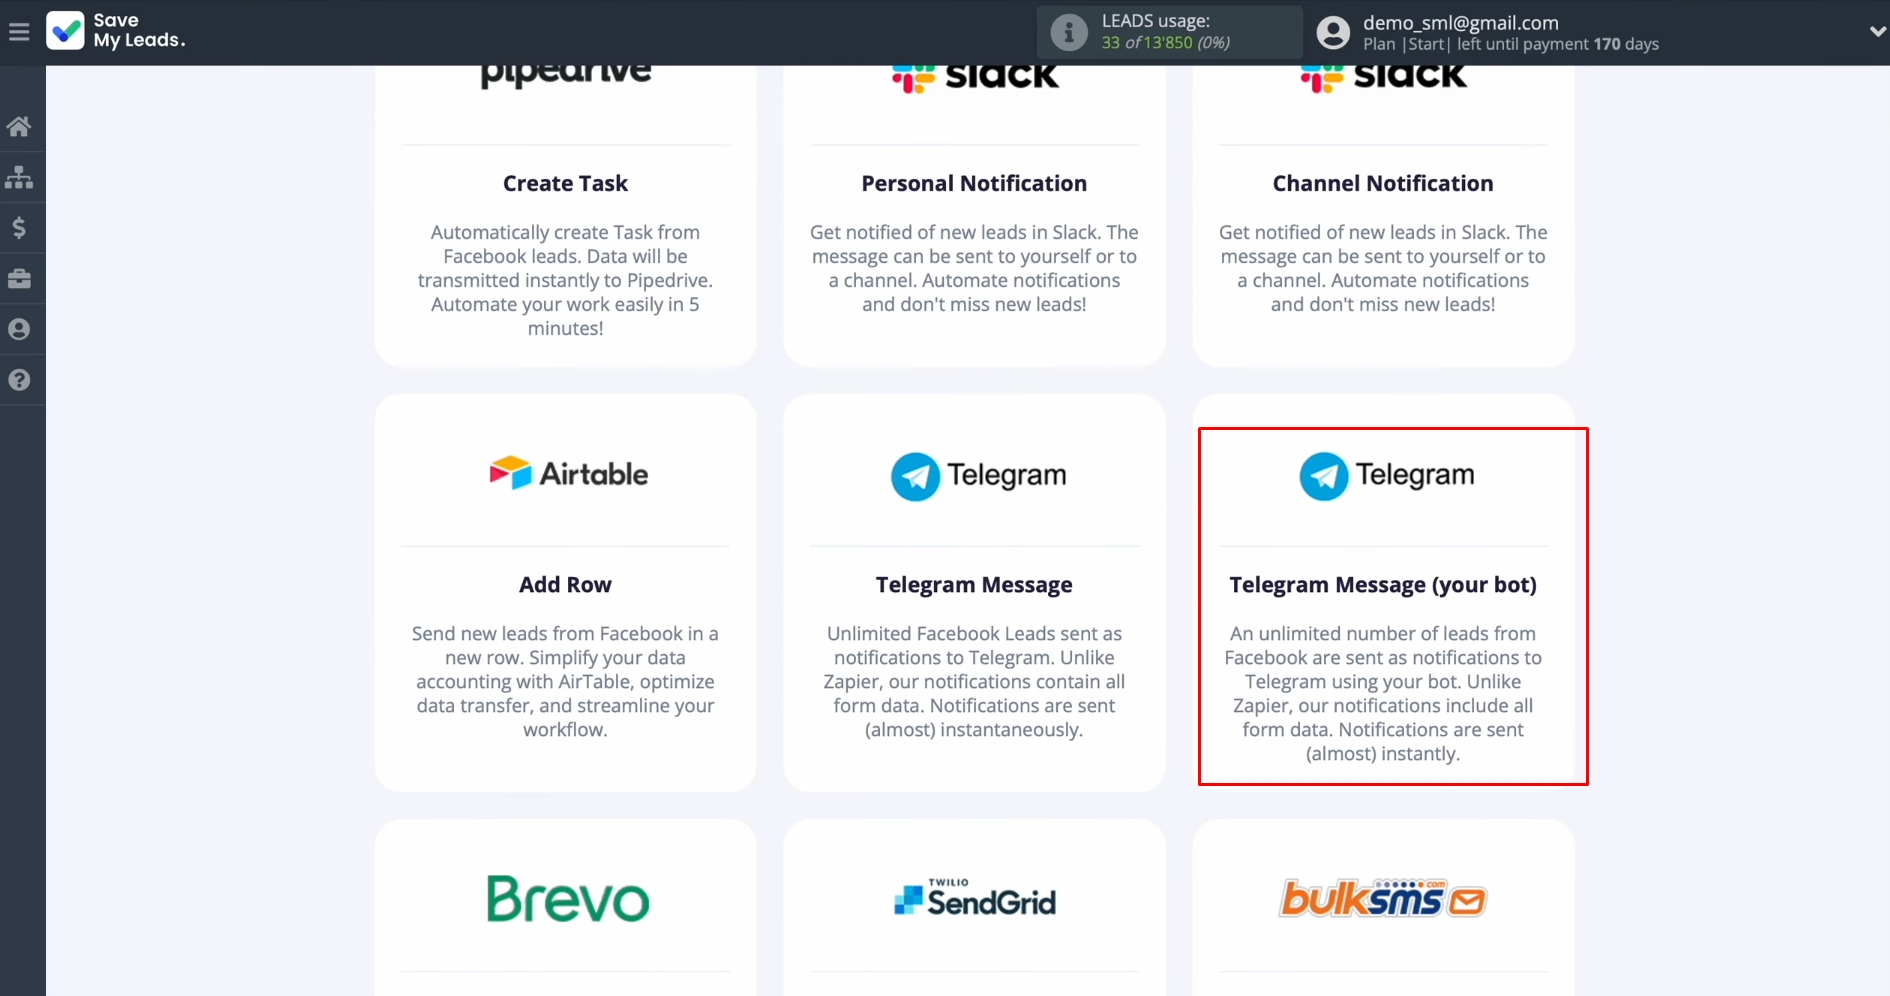
Choose the system where you want to
transfer new leads from Facebook. This is Telegram (your bot).
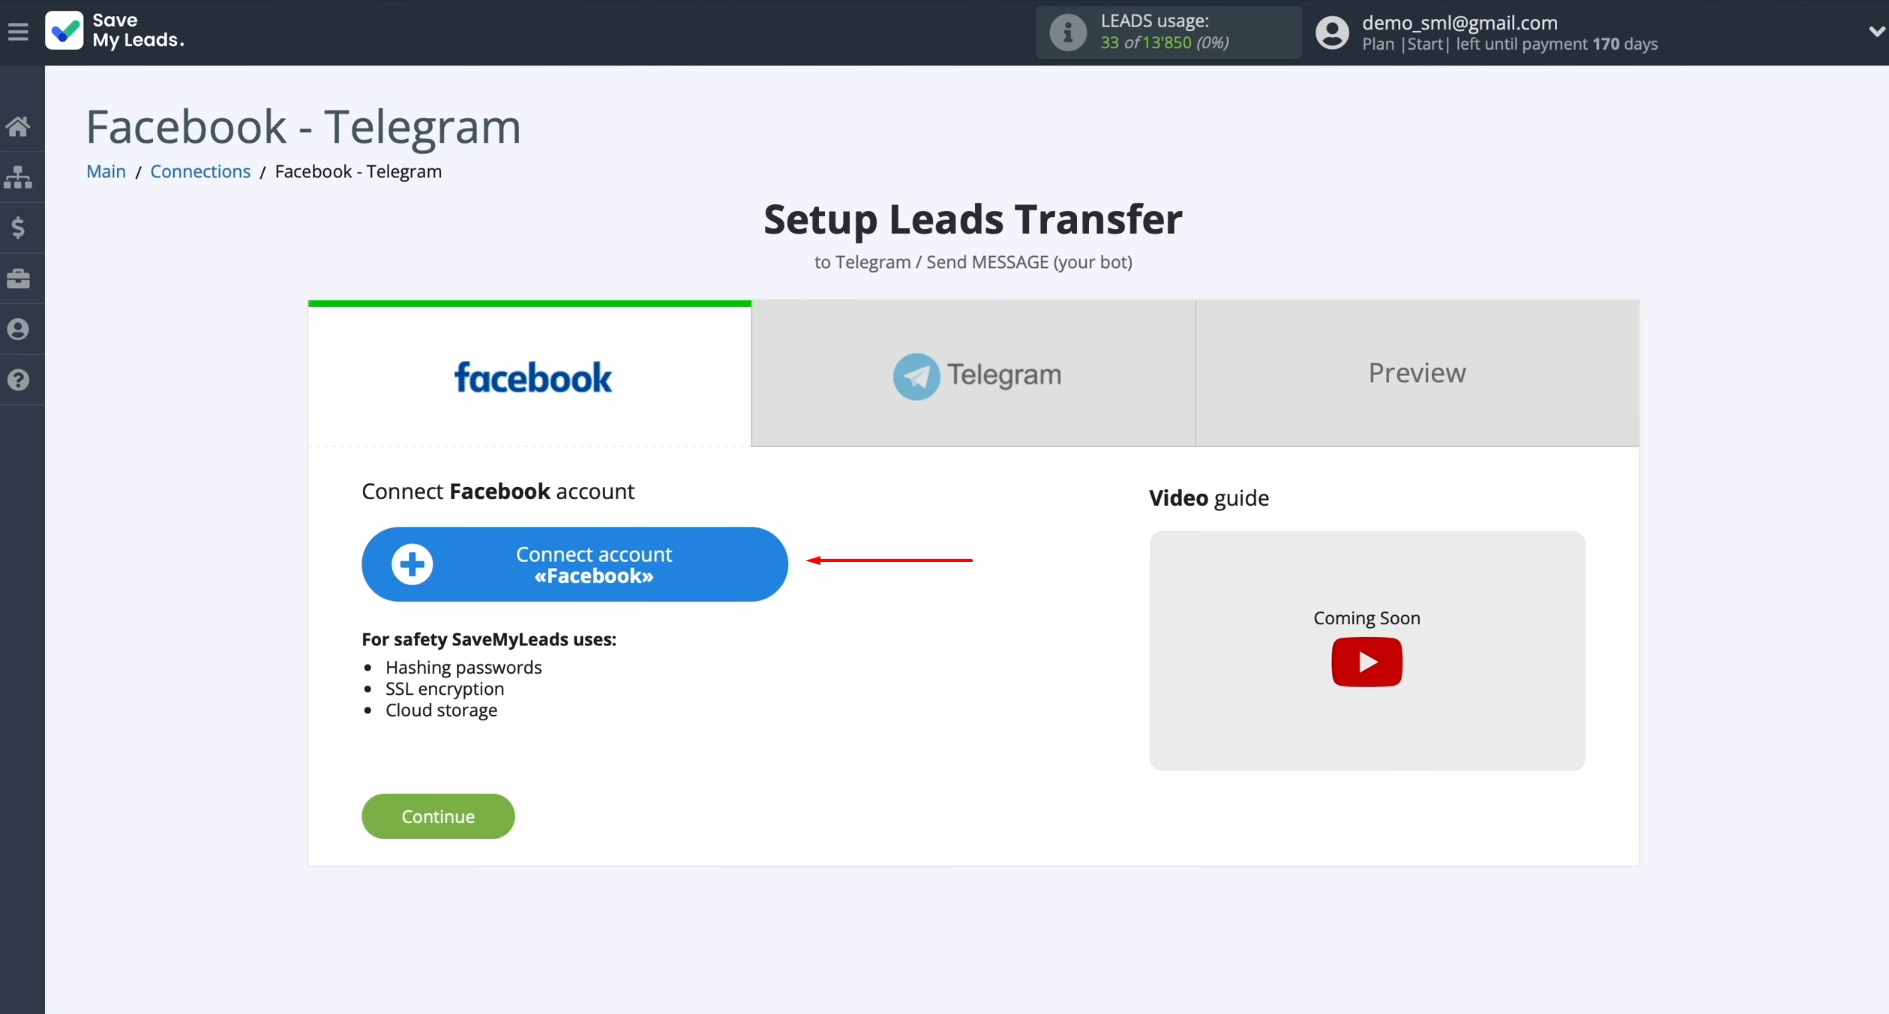
Connect your Facebook account to SaveMyLeads. To do this, press the blue
button.
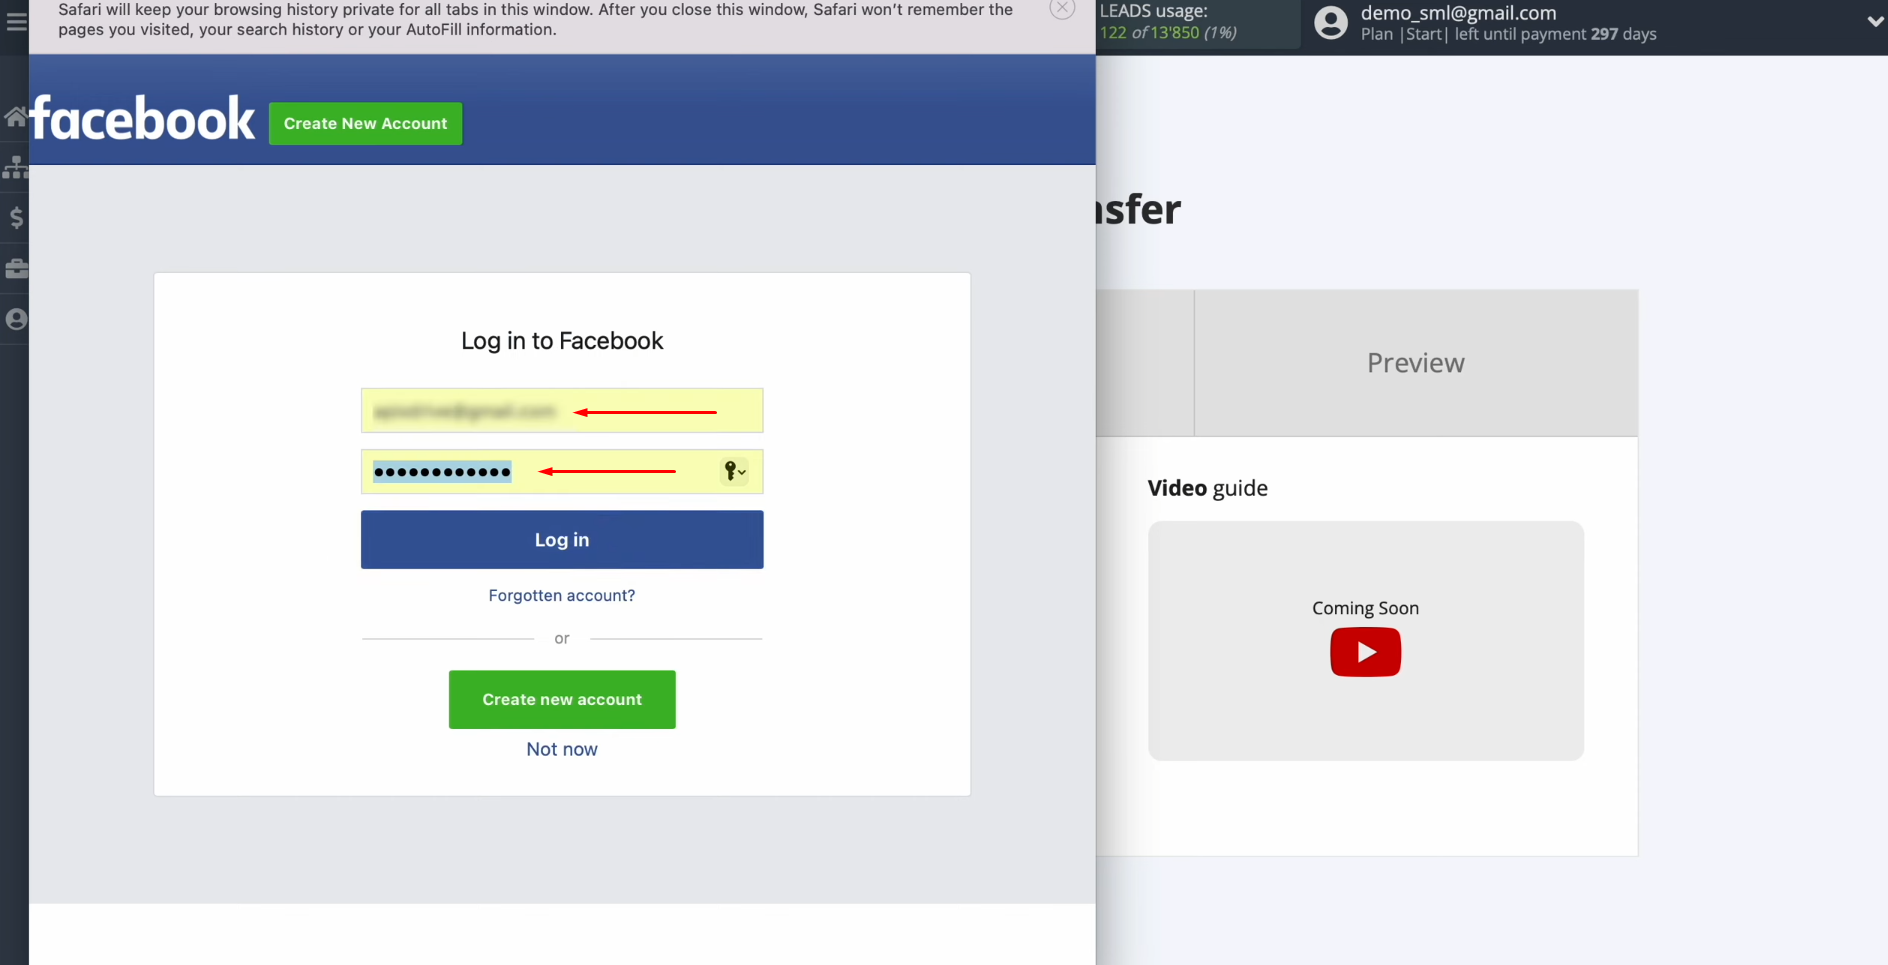
Specify the username and password of the Facebook personal account and click “Log in”.
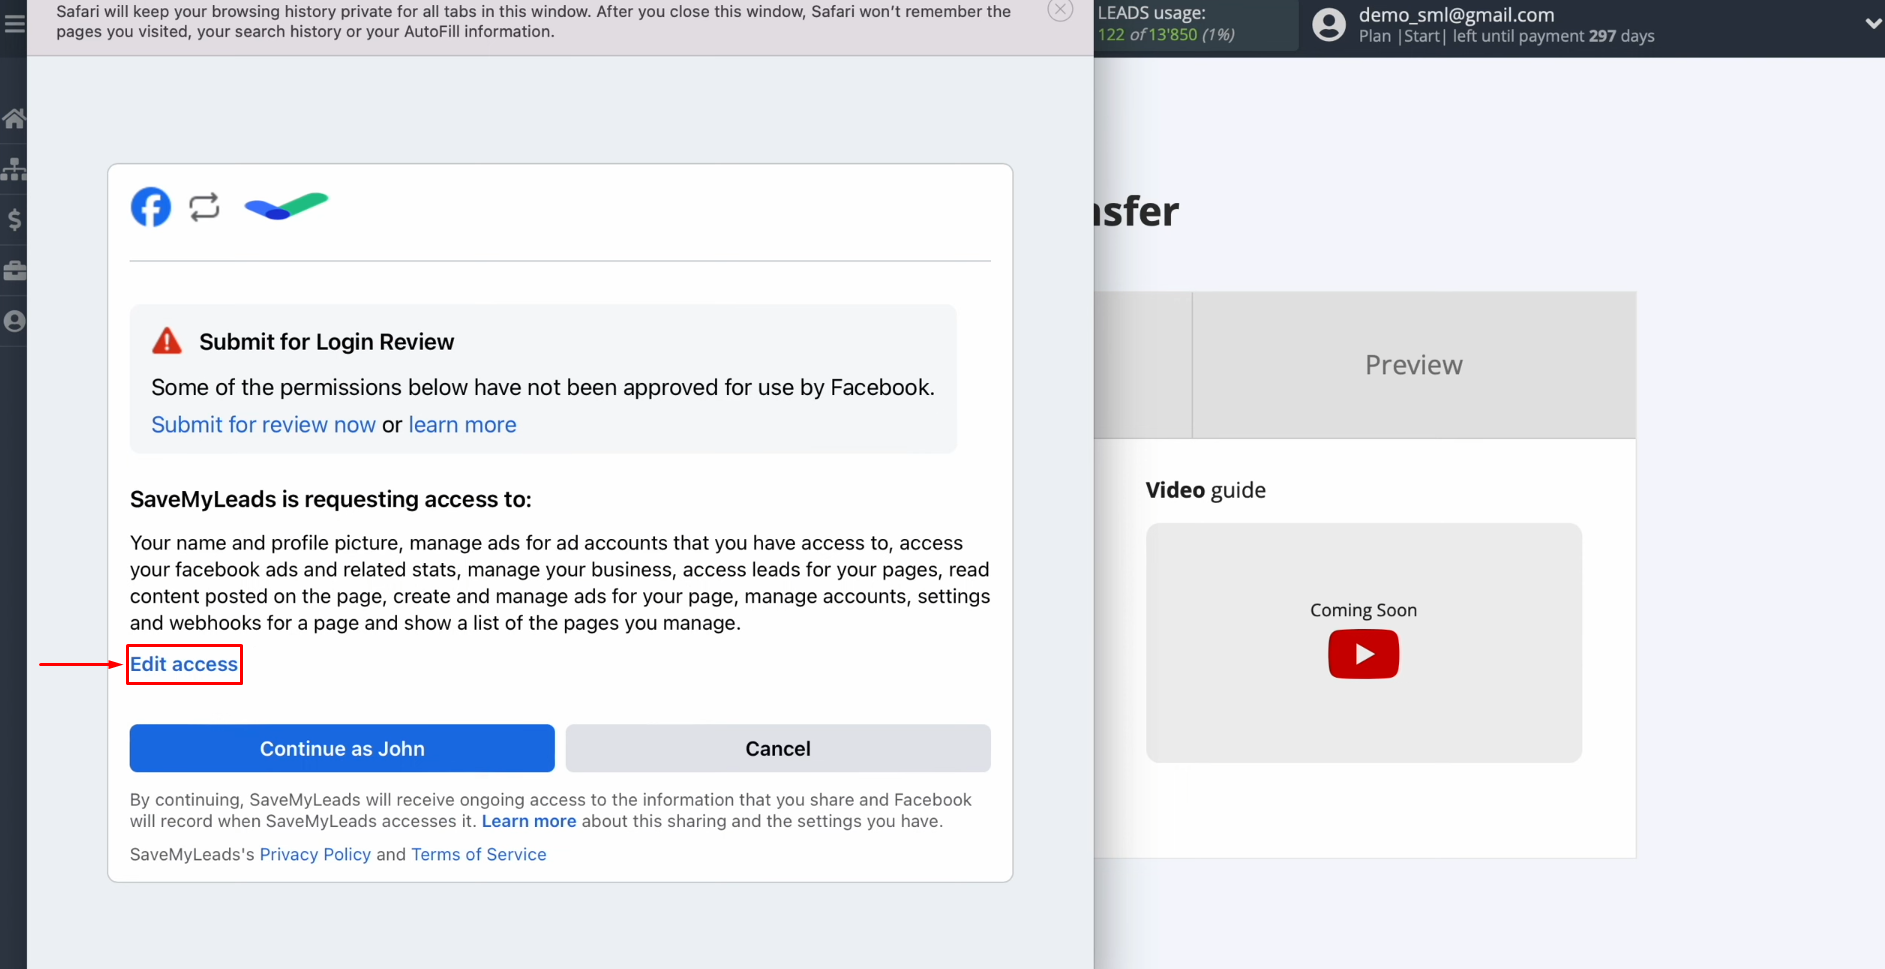
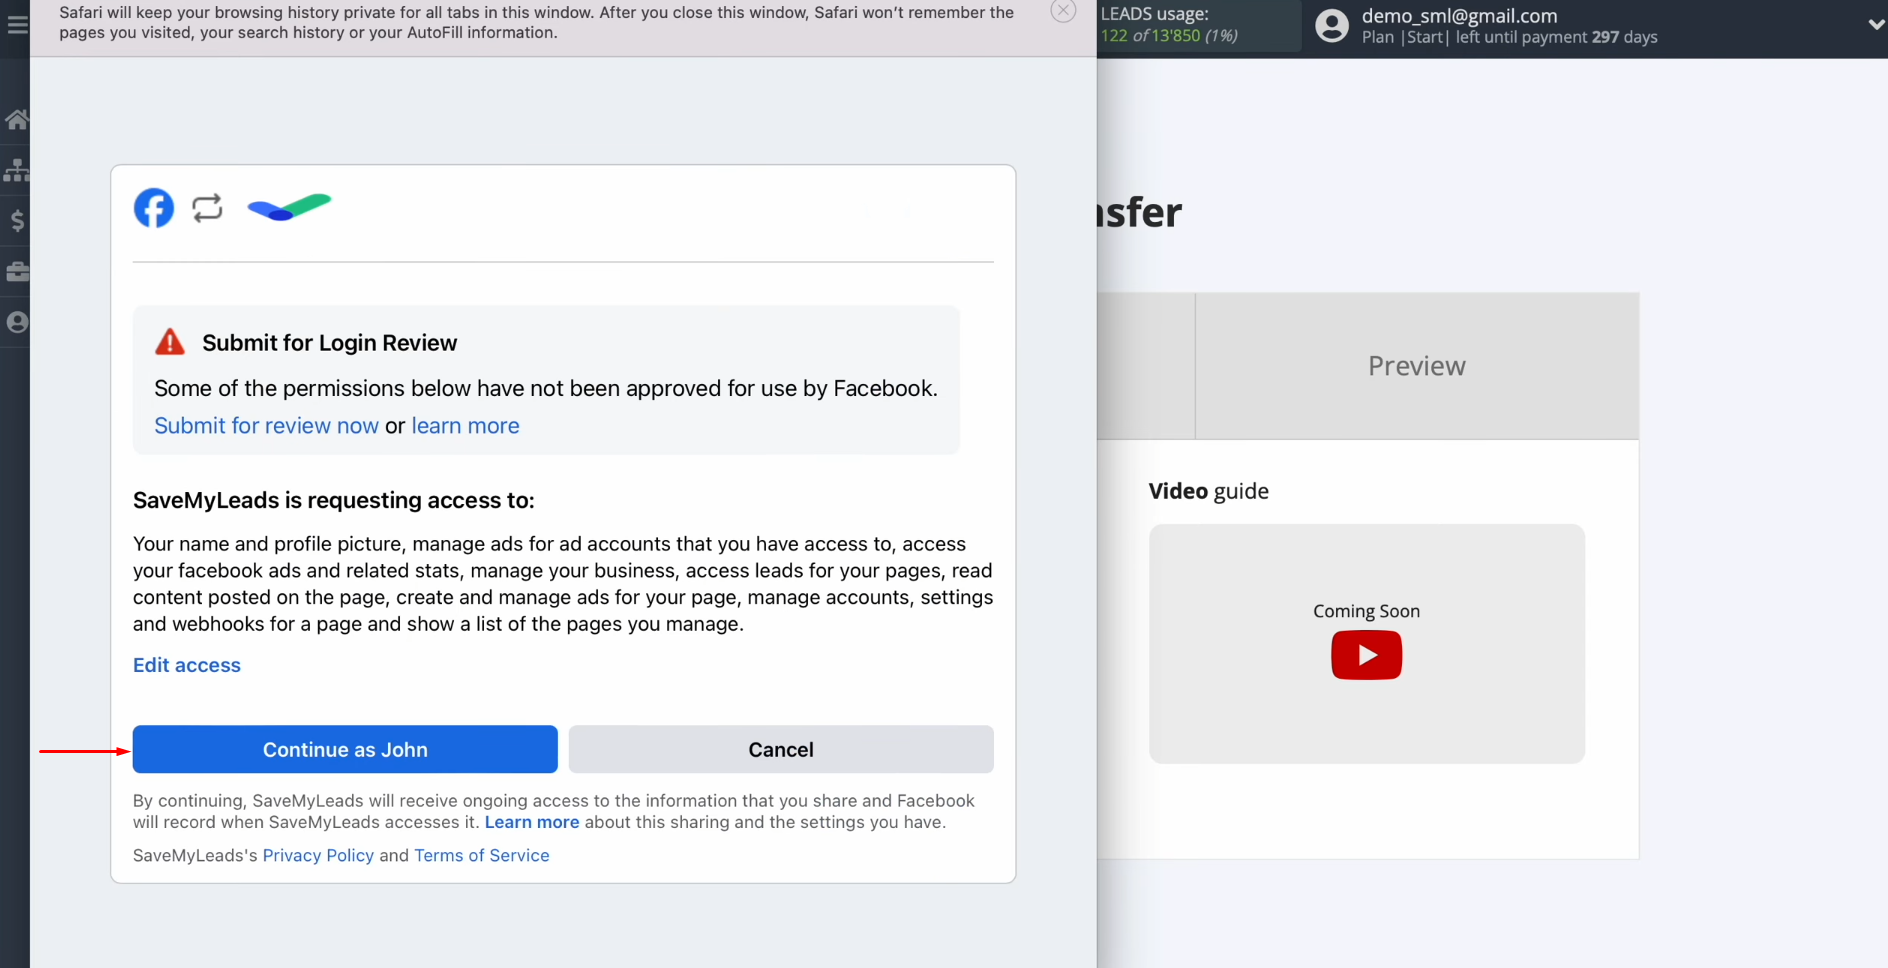
Provide SaveMyLeads access to
work with your Facebook account. To do this, go to settings – click
“Edit access”.
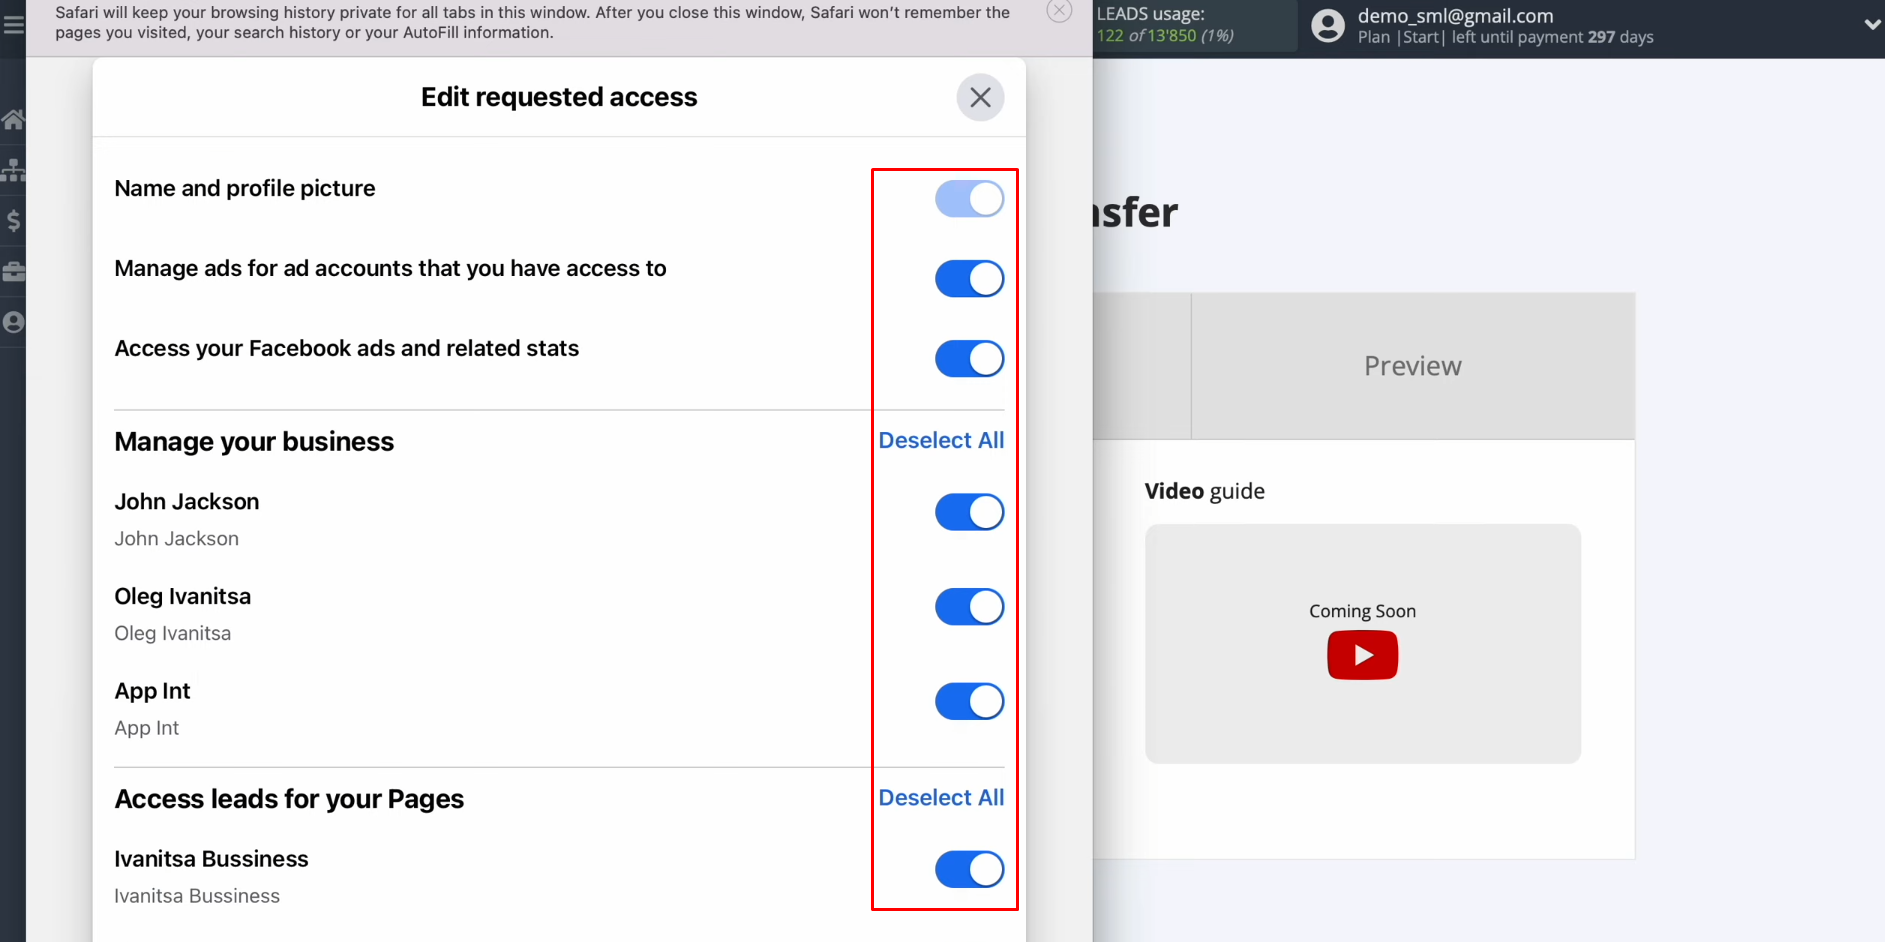
Leave
all access checkboxes enabled.
Click
“Continue as…”.
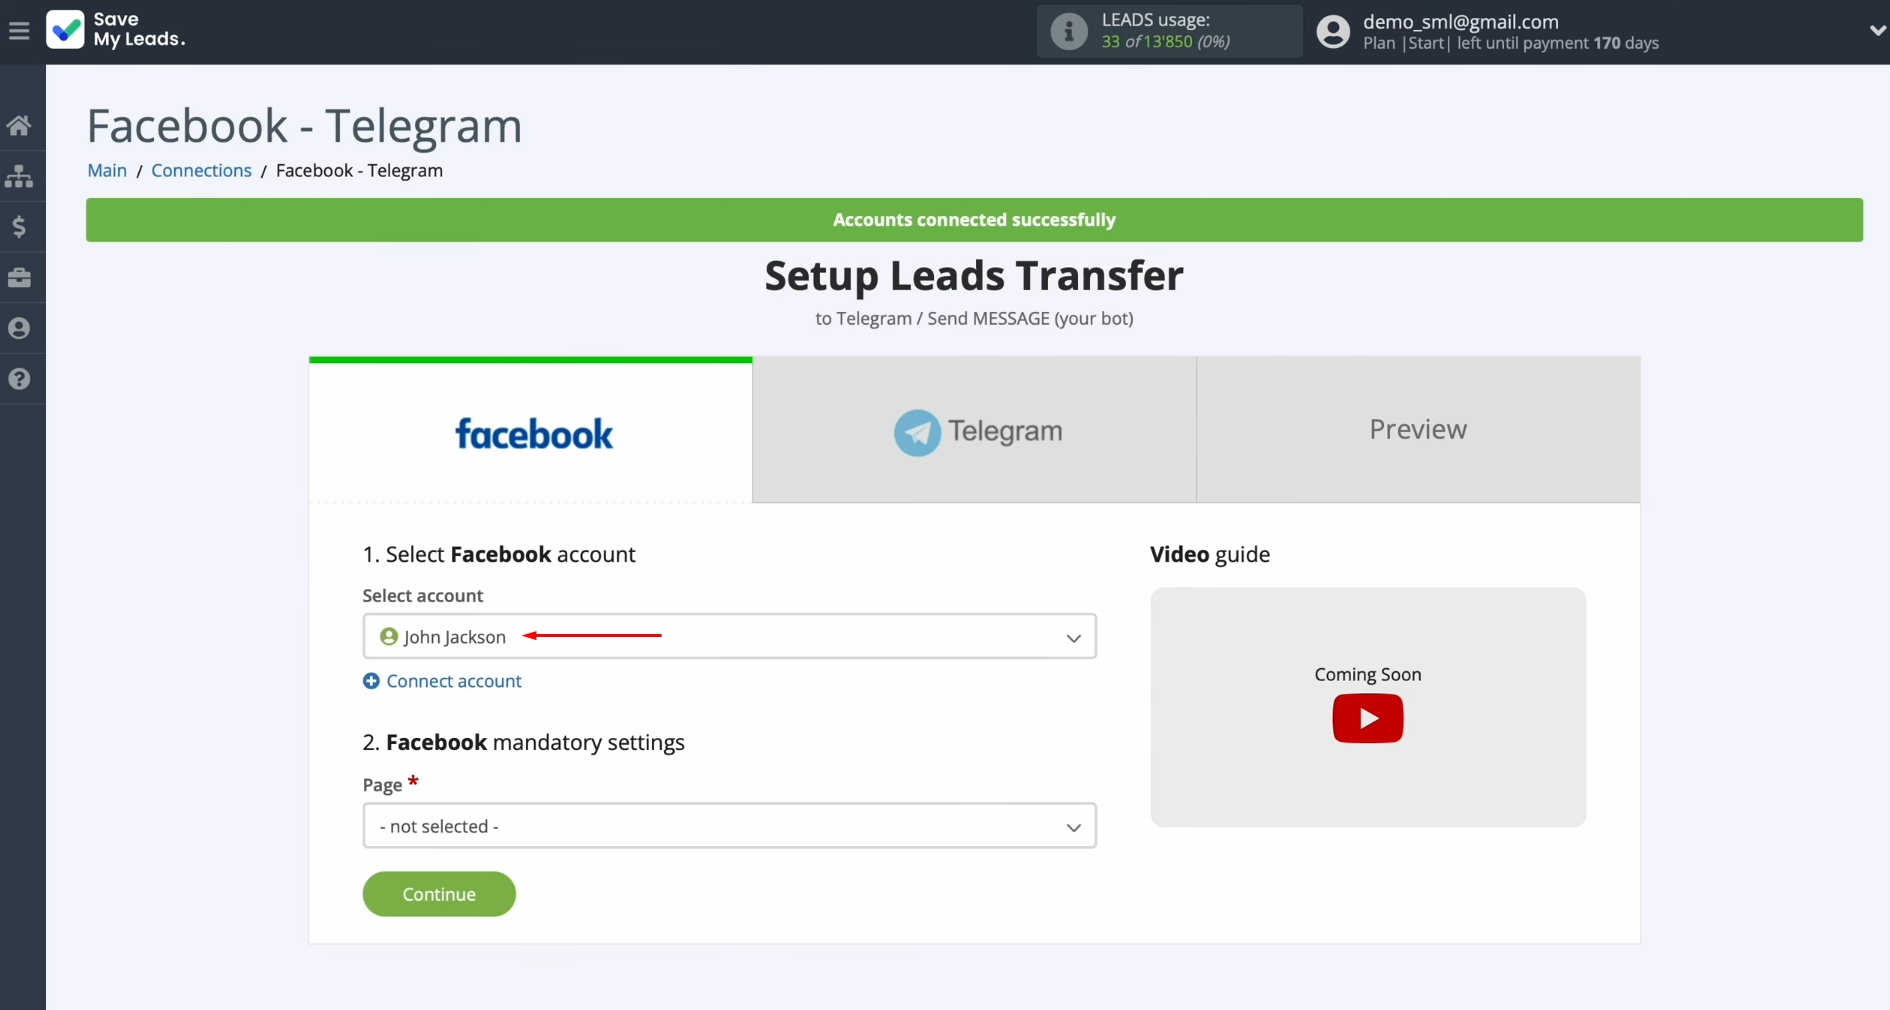
When the connected account is displayed in the list, select it.
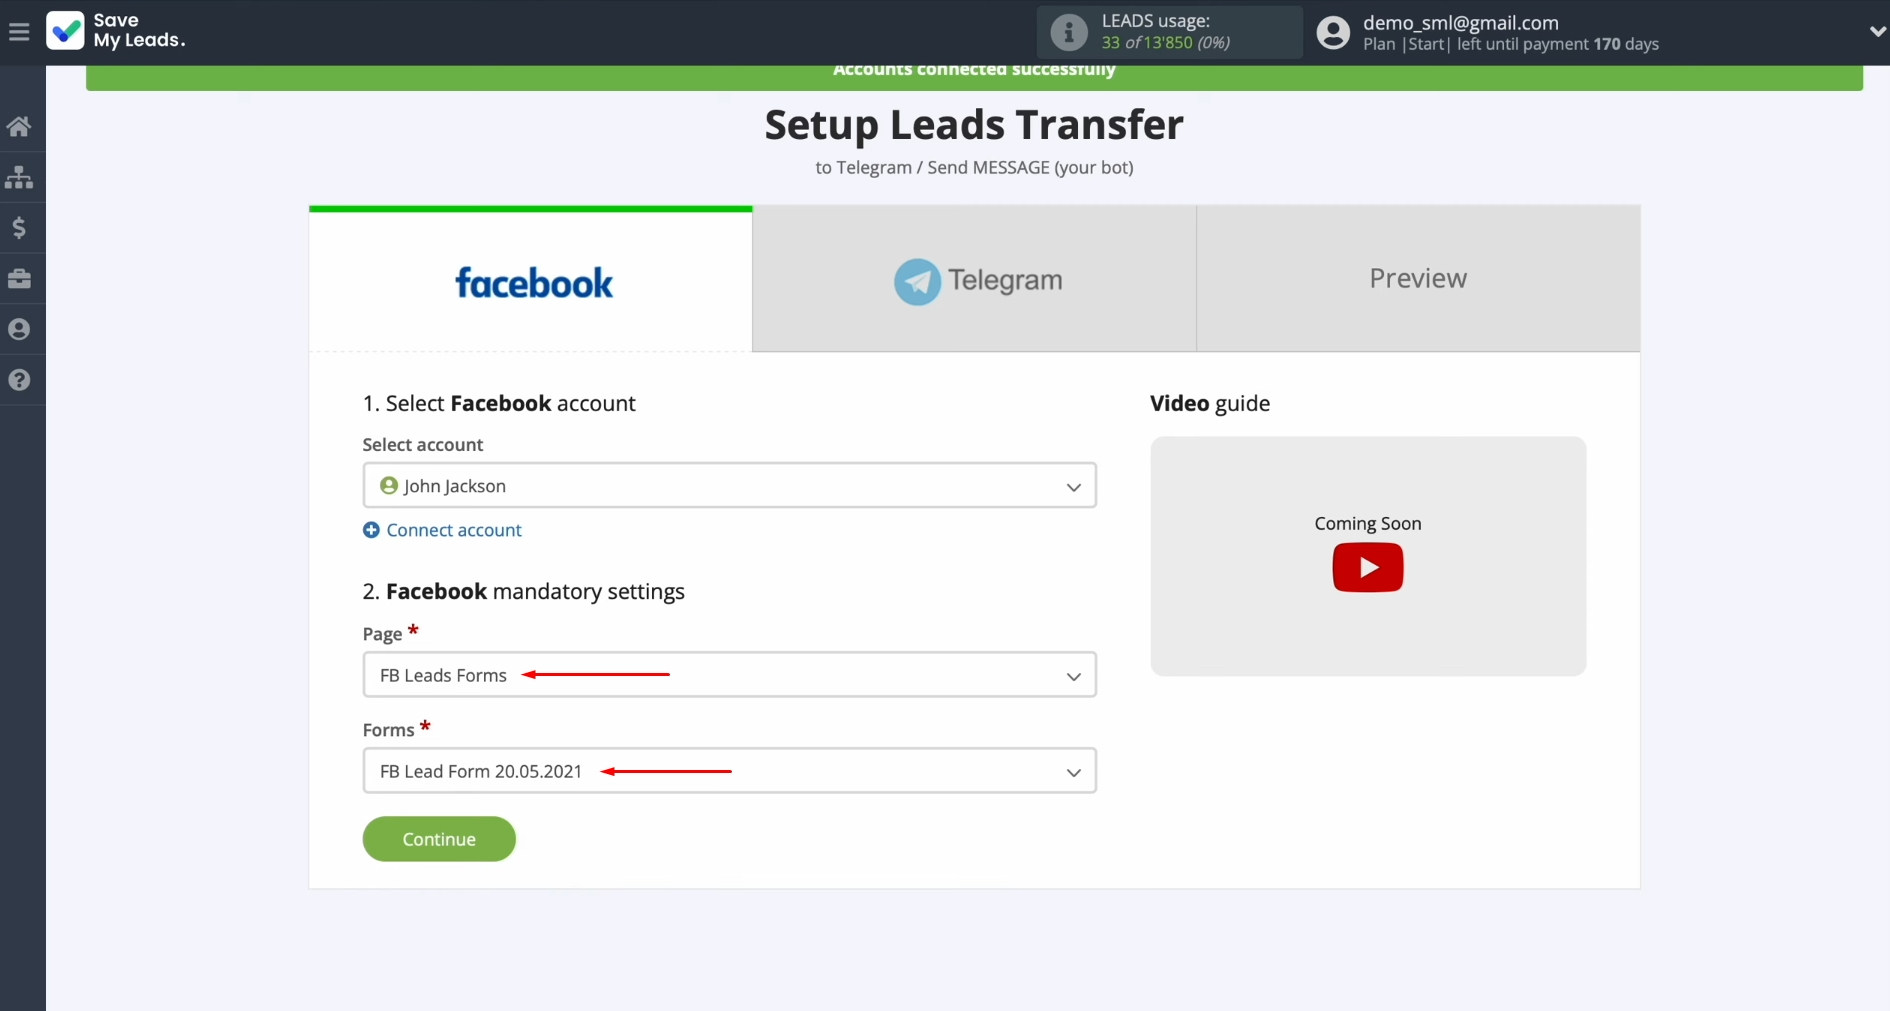
Choose the
advertising page. Then you
need to specify the form from which the data will be downloaded. After that,
click “Continue”.
If you want multiple forms specified, you will need to create multiple
connections for each of them.
Setting Up the Data Receiver – Telegram
To set up Telegram integration with Facebook, connect your Telegram bot to SaveMyLeads.
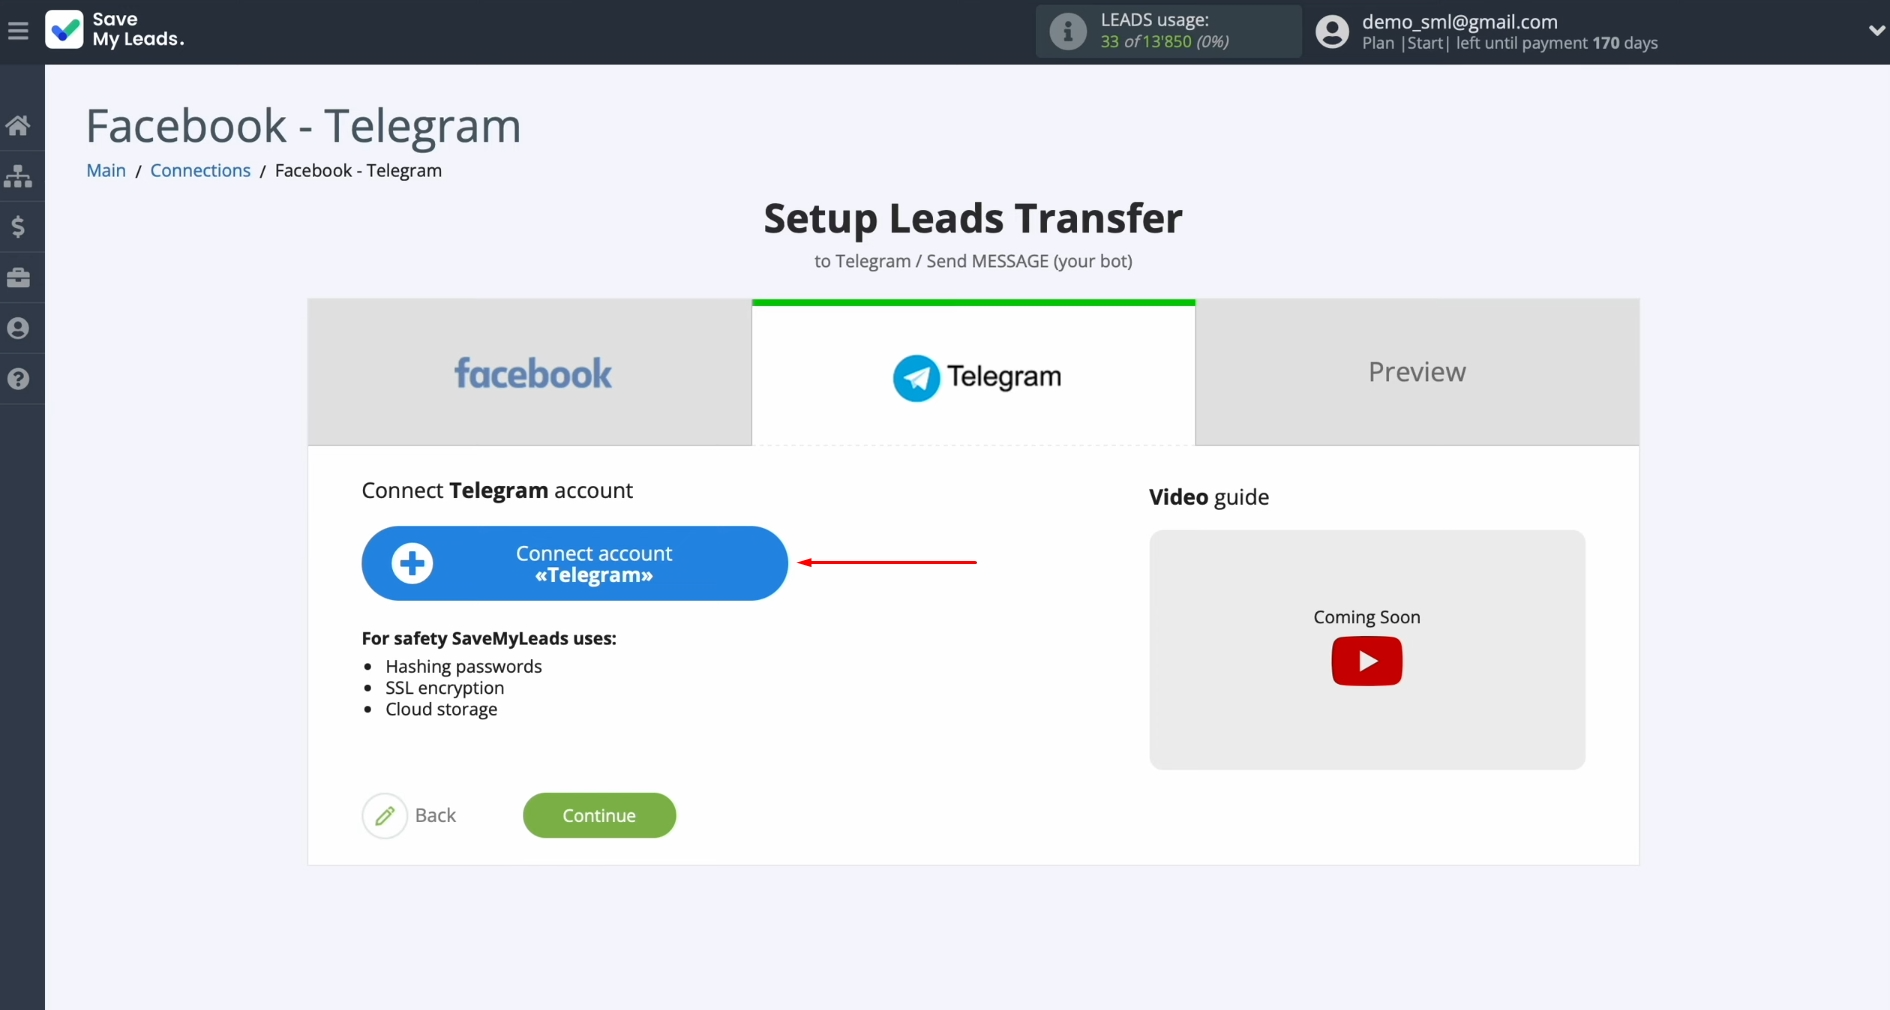
In this window, you need to specify the
bot token.
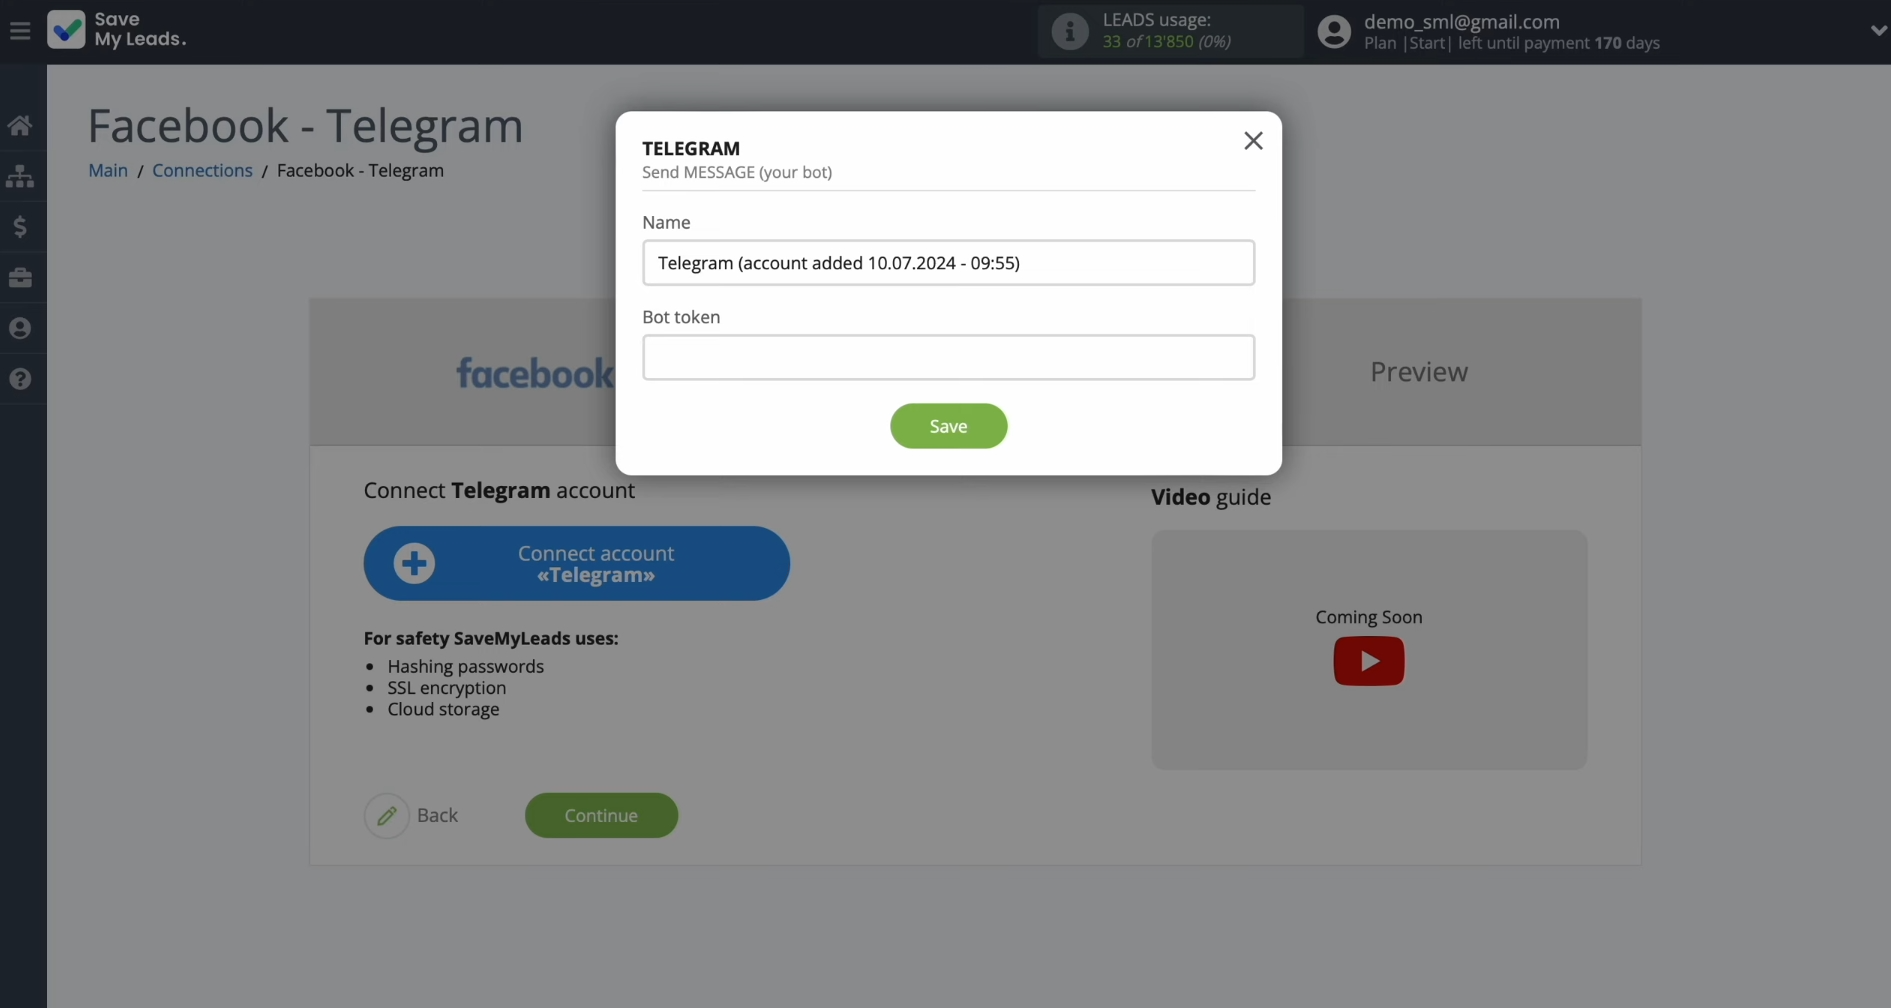
To get the
bot token, go to
Telegram. Then find
BotFather, launch it, and click “Start”.
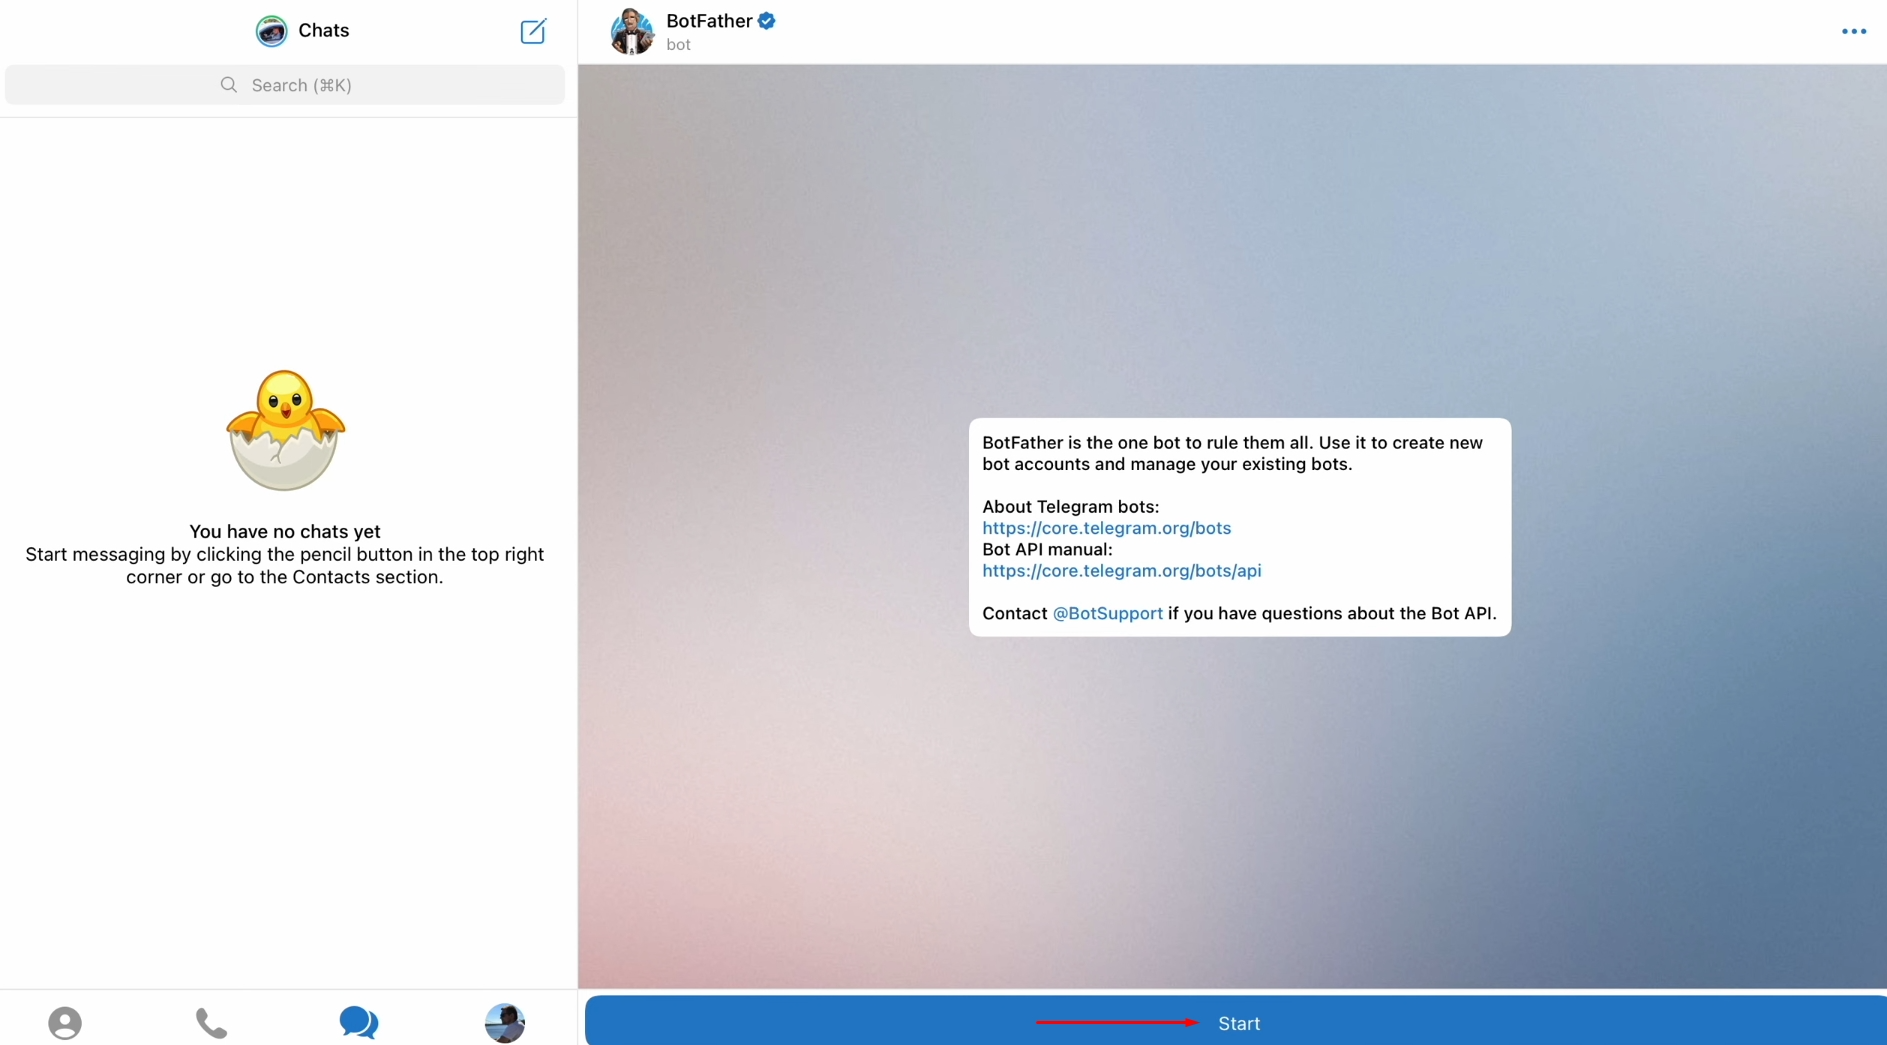
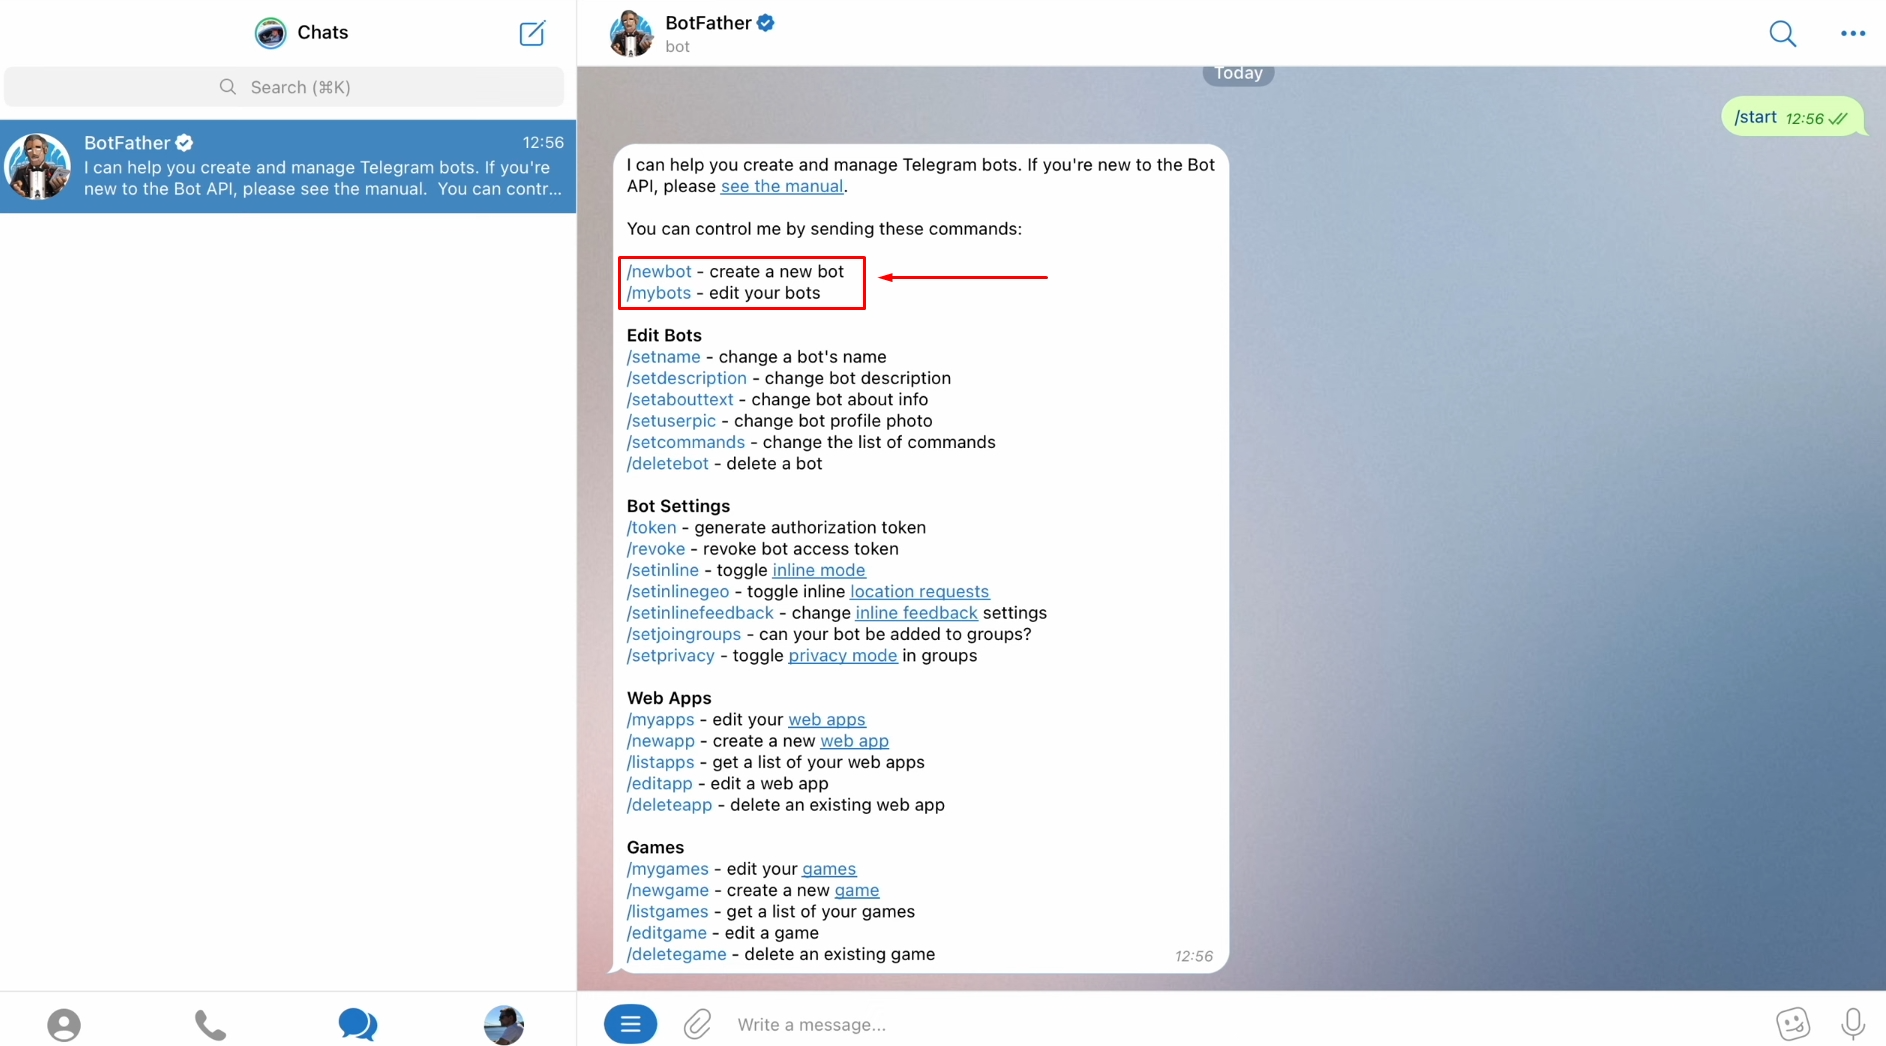
If you have
not yet created a Telegram bot, click “New bot”. If you have already created a bot,
click “My bots”.
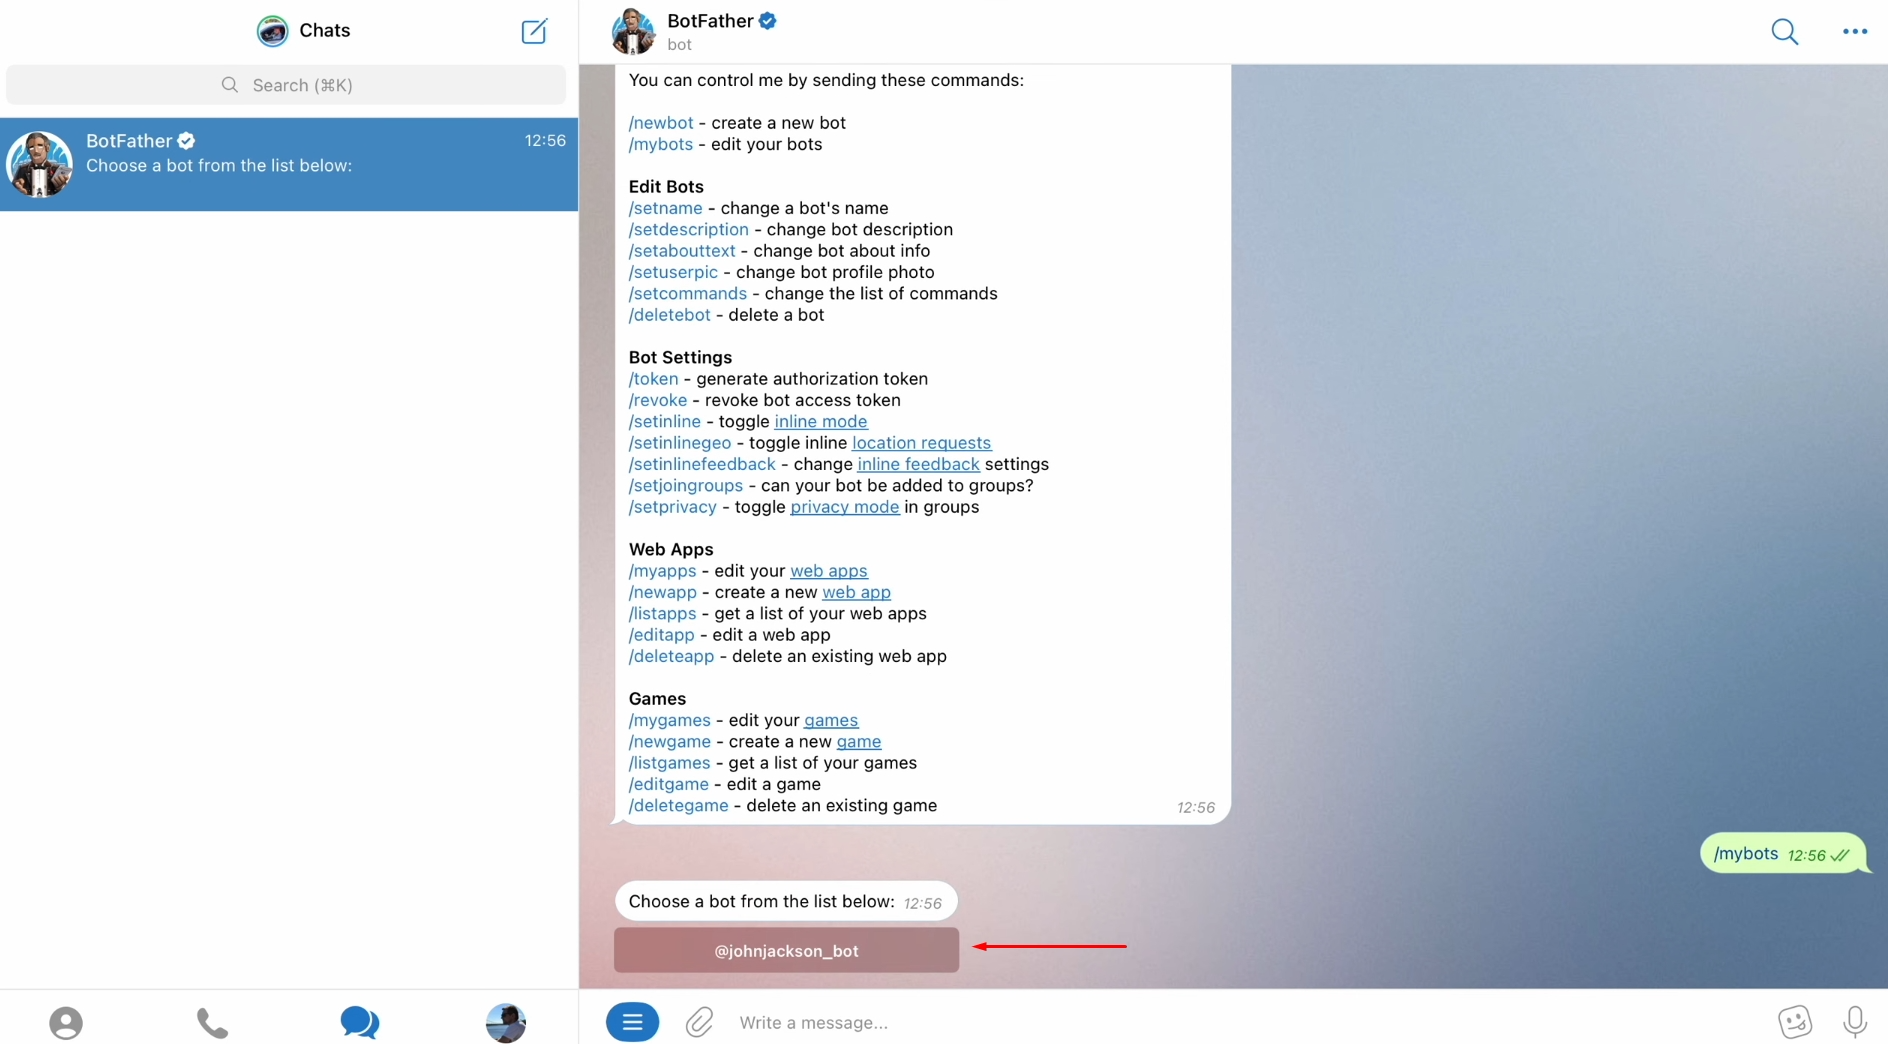
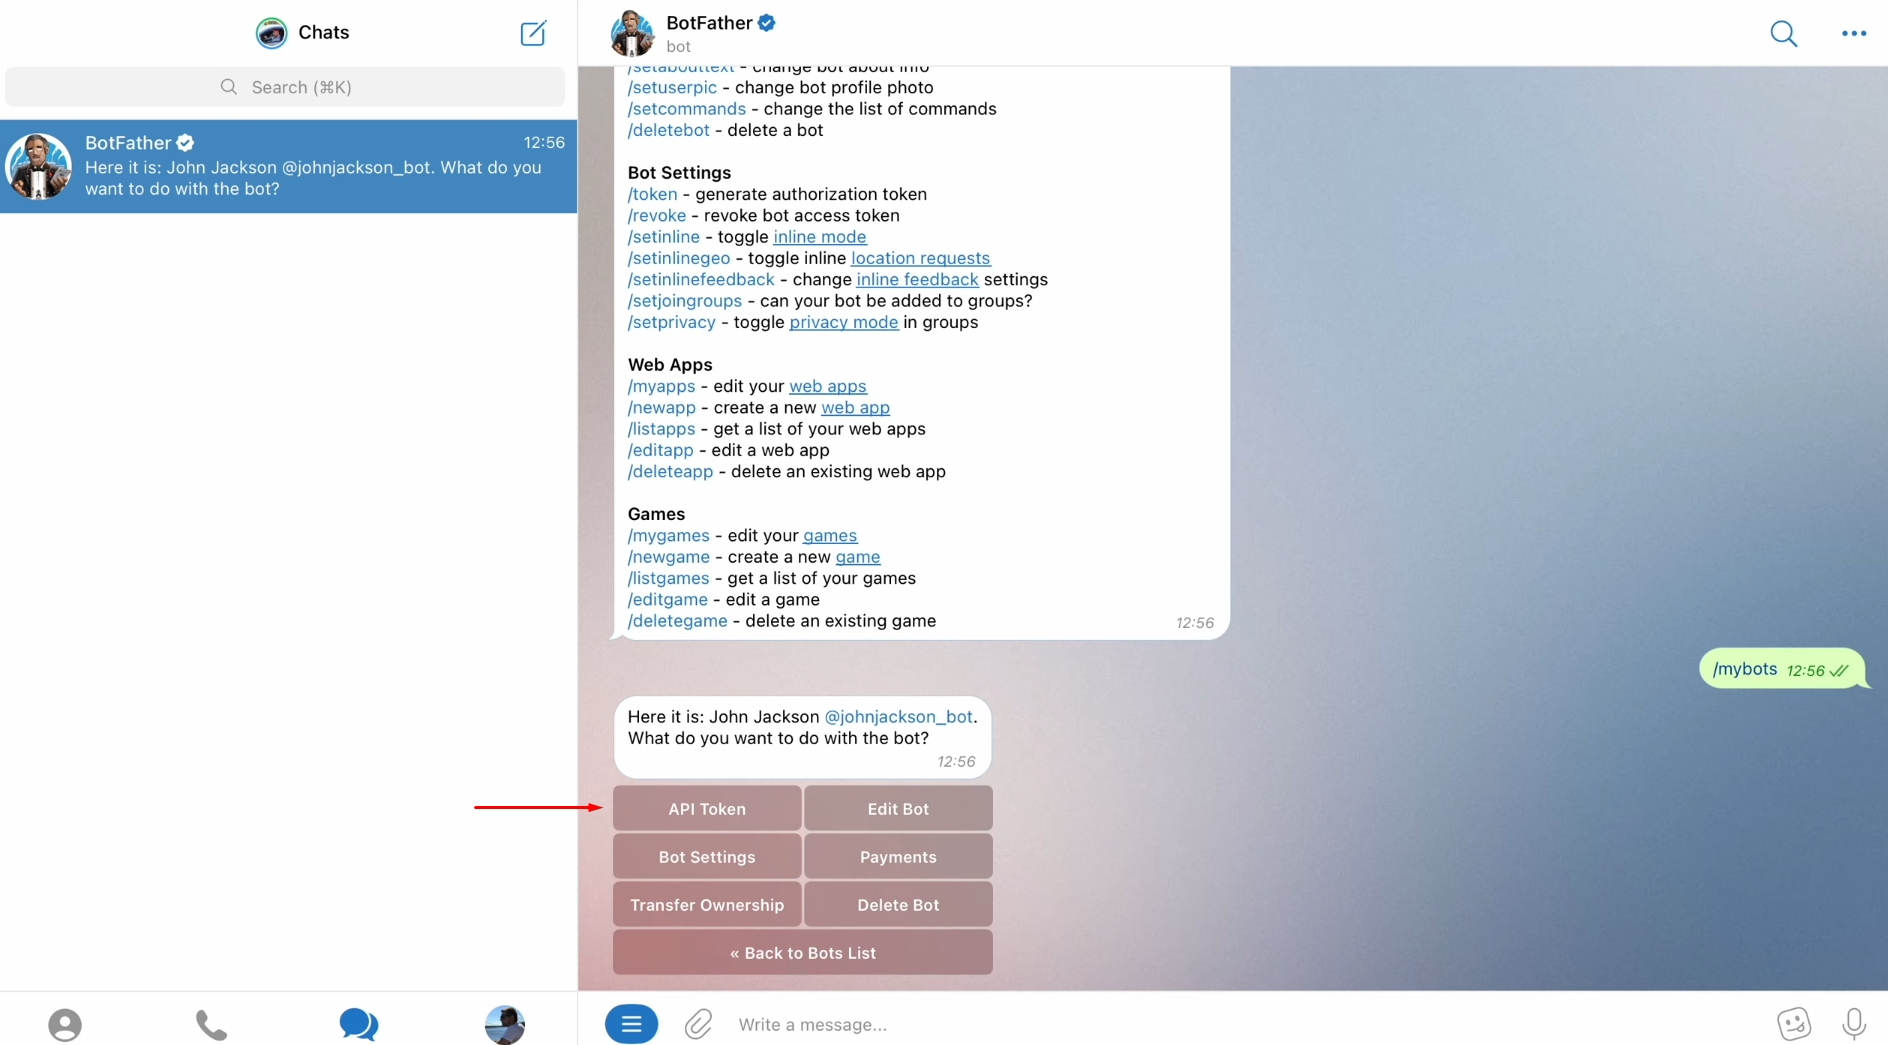
Select the
required bot.
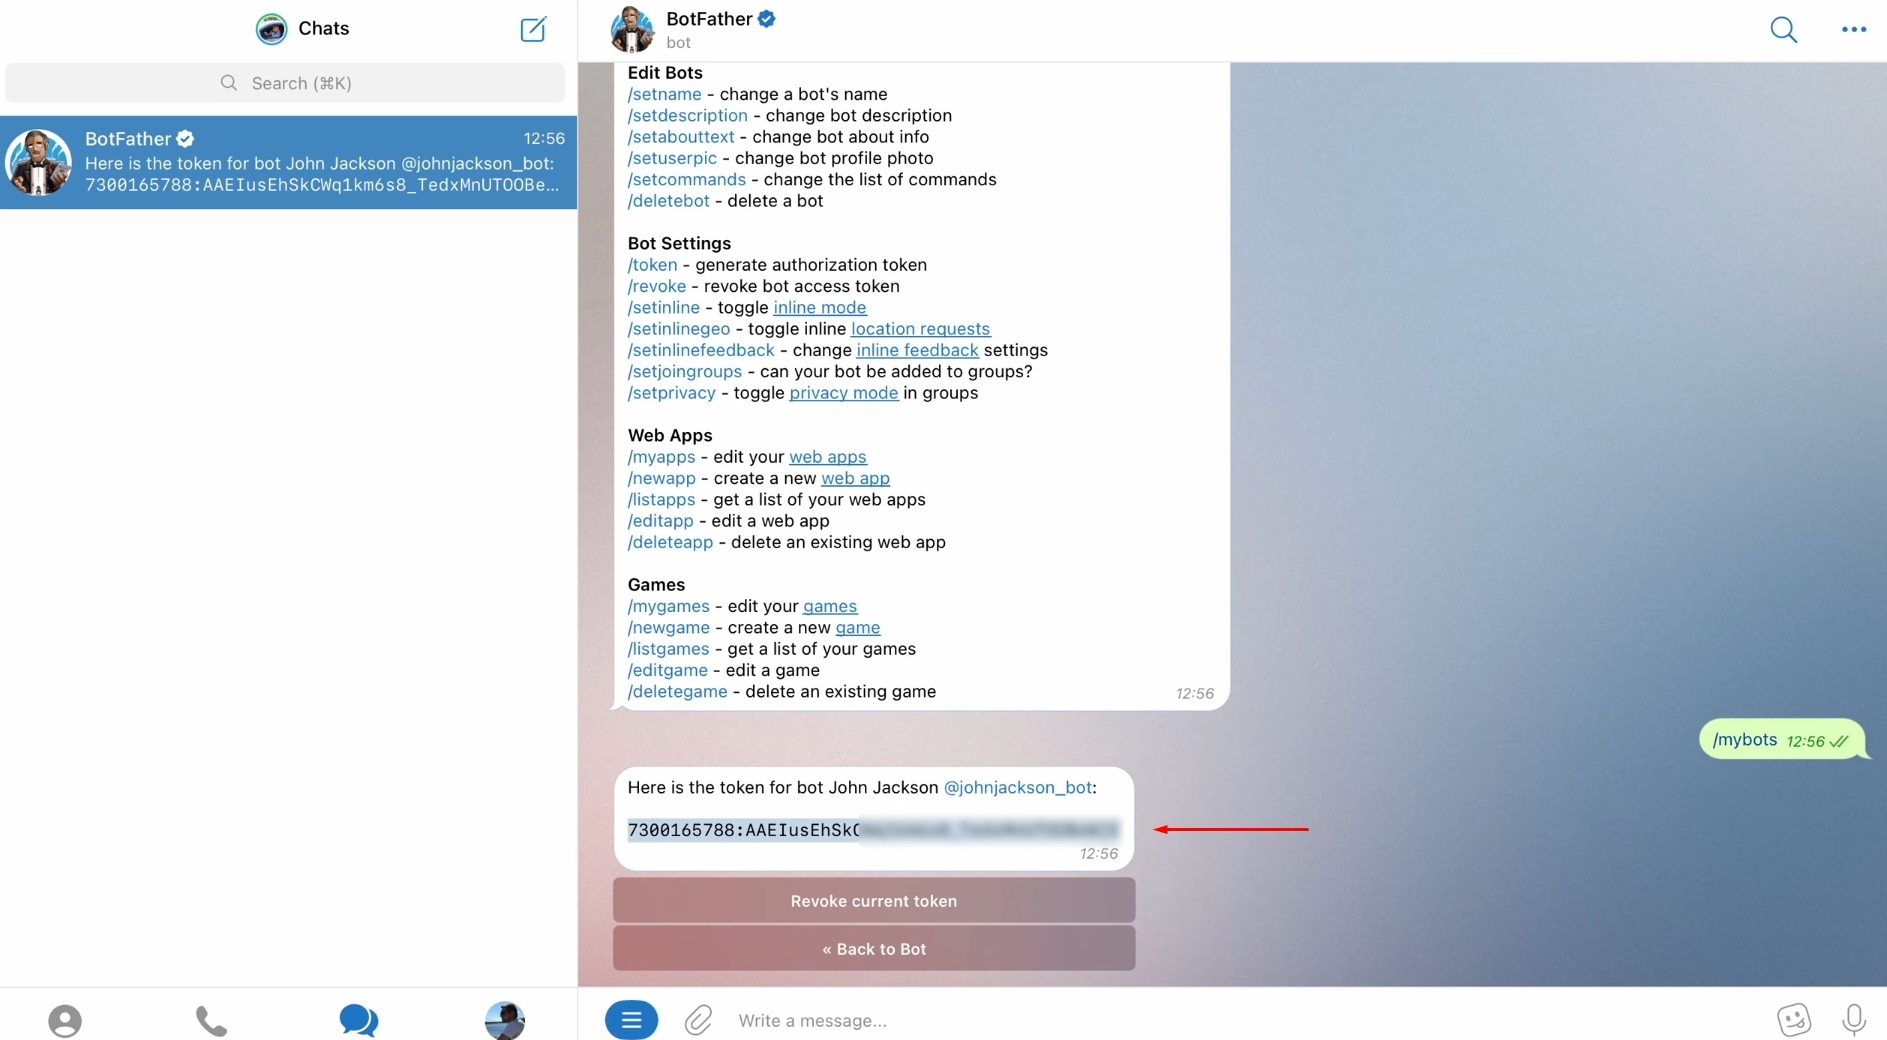
Click “API token”.
Copy the
token.
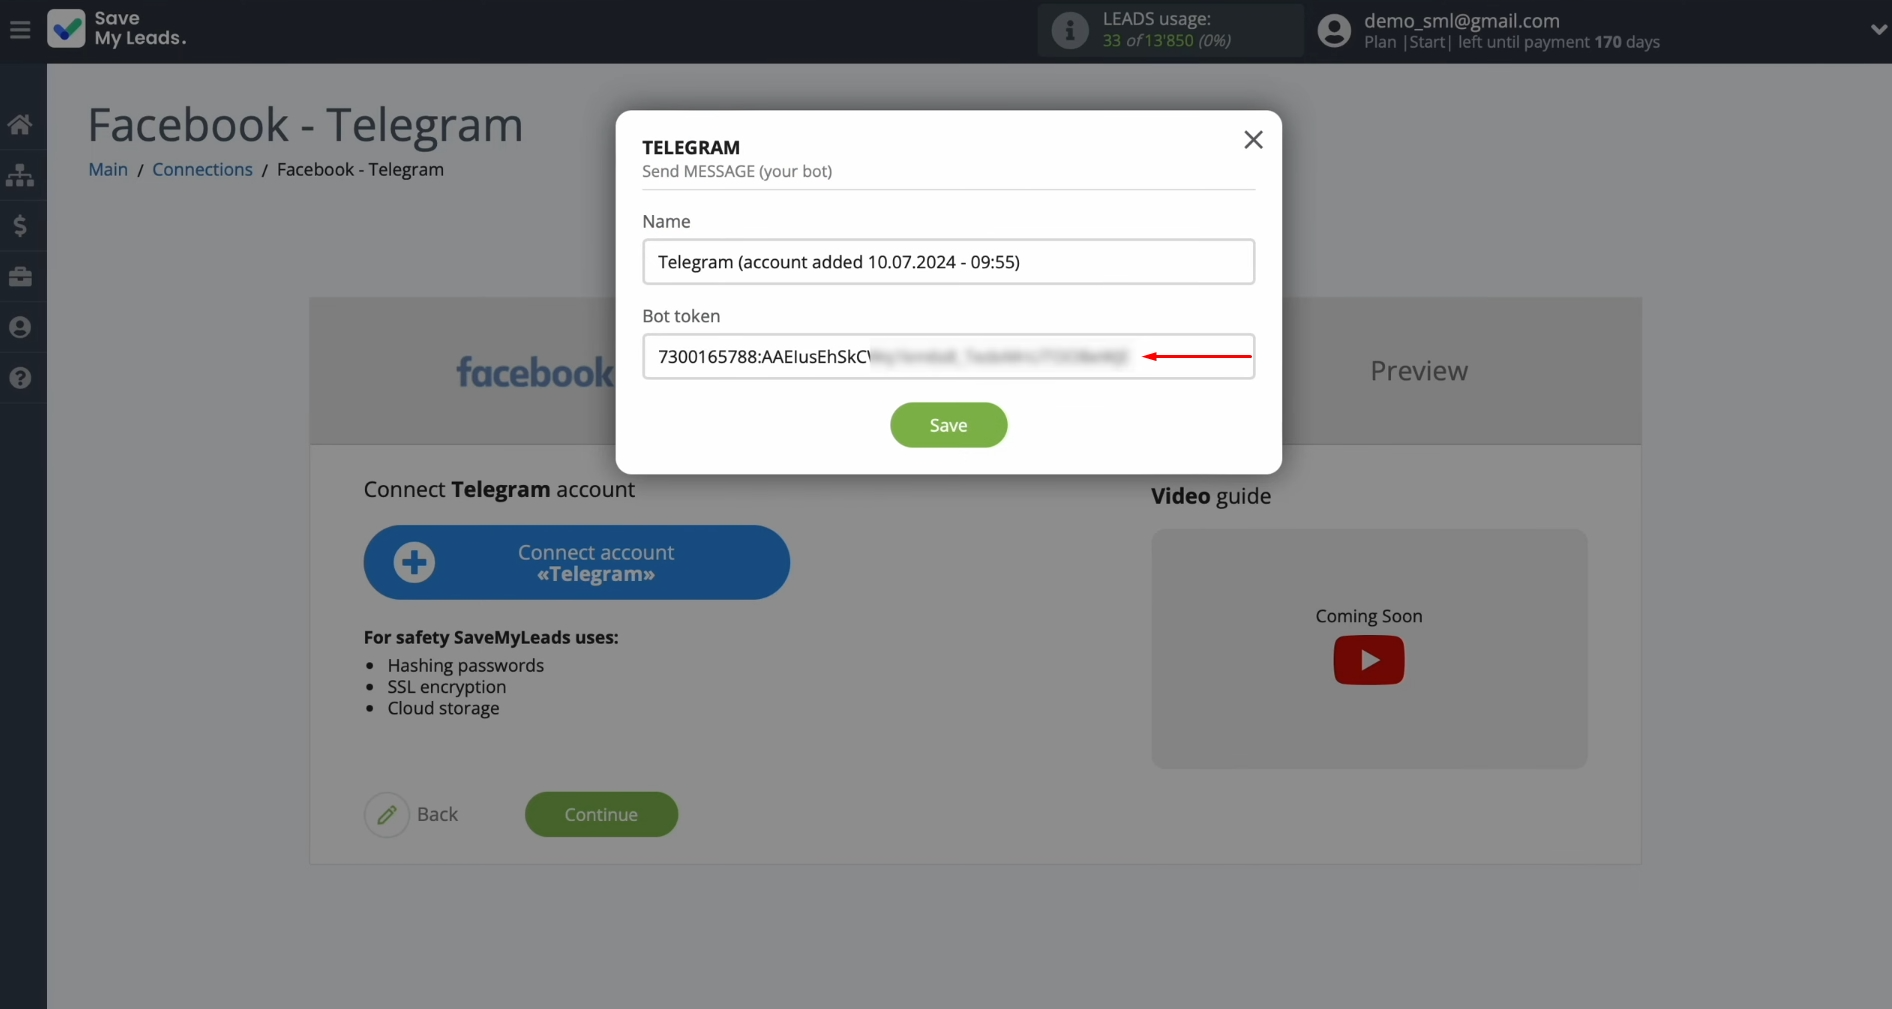
Paste the
token into the appropriate field in SaveMyLeads. When the required field is filled
in, click “Save”.
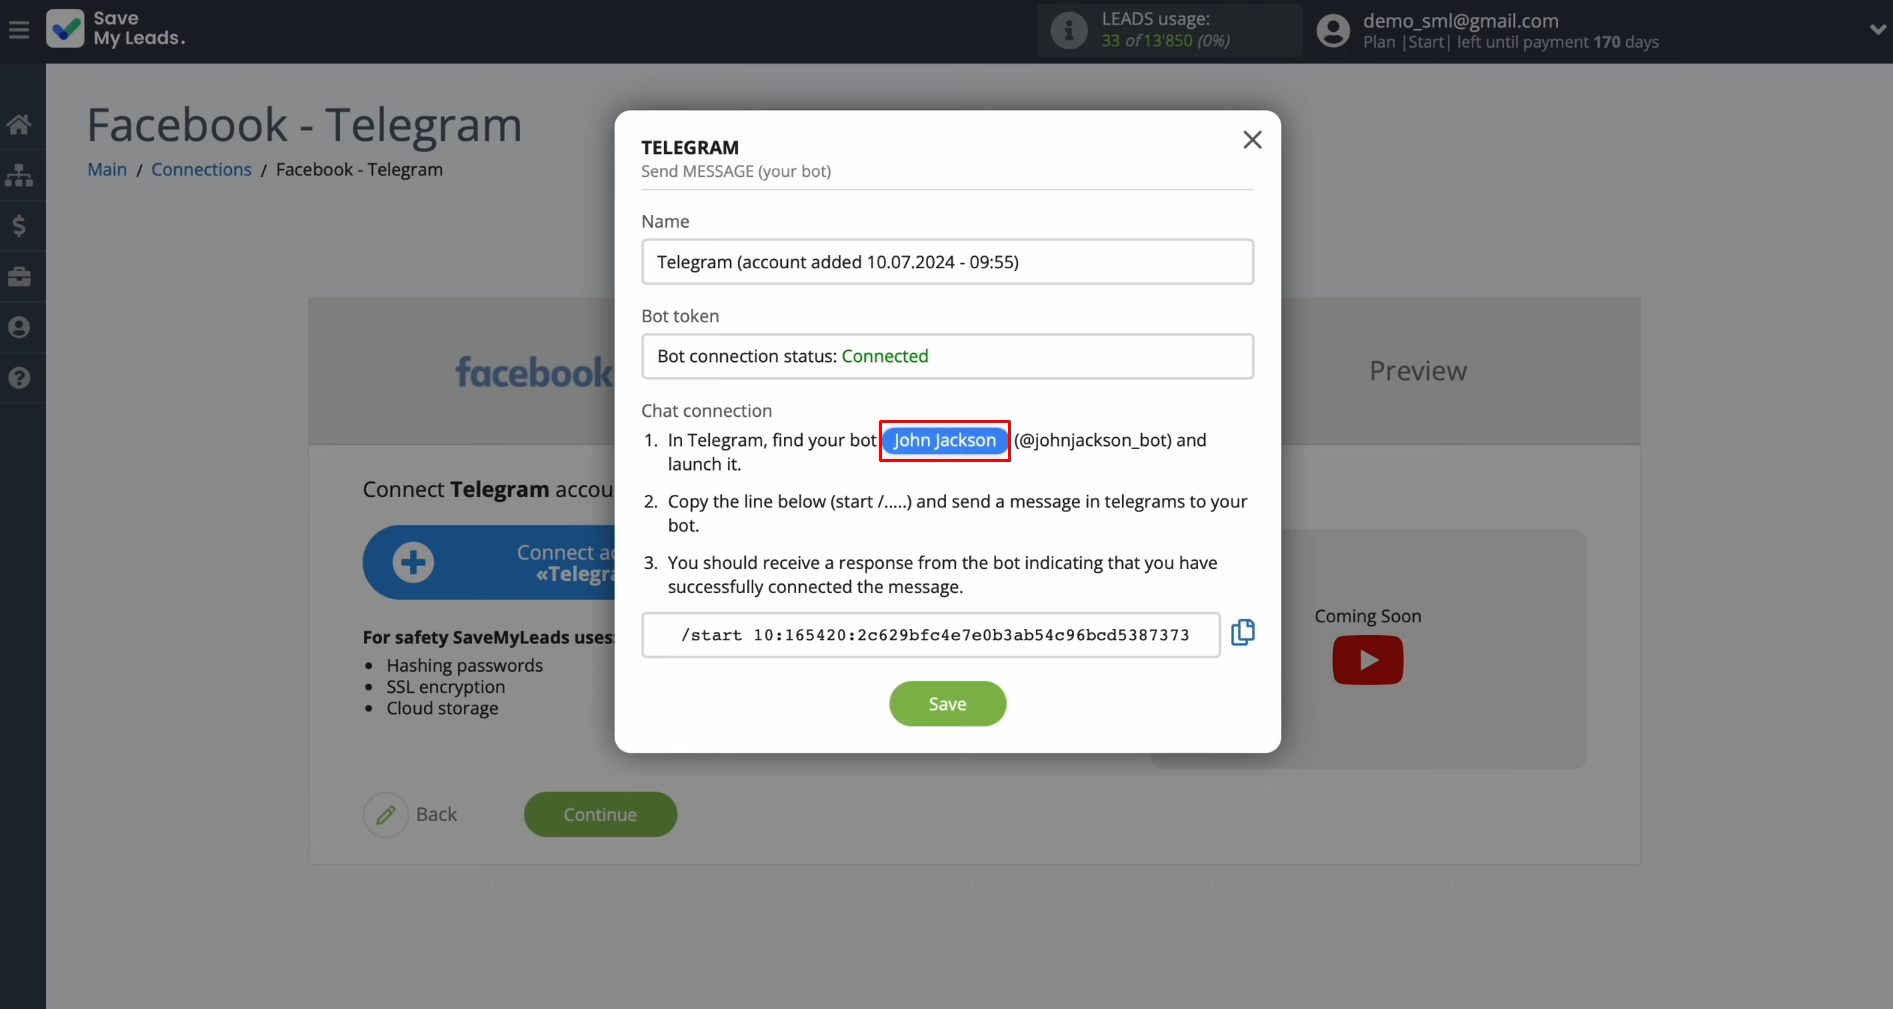
After connecting
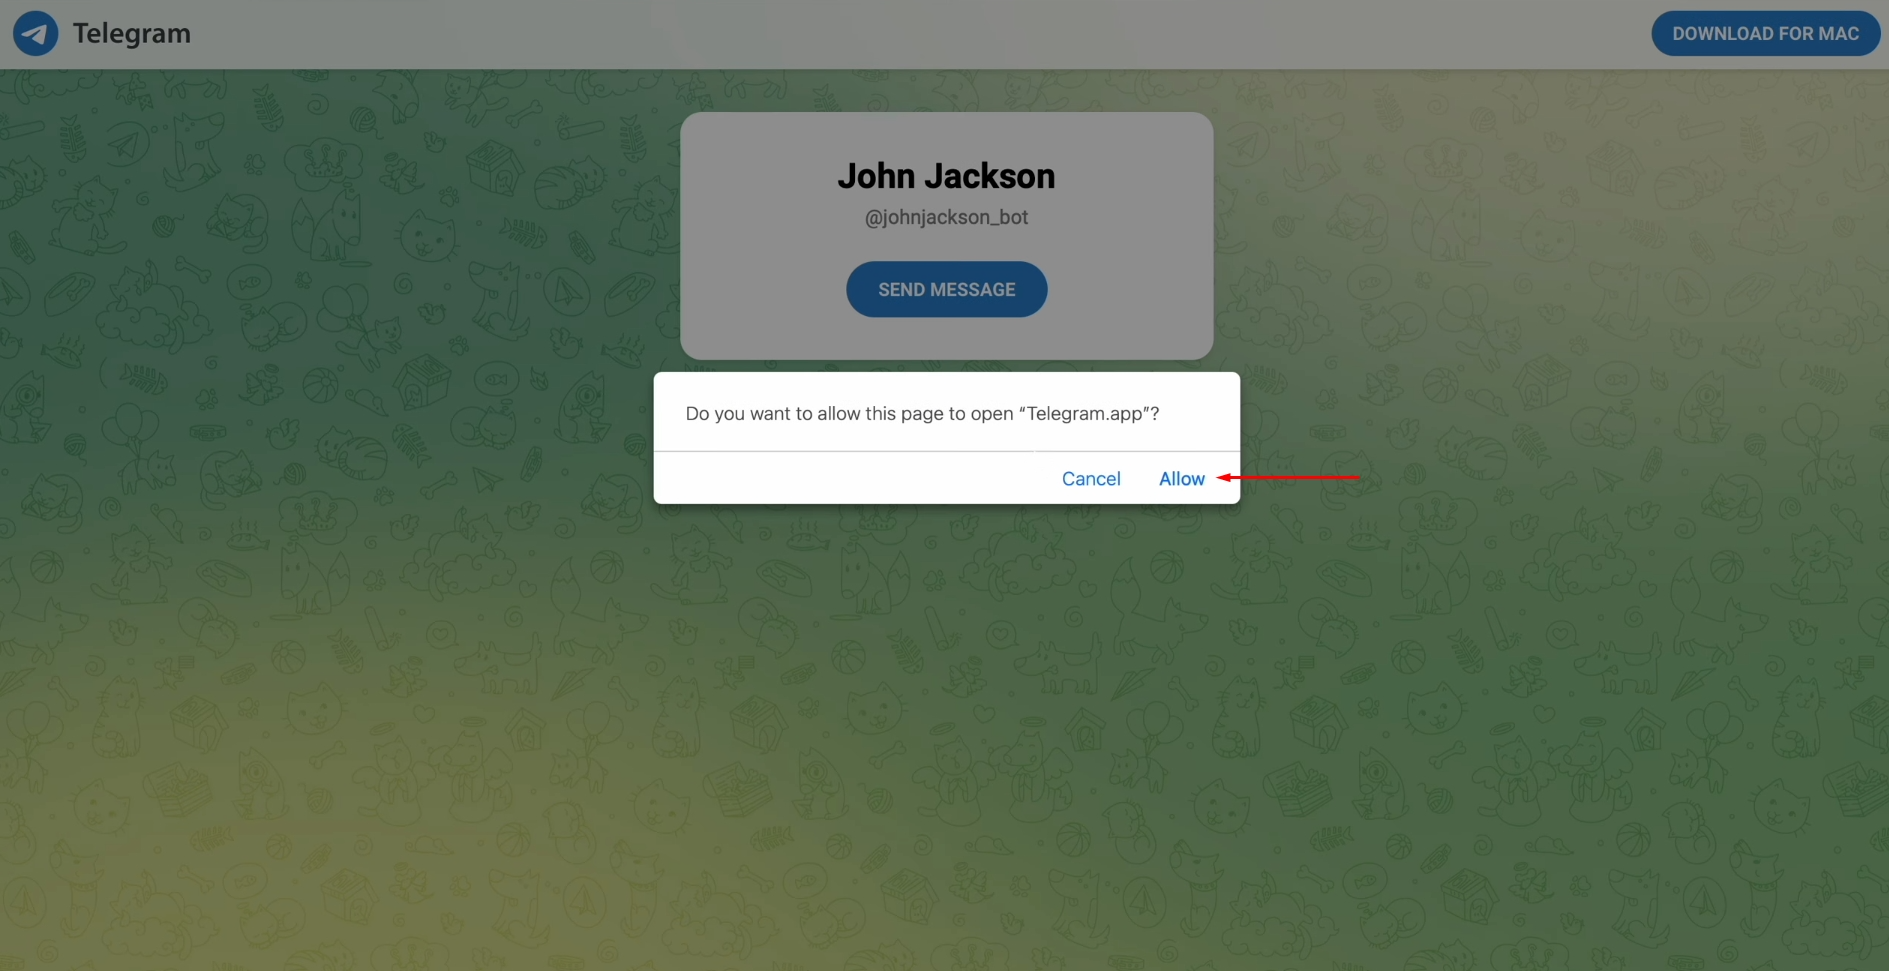
the bot, launch it in your Telegram. To do this, click on the button
with the name of the bot or find it manually.
Allow this page to open Telegram.
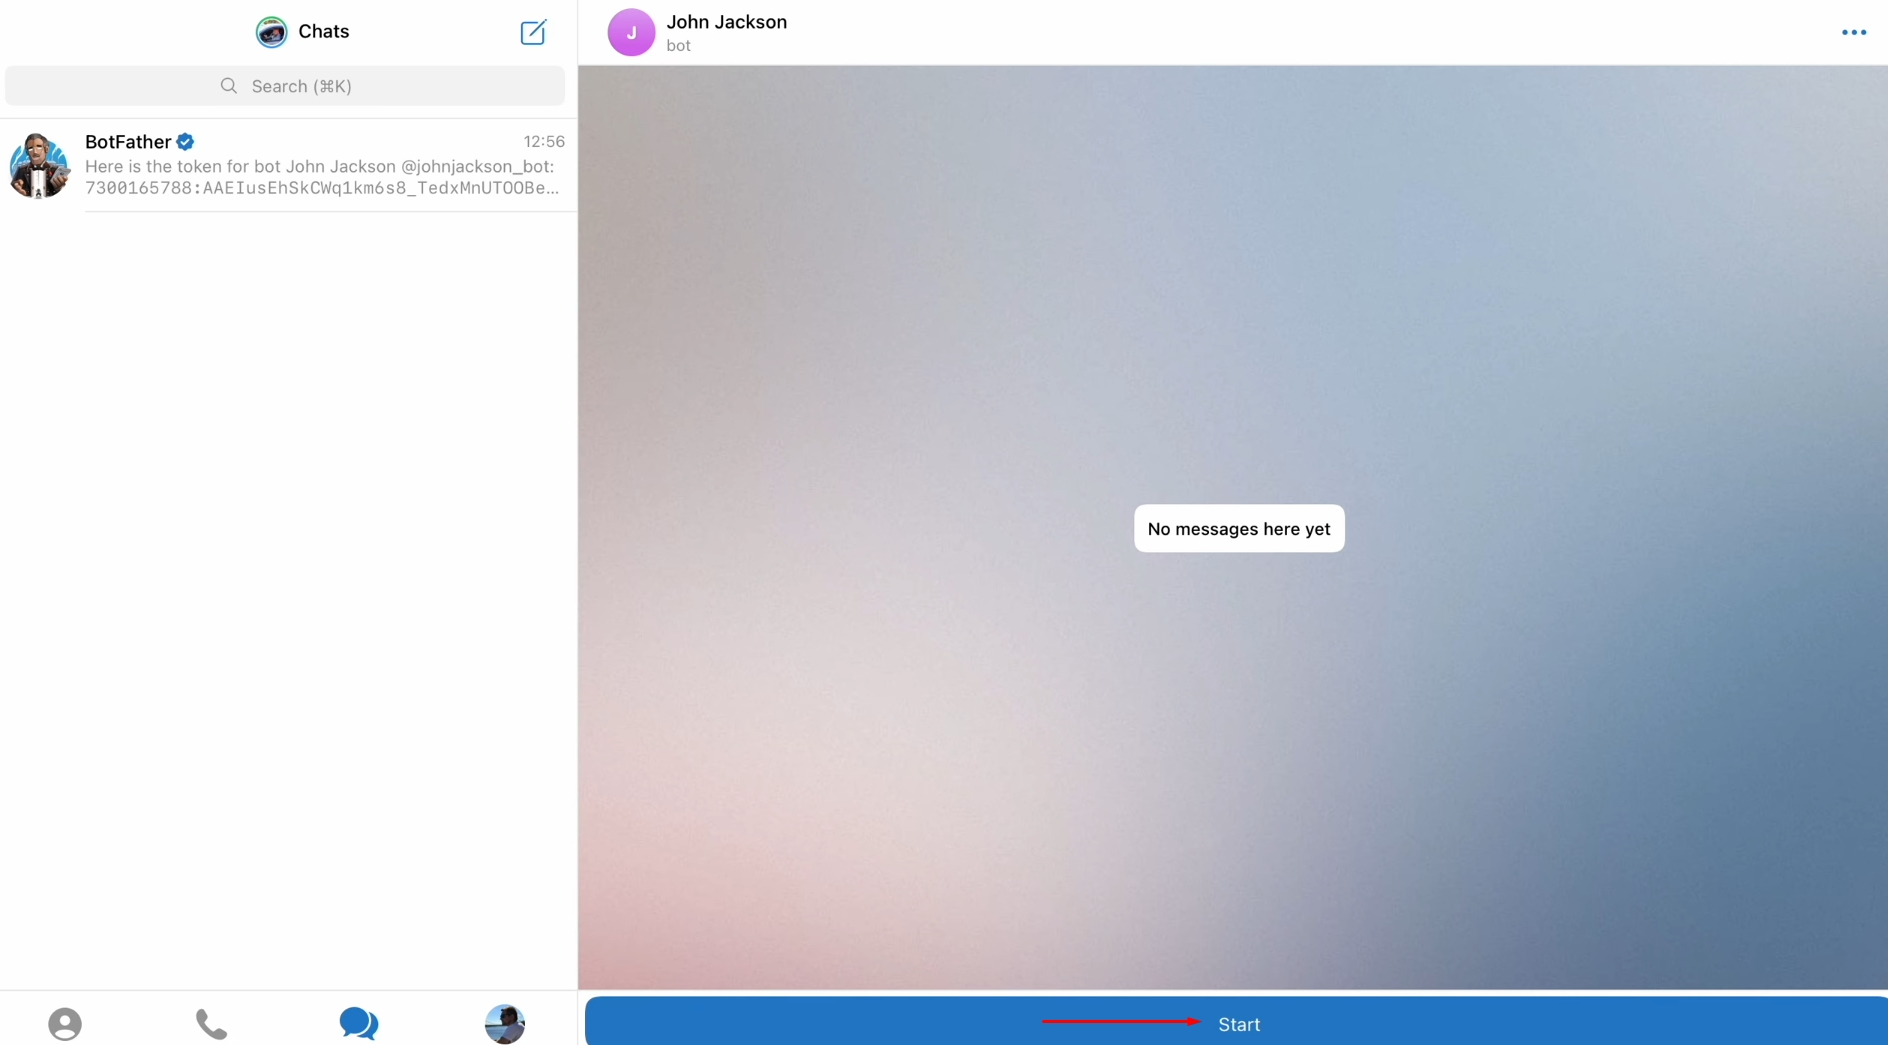
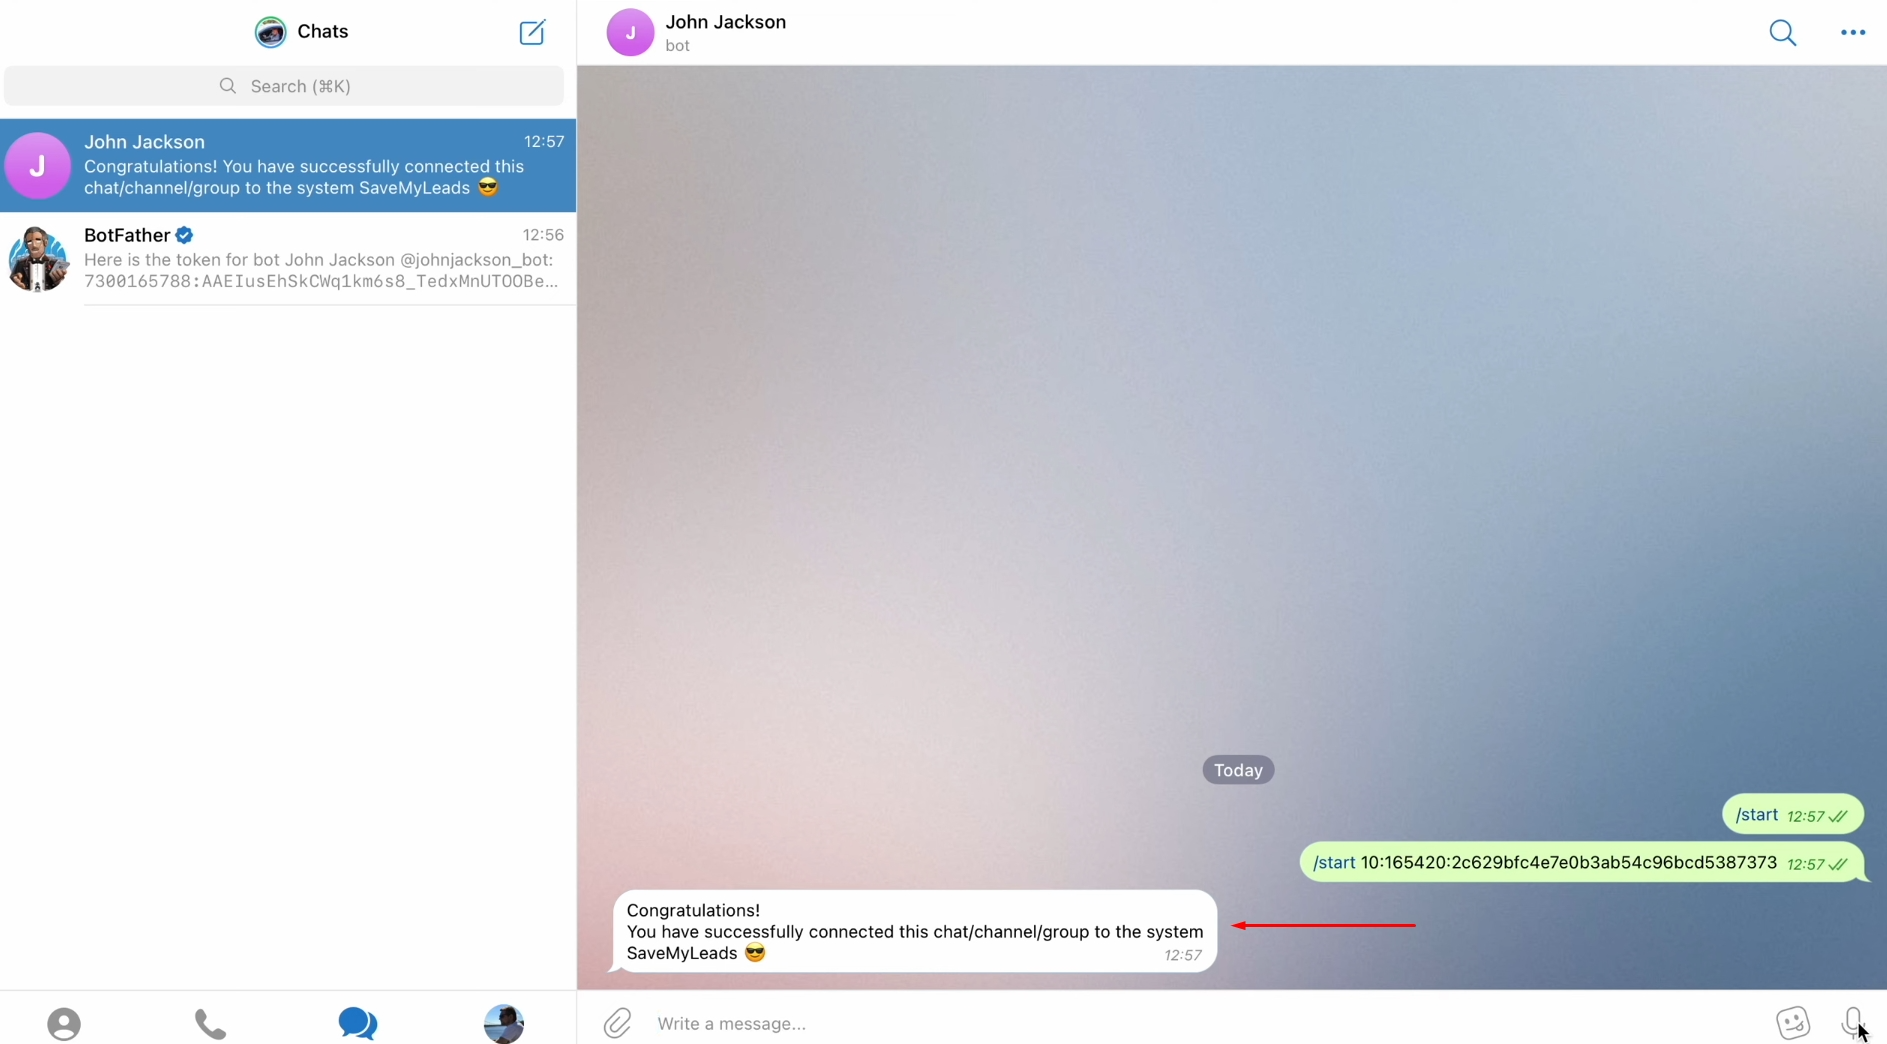
Click “Start”.
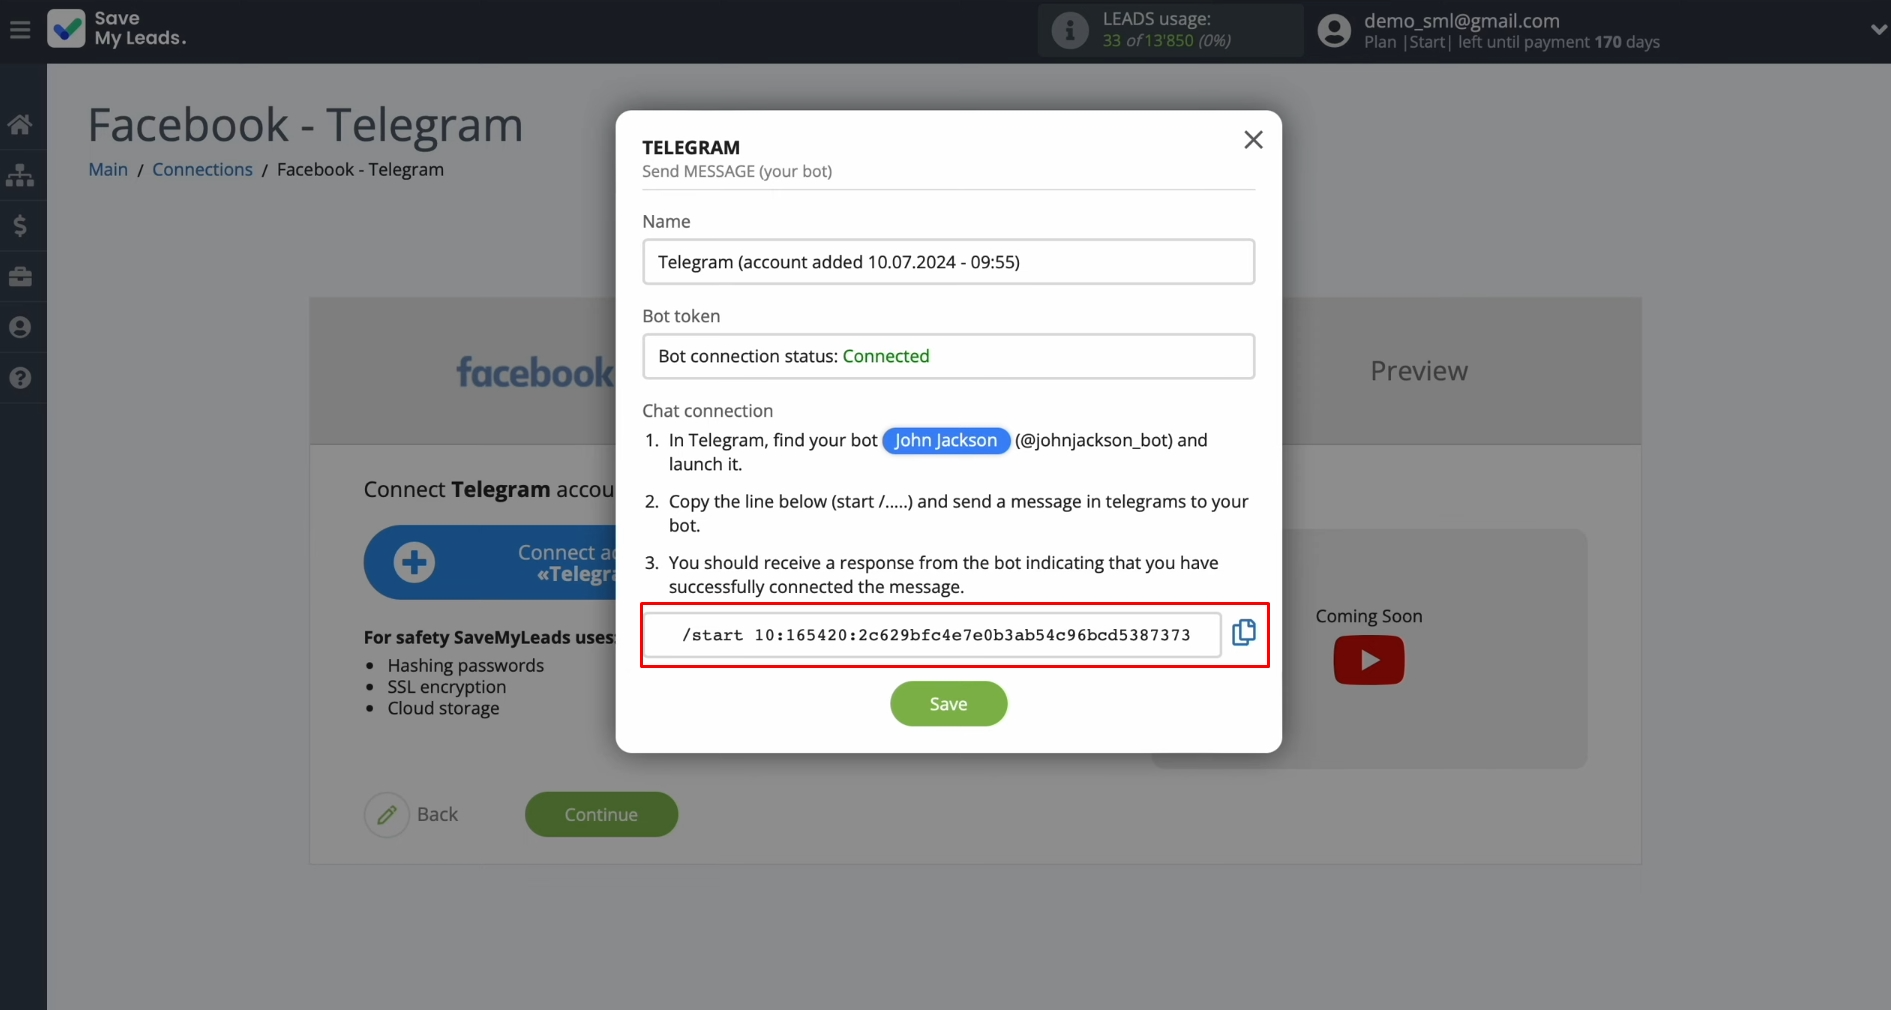
Copy the
string to connect the Telegram bot.
Send the
string as a message.
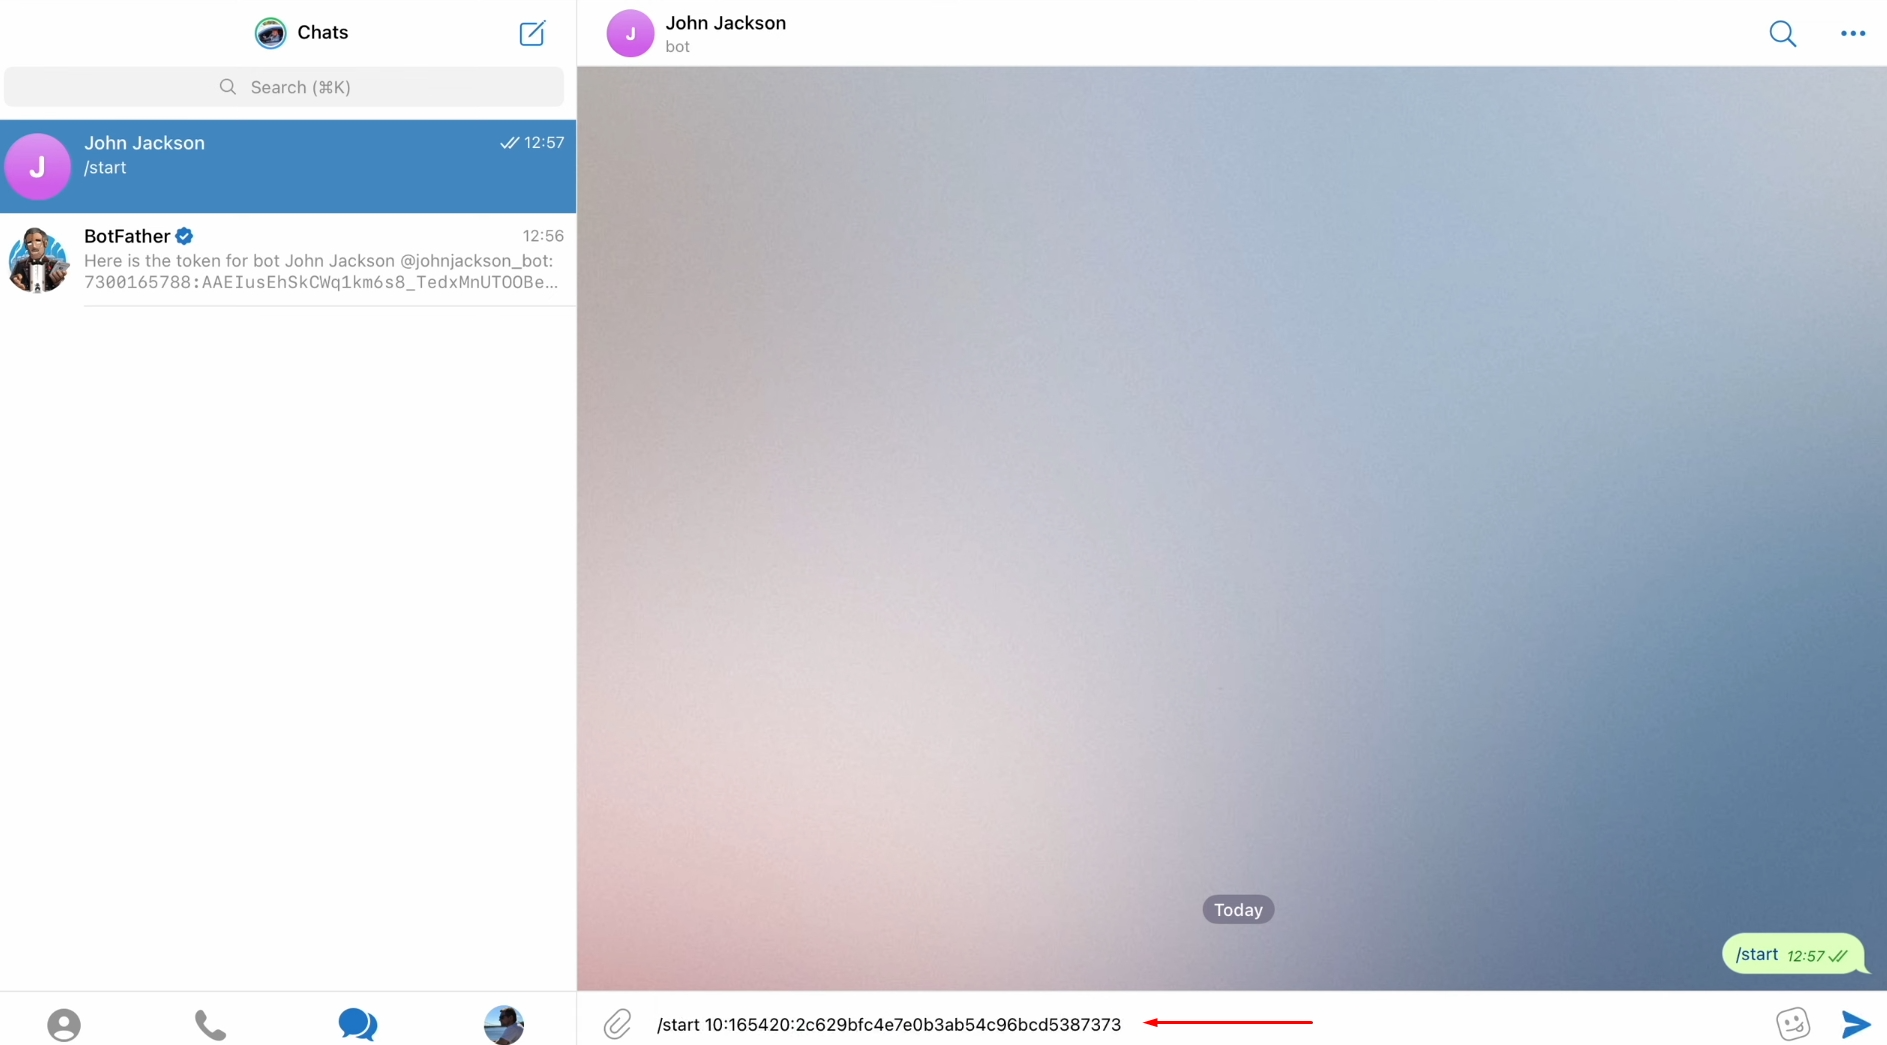
After you
receive a message about successful connection, return to SaveMyLeads and continue setting up.
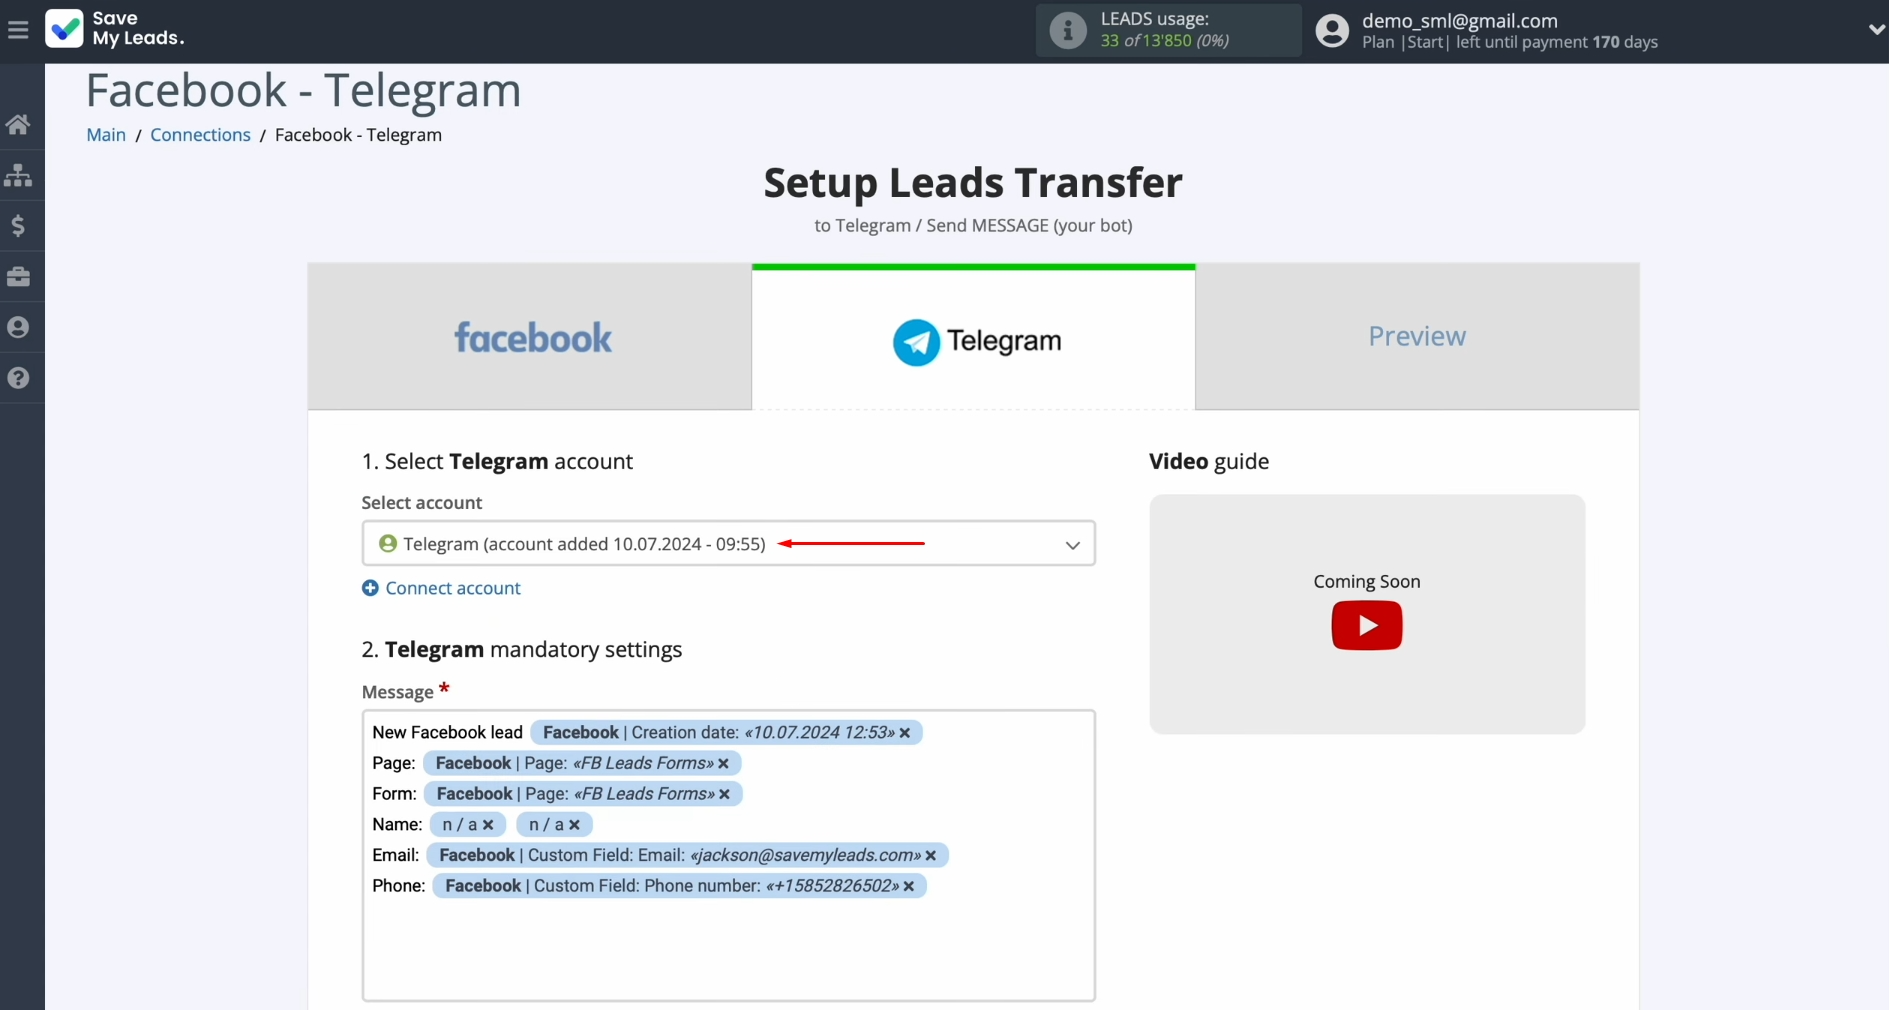
When the
connected login appears in the list, select it.
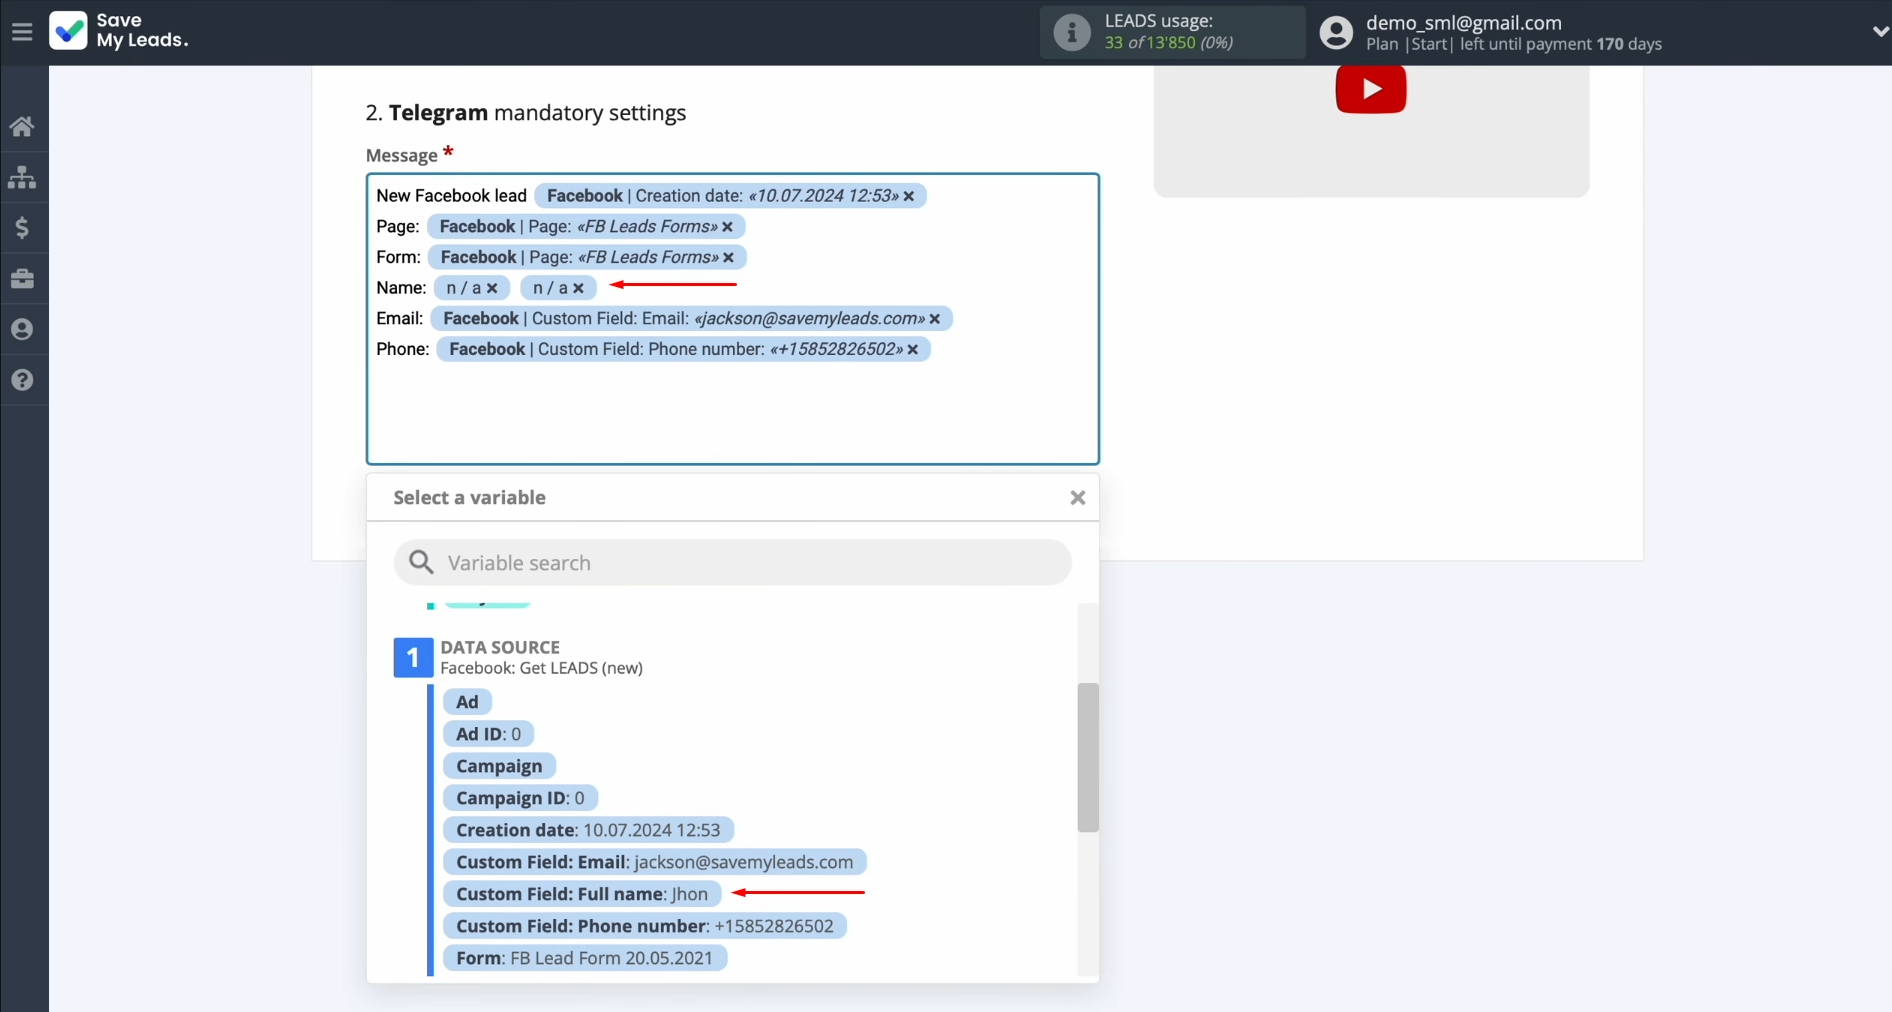
You will see the Message field in which you
can assign variables from Facebook. To do this, click in the field and
select a variable from the drop-down list.
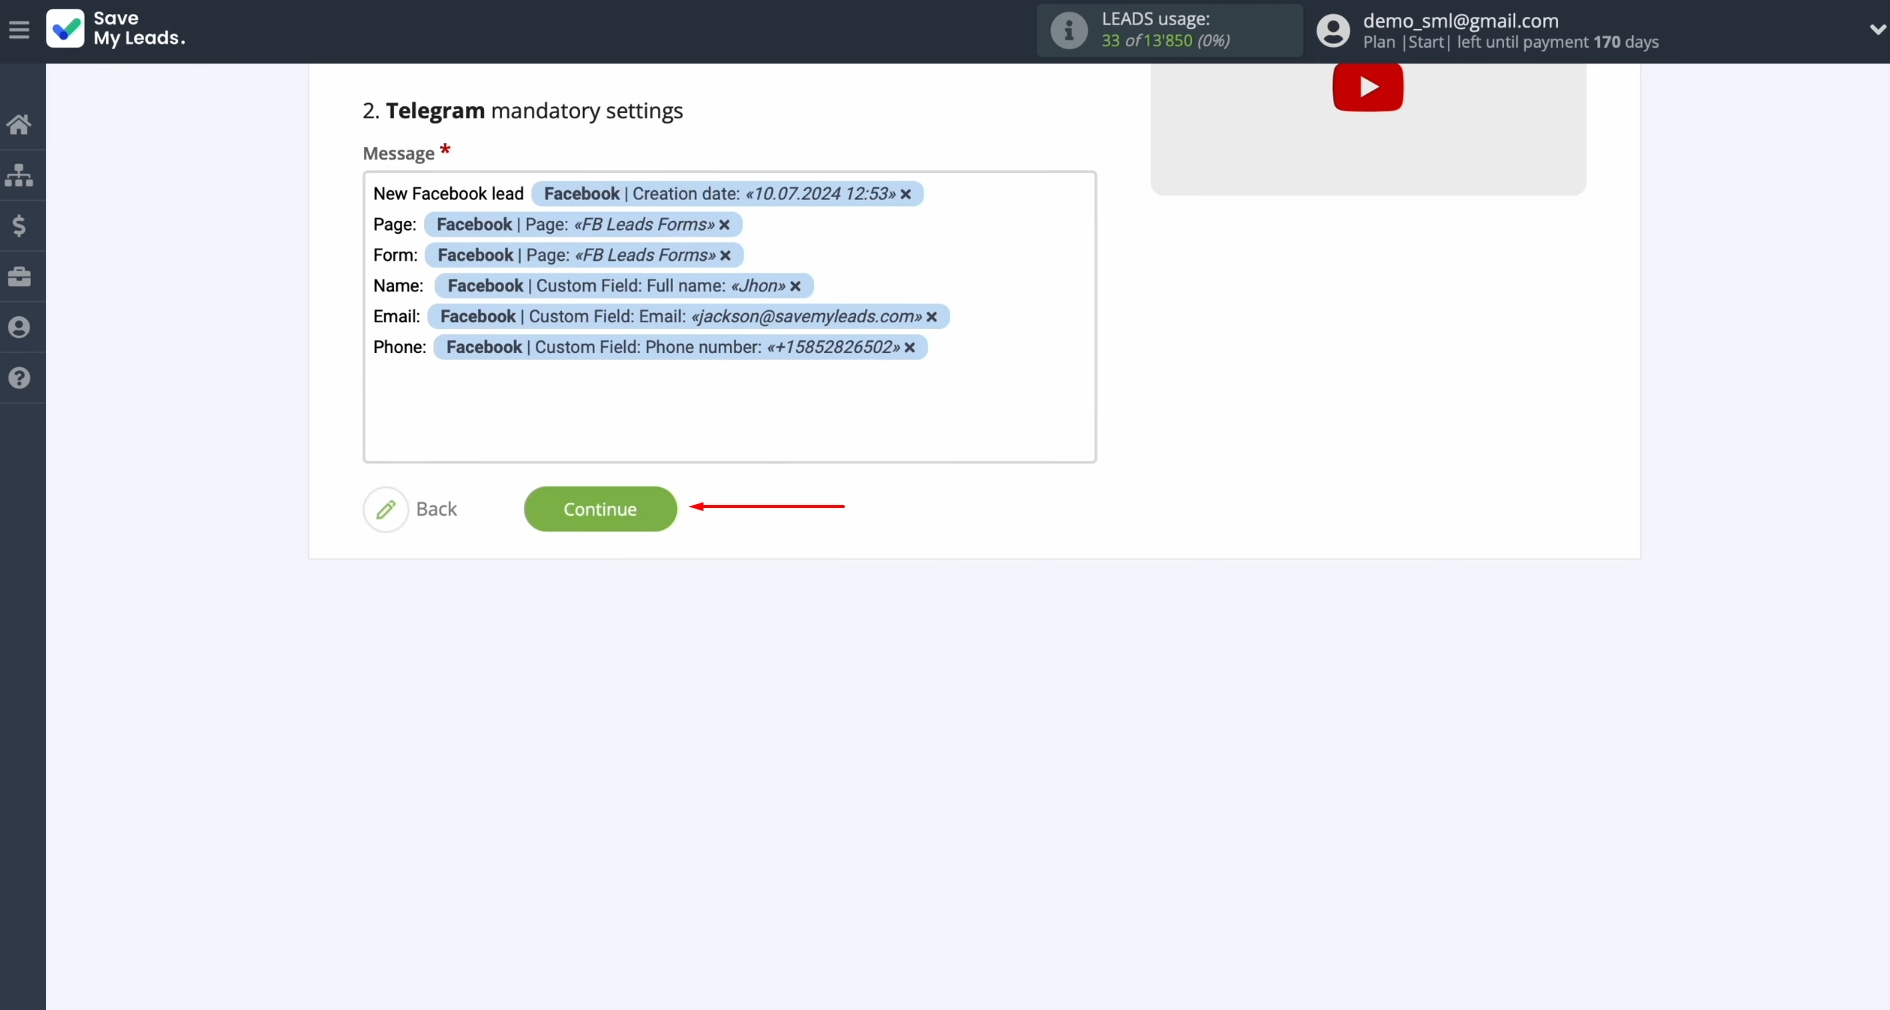
When all
required fields are filled in, click “Continue”.
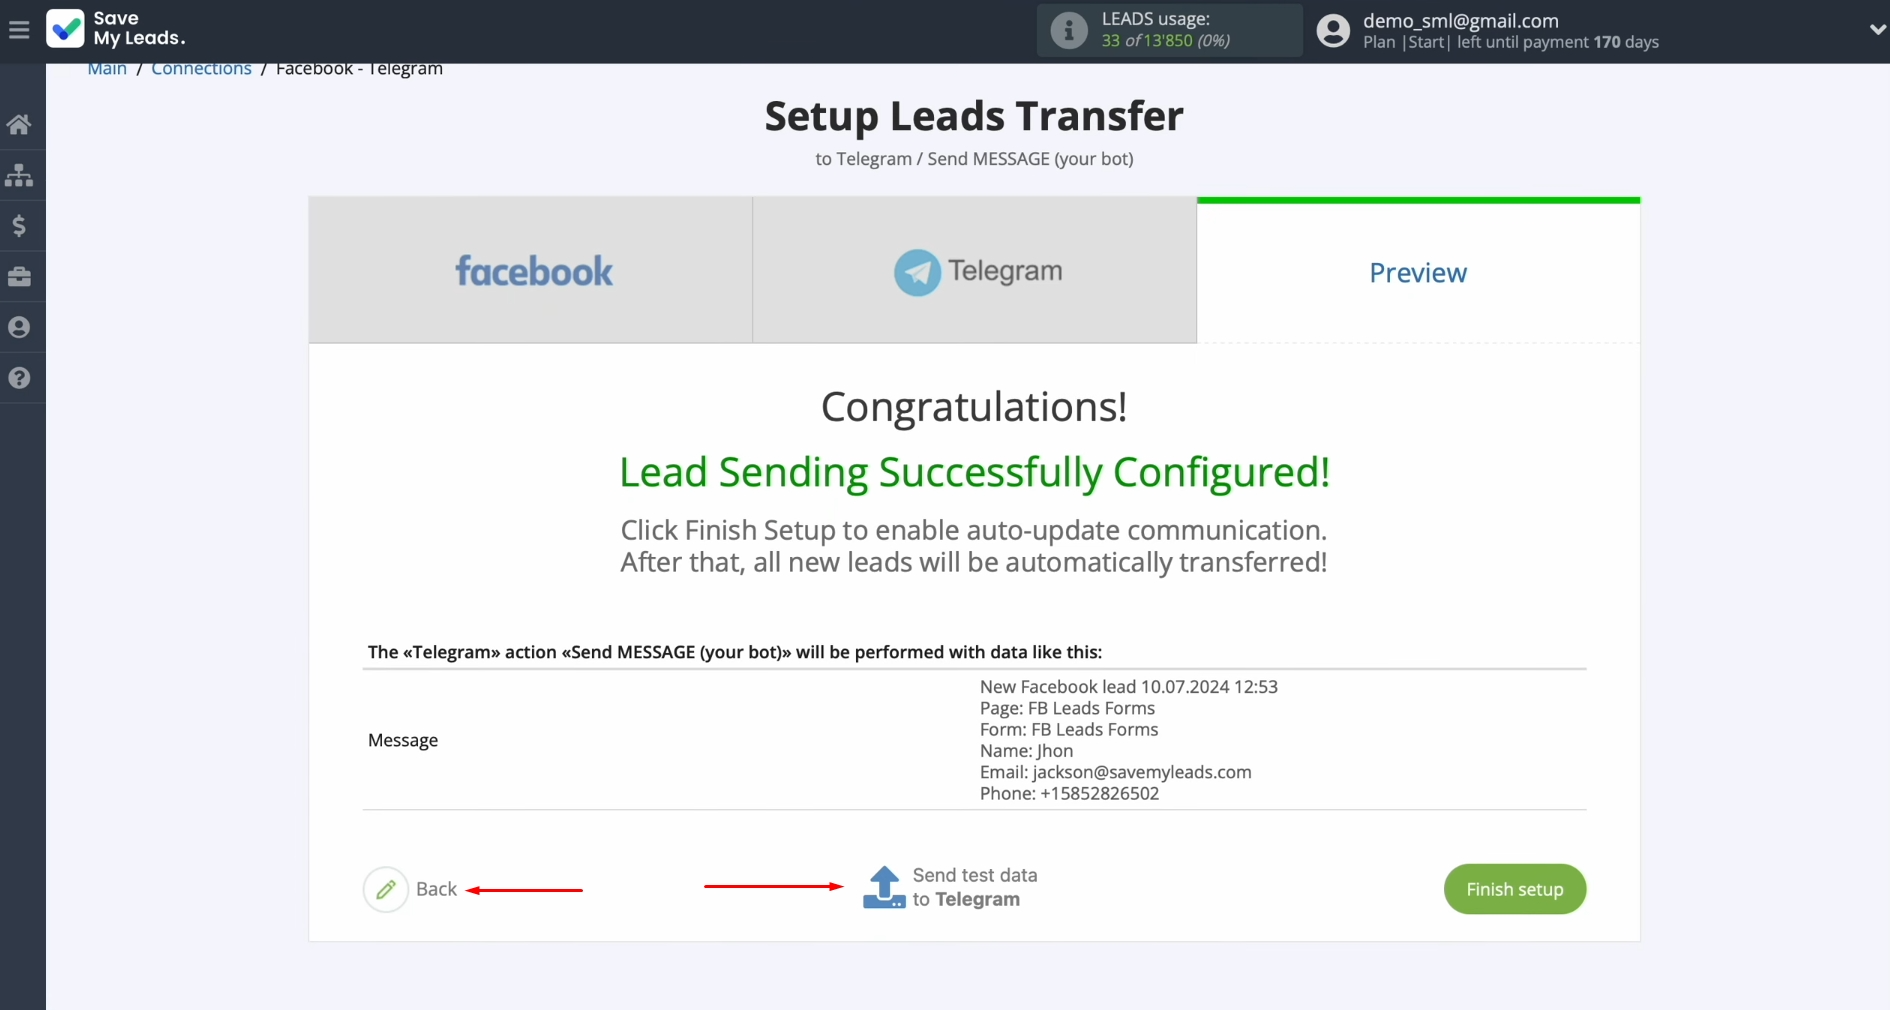
You will see an example of data that will be
sent to Telegram to your bot with each new lead from Facebook. If you are not satisfied with
something, click “Back” and go back a step. To check the correctness of the
settings, click “Send test data to Telegram”.
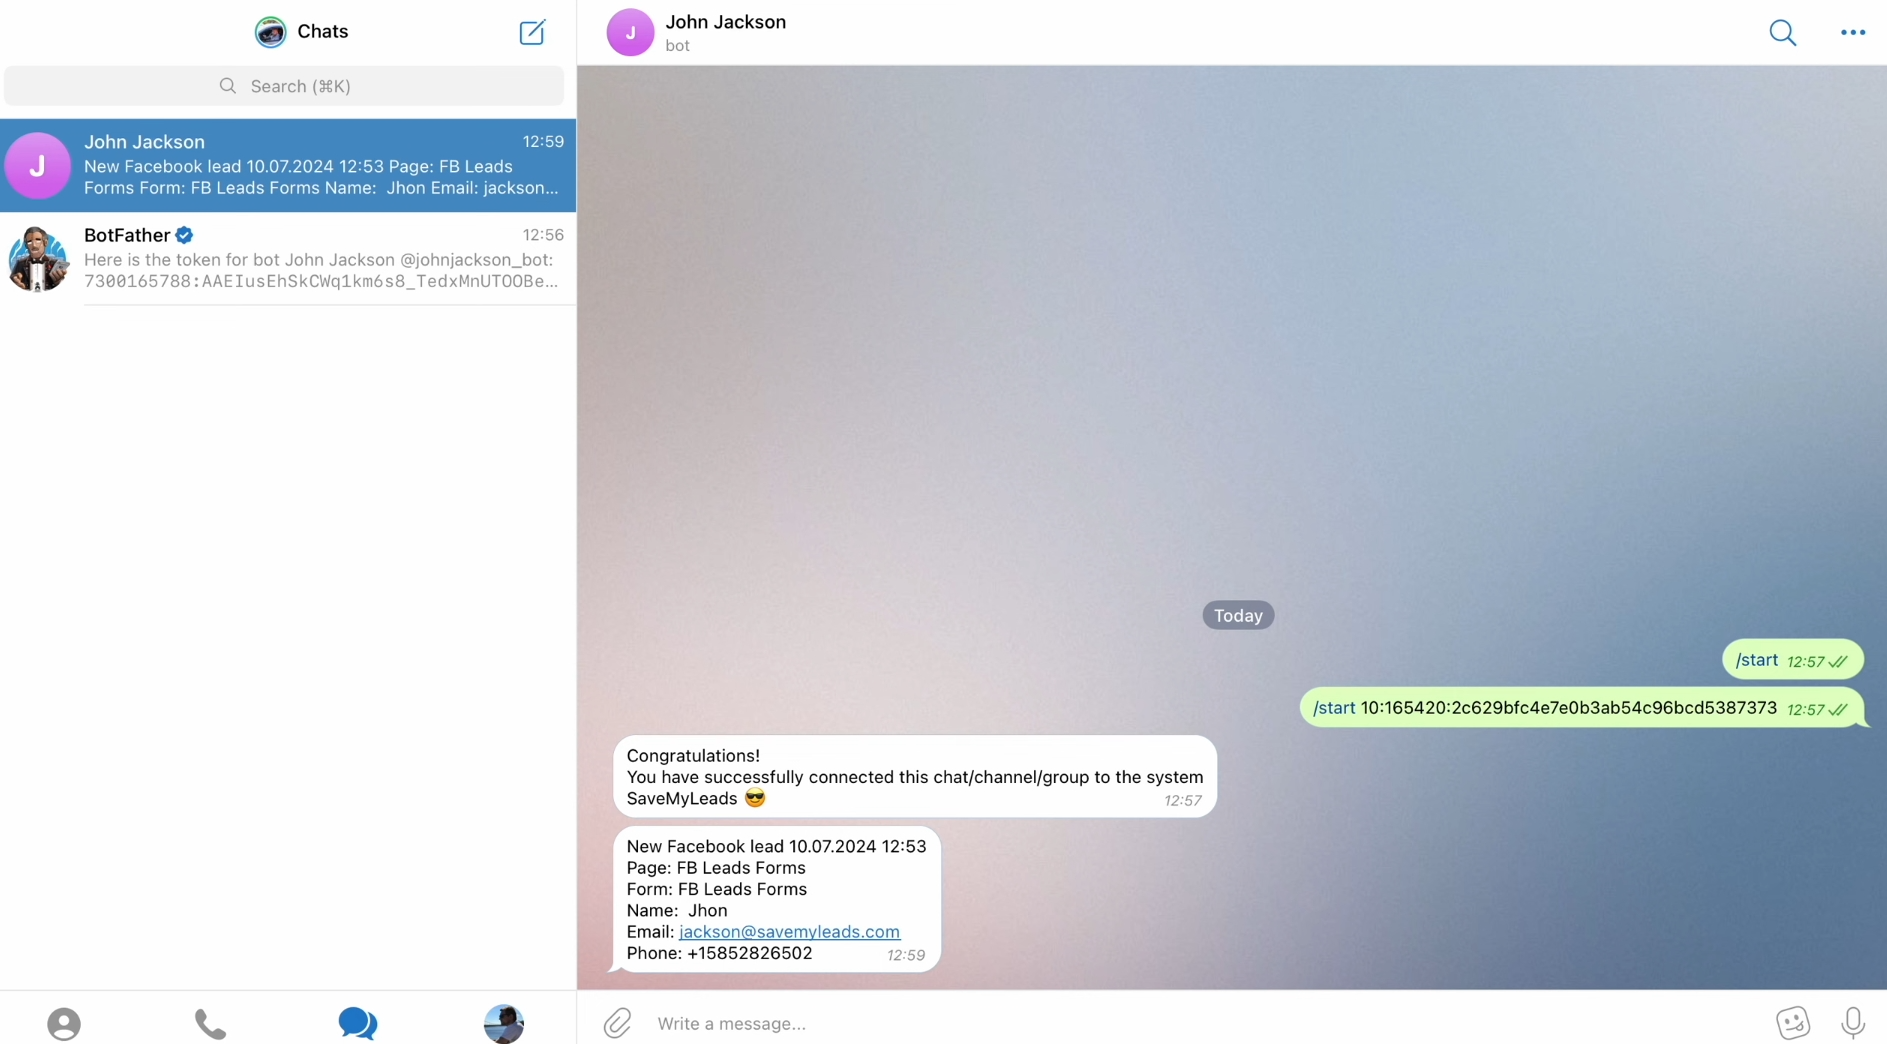
Go to your Telegram bot to check the result. If you are
satisfied with everything, return to SaveMyLeads and continue setting up.
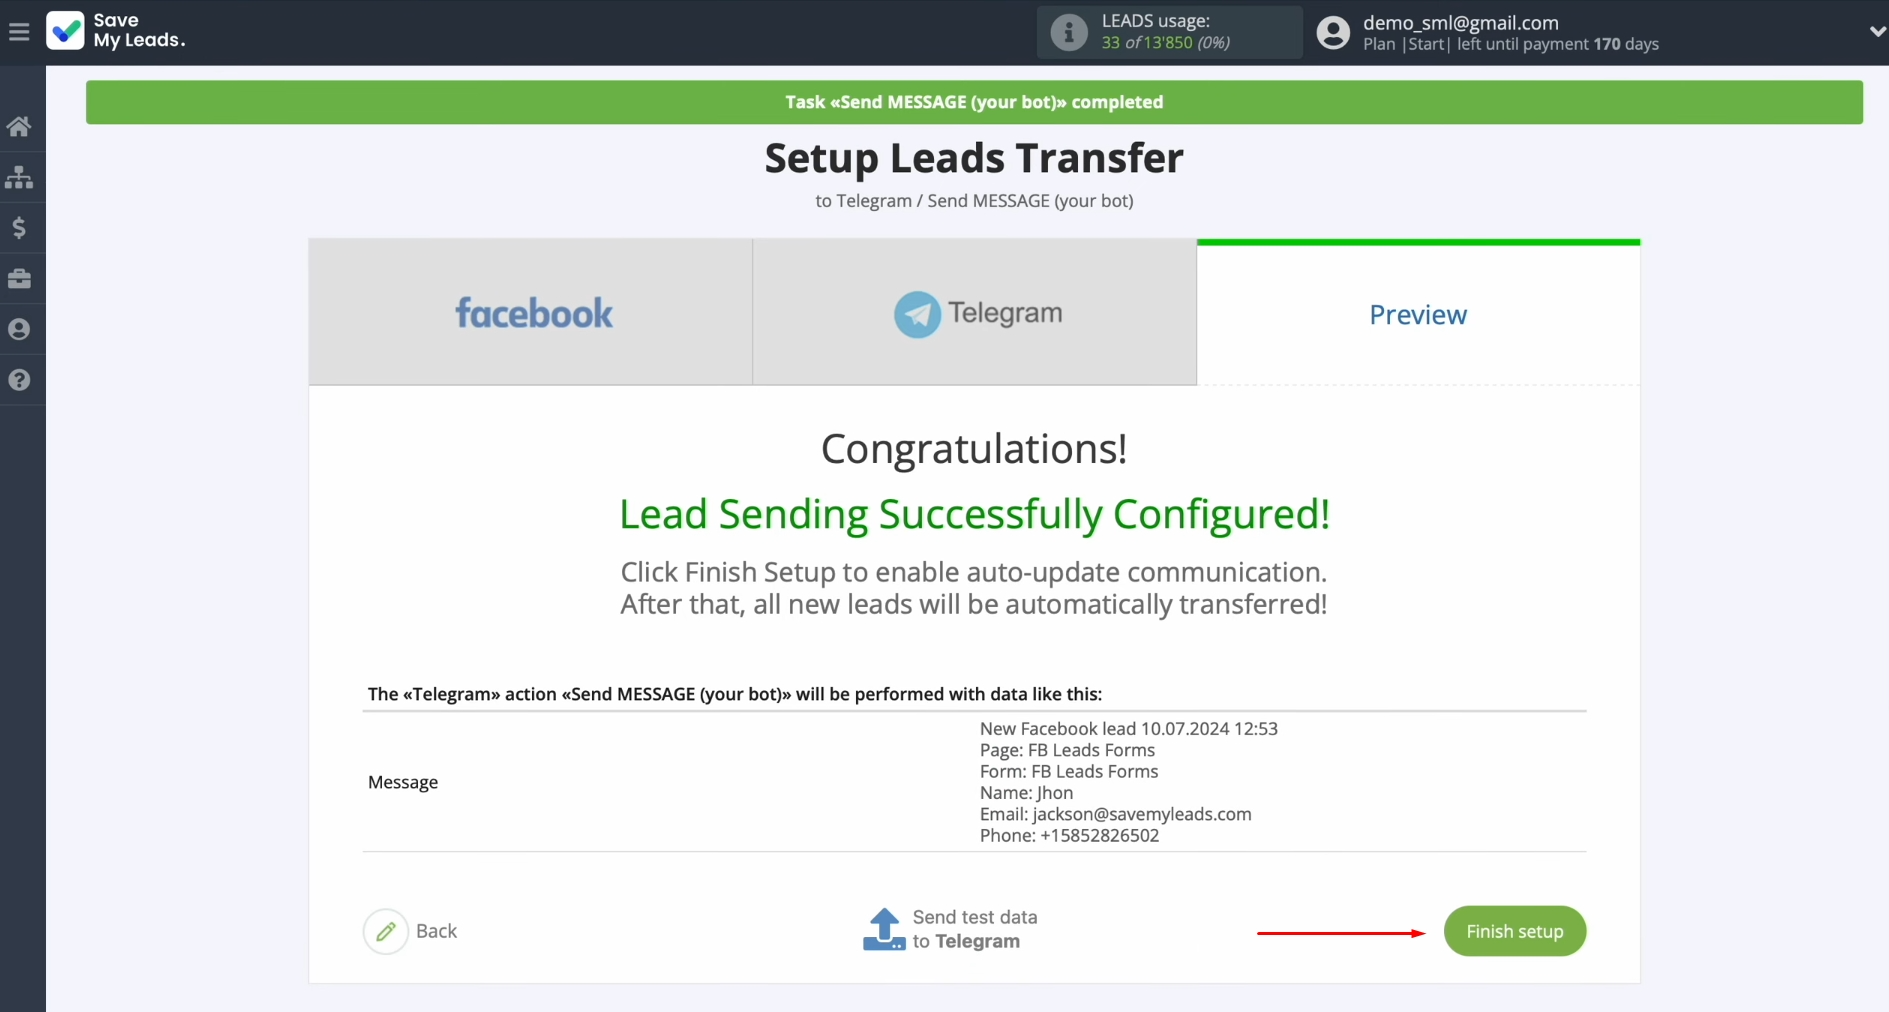
Setting Up Auto-update
Click “Finish setup” to enable auto-update of the connection. In this case, all new leads from Facebook will be instantly transferred to your Telegram bot.
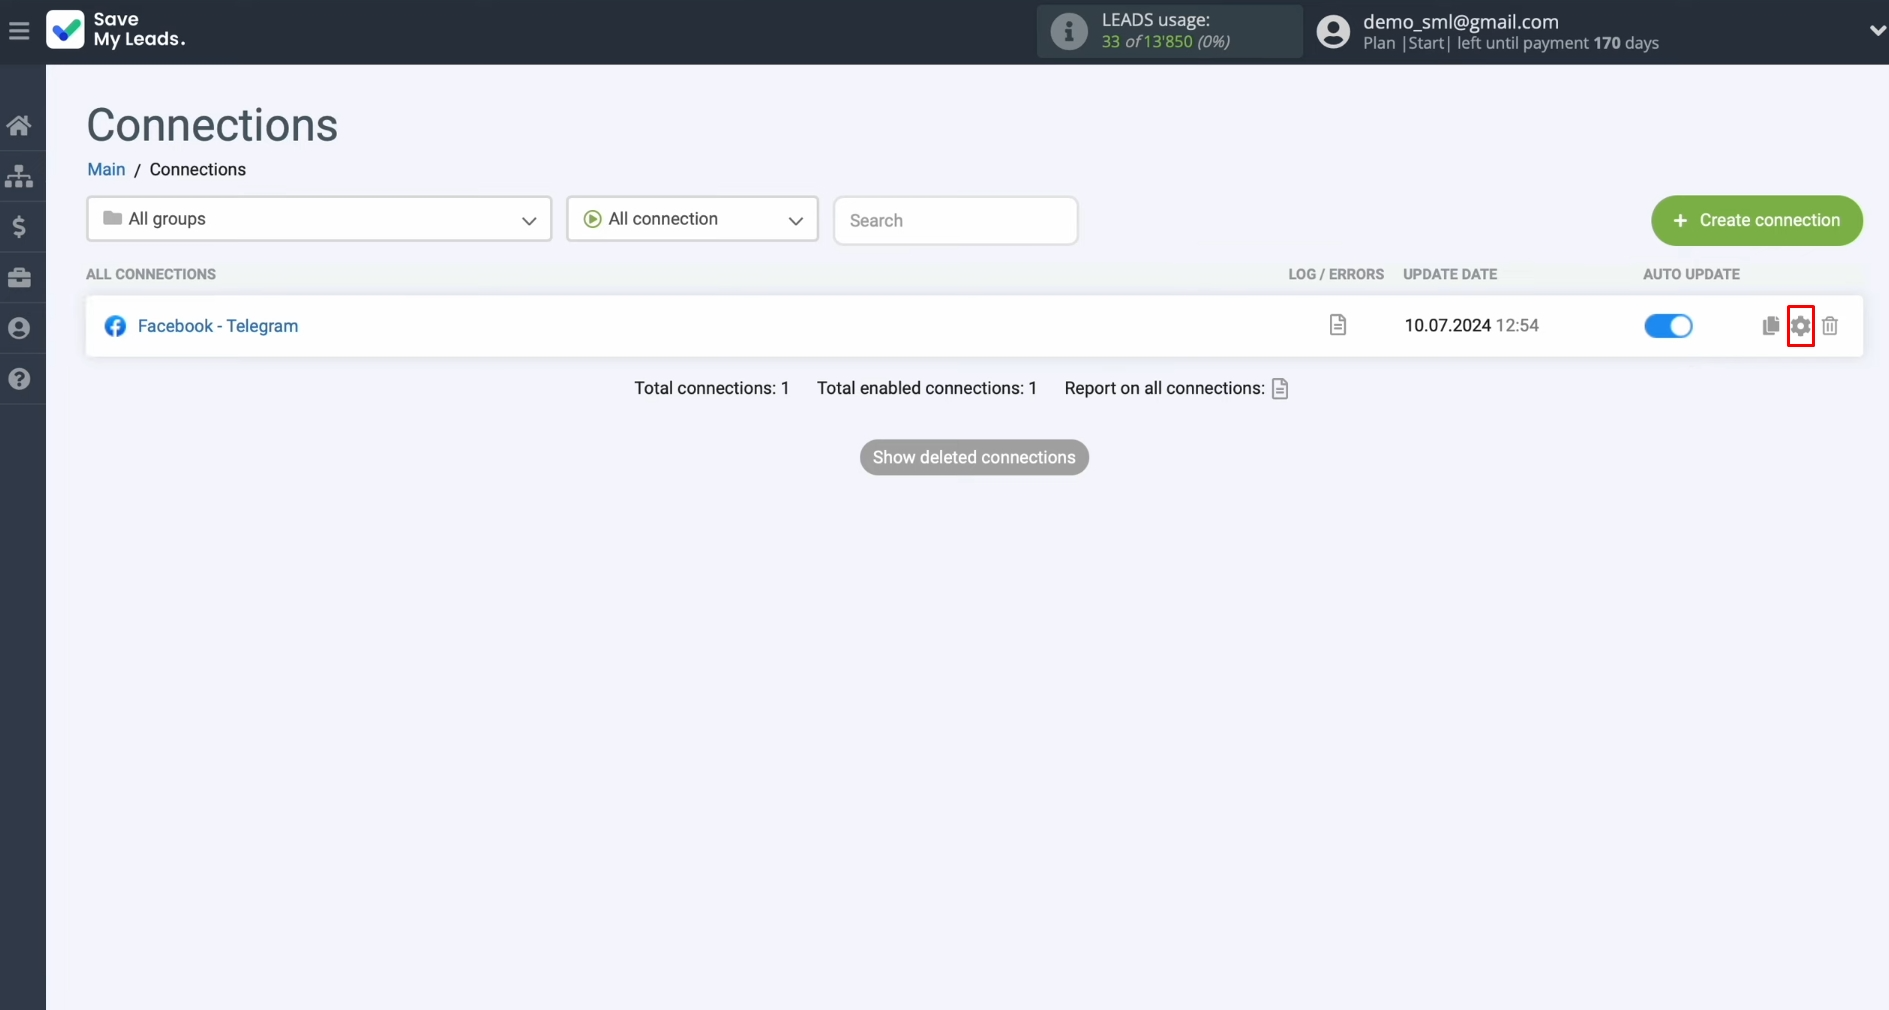
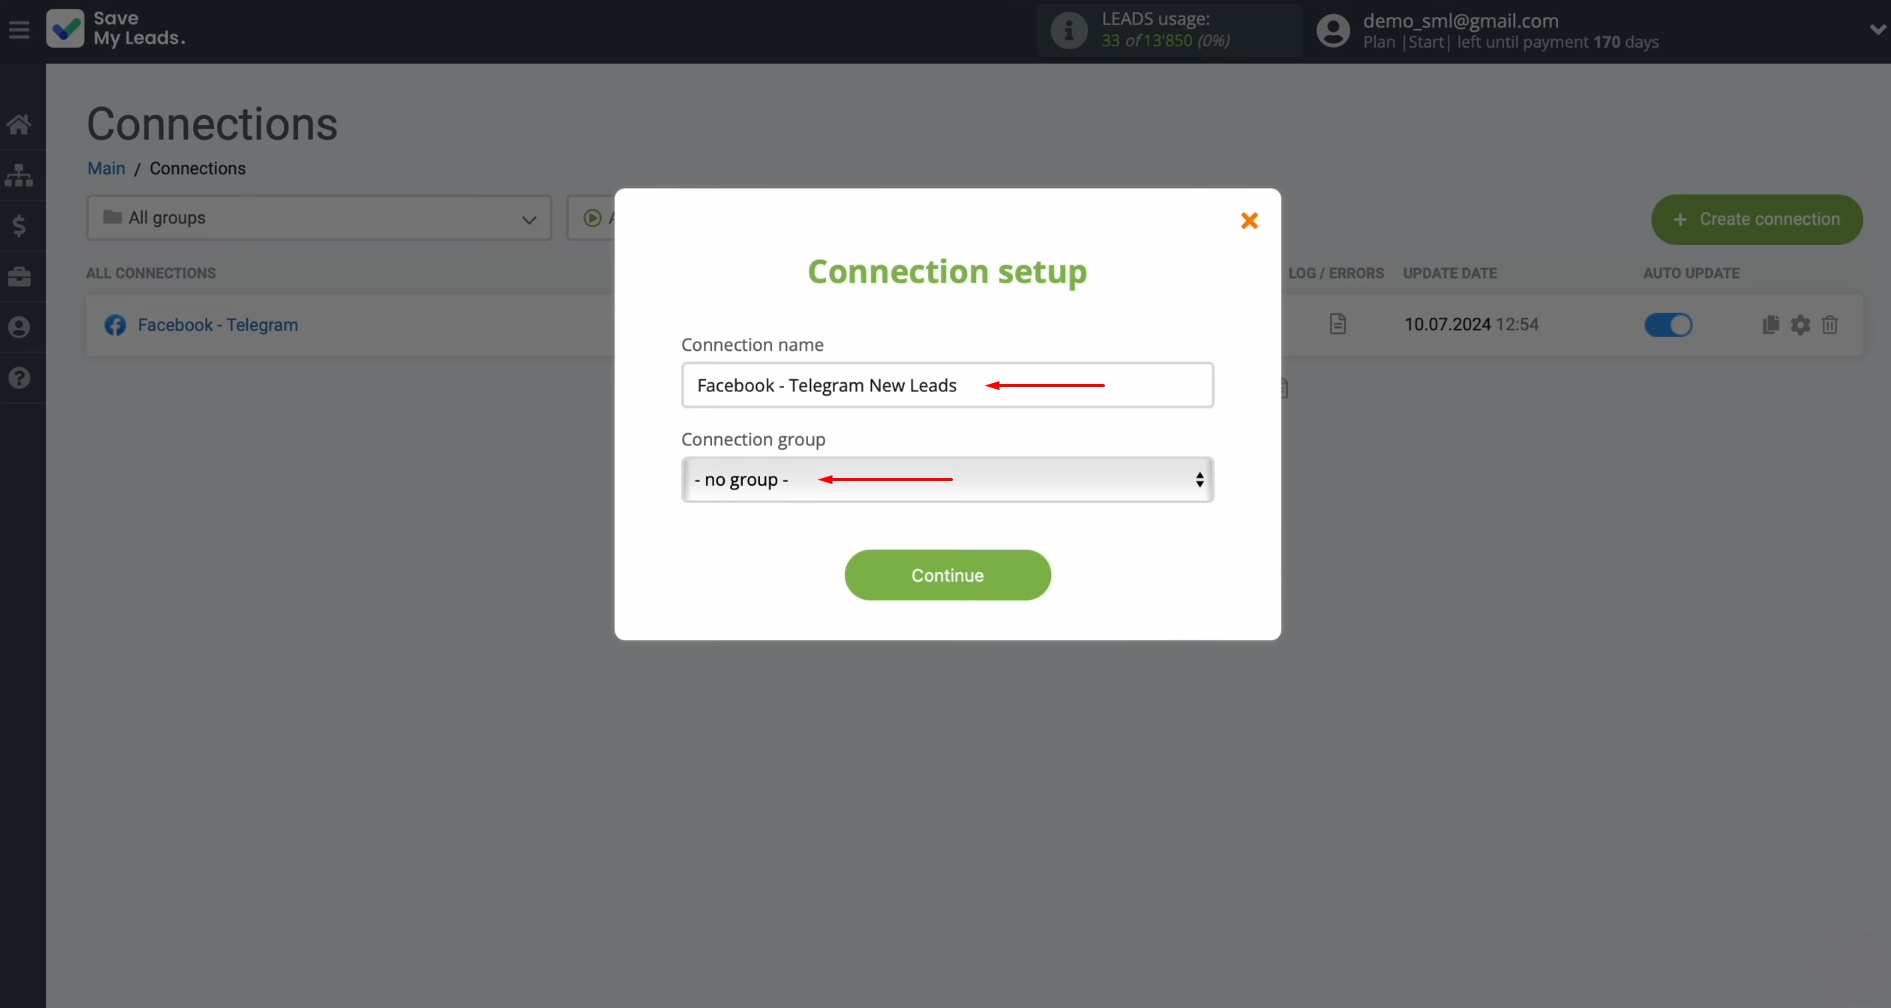
If you want to change the connection name, you can do this in its
settings. For this, click on the gear icon.
Here, you can change the connection name and add your
connection to a group. After that, click “Continue”.
That's all. The Facebook Lead Ads & Telegram integration has been completed.
Results of Facebook-Leads and Telegram Integration
Setting up the Facebook & Telegram integration, following our instructions, should already yield the first results. Every new lead who completes the Lead Ads form will be instantly transferred to your Telegram bot, along with their contact details. Automating this process significantly speeds up the handling of customer requests and simplifies your team's work, eliminating the need for manual data processing.
As you may have noticed, configuring the Telegram & Facebook integration does not require any special skills. It can be easily done through SaveMyLeads' user-friendly web interface. Shortly after launching, the entire process of data transfer will be automated. This will allow you to focus on other aspects of your business, such as enhancing productivity and customer service.
Step-by-Step Guides for Setting Up Integrations:
