A business without automation is unlikely to become successful today. Progressive entrepreneurs and companies are trying to optimize work processes as much as possible in order to save time and budget, as well as gain a competitive advantage. For this purpose, automation services, system connectors, and artificial intelligence are used. If you use Facebook Lead Ads to promote products or services, as well as collect feedback from clients, and Freshdesk to support, you can significantly speed up and simplify your work. To do this, you just need to connect both platforms with each other using our SaveMyLeads online connector. It will allow you to automate the transfer of leads from a social network to the "help desk" service and the creation of new contacts in the latter. This will eliminate the need for time-consuming manual data transfer.
Our step-by-step instructions will help you set up and launch the Facebook and Freshdesk integration correctly. If you are still in doubt, we have prepared several compelling arguments why you should still use the SaveMyLeads connector.
Why Choose SaveMyLeads?
When properly configured to transfer customer data from Facebook to Freshdesk using SaveMyLeads, it will be automatically and seamlessly included in the "help desk" service. There, it is immediately formalized as a new contact.
A few words about why we suggest you use SaveMyLeads for Freshdesk and Facebook integration. Firstly, this no-code tool makes setup simple, easy, and fast. Thanks to the intuitive interface, a user with any level of training can do it in a maximum of 10 minutes. Secondly, this connector offers many ready-made solutions for CRM systems, email and SMS services, instant messengers, task managers, Google services, and more. Some of them may be of interest to you if you want to automate as much as possible and integrate other systems that you also use. Thirdly, its pricing is quite budget-friendly. And finally, let’s note the professional and responsive technical support, which is an undeniable plus.
How to Set up Facebook-Leads and Freshdesk Integration
Algorithm of actions:
- Create a Facebook Lead Ads form for the task you need.
- Register an account with SaveMyLeads.
- Connect Facebook as a data source.
- Specify the Facebook page and form from which you want to forward leads.
- Connect and configure Freshdesk as a data sink.
- Activate auto-update mode.
We won't go into creating a Facebook form here, since you most likely already know how to do it. But let's look at the next actions step by step.
Setting up the Data Source – Facebook
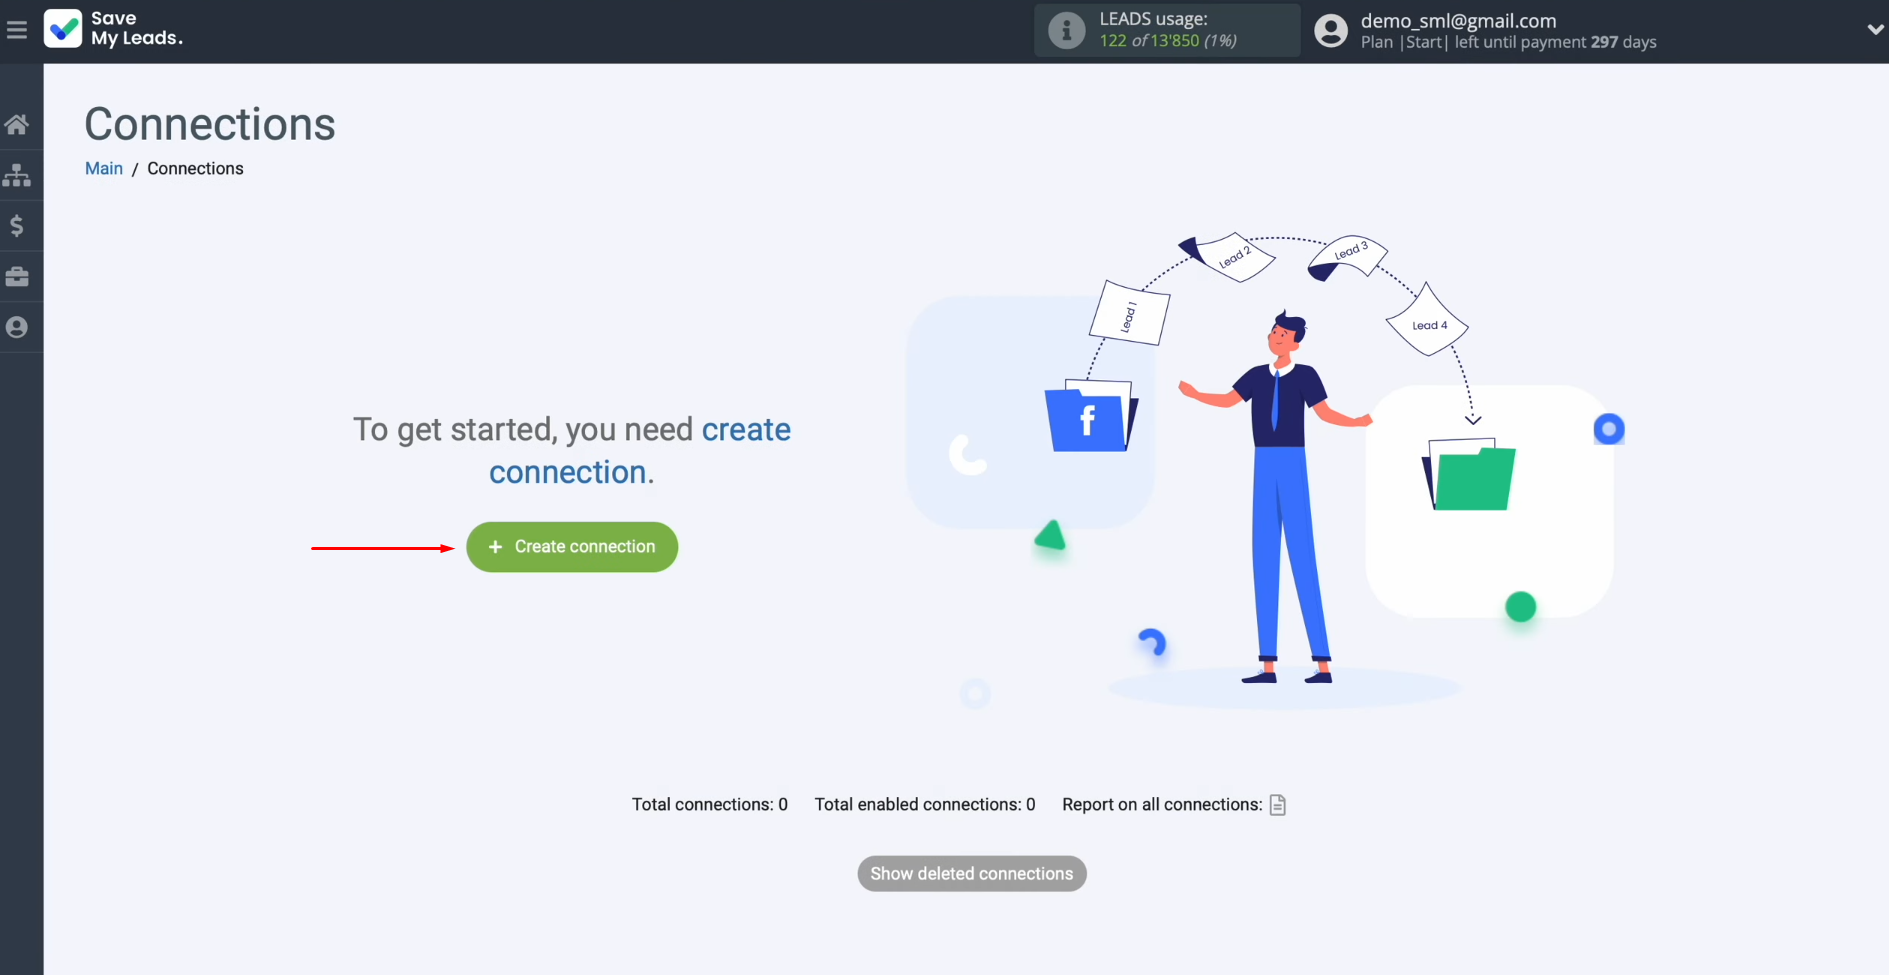
To set up Facebook integration with Freshdesk, first, you need to create a new connection. For this, click on the green button.
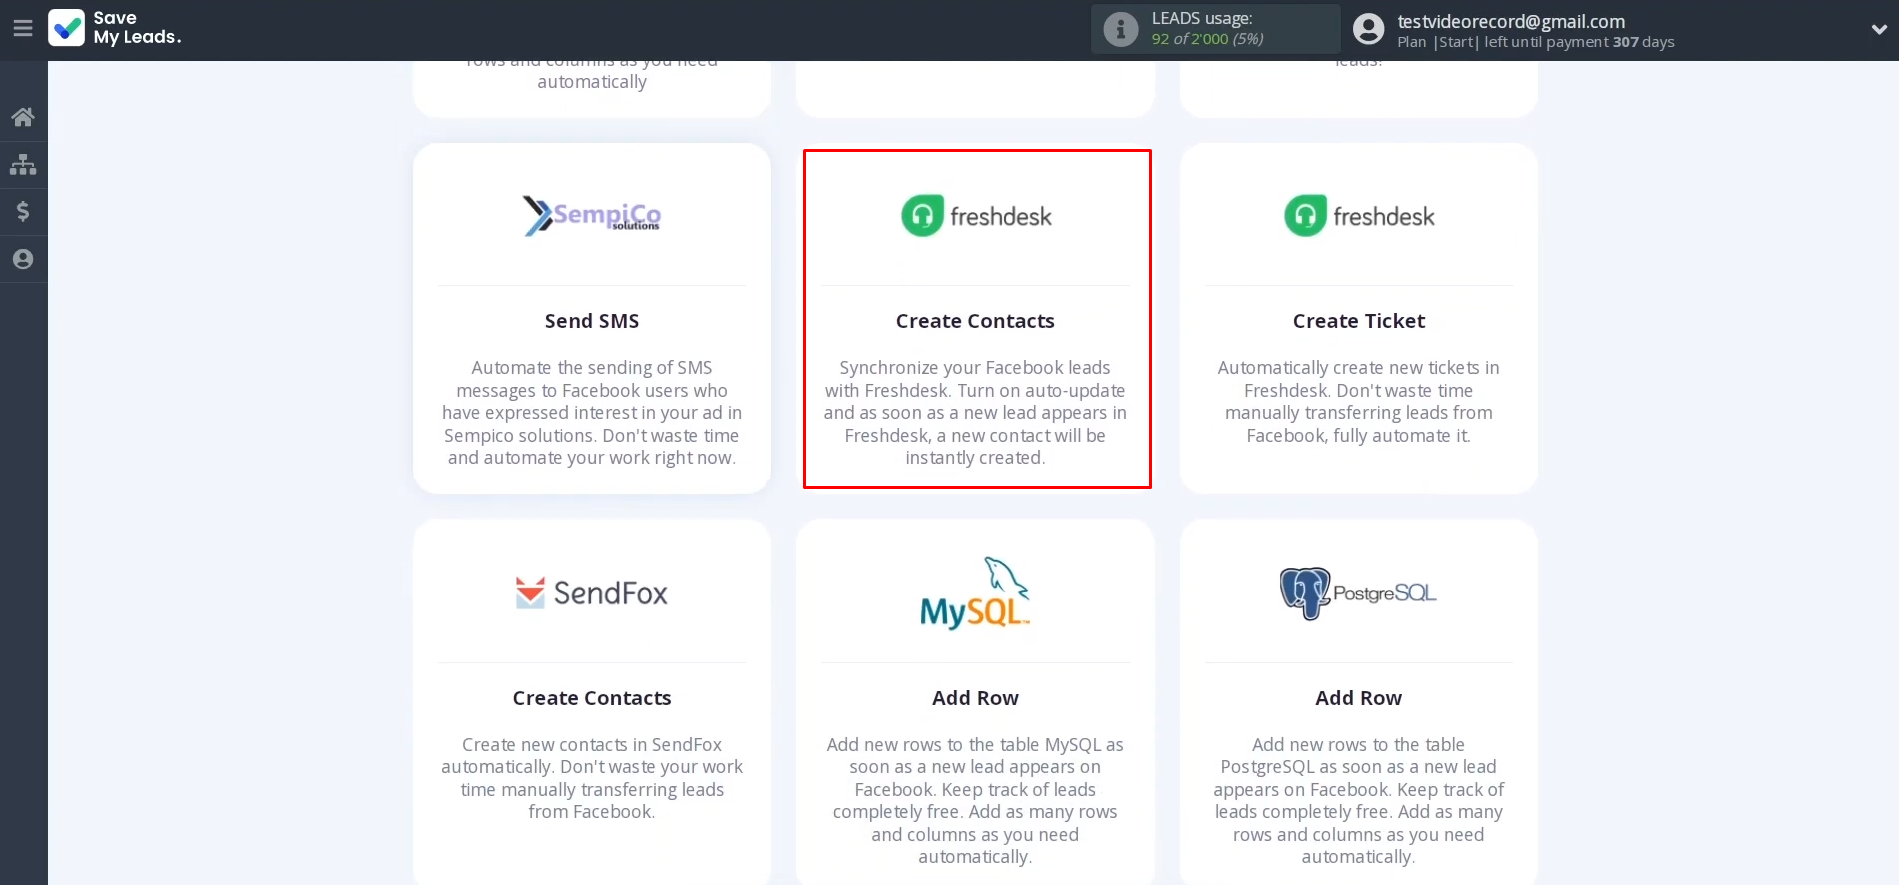
Select the system from which you want to receive new data. You need Facebook.
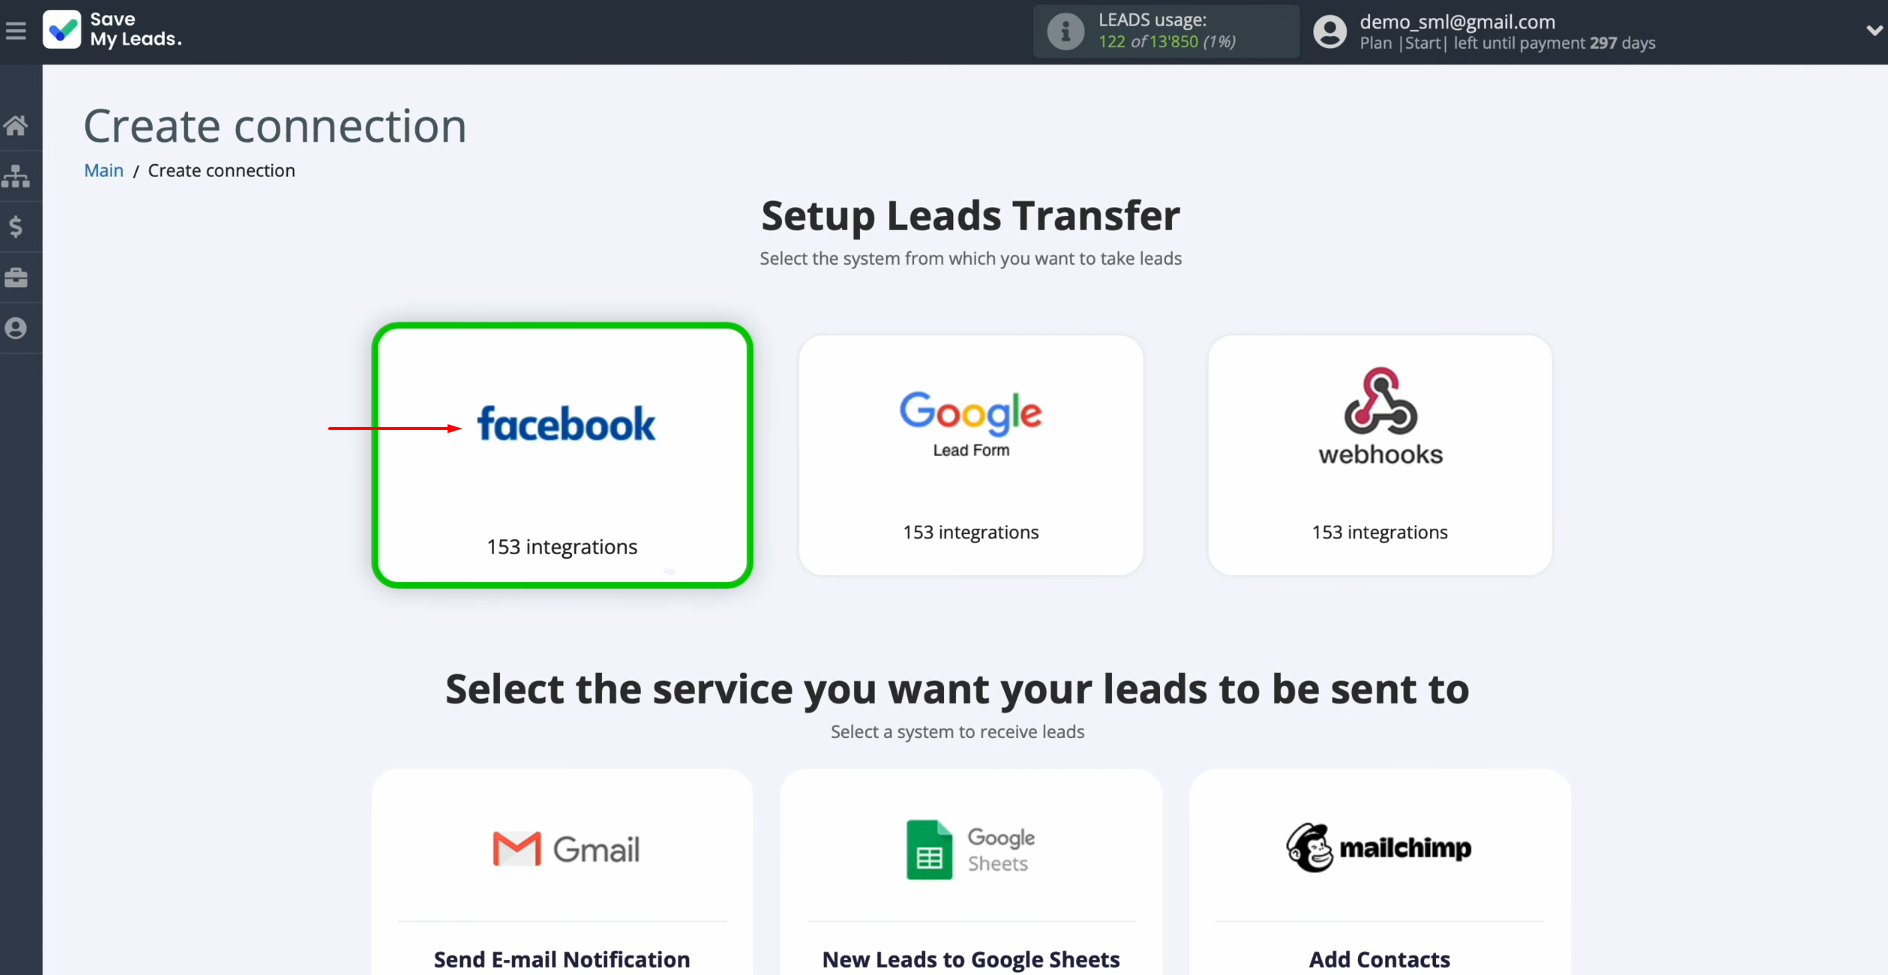
Choose one of
the ready-made
templates where you want to send leads
from Facebook. You need Freshdesk (Create Contacts).
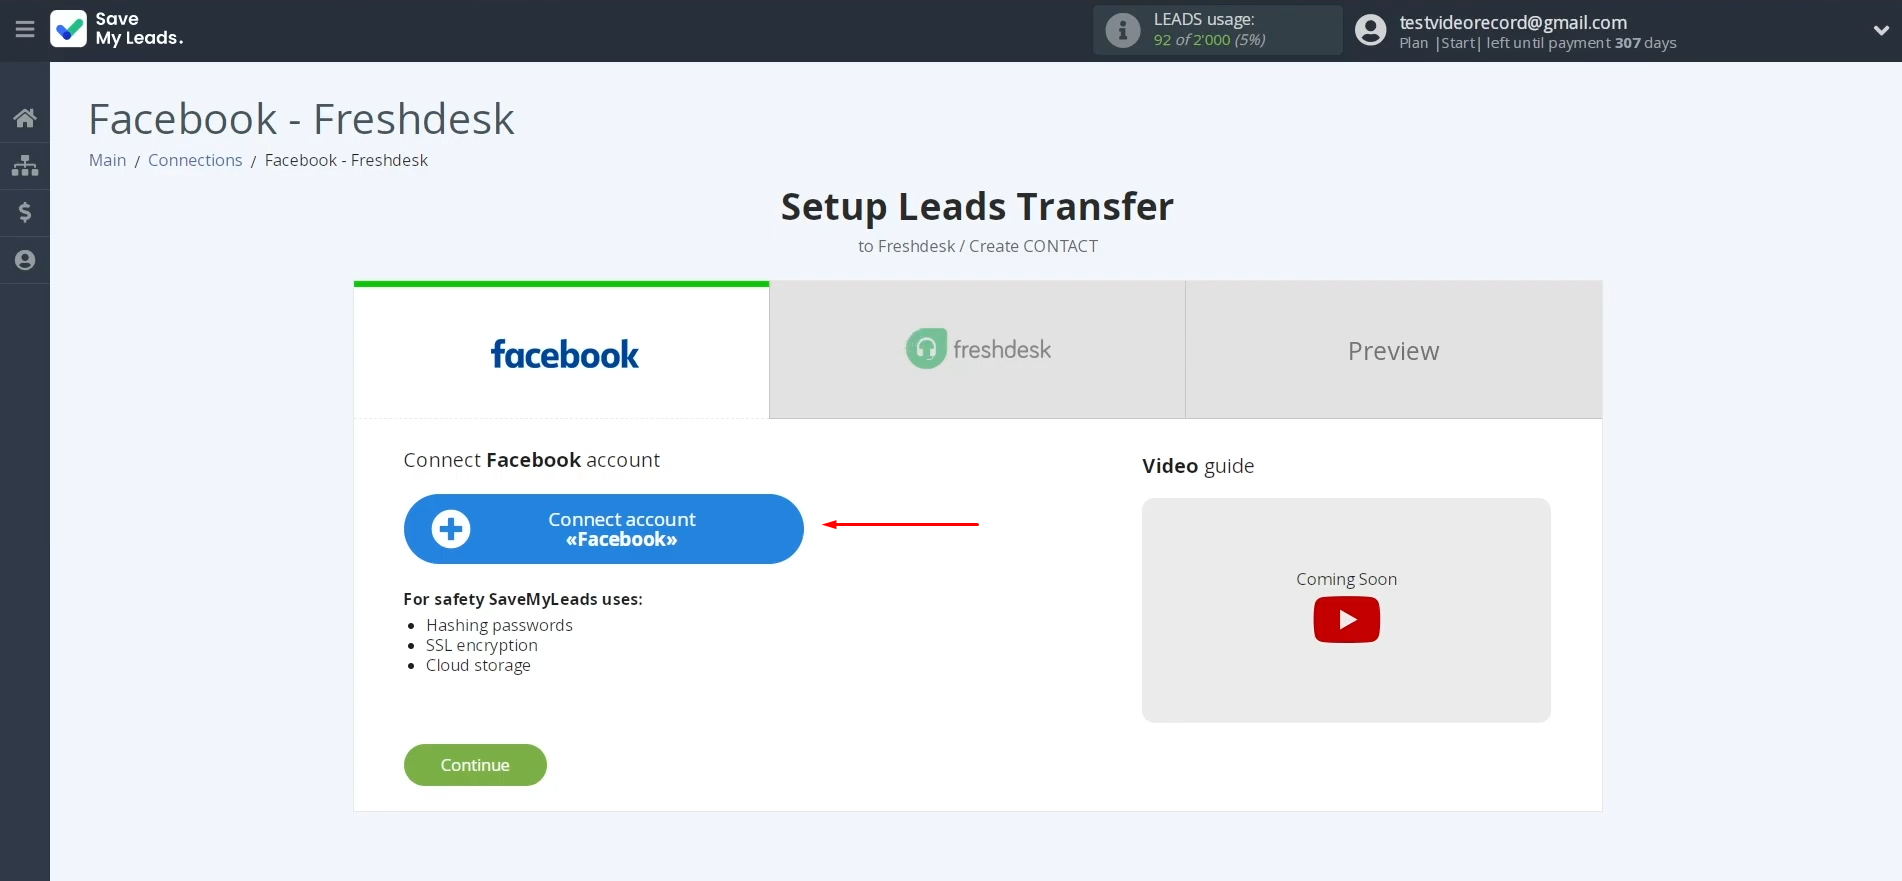
Connect your Facebook
account to SaveMyLeads. To achieve this, press the blue button.
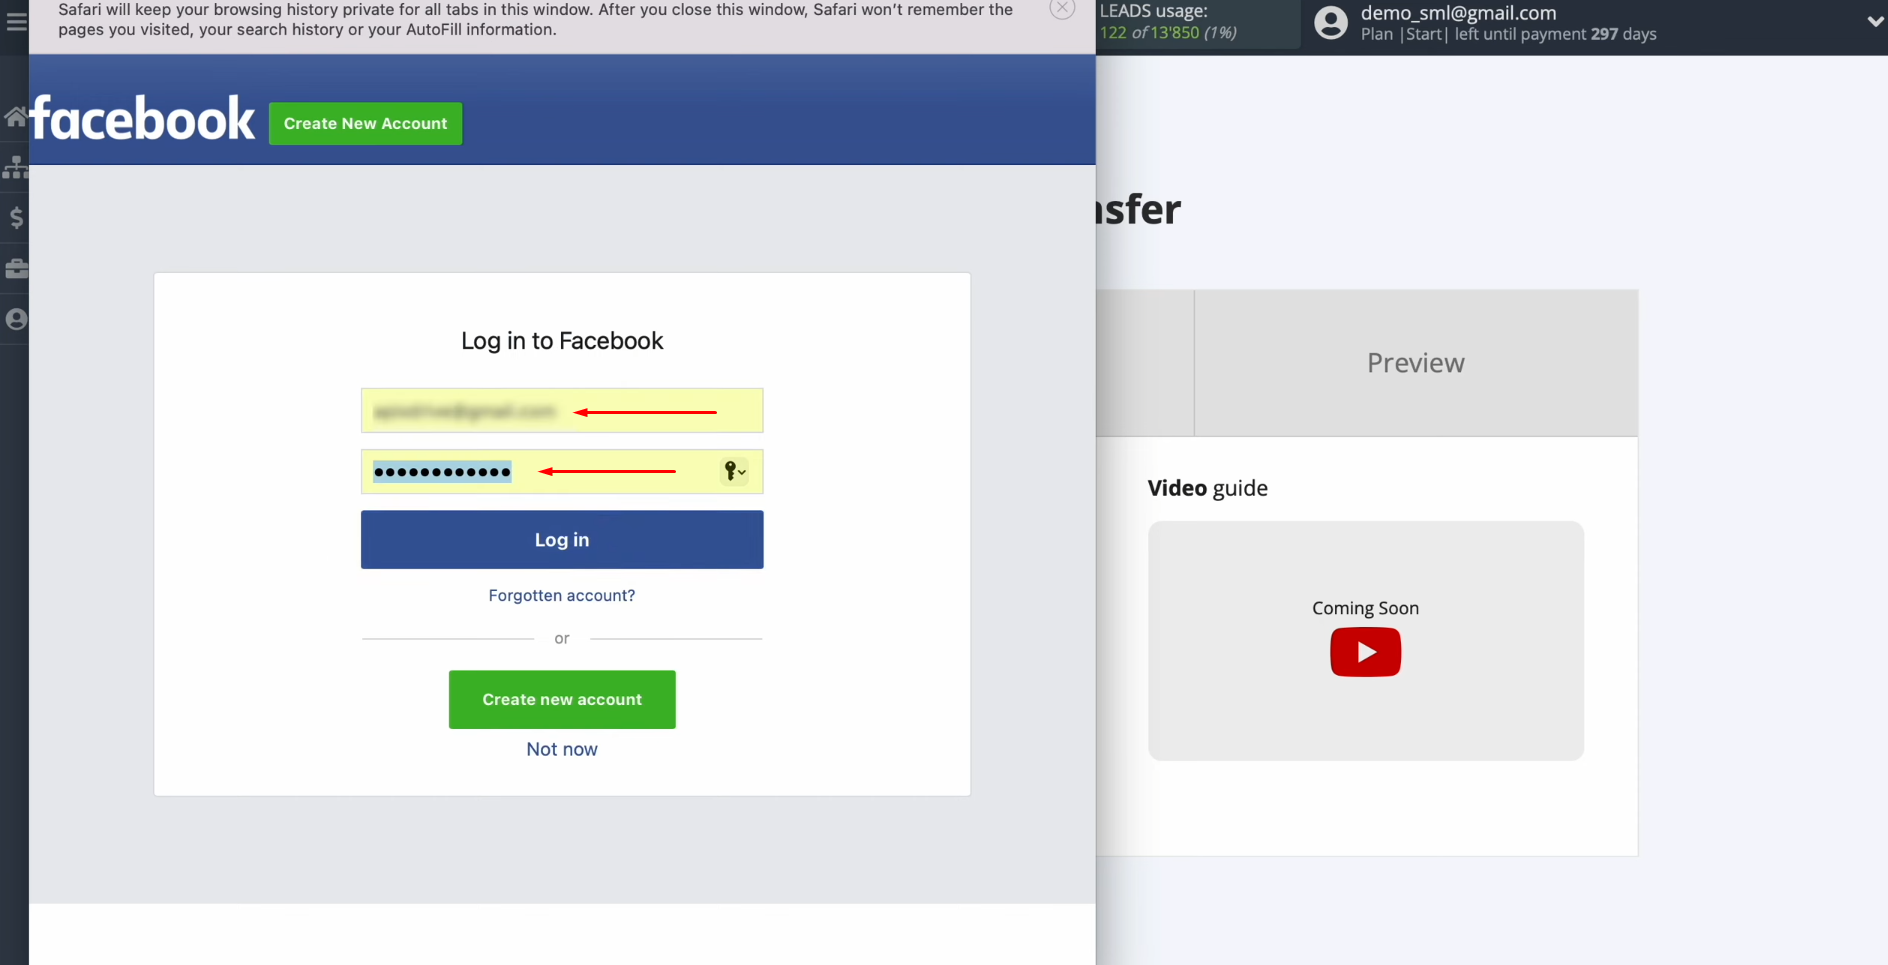
Specify the username and password of the
Facebook personal
account and click “Log in”.
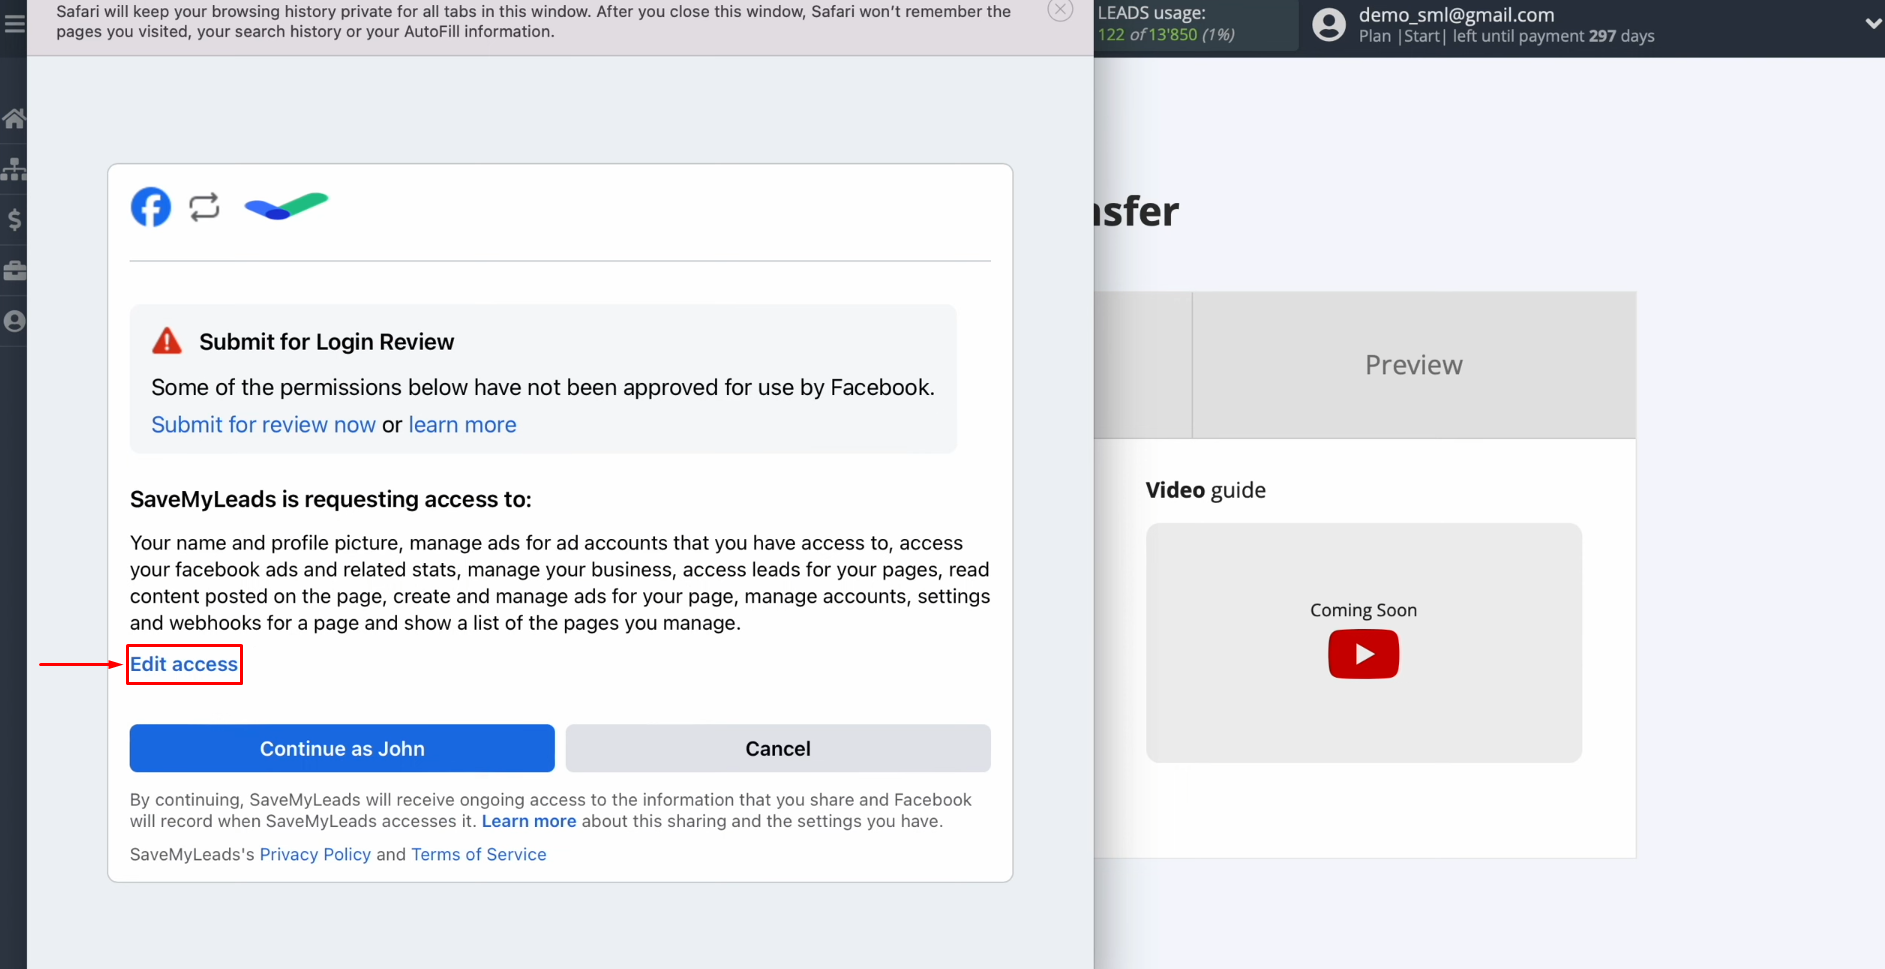
Provide SaveMyLeads access to
work with your Facebook account. To do this, go to settings – click
“Edit access”.
Leave
all access checkboxes enabled.
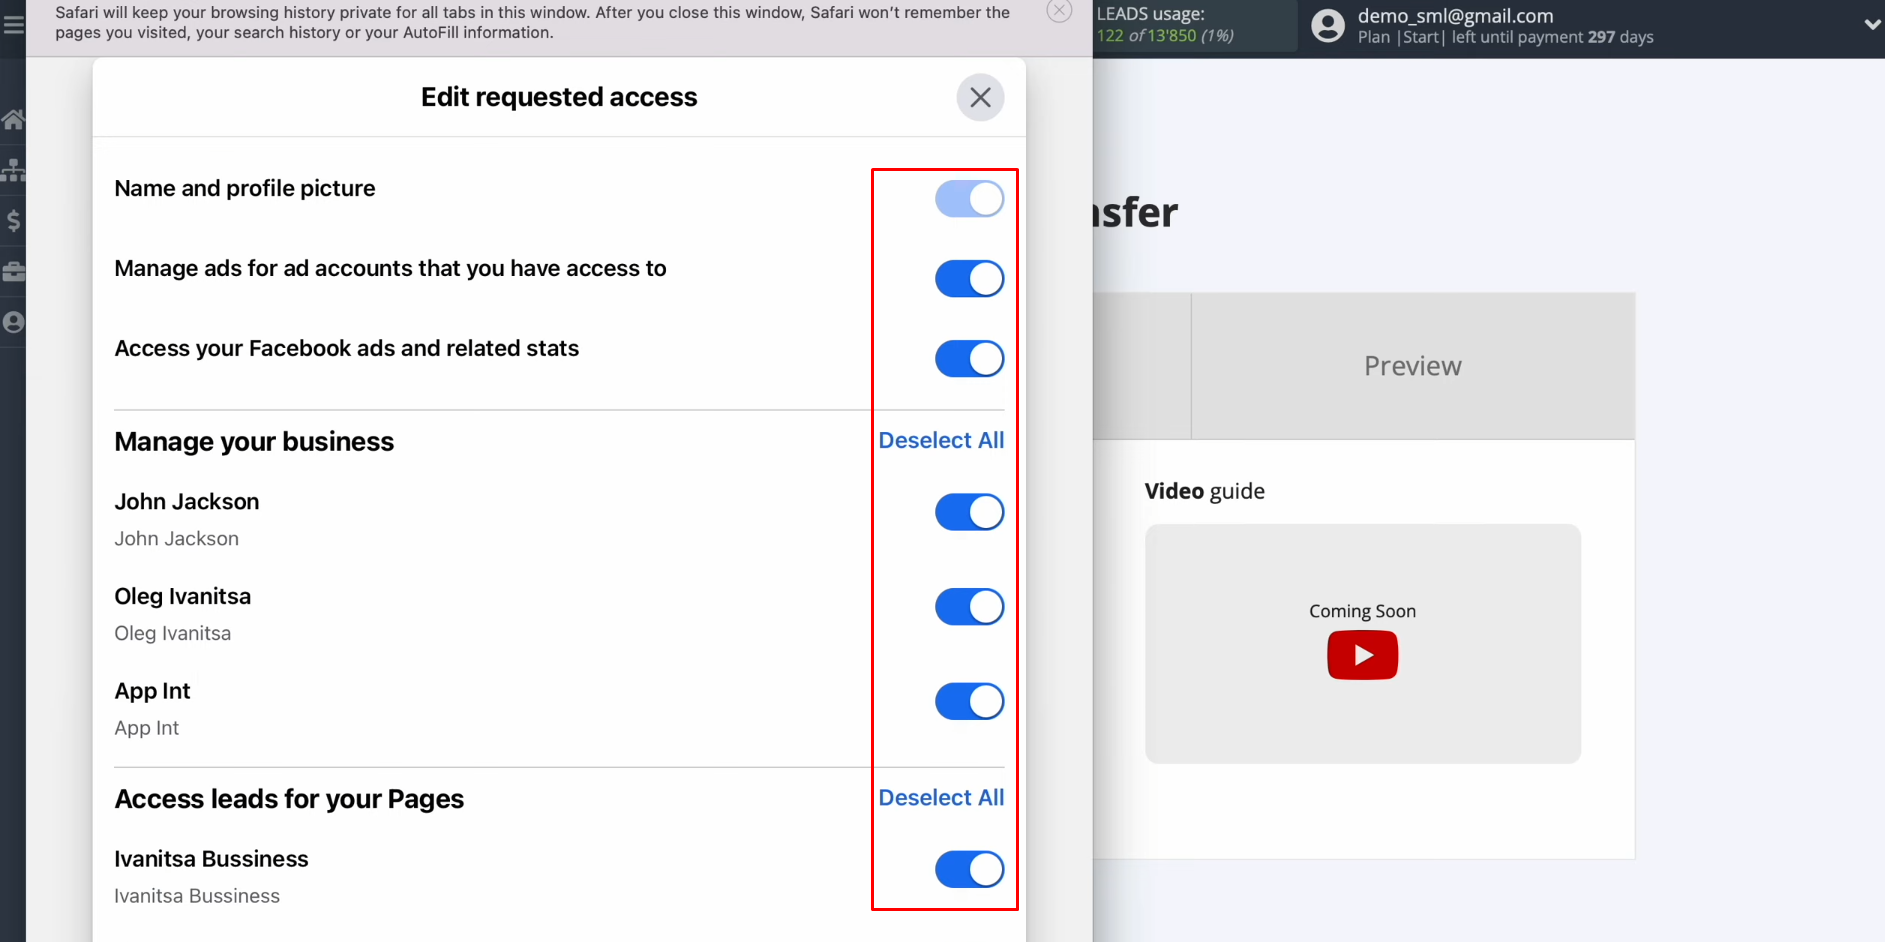
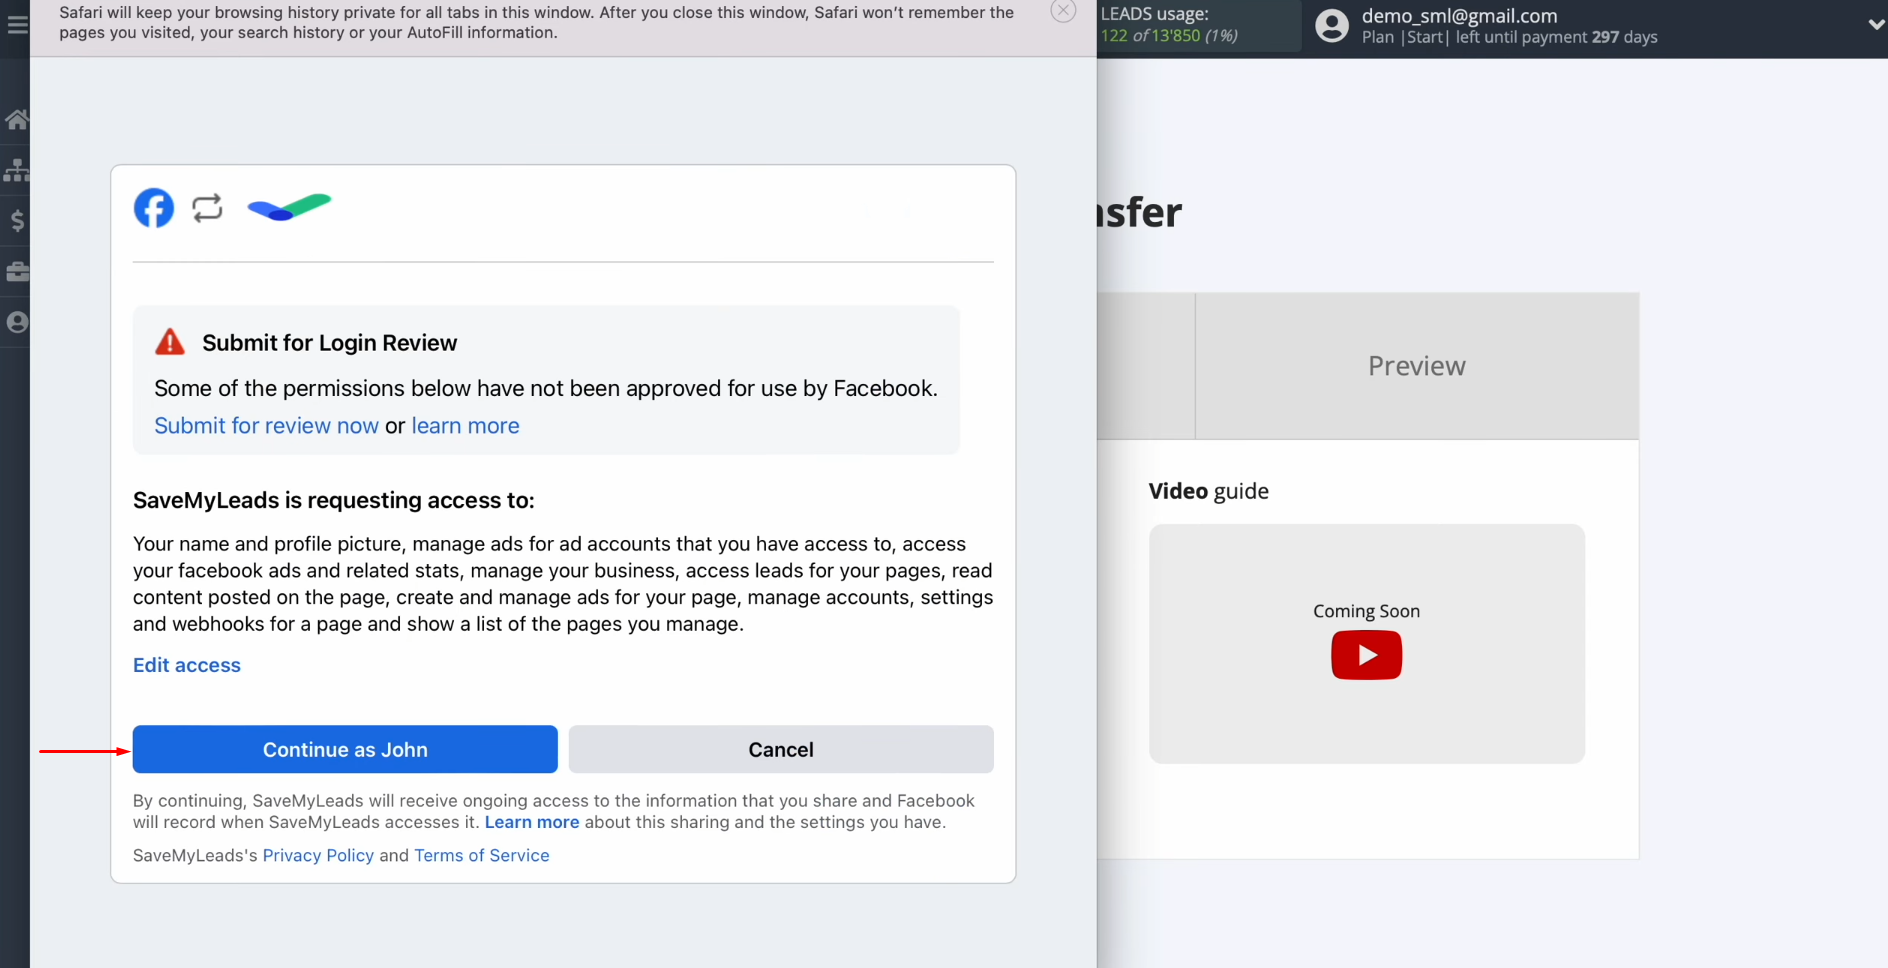
Click
“Continue as…”.
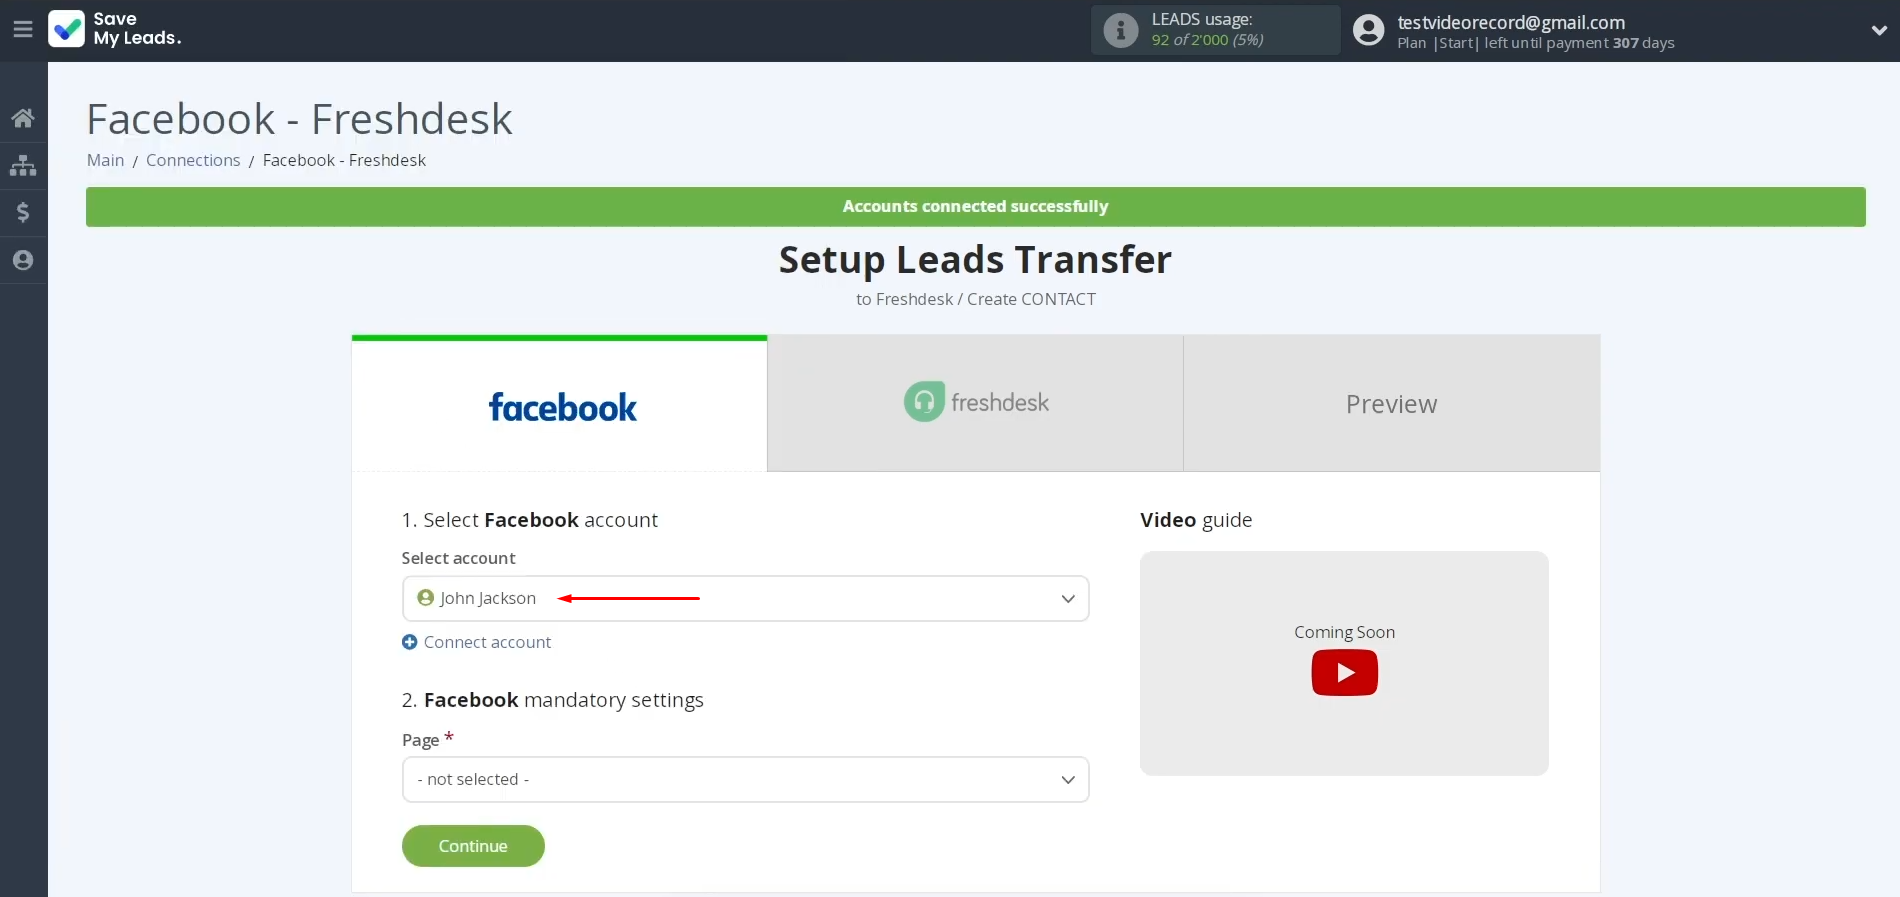
When the connected account is displayed in the list, it must be selected.
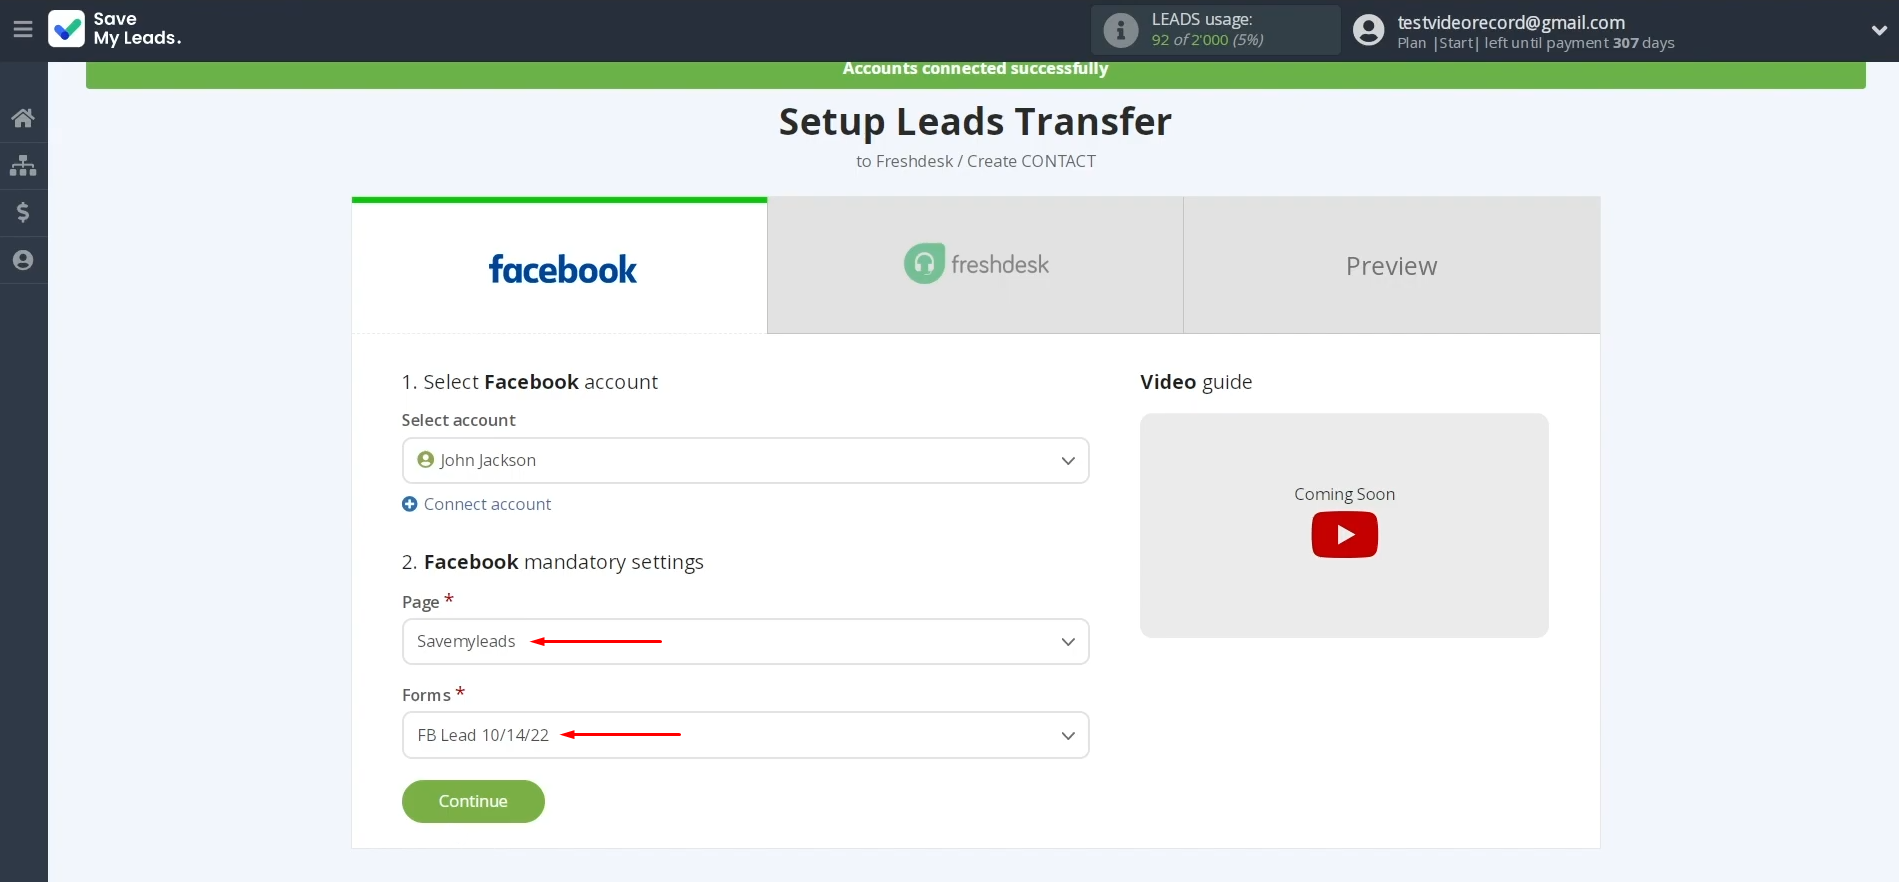
Select the
advertising page. Then you
need to specify the form from which the data will be downloaded. Click
“Continue”.
If you have multiple forms specified, you will need to create multiple
connections for each of them.
Setting up the Data Receiver – Freshdesk
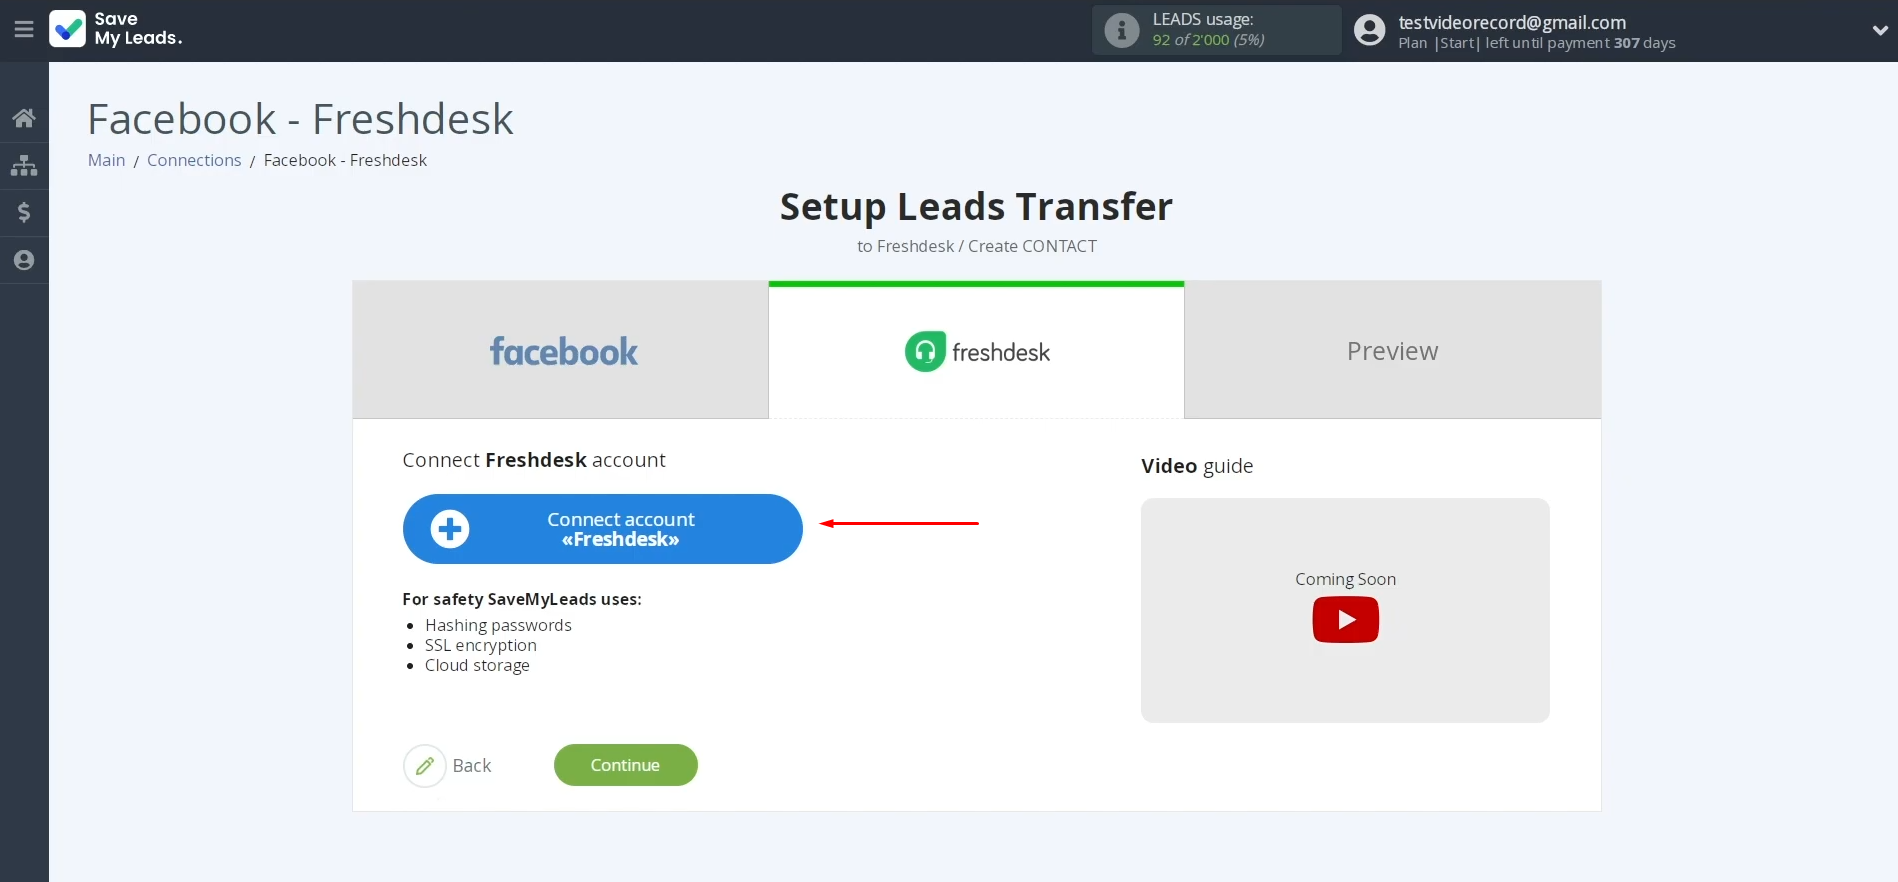
To set up Freshdesk integration with Facebook, you need to connect your Freshdesk account to SaveMyLeads. To achieve this, click the blue button.
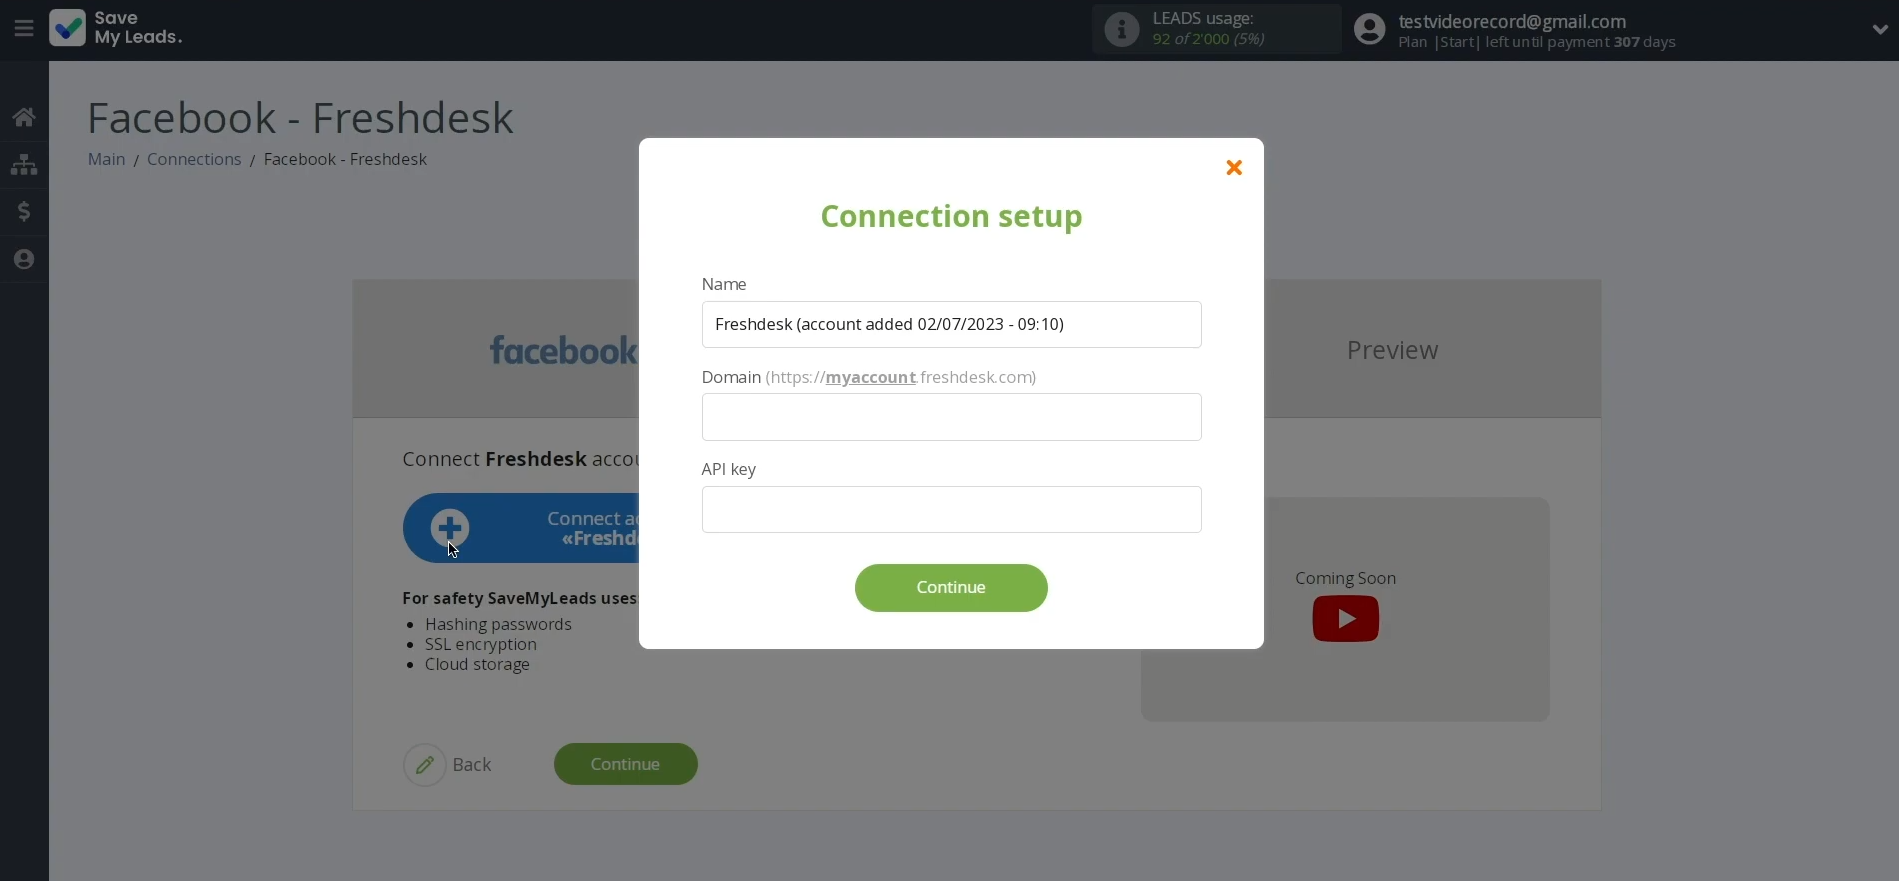
In this
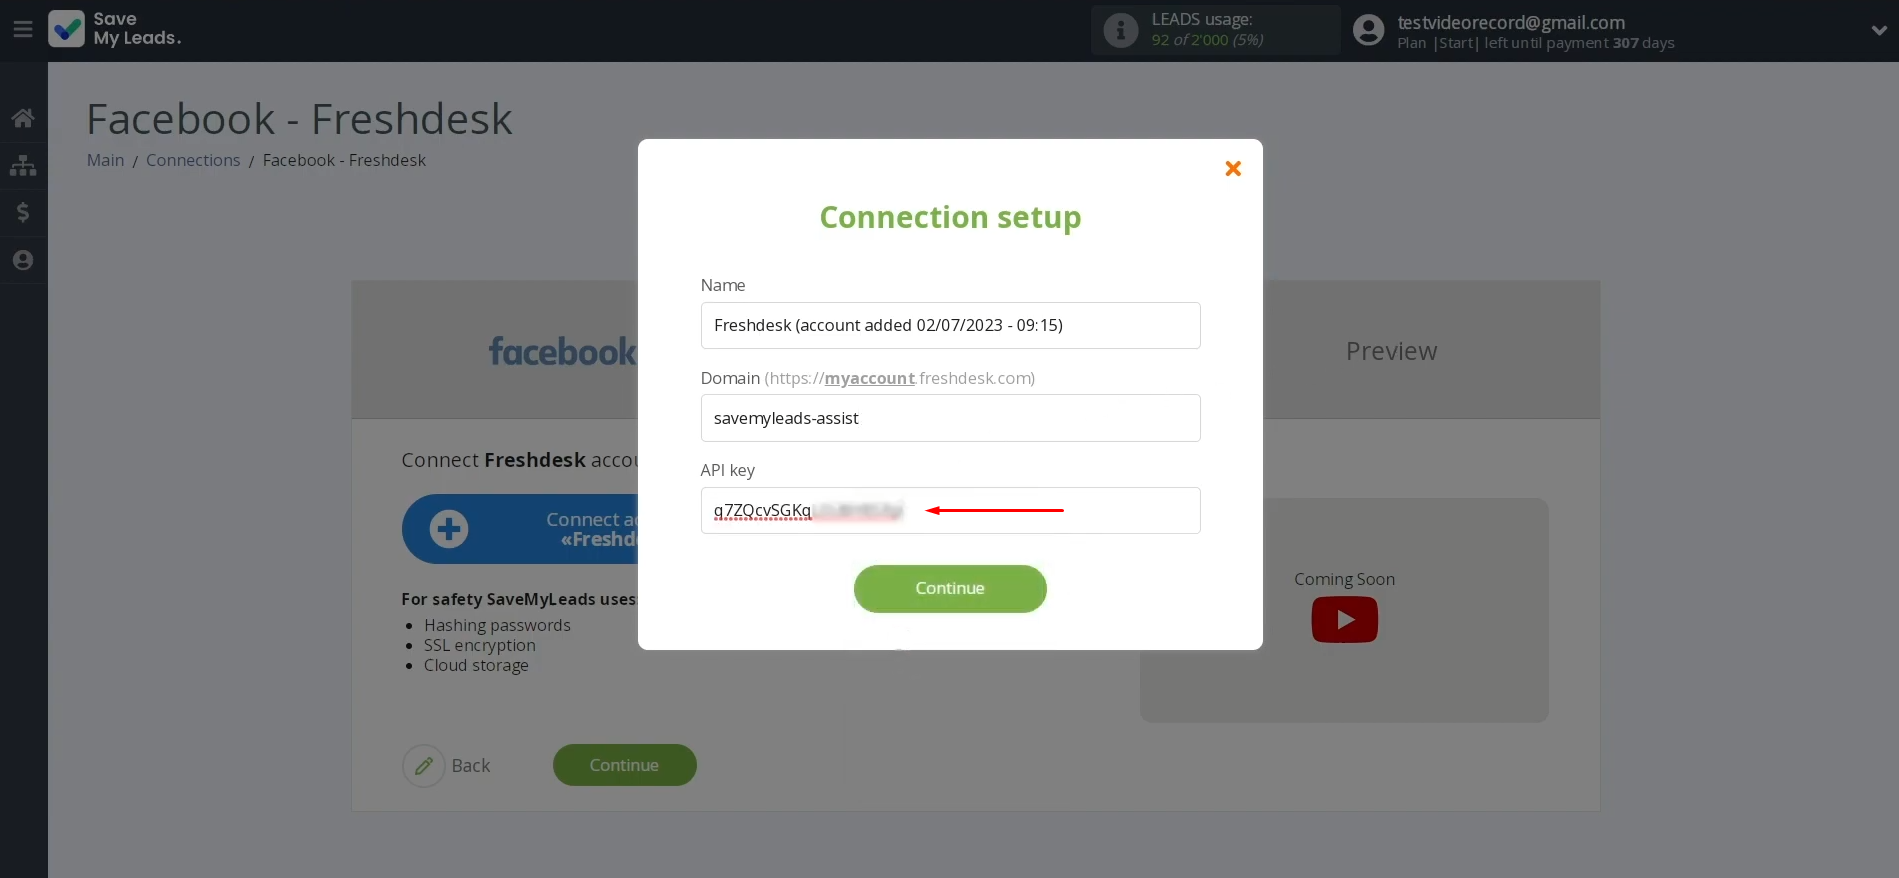
window, you must specify the domain and API key.
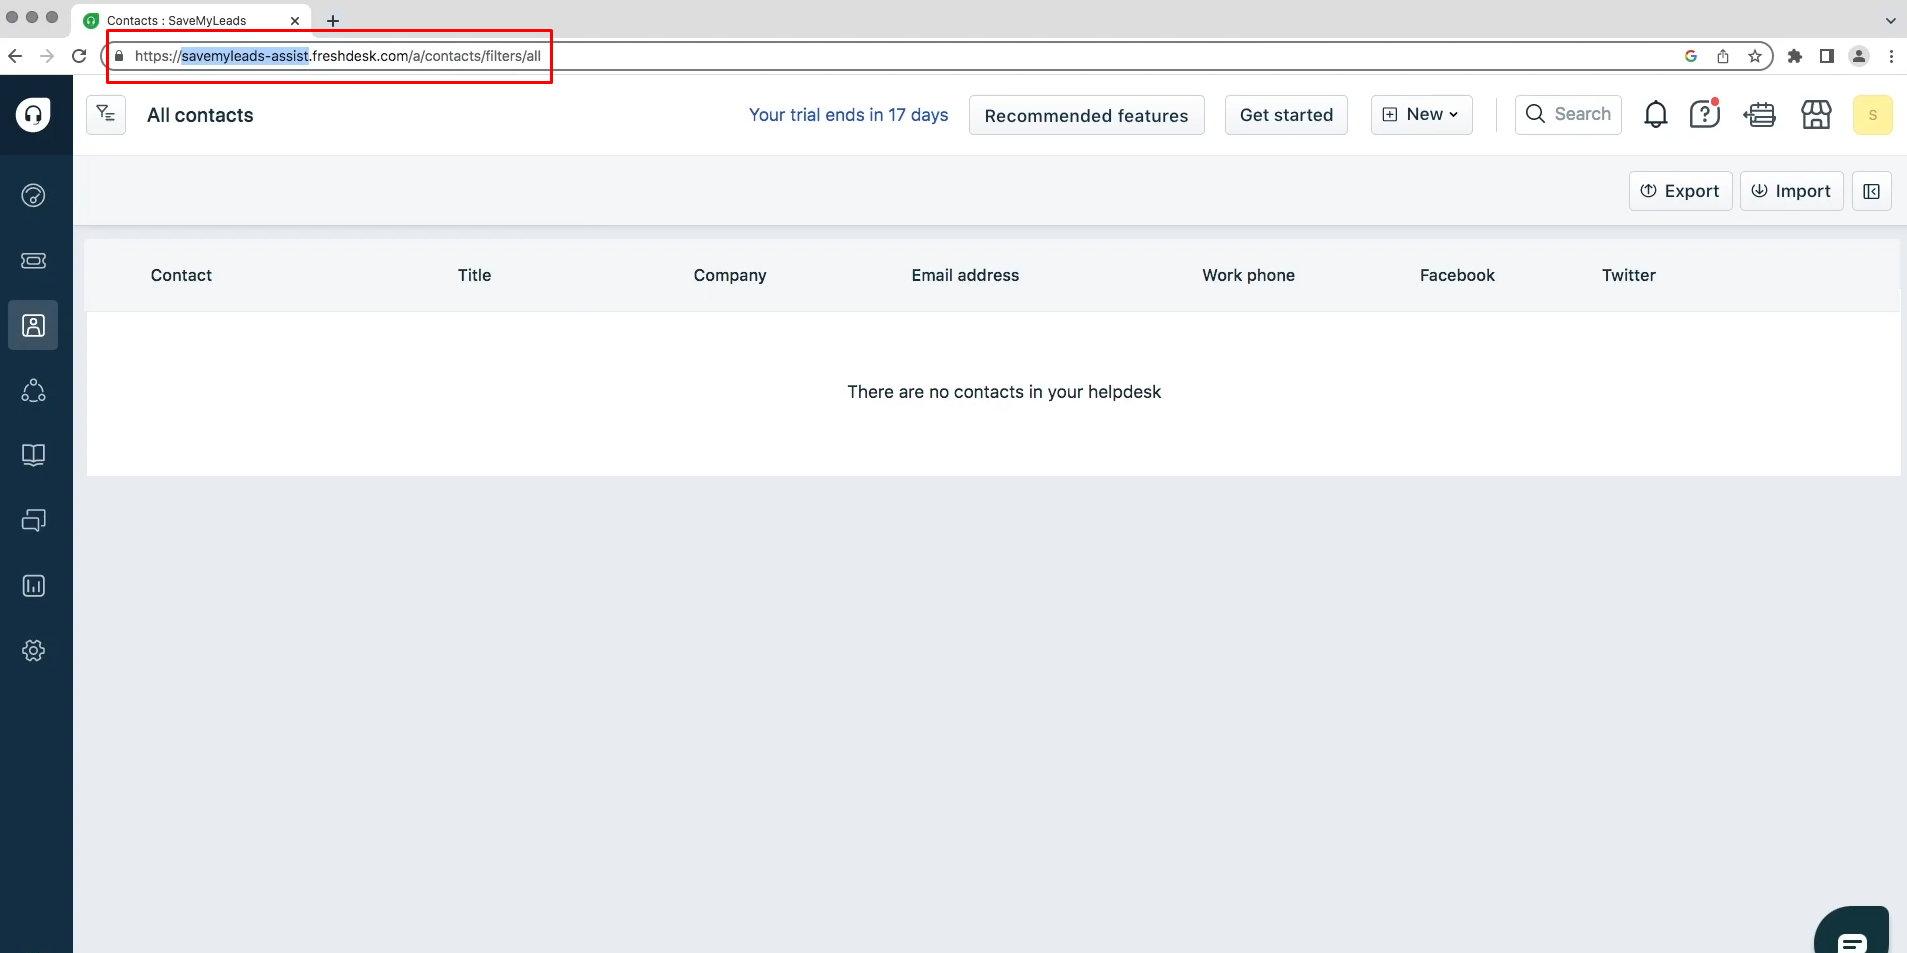
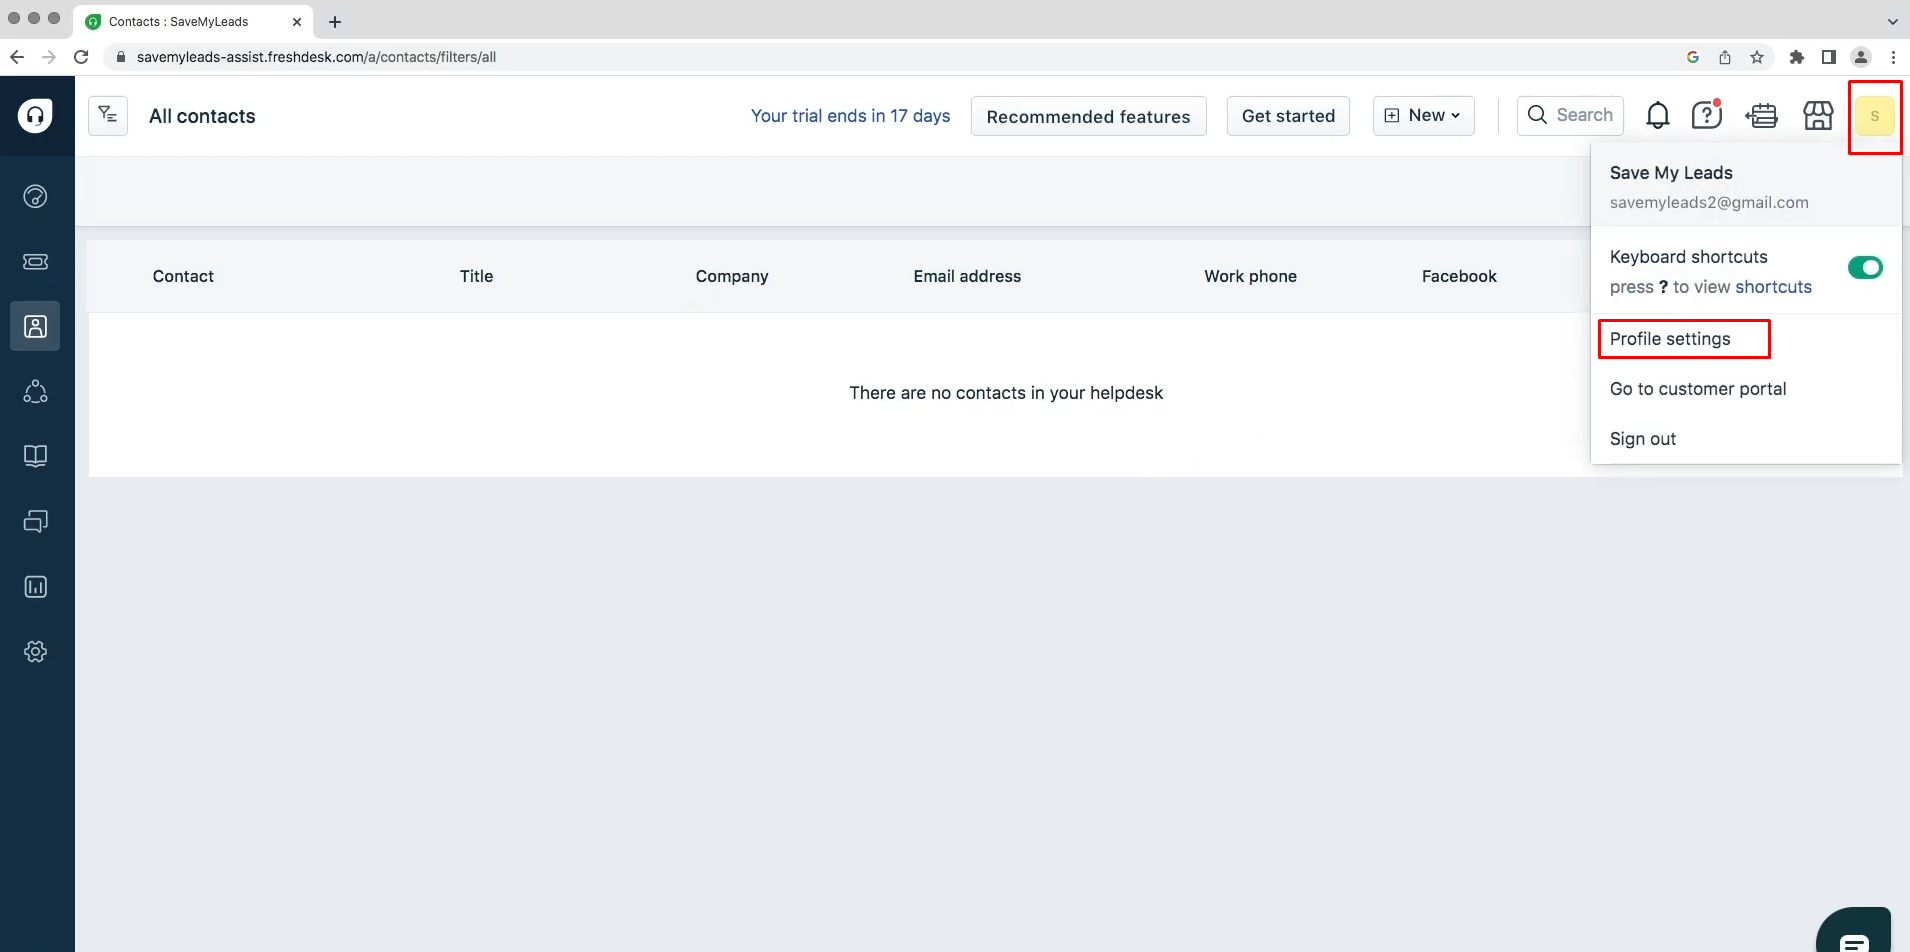
To get the domain and API key, go to your personal Freshdesk account. Copy the domain from the address bar. It must be copied without extra
characters.
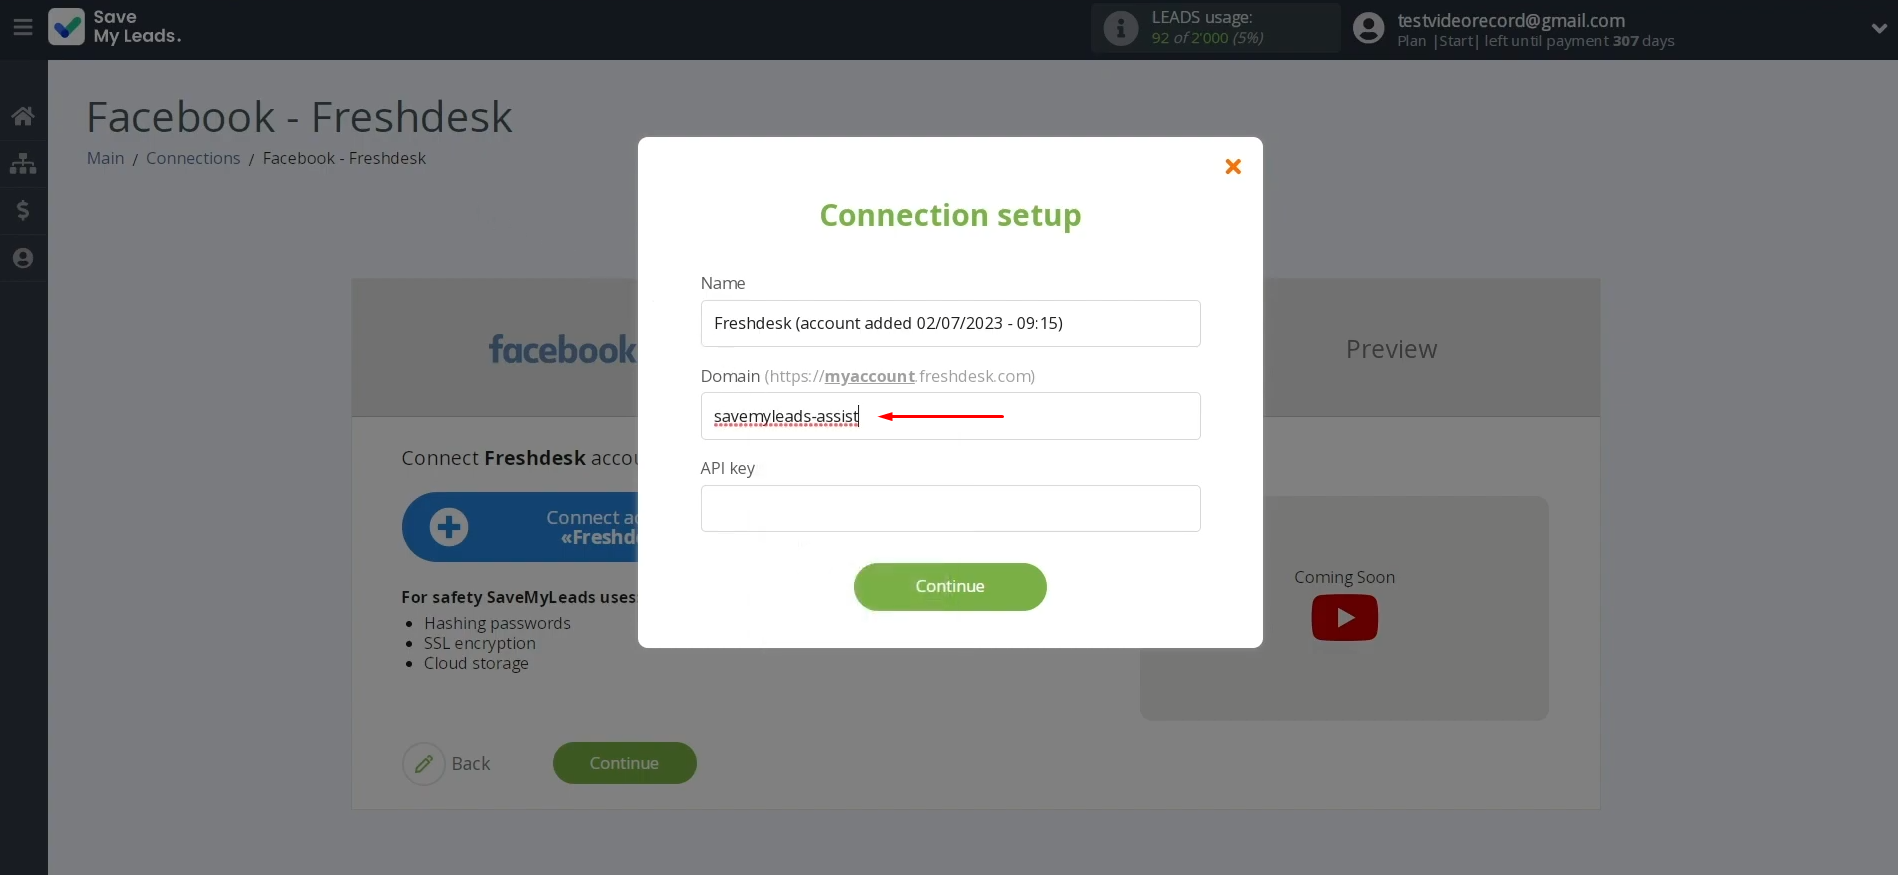
Paste the
domain into the appropriate field in SaveMyLeads.
Return to Freshdesk and go to the profile settings section.
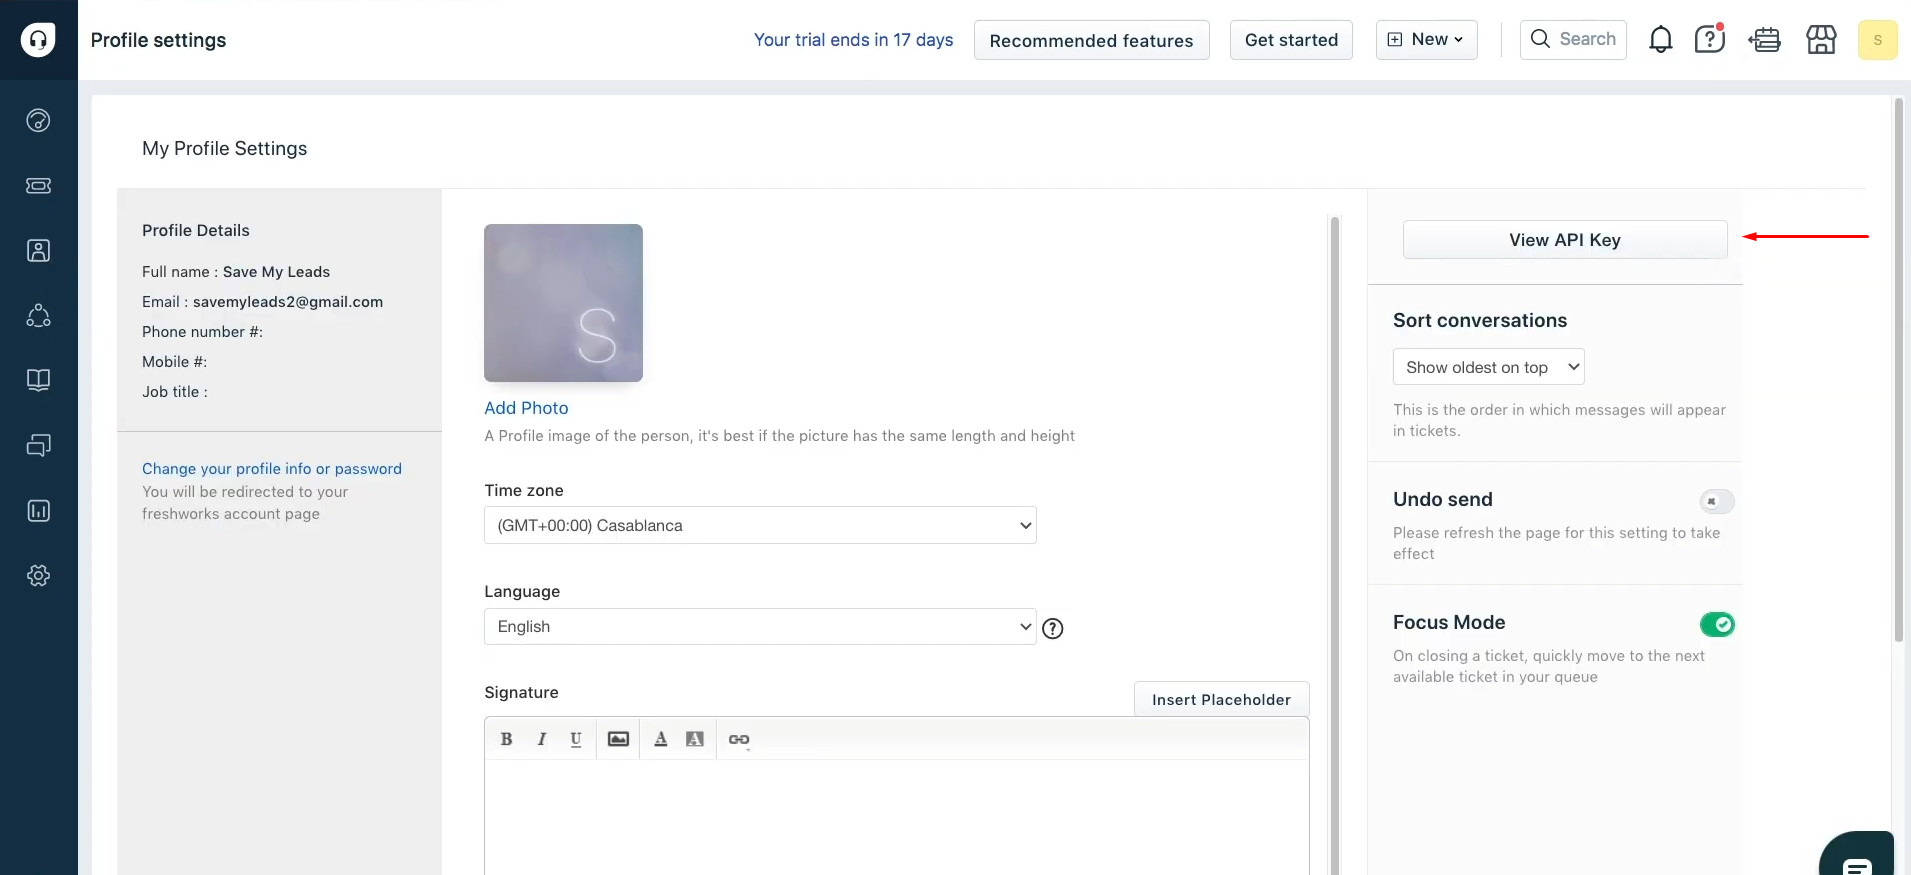
Click “View API key”.
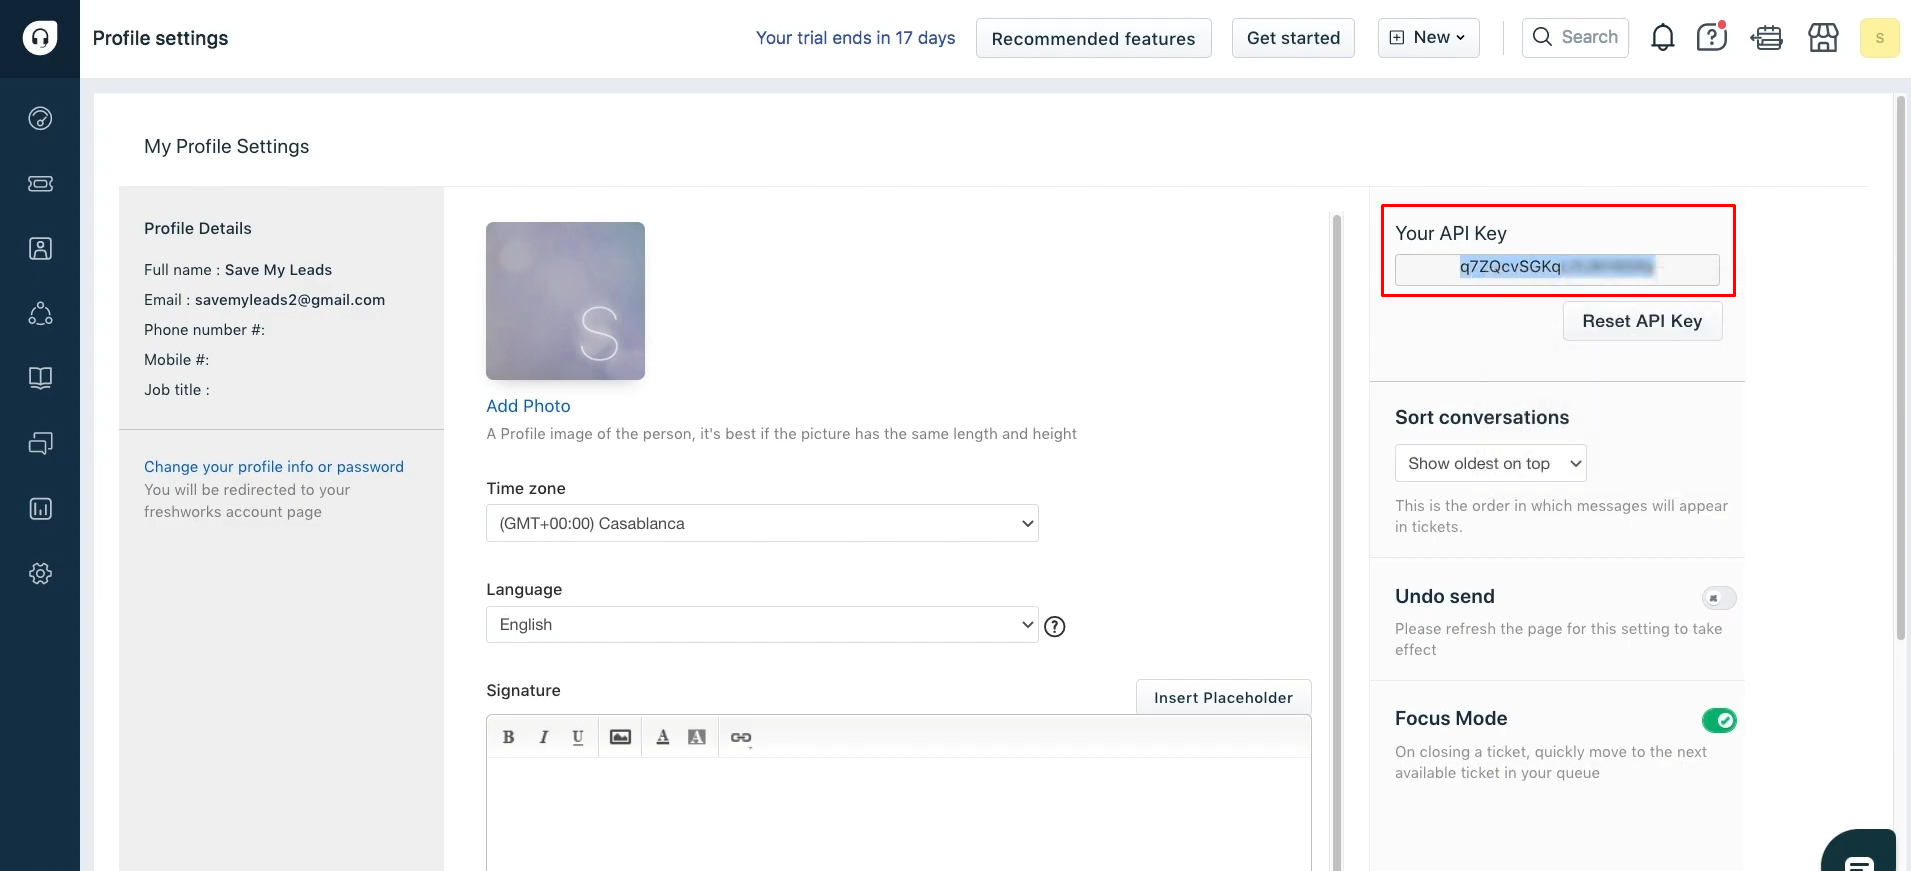
Copy the API
key.
Paste the API
key into the appropriate
field in SaveMyLeads. When all required fields are filled in, click “Continue”.
When the
created login is displayed in the list, select it.
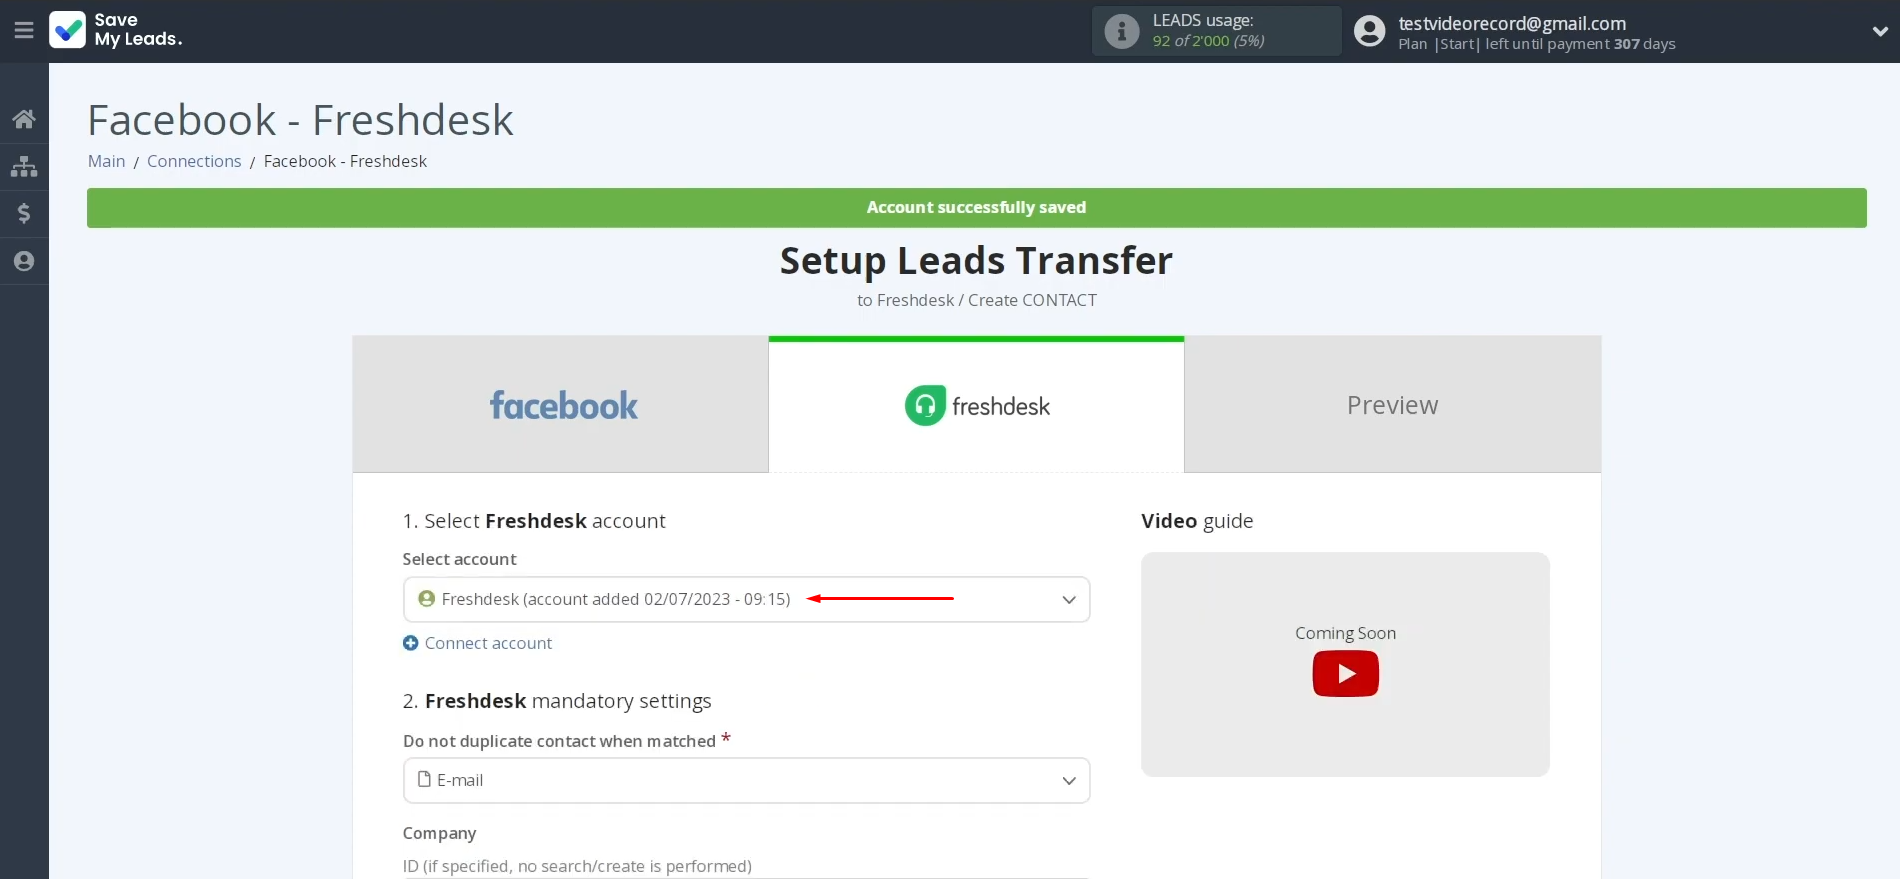
Here, you see Freshdesk fields where you can assign variables from Facebook. SML has already done this, but if something does not suit you, add variables from the drop-down list.
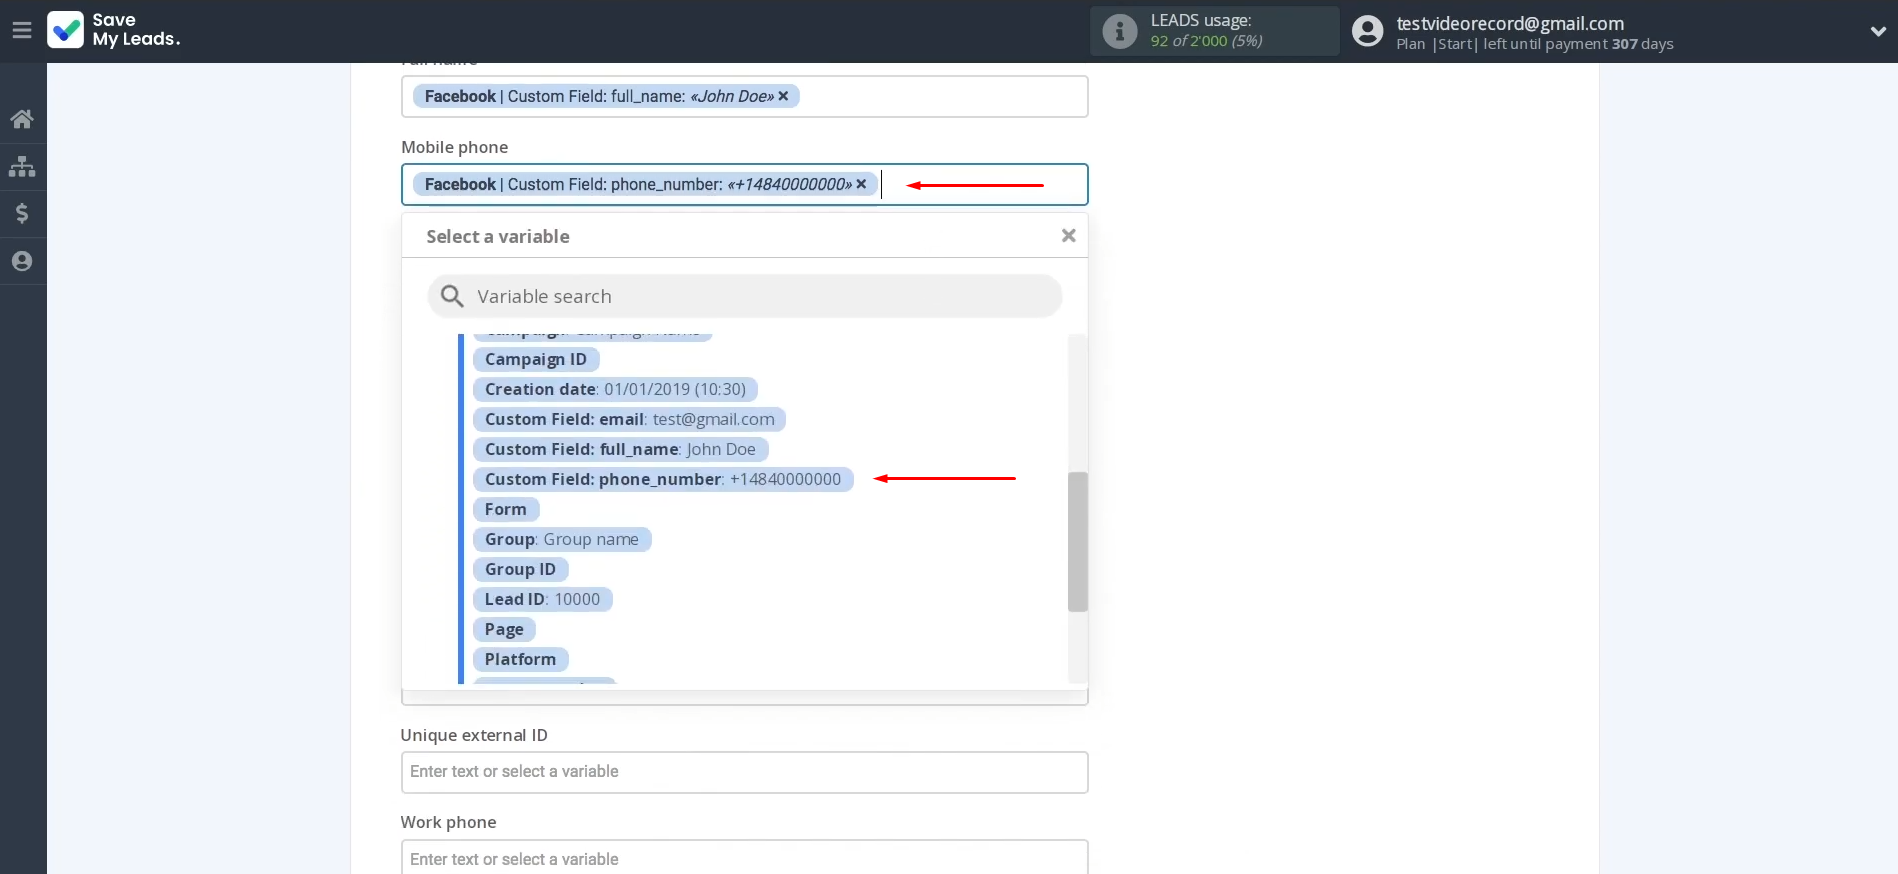
Once
data is assigned, click “Continue”.
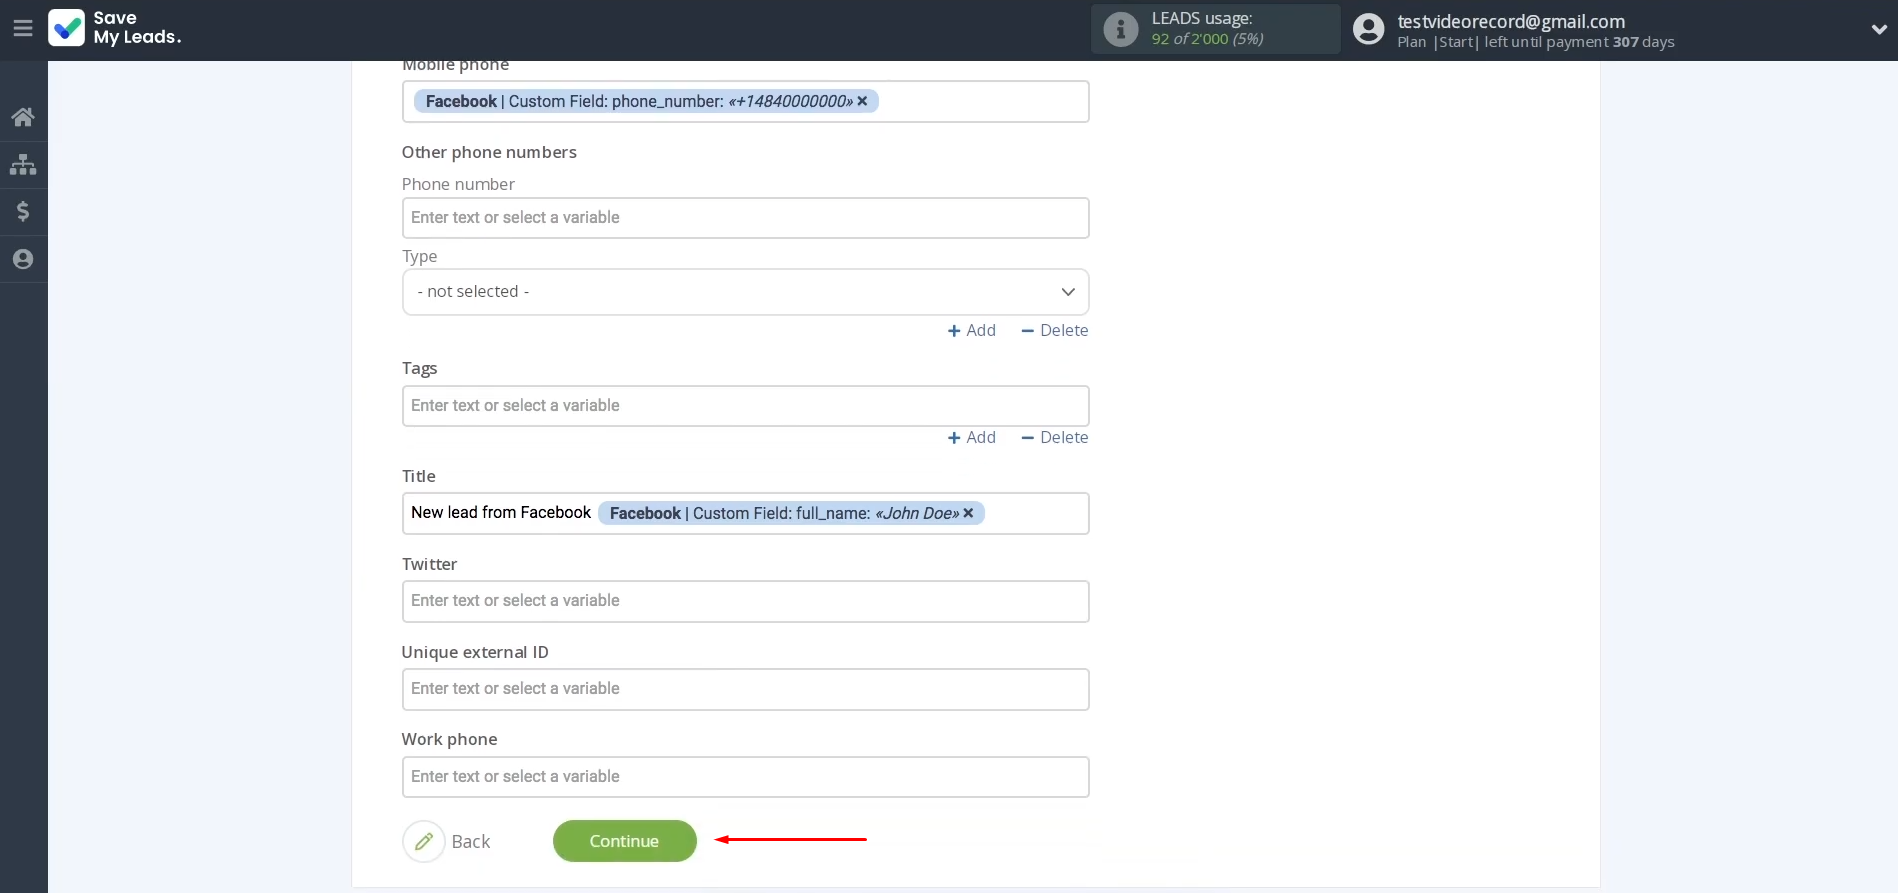
Now, you see an
example of the data that
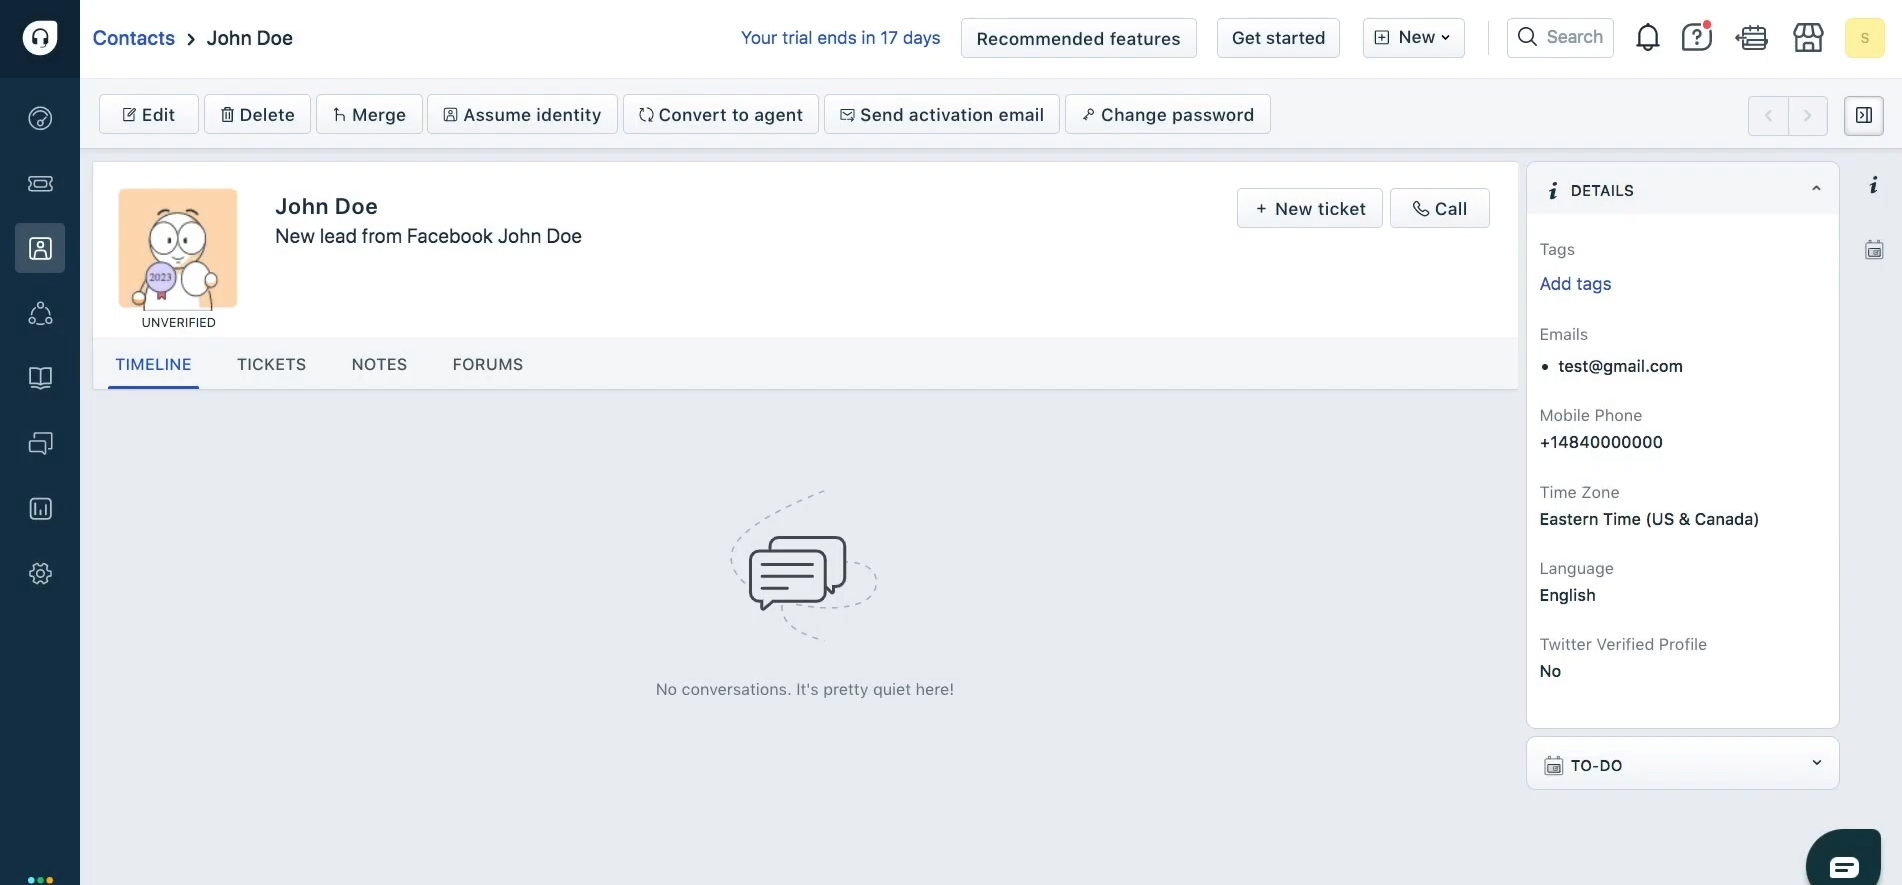
will be sent to your Freshdesk with each new Facebook lead. If everything suits you, click “Send test data to Freshdesk” to check if the settings are correct.
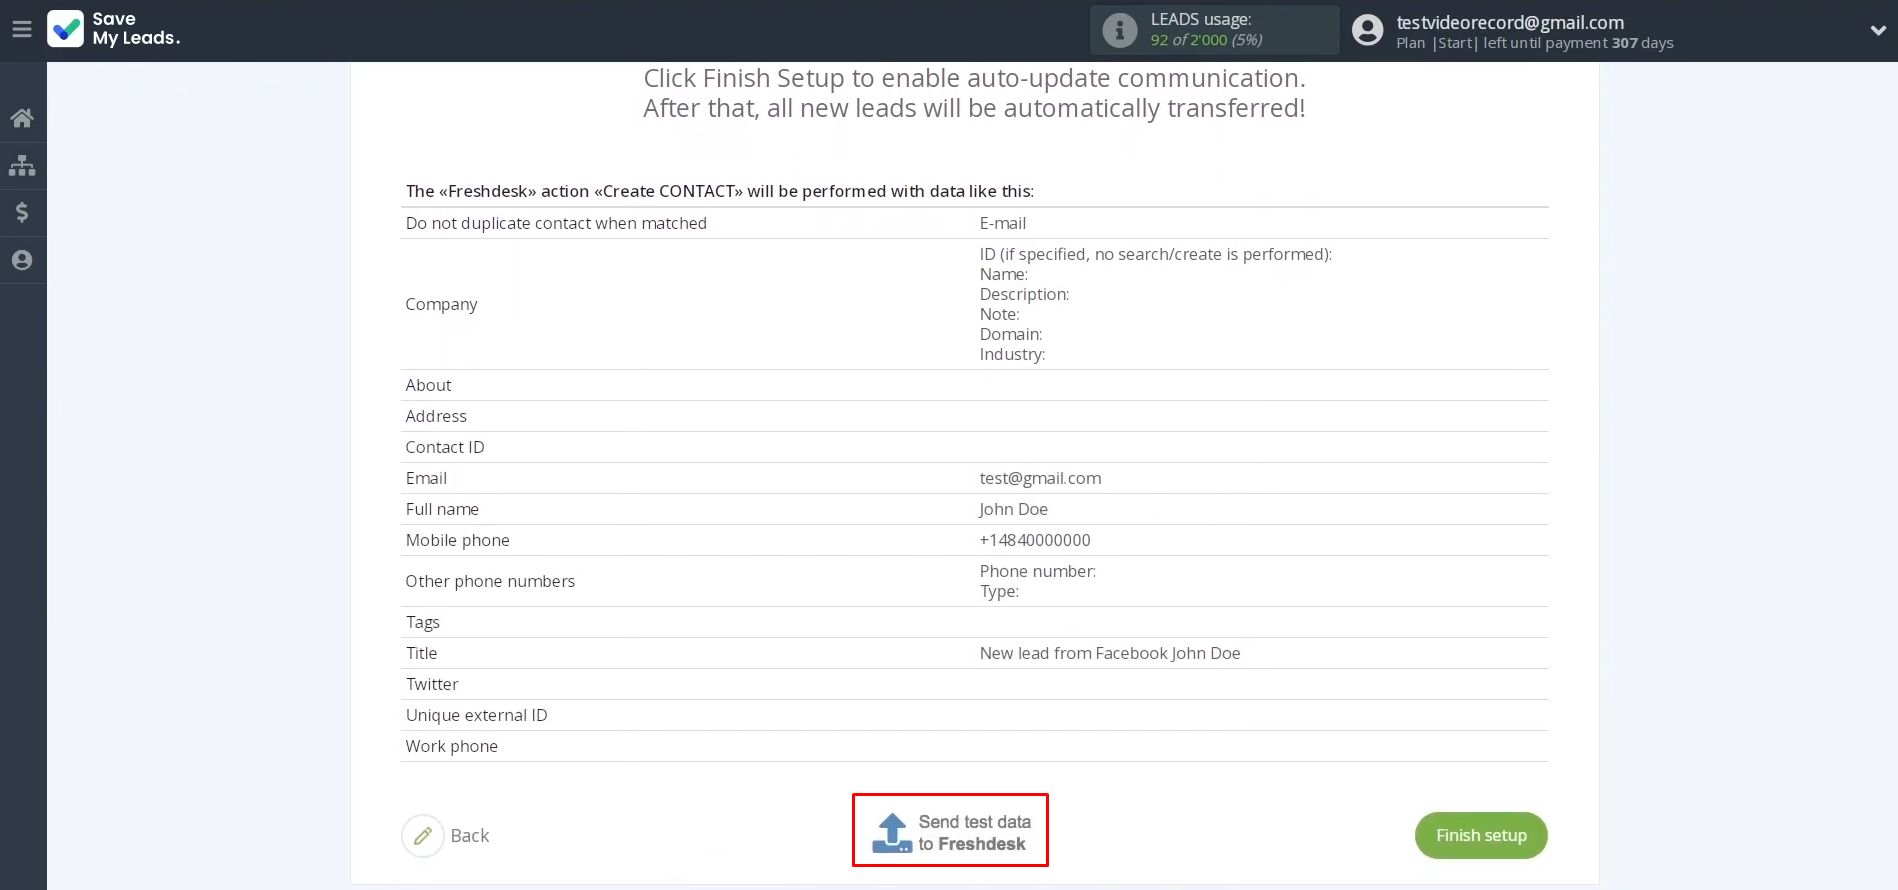
To check the
result, go to Freshdesk.
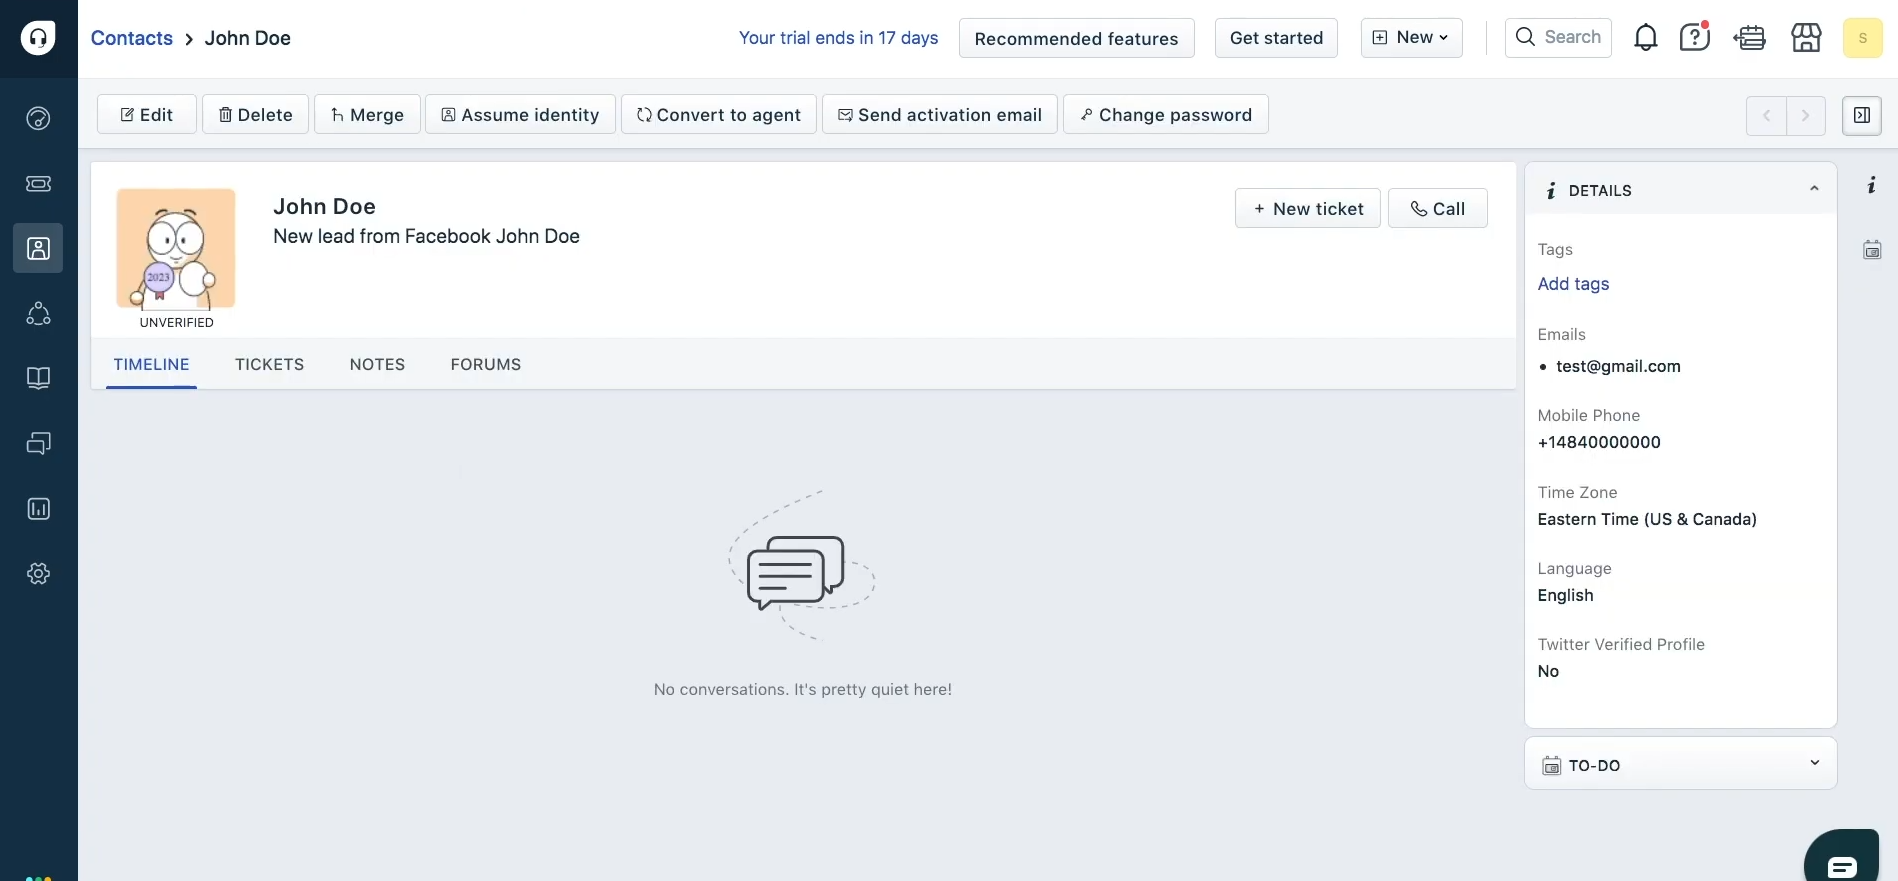
If everything
suits you, return to SaveMyLeads
and continue setting up.
Setting up Auto-update
Click “Finish setup” to enable auto-update of the connection. In this case, all new leads from Facebook will be instantly transferred to the Freshdesk system to create new contacts.
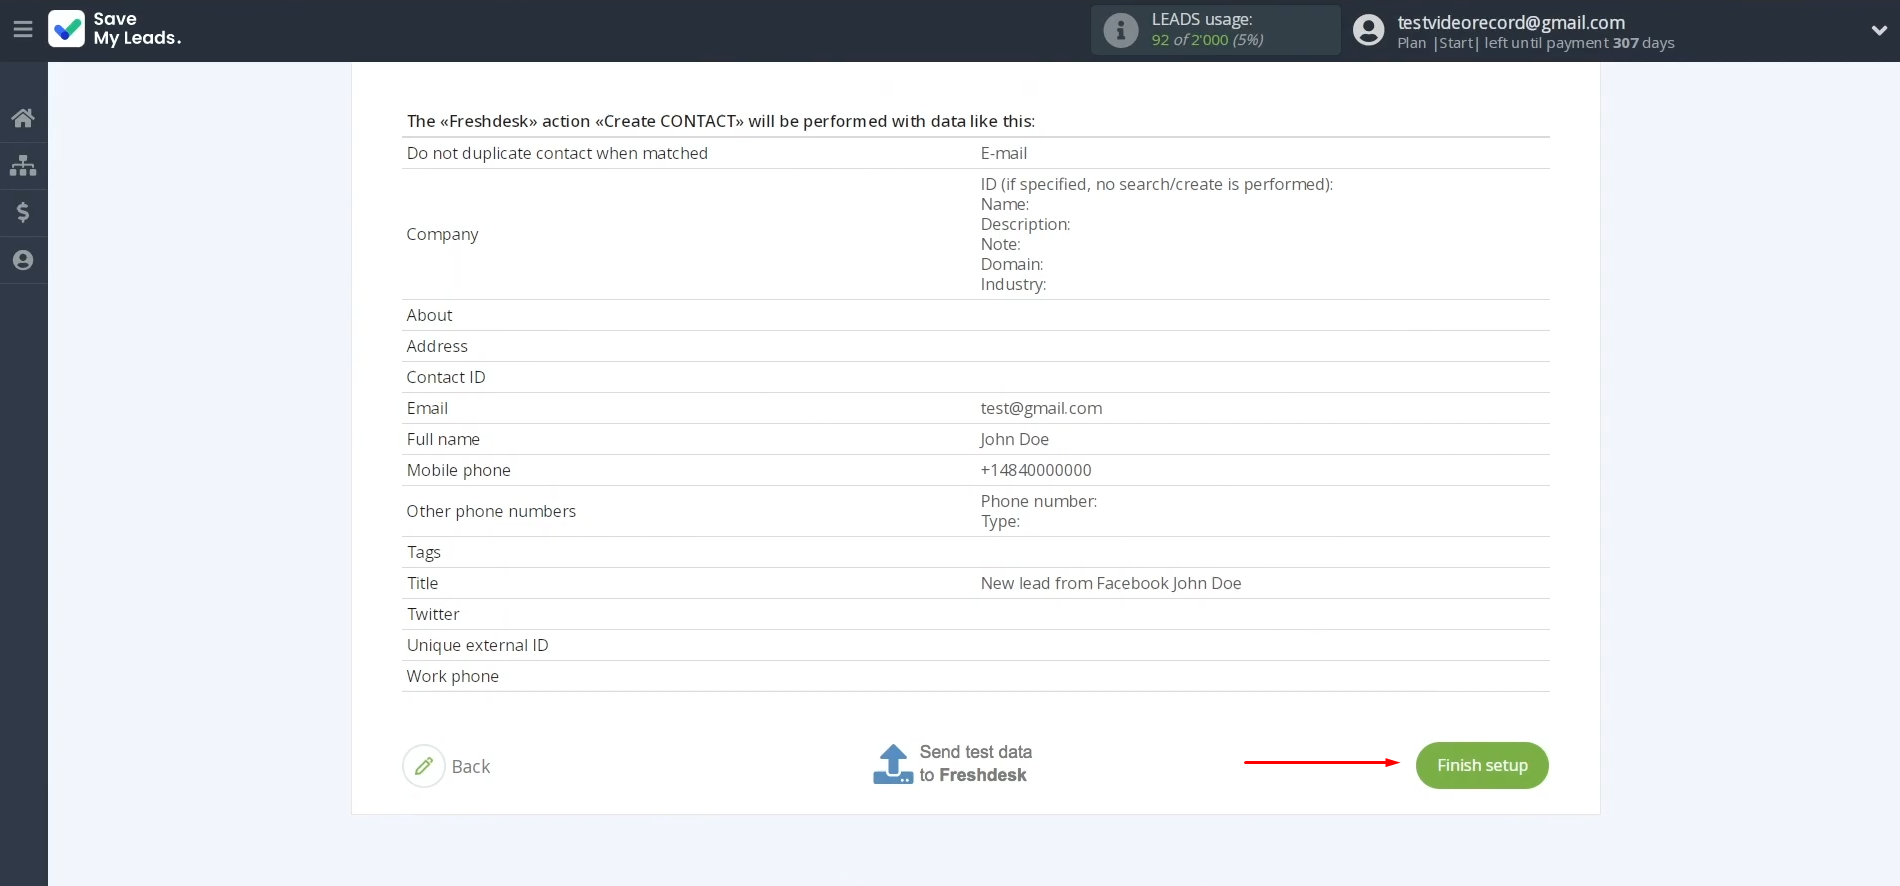
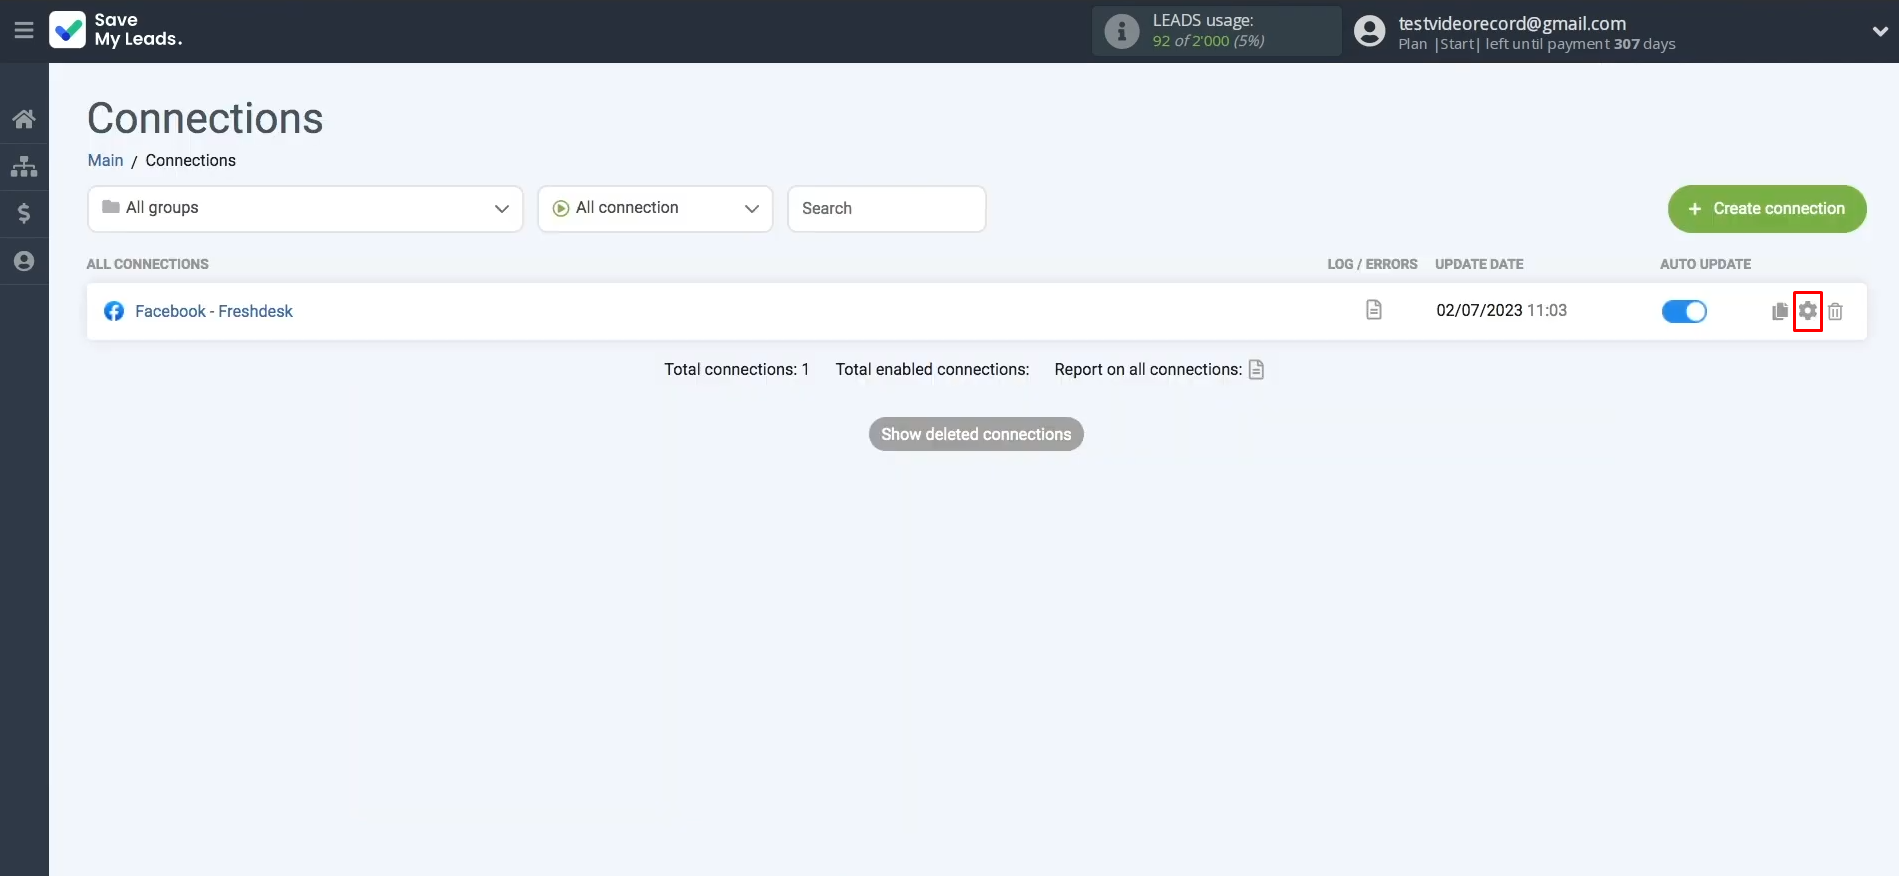
If you want to change the connection name, you can do this in its
settings. For this, click on the gear icon.
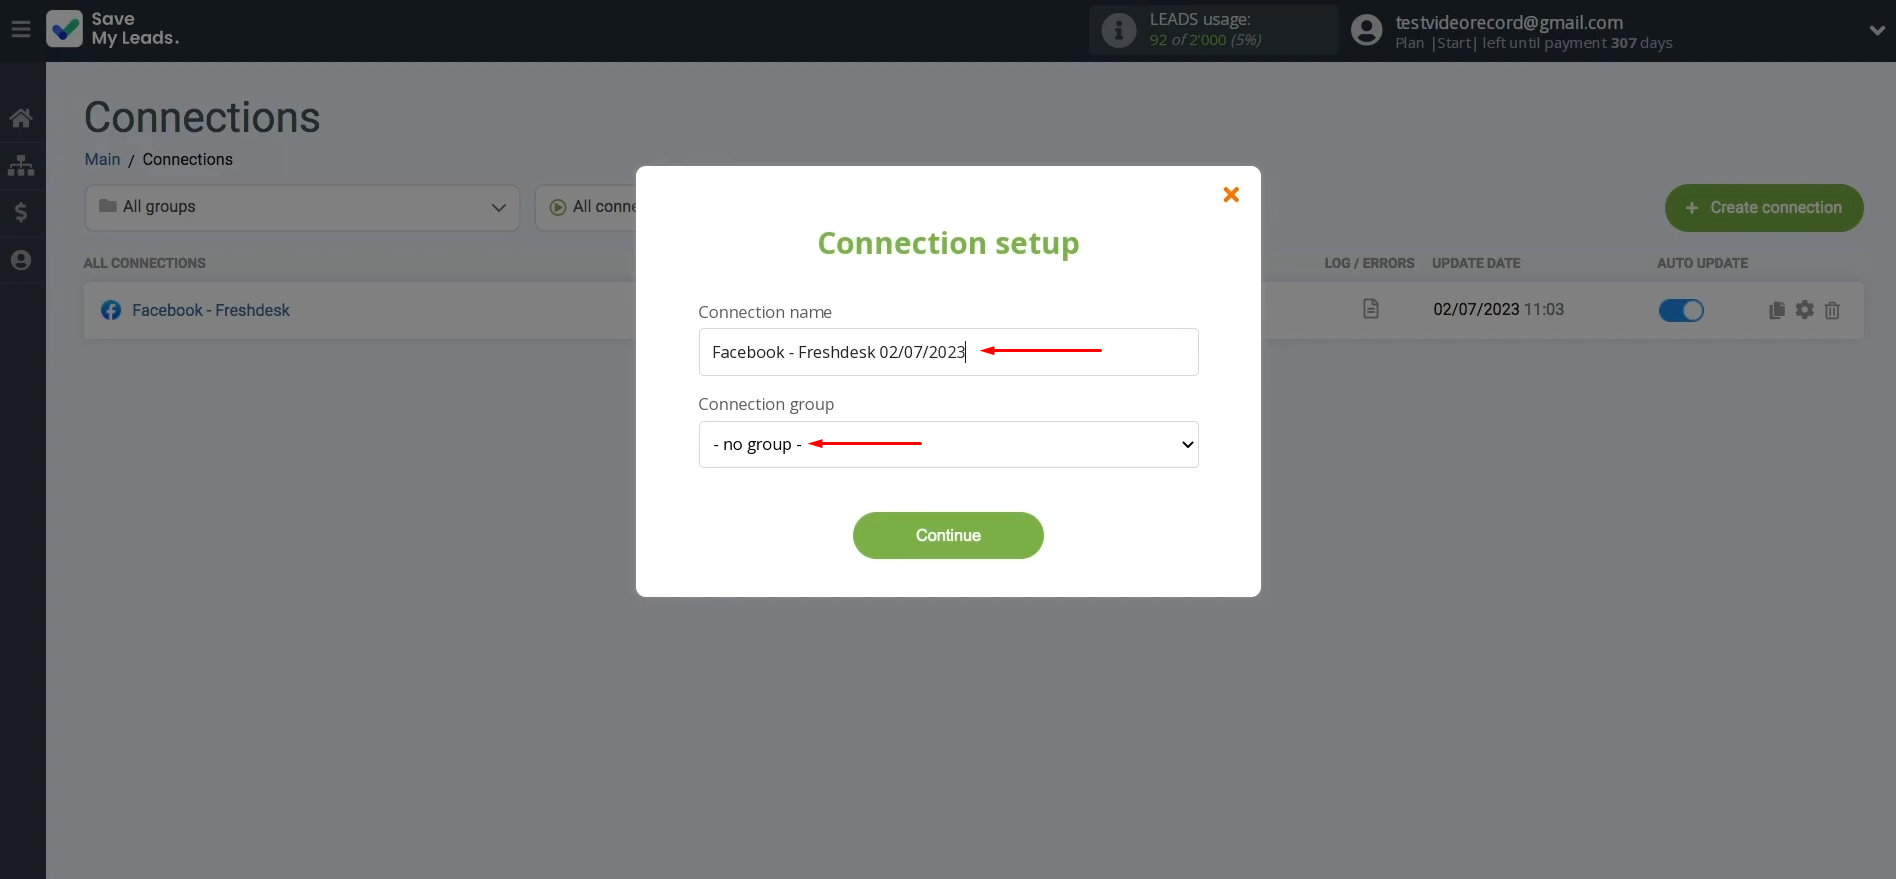
Here, you can change the connection name and add your
connection to a group. After that, click “Continue”.
That's
all. The Facebook Lead Ads and Freshdesk integration has been completed.
Result of Facebook and Freshdesk Integration
Having configured the Freshdesk Facebook integration according to our instructions, you have probably already managed to get its first results. Each new lead that fills out and submits the Lead Ads form on the social network is immediately transferred to the "help desk" service and registered there as a new contact. Automating this process will allow you to significantly speed up the processing of customer requests and will greatly simplify the work of your employees, relieving them of the need to do it all manually.


As you have most likely seen, you do not need any special skills to create Facebook Freshdesk integration. The connection is easily configured through the intuitive web interface of the connector in just a few minutes. From the moment of its launch, SaveMyLeads will handle the routine transfer of data received from Lead Ads forms to the Freshdesk customer support service. In the meantime, you can shift your attention to other tasks, improving productivity and quality of work with clients.
Step-by-Step Guides for Setting Up Integrations:
