Ads Manager – Facebook advertising account. In principle, working with it is not difficult, but those who are not yet very familiar with this social network may experience difficulties. Our step-by-step guide will help you quickly create and properly set up an advertising campaign in Facebook Ads Manager.
Advertising campaign planning
To create an advertising campaign, it is recommended to prepare in advance. Without planning, the risk of making mistakes will be quite high, and the whole process will take you much longer. Here's what to think about:
- "Draw" a portrait of your target audience according to the main characteristics: age, gender, geolocation, marital status, language, level of financial well-being, devices used to access the Internet.
- Set campaign goal. Think about what you want to get as a result: increase awareness, reach or engagement, attract traffic, gain new leads, sell a product. Take this task seriously. Keep in mind that setting a goal is one of the most important steps in setting up a Facebook ad campaign.
- Choose a format (single image, carousel, slideshow, video, etc.).
- Develop a campaign structure. Targeted advertising should be concise, contain a pronounced emphasis on the benefits of the promoted product, and solve the problems of the target audience with its help.
- Determine the budget and type of bid (for one day or until the end of the campaign). If you want to strictly limit your daily expenses, it is better to stop at the first option. No clear limits? Then the second one will do.
- Choose the most convenient payment method (bank card, PayPal international payment system, online banking).
Step-by-step instruction
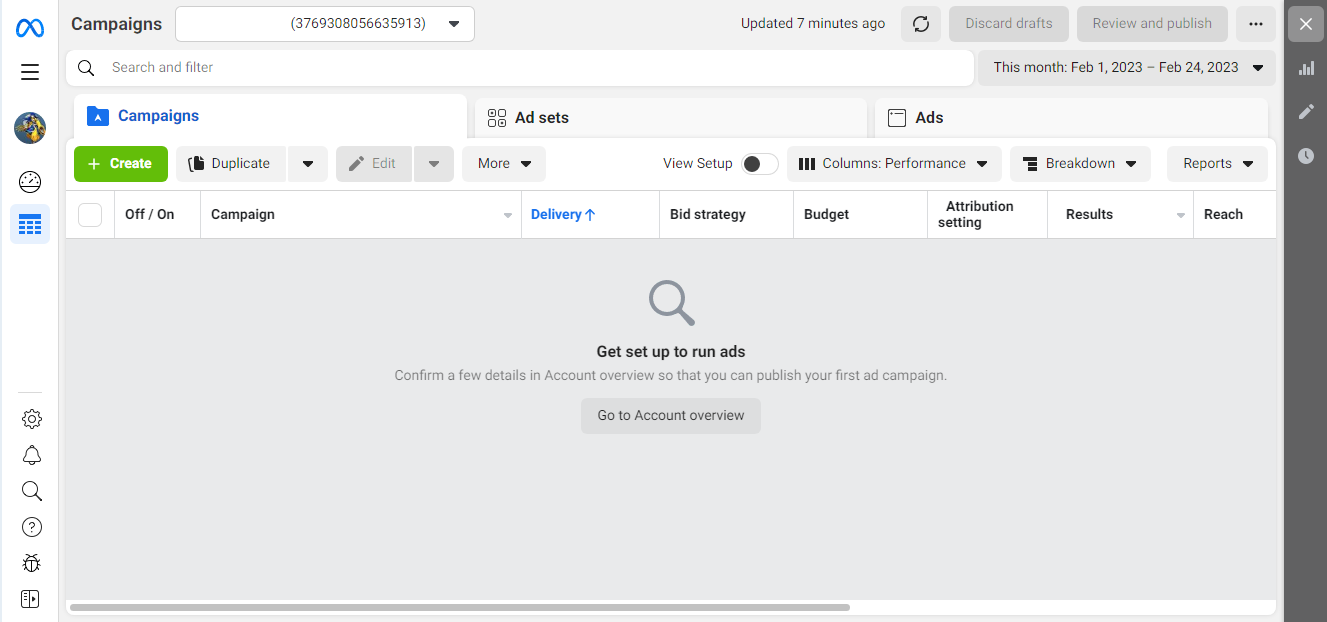
If you've never run Facebook ad campaigns, your Ads Manager will be empty. To create the first one, select the "Campaigns" tab and click "Create".
Definition of goals
After you click the "Create" button, a small window will open in front of you, where you will need to select a campaign goal. The system offers 6 options:
- Awareness;
- Traffic;
- Engagement;
- Leads;
- App promotion;
- Sales.
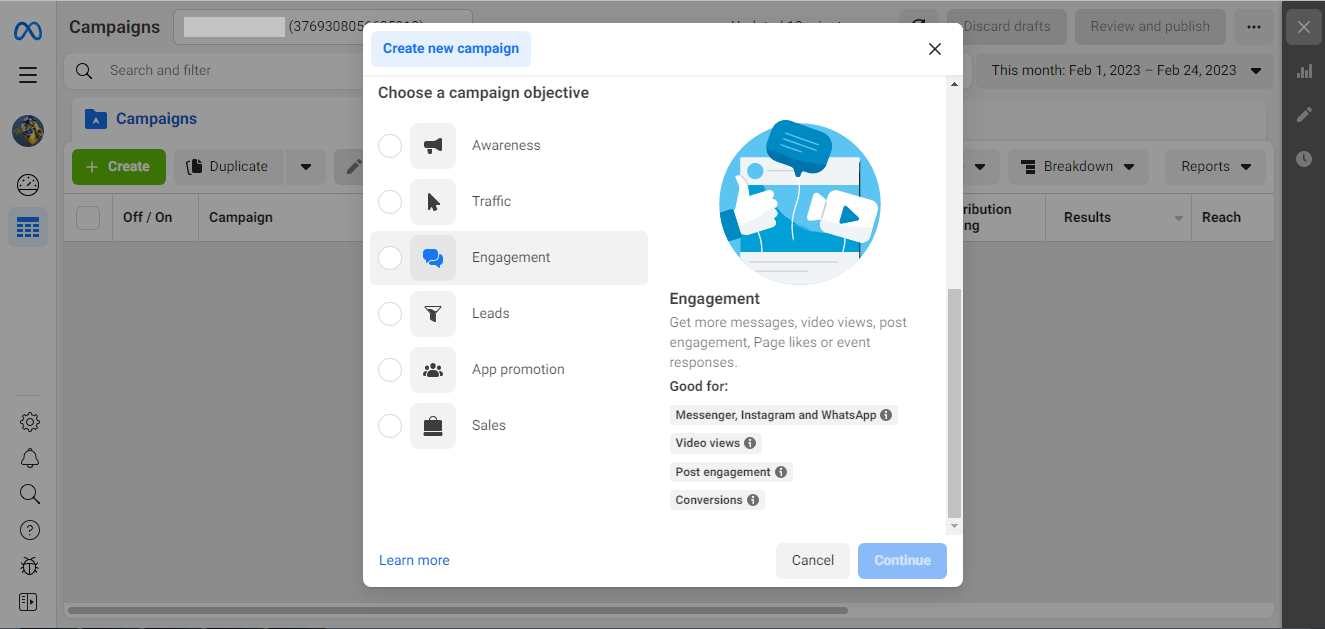
By hovering over any target, you can read a more detailed description of it and find out who it suits best. To make the right choice, it is advisable not to rush to the next step, but to carefully read the information provided.
You can also give your campaign a name here. To achieve this, click on "Name your campaign" at the bottom of the window. However, it is not at all necessary to do so.
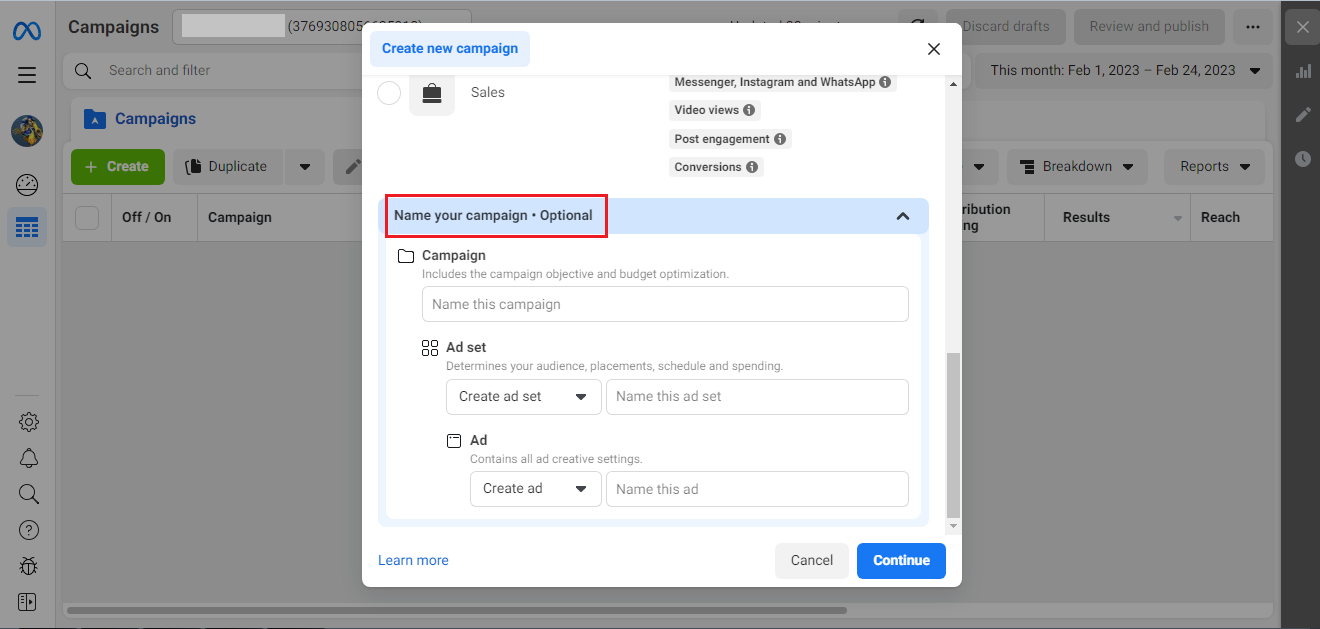
After selecting a target, click the "Continue" button.
Optional settings
On the page where you will be transferred after clicking the "Continue" button, you will have the opportunity to make a number of additional settings:
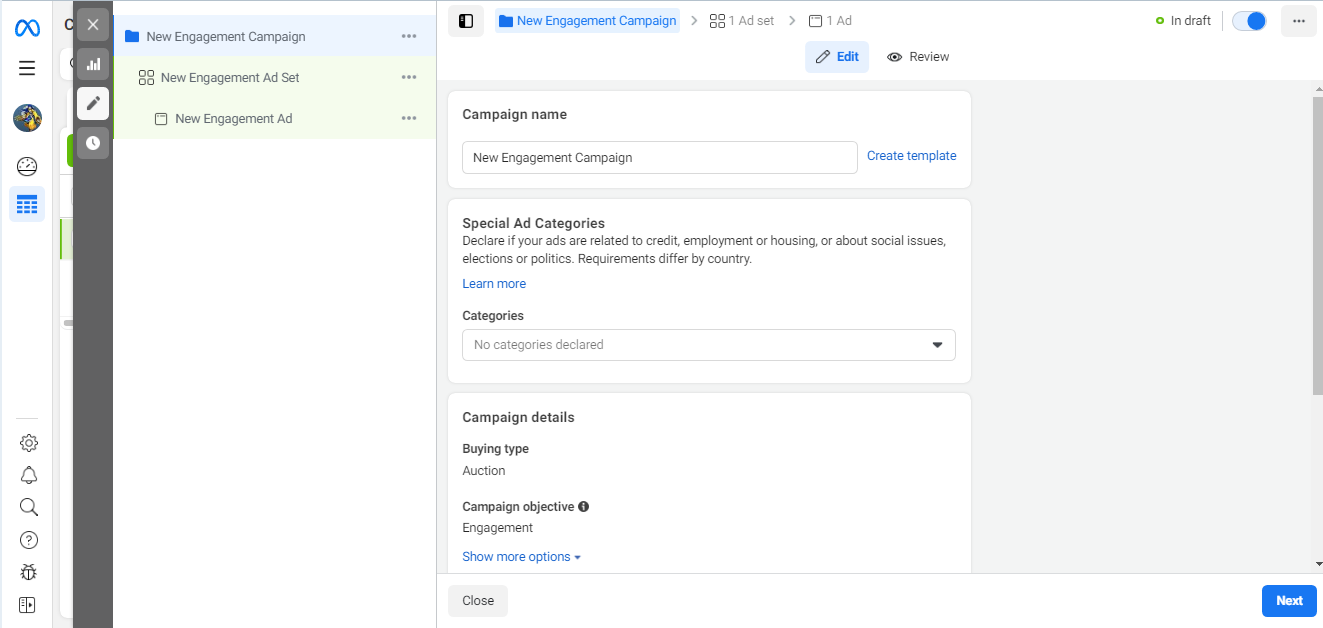
- Campaign name. By entering it, it will be easier for you to find ad campaign in the advertising account, among many others.
- Special Ad Categories (Credit, Employment, Housing, Social Issues, elections or politics). If your advertisement is related to one of them, it is advisable to declare this point here.
- Campaign details (Buying type, Campaign objective). Here you can change the goal of the campaign, if you suddenly made a mistake earlier.
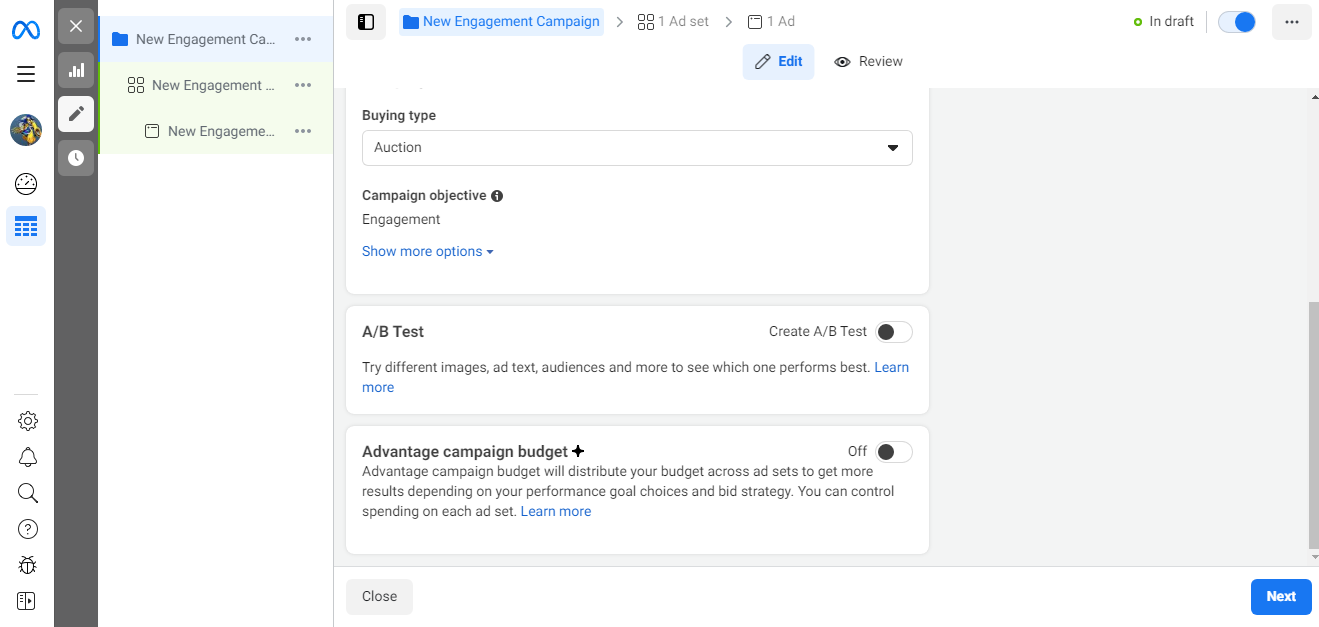
- A/B test. Just move the slider if you want to A/B test your campaign.
- Advantage campaign budget. Move the slider if you want special system algorithms to help you optimize your budget.
Conversion
In our instructions, the goal of an advertising campaign is conversion. Having adjusted to our choice, the system offers to determine the place where you want to attract the attention of users. The following options are offered:
- Messaging Apps (interaction will take place on Messenger, WhatsApp and Instagram).
- On your ad (interaction with advertising posts, videos or events).
- Website (attraction to a web resource).
- App (installation and use of the mobile application).
- Facebook Page (attracting users to your page on a social network).
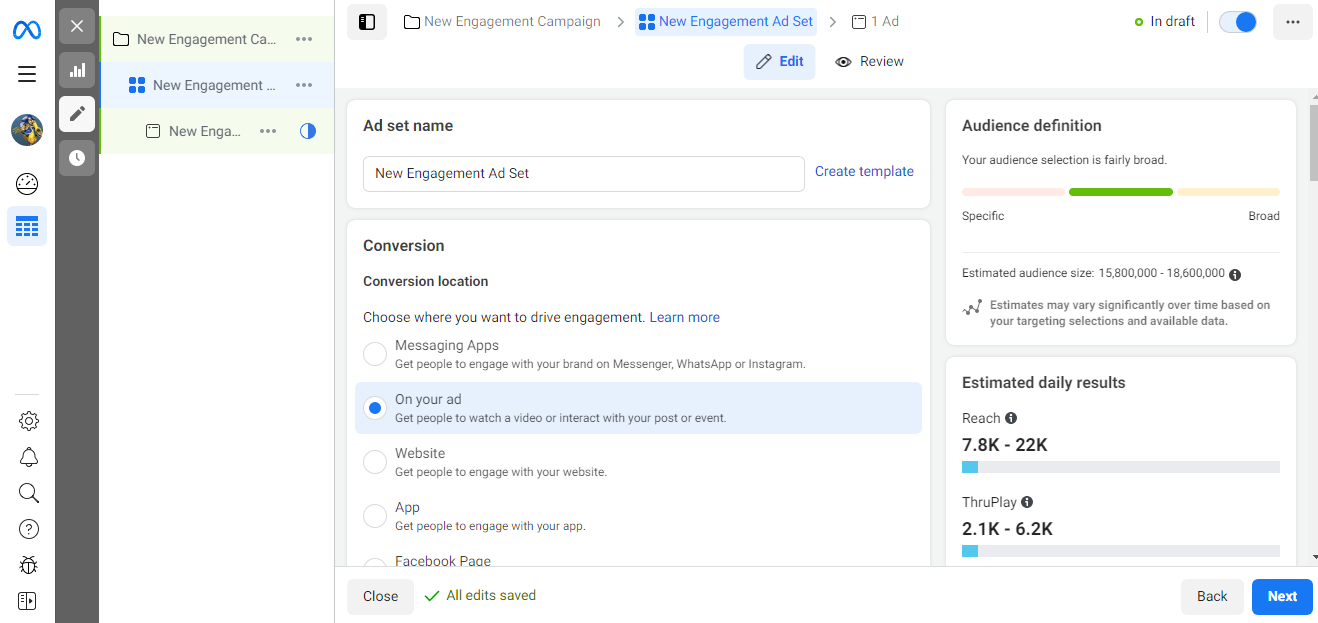
If, for example, the “On your ad” option suits you, check the box next to it and specify the type of interaction: with advertising posts, videos, or events.
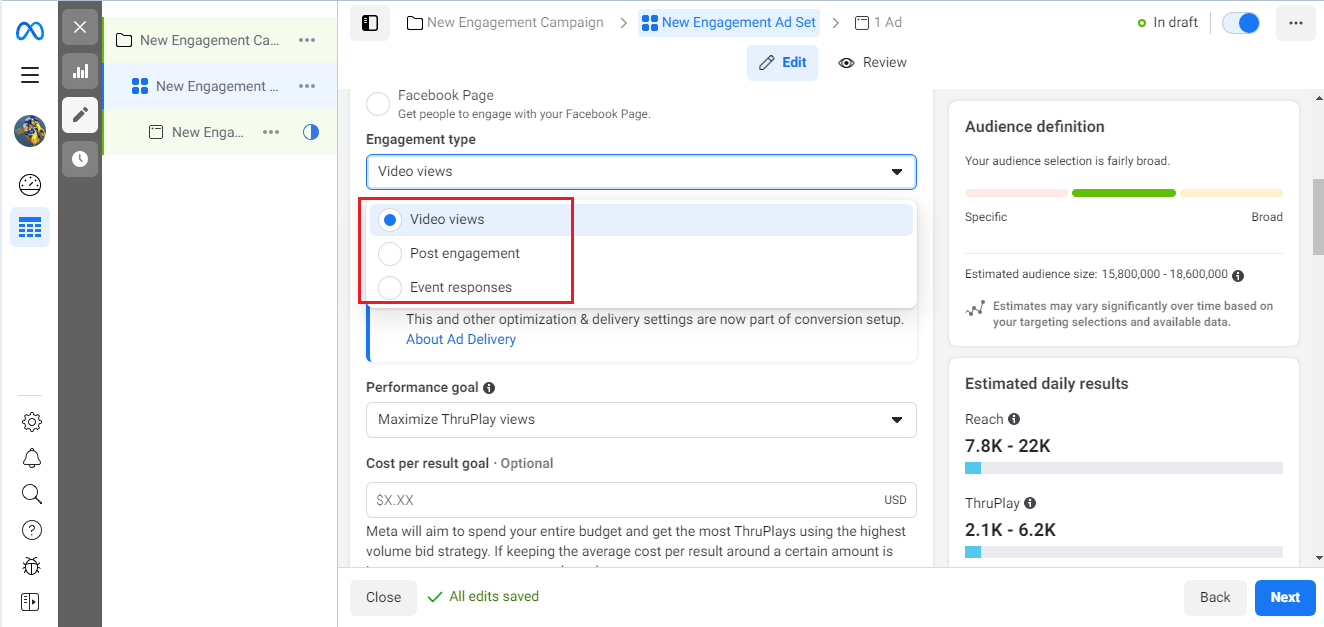
In the "Performance goal" section, the default setting is "Maximize ThruPlay views". What does it mean? The algorithms of the system will contribute to the growth of impressions of your promotional videos. Based on user habit analytics, they will show video ads shorter than 15 seconds to those who are configured to watch the entire video, as long as the length of the video does not exceed those 15 seconds. Larger videos will be targeted primarily at those who are more likely to watch at least 15 seconds.
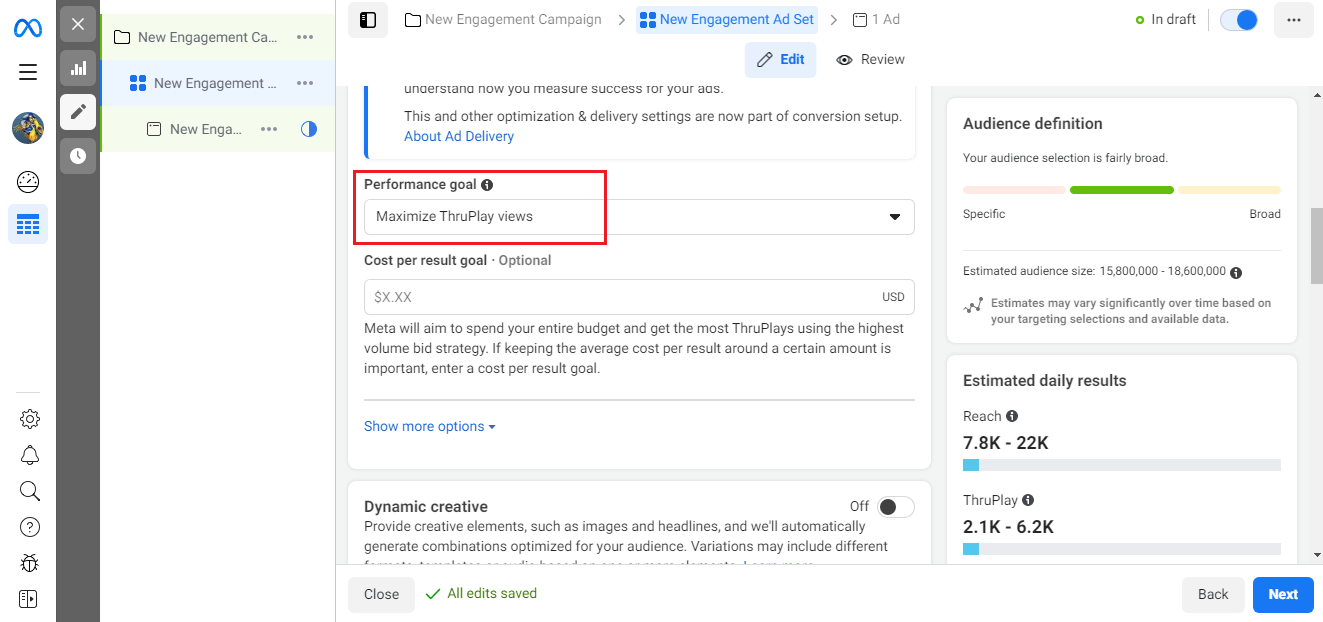
Below, you can set a "Cost per result goal", indicating the target cost of the result achieved. Doing this is optional.
If you want to add some creativity to your ad images and headlines, in the "Dynamic creative" section, move the slider to the right. The system will offer you a number of combinations for your target audience.
Budget
On the same page, the advertising campaign budget is configured. There are two options to choose from:
- Daily Budget (amount for 1 day).
- Lifetime Budget (the amount you plan to spend during the entire campaign period).
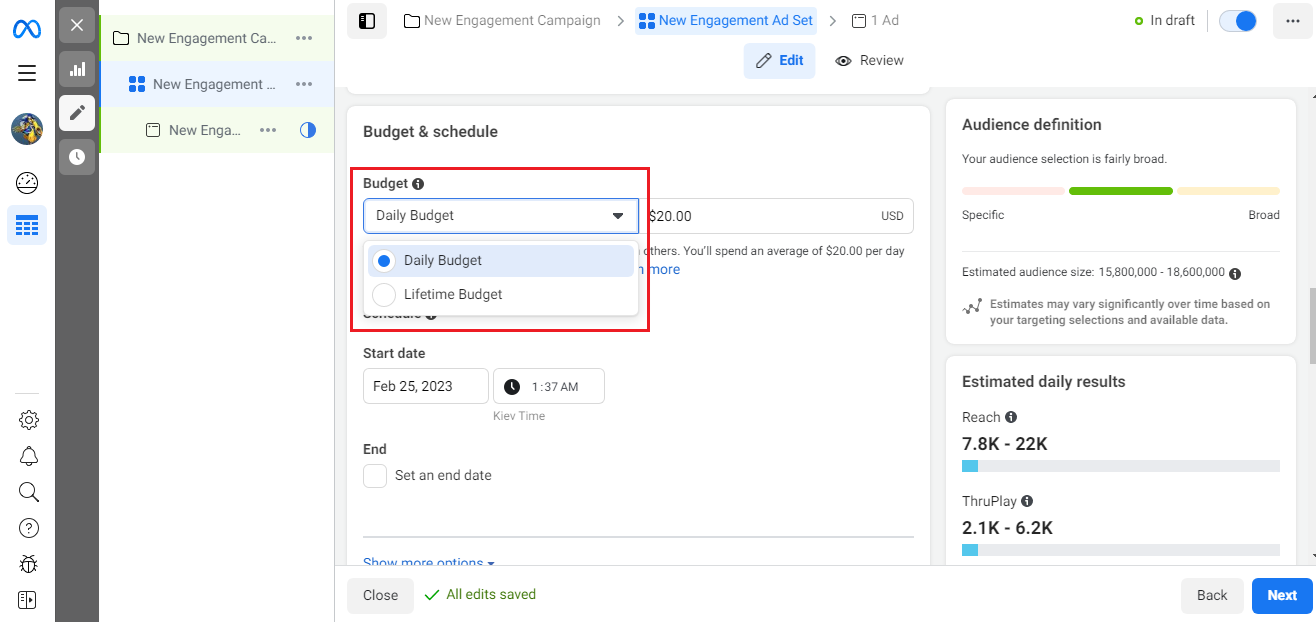
Here you can also immediately set the start date of the campaign and the day it ends.
The target audience
The effectiveness of your advertising on a social network largely depends on the definition and settings of the target audience. Several of its features are available in the Ads Manager advertising account:
- Location.
- Age.
- Gender.
- Detailed targeting. Here, you can specify the audience according to a number of narrower parameters. The system offers to consider such characteristics: demographic (level of education, family relations, solvency, and so on), specific interests (business, relationships, health, food, shopping, sports, and so on), behavioral (preferred device for accessing the social network, types of favorite digital activity, football fans, travelers and so on).
- Languages.
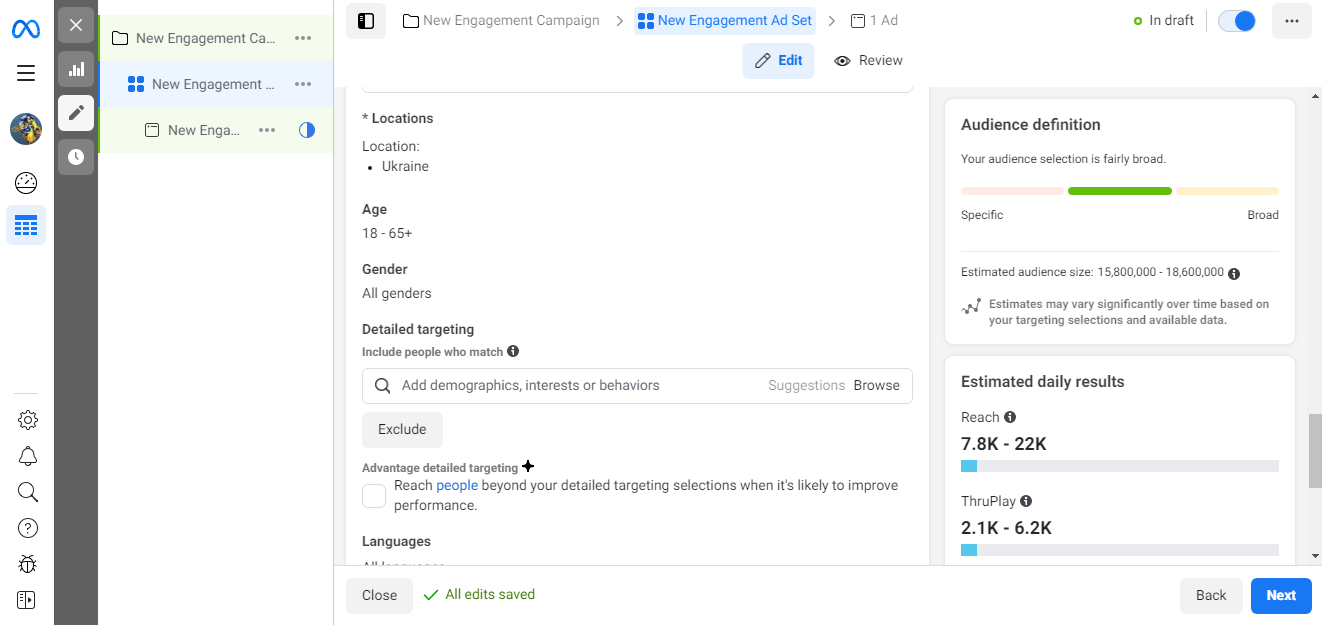
It is recommended to save the configured target audience as a template so that when creating the next campaign, you do not waste time repeating actions. To complete this, click the "Save this audience" button.
Places of publication of announcements
After painstakingly setting up the target audience, it's time to start doing placements. The choice of places where your ad will be placed also affects the level of its effectiveness, so they should be taken with the same seriousness as the portrait of the target audience. Ads Manager offers 2 options:
- Advantage+ placements (recommended). Automatic budget distribution using different placements to achieve maximum coverage.
- Manual placements. Independent selection of a platform and device for displaying ads, specifying placements (tape, Stories, In-Stream, search, and so on).
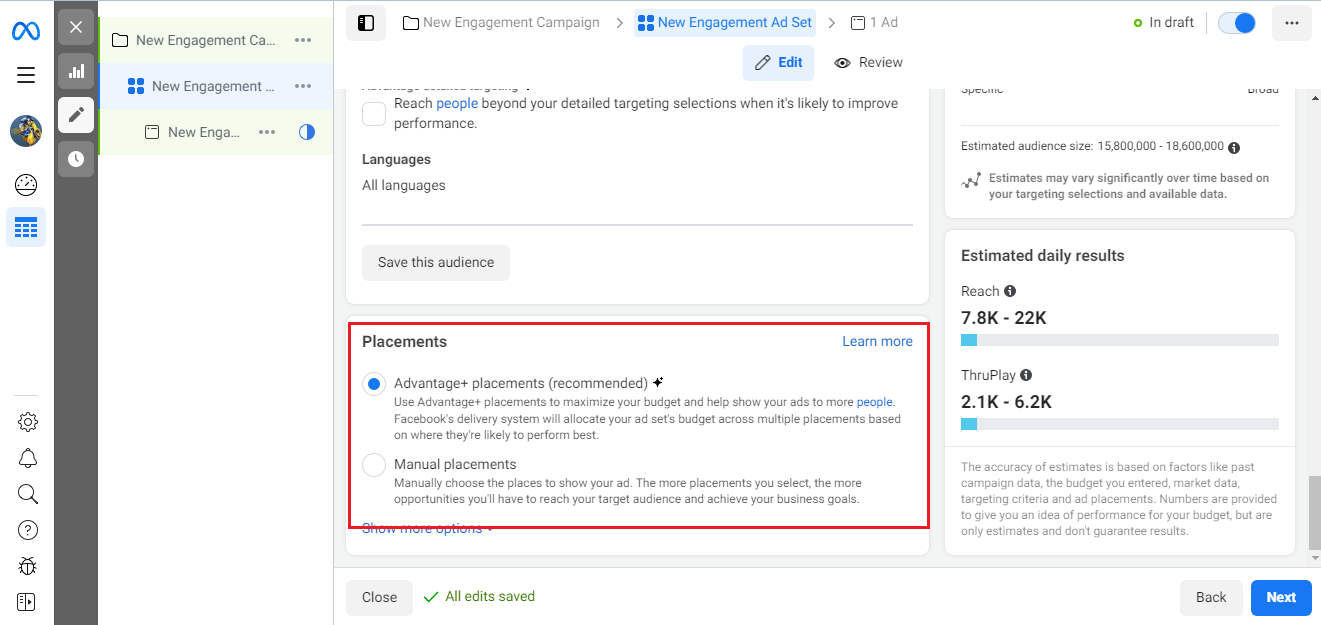
If you are doing an advertising campaign for the first time, it is better to choose Advantage+. Then, your ads will be automatically shown to those users who are potentially interested in your product. With gaining experience, it is still recommended to switch to manual tuning. This is a higher accuracy mode because the work of Facebook algorithms, unfortunately, cannot be called ideal yet.
Check again if you filled out everything correctly and did not miss anything. If everything is in order, click the "Next" button in the lower-right corner of the window.
Creating and setting up an ad
First, you need to give your ad a title. Enter it in the line "Ad name". Then go to the "Identity" section. If you don't have a business page yet, you can create one right from here by clicking the "Create Page" button.
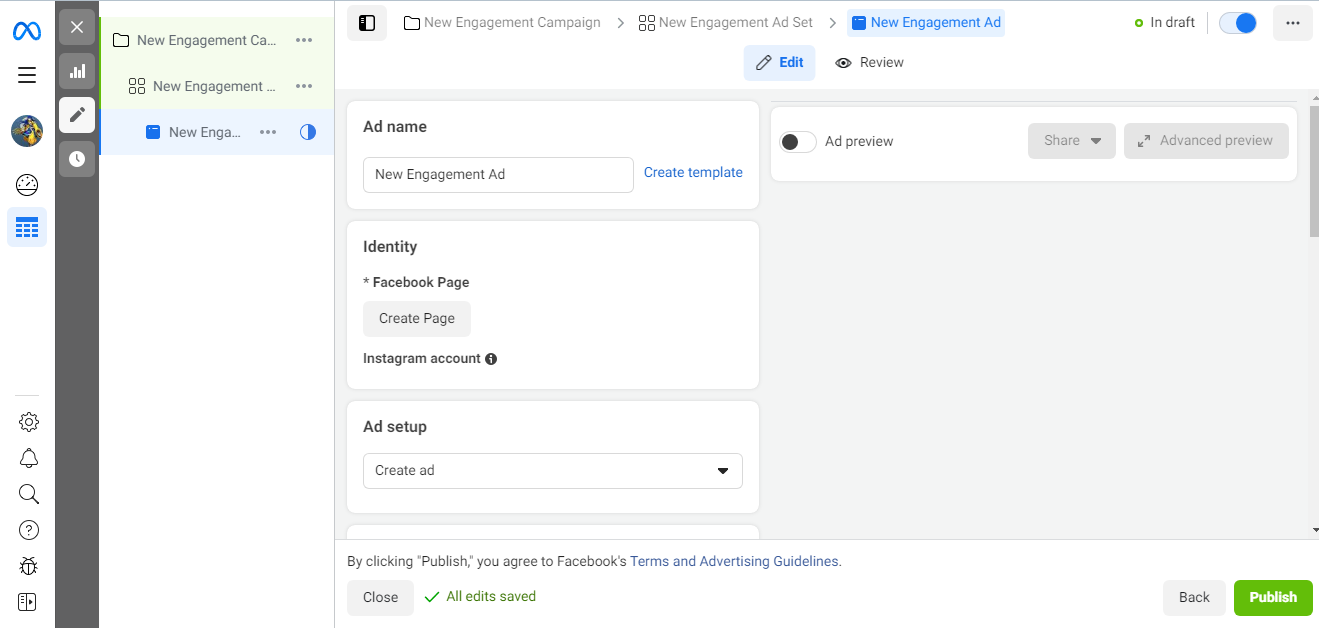
In the "Ad setup" section, leave "Create ad" as you just have to create it. In the next "Ad creative" section, you can add a promotional video if you already have one in place. To achieve this, click on "Add video". If it doesn't exist yet, click "Create video" and start creating it.
Be sure to add a short accompanying text to the video, which will make it clear what the essence of your video ad is.
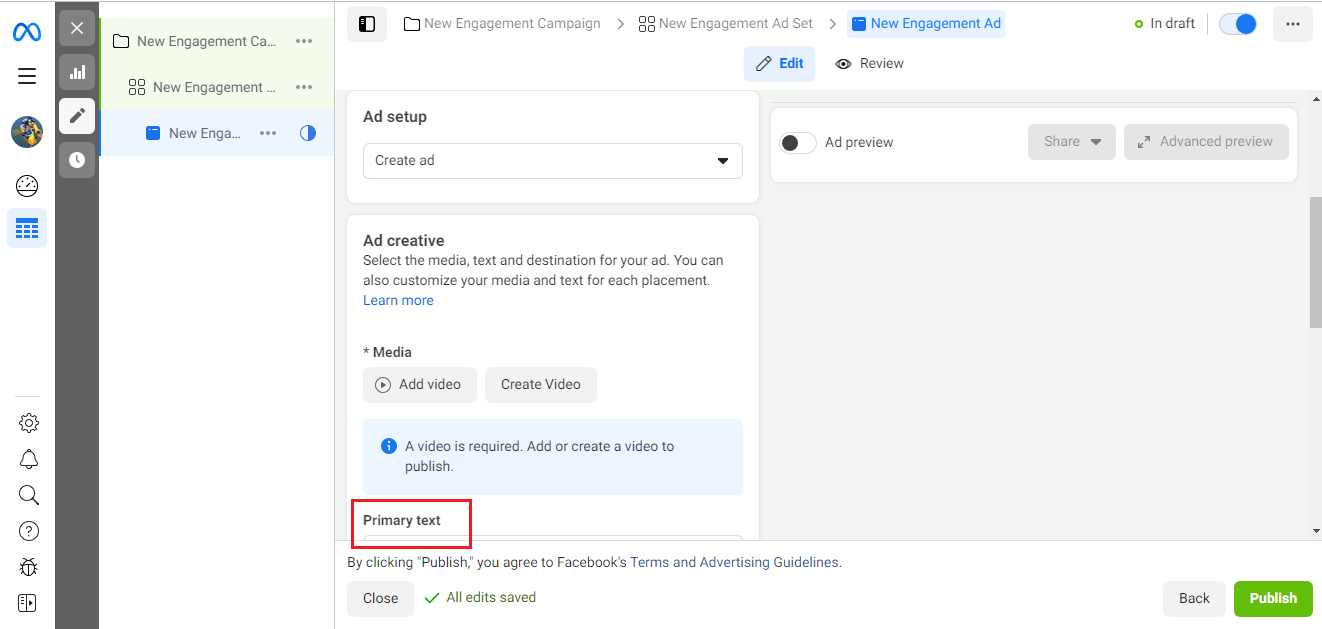
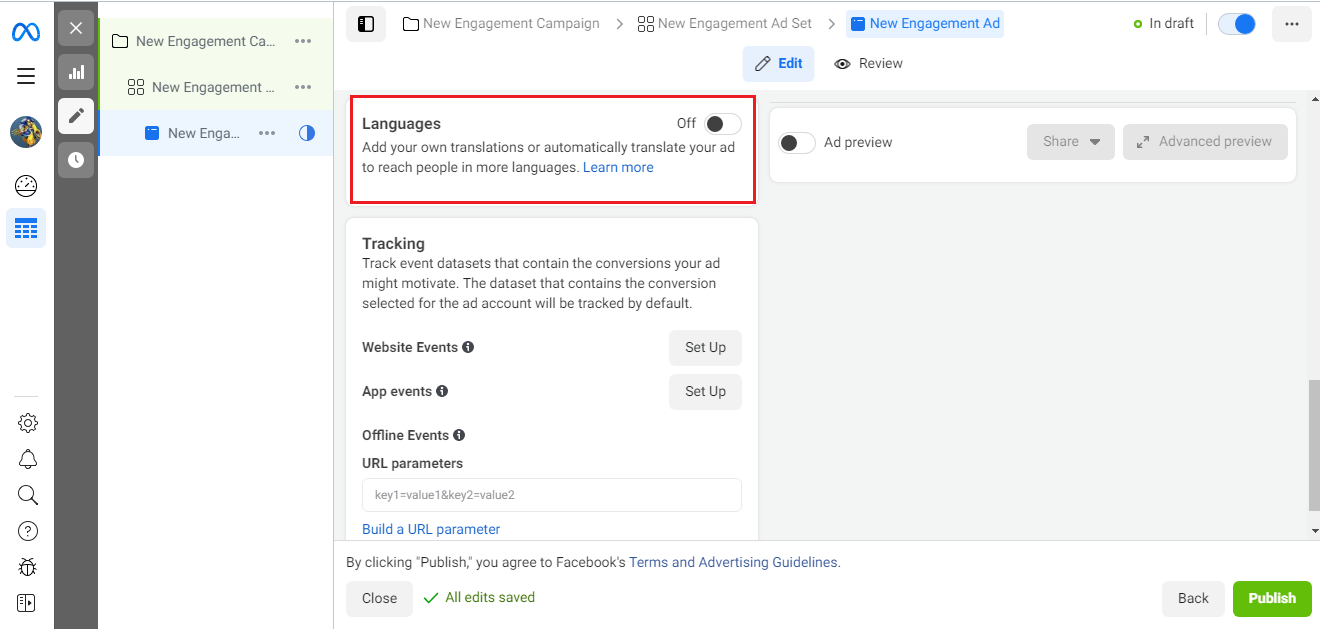
If you need automatic translation of ads into other languages, move the slider next to "Languages" to the right.
You can read more about creating and setting up an ad here.
Tracking
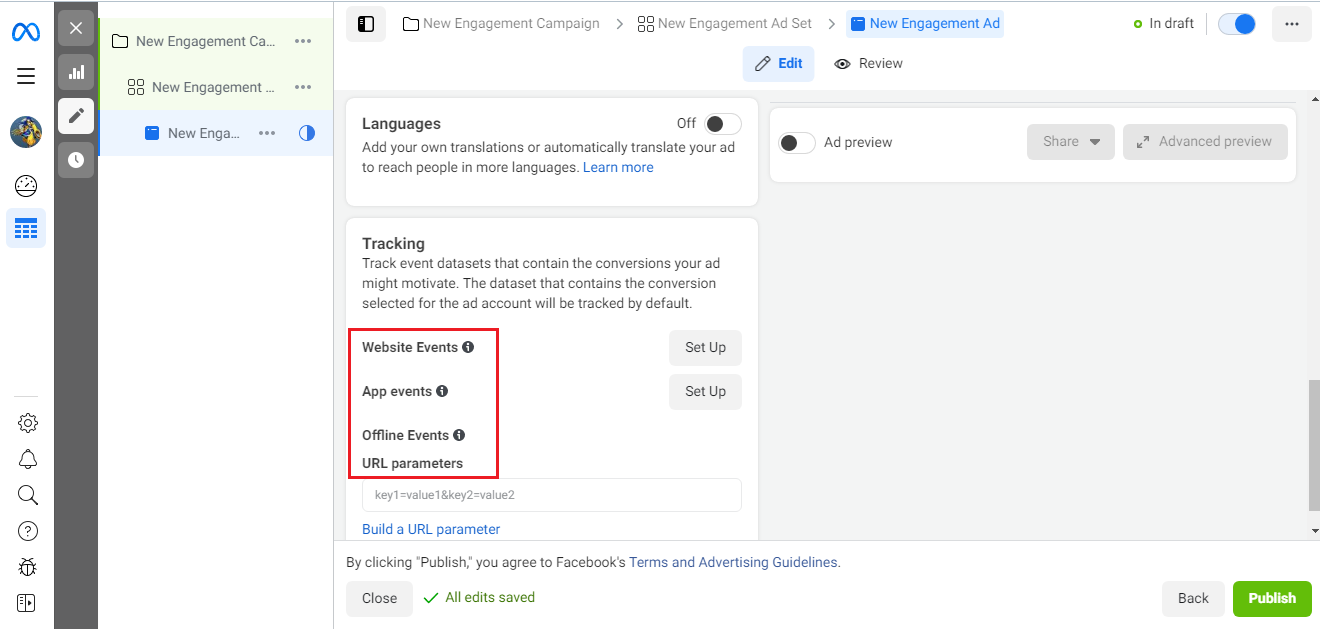
Ads Manager provides several ways to track events (conversions and user actions):
- Website events;
- App events;
- Offline events;
- URL parameters.
By hovering over the icon with the letter "i" next to each of them, you can find out what their essence is and select the ones that you may need.
Verification and publication
After completing the work on the advertising campaign, carefully check all the fields and checkboxes to make sure that you didn’t miss anything and did everything without errors. You can also use the preview button – "Review" (located at the top of the page).
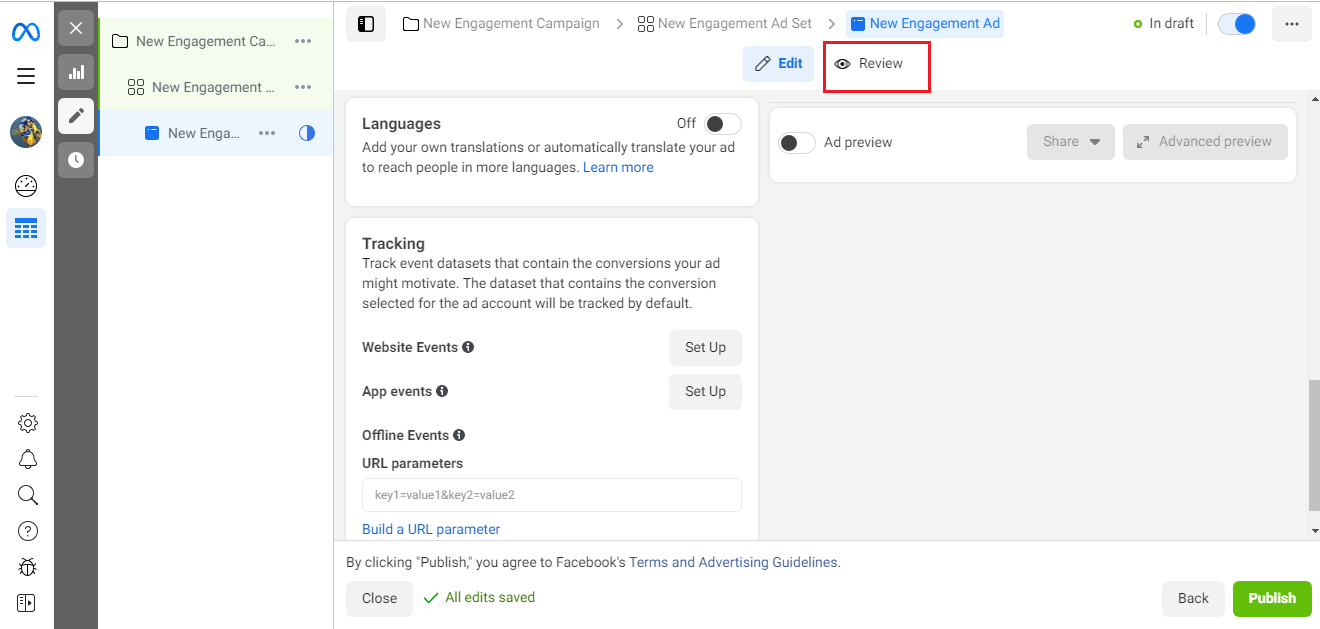
If everything suits you, click "Publish" and follow the instructions. The system will send your ad for moderation. After successful verification, the campaign will be launched.
SaveMyLeads is a simple and effective service that will help you automate routine tasks and optimize business processes. Stop wasting time uploading leads from Facebook manually – you can do it automatically, saving a lot of time and money. Eliminate routine from workflows and achieve more with minimal investment of money, effort and human resources.
