Tired of wasting time manually sending transactional emails? SaveMyLeads can help you make MoonMail automatically send a greeting, order confirmation, or any other email message to every user who has filled out the Facebook lead form. All this is quite possible to set up in a few minutes and without the help of a programmer.
Contents :
1 . How to set up Facebook and MoonMail integration
2 . Register on SaveMyLeads
3 . Connect Facebook Leads Ads
4 . Connect MoonMail
5 . Test data transmission
6 . Finish the setup
Automation can bring several tangible benefits to your business. Let's talk about them briefly.
First, you save yourself from performing unnecessary actions. You no longer have to monitor Facebook for new leads, upload them to a CSV file, copy the address and name of the client from it to the mailing service and send a message. After all, thanks to SaveMyLeads, all this will be able to work in automatic mode.
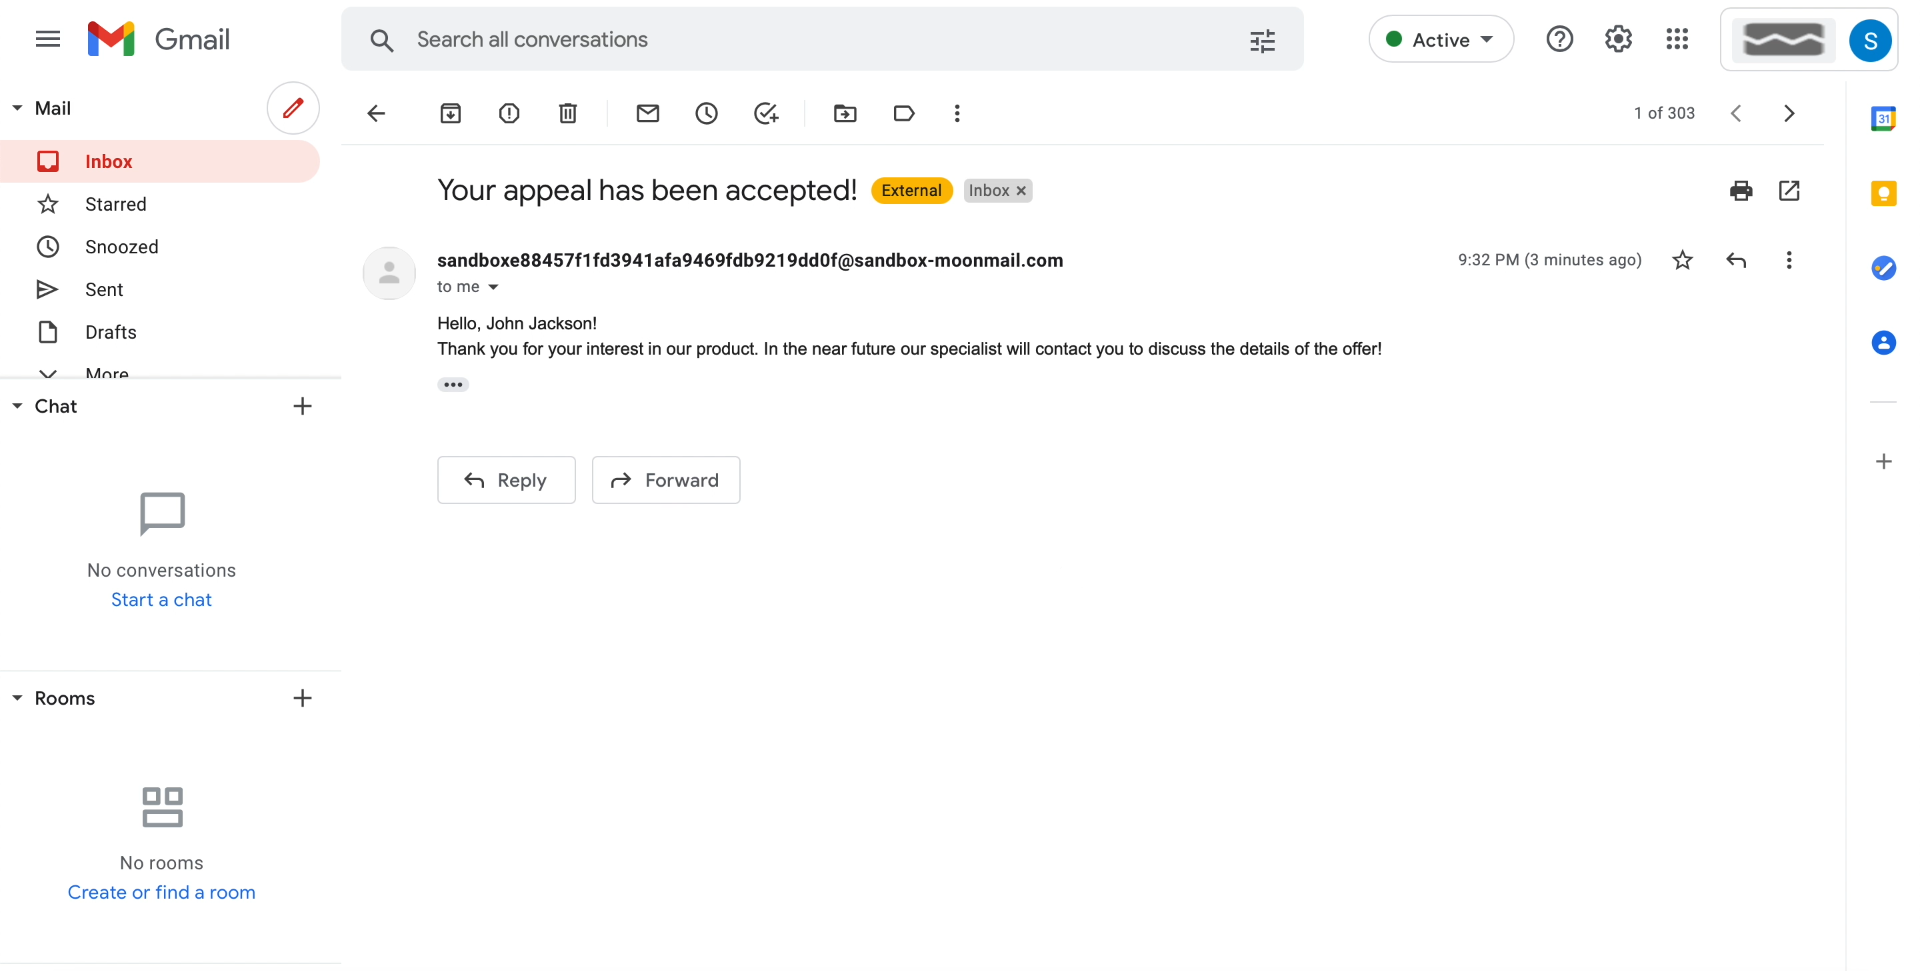
Second, you stop responding to new customer requests late. SaveMyLeads checks the Facebook form every second. As soon as the user leaves his data in it, the service immediately initiates sending a letter via MoonMail. Messages will always arrive on time, and impatient customers will have no reason to go to competitors.
Plus, you'll minimize the chances of errors that are common when sending emails manually. A person may, for example, misrepresent a contact or confuse a customer's name.
Plus, SaveMyLeads provides options for personalizing emails. The service extracts the username, contact and other data left in the form from each lead and can automatically insert them into the message before sending.
How to set up Facebook and MoonMail integration
You don't need to be a programmer to work with SaveMyLeads. It is enough to register on the service website and launch the integration between Facebook and MoonMail using the interface prompts. The whole process takes no more than five minutes on average.
Below is a detailed setup guide with comments and screenshots. It will help you quickly figure everything out. And if you have any questions while using SaveMyLeads, the support service can answer them.
Register on SaveMyLeads
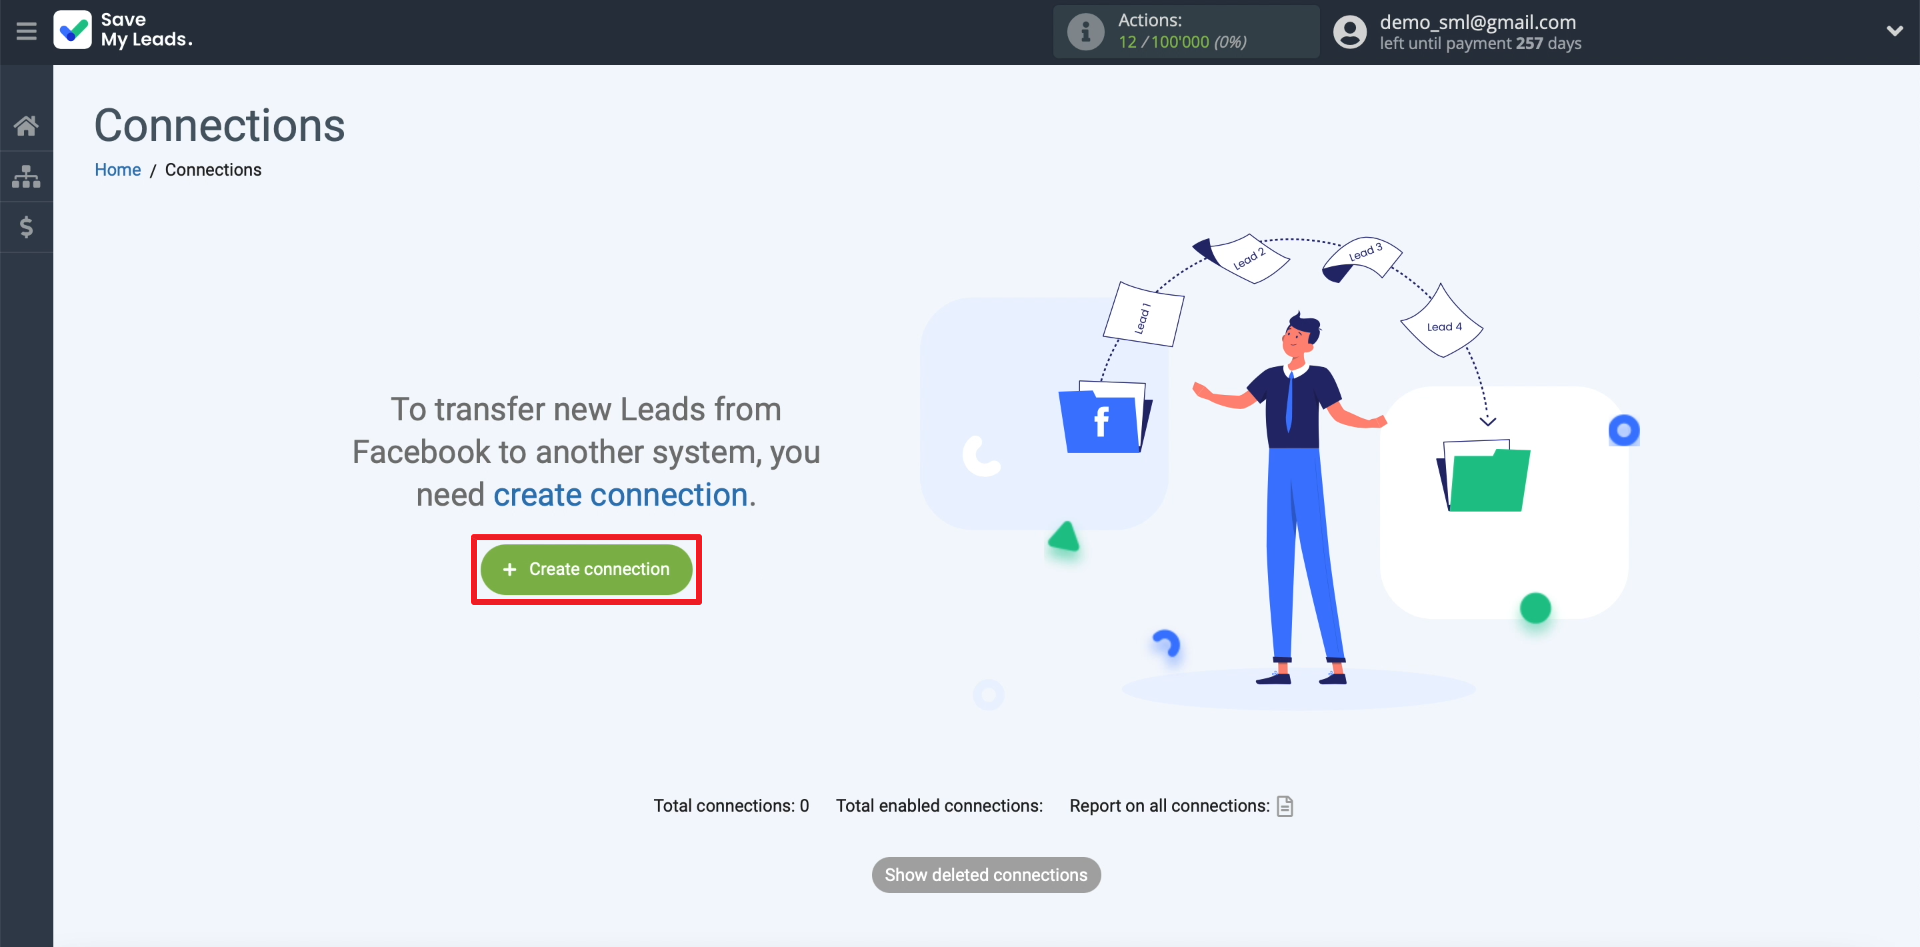
We register on the SaveMyLeads website, enter your personal account and click Create connection.
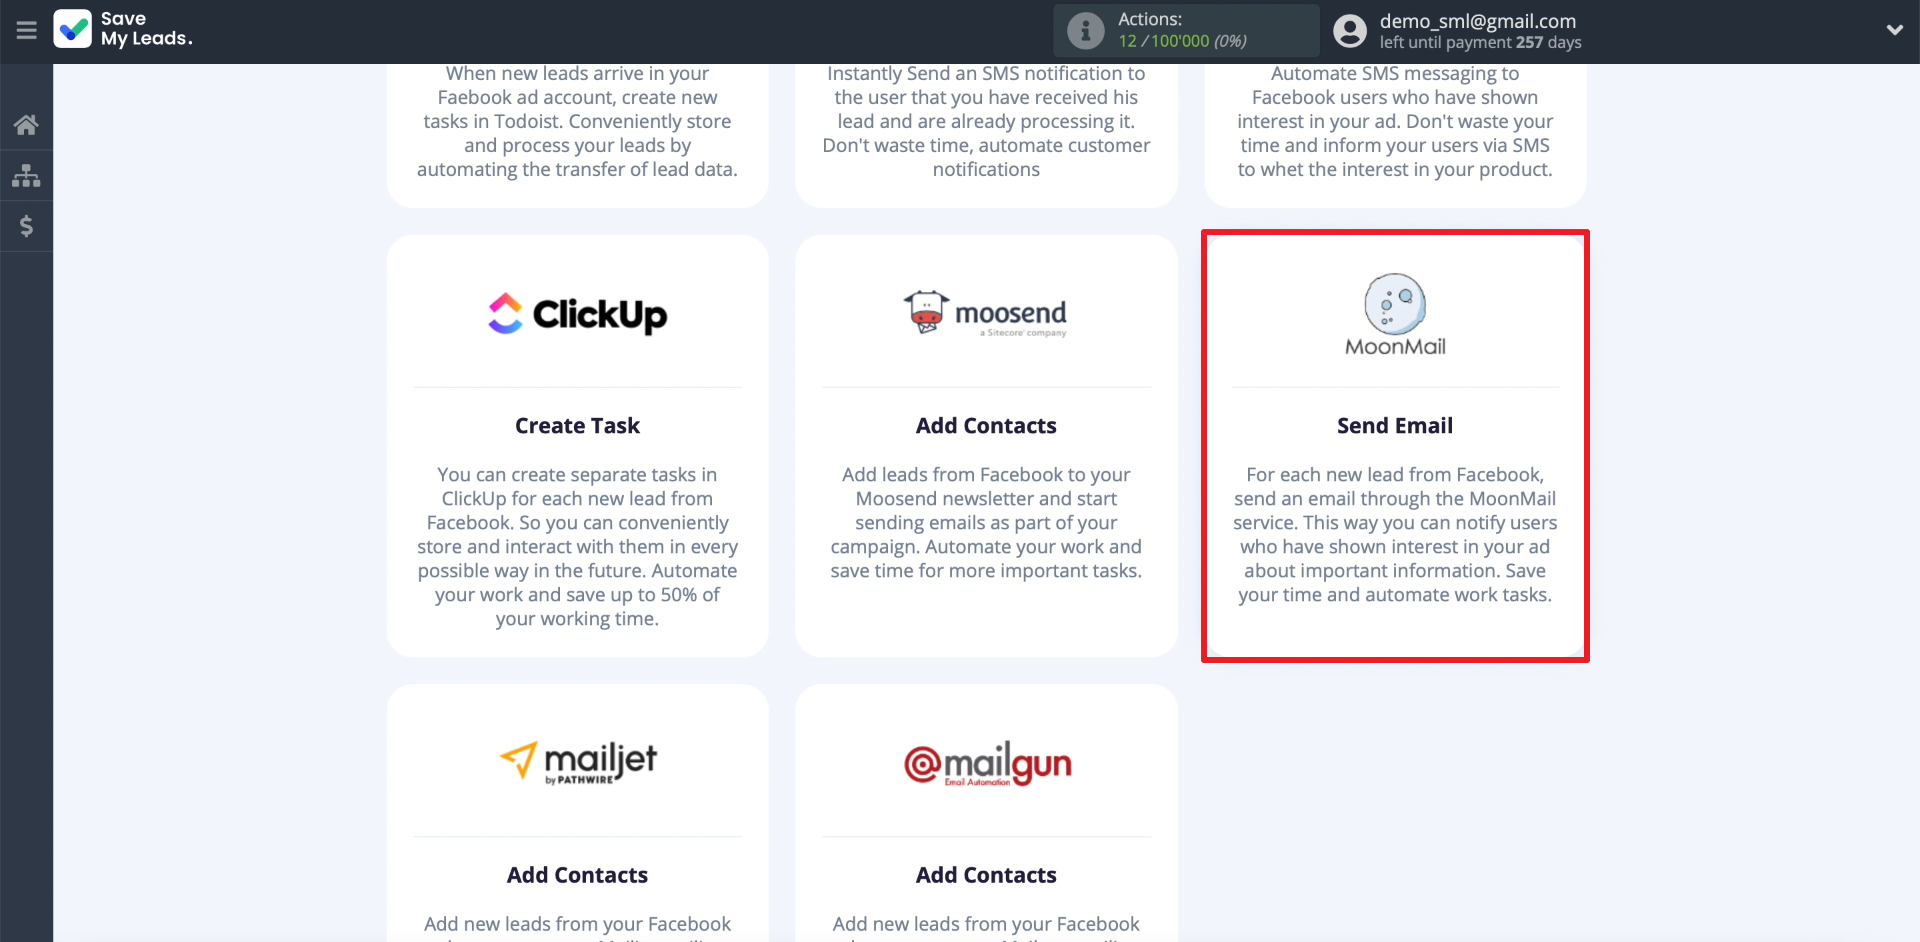
The screen should display a list of integrations that SaveMyLeads allows you to configure between Facebook and other systems. Since we are interested in MoonMail, we choose integration with this service.
Connect Facebook Leads Ads
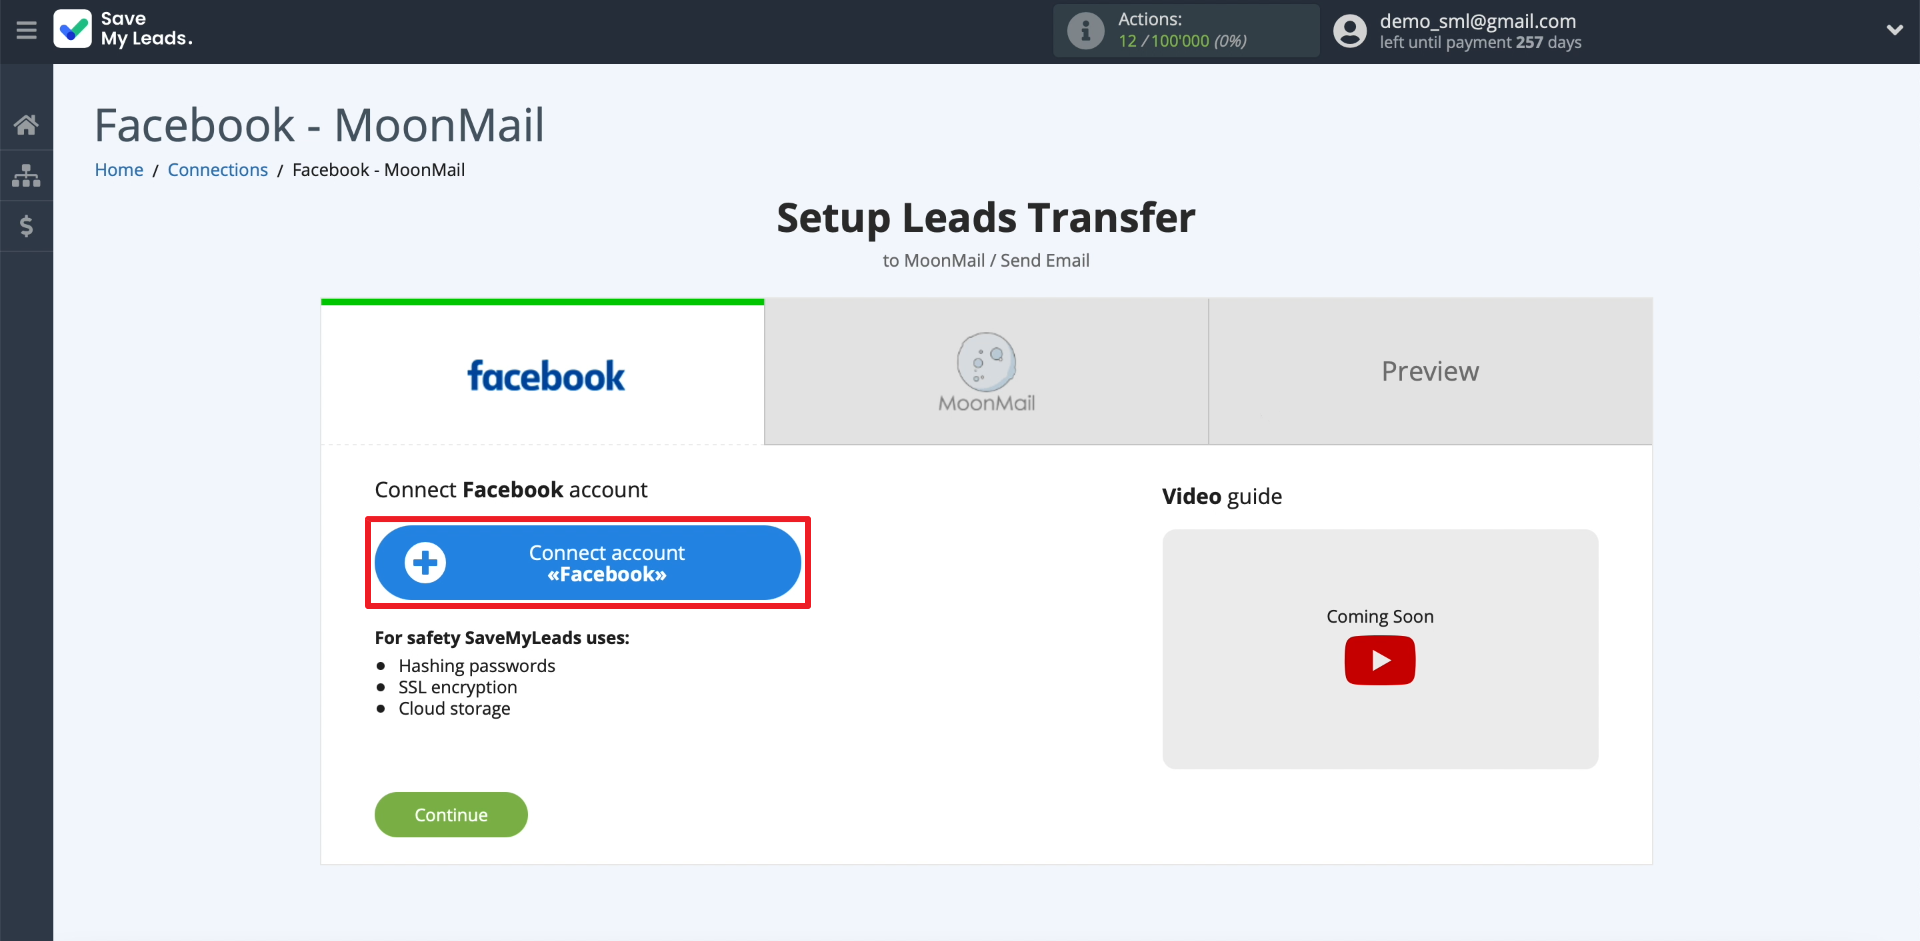
We connect the Facebook account, which we use to manage ads. If necessary, enter your username and password. We also provide the system with all the requested permissions to access Facebook. This is necessary in order for SaveMyLeads to receive data from lead forms.
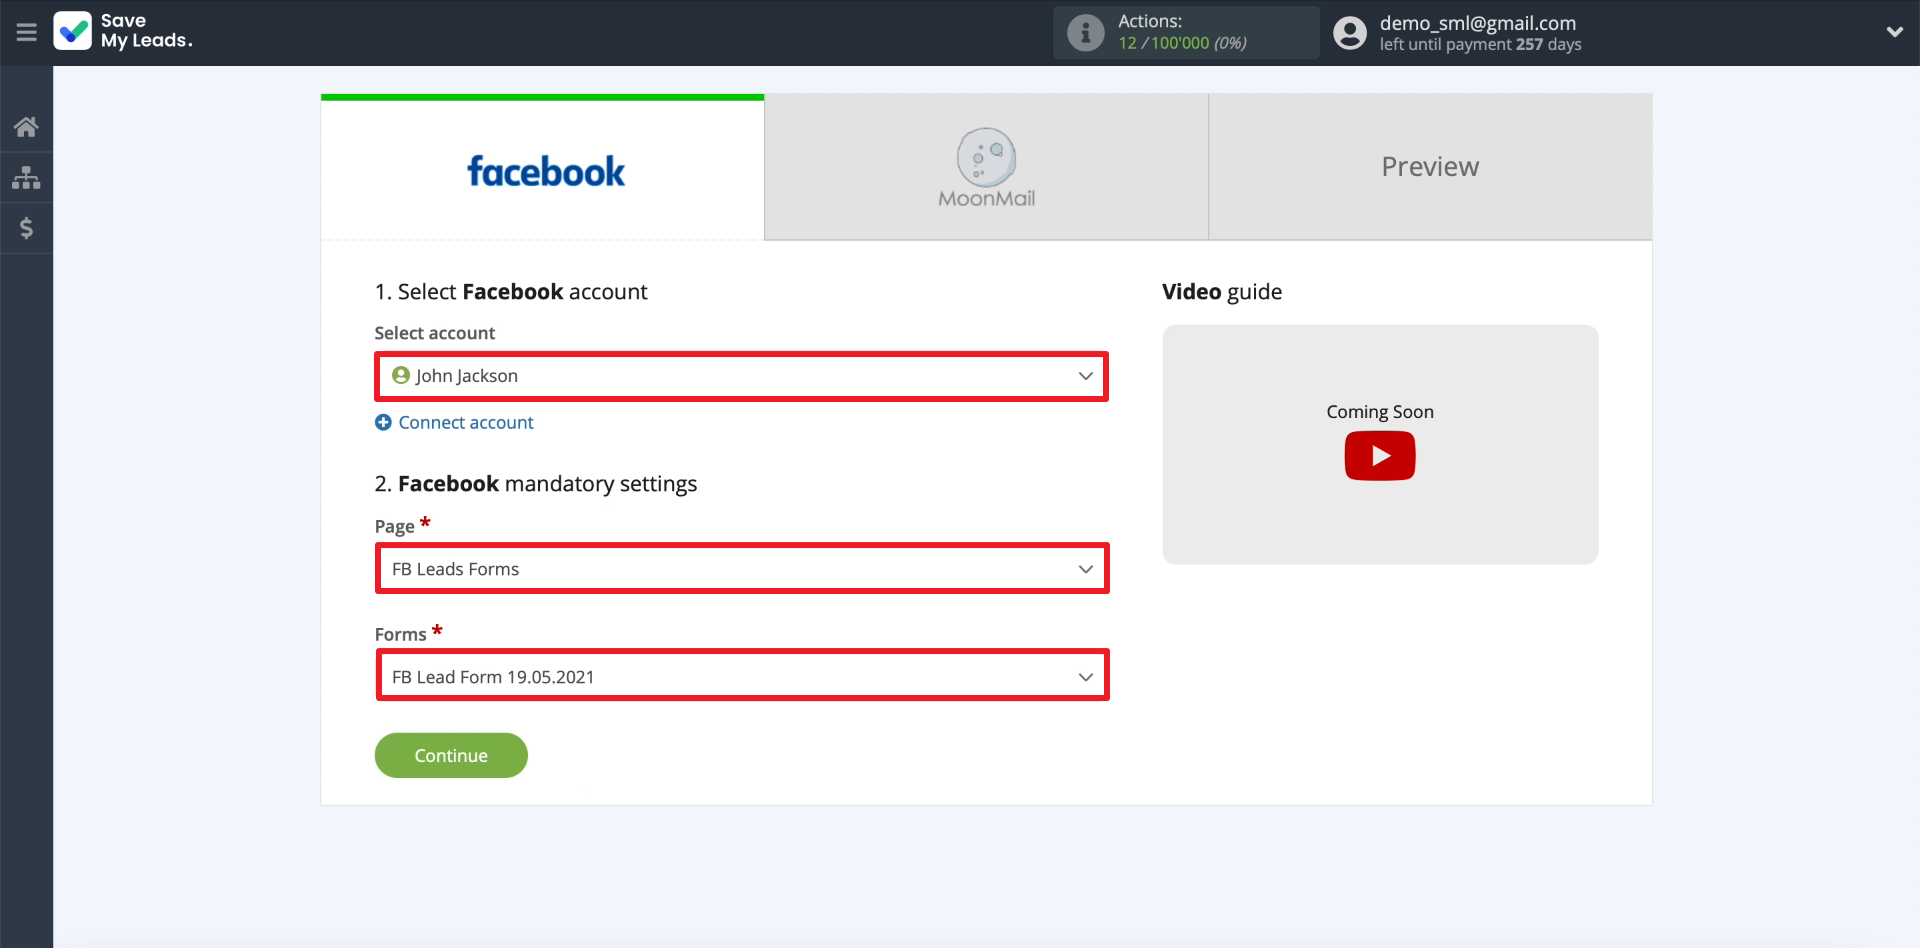
We select the newly connected Facebook account. Then we specify the page to which the advertisements are linked and the form for collecting leads. To set up sending messages to leads from multiple forms, you need to create a separate integration for each.
Connect MoonMail
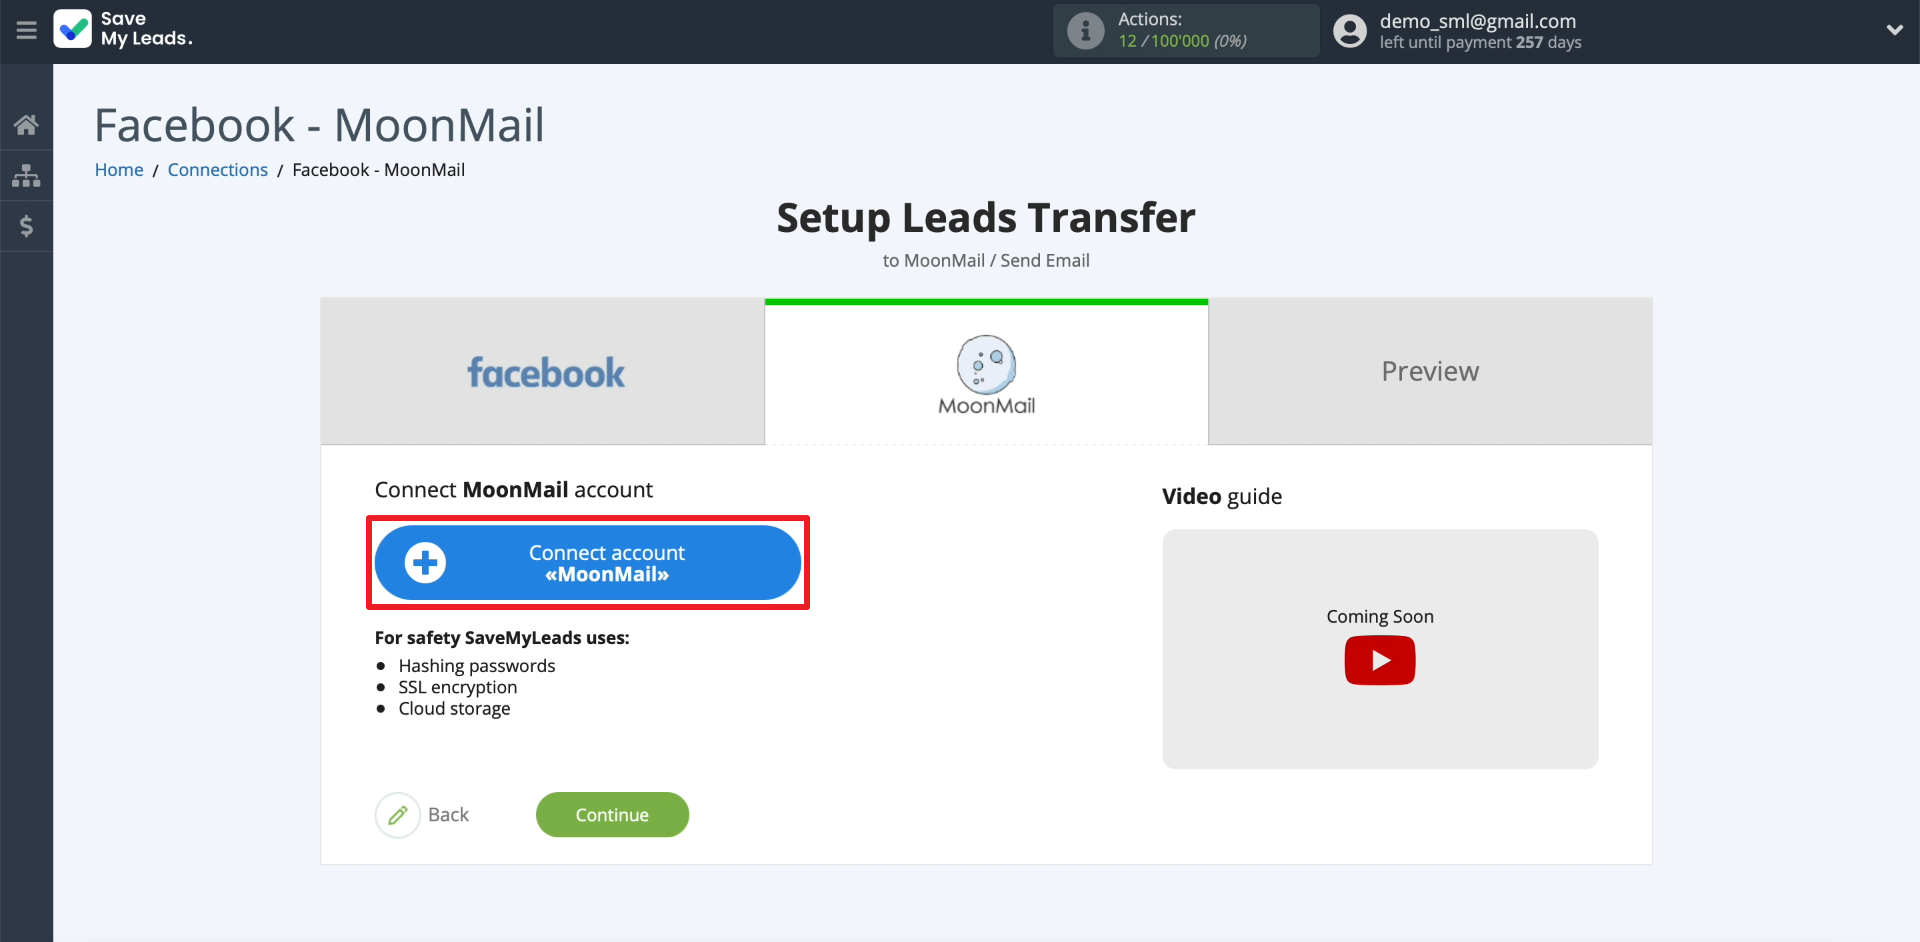
Click Connect account «MoonMail».
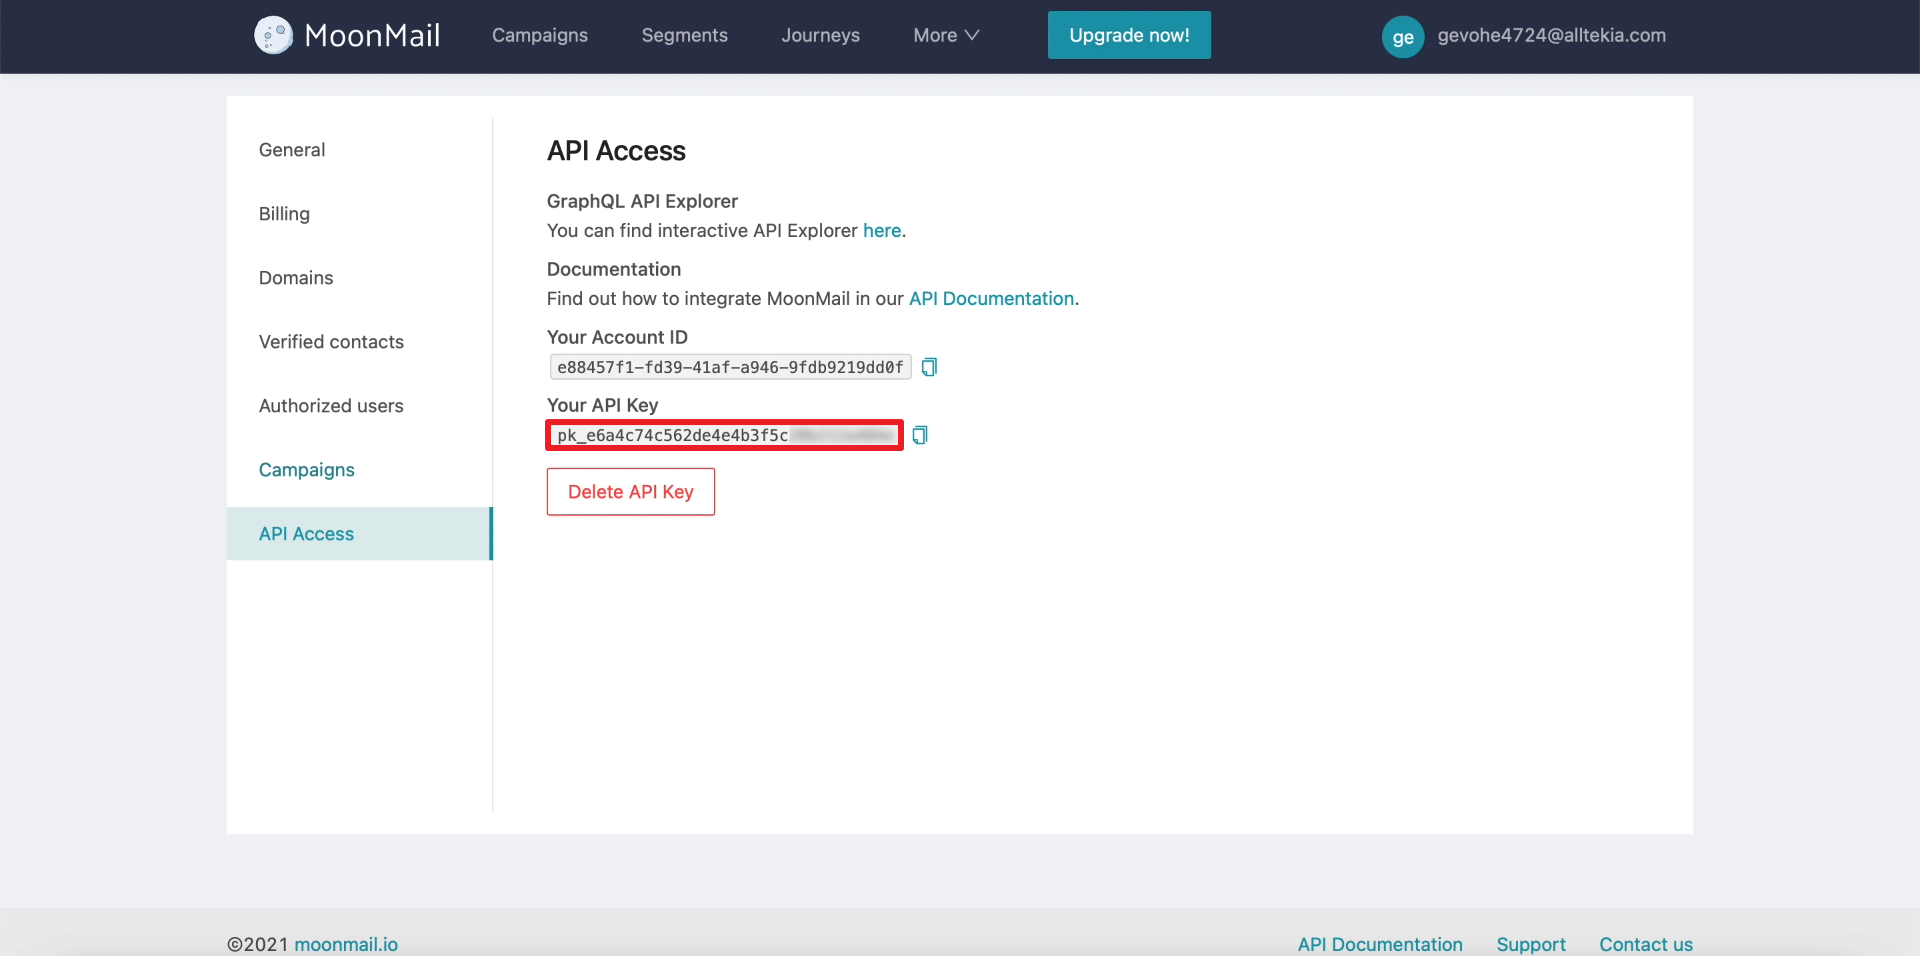
Open the MoonMail website in a new tab, enter your profile settings and copy the API Key on the API Access tab. You will need it for integration.
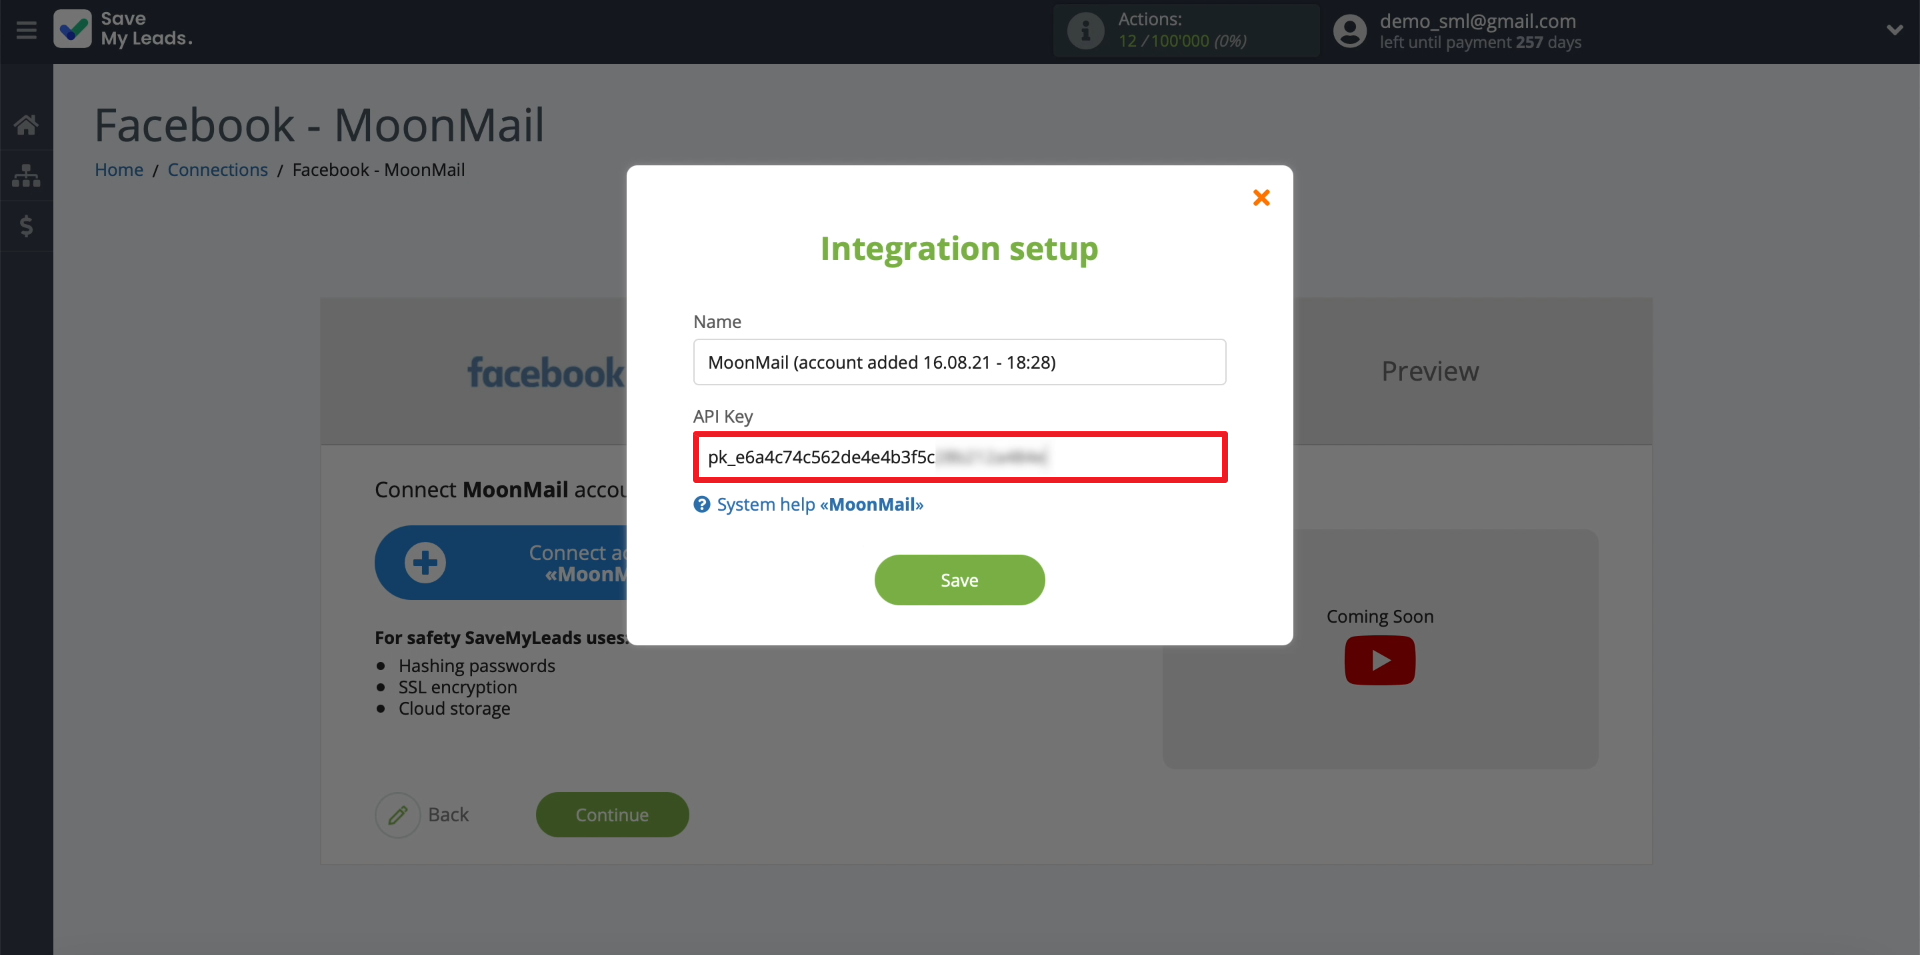
Go back to the SaveMyLeads website and paste the key you just copied to connect your MoonMail account.
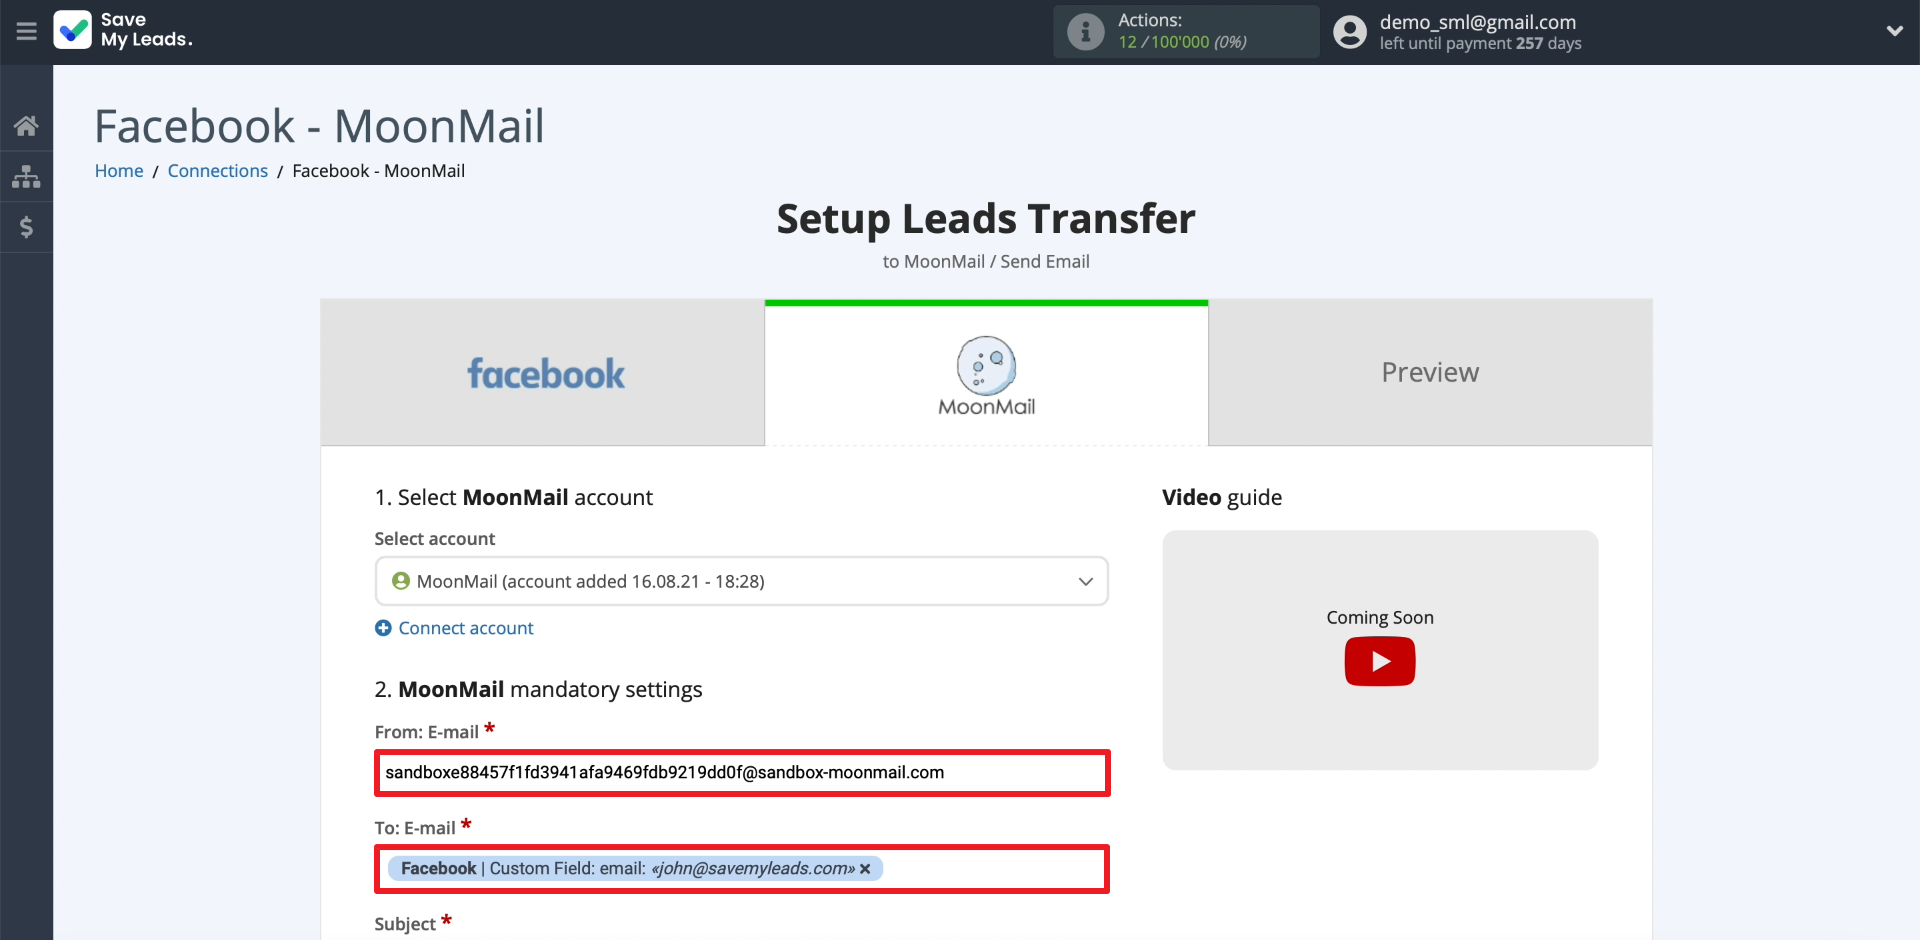
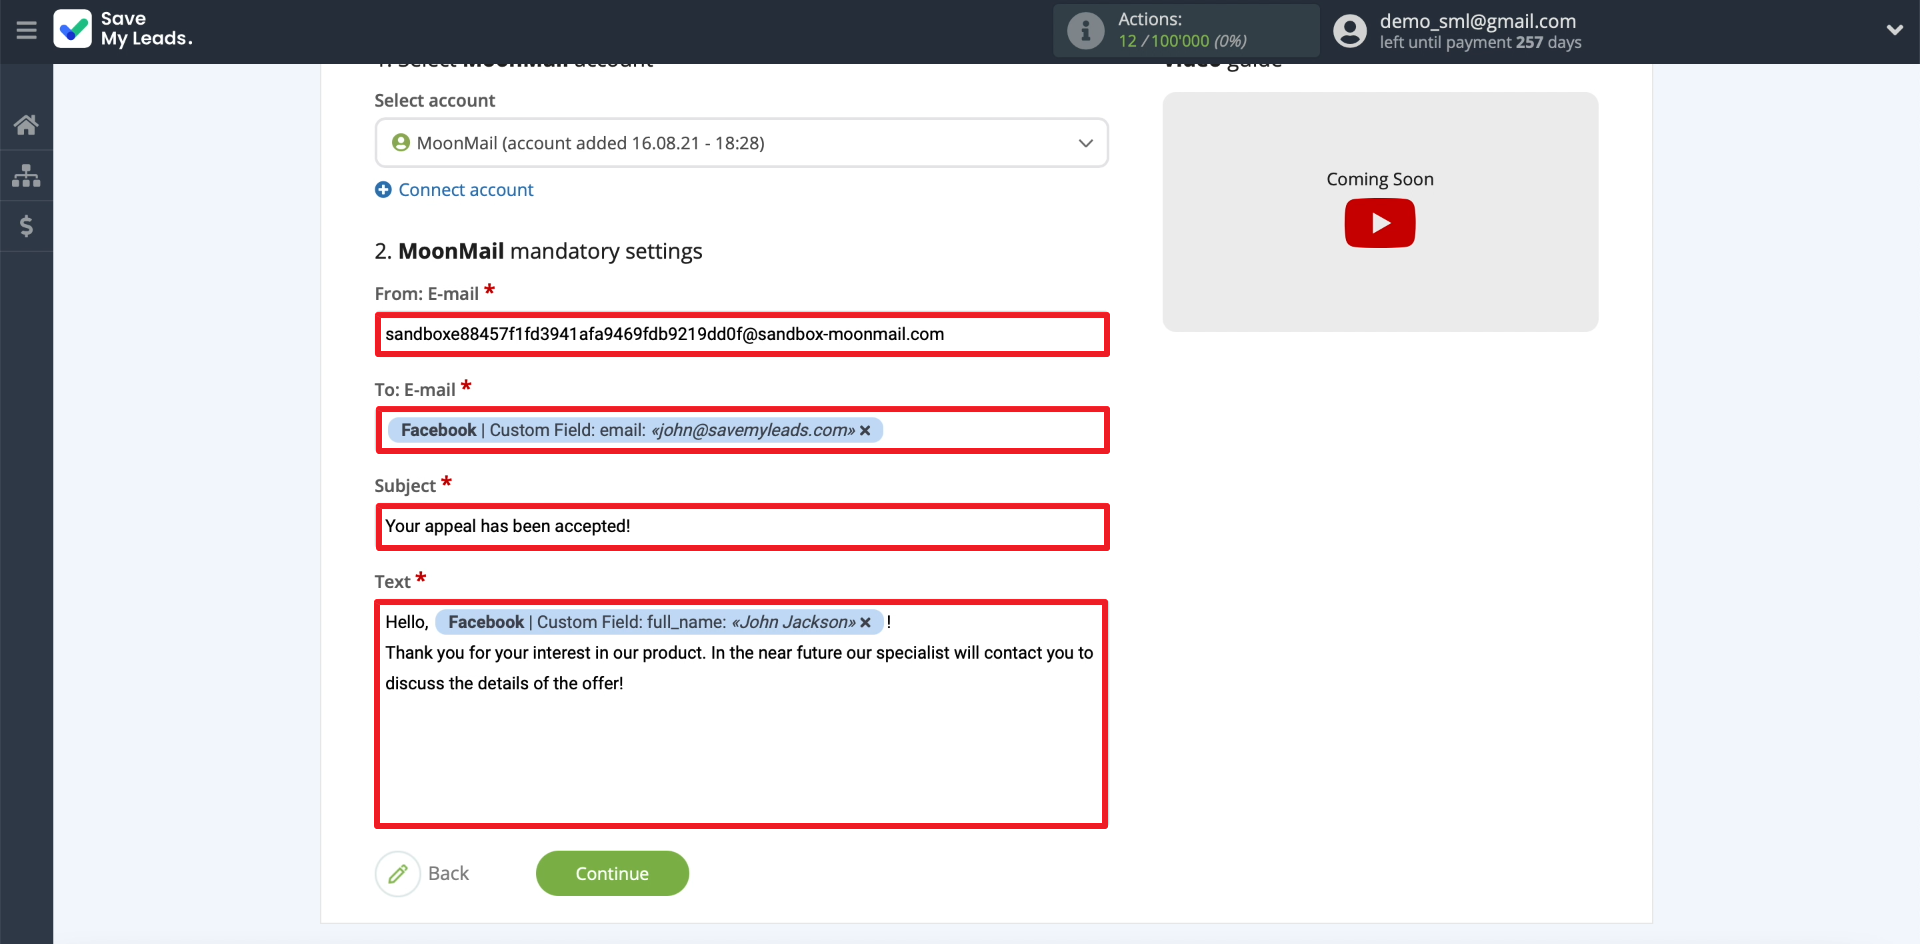
Now we set up the email template. The fields display the data that SaveMyLeads will unload from each lead and insert into the message before sending. These are username, email, and so on. Leave the data selected by the system by default, or select new ones using the drop-down list. You can also enter arbitrary text in the fields.
Test data transmission
We open our form on the Facebook website and fill it out for the test, indicating your email. After that, we update the SaveMyLeads page - the entered data will appear on the screen.
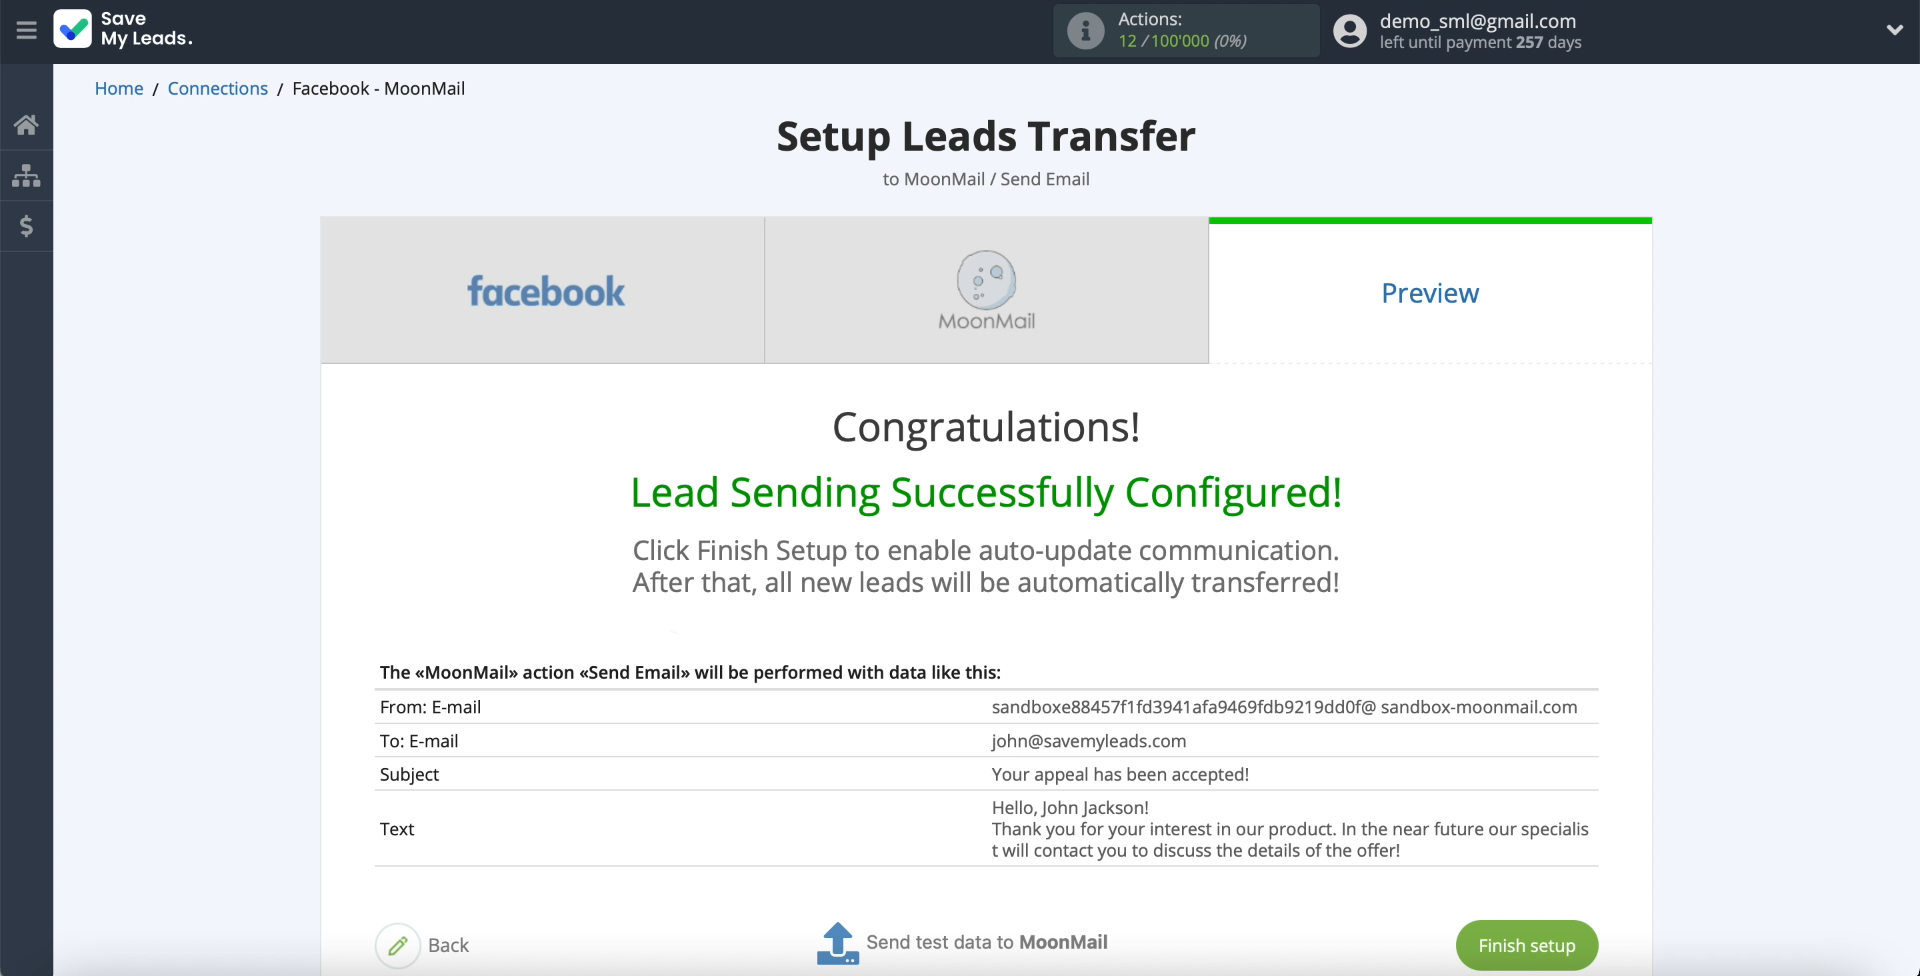
Click Send test data to MoonMail to test sending.
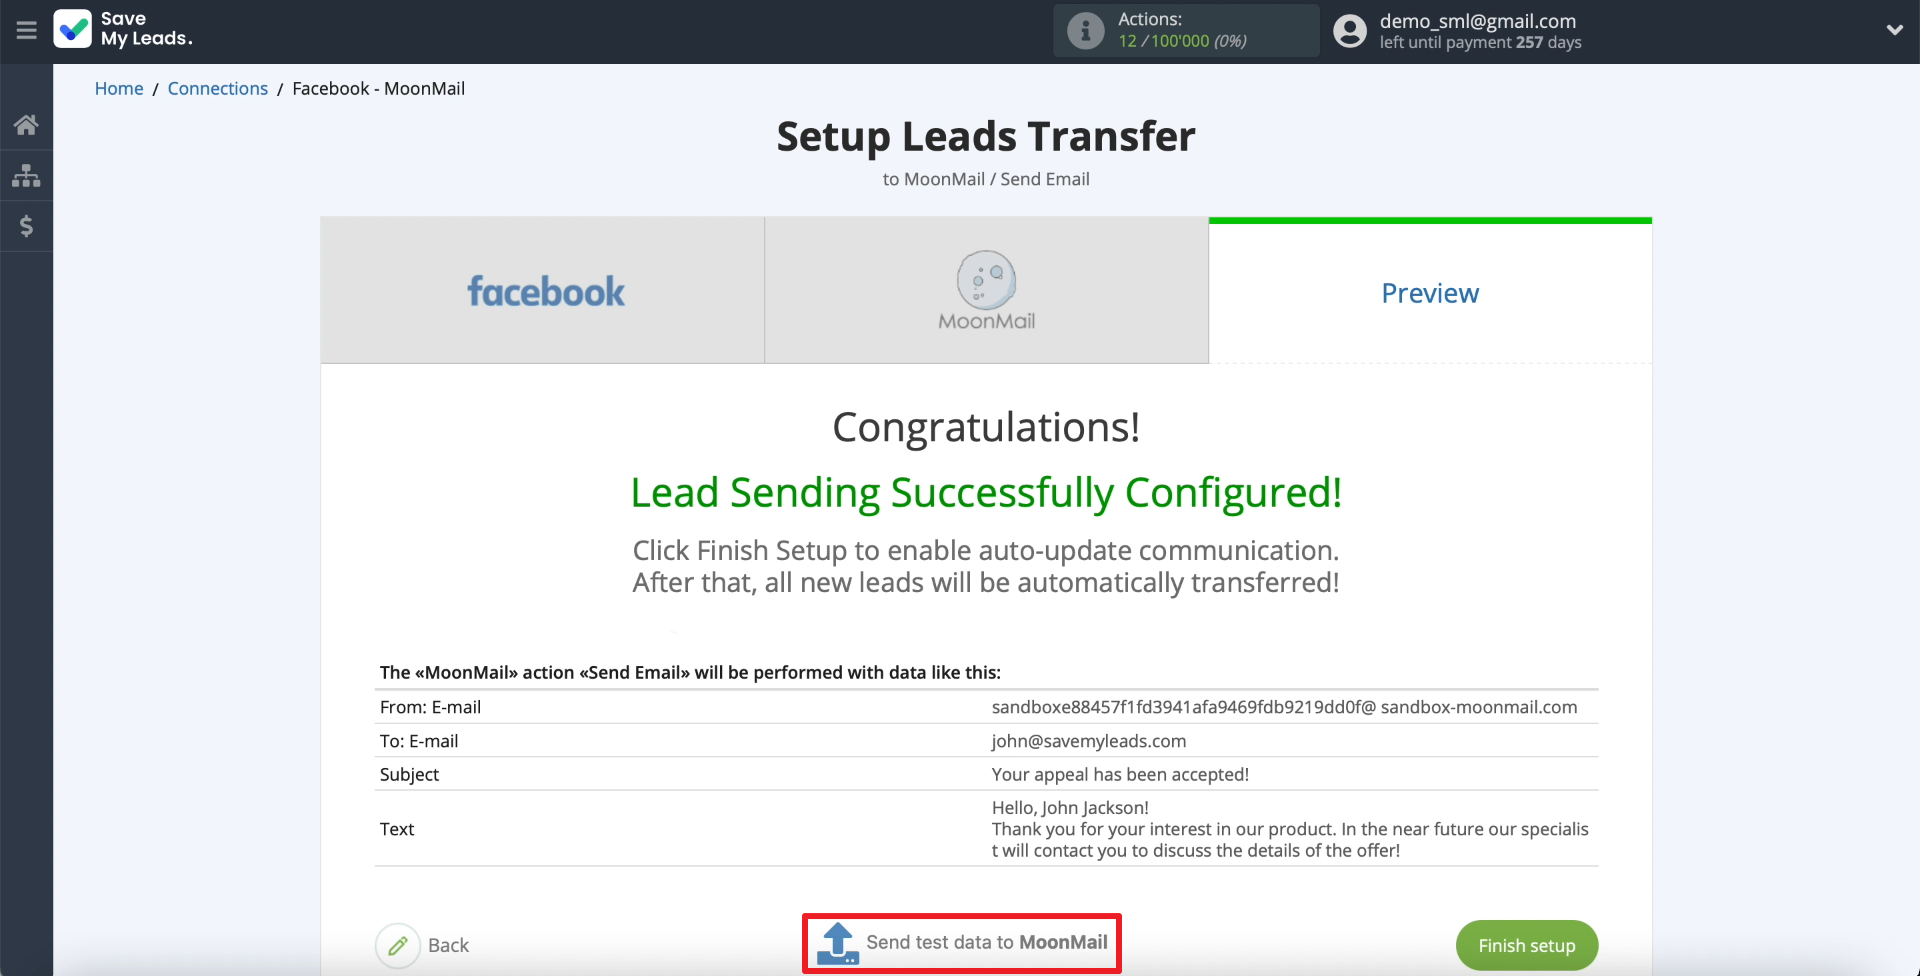
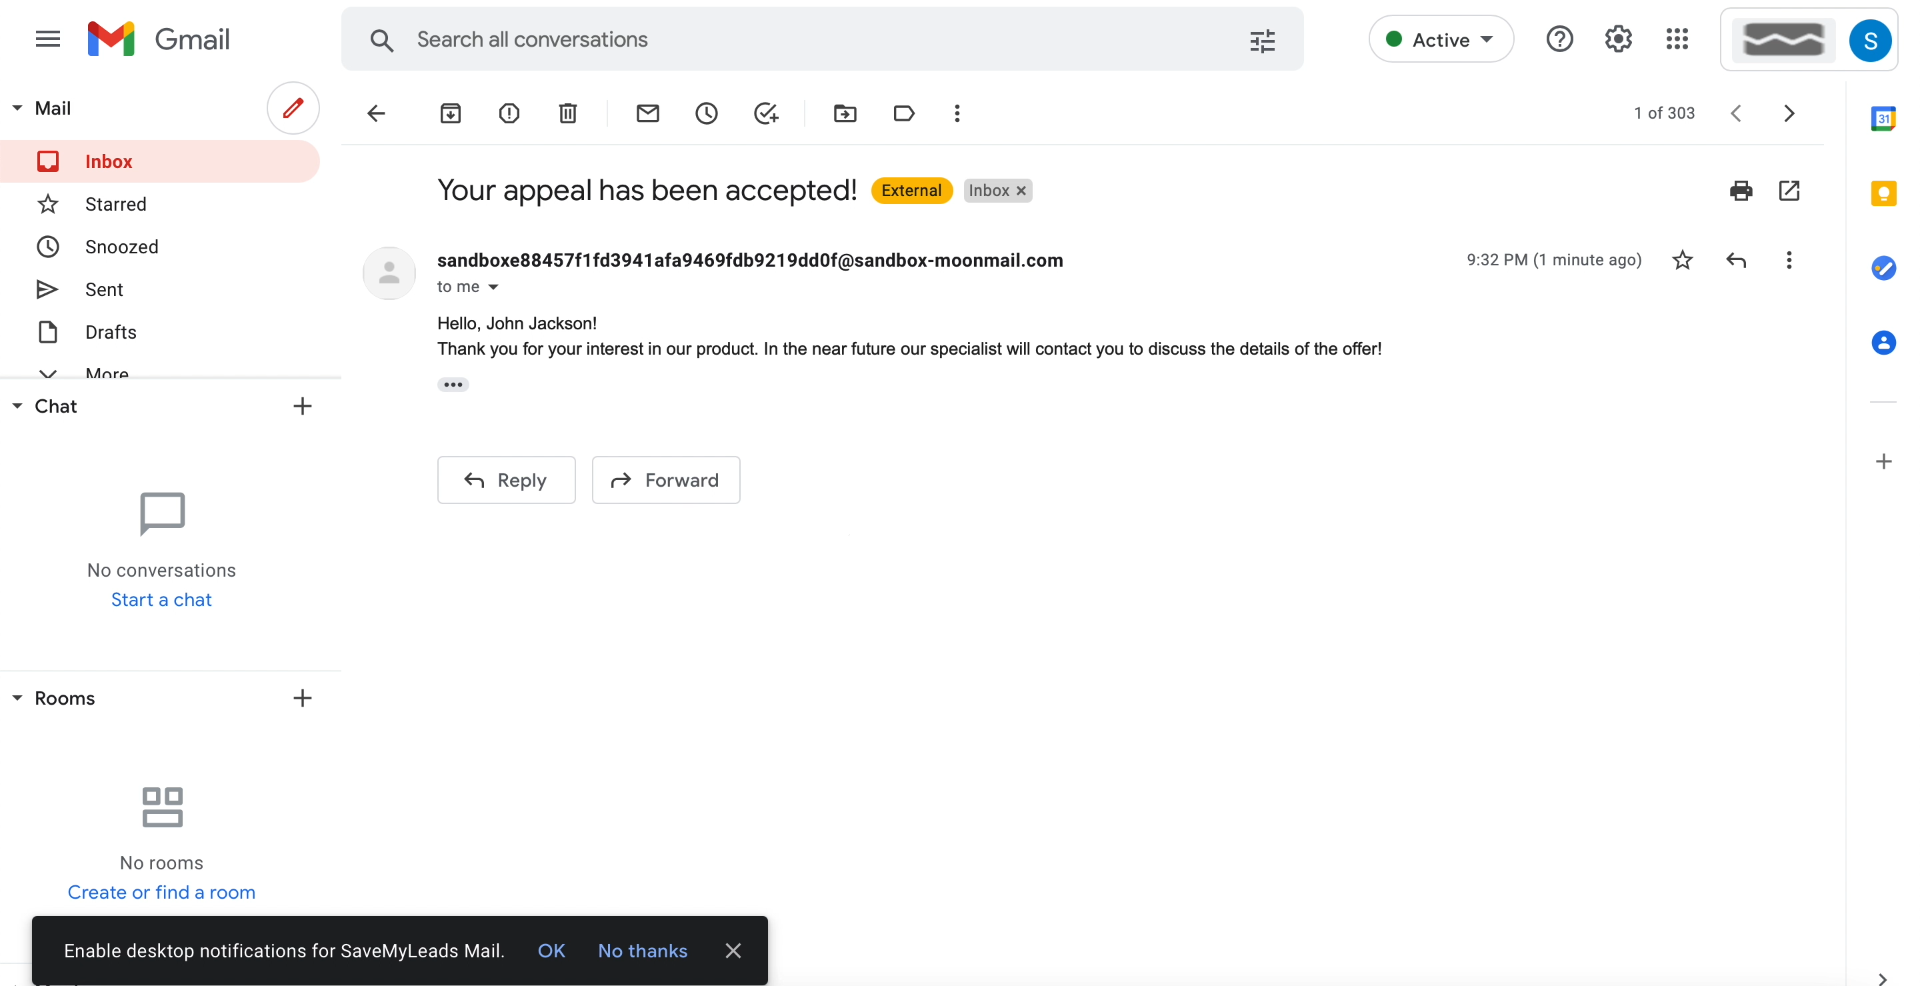
We go into your mailbox and check for the presence of a letter. If it is not there, we look for errors in the previous configuration steps.
Finish the setup
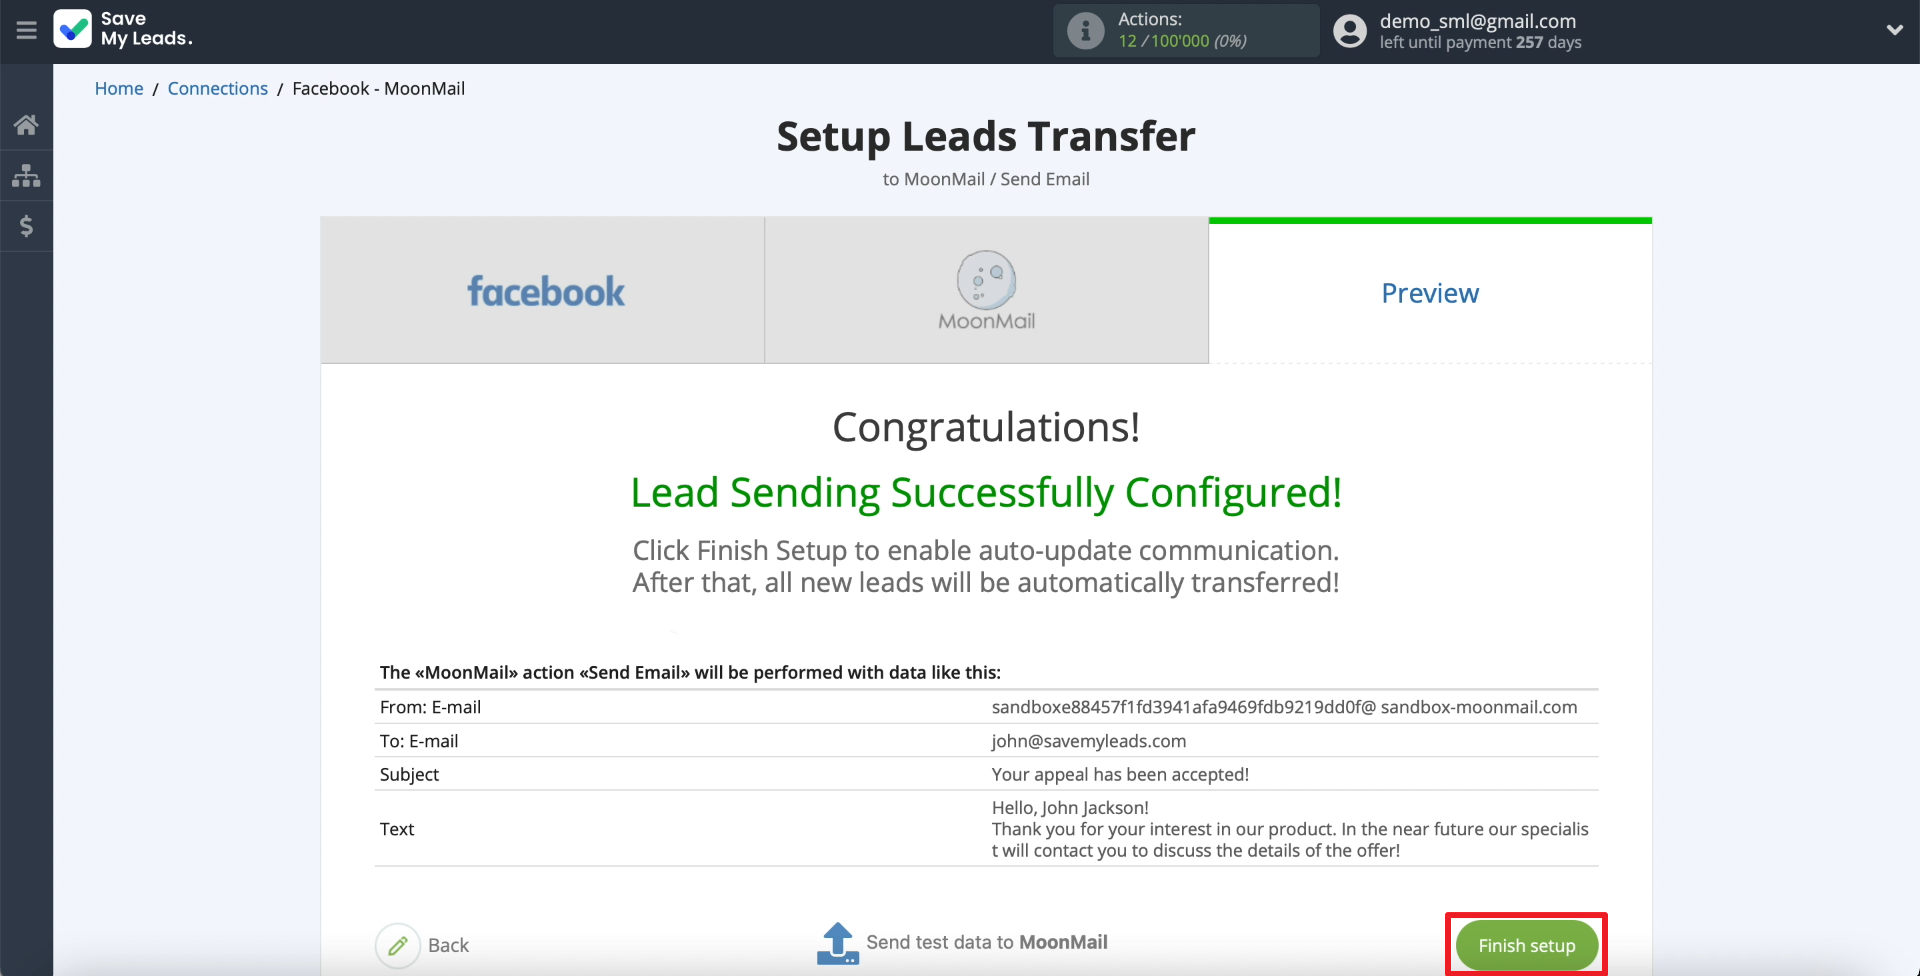
Click Finish setup to finish creating the integration and enable automatic data transfer.
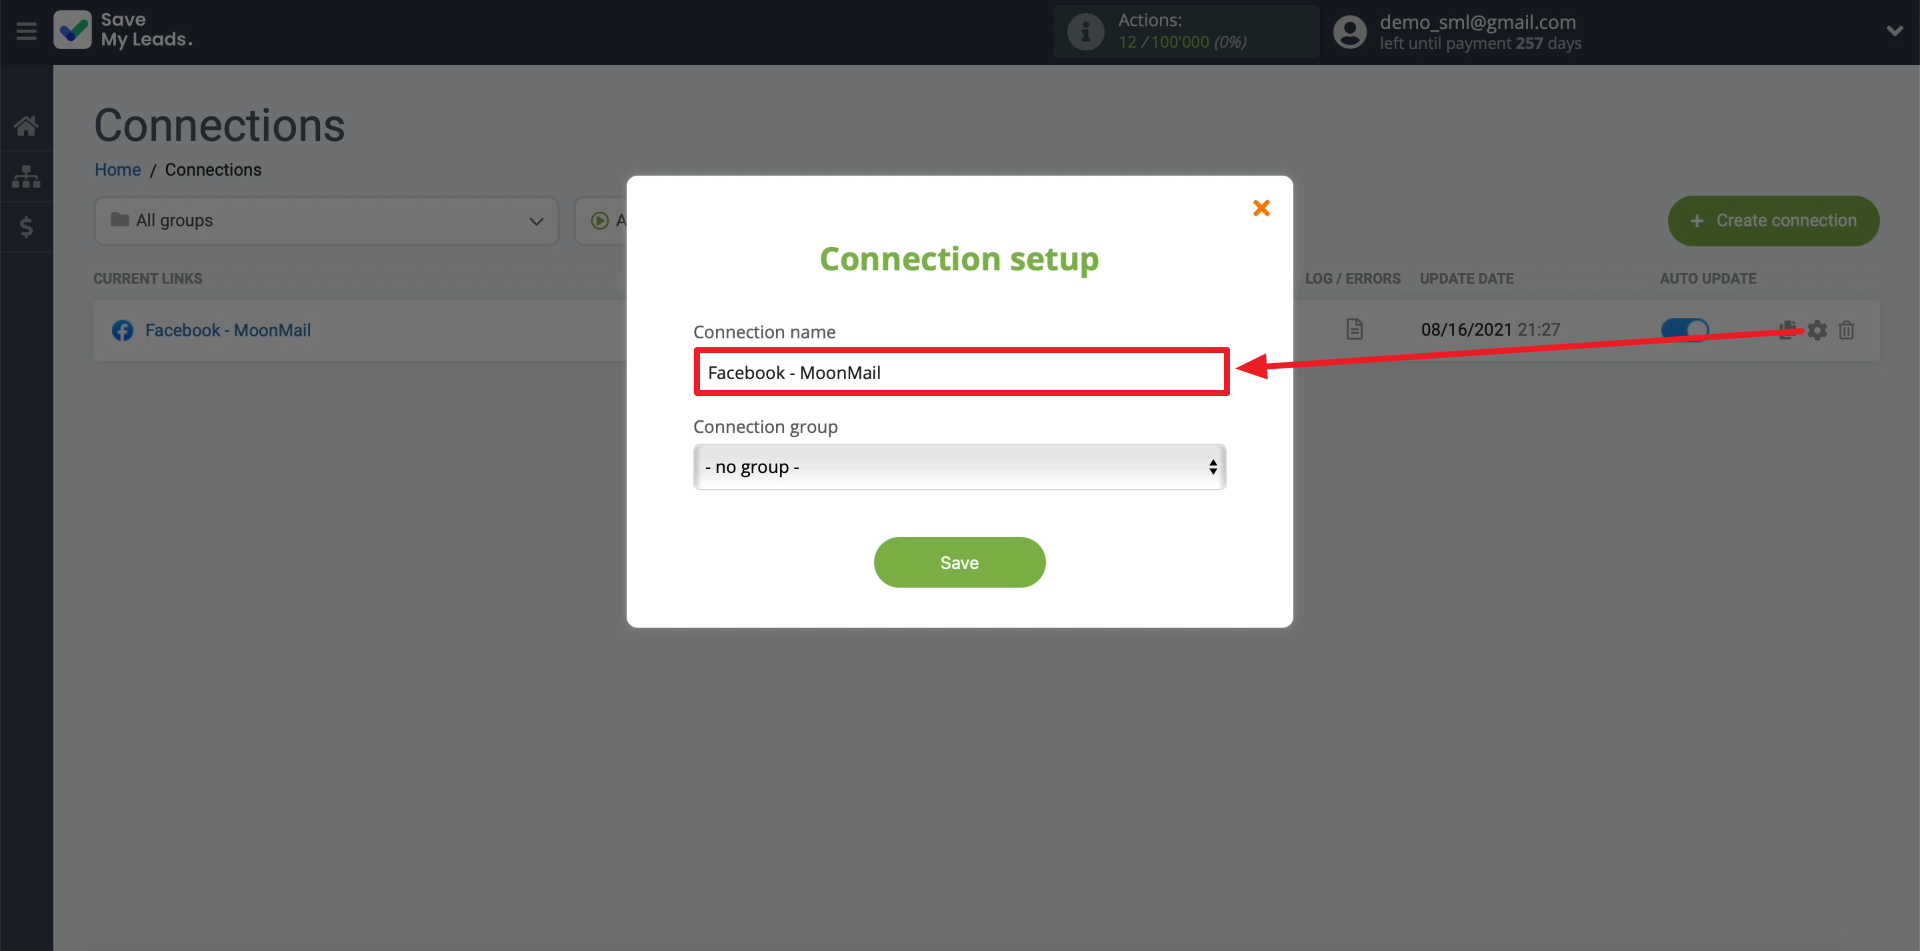
If you suddenly need to change the name of the integration, click on the gear and enter the appropriate text.
That's all. When each lead appears on the social network, SaveMyLeads will initiate sending a message to the user via MoonMail. Good luck with your work!
