Today, in the era of rapid digital technology development, it’s difficult for businesses to succeed without implementing automation. Leading companies and entrepreneurs strive to optimize workflows to save resources and increase their competitiveness. If you use Google Lead Form to collect data from potential customers and have chosen Sinch for communication, you can significantly simplify the process of data transfer between these tools. All you need is to integrate them using our online connector SaveMyLeads. This solution allows you to automate the process of sending SMS messages to potential customers from Google Lead Form via the Sinch service without unnecessary complications. You won’t need to develop a special script or manually configure the integration from scratch. We offer you a step-by-step guide to correctly set up and launch the Google Lead Form and Sinch integration.
Why Should You Choose SaveMyLeads?
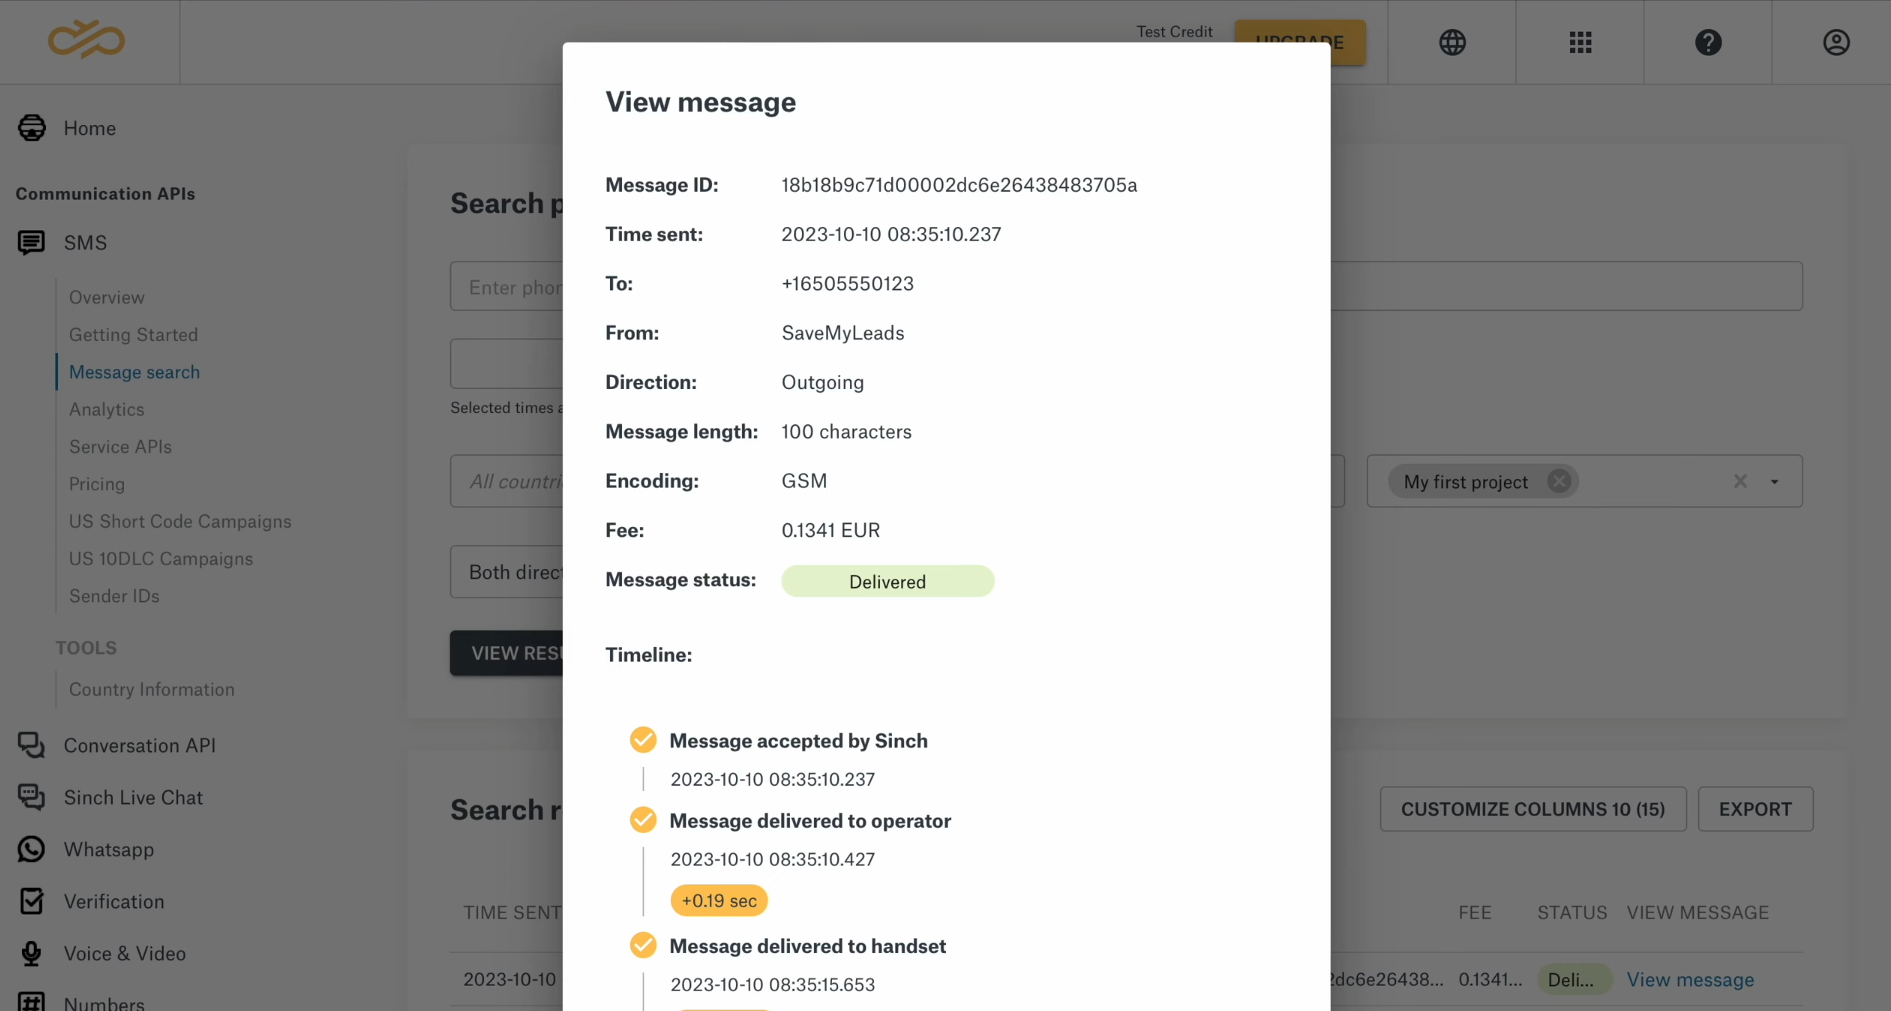
With the proper setup of data transfer from Google Lead Form to Sinch using SaveMyLeads, information about potential clients will be automatically and reliably sent to the communication system. Thereafter, leads will immediately receive an SMS. This message can contain a greeting, a thanks for the order, or any other information. You can write its text directly in the connector.
Now, a few words about why we recommend using
SaveMyLeads for the Sinch and Google Ads
Lead Form integration. Firstly, this no-code tool allows you to set up
the integration as simply, quickly, and effortlessly as possible. Thanks to its
intuitive interface, even a beginner can complete the task in 10 minutes.
Secondly, this connector offers many ready-made solutions for
integration with CRM systems, email and SMS services, messengers, task
managers, Google services, and many other platforms and apps. Thirdly, the pricing plans of
SaveMyLeads are quite affordable and suitable for many companies. And finally,
we can’t overlook the professional technical support team, always ready to
assist those who don’t understand something about the service or are
experiencing difficulties with the settings.
How to Set Up Google Ads Lead Form and Sinch Integration
Step-by-step instructions:
- Create a Google Lead Form tailored to your task.
- Sign up on SaveMyLeads.
- Connect Google Lead Form to the connector as a data source.
- Configure the necessary settings for the form from which lead data will be collected and forwarded.
- Add Sinch to the connector as the data recipient.
- Enable the auto-update function.
We won't go into detail on creating a form in Google Ads, as you're likely already familiar with this process. However, we will go through the following steps of the Sinch and Google Lead Form integration step by step.
Setting Up the Data Source – Google Lead Form
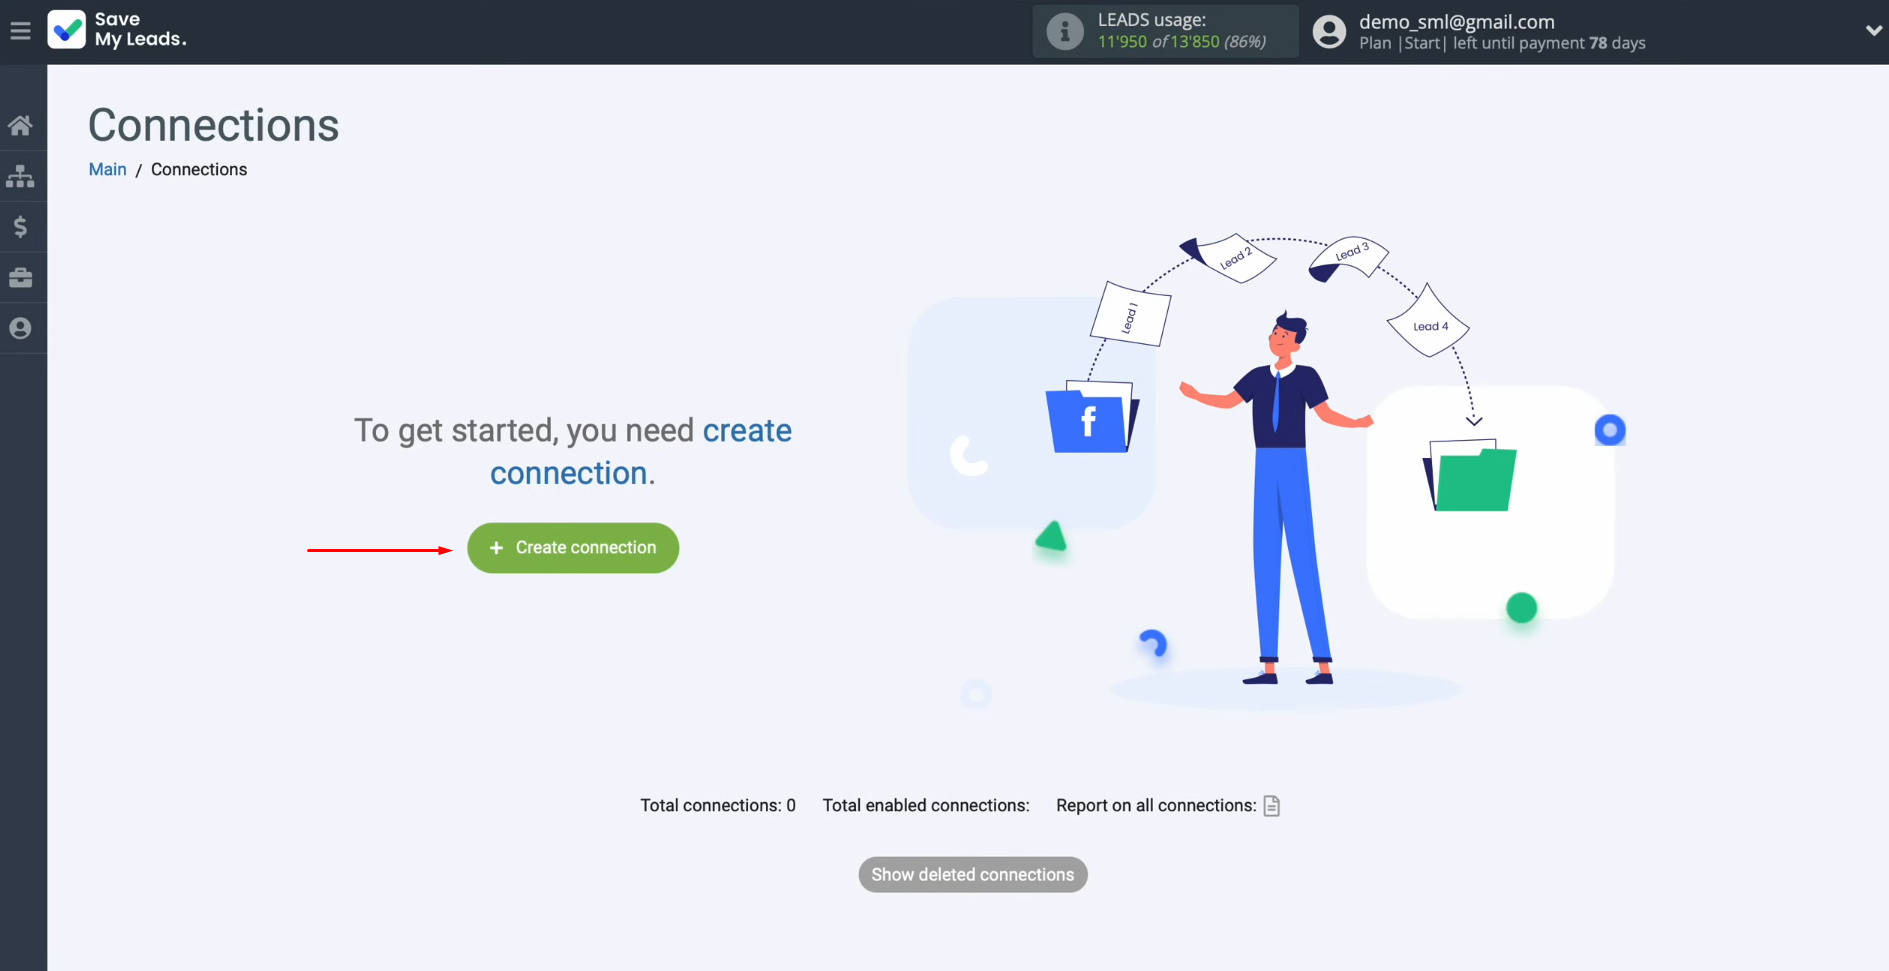
To set up Google Lead Form + Sinch integration, first, you need to create a new connection.
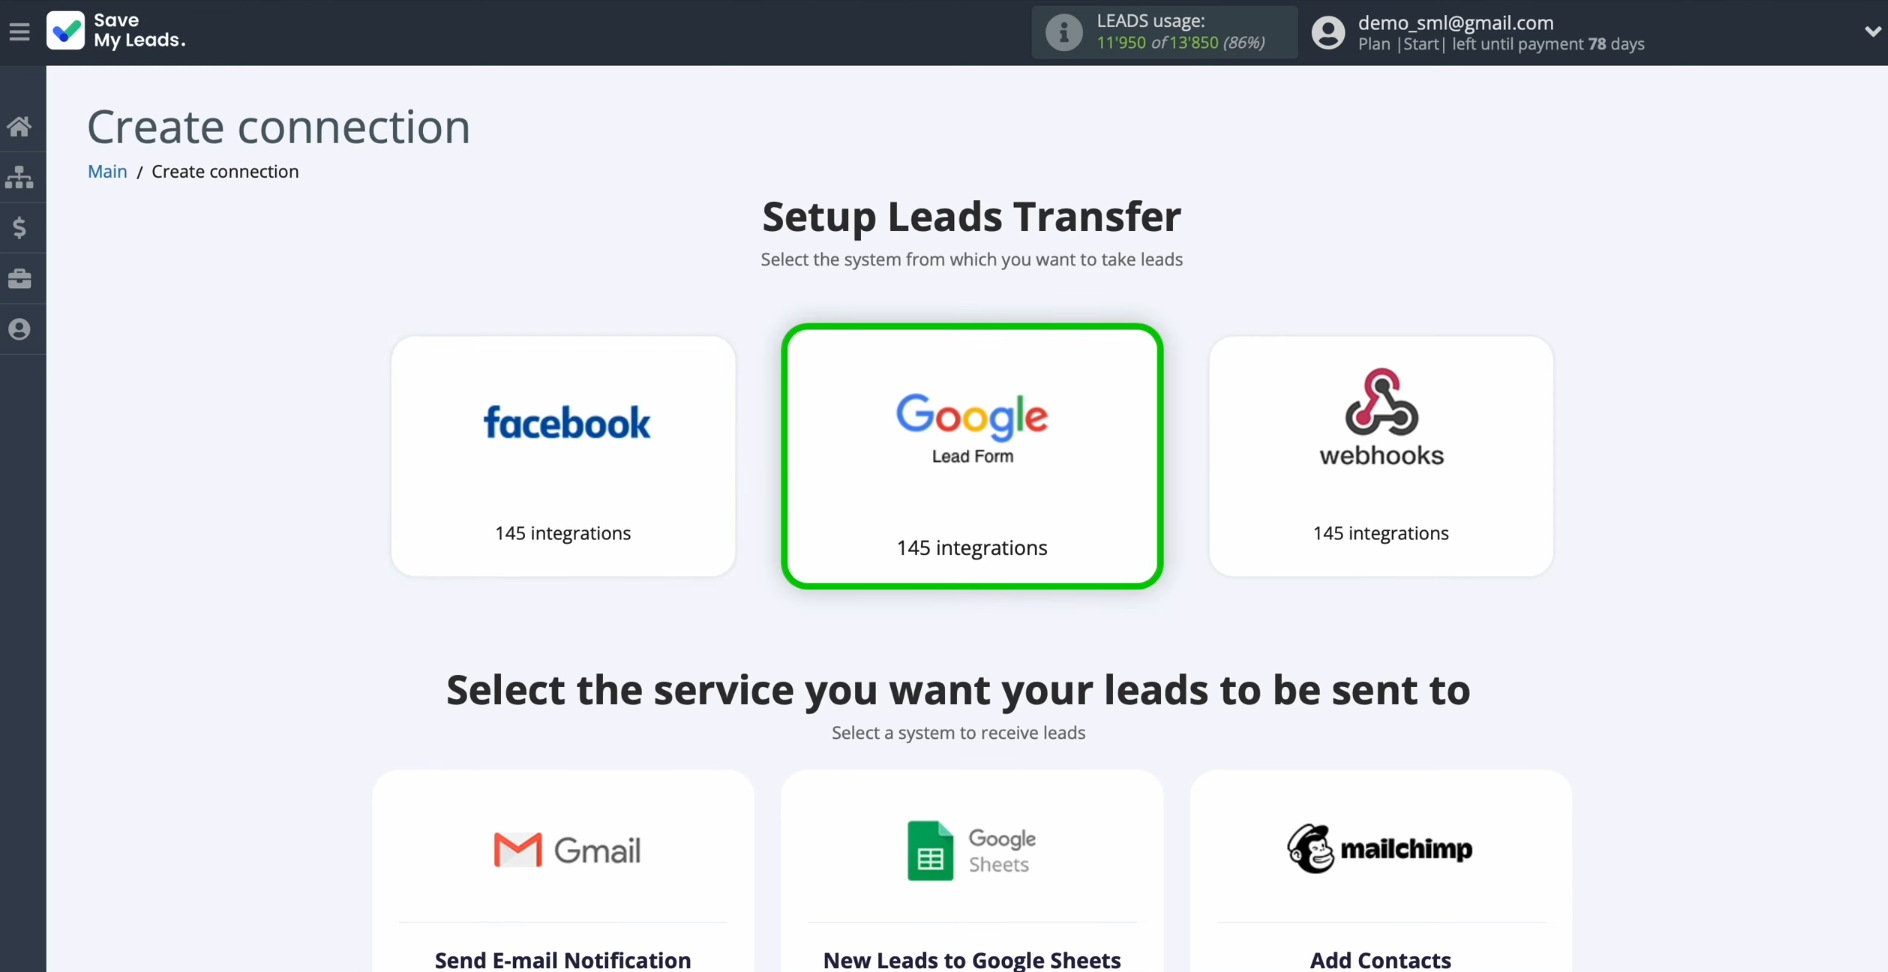
Сhoose the system from which you want to transfer
leads. You need Google Lead Form.
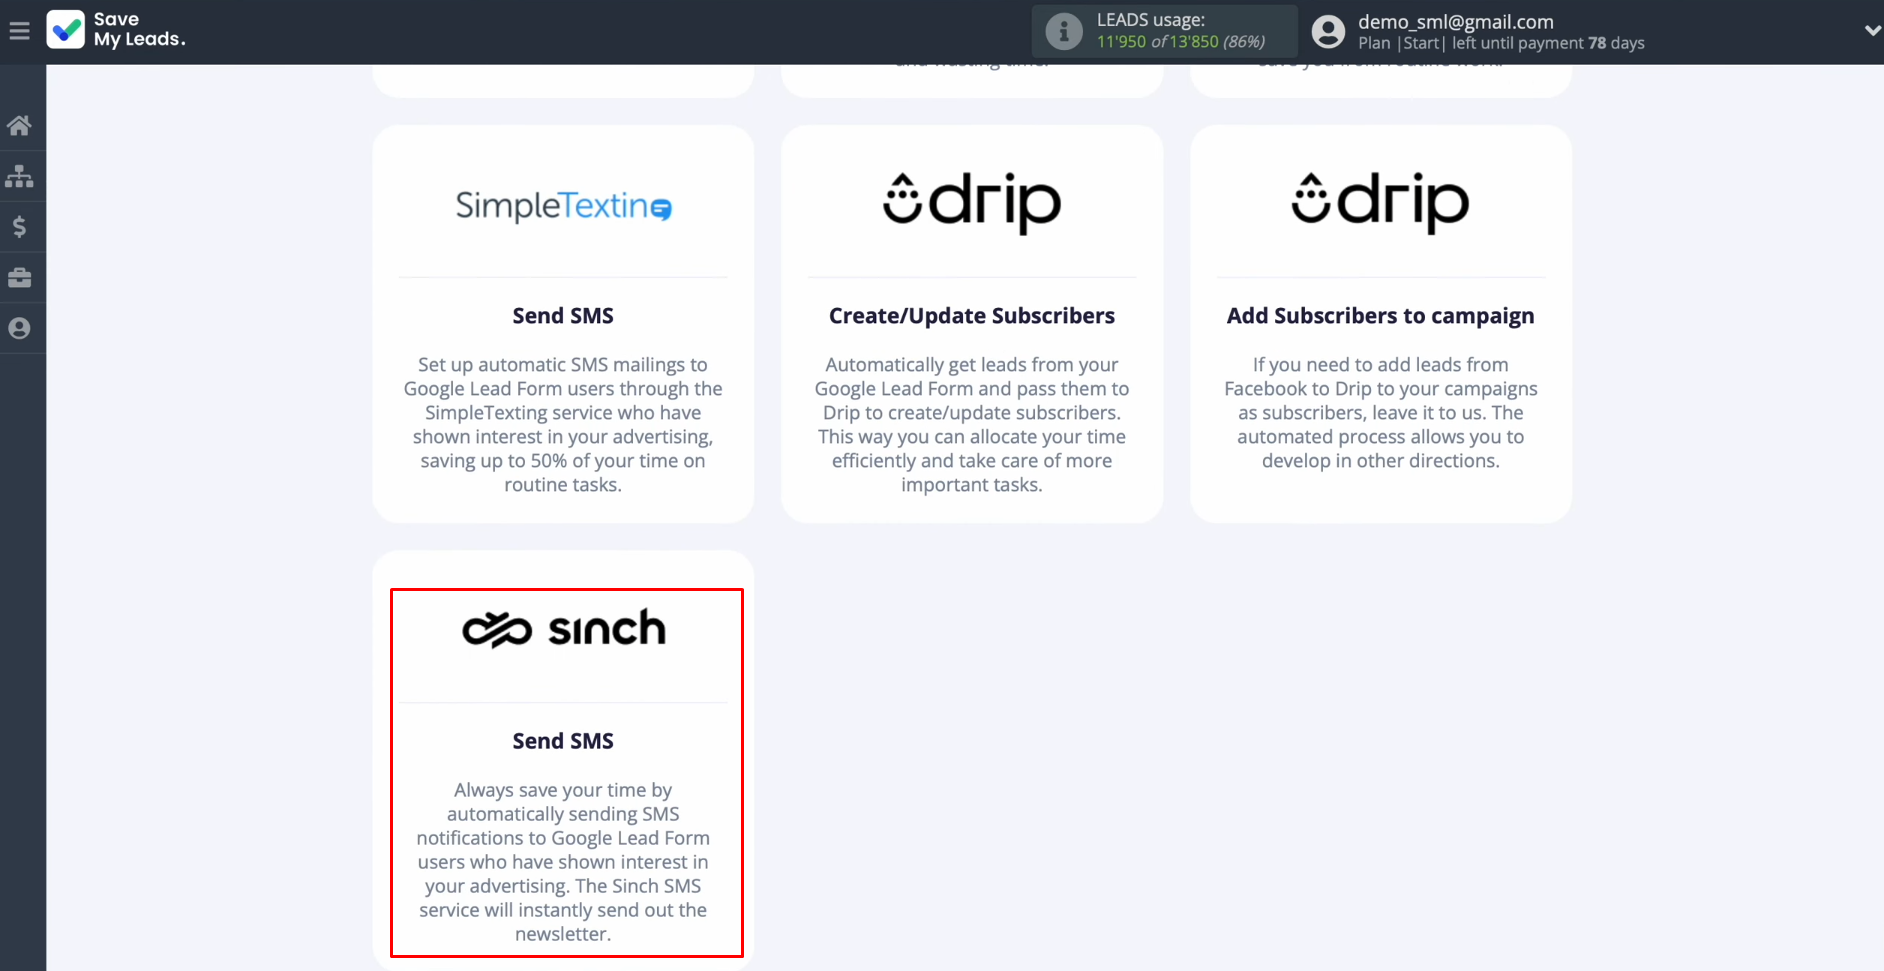
Select the system where you want to
transfer new leads from Google Lead Form. You need Sinch.
Connect the Google Lead Form account
to SaveMyLeads.
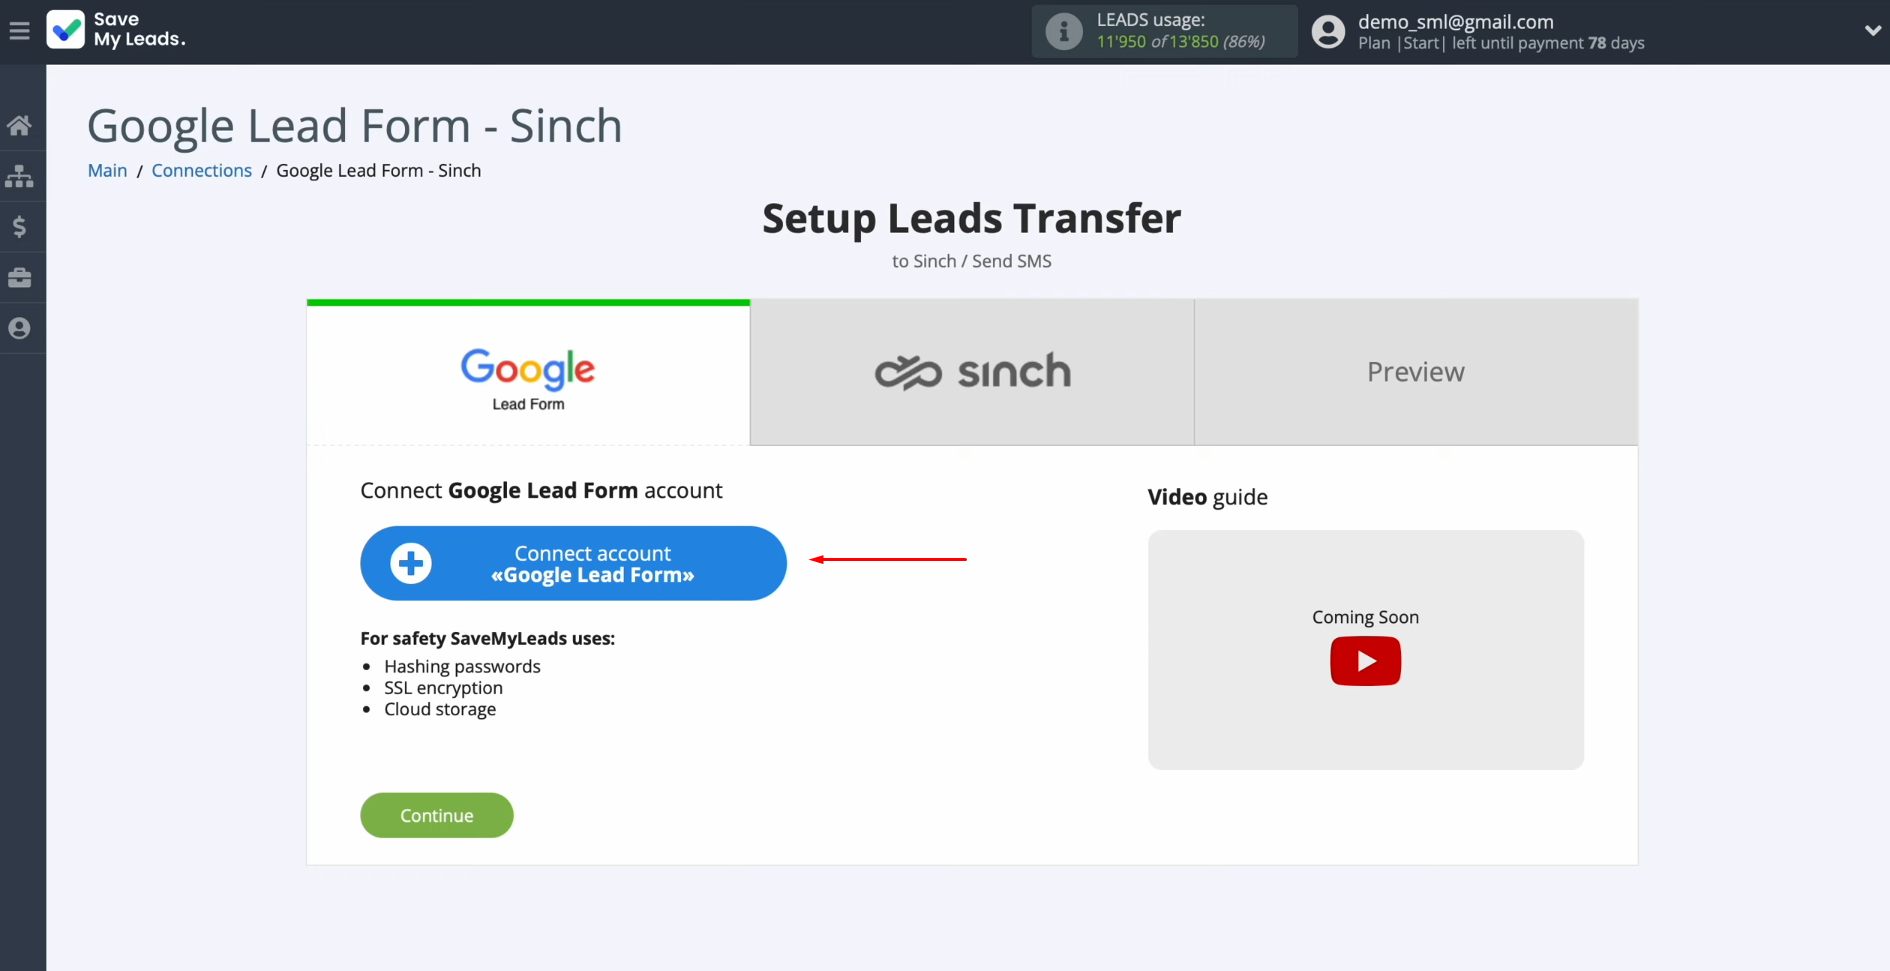
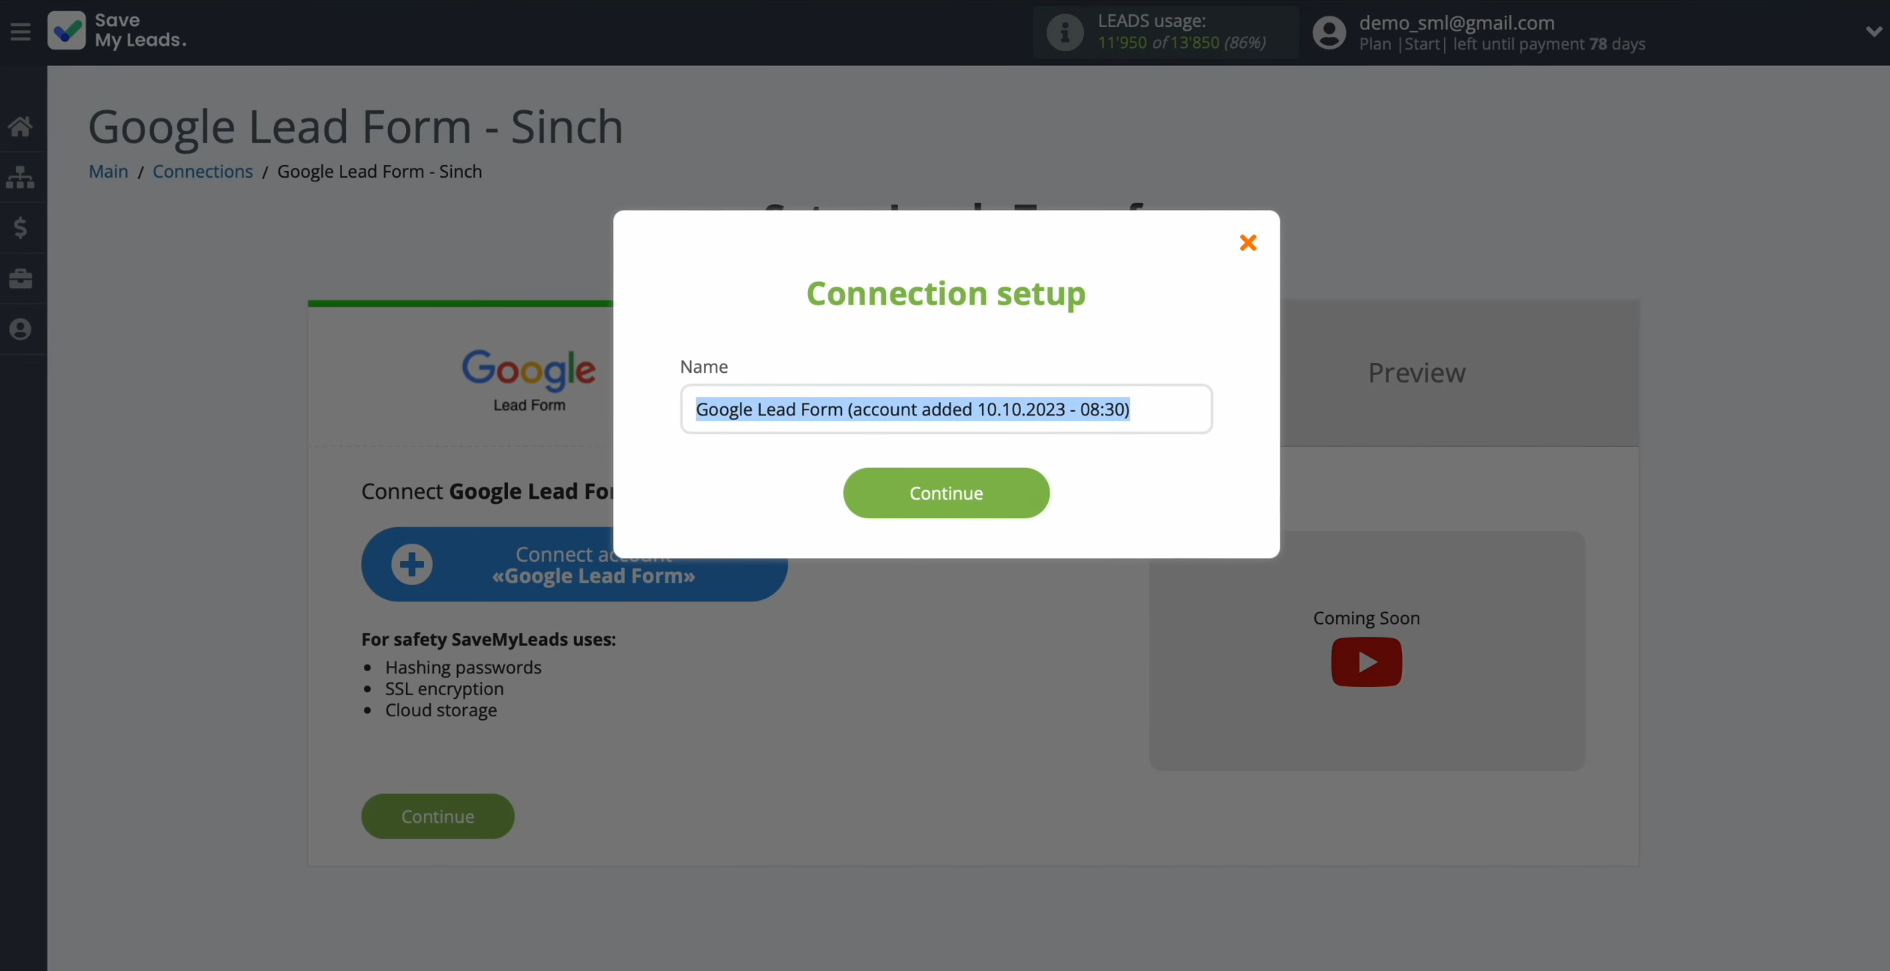
Give a name to this
connection or just
click “Continue”.
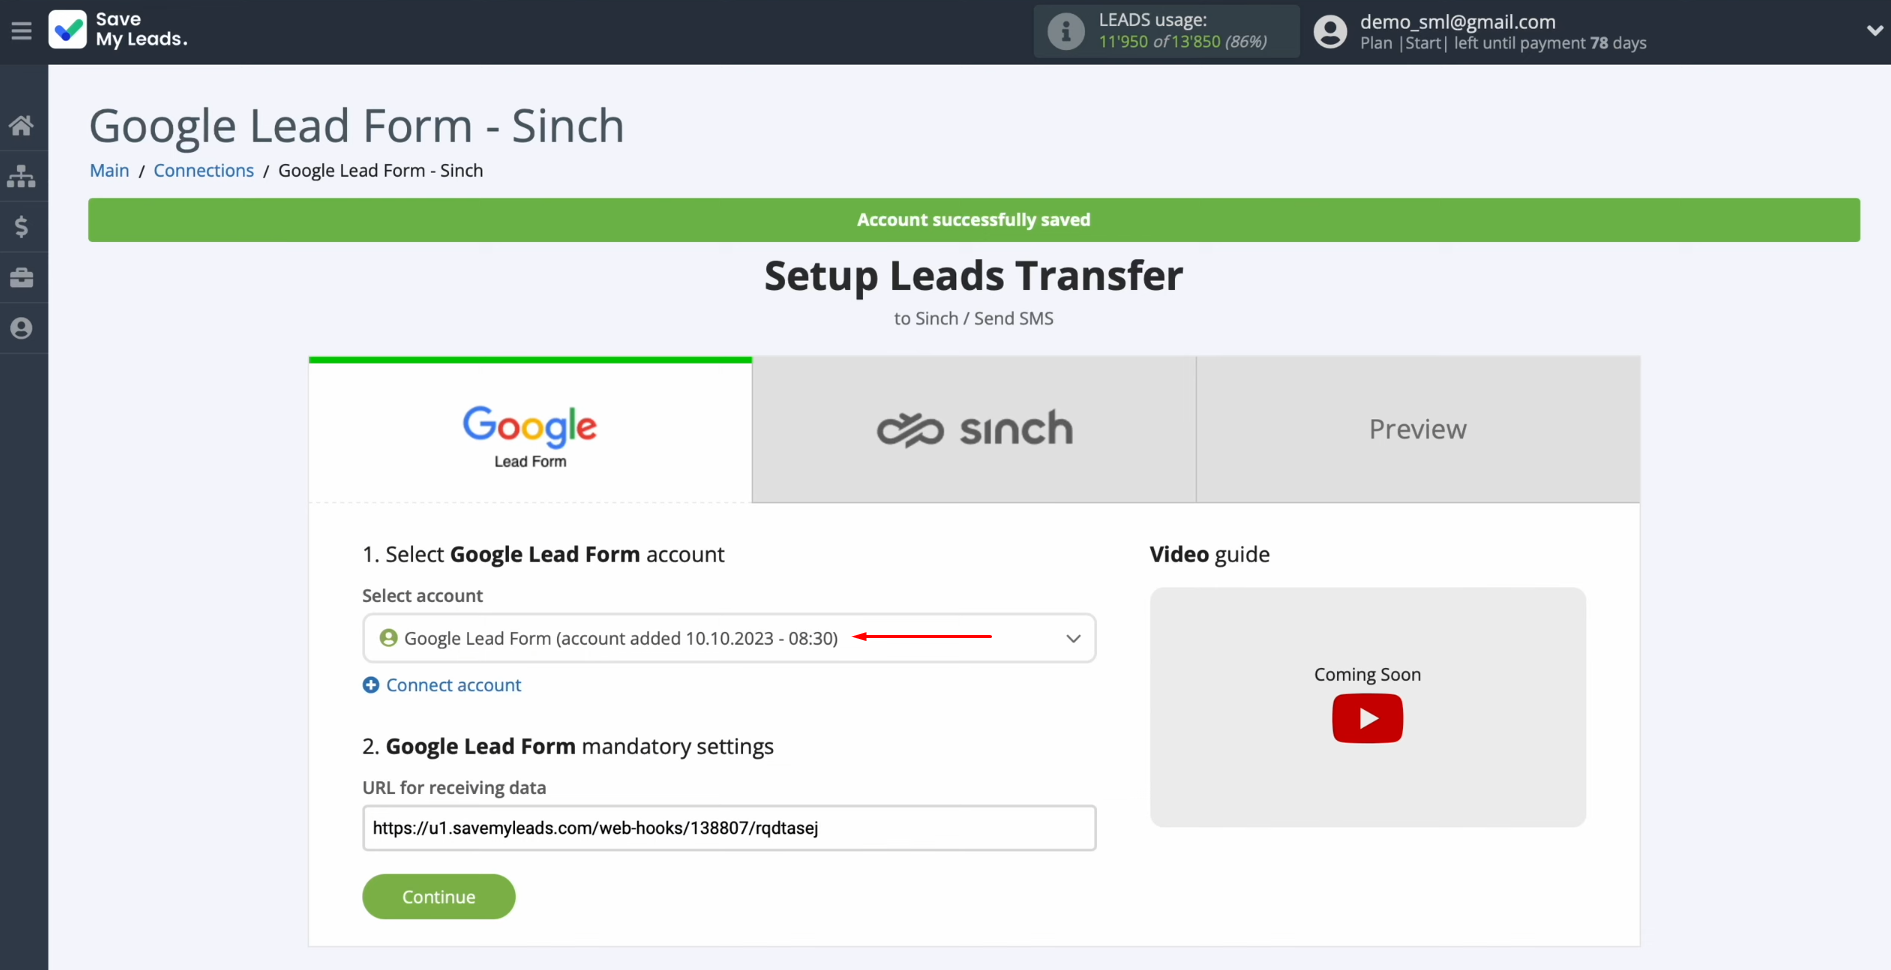
When the
connected account is displayed in the list, select it.
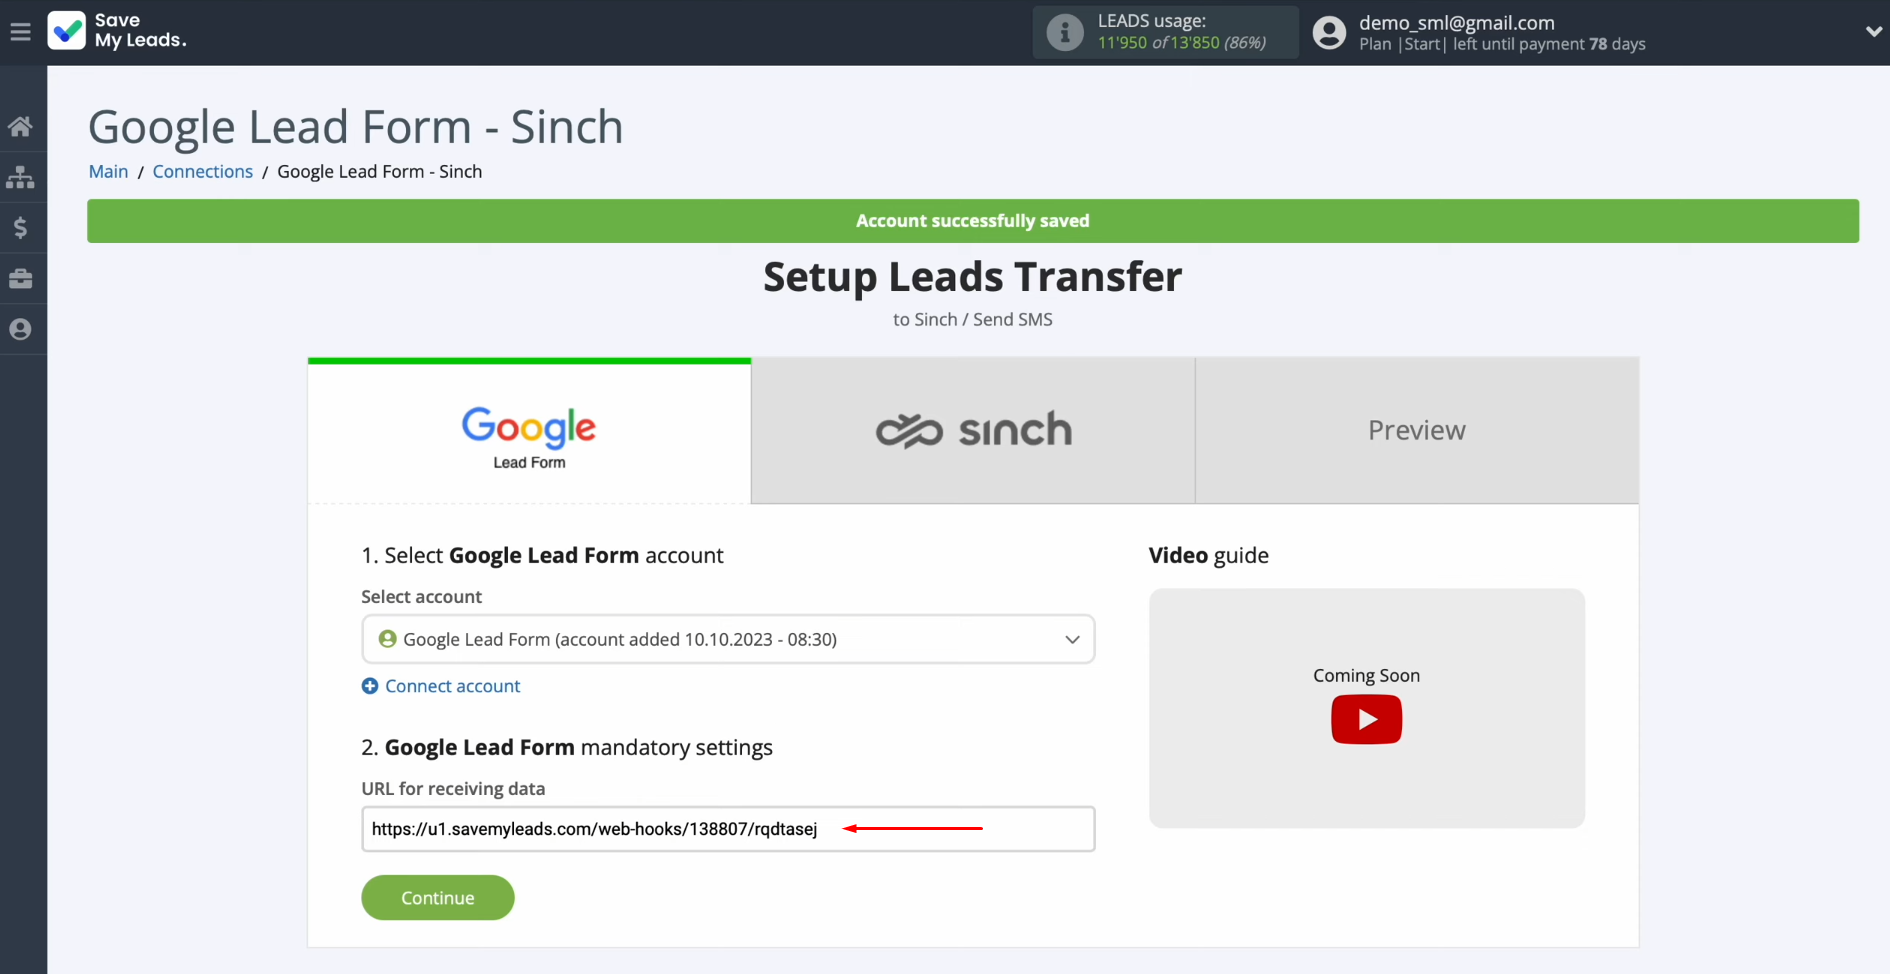
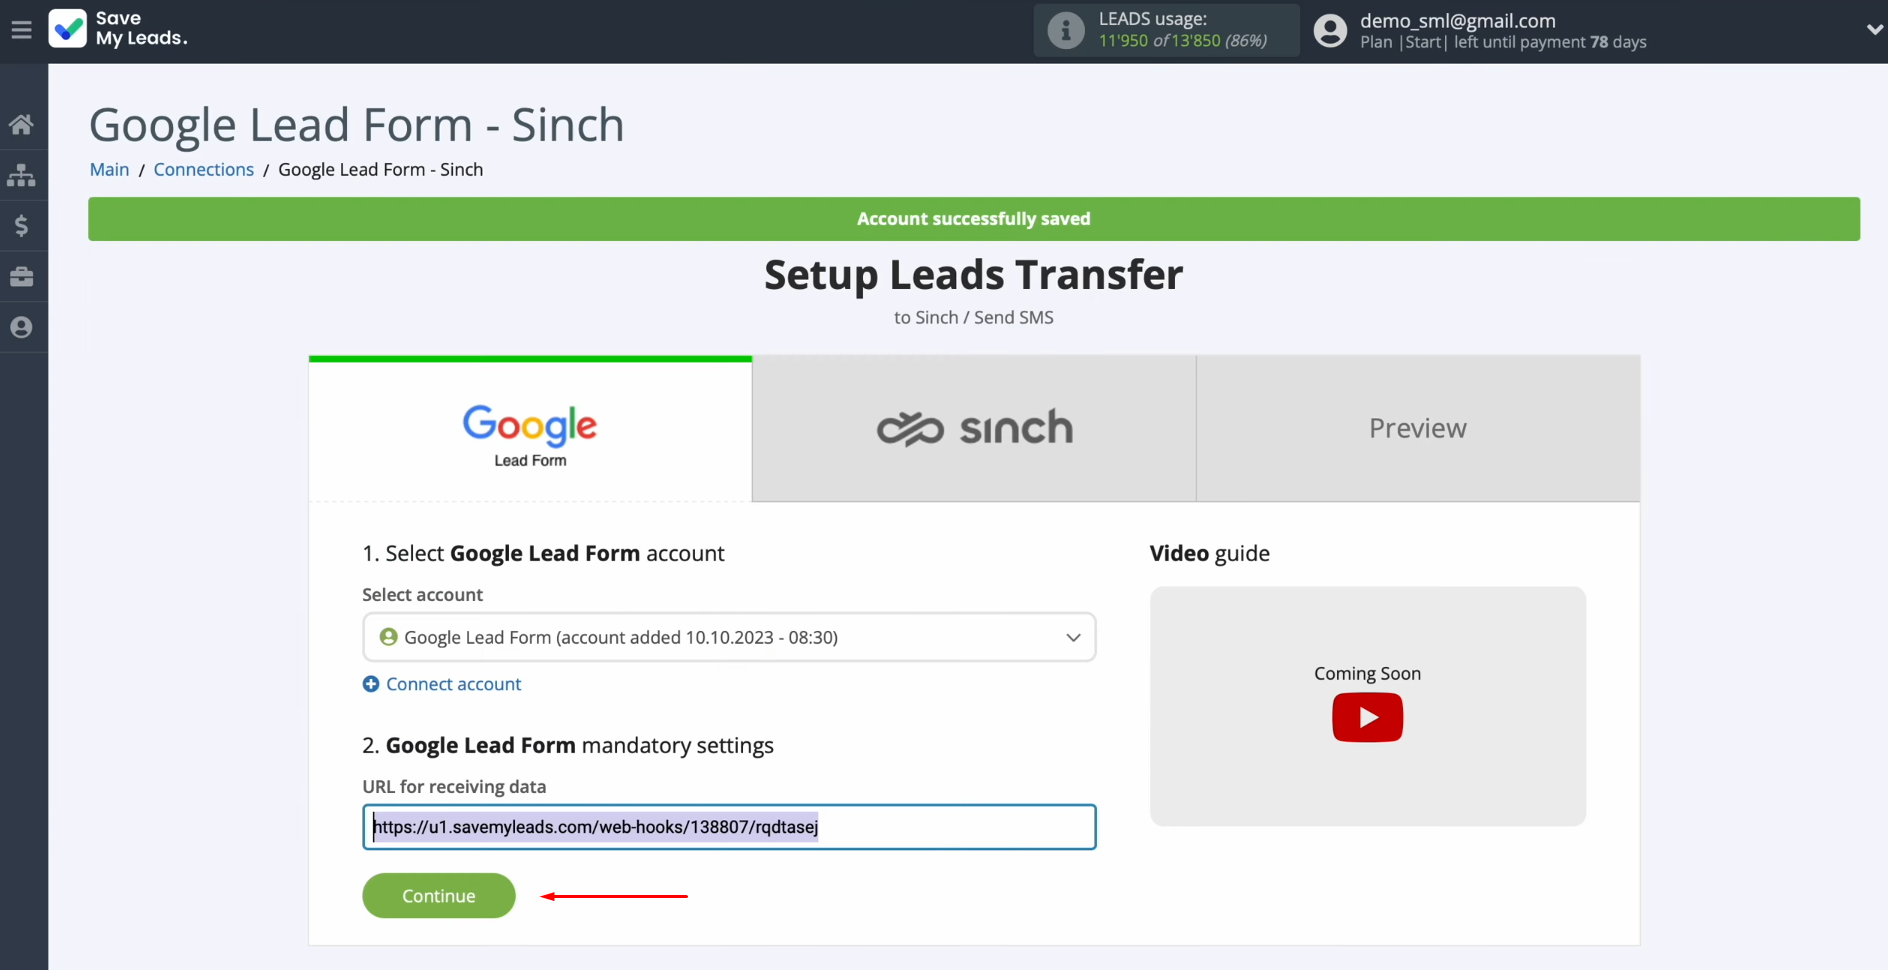
Now, you
see the URL for receiving data. This is the URL where new data from the Google Lead
Form will come. To continue setting up, copy the URL.
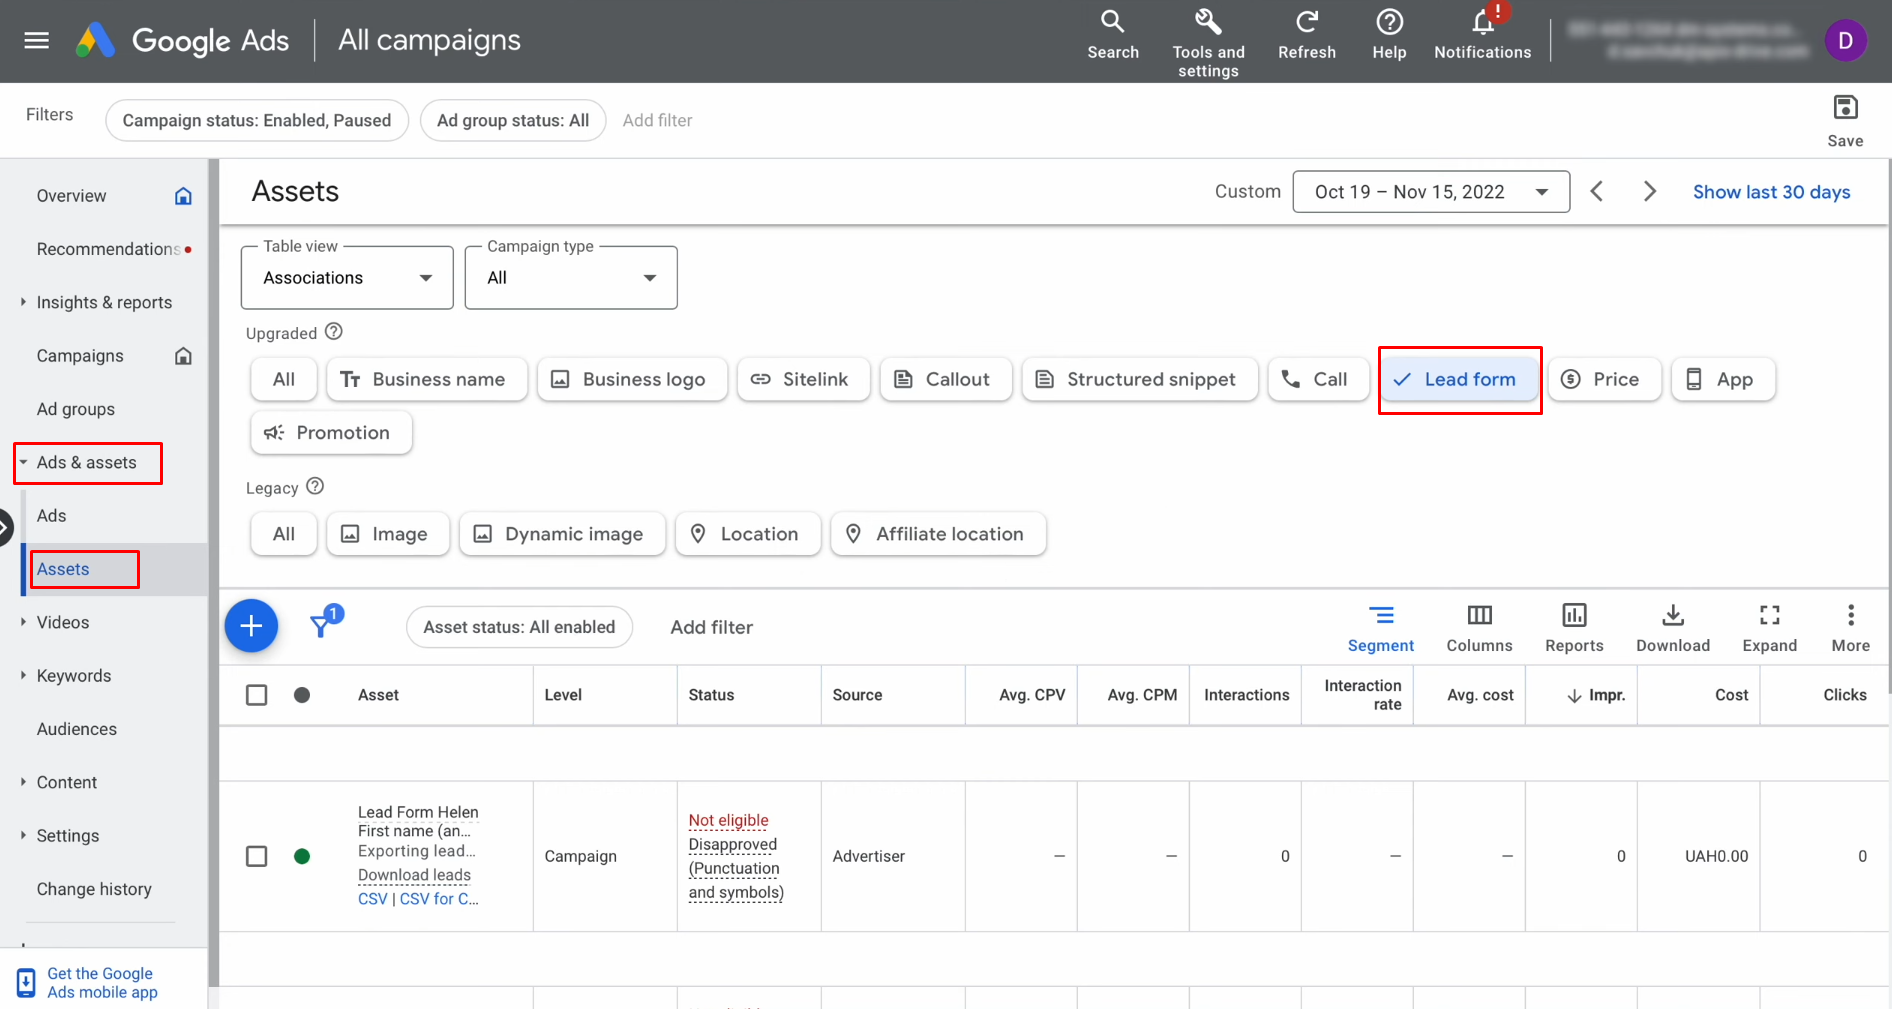
Go to the "Ads and Assets"
section in your
personal Google Ads account. You need the "Assets" tab. Make sure
the Lead Forms tab is checked.
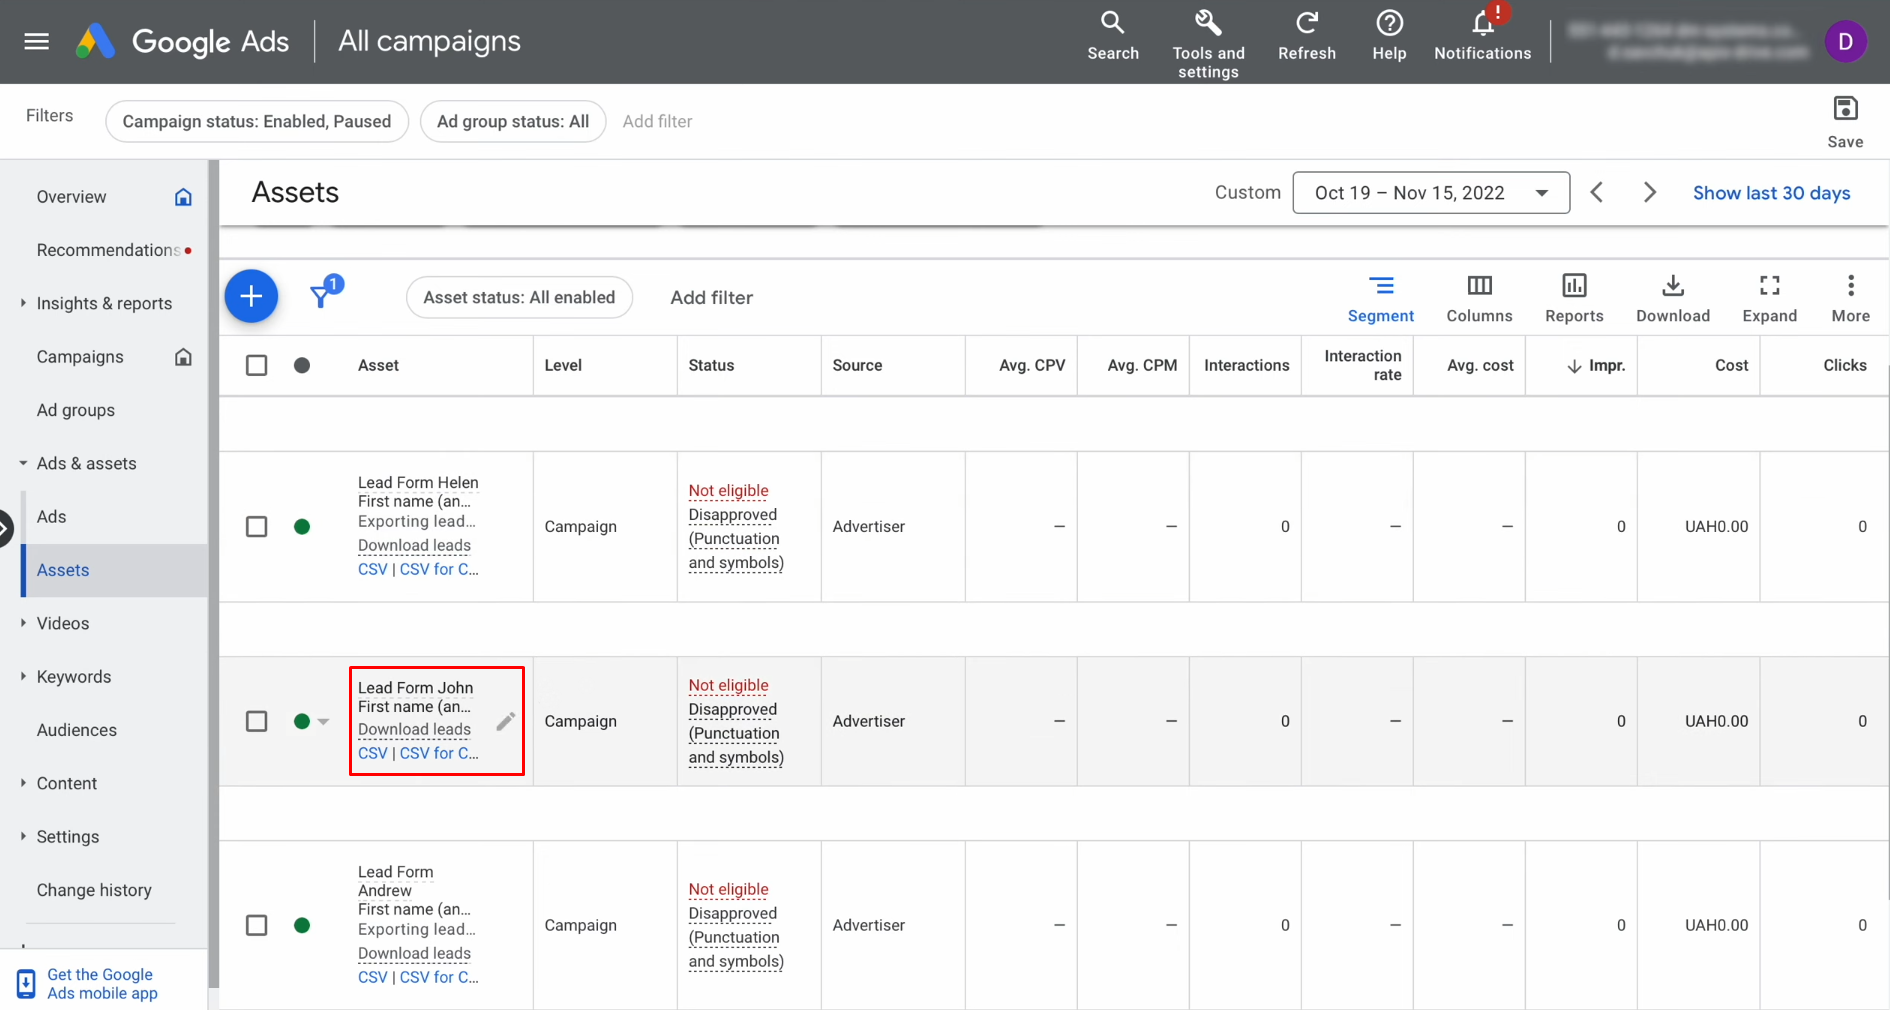
Go to the form from which you want to
receive data.
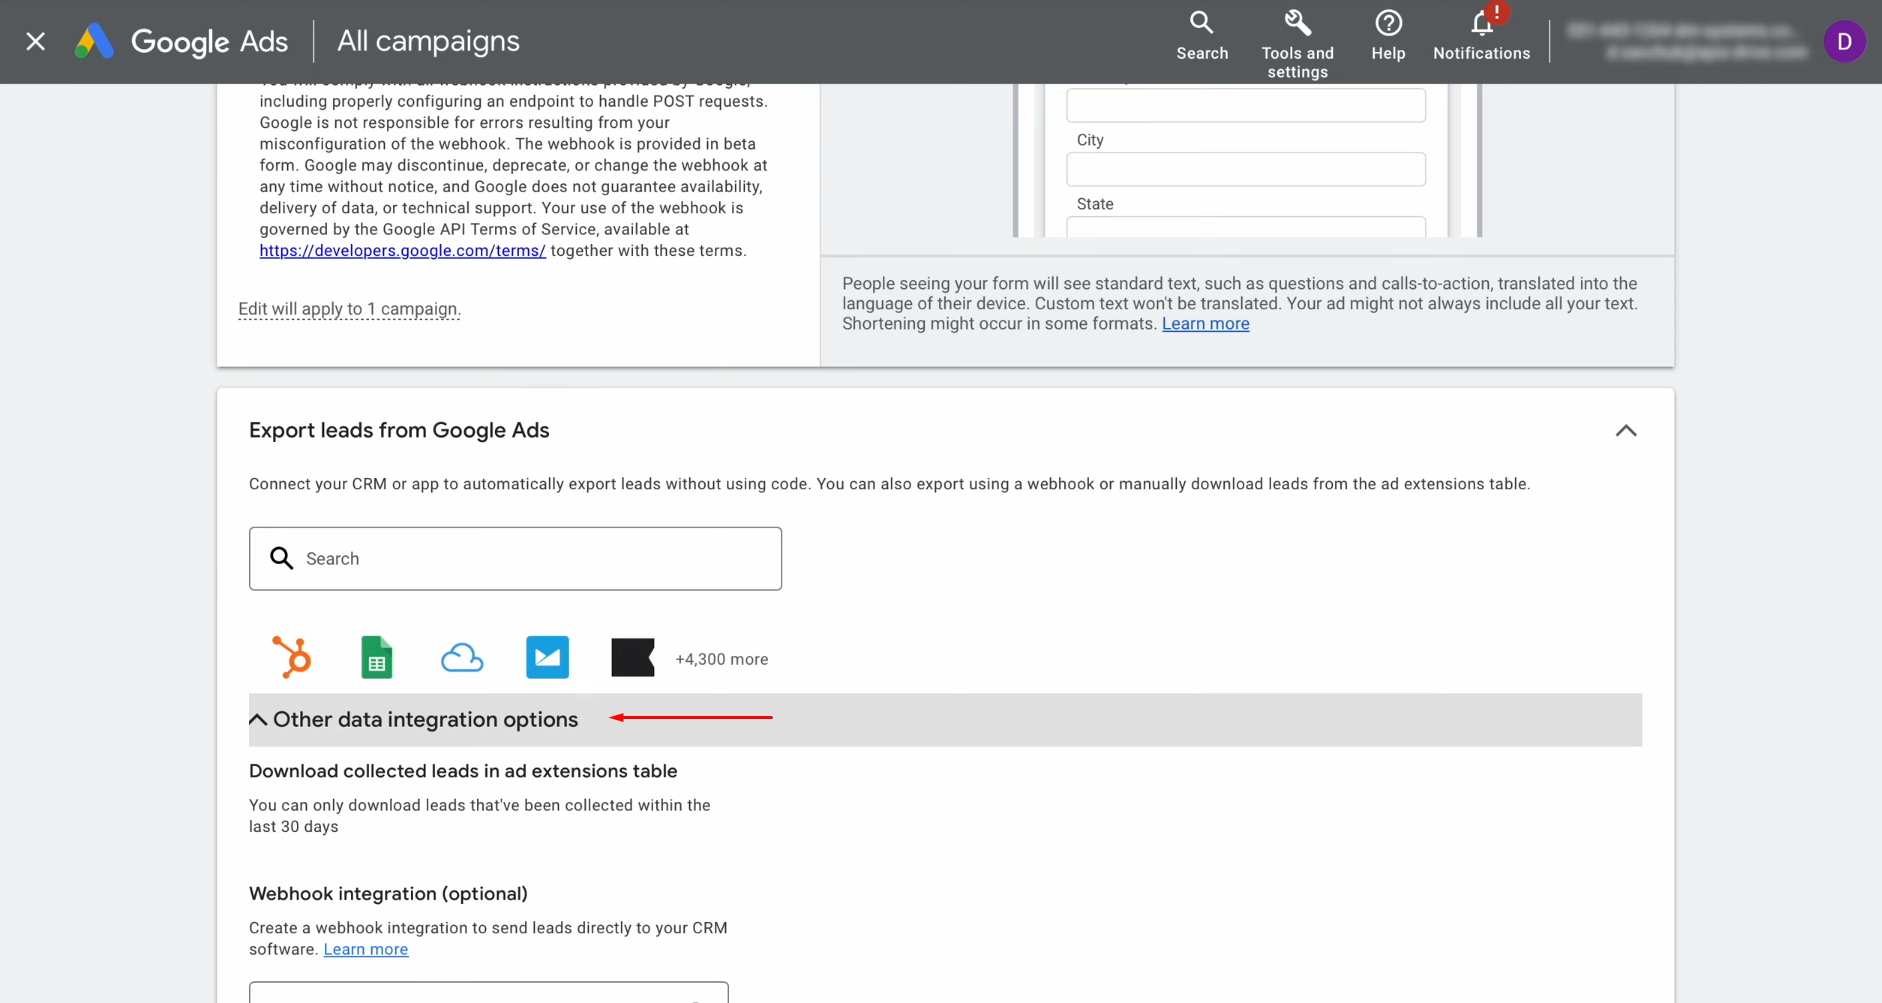
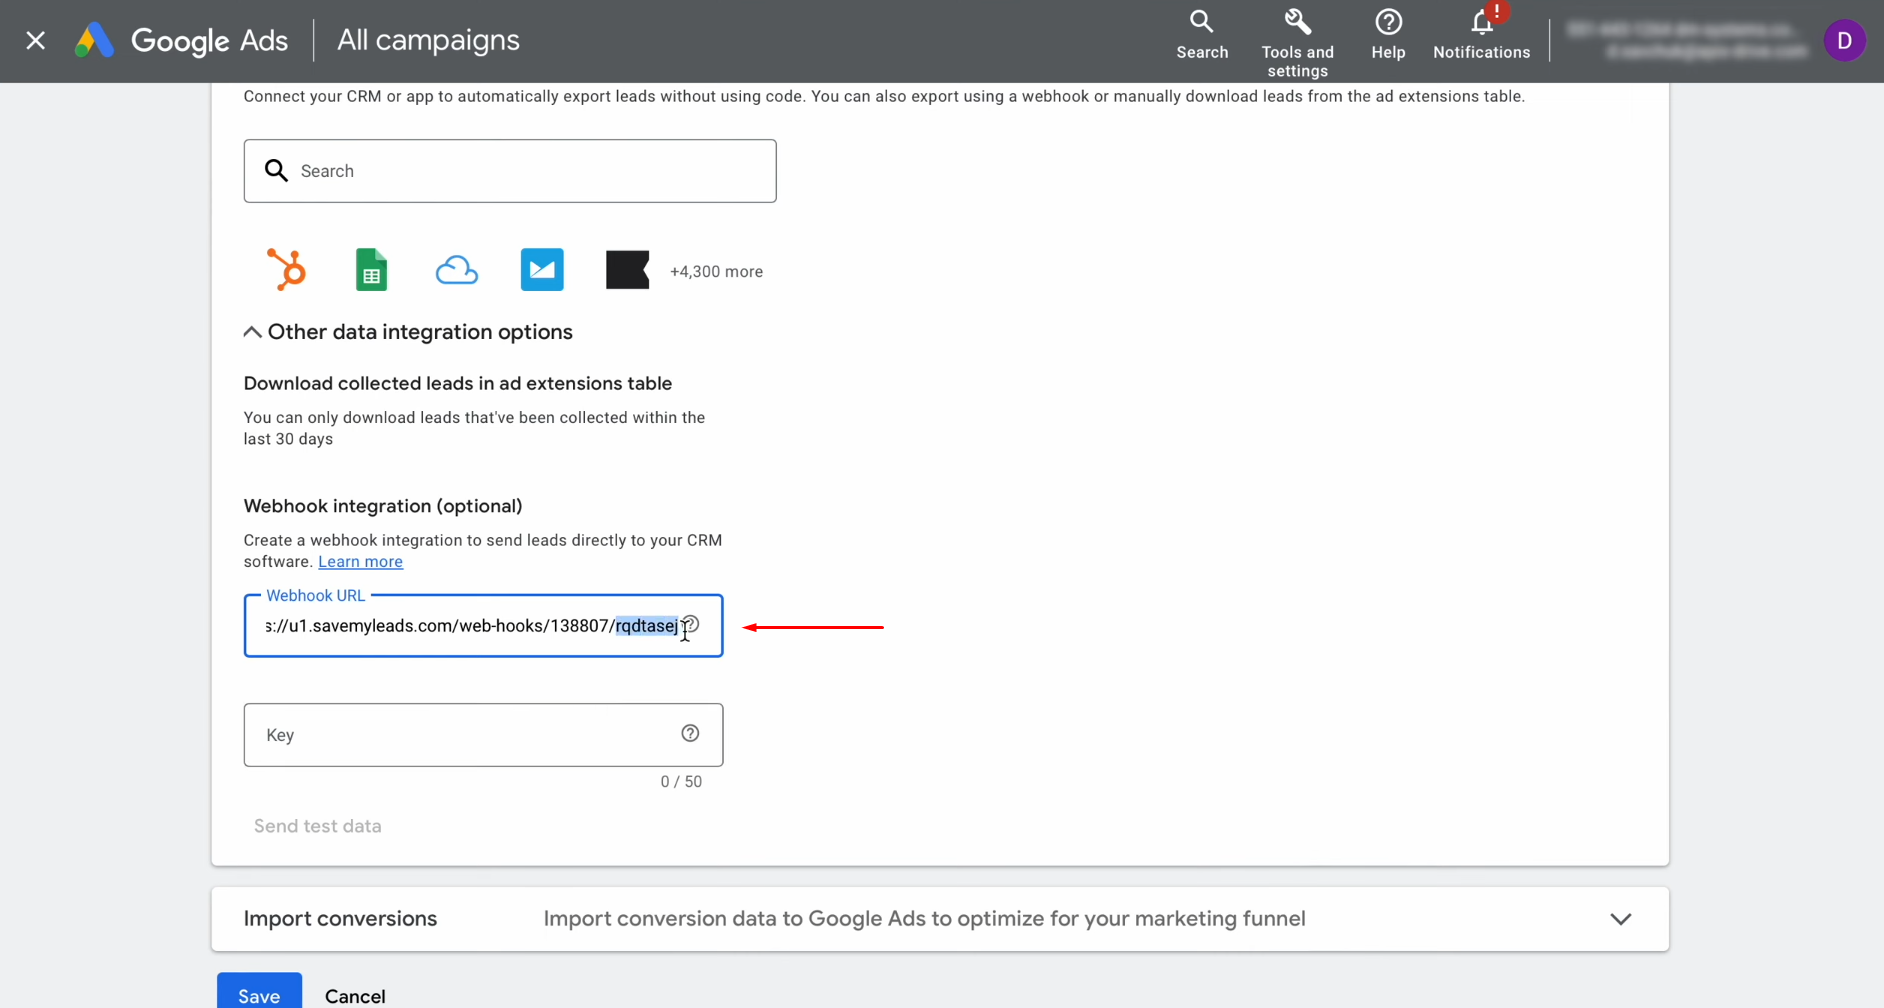
Find the section
"Other data integration options".
Paste the
copied link in SaveMyLeads into the appropriate field.
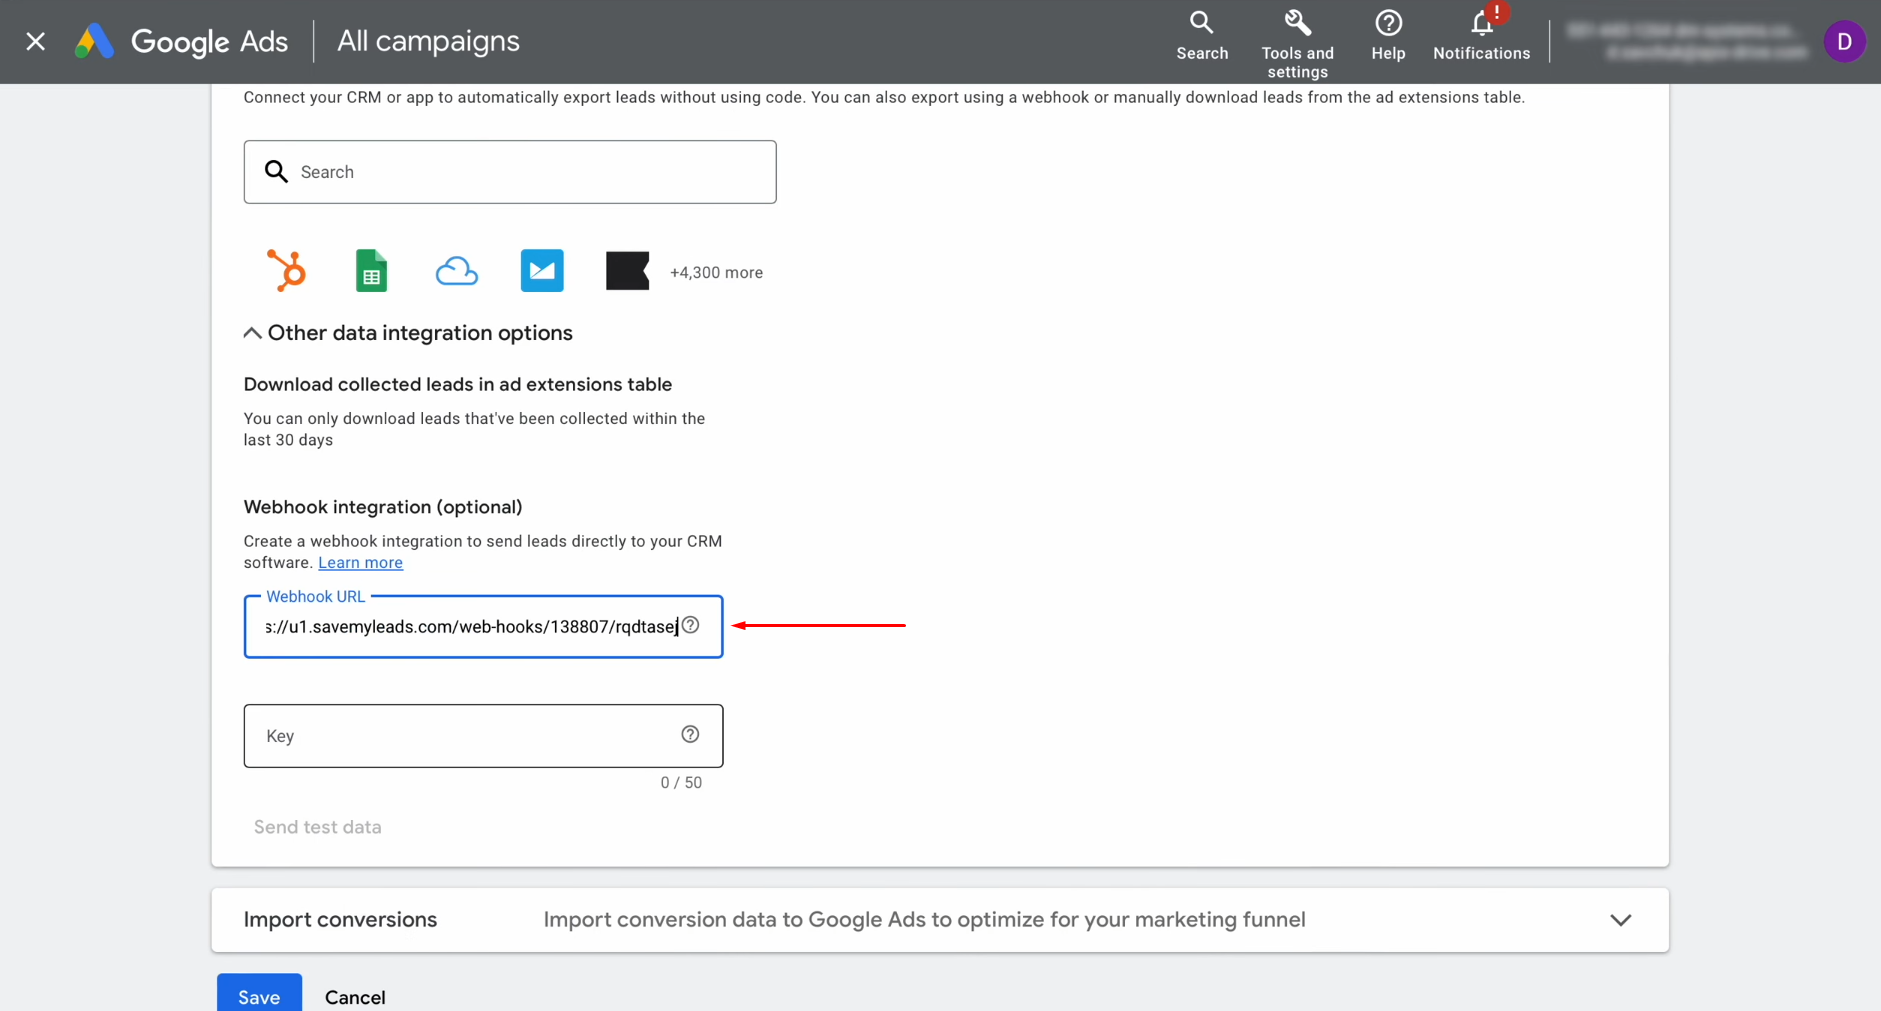
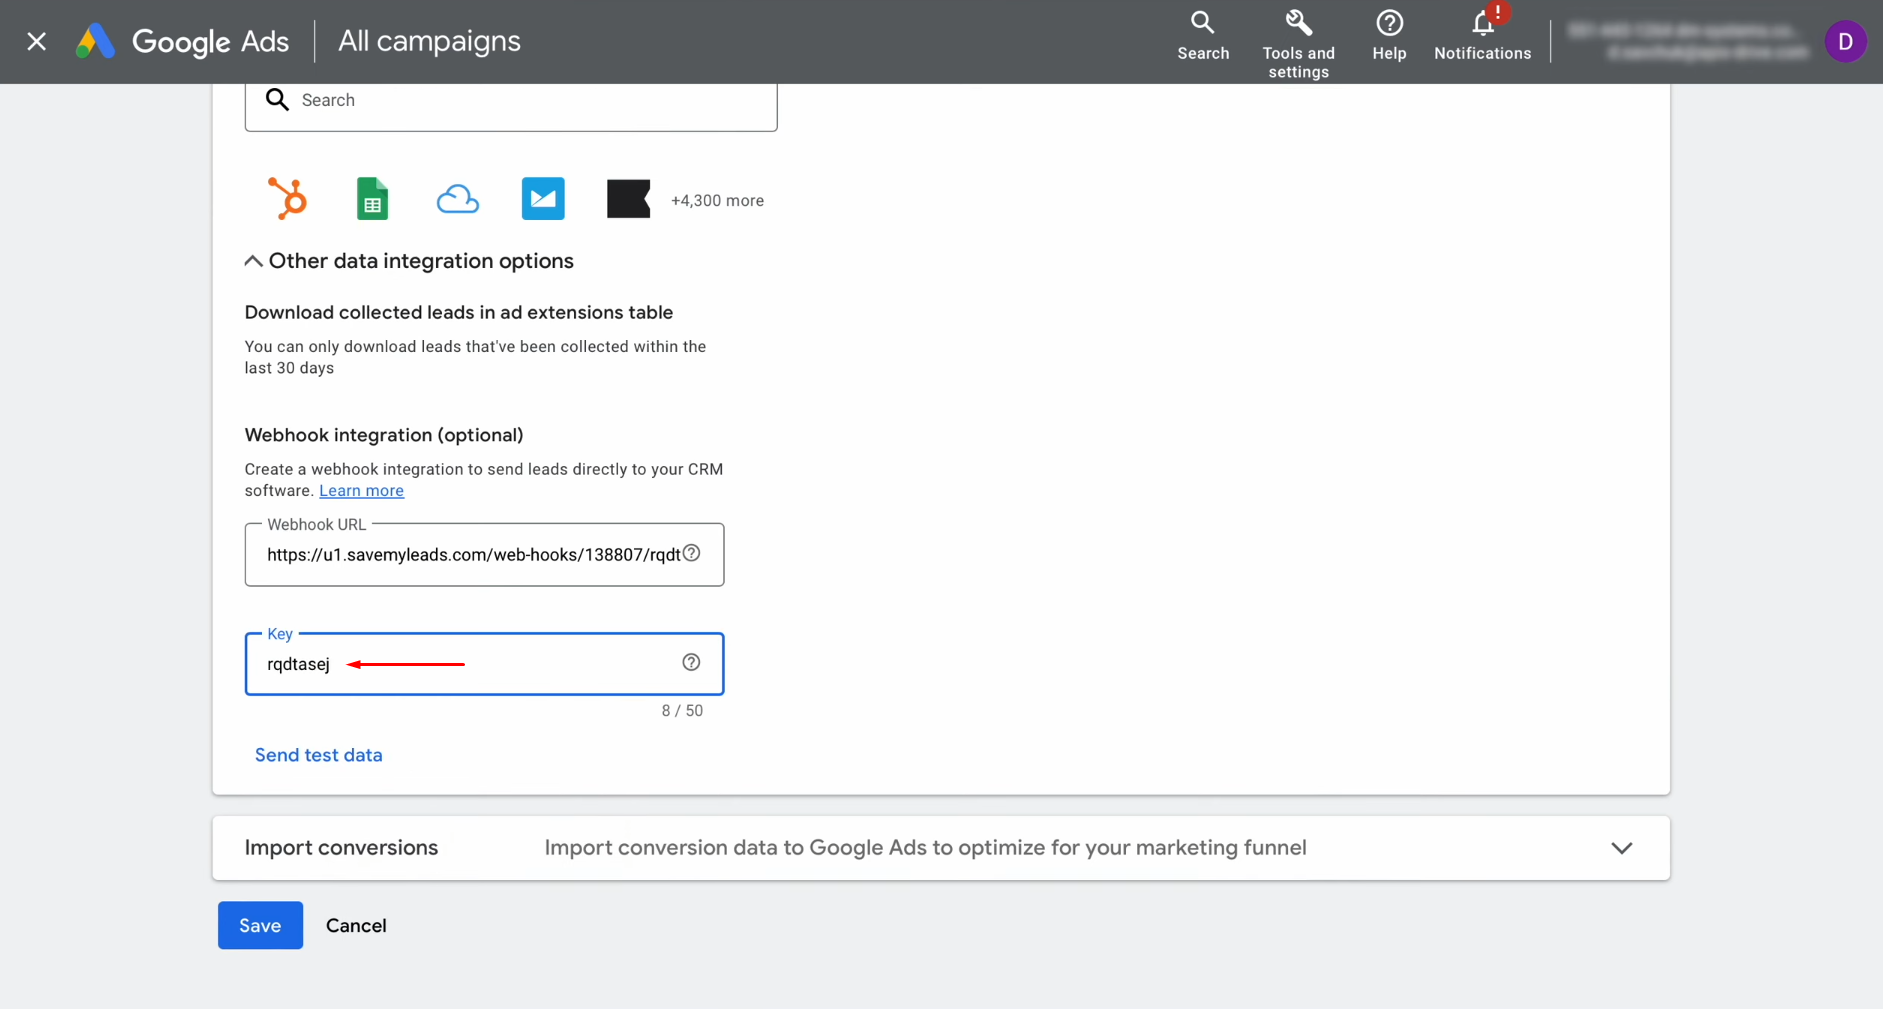
Next,
as a key, specify the last part of the URL.
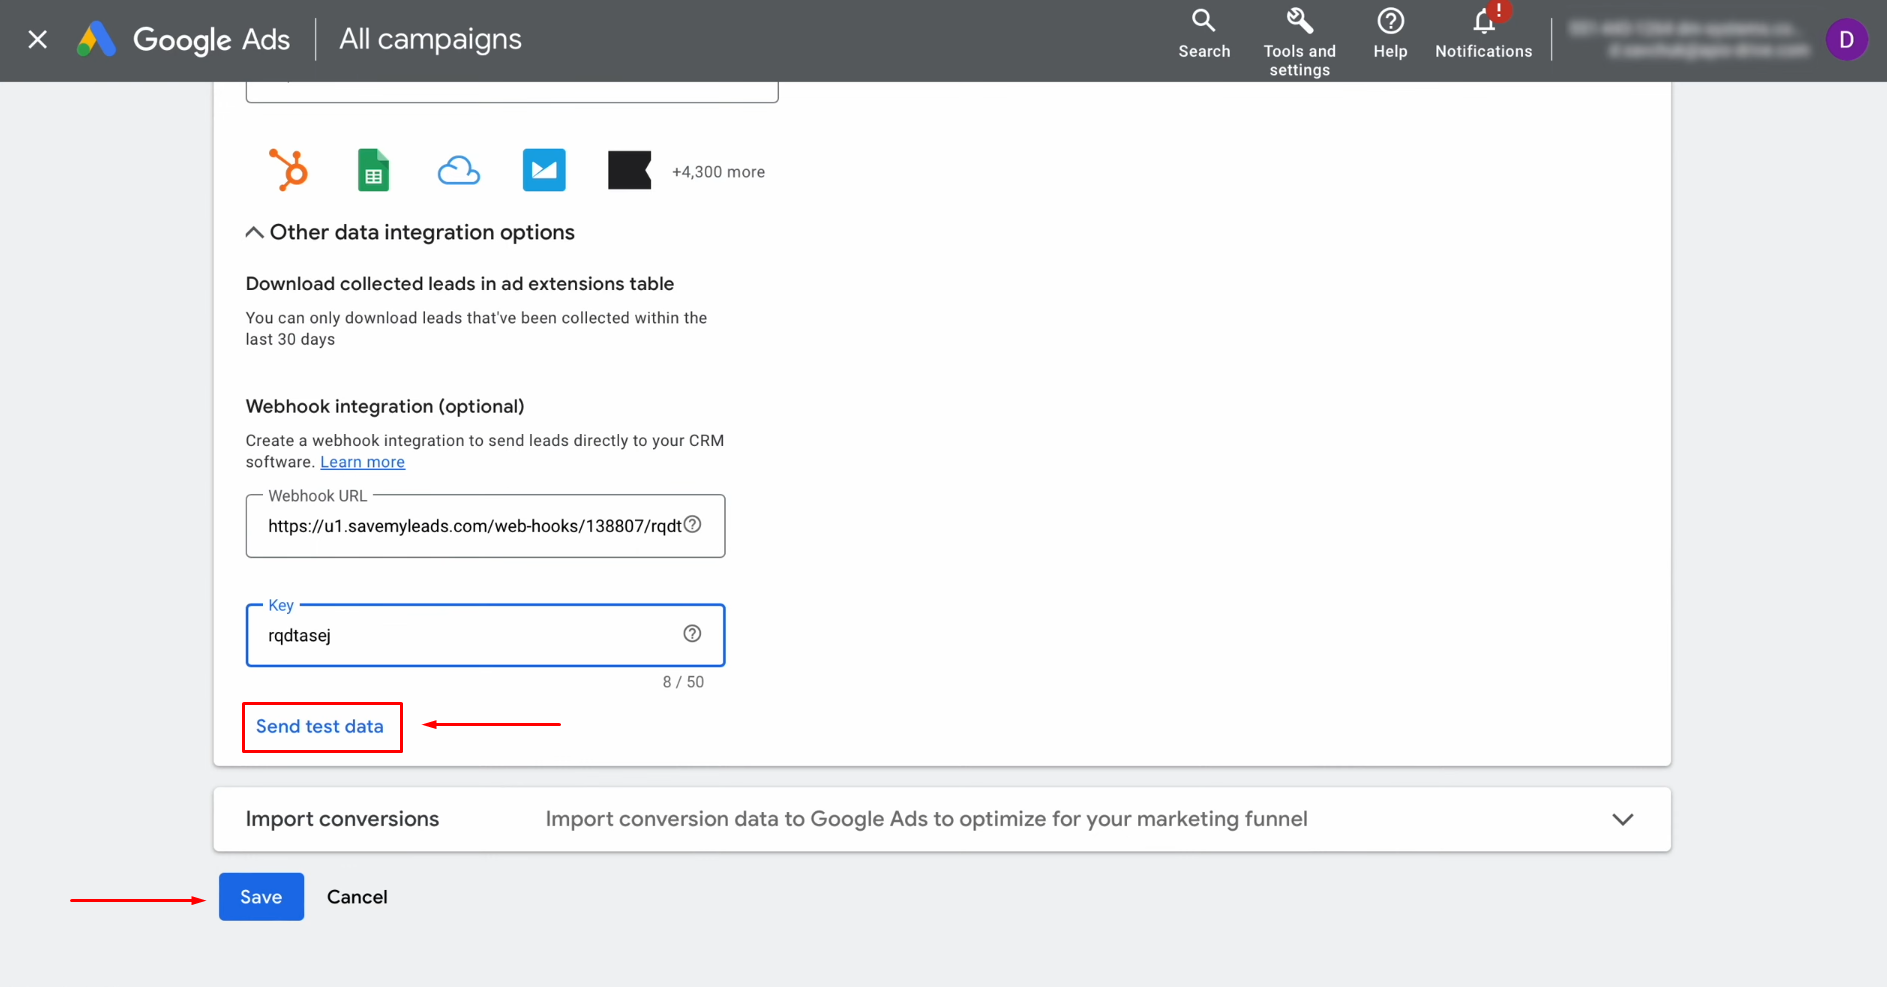
To
continue the setup, you need to generate test data. Therefore, click "Send Test Data". Don’t
forget to save the
changes.
Now, you can
return to
SaveMyLeads and continue setting up.
Setting Up the Data Receiver – Sinch
To set up Sinch + Google Ads Lead Form integration, connect your Sinch account to SaveMyLeads.
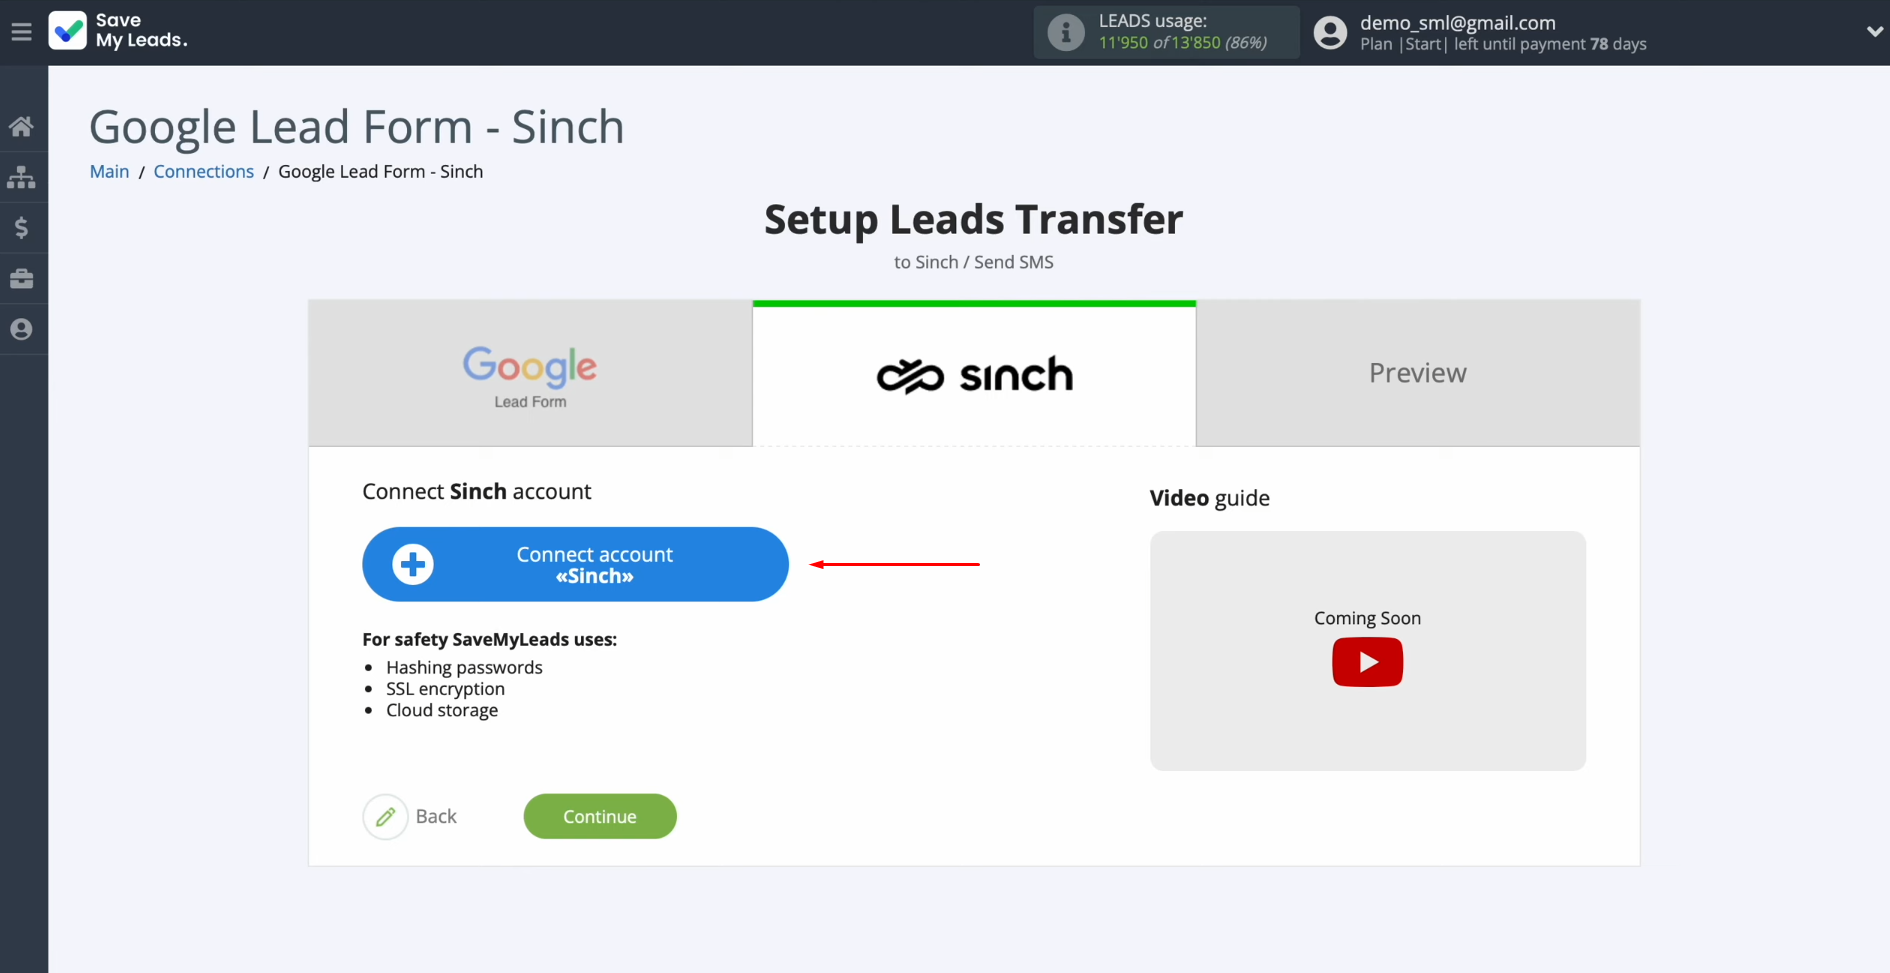
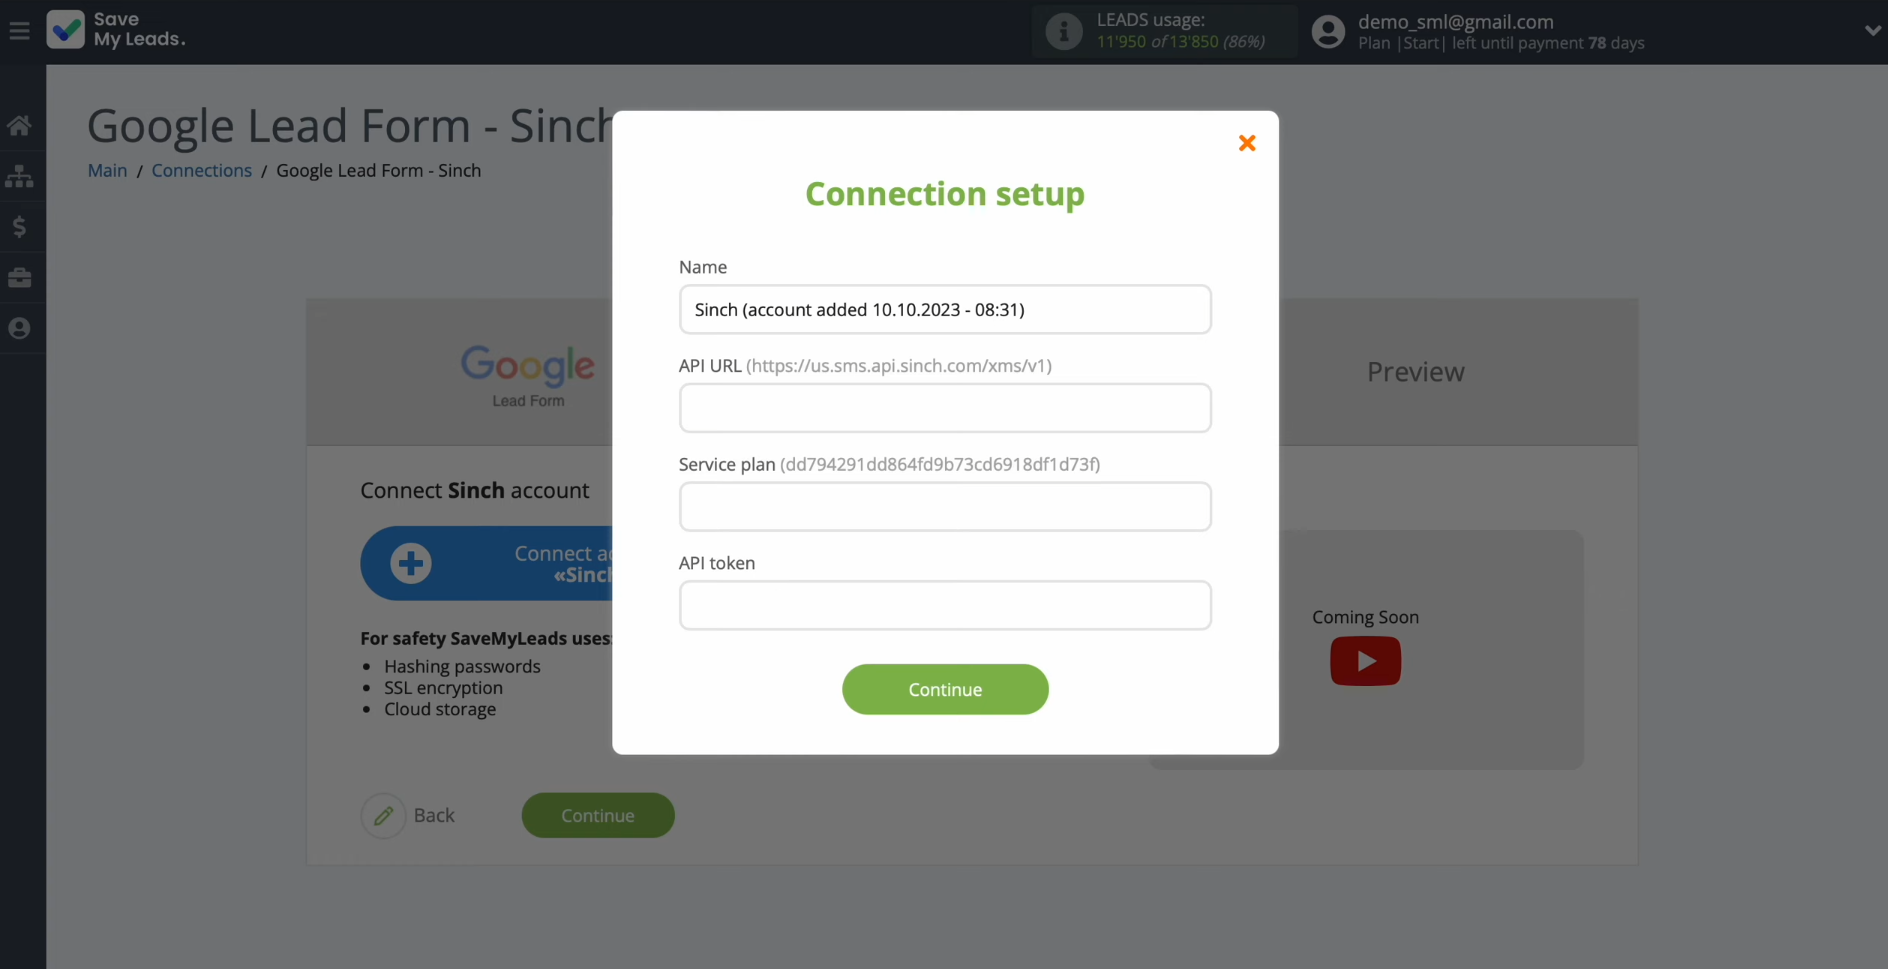
In this
window, you must
specify the API URL, service plan, and API token.
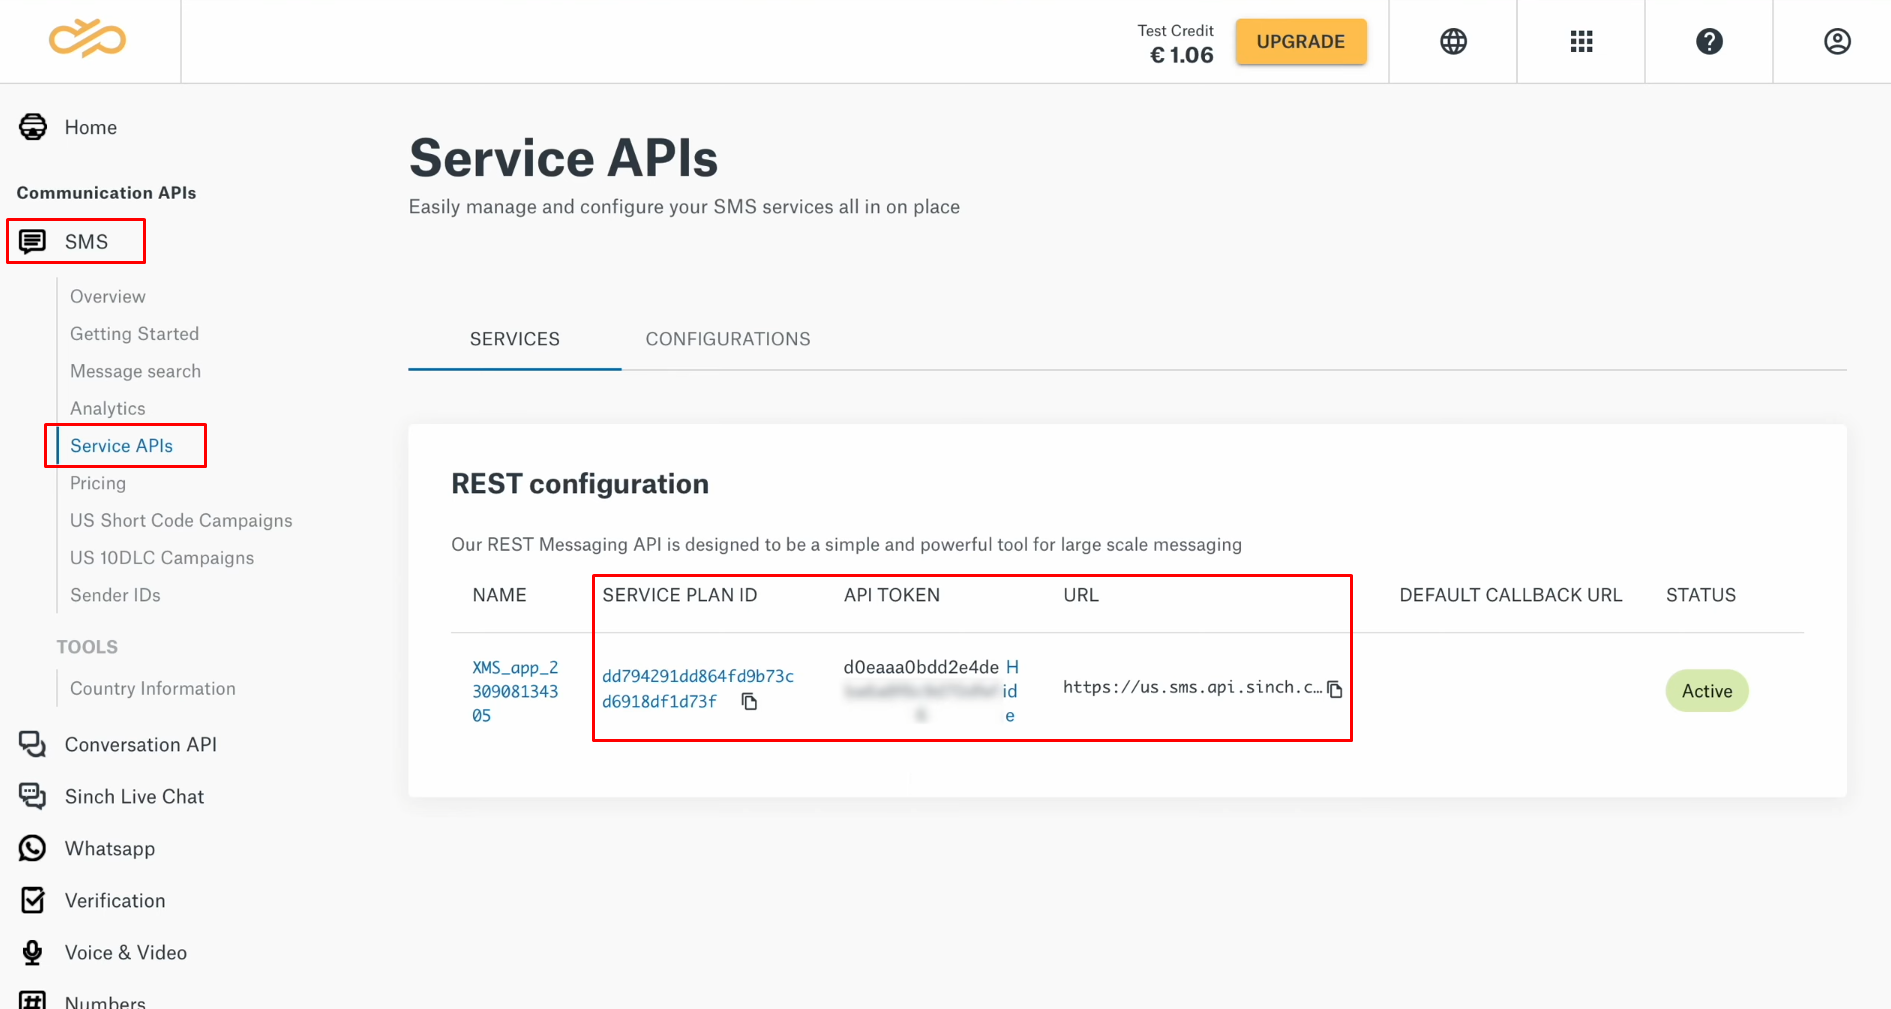
To get this
data, go to your Sinch personal account. Here, you
need the Service APIs section. Find and
copy the URL,
service plan, and API token.
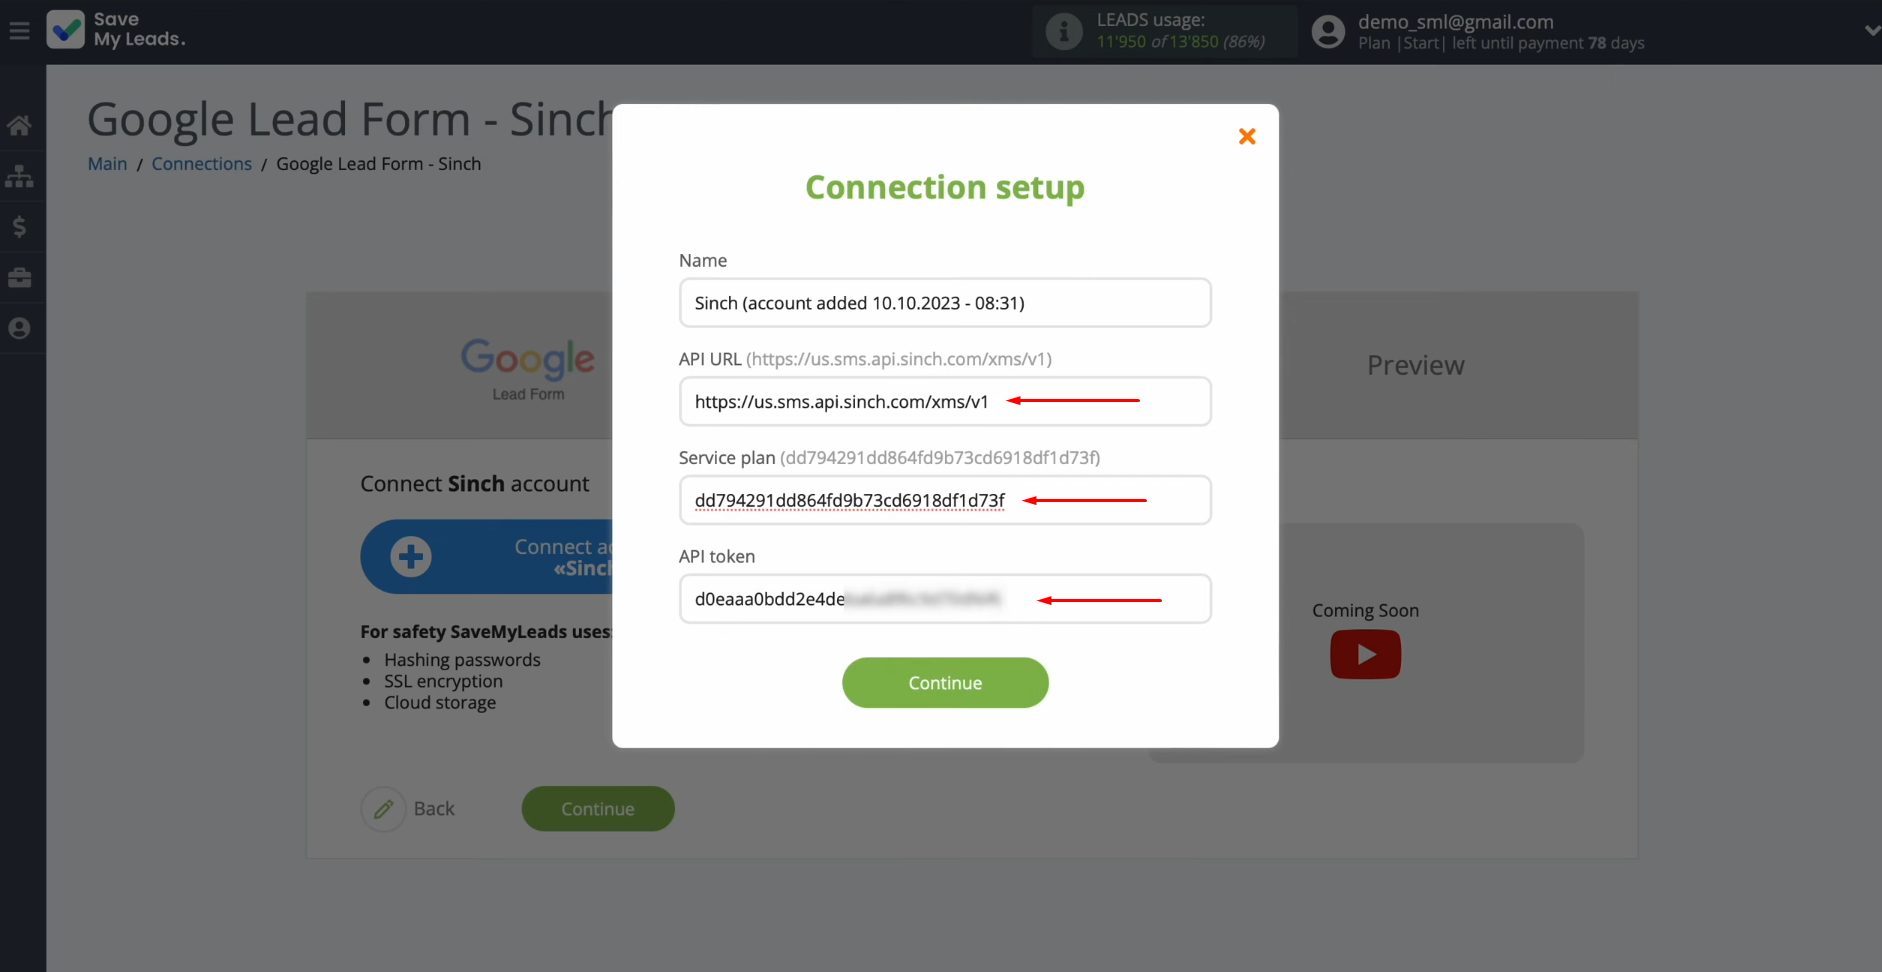
Paste data
into the appropriate fields in SaveMyLeads. When all the required fields are
filled in, click “Continue”.
When the
connected account appears in the list, select it.
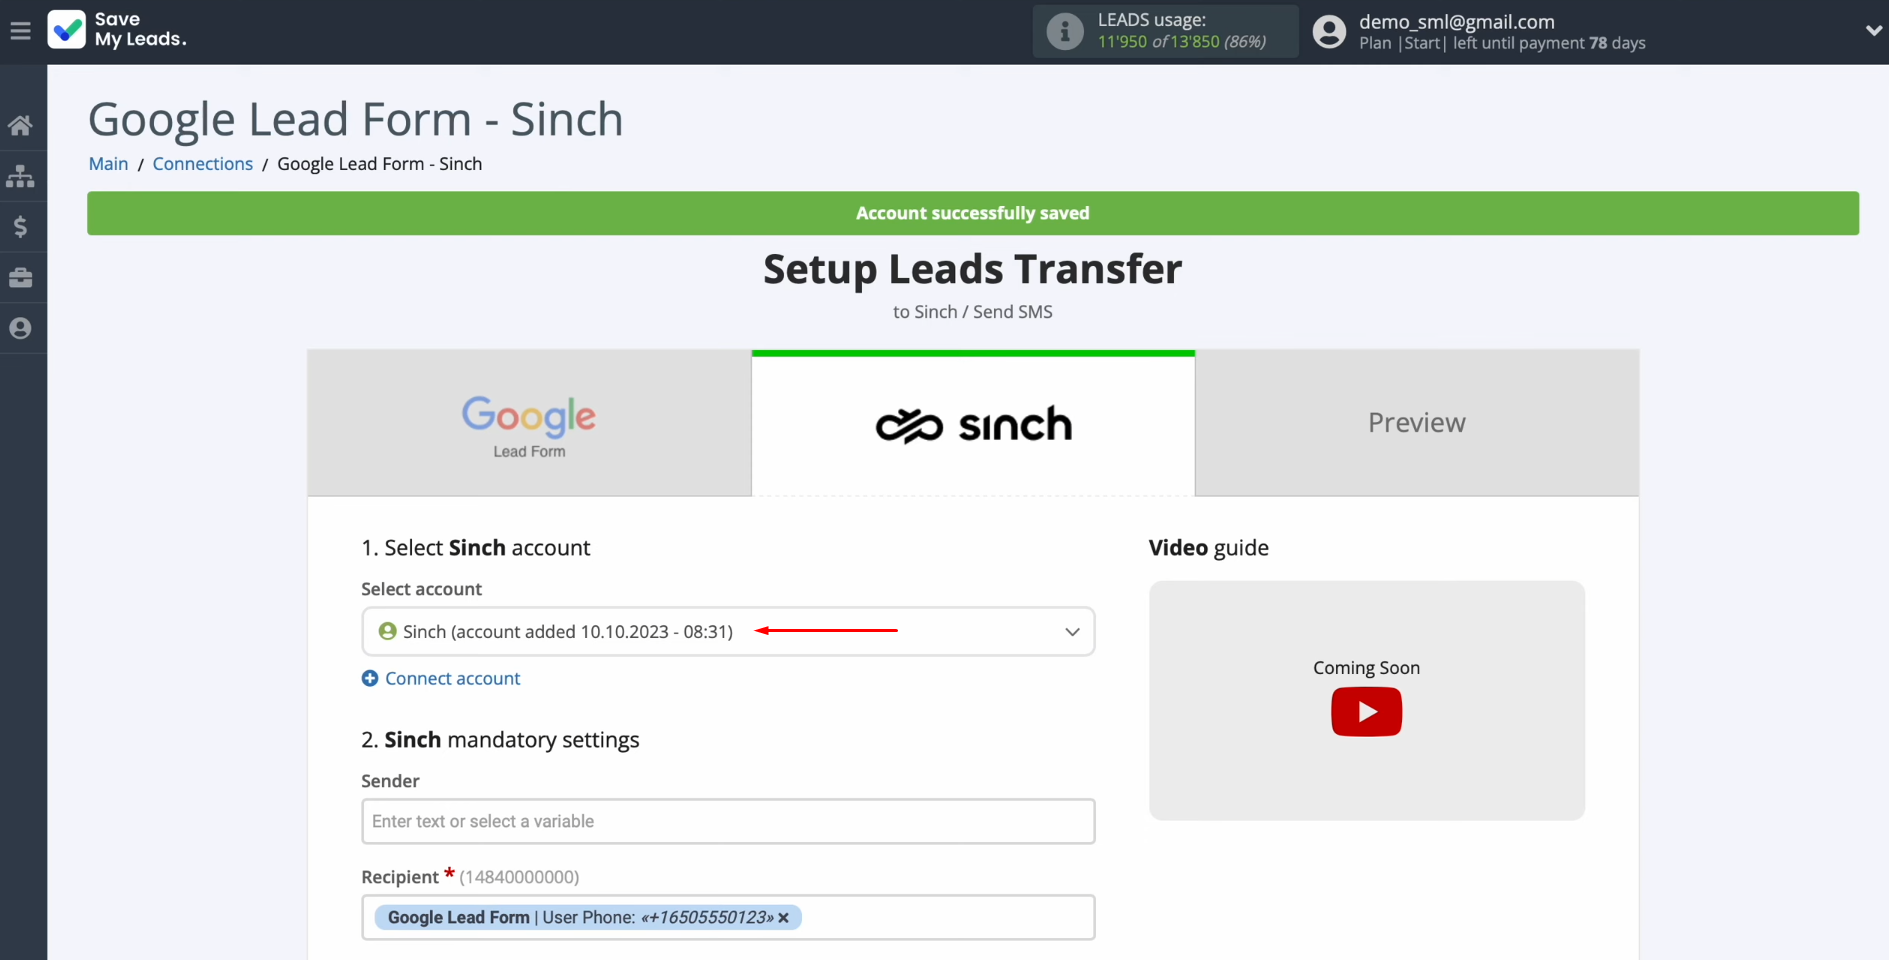
Now, you see Sinch fields for sending
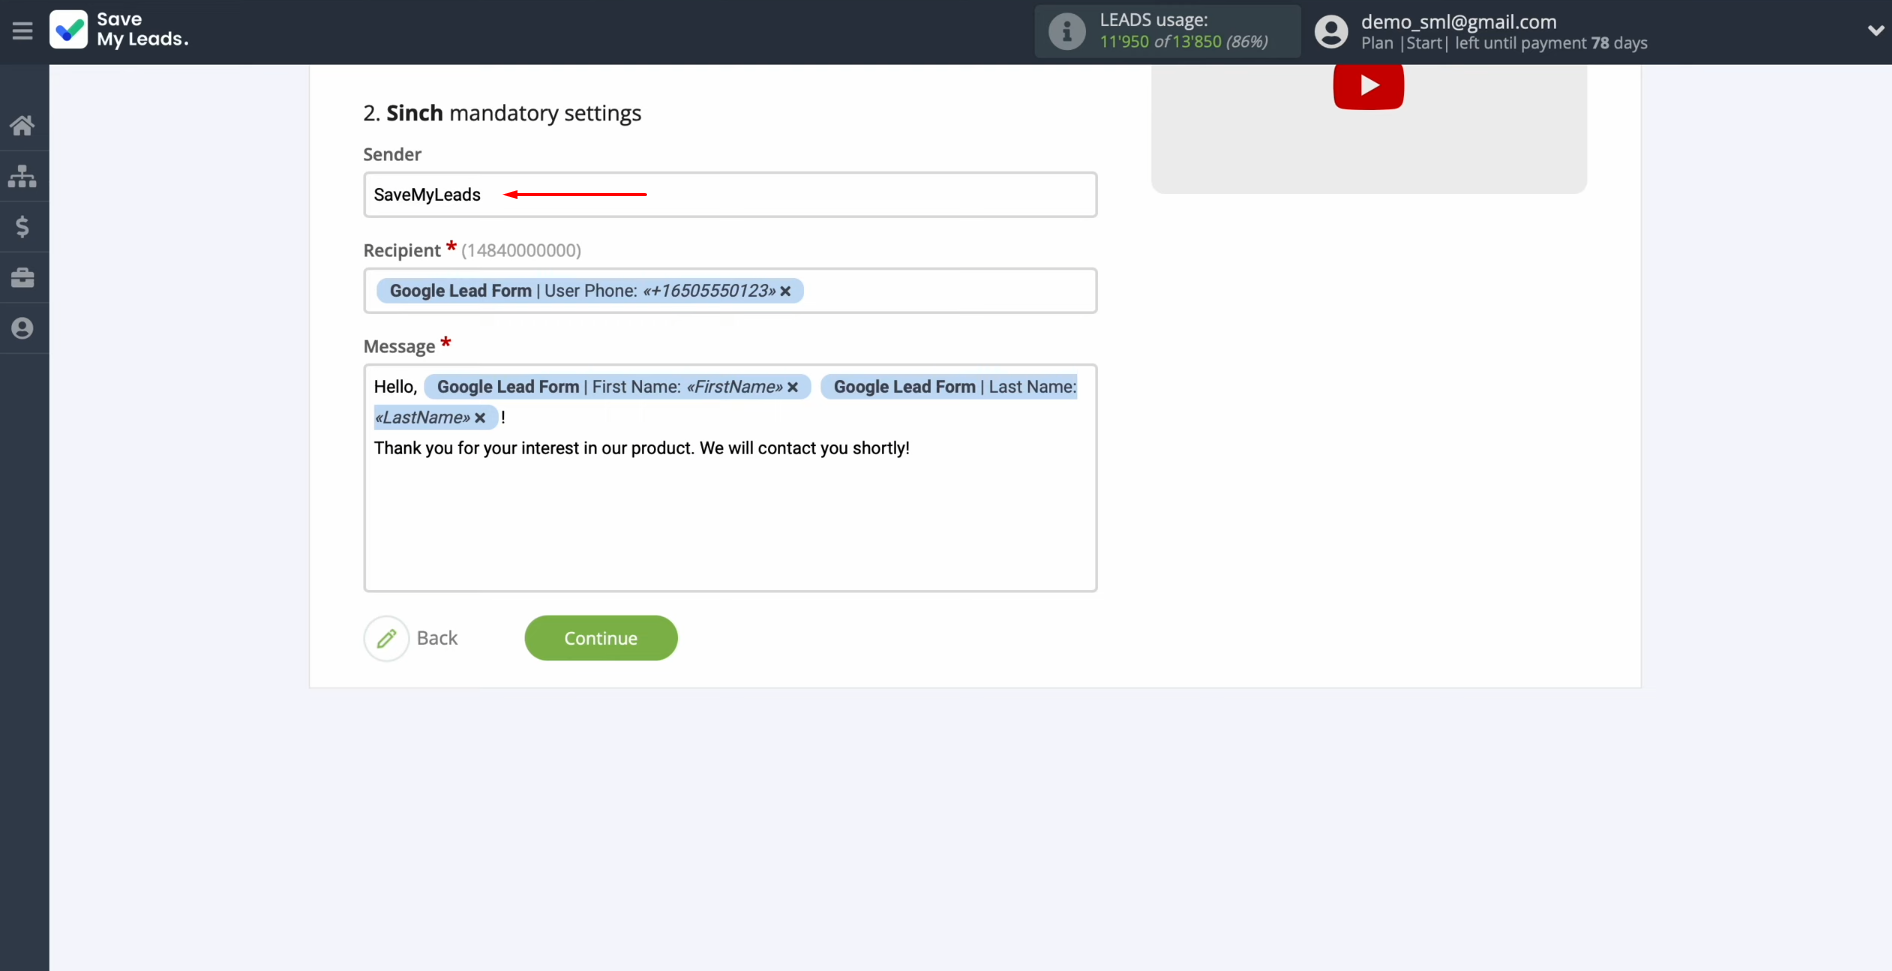
SMS messages. In the
sender field, you need to enter the name of the sender, which must
be previously registered in your Sinch personal account.
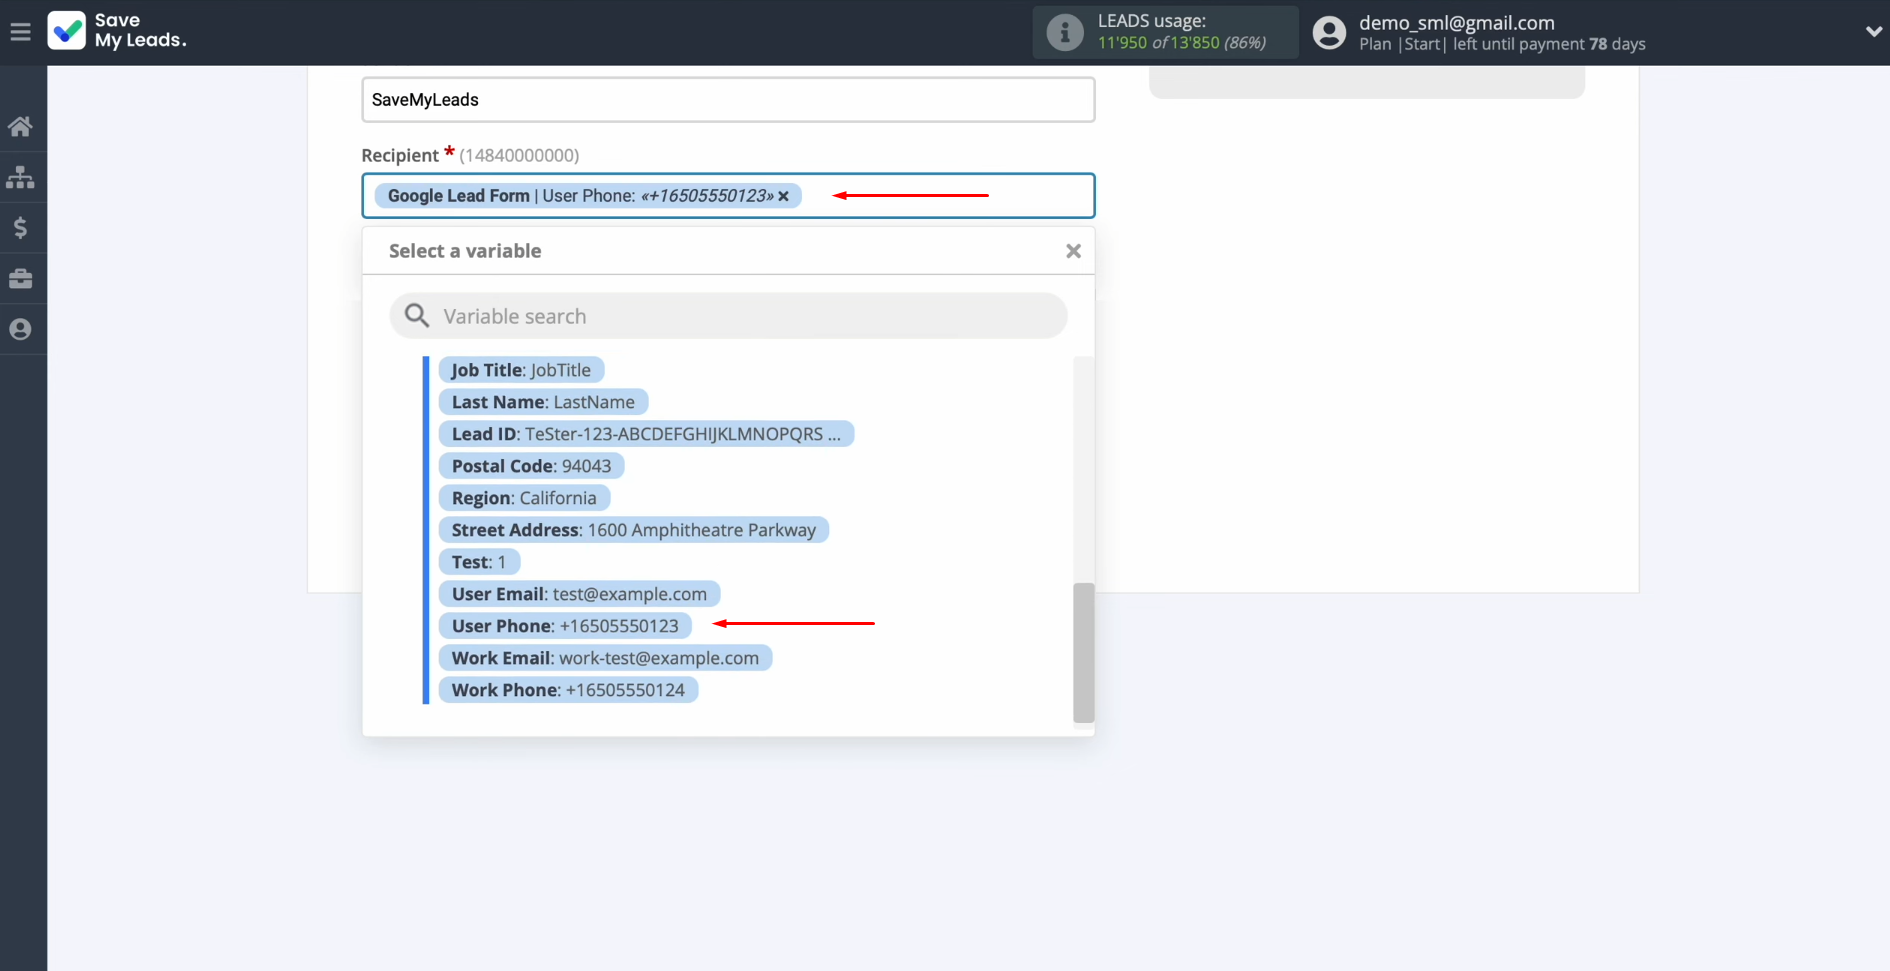
In the
recipient field, you need to assign a variable from Google Lead Form that
contains the phone number. To do this, click in the field and select a variable
from the drop-down list.
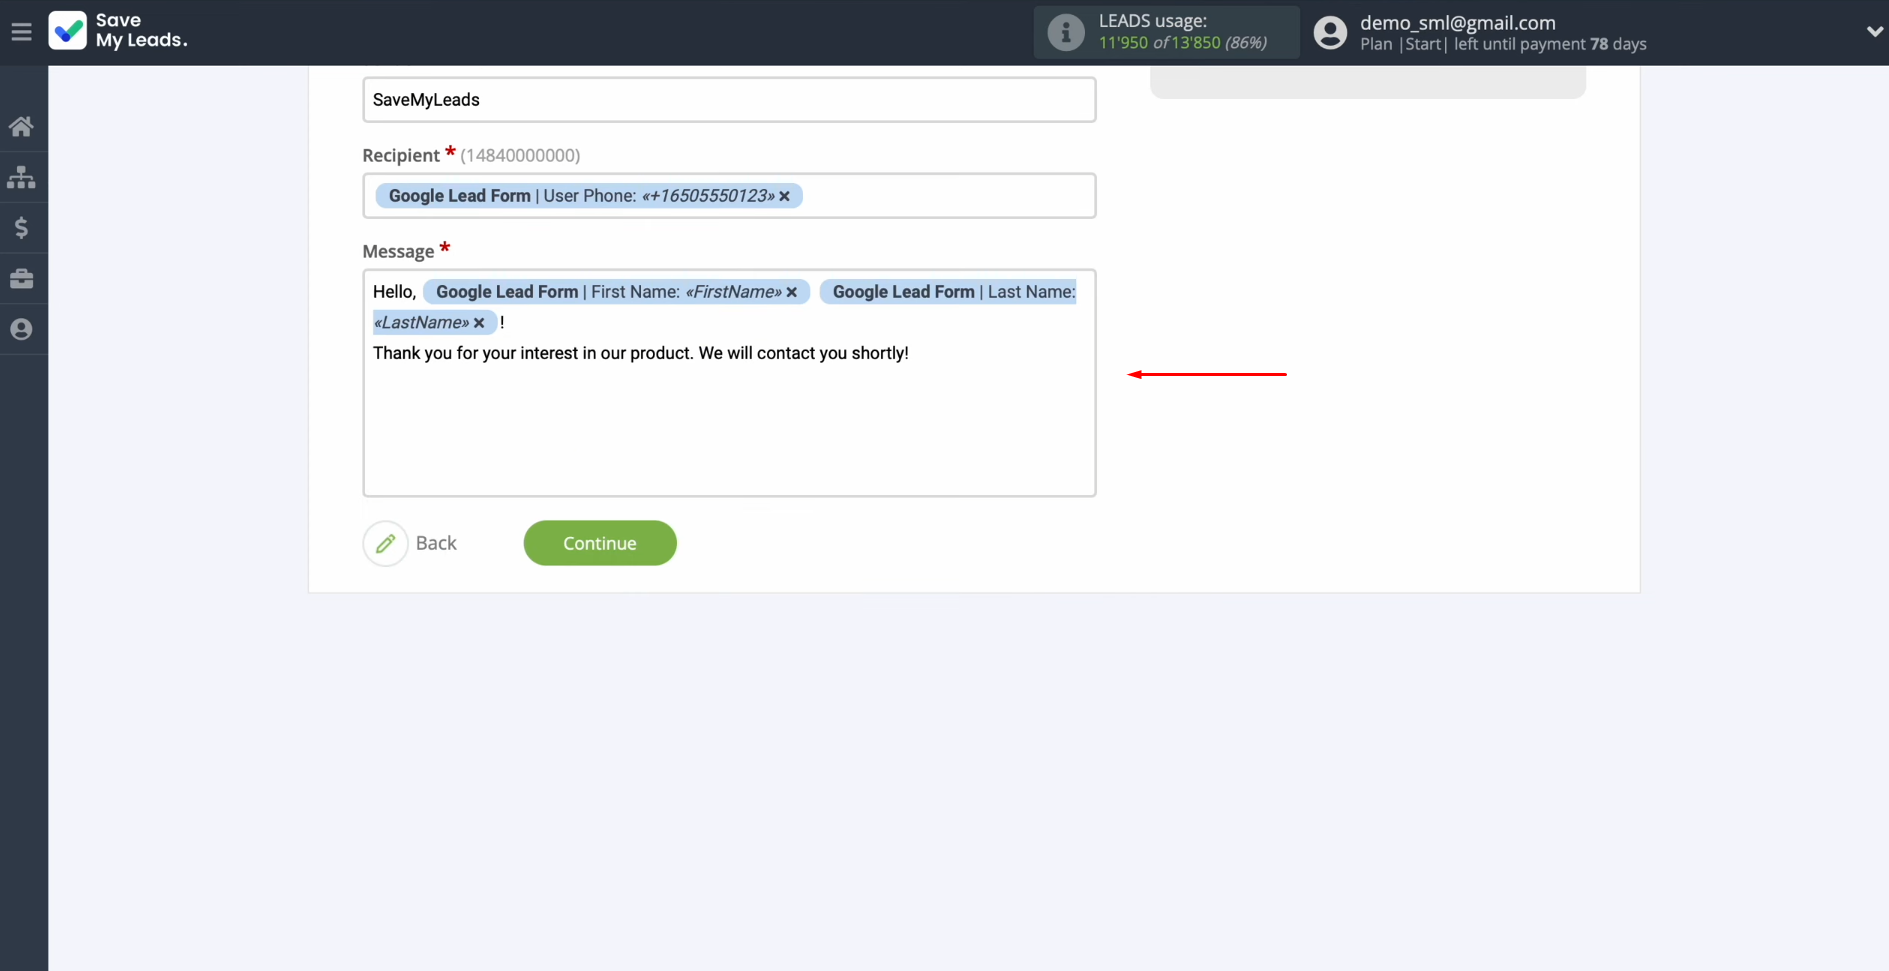
In the
message field, you need to create a message that will be sent as an
SMS to each lead from the Google Lead Form. Please note that you can use not
only variables from the drop-down list but also enter data manually. When all required fields are filled
in, click “Continue”.
Now, you see an
example of data that will be sent as an SMS message via the Sinch service
with each new lead from Google Lead Form. To check the correctness of the
settings, click “Send test data to Sinch”.
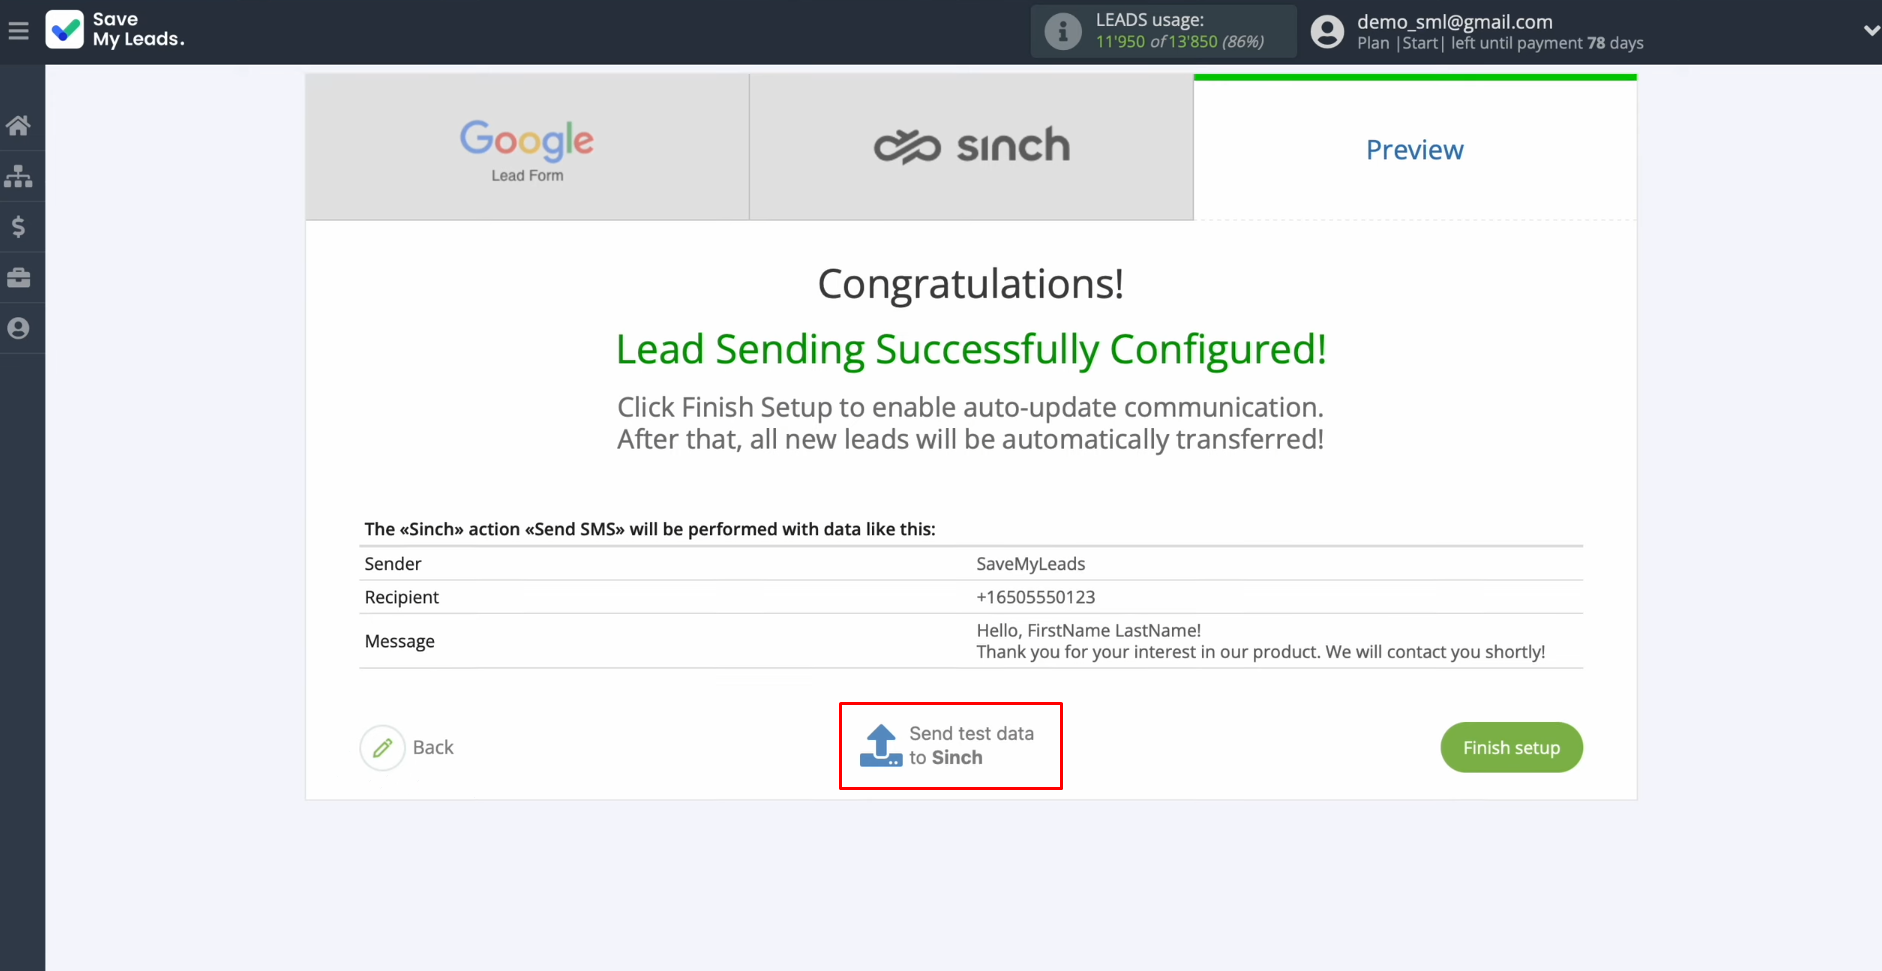
After
successful sending, go to Sinch and check the result.
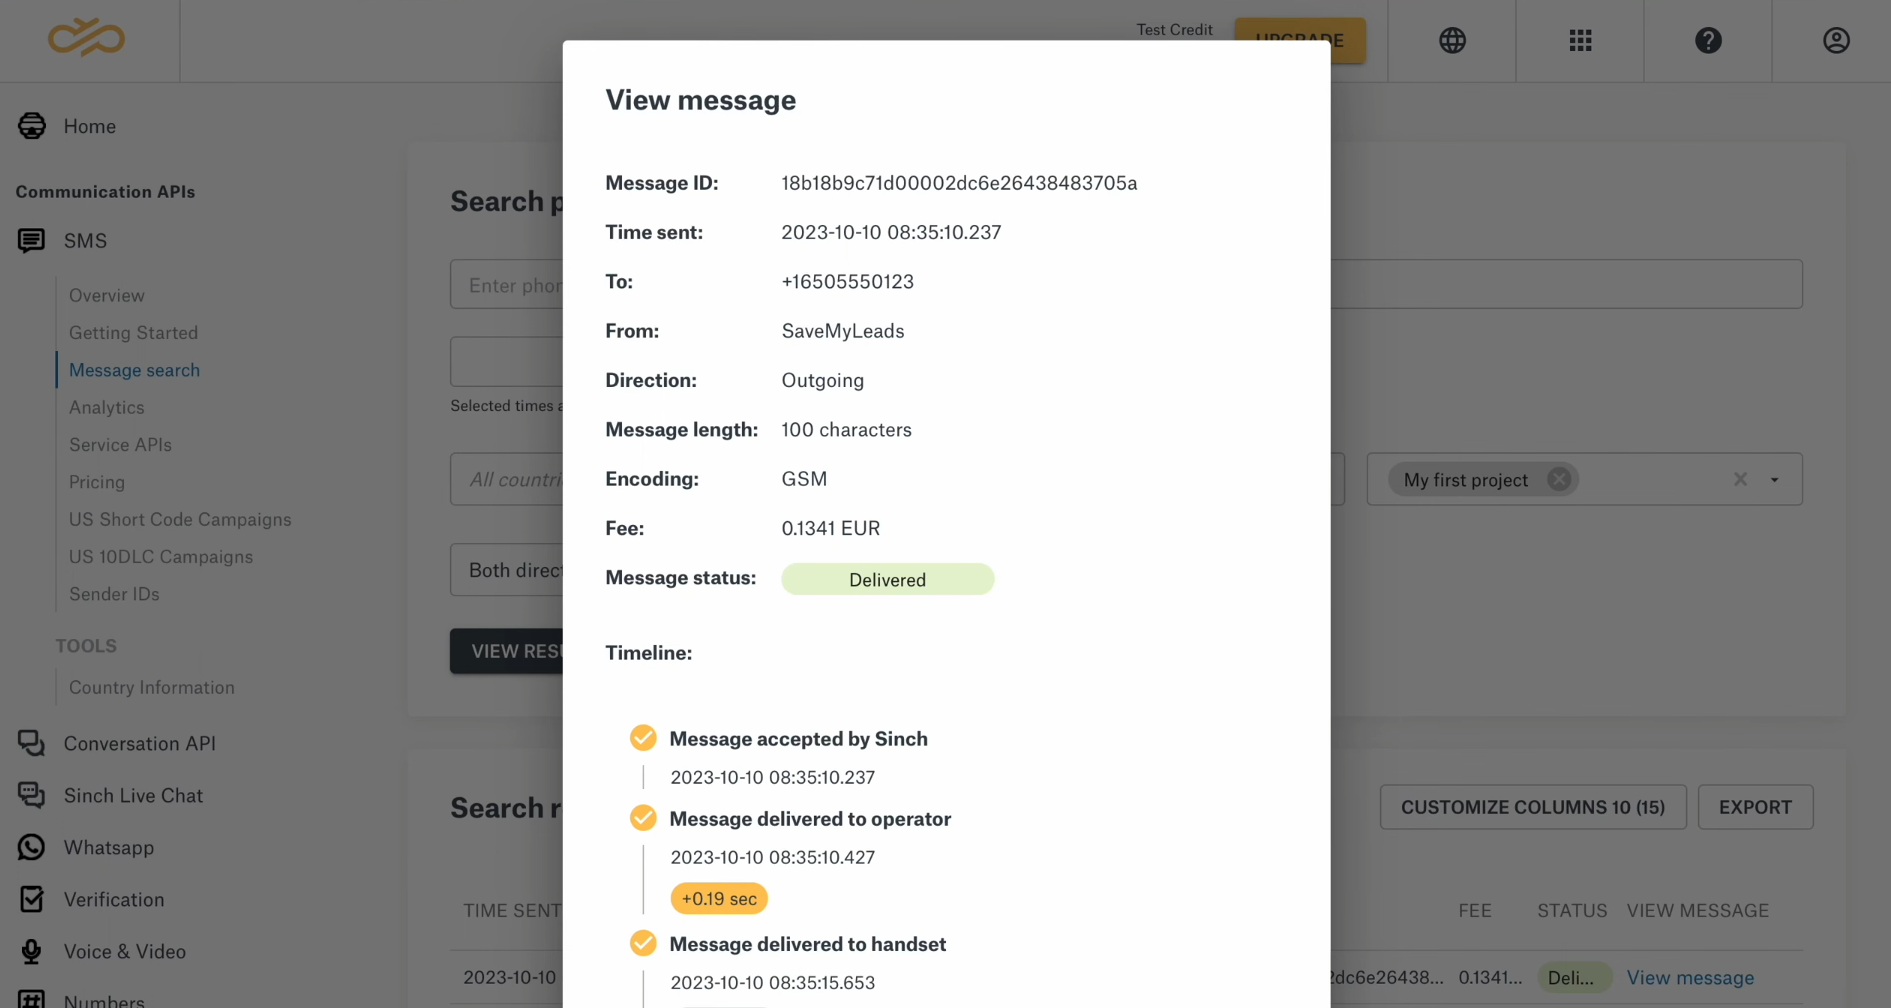
Then, return to
SaveMyLeads and continue setting up.


Setting Up Auto-Update
Click “Finish setup” to enable auto-update of the connection. In this case, each new lead from Google Lead Form will instantly receive an SMS message via the Sinch service.
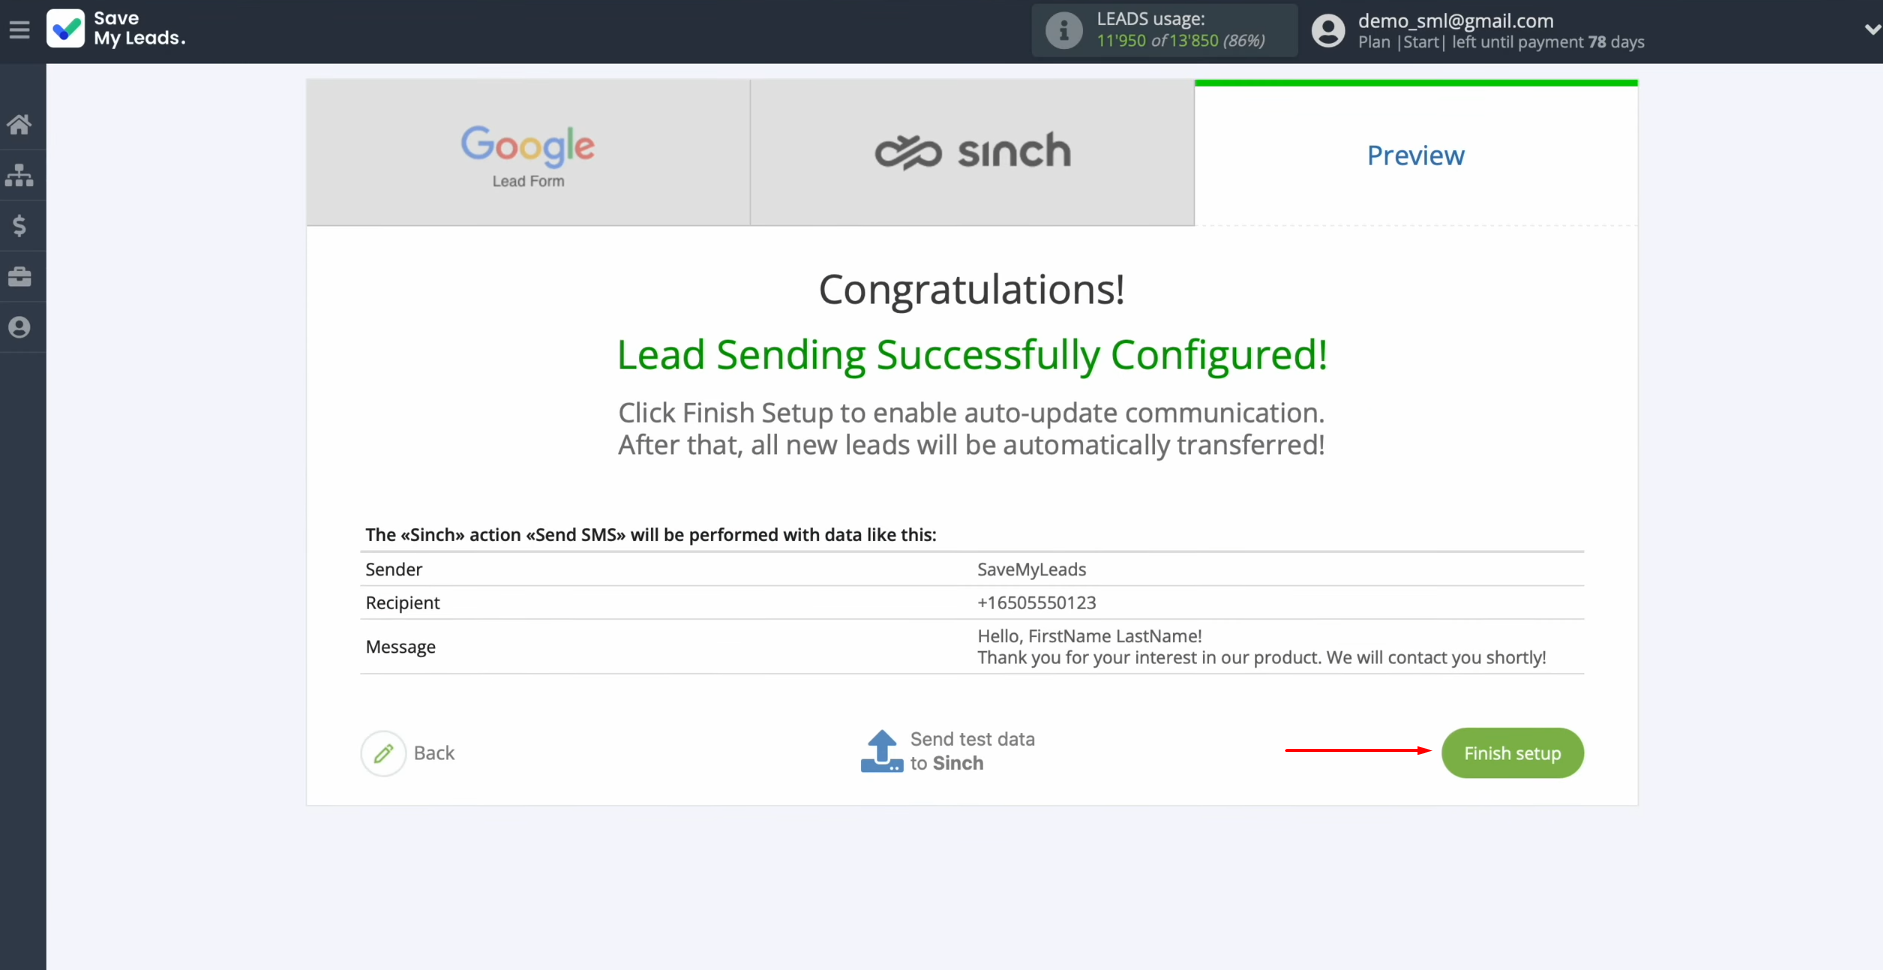
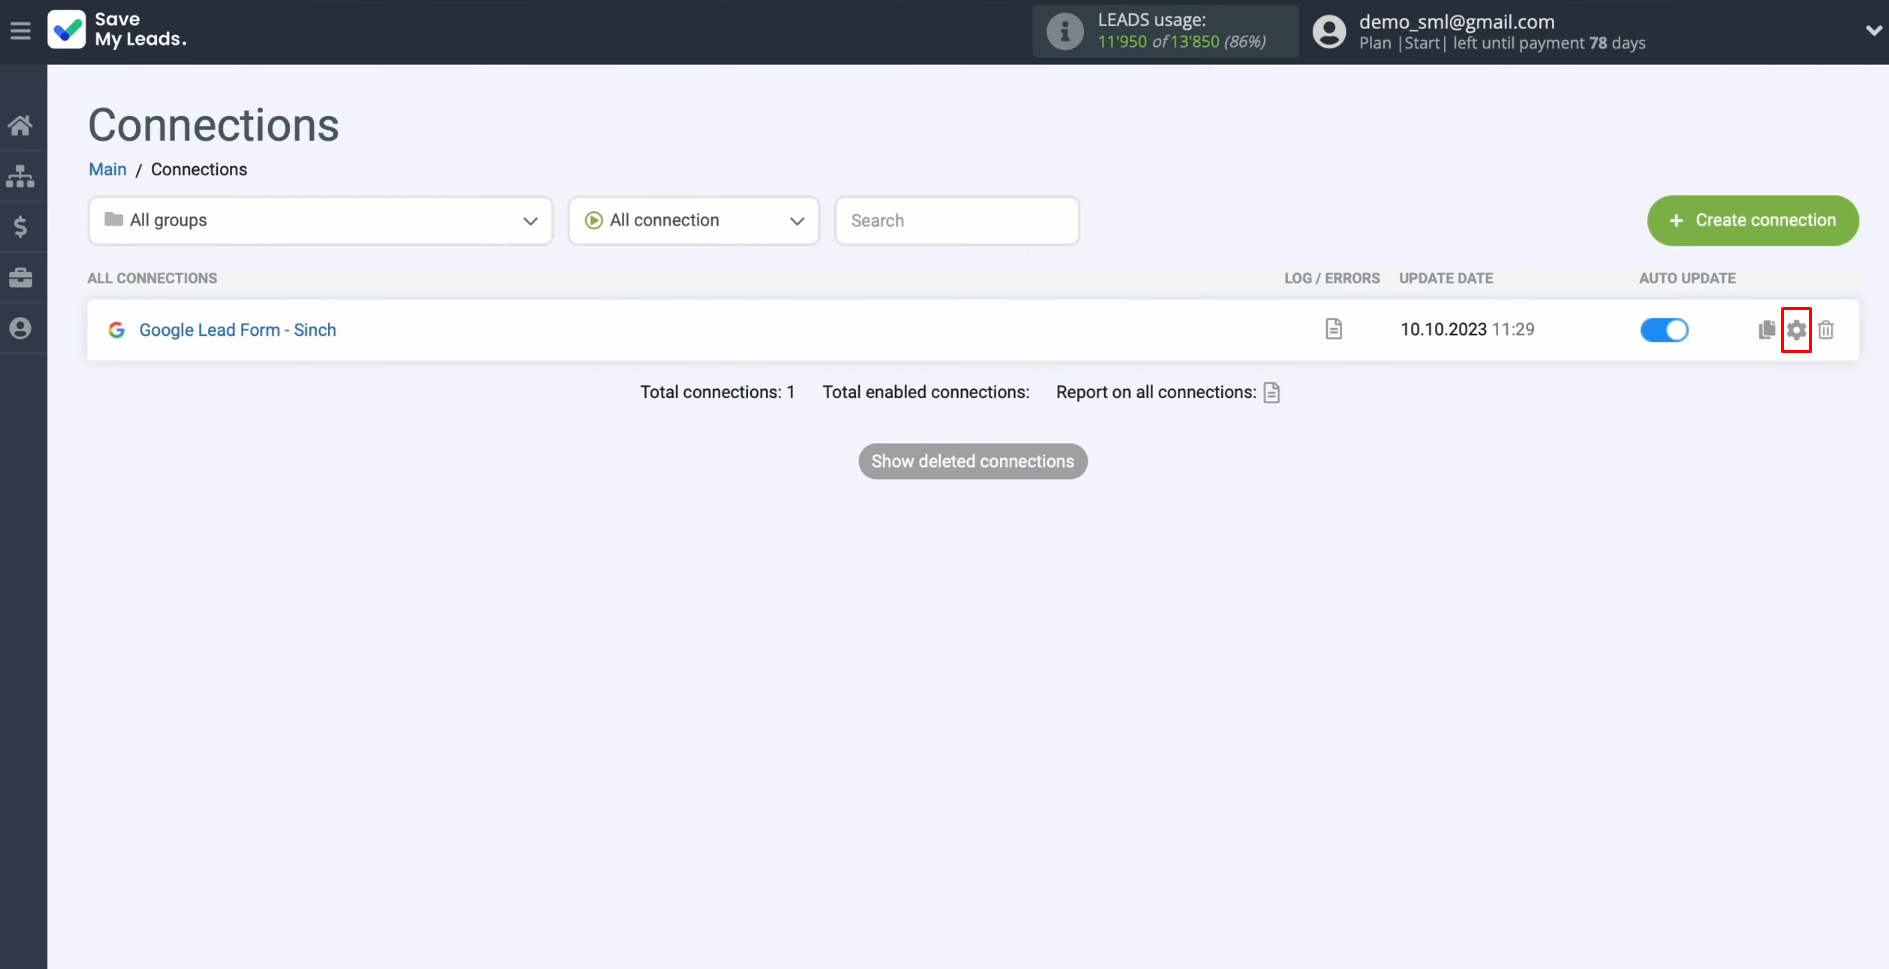
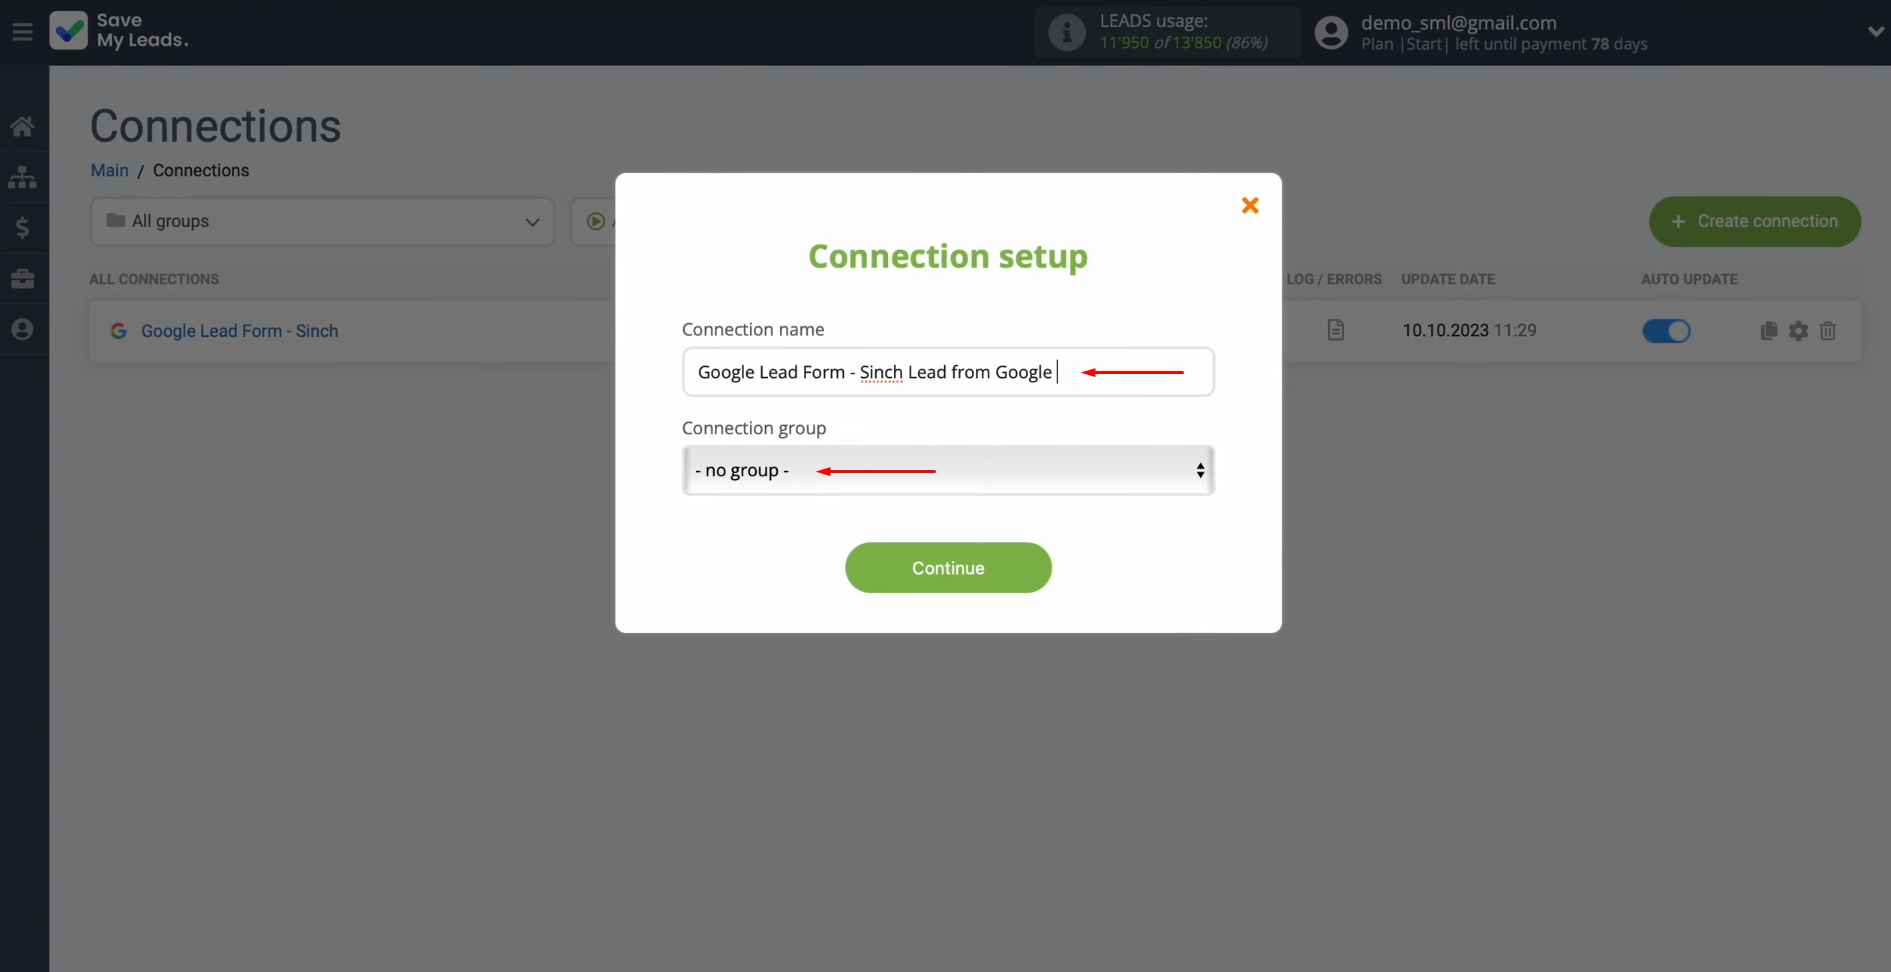
If you want to change the connection name, you can do this in its
settings. For this, click on the gear icon.
Here, you can change the connection name and add your
connection to a group. After that, click “Continue”.
That's all. Google Ads Lead Form + Sinch
integration has been completed.
Result of Google Lead Form and Sinch Integration
After setting up the Sinch + Google Lead Form integration using the instructions we provided, you’ve likely already noticed its initial results. Every new lead that fills out and submits the form immediately receives an SMS through the communication service. Automating this process significantly speeds up the handling of requests and eases your team’s work.
As you’ve probably noticed, no special knowledge is required to create this integration. The setup is done through the connector's intuitive web interface and takes up to 10 minutes. Once the integration is launched, the routine data transfer from Google Lead Form to Sinch will occur automatically thanks to SaveMyLeads.
Step-by-Step Guides for Setting Up Integrations:
