Automation is a progressive method of increasing the productivity of business processes. It helps collect and analyze potential buyers' contact info. It also improves ad campaign management and speeds up customer communication. Google Lead Form is a tool integrated directly into Google Ads. It lets you request data from potential customers. It does so without redirecting to other sites. Furthermore, it simplifies the buying process for users. Elastic Email is a reliable email marketing platform. It has great tools for creating, personalizing, and automating mailings. Both services show very decent results. How about expanding their potential? You can achieve this by connecting them and setting up a data exchange. In this article, we will tell you how to quickly and easily perform Google Ads Lead Form and Elastic Email integration.
Google Lead Form and Elastic Email Integration – Advanced Business Process Automation
Elastic Email and Google Ads Lead Form integration boosts e-commerce workflows. It makes them more accurate and faster. This is especially evident in marketing. When both systems work together, they send the leads' forms to Elastic Email. They are then turned into new contacts for mailing.
What are the benefits of this approach? Let's look at real-life examples. They will show how integrating these services can boost a company's performance.
- A chain of fitness centers uses Google Lead Form to find new customers for classes and memberships. The form data goes to Elastic Email. It creates customized newsletters with info on group classes, personal training, and special deals. This ensures higher levels of customer engagement and retention.
- An online clothing store uses Google Lead Form to collect buyer inquiries. Once a customer fills out the form, their data is sent to Elastic Email. They instantly receive offers on new collections, exclusive discounts, and news. This boosts purchase chances and improves conversion.
How to Perform Google Lead Form and Elastic Email Integration
To connect Google Lead Form with Elastic Email, you don’t need to master programming or study the API. There is no need to involve IT specialists. The SaveMyLeads online connector will do all the technical work for you. This tool allows you to set up interaction between systems with ease and efficiency. The SaveMyLeads interface is intuitive, so the setup process takes no more than ten minutes. Also, you will get detailed text instructions and video tutorials. They will help you set up and connect your accounts.
We suggest you do it right now. First, register on the SaveMyLeads website if you haven’t done so yet. Ready? Great! Now you can proceed directly to the Elastic Email and Google Lead Form integration.
Set Up the Data Source – Google Lead Form
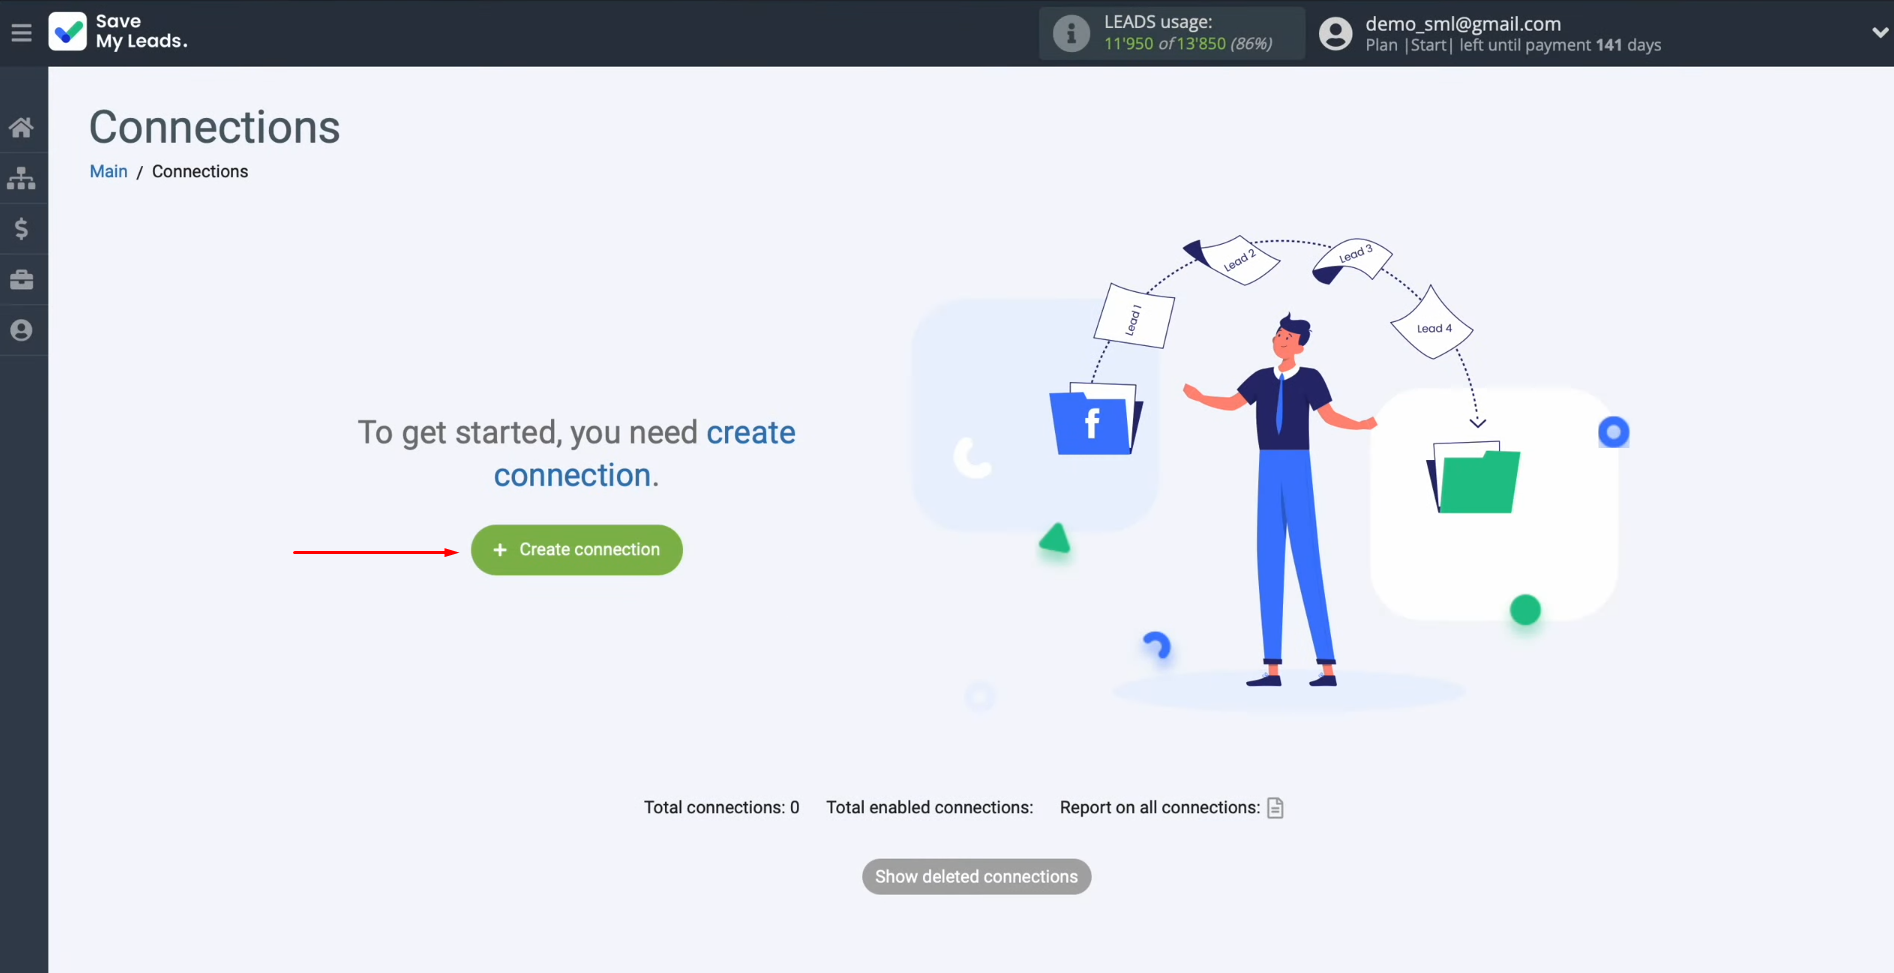
To set up Google Ads Lead Form + Elastic Email integration, first, you need to create a new connection. For this, click on the appropriate button.
Choose the
system from which you want to transfer leads. You need Google Lead Form.
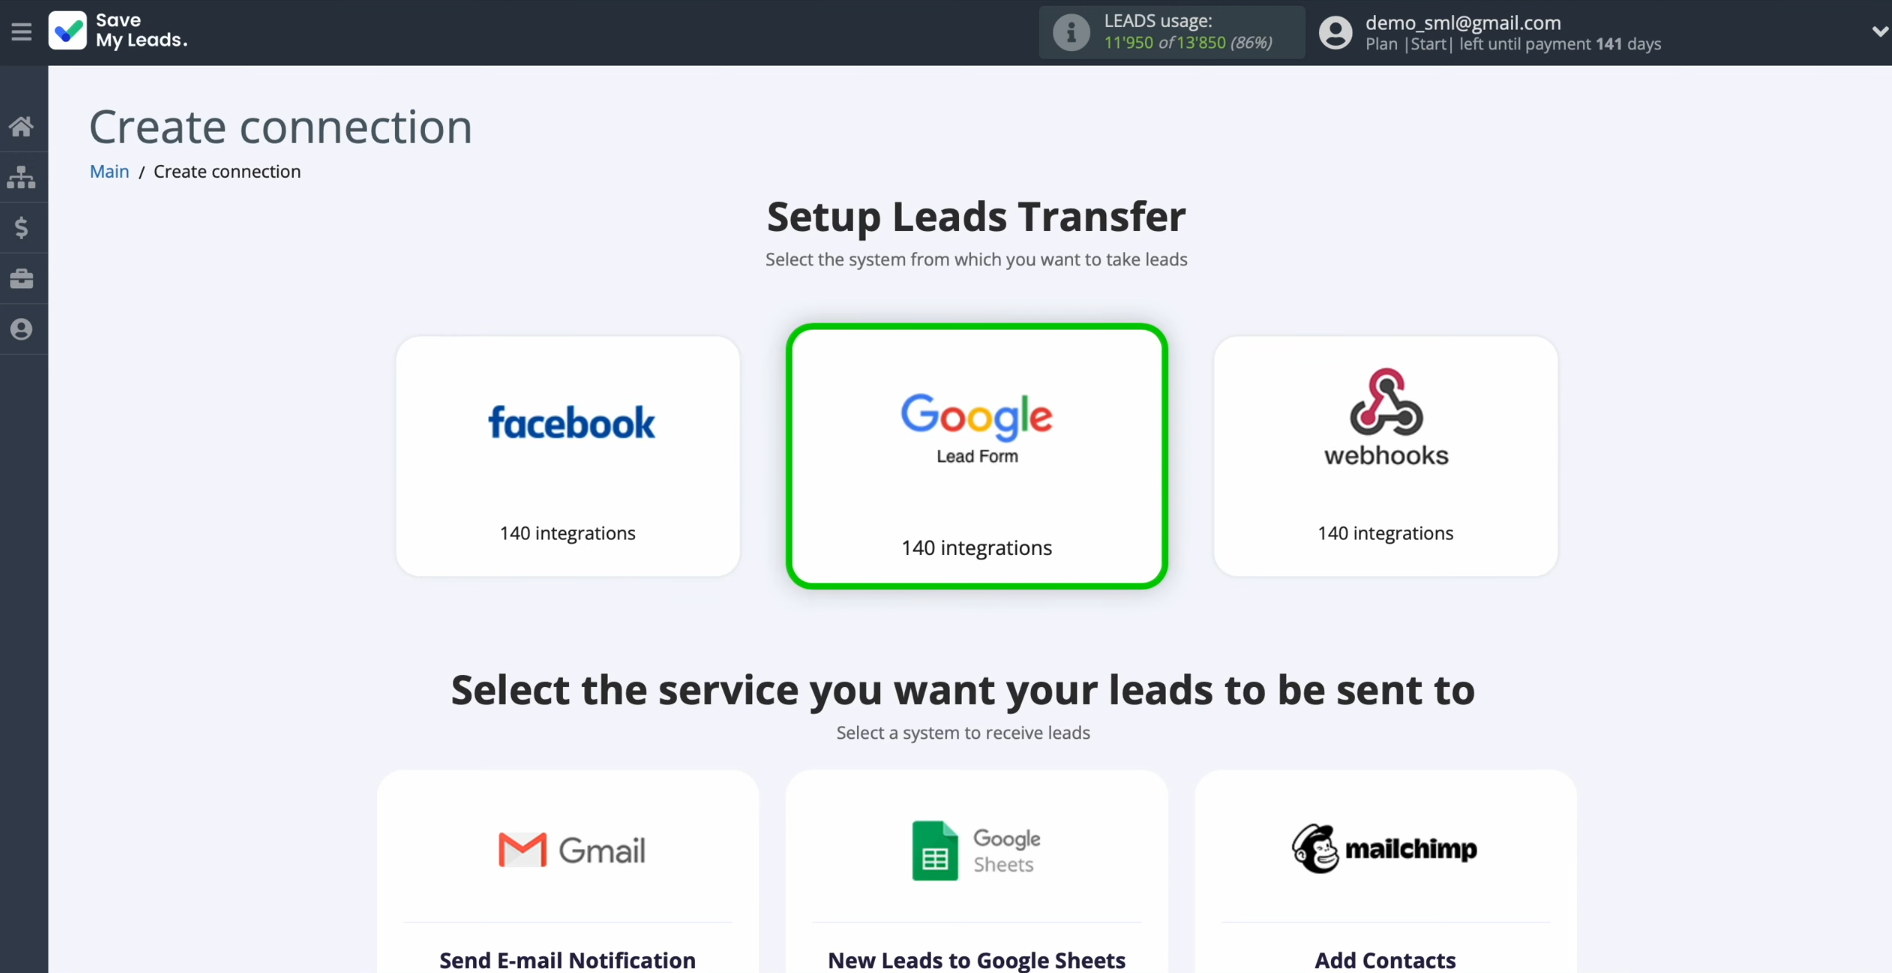
Select the
system where you want to transfer new leads from the Google Lead Form. You need Elastic Email (Create Contacts).
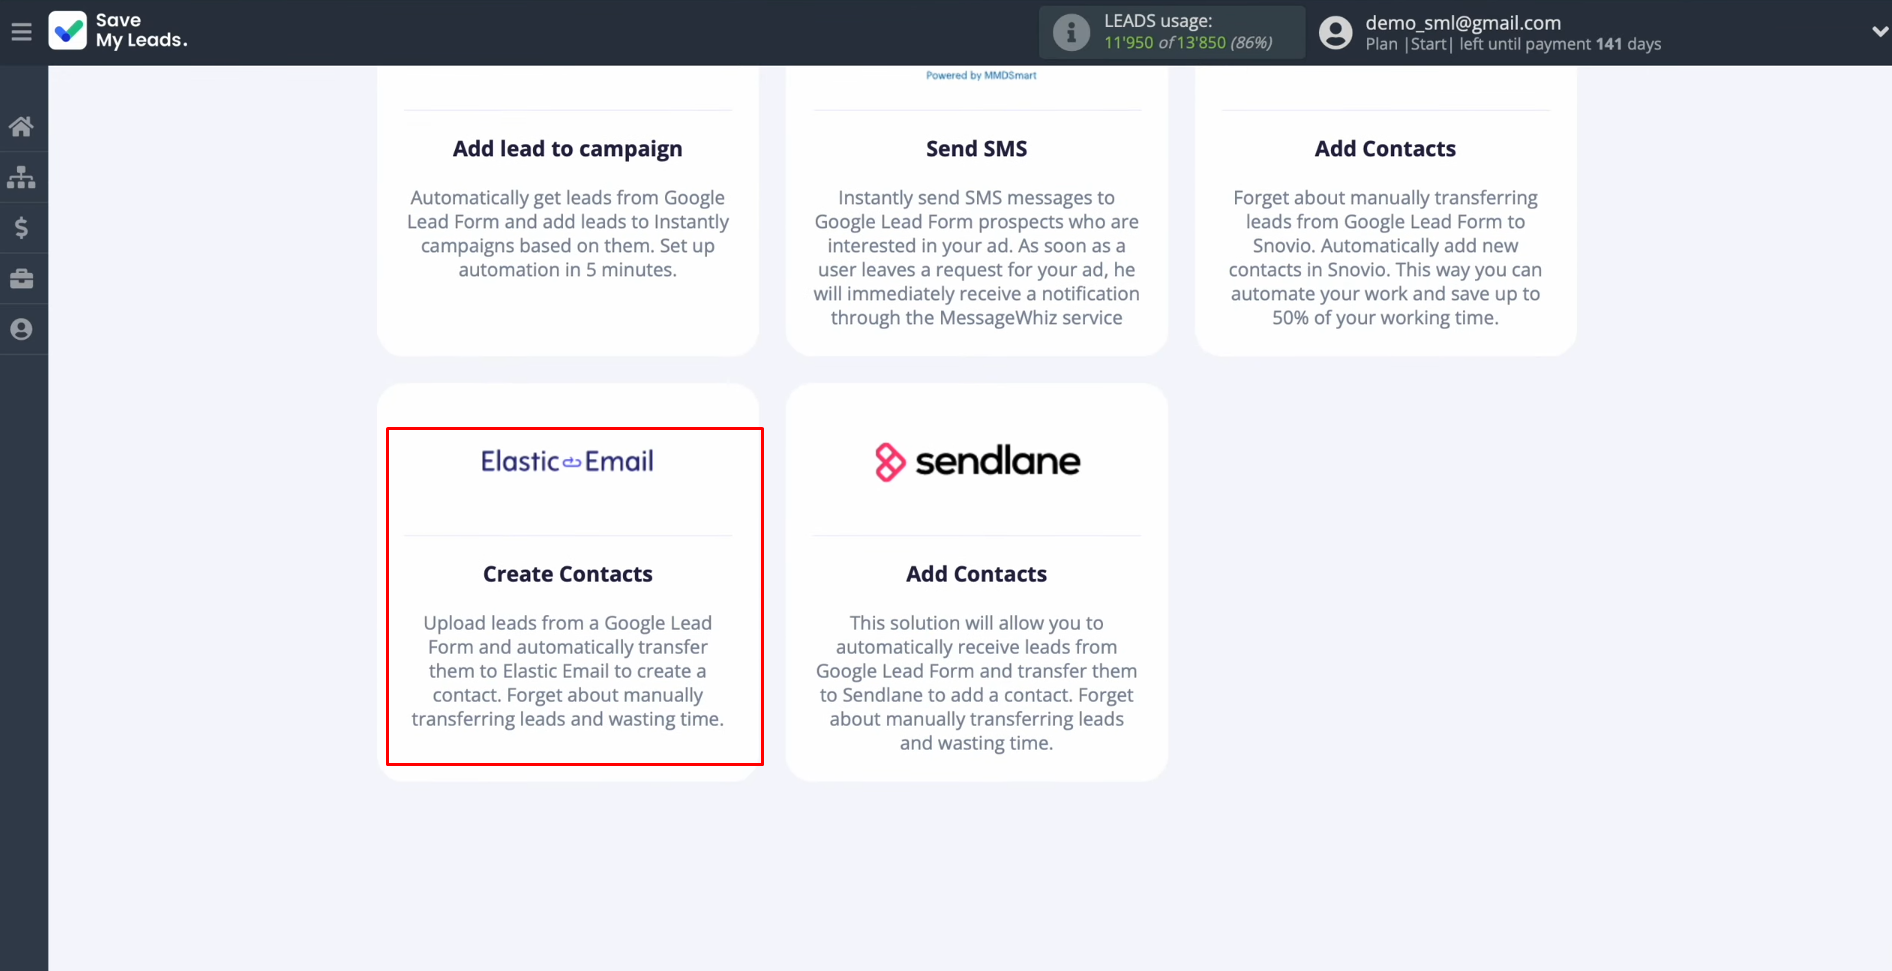
Connect the
Google Lead Form account to SaveMyLeads.
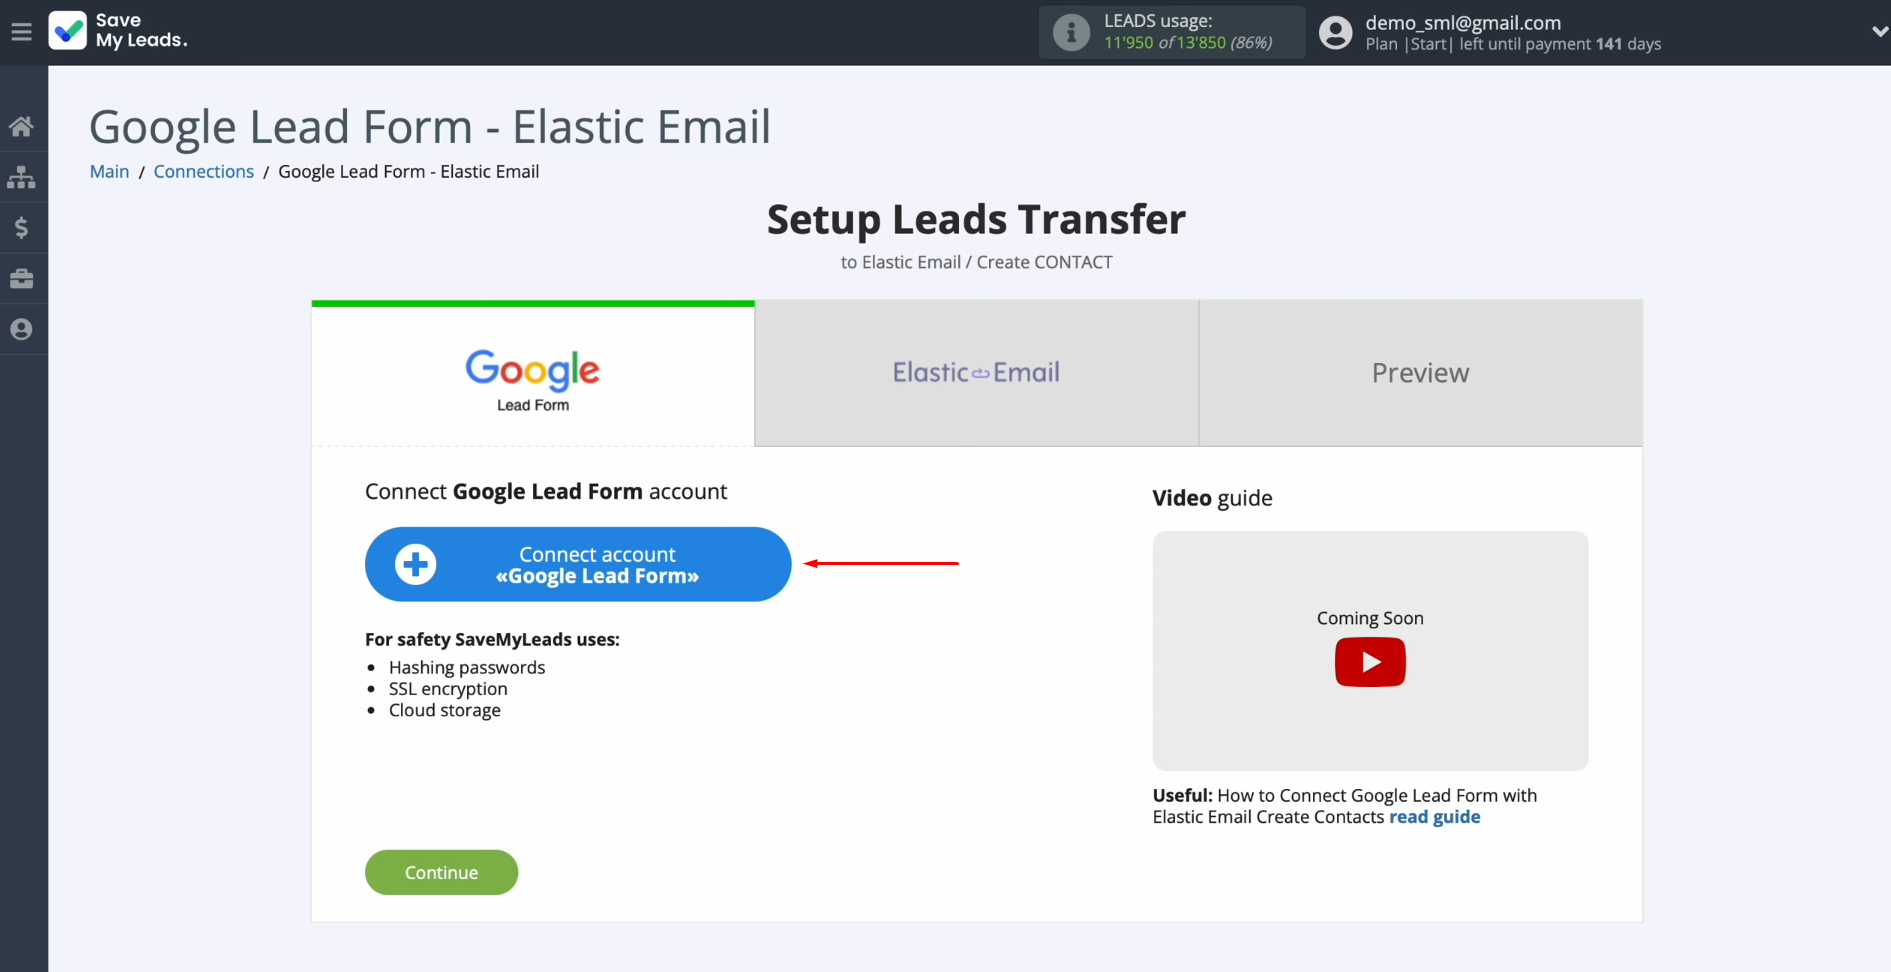
Here, you can give a name to this
connection or just
click “Continue.”
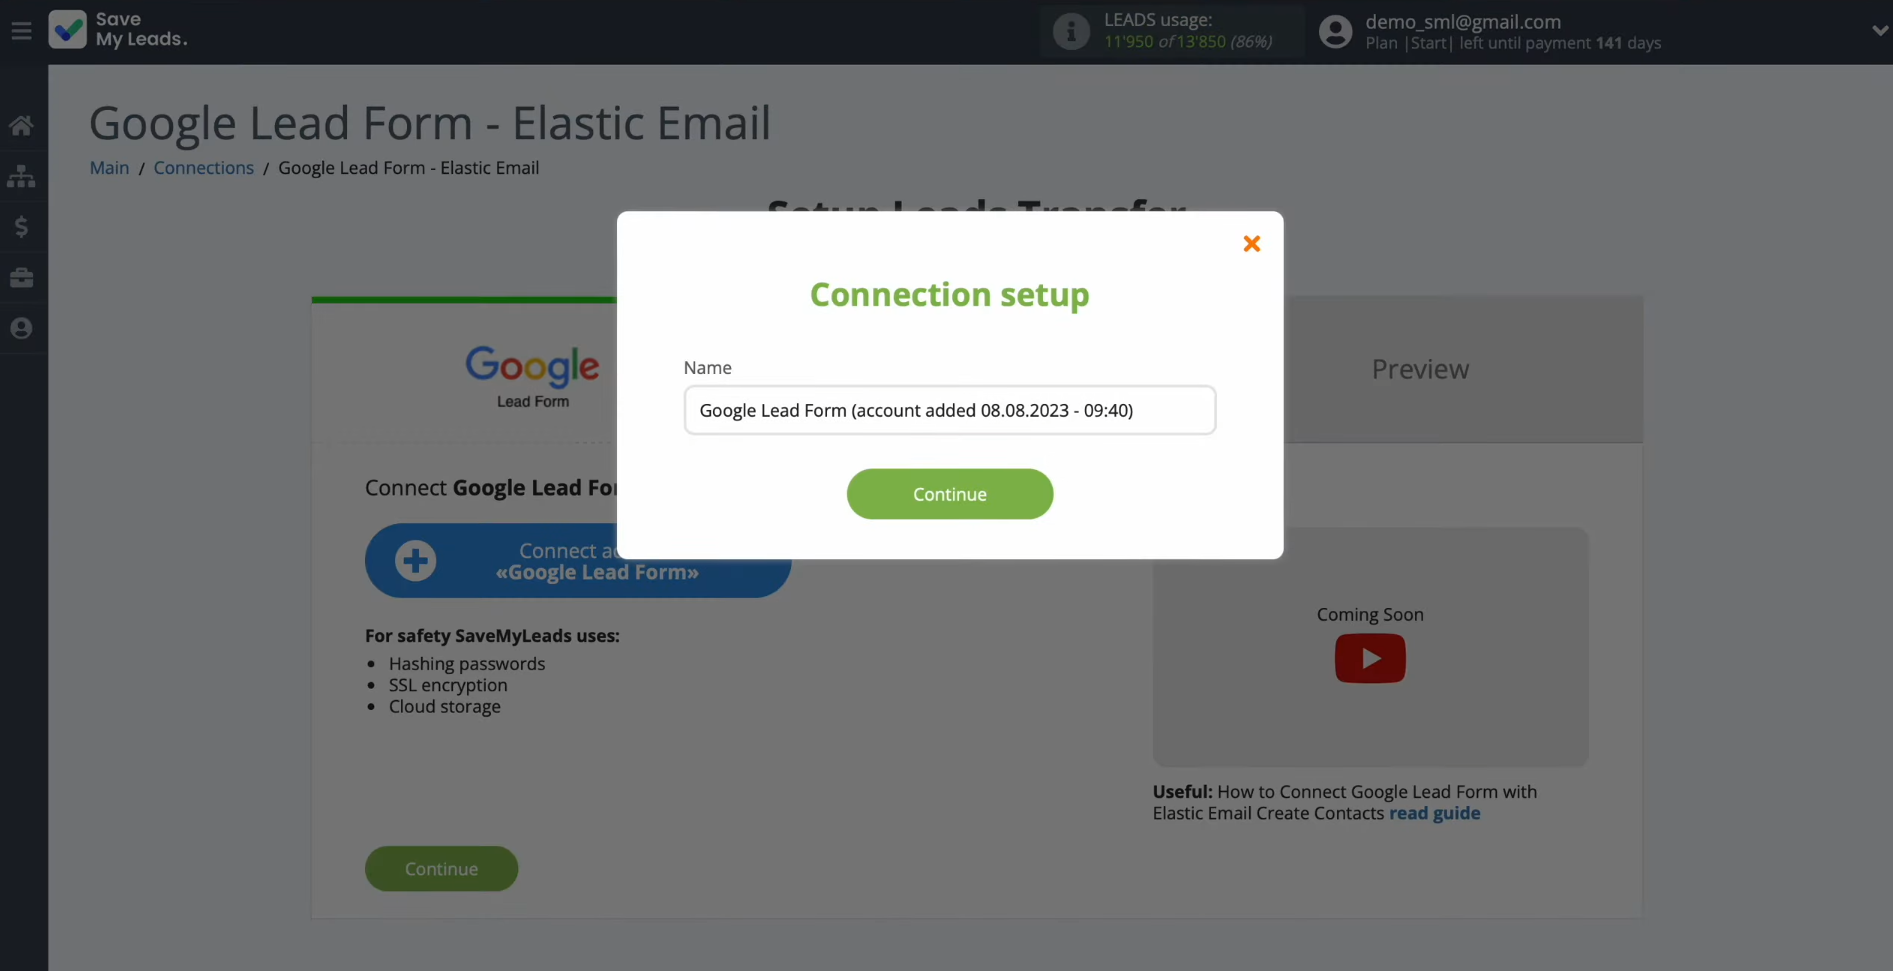
When the
connected account is displayed in the list, select it.
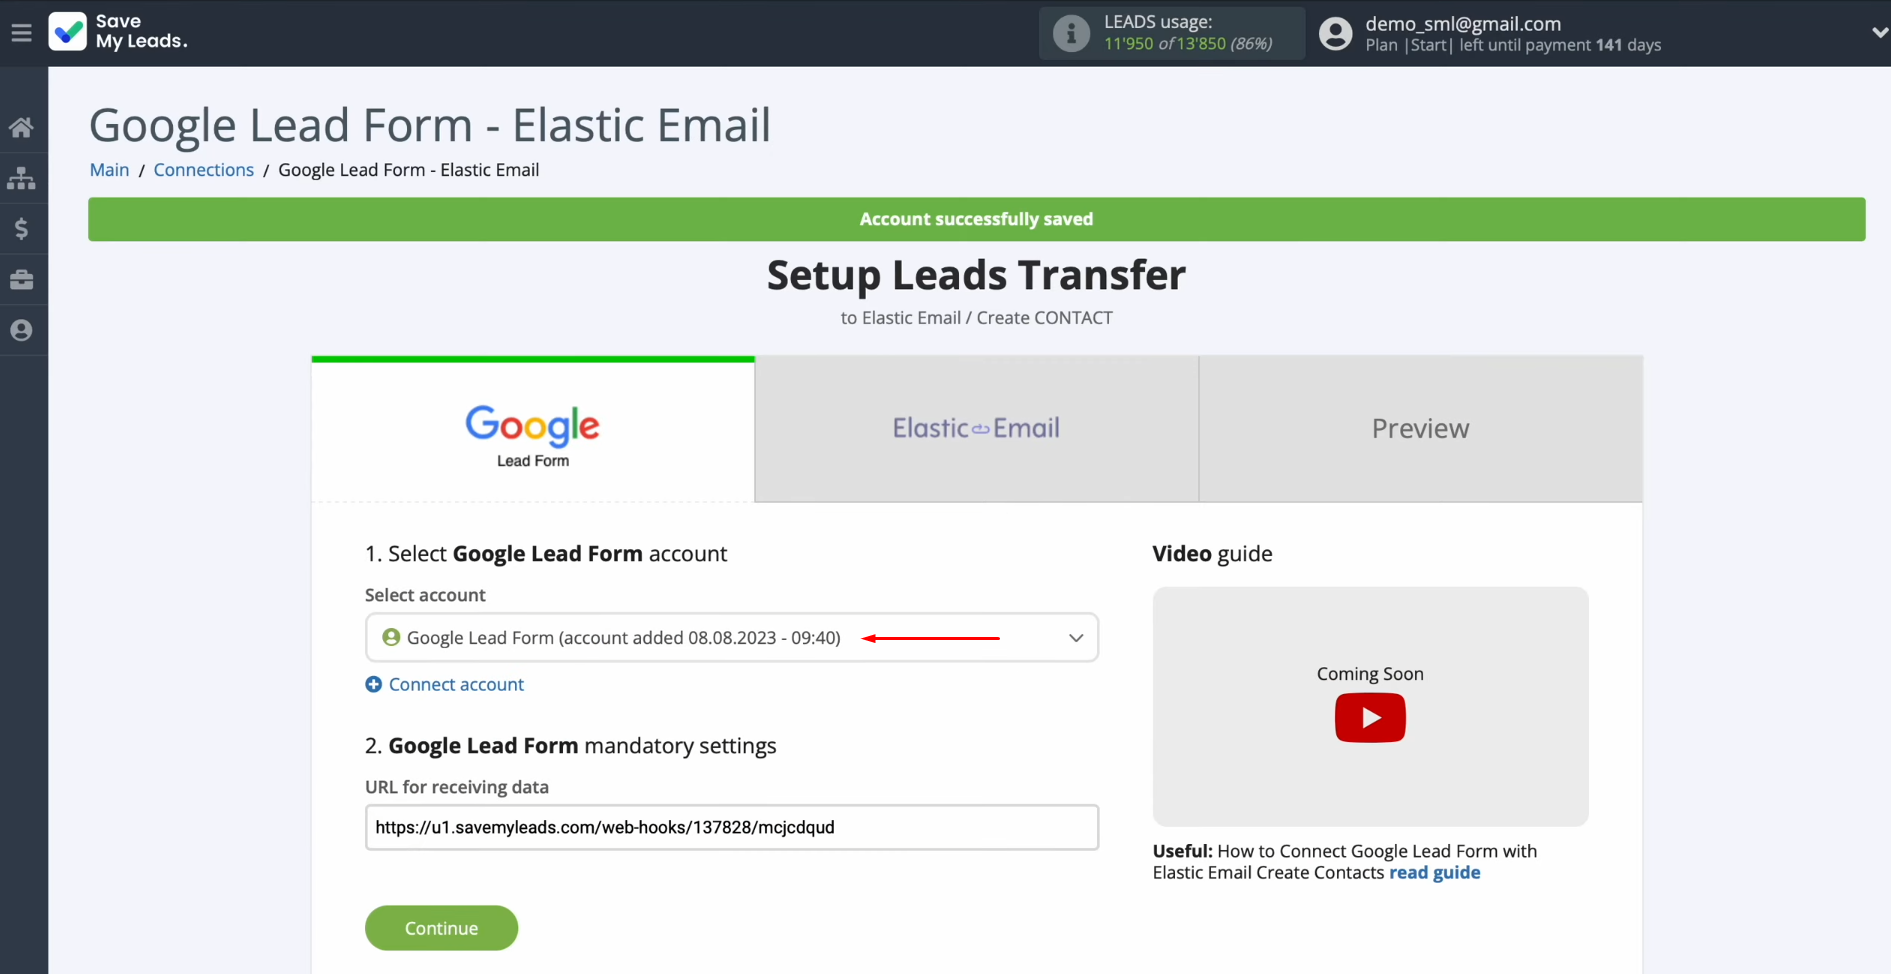
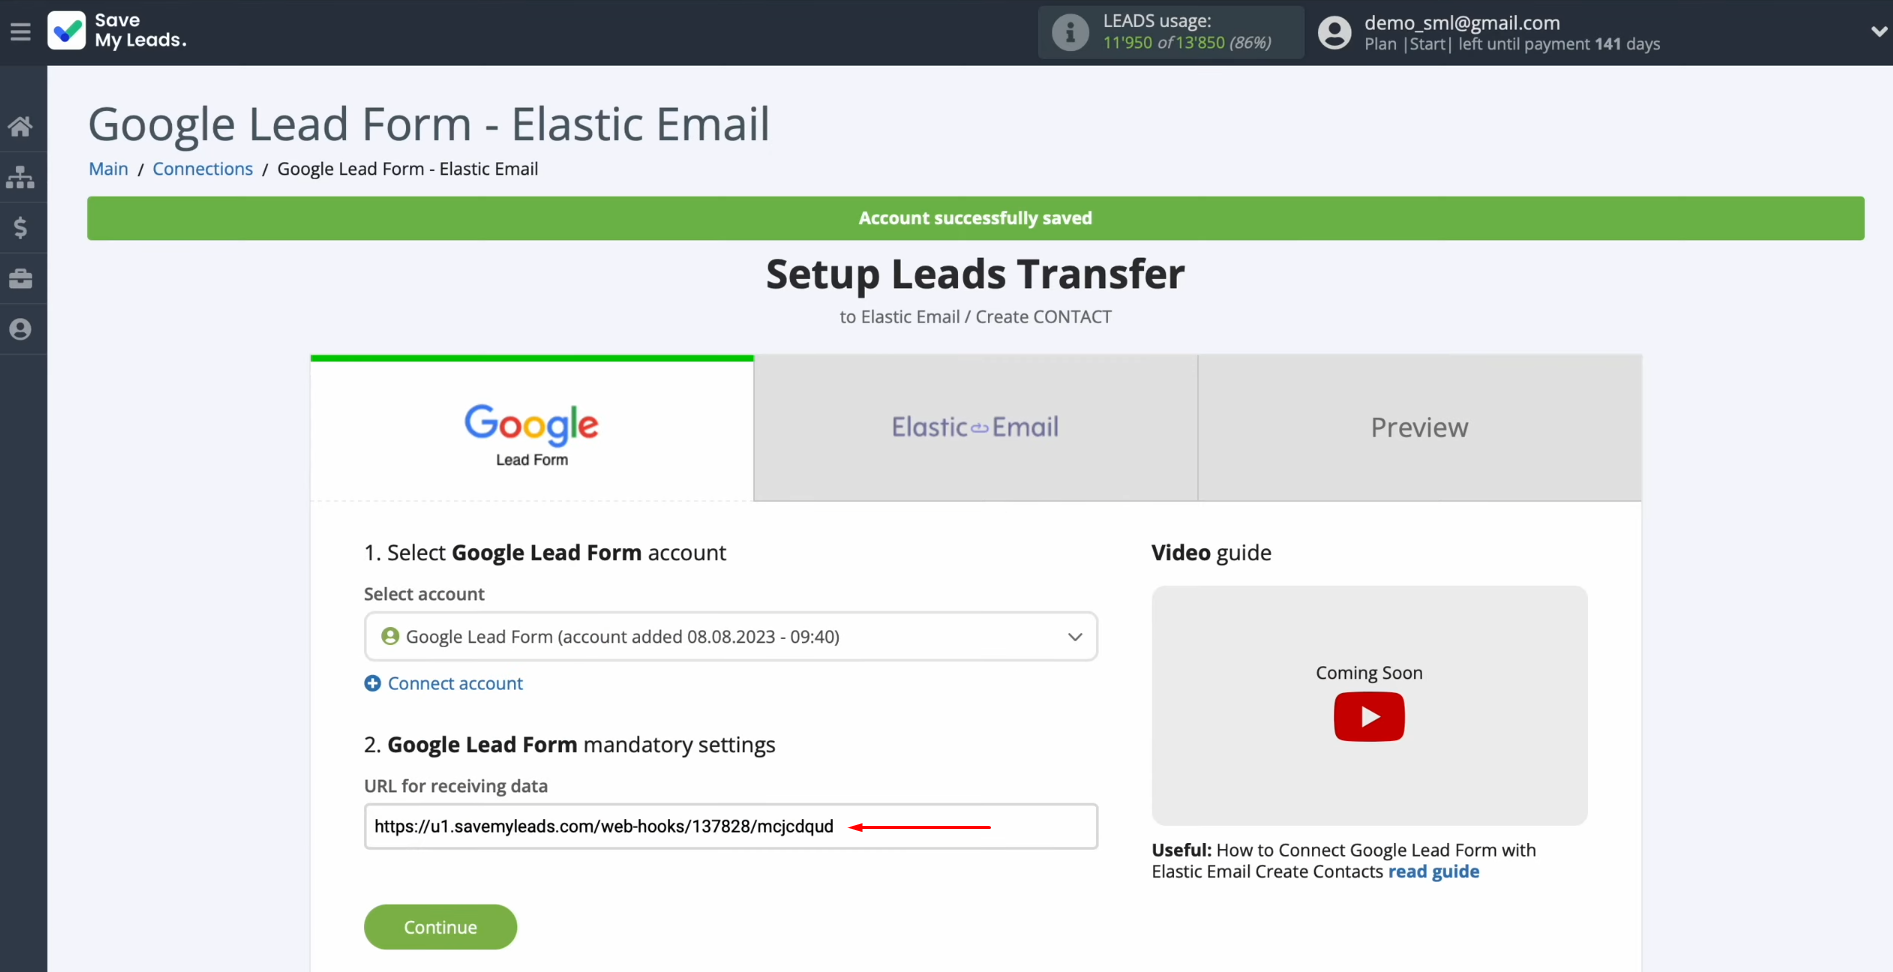
Now, you see the URL for receiving data. This is the URL where new data from
the Google Lead Form will come. To continue setting up, copy the URL.
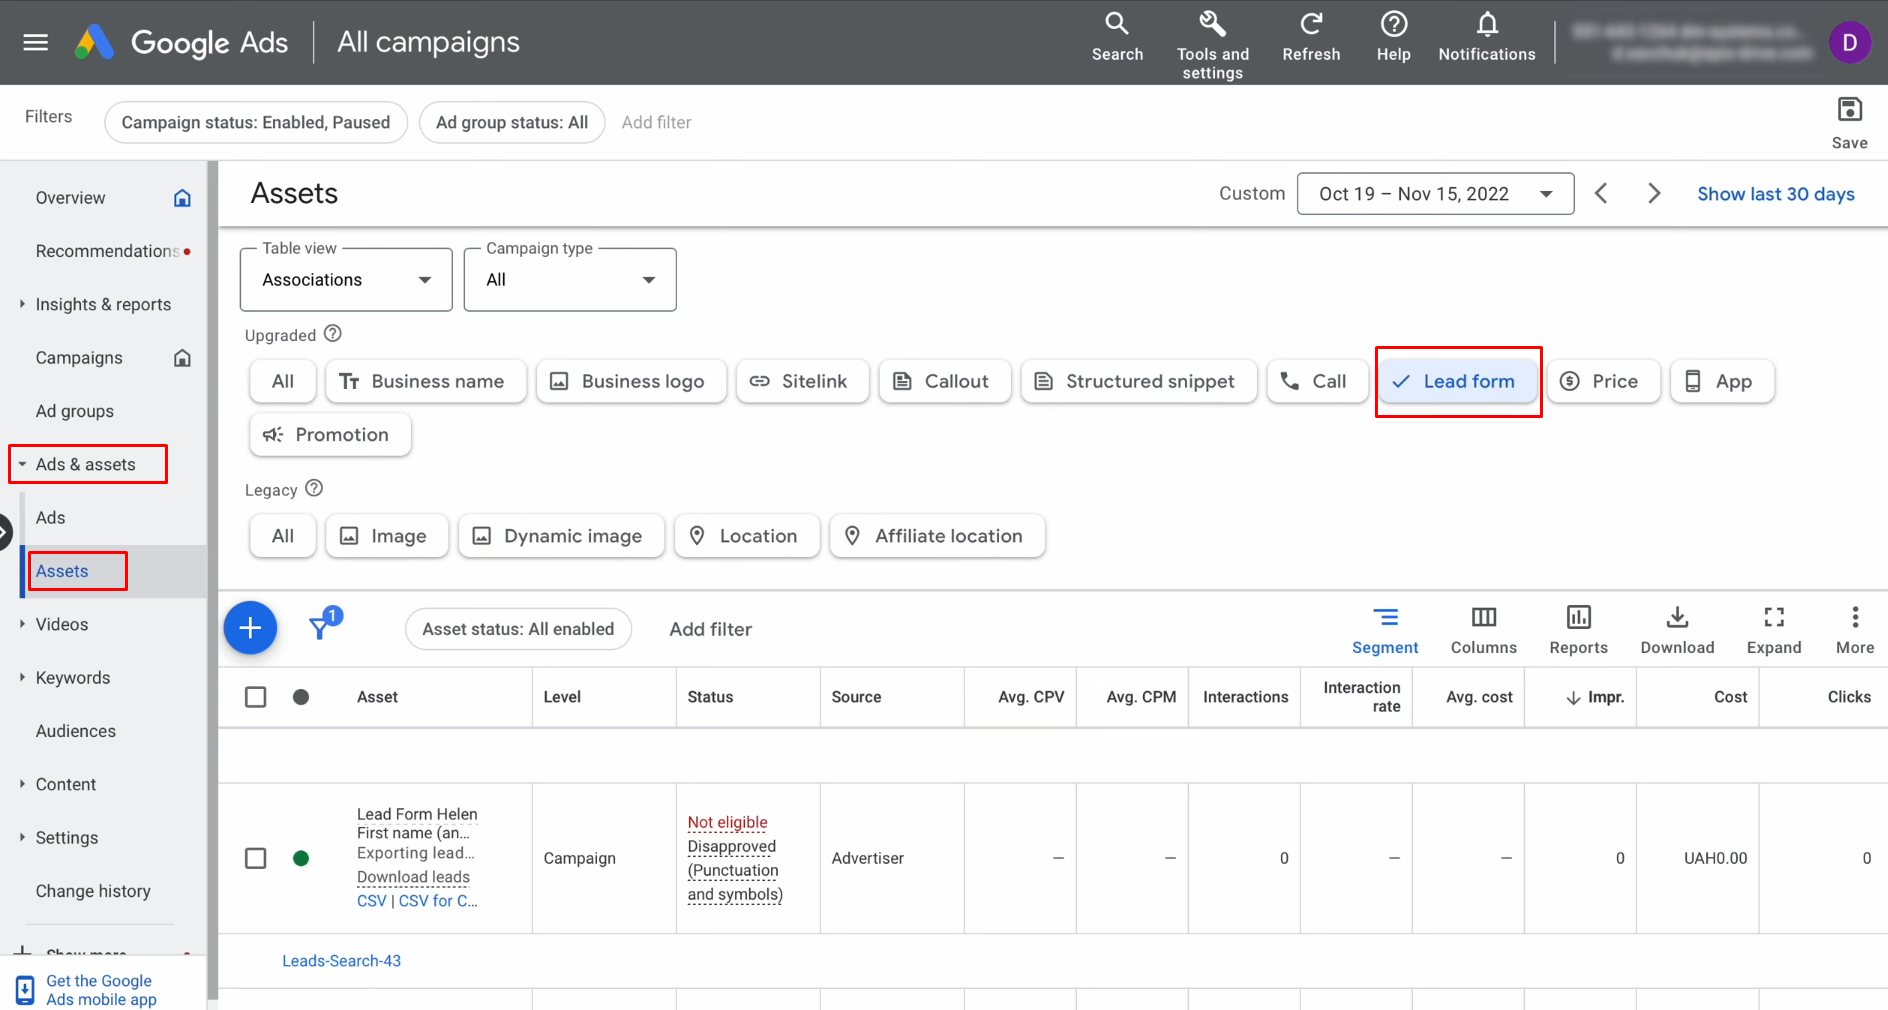
Go to the
"Ads and Assets" section in your personal Google Lead Form
account. You need the
"Assets" tab. Make sure the Lead Forms tab
is checked.
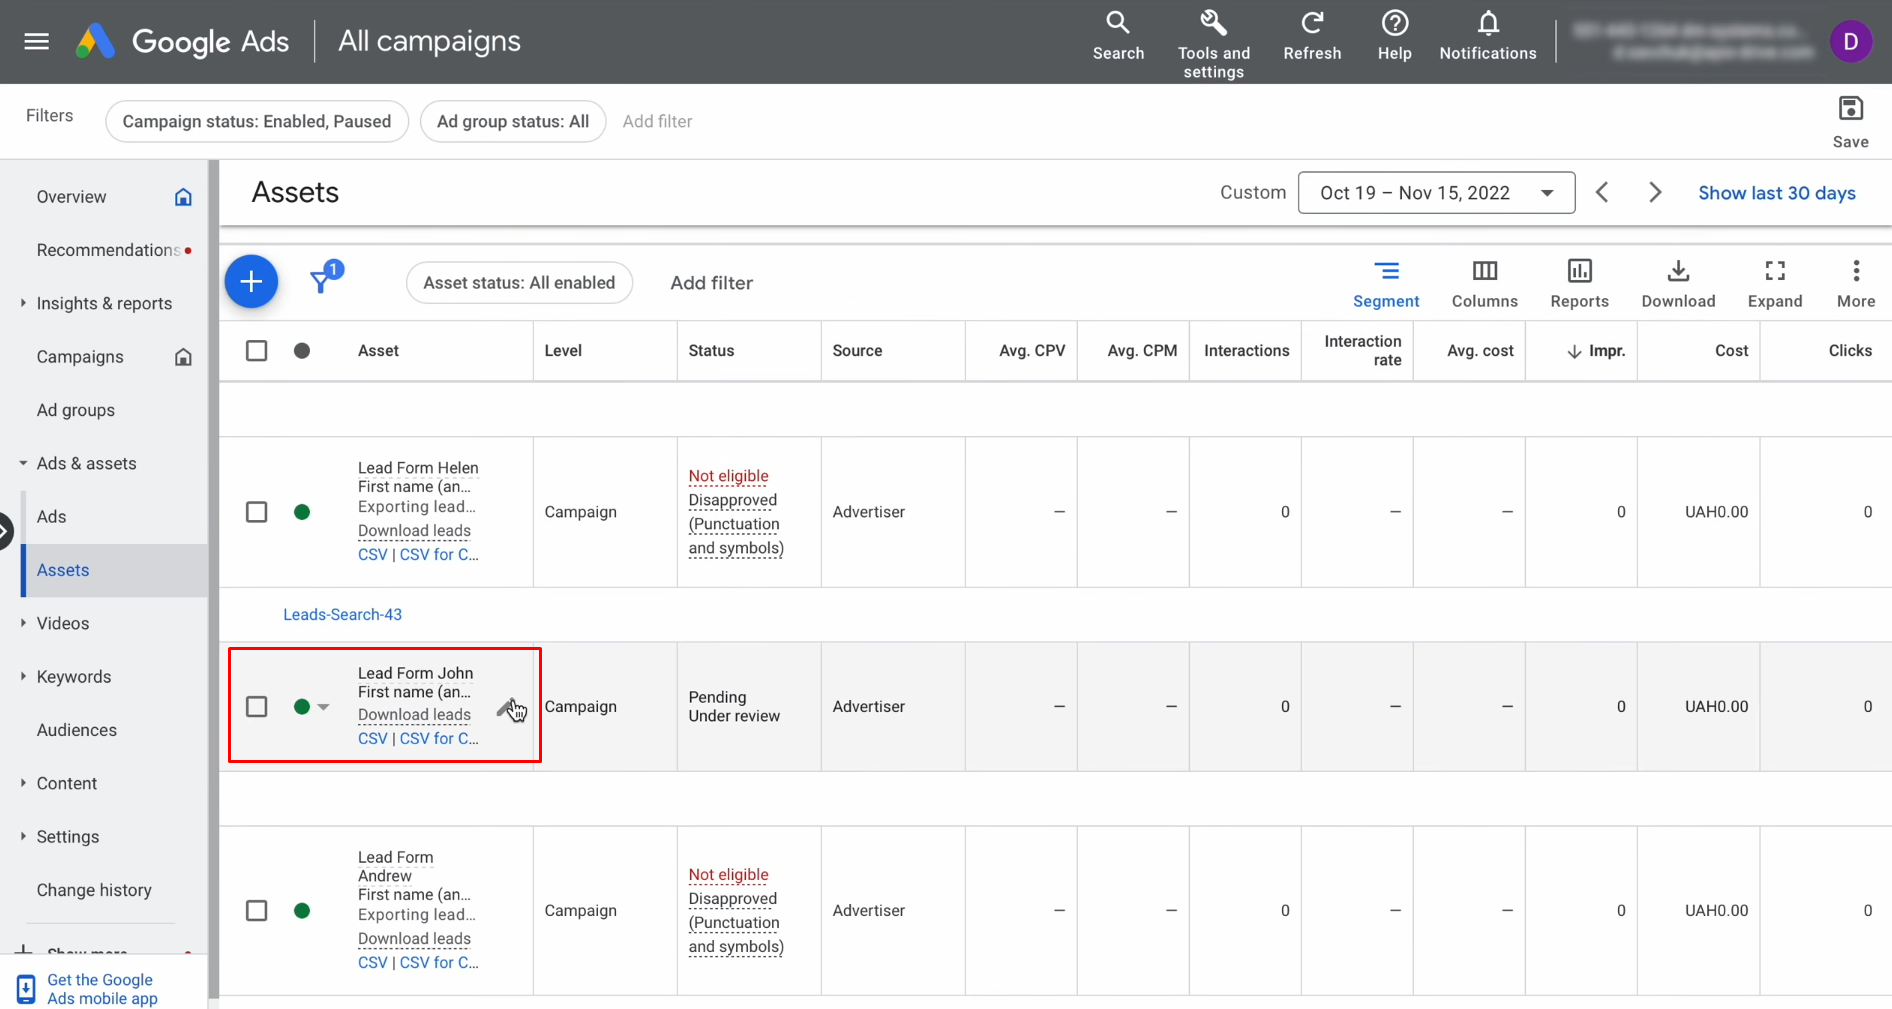
Go to the
form from which you want to receive data.
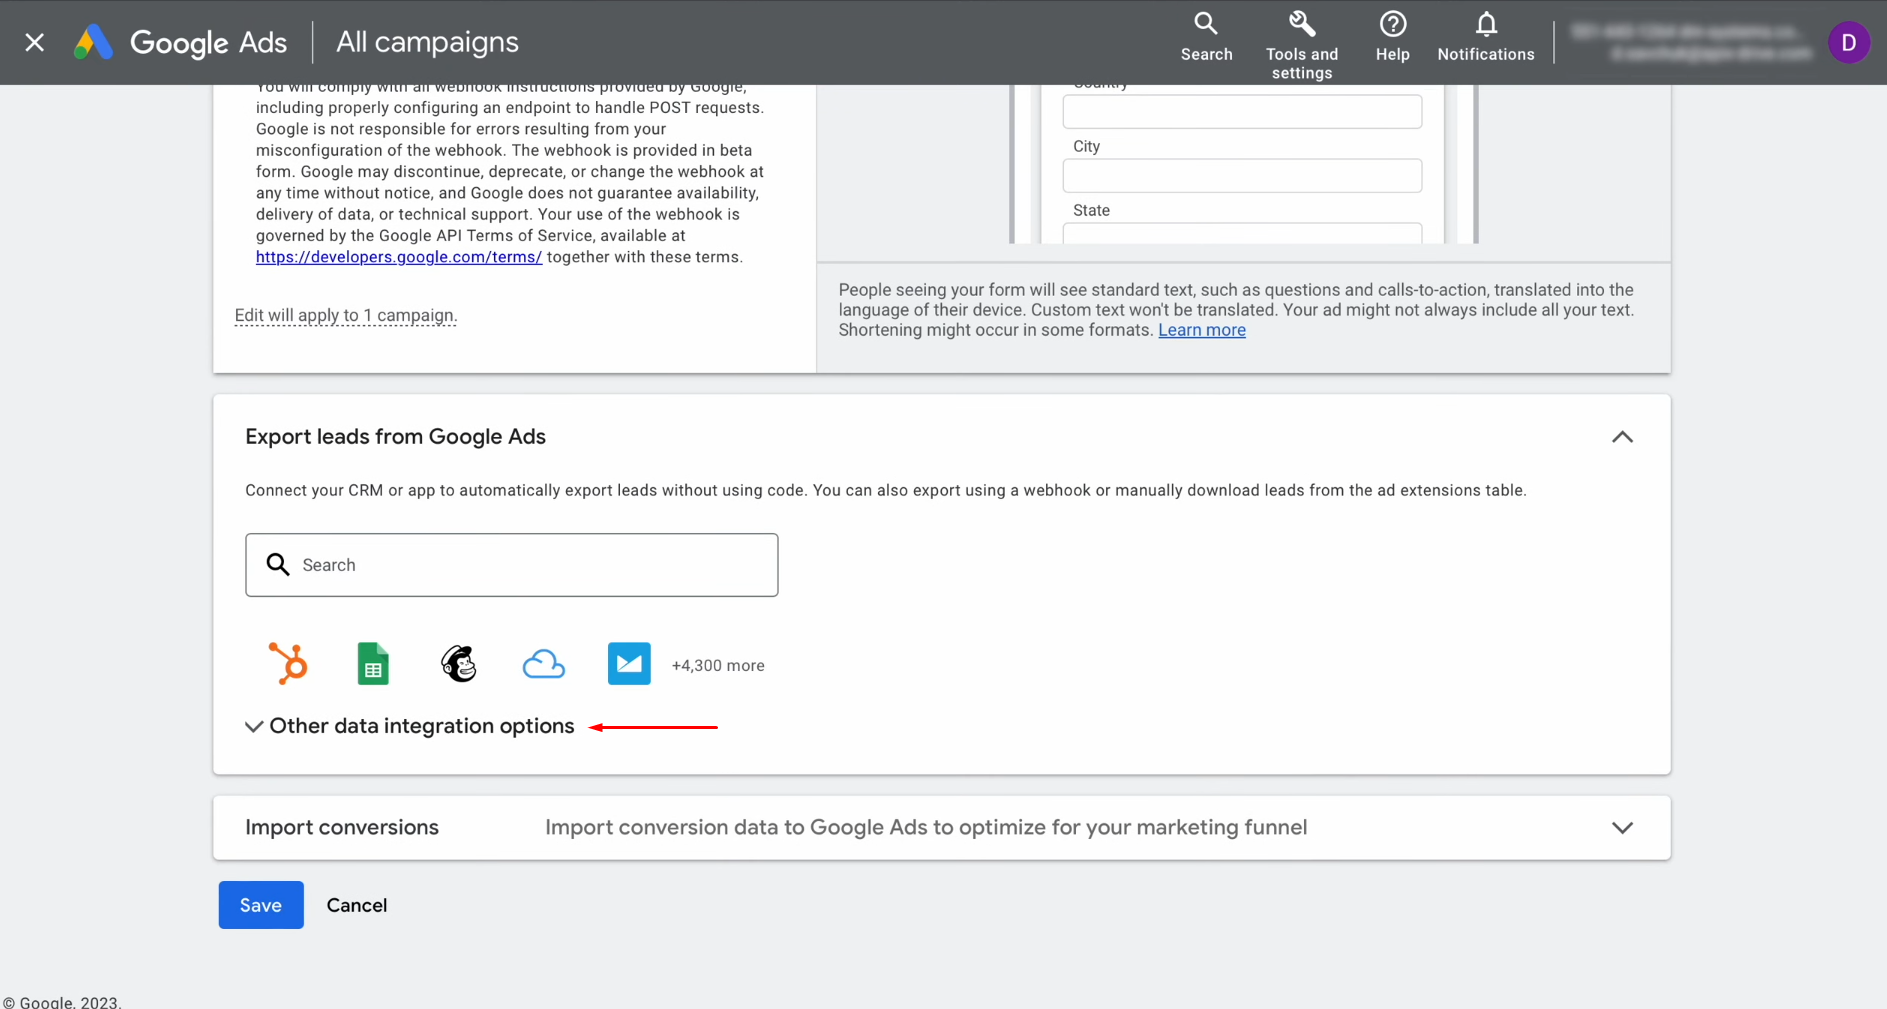
Find the
section "Other data integration options."
Paste the
copied link in SaveMyLeads into the appropriate field.
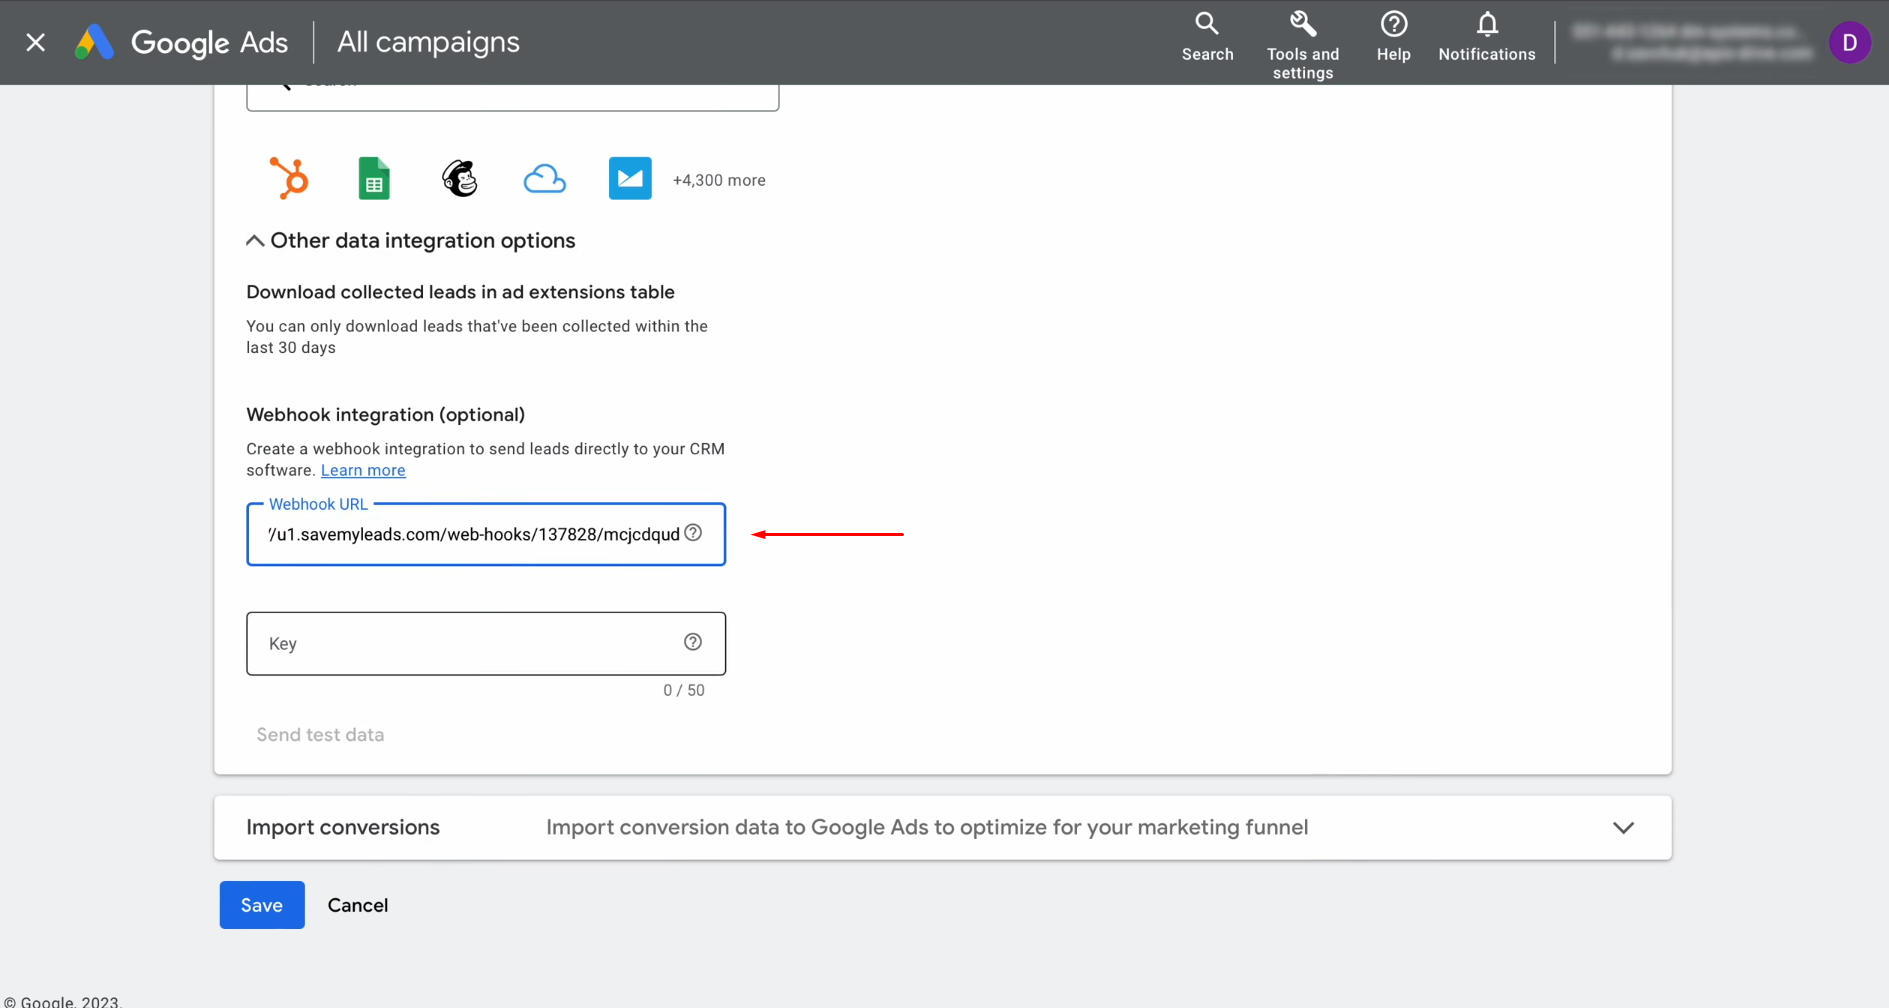
Next, as a
key, specify the last part of the URL.
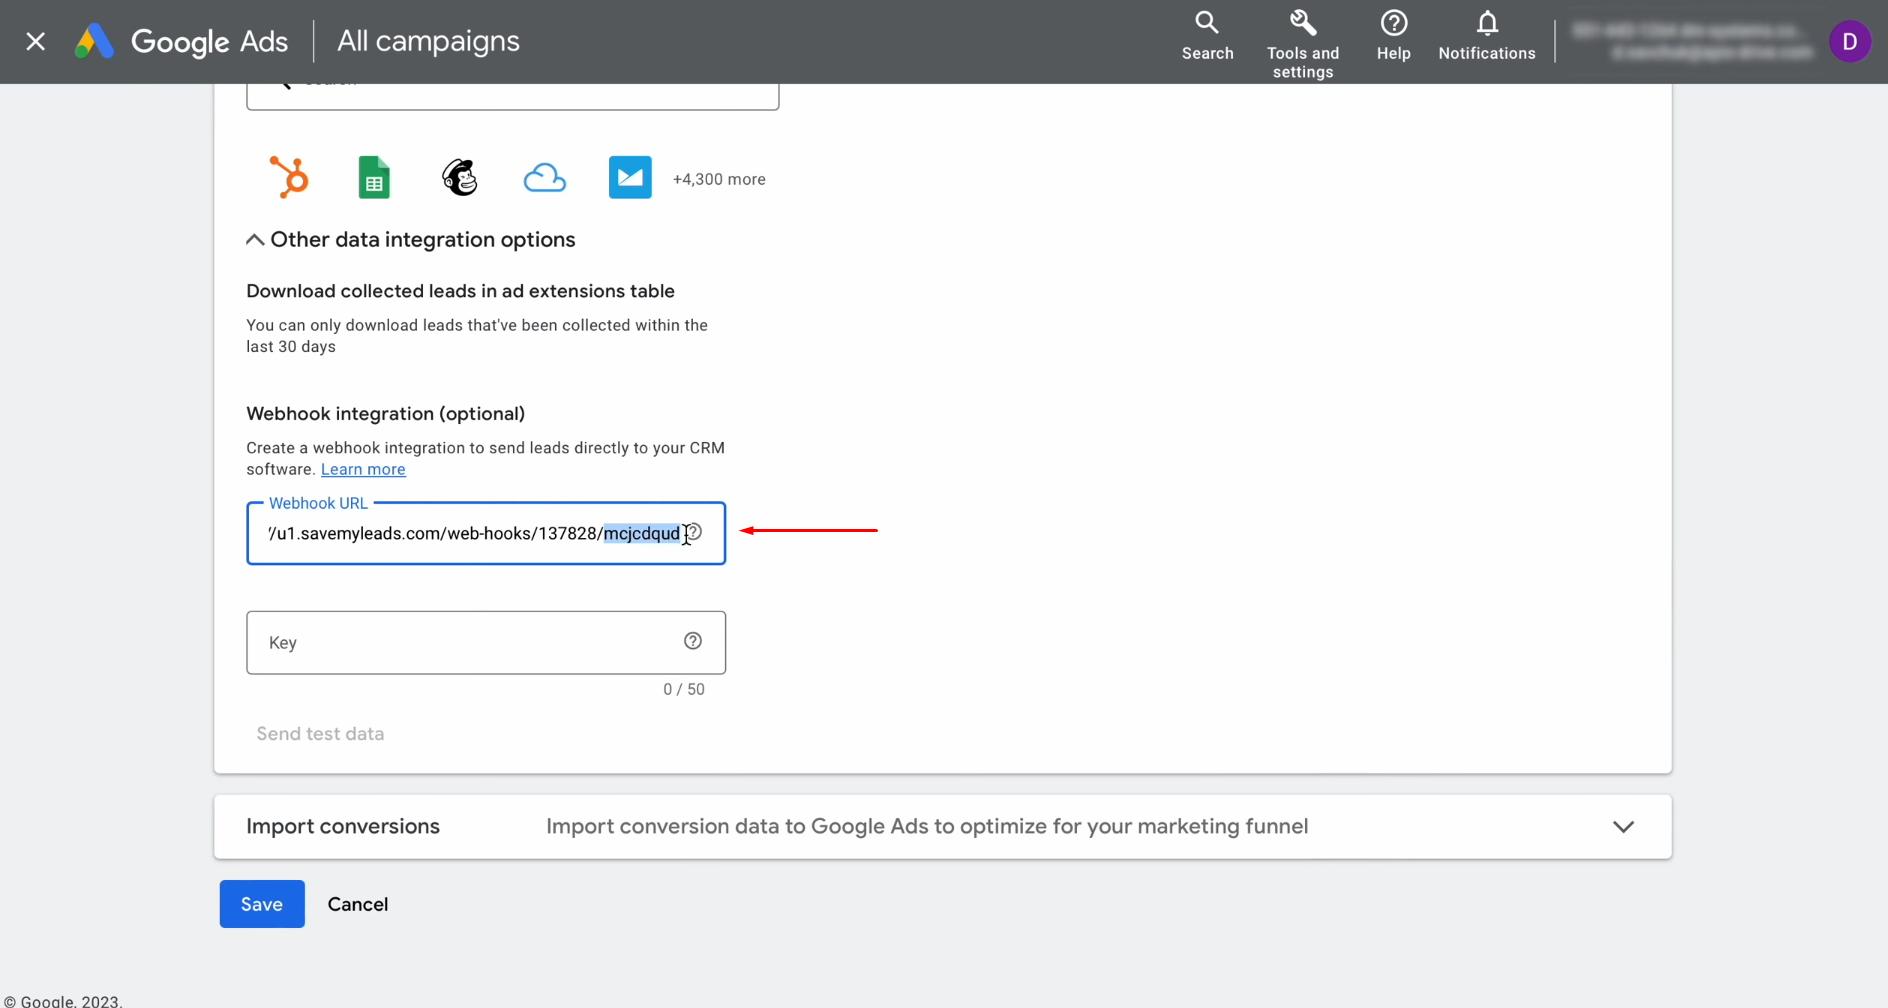
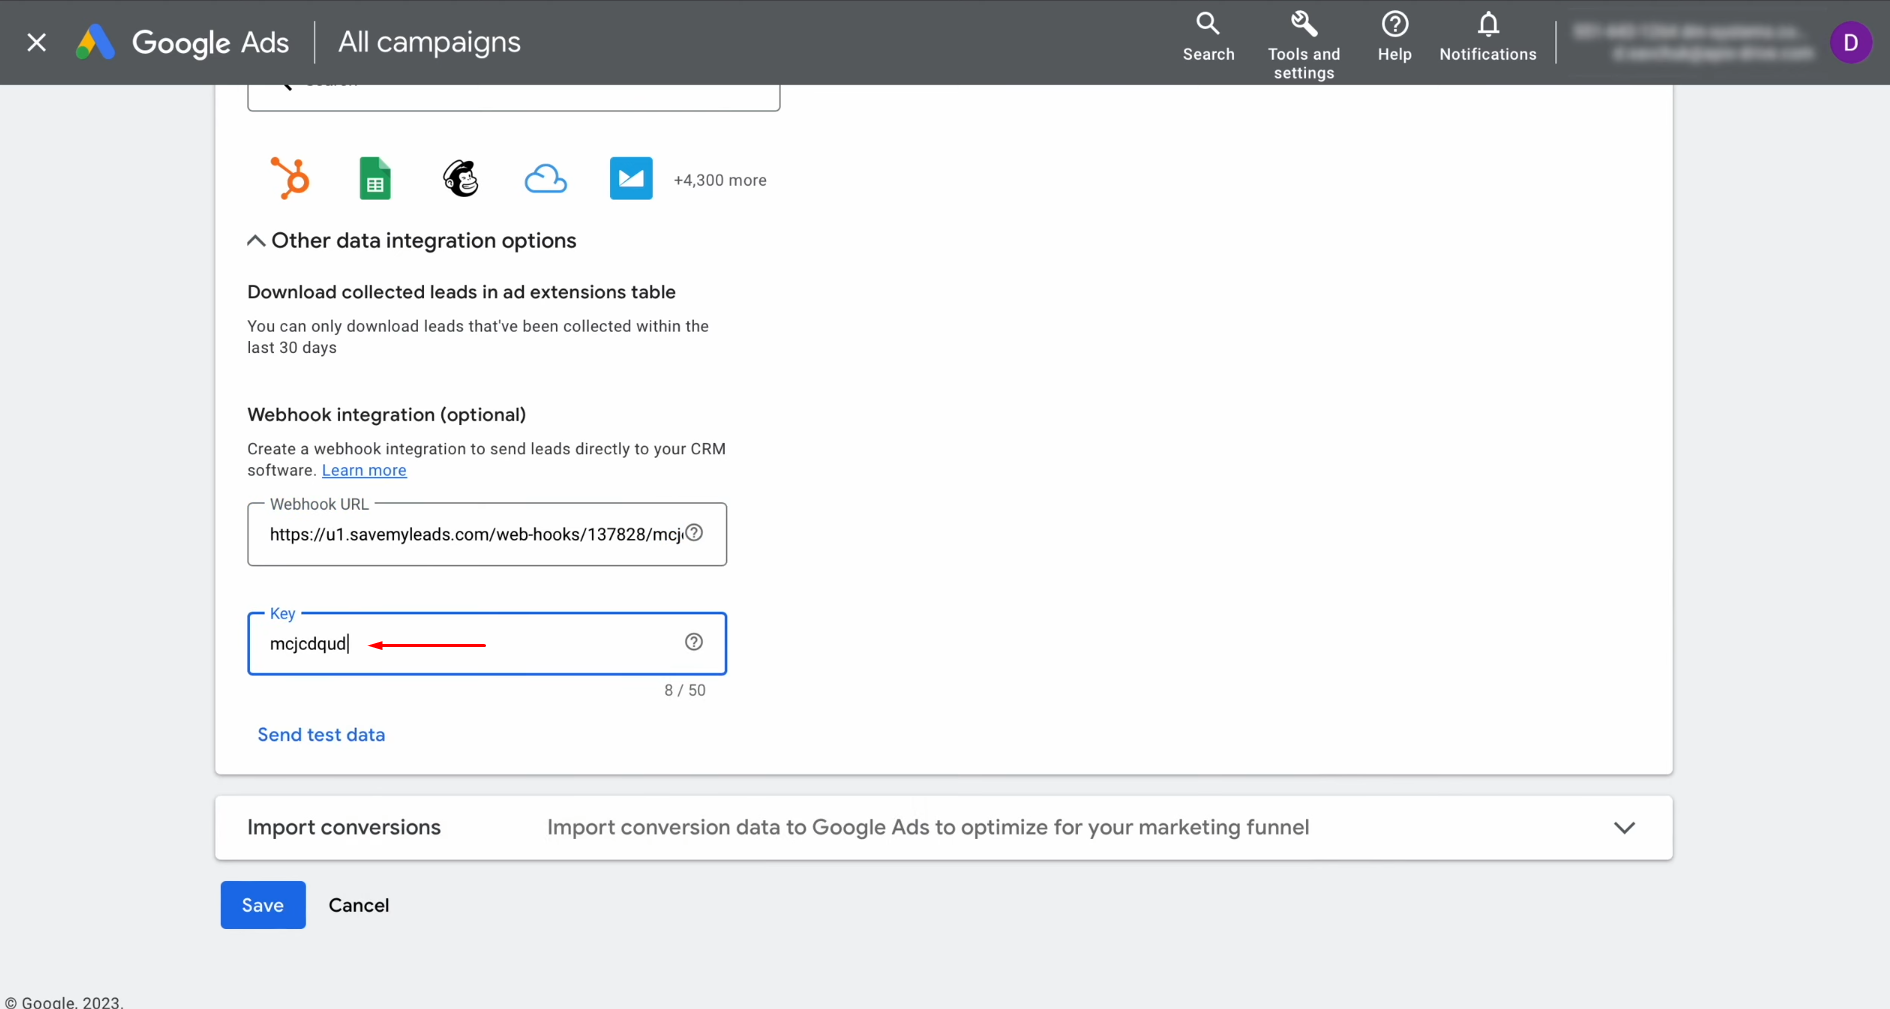
To continue
the setup, you need to
generate test data. Therefore, click "Send test data." Don’t
forget to save the
changes.
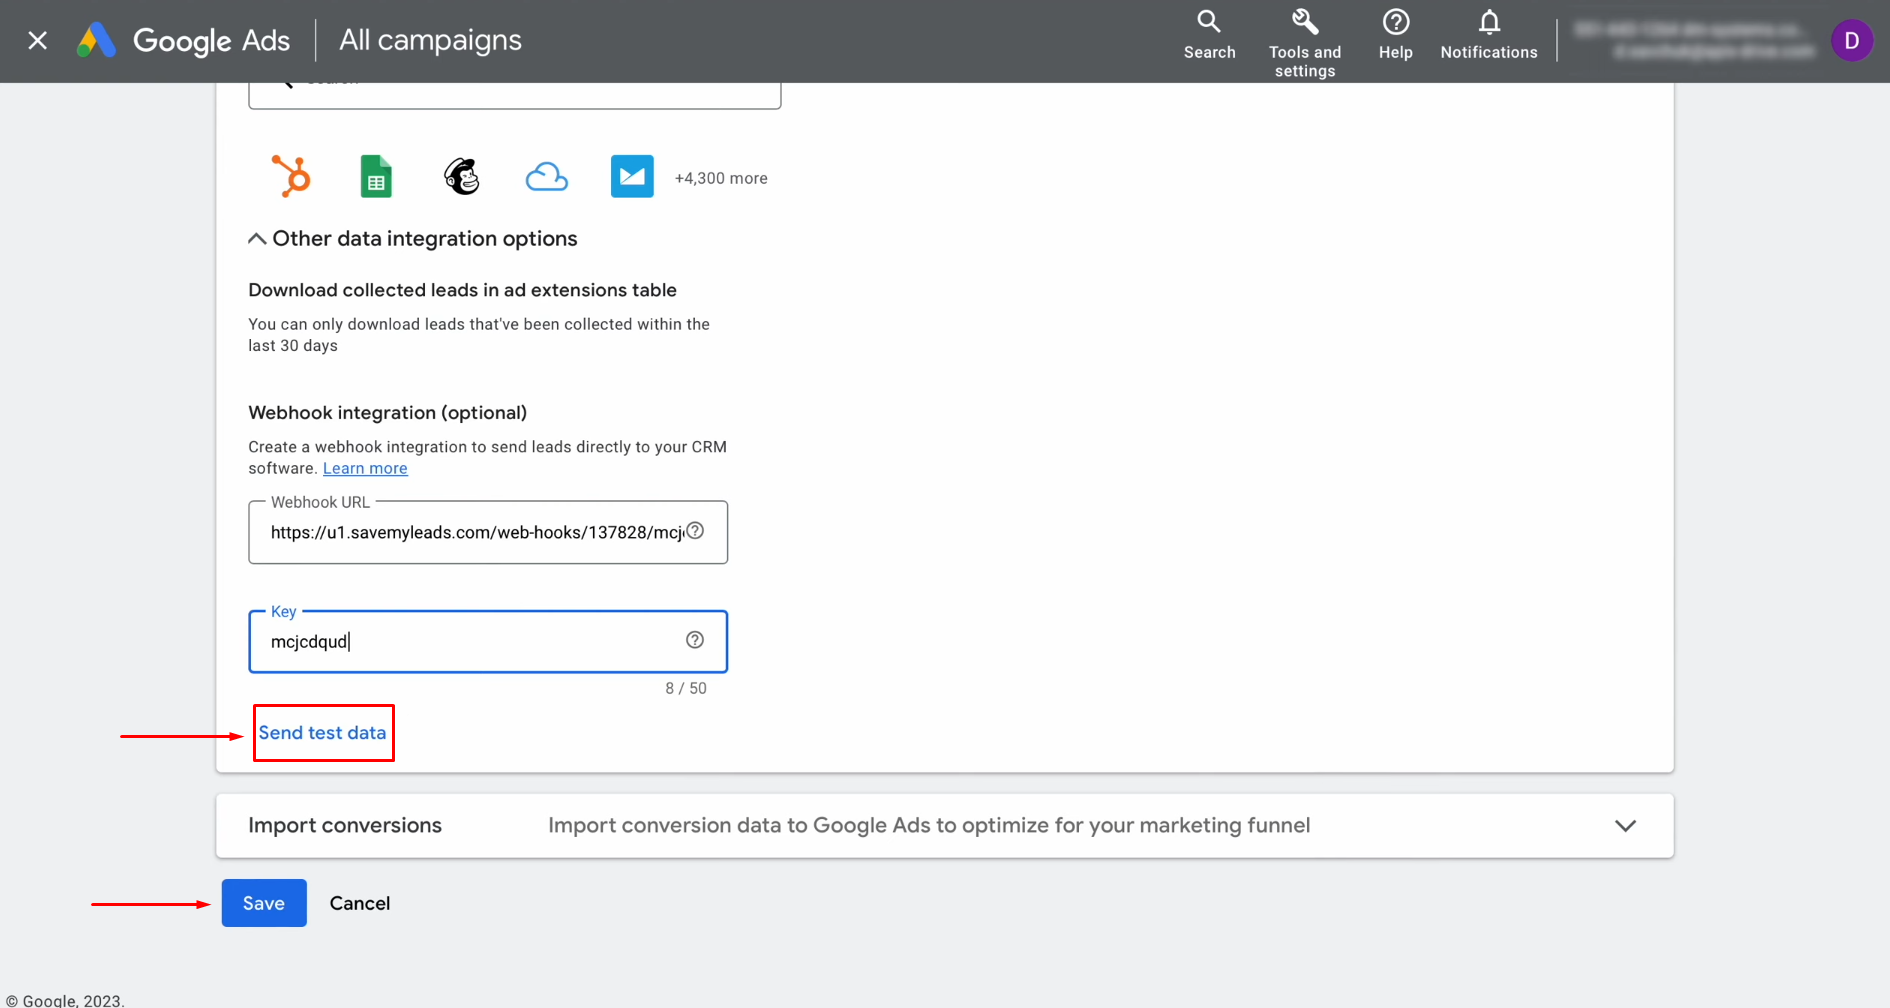
Now, you can return to
SaveMyLeads and continue setting up.
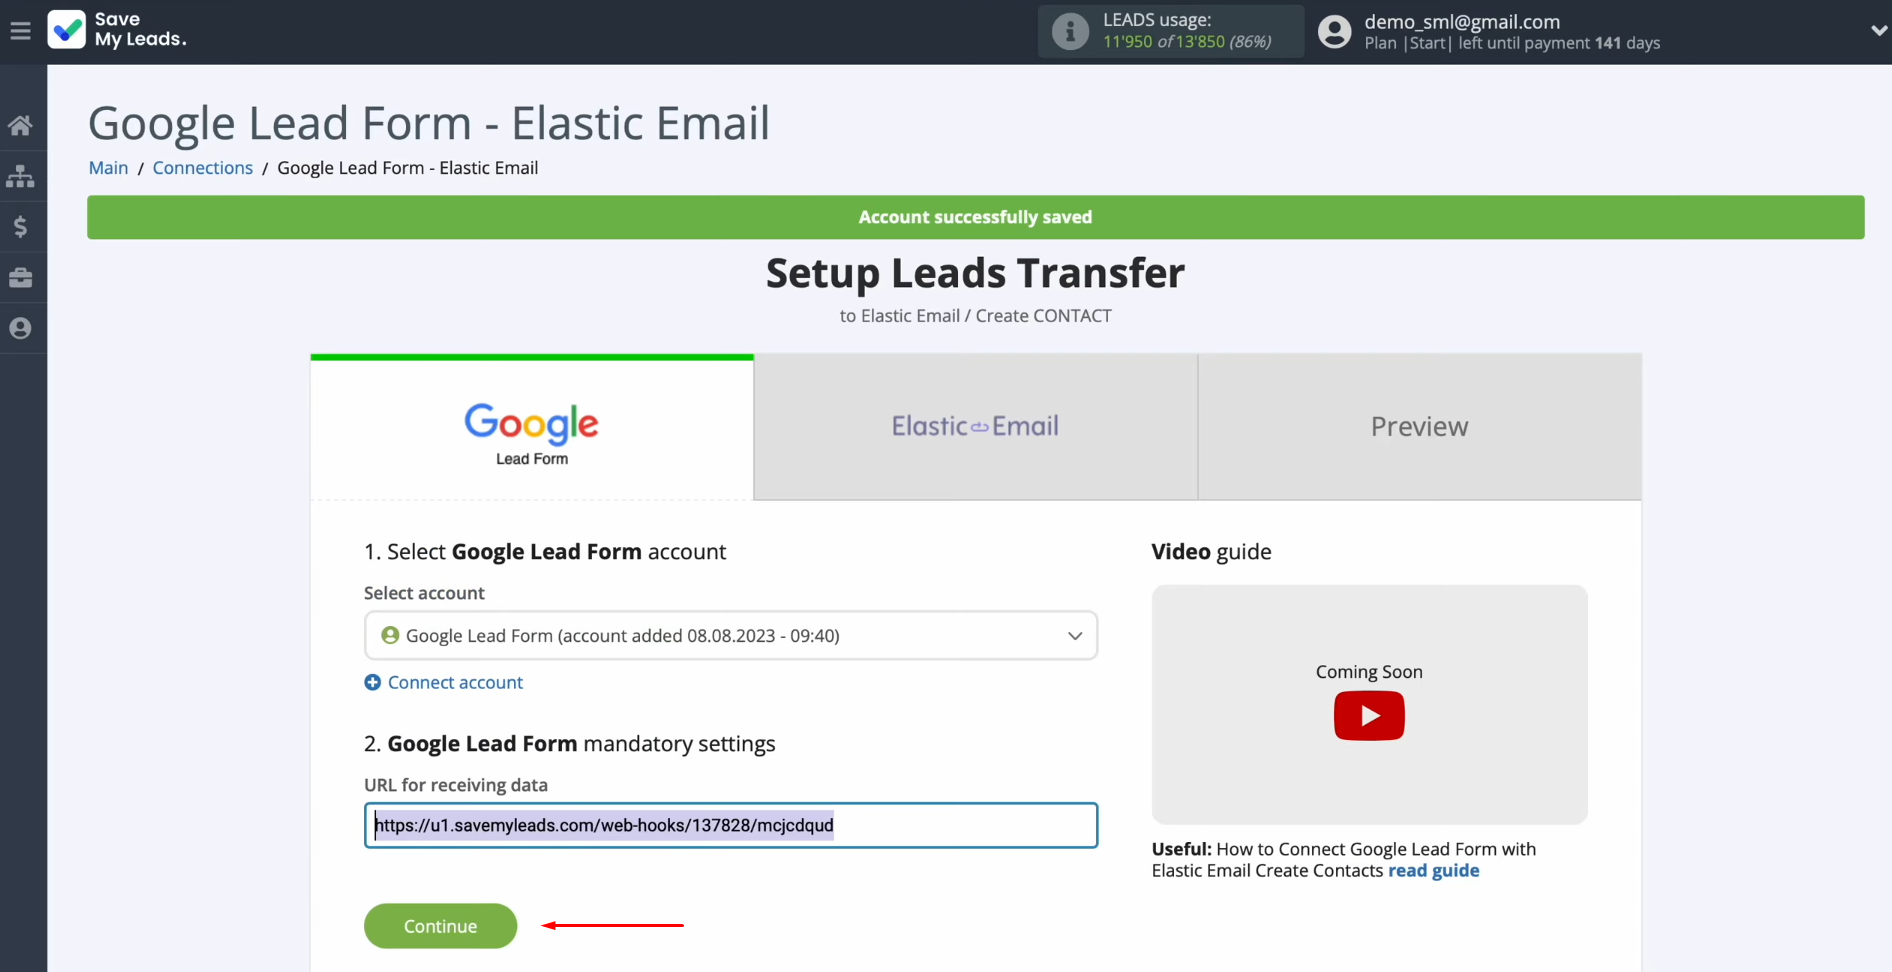
Set Up the Data Receiver – Elastic Email
To set up Elastic Email + Google Ads Lead Form integration, you need to connect your Elastic Email account to SaveMyLeads. For this, click on the appropriate button.
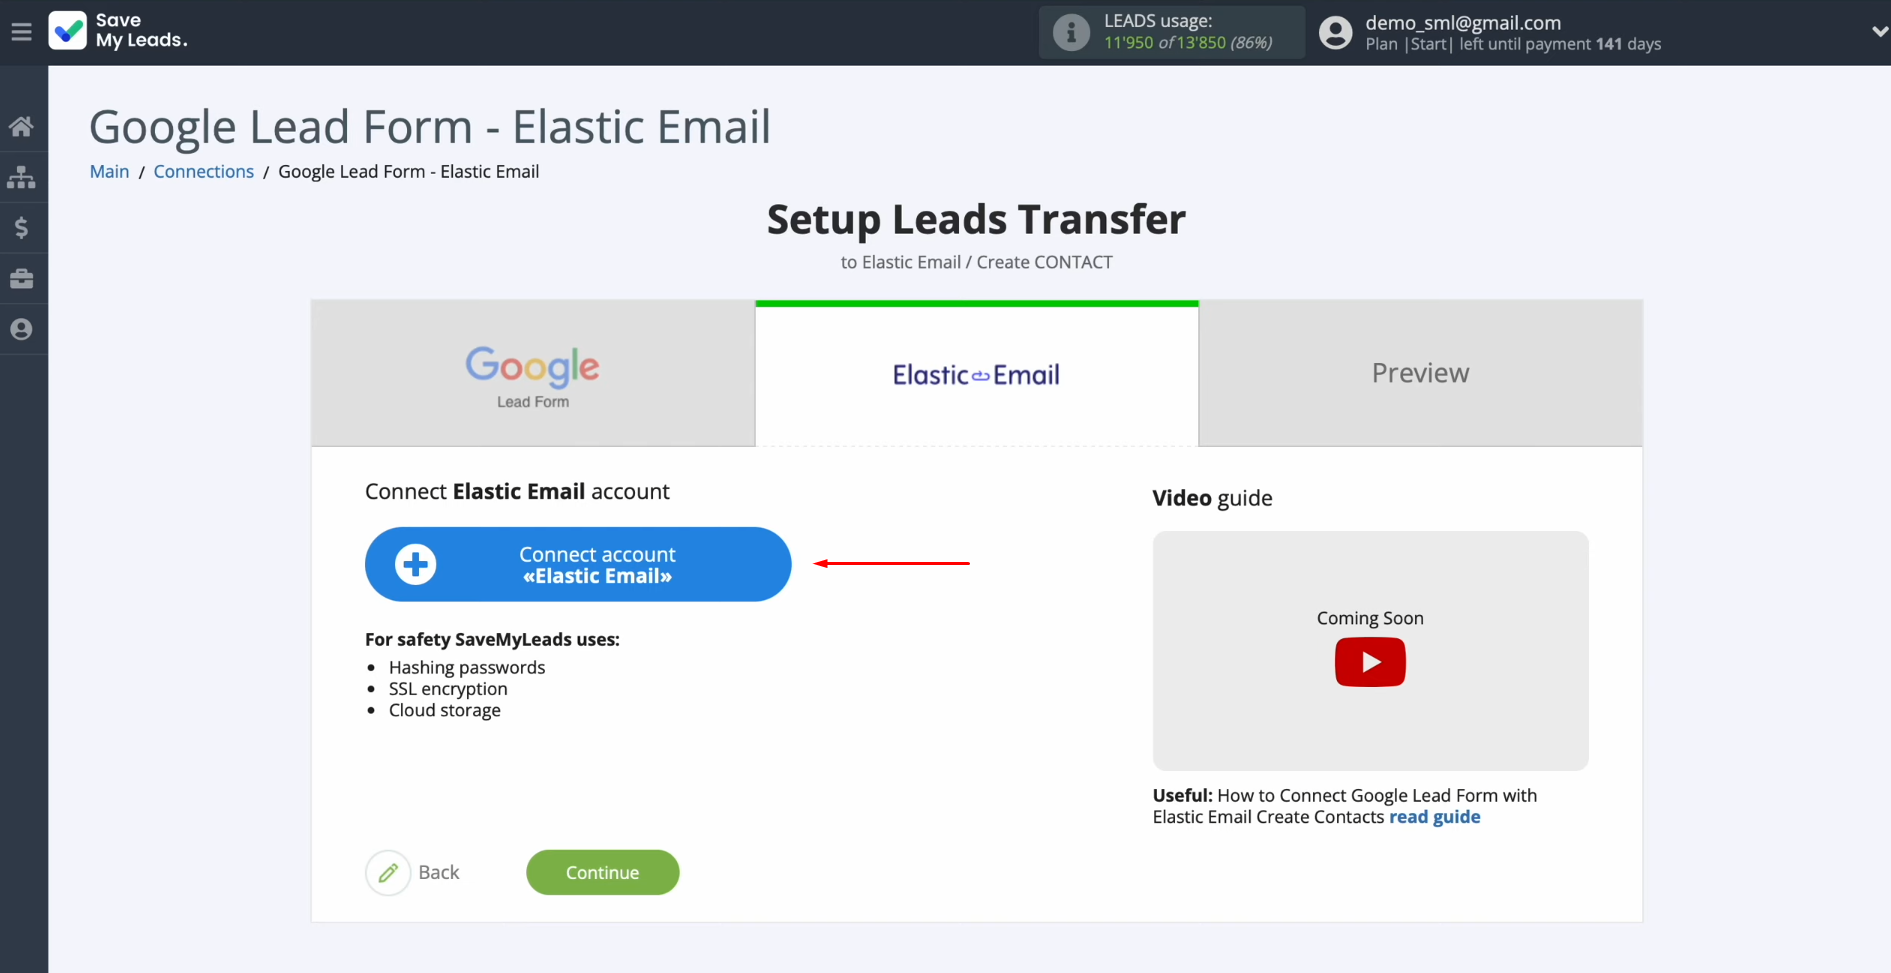
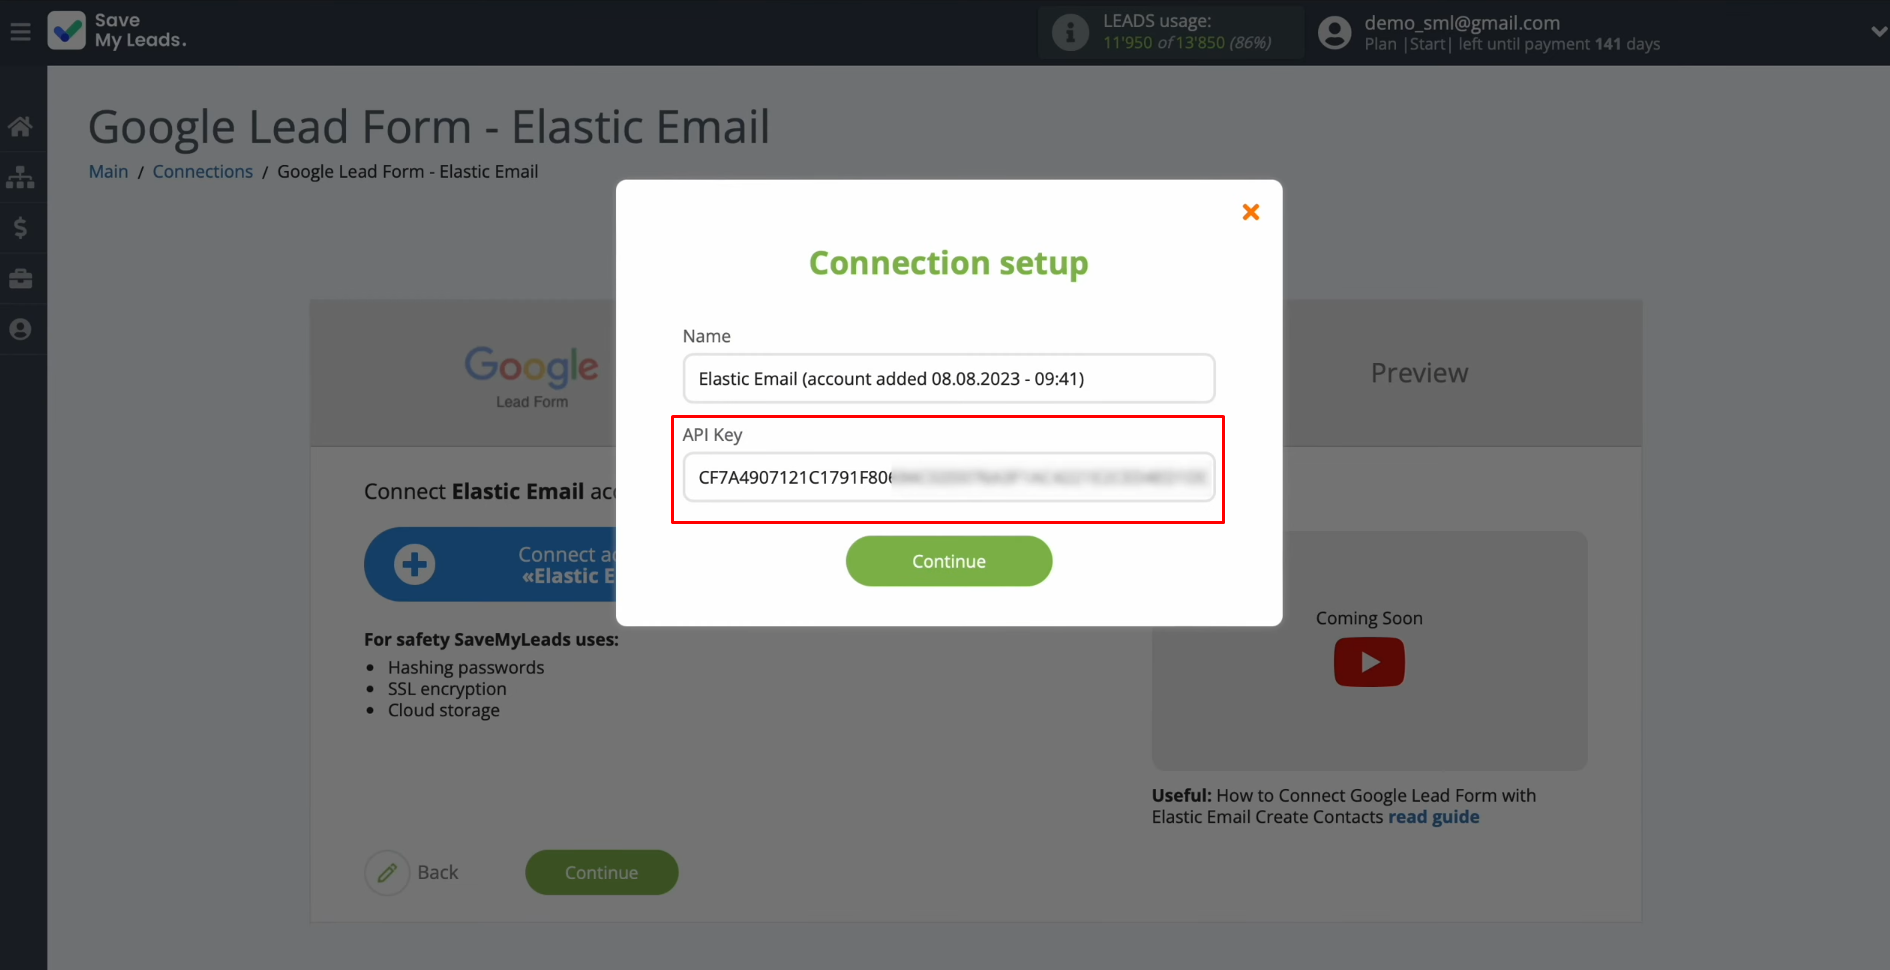
In this
window, you must specify the API key.
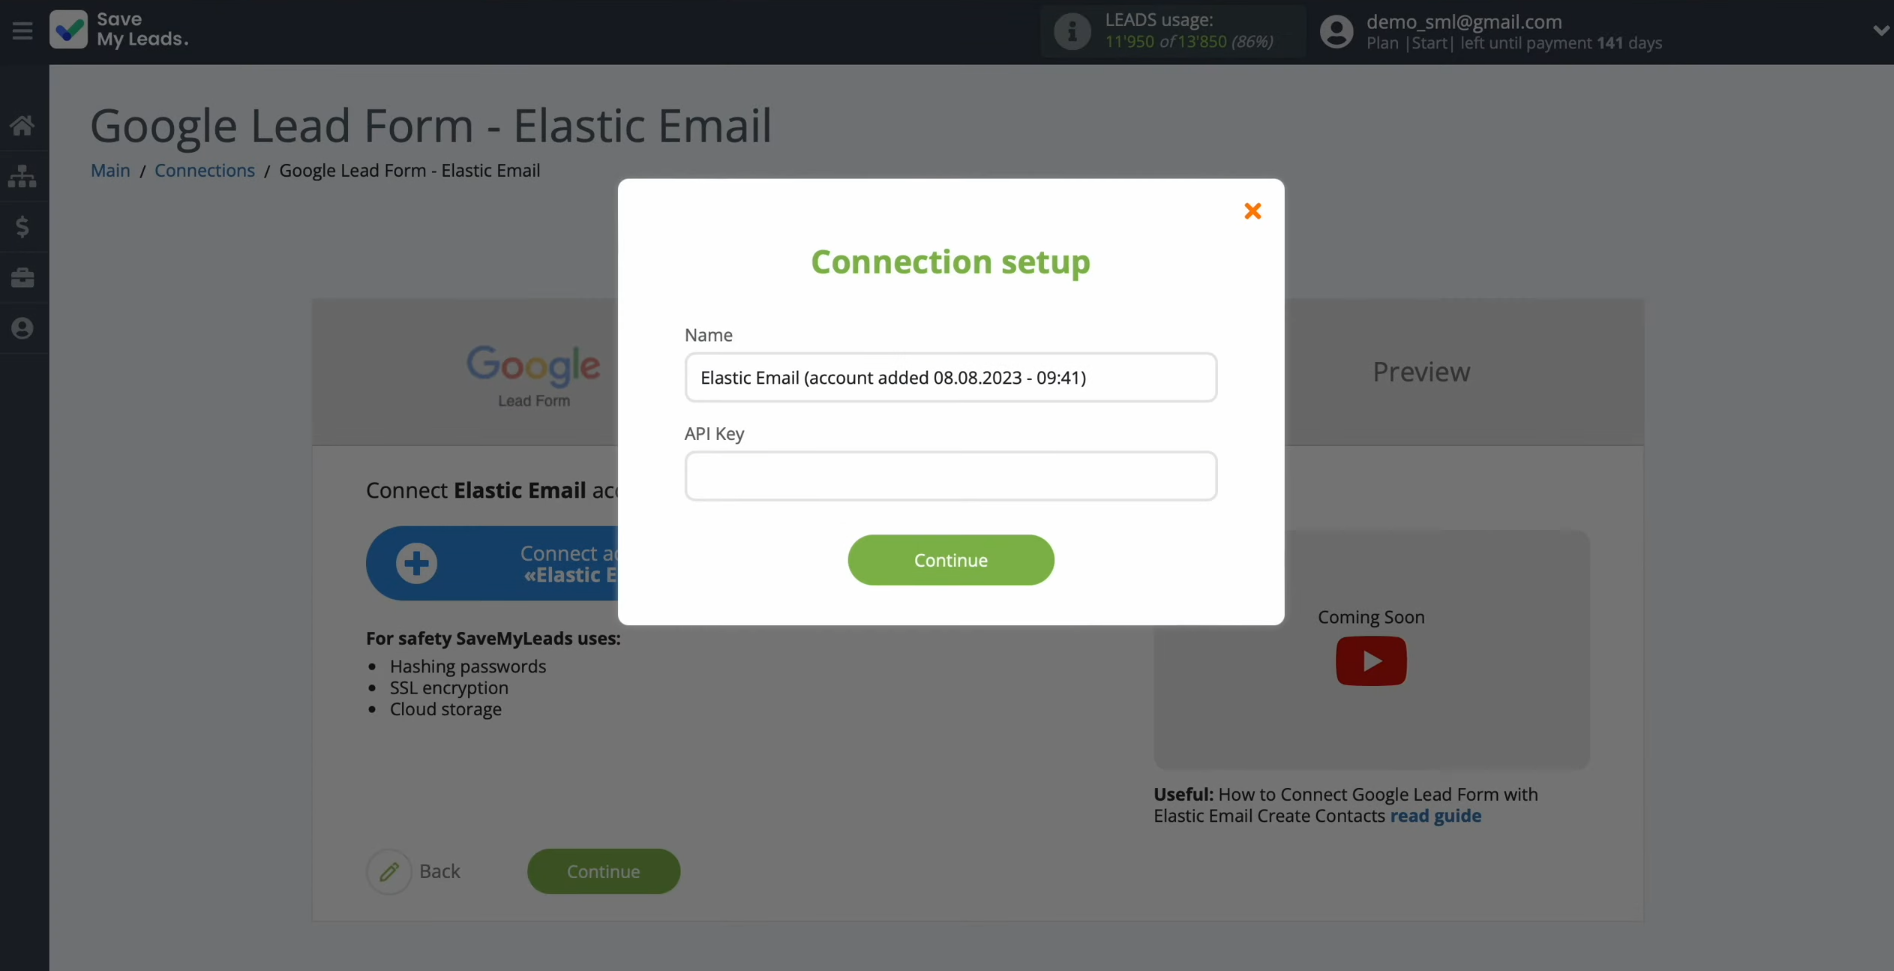
To receive the
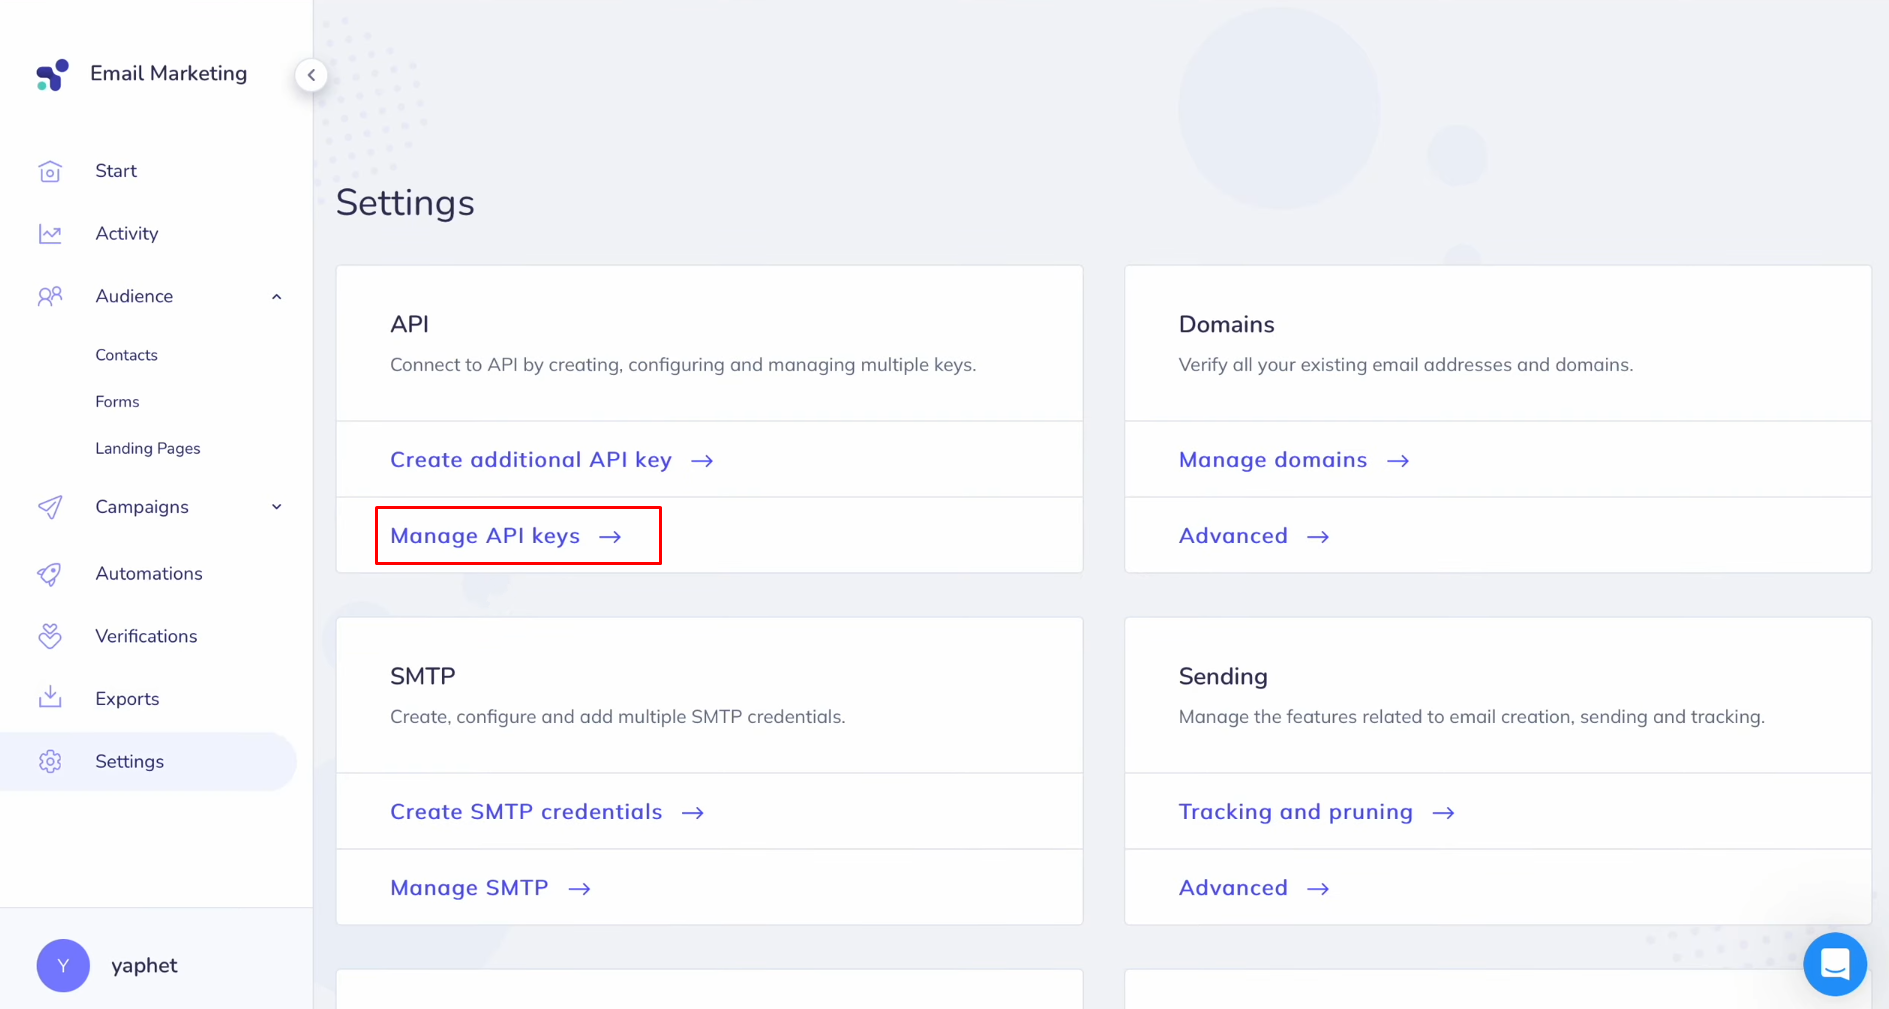
API key, go to the settings of your personal Elastic Email account.
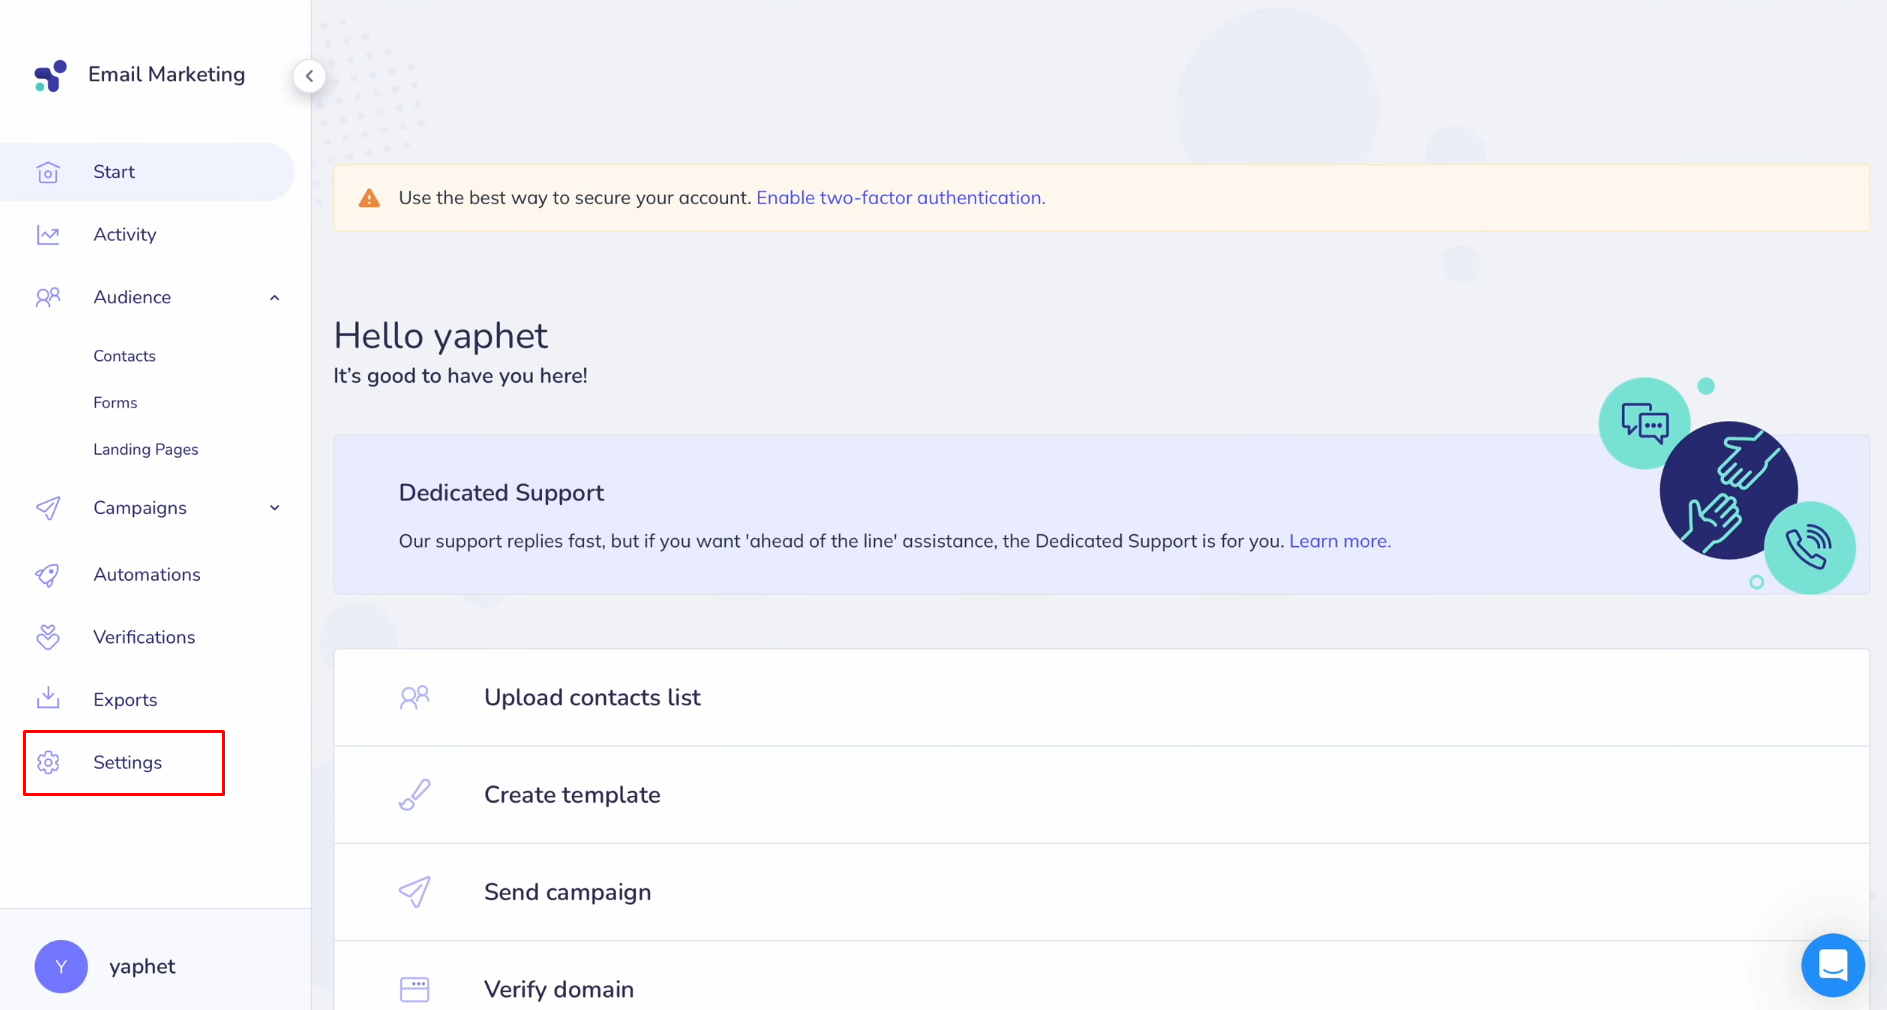
Find the API
section and click “Manage API
keys.”
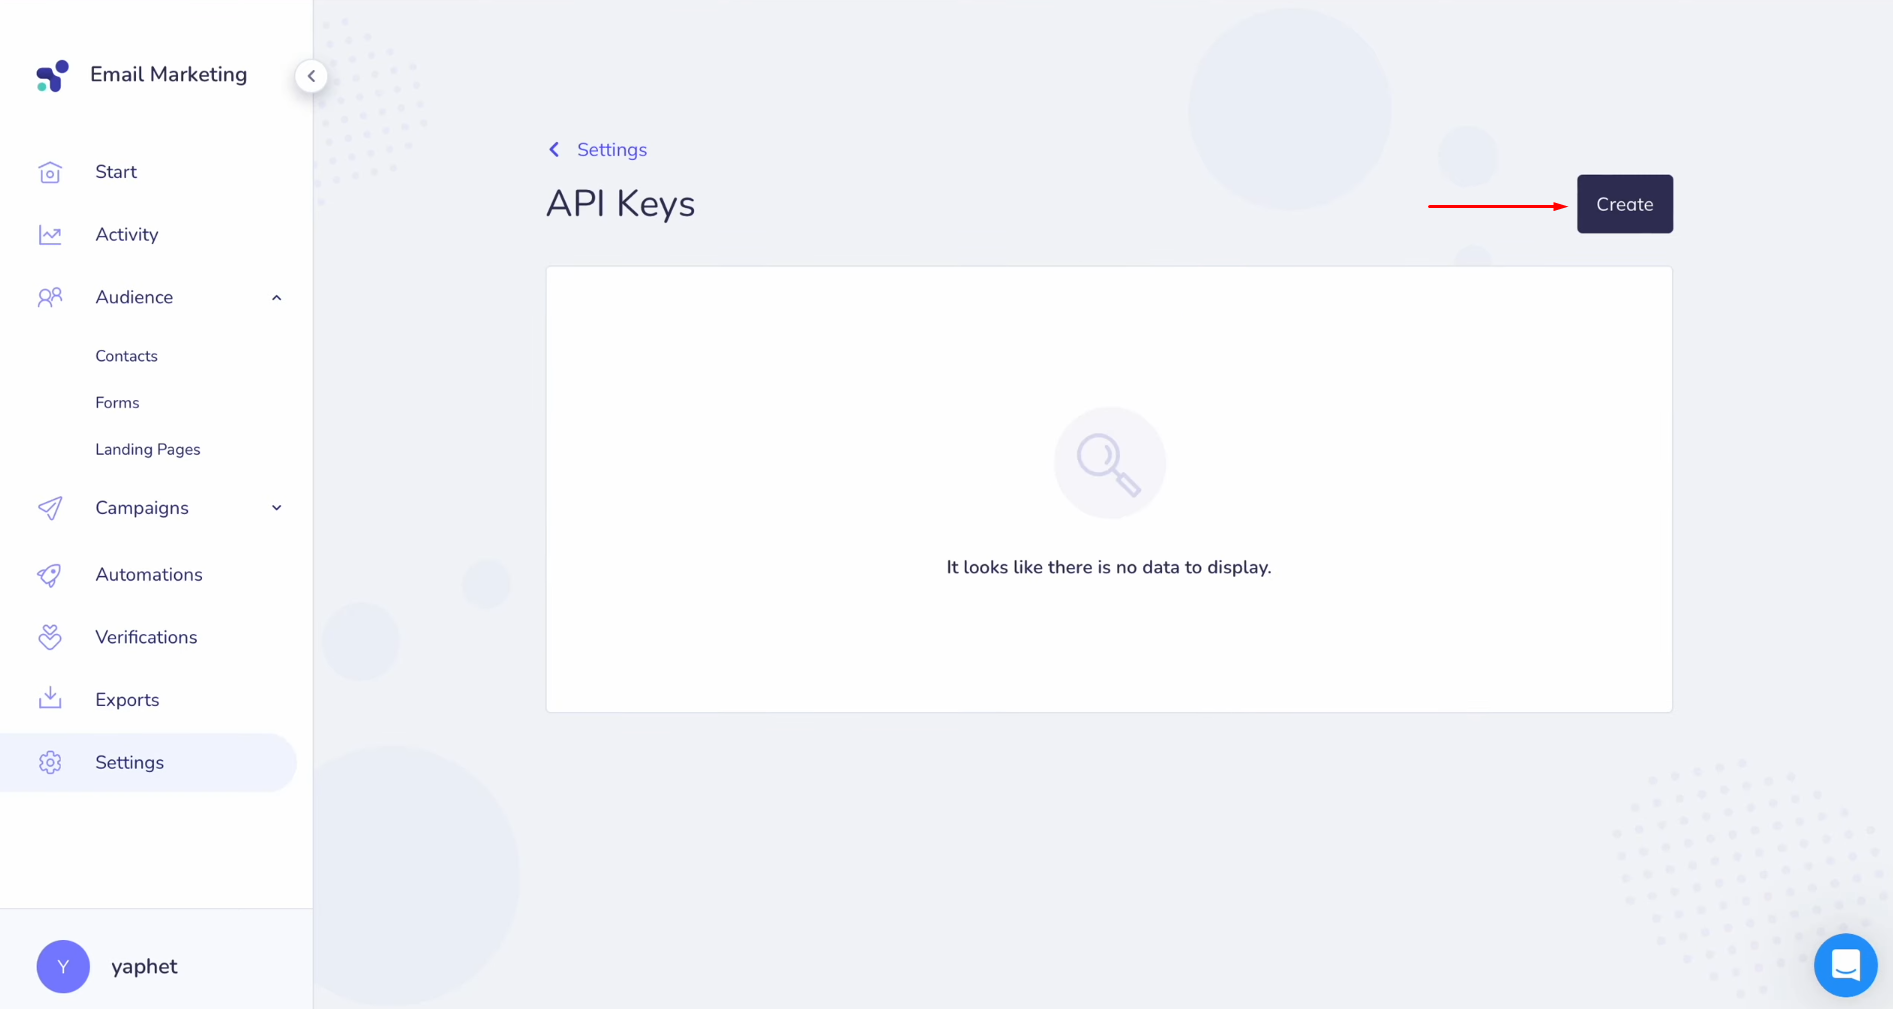
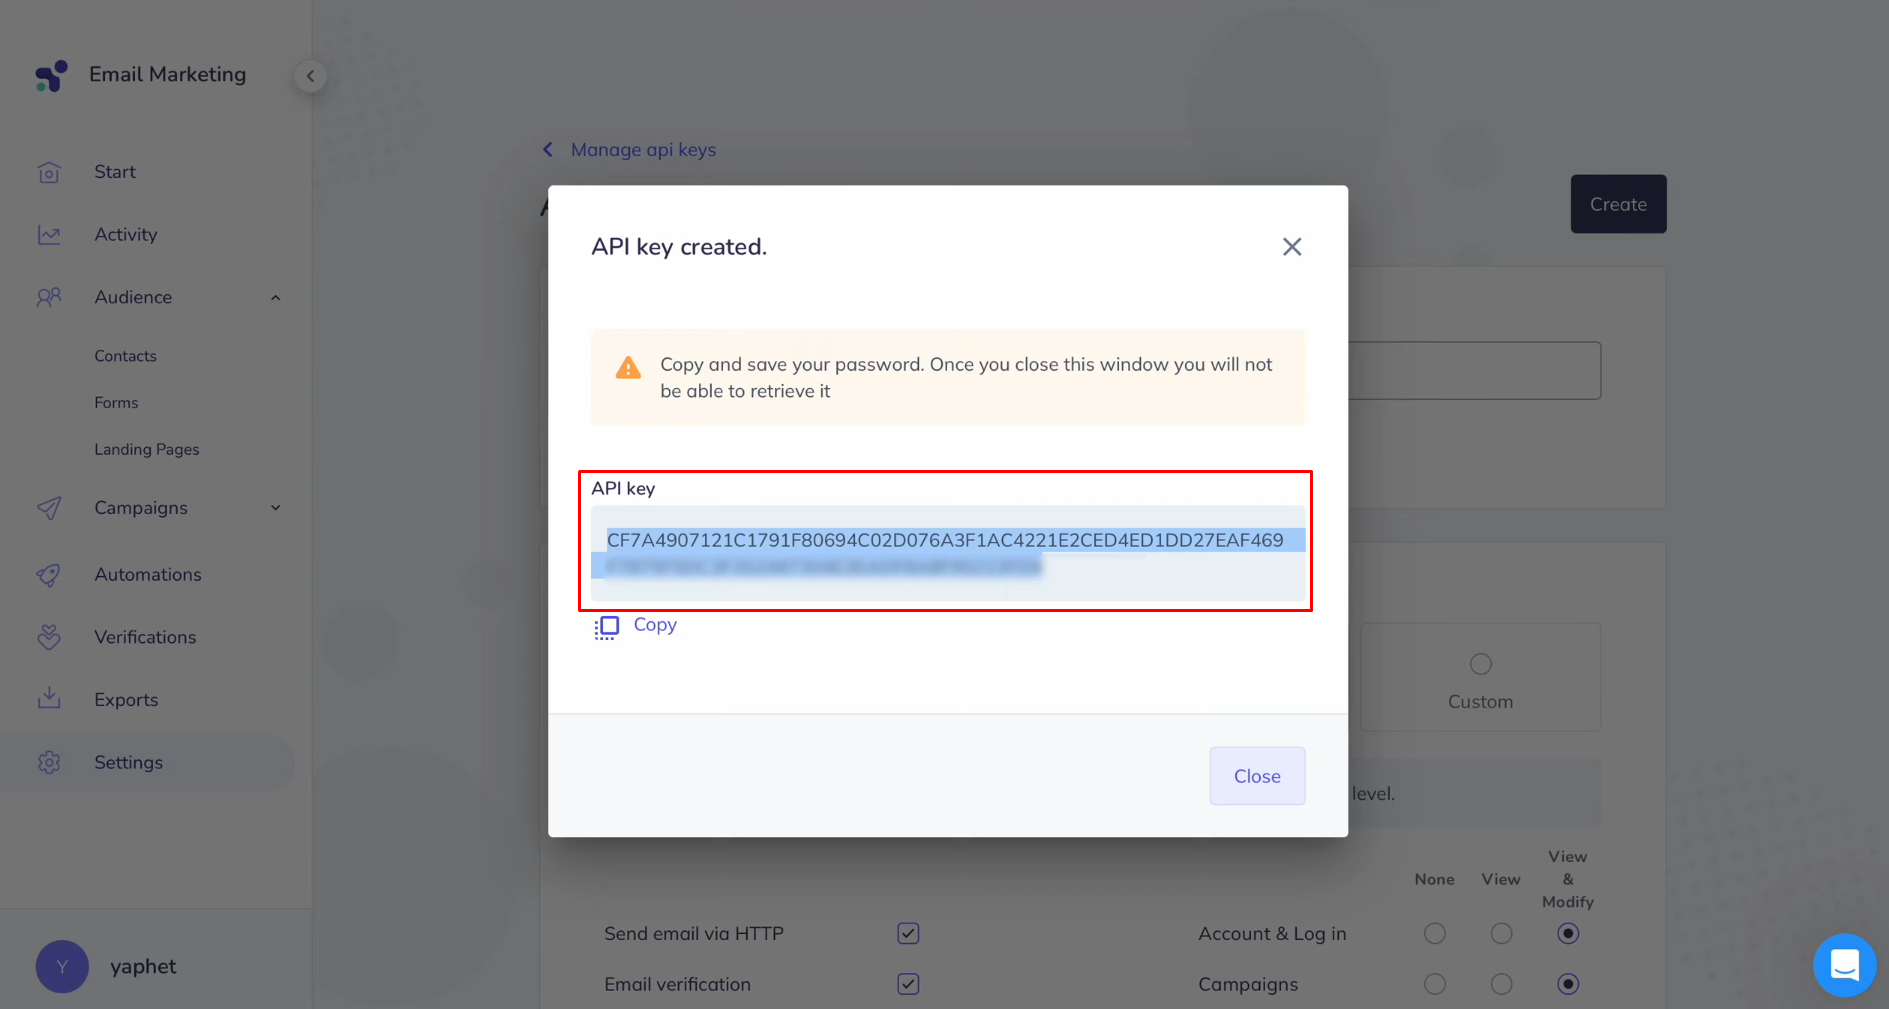
Click “Create.”
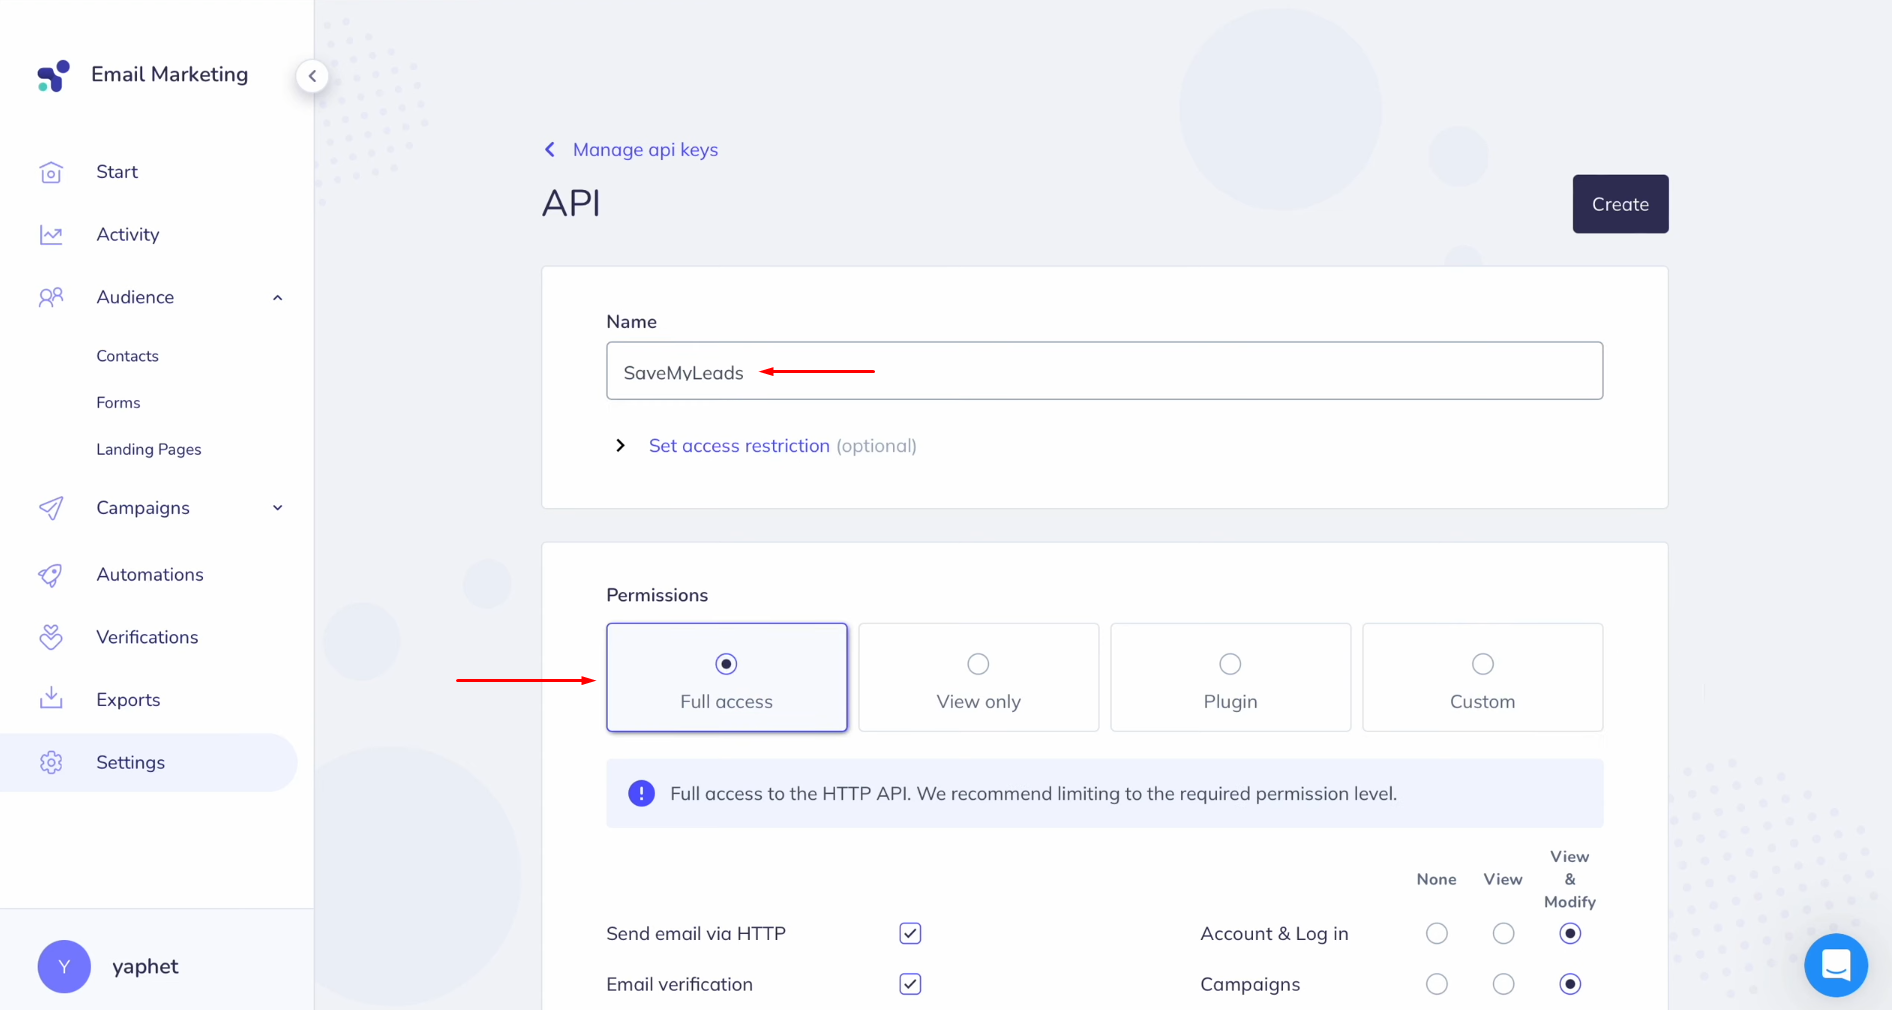
Specify a
name for the new key and provide full access.
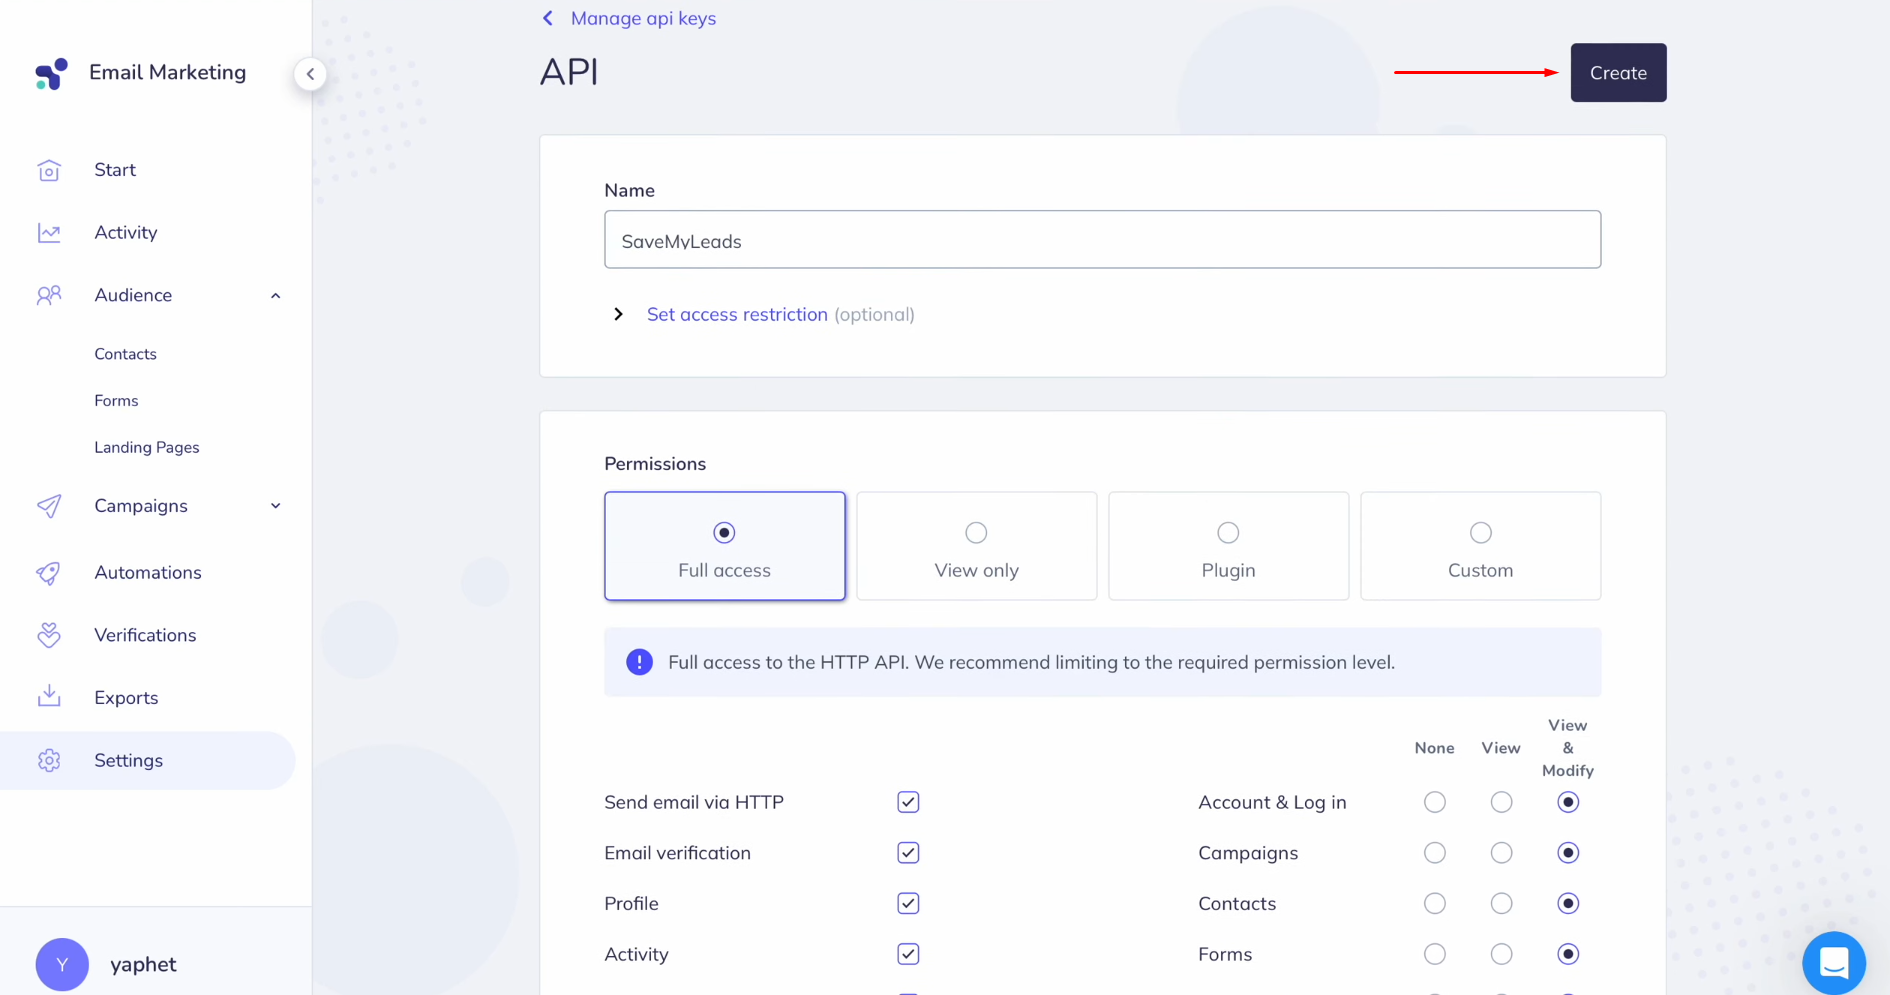
Click “Create” again.
Copy the API
key.
Paste the API
key into the appropriate field in SaveMyLeads. When the required field is filled,
click “Continue.”
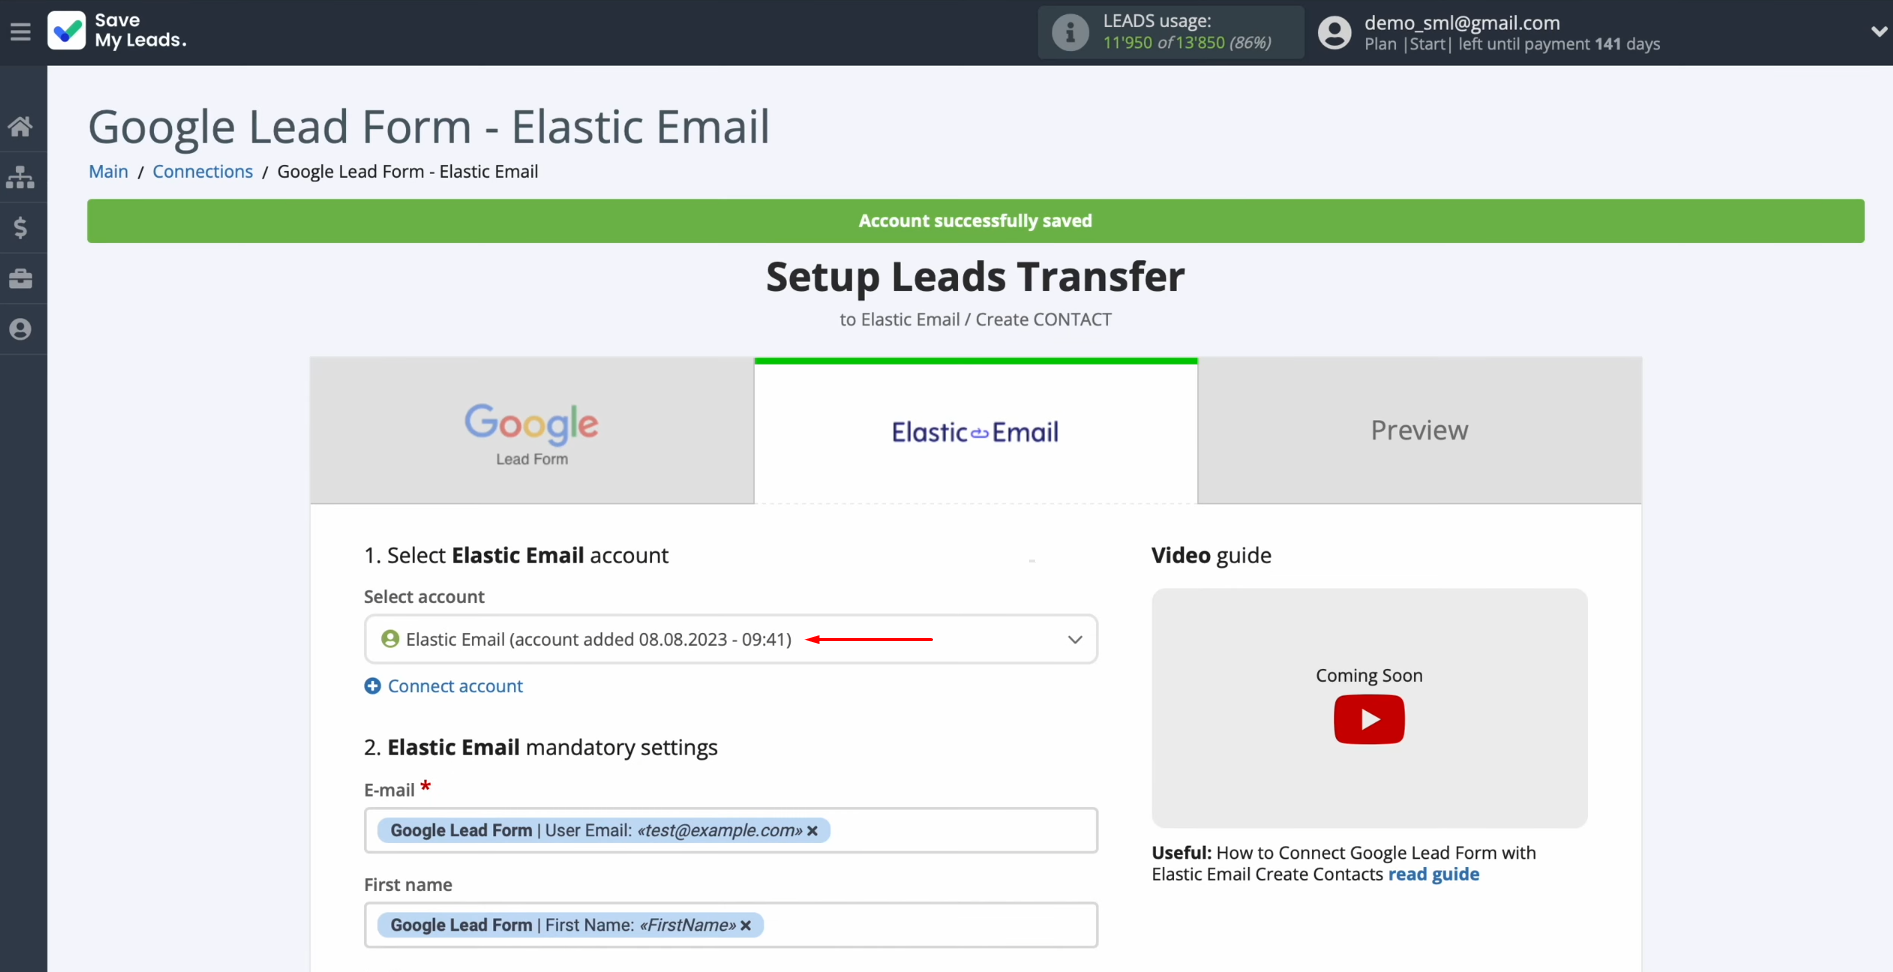
When the
connected account is displayed in the list, select it.
Select the
list in which new contacts will be created.
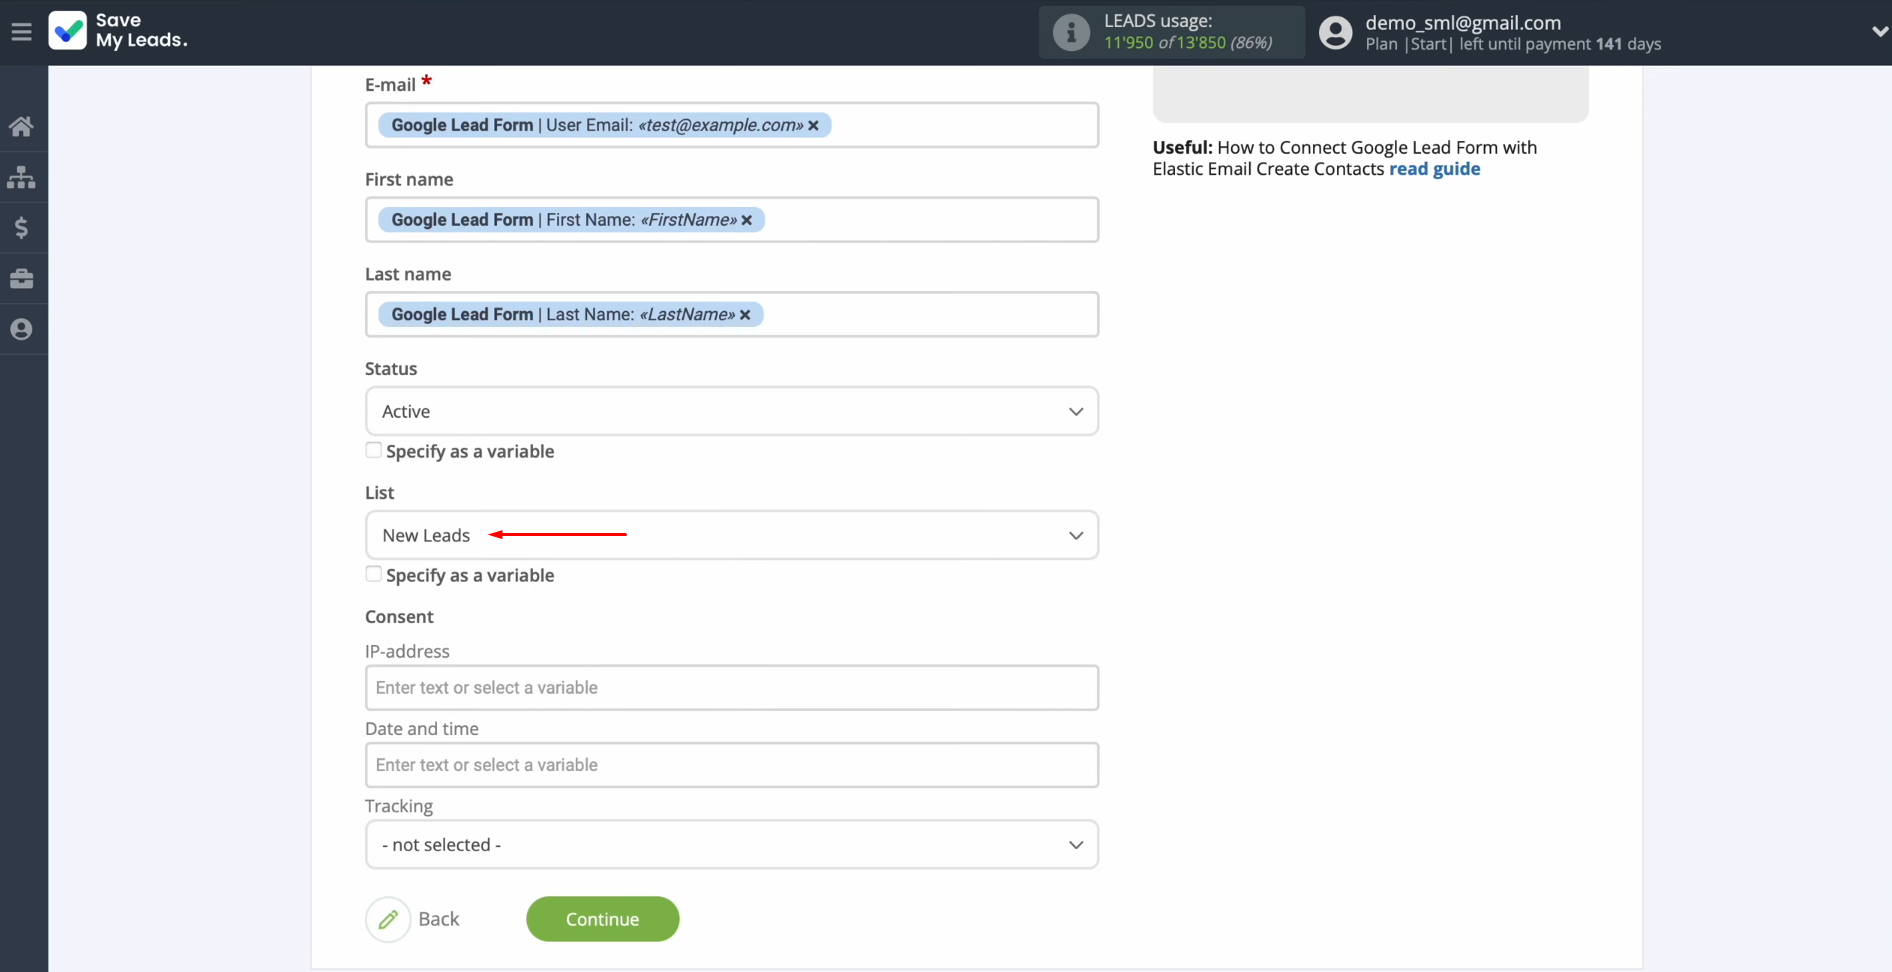
You see the Elastic Email fields
for creating new contacts. You can assign variables from the Google Lead Form to
these fields. To do this,
click in the field and select a variable from the drop-down list.
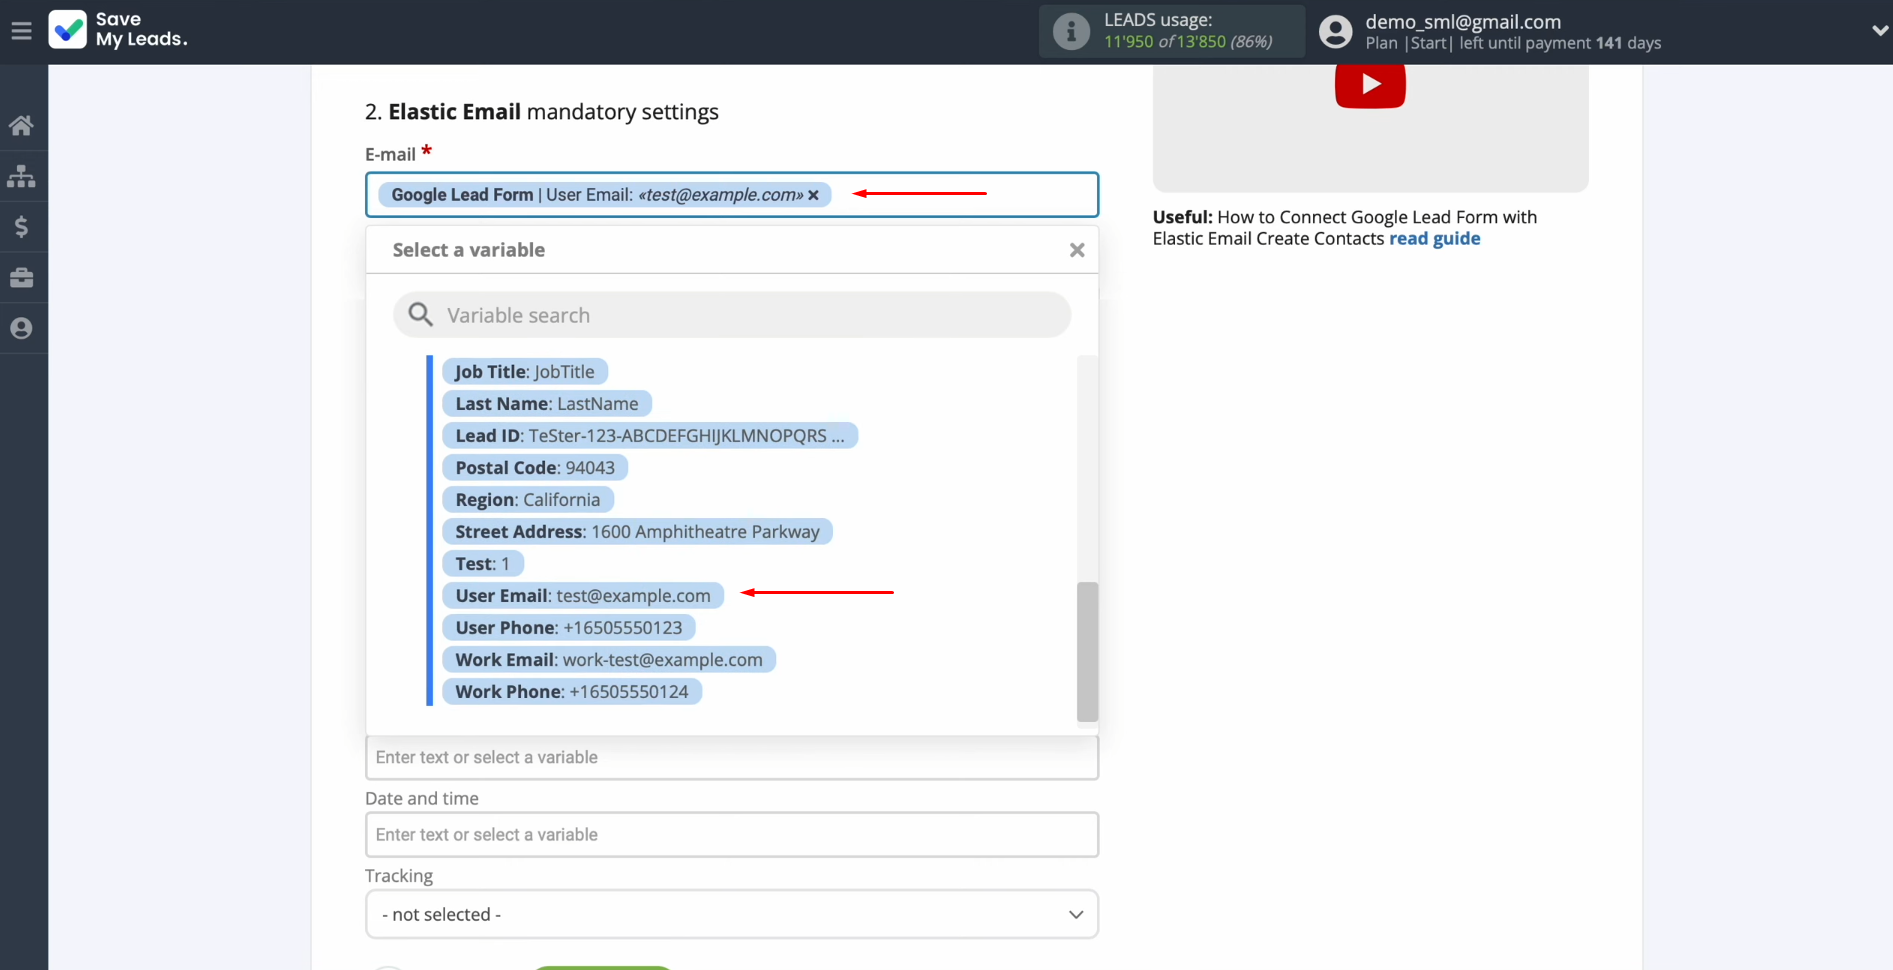
When all the
required fields are filled, click “Сontinue.”
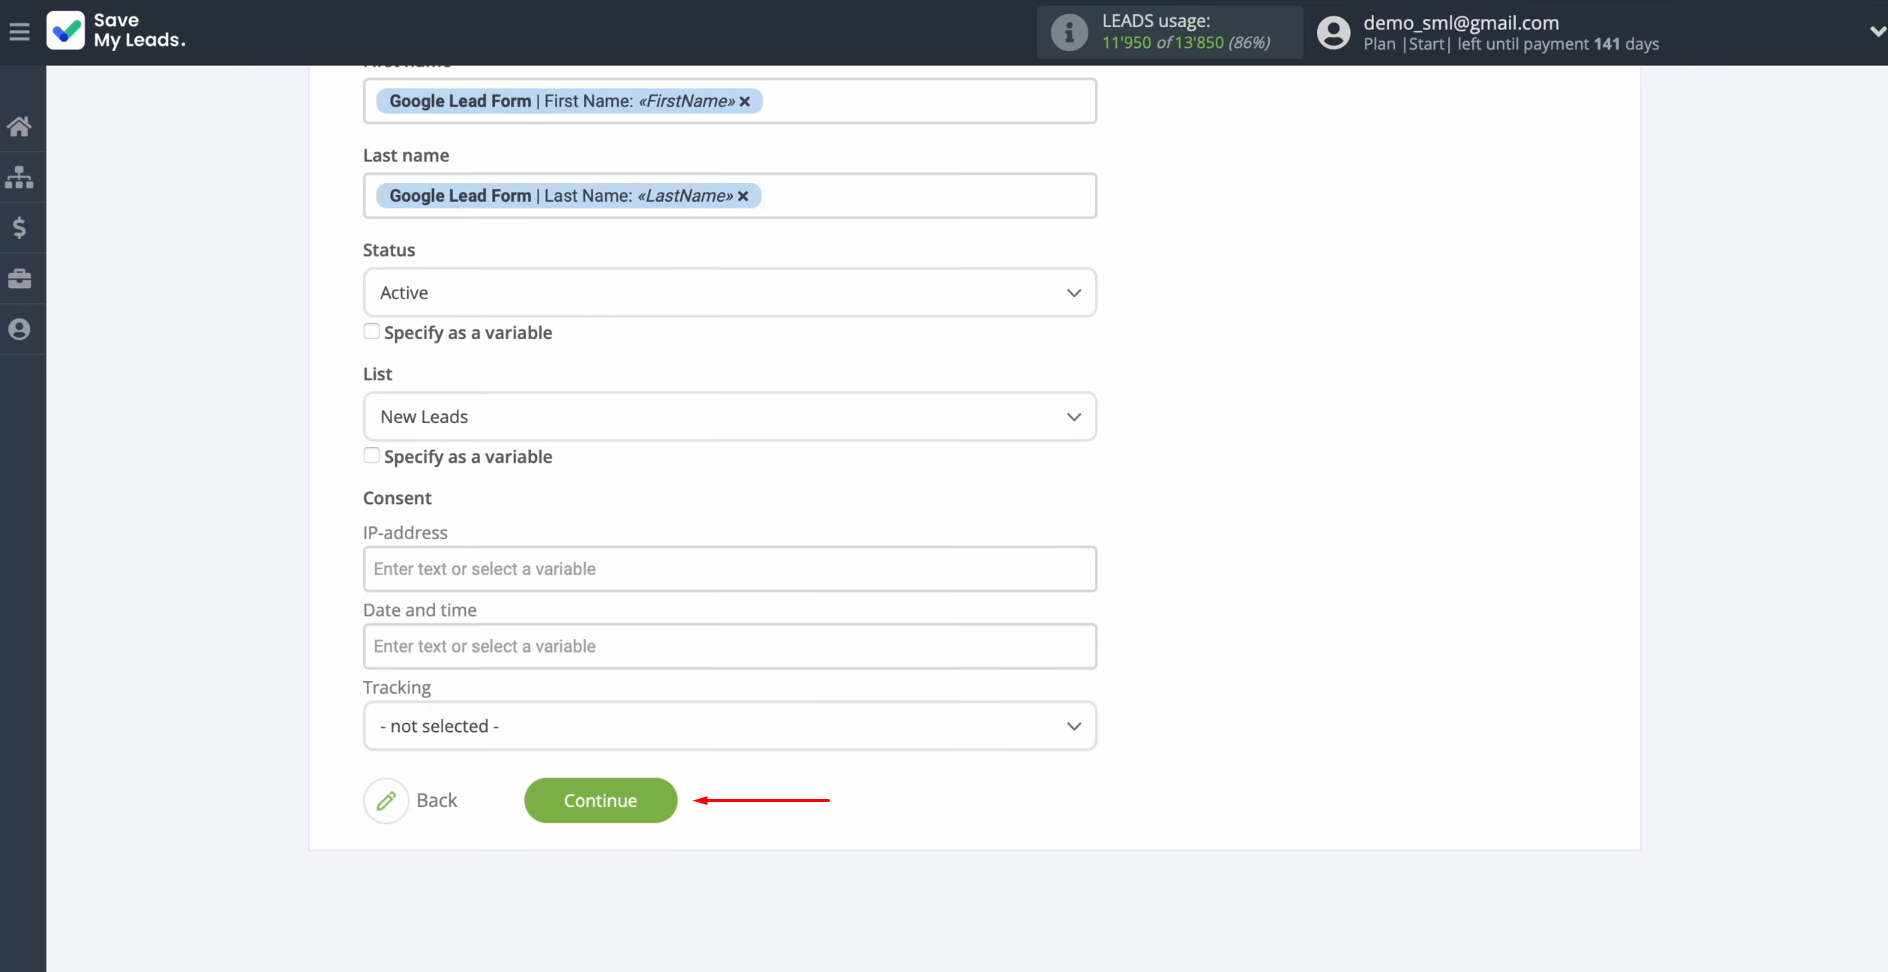
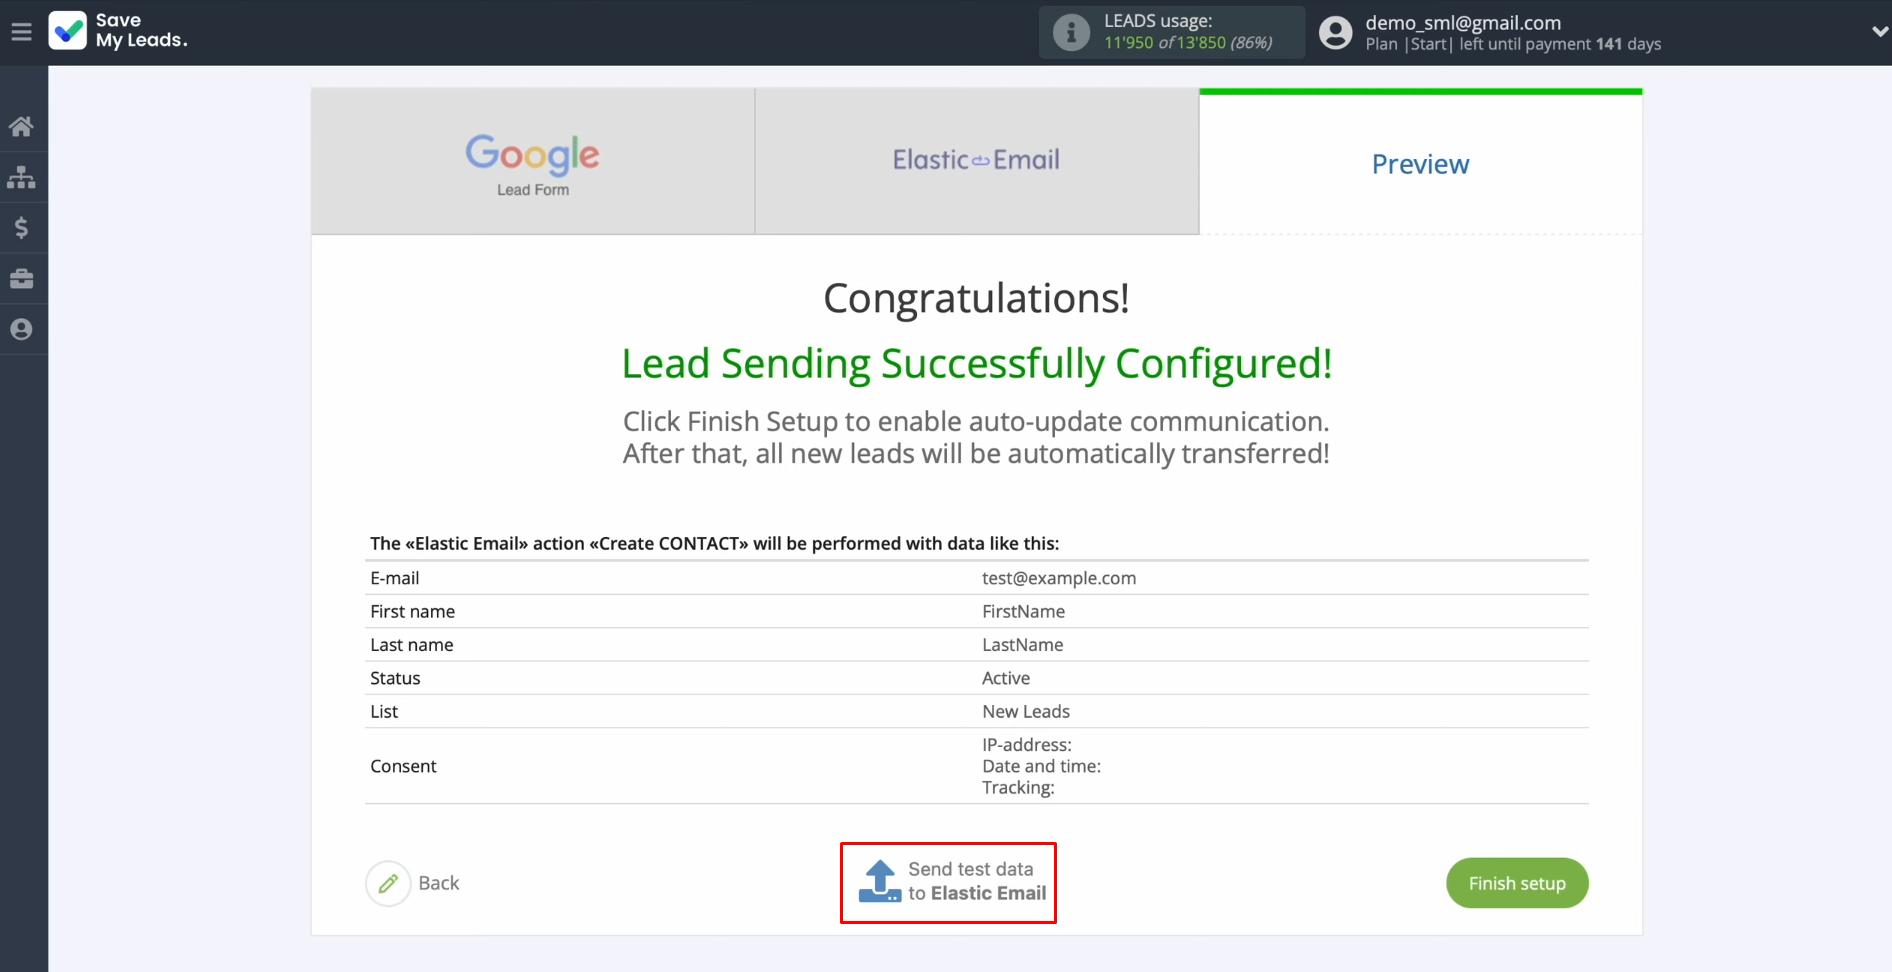
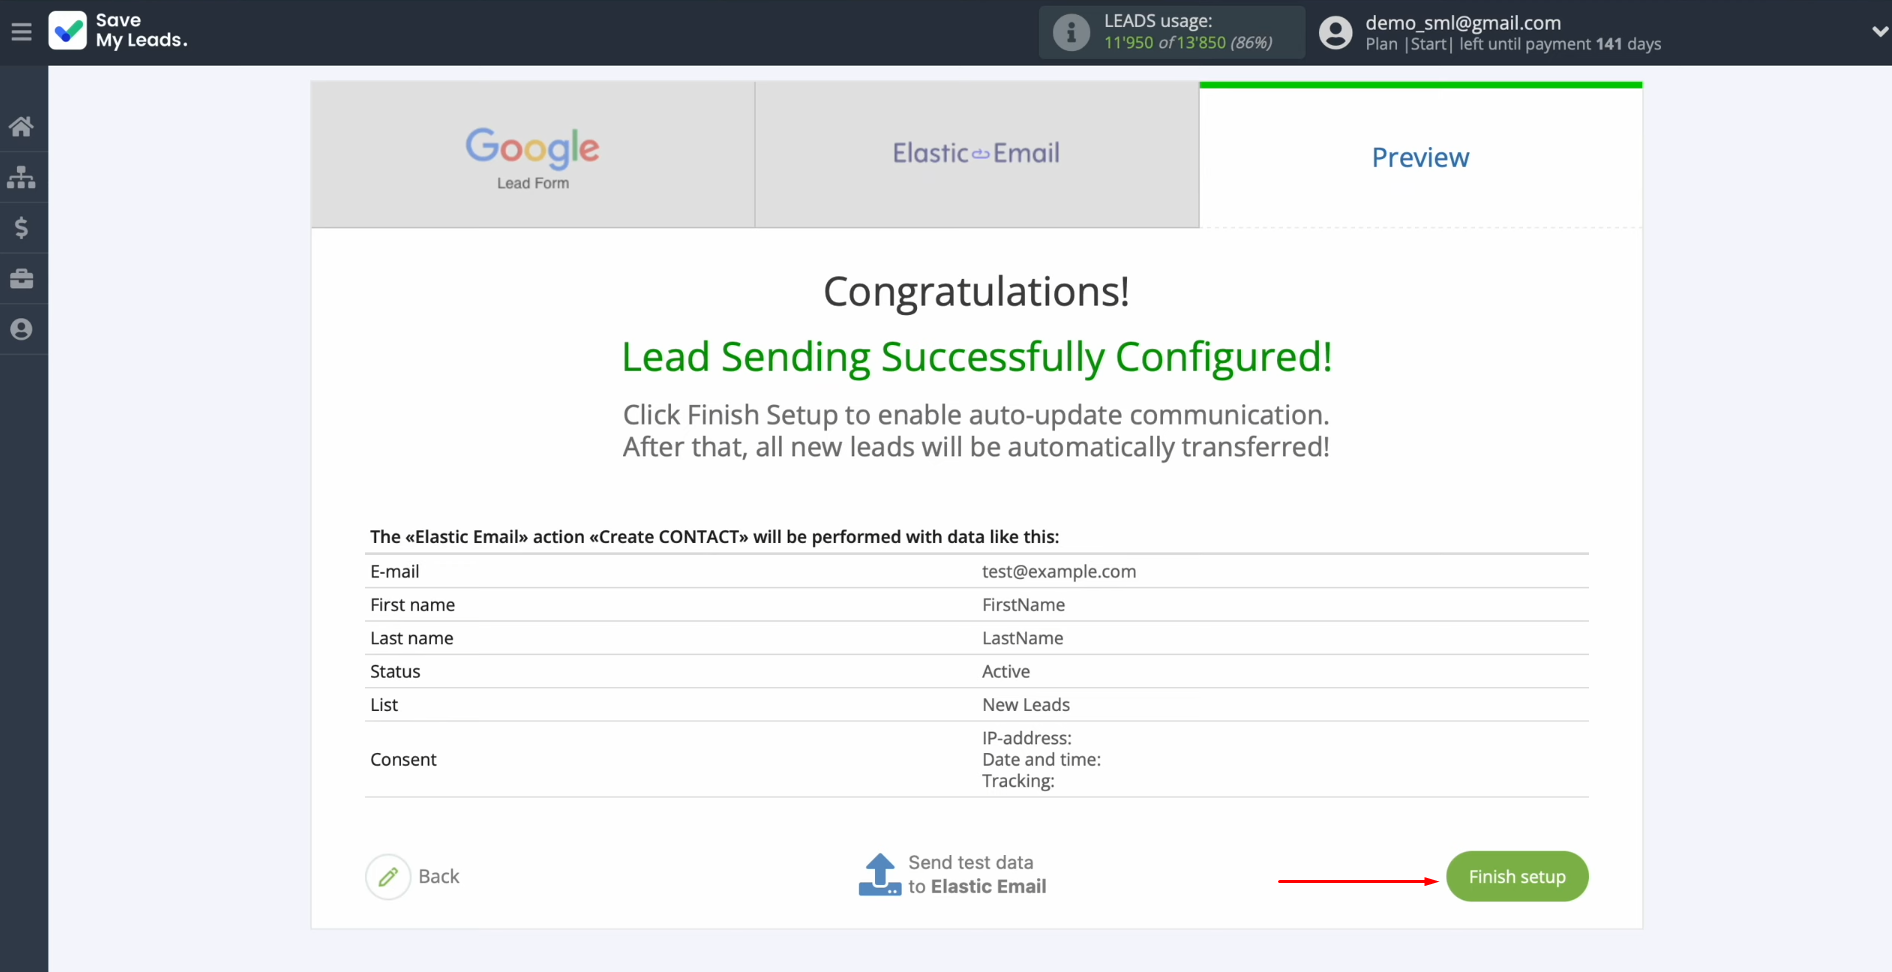
Here, you see an
example of the data that will be sent to Elastic Email as new
contacts for each new lead from the Google Lead Form. To check the correctness of the
settings, click “Send test data to Elastic Email.”
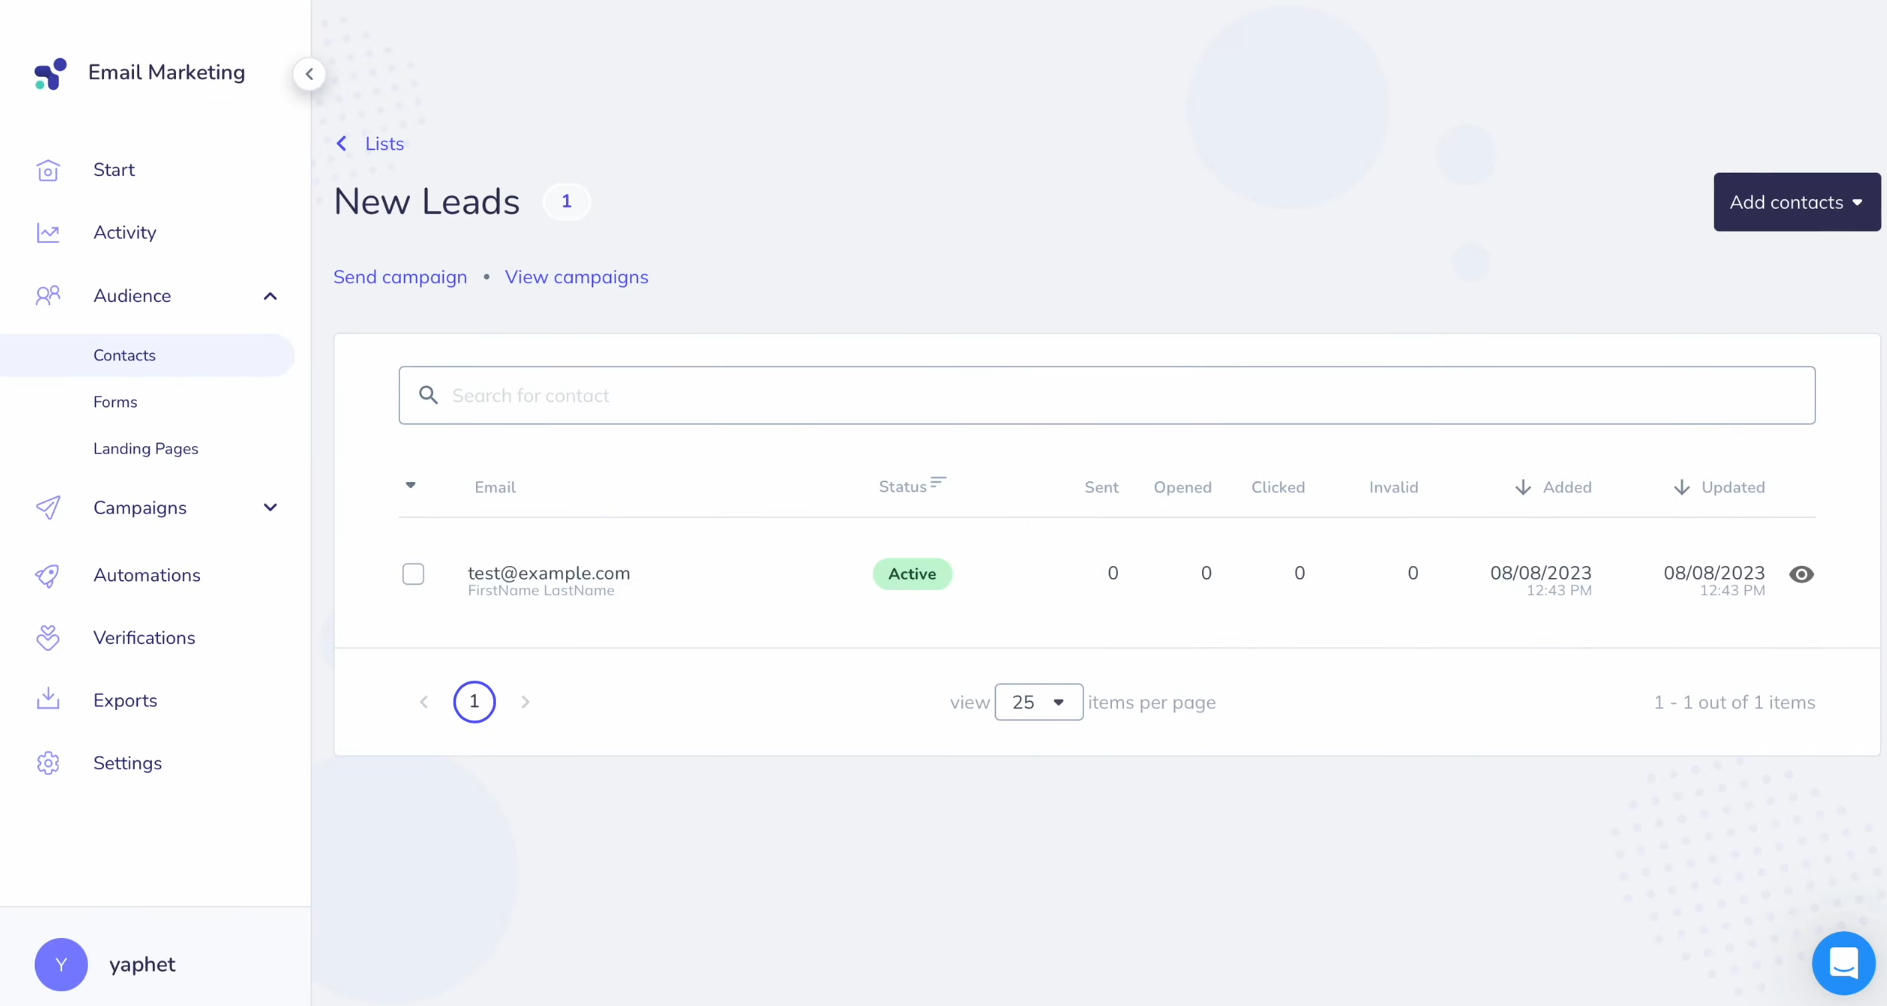
After successfully sending, go to Elastic Email and check the results.
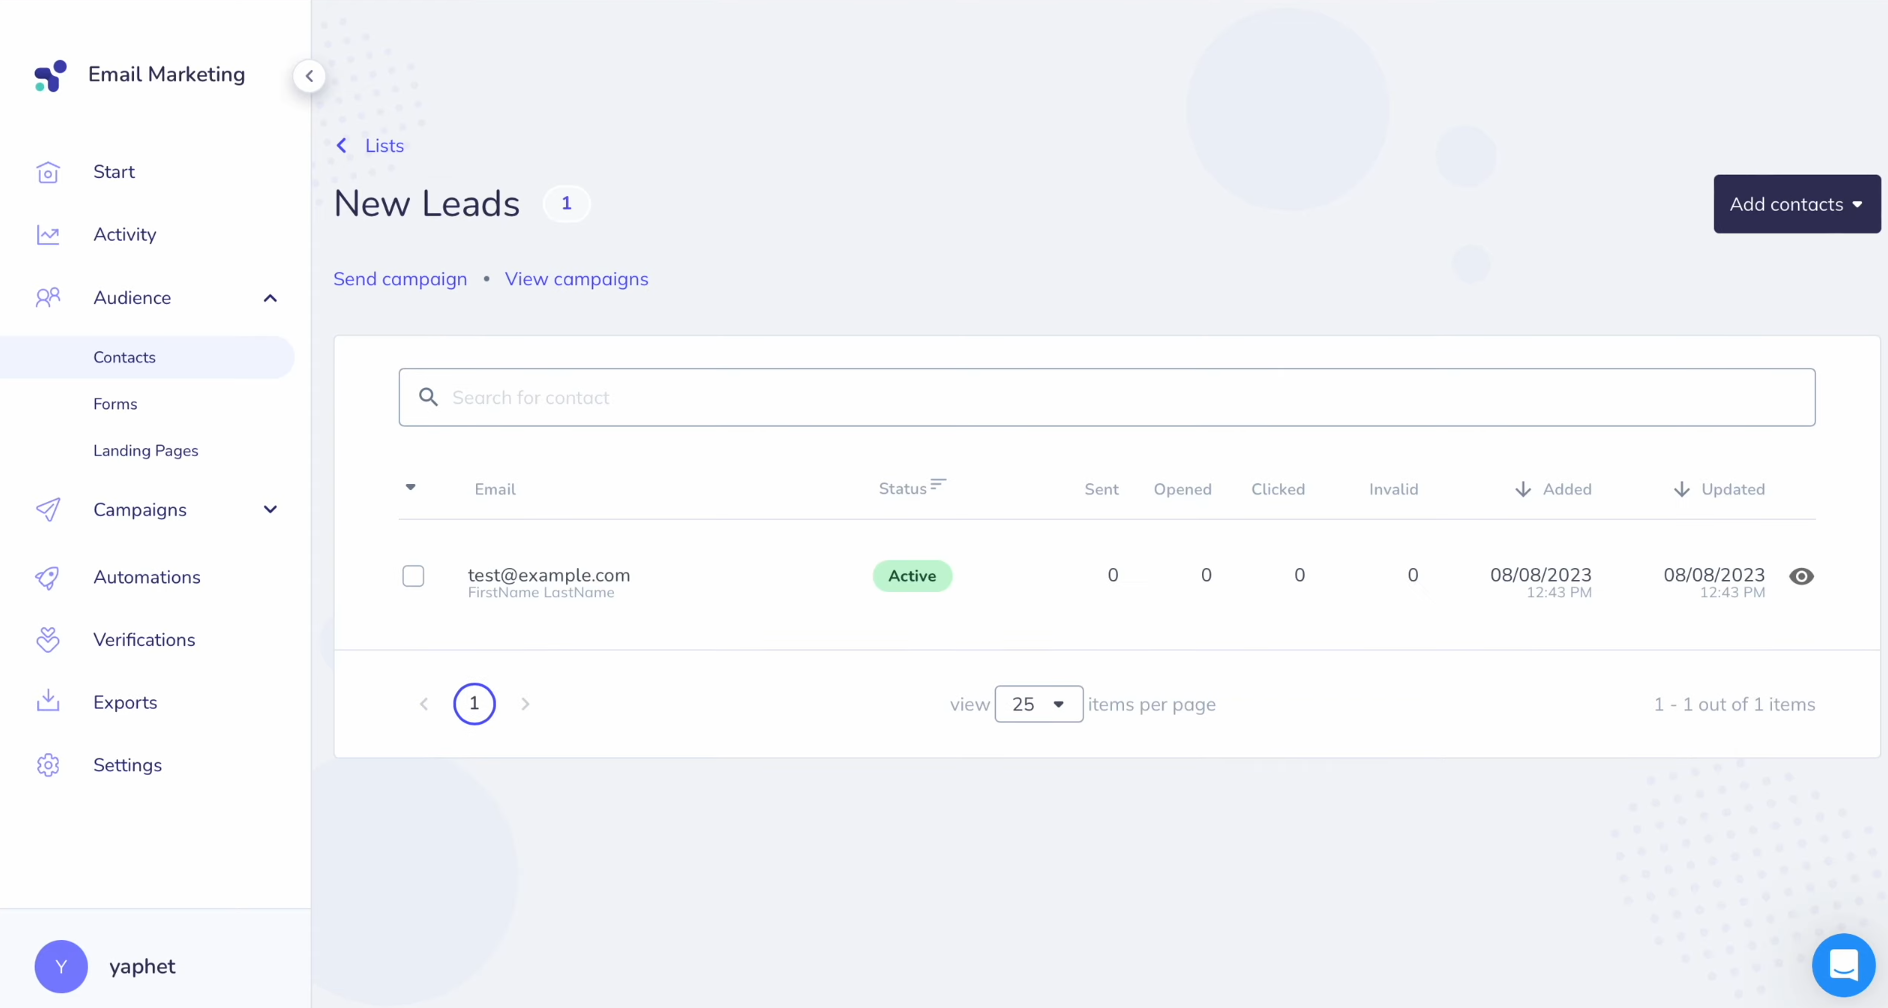
Then, return to
SaveMyLeads and continue setting up the Elastic Email + Google Lead Form integration.


Set Up Auto-Update
Click “Finish setup” to enable the auto-update of the connection. In this case, all new leads from Google Lead Form will be instantly transferred to Elastic Email to create new contacts.
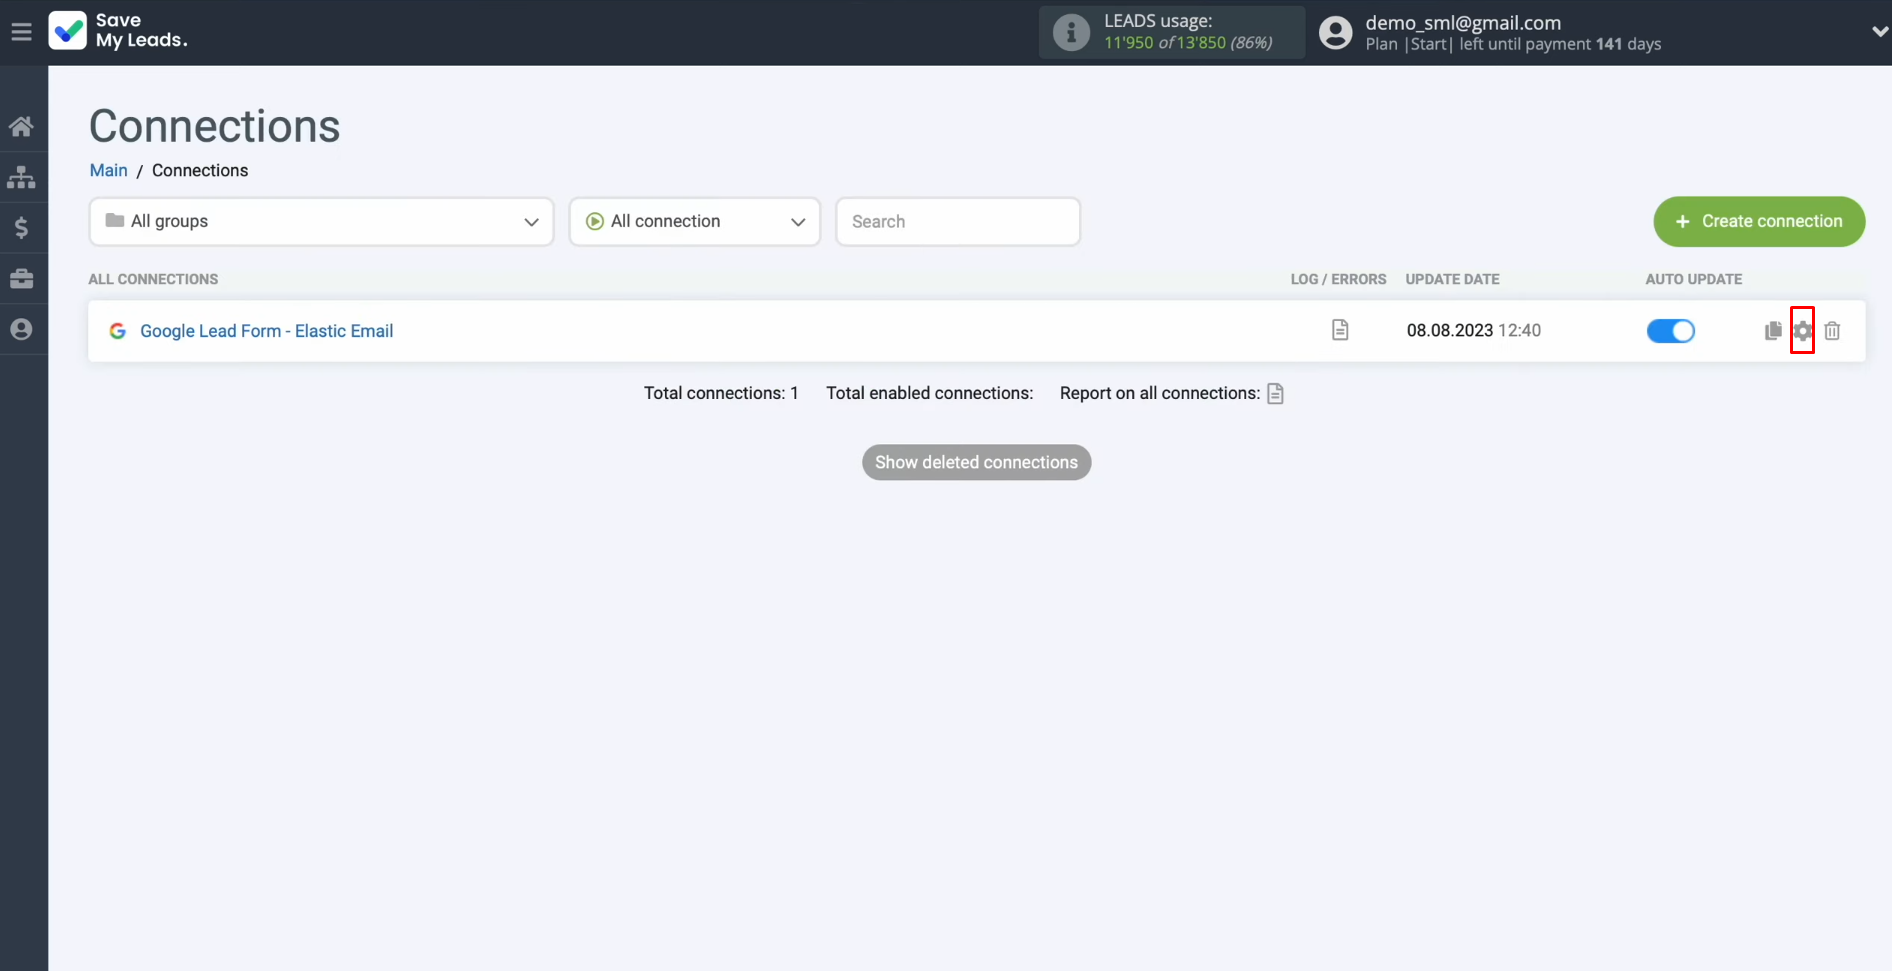
If you want to change the connection name, you can do this in its
settings. For this, click on the gear icon.
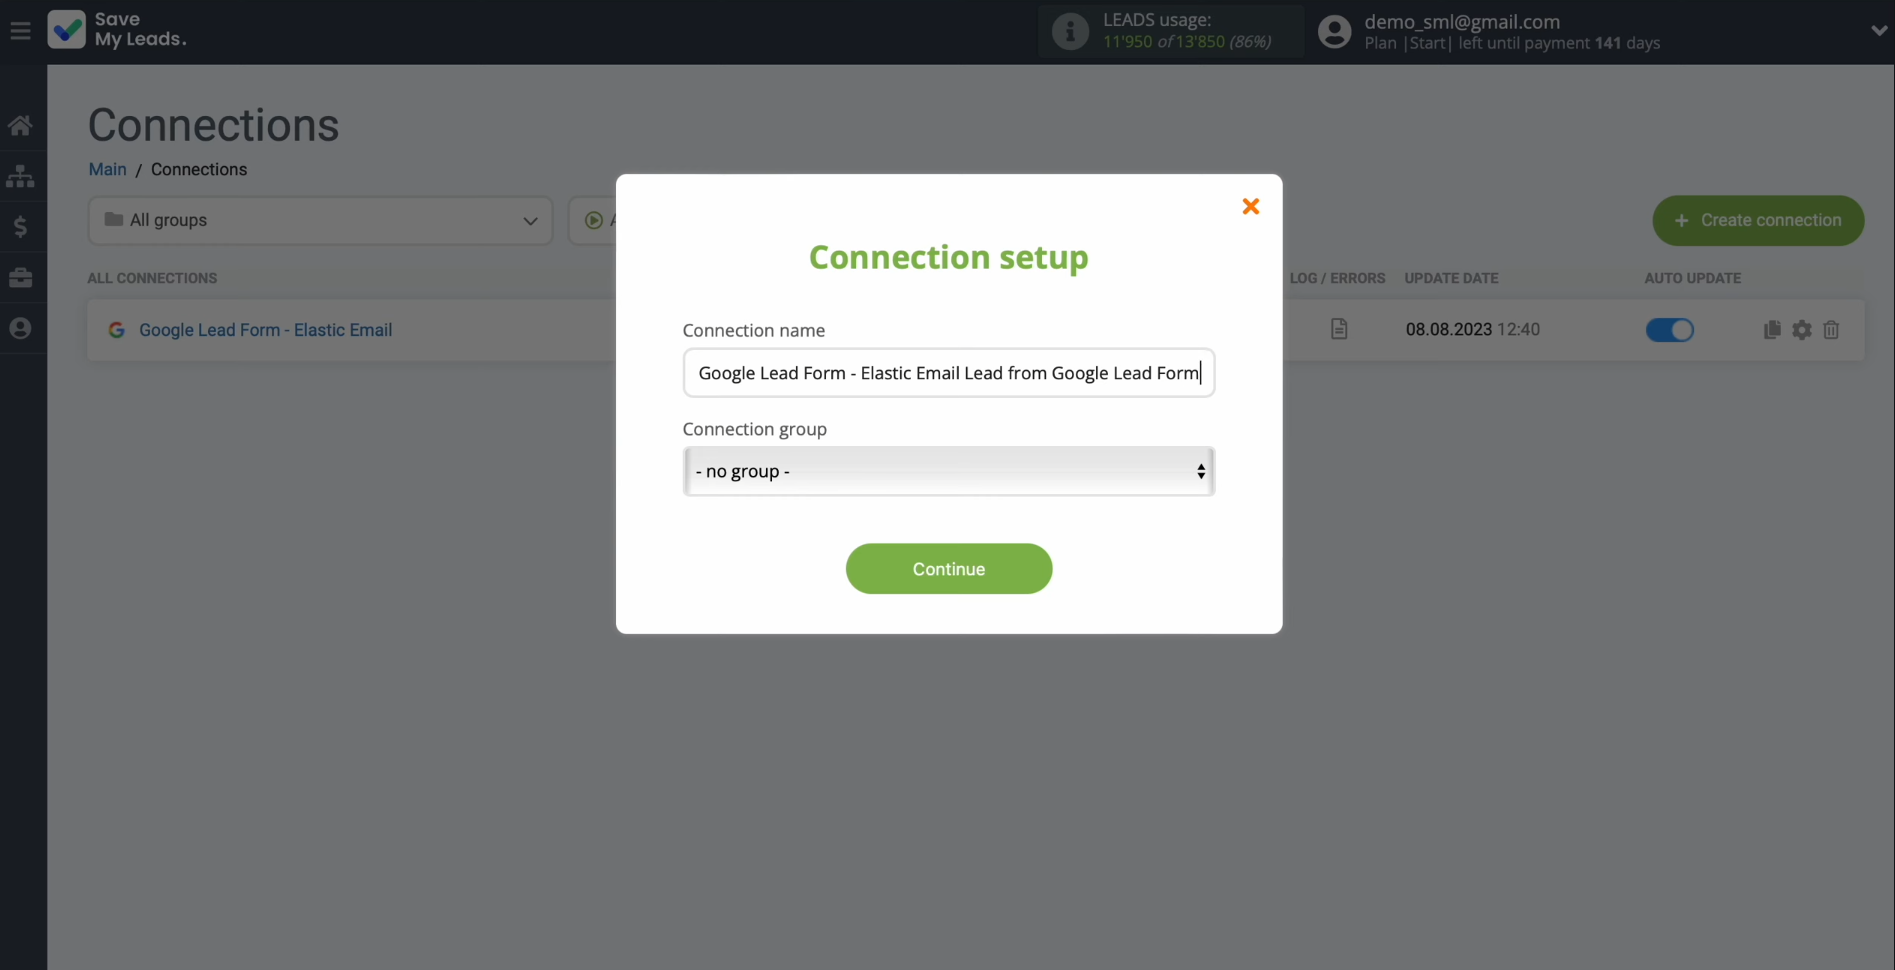
Here, you can change the connection name and add it to a
group. After that, click “Continue.”
That's
all. The integration
has been completed.
Results
Successful setup of the Google Lead Form + Elastic Email integration and activation of the automatic update function launches stable interaction between systems. We hope that our instructions helped you do this quickly and without difficulties. You have likely received the results of such a union: uninterrupted data transfer.
By integrating Google Lead Form with Elastic Email, you no longer have to manually transfer lead data. This process is now fully automated. Our online connector, SaveMyLeads, is here to help. It can automate your daily data transfers between platforms. This will let you focus on improving customer service. You can also develop innovative strategies and other vital parts of your business.
Step-by-Step Guides for Setting Up Integrations:
