It is impossible to imagine a modern business without automation because it is one of the keys to success. Progressive entrepreneurs are actively working to optimize their processes using automation services, integration systems, and artificial intelligence technologies. If you promote products or services through TikTok and use Mailchimp for email marketing, you can significantly simplify and speed up your work with these platforms. All you need to do is set up their integration using the SaveMyLeads online connector. This tool automates the transfer of leads from the social network directly to the email newsletter service. We have prepared step-by-step instructions for you that will help you easily set up and launch TikTok and Mailchimp integration.
Why Choose SaveMyLeads
SaveMyLeads makes it easy to set up data transfer from TikTok to Mailchimp. As a result, leads will automatically and seamlessly flow into your email marketing platform. There, they are immediately created as new contacts that can be included in email campaigns. This eliminates the need for time-consuming manual transfer of lead data.
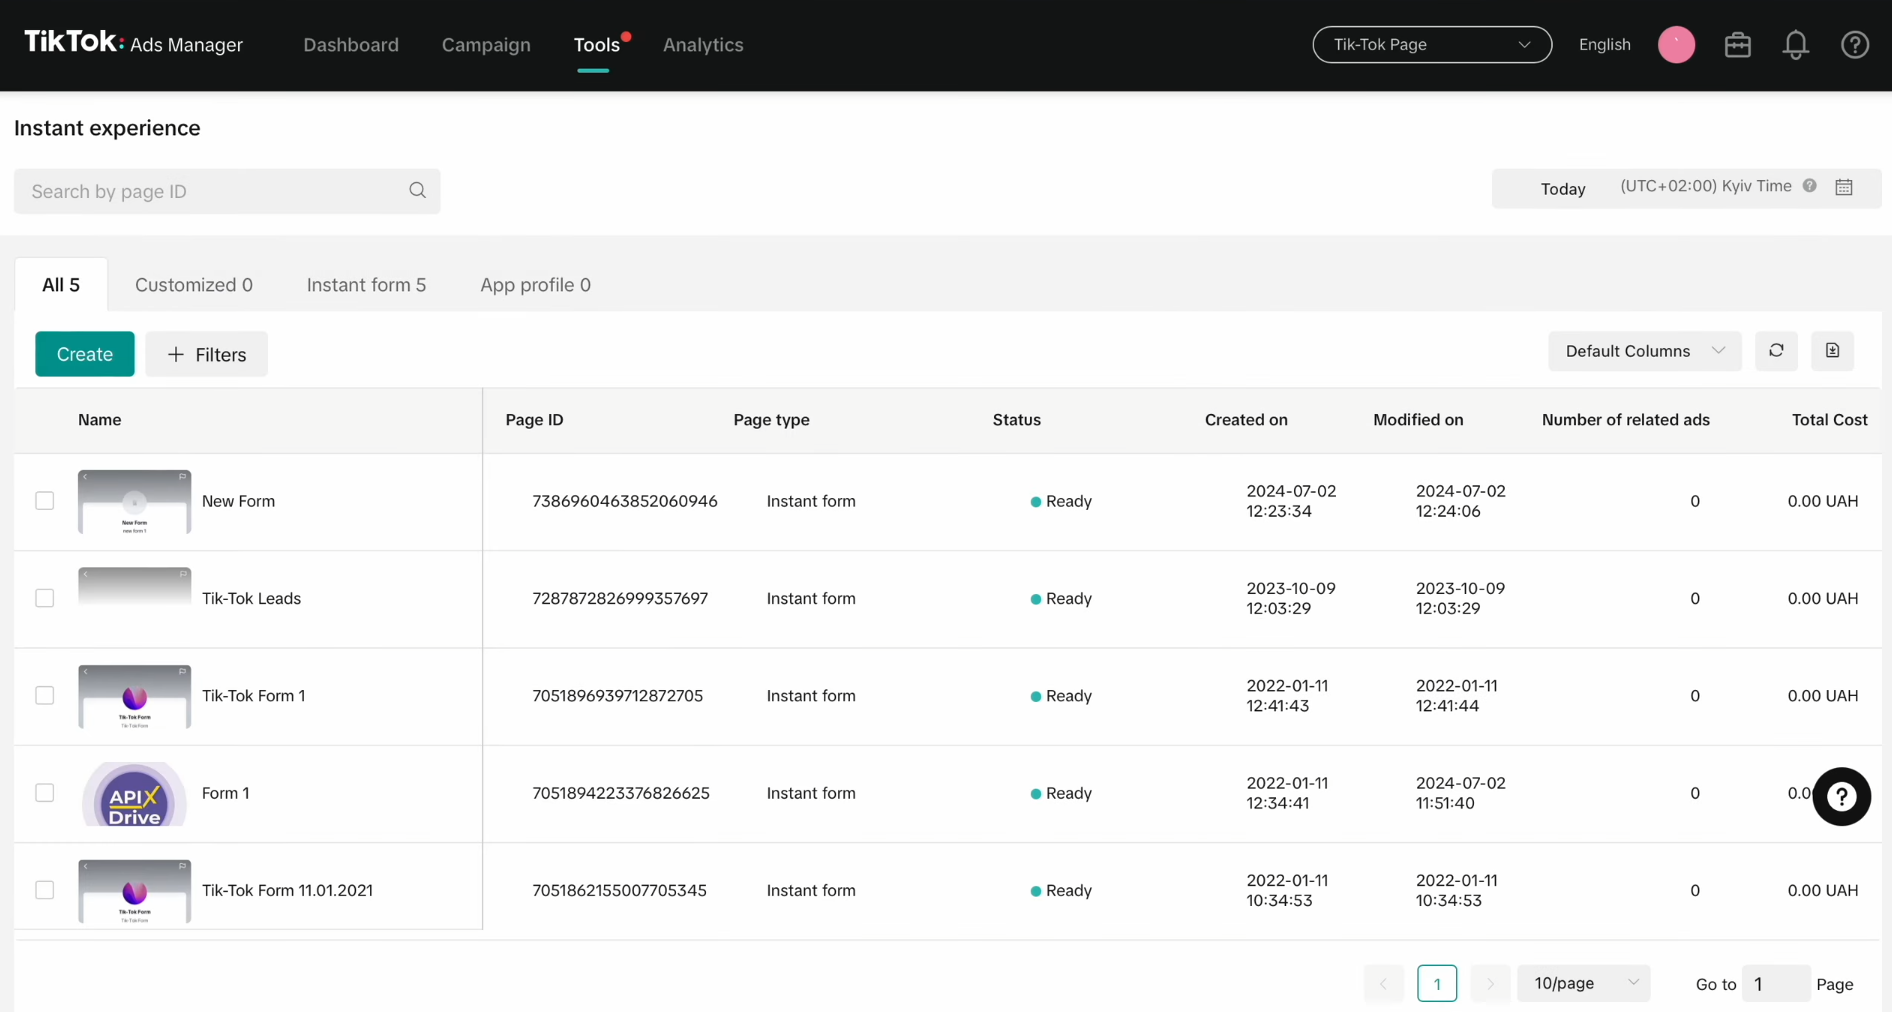
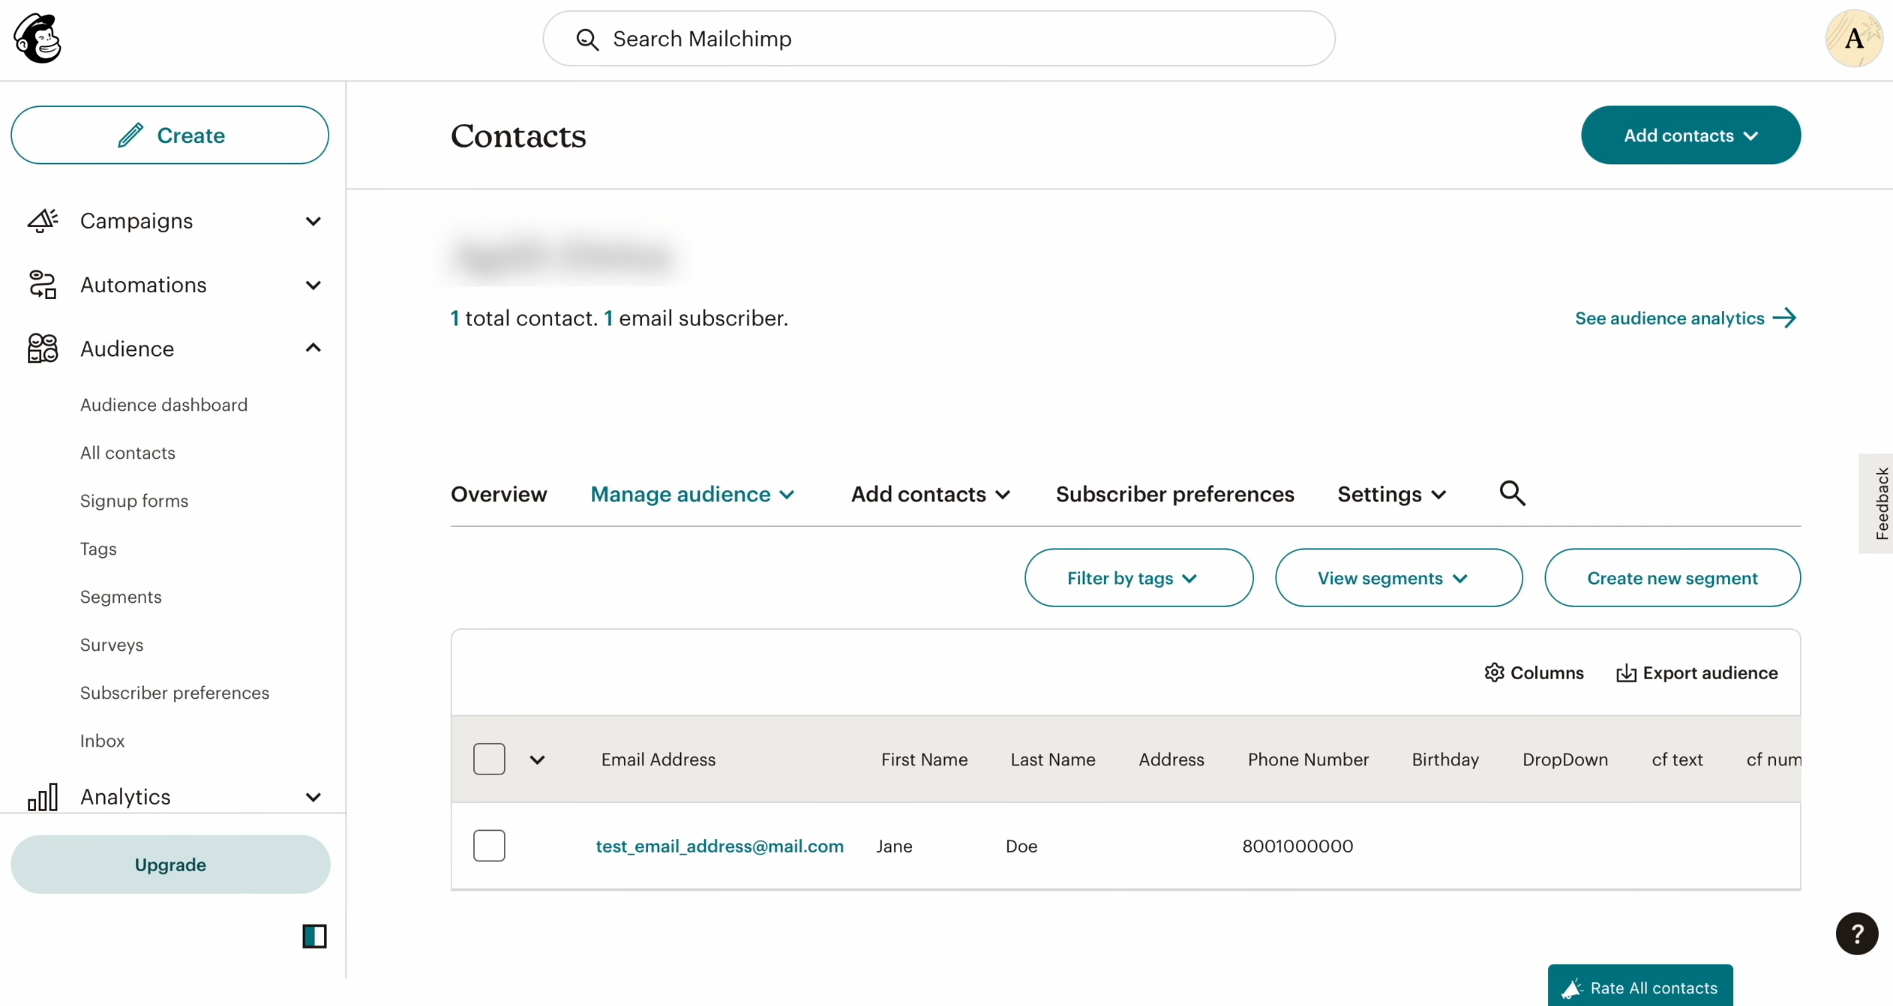
Now, more details on why we recommend SaveMyLeads for Mailchimp and TikTok integration:
- The no-code service allows you to set up integration as simply, quickly, and conveniently as possible. Thanks to the intuitive interface, even a person with minimal experience can handle the settings in just 10 minutes.
- The tool offers a wide range of ready-made solutions for integration with CRM systems, email and SMS platforms, messengers, task managers, Google services, and more. This makes SaveMyLeads an excellent choice for those who want to automate work processes as much as possible and integrate programs they already use.
- Pricing plans are designed to be budget-friendly. The availability of several plans shows that the service caters to the budget needs of both large companies and small businesses or individuals.
- Professional and prompt technical support provides timely assistance to resolve any issues.
How to Set Up TikTok and Mailchimp Integration
Steps to follow:
- Create a TikTok lead form tailored to your needs.
- Register an account on the SaveMyLeads platform.
- Connect TikTok to the connector by selecting it as a data source.
- Specify the page and specific form on TikTok from which you plan to transfer contacts.
- Connect Mailchimp to SaveMyLeads and set it up as a data receiver.
- Enable automatic updates.
We will skip the step of creating a business account and lead form on TikTok, assuming that you are already familiar with this process. We will analyze the remaining steps for setting up TikTok & Mailchimp integration in order.
Setting Up the Data Source – TikTok
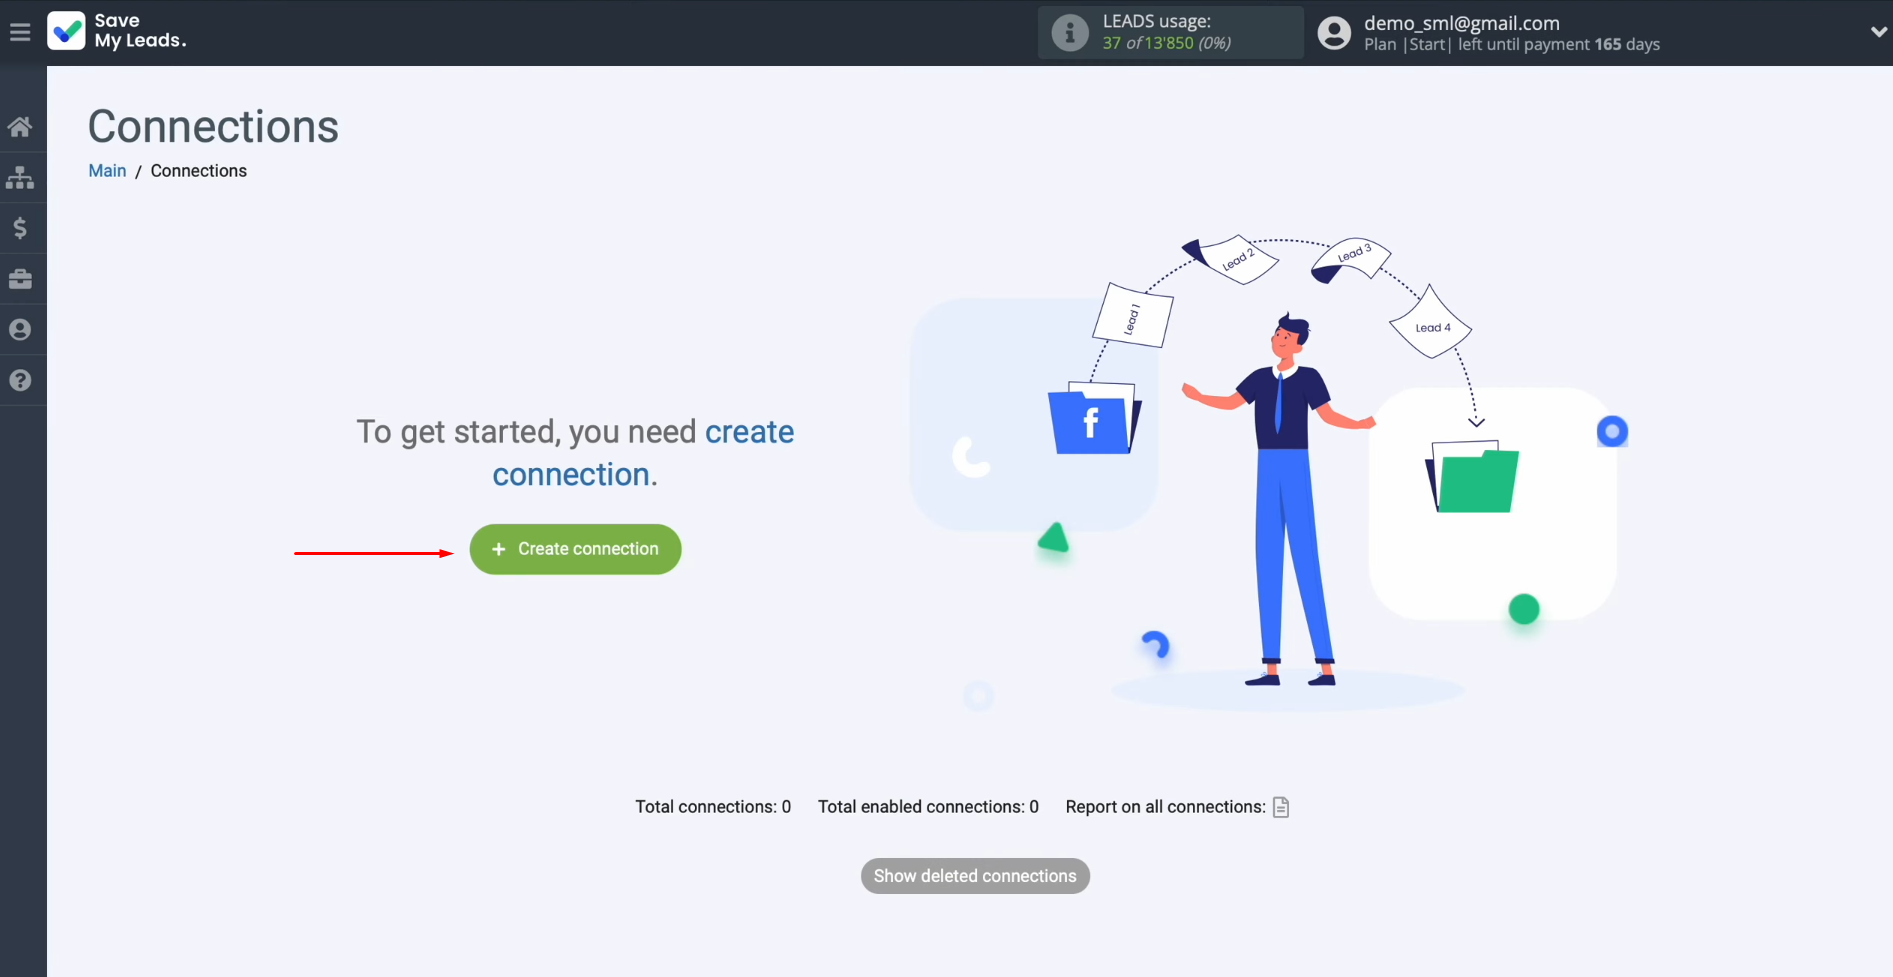
To set up TikTok integration with Mailchimp, first you need to create a new connection.
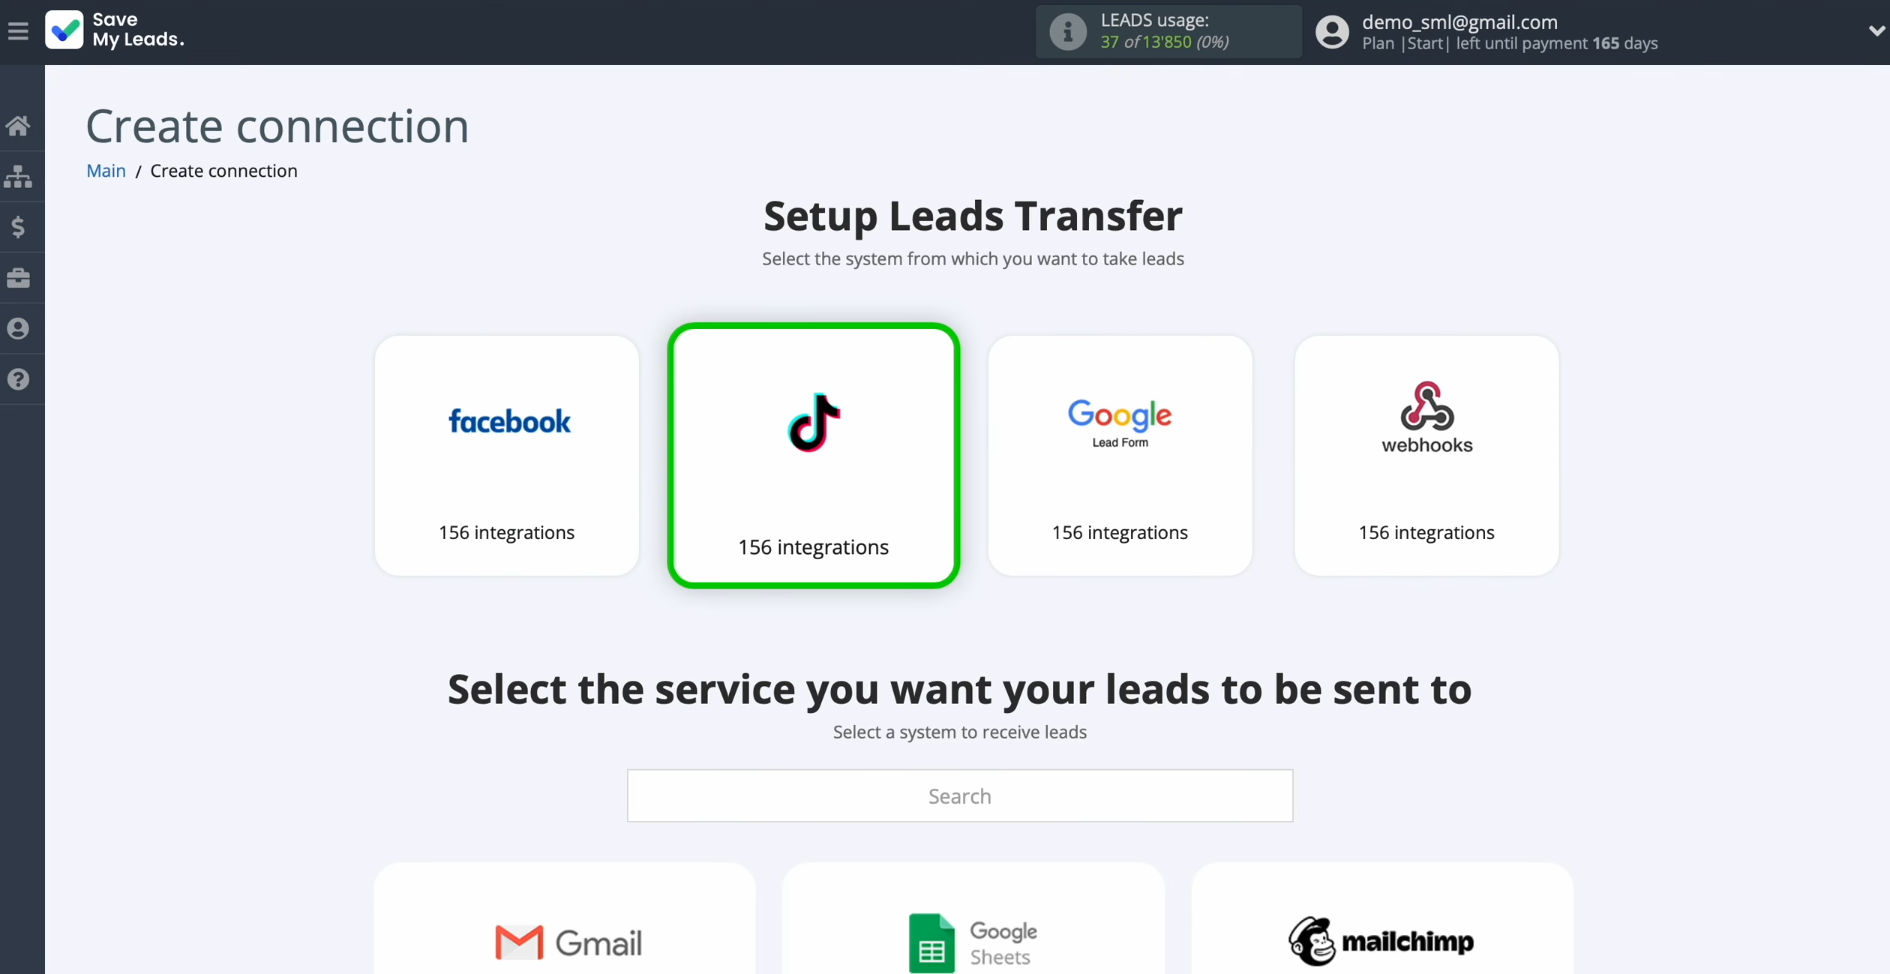
Select the
data source system. This is TikTok.
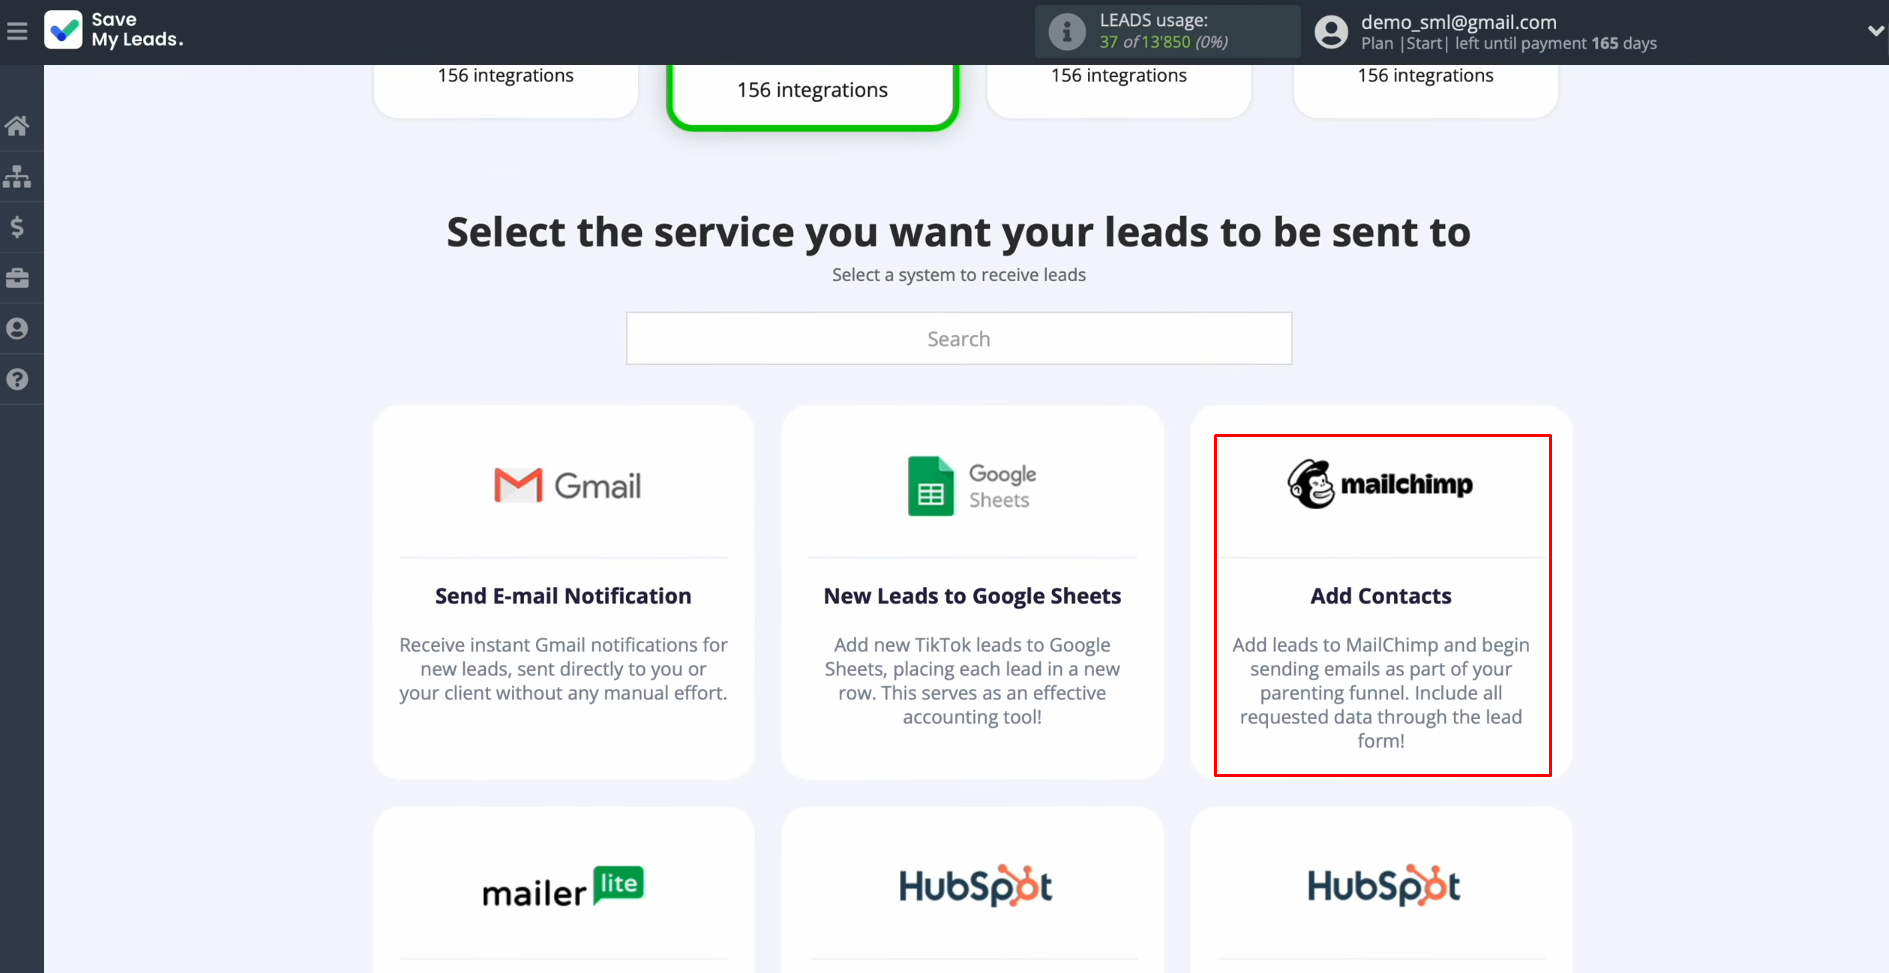
Choose the system
where you want to transfer new leads from TikTok. This is Mailchimp.
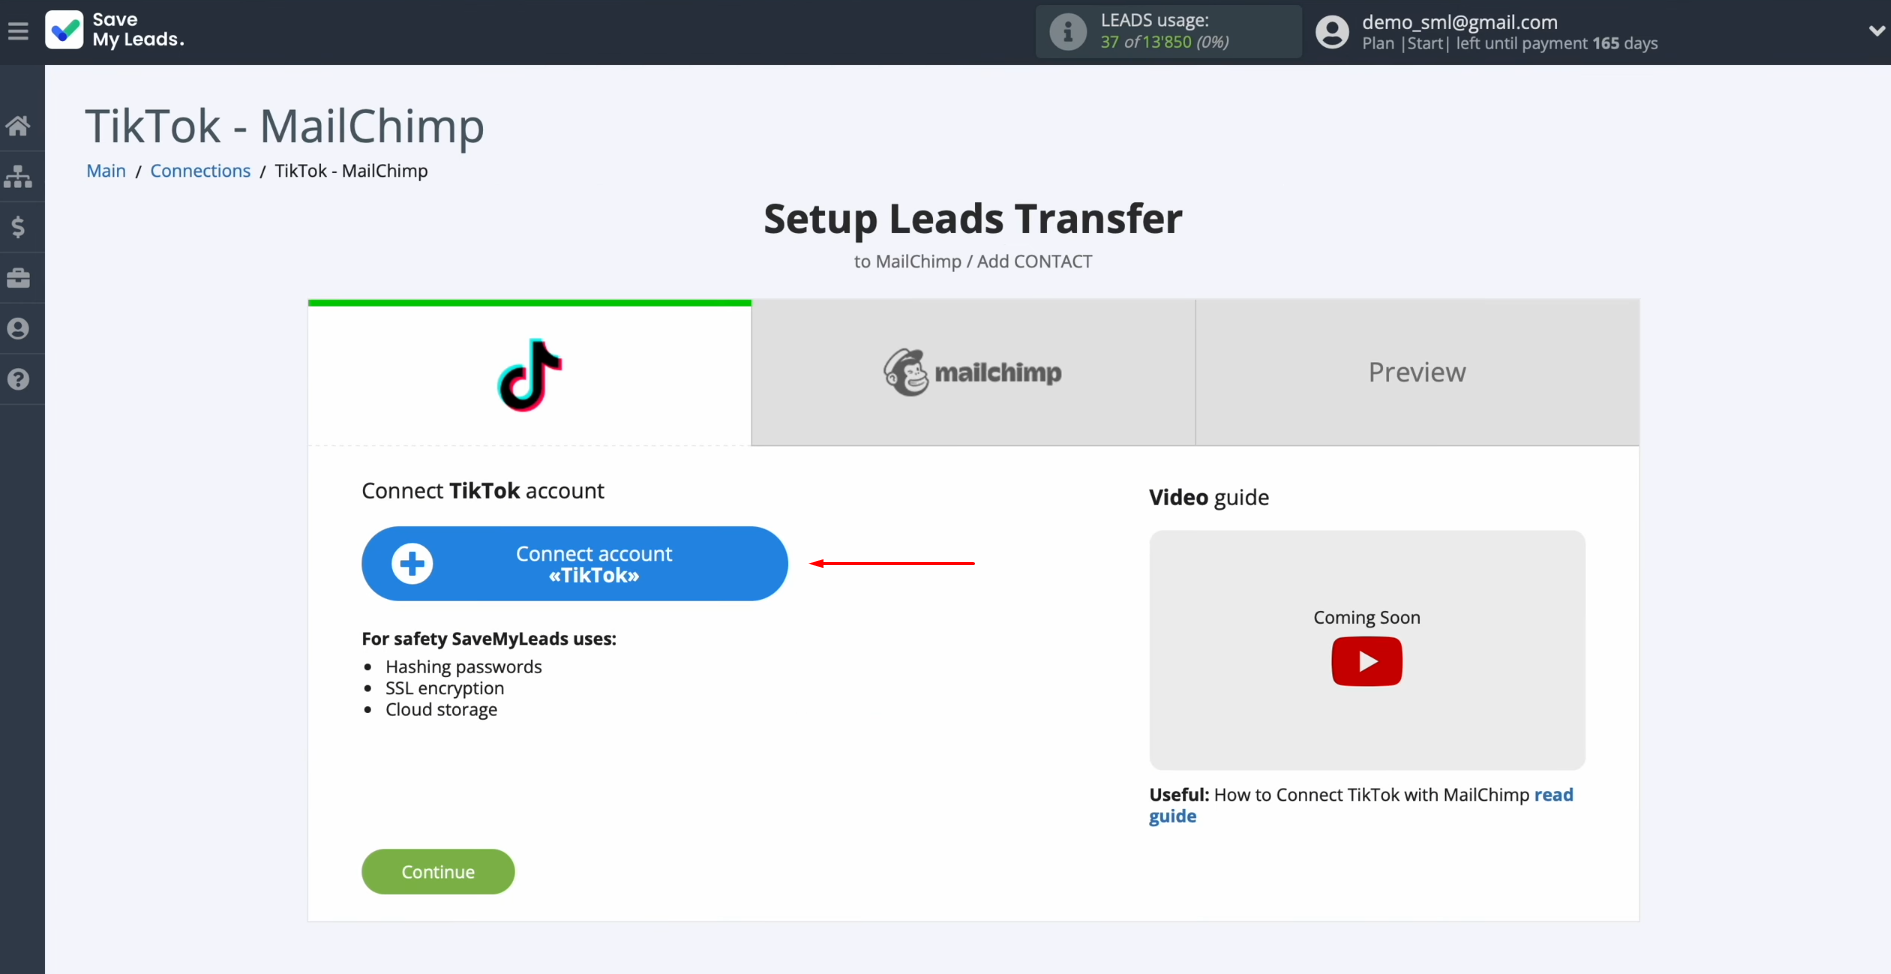
Connect your
TikTok account to SaveMyLeads.
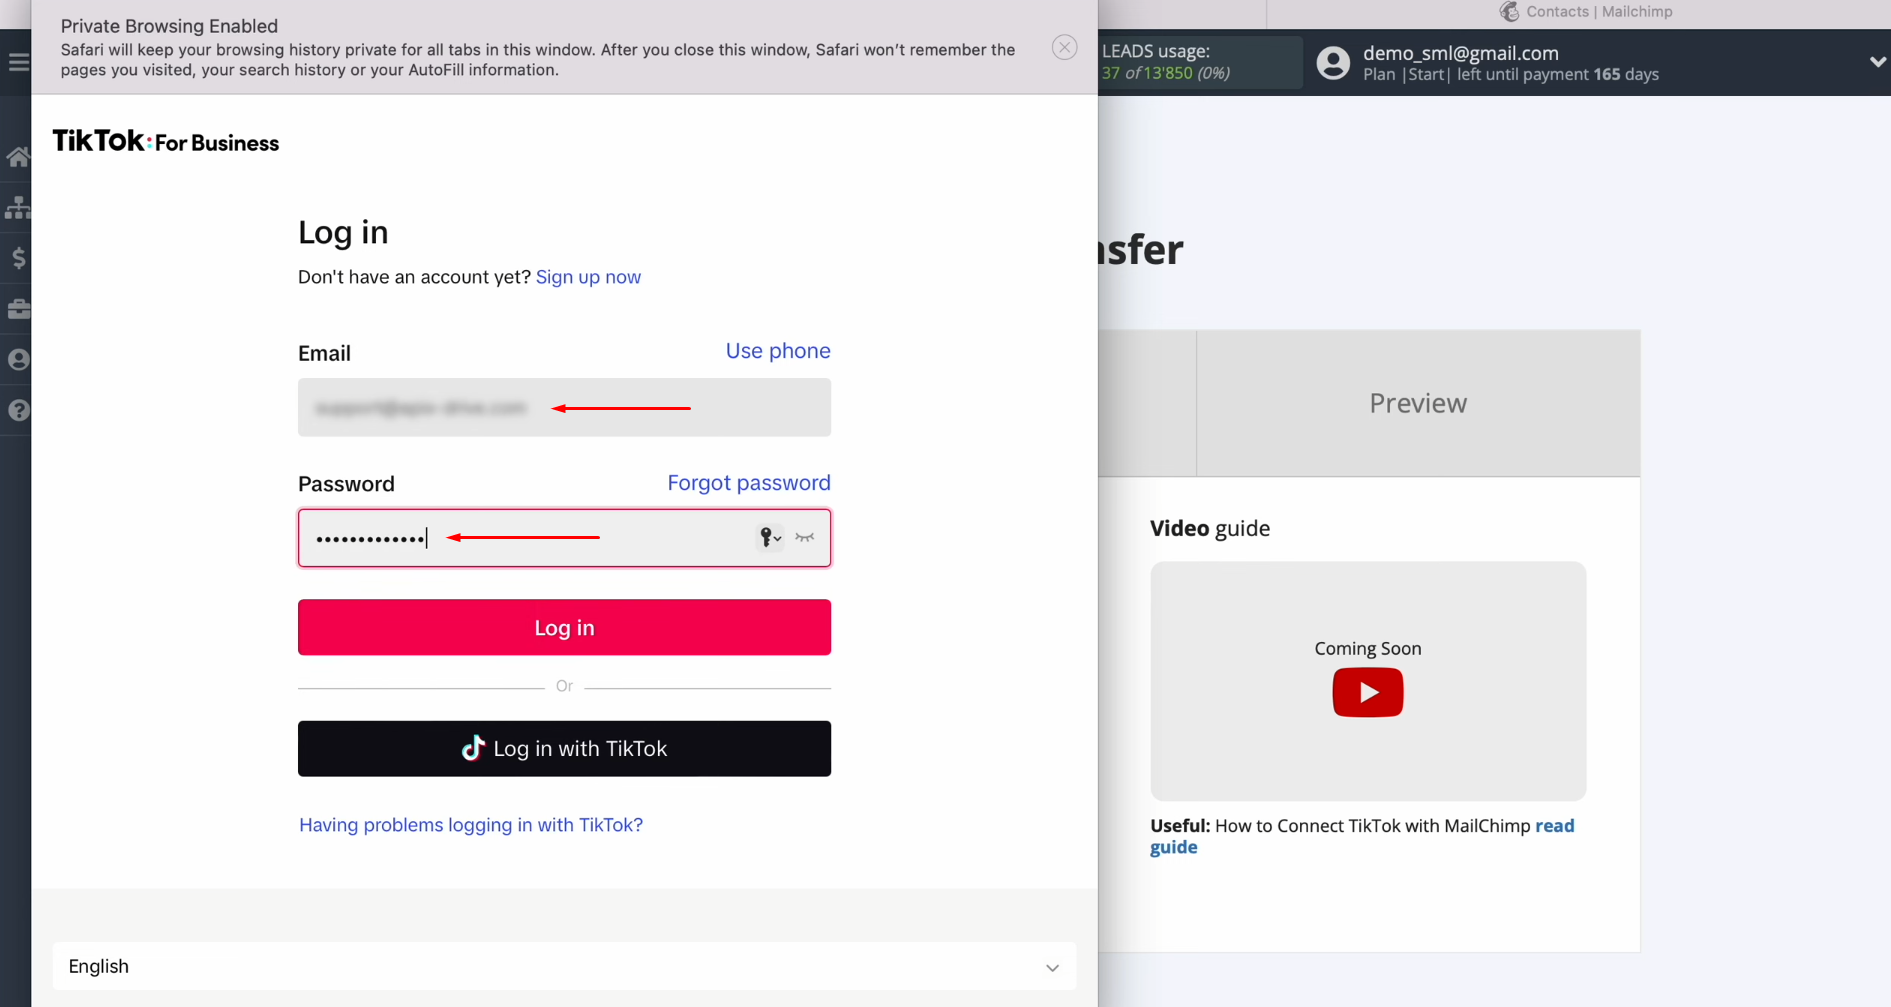
Specify the
login and password of your TikTok personal account. Click “Log
in.”
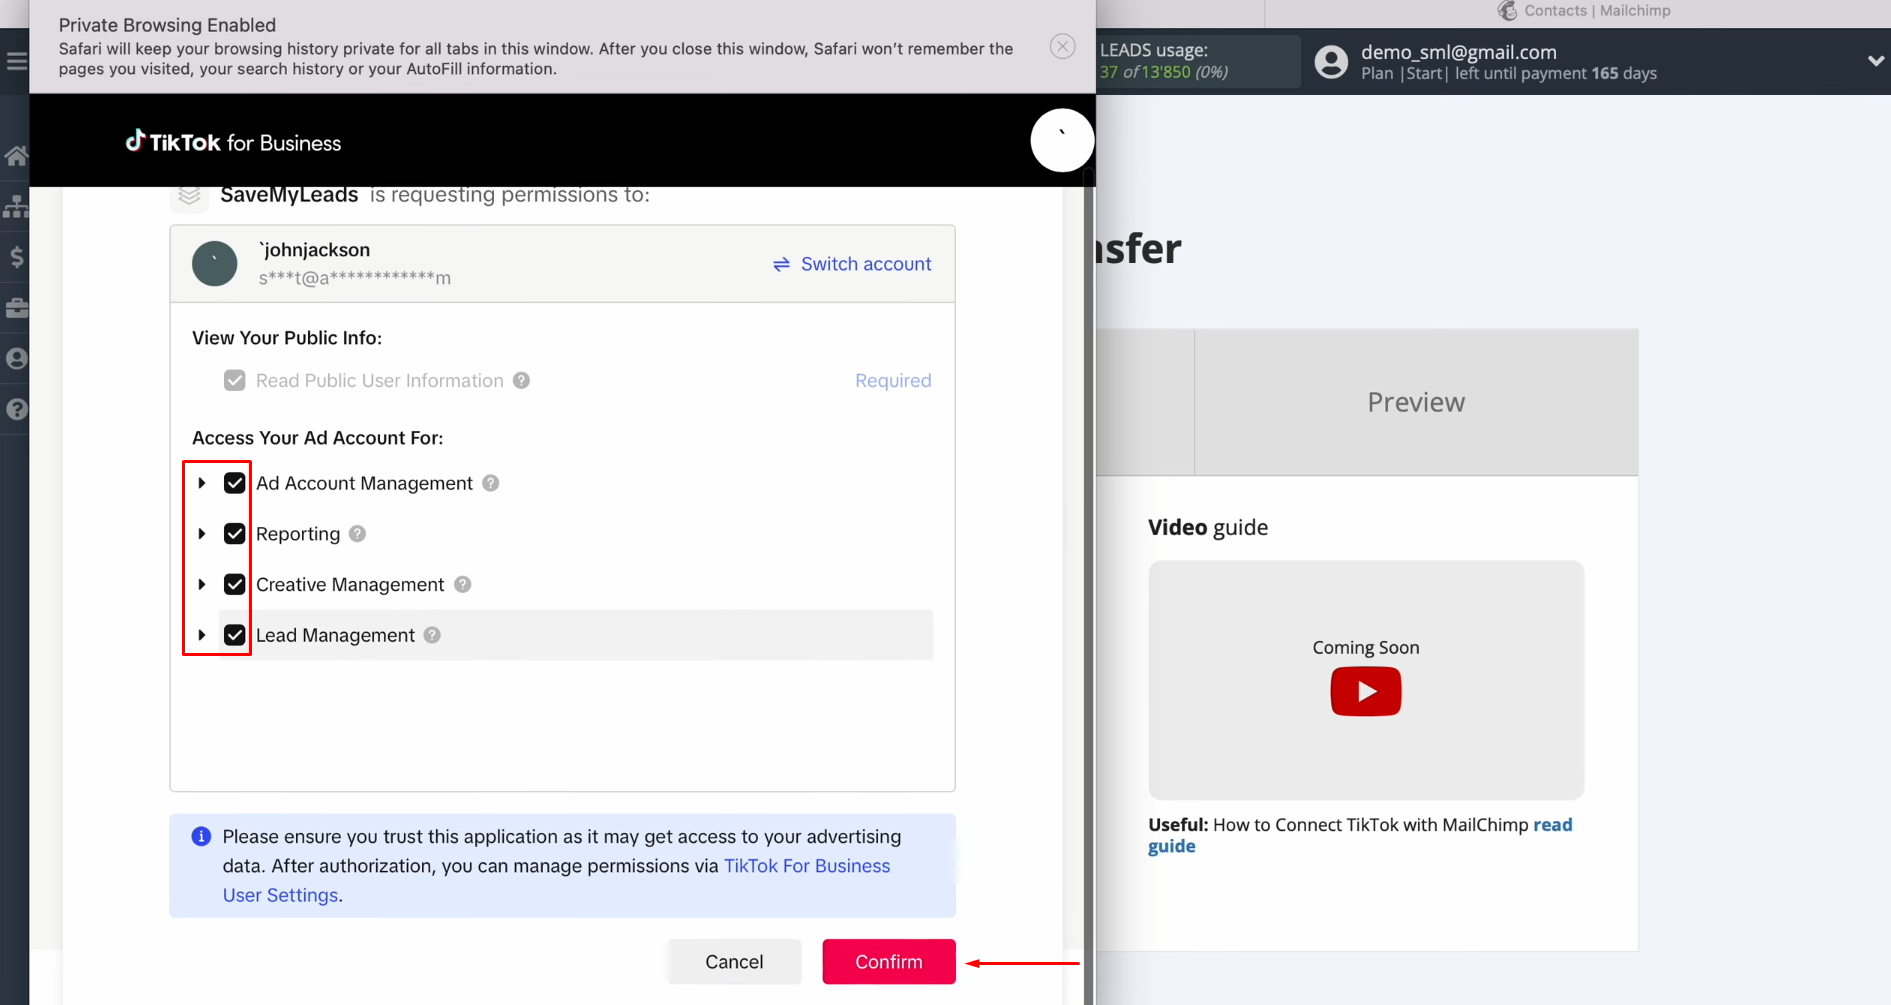
Give
SaveMyLeads access to work with your TikTok account. Make sure
that all access checkboxes
are enabled. Click
“Confirm.”
When the
connected account appears in the list, select it.
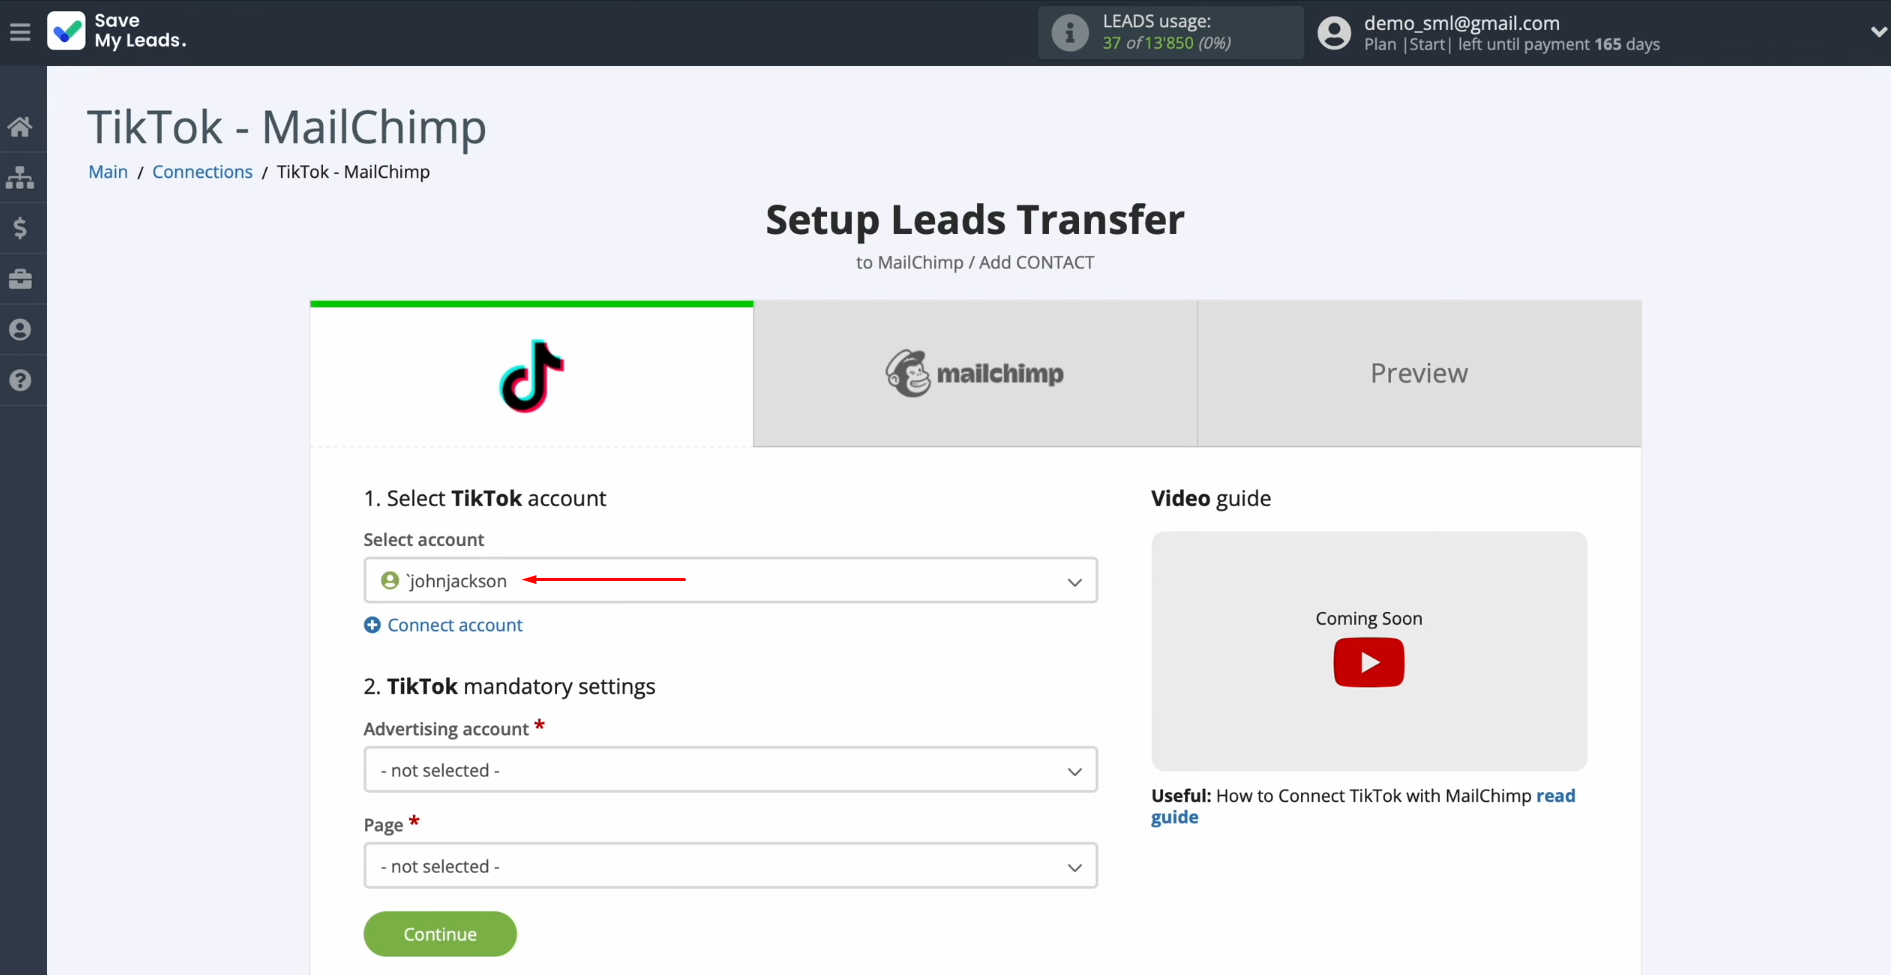
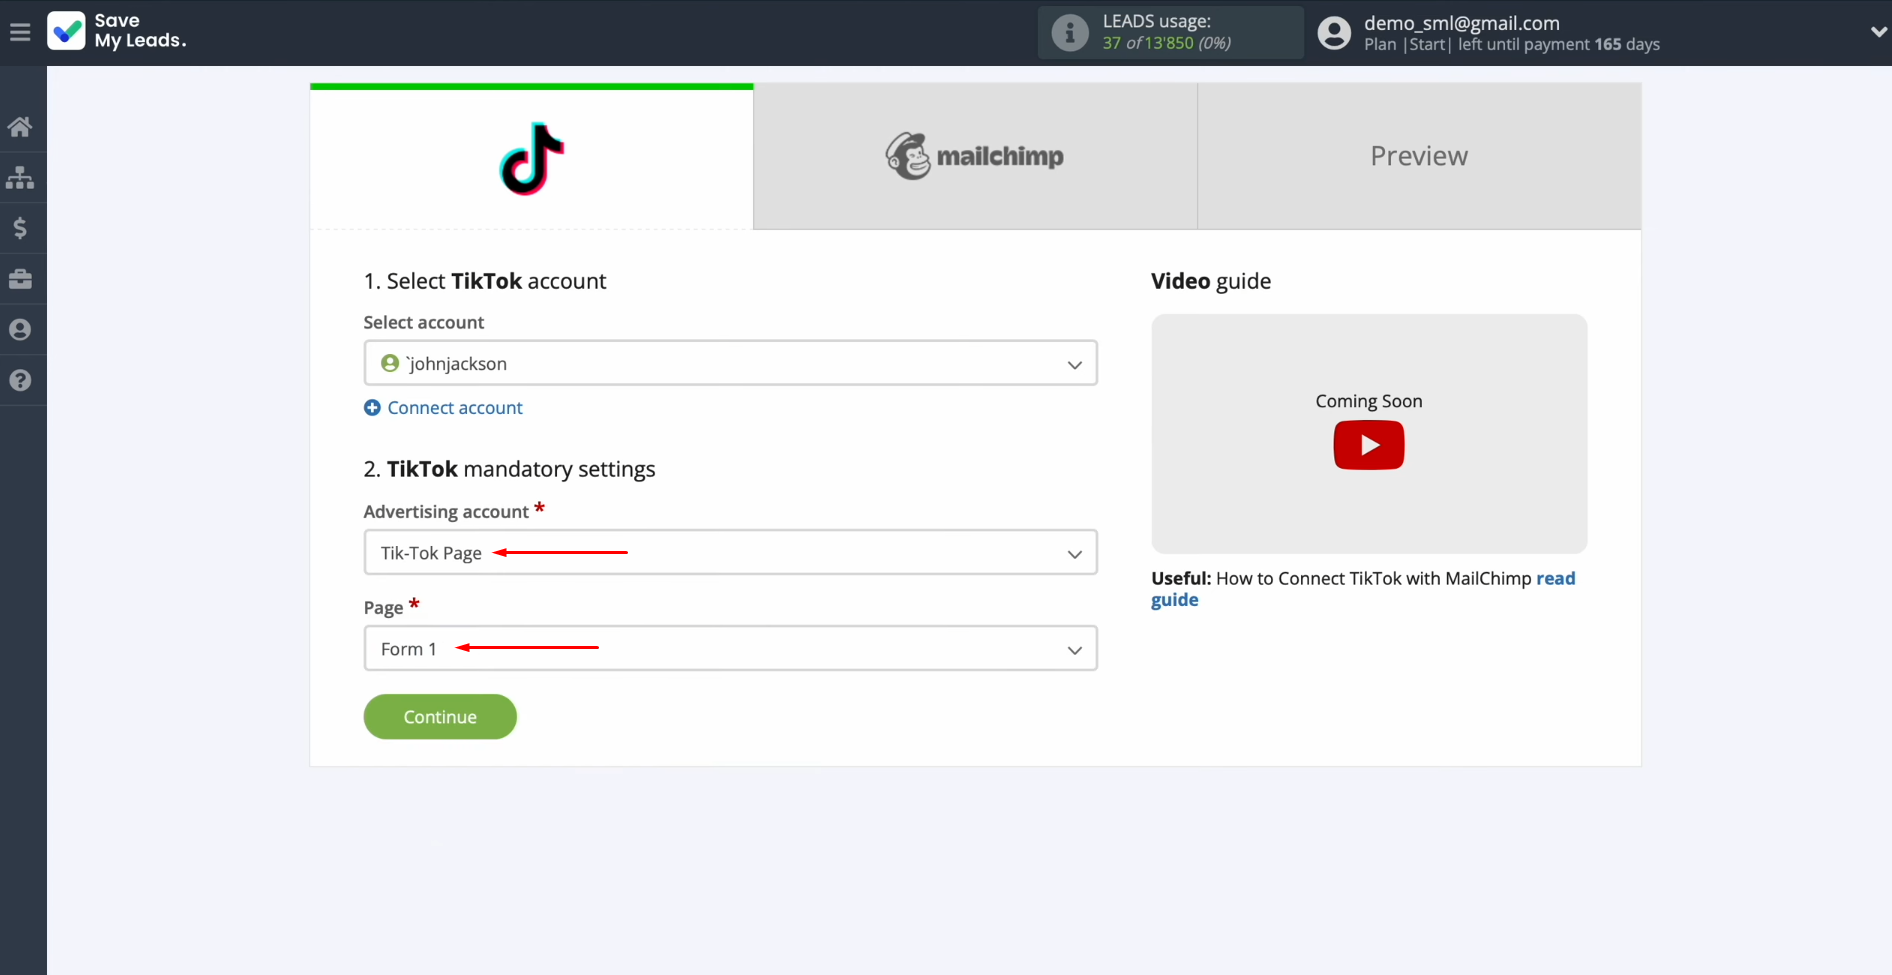
Select the advertising page and form. Then, click “Continue.”
Setting Up the Data Receiver – Mailchimp
To set up Mailchimp integration with TikTok, you need to connect your Mailchimp account to SaveMyLeads.
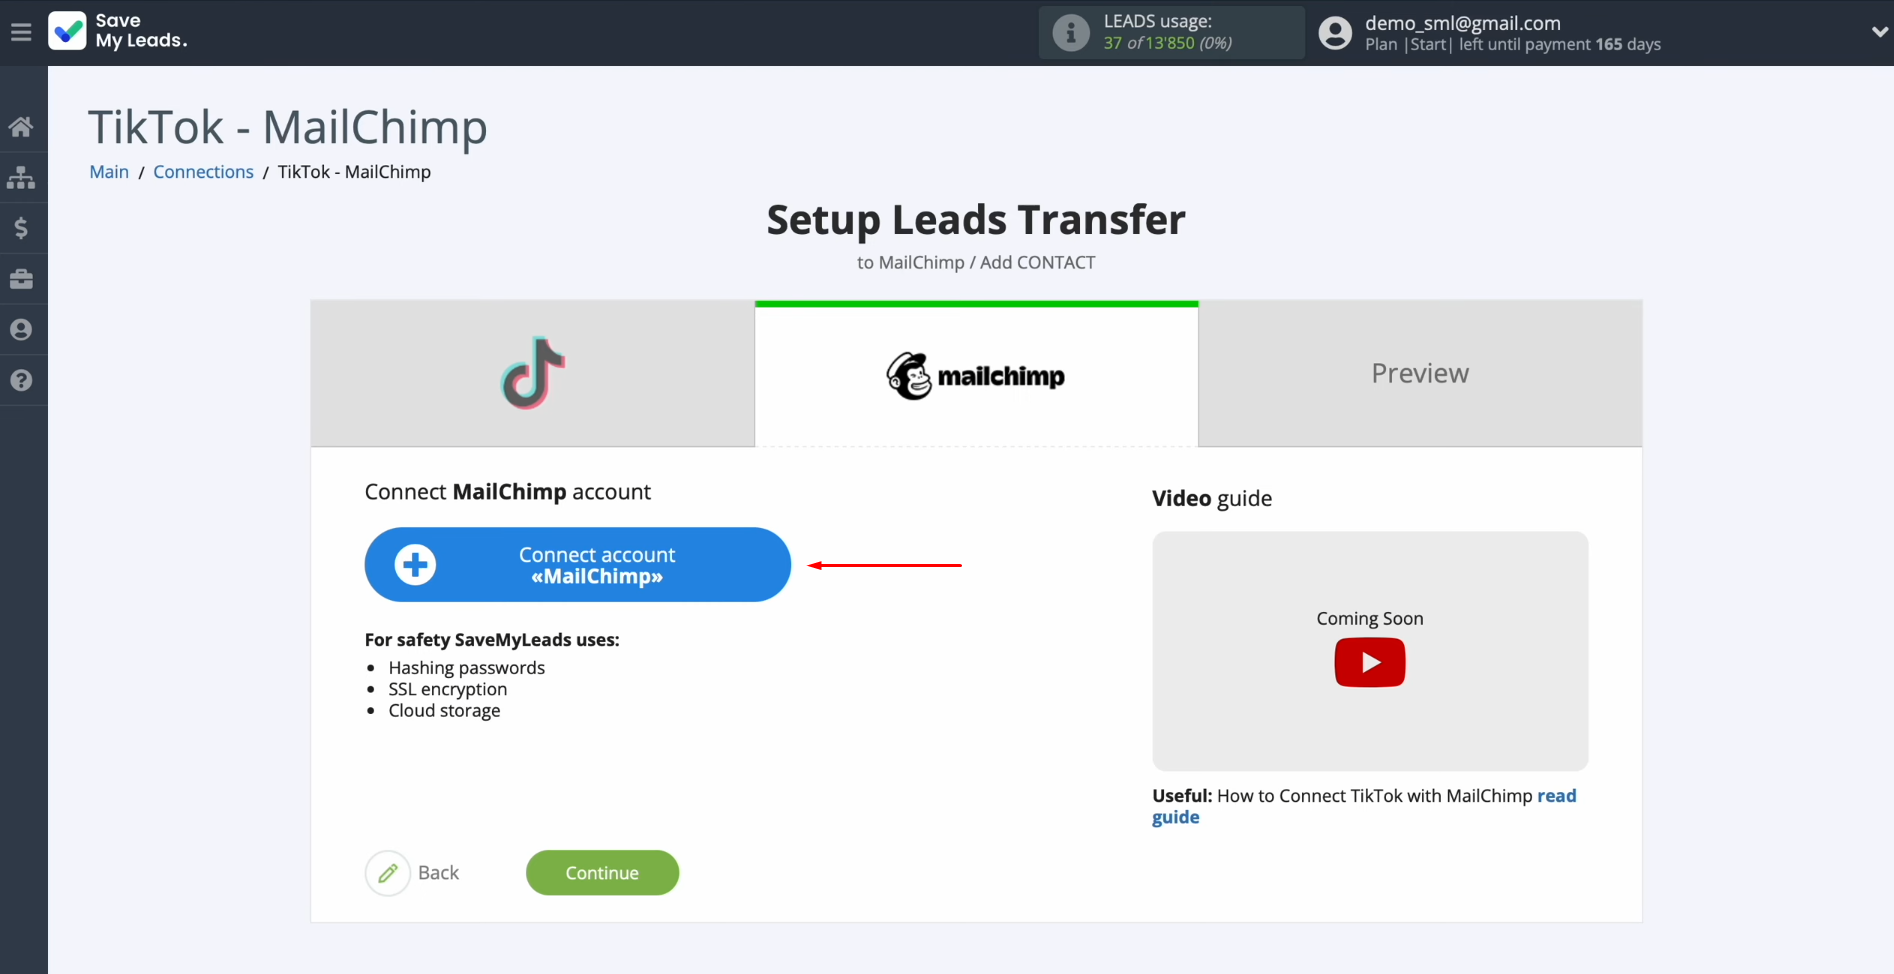
In this
window, you must specify the
API key.
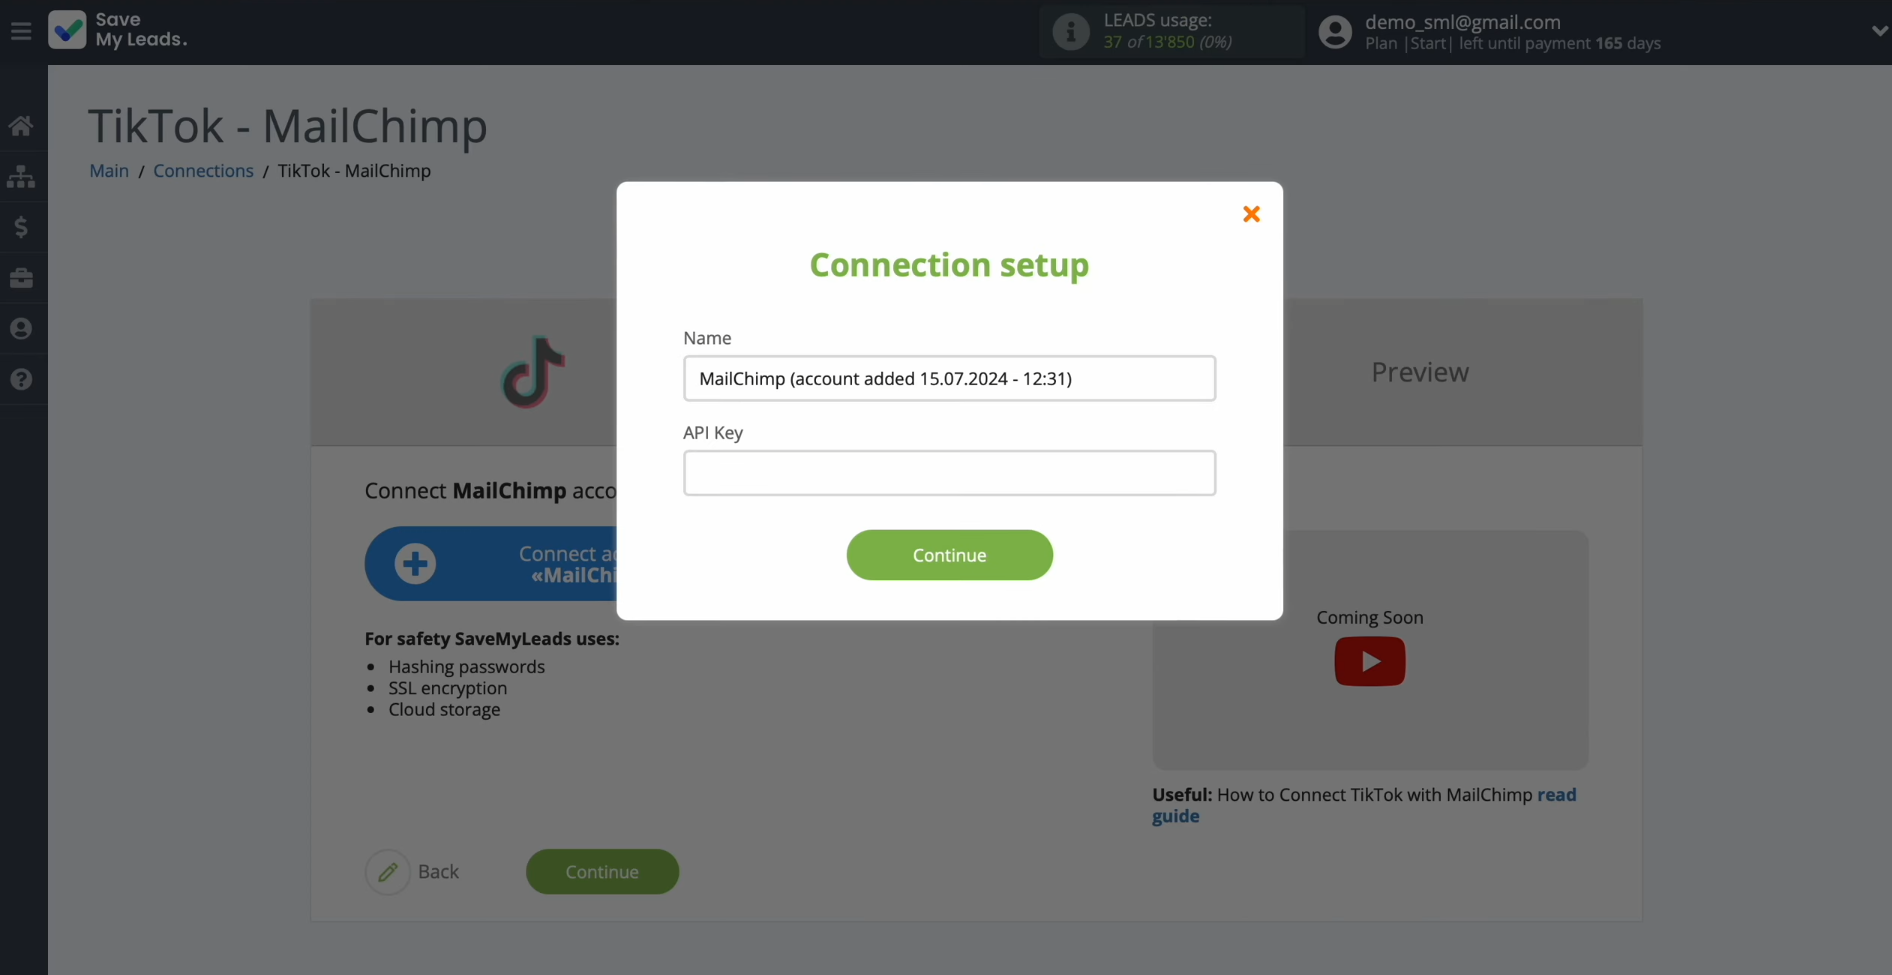
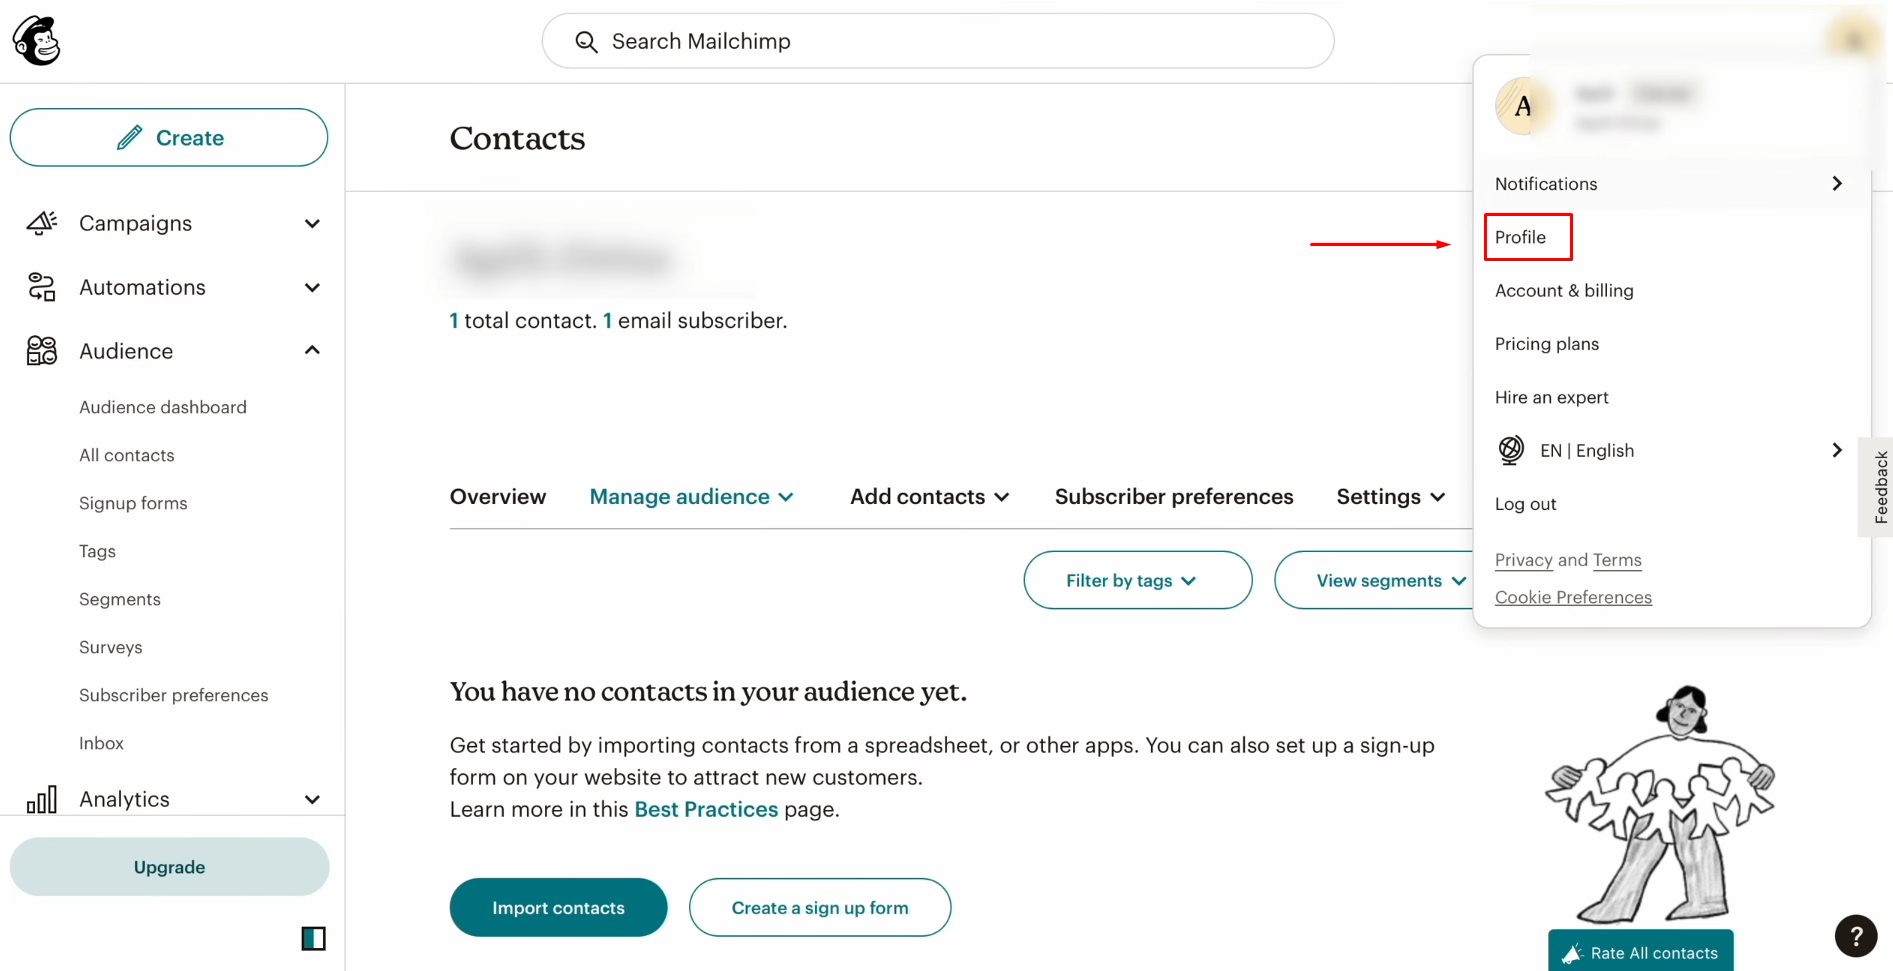
To get the
API key, go to the profile settings of your Mailchimp personal account.
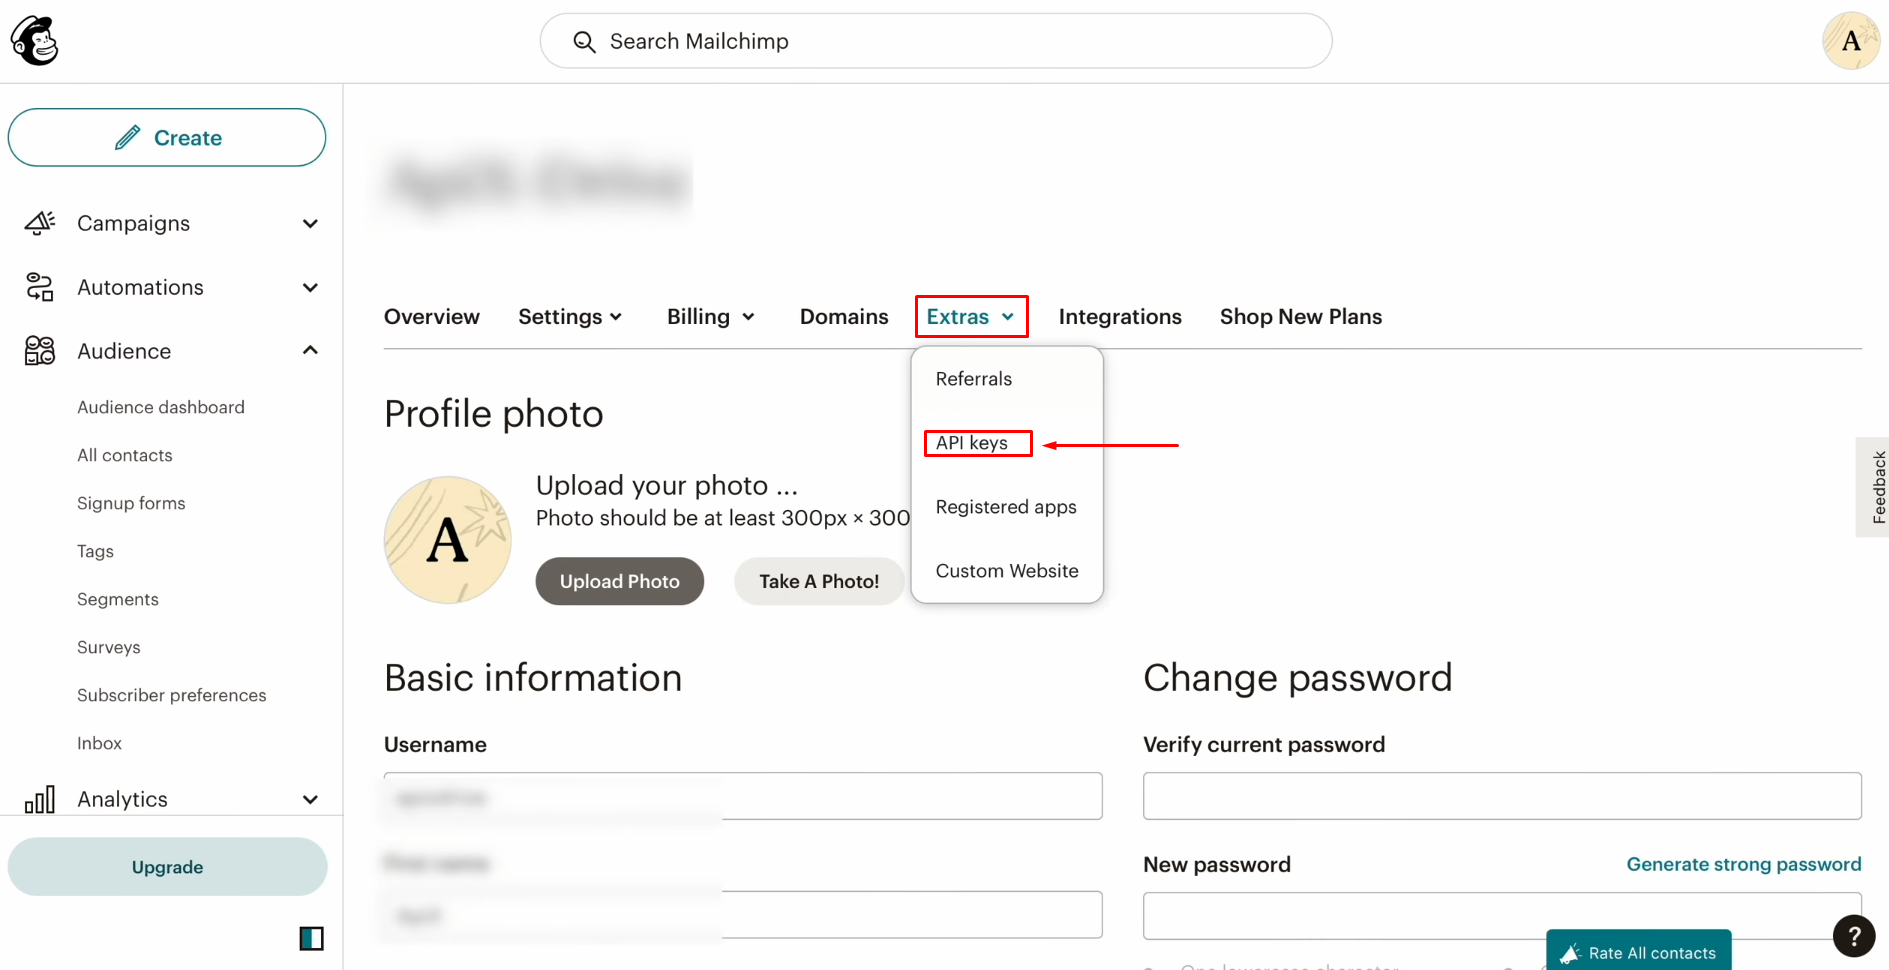
Go to the “Extras” section and find “API keys” here.
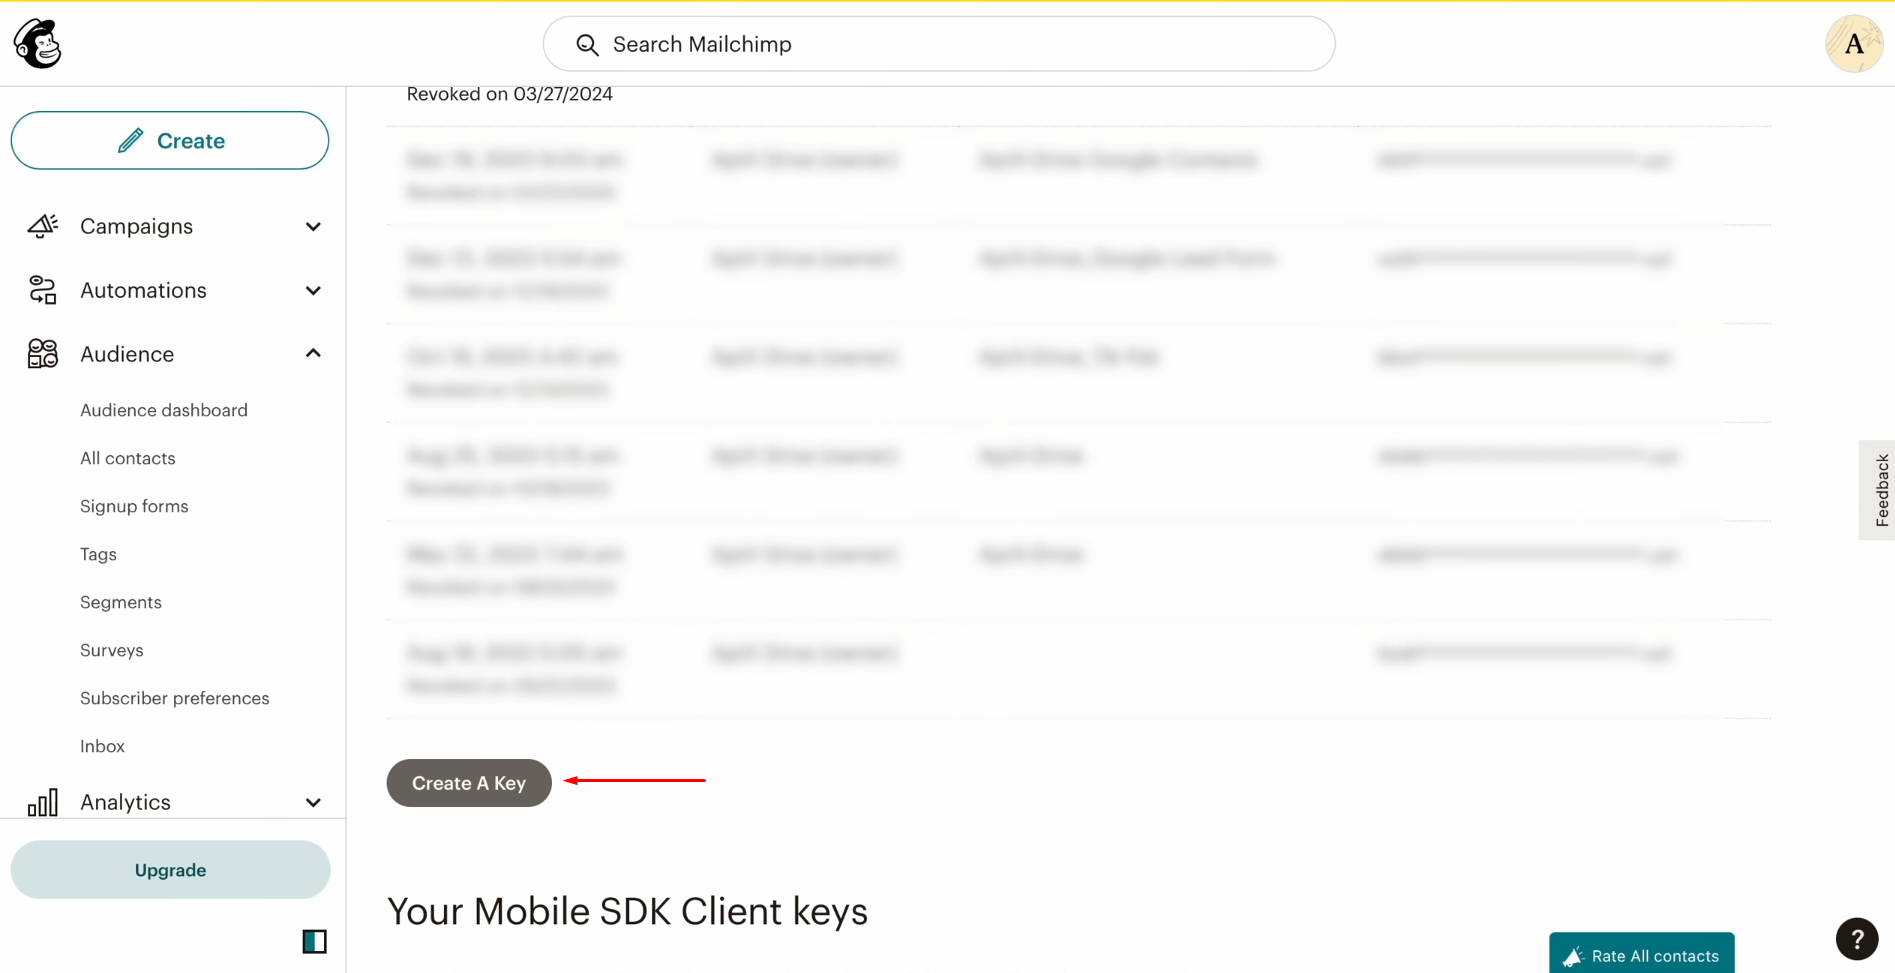
Click “Create A Key.”
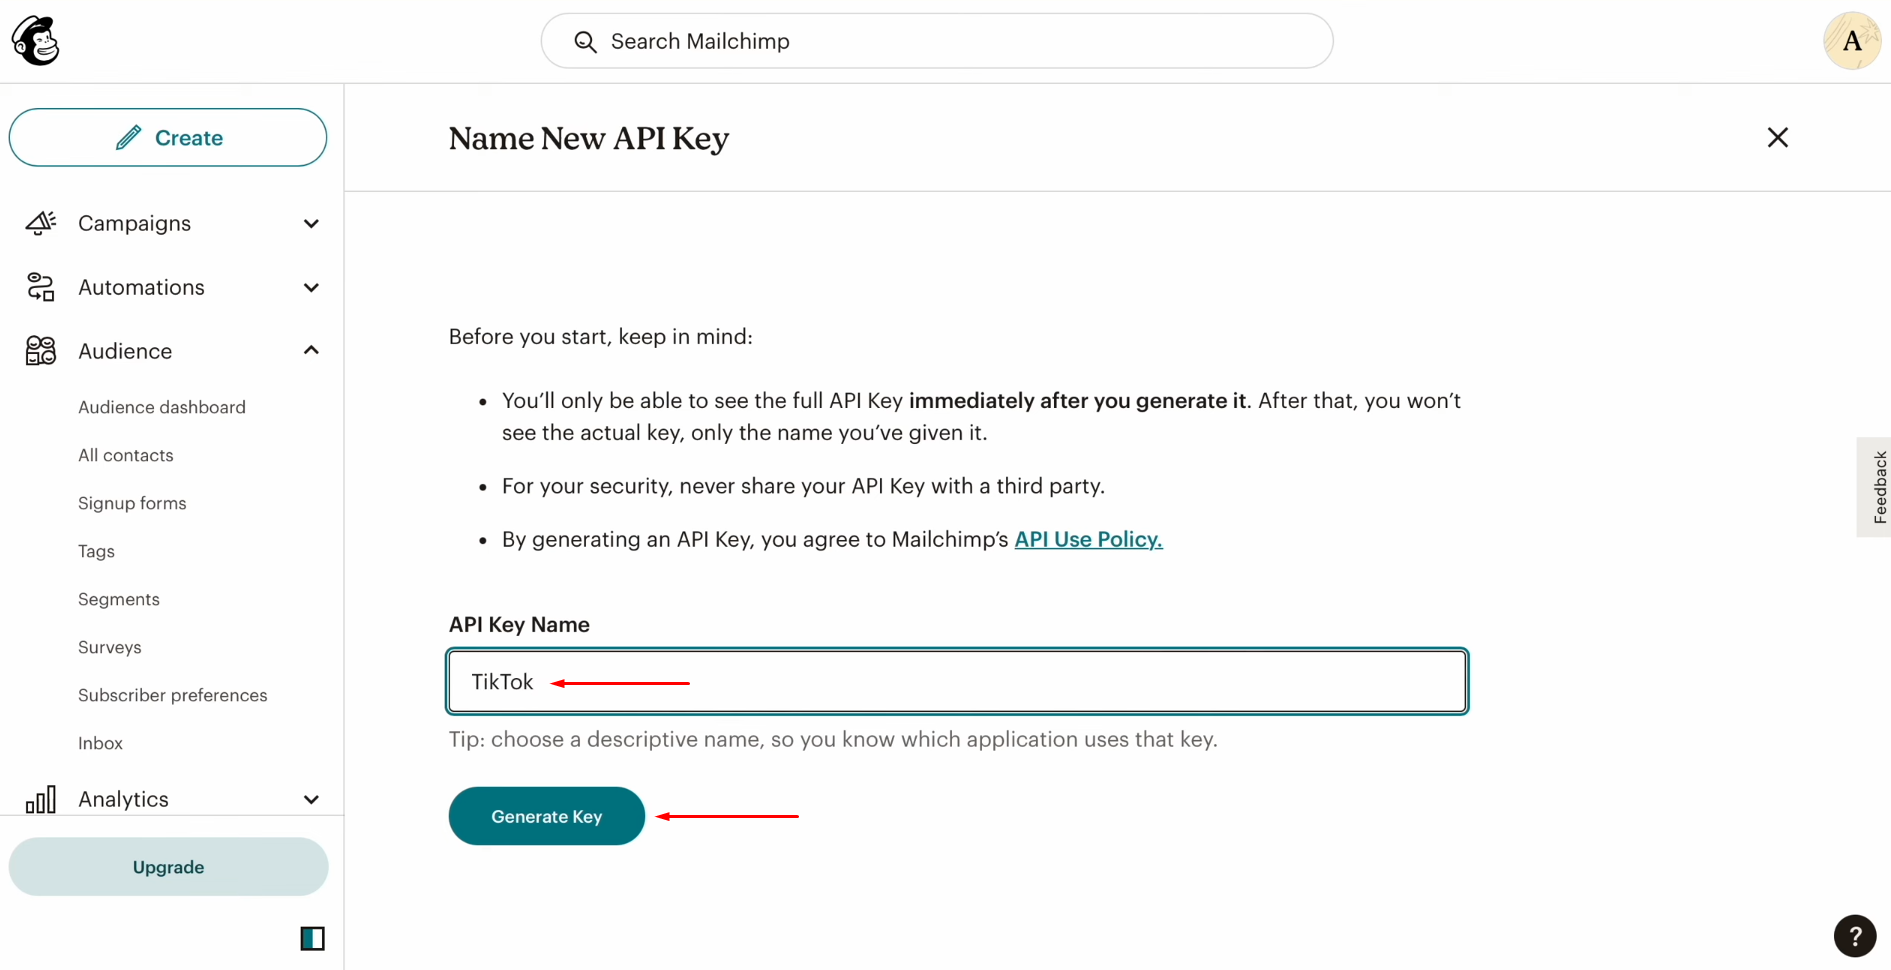
Specify a
name for the new API key and click “Generate Key.”
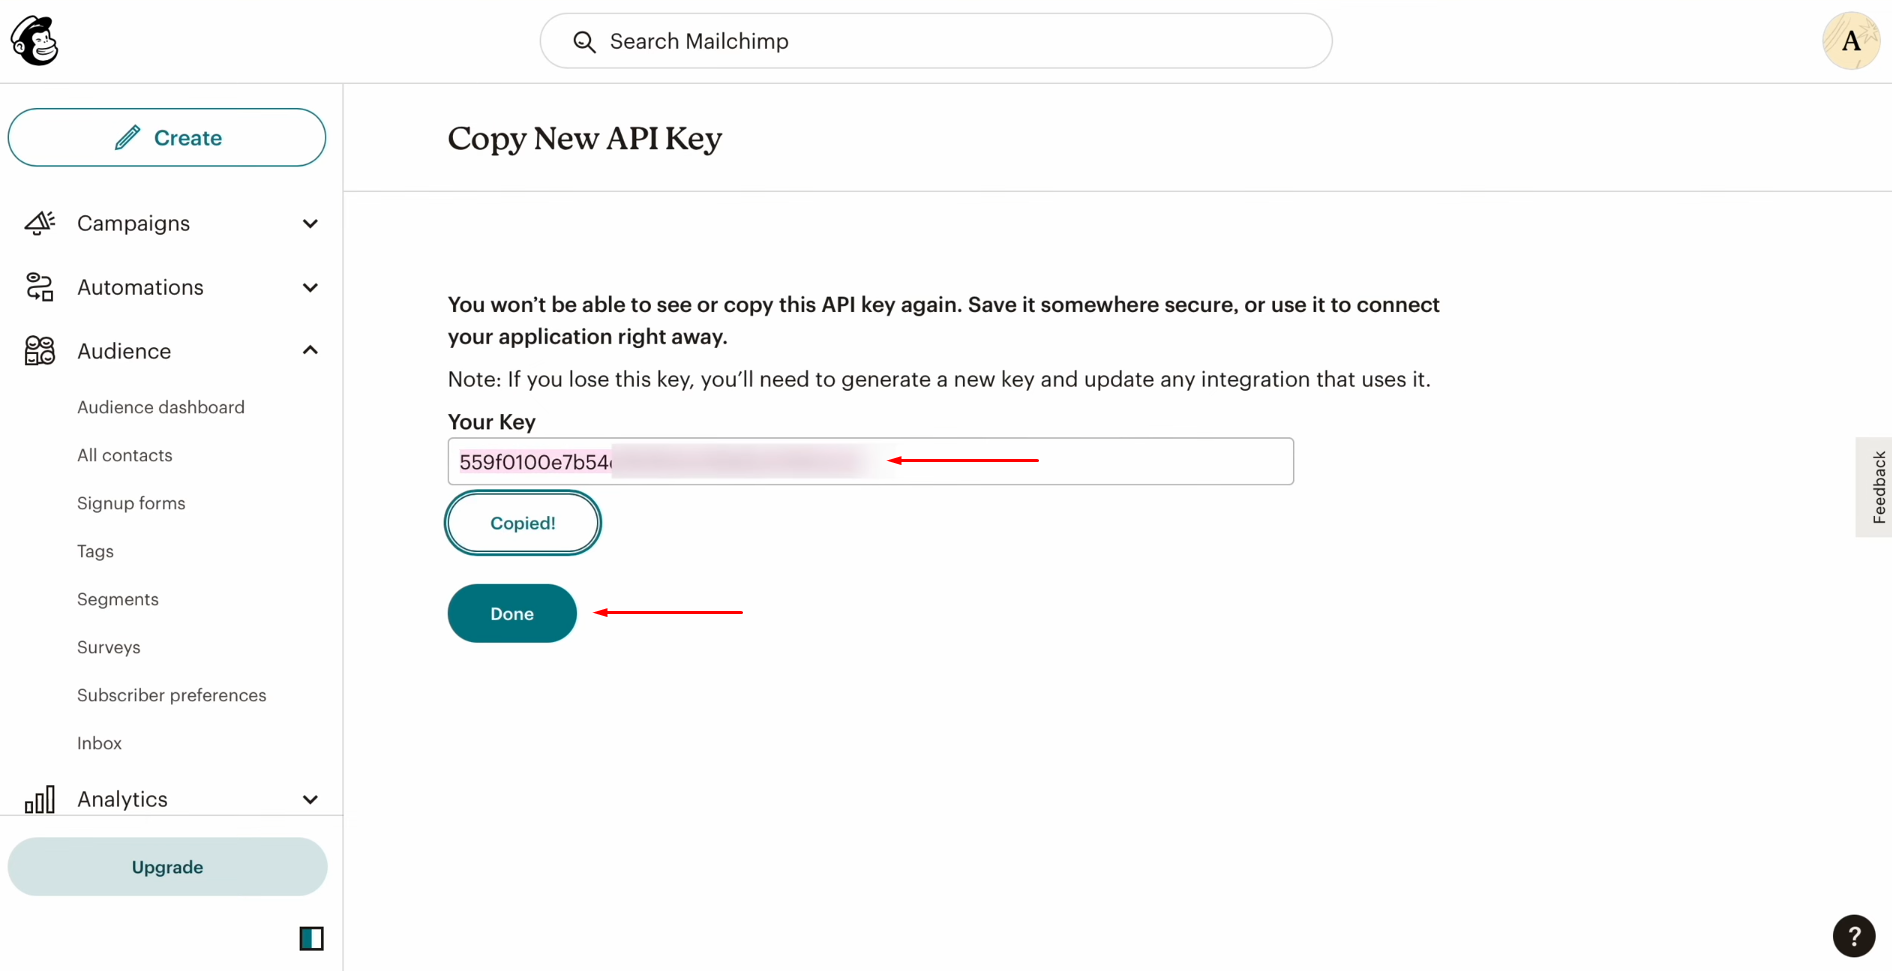
Copy the API
key and click “Done.”
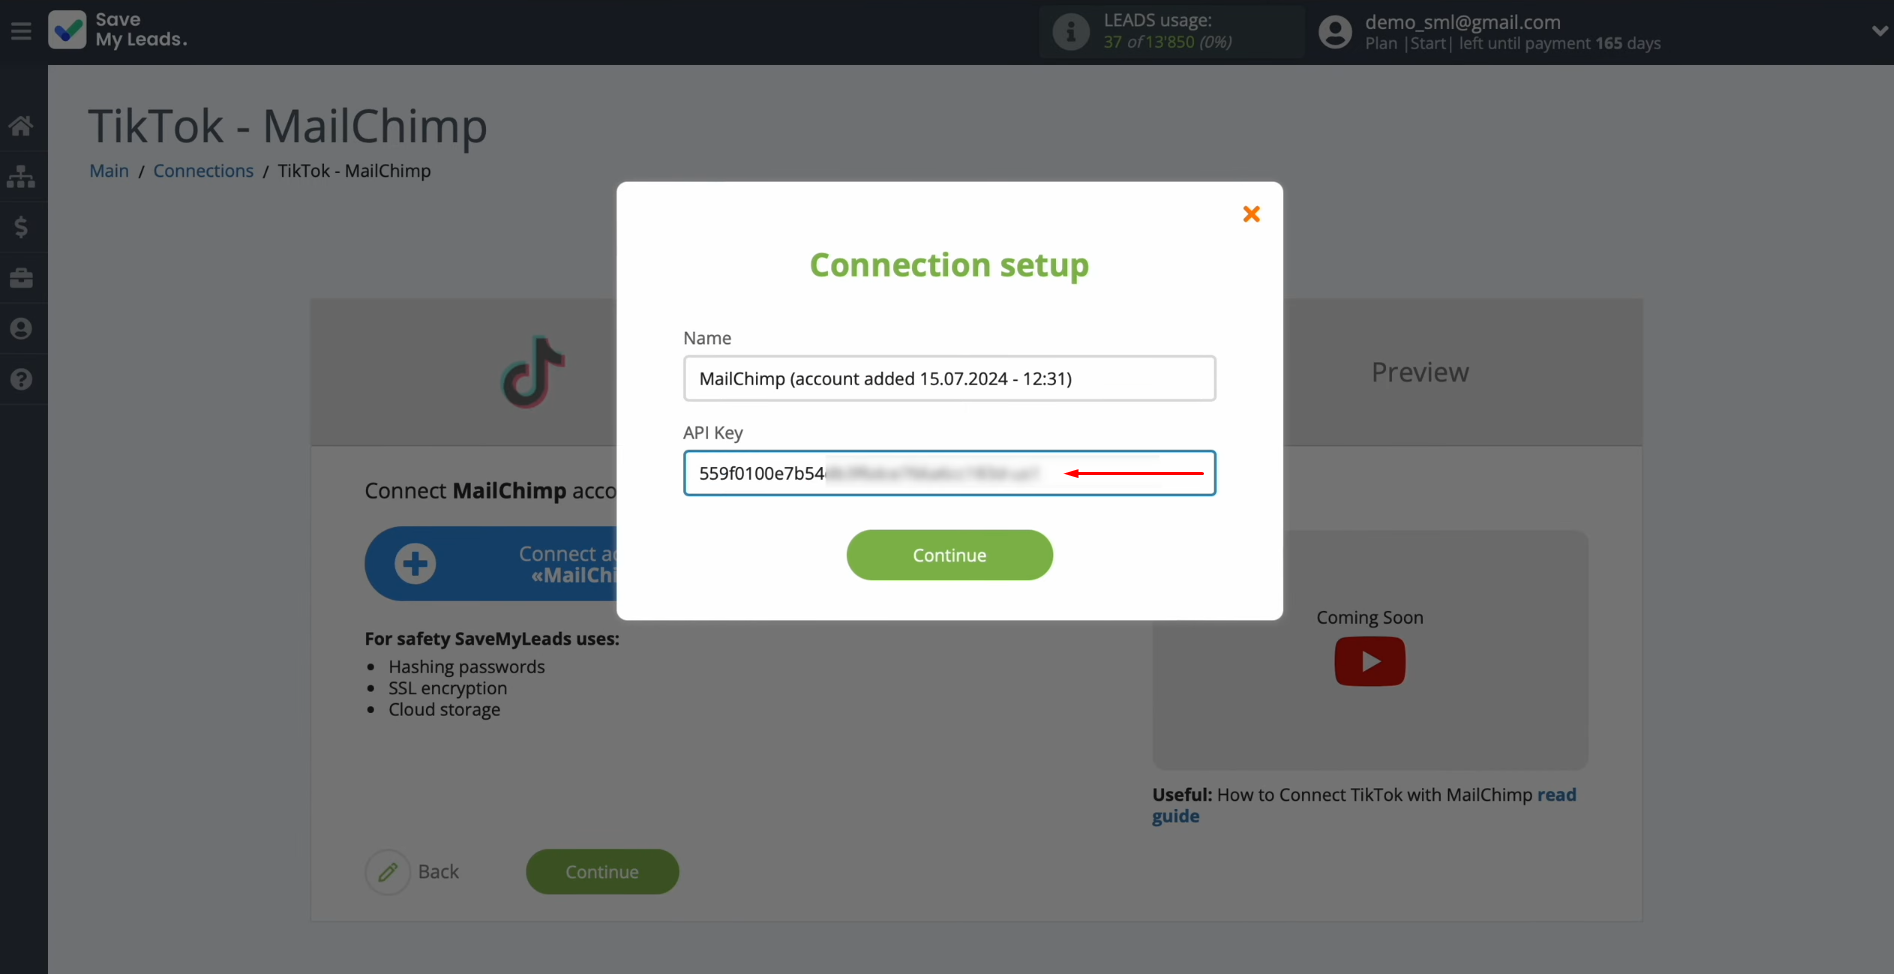
Paste the API
key into the appropriate field in SaveMyLeads and click “Continue.”
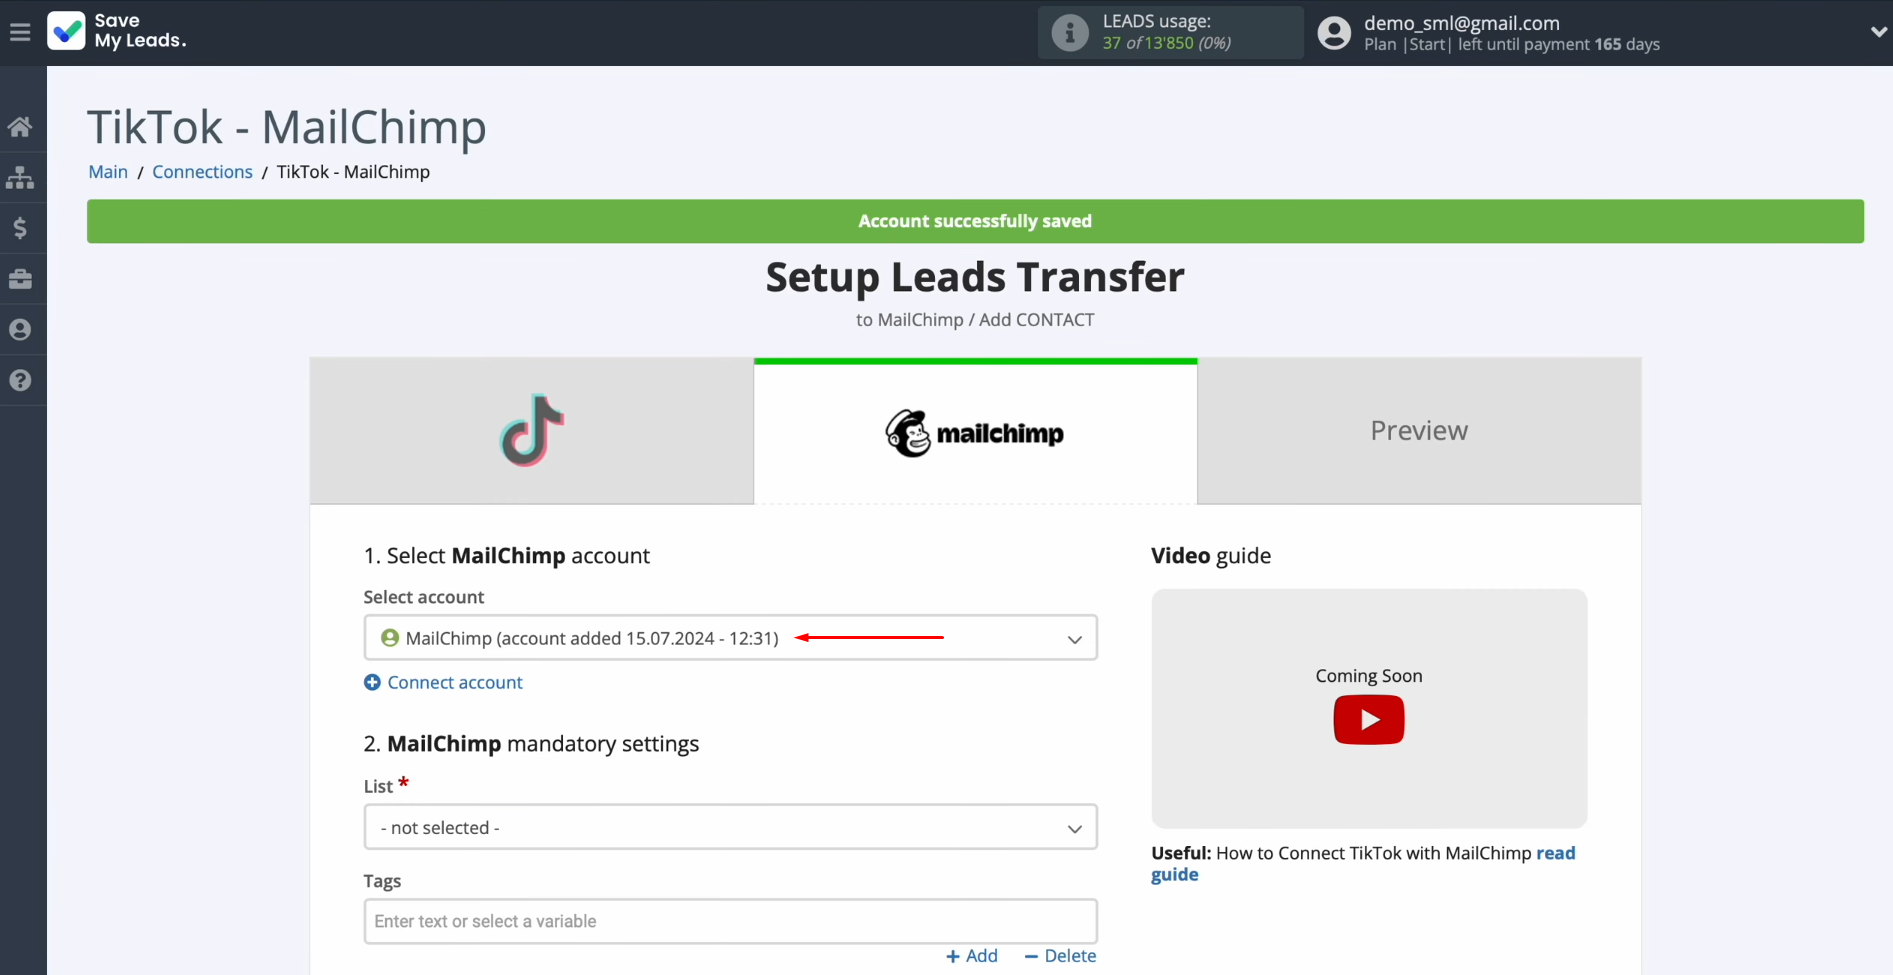
When the
connected login appears in the list, select it.
Select the
List to which new contacts will be added.
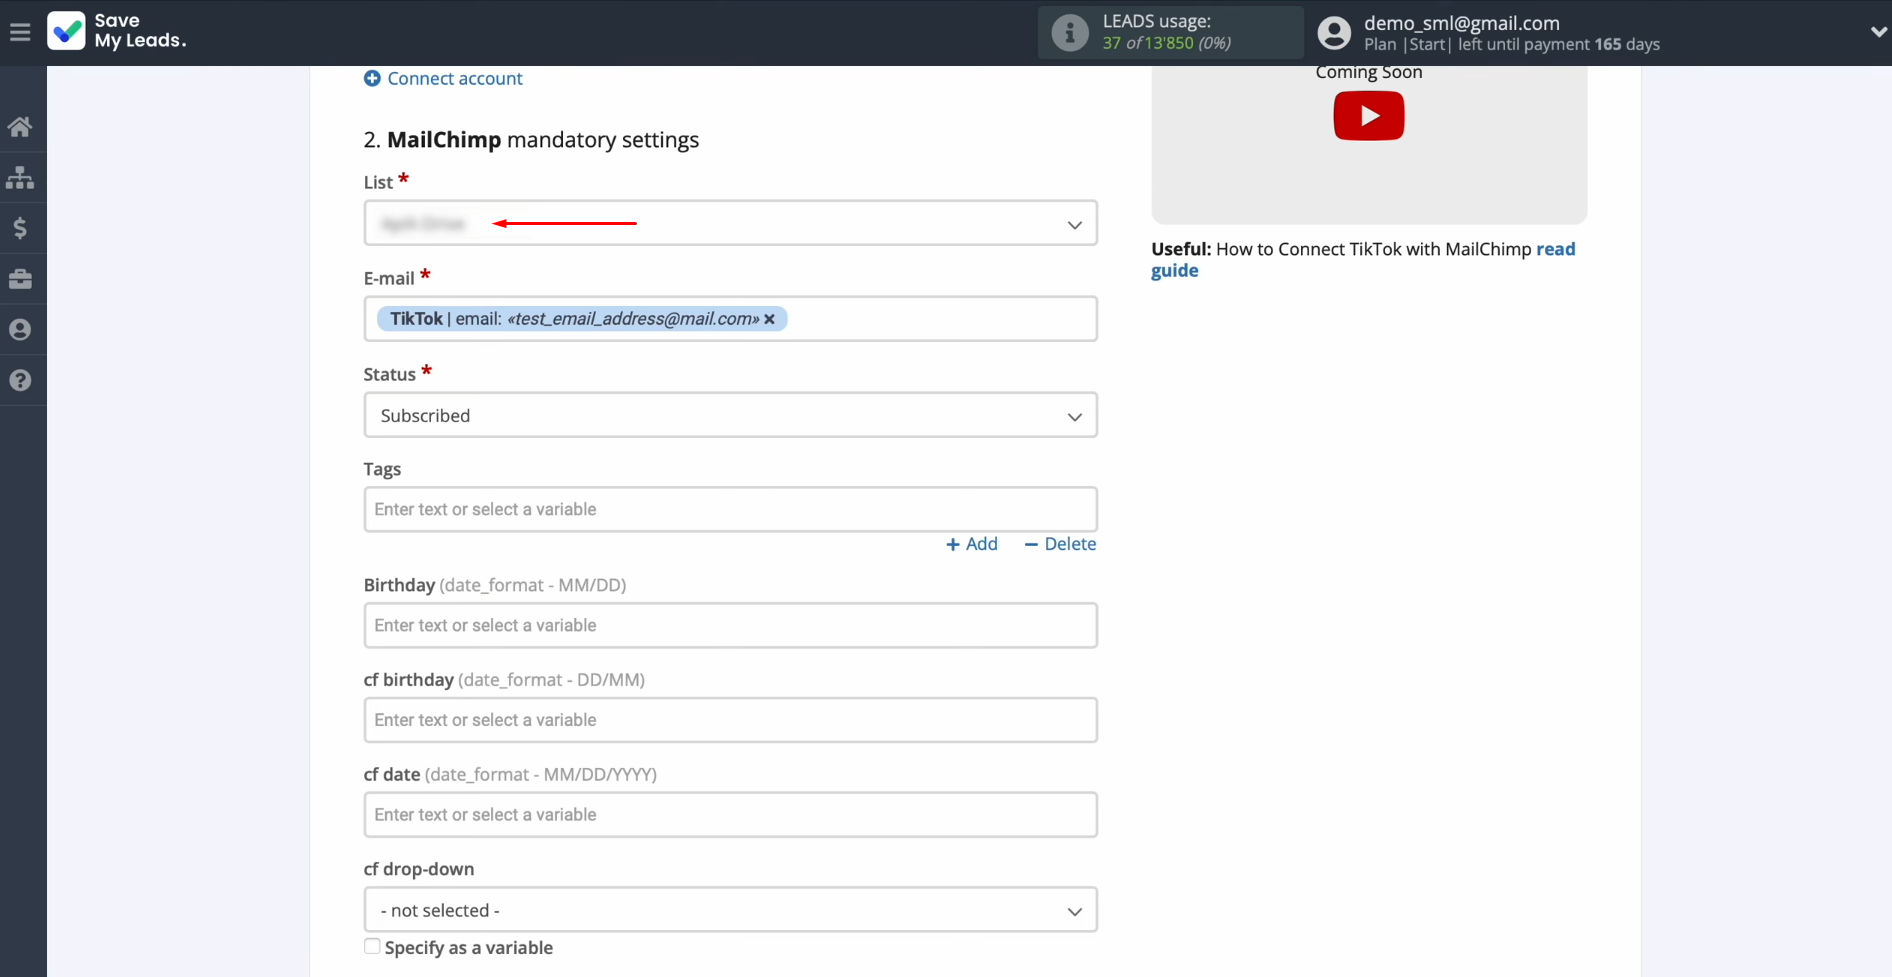
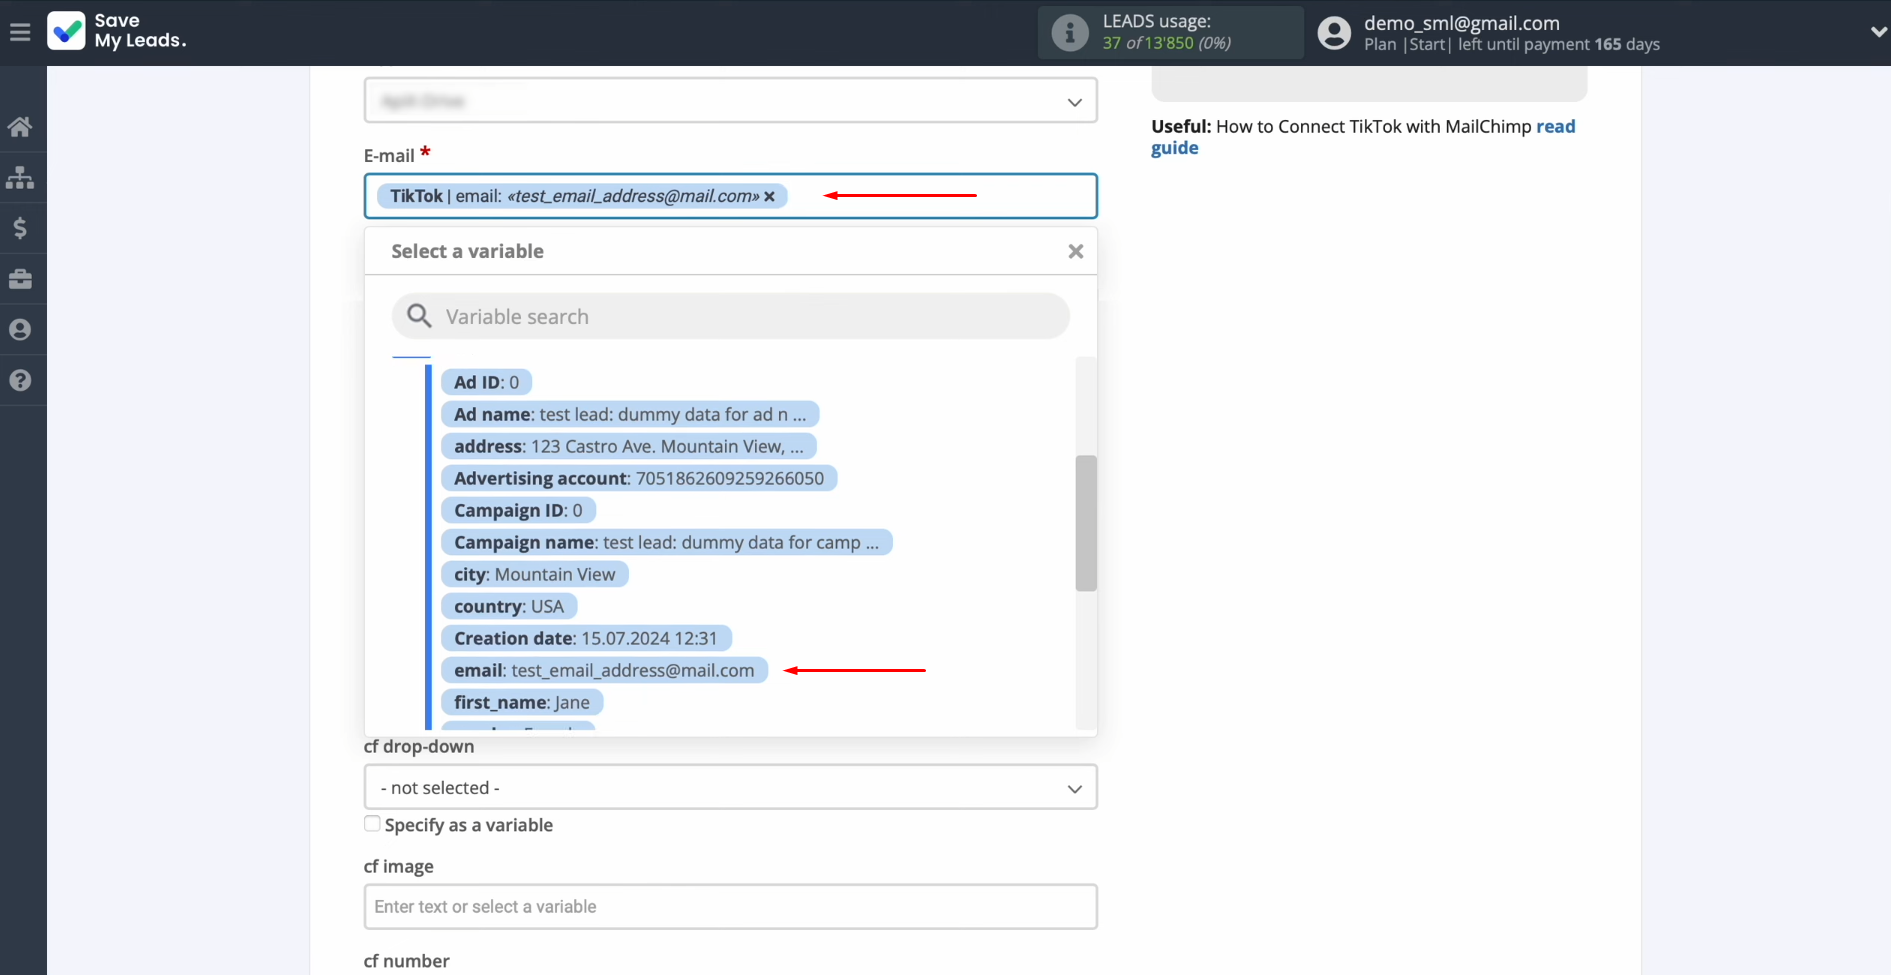
Now, you see Mailchimp fields for
creating new contacts. You can assign variables from
TikTok to these fields. To achieve this, click in the field and select a
variable from the drop-down list.
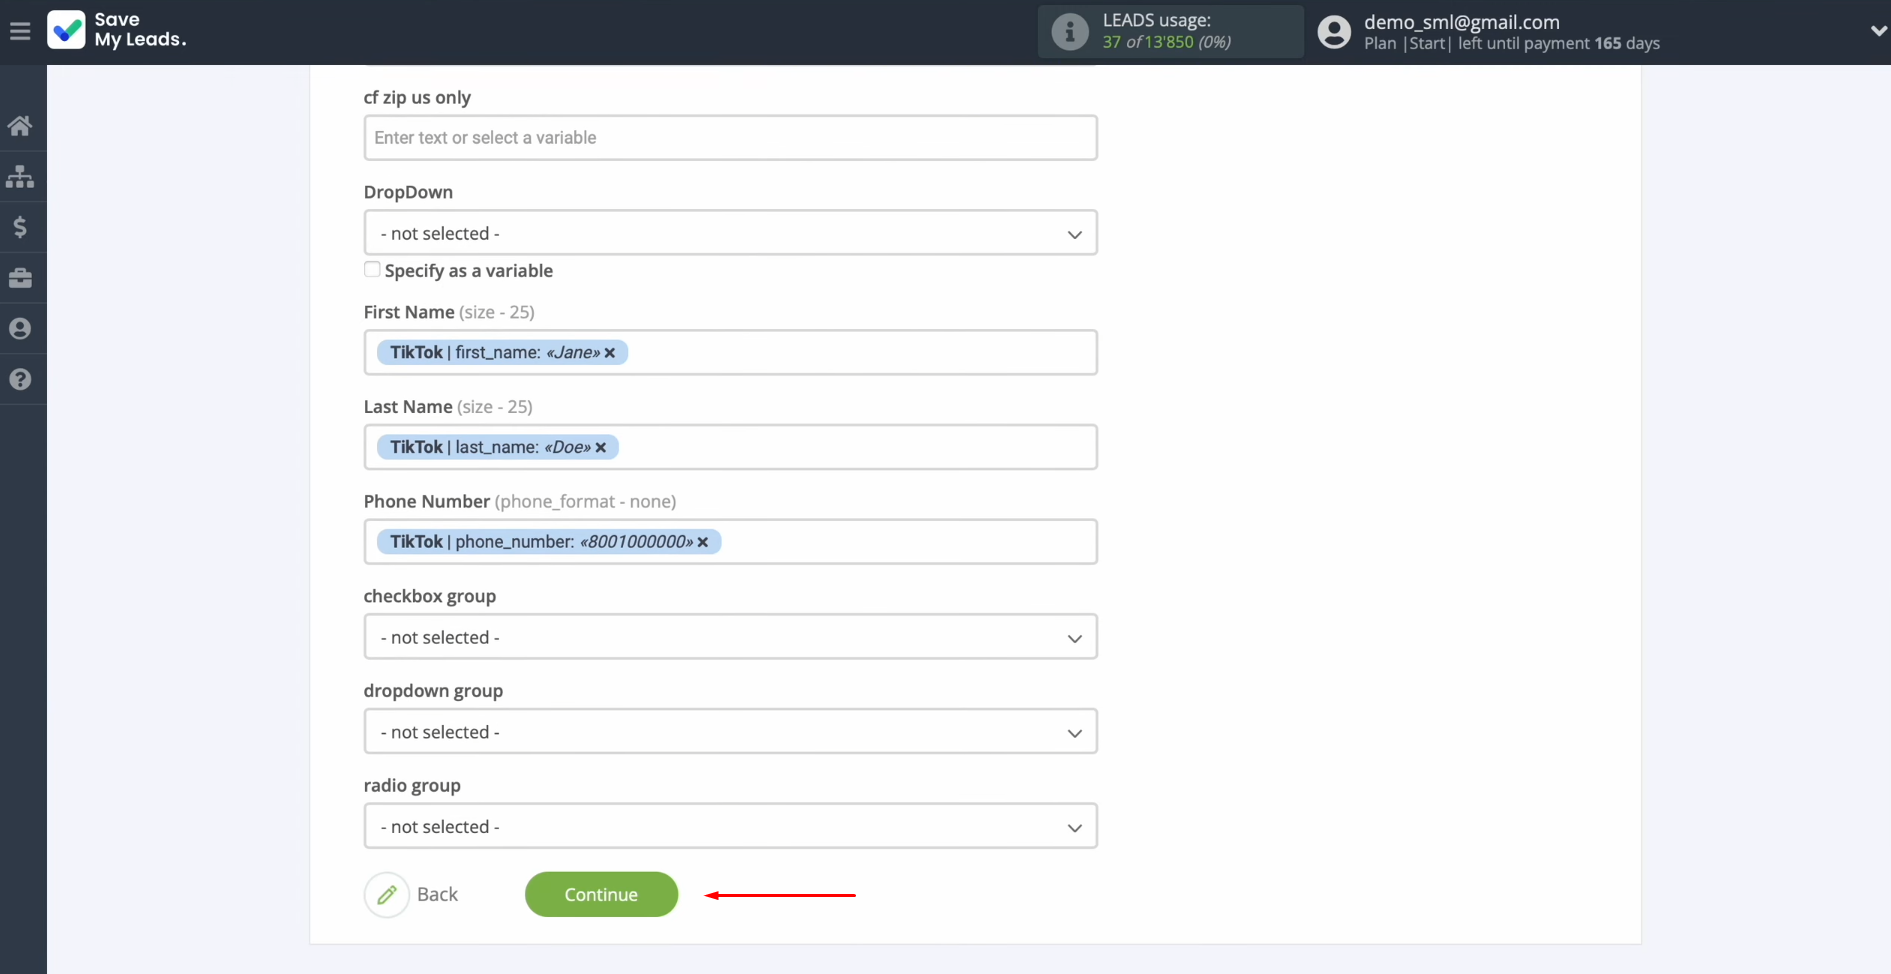
After all
the necessary variables are assigned, click “Continue.”
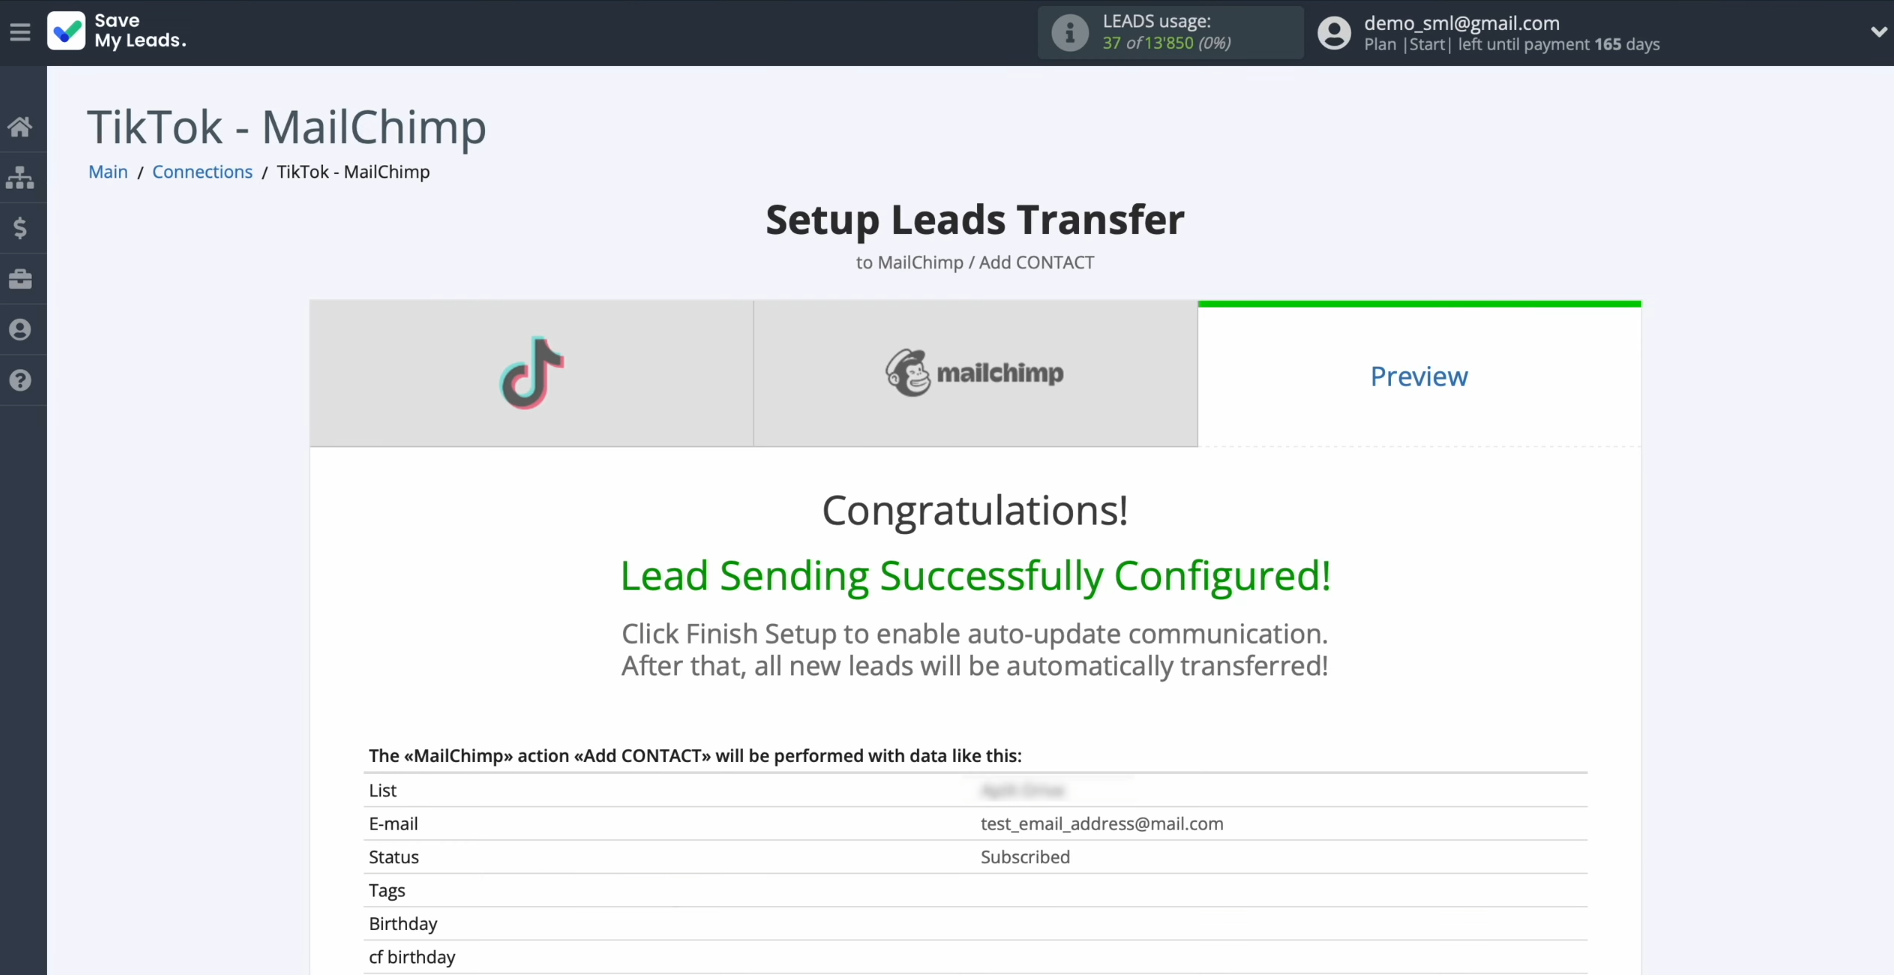
Here, you see an
example of the data that will be sent to Mailchimp in the form of new
contacts for each new lead from TikTok.
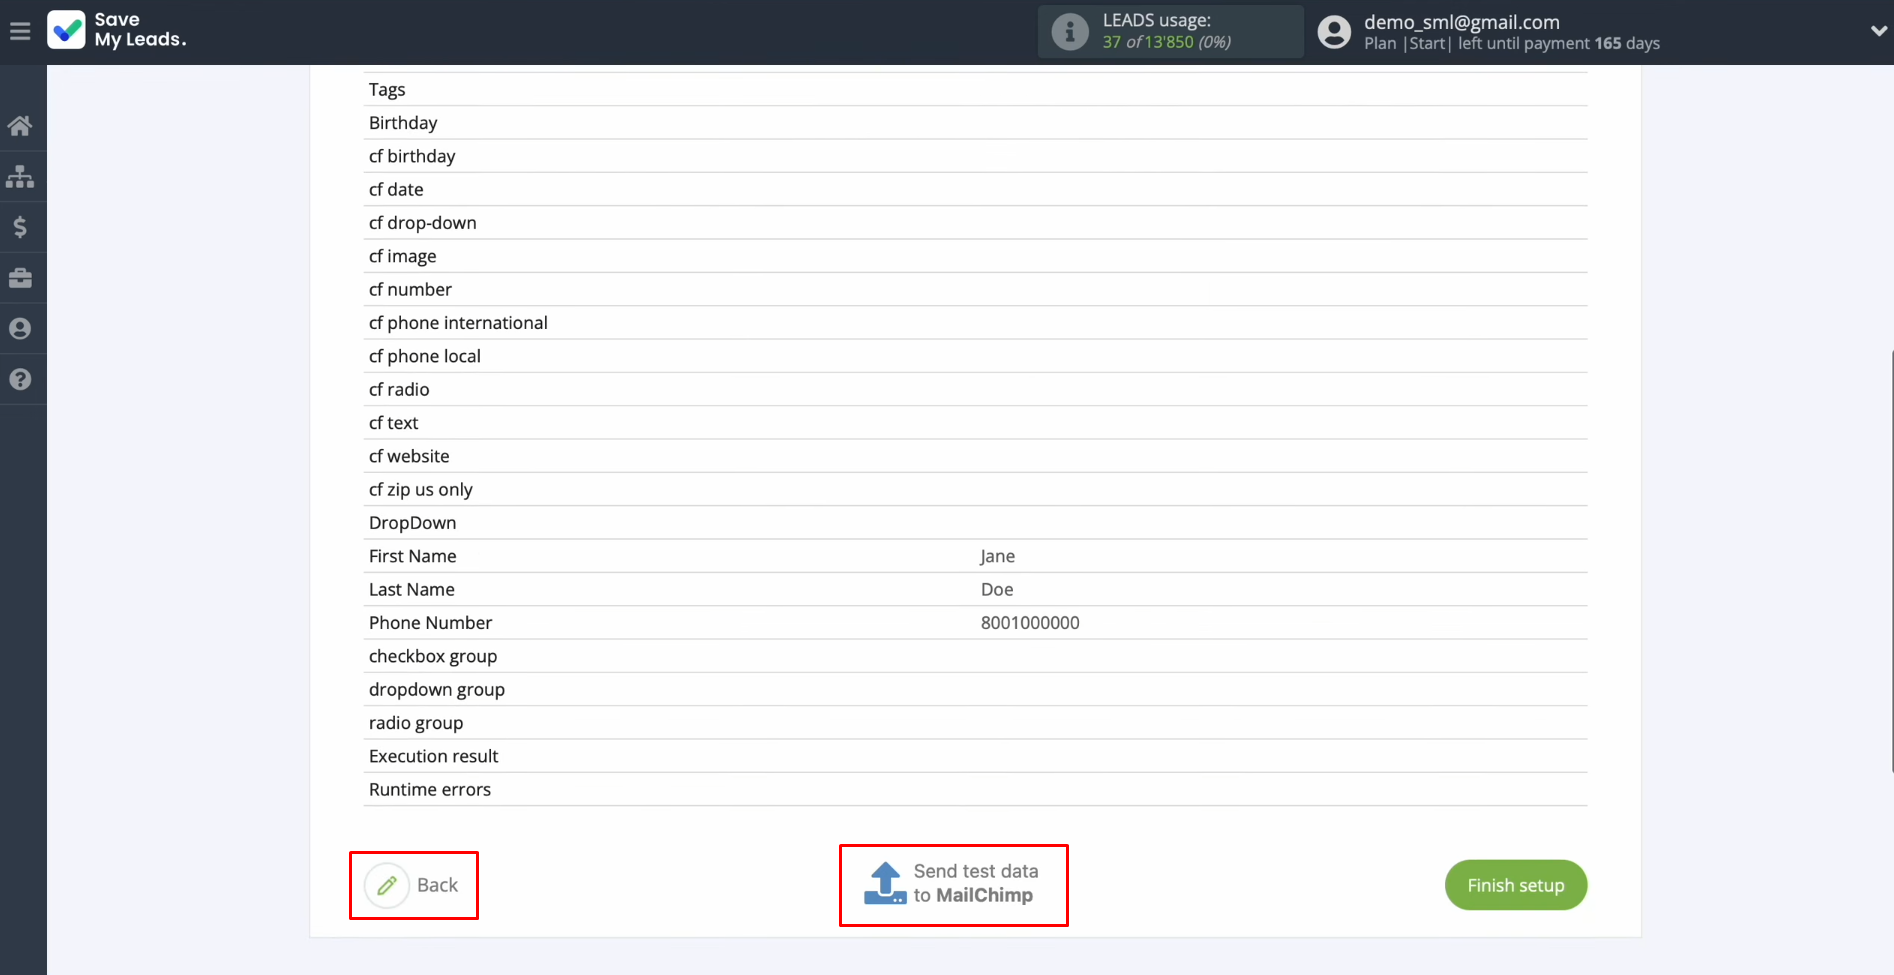
If you are
not satisfied with something, click “Back,” and you will go back a step. To check the correctness of the
settings, click “Send test data to Mailchimp.”
Go to
Mailchimp and check the result.
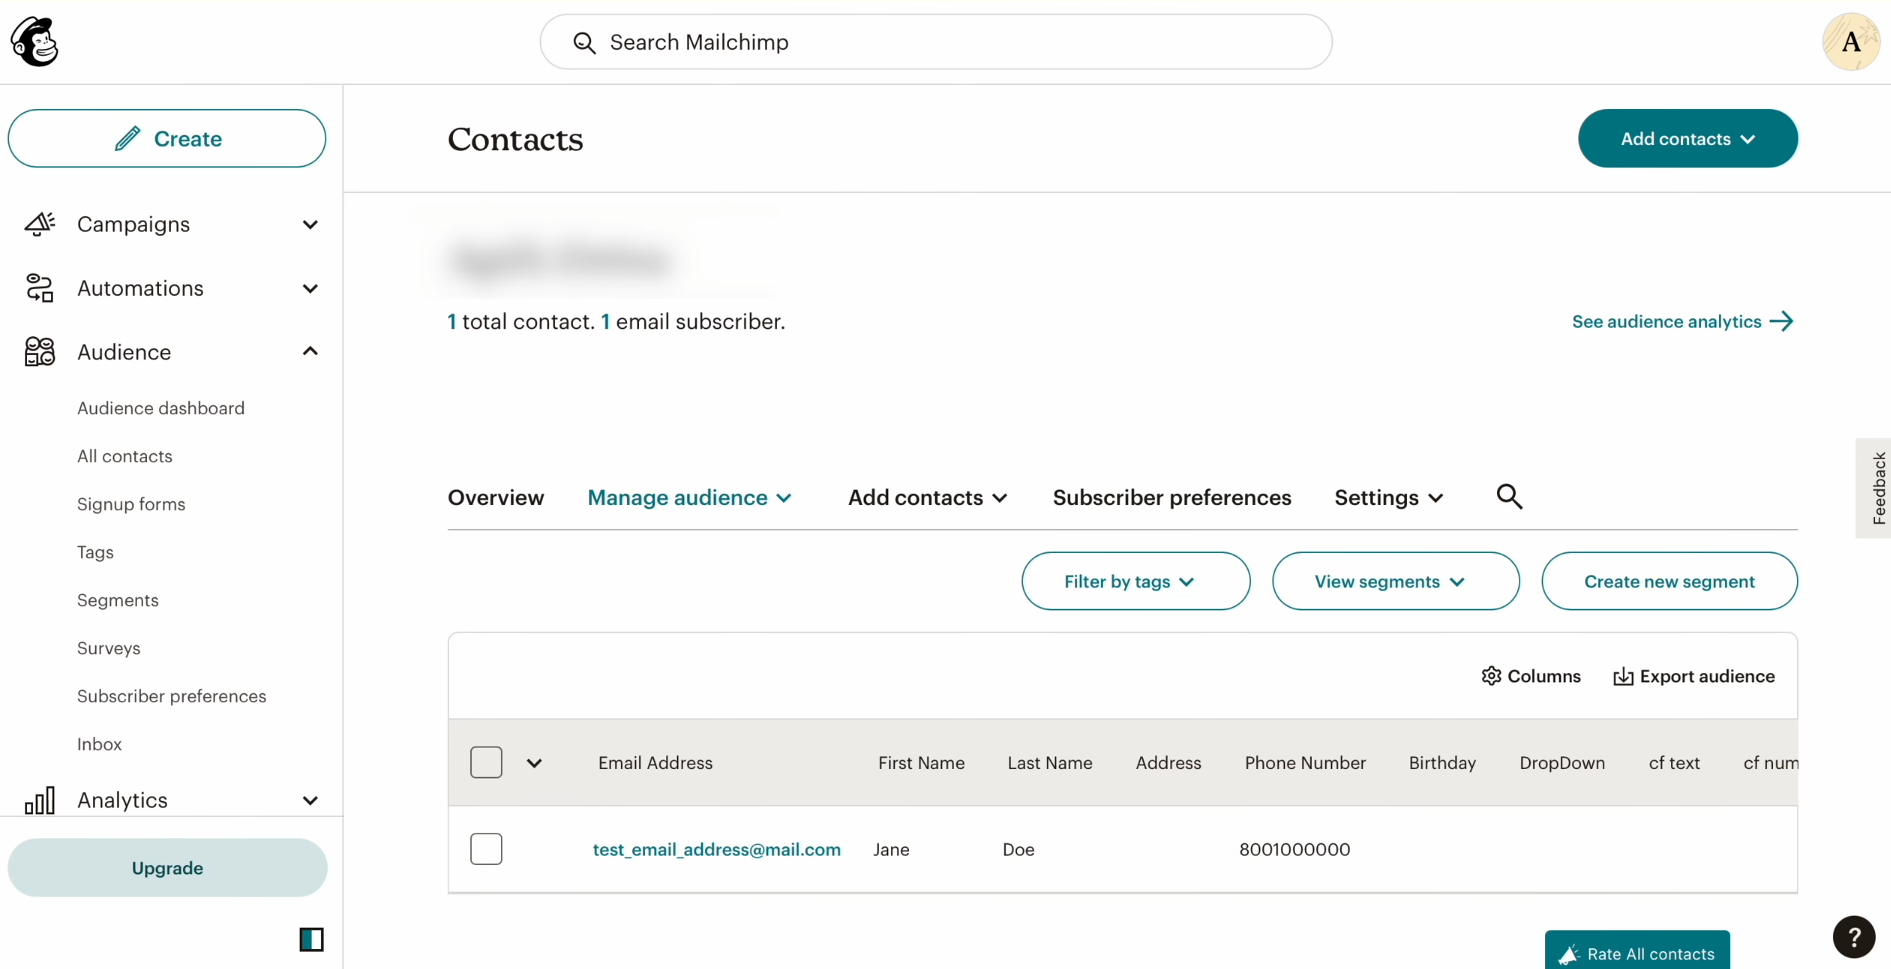
Then, return to
SaveMyLeads and continue setting up.
Setting Up Auto-Update
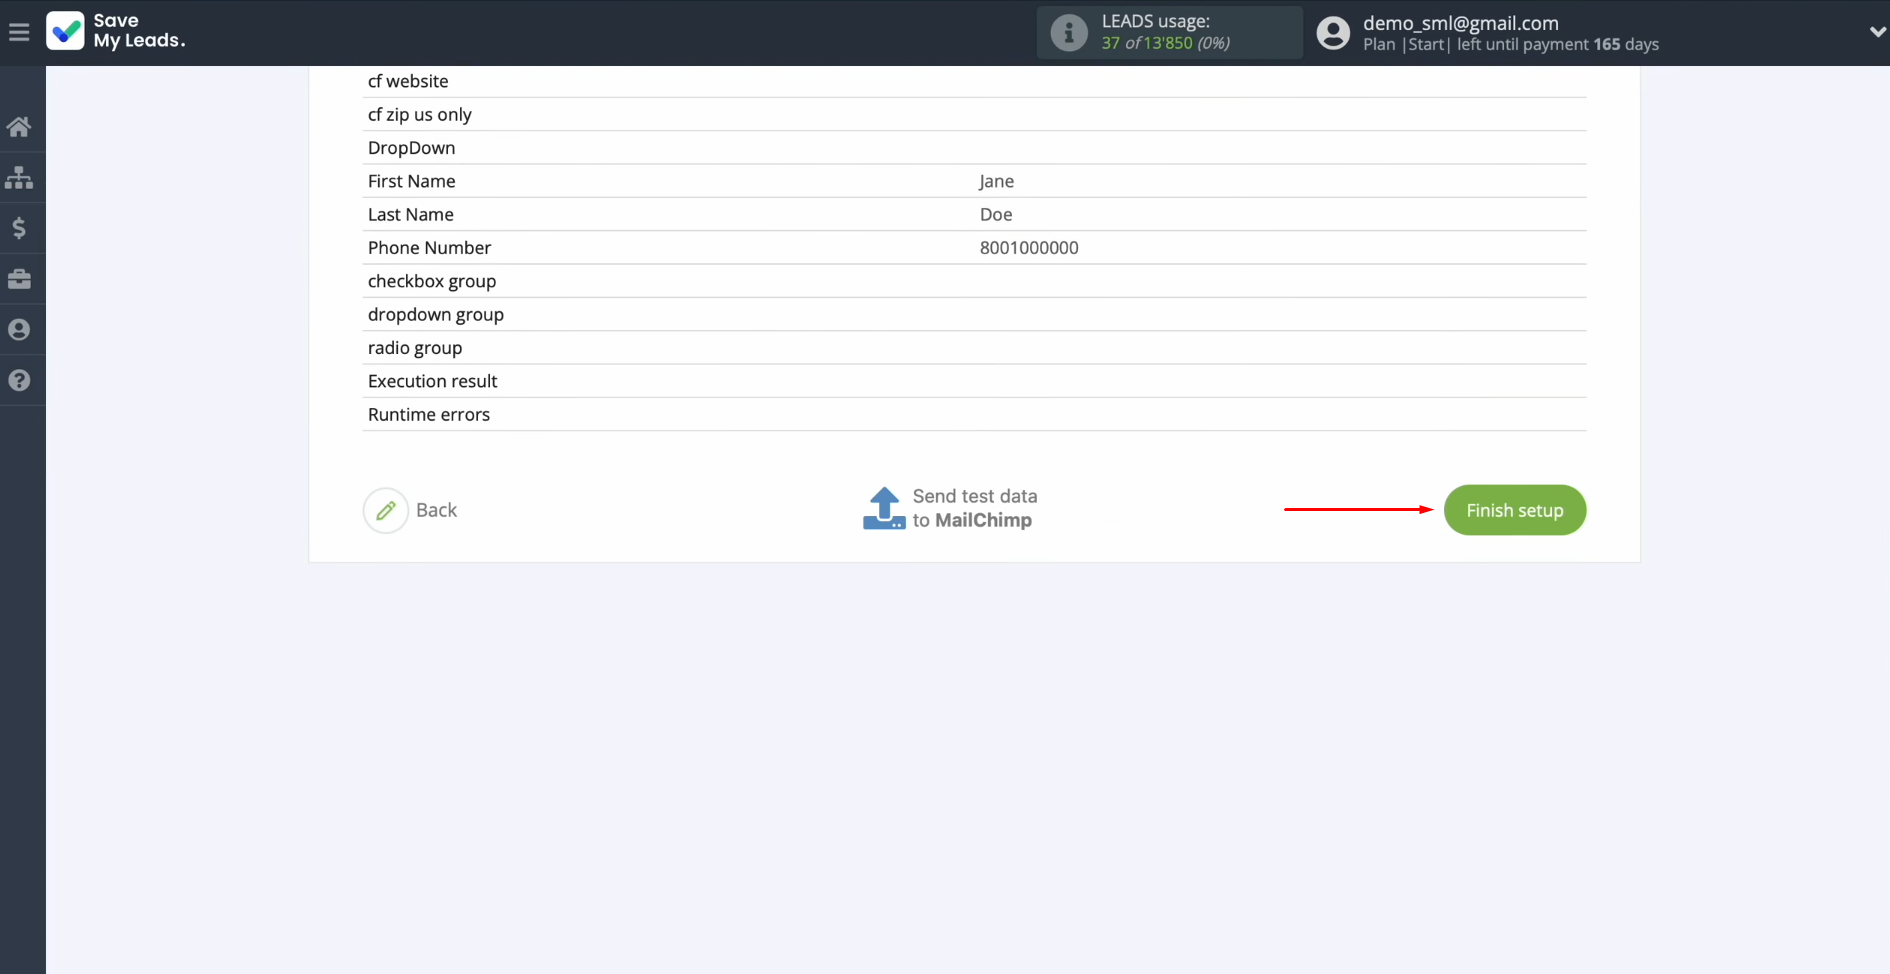
Click “Finish setup” to enable auto-update of the connection. In this case, all new TikTok leads will be instantly transferred to Mailchimp as new contacts.
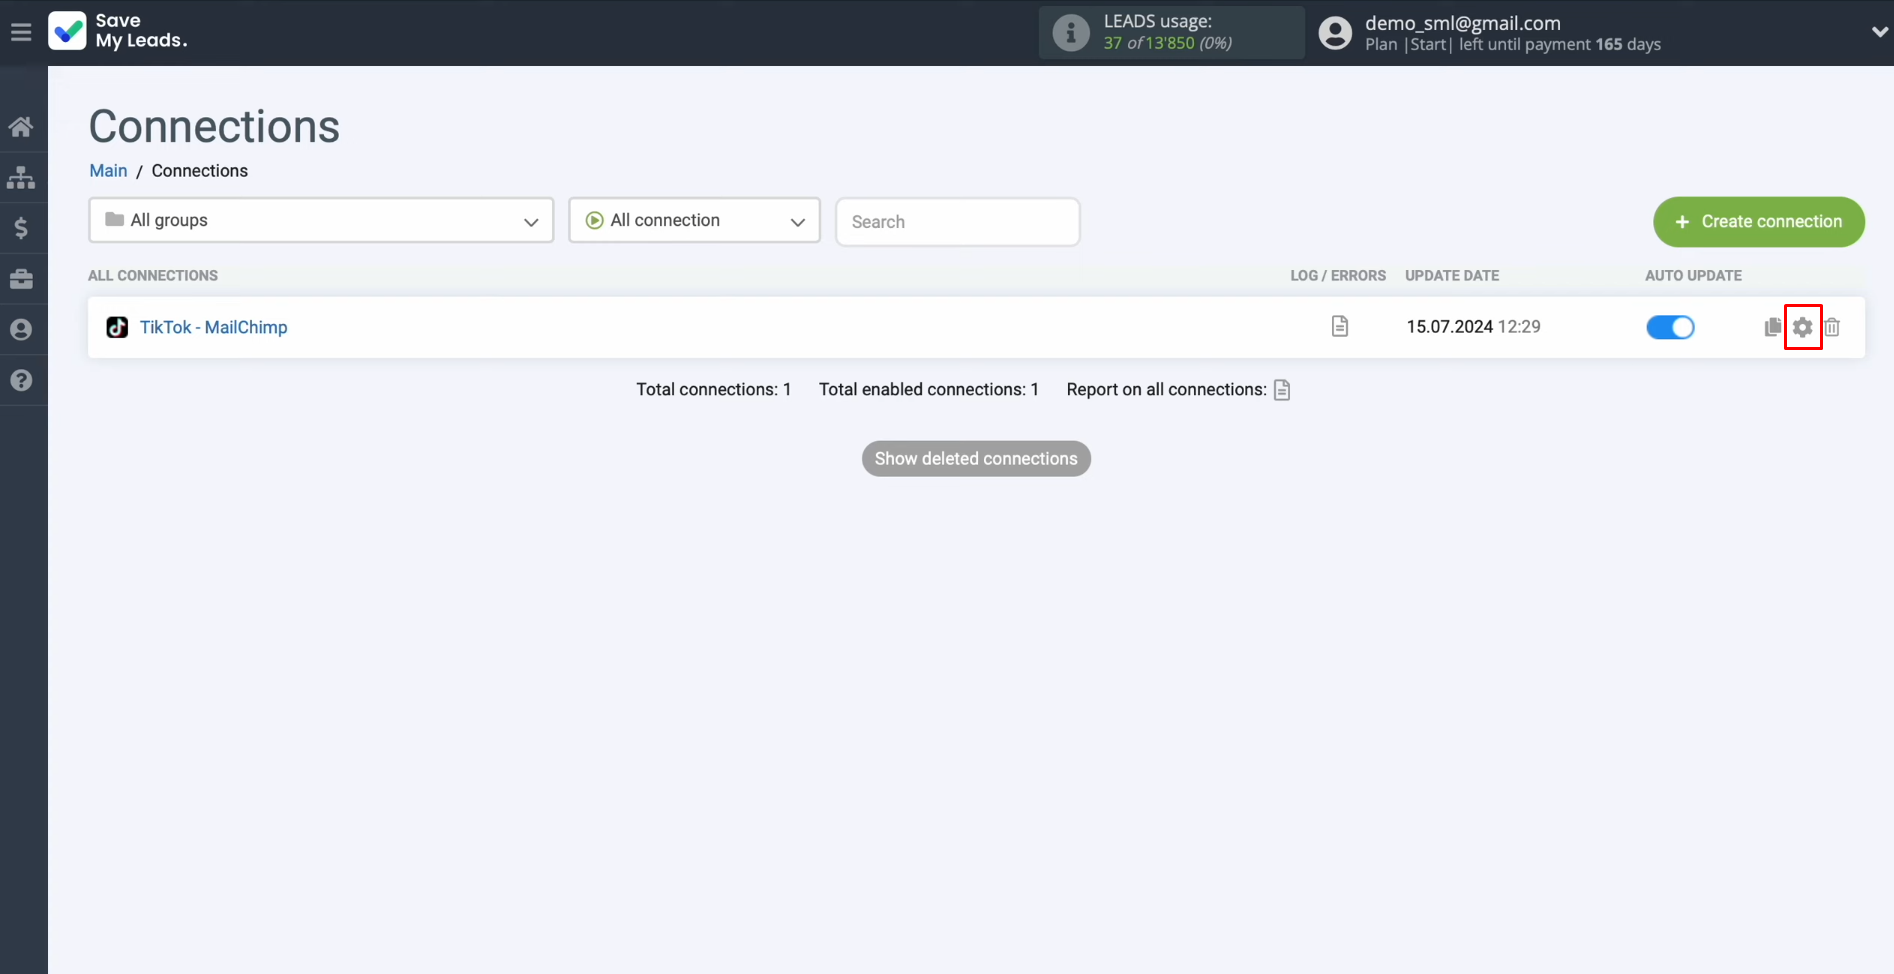
If you want to change the connection name, you can do this in its
settings. For this, click on the gear icon.
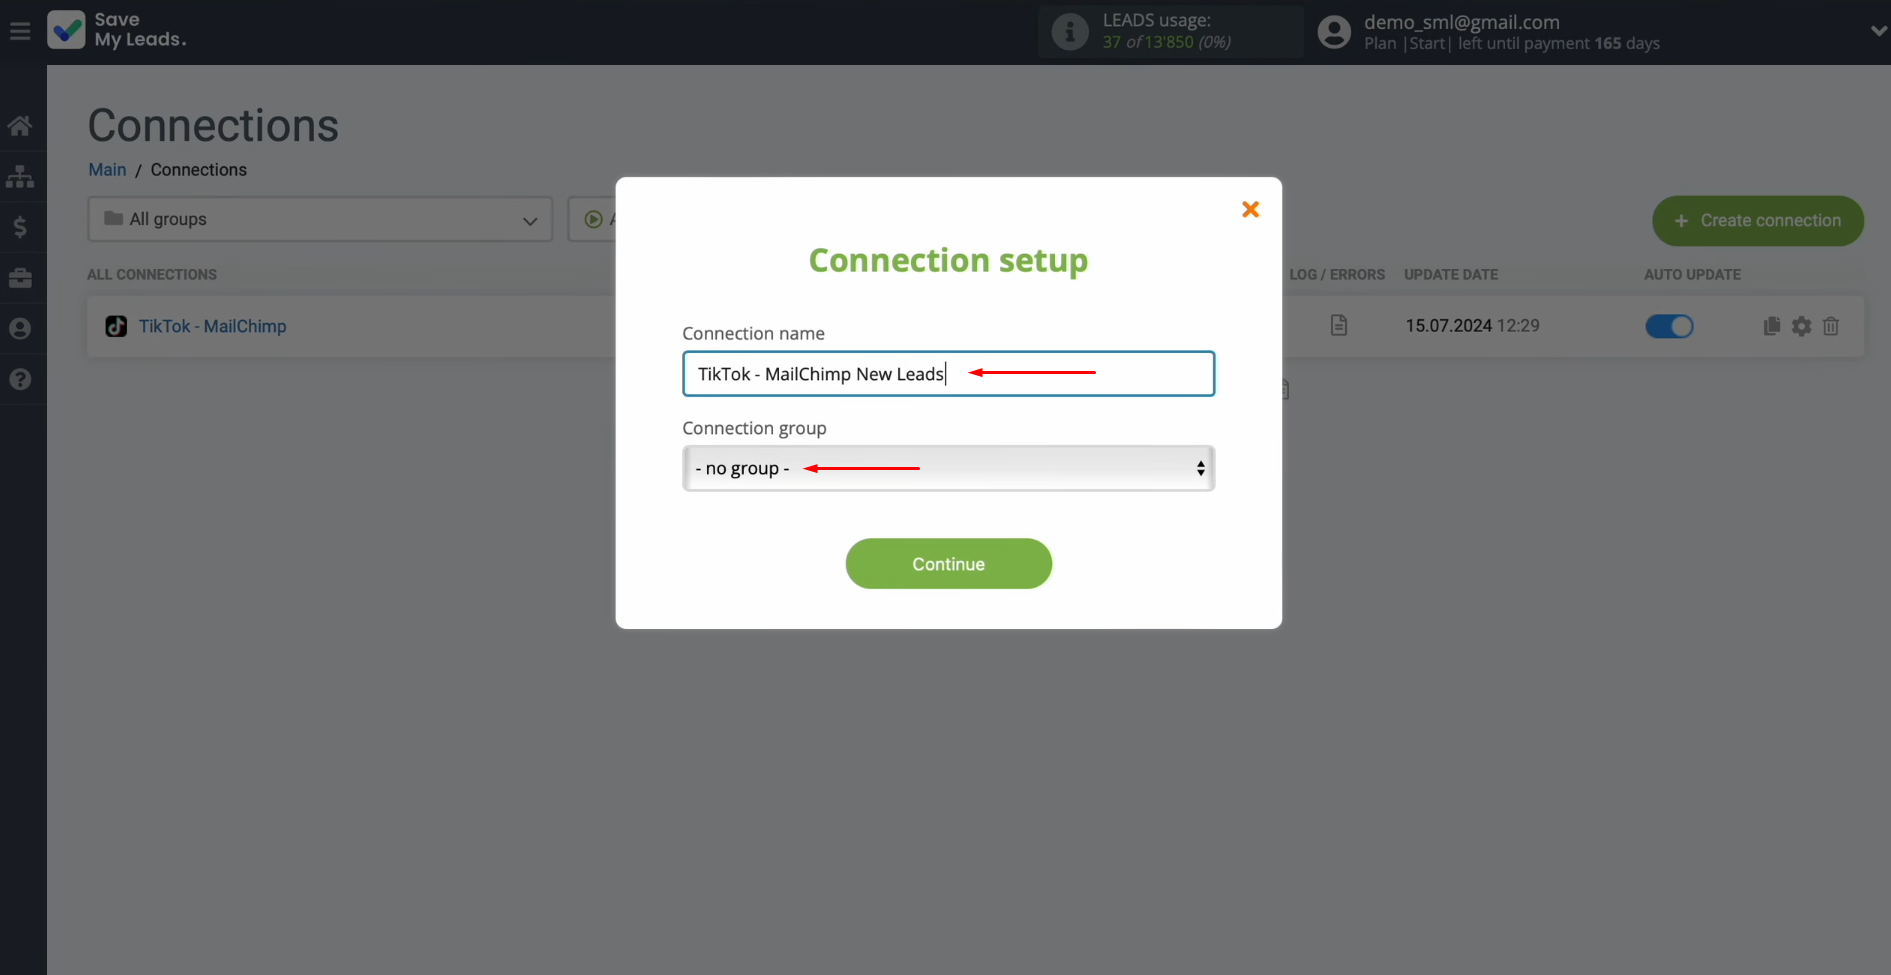
Here, you can change the connection name and add it to a
group. After that, click “Continue.”
That's all. Mailchimp & TikTok integration has been completed.
Results
After successfully setting up TikTok integration with Mailchimp, you have probably already received the results. Each of your leads who filled out and submitted a form on TikTok is now automatically forwarded to Mailchimp, where a new contact is immediately created. Automating this process allows you to significantly speed up the processing of applications and simplifies the tasks of your employees, freeing them from manual work.
The setup process for Mailchimp integration with TikTok is straightforward and does not require advanced technical skills. The integration is performed via a convenient and clear web interface of the connector in just a few minutes. Once launched, SaveMyLeads takes over the routine transfer of data from TikTok forms to the Mailchimp email service. This will allow you to focus on more important tasks, increasing business efficiency and improving customer interactions.
Step-by-Step Guides for Setting Up Integrations:
