Tired of writing to clients manually? You can automate the sending of SMS to targeted users who are interested in your Facebook ads. This will free up valuable working time for you. You don't have to be a programmer to set up automation. It is enough to use the SaveMyLeads service.
Content:
1. How to setup Facebook and eSputnik integration
2. Getting started with SaveMyLeads
3. Connecting Facebook Leads Ads
4. Connecting eSputnik
5. Testing data transfer
6. Completing the setup
When leads arrive, it often becomes necessary to send them various messages. For example, it can be an SMS with thanks for the order, the response time of the manager, the order number, or other similar content.
The SaveMyLeads service allows you to quickly set up automatic sending of such SMS to new leads from Facebook through the eSputnik marketing mailing system. Automation works as follows. When a potential client fills out an application in the lead form, SaveMyLeads transfers the contact and other data left by the user to eSputnik and initiates the sending of a message.
What are the benefits of automation? Here are just a few of them:
1. Reducing the number of routine activities. You don't have to keep track of new leads in the form, copy their data to eSputnik and send messages manually. All these actions will be performed by SaveMyLeads.
Moreover, the service eliminates the need to type and personalize SMS text for each client. It is enough to set up a text template once and specify where the recipient's name should be displayed. As a result, SaveMyLeads will substitute it automatically.
2. Instant message delivery. You will save yourself from worrying that you will not be able to send SMS to all customers in time. Even with a large flow of leads. After all, SaveMyLeads monitors Facebook every second, and as soon as a new lead appears in the form, the service instantly initiates sending him a message. No matter how many customers there are, they will all receive their SMS immediately after filling out the form.
3. No errors in contact details. You will insure yourself against inaccuracies when entering data, which often occur when sending messages manually. A person can, for example, write down a phone number incorrectly or mix up the recipient's name. Automation does not allow such errors.
How to setup Facebook and eSputnik integration
You don't have to write any code to set up automatic sending of messages. All you have to do is register on the SaveMyLeads website, choose to connect eSputnik to Facebook, and follow the prompts on the screen. They'll help you link these platforms' accounts and choose your upload options.
To make it easier for you to understand, we will analyze the auto-send settings step by step. We will assume that you have already prepared an eSputnik account for work, and also created a lead form on Facebook. In addition, be sure to add your contacts to the form as a new lead - this will come in handy for the test. After that, you can start setting up.
Getting started with SaveMyLeads
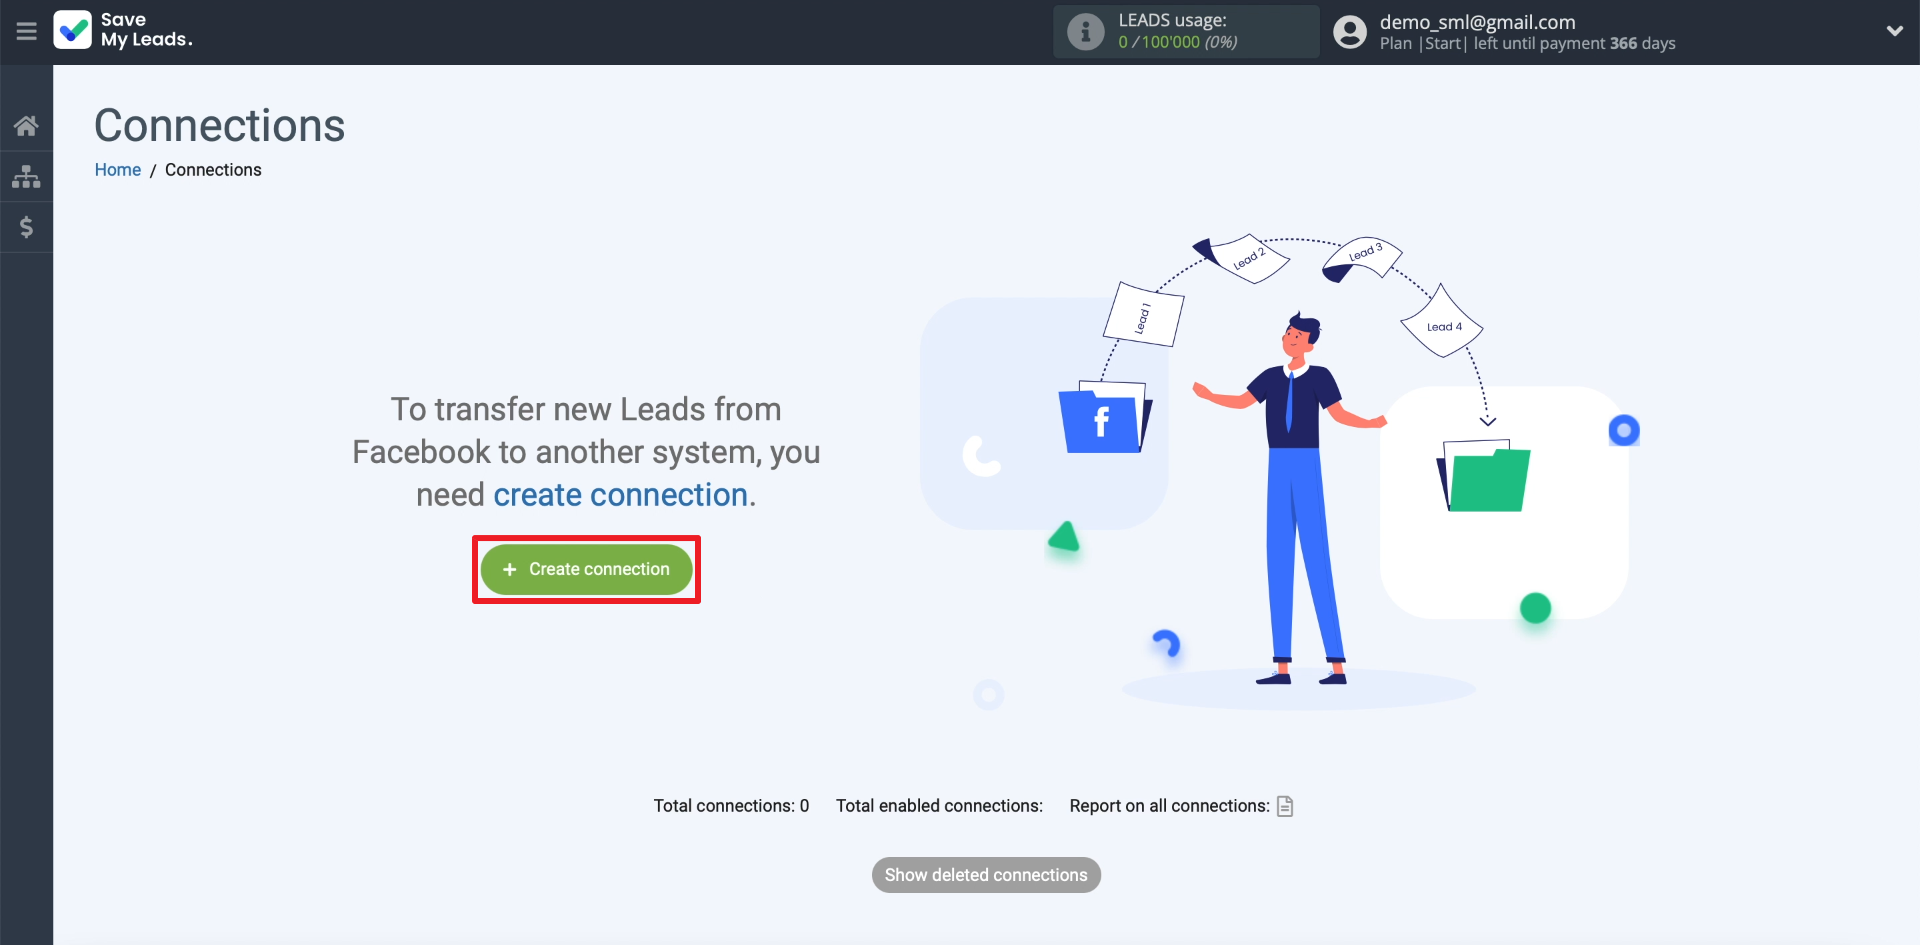
Registering on the SaveMyLeads website. Then we enter your personal account and click "Create connection".
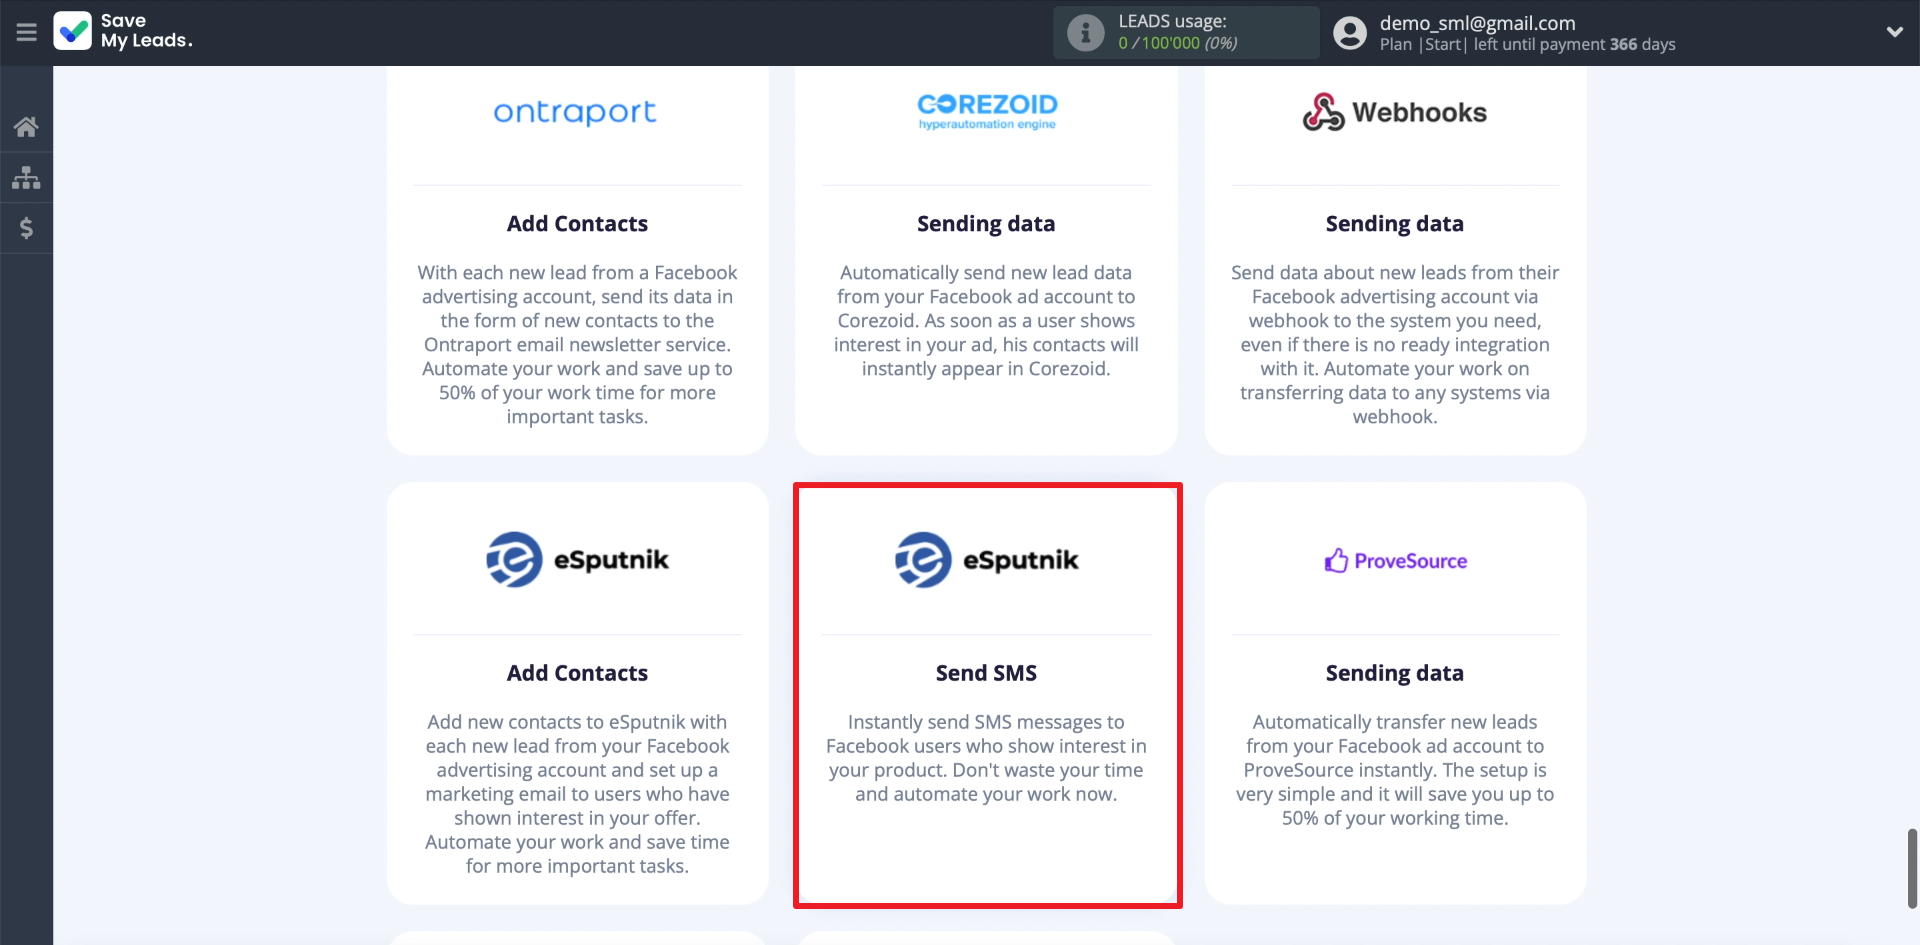
A list of connections supported by SaveMyLeads should appear on the screen. Each of them is designed to send data from Facebook to other services. We select the connection with which SaveMyLeads can transfer contacts for sending SMS to eSputnik.
Connecting Facebook Leads Ads
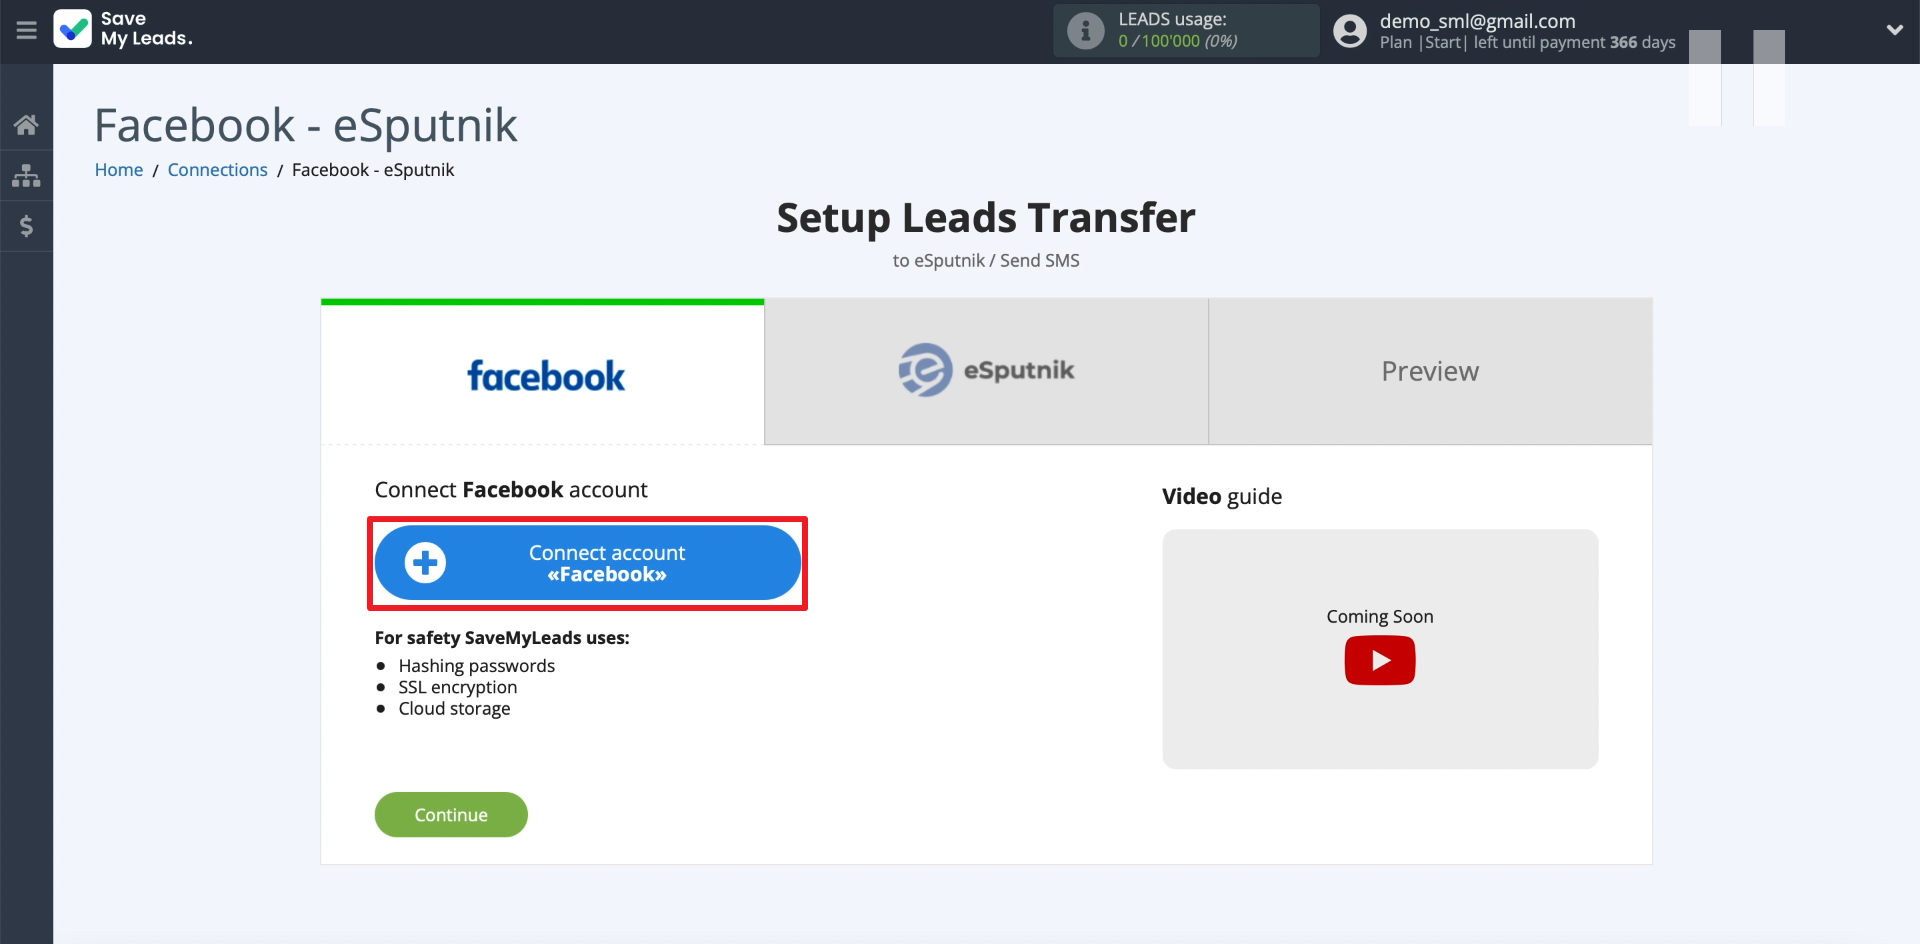
In order for SaveMyLeads to upload leads, we will connect a Facebook profile to it. To do this, click "Connect account "Facebook". We enter the login and password from our account and provide all the permissions that SaveMyLeads requests. This is necessary for the service to gain access to leads.
Next, let's show SaveMyLeads where it can upload leads from. First, select the account that we just connected. Then - the business page for which the advertising campaign is set up. After that, we select our form for collecting leads.
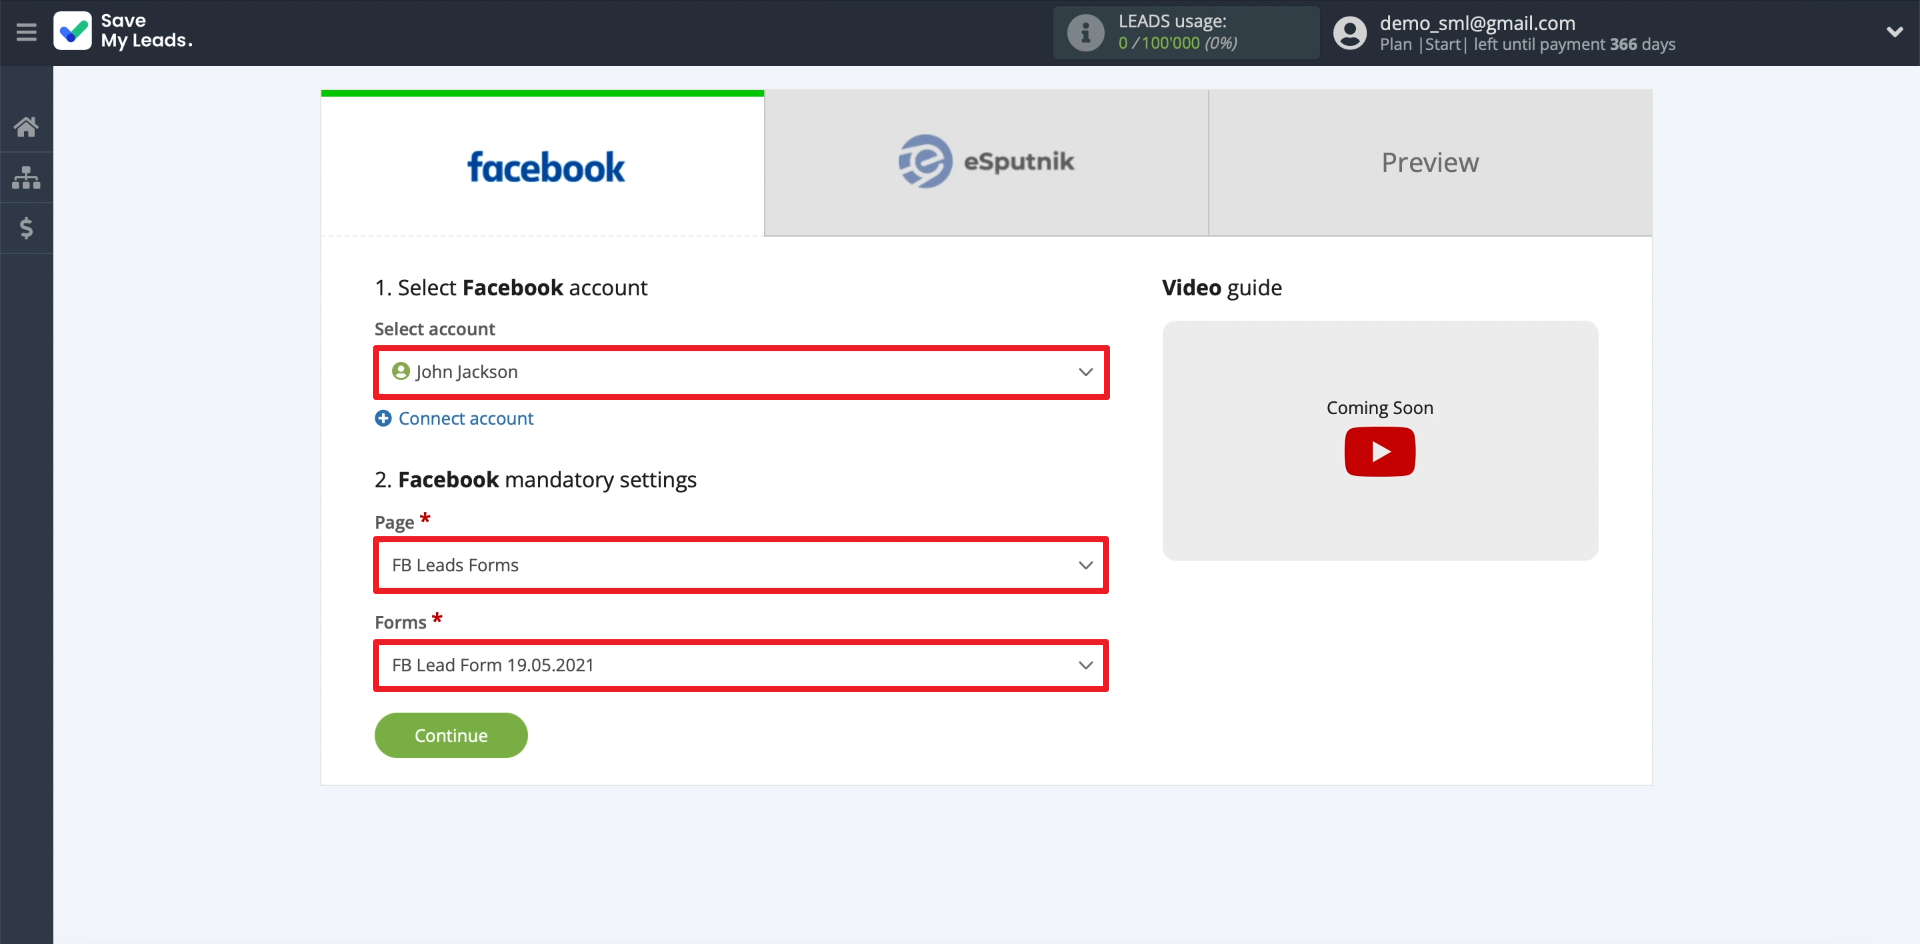
Only one form can be selected per connection. To set up uploading leads from several forms, you need to create a separate connection for each of them in SaveMyLeads.
Connecting eSputnik
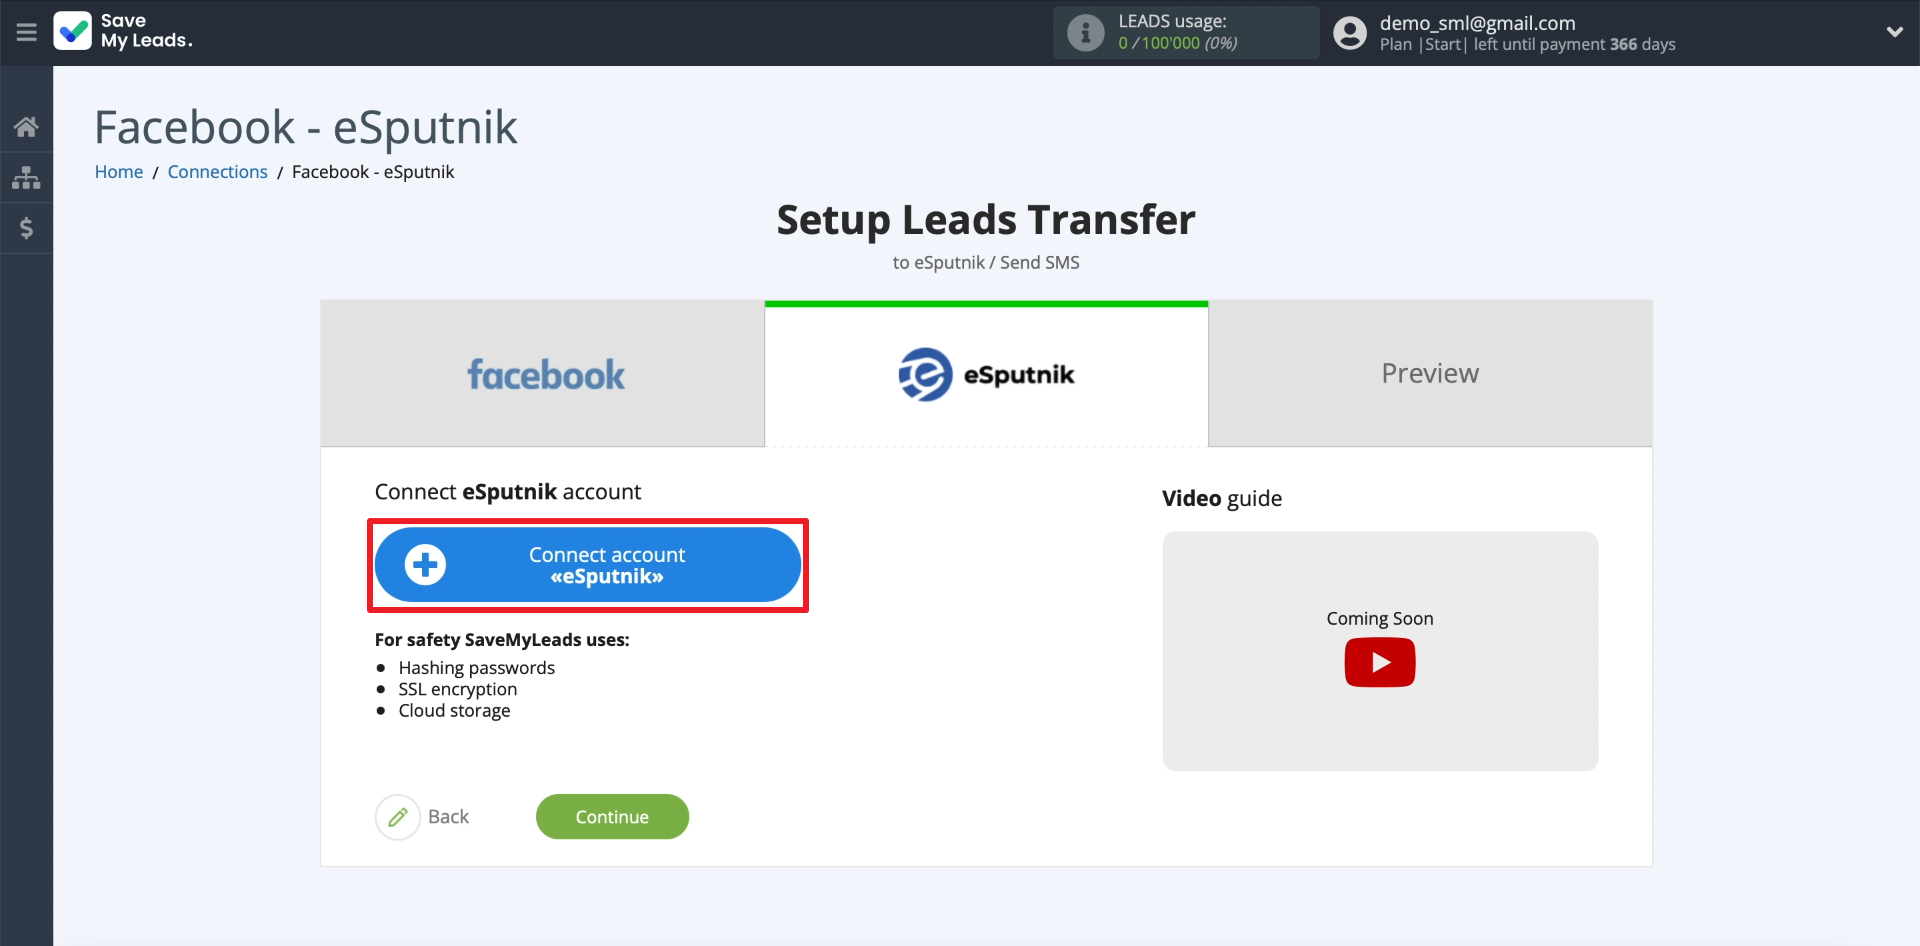
In order for SaveMyLeads to transfer contact data from leads and initiate sending SMS, we will connect our eSputnik profile to the service. To do this, click "Connect account "eSputnik".
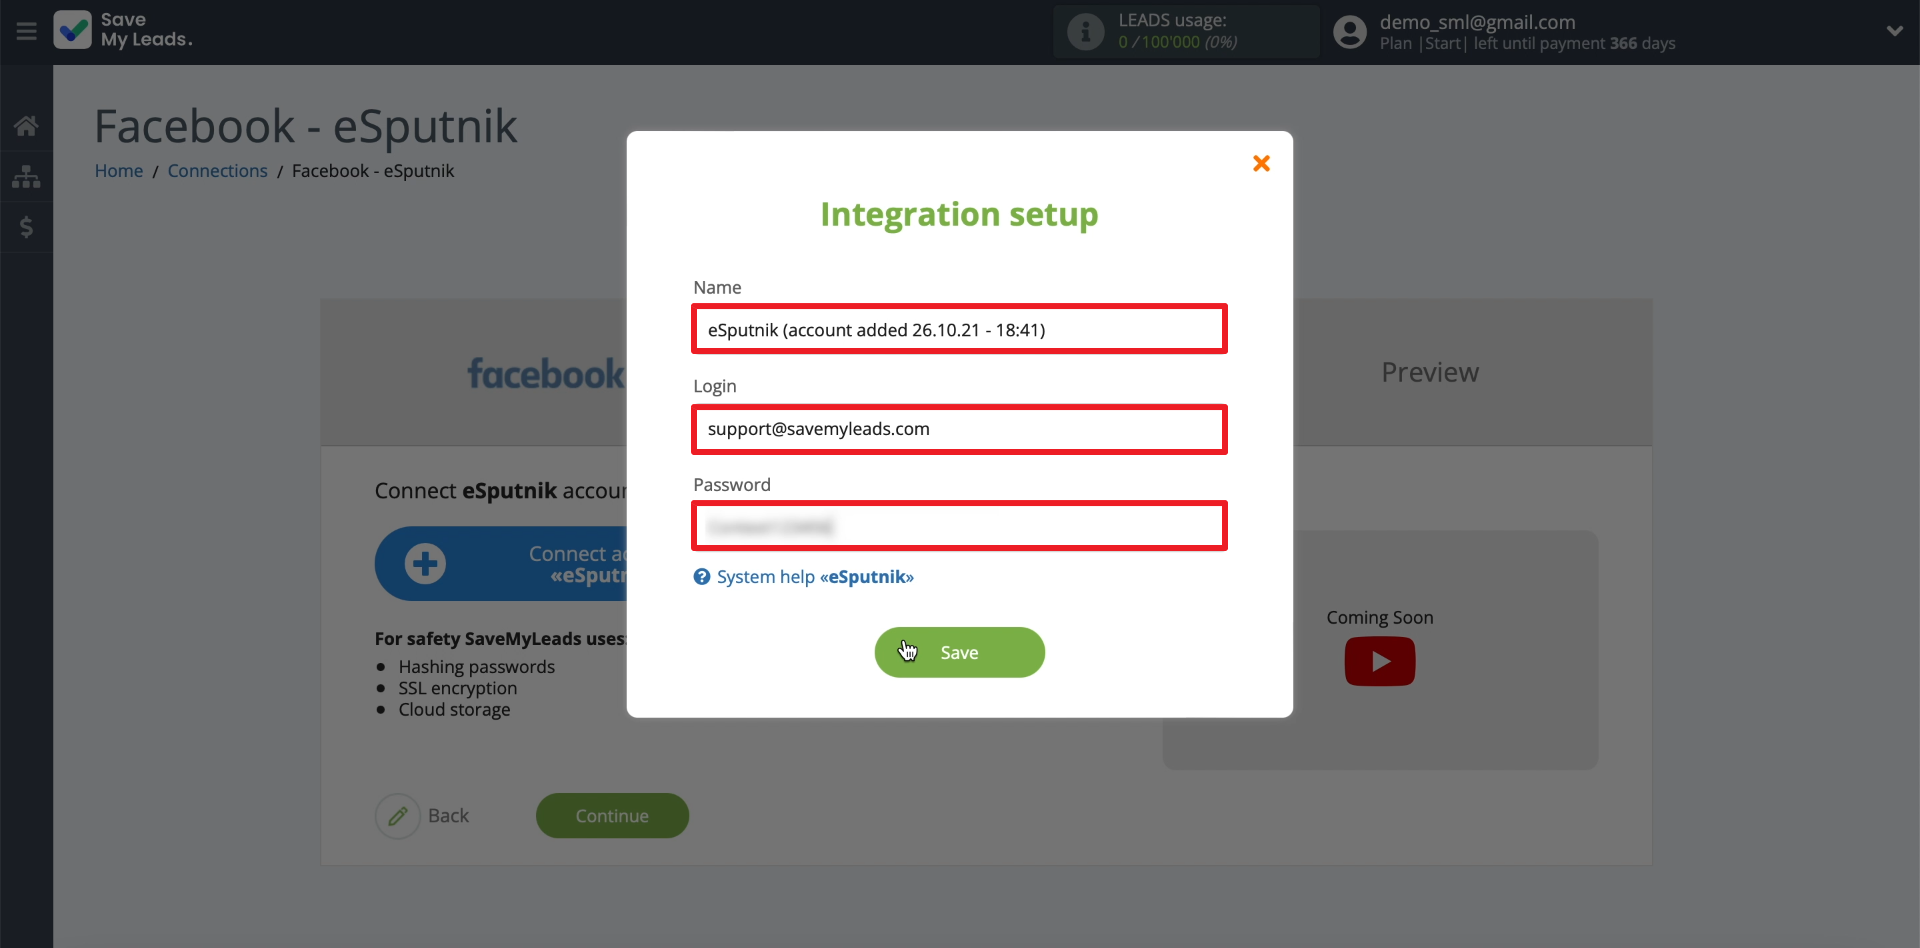
We enter any name under which our eSputnik account will be displayed in SaveMyLeads. Below we type the login and password for this account.
Select the newly connected account.
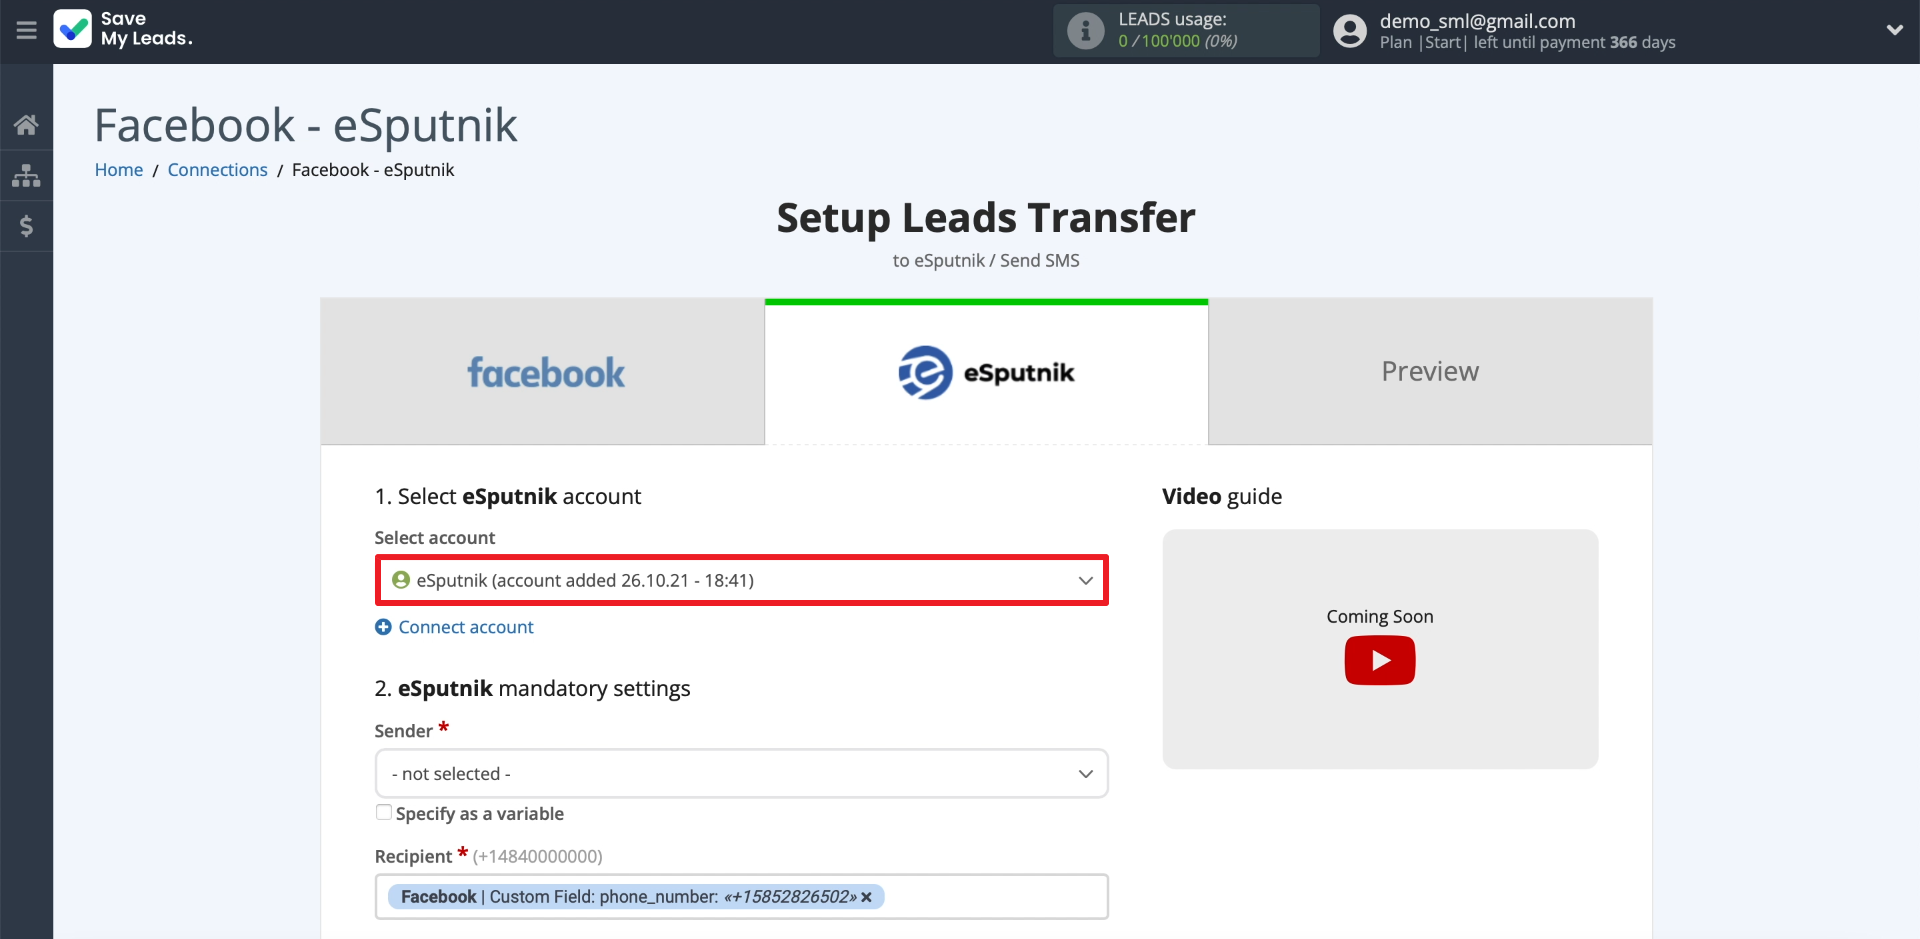
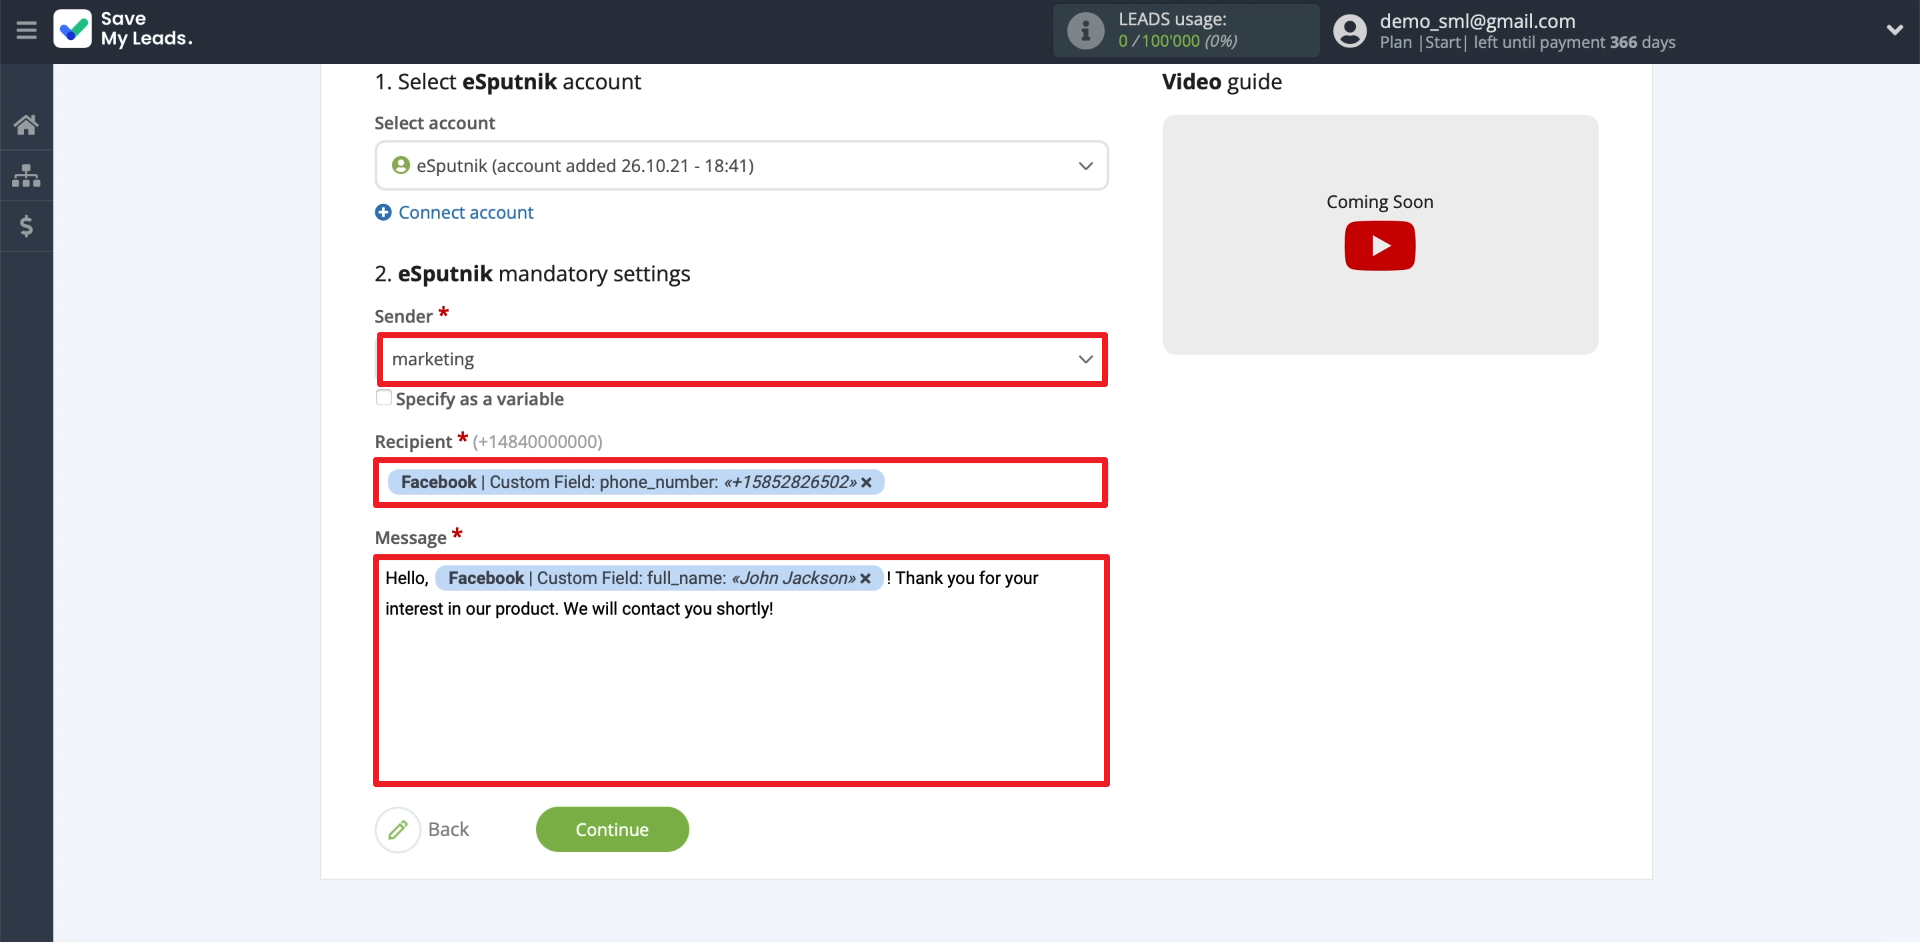
Next, we set up sending a message. First, choose a sender. In order for it to be displayed in SaveMyLeads, it must be registered with eSputnik in advance.
- Automate the work with leads from the Facebook advertising account
- Empower with integrations and instant transfer of leads
- Don't spend money on developers or integrators
- Save time by automating routine tasks
In order for SaveMyLeads to substitute the desired recipient number in each letter, click on the “Recipient” field and select the lead variable that stores the phone number.
Then we enter the text of the message we need. In order for SaveMyLeads to automatically insert the recipient's name into the SMS, click in a suitable place in the text and select the lead variable that contains the name.
Testing the data transfer
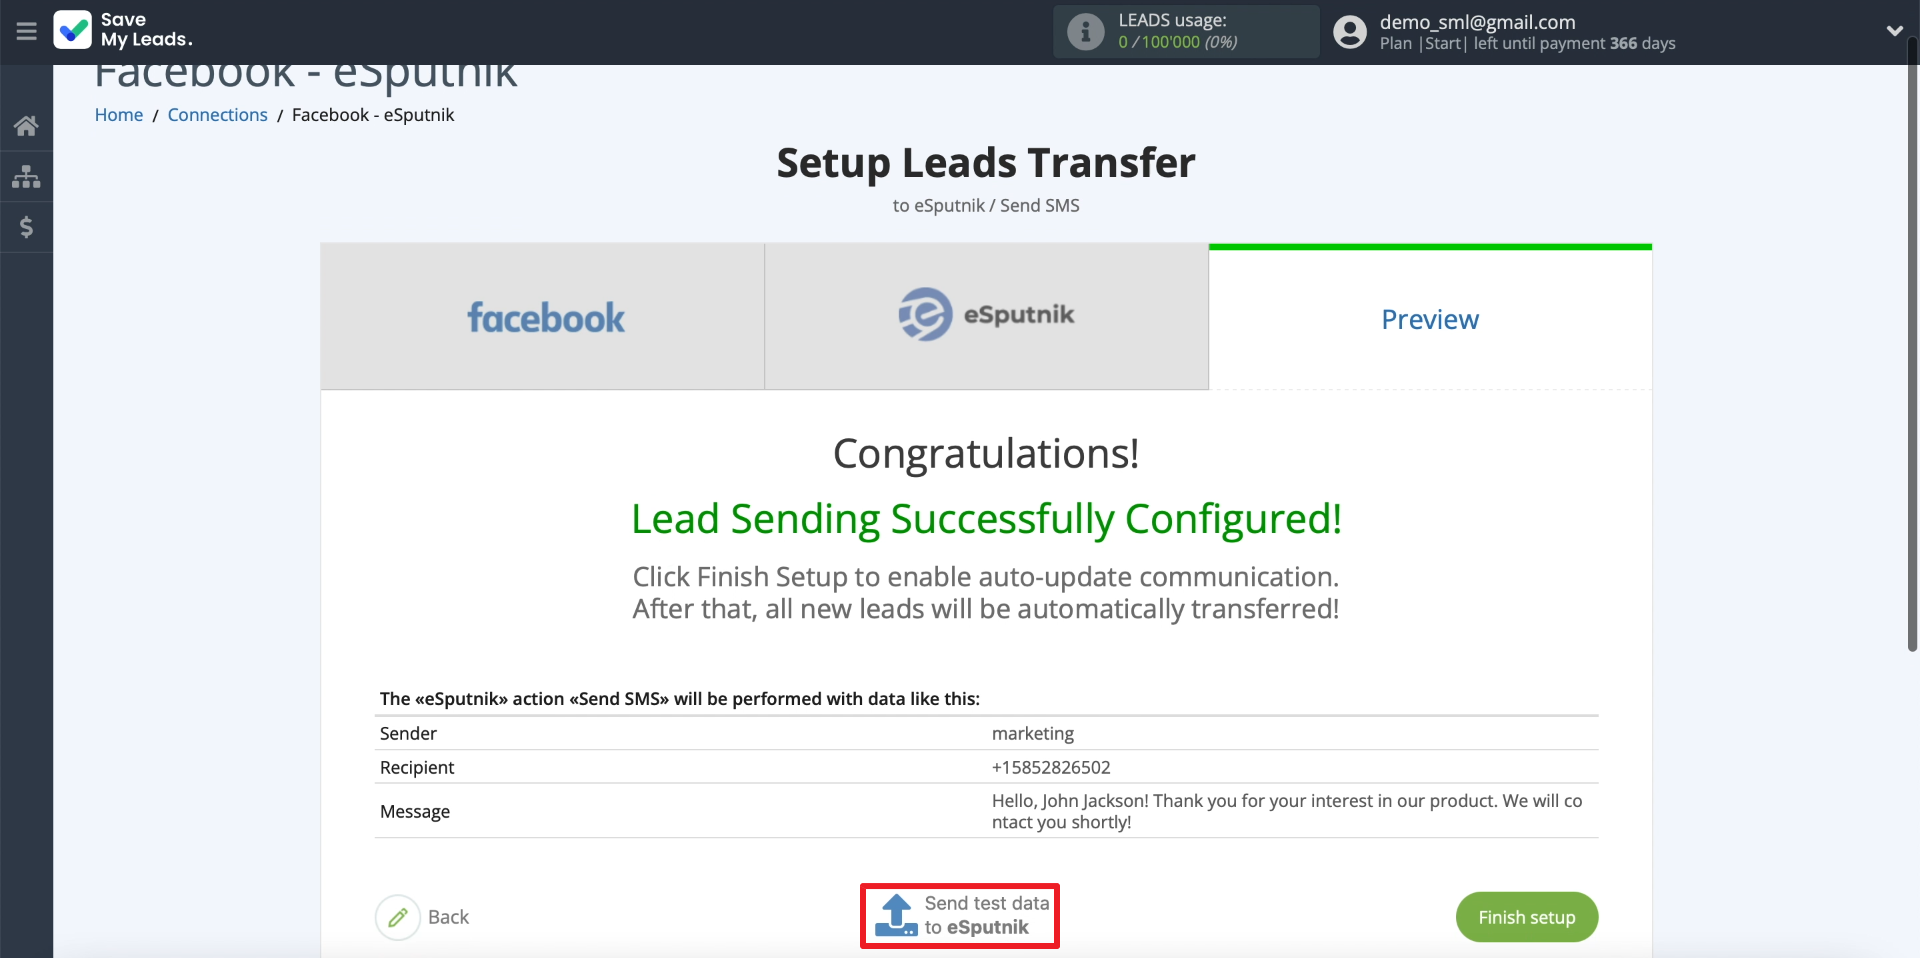
At this point, SaveMyLeads should display your contacts, which we asked you to add to the form as a test lead. We use them to check if sending SMS is working. To do this, click "Send test data to eSputnik".
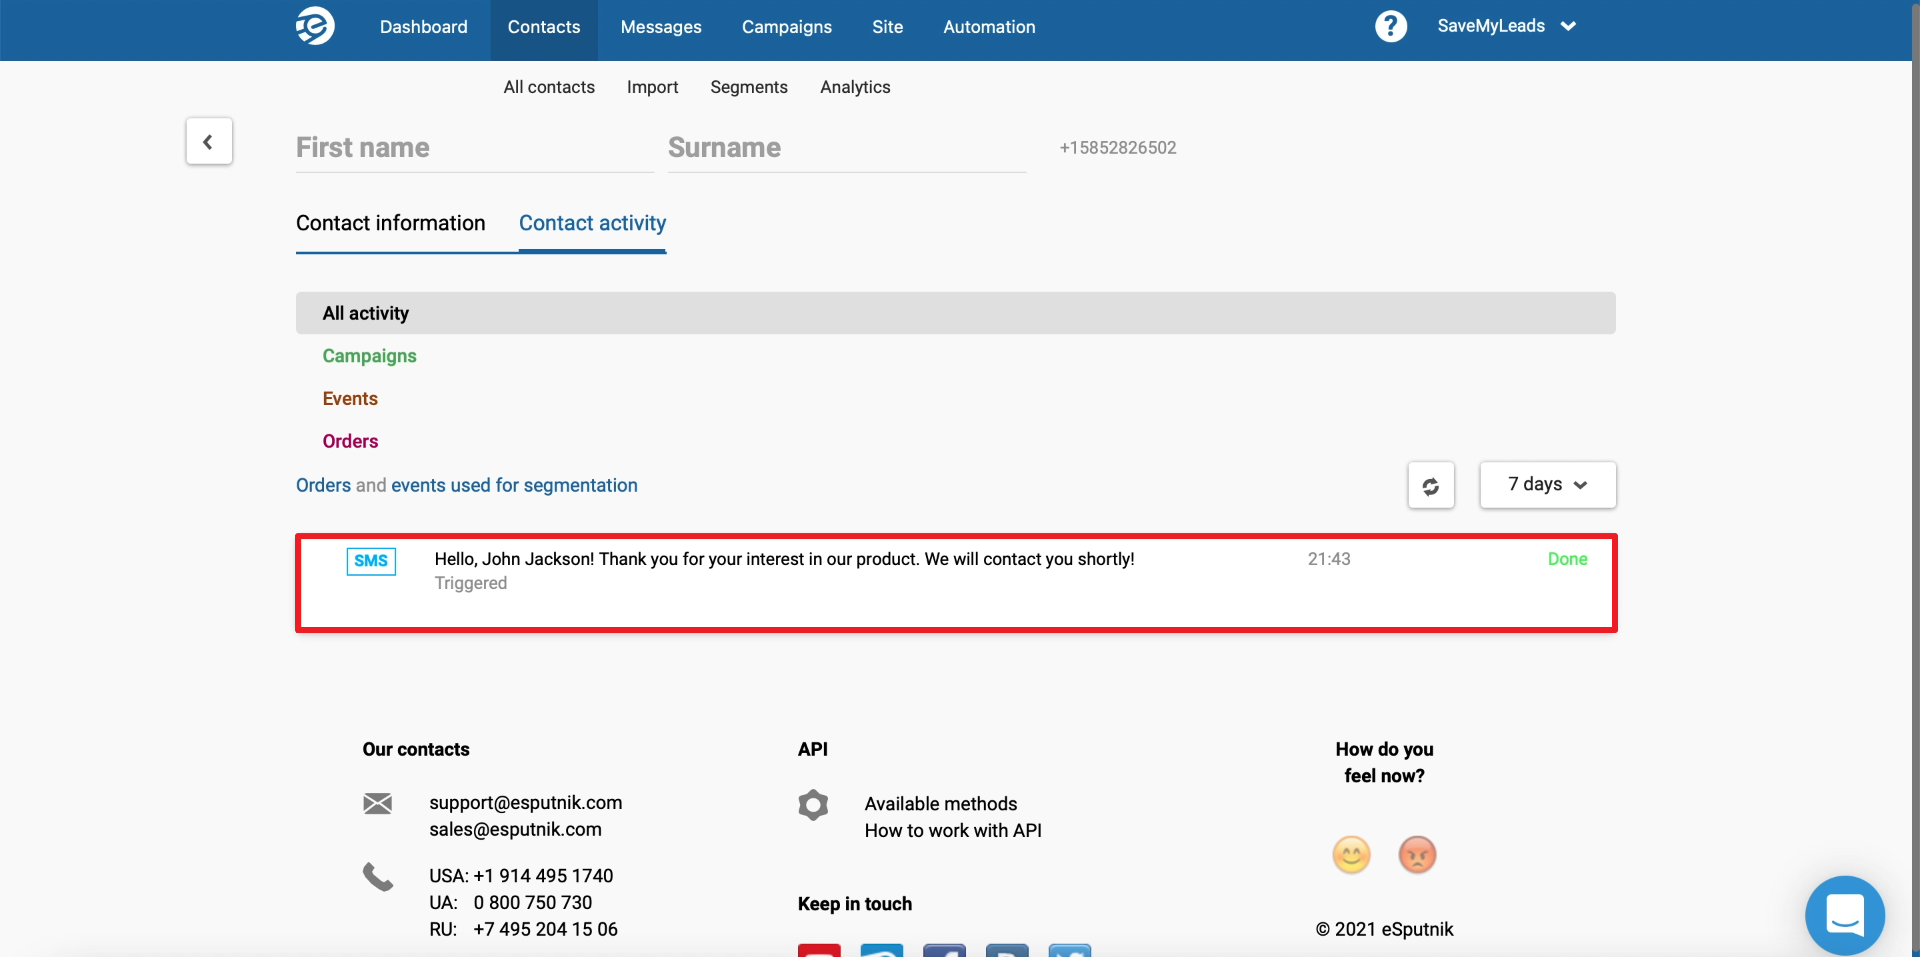
If everything is set up correctly, you should receive a message. In addition, it should also appear on the eSputnik website. To view it, you need to go to your personal account, open the "Contacts" tab, click on the contact card and select "Contact activity".
Finishing the setup
Click "Finish setup" to complete the setup and enable automatic SMS sending.
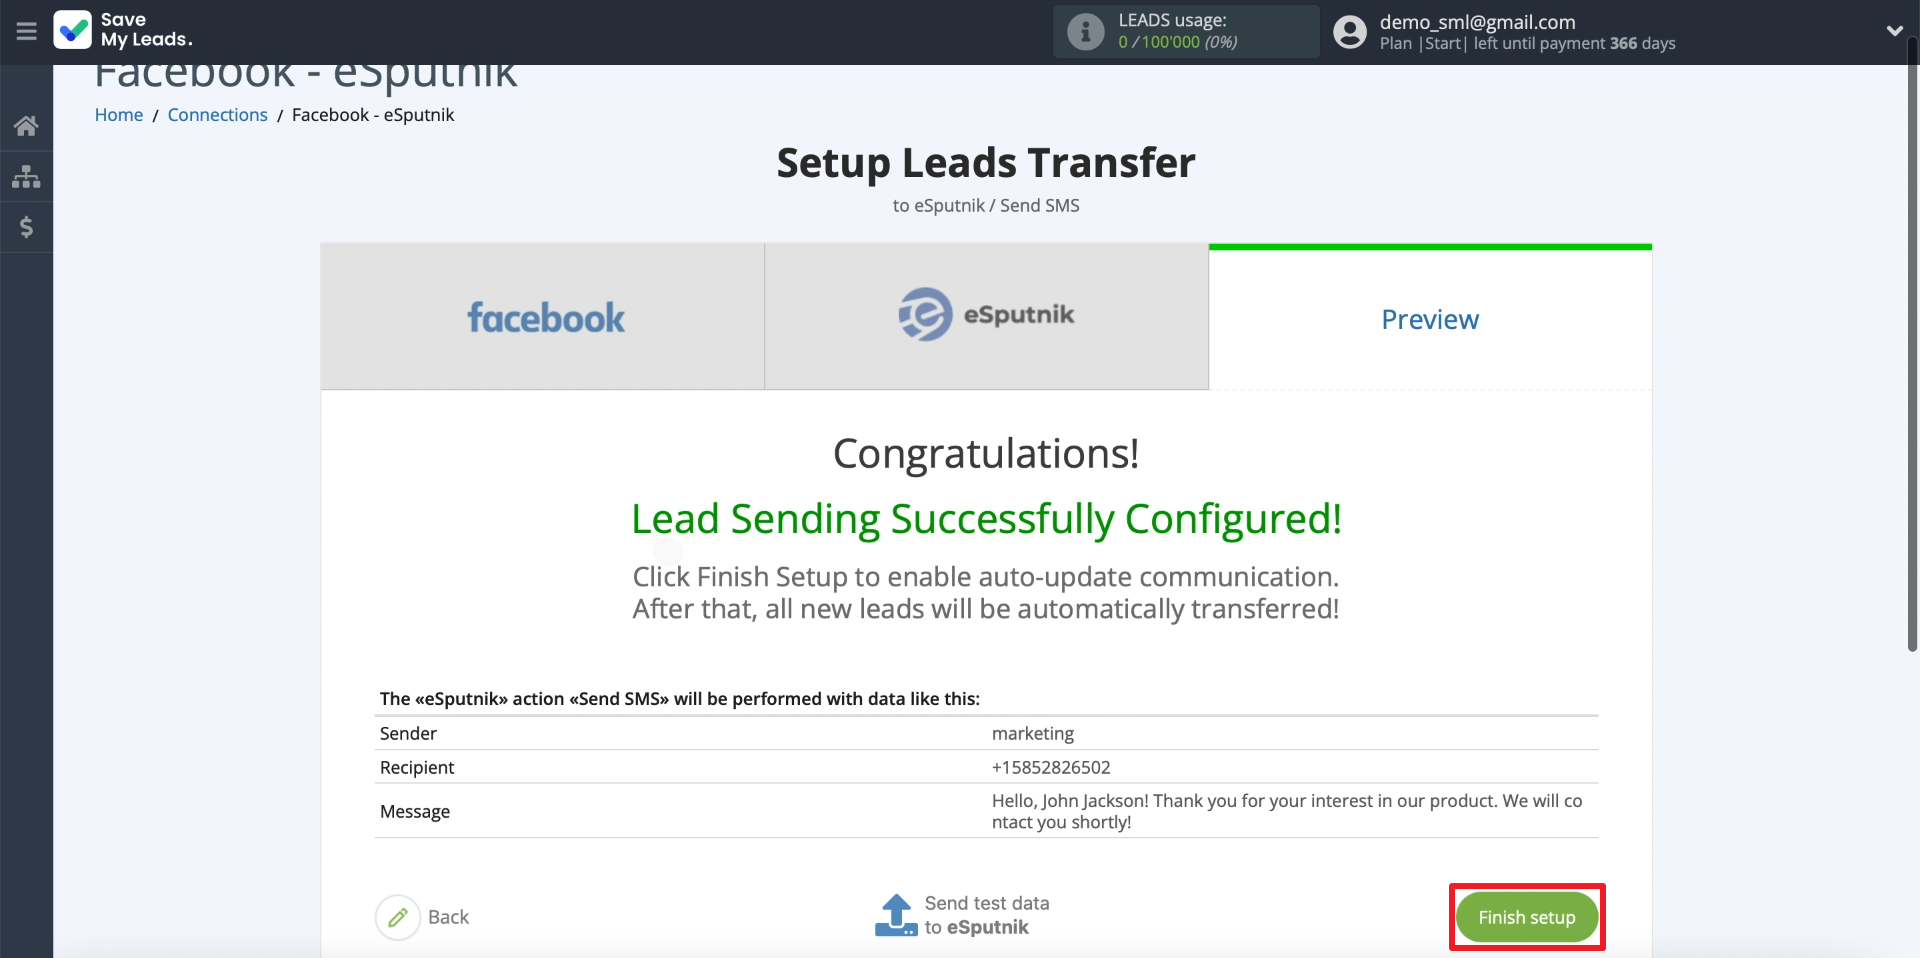
If necessary, edit the name of the connection: click on the gear and enter the required text in the field.
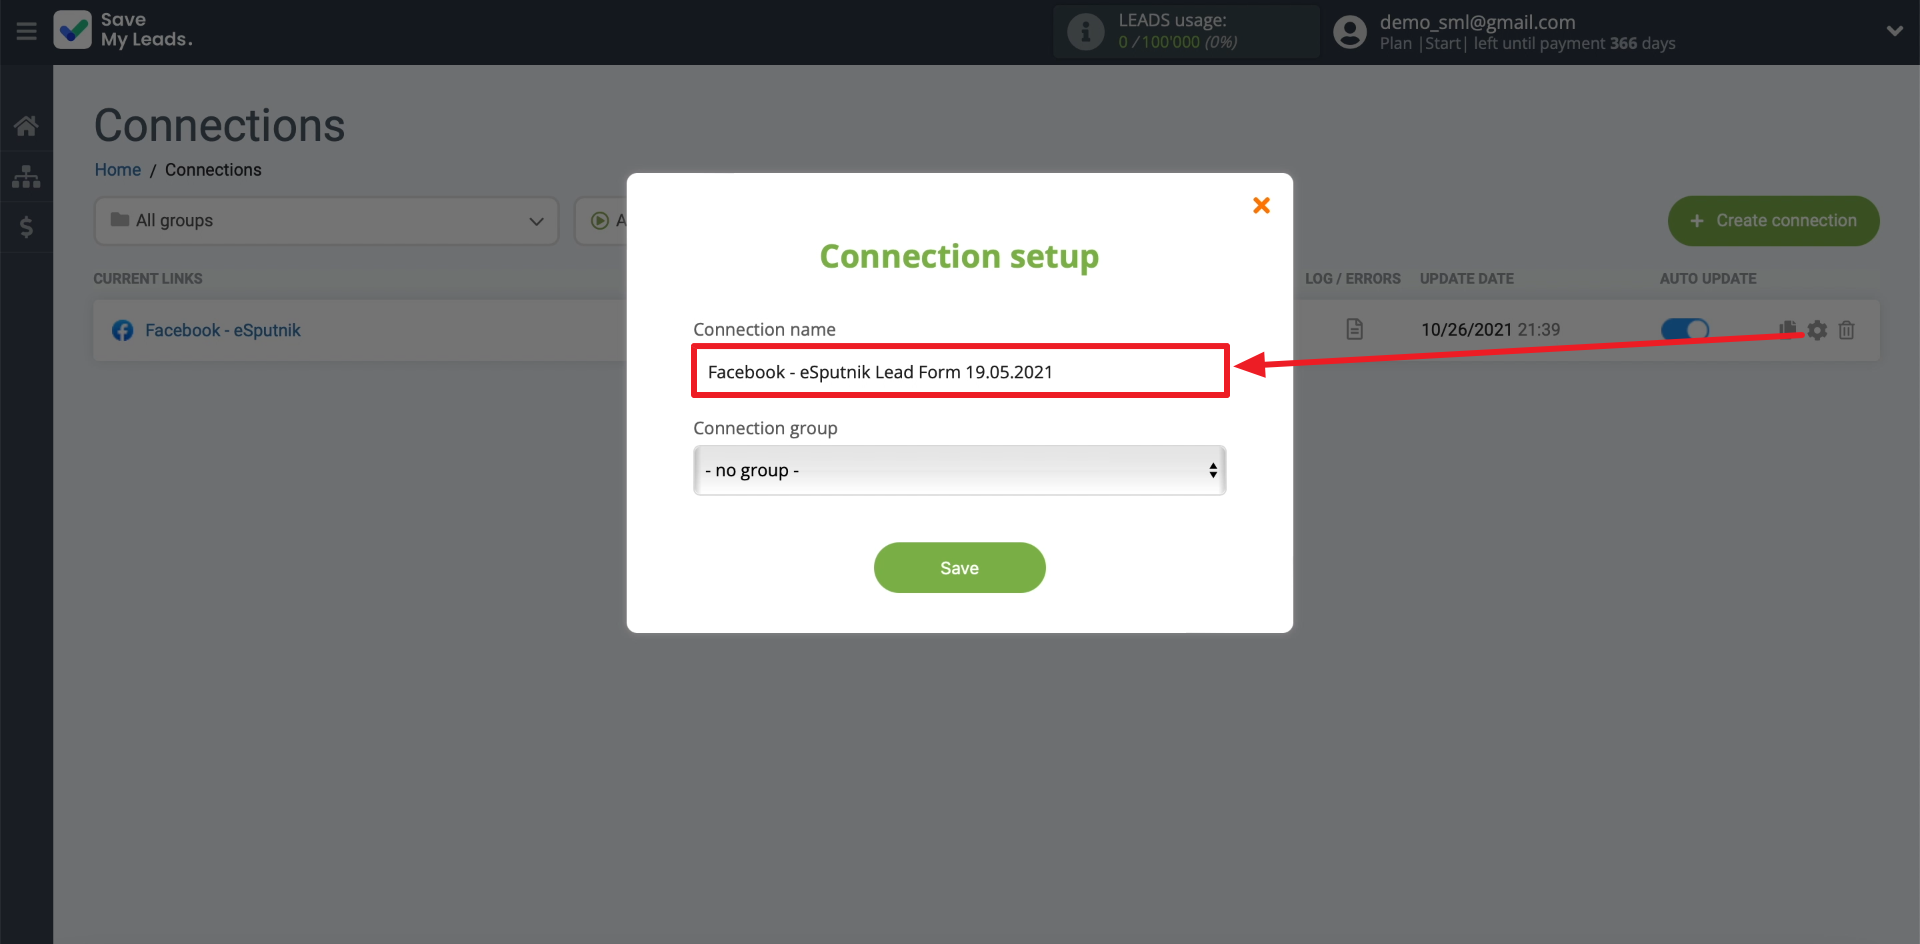
That's it, setup is complete. Now SaveMyLeads will automatically transfer new leads to eSputnik and initiate SMS sending.
