In this article, we'll show you how to link your Facebook ad account and iCloud Mail account. You can use this integration to automatically send emails to new leads from Facebook and Instagram. You can also set up notification letters for employees about new requests from social networks.
Contents:
1. How to setup Facebook Lead Ads and iCloud integration
2. Connect Facebook Lead Ads
3. Connect iCloud
4. Enable automatic data update
5. Conclusions
iCloud is cloud storage for Apple devices. The service provides data synchronization in Mac, iPhone, iPad and iPod. iCloud keeps photos, files, passwords, notes, and more up to date. The cloud storage service feature is available by default for all Apple devices. A certain amount of memory is provided free of charge. It can be increased at an additional fee. iCloud also includes the Mail app for email. iCloud Mail can be used in a company as one of the tools for internal and external communication.
Consider a situation where a business is using Facebook Lead Ads to acquire new customers on social media. Orders on Facebook and Instagram are often emotional in nature, so they need to be processed as quickly as possible. The user is waiting for prompt feedback. The client wants to make sure that his request is not lost. With the help of an e-mail, you can thank the buyer for the application, confirm the order, provide additional information.
In order for a lead from Facebook or Instagram to be promptly processed, the data from the completed lead form should be received by the manager as quickly as possible. Constantly checking the advertising account for new orders and downloading them in CSV format is an irrational decision. You can set up automatic uploading of new leads, for example, in the form of letters to iCloud Mail box. Thus, the manager will quickly receive up-to-date data without having to go to the FB advertising account. Automatic sending of letters to new customers and notification letters to managers can be configured using Facebook and iCloud integration.
How to set up Facebook Lead Ads and iCloud integration
To link Facebook ad account and iCloud, we'll use the SaveMyLeads online connector. With this service, you can set up automatic transfer of new leads from Facebook to various applications and systems. For example, in messengers, chat bots, CRM systems, etc. If you use the Facebook Lead Ads advertising tool and regularly transfer new leads manually to other services, then you have a good opportunity to significantly simplify your work. Set up integrations in the SaveMyLeads system and get rid of routine data transfer operations.
For our task, we will create a Facebook and iCloud integration. SaveMyLeads is a no-code tool with an intuitive setup process. No programming experience or knowledge of APIs or similar technologies is required. We need a SaveMyLeads office, as well as access to Facebook and iCloud accounts. Let's take a detailed look at the setup process.
Connect Facebook Lead Ads
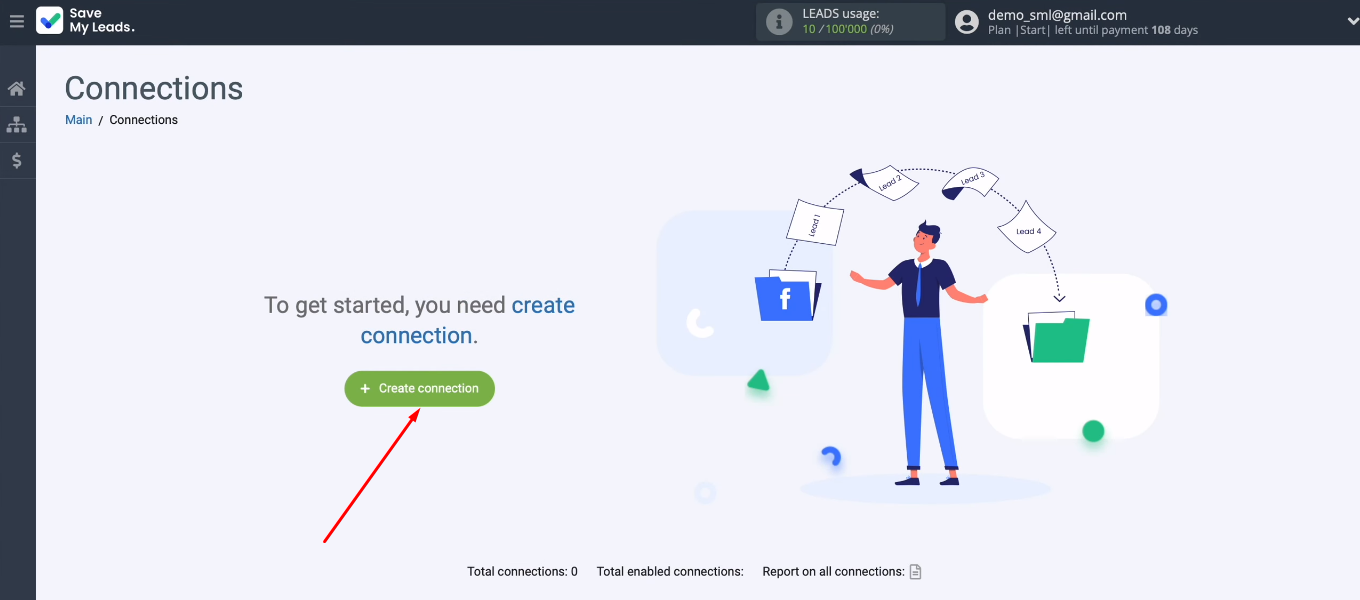
First, create a new integration — the “Create connection” button.
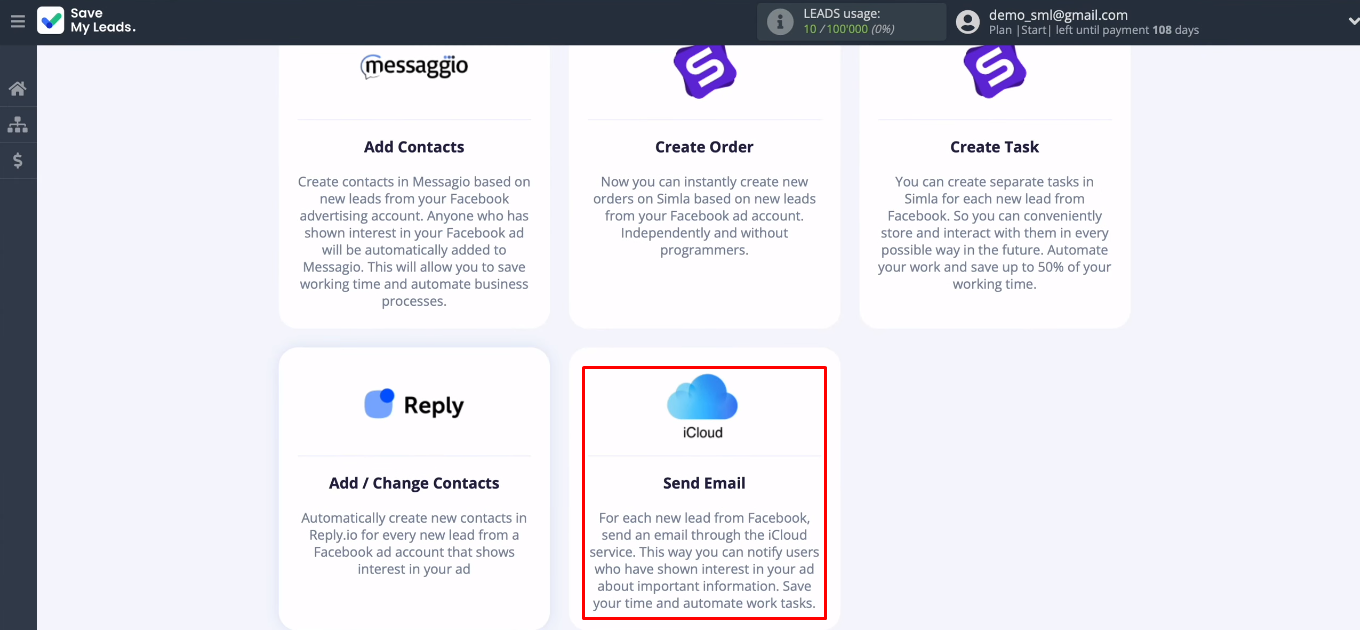
The next step is to choose a template to customize. In our case it is “iCloud (Send Email)”.
Connect your Facebook account to the SML system.
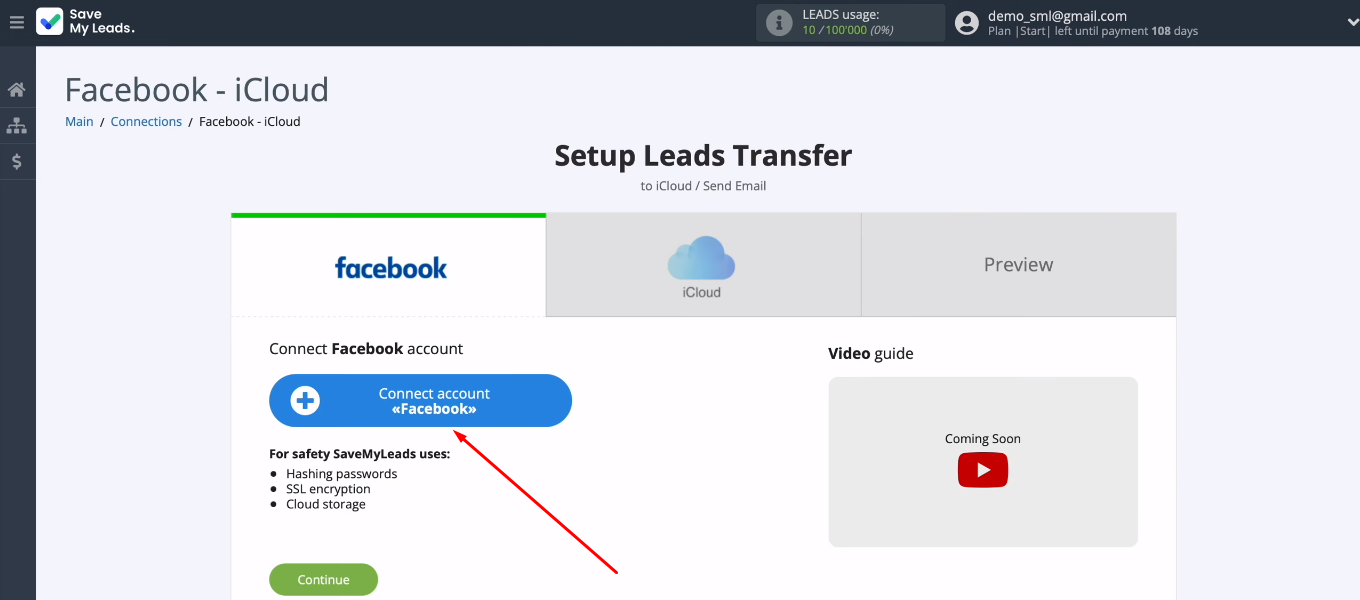
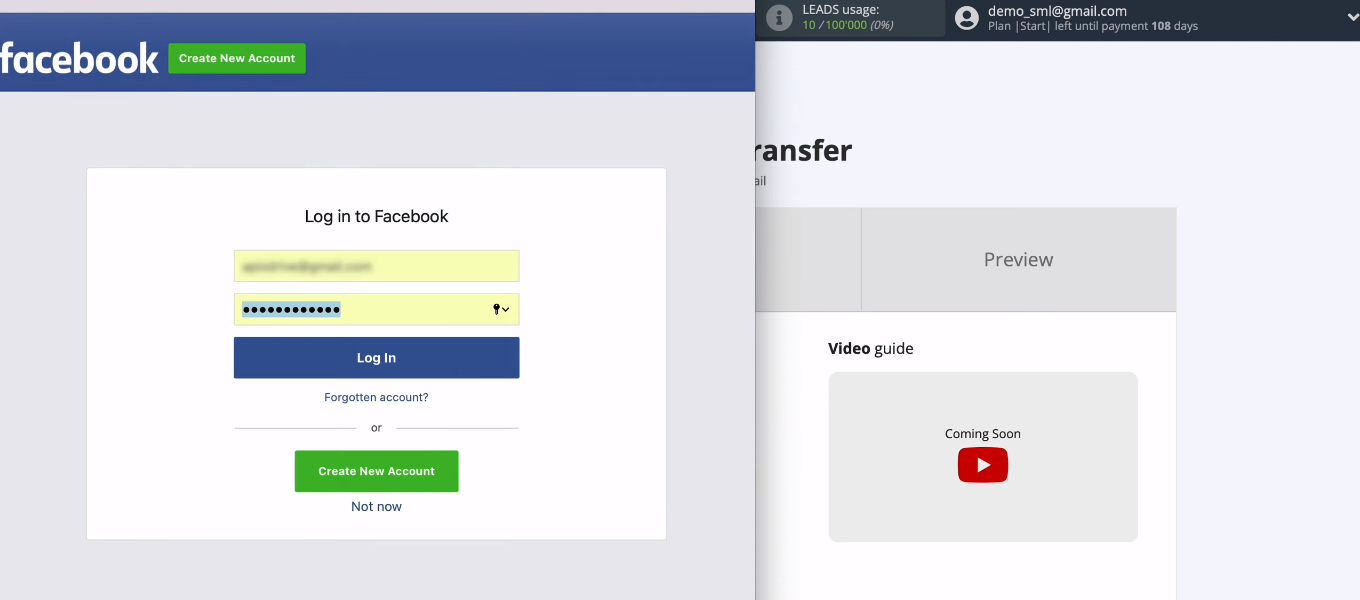
Enter the username and password for your FB account.
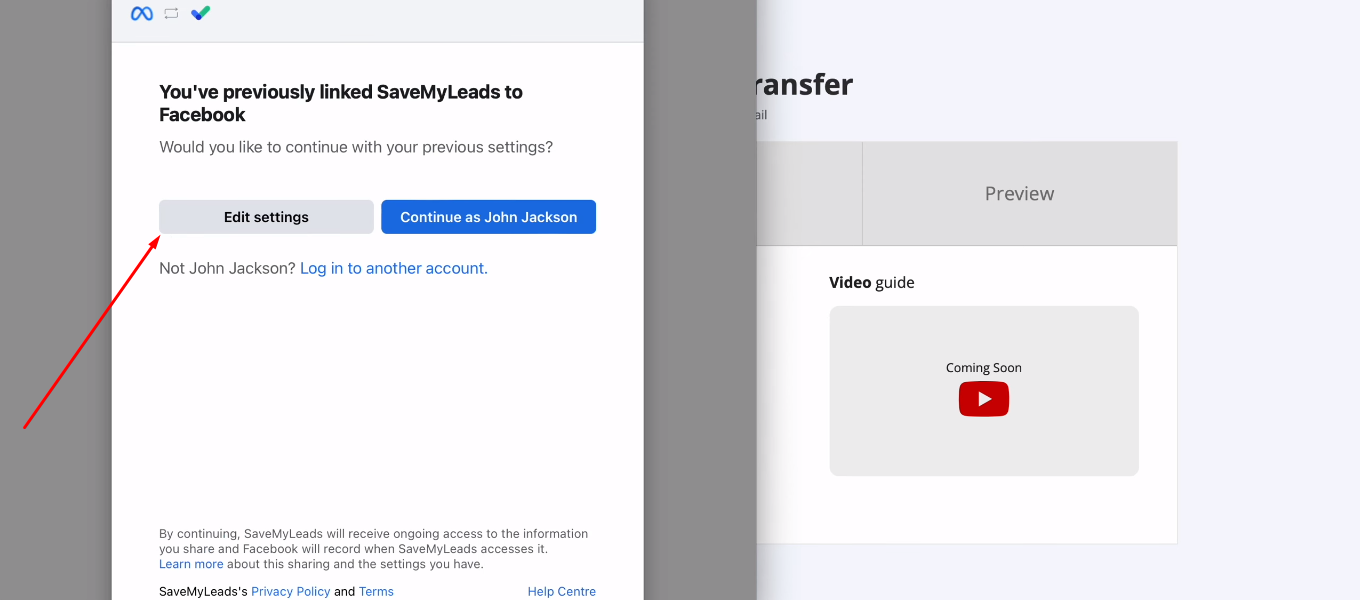
Click "Edit settings".
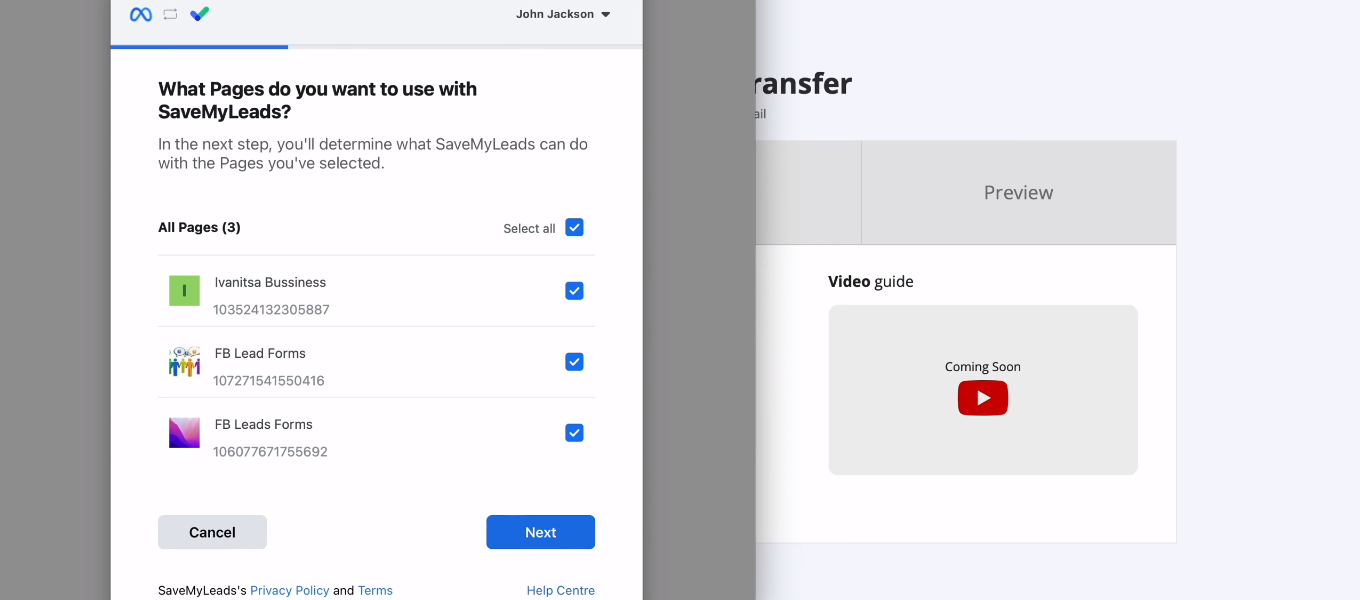
Check the checkboxes of the advertising pages for which you want to receive leads.
Make sure all access checkboxes are enabled.
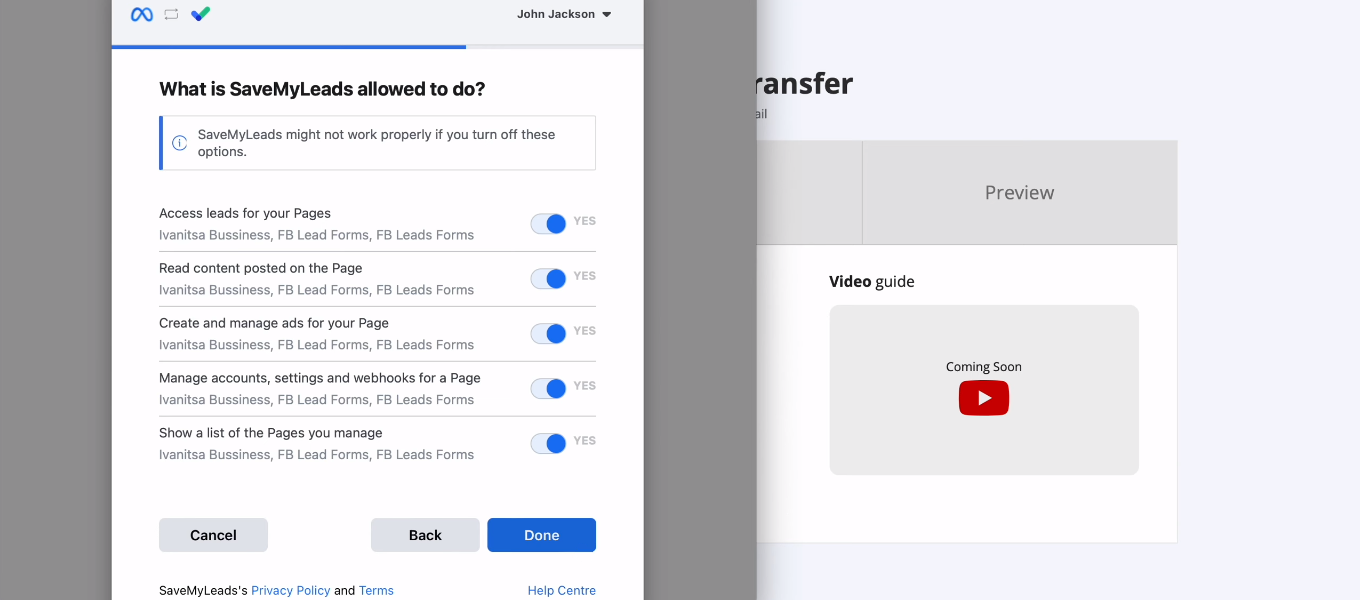
Click "OK".
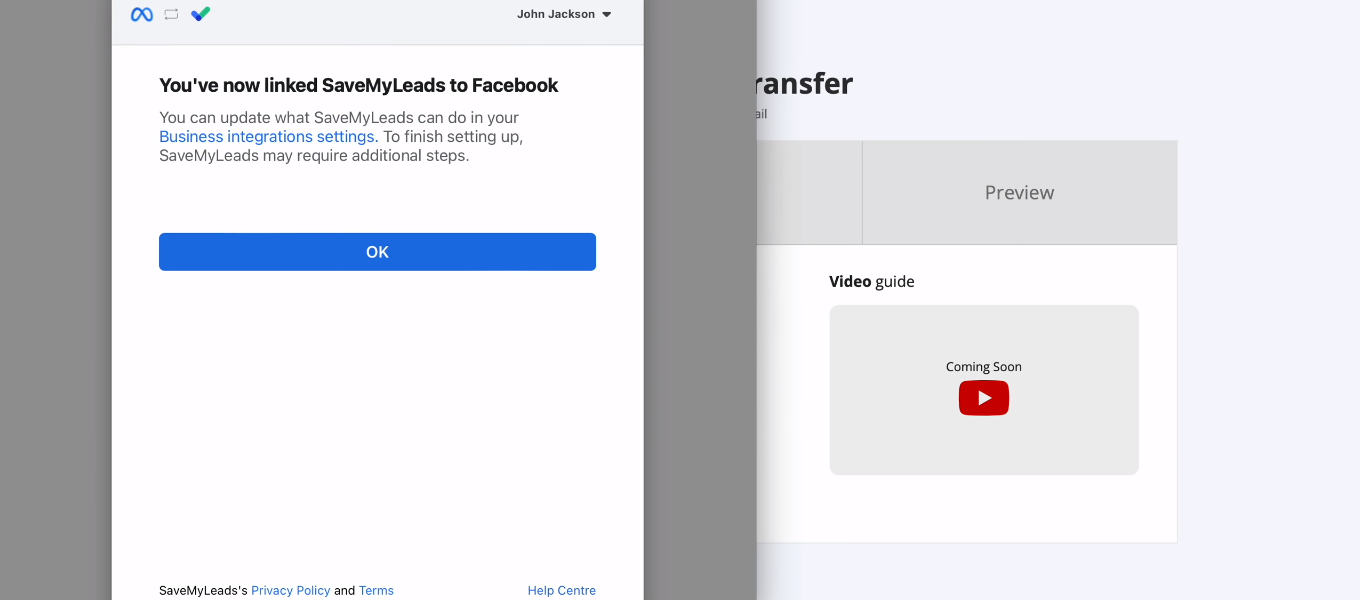
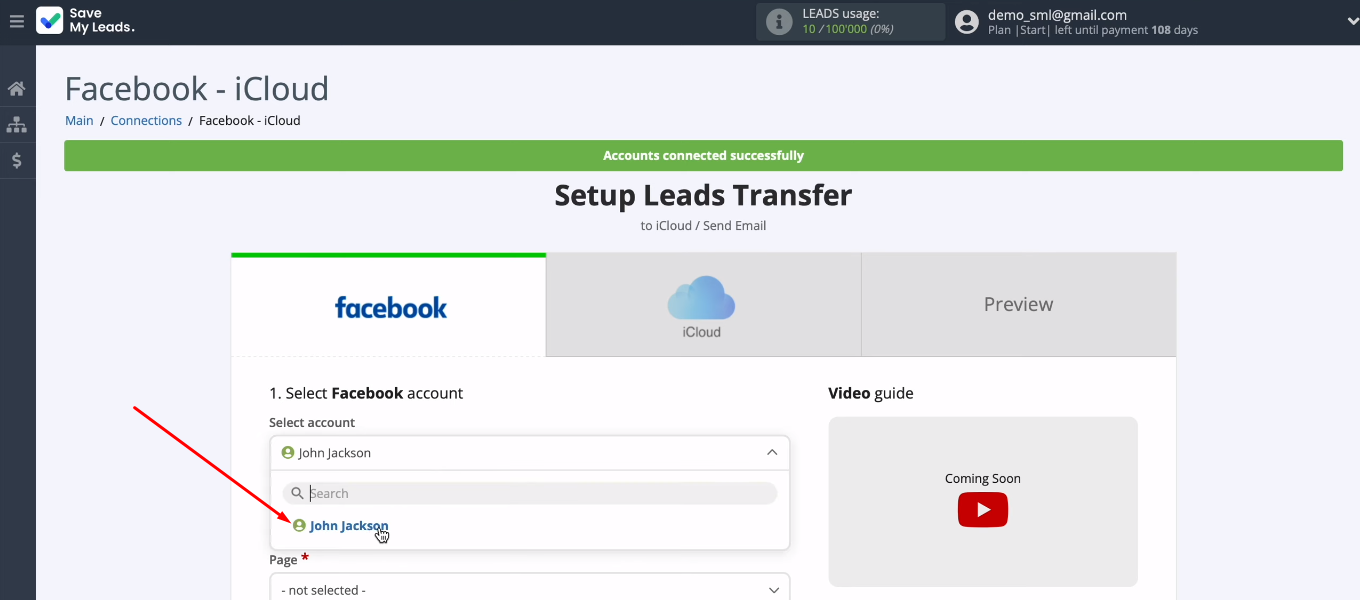
The connected Facebook account appeared in the list of available ones. Select it.
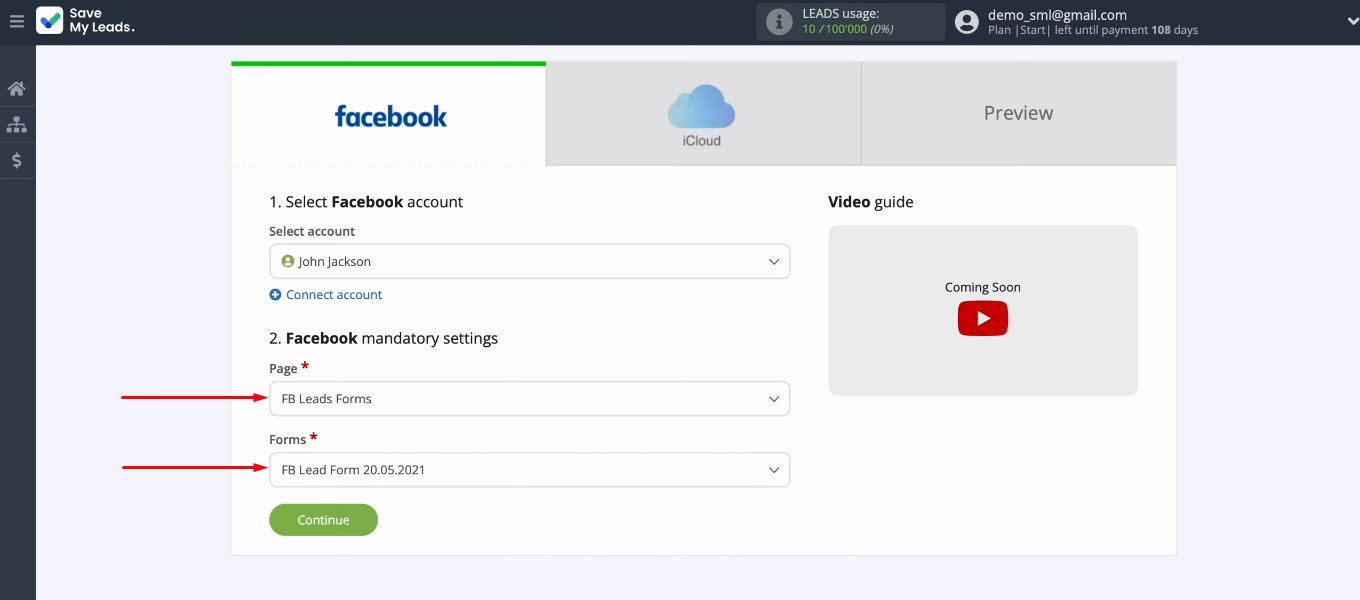
Choose ad page and lead form. To receive leads on multiple forms, you need to set up separate connections. When all required data source parameters are defined, click “Continue”.
Connect iCloud
Now you need to set up iCloud as the receiving system. Click "Connect account iCloud".
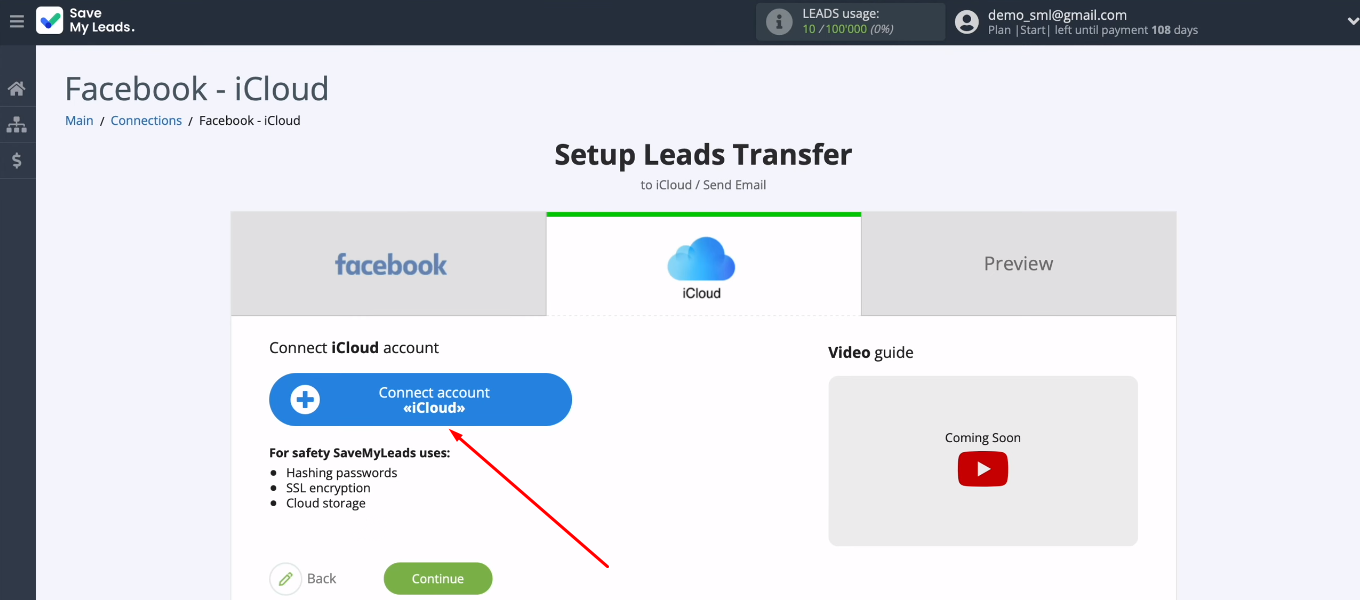
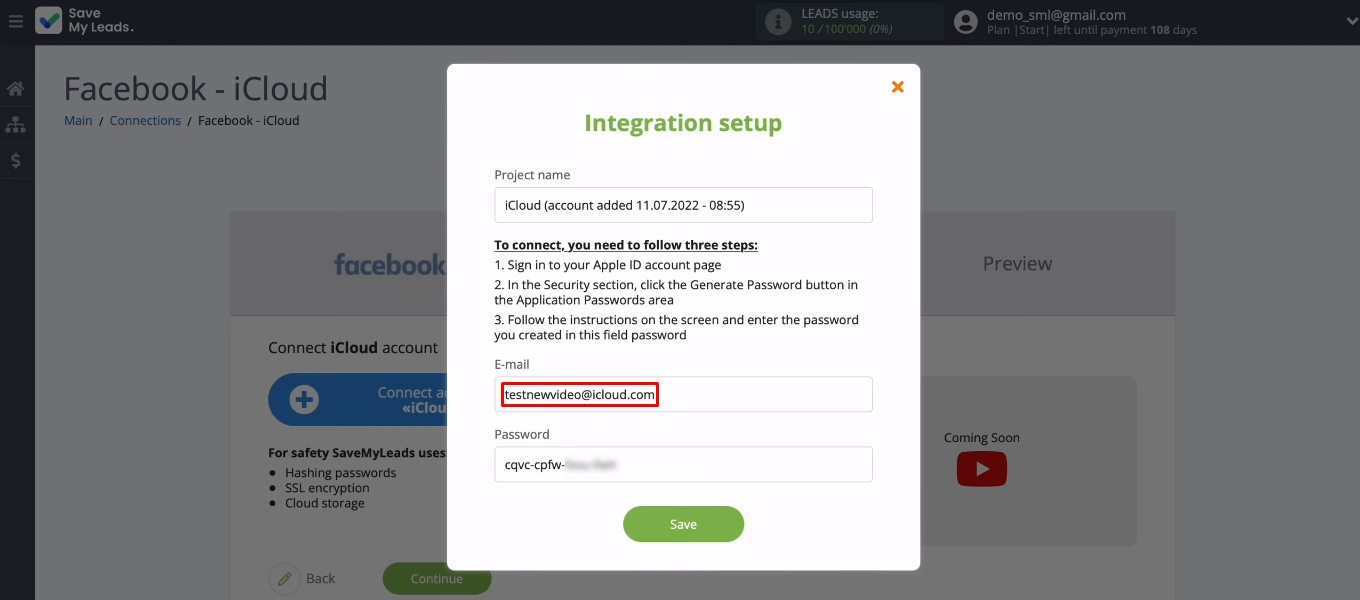
To add an iCloud account to the SaveMyLeads system, you need to fill in two fields: "Email" and "Password".
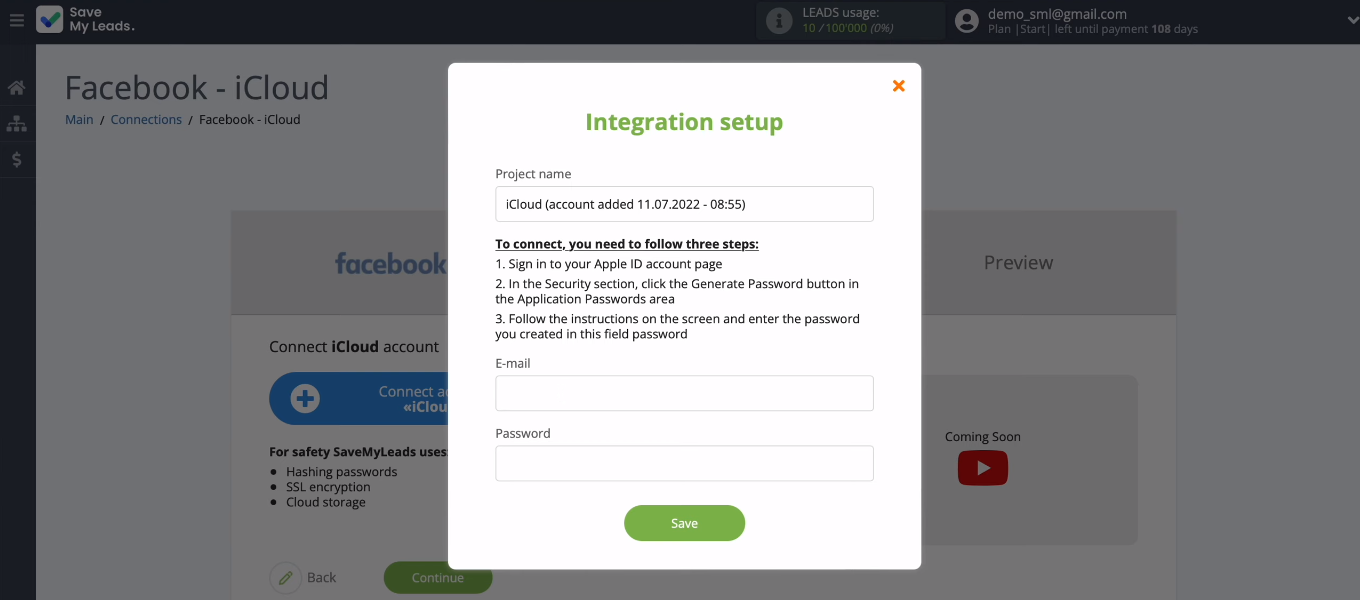
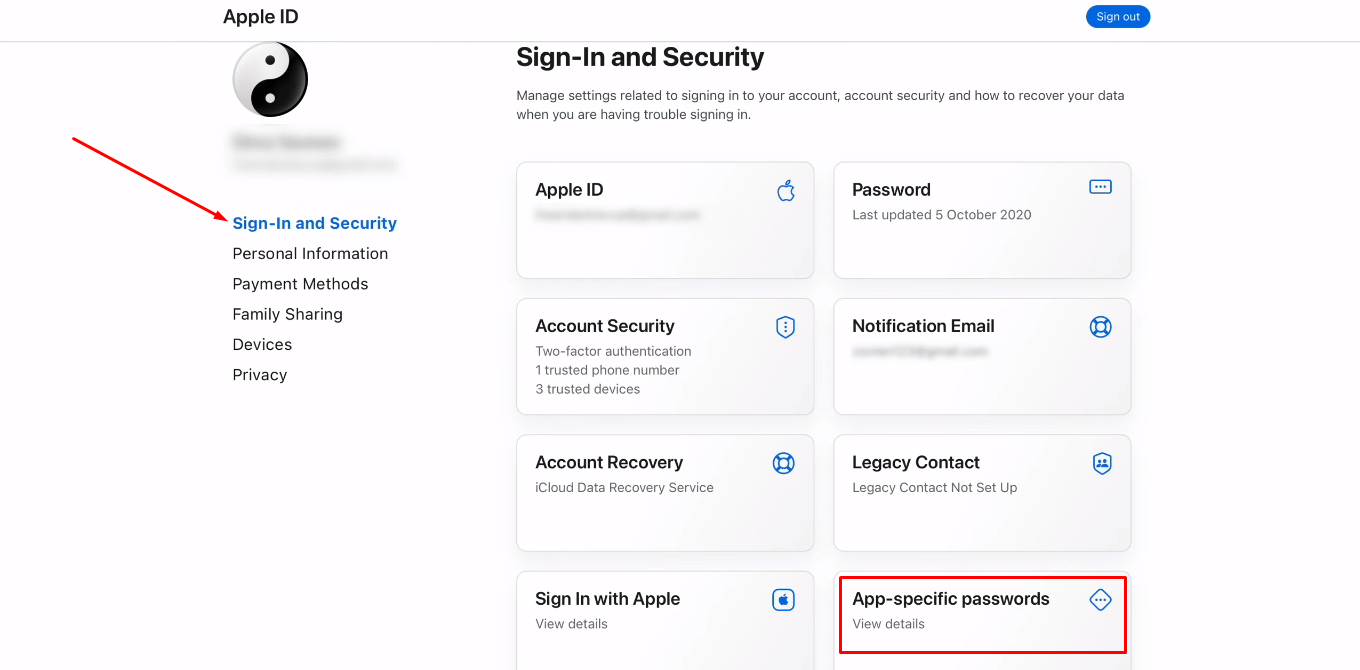
First, let's deal with the "Password" field. Go to your Apple ID account settings. In the "Sign-In and Security" section, select "App-specific passwords".
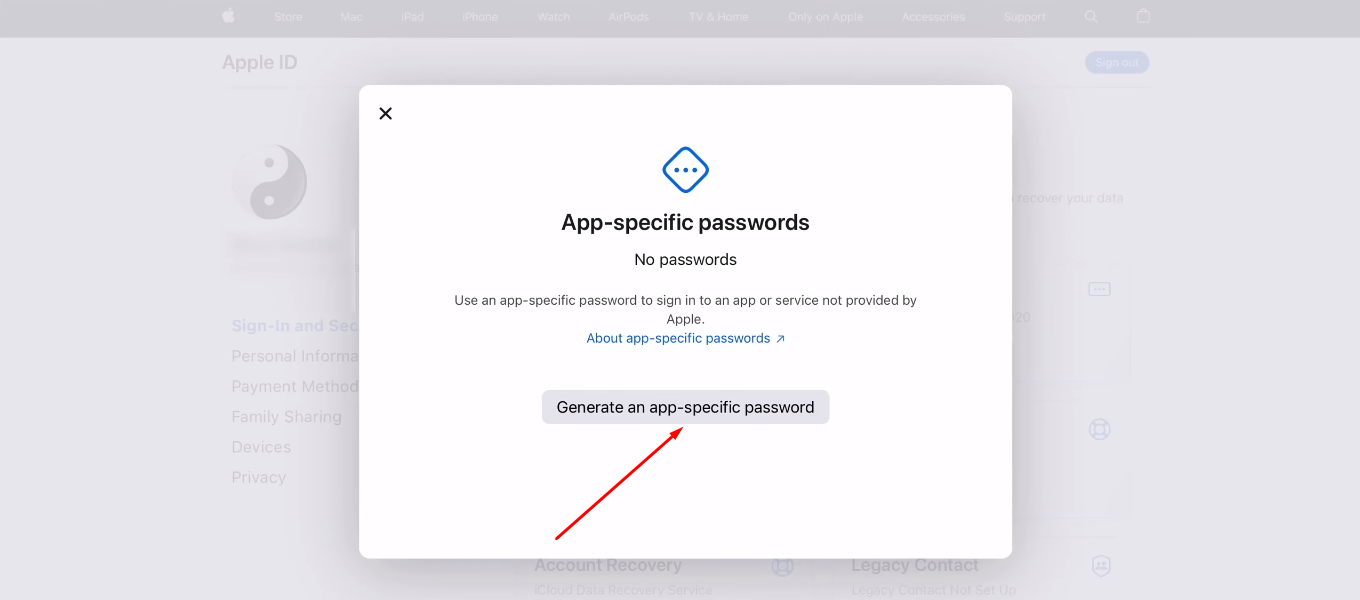
Click "Generate an app-specific password".
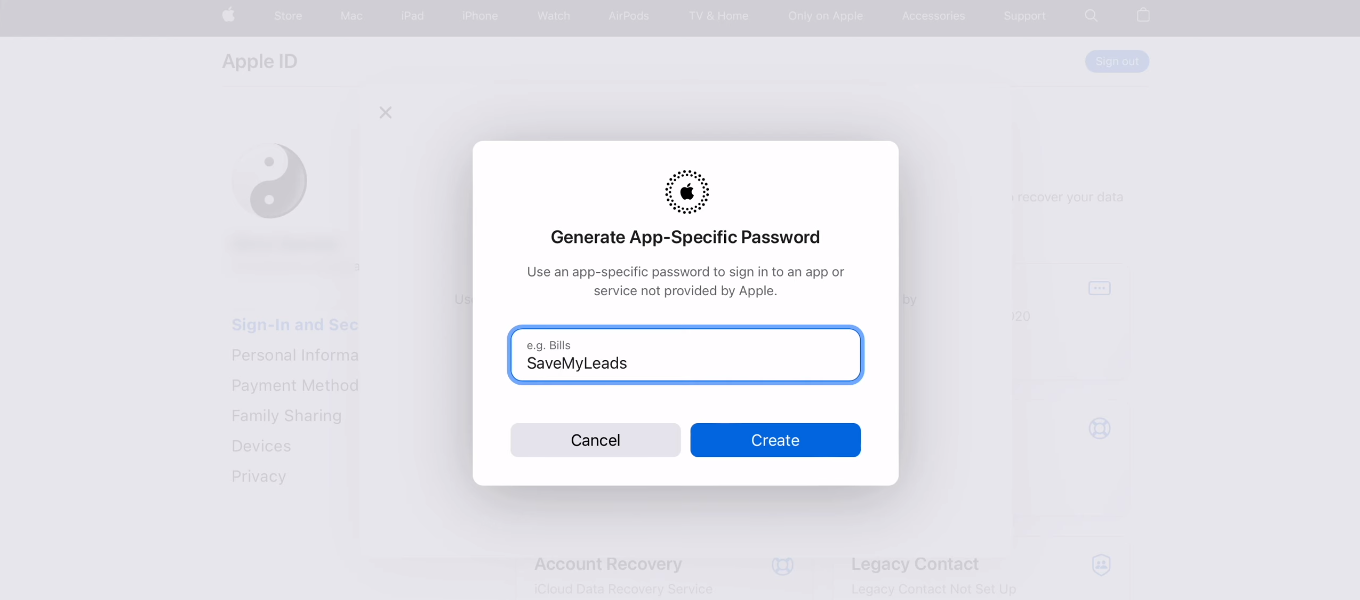
Enter a label for the password. Click "Create".
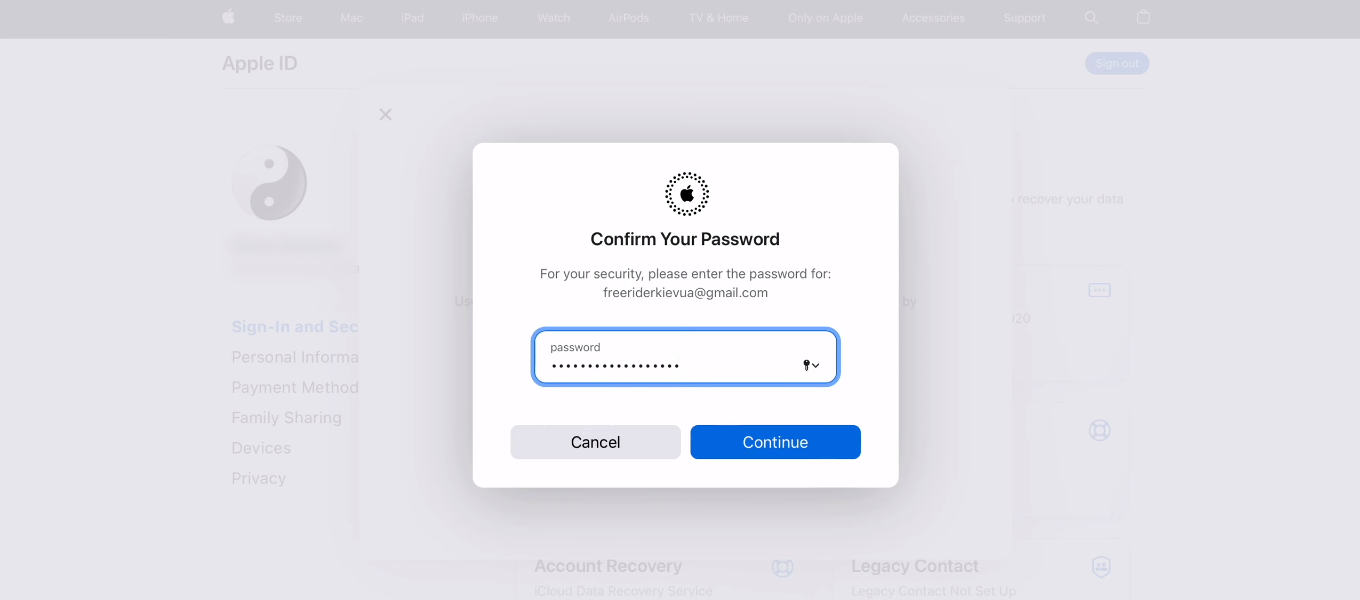
Enter your iCloud account password. Click "Continue".
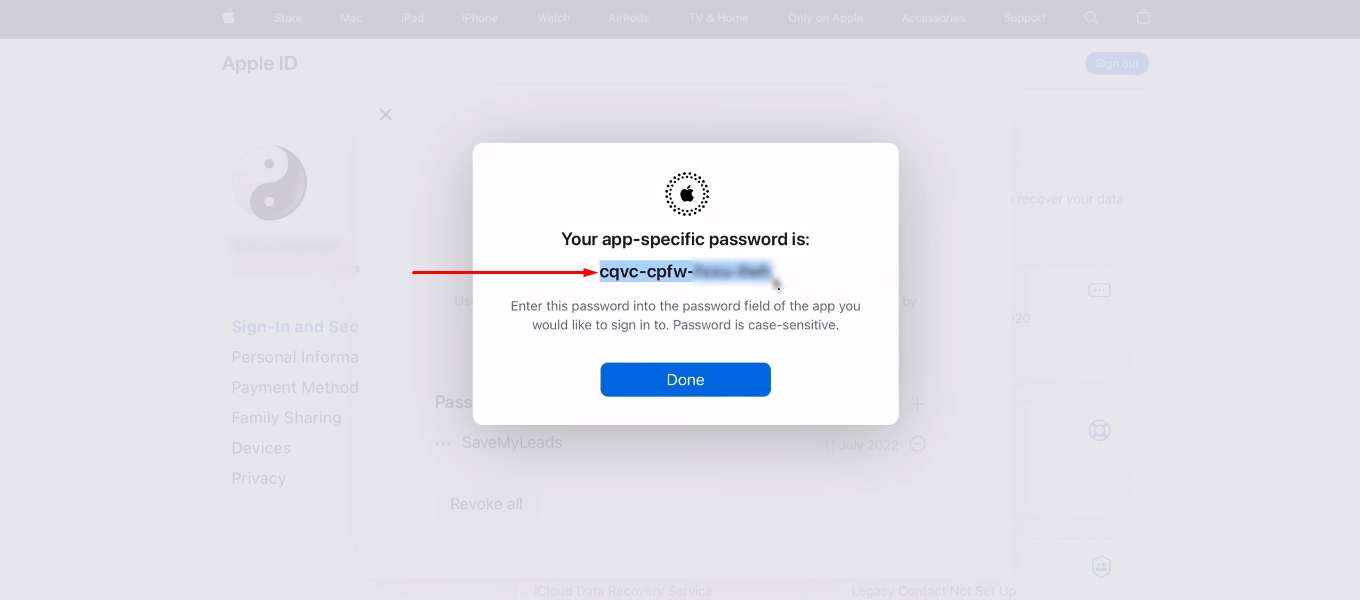
The password for the SaveMyLeads service has been created. Copy it.
Return to the SaveMyLeads system and paste the copied password into the appropriate field.
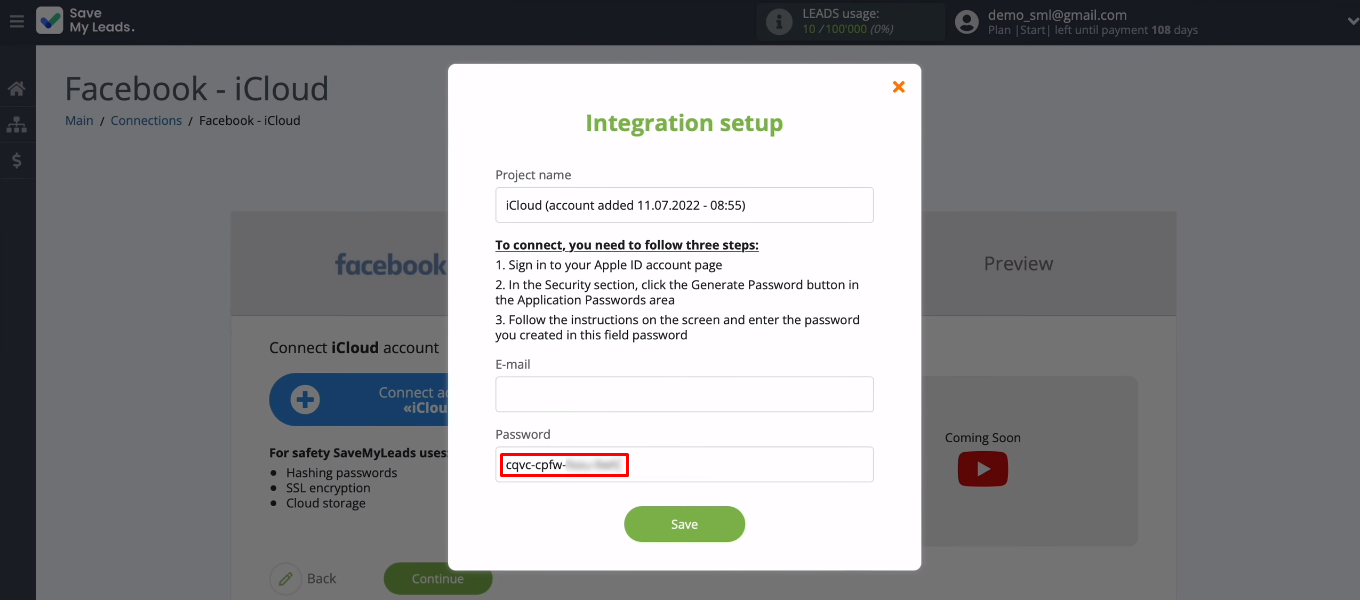
In the “E-mail” field, enter the email address to sign in to your iCloud account. Click "Save".
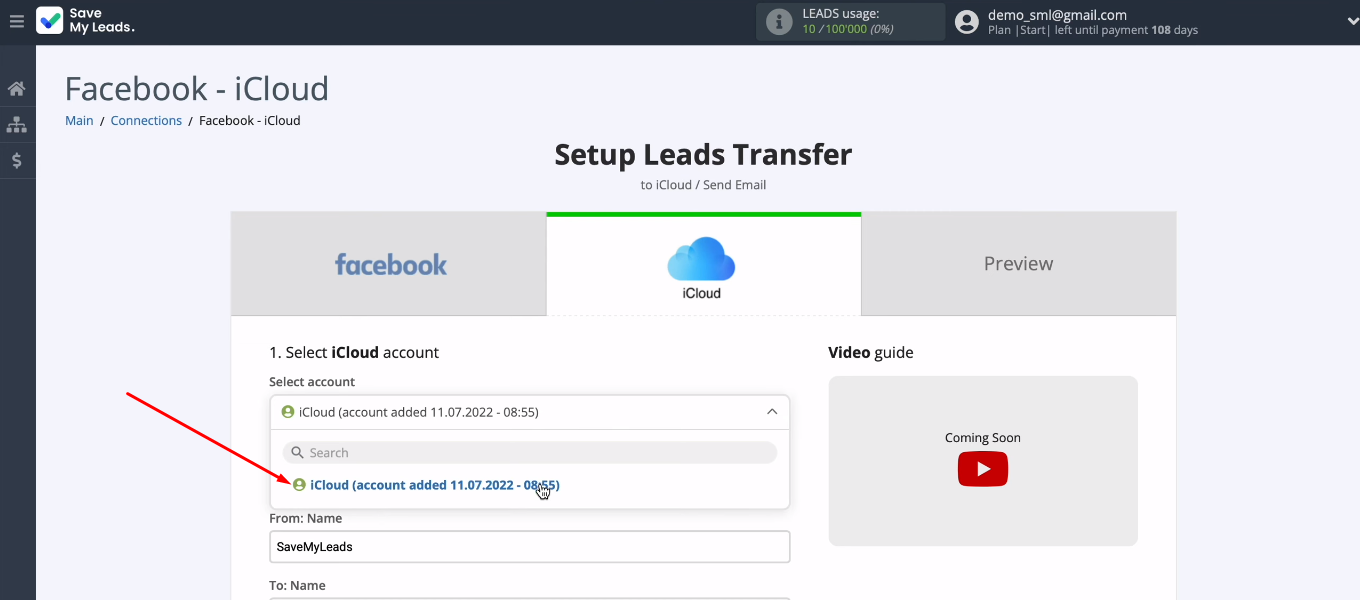
The connected iCloud account appears in the list. Select it.
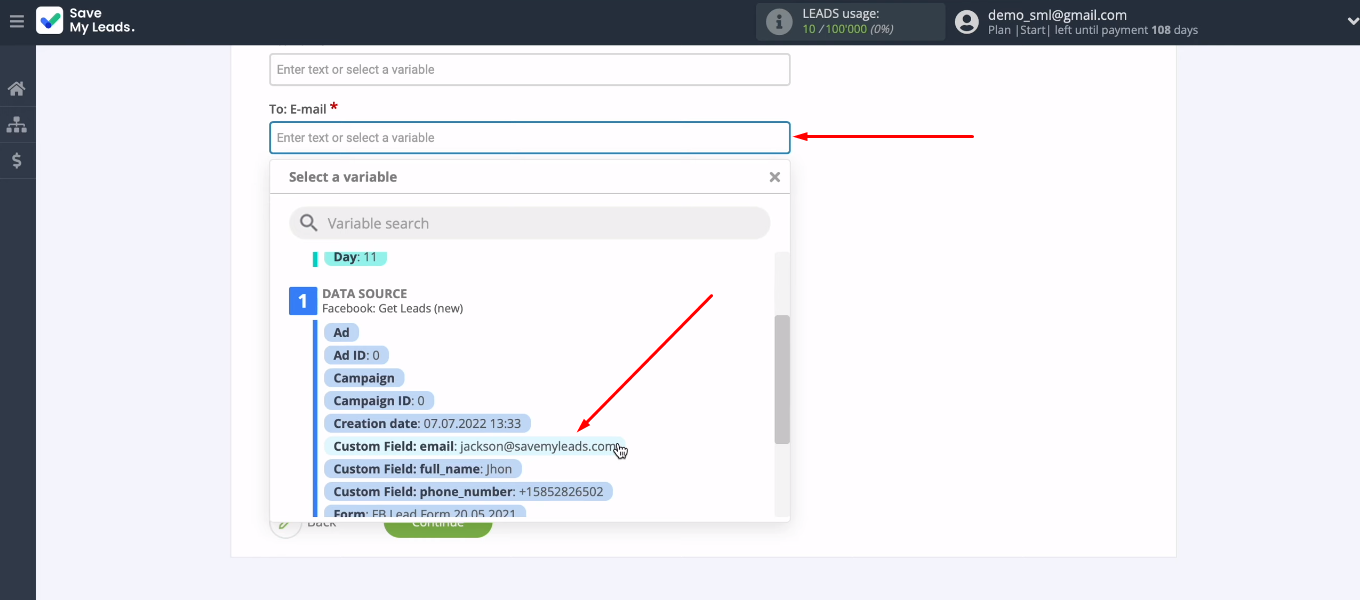
Now you need to configure the iCloud fields, the information from which will be used when sending an email. If you want to send an email to every new Facebook lead, then in the “To: E-mail” you need to set a variable with the client's address. Click in the field and select the appropriate variable from the list.
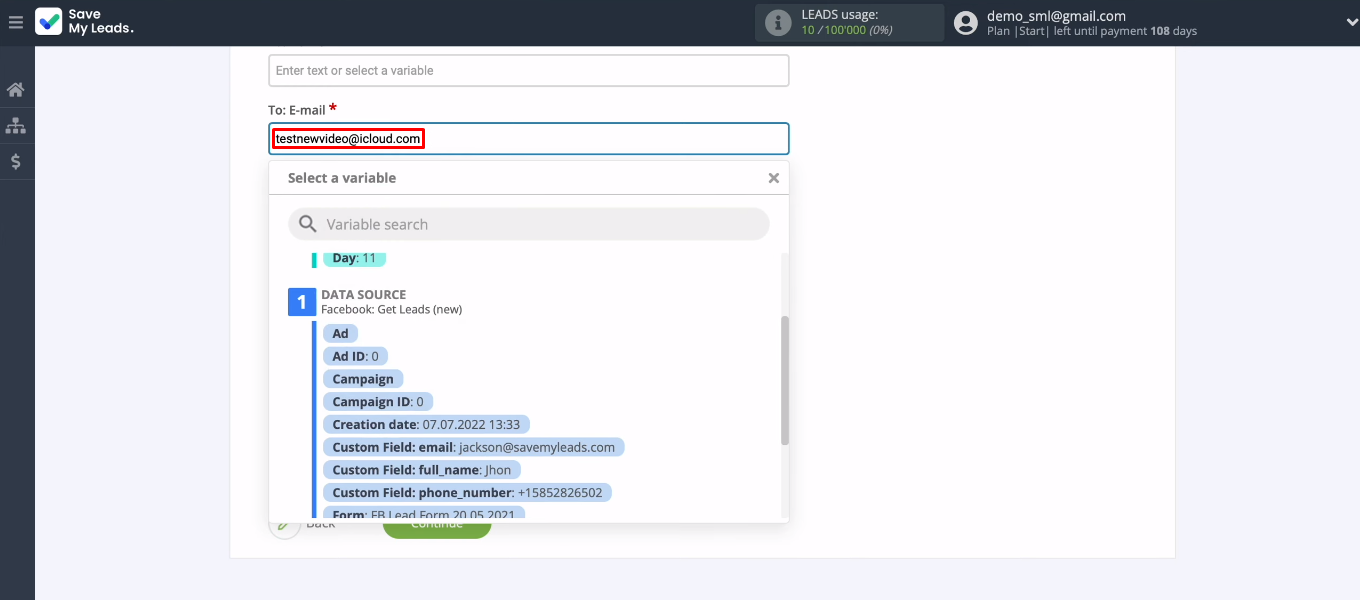
If you want to send a notification letter about new leads to yourself or to someone from your company's employees, then specify the mailbox manually.
Set up the “Subject” and “Body” fields. Enter your own text, use system variables and Facebook variables. When the contents of all required iCloud fields are defined, click “Continue”.
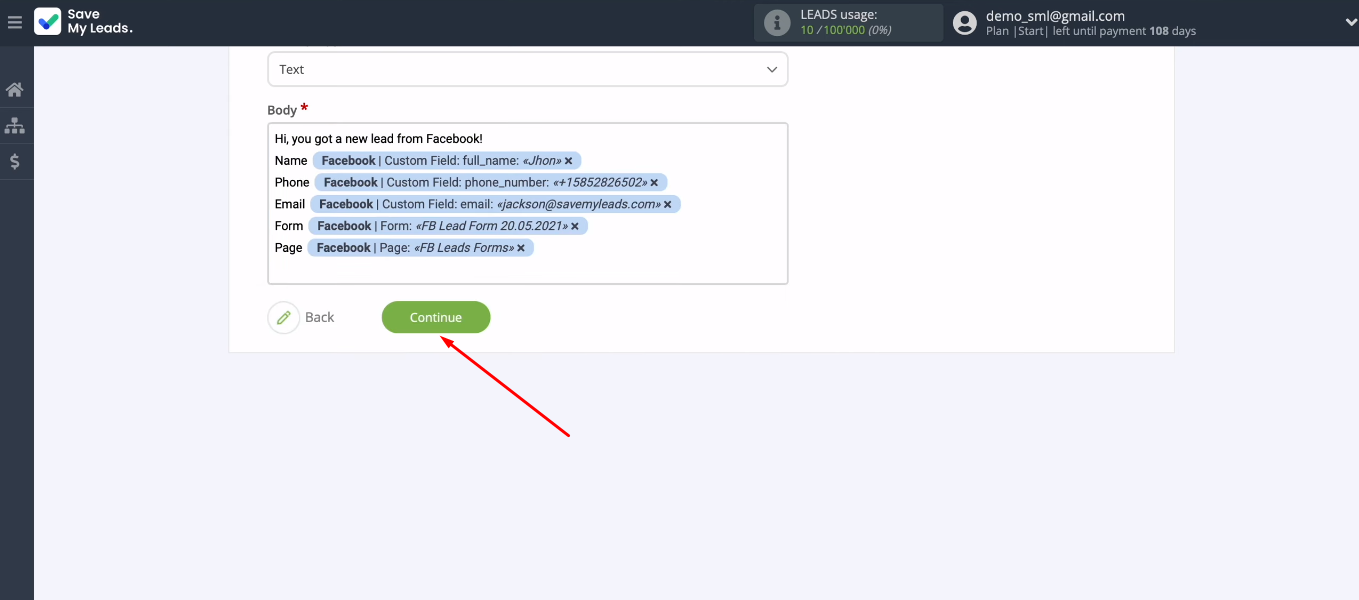
In the next step, study the sample data that will be used to send the email. If something does not suit you, go back one step (the “Back” button) and make the necessary changes. If everything is in order with the data and the letter format, click “Send test data to iCloud”.
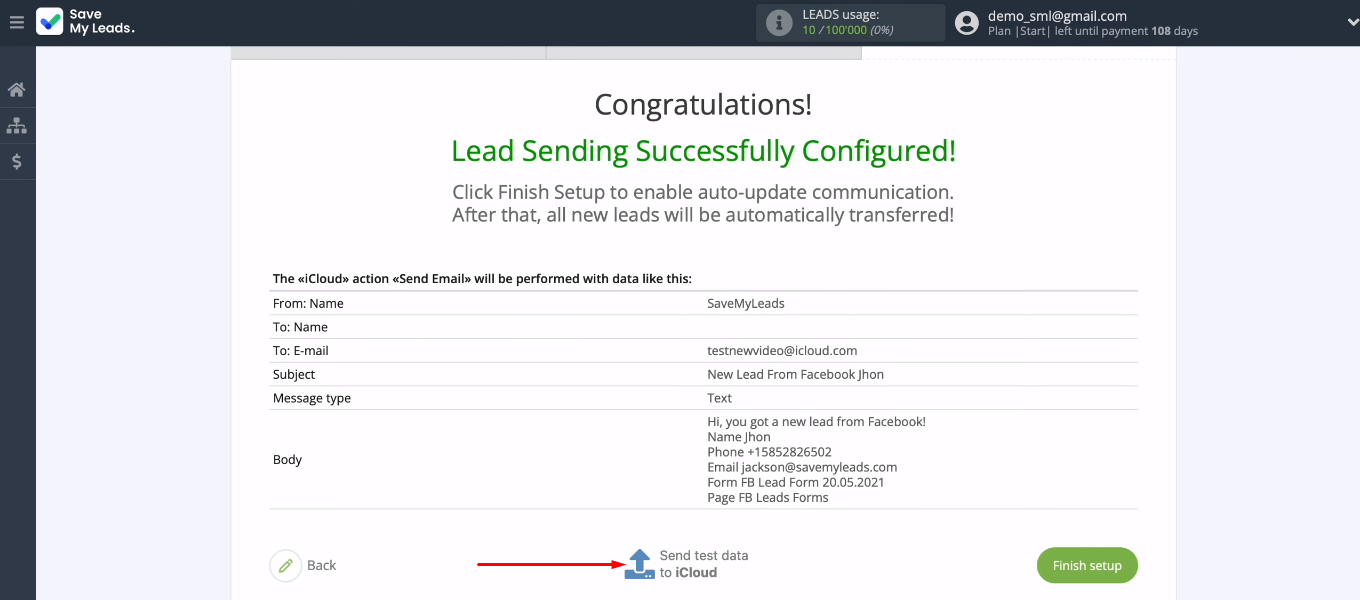
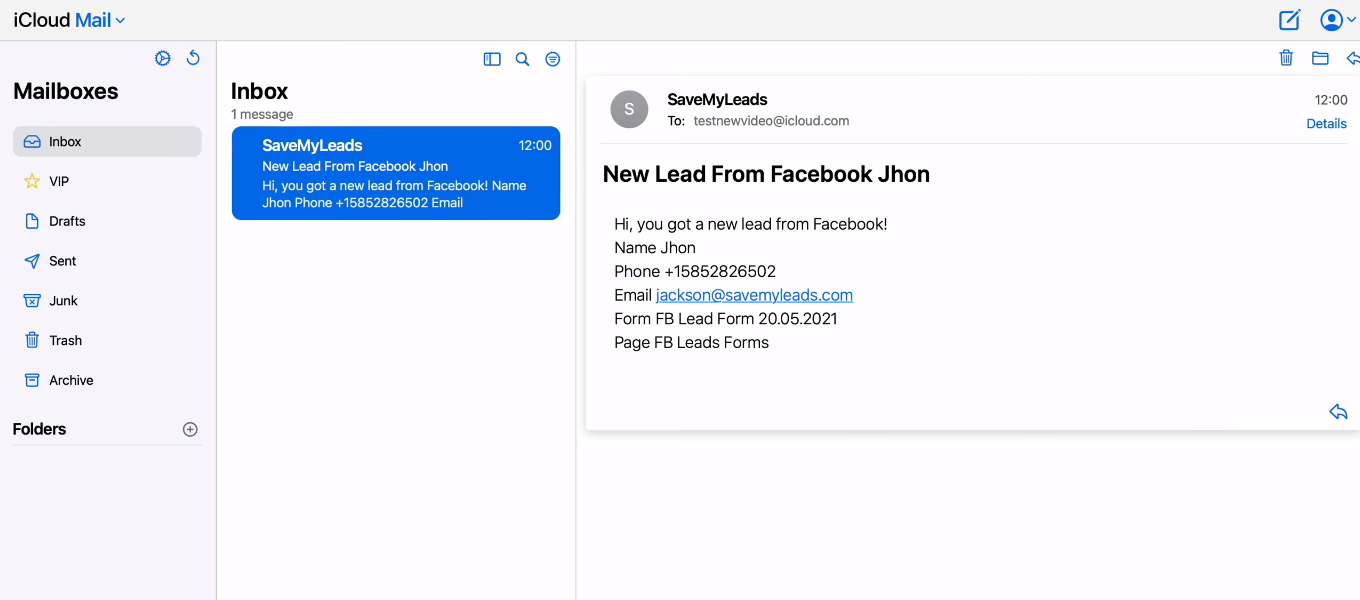
In our example, we set up automatic sending of emails to a specific address. Go to the mailbox that you specified in the “To: E-mail” field and check for a test letter.

Enable automatic data update
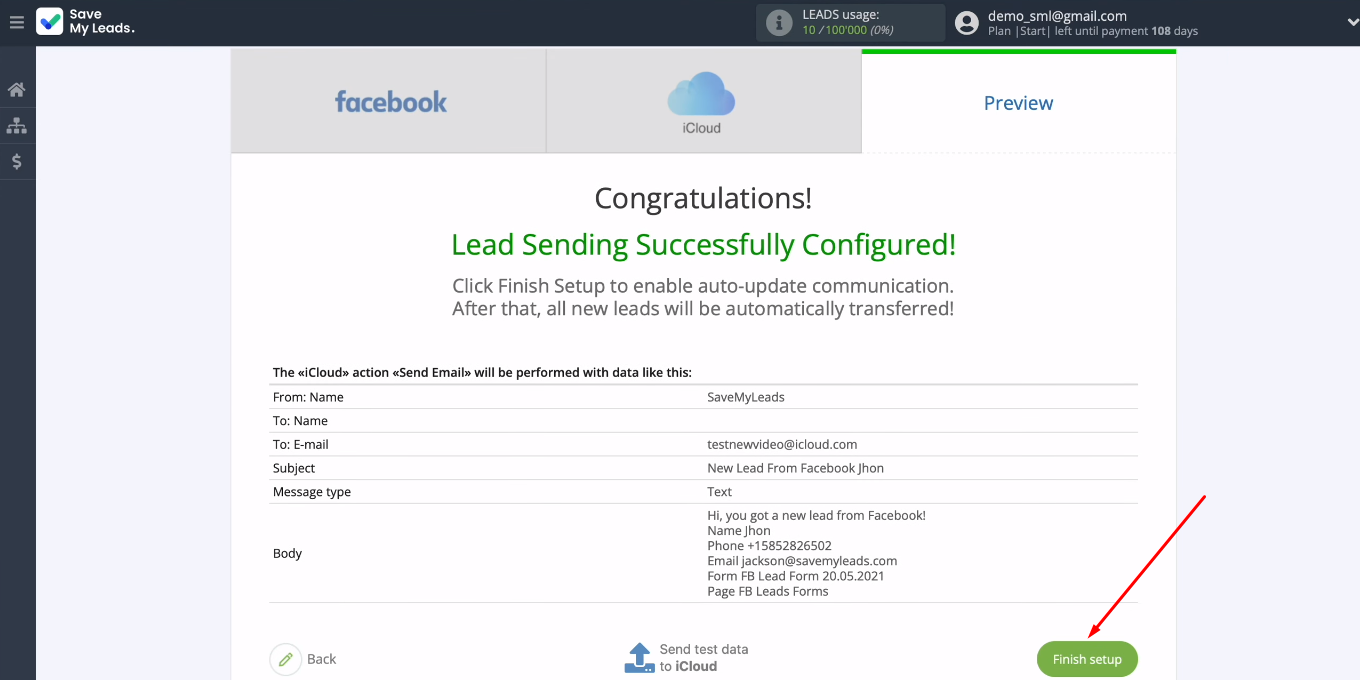
In order for each new lead to be tracked by the SaveMyLeads system and sending a letter is initiated, you need to enable auto-update. Click "Finish setup".
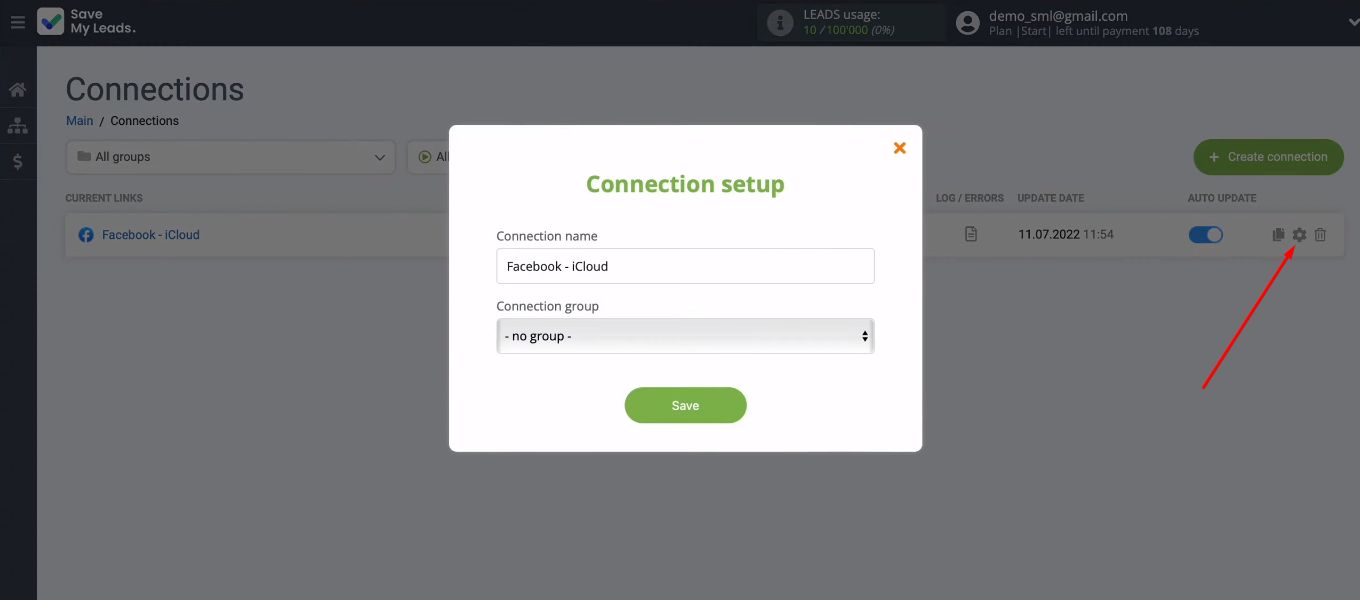
You can change the name of the integration, as well as add a connection to a specific group. To do this, go to the connection settings — click the “gear”.
Сonclusions
We set up Facebook and iCloud integration using the SaveMyLeads service. Now data on new leads is downloaded from the FB advertising account and used to send emails. Both processes are implemented automatically and do not require the involvement of a human resource.


You don't need any special skills or knowledge to work with the SaveMyLeads system. Register on our website, go to your personal account and connect Facebook with the necessary systems and applications. Integrations in SML are configured in just 5-10 minutes. Automate the transfer of data from Facebook to other services, get rid of routine operations and use your working time efficiently.
