The Copper CRM system allows you to effectively organize contacts, track deals and leads, set up sales pipelines, conduct analytical work, etc. In this article, we will tell you how to automatically transfer new leads from Facebook to the Copper CRM workspace. You will learn how to get rid of the regular routine task of transferring data from one system to another in a few minutes.
Content:
1. How to setup Facebook and Copper integration
2. Connect Facebook
3. Connect Copper
4. Enable auto-update
5. Conclusion
Copper is a platform that is famous for its high-quality integration with Google services. Users of the CRM system can work effectively with Gmail, customize email templates, implement newsletters, etc. Directly from Gmail, you can collect leads for further processing. Copper also offers functionality for sales pipelines that helps you track the path of the lead and the effectiveness of its processing.
CRM services in general are designed to improve the quality of order processing and customer service. In addition, such platforms help to increase the productivity of managers, as well as set up efficient and transparent workflows. Copper offers a whole range of tools to increase sales, ensure business communications, process customer data, implement automation, lead tracking.
Leads can be added into Copper CRM from different channels. For example, based on the results of lead generation using Facebook advertising tools. Here it is important to pay attention to the speed of transferring orders to CRM. You need to regularly check your Facebook ad account, upload new leads and transfer them to Copper. This is a monotonous job that takes quite a lot of time. But if you set up the integration of Facebook and Copper, then you can automate the process of transferring leads from the social network to the CRM system.
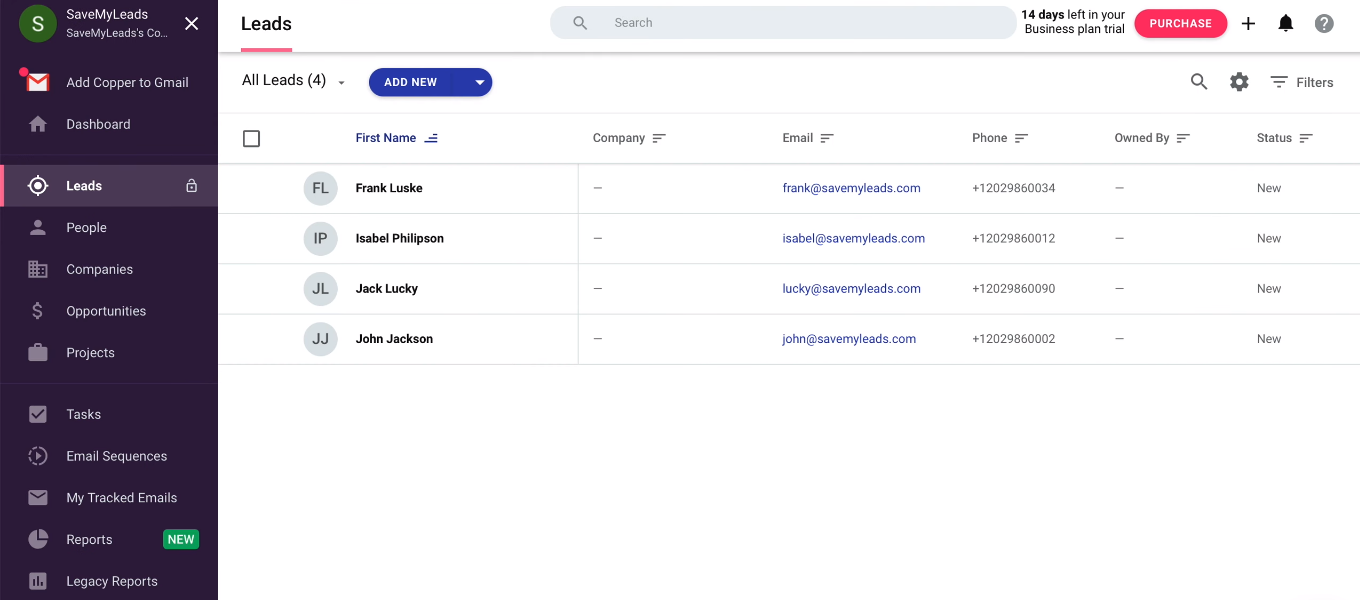
How to setup Facebook and Copper integration
We receive new leads using Facebook Lead Ads, and process them in the Copper CRM platform. It is necessary to ensure the fast transfer of data from one system to another. The solution to this problem is the integration of Facebook and Copper. The SaveMyLeads service allows you to quickly and without the help of programmers set up automatic transfer of new leads from Facebook to various platforms. In particular, you can create integrations with CRM systems.
To work with the SaveMyLeads service, you do not need to have special skills or knowledge. The integration is extremely easy to set up, and anyone can automate the process of transferring data from Facebook to the desired system. In our case, the results of completed Facebook lead forms will be quickly transferred to Copper. As a result, the manager does not need to check the advertising account and manually enter leads in the CRM system. Next, we will describe in detail how to set up a connection and greatly simplify your work.
Connect Facebook
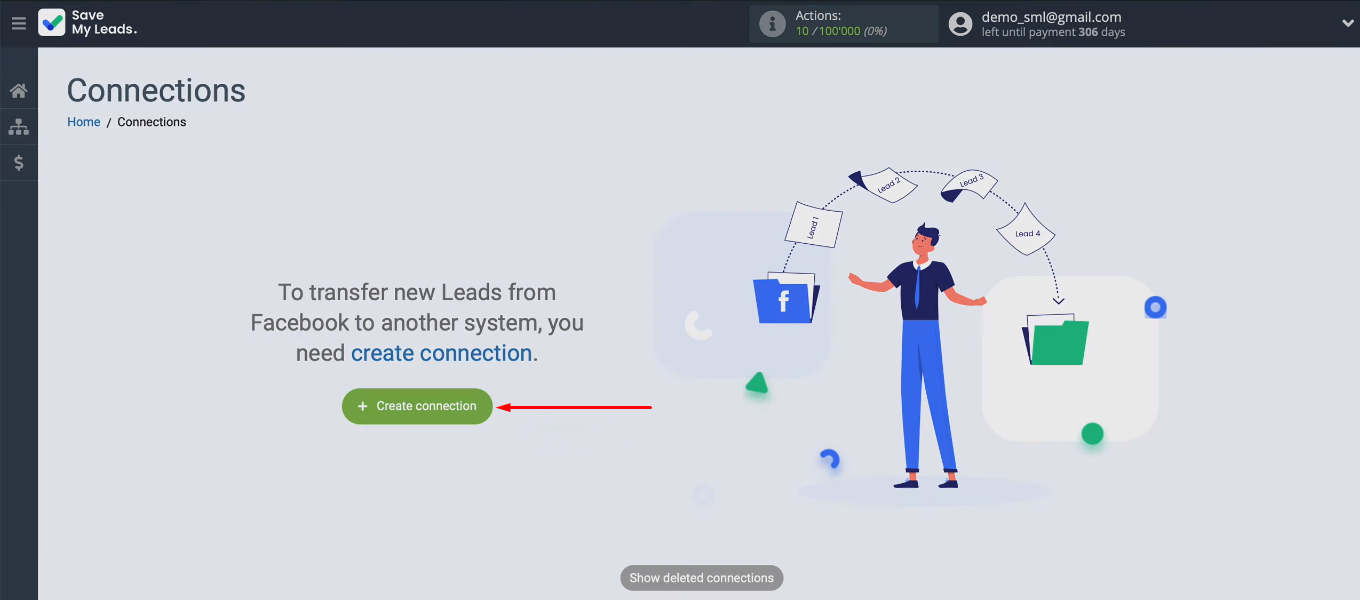
Go to the SaveMyLeads personal account and create a new connection.
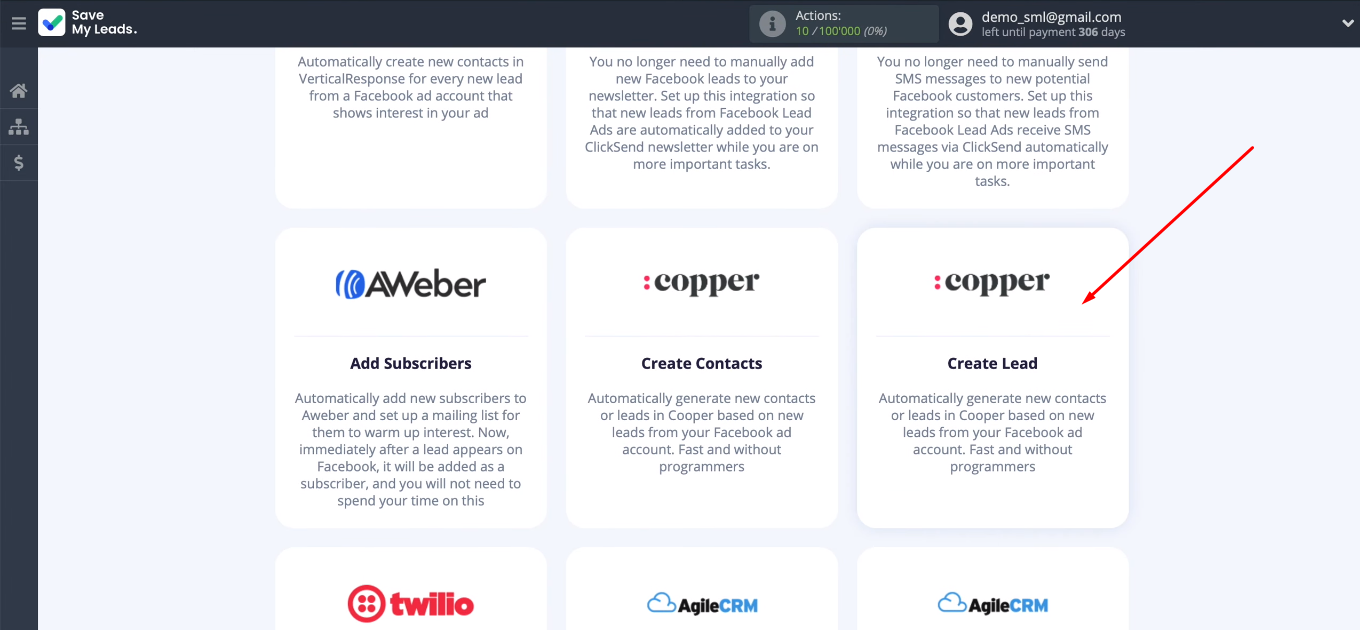
At the next stage, we see a list of templates for setting up the transfer of leads from Facebook to various systems. For our task, we need the “Copper (Create Lead)” option.
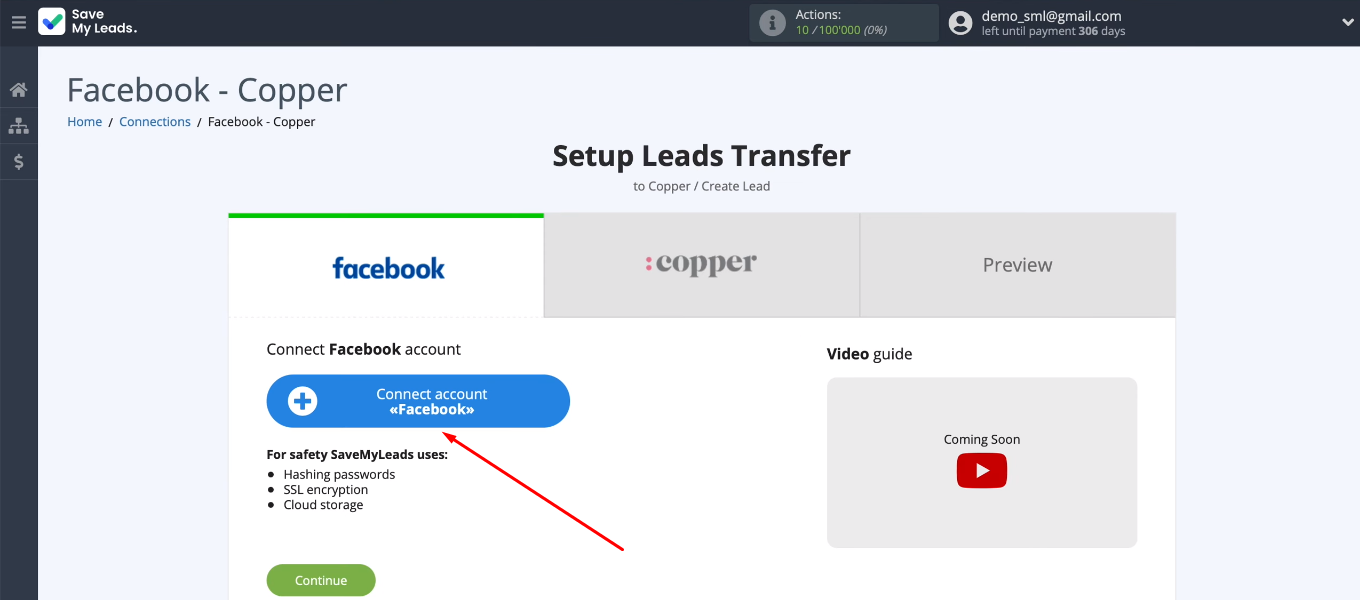
Connect the Facebook account to the SaveMyLeads system.
Specify login and password.
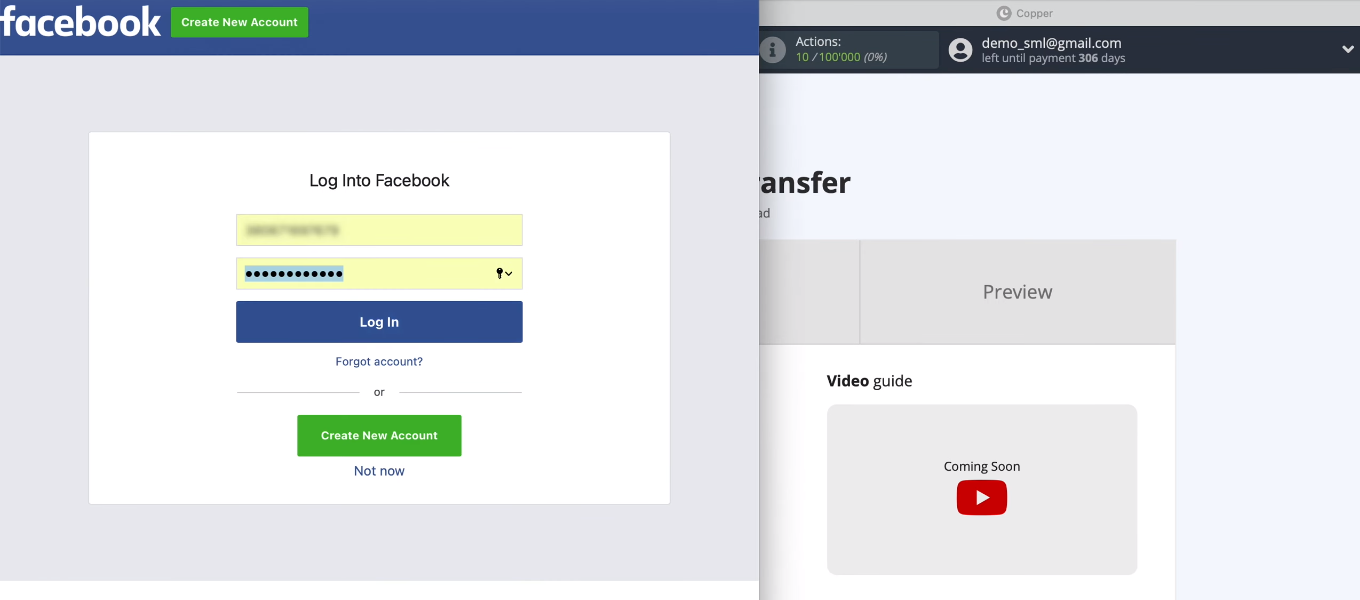
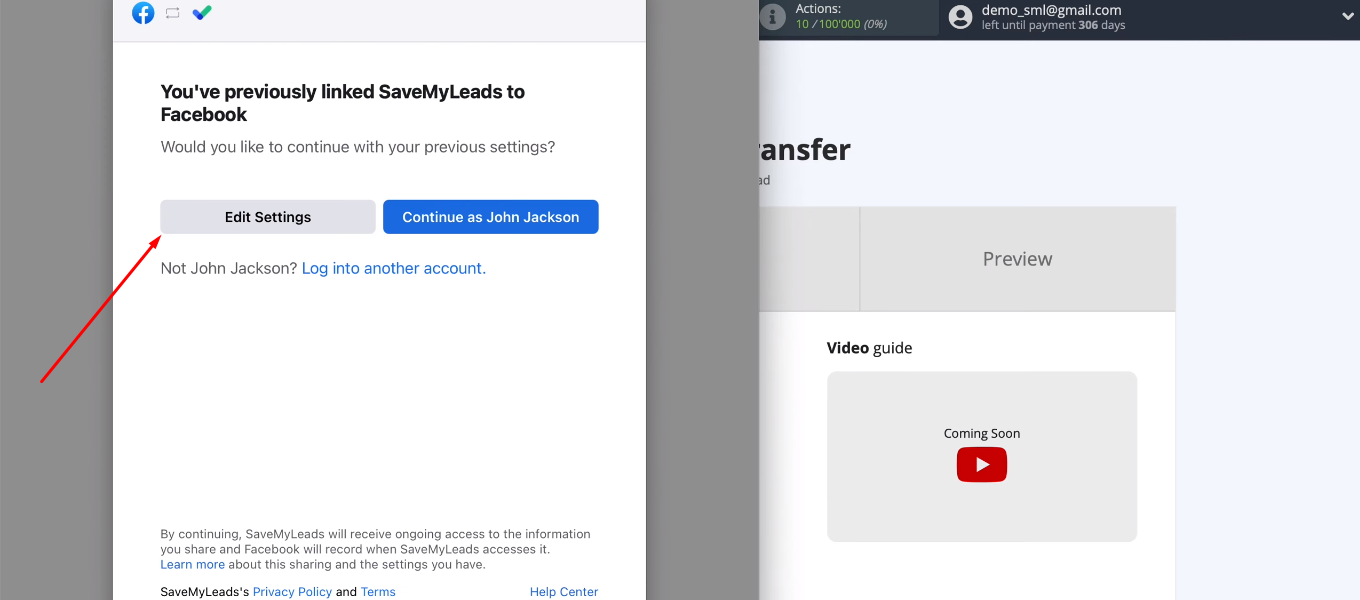
Let's go to the settings.
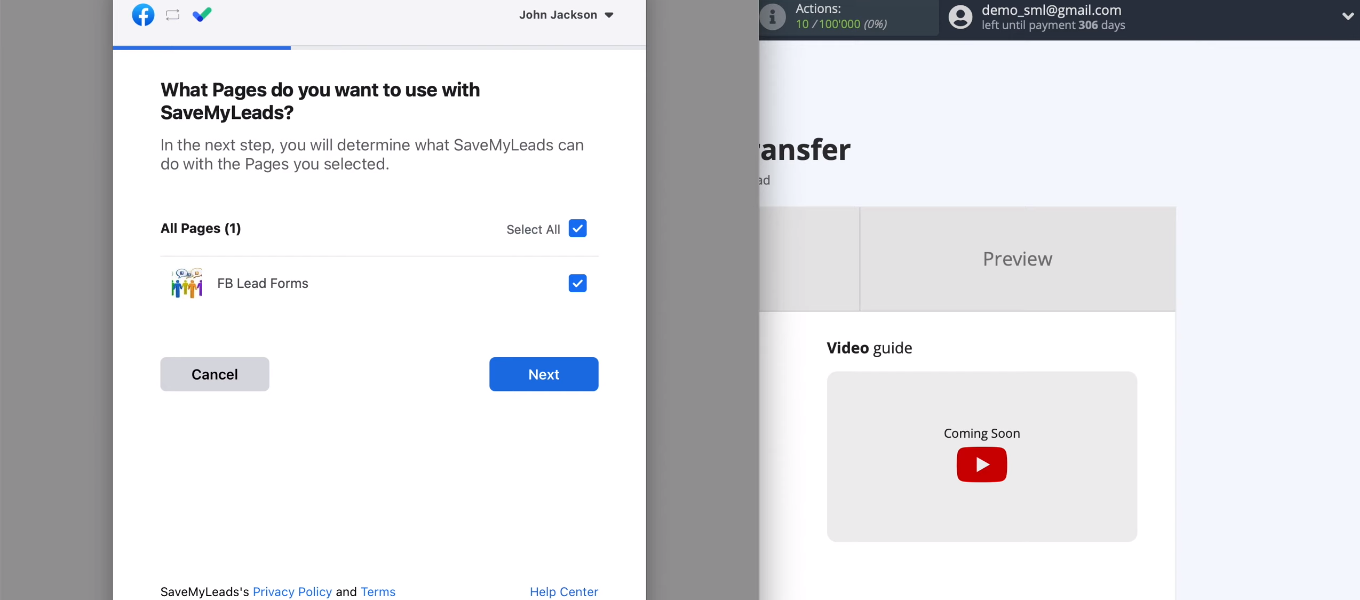
It is necessary to select advertising pages with which we can work in the future.
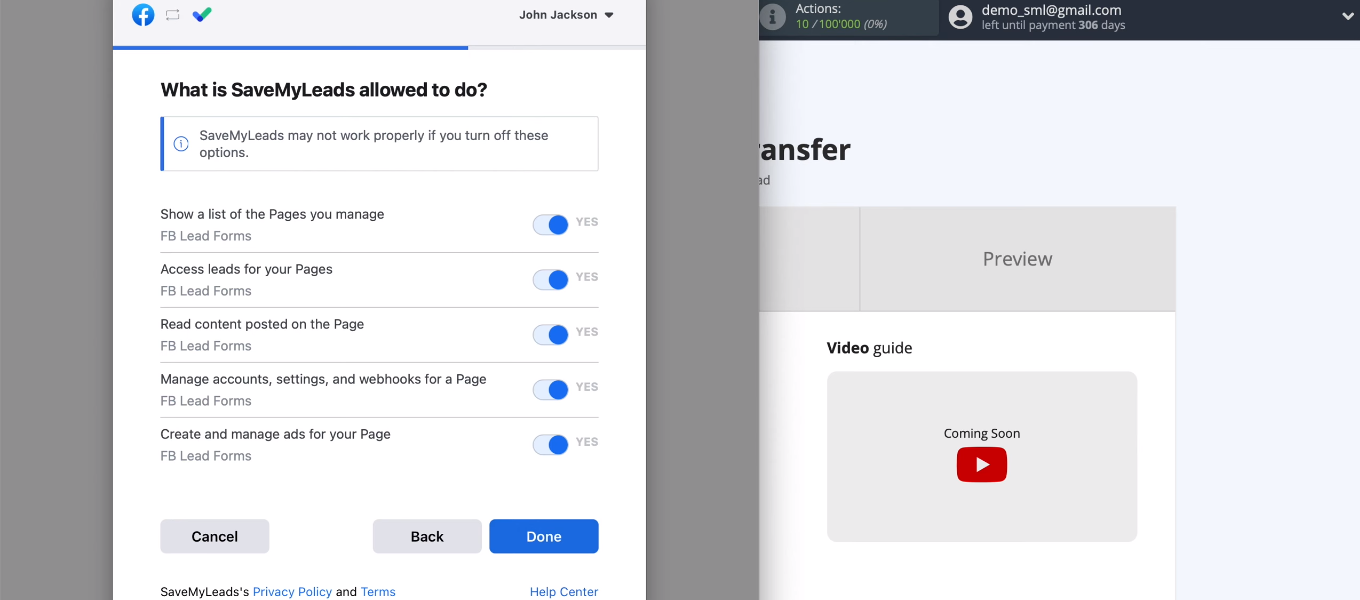
Provide the necessary access. All checkboxes in this window must be enabled.
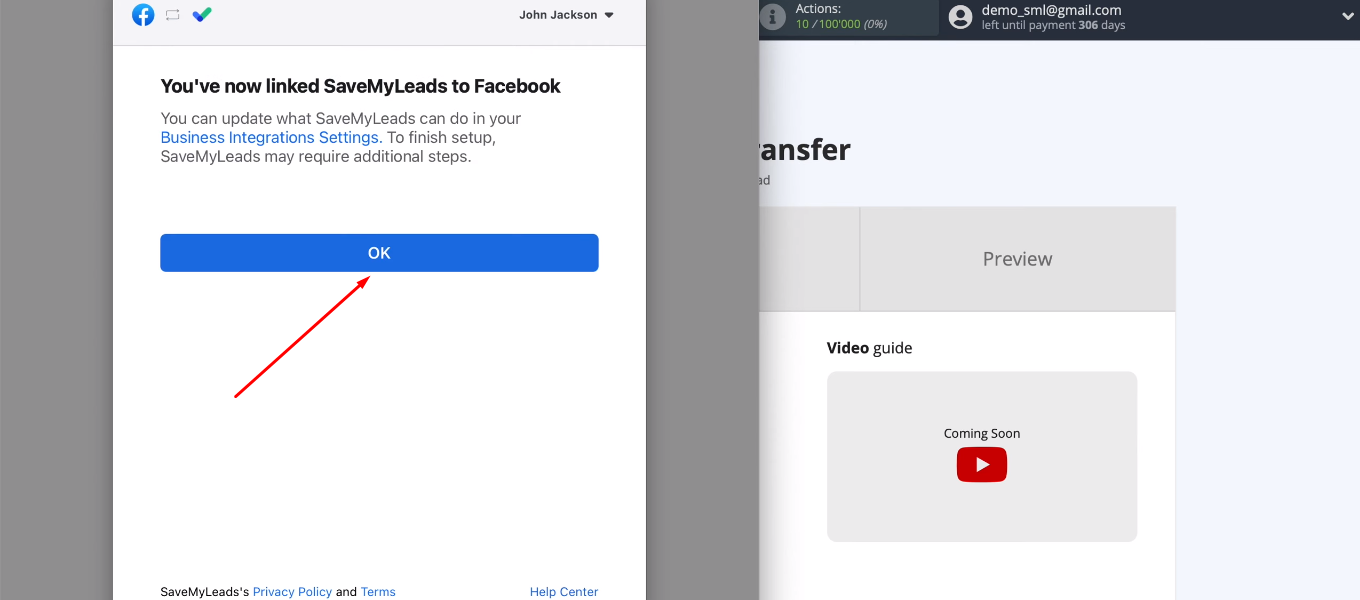
We have connected a Facebook account to the SaveMyLeads system. Click "OK".
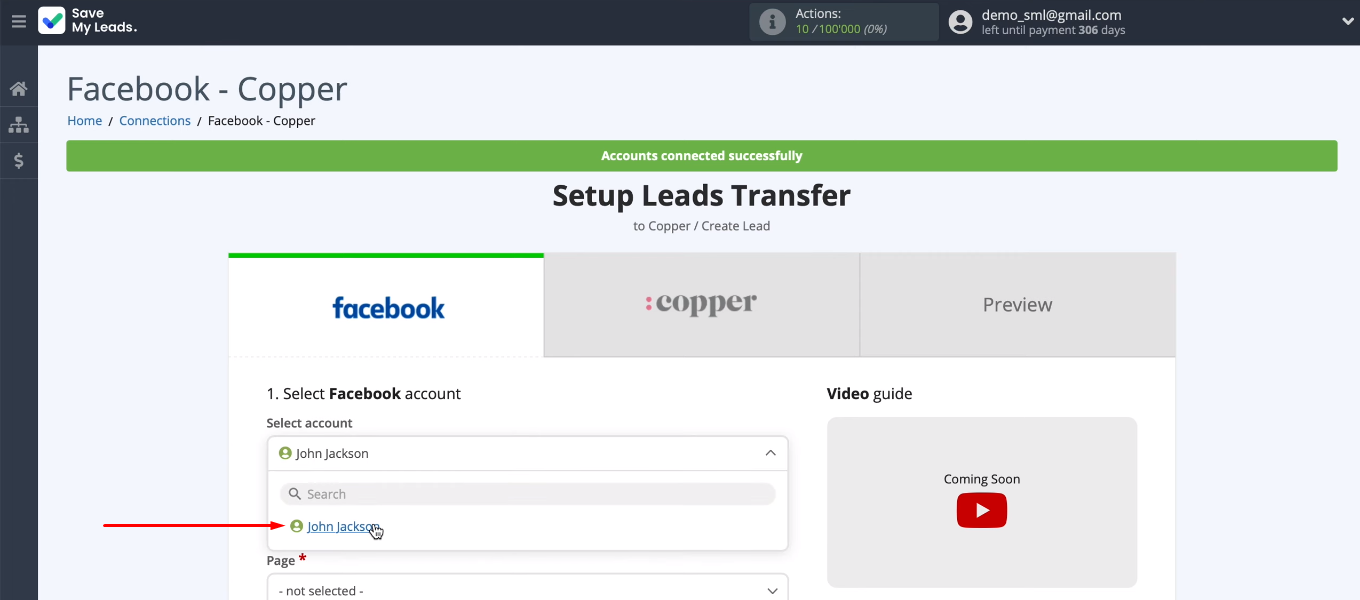
The connected account appears in the list. Let's choose it.
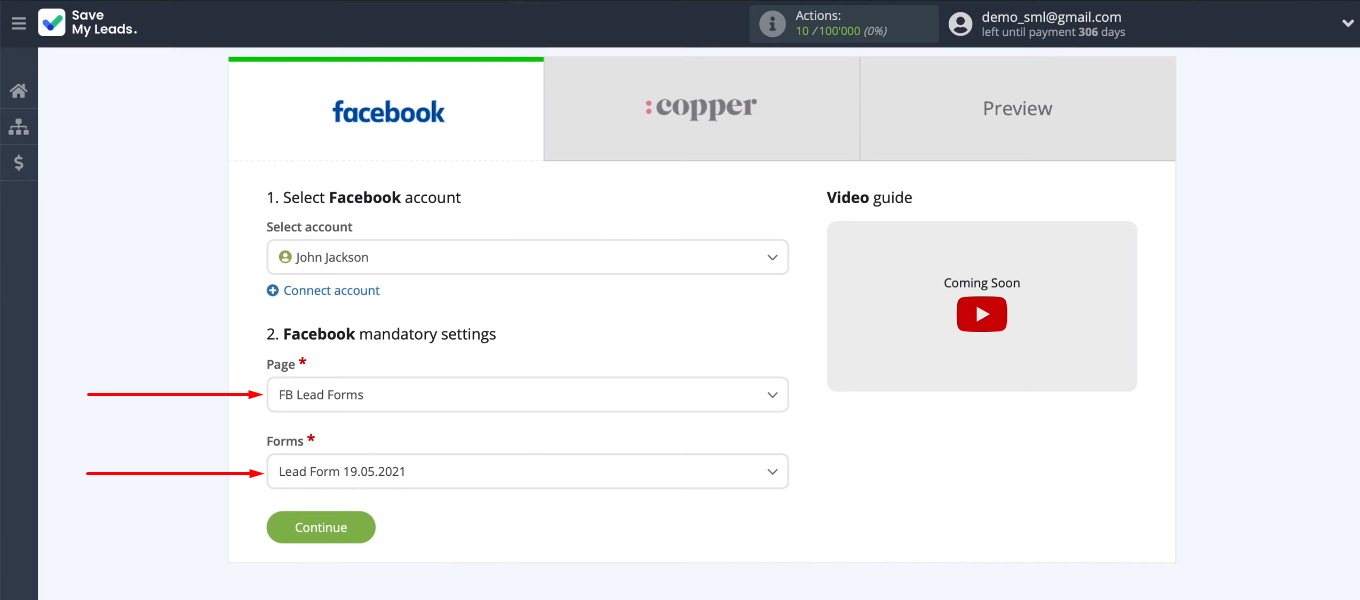
Define the required parameters — the advertising page and the form by which we will receive leads. If you want to work with several lead forms at once, then you need to create a separate connection for each of them. When we have decided on the page and form, click “Continue”.
Connect Copper
Now we have to set up the receiving system. Let's connect the Copper account to the SaveMyLeads service.
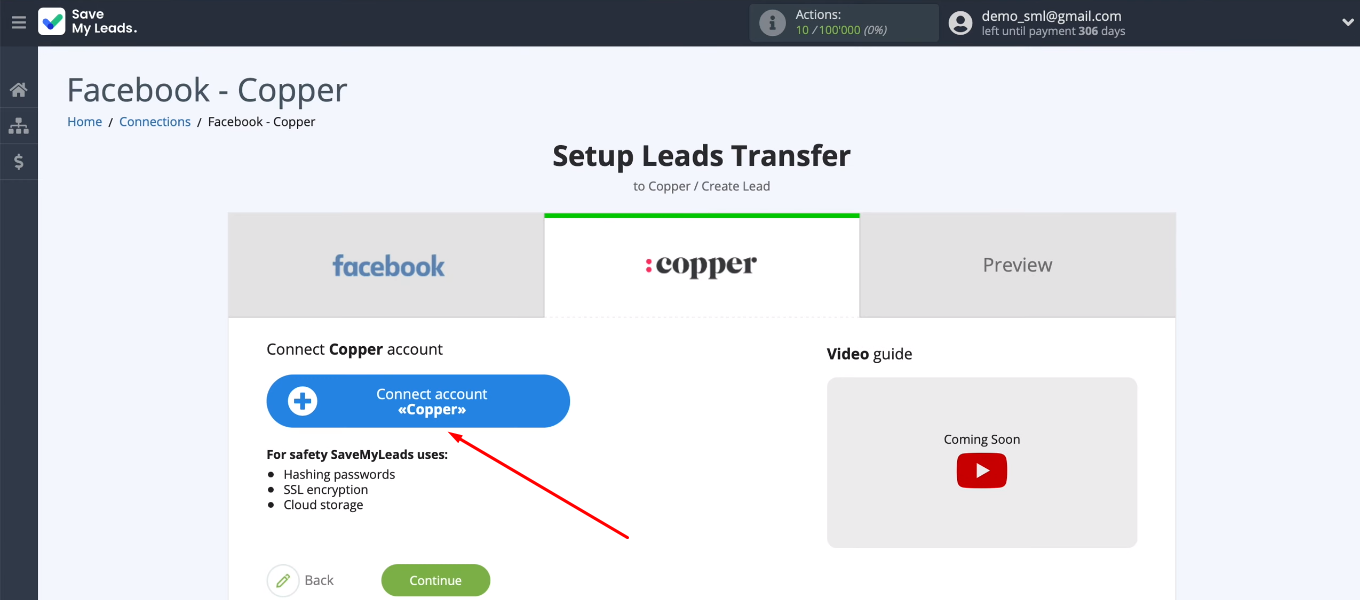
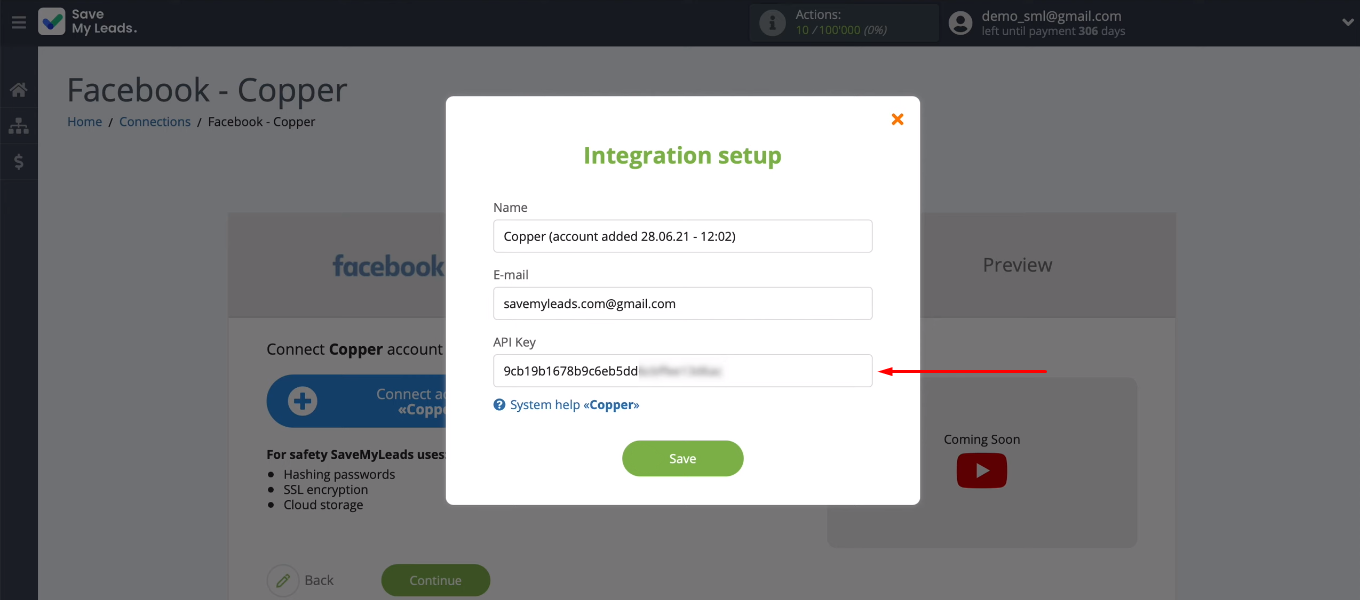
We need to fill in two fields. Specify the Email to which the Copper account is registered.
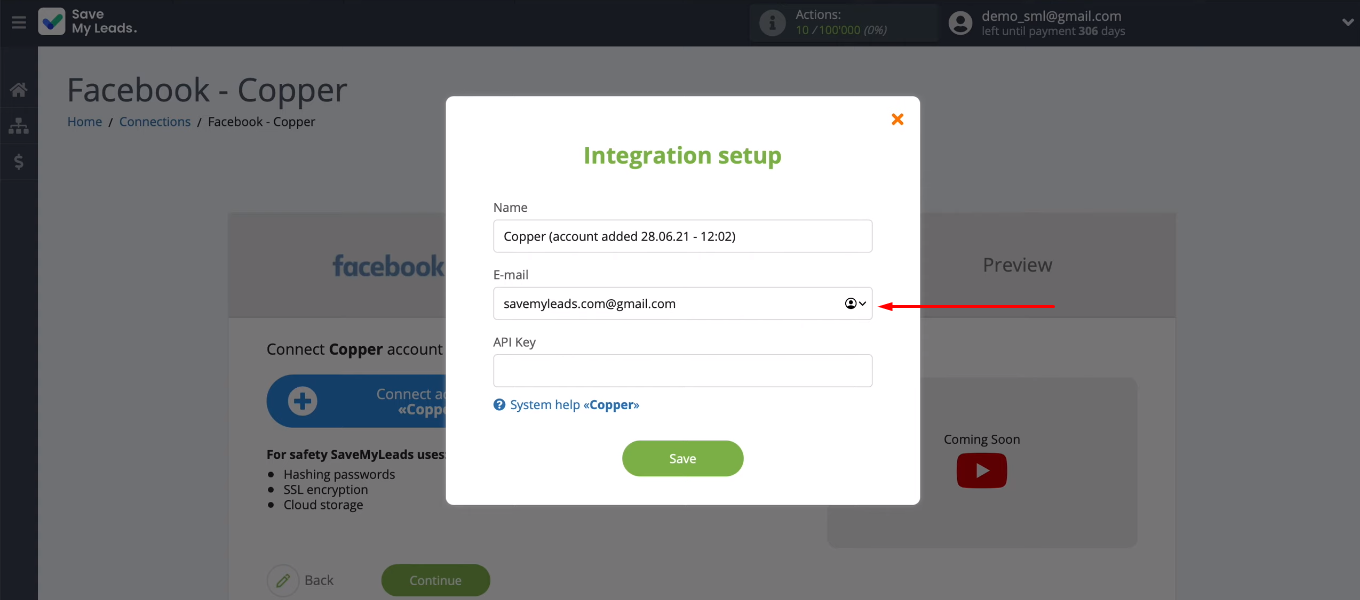
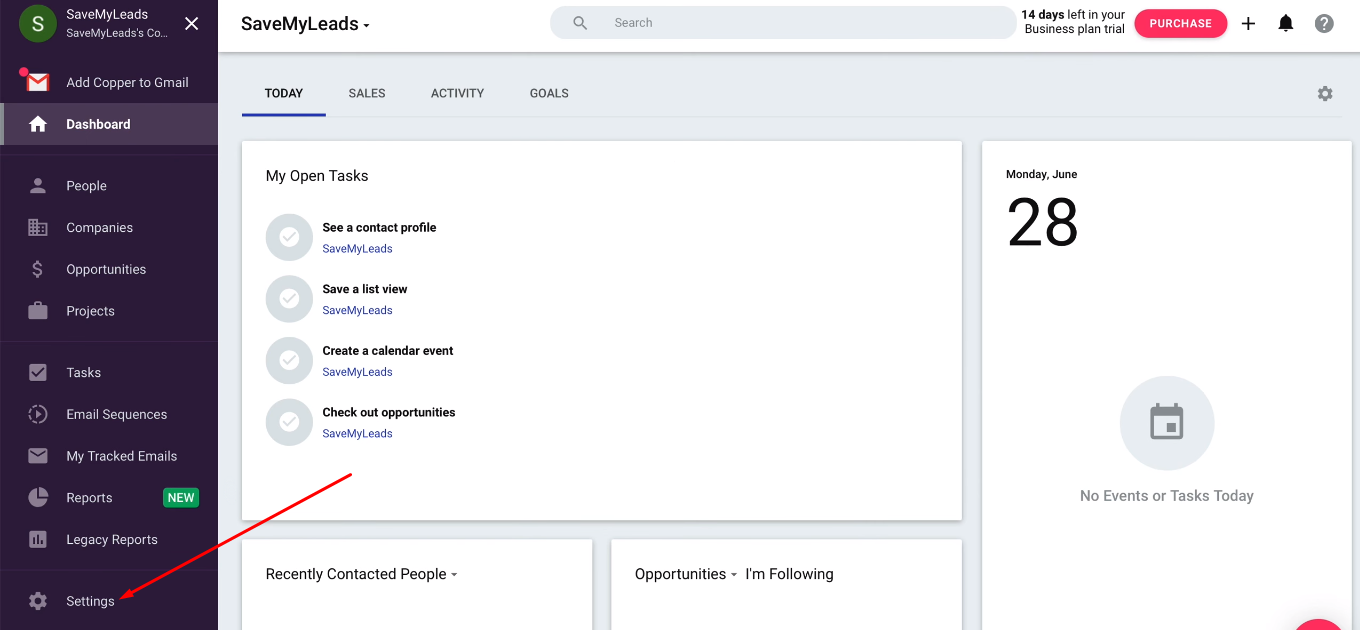
Now you need to fill in the "API Key" field. Go to the Copper account. We are looking for the “Settings” section in the menu.
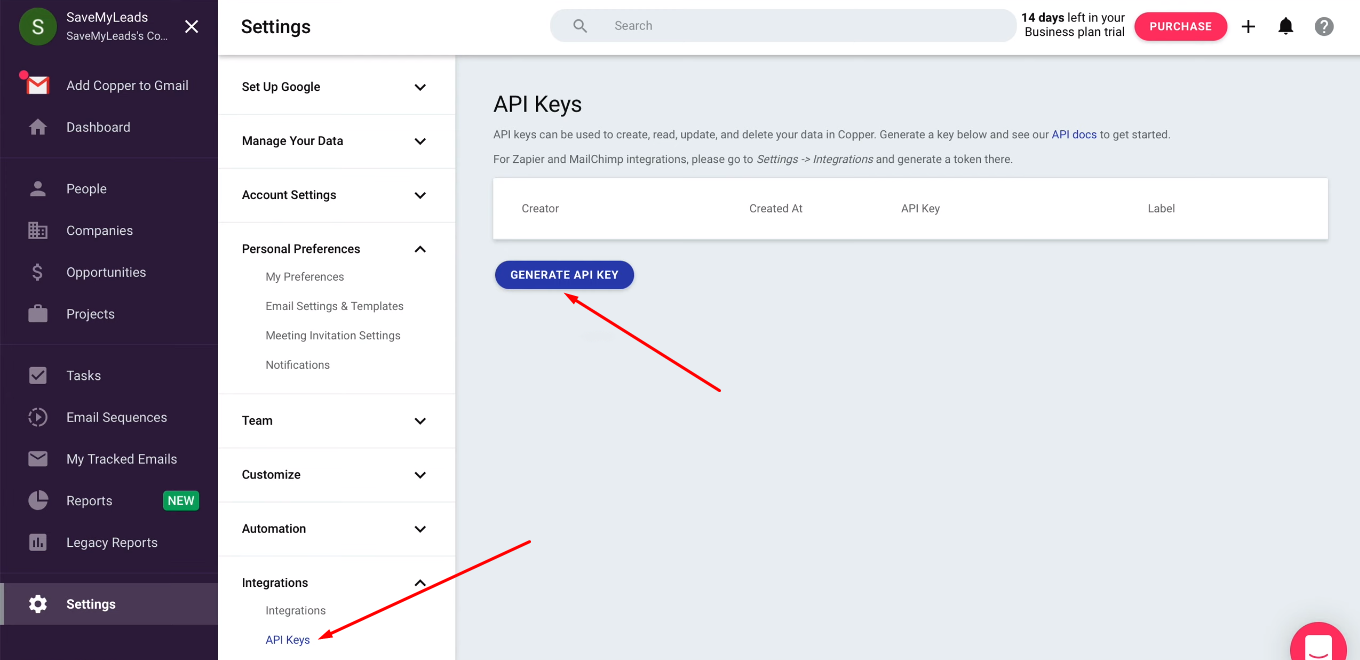
In the "Integrations" section, select the "API Keys" item. We need to generate an API Key.
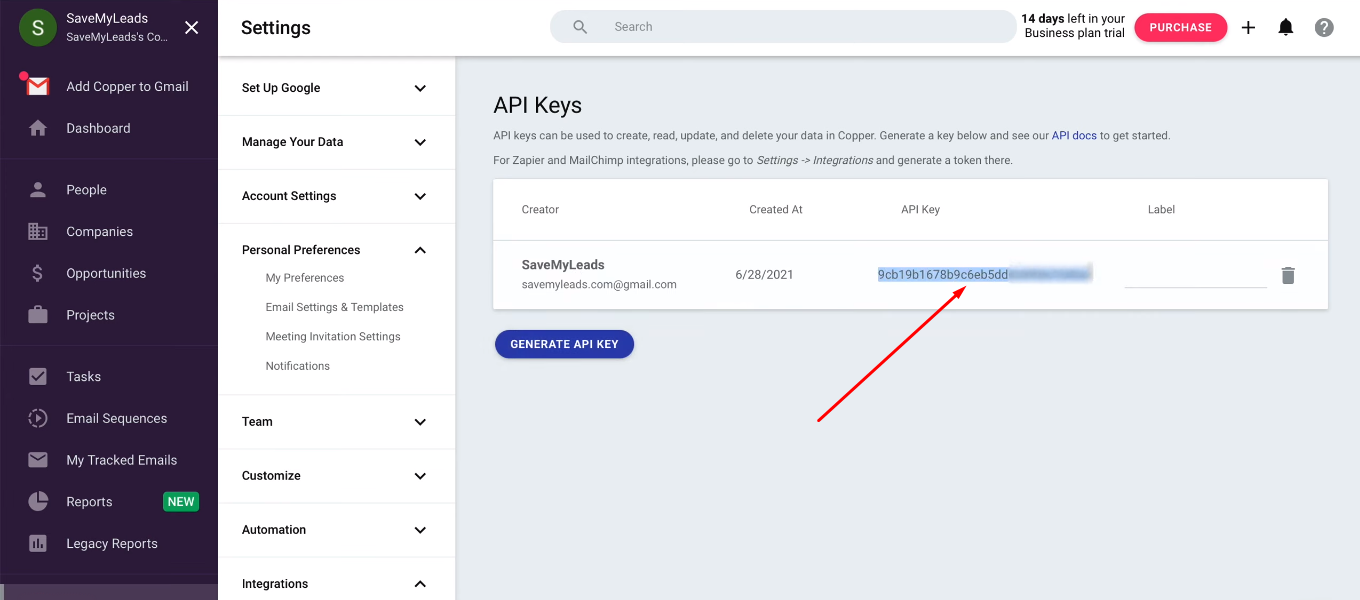
Copy the API Key.
Return to the SaveMyLeads system and insert the API Key into the required field. Save the connection.
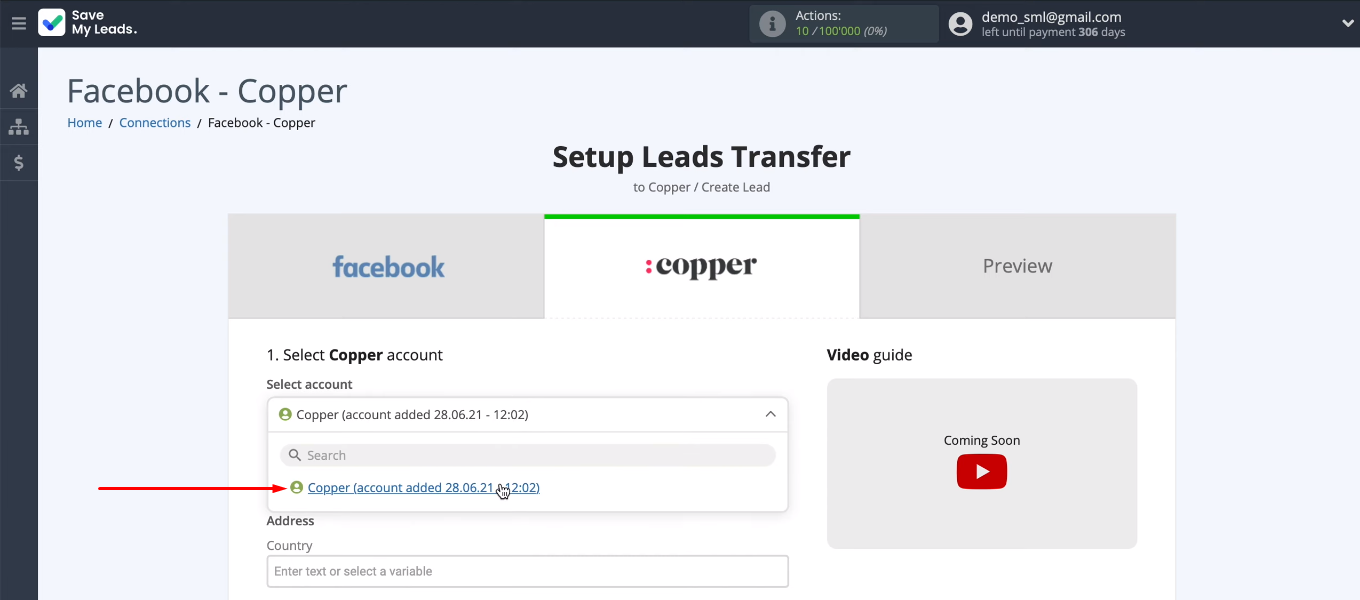
The connected Copper account appeared in the list. Select it for further configuration.
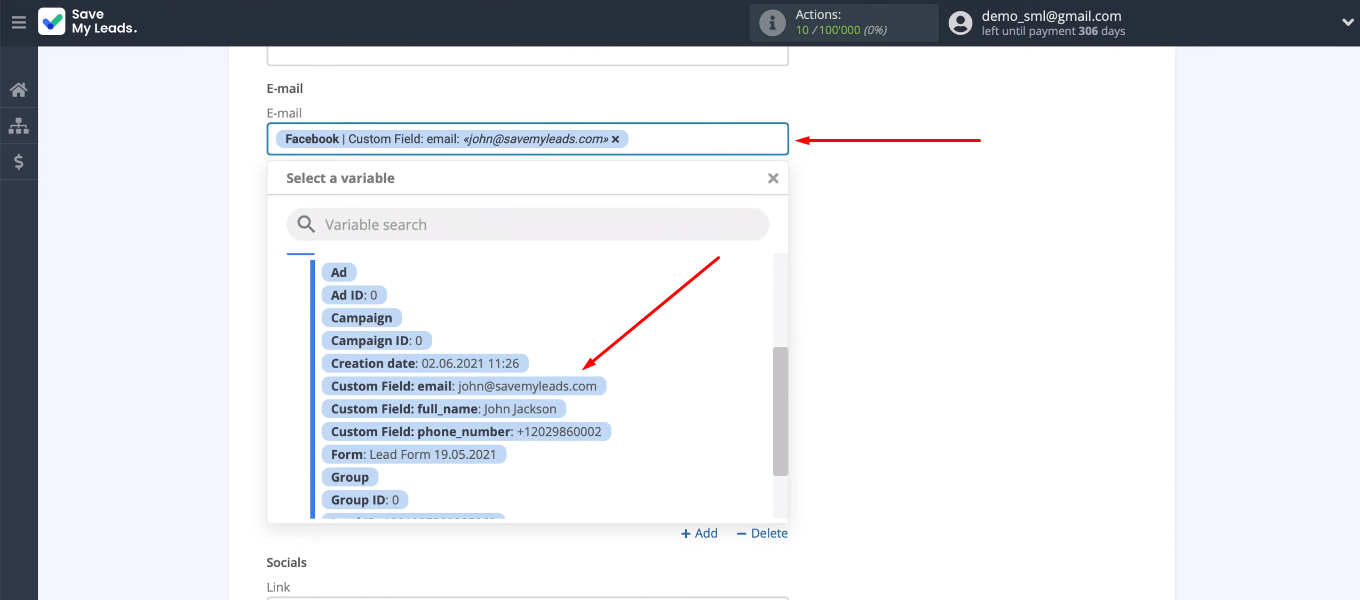
We need to define the contents of the Copper fields to create new leads in CRM. The system offers preset values. If the proposed option suits you, then you can proceed to the next step. To assign a variable yourself, you need to click in the field and select the appropriate value from the drop-down list. It is also possible to enter text into the field manually.
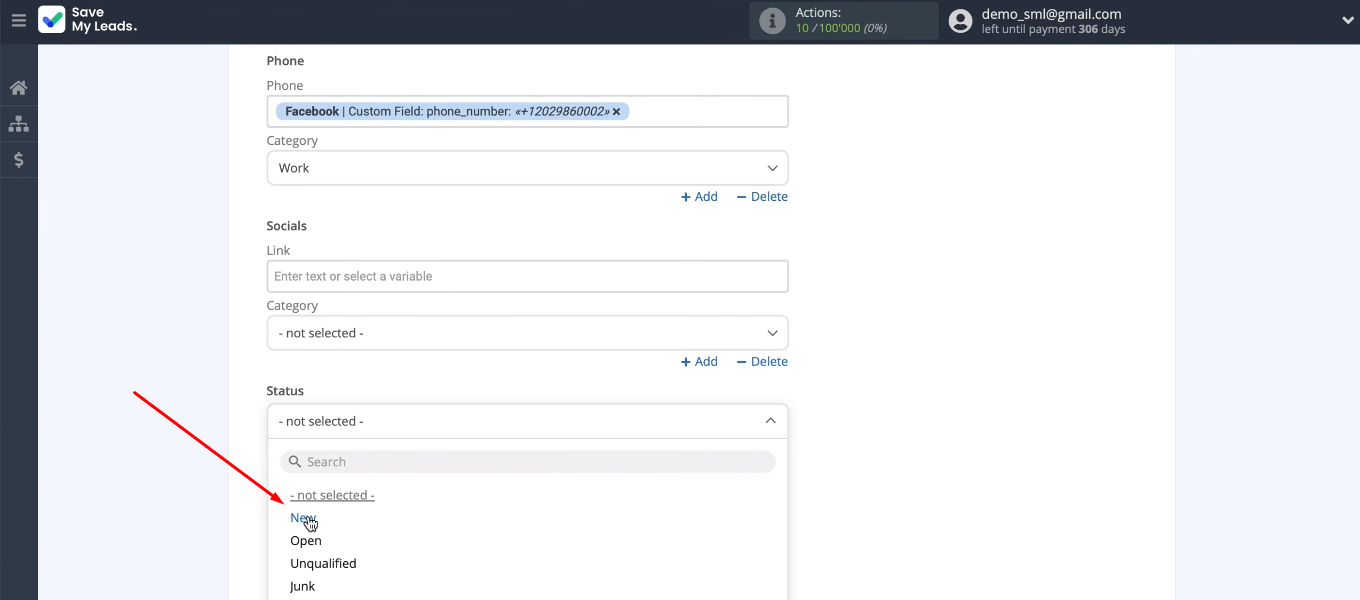
For some fields, the value is selected from an already defined set of options.
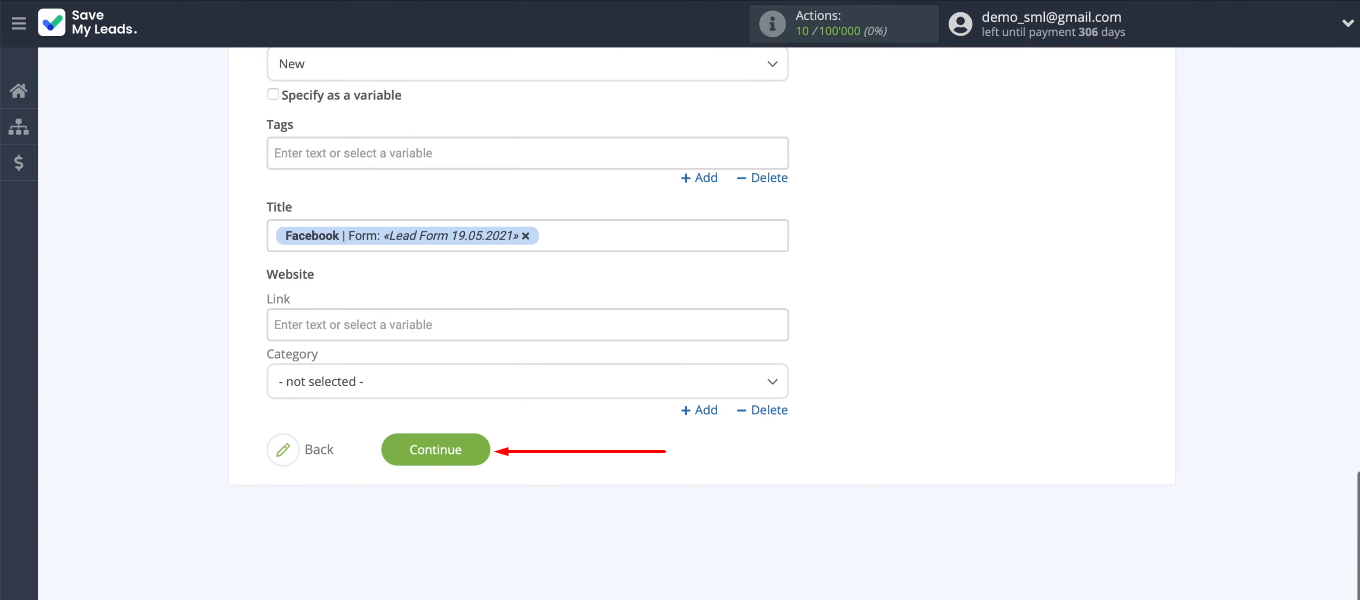
When all the fields for creating a Copper lead are configured, click “Continue”.
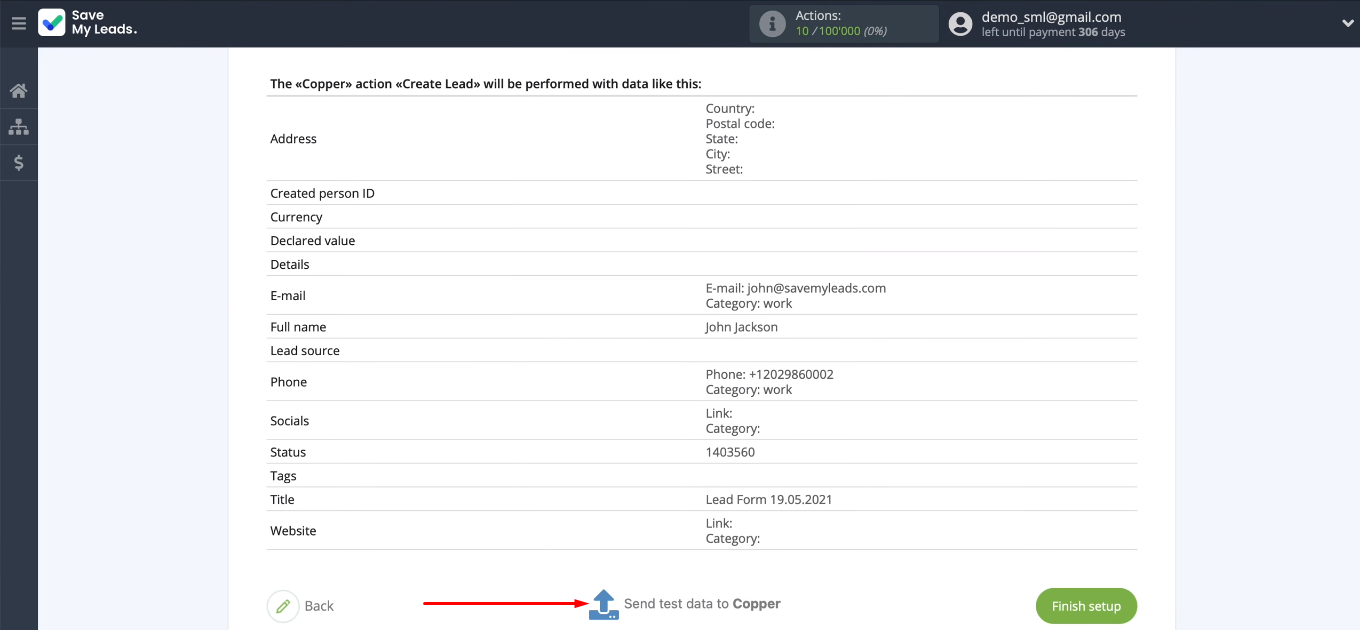
In the next step, we see an example of data for creating a lead on the Copper side. Click “Send test data to Copper”.
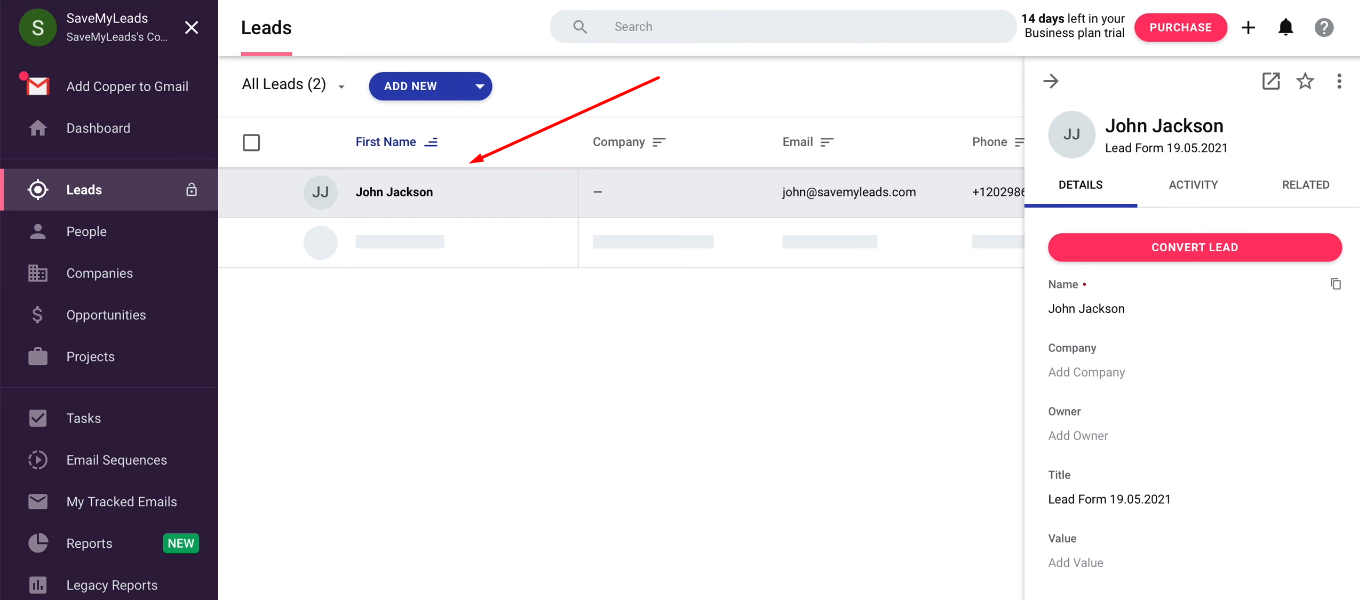
Go to the Copper account and check the correctness of adding a test lead.
Enable auto-update
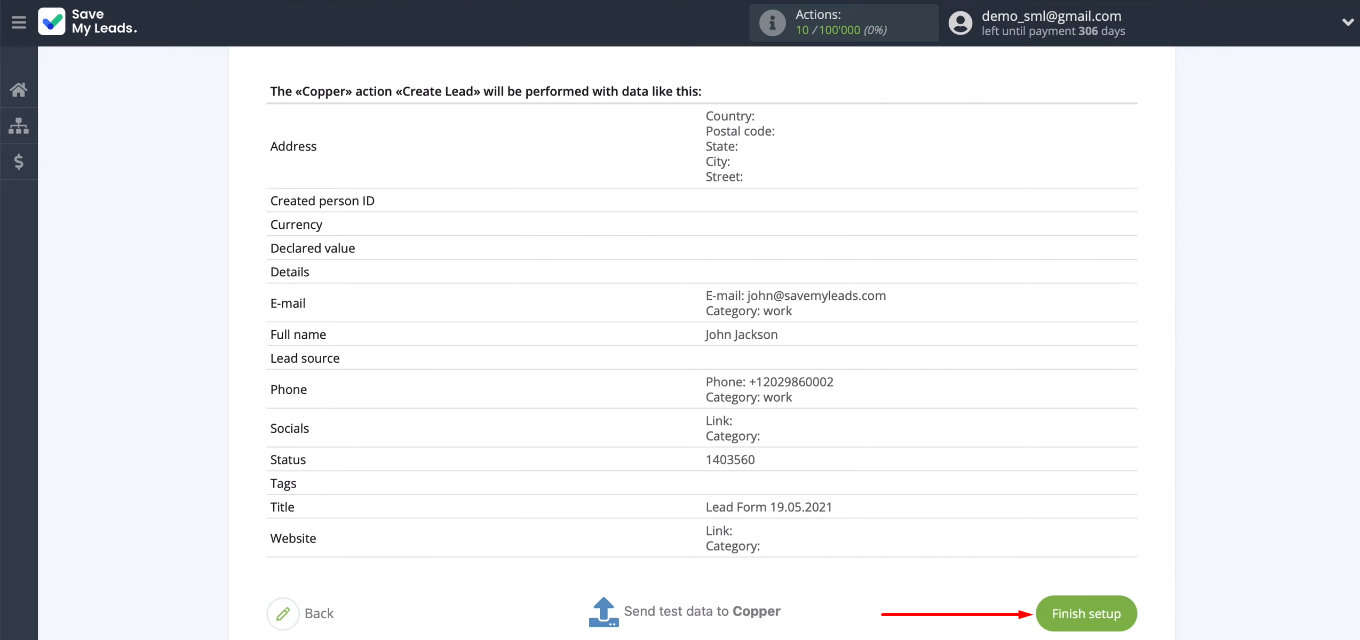
Return to the SaveMyLeads system. To instantly create leads in Copper based on new leads from Facebook, you need to run auto-update. To do this, click "Finish setup". Facebook and Copper integration successfully configured and activated.
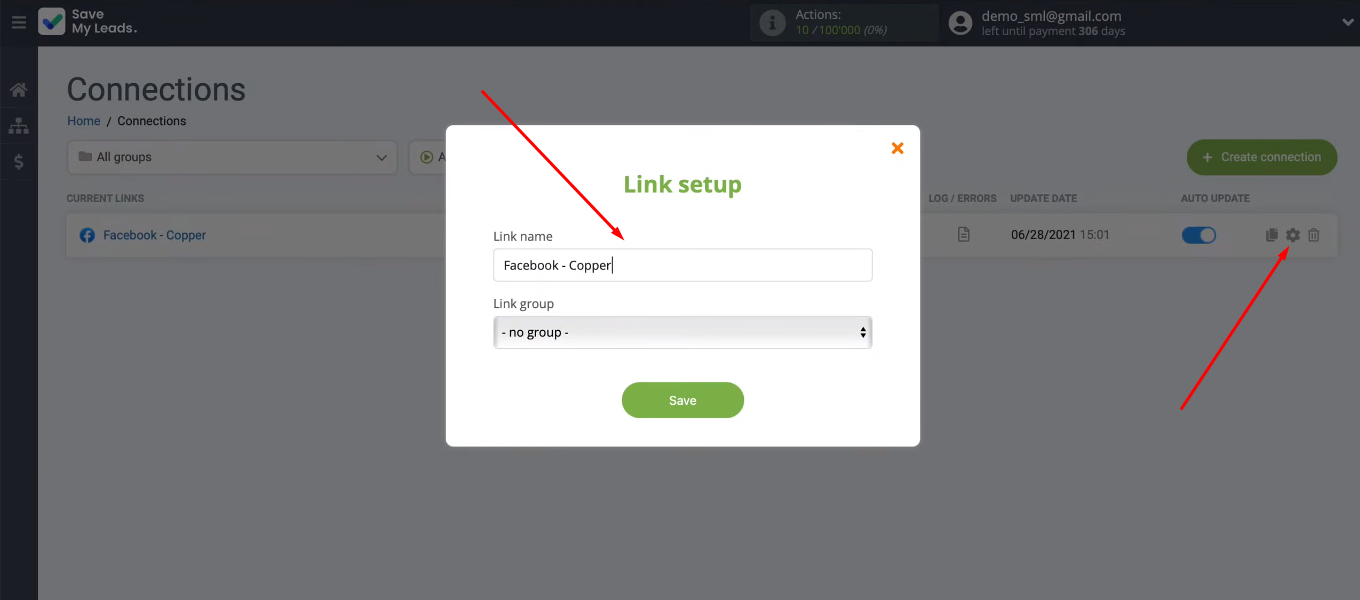
Optionally, you can change the name of the integration. To do this, go to the connection settings and change the value in the “Link name” field.
Conclusion
Using the SaveMyLeads service, we set up the integration of Facebook Ads and Copper CRM. The result of our efforts is an automated process of “checking Facebook advertising account - uploading new leads - creating leads in the Copper CRM system”. All these tasks are solved without human intervention.
- Automate the work with leads from the Facebook advertising account
- Empower with integrations and instant transfer of leads
- Don't spend money on developers or integrators
- Save time by automating routine tasks
Thus, we got rid of a decent amount of routine work. Also, a significant advantage of the created integration is the quick entry of leads generated on Facebook into the Copper CRM system. This means that managers get the opportunity to improve the speed and quality of processing applications. In addition, Copper's automatic lead generation minimizes the chances of skipping an order through Facebook lead form.
