This guide will show you how to use the SaveMyLeads online connector to set up automatic uploading of leads from your Facebook advertising account to the Intercom service.
Content:
1. How to set up Facebook and Intercom integration
2. Connect Facebook Leads Ads
3. Connect Intercom
4. Automate data update
5. Conclusion
With Facebook ads, eCommerce business owners can significantly increase their customer base and sales. Despite the broad functionality of the advertising office, it is not very convenient to work with new leads in it, for example, managers have to constantly monitor incoming requests and quickly respond to them.
If the account is just gaining a client base, then at first managers will be able to work with clients without automation, although this will take up a lot of their time, which they can spend on more important tasks. But if you already have a large audience, you cannot do without third-party services. With a large flow of requests, managers will no longer be able to process them, as a result, some of the new leads will be left unattended and will be lost.
To avoid this, you need to configure the unloading of potential customers into a service that will allow you to conveniently work with them in a single interface, for example, in Intercom. The functionality of this site allows you to organize effective interaction with new requests:
- accept applications from clients;
- communicate with them in real time;
- send email newsletters to the client base;
- collect contact information;
- set up automatic SMS mailings both in time and taking into account customer behavior;
- segment customers into groups, depending on different criteria;
- schedule mailings;
- evaluate the effectiveness of advertising campaigns in real time and much more.
To set up automatic uploading of leads from an advertising account on Facebook to the Intercom service, you need to integrate them via API. As a result, you will not miss a single lead, you will be able to effectively work with them in a user-friendly interface and automate a number of business processes.
How to set up Facebook and Intercom integration
If you or your employees are knowledgeable in programming and in the features of the API, you can set up the integration on your own. But if you do not have knowledge in development, then you can turn to an IT specialist for help. But this is a waste of time and money.
In order not to lose potential customers and to fine-tune the integration, use the SaveMyLeads service. It is an online connector that can be used to connect the operation of various systems, applications and services. It is designed specifically for business owners to help solve various problems with service integration and business process automation.
The connector has an intuitive interface to use. Thanks to this, you can independently, without programming knowledge, integrate Facebook and Intercom. This process will take you no more than 5 minutes of time. If you encounter difficulties while working with the connector, you can contact the SaveMyLeads service specialists for help.
Connect Facebook Leads Ads
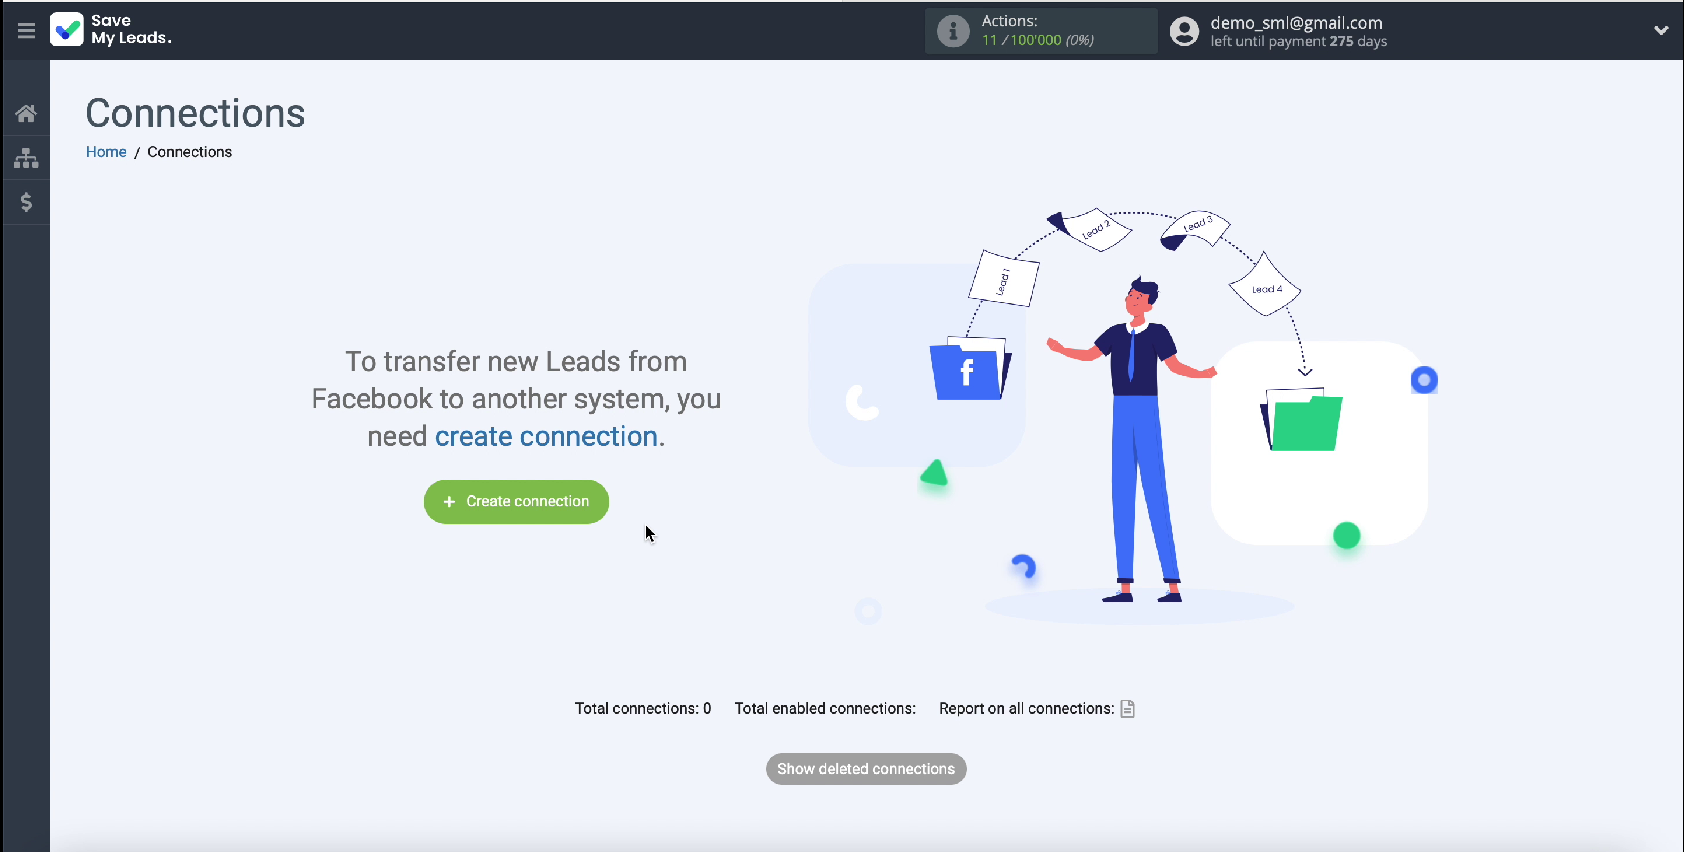
To start configuring, create a new connection.
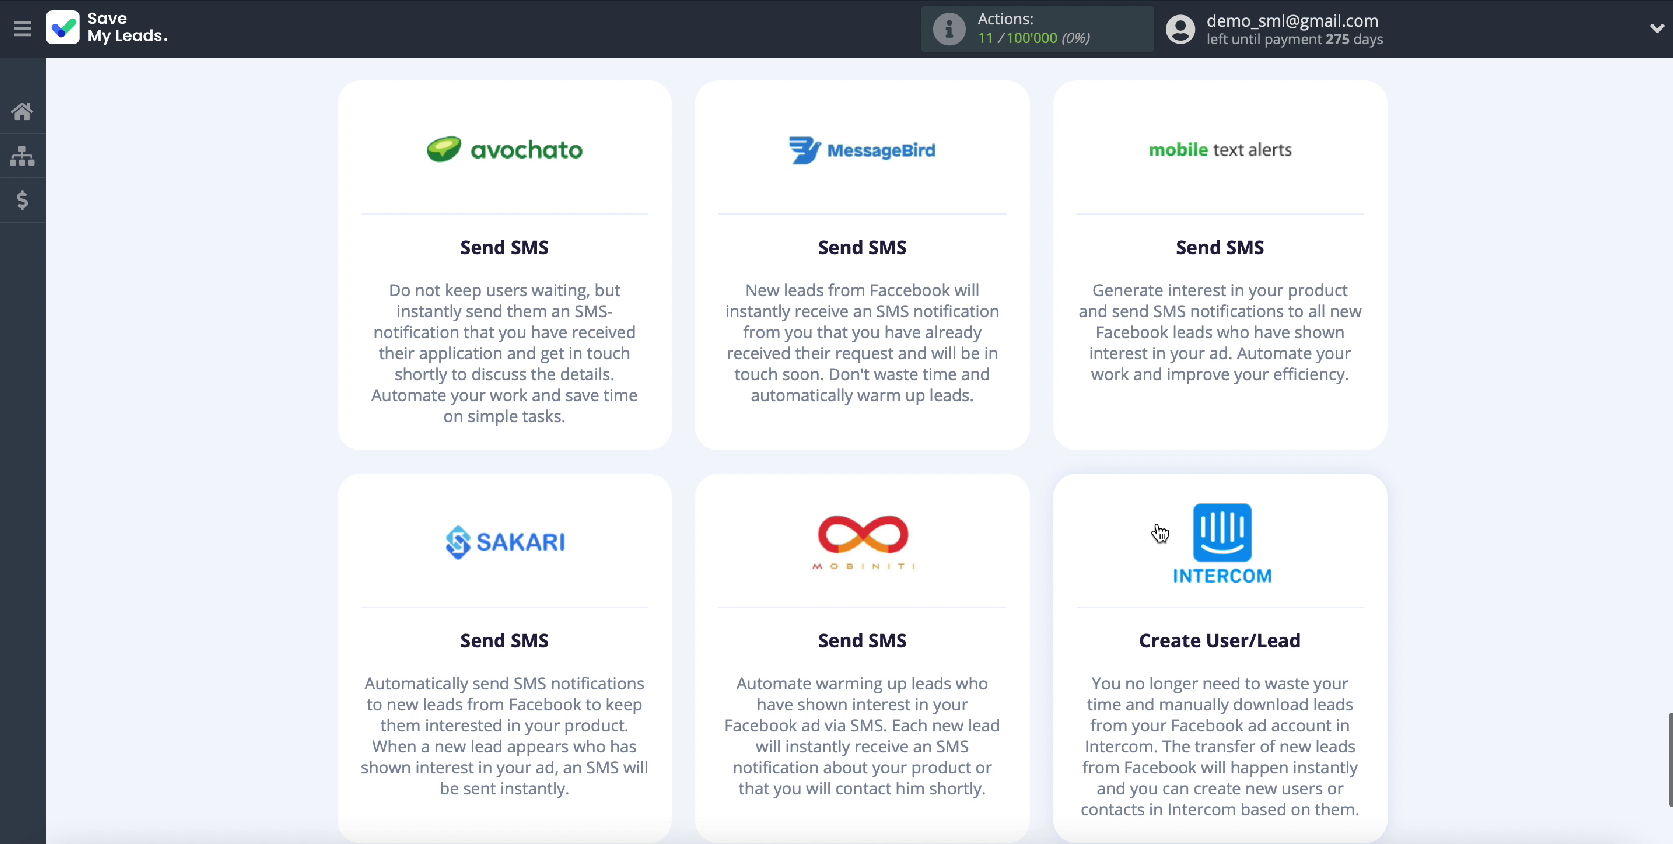
Choose Intercom from among the ready-made templates for systems to which you can transfer data.
At the next stage, connect your Facebook advertising account to the service in the SaveMyLeads system.
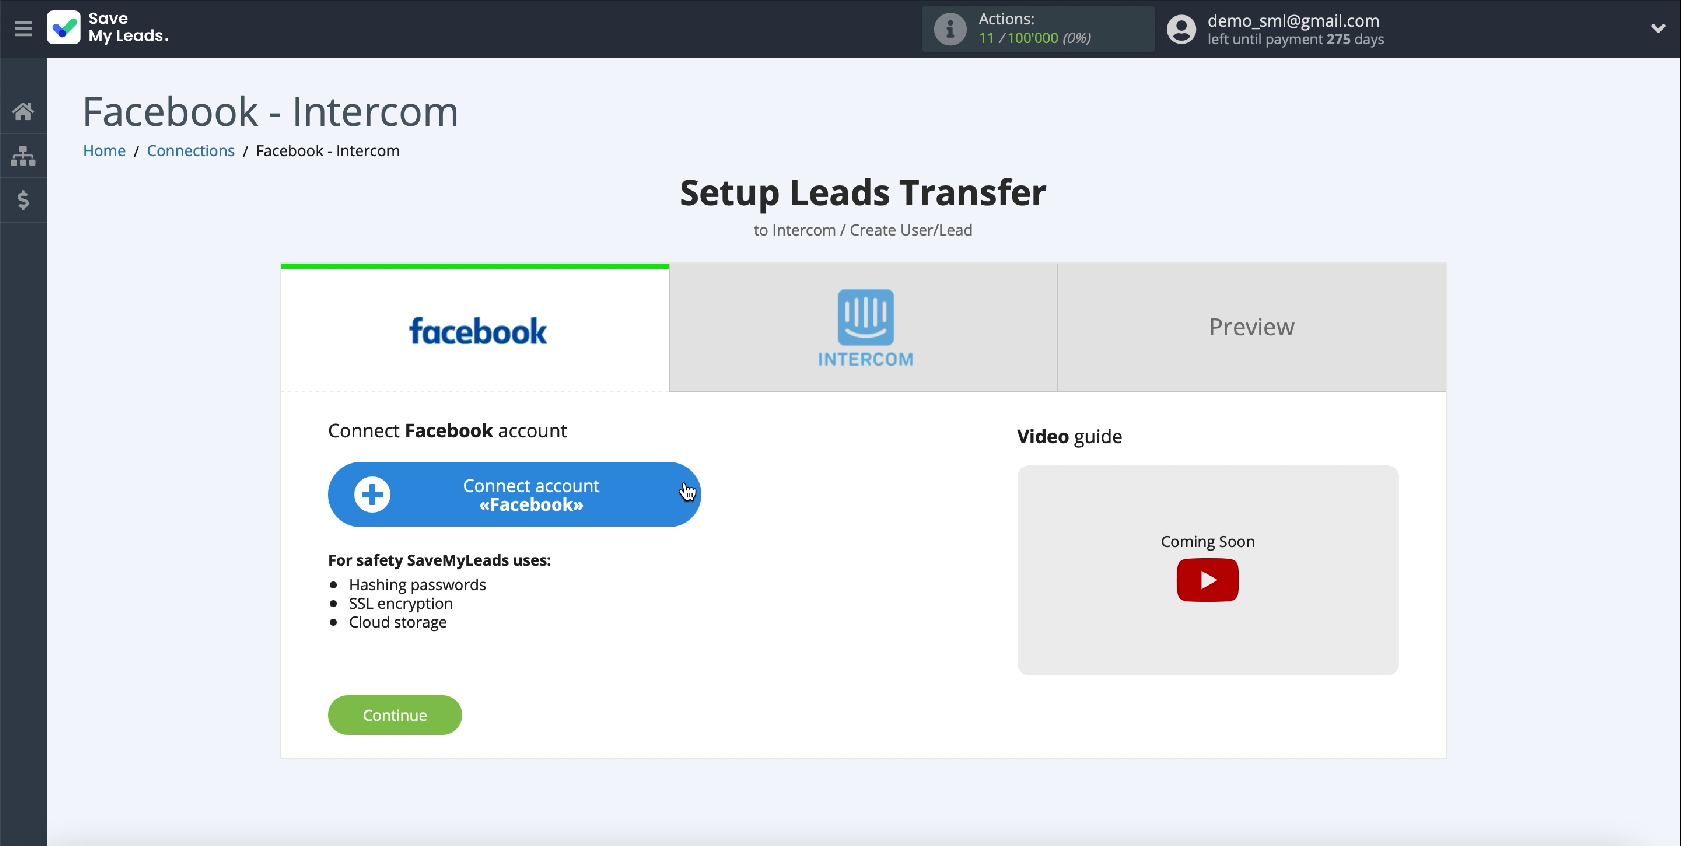
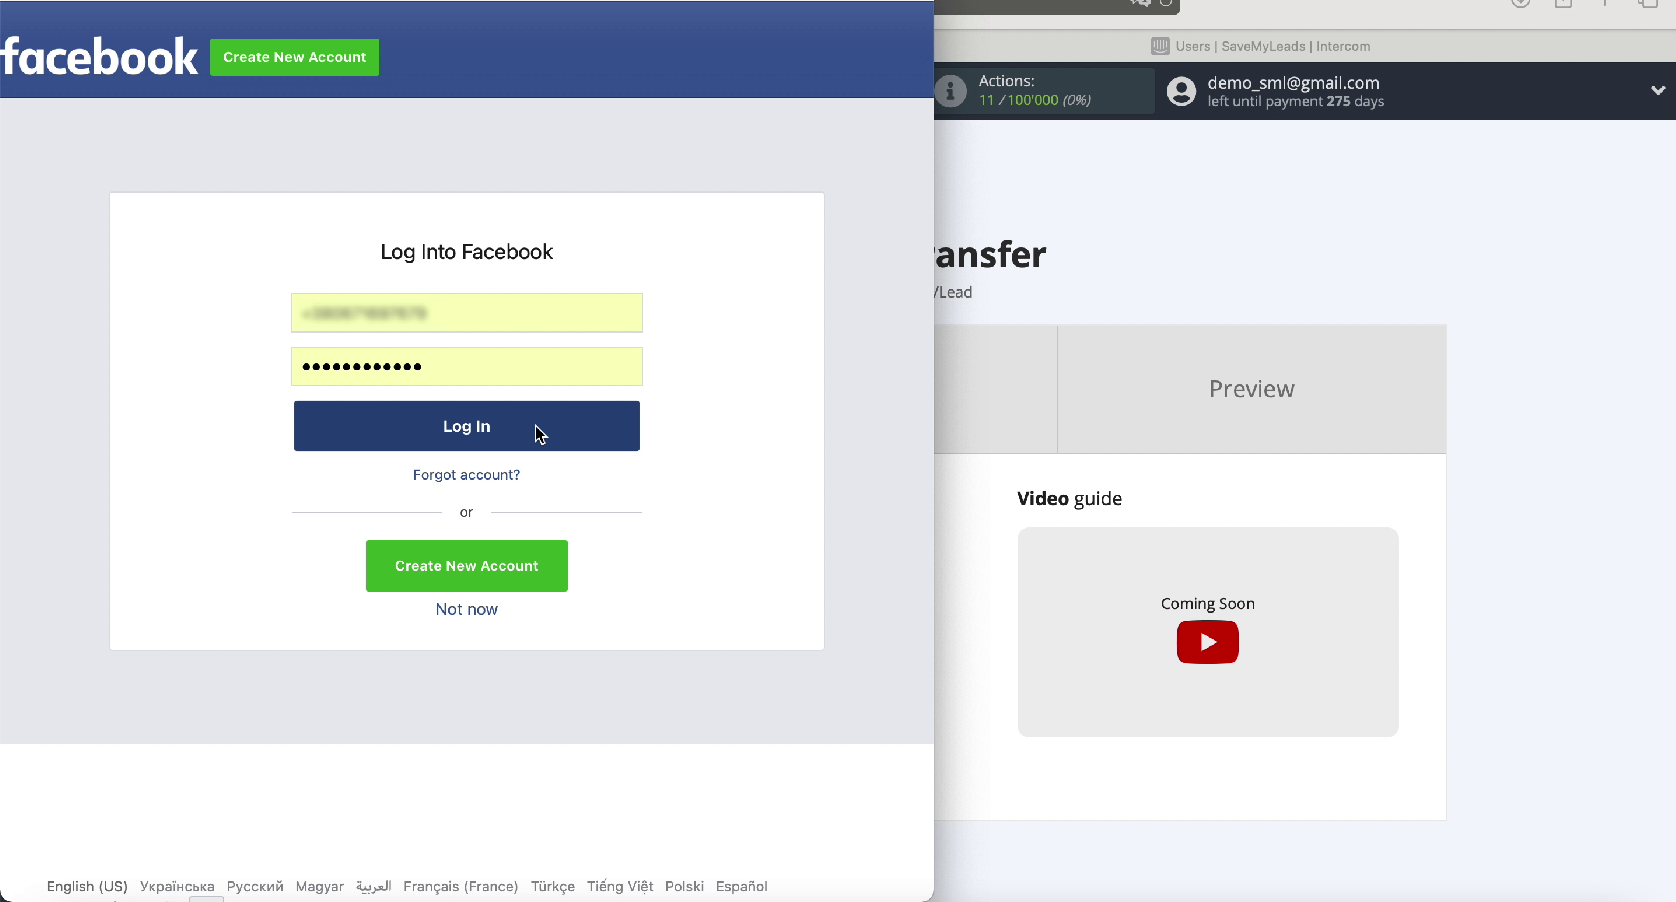
Enter your username and password for your advertising account on Facebook
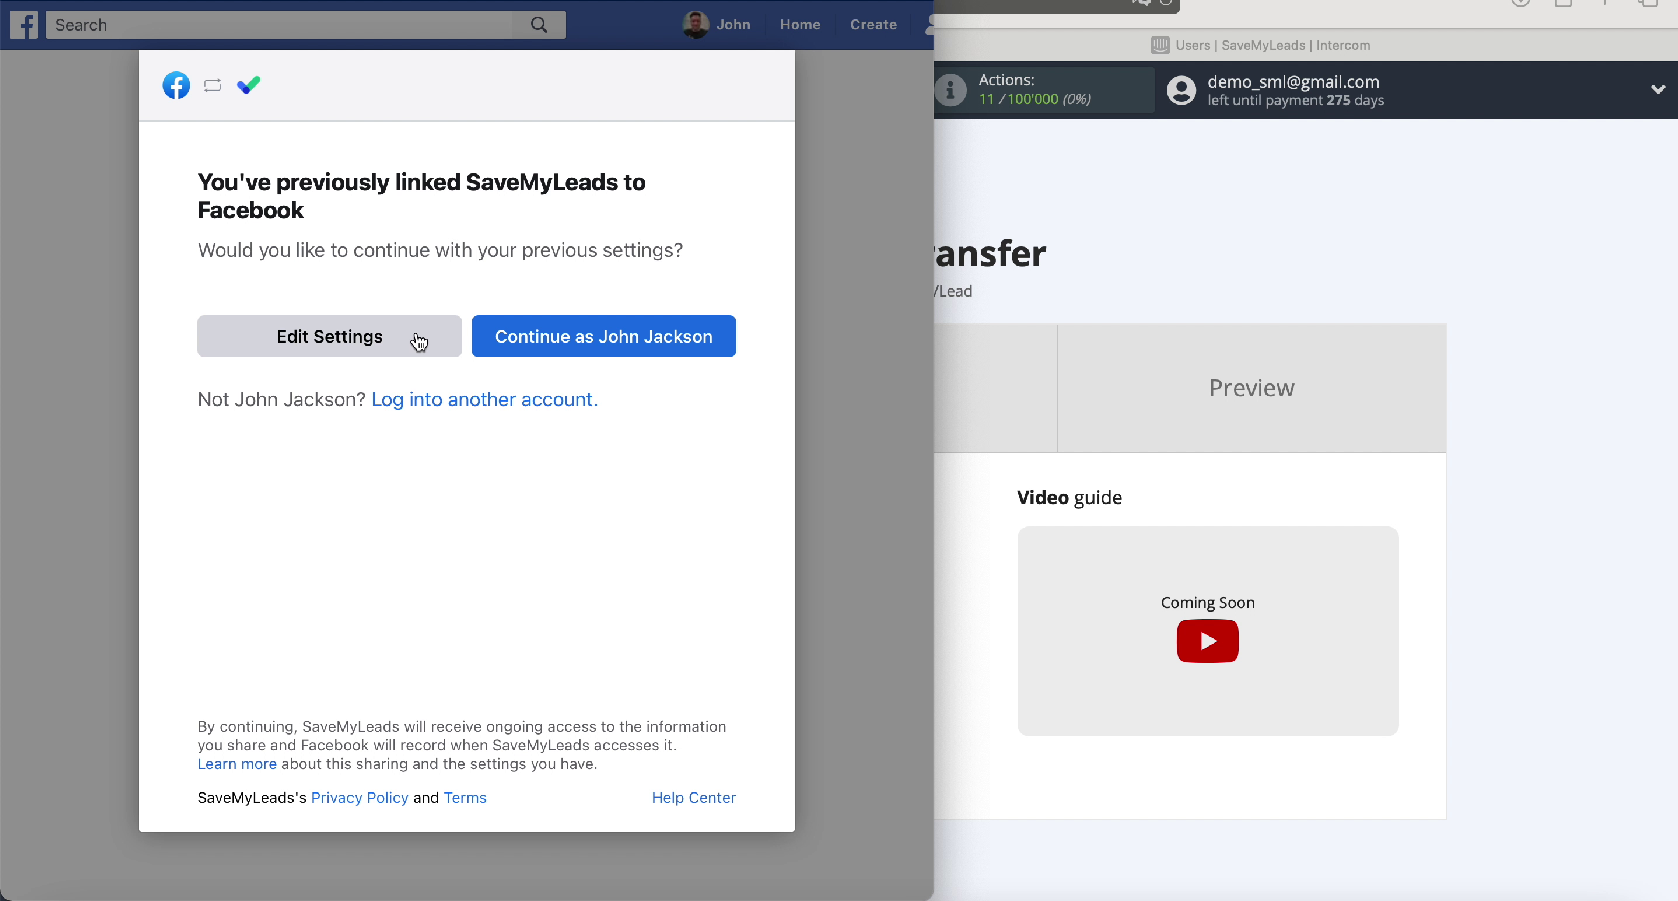
To proceed with the configuration, click Edit Settings
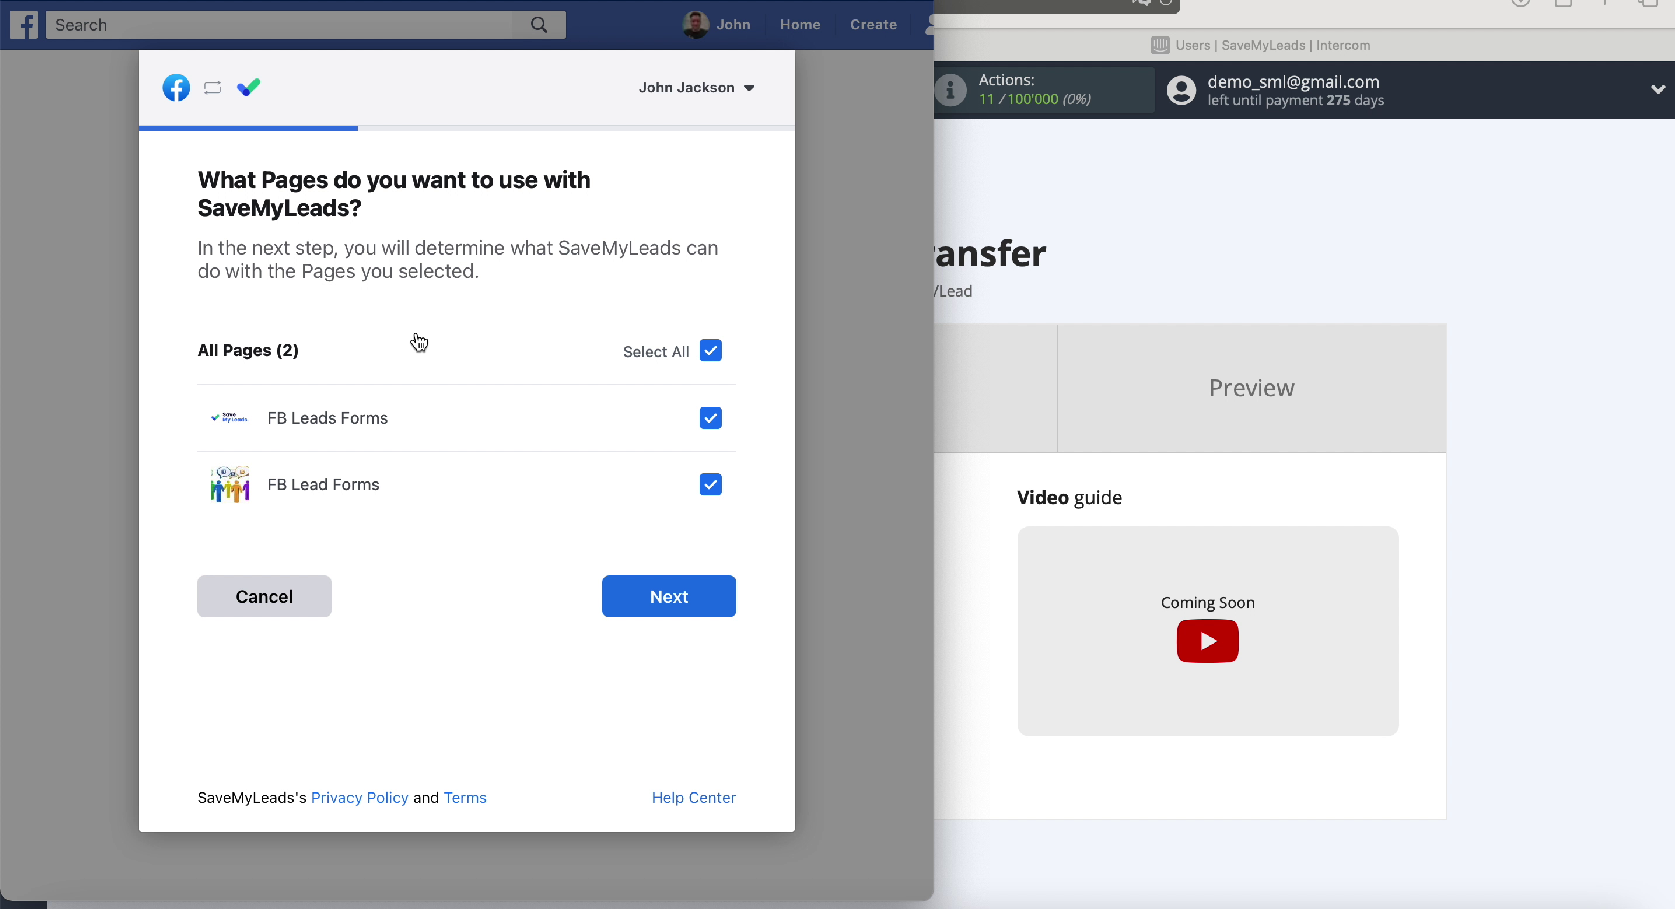
Next, you will see the advertising pages that you have access to. It is better to mark all of them with checkmarks, thanks to this in the future you will be able to work with them.
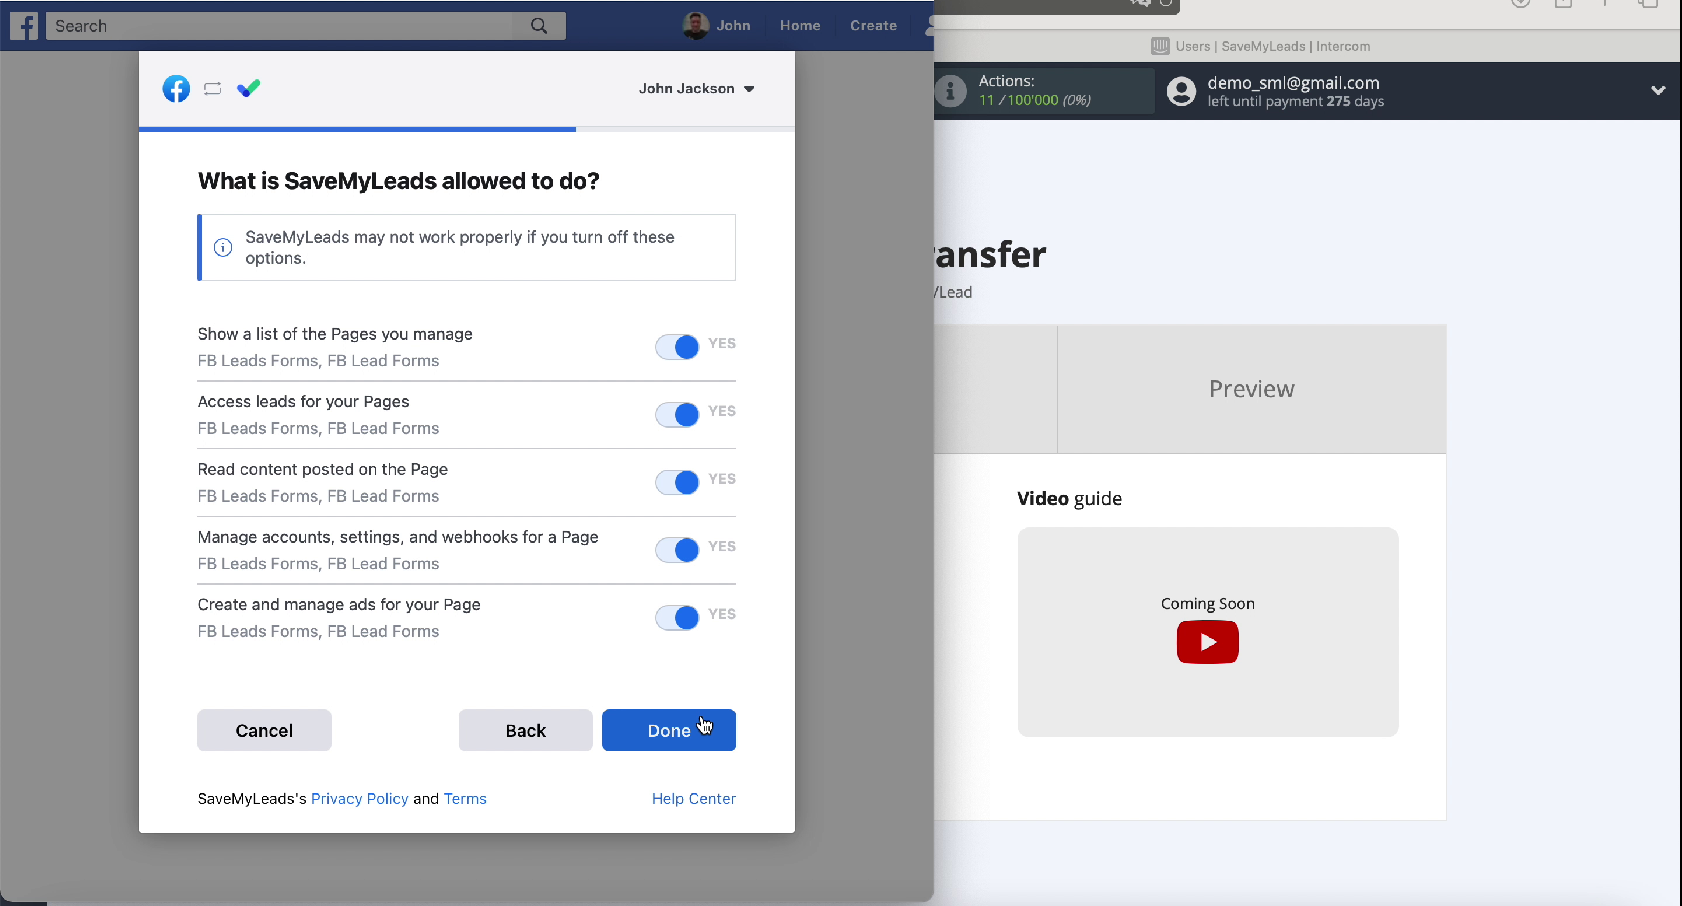
In the window that appears, leave all the access checkboxes enabled
Yours should be reflected in the list of connected accounts, select it
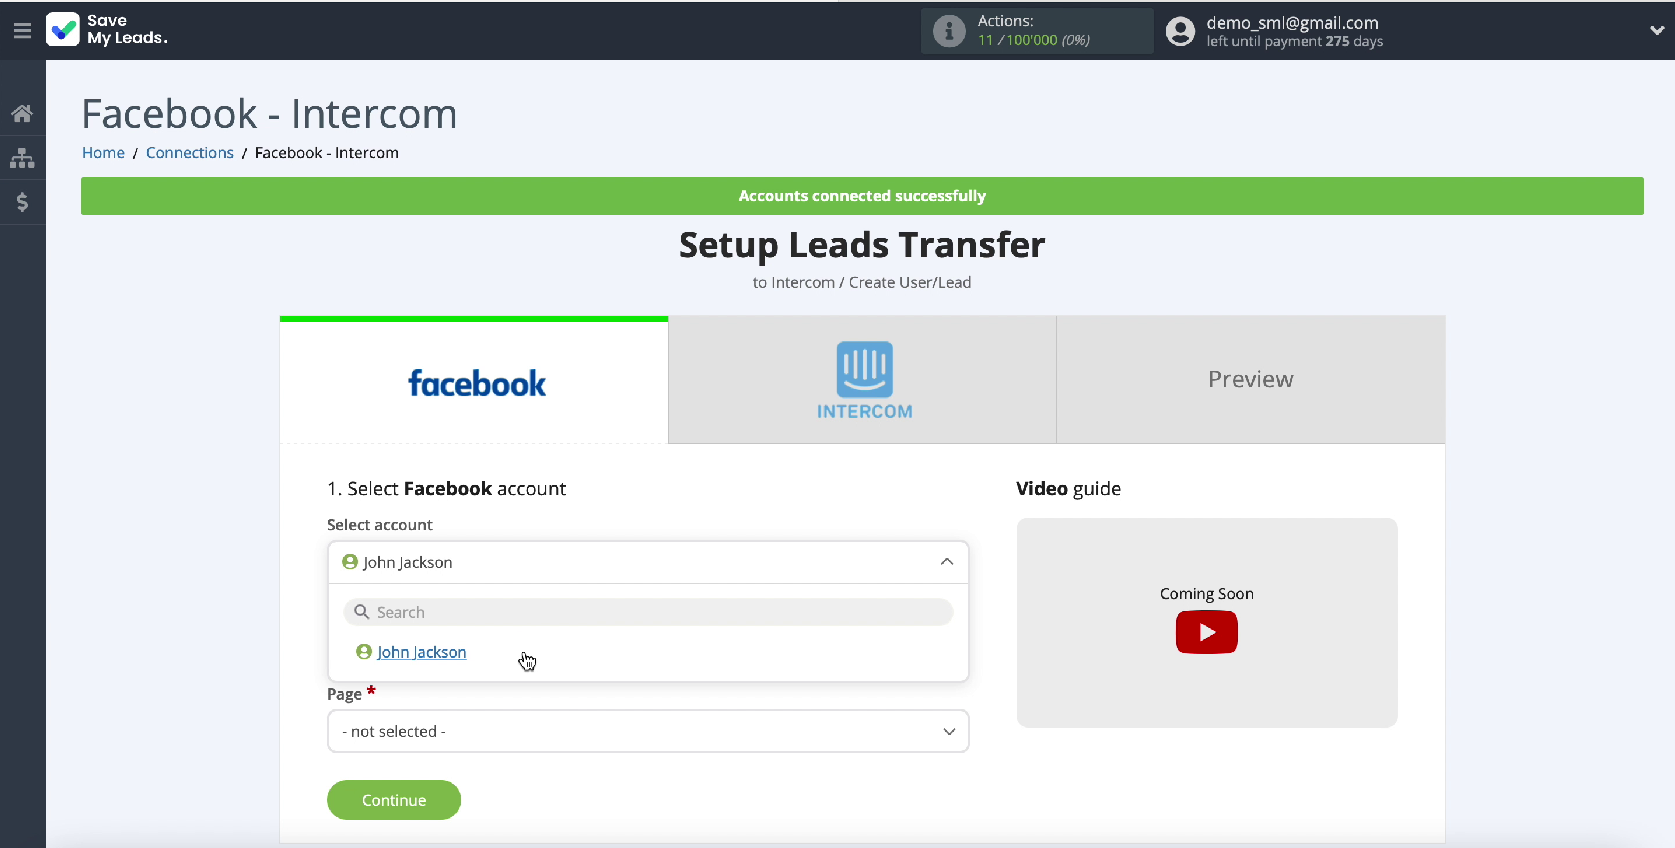
In the same window, select the ad page for which you want to send leads
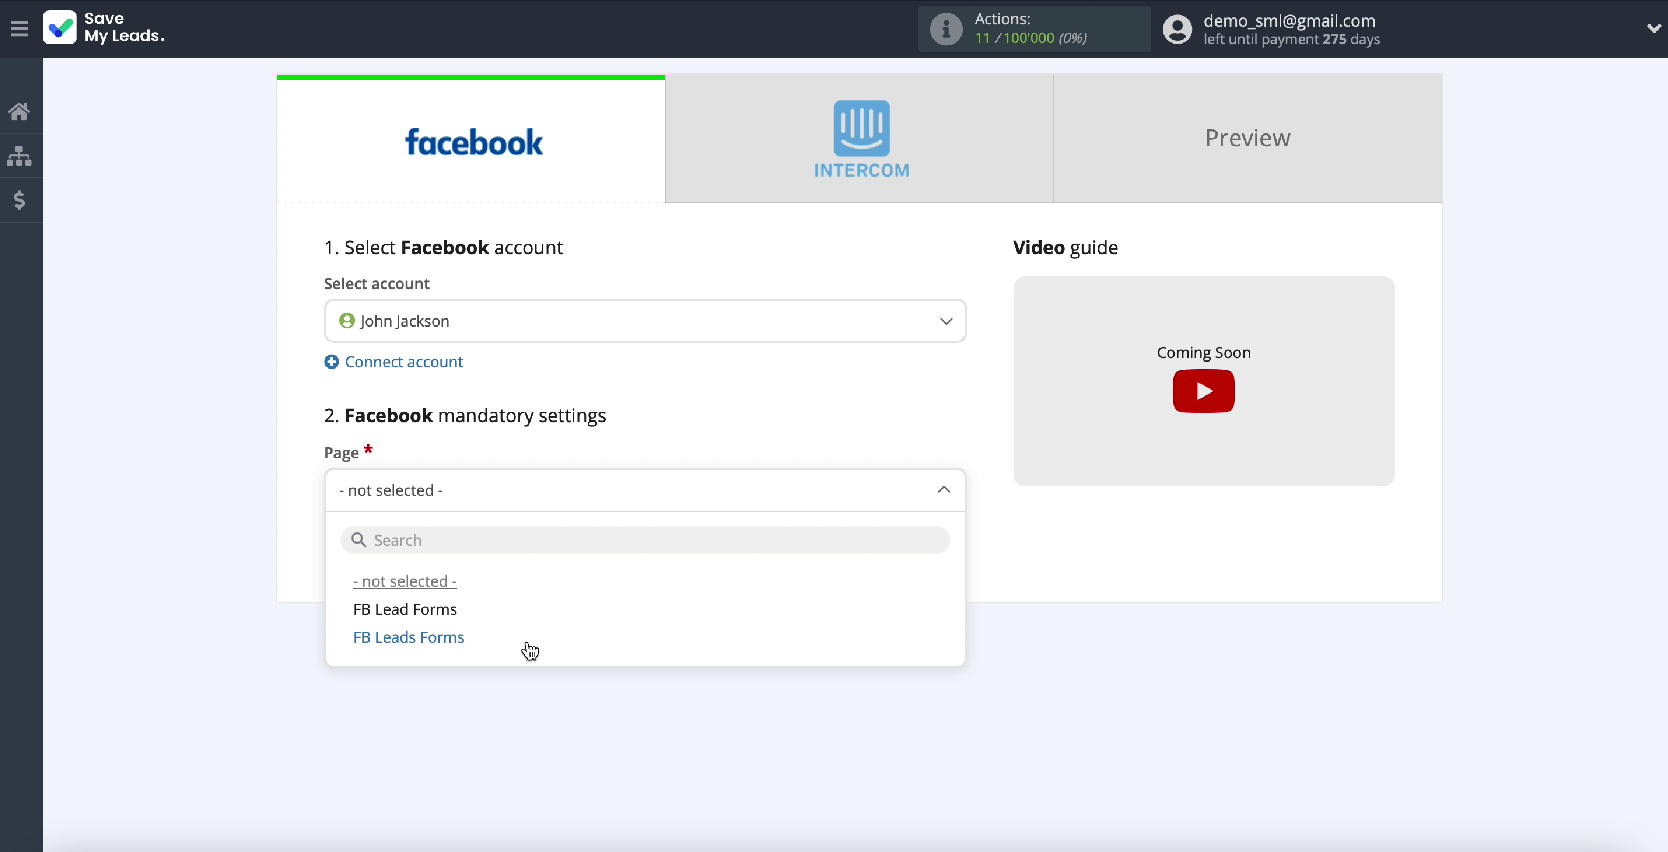
Specify the forms by which you will upload data. If you have several forms, then for each of them you will need to create a separate connection
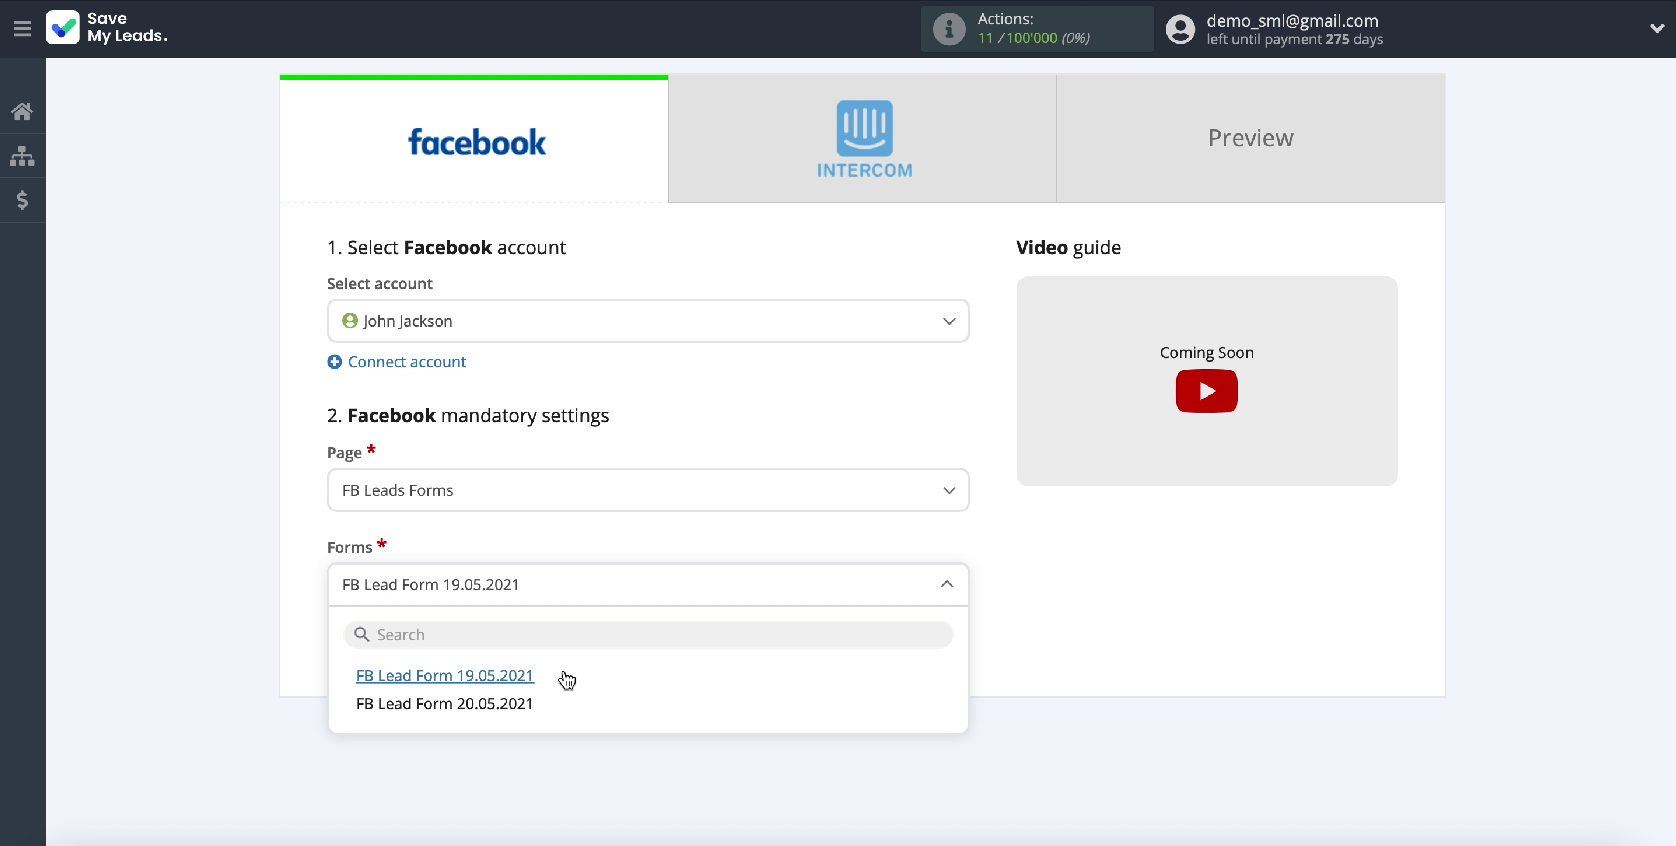
At this point, the Facebook setup is complete
Connect Intercom
To proceed with the configuration, connect your Intercom account to the SaveMyLeads online connector.
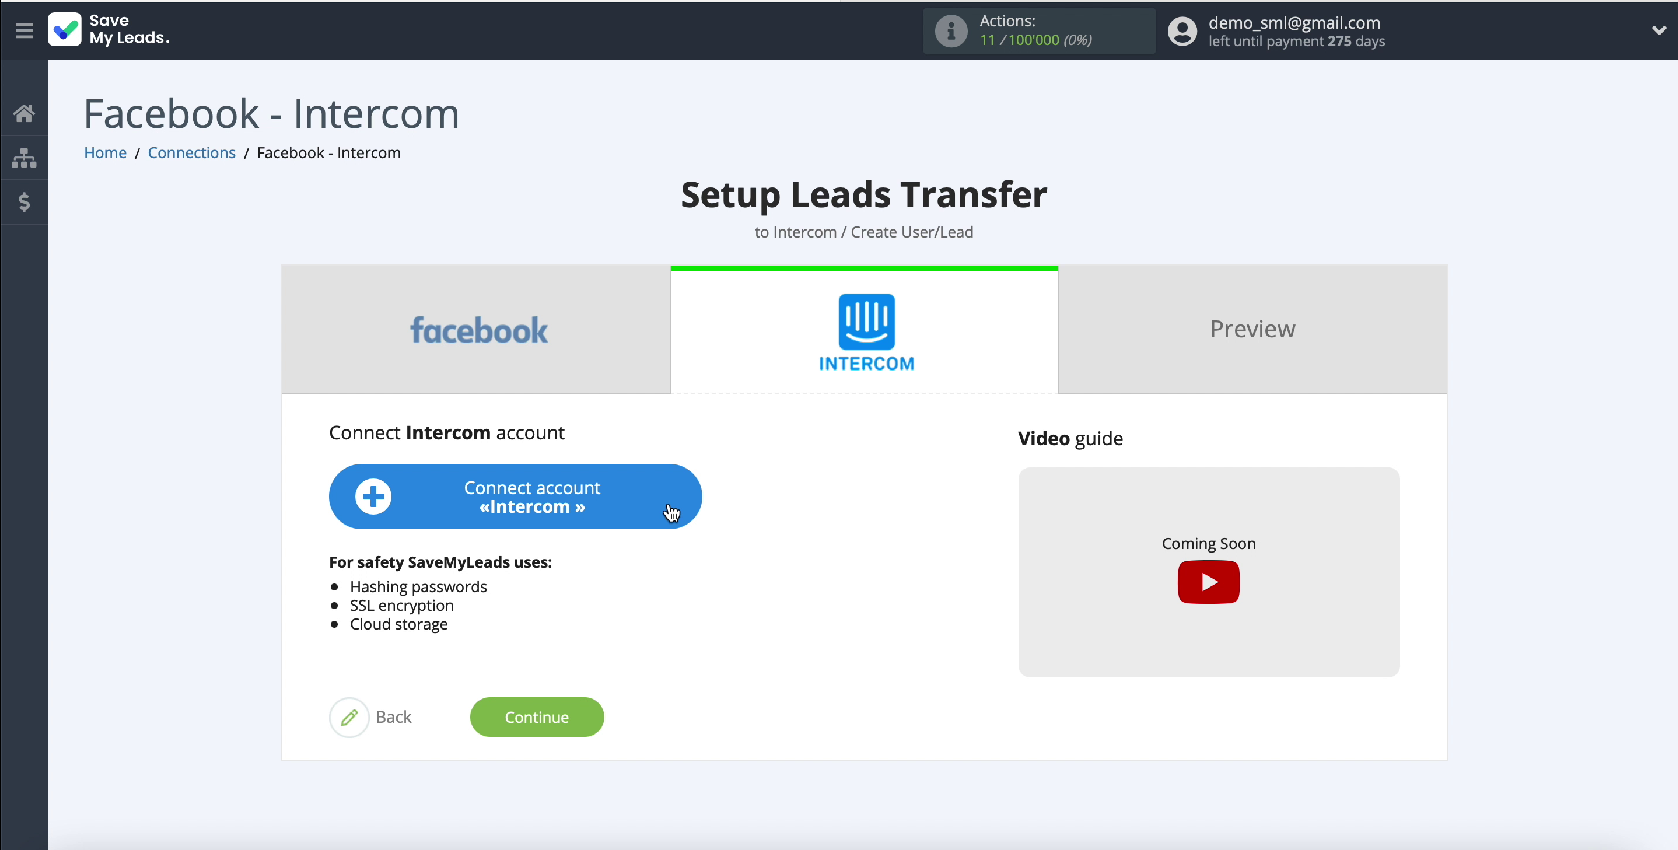
To connect an account in Intercom, in the window that appears, specify the username and password from your personal account in this service.
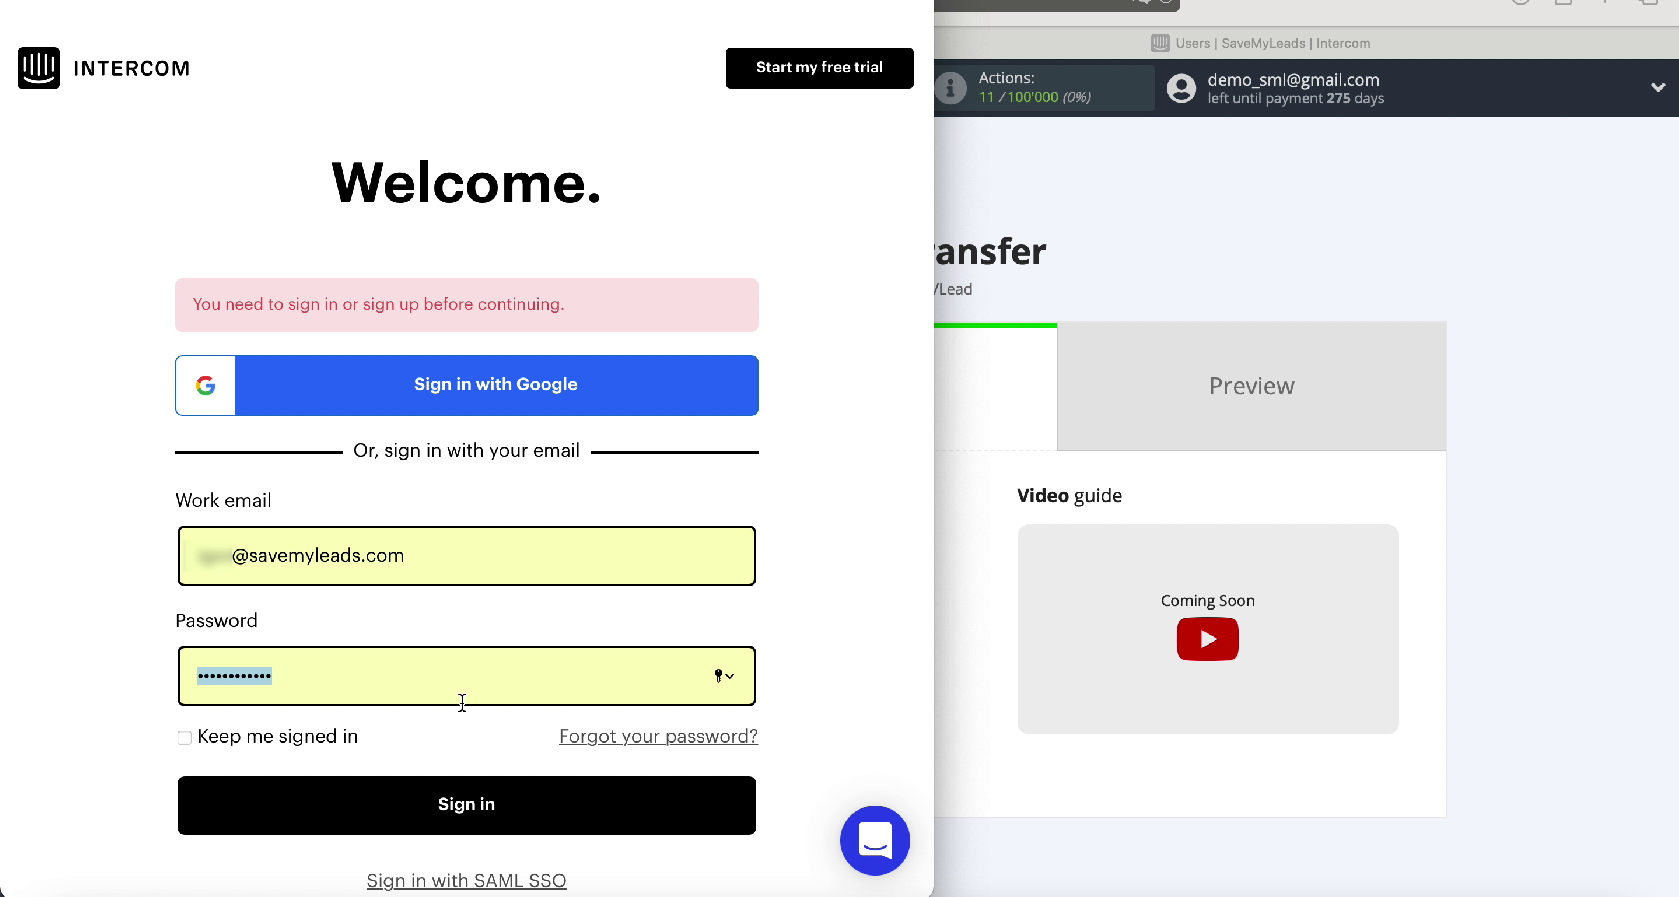
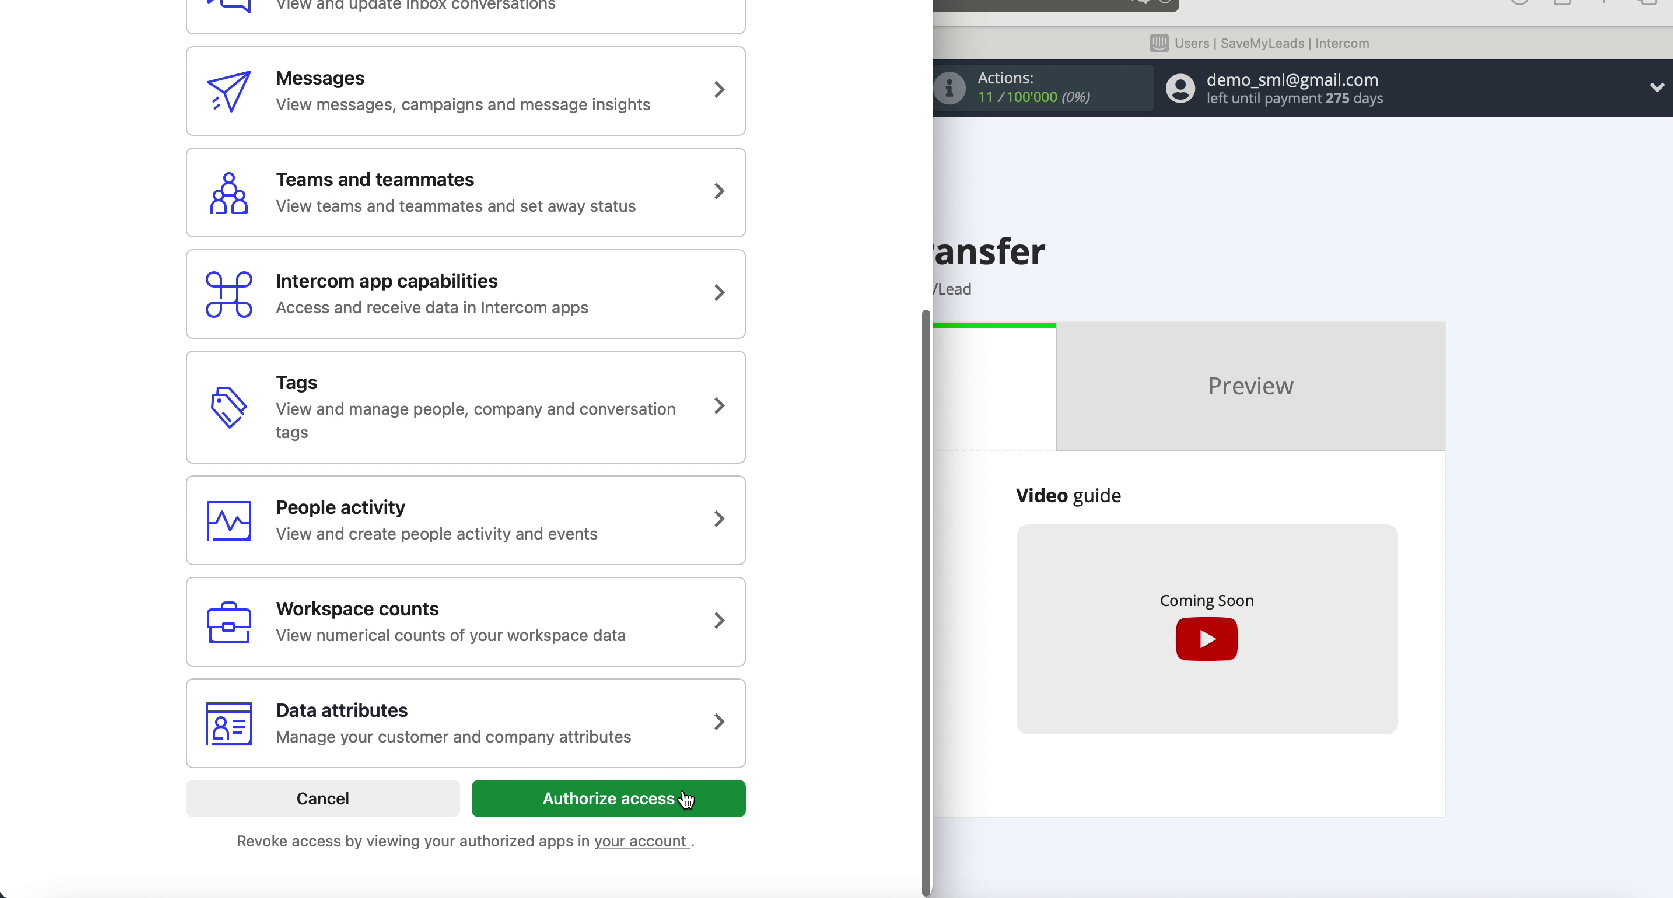
Next, grant the SaveMyLeads service permission to work with your Intercom account.
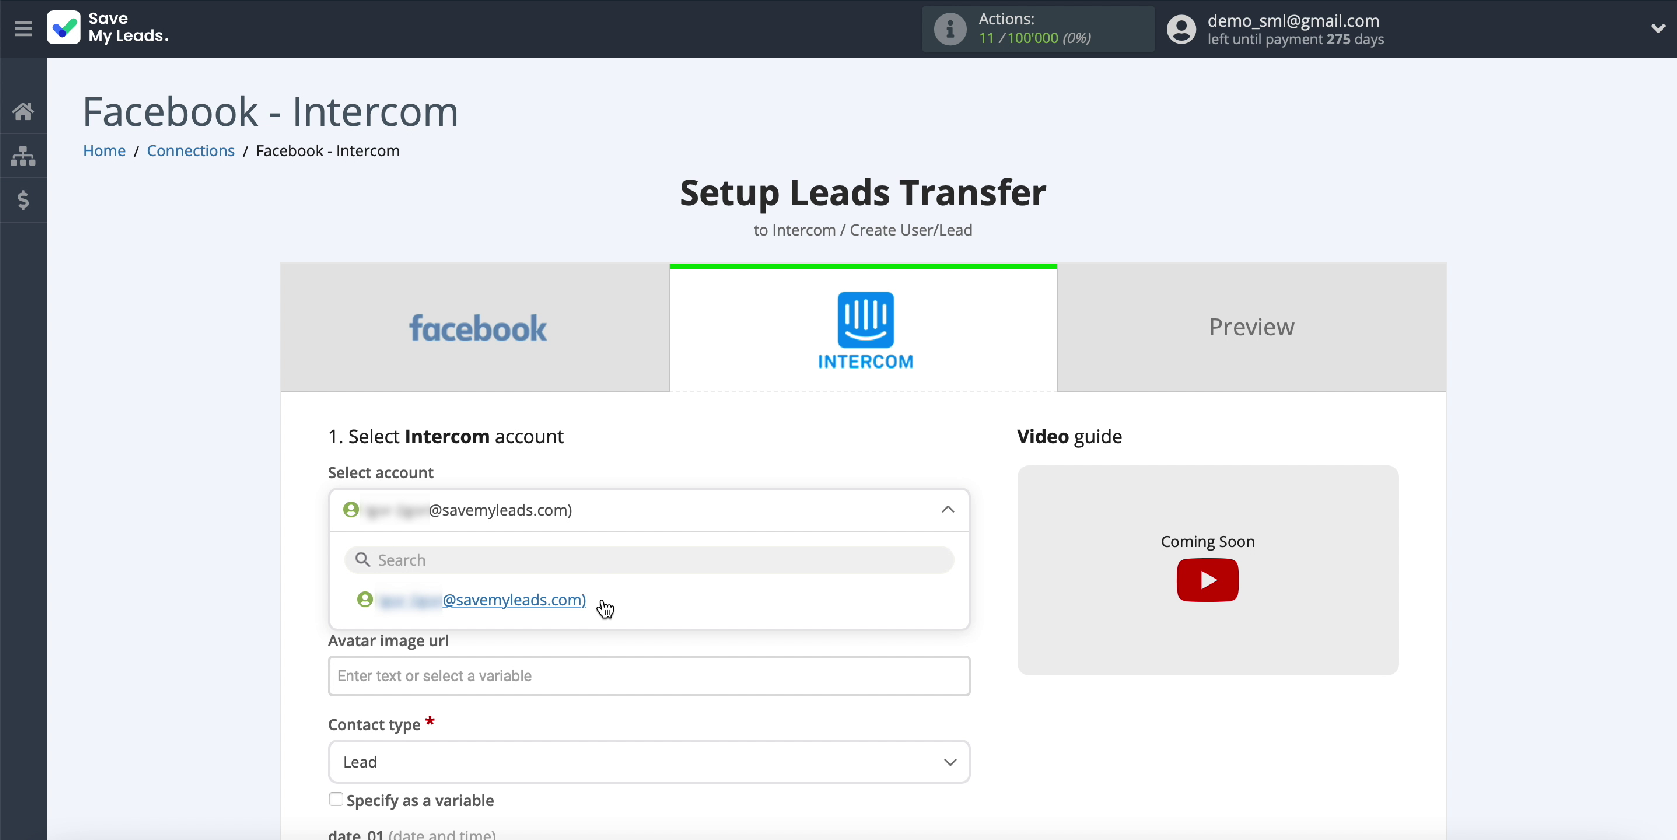
In a new window in the section "Connected accounts" your login should appear, select it.
In the same window, in the "Contact type" section, specify the Lead or User value. In our case, Lead.
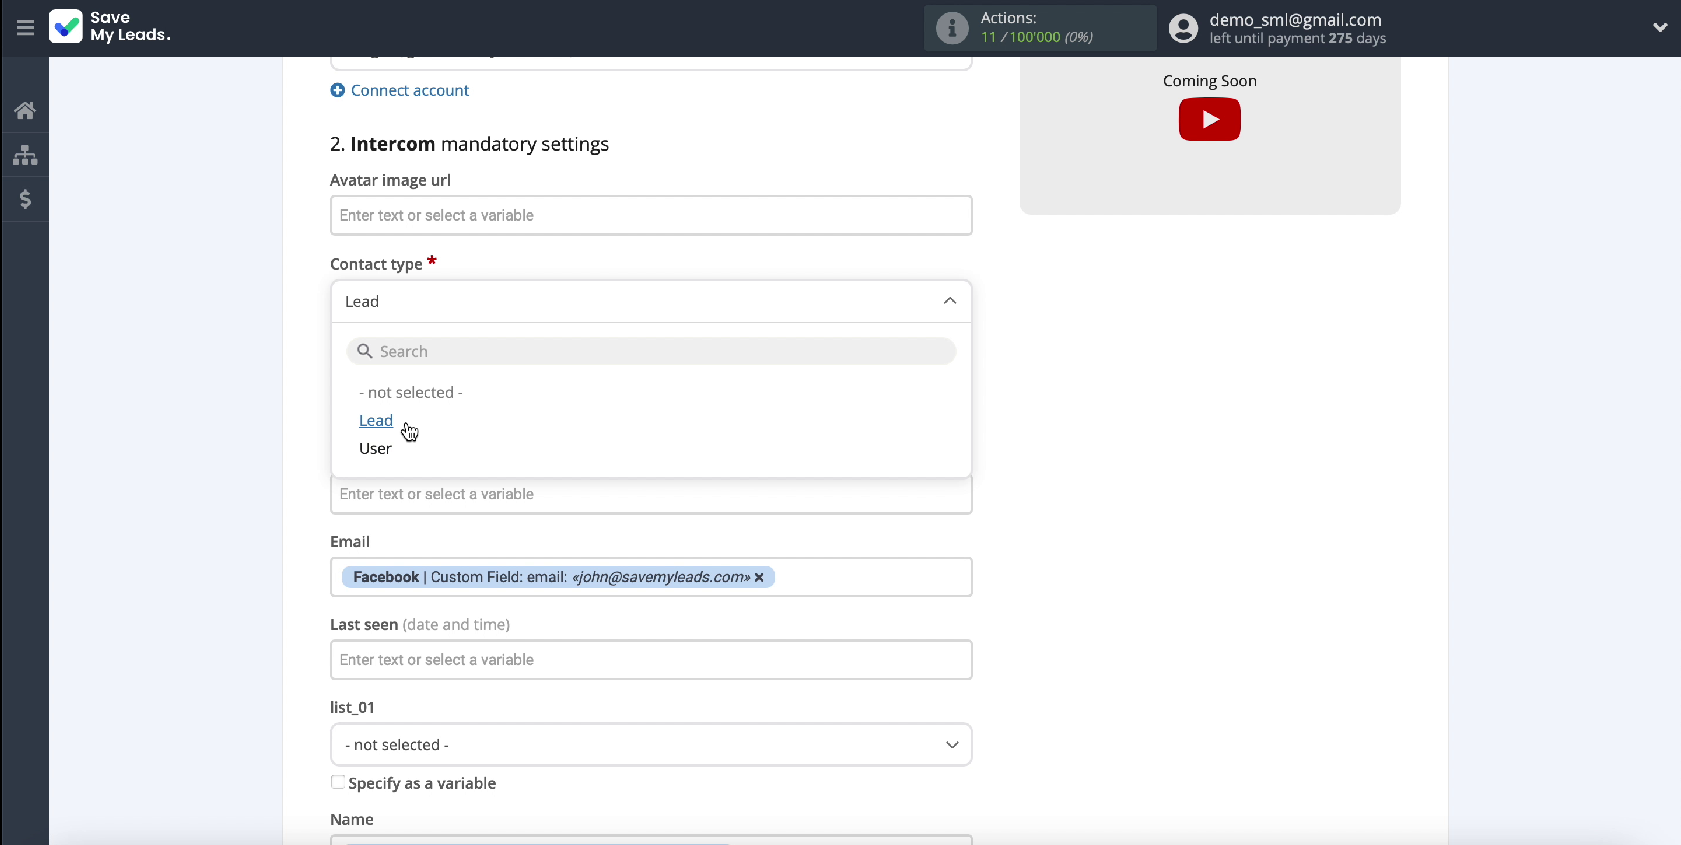
Next, fill in the fields with variables from Facebook to create a lead. To do this, click in an empty field and select a variable from the drop-down list. If you are satisfied with the initial presetting of the fields, you can leave them unchanged.
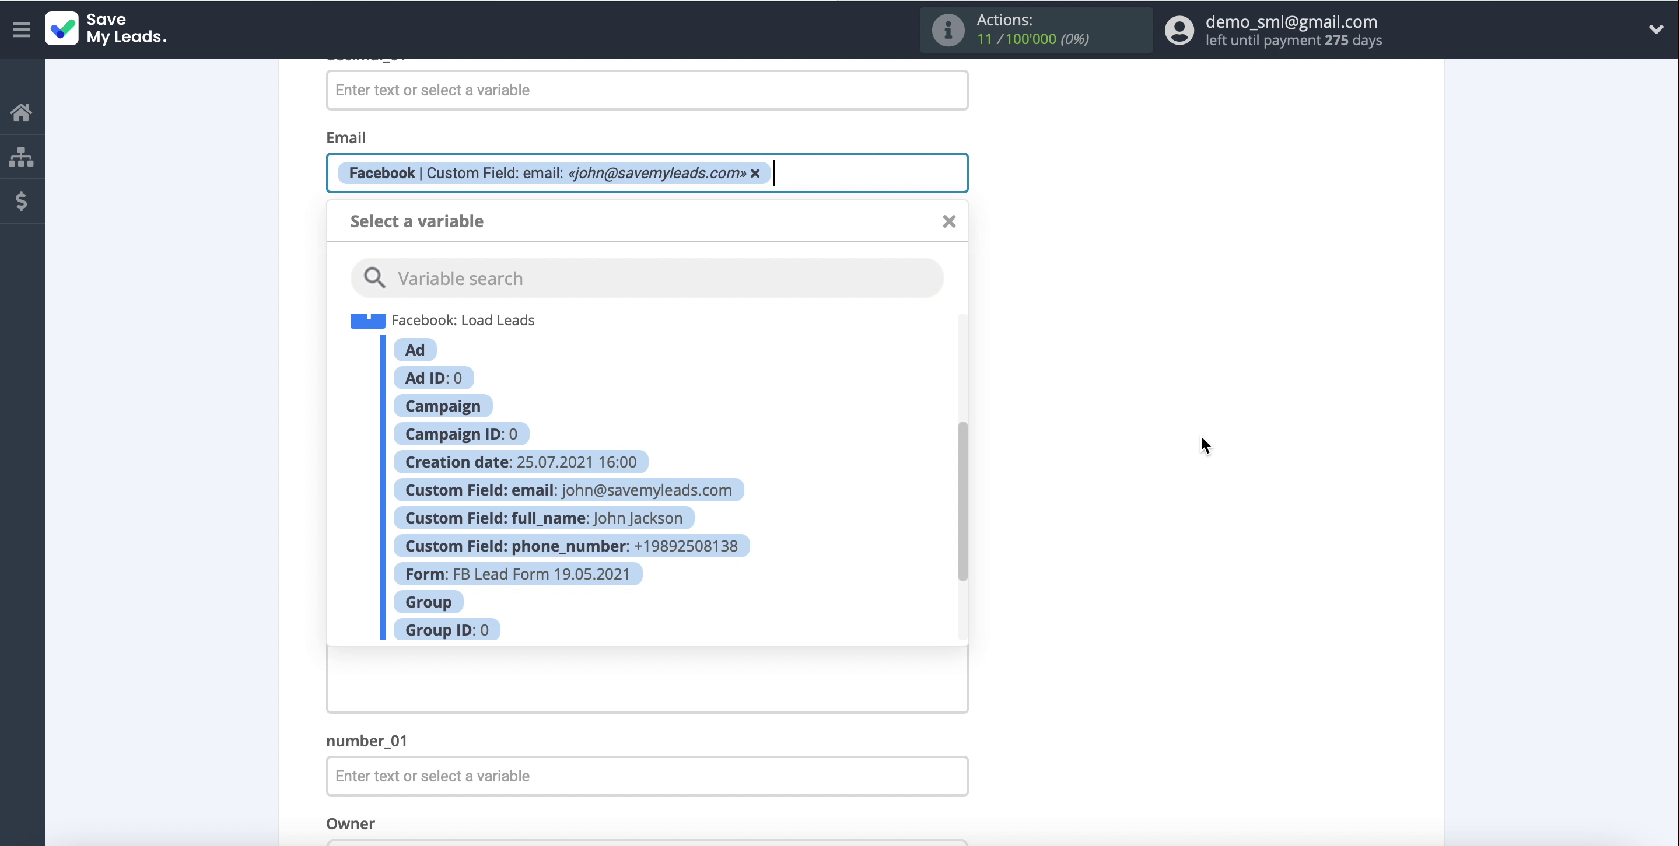
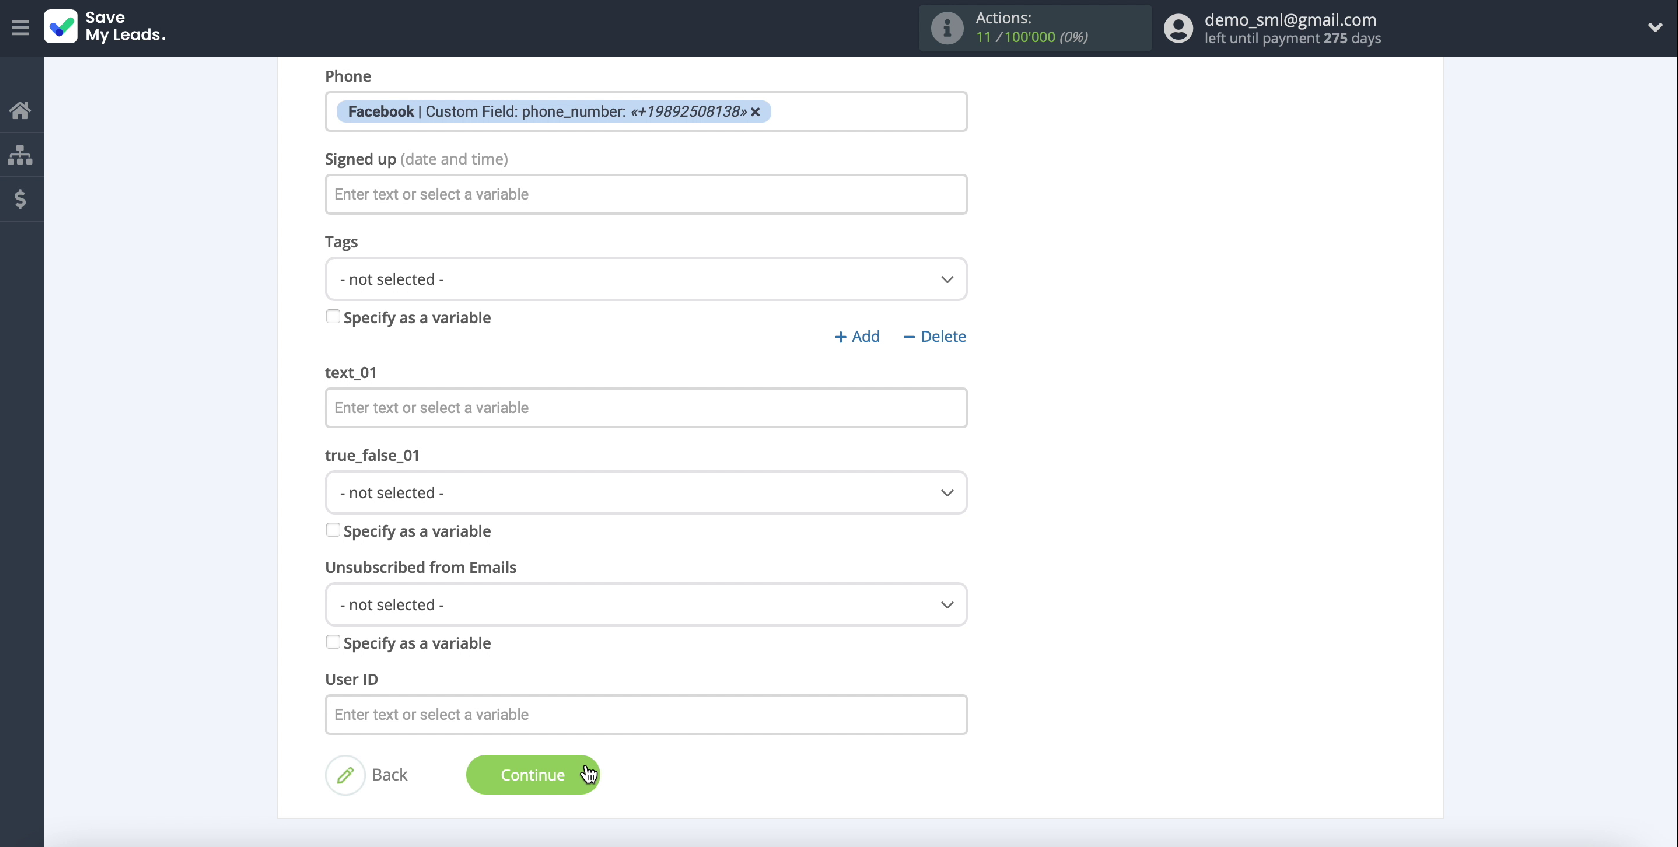
After specifying the variables, continue the configuration - click Continue.
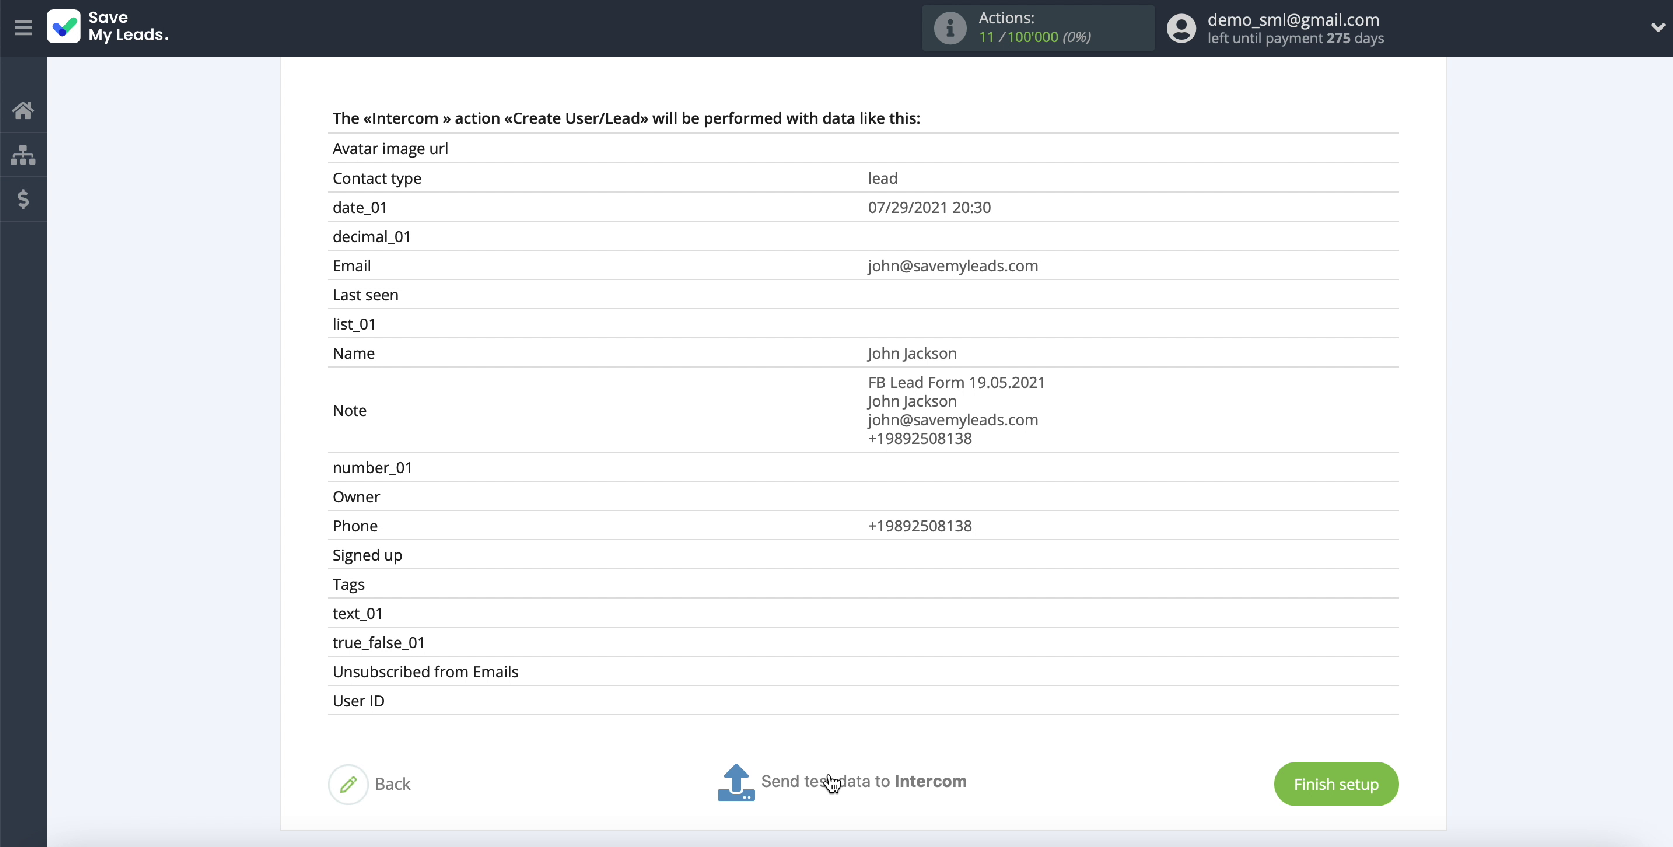
In the new window, you can see an example of how the fields for new leads will be filled. If you want to check the correctness of the settings, click Send test data to Intercom.
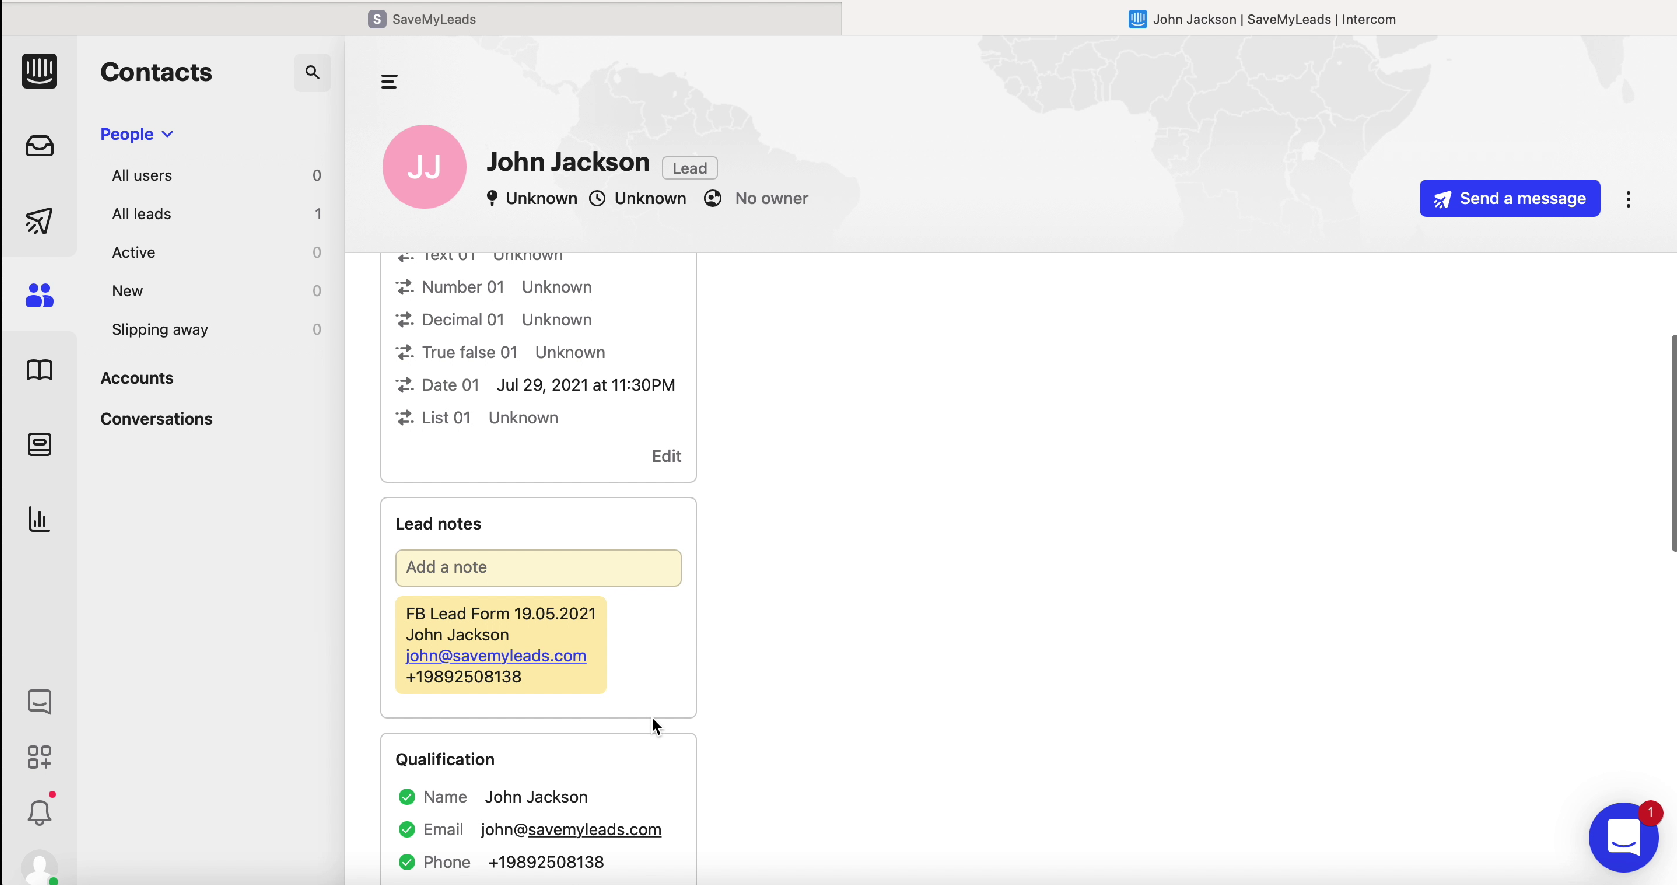
To check the result, go to your Intercom account. If everything suits you, go back to the SaveMyLeads service tab and complete the setup.
Automate data update
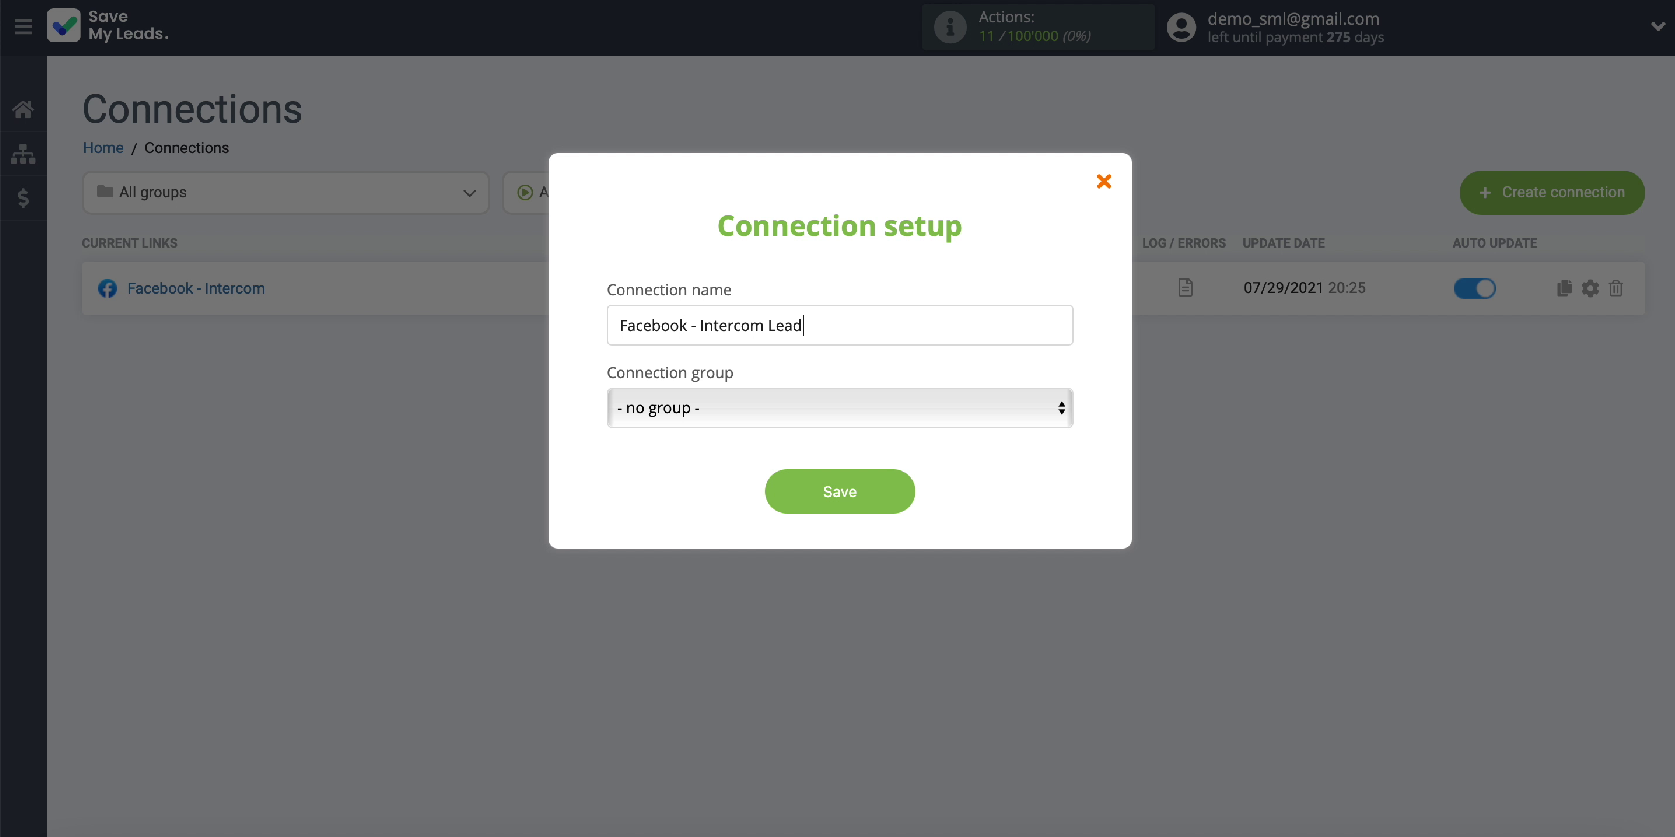
Turn on auto-renewal to instantly create new users in Intercom based on new leads from Facebook. To do this, click Finish Setup. If necessary, in the connection settings, you can change its name.
Conclusion
Thanks to the integration of the Facebook ad account and the Intercom service, you can set up automatic unloading of leads from your ad account so that in the future you can conveniently work with them in a single interface. This will increase the efficiency of your staff and your business, as well as strengthen customer loyalty to the company.


To set up integration using the SaveMyLeads online connector, you do not need any programming knowledge or the help of IT specialists. Thanks to the intuitive interface of the connector, the whole process will take less than 5 minutes.
