Lead Ads is an effective marketing tool for promoting products, services, and collecting leads on Facebook. By manually uploading the data of potential clients into the Airtable cloud database, you waste time and reduce efficiency. This is unacceptable for businesses today. This way, you can easily be overtaken by competitors who have automated everything that can be automated. We suggest optimizing your experience with both services by integrating them. We recommend using our connector, SaveMyLeads. This article will show you how to configure Airtable and Facebook integration and thus automate the transfer of data received from Lead Ads forms to a cloud database table.
The main advantages of automatically transferring leads from the social network to Airtable are:
- Saving time. You will be freed from at least one workflow.
- Increasing the efficiency of using human resources. The employee who was involved in transferring lead data will be able to switch to solving more important tasks.
- Accelerating work with leads. You will give them feedback much faster.
You can see and evaluate the first results of the Facebook Lead Ads and Airtable integration immediately after setting it up using the SaveMyLeads codeless online connector. New leads' contact information from completed Lead Ads forms will automatically appear in the database as new rows. From now on, the need to manually transfer data of potential clients (first and last name, contact phone number, email address) will disappear. Your work processes will be successfully optimized. Your clients will also feel the benefits of automation. They will receive quick feedback and will be satisfied with the positive experience of interacting with you. This will give you the opportunity to get ahead of those competitors who are not yet using automation in their business, and to catch up with those who have already implemented it before.
How to Set up Facebook and Airtable Integration
You can easily handle the Facebook-Leads and Airtable integration settings yourself, even if you have never done anything like this before. You definitely don't need to learn programming for this. Our online connector, SaveMyLeads, will assist you with everything. This service has an intuitive interface and operating algorithm, making it easy and fast to connect systems. The time required is minimal – only up to 10 minutes. Step-by-step instructions in text and video format, prepared by SaveMyLeads employees, will help you correctly connect the accounts of both platforms and avoid mistakes in the settings.
If you have not yet registered on the official SaveMyLeads website, please do so first. Ready? Now you can start the Facebook and Airtable integration.
Setting up the Data Source – Facebook
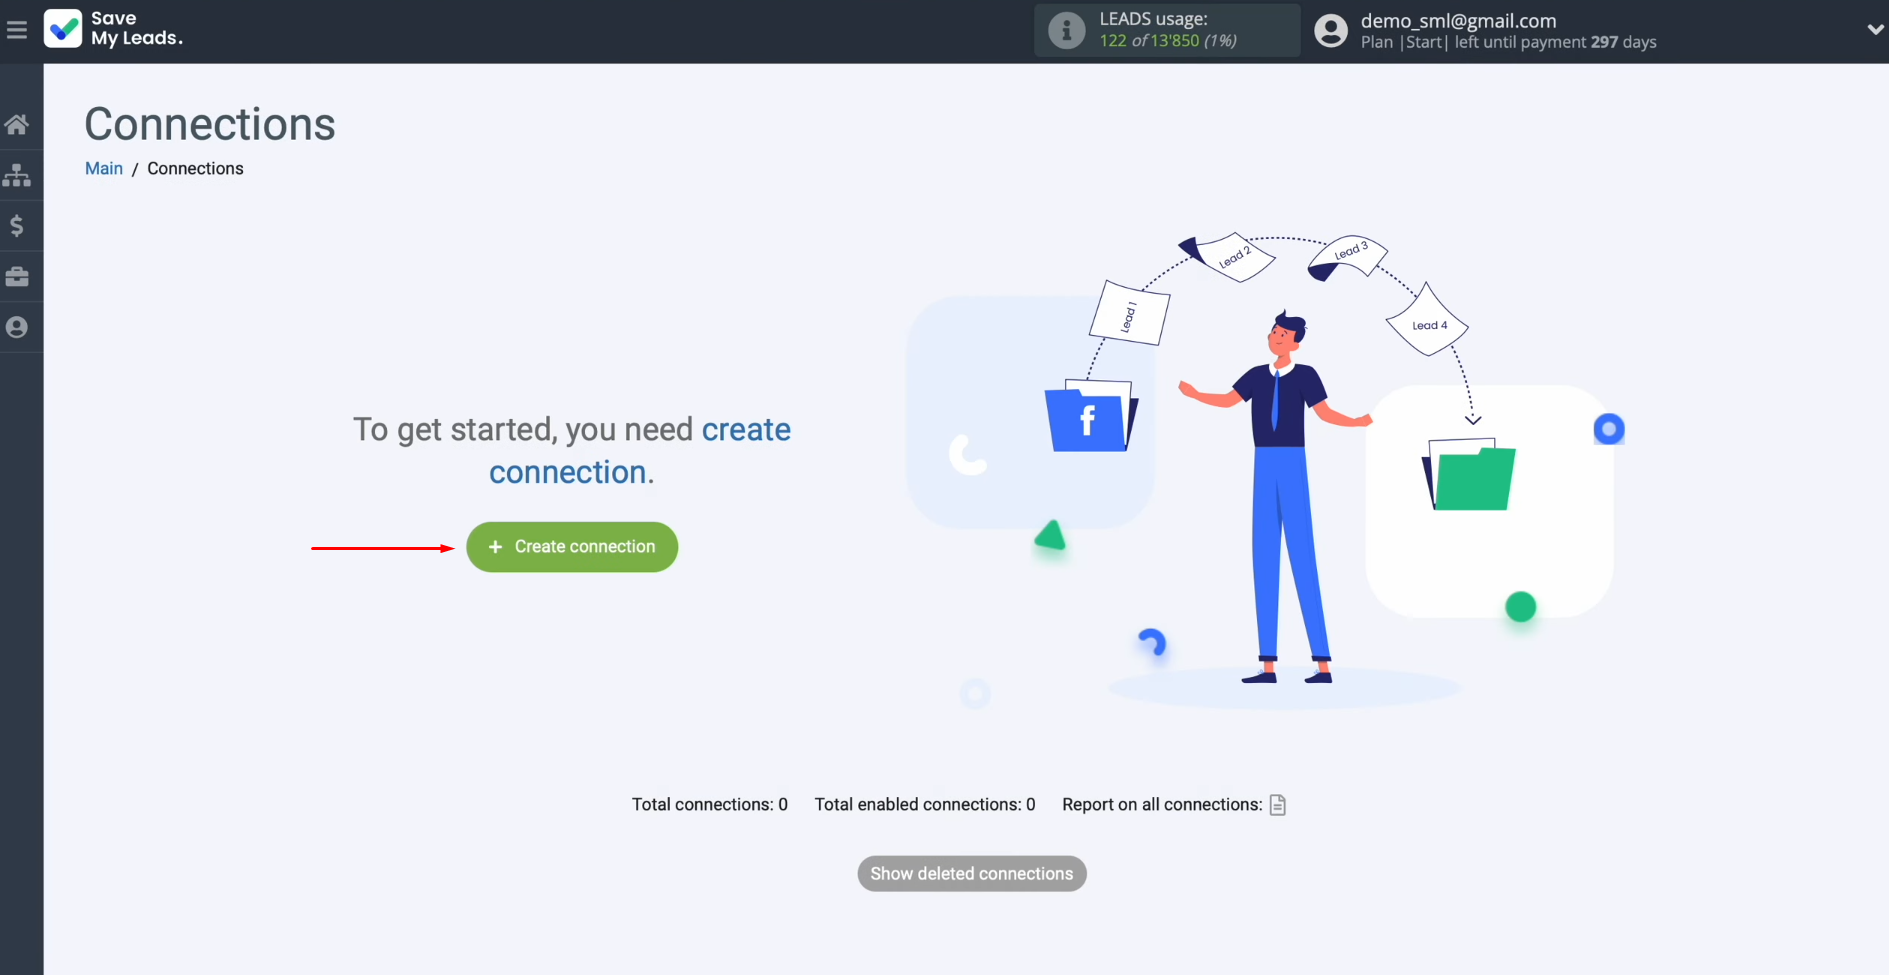
To set up Facebook integration with Airtable, first, create a new connection. For this, click on the green button.
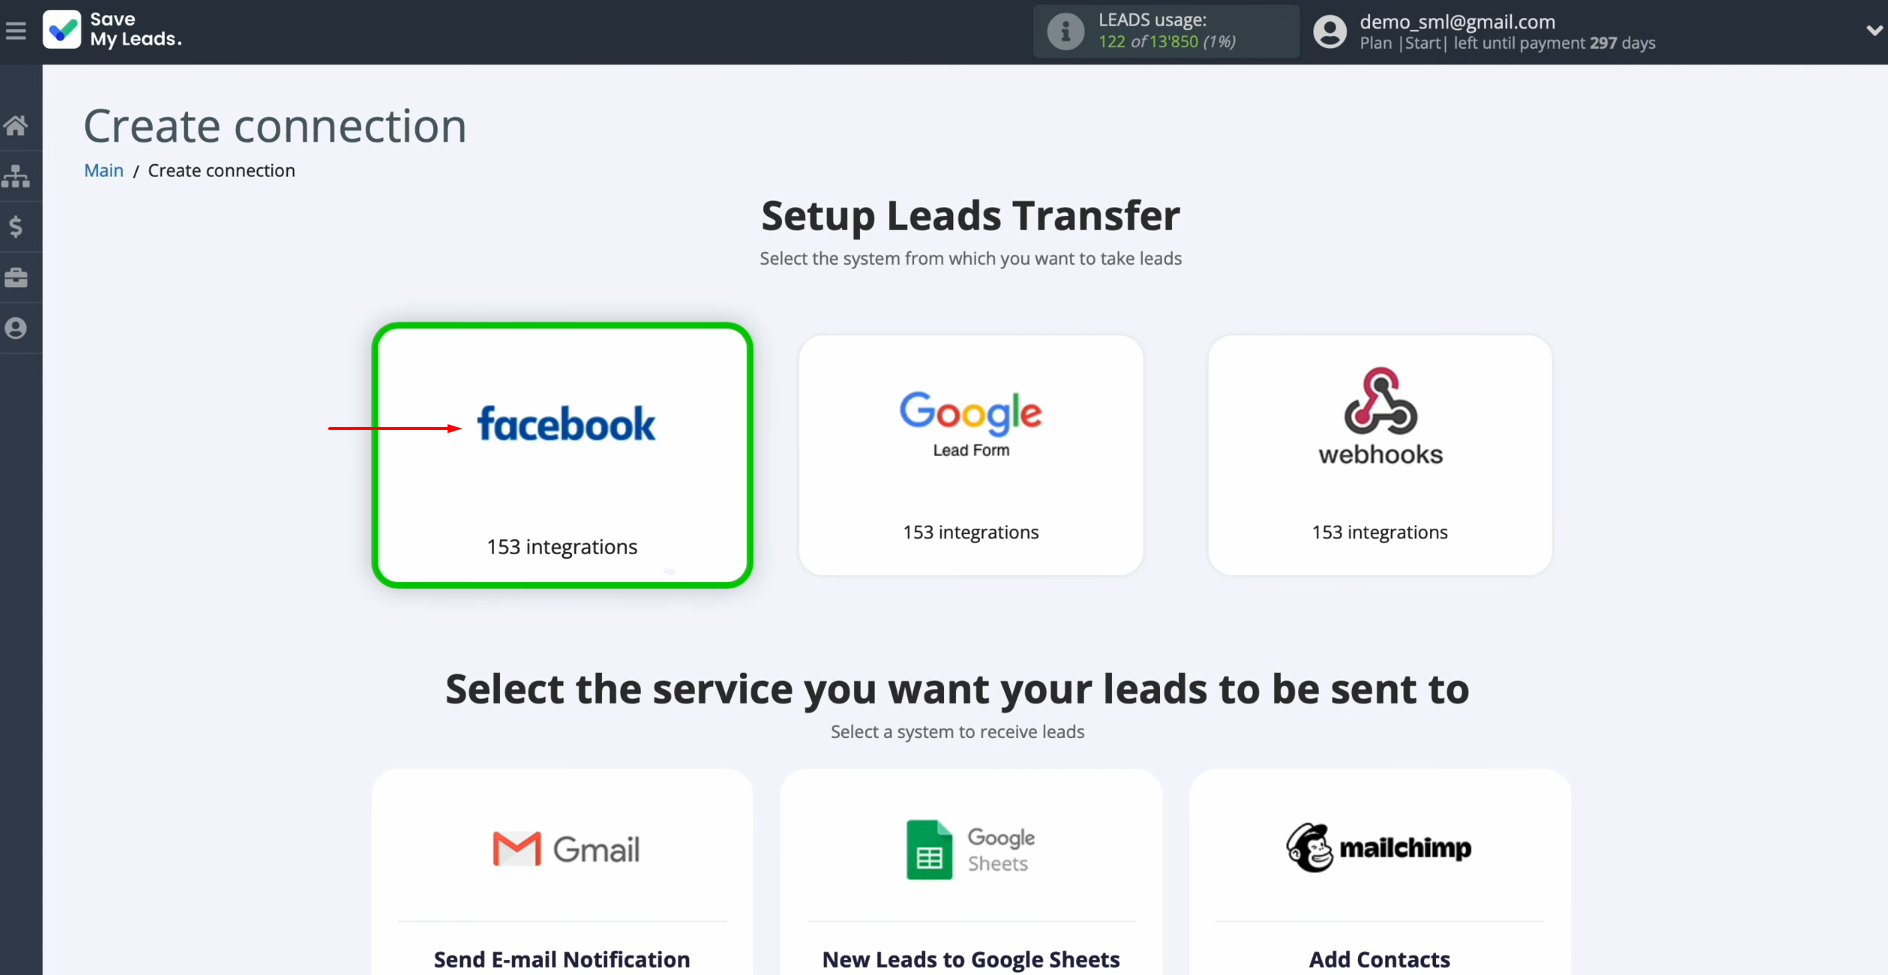
Select the data source system. In this case, it is Facebook.
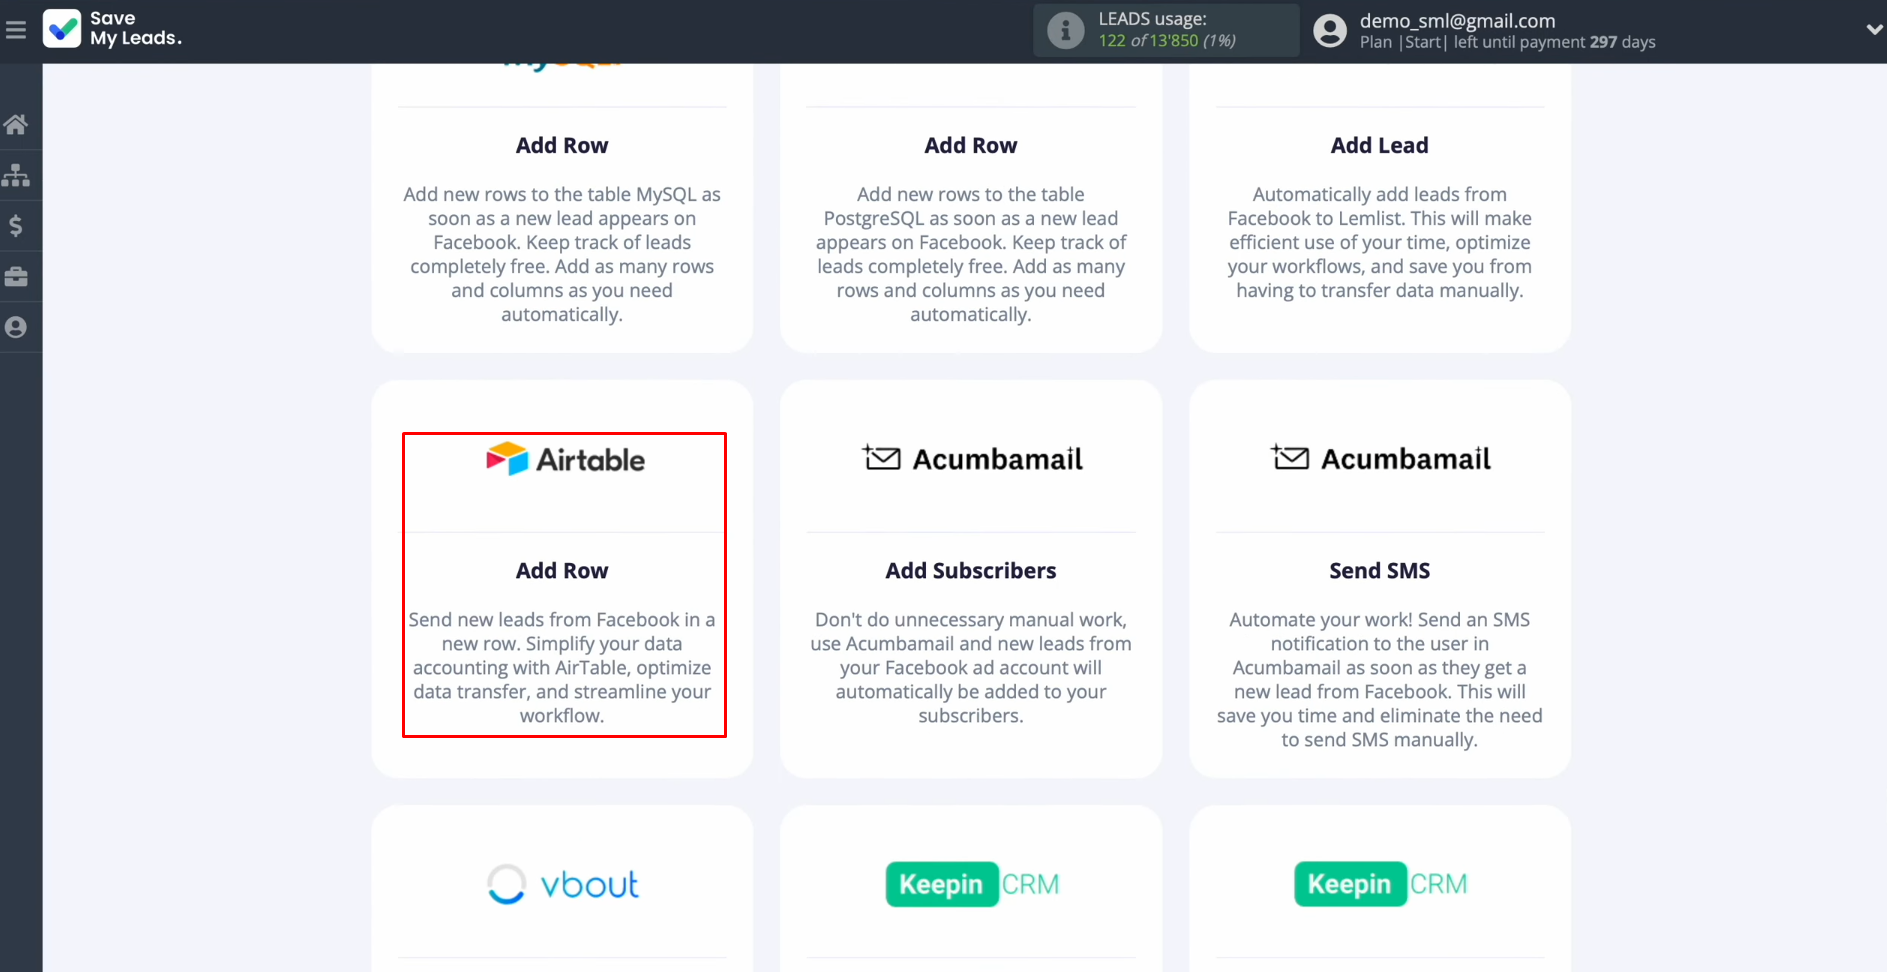
Select the
system where you need to transfer new leads received from Facebook. In this case, it is Airtable (Add Row).
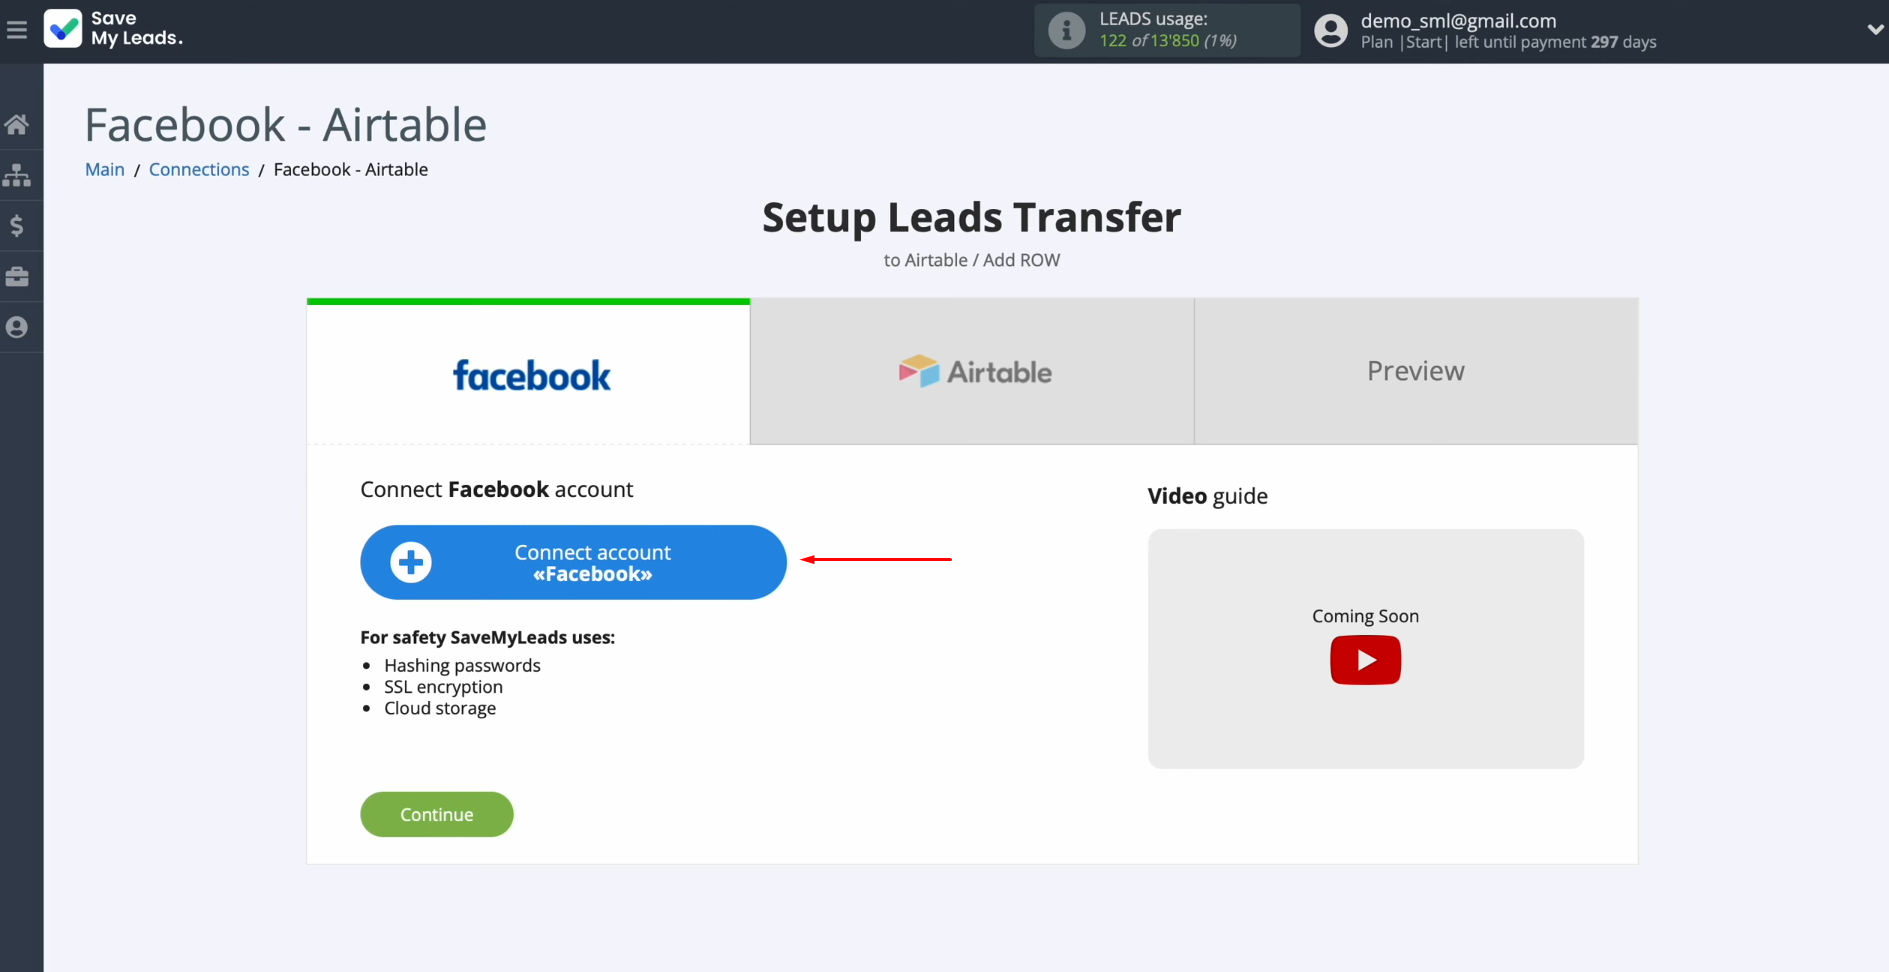
Connect your Facebook account to
SaveMyLeads. To achieve this, press the blue button.
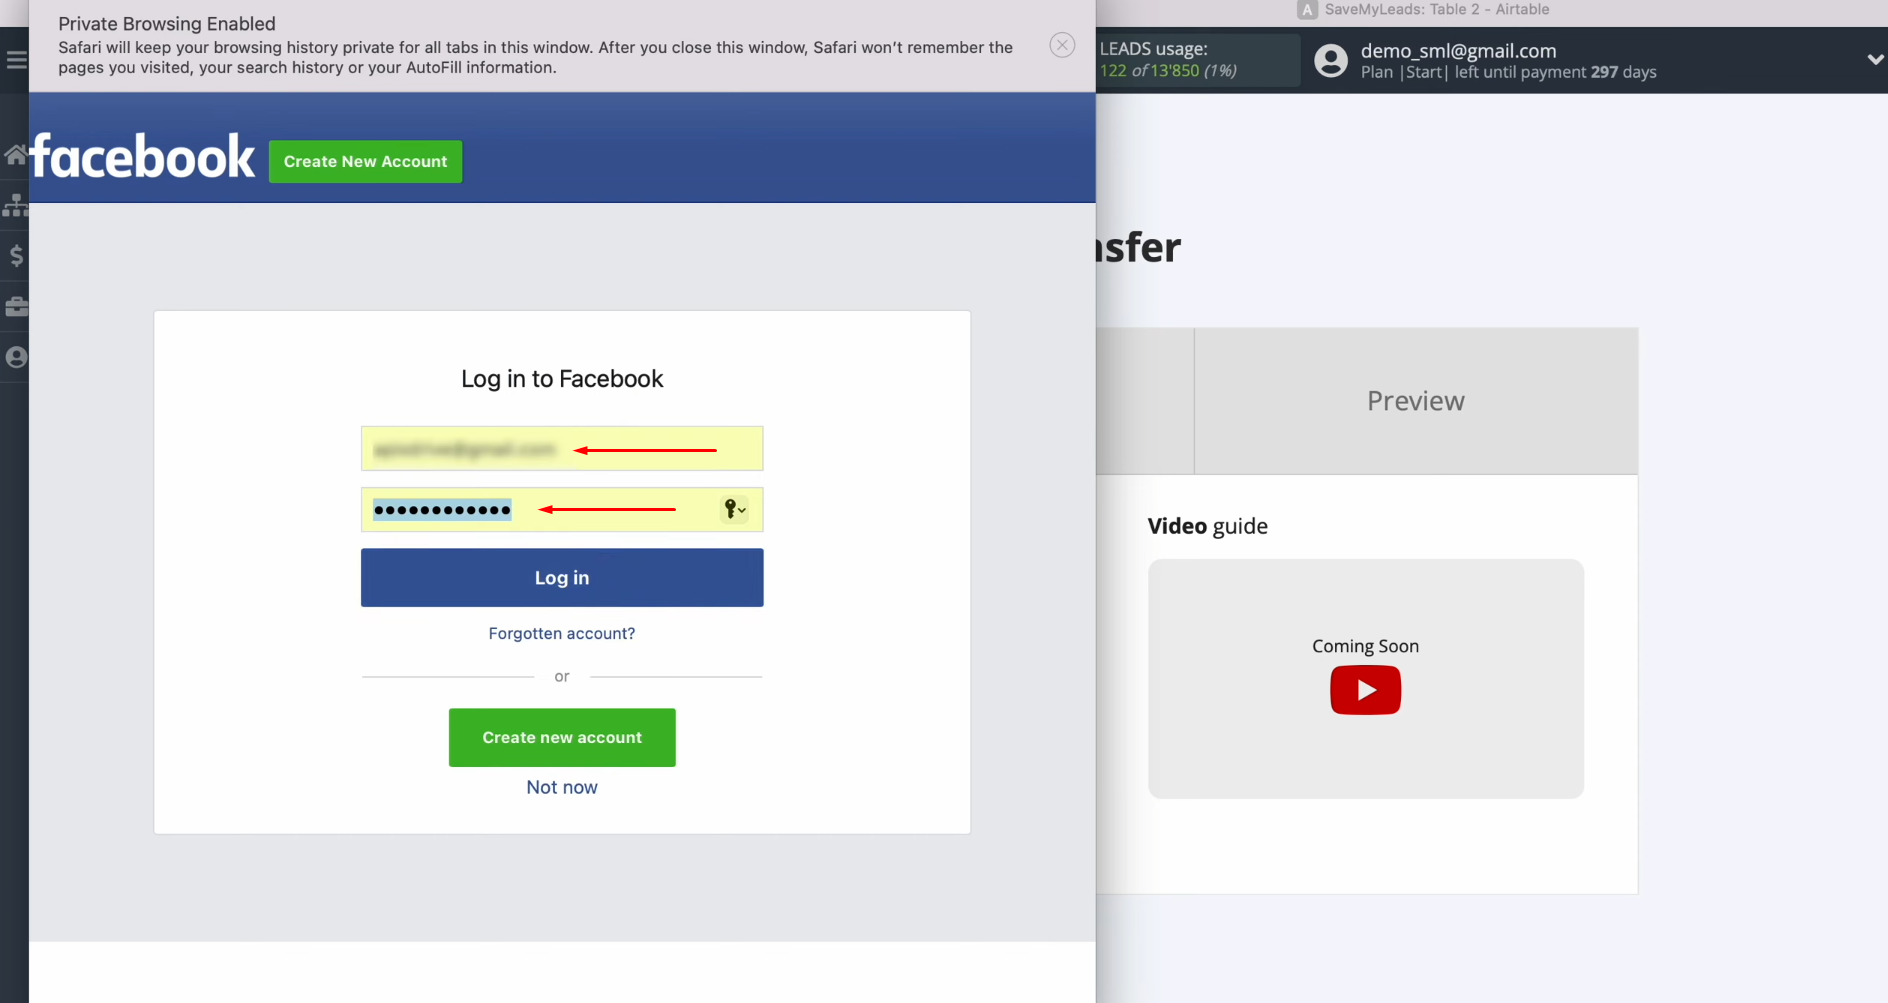
Specify the login and password of your Facebook personal account. Click “Log in”.
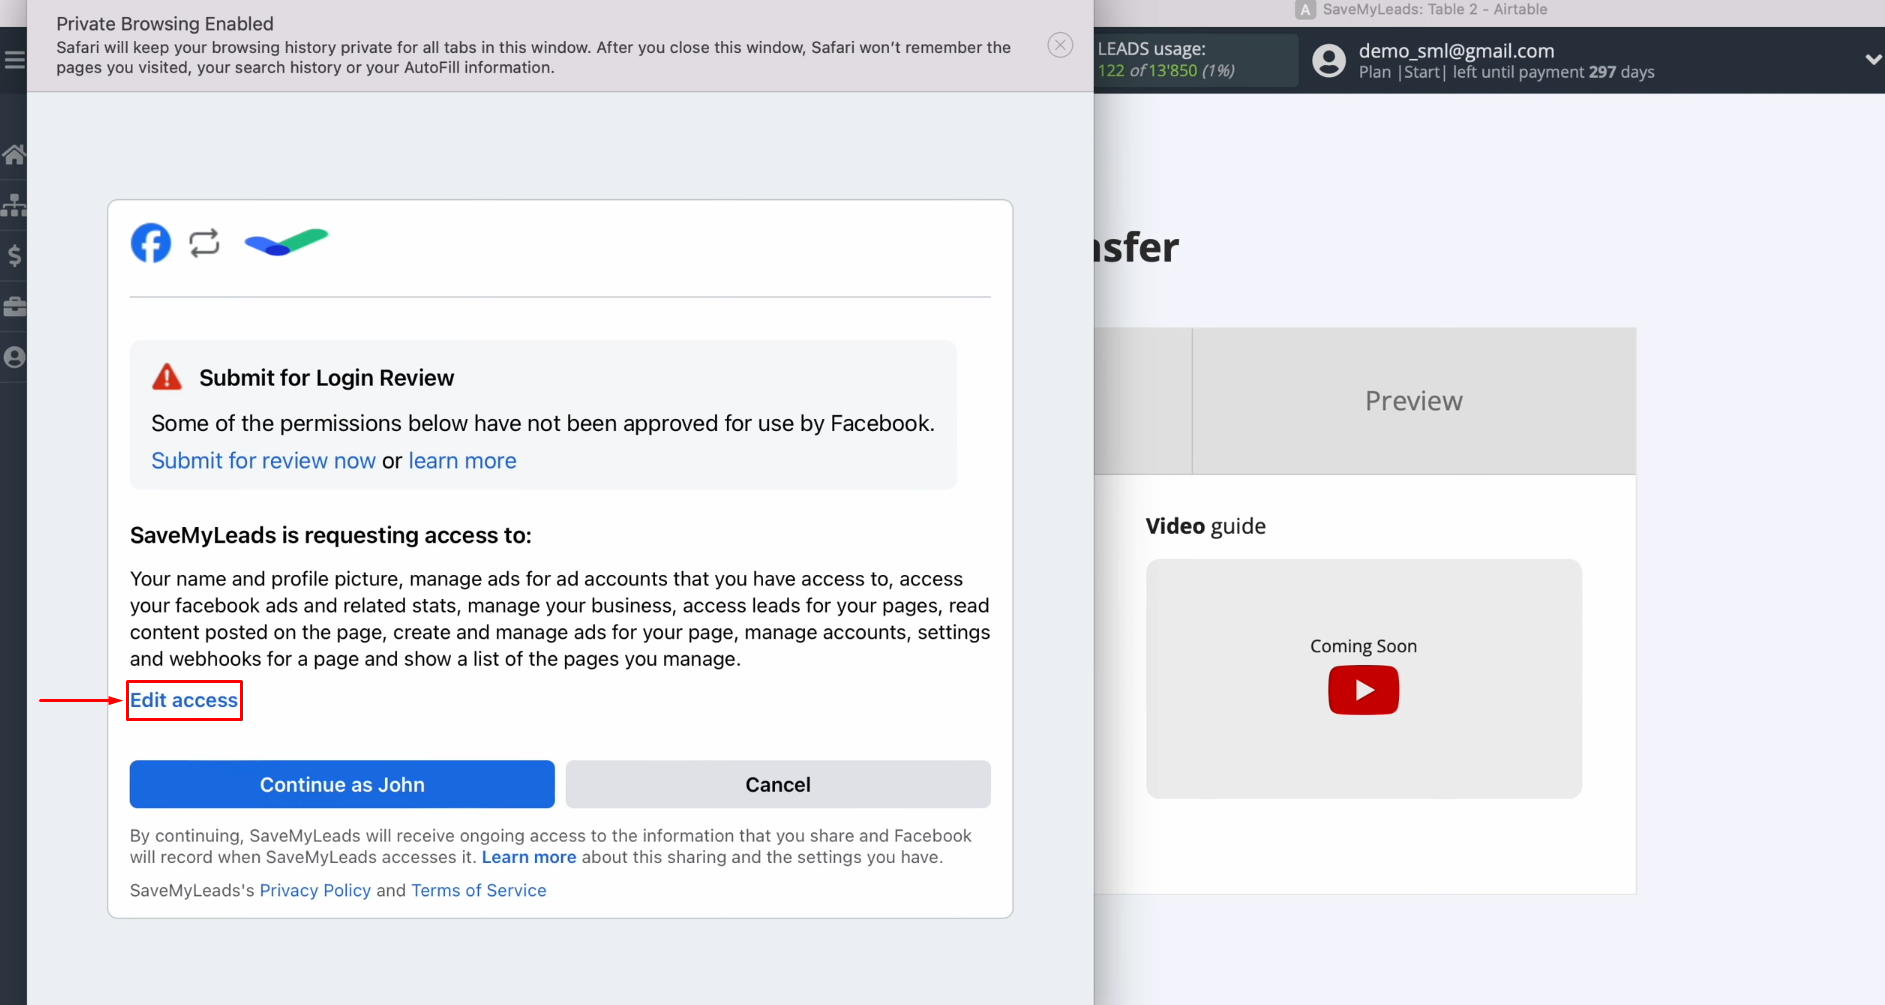
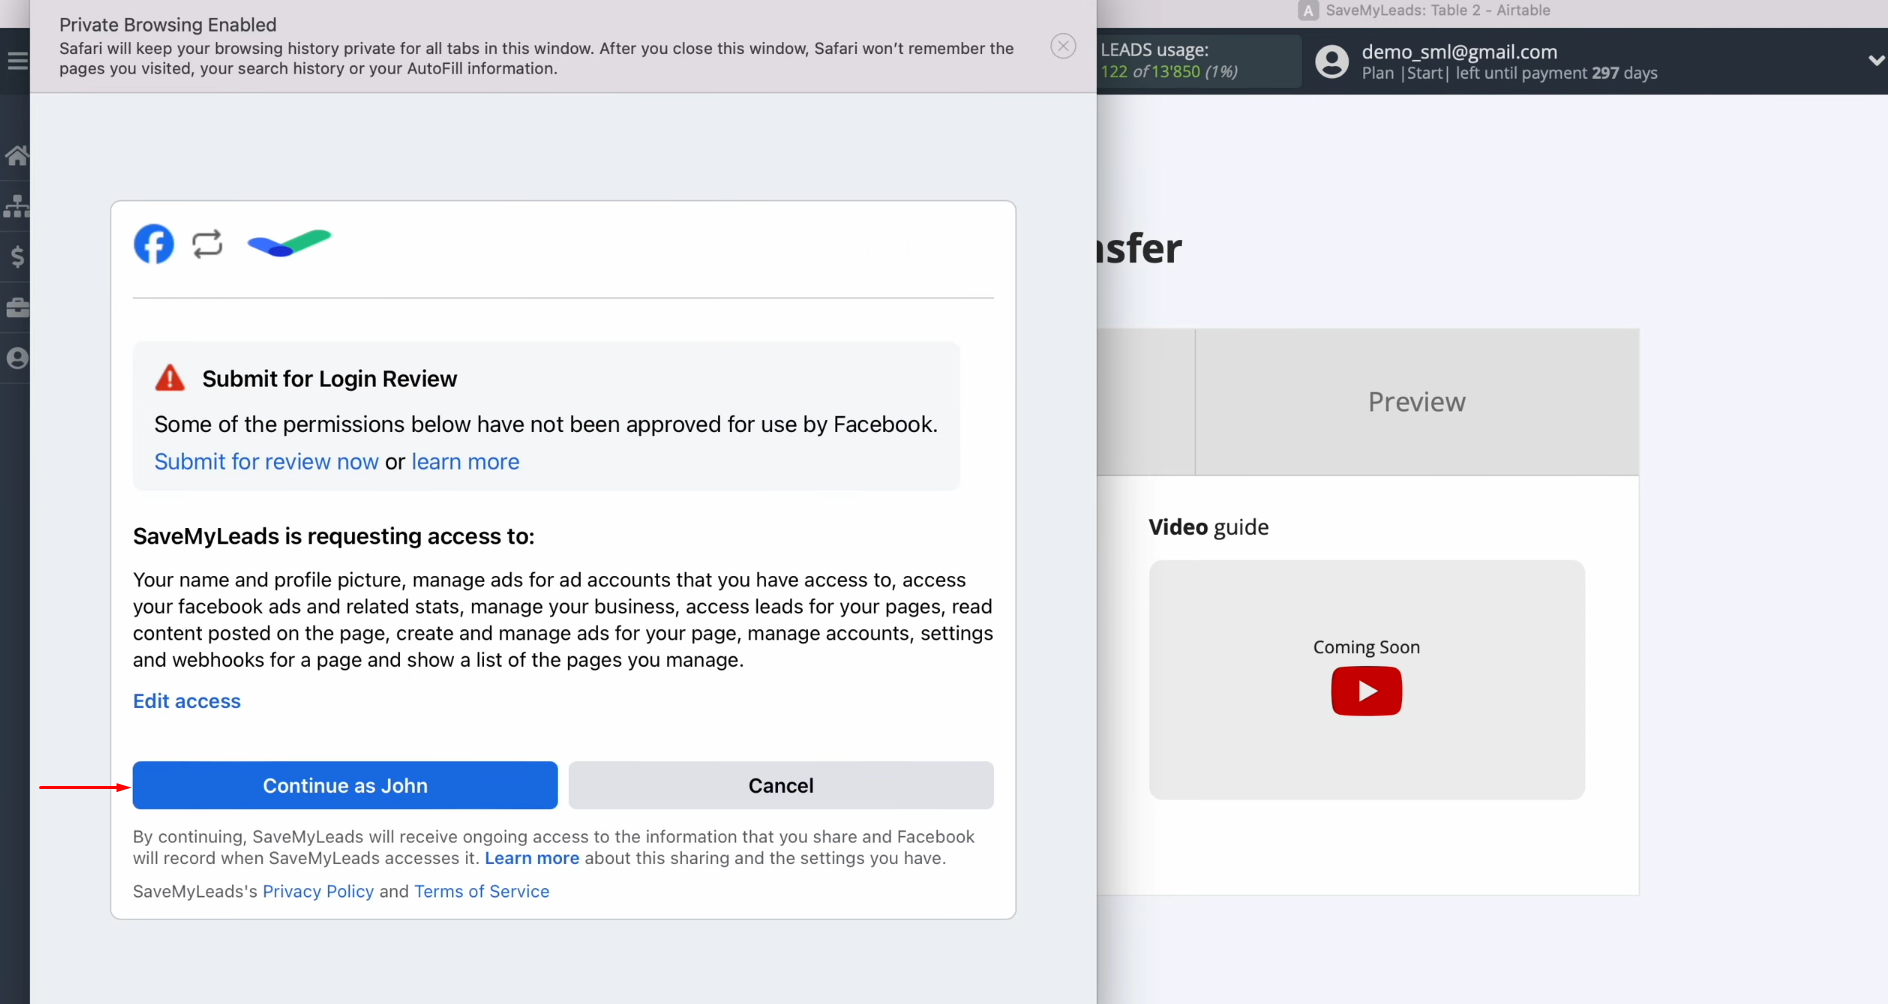
Provide SaveMyLeads
access to work with your Facebook account. To do this, click
“Edit access”.
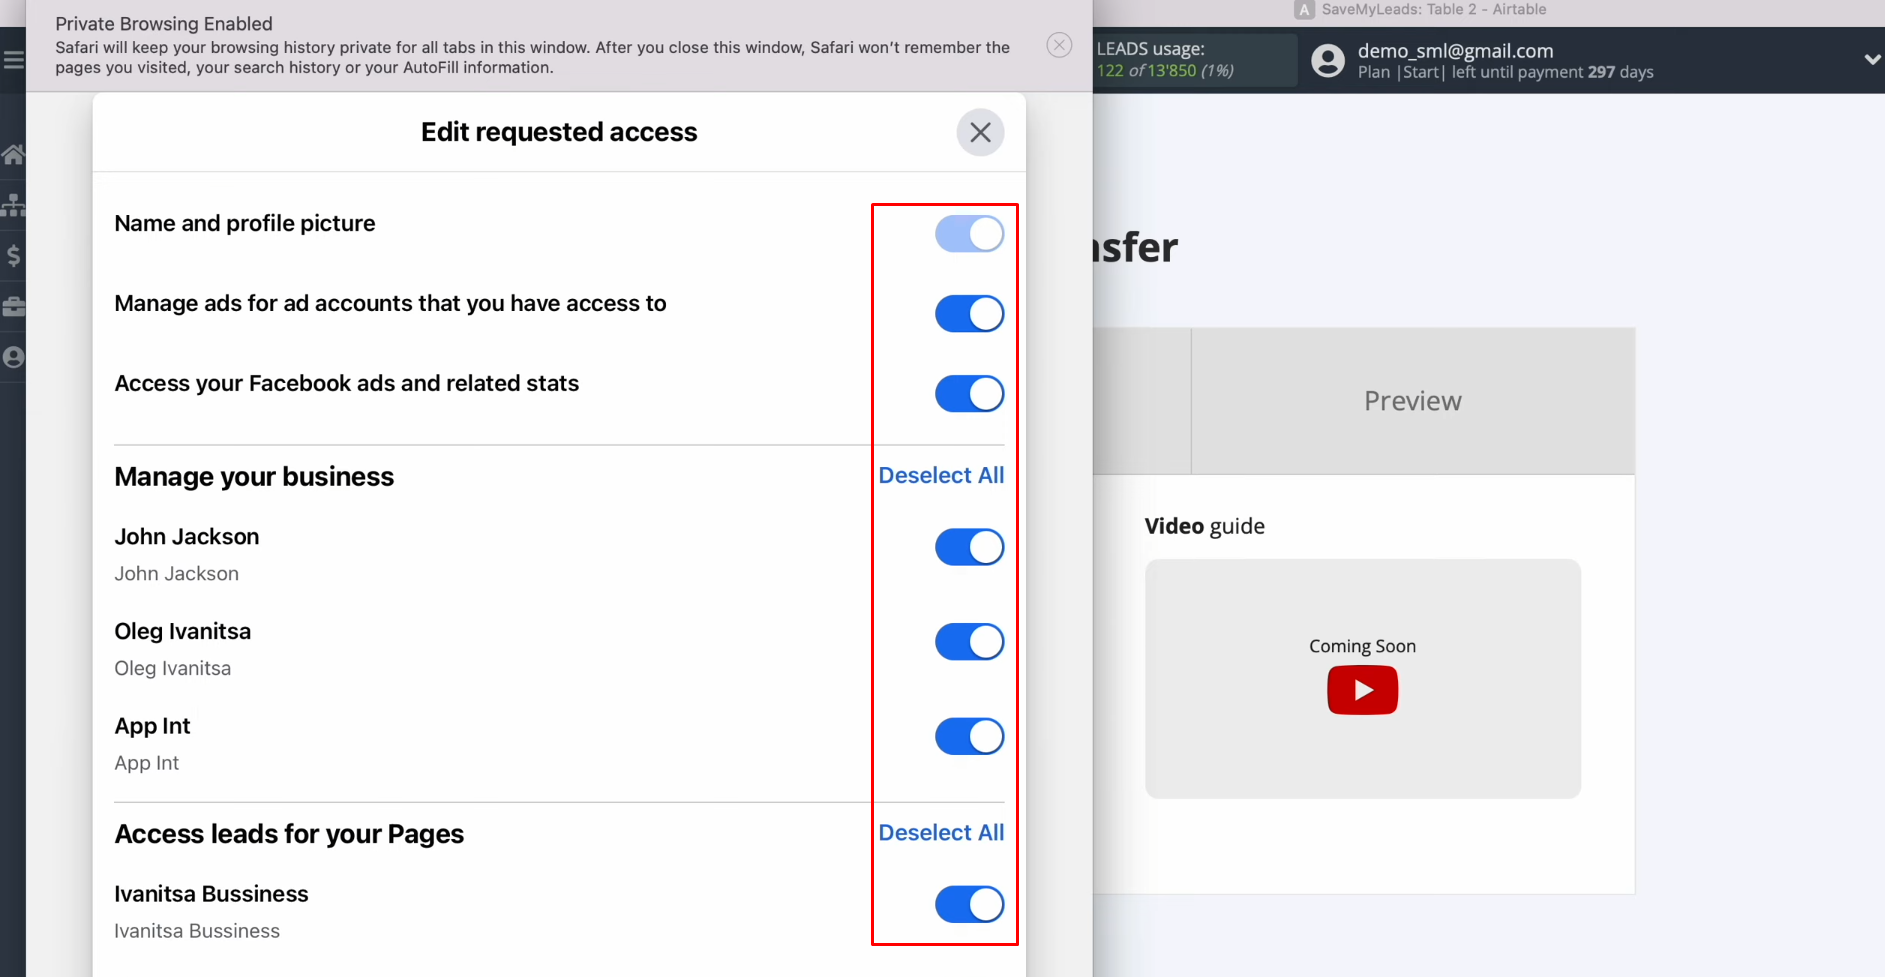
Leave all access checkboxes
enabled.
Click “Continue as…”.
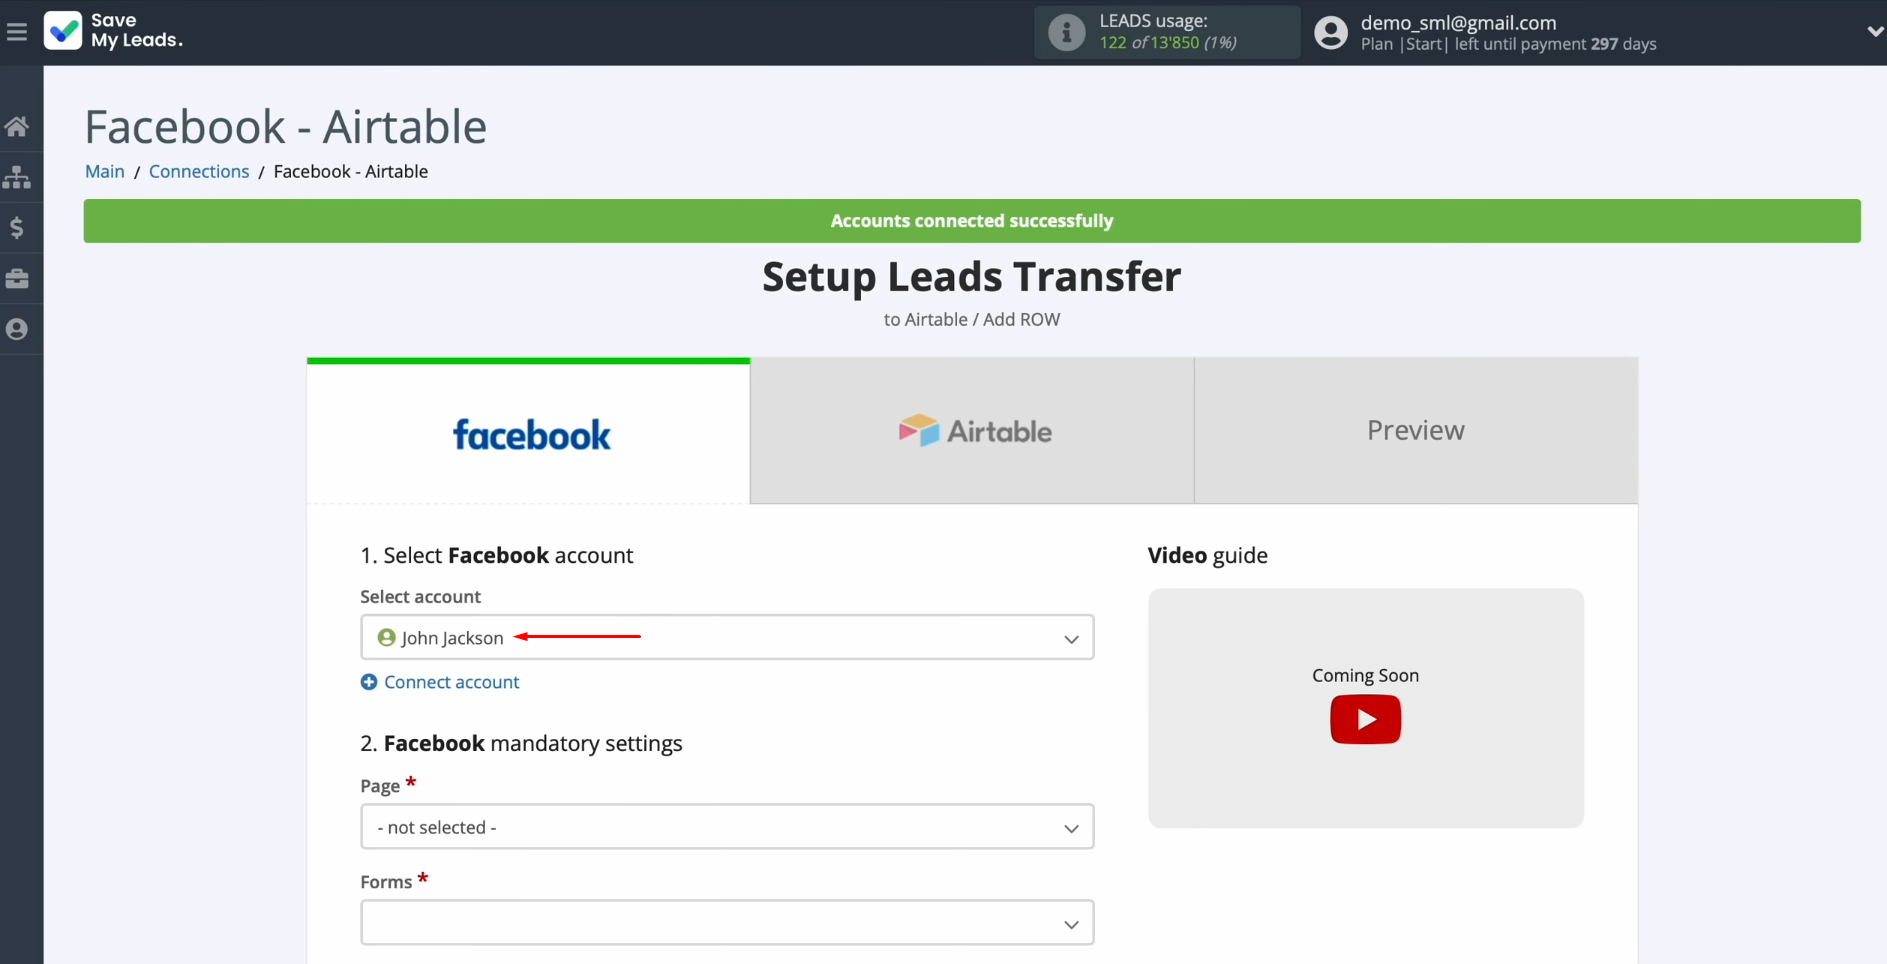
When the connected account
appears in the list, select it.
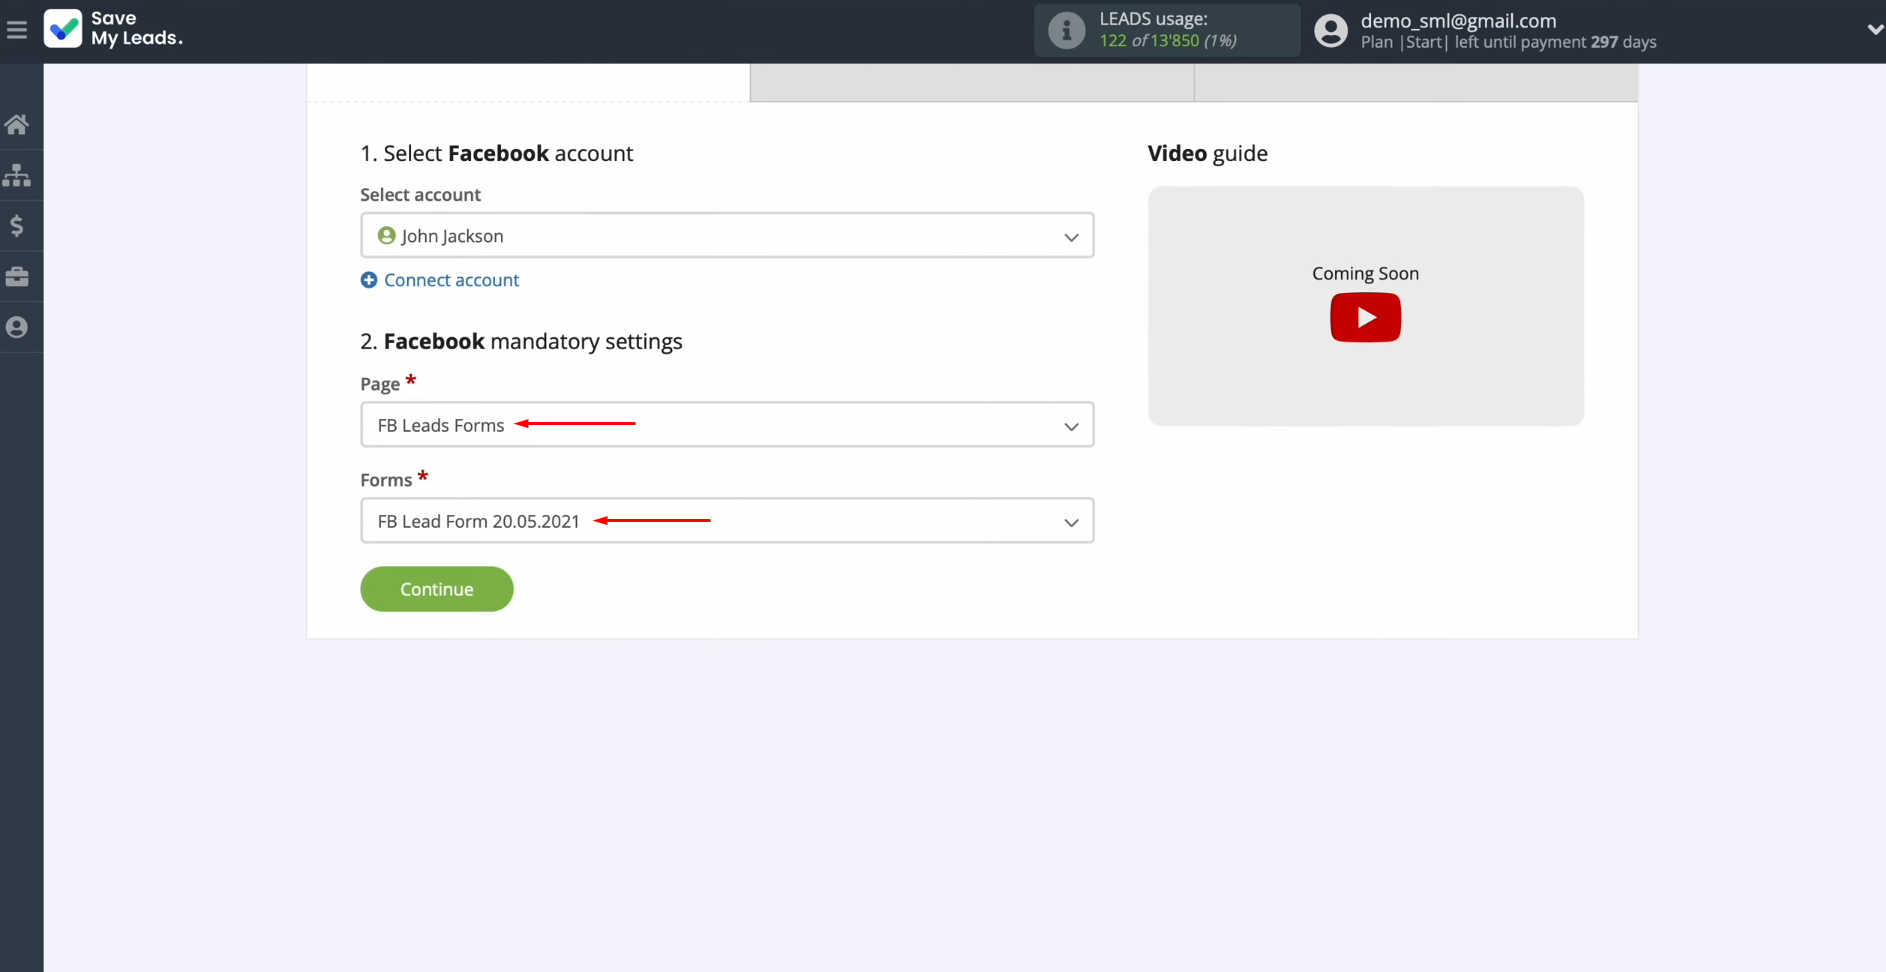
Select the
advertising page and form by which you want to receive new leads from
Facebook. Click “Continue”.
Setting up the Data Receiver – Airtable
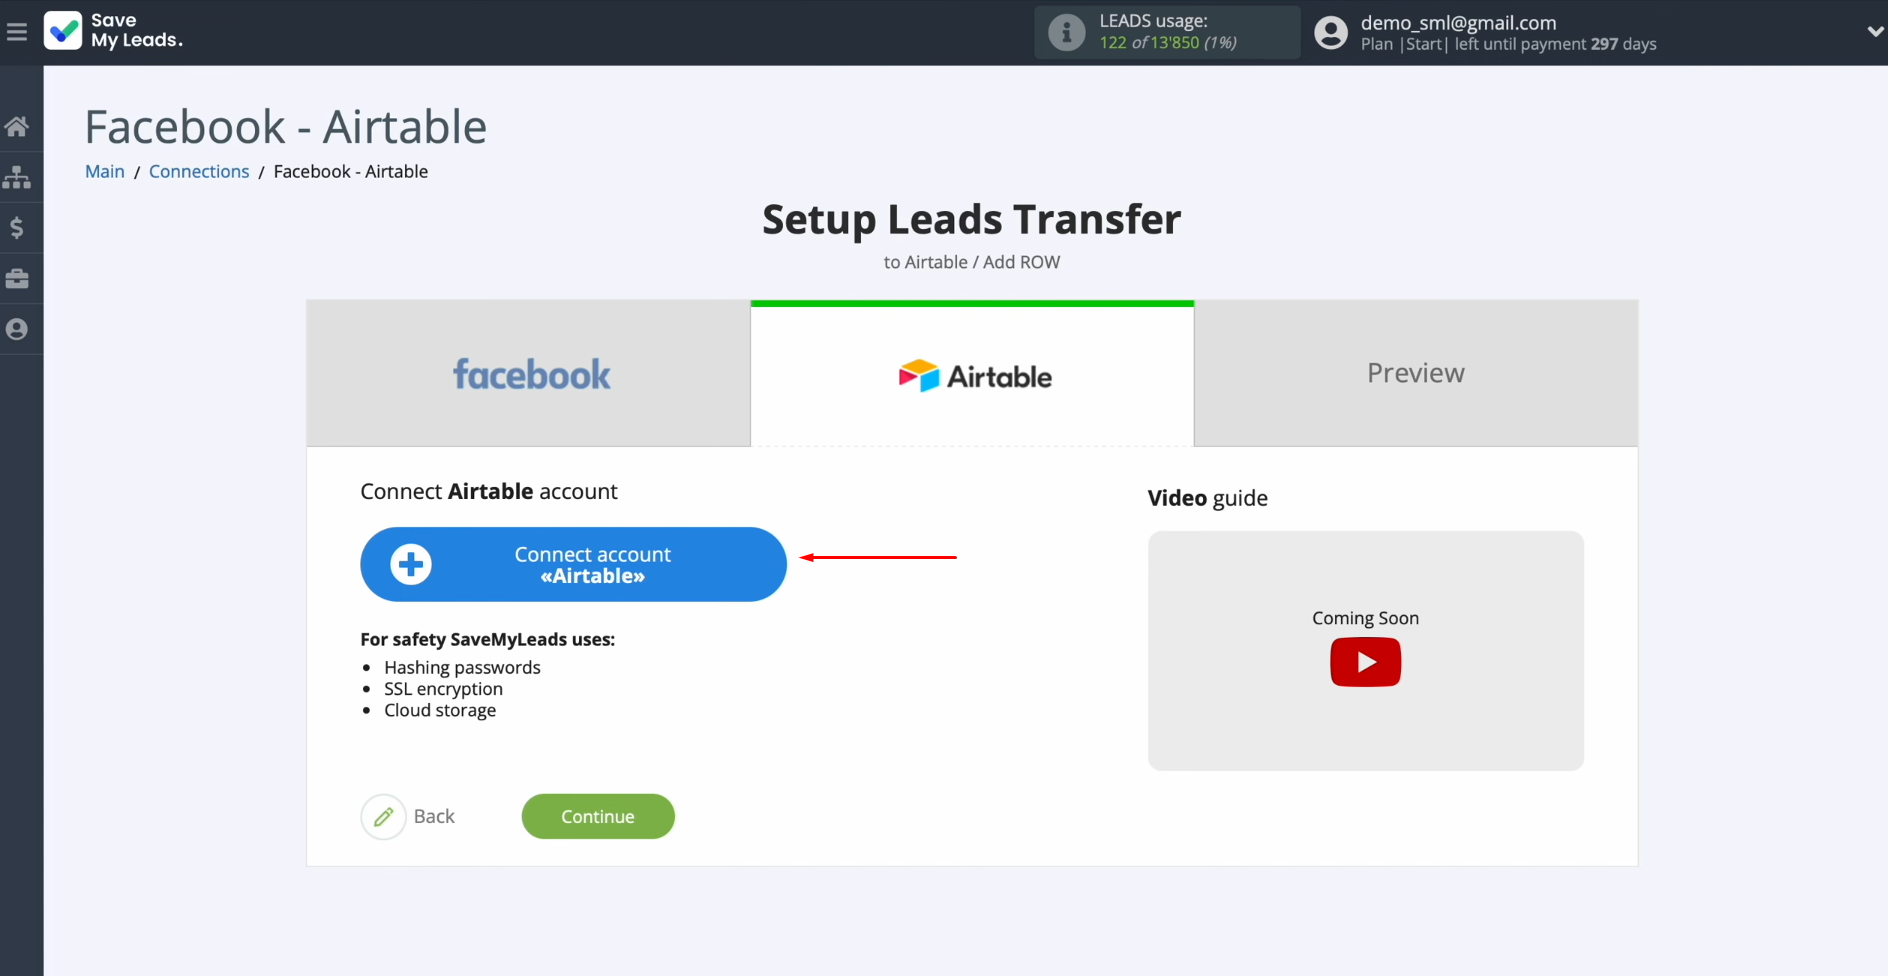
To set up Airtable integration with Facebook, connect your Airtable account to SaveMyLeads. To achieve this, click on the blue button.
Specify the login for your
Airtable personal account. Click
“Continue”.
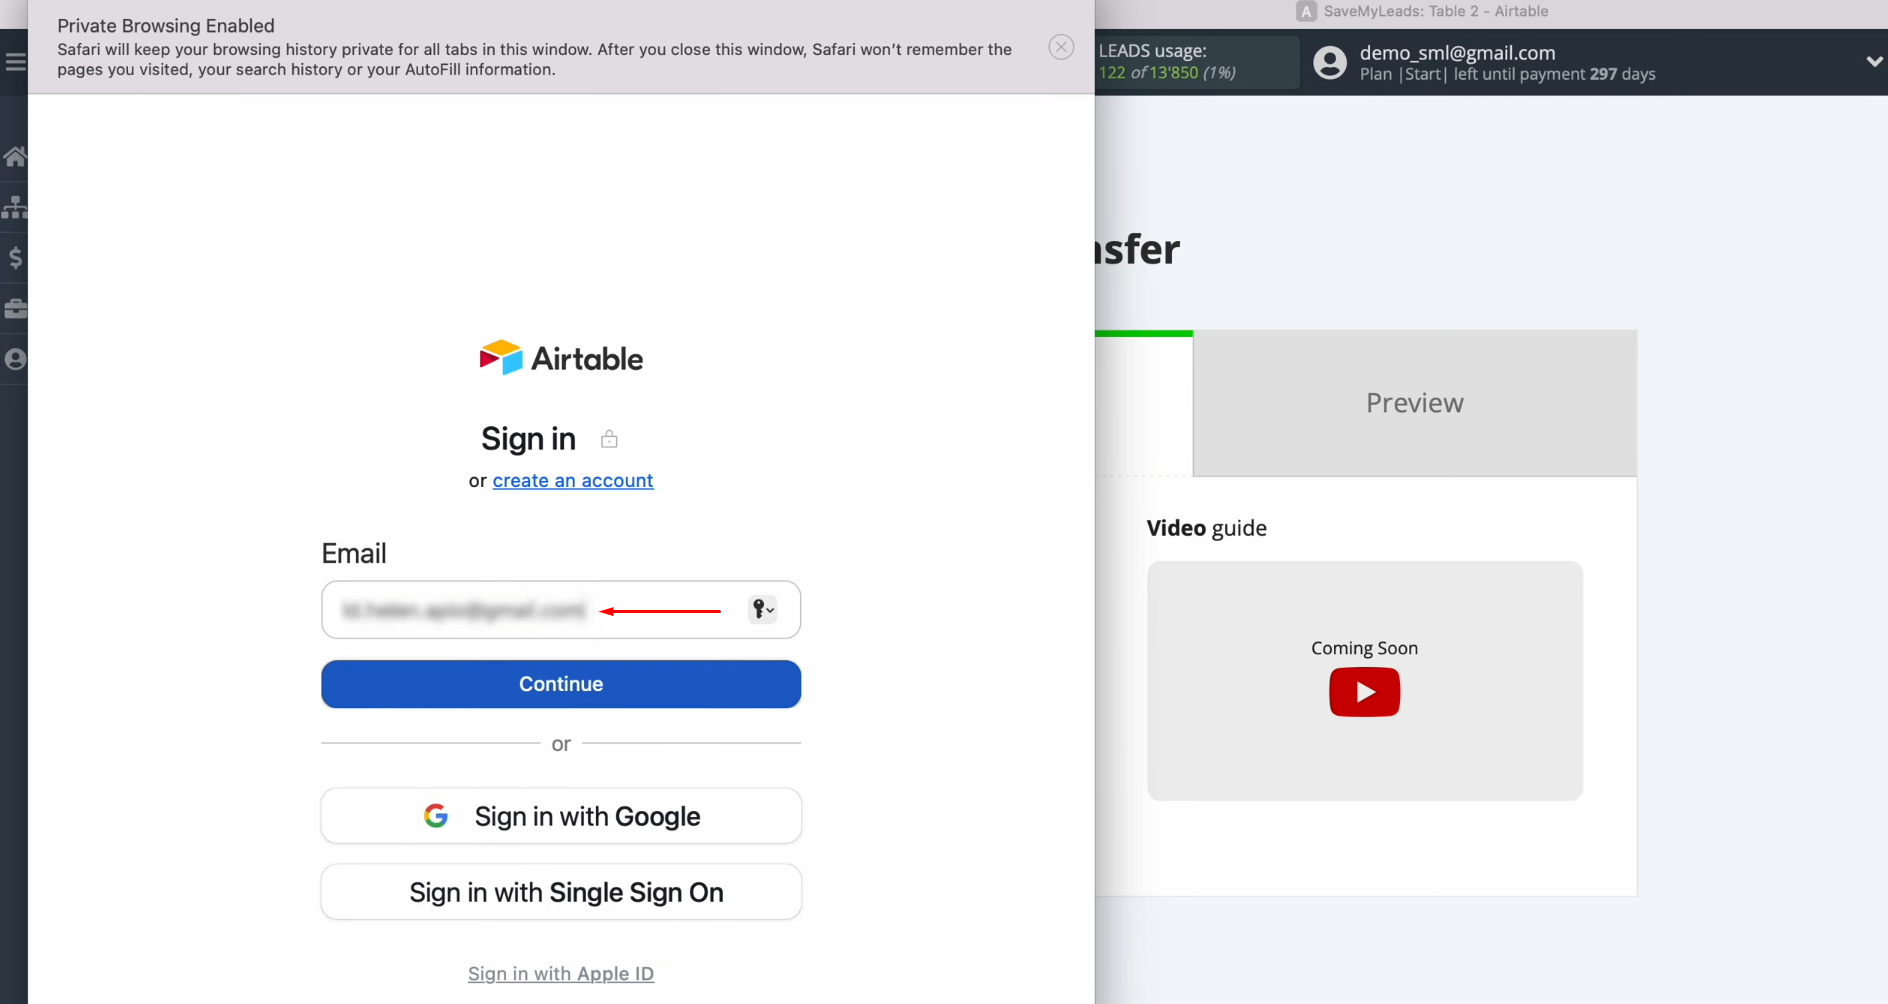
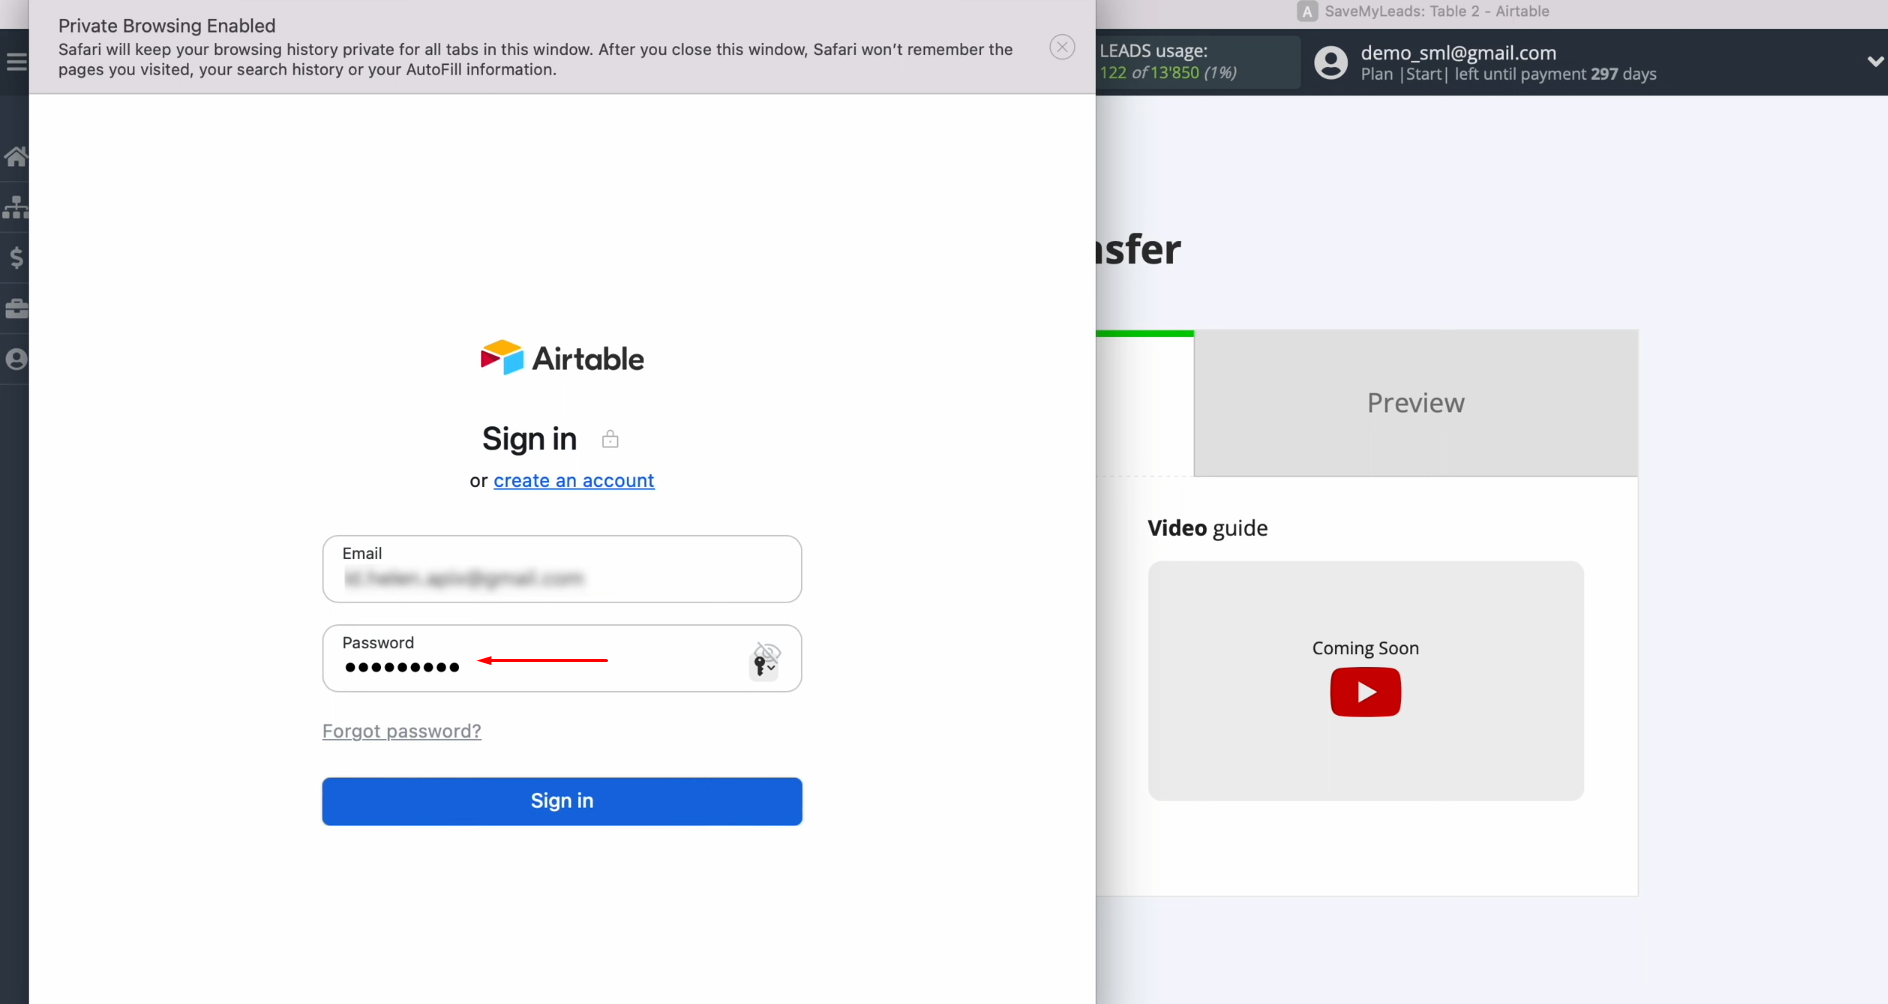
Specify the password for your
Airtable personal account. Click
“Sign in”.
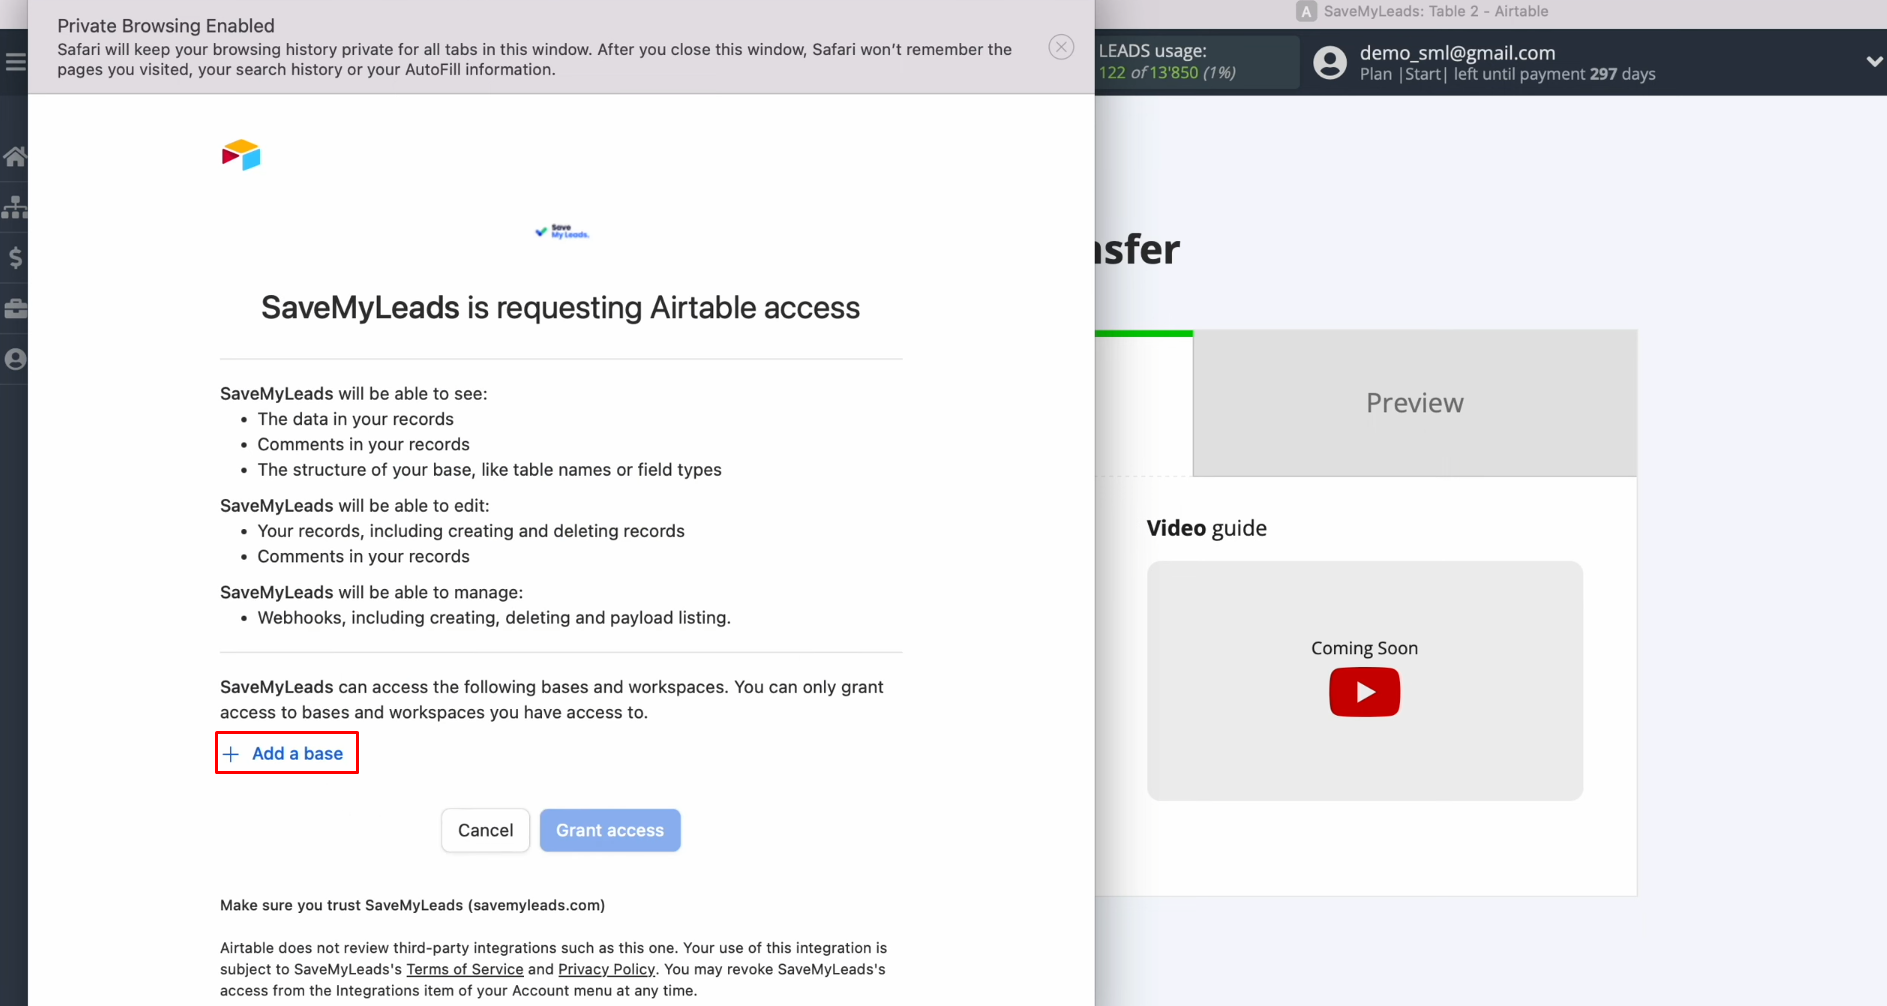
Provide
access to your databases. To do this, click “Add a
base”.
Then, click “Grant access”.
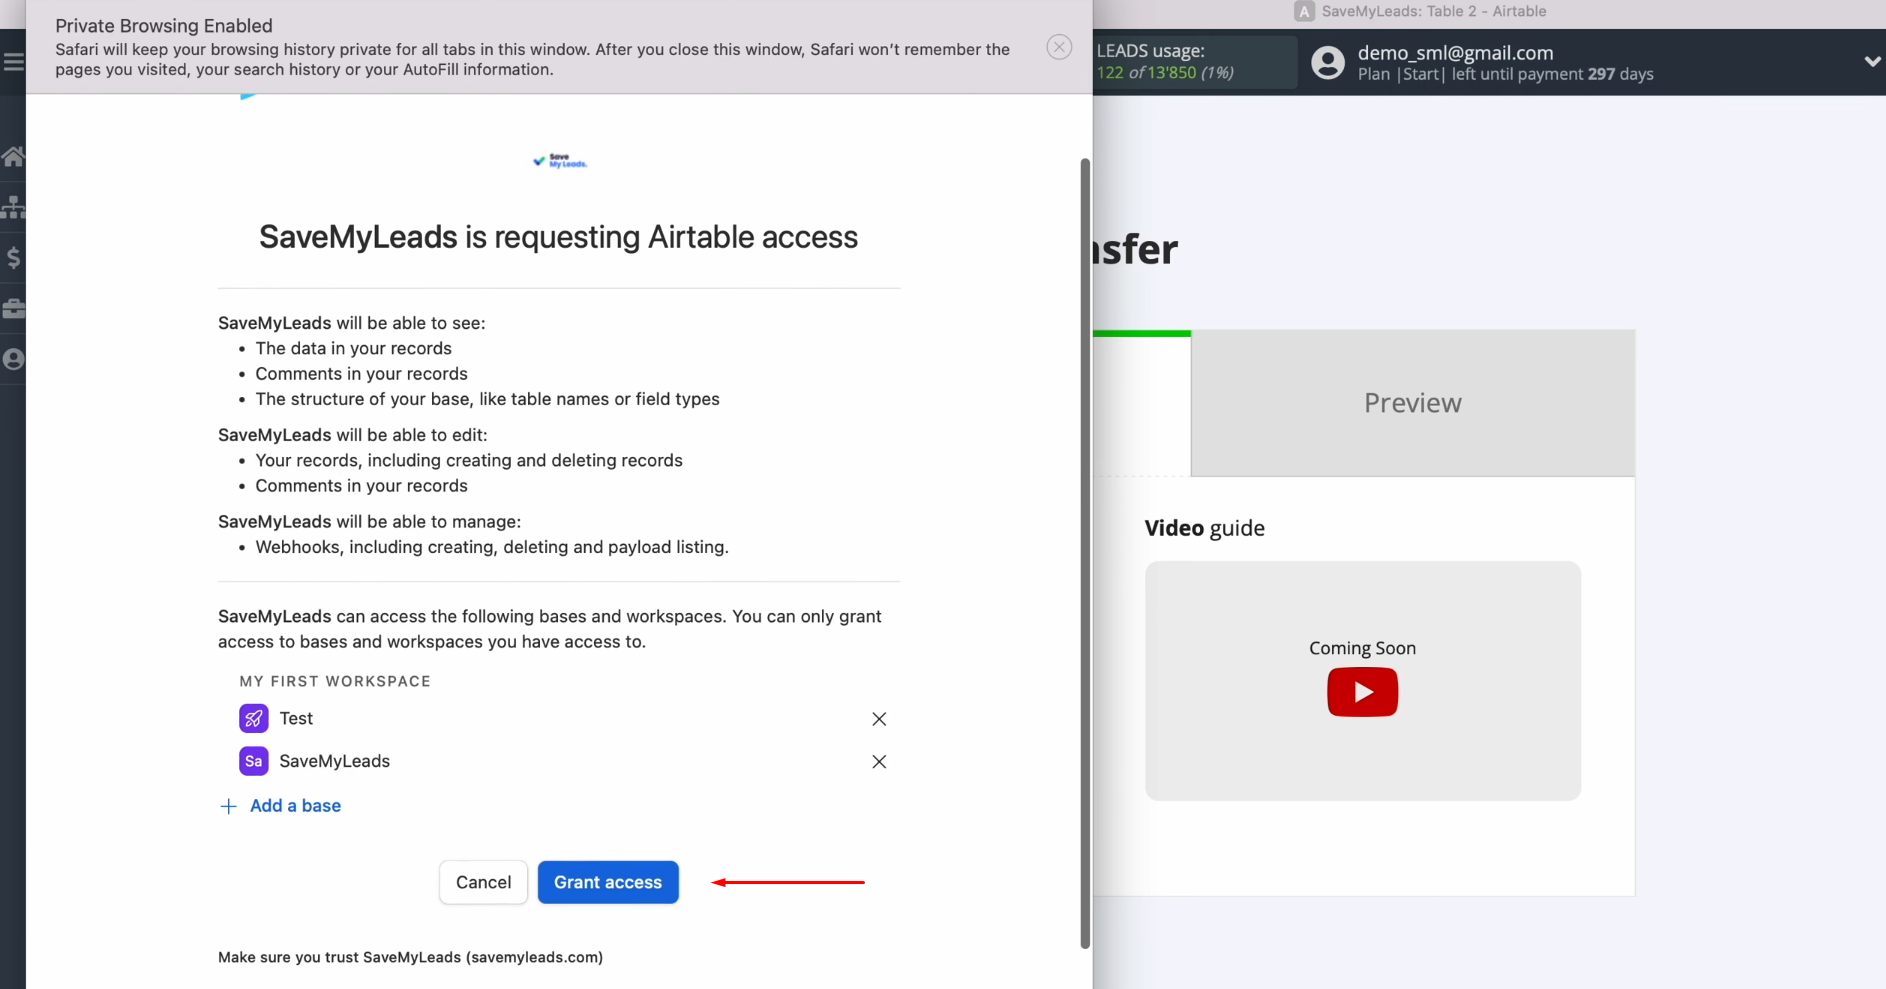
When the connected login appears
in the list, select it.
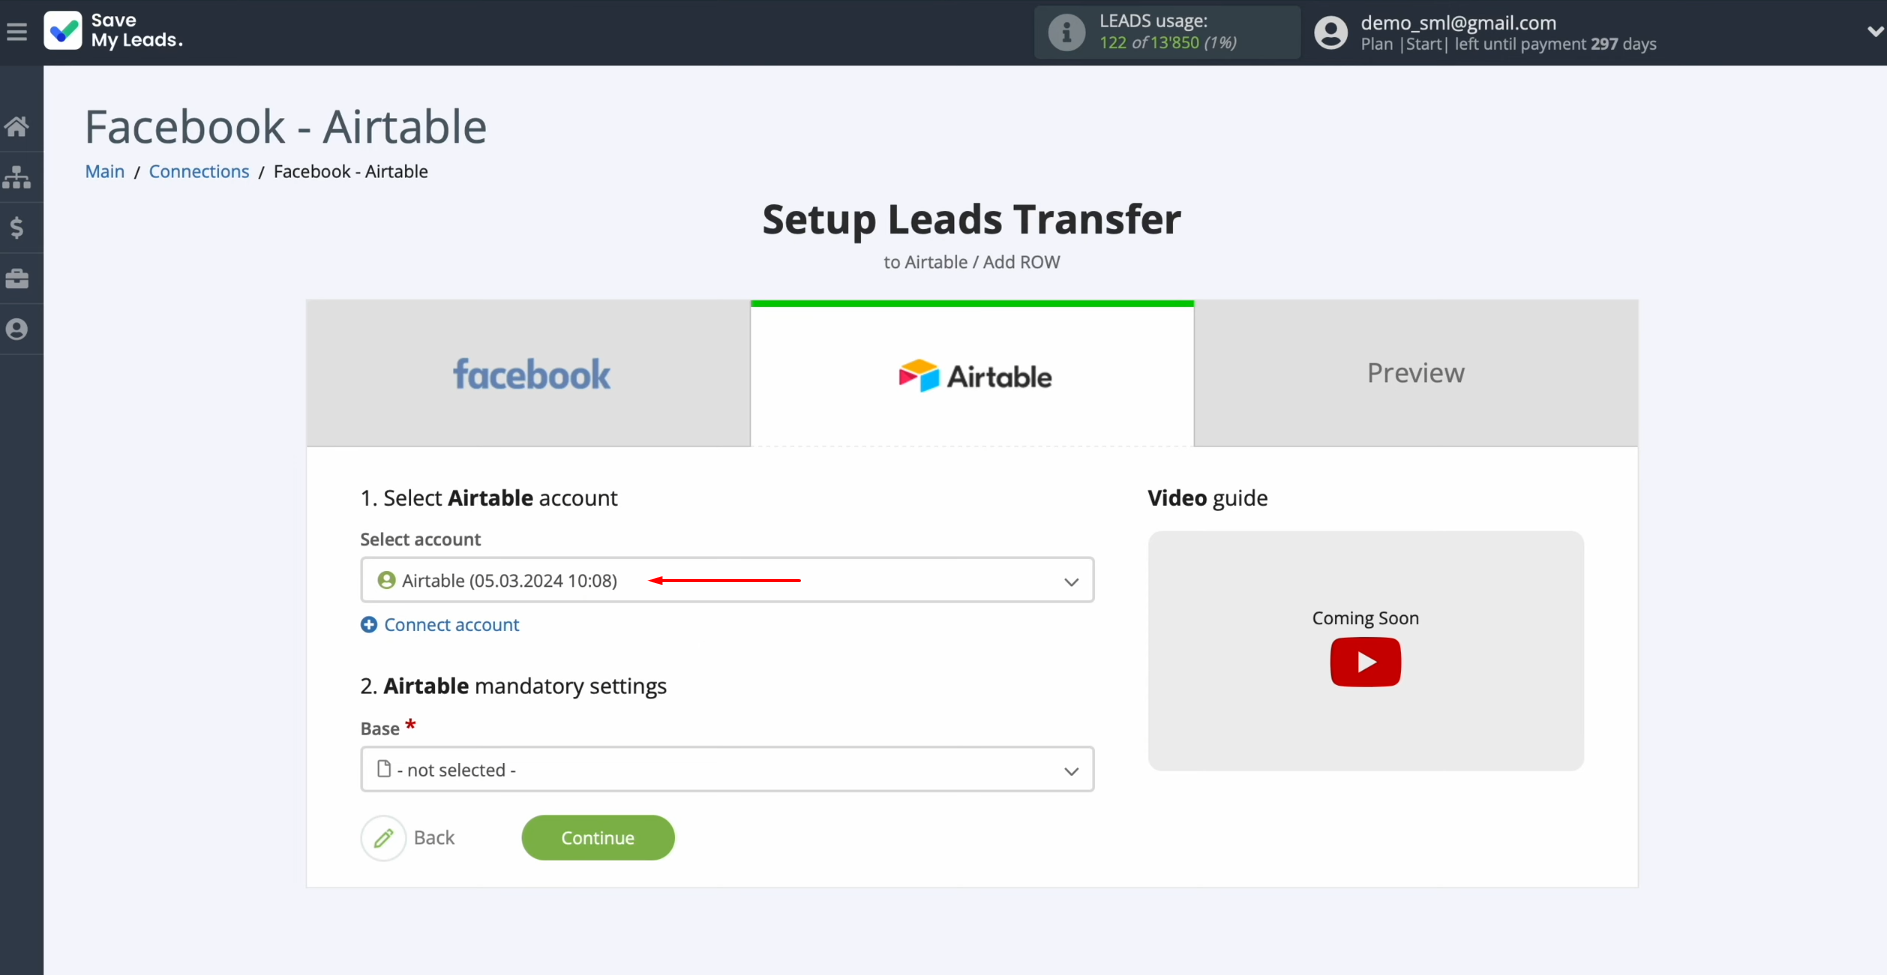
Select the database in which you will create new rows.
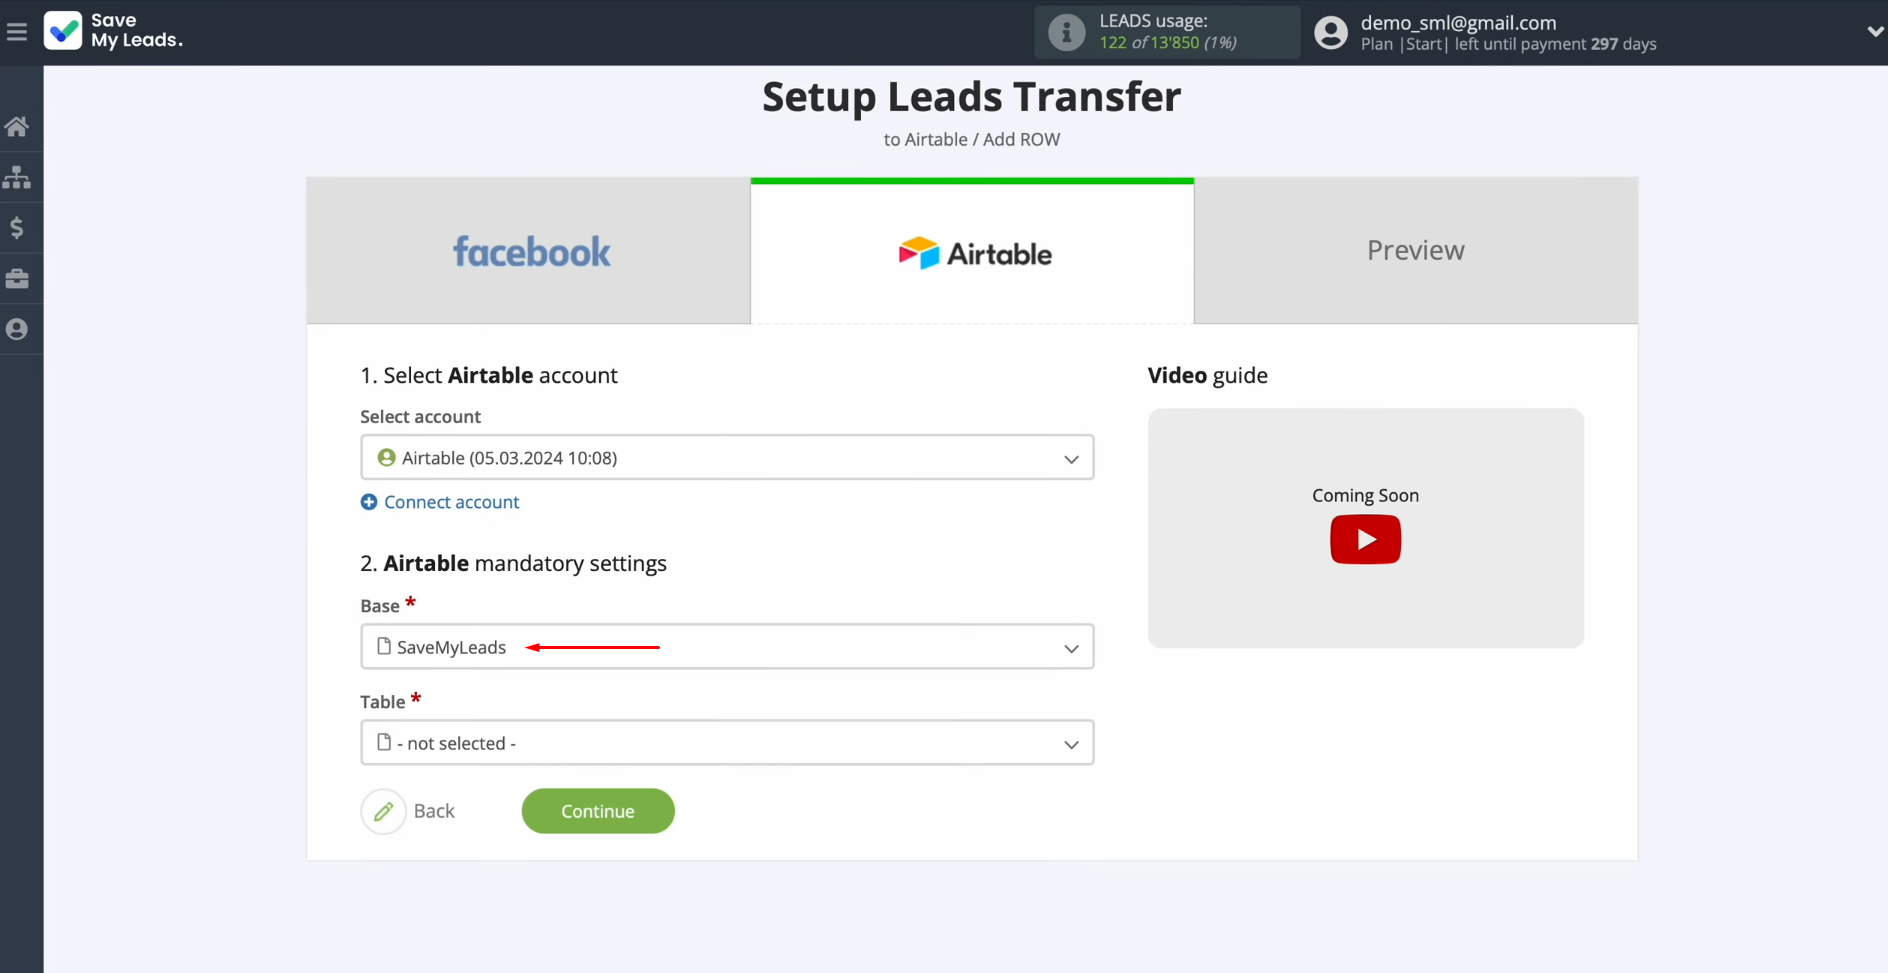
Select the table.
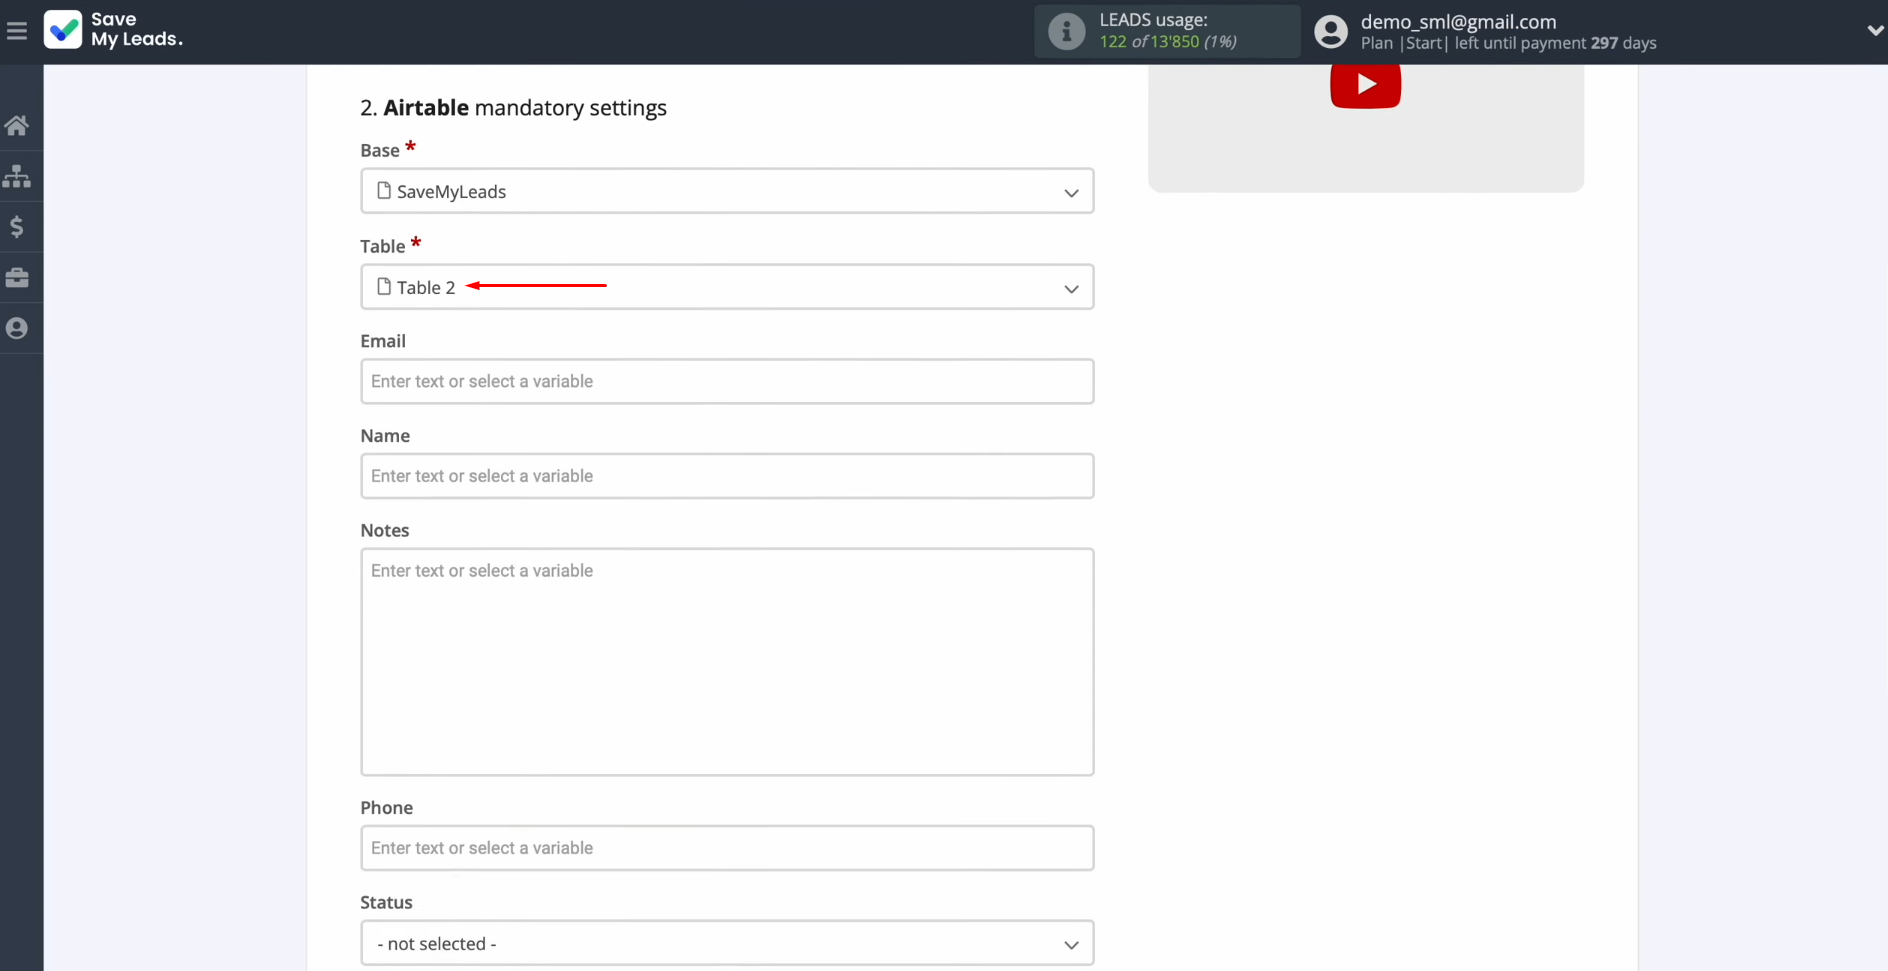
Here, you will see Airtable fields
to which you can assign variables from Facebook.


To do this, click on the required field and select the appropriate variable from the drop-down list.
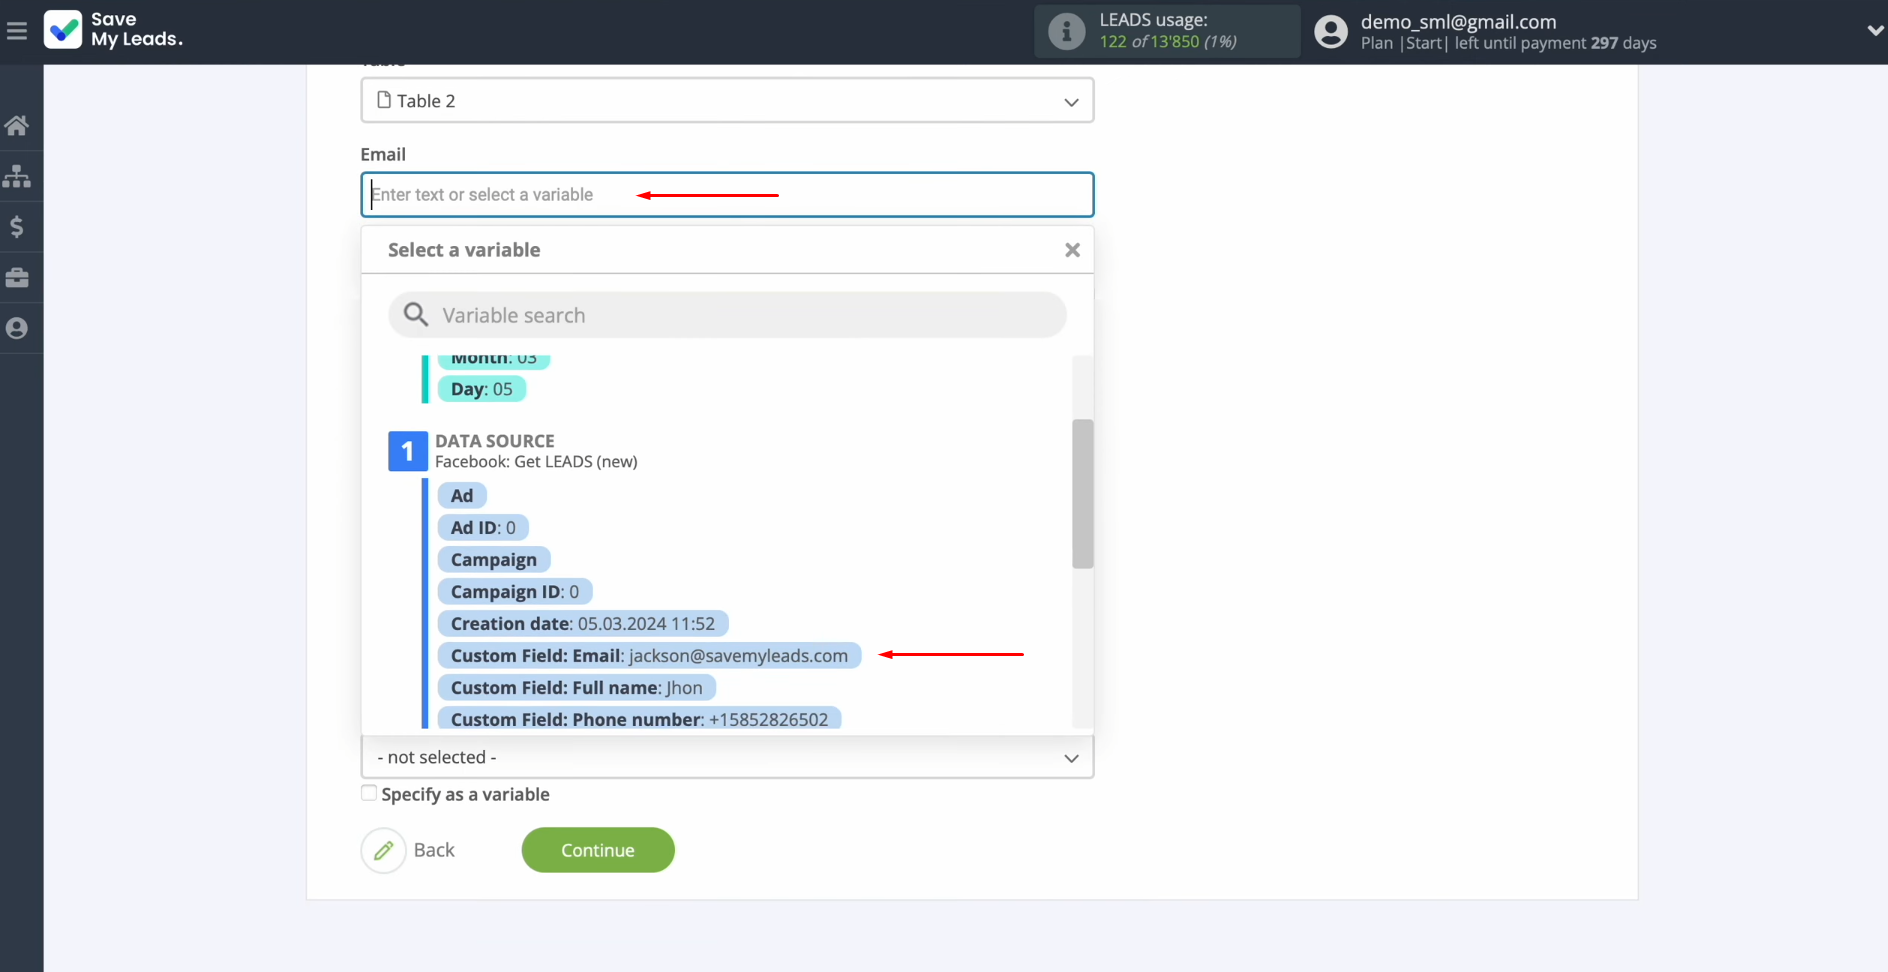
Please note
that you can use not only variables from the drop-down list but also enter
data manually.
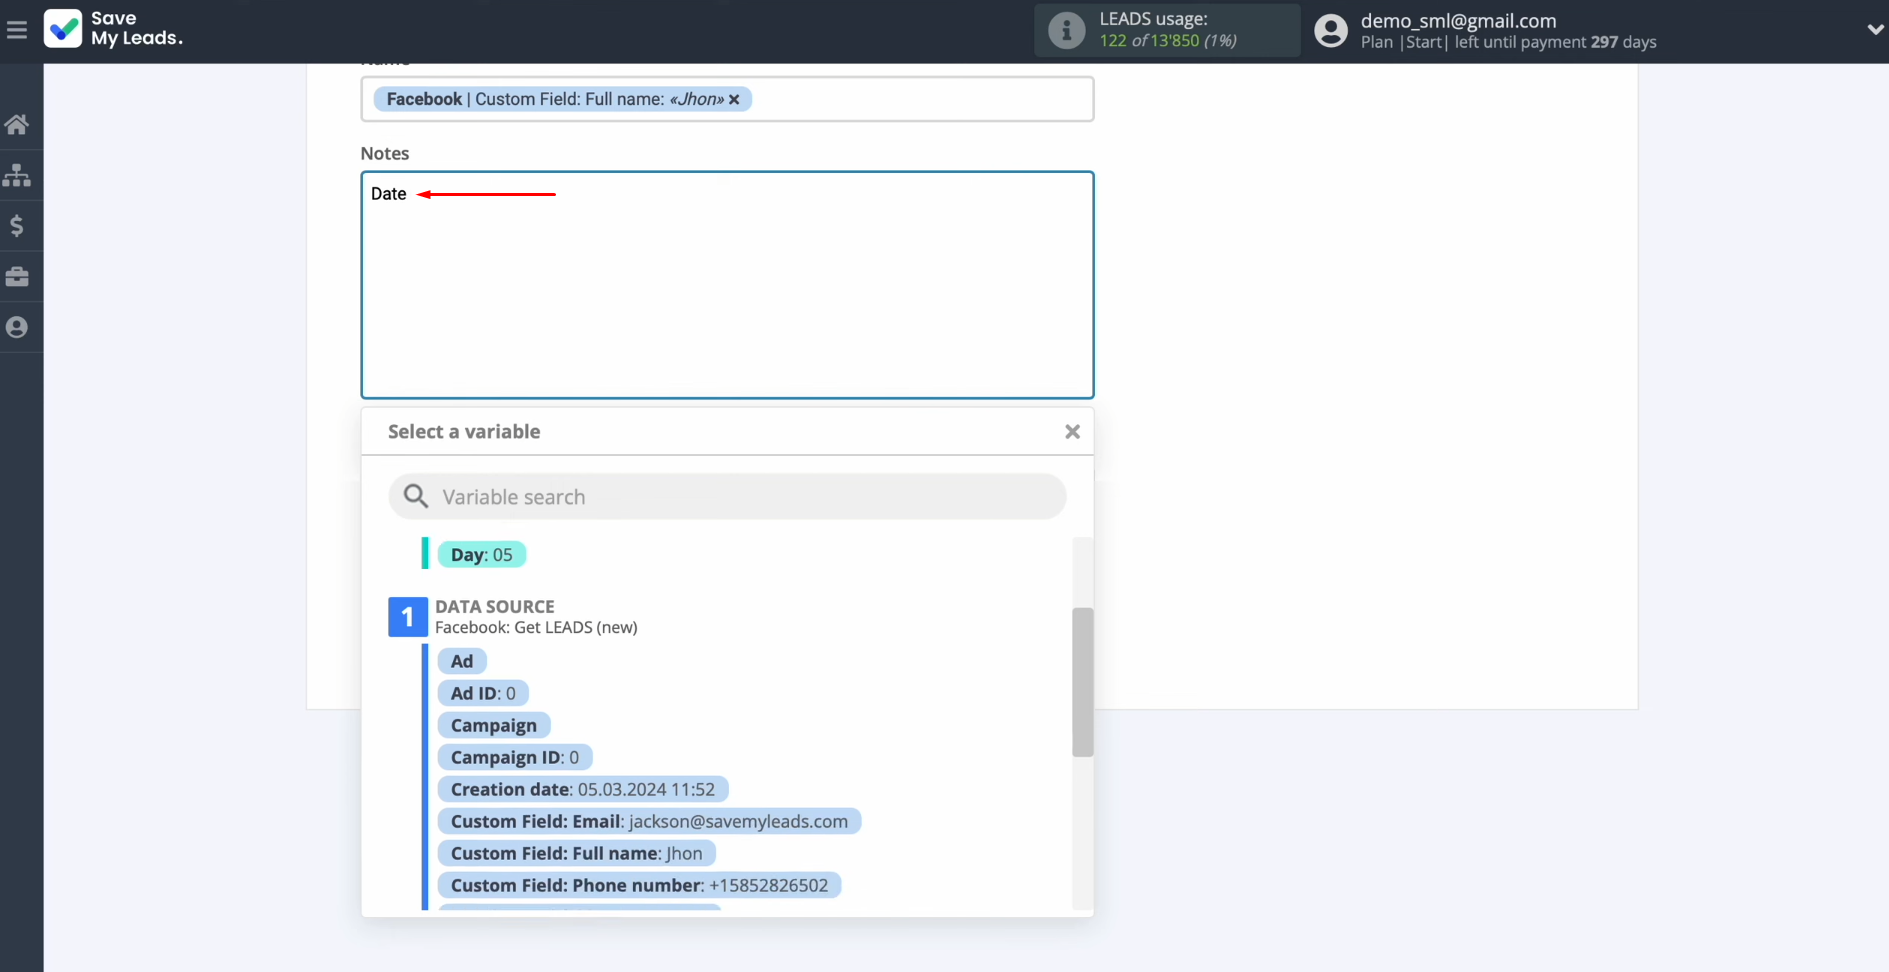
To go to the next line, press “Enter”.
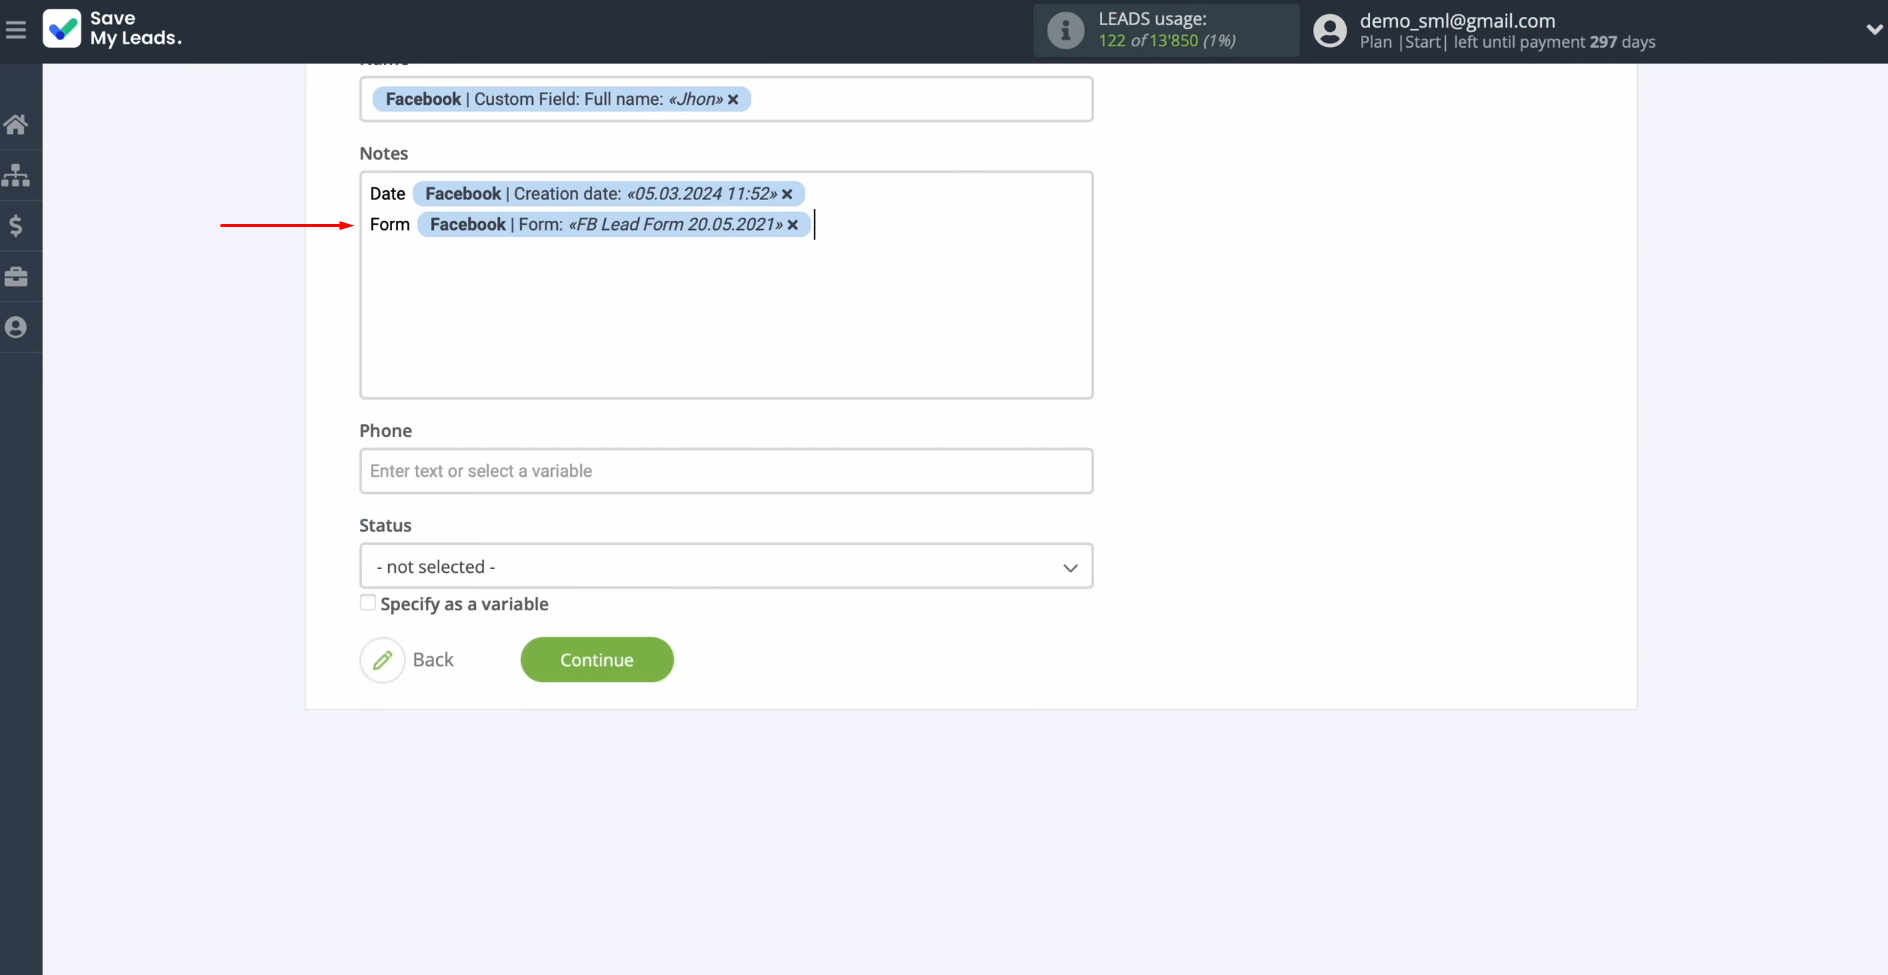
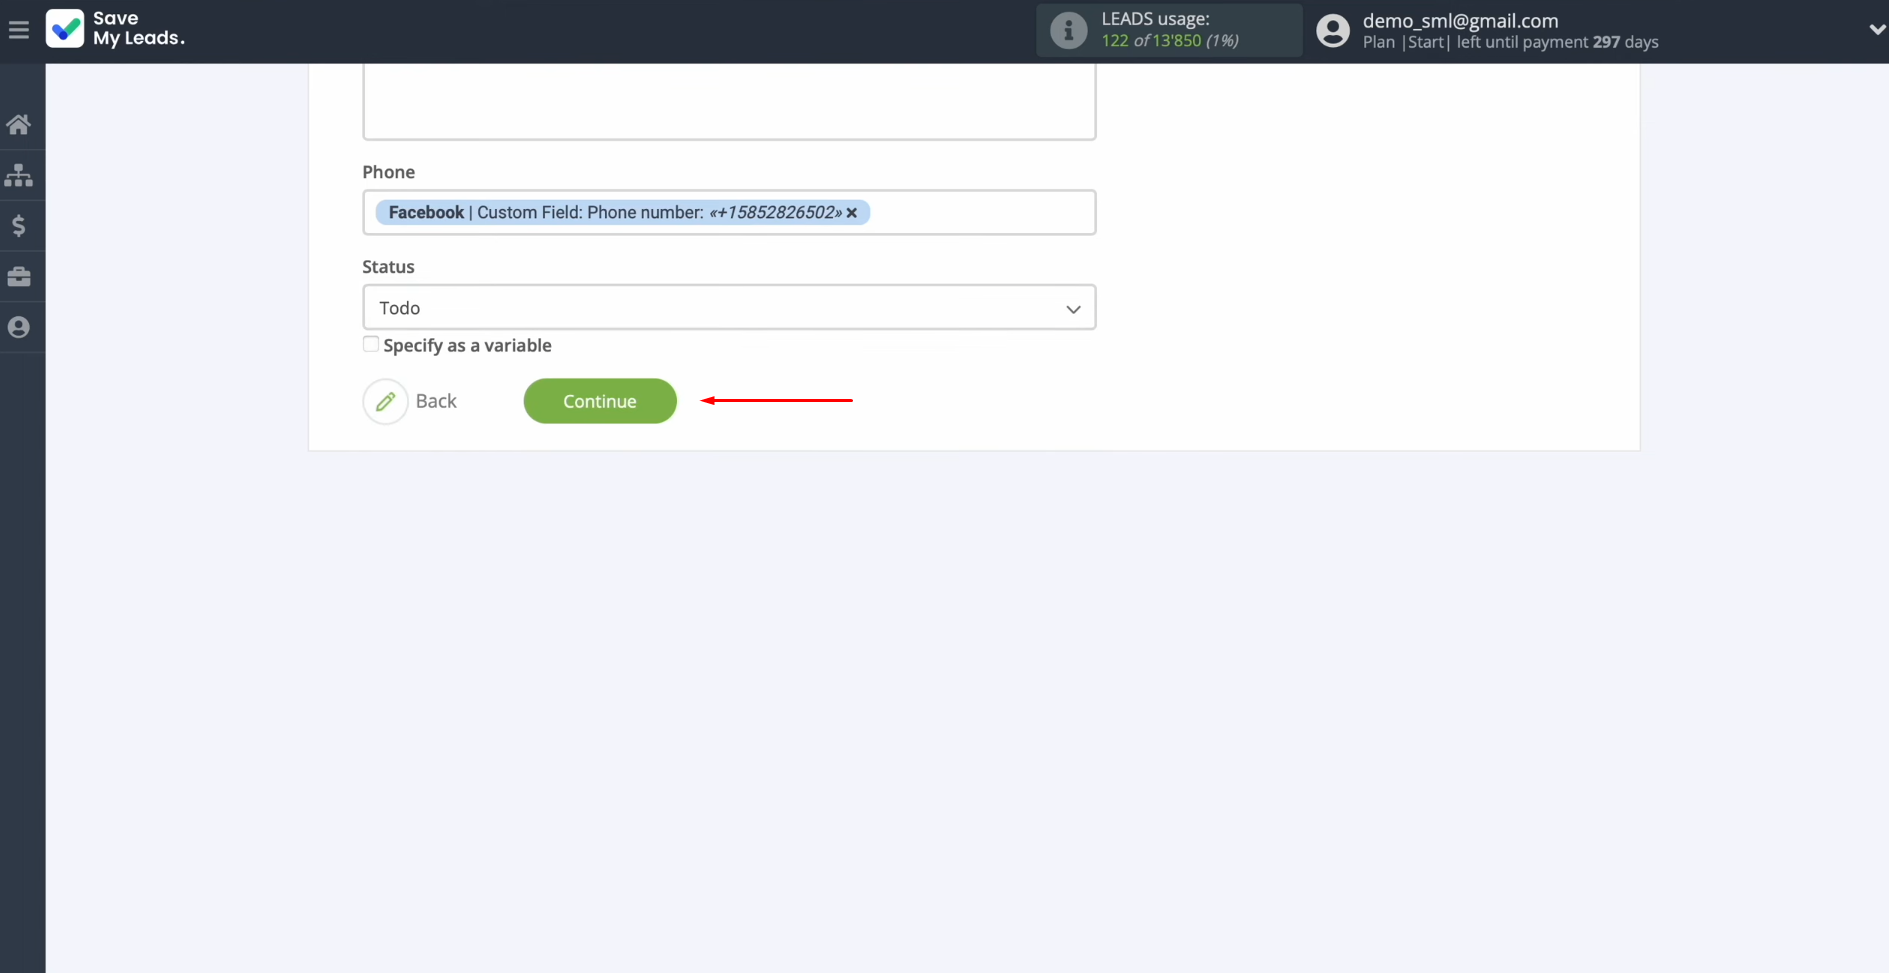
When all required fields are
filled in, click “Continue”.
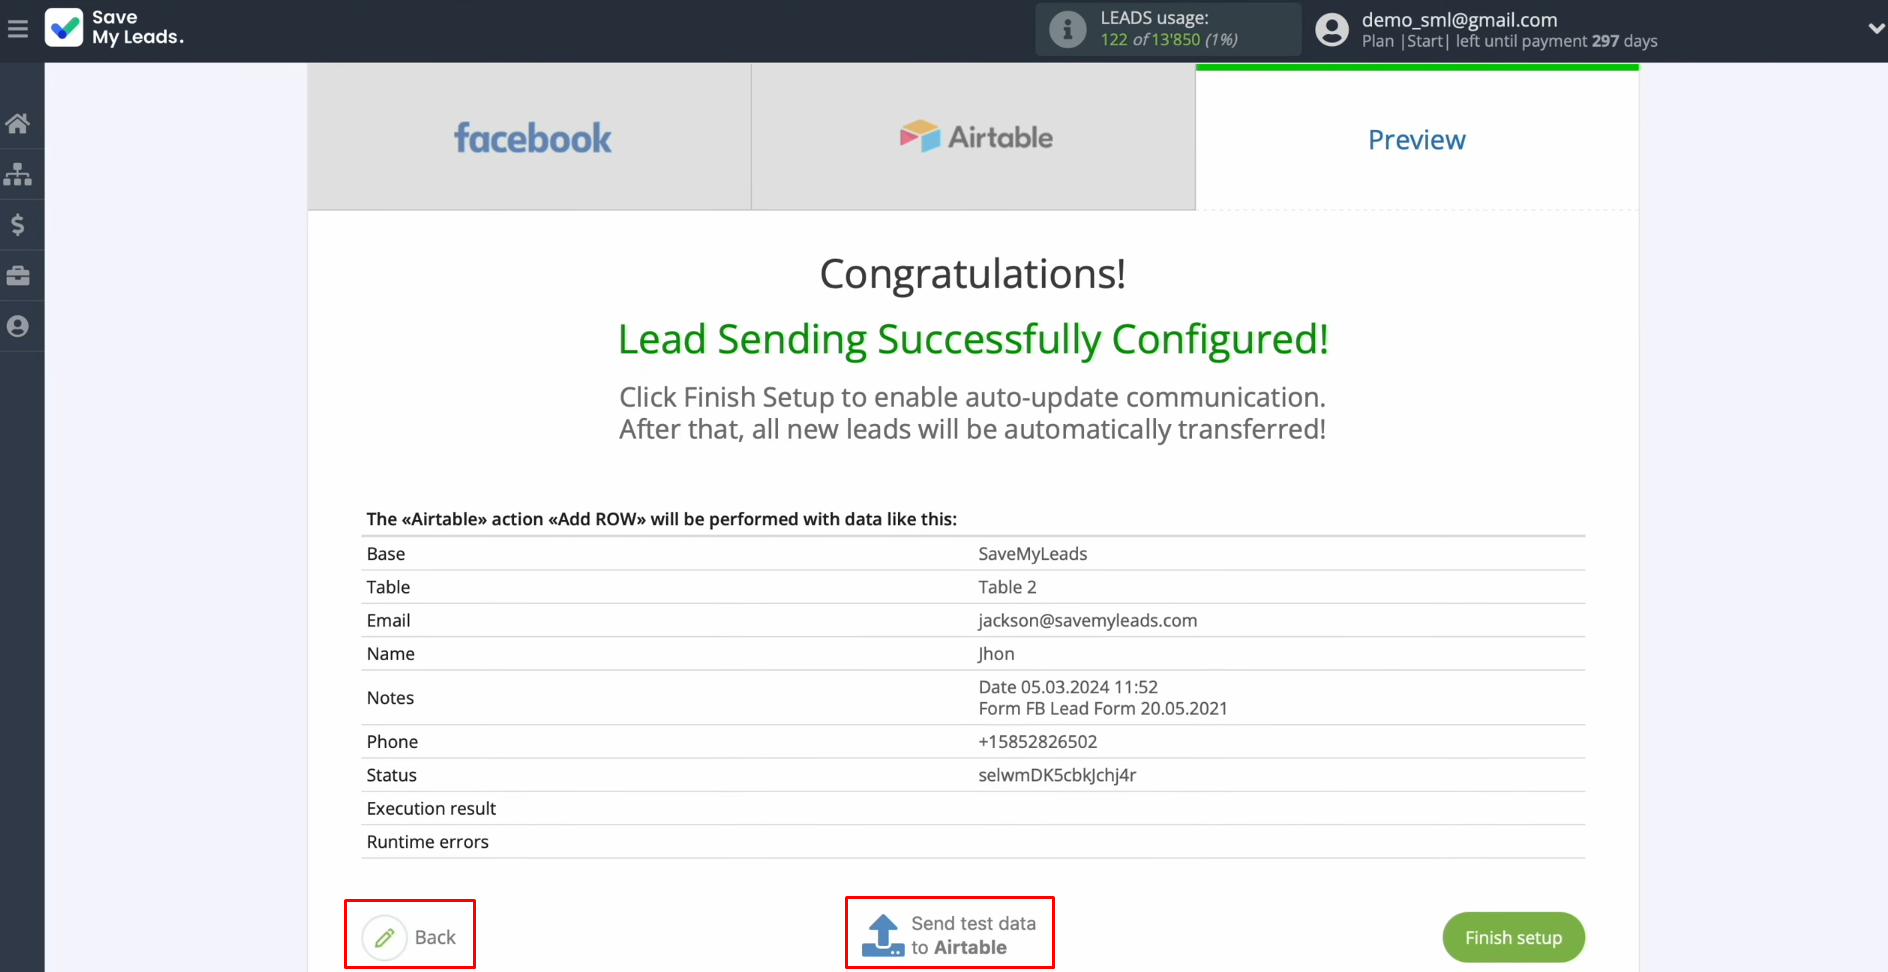
You will see an
example of the data that will be sent to Airtable as new rows for each
new lead from Facebook. If you are not satisfied with something, click “Back” and go back a step. To check if you have made the settings correctly, click “Send test data to Airtable”.
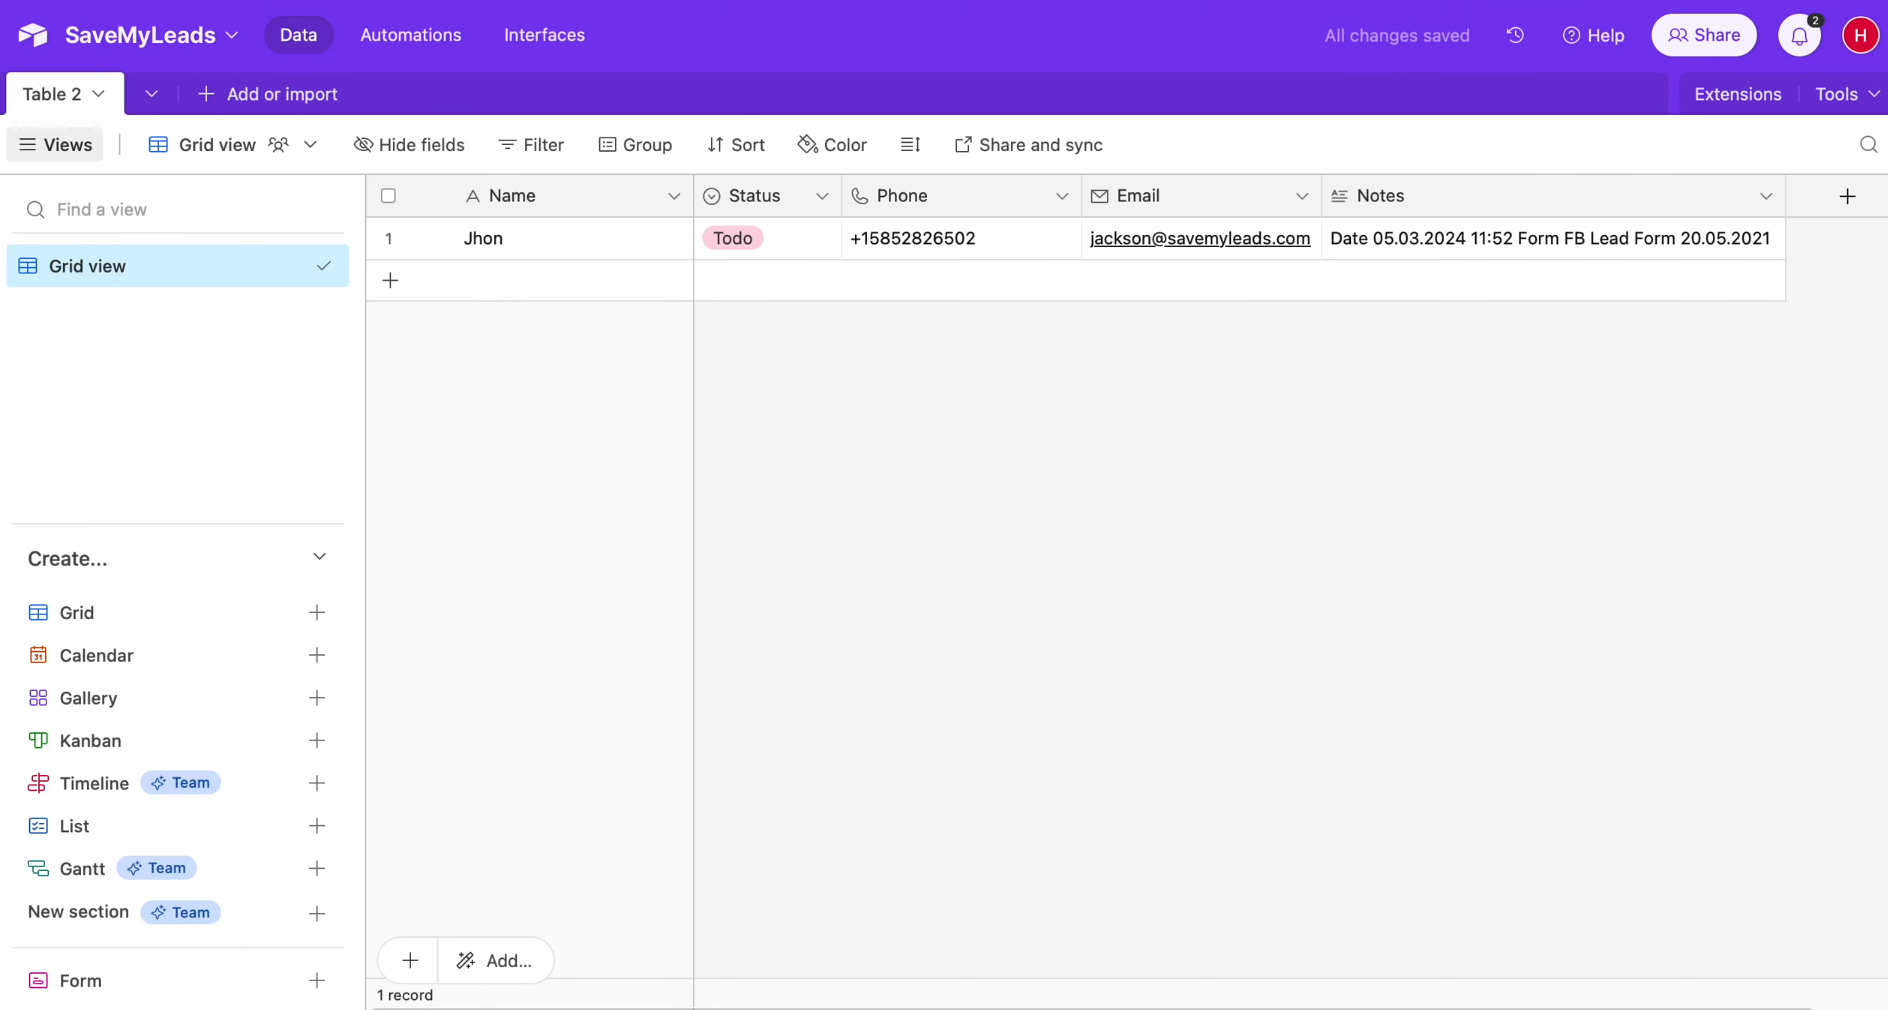
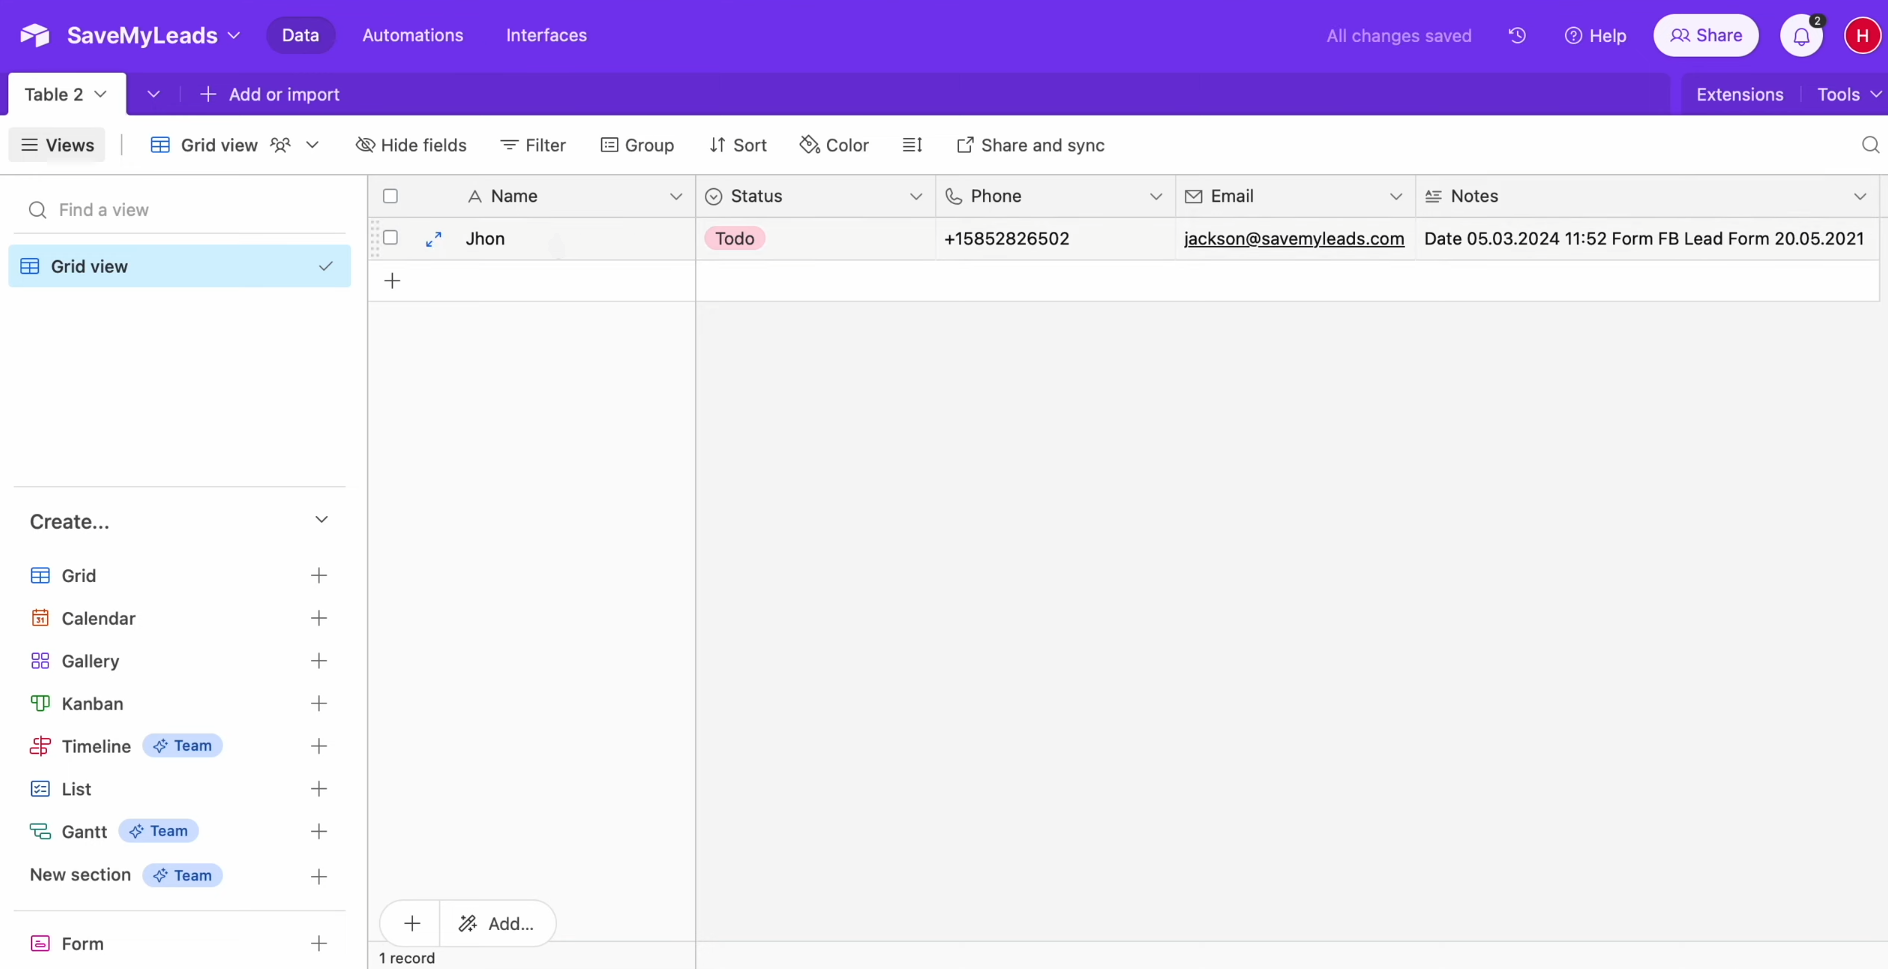
After successfully sending, go to
Airtable and check the result.
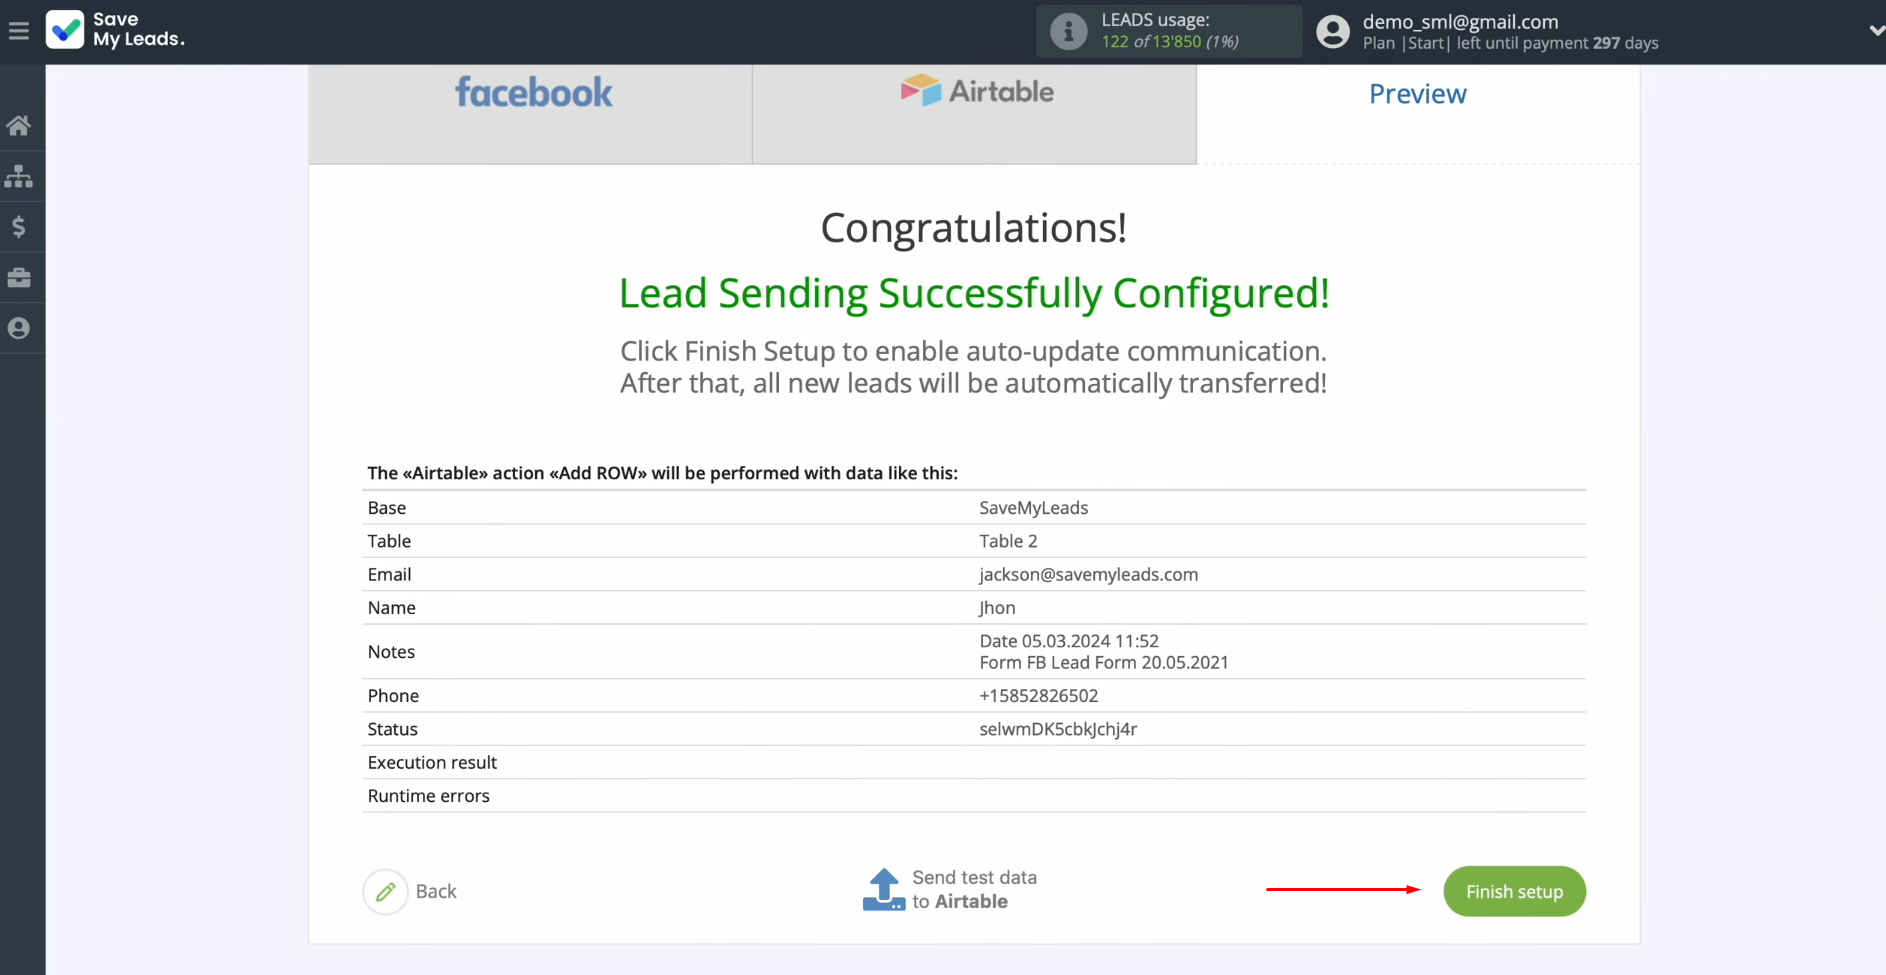
Setting up Auto-update
In order for new leads from Facebook to be instantly transferred to Airtable in the form of new rows, you need to enable auto-update. To do this, click “Finish setup”.
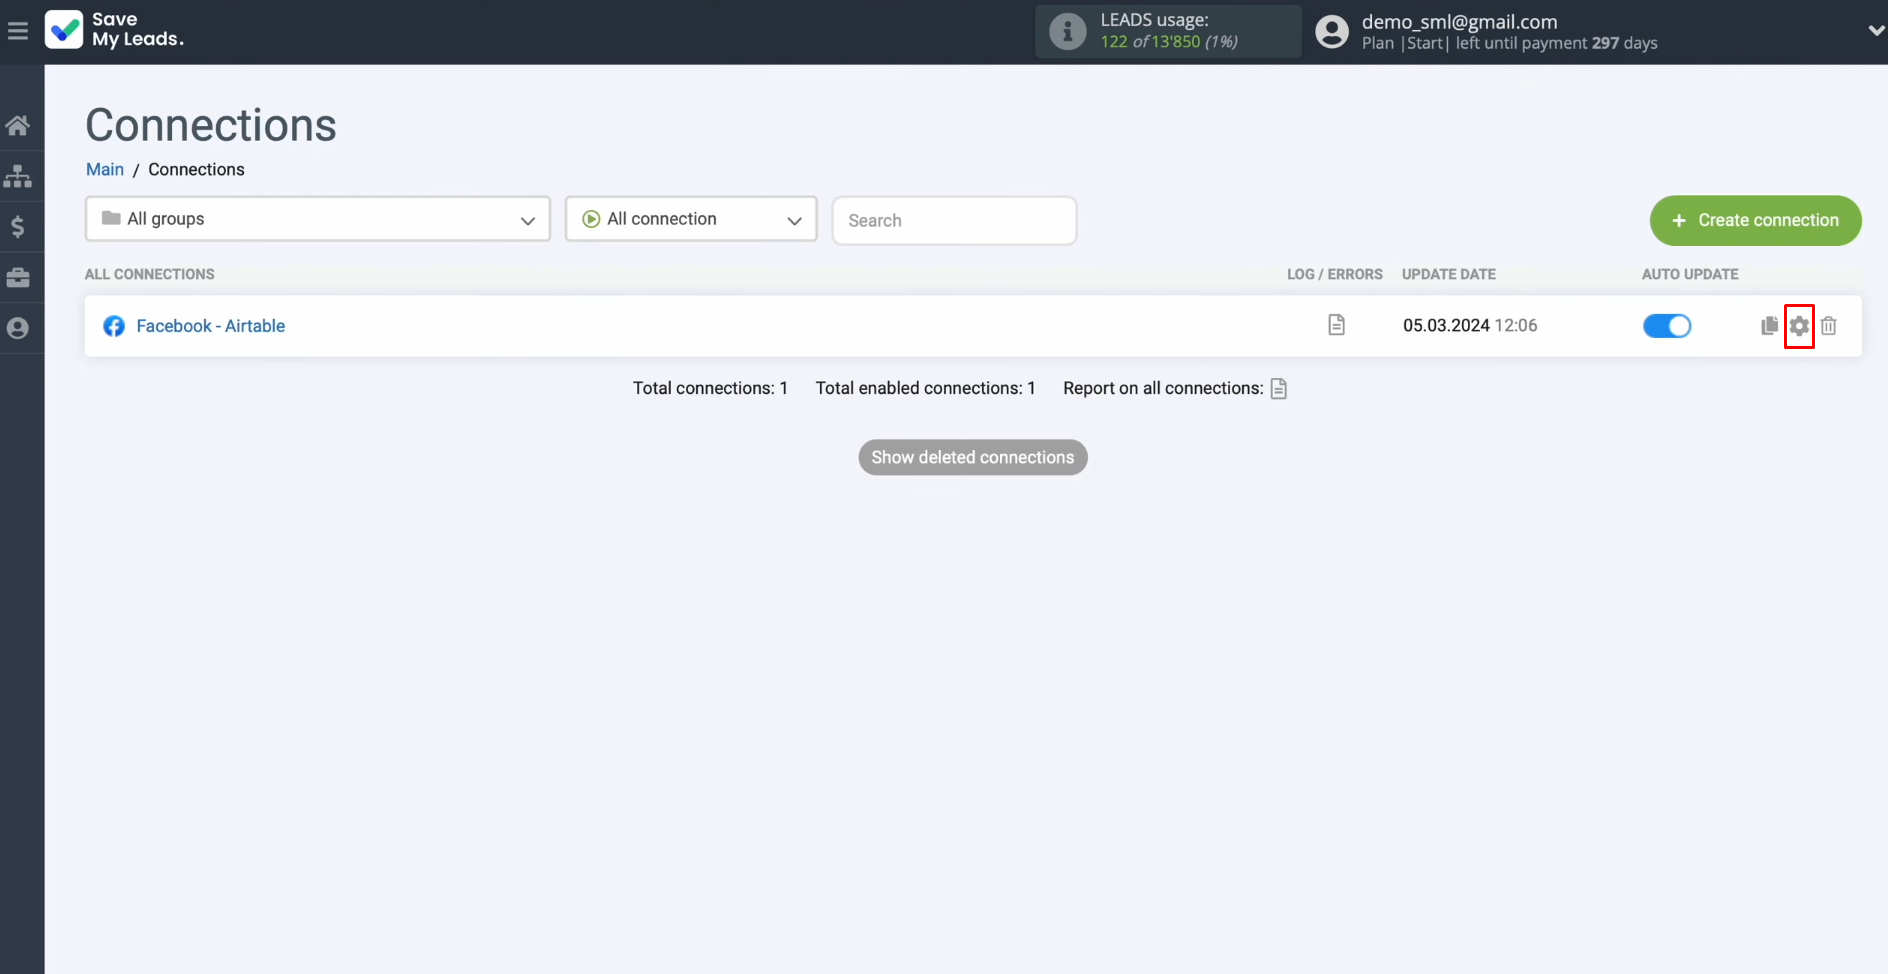
If you want to change the connection name you can do this in its
settings. Click on the gear icon.
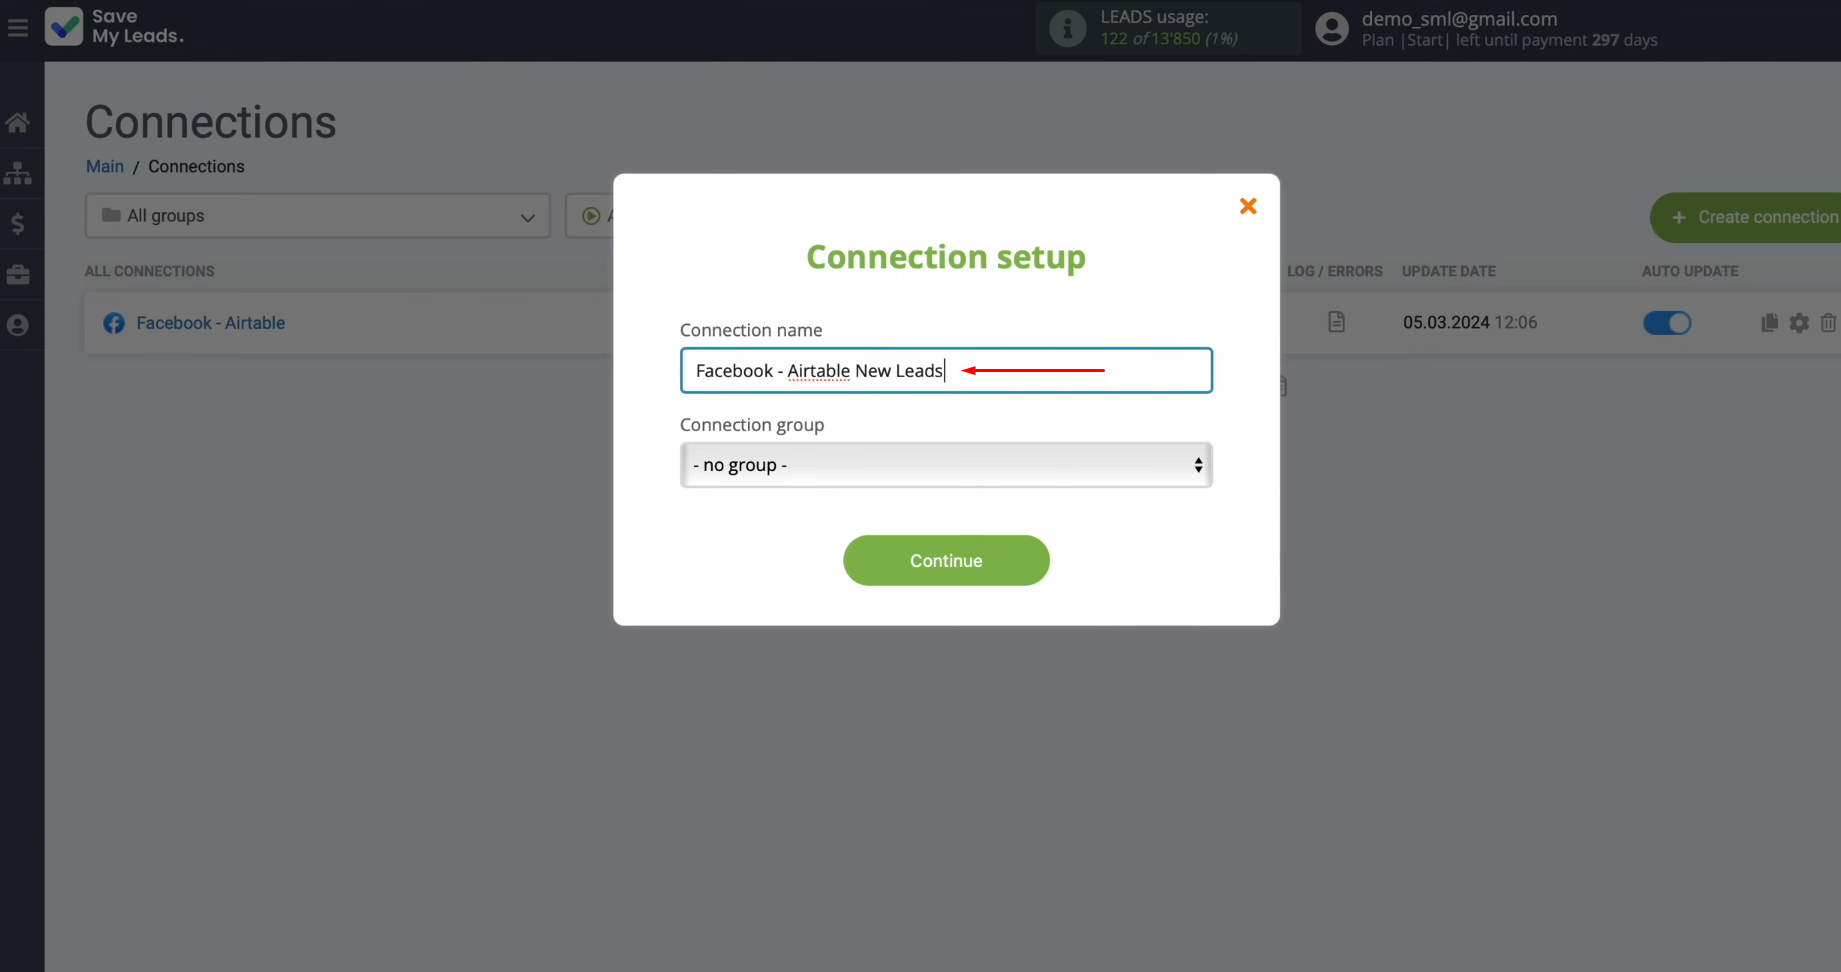
Here, you can change the connection name and add your
connection to a group. After that, click “Continue”.
That's
all. The Facebook and Airtable integration has been completed.
Bottom Line
We hope you were able to successfully configure the Airtable and Facebook integration and run auto-update. In this case, you have received a properly functioning 24/7 connection between both systems. If you followed the instructions clearly, the result probably came quickly, and you saw how the automatic transfer of leads occurs.
With the Facebook and Airtable integration, you can eliminate the monotonous manual work of copy-pasting. This process will be completely automated. Our online connector, SaveMyLeads, will take care of the routine for you. You can use the freed-up time as you wish: work on improving interaction with clients, innovations in marketing, and other important issues aimed at developing your business.
