Accelerating and improving communication with potential customers is the key to effective competition for a company, regardless of its field of activity. The main purpose of the Lead Ads tool, developed by the social network Facebook, is precisely to improve this process. Through a data collection form, leads can express their desire to purchase a product or service in just a couple of clicks. KeepinCRM is a CRM system tailored to the needs of small and medium-sized businesses. This platform allows you to optimize and automate a maximum of the company’s work processes: working with leads and clients, transactions, current tasks, accounting for goods, price lists, maintaining financial statements, and document flow. Read this article to learn how to combine Facebook Leads and KeepinCRM for automatic lead transfer.
If you already use these services or plan to use them in your work, it is extremely important not only to maintain the current speed and quality of contact with clients, but also to strive to improve them. By connecting the platforms through our SaveMyLeads online connector, you fully automate the process of transferring data from one system to another and are guaranteed to achieve your goal. We will tell you how to get Facebook and KeepinCRM integration so that the transfer of lead data from Lead Ads directly to CRM occurs automatically, without your participation.
Advantages of Automating Data Transfer from Facebook to KeepinCRM
Automating the transfer of lead information from Facebook to KeepinCRM provides a triple benefit for your business:
- Increasing the speed of communication with clients. This allows them to receive feedback faster and reduces the likelihood of abandonment.
- Optimizing employee workflow. Those who previously had to manually transfer data are freed up to provide better customer service.
- Reducing the number of work processes requiring daily personal intervention. This saves time for both you and your colleagues.
Using SaveMyLeads for KeepinCRM and Facebook integration, you will be able to evaluate its results immediately after completing the setup. Leads who submit a request through the Lead Ads form will now be automatically redirected to the CRM. From now on, the need to manually enter their data is completely eliminated. Not only will this make your job easier, but with quick feedback, it will also create a pleasant experience for your customers. Ultimately, satisfied customers are more likely to become repeat customers, contributing to the growth and success of your business.
How to Set up Facebook-Leads and KeepinCRM Integration
Setting up the Facebook Lead Ads and KeepinCRM integration using SaveMyLeads is very simple, even for beginners. By choosing our online connector, you won't need to urgently study the system connection API or look for a specialist to perform this task. We've made the process intuitive and as convenient as possible, so you can set everything up seamlessly in just a few minutes. If you already have experience with integrations, it will take even less time. To avoid mistakes and set everything up correctly on the first try, we suggest you use our step-by-step instructions with the ability to choose the most comfortable format: text or video.
If you haven't registered with savemyleads.com yet, please do so first. It won't take much of your time: you just need to enter your name, email address, and create a password. If you have Google and Facebook accounts, you can use them for faster registration. Is it ready yet? Great! Now let's start setting up the integration of Facebook Lead Ads with KeepinCRM.
Setting up the Data Source – Facebook
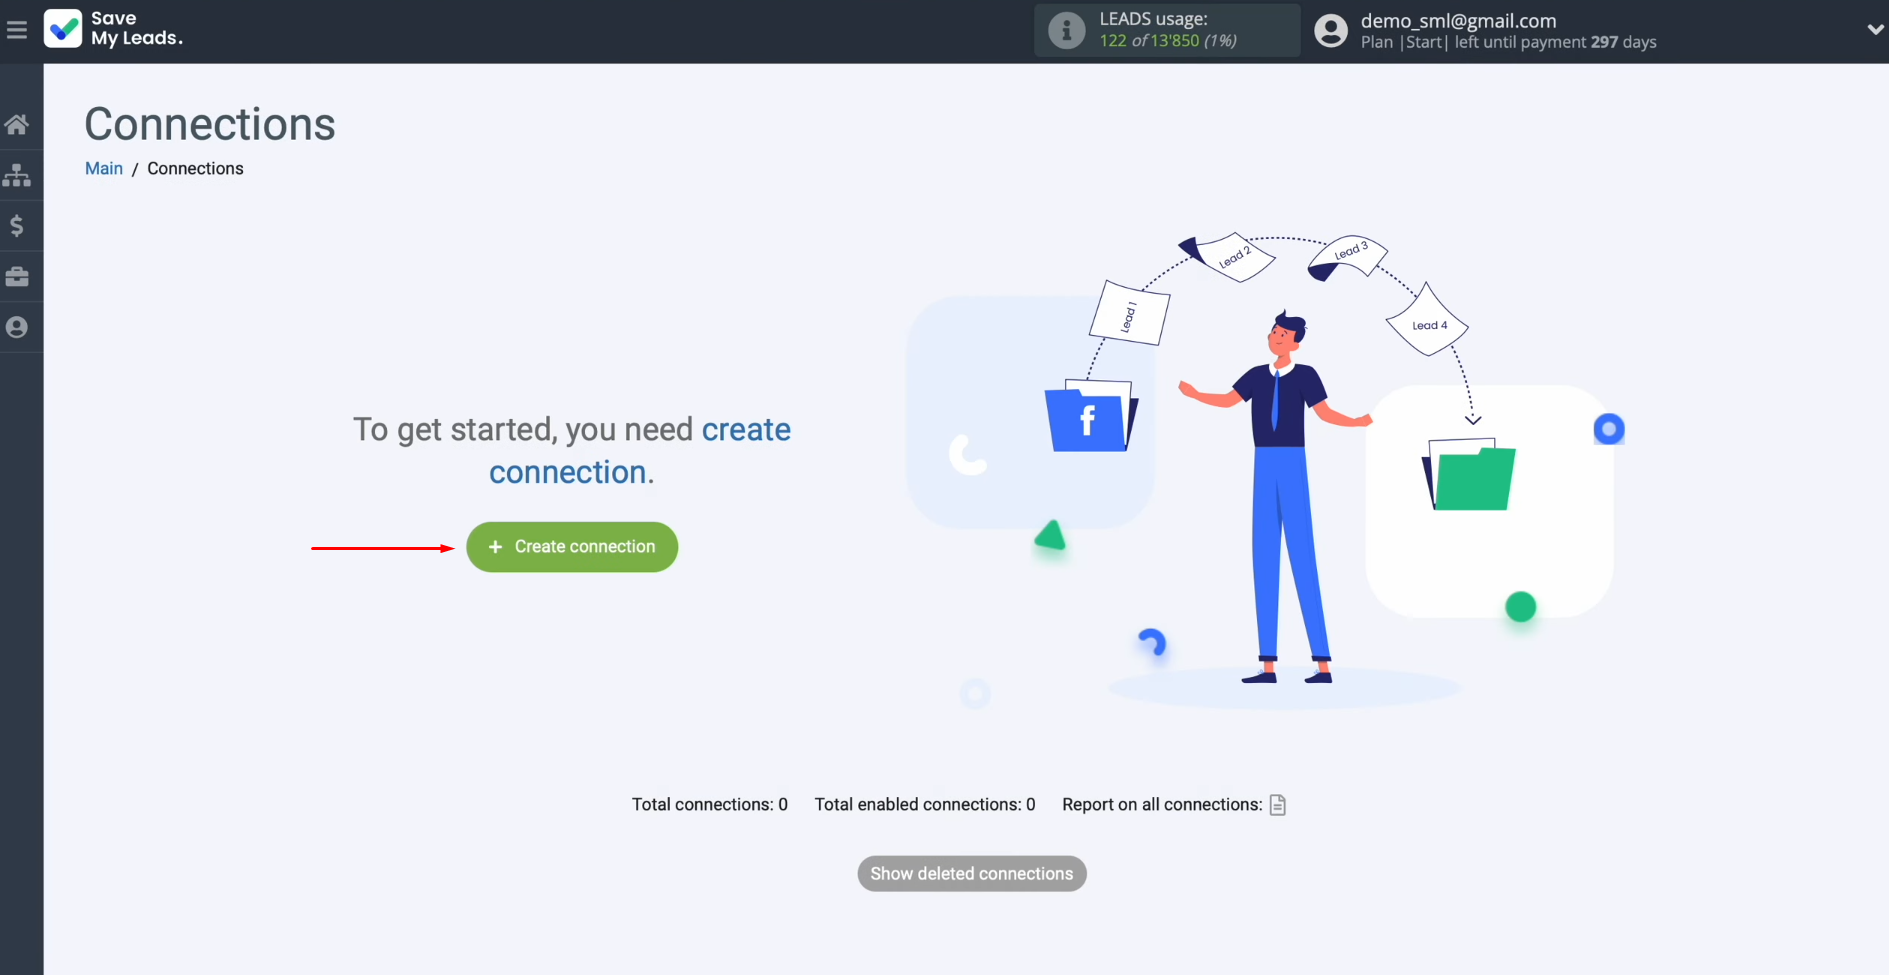
To set up Facebook integration with KeepinCRM, first, you need to create a new connection. For this, click on the green button.
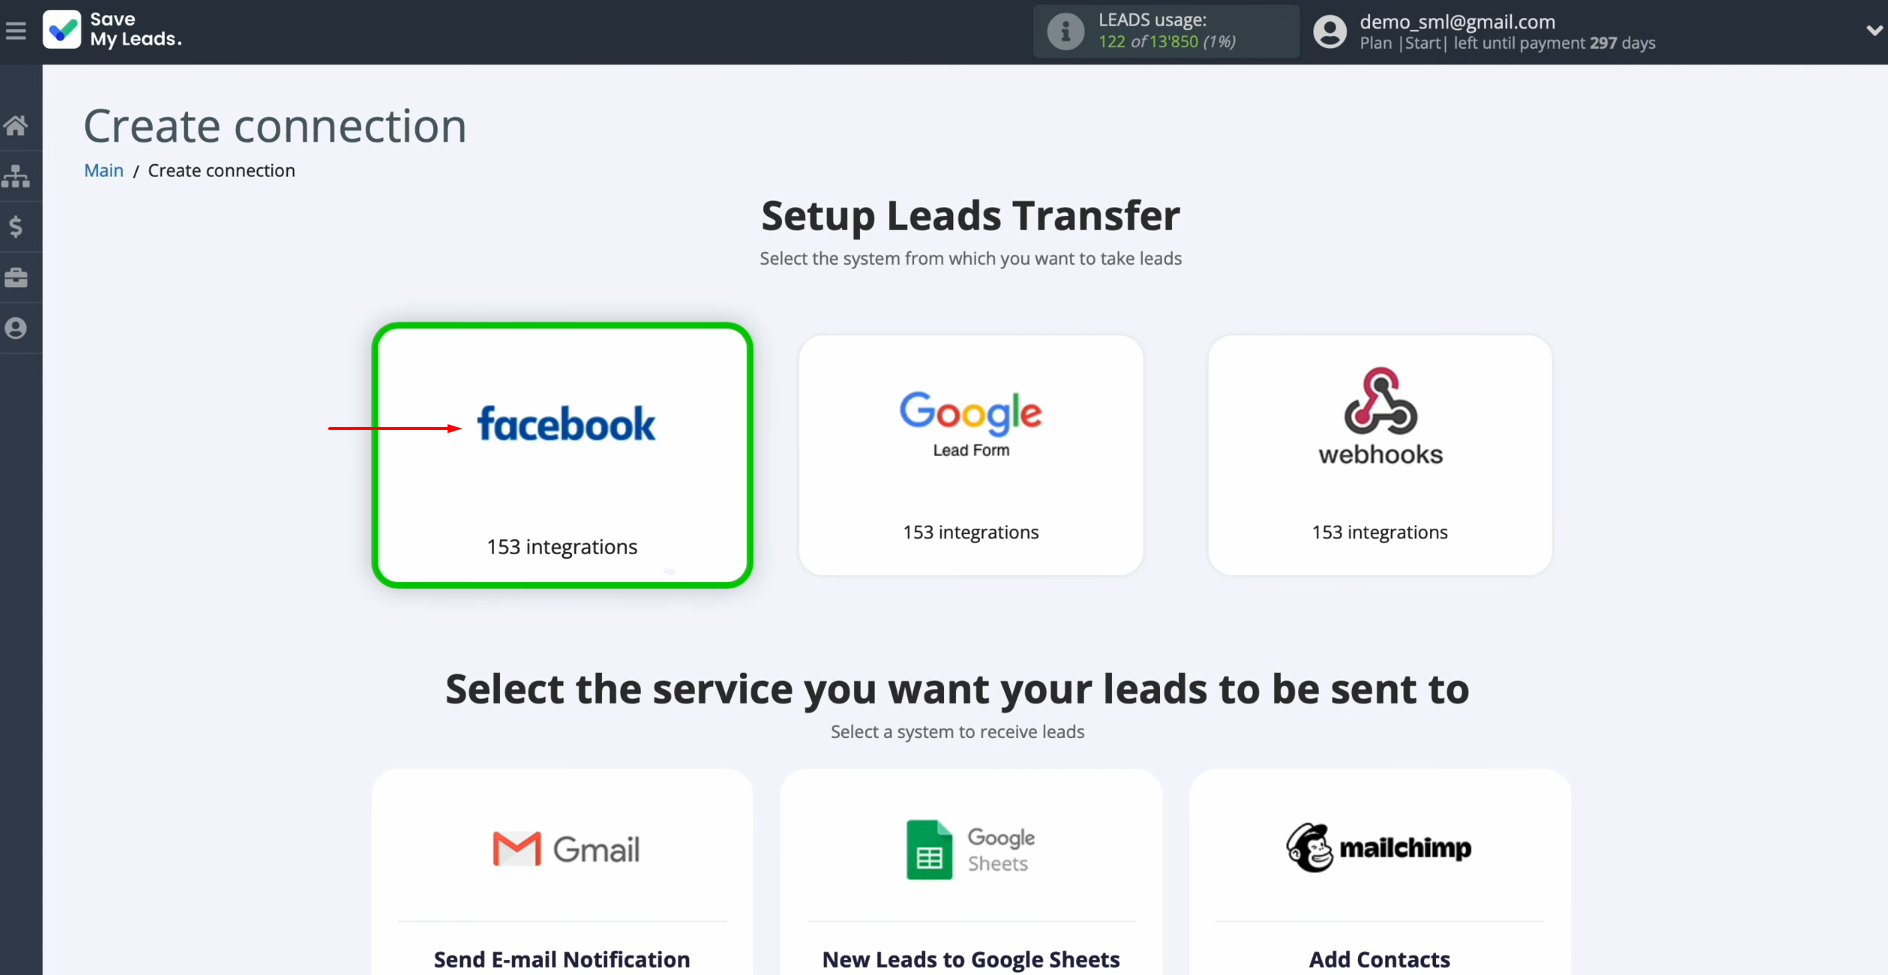
Select the system from which you want to receive new data. Choose Facebook.
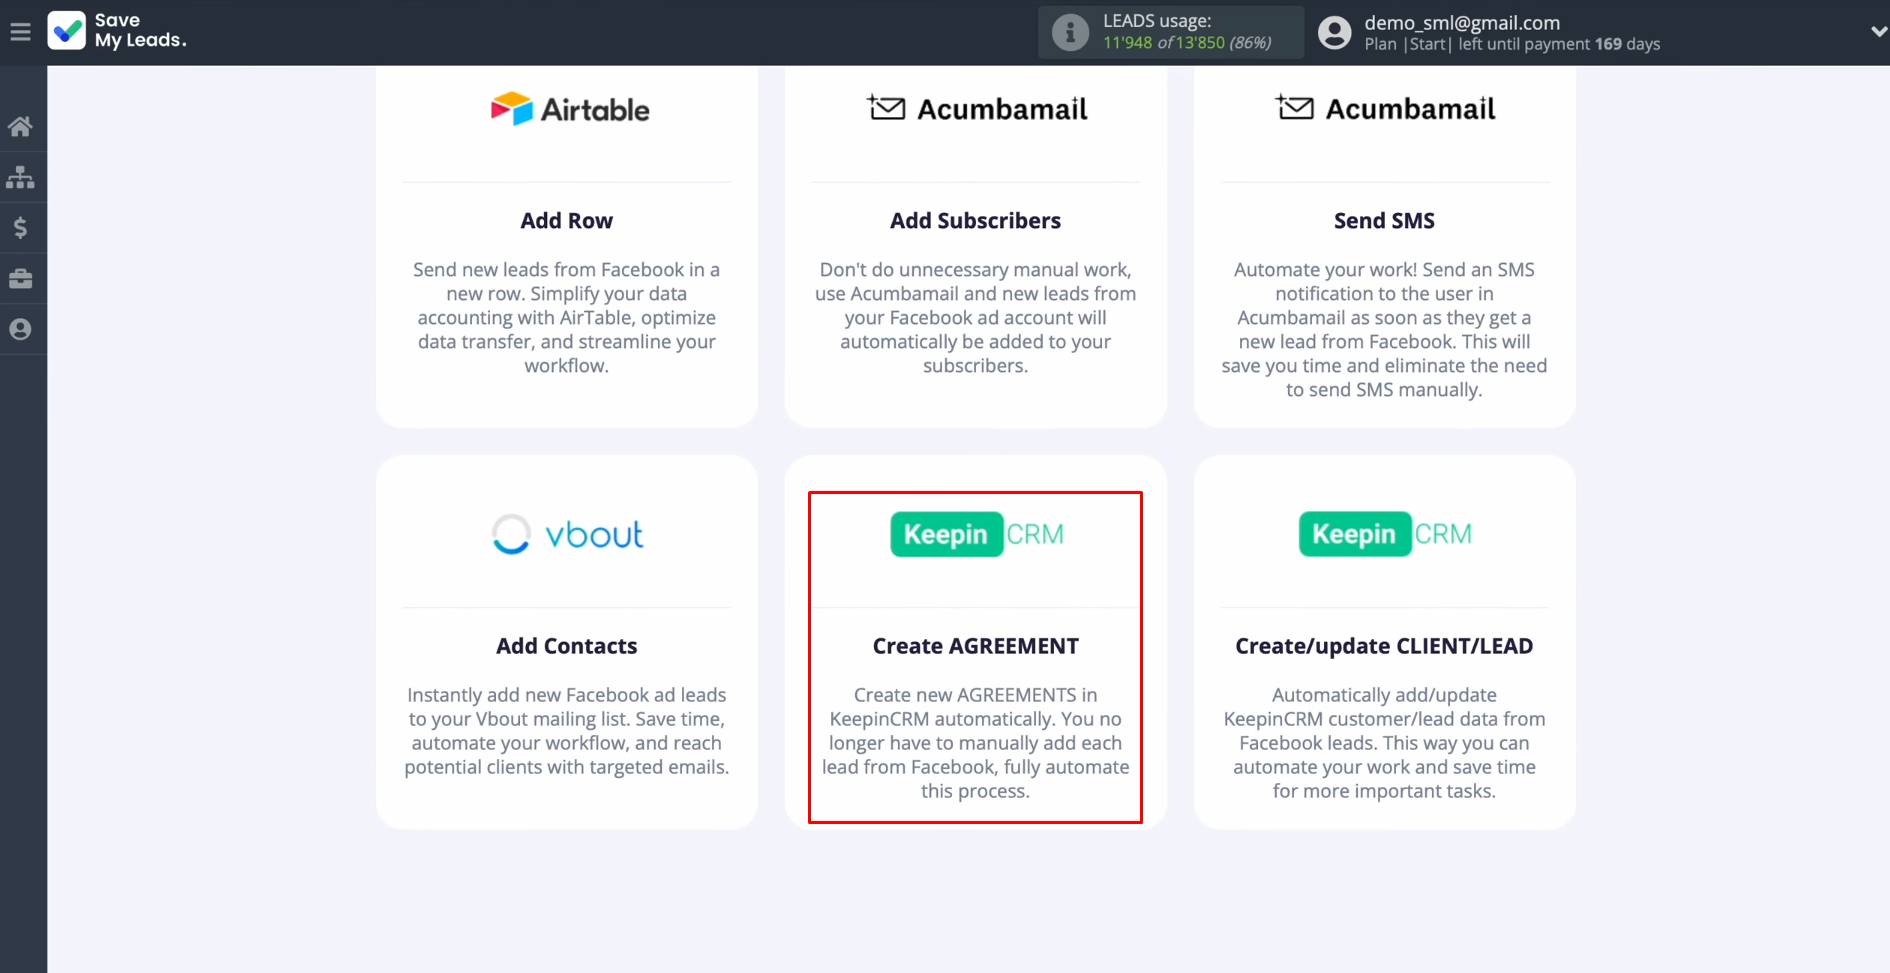
Select the system where you
want to transfer new leads from Facebook. Choose KeepinCRM (Create AGREEMENT).
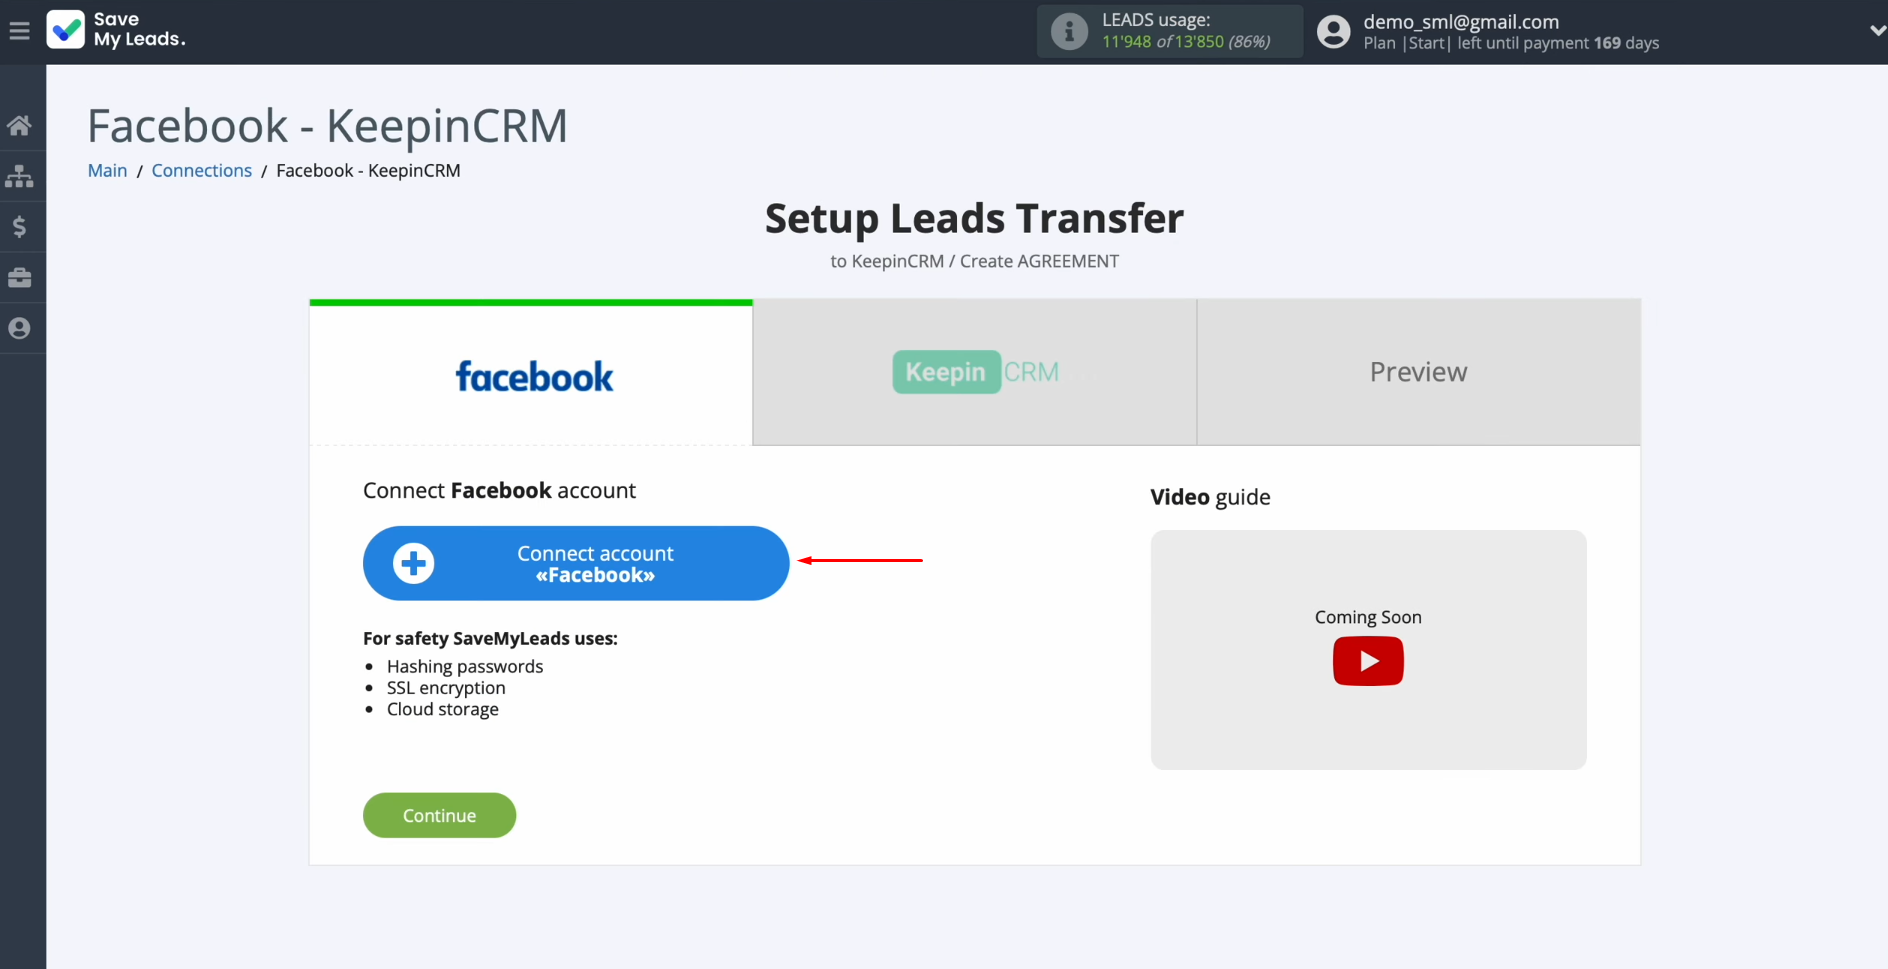
Connect your Facebook
account to SaveMyLeads. To achieve this, press the blue button.
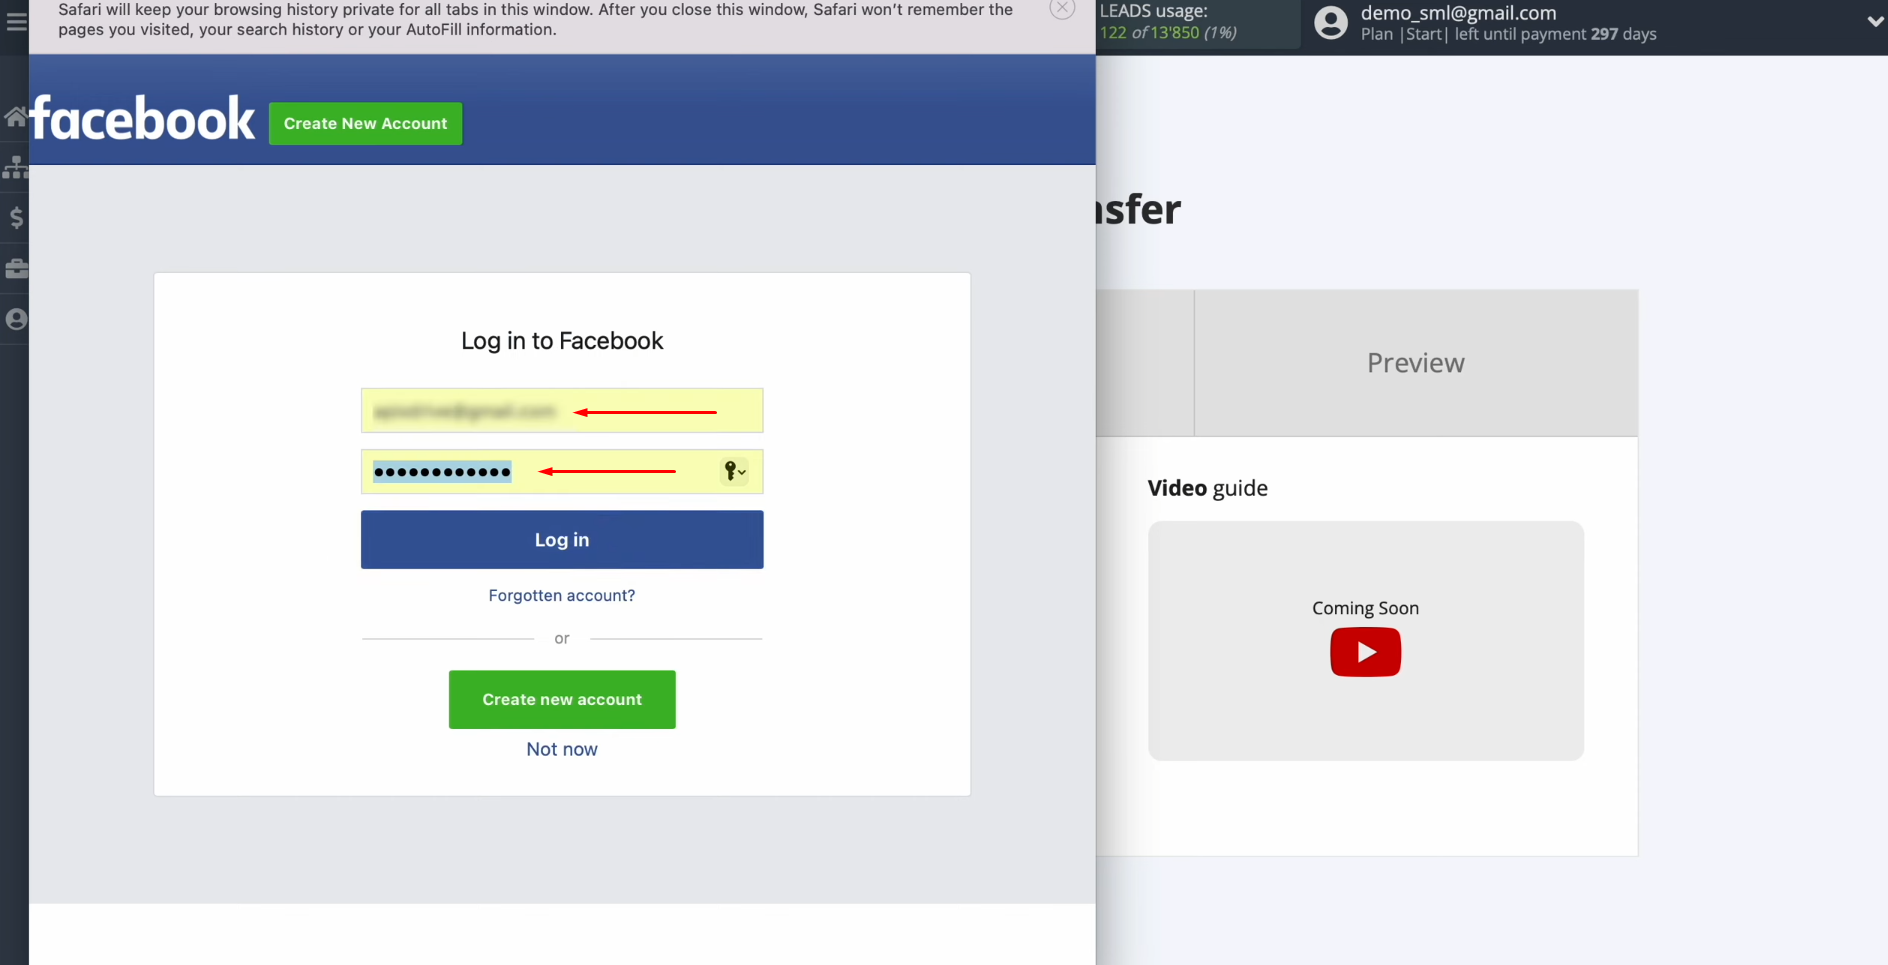
Specify the username and password of the
Facebook personal
account. Click “Log in”.
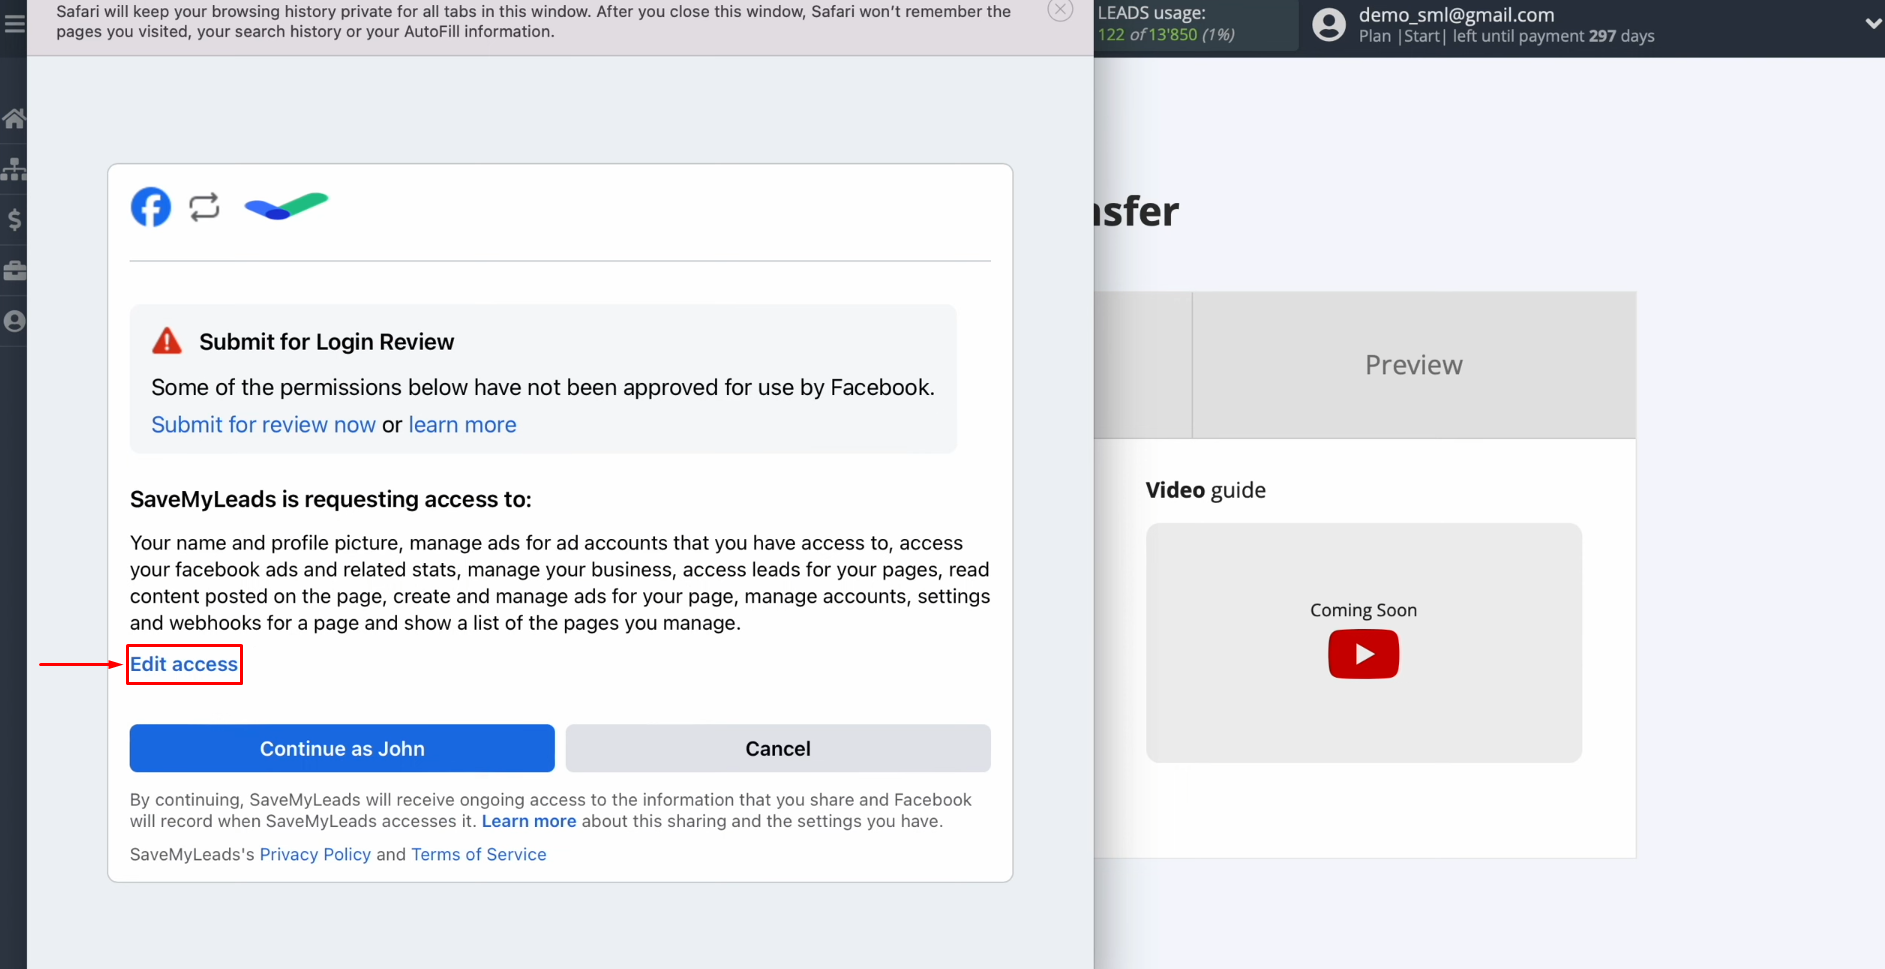
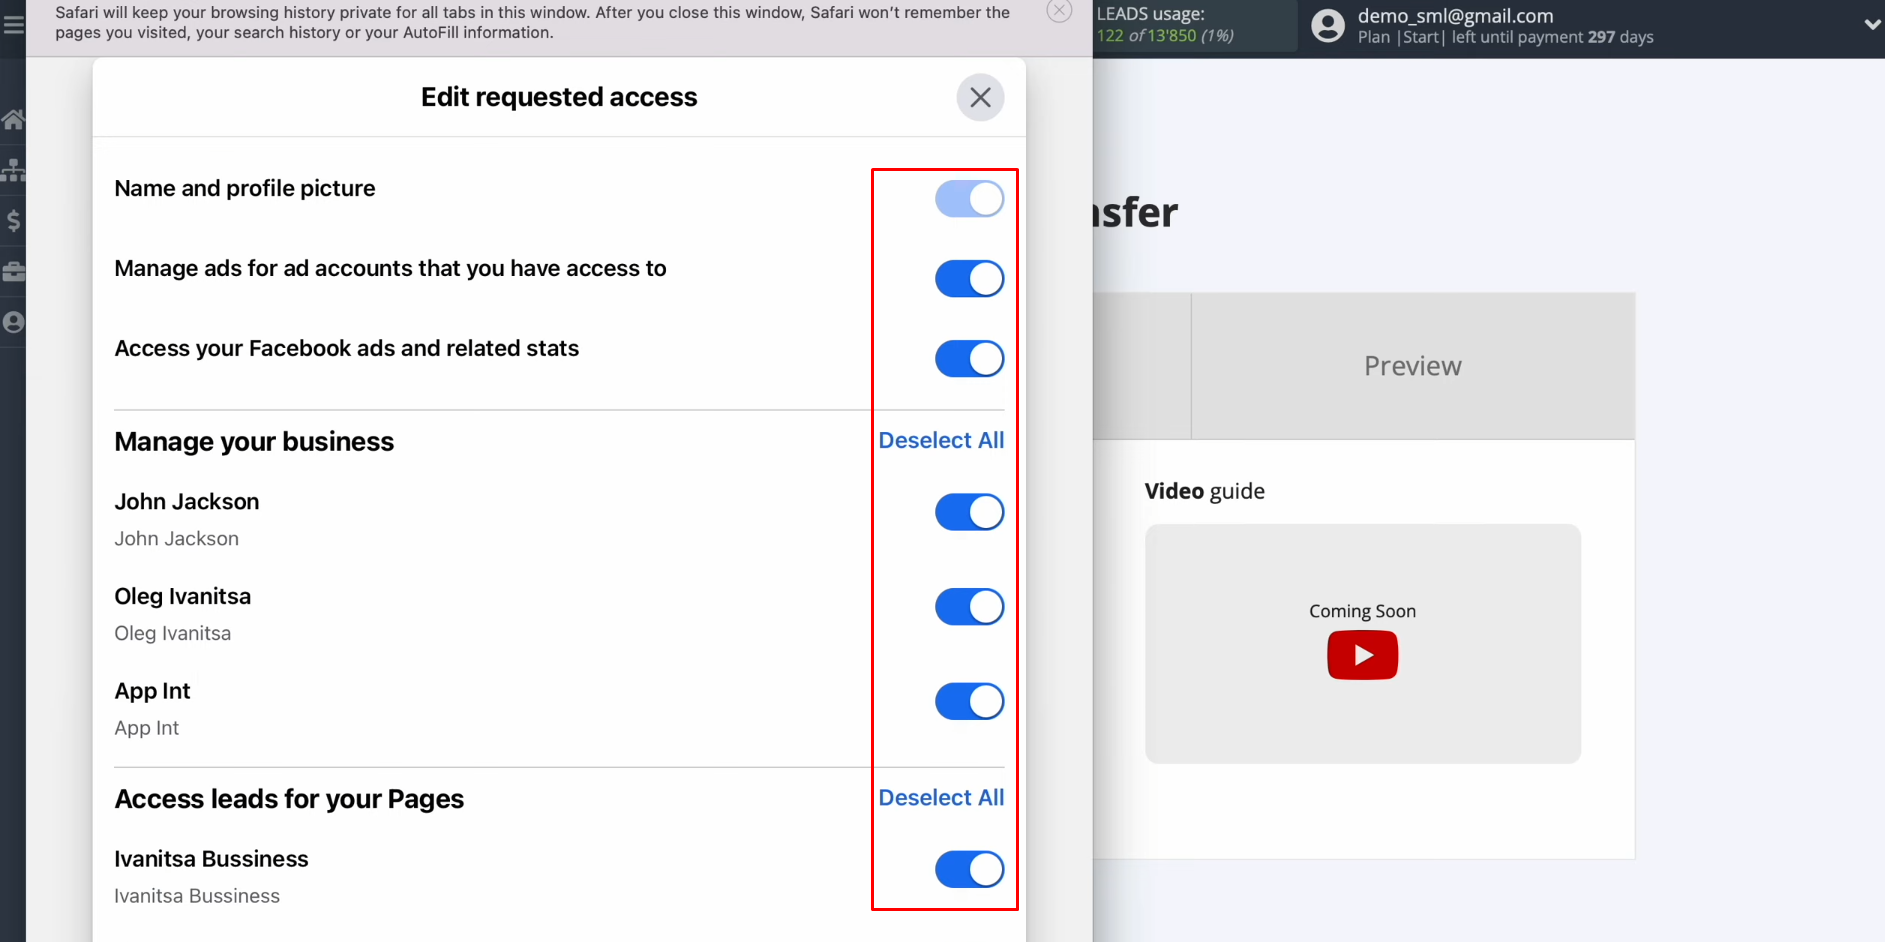
Provide SaveMyLeads access to
work with your Facebook account. To do this, you must click
“Edit access”.
Leave
all access checkboxes enabled.
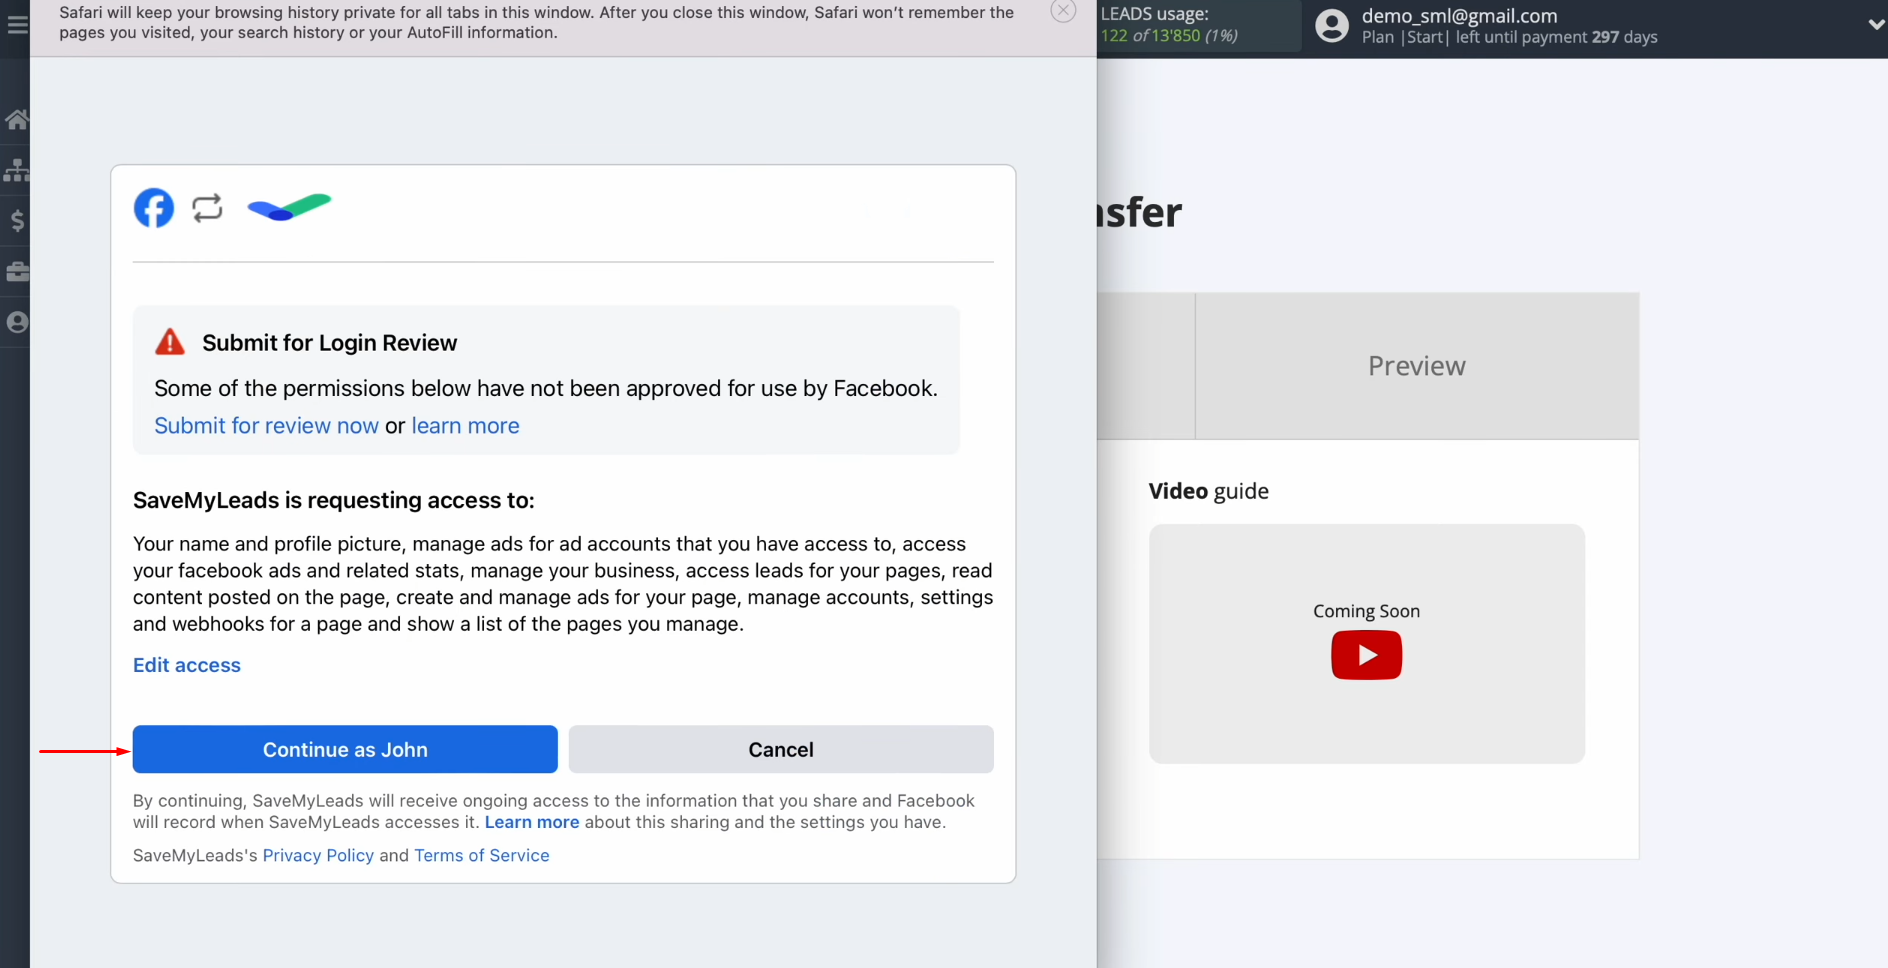
Click
“Continue as…”.
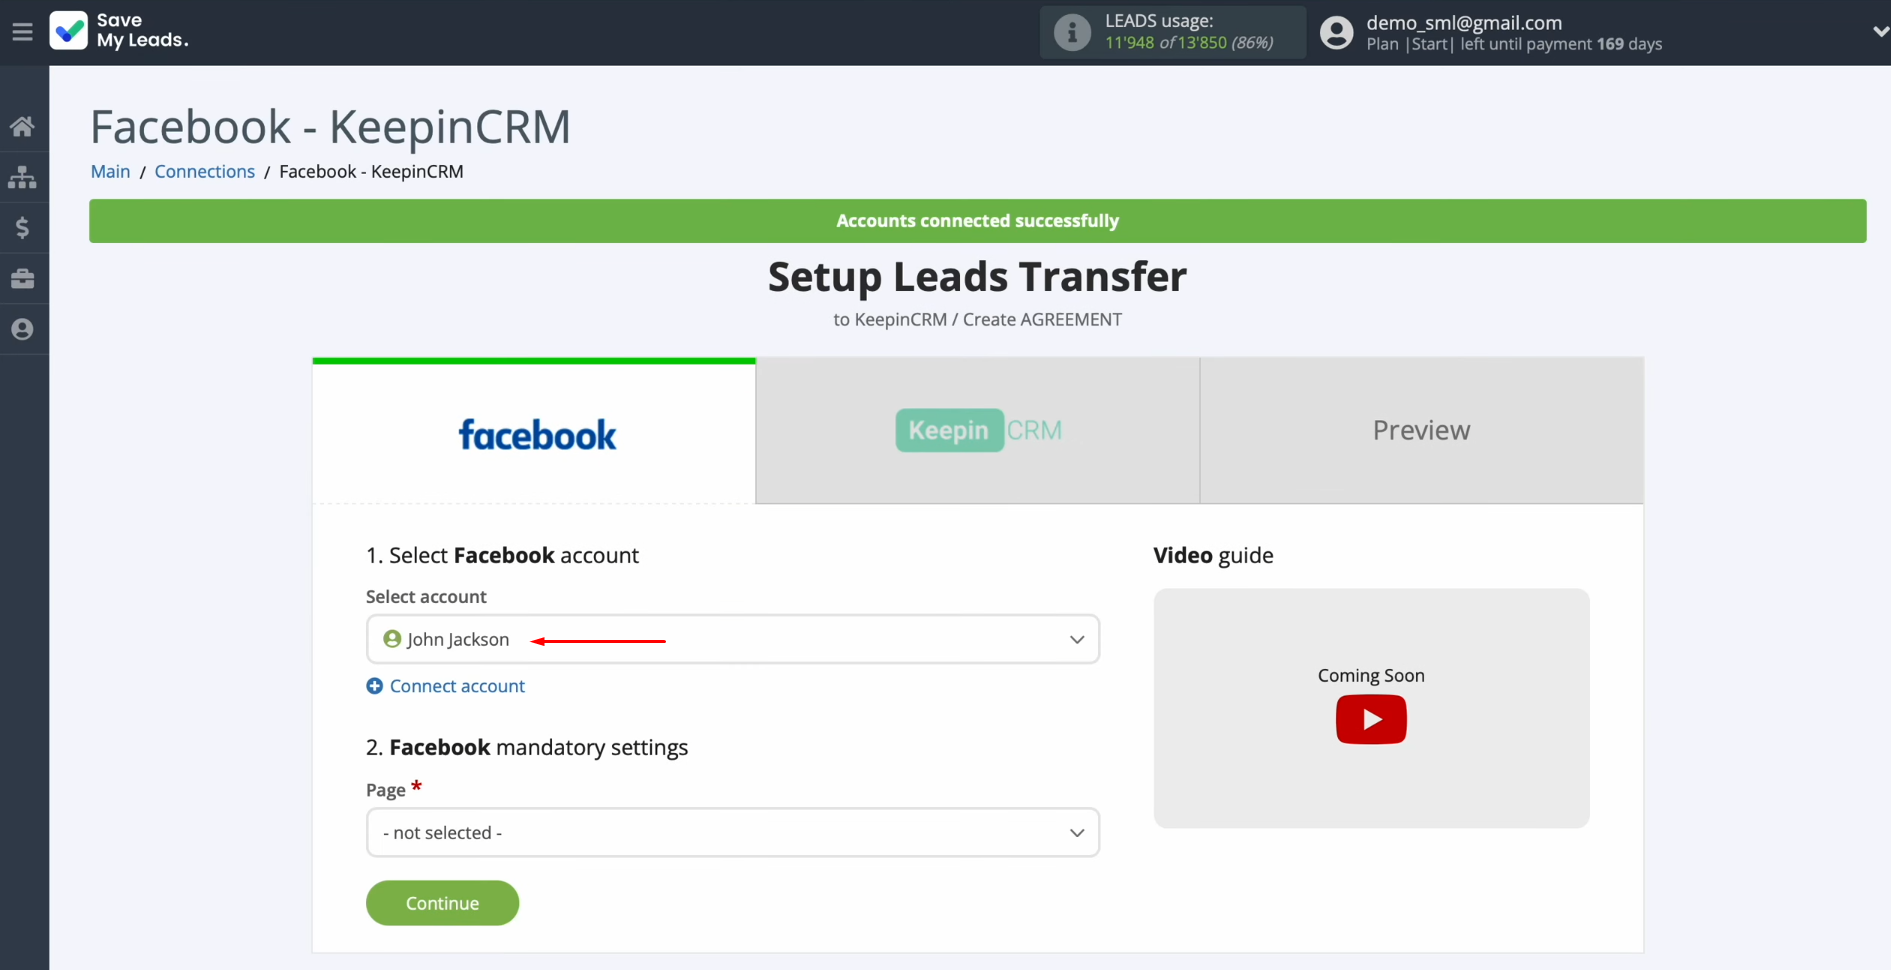
When the
connected account is displayed in the
list, it must be selected.
Select the advertising page. Then, you have to specify the form from which the data will be downloaded.
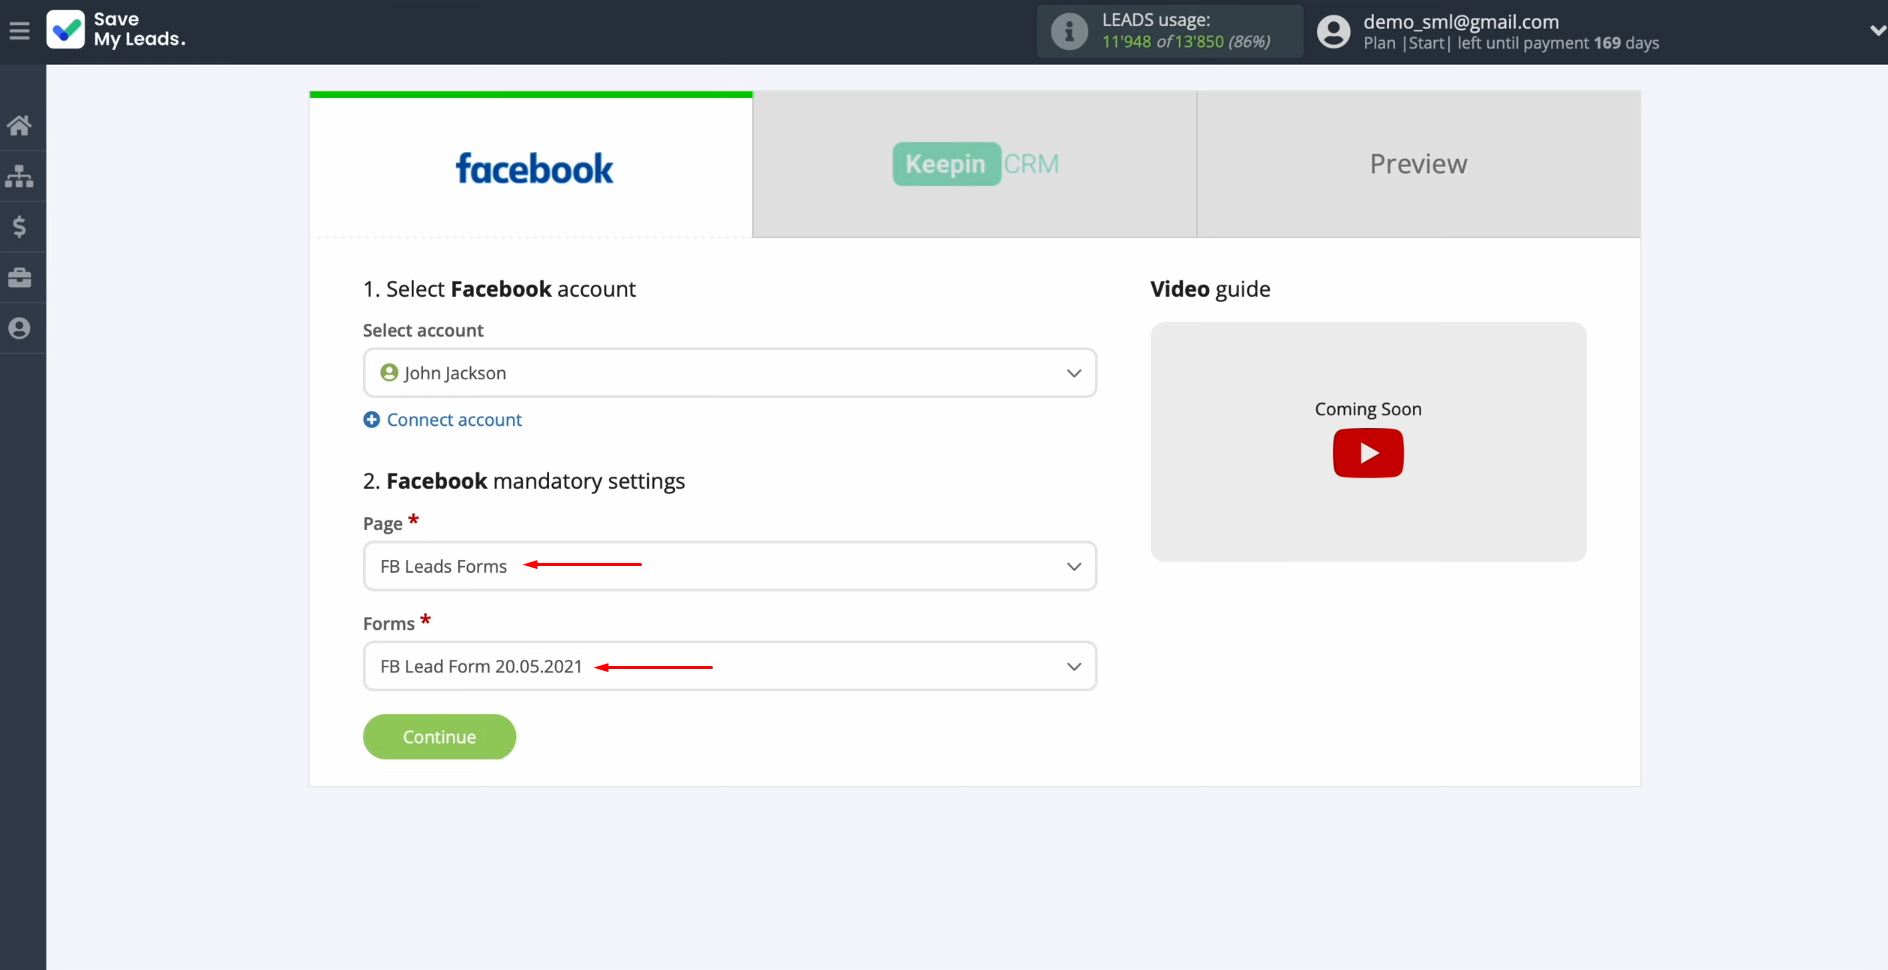
If you need to work with several forms, you will need to create separate
connections for each of them.
Setting up the Data Receiver – KeepinCRM
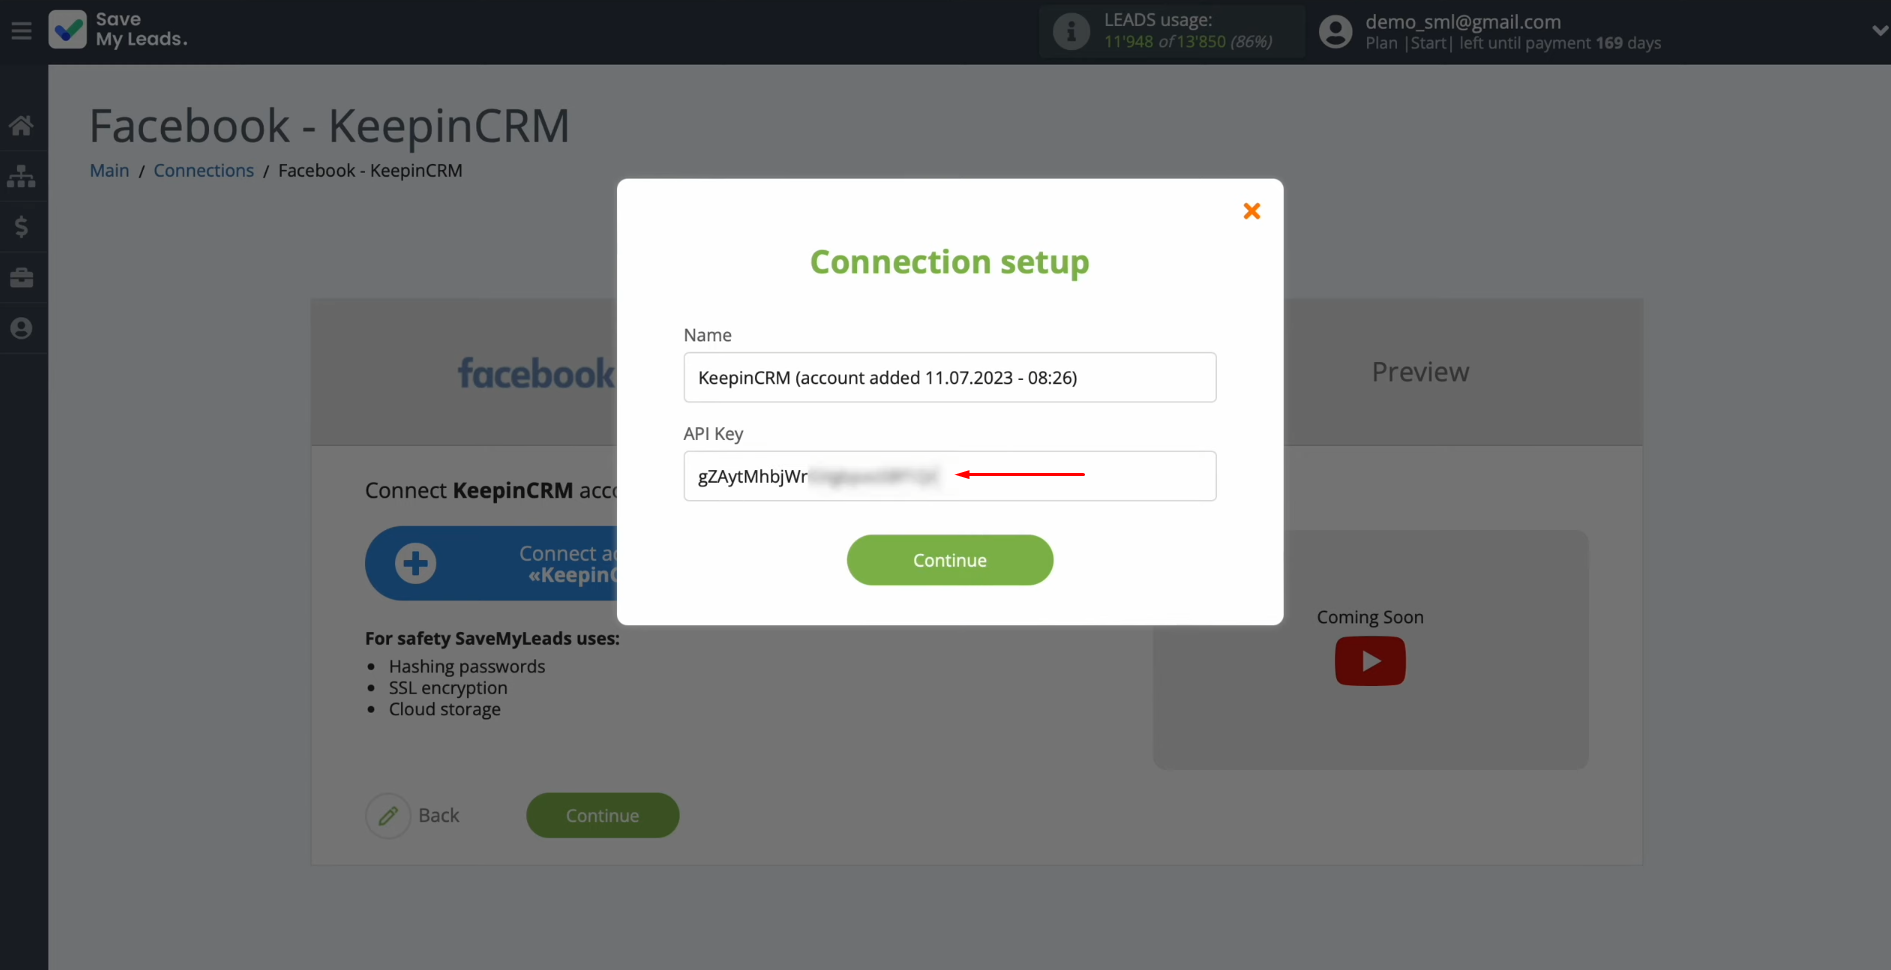
To set up KeepinCRM integration with Facebook, connect your KeepinCRM account to SaveMyLeads. For this, click on the blue button.
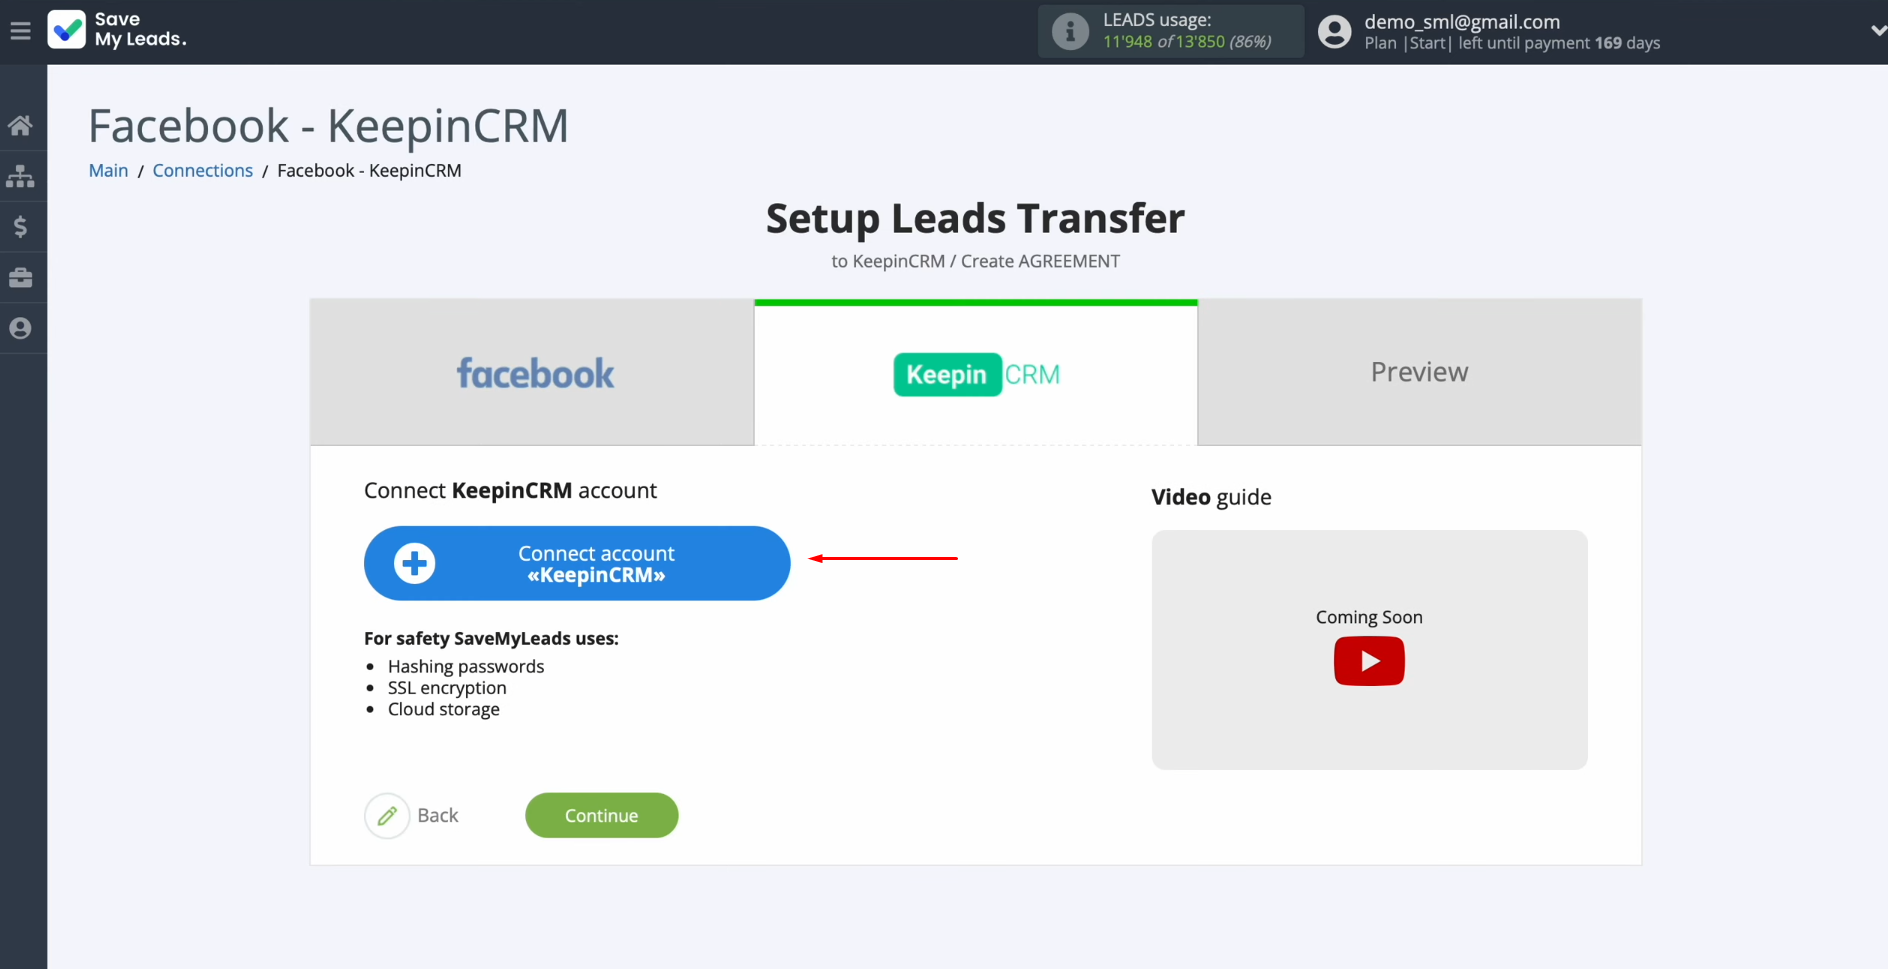
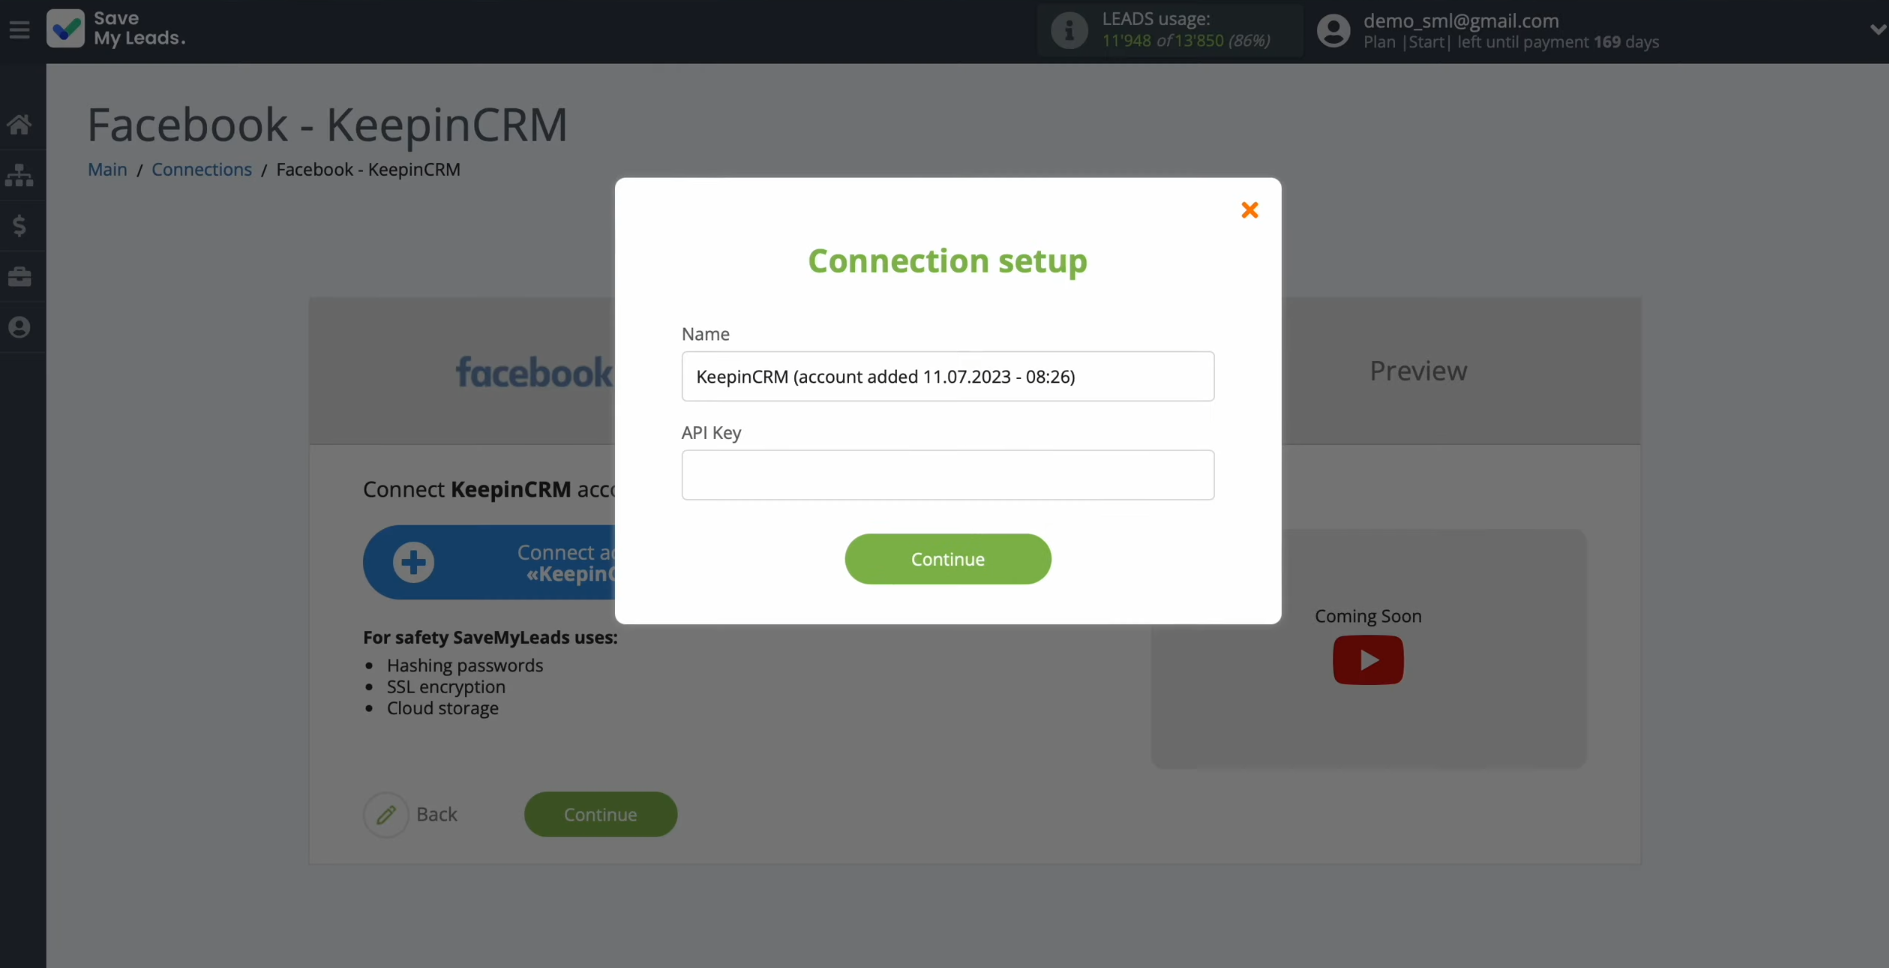
In this window, you must specify the
API key.
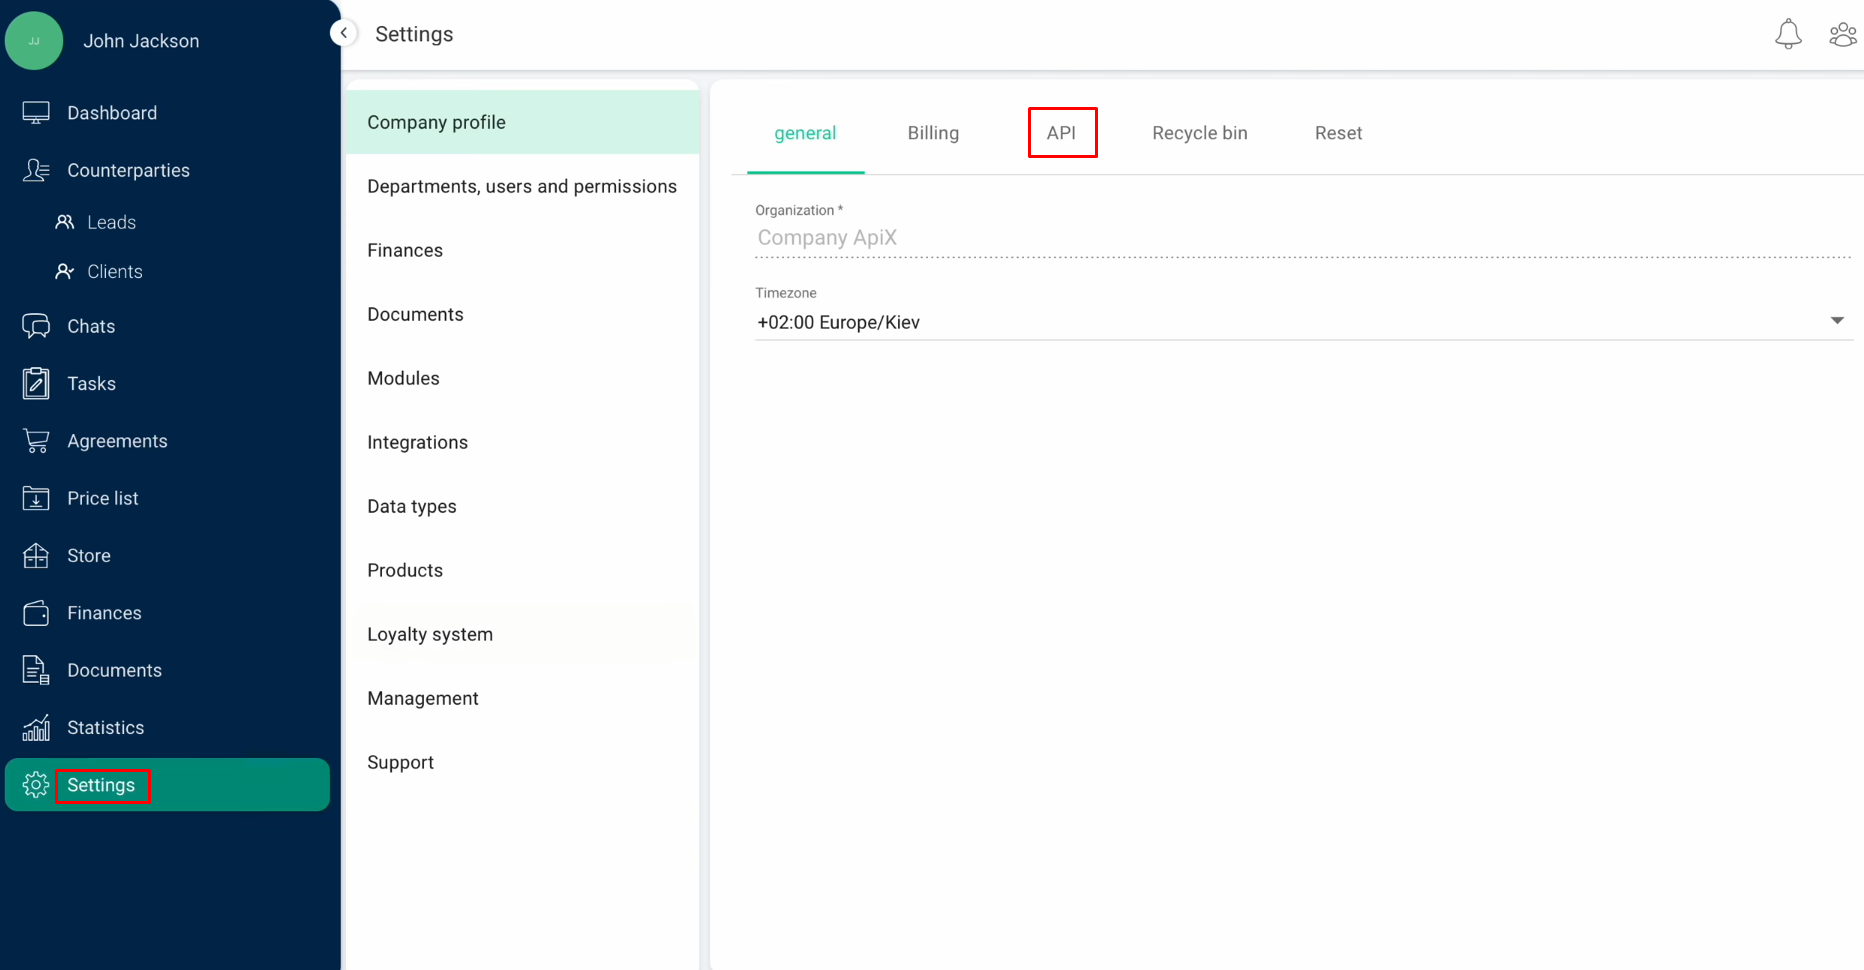
To obtain it, go to your personal KeepinCRM account. Here, you will need to go to the “Settings” section and then the “API” section within it.
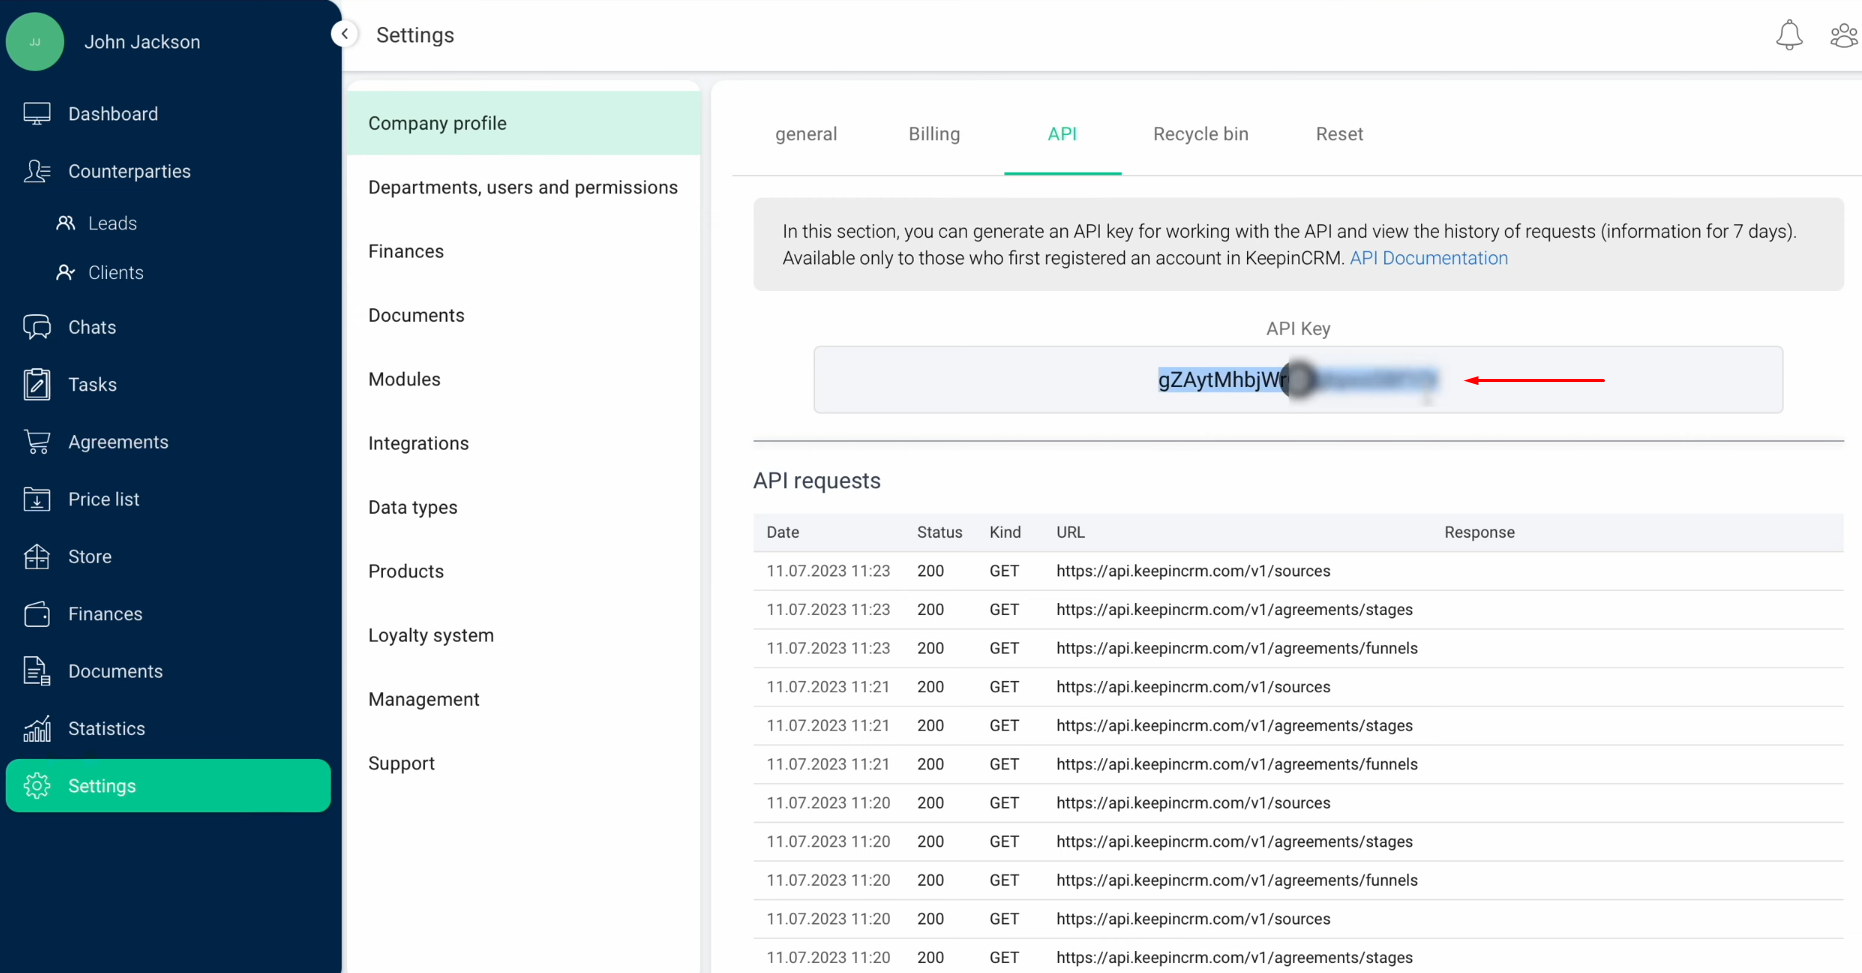
Copy the API
key.
Paste the API
key into the corresponding field in SaveMyLeads. Click “Continue”.
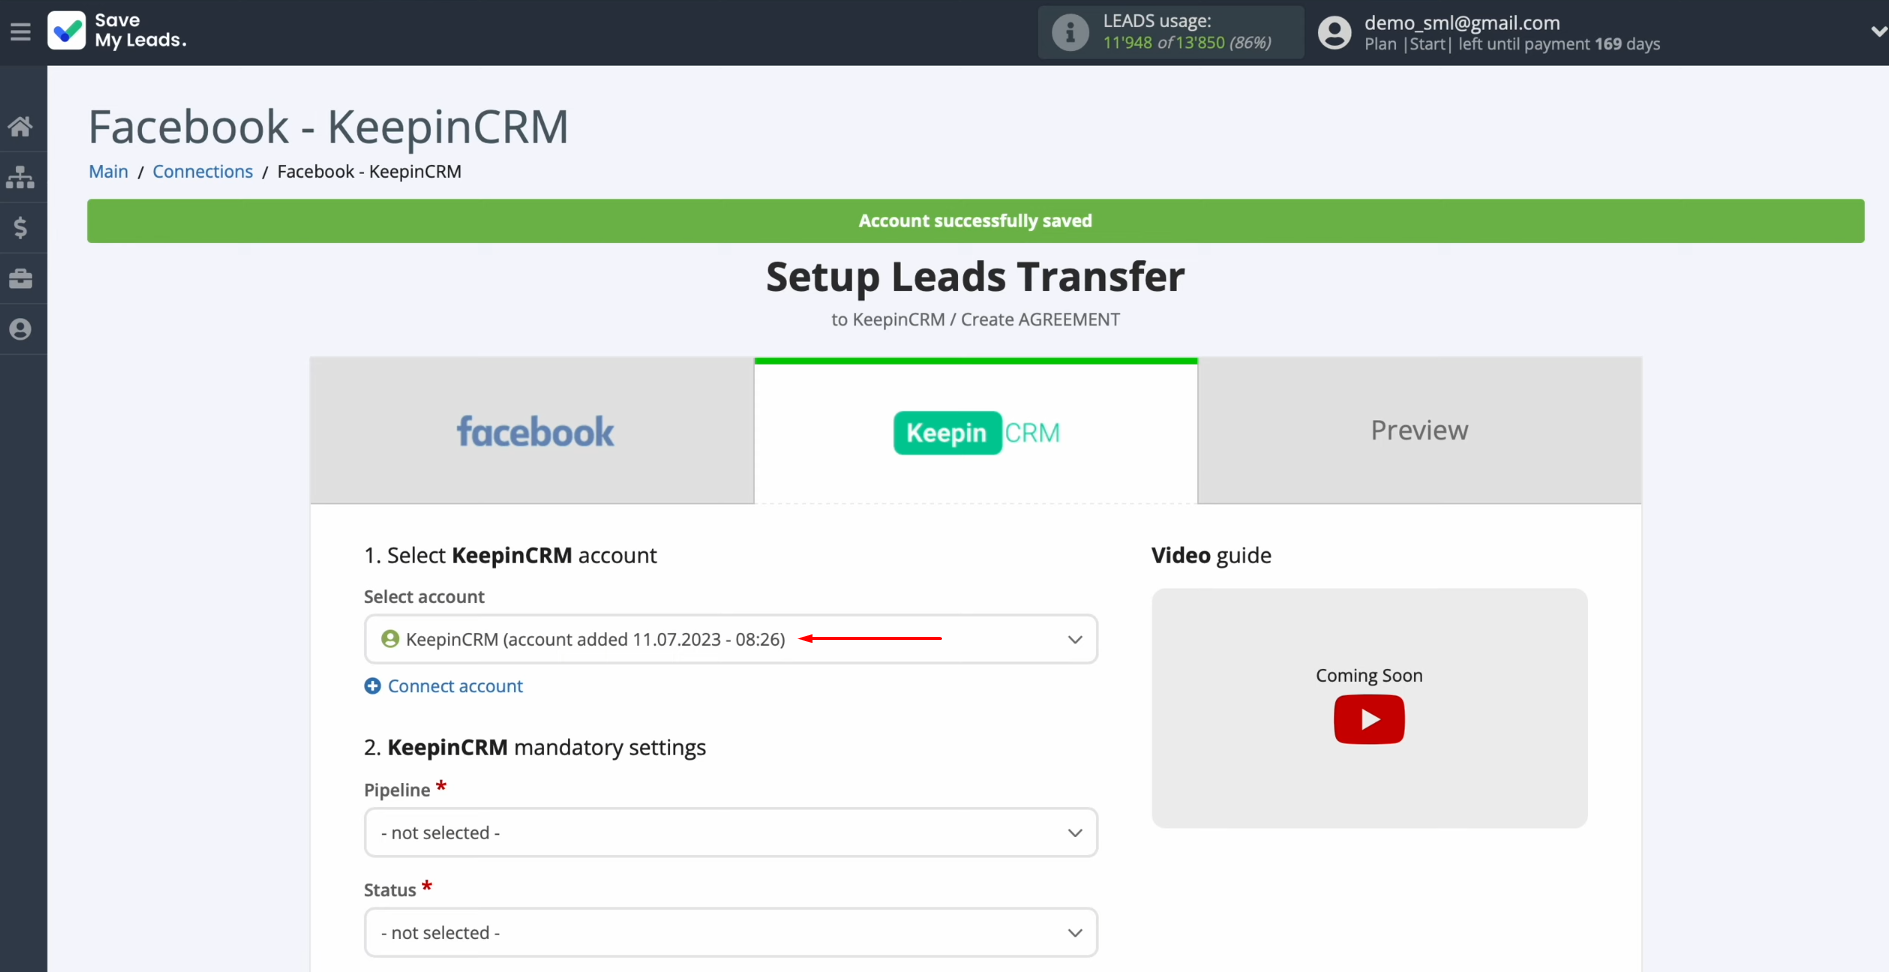
When the
created login is displayed in the list of active accounts, select it.
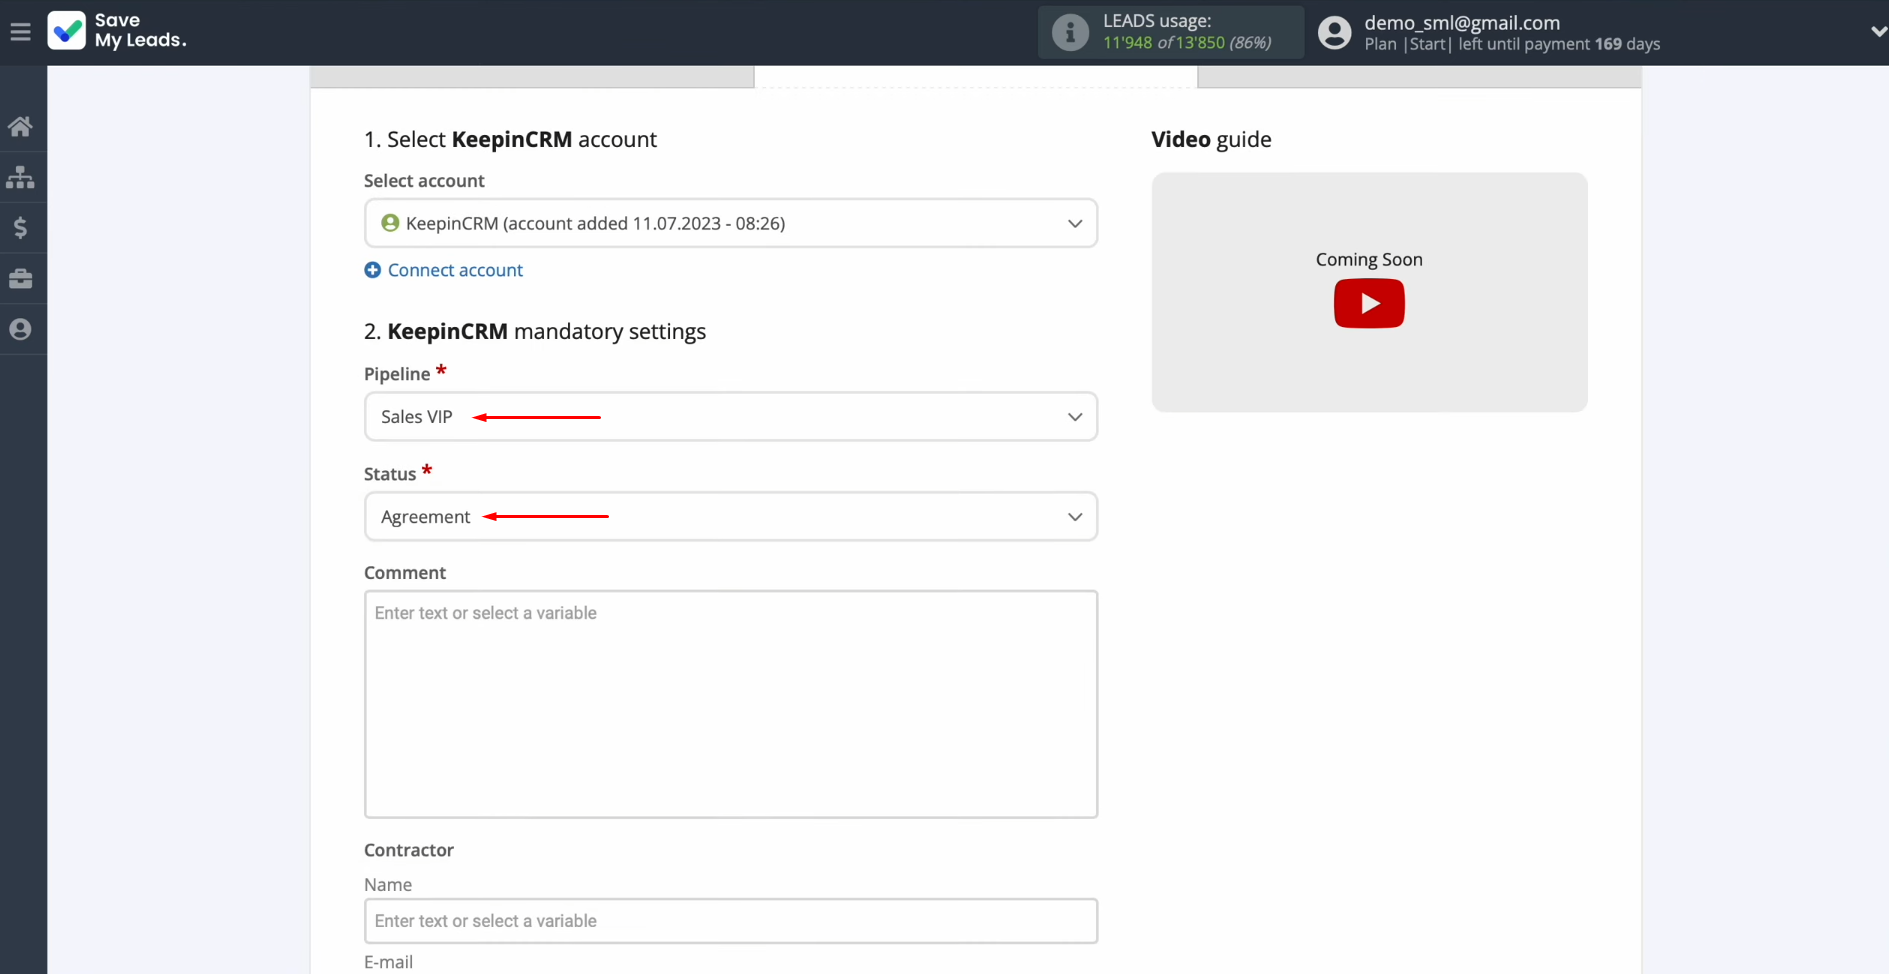
Choose the pipeline and the status.
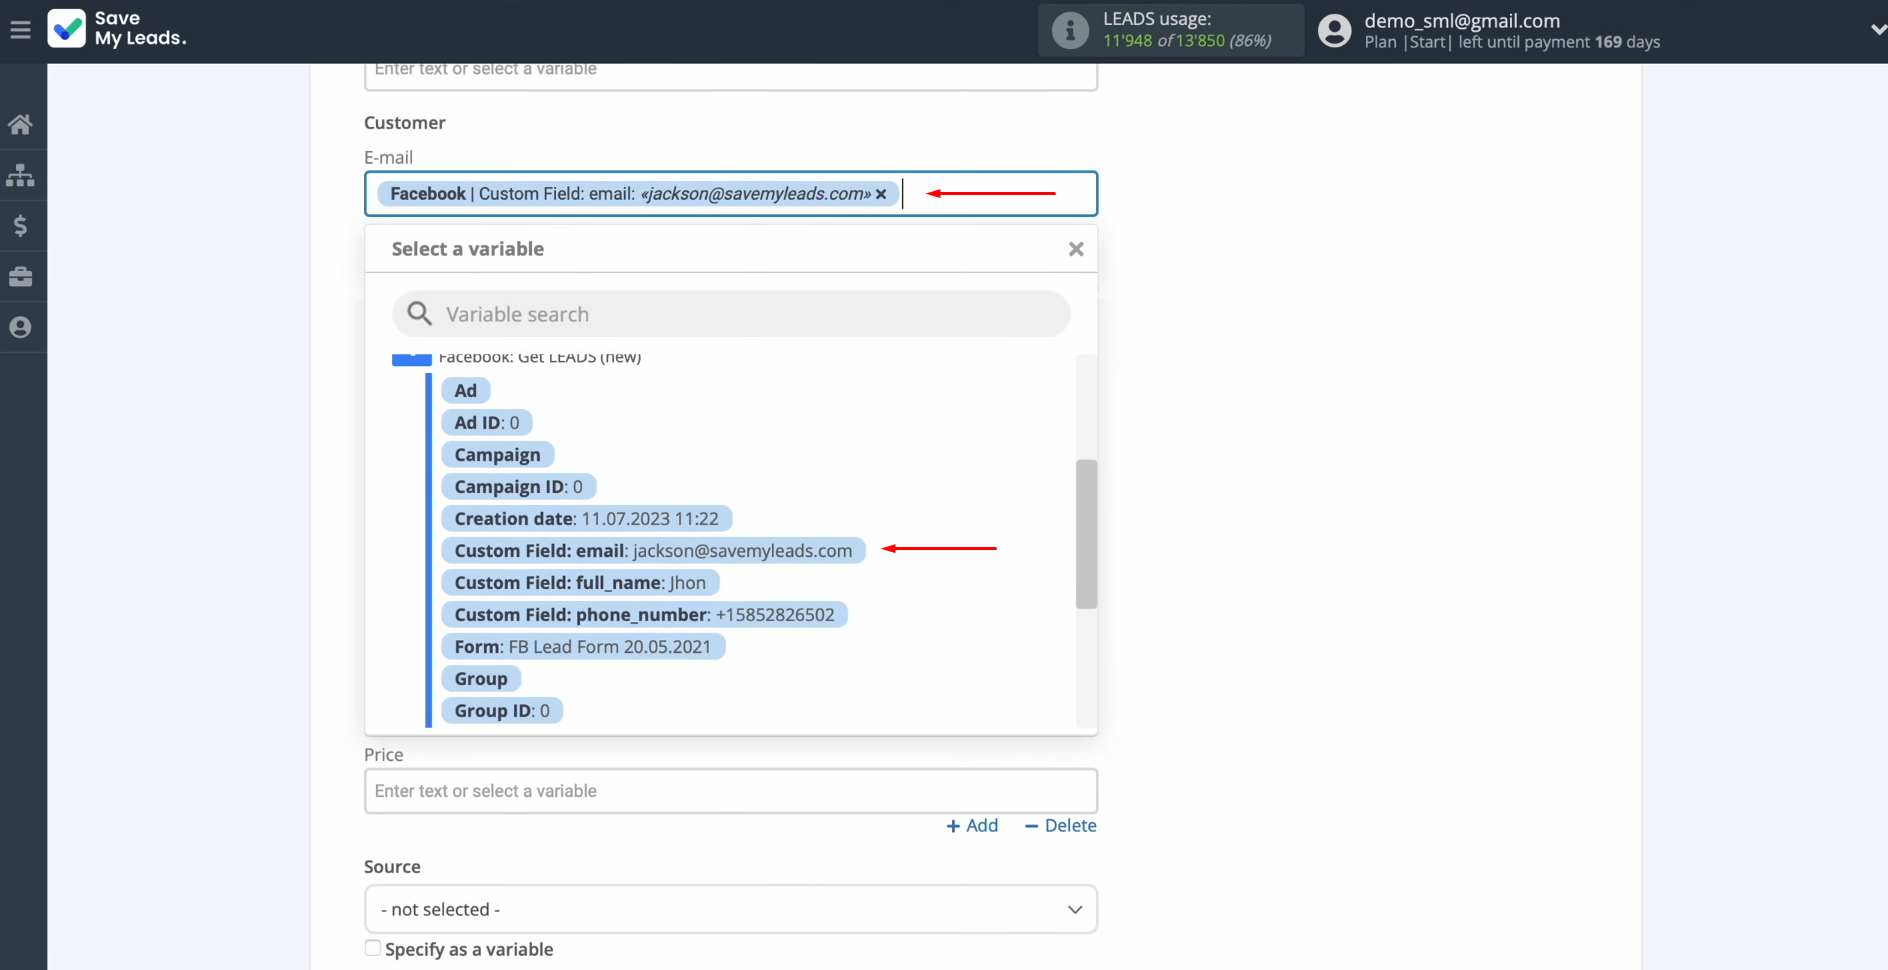
Now, you can see the KeepinCRM fields for creating new agreements. You can select variables from
Facebook for these fields. To do this, click on the field and choose a variable from the drop-down list.
If necessary, you can change the margin settings.


Note that you can use not only variables but also manually input values.
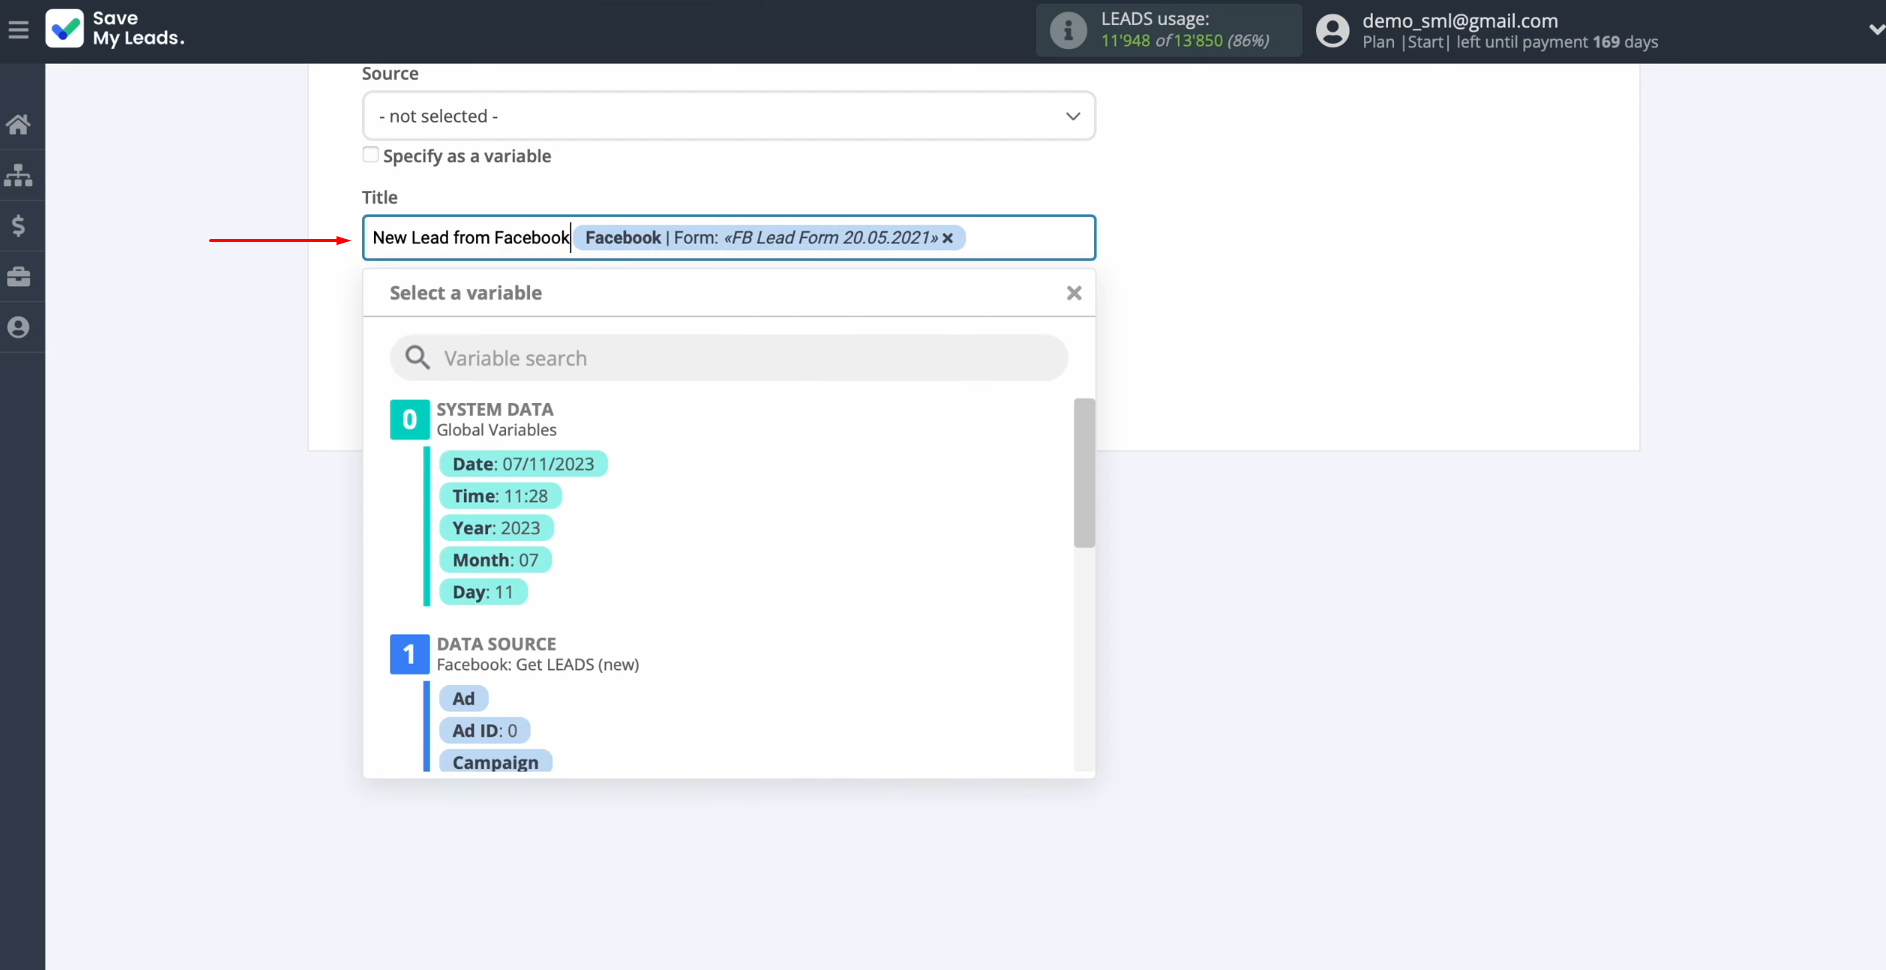
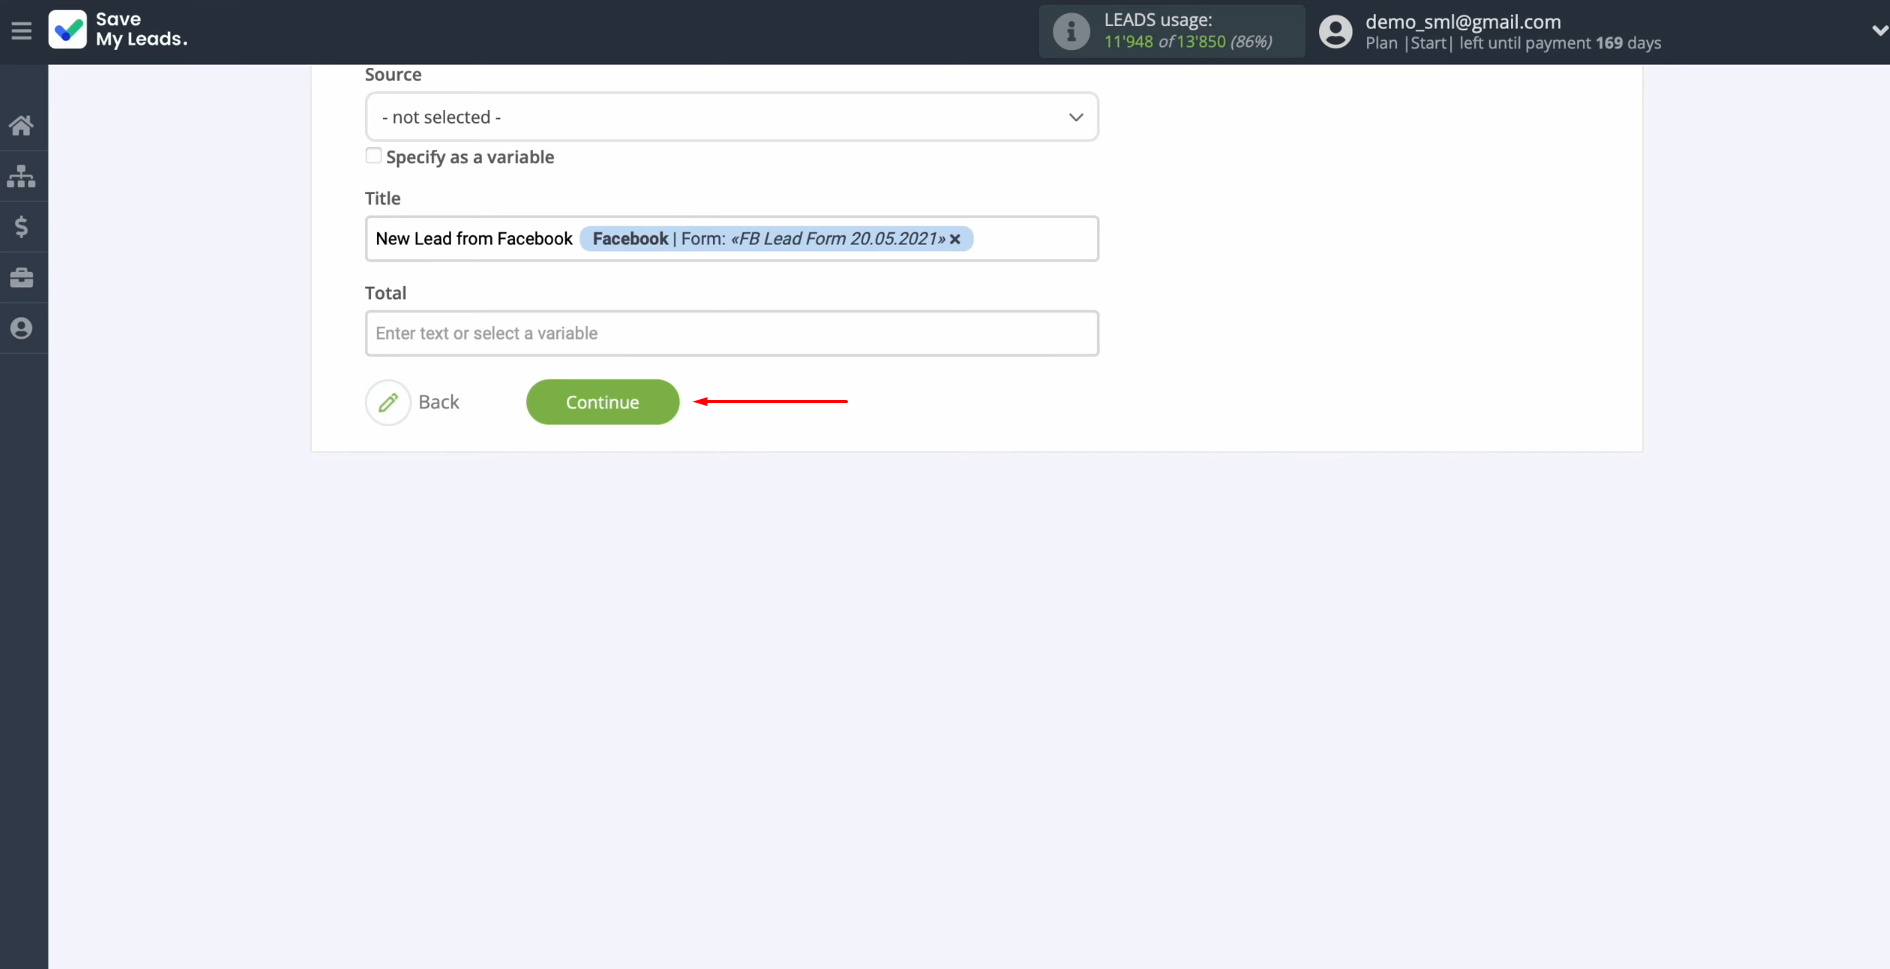
Once all fields are
filled, click “Continue”.
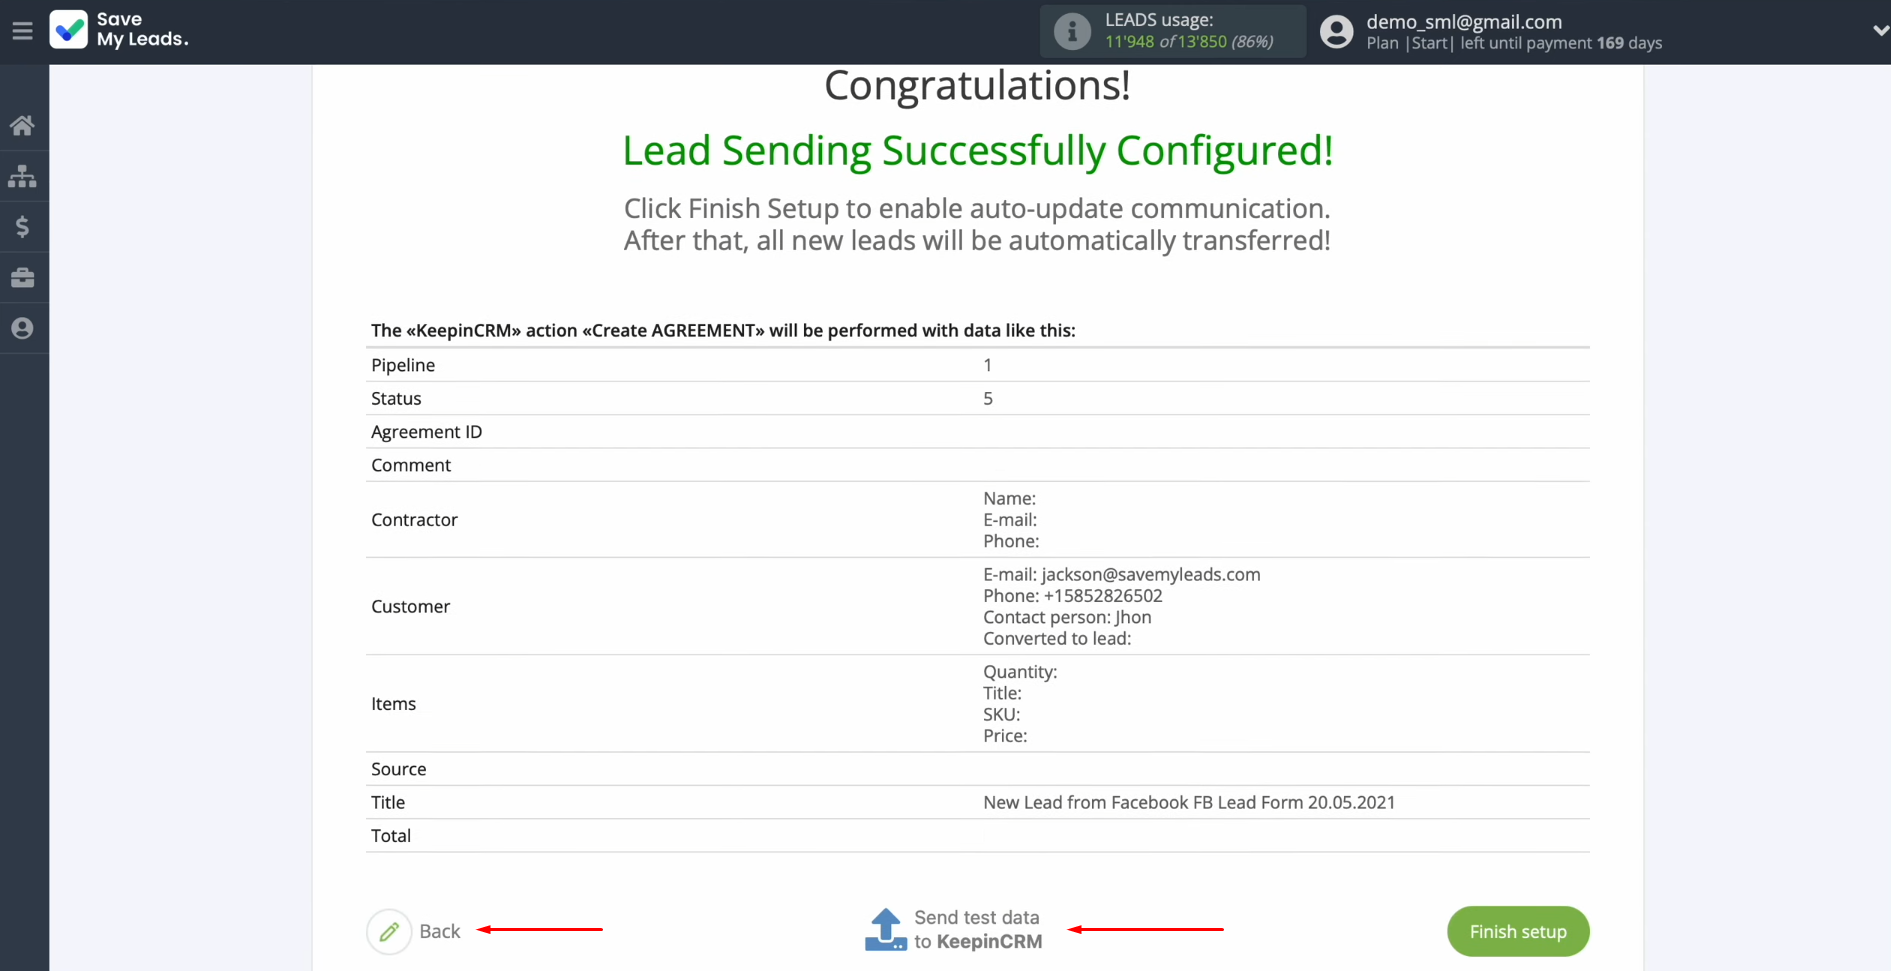
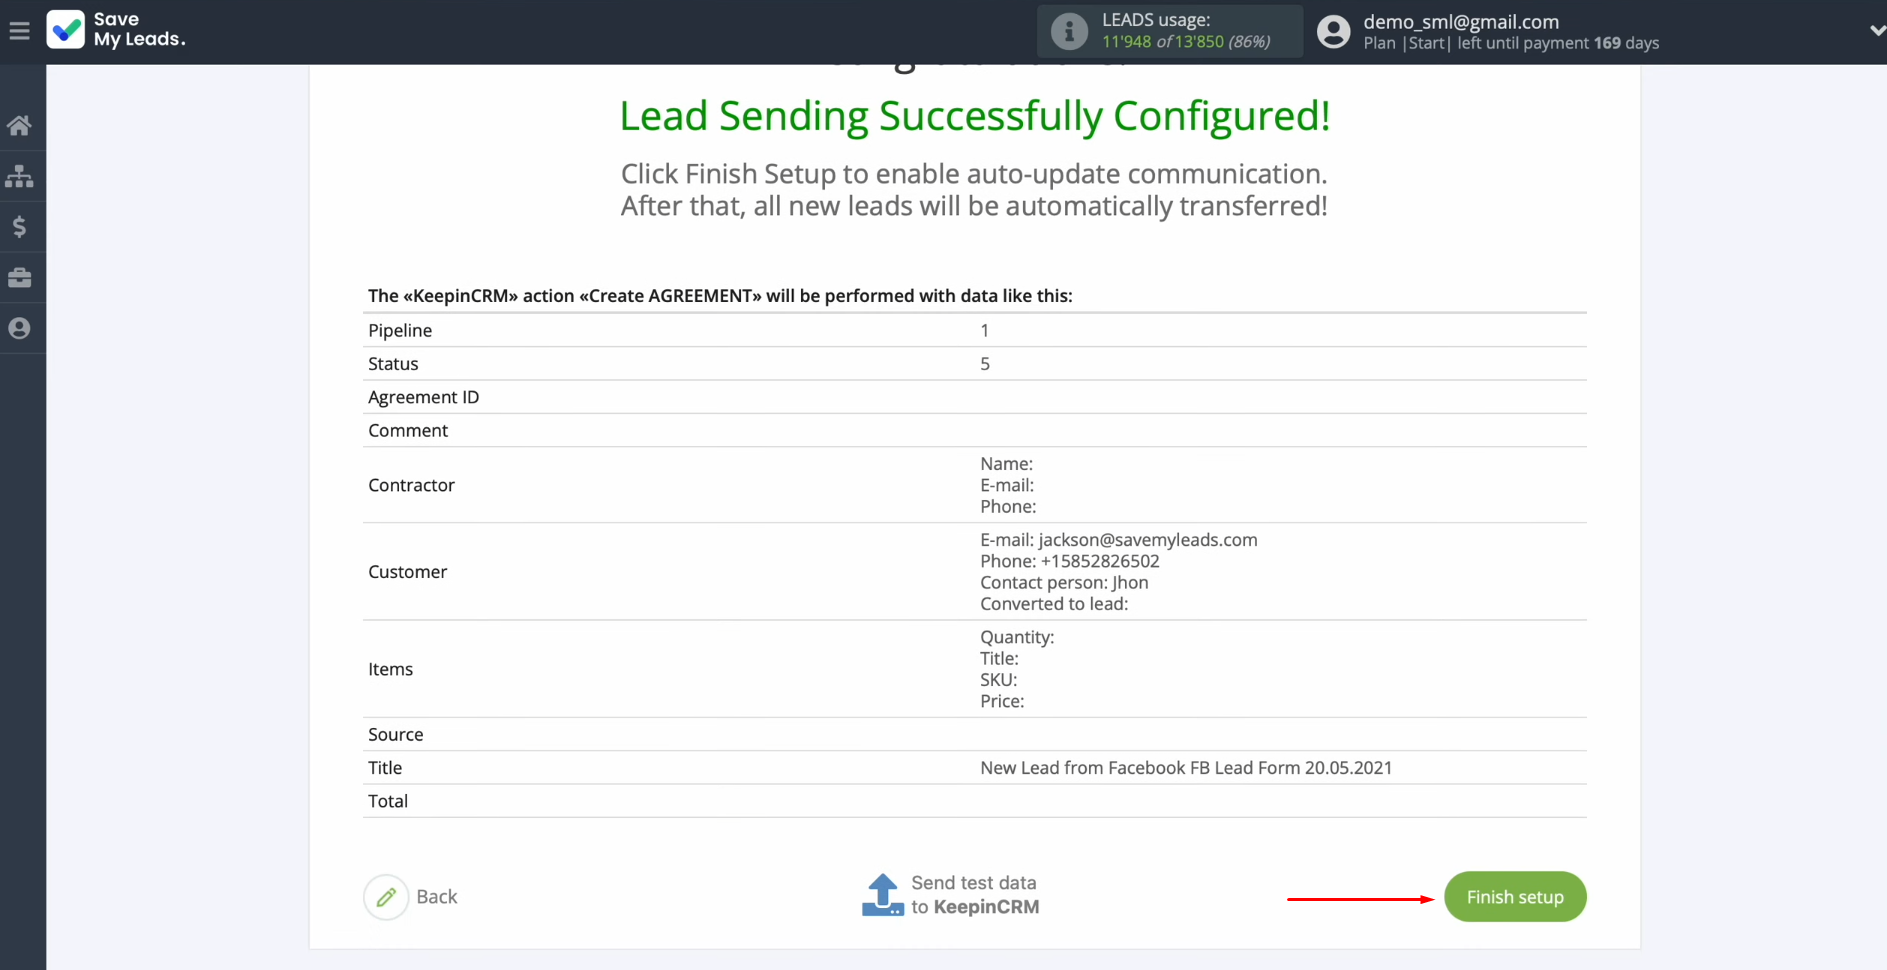
At this stage, you can see an example of the data that will be sent to your KeepinCRM as new
agreements for each new lead from Facebook. If you want to make any changes, click "Back" to go back one step. To ensure that you have configured everything correctly, click “Send test data to KeepinCRM”.
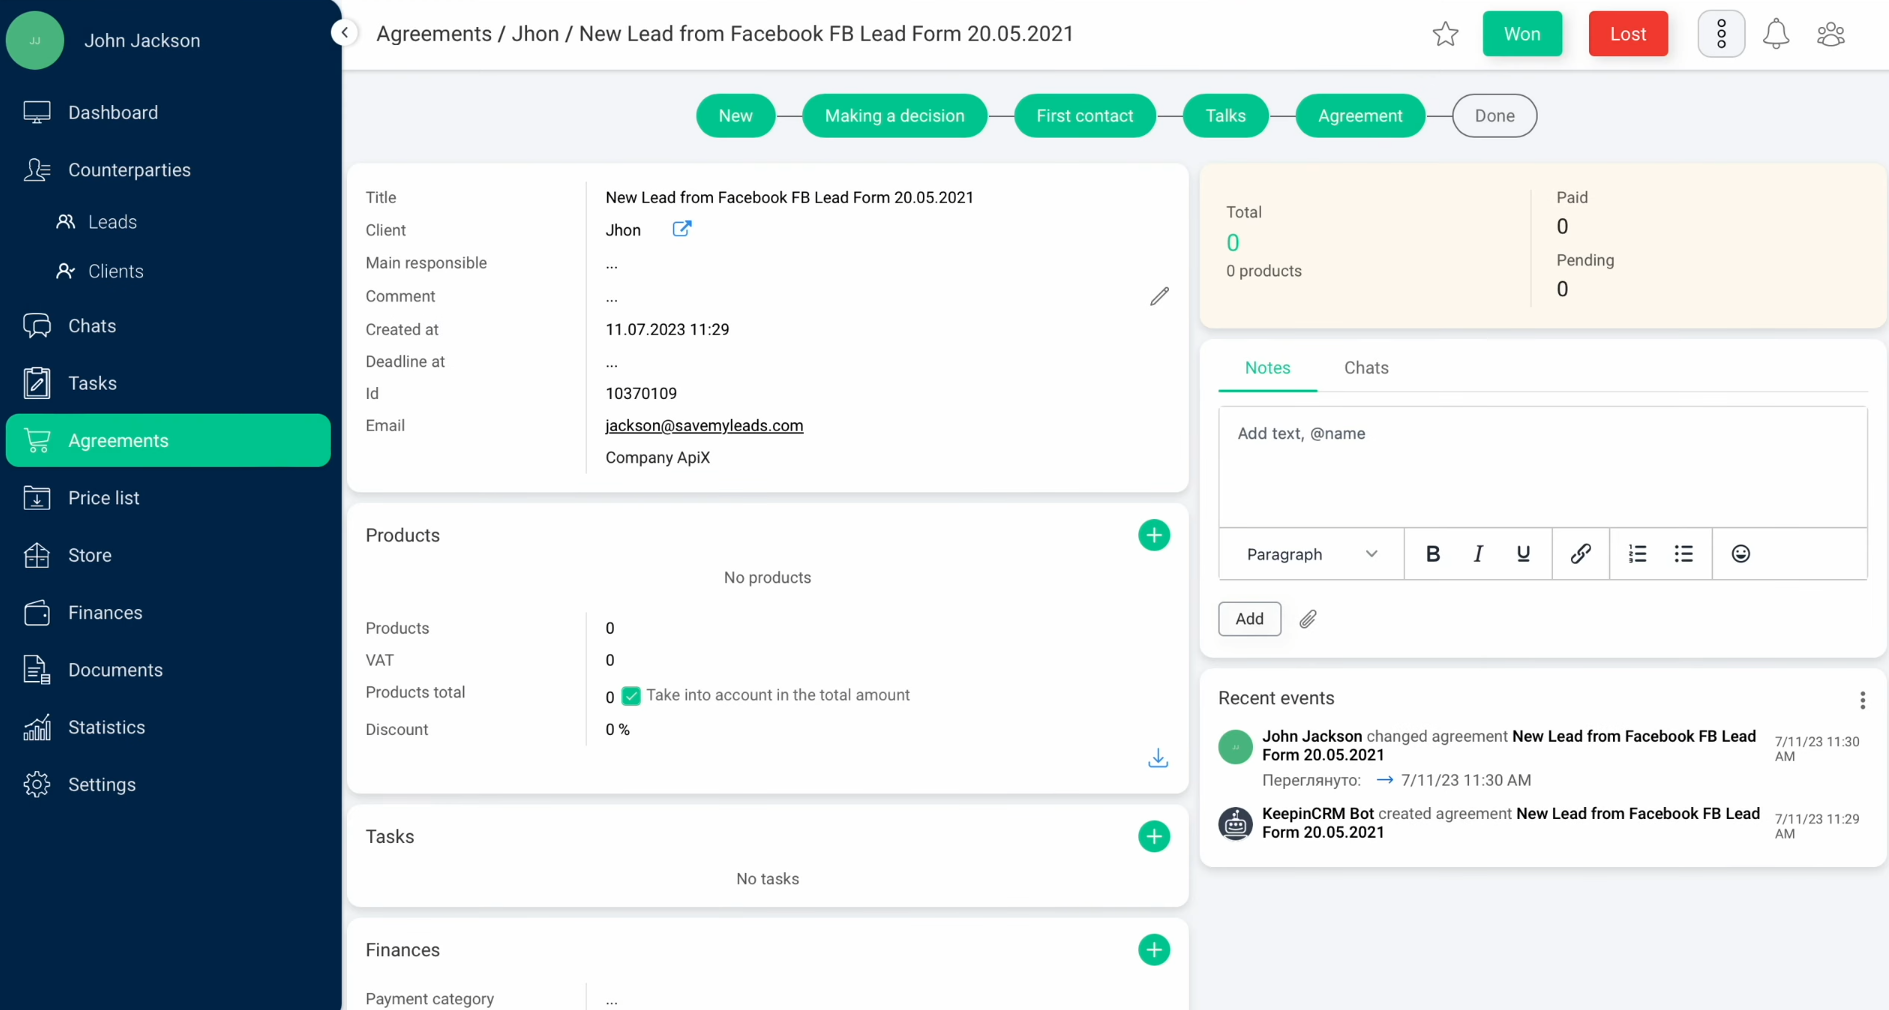
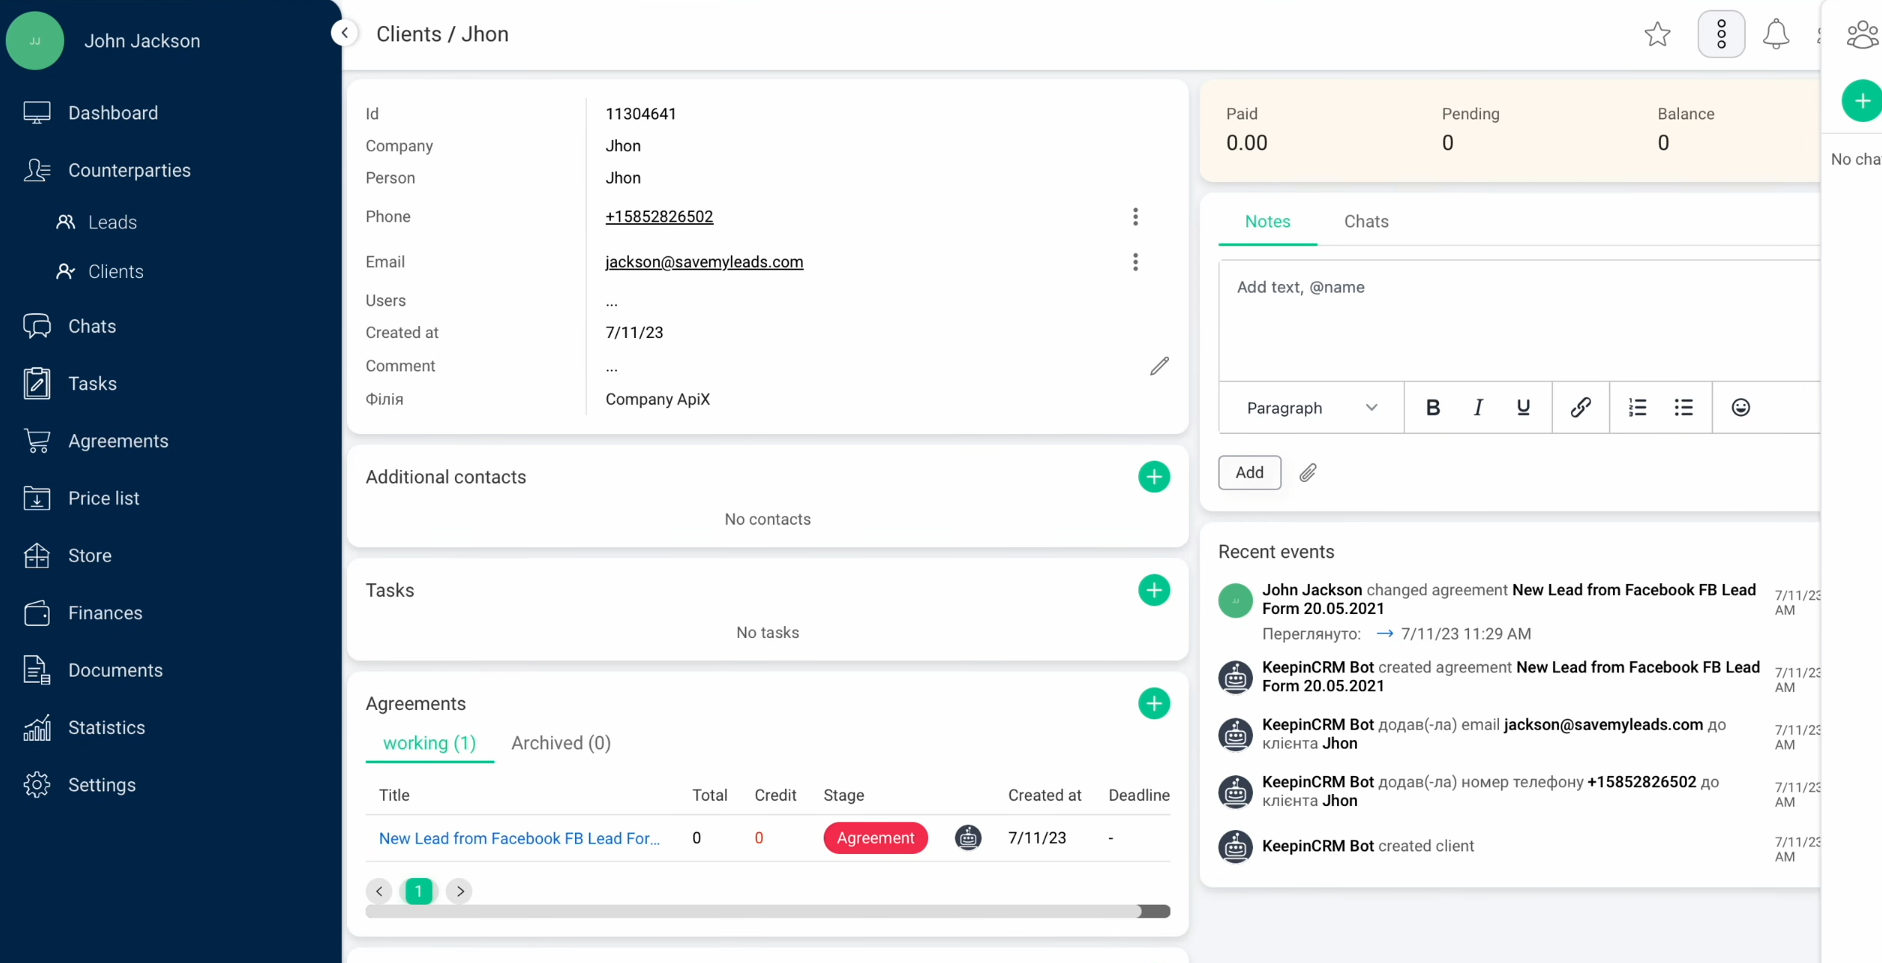
After successfully sending the test data, go to KeepinCRM and check the result.
Return to SaveMyLeads to complete the setup.
Setting up Auto-update
Click “Finish setup” to enable auto-update of the connection. In this case, all new leads from Facebook will be instantly transferred to the KeepinCRM system in the form of new agreements.
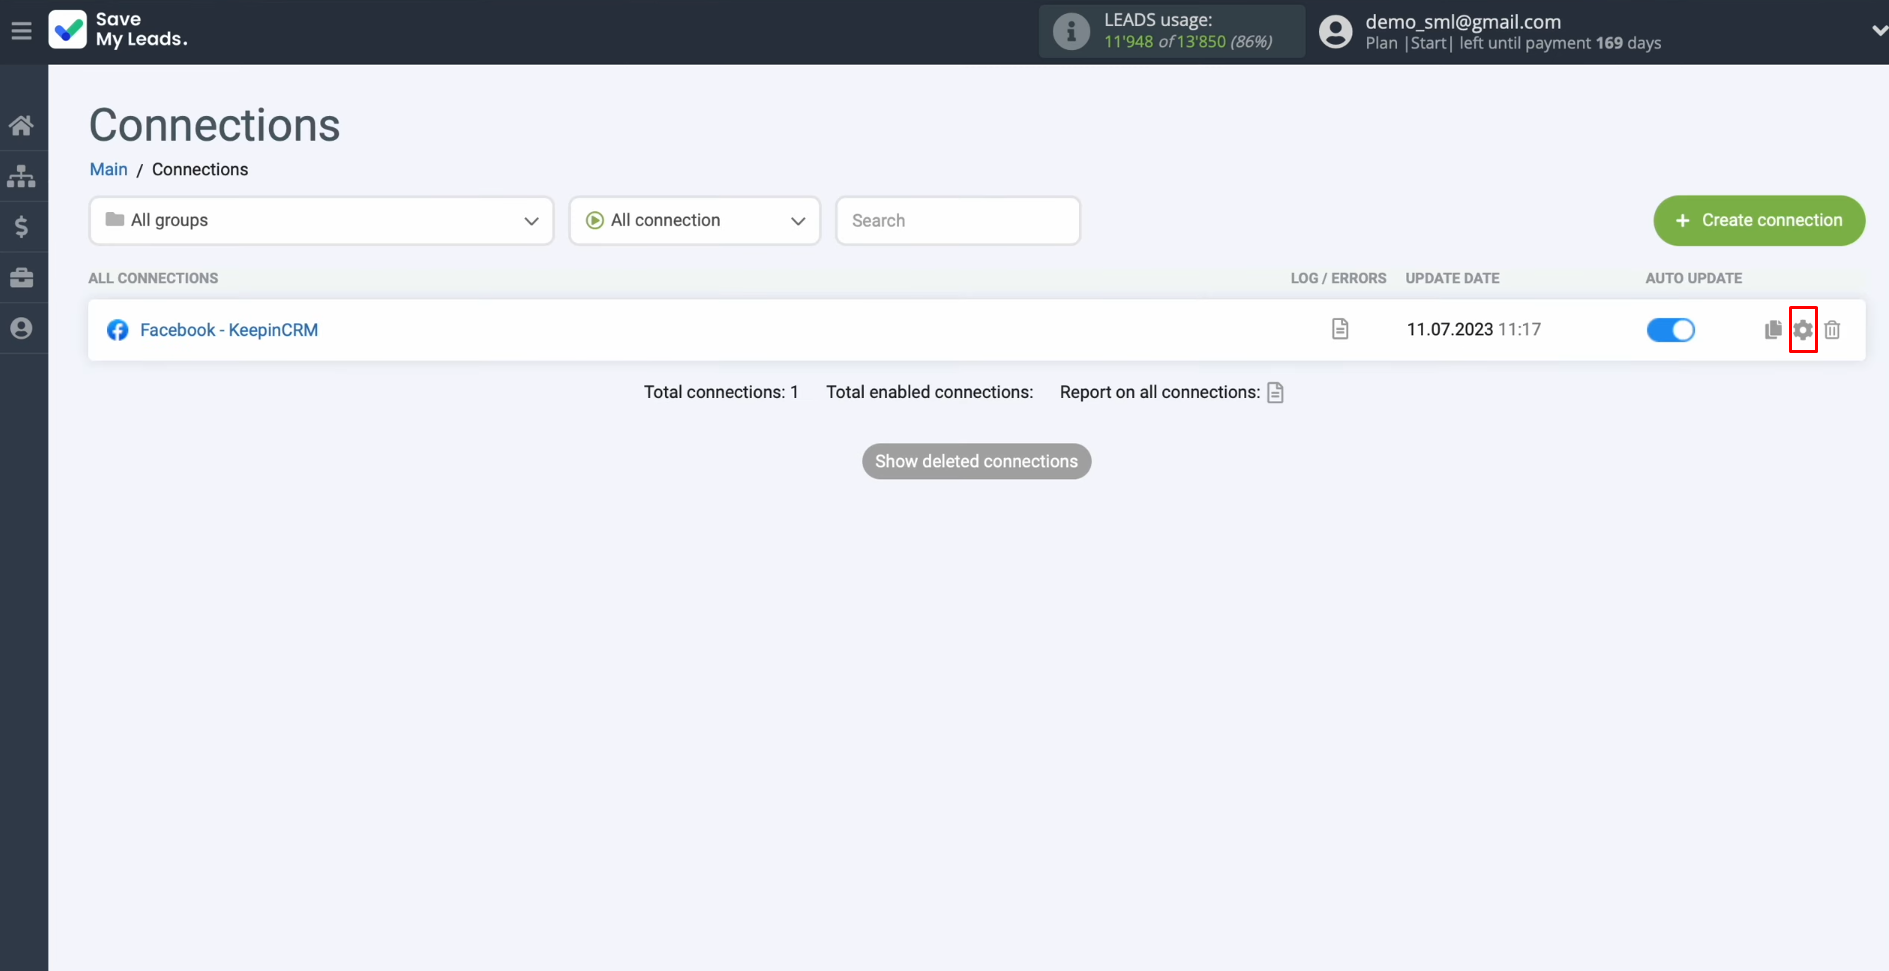
If you want to change the connection name, you can do this in its settings. Click on the gear-shaped icon.
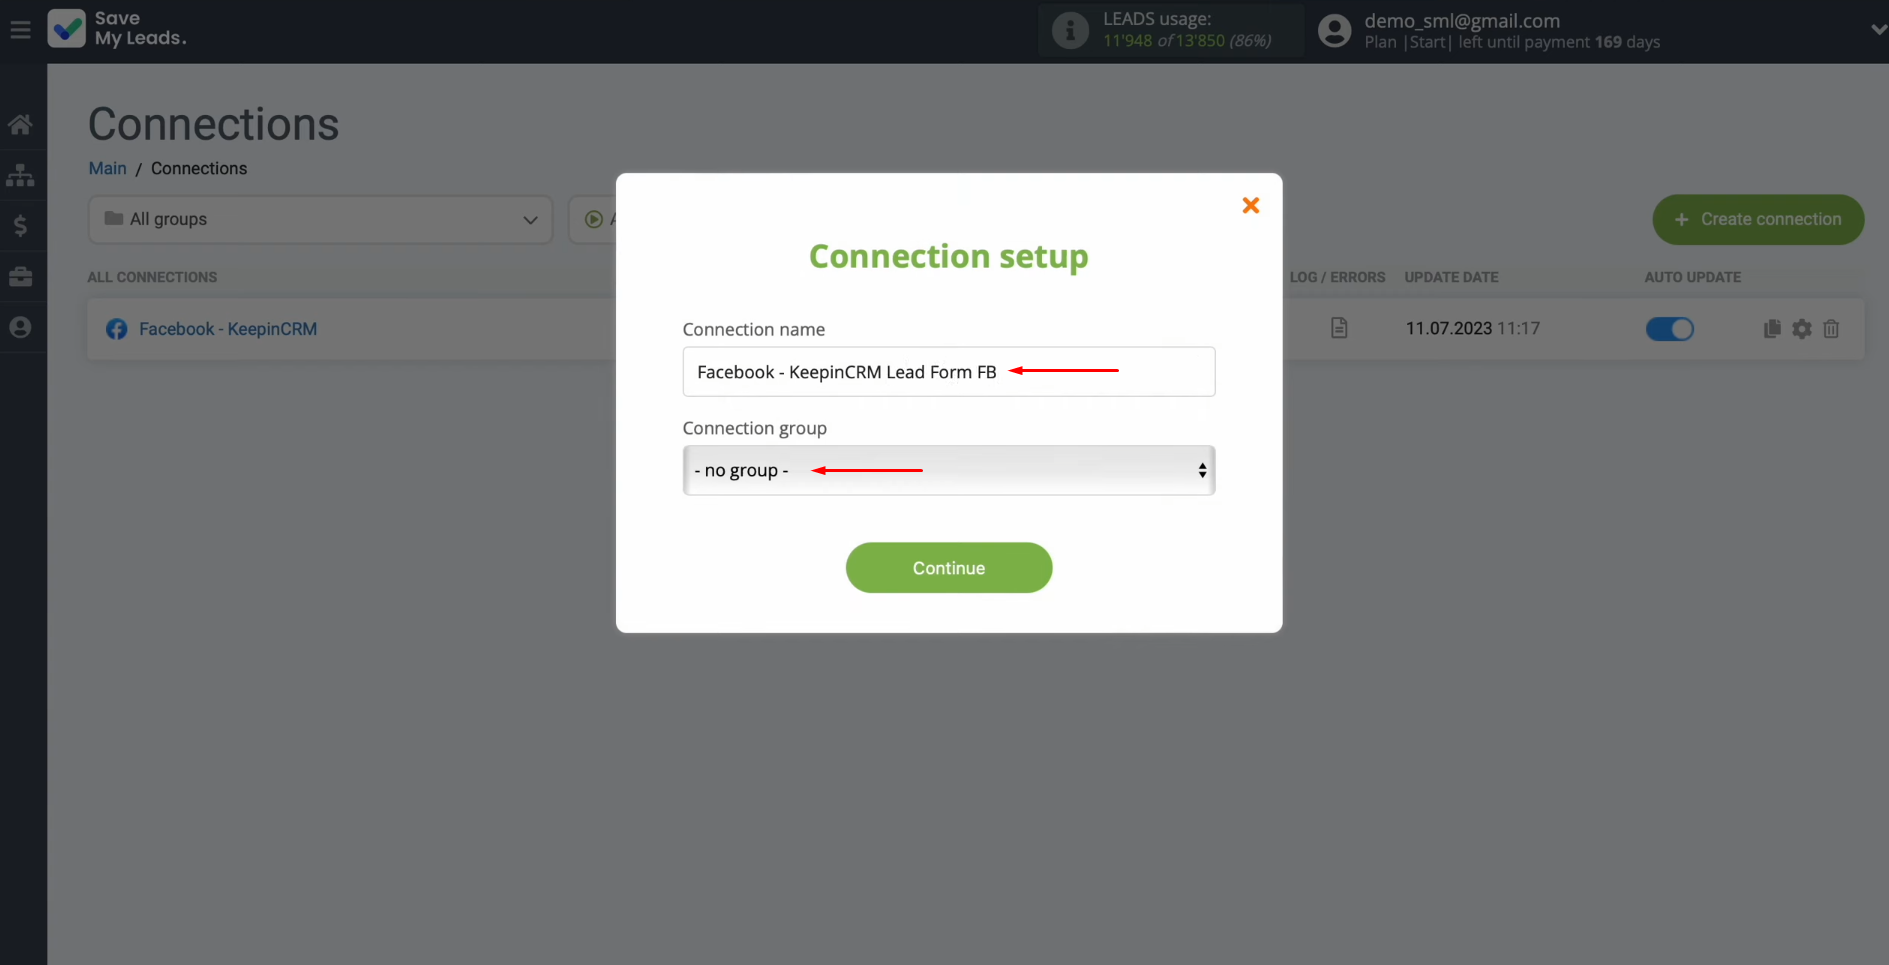
Here, you can change the connection name and add your
connection to a group. After that, click “Continue”.
That's
all. The Facebook and KeepinCRM integration has been completed.
Conclusion
By following our detailed instructions, you have probably already successfully completed the Facebook and KeepinCRM integration setup and started using its result – automated transfer of lead data. Monitoring it for a longer period of time will show you that the connection between these platforms is truly reliable and stable.
KeepinCRM and Facebook integration will free you from the need to perform one of the most monotonous processes manually by switching it to automatic mode. With the SaveMyLeads connector taking care of this chore, you'll be free to focus on other aspects of your work. Now more time and other resources can be devoted to improving the quality of communication with customers, developing innovative marketing strategies, and other key areas. Implementing lead transfer automation will not only improve the current state of your business but will also contribute to its further development. And SaveMyLeads will become your reliable assistant on this path.
