If you want to learn how to use one of the most powerful lead generation tools, you will find all the details in our step-by-step instructions.
Content:
1. New campaign setup
2. New ad set setup
3. Lead form ad setup
4. Ad launch
5. Leads download
6. Conclusion: a brief review of lead generation on Facebook
A Facebook lead form is an ad format created for lead generation. With this tool, you can quickly collect many contacts from your target audience on Facebook and Instagram.
A lead collection advertisement consists of two parts. The first one is a cover with a short text that calls to leave contact information in the form: most often an email or phone number. As motivation, it is usually offered some free content, a discount, or help with the product or service selection.
Once the user has clicked on the ad, its second part opens - a small form for data submitting. If you fill in this form, the advertiser will receive the contacts of the potential client, and the user will receive the promised reward. Both sides have their benefits.
If you want to launch an ad campaign to collect leads on Facebook, follow our instructions. But before you proceed, make sure you have a Facebook business account.
New campaign setup
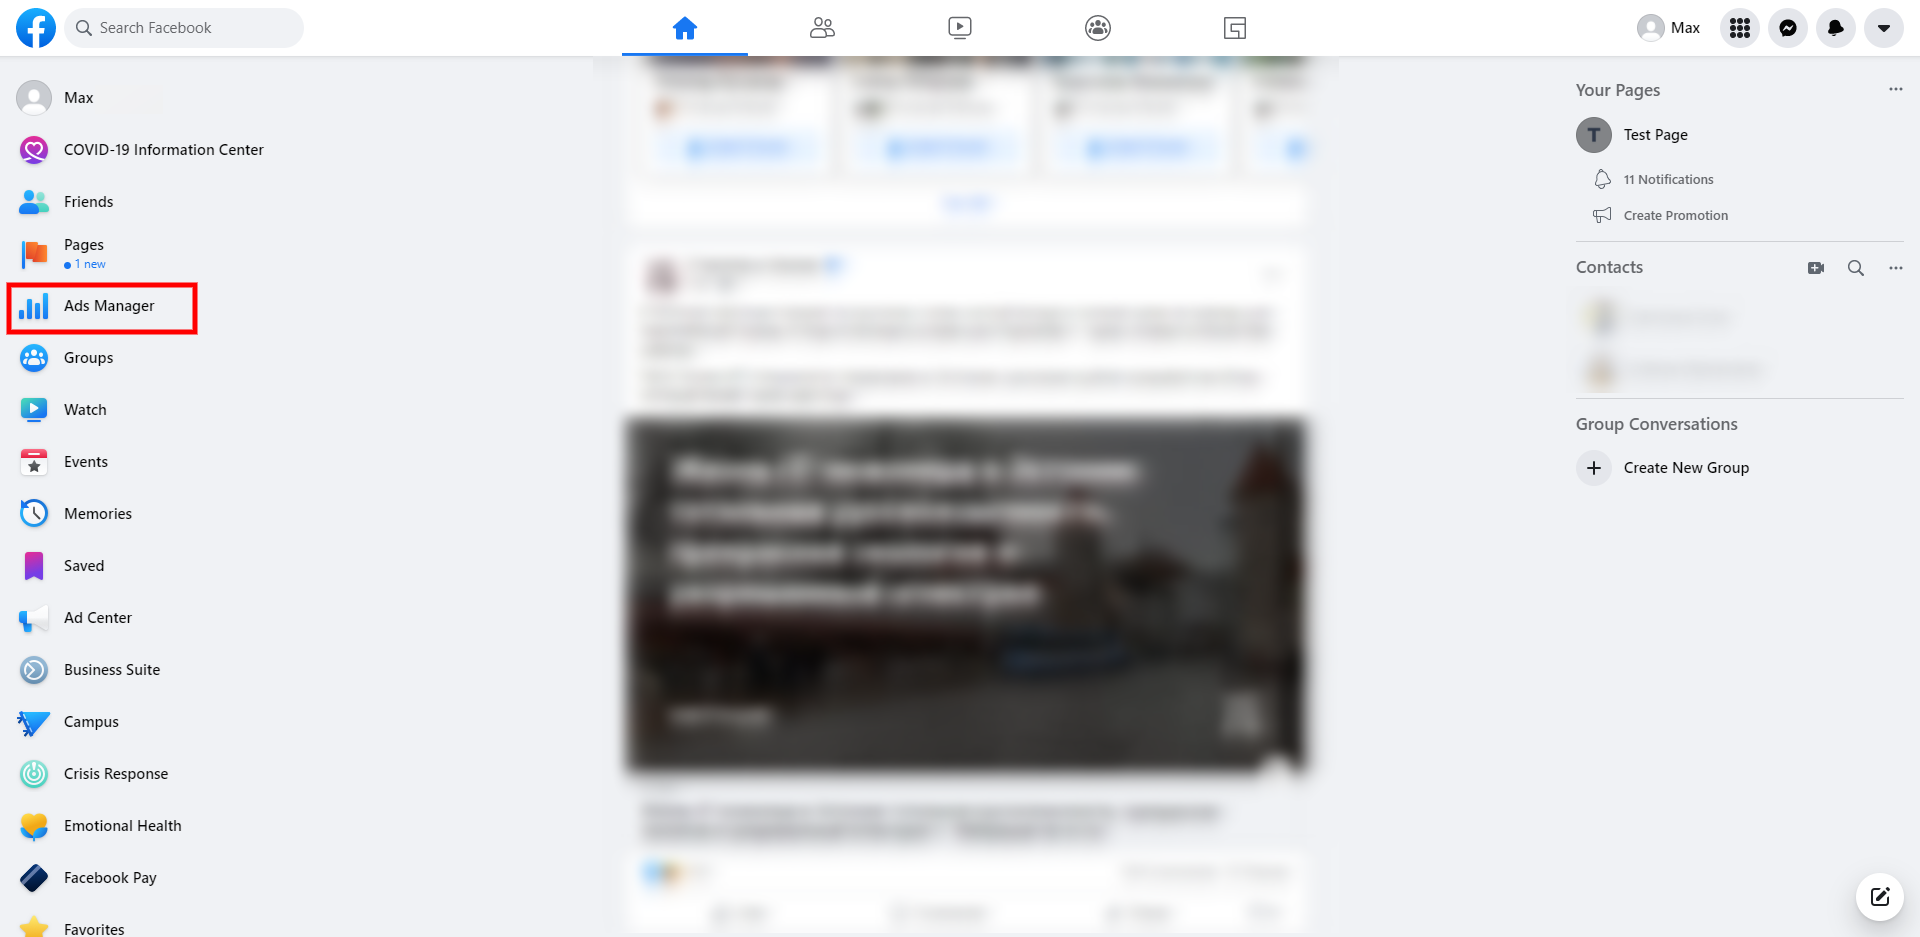
All settings are done in the Ads Manager section. To get into it, open your Facebook personal page and select the Ads Manager tab in the side menu.
Facebook ads have a three-level structure: campaigns, ad sets, and separate ads. A campaign is a top-level where basic settings such as promotion objectives are set. So let's start with the creation of a new campaign.
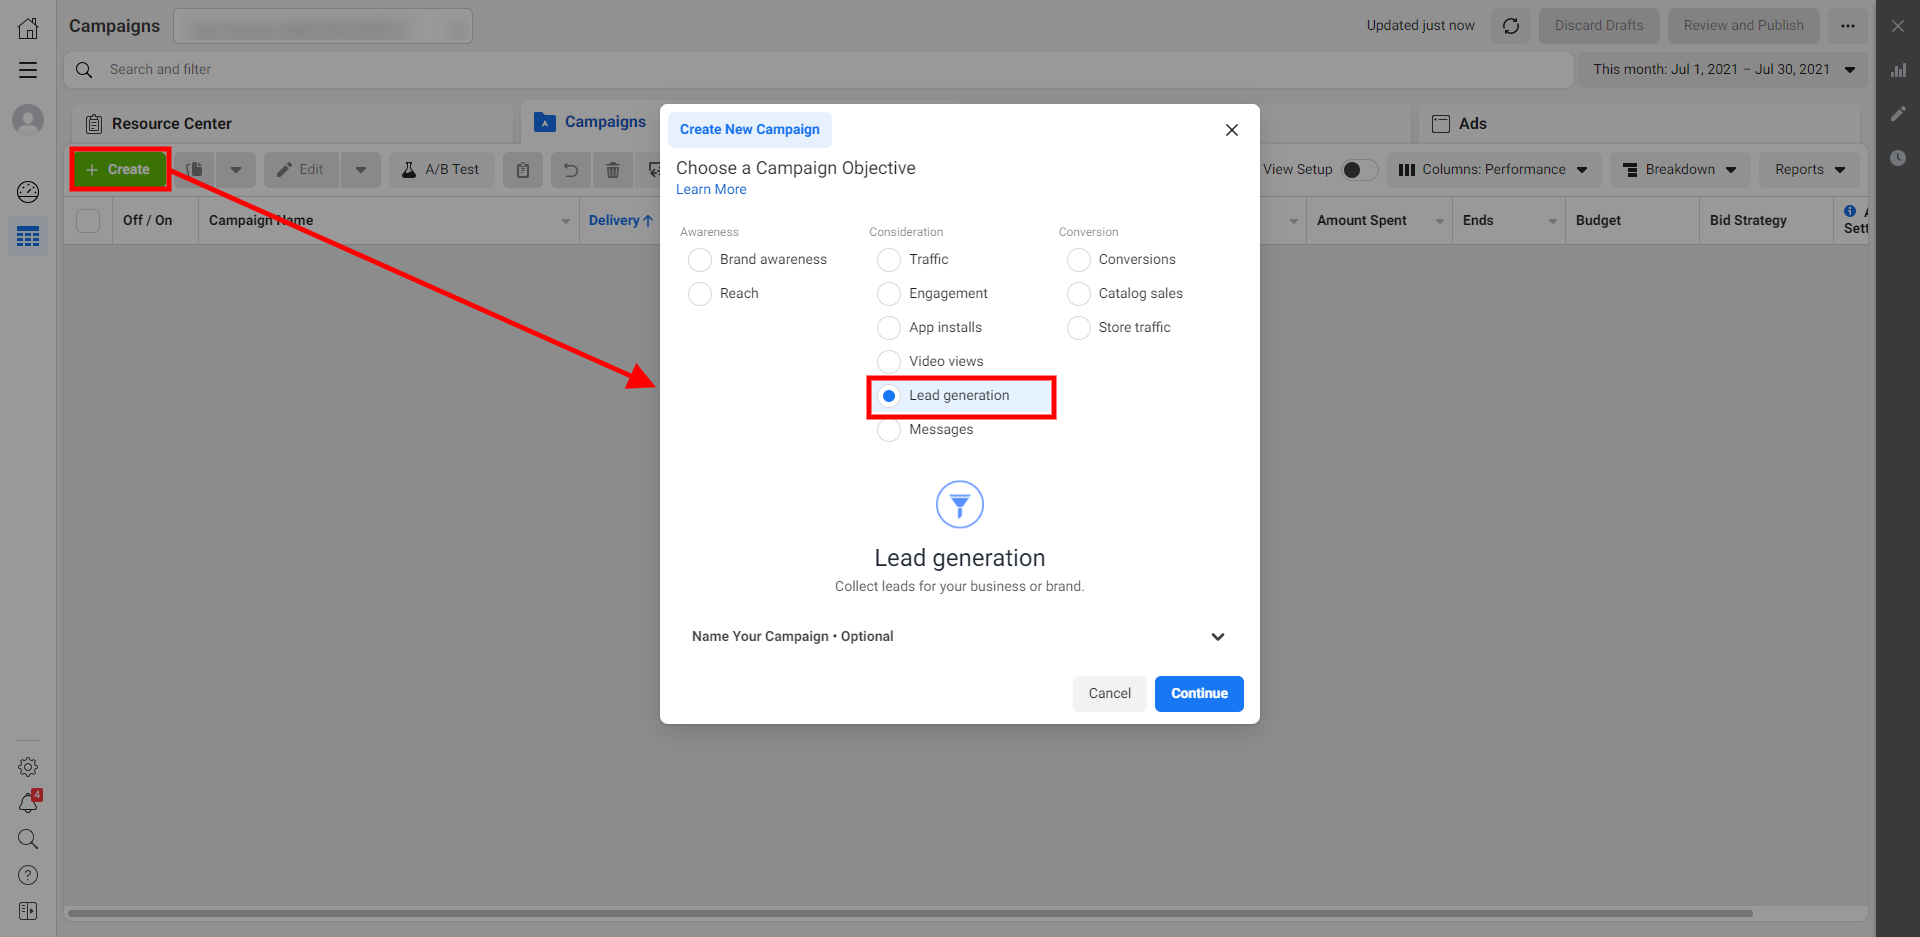
If you are in the Ads Manager, click on the "Create" button and select the campaign objective - "Lead Generation".
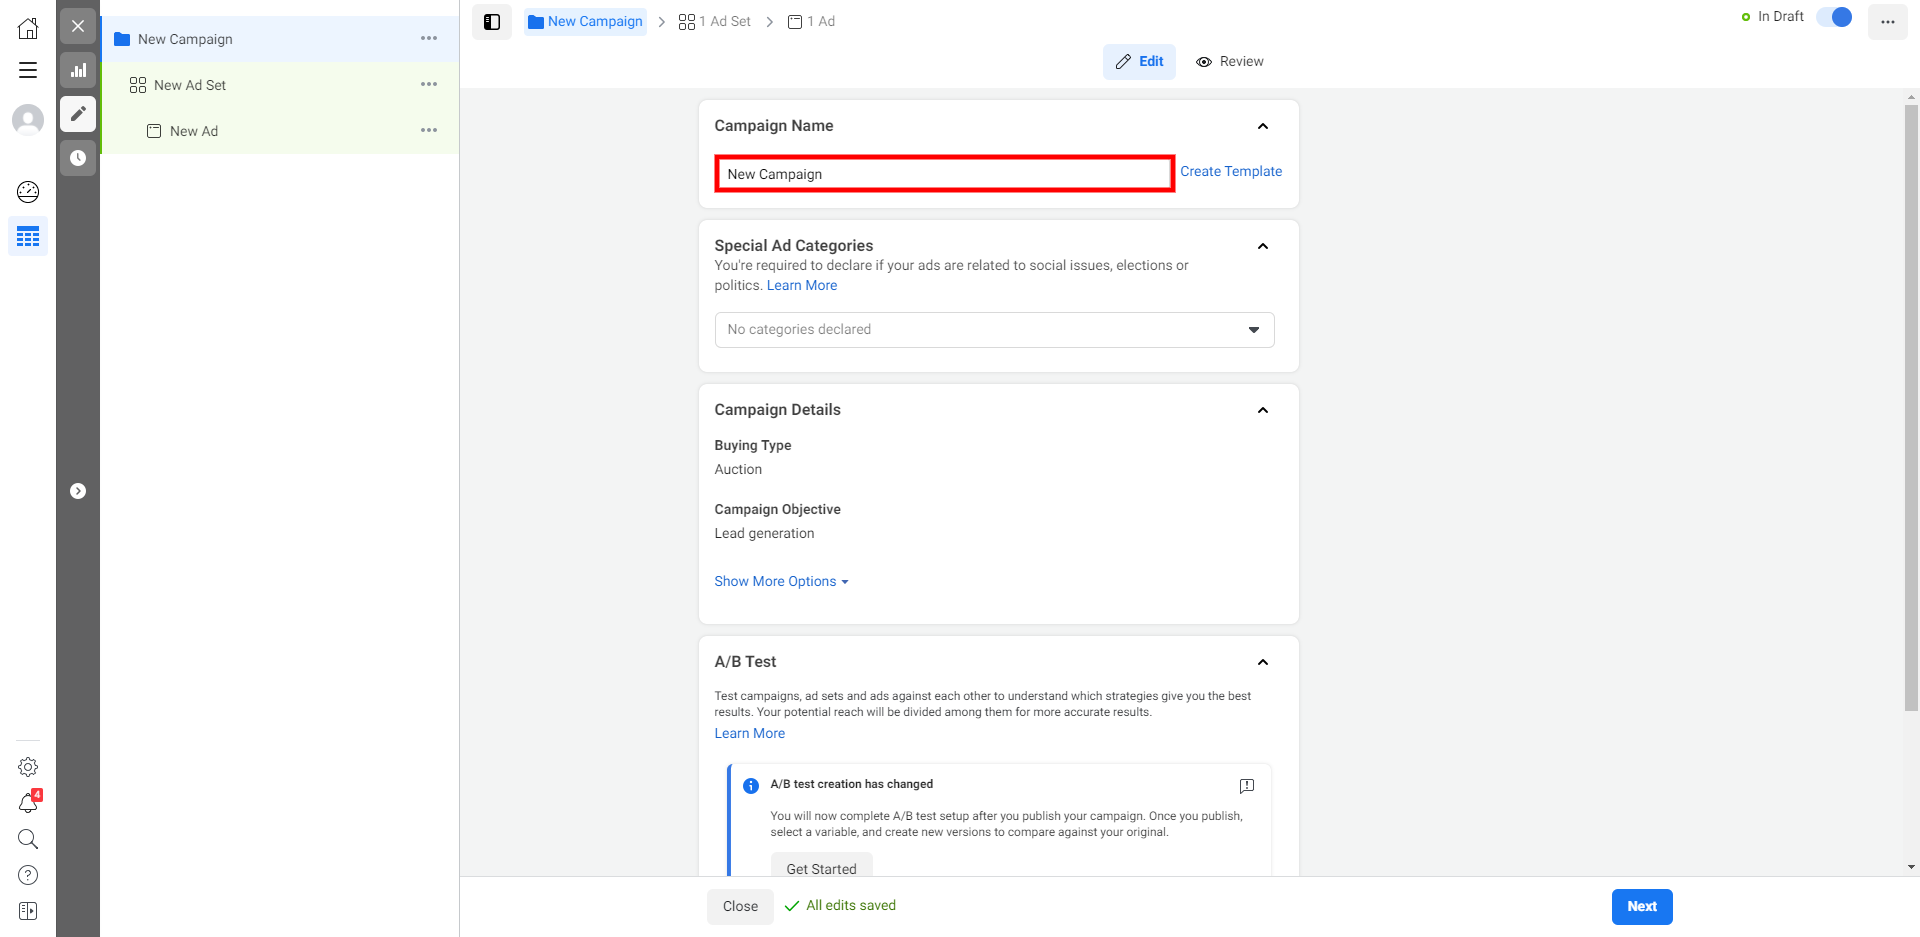
Enter an appropriate name for your future advertising campaign, which is visible only to the advertiser, as well as the names of ad sets, separate ads, and forms that you will create later.
Now enable budget optimization. As a result, the algorithm will automatically allocate ad costs, so the campaign brings the best results.
Enter the amount that you are ready to spend on advertising a day. For beginners, it is better not to enter large numbers to avoid unwanted expenses.
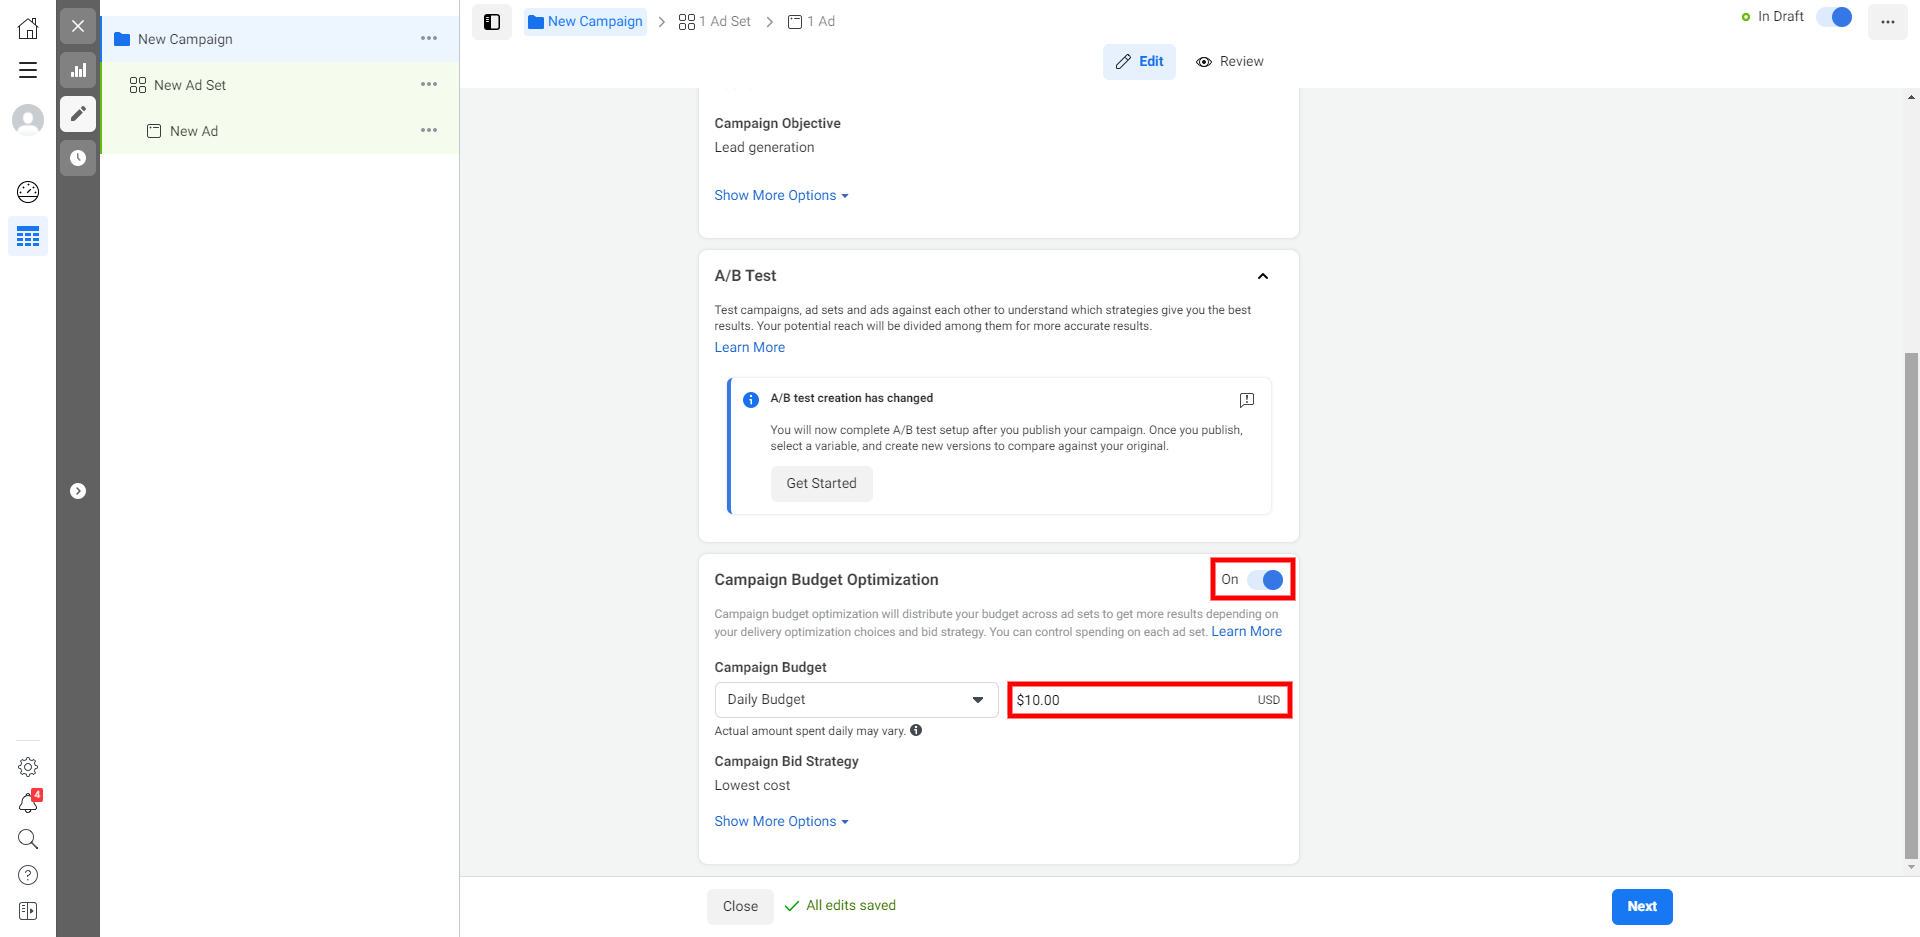
Press “Next” to proceed with creating an ad set.
New Ad Set setup
Every campaign must contain at least one ad set. This is the next level of the advertising structure, where the audience and other important parameters are set.
Enter the name for an ad set. Then select the "Instant Forms" lead generation method. If you have several business pages, pick the one you are going to launch advertising from.
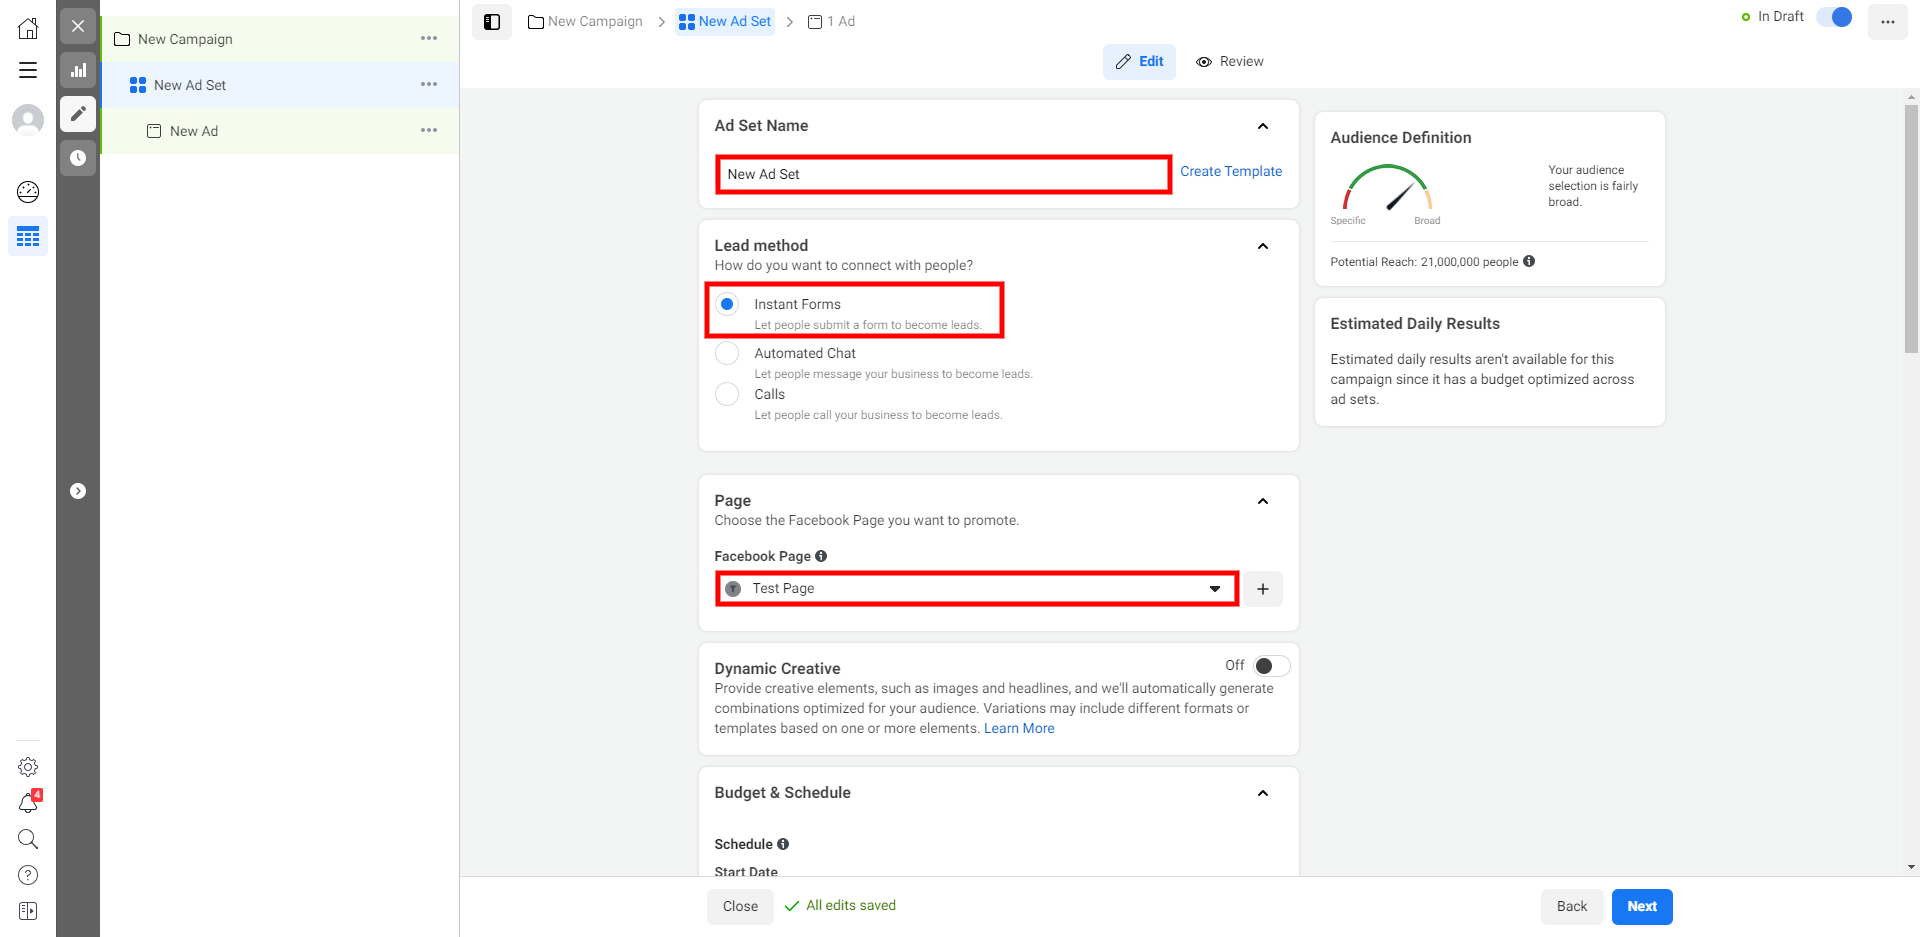
Set а preferred ad display period.
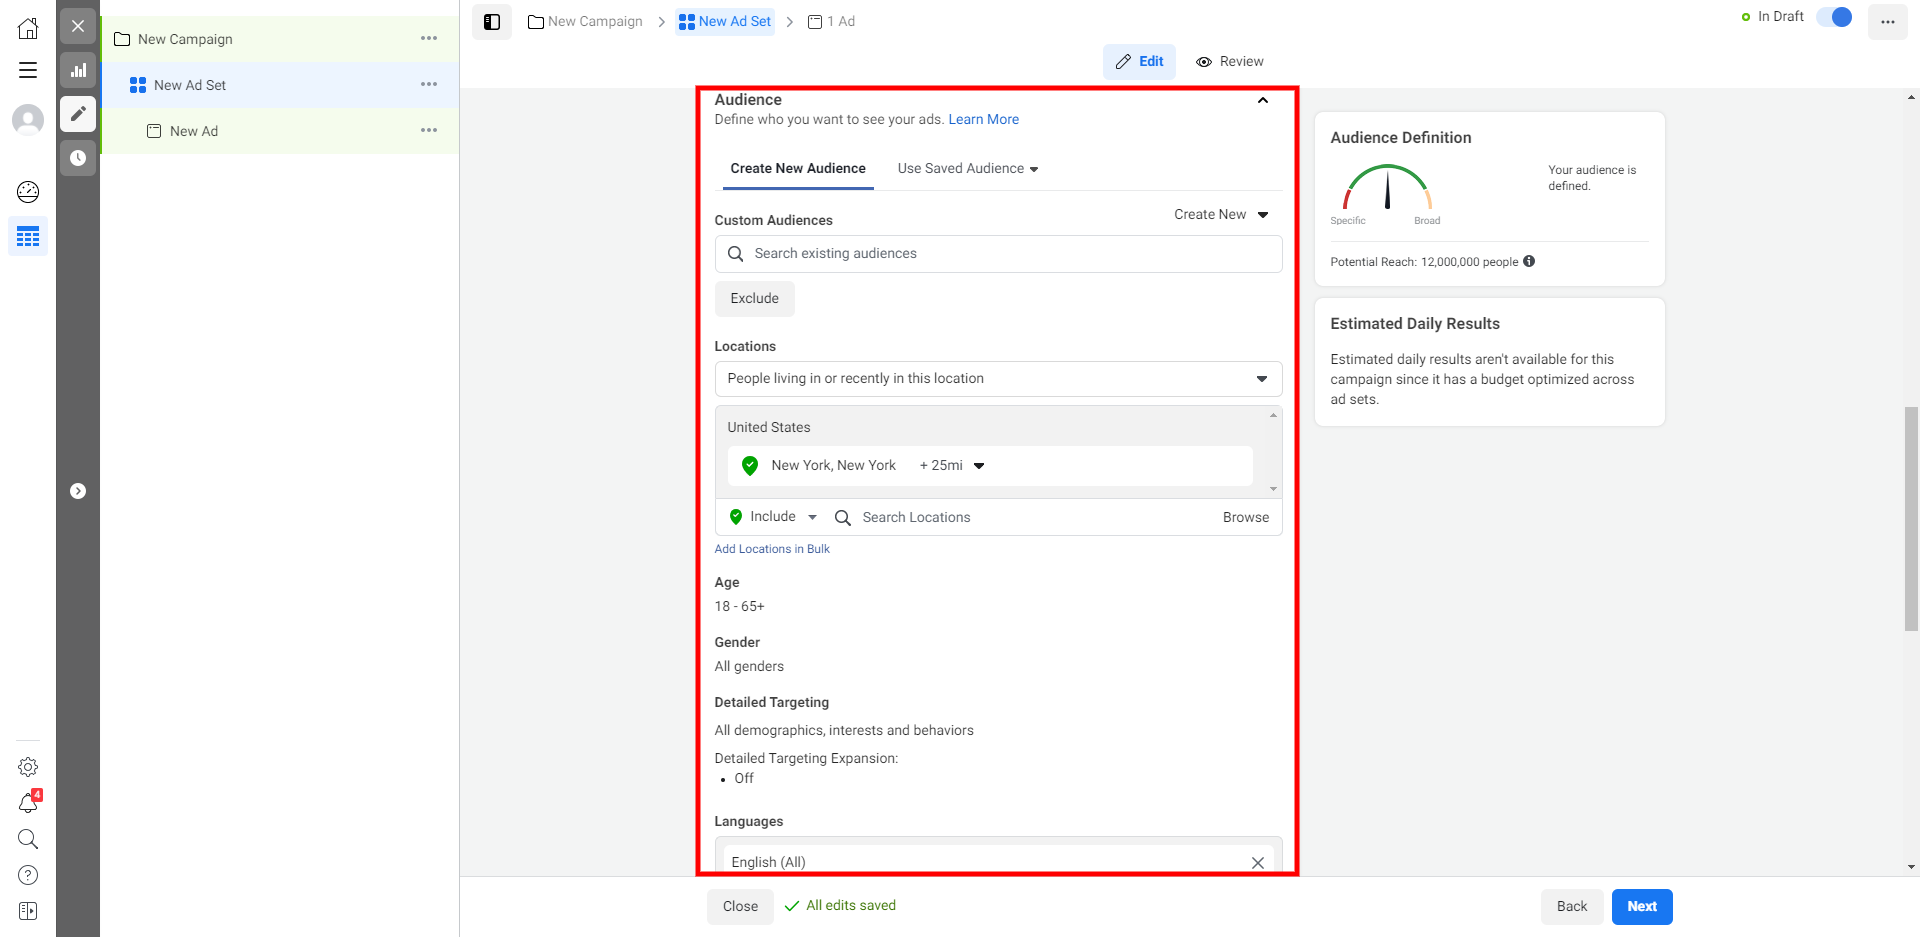
In this section, you need to specify the parameters of the target audience that will see your advertisement. The system allows you to select the region, gender, age, and interface languages that can be used by Facebook or Instagram users. The "Detailed Targeting" option allows you to make fine settings of the target audience using additional parameters like interests, habits, and more.
The ad placement selection determines exactly where the system will display your ads: in the Facebook feed, Stories, Instagram feed, and so on. If you are a beginner, it is better to use Automatic Placements so that the algorithm makes everything for you. The optimization and display settings you may leave as default.
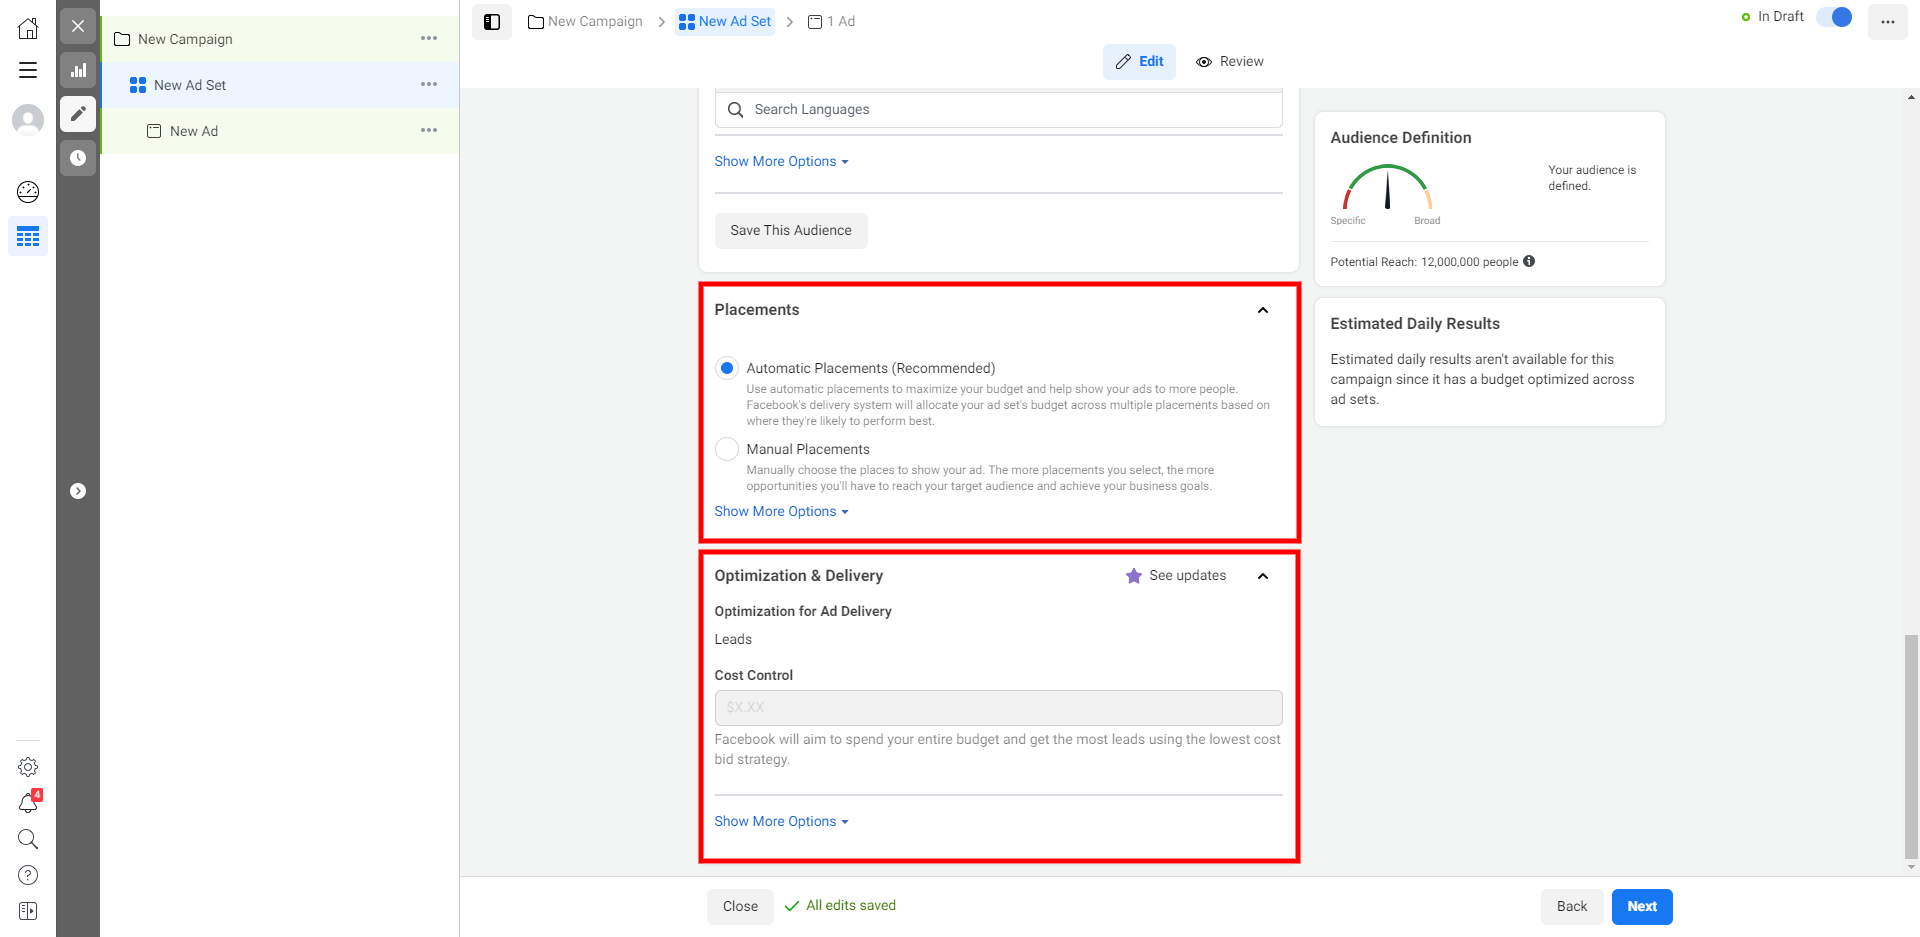
Click “Next” to proceed with setting up separate ads.
Lead form ad setup
At the ad level, the lowest one in the Facebook ad structure, you customize the content of each ad.
First, enter the name of the first ad.
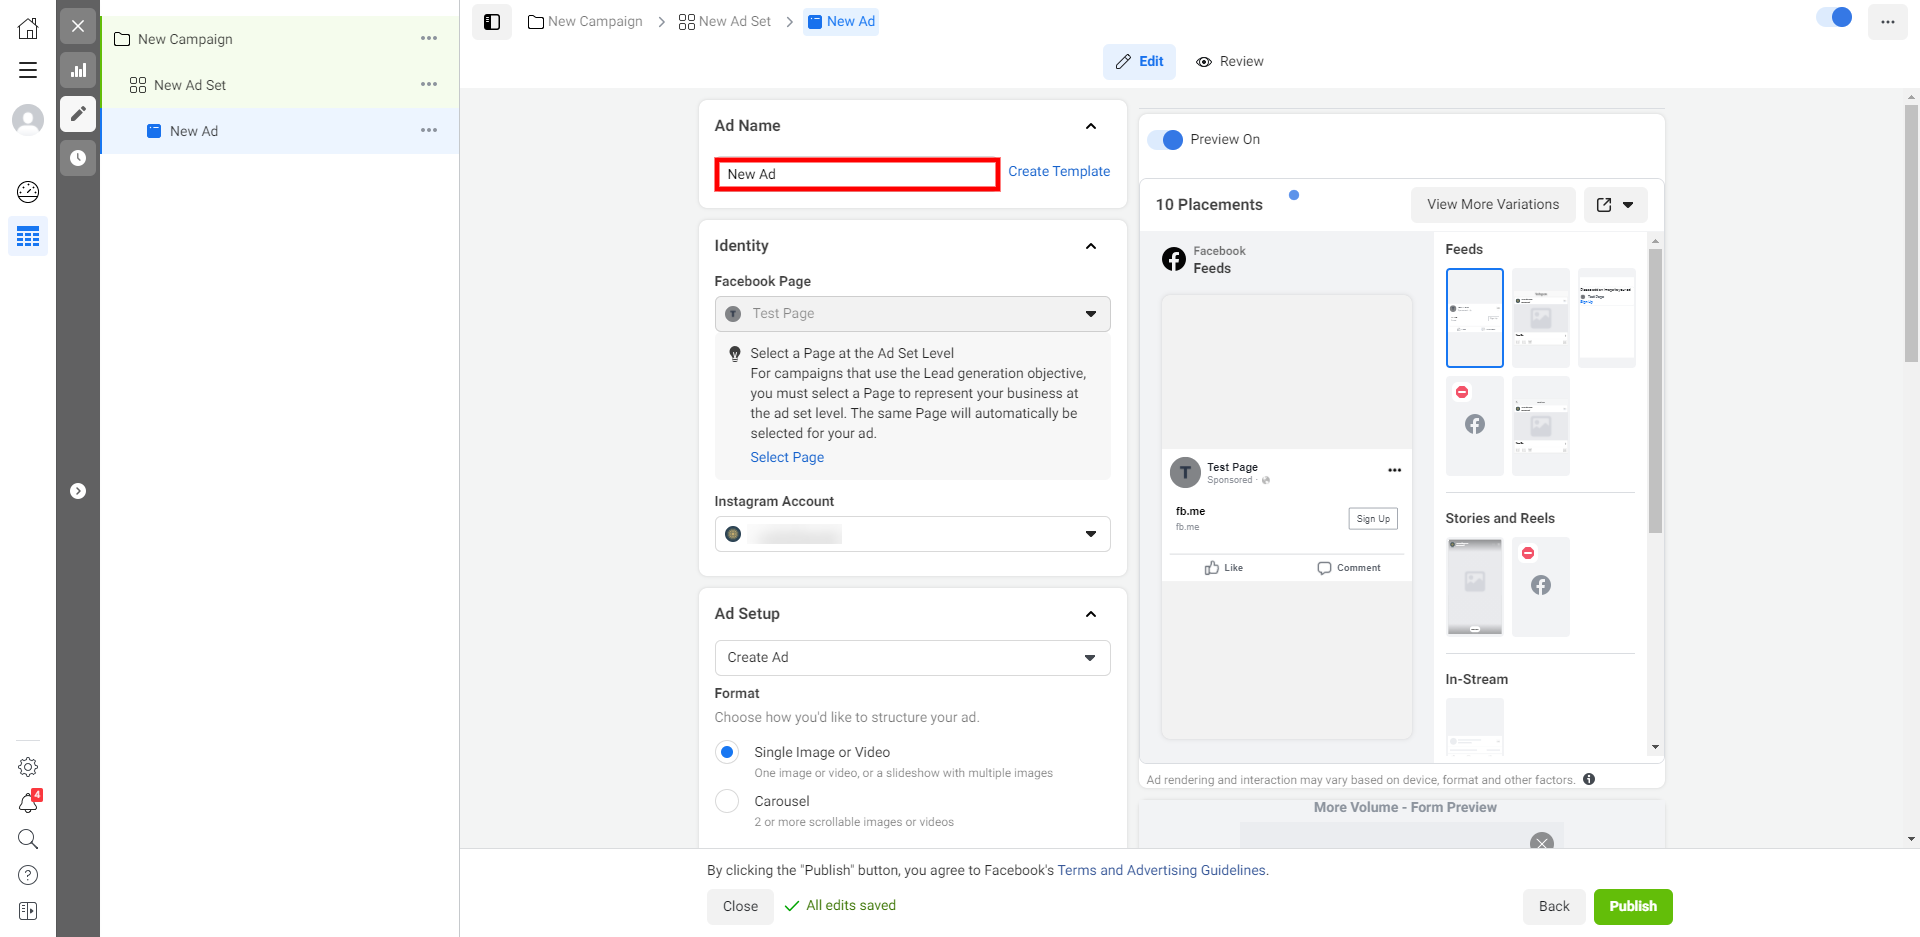
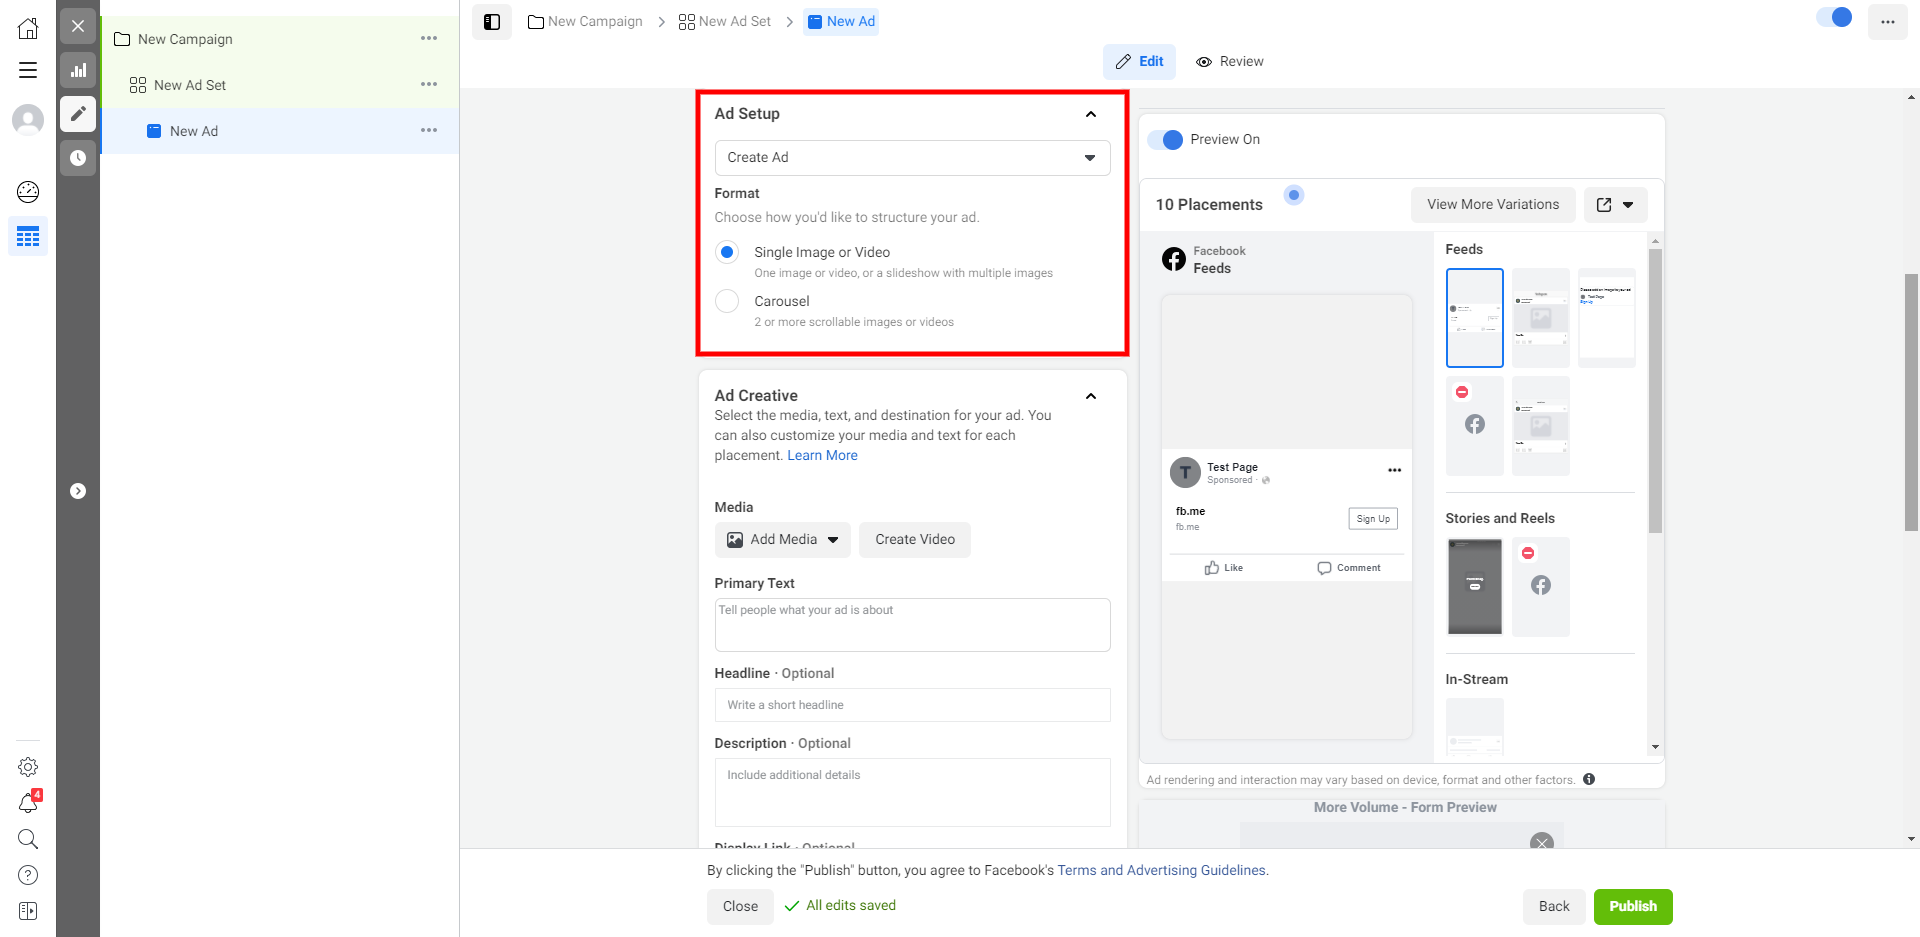
Select the ad format: with an image or with a gallery.
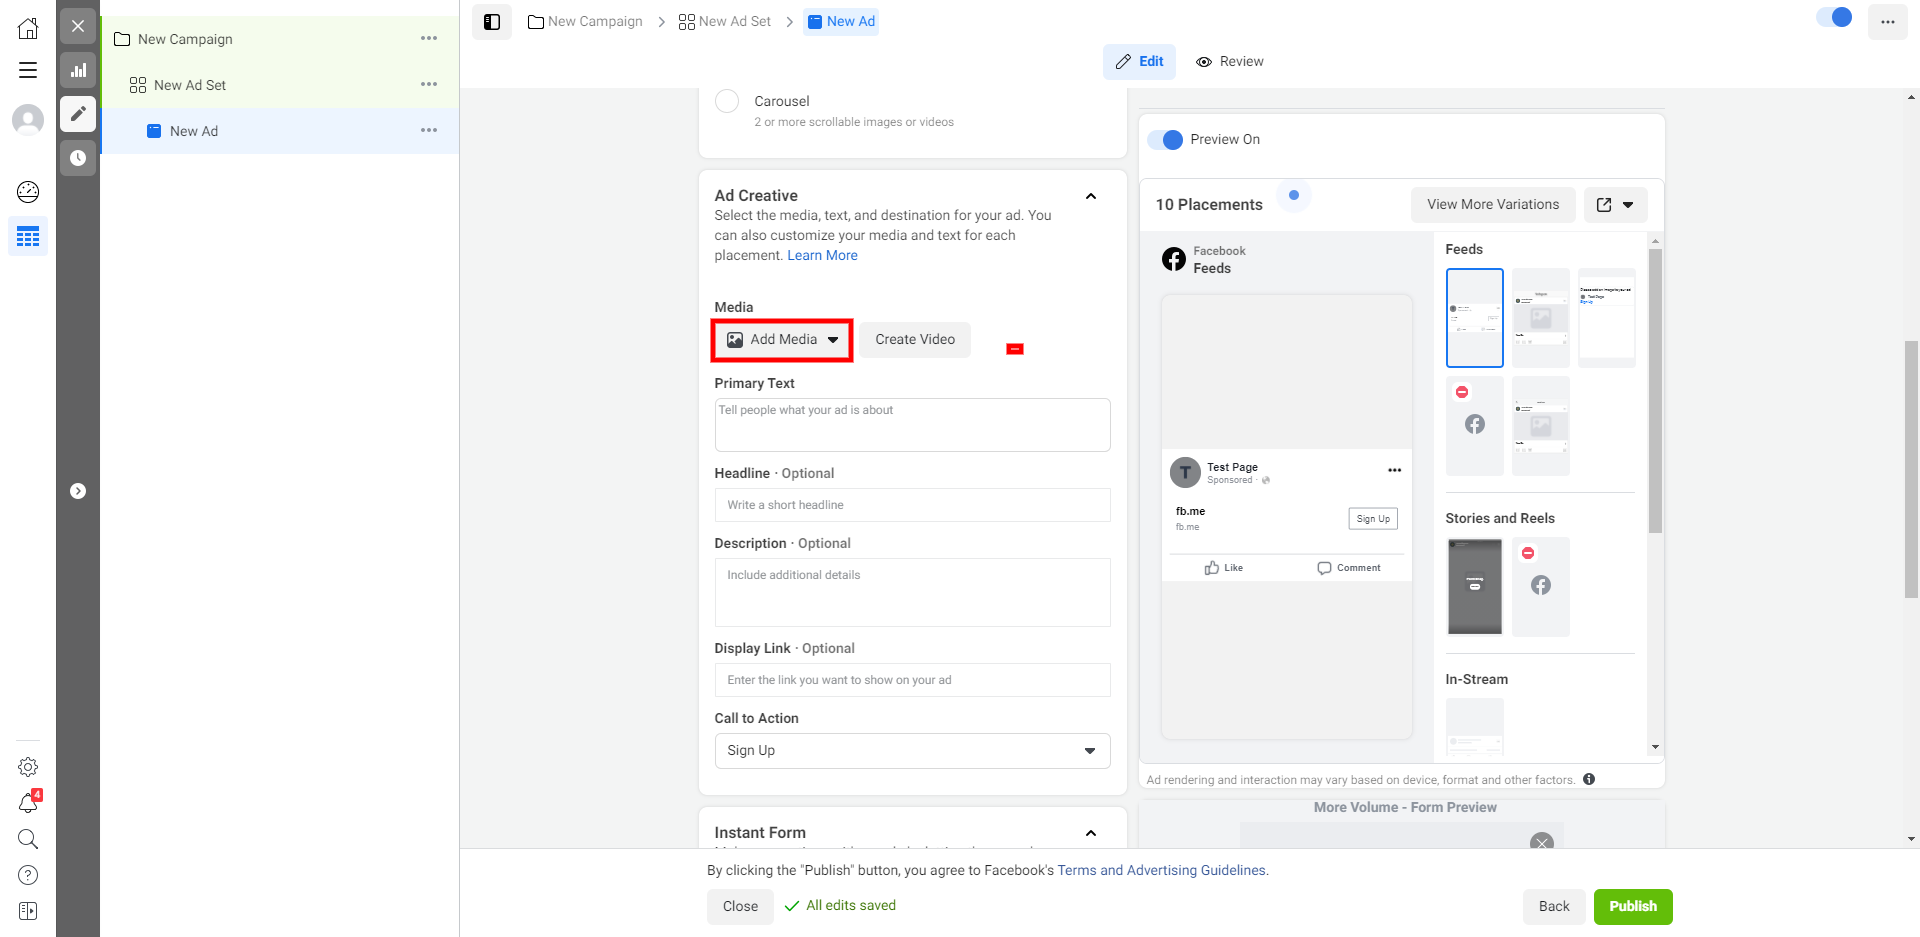
Upload a cover picture by clicking on the "Add Media" button.
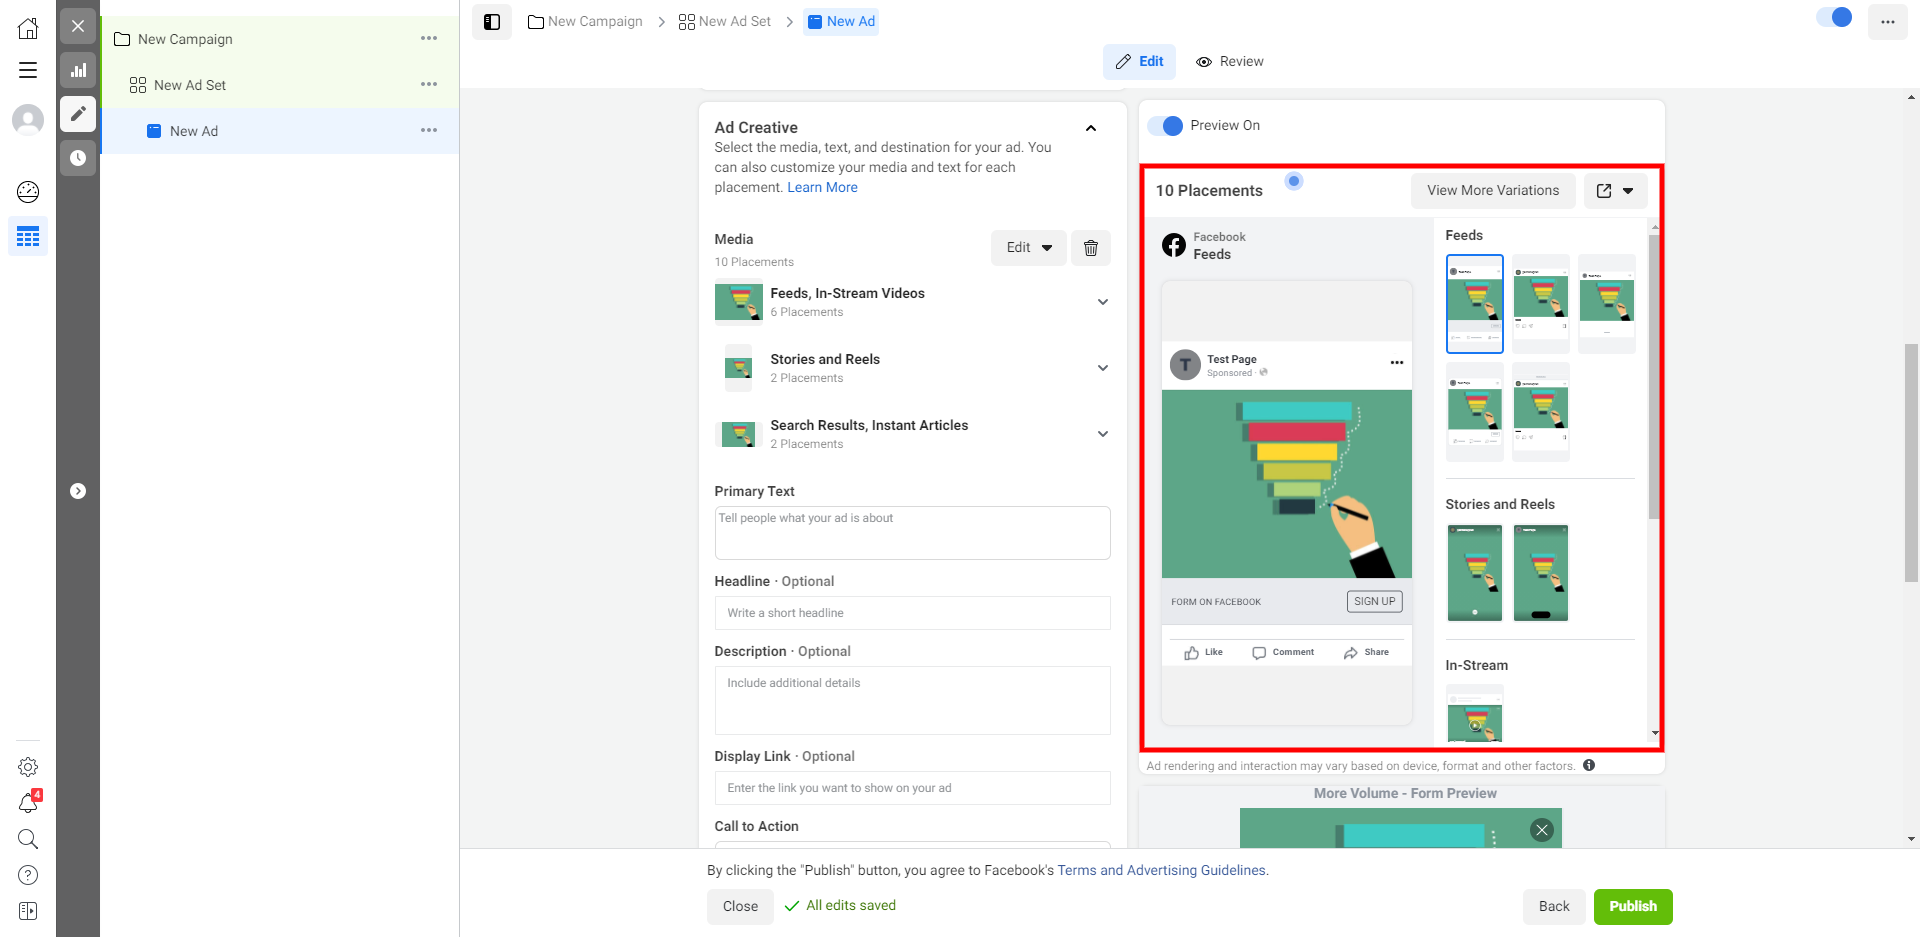
Once the media is uploaded, you can see how the ads are displayed in different placements.
Now let's create text creatives. You need to add a title and description. And if, after filling out the form, you need to bring the user to the site, you can also add a link. It is also worth choosing a call to action, an inscription on the button that opens the form.
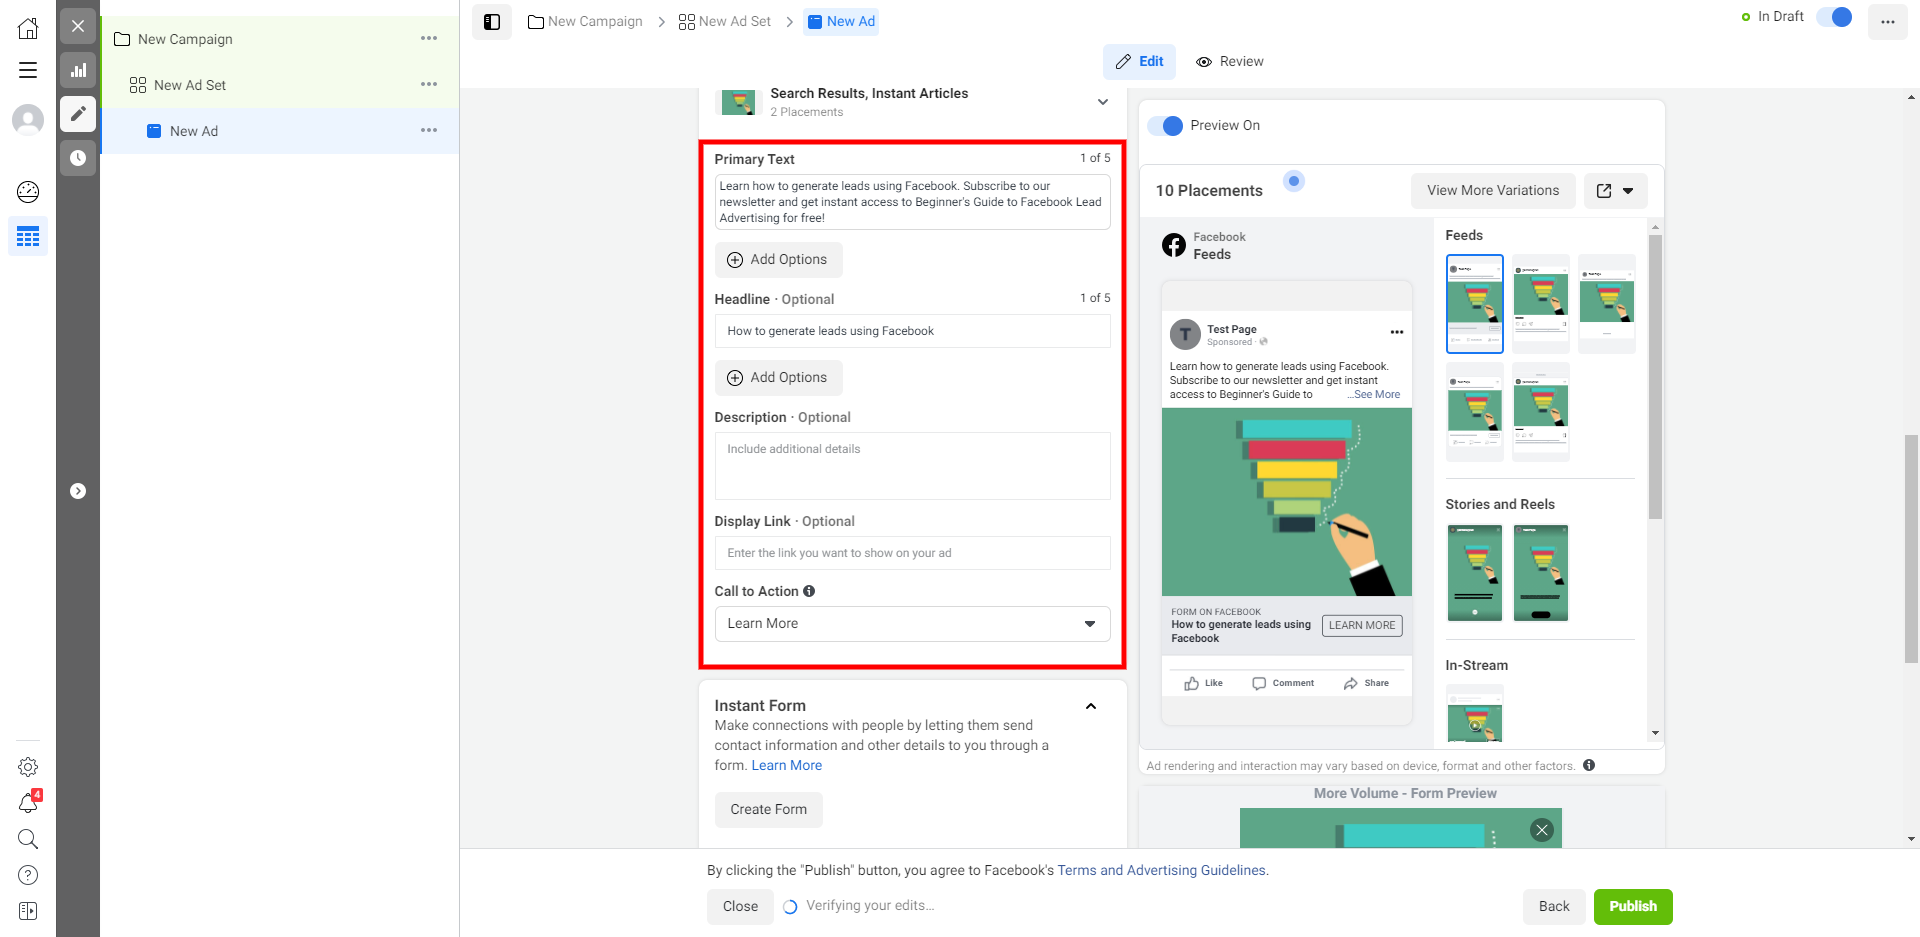
Let’s move on to adding a form - click "Create a form".
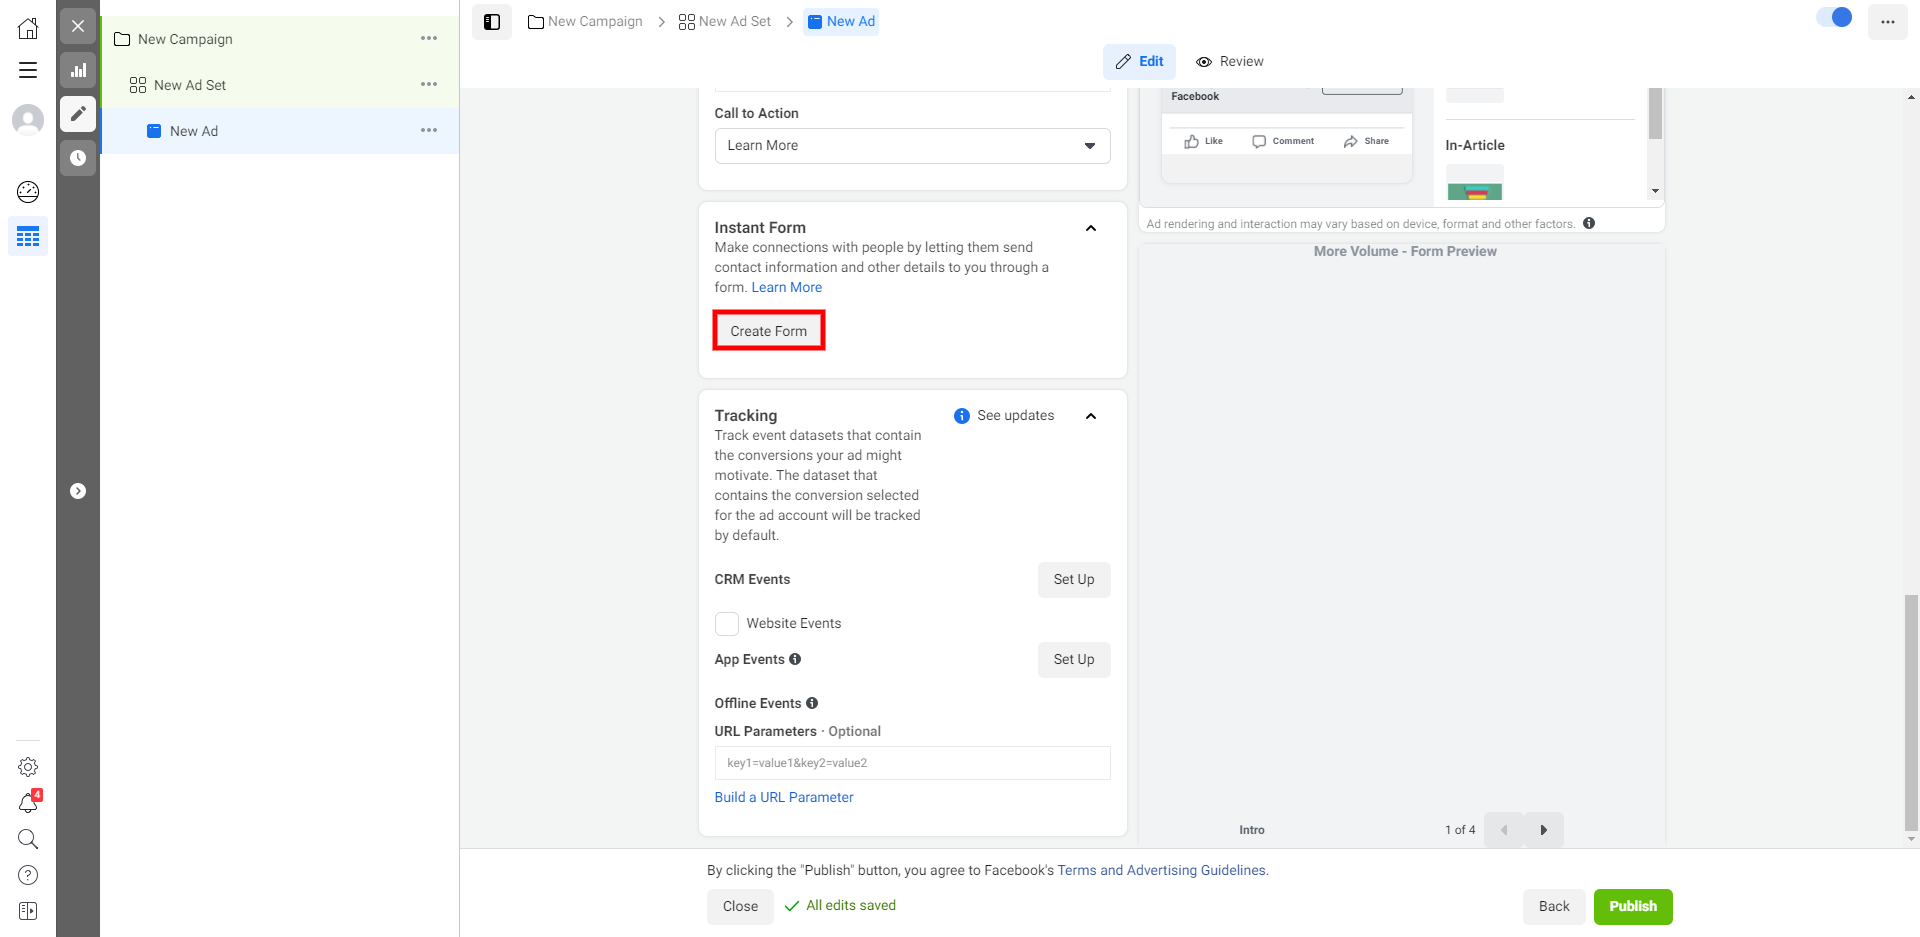
Open the "Settings" tab and select a suitable form language. Then check "Available to all" so that users can share an announcement and thereby draw their subscribers' and friends' attention.
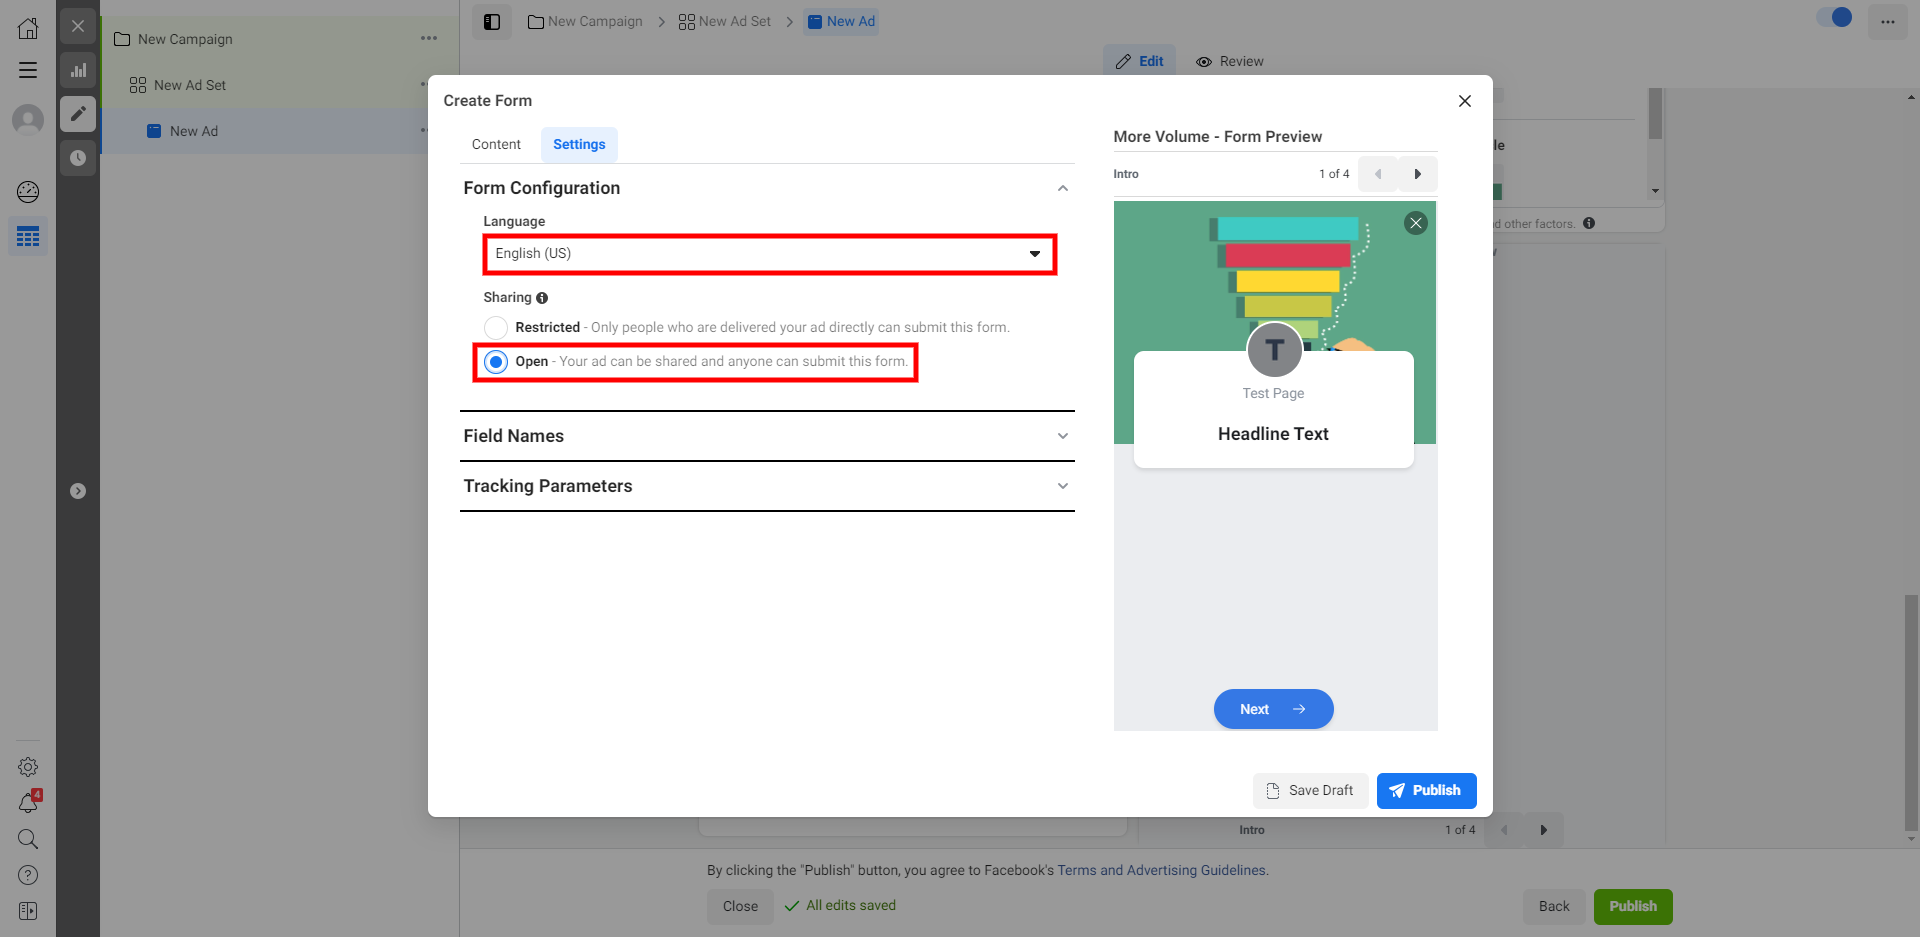
Now go back to the "Content" tab and enter the form name, then select the "More volume" type.
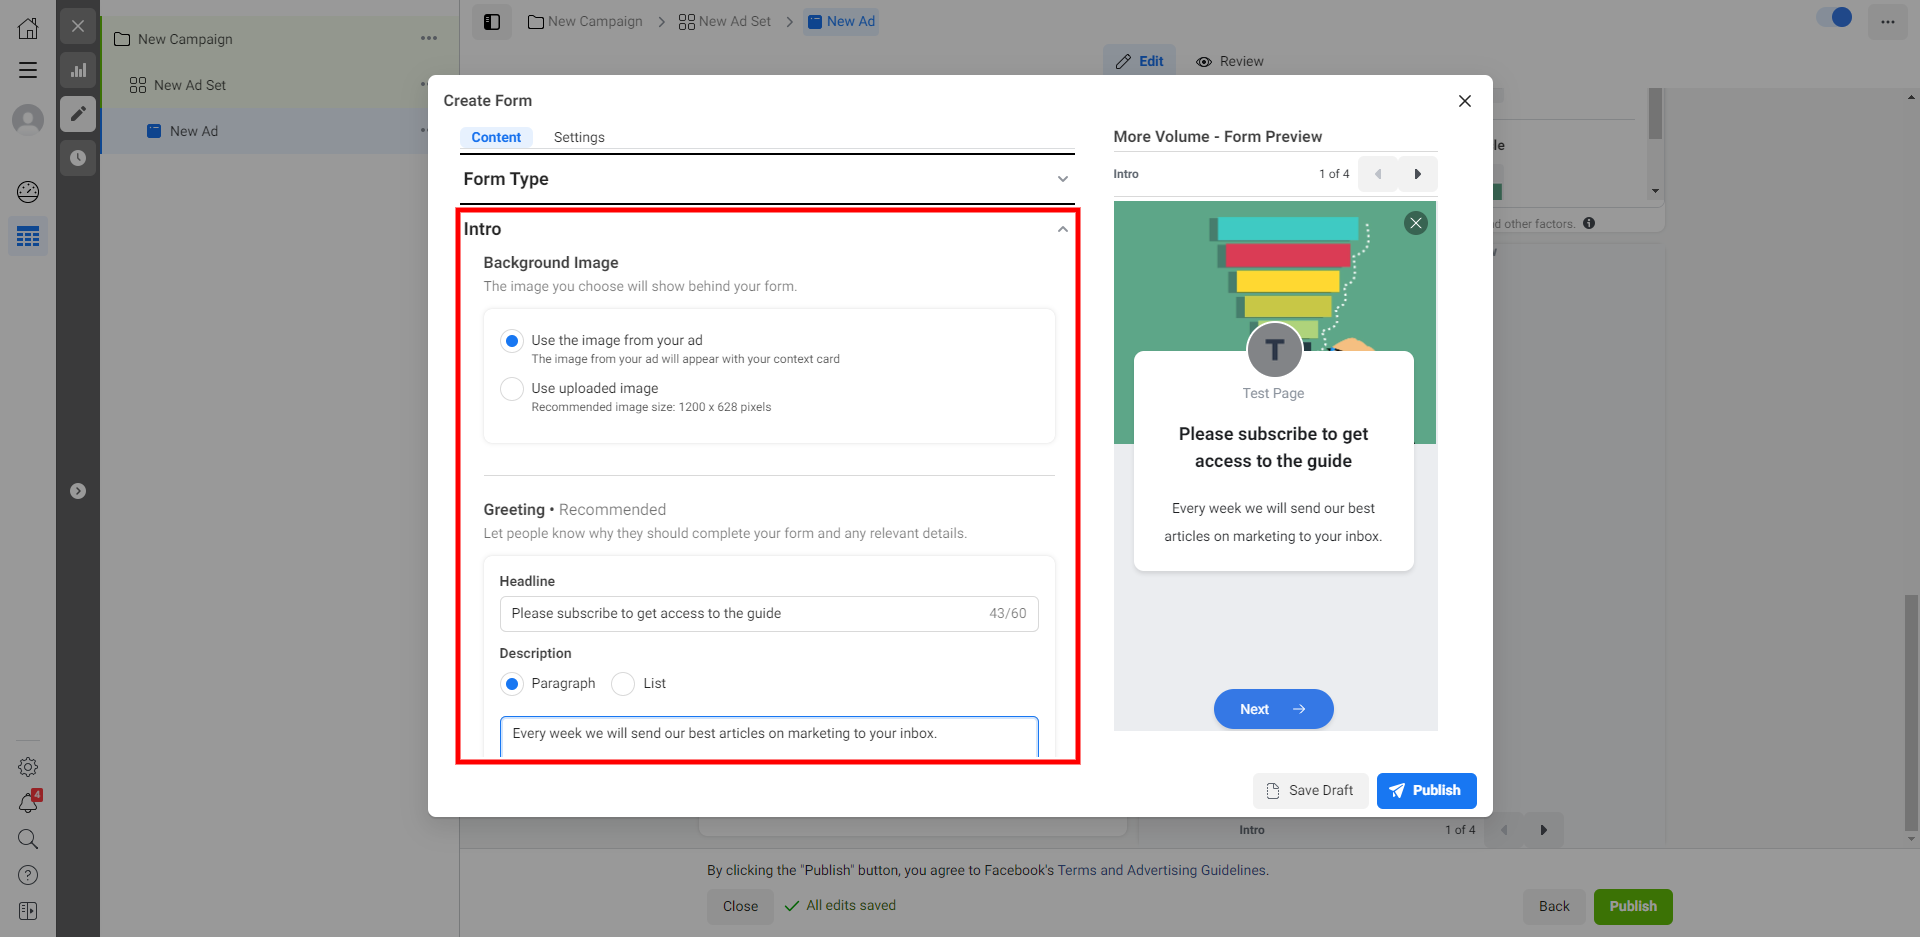
Fill in the section "Brief information". Its content is displayed on the first screen and visible to the users. First, select an image, enter the title, and welcome text. With their help, you have to remind the users why they should share their data with us.
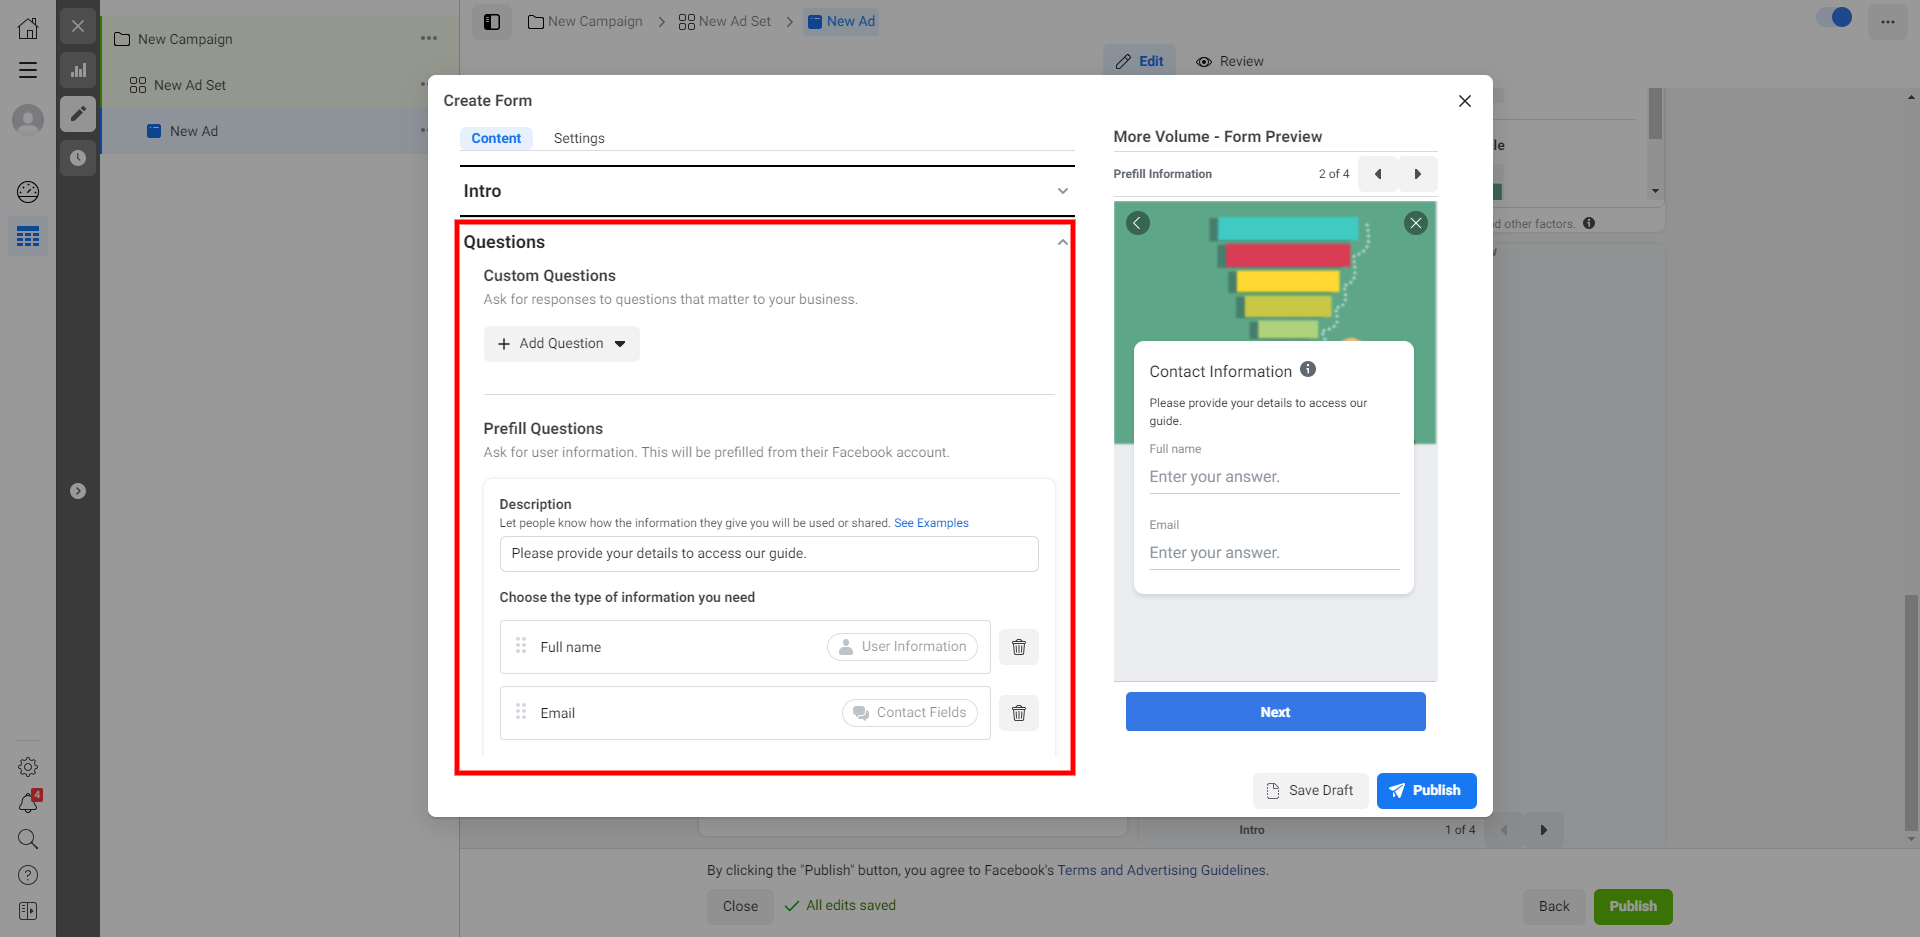
Fill in the second section - "Questions". Here you need to configure the fields for requesting data, and explain how you will use it.
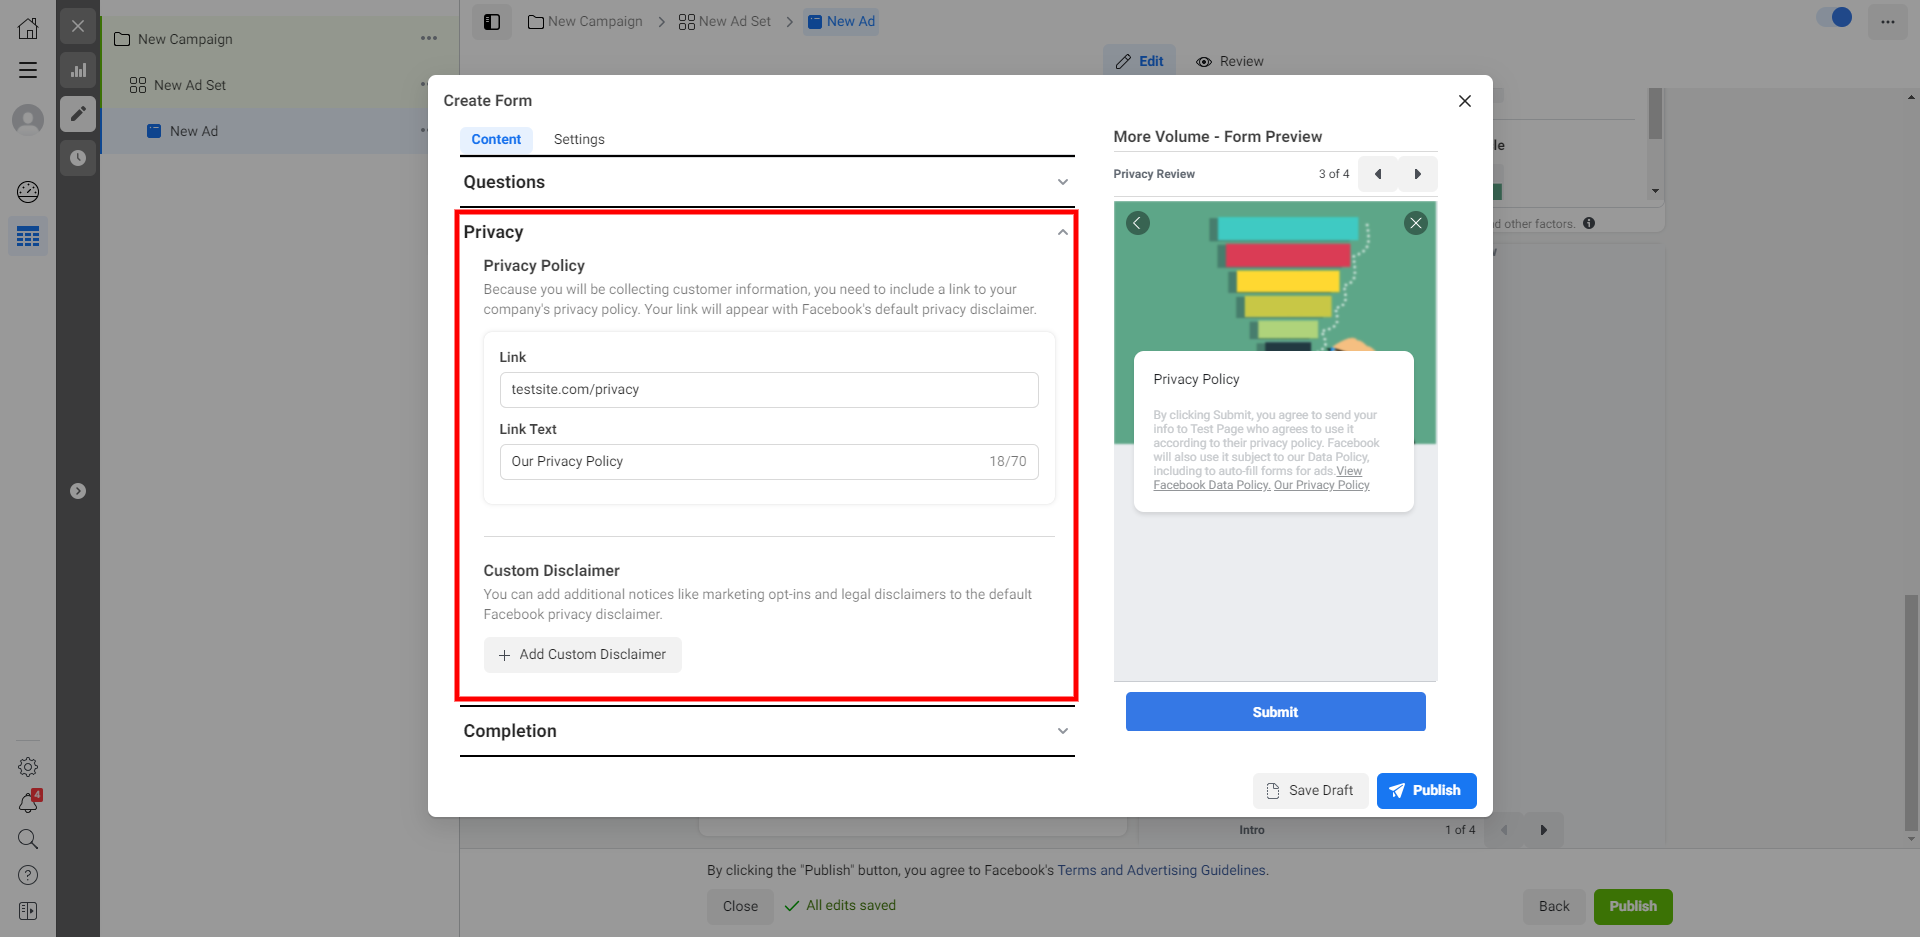
In the "Privacy" section, add a link to the page with your privacy policy. If there is no such page, make sure to create it. If there is no website either, you can easily create it using Tilda, Wix, or other similar website builders.
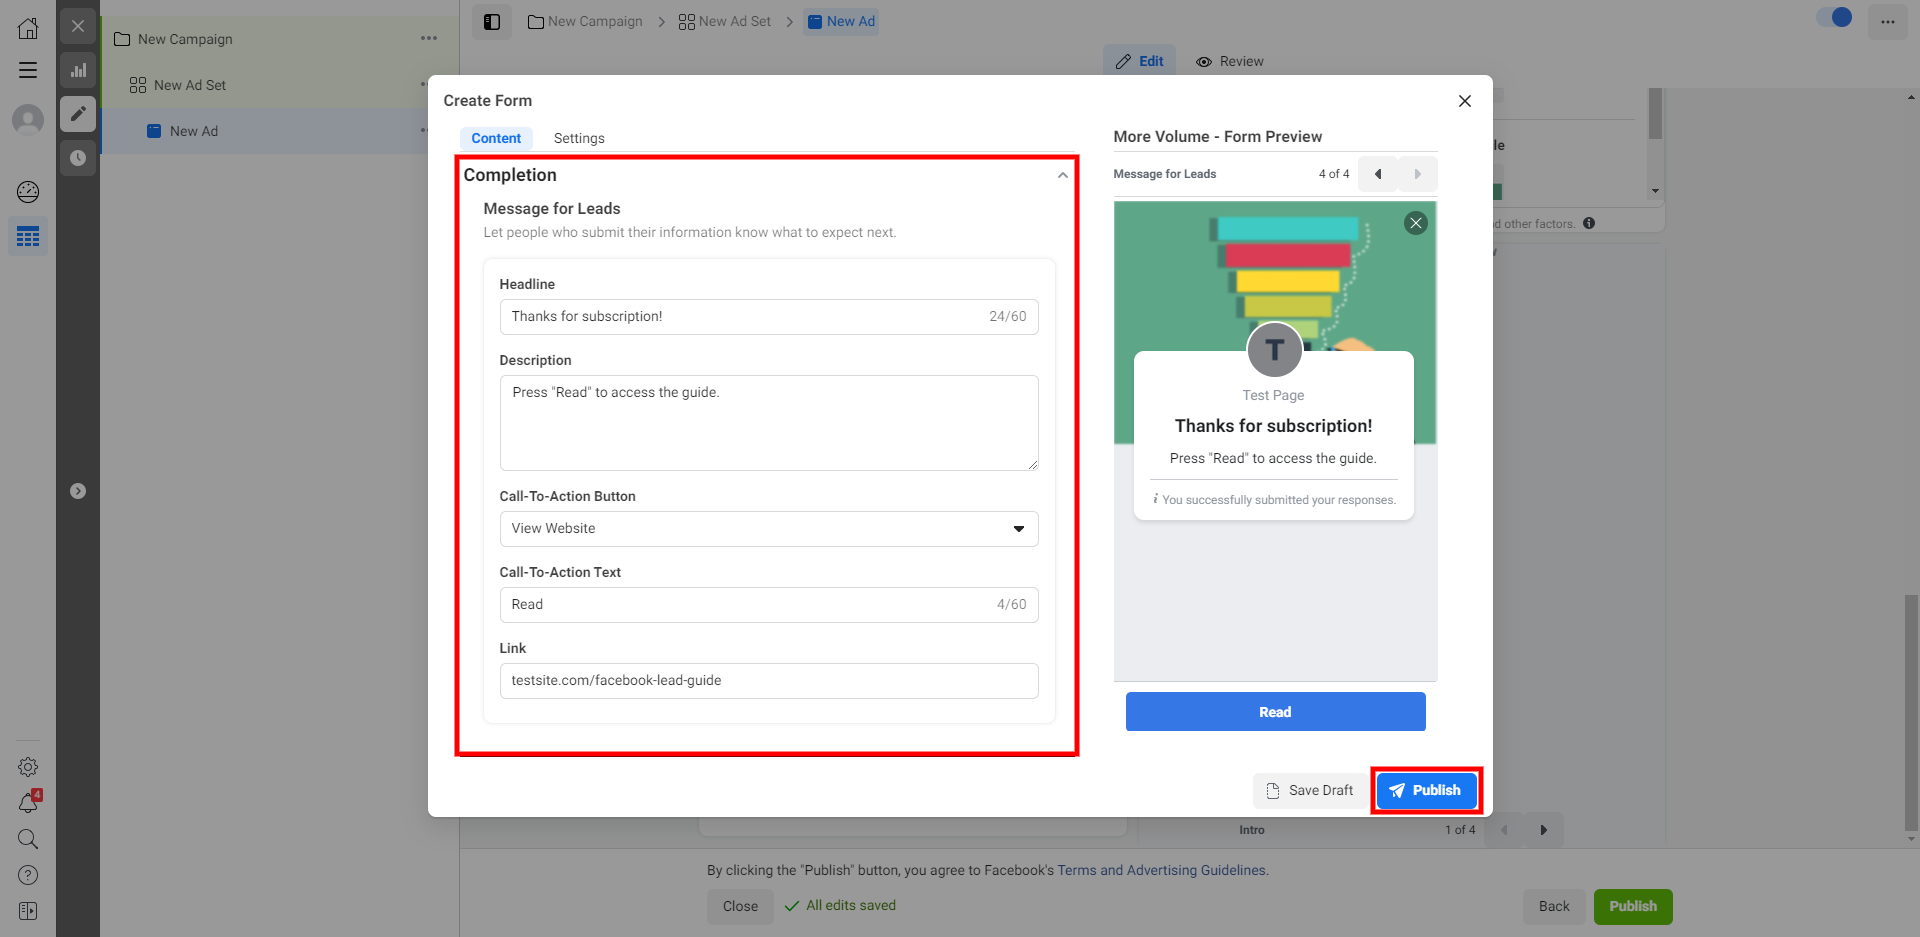
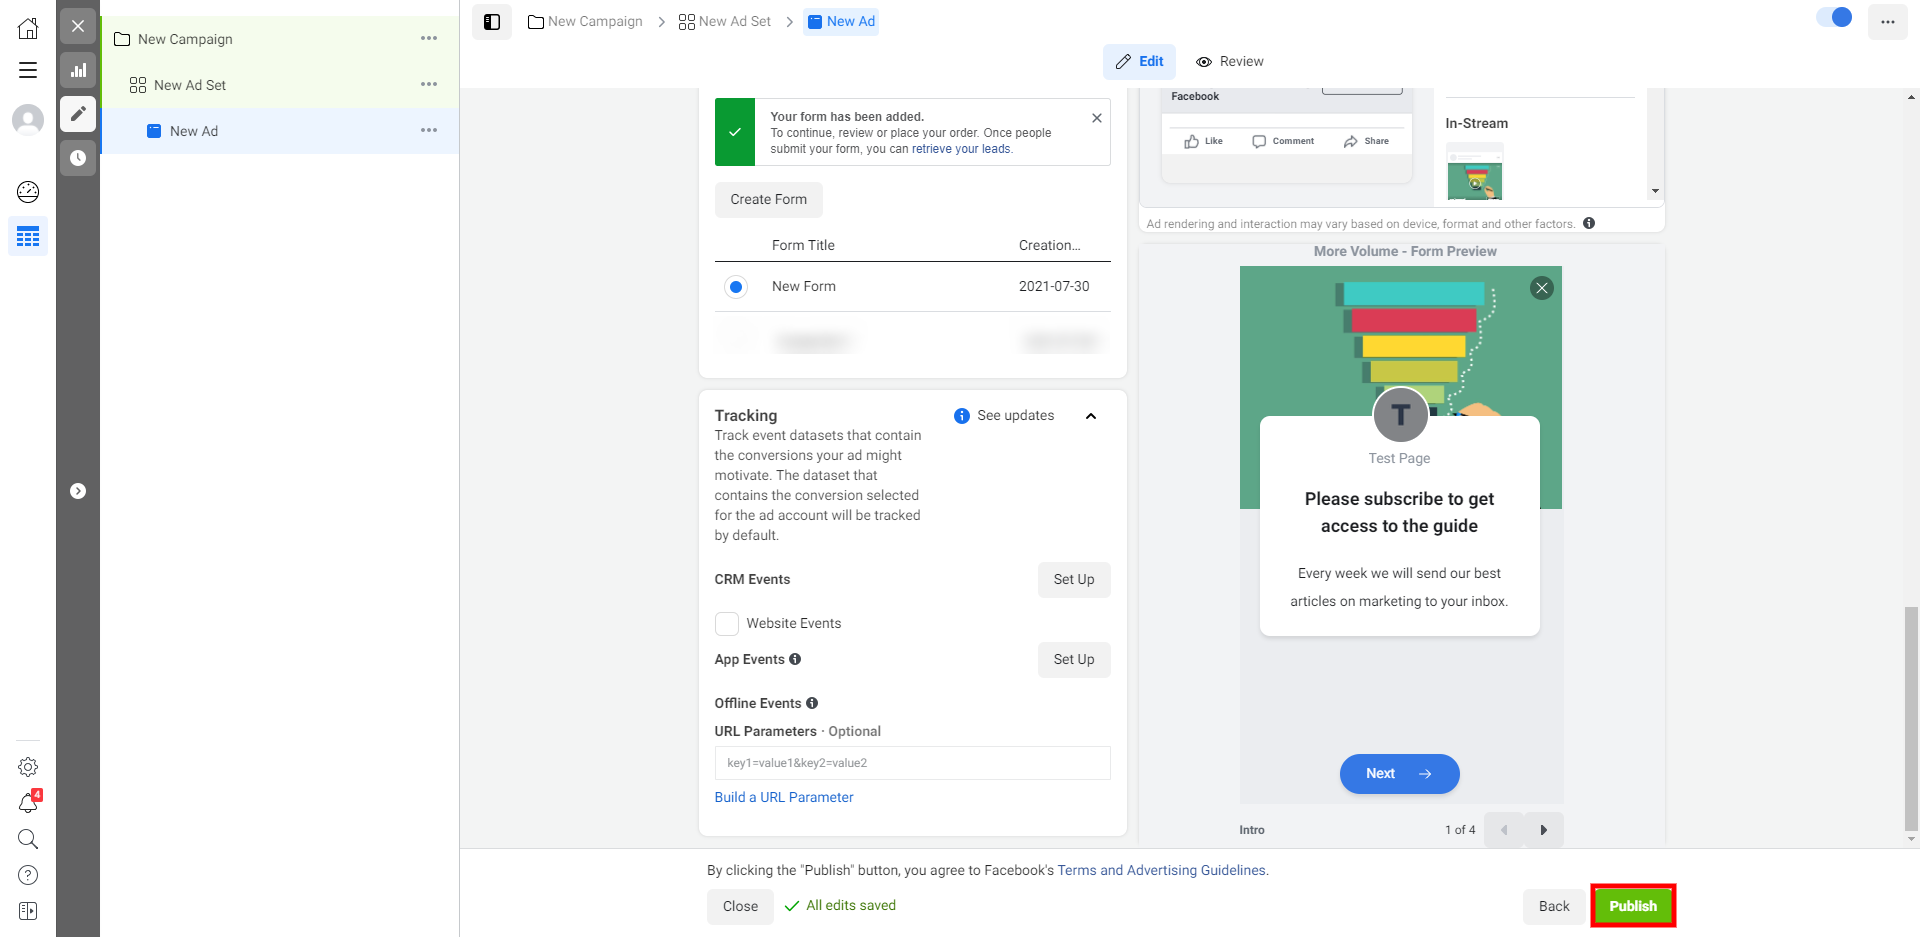
In the last section, "Completion," add a title and description that explain to the user what to do after filling out the form. For example, you can encourage them to click on a button to get the content you promised in creatives. The type, text, and link for the button can be added below. After setting up the form, click "Publish".
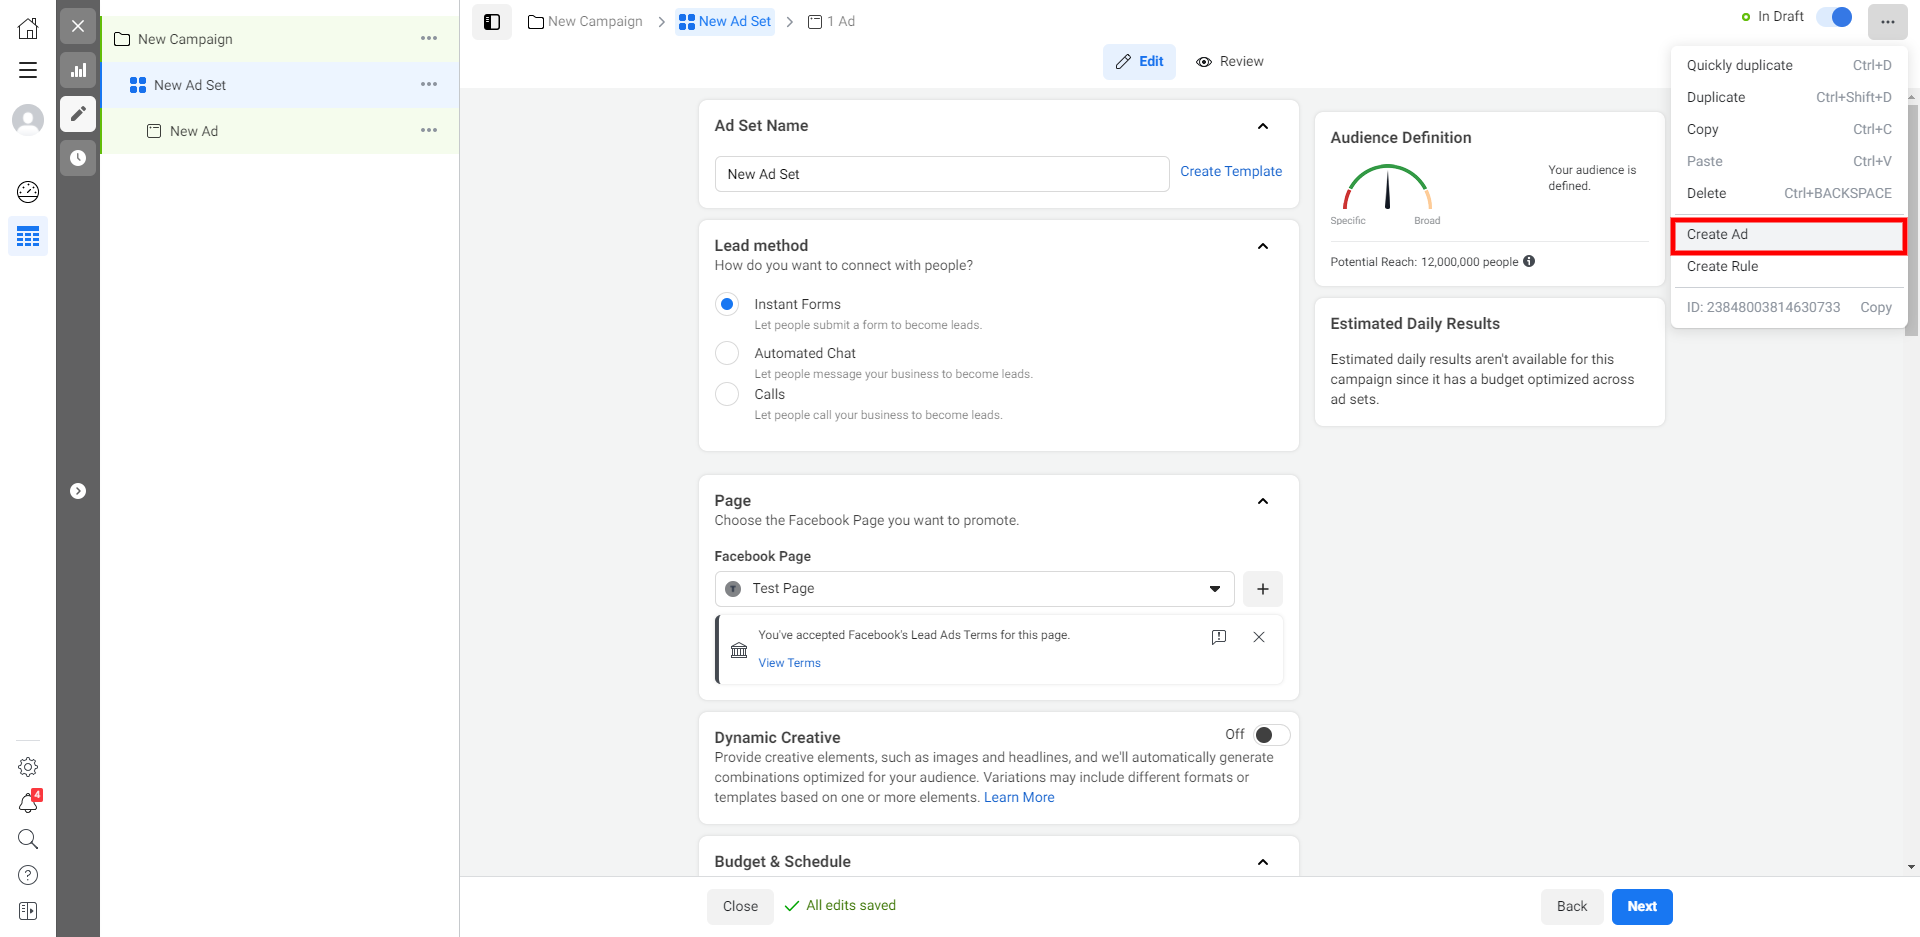
If necessary, you can add another ad to the current set. To do this, select the ad set on the left, click the three dots in the upper right corner and select "Create ad", then configure it the way you did it before.
Ad launch
Once all settings are done, launch the campaign using the appropriate button.
If you have not set the payment method, you can do this in the "Billing" section. On the Ads Manager left panel, select "Billing" and then click on the "Payment settings" button.
Leads download
Facebook does not have tools to process the received leads, so they should be downloaded and processed in external services.
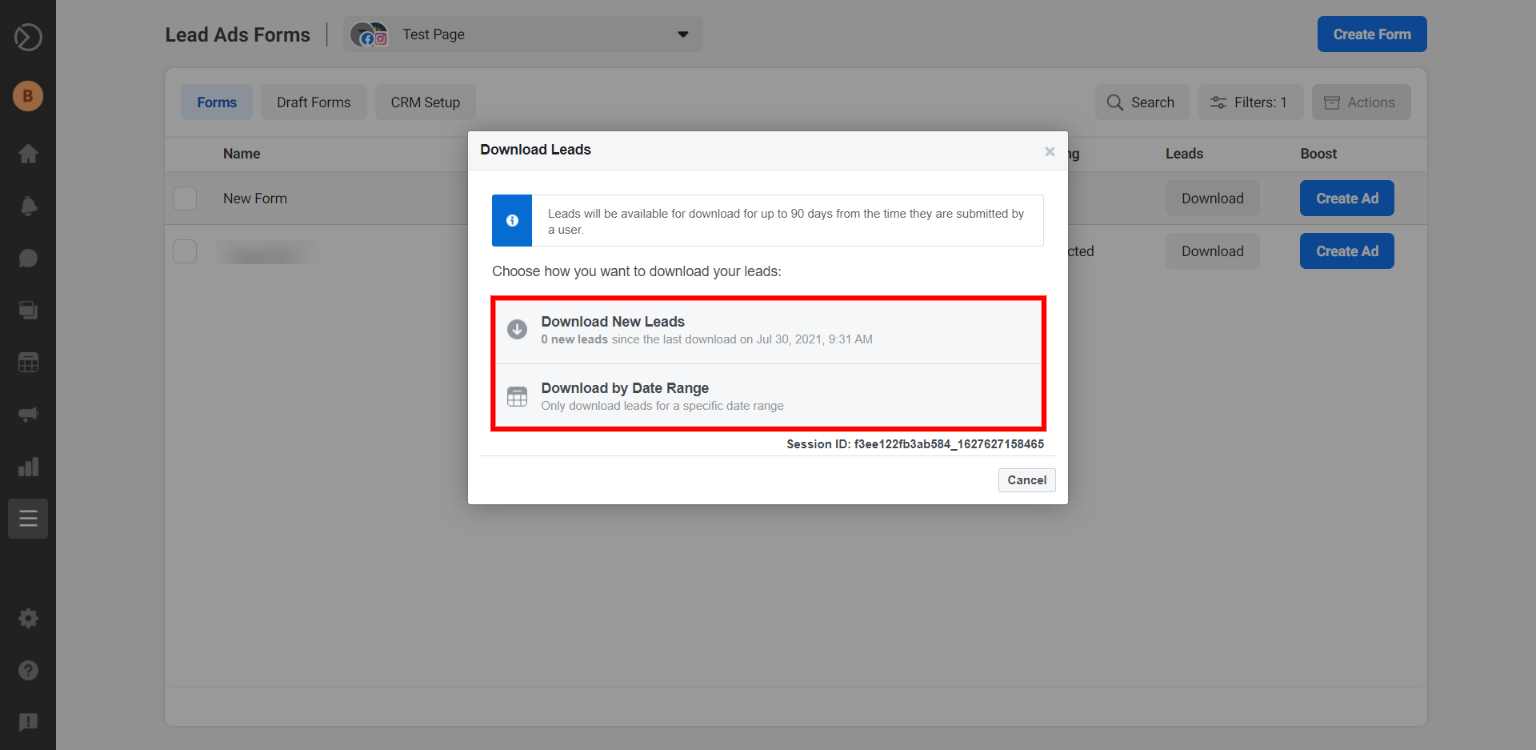
The leads can be downloaded manually in CSV or XLS format. To do this, open your business page and select "Publishing Tools" on the left panel. Then click "More Tools" - "Instant Forms".
Next to the selected form, click "Download", and then select the download option. Each lead is available for download within 90 days from the moment it was sent by the user.
The problem that arises when you manually download leads is that you will have to regularly check for new leads and download them in the table form. It is too inconvenient and takes a lot of time. It may lead to late responding to customers or even losing valuable contacts.
Therefore, most entrepreneurs and marketing experts prefer to automate this process by using online spreadsheets or CRMs.
To do this, you do not need to have any programmer skills. With the SaveMyLeads connector, you can set up the Facebook integration with the required system in a few minutes. This tool supports Google Sheets, amoCRM, retailCRM, Telegram, Slack, Trello, Gmail, and hundreds of other services.
As a result, SaveMyLeads will automatically transfer each new lead to the selected system.
Conclusion: a brief review of lead generation on Facebook
- Facebook makes it possible to collect a lot of leads from your target audience.
- To do this, you need to set up advertising campaigns with a special ad format - a lead form.
- All settings are done in the Ads Manager section. First, you need to create a new campaign with the "Lead generation" objective. Then add at least one ad set and select a target audience. After that, you need to create the required number of ads with a form.
- Facebook does not have any tools for lead processing. Therefore, they have to be downloaded and processed in external services.
- Instead of downloading data manually, it is better to automate lead transfer from Facebook to user-friendly services like spreadsheets or CRM. With the SaveMyLeads connector, this can be done quickly and without the programmer's' help.
