Tired of manually adding subscriber contacts? The SaveMyLeads service will help automate the upload of data from a social network lead form to a mailing list in a few minutes. All you need to do is connect Facebook to GetResponse with a simple visual interface.
Contents :
1 . How to set up Facebook and GetResponse integration
2 . Register on SaveMyLeads
3 . Connect Facebook Leads Ads
4 . Connect GetResponse
5 . Test data transmission
6 . Finish the setup
The automatic contact unloading that you can customize with SaveMyLeads offers a number of significant benefits to businesses. Here are just a few of them.
Less chores. You no longer need to regularly check for new contacts on the social network, upload them as a CSV file and copy from it to the mailing list. All data will be transmitted automatically: as soon as a new contact gets to Facebook, SaveMyLeads adds it to the mailing list. You will be able to spend the free time on rest or other work activities.
No mistakes. If you upload data manually, you can accidentally confuse the names or mailing addresses of clients, or even miss some important contacts. Automation minimizes the likelihood of such errors: SaveMyLeads passes data to GetResponse in the same form as it appears in the Facebook lead form.
Continuous transfer of contacts. Automatic data export works 24/7. This means that SaveMyLeads will continue to copy contacts to the mailing list, even if you go out for lunch or a weekend. You can relax and enjoy your holiday in peace.
Full control over the transmitted data. You can choose what kind of subscriber data SaveMyLeads will copy from Facebook, be it email, name, city or something else. The service is capable of transmitting to GetResponse any information that the client leaves in the lead form.
How to set up Facebook and GetResponse integration
To set up automation, all you have to do is link your Facebook and GetResponse accounts on the SaveMyLeads site. You don't need to be a programmer to work with the service. You just need to make a few clicks, following the interface prompts, - the system will do the rest by itself.
Our visual instruction will help you understand SaveMyLeads and quickly set up automatic data upload.
Register on SaveMyLeads
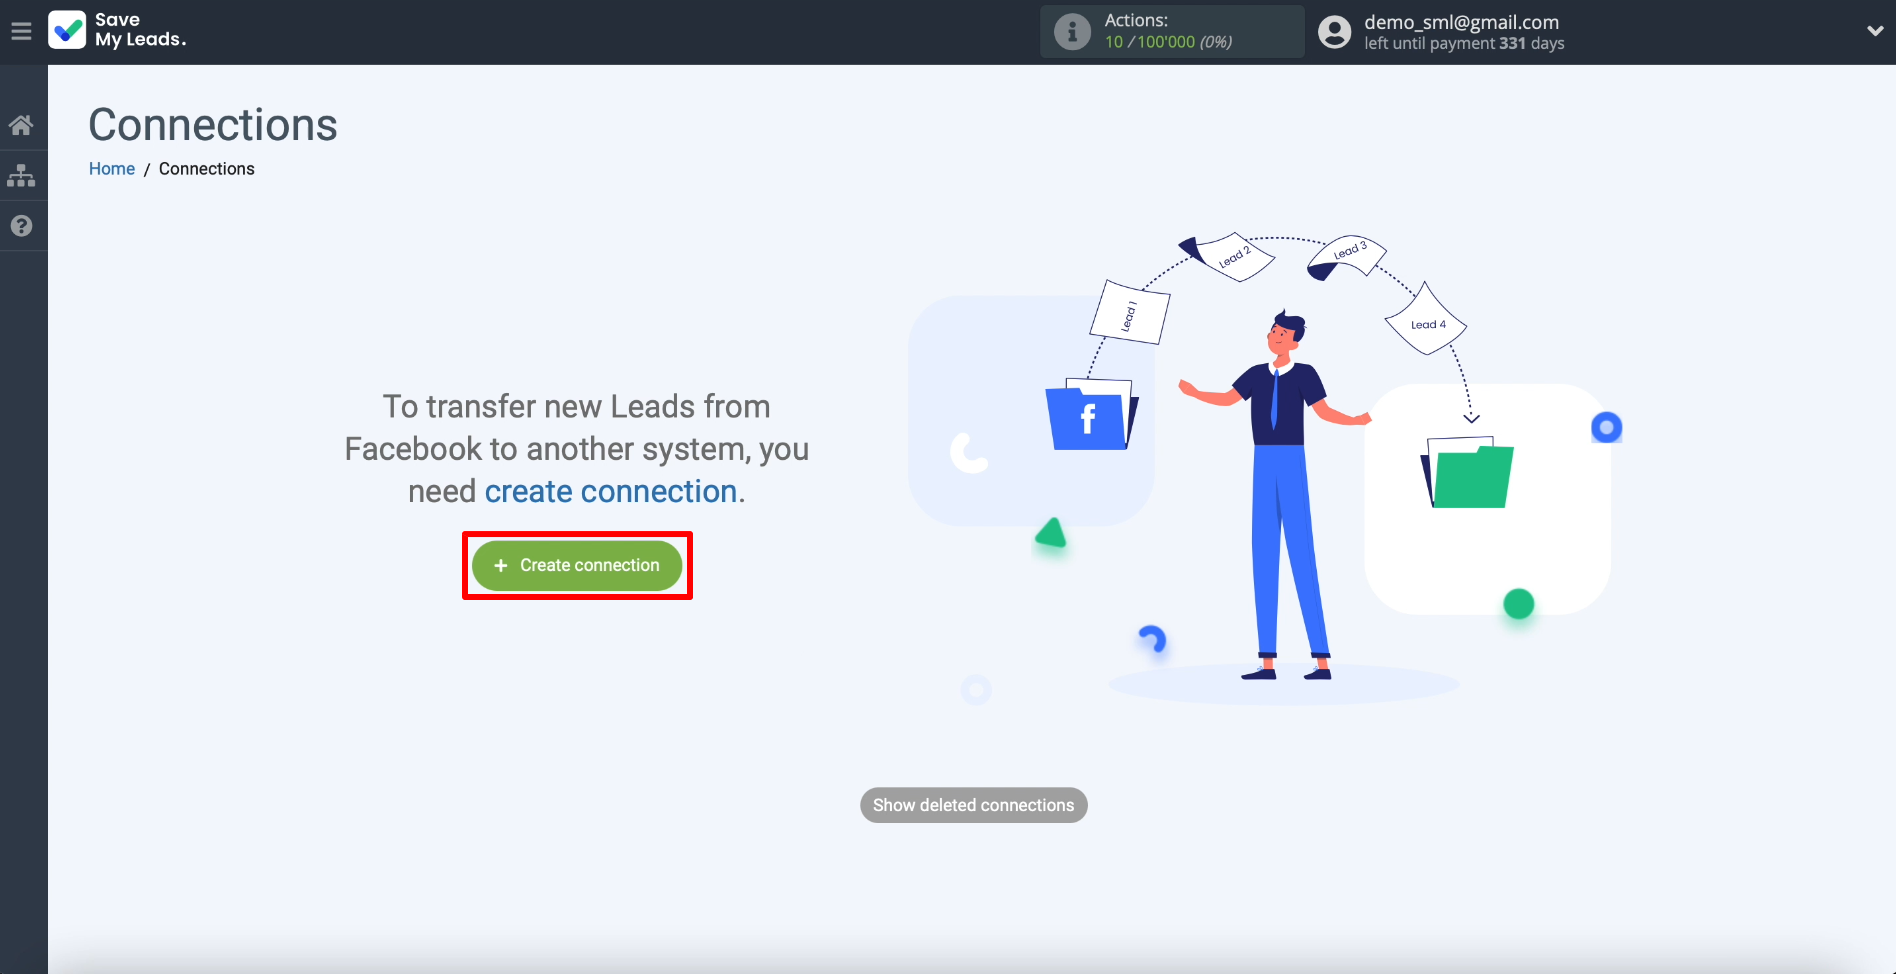
We register on the SaveMyLeads website. After entering your personal account, click "Create connection" to open the list of available integrations.
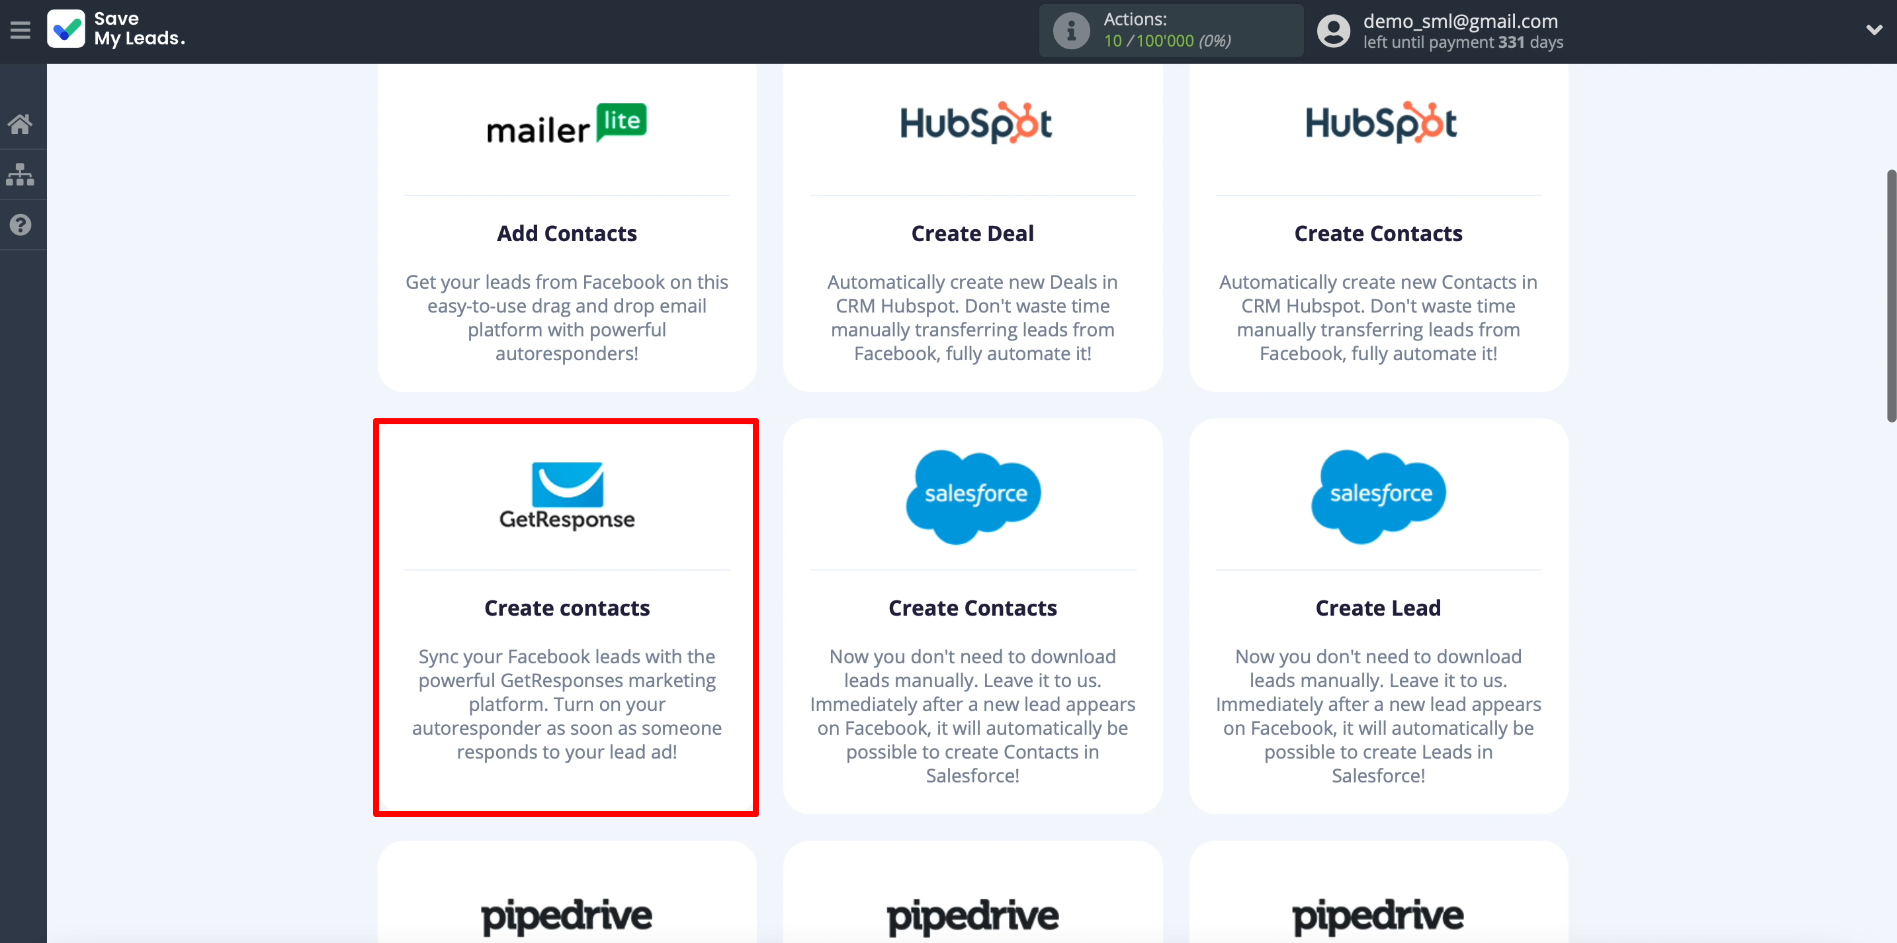
SaveMyLeads allows many other systems to connect to Facebook. But we are interested in GetResponse, so we select integration with this service from the list.
Connect Facebook Leads Ads
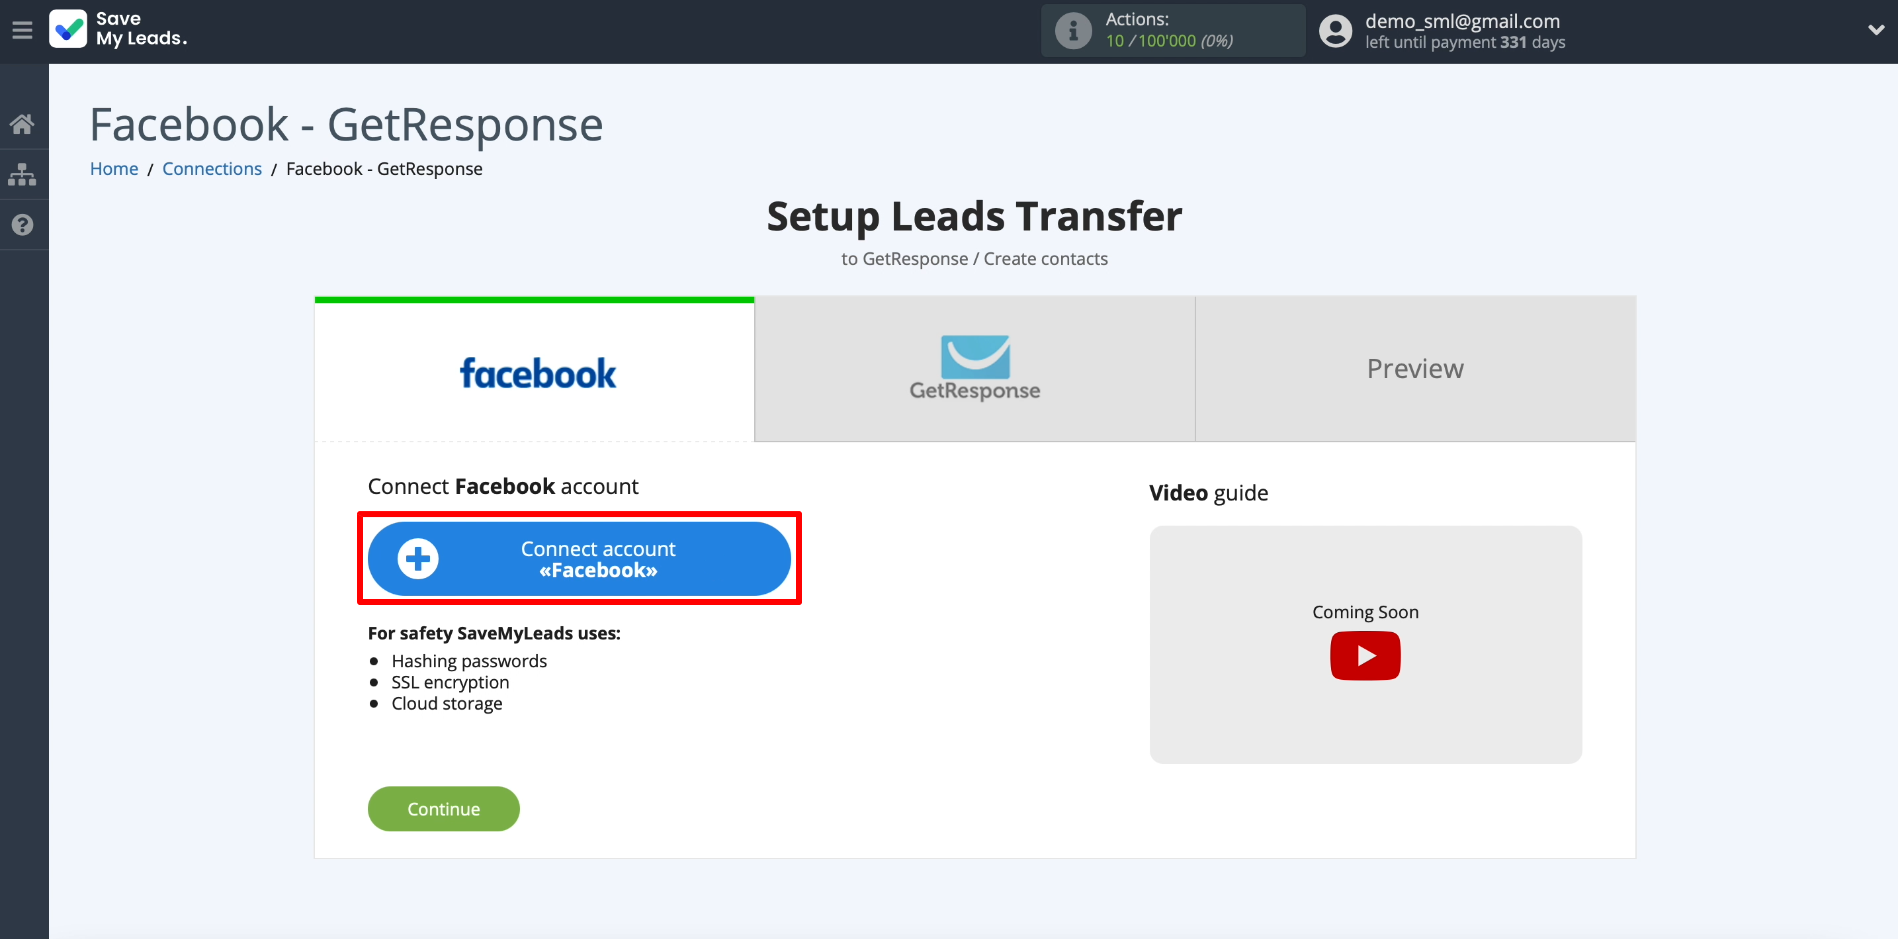
In order for SaveMyLeads to be able to unload our leads, we connect a Facebook account to it as a data source. If necessary, enter the username and password for the account that we use to manage advertising. In order for SaveMyLeads to get access to the leads, we give the system all the requested permissions.
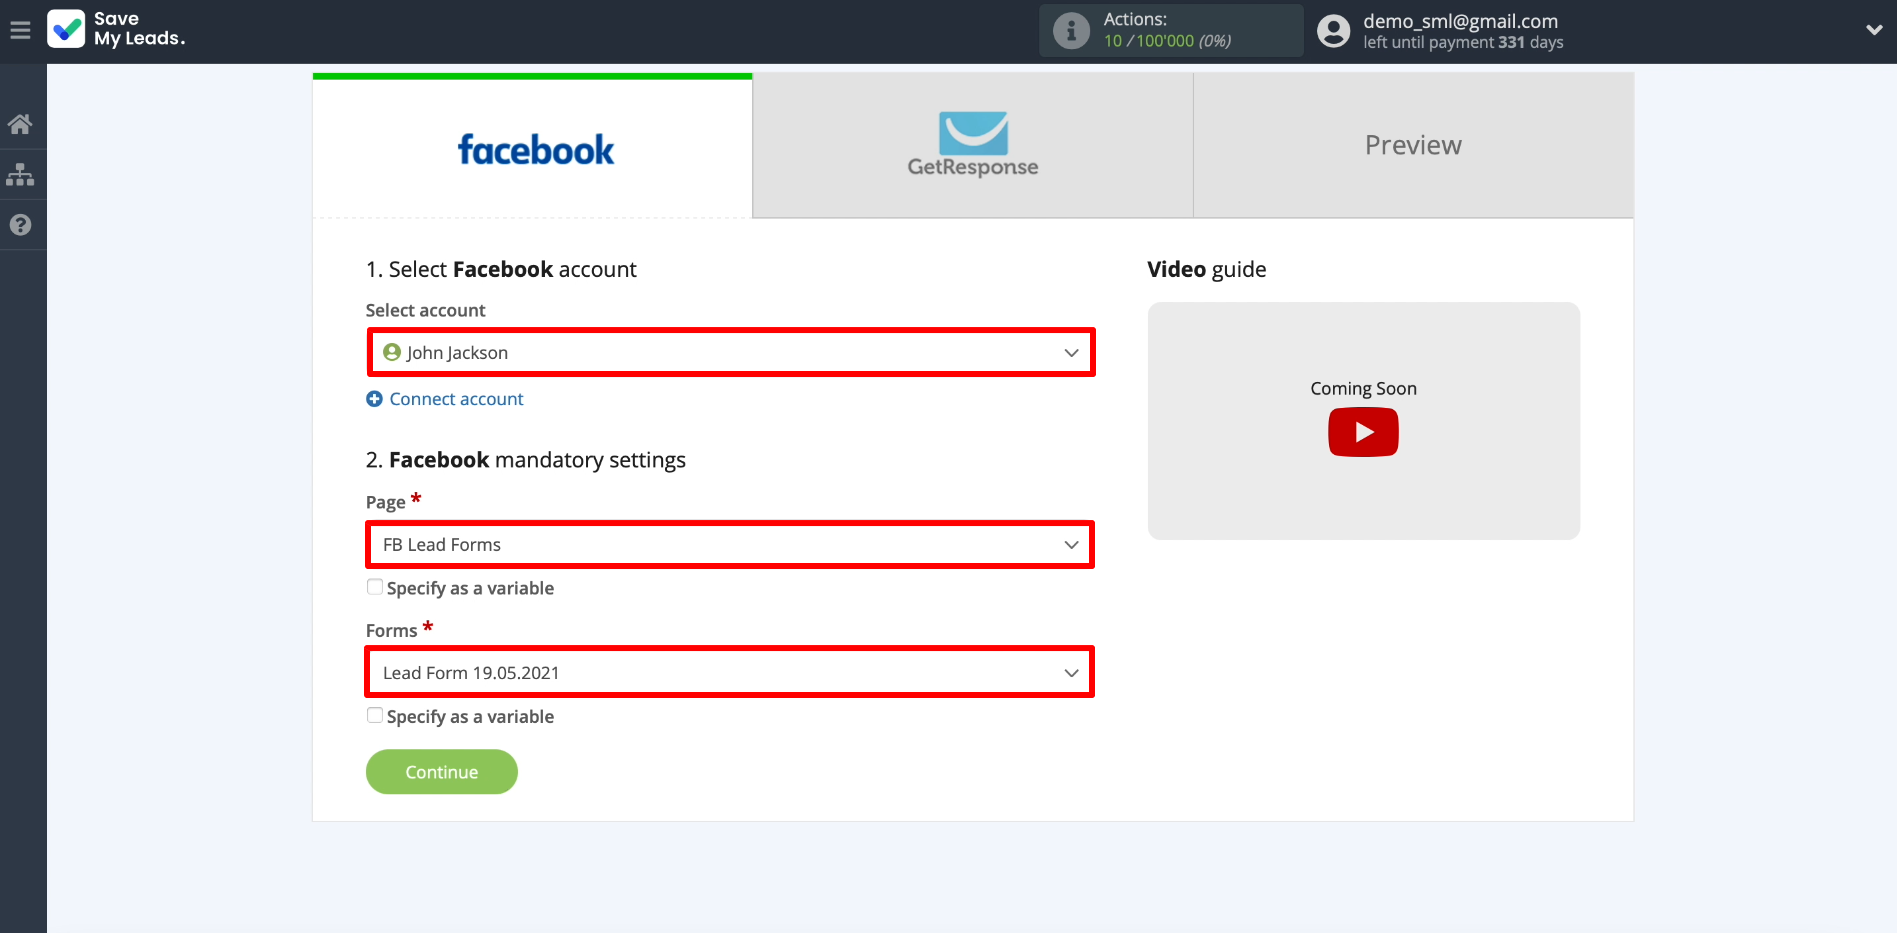
Now we will show the system where to download data from. Select the newly connected account, and below - the page for which the advertising campaign is configured, and the form for collecting leads.
- Automate the work with leads from the Facebook advertising account
- Empower with integrations and instant transfer of leads
- Don't spend money on developers or integrators
- Save time by automating routine tasks
Only one form can be specified within one connection. To automate the export of leads from several forms, you need to set up a separate integration for each of them.
Connect GetResponse
So that SaveMyLeads can add uploaded contacts to the mailing list, we connect our GetResponse account to the service. To do this, click on the appropriate button.
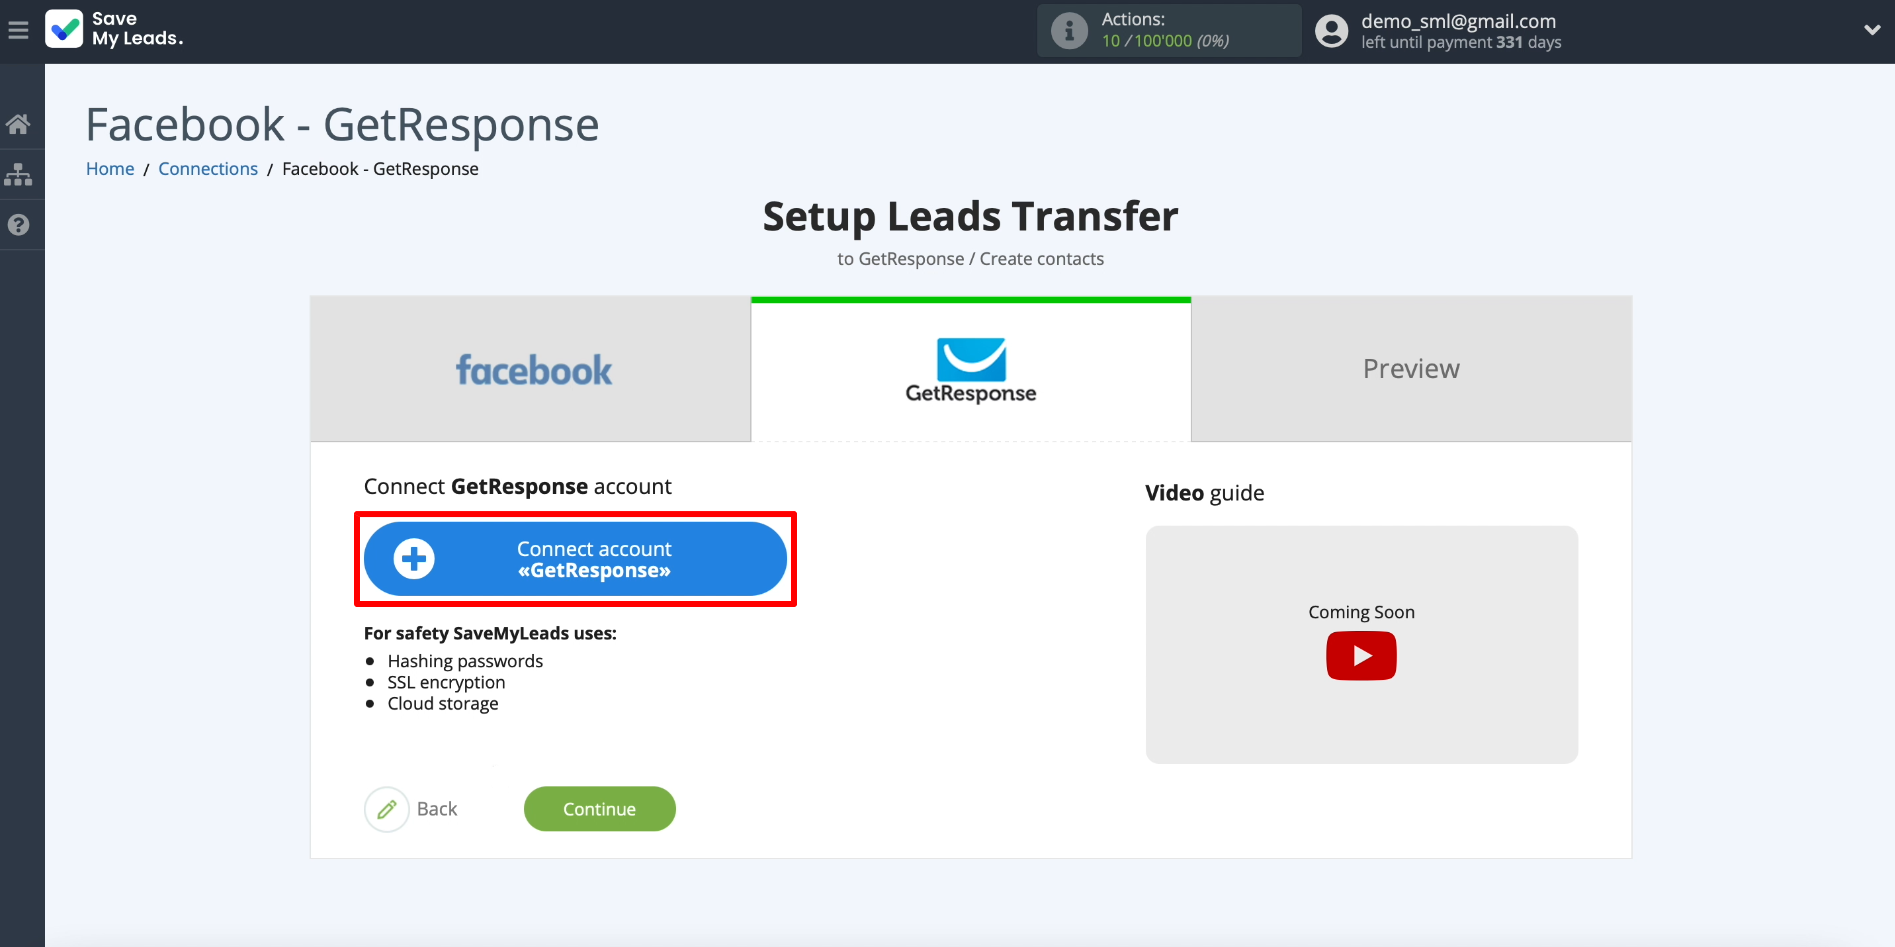
To connect, you need an API key. To get it, open your account on the GetResponse website in a new browser tab. Go to the Menu - Integrations and API - API section. Click Generate API key and enter any name for the key.
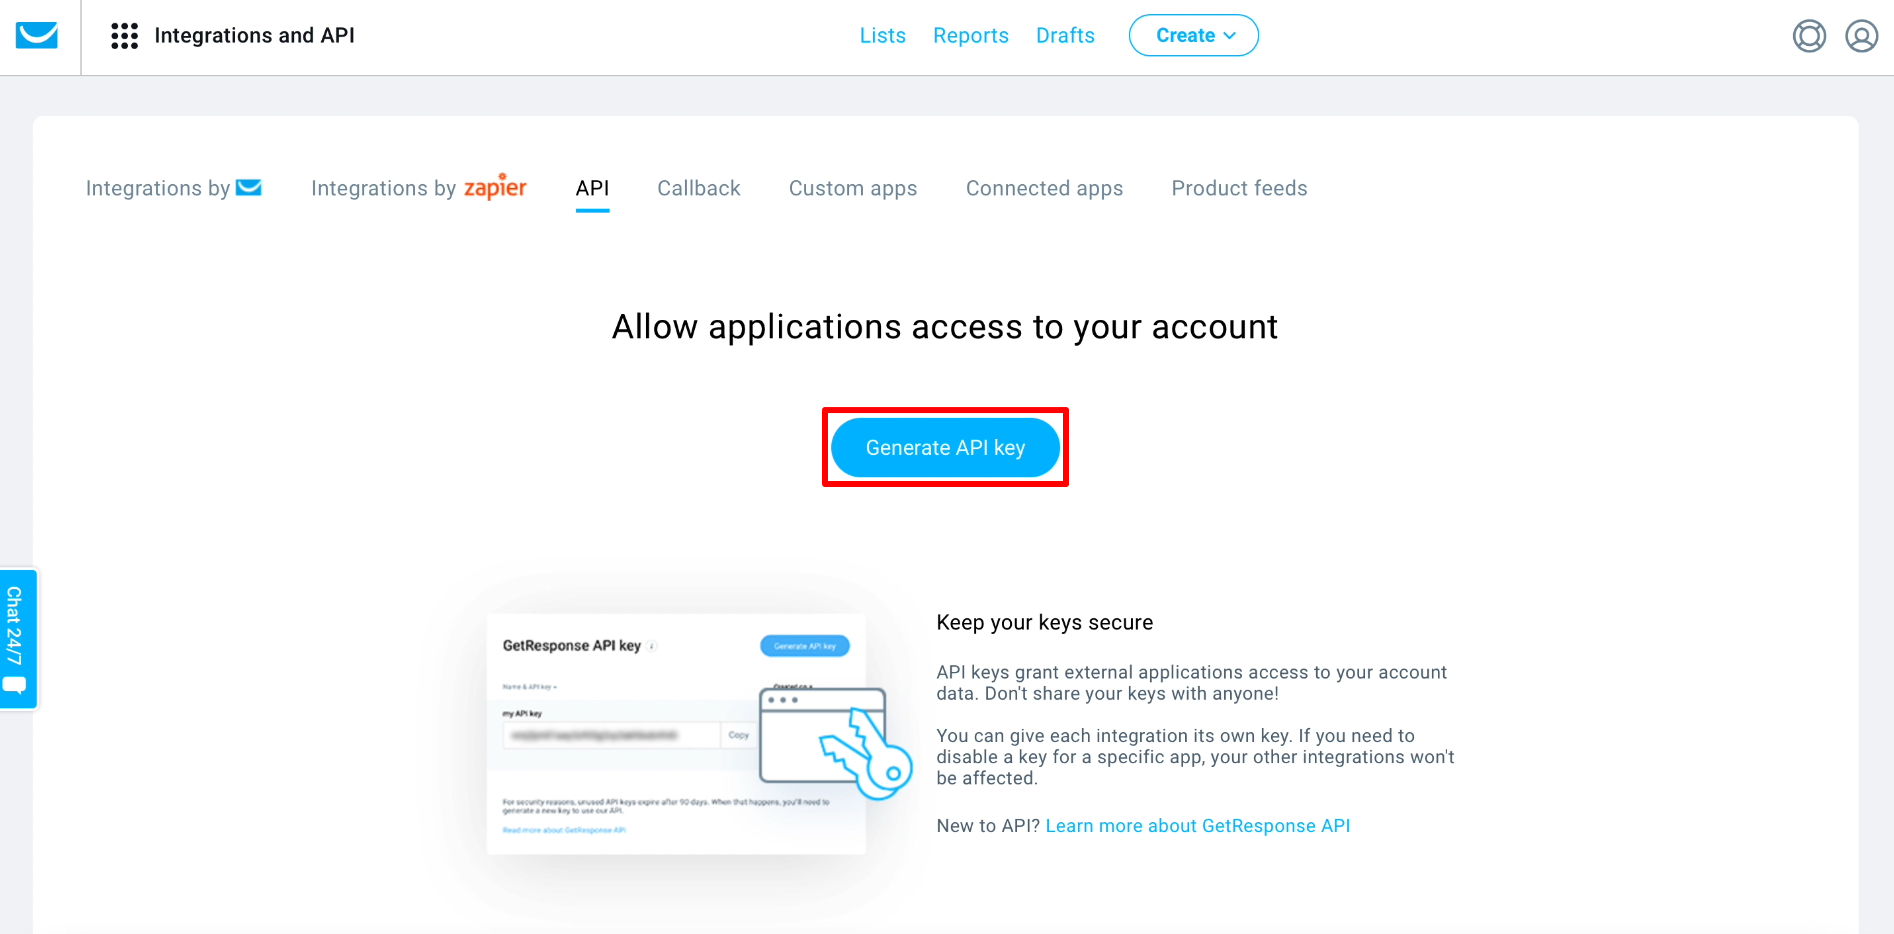
Copy the generated key and return to setting up the connection in SaveMyLeads.
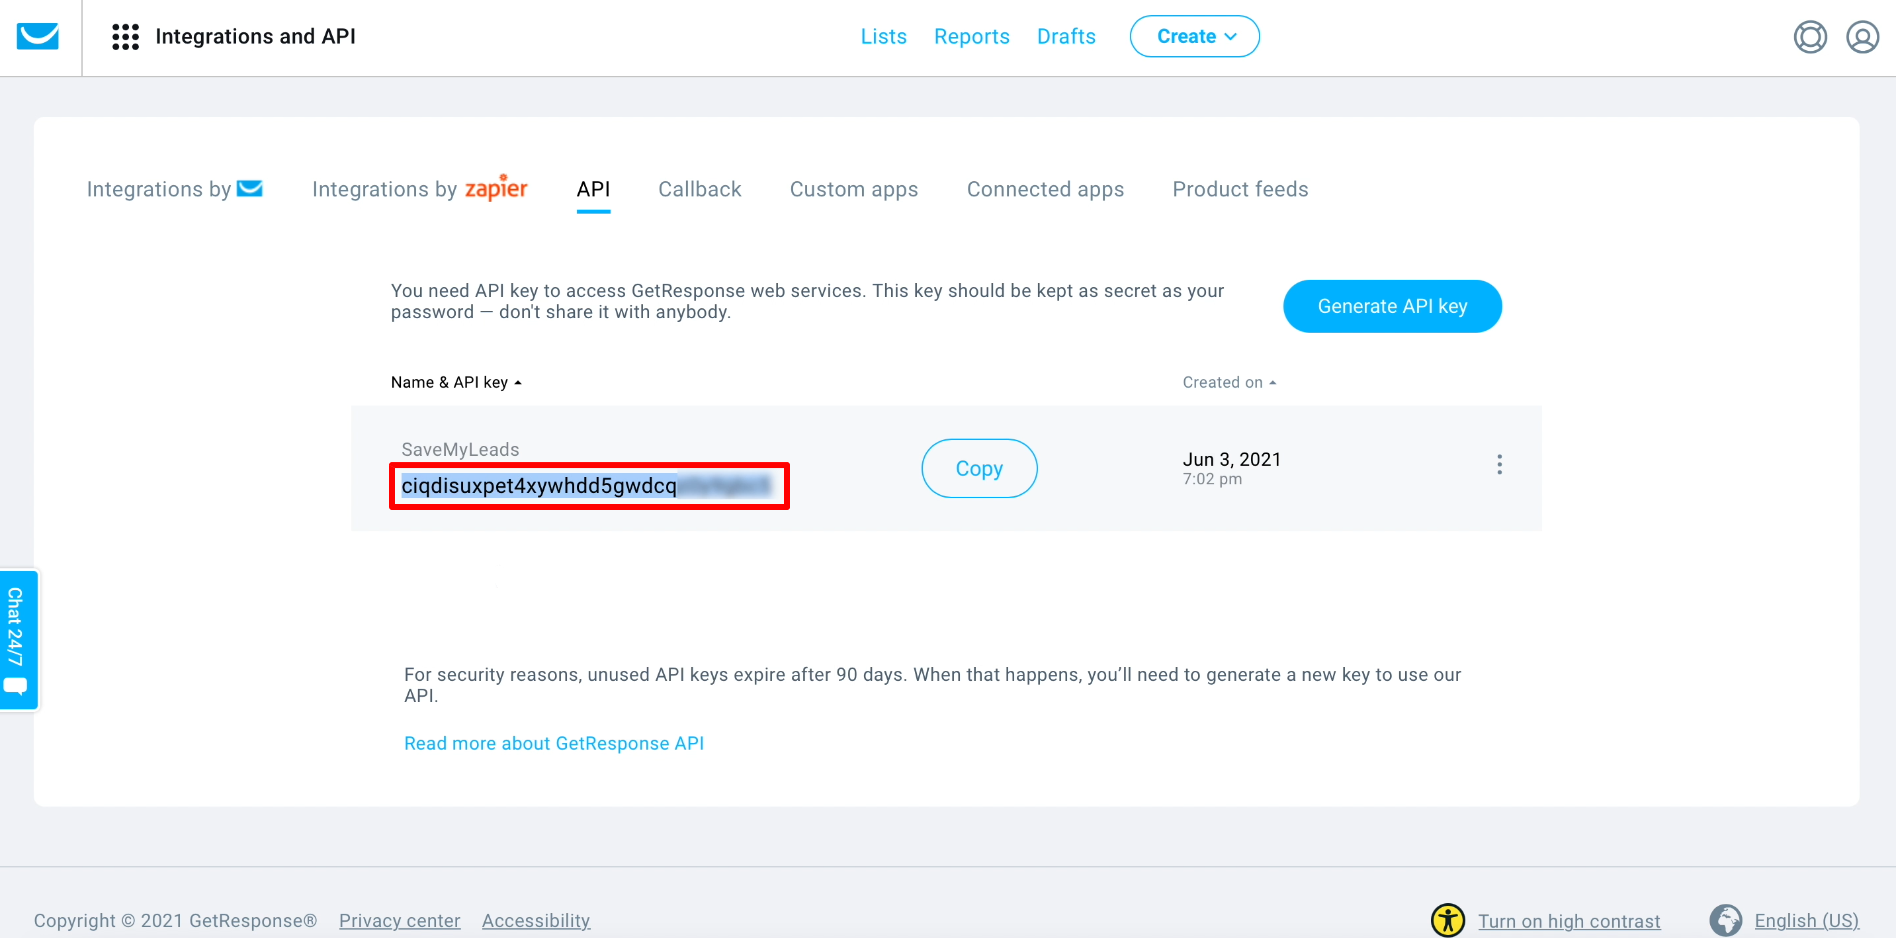
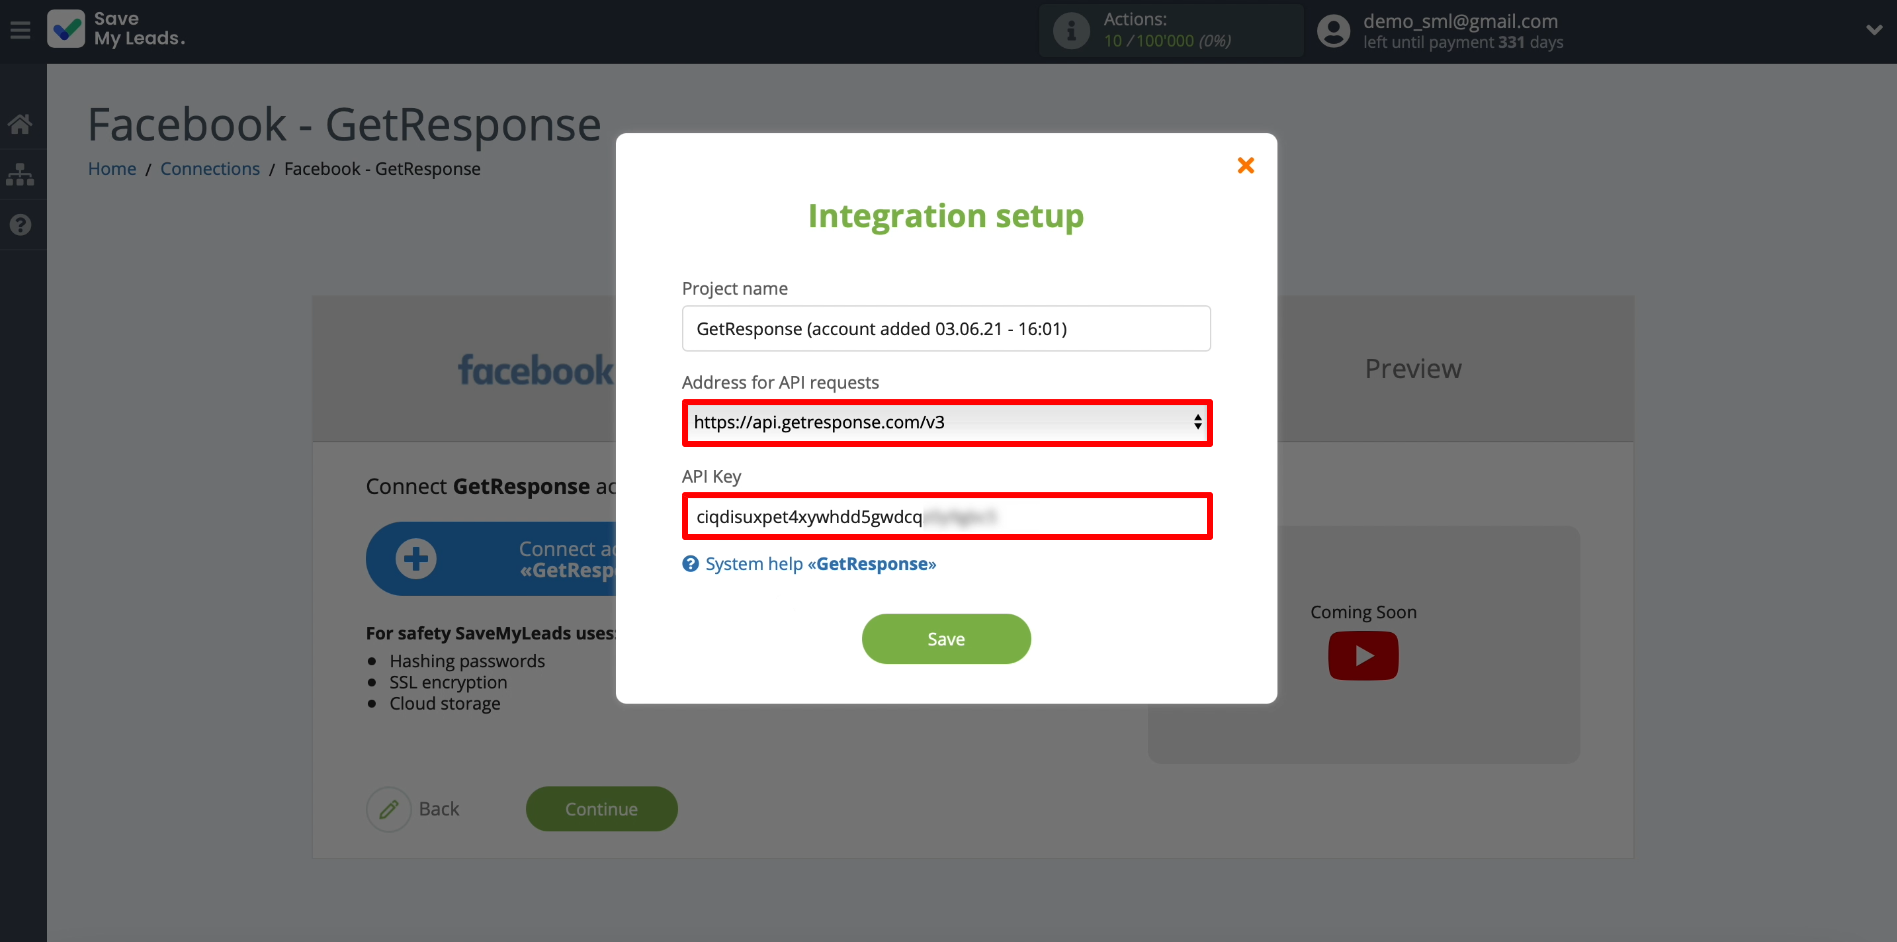
We specify the Address for API requests corresponding to our tariff. If necessary, contact your GetResponse manager for the correct address. Below we paste the API key we just copied.
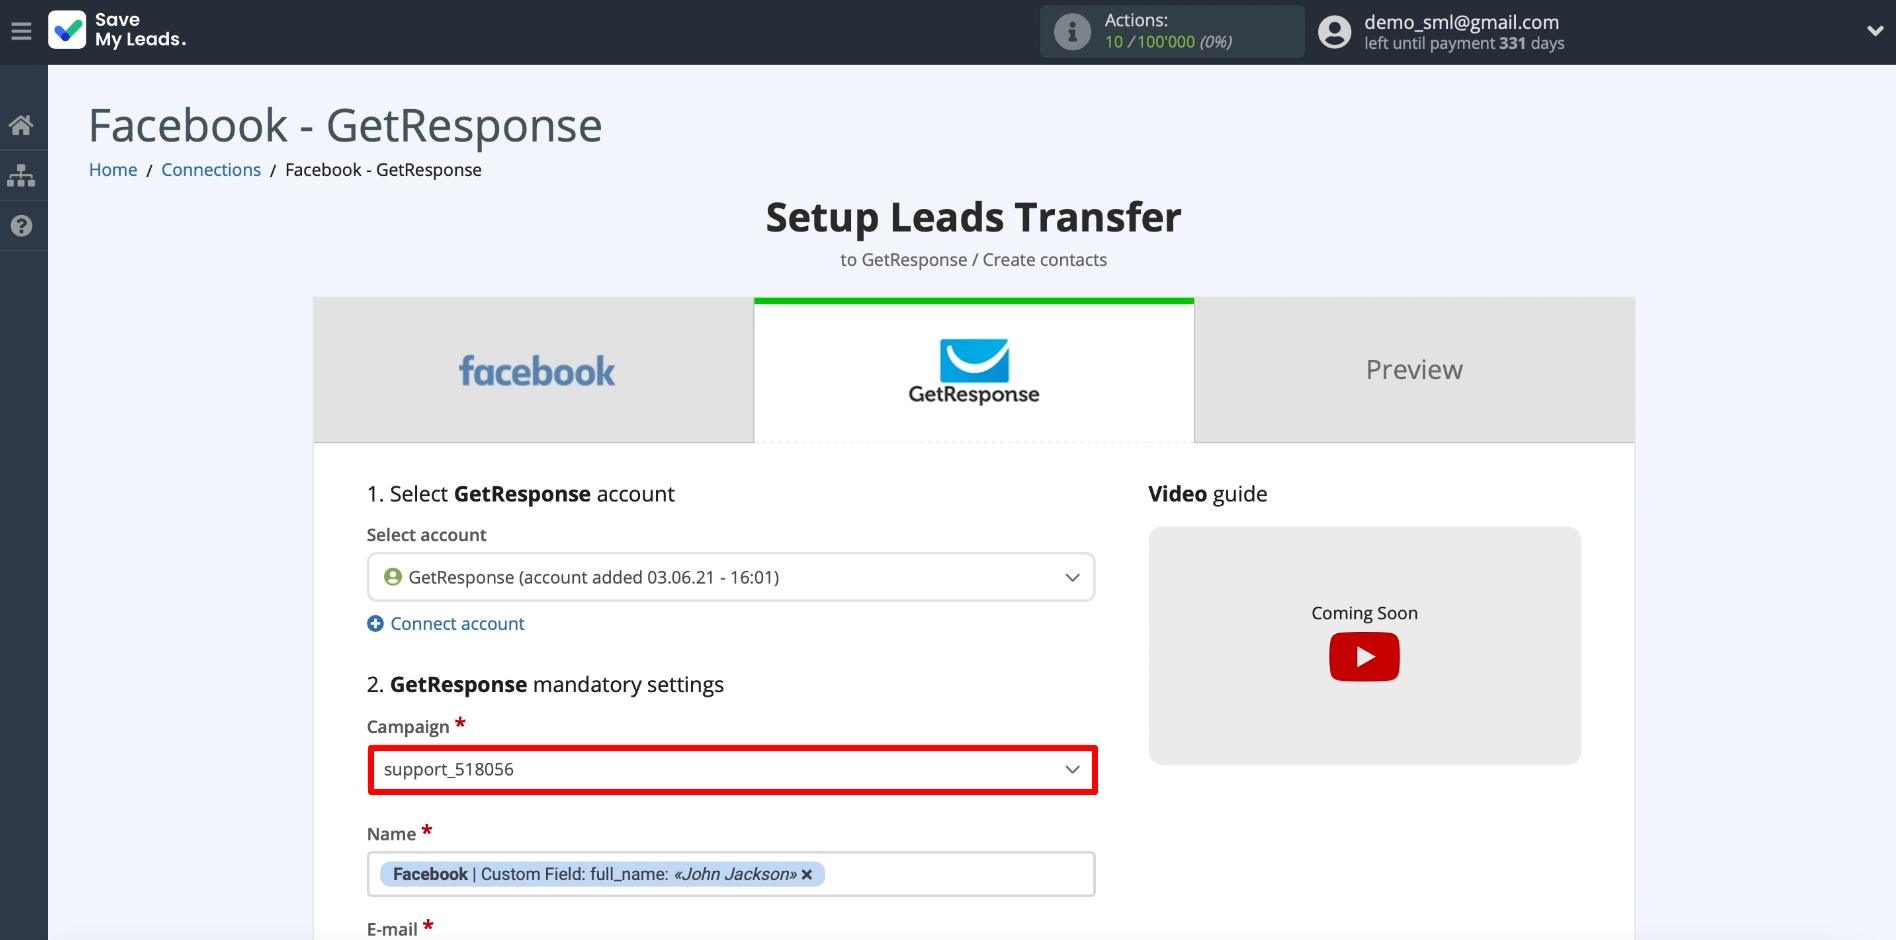
Now we specify the mailing list to which SaveMyLeads should add contacts.
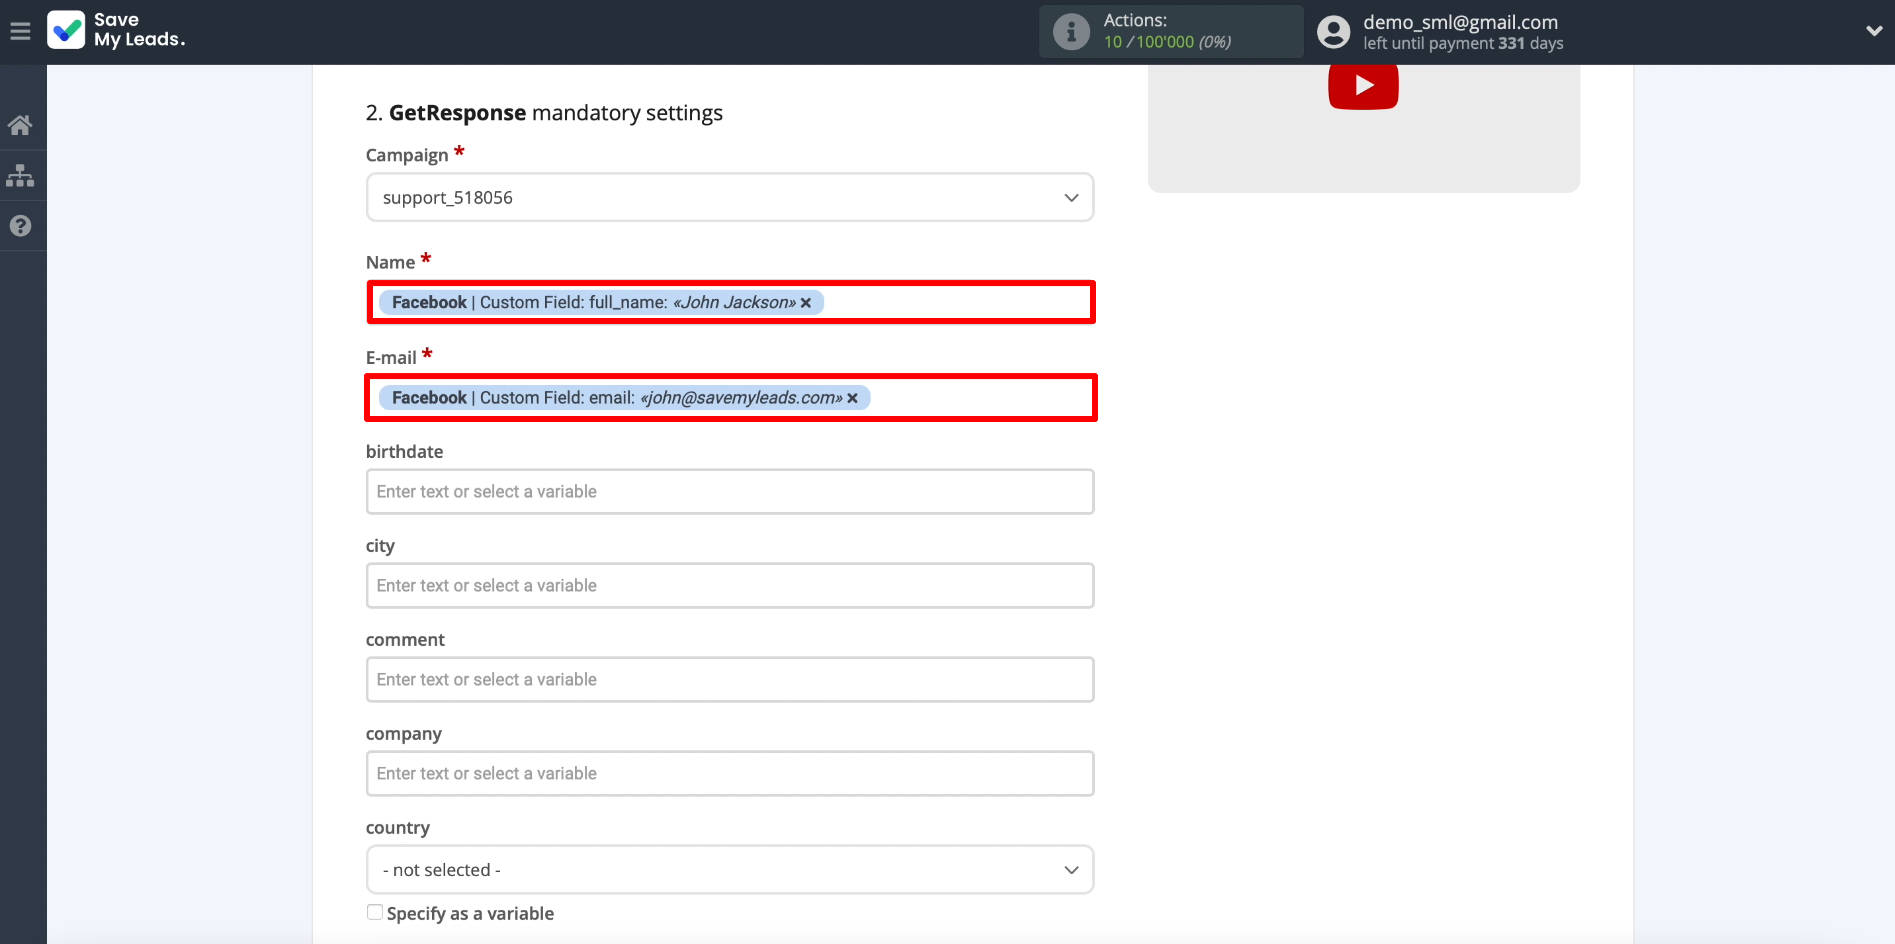
Below we select which data will be downloaded from each lead. To do this, click on the required GetResponse fields and for each of them select from which Facebook field the data will be sent to it.
For example, to set up the transmission of a postal address, click on the "E-mail" field and select the field in the lead form for entering the address. Leave the extra fields empty.
Test data transmission
To check if the data upload is working, we send any test lead through the form on the Facebook website. After that, go back to SaveMyLeads and refresh the page. The uploaded data of our lead should appear on the screen.
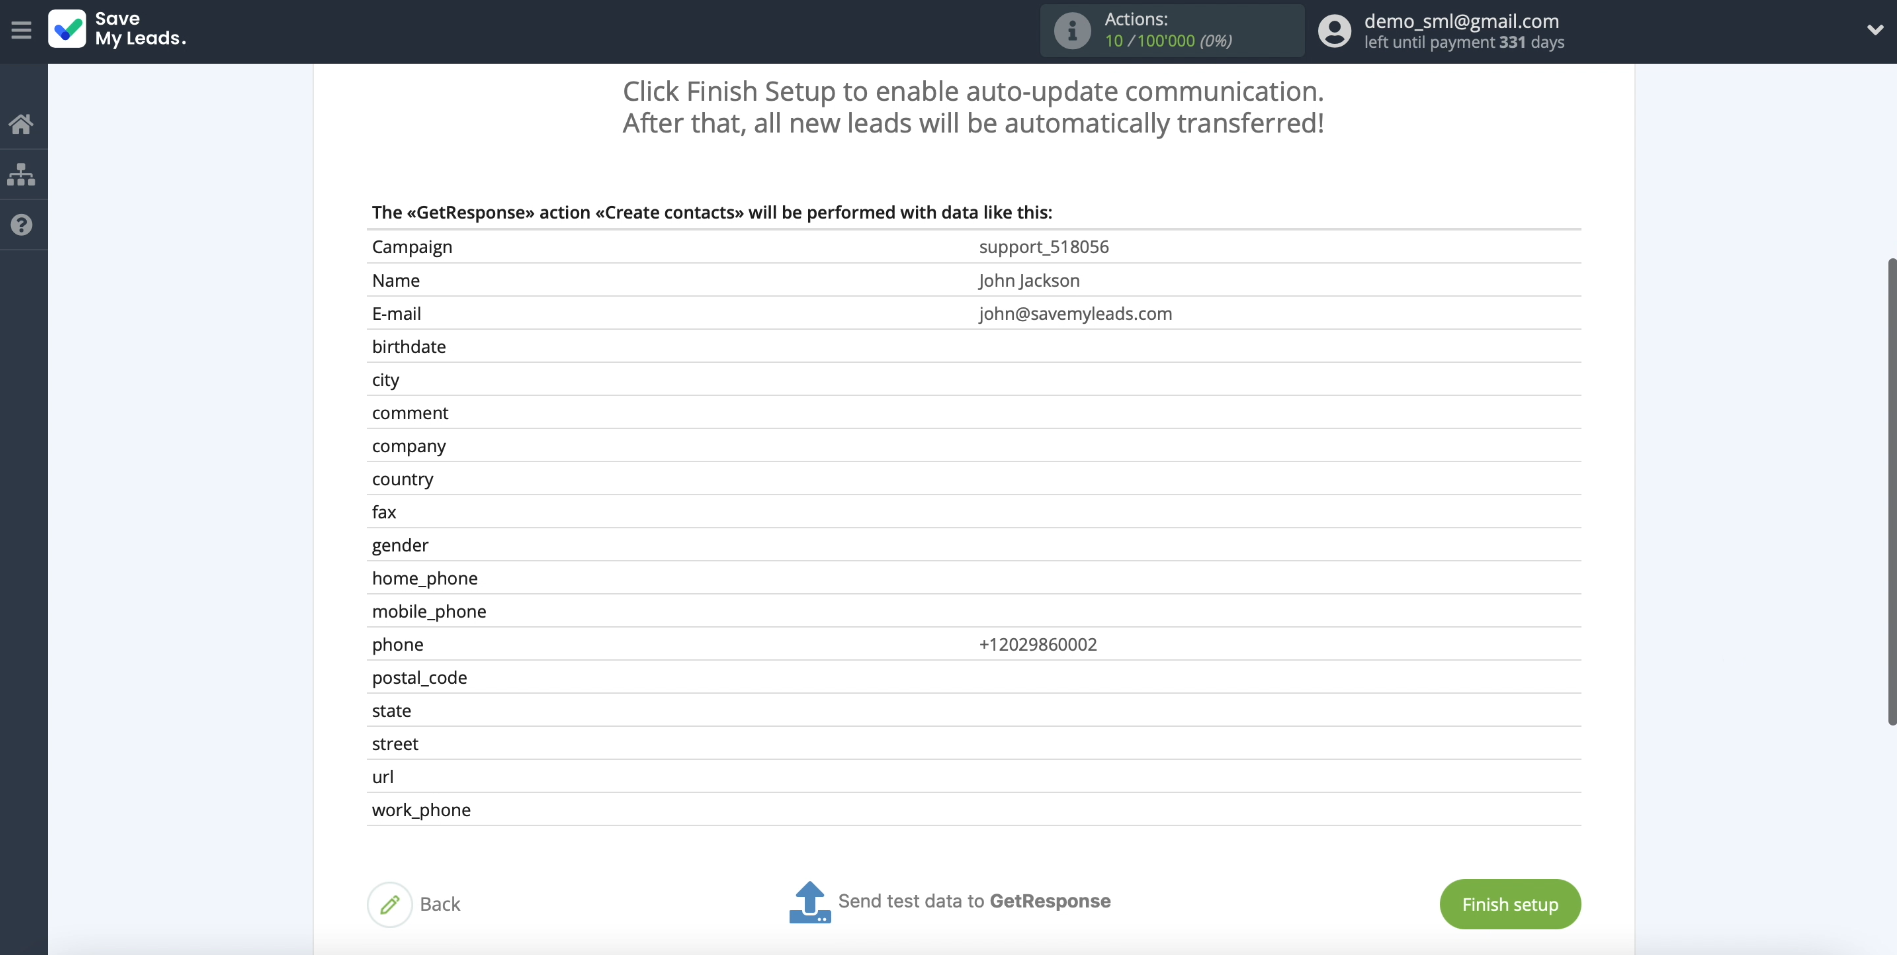
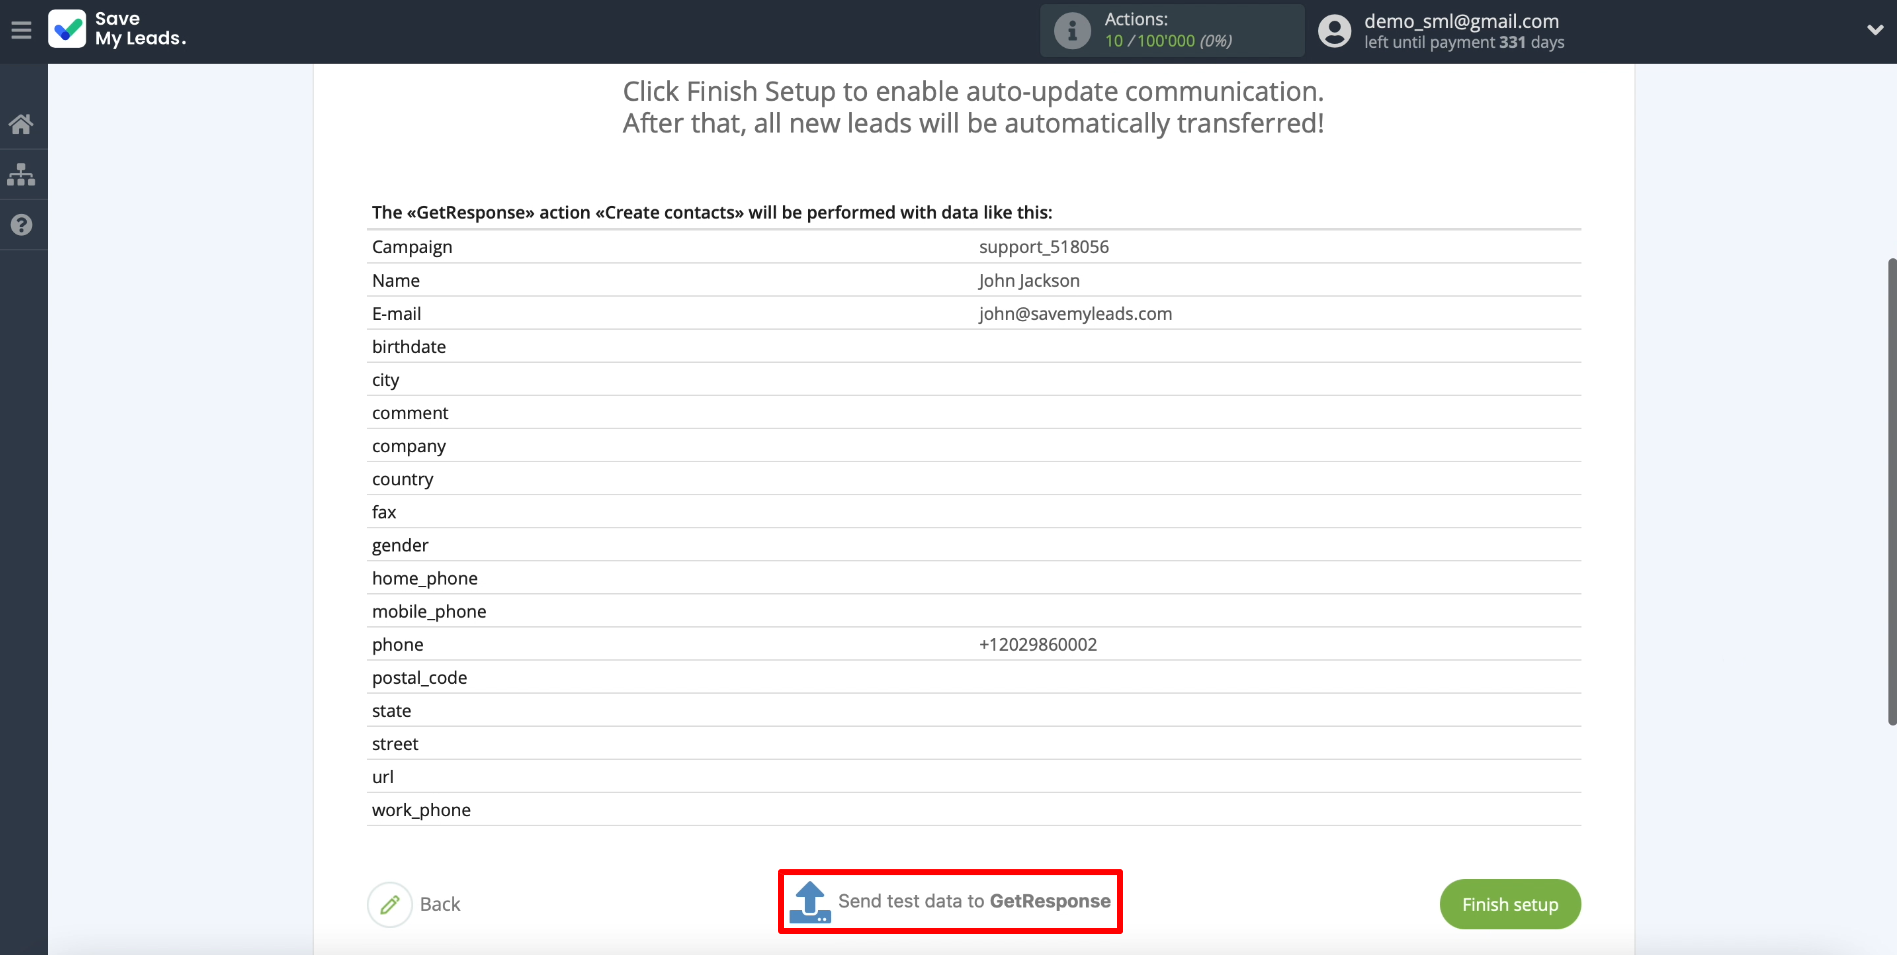
Now let's check the transfer of the uploaded data to GetResponse. To do this, click Send test data to GetResponse.
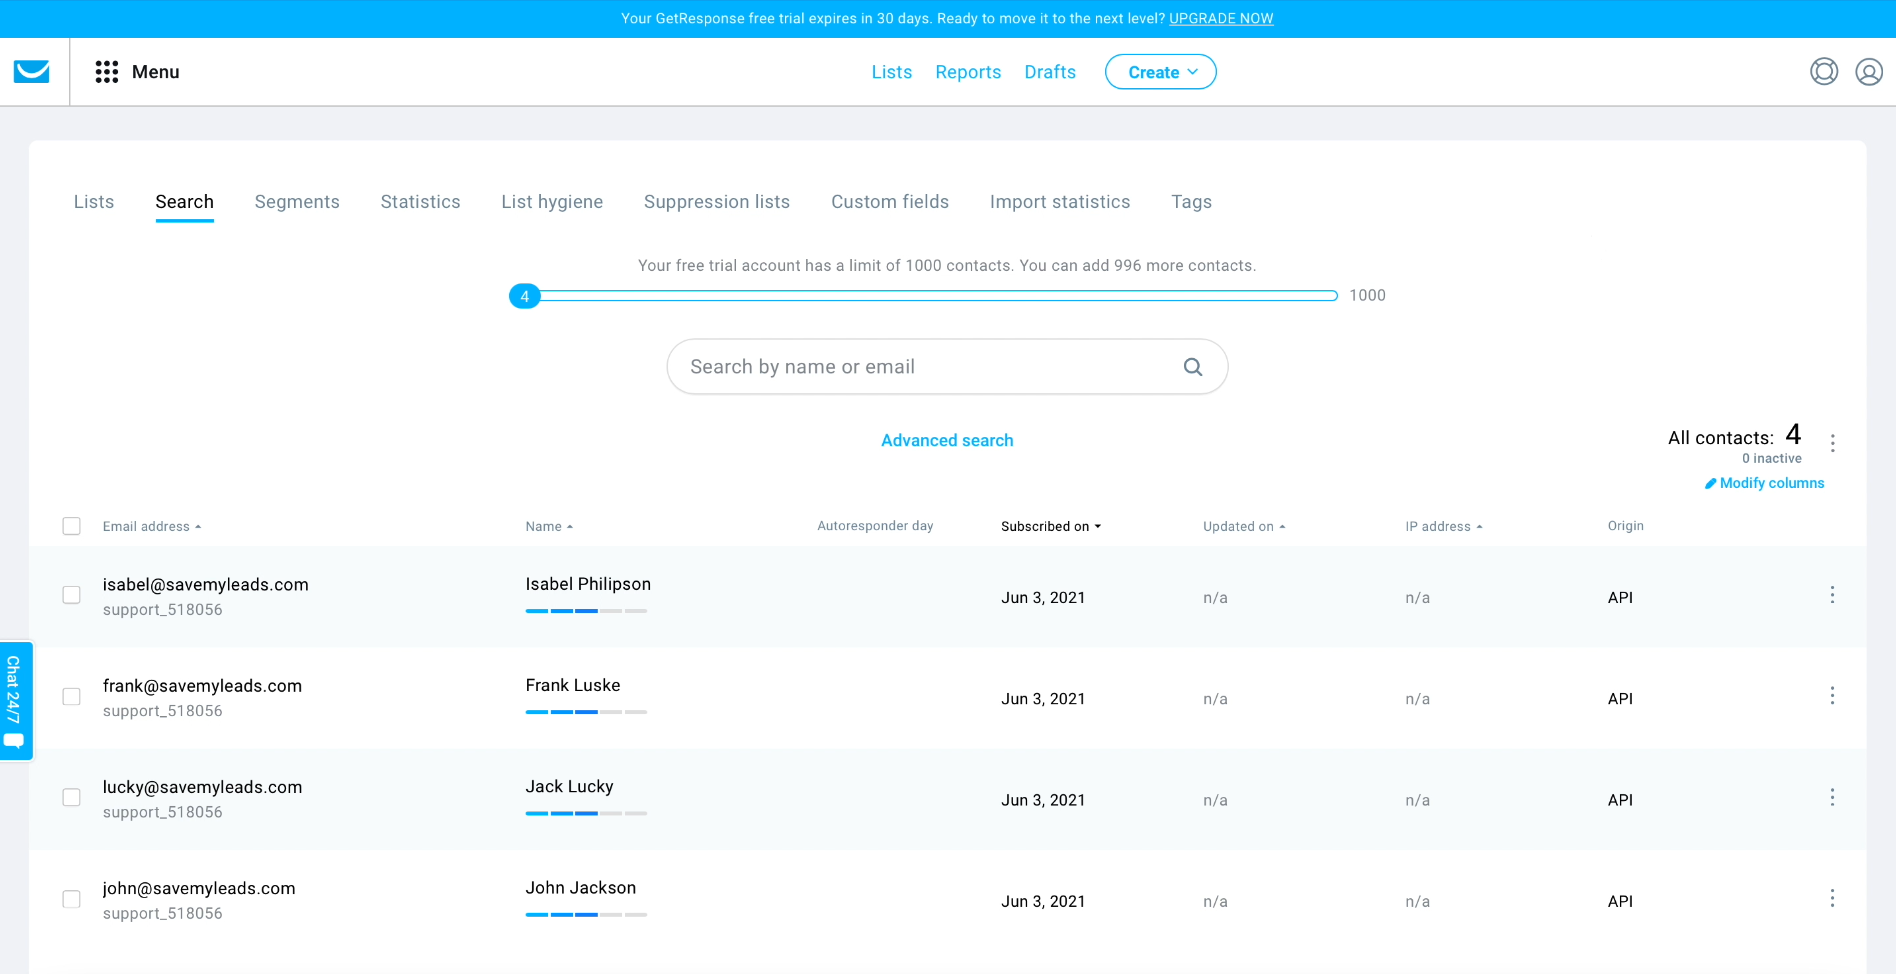
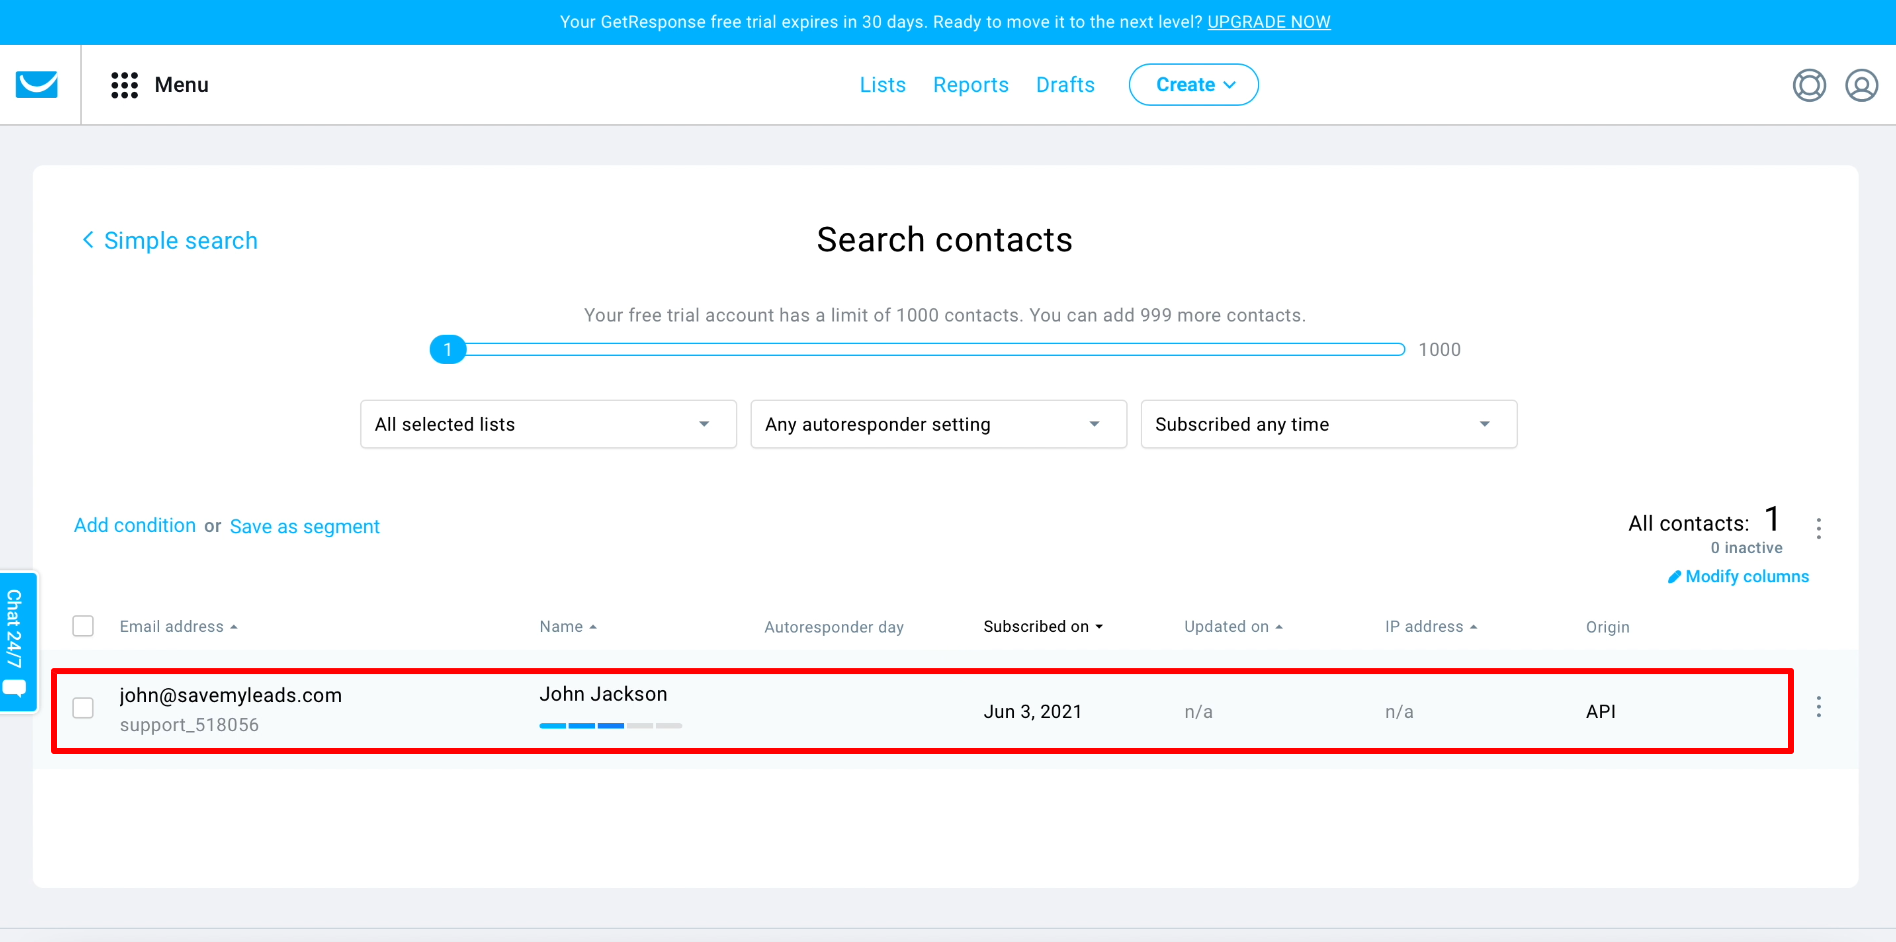
Opening the GetResponse website, go to the mailing list that we have chosen to add contacts. This is where our first Facebook follower should appear. If this did not happen, check the correctness of the previous configuration steps.
Finish the setup
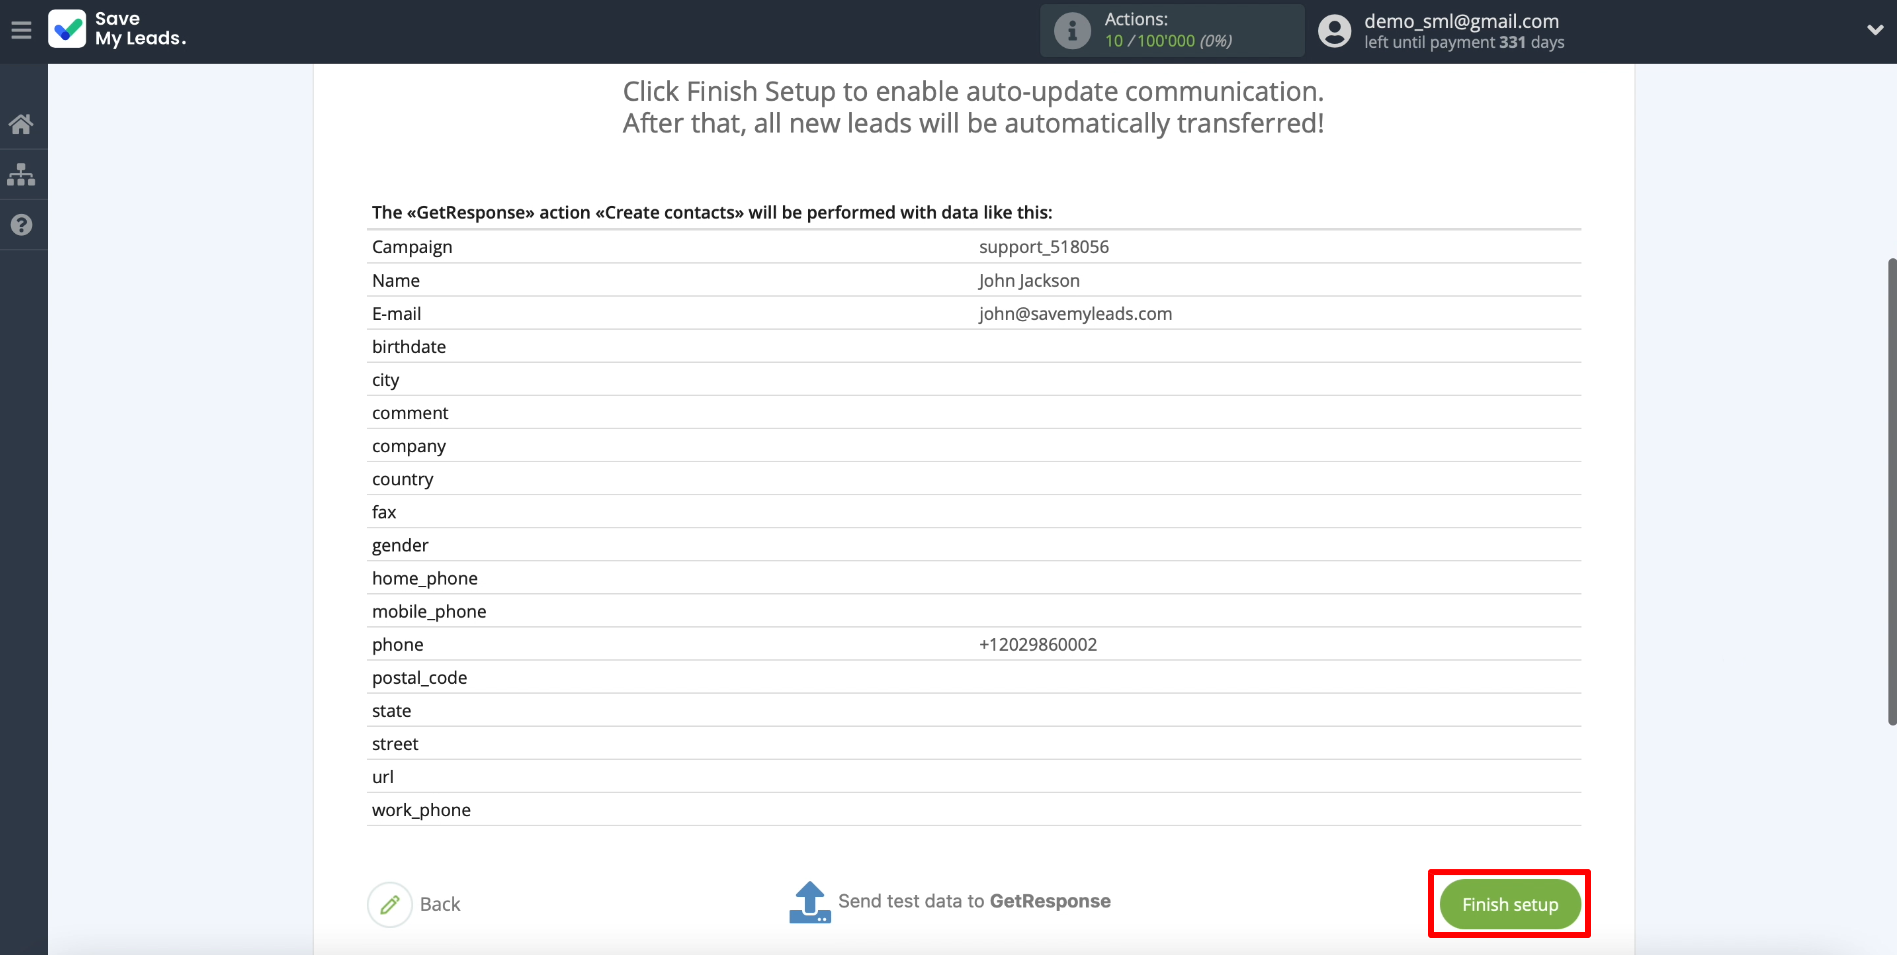
Go back to SaveMyLeads and click Finish setup to start automatic data upload.
If necessary, edit the name of the connection. To do this, click on the gear and enter the desired text.
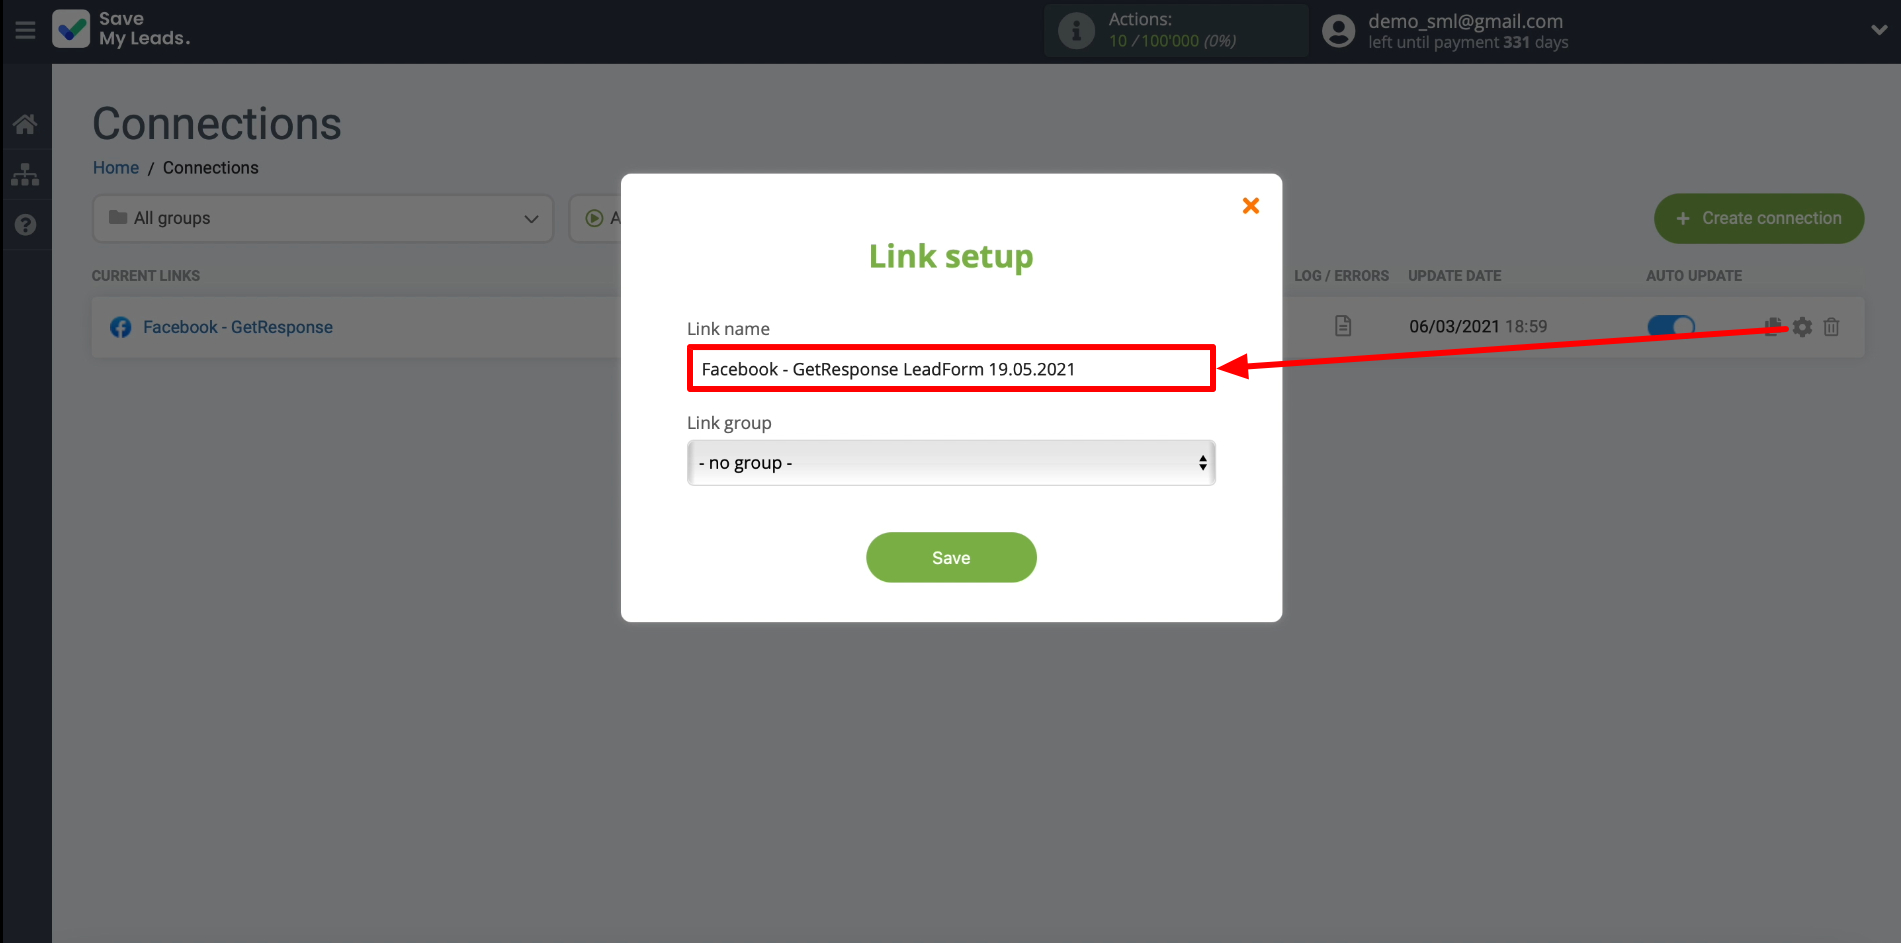
That's all. SaveMyLeads will automatically upload subscriber contacts from Facebook directly to the GetResponse mailing list. The configured connection can be paused, edited or deleted at any time. Good luck with your work!
