High speed of interaction with potential clients gives a business the opportunity to compete adequately in its niche. The Lead Ads advertising format provided by the social network Facebook was designed specifically to increase it. Using the application form, leads can instantly signal their desire to make a purchase or place an order in a couple of clicks. The Lemlist platform automates work with email. It generates personalized newsletters with dynamic content and thus significantly speeds up the manager’s work. Are you already using both services or are you considering introducing them into your workflow in the near future? Then it will be important for you to at least maintain the existing pace of communication with leads, and at maximum, increase it. It is possible to achieve this goal by connecting platforms with each other through our SaveMyLeads online connector. This article will show you how to set up Facebook and Lemlist integration to automate the transfer of lead data from Lead Ads forms directly to the email marketing platform.
Automatic transfer of potential customer data from Facebook to Lemlist brings triple benefits to businesses:
- Increasing the speed of communication with leads. Buyers of your product or service will receive feedback from you faster. This significantly reduces the risk of them changing their decision.
- Optimization of personnel work. Managers tasked with transferring lead data can be refocused on improving the quality of contact with them.
- Saving time. You will have fewer active daily work processes that require your direct participation or the participation of your colleagues.
You can view the results of Lemlist and Facebook integration immediately after completing its setup using the SaveMyLeads connector. Leads who submit an application through the Lead Ads form will be automatically transferred immediately to the email marketing platform. If you used to manually transfer their names, phone numbers, email addresses from one service to another, now you can make this outdated method a thing of the past forever. By the way, automating data transfer will benefit not only you personally, making your work easier. Pleasantly surprised by the speedy feedback and positive experience of interacting with you, leads are more likely to want to become your regular customers. And this is a more serious benefit – growth, development, and success of the business as a whole.
How to Set up Facebook and Lemlist Integration
Setting up the Facebook-Leads and Lemlist integration using SaveMyLeads is extremely simple. Even a completely inexperienced person can easily handle this. By choosing this online connector to establish a connection between a social network and an email marketing platform, you won't have to urgently learn how to connect systems via API or search for a specialist to perform such a task. The developers have made sure that the process is intuitive and users don't encounter any difficulties. You will only spend up to 10 minutes on everything. If you have experience with integrations, it will take even less time. The step-by-step instructions we have prepared in text and video format will help you avoid any accidental mistakes and set everything up correctly the first time.
The first step is to register on savemyleads.com. To create an account, you will need to enter your name, email address, and create a password. If you have Google and Facebook accounts, you can register through them. Ready? Now let 's start setting up the Facebook Lead Ads and Lemlist integration.
Setting up the Data Source – Facebook
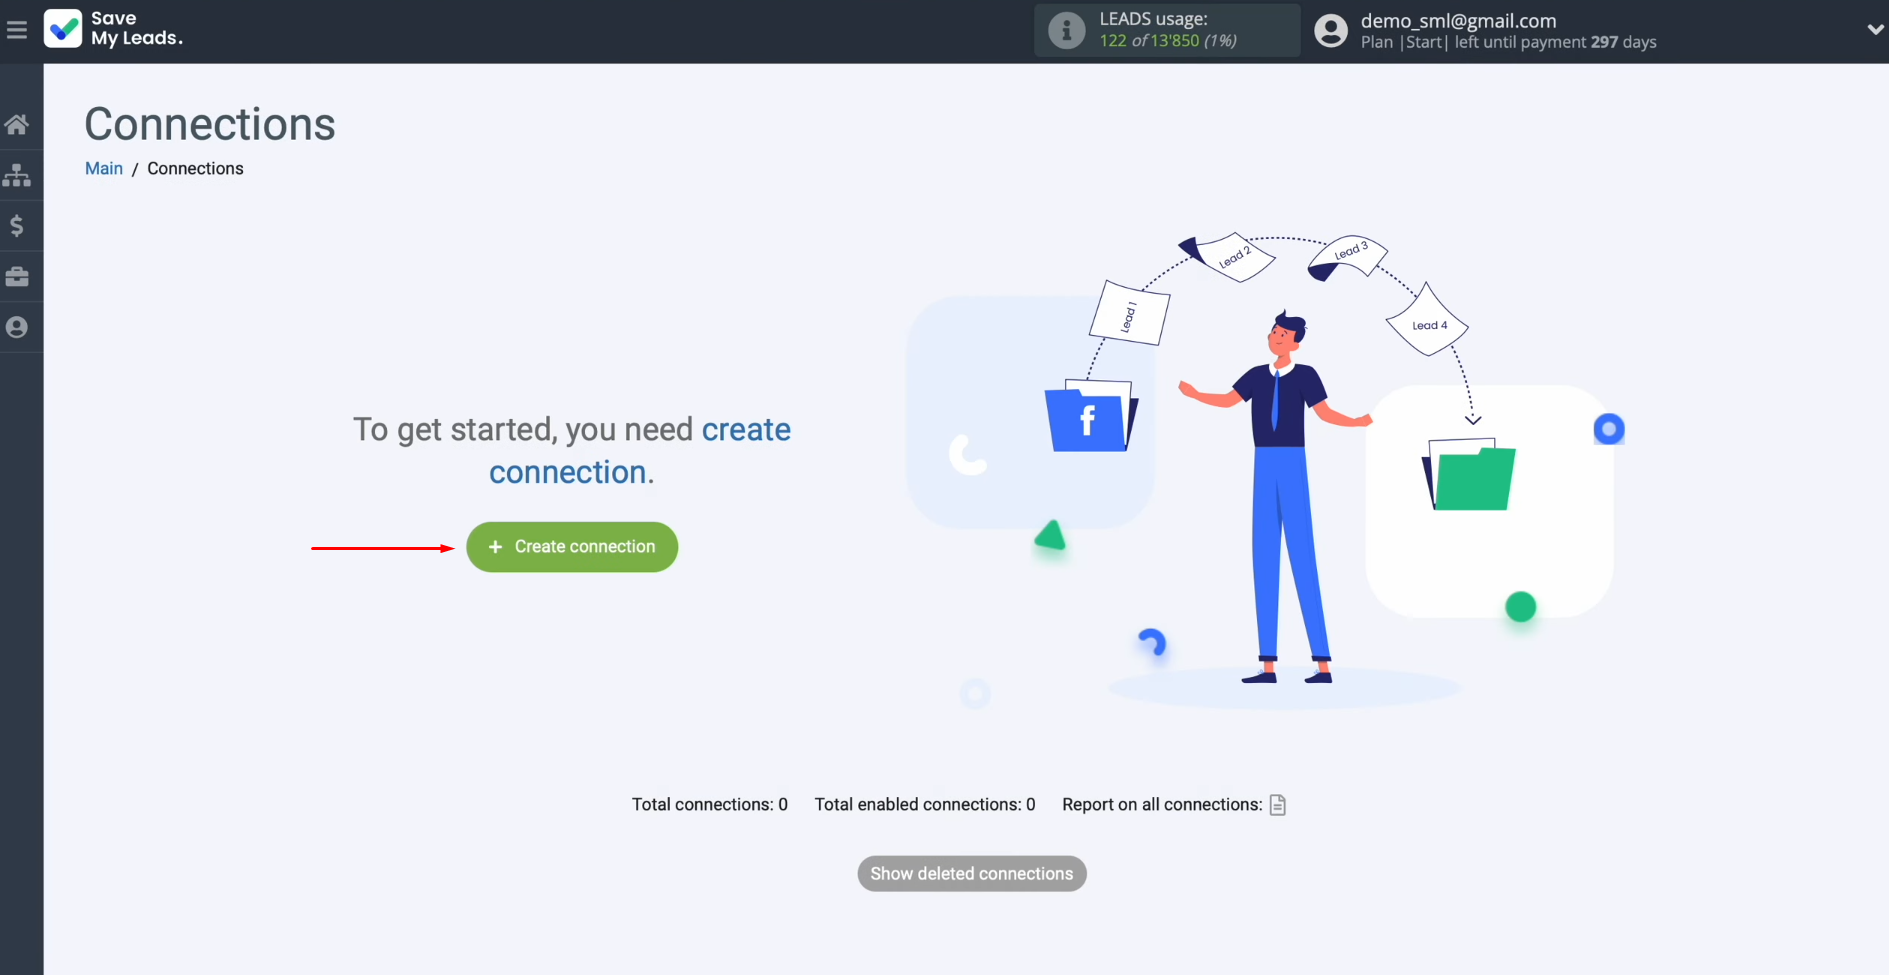
To set up Facebook integration with Lemlist, first, you need to create a new connection. For this, click on the green button.
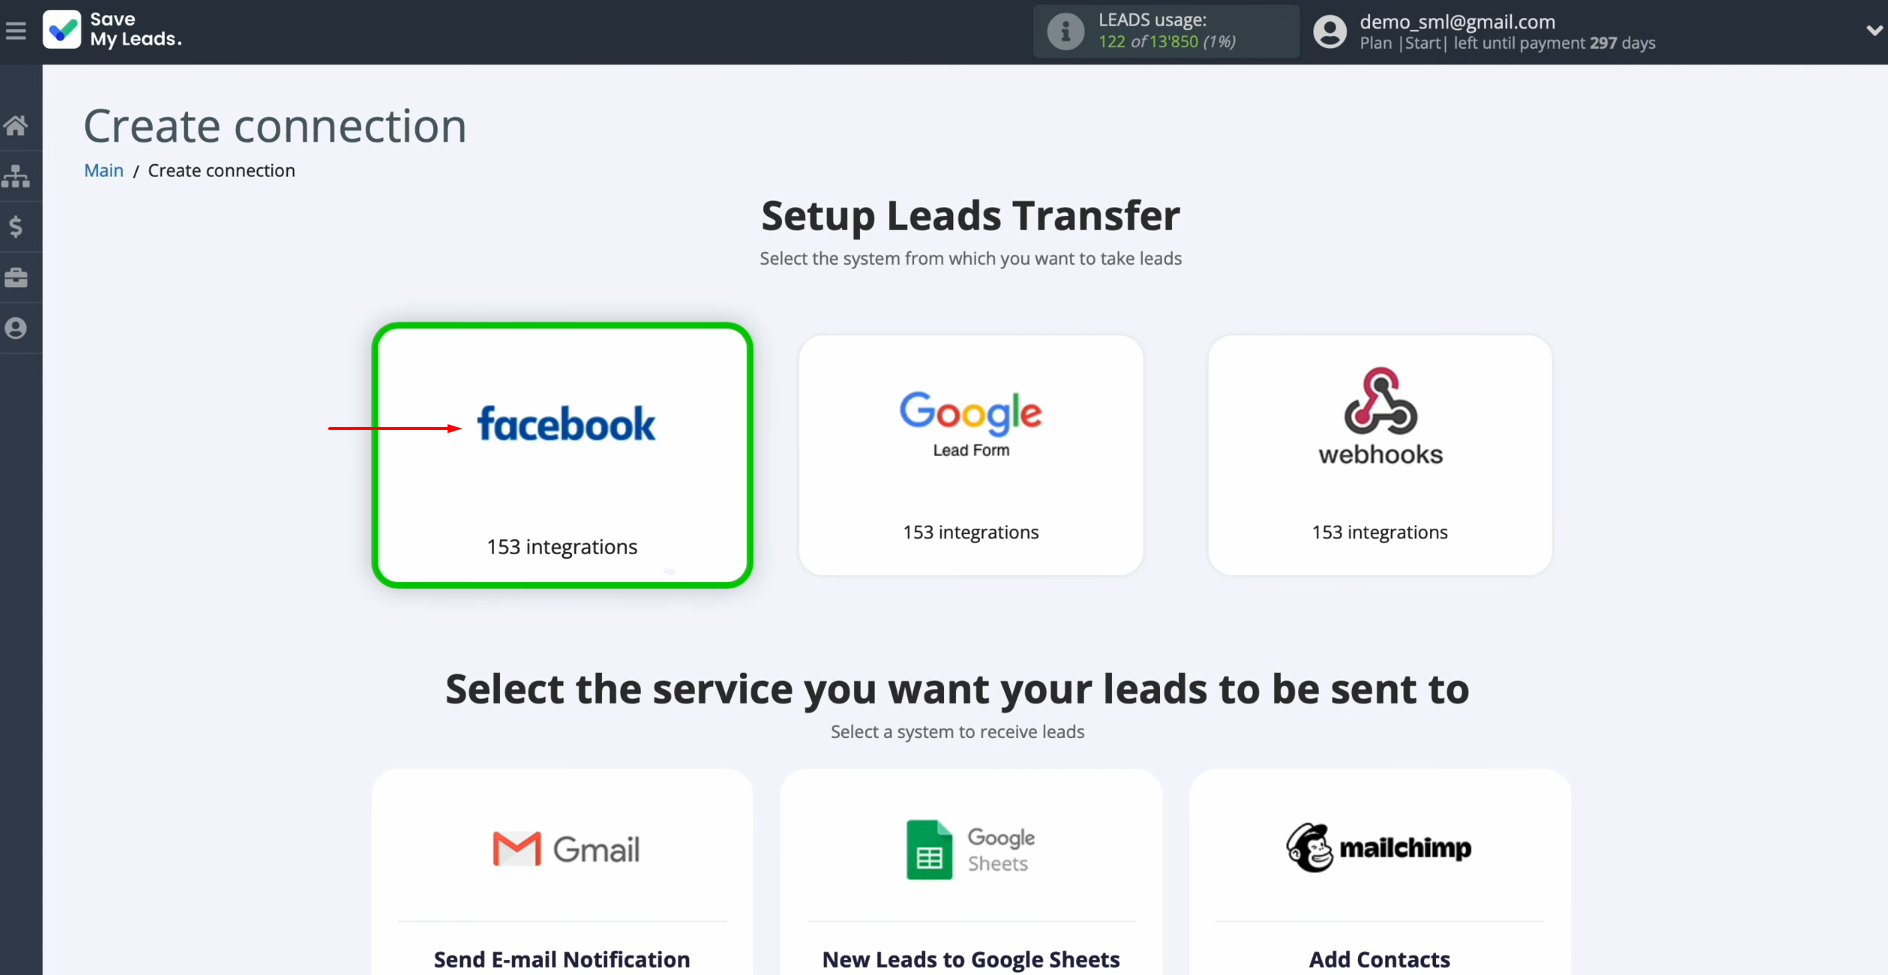
Next, you need to
select the system from which you
want to transfer new data. In this case, you must select Facebook.
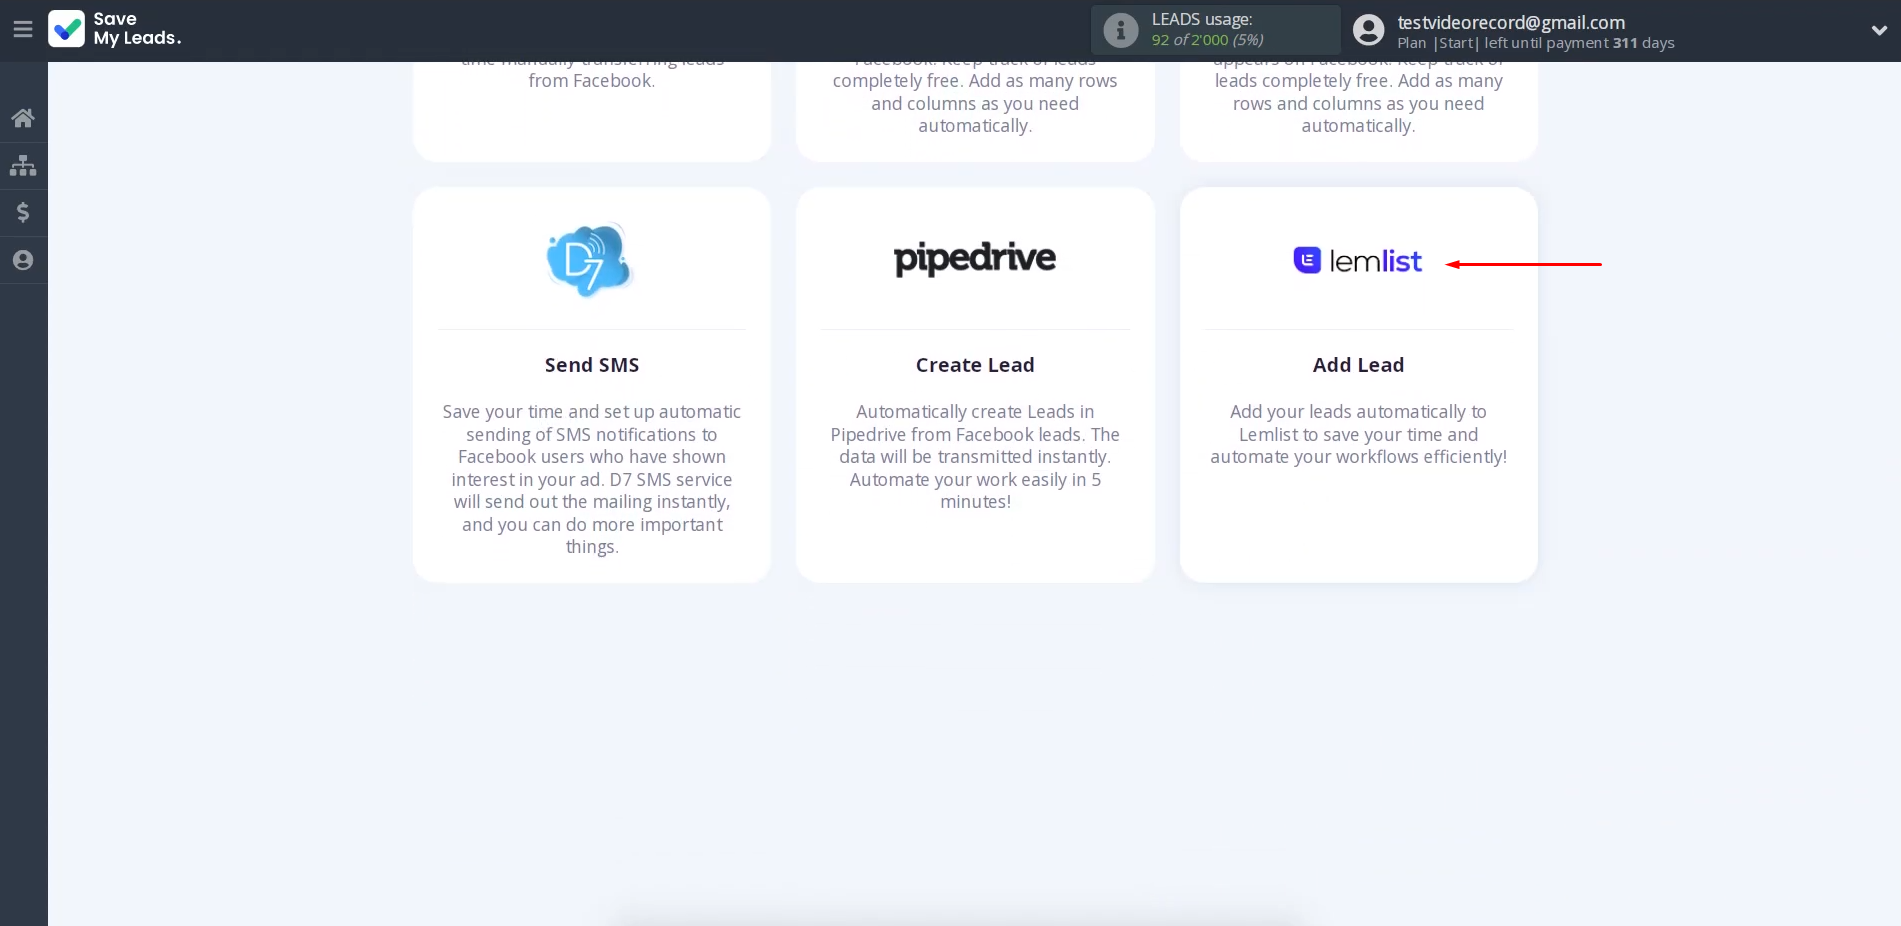
At this stage, you can choose one of the ready-made templates where you want
to send leads
from Facebook. In this case, you need to select Lemlist (Add Lead).
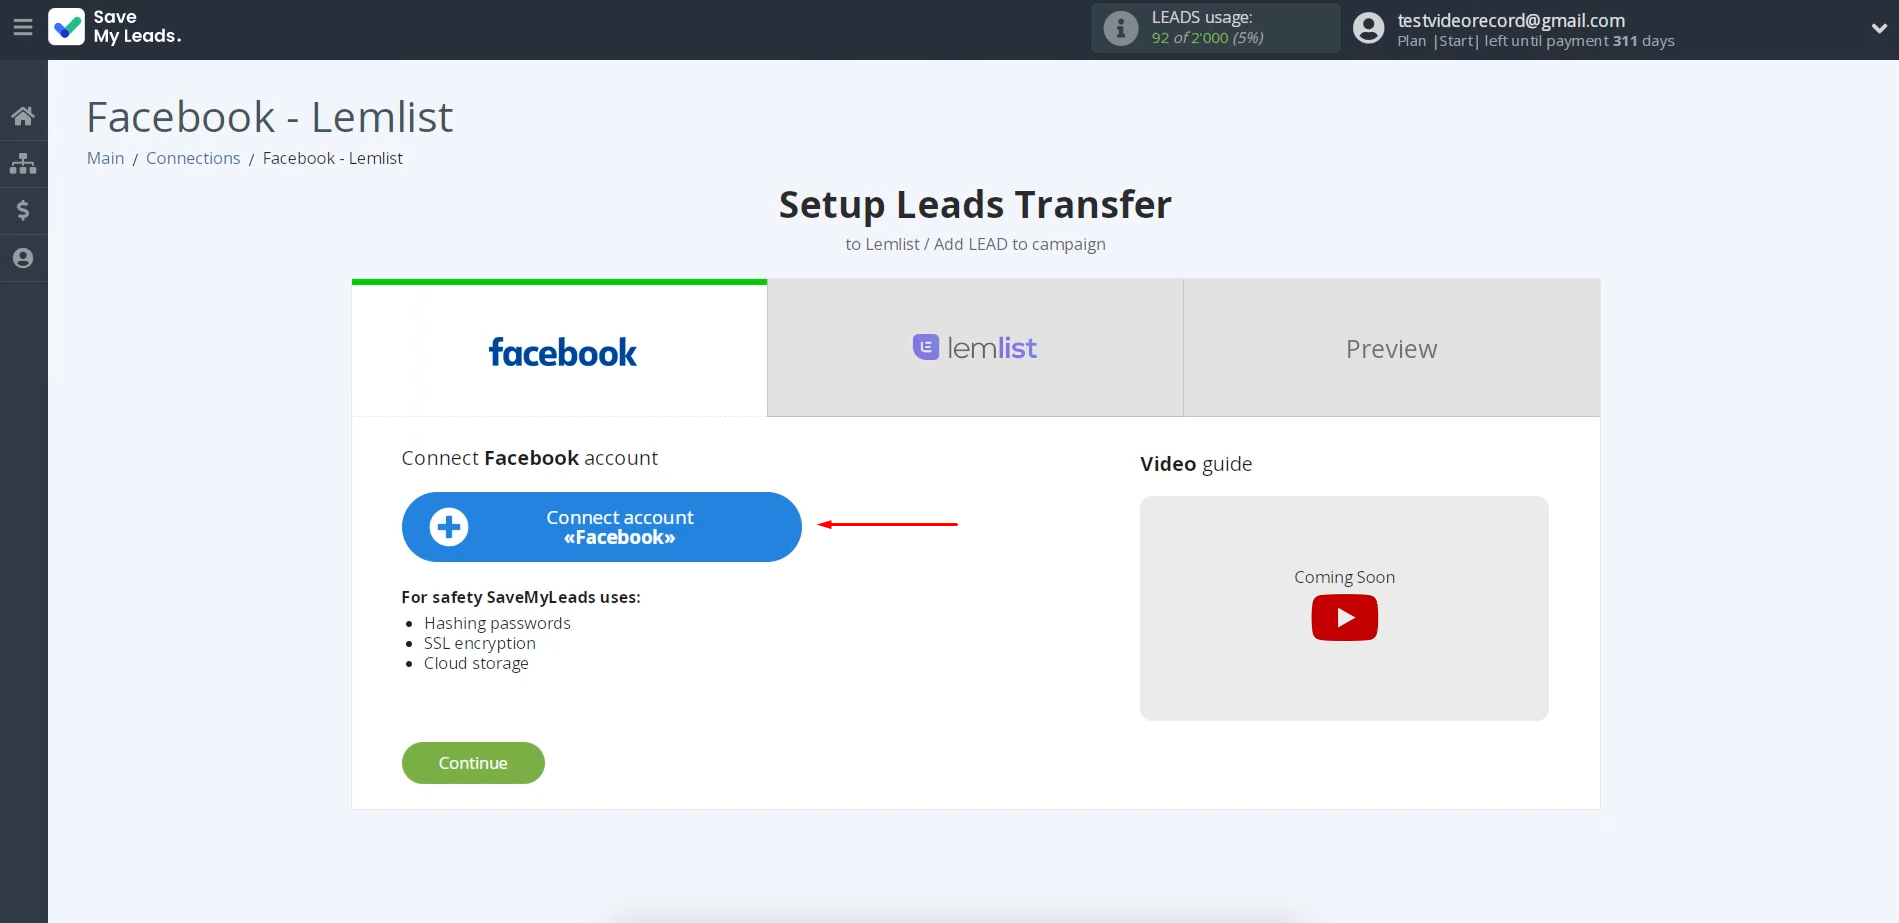
Now, you need to connect your Facebook account to SaveMyLeads. To achieve this, press the
blue button.
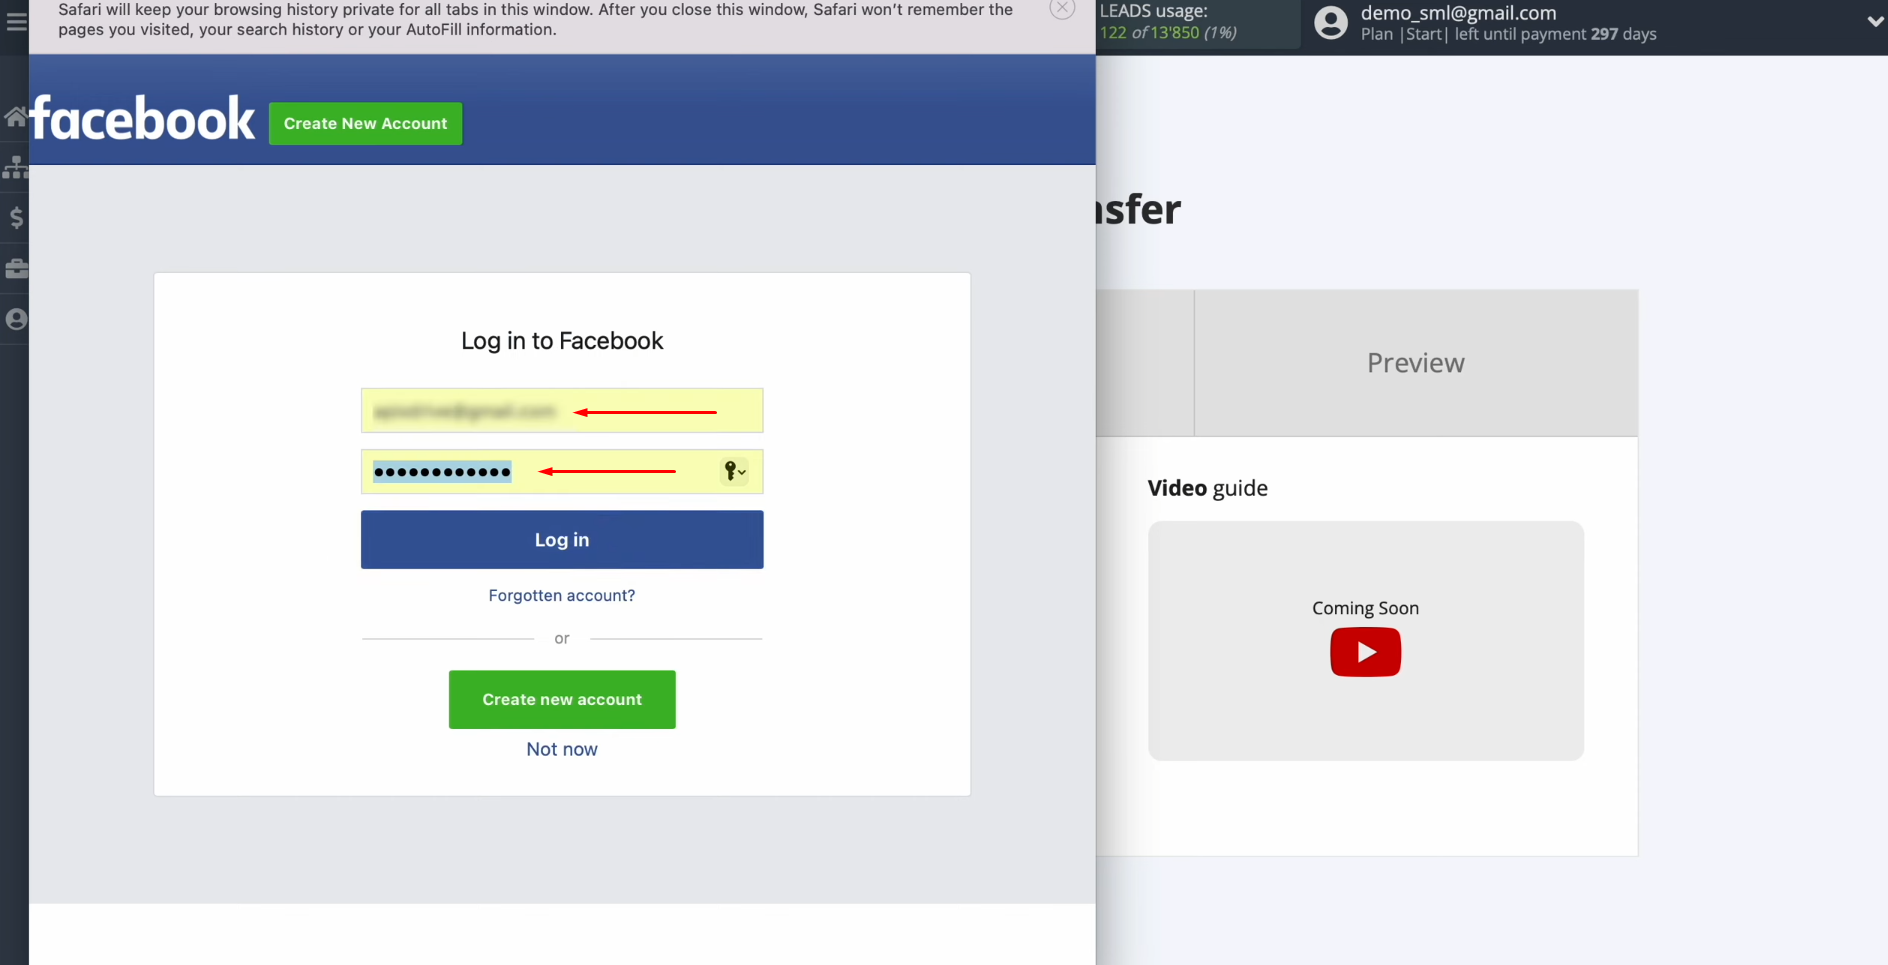
In this
window, we need to
specify the username and
password of the Facebook personal
account. Click “Log in”.
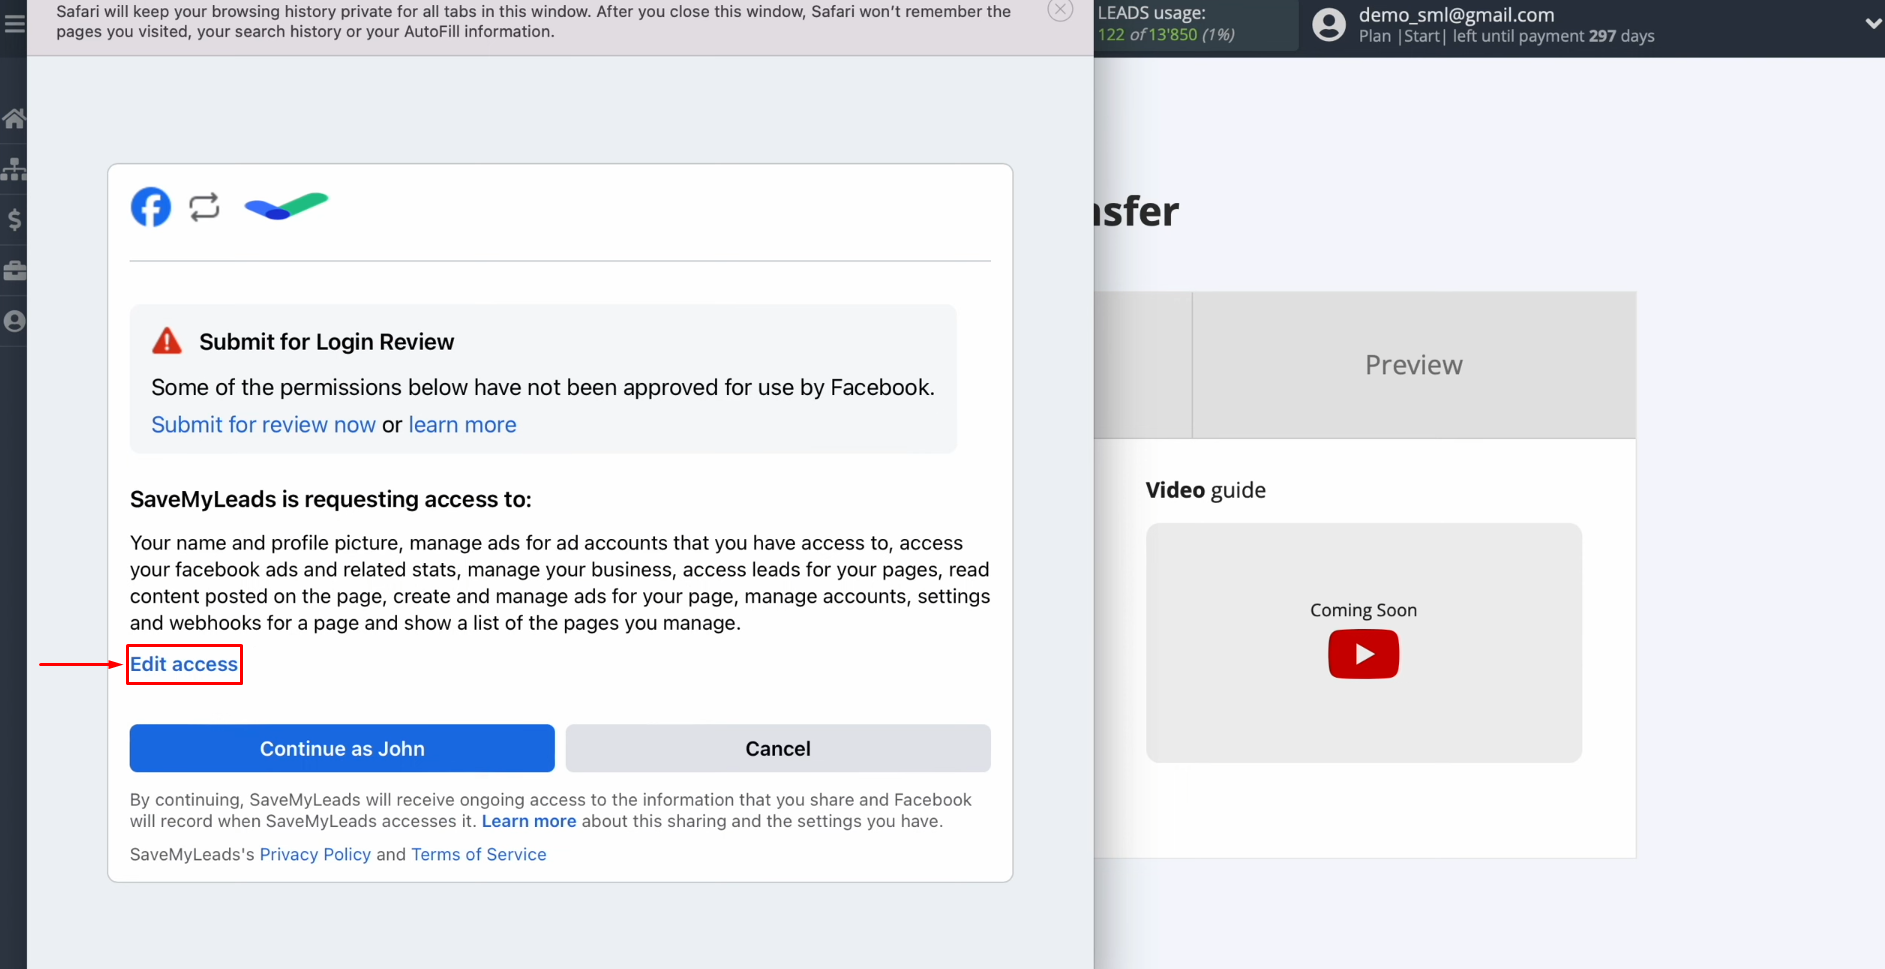
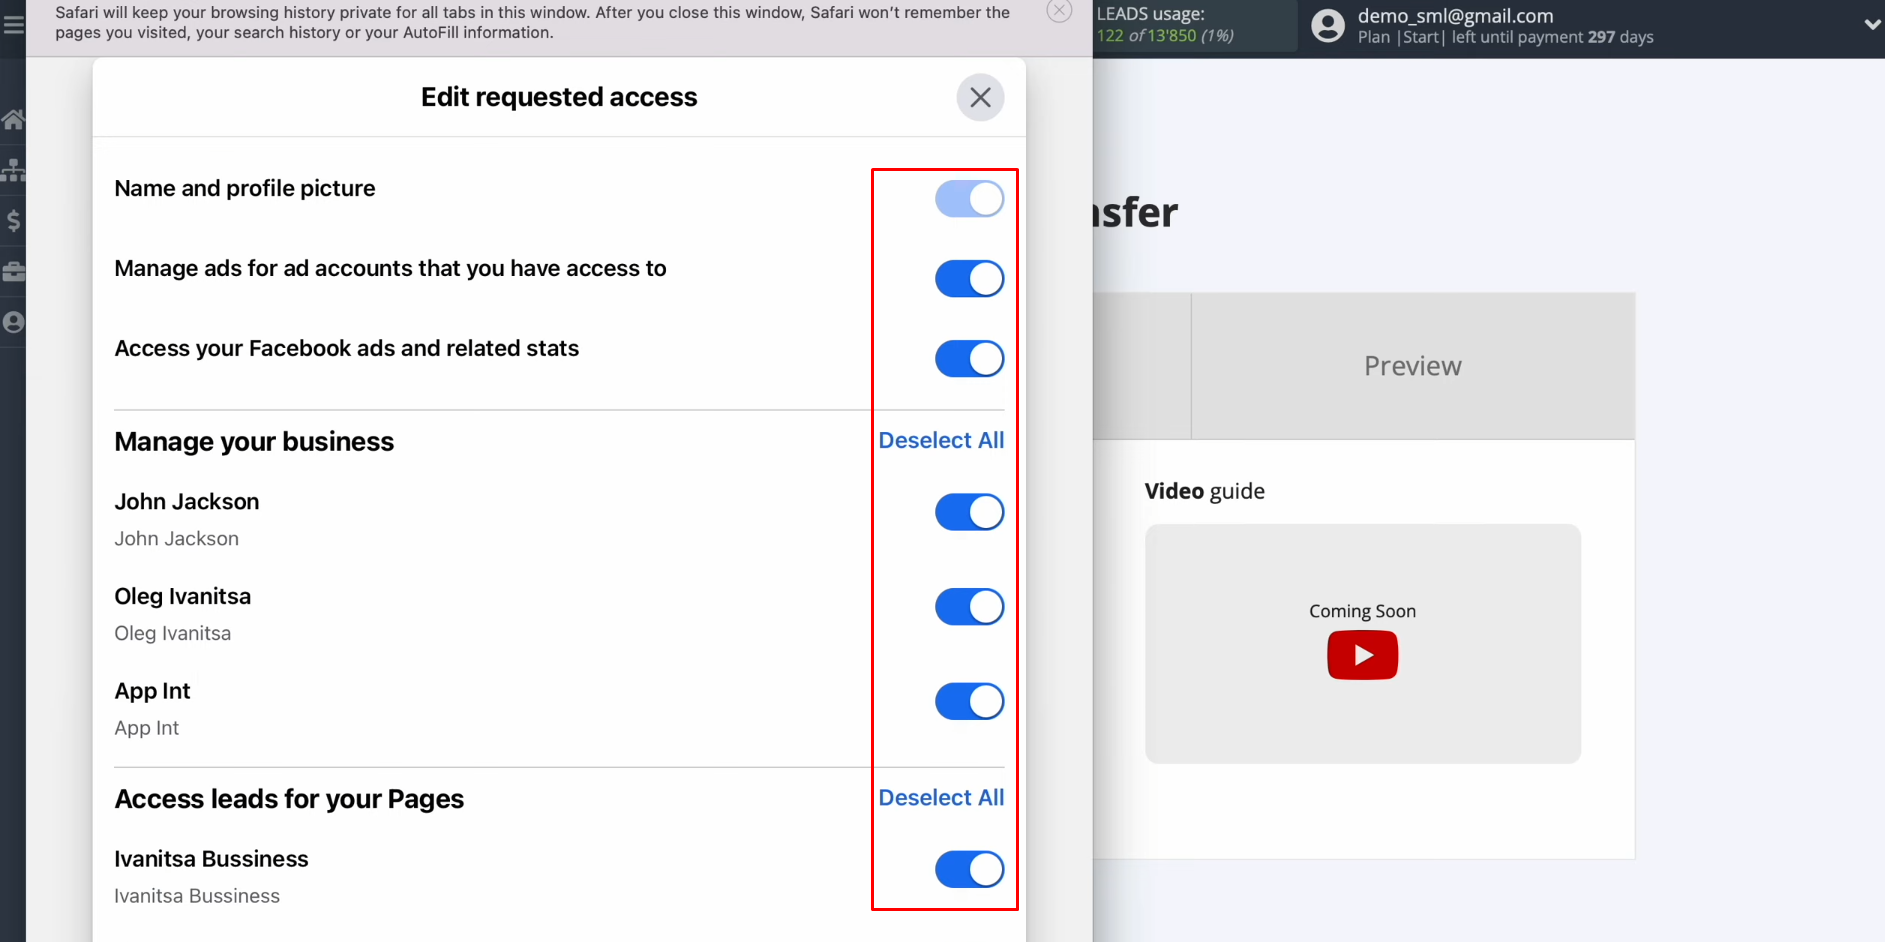
Provide SaveMyLeads
access to work with your Facebook account. To do this, go to settings – click
“Edit access”.
Leave all access checkboxes
enabled.
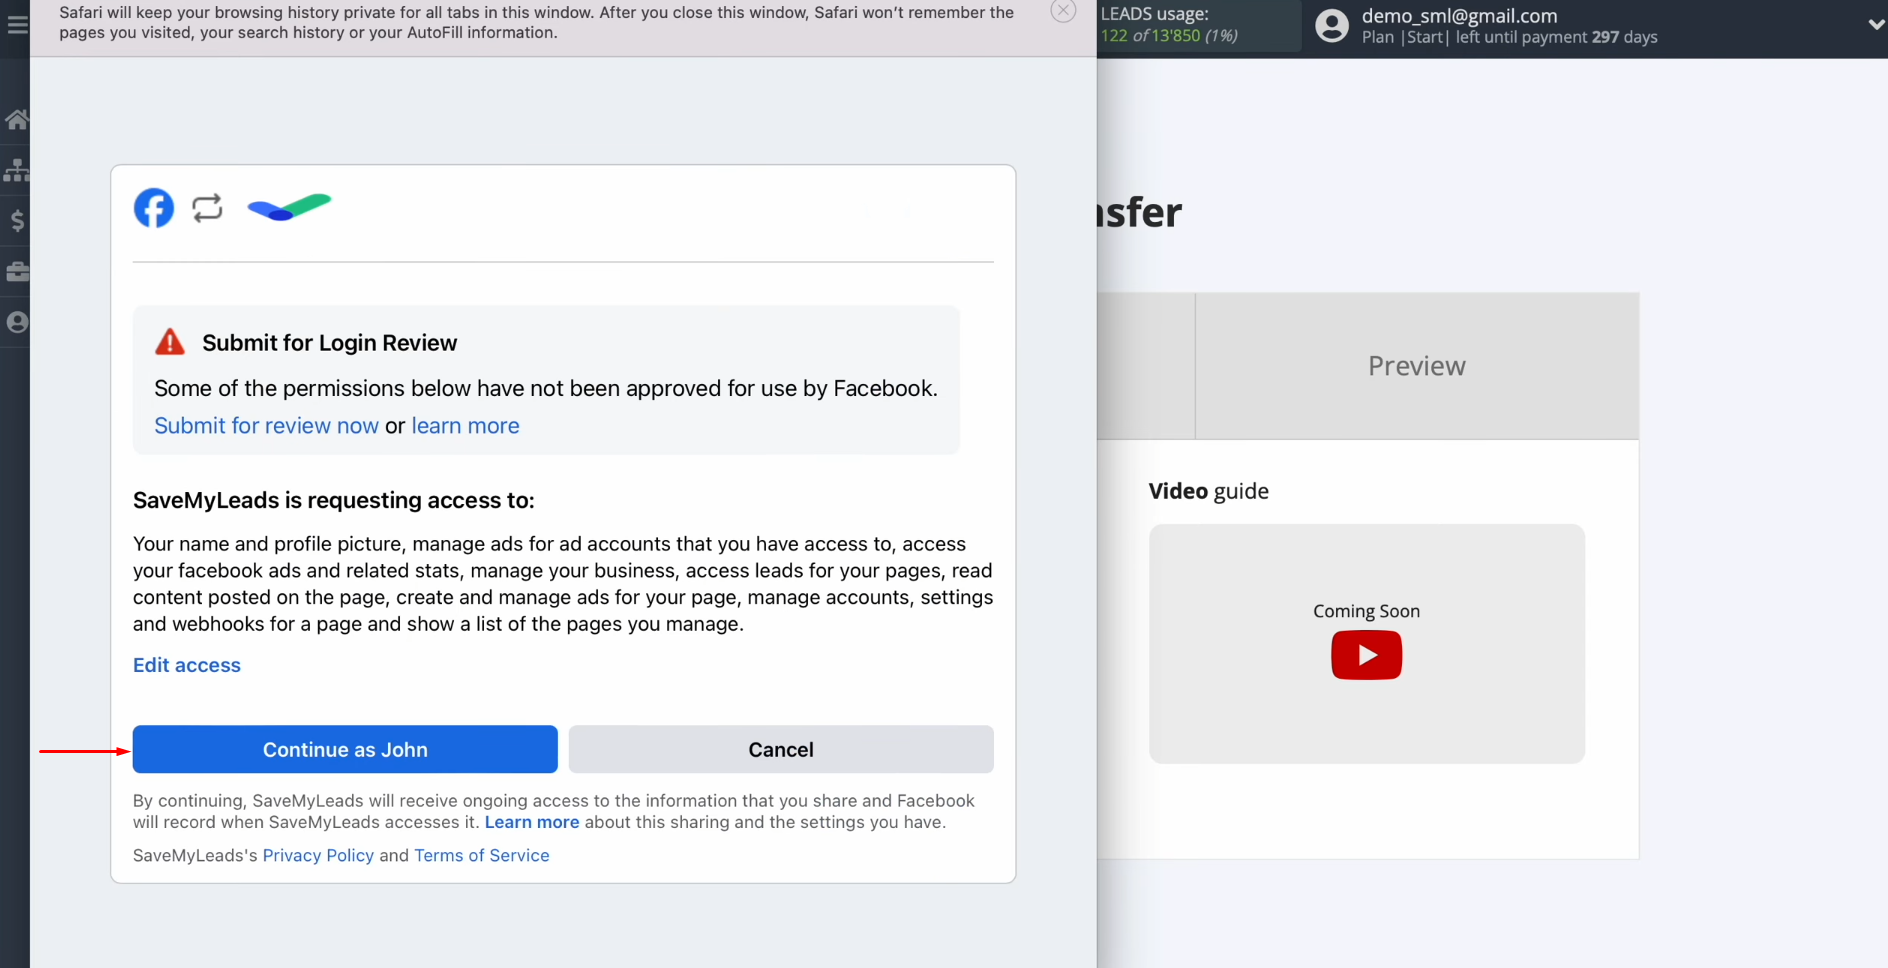
Click “Continue as…”.
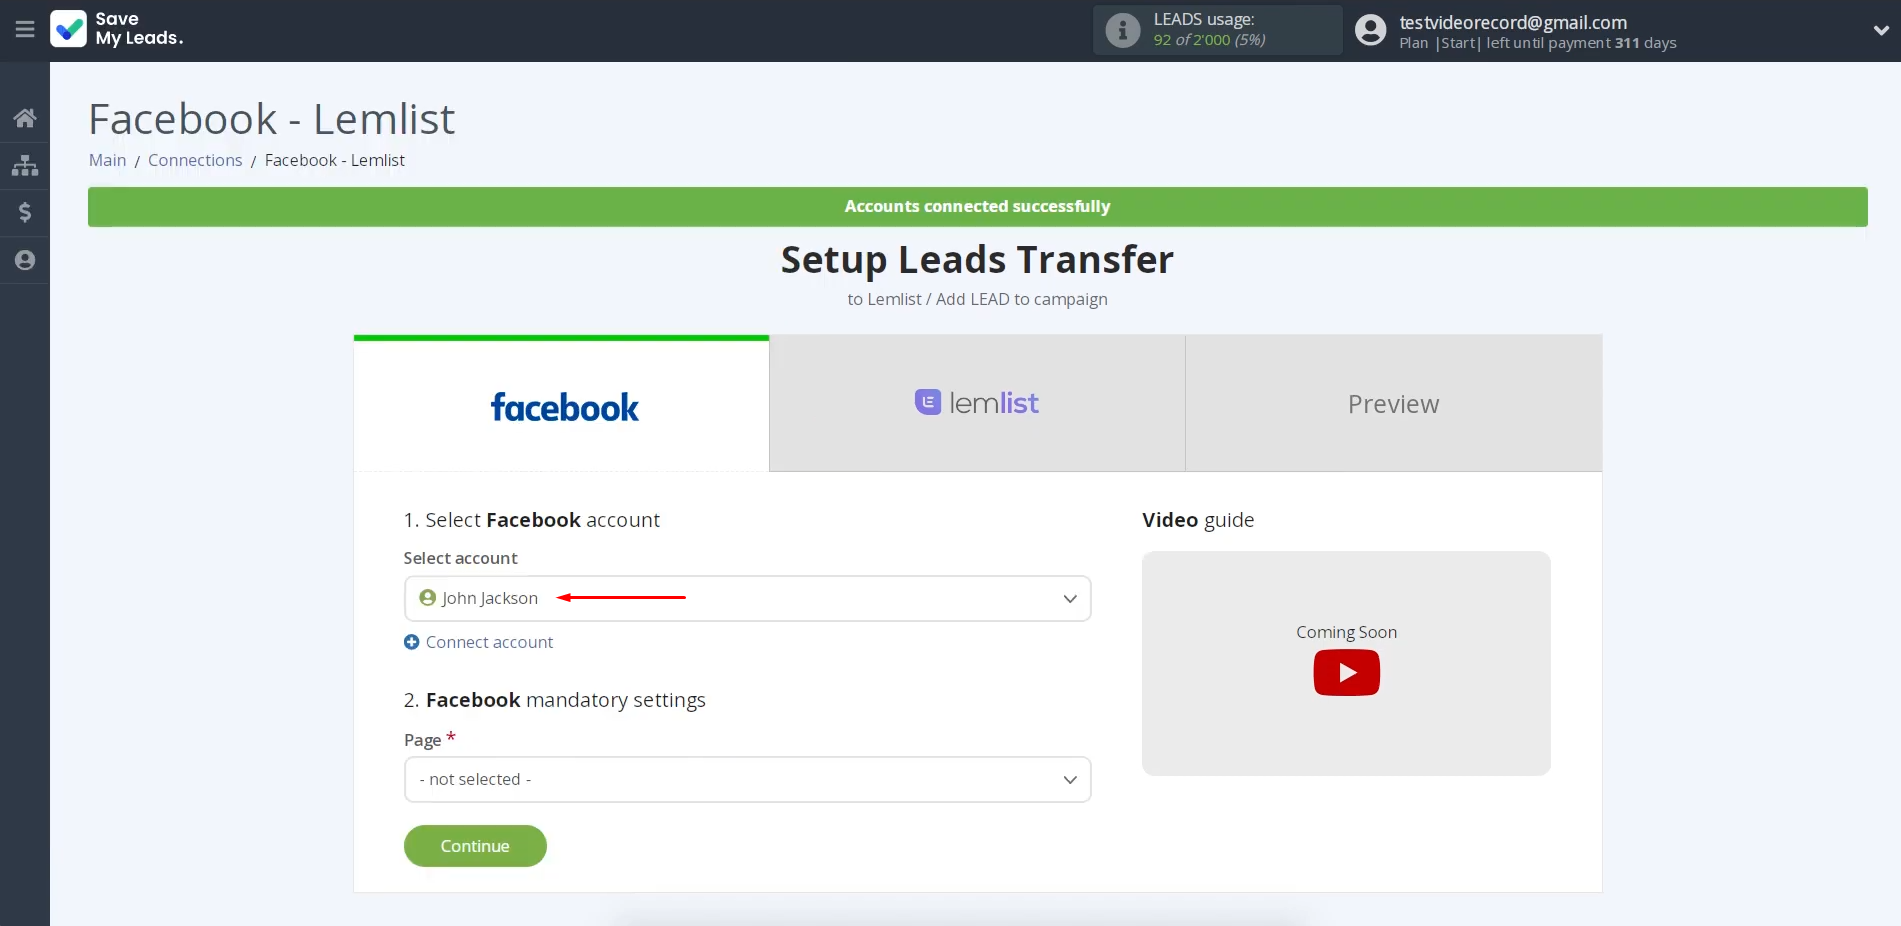
When the
connected account appears in the list, select it.
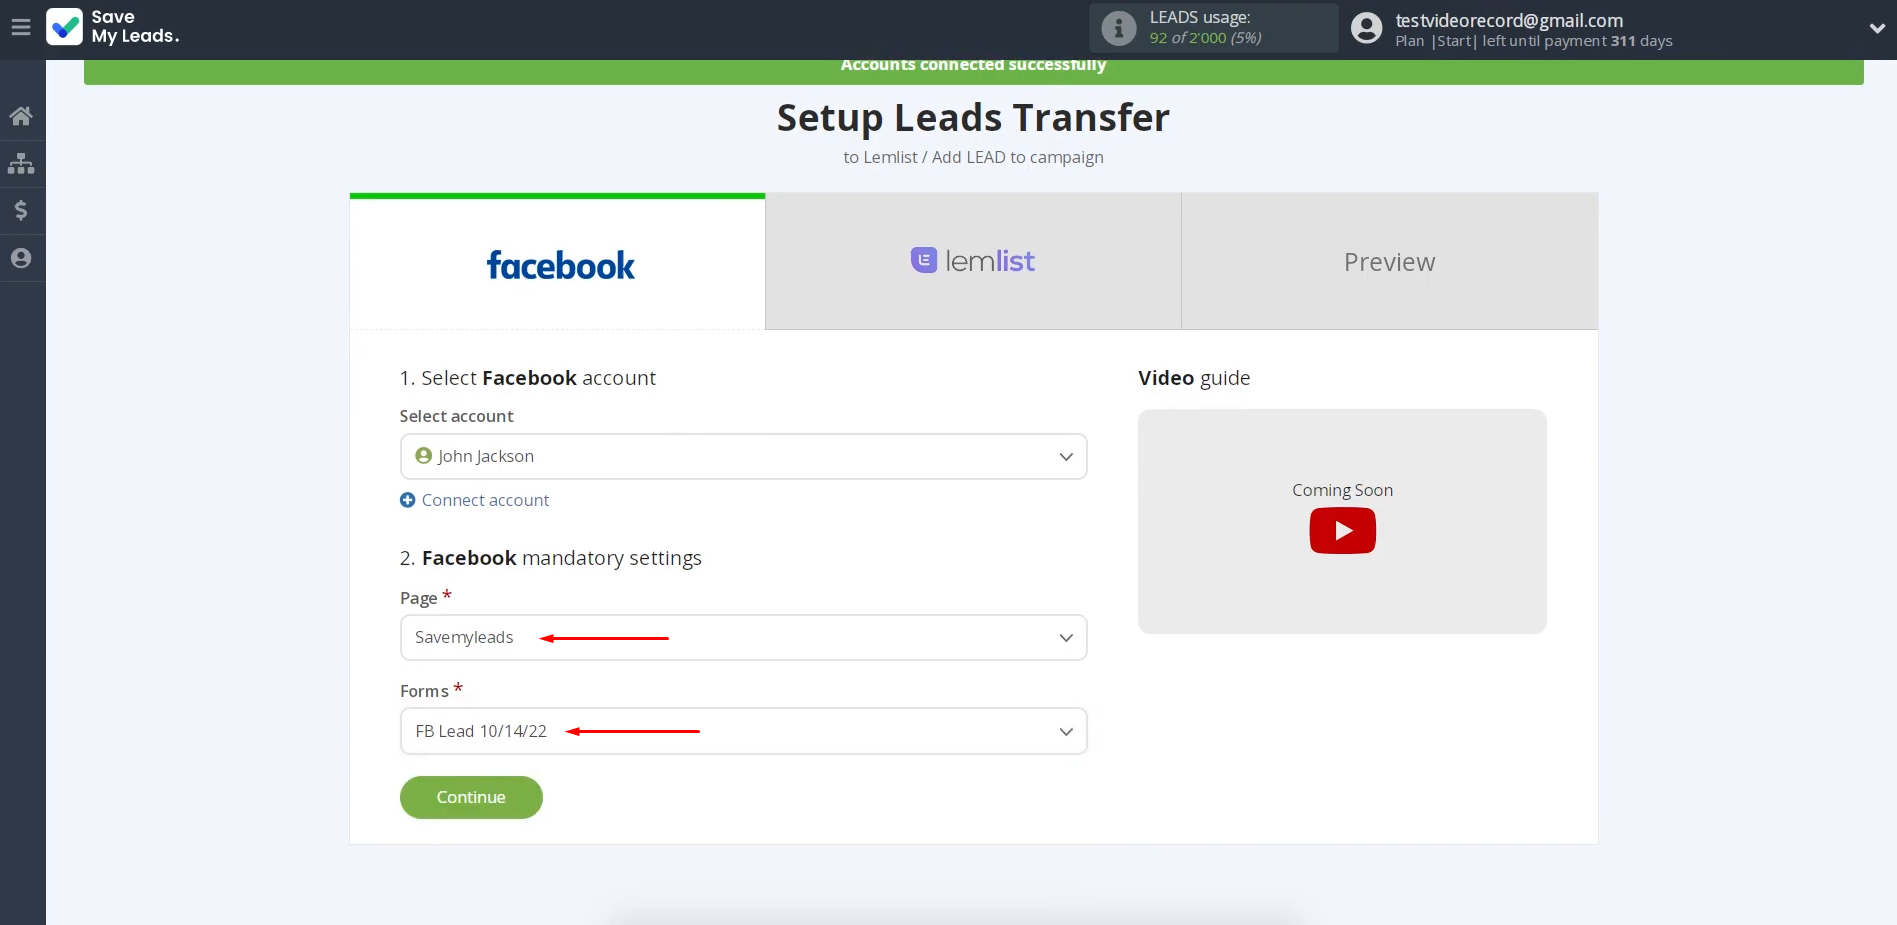
Select the
advertising page and form by which you want to receive new leads from
Facebook. Click “Continue”.
If you want
to receive data from several forms, you need to create several connections for each of them.
Setting up the Data Receiver – Lemlist
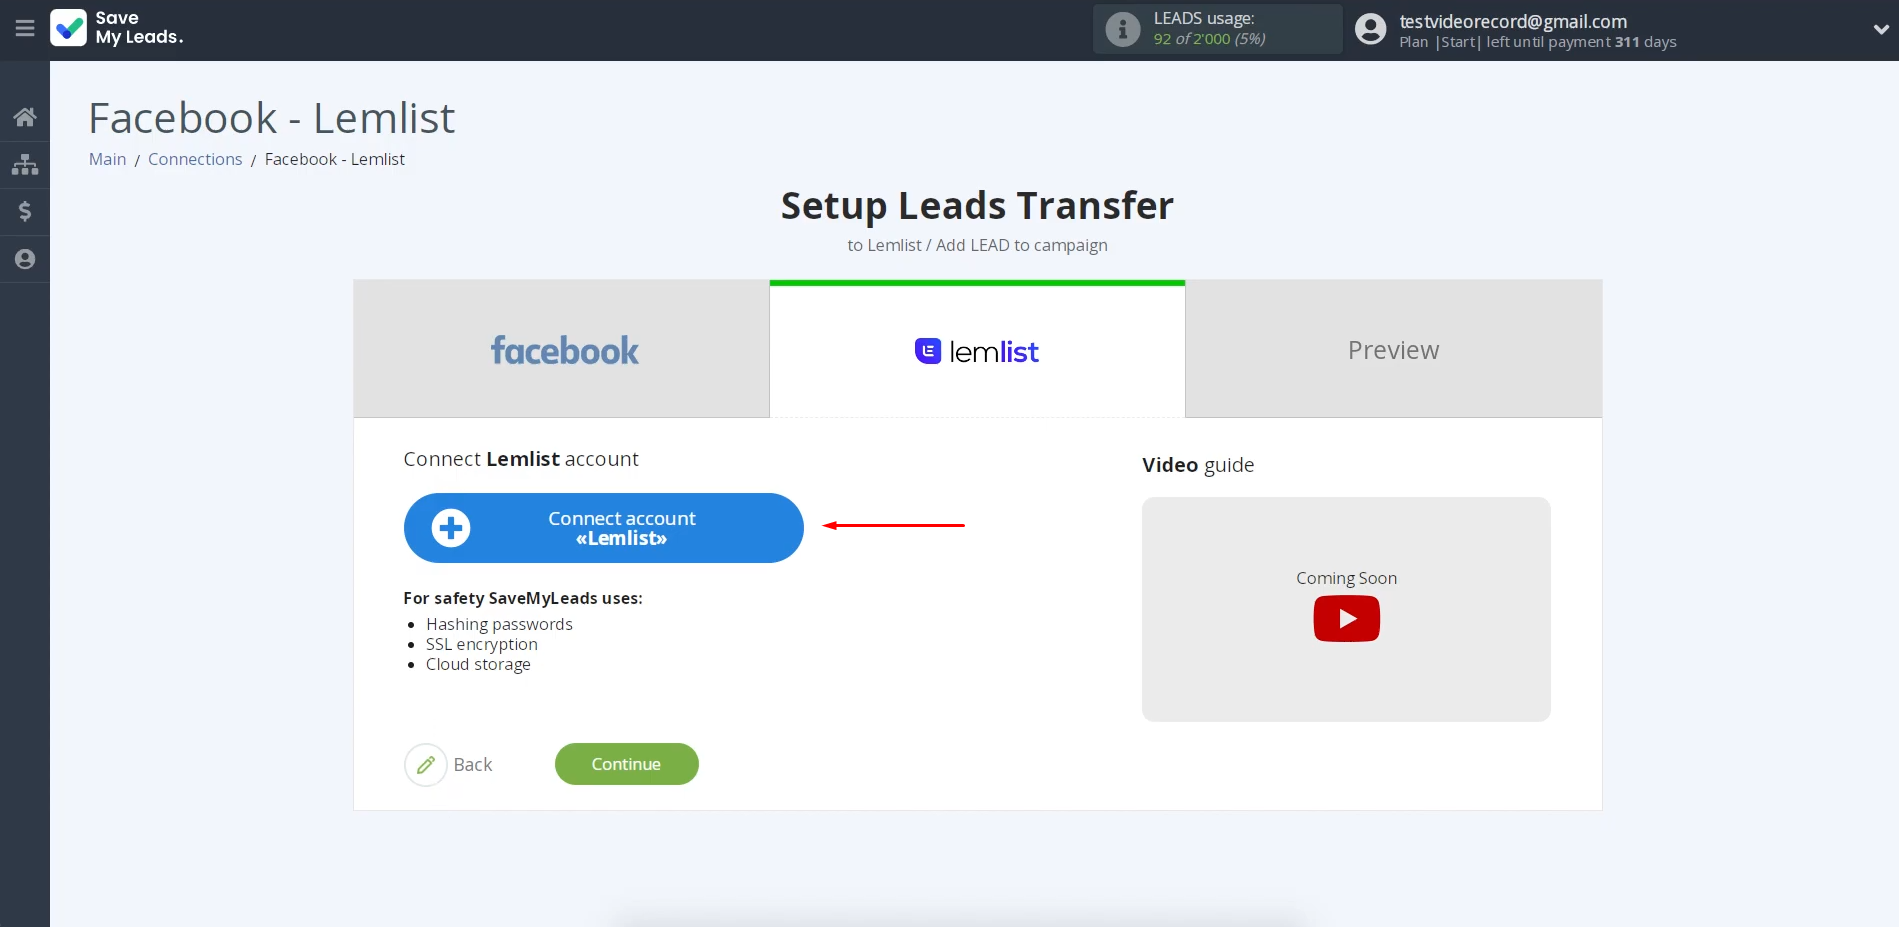
To set up Lemlist integration with Facebook, connect your Lemlist account to SaveMyLeads. For this, click on the blue button.
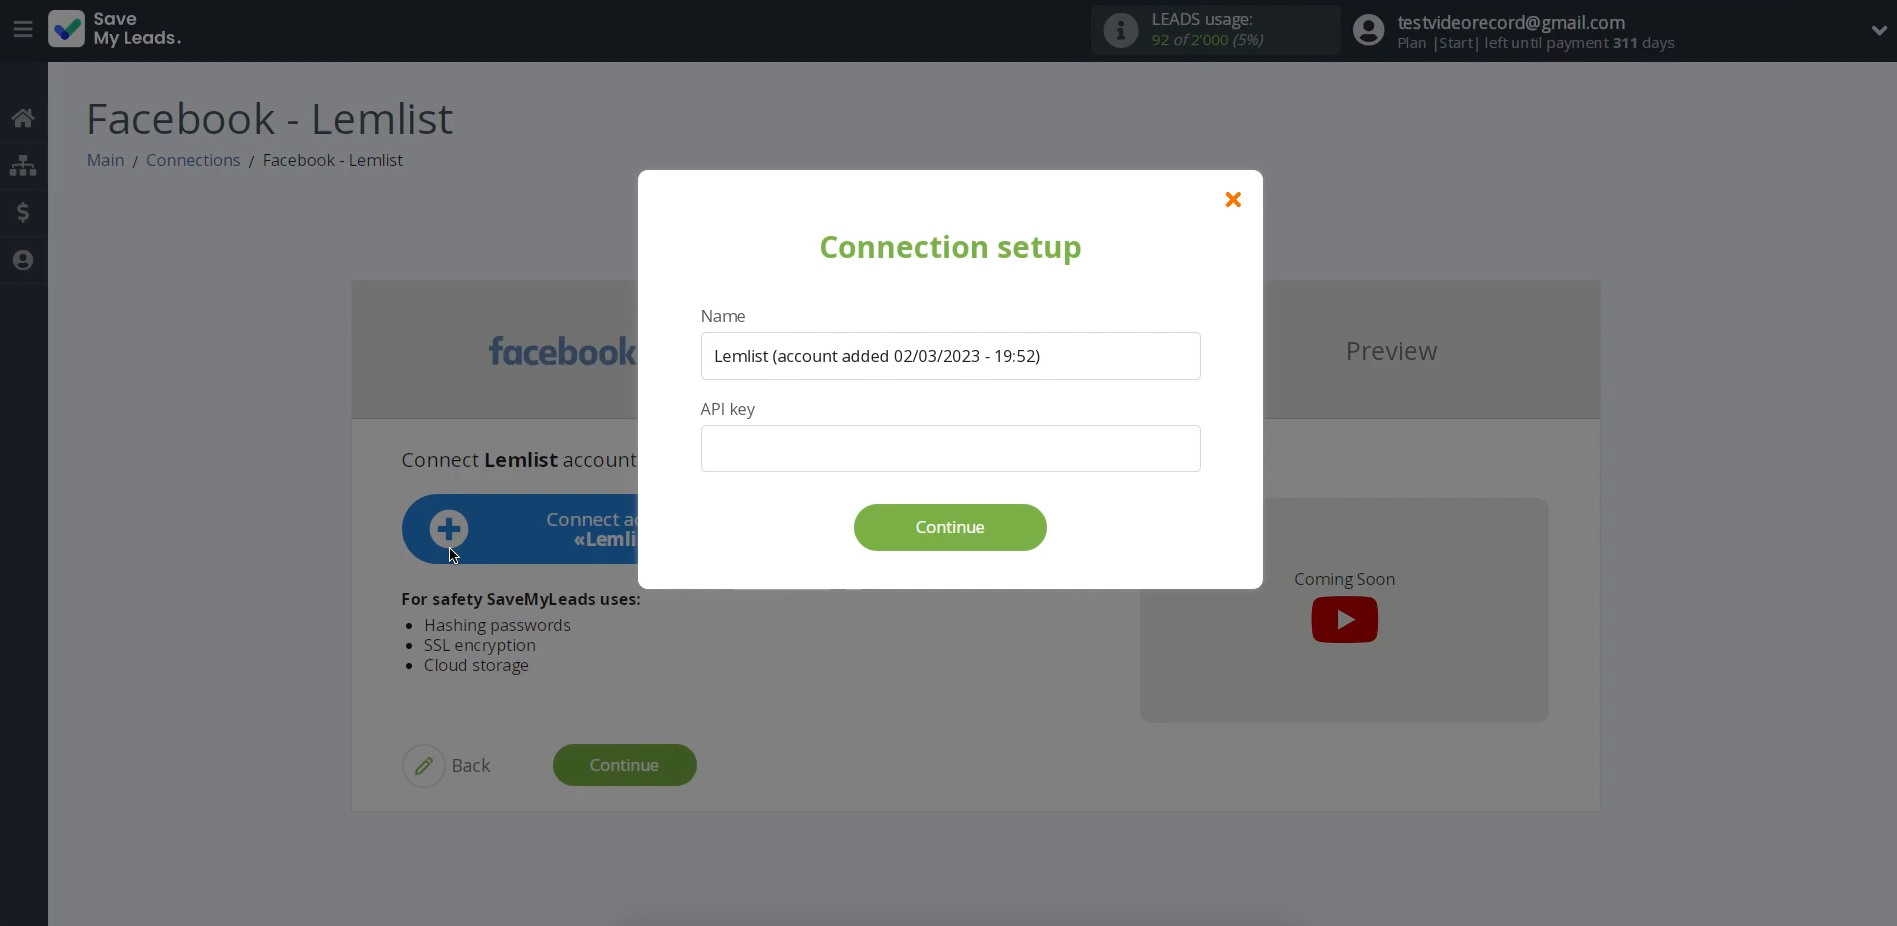
In this window, you must specify the
API key.
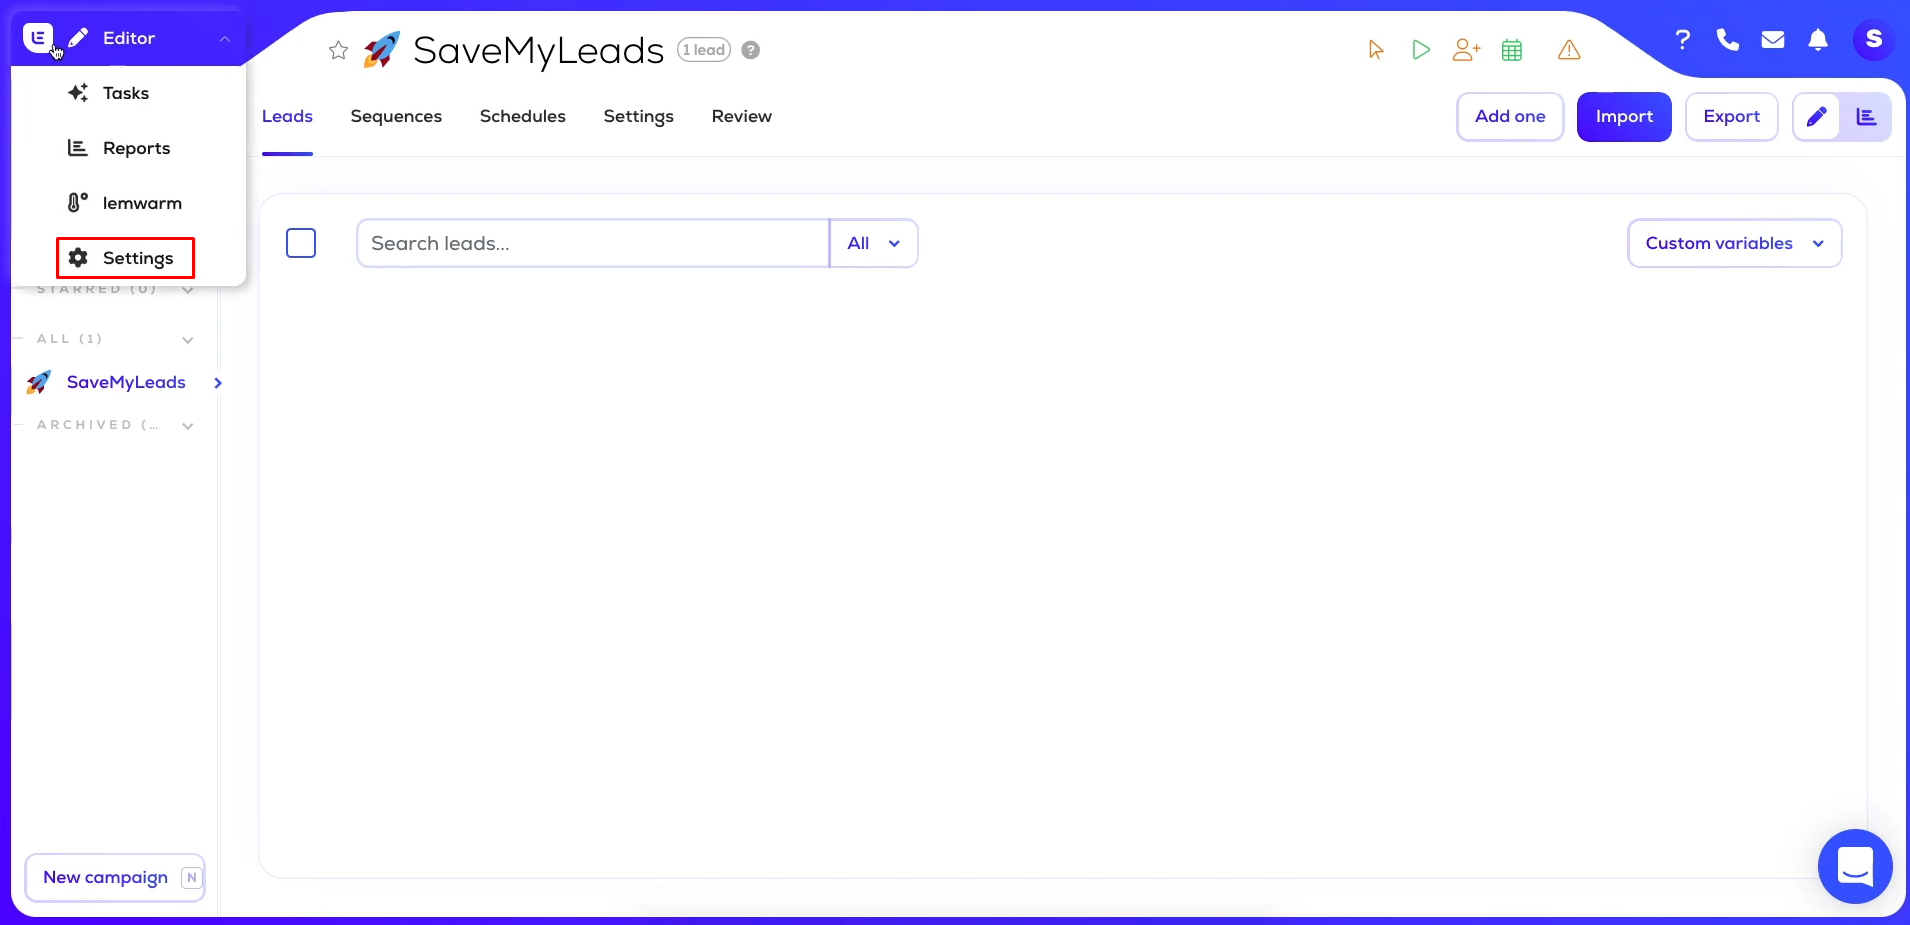
To receive it, go to the “Settings” section in your personal Lemlist account.
Next, go to the Integrations tab and find the “API” section.
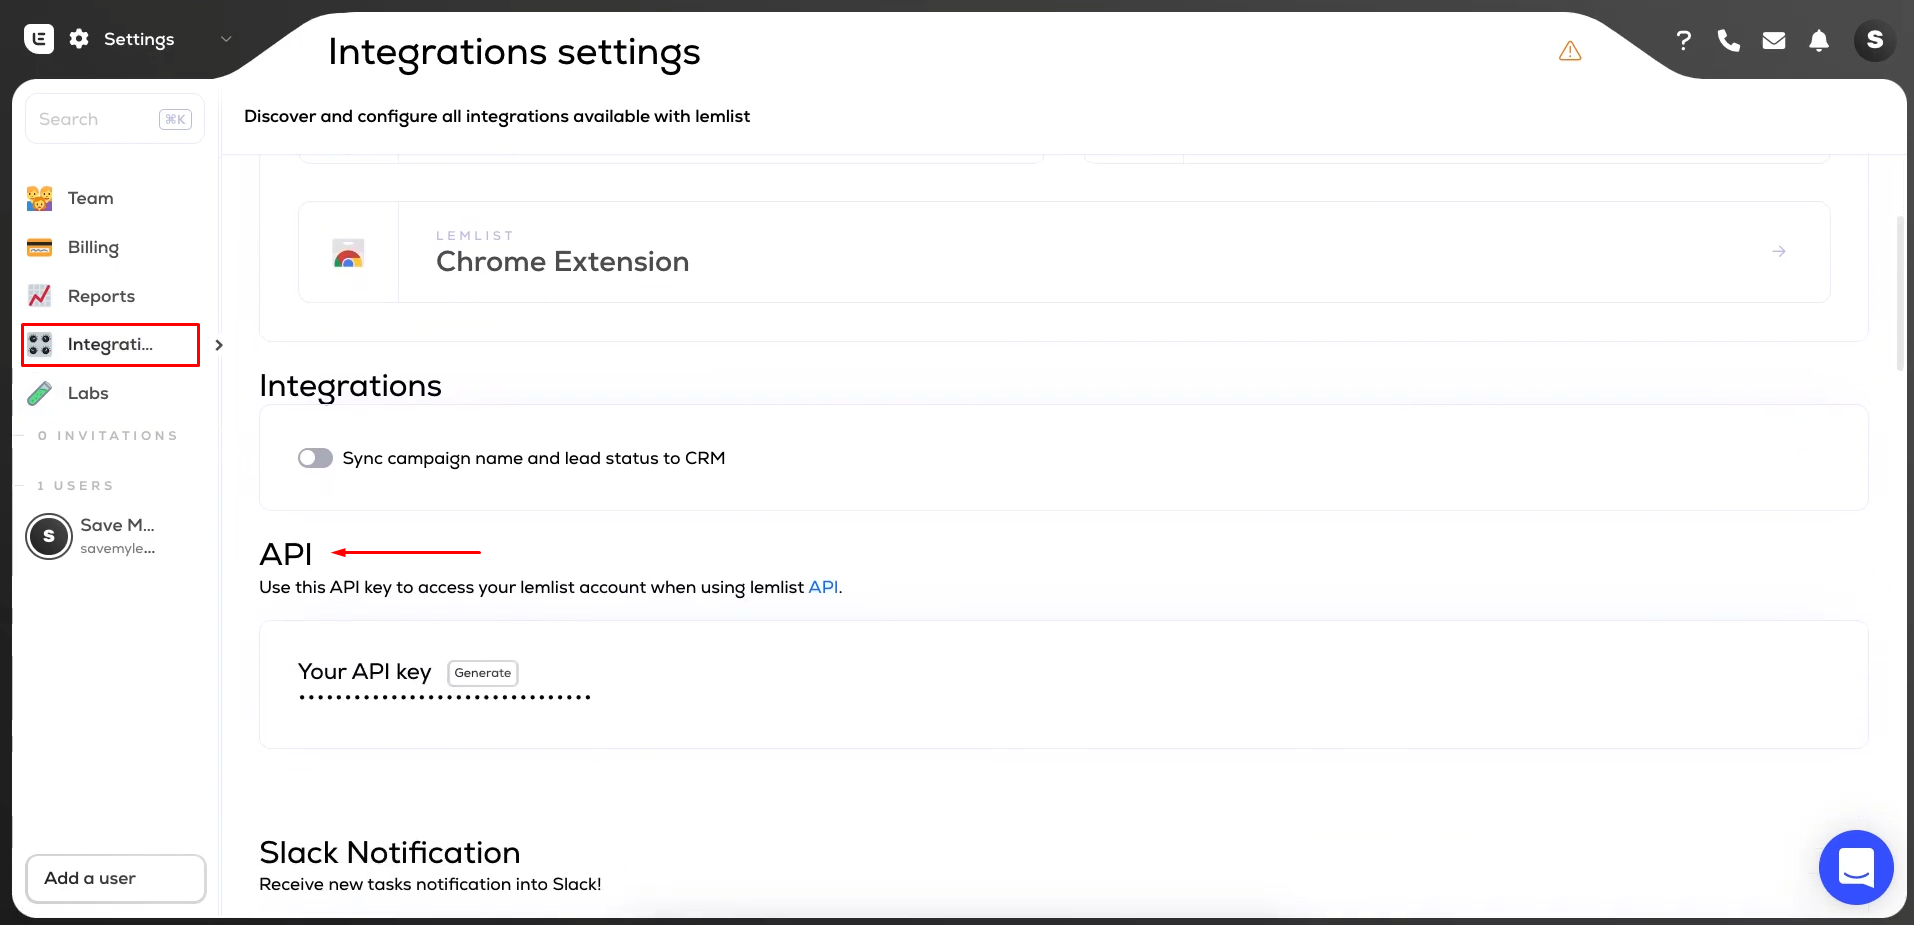
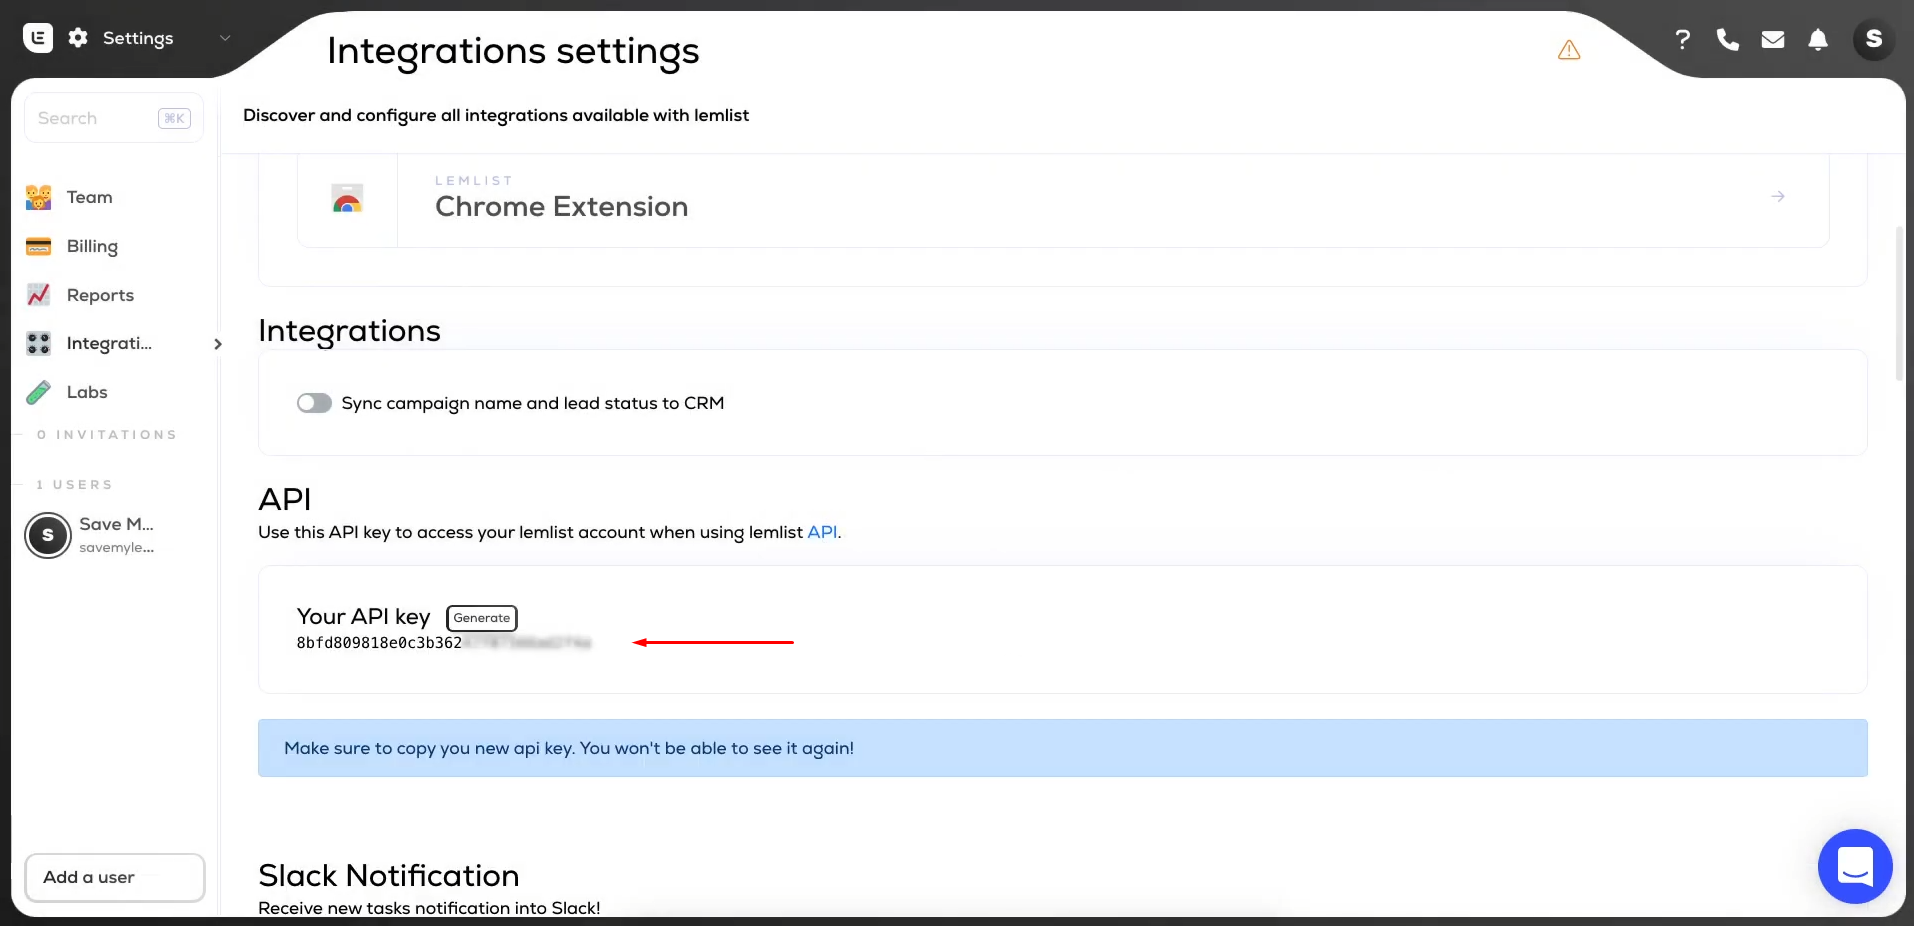
Click “Generate”.
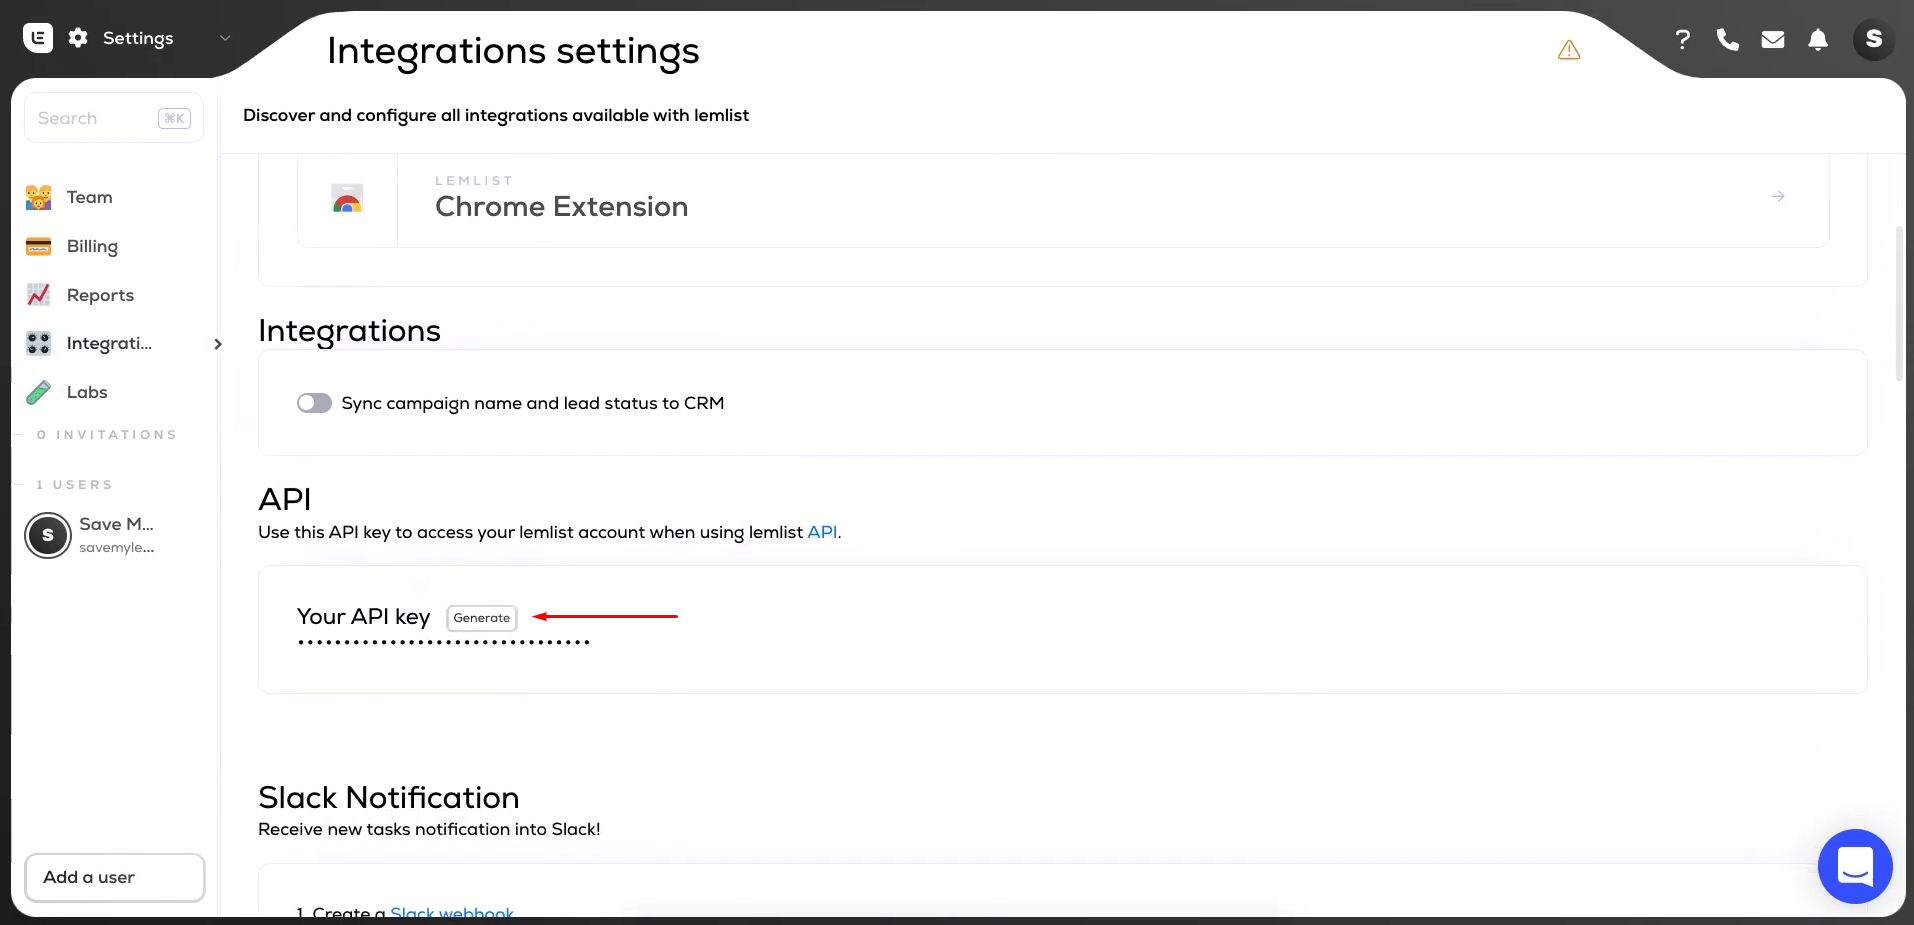
Copy the API
key.
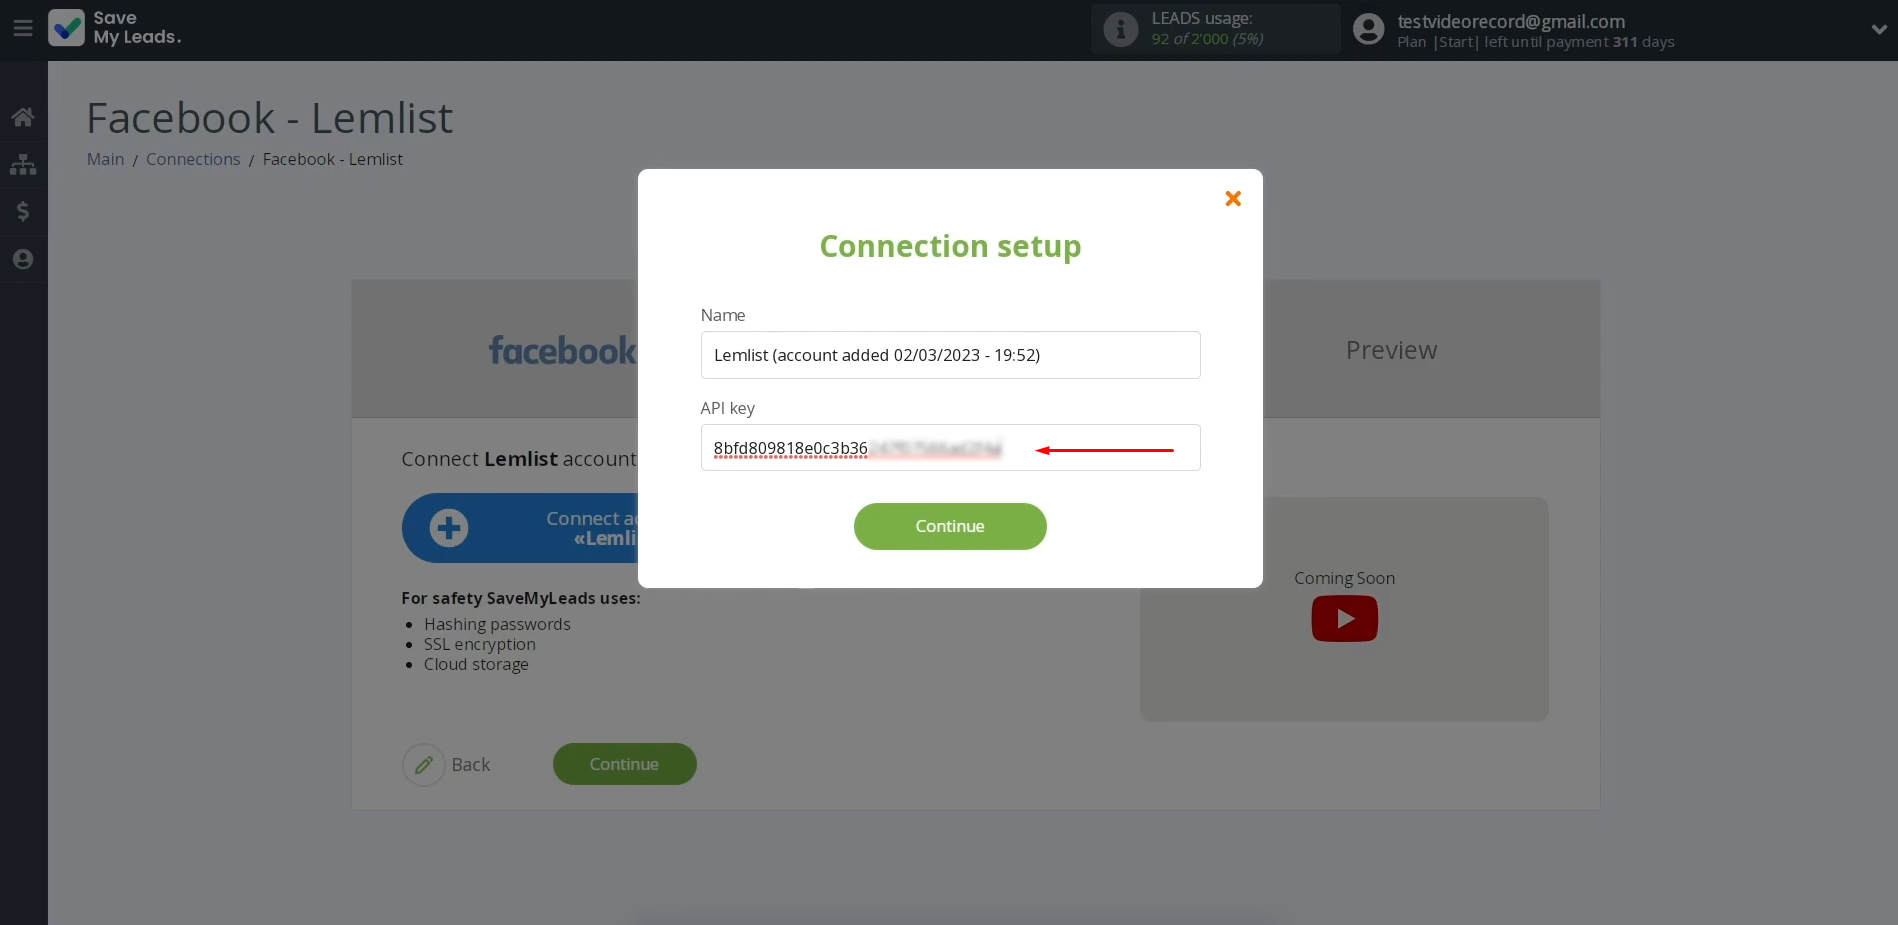
Paste the API
key into the appropriate
field in SaveMyLeads. When
all fields are filled, click “Continue”.
When the
created login is displayed in the list, select it.
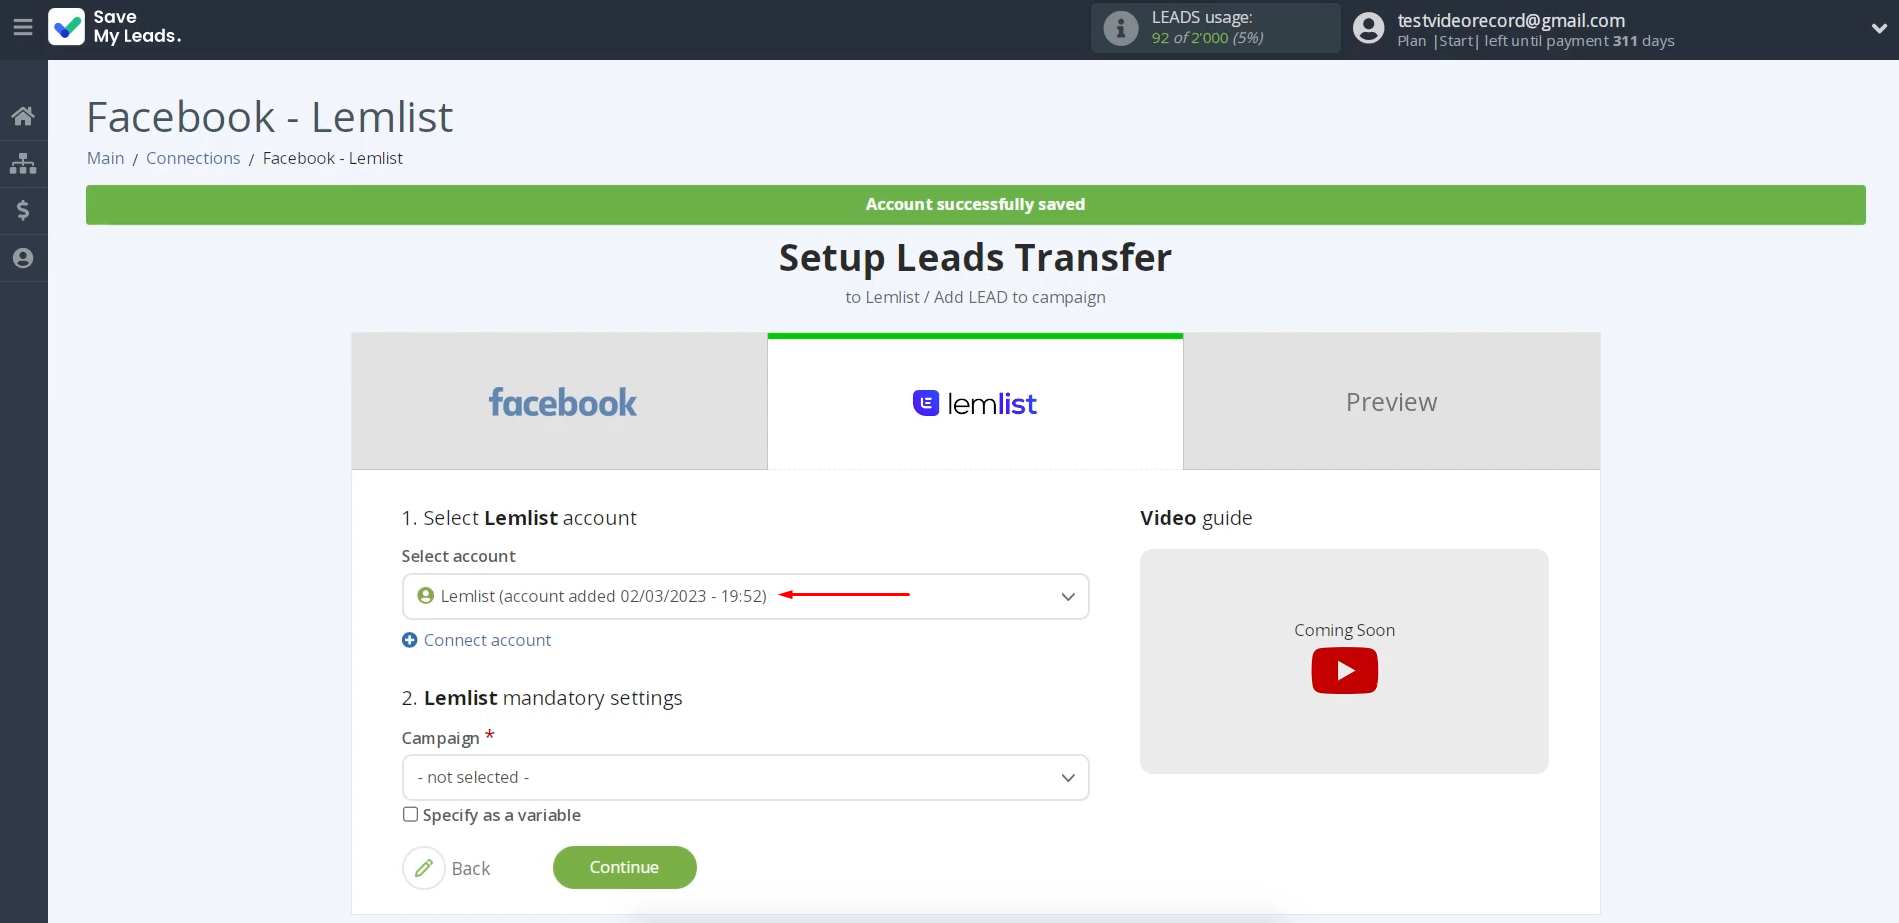
Next, you need to specify the campaign to which the data will be transferred.
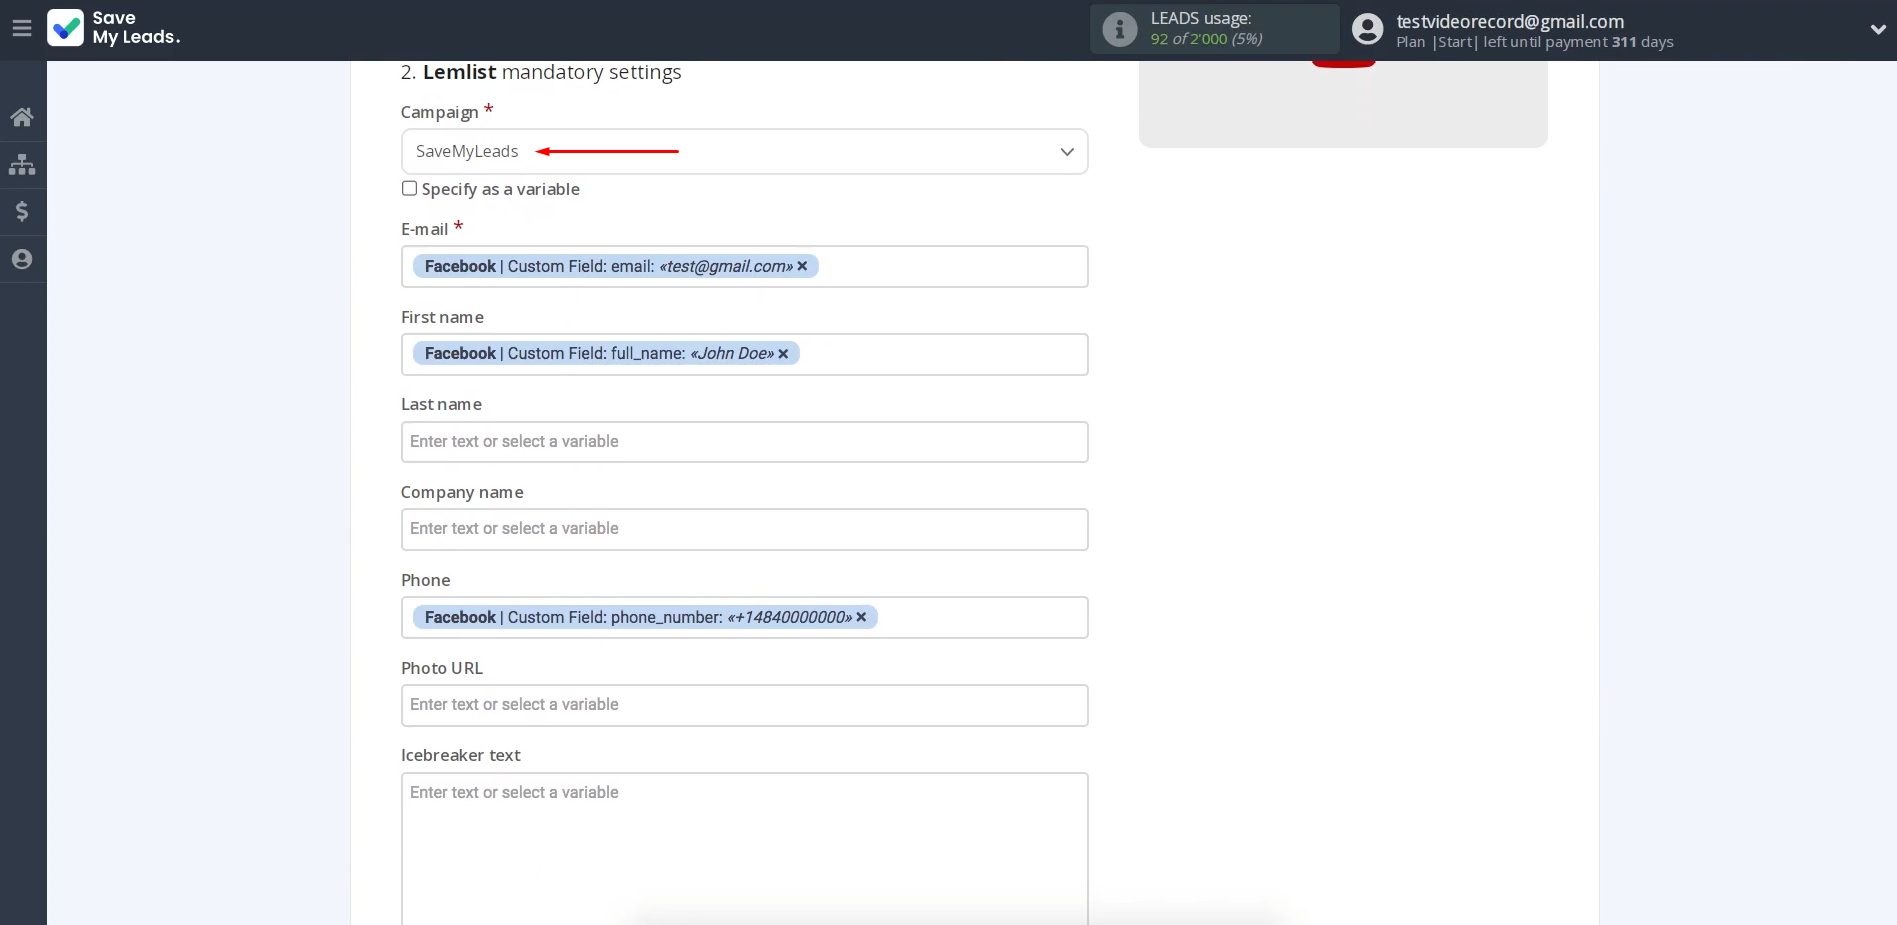
Now, you will see the fields where you can assign variables that will
be received
from Facebook. We have already done this, but if something does not suit you, you can add variables from the drop-down list.
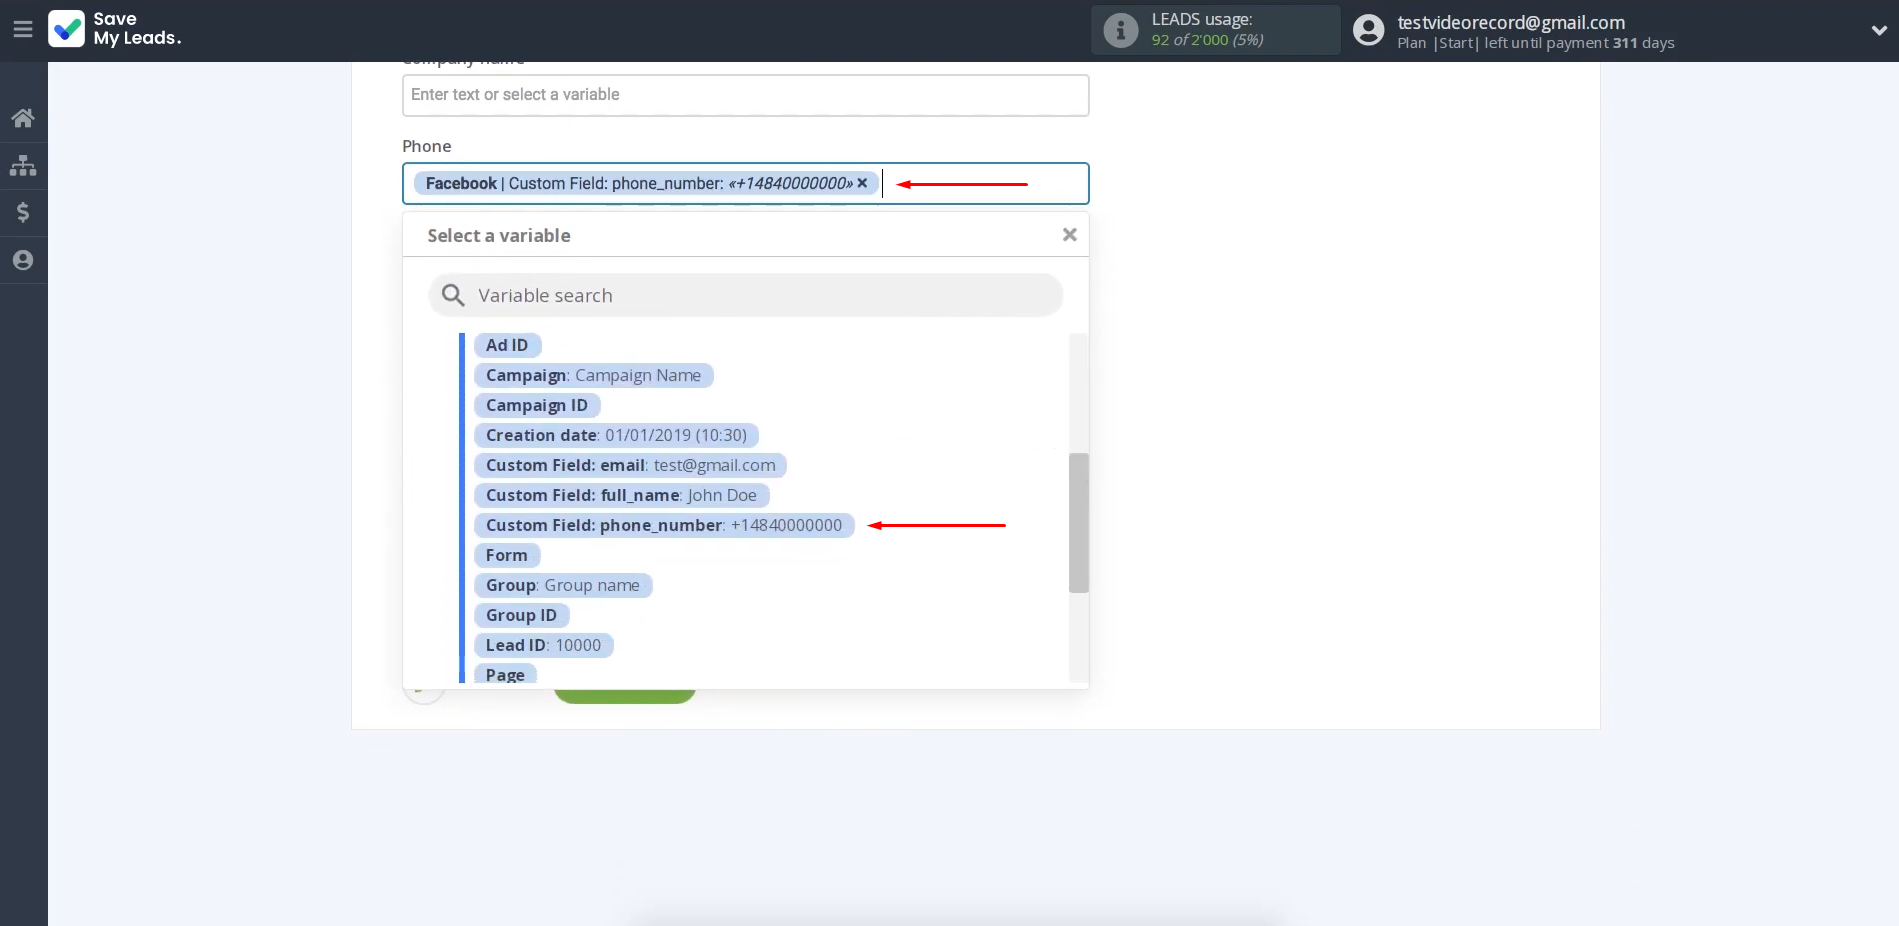
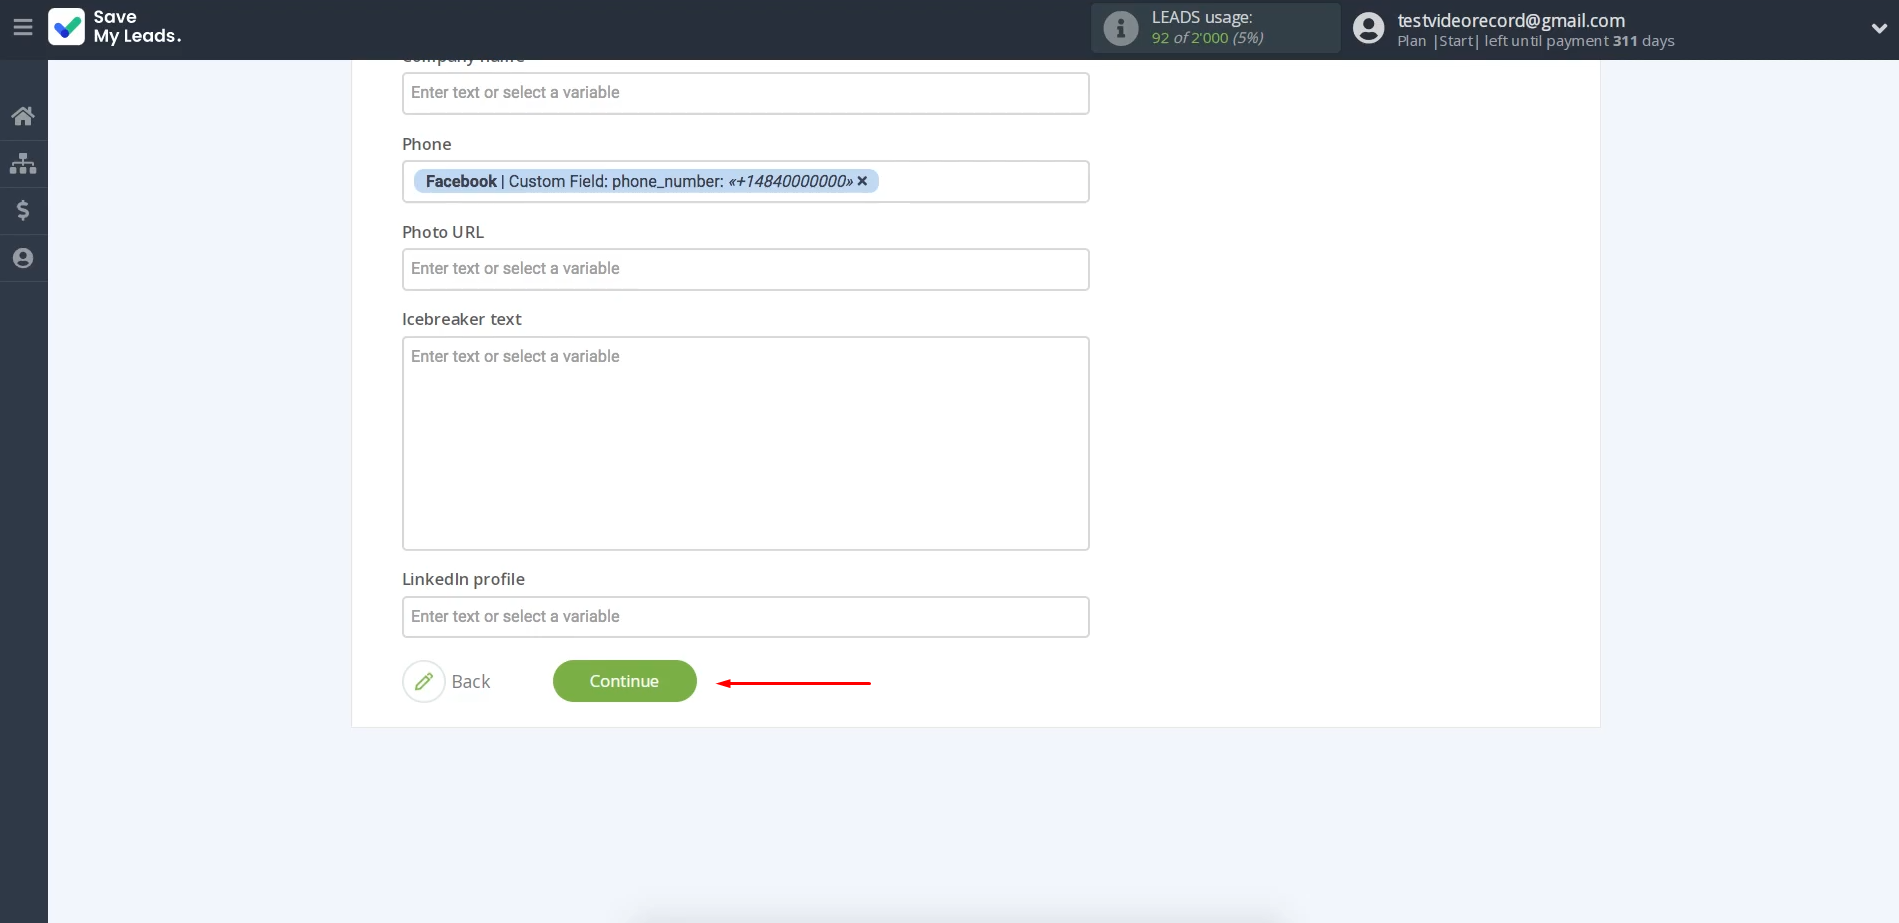
When all the
necessary data is assigned, click “Continue”.
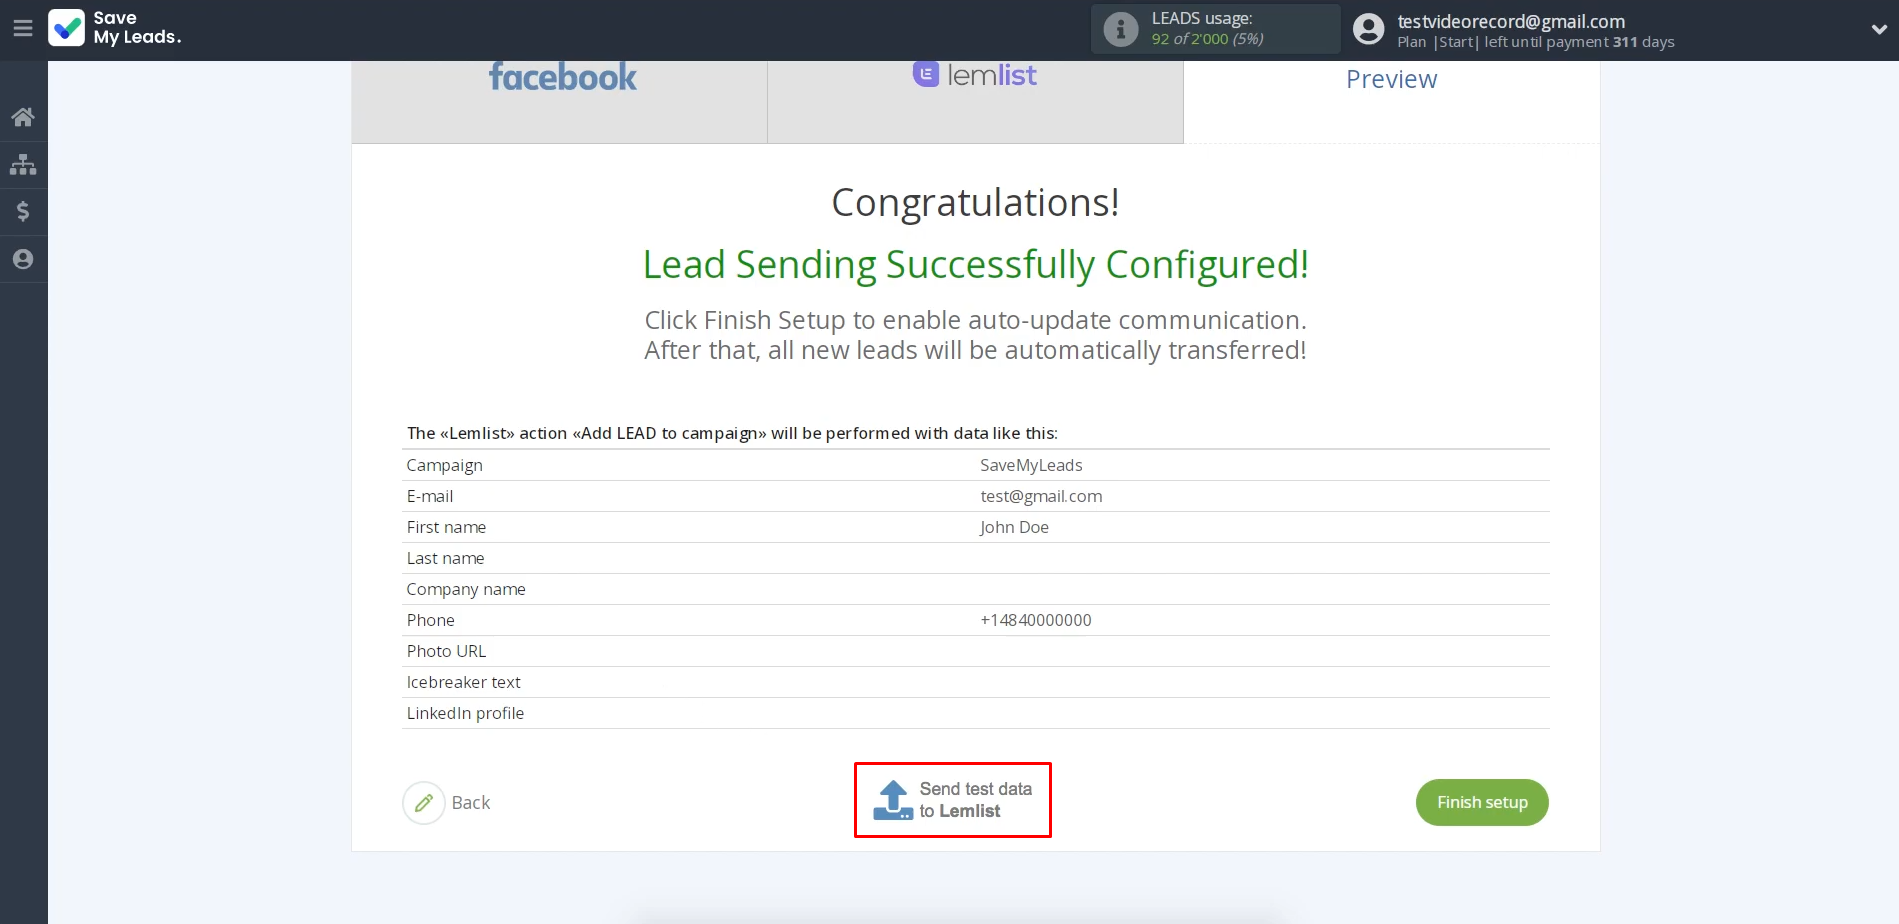
At this stage, you will see an example of the data that will be sent to your Lemlist with each new lead from
Facebook. If everything is fine with the data, click “Send test data to Lemlist” to check if the settings were made correctly.
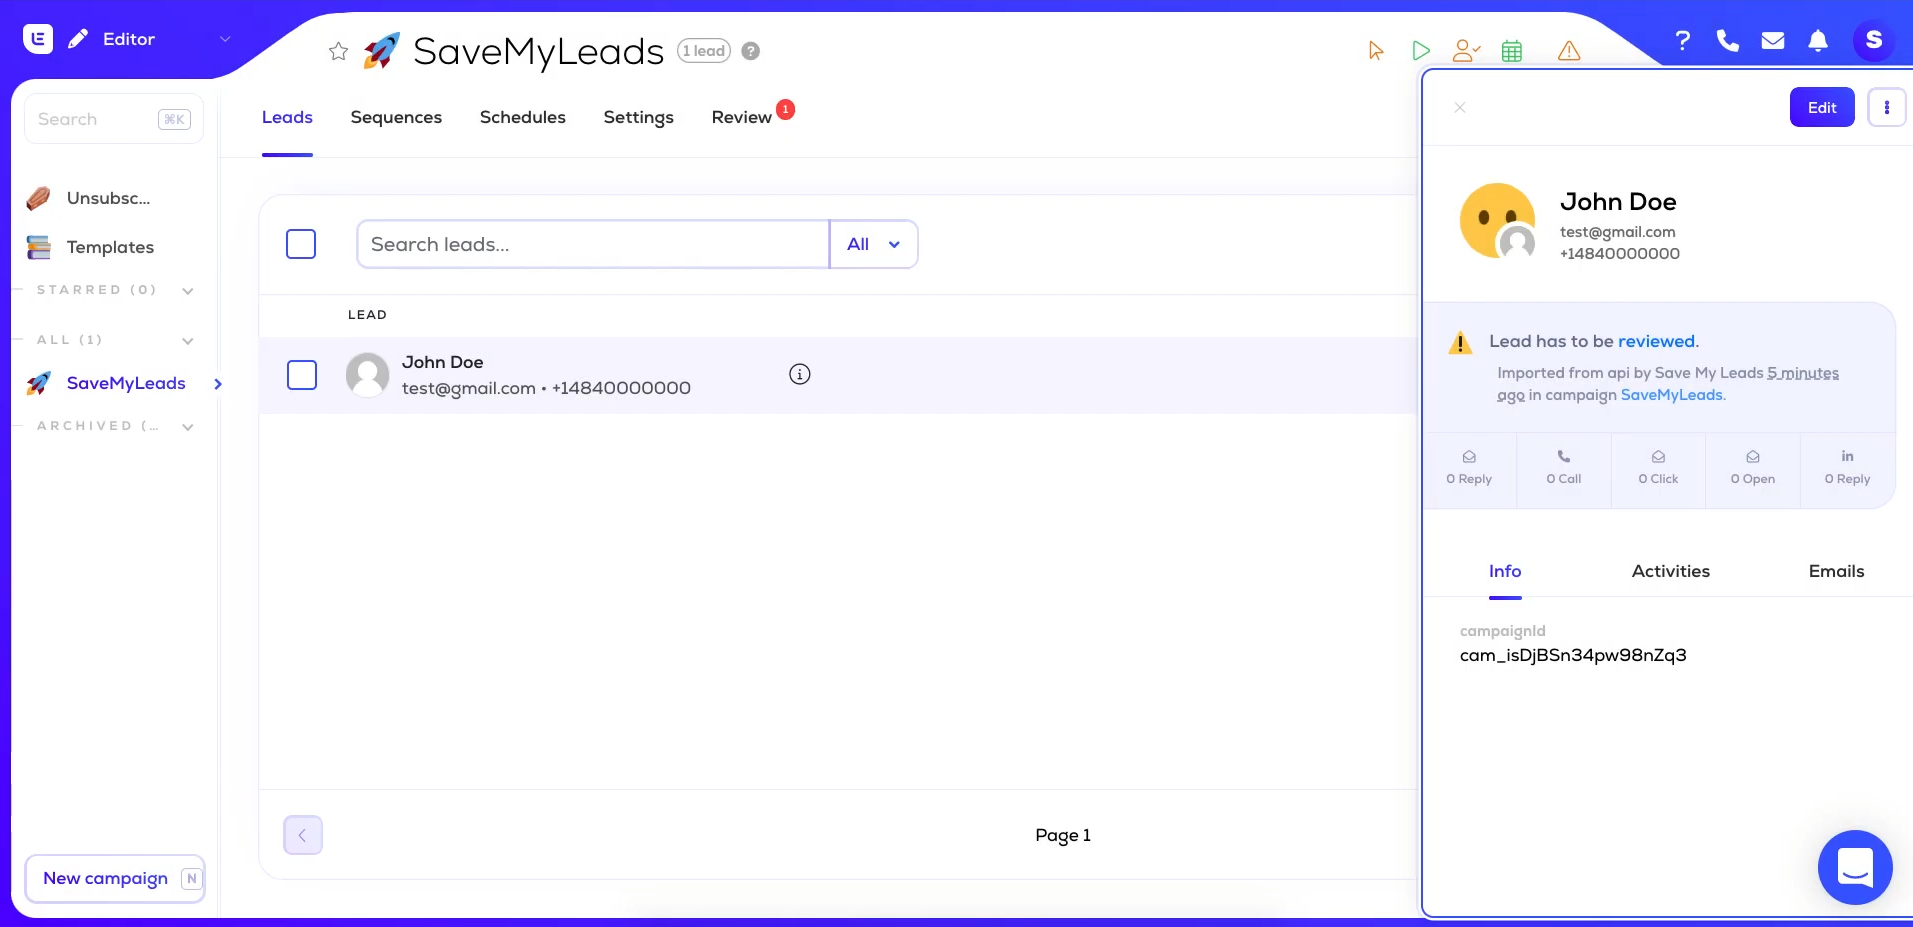
To check the
result, go to Lemlist.
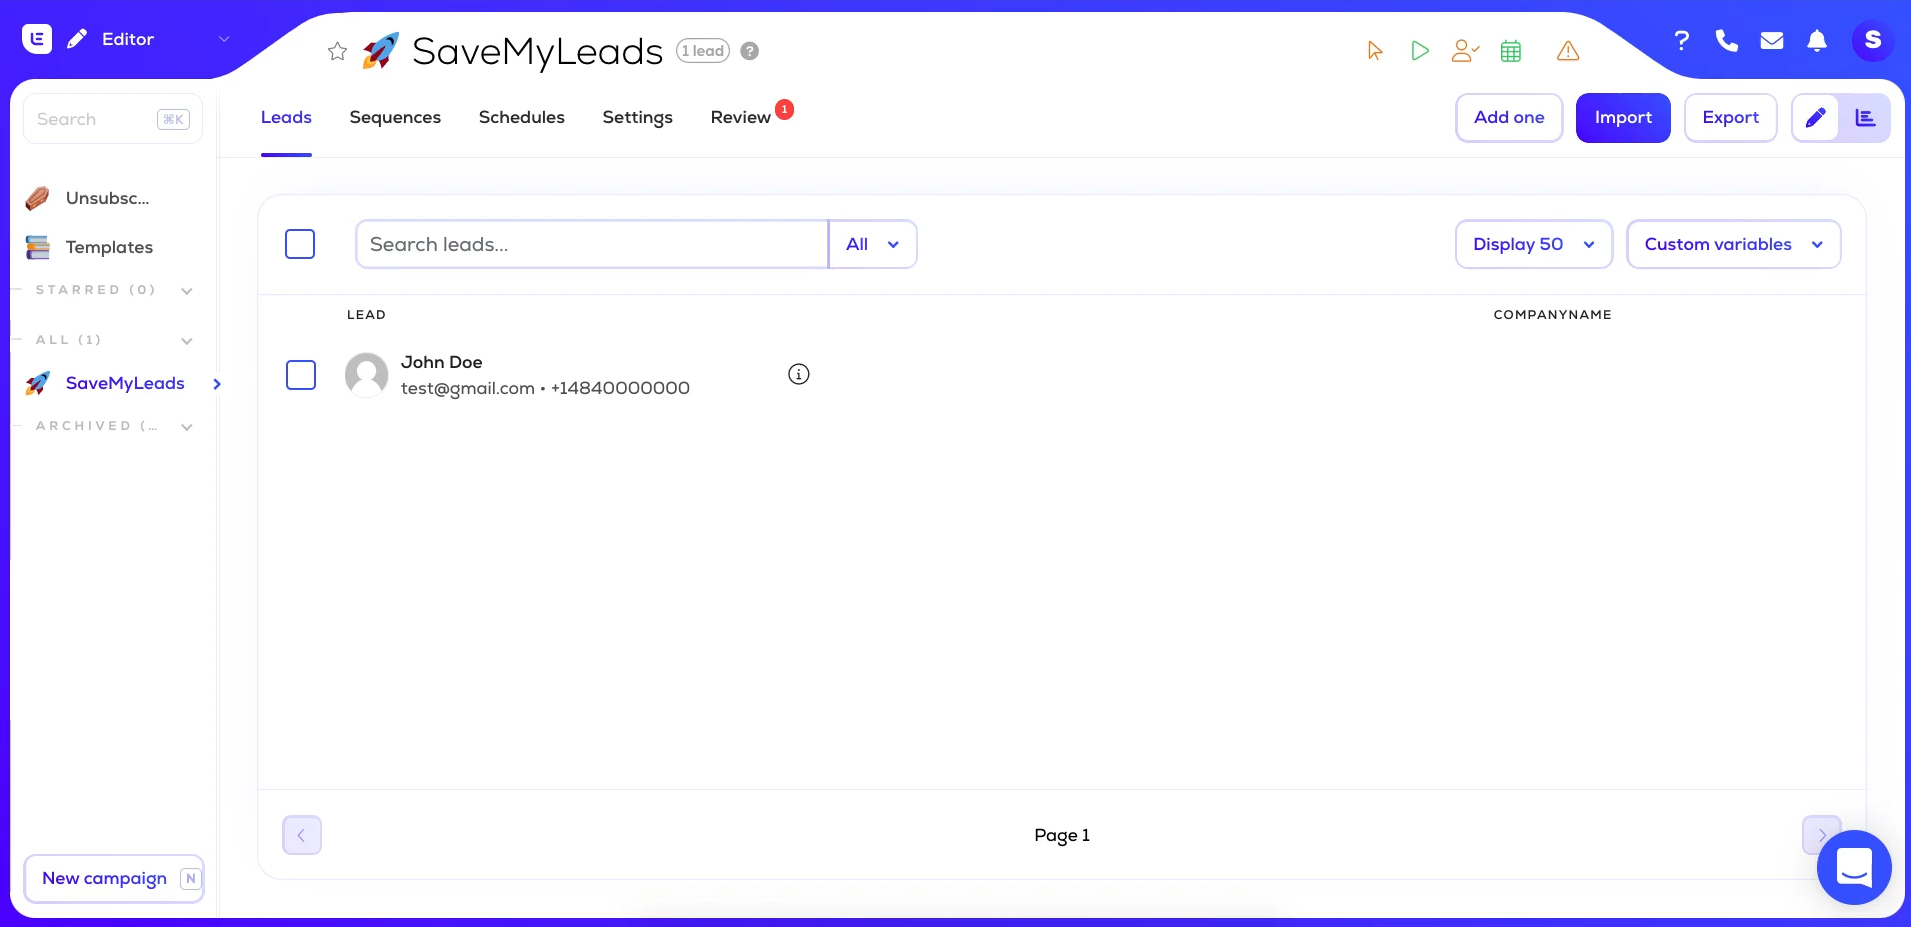
If everything is okay, return to SaveMyLeads to complete the setup.
We have the final stage of the integration setting up ahead of us.
Setting up Auto-update
Click “Finish setup” to enable auto-update of the connection. In this case, all new leads from Facebook will be instantly transferred to the Lemlist system for adding new leads.
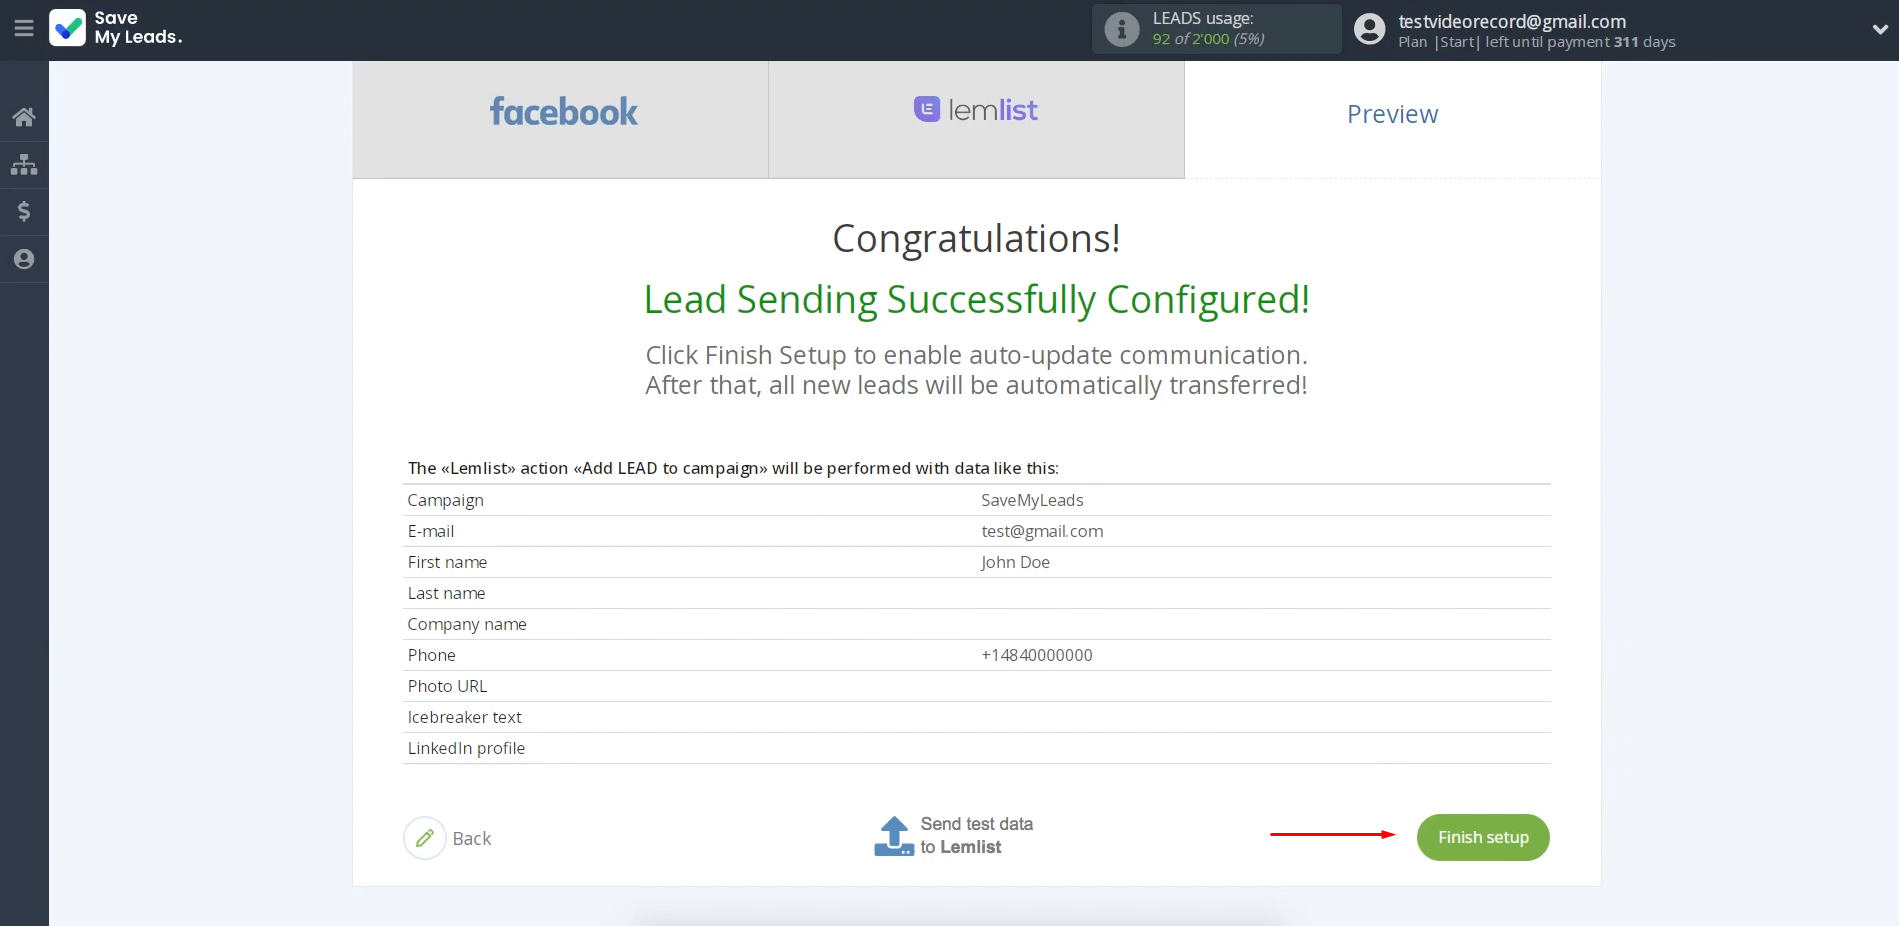
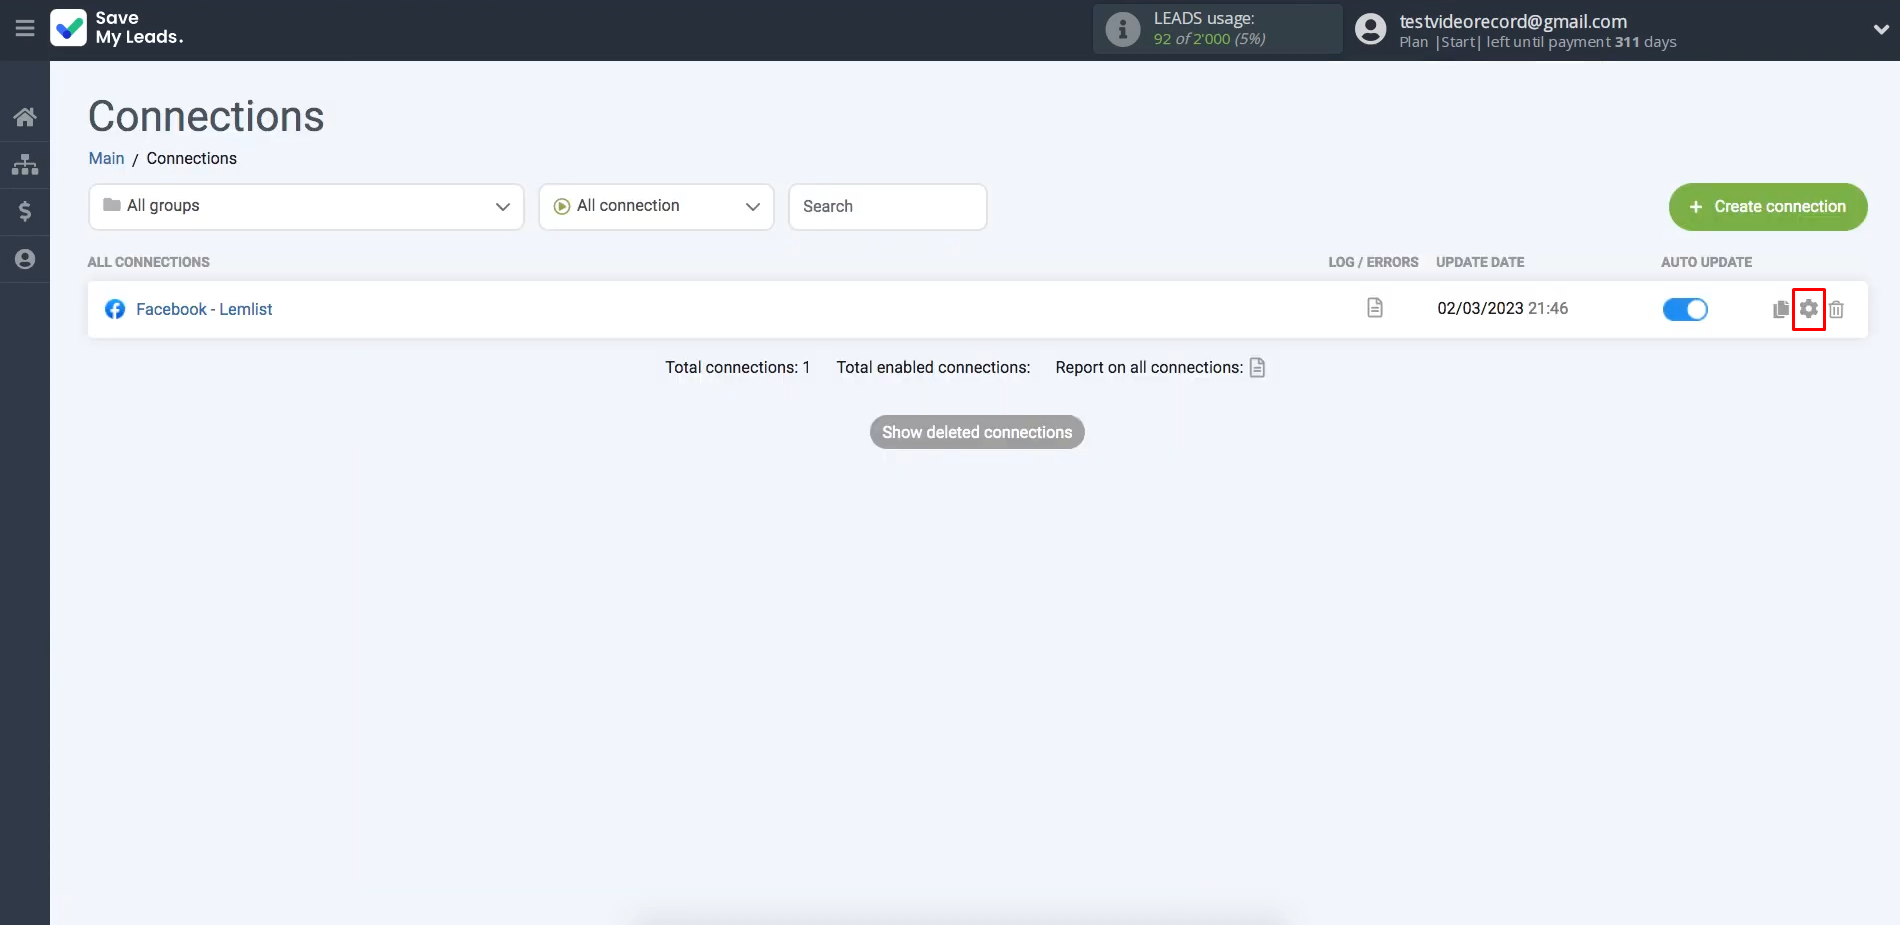
If you want to change the connection name, you can do this in its
settings. Press the gear icon.
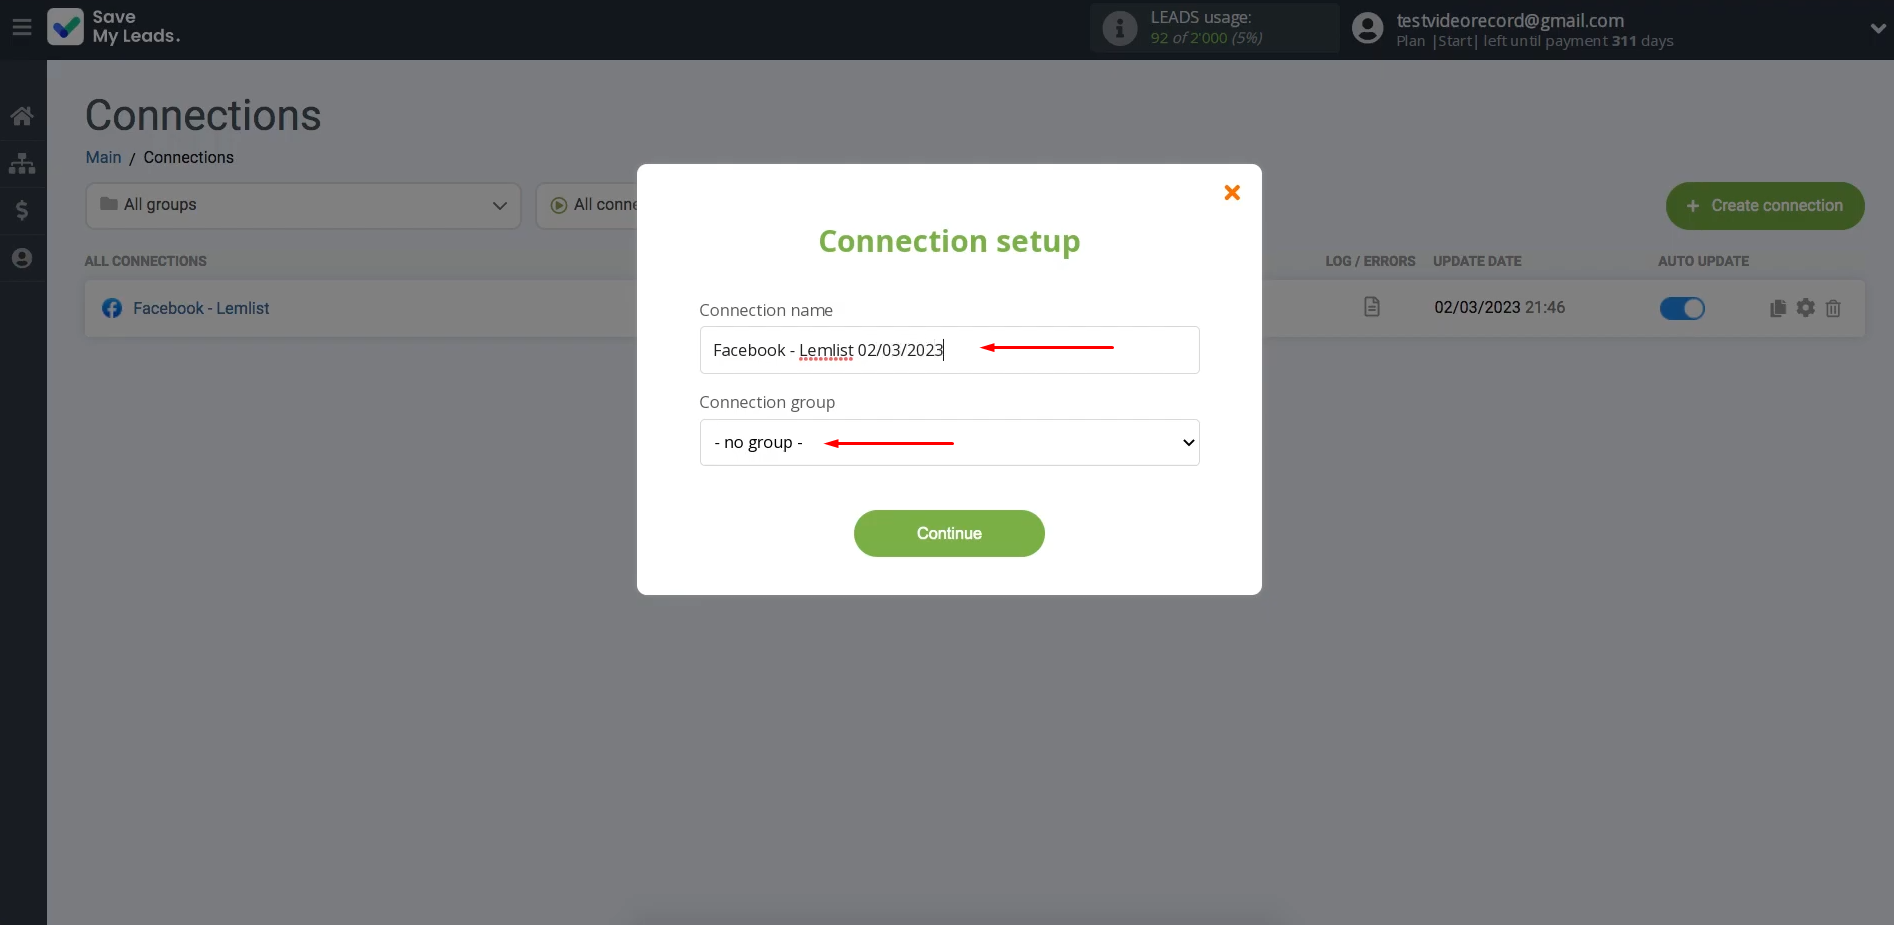
Here, you can change the connection name and add your
connection to a group. After that, click “Continue”.
That's
all. The Facebook and Lemlist integration has been completed.
Conclusion
By following our step-by-step instructions, you have probably already received a correctly configured Lemlist and Facebook integration and even managed to evaluate its benefits – automatic transfer of lead data. If you observe it a little more, you will see that the connection between both platforms is really strong and works smoothly.
Facebook and Lemlist integration will save you from one of the most monotonous manual processes by switching it to “automatic” mode. While the SaveMyLeads connector takes care of the monotonous routine, you can focus on other tasks. Now you can devote more time to the quality of communication with clients, developing new marketing strategies, or other important areas. Automation of work processes will not only modernize your business but also take it to a new level of development. And our SaveMyLeads will definitely help you with this.
