Facebook Pixel is a tool that can improve ad performance. But first, you need to create and connect it. How to do it you will learn from this article.
Content:
1. What is Facebook Pixel?
2. What is the use of Facebook Pixel?
3. How to install Facebook Pixel?
4. How to set up Facebook Pixel Events?
5. Facebook Pixel Test
6. Conclusion: a brief review of Facebook Pixel
What is Facebook Pixel?
Facebook Pixel is a social networking tool that allows you to track users' actions on external sites. Among other things, it shows which pages are visited and which buttons are clicked by users who went to the website via Facebook advertisements.
To make Pixel start collecting data about the website audience, it is necessary to add a special fragment in JavaScript to the code of Pixel. After that, the social network ad account will begin to display statistics on the actions of visitors in a graph.
What is the use of Facebook Pixel?
Pixel is a highly demanded tool among internet marketers, as it can significantly increase the ad campaign's effectiveness on Facebook. These are the main functions the tool performs:
1. Ad performance evaluation
You can track the activity of the customers who were directed to your site through the ads. It allows you to understand which advertisements work and which do not. Thus, if people who click on an advertisement sign up, place orders, or take other targeted actions, it is effective. If too many visitors leave the site, the ad doesn’t work and needs to be edited.
2. Target audience search
With Facebook Pixel, you can target your ads more precisely, as the system allows you to target the ads on people who have already shown interest in your website, and therefore they are more likely to do it again. Thus, you can select the users, who:
- Visited your resource within the last 30, 60, 90, or 180 days;
- Opened certain pages;
- Spend a lot of time on the site, that is, they are the most active visitors;
- Performed certain actions on your site (for example, added an item to the cart, but they didn’t pay for it);
- Visited the website, using a mobile device.
When setting up targeting, you can combine several criteria. In addition, Facebook Pixel can find an audience among lookalike users.
3. Ad campaign optimization
Facebook Pixel data allows the social network algorithm to target users who are more likely to convert. The system will analyze your most active customers and show ads to similar Facebook users. This function significantly increases the number of conversions and reduces their cost. The more conversion actions your site visitors perform, the more accurately targeting optimization works.
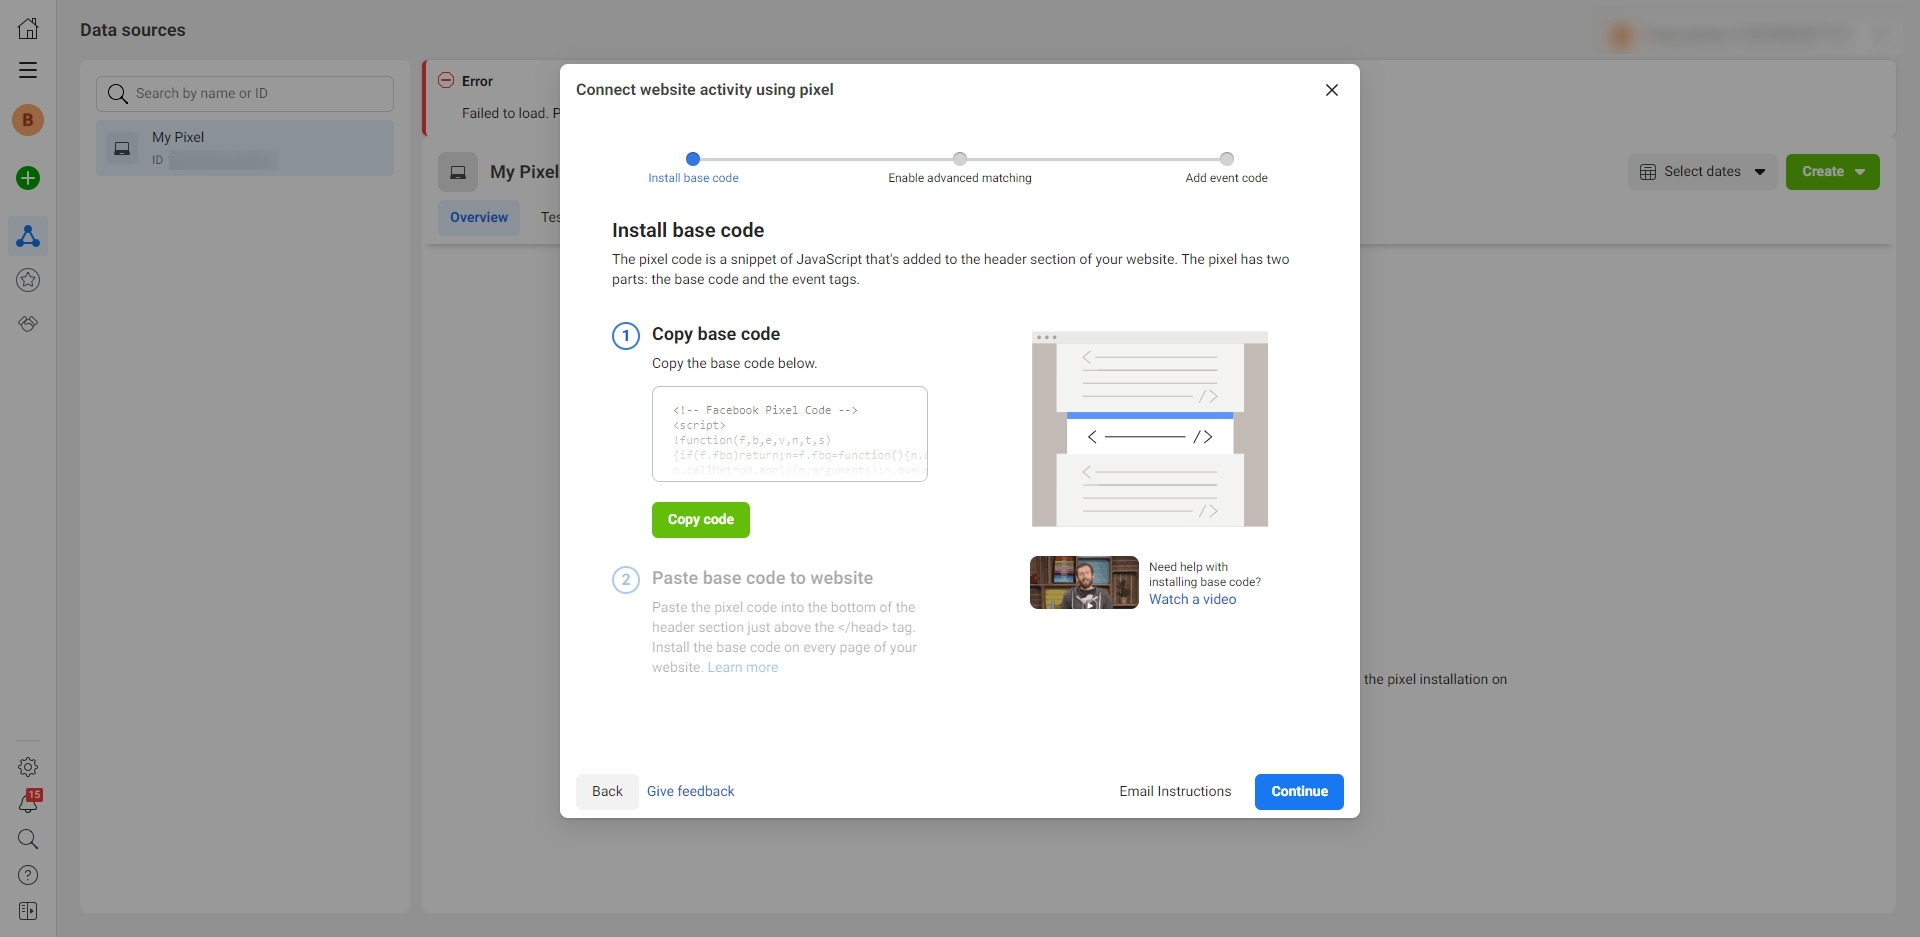
How to install Facebook Pixel
Before Pixel installation, go to Ads Manager and open the “Events Manager” tab on the left panel, click "Connect a Data Sources" and select "Web" - Facebook Pixel. After that, enter any Pixel name and click "Continue".
A window with three installation options will appear on the screen. Let's take a look at each of them.
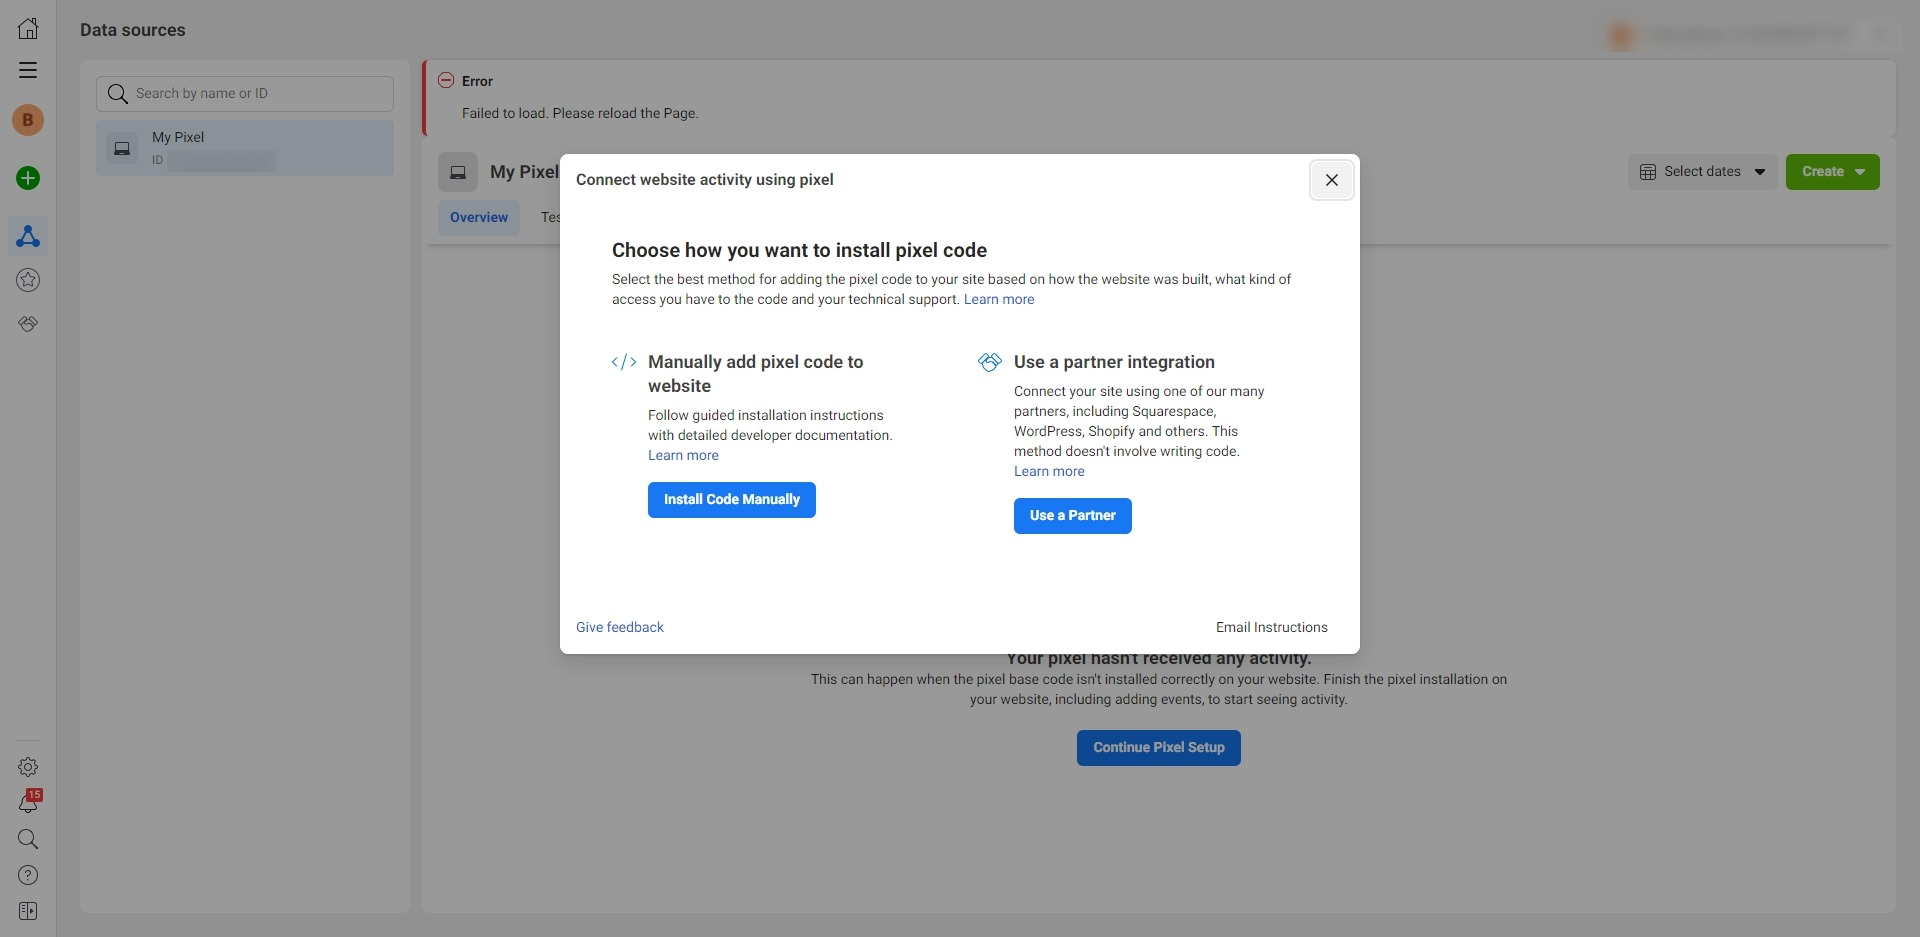
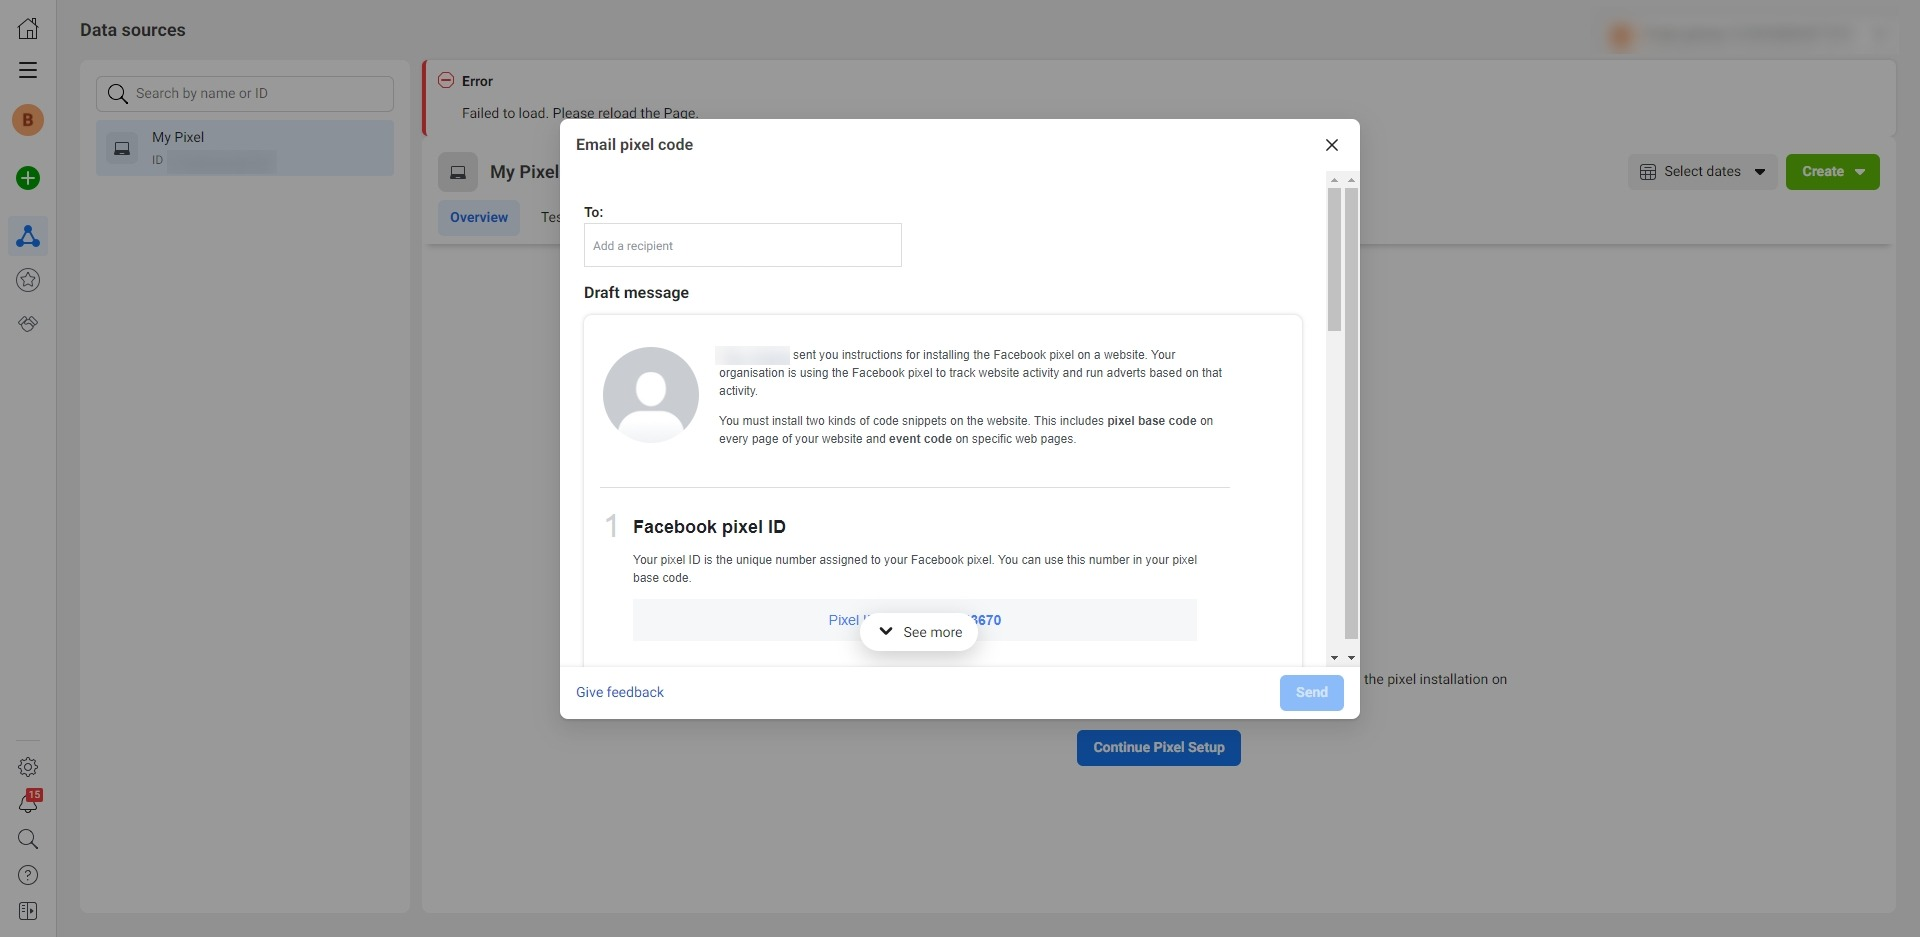
1. Via e-mail instructions (for developers)
This option is acceptable if you have a technician who you entrust to install and configure the Facebook Pixel. In this case, click "Send instructions by e-mail". In the next window, specify the e-mail address of the employee, who will receive all necessary Pixel installation instructions.
2. With a partner integration
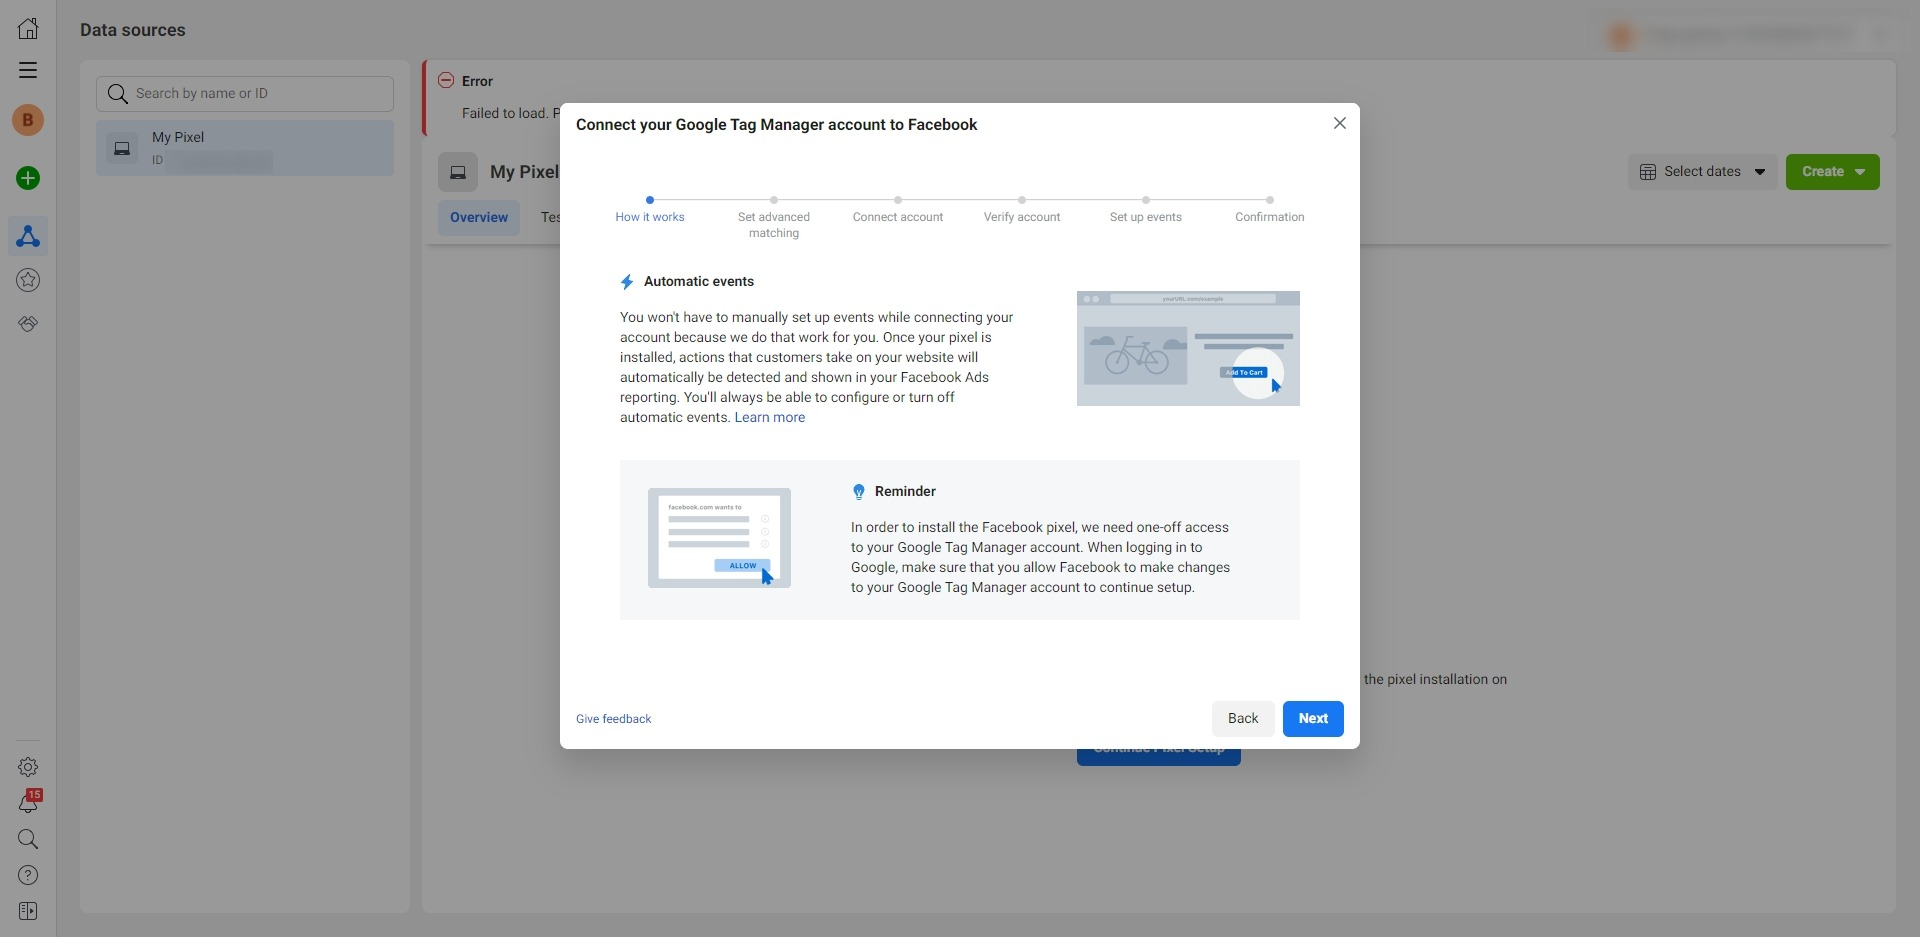
If your site runs on a popular CMS like Shopify, Wix, Opencart, Drupal, Joomla, or WordPress, you can install Facebook Pixel in a semi-automatic mode. You can also pick this option if your site is connected to the Google Tag Manager.
All these services are Facebook partners and ready for Pixel connection. Thus, the installation process will be simplified and will not require technical knowledge.
To view all products that support Quick Install, click “Use a Partner Integration”, and the complete list of services will appear.
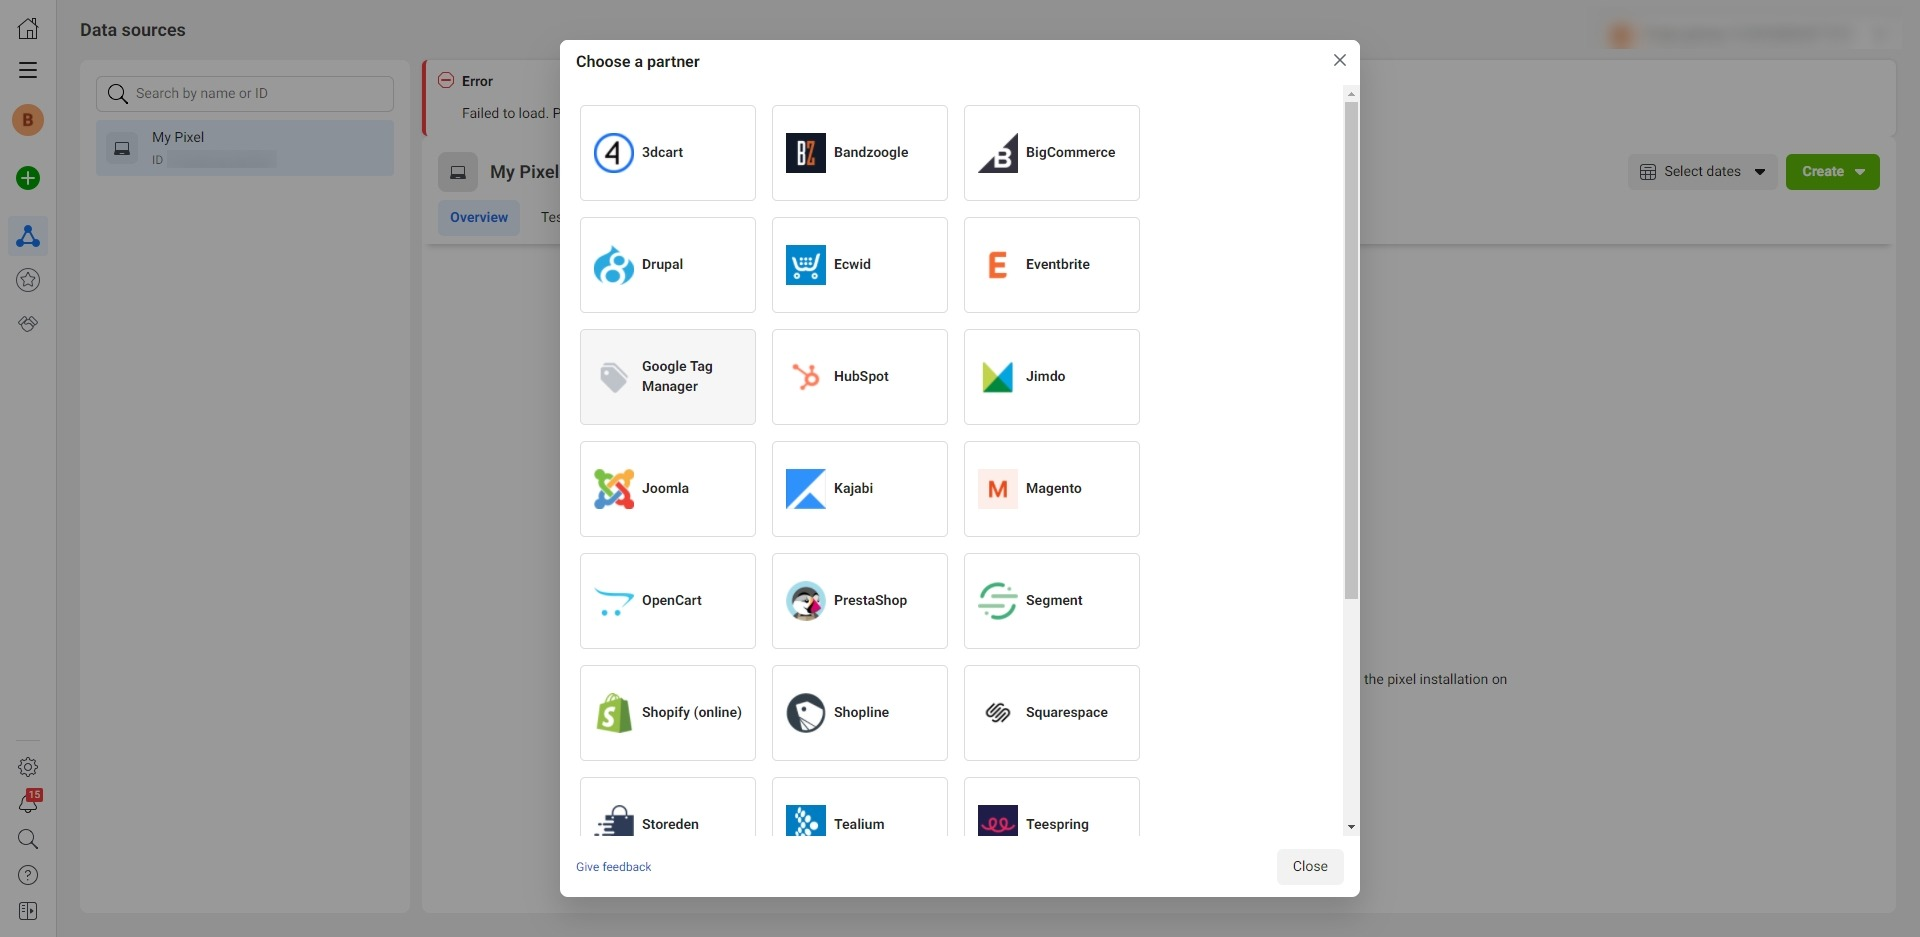
If you use one of these products, select it (for example, Google Tag Manager) and follow the instructions on the screen. It will guide you through all installation process with detailed prompts. It’s quite simple - you don't have to write any code.
3. Manual code installation
If the CMS of your site doesn’t support quick integration, and you don’t want to connect Google Tag Manager to it, you can install Pixel manually. Even in this case, you can go without a programmer.
- Automate the work with leads from the Facebook advertising account
- Empower with integrations and instant transfer of leads
- Don't spend money on developers or integrators
- Save time by automating routine tasks
Click "Install code manually" and follow the steps listed in the instructions. All you need is to copy and paste the code into the appropriate place on the site. You don't have to write the code yourself.
How to set up Facebook Pixel Events?
After Pixel installation, you must add the events that you want to track on the site (button click, link click, and so on). Otherwise, the tool will not receive data.
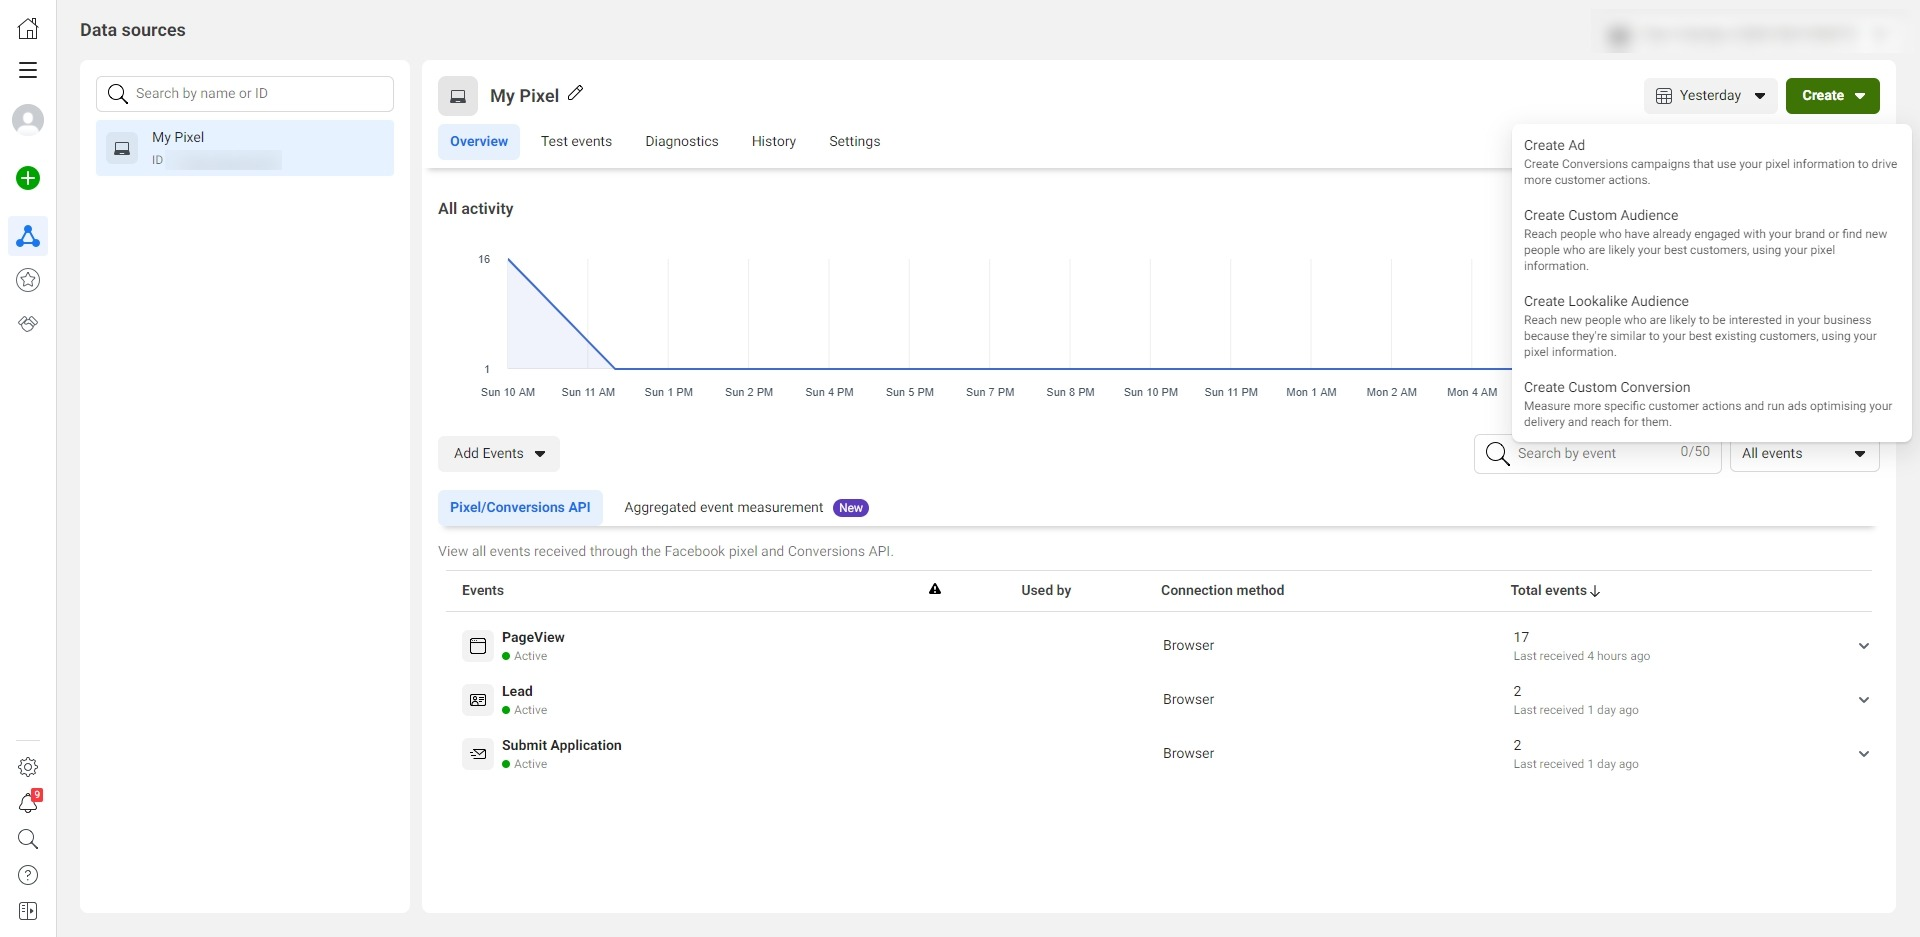
On the Pixel page in Events Manager, click the “Overview” tab. Click on the “Add Events” button and select “From Pixel”. In the next window, you can choose one of two configuration methods.
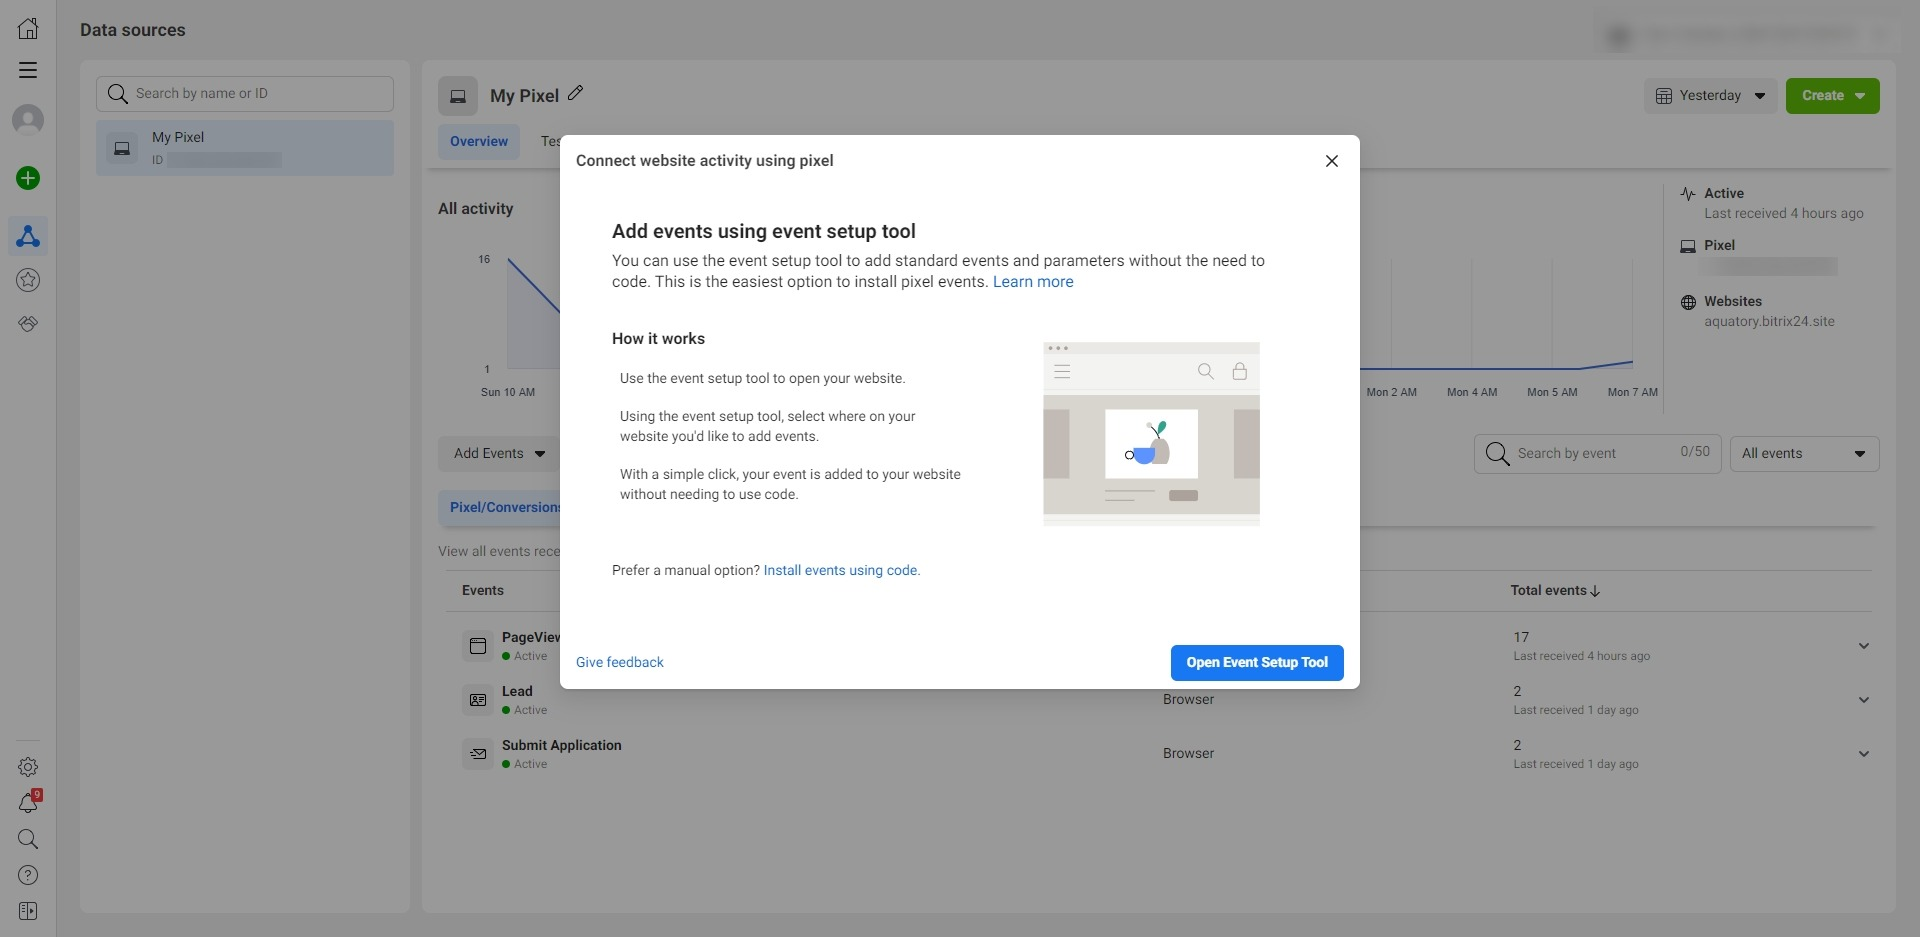
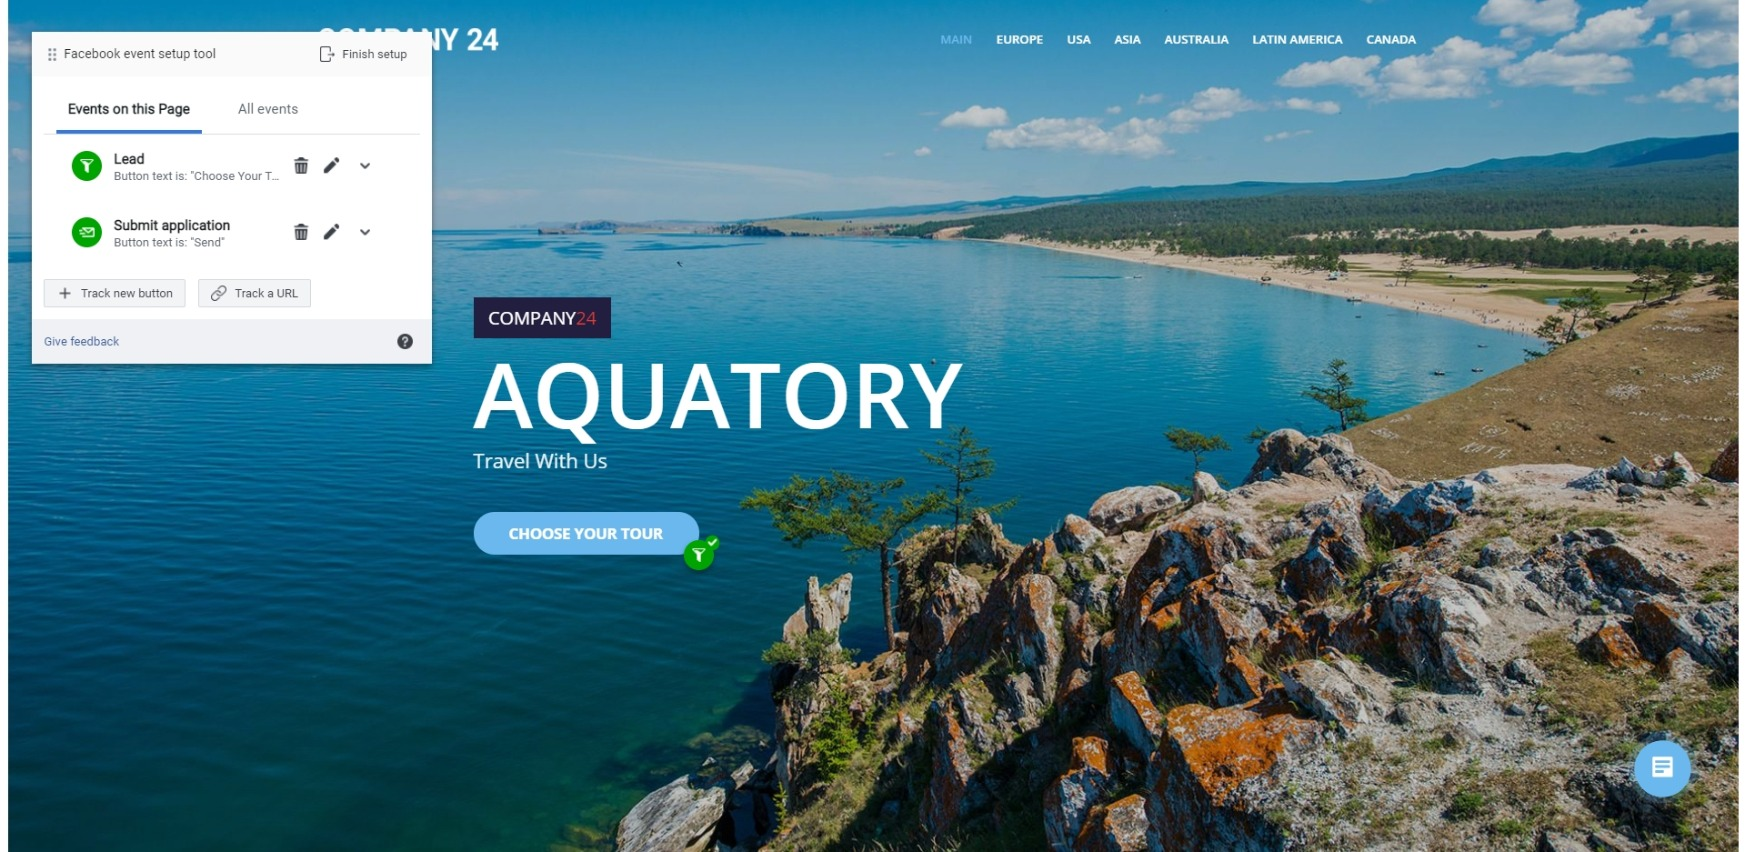
1. Event Setup Tool
This method is the simplest, but it allows you to configure standard events predefined by Facebook. If you want to use it, click "Open Event Setup Tool" and enter the URL for the page on which you want to install the pixel event.
After that, the setup wizard will redirect you to the site and display tips on top of the pages, which will help you add the necessary events.
2. Manual settings
To use this option, you have to be able to write the code. Therefore, you need to know at least the basics of JavaScript. On the other hand, you can add custom events for your site that cannot be created by the Event Setup Tool, and get more control over them.
To configure events manually, click " Install event code manually". A page will open with a description of the JavaScript functions that are responsible for the events and the corresponding parameters. Use them as you see fit.
Facebook Pixel test
Well, the pixel is installed, the events are set up. It is high time to check if Facebook receives data.
First, go to the website and take a few test actions. For example, if you have added events to track order placement clicks or transitions to certain pages, click on this button and visit the corresponding pages.
Then go back to the Pixel Facebook page and click the “Overview” tab. Wait 30 minutes and refresh the page. The event data should be displayed here. If nothing comes up, go to the “Test Events” and “Troubleshooting” tabs. The system will display occurred problems and offer possible solutions.
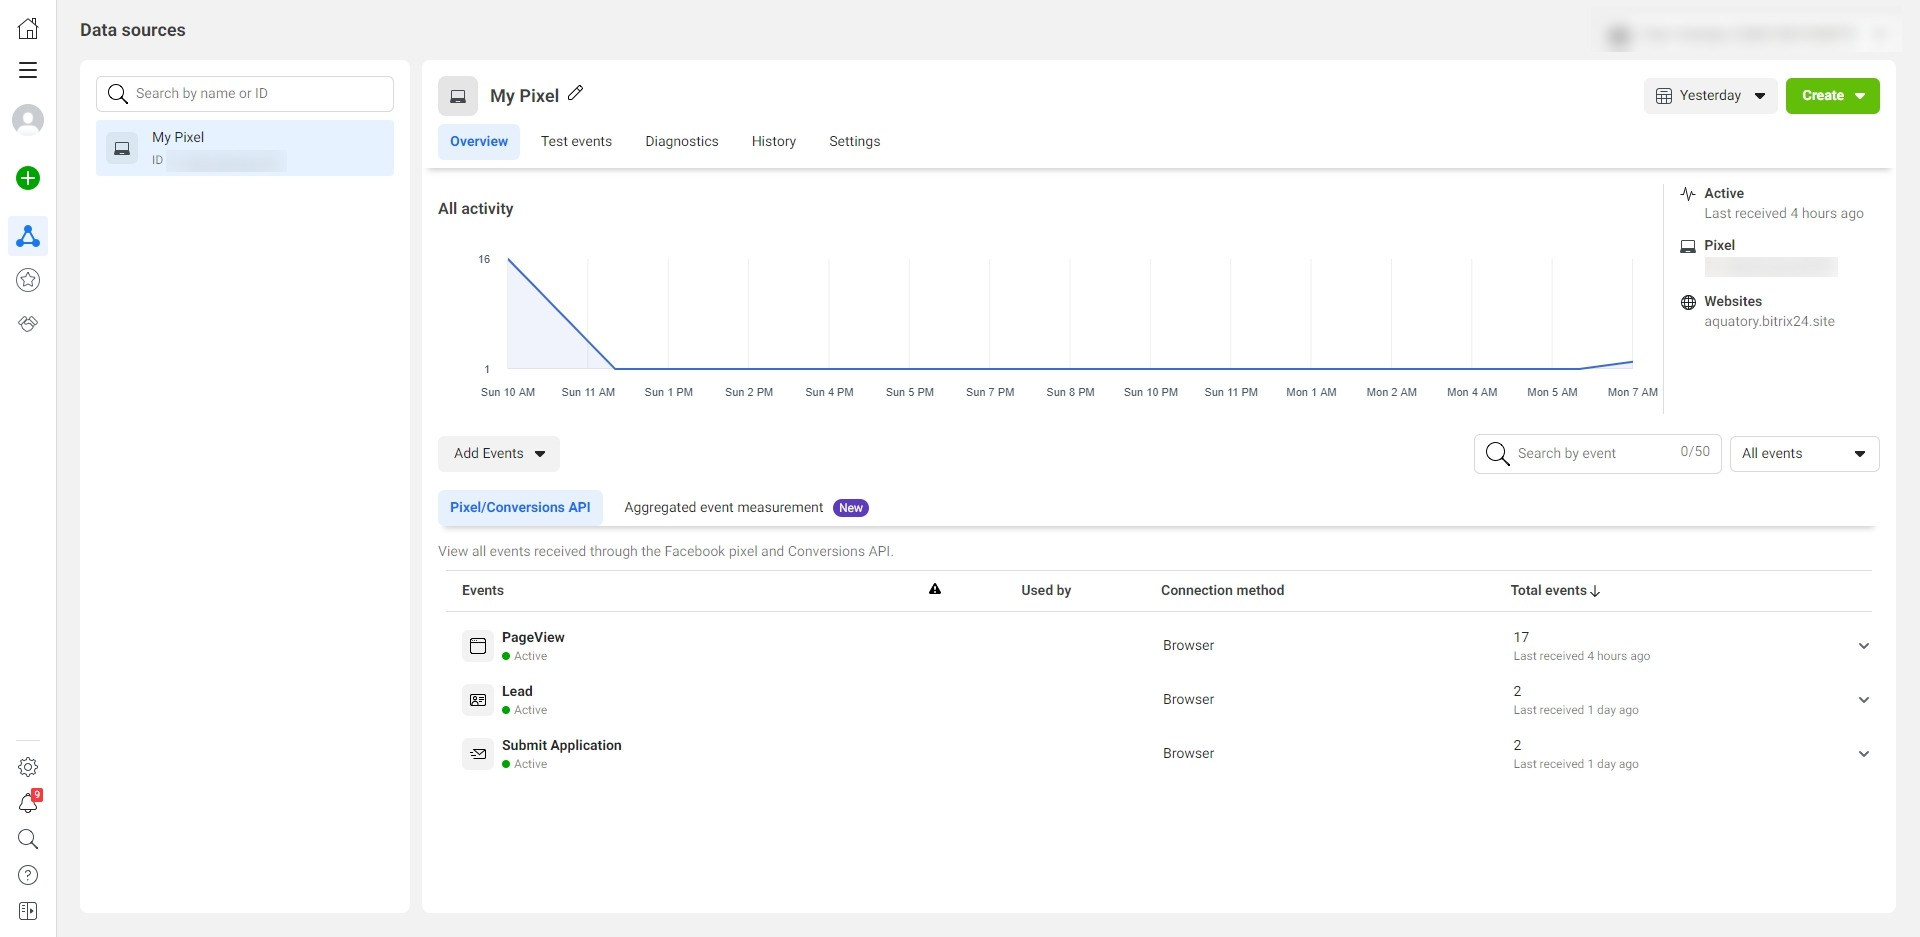
Once the pixel has collected a sufficient amount of data, you can use its other features to create a target audience, optimize ads, and so on.
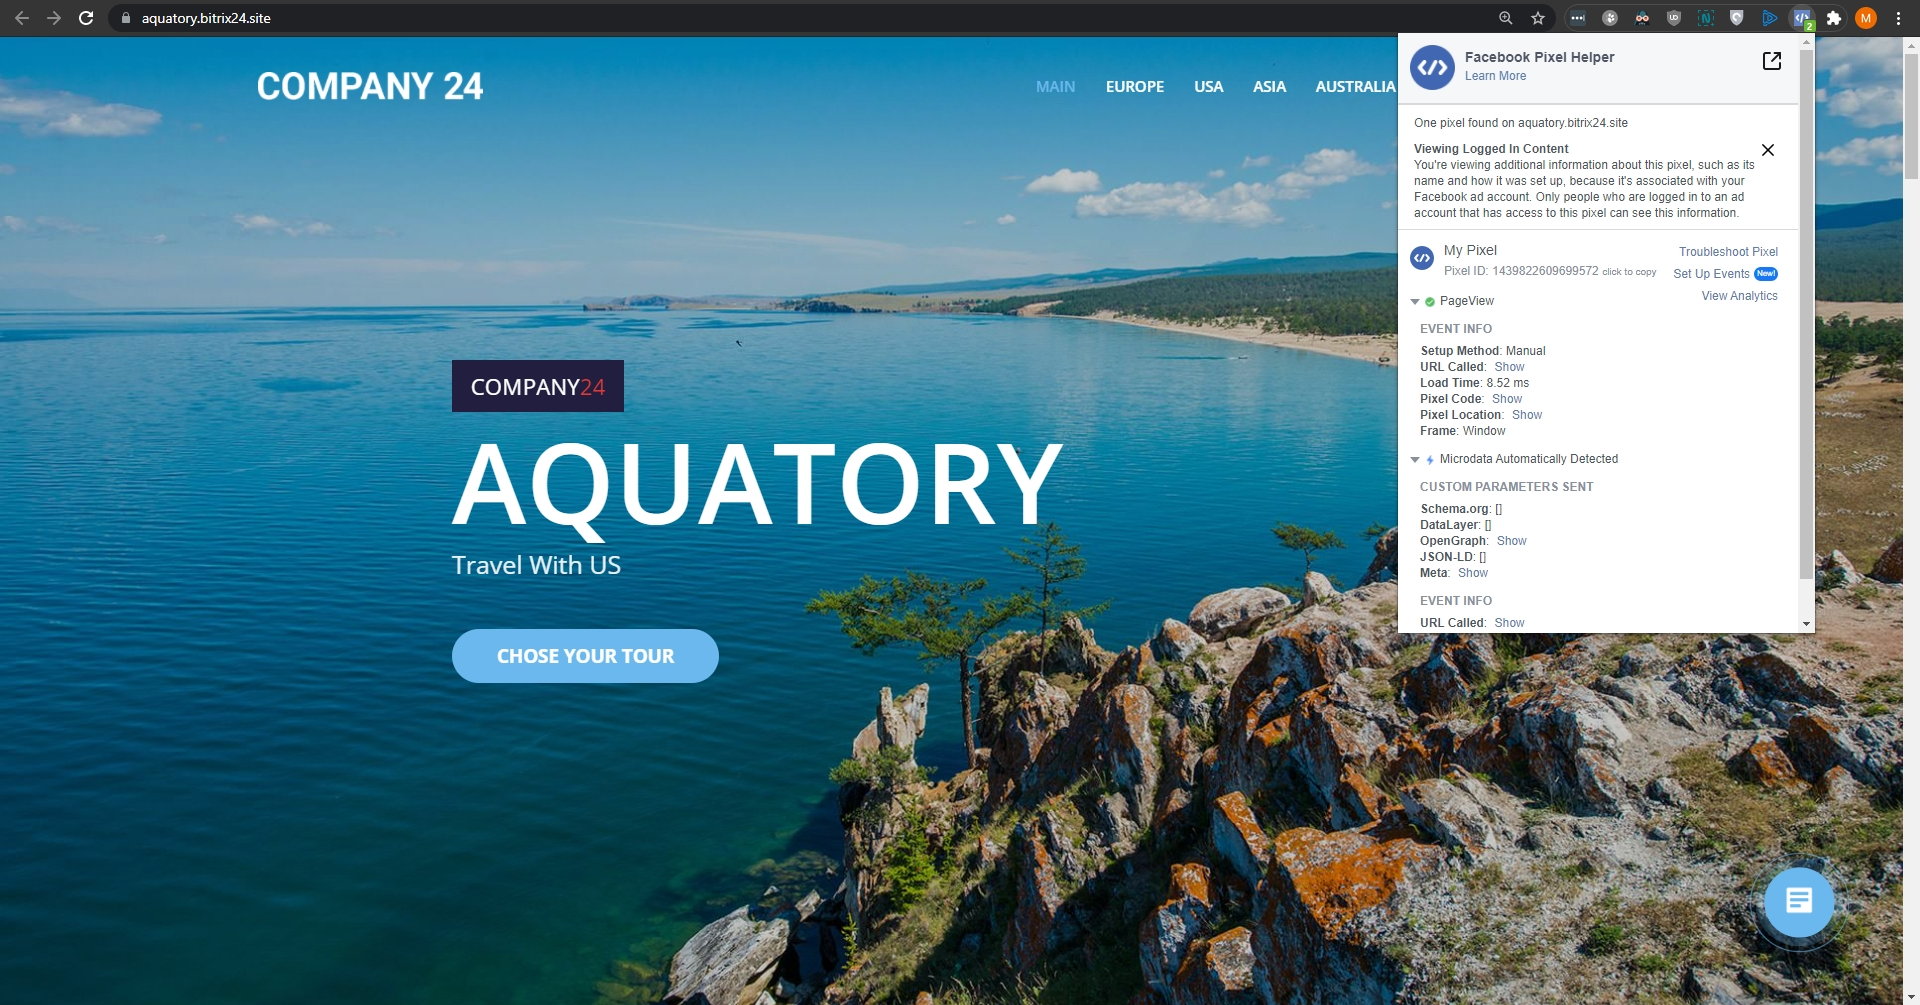
Another way to check if Pixel works is a free official Pixel Helper extension for Chrome. Download it from the Chrome Web Store and install it in the browser, then open the site connected to Pixel. If everything works correctly, a green event light will appear on the extension icon. By clicking on it, you will see data about the pixel state and the latest events.
Conclusion: a brief review of Facebook Pixel
- Facebook Pixel is a social networking tool that allows you to track people’s actions on external sites;
- Pixel evaluates ad performance, finds target audiences, and optimizes Facebook ad campaigns;
- You can set up the pixel in the Events Manager section. You need to click "Connect data source", select "Web" - Facebook Pixel and follow the installation instructions that will appear on the screen;
- After the Pixel installation, you need to add the events you want to track on the site. This can be done on the Pixel page using the “Add Event” button on the “Overview” tab;
- To check the Pixel performance, you need to activate several events on the site, and then see the results on the "Overview" tab. You can also use the Facebook Pixel Helper extension for the test.
When collecting leads via Facebook, it is very important to optimize ads and set up automatic lead delivery in CRM. After all, if you download leads manually, you will not have time to process them. The customers will not wait and will cancel the orders.
For this reason, we created SaveMyLeads. With this platform, you can quickly automate the data transfer between different services. In addition, the connector can transfer requests from Facebook to different CRMs as well as to other systems like Google Sheets, Mailchimp etc.
You don't need to have any programmer’s skills to work with the connector. All you need is to register on the SaveMyLeads website and link Facebook with the desired service.