It's easier to work with Google Sheets if you know how to make drop down lists. In this article we will describe the easy way to create such a useful tool.
Content:
1. When to use a drop down list in Google Sheets
2. How to make a drop down list with data from a range of cells
3. How to make a drop down list with manual data entry
When to use a drop down list in Google Sheets
The main advantage of this feature is a significant acceleration of data entry, the absence of annoying errors and typos that can slip when cells are filled quickly. In addition, choosing from a pre-prepared list is much more convenient than typing everything manually.
When do drop downs apply? They are mainly used when you need to specify certain parameters for a Google Sheets user who works with a file in shared mode. They are also very popular with frequent input of the same values and data, because the slightest mistake here can lead to the formation of an incorrect report and an incorrect miscalculation according to the formula.
Let us illustrate with examples:
- step-by-step control of the employee's activities (“task accepted”, “in progress”, “task completed”);
- accounting for the availability of goods in stock by categories (“educational toys”, “soft toys”, “weapons”, “dolls”, “cars and equipment”);
- a table with a diet and a list of dishes for each meal for all days of the week (“breakfast”, “lunch”, “afternoon snack”, “dinner”, “snack”).
How to make a drop down list with data from a range of cells
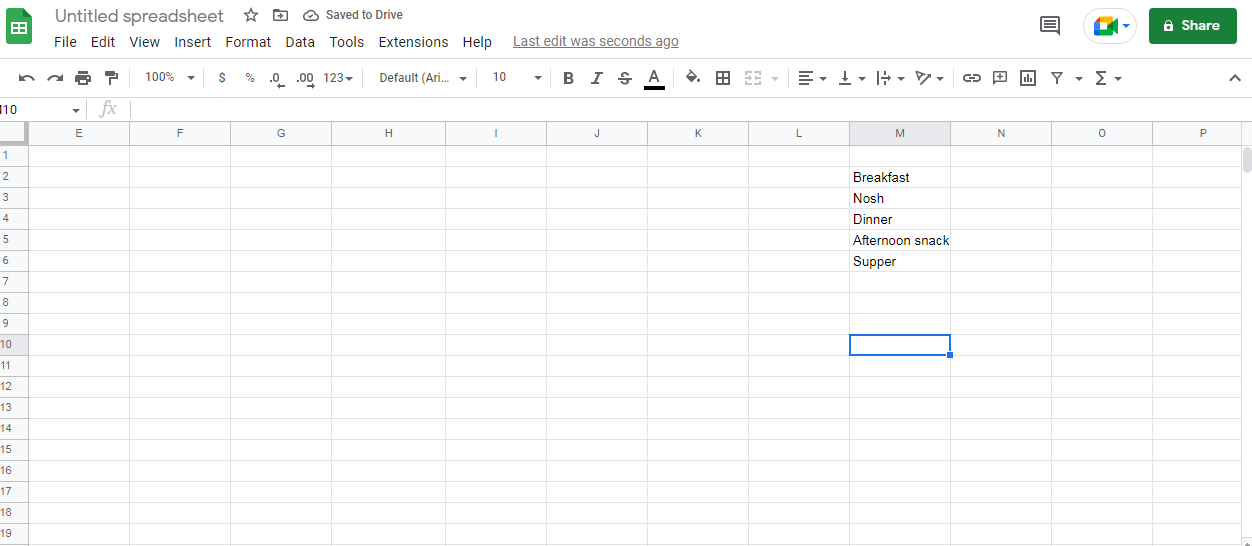
1. Prepare the contents of the drop down list. To do this, select an inconspicuous place on the sheet (preferably away from the workspace) and type one item in your list into the column from top to bottom.
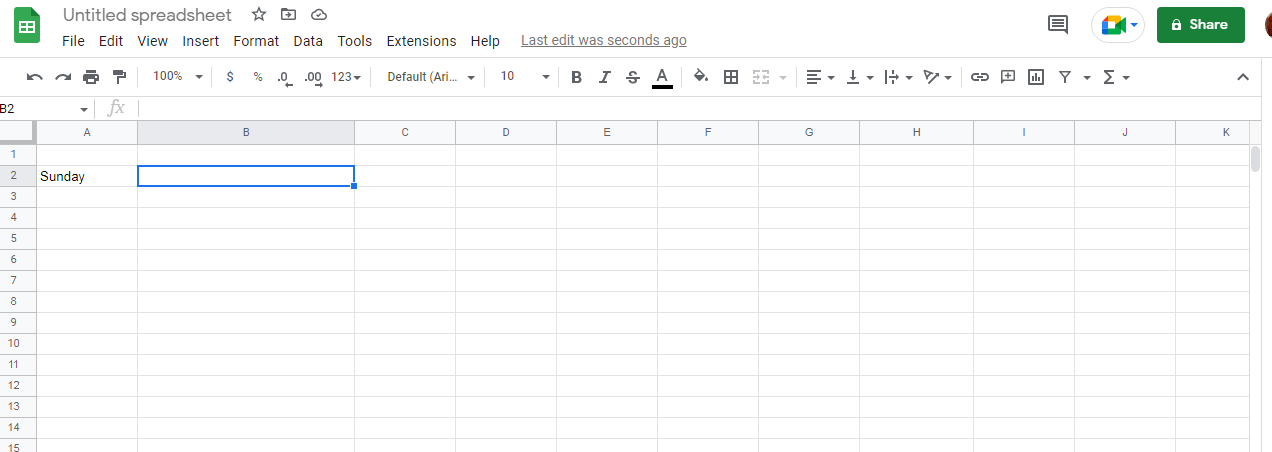
2. In Google Sheets, select one cell or a range of multiple cells where you want the drop down list to appear. To do this, click on it with the left mouse button.
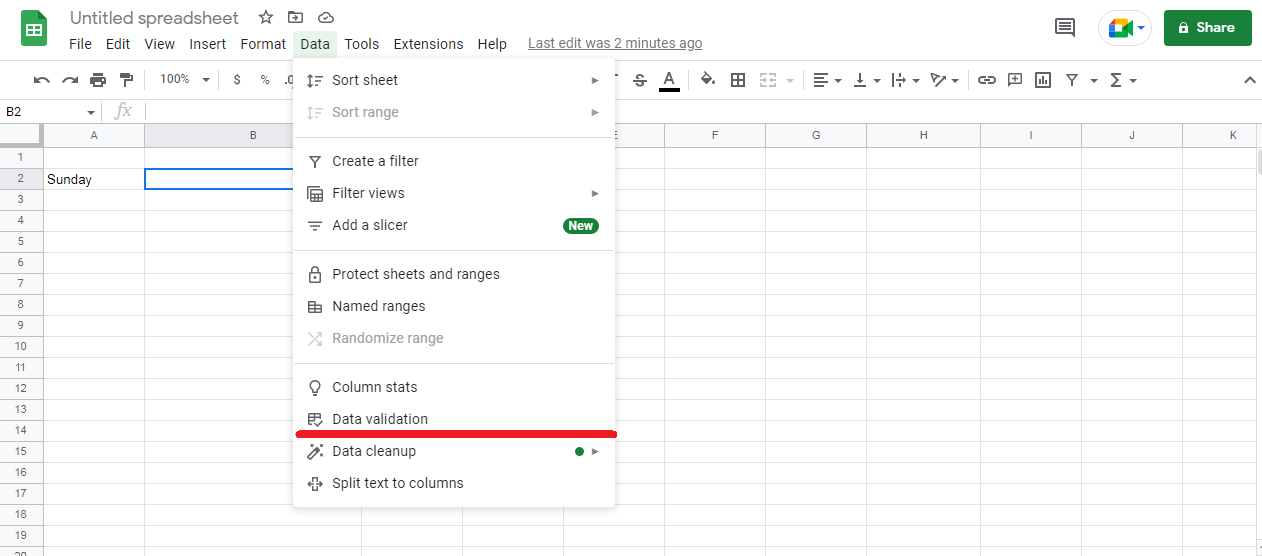
3. Go to “Data” from the top menu.

4. From the submenu that appears, select Data validation.
5. The Data validation window has opened. Look at the “Cell range” column and make sure that there is a cell you need or a range of them. If you see the wrong one, correct the error here manually.
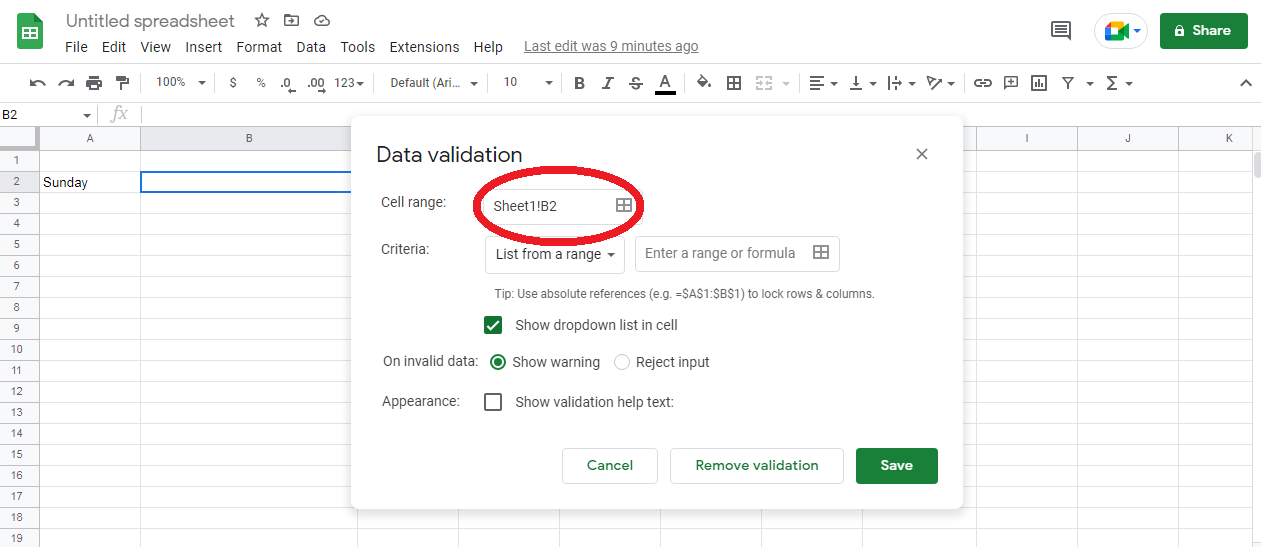
6. In the “Criteria” column, establish the parameter “List from a range”.
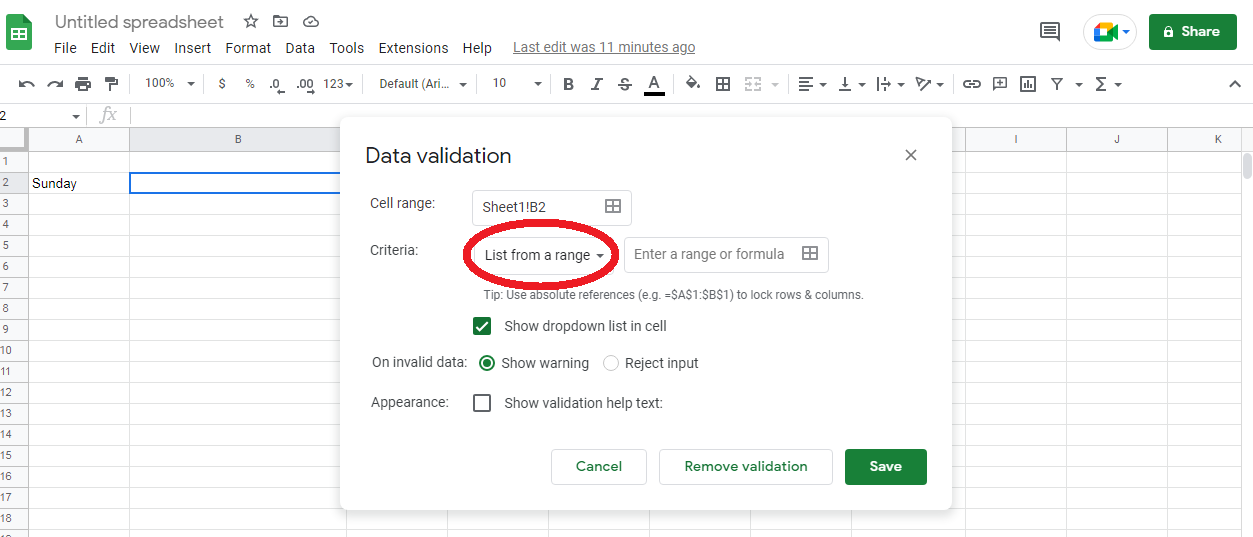
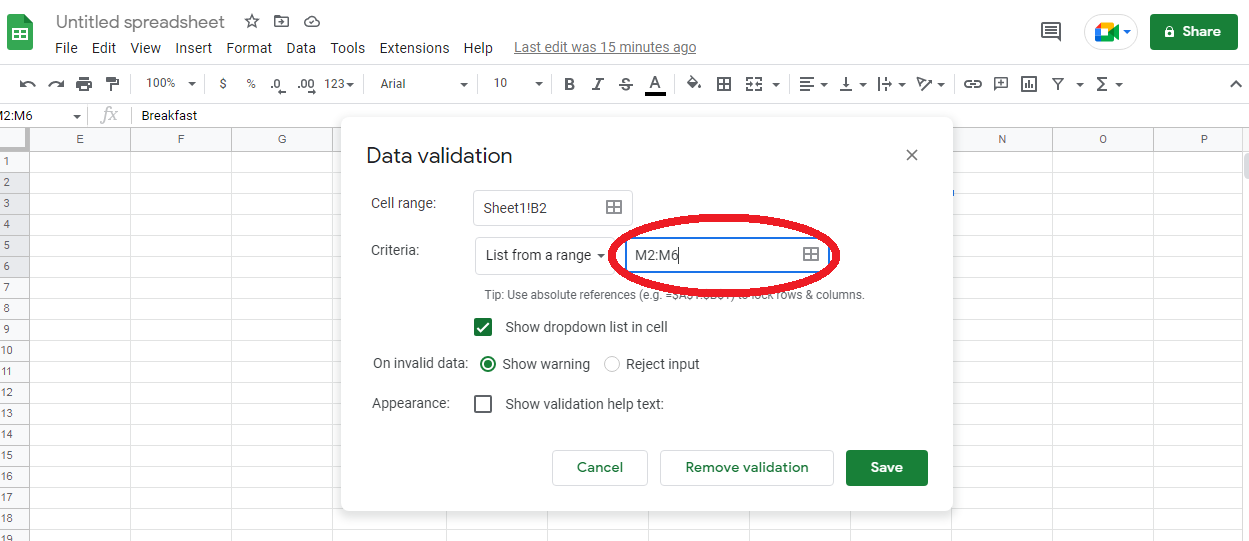
7. In the box next to the “List from a range” parameter, put the address of the cell or range where you want to create the drop down list. The best way to do this is to click on the “Select data range” icon and manually select the desired cell or range on the sheet.
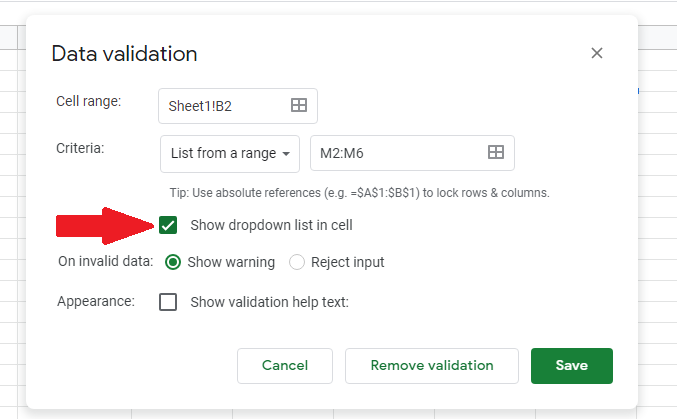
8. Make sure that the “Show drop down list in cell” option is checked. If it does not exist, the drop down list icon in the cell or range you want to use will not be visible.
9. Don't forget to click the Save button.
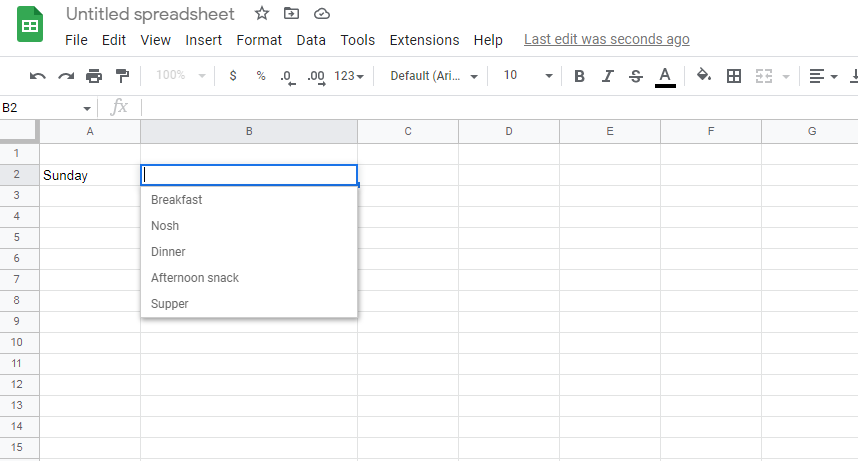
We check what happened. A drop down icon appears at the end of the selected cell (a small triangular arrow pointing down). When you click on it, it opens and you can see it in its entirety. Selecting one of the items in the list automatically inserts it into the cell.
How to make a drop down list with manual data entry
Not everyone likes looking for a place to prepare the contents of a drop down list somewhere on the edges of the Google Sheets sheet. Lovers of accurate file management then spend time looking for a way to hide such a “draft” column. How to avoid unnecessary actions? An alternative is to manually list the contents in the Data validation window.


Using the drop down list, you can speed up and facilitate your work with Google Sheets, avoid mistakes when entering data. We offer you detailed instructions on how to make and use it.
1. Select the cell or range where you want to place the drop down list.
2. Go to “Data” from the top menu.
3. Press “Data validation”.
4. Carefully check that the cell or range you really need is registered in the “Cell range”. If there is a different value, correct the error immediately.
5. Under Criteria, select the List of items option.
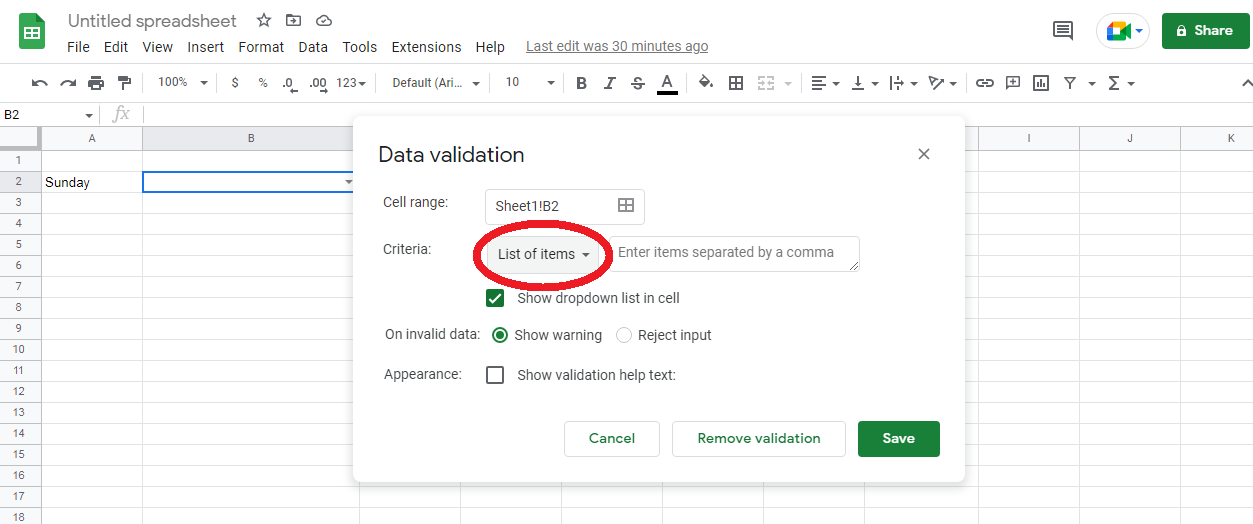
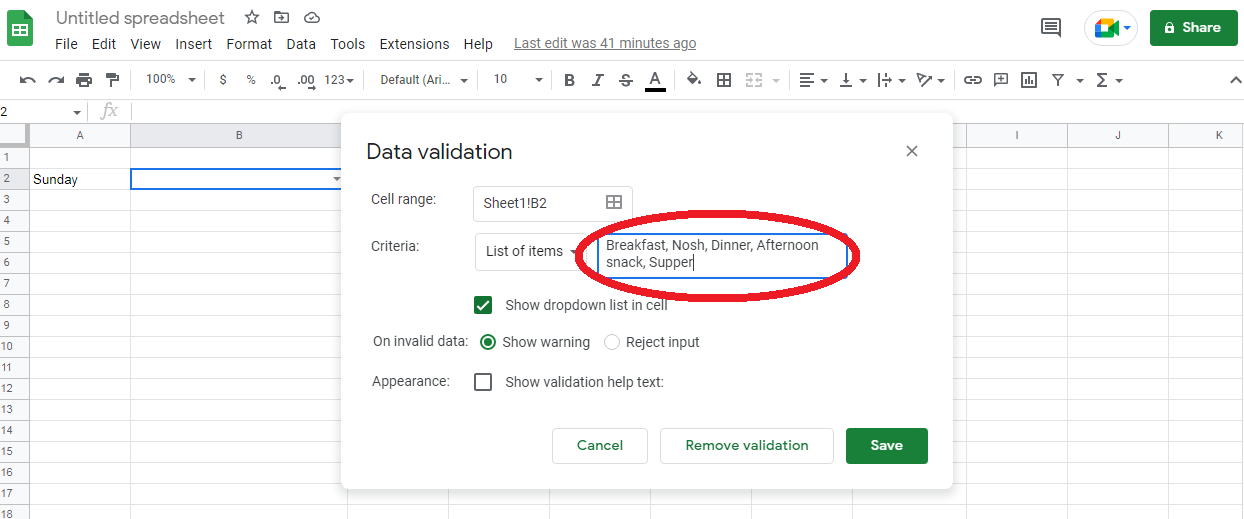
6. In the “Enter items separated by a comma” box next to it, enter the contents of your drop down list. Be sure to place a comma after each item. For example: Breakfast, Nosh, Dinner, Afternoon snack, Supper.
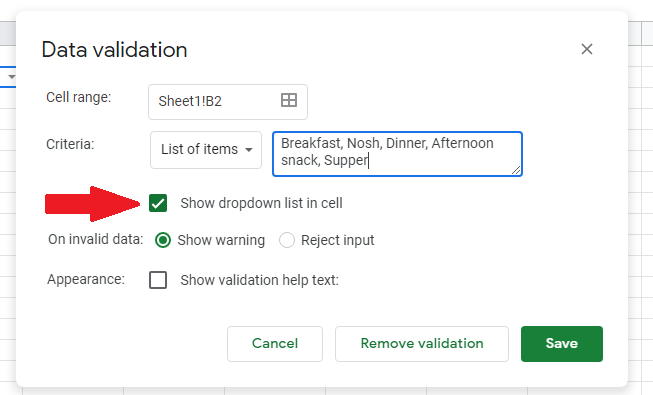
7. Check the “Show drop down list in cell” option. There should be a tick next to it. If there is no such mark, there will be no drop down icon either.
8. At the end, click Save.
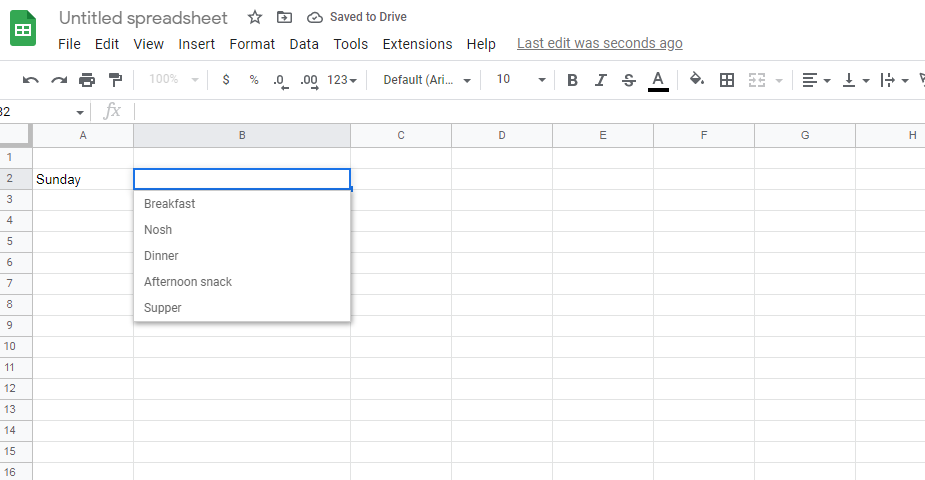
By clicking on the drop down icon (the triangle arrow at the right end of the cell), you will see everything it contains. By selecting one of the items, you will automatically place it in the cell.
Are you actively using Facebook ads to promote your business? Then our service will be very useful for you. SaveMyLeads will allow you to create the integration between Facebook Lead Ads and other systems, enable uninterrupted data transfer. Using the information left by the user on the Facebook lead form, you can automatically create new tasks and contacts in CRM, make personalized mailings or add new lines to Google Sheets. This is a great opportunity to automate your business! Sign up for free trial!
