Manually sending messages takes a lot of time and effort. Set up automatic SMS sending to your customers from Facebook to increase business efficiency. Thanks to the SaveMyLeads service, this can be done without special knowledge and in just a few minutes.
Content:
1. How to setup Facebook and MSG91 integration
2. Getting started with SaveMyLeads
3. Connecting Facebook Leads Ads
4. Connecting MSG91
5. Testing data transfer
6. Finishing setup
Driving leads with Facebook ads? Then you will certainly need the ability to send messages to social network users who have shown interest in your advertising. For example, with the help of SMS, you can inform such potential customers about the manager's soon response, thank for leaving contacts, send discounts, and so on.
SaveMyLeads allows you to quickly connect Facebook to the MSG91 marketing email service and set up automatic sending of such messages. Automation works as follows. When a new lead appears in the form, SaveMyLeads uploads their data to MSG91 and initiates an SMS to this person. You set the text of the message at your discretion when setting up the service.
By setting up automation, you will get several tangible benefits:
1. Get rid of routine actions. You do not have to upload each lead from Facebook, extract contacts from it, copy them to the mailing service and click the send button. SaveMyLeads will take care of these tasks, and you will be able to use the released resources for other work tasks.
In addition, SaveMyLeads is able to automatically insert the client's first name, last name, and other data into the message text. Thus, the service can personalize each SMS without forcing you to edit it.
2. Speed up the sending of messages. SaveMyLeads monitors the emergence of new leads on Facebook every second. As soon as the next user leaves the data in the form, our service immediately starts sending him a message. What's more, SaveMyLeads is open 24/7. Therefore, your customers will receive the necessary messages always on time, regardless of time and date.
3. Insure yourself against mistakes. When manually adding data, an employee may write down the phone number incorrectly, miss or confuse important contacts. As a result, the client will not receive the message. Automation eliminates such problems. SaveMyLeads uploads contact information to the mailing service in the same form in which the client leaves it in the form.
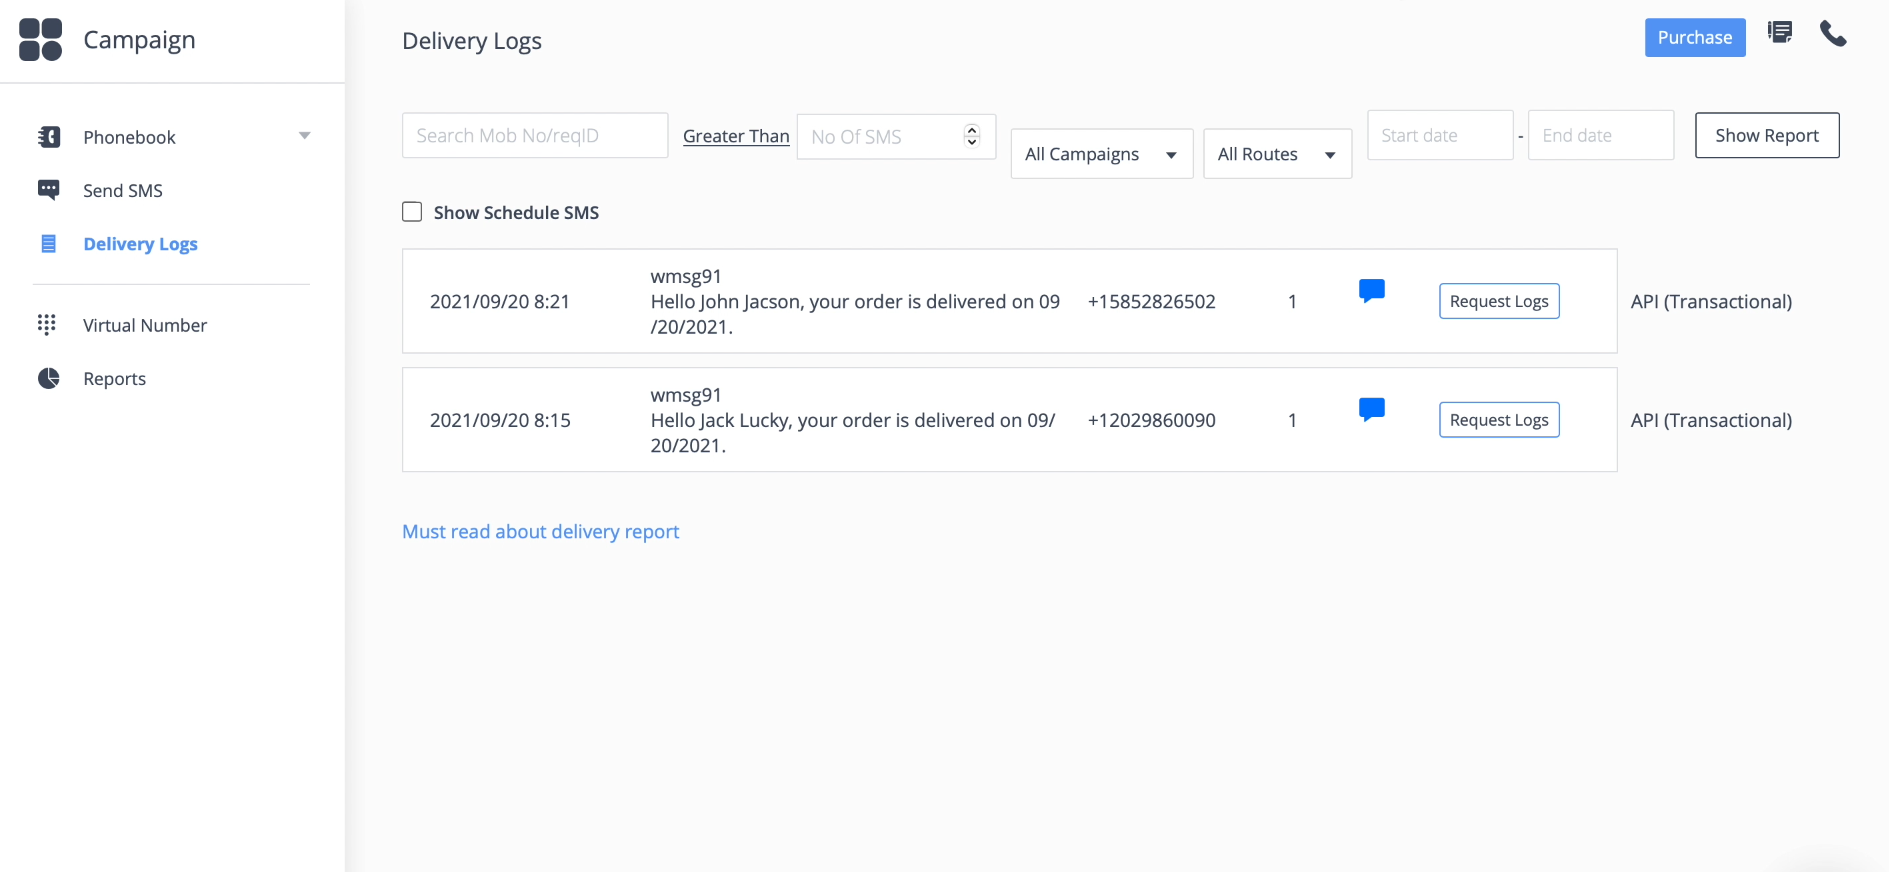
An example of messages sent to new leads via MSG91 using SaveMyLeads:
How to setup Facebook and MSG91 integration
Our service allows you to set up automatic SMS sending without a single line of code. All you have to do is register on the SaveMyLeads website, select a connection between Facebook and MSG91, and then follow the prompts on the screen. The system will help you link the accounts of these services to SaveMyLeads and set auto-send settings.
Our instructions will help you set up automation as quickly as possible. Be sure to set up your MSG91 account and create a Facebook ad with a lead form before you start. In addition, add your phone number to the form - this will come in handy for text.
Getting started with SaveMyLeads
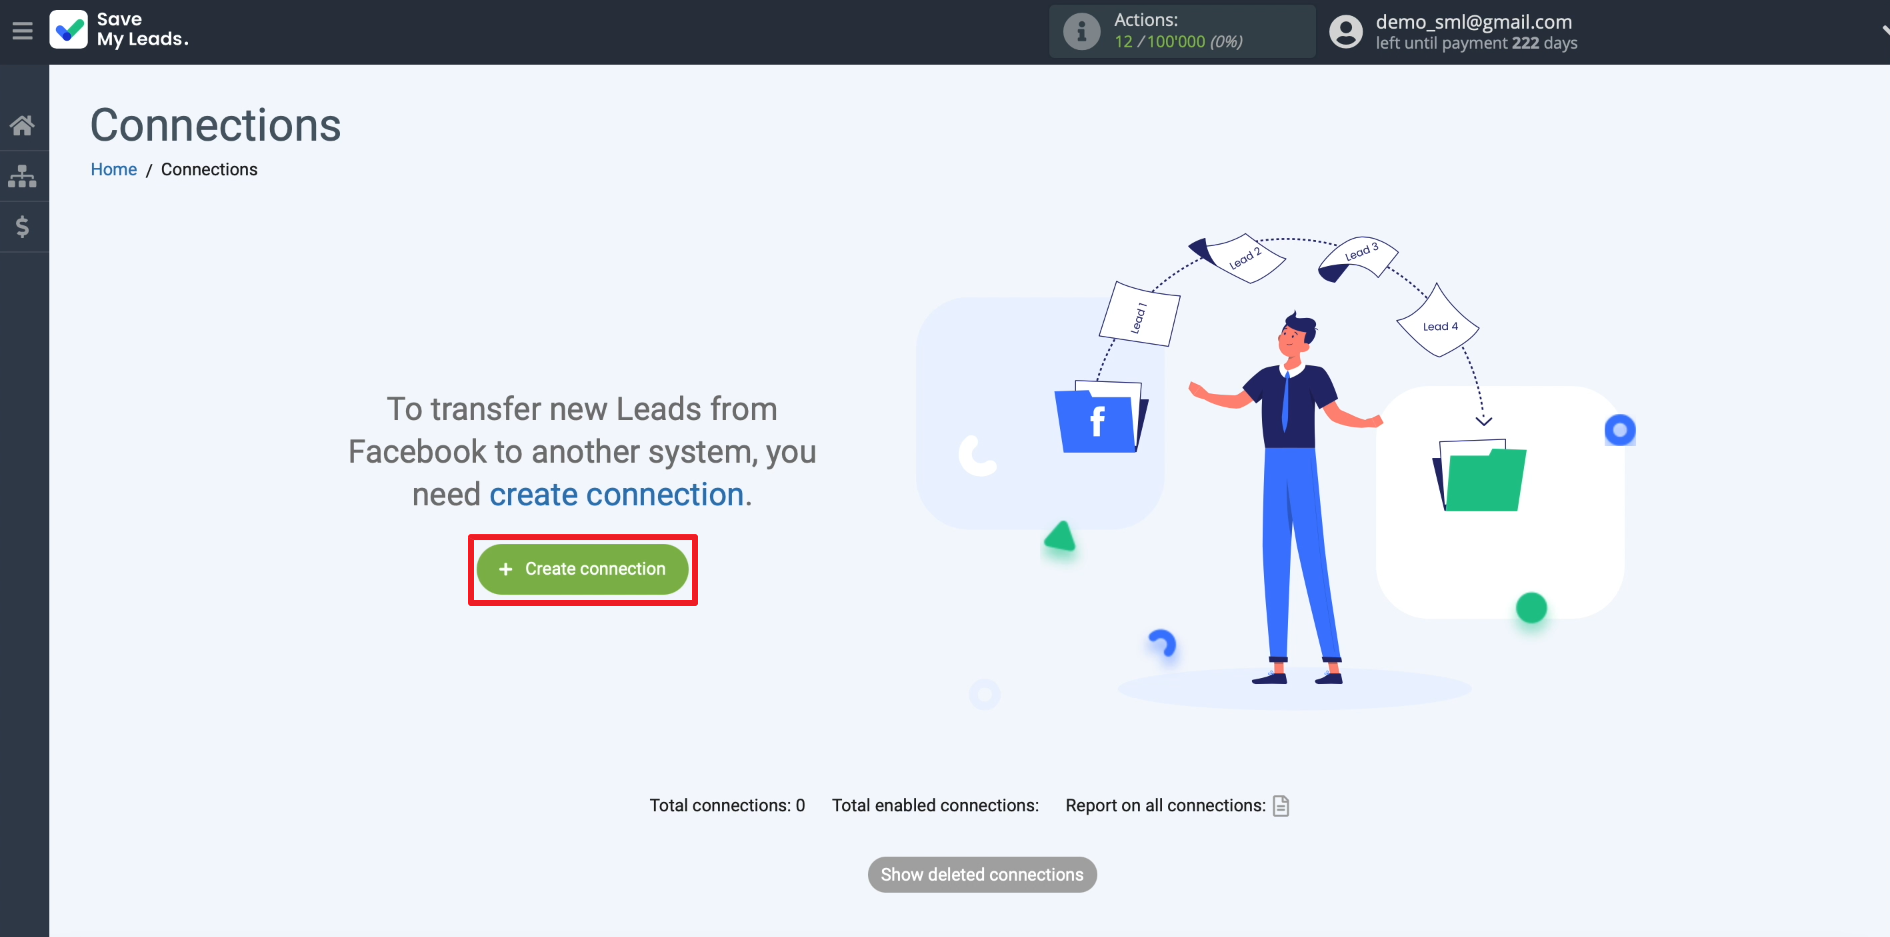
Registering on the SaveMyLeads website. Enter to your personal account and click "Create connection".
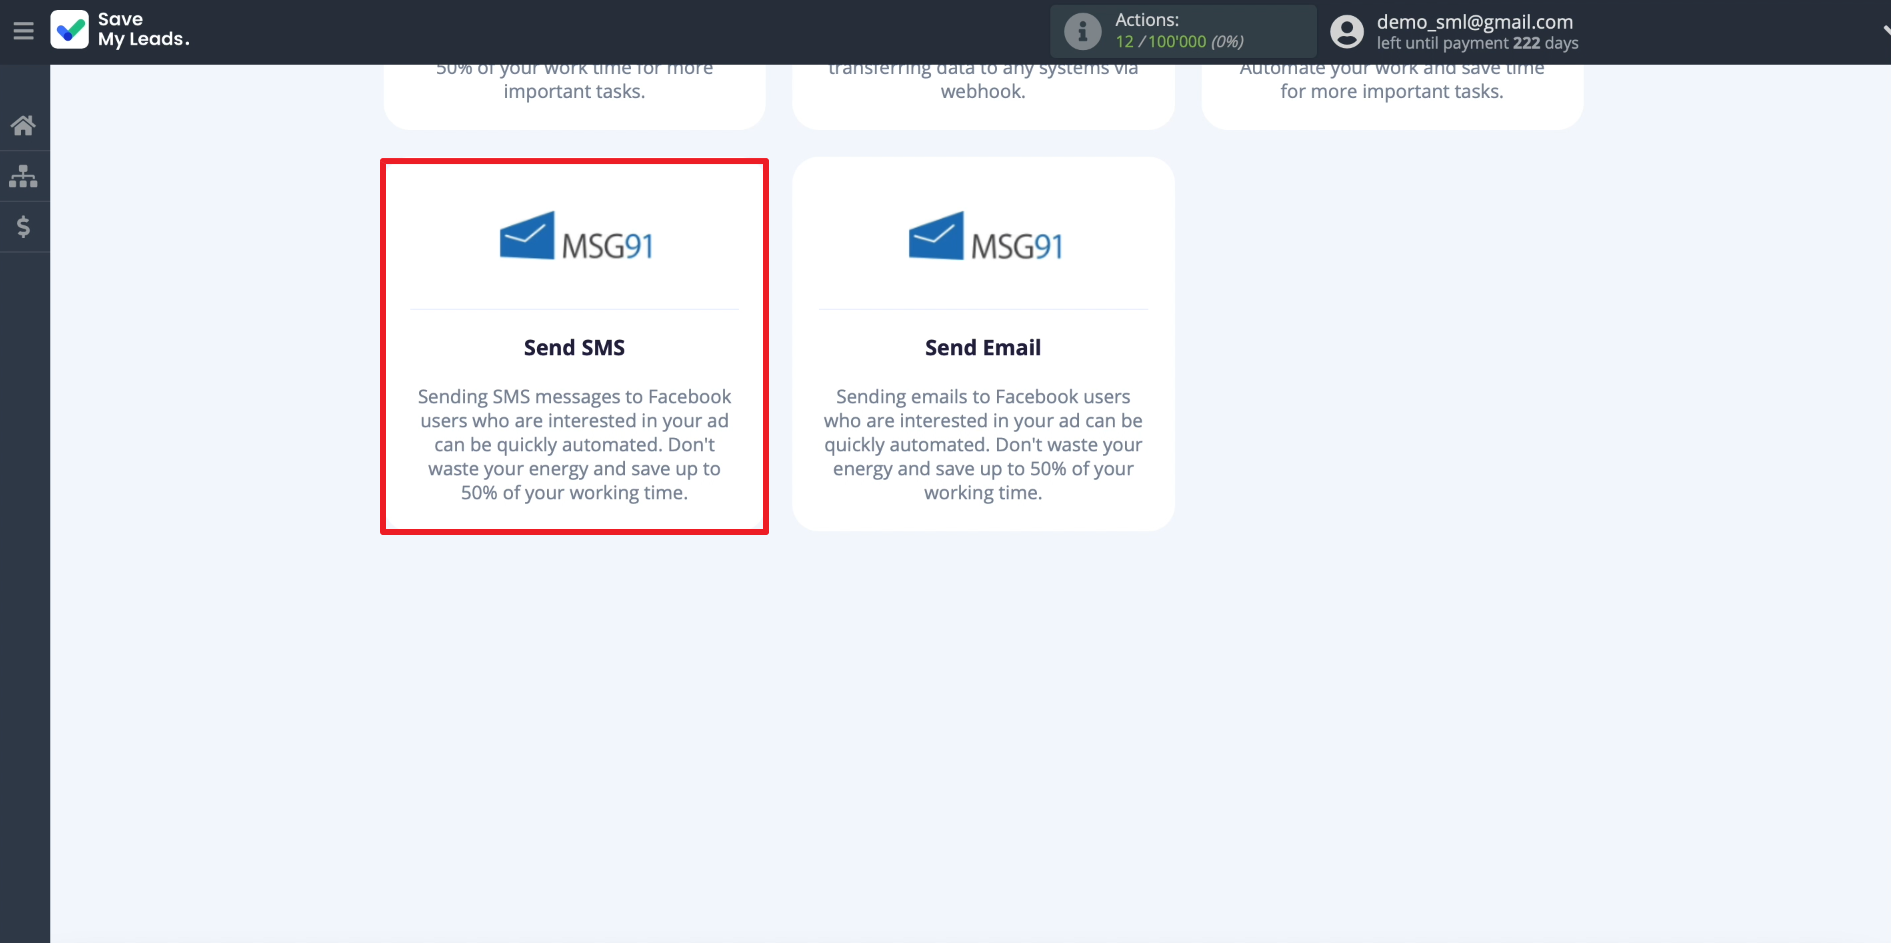
A list of connections to external services that can be created using SaveMyLeads will appear on the screen. We select the connection intended for sending SMS via MSG91.
Connecting Facebook Leads Ads
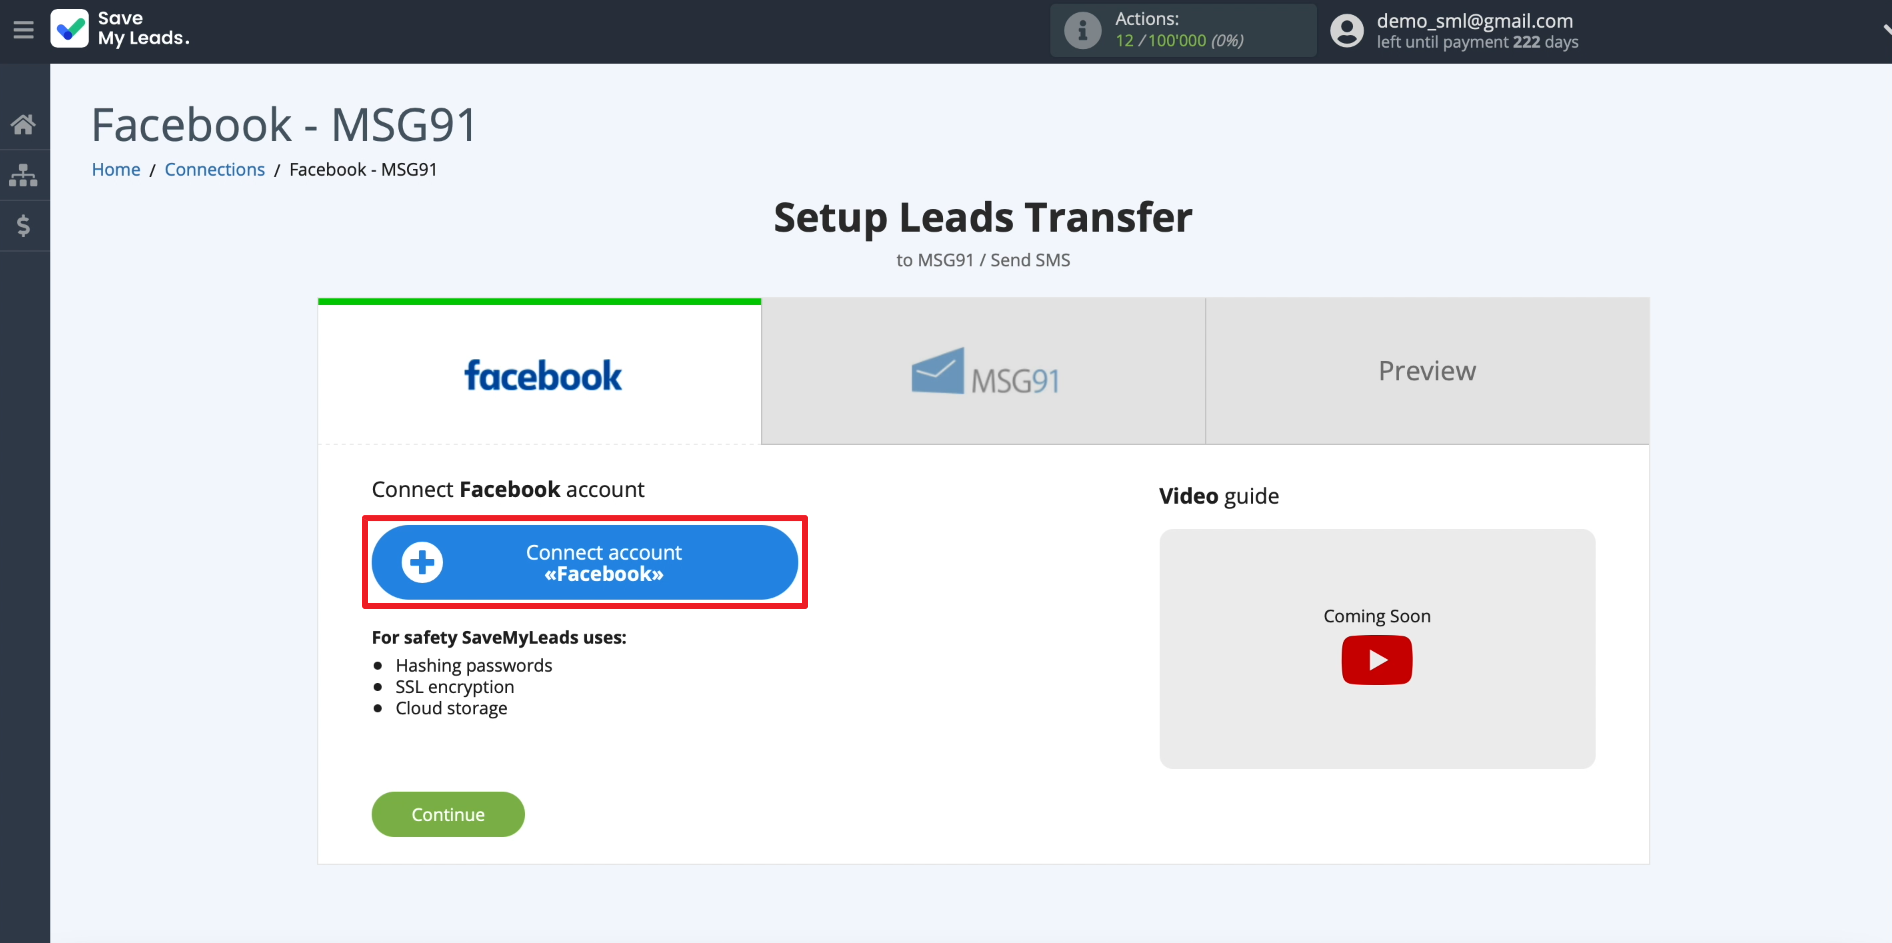
In order for SaveMyLeads to upload leads, we need to connect Facebook to it. To do this, click "Connect account "Facebook". We enter the login and password from our account and provide all the requested permissions. This is required for SaveMyLeads to access the leads.
Now we need to show SaveMyLeads exactly where it can upload leads from. Select the newly connected account first. Then the business page for which advertising is configured. After that, we indicate the form for receiving leads.
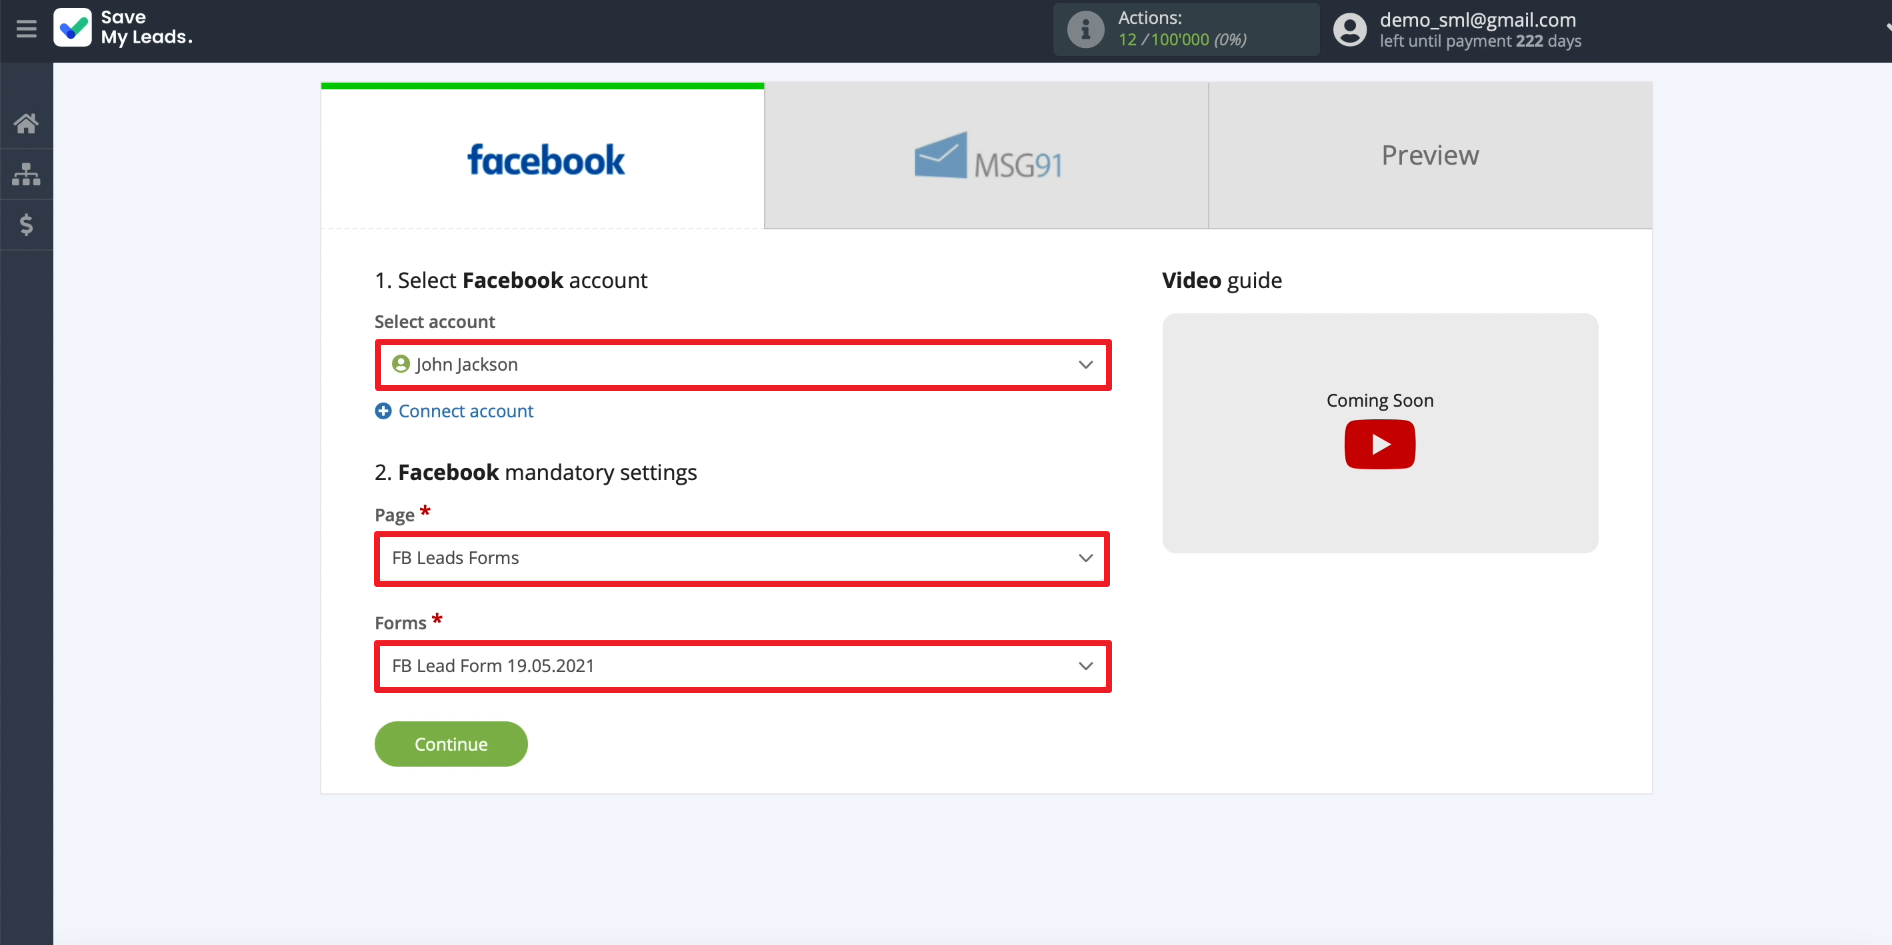
SaveMyLeads only allows you to select one form per connection. If you want to set up uploading leads from several forms, create a separate connection for each of them.
Connecting MSG91
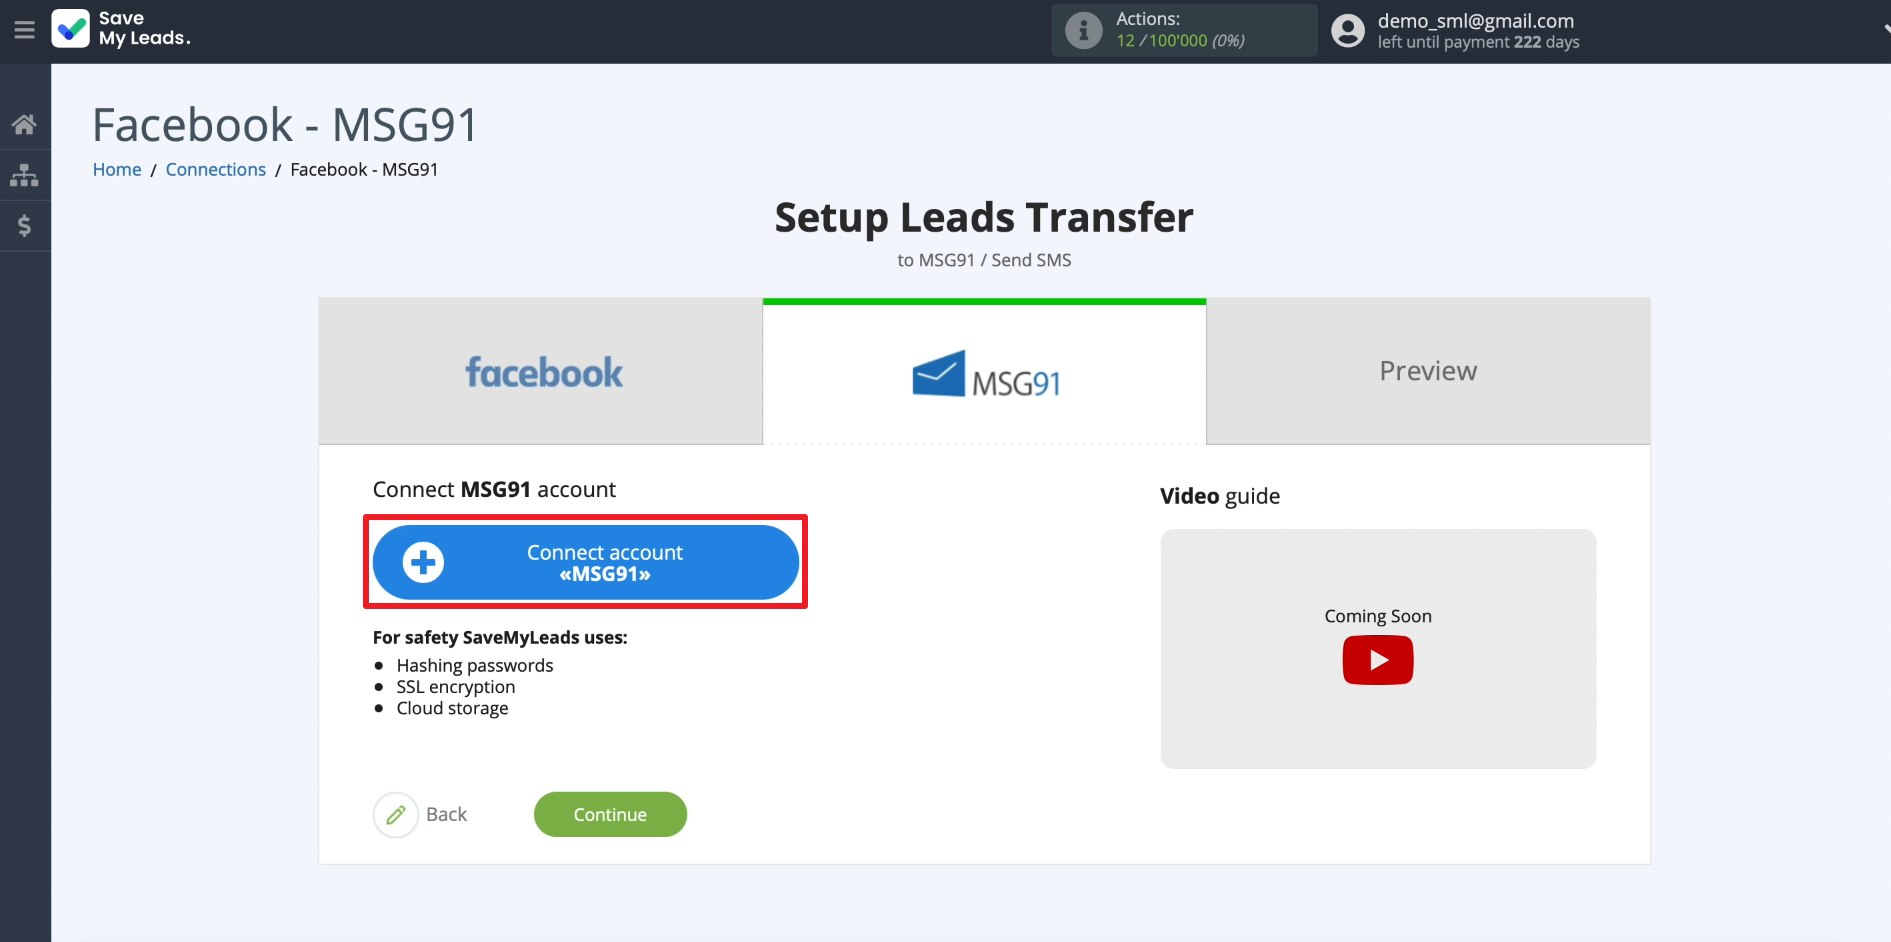
In order for SaveMyLeads to copy contacts from the uploaded leads and initiate automatic SMS sending, we will connect the MSG91 account to it. Click "Connect account "MSG91".
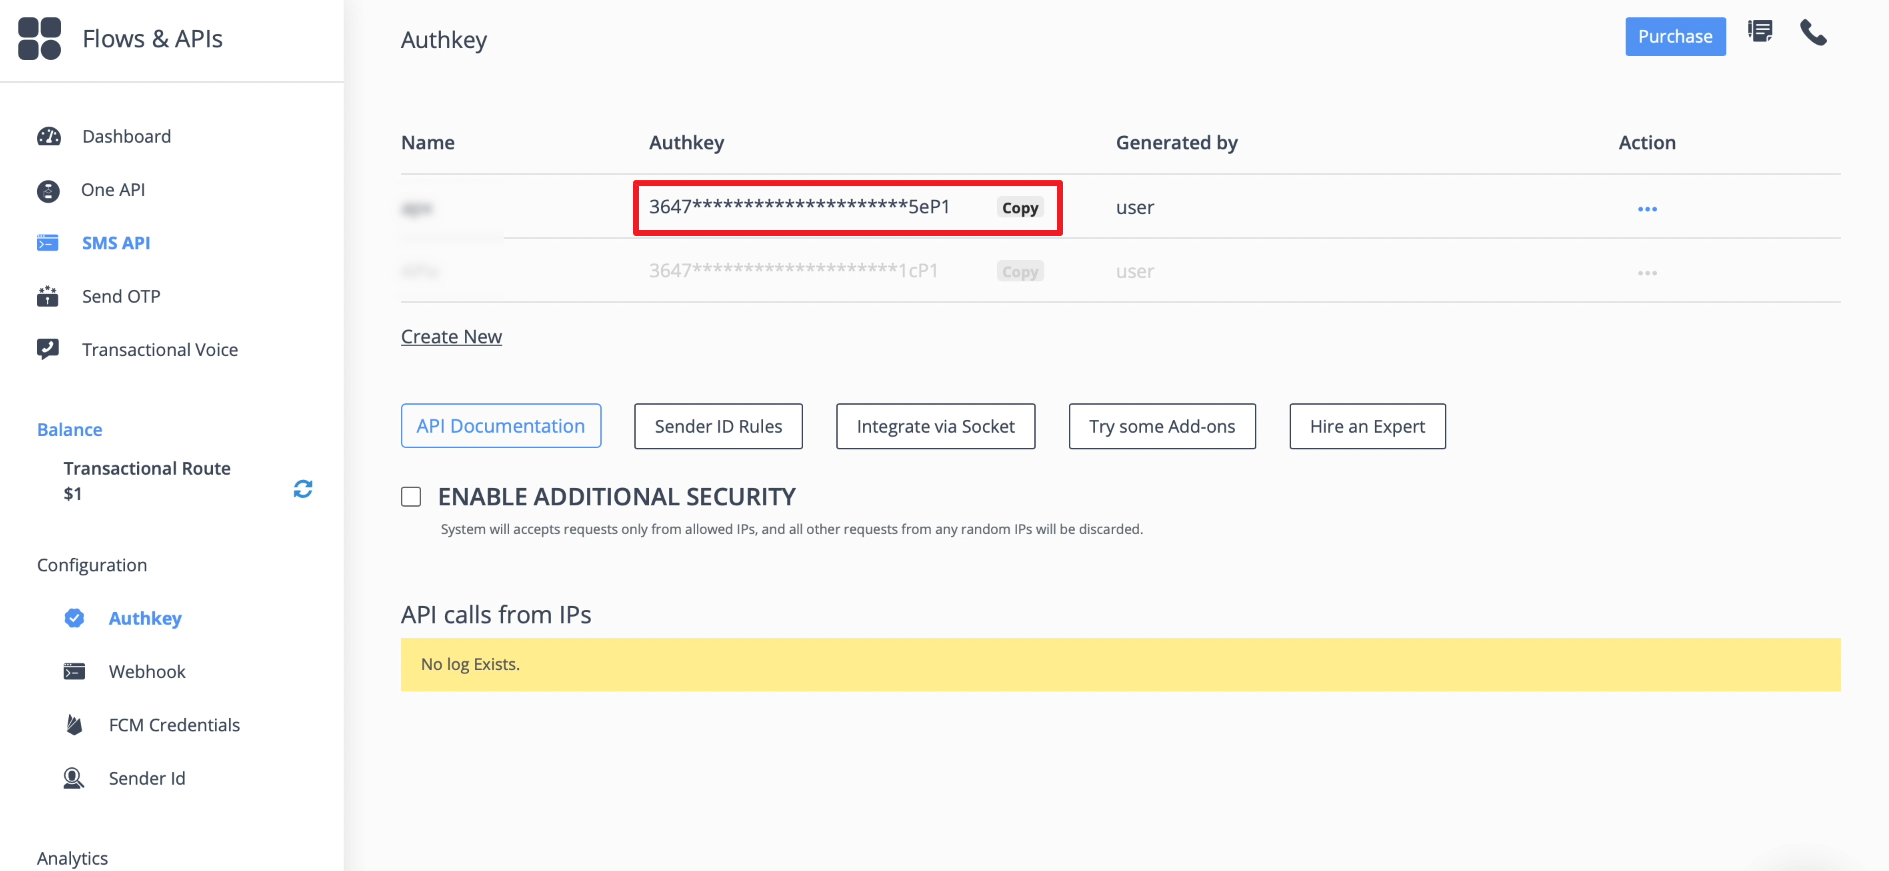
We enter account name, and then our personal API-key.
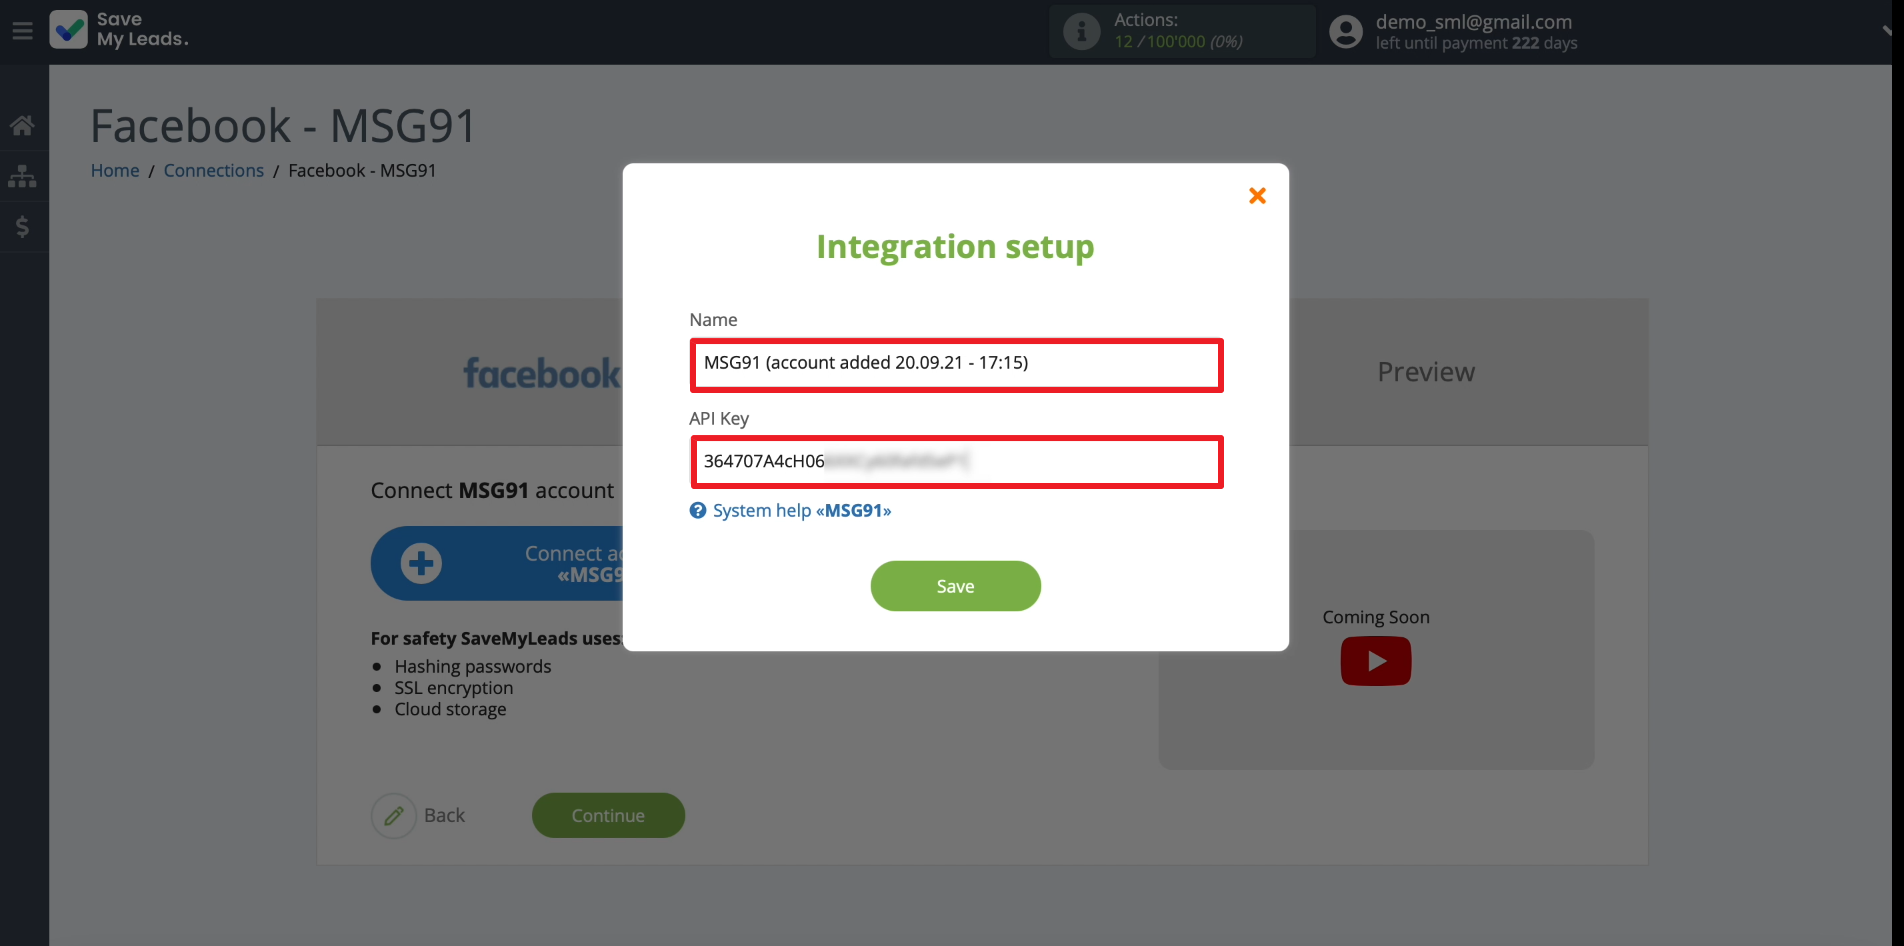
The API key is a unique identifier that is required to connect MSG91. It can be found and copied in your account on the mailing service website. To do this, go to the "One API" section, click on the "SMS API" on the left, click on "Create New" and copy the key that appears.
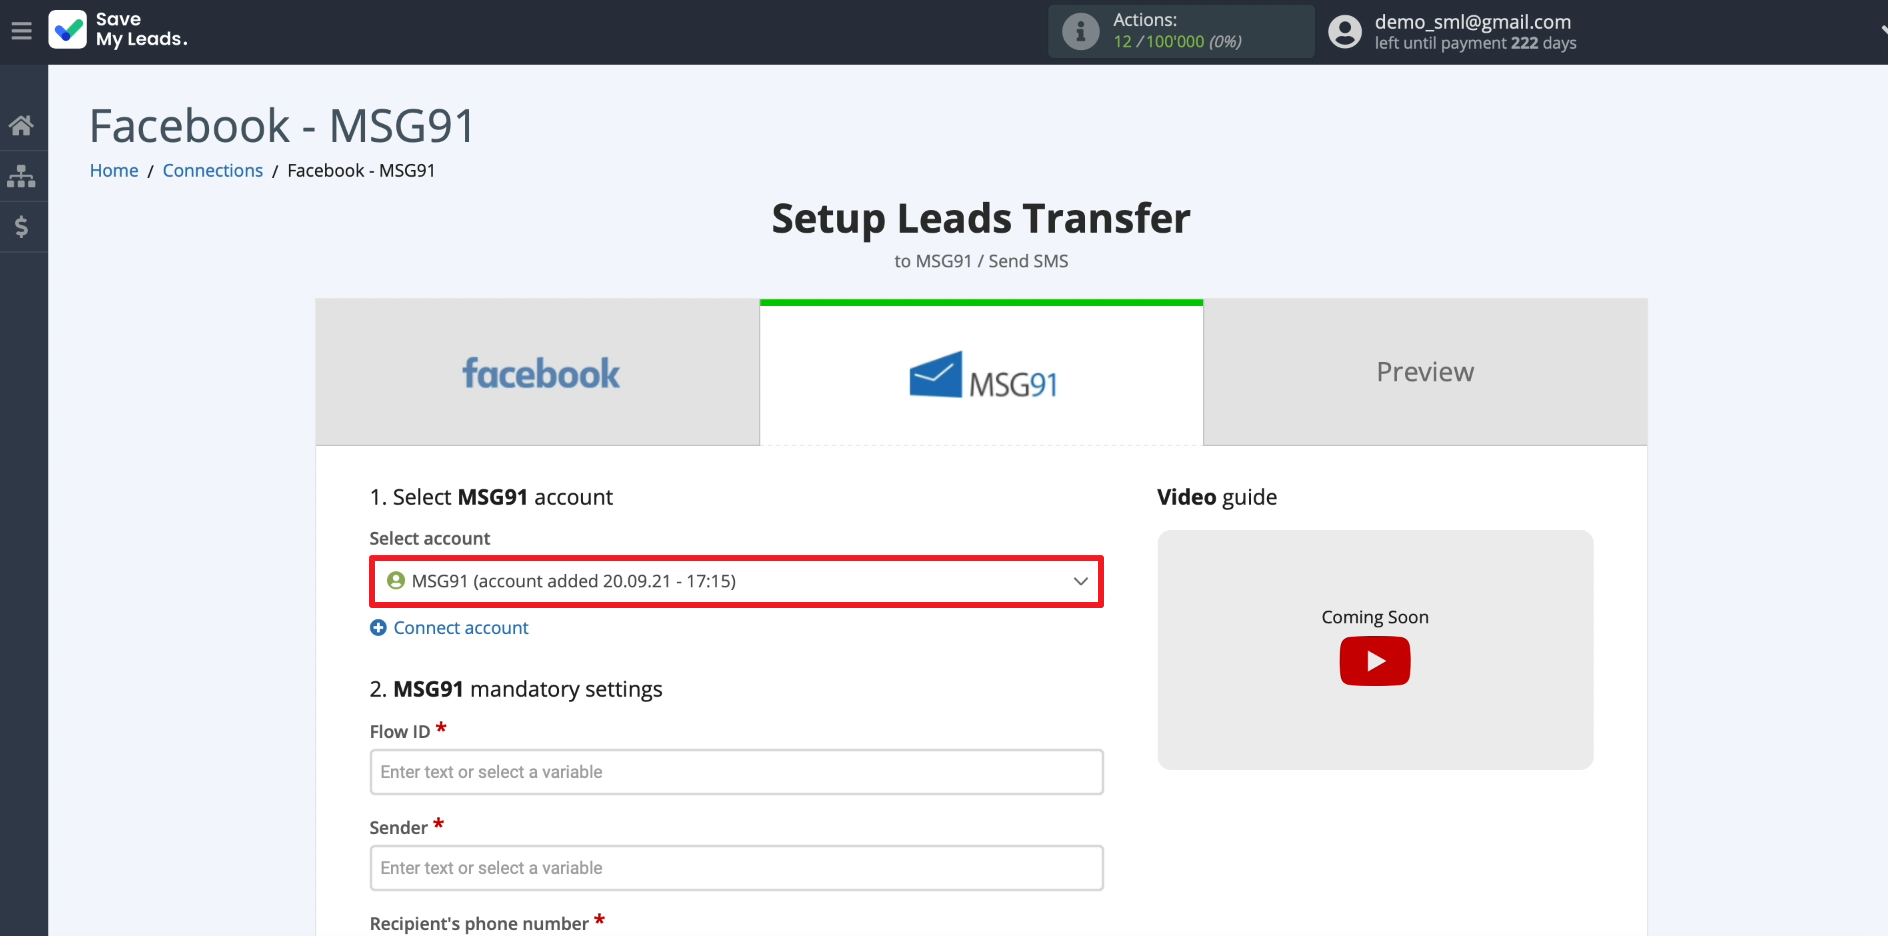
After linking the account, we will specify the MSG91 parameters required to send SMS. First of all, select the newly connected MSG91 account.
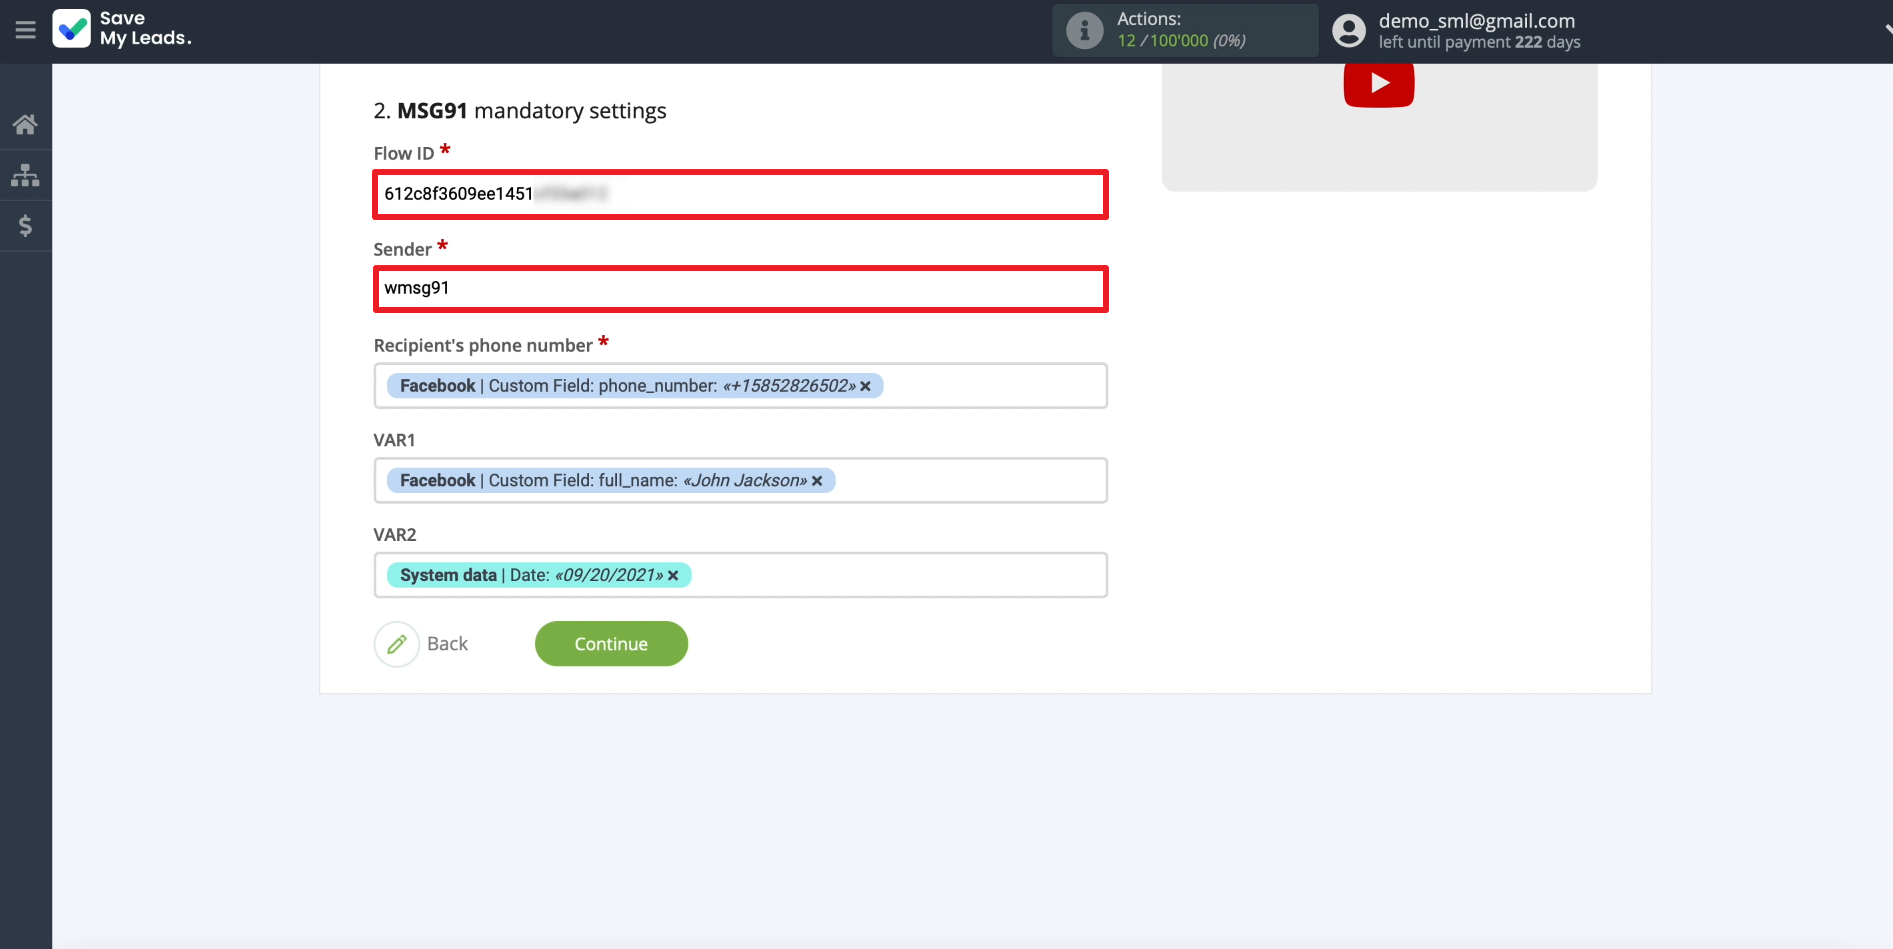
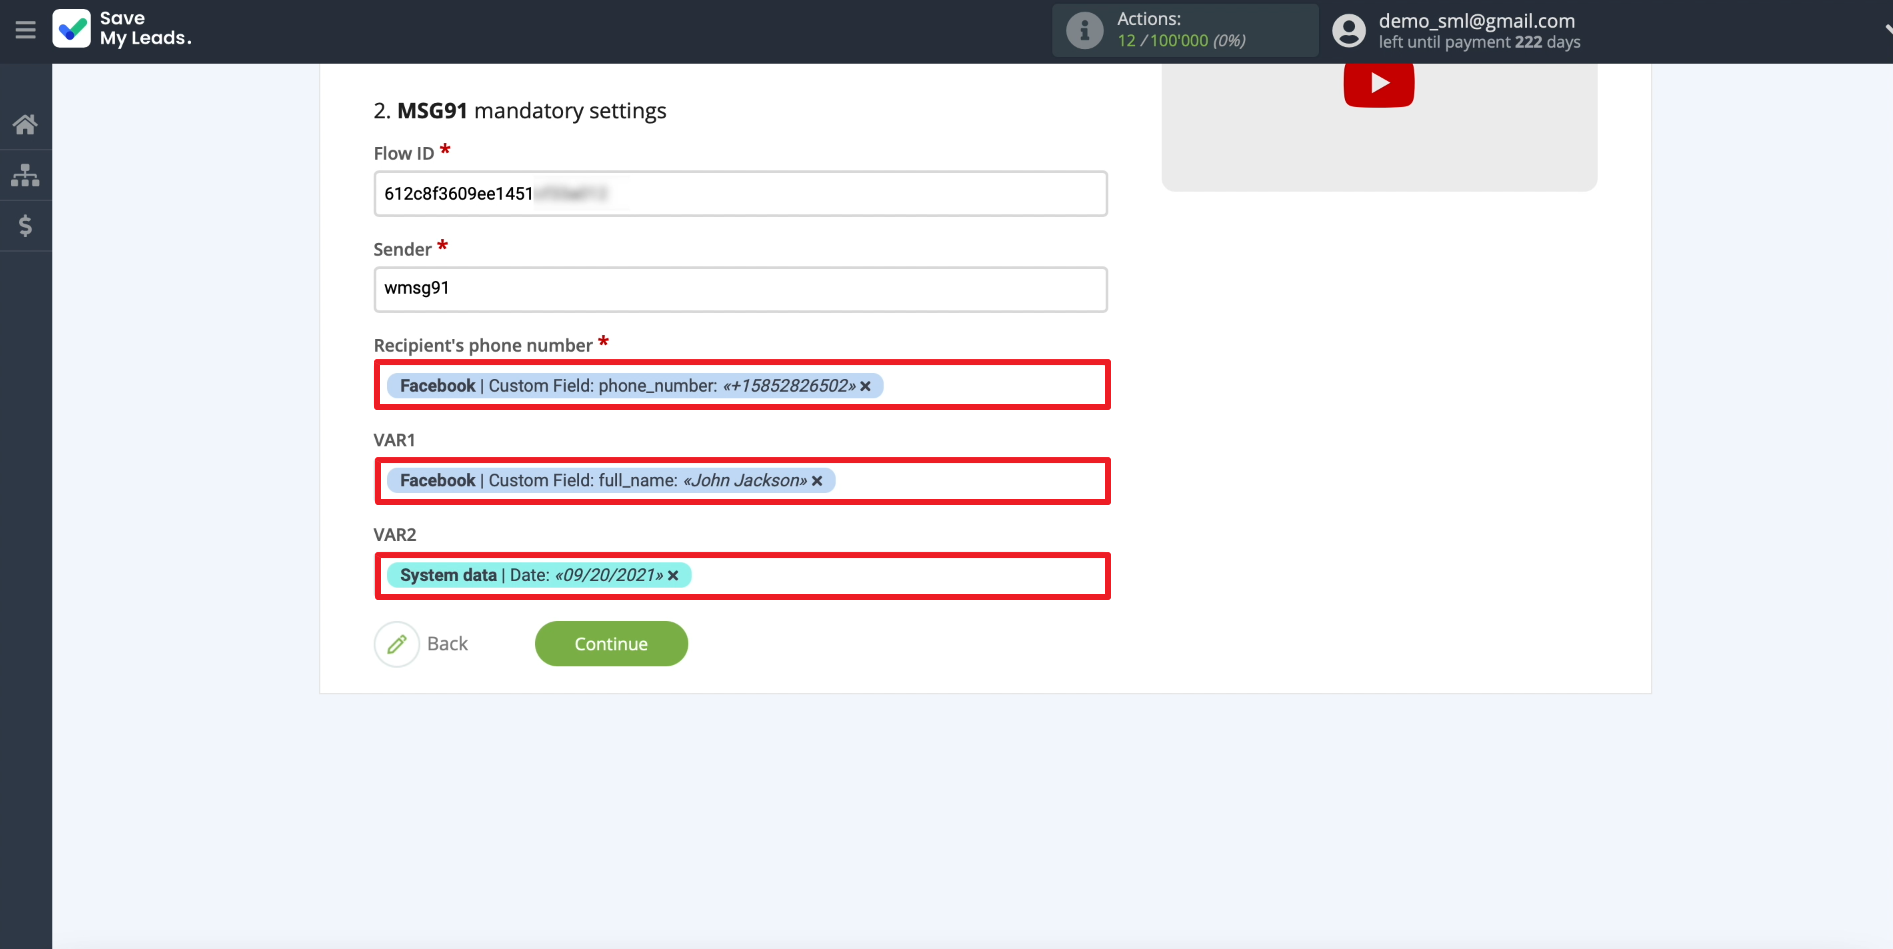
Then we choose what data SaveMyLeads should automatically copy to MSG91 for each SMS. To do this, click on the available message fields and specify what information will be transferred.
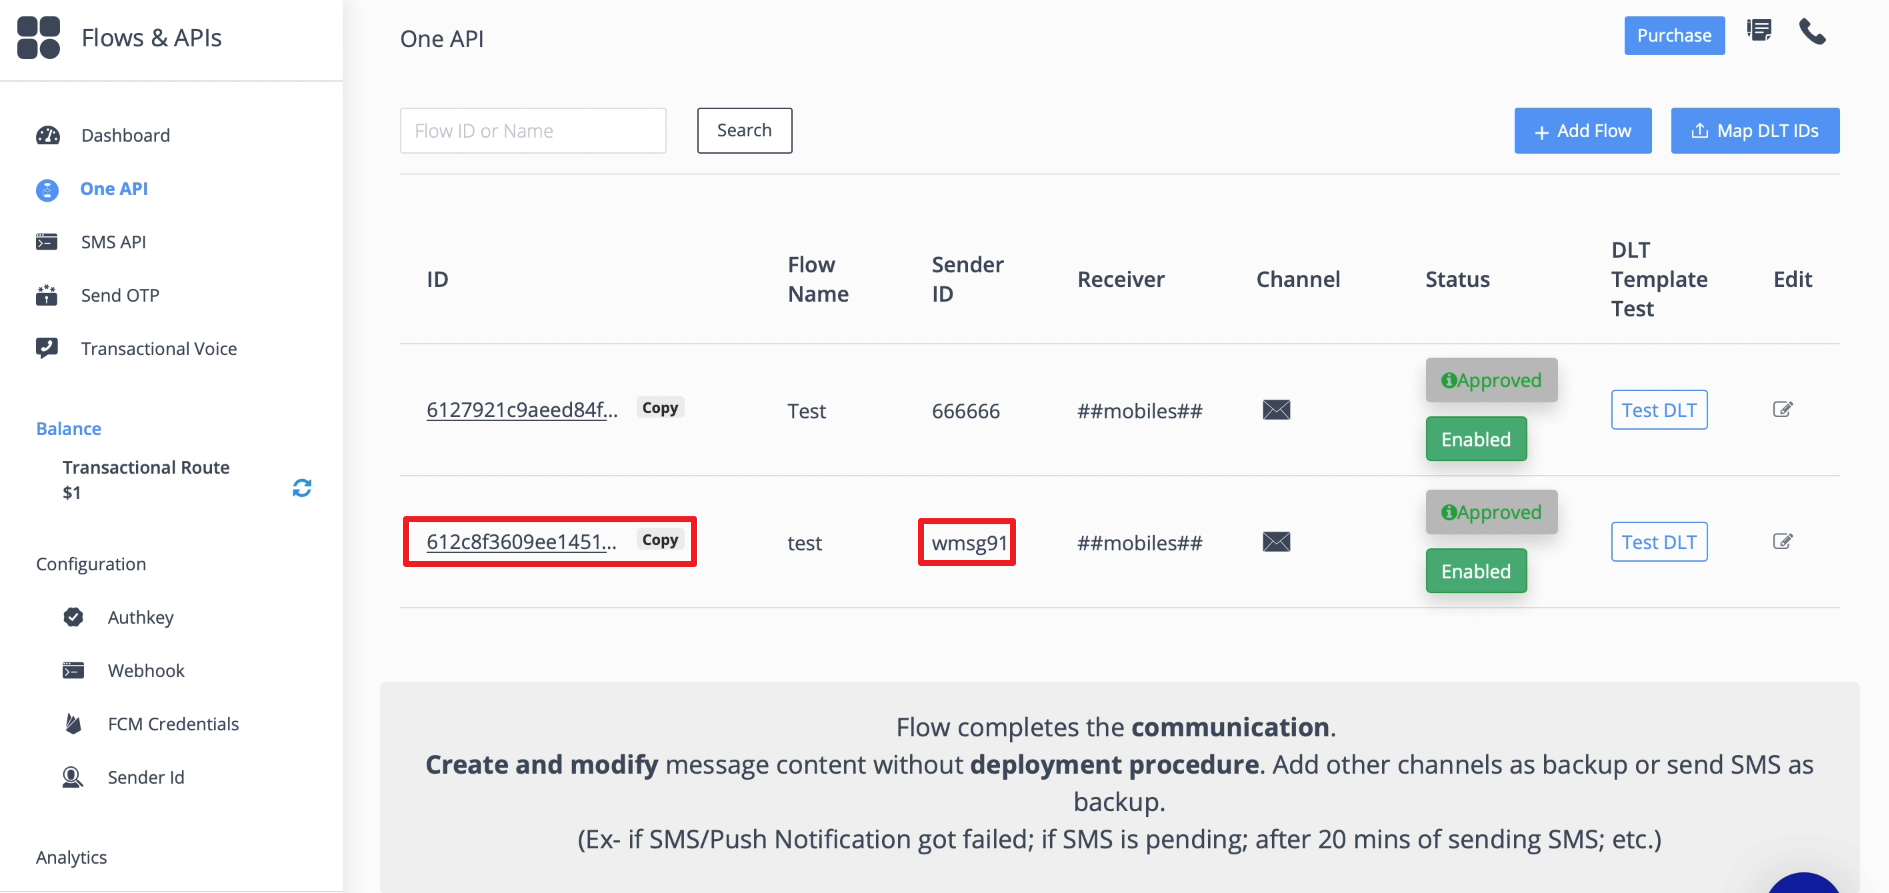
In the "Flow ID" field, enter the ID of the SMS text template. In the "Sender" field, enter the sender's identifier.
Both identifiers can be copied in your personal account on the MSG91 website. They are in the "One API" section. If nothing appears here, set up a text template and add the sender.
By clicking on the "Recipient's phone number" field, select a variable that stores the phone number of the last lead. You can also fill in the rest of the fields. They are intended for automatic copying of the client's name or other additional data into the SMS text.
Testing the data transfer
At this point, the screen should display your contact details, which we asked you to add to the form before setting up SaveMyLeads. We use them to test sending a message. To do this, click "Send test data to MSG91" to test sending the message.
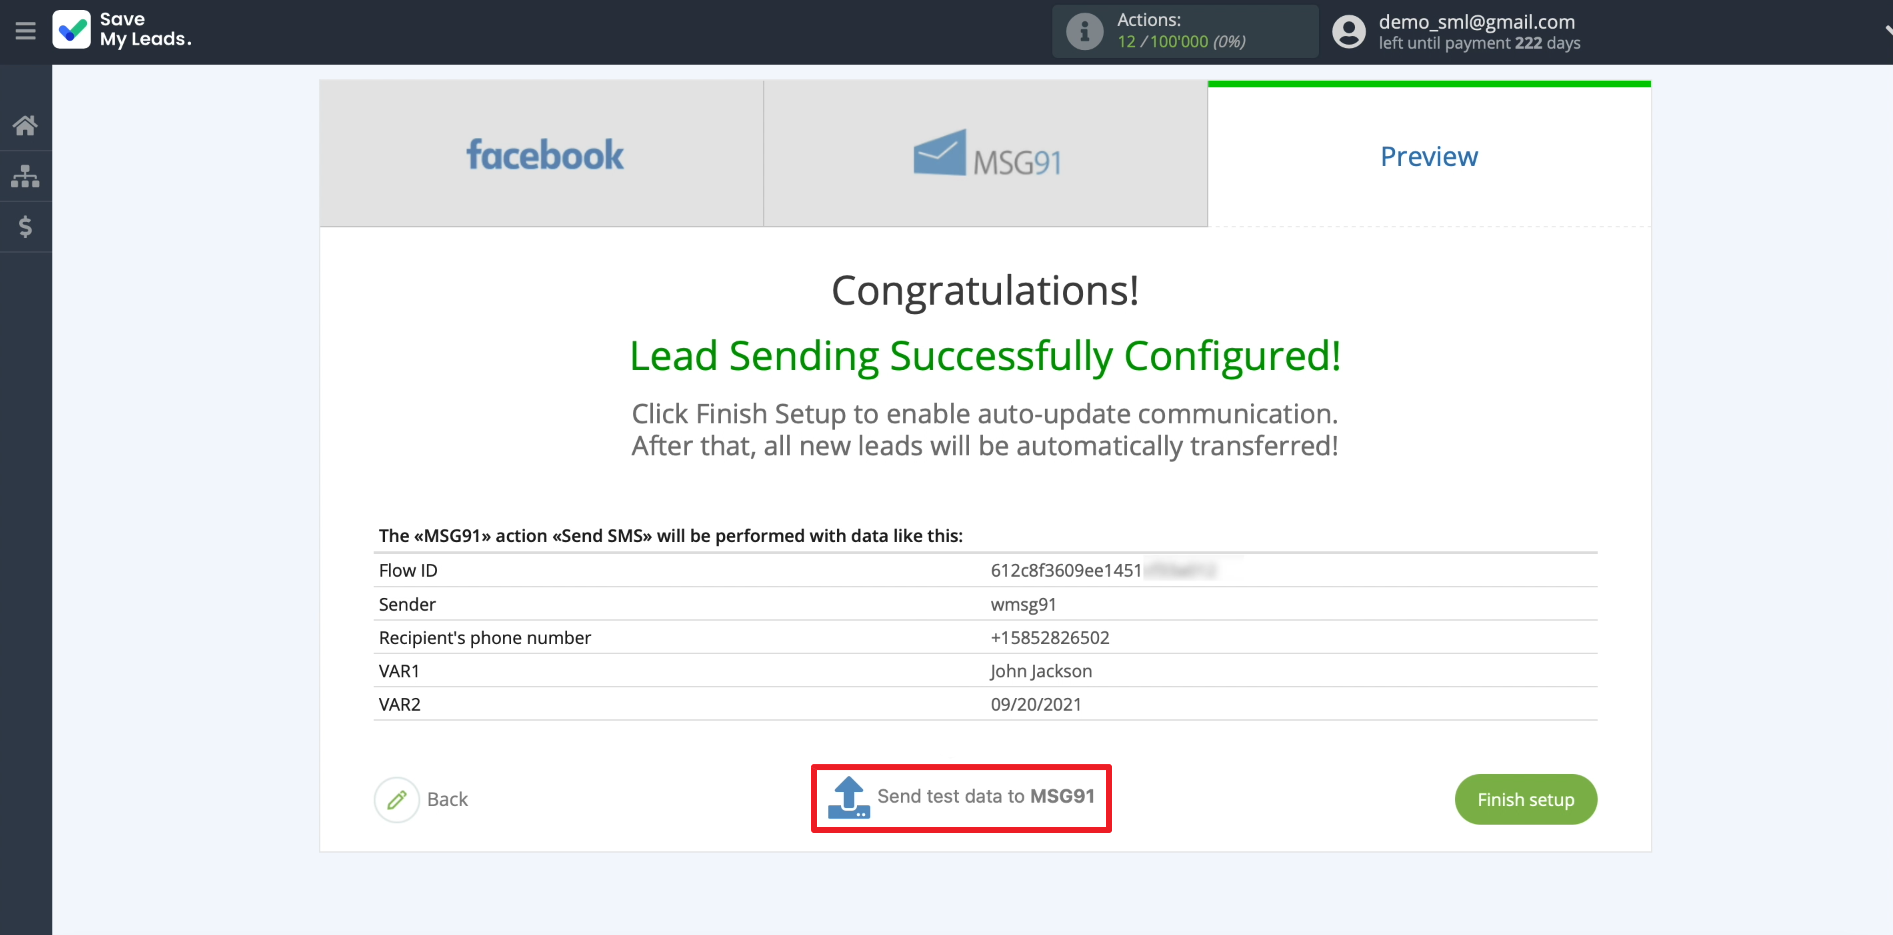
If everything is set up correctly, SaveMyLeads should send a message to the contact added to the form. If this contact is yours, you will receive an SMS. In addition, this message should appear on the MSG91 website in the history of sent SMS.
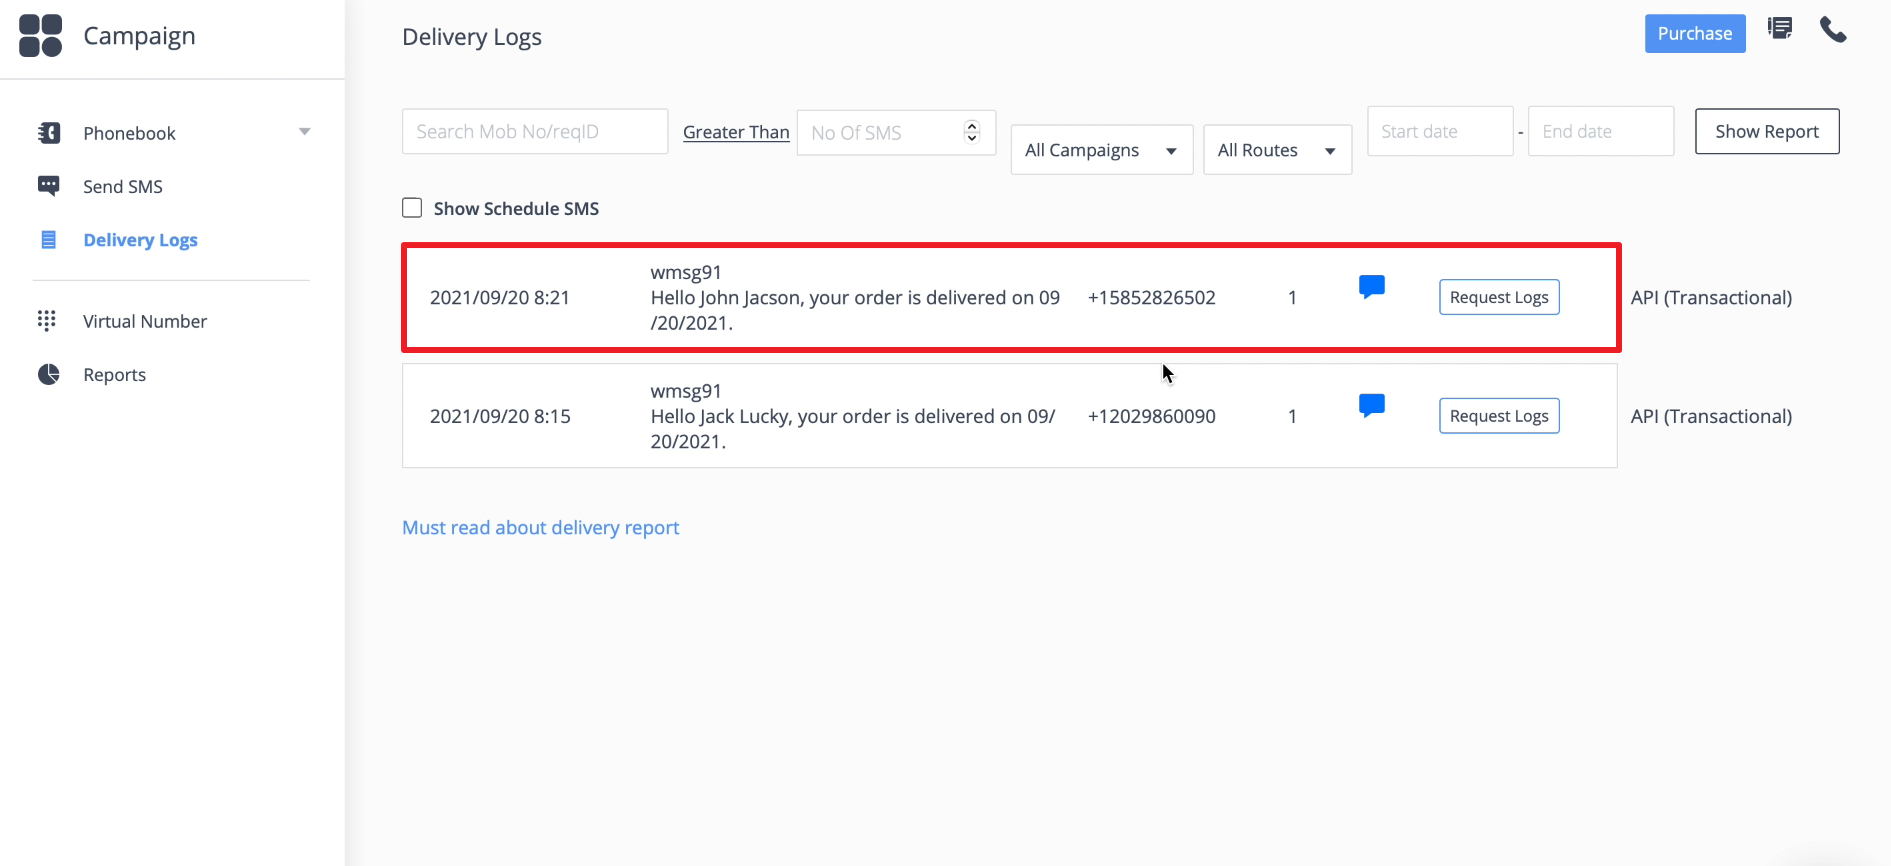
If the message appears, go to the final stage.
Finishing setup
Click "Finish setup" to complete the setup and enable auto-sending messages.
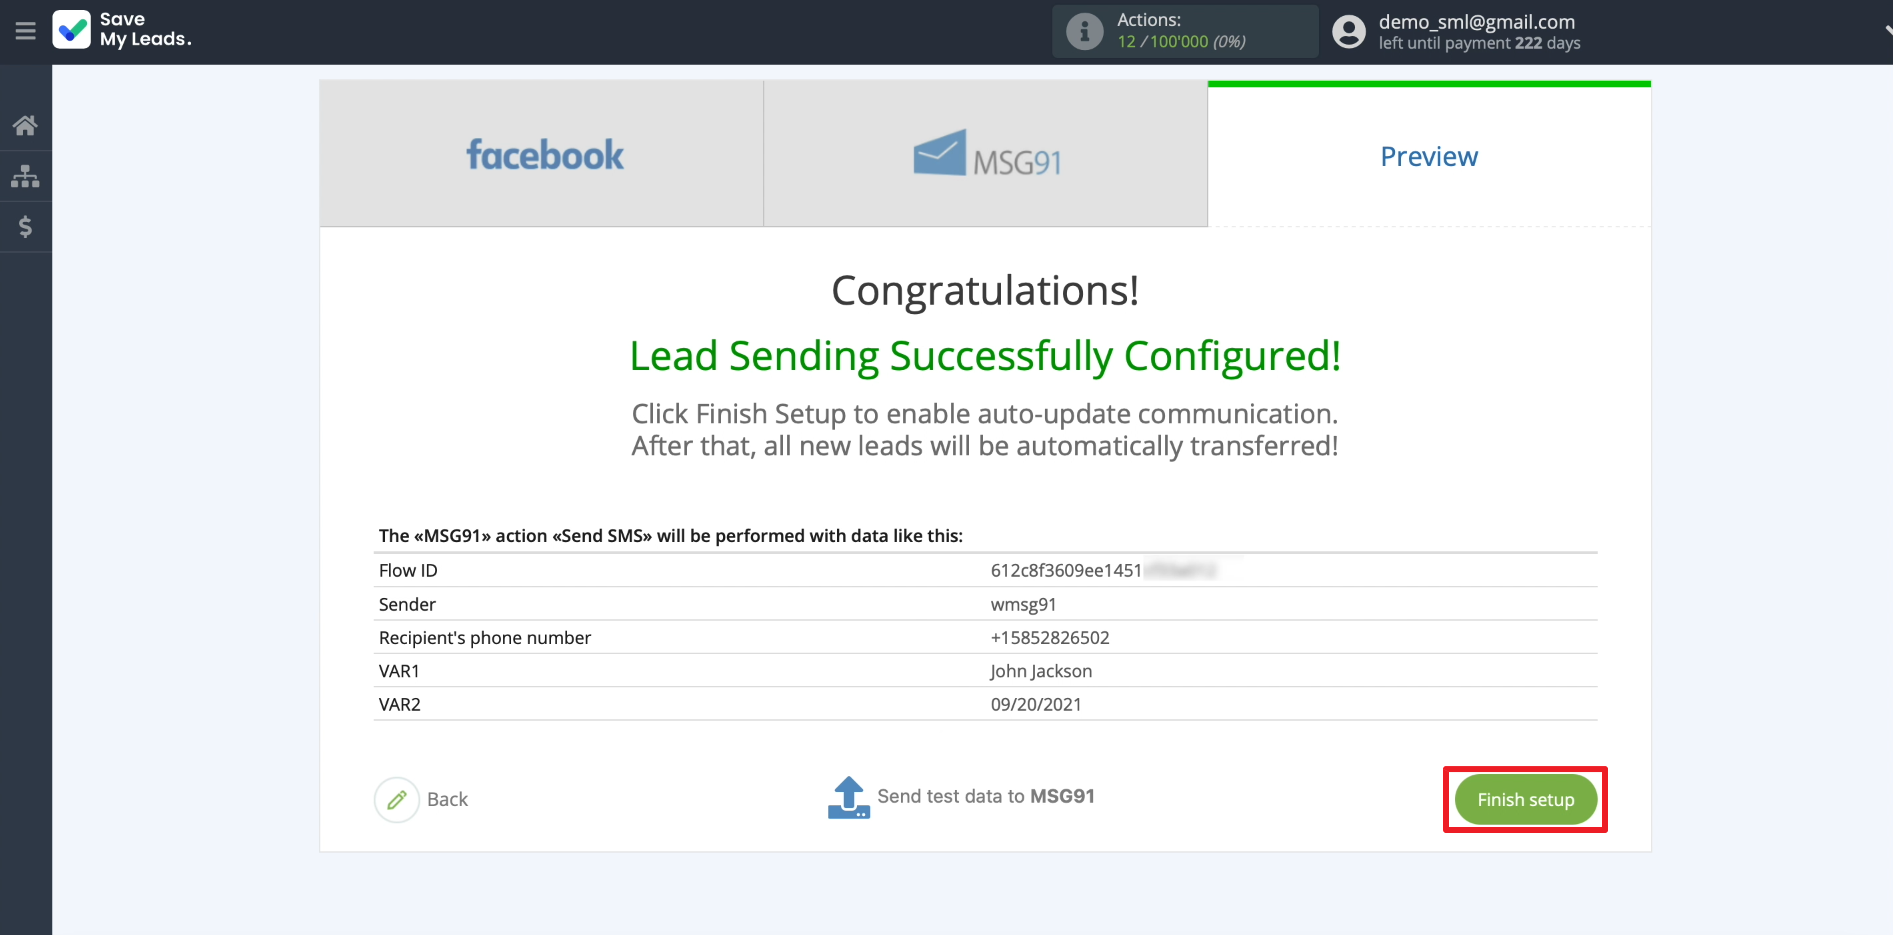
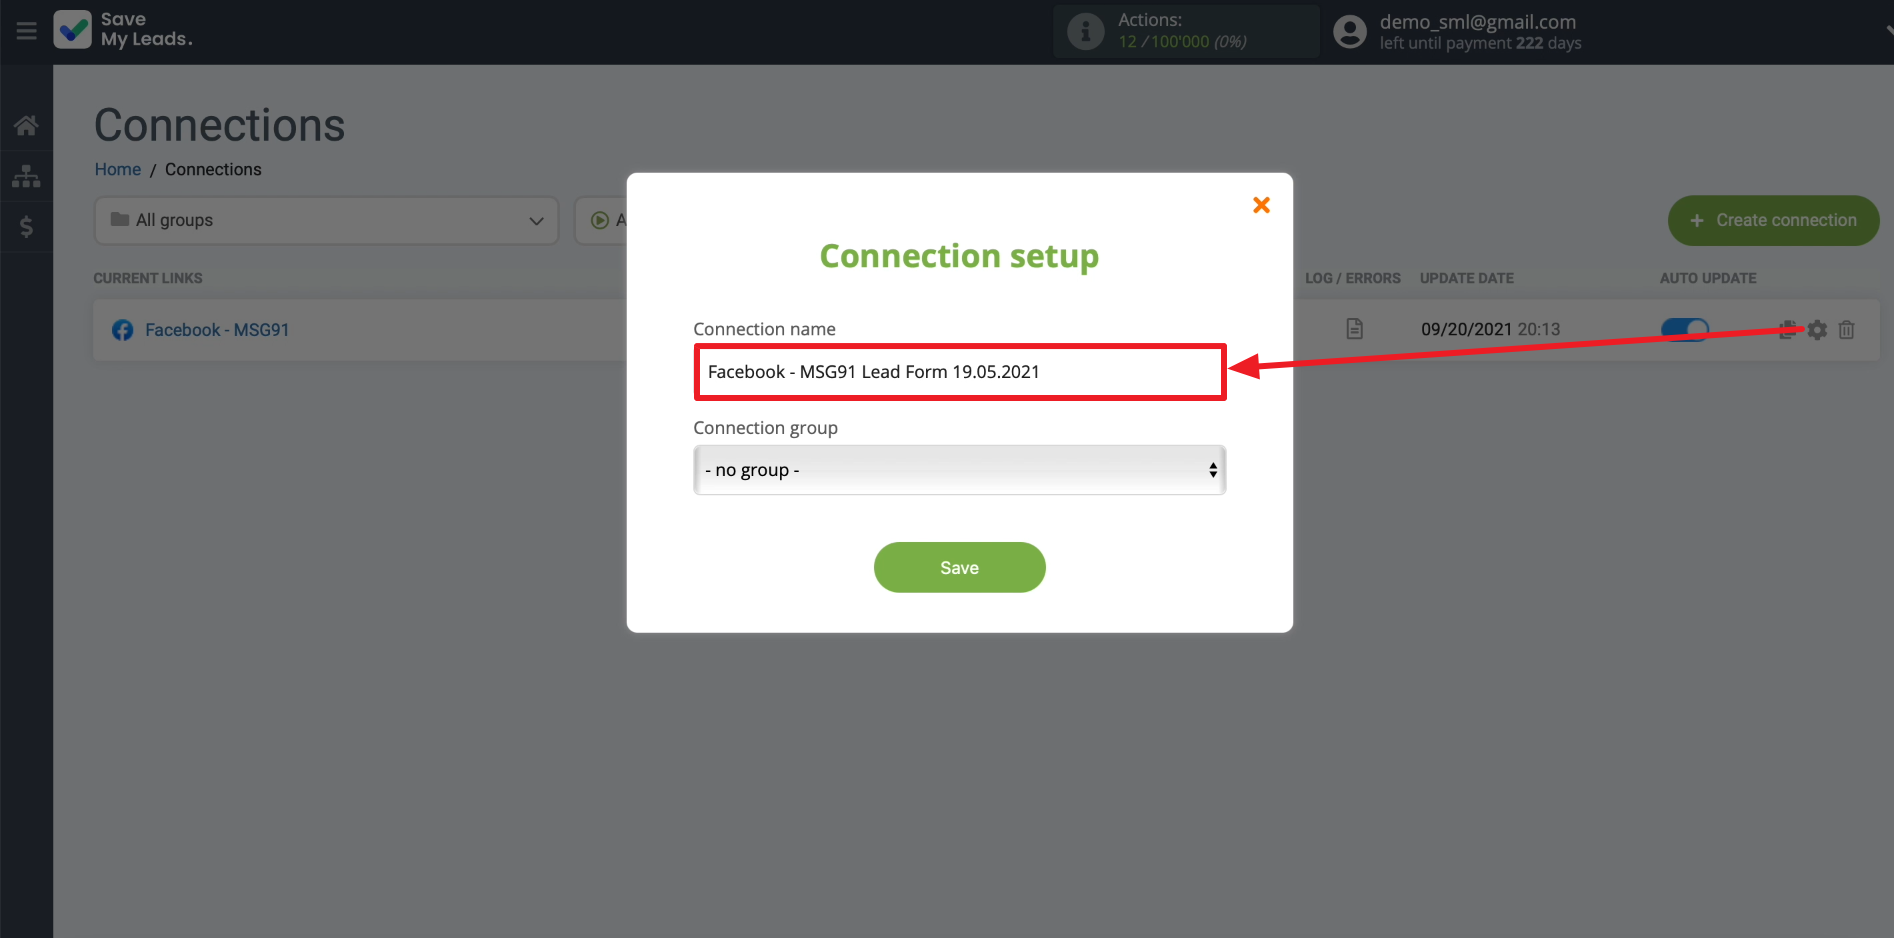
Edit the name of the connection if necessary. To do this, just click on the gear and enter the required text.
That's all! The setup is complete and now SaveMyLeads will automatically send SMS to all Facebook users who are interested in your ad.
