Amazon SES is an cloud-based email service from AWS. Simple Email Service (SES) offers tools for organizing various mailing lists. In this article, we will show you how to create a Facebook and Amazon SES integration to automatically send an email to each new lead from a social network.
Contents:
1. How to set up Facebook Lead Ads and Amazon SES integration
2. Connect Facebook Lead Ads account
3. Connect Amazon SES account
4. Enable auto-update
5. Conclusions
Amazon SES is a popular and highly scalable email management service. Using this platform, you can carry out various types of mailings (selling, content, transactional, service, reactivation). Amazon SES also allows you to process incoming emails, connect domains, perform analytics, and more. The reputation panel lets you track and respond to issues that affect email deliverability.
In this guide, we'll show you how to link your Facebook ad account and Amazon SES. Such integration will help automate several business processes:
- Sending an email to every user who filled out a lead form on Facebook or Instagram.
- Sending notification letters about new orders on social networks to your mailbox or company employees.
In the first case, integration solves the problem of a quick response to the activity of a potential client. The second option for using communication allows you to quickly deliver data to the responsible employee to increase the speed of lead processing. Naturally, these automated processes can be combined.
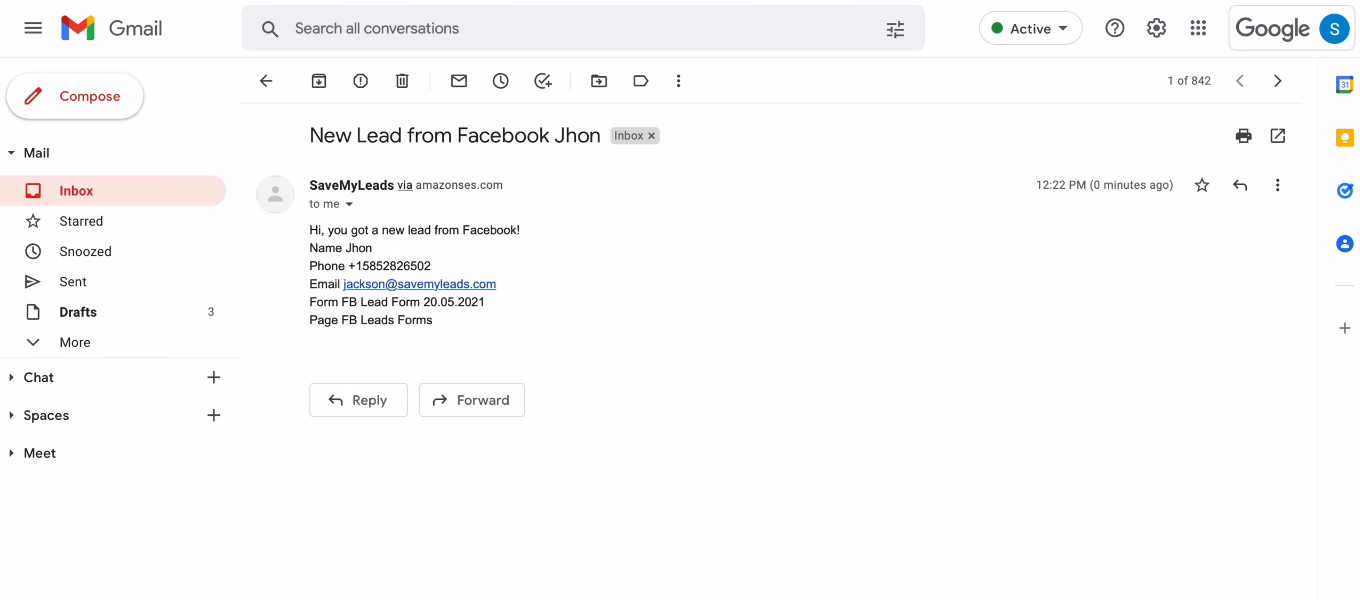
How to set up Facebook Lead Ads and Amazon SES integration
We need to set up automatic sending of emails through Amazon SES with data obtained from the Facebook advertising account. To do this, you need to “make friends” between the two systems. One of the easiest solutions to this problem is to use the SaveMyLeads online connector. This service allows you to set up integrations for Facebook Lead Ads without special knowledge and involvement of programmers.
After we create the integration, the SaveMyLeads system will automatically upload new leads from the Facebook ad account, transfer them to Amazon SES, and initiate the sending of emails. By default, the Amazon SES service has a number of restrictions and mail can only be sent to verified mailboxes. This may be enough to transfer lead data to company employees (their mailboxes must be verified). But if the task is to send letters to all new Facebook leads, then you need the Amazon SES service status, which allows sending to any address.
Connect Facebook Lead Ads account
Let's take a closer look at the setup process. To get started, register on our website and go to your personal account.
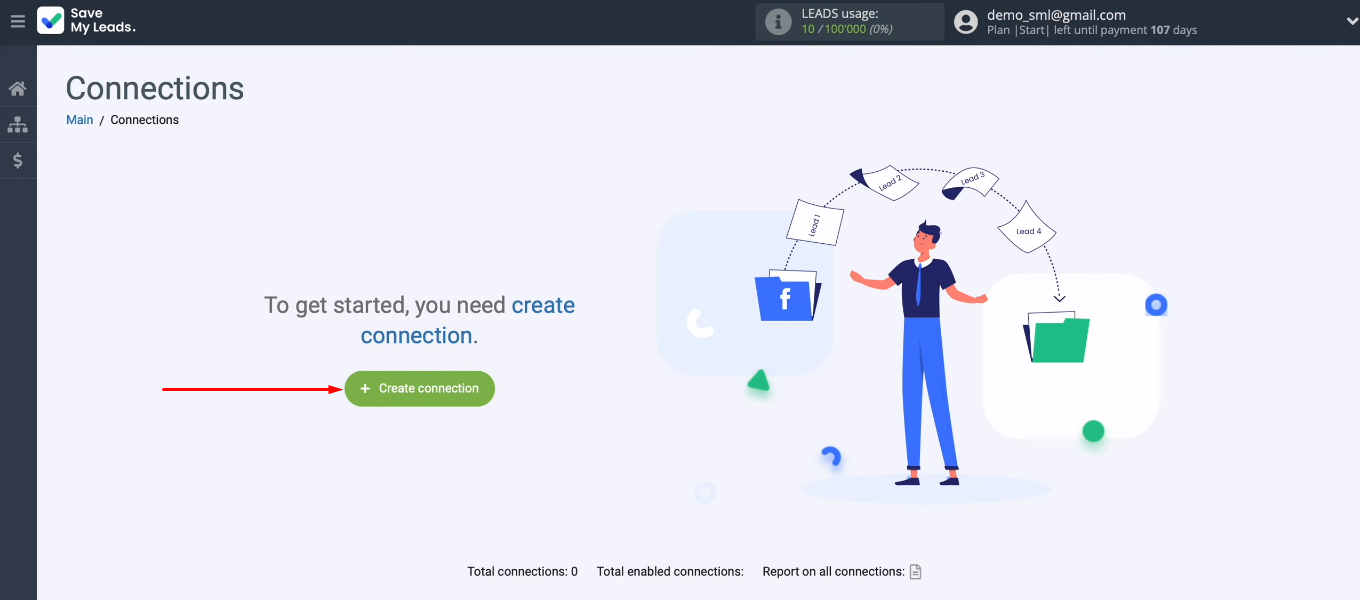
Click "Create connection".
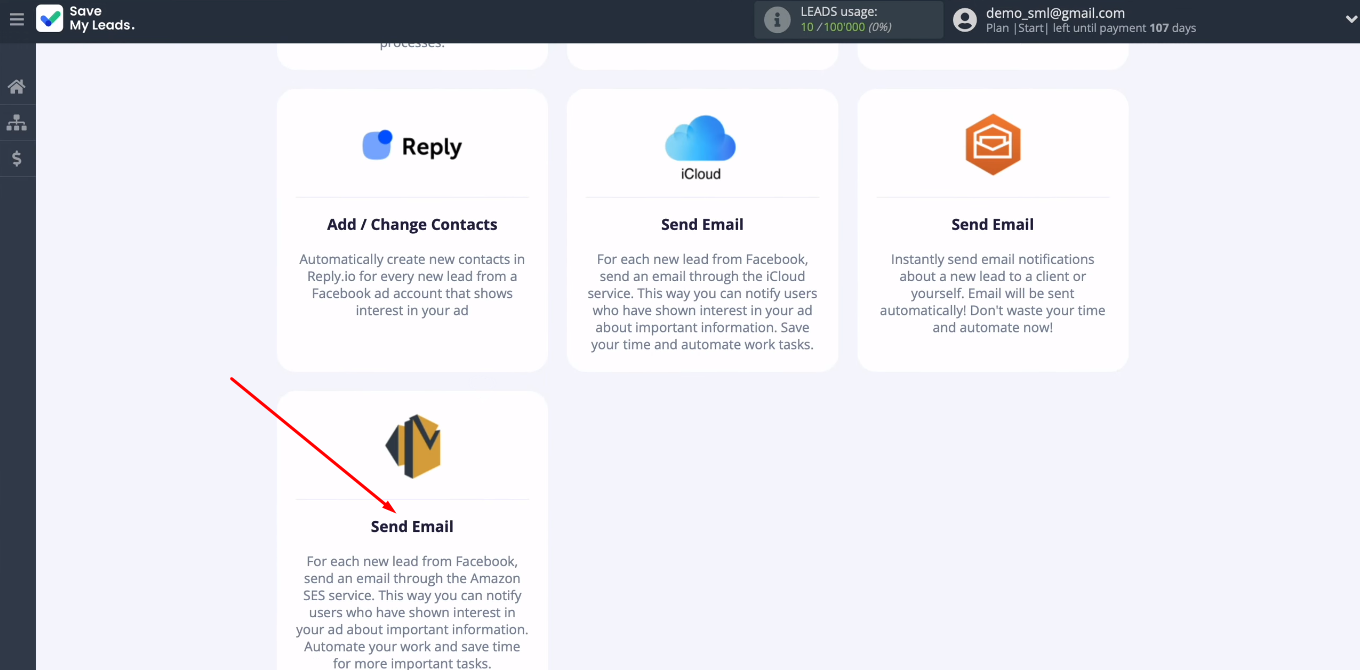
Select the setup template — “Amazon SES (Send Email)”.
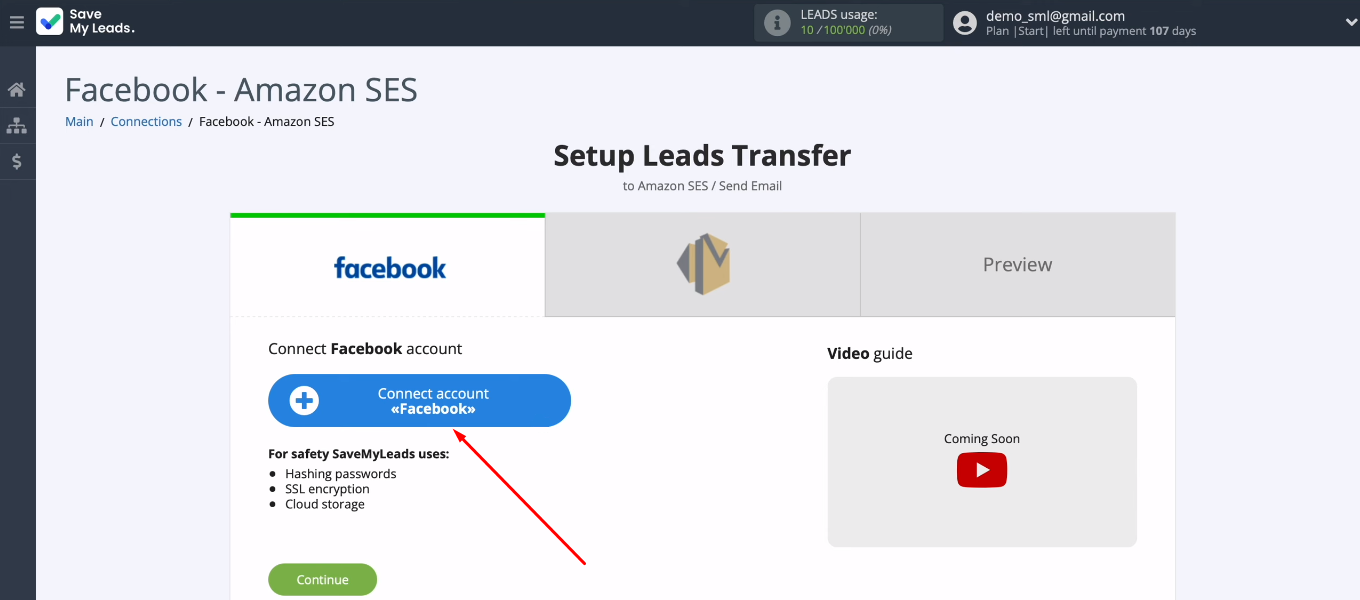
Click "Connect account Facebook".
Log into your FB account.
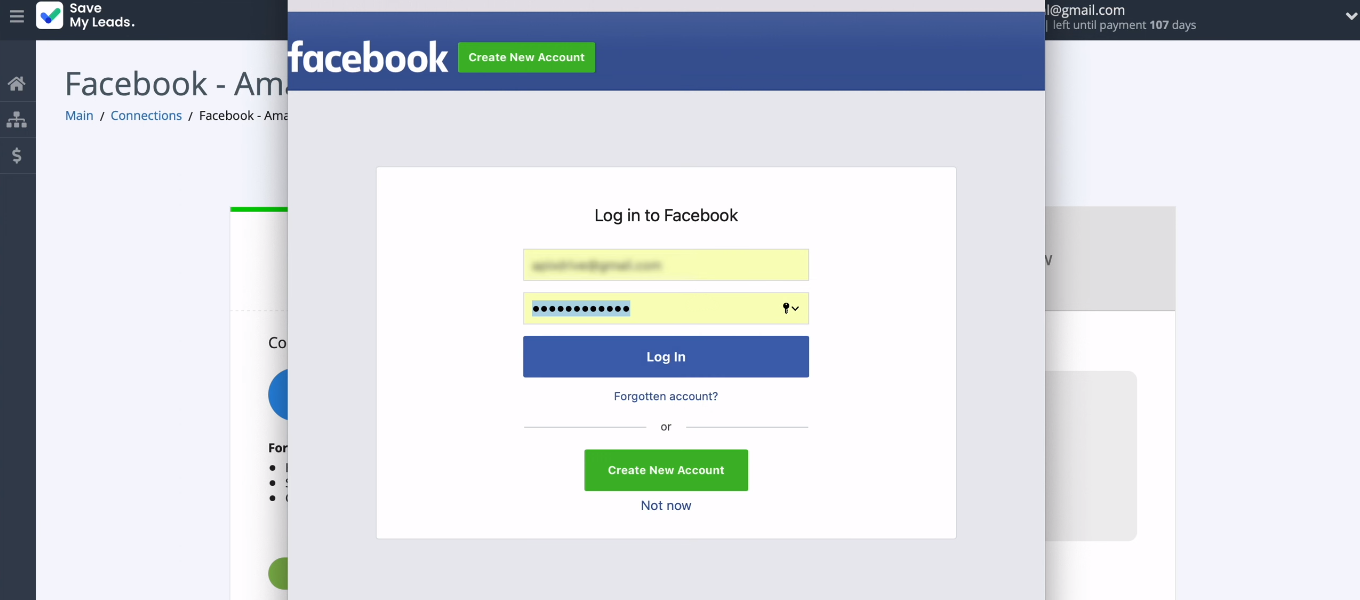
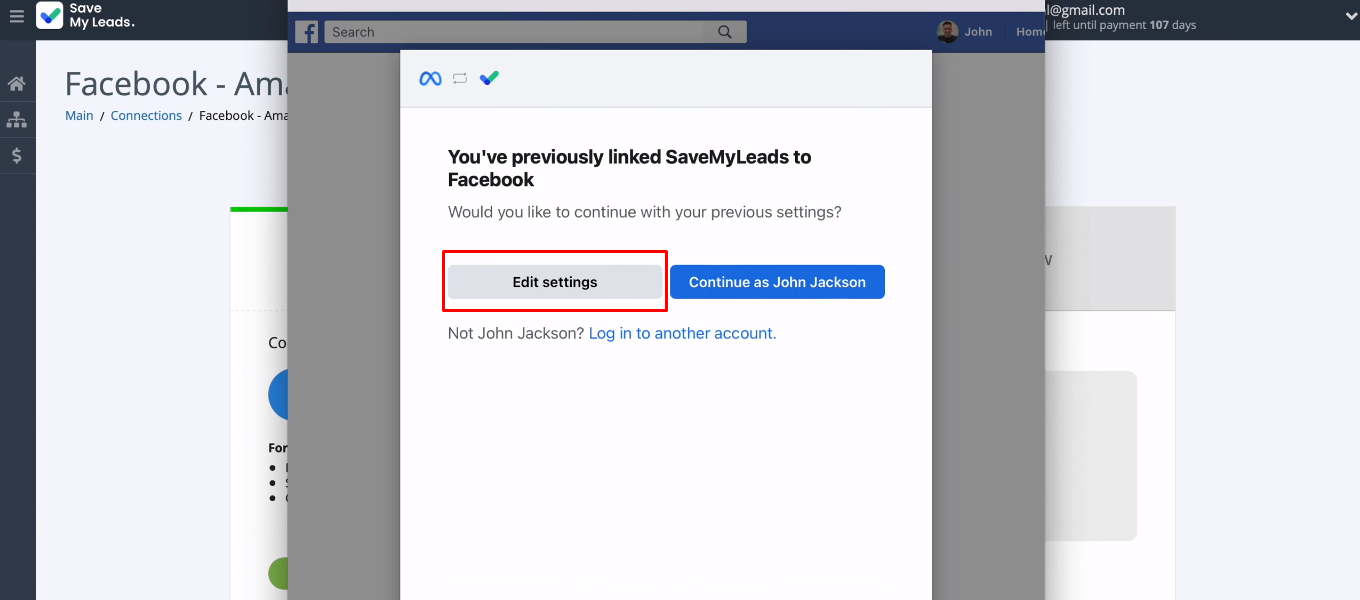
Click "Edit settings".
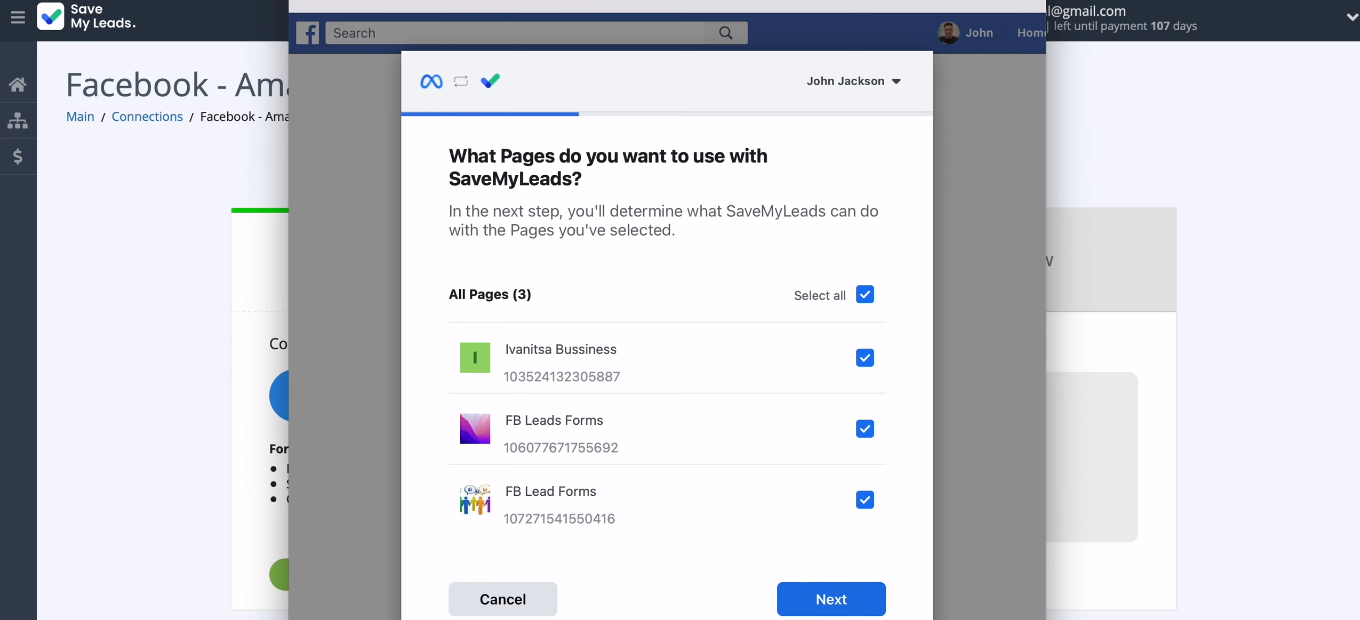
Select the advertising pages you want to work with in the SaveMyLeads system.
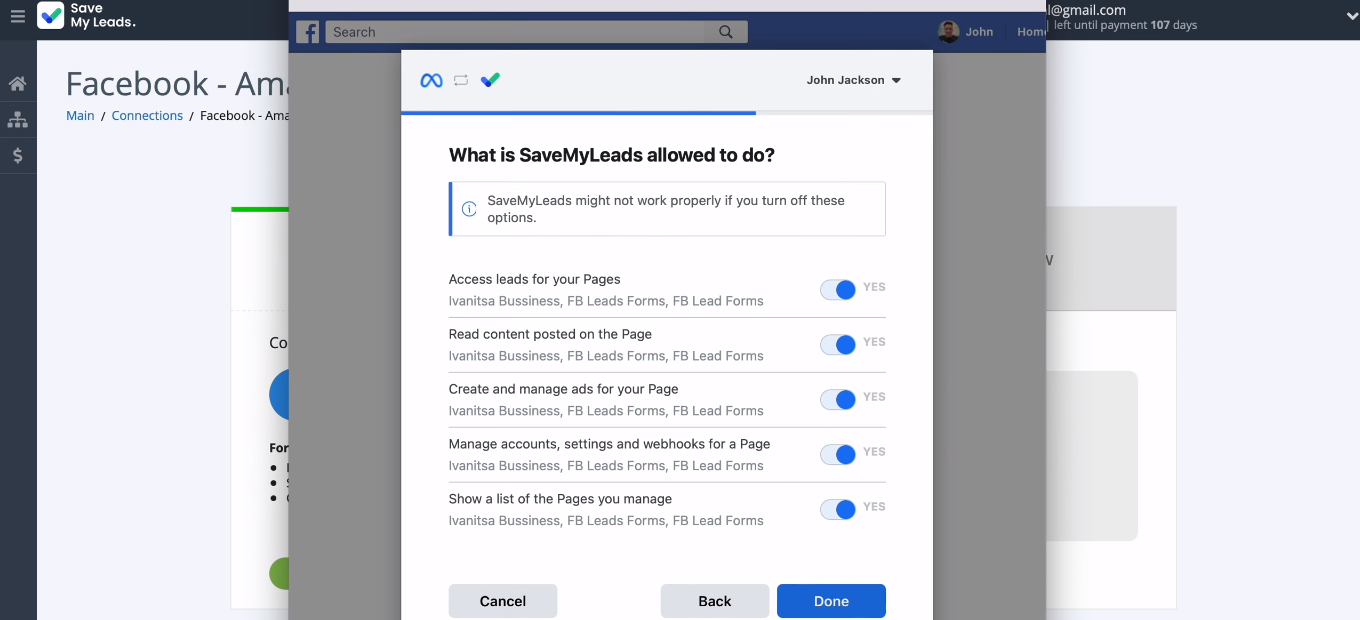
All access checkboxes must be enabled.
FB account added to SML system, continue setup.
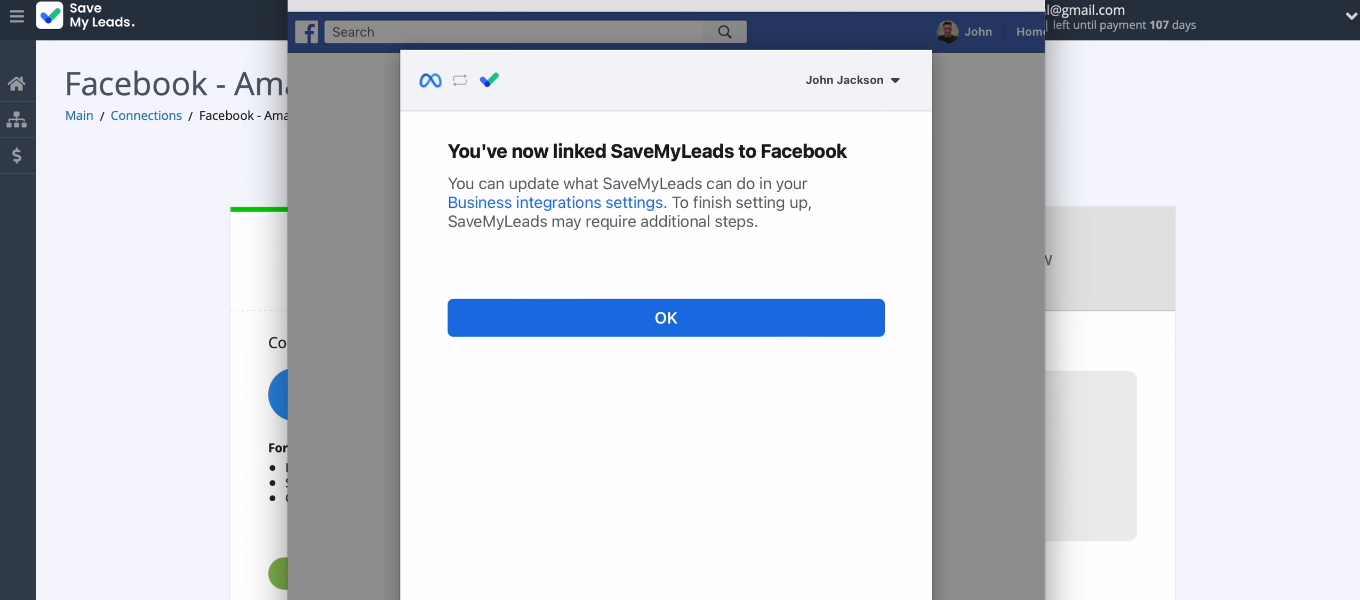
Select a connected Facebook account.
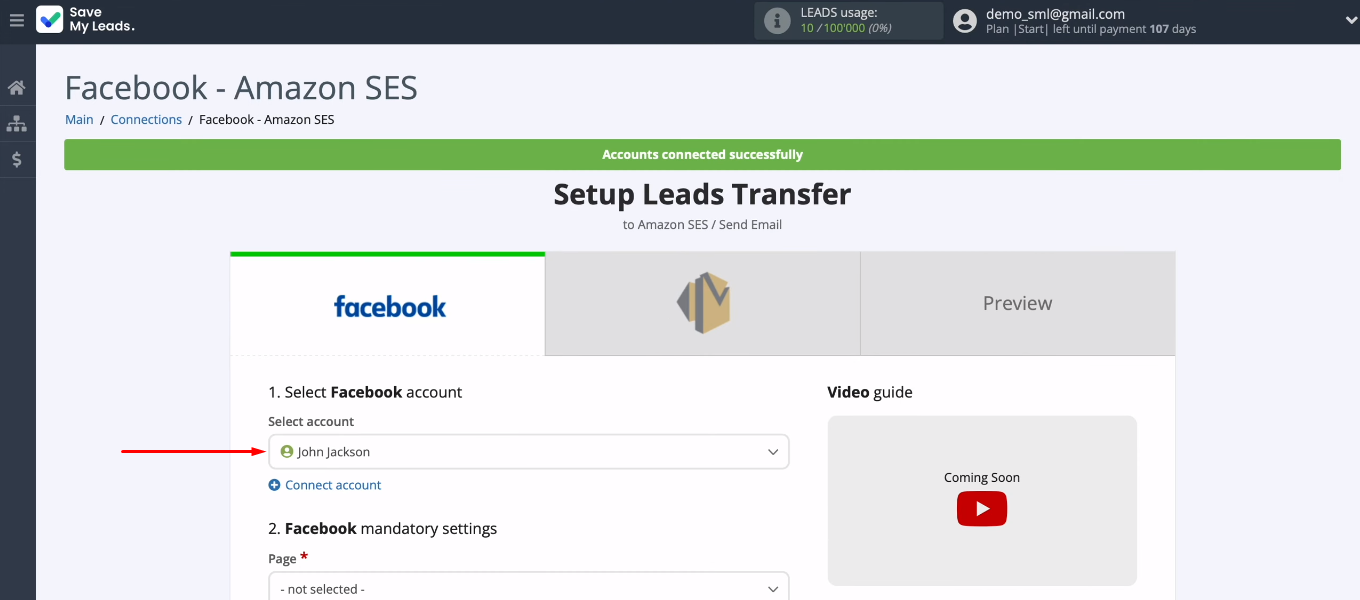
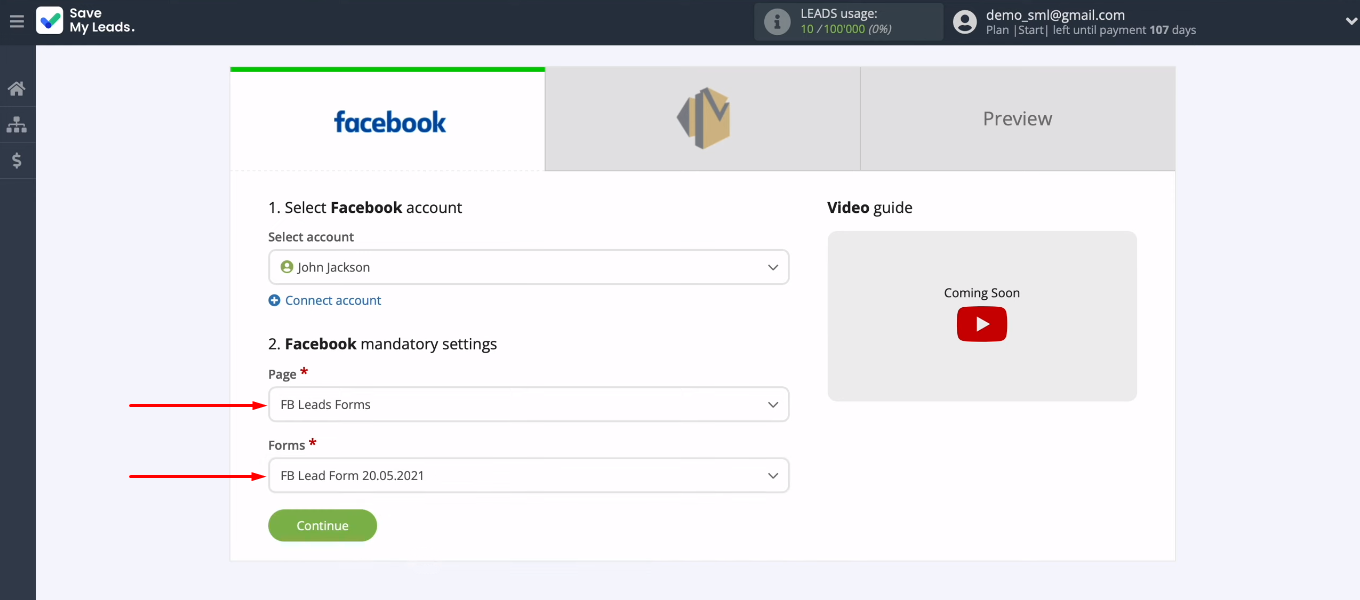
Define the ad page and lead form whose results will be uploaded. Click "Continue".
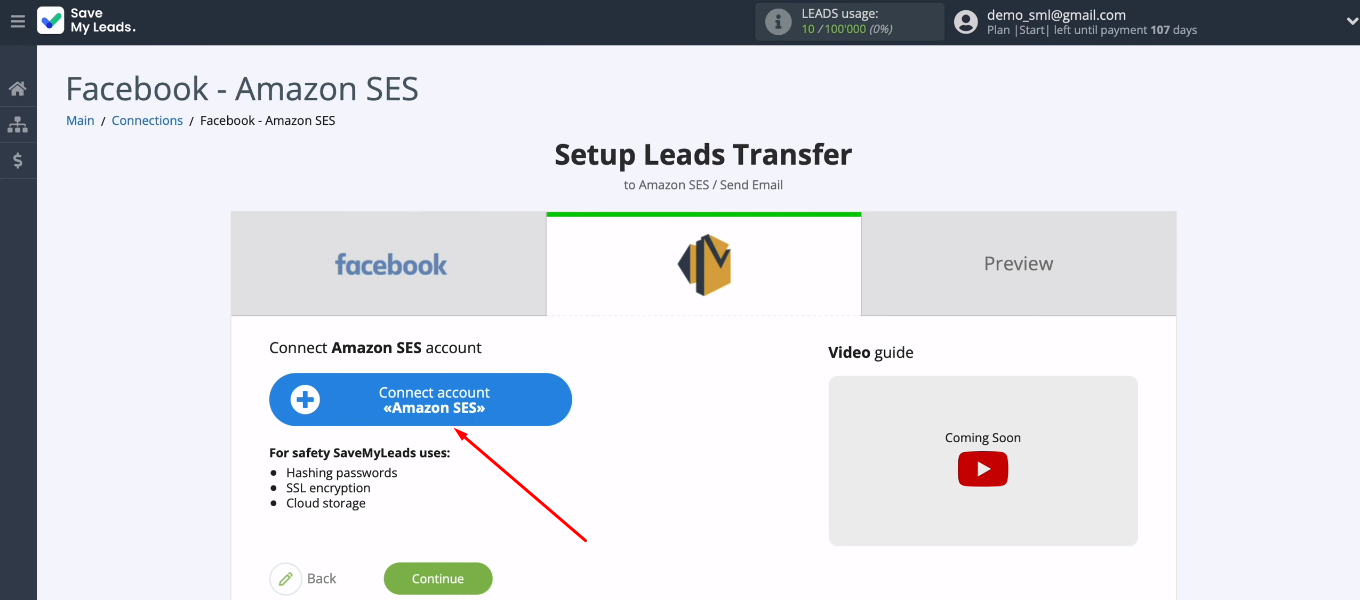
Connect Amazon SES
Click "Connect account Amazon SES".
To add an Amazon SES account to the SML system, we need to complete a number of fields. First, let's define the contents of the "Region" field.
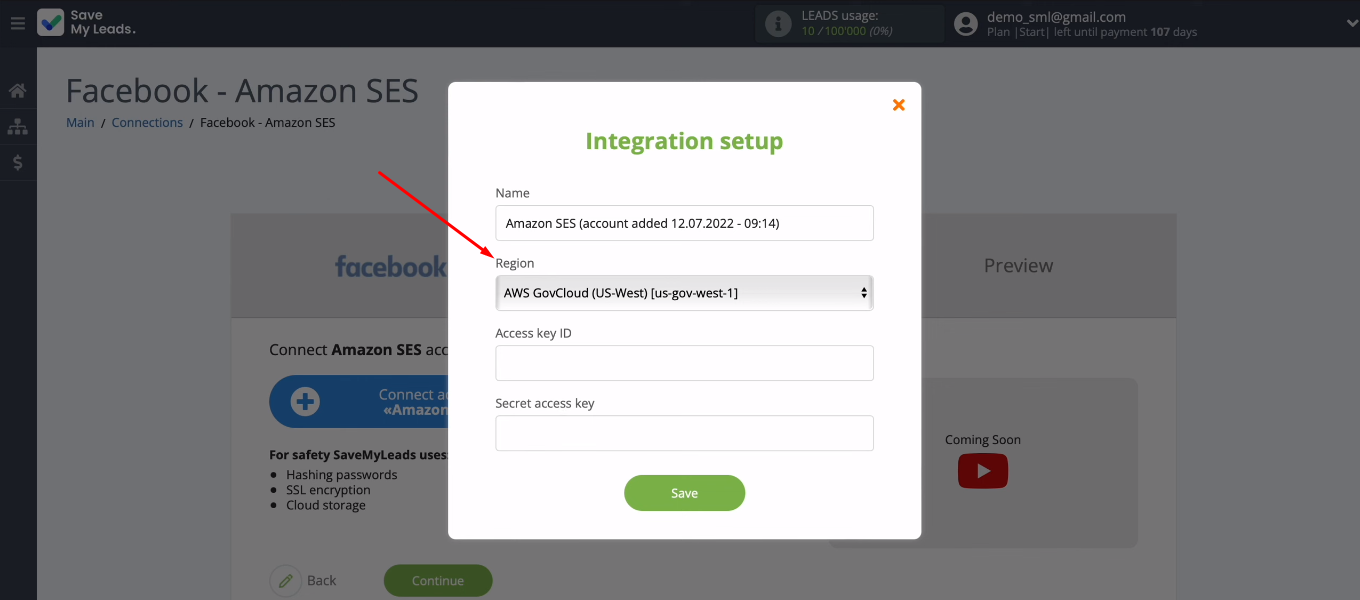
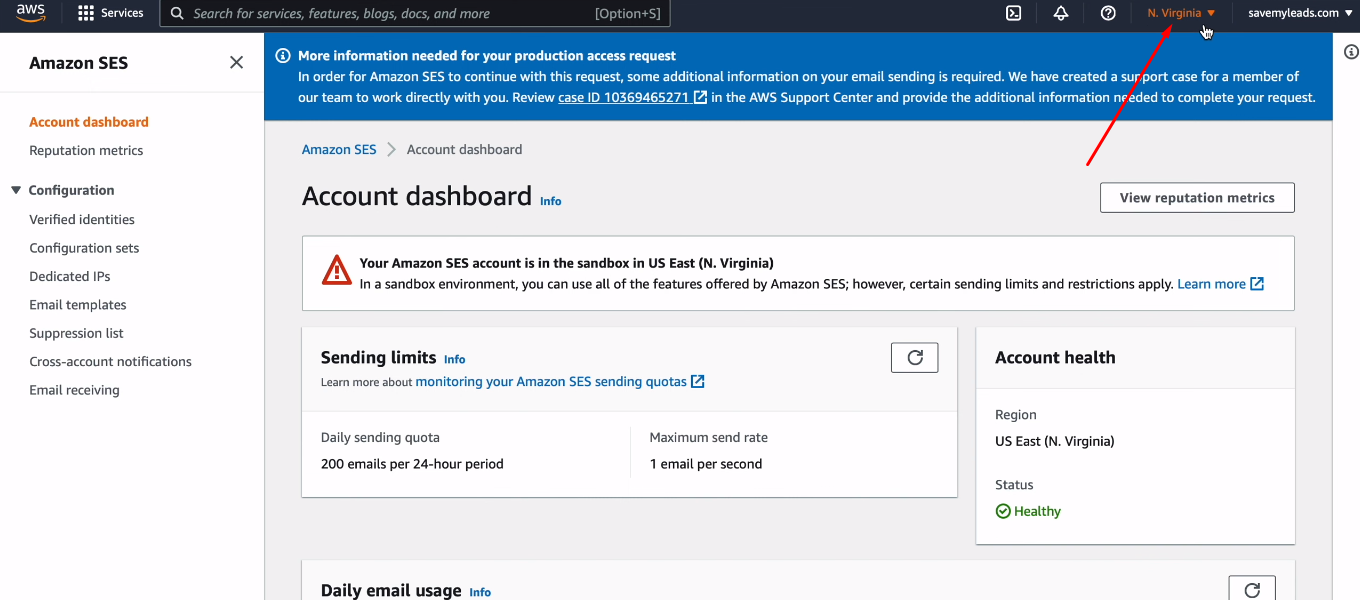
Log in to your personal Amazon account. In the upper right corner you can see the actual name of the region.
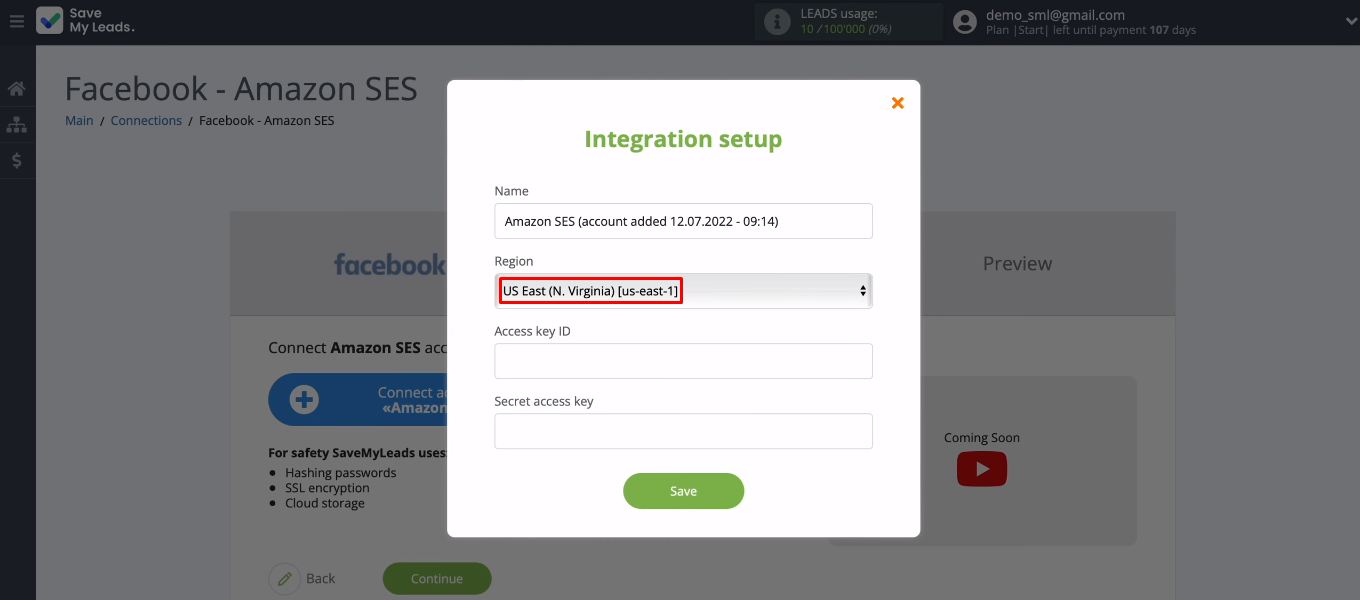
Go back to SaveMyLeads and set the "Region" field to the same value as your Amazon account.
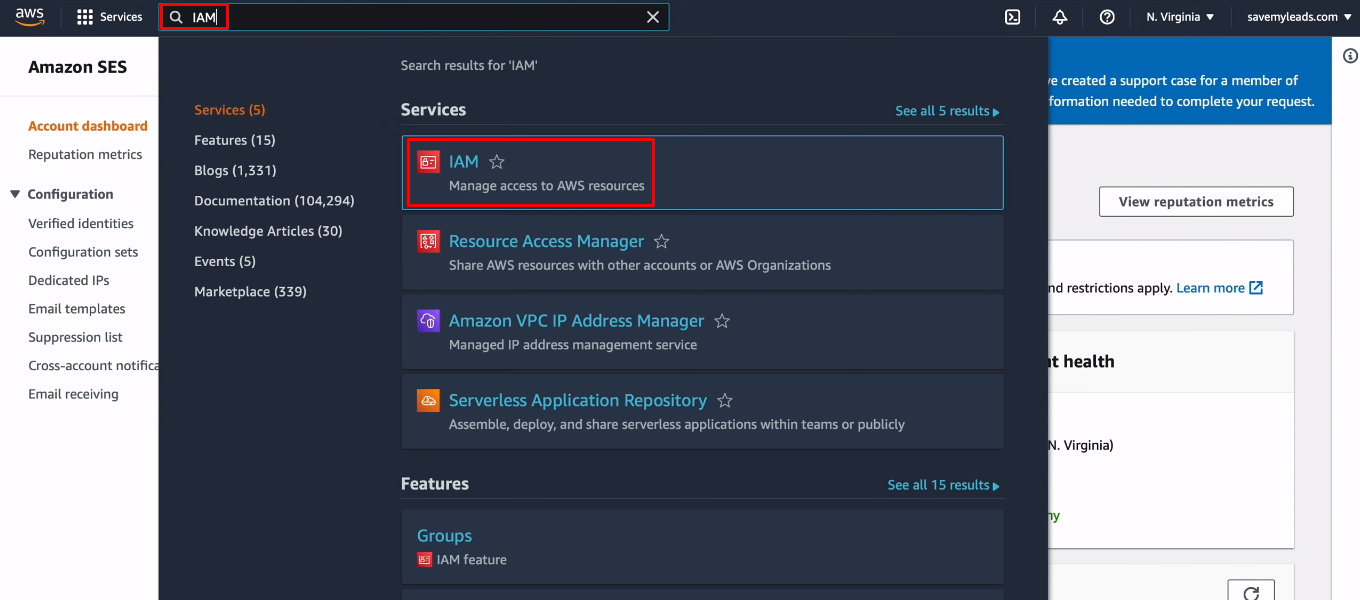
We have to fill in two more fields with keys. Go back to your Amazon account. Through the search bar, find and go to the IAM system.
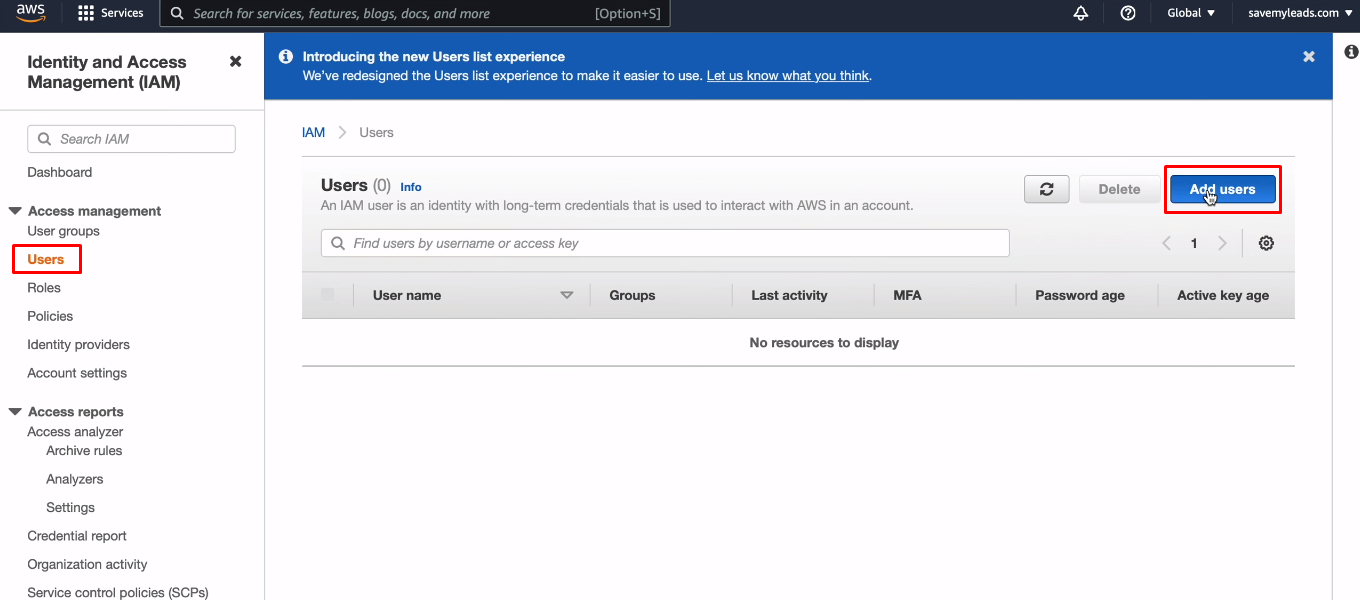
In the "Users" section, click "Add users".
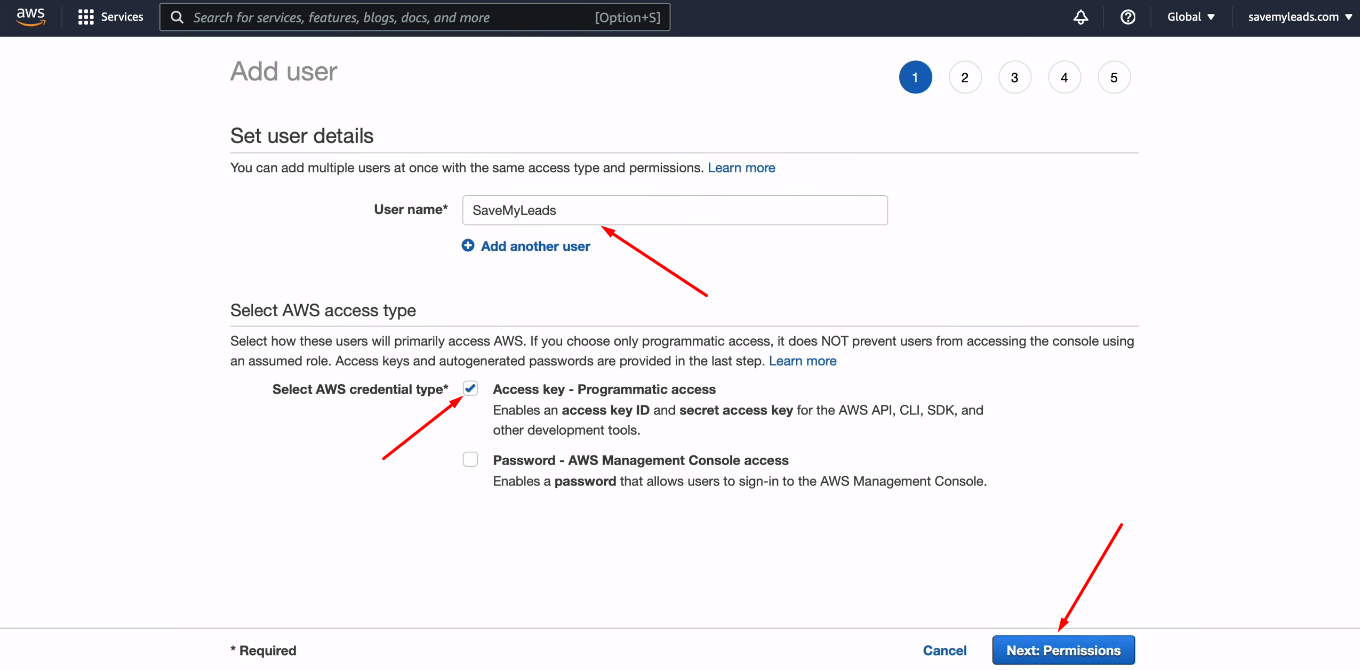
Specify the user name, check the box "Access key - Programmatic access" and click "Next: Permissions".
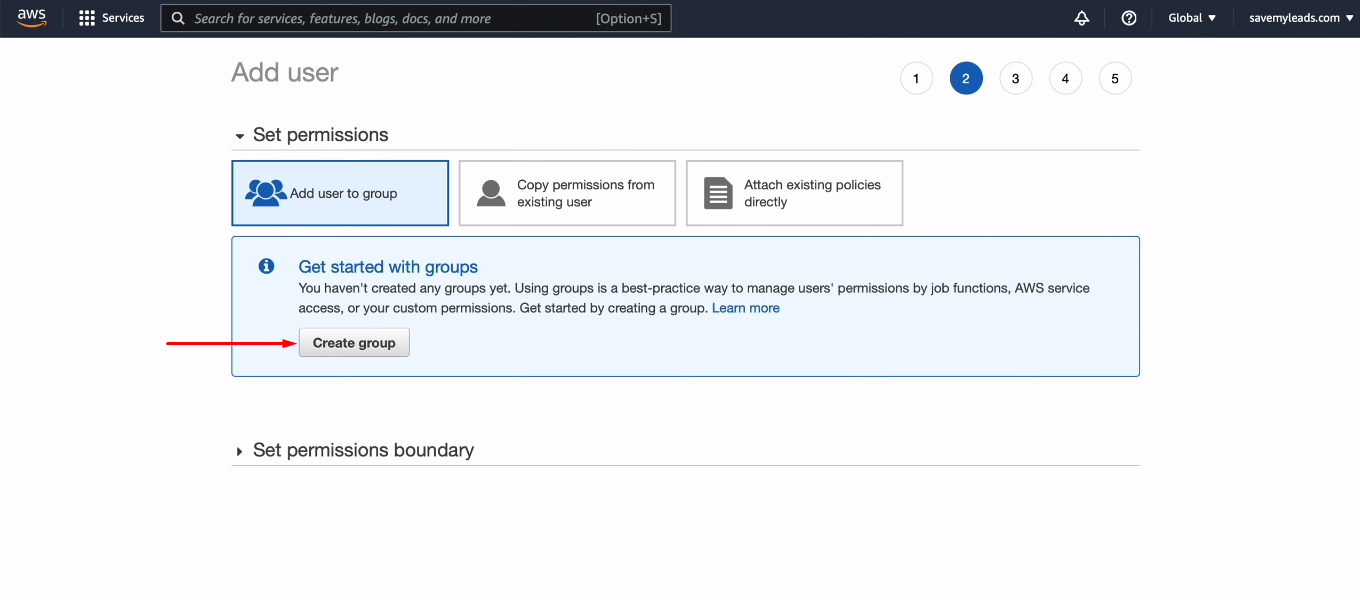
Now click "Create group".
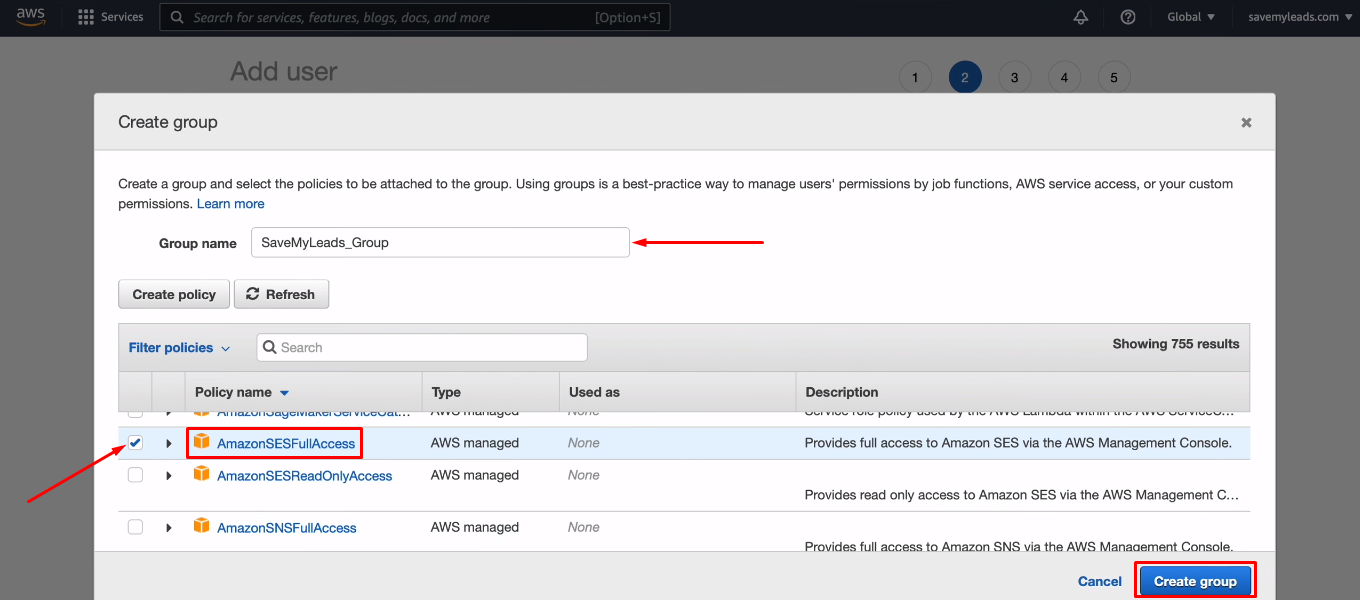
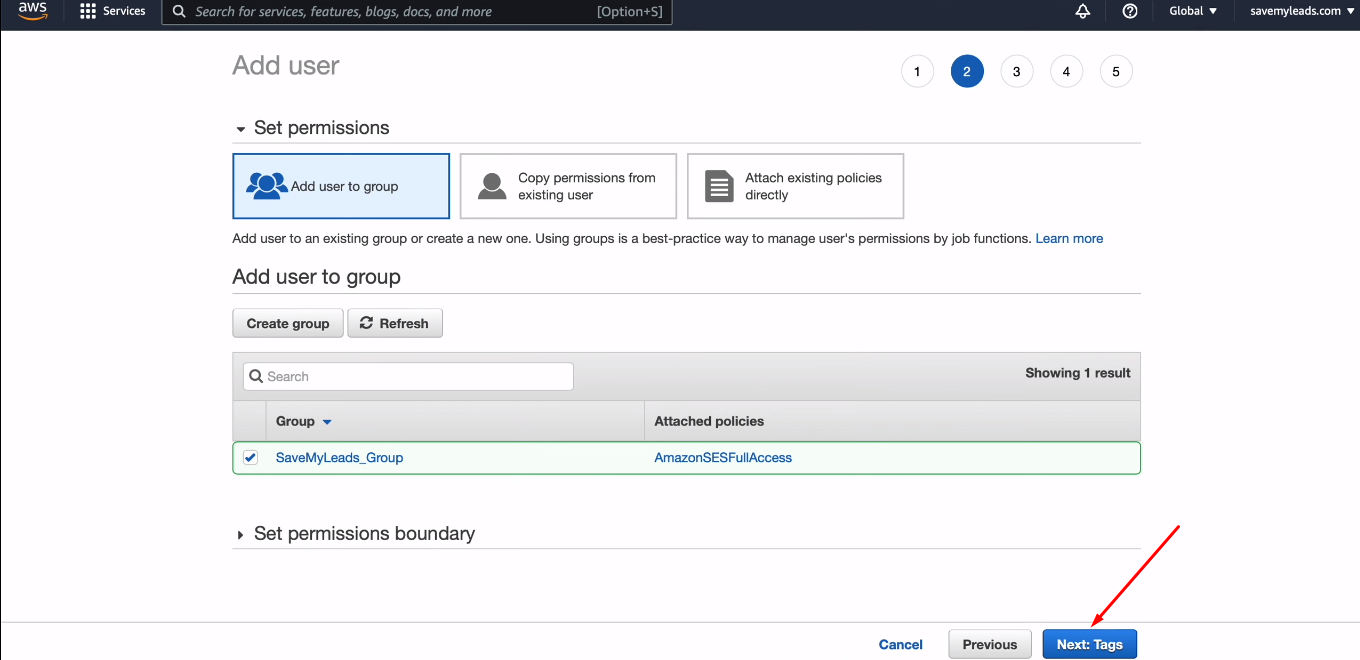
Enter a group name. In the list of policies, find the item “AmazonSESFullAccess” and check it. Click "Create group".
Click "Next: Tags".
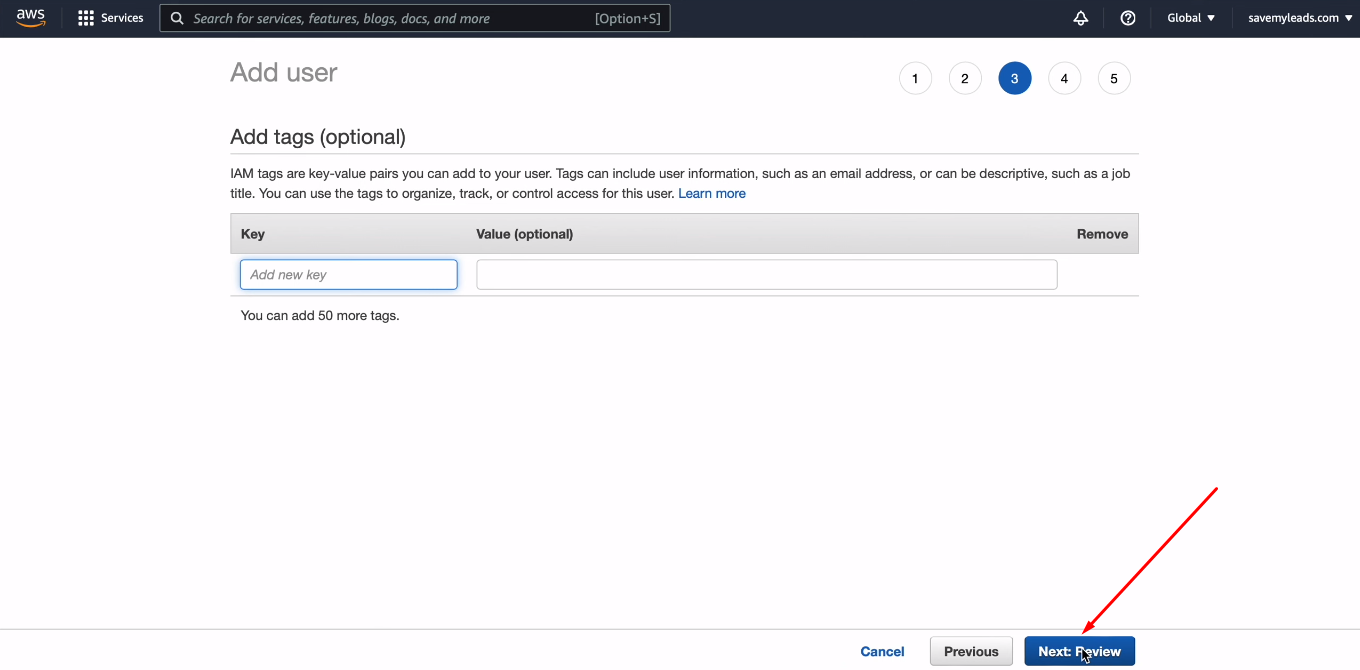
Click "Next: Review".
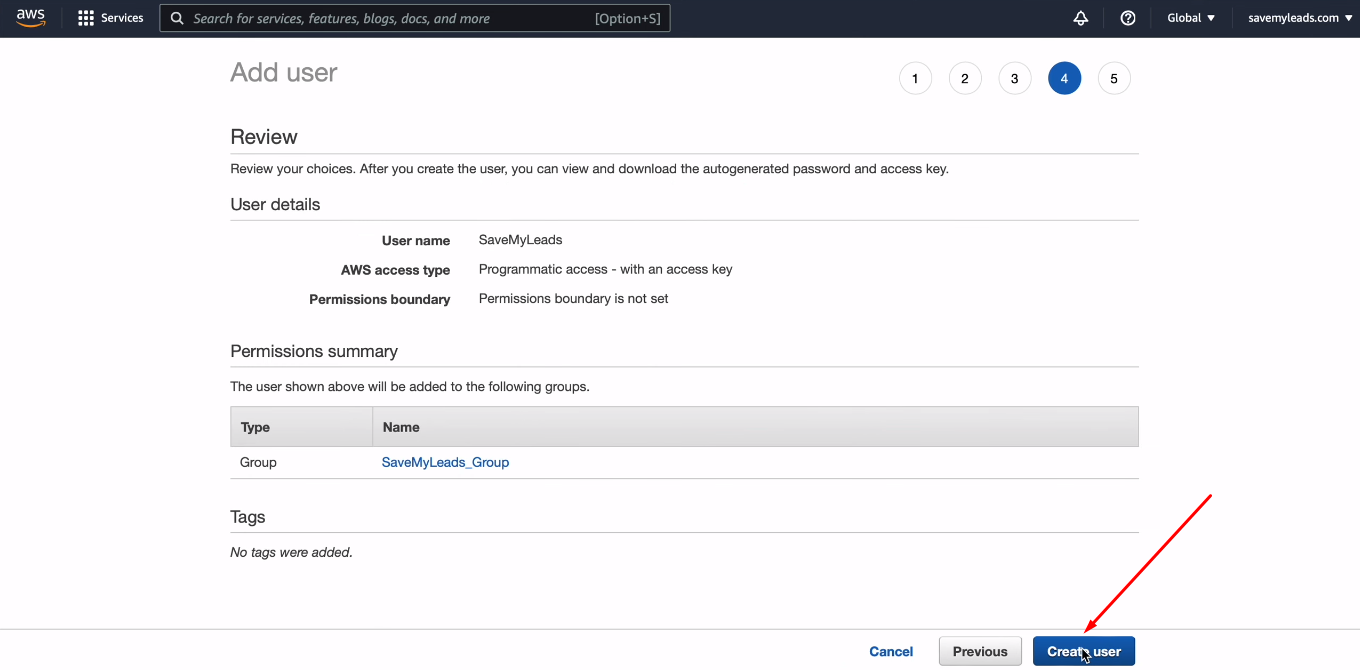
Click “Create user”.
The next window contains both keys that need to be transferred to the SaveMyLeads system. Copy the value in the "Access key ID" field.
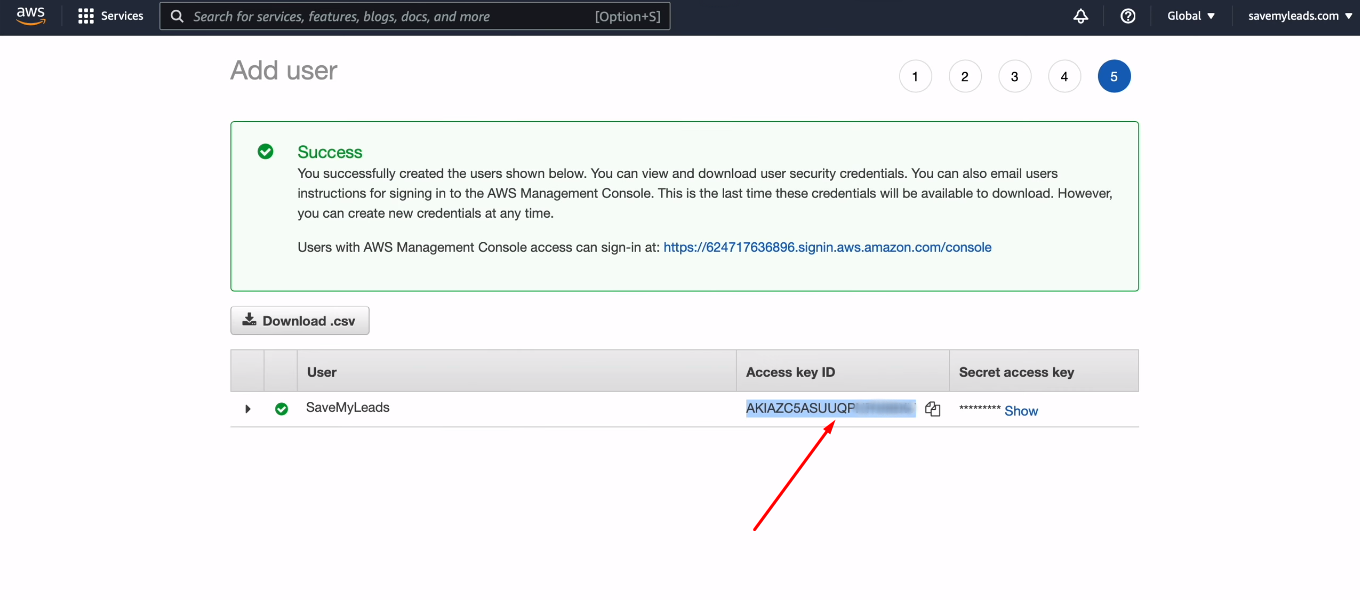
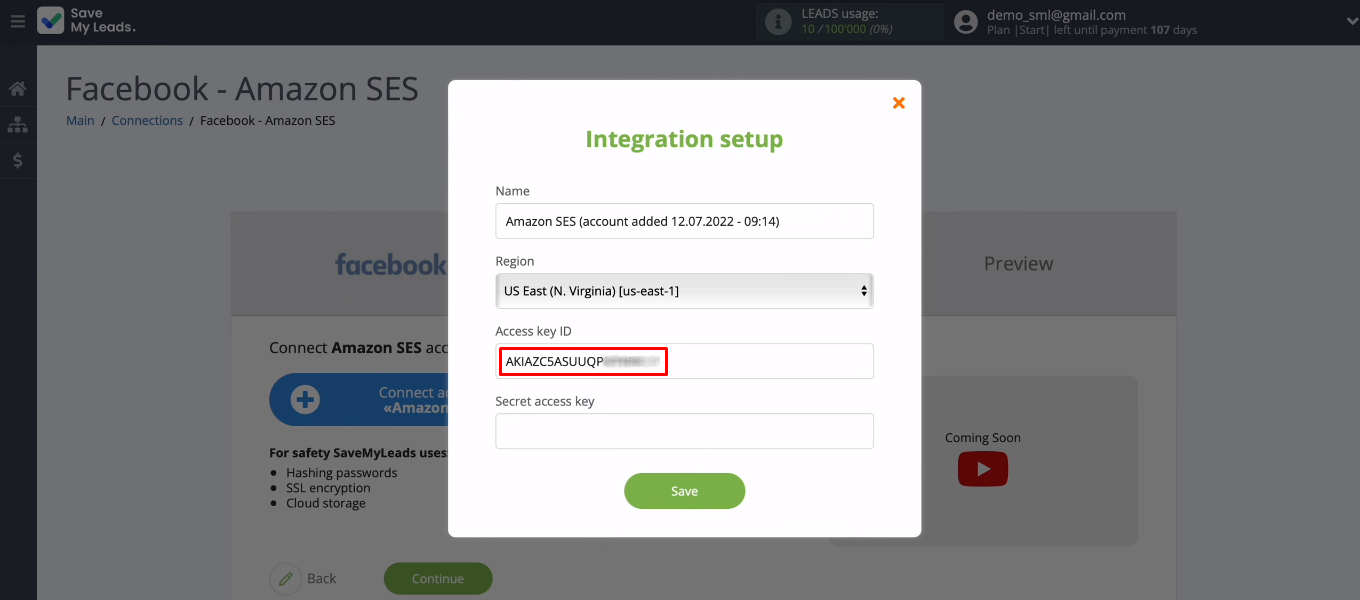
Go to the SaveMyLeads system and paste the copied value into the “Access key ID” field.
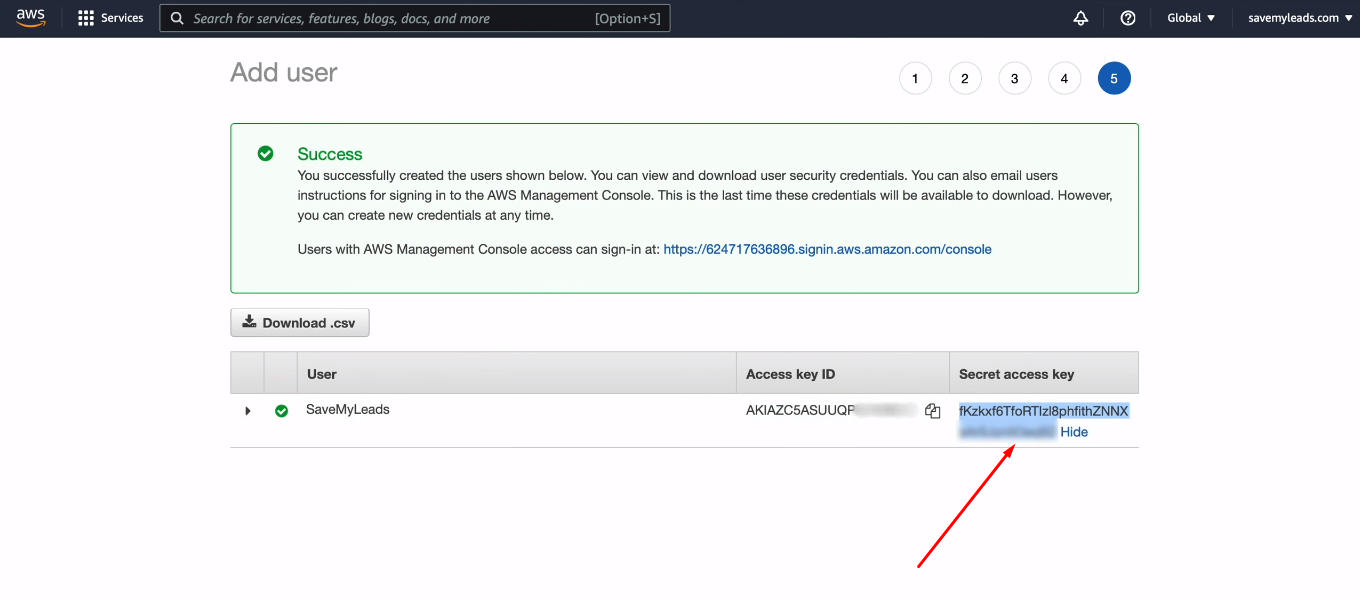
Return to the Amazon workspace, click the "Show" button and copy the Secret access key.
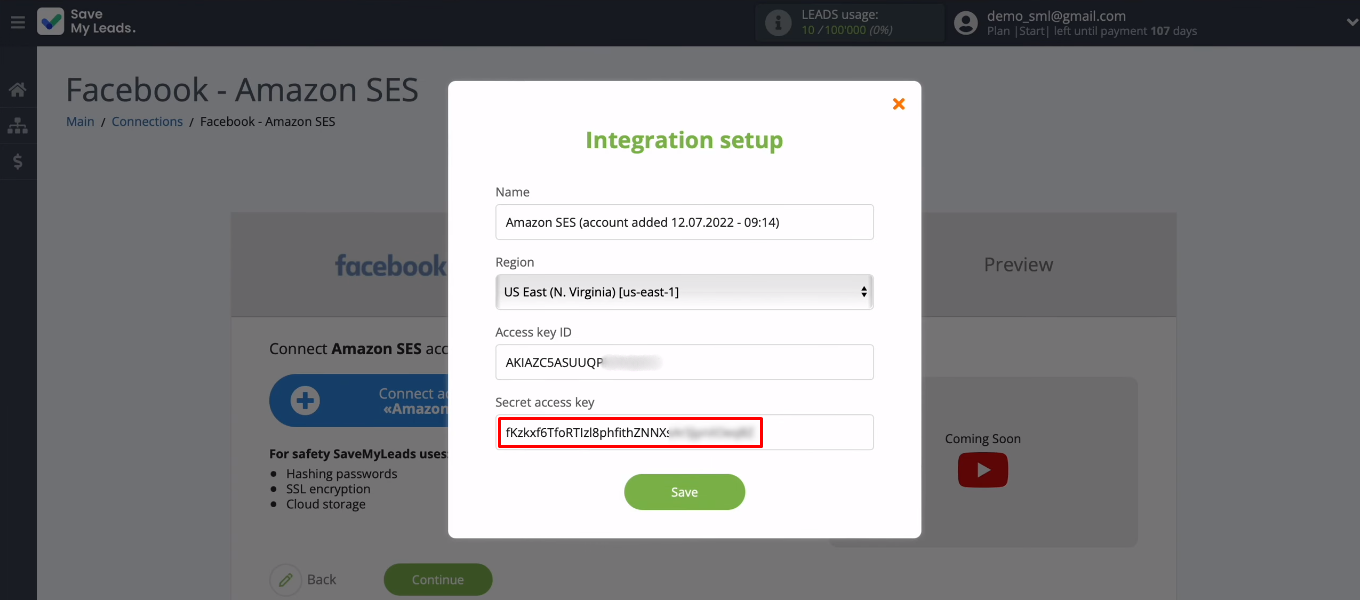
Now in the SaveMyLeads system, fill in the “Secret access key” field and click “Save”.
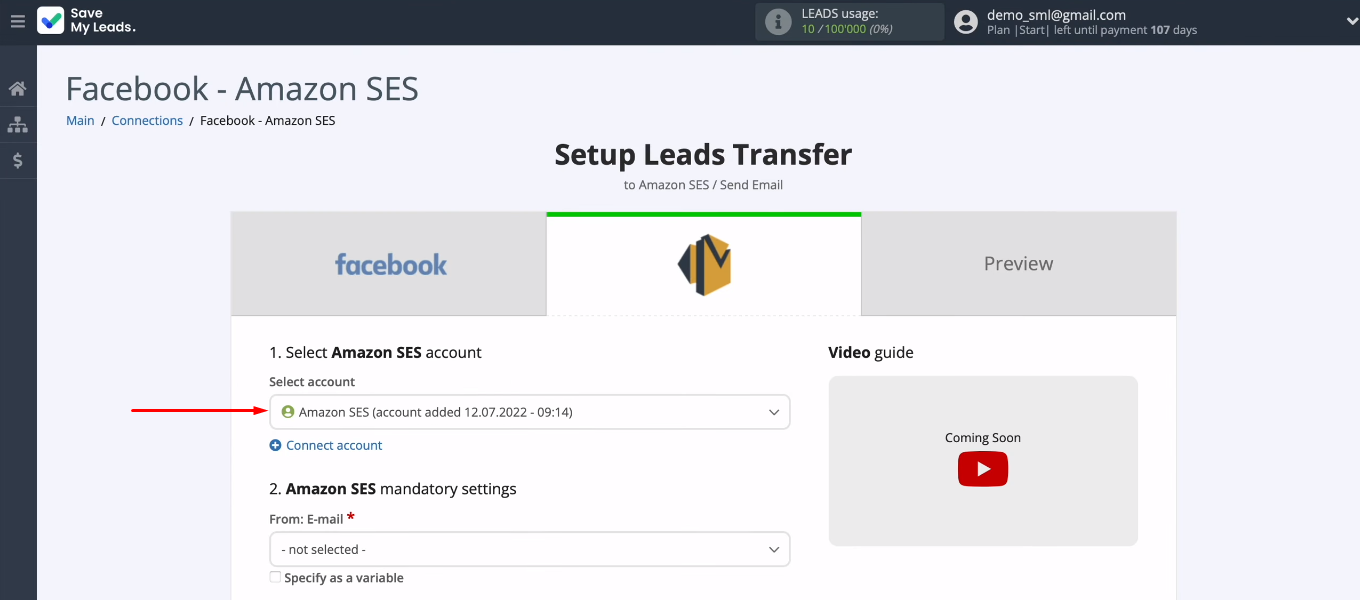
The connected login appeared in the list of available ones. Select it.
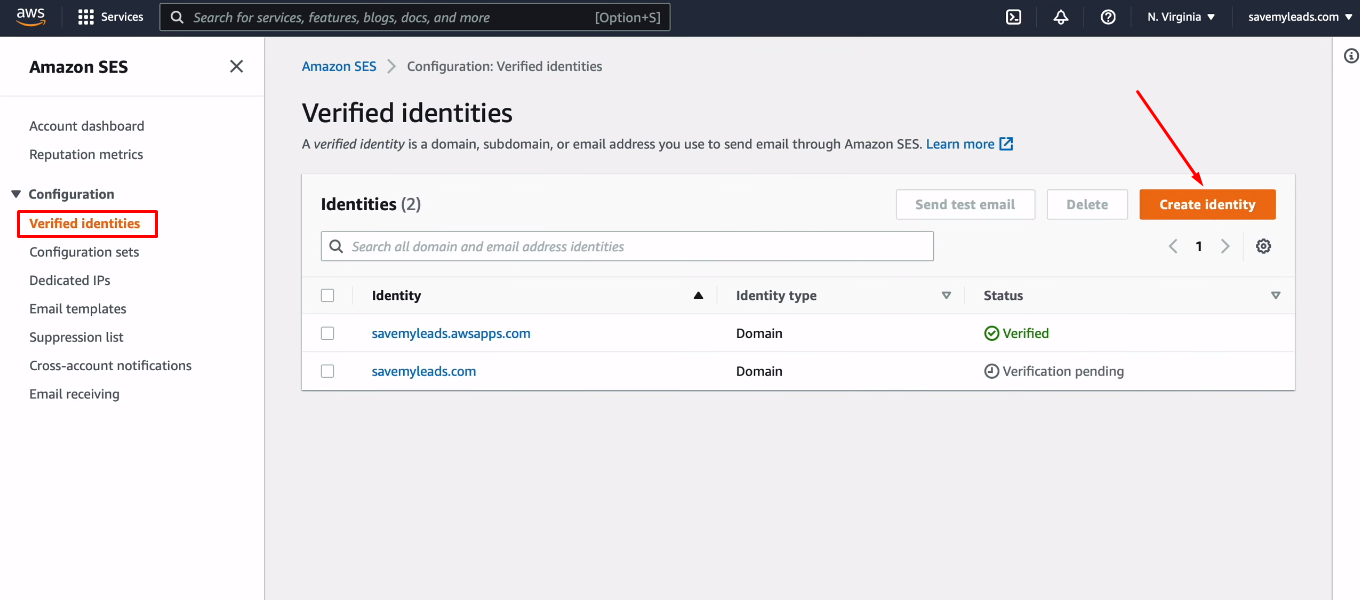
Now create an e-mail on behalf of which the mailing will be carried out. Return to Amazon SES. We need a "Verified identities" section. Click "Create identity".
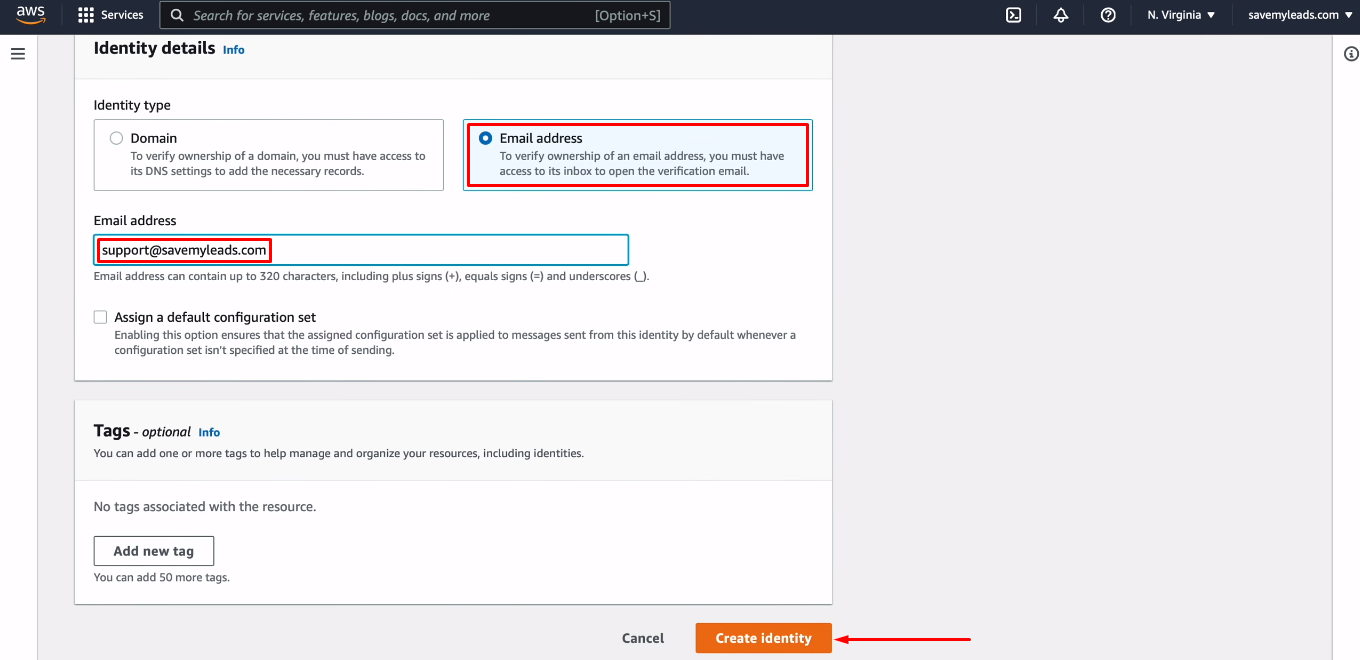
In the “Identity type” field, select the “Email address” option. Specify the mail from which letters will be sent. Click "Create identity".
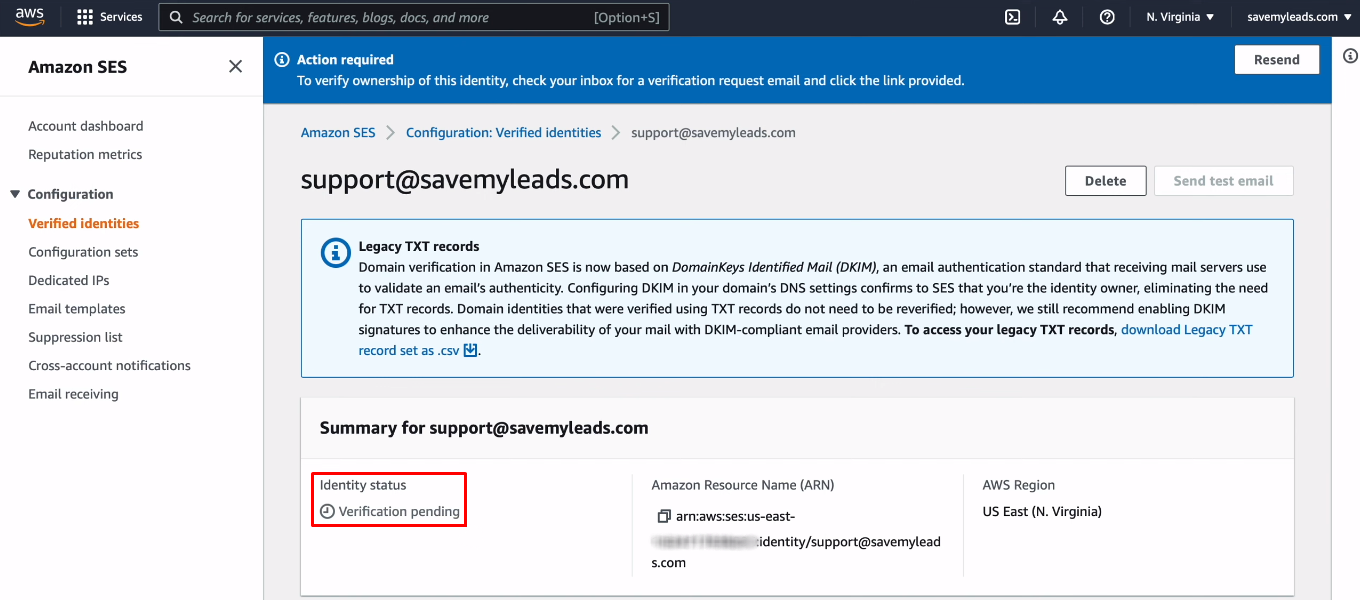
We need to verify the mailbox.
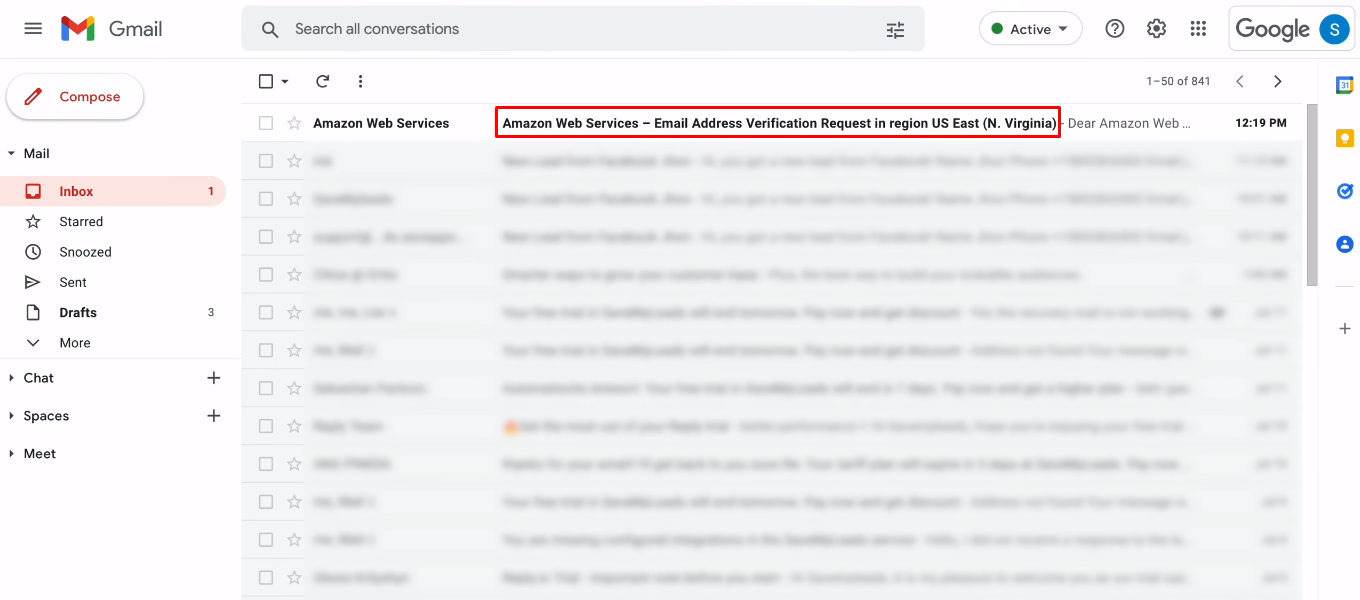
Go to the mail, open the letter for verification and follow the link to confirm the mailbox.
The email address has been verified.
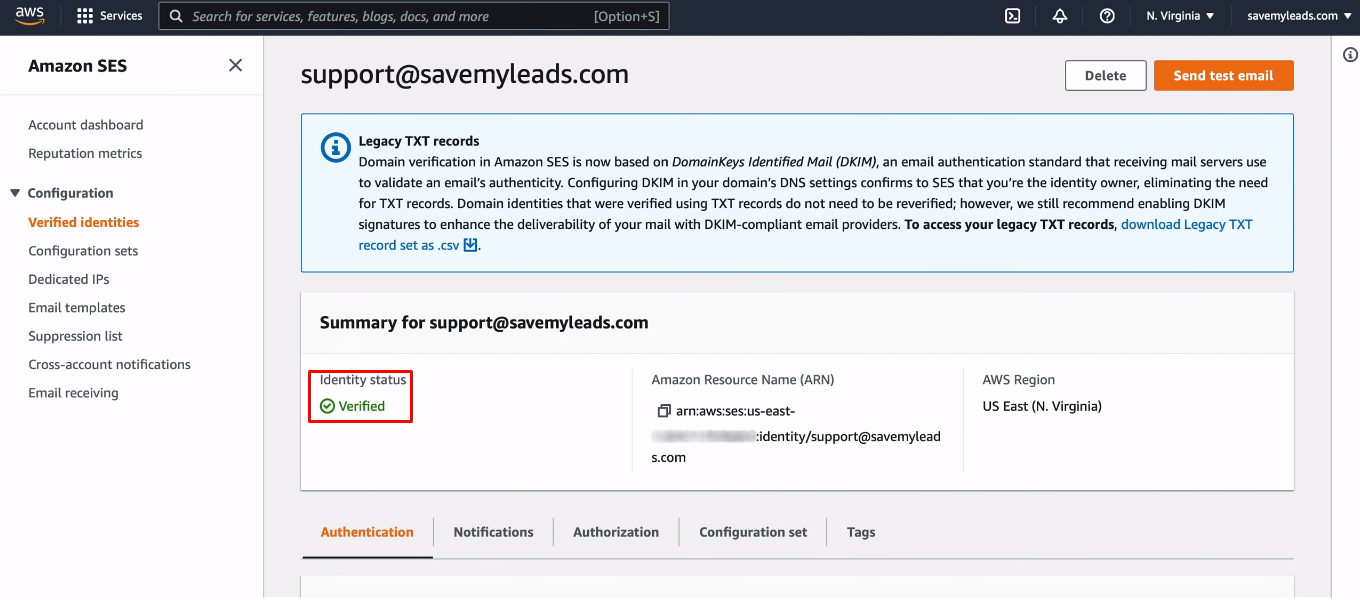
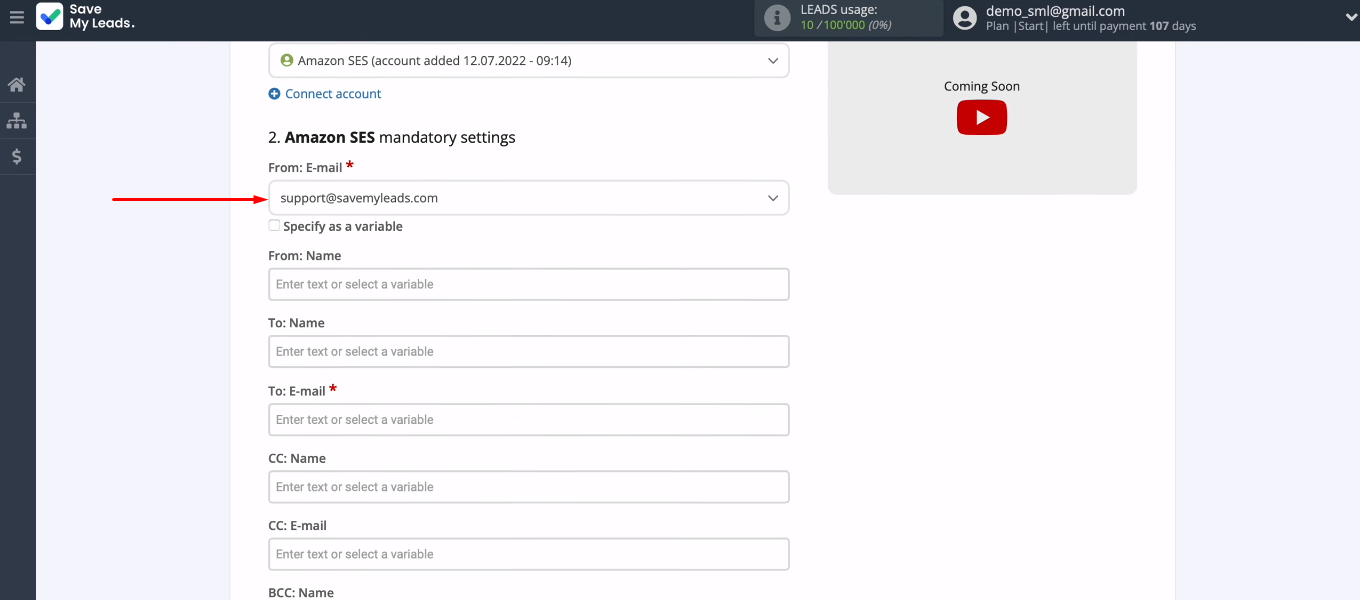
Return to SaveMyLeads. At this stage, you need to configure the fields that will be used to send emails. Set the sender to the mailbox you verified in Amazon SES above.
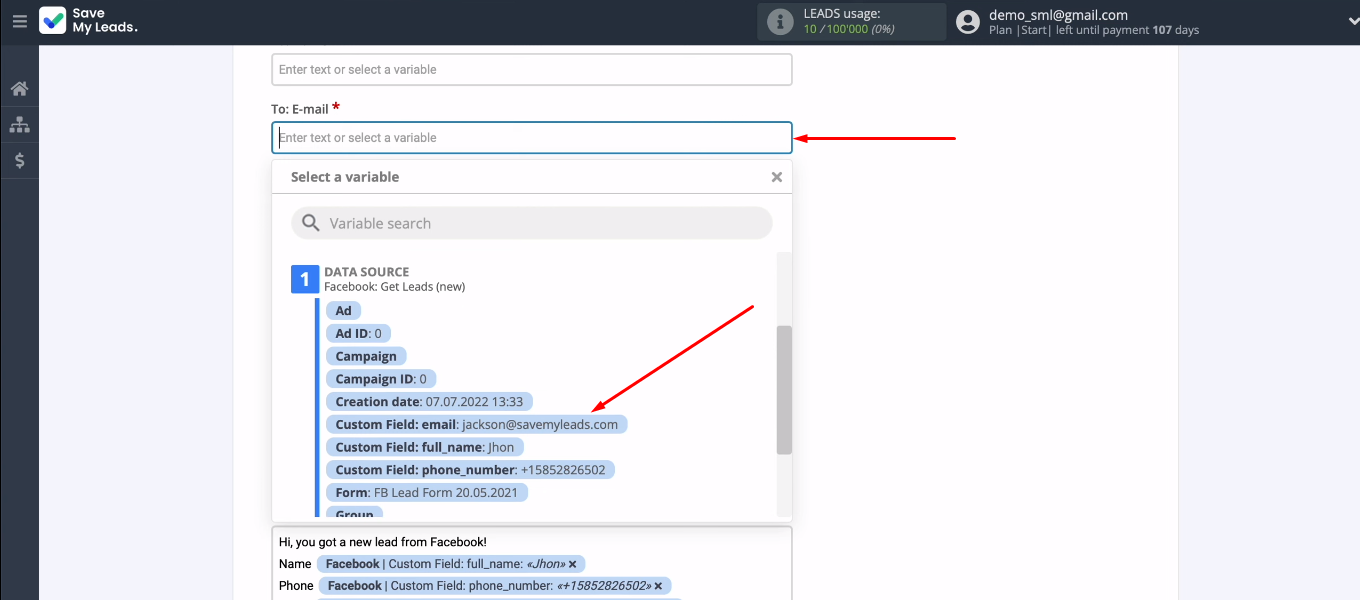
If you want to send emails to each new lead from Facebook, then in the “To: Email” field, you need to insert a variable with the email addresses of customers. To do this, click in the field and select the desired variable from the list. You can use the search bar.
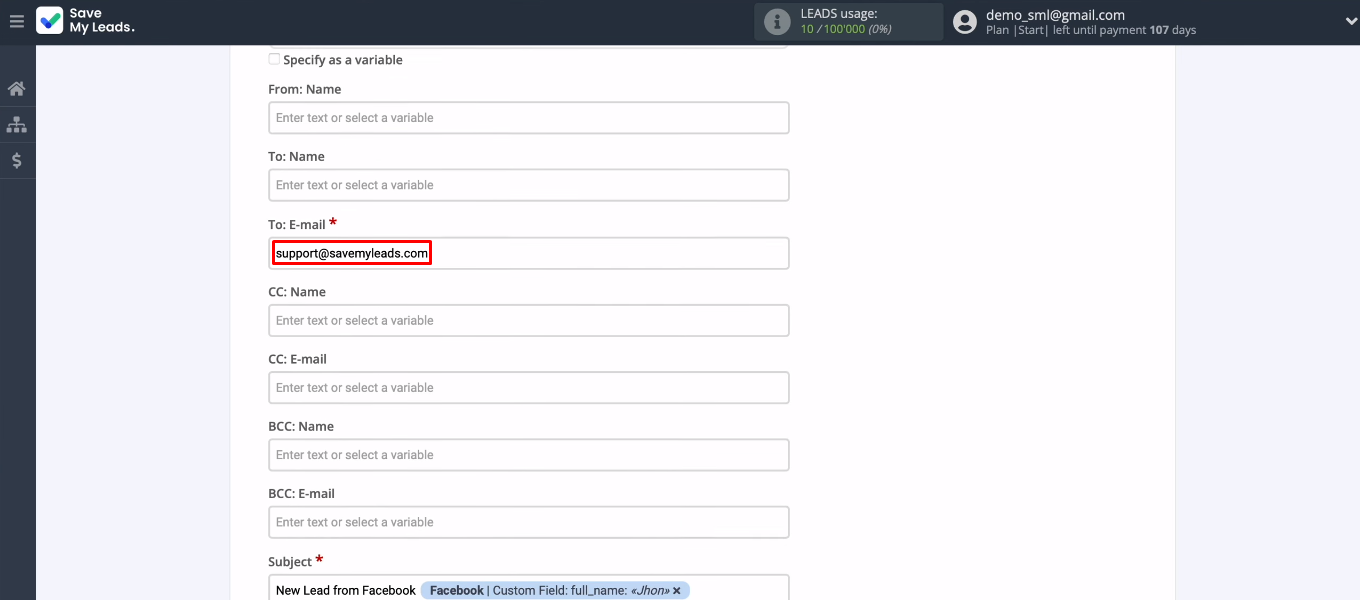
If you want to send letters to your mailbox or a colleague's mailbox, then fill in the field with the addressee manually. Set up all the fields you need. Click "Continue".
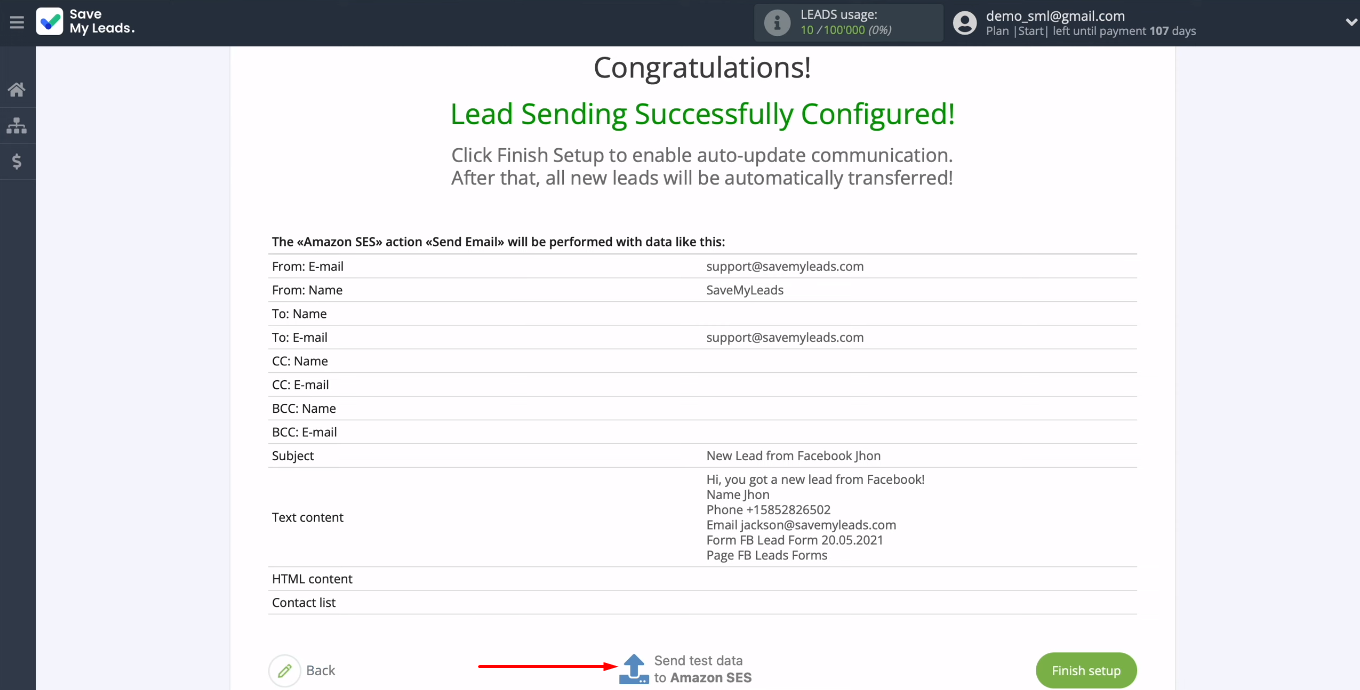
In the next step, you can check the test data set that will be used to send the email. If you don't like something, click "Back" and make the necessary adjustments. If you are satisfied with the data set and format, click “Send test data to Amazon SES”.
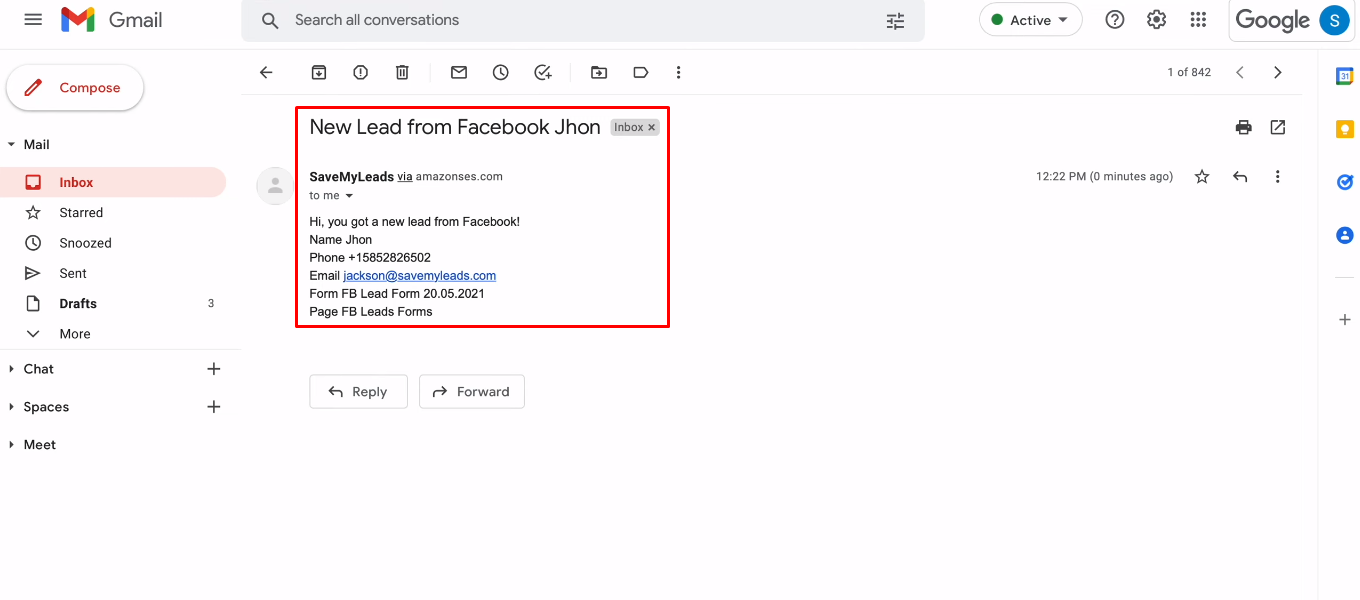
Go to the mail specified as the addressee, check for a test letter and its contents.
Enable auto-update
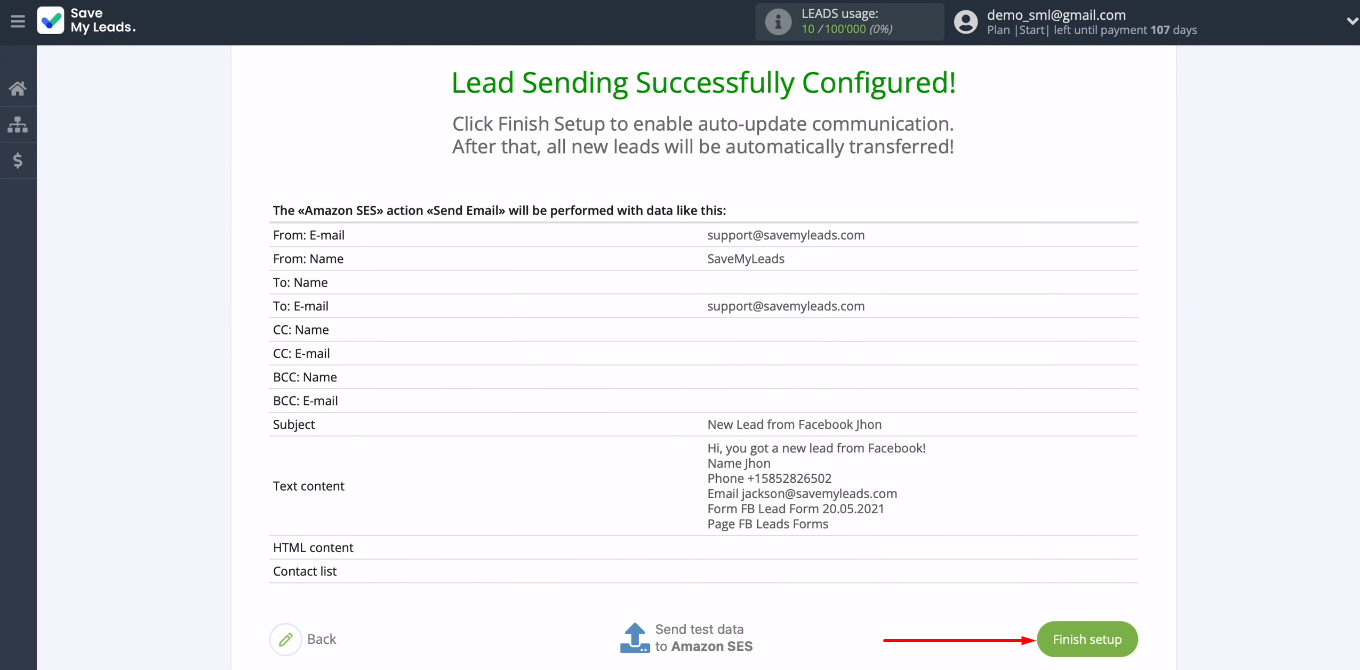
Return to SaveMyLeads. The correctness of the connection has been checked, and now you need to enable auto-update of data. Click “Finish setup” — integration is activated.
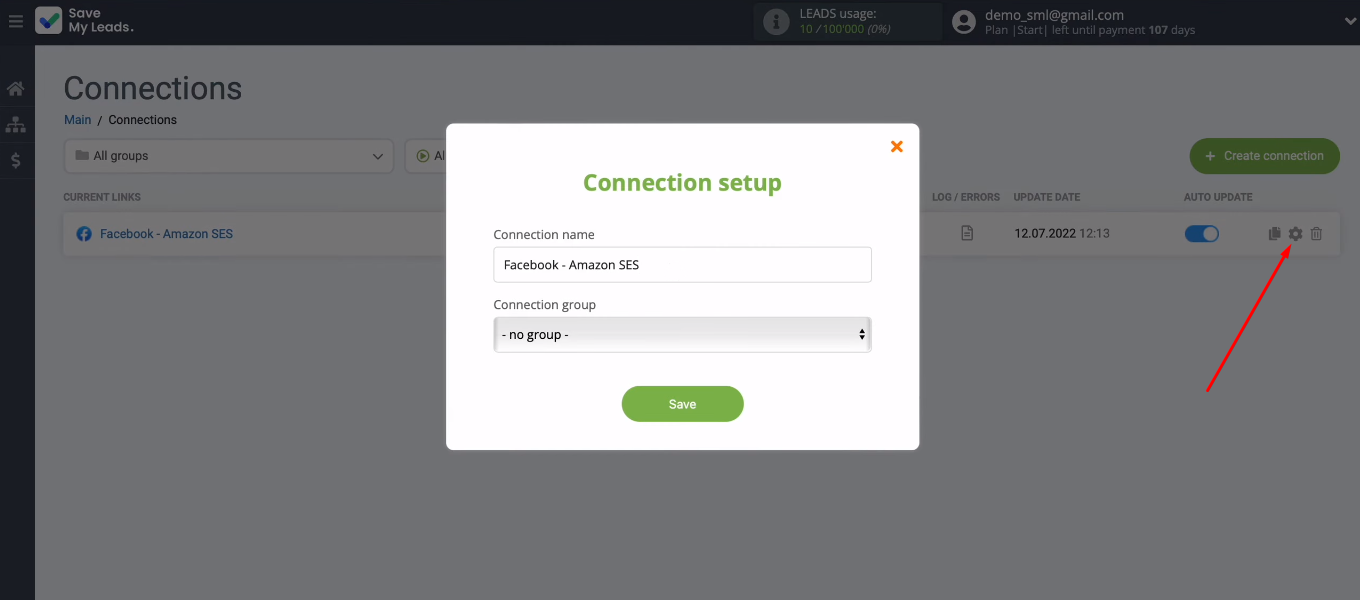
If necessary, you can add the created connection to the group or change its name. To do this, go to the connection settings — “gear”.
Conclusions
In the SaveMyLeads system, we set up the integration of Facebook and Amazon SES. Using this connection, you can automate sending letters to new leads from FB, as well as promptly deliver order data in the form of a letter to company employees. SaveMyLeads offers a simple interface and dozens of ready-made templates for connecting Facebook Lead Ads to various applications. You can quickly, easily and independently implement automation and get rid of routine operations.
