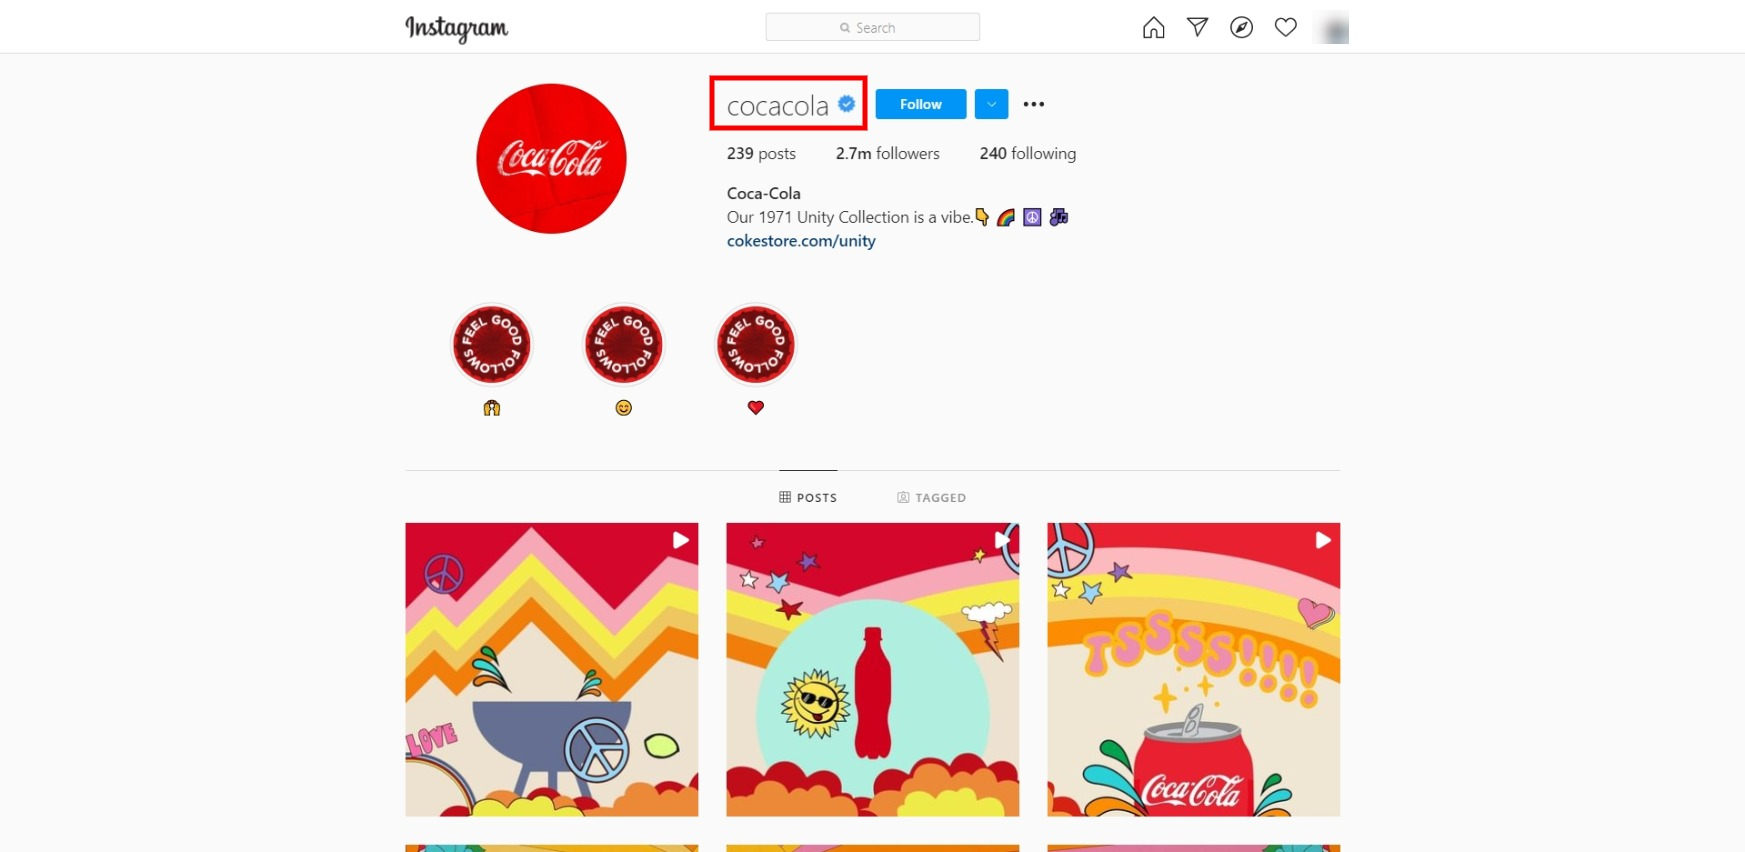
You have probably noticed a blue checkmark badge next to some profile names on Instagram. It means the social network administration has verified the account. This kind of mark can be very useful for companies and public figures. What is the use of this badge and how to get it - read our material.
Content:
1. What is the use of verification on Instagram?
2. Instagram requirements for getting a blue badge
3. How can an Instagram account lose its blue badge?
4. How to verify an Instagram account?
What is the use of verification on Instagram?
First of all, the checkmark increases the confidence of the profile, which helps to protect its owner from scammers and other impostors. For example, if a user enters the name of your company in the search tab and sees fake profiles among the results, he or she will choose your account. After all, the verification icon is displayed only in authentic profiles.

In addition, this checkmark raises the status of the account owner in the eyes of users. People notice that all large organizations and celebrities are marked with this badge. As a result, it became associated with popularity, success, and prestige.
Instagram requirements for getting a blue badge
The verification procedure is available for accounts of companies and any public figures. To get a blue badge, the profile must be:
- Authentic. The profile owner must prove that he or she represents the claimed person, company, or organization. For example, in order to verify the account of an online store, you need to provide the Instagram administration with documents for this store.
- Unique. A specific person, company, or organization can be represented by only one account or several accounts in different languages. For example, if you previously verified a company profile, but lost access to it, it will be difficult to get a second checkmark for a new account of the same company. First, you will have to cancel verification on the old profile or restore it.
- Complete. The account must be open, have a profile picture and description. In addition, it is not allowed to post links to other social services.
- Notable. The organization, company, or person that the account represents must be well-known. The Instagram administration will check this by the presence of publications in the media. That is, you will not be able to pass verification until several popular publications write about you. Moreover, advertising publications are not taken into account.
- Compliance with the rules of the service. Account must adhere to Instagram's Terms of Service and Community Standards. For example, you may not spread fake news, incite violence, or use hate speech. More details about the Guidelines can be found in the "Settings" – "Information" section.
How can an Instagram account lose its blue badge?
If you try to provide false or misleading information during the verification process (for example, false documents), the administration can remove your blue badge and even delete the account.


If you do not follow Instagram’s Terms of Service and Community Guidelines this can lead to the badge removal and deletion of the account.
How to verify an Instagram account?
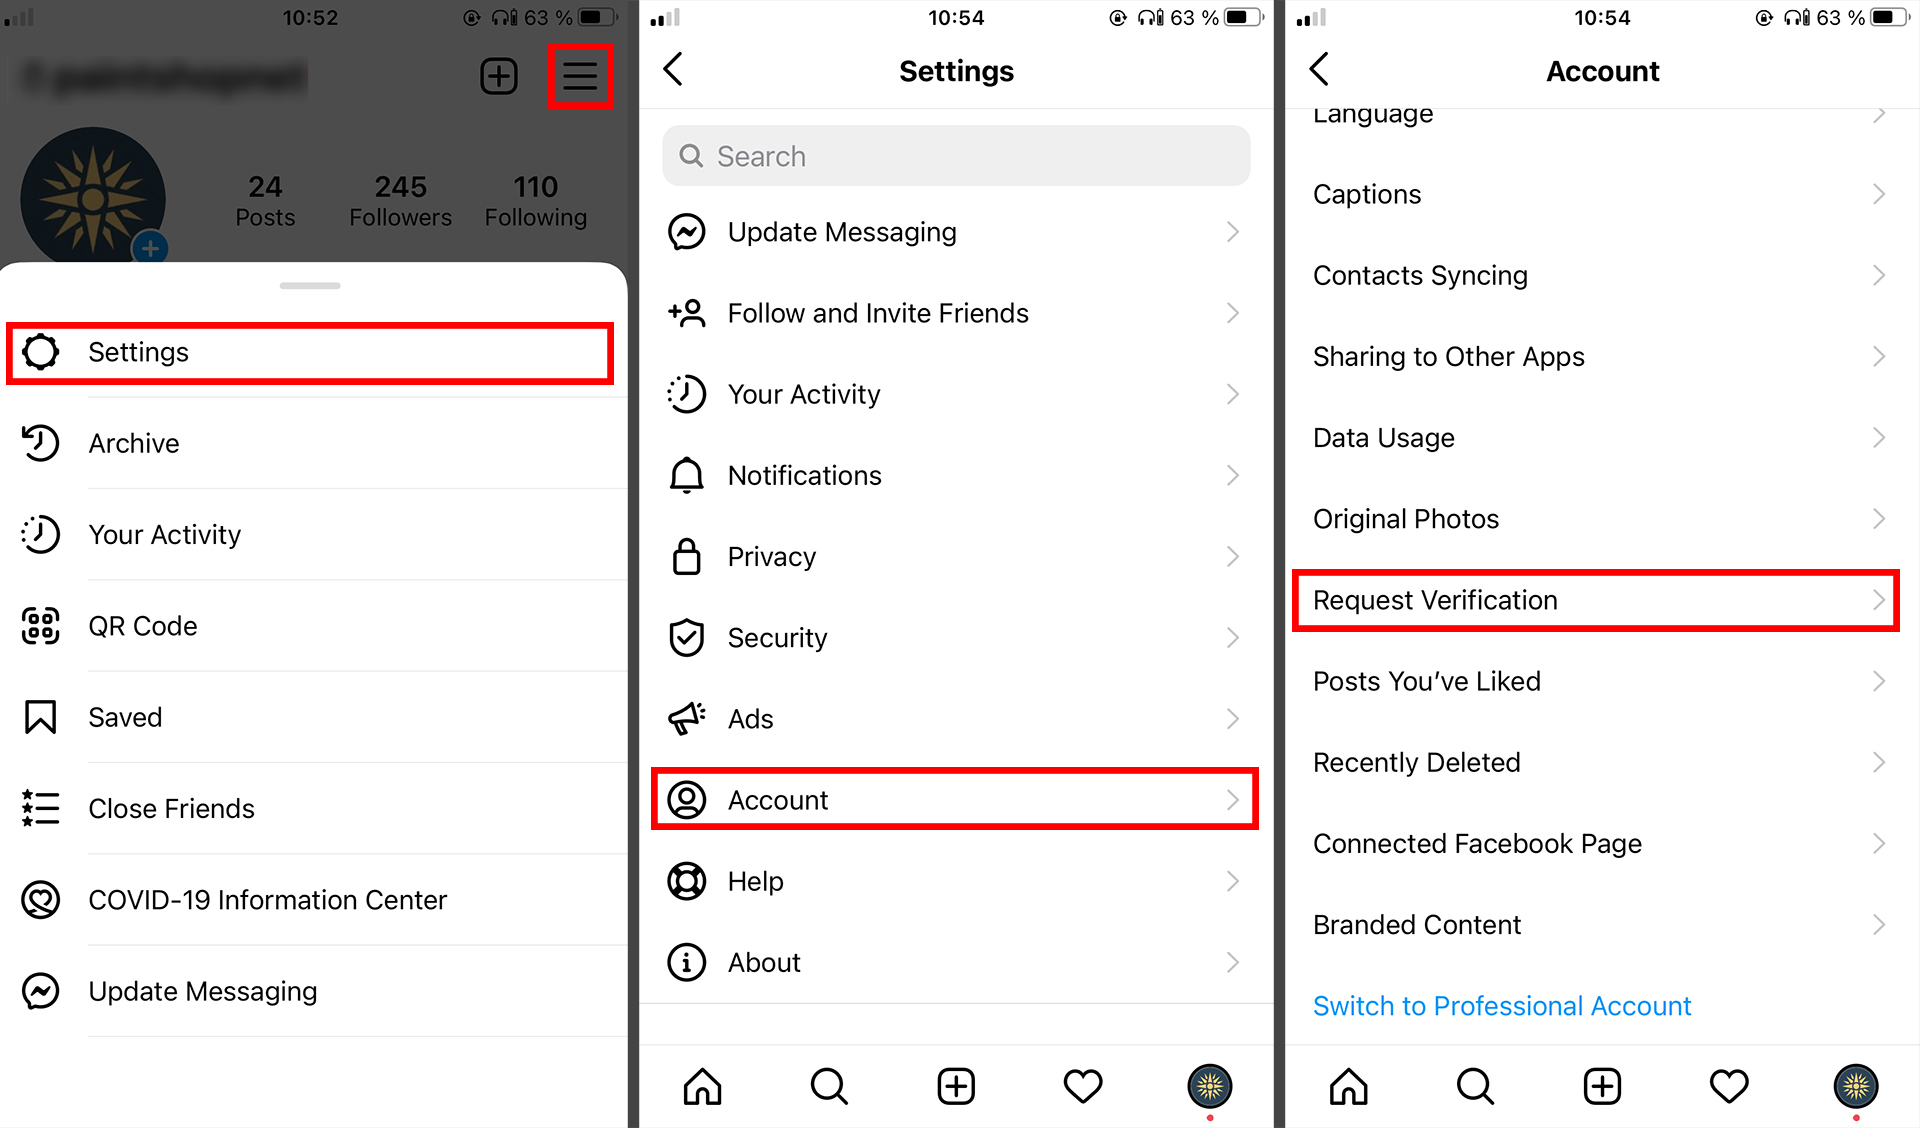
- Open the menu in the Instagram app: go to your profile page and tap the three bars icon in the upper right corner;
- Tap “Settings” - “Account” - “Request verification”;
- Enter all required information and tap “Submit”.

If you do not receive a response within a month, please make sure your account meets all the requirements and resubmit the information.
If you deal in promoting a business on social media, you know that this work consists of many similar tasks. To save you from this routine work, we have created SaveMyLeads – the online connector that allows you to automate downloading leads from Facebook to CRM or mailing notifications to the customers.
To start using the service, you need to register on the SaveMyLeads website, select and connect the necessary systems with Facebook – that’s all!
