If you work with clients via WhatsApp, Facebook and Instagram, then you probably know how difficult it is to organize efficient and fast processing of requests from several channels at once. With the help of the Simla service, you can communicate and serve all customers in a single interface. This greatly simplifies communication and helps improve responsiveness. We offer Simla users to boost their productivity even more. Read this article and learn how to set up Facebook and Simla integration so that all new leads from the social network are automatically converted into tasks on the Simla side.
Contents:
1. How to setup Facebook and Simla integration
2. Connect Facebook Lead Ads
3. Connect Simla
4. Enable auto-update
5. Result
The Simla platform offers a wide range of functionality for managing sales and organizing communication with customers. Users of this service get a convenient interface to control WhatsApp, Facebook and Instagram chats. Also, using Simla, you can maintain a customer base, track the activities of staff and work with tasks. For tasks, you can apply filters, make bulk changes, change statuses, etc. You can create a task from a list, an order, or a customer card.
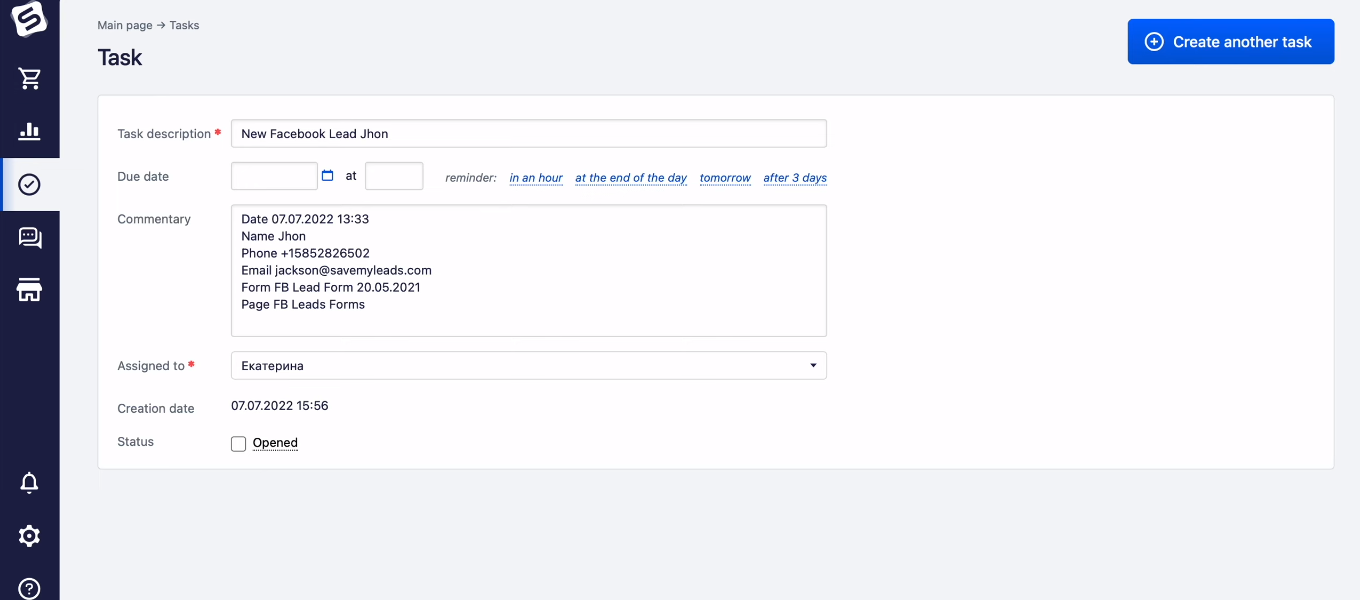
Tasks in Simla is a convenient tool for organizing and controlling work with clients and orders. We'll show you how to set up automatic task creation when new leads appear in your Facebook ad account. Facebook lead forms allow you to collect contacts and orders directly from social networks. Such requests require a prompt response, so there is a need to regularly check the advertising account, upload new leads and transfer data to Simla. But things can be much easier if you implement automation. With the SaveMyLeads service, you can set up Facebook and Simla integration. As a result, the data from each completed Facebook lead form will be automatically transferred to Simla as a task.
How to setup Facebook and Simla integration
Automation of business processes often concerns the processing and transfer of data. Using the SaveMyLeads online connector, we will link the Facebook ad account and the Simla account. The SML system will monitor the emergence of new leads in real time, upload the necessary data and use it to create new tasks in Simla. You do not need to regularly log into the advertising account, check for new orders and transfer them manually. All the routine work will be done by the SaveMyLeads online connector.
With the SaveMyLeads system, you can set up integrations without special knowledge and skills. You do not need to understand the nuances of the API and other IT tricks. Integration is configured through a web interface. The setup process is intuitive and broken down into a few easy steps. Register on our website, go to your personal account and let's create a Facebook and Simla integration together to get rid of the routine task of transferring data.
Connect Facebook Lead Ads
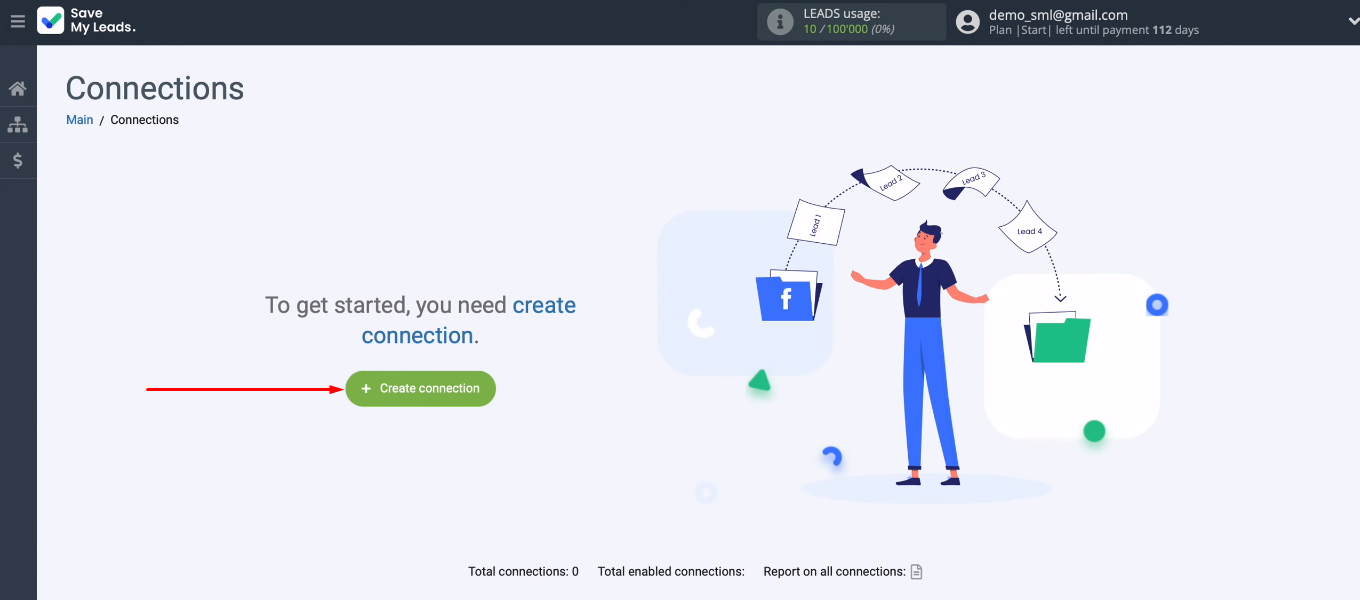
To get started, click the “Create connection” button.
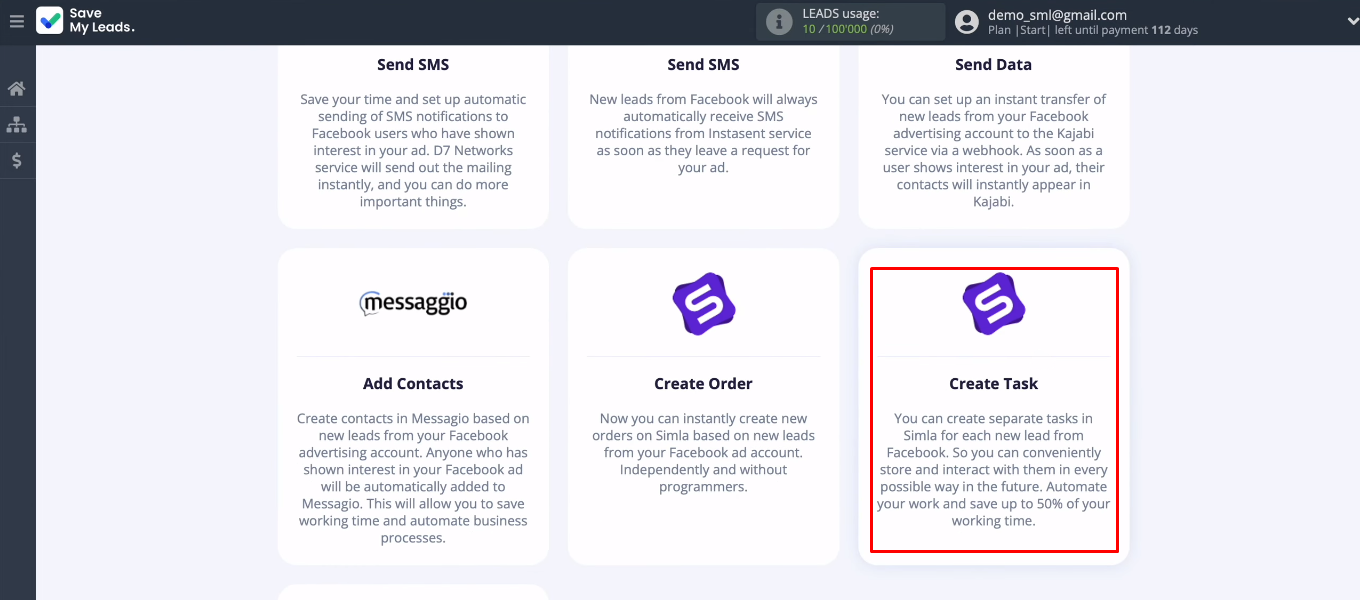
The SaveMyLeads service offers dozens of ready-made templates for connecting Facebook to various systems and applications. We are interested in the “Simla (Create Task)” template.
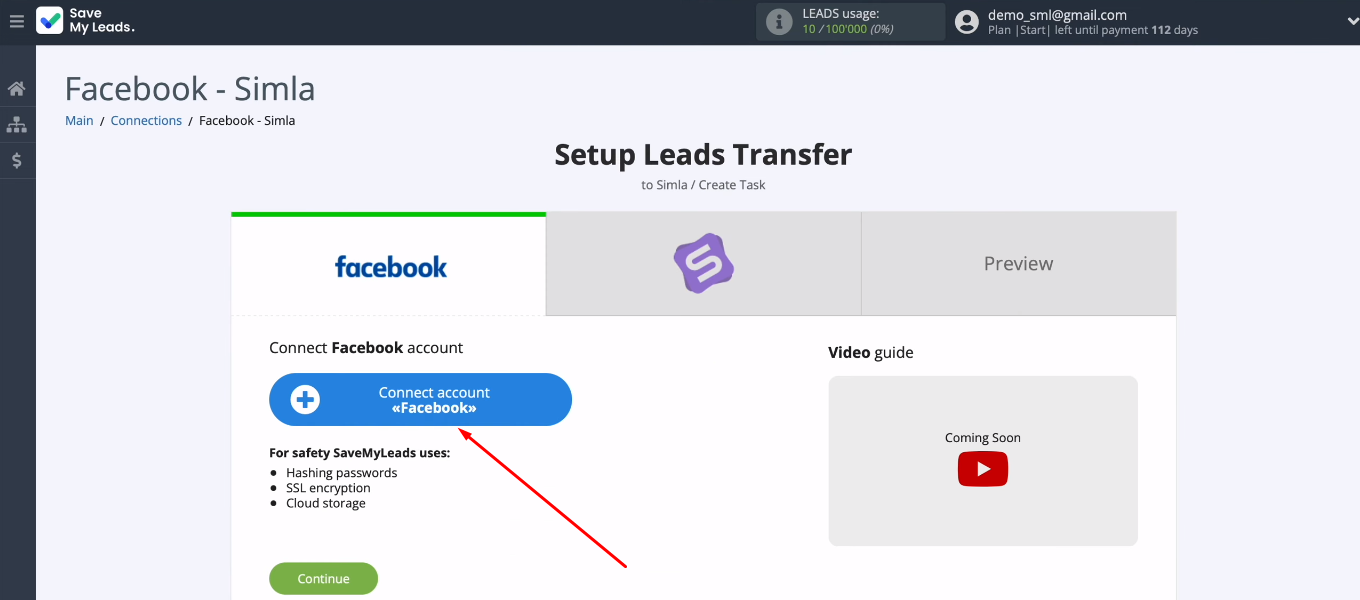
Let's set up the data source. You need to connect your Facebook account to the SaveMyLeads system.
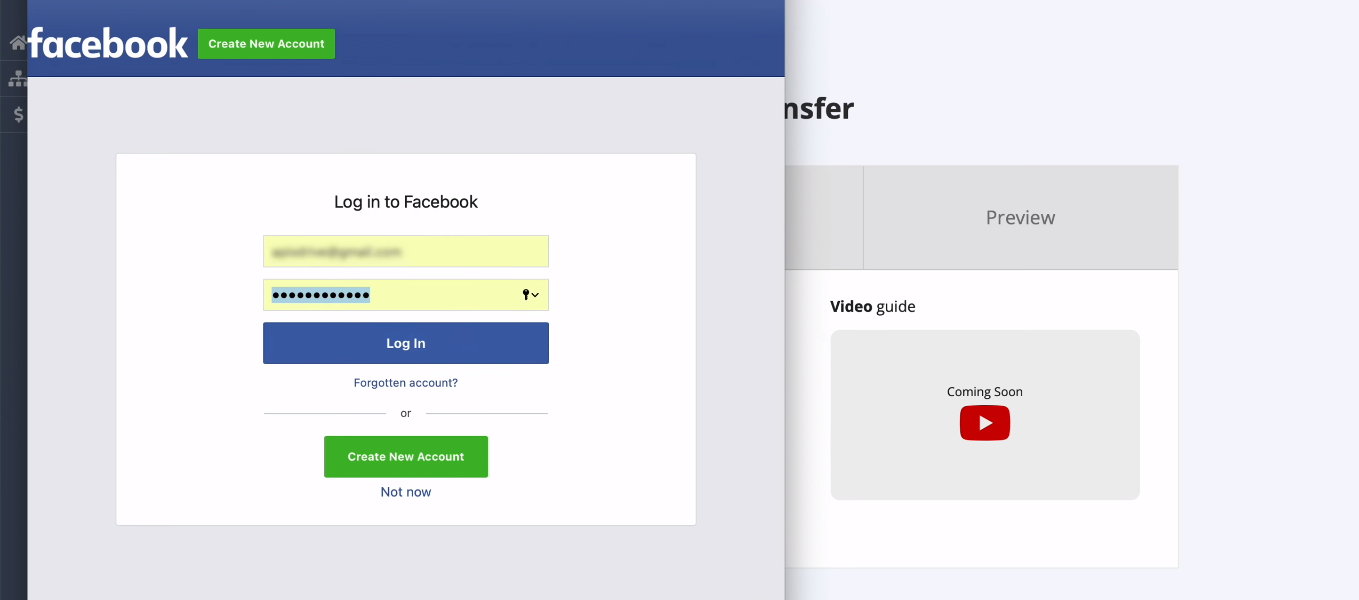
Enter login and password.
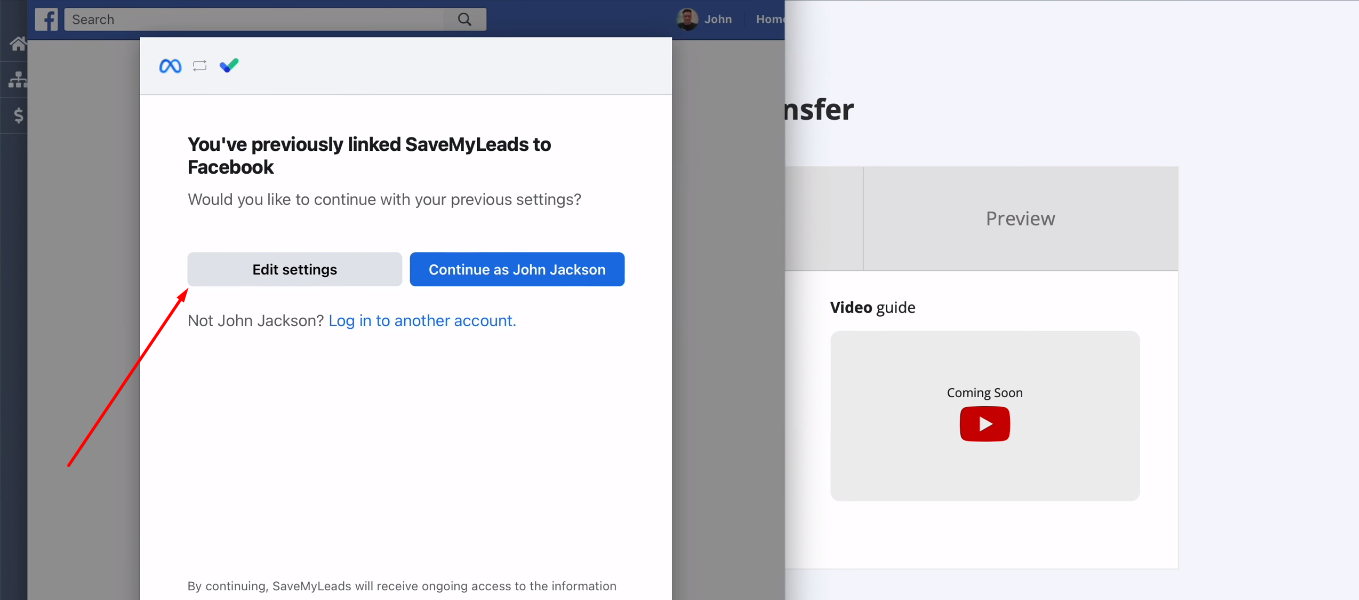
Click "Edit settings".
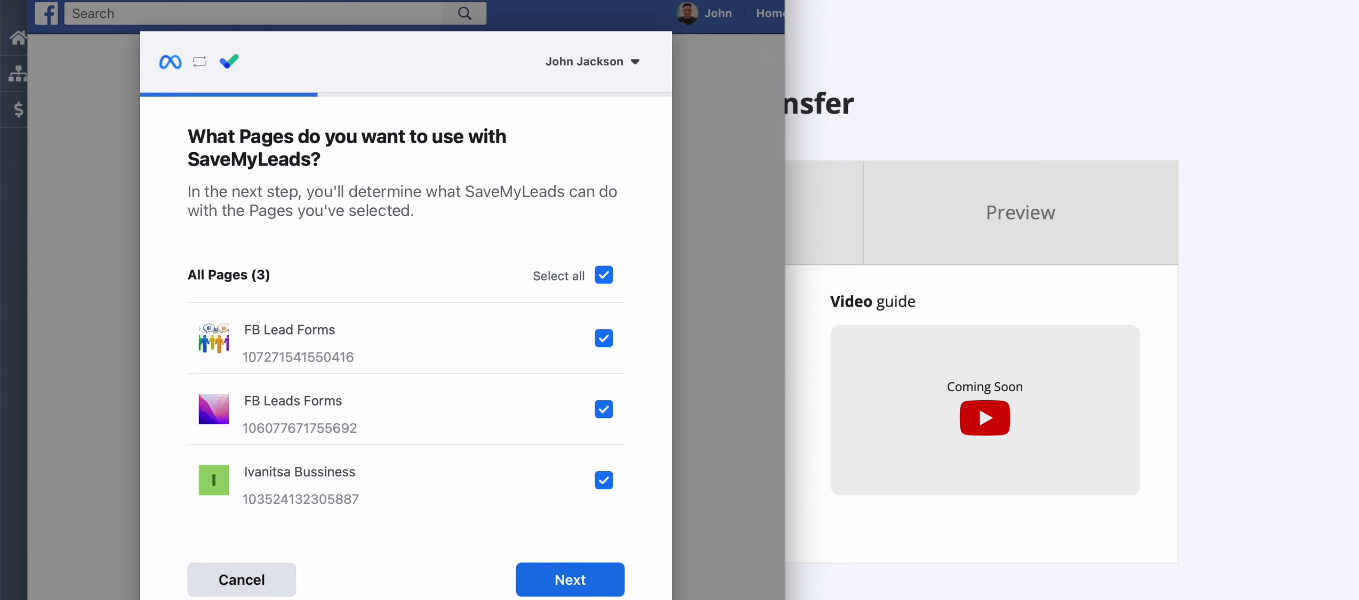
Select the promotional pages that will be available in the SML system for uploading leads. We recommend that you immediately mark all the advertising pages to which you have access.
In the next window, check that all access flags are enabled.
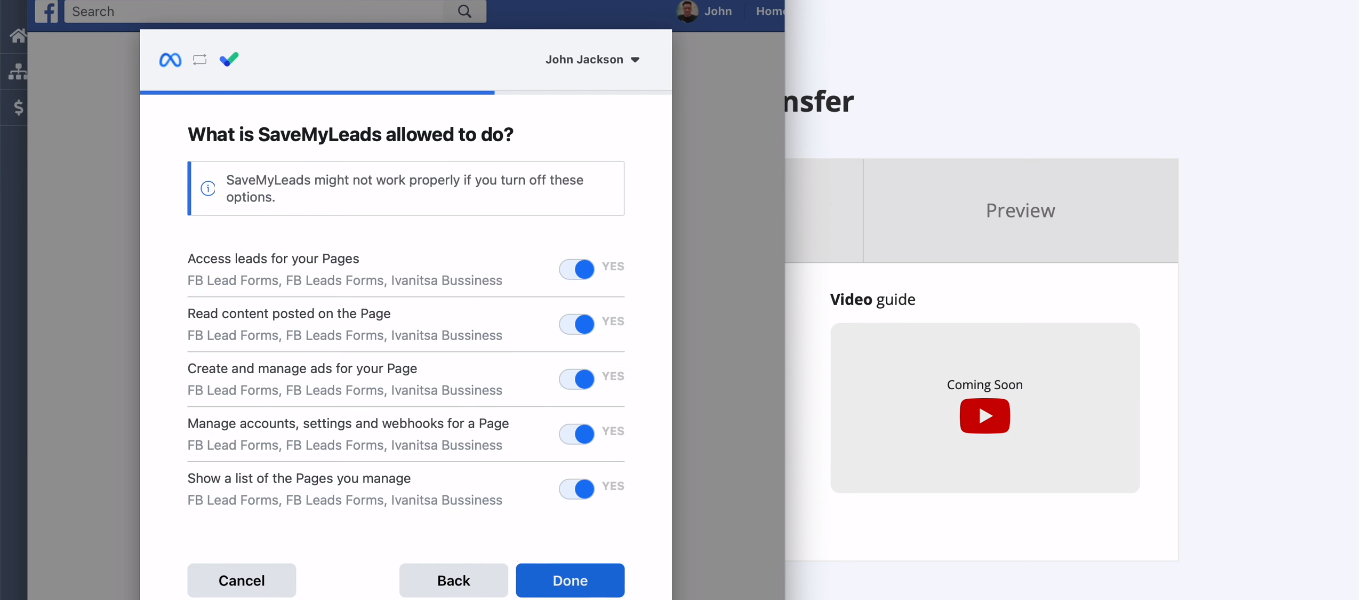
Click "OK".
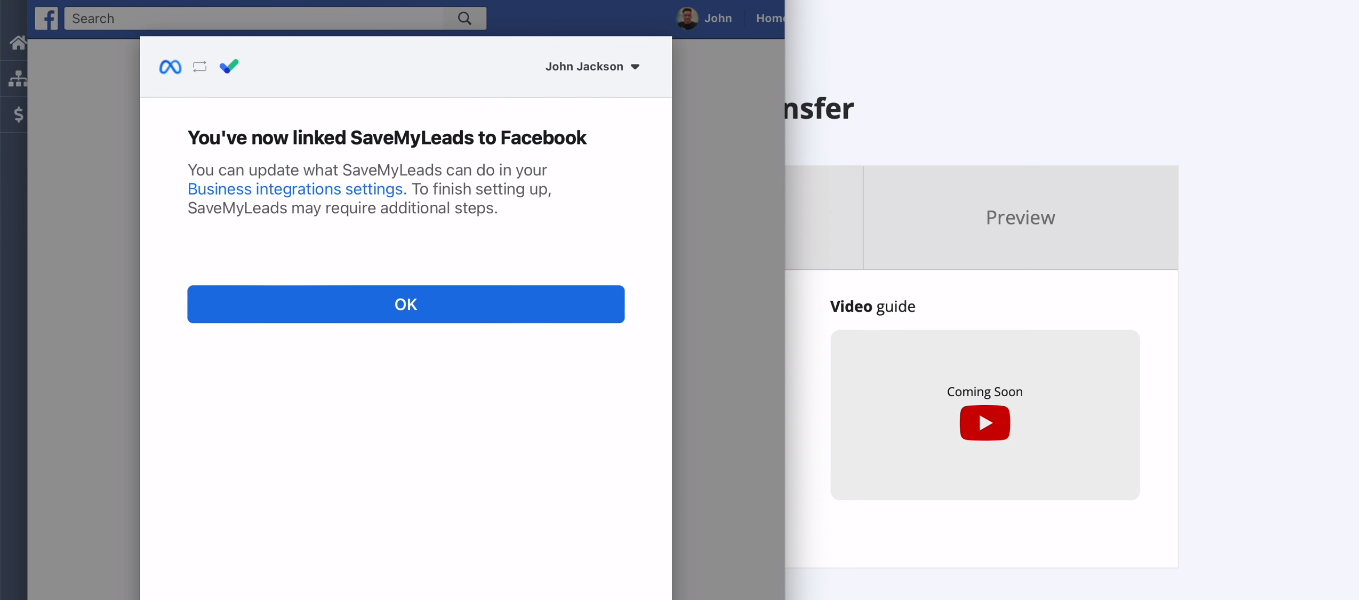
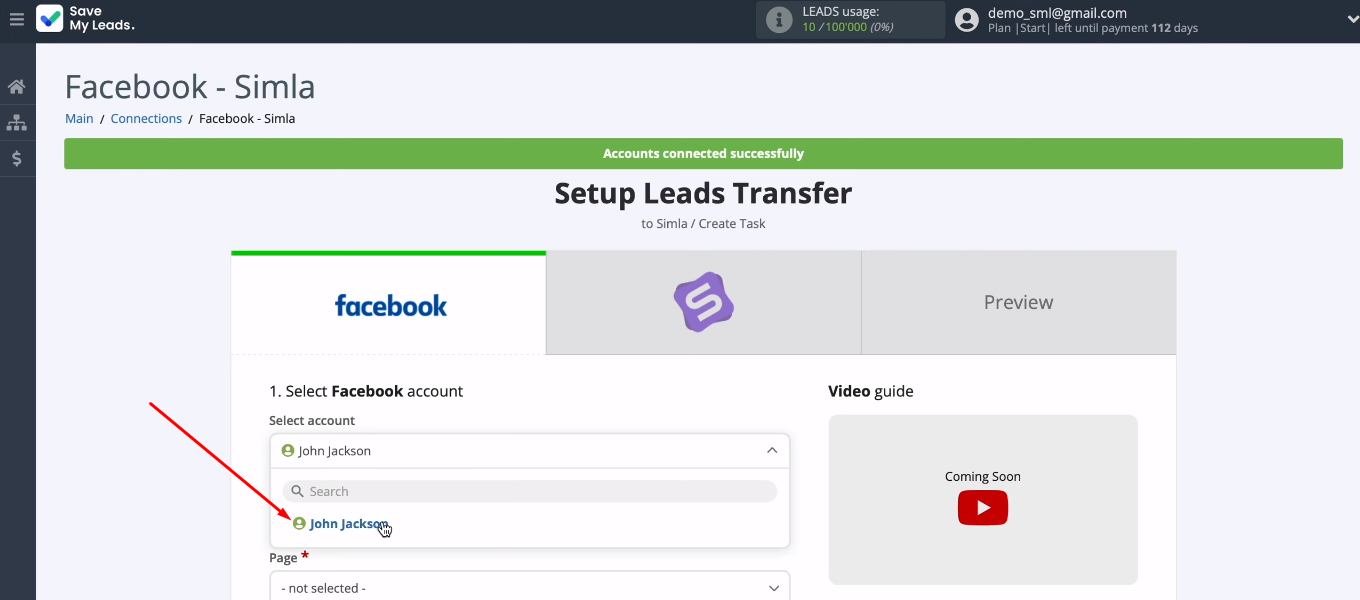
Select the added FB account.
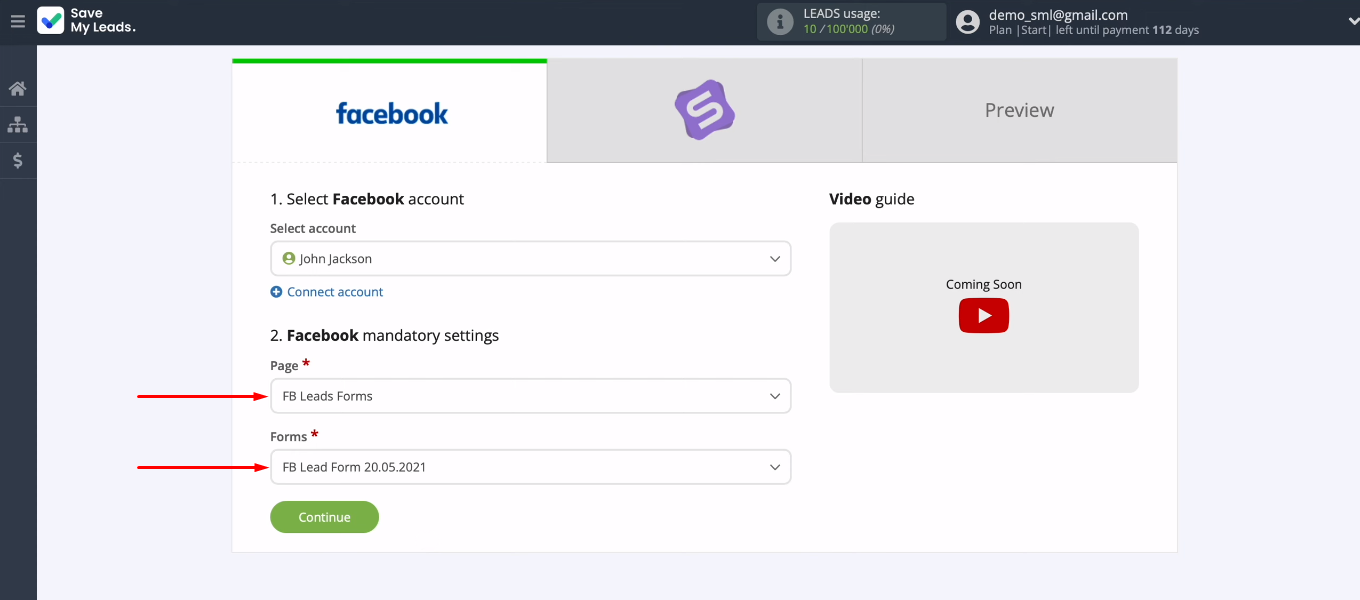
Select the promotional page and form that the SML system will use to track new leads. When all required parameters for the data source are specified, click “Continue”.
Connect Simla
Let's move on to setting up the receiver. Connect your Simla account to the SML system.
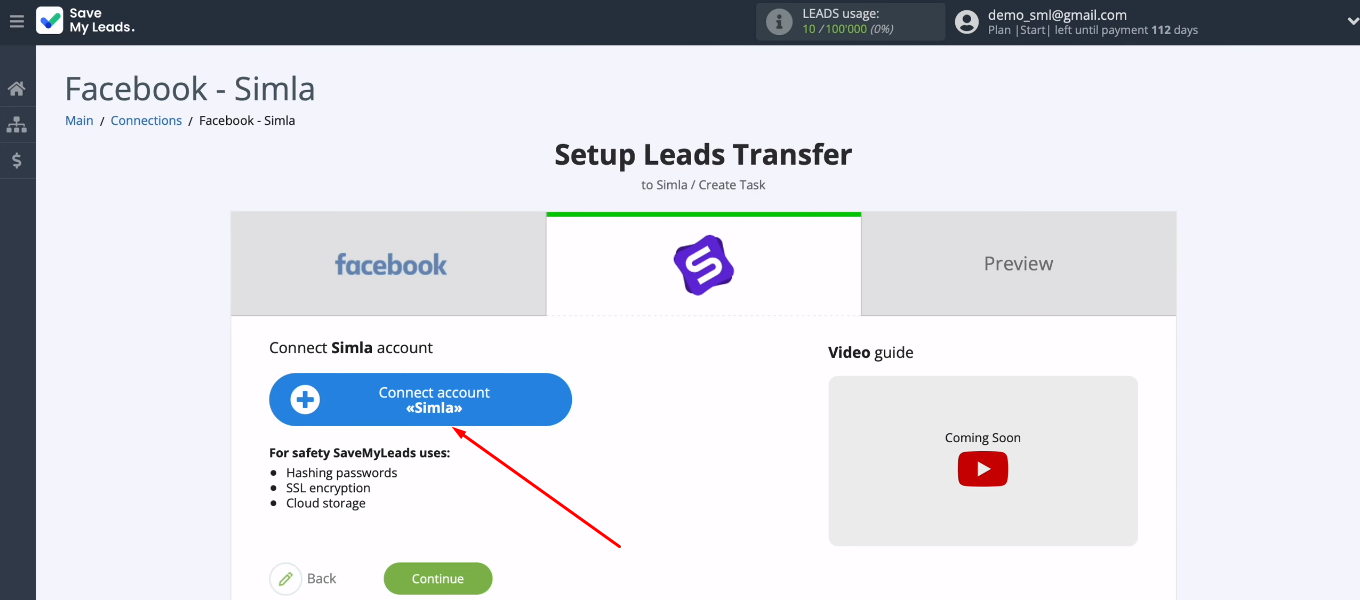
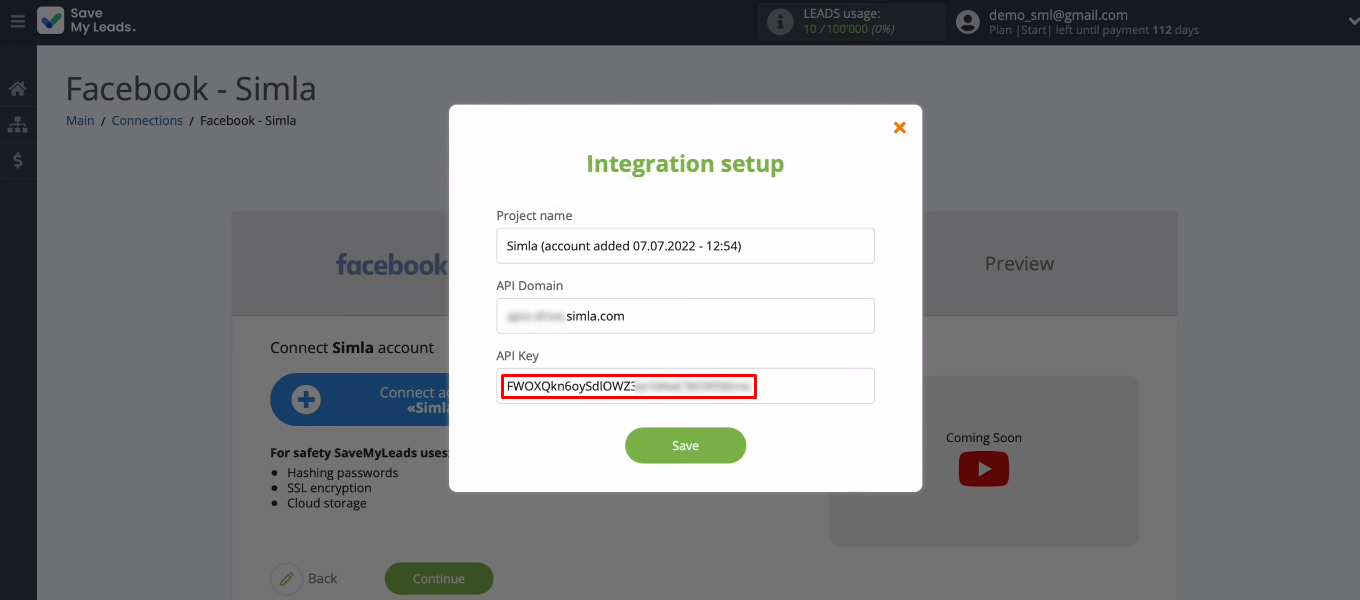
To add a Simla account to the SaveMyLeads service, you need to fill in the “API Domain” and “API Key” fields.
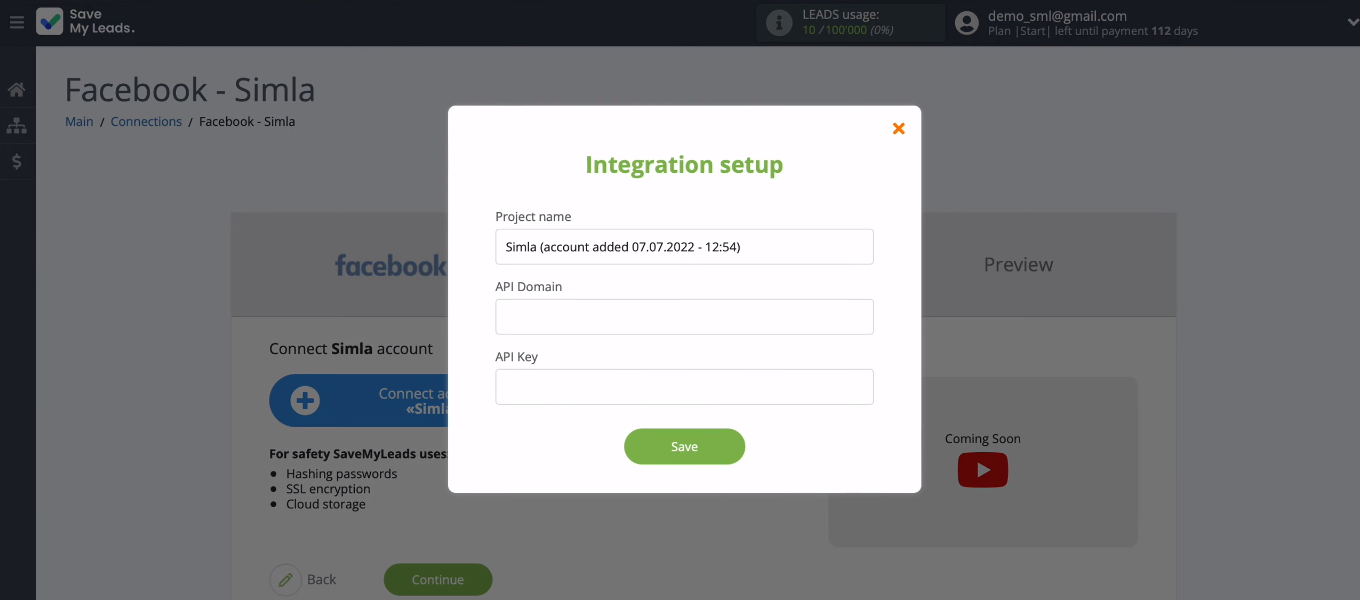
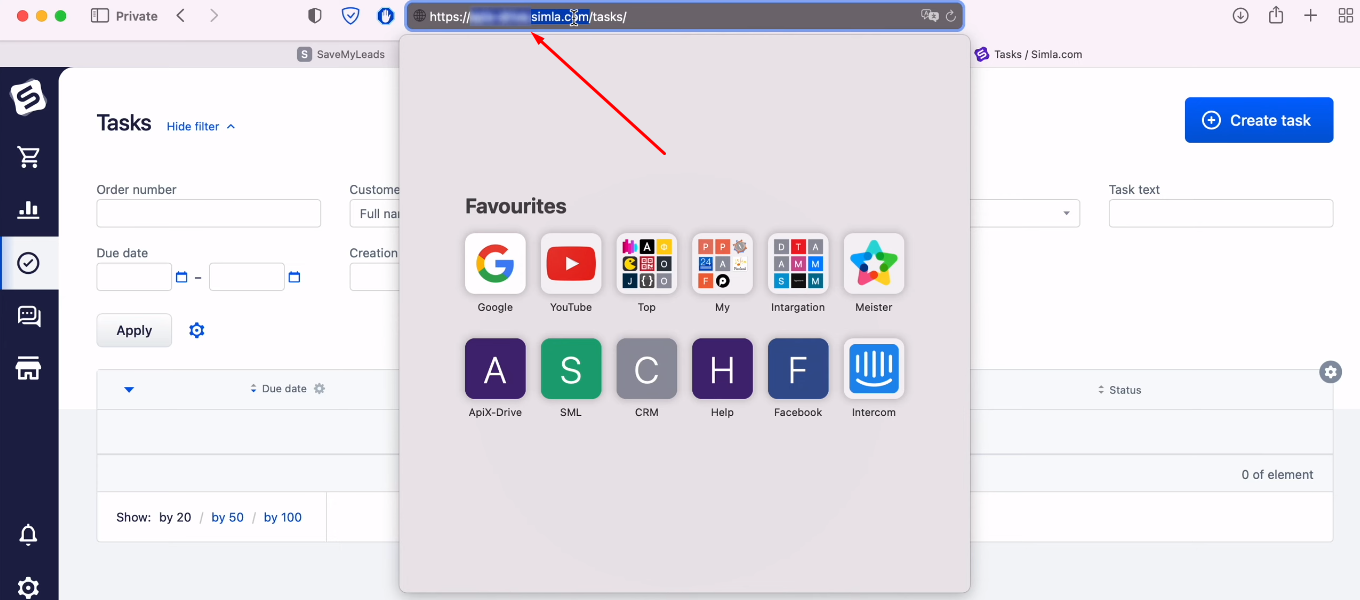
Go to your personal Simla account. Copy the domain in the address bar (without additional characters).
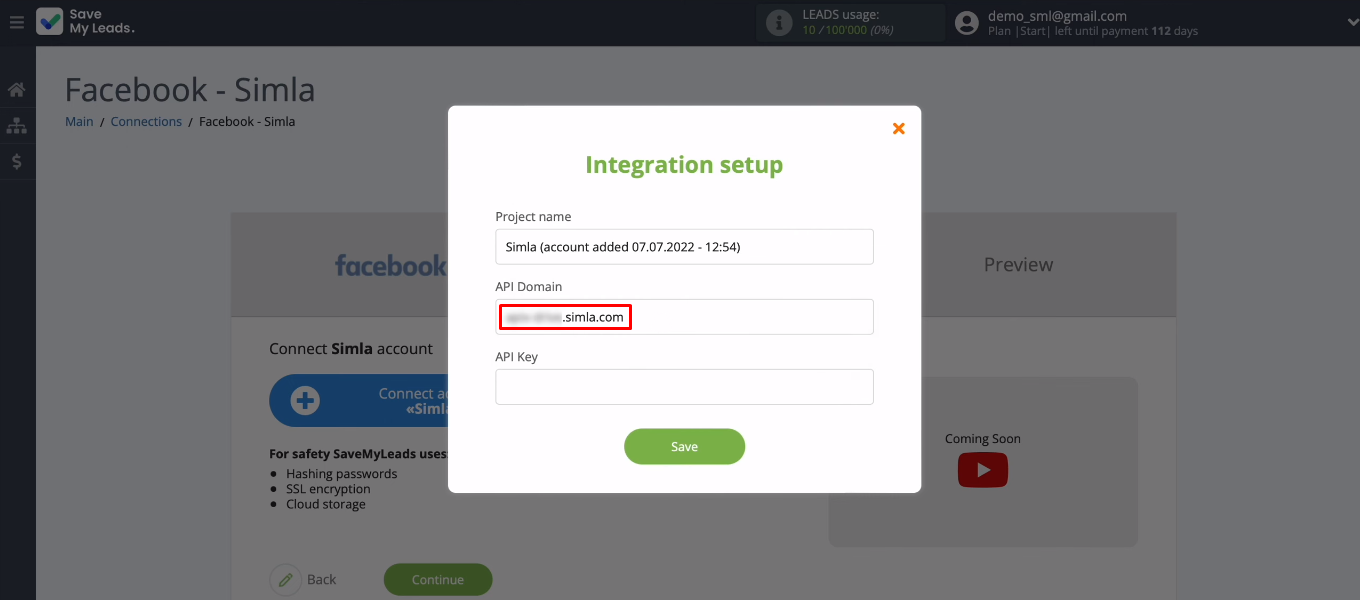
Paste the copied value into the “API Domain” field.
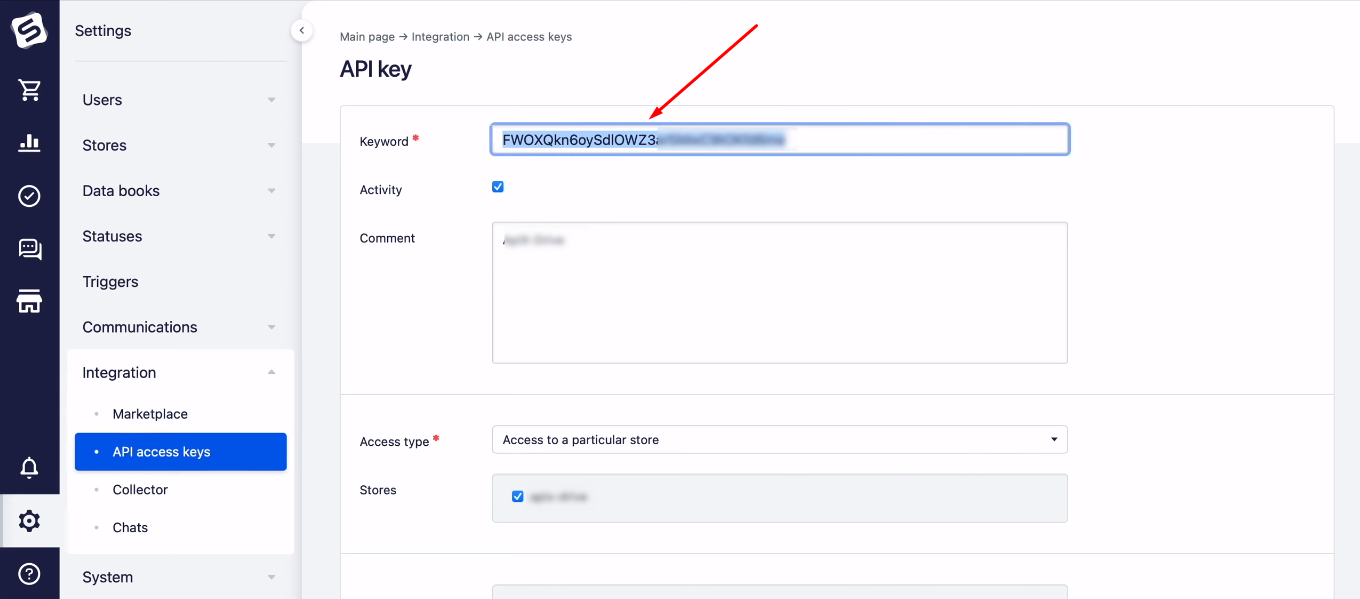
Now in your Simla account go to settings. Find the “Integration” section, it has several sub-items. We are interested in the “API access keys” tab. To create an API key, use the "Add" button. Click on the active API key.
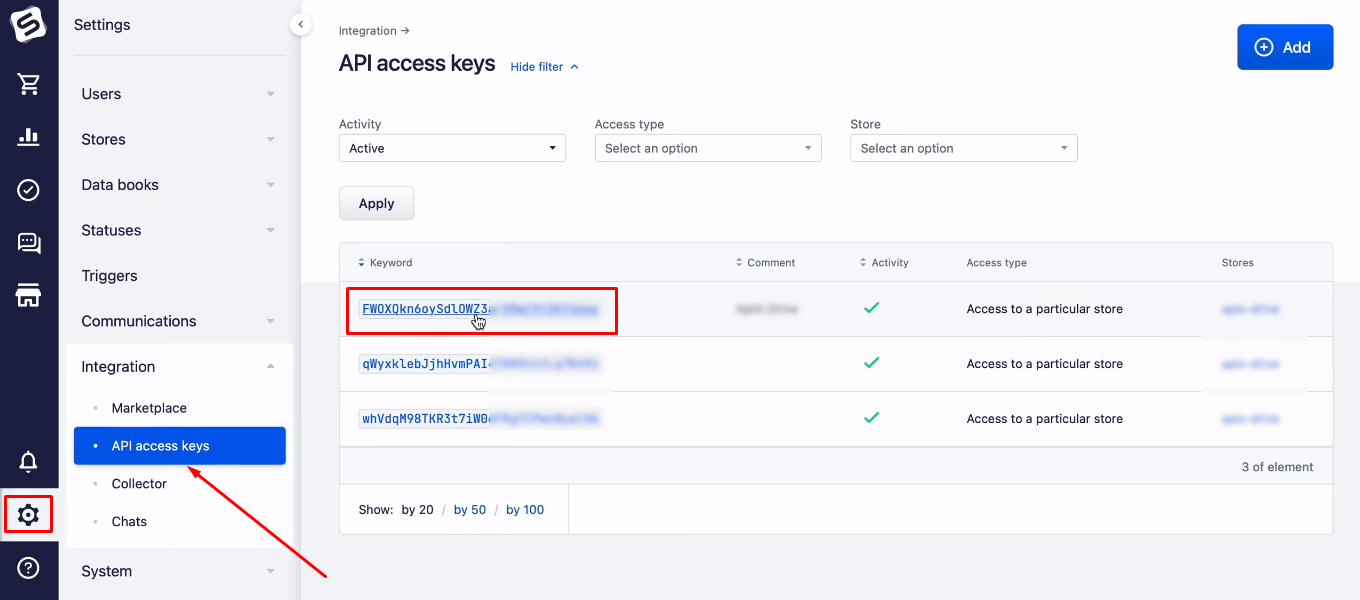
In the window that opens, copy the value in the “Keyword” field.
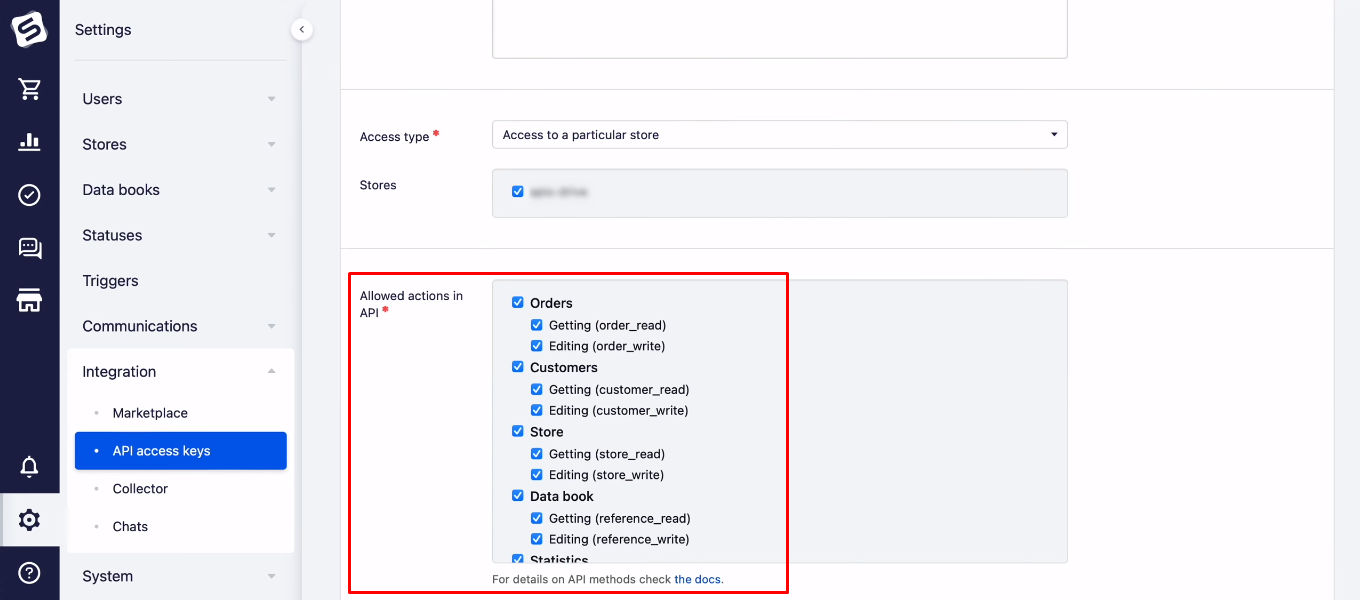
Make sure all checkboxes in the "Allowed actions in API" field are enabled.
Go back to the SaveMyLeads system and paste in the "API Key" field the value you copied earlier in Simla. Click "Save".
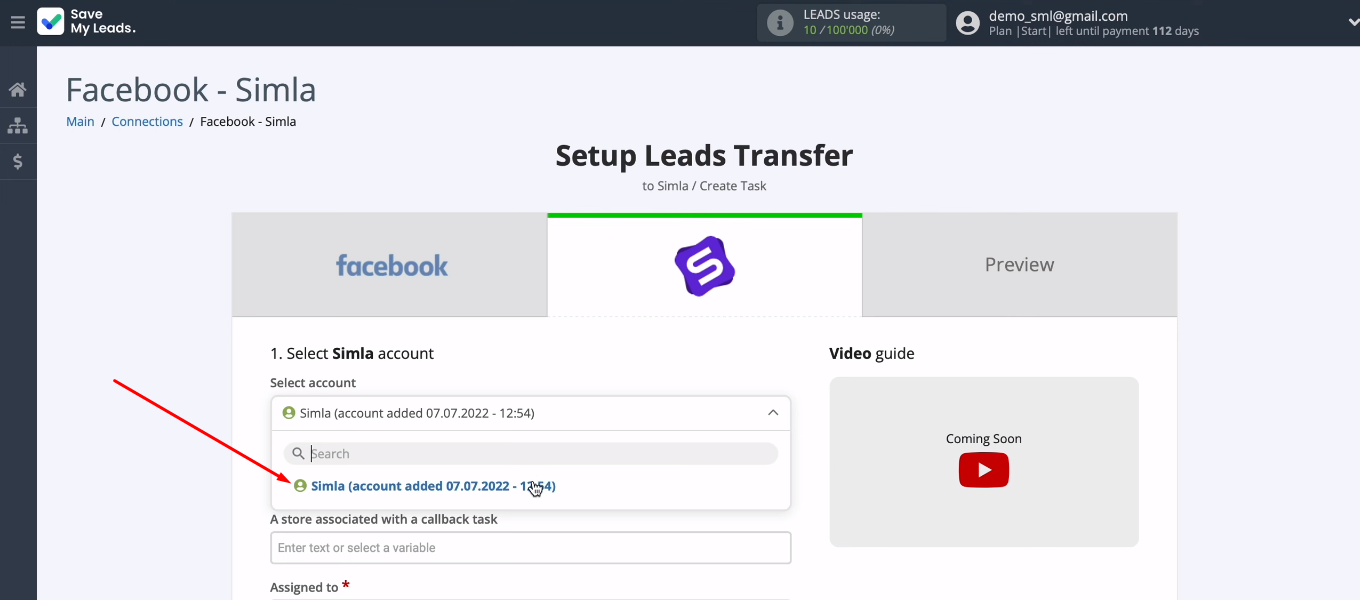
We have added a Simla account to the SML system. It is available for further customization.
Now we need to define the contents of the Simla fields to create new tasks. The SaveMyLeads system offers its own filling option. If you are satisfied with the preset values, you can continue with the settings without changes. To assign a variable, click in the field and select the appropriate value from the dropdown list. To quickly search for a variable, use the "Variable search" field.
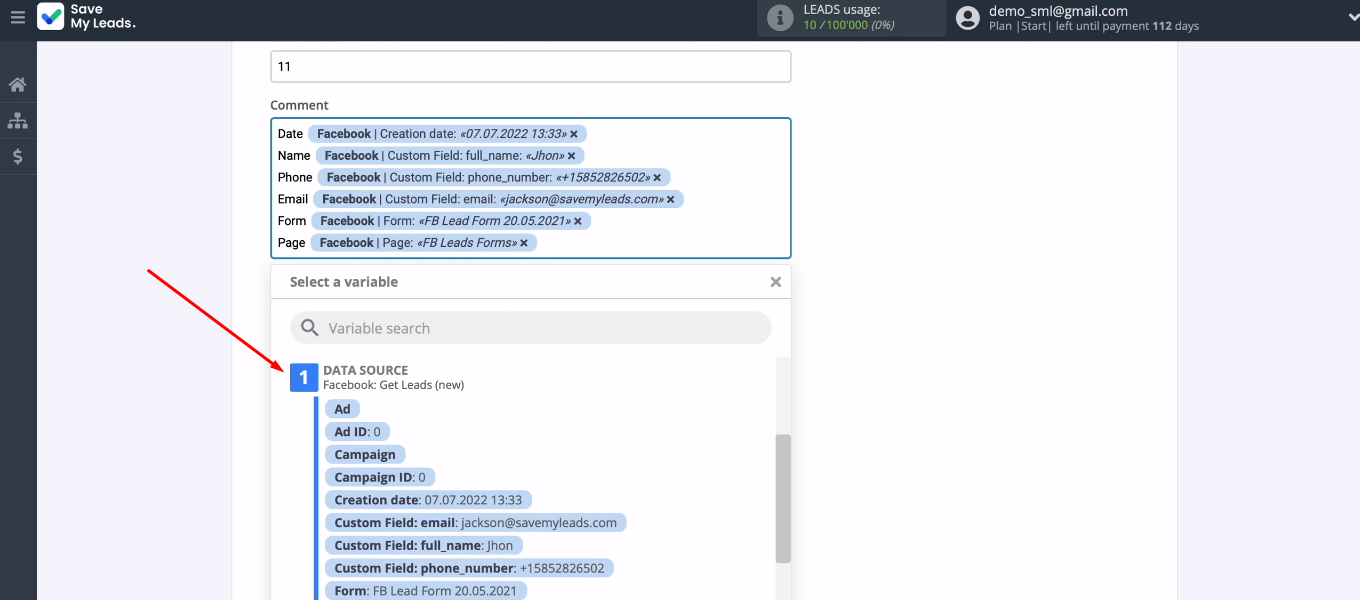
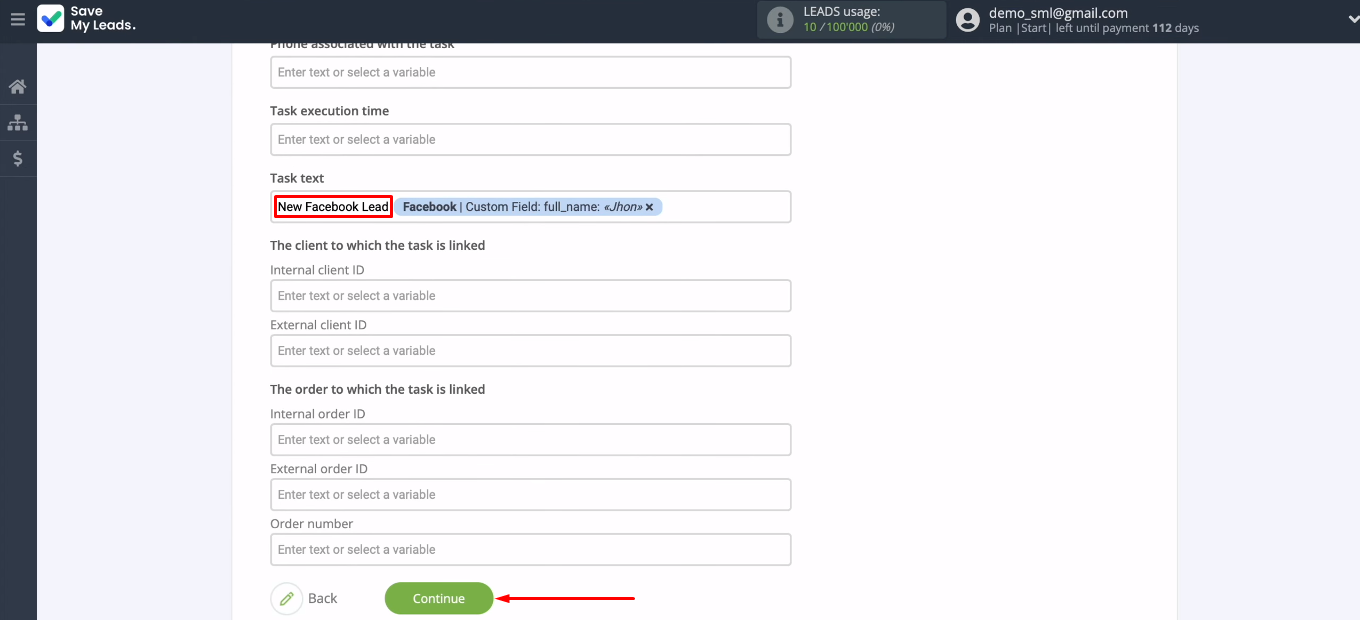
You can also enter text manually and combine it with variables. When all required Simla fields are configured, click “Continue”.
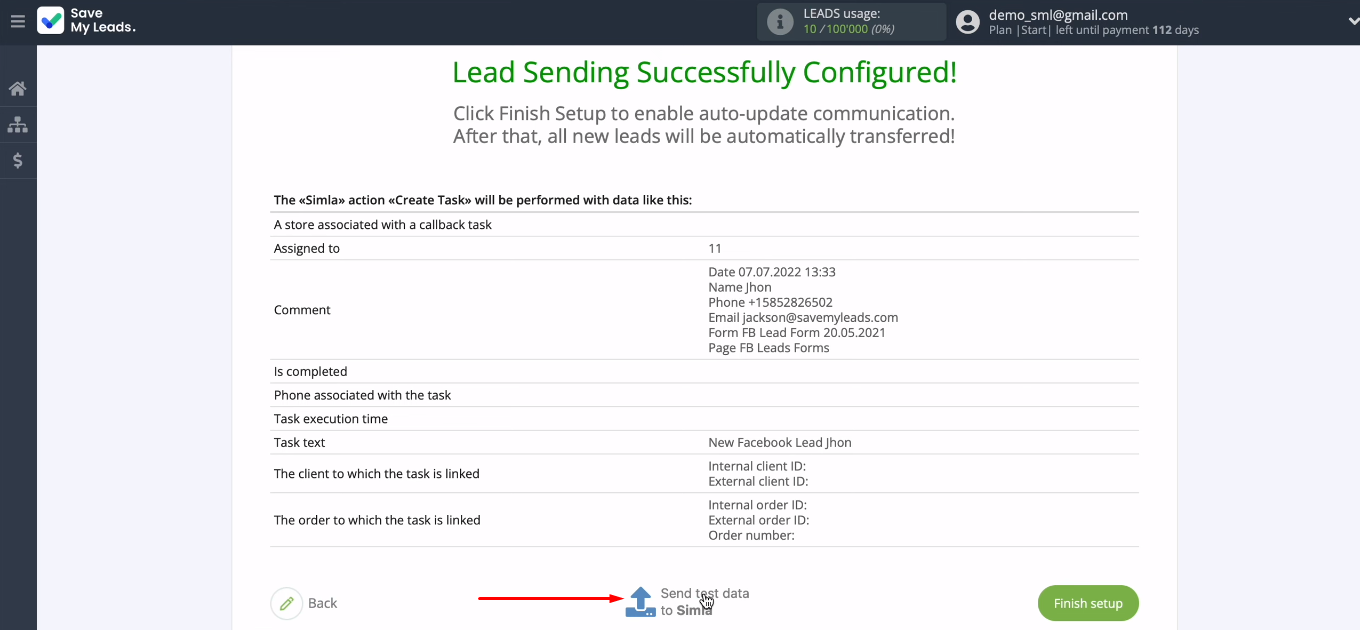
Check out an example of the data that will be used to create new tasks in Simla. You can click the "Back" button, go back one step and make any changes. If everything suits you, click “Send test data to Simla”.
Go to Simla and check the result.

Enable auto-update
Return to the SaveMyLeads workspace and click “Finish setup”. With this action, you will start the integration and the online connector will start tracking new leads on Facebook.
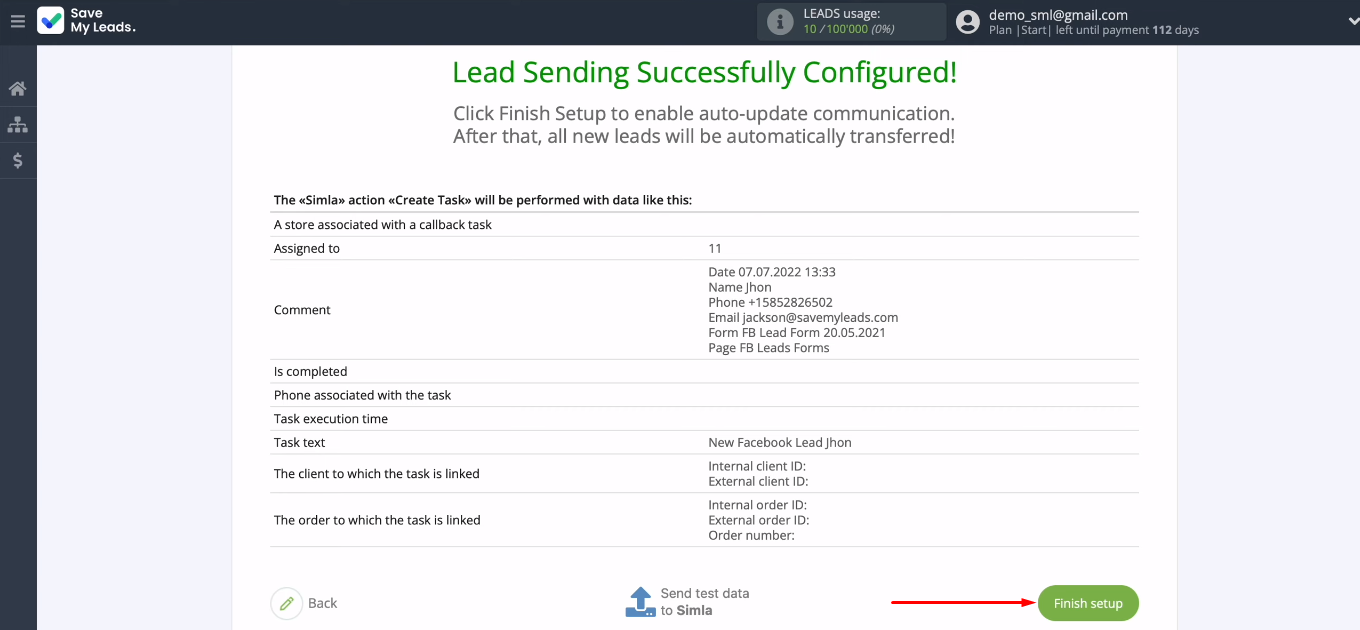
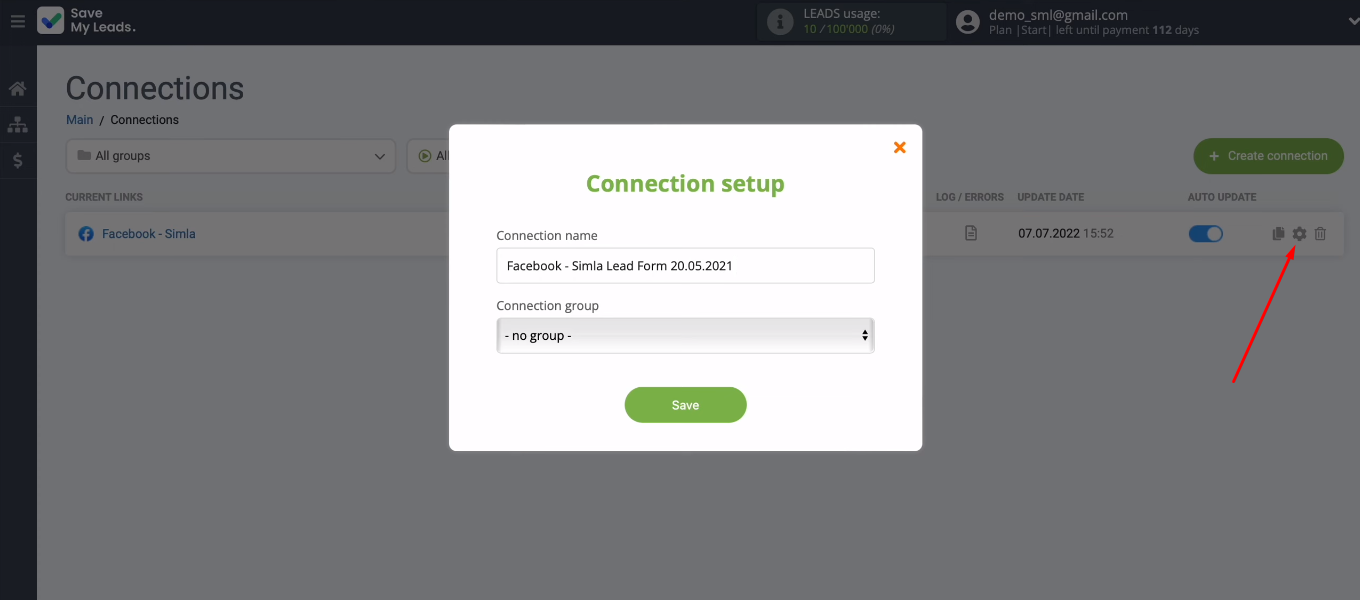
To change the name of the connection, click the “gear”. In the settings window, you can also add an integration to a specific group. This is useful when you have many connections configured. You can group them for quick search and work with them.
Result
We set up the integration of Facebook Lead Ads and Simla using the SaveMyLeads service. As you can see, we did not need any special knowledge and skills. The whole setup process takes 5-10 minutes. And as a result, you completely get rid of the routine operation of transferring data from Facebook to Simla. The introduction of automation is a step towards improving the quality of processing orders from social networks. Stay in your Simla account and quickly receive data on new leads generated using Facebook Lead Ads.
