In this tutorial, we'll show you how to automatically upload leads from your Facebook advertising account to the ClickUp service as new tasks. You will spend no more than 5 minutes of your time on setting up a connection, even without coding knowledge. Thanks to this, you can instantly get new leads to the ClickUp task service for further work with them.
Contents:
1. How to set up Facebook and ClickUp integration
2. Connect Facebook Leads Ads
3. Connect ClickUp
4. Automatic data update
5. Finish the setup
A Facebook ad account allows you to collect leads for your business and increase sales and the number of customers. It is not very convenient to work with new incoming leads on a Facebook account: you constantly have to monitor incoming requests from customers and pass them on to responsible managers, plus, with a large flow, some of them can be missed.
It is much more convenient to set up the upload of leads from Facebook to a service for teamwork, for example, ClickUp and interact with new leaders already there: assign a responsible manager to call customers, send promotional and transactional letters, and conduct an appeal through the sales funnel.
This will help not only to warm up interest in your company, products, but also to distribute incoming requests from leads among the company's employees - everyone will be engaged in certain tasks or a potential buyer, promptly respond to his requests, work with him from the moment the application is received to the dispatch of the purchased product.
Thanks to the API integration of your Facebook advertising account and the ClickUp service, you will not miss a single client, quickly process requests, thereby increasing customer loyalty to your company.
How to set up Facebook and ClickUp integration
You can integrate the work of the systems yourself if you understand programming, or you can turn to IT specialists for help. But this is an additional expense of time and money, for which you can miss out on potential customers. To avoid this, use the SaveMyLeads online connector. It is specifically designed to help business owners solve the problems with the integration of various services and systems that companies need to automate business processes and work more efficiently.
Connect Facebook Leads Ads
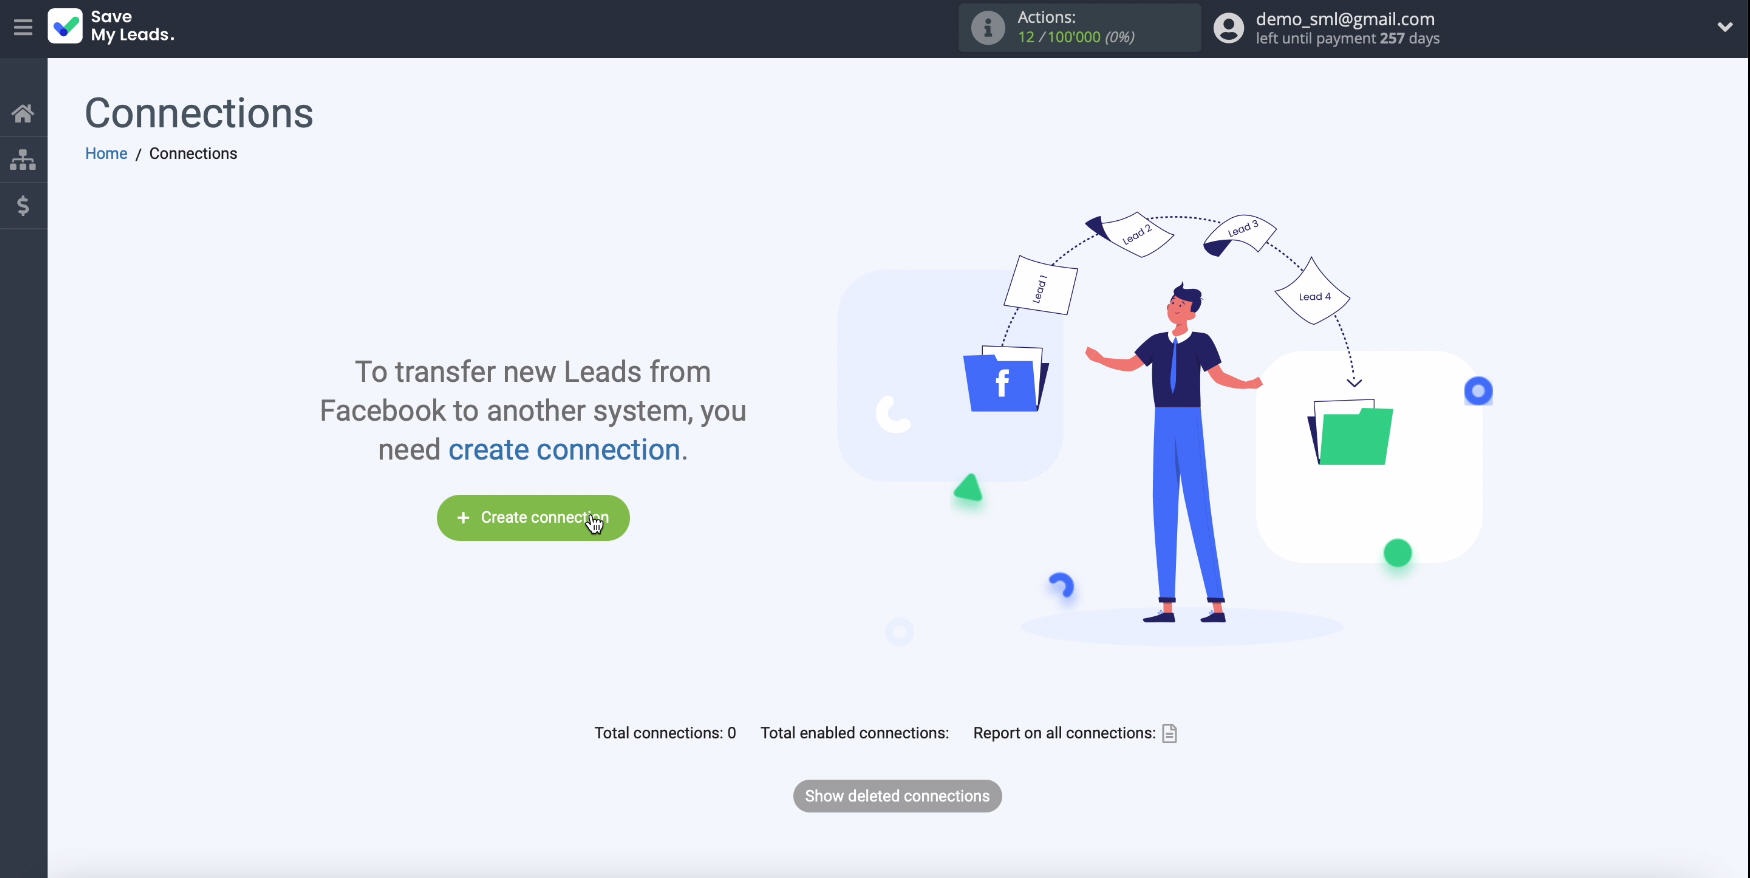
To start setting up, create a new connection
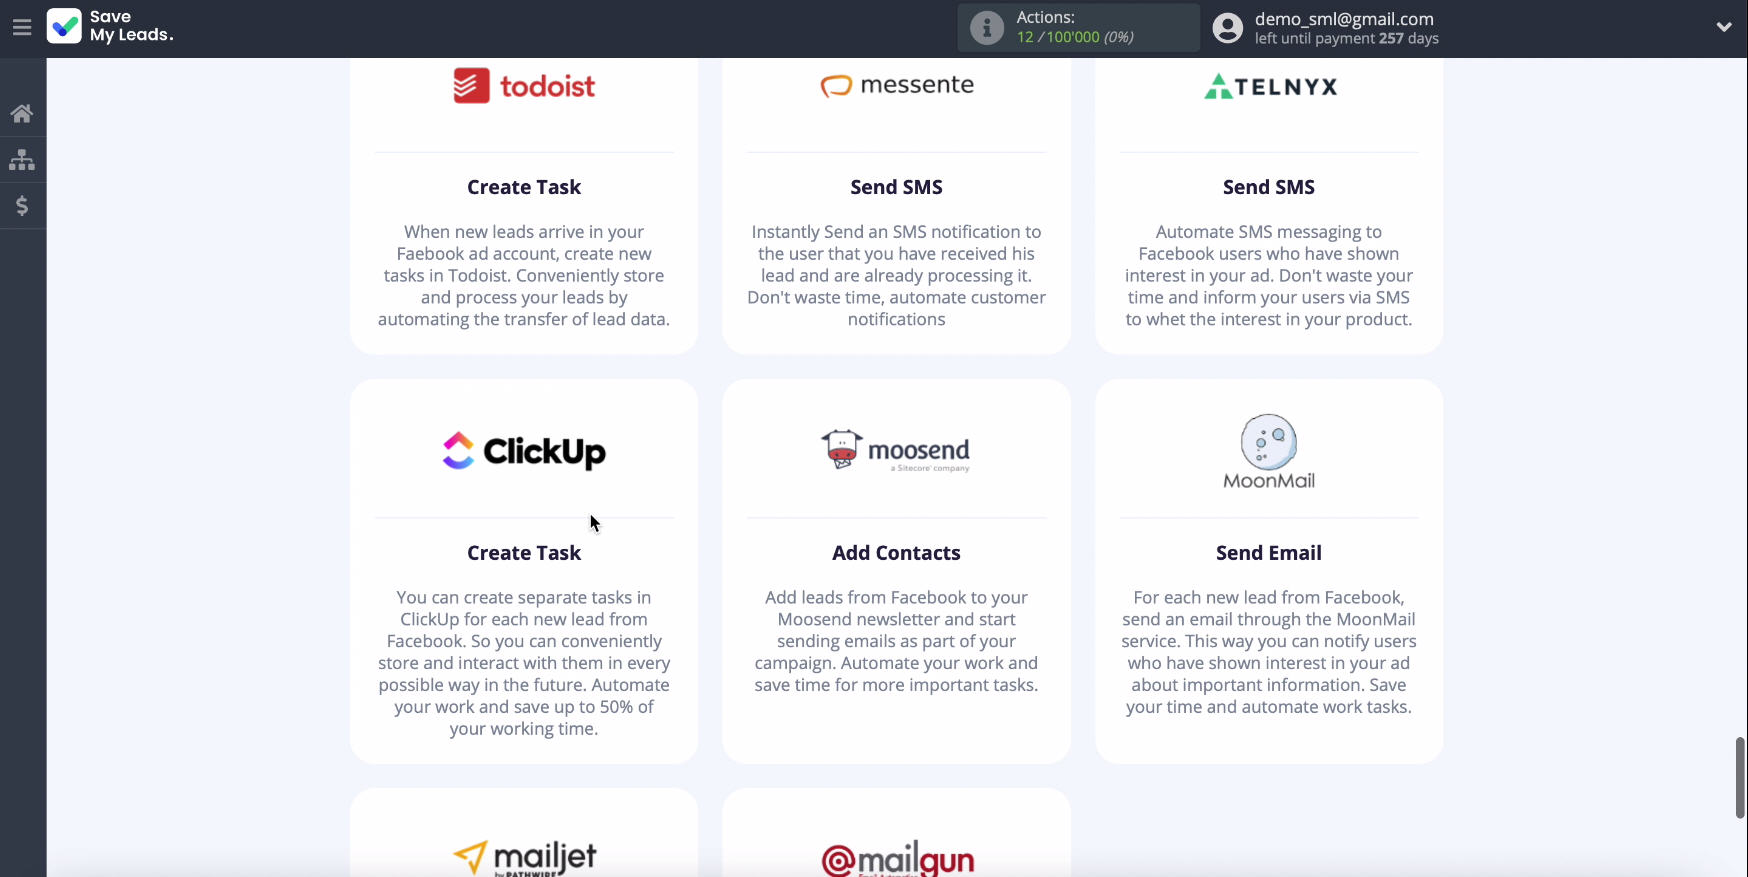
Select a ready-made template for systems to which data can be transferred, in our case, this is ClickUp.
Next, you need to connect your Facebook account to the SaveMyLeads system.
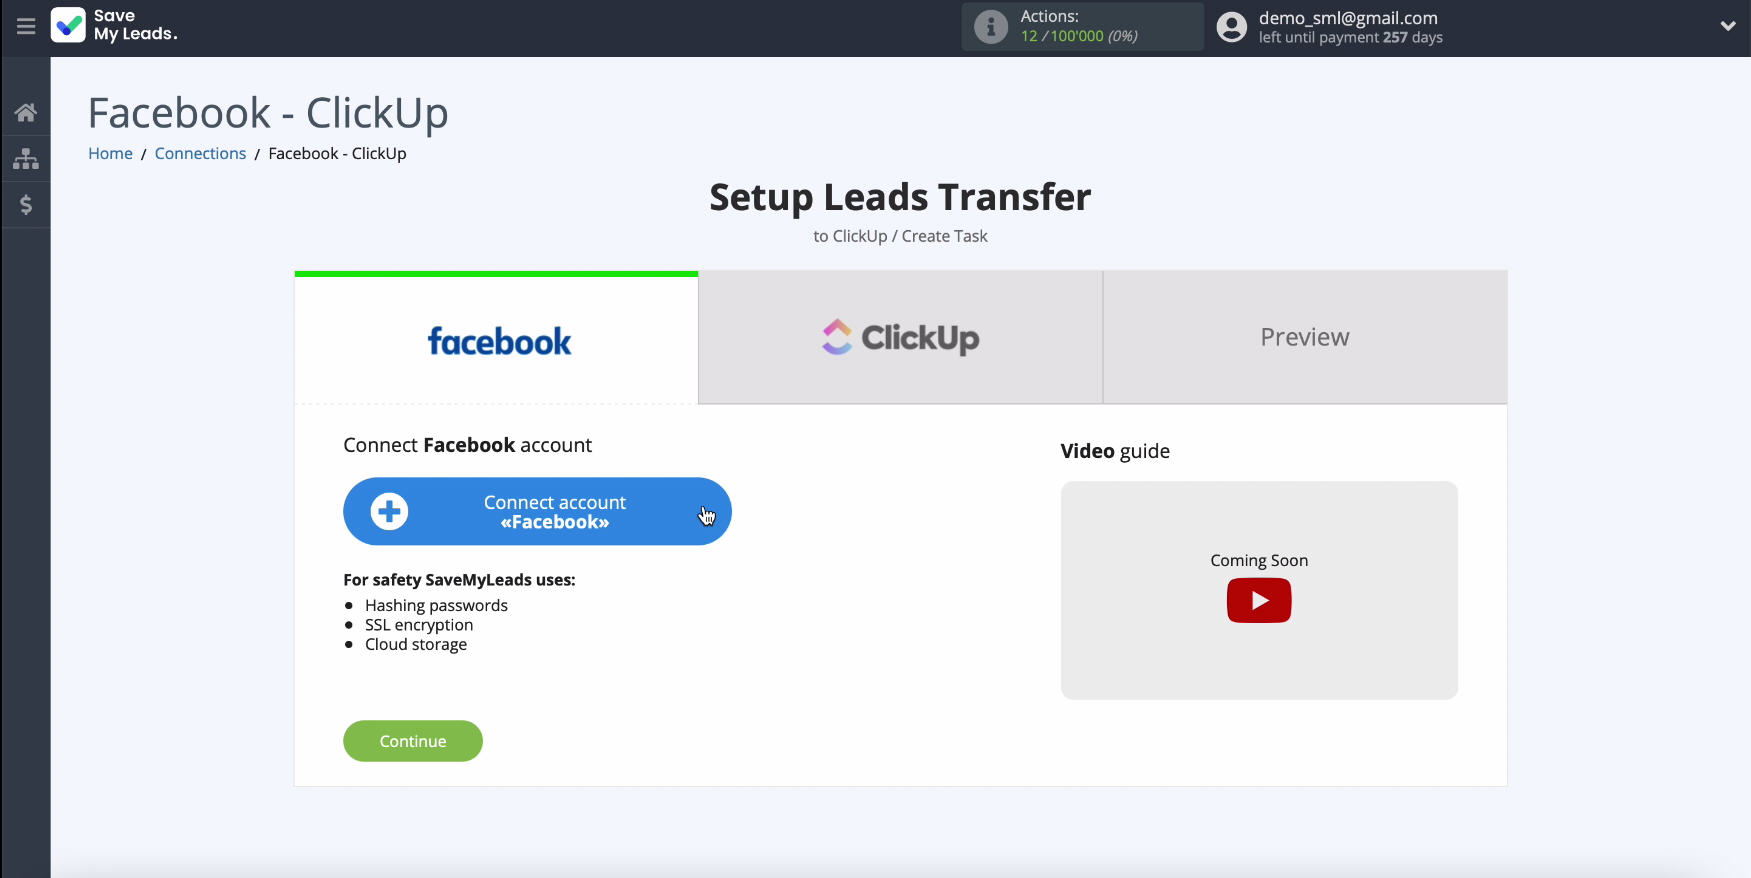
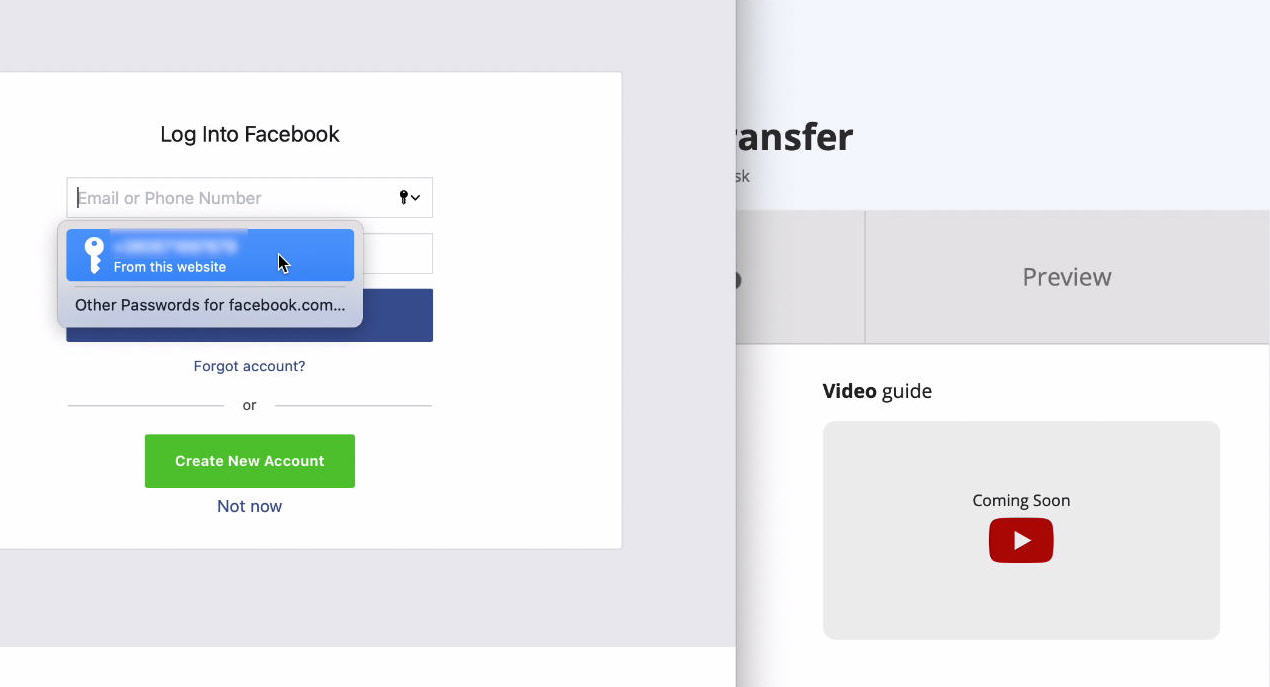
To connect your Facebook account to the SaveMyLeads system, enter your username and password from your personal account.
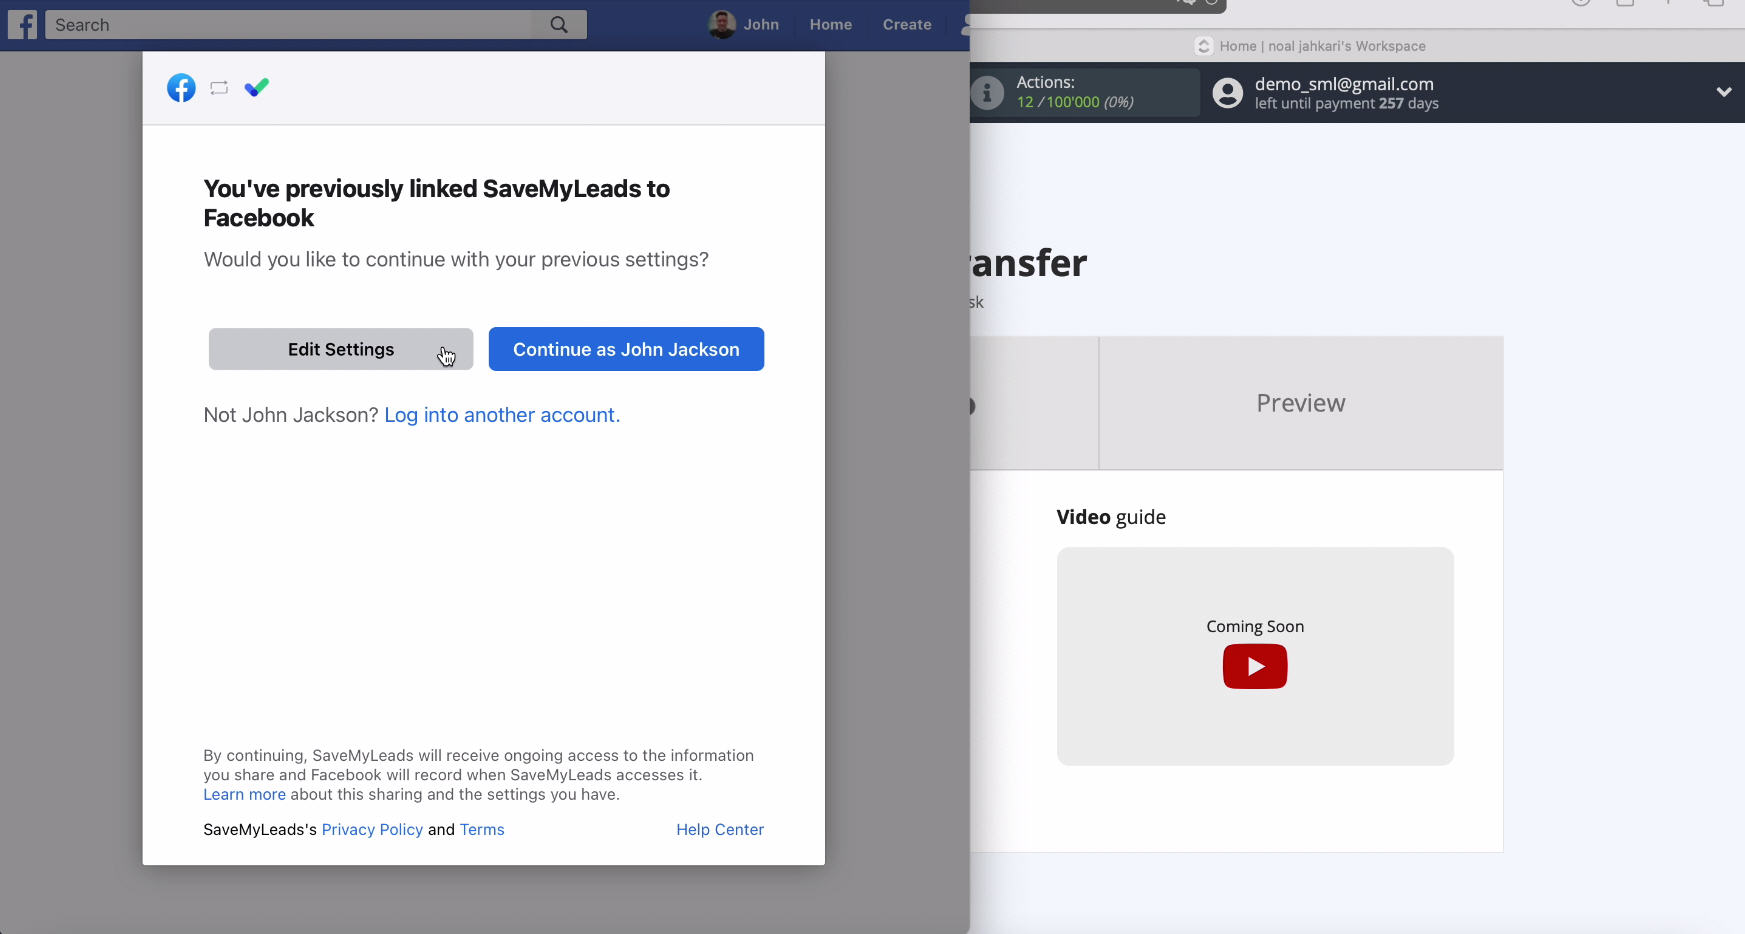
In the new window, click Edit Settings.
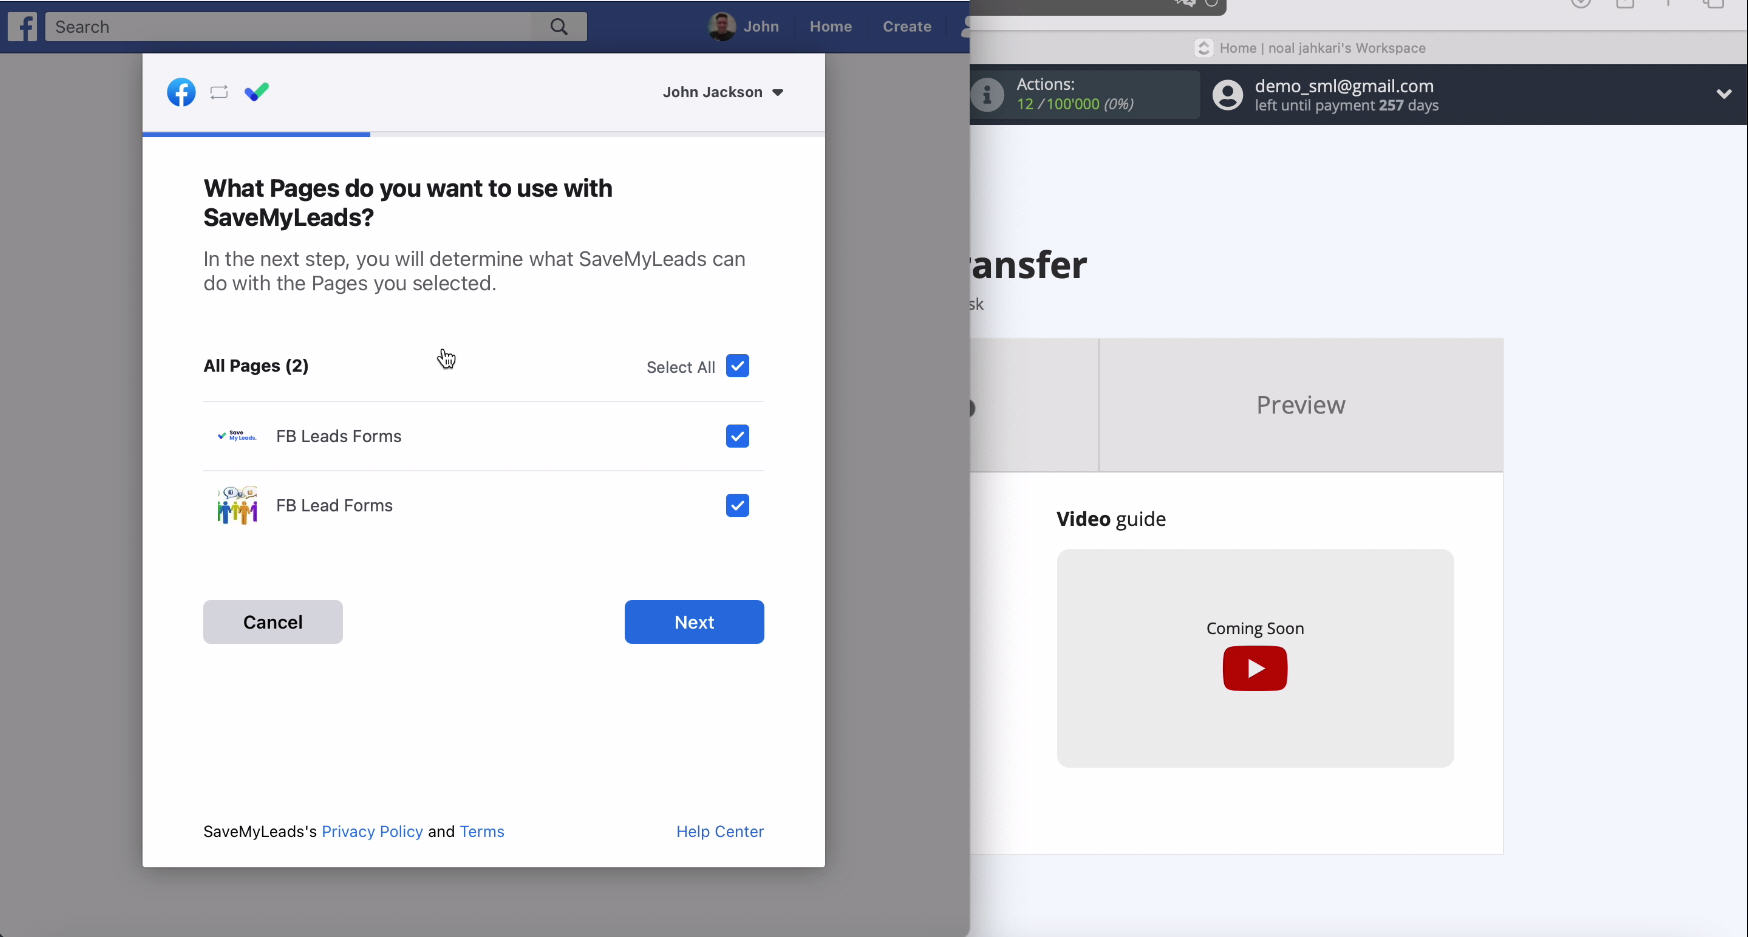
Now you will see all the advertising pages available to you, it is advisable to tick all of them at once so that you can work with them in the future. After checking the boxes, click "Continue".
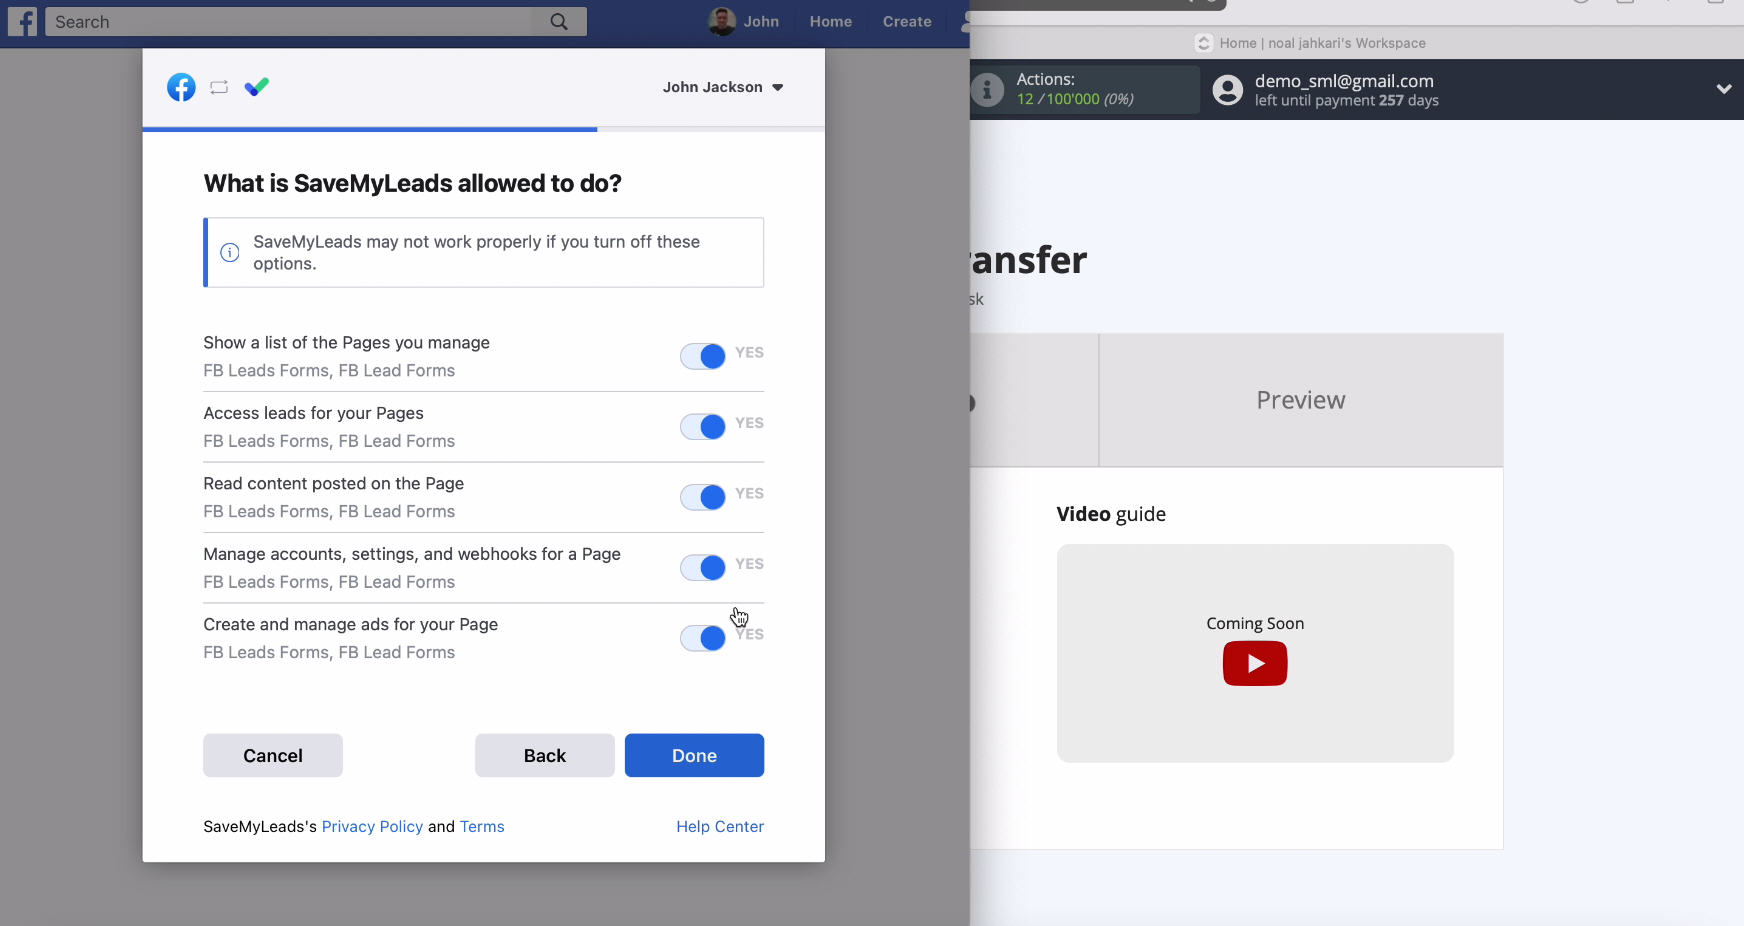
At the next stage, you need to leave all the access checkboxes enabled and click "Next".
In a new window, you will see the connected account, select it.
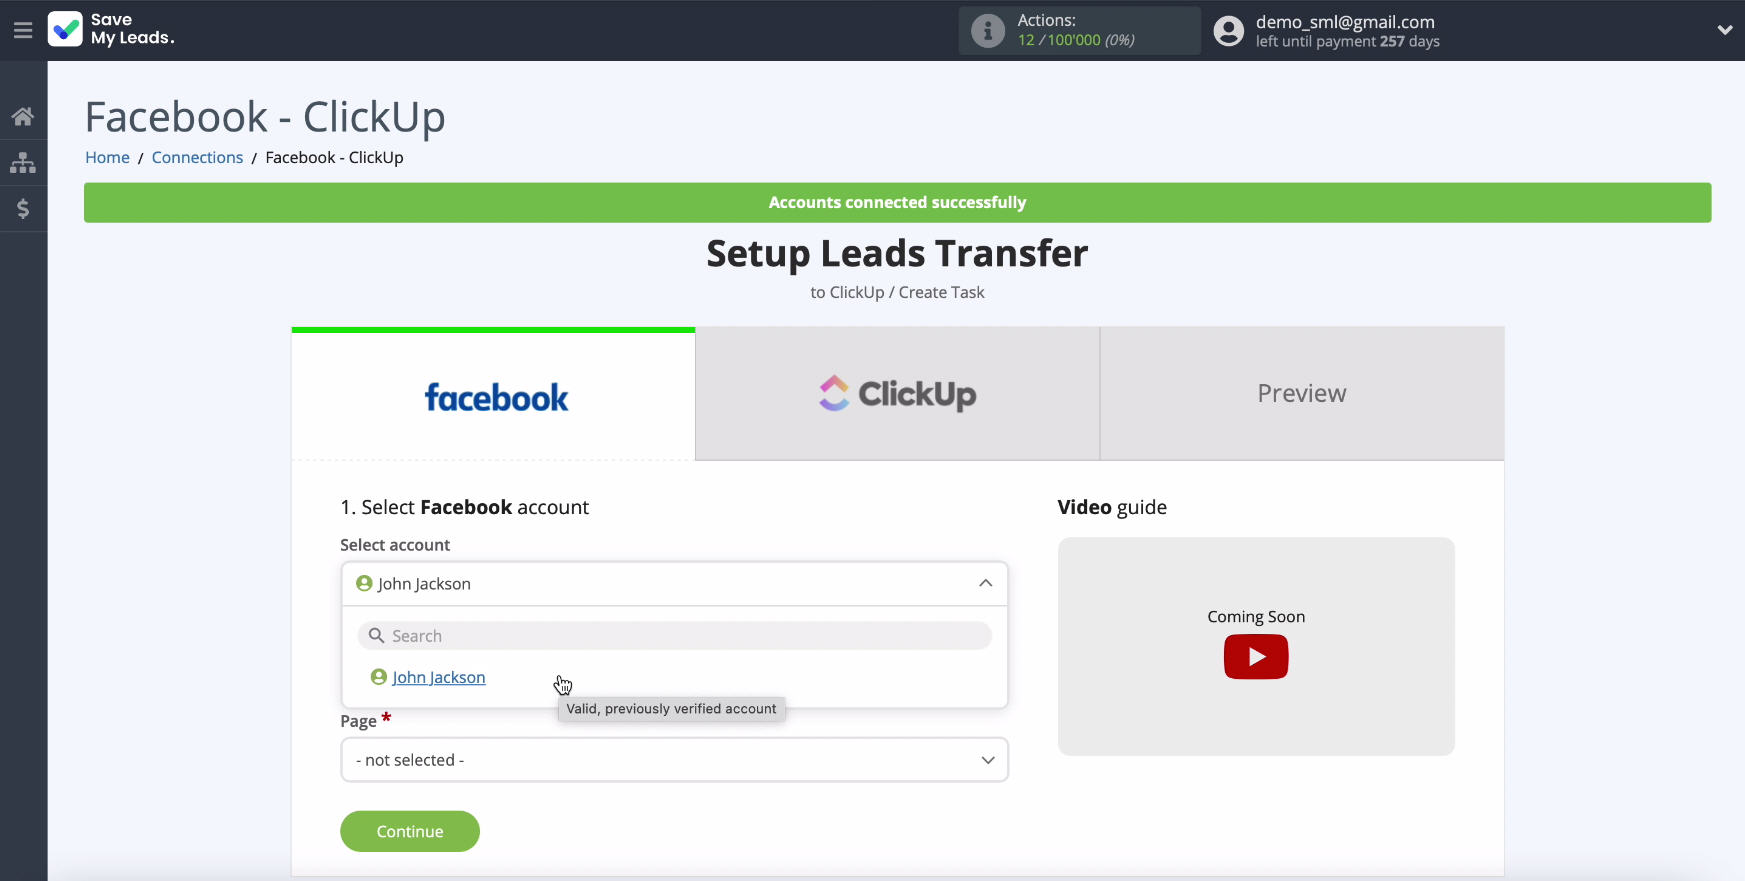
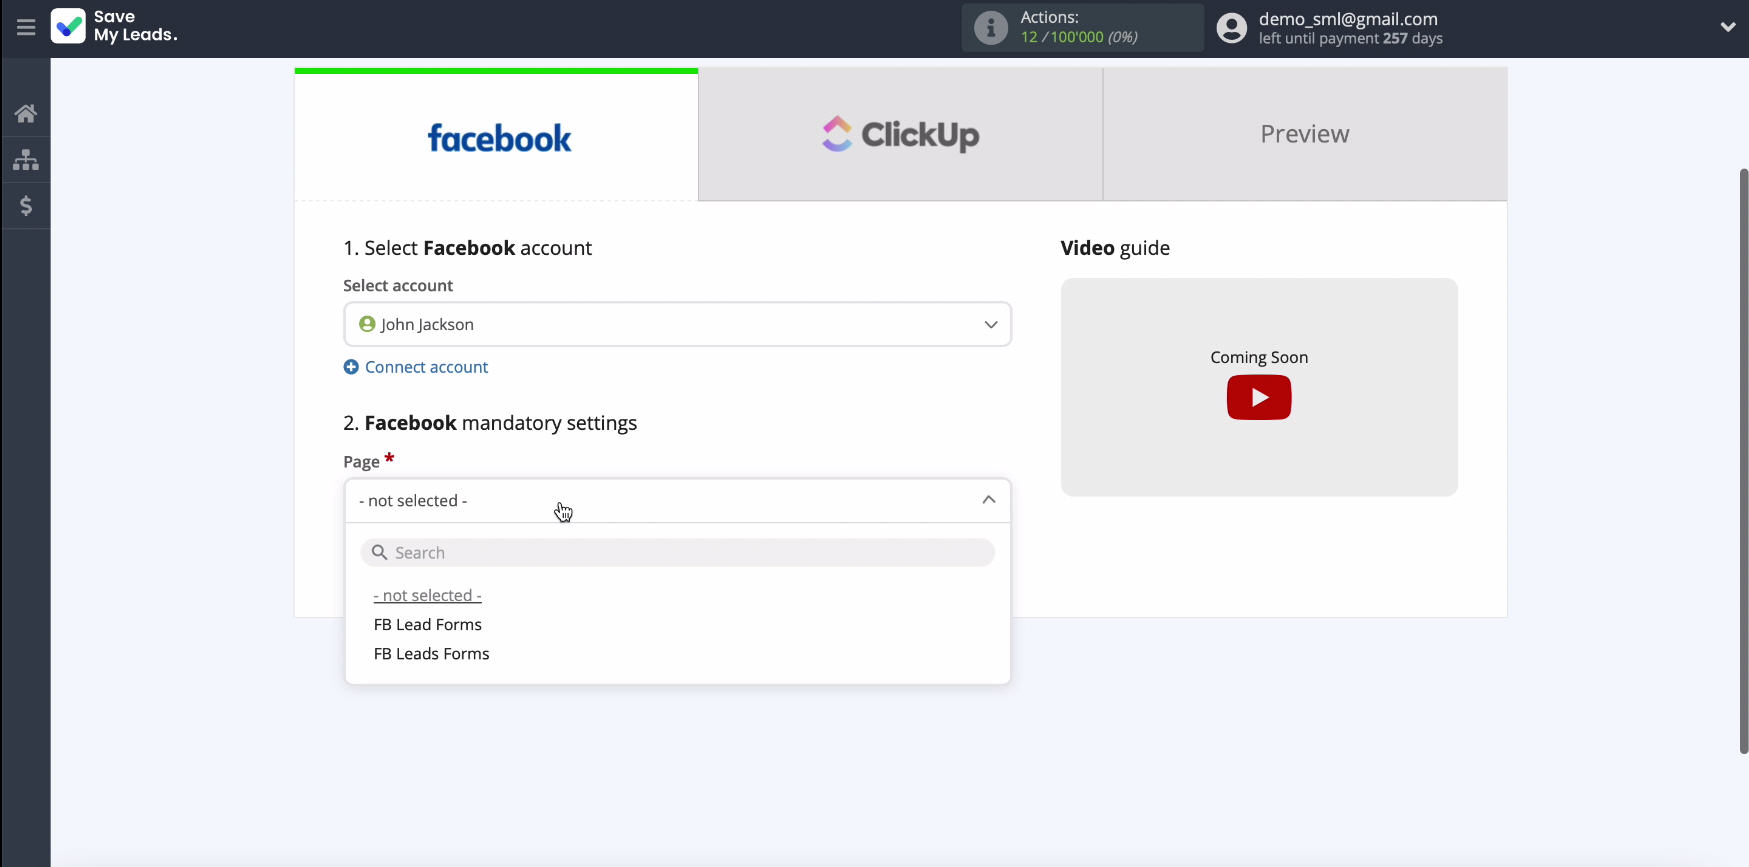
In the same window, you must select the advertising page for which you want to send leads.
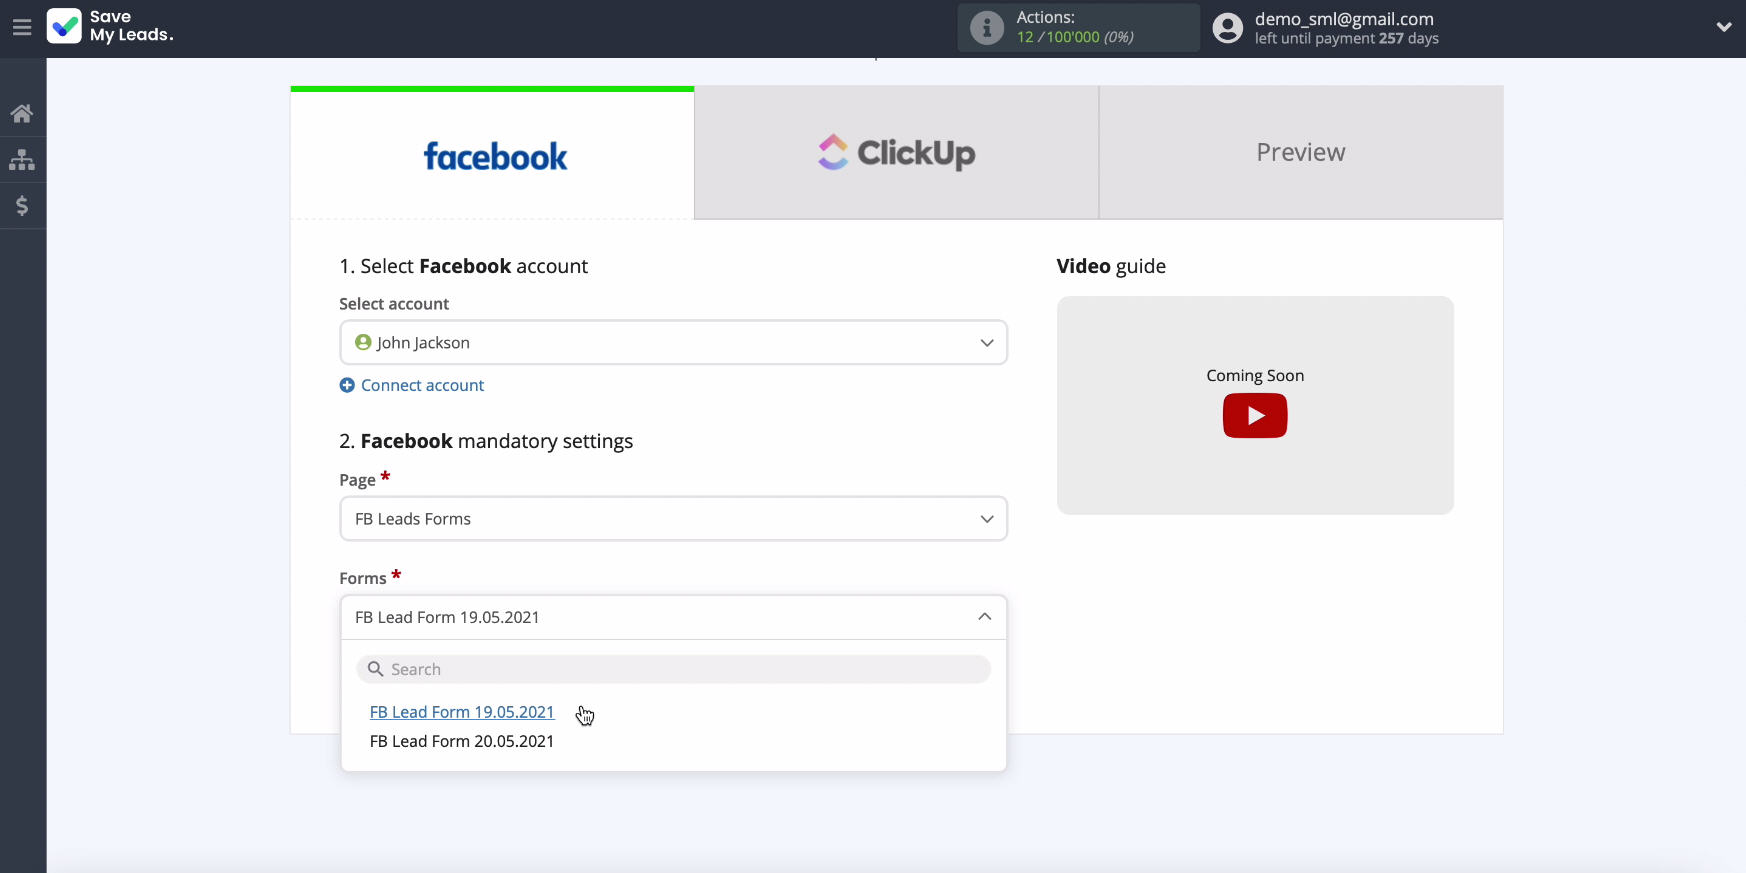
In the same window, specify the forms for uploading data. If you have several of them, you will need to create connections for each of them.
Connect ClickUp
Now you need to connect your ClickUp account to the SaveMyLeads service.
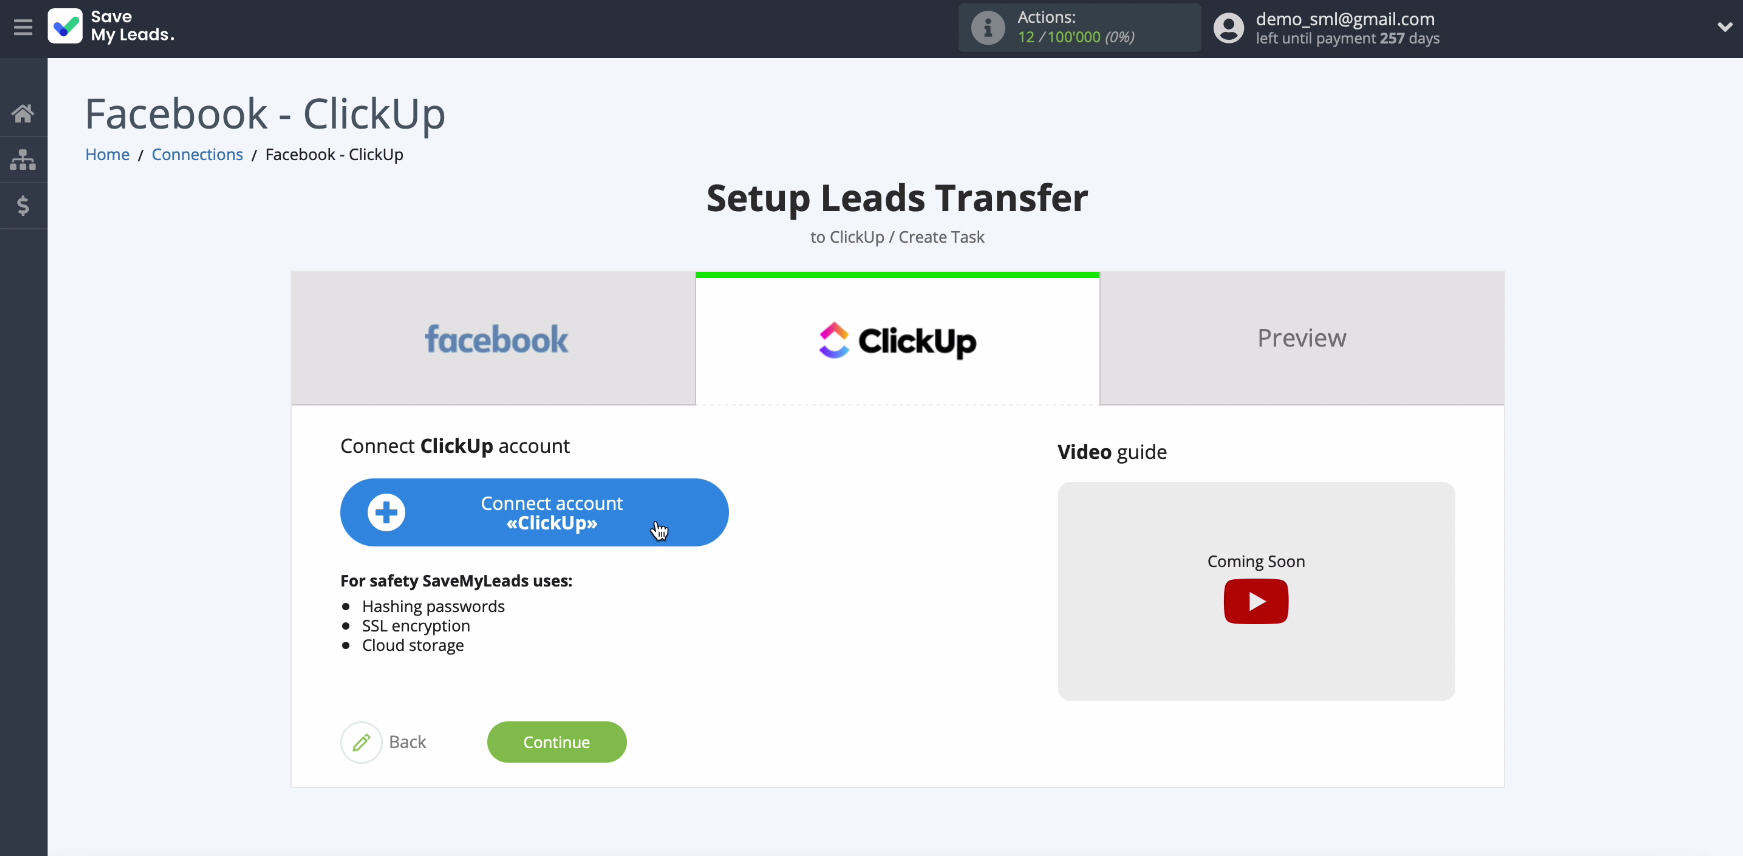
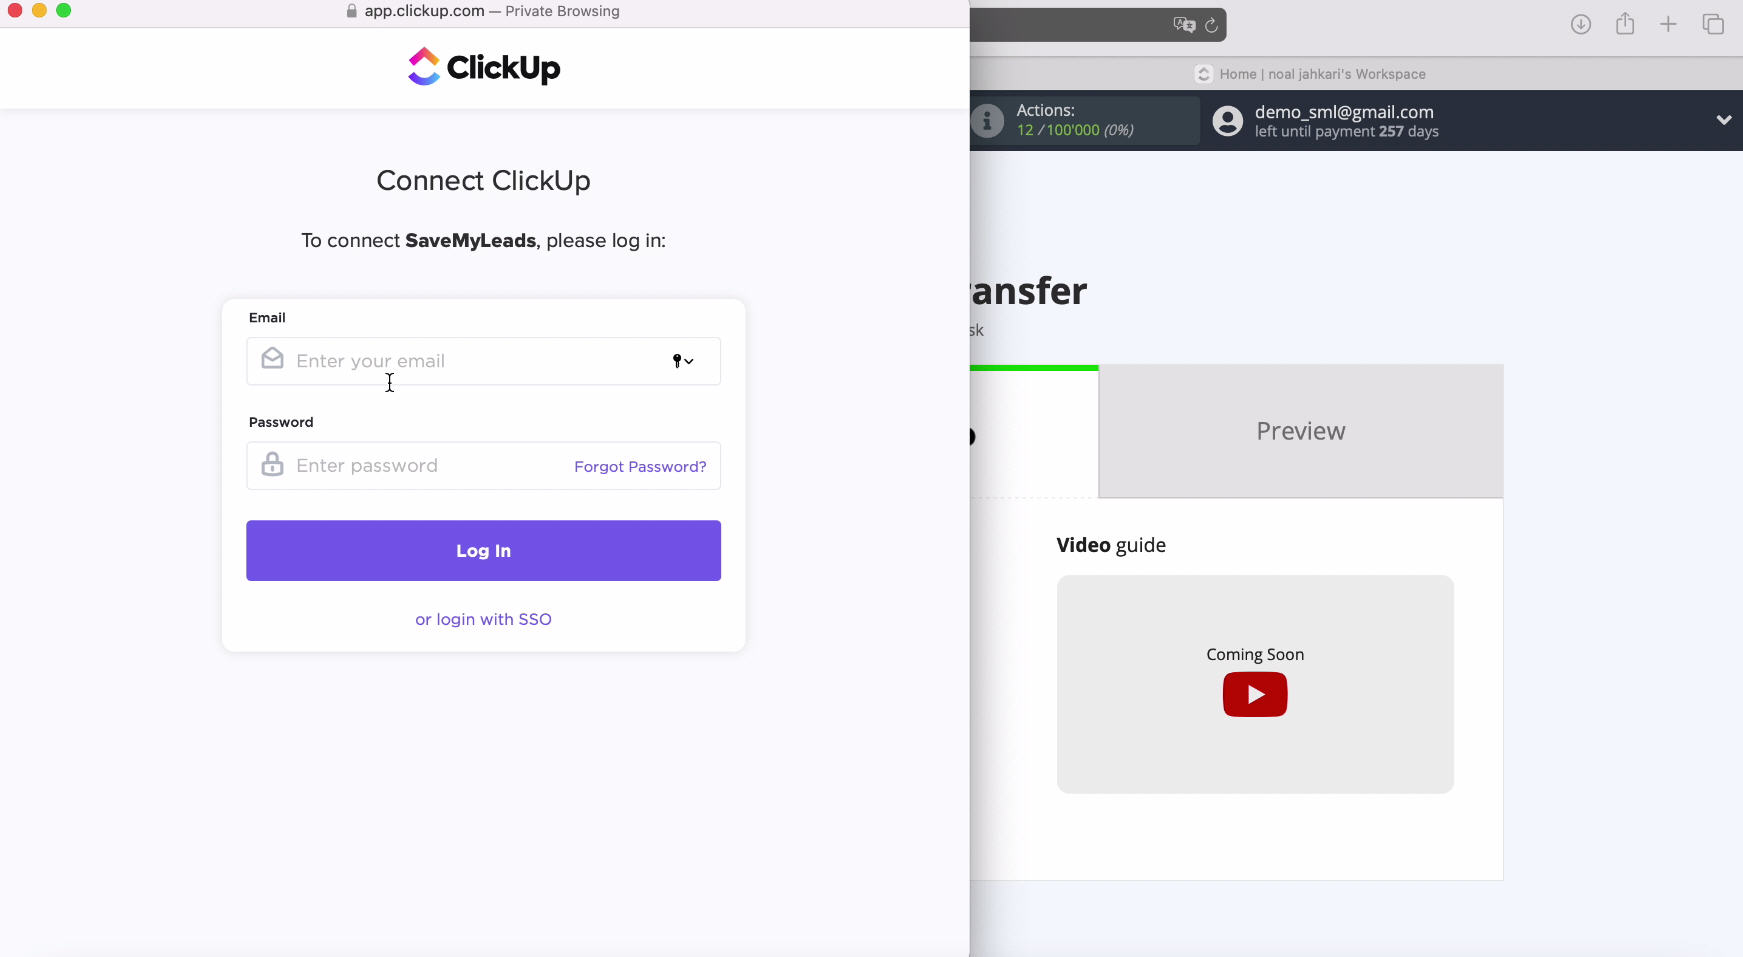
To continue connecting, in the window that appears, specify the username and password from your ClickUp personal account.
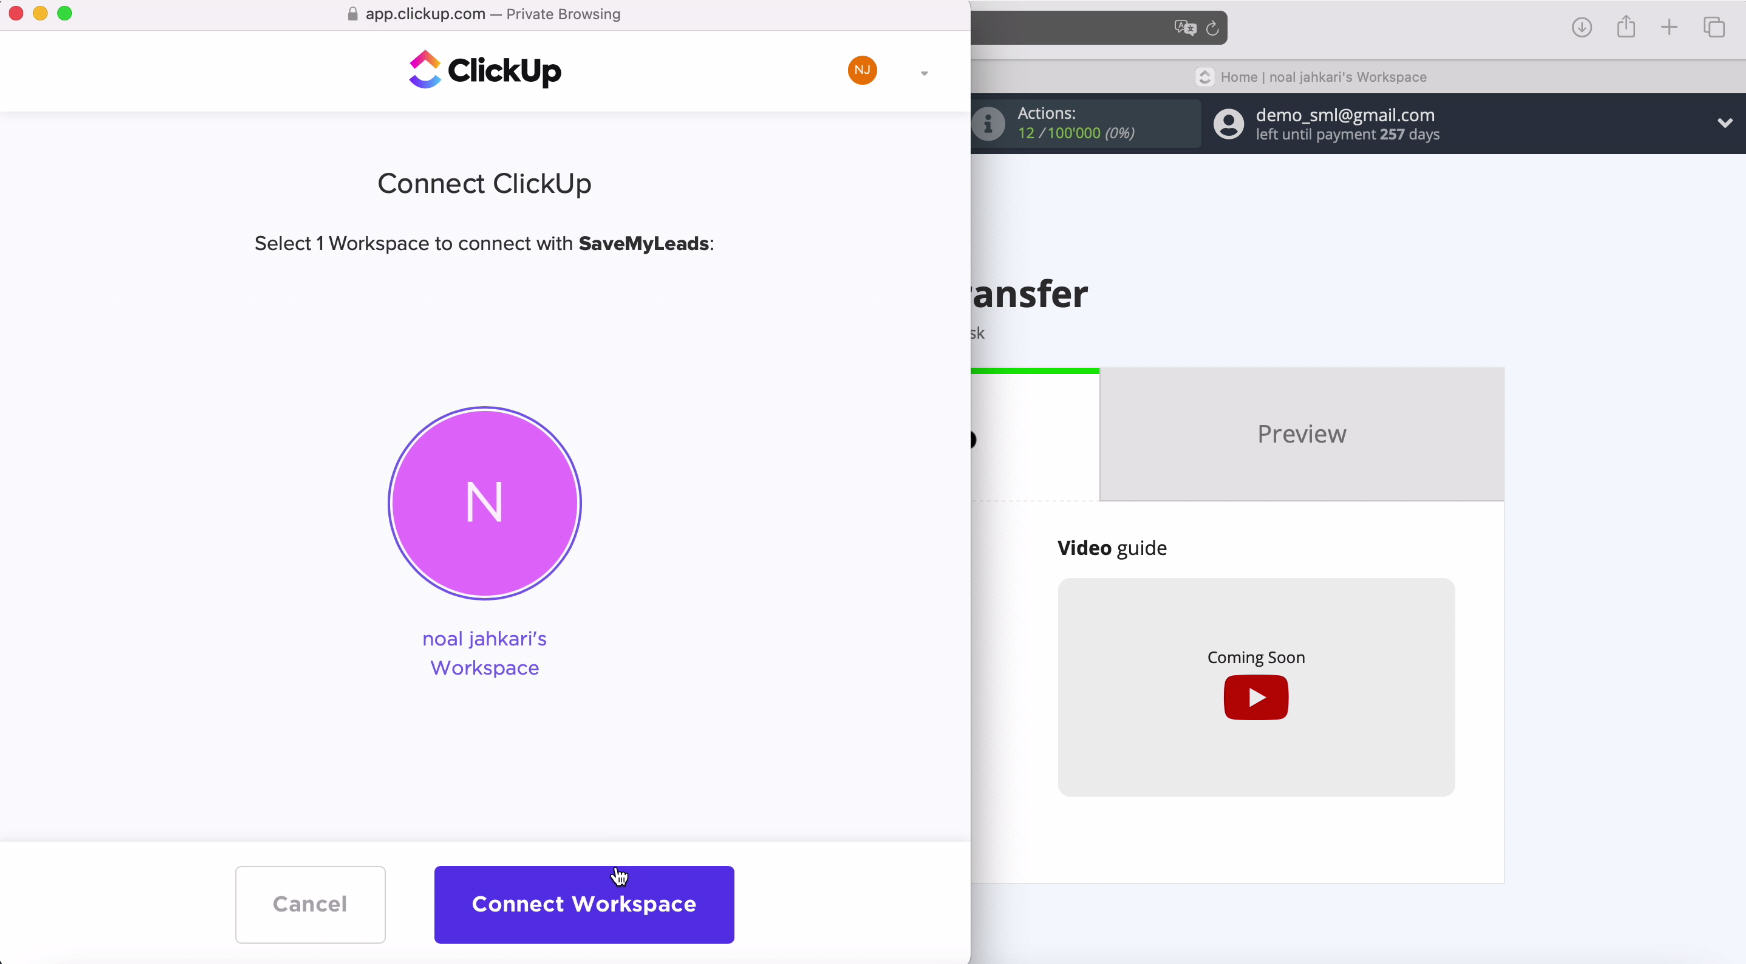
In the window that opens, select your Workspace and click the Connect Workspace button.
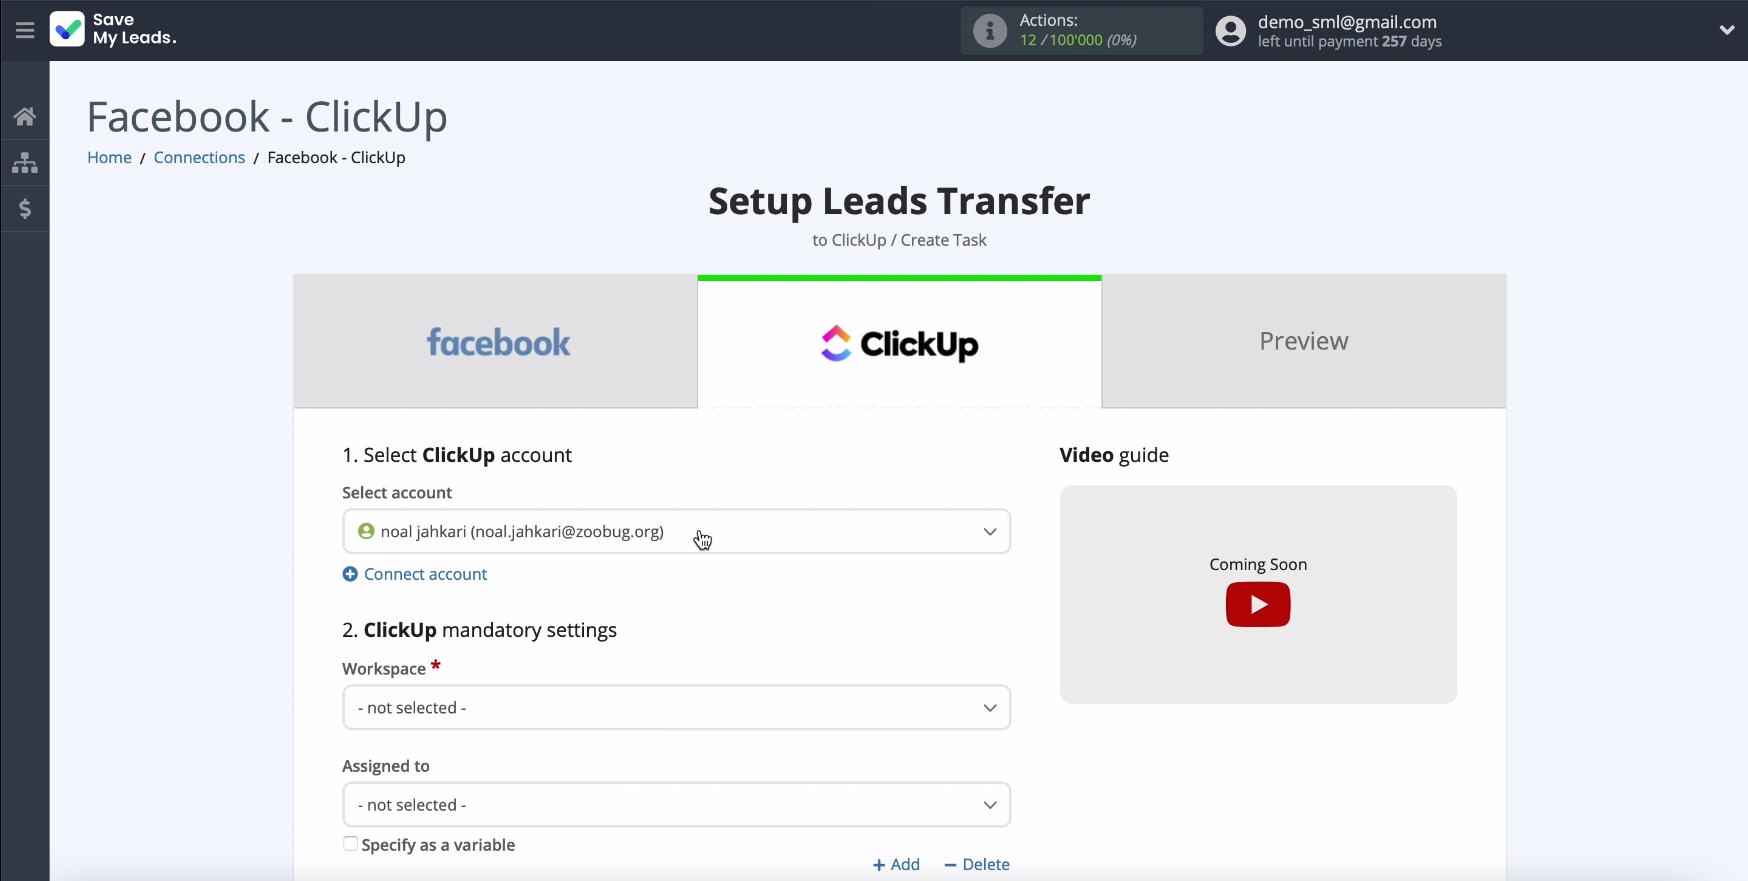
Now you need to select the displayed connected account from the list.
In the same window, in the appropriate sections, select the Workspace in which new tasks will be created.
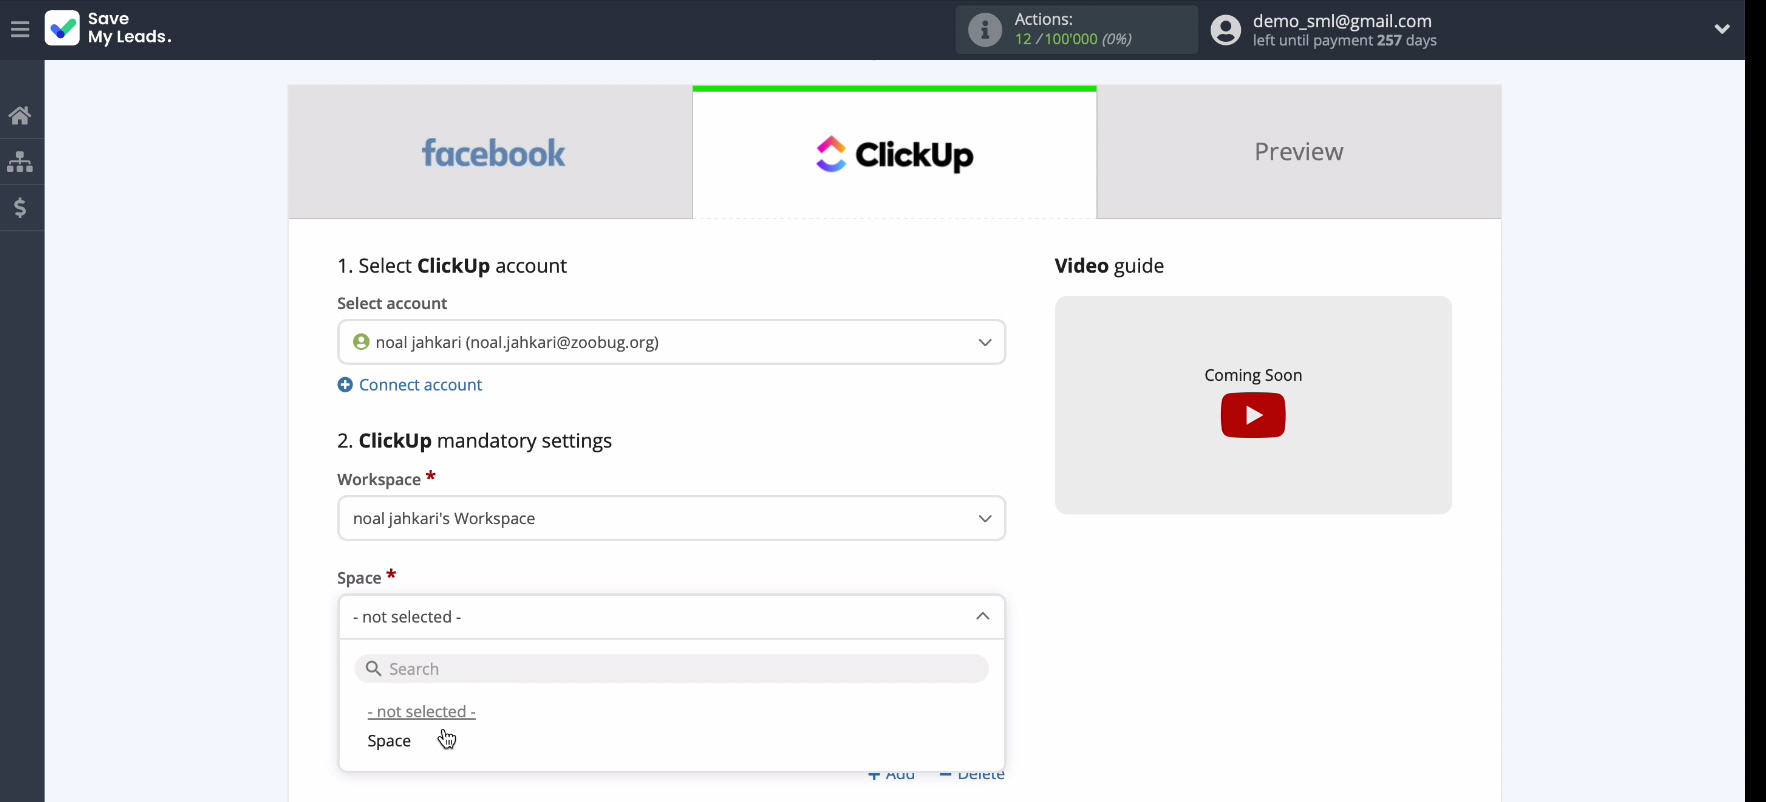
You must also select List
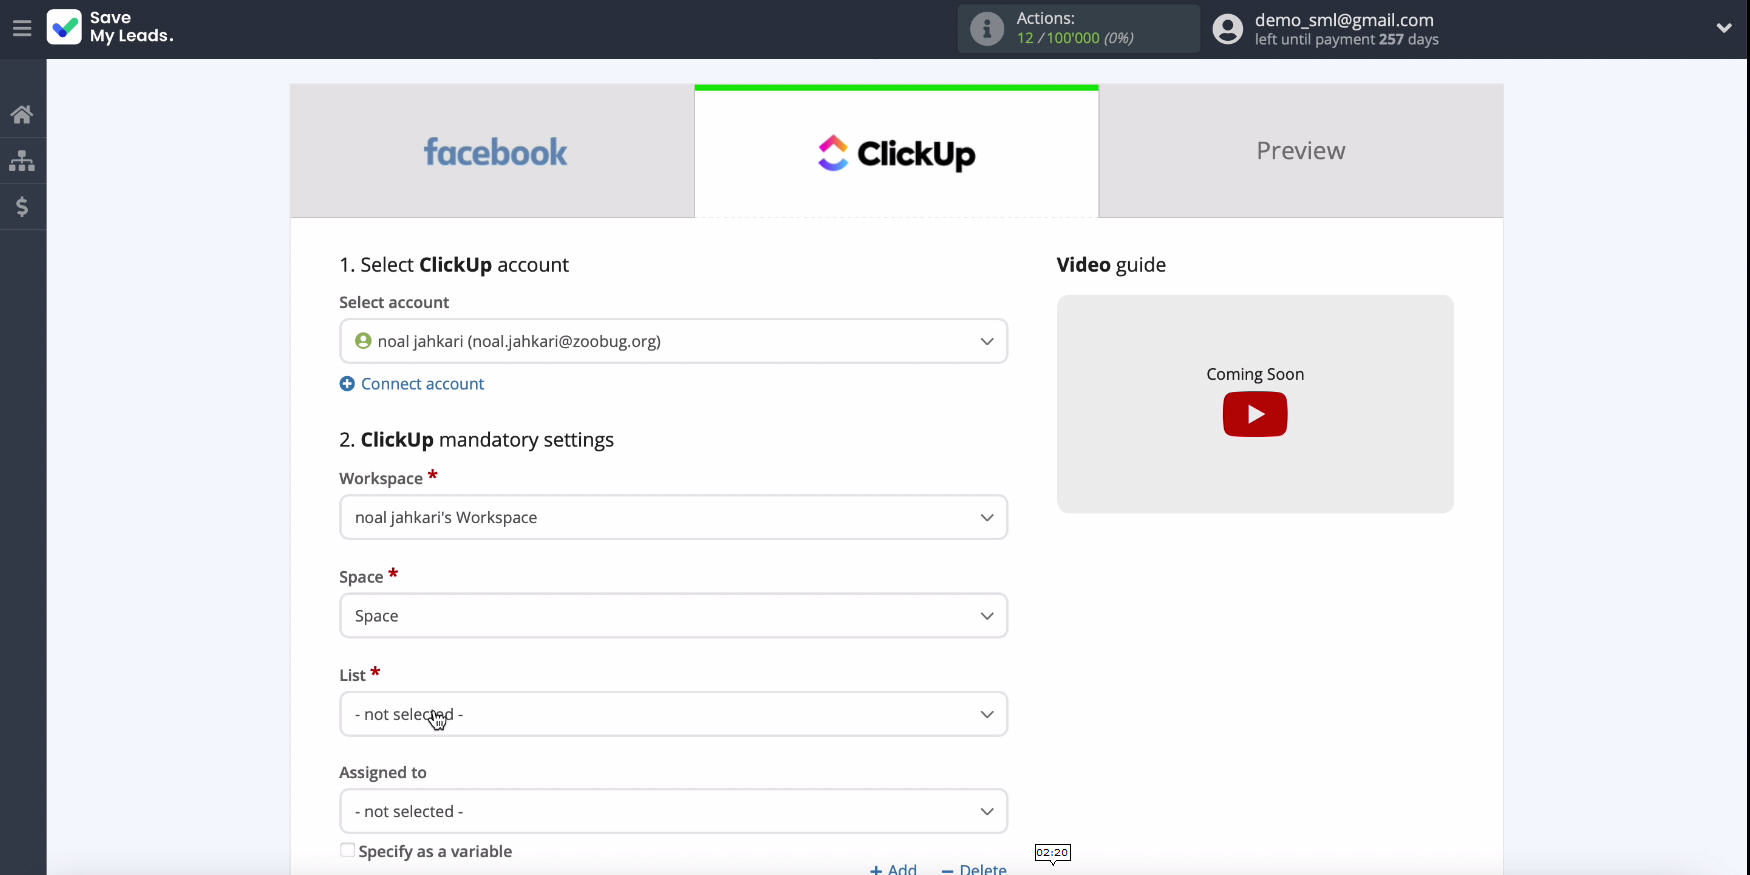
In the same window you will see the fields with which you can create tasks. In them, you can set variables from Facebook. To set them, click in the free field and select a variable from the drop-down list.
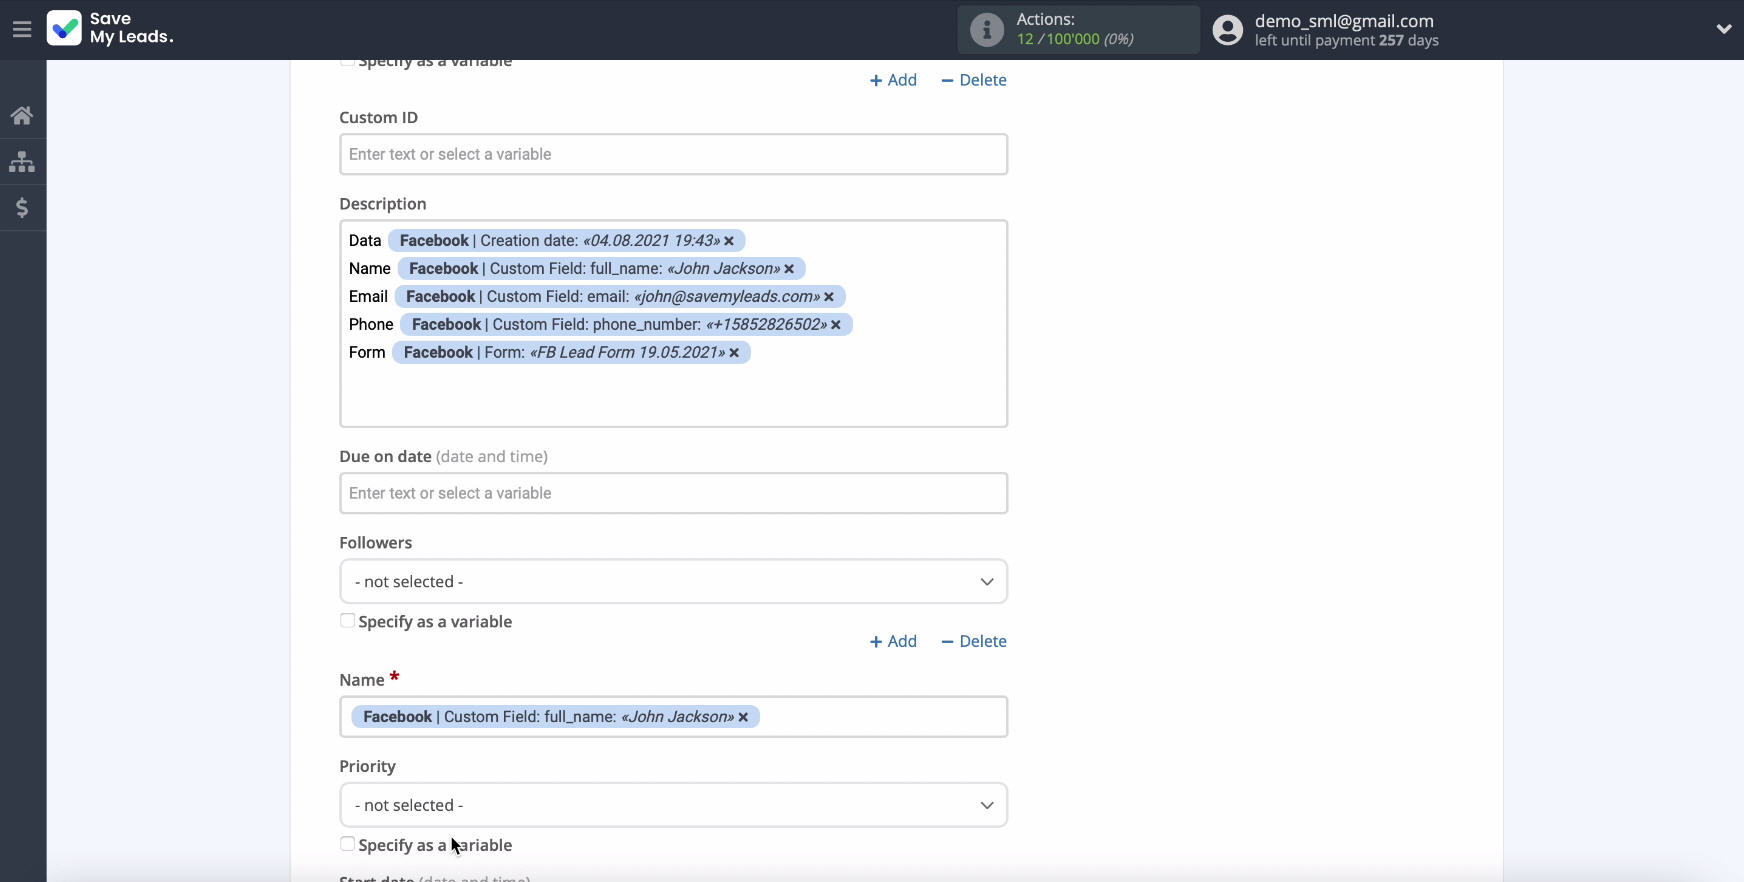
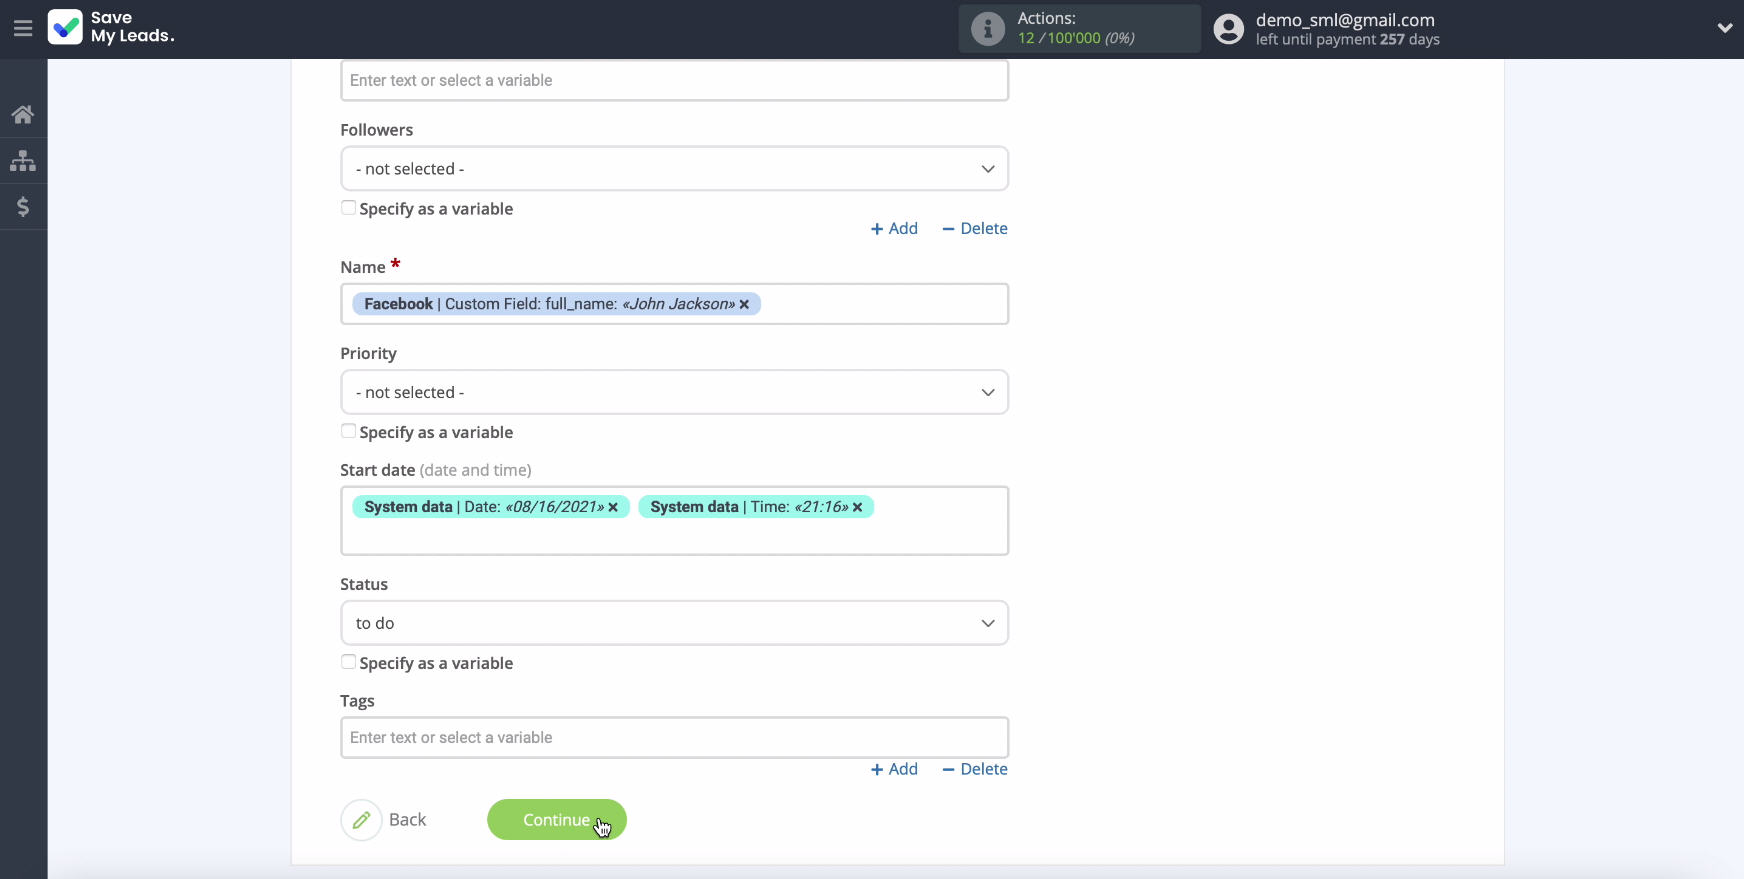
If the presetting of the fields suits you - leave everything unchanged and click "Continue".
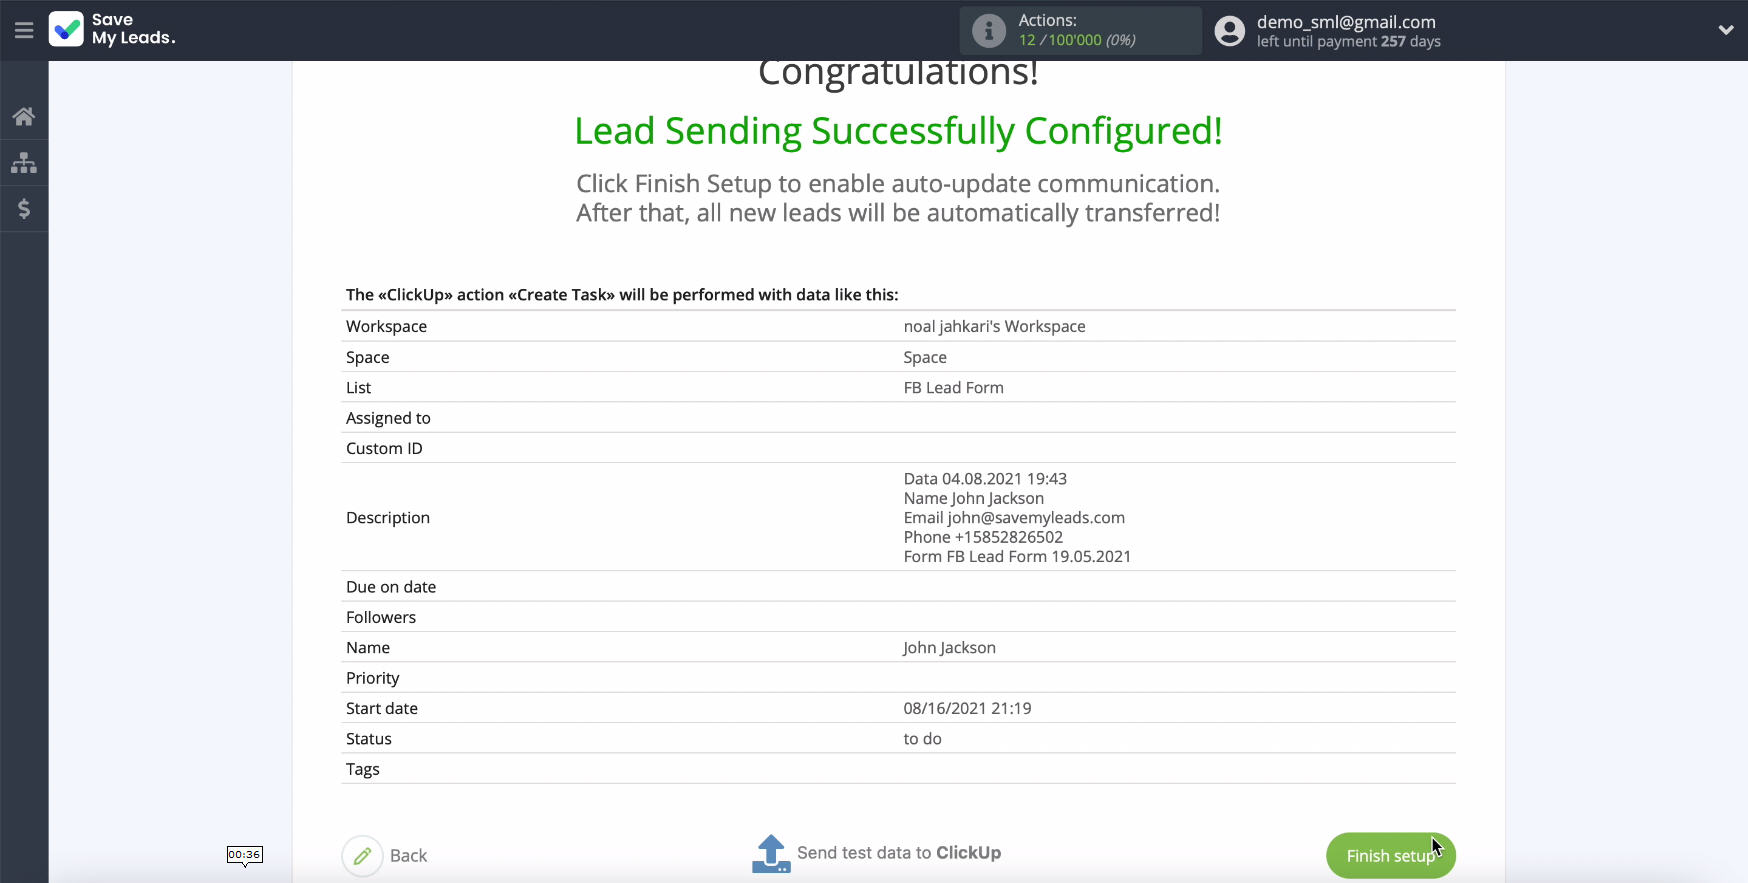
In a new window you will see an example of filling in the fields for the task. If you want to check if the settings are correct, click Send Test Data to ClickUp
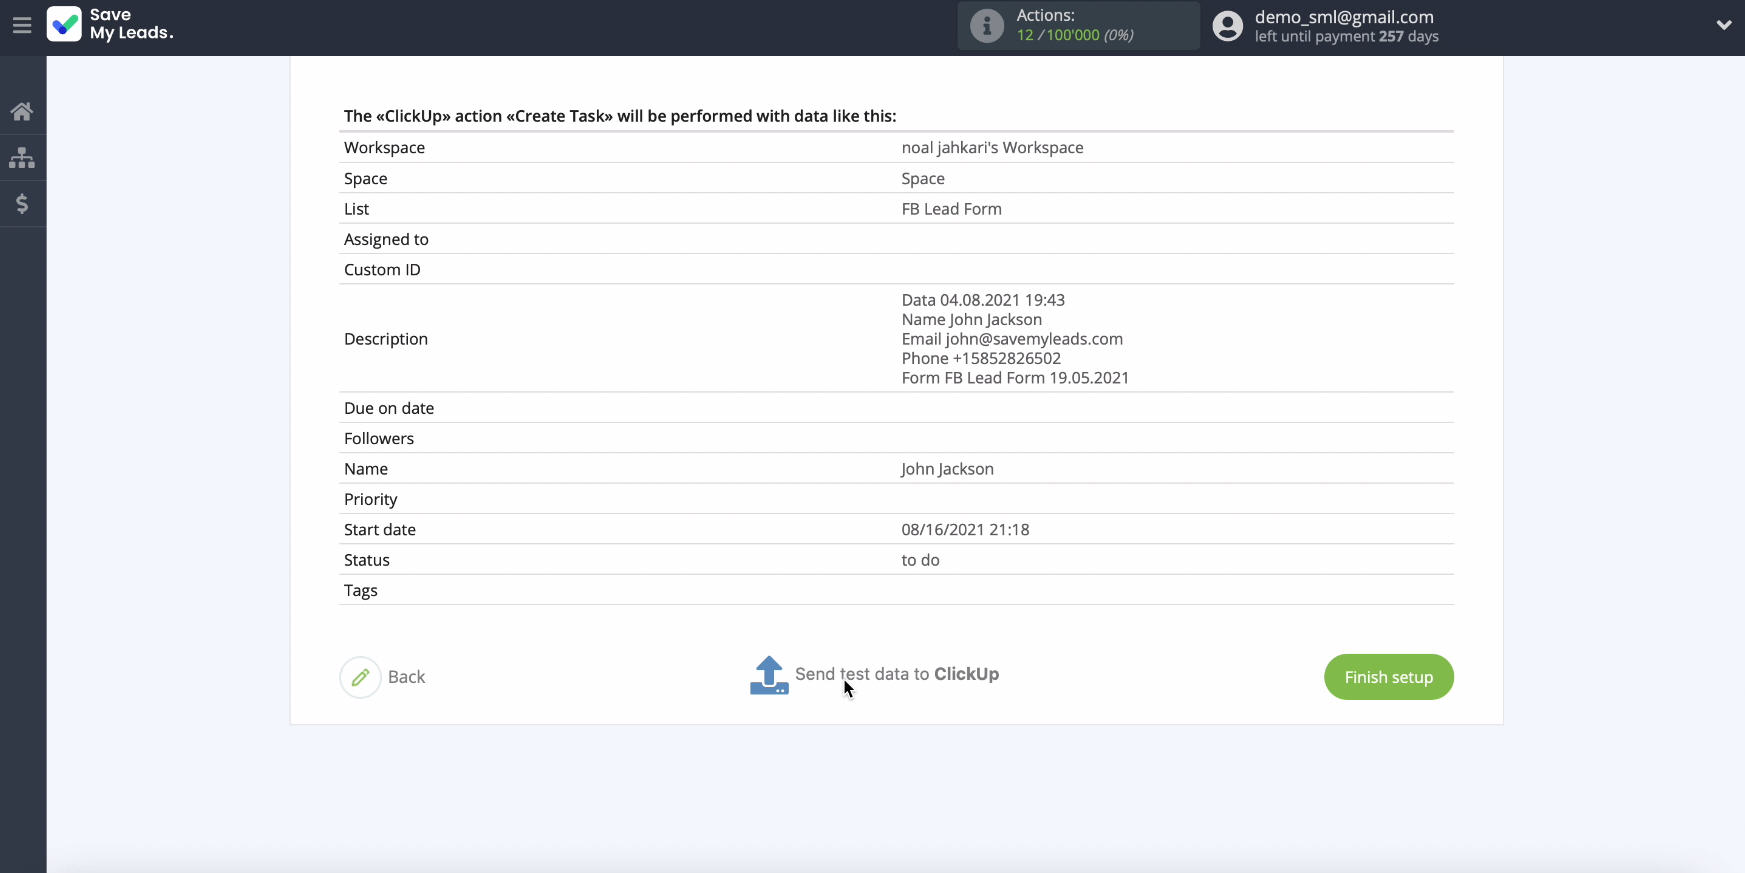
After you have sent the test data, go to your ClickUp account and check the result.
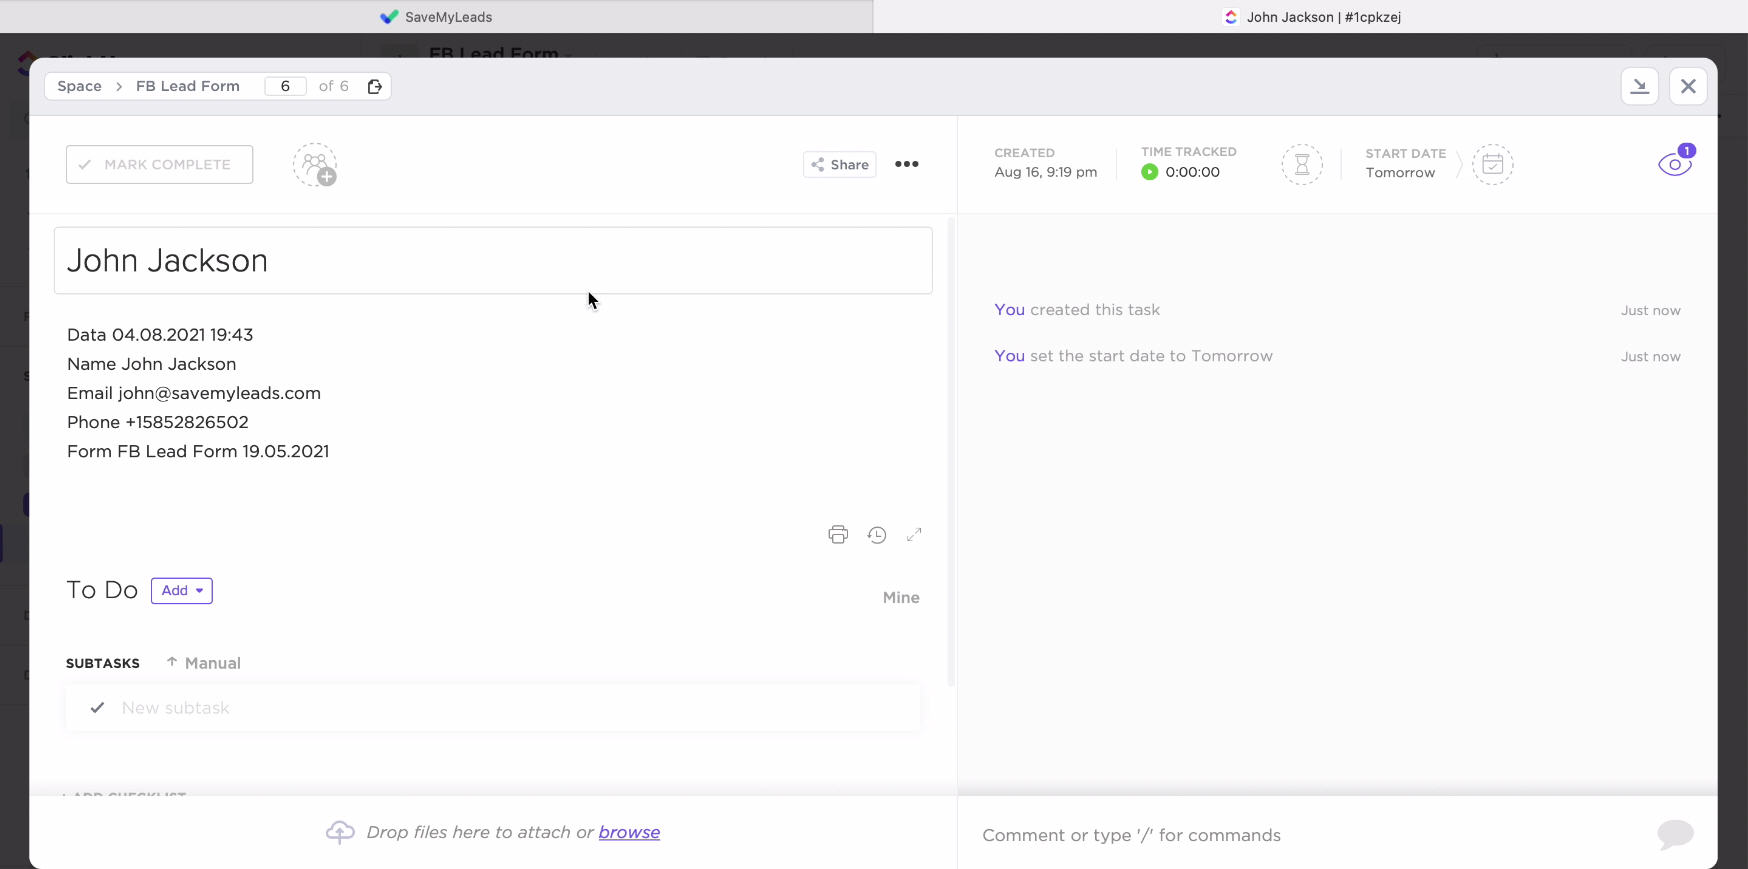
If you are satisfied with the result obtained, return to the SaveMyLeads service tab and complete the configuration.
Automatic data update
In order to instantly create new tasks in ClickUp when new leads from Facebook appear, you need to turn on auto-update. To do this, click Finish Setup.
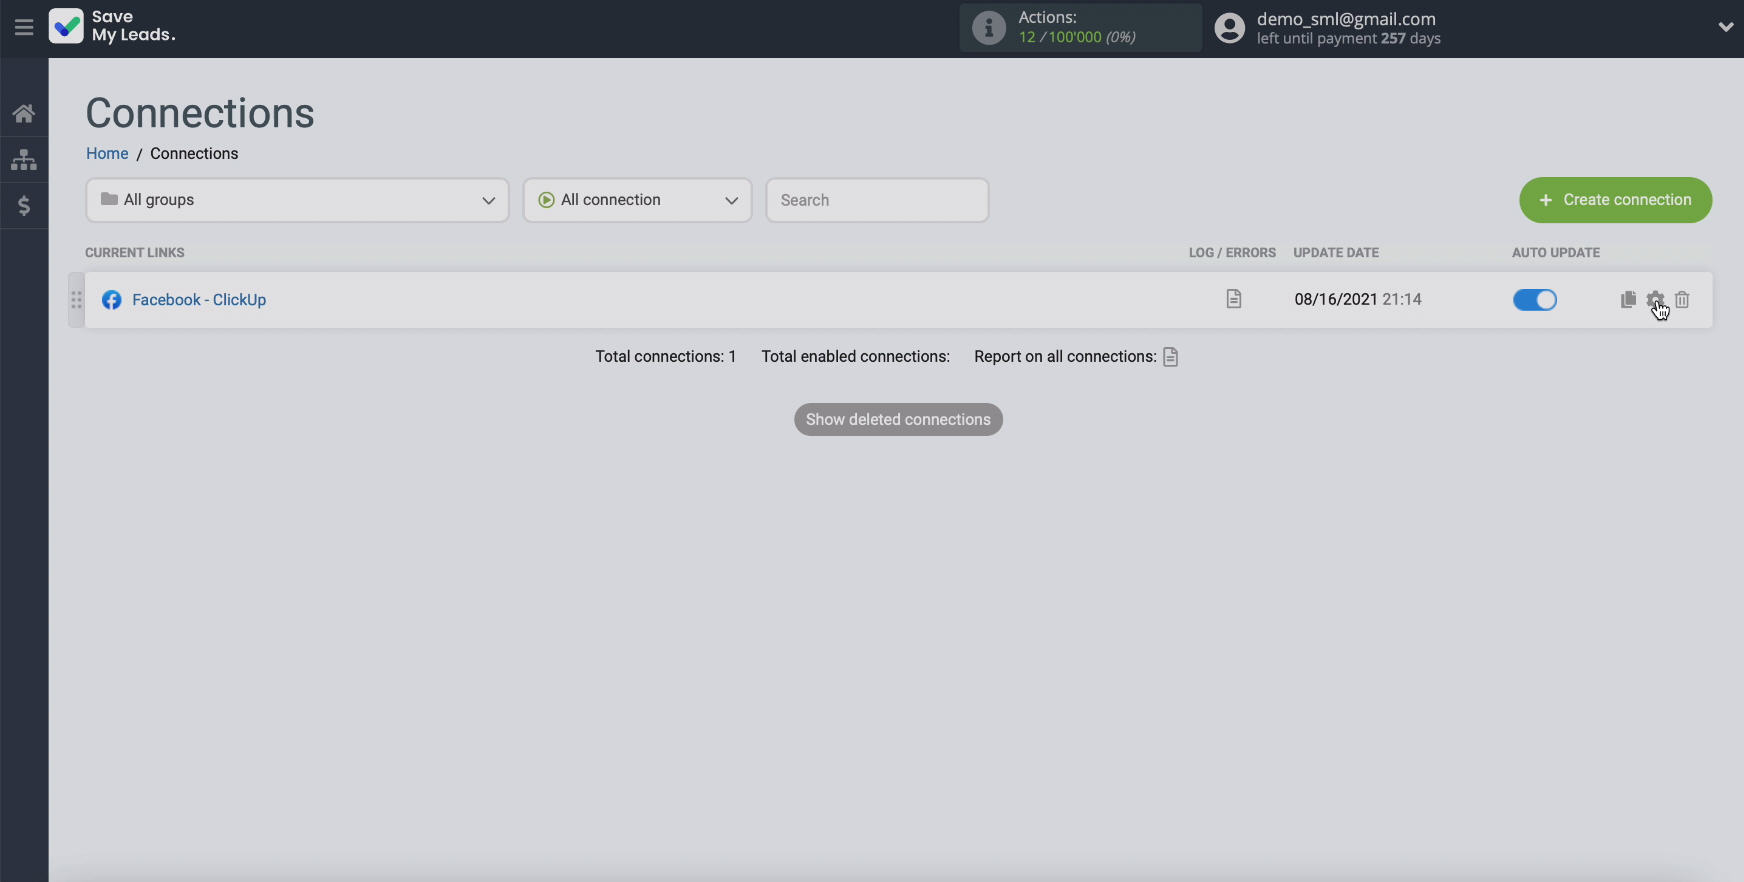
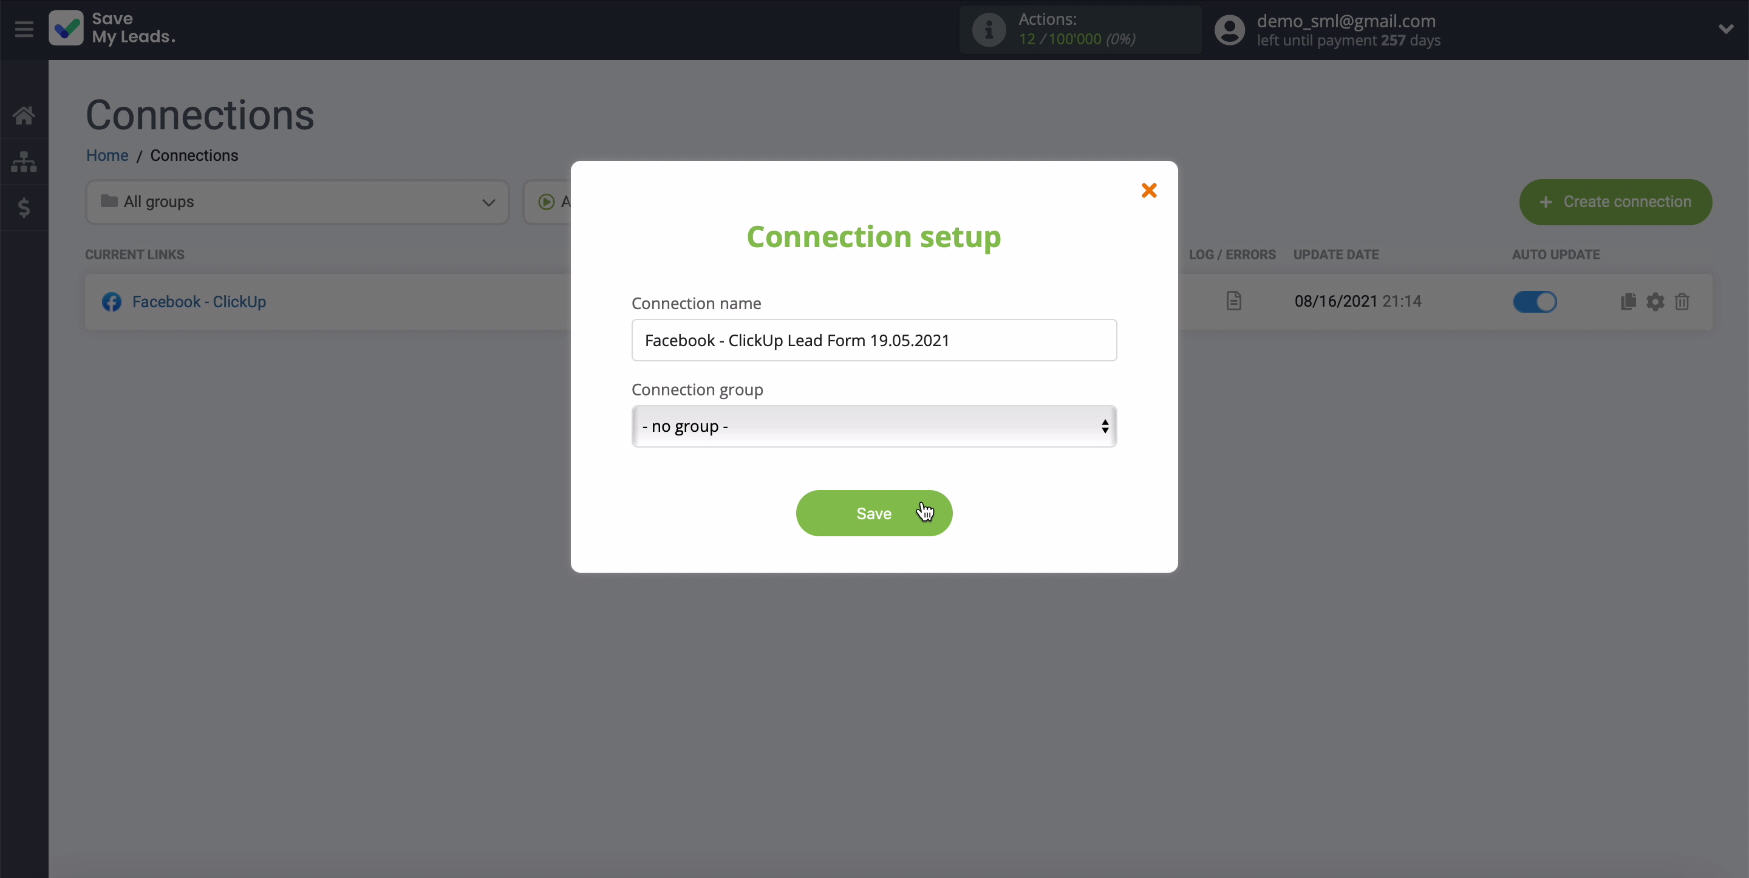
In the next window you can change the name of the link, to do this go to the settings:
Finish the setup
Integration of the Facebook ad cabinet allows you to automatically receive new leads that are interested in your advertisement in the task manager ClickUp, in order to conveniently interact with them, assign them to responsible managers and process them promptly in the future.


This will increase the efficiency of your staff and business as a whole, as well as strengthen the loyalty of your customers to the company and its products. Integration does not require programming, coding knowledge, and complex APIs. The convenient SaveMyLeads platform and our step-by-step instructions will help with this. Try it and see for yourself how fast and easy the integration is!
