Tired of adding orders manually? Set up automatic data upload from Facebook lead forms to Ecwid. As a result, all leads will be added to the store control panel as new orders - without any effort on your part. You don't need to know how to program for this. It is enough to use the SaveMyLeads service.
Content:
1. How to setup Facebook and Ecwid integration
2. Getting started with SaveMyLeads
3. Connecting Facebook Leads Ads
4. Connecting Ecwid
5. Testing data transfer
6. Finishing setup
As you know, the Ecwid store management platform allows you to add orders through a variety of marketing channels. Including through advertising on Facebook. But in this case, the seller needs a simple and effective way to deliver the leads received through the social network to the store's control panel in the form of new orders.
Such delivery can be provided by the SaveMyLeads service. With it, you can quickly connect Facebook to Ecwid and set up automatic uploading of leads from the social network to the store. Here's how it would work: as soon as a customer submits a lead in the Facebook form, SaveMyLeads creates an Ecwid order based on it.
Moreover, you can choose which lead data will be sent from the form to the card of each order. This can be the customer's name, phone number, email, product name, cost, and so on. SaveMyLeads is capable of transmitting any textual information that the client leaves in the Facebook form fields.
Let's take a look at how SaveMyLeads' automation can help your business:
1. Reduce repetitive work. You won't need to regularly upload leads from Facebook forms and copy them to your Ecwid control panel. SaveMyLeads will transfer all the necessary data automatically, and you can focus on other work tasks.
2. Speed up the addition of orders. SaveMyLeads will monitor Facebook every second and upload each new lead to Ecwid as soon as it appears in the form. Thus, you will be able to process orders without delay and will not lose customers who do not like to wait.
3. Get rid of unnecessary mistakes. By adding orders manually, you can easily make a mistake in writing contacts, confuse or miss something. Automation eliminates these problems. SaveMyLeads transfers all data in the form in which the client left them in the lead form fields.
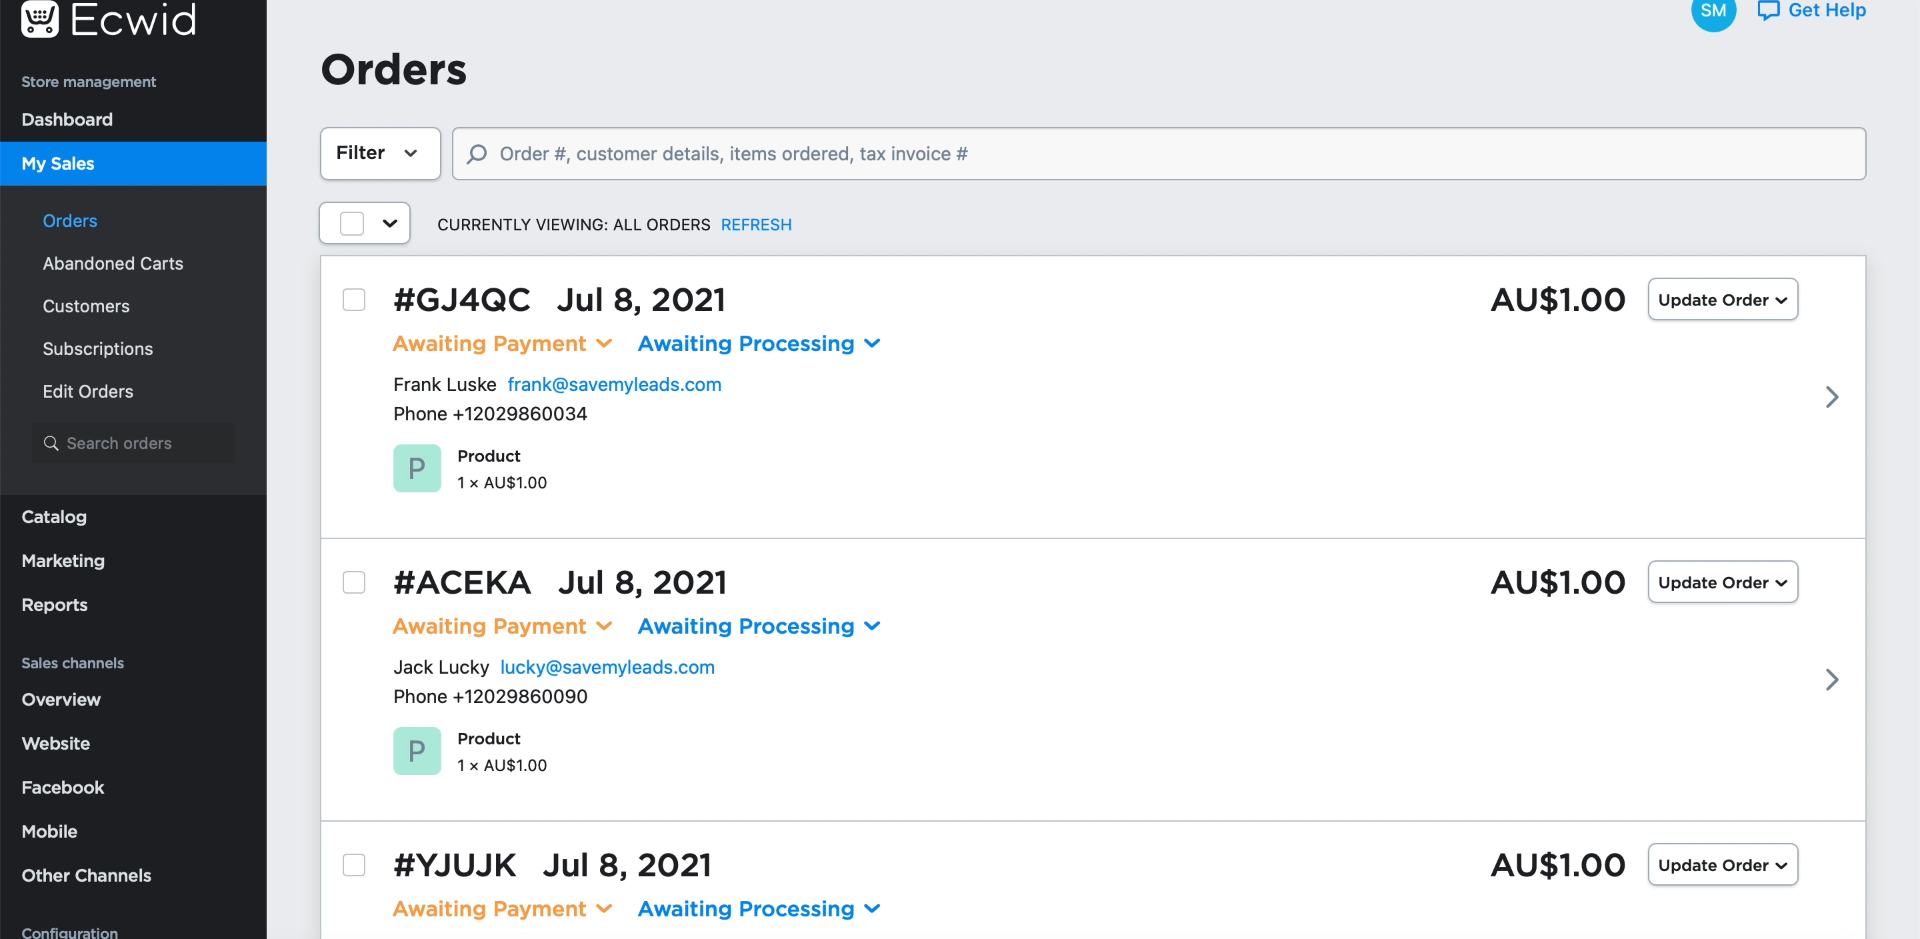
Examples of orders created from new Facebook leads using SaveMyLeads:
How to setup Facebook and Ecwid integration
You don't need to be a programmer to set up automatic uploading of leads as new orders. It is enough to register on the SaveMyLeads website, select the connection between Facebook and Ecwid and follow the prompts on the screen. The system will ask you to link the accounts of these services to it and set the data transfer parameters.
Our guide will help you set up automation in a few minutes. Before proceeding with its implementation, create a new Facebook form and add any lead to it - this will come in handy for the test. In addition, we will assume that your store on the Ecwid platform has already been created and is ready to go.
Getting started with SaveMyLeads
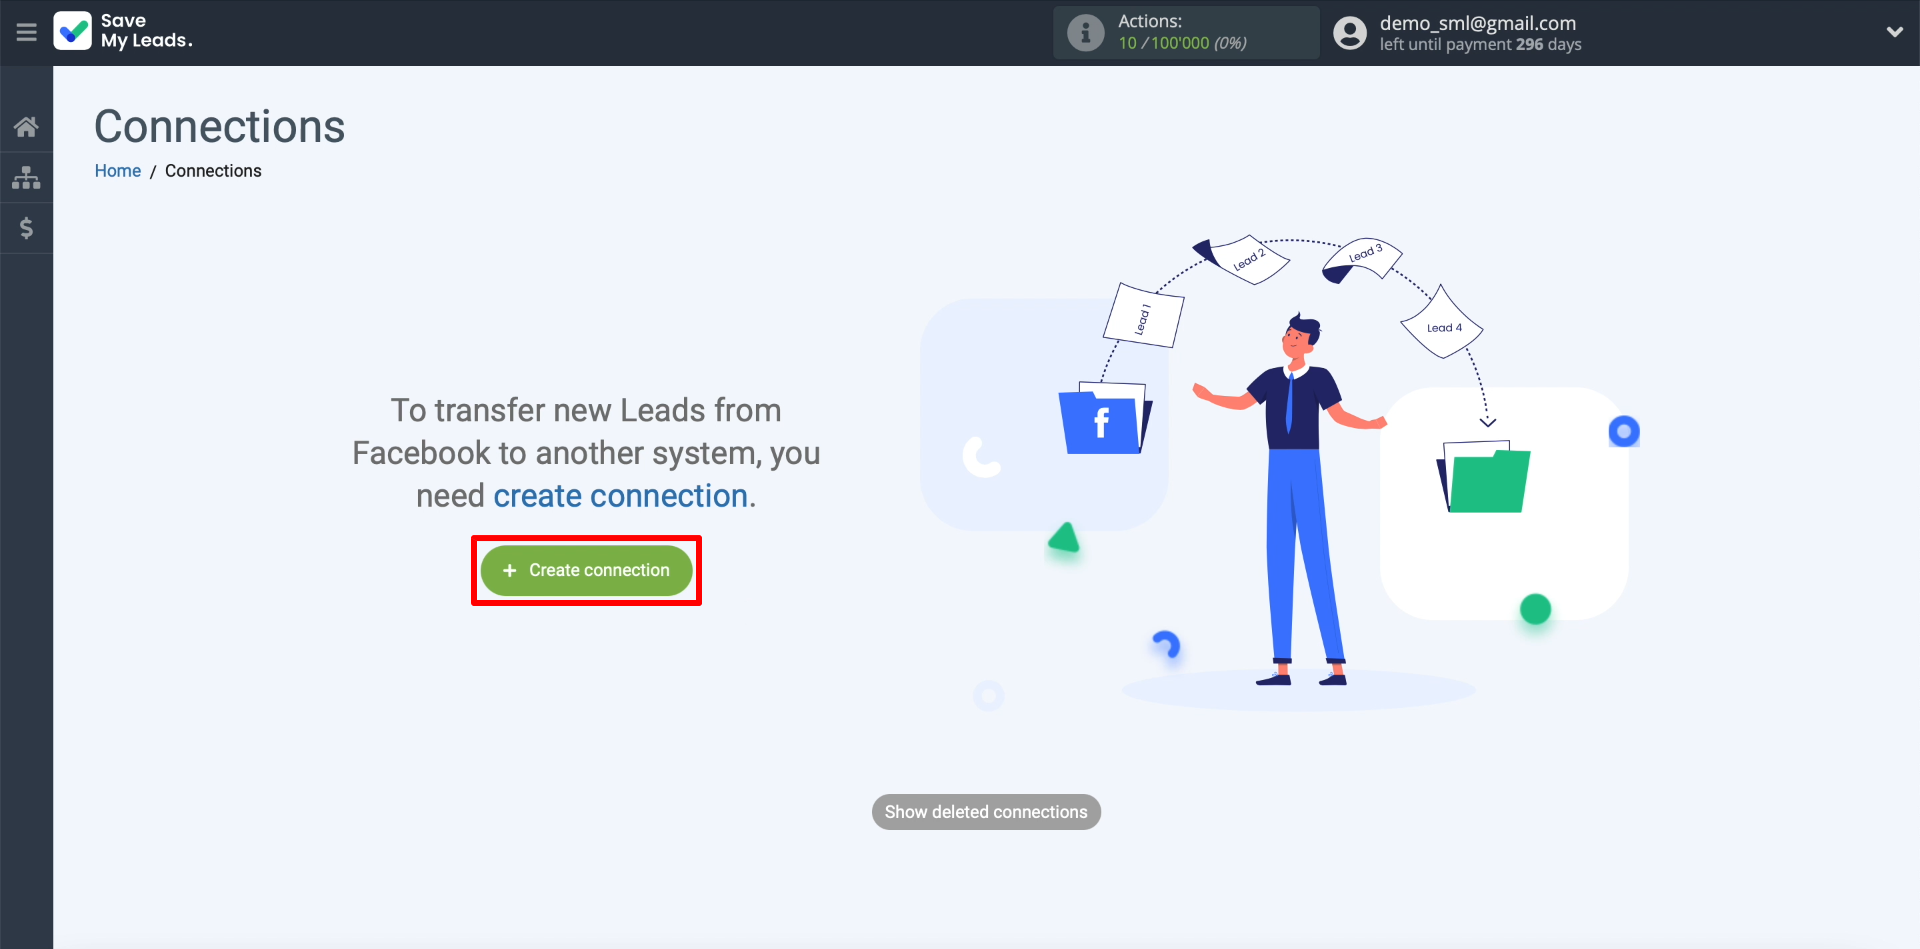
Registering on the SaveMyLeads website. Then click "Create connection".
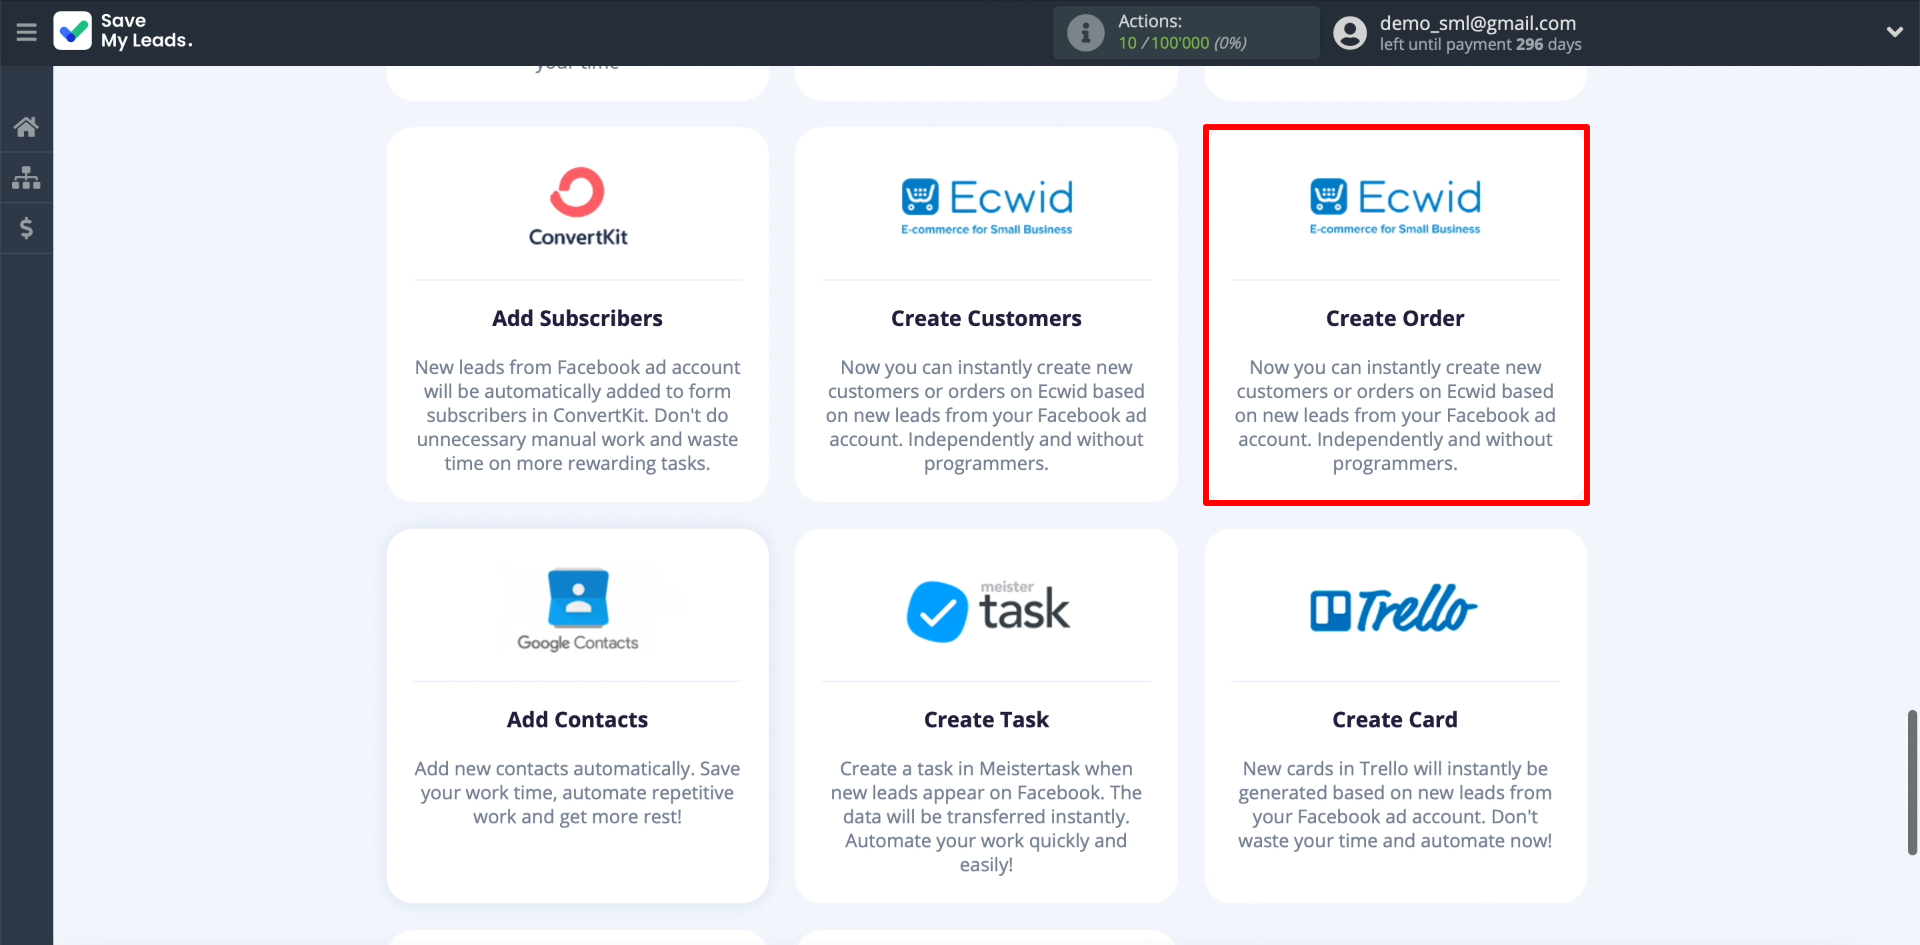
The screen should display a list of connections that you can configure using SaveMyLeads. Each of them serves to transfer leads from Facebook to one of the external systems. We select the connection intended for uploading leads in the form of orders to the Ecwid system.
Connecting Facebook Leads Ads
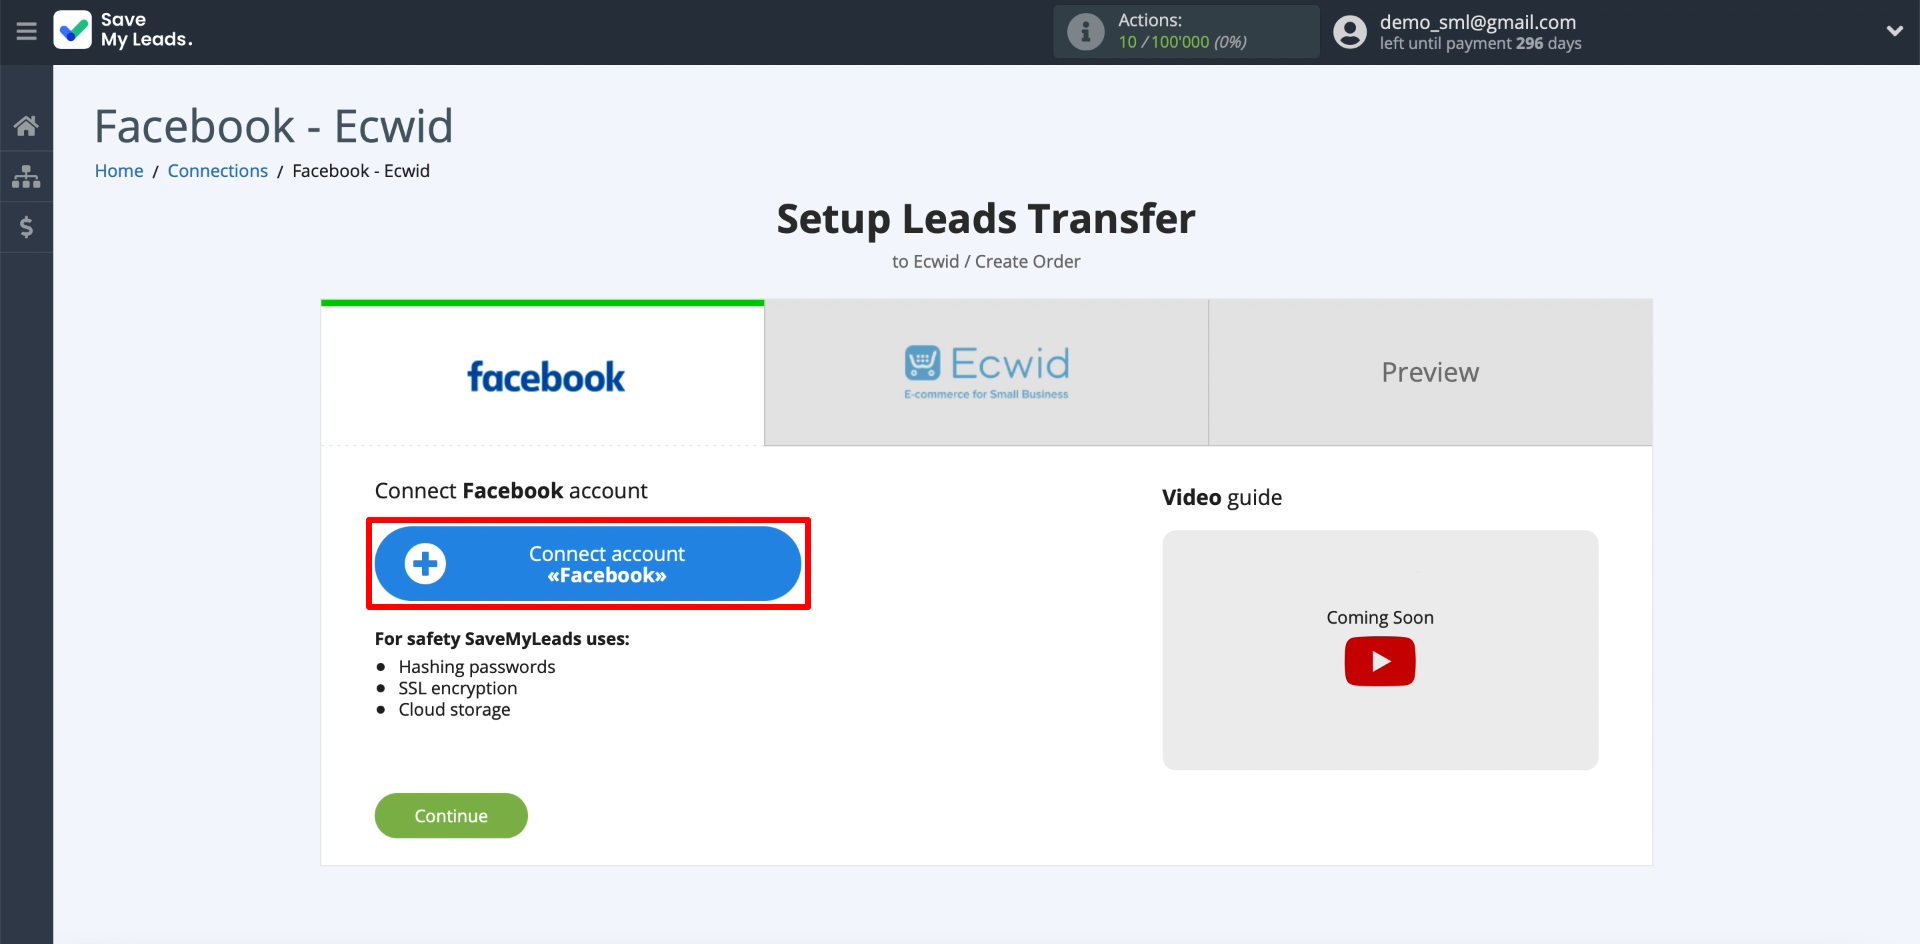
In order for SaveMyLeads to upload leads from the form, we connect our Facebook account to it. To do this, click "Connect account "Facebook". Enter the username and password for our account. After that, we issue all the requested permissions to SaveMyLeads so that the service has access to the leads.
Now let's show SaveMyLeads where exactly it can upload leads from. Select the newly connected Facebook account. Then - the business page for which the advertising campaign is set up. After that, select the form that will be the source of leads.
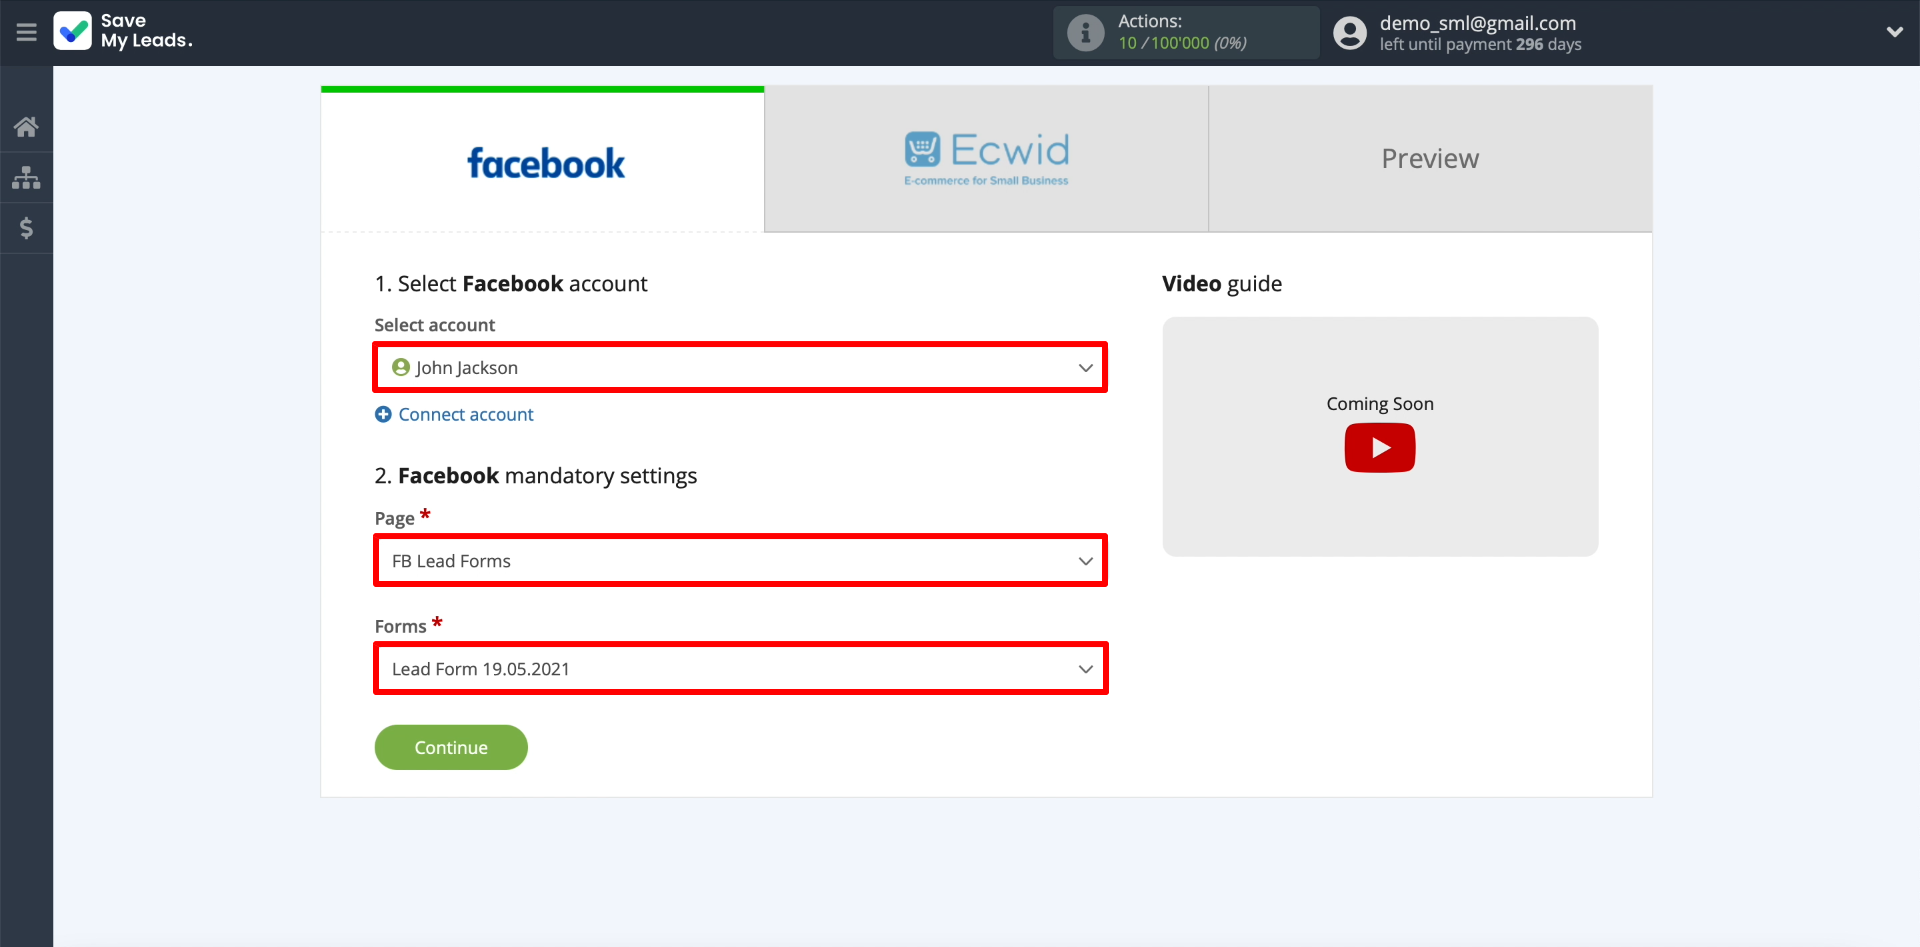
Only one form can be selected per connection. If you want to set up uploading leads from several forms, create a separate connection for each.
Connecting Ecwid
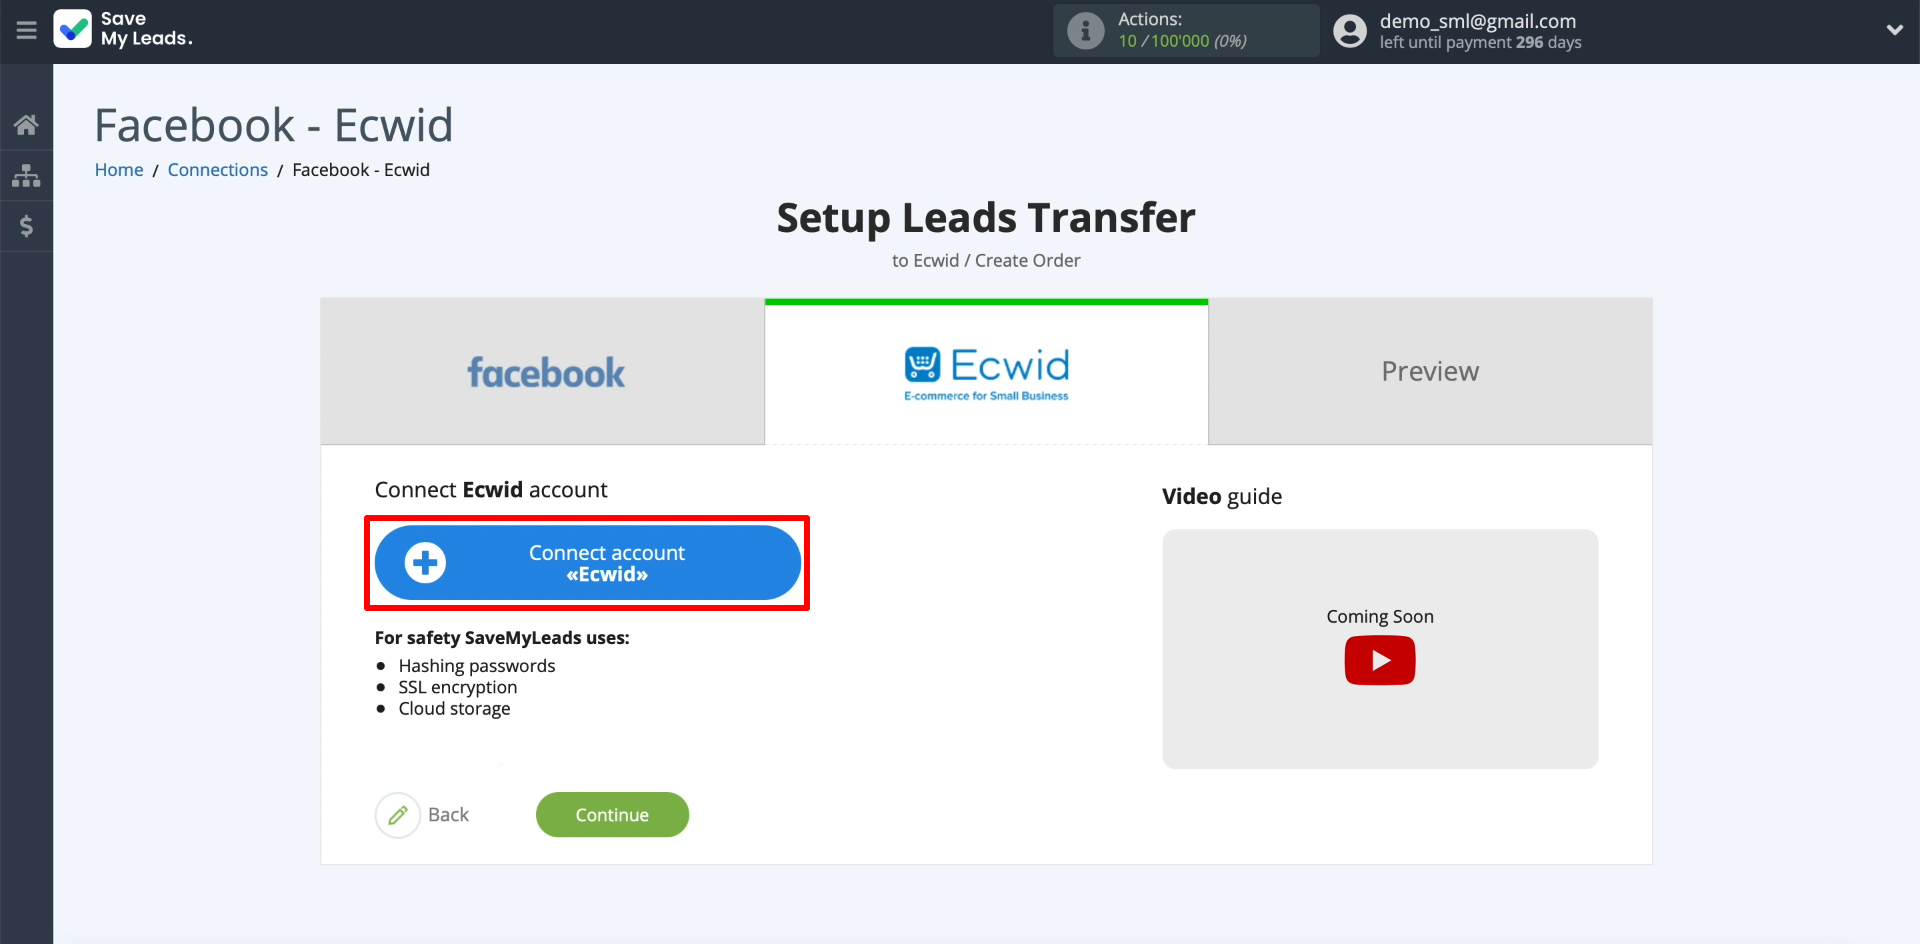
In order for SaveMyLeads to add uploaded leads as new orders to our store, we will connect an Ecwid account. Click "Connect account "Ecwid", and then enter the login and password from our account.
Select the newly connected account.
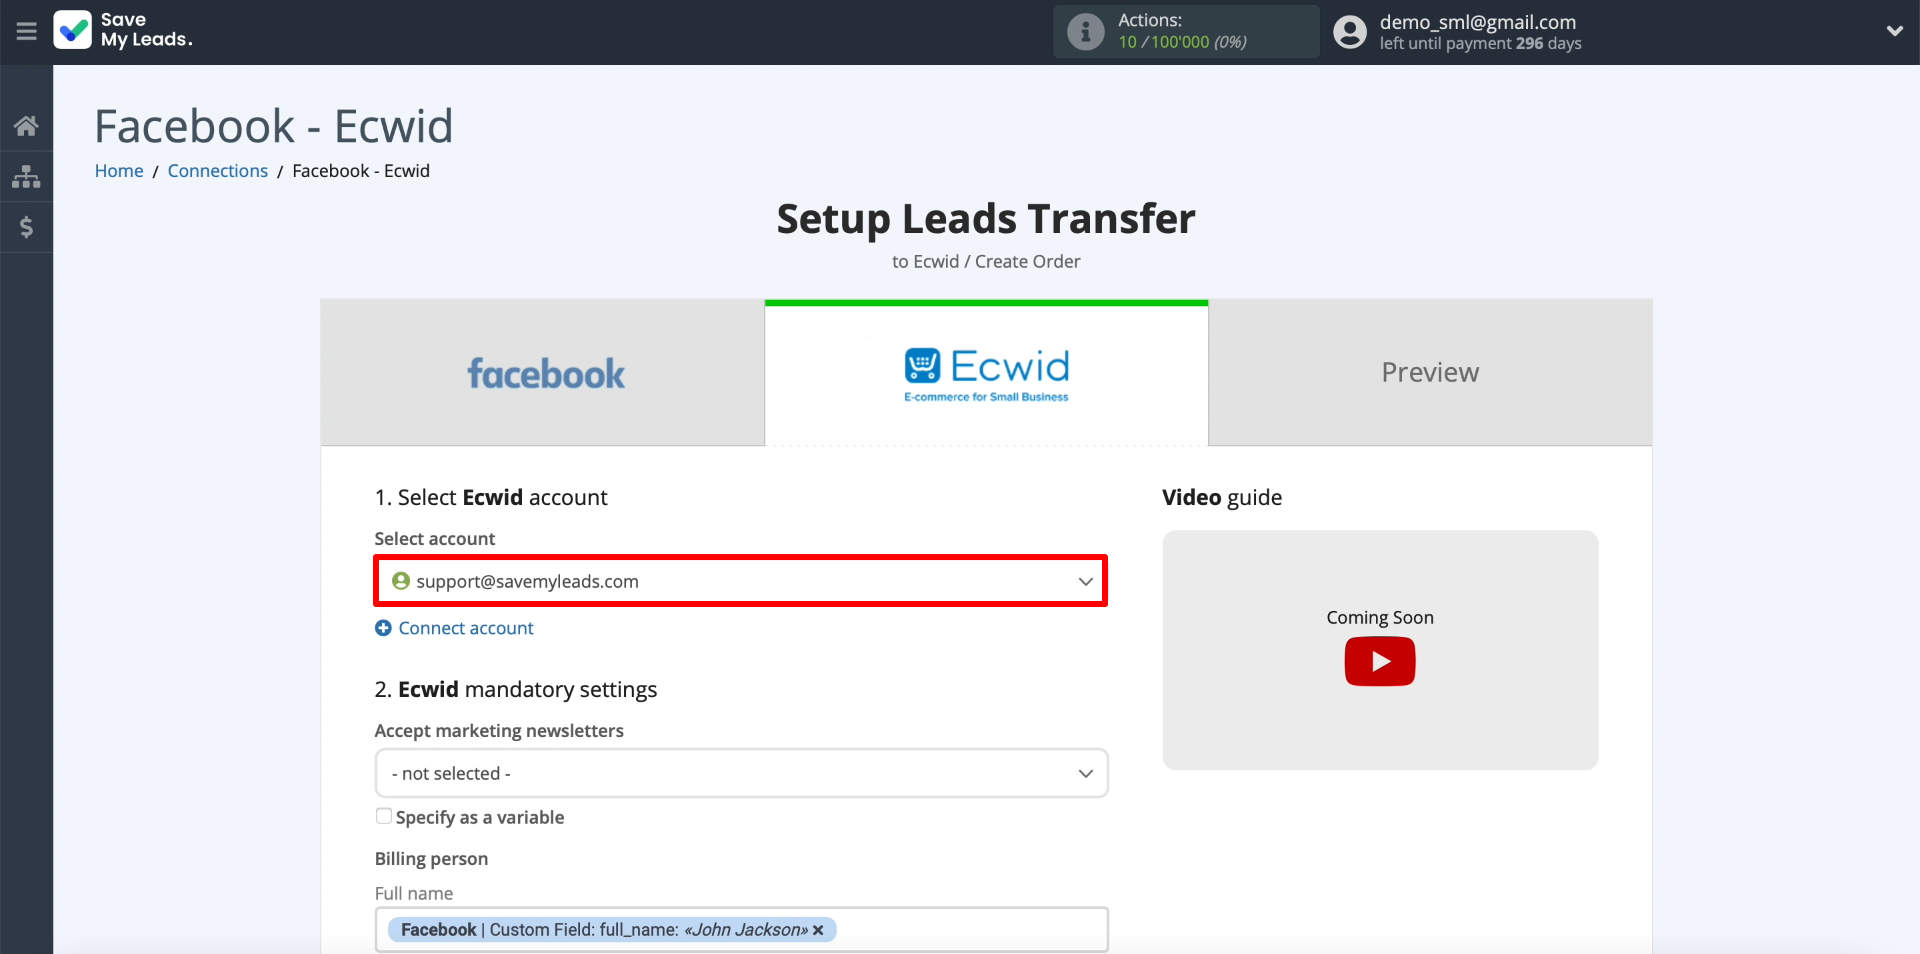
Then we decide what data SaveMyLeads will automatically copy from each uploaded lead to Ecwid. To do this, click on each order field we need and select the appropriate data in the drop-down list that will come from Facebook. For example, in order for SaveMyLeads to copy the name, number and mail of the client into the order, fill in the fields “Full name”, “Phone” and “E-mail”. Leave the extra fields blank.
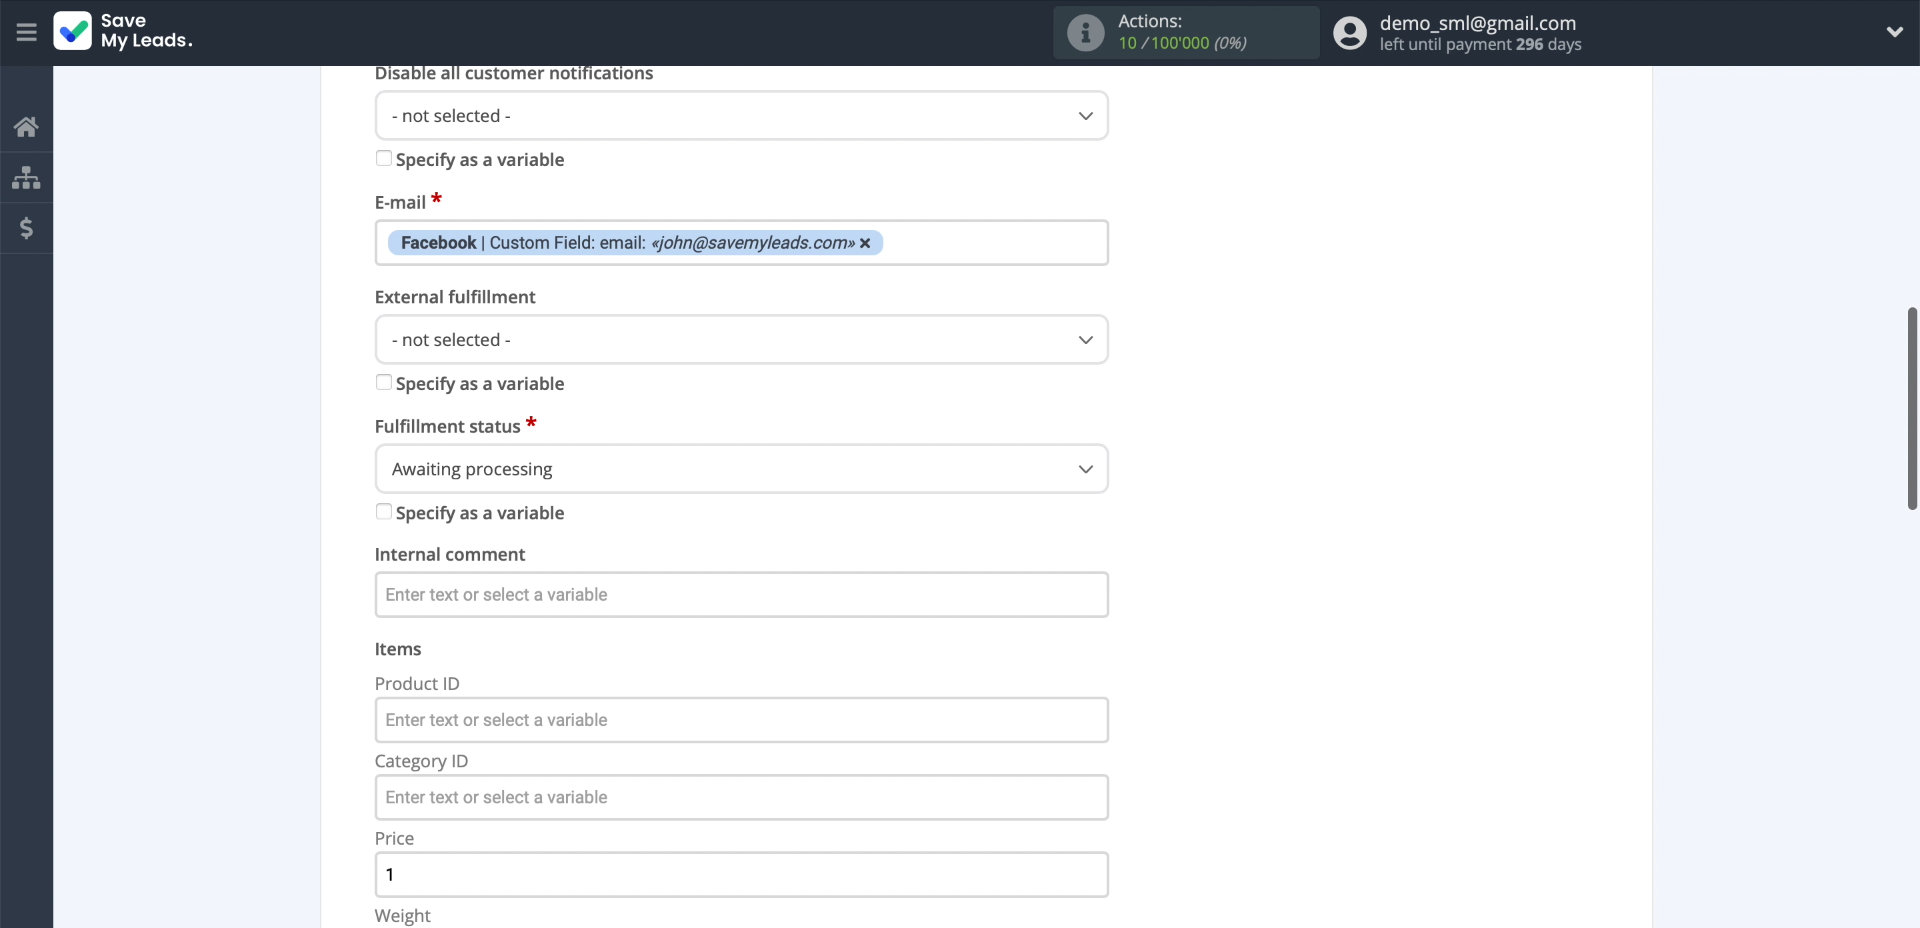
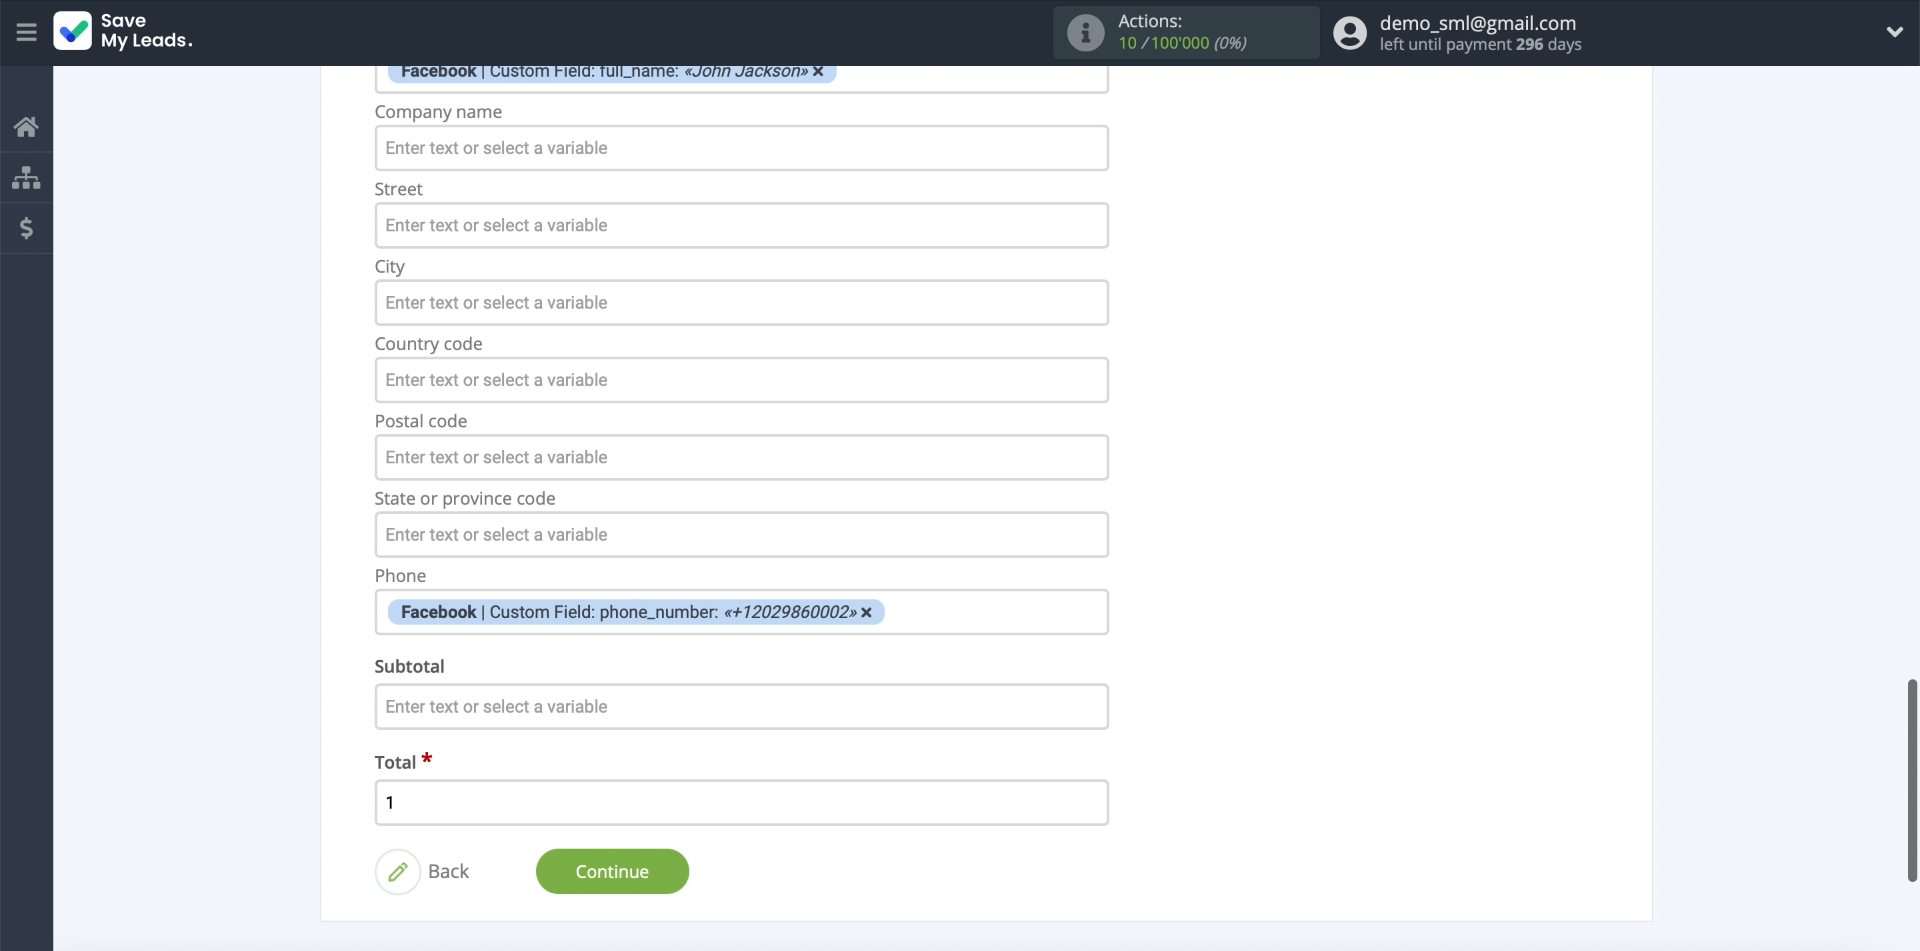
Some fields are automatically filled in by SaveMyLeads. If their content suits you, you can leave it, if not, edit it.
Testing data transfer
At this point, SaveMyLeads should unload the lead we asked you to add before starting the setup and display its data on the screen.
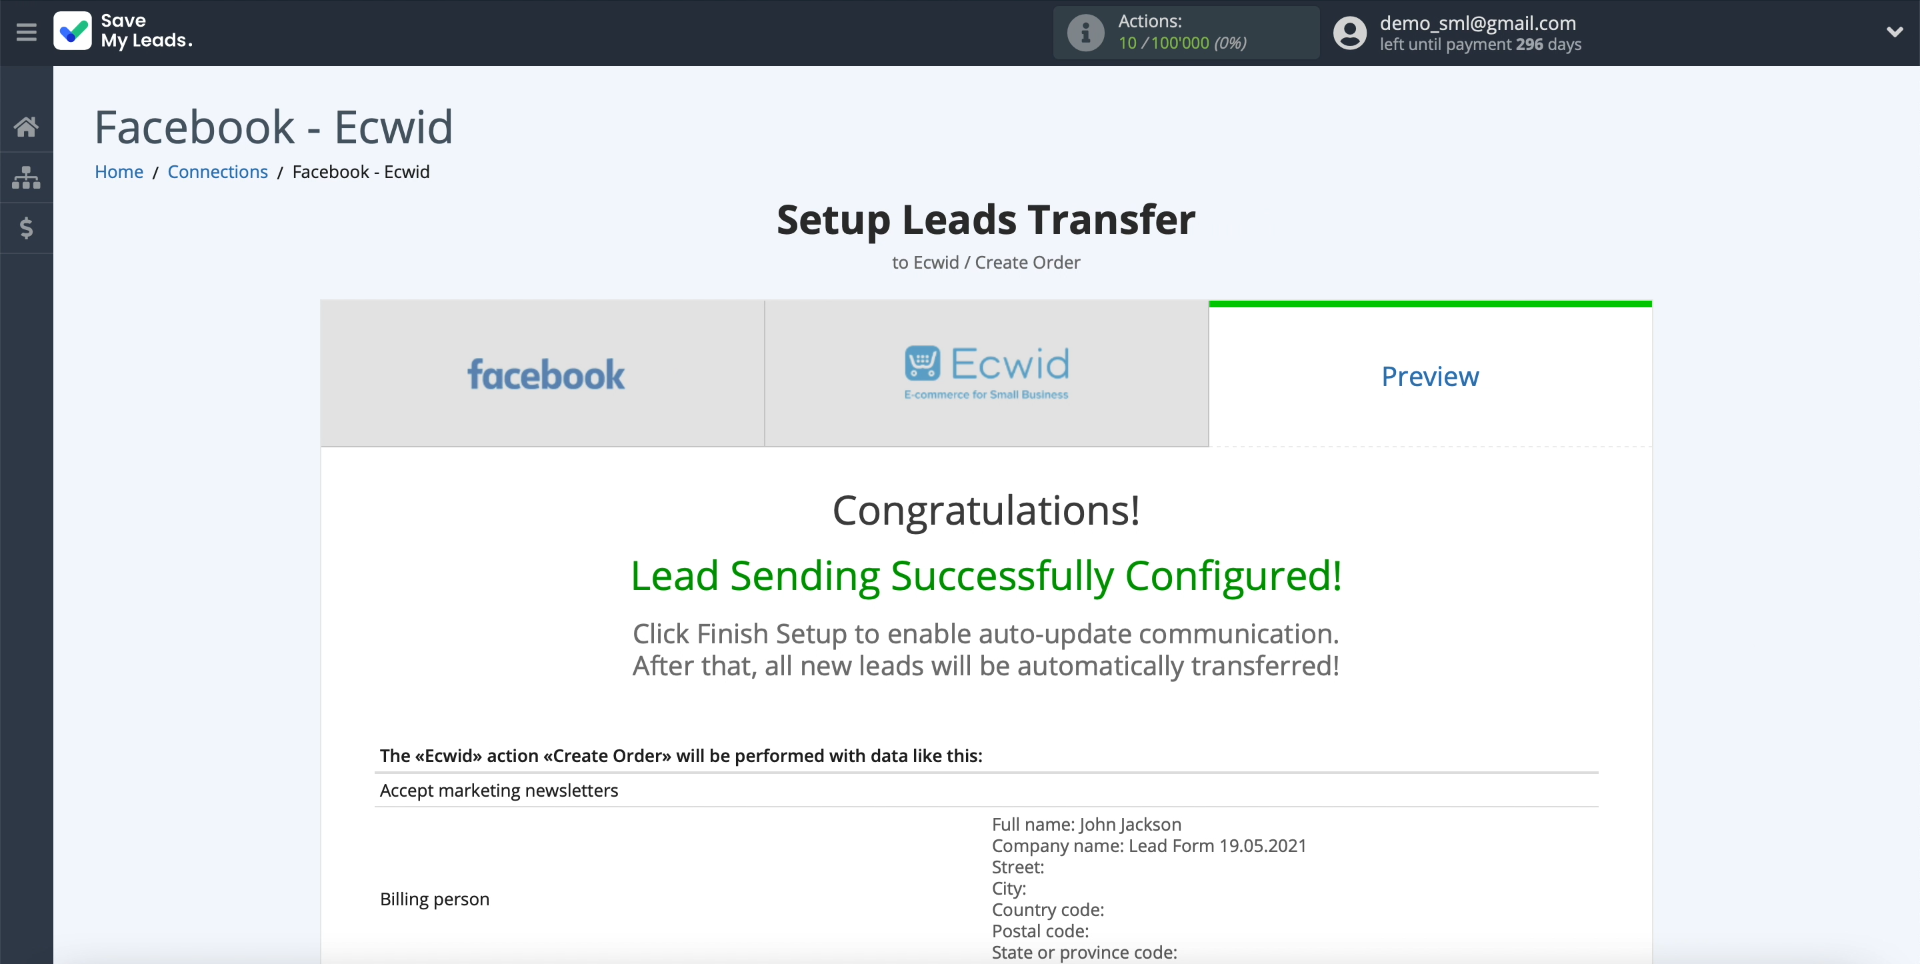
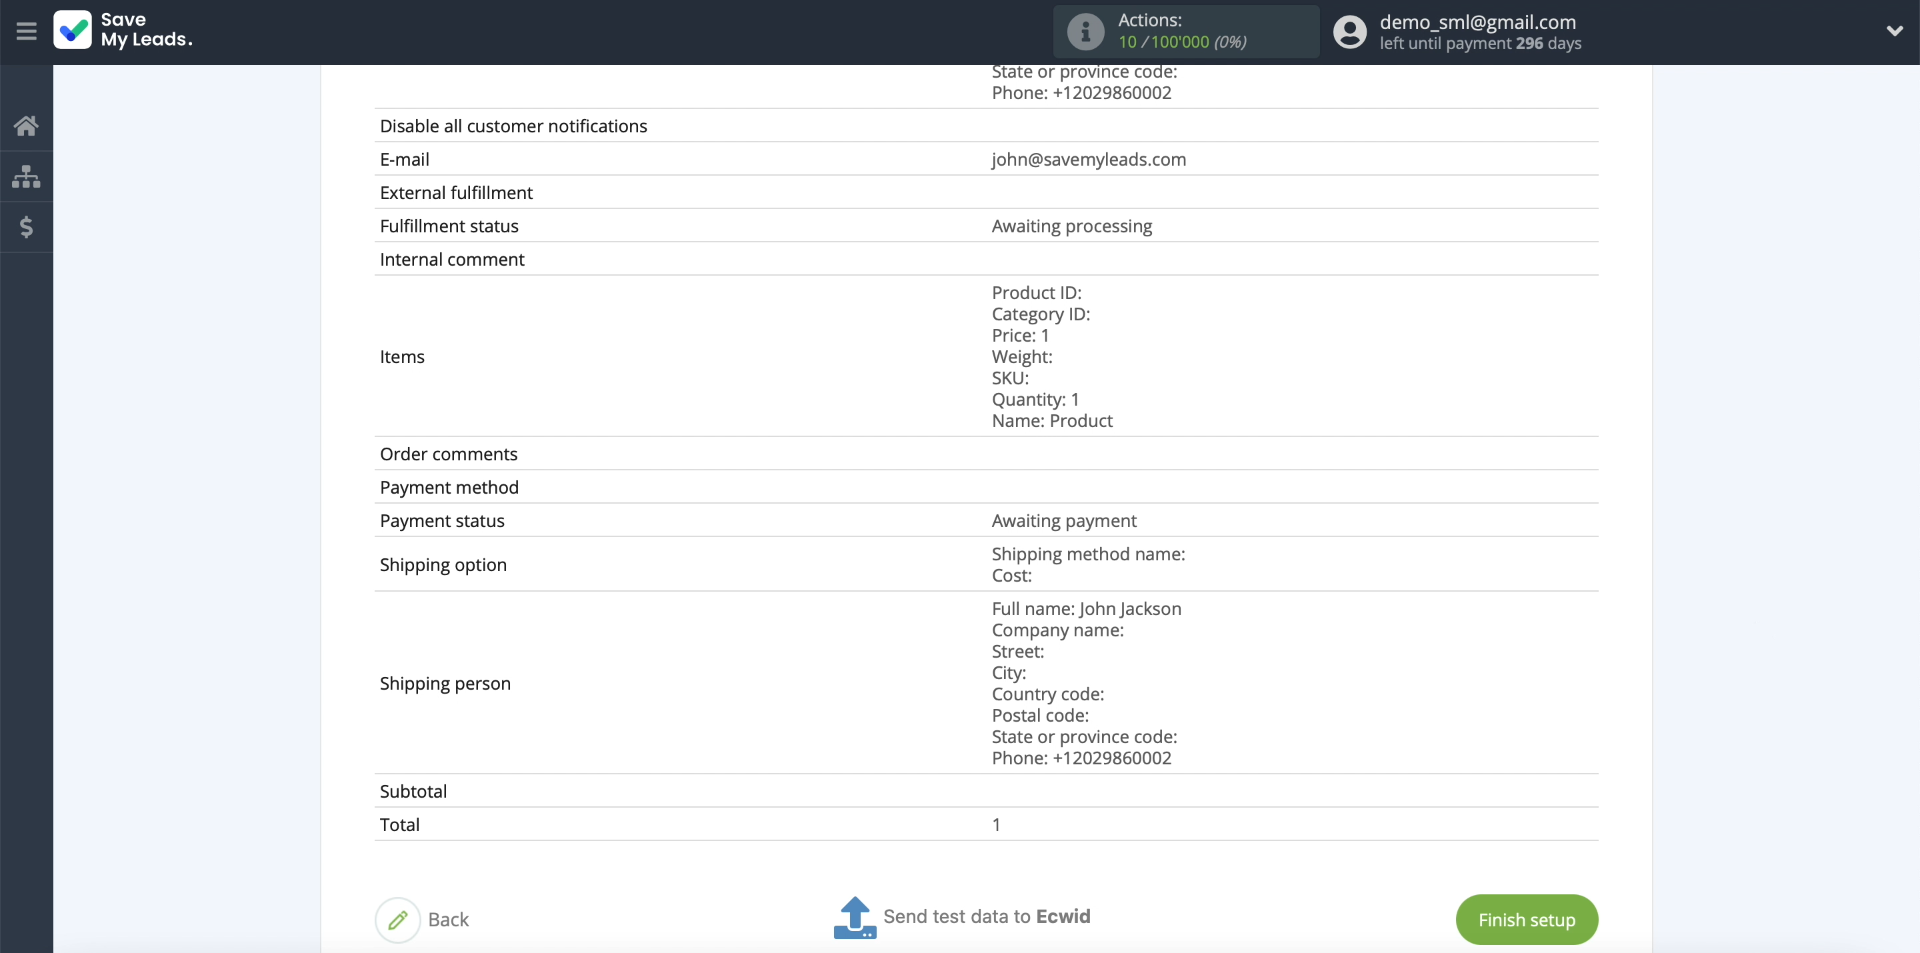
To check if data transfer to Ecwid works, click "Send test data to Ecwid".
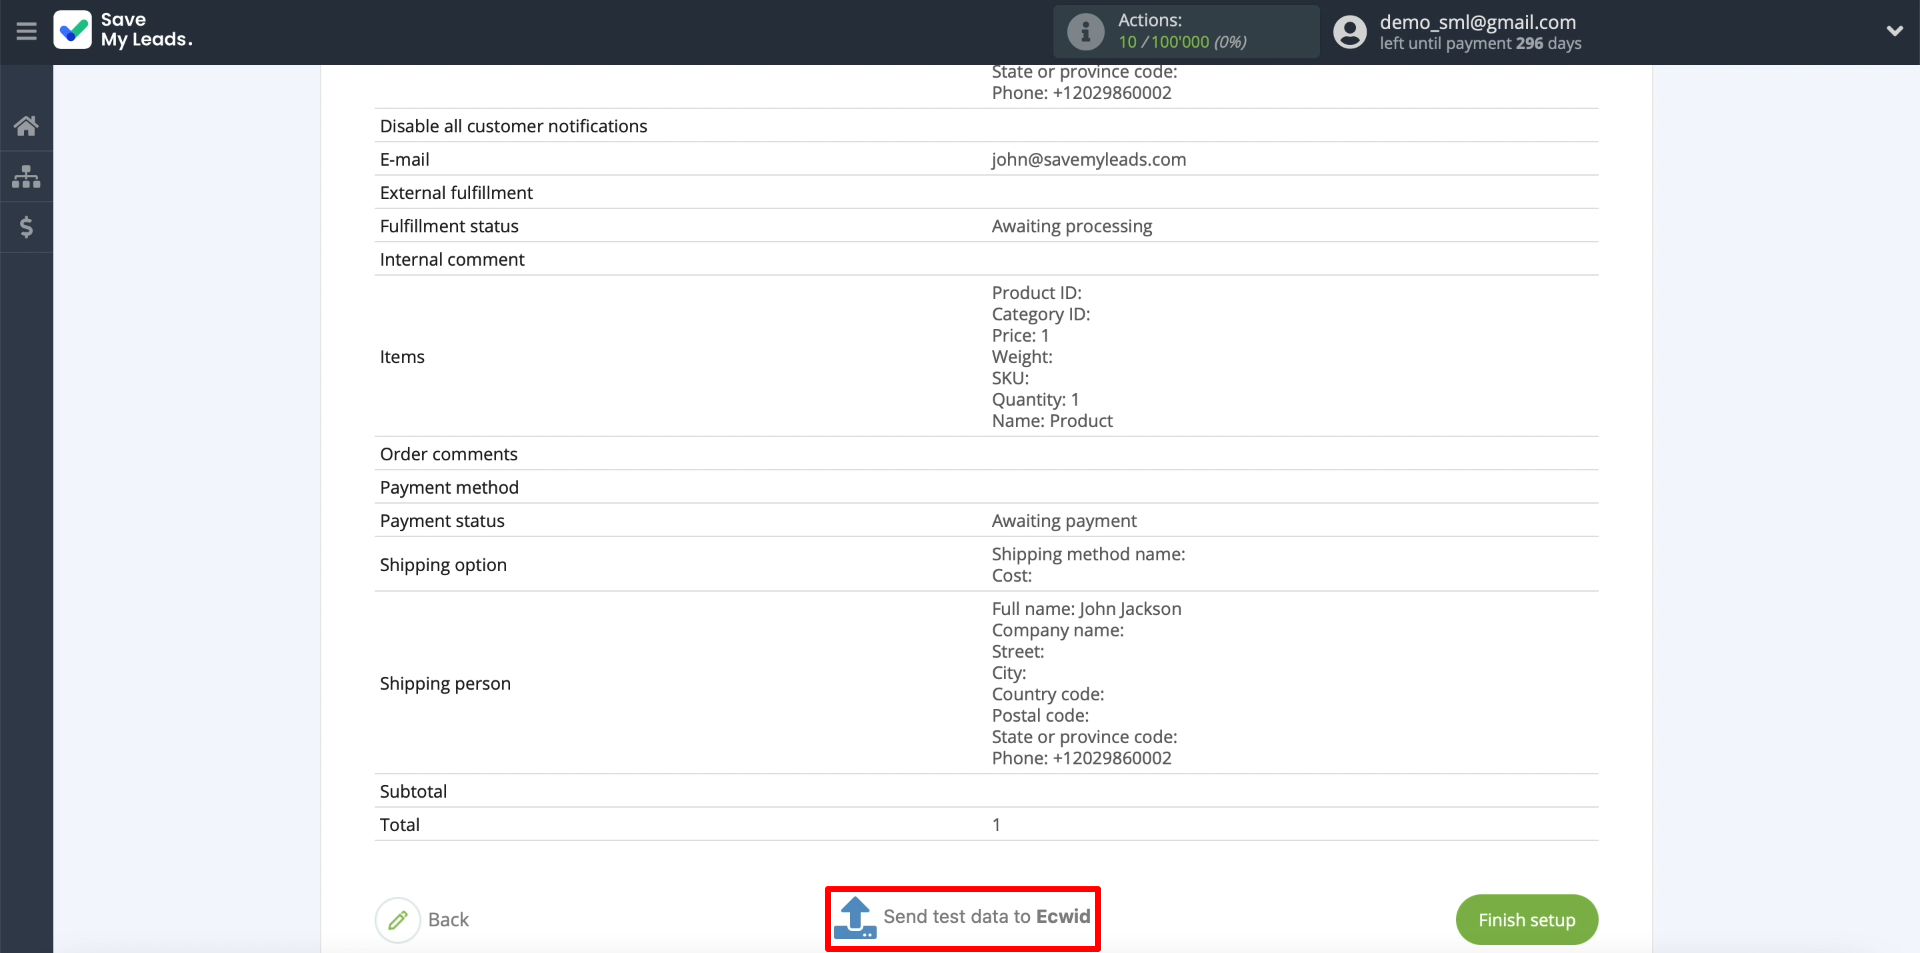
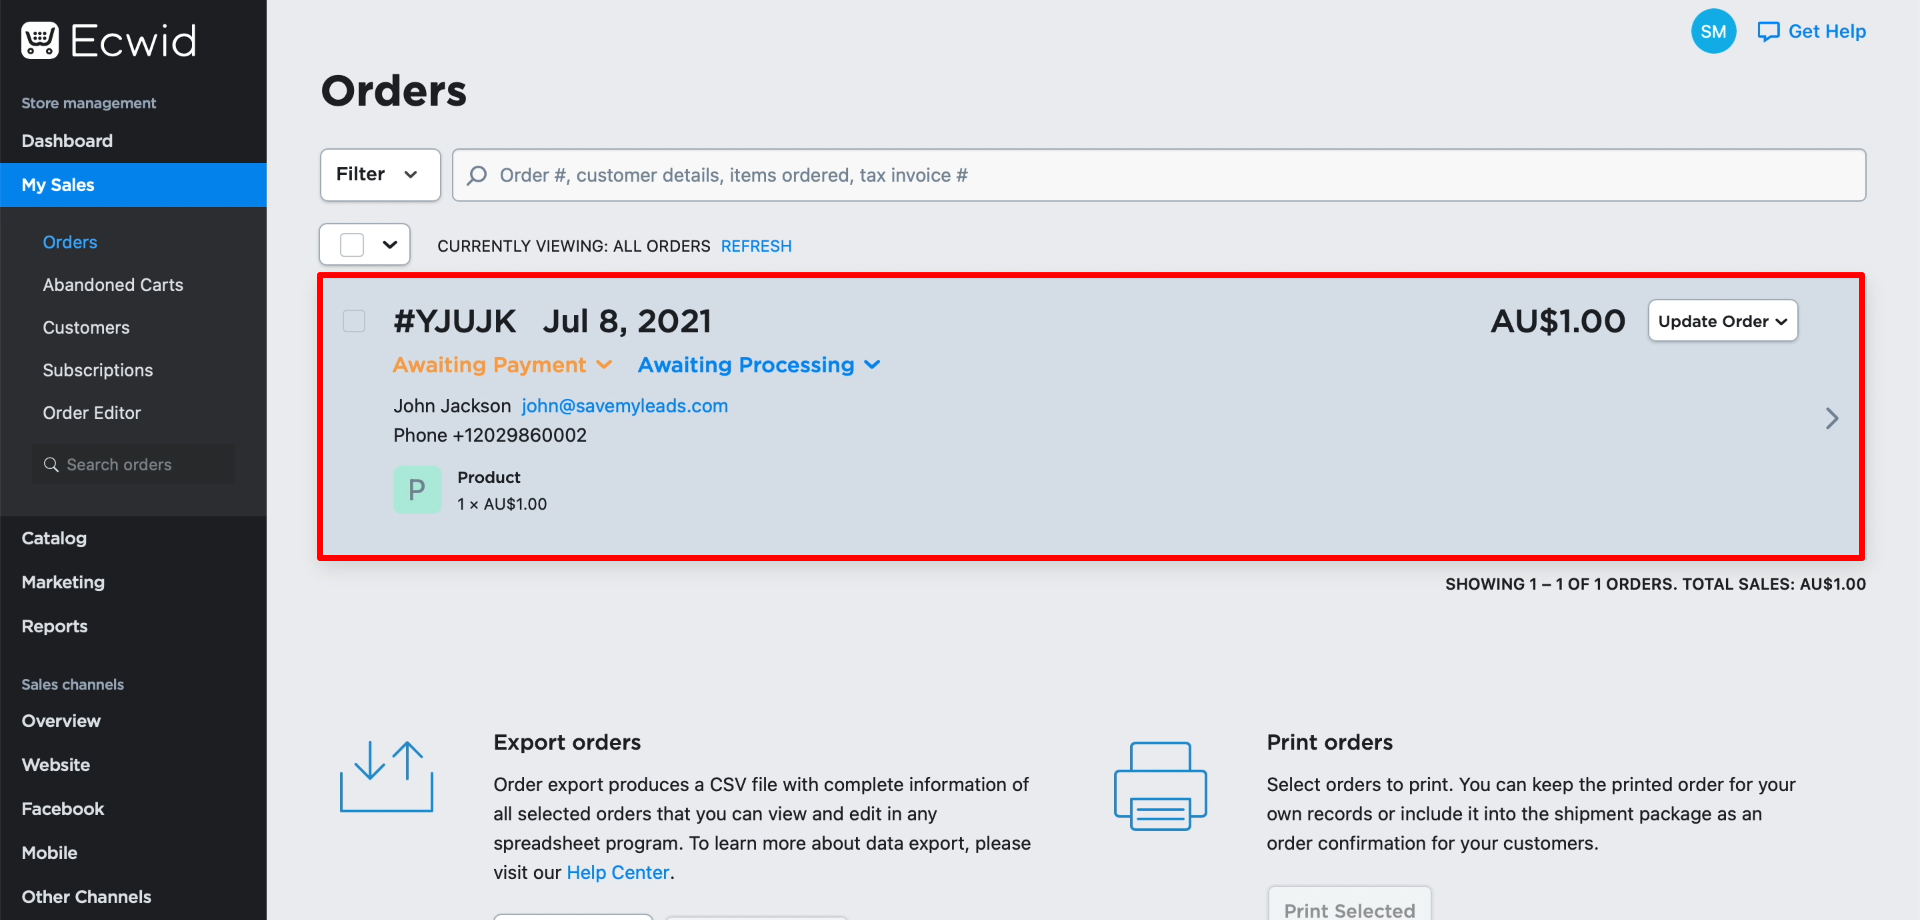
If everything is set up correctly, SaveMyLeads should copy the lead data to the order card. We go to Ecwid and check. If the order has not been added, we look for errors in the previous configuration steps. If there is an order, we proceed to the final stage.
Finishing setup
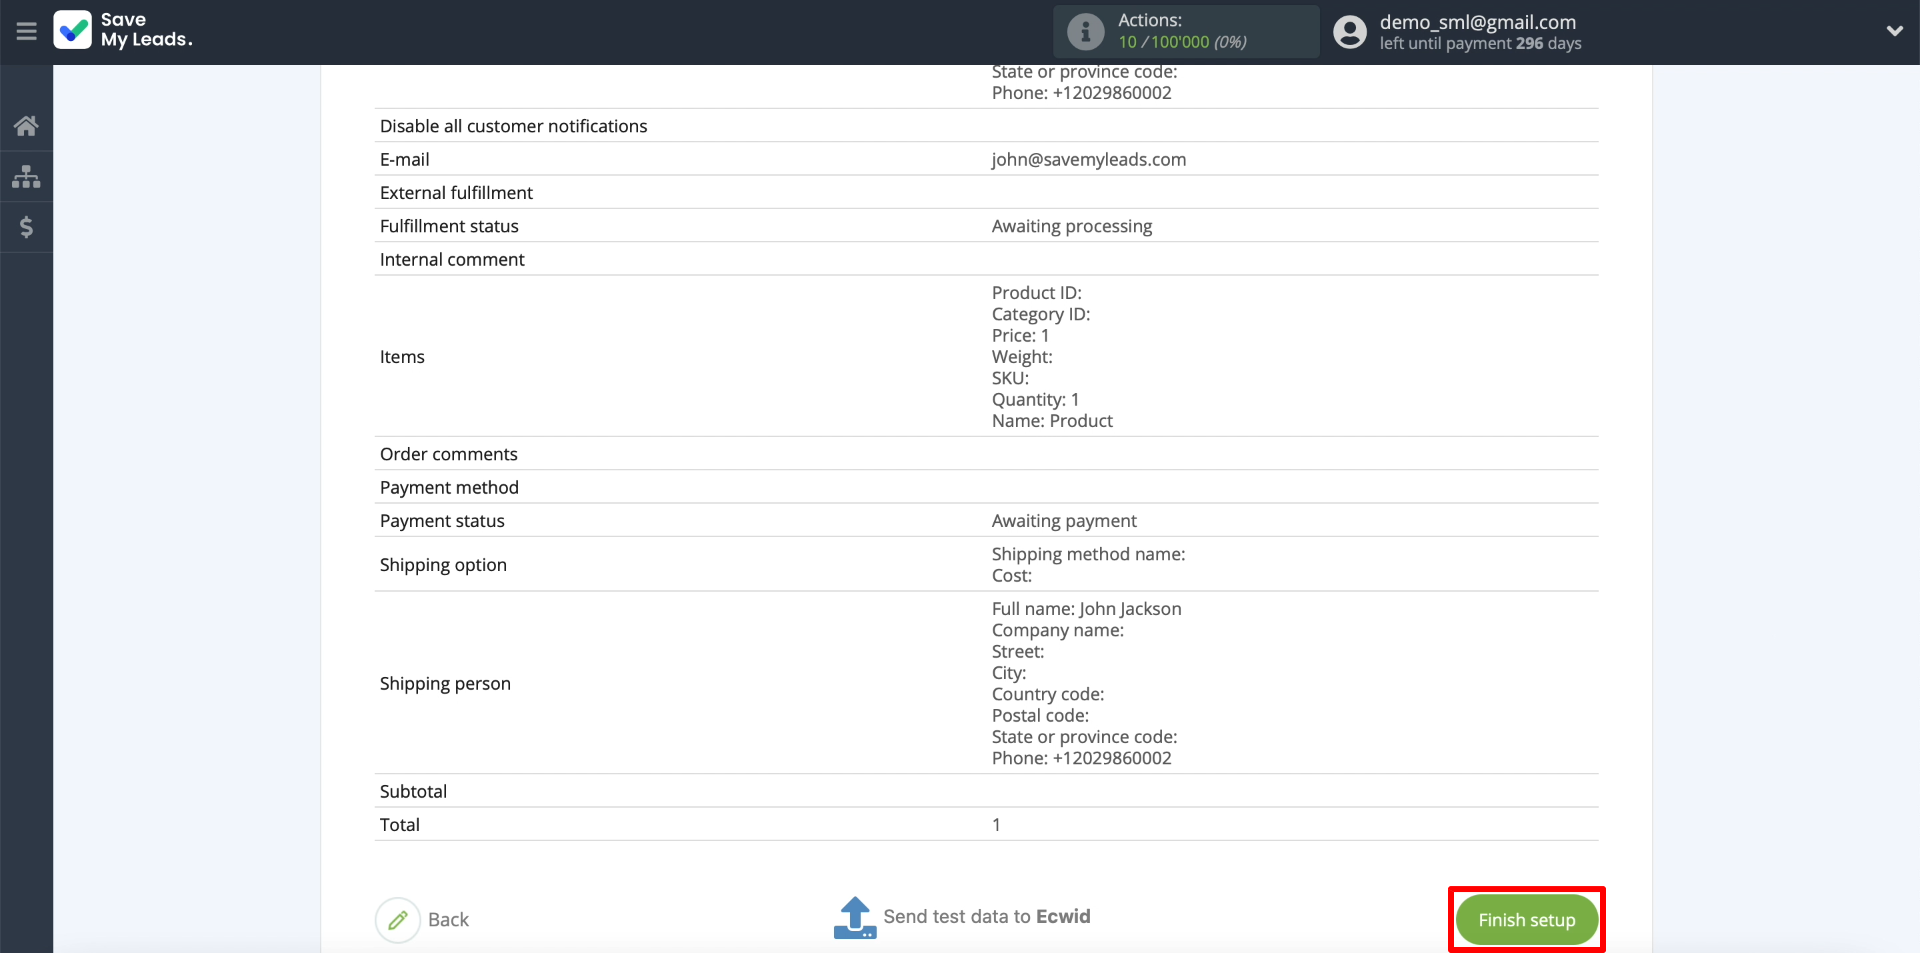
Click "Finish setup" to complete the connection setup and enable automatic data transfer.
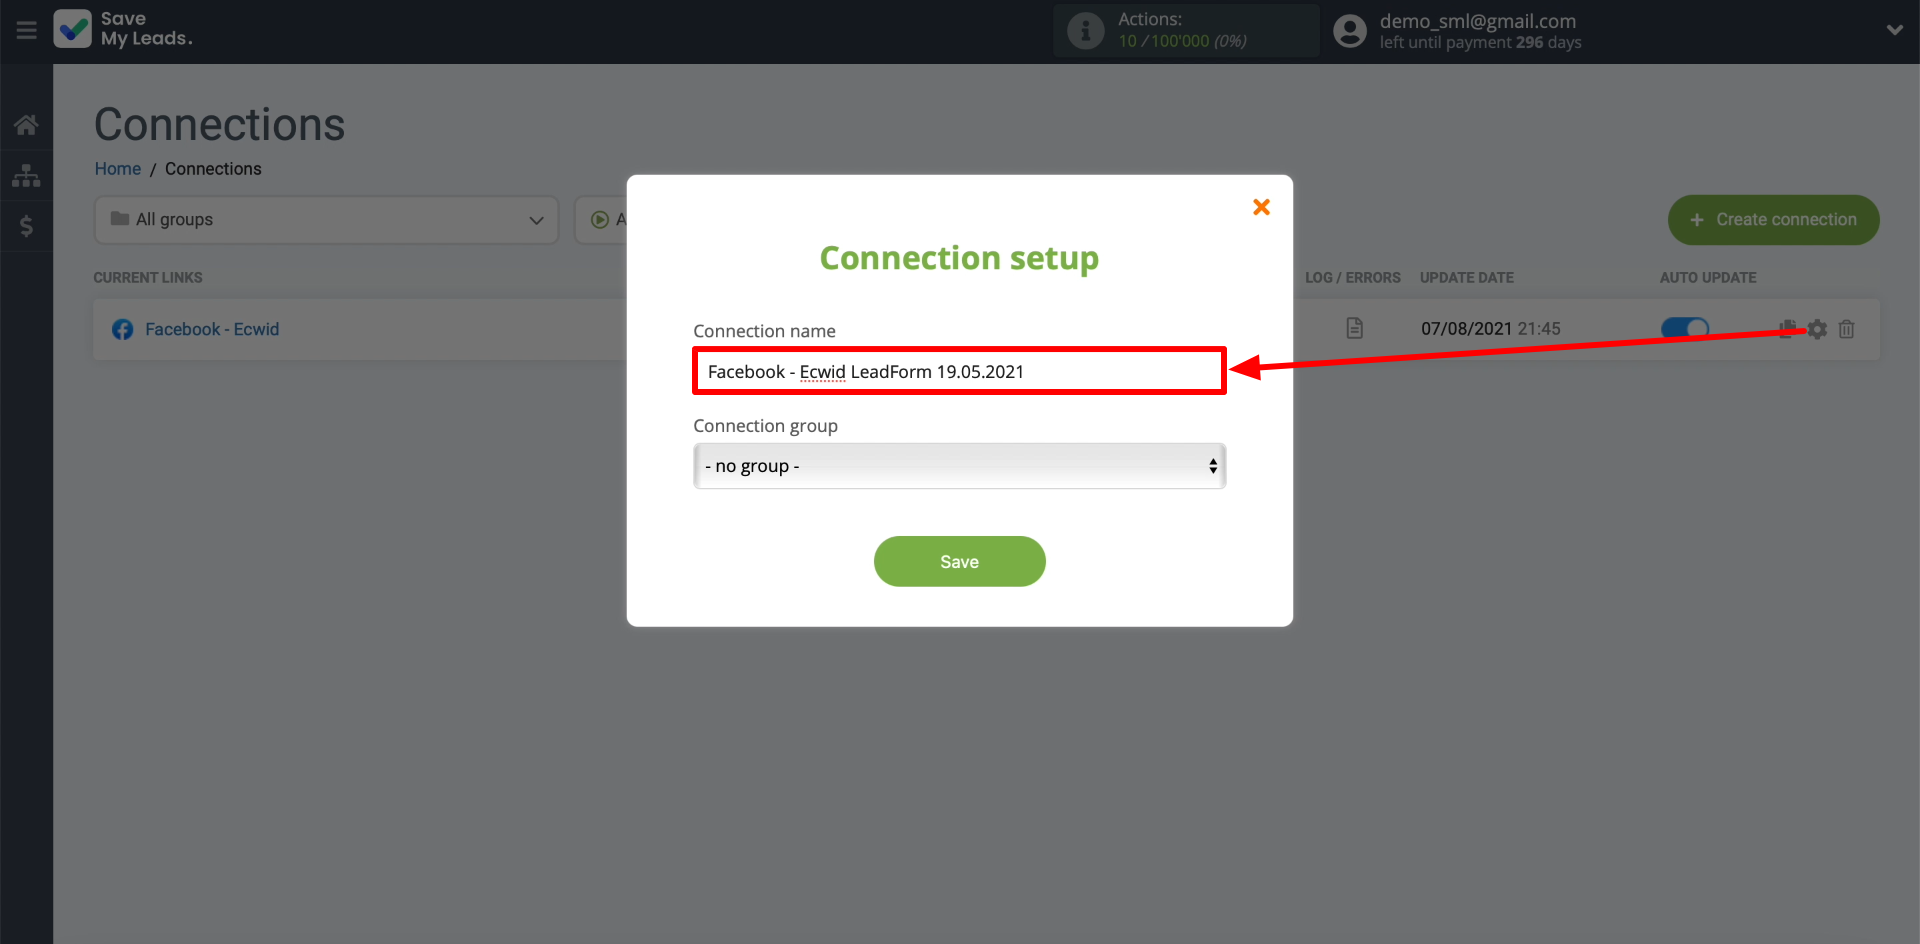
If necessary, edit the name of the created connection. To do this, click on the gear and enter the appropriate text.
That's all. The connection is created and activated. As a result, SaveMyLeads will automatically create Ecwid orders based on new leads from Facebook. You can pause, edit or delete the current connection or add new ones at any time. Good luck with your work!
