To automatically transfer leads from the Facebook ad account to the Asana project management system in the form of tasks, you need to link the systems via API. The connector of services and applications Save My Leads will help you with this task in 5 minutes without any code.
Contents:
1. How to transfer leads from Facebook Lead Ads to Asana
2. Connect Facebook Leads Ads
3. Connect Asana
4. Automate data update
5. Conclusion. How to set up Facebook and Asana integration
If you set up Facebook ad campaigns and process leads in the Asana task manager, your managers have to transfer them manually and spend a lot of time on these routine actions. Fatigue and burnout can lead to the fact that some applications are missed, and some are processed at the wrong time. Social networks are a place for spontaneous, emotional purchases, and if you delay the processing of a lead, then it will not convert into a buyer, and even more so, into a loyal regular customer.
To avoid this, the transfer of leads in the form of tasks to Asana must be automated. To do this, you need to integrate the Facebook ad account and the Asana system. As a result, you will reduce all routine processes associated with the transfer of leads, customer requests will not be missed due to the human factor, thanks to automatic data updates, they will be processed on time, and employees will have more time for more important tasks.
How to transfer leads from Facebook Lead Ads to Asana
To set up communication between systems, you need to integrate them via the API. Facebook has it open so developers can send API requests. If you have an IT specialist on your staff, and they know how to set up integrations, then the issue is resolved. In other cases, you will have to hire an external developer, which means that the integration will take some time and will require additional costs. If in the future you need some improvements, for example, you want to set up filtering of leads so that not all of them are transferred to Asana, but only a part - you will need to contact the developer again and waste time and money again.
To avoid all these problems, set up the integration yourself quickly, easily and without programming knowledge - using the convenient online connector Save My Leads. This system helps to connect different applications via API in 5 minutes. No need to wait for the integration to complete, allocate a budget for them and hire programmers. No coding knowledge or skills required to work with API requests. Save My Leads allows any specialist to set up integrations on their own, because they are all already implemented in the system. You just need to connect your accounts to it and enable automatic data update. We will tell you how to do this in our step-by-step instructions.
Connect Facebook Leads Ads
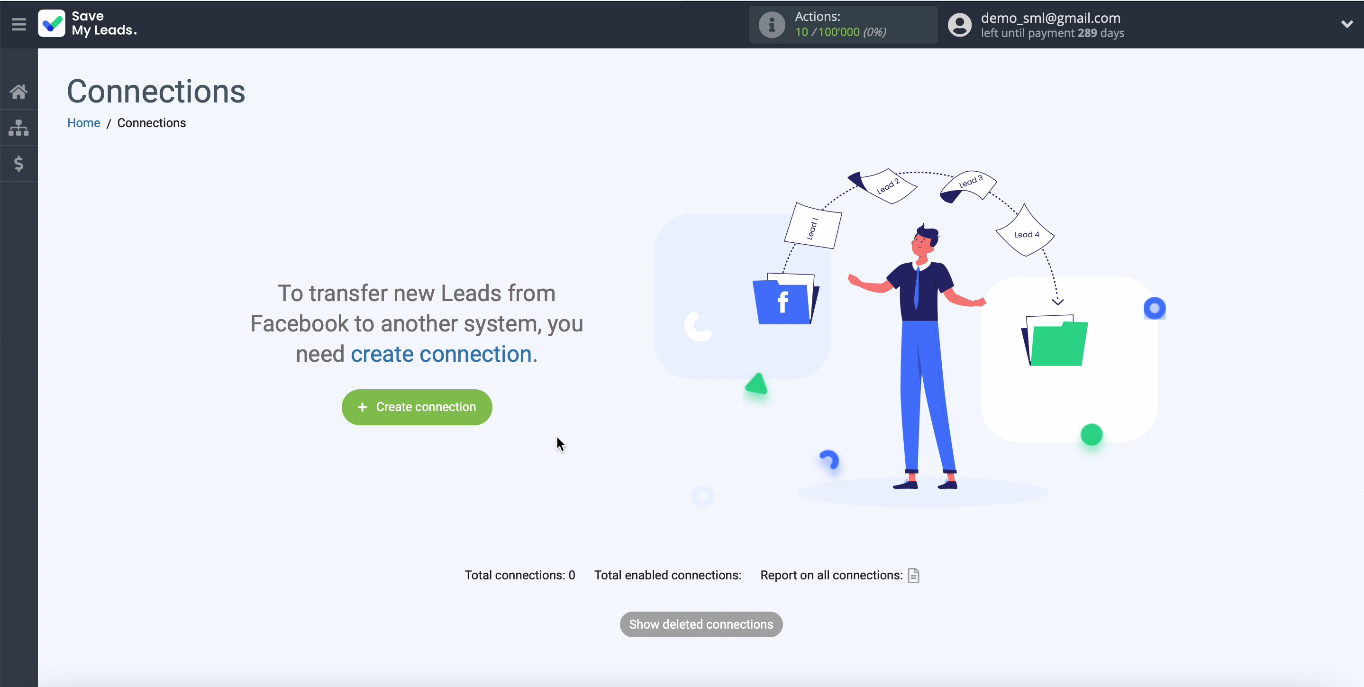
First, you need to register on the official Save My Leads website, enter your email address and come up with a password. The process will not take more than 5 minutes of your time. Now go to your personal account and create a new connection:
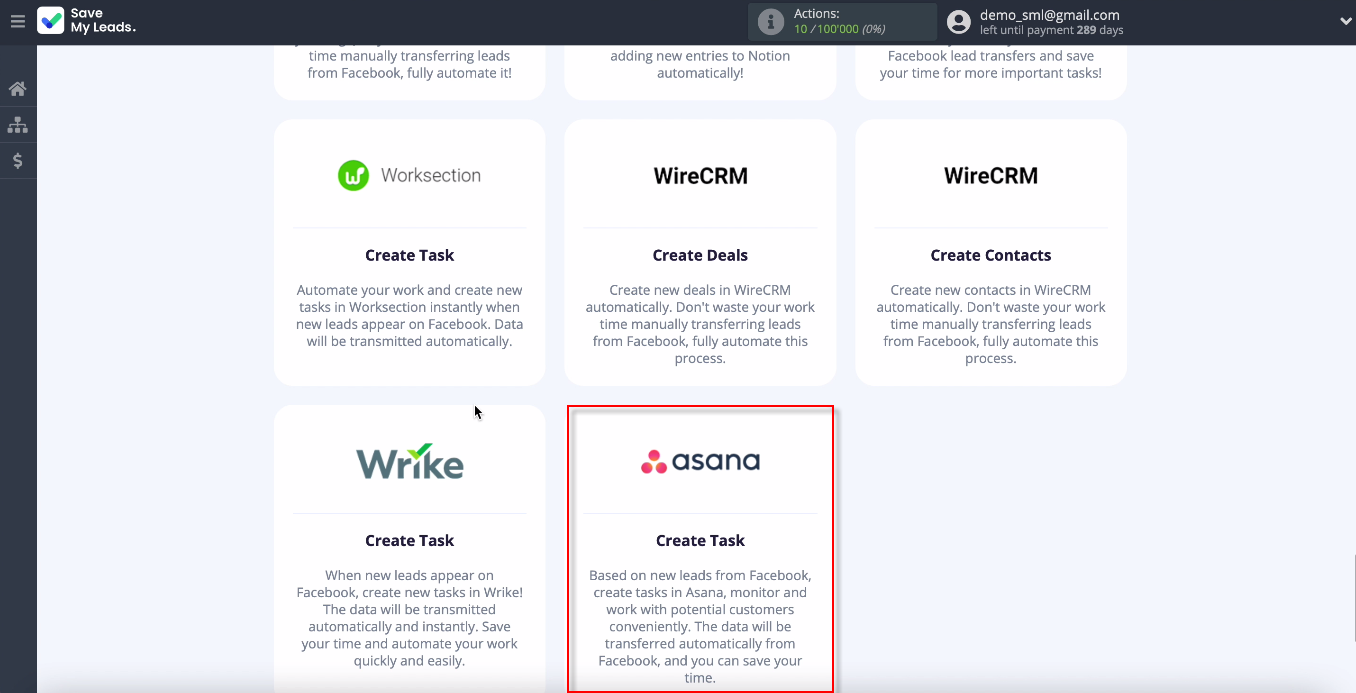
Select the Asana template among the ready-made ones in the system.
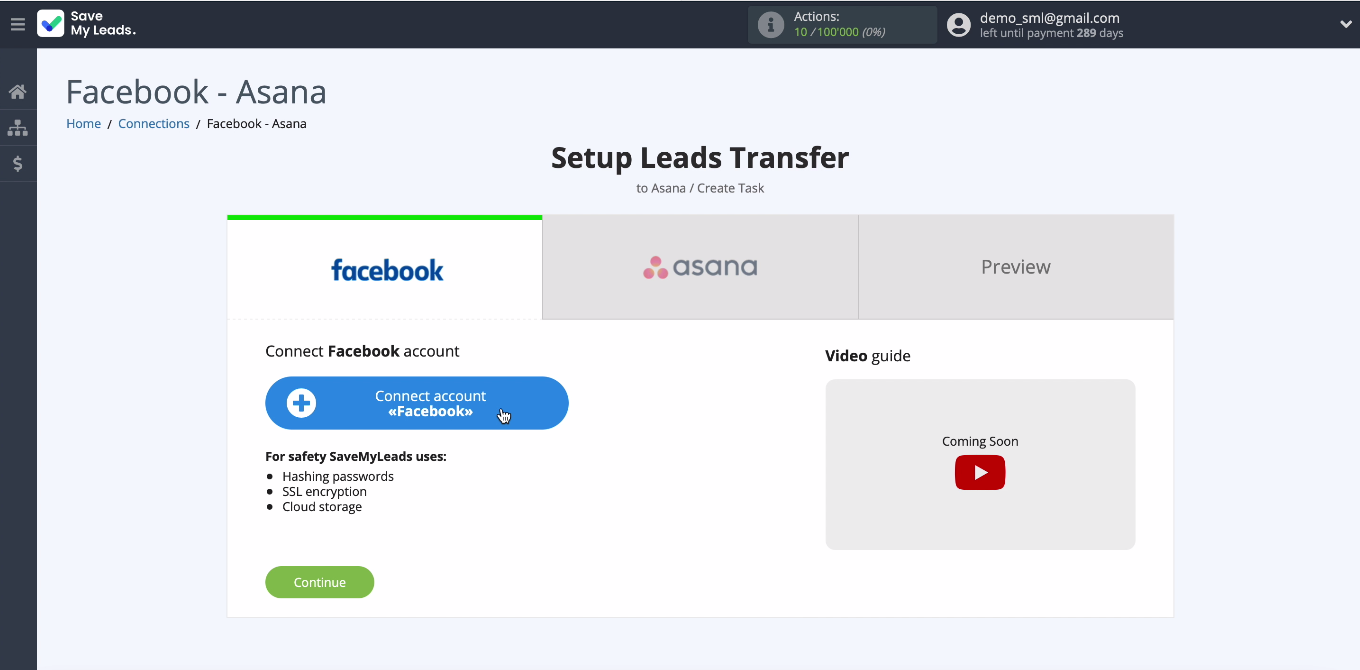
Now you need to connect your Facebook account to the Save My Leads system. Enter your username and password, and click Edit Settings:
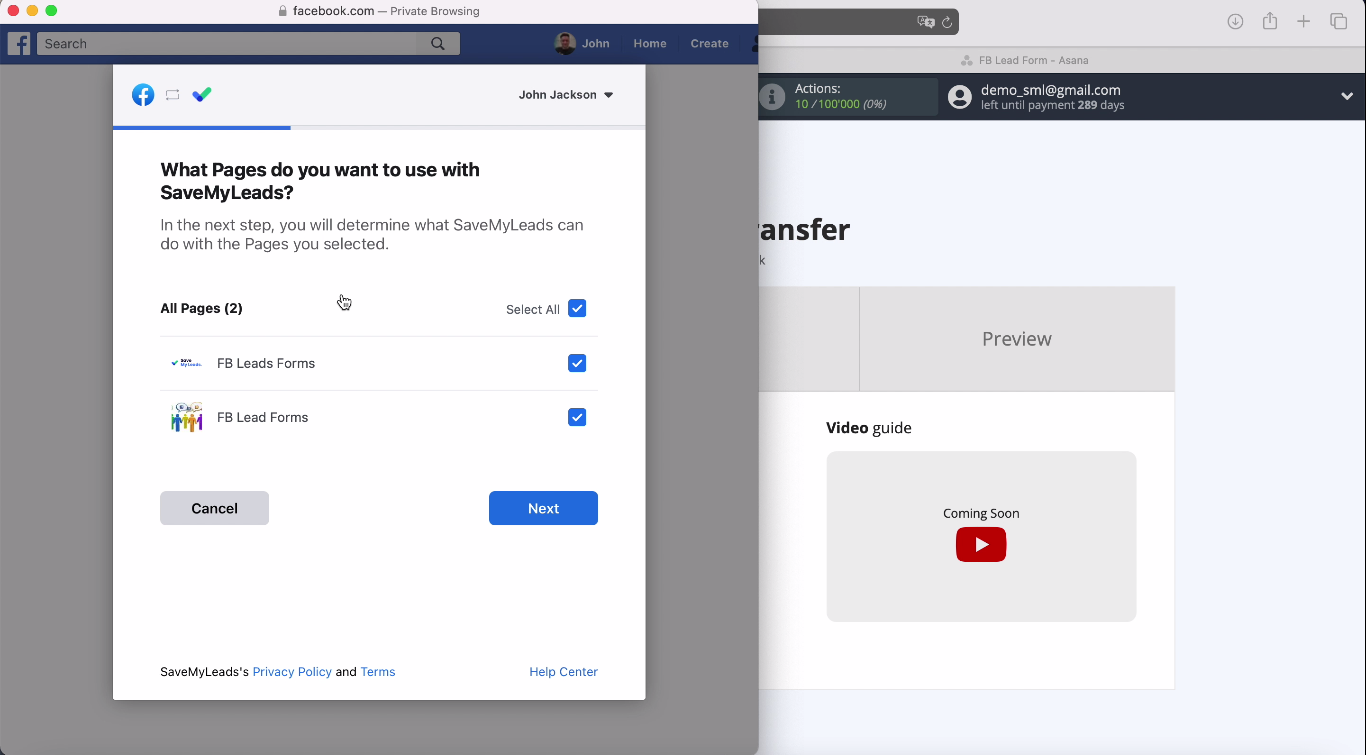
Now you can see the advertising pages that you can connect to the system. It is better to select all of them at once, even if at the moment you are receiving leads from only one of them. This way you will be able to work with them in the future:
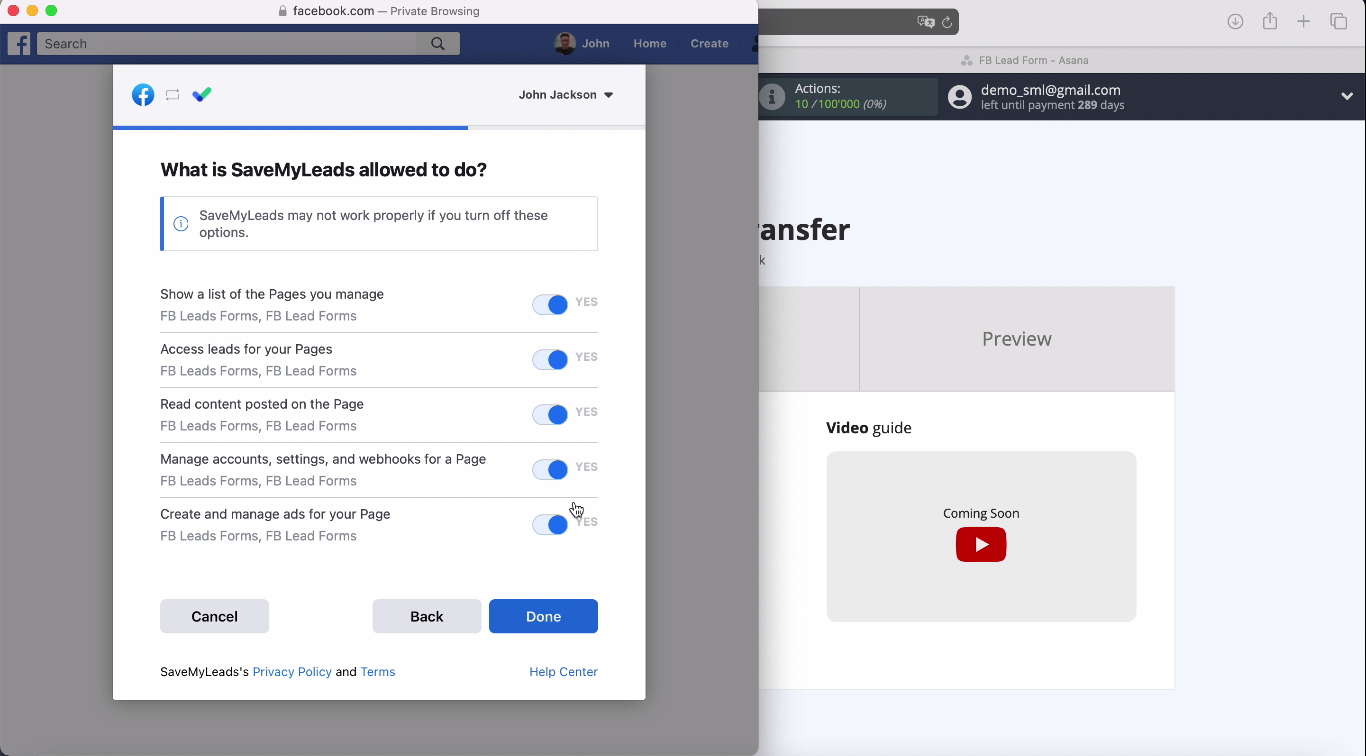
Checkboxes Leave all access checkboxes enabled:
If the account appears in the list of connected ones, you did everything right. Select the advertising page for which you want to send leads and specify the forms by which the data will be uploaded. If you have specified several forms, then you need to create several connections for each of them:
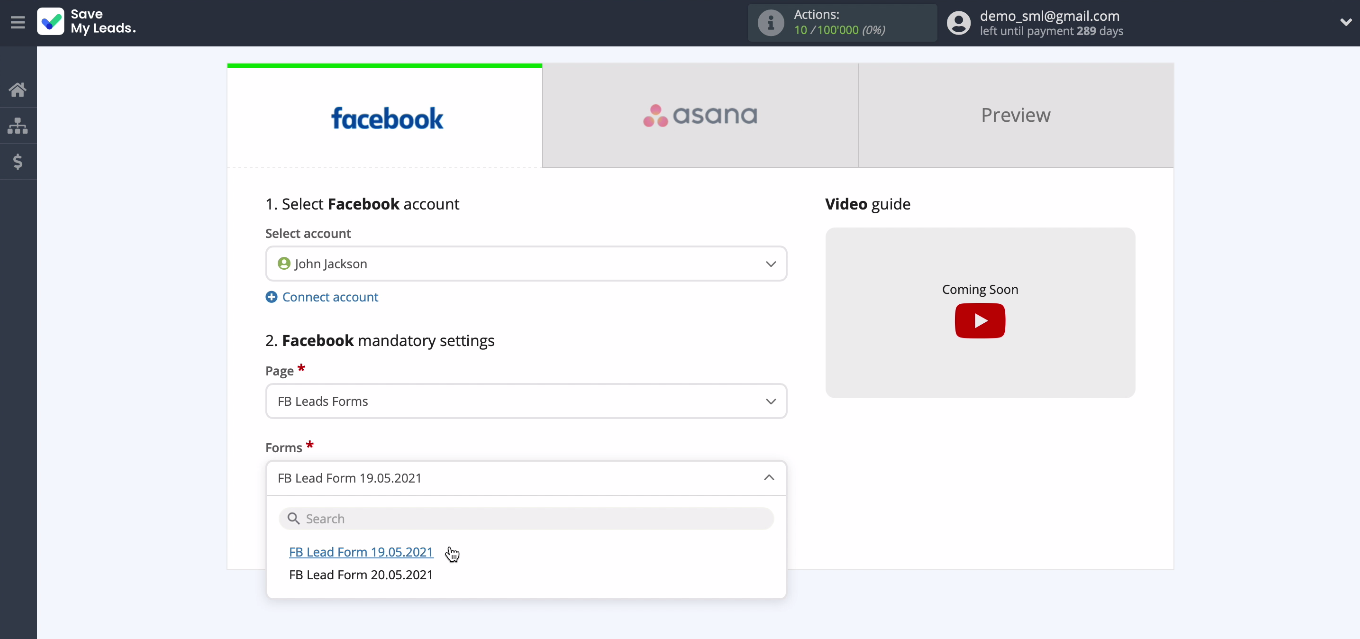
At this, the settings of the system that transmit data - Facebook - are completed.
Connect Asana
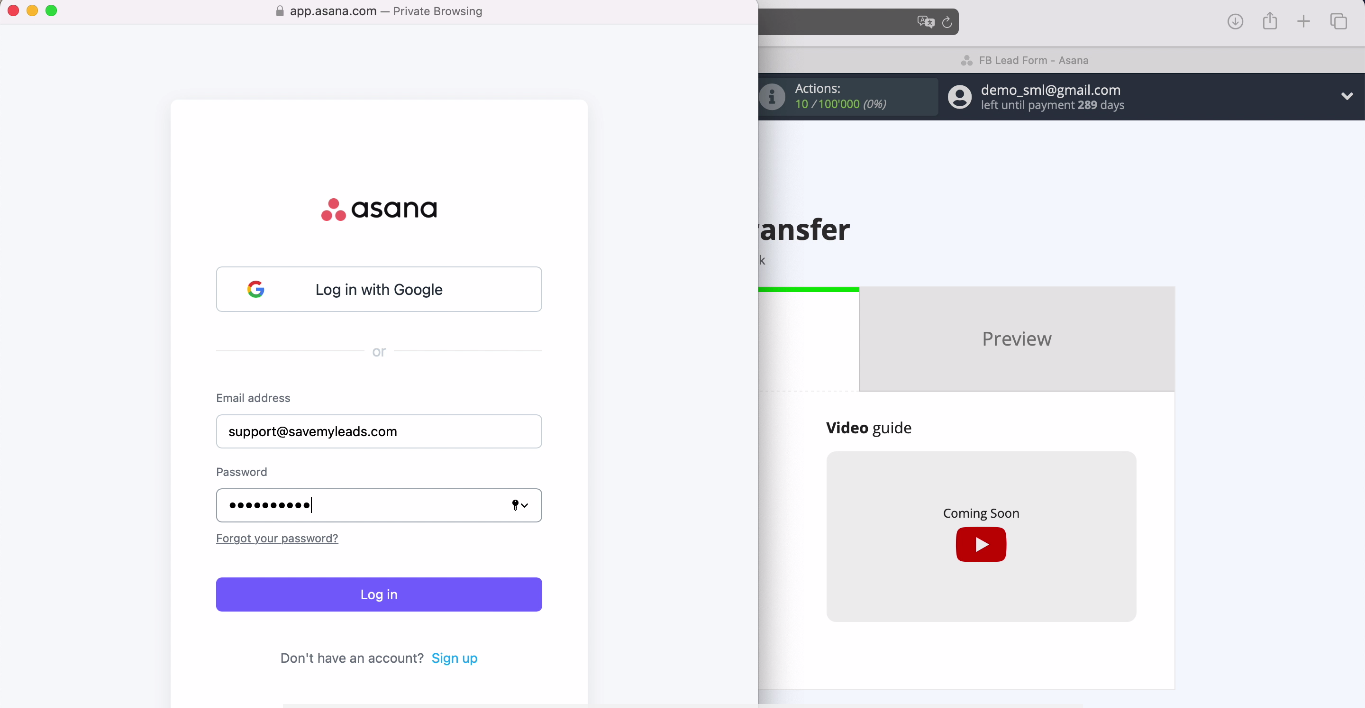
Now let's connect your Asana account to the Save My Leads service. Enter your email and password from your personalin the Asana system:
Now specify the Workspace in which the system needs to create new tasks:
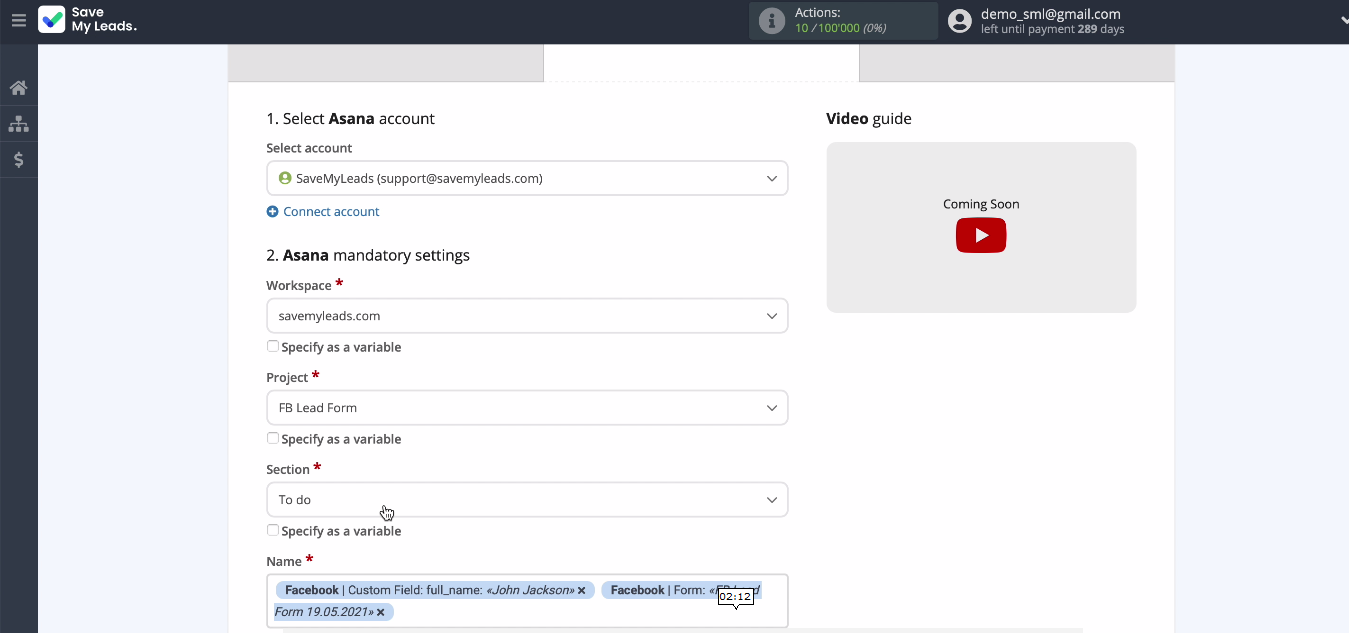
Select a project. At this stage, you will see the fields to which data from Facebook will be transmitted when creating tasks. You need to tell the system which data to transfer to which fields. To do this, you need to fill in the variables: click on an empty field and select a variable from the drop-down list:
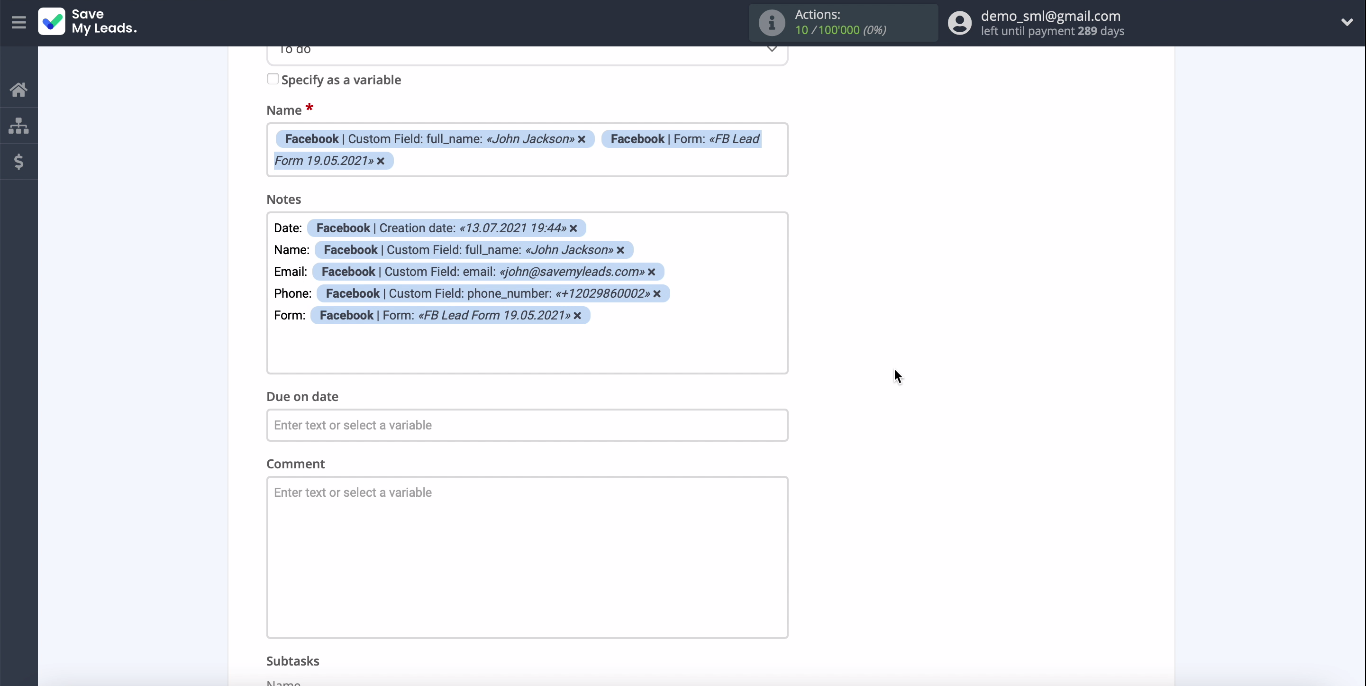
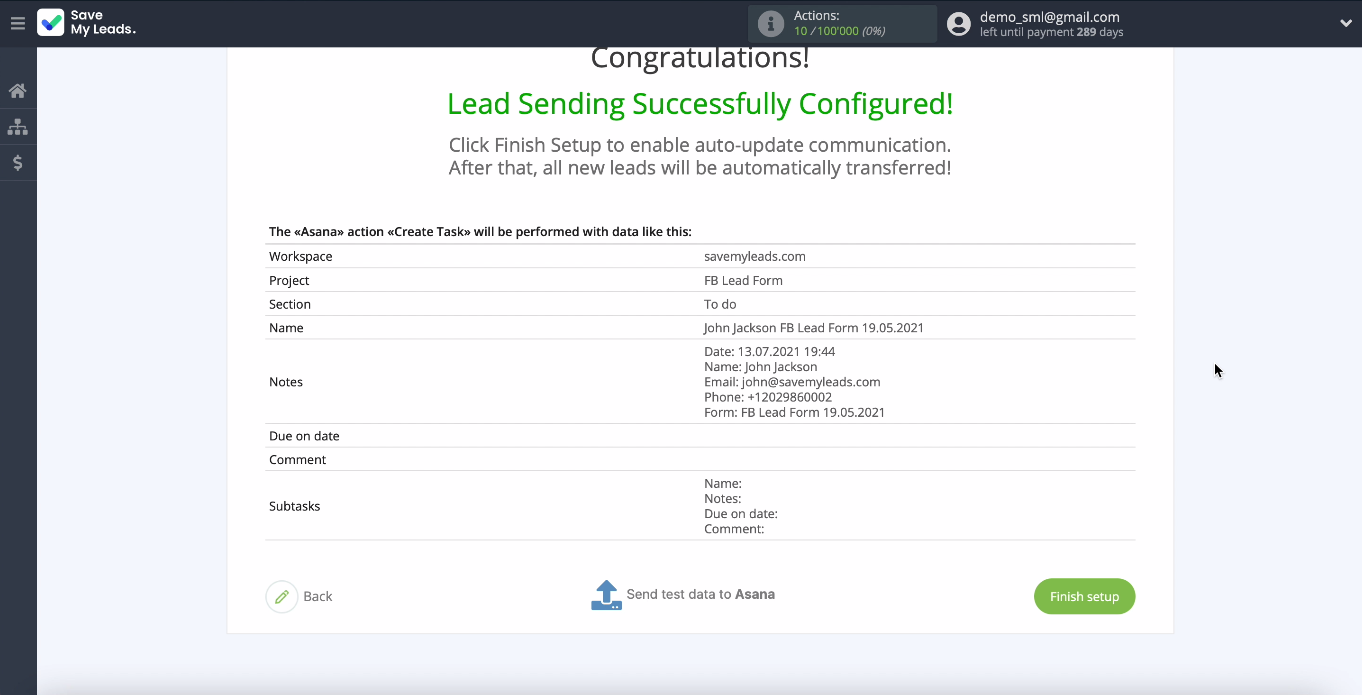
At the next stage, you will see how the fields are filled, check how it will look in the task, click Send Test Data to send test data to Asana:
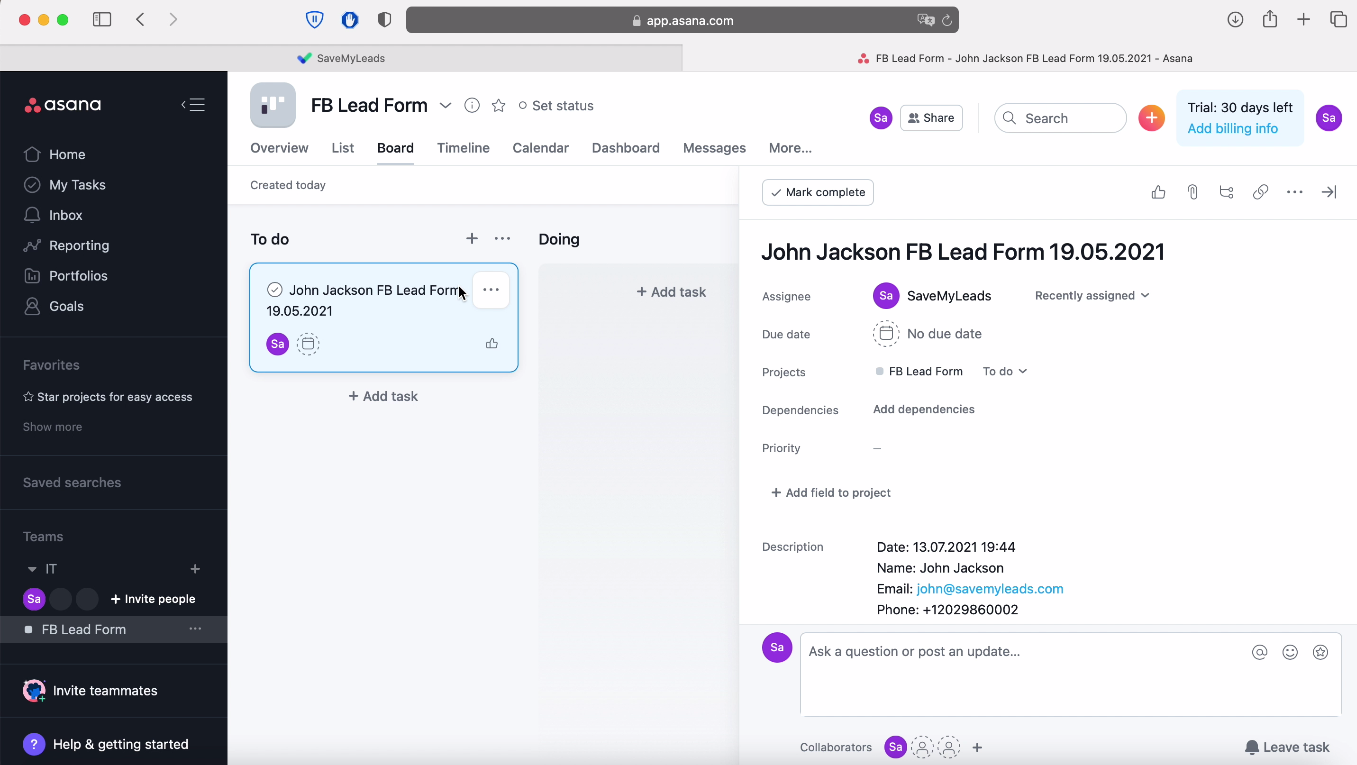
Go to your Asana account and check the result.
- Automate the work with leads from the Facebook advertising account
- Empower with integrations and instant transfer of leads
- Don't spend money on developers or integrators
- Save time by automating routine tasks
If everything suits you - the Asana setup is completed, it remains to enable automatic data update:
Asana setup is completed.
Automate data update
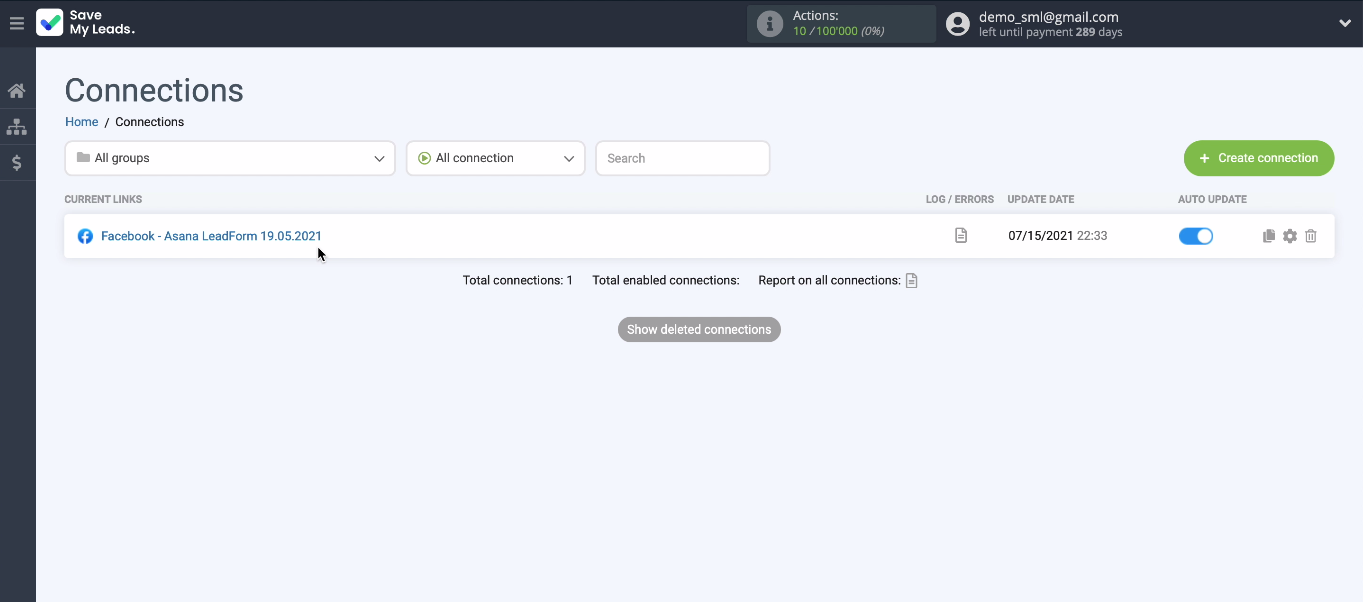
In order for new tasks in Asana to be created instantly when new leads appear in the Facebook advertising account, you need to enable automatic data update. If necessary, you can change the name of the link in its settings.
Conclusion. How to set up Facebook and Asana integration
Setting up integration with the Save My Leads online connector is quick and easy, this task can be done by any specialist, regardless of coding and integration skills. With this system, you will spend 5 minutes on setting up the connection, and it will send leads from Facebook in the form of applications to Asana constantly, as soon as they appear in your ad account. Try it and see for yourself how simple and convenient the Save My Leads service is.
Are you actively using Facebook Ads Manager in your advertising campaigns? Set up the integration of this service with other systems and take your business automation to the next level. For example, set up that contact information from leads left by potential customers will be used for automated email campaigns or for creating new contacts and tasks in your CRM. Sign up and try it for free!
