Sendlane is a platform for comprehensive Internet marketing that provides a solid set of tools for launching SMS and email campaigns, placing advertising pop-ups and managing reviews. One of the most popular among them is used in email marketing to create personalized, relevant campaigns. In our article, you will learn how to set up Sendlane and Facebook integration to automate the transfer of leads from a social network to this service to further launch mailings to them.
Facebook Lead Ads are an effective tool for lead generation. If you are interested in this article, most likely you are already using Lead Ads to promote products or services. You're probably also using or planning to use the Sendlane platform to send emails to new leads. You can, of course, enter the contact information of your potential clients who came from the social network using the old method – manually. But it will take a long time. We offer you a more progressive method – automation. It allows you to get rid of one of the most time-consuming work processes. By linking the online marketing platform and the social network together, you can improve your productivity.
The codeless online connector SaveMyLeads will help you automate the transfer of leads. Setting up Facebook and Sendlane integration according to our instructions, you will see how the personal data of each new lead from the Lead Ads form ends up in the marketing service. Just imagine that you will no longer need to manually transfer a series of contact details about a product buyer, a service customer, or an event visitor. And you don’t have to spend extra time checking the correctness of the transfer of first name, last name, phone number, email address, and country of residence. You will be able to effectively optimize your work, and your client will be pleasantly surprised by the high speed of response to their request.
How to Set up Facebook-Leads and Sendlane Integration
When it comes to installing or configuring software or services, many people prefer to immediately contact a professional. The most common reasons for such a decision are fear of making a mistake and lack of time. However, don't rush to find someone to set up Facebook Lead Ads + Sendlane integration for you. We offer you a simple tool with which you will solve this problem yourself – the SaveMyLeads connector. It will help you not only get ready-made integration much faster, but also save money. The interface and operating principle of our service are intuitive. You can set up the connection you need in 5–10 minutes.
The schema Sendlane Facebook integration is as follows: “data source – online connector – data receiver”. The SaveMyLeads service continuously monitors your Facebook ad account. As soon as a new lead submits a form with their contact details, they will be transferred to your mailing list on the Sendlane platform. To set up and launch automated transfer of potential customer data, you will need to do a few simple steps. Let's not delay and start right now.
Setting up the Data Source – Facebook
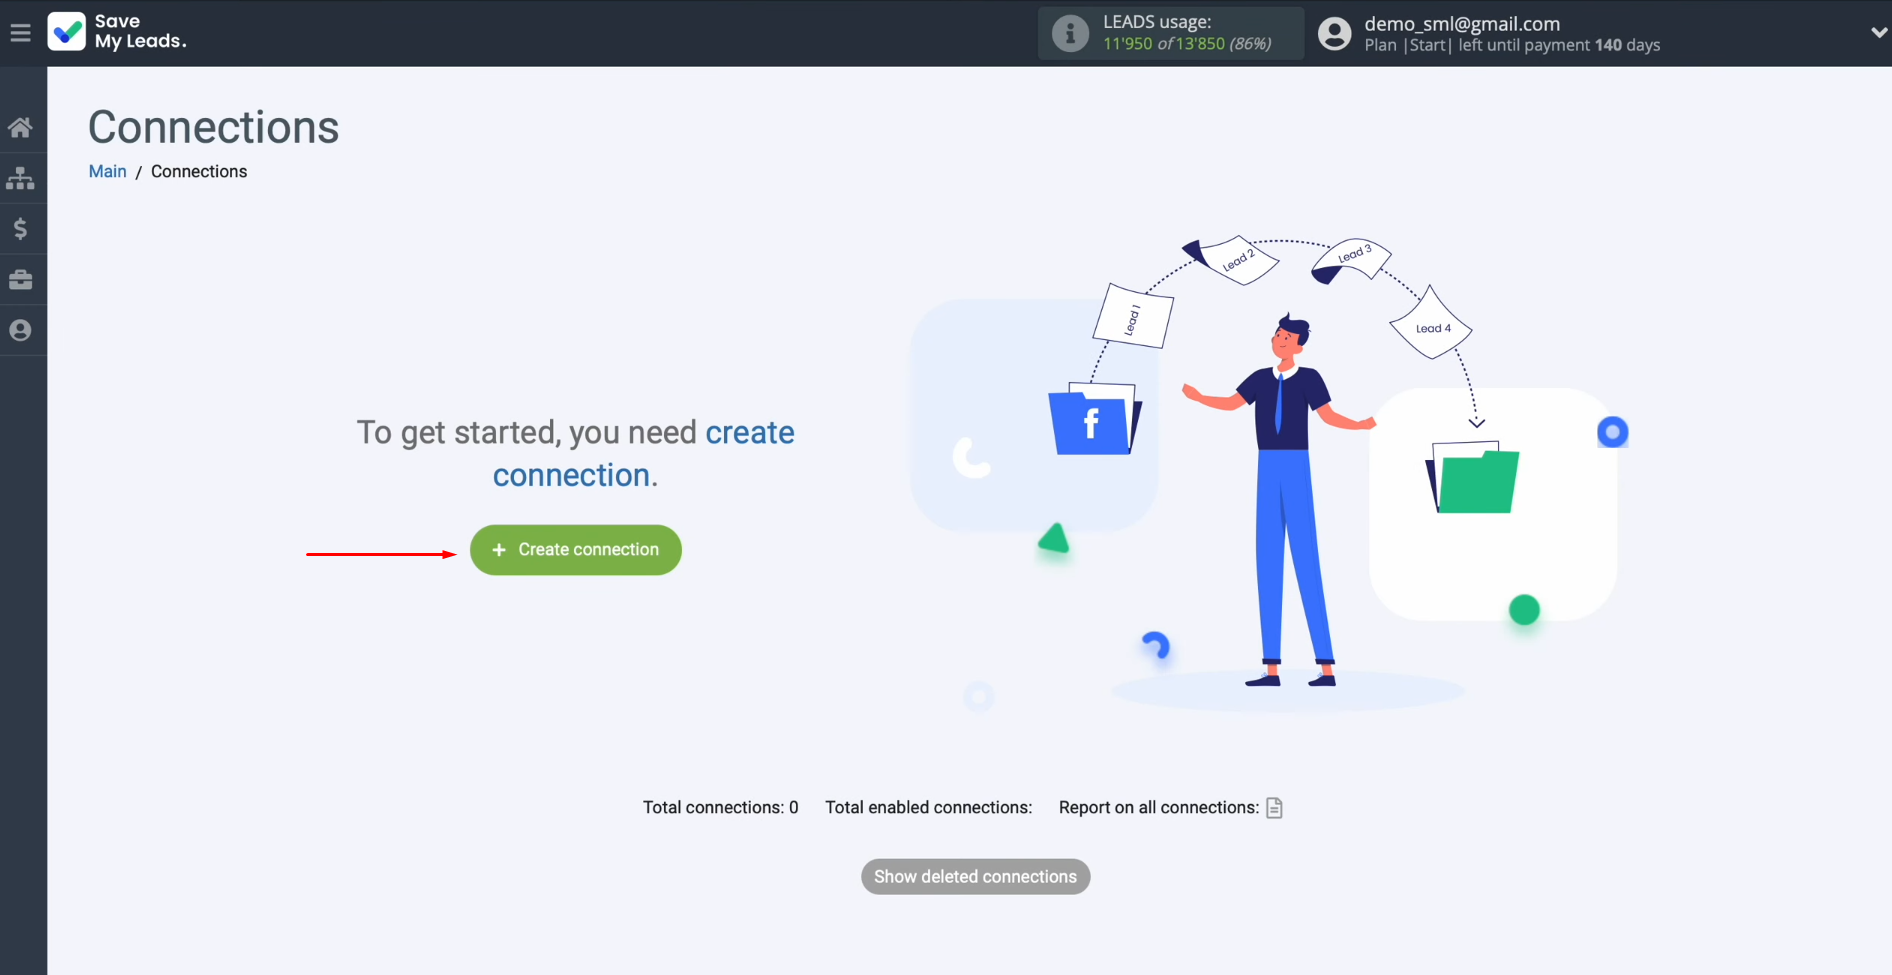
To set up Facebook integration with Sendlane, first, you have to create a new connection. For this, click on the button "Create connection".
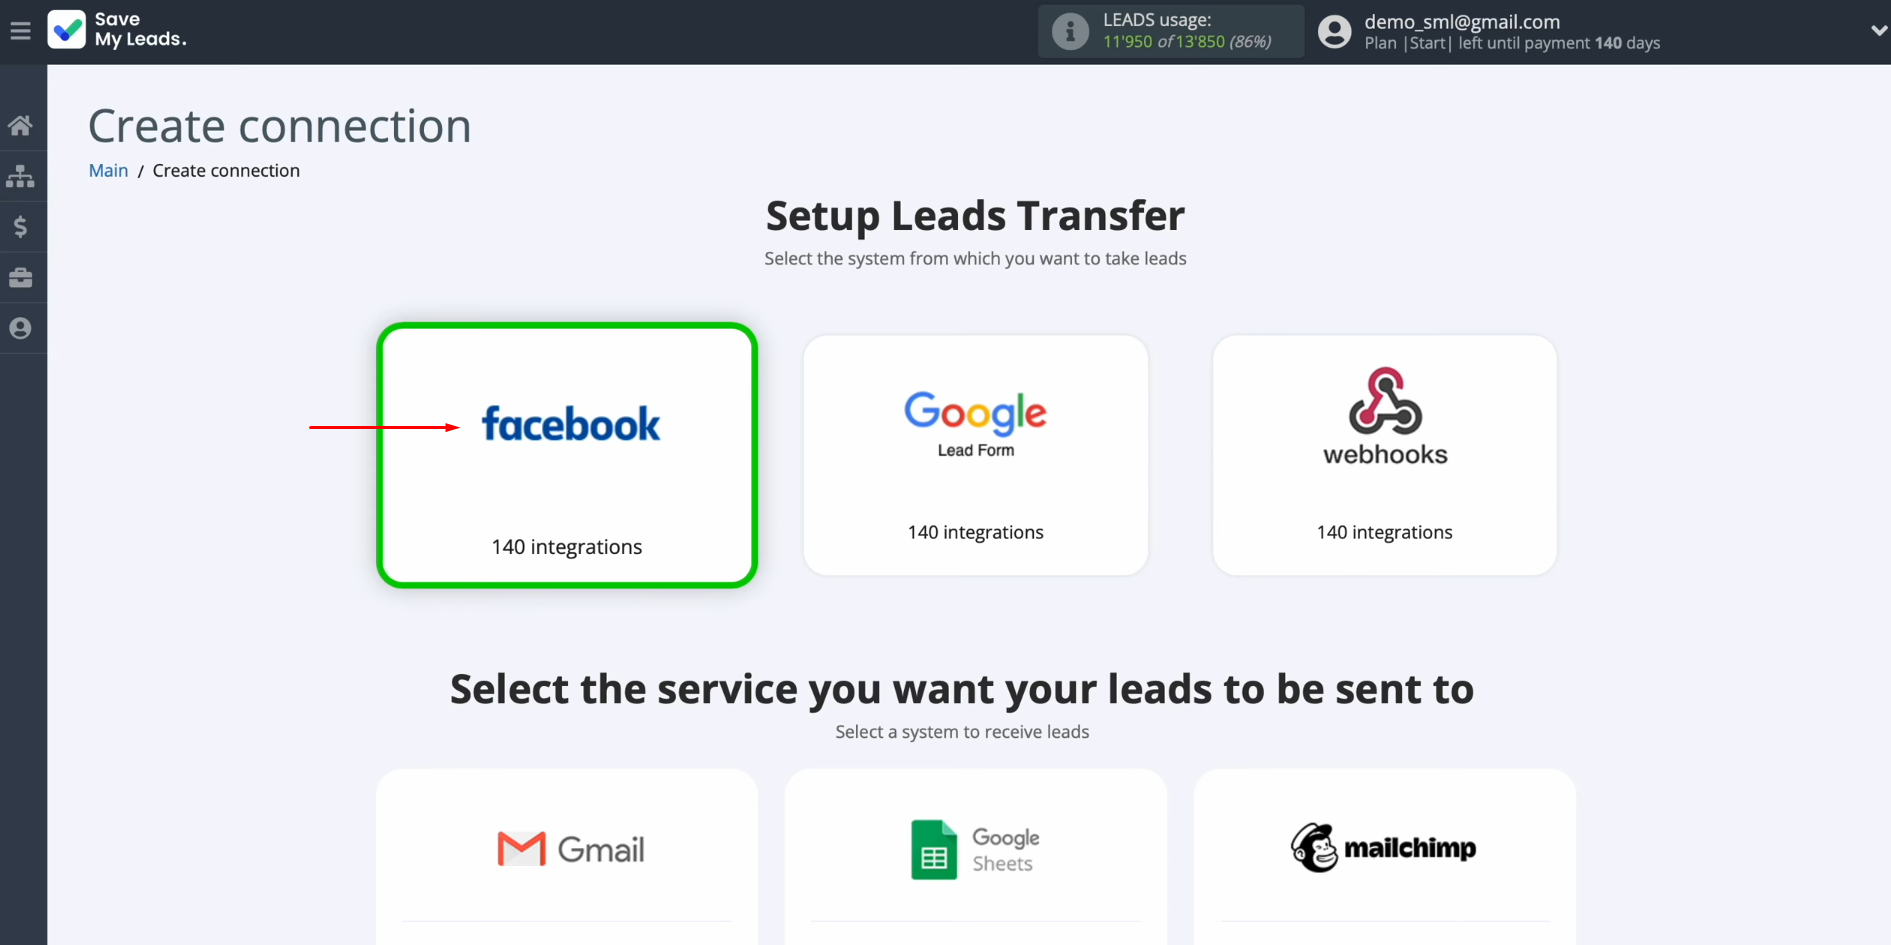
Next, you have to select a data source
system. In this case, choose
Facebook.
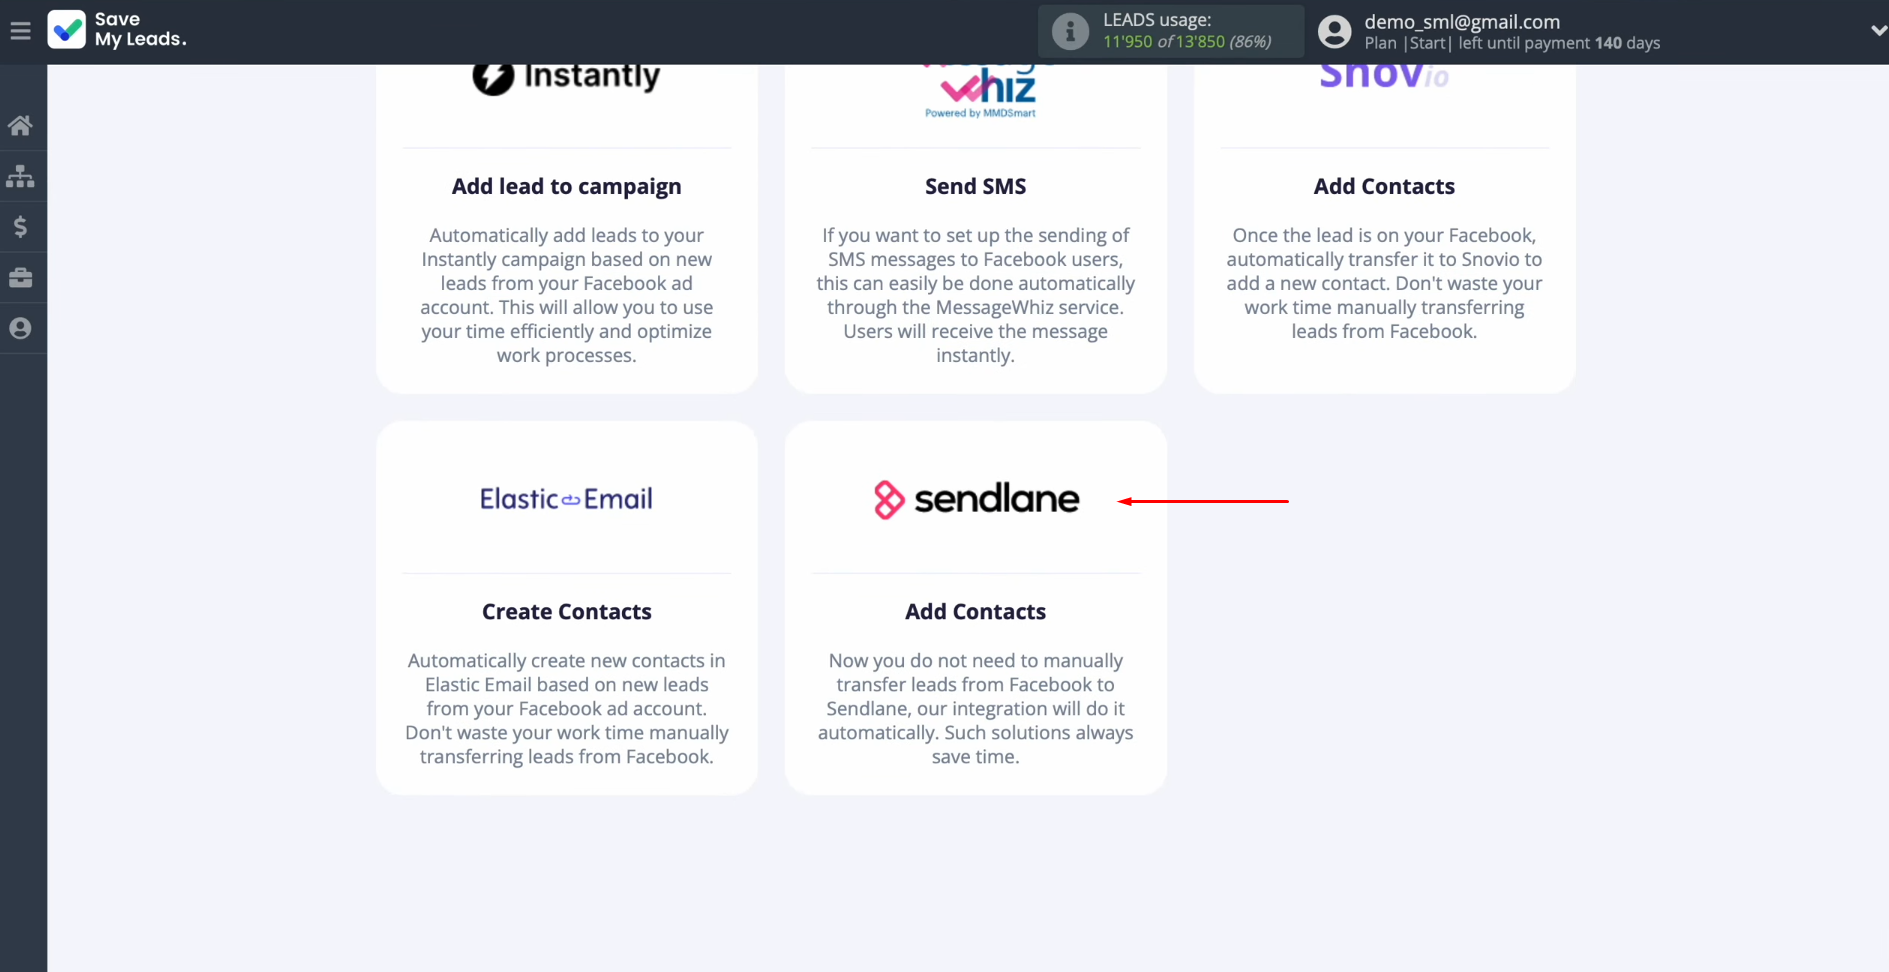
Now, you must select the system where
you want to transfer new leads from Facebook. In this case, select "Sendlane Add Contacts".
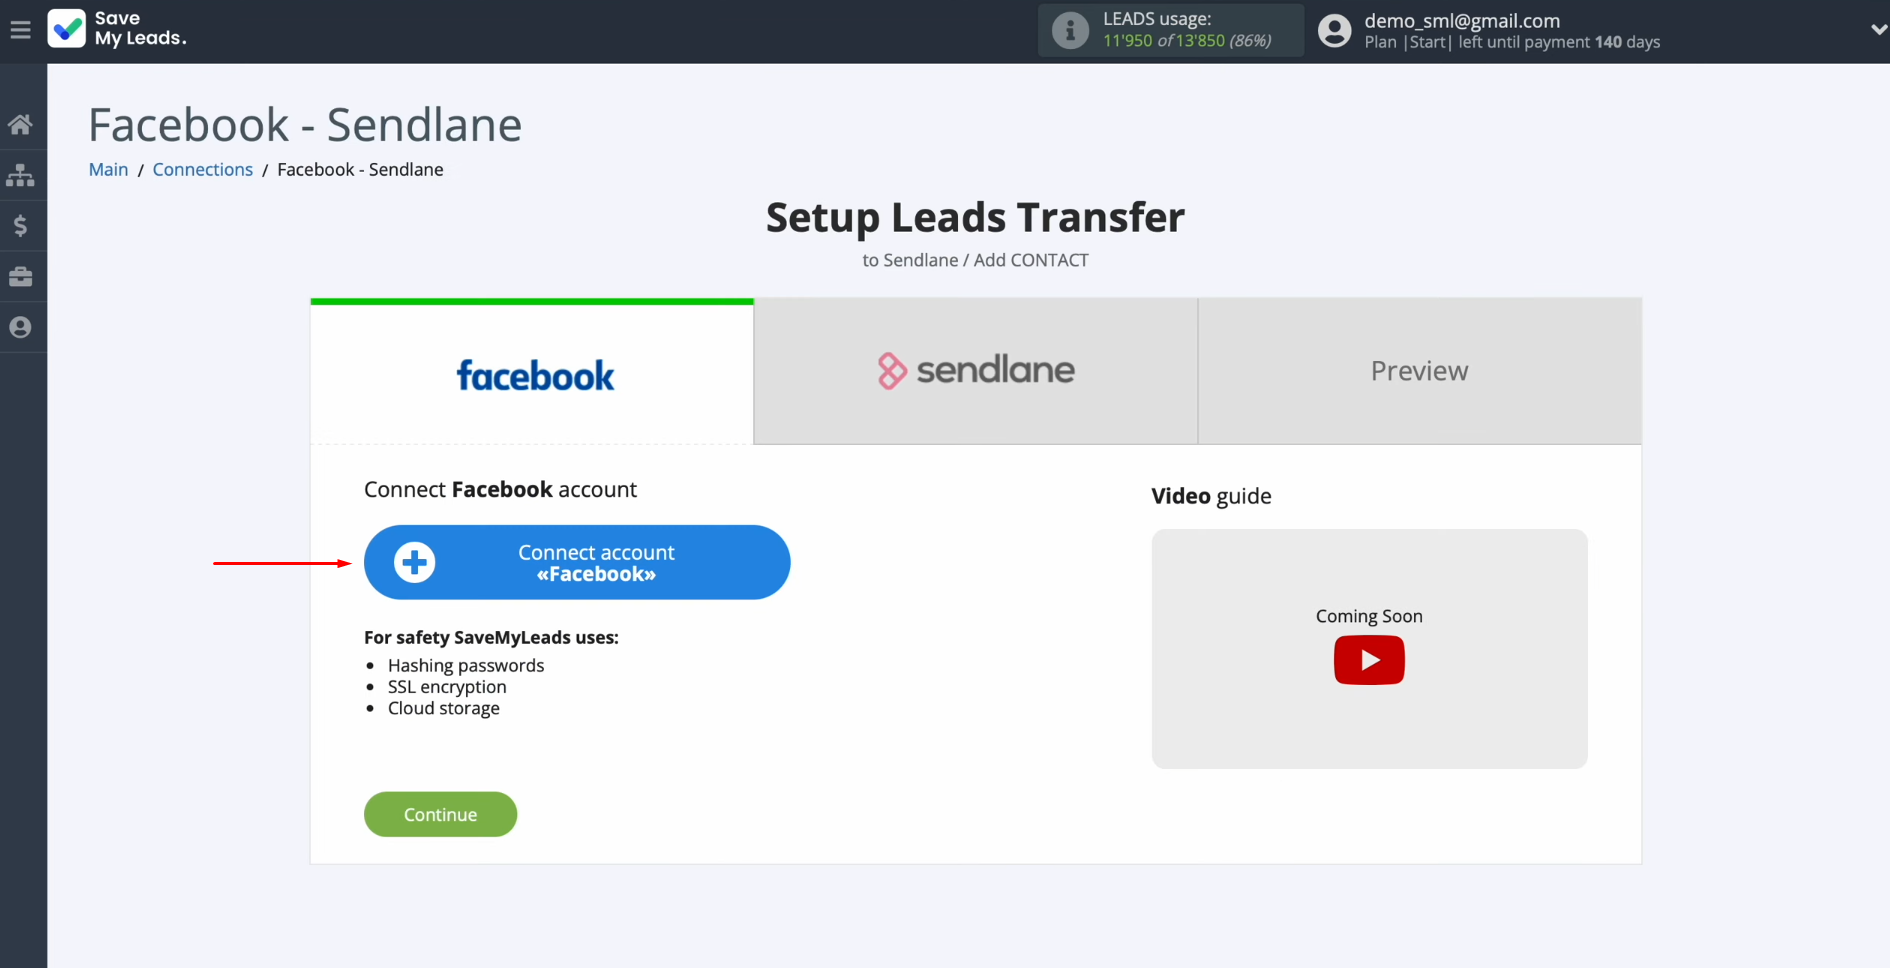
At this stage, you have to connect your Facebook
account to SaveMyLeads. Click on
the blue button.
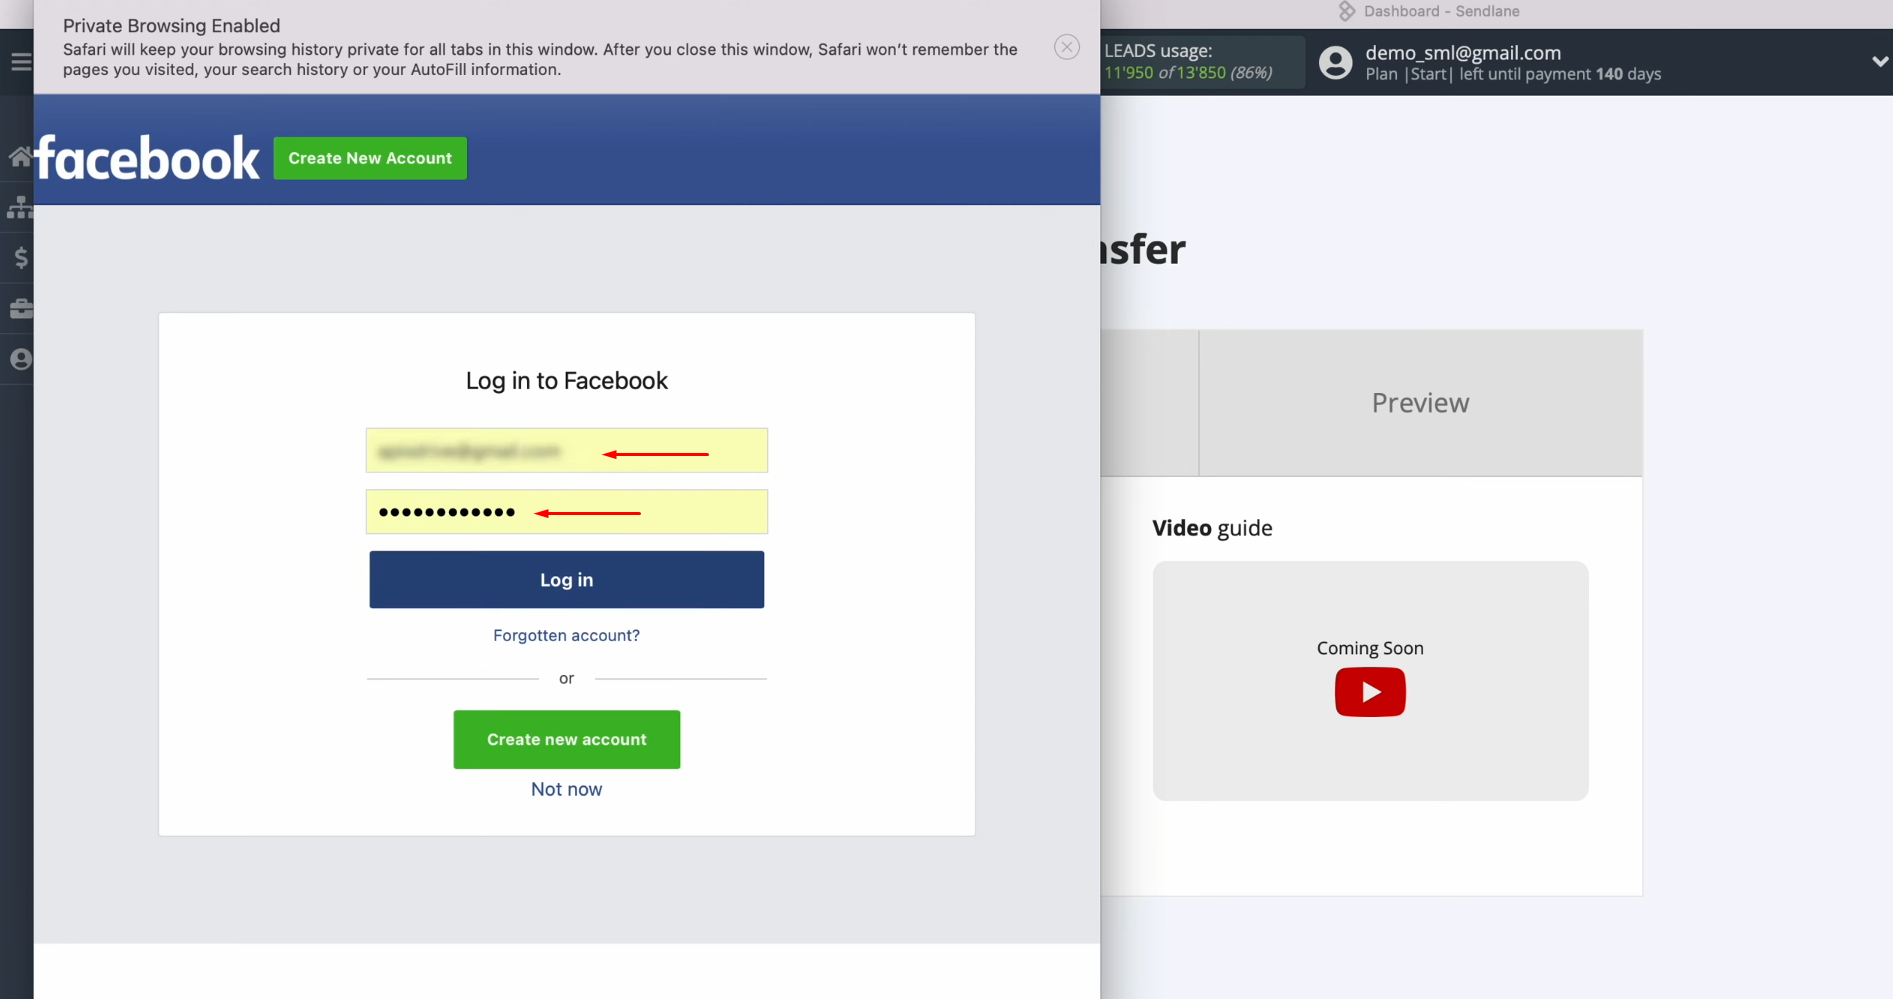
In this
window, you must specify the login and password of your personal Facebook account. Click “Log
in”.
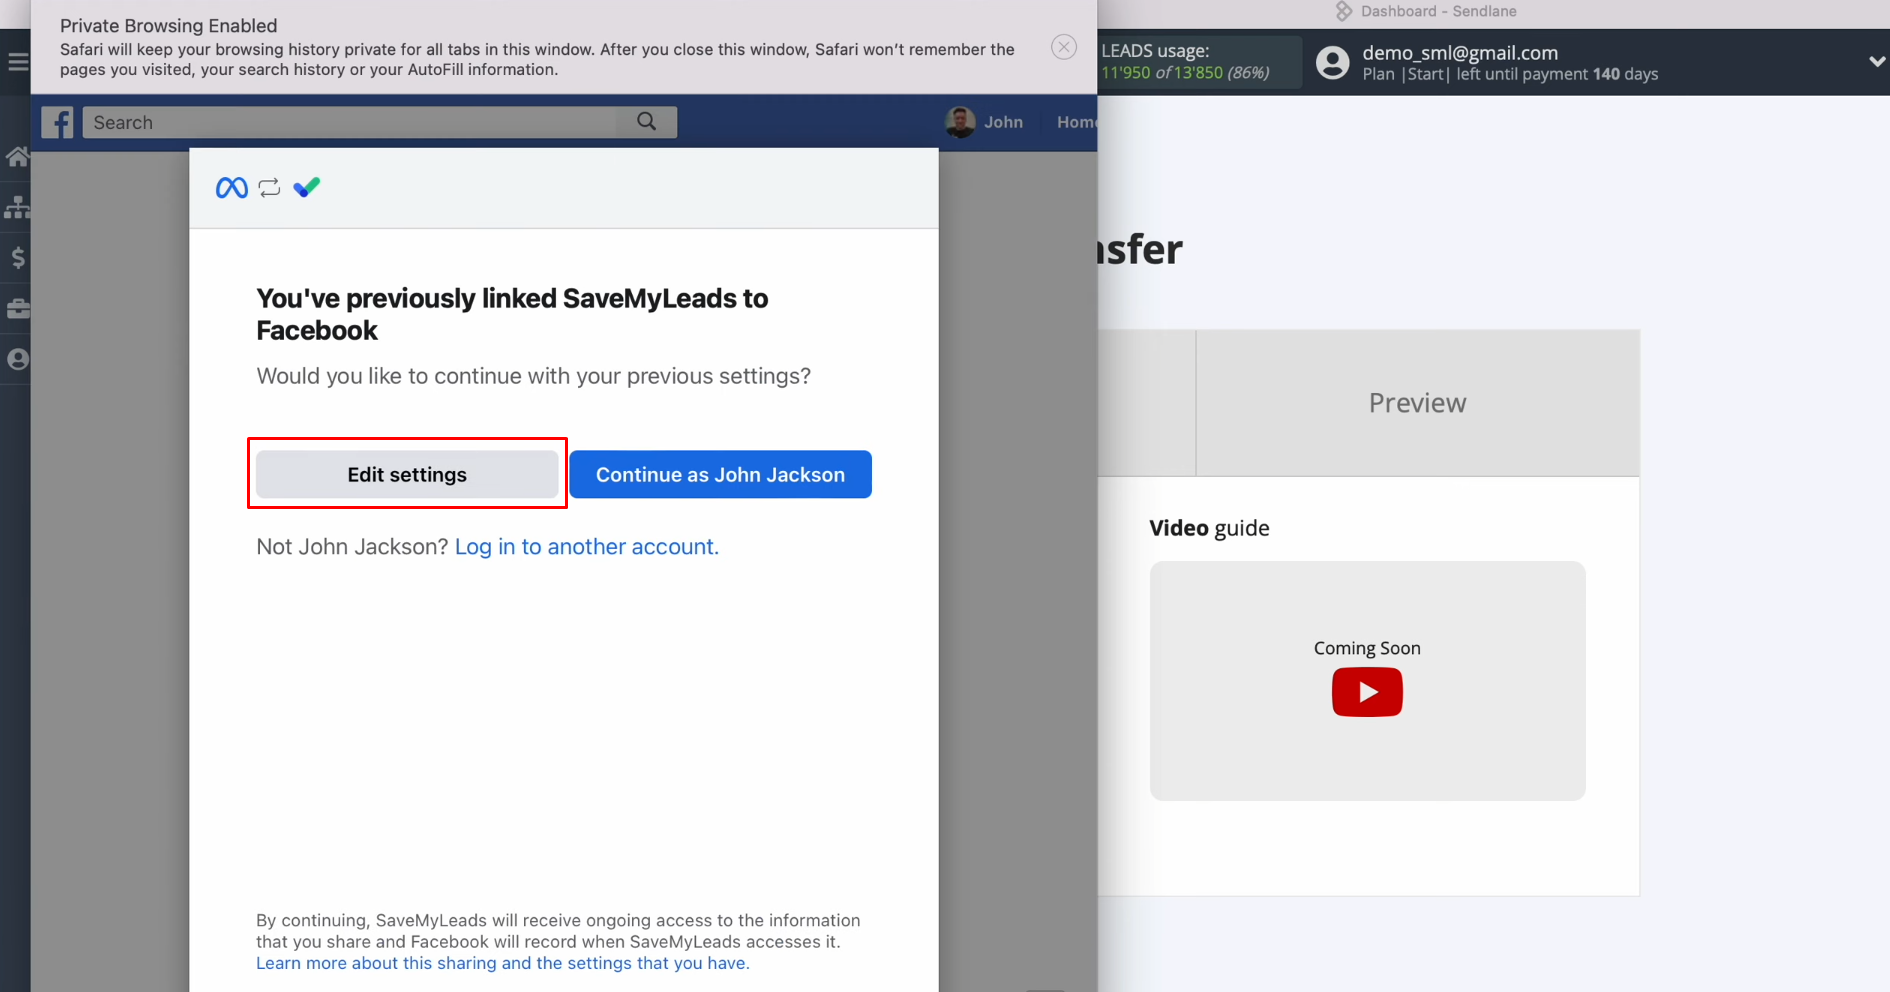
Then click
“Edit settings”.
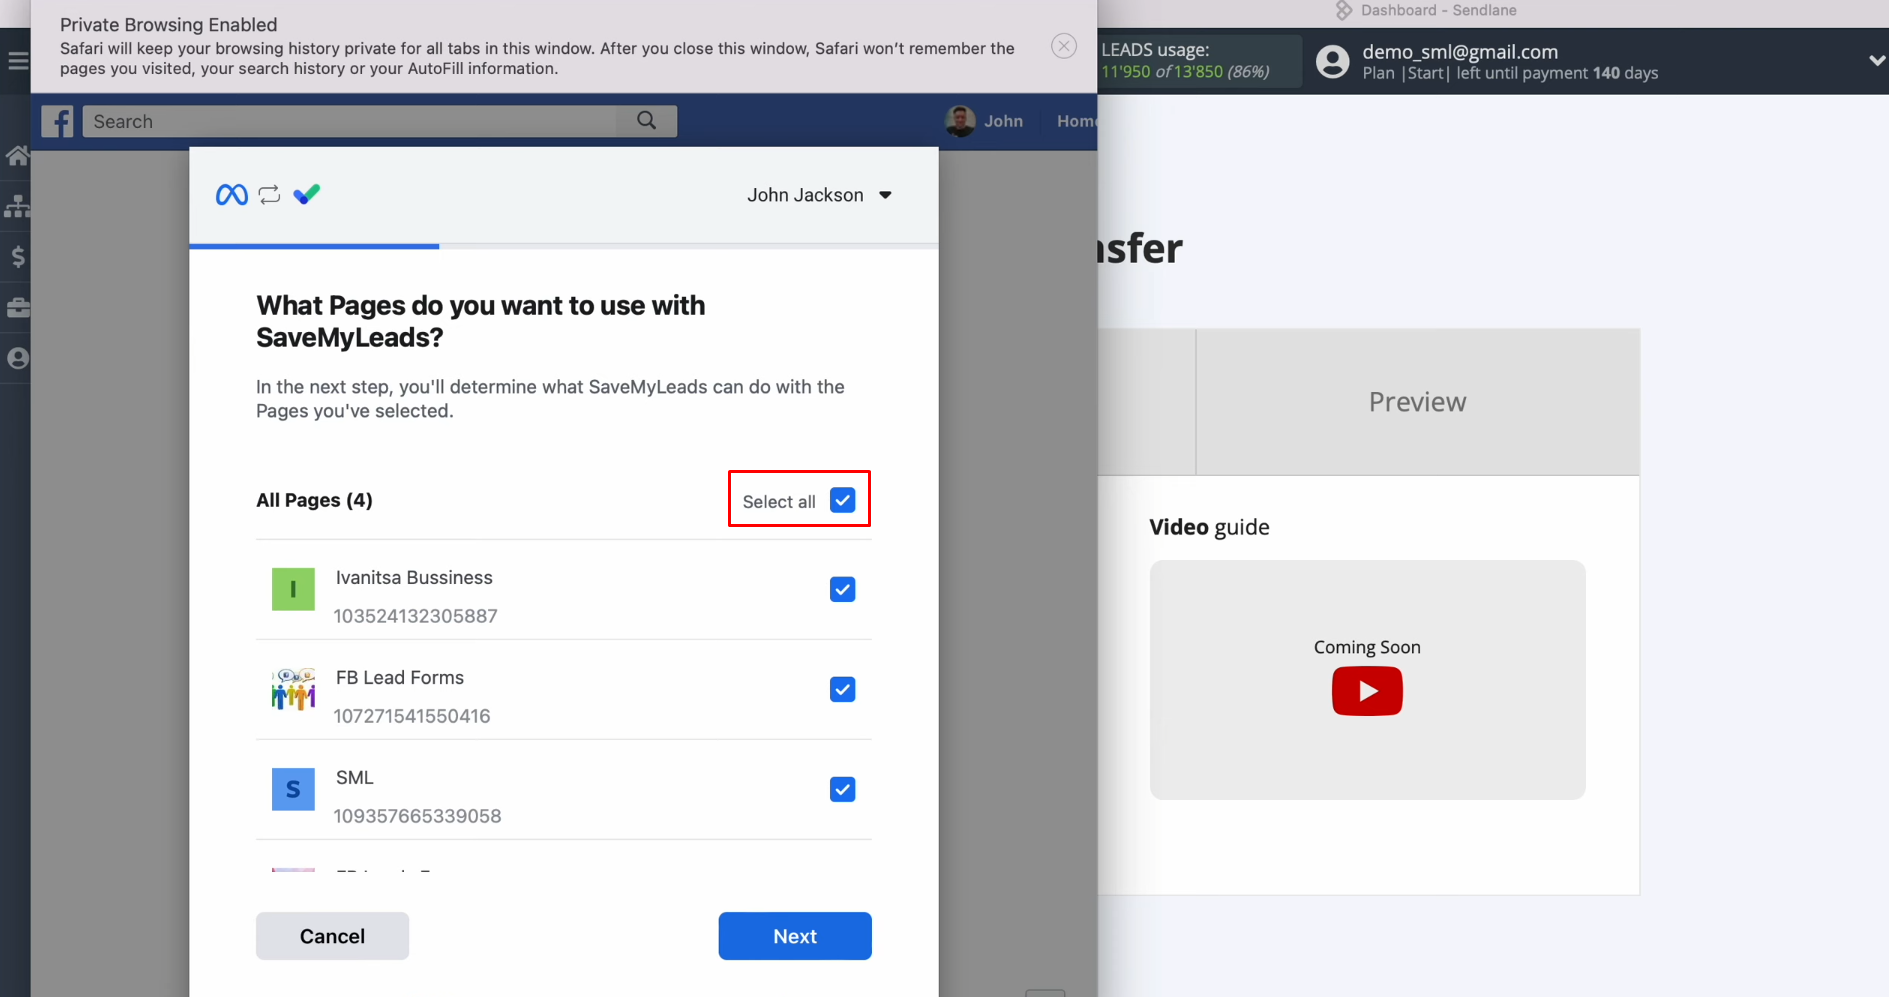
At this stage,
it is necessary to tick the
advertising pages from
which you want to receive
new leads. We recommend marking all advertising pages at once to be able to work with them in the future. Click
“Next”.
Here, leave all check boxes enabled. Click “Done”.
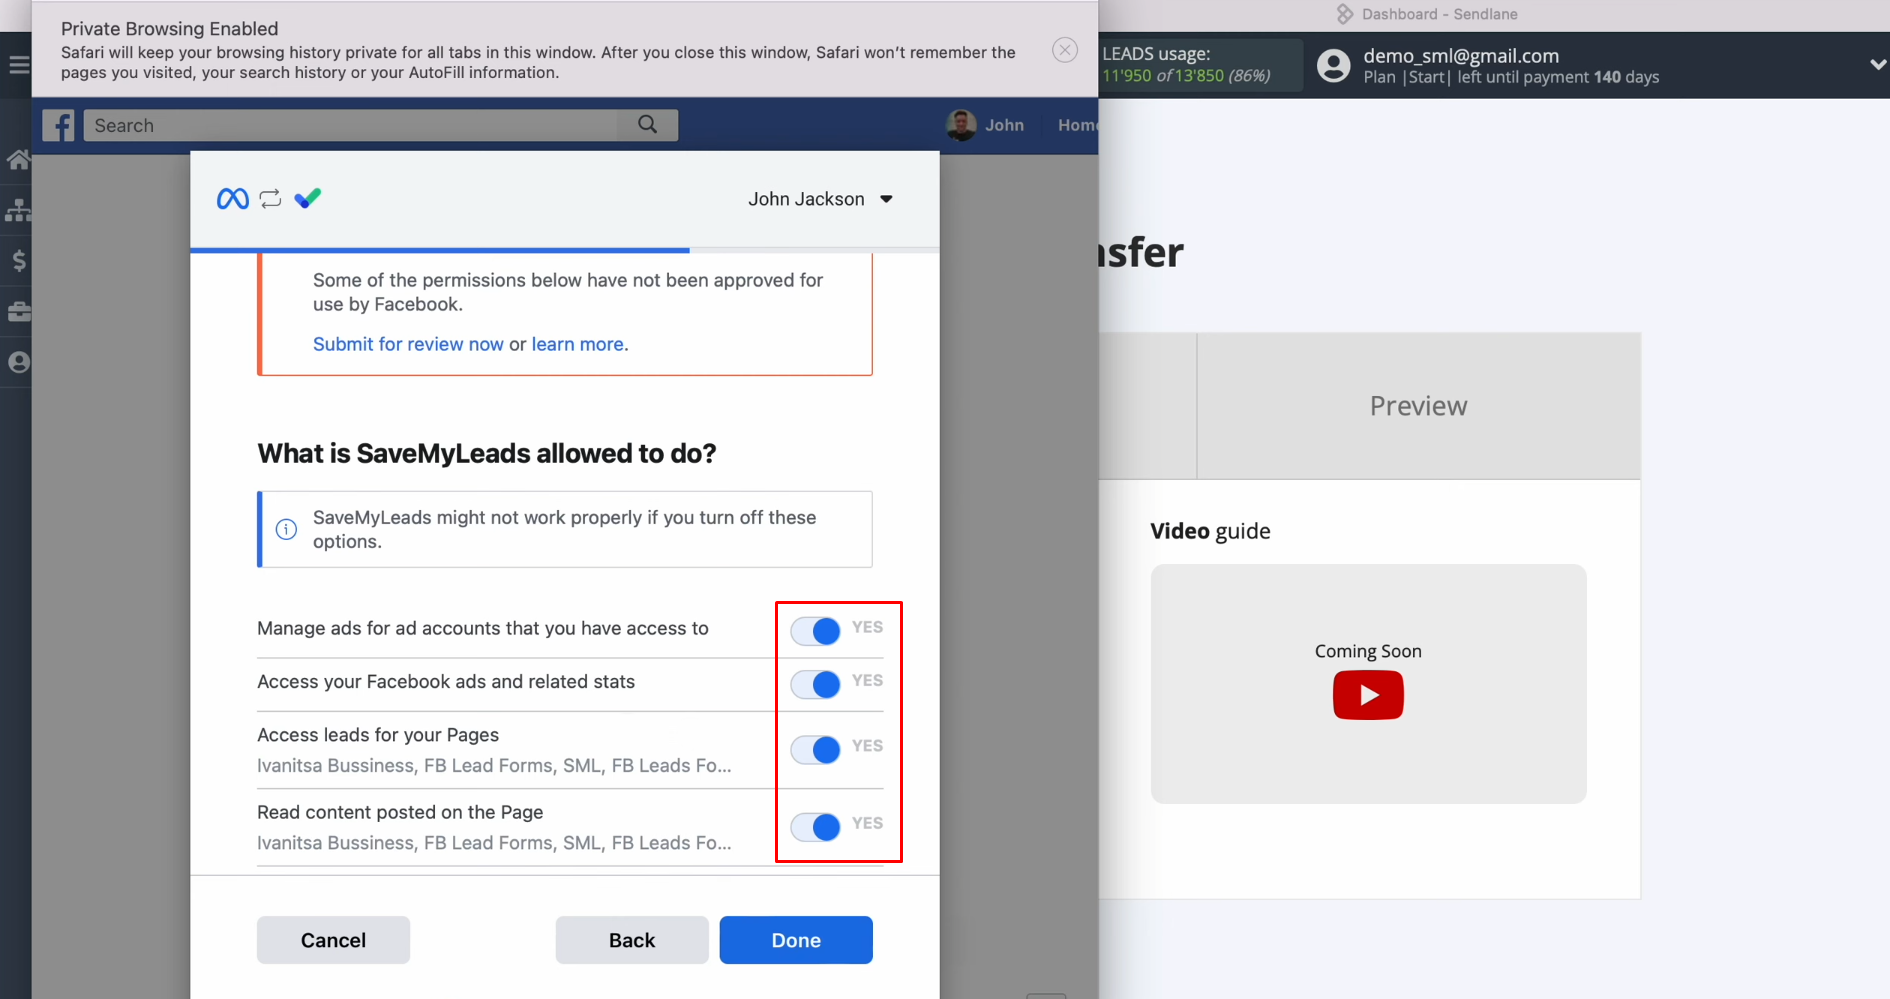
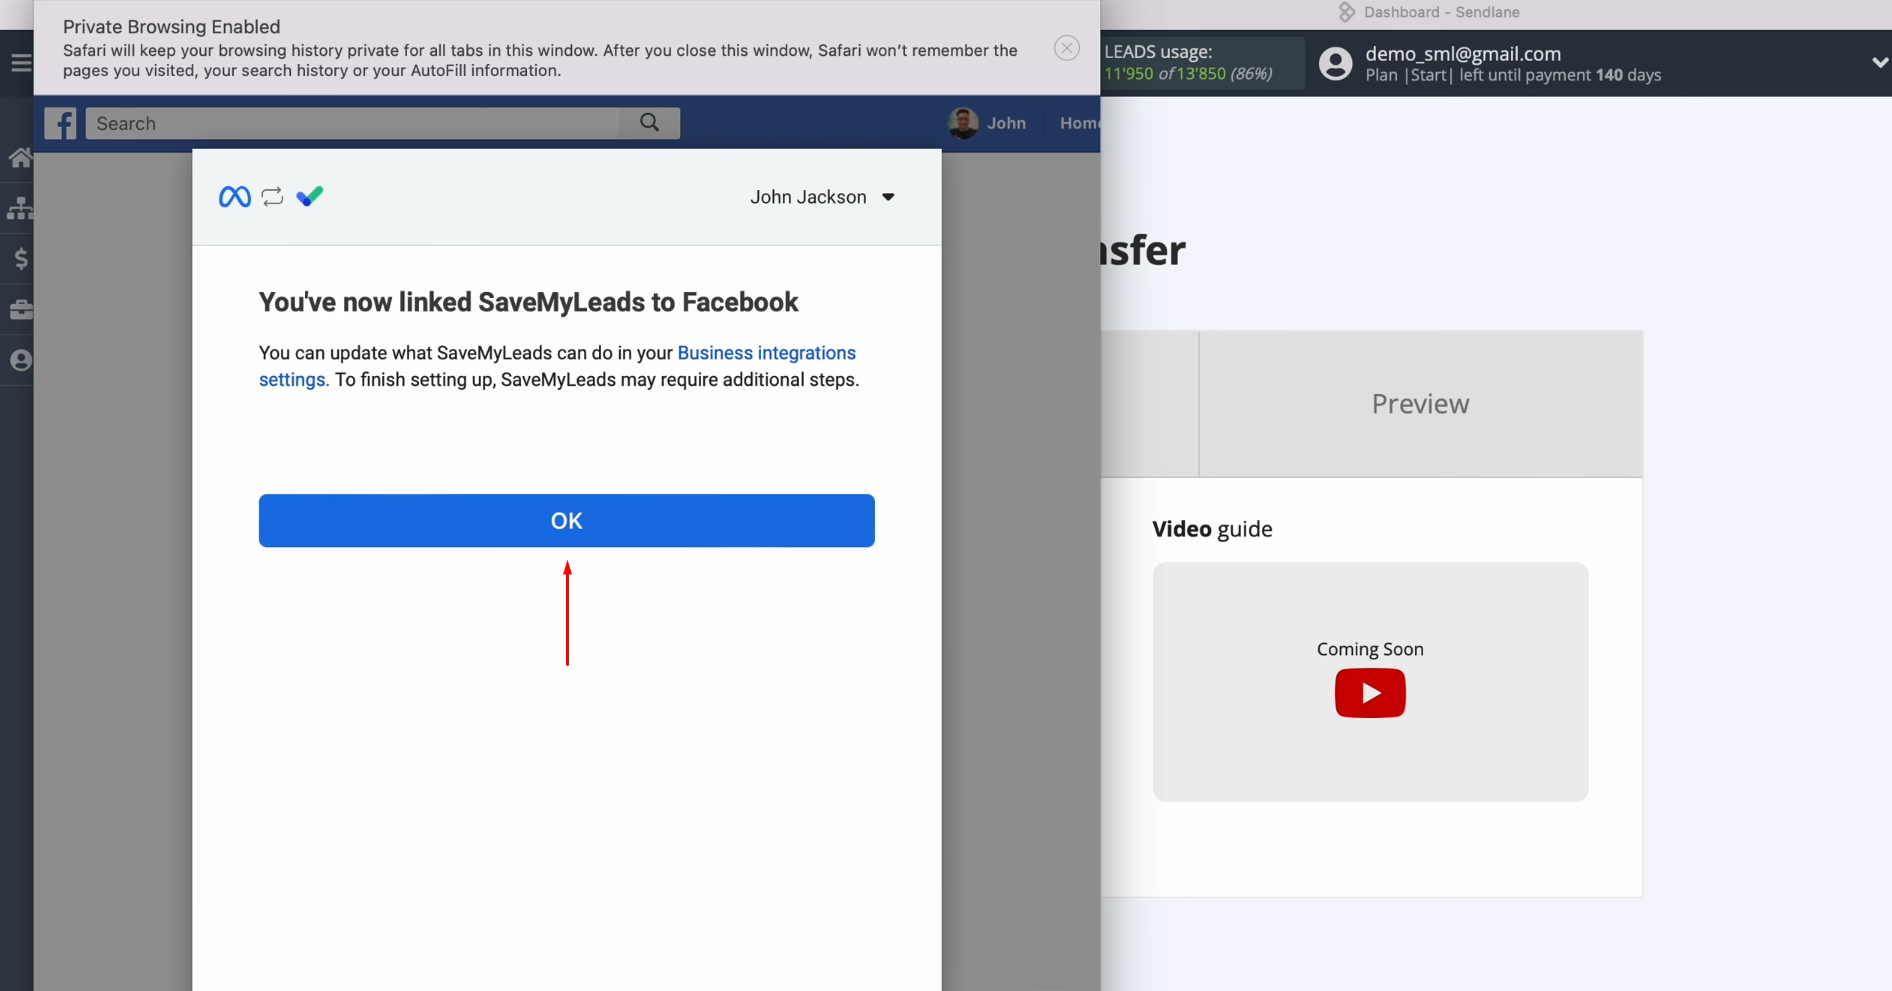
Now,
click “OK”.
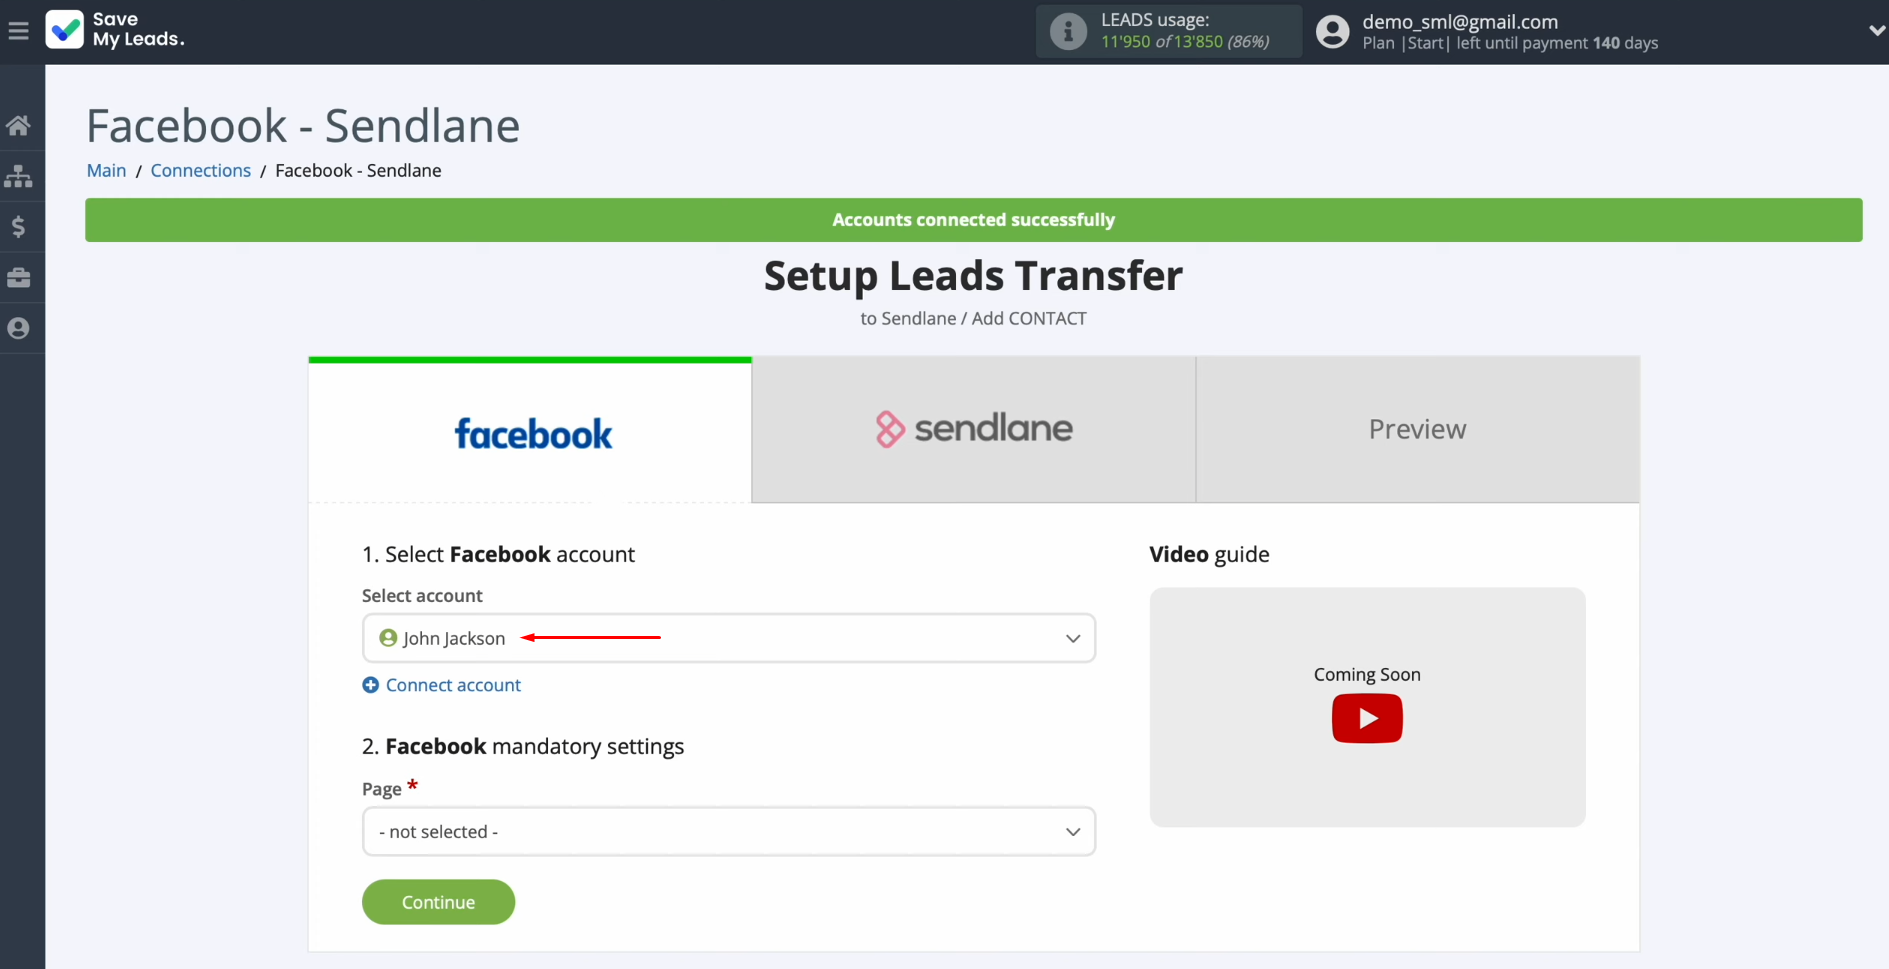
When the
connected login is displayed in the list, select it.
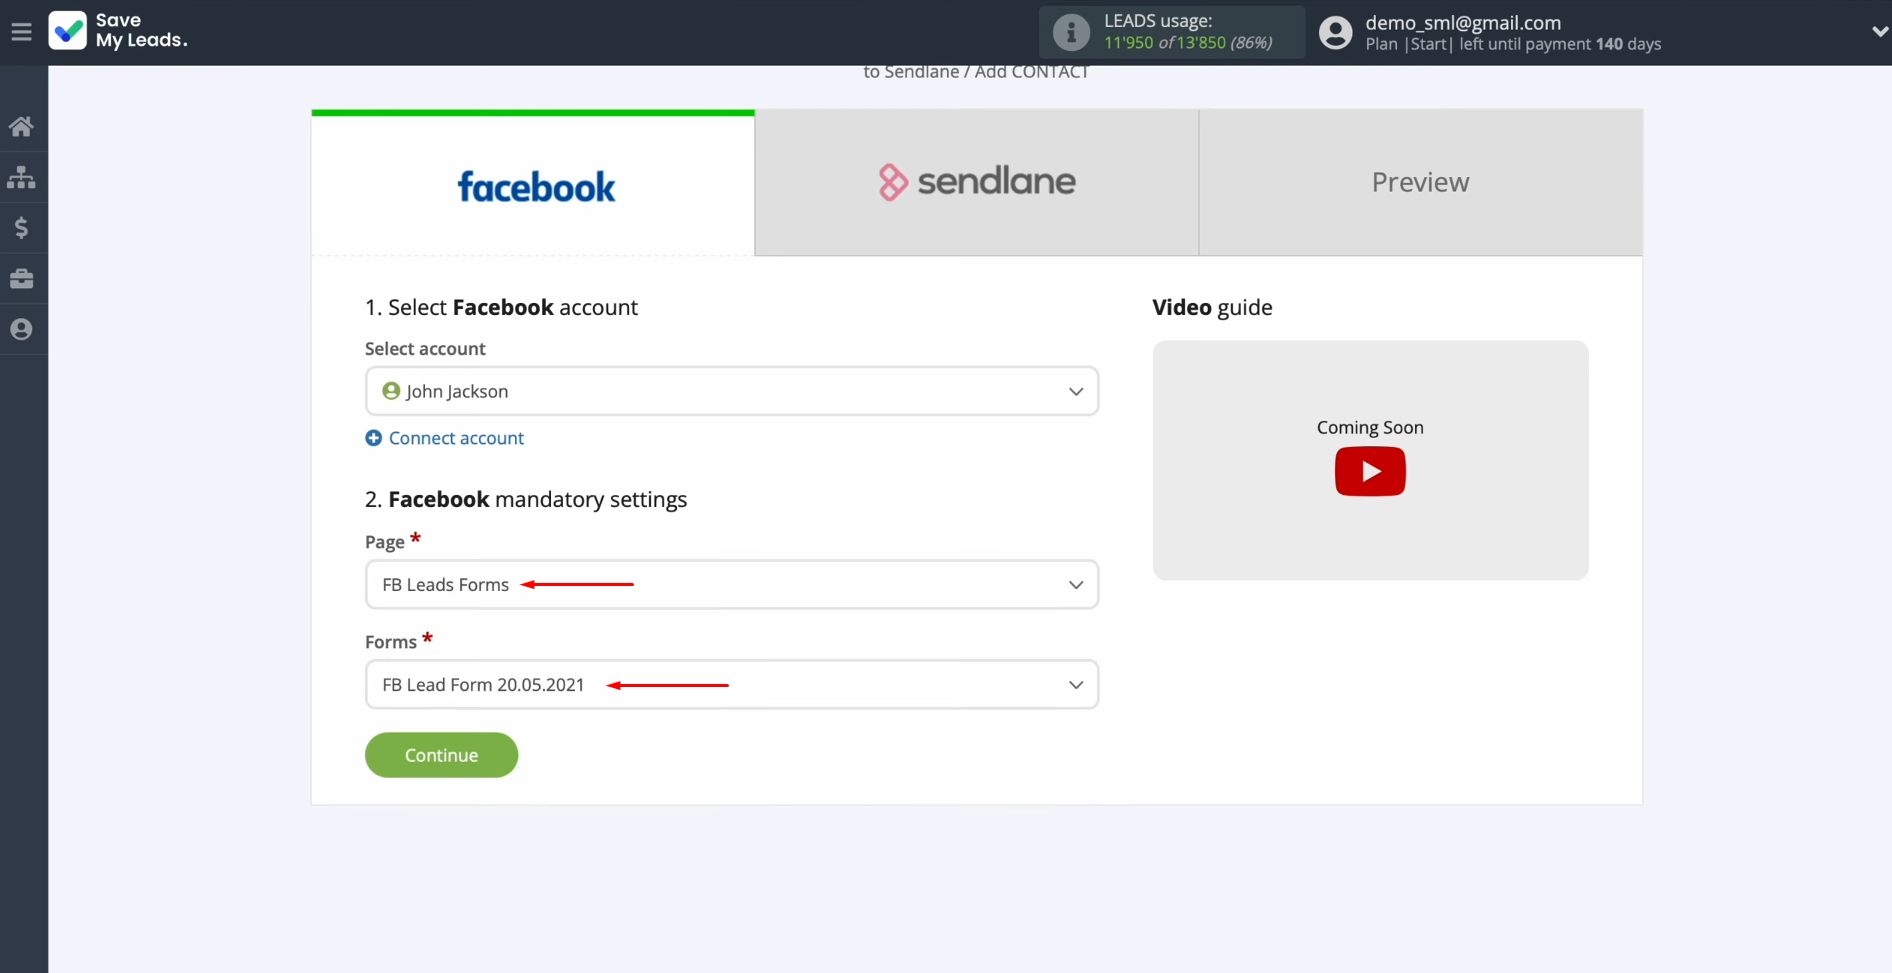
Now, you have to select the advertising page and the
form for which
you want to receive new leads. Click “Continue”.
Setting up the Data Receiver – Sendlane
To set up Sendlane integration with Facebook, you need to connect your Sendlane account to SaveMyLeads. Click on the blue button.
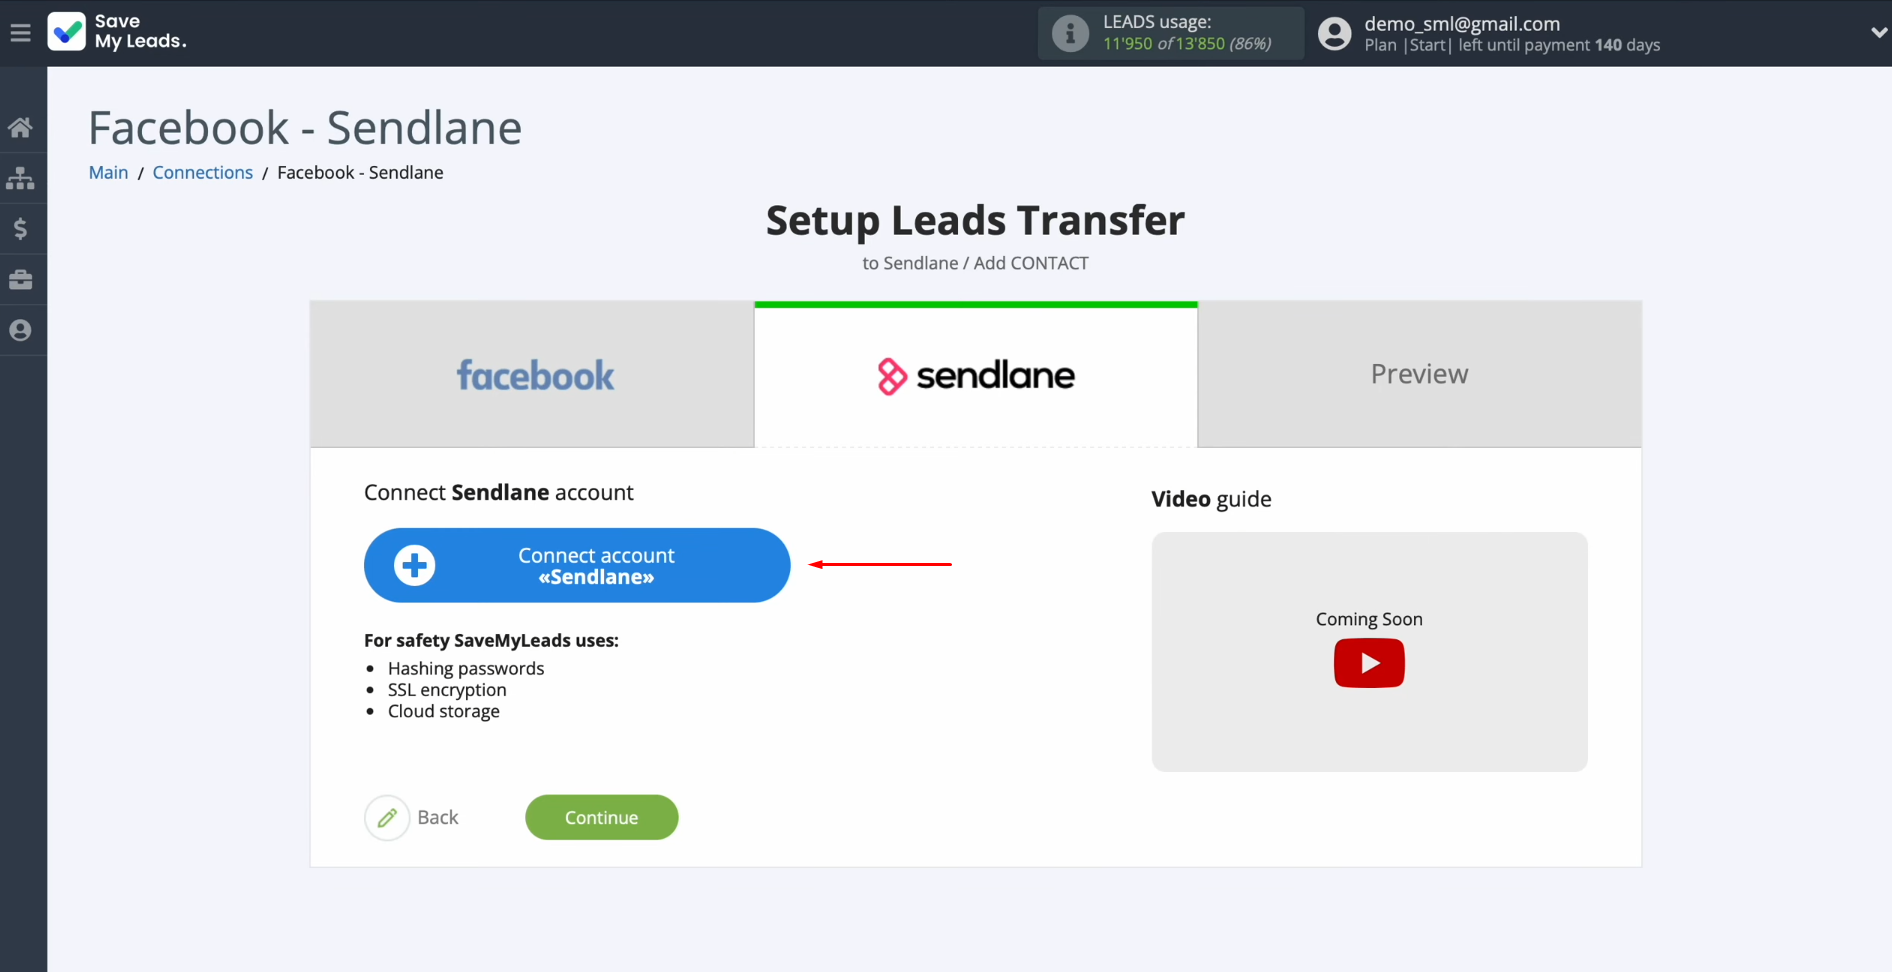
In this
window, you must specify the API key.
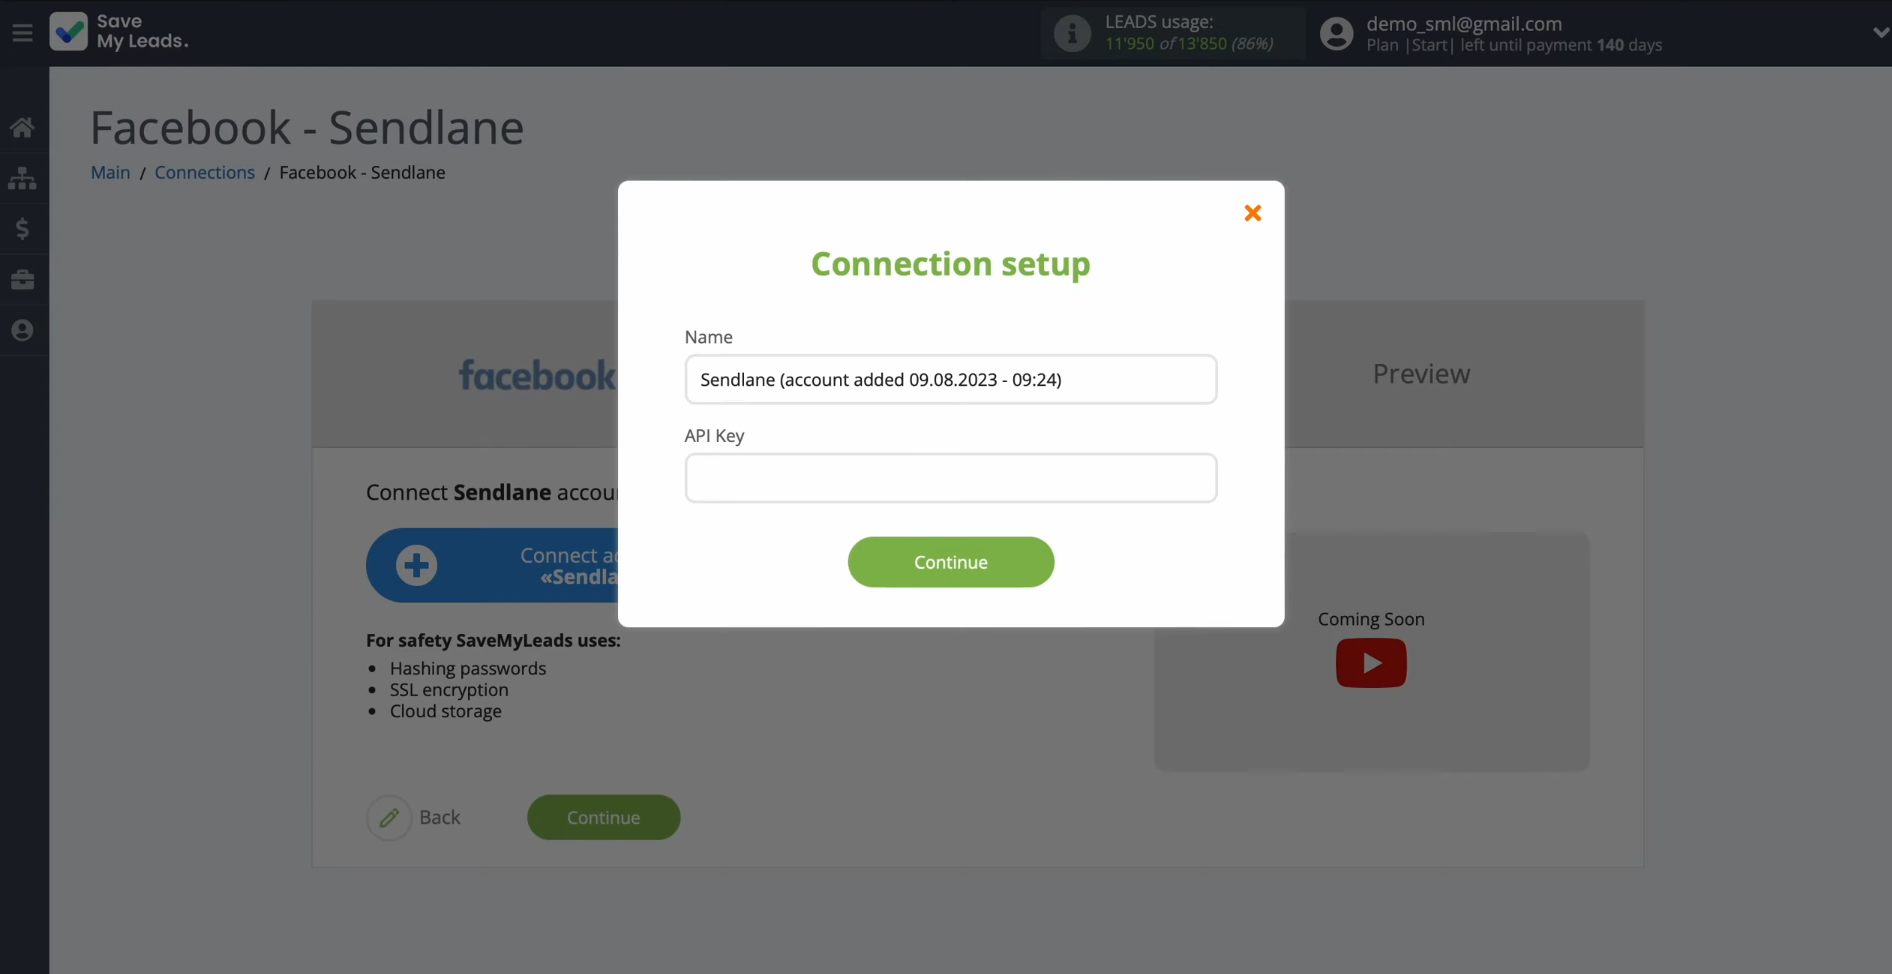
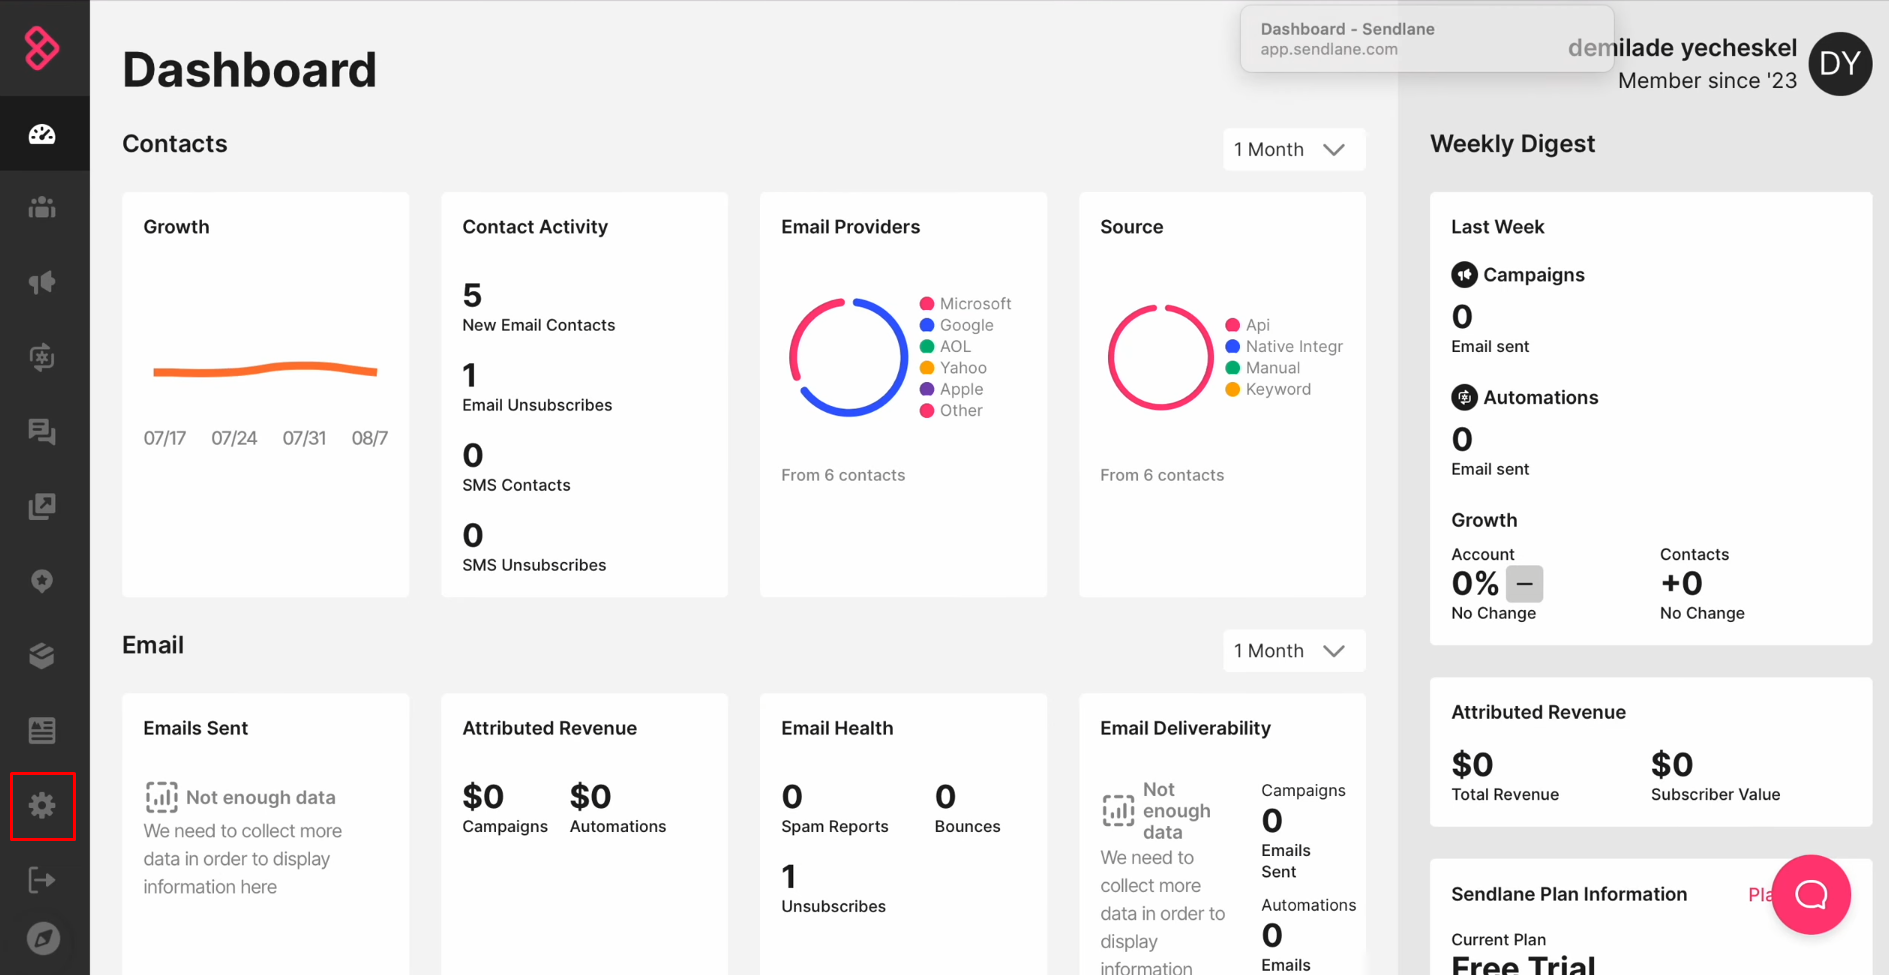
To receive it, go to your personal account in Sendlane. Enter the
settings section.
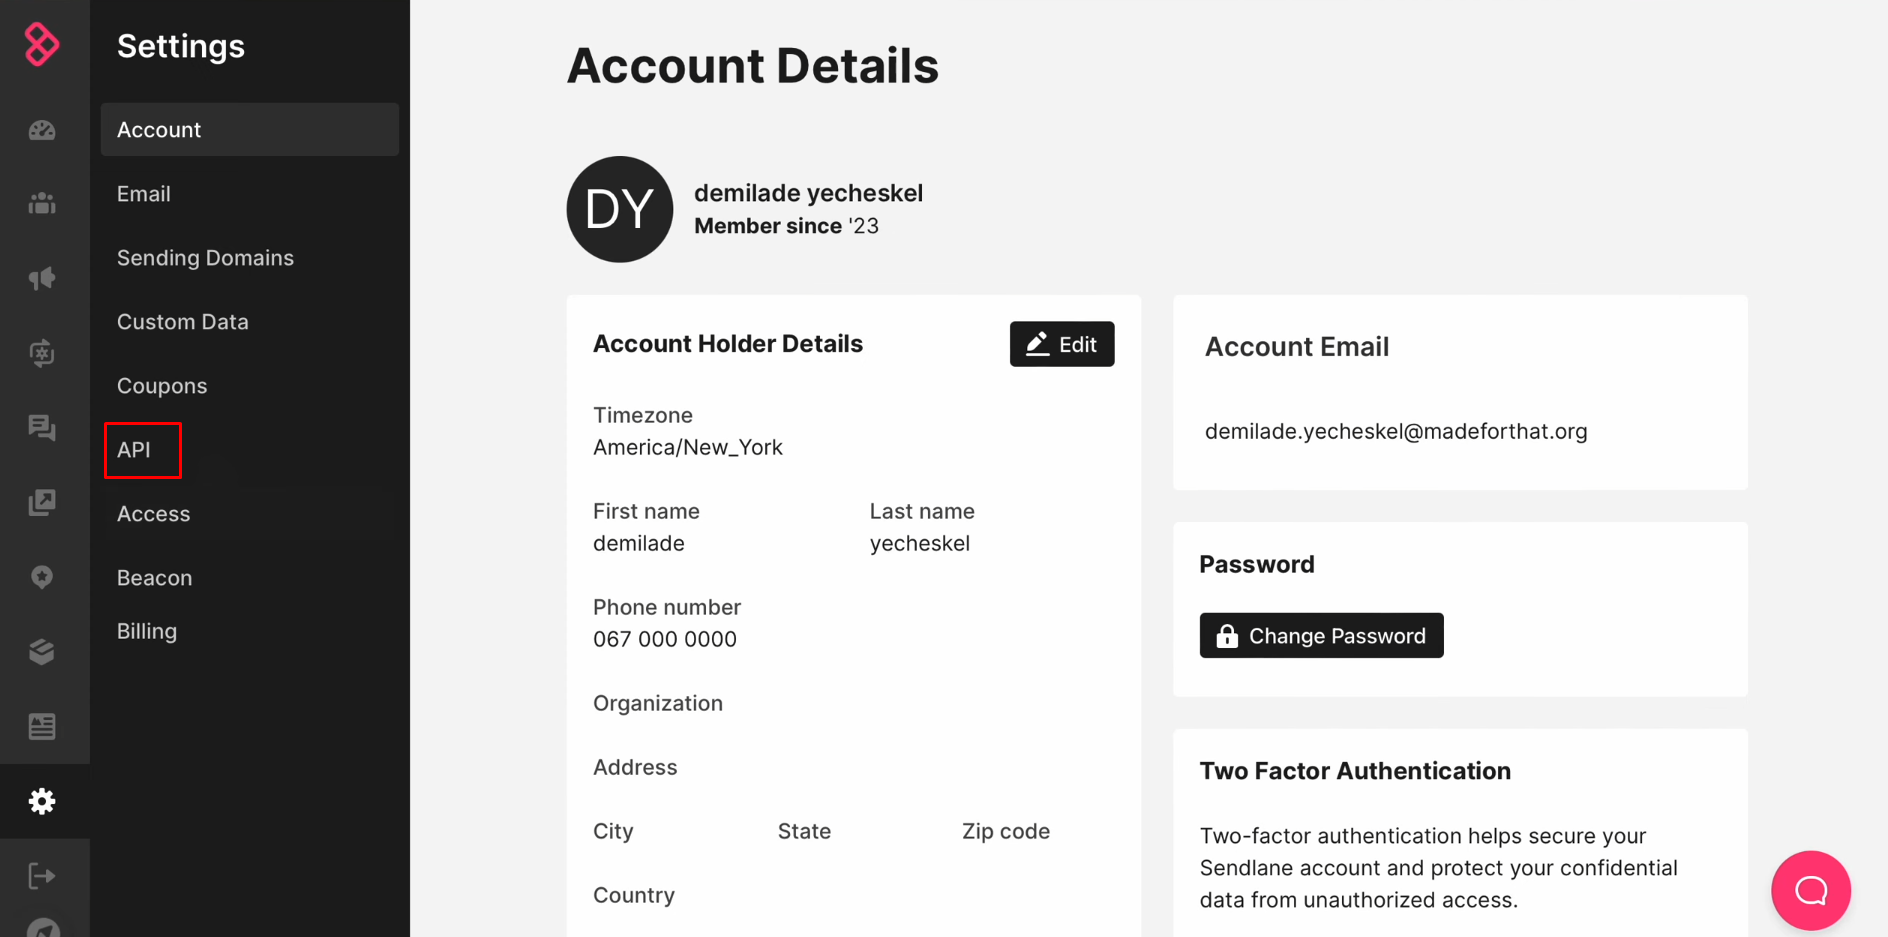
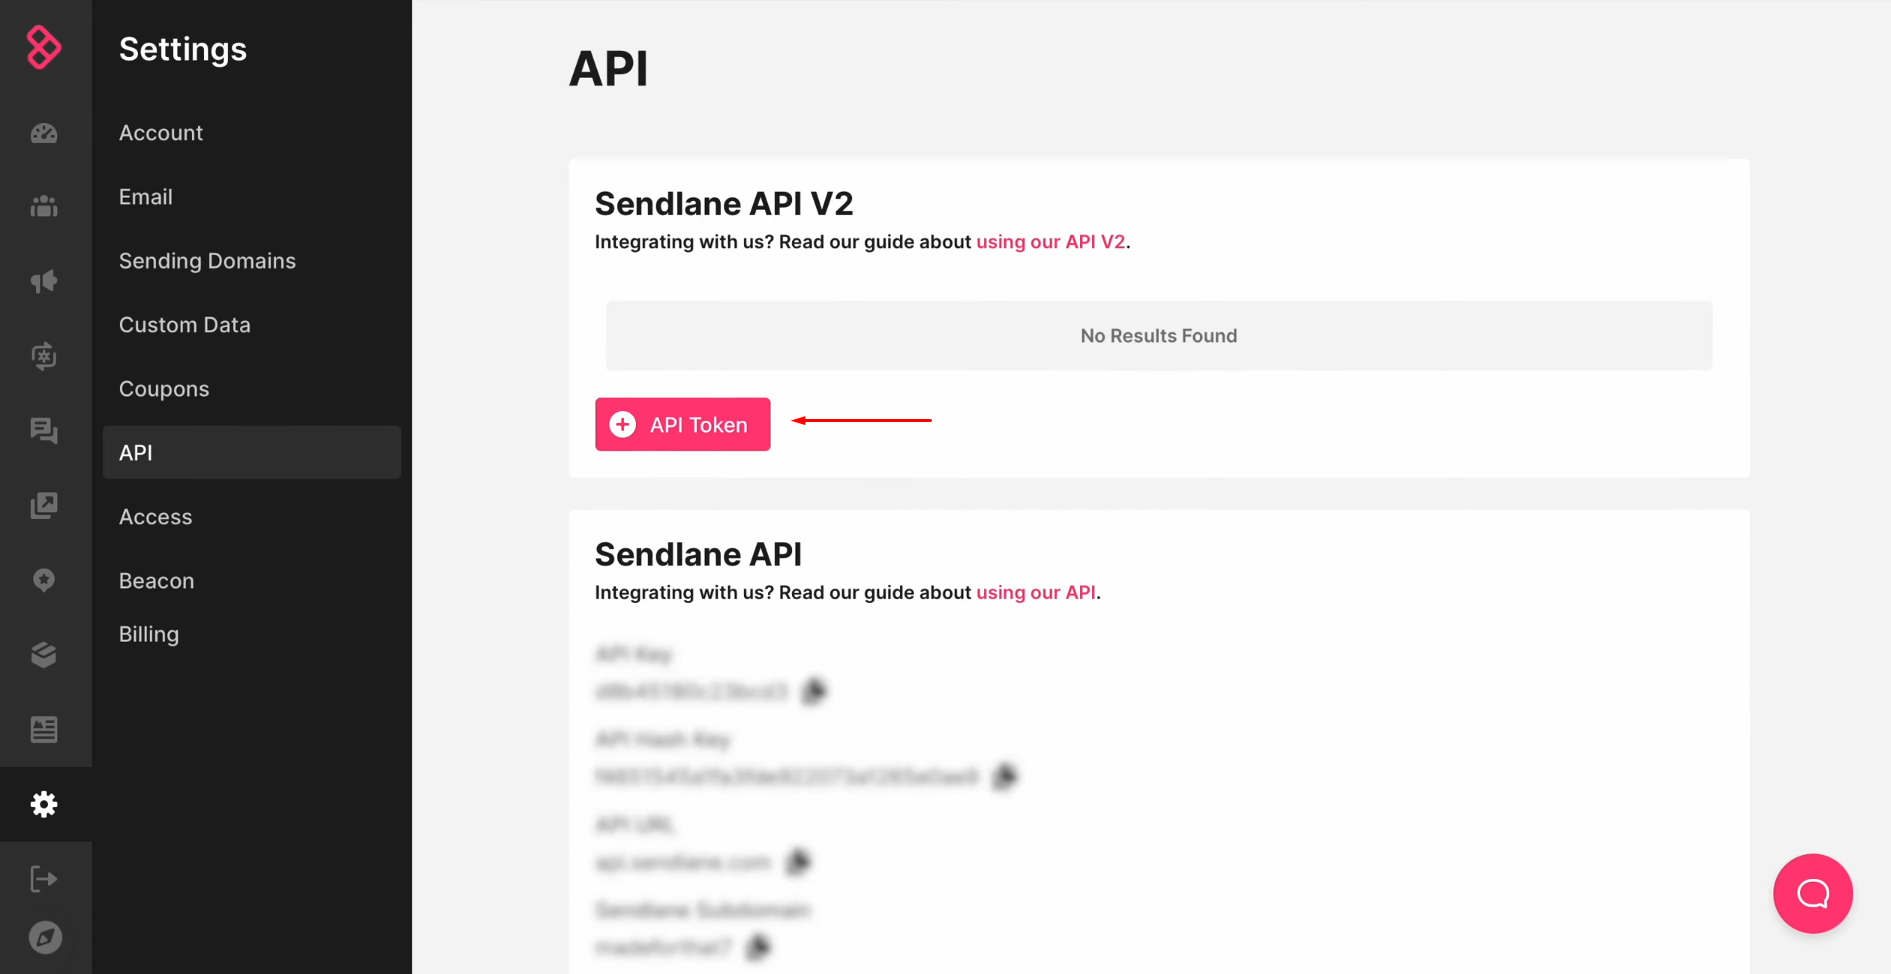
Next, go to the API section.
Click “API token”.
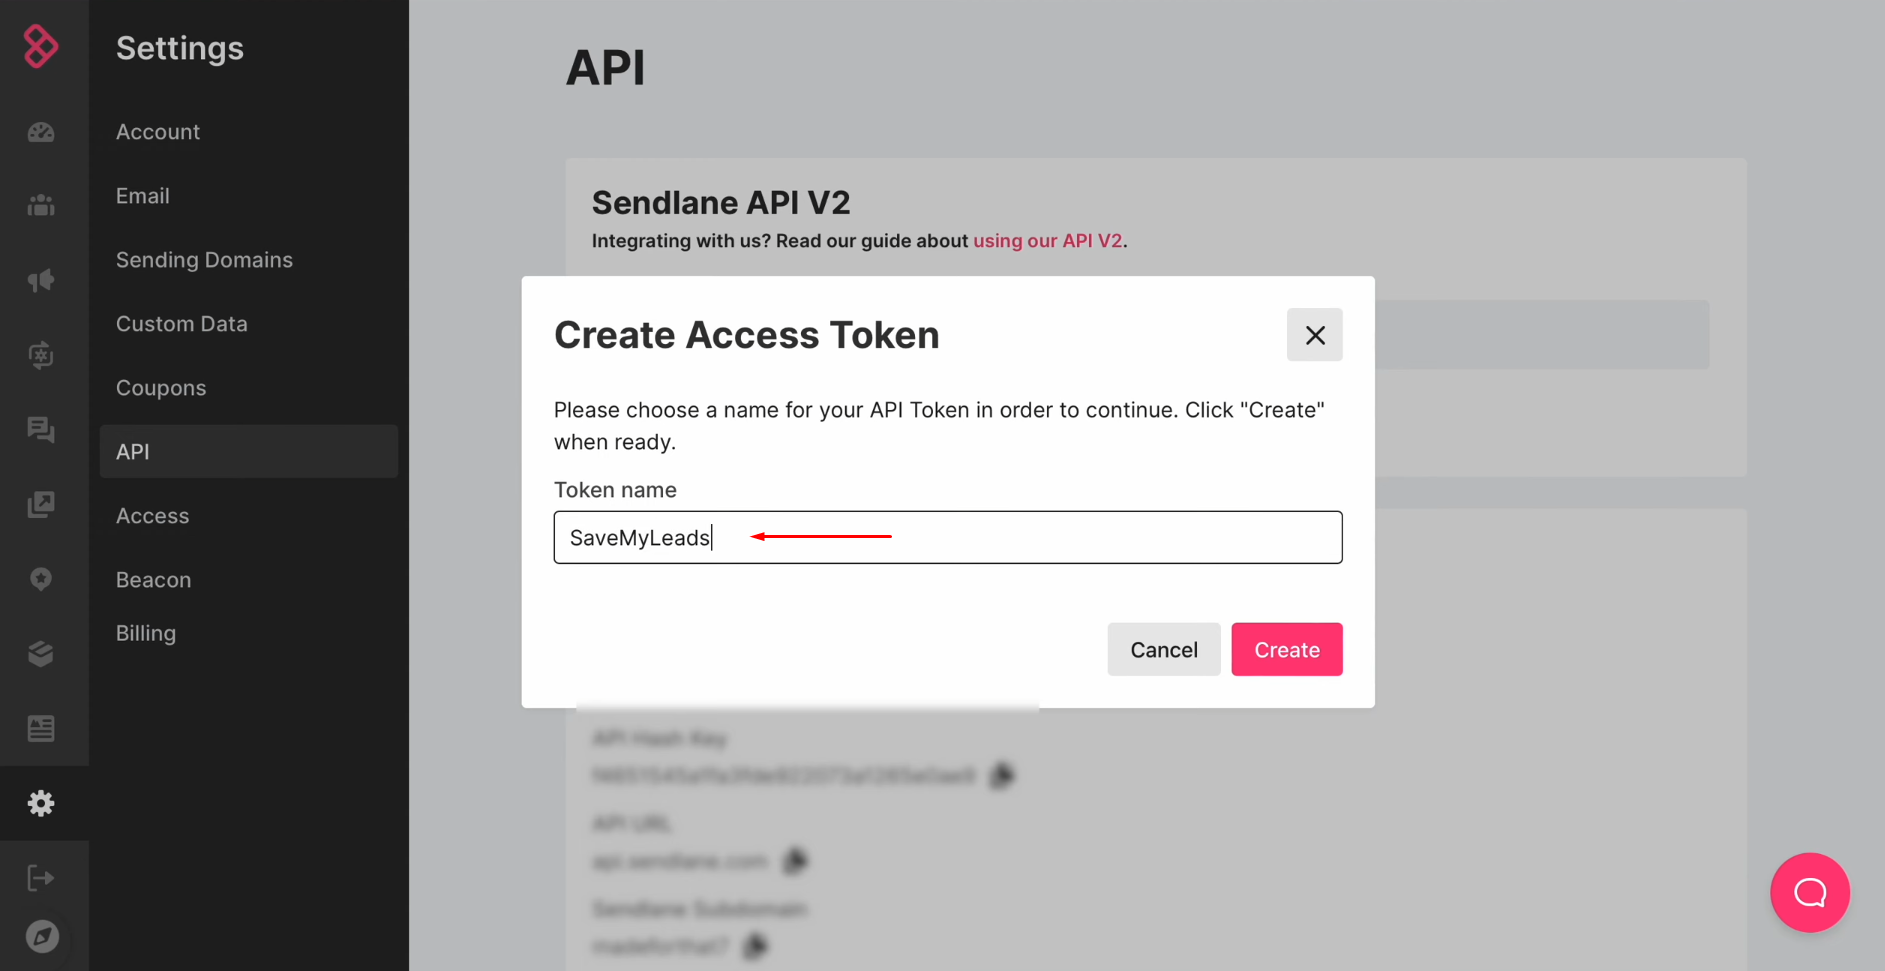
In this
window, you must specify a name for the new token. Click “Create”.
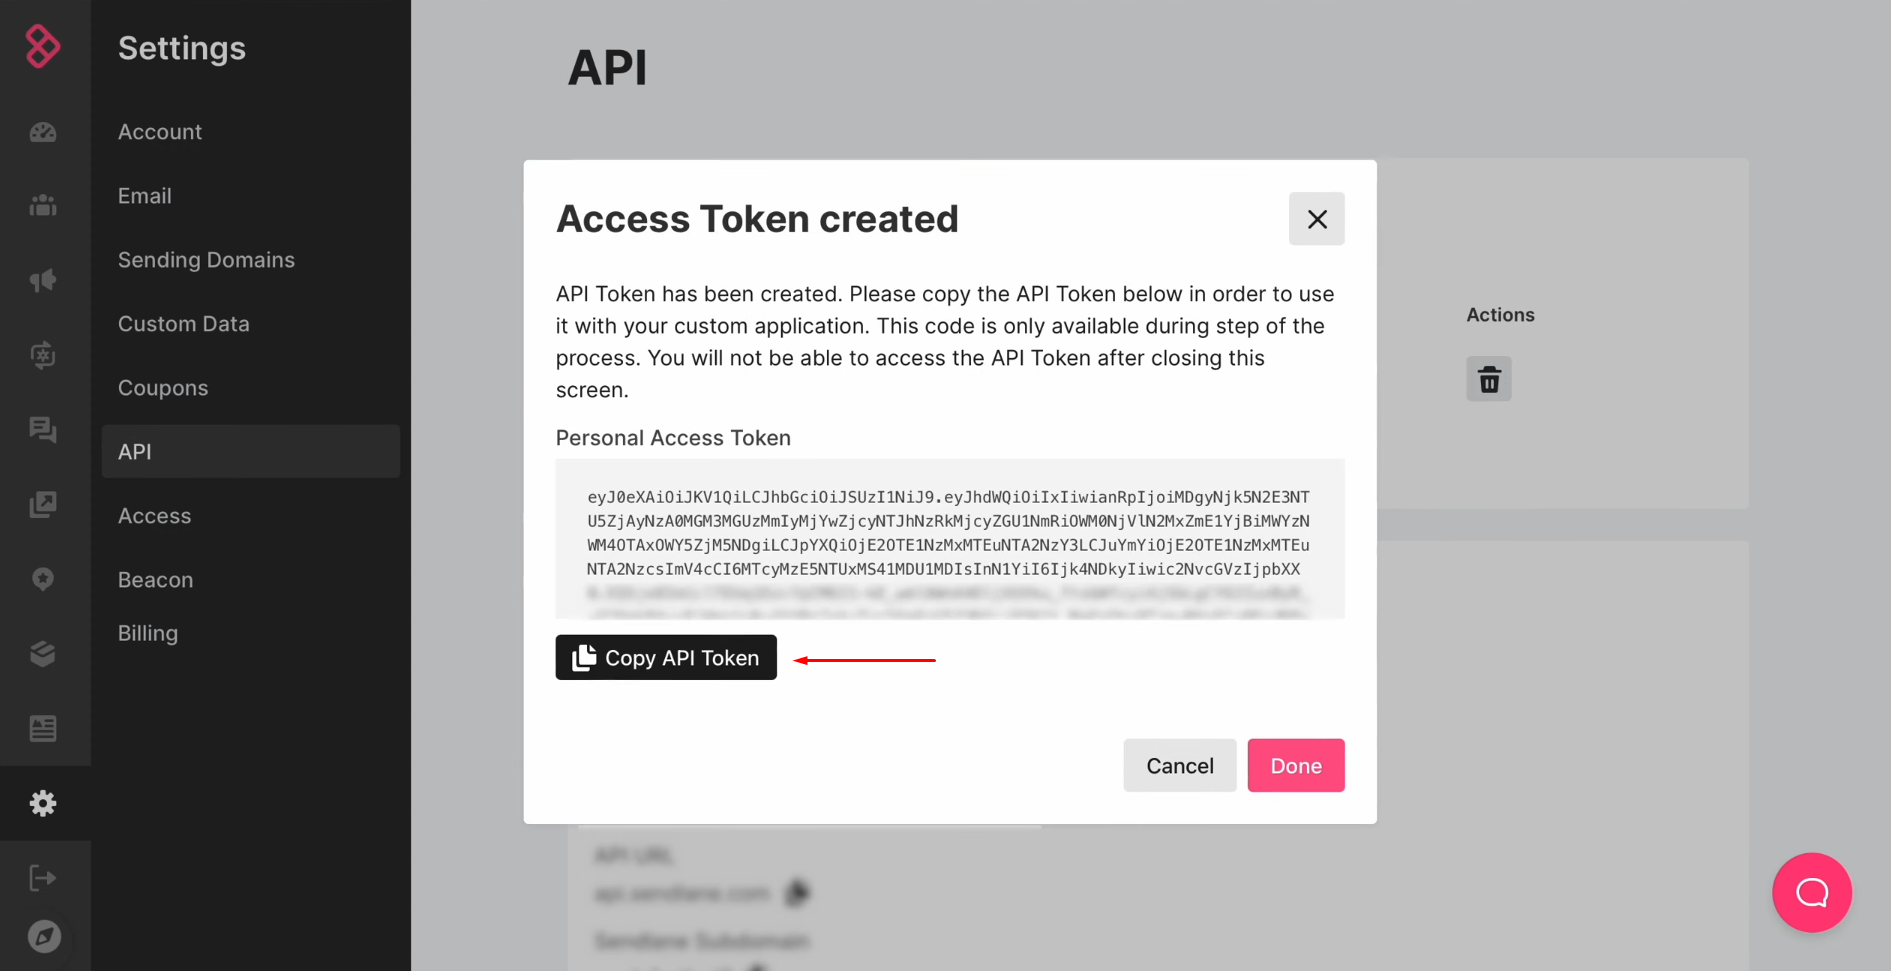
Copy the API
token.
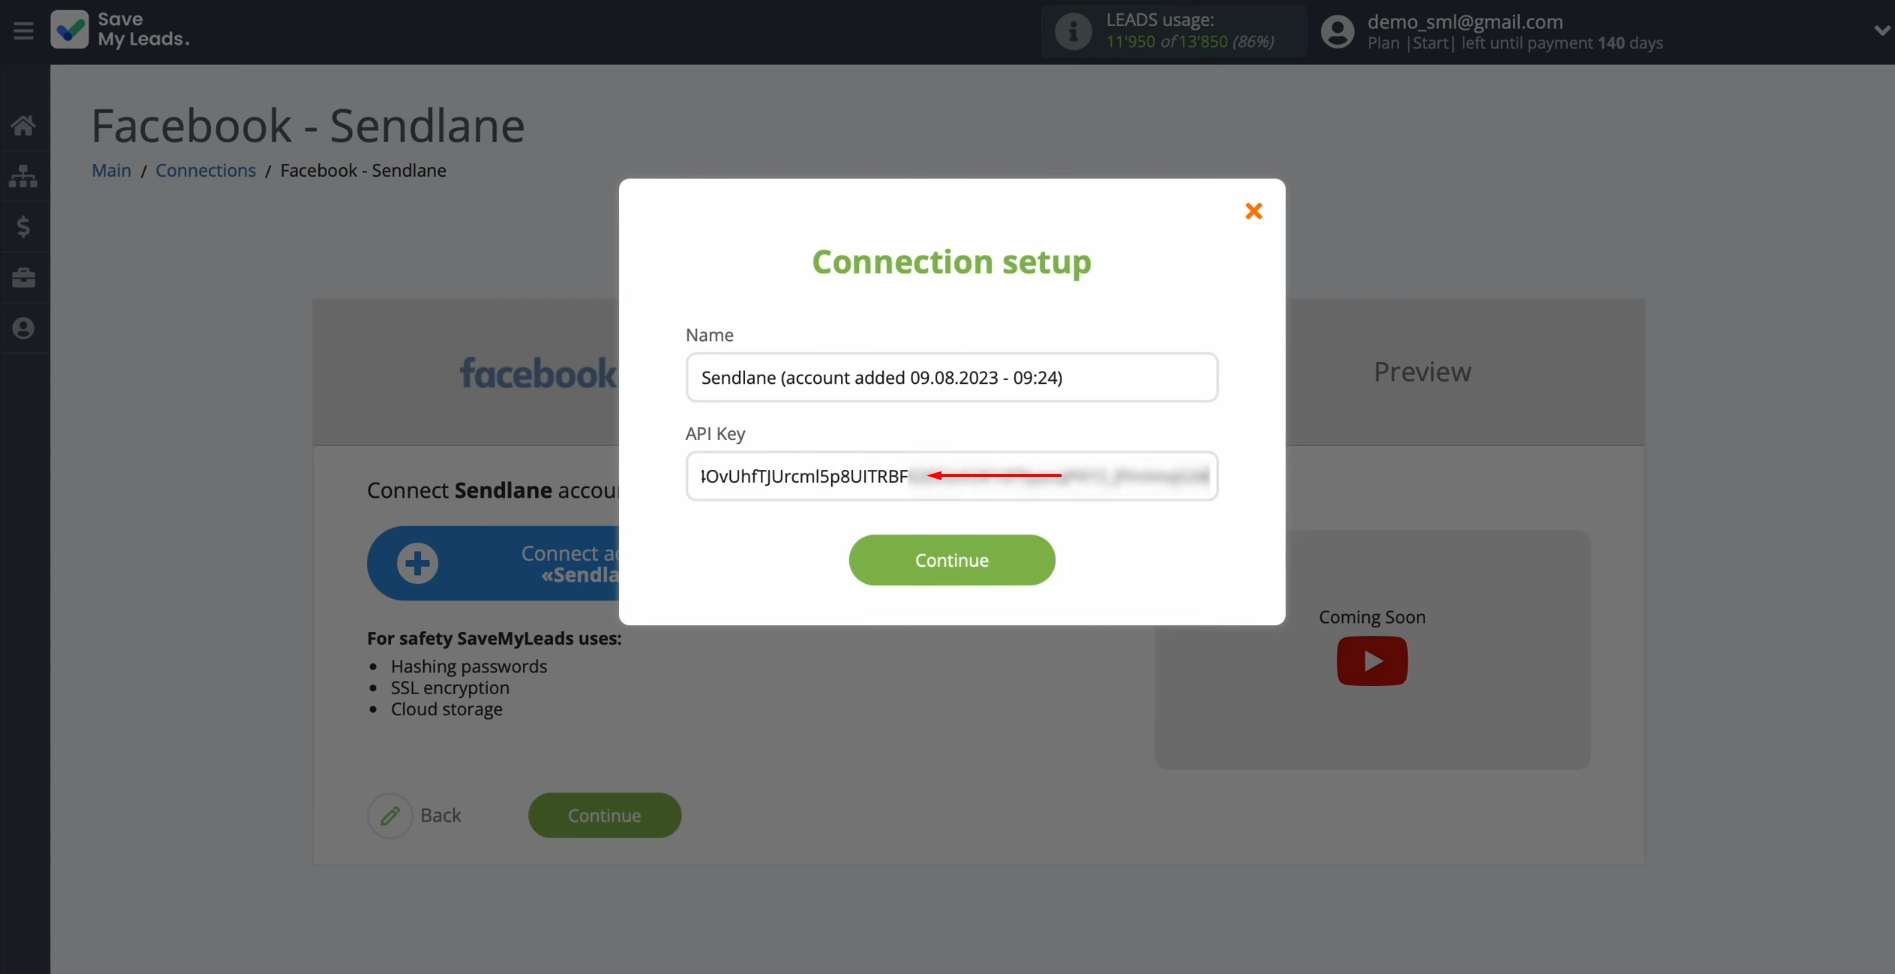
Paste the API
token into the appropriate
field in the SaveMyLeads. When the required field is filled, click “Continue”.
When the
connected account is displayed in the list, select it.
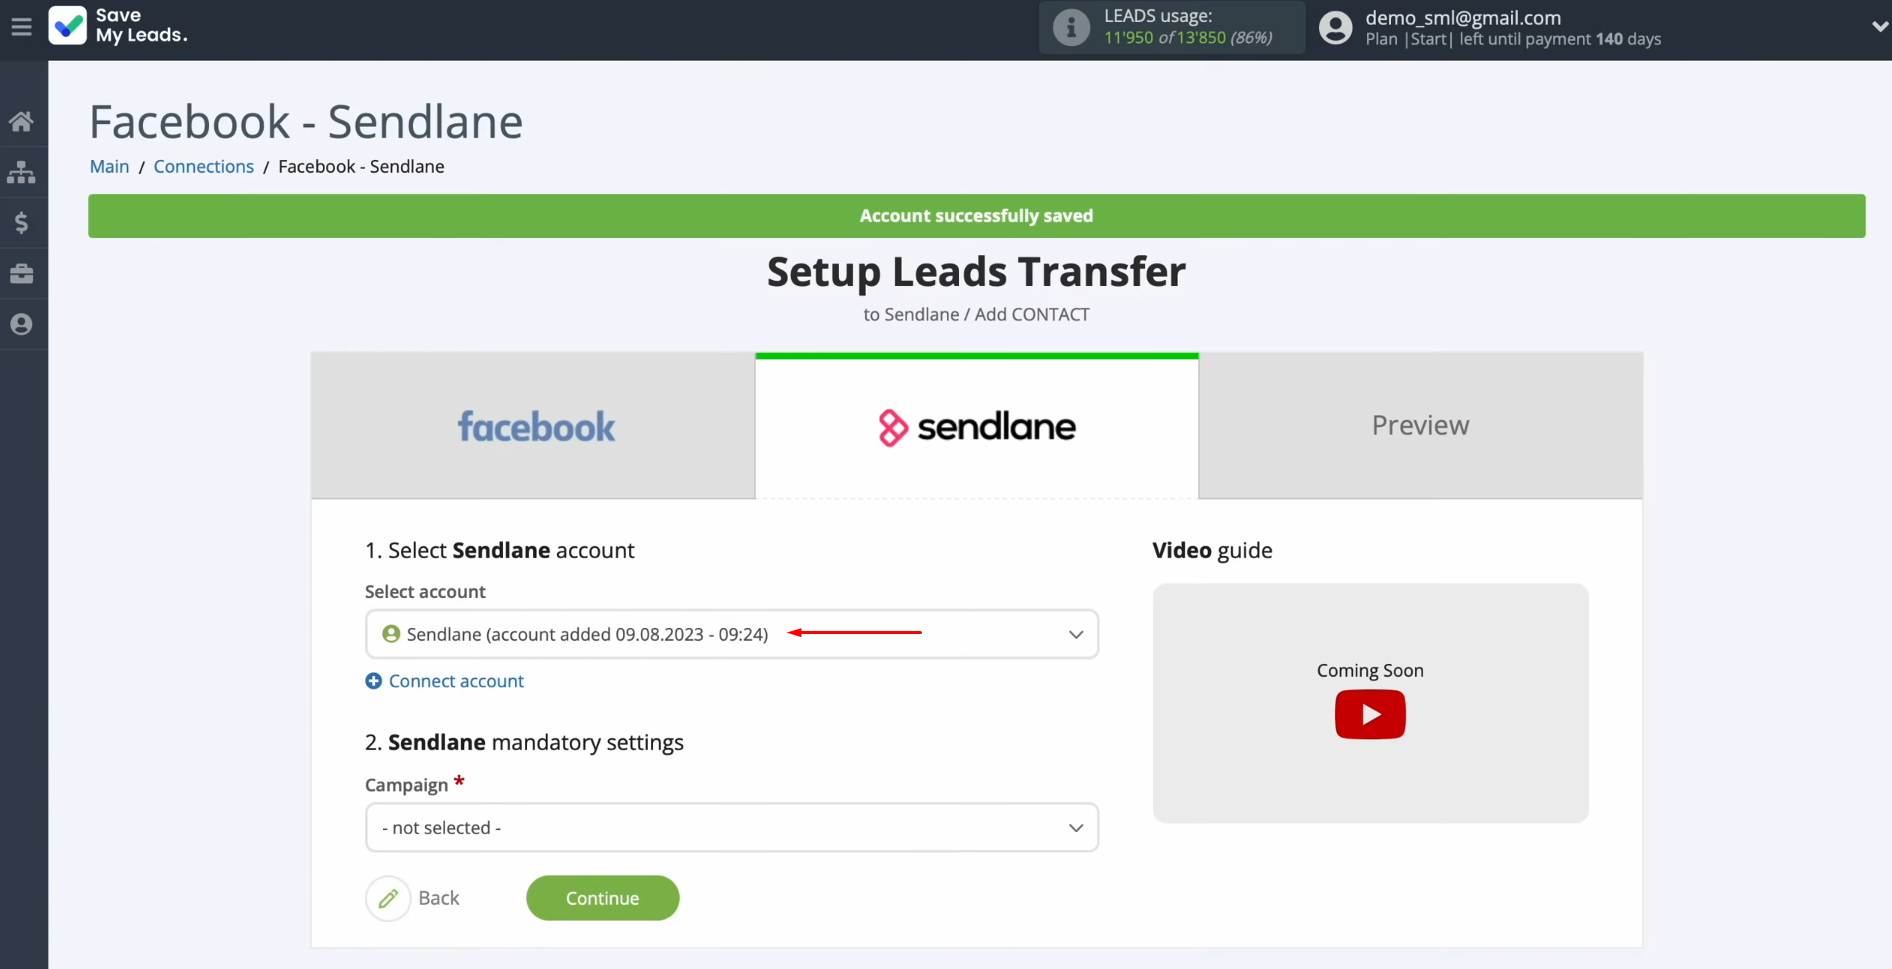
Next, you have to select a campaign, to which new
contacts will be
added with each new lead from Facebook.
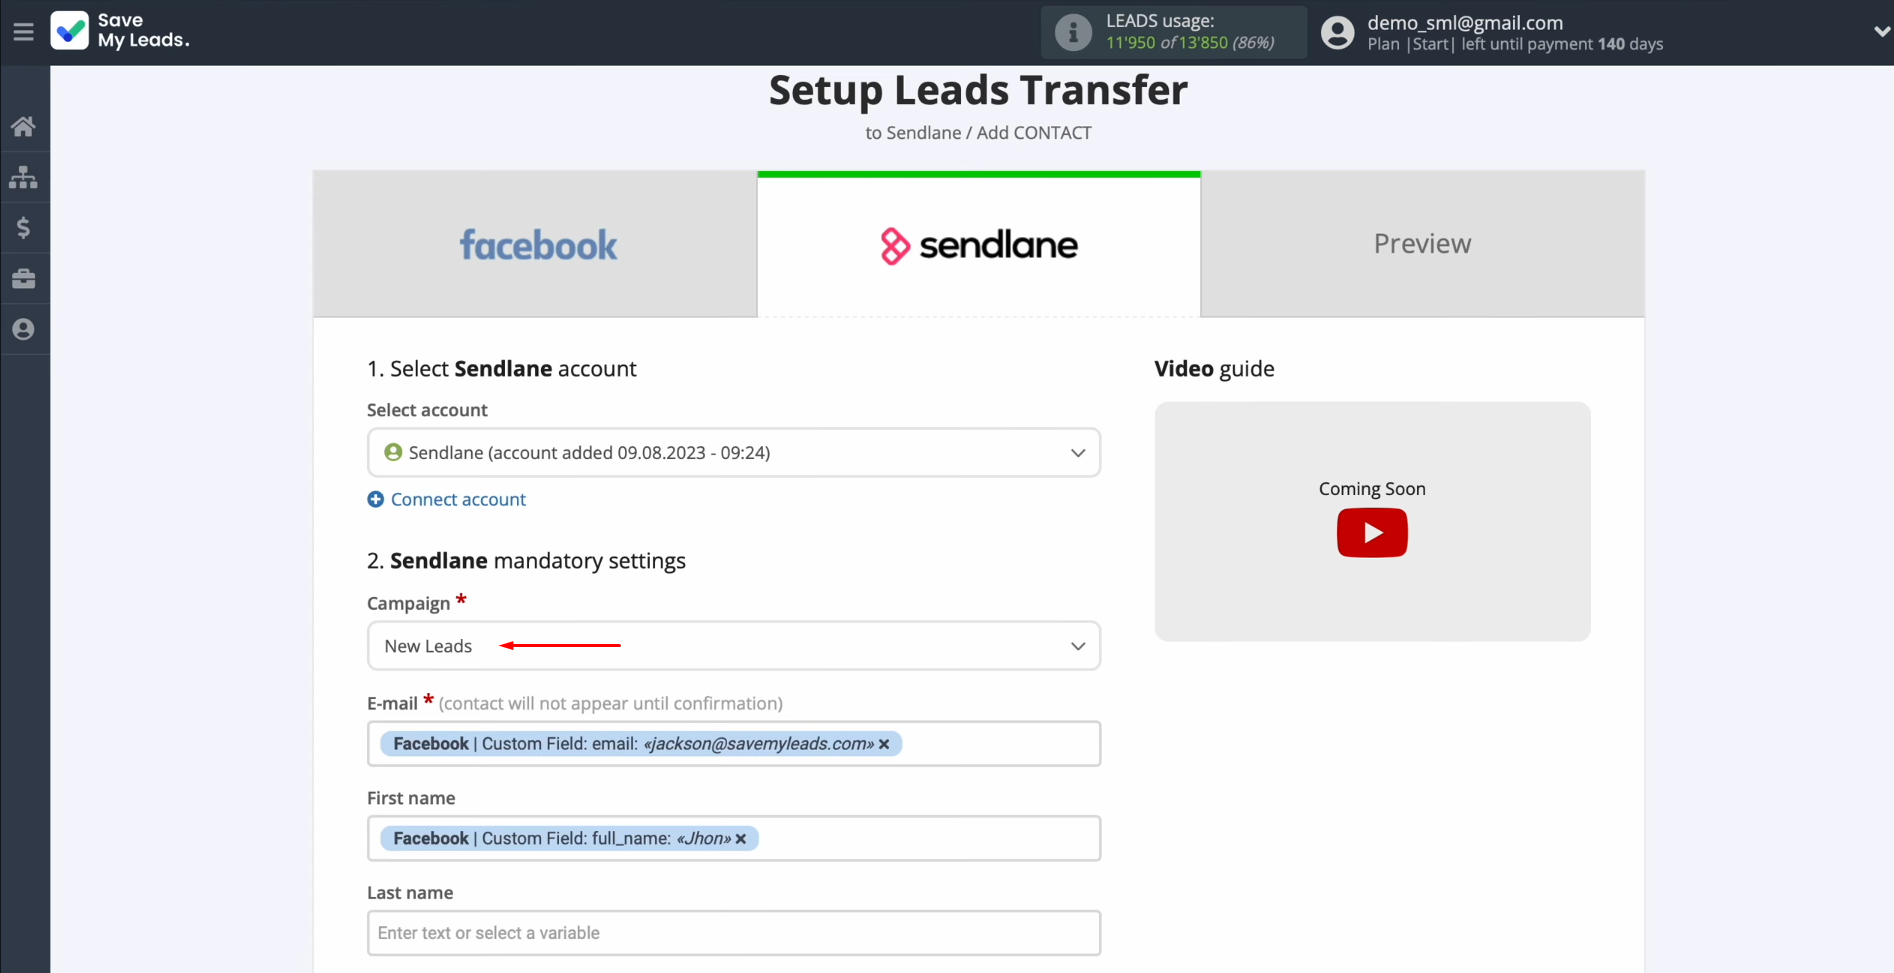
Now you see
the Sendlane fields for creating new contacts. You can assign the desired variables from Facebook. To achieve this, click in the field and select a variable from the
drop-down list.
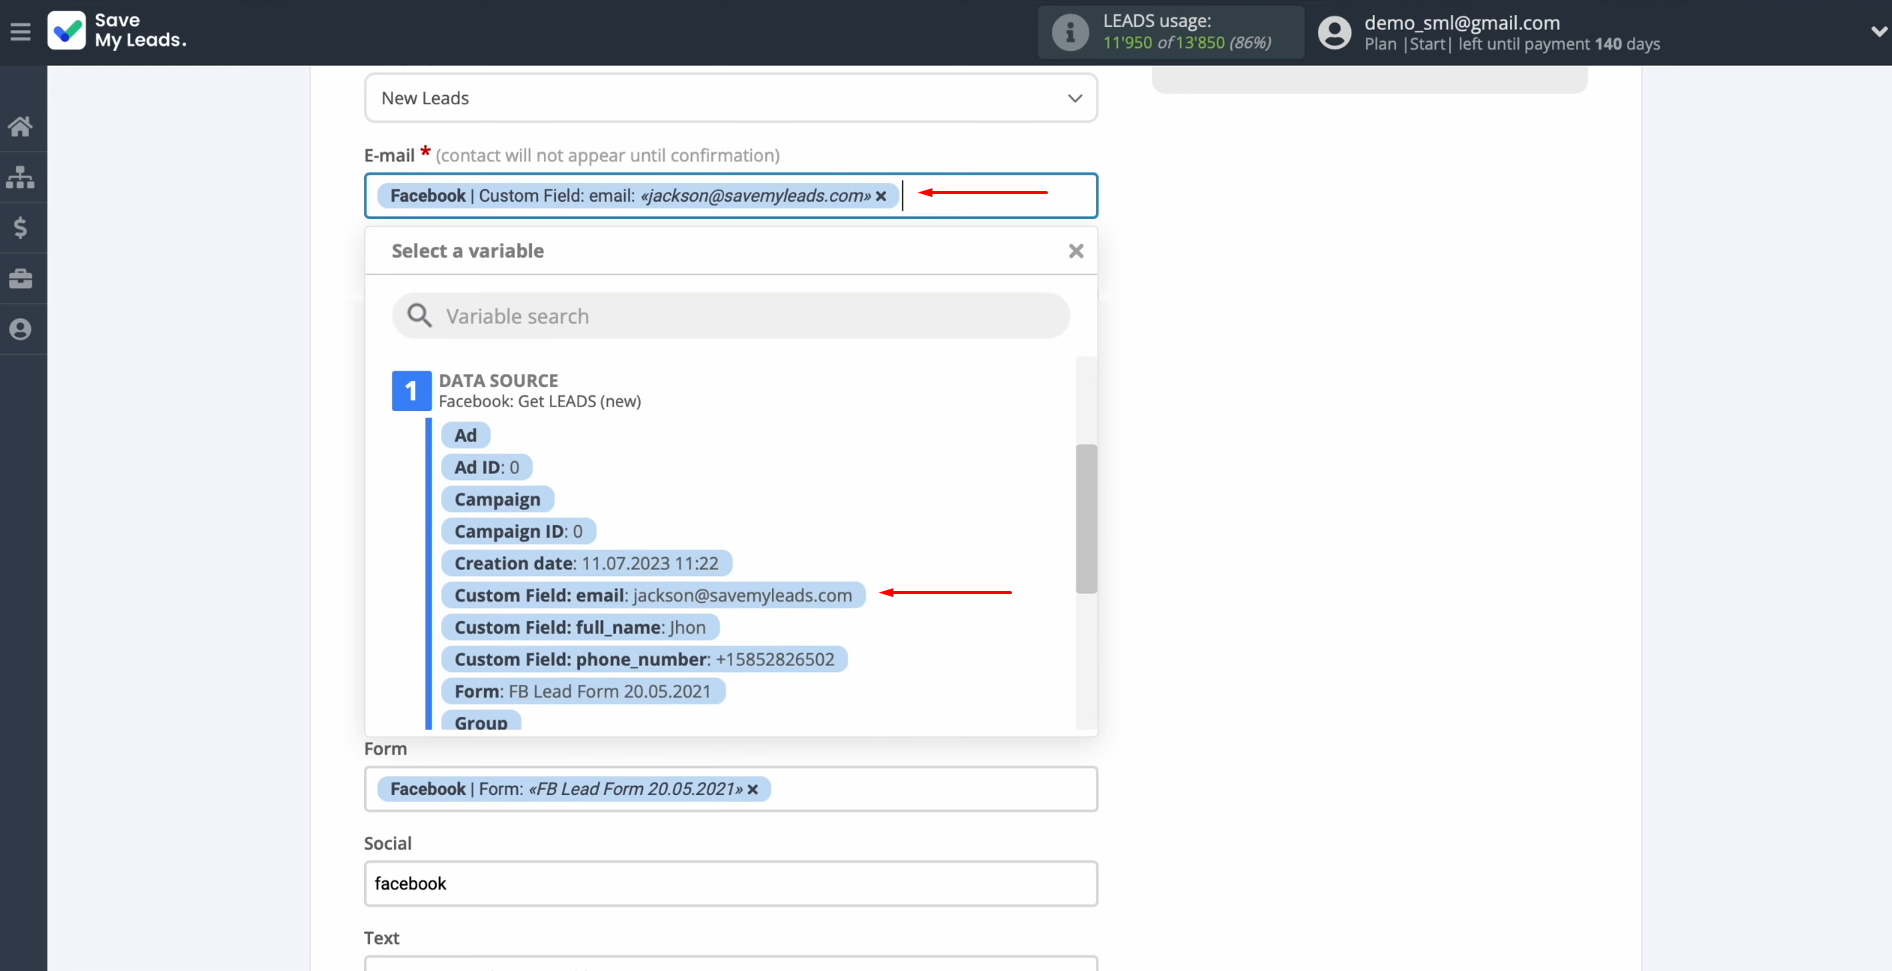
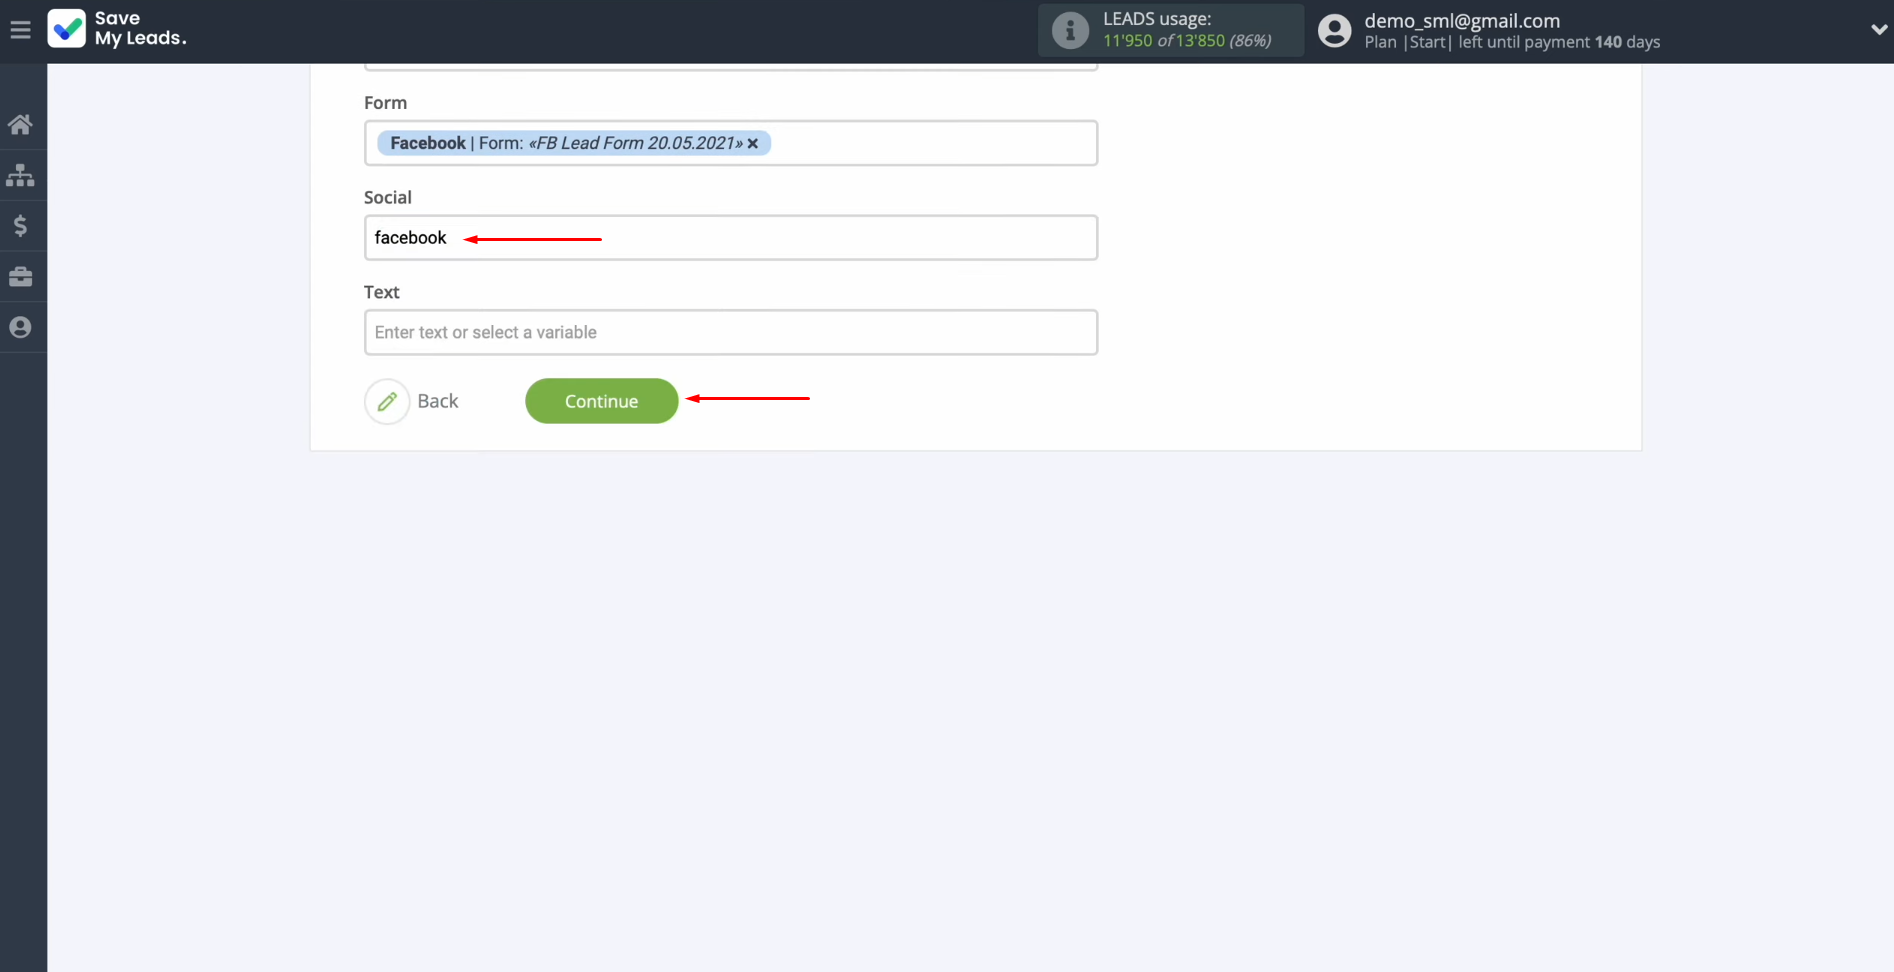
Note, that you can use not only variables
but also write values manually. When all the required fields are
filled, click “Continue”.
At this point, you see an example of the data that
will be sent to Sendlane as new contacts for each new lead from Facebook. If something does not suit you, click “Back” and you will go back one step. To check if the settings were made correctly, click “Send test data to Sendlane”.
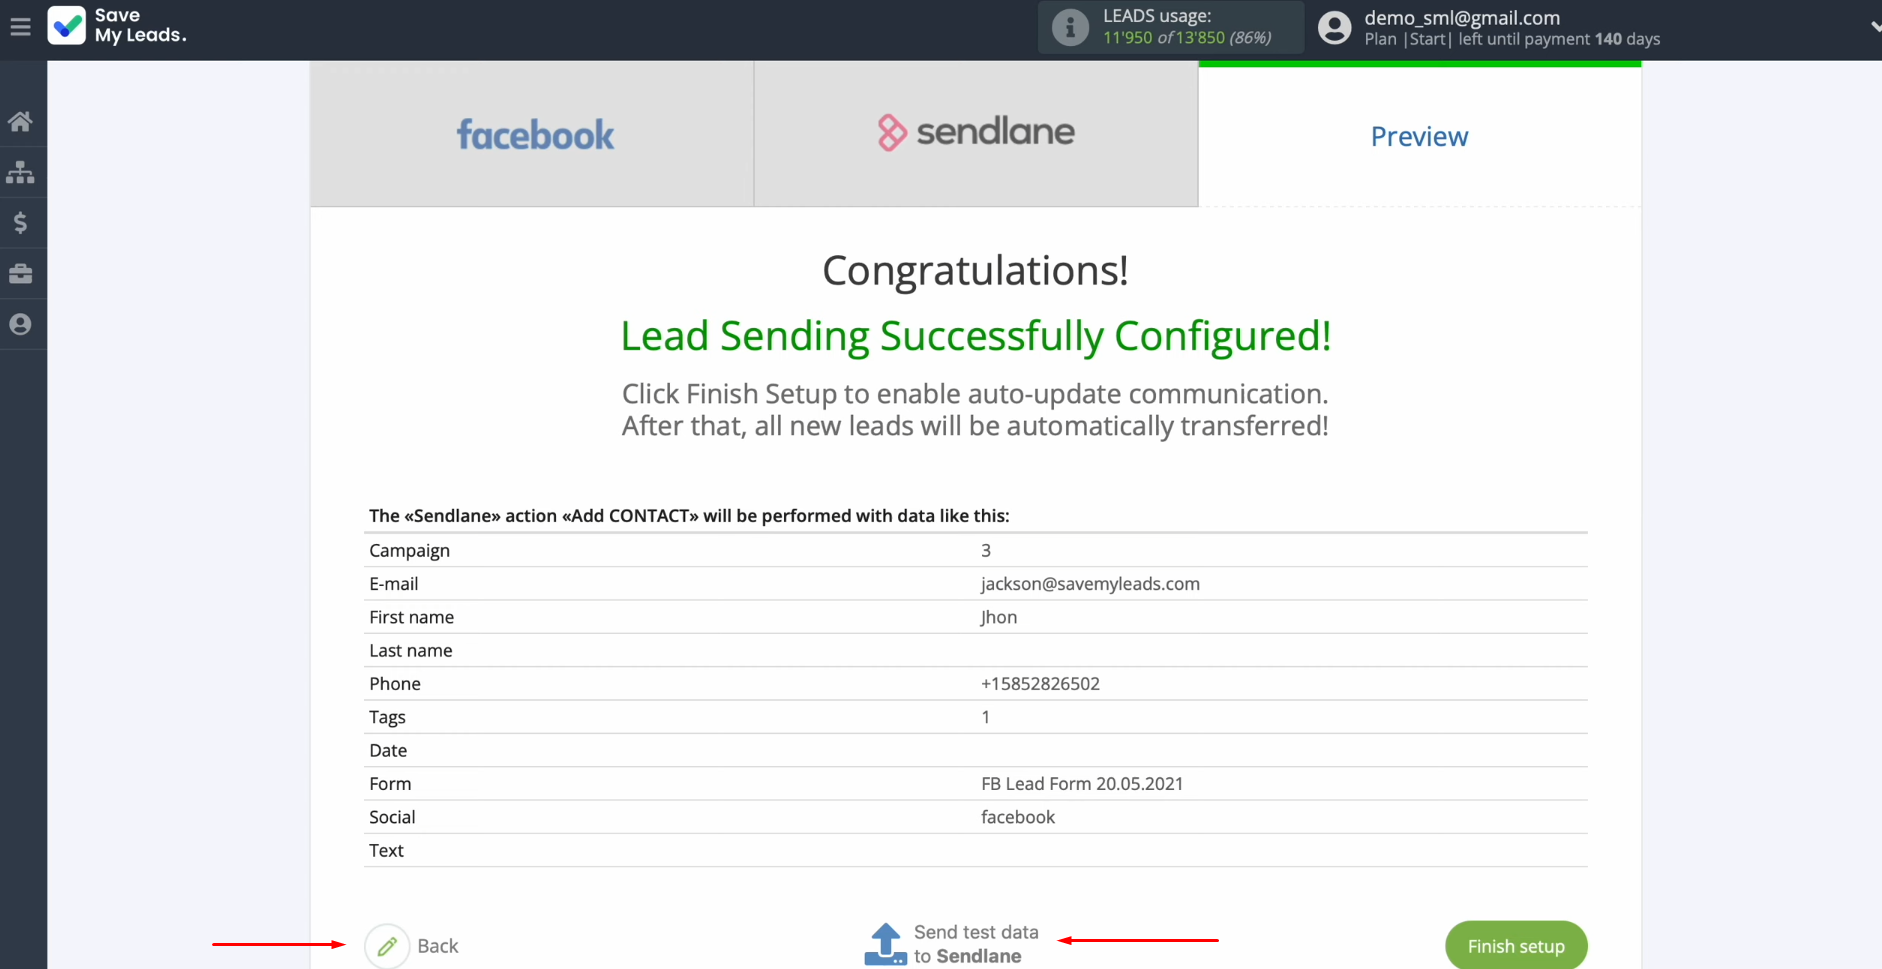
After
successful sending, go to Sendlane and check the result. Please note that after sending the test data, an email will be sent to the specified email address confirming
the subscription
to the email newsletter. Only after you confirm this
newsletter, the contact
will be added to the Sendlane personal account.
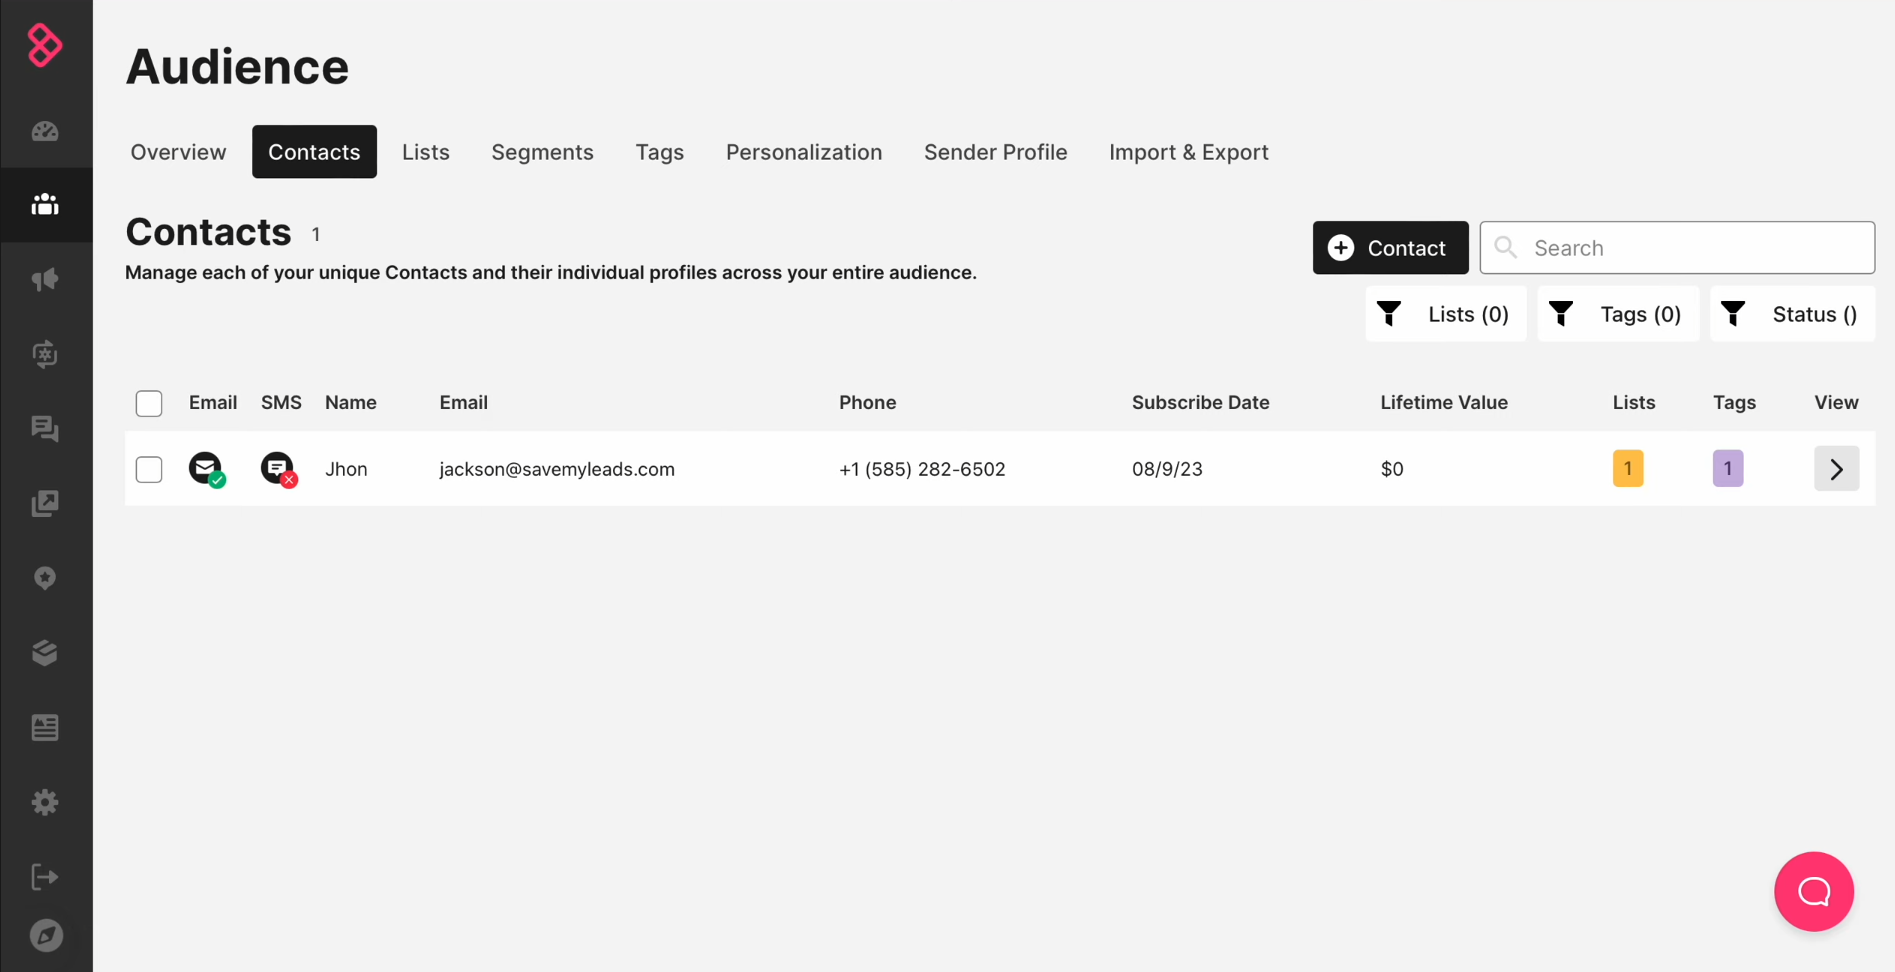
If everything
suits you, return to
the SaveMyLeads and continue setting up.
Setting up Auto-update
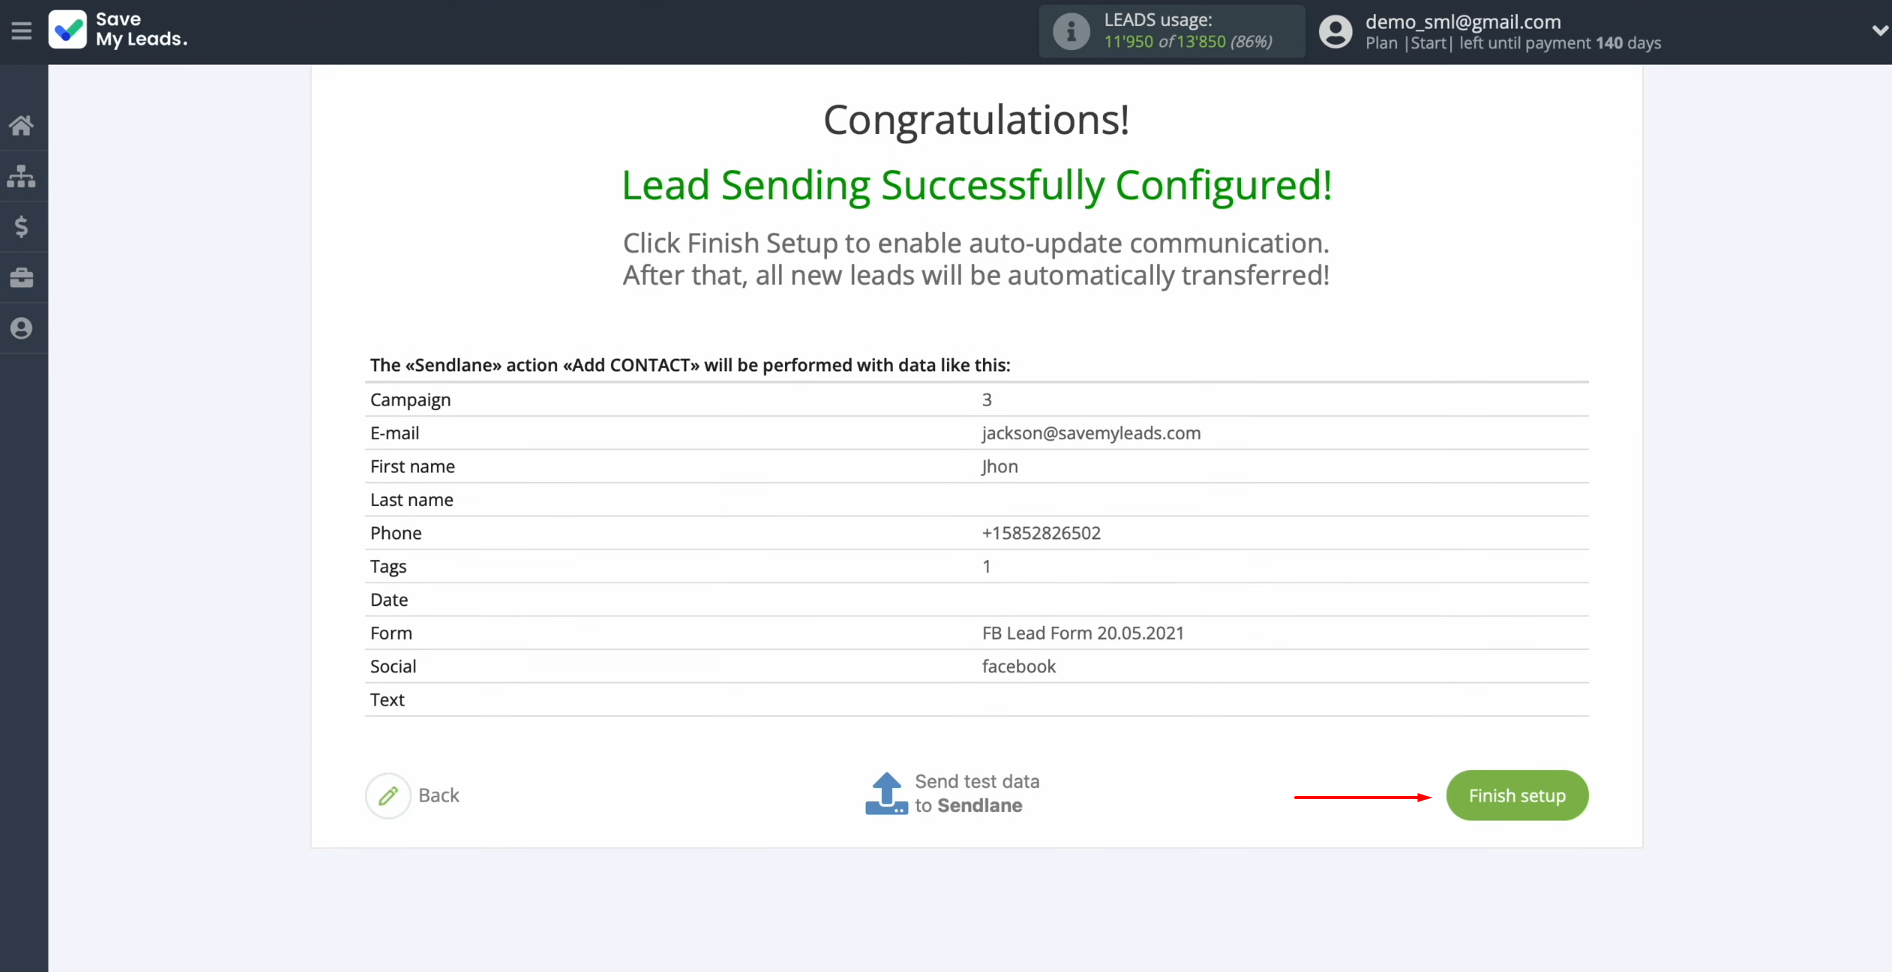
In order for each new lead from Facebook to transfer to the Sendlane service, enable auto-update. To achieve this, click "Finish setup".
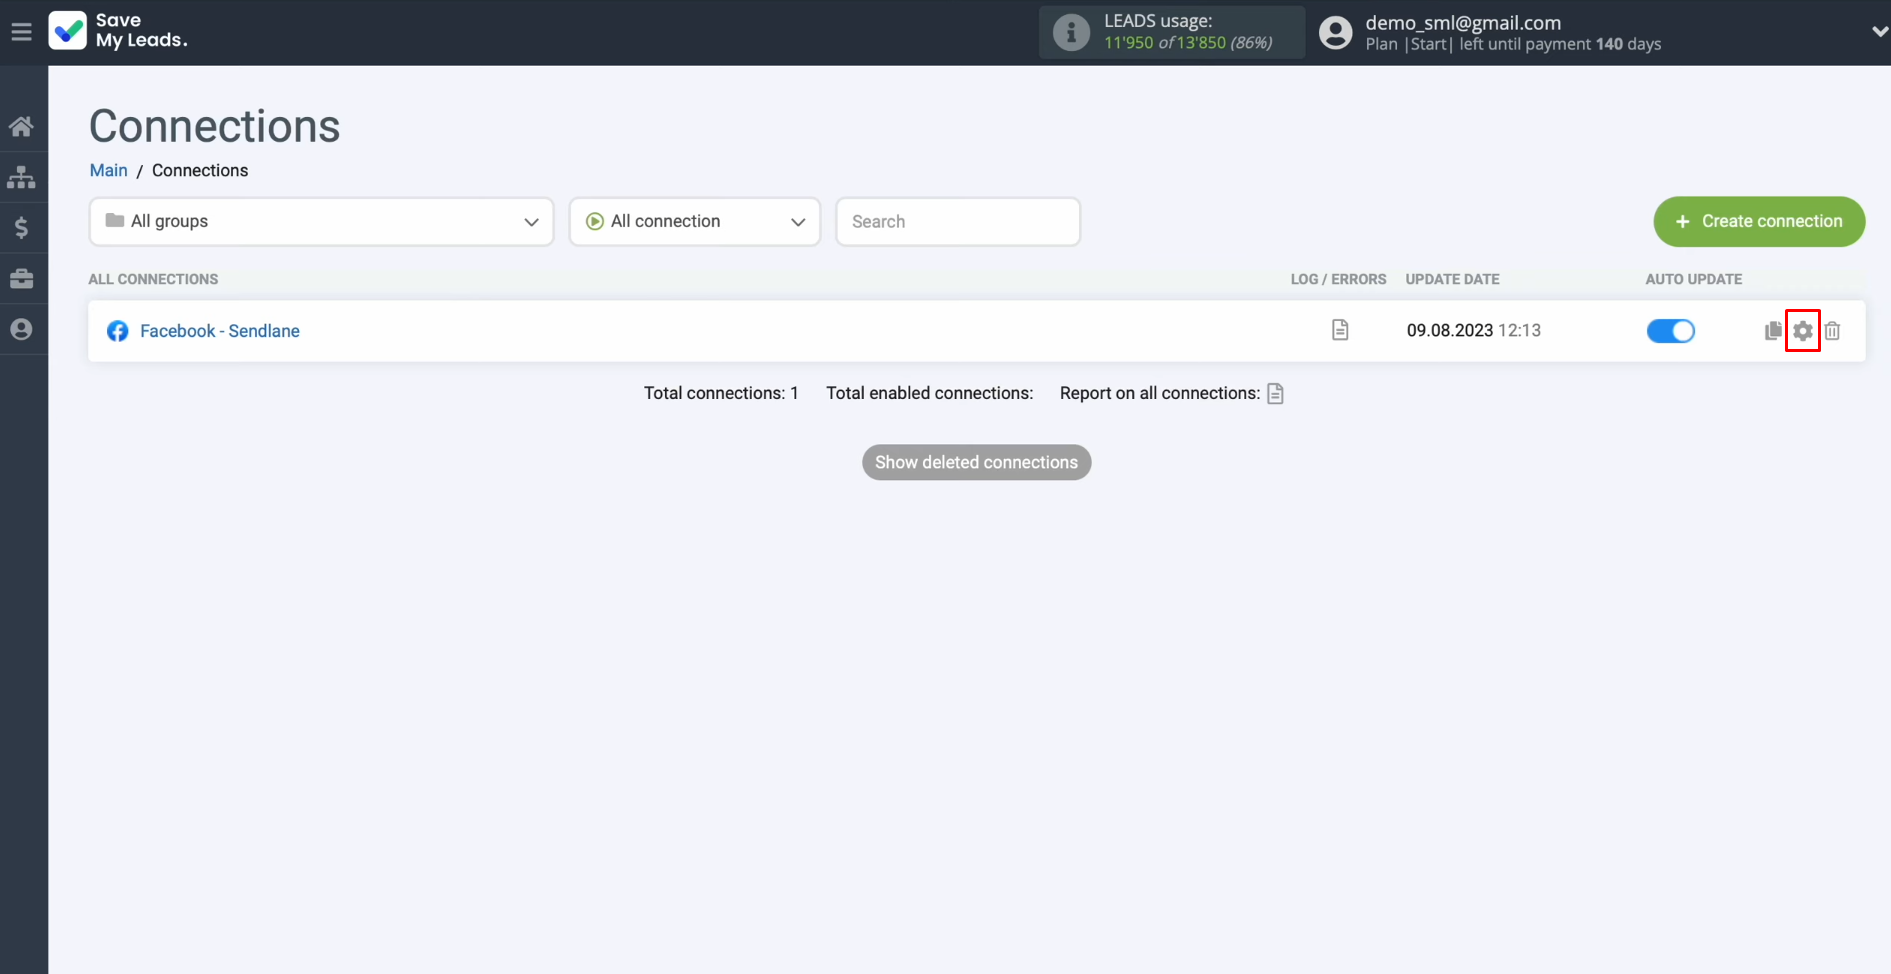
If you want to change the connection name, you can do this in its
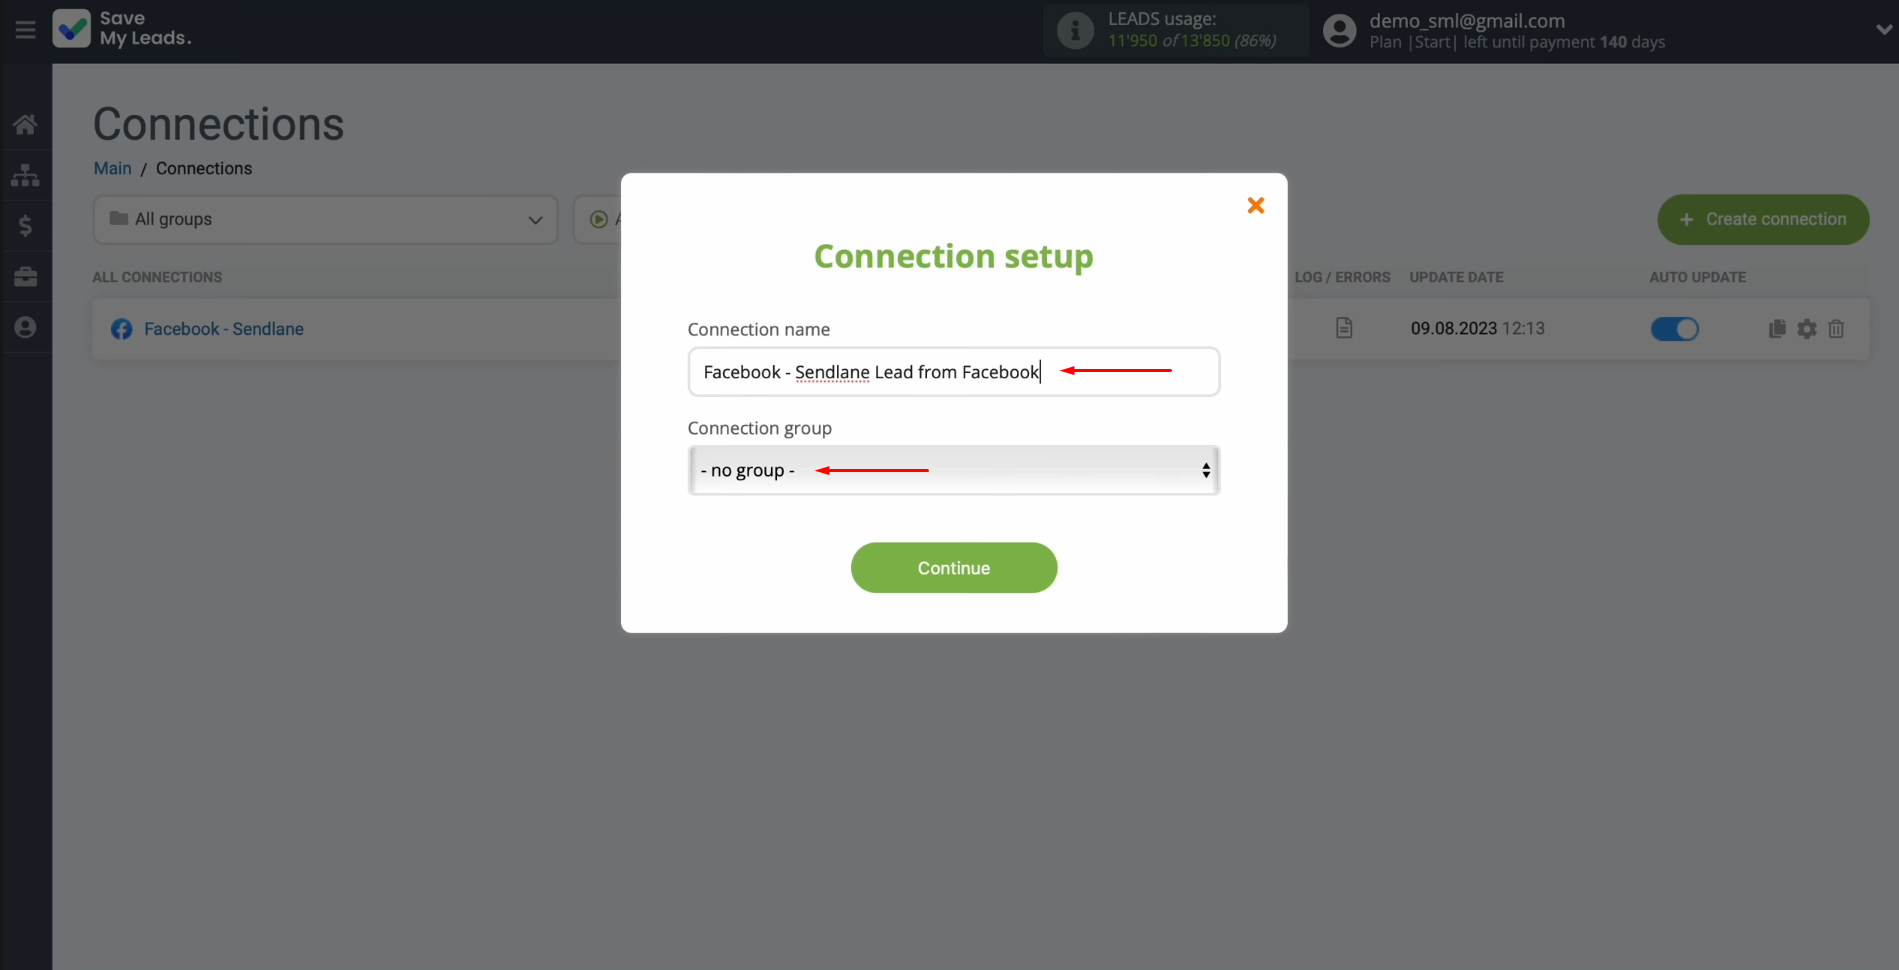
settings. For this, click on the gear icon.
Here you can change the name of the connection and add it to a group. Thereafter, click “Continue”.
Result of Facebook and Sendlane Integration
If you followed our instructions, you were able to set up a properly functioning connection between both platforms. In addition, you have probably already tested the automatic transfer of new leads from the social network to the mailing service. Facebook Sendlane integration will free you from the need to perform monotonous and repetitive tasks. Thanks to this connection, you no longer have to deal with transferring lead contact information from Lead Ads. This will happen automatically. Our online connector SaveMyLeads will take over the boring routine. Meanwhile, you can refocus on higher-level tasks. For example, to improve the quality of communication with potential and existing clients or to think about new strategies and tactics in business development. Whatever you choose, we wish you success!
What do you do with the data you get from Facebook lead forms? Do you send them to the manager, add them to mailing services, transfer them to the CRM system, use them to implement feedback? Automate all of these processes with the SaveMyLeads online connector. Create integrations so that new Facebook leads are automatically transferred to instant messengers, mailing services, task managers and other tools. Save yourself and your company's employees from routine work.
