Elastic Email is a platform that provides comprehensive and effective solutions for email marketing. Entrepreneurs and marketers who use it note its intuitive interface and reliability, emphasis on performance, and advanced functionality for email campaigns. In this article, you will learn how to set up Elastic Email and Facebook integration to automate the transfer of leads from the social network to this service.
Elastic Email is a marketing service equipped with a comprehensive set of tools for creating and managing automated, personalized email campaigns. Users can design layouts from scratch using a user-friendly drag-and-drop constructor or by programming in HTML. Additionally, the platform offers a vast library of customizable templates. Elastic Email also enables the analysis of the effectiveness of different versions of mailings through A/B testing. Furthermore, users can visualize plans, identify triggers, and establish separate sets of rules for each campaign.
Many people still manually populate their Elastic Email contact database with potential clients from Facebook Lead Ads. However, this process can be automated by integrating both services, saving a valuable resource: time. This automation eliminates the need for manual data entry, thereby boosting productivity for yourself, your department, or your company. Additionally, this efficiency can enhance customer loyalty, as they will appreciate the swift processing of their applications. If you're interested in the benefits of automatic lead transfer but unsure about implementing it correctly, we offer step-by-step instructions. These will assist you in connecting Facebook Lead Ads and Elastic Email with ease.
How to Set up Facebook and Elastic Email Integration
Good news for non-IT users. To set up Facebook Lead Ads and Elastic Email integration, you don't need developer skills. You don't even need to know what an API is. Although for self-development it is quite possible to inquire. You won’t have to call any of the programmers for help, either. The creators of the SaveMyLeads online connector have already taken care of everything, which will do all the complex technical work for you. The capabilities of this service allow you to connect different platforms quickly and easily. Thanks to the intuitive interface, you can handle the settings in just 5–10 minutes.
You can start using the connector immediately after registering an account on the official website – savemyleads.com. To achieve this, you need to provide your email and come up with a password. There is an alternative option – registering through a Facebook or Google account. Ready? Now let's start integrating Facebook Lead Ads and Elastic Email.
Setting up the Data Source – Facebook
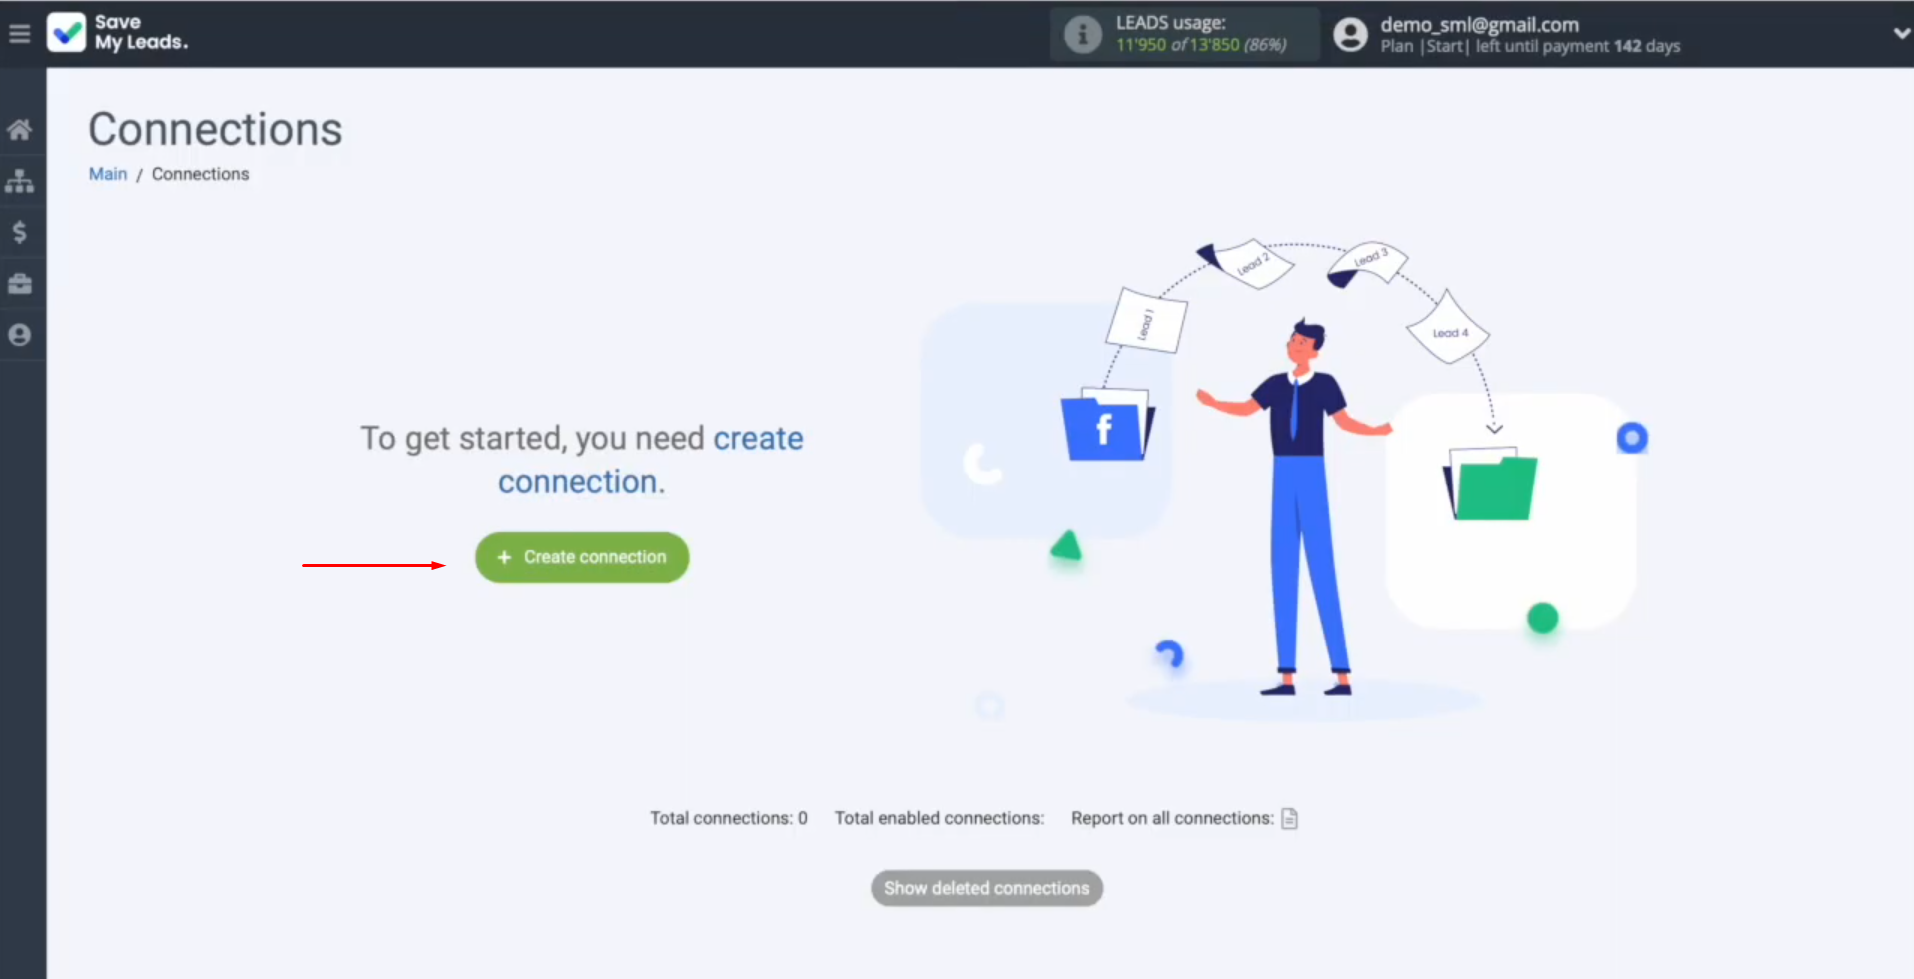
To set up Facebook integration with Elastic Email, first, you have to create a new connection. For this, click on the green button.
Next, you must select a data source system. In this case, it is Facebook.
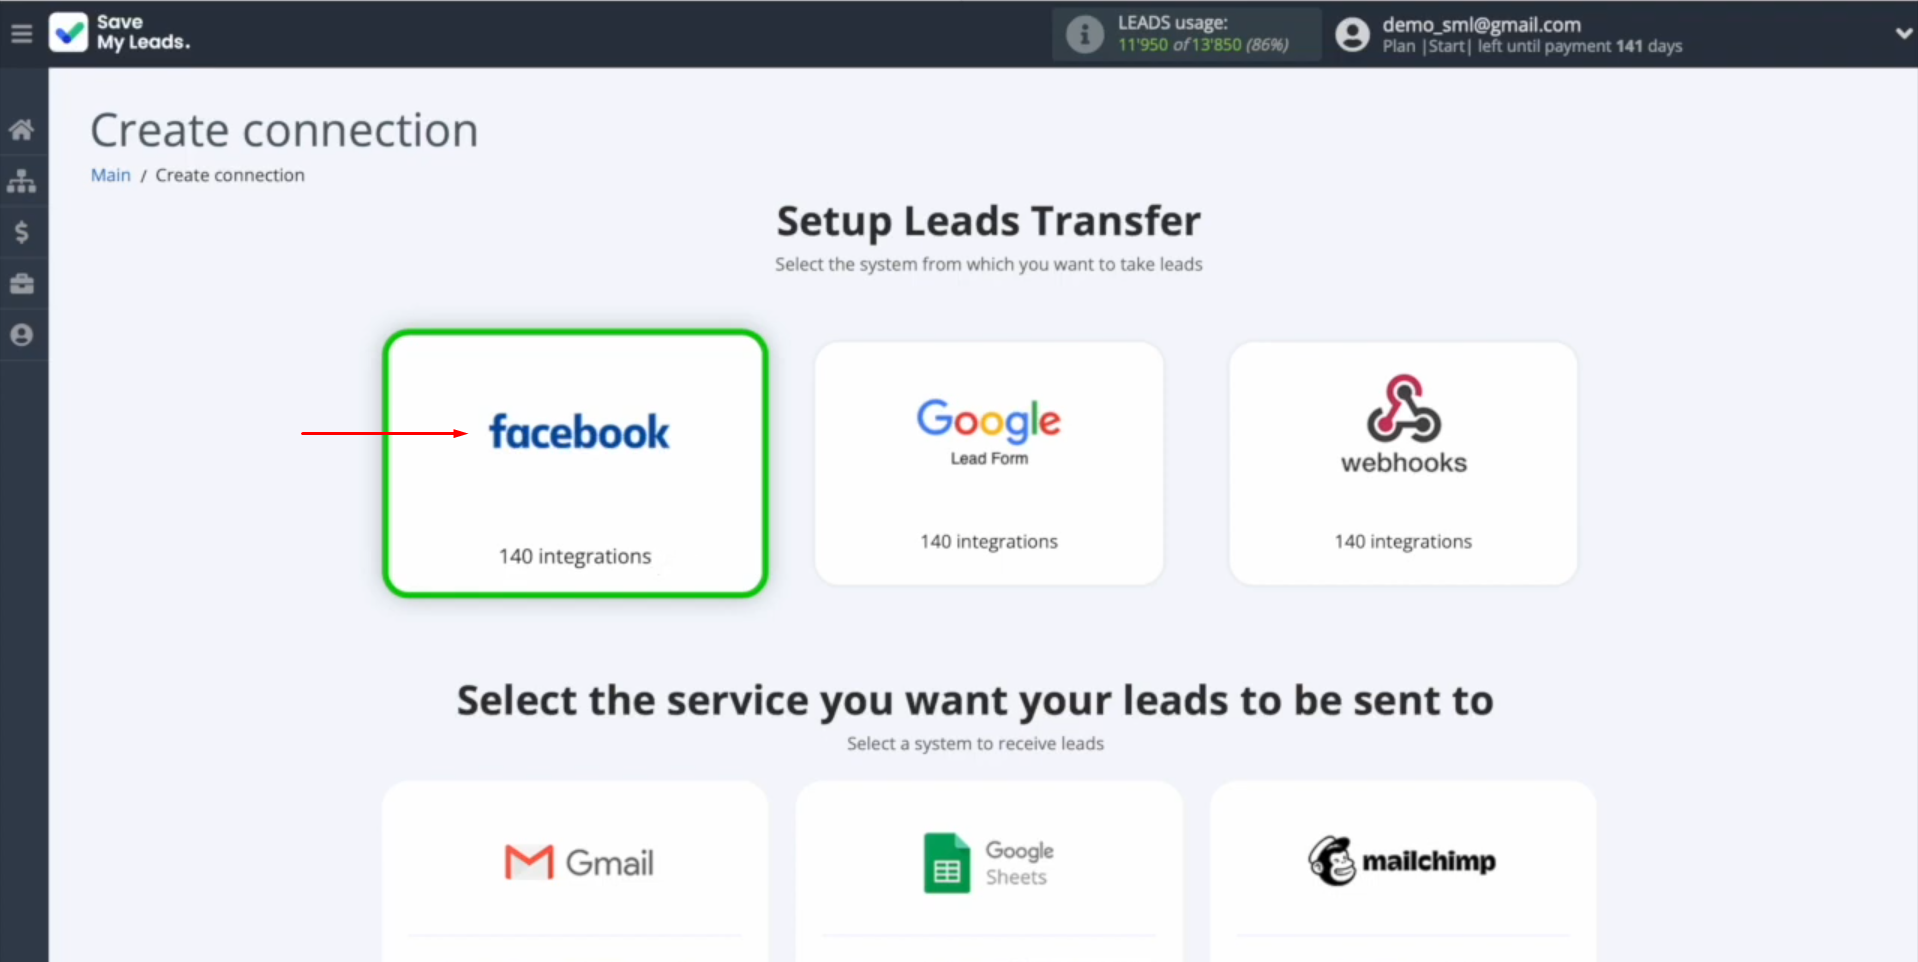
Now, you have to select the system where you want to transfer new leads from
Facebook. In this case, it is Elastic Email (Create Contacts).
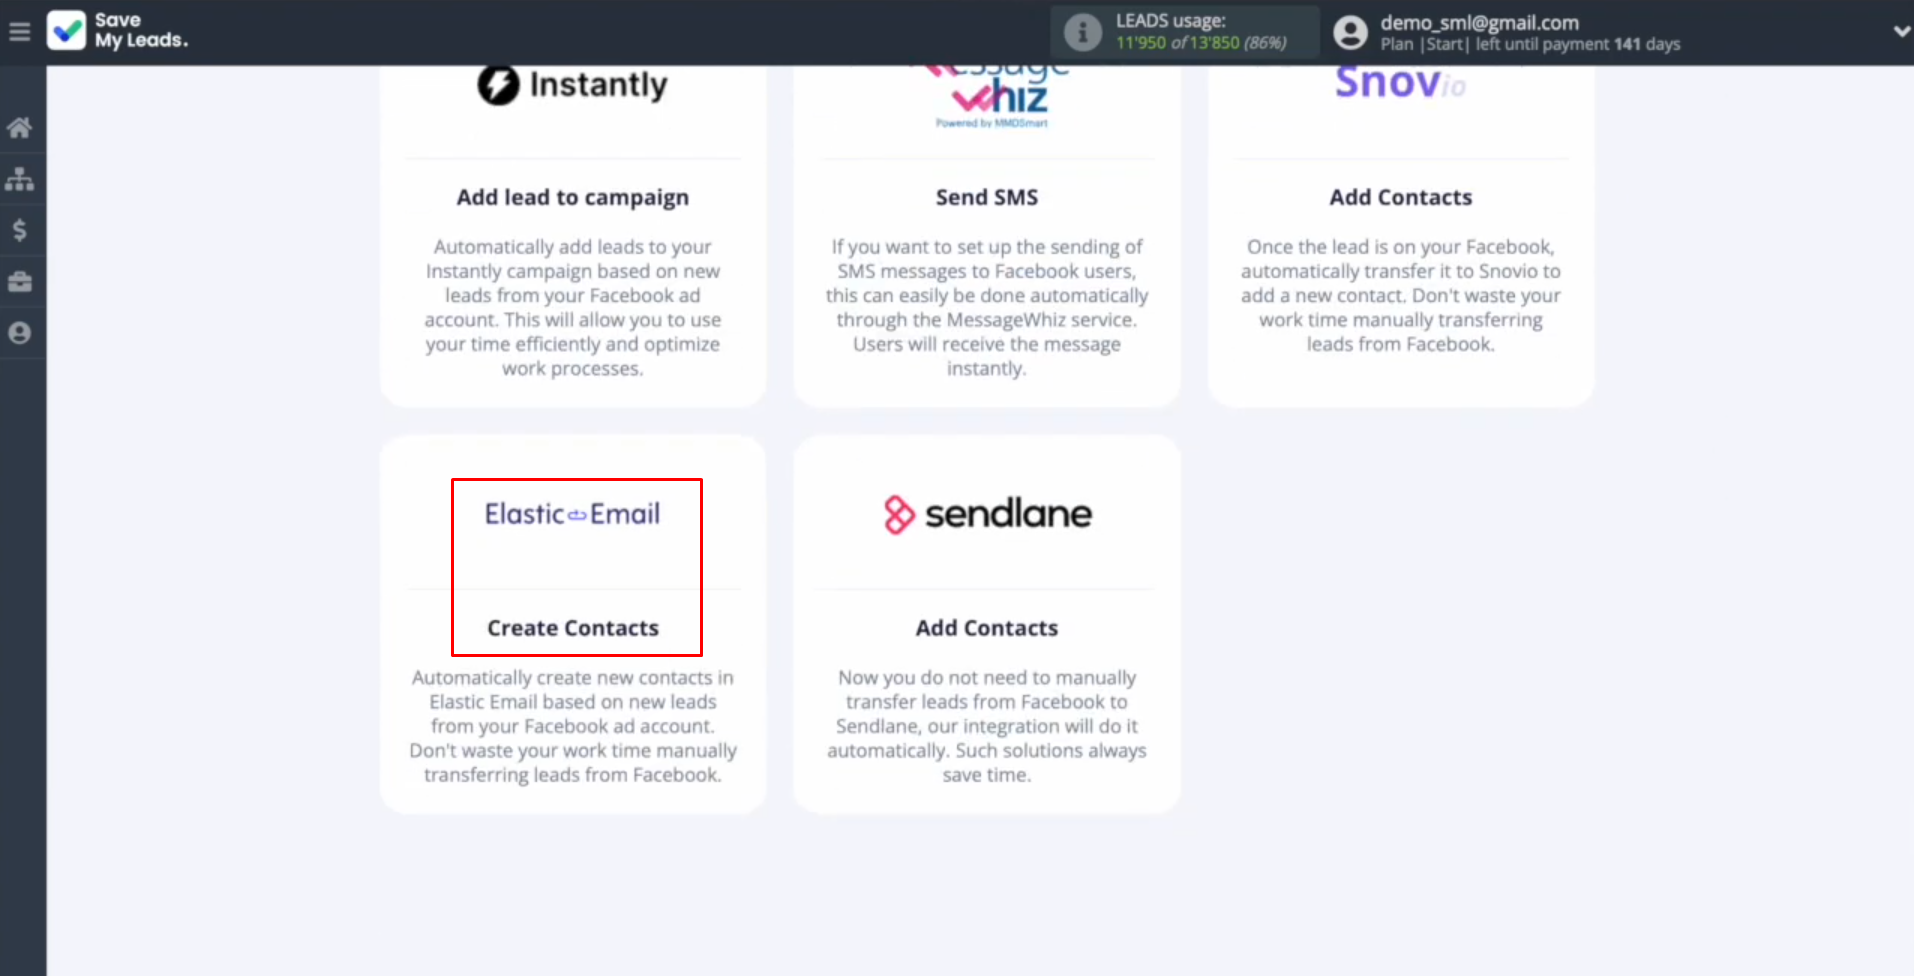
At this stage, you need to connect your Facebook account to SaveMyLeads. For this, click on the blue
button.
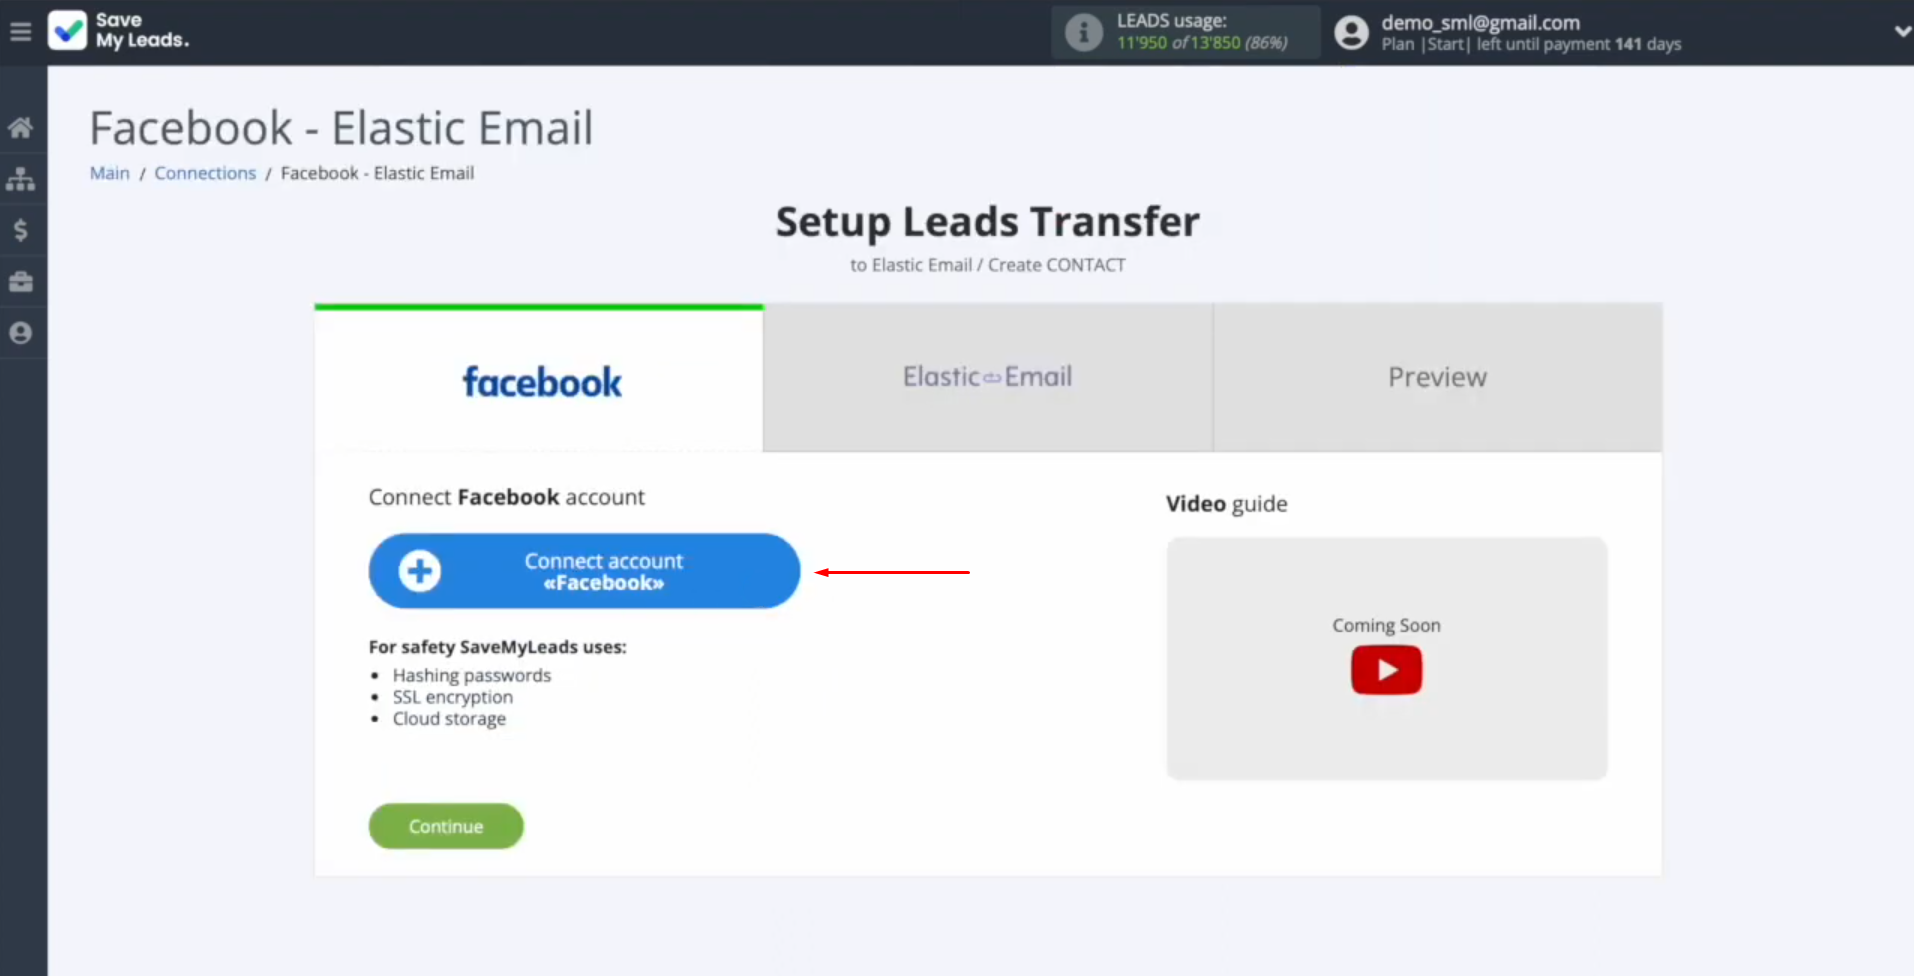
In this
window, you must
specify the login and
password of your personal Facebook
account. Click “Log in”.
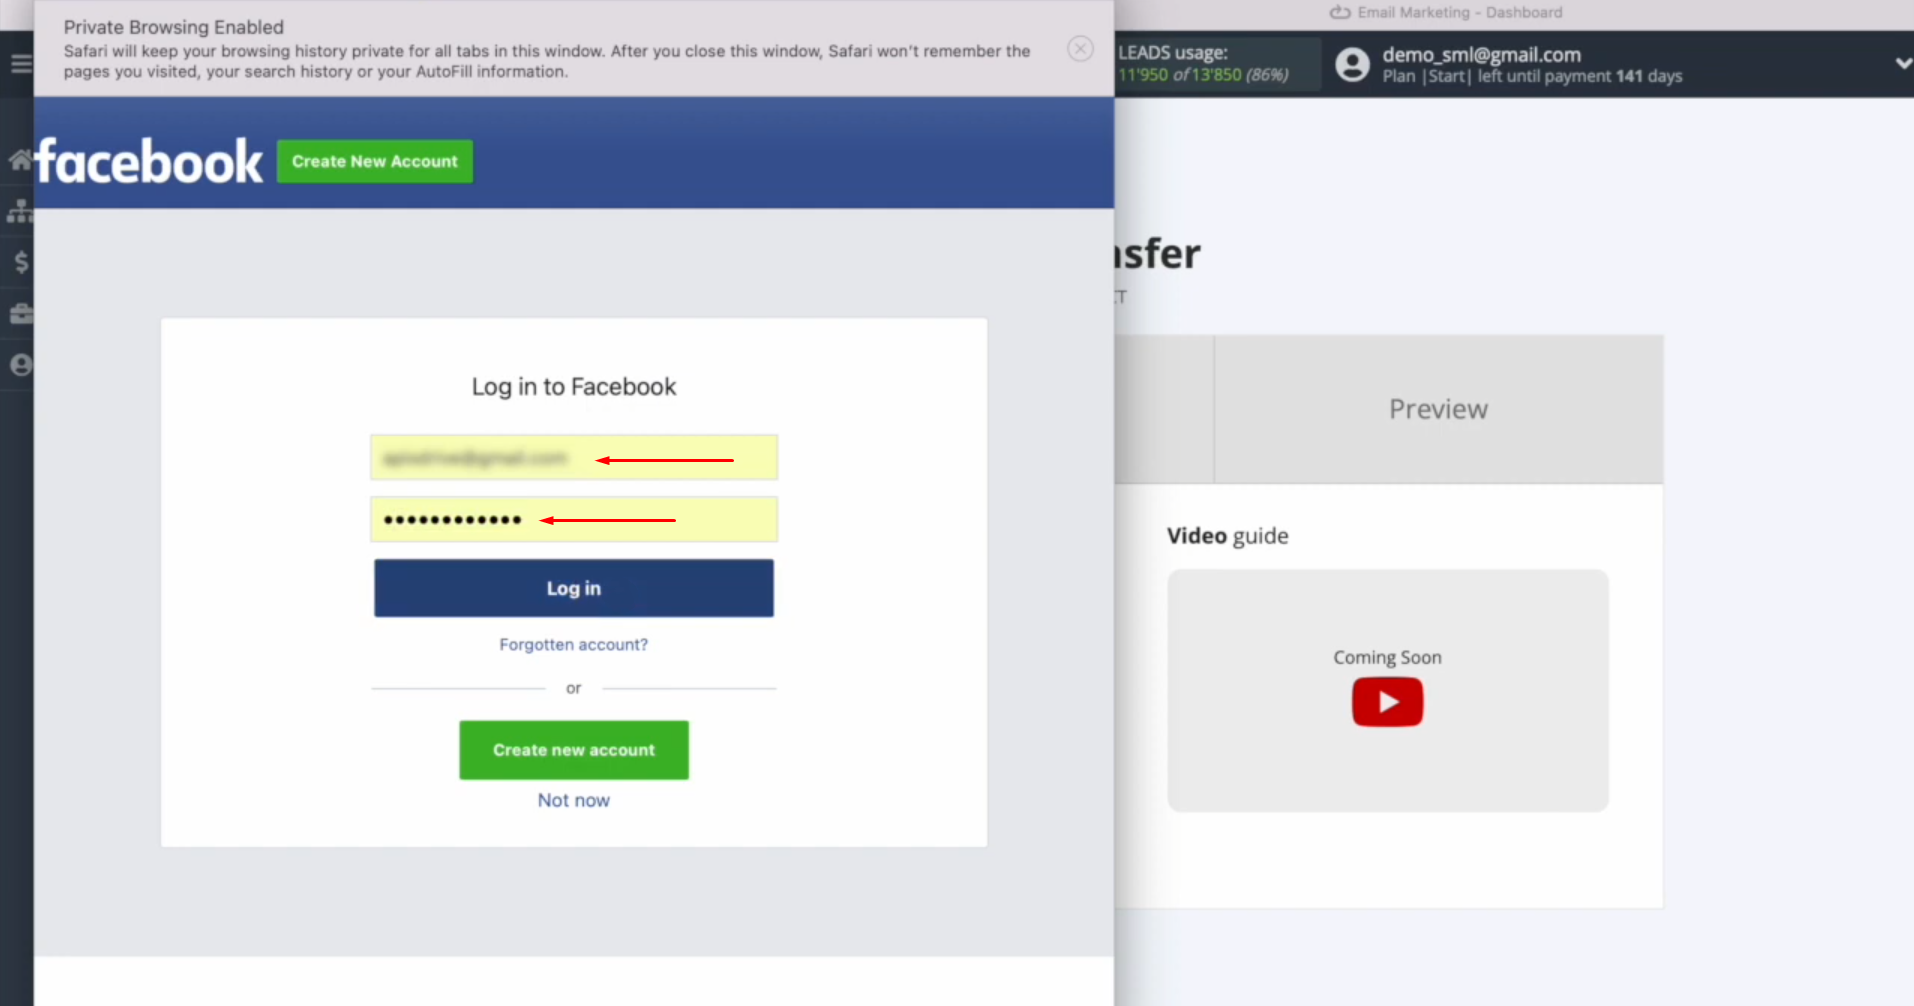
Then click
“Edit settings”.
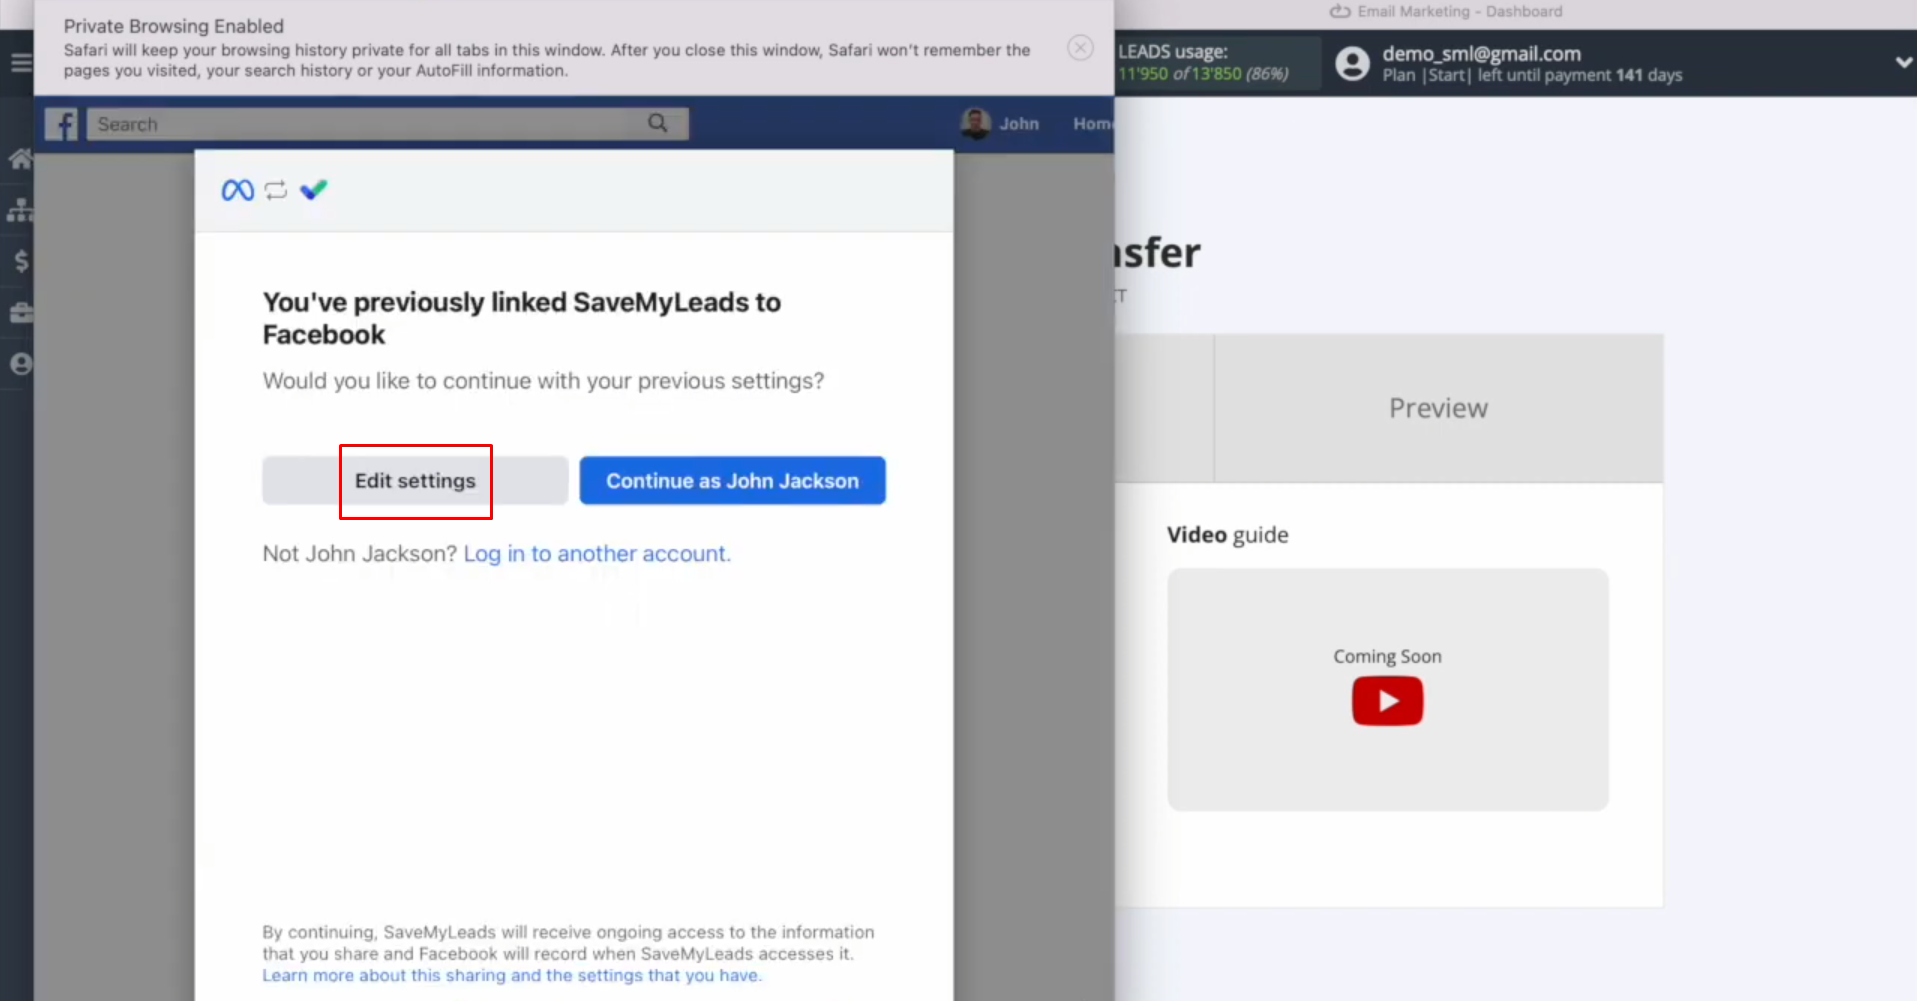
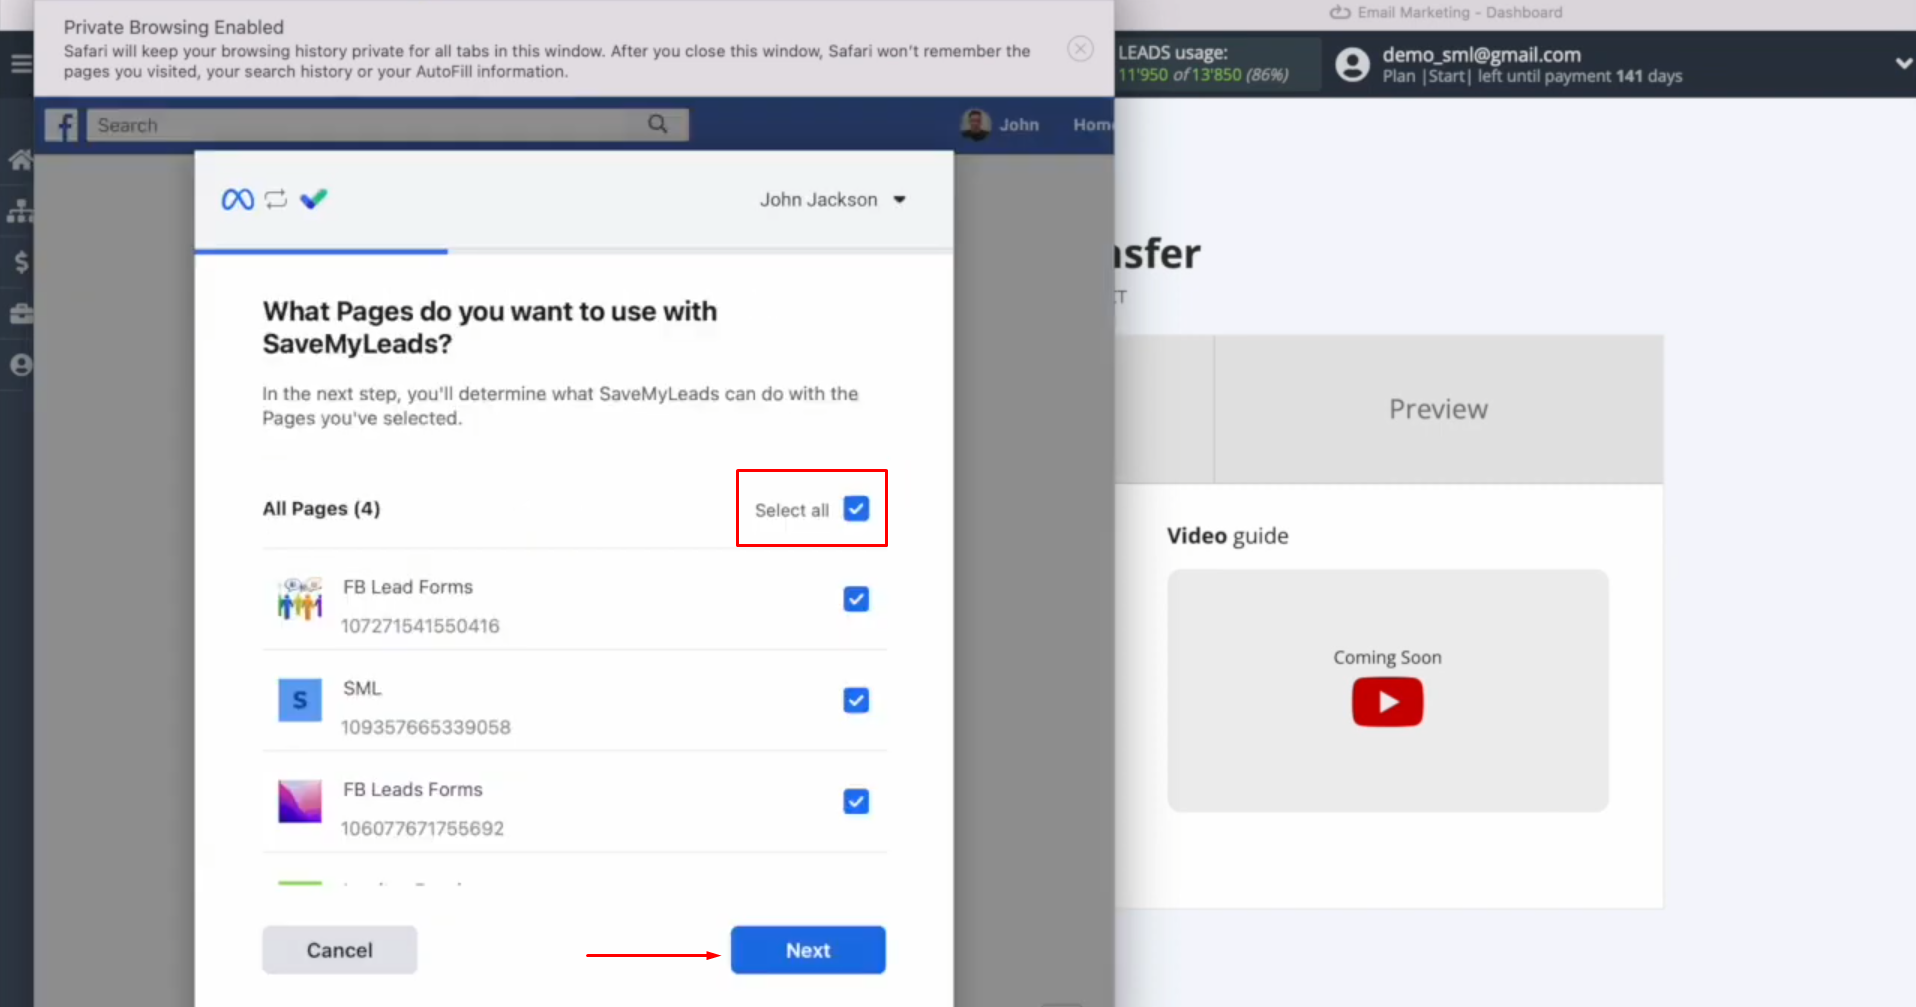
At this stage, it is necessary to tick the advertising pages from which you want to receive new
leads. We recommend
marking all advertising pages at once to be able to work with them in the future. Click “Next”.
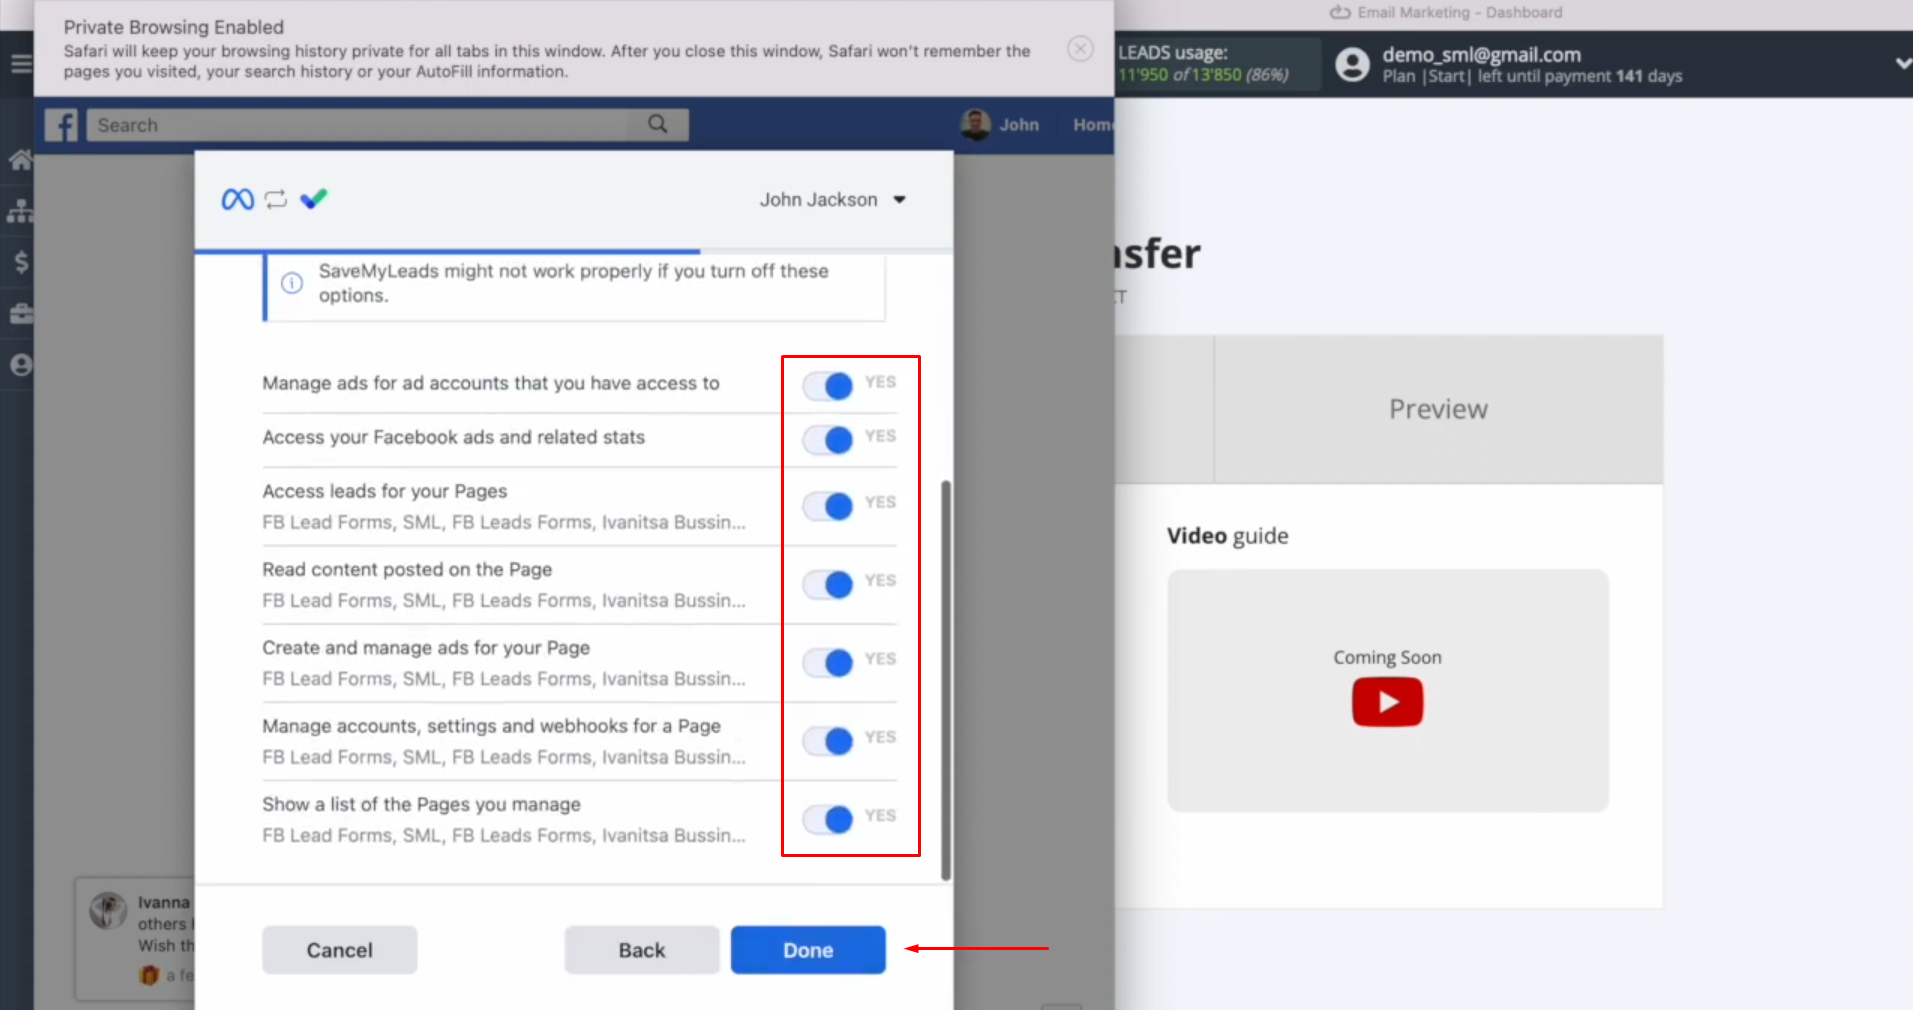
Here, leave
all access checkboxes enabled. Click “Done”.
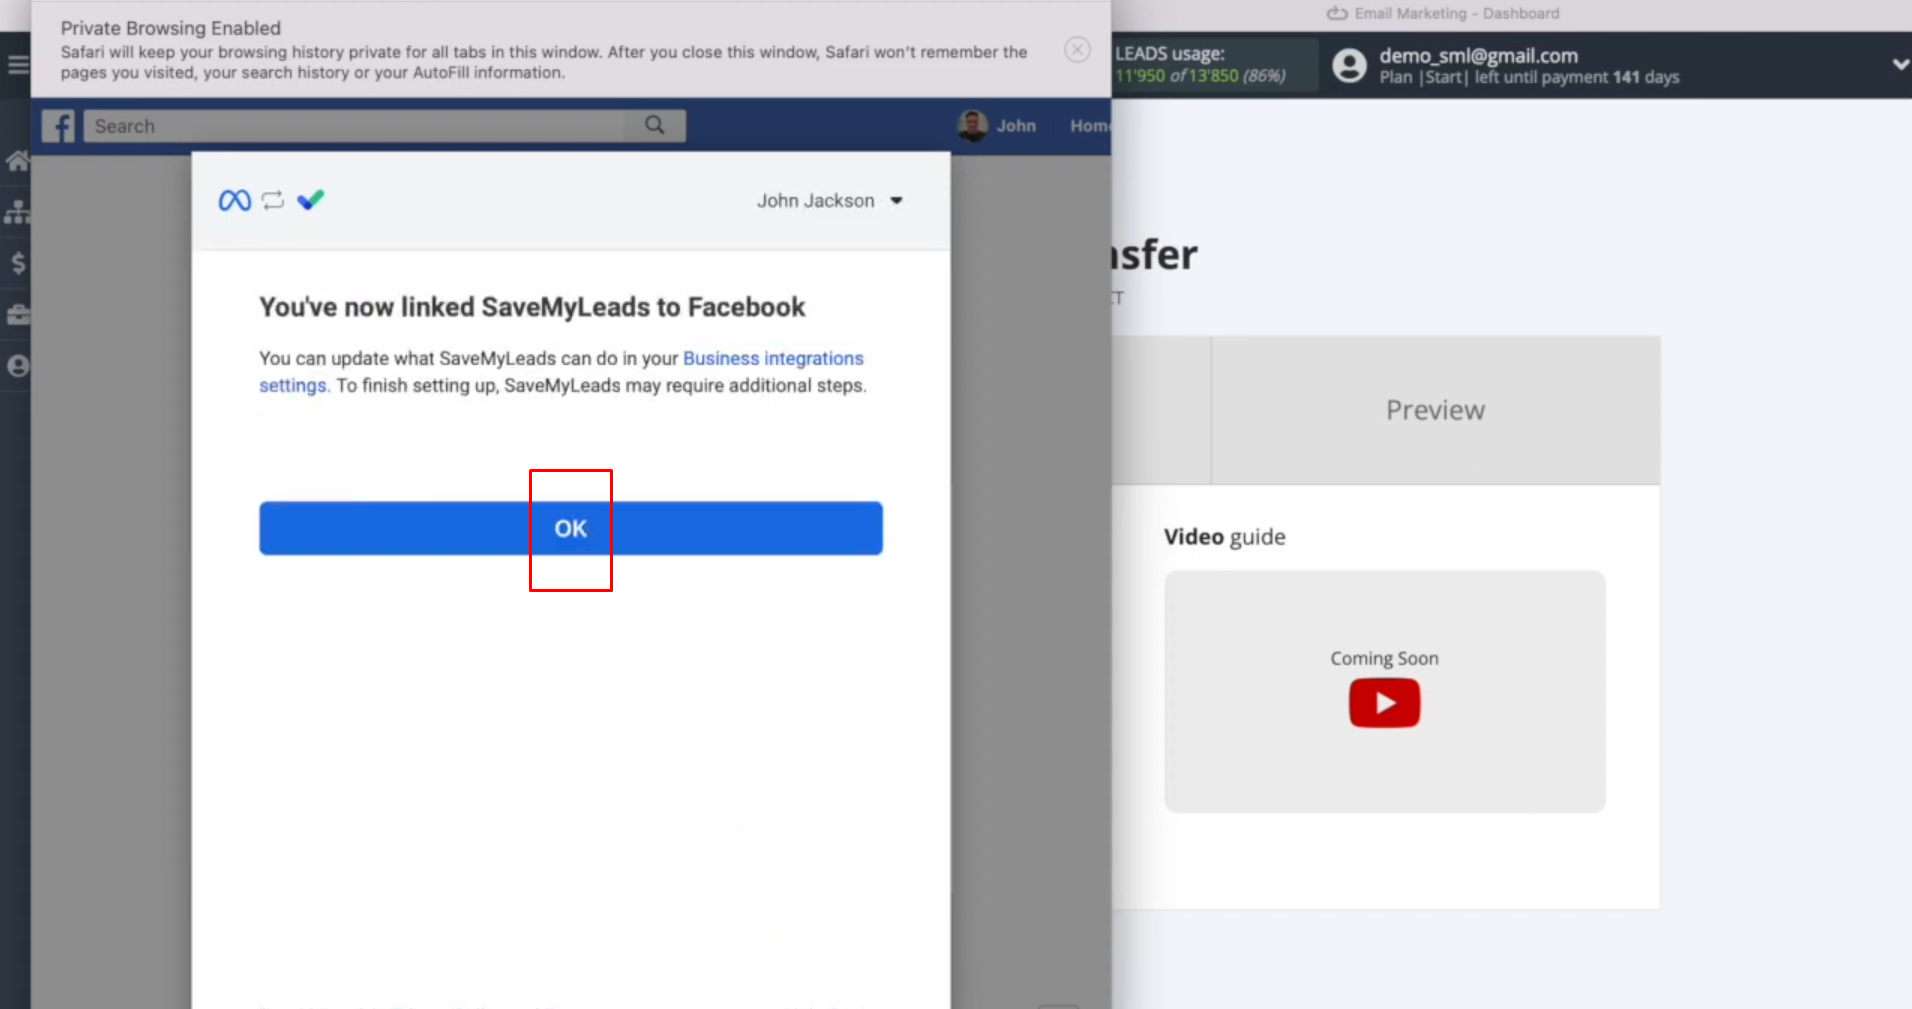
Click “OK”.
When the
connected login is displayed in the list, select it.
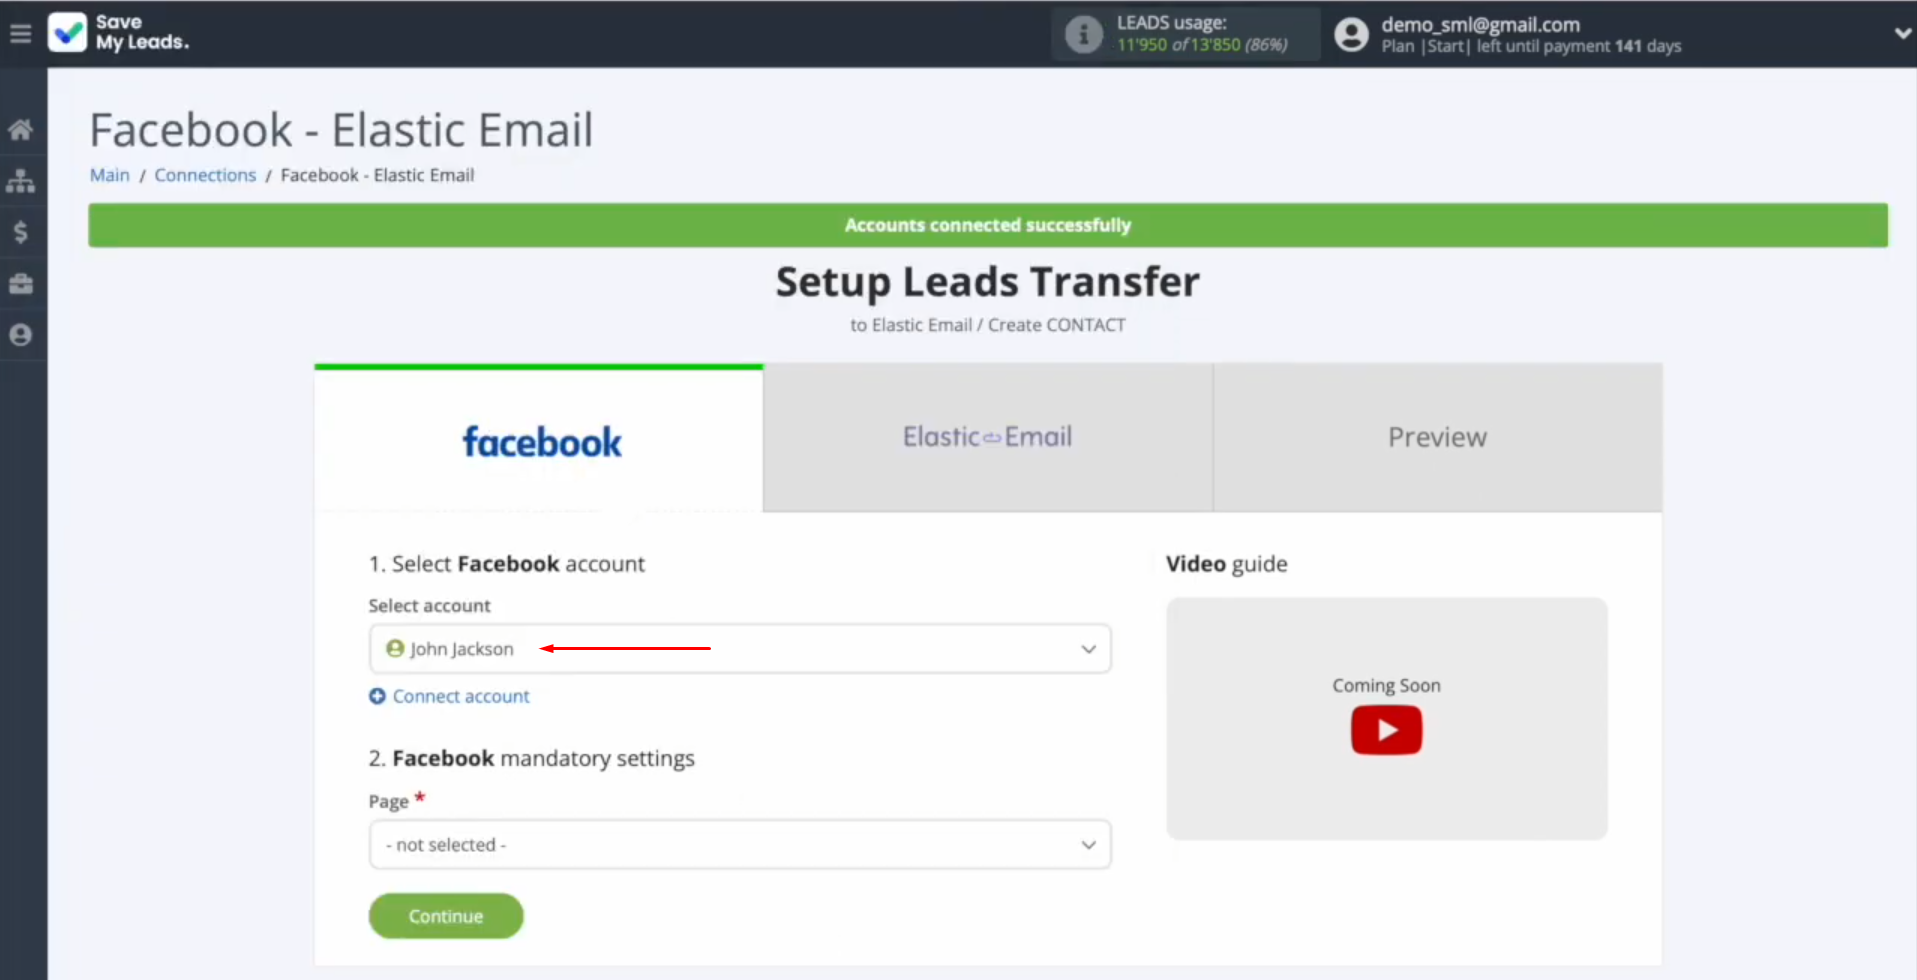
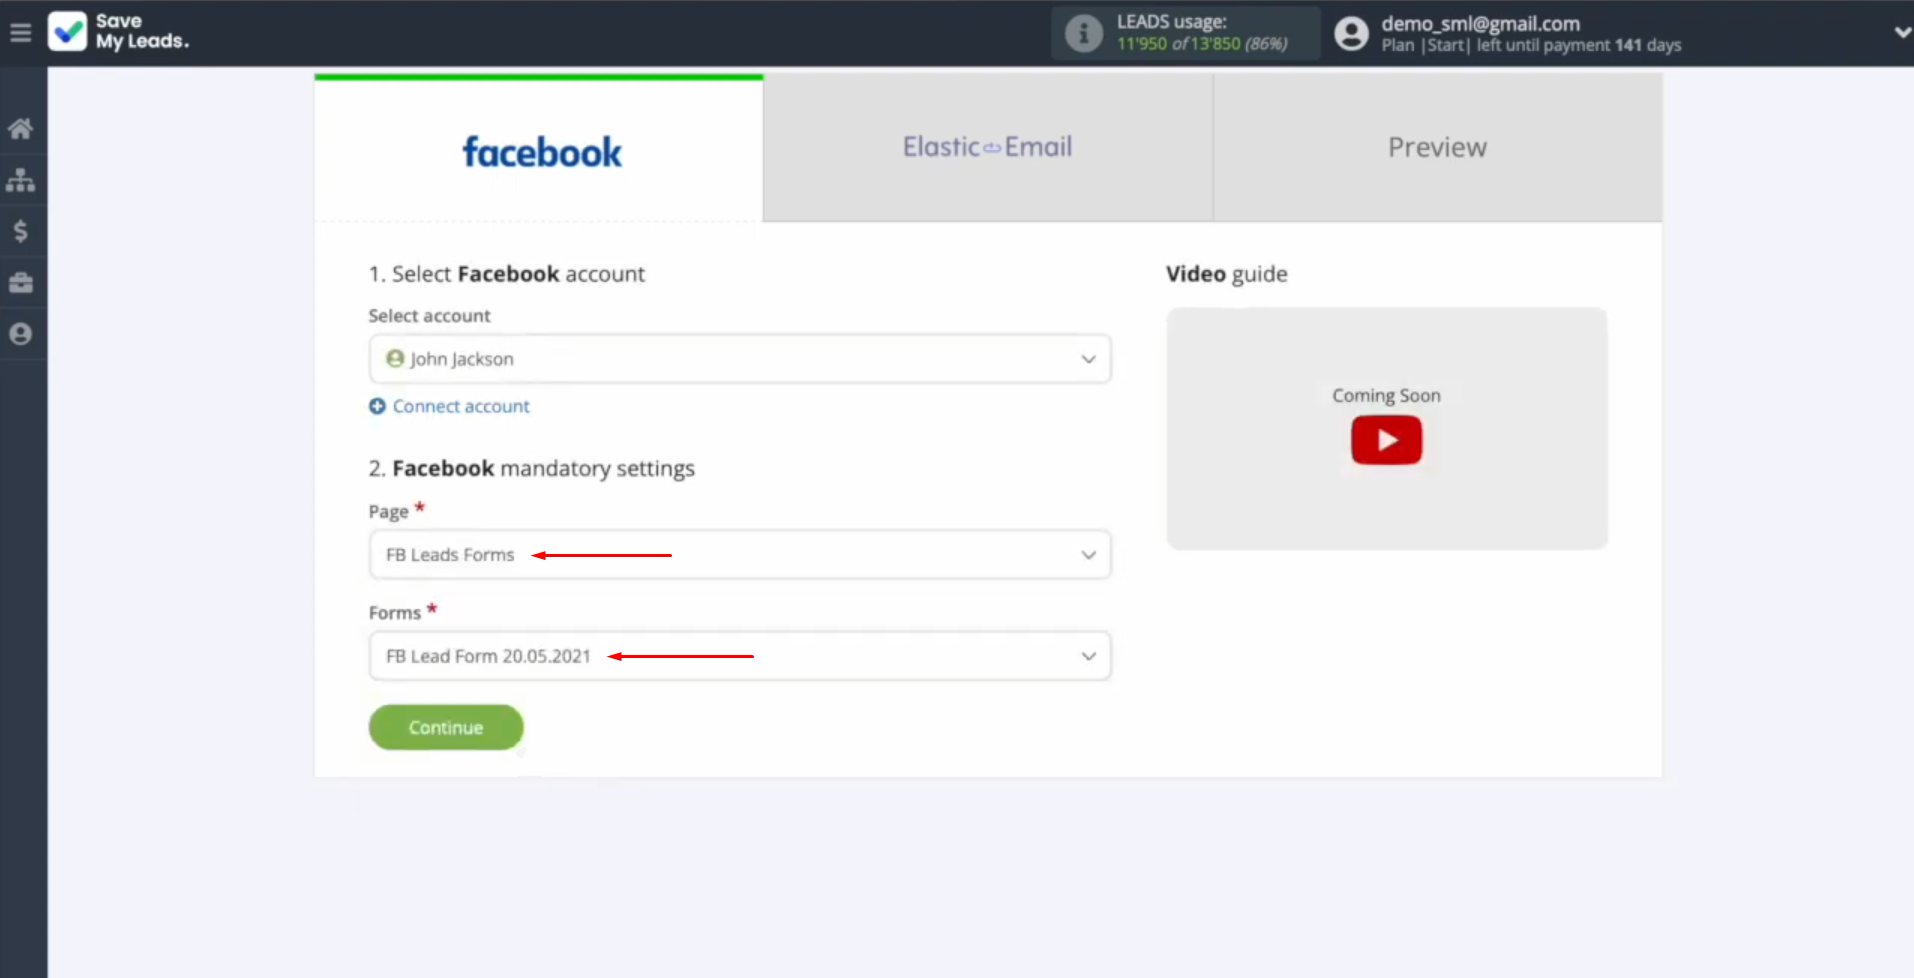
Now, you need to select the advertising page and the
form for which
you want to receive new leads. Click “Continue”.
Setting up the Data Receiver – Elastic Email
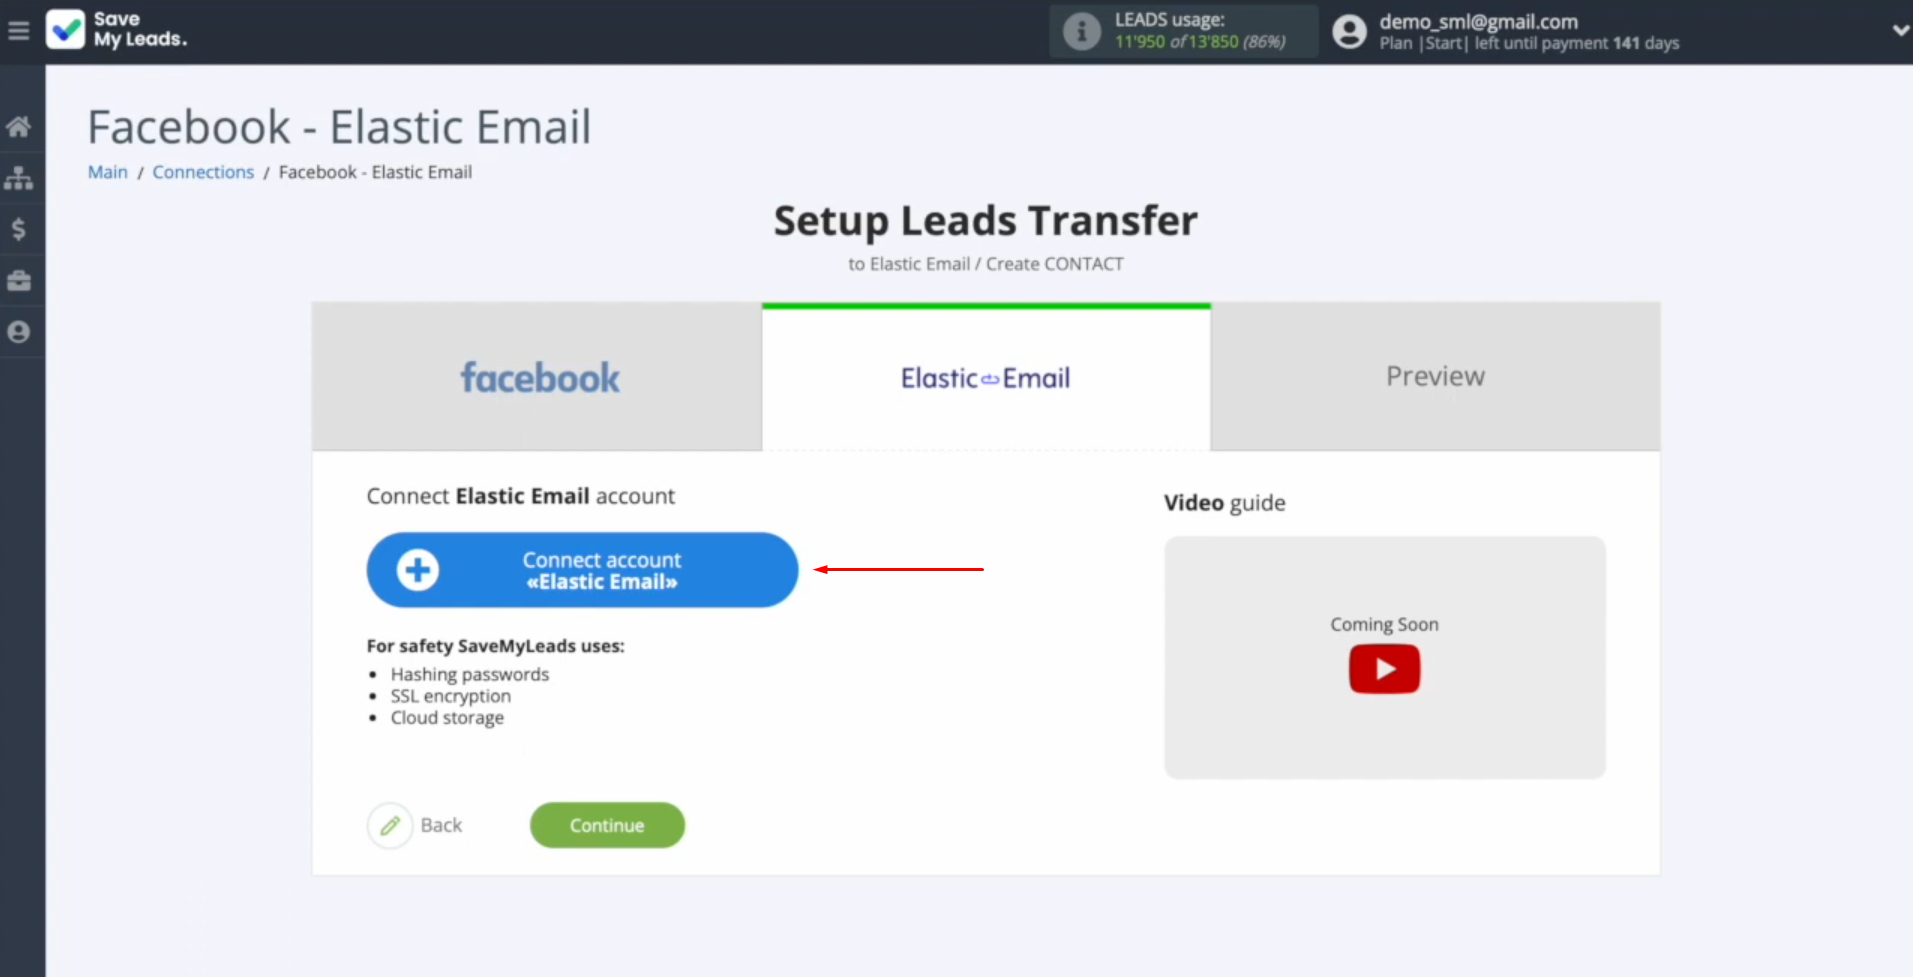
You need to connect your Elastic Email account to SaveMyLeads. To do this, click on the blue button.
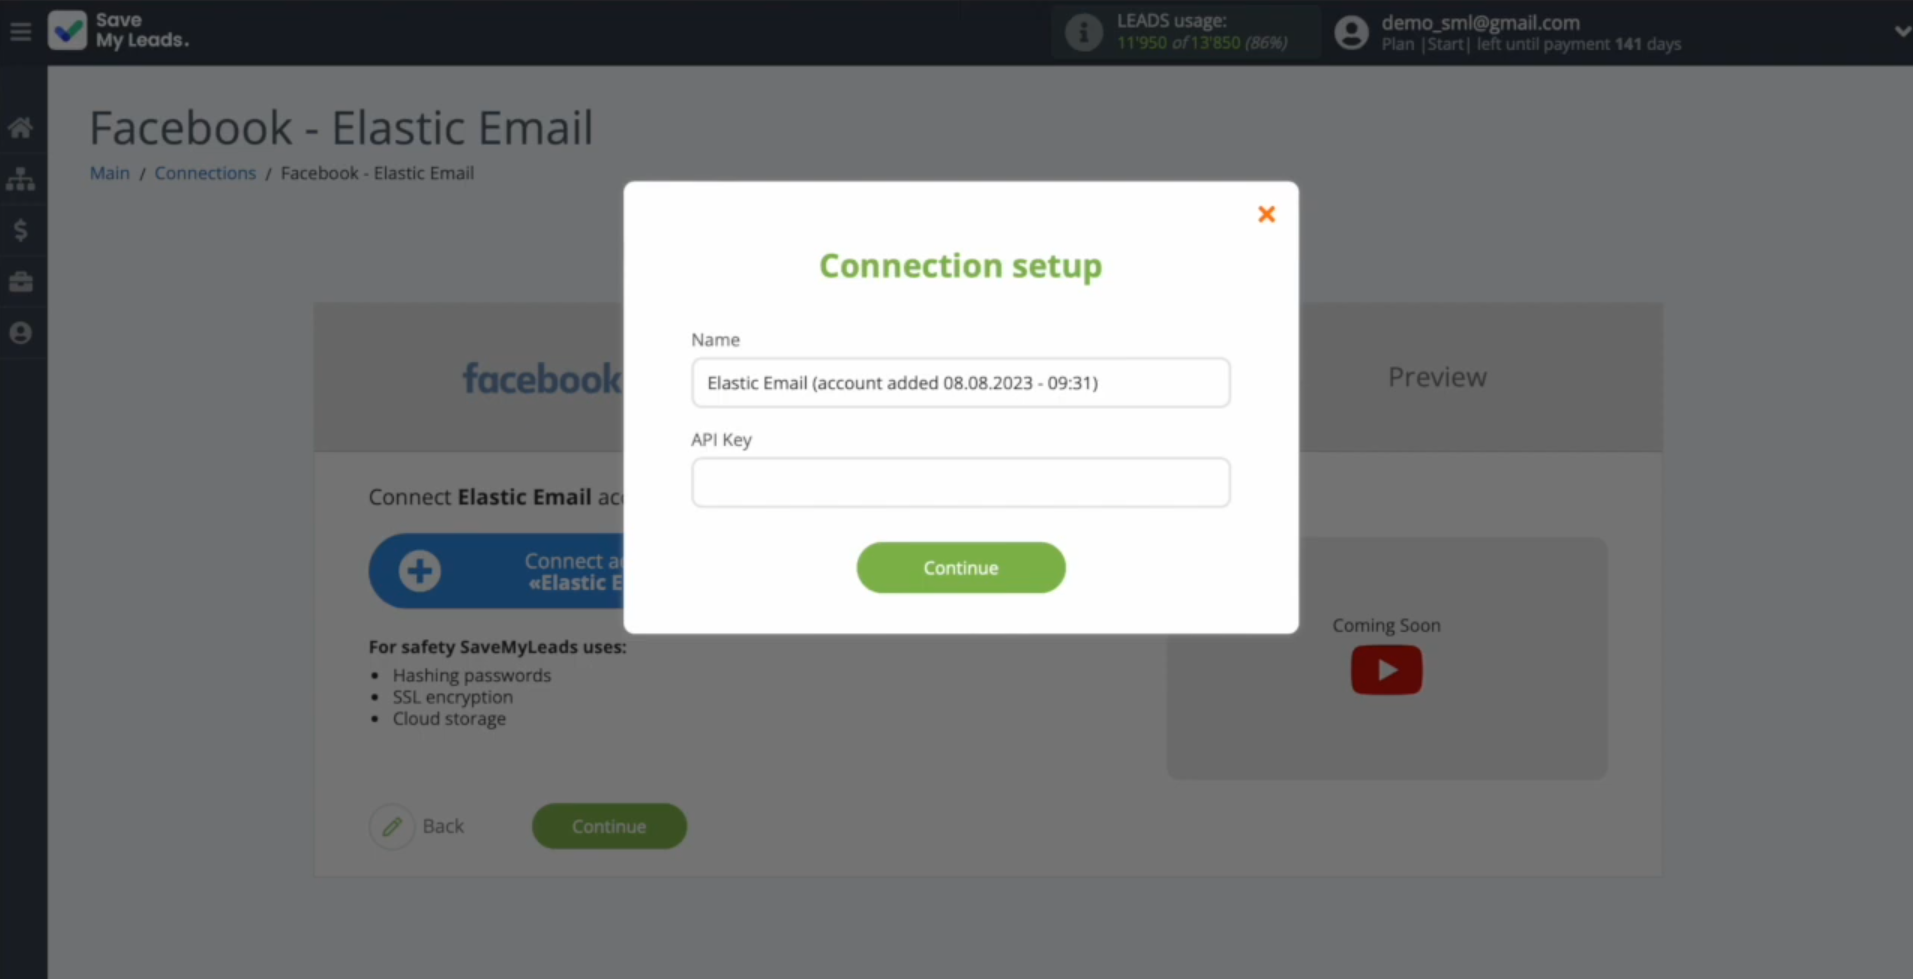
In this
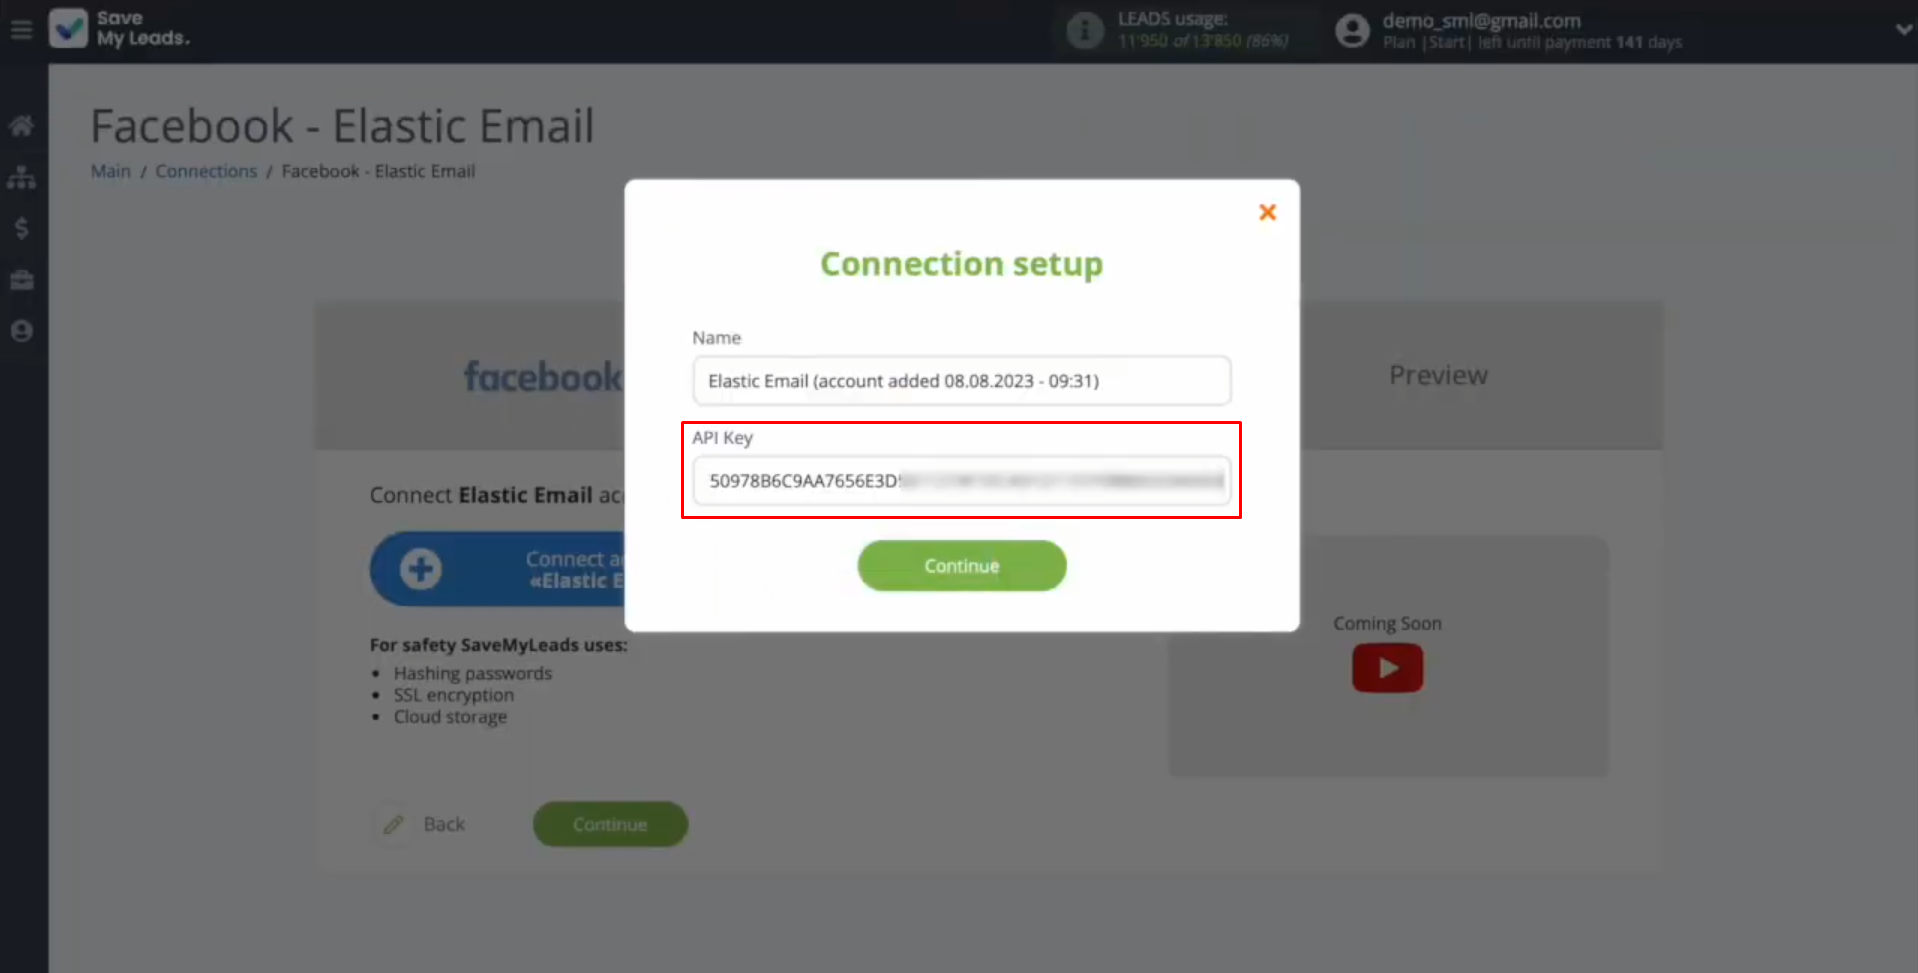
window, you need to specify the API key.
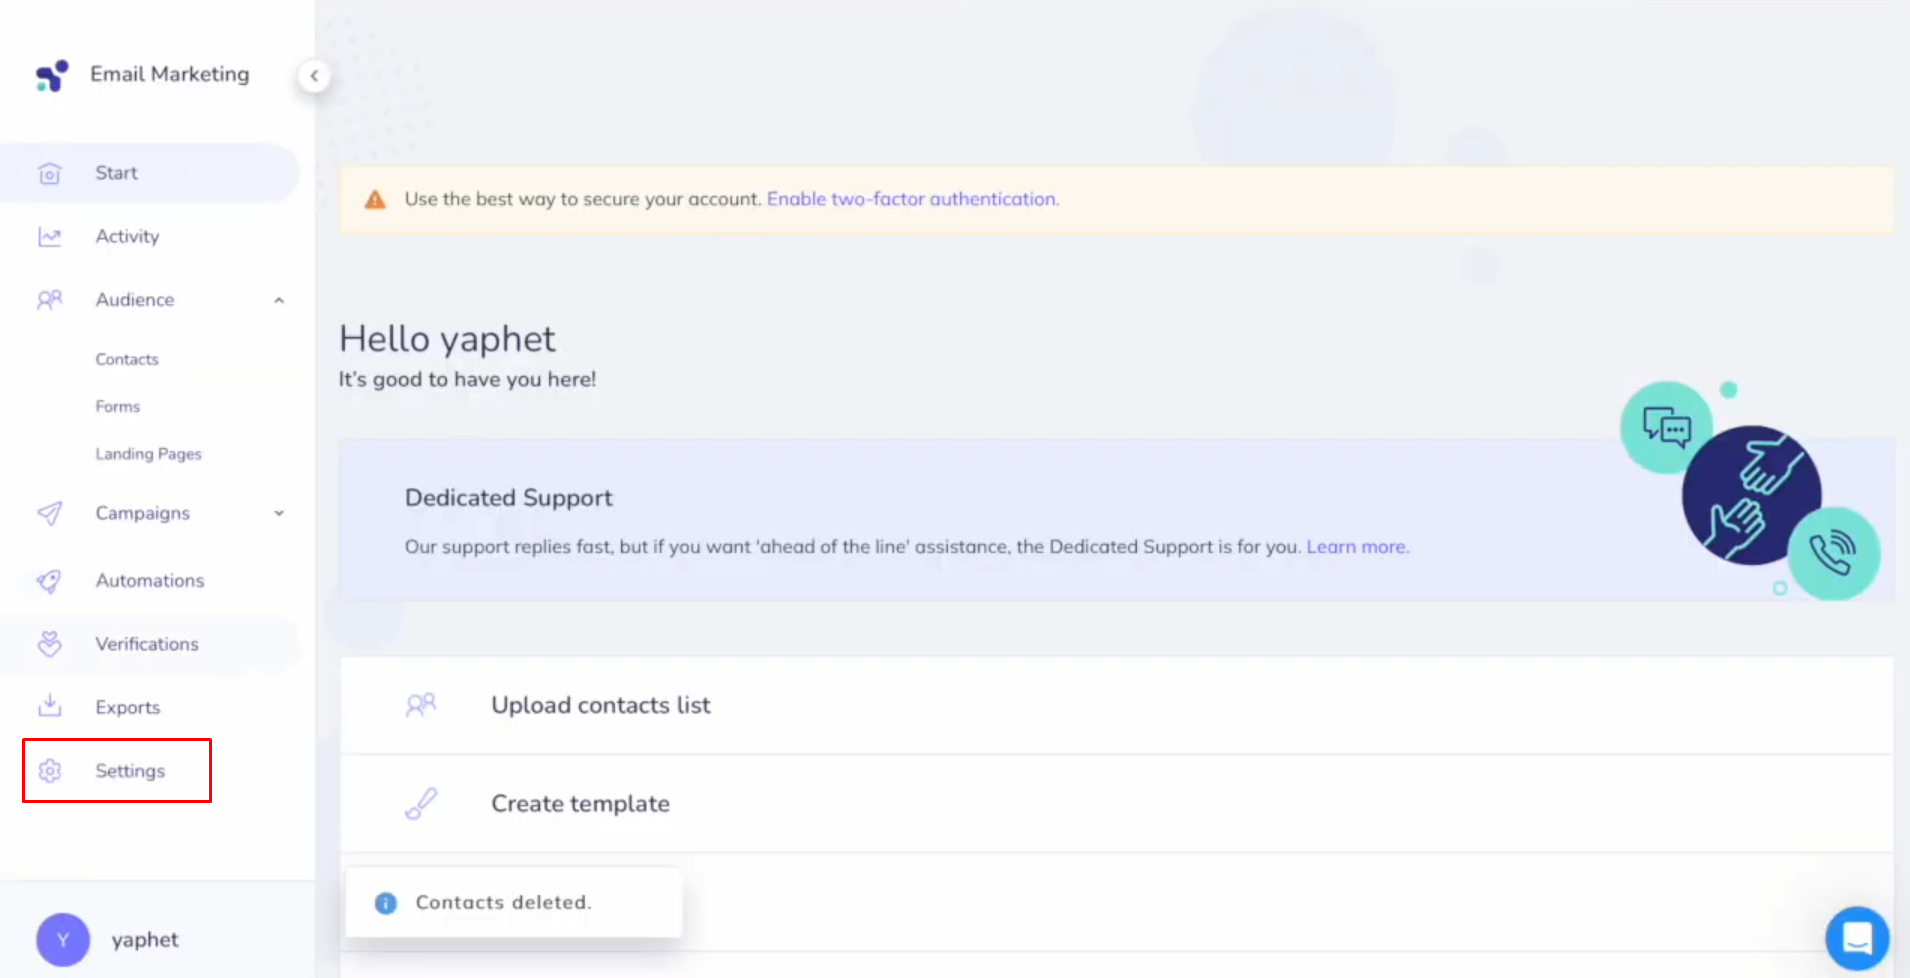
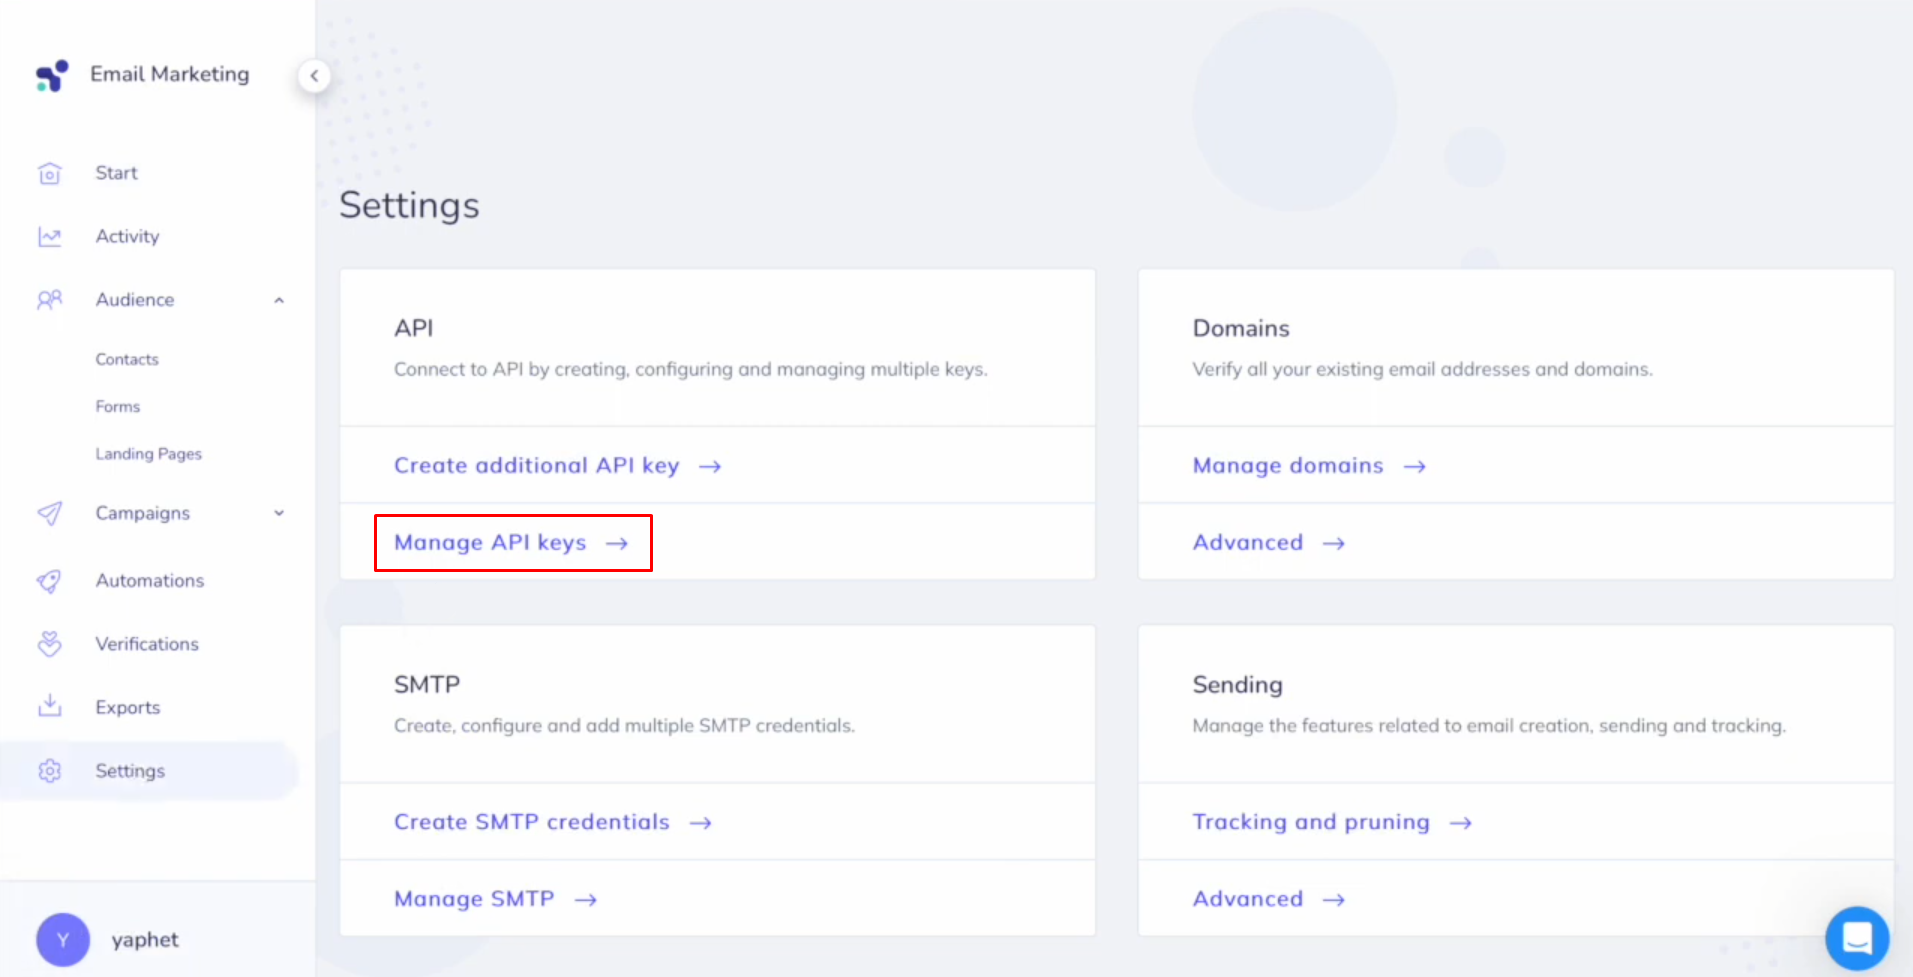
To obtain it, go to your personal account in Elastic Email. Then, go
to “Settings”.
Go to the API section and click on “Manage API
keys”.
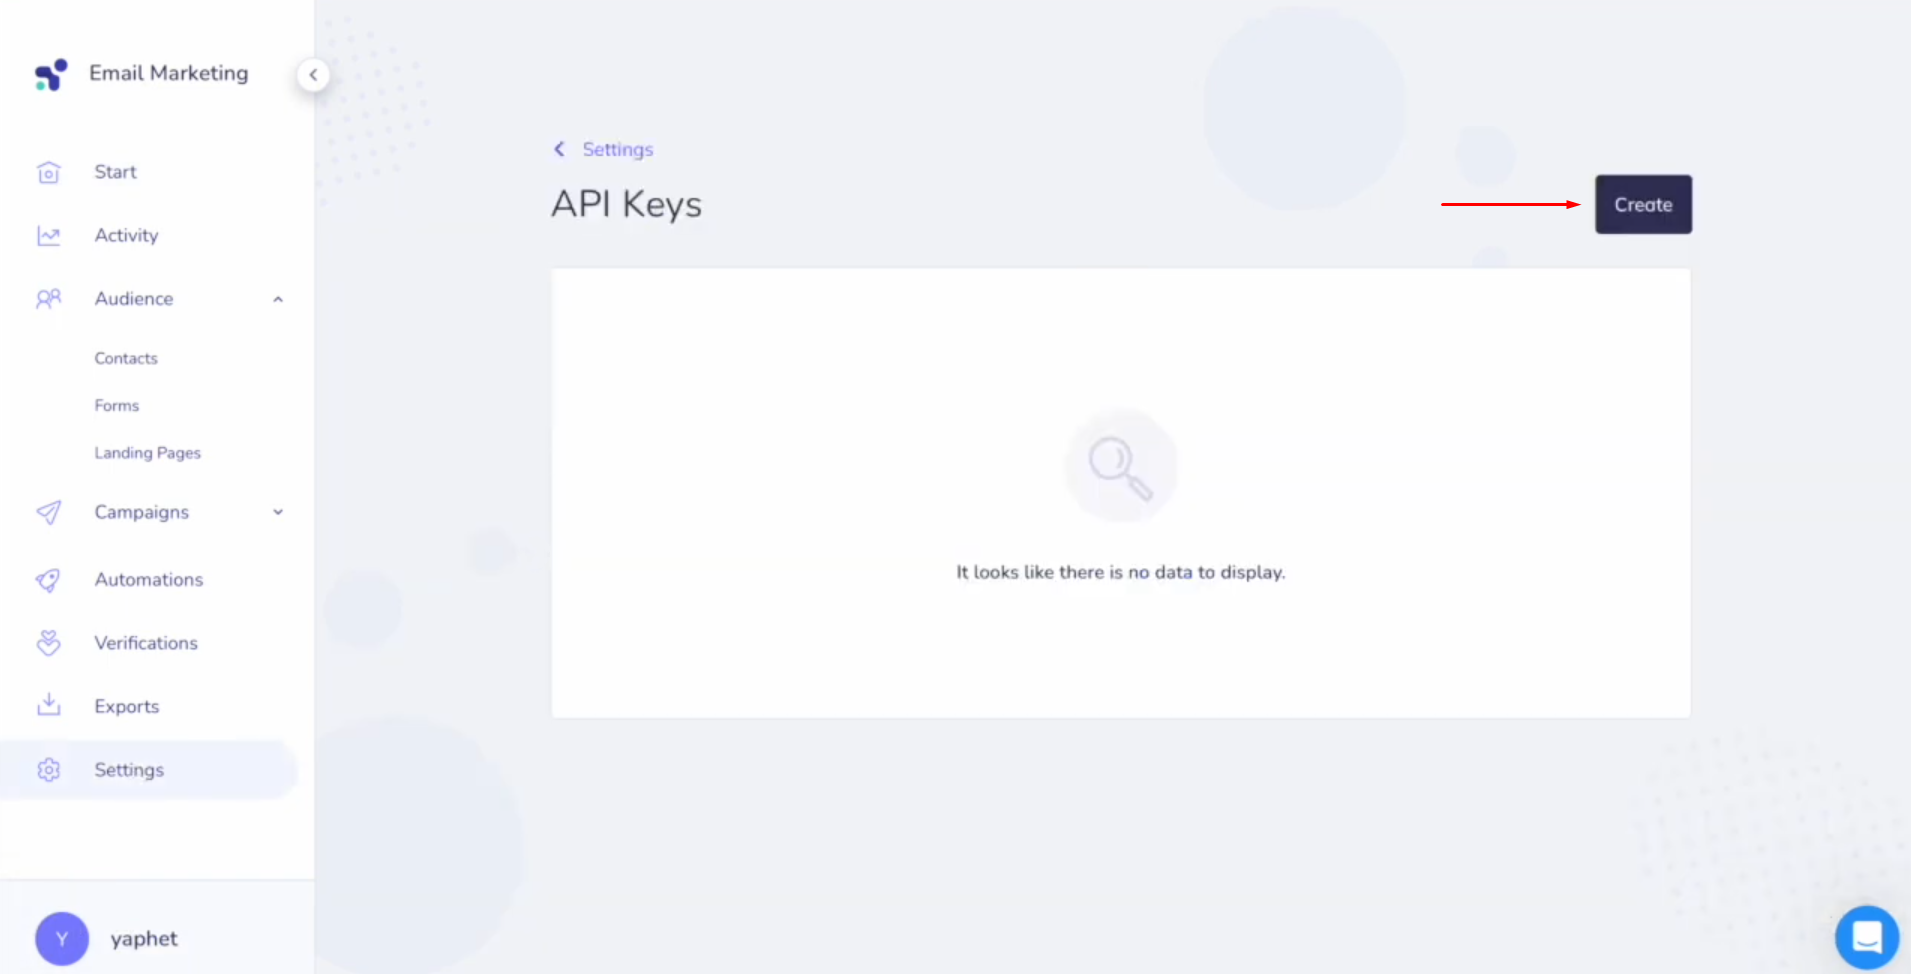
Click on “Create”.
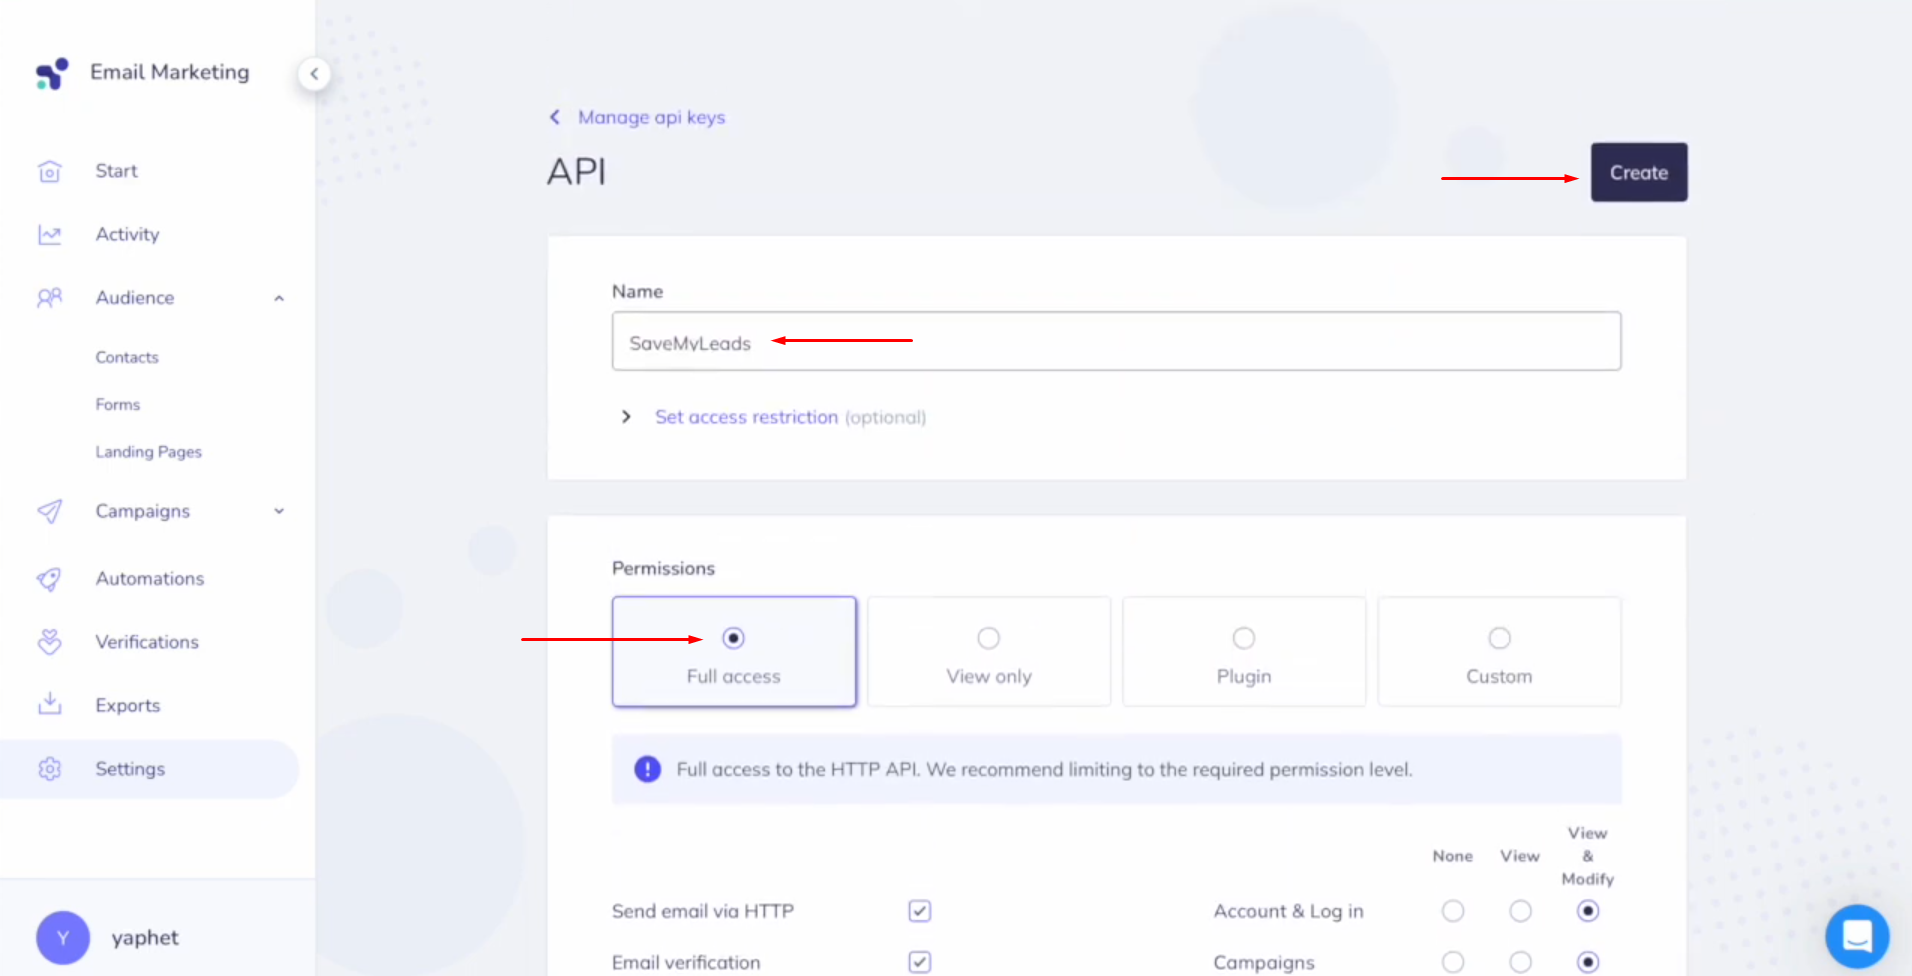
Specify a
name for the new key, check the box “Full access”, and click on “Create”.
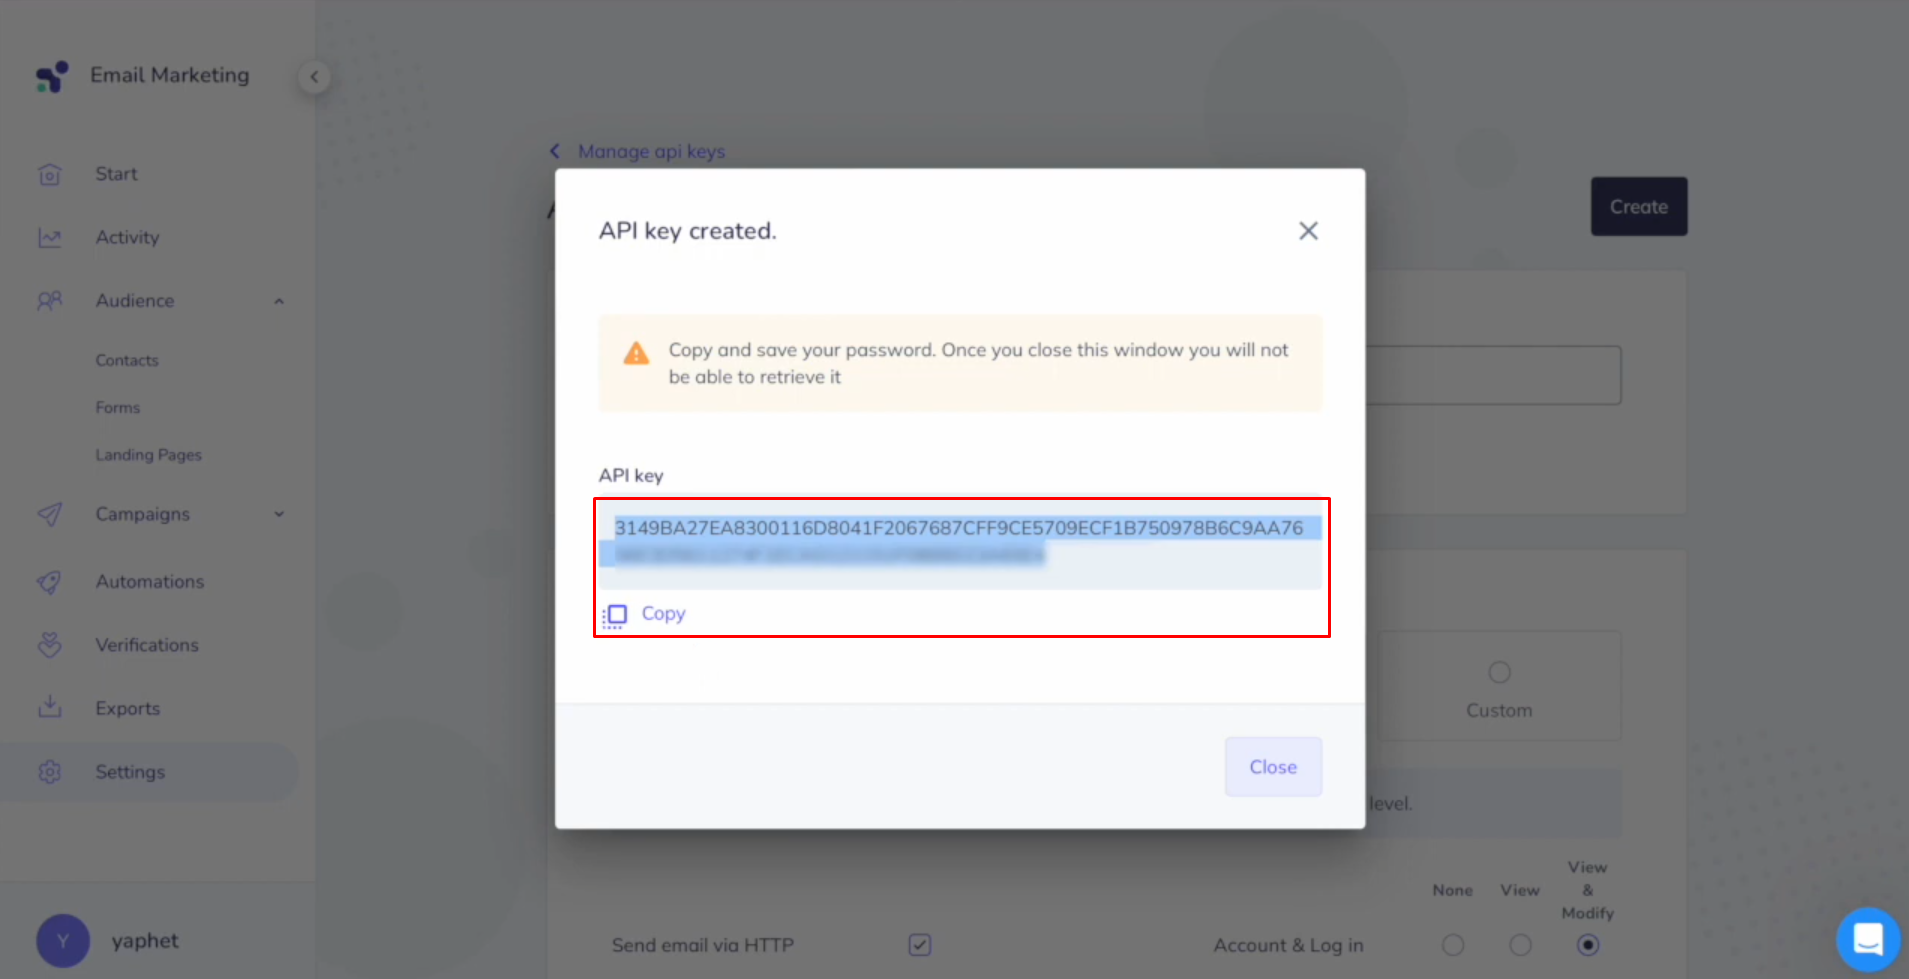
Copy the API
key.
Paste the API
key into the appropriate
field in SaveMyLeads. Once the required field is filled, click on “Continue”.
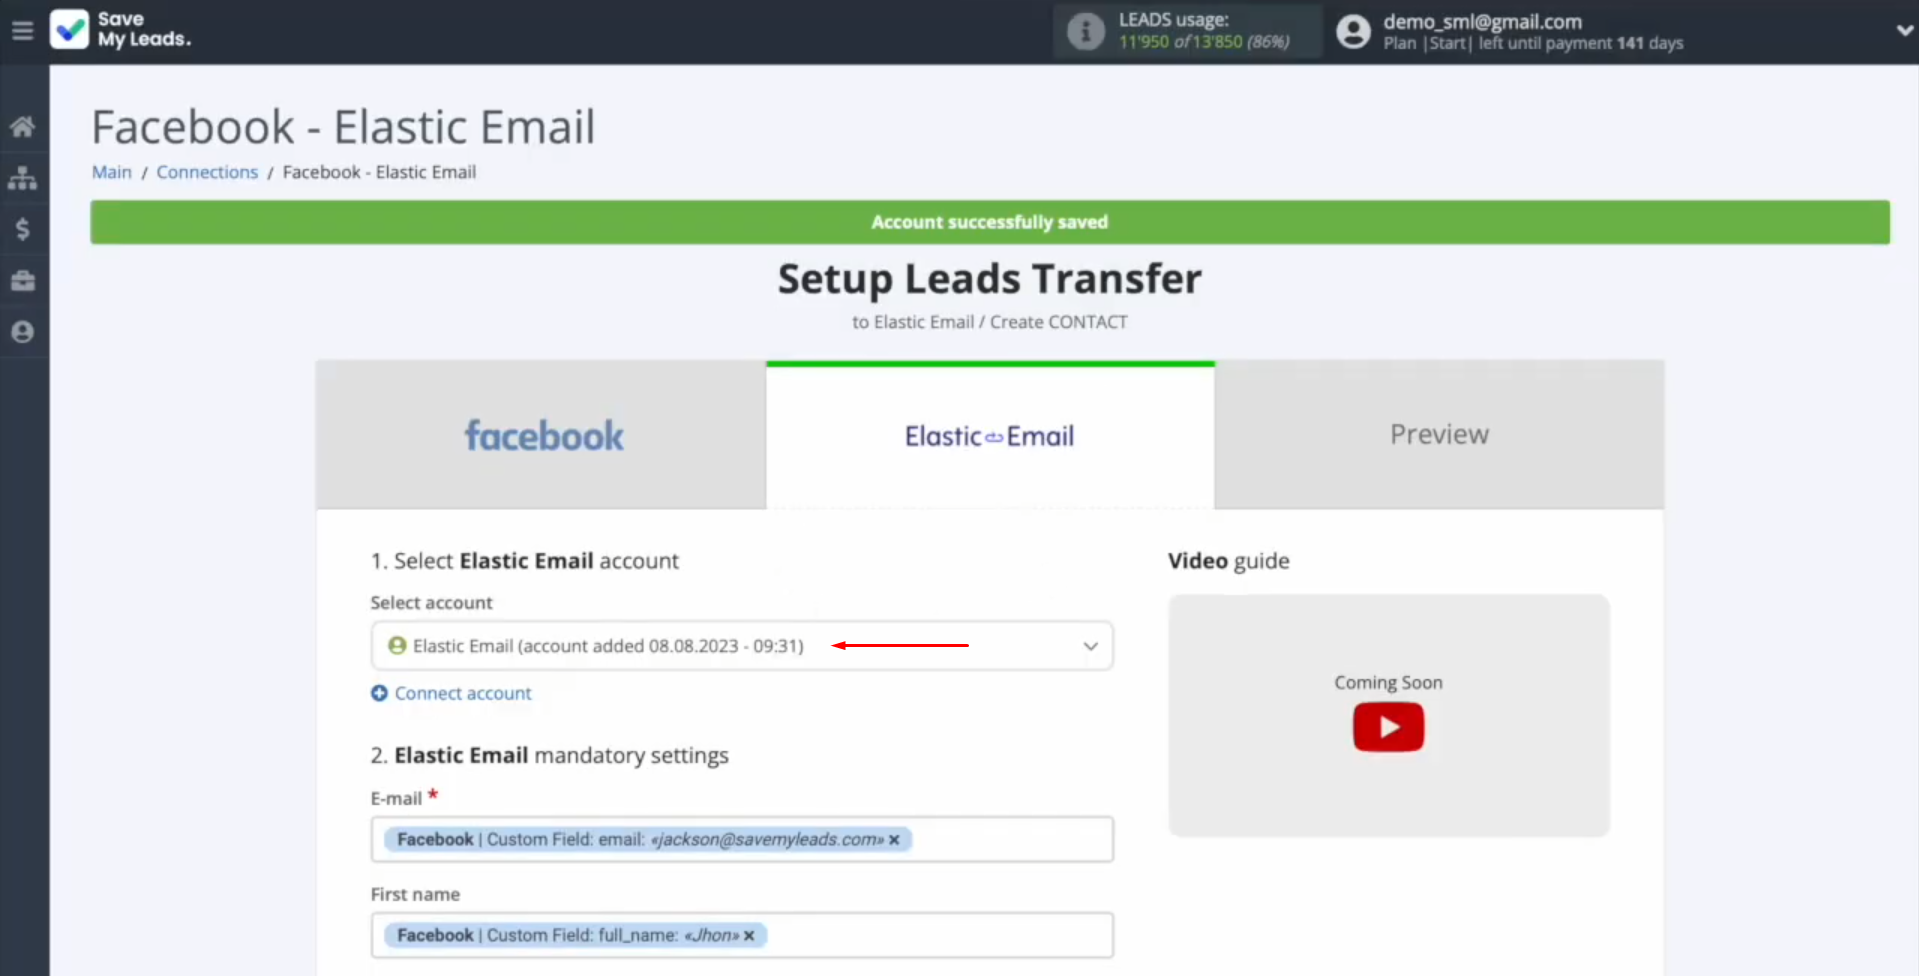
Once the
connected account is displayed in the list, select it.
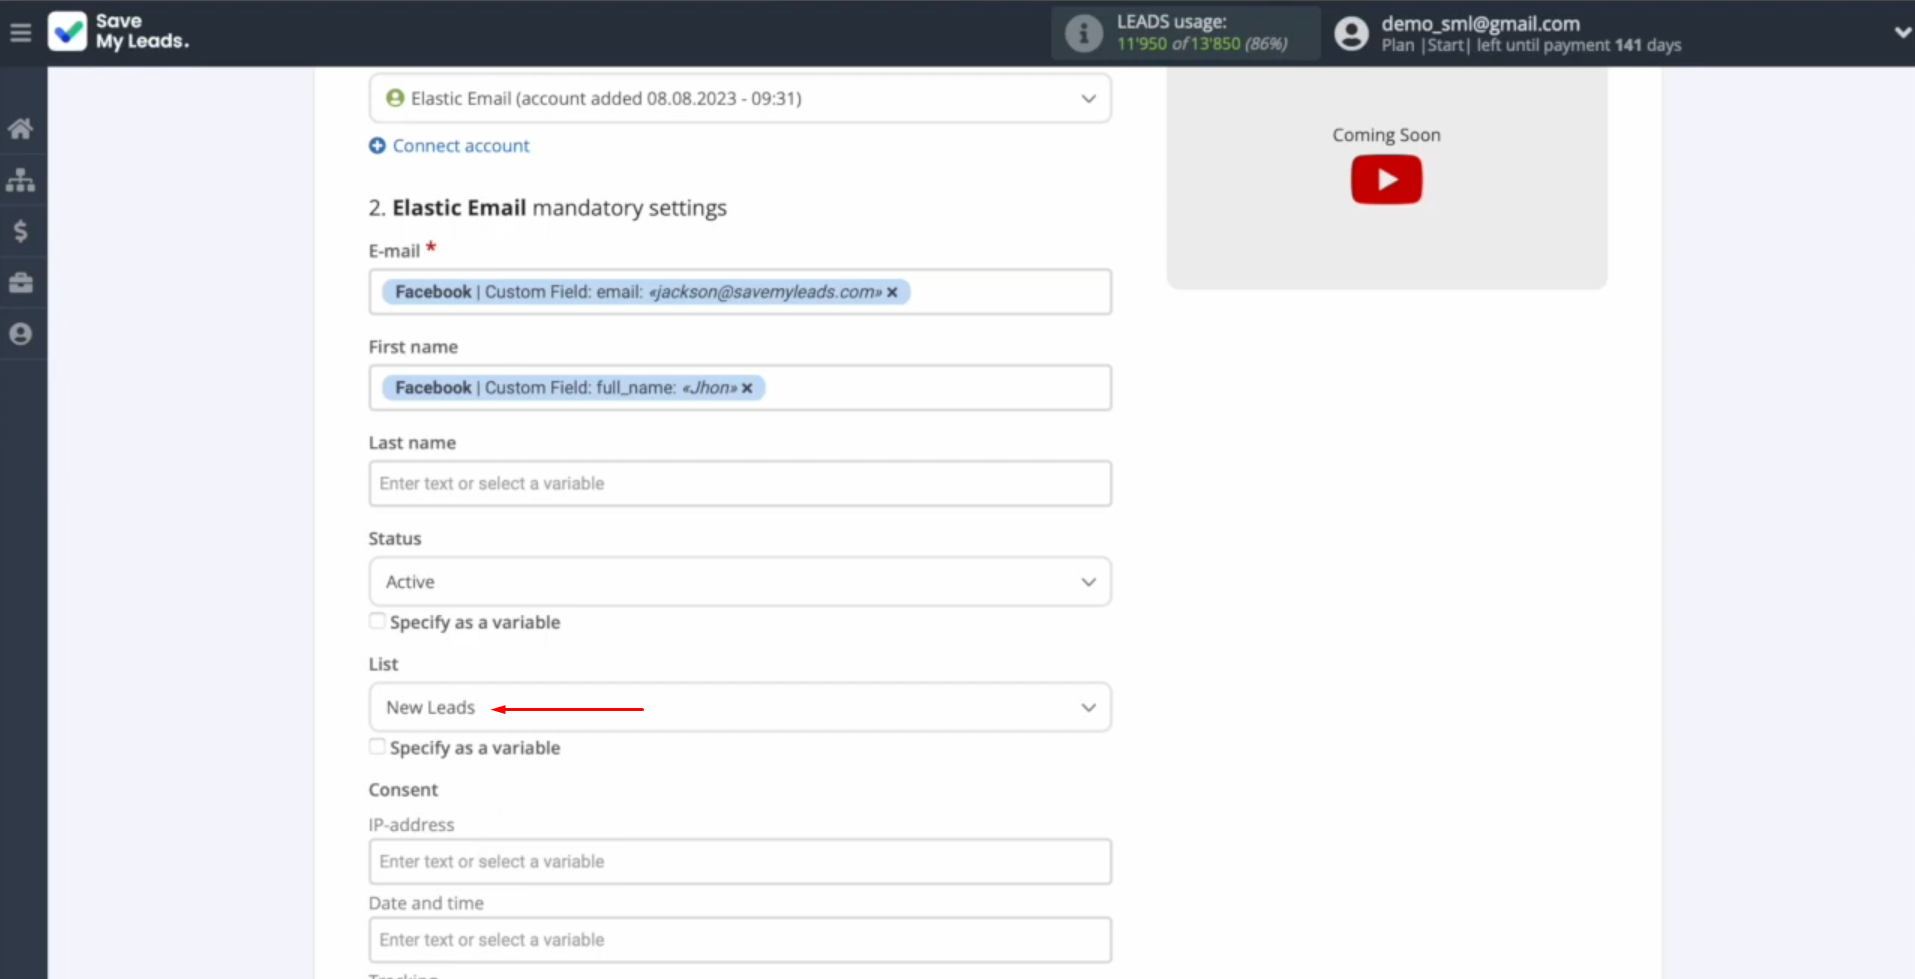
Next, you need to select the list in which new contacts will be created
with each new
lead from Facebook.
You will see the Elastic Email fields for creating new contacts. You can assign variables from Facebook to these
fields. To do this, click on the field and select a variable from the
drop-down list.
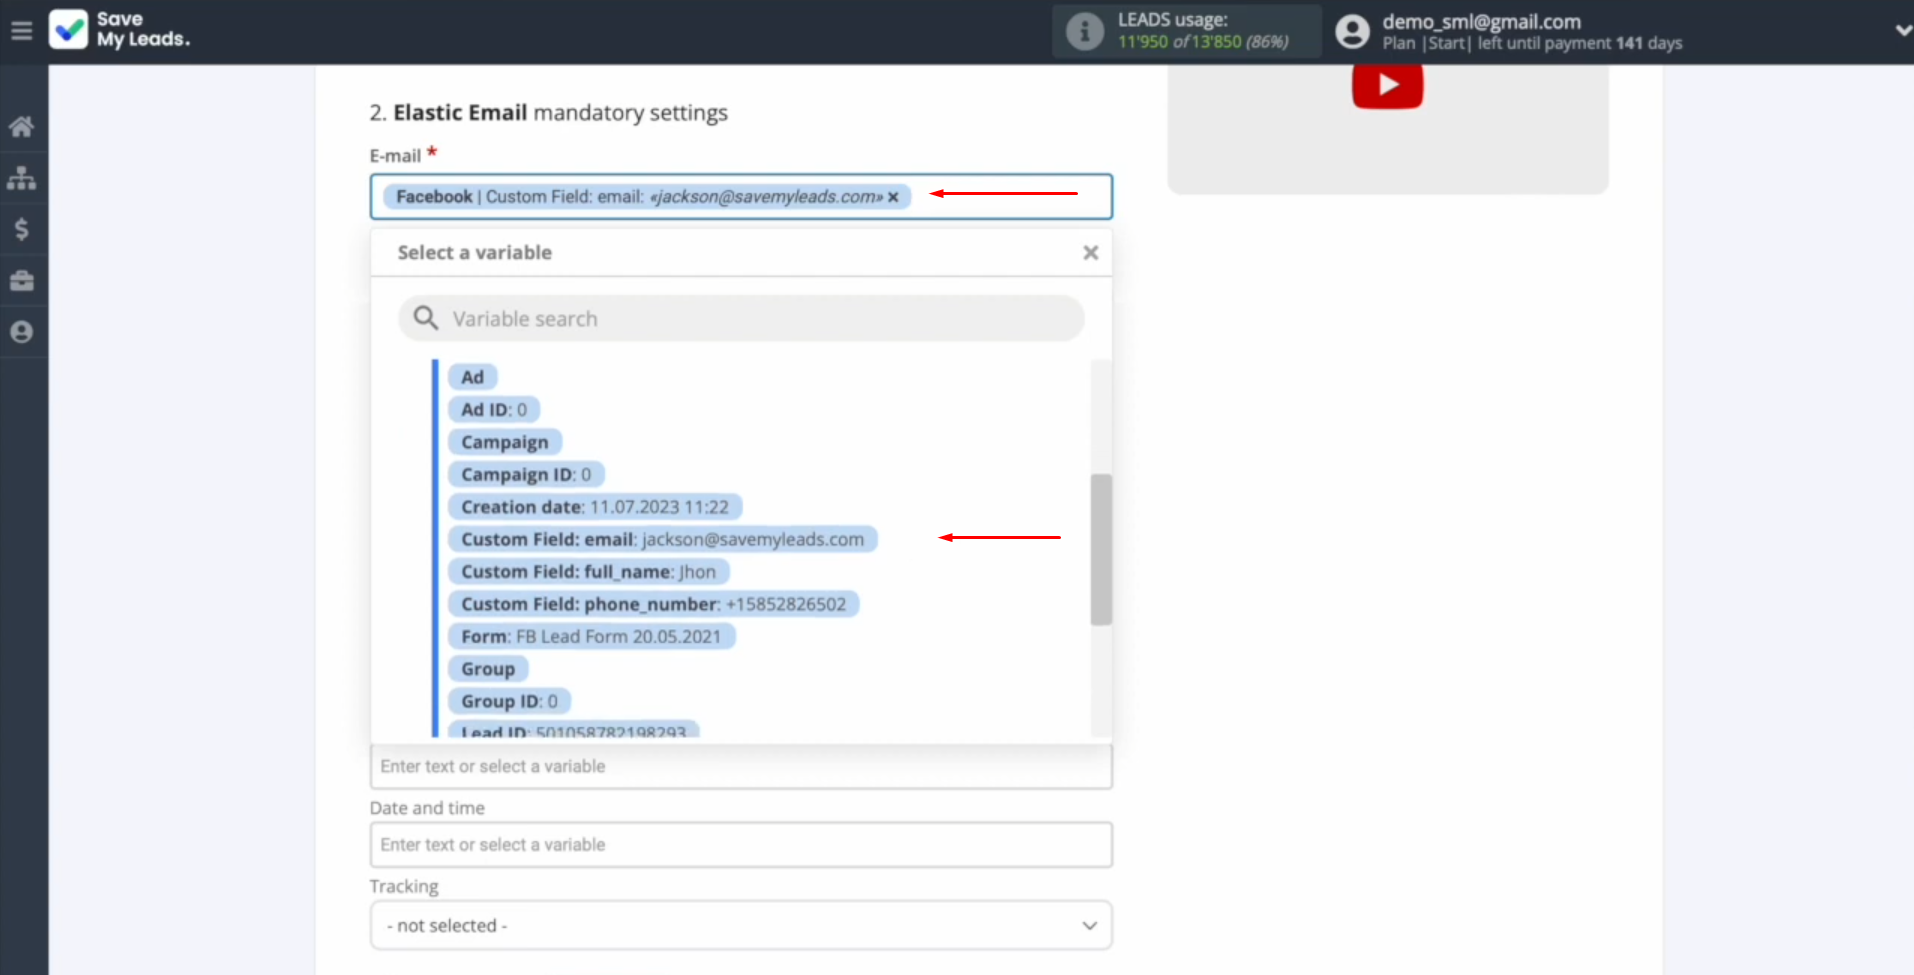
Once all the required fields are
filled in, click on “Continue”.
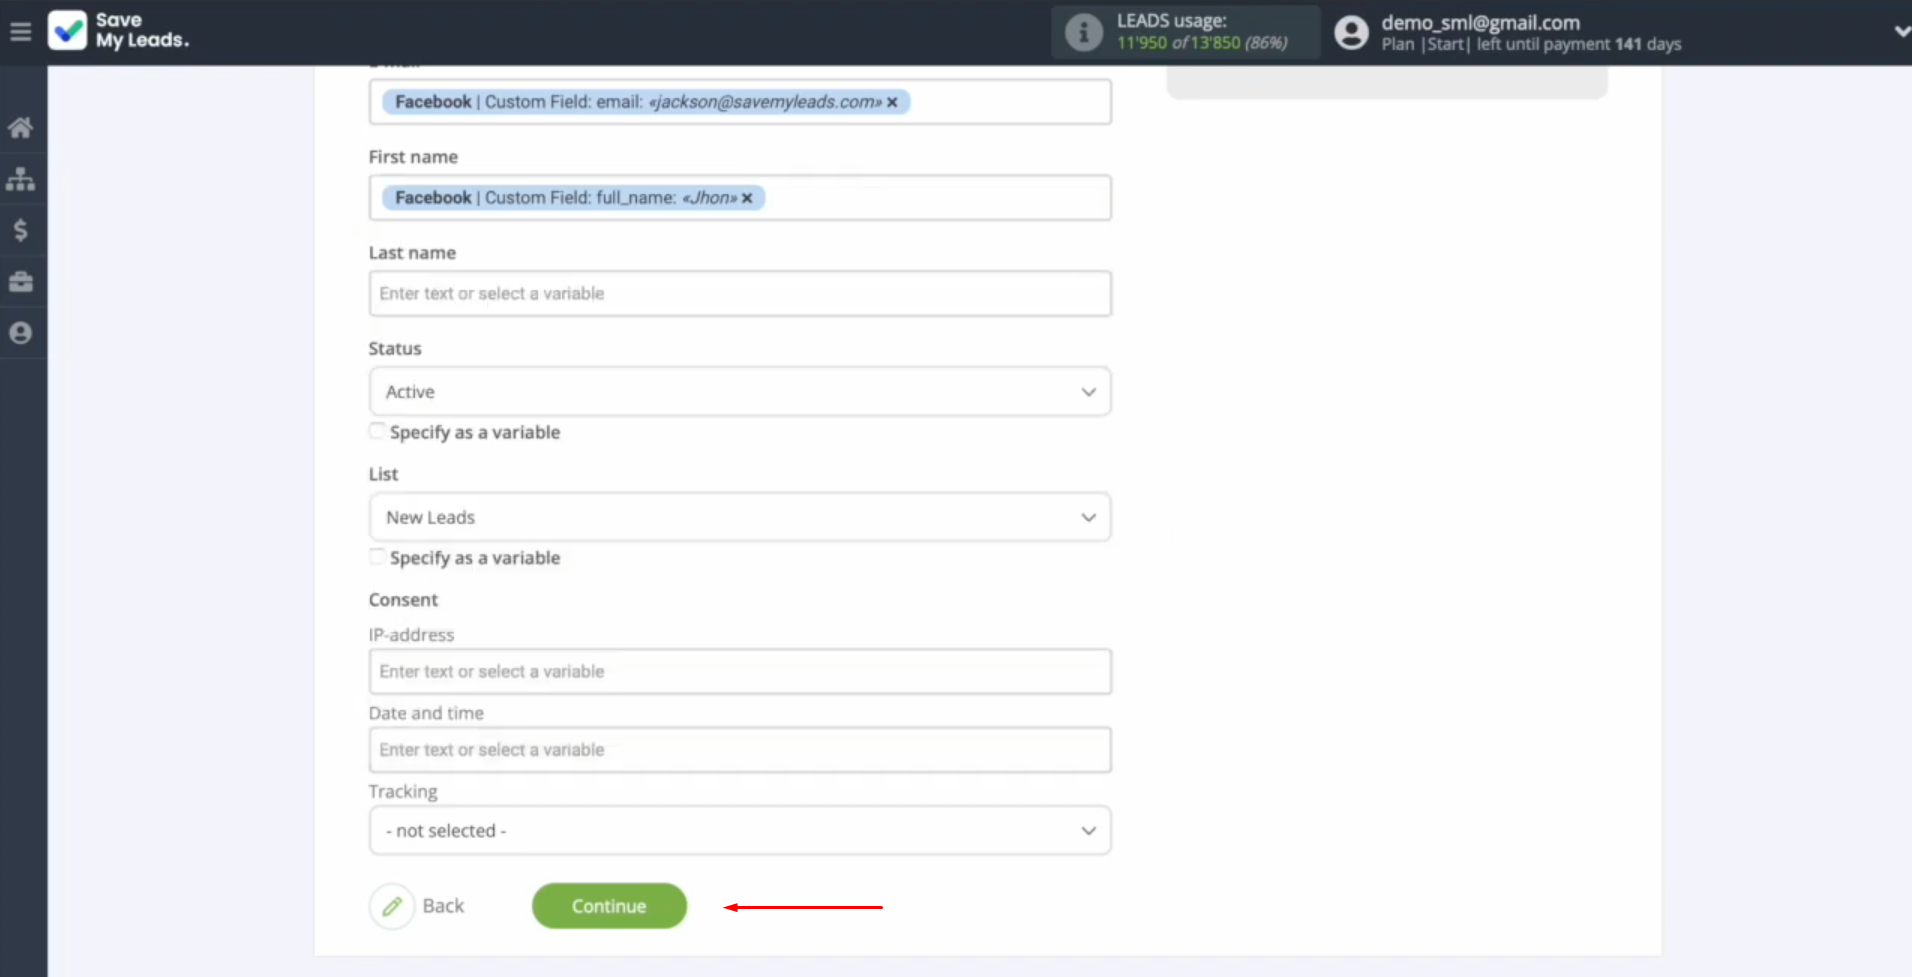
At this point, you will see an example of the data that will be sent to Elastic Email as new contacts for each new lead from Facebook. If something is not suitable, click on “Back” to go back one step. To check the correctness of the settings, click on “Send test data to Elastic Email”.
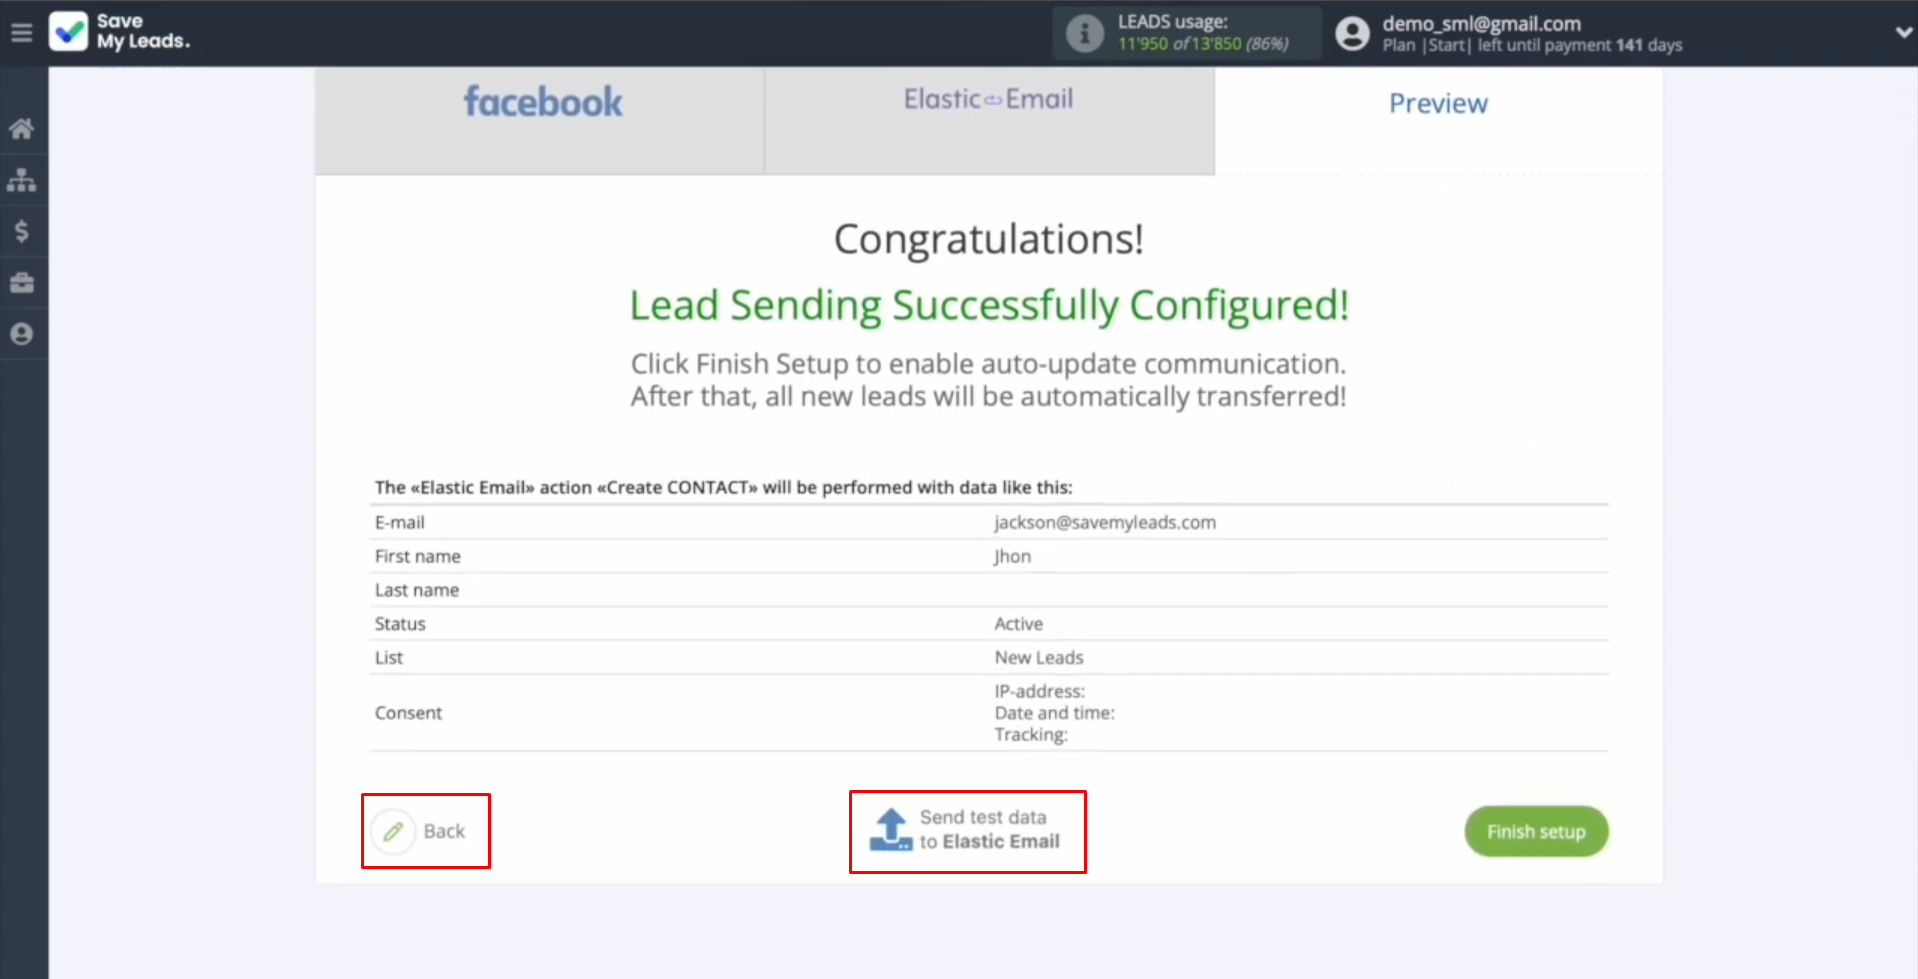
After
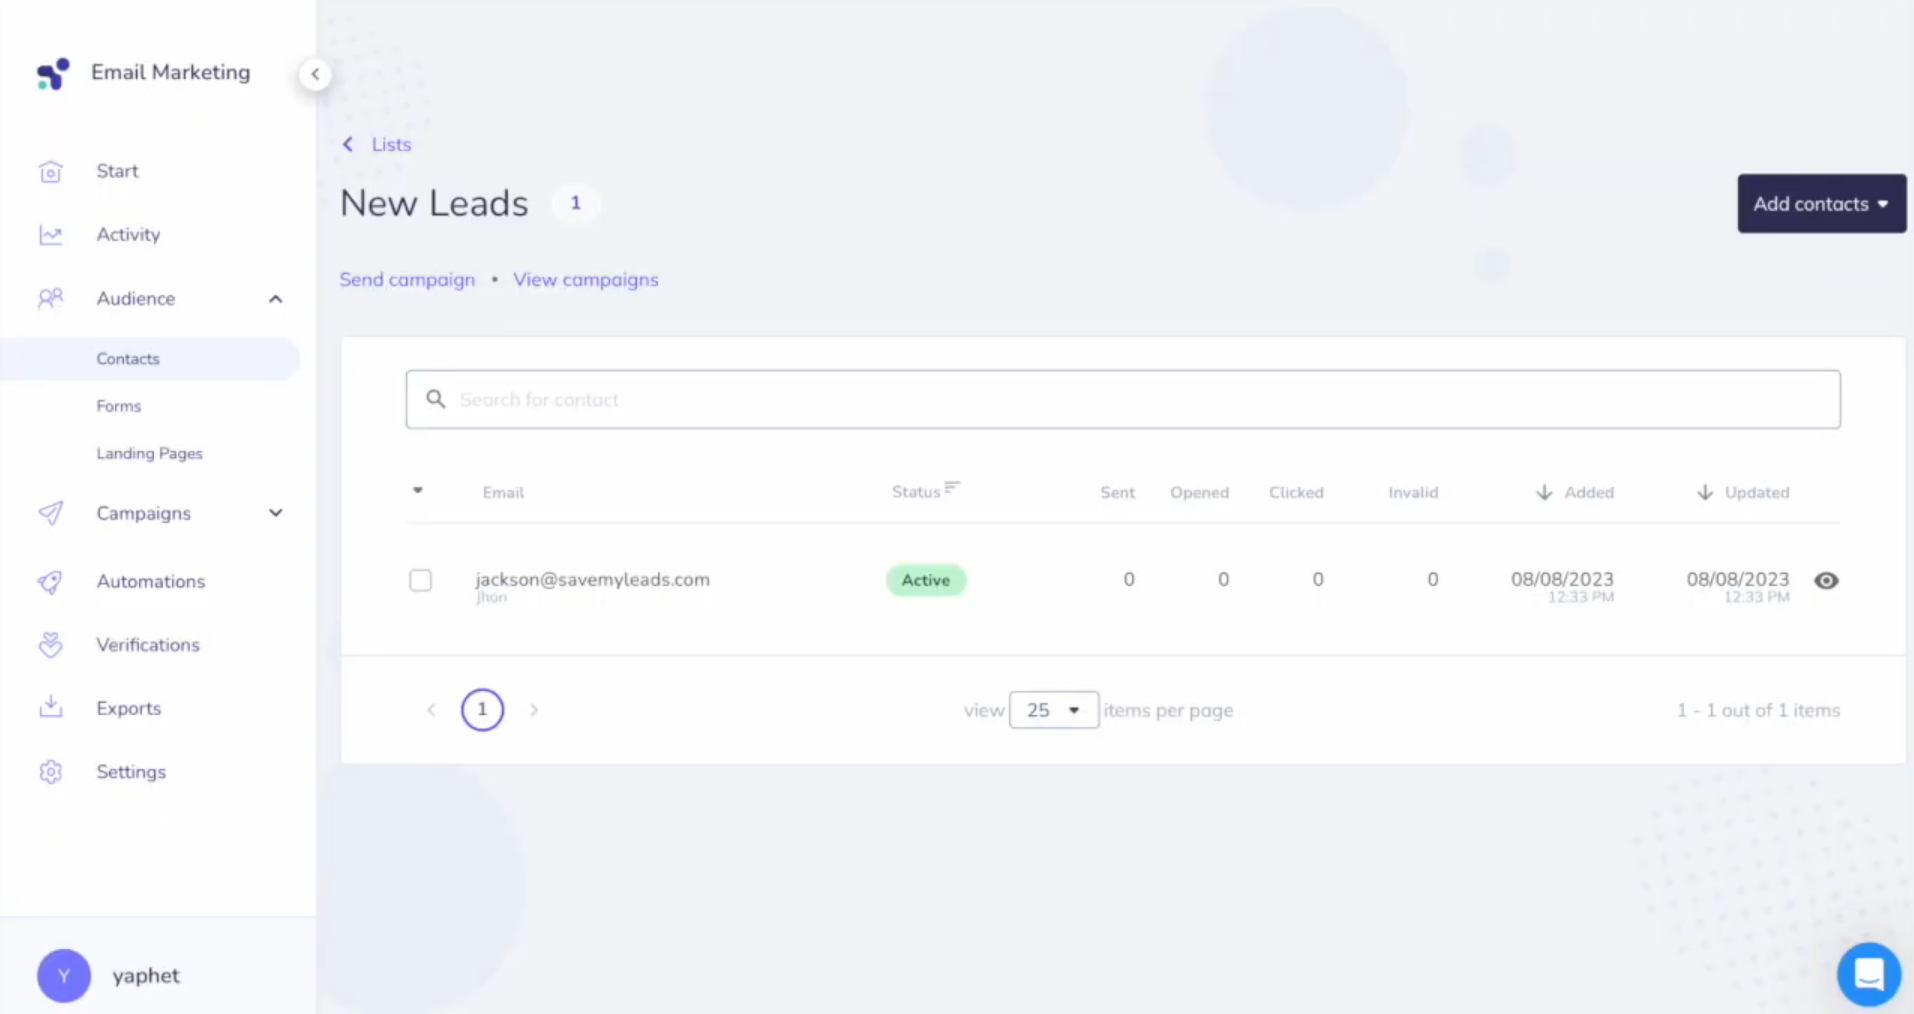
successfully sending, go to Elastic Email and check the result.
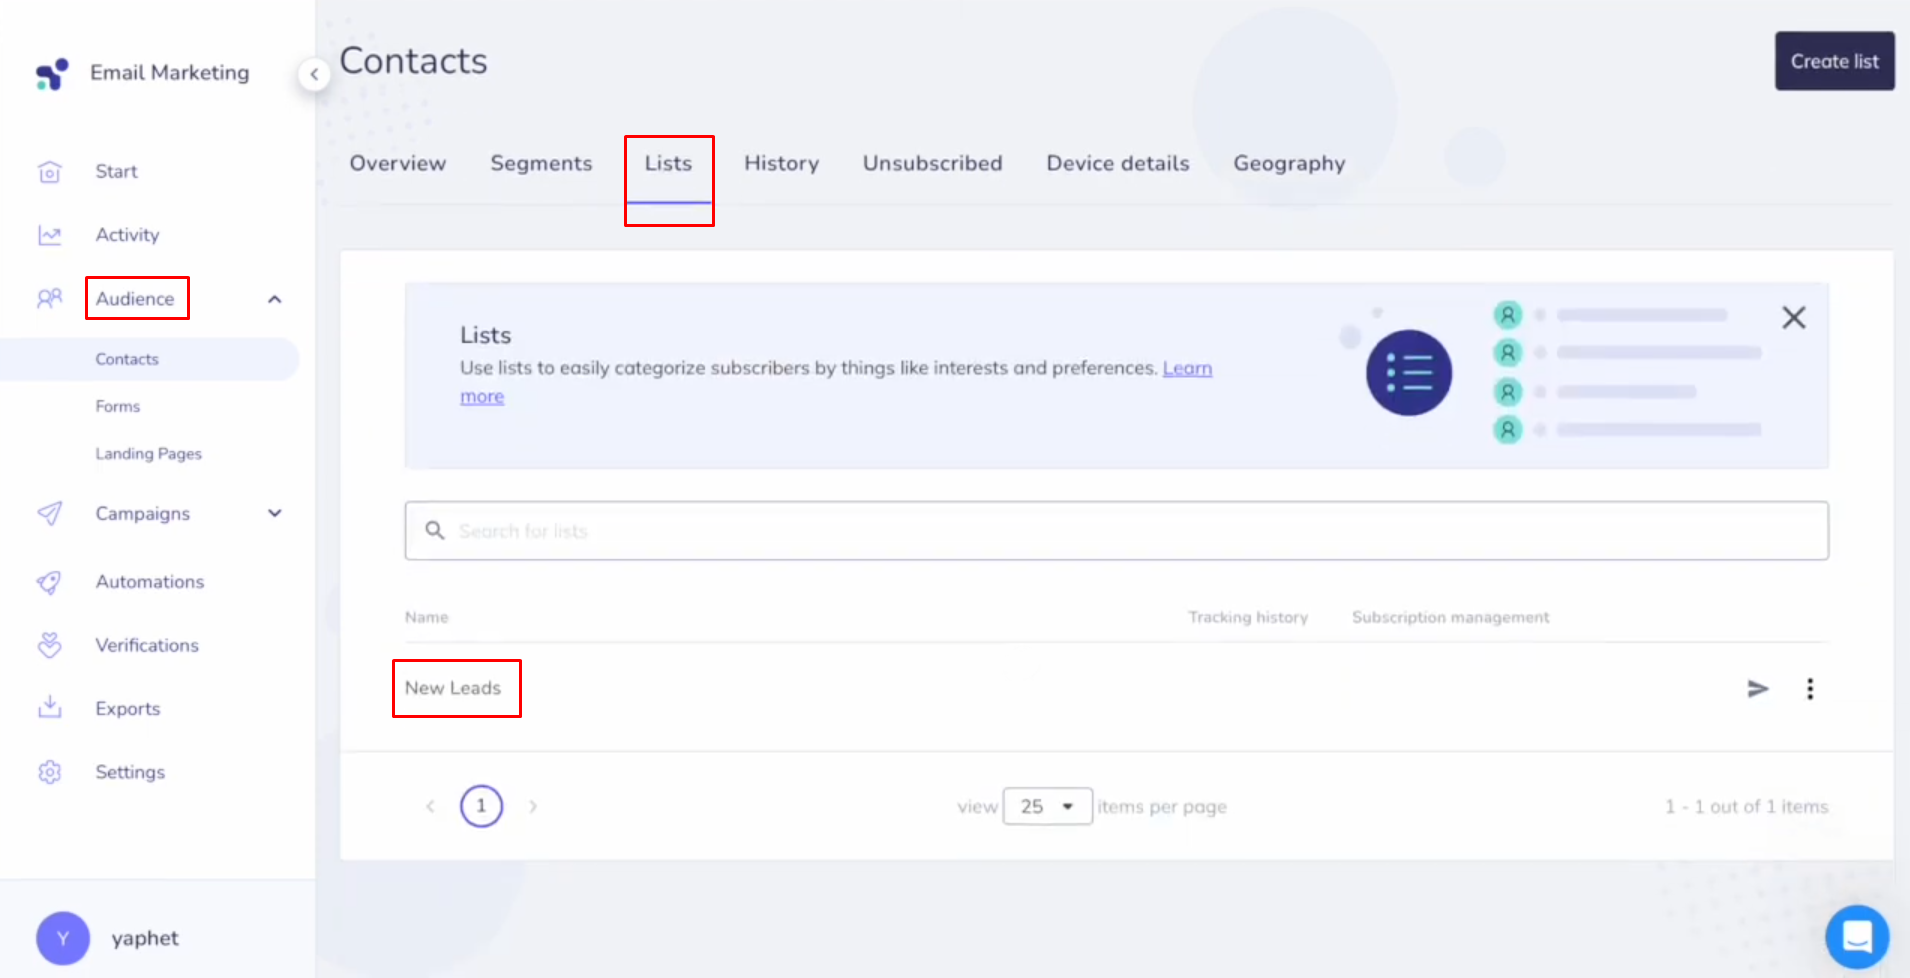
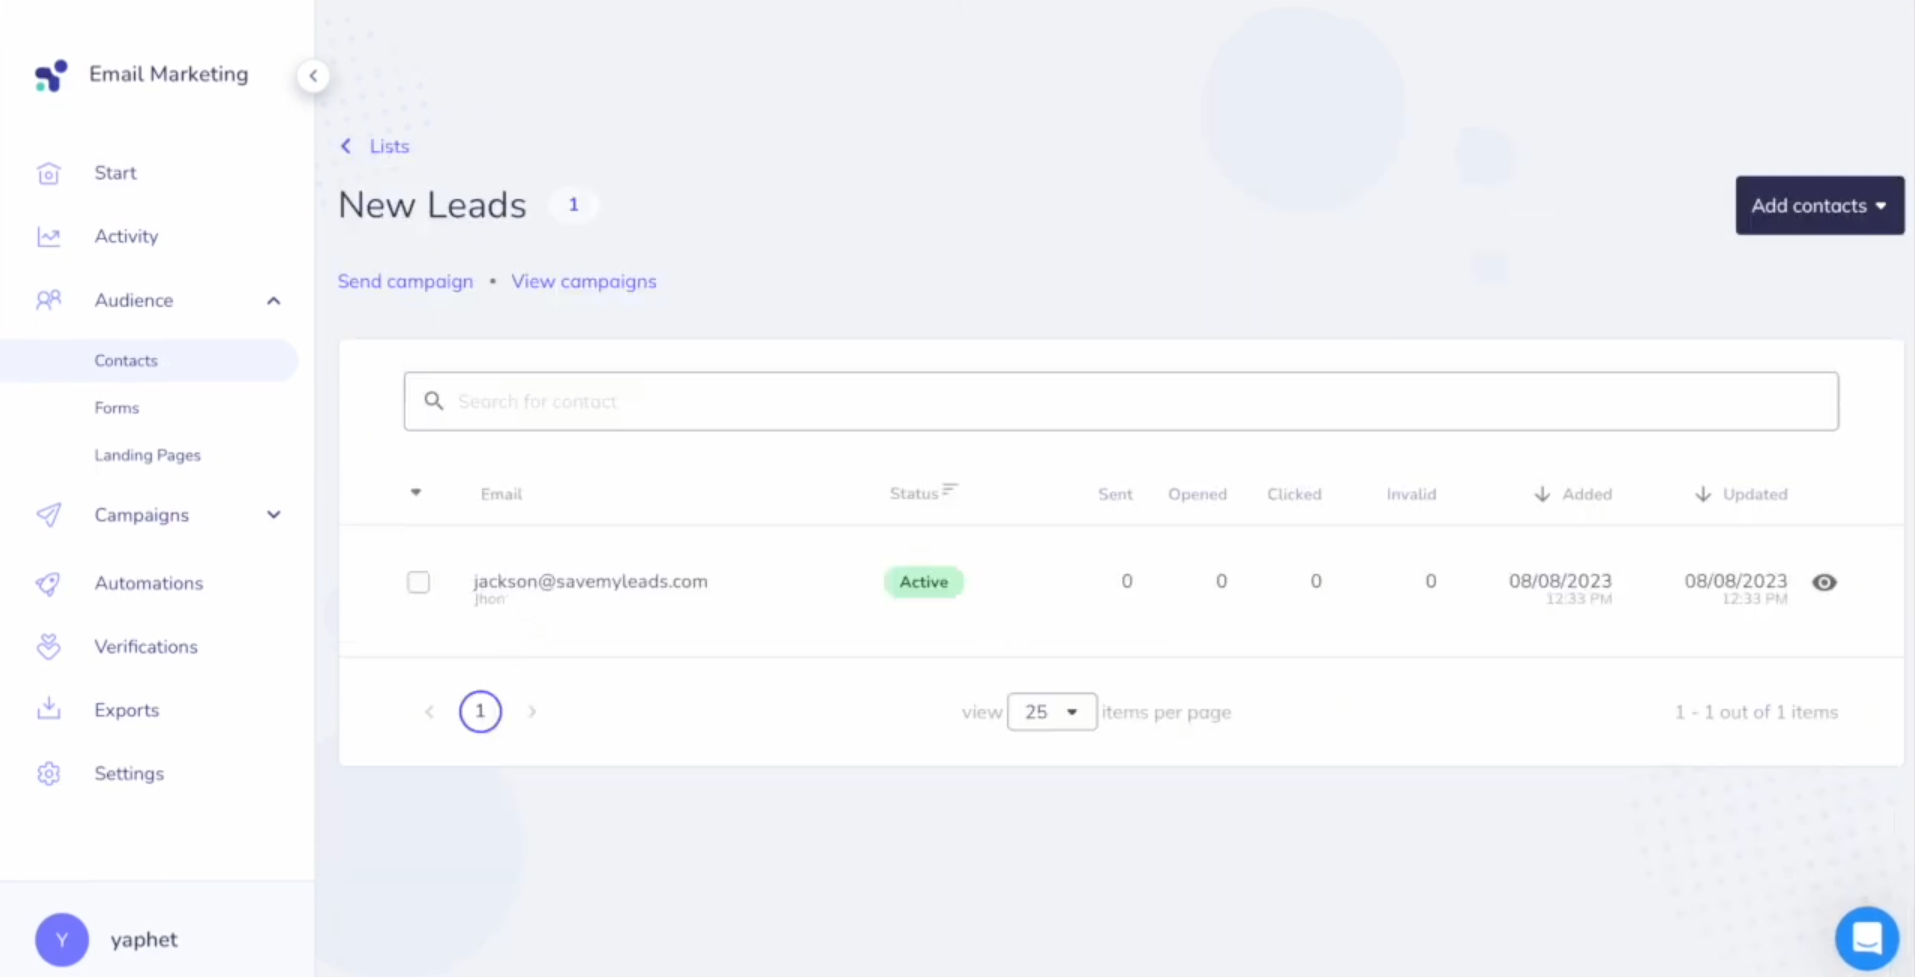
If everything
is satisfactory, return to SaveMyLeads and continue with the set-up.
Setting up Auto-update
In order for each new lead from Facebook to be instantly transferred to Elastic Email in the form of new contacts, you must enable auto-update. To do this, click on “Finish setup”.
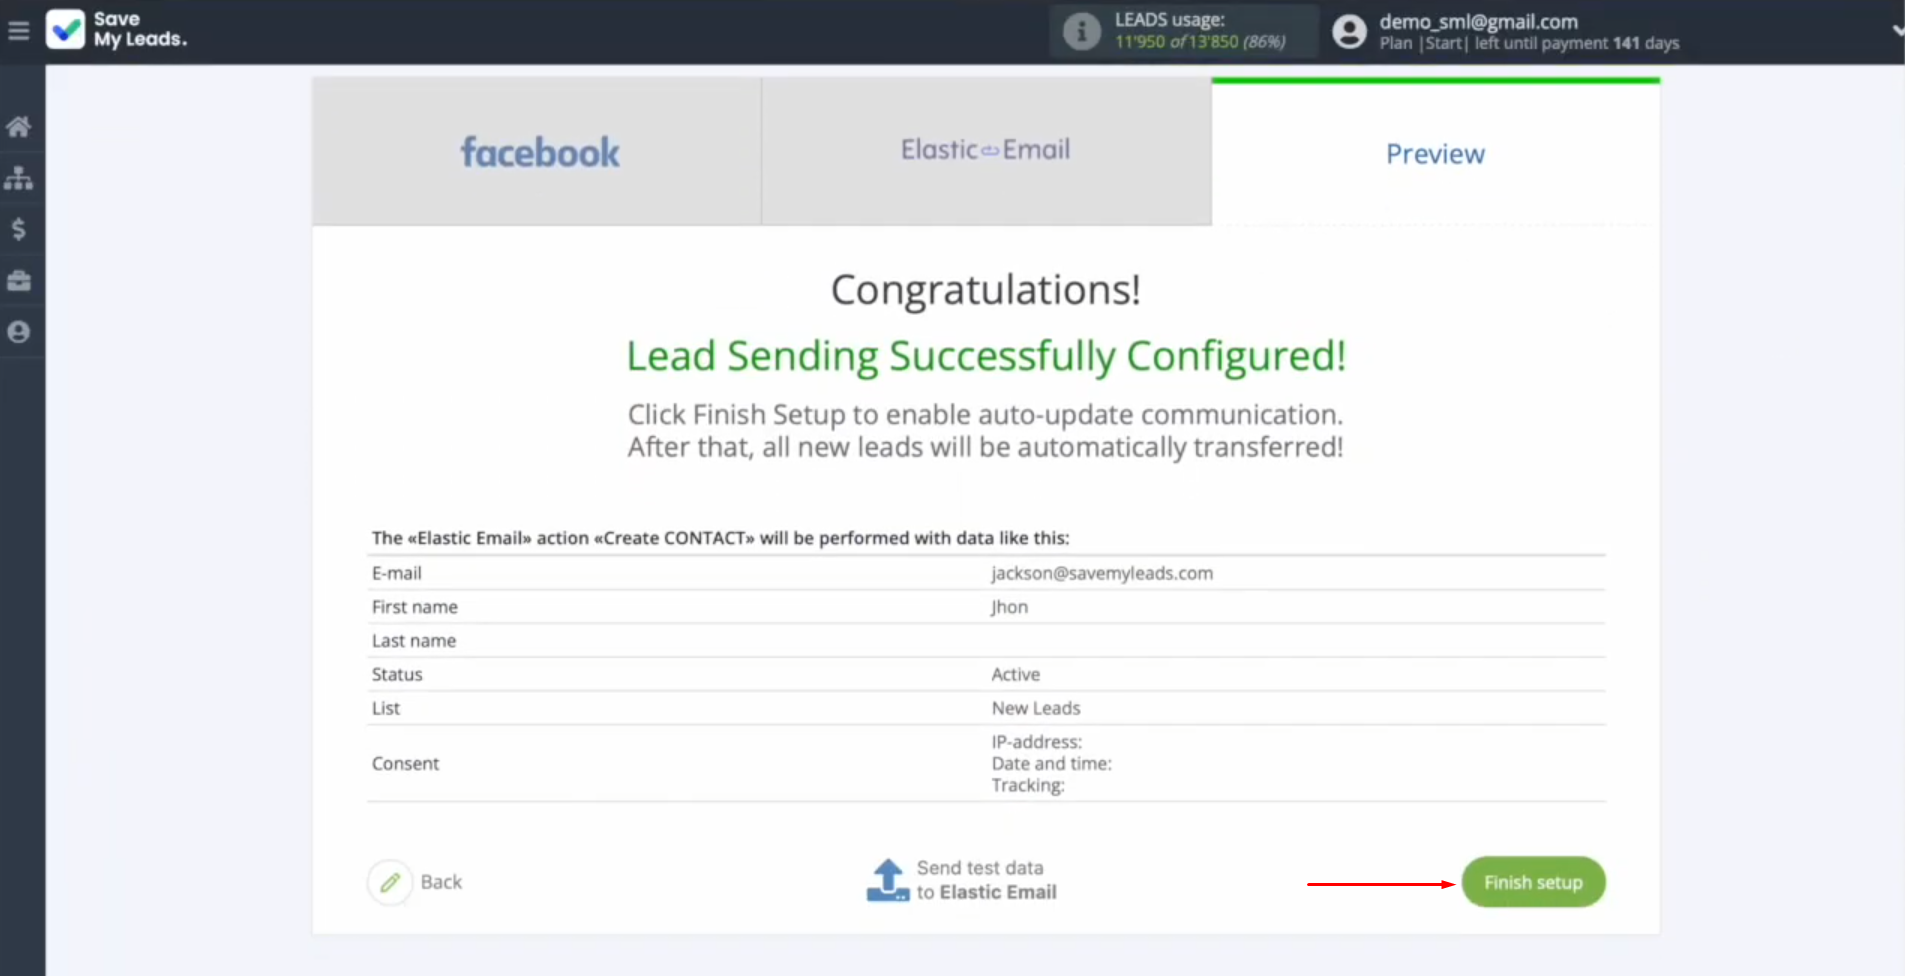
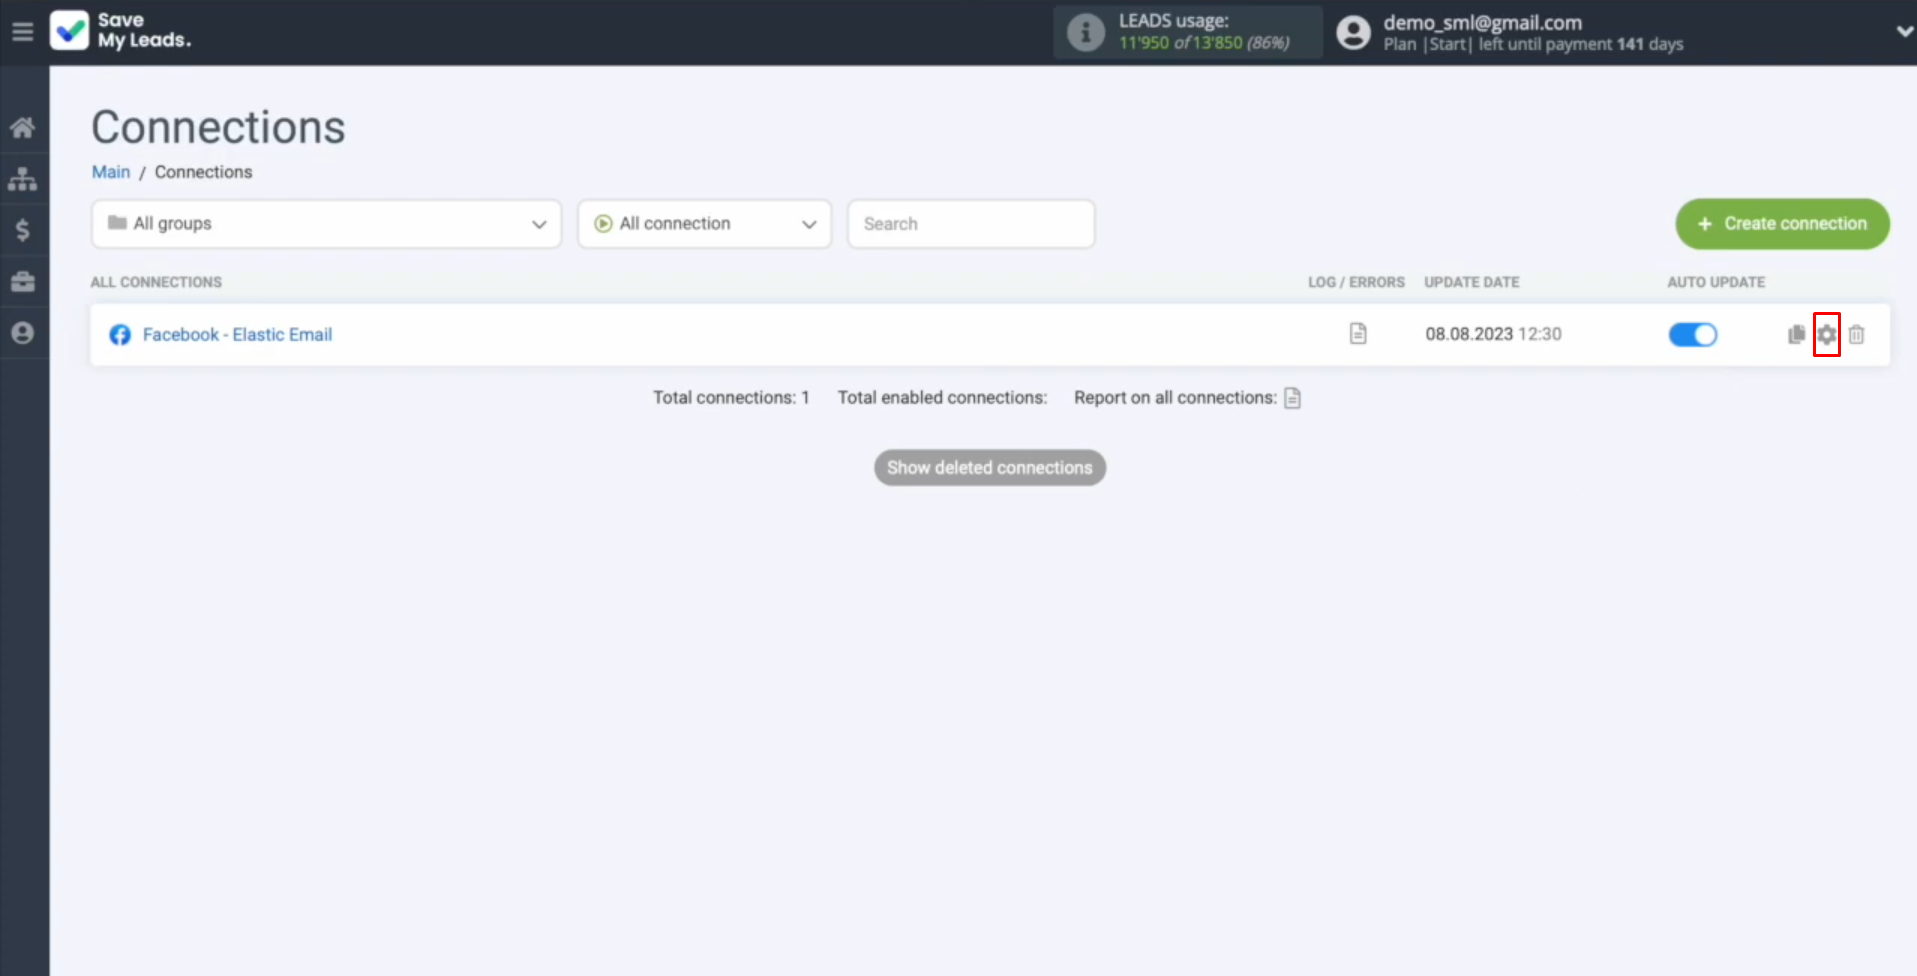
If you want to change the connection name, you can do so in its
settings. Click on the gear icon. You can change the connection name and add your
connection to a group. Afterward, click on “Continue”.
That's
all. The Elastic Email and Facebook integration has been completed.
Result of Facebook-Leads and Elastic Email Integration
Having set up system integration according to our instructions, you have probably managed to ensure that special skills are not required for this. The developers of the SaveMyLeads online connector have done everything to ensure that this task is within the capabilities of the average PC user with no IT experience.
- Automate the work with leads from the Facebook advertising account
- Empower with integrations and instant transfer of leads
- Don't spend money on developers or integrators
- Save time by automating routine tasks
Facebook and Elastic Email integration will begin to benefit you and your company almost immediately after launch. First, it will save time and human resources. The connection of these services significantly increases the speed of working with lead contact information and simplifies it, removing manual processes. Monitoring the emergence of new leads and transferring their data will now occur automatically. By entrusting the collection of your client database to the SaveMyLeads connector, you will have the opportunity to refocus on other tasks and thus improve your productivity.
Are you using Facebook Lead Ads? Then you will surely appreciate our service. The SaveMyLeads online connector is a simple and affordable tool that anyone can use to set up integrations for Facebook. Please note that you do not need to code or learn special technologies. Just register on our website and create the necessary integration through the web interface. Connect your advertising account with various services and applications. Integrations are configured in just 5-10 minutes, and in the long run they will save you an impressive amount of time.
