In this text we will show you how to integrate Facebook with Google BigQuery in 5 minutes without programming skills to automatically send leads using the Save My Leads online connector.
Contents:
1. How to set up Facebook and Google BigQuery integration
2. Connect Facebook Leads Ads
3. Connect Google BigQuery
4. Automatic data update
5. Finish the setup
In order to automatically transfer new leads from Facebook as new rows to the BigQuery database, you need to link the operation of the systems. As a result, they can be conveniently stored and processed so that in the future, for example, send a mailing list to potential customers or interact with them in another way: call, send transactional SMS, conduct through the sales funnel in the CRM system.
Now you do not need to transfer all the data manually and be afraid to miss the data of this or that lead, or make a mistake, waste time and effort on it. Thanks to automation, you can reduce the amount of routine and free up employee time for more important tasks.
How to set up Facebook and Google BigQuery integration
Integration setup is a task for a programmer who has skills in working with API requests. If you do not have such an employee, you will have to turn to freelancers or outsourcing specialists, this, of course, is more profitable than hiring a developer on the staff, but it will still require investments and take some time.
Plus, in the process, you may need to change the integration settings, for example, add data filtering or set up a new connection. This means that you will need to contact the developers and spend funds periodically. It also happens that a specialist starts setting up a connection, and then it turns out that he is not familiar with the API of a particular service and cannot set up the integration or it does not work correctly. in this case, the business lost both time and money.
To avoid this, use a simple and reliable solution - the Save My Leads online connector. This service was developed specifically to link the operation of various systems via API. Here, all API requests have already been completed and the integration is actually ready, you only need to connect your accounts to the connector and specify what data to transfer where. In this tutorial, we'll show you how to do it.
Connect Facebook Leads Ads
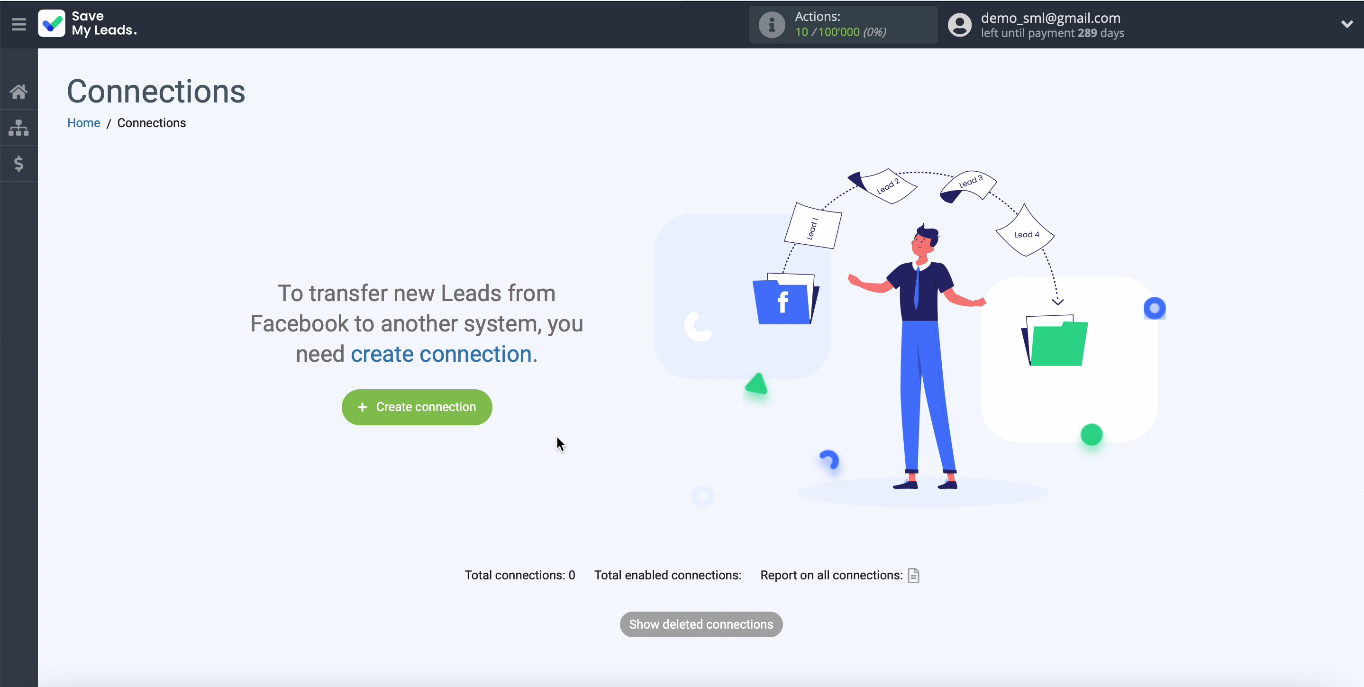
First you need to register in the Save My Leads system, enter your email and password. Now you can go to your personal account and create a new connection:
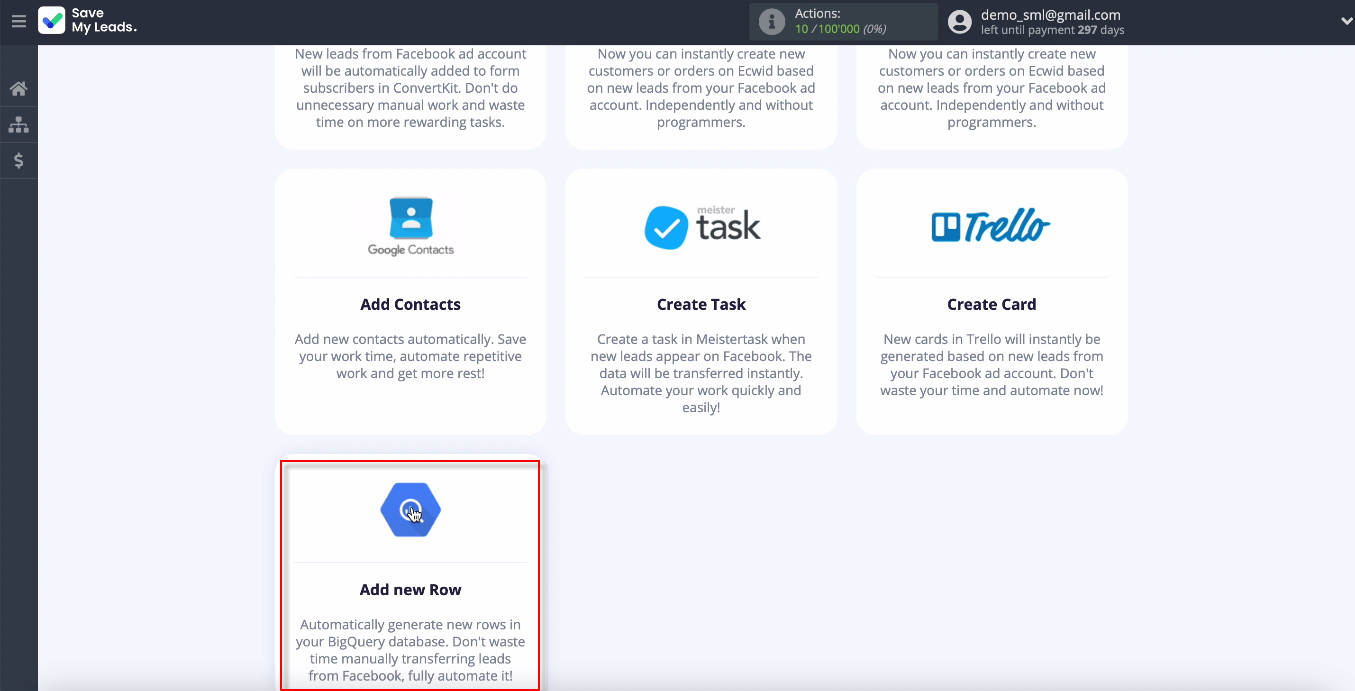
Now choose one of the ready-made templates for systems to which you can transfer data, we need BigQuery.
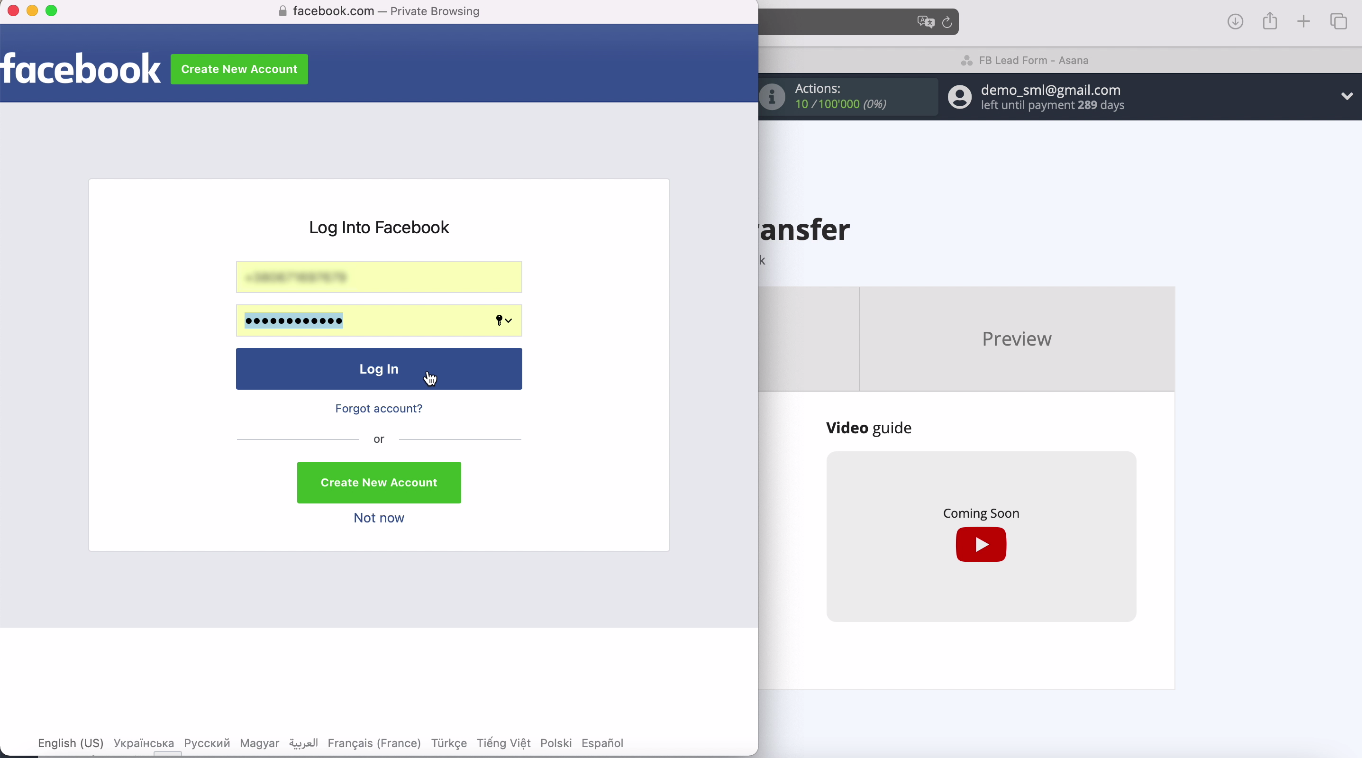
Connect your Facebook account to the Save My Leads system. Enter your username and password from your Facebook:
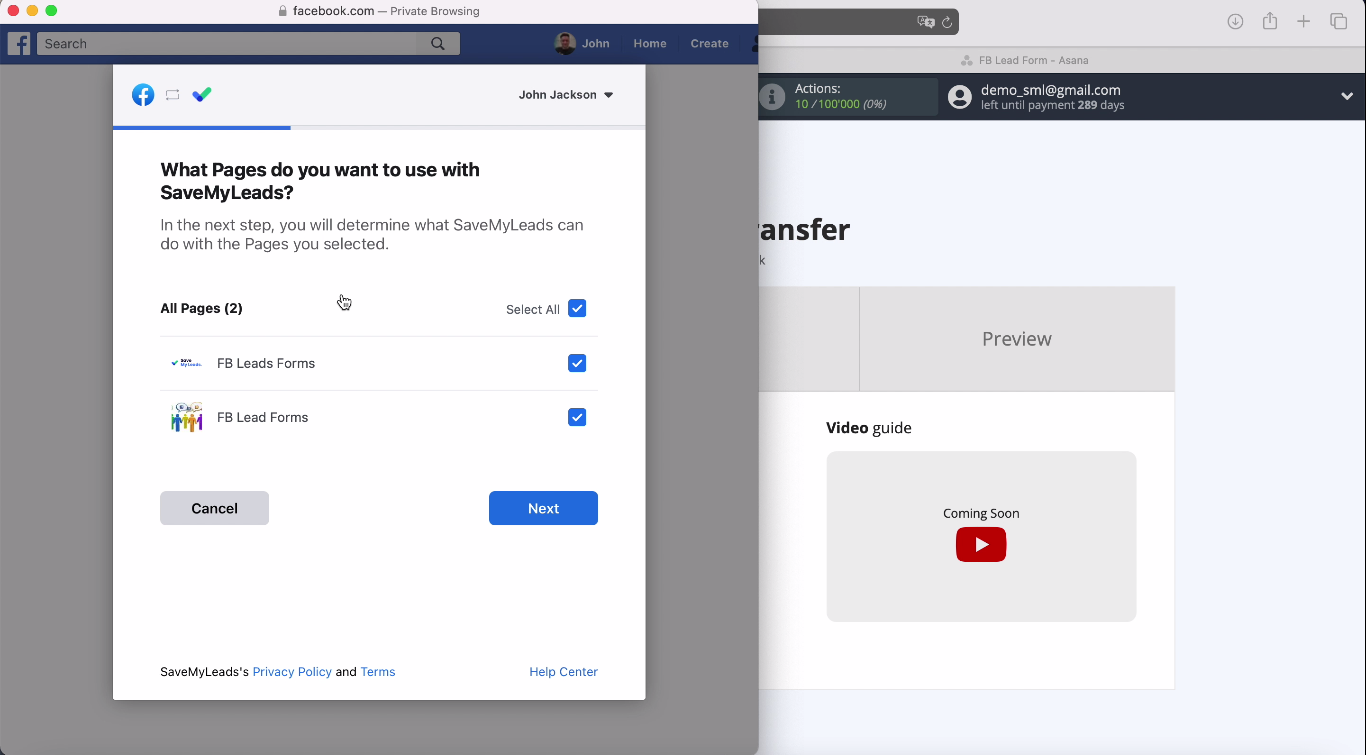
Now you can see all the advertising pages to which you have access. We recommend that you tick all the boxes at once so that in the future you can work with all of them:
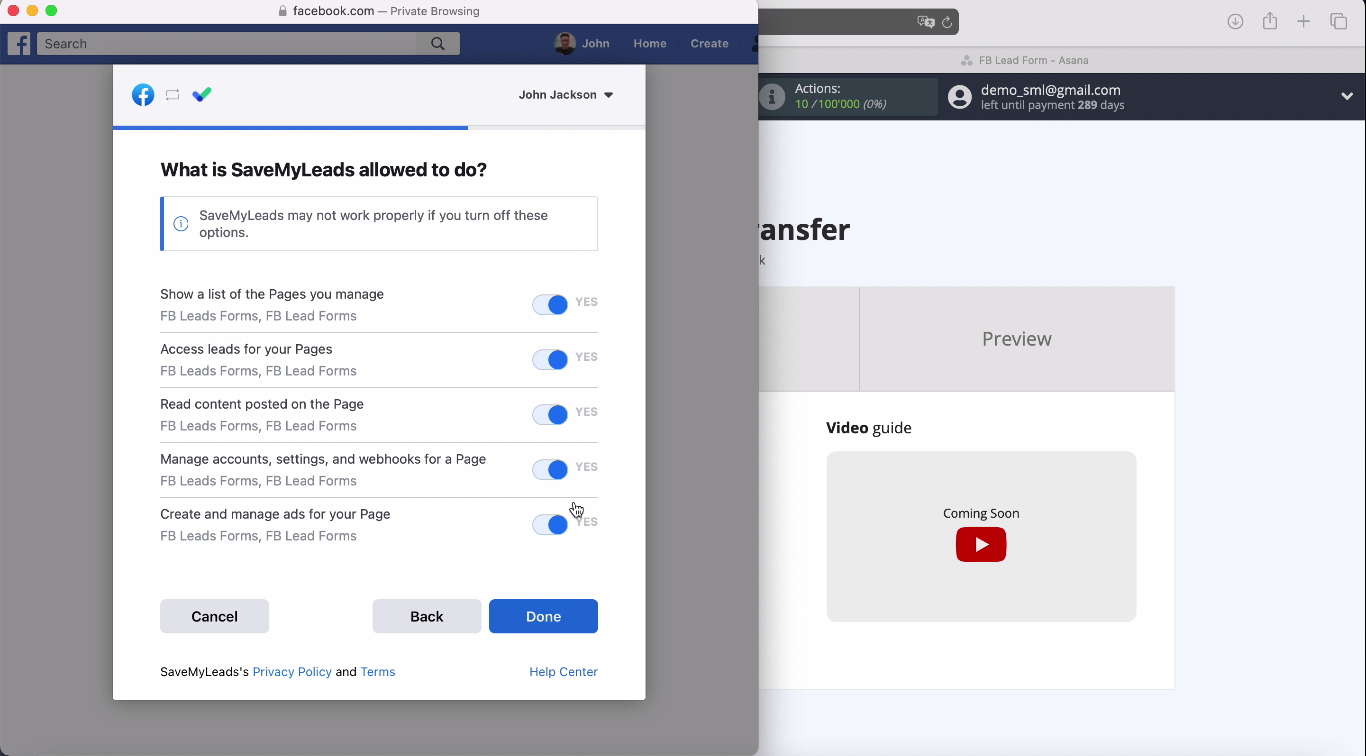
Leave all access checkboxes enabled:
After the connected account is displayed in the list, select it. Then select the ad page for which you want to send leads and the forms for uploading data. If there are several forms - for each you need to create its own connection:
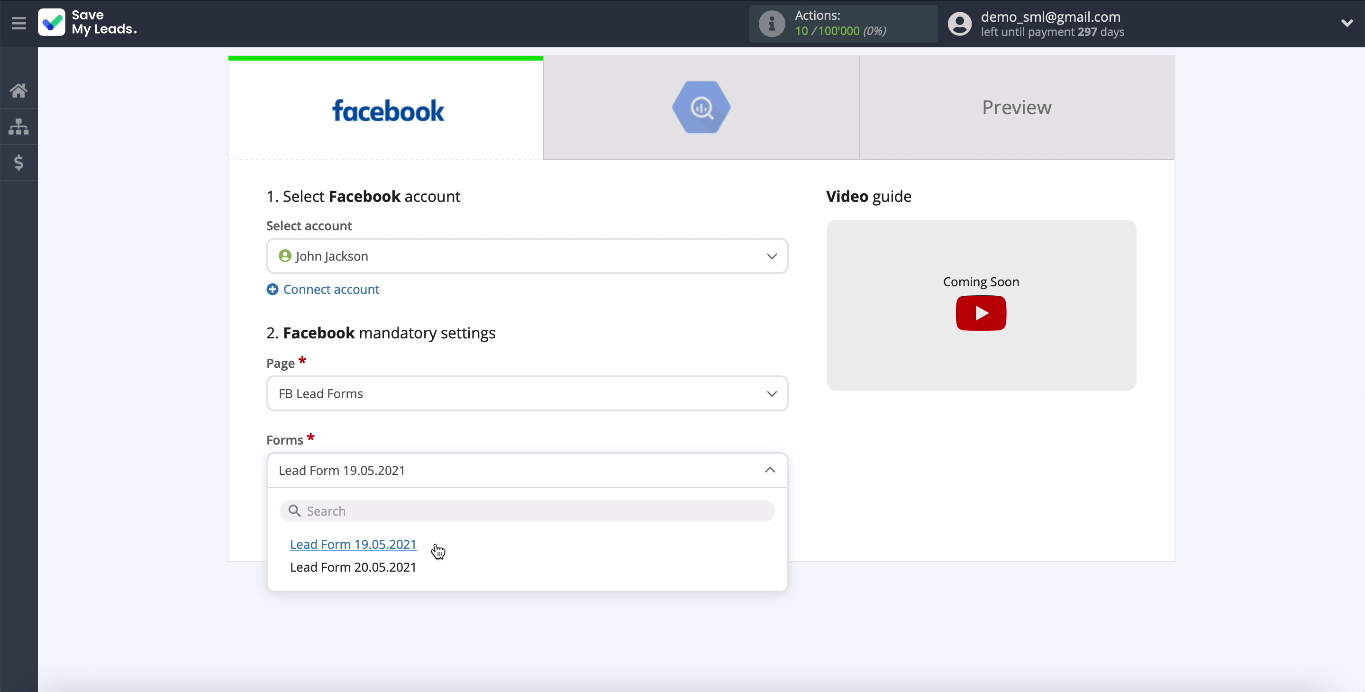
We are done with setting up Facebook.
Connect Google BigQuery
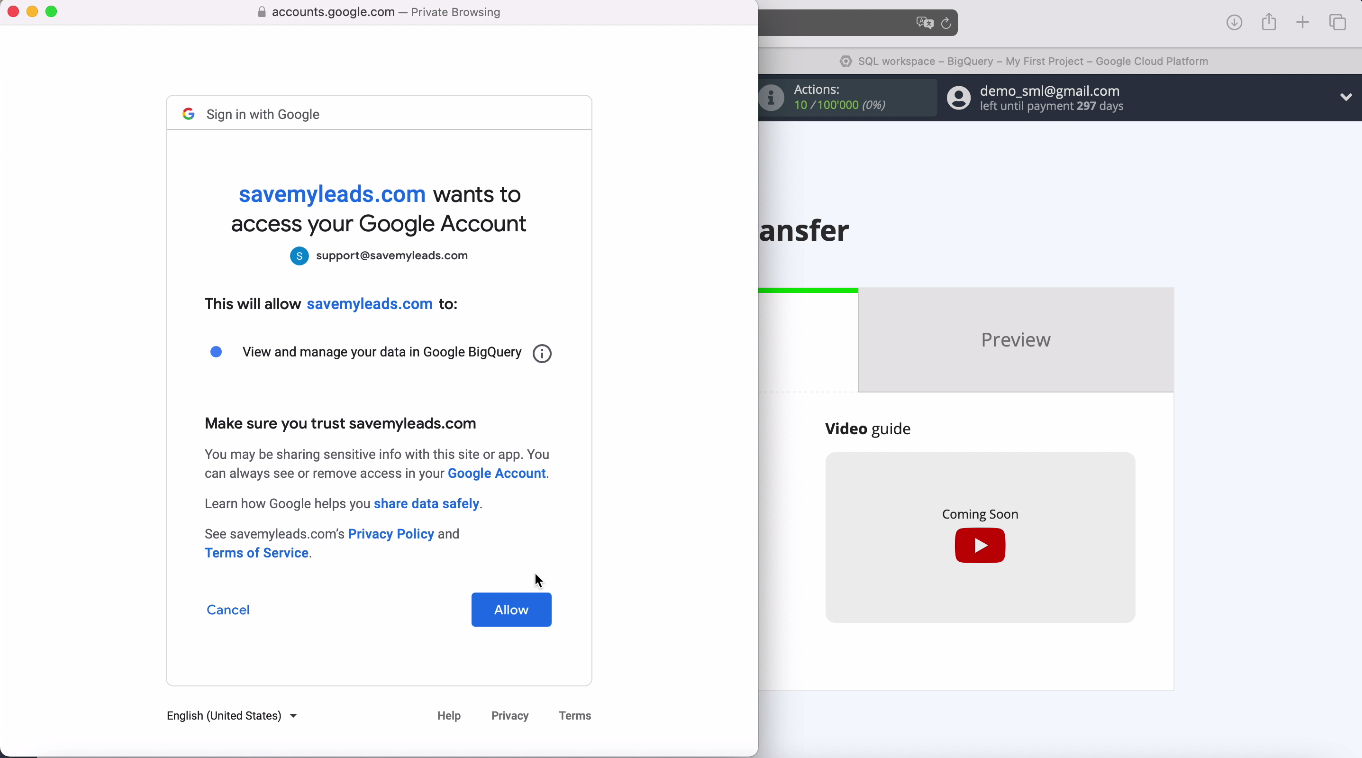
Now you need to connect your BigQuery account to the Save My Leads service. Enter your BigQuery login and password. Give permission to the Save My Leads system to work with it:
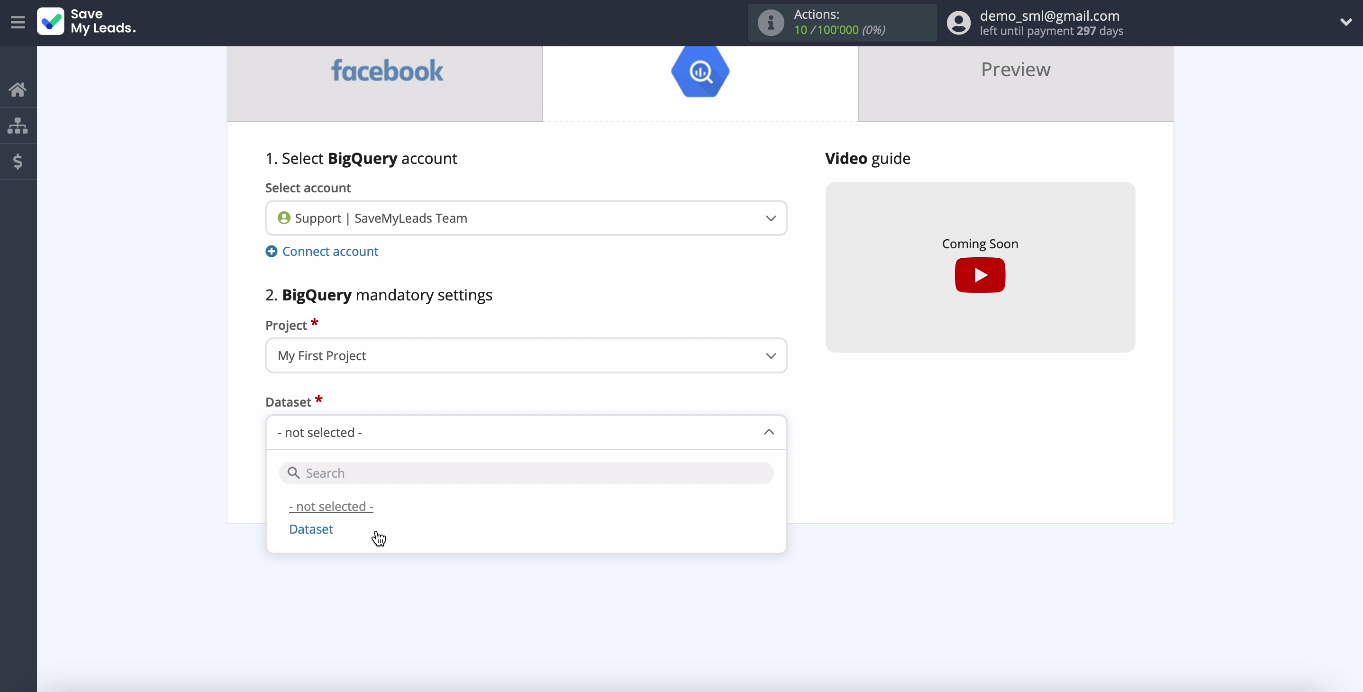
At the next stage, the connected account will be displayed in the list, select it, and then specify the project to which you will transfer data. Specify the DataSet and the table to which new lines will be added when a lead comes from Facebook:
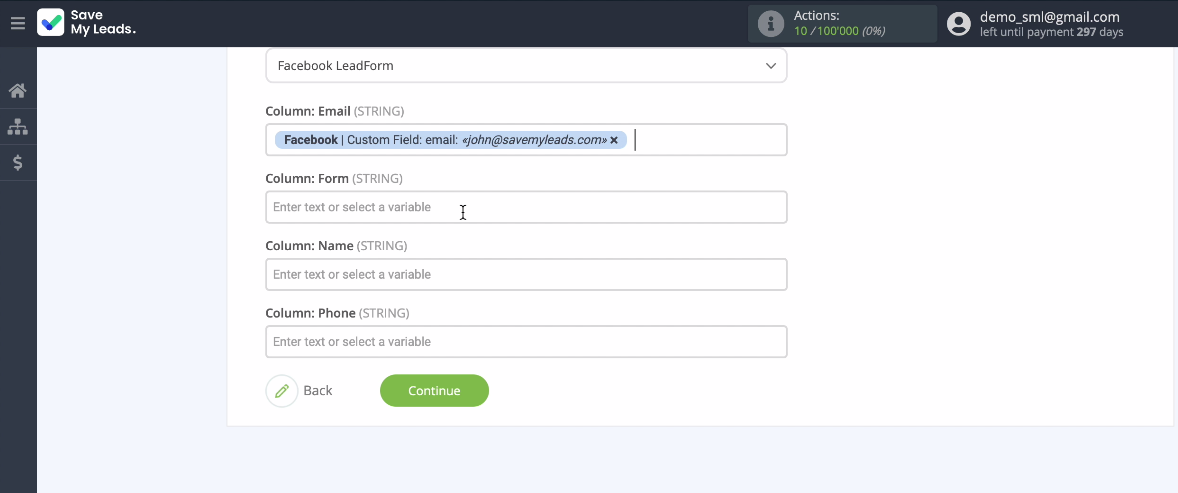
The next window will display the columns that you added when you created the table. If they are not enough, you can add new ones. Assign variables from Facebook to free fields. To do this, click on an empty field and select a variable from the drop-down list:

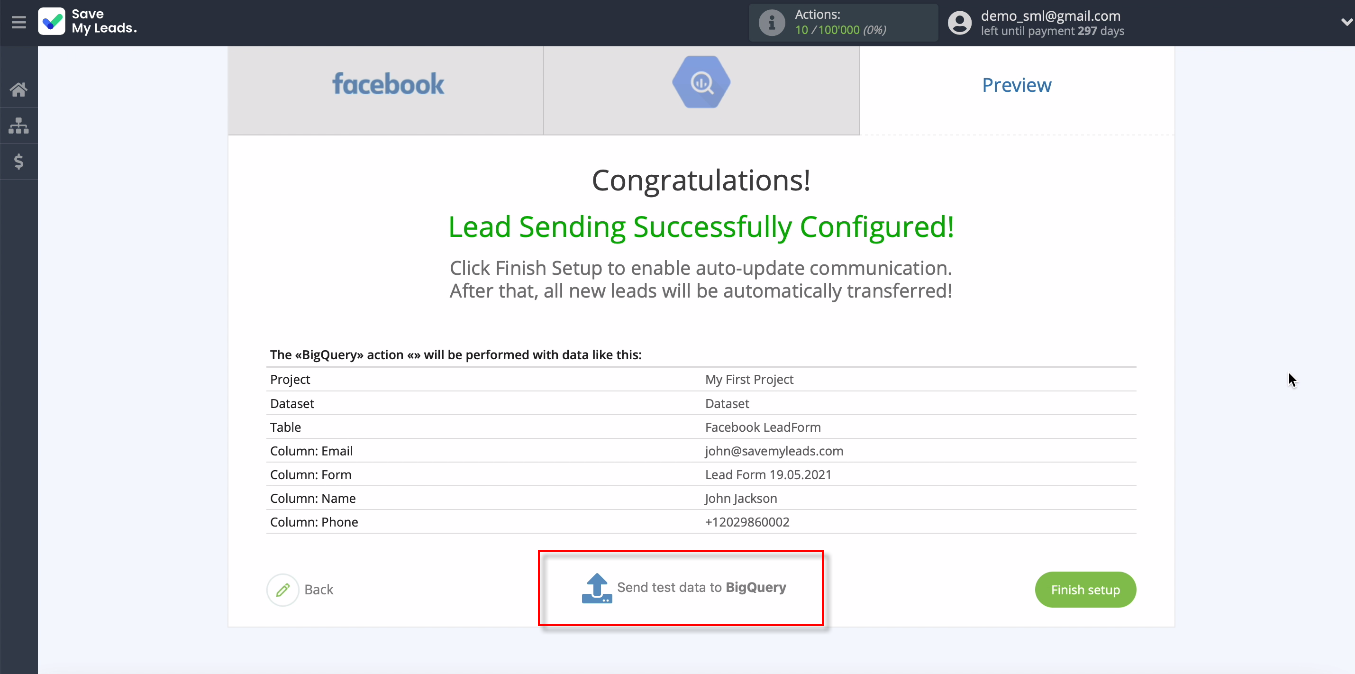
After all the required fields are filled in, you can see an example of the data that will be sent to BigQuery. Verify that the settings are correct and click Send Test Data to BigQuery.
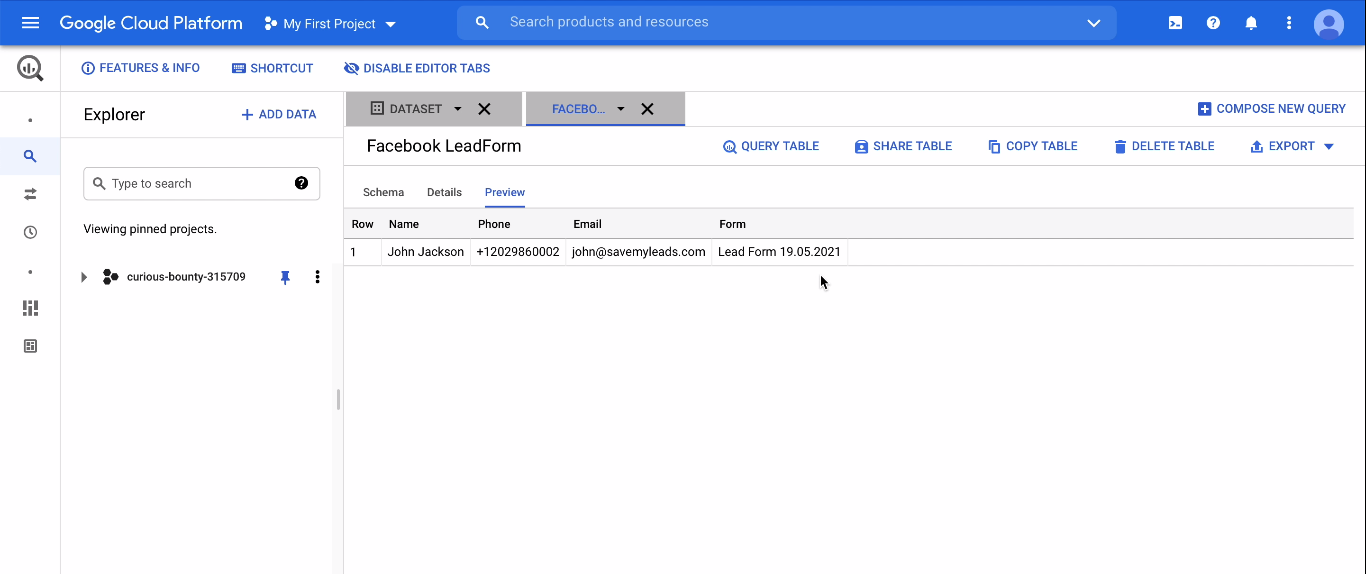
Go to your account and check the result:
Automatic data update
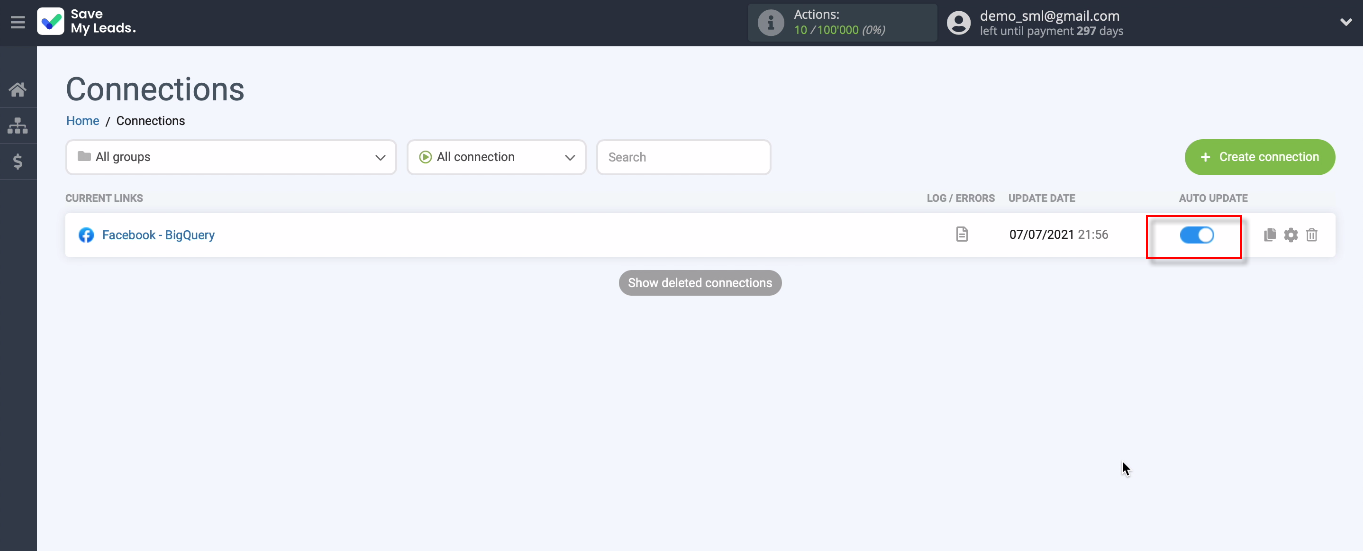
To instantly create new rows in BigQuery based on new leads from Facebook, enable auto-update after clicking Finish Setup. To do this, put the slider in the active state and set the automatic update interval.
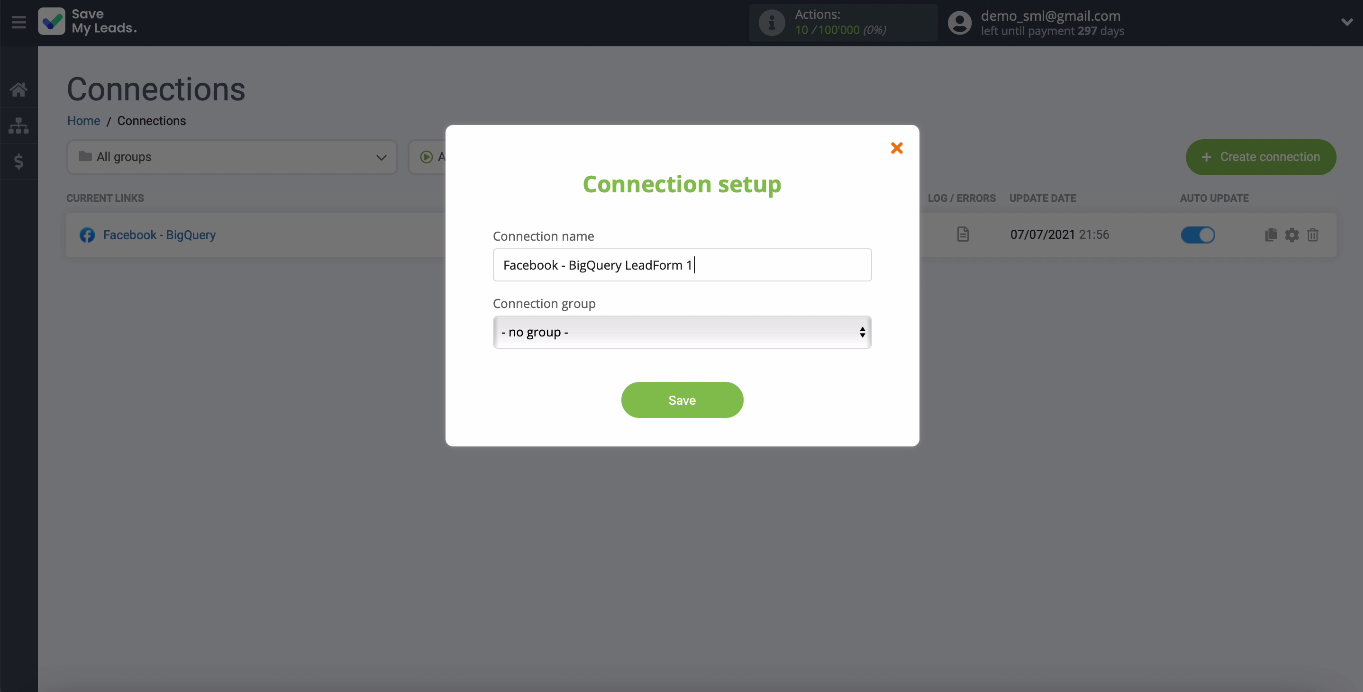
If necessary, change the name of the integration in the settings:
Finish the setup
As you can see, setting up the integration using the online connector Save My Leads does not take much time, any employee will cope with this task in 5 minutes. The system interface is intuitive and guides you step by step through the system communication setup. With Save My Leads, you don't need to hire a third-party developer or distract your staff member from important tasks. Perform integrations quickly and easily to automate routine business processes and make your business even more profitable and efficient.
