We will tell you how to set up automatic transmission of leads from an advertising account on Facebook to set up email campaigns using the SendGrid service. You will cope with this task on your own without programming knowledge in 5 minutes.
Content:
1. How to set up Facebook and SendGrid integration
2. Register on SaveMyLeads
3. Connect Facebook Leads Ads
4. Connect SendGrid
5. Automatic data update
6. Conclusion
If you set up ad campaigns for lead generation in Facebook Ads, then in the future you will need to interact with them in other systems. Any business seeks not only to process leads on a social network, but also to work with them in the future: to form a base from them, send them a newsletter, conduct a sales funnel, etc.
How to set up Facebook and SendGrid integration
To transfer leads from your Facebook ad account to the SendGrid newsletter service, you will need to integrate these services through the API. To do this, you can go in three ways:
- set up integration by a full-time programmer or even your own, if you or your developer has experience working with API requests;
- ask for help from third-party developers, for example, freelancers for one-time services. Here you need to take into account that, firstly, you will have to allocate a separate budget and stock up on time, and secondly, everything may not be enough for a one-time task. Integrations, business process automation is a trend in the eCommerce field, companies are constantly adjusting the connections of different systems in order to automatically load data from one to another. Most likely, you will need new links or additional settings for existing ones. This means that you will need to contact programmers regularly;
- use the online connector SaveMyLeads . The service will help any specialist without programming knowledge to connect the work of the Facebook advertising cabinet and systems in 5 minutes. The platform is specially designed to simplify automation and make it available to specialists without knowledge of IT and API interfaces.
Register on SaveMyLeads
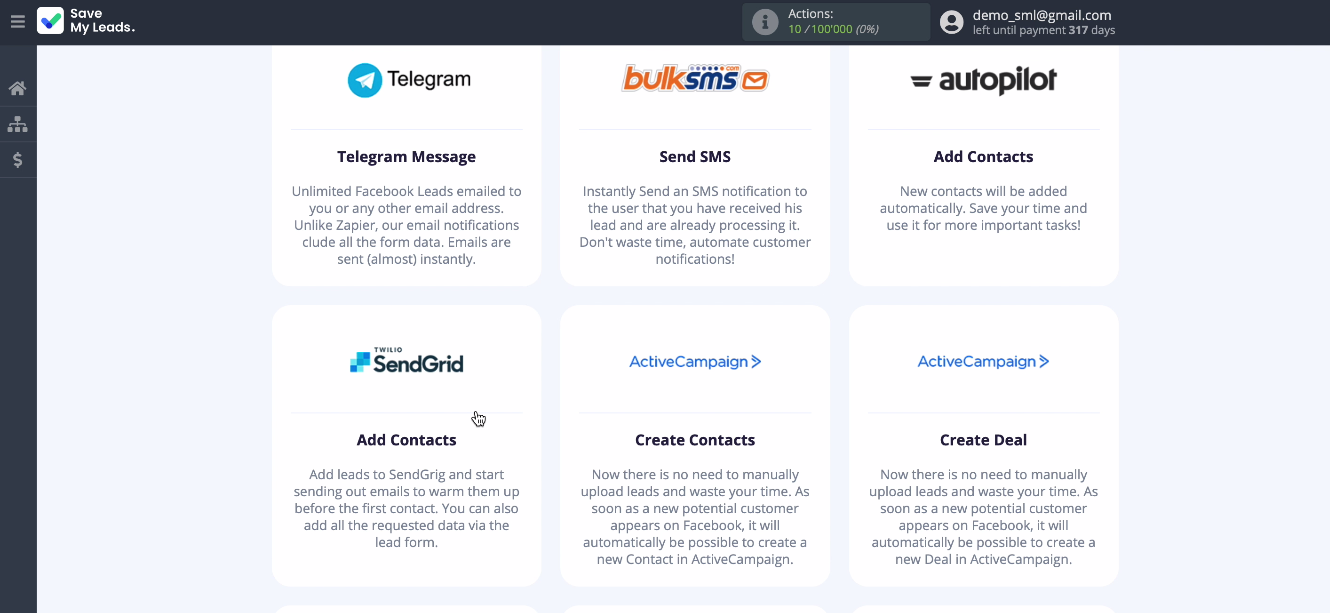
After registering on the SaveMyLeads platform, proceed to setting up communication. To do this, create a new connection. Use one of the ready-made templates for systems to which you can transfer data - select the SendGrid system template:
Connect Facebook Leads Ads
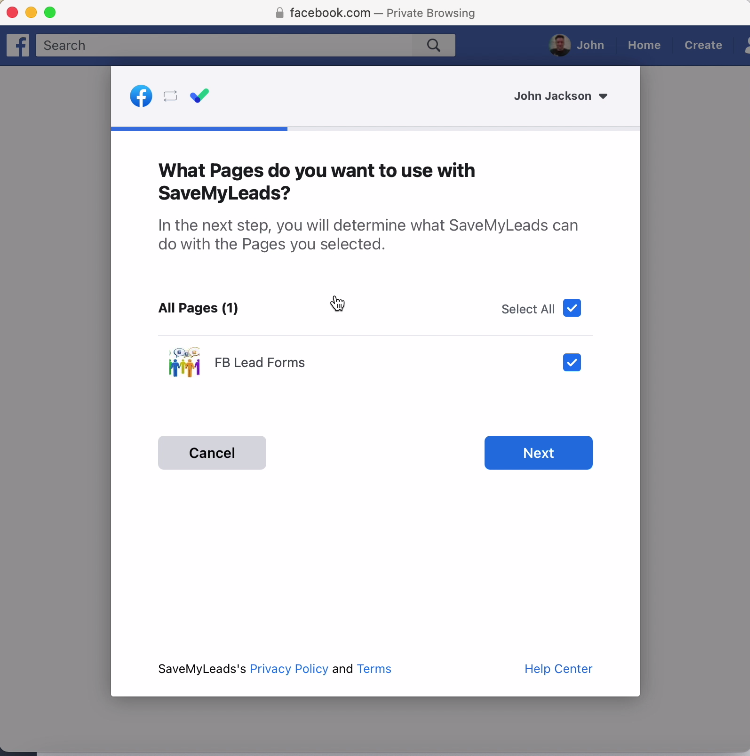
Connect your Facebook account to SaveMyLeads. Enter your username and password from your personal account on Facebook. You can now see all the ad pages that you have access to. Check all of them so that you can work with them in the future.
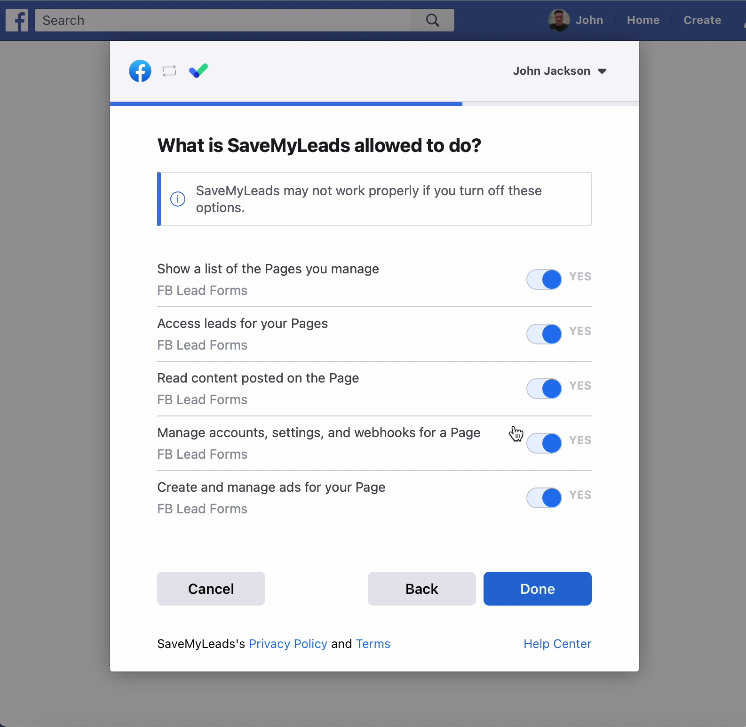
Leave all access checkboxes enabled
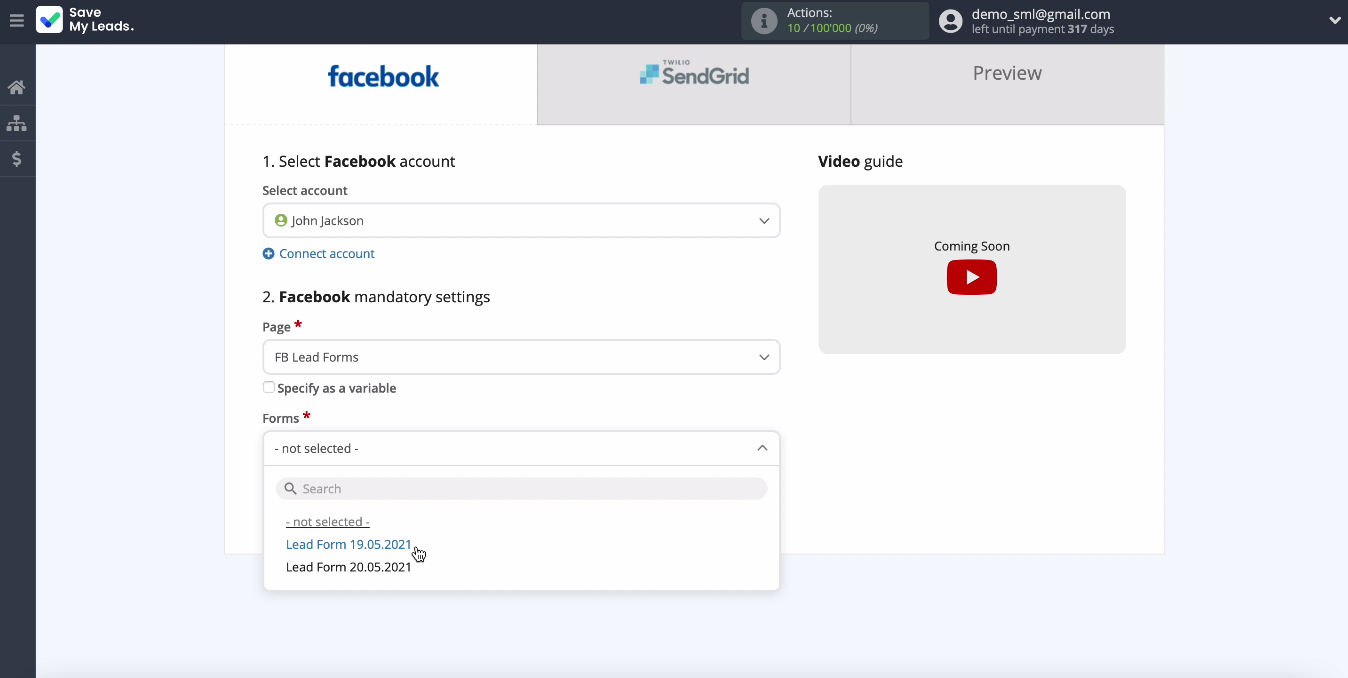
After the connected account is displayed in the list, select it and the advertising page through which you will send leads. Specify the forms by which you need to upload data. If you have multiple forms, create a connection for each of them.
Connect SendGrid
Connect your SendGrid account to the SaveMyLeads service. To do this, specify the API key. To get it, go to your SendGrid account, then find the "API Keys" section in the settings:
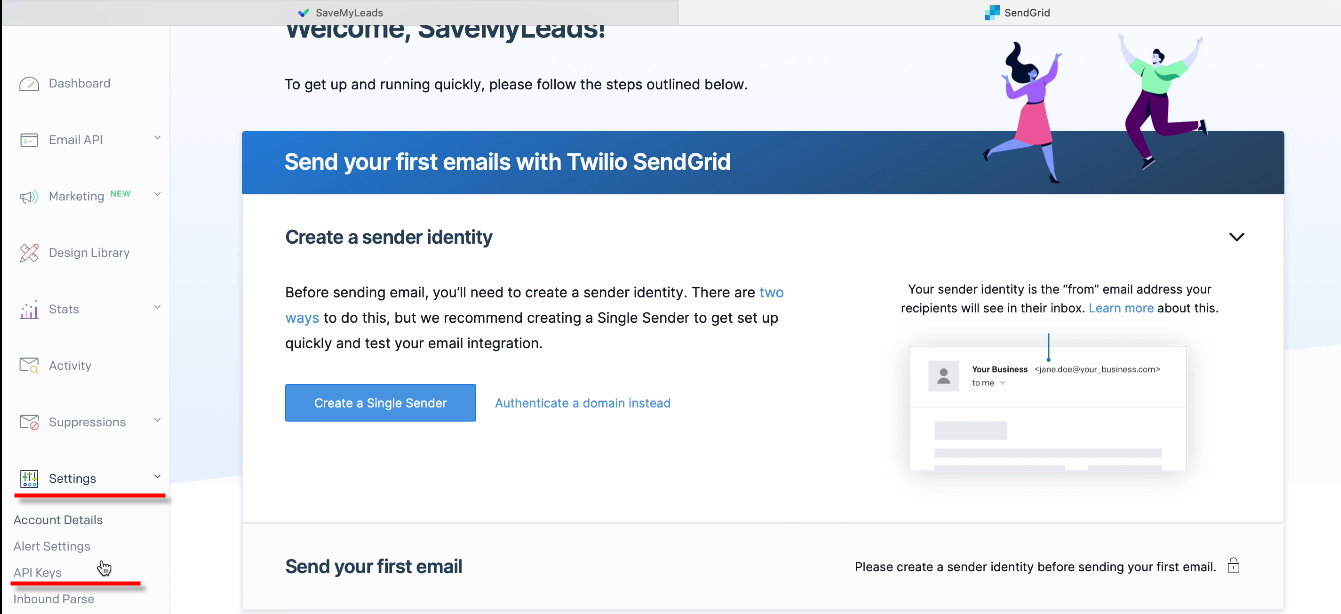
Now you need to create a new API key. It can be called SaveMyLeads, since you will receive data using this service.
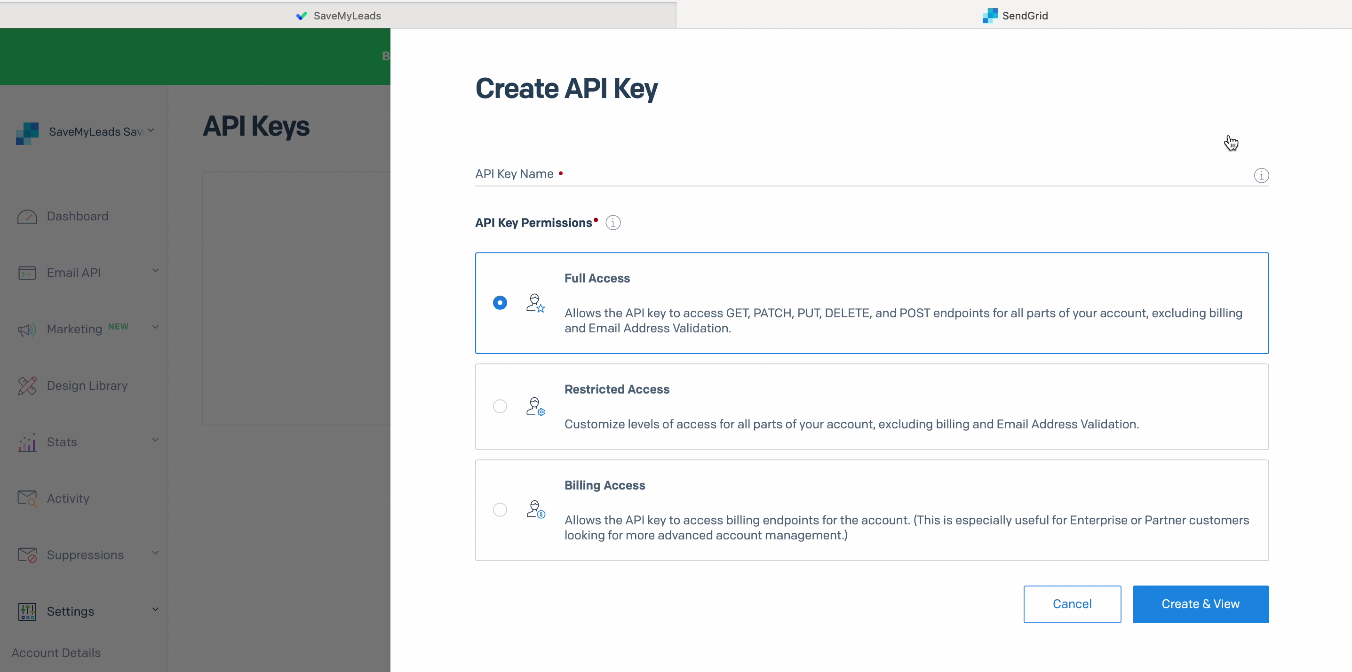
Leave full access for the API key. Copy the key and paste it into the required field in SaveMyLeads:
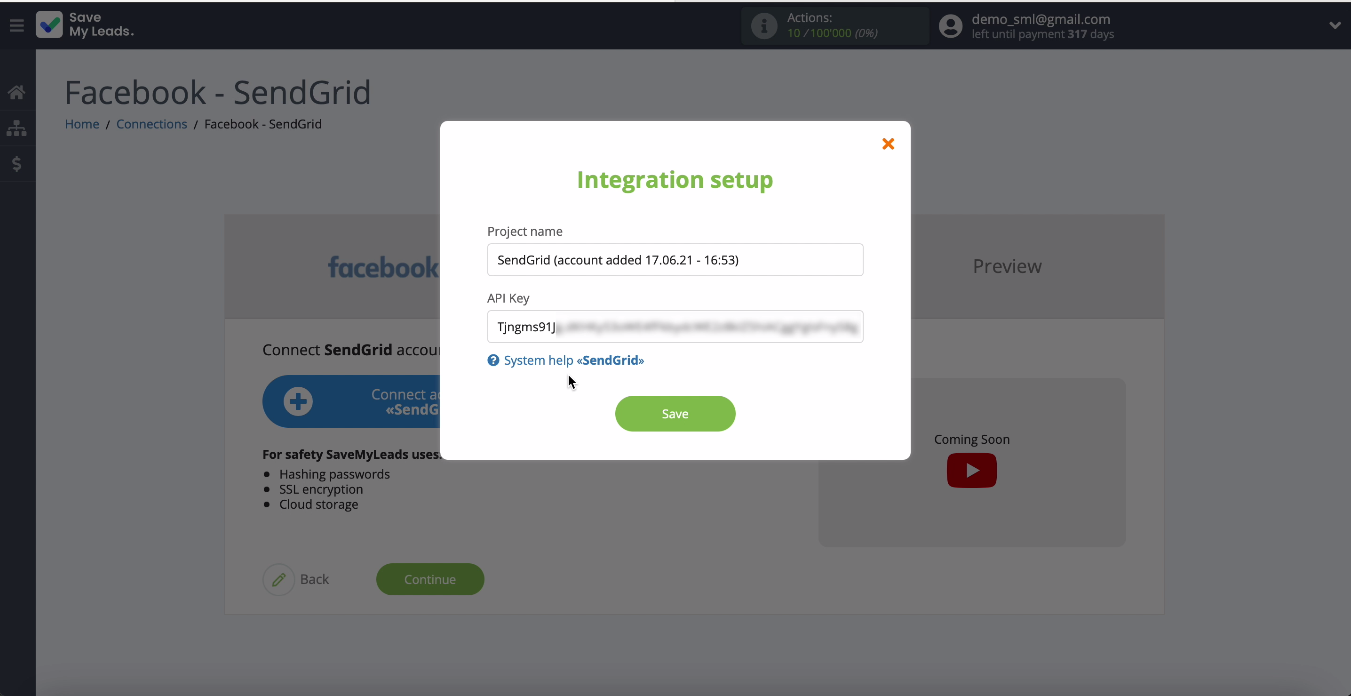
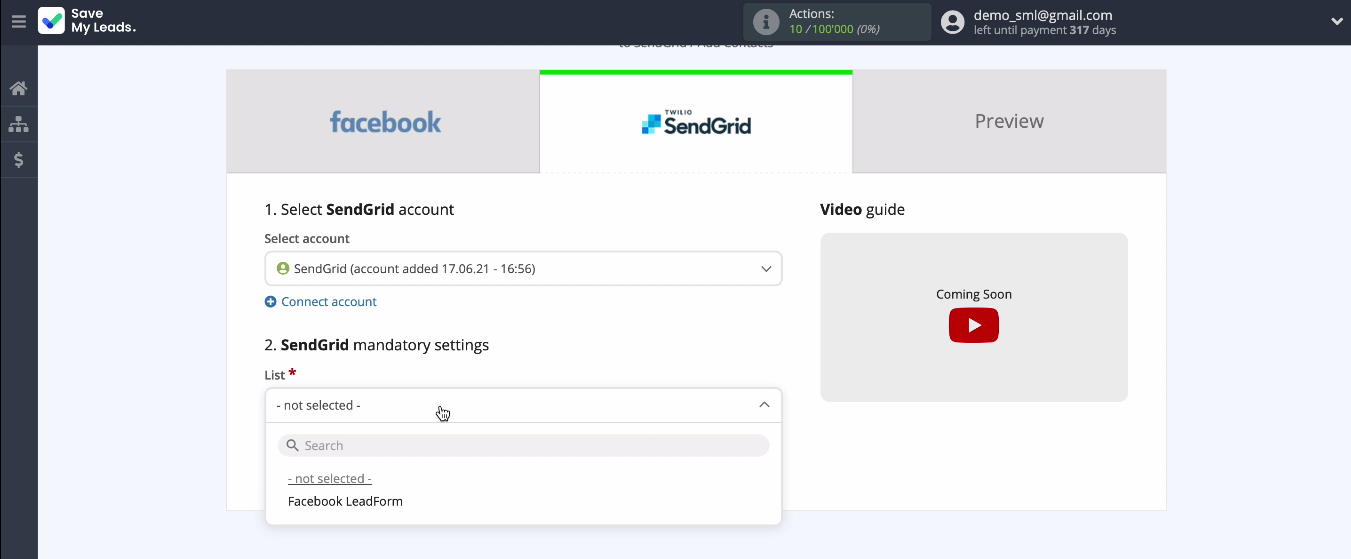
When the connected account is displayed in the list, select it and specify the List, to which new contacts will be added with each new lead from Facebook
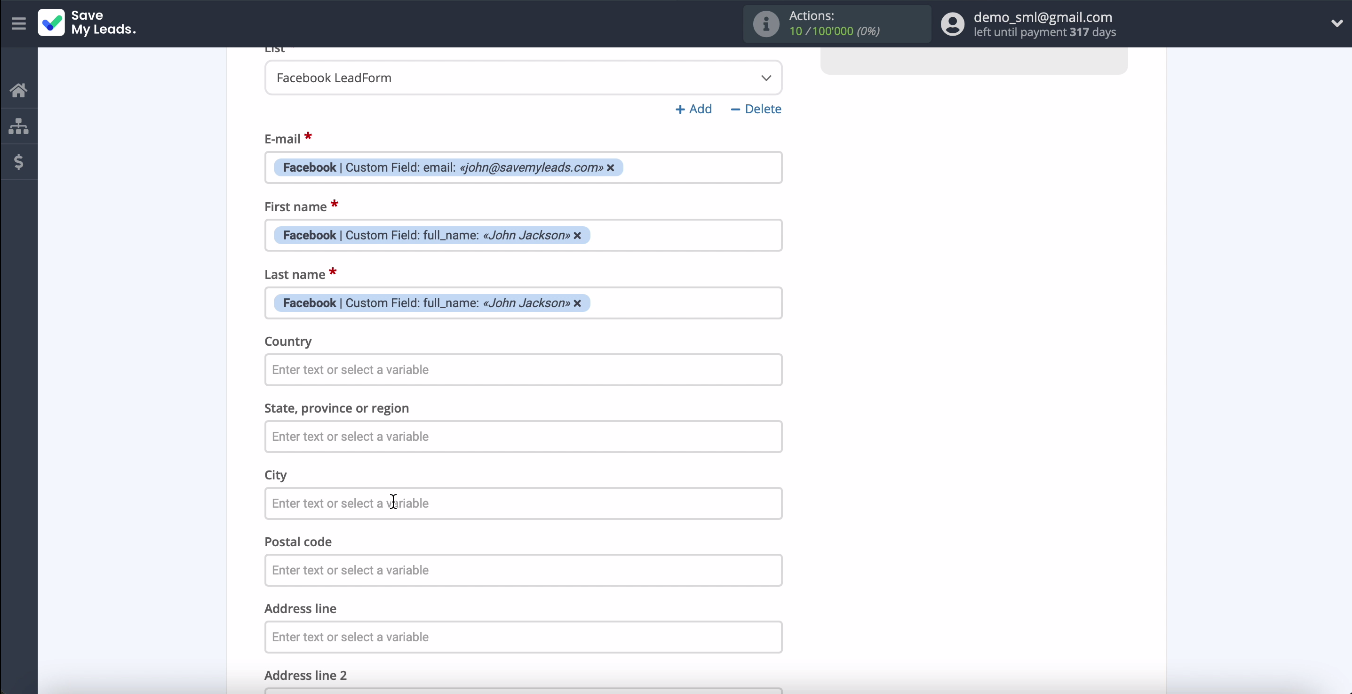
Now fill in the fields by contact with variables from Facebook, select them from the drop-down list. By default, they are all already filled with data, if you are satisfied with the preliminary setting, then you can not change anything:
At this point, you can see an example of the data that will be sent to SendGrid with every new Facebook lead.
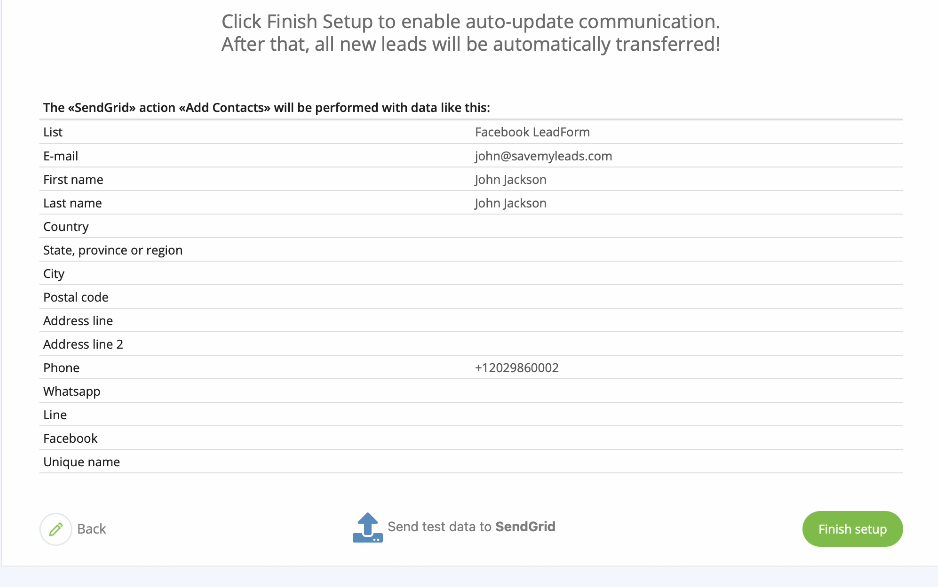
To check the correctness of the integration settings, click Send Test Data to SendGrid. Go to your Sendgrid account and check the result:
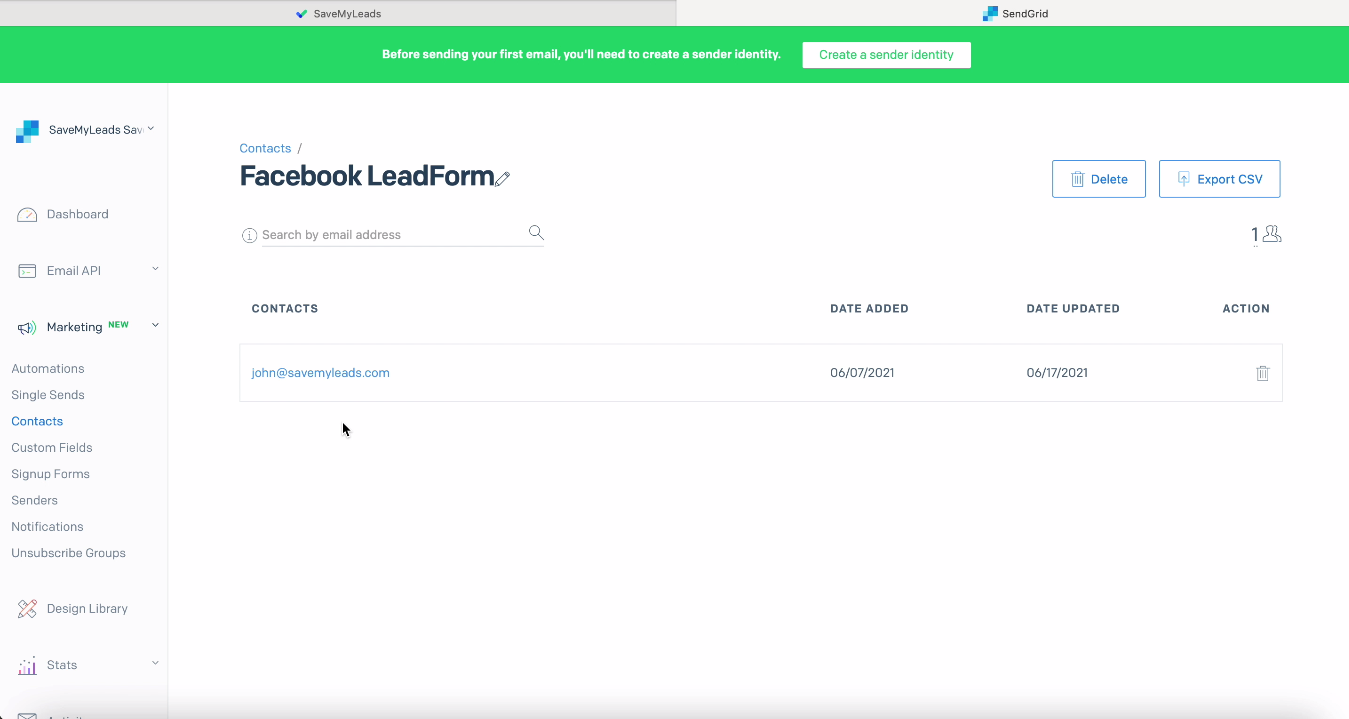
The data is being transferred successfully.
Automatic data update
Instant transfer of leads in the form of new contacts to SendGrid will be ensured by automatic data update, which is immediately enabled in the SaveMyLeads system after completion of the communication settings. Click Finish Setup.
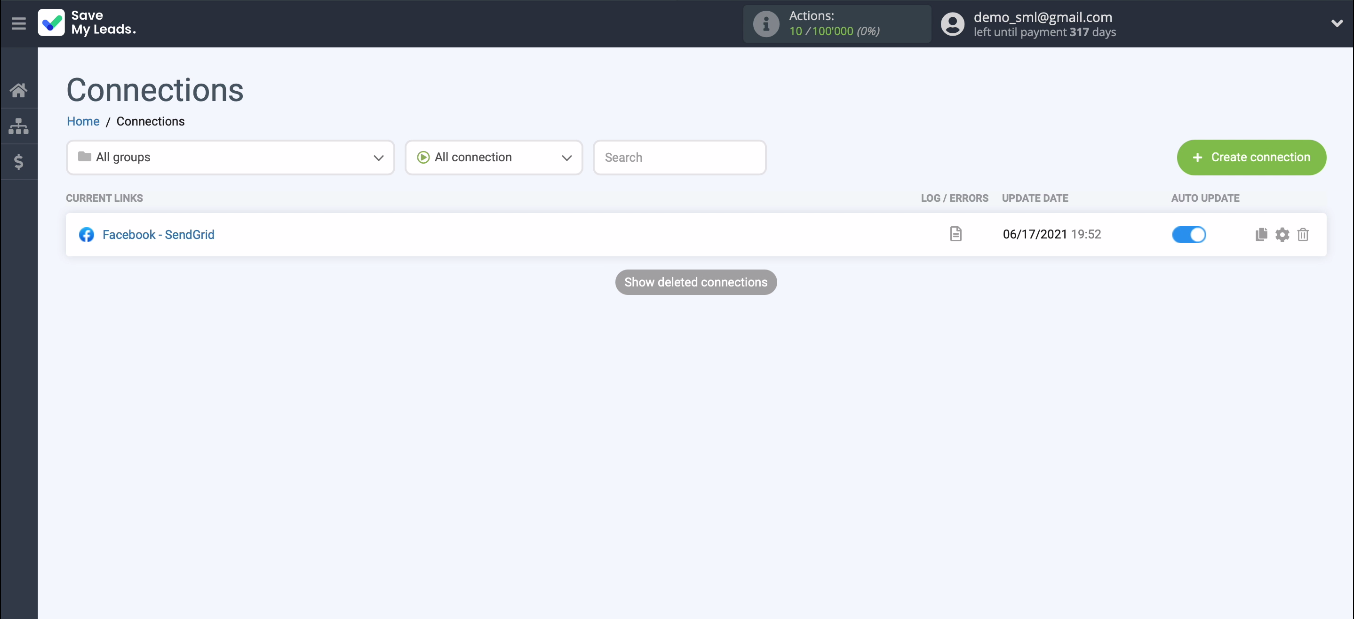
If necessary, you can change the name of the link in the settings.
Conclusion
It will not take you a lot of time to set up the integration of the Facebook ad account and the SendGrid mailing service. No programming knowledge required. With SaveMyLeads, you or your employee will not spend more than 5 minutes on this task. But then integration will help you automate important business processes. You will be able to work faster and more efficiently, you will be able to work less on your employees or reduce your staff.
